

Would you like to save this?
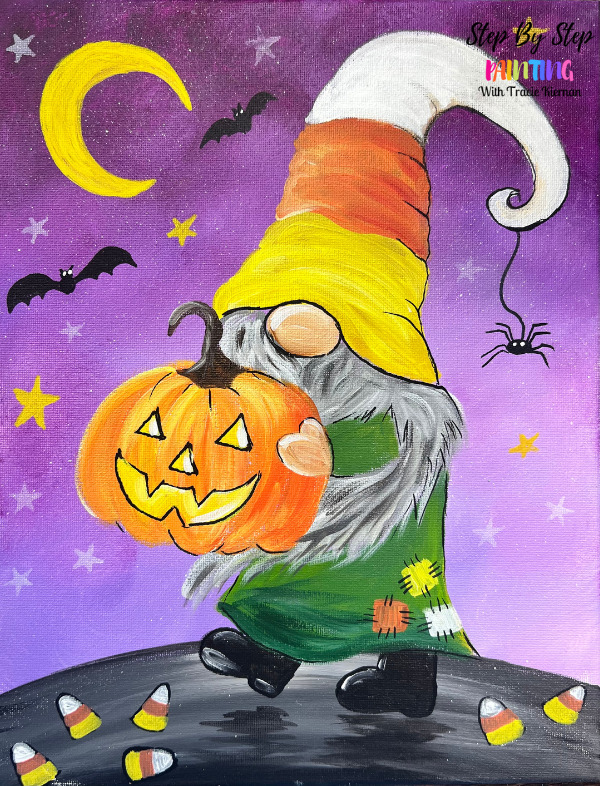
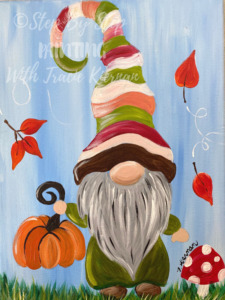
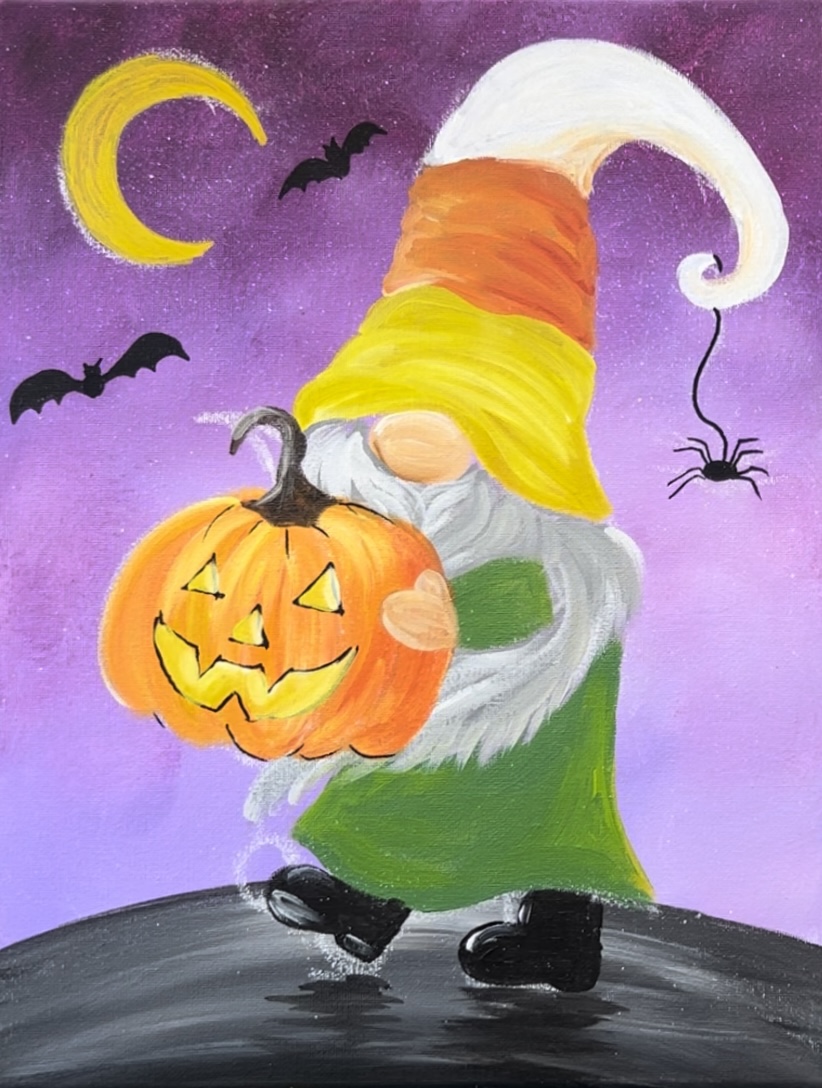
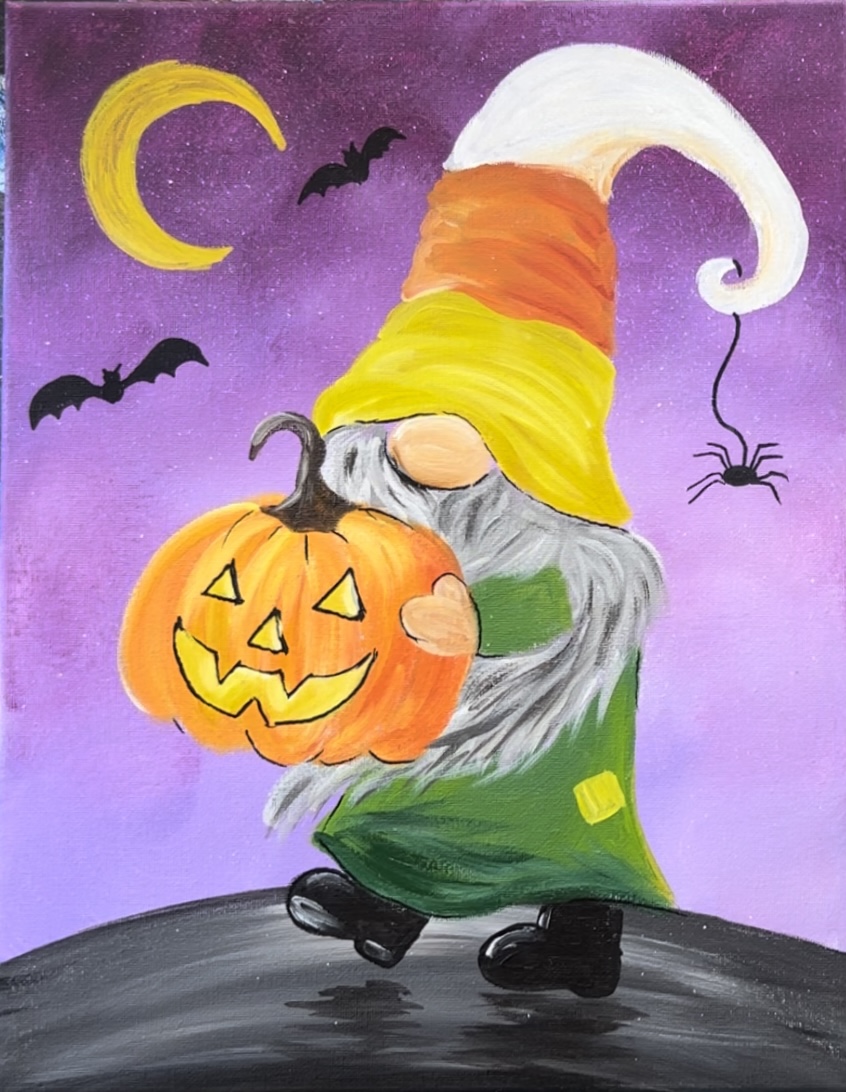
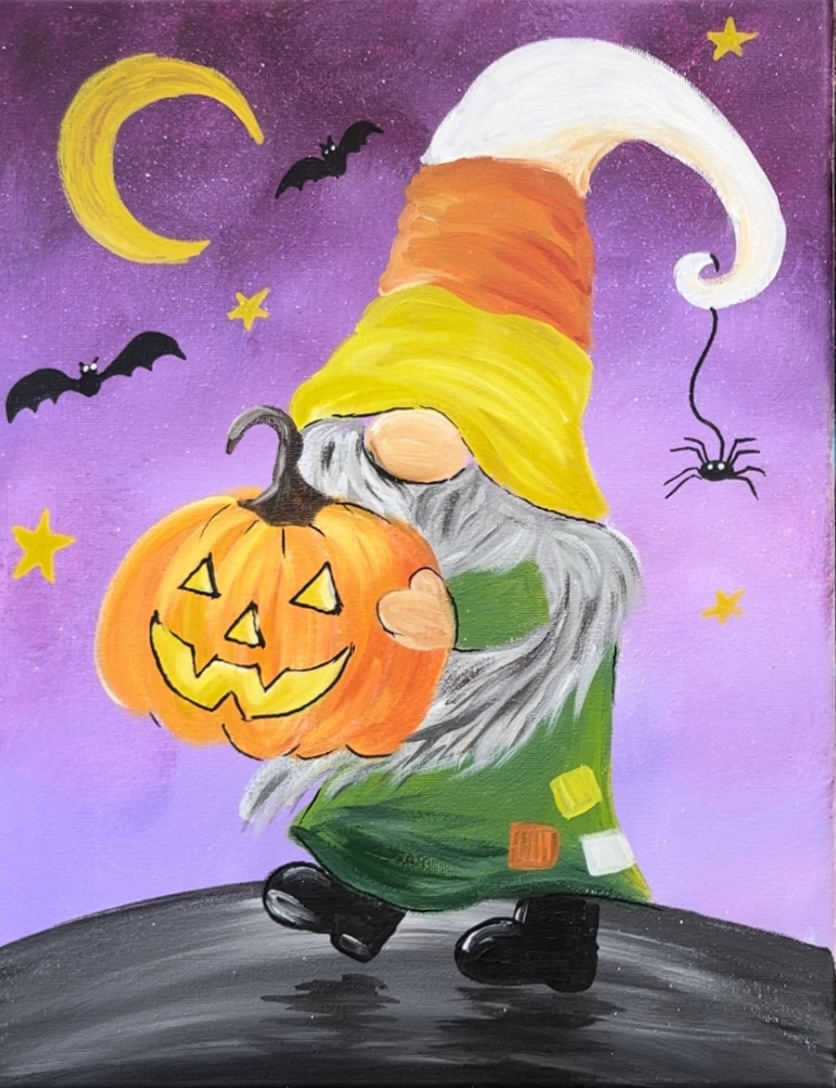
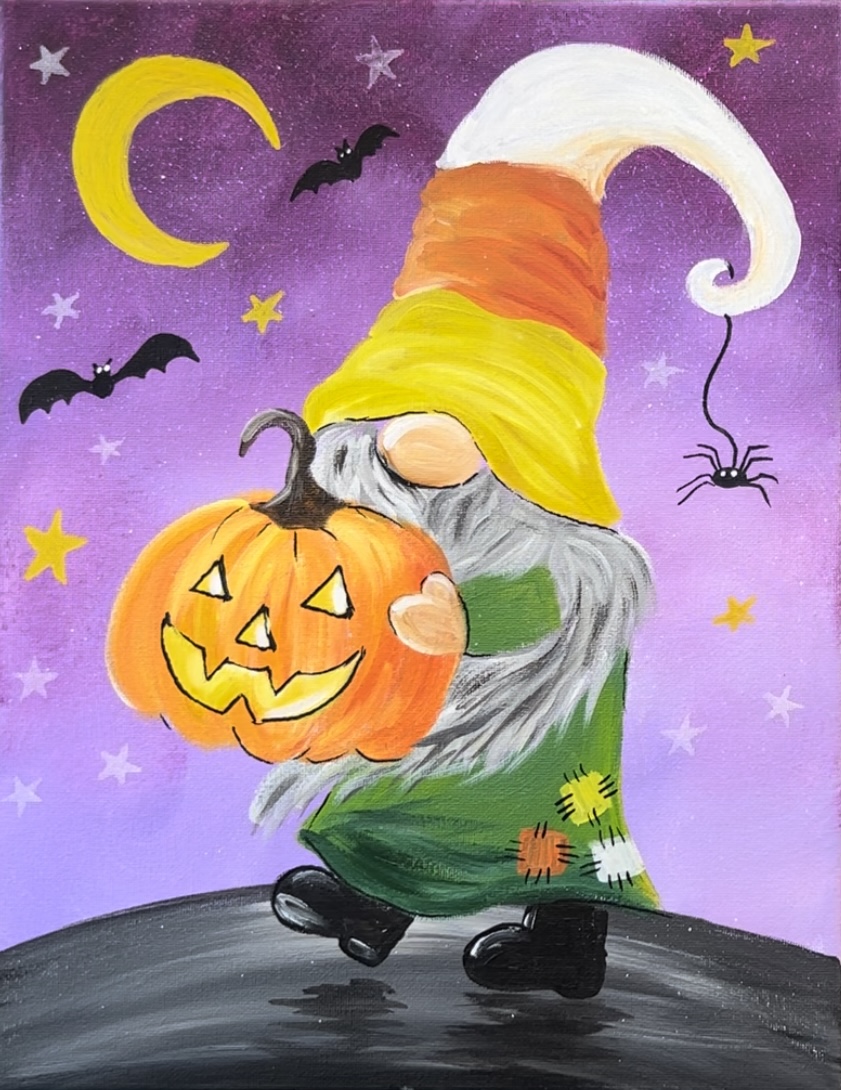
Paint a jack-o-lantern candy corn gnome! This acrylic painting tutorial takes you through the steps of setting up the pretty purple background, how to draw the gnome and acrylic painting techniques for painting this gnome!
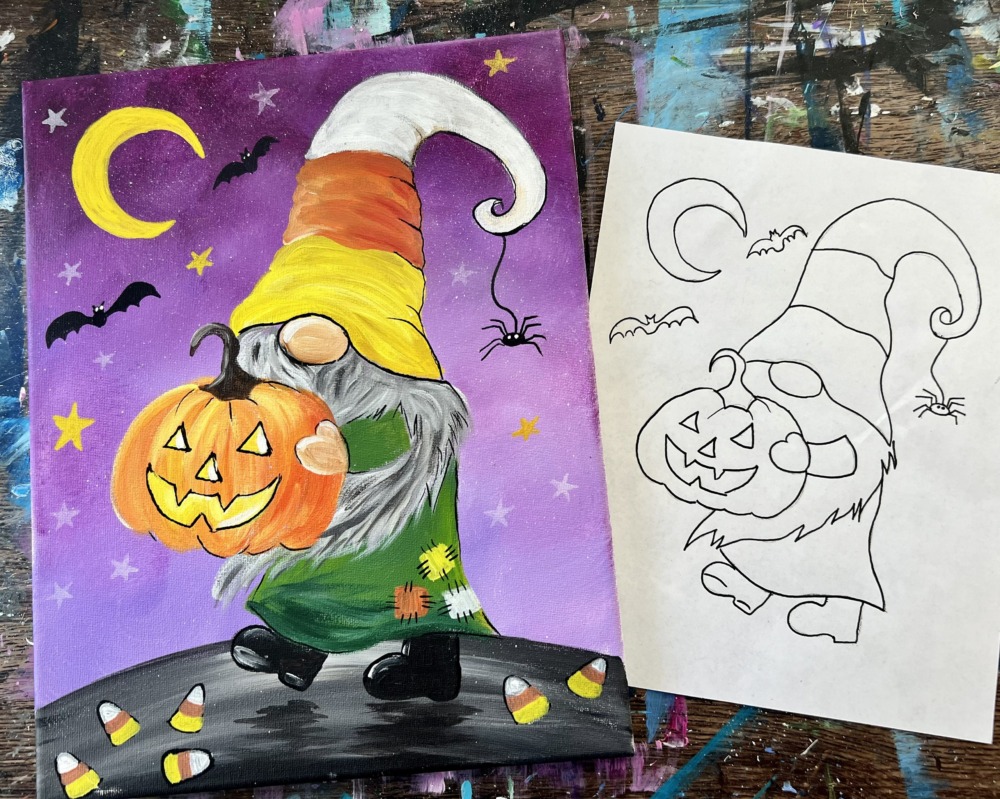
The tutorial includes an optional traceable template.
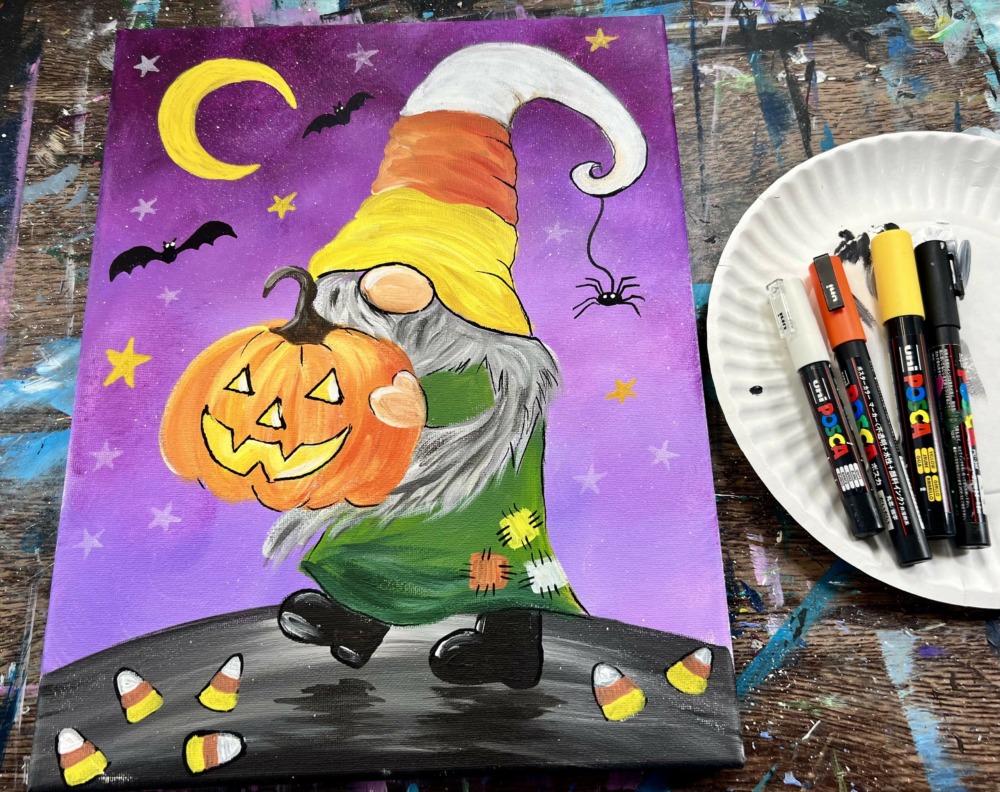
I also used POSCA paint pens for some of the detail work in this. The paint pens are also optional but fun and easy to use on paintings.
Enjoy and happy painting!
See Also…

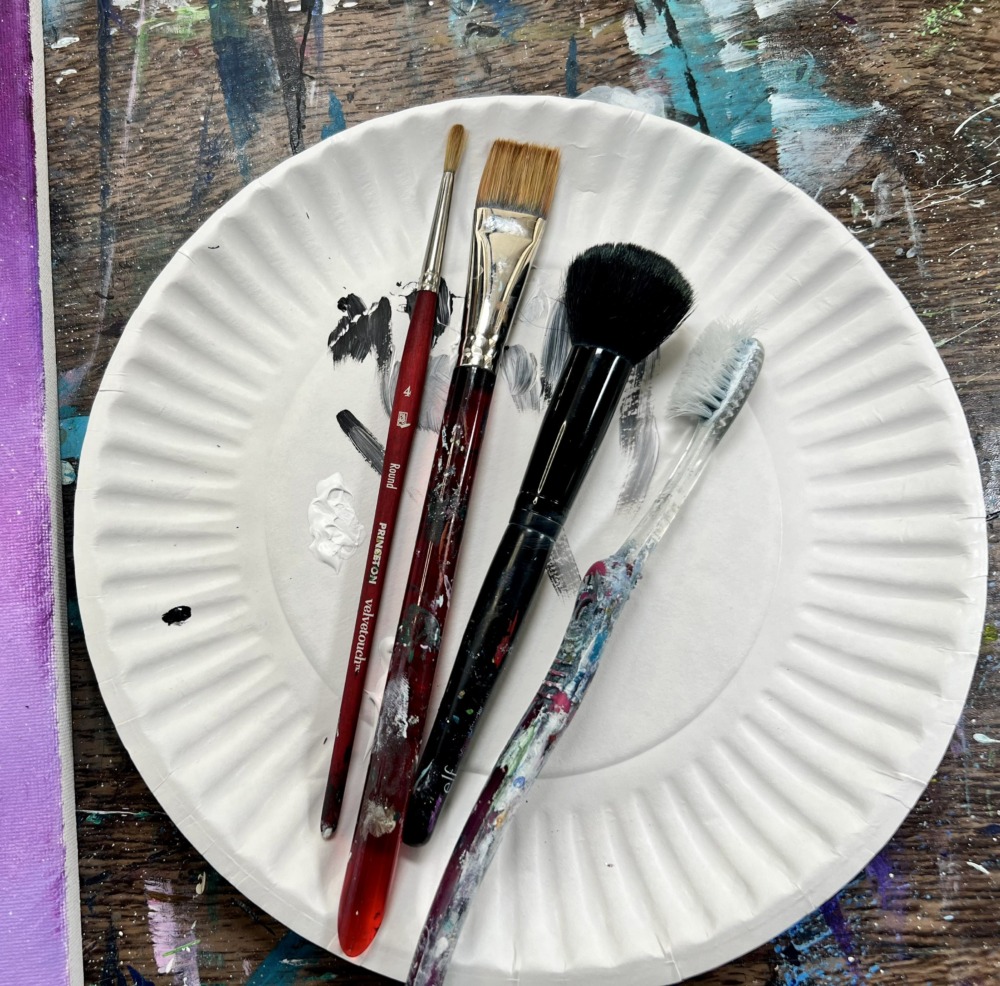
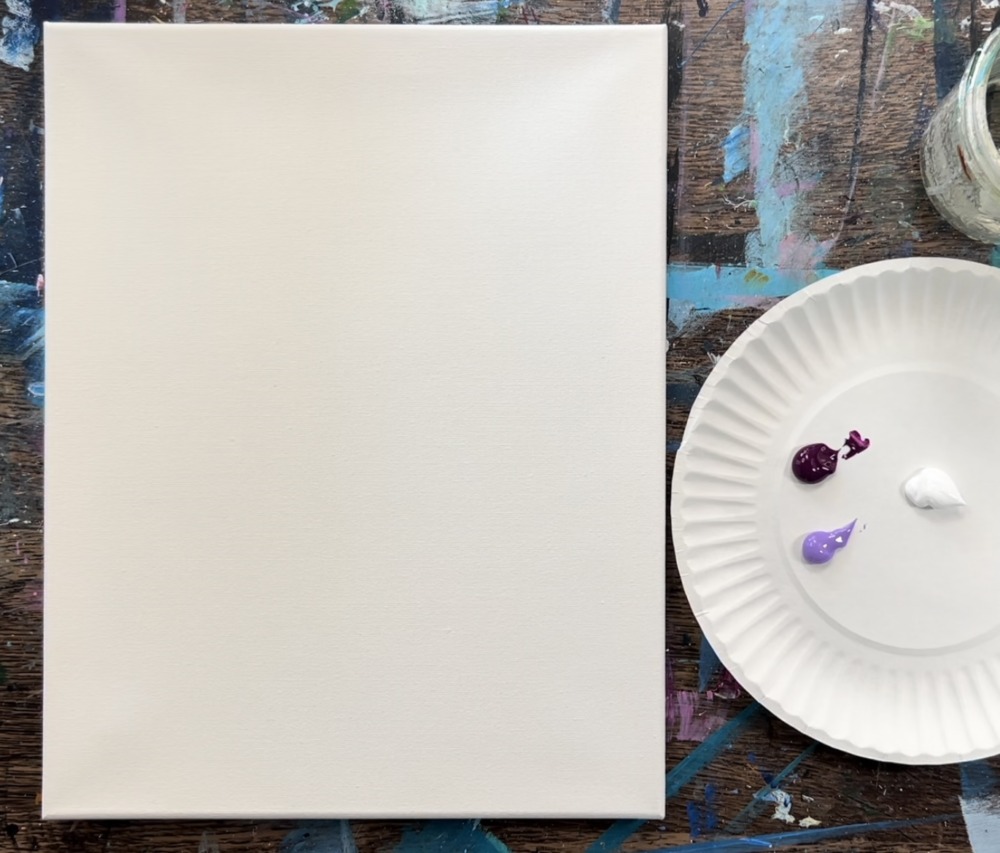
Materials Needed:
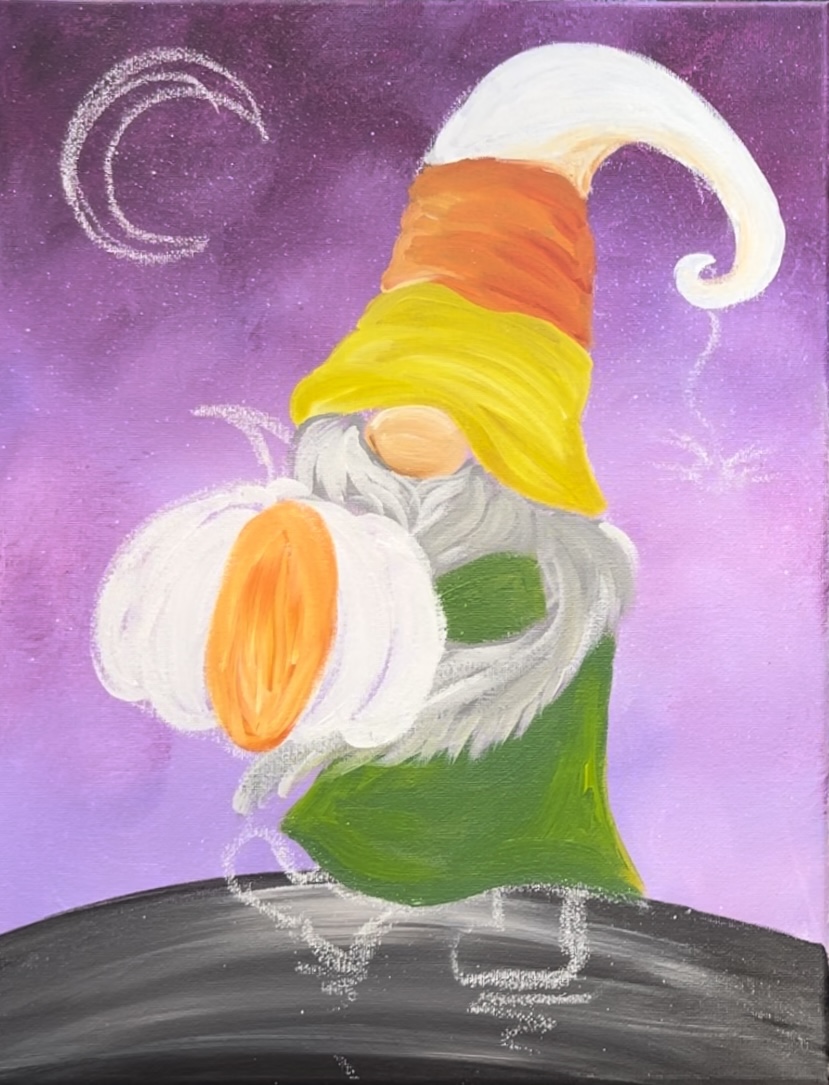
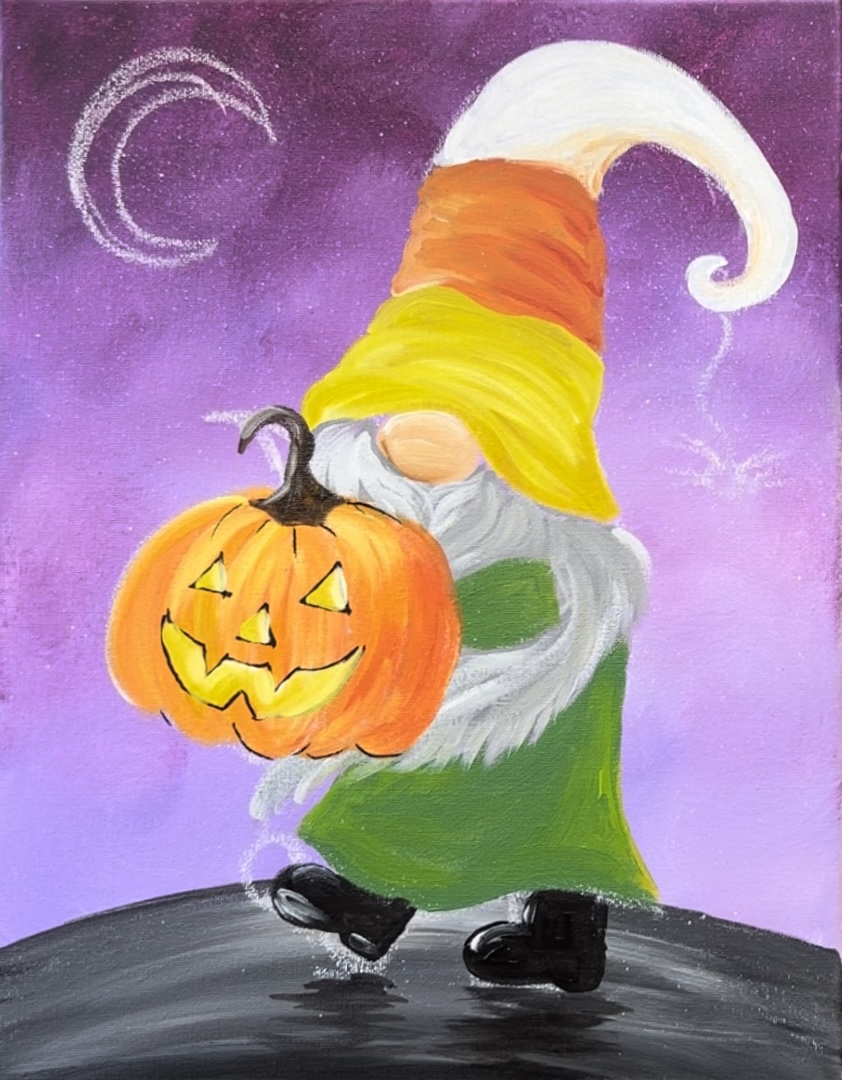
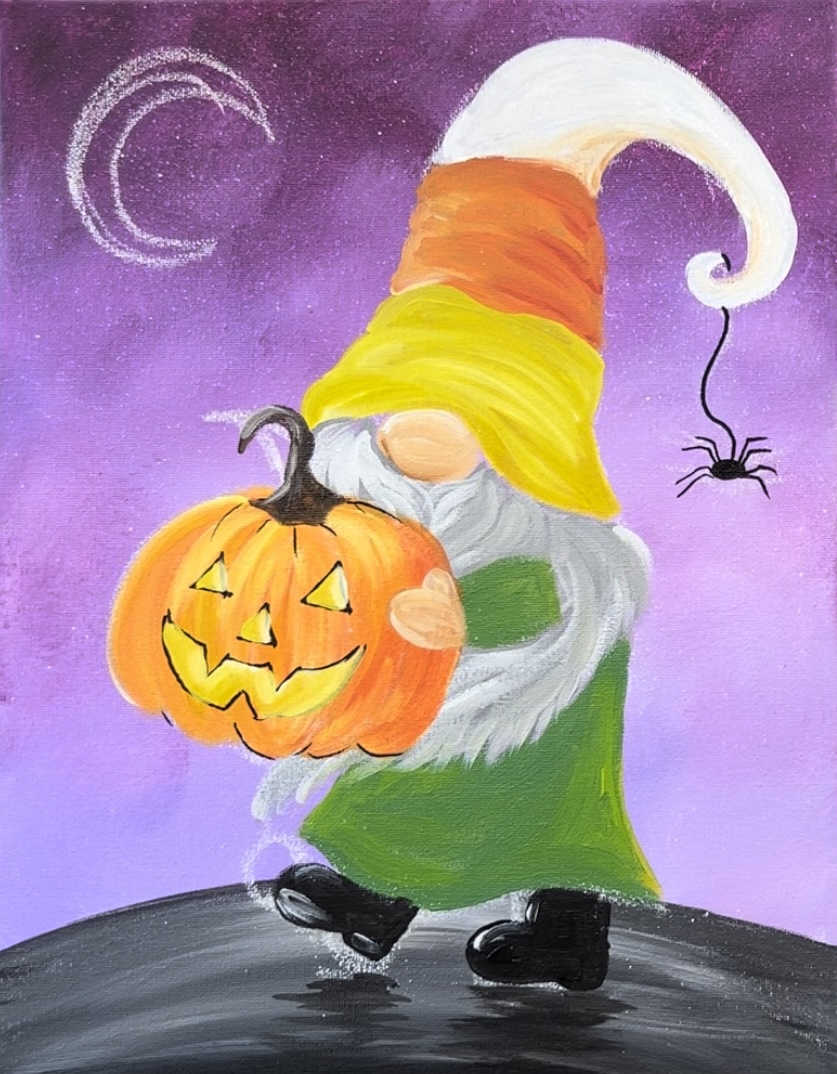
Jack-O-Lantern Candy Corn Gnome - Acrylic Painting Tutorial
Paint a Halloween gnome holding a jack-o-lantern and wearing candy corn themed attire! This tutorial includes an optional tracable template and full instructions for how to paint.
Materials
- 11 x 14 Canvas
- Acrylic Paint
- Paint Brushes
- Blender Brush (optional)
- Optional Tracer
- Optional Graphite Paper For Tracer
- Chalk For Drawing Gnome
- Optional POSCA Paint Pens (White, Black & Yellow)
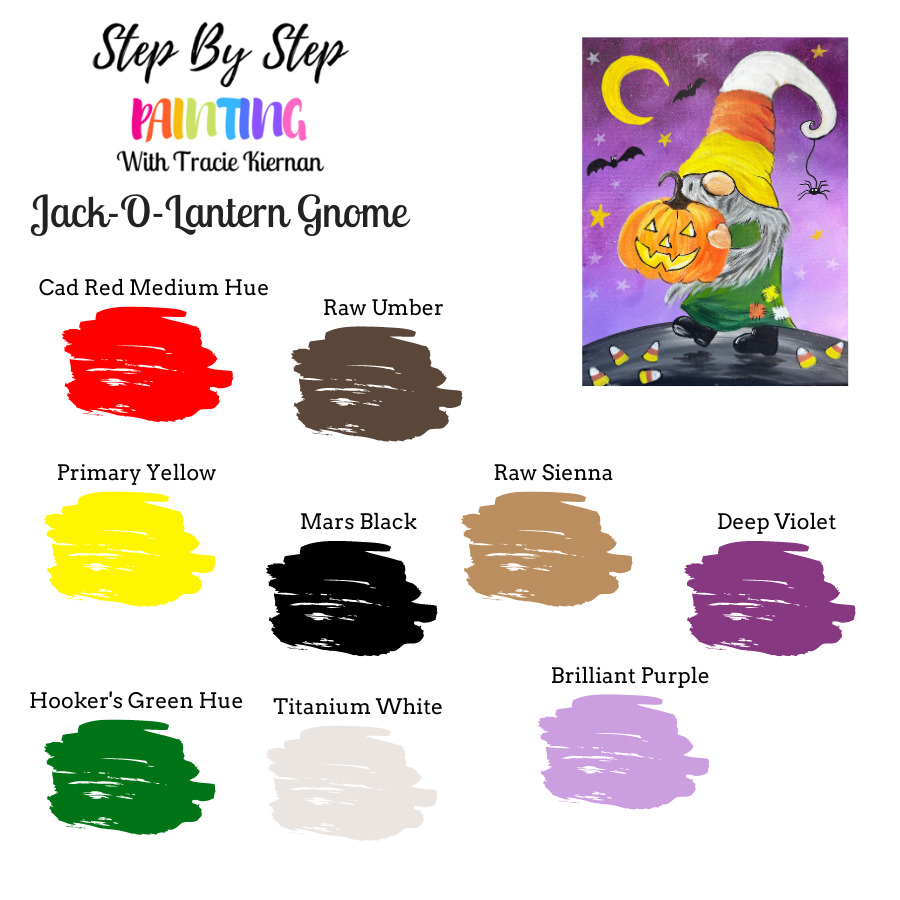
Colors
- Titanium White
- Mars Black
- Cadmium Red Medium Hue
- Primary Yellow
- Hooker's Green Hue Permanent
- Deep Violet
- Brilliant Purple
- Raw Umber
- Raw Sienna
Brushes
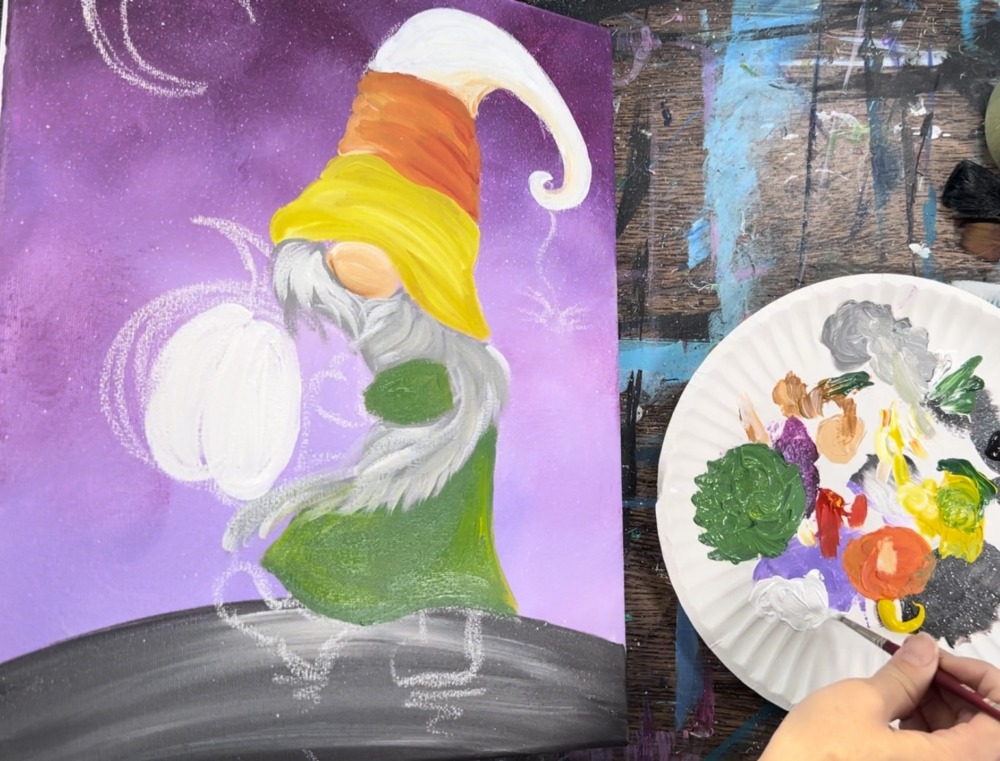
Color Palette
I use Liquitex BASICS acrylics. If you are using a different brand, you can use the color chart below to help you match colors:
Craft Paint Conversion
If you are using craft paints such as Apple Barrel Craft Paints, I would recommend subbing to:
- Flag Red
- Melted Chocolate
- Nutmeg Brown
- Yellow Flame
- Black
- White
- Purple Iris
- Holly Branch
Directions At A Glance
Traceable
This traceable is optional. In the video and instructions, I will be drawing this gnome with a piece of chalk.
Video
Step By Step Instructions:
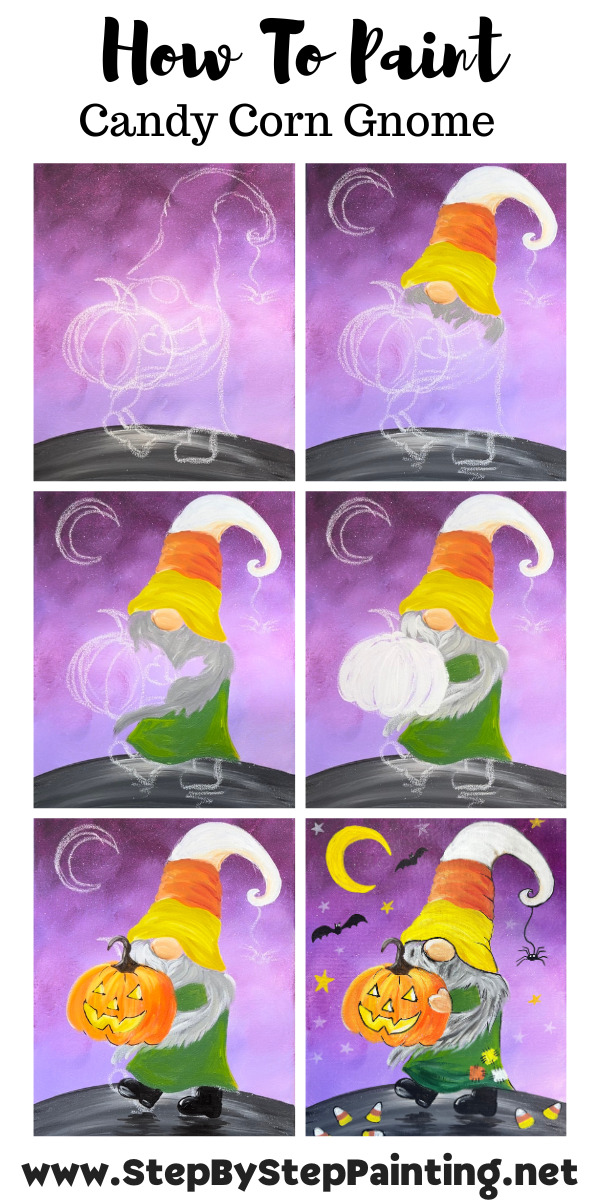
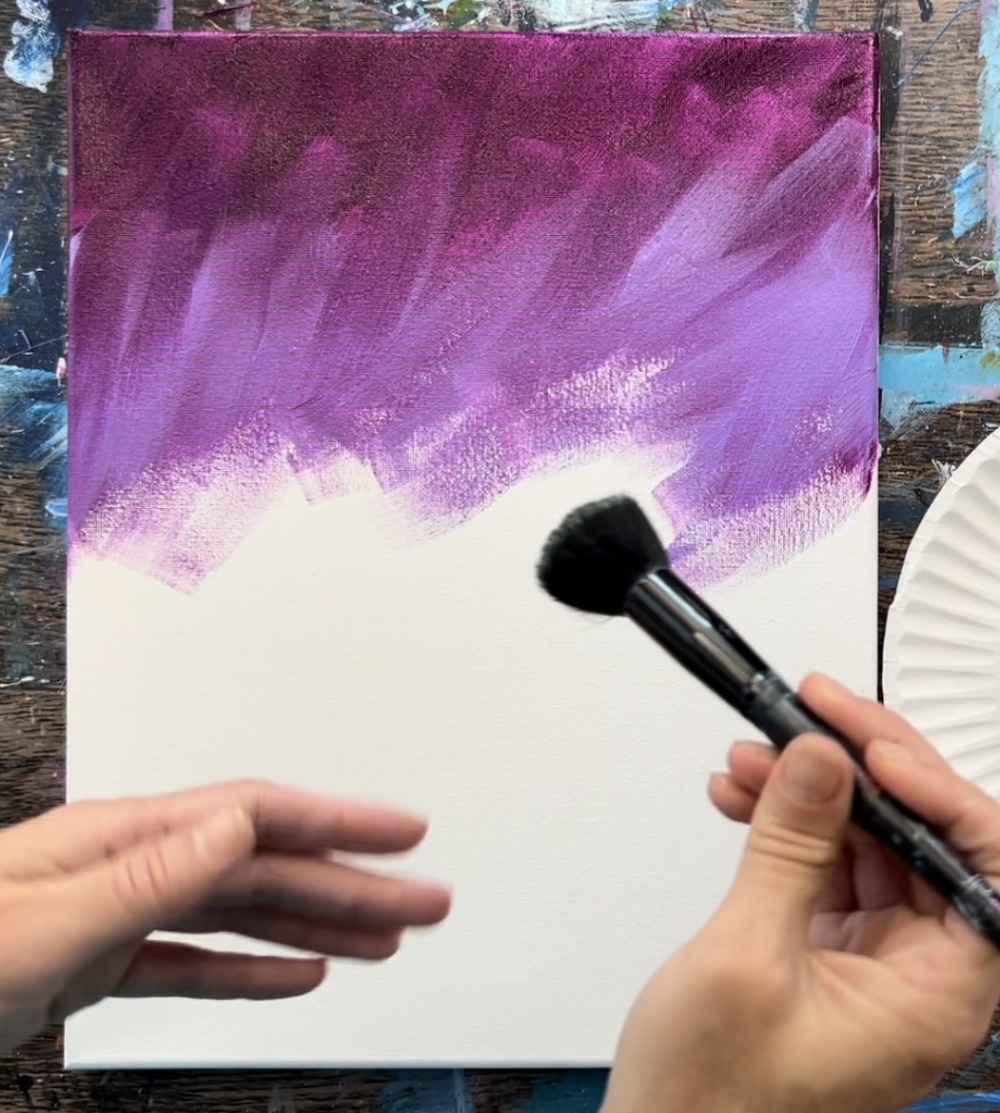
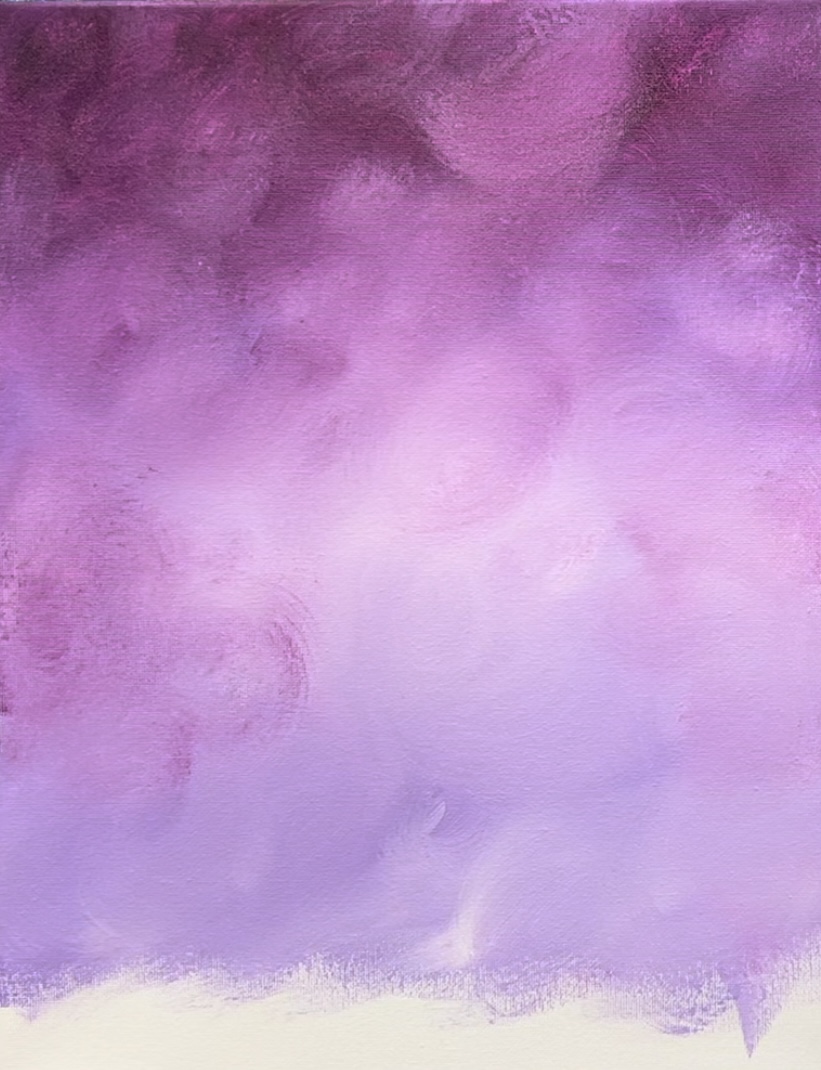
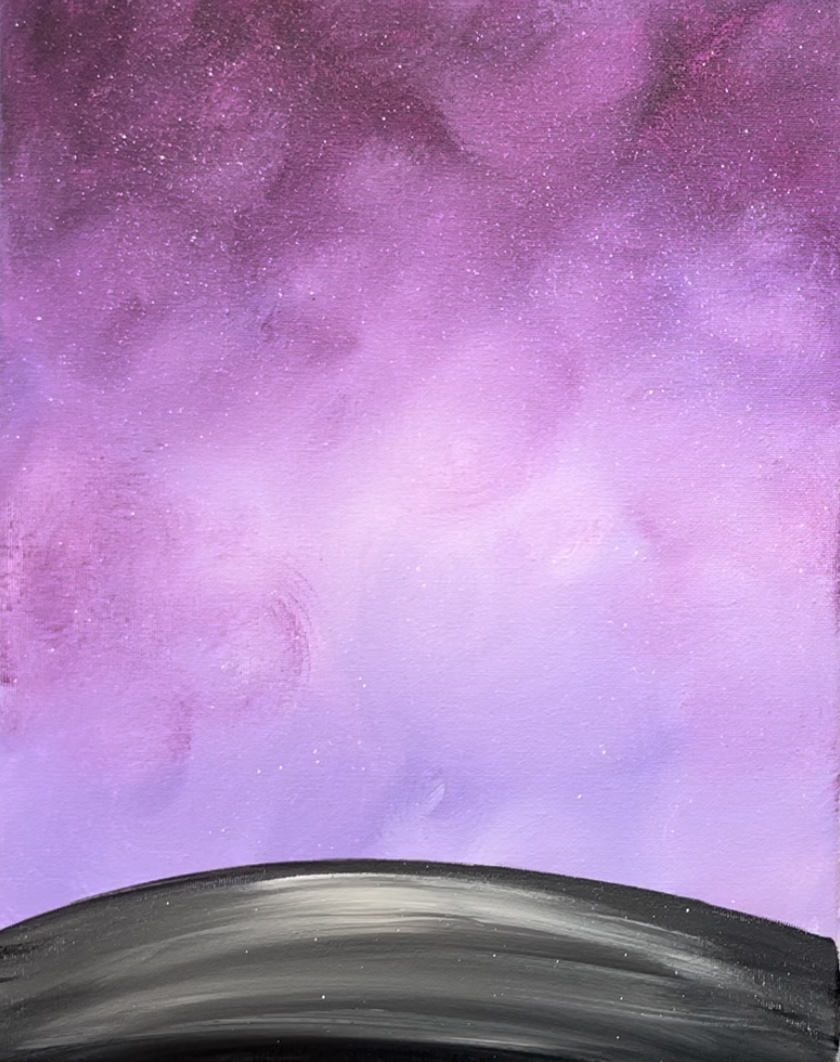
1. Paint The Background
Load your palette with the colors: deep violet, brilliant purple and titanium white.
Load your 3/4″ flat wash brush into water and dry it slightly (leave some water left on the brush but not dripping). Then load it into the color “deep violet”.
Start at the top of the canvas and paint large expressive strokes on the top quarter of the canvas.
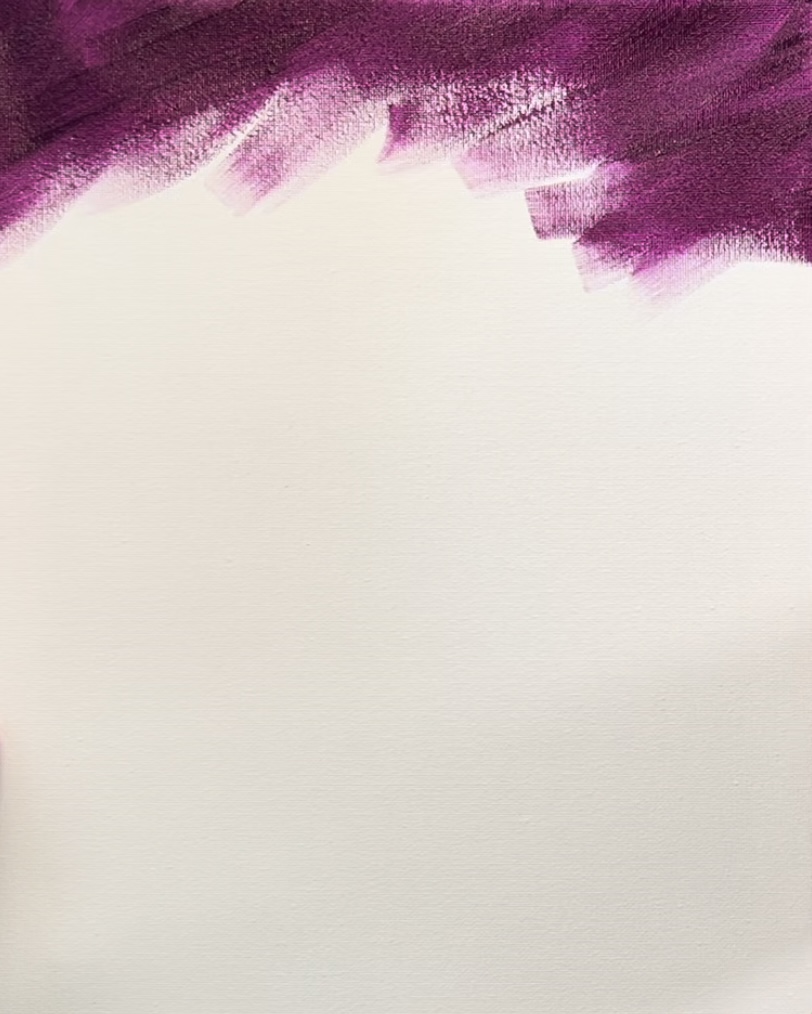
Then, without rinsing the brush, load it into brilliant purple and blend it up into the deep violet with the same expressive/ long angled strokes.
If you are using the blender brush, use this brush dry and with no paint on it. Gently blend the two purple colors together.
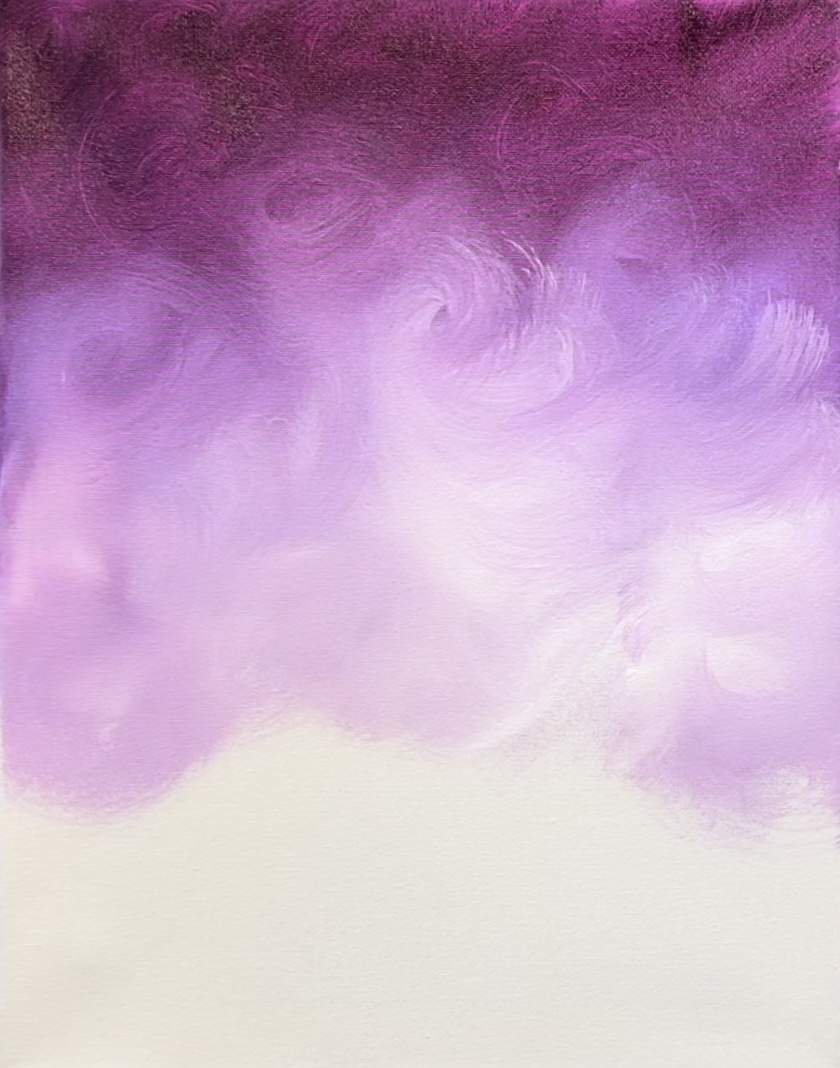
Swirl the brush in circular strokes. You don’t need to press too hard on the bristles, just lightly use the tip of it to blend the paint colors together. This will create a soft, cloudy effect in the background.

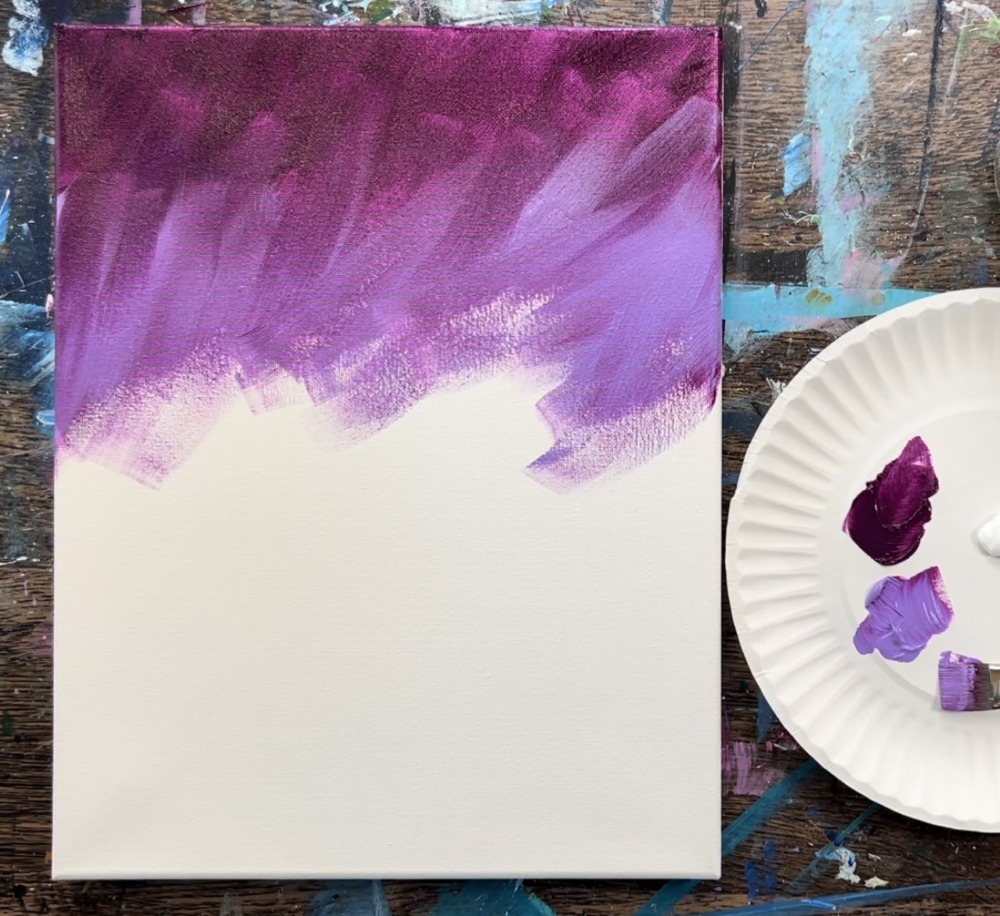
Next, use the 3/4 flat brush (without rinsing the purples off) to paint white below this light purple color. Load it into titanium white and paint long, expressive strokes.
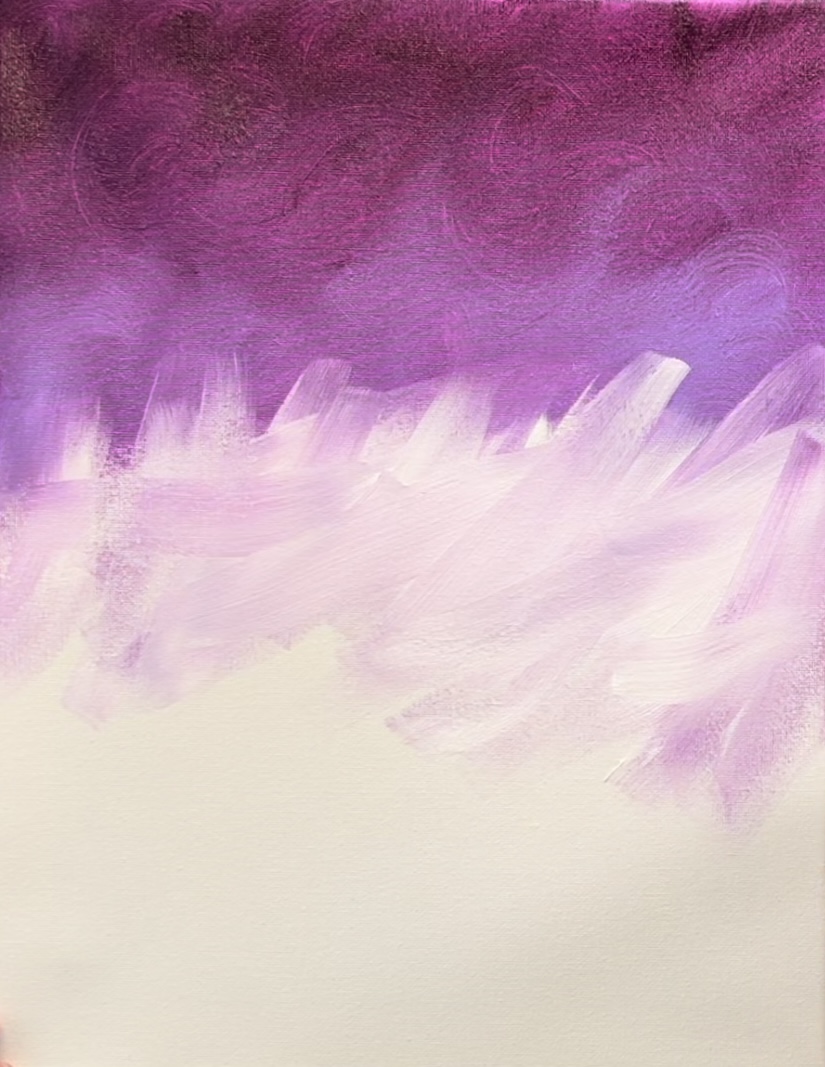
Then use the blender brush to blend it into the purple.
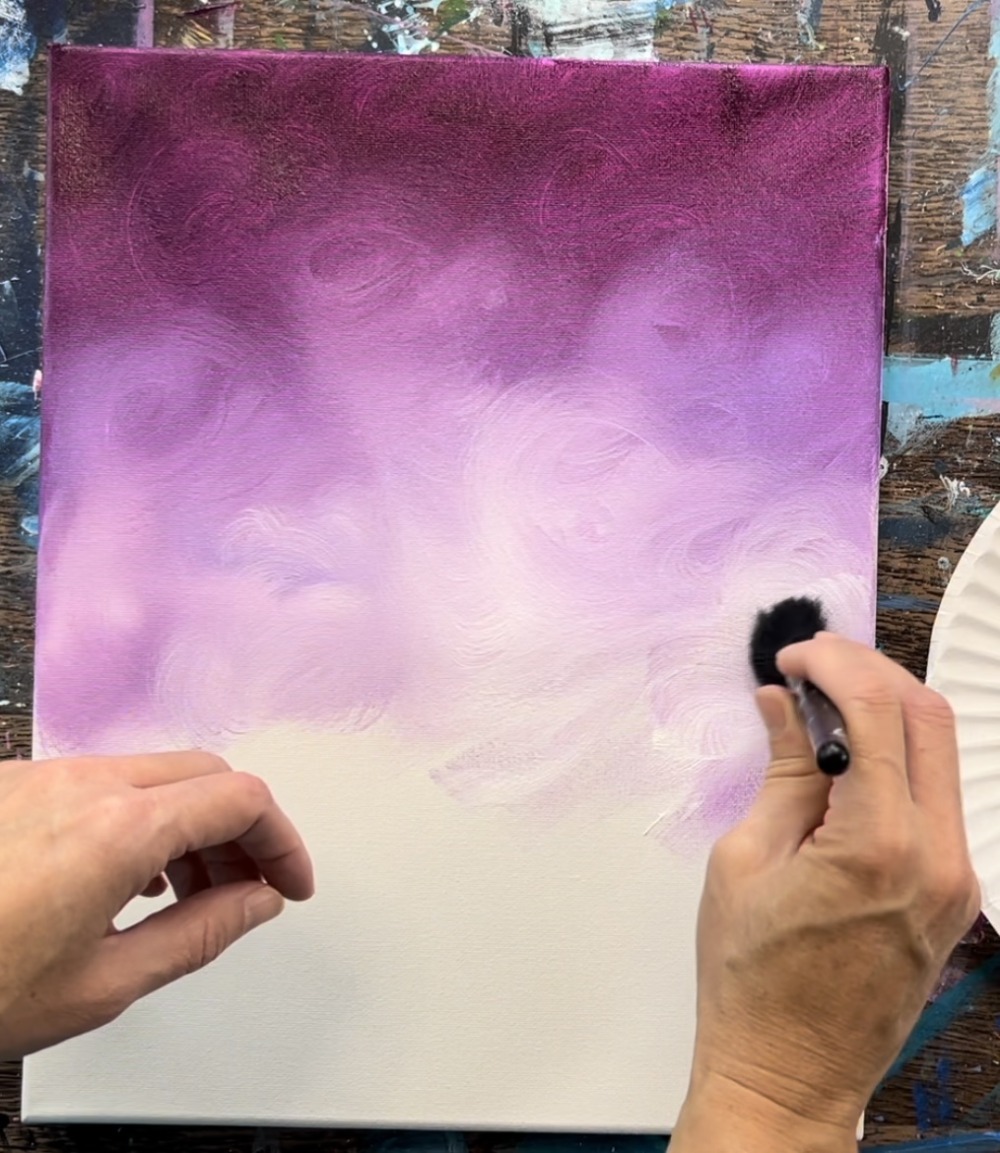
Add more of the light purple towards the bottom of the canvas and then use the blender brush to blend that into the colors.
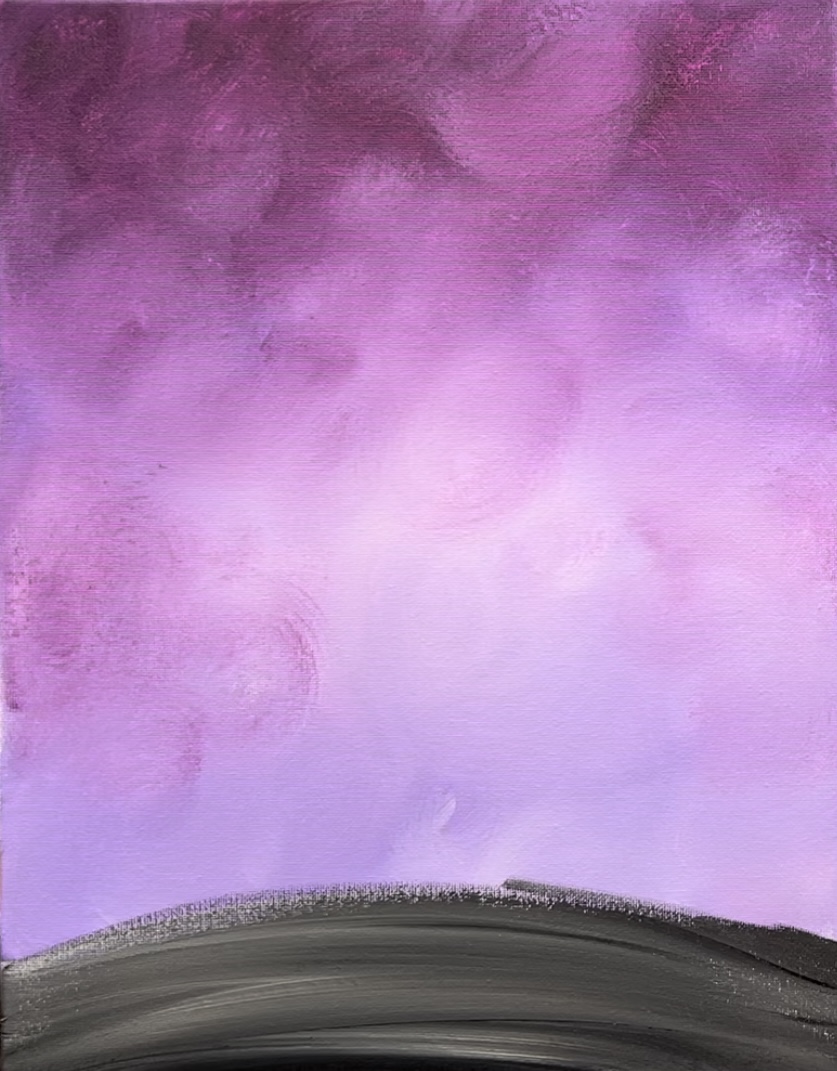
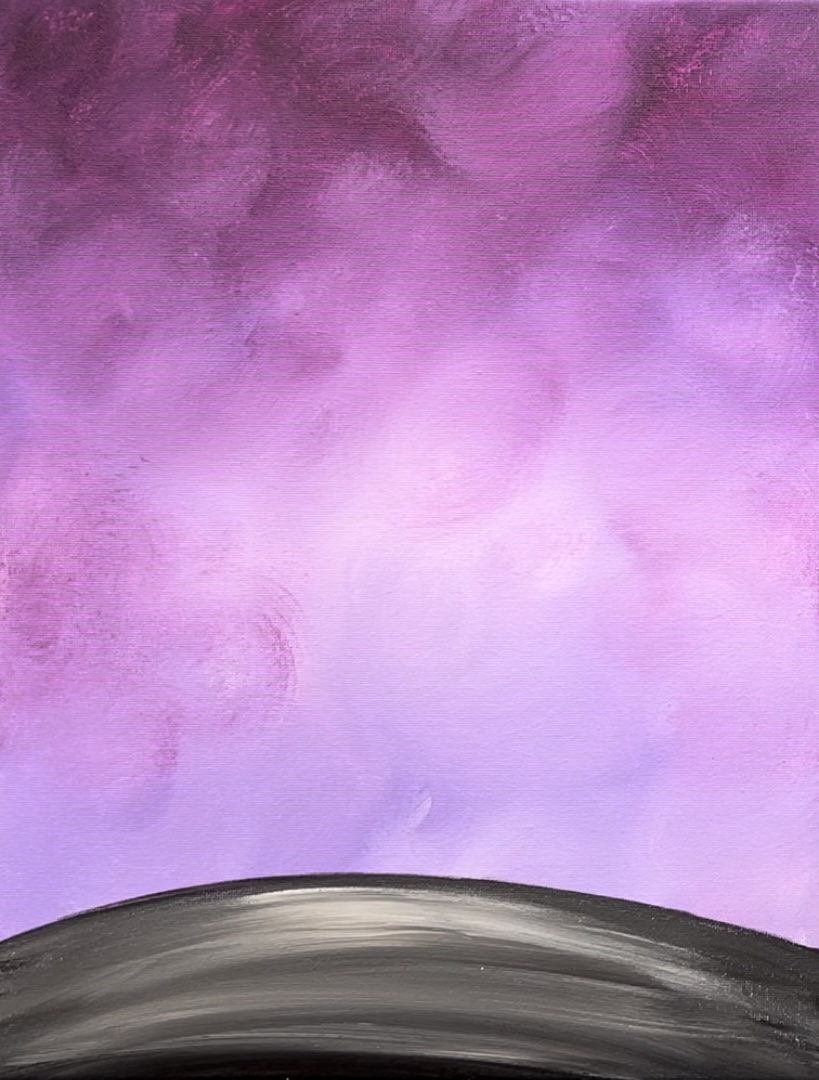
2. Paint Ground
Load your palette with mars black. Use a 3/4 flat brush to paint a “hill” area on the bottom of the canvas. The height of this hill in the middle is about 3″.
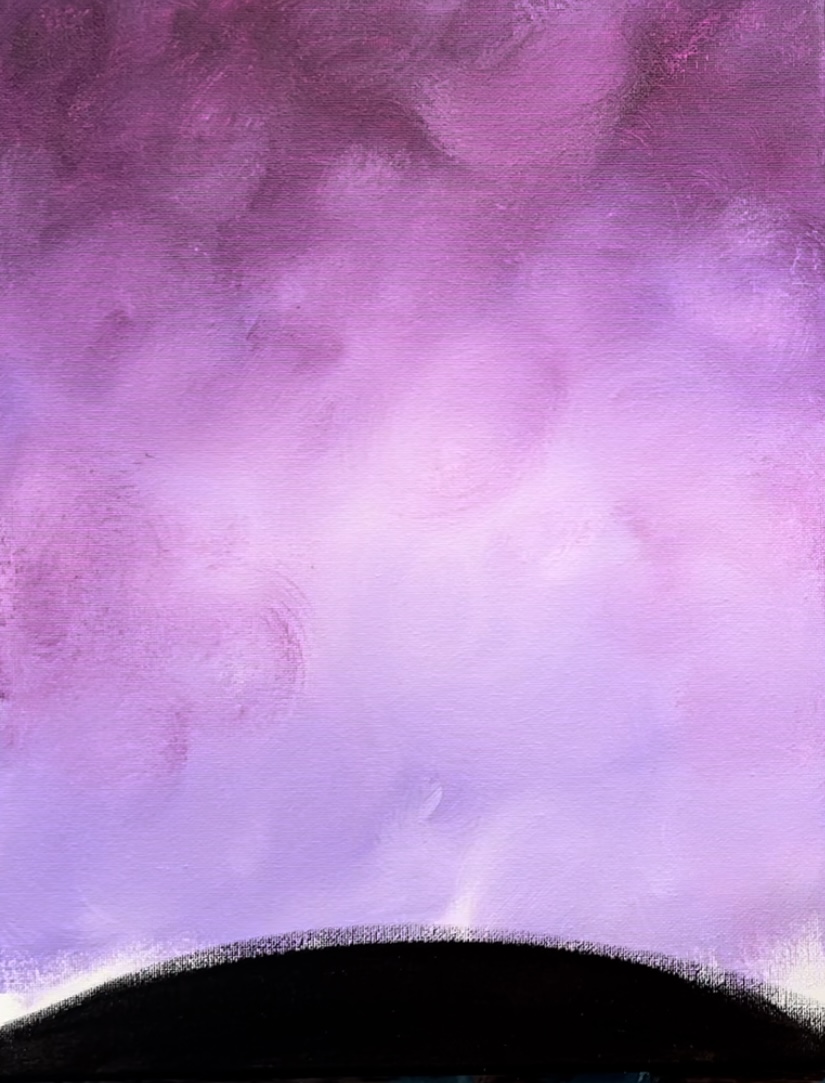
Then add a small amount of titanium white paint on the brush with the black paint. Gently blend the white into the black so that it turns a medium gray. Try not to blend the color all the way together.
3. Splatter Star Dots In Sky
Use a toothbrush that is slightly wet. Then load it into titanium white. Test another surface first before splattering the stars on the canvas. Then splatter the fine start dots all over the sky.
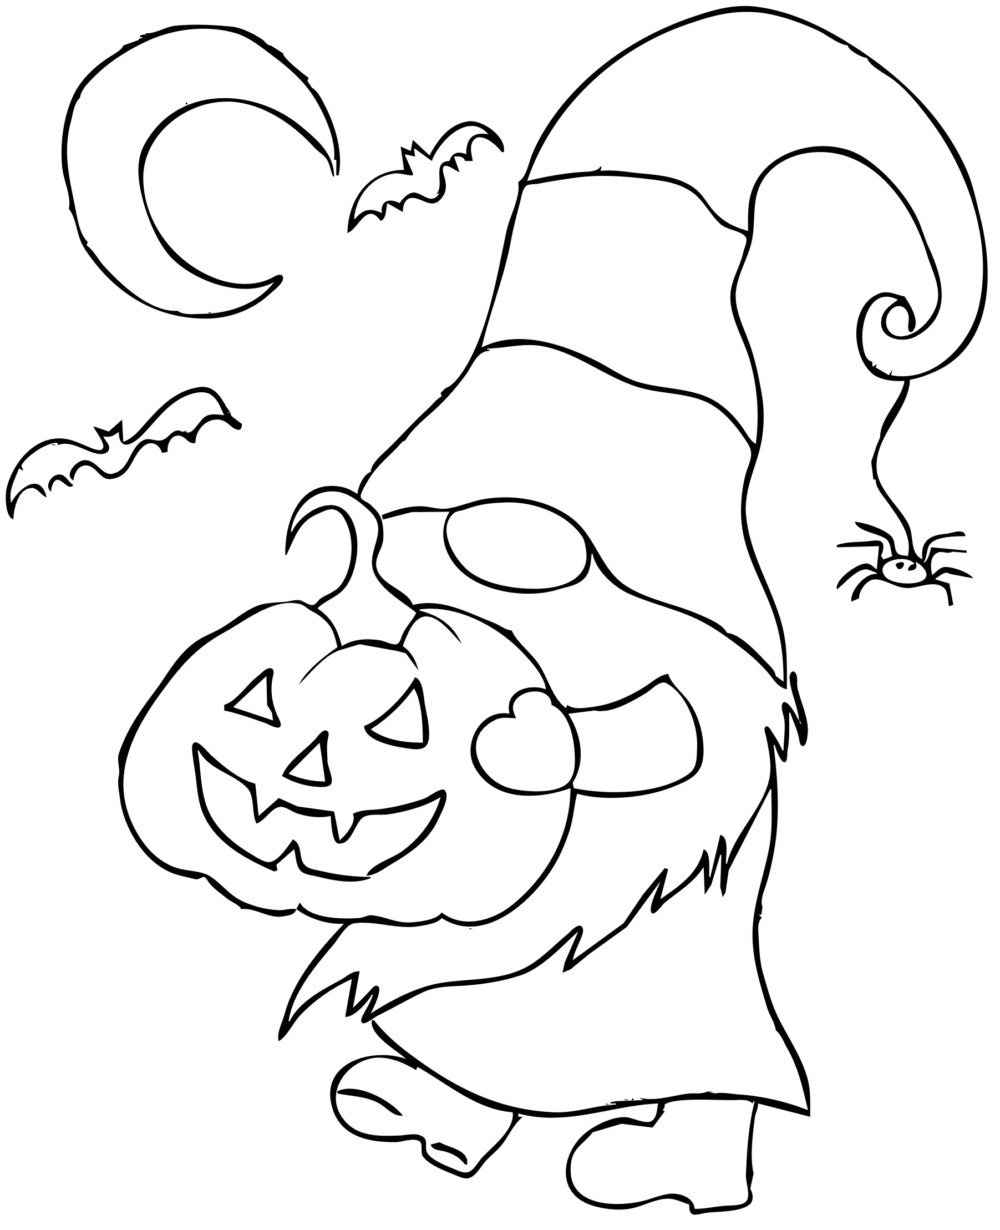
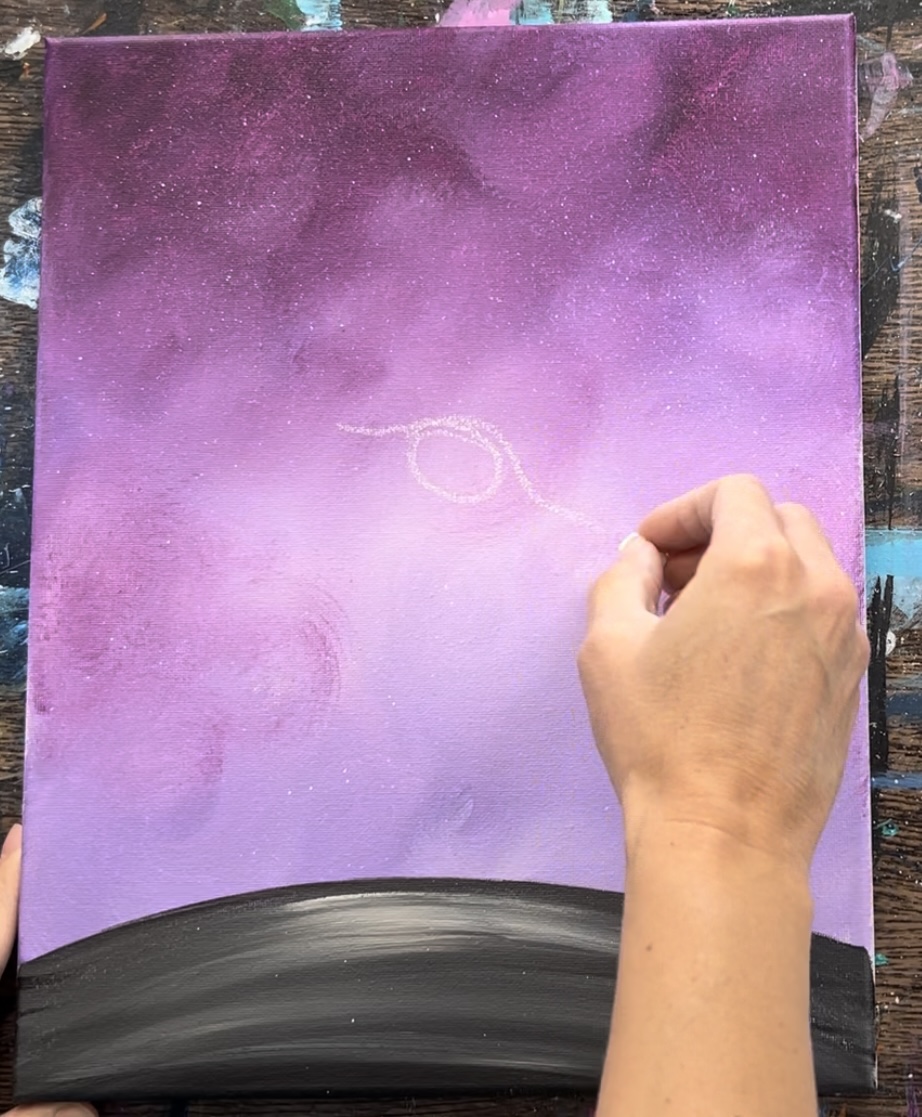
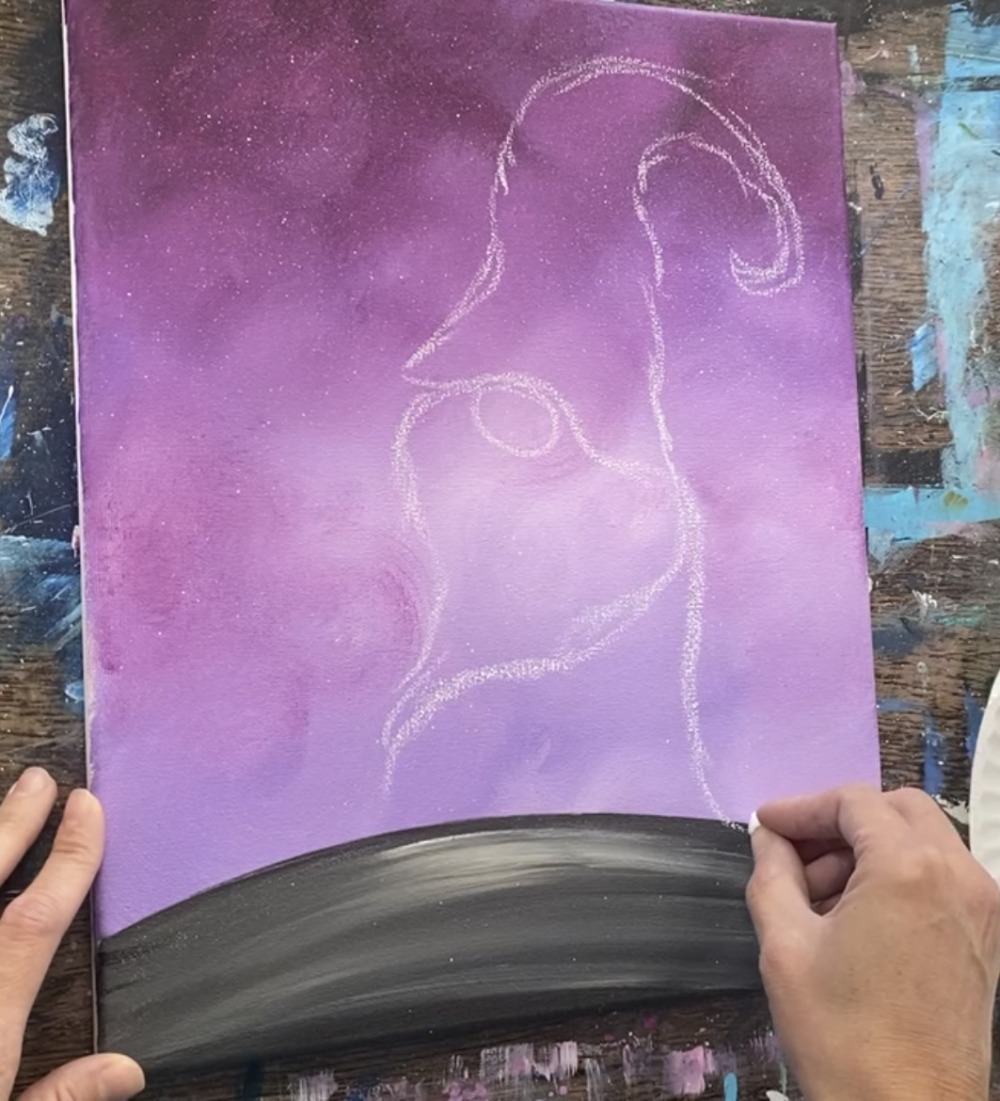
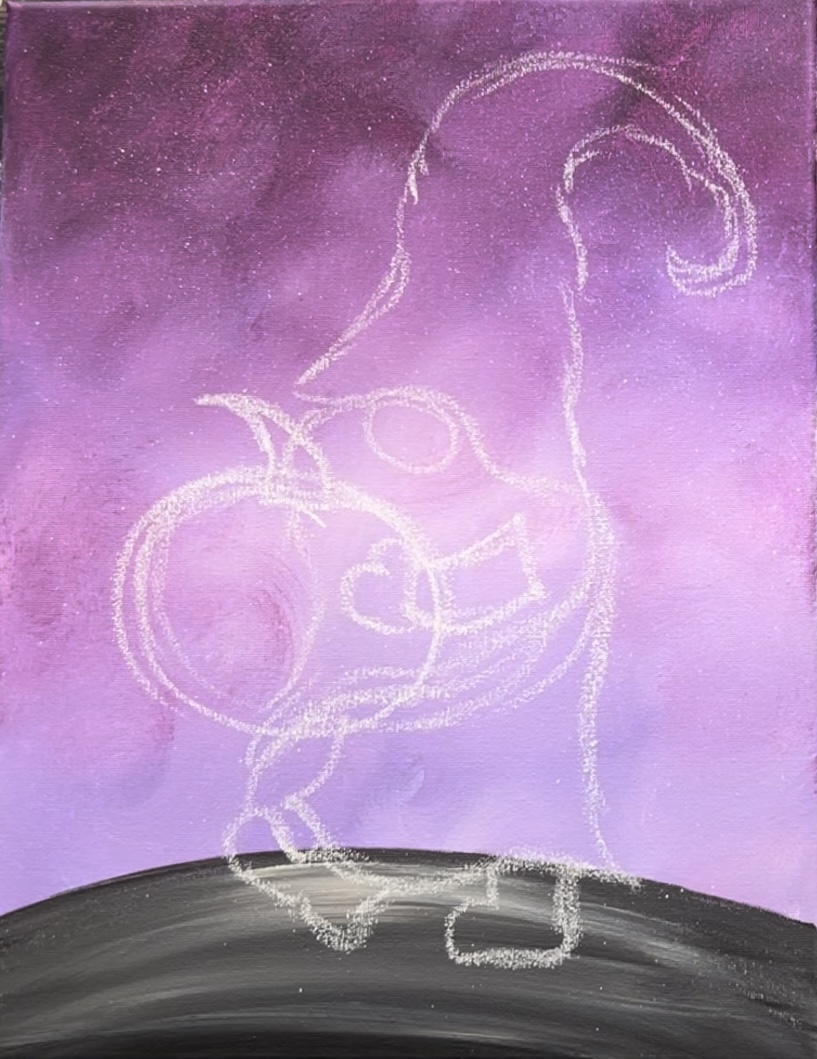
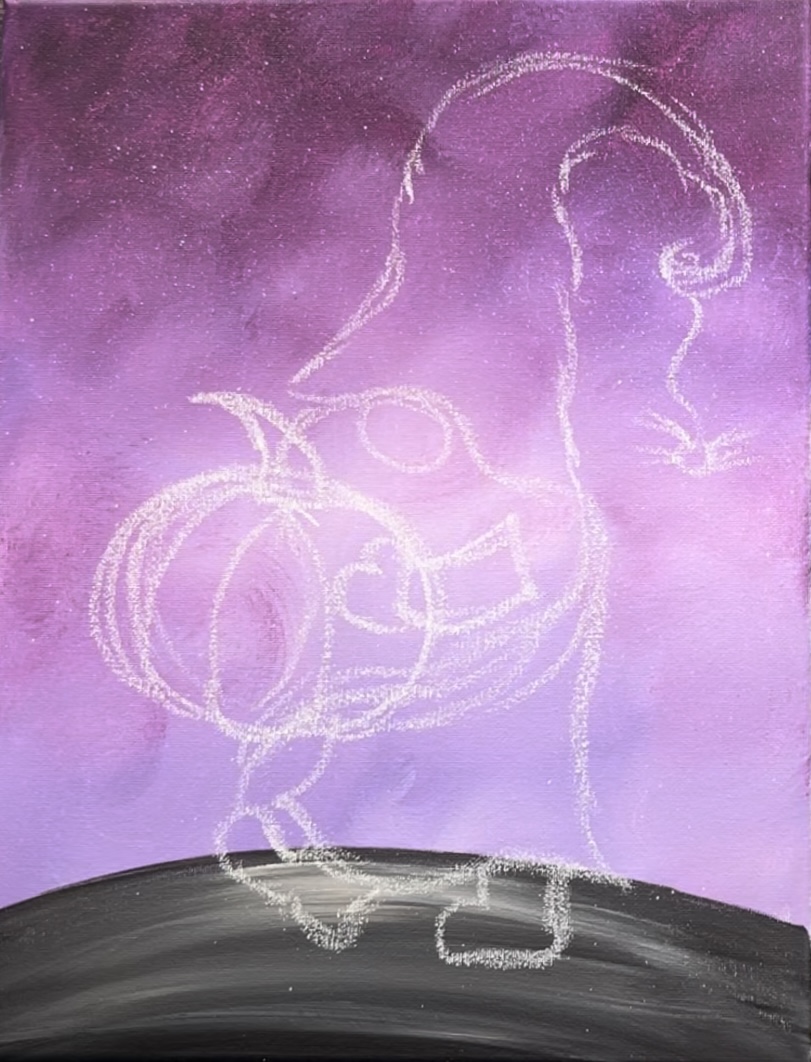
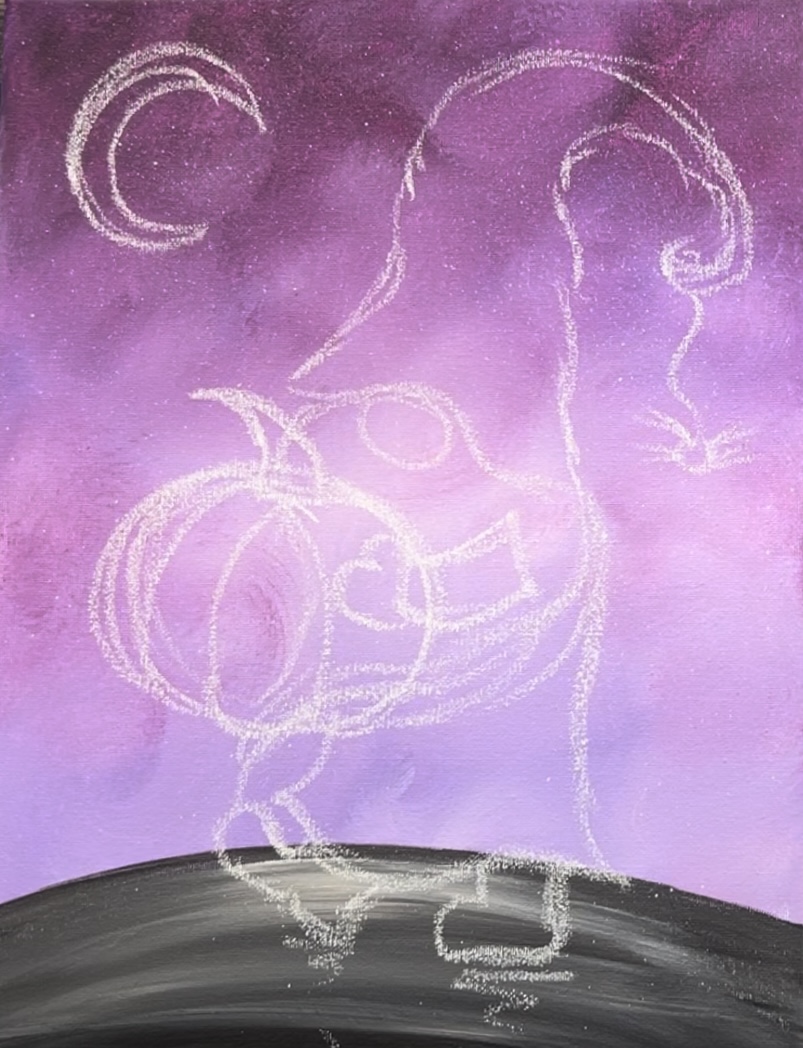
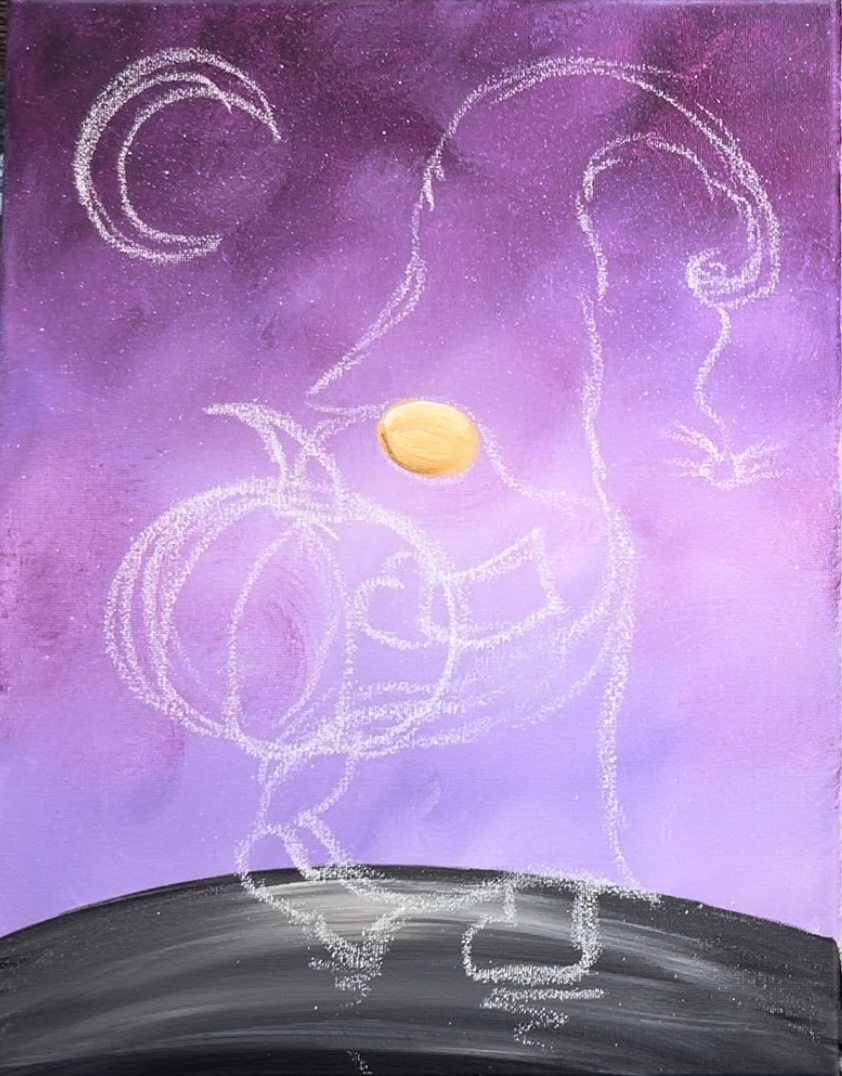
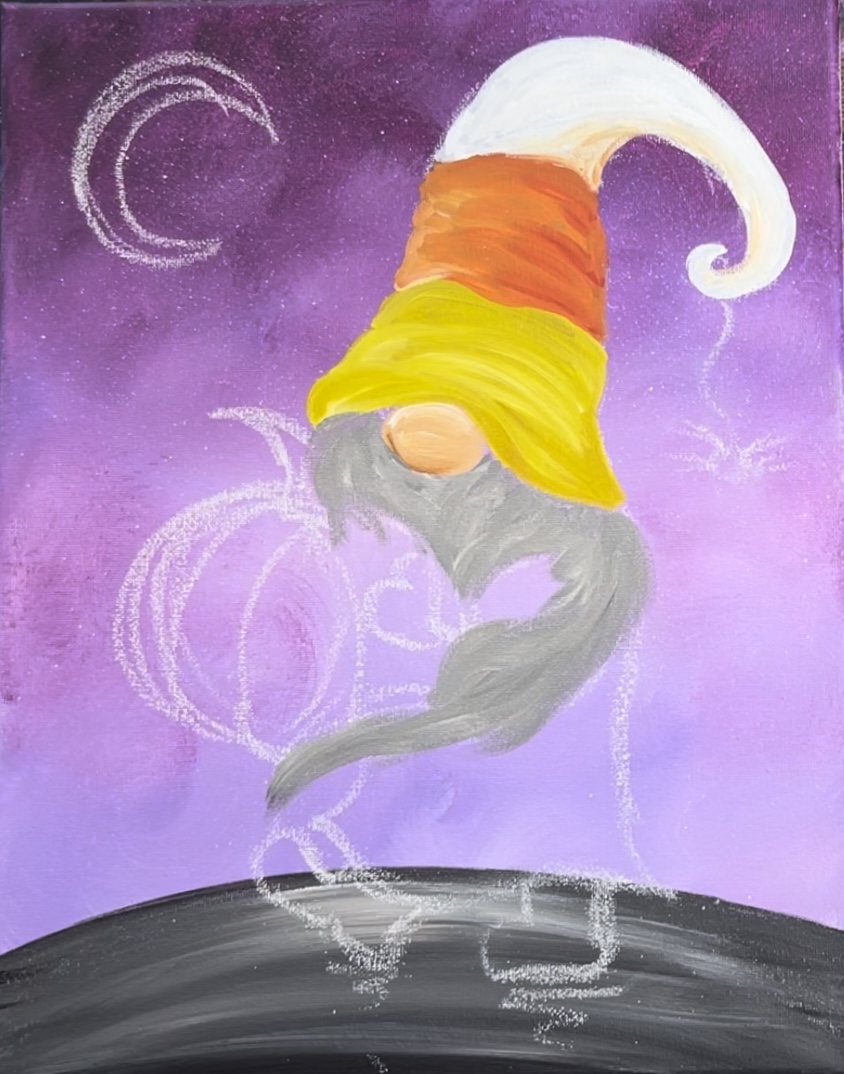
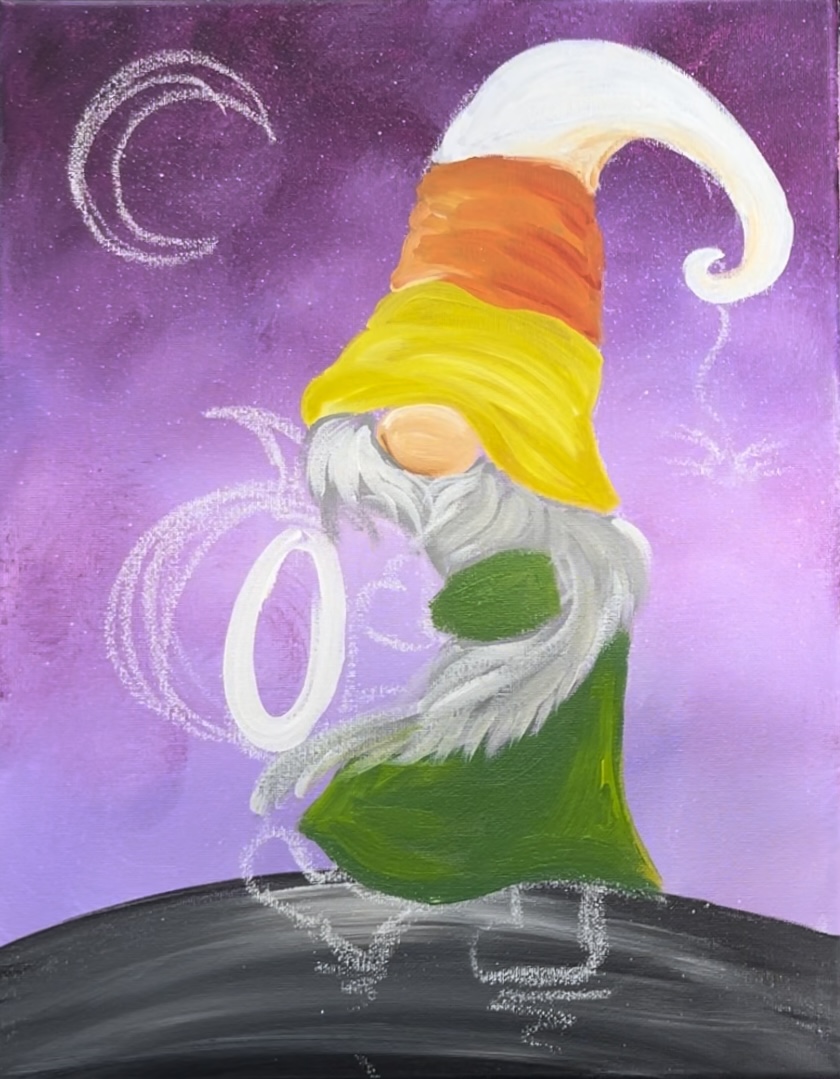
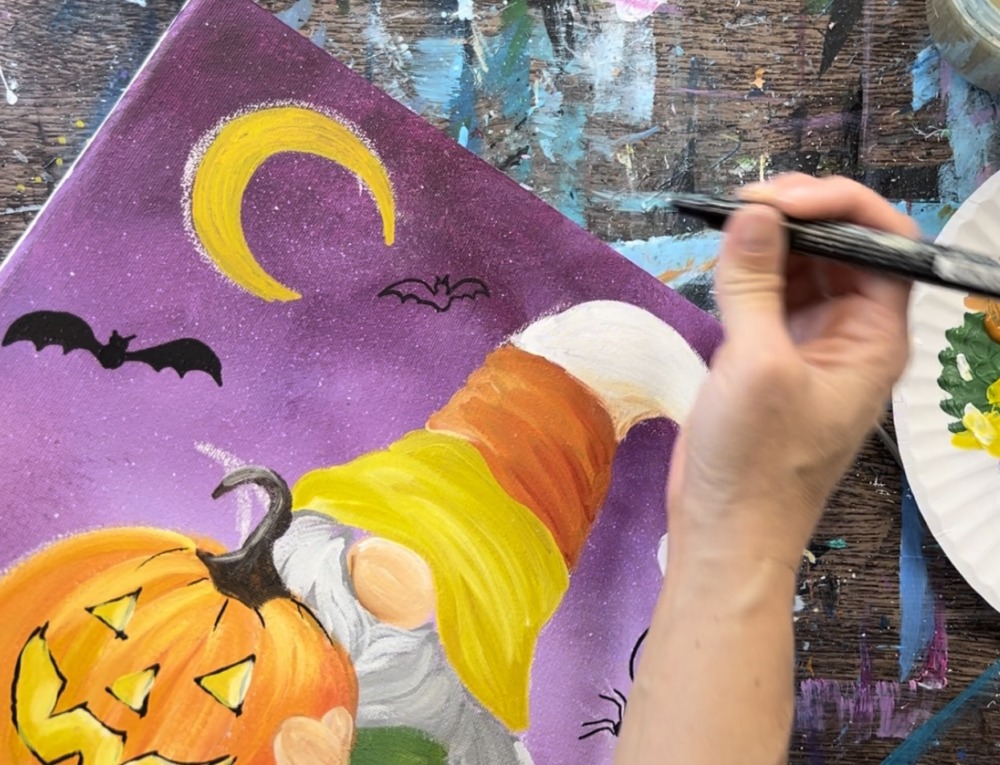
4. Draw Gnome
If you are using the traceable template, position graphite paper below the printable and transfer the gnome design to the canvas.
If you are drawing this gnome, use a piece of white chalk. You can also use a pencil or white chalk pencil.
Start in the center of the canvas. Draw the nose as an oval that is slightly slanted. Then draw a curved line above the nose. This is the bottom edge of the hat and it lays just over the top of the nose.
Then draw the hat so that it goes almost to the top edge of the canvas and curves downwards and kind of spirals at the tip.
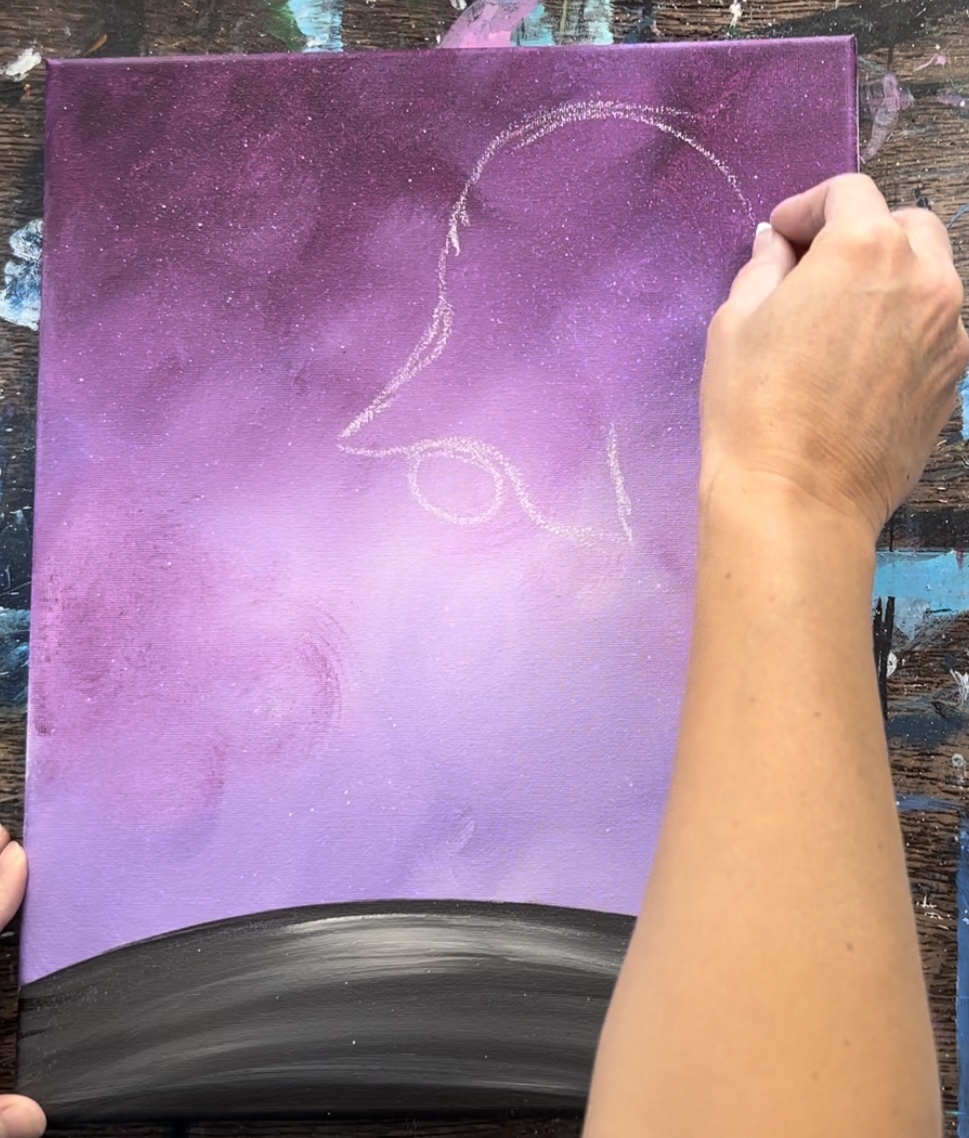
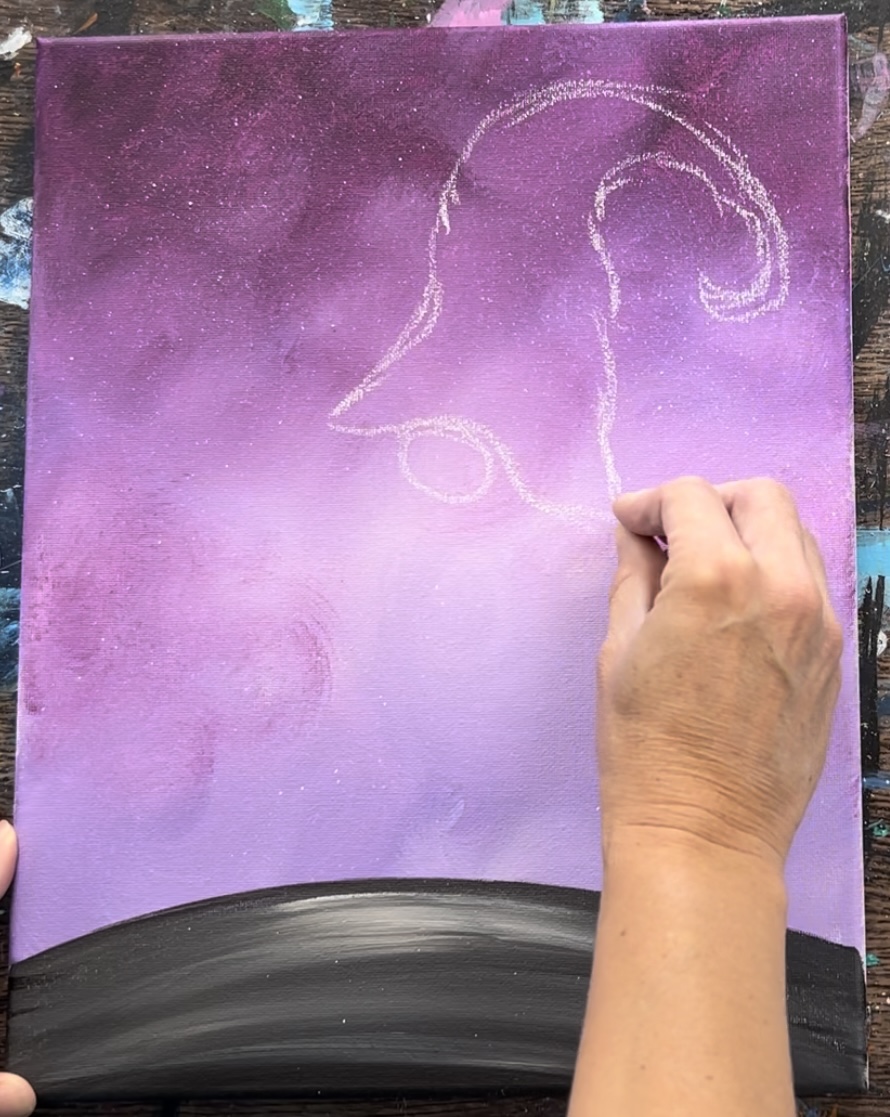
Then draw the beard. Both the left and right side of the beard start just under the sides of the hat. The beard needs to sway towards the left because the gnome is taking a step and walking.
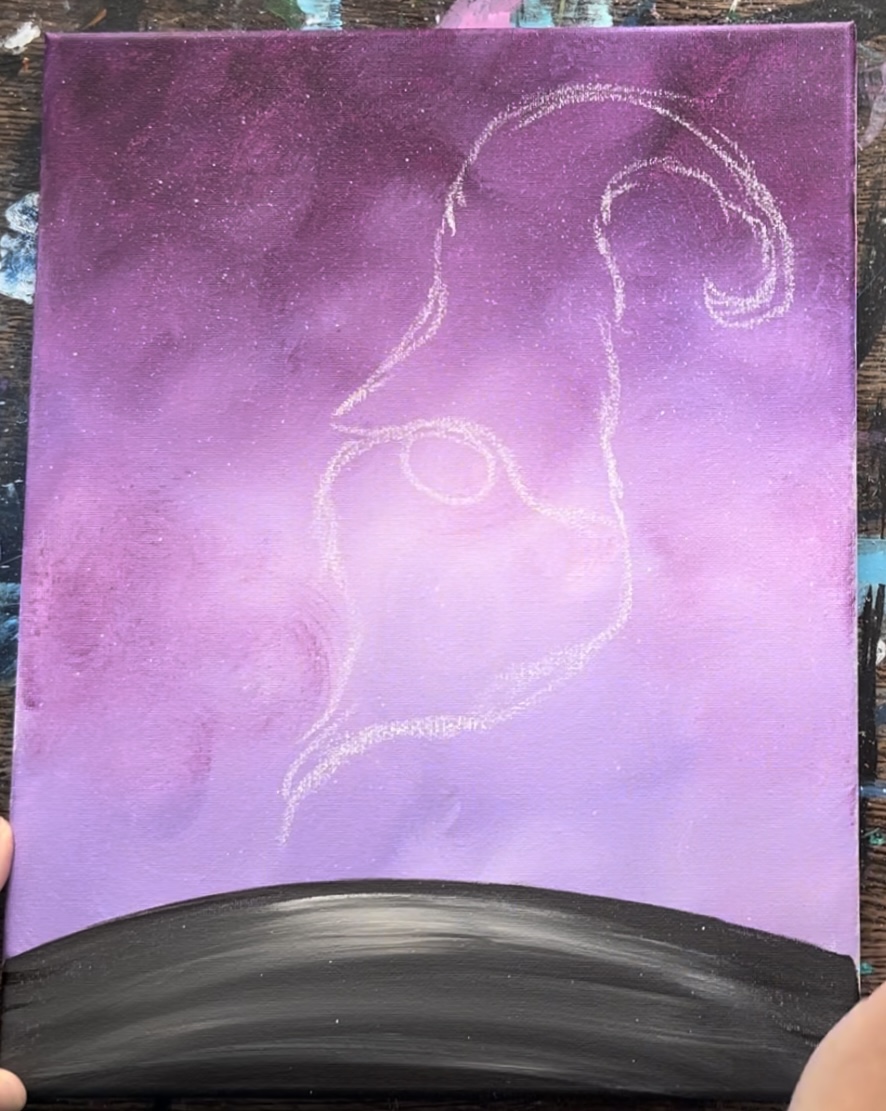
Draw the robe. Draw a line on the far right of the beard that goes down and slightly curves inwards.
Then draw the bottom of the robe. This goes all the way down and slightly past the top of the “hill line”.
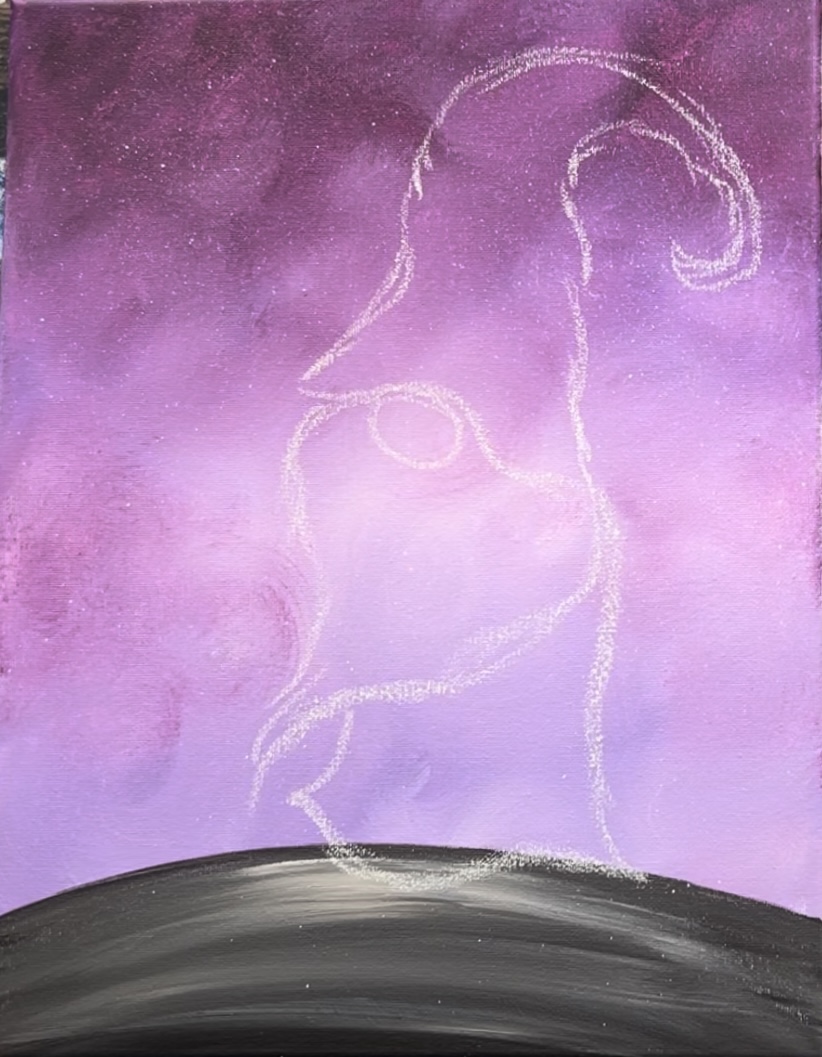
Then draw the gnome boots so they are walking and pointing towards the left. The boot on the right is flat on the ground. The boot on the left is angled upwards like he is taking a step.
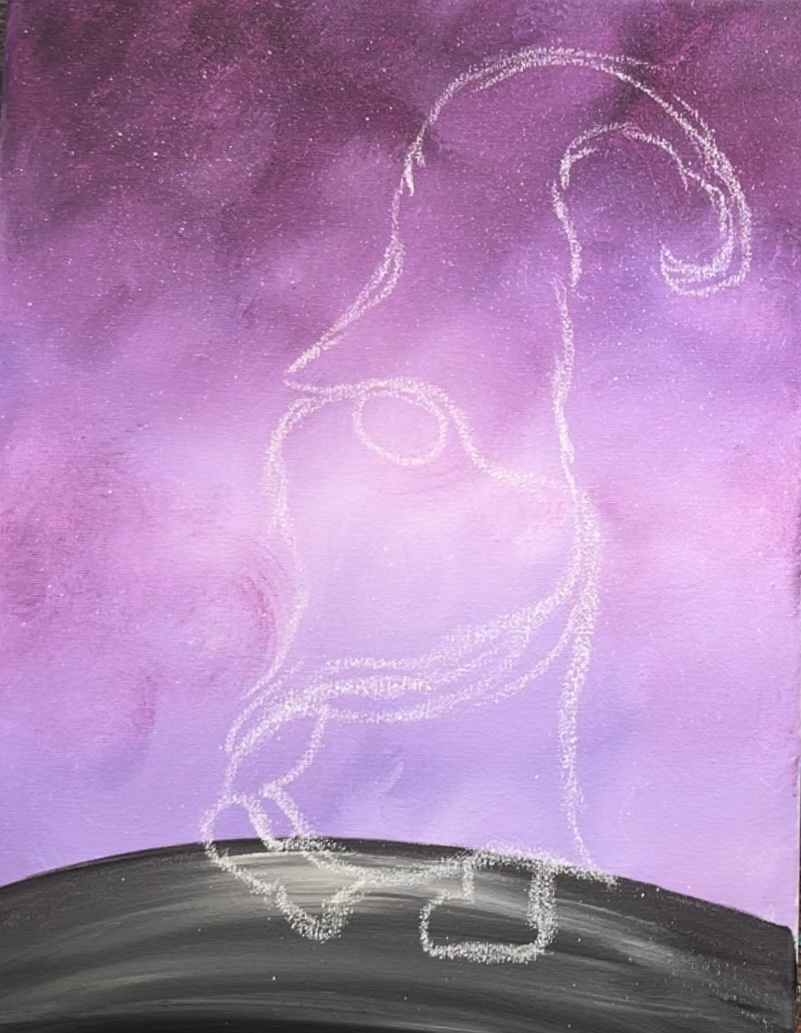
Draw an oval shape that overlaps the bottom of the beard.
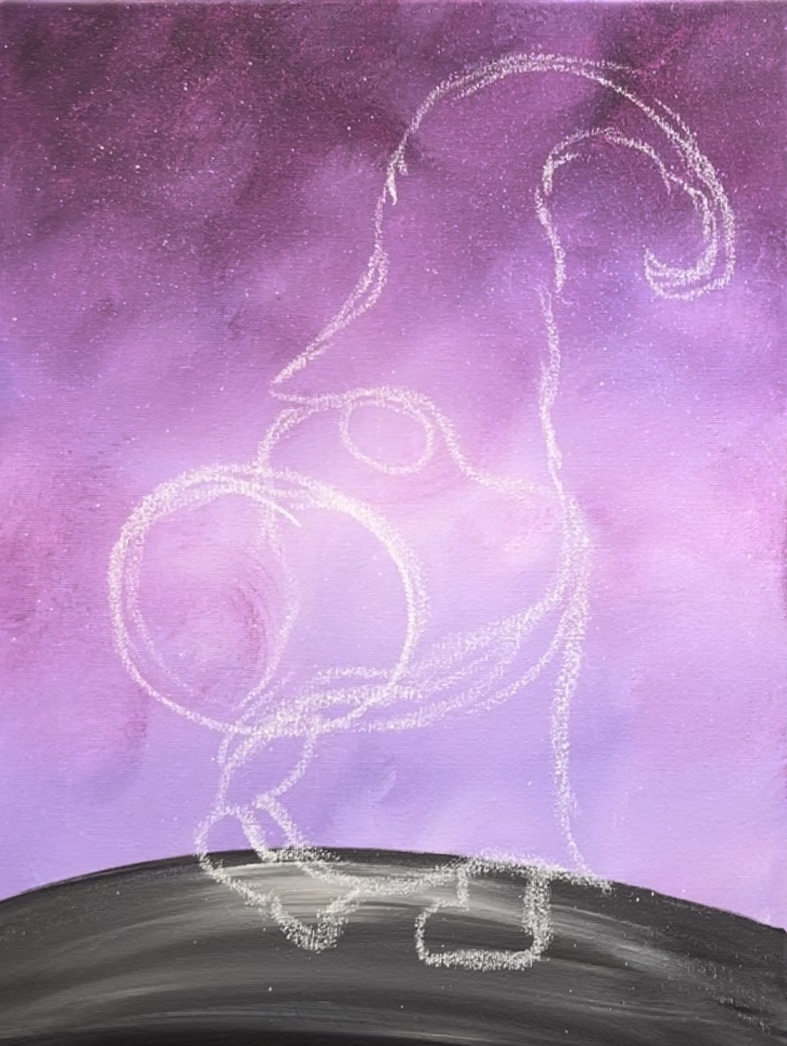
Draw the sleeve of the gnome and a mitten hand. Then draw a stem on the top of the pumpkin.
Draw an oval in the center of the pumpkin and then draw curved lines on the left and right of the oval to give the pumpkin more “form”. Draw a spider web line coming down from the end of the hat then draw a spider on the end of the web line.
Finally, draw a crescent shape for the moon.
5. Paint Gnome Nose
Load your palette with titanium white and raw Sienna. Mix the two together (equal amounts). Then paint the nose using a #4 round brush. Add a little extra brown on the bottom of the nose for shading and a little extra white on the top of the nose for highlight.
6. Paint Hat
Load your palette with primary yellow and titanium white. Use the #4 round brush to paint the bottom of the hat. Mix equal amounts of yellow and white together. Then paint about an inch and a half up the hat (or the bottom third of the hat).

Paint in curved strokes to give the hat some form. To give it kind of a “wrinkled look”, load different amounts of yellow on your brush that have different amounts of white (so some lighter and some darker). Let that gently blend on the canvas.
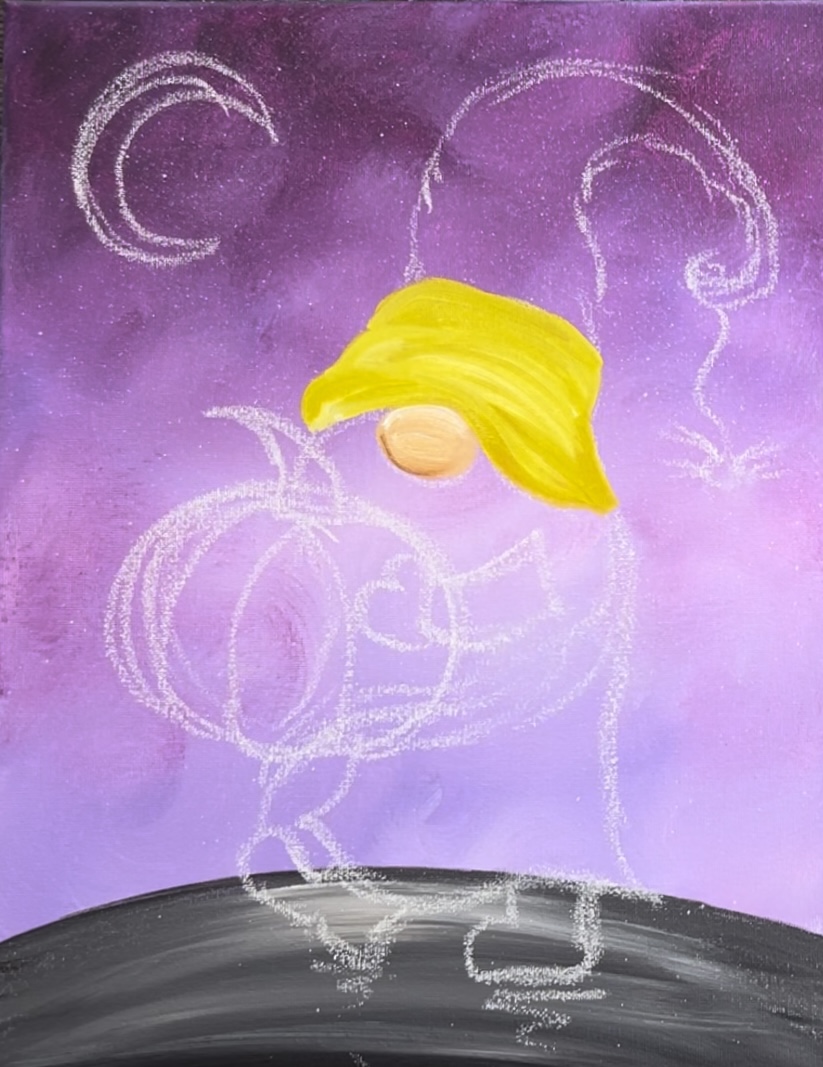
Mix orange on your palette. Mix about 2 parts yellow and 1 part cadmium red medium hue. This will make an orange. Then paint the middle third of the hat.

Do this with curved strokes and also “vary” the orange a bit by adding more red or more yellow.
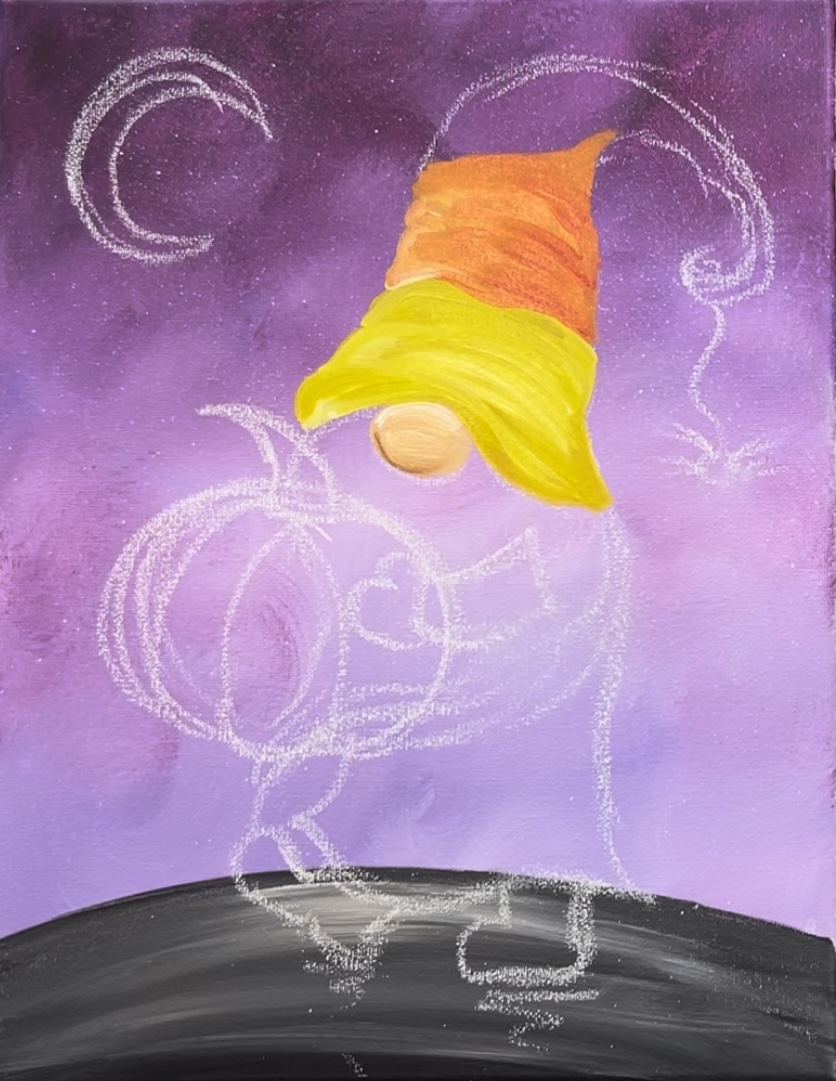
Paint the top part of the hat with titanium white. You can add a little bit of “shading” to the white part by blending in some orange or raw Sienna on the bottom right edges of the white portion of the hat.

7. Paint Beard First Layer
Mix a gray on your palette by mixing about 2 parts titanium white and 1 part mars black. Use a #4 round brush to paint the beard with this gray. Paint the strokes so they curve and part/change directions just under the nose.
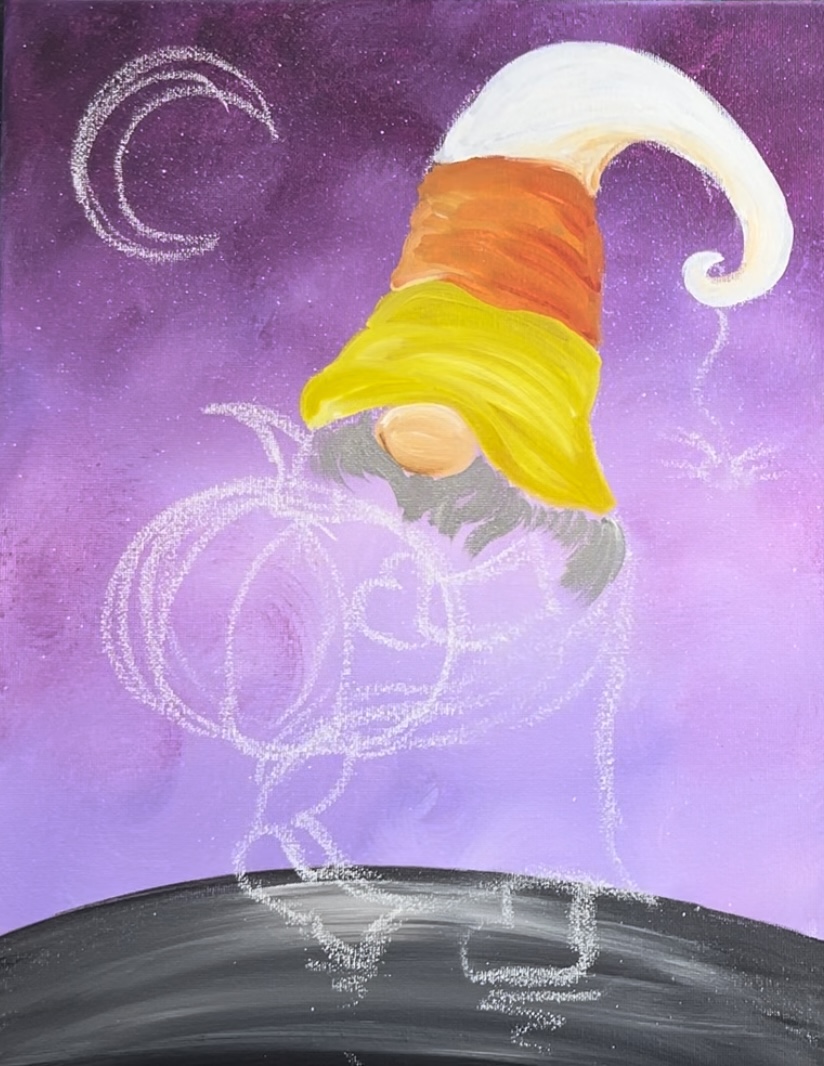
Contour the strokes so that the beard curves to the left.

This first layer of the beard will be the same color. We will add more texture/ lighter and darker hair colors later.
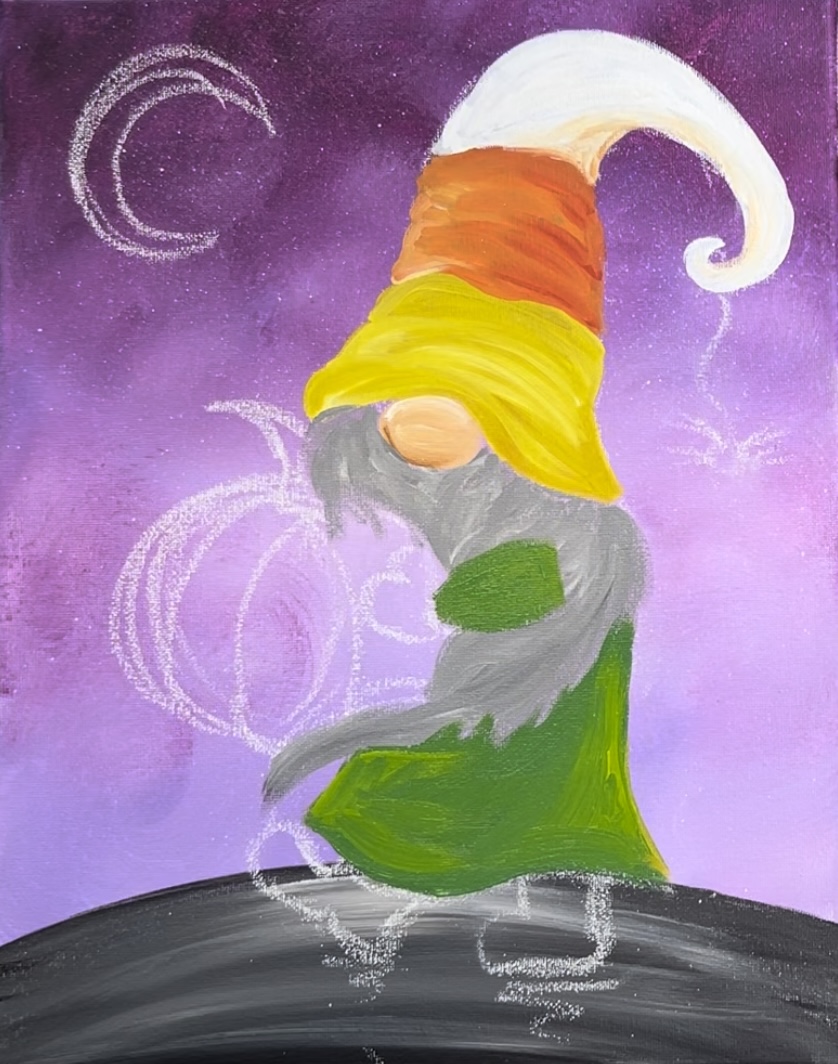
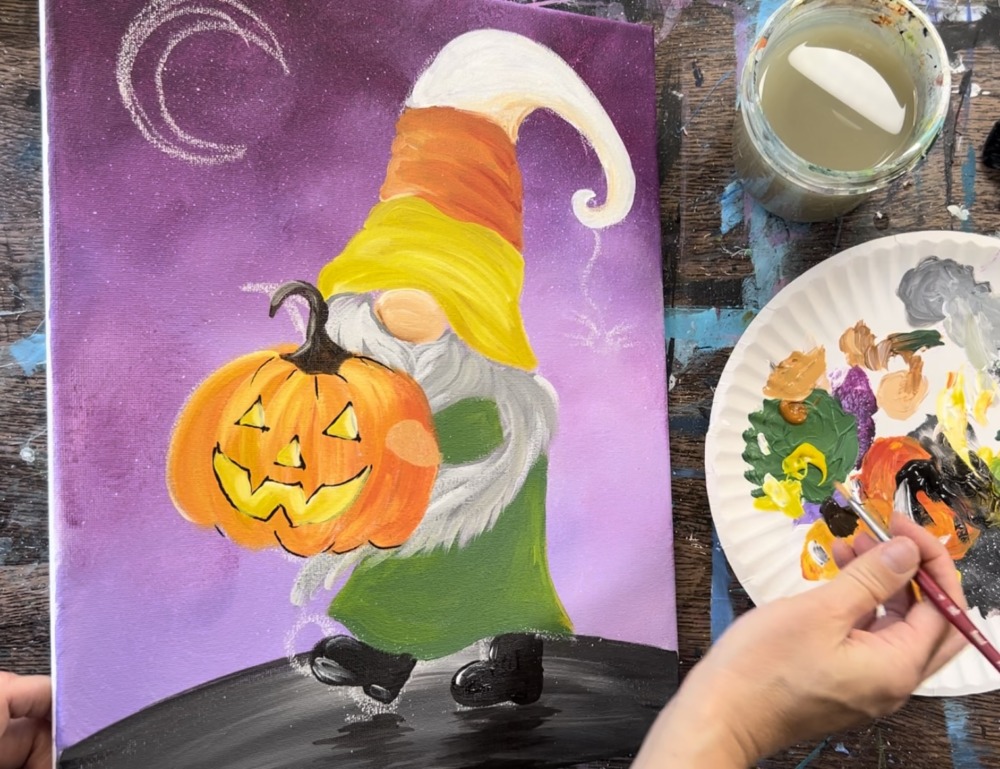
8. Paint Green Robe
Load hooker’s green hue onto your palette. Mix yellow, white and raw Sienna into the green to make it more of a yellow/ warm green. Then use the #4 round brush to paint the robe. Outline the shape of the robe and fill it in using long, contouring strokes.
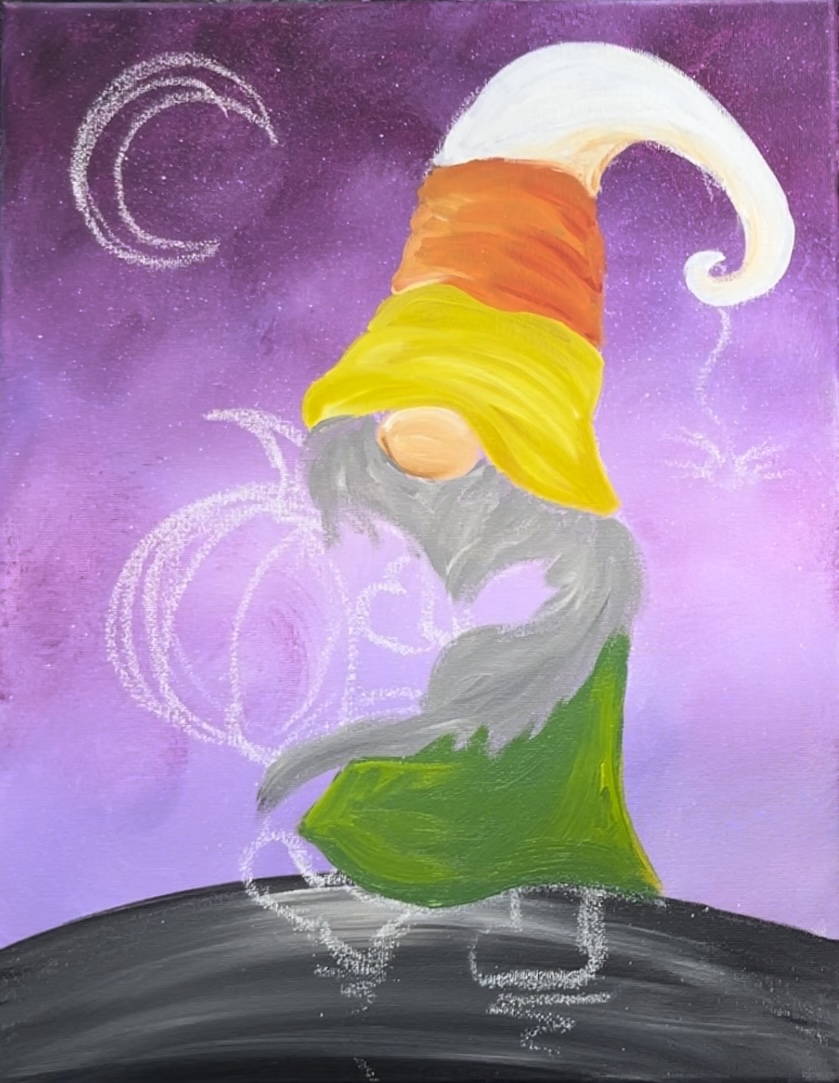
Paint the gnome’s sleeve using the same green.
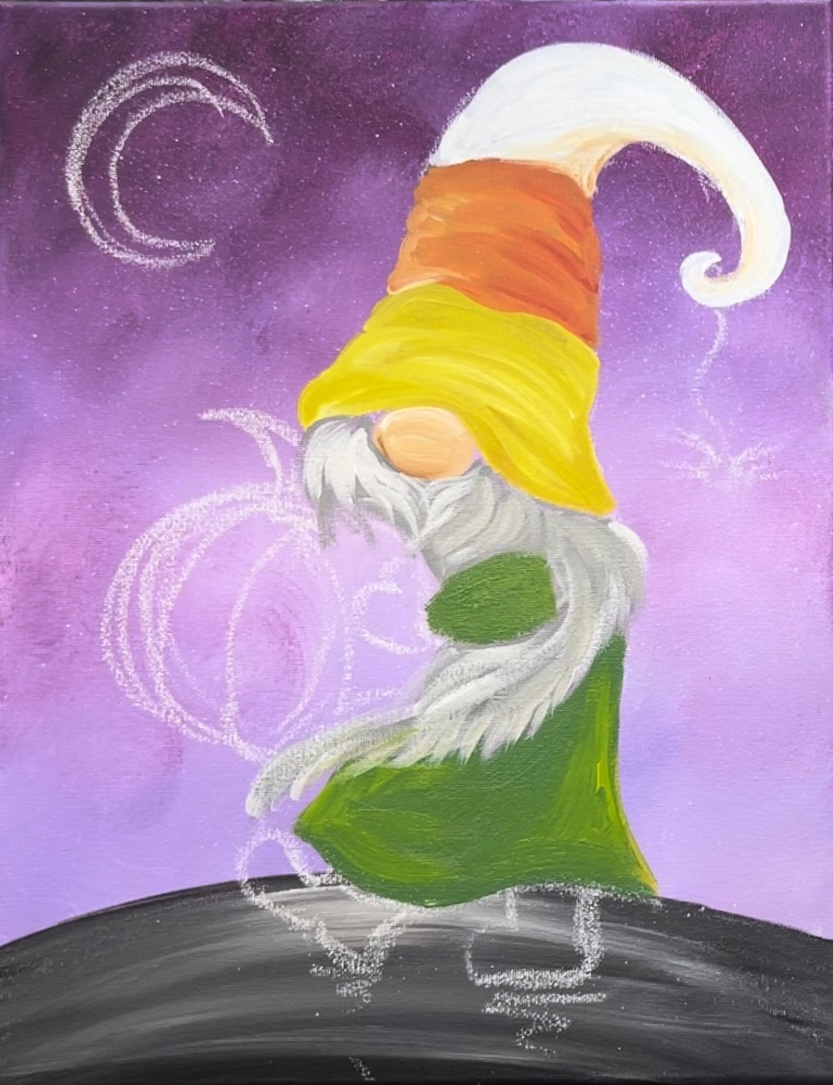
9. Paint Second Layer On Beard
Load your brush with a lighter gray. Add more white to the first gray you used to paint the first layer of the beard. Then use the #4 round brush to paint textured strokes of the beard hard but leave a lot of the first darker gray layer still showing through.
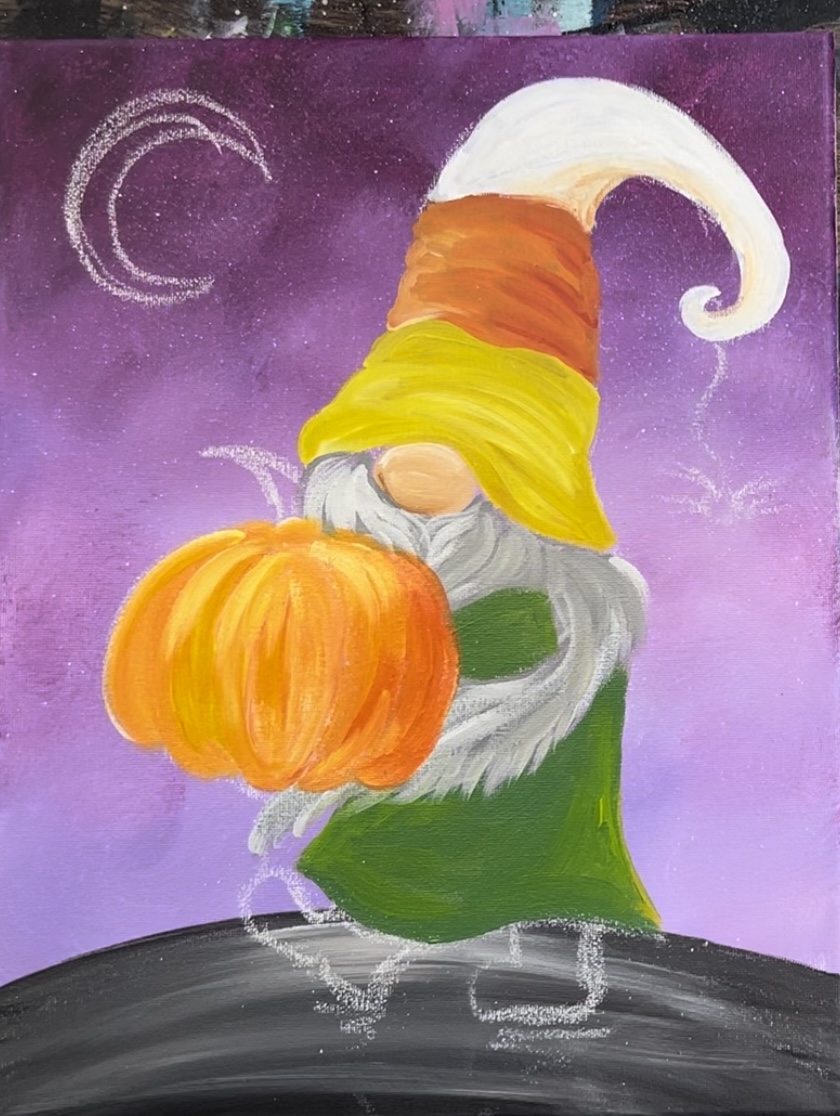
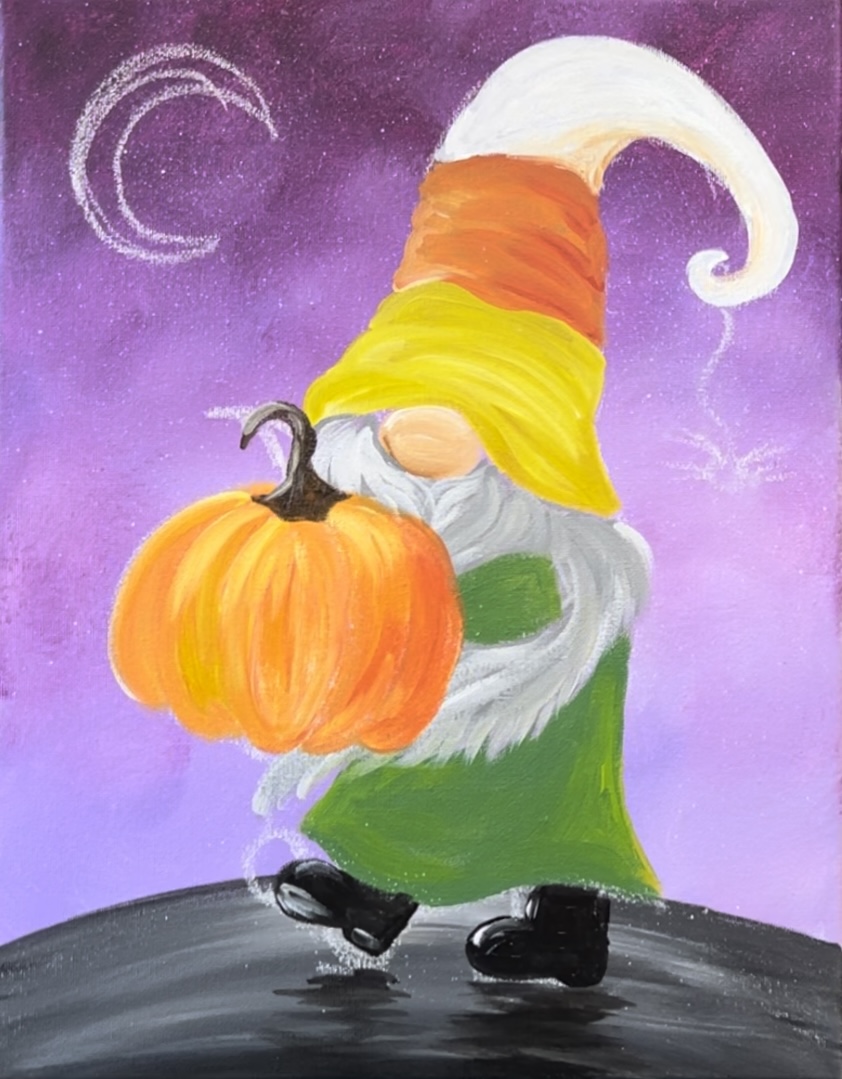
10. Paint Pumpkin
Use titanium white and a clean #4 round brush to paint the pumpkin. It is recommended that you paint the pumpkin white first so the orange will be bright and have good coverage.
Start by painting the center oval of the pumpkin titanium white.
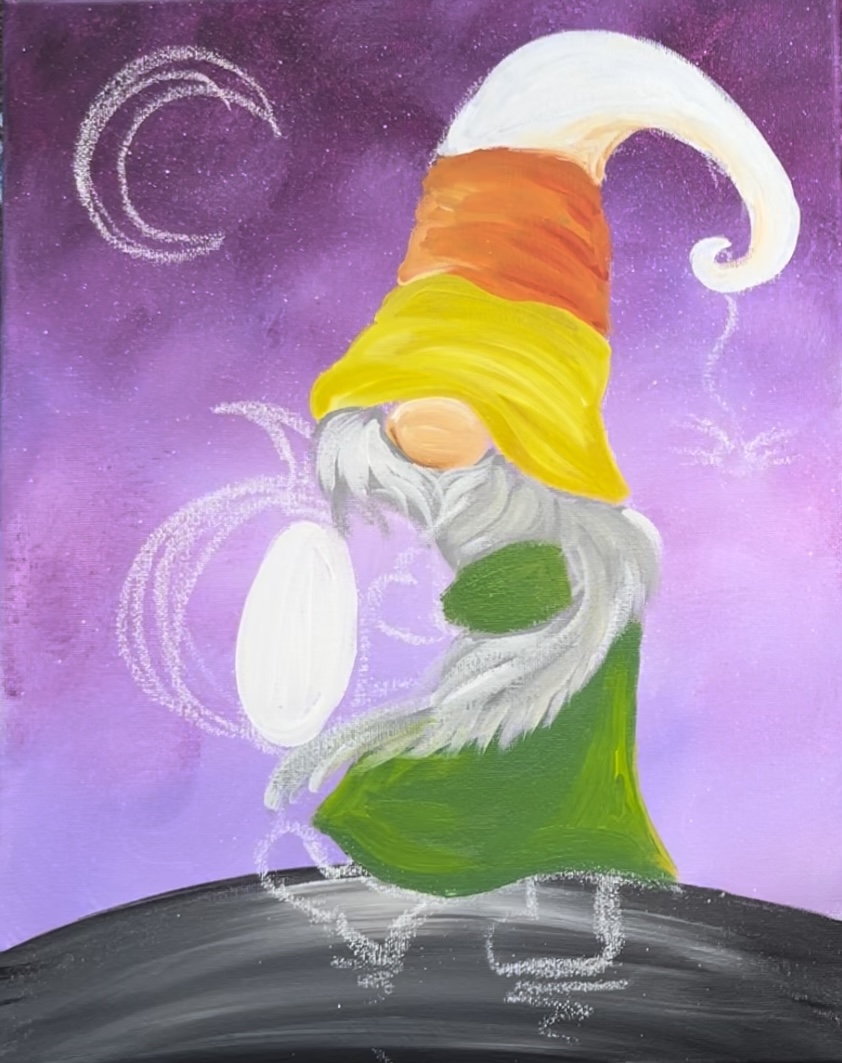
Then paint the next “pumpkin bump” to the left and the right of the center oval.
It’s okay if some of the purple is still showing through from the background.
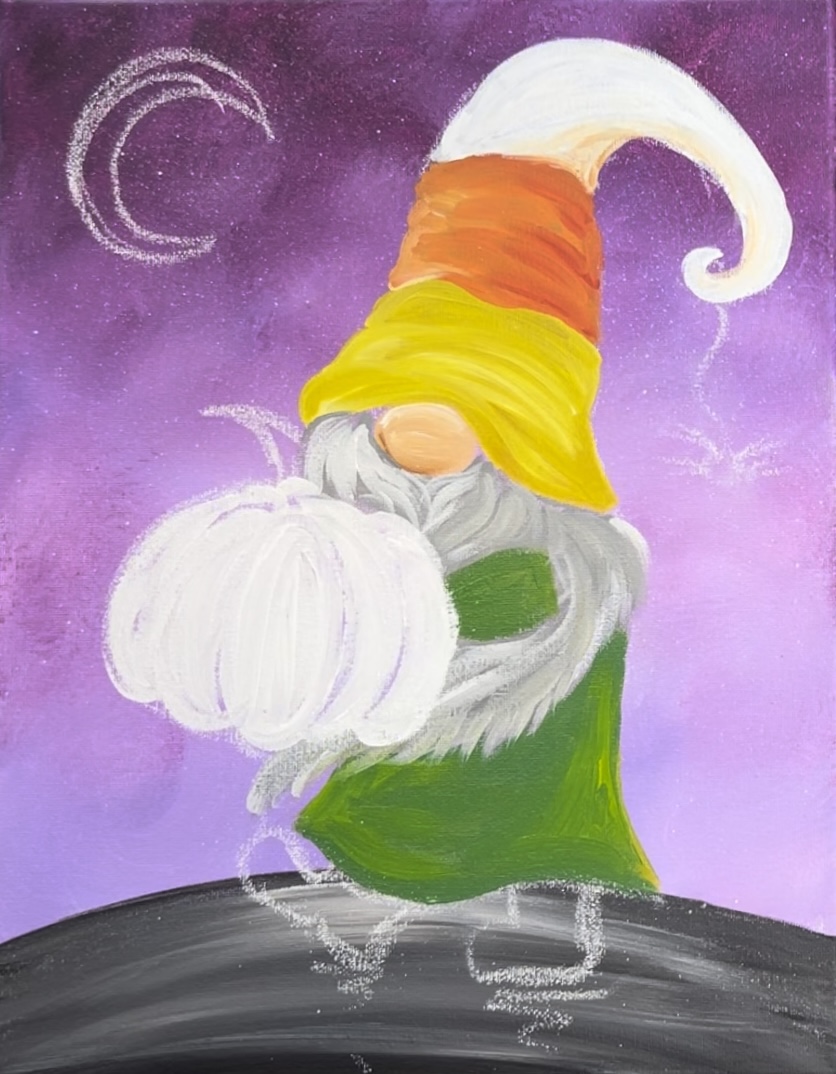
Mix orange on your palette (the same orange you used in the middle of the hat).
Use a #4 round brush to paint the center of the pumpkin first. It’s okay if this orange mixes a little bit with the white below but the white below should not be saturated. If it is, let the white dry a bit more.
Then paint each of the “pumpkin bumps” one at a time. Paint in a curved direction starting at the top of the bottom of the pumpkin. Alter the orange a little for each of the “pumpkin bumps” by adding a little more yellow or red into the orange.
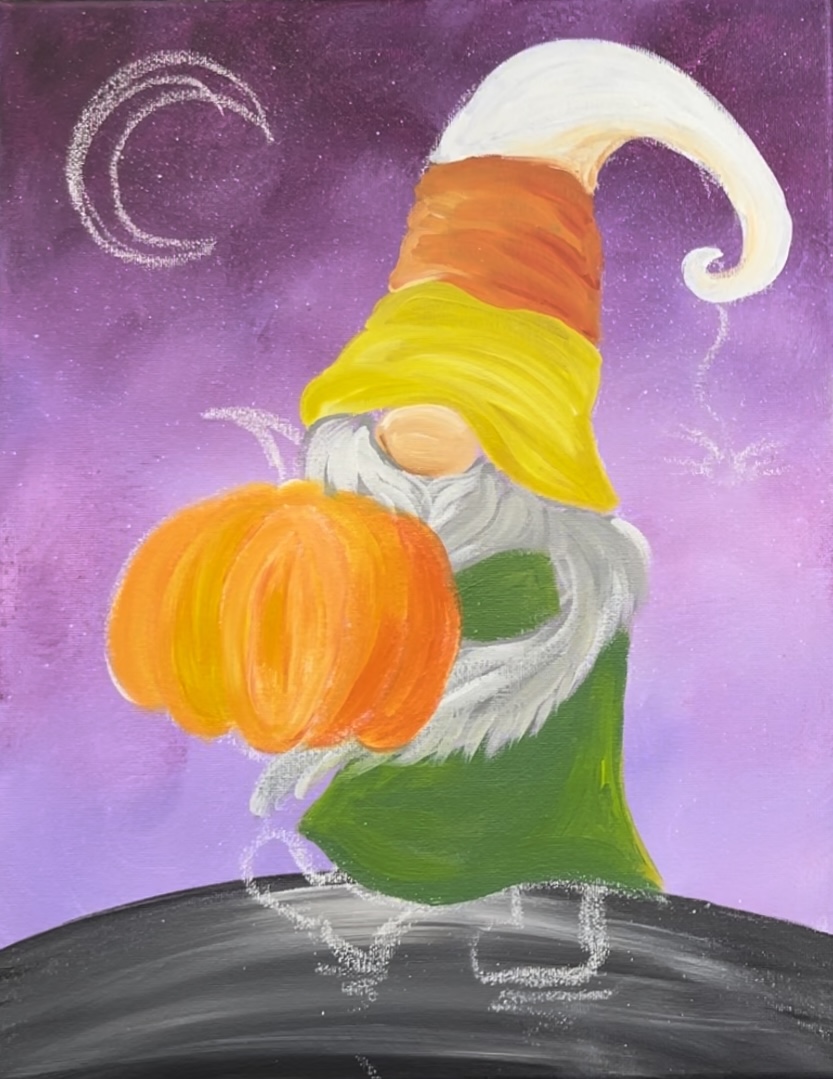
Next, mix white into some of the orange. Then paint curved strokes on the top of the pumpkin bumps and curved downwards to create some highlight on the pumpkin.
11. Paint Shoes
Load mars black onto your palette. Use the #4 round brush to paint the boots a solid coat of black.
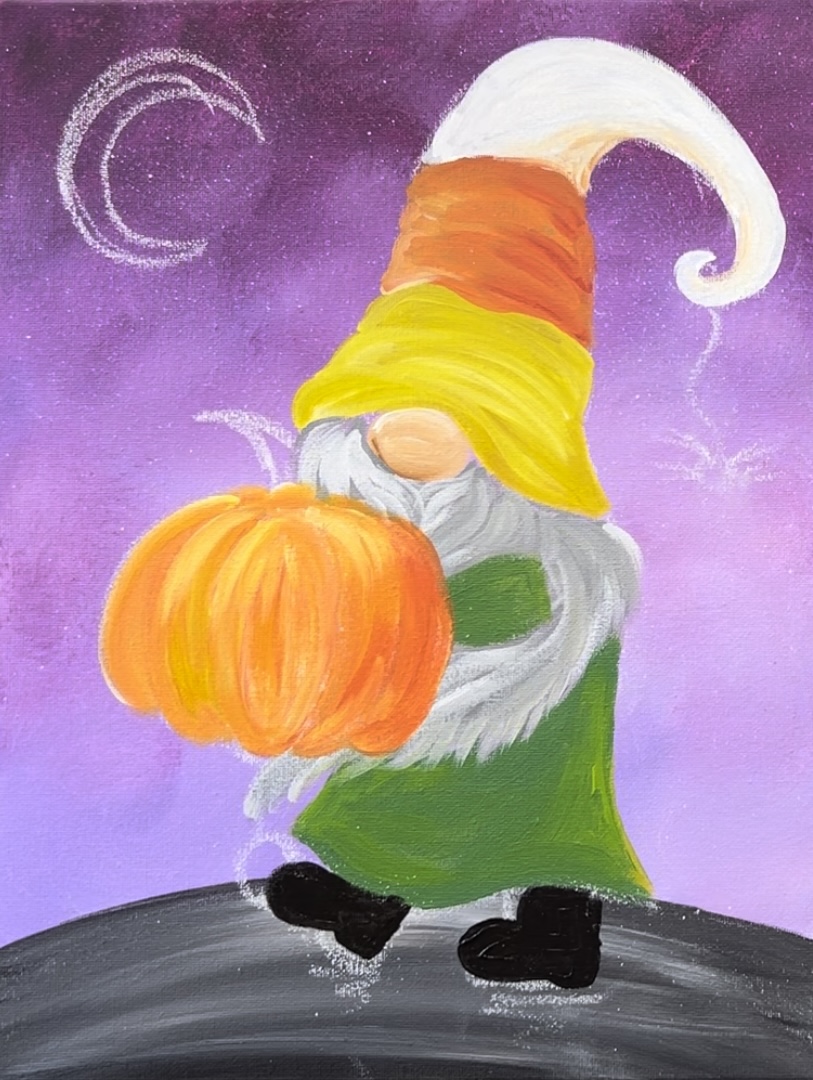
Load titanium white on the brush and paint a white curve on the top edges of the boots. Also, paint a white mark on the bottom of the boot and bottom of the heel.
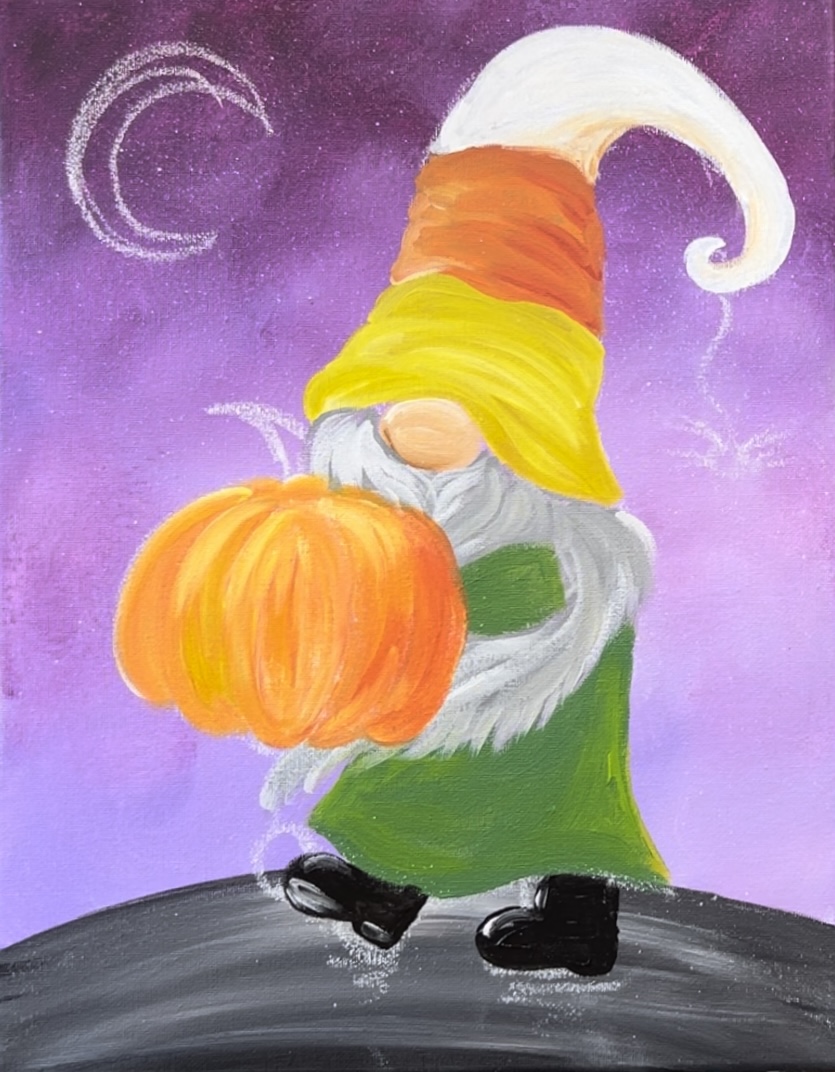
12. Paint Pumpkin Stem
Load your brush into raw umber. Then paint the stem using a #4 round brush. Add a little bit of white on the left side of the stem and let it blend gentle with the brown to create some highlights on the stem.
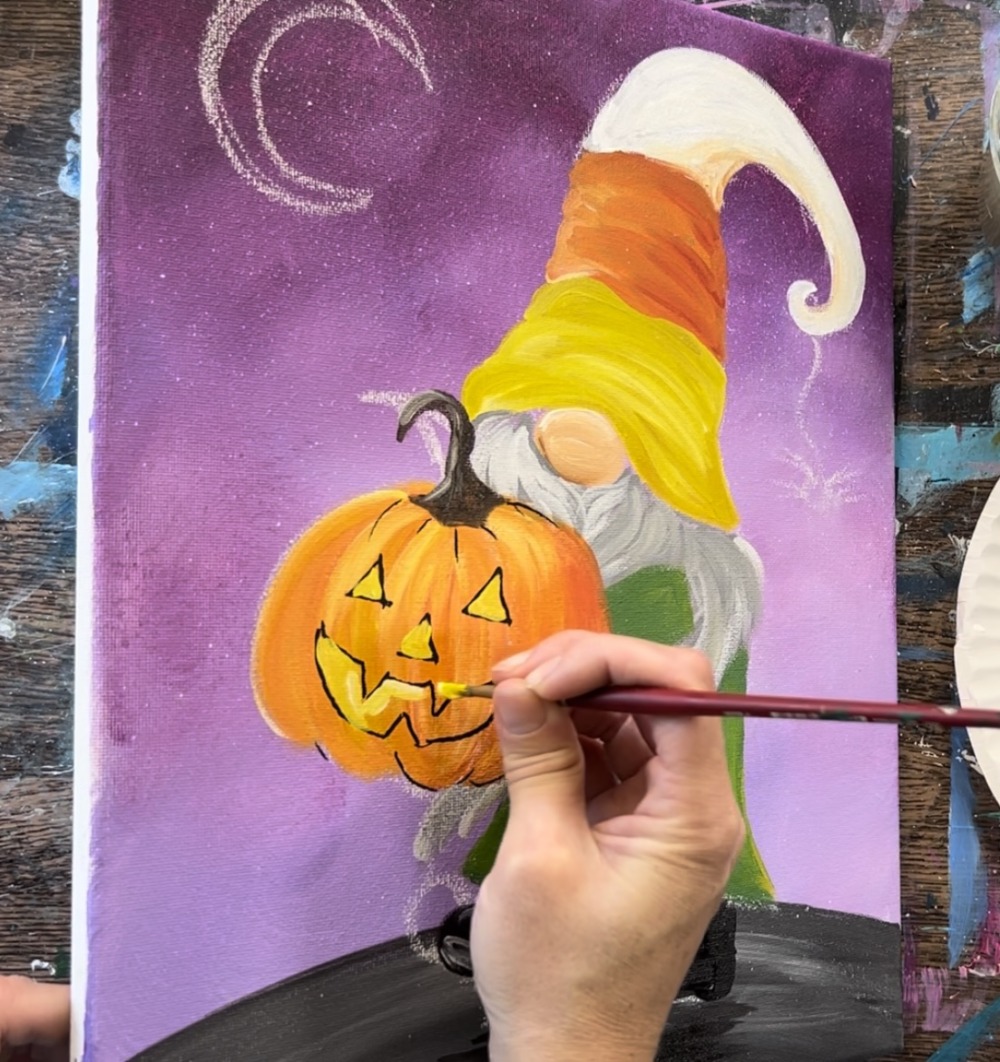
13. Draw & Paint Pumpkin Face
Next, use a black paint pen to draw the face onto the pumpkin. Draw two triangles for the eyes, one triangle for the nose and then draw the mouth.
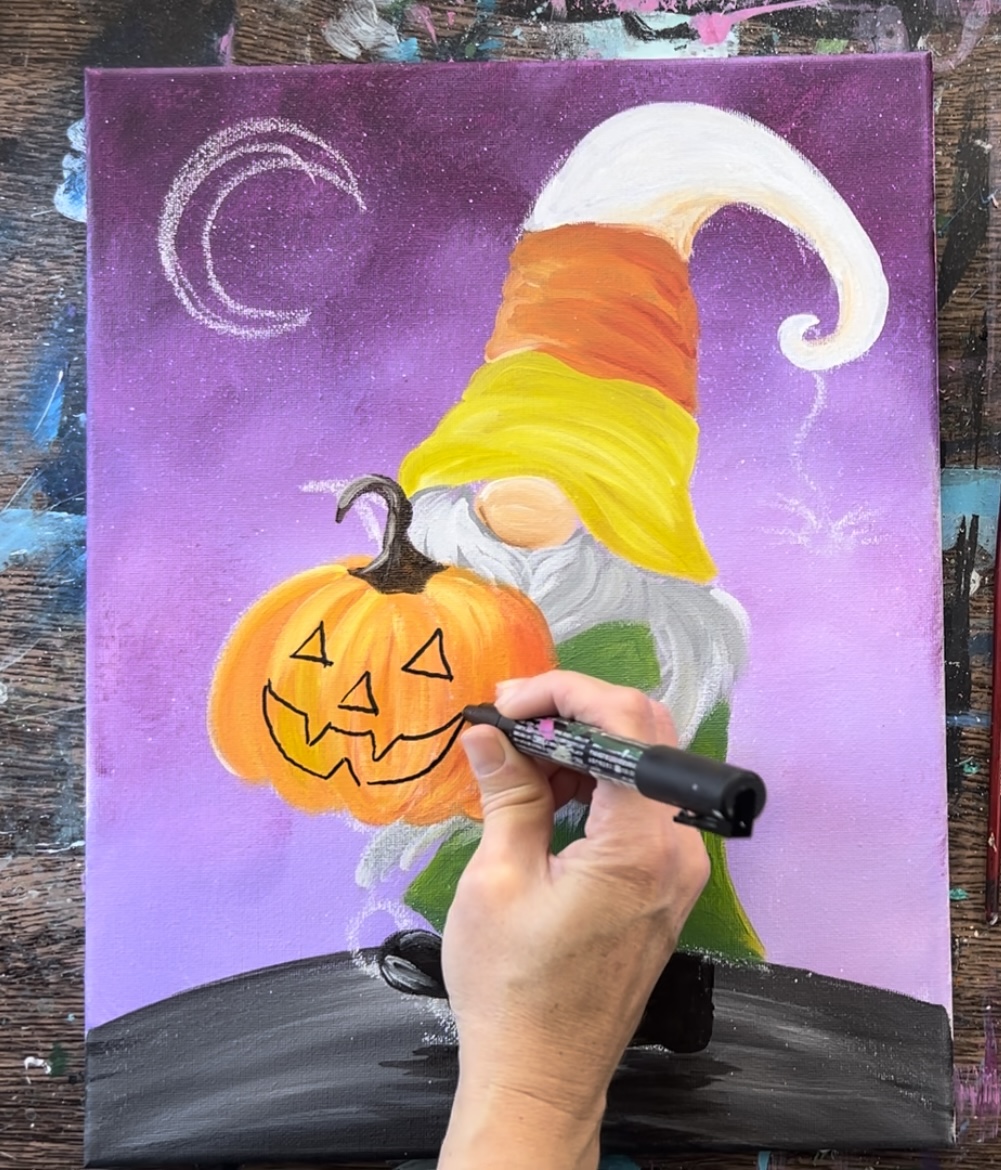
Then paint the inside of the face shapes with titanium white mixed with primary yellow to make a bright yellow. Use the #4 round brush (or a yellow paint pen).
14. Paint Hand
Mix titanium white and raw Sienna onto your palette to paint the hand. Paint a larger oval shape and a smaller thumb shape to create a mitten style hand.
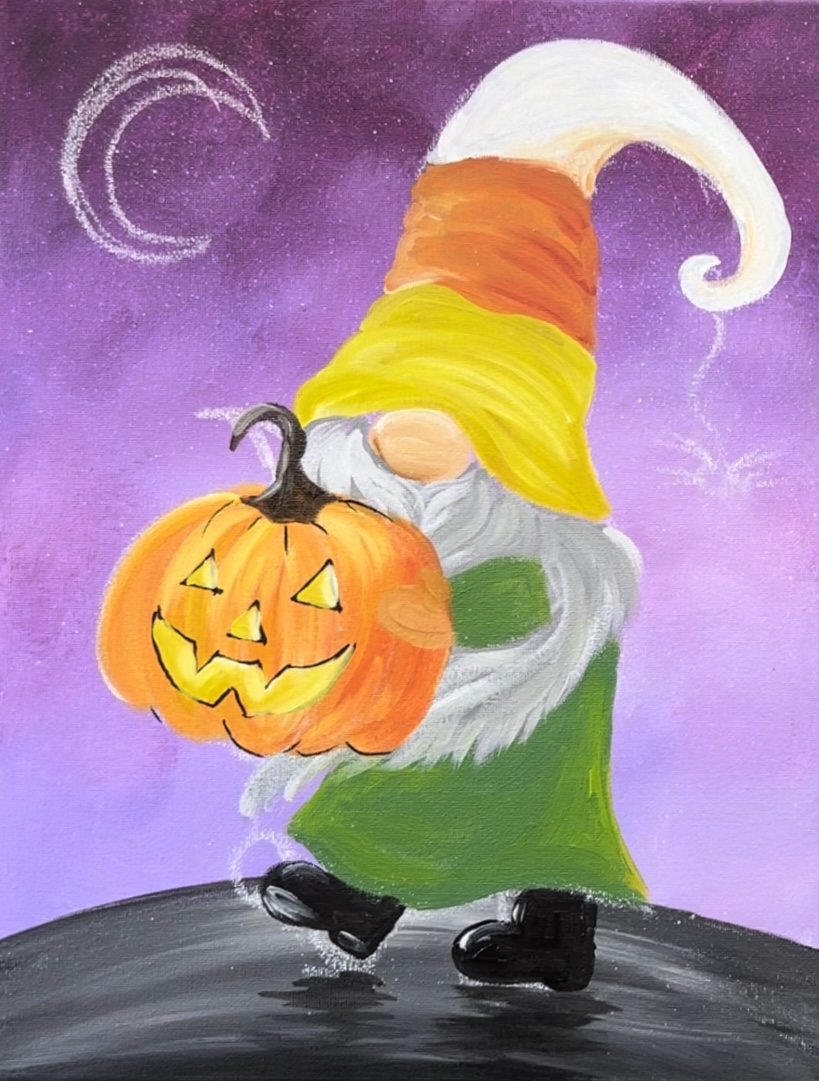
If needed, add a little more titanium white to create more contrast on the hand (or outline the hand later with a black POSCA paint pen).

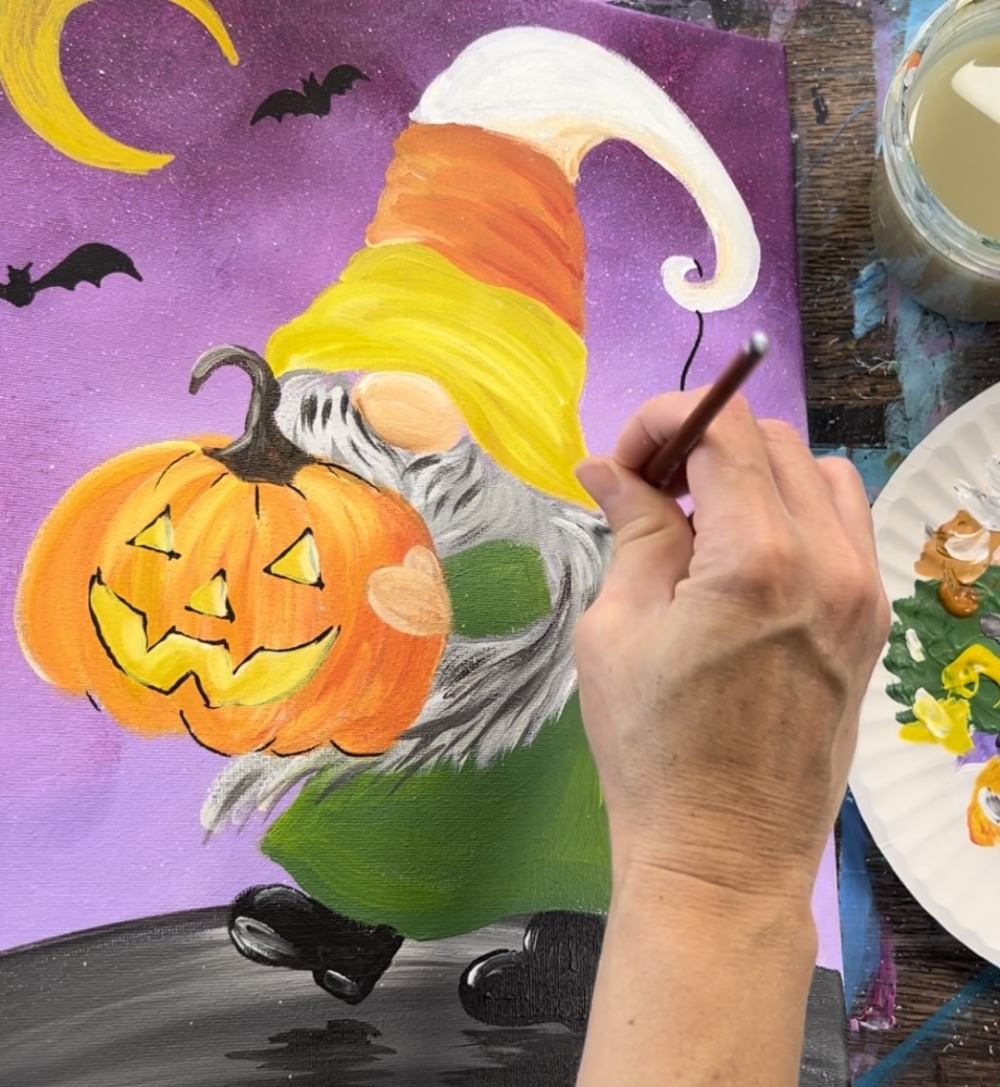
15. Draw Spider
Use the black POSCA paint pen to draw the spider and its web line.
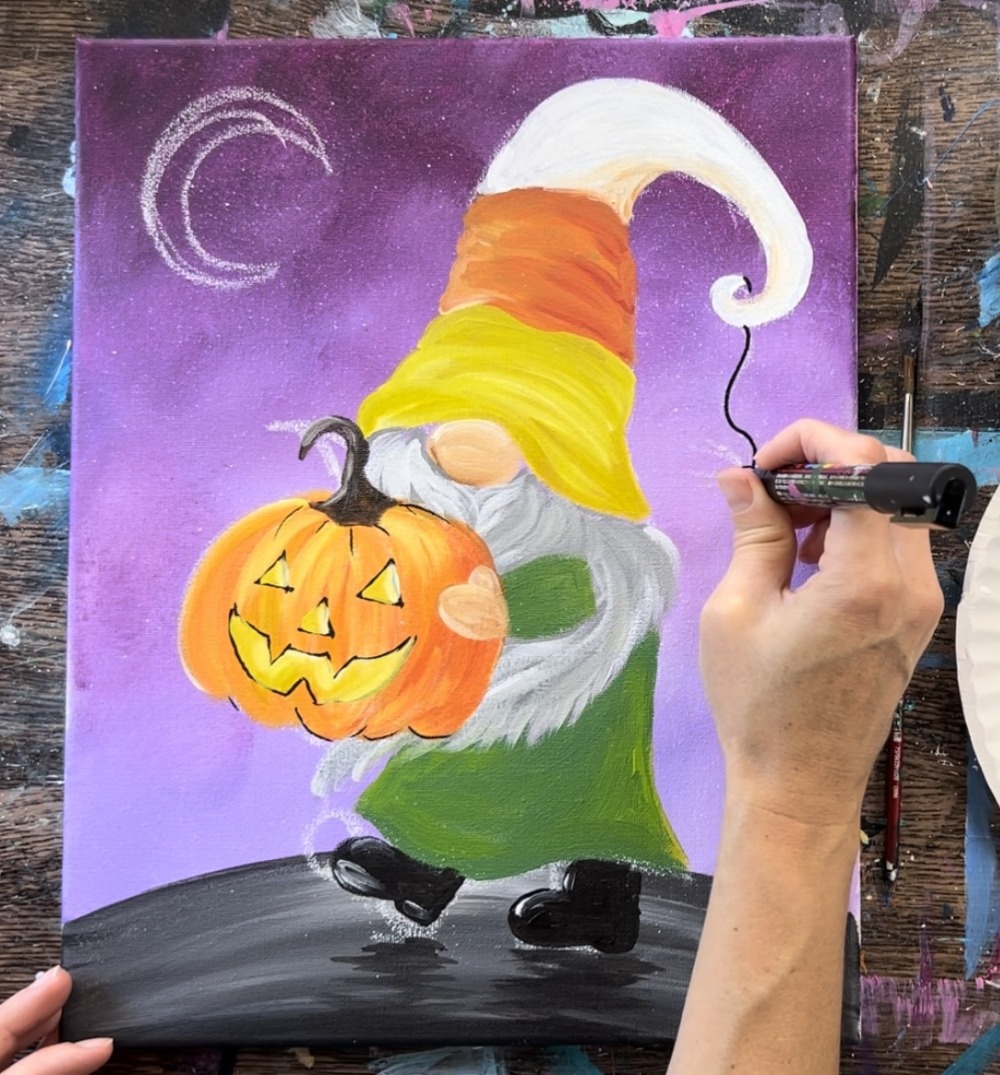
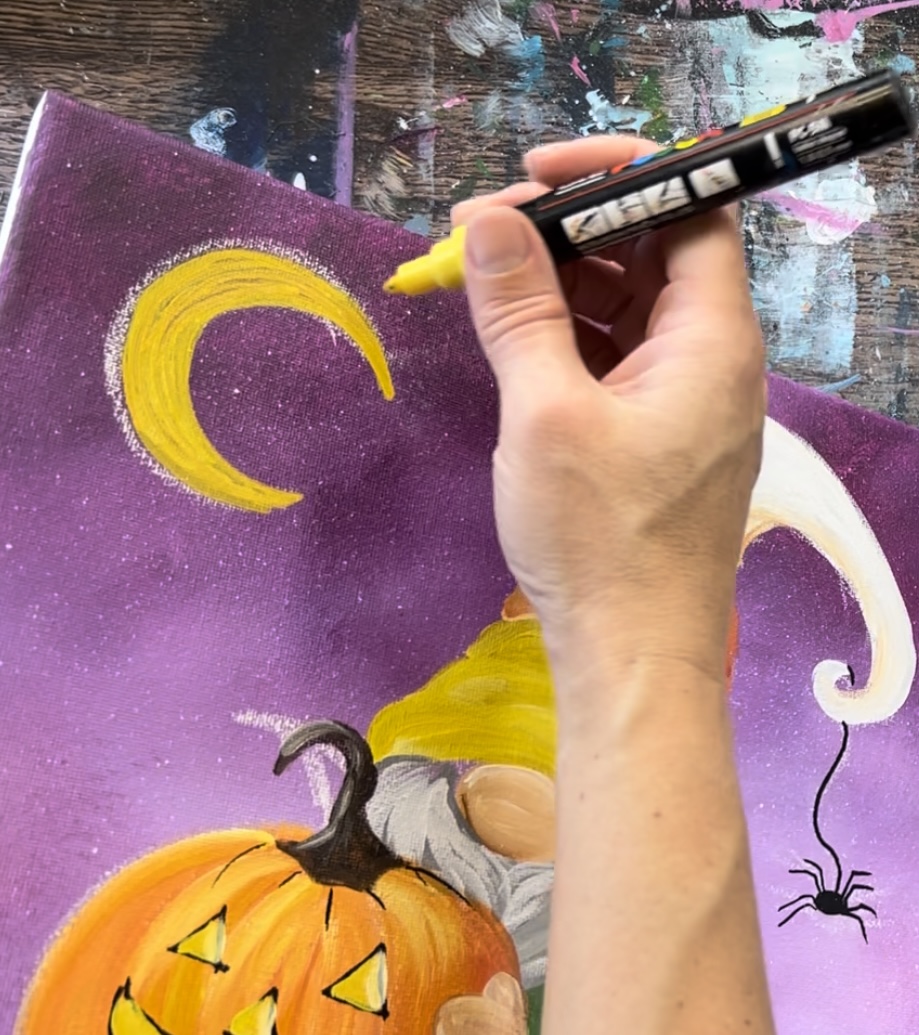
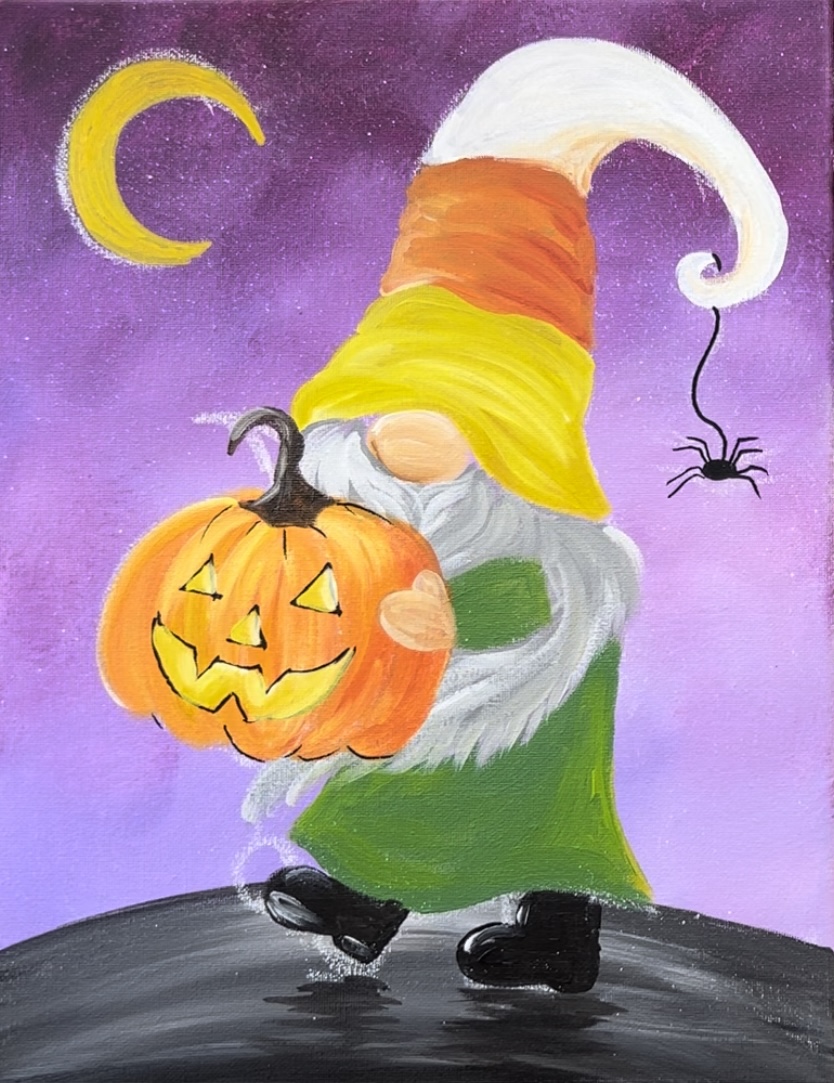
16. Paint Moon
For the crescent moon, you can either paint it with yellow and white paint or use a yellow POSCA paint pen.
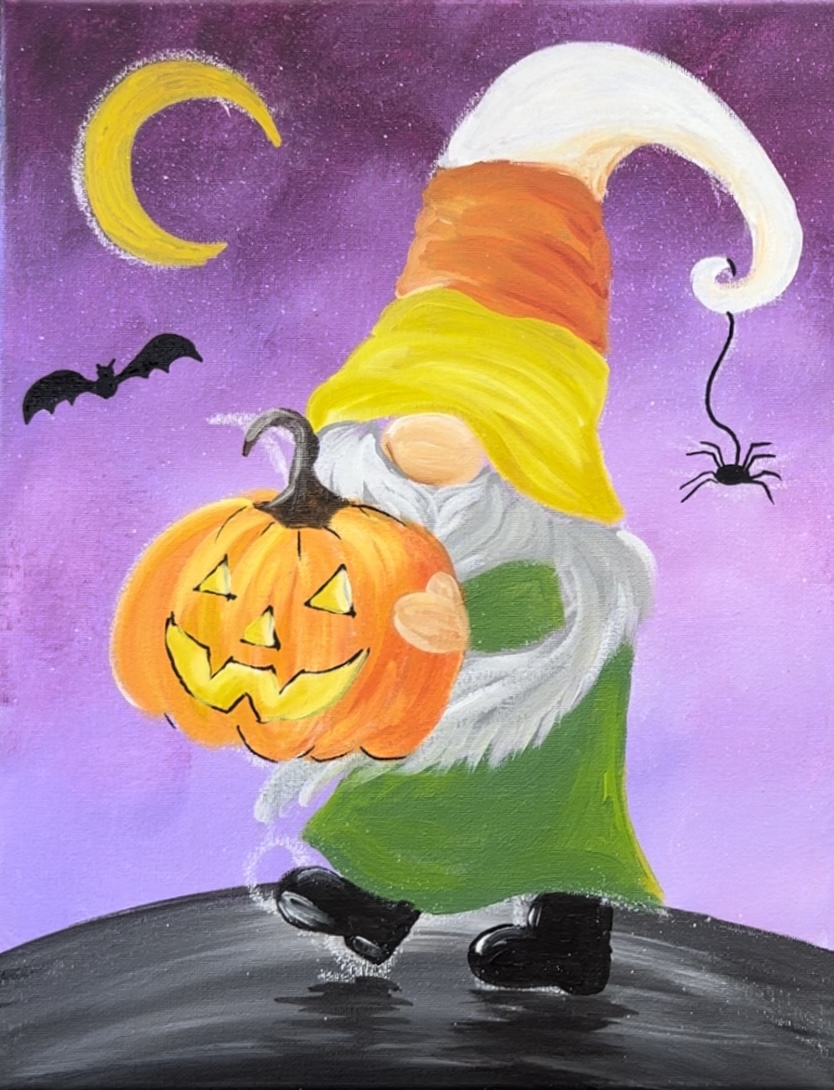
17. Draw/ Paint Bats
Use the black paint pen to draw and paint the bats.

18. Paint Another Layer On Beard (optional)
This is optional. If you like the way the beard looks you can leave it as it is. Use the #4 round brush and dark gray (mix black and white to make a darker gray. Paint more hair texture lines on the beard that go in the direction of the flow of the beard.
19. Paint Patches On Robe & Eyes On Bats/ Spider
Use the #4 round brush to paint three square patches. One is yellow, one orange and one white.
Use the back of the paint brush to paint little white dots for eyes on the spider and the bats.
Use a yellow paint pen to draw/ paint the stars.
Use the white paint pen to draw/ paint more white stars throughout the sky. Then use the black paint pen to draw the stitch marks on the patches. You can also outline the gnome’s nose and the bottom edge of the hat to create more contrast in that area.
Finished!
As a final optional touch, I drew candy corn pieces on the ground and painted them in with the paint pen as well as paint.
