
Would you like to save this?
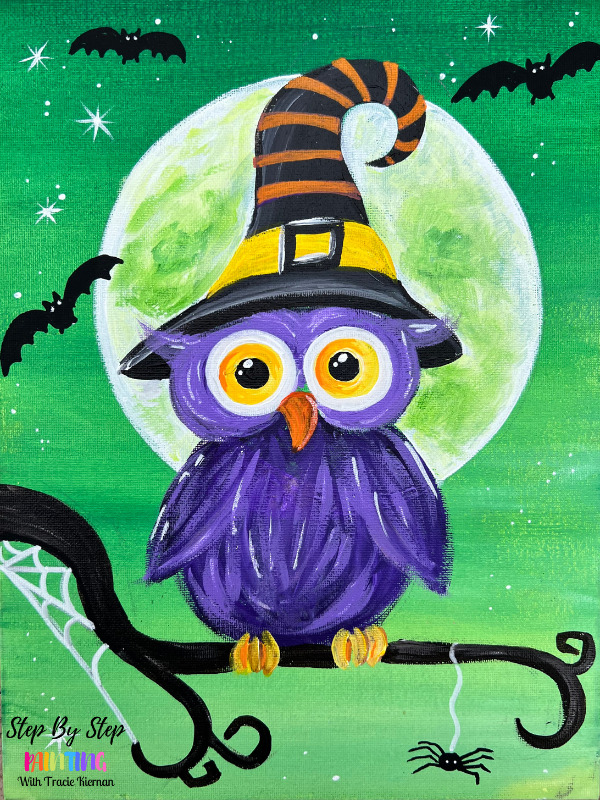
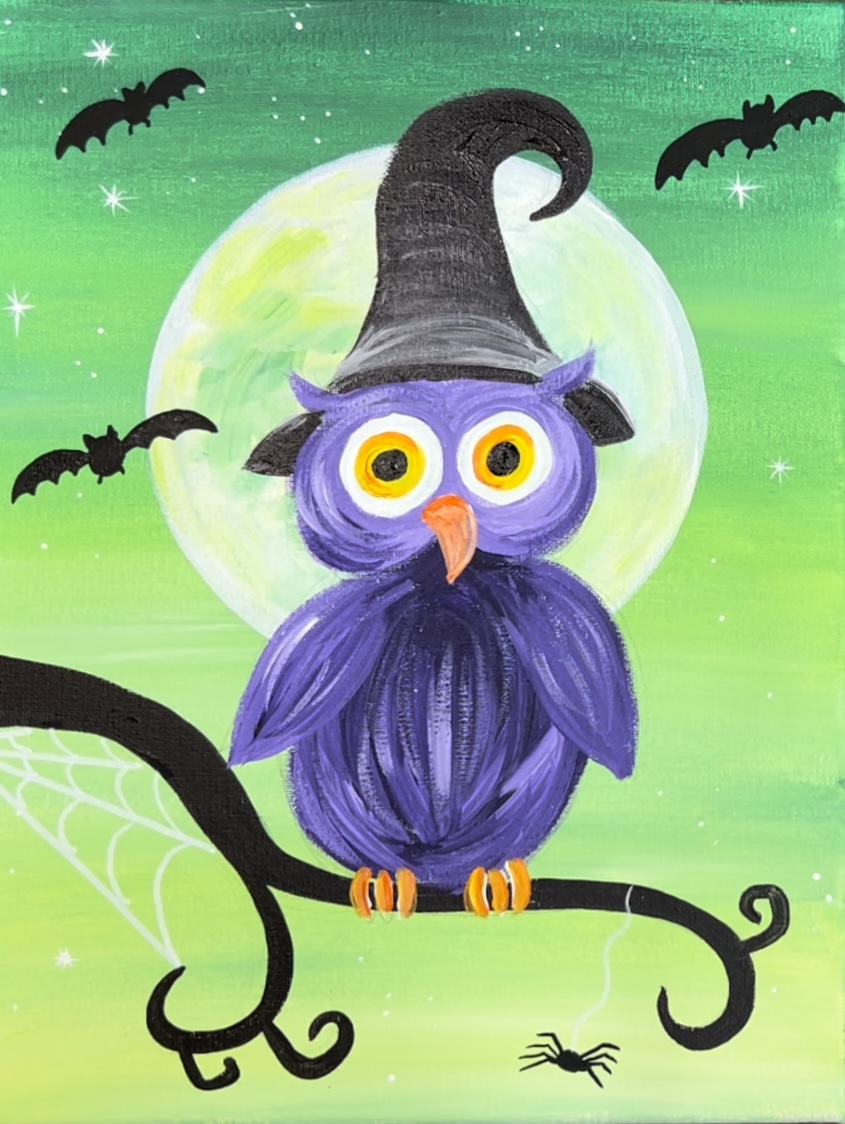
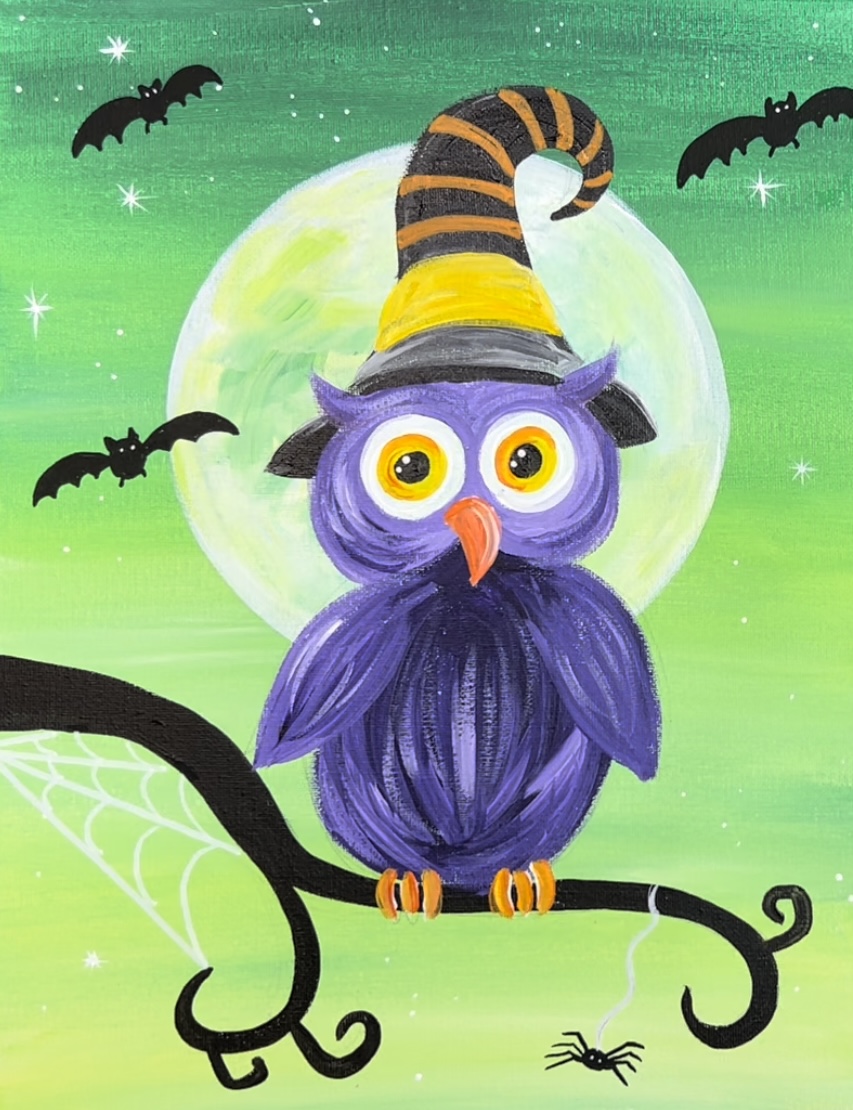
Learn how to paint this adorable halloween owl painting with acrylics on canvas!
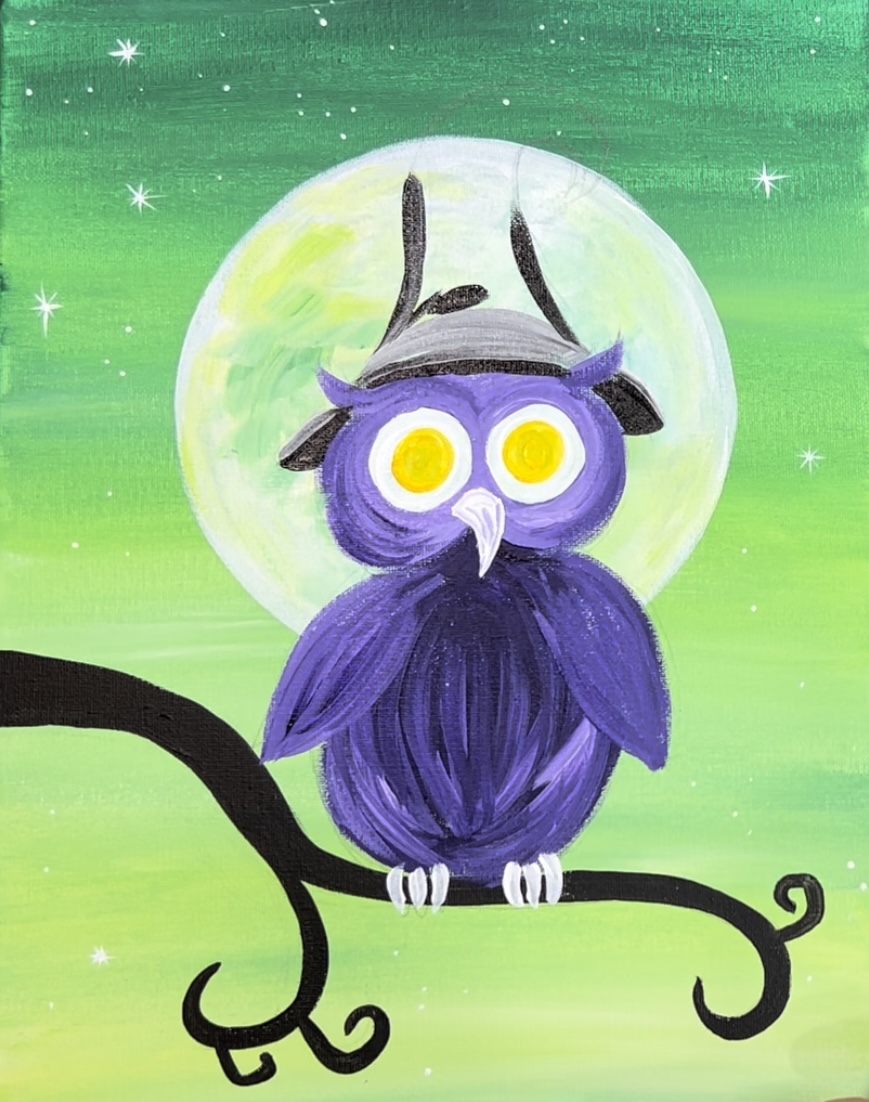
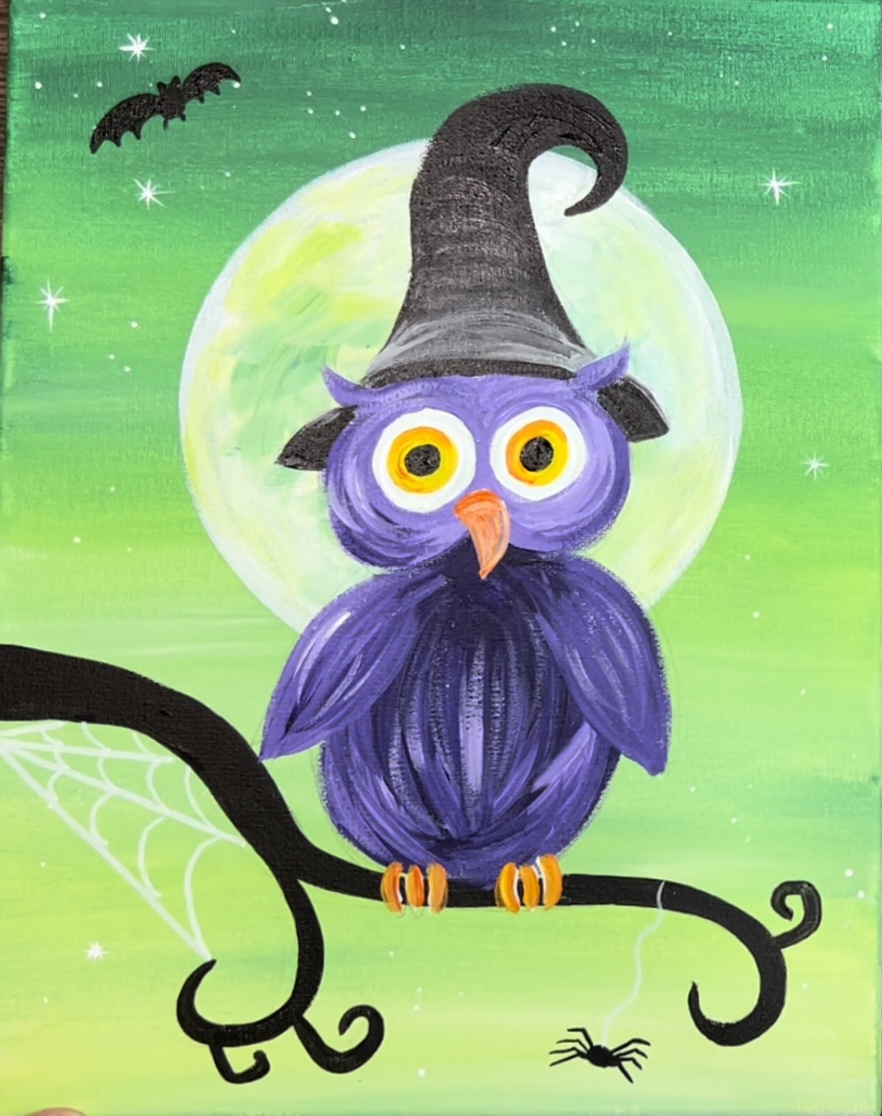
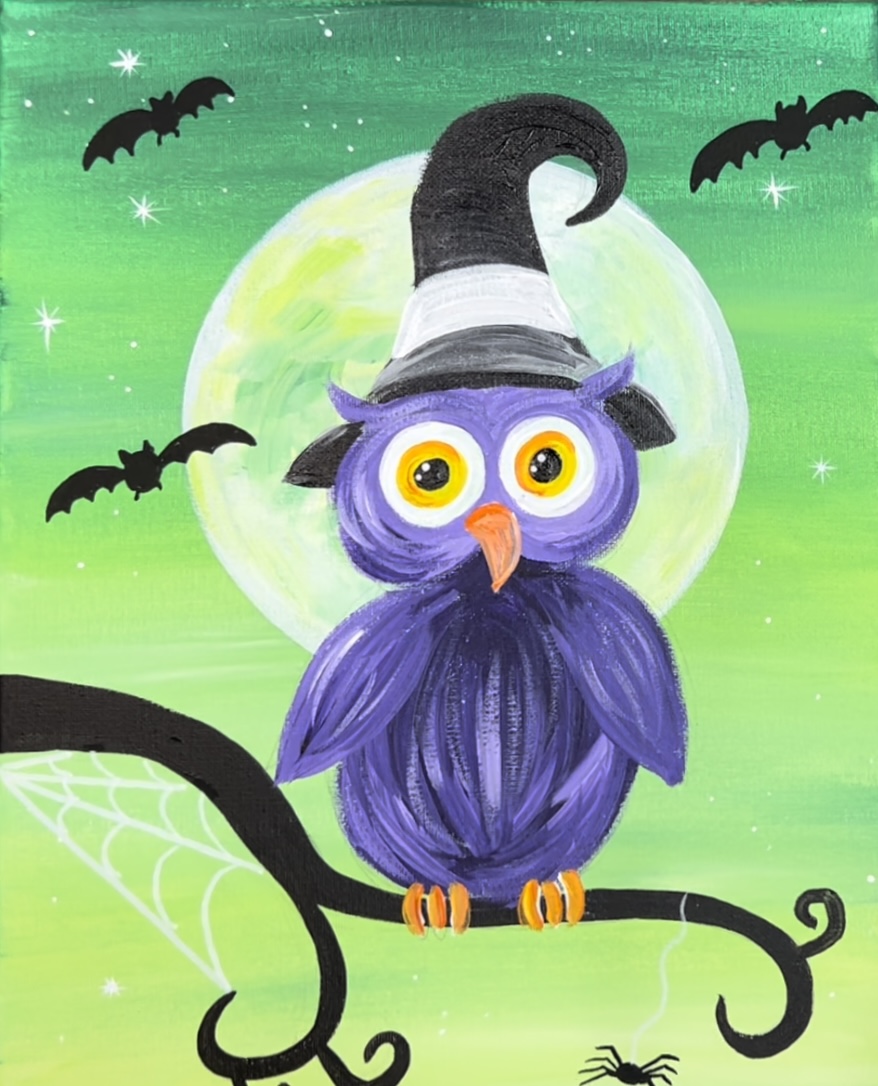
This tutorial will demonstrate step by step how to paint a unique green sky background with a full moon and an adorable purple owl with witch hat.
I’ll be providing a free traceable template for this as well as showing you in the video how to draw the owl.

Details of this painting such as the bats and spider were done using POSCA paint pens. These are acrylic pens that are great to use for detail work in paintings! If you don’t have paint pens, you can use a tiny brush to paint these details.
Enjoy and happy painting!
Materials
How To Paint A Halloween Owl
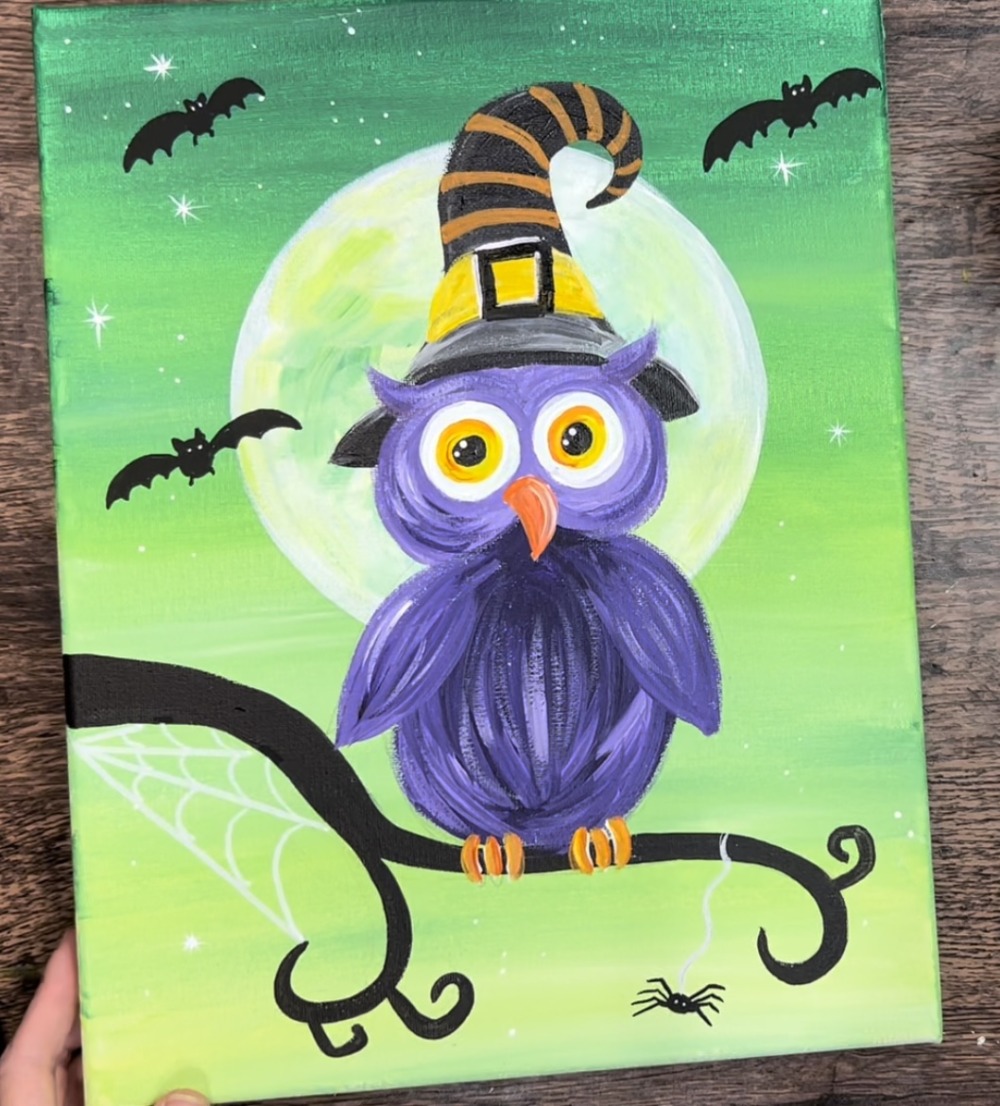
Learn how to paint a cute purple halloween owl with witch hat and a green spooky background.
Materials
- 11 x 14 Canvas
- Acrylic Paint
- Brushes
- Optional Paint Pens (black, white and orange)
- Pencil
- Optional Traceable
- Optional Graphite Paper (If using traceable)
- Compass or Large 7" Circle To Trace
Colors
- Titanium White
- Mars Black
- Cadmium Yellow Medium Hue
- Deep Green Permanent
- Brilliant Yellow Green
- Dioxazine Purple
- Burnt Umber
- Cadmium Orange Hue
Brushes
- 3/4" Wash Brush
- #4 Round Brush
- #8 Round Brush
- 12 Bright Brush
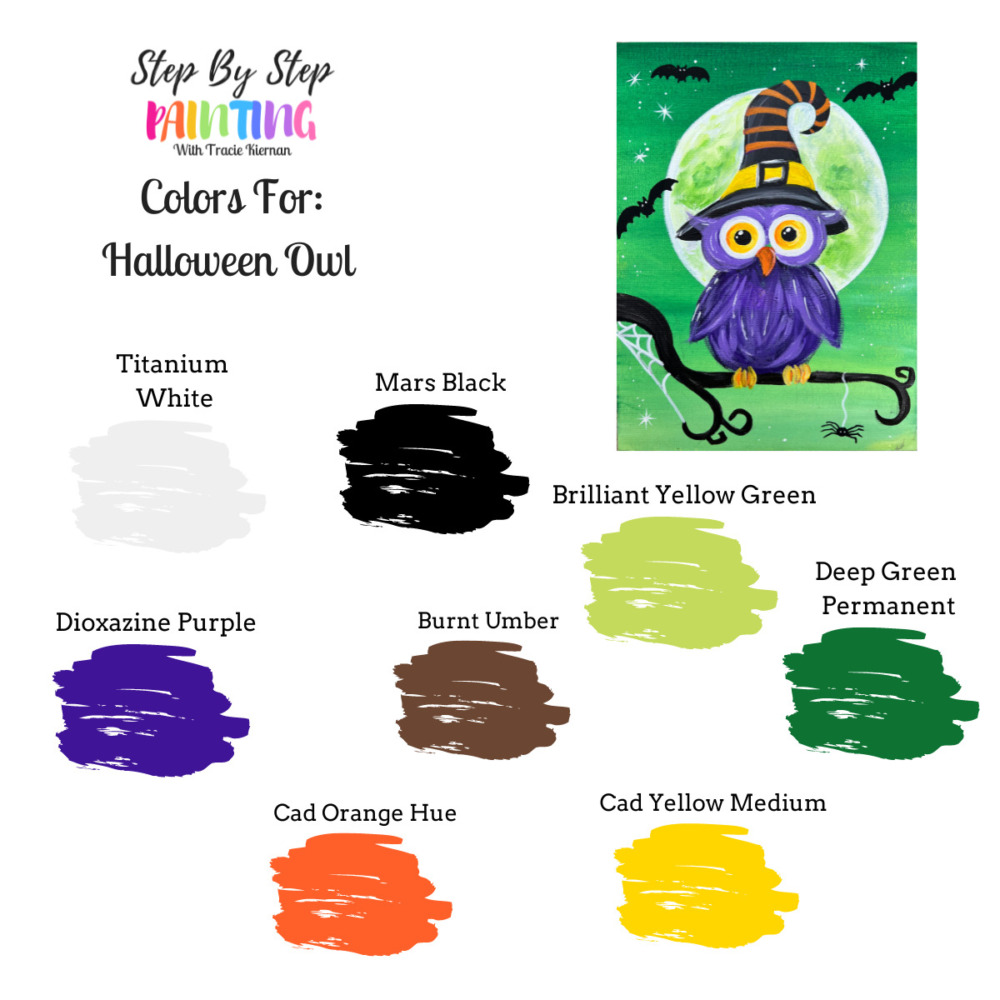
Color Palette
I used Liquitex BASICS acrylics for this painting. If you are using a different brand, use the color chart below to help you match your colors:
Using Craft Paints?
If you are using craft paints such as the Apple Barrel craft paints, I would recommend subbing to these colors:
- Black
- White
- New Shamrock
- Holly Branch
- Purple Iris
- Melted Chocolate
- Jack O Lantern
- Bright Yellow
Directions At A Glance

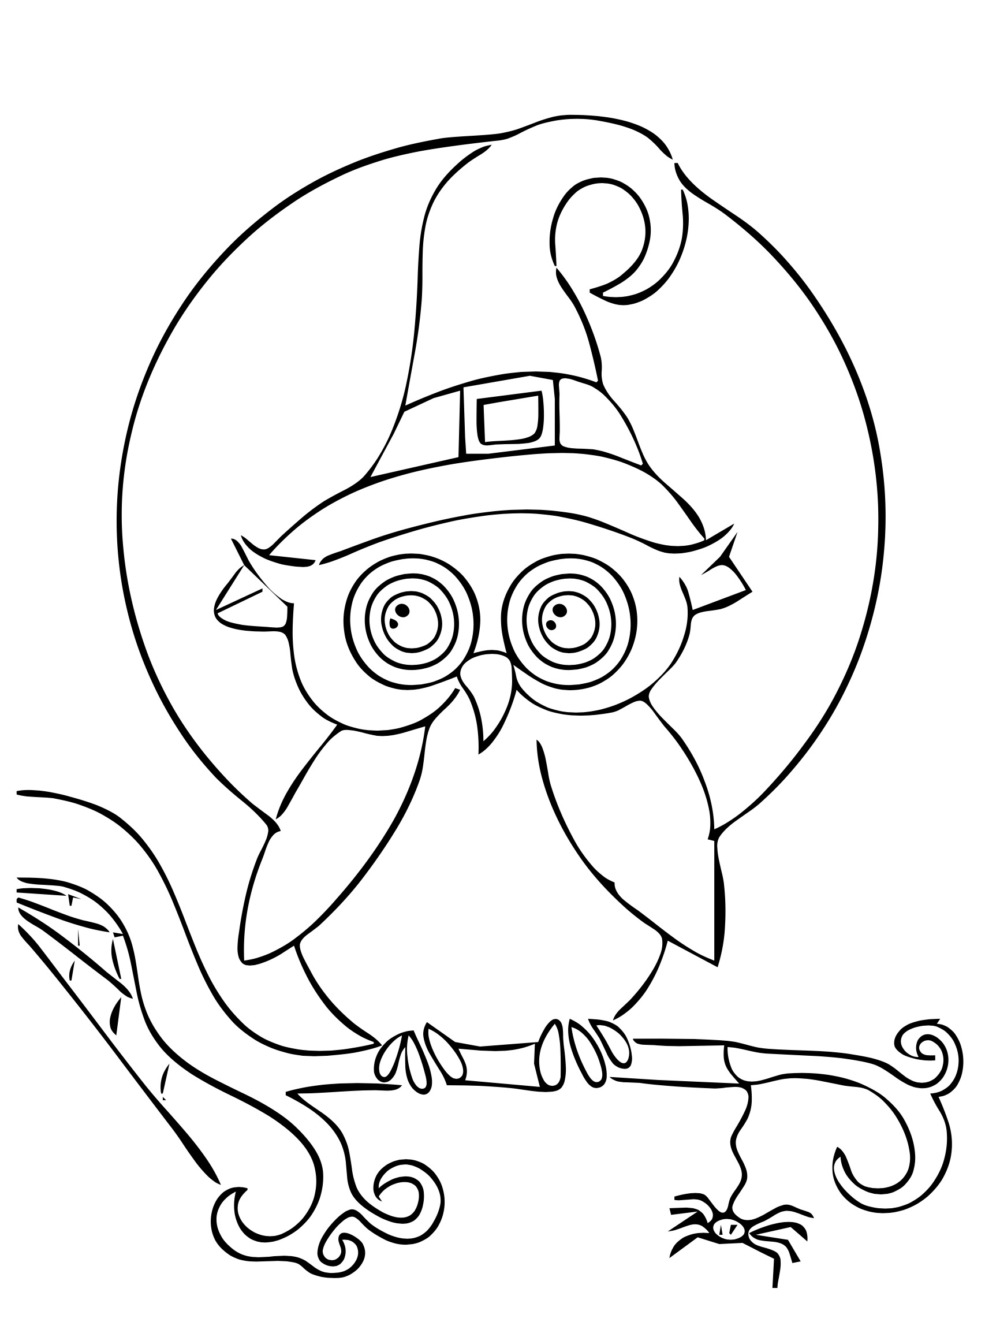
Traceable
This traceable is optional! I demonstrate how to draw the owl in the tutorial.
If you want to use the traceable, I would recommend painting the background first (up to step 2 of this tutorial) and then transferring the design onto the canvas.
Video
Step By Step Directions
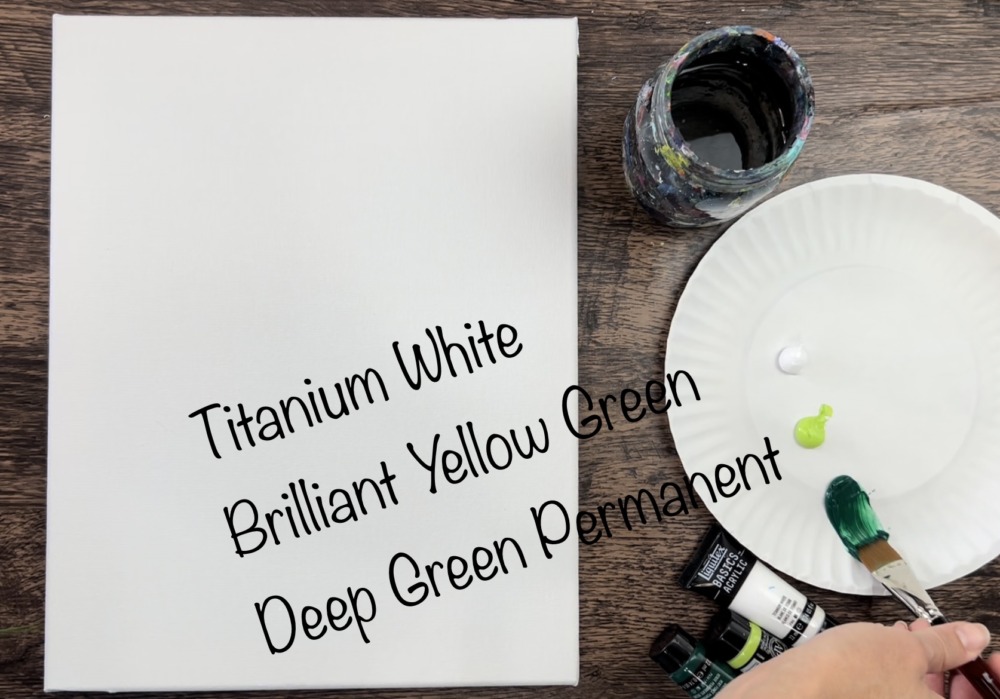
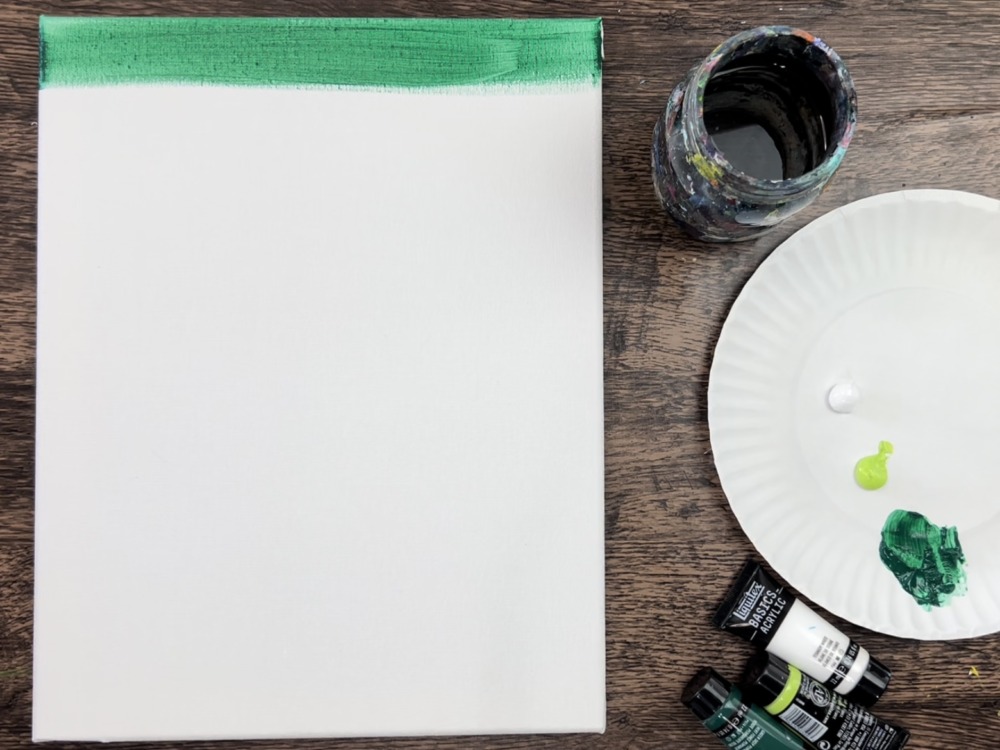
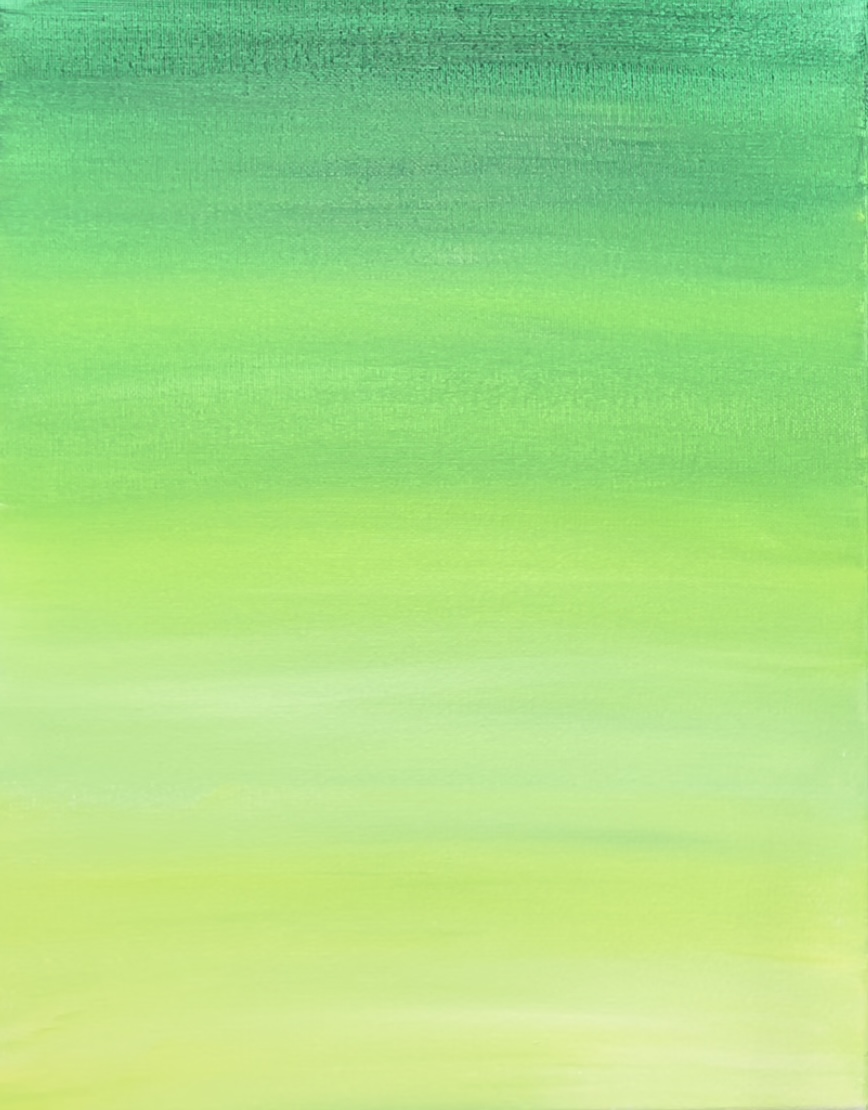
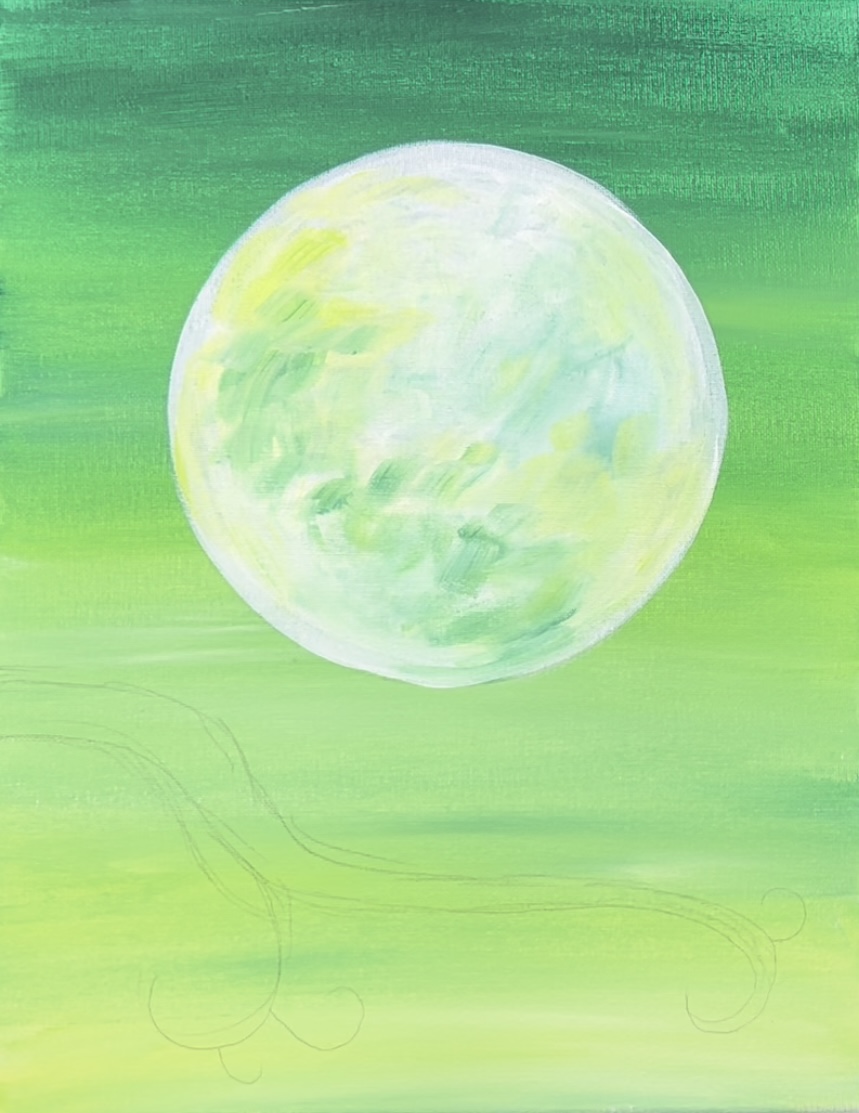
1. Paint The Background
The background of this painting is a gradient blend of two different kinds of greens with the darkest green on the top and it blends down to a bright green on the bottom.
Load your palette with the colors: deep green permanent, brilliant yellow green and titanium white.
Use a 3/4″ flat wash brush. Load it into the water and tap the excess water from it. Then load it into the darkest green color. Start at the top of the canvas. Paint left and right strokes. Go down about 4 inches with this dark green.
Then, without rinsing your brush, blend in brilliant yellow green. Add small amounts of the dark green into it as well (so it doesn’t get too light too soon).
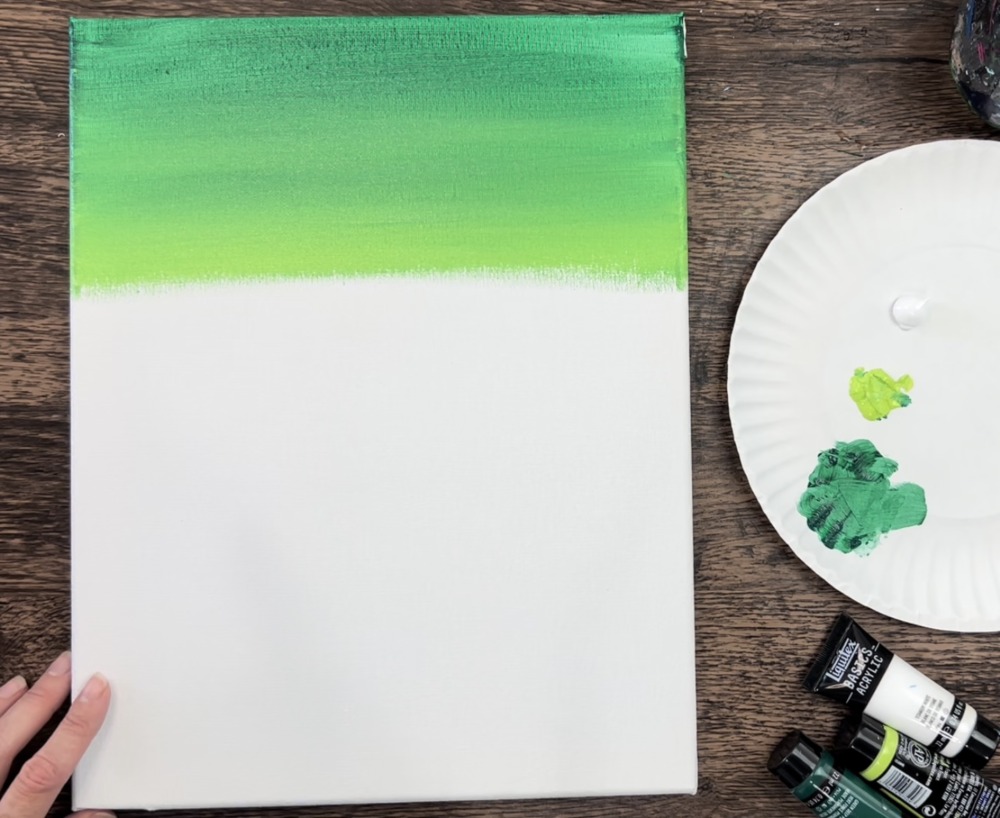
Go down about half way with this brilliant yellow green and deep green combination.
Then, as you approach the bottom region of the canvas, paint just the brilliant yellow green.
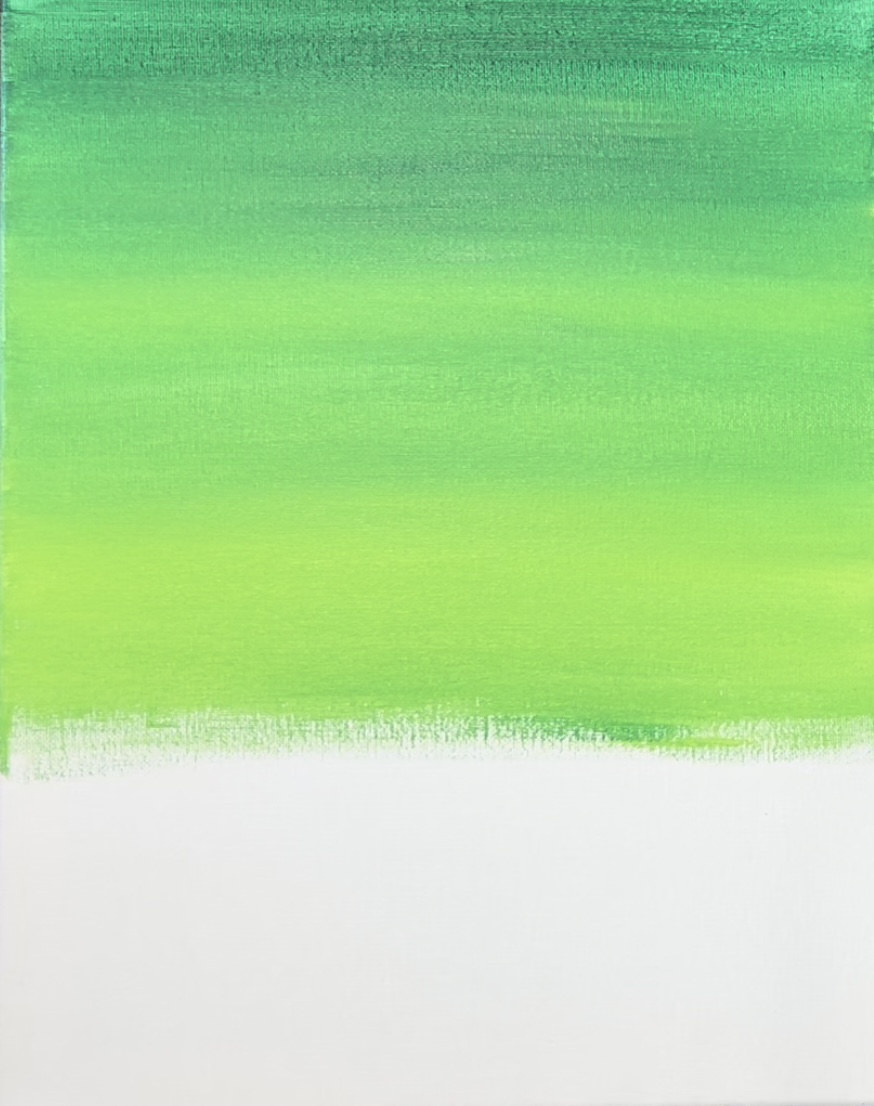
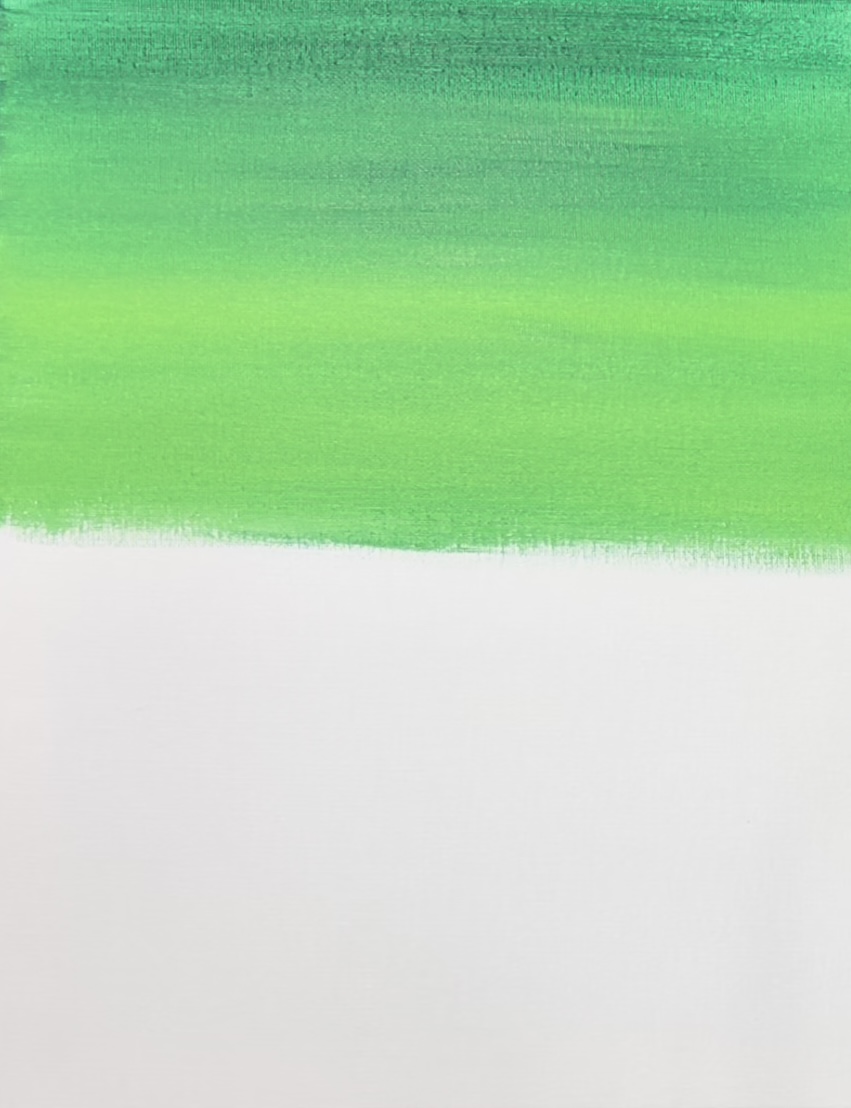
Next, without rinsing the brush, add titanium white onto the brush and blend this on the bottom. The white should blend with the lighter green to make a much lighter and brighter green.
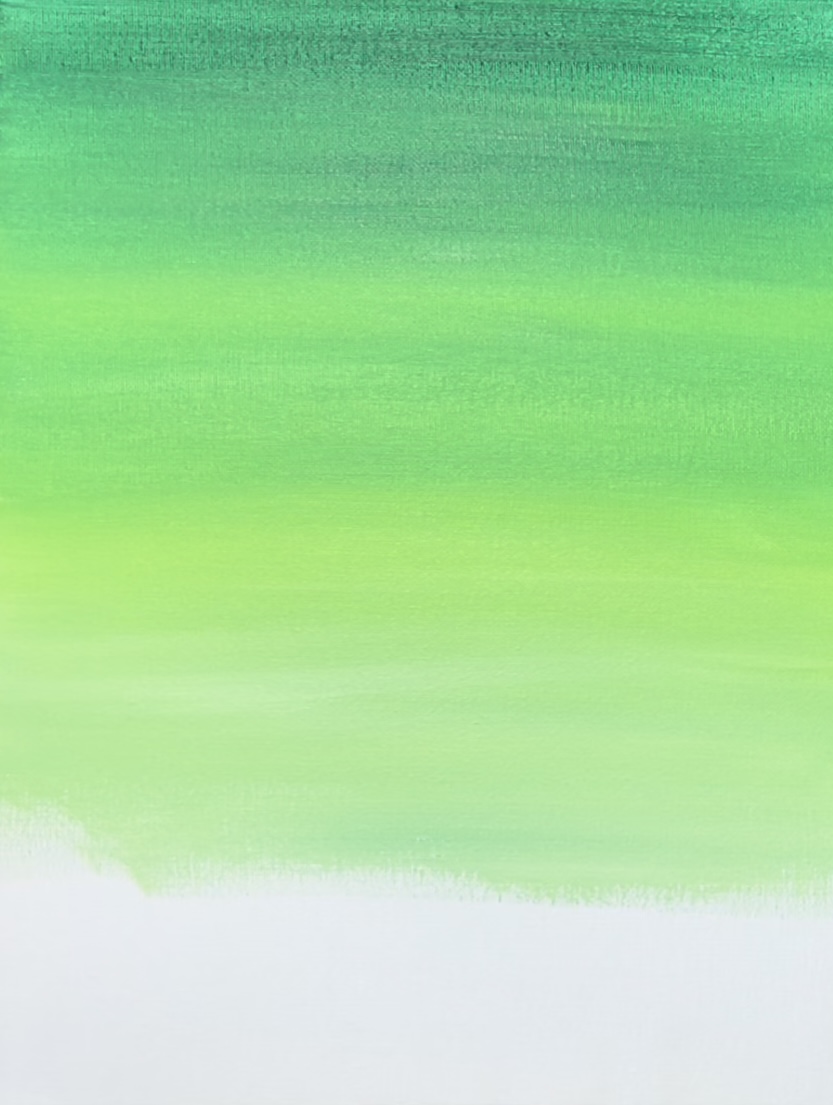
Go all the way to the bottom of the canvas. You should have a mix of dark green at the top and lighter green at the bottom. This does not need to be a perfect gradient and it is okay if you colors do not blend all the way!
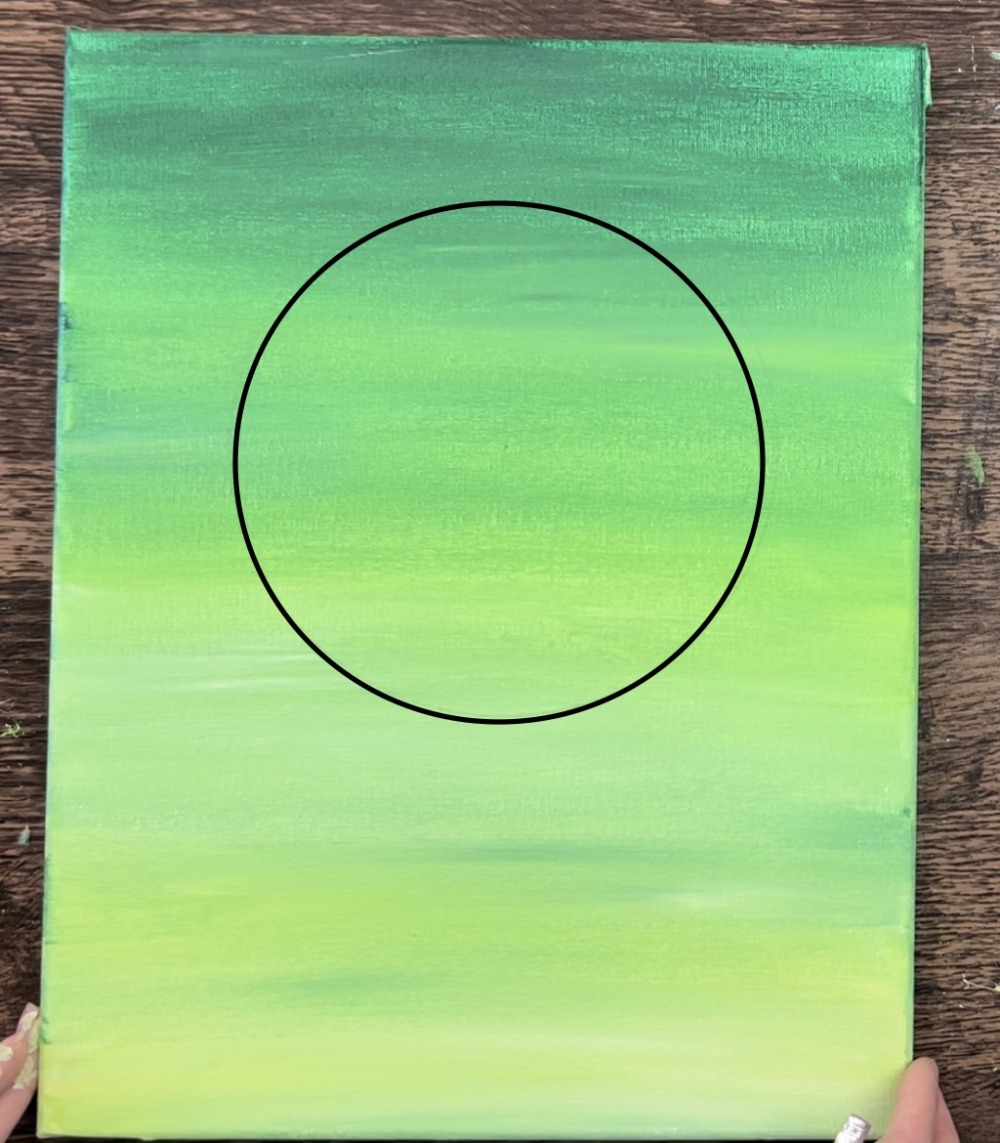
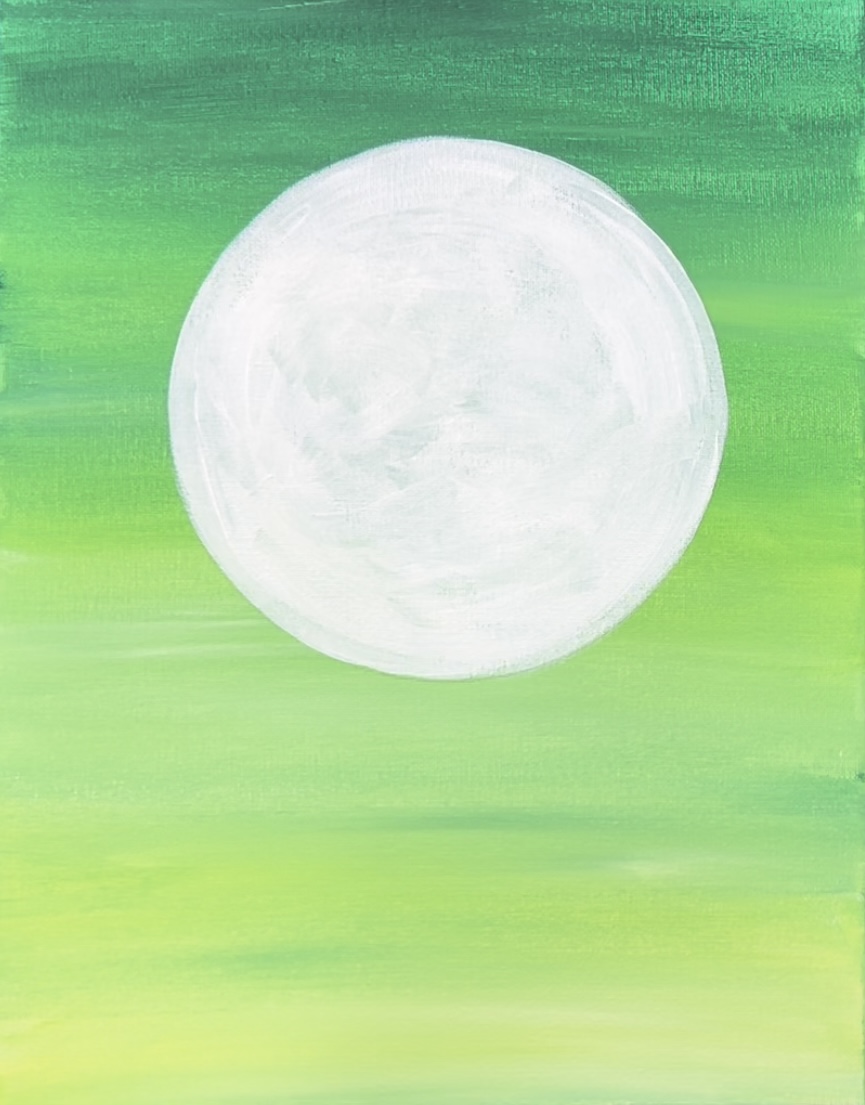
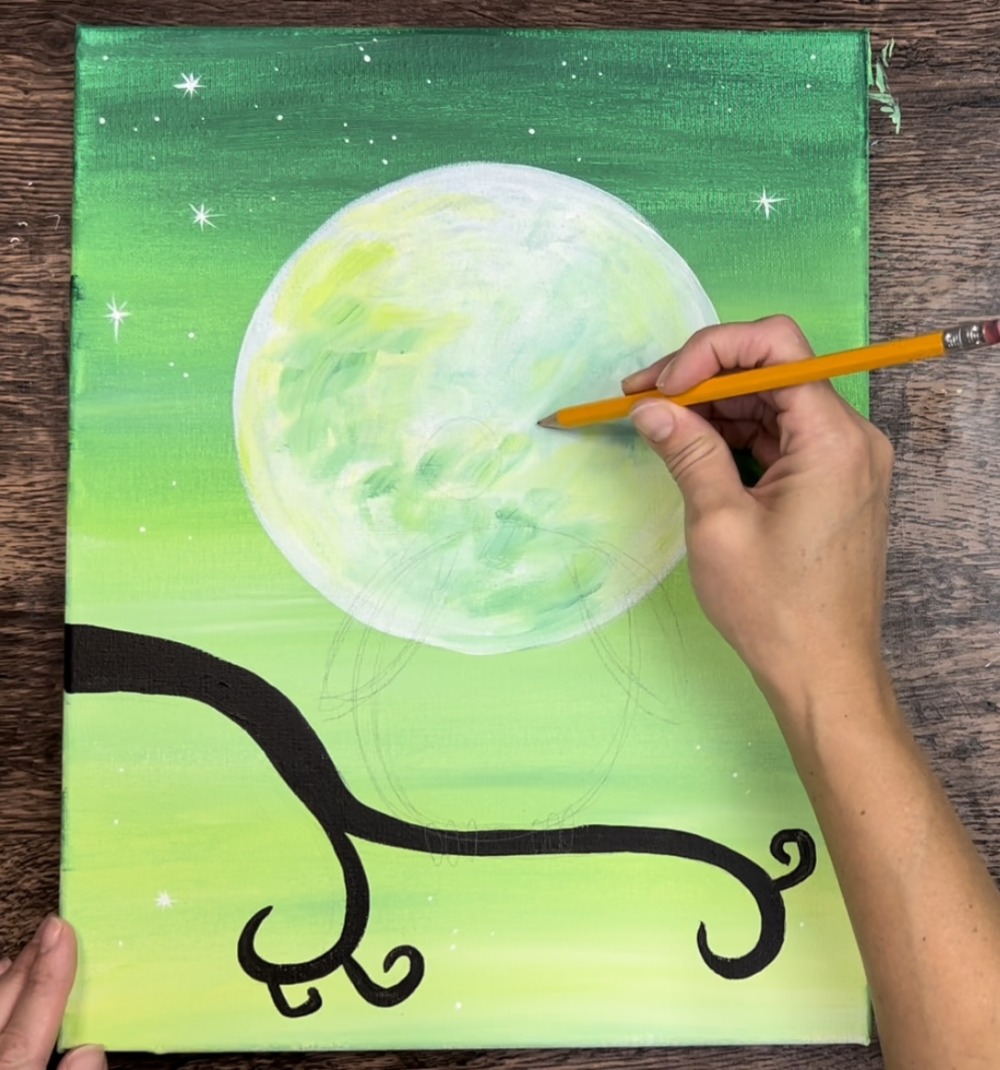
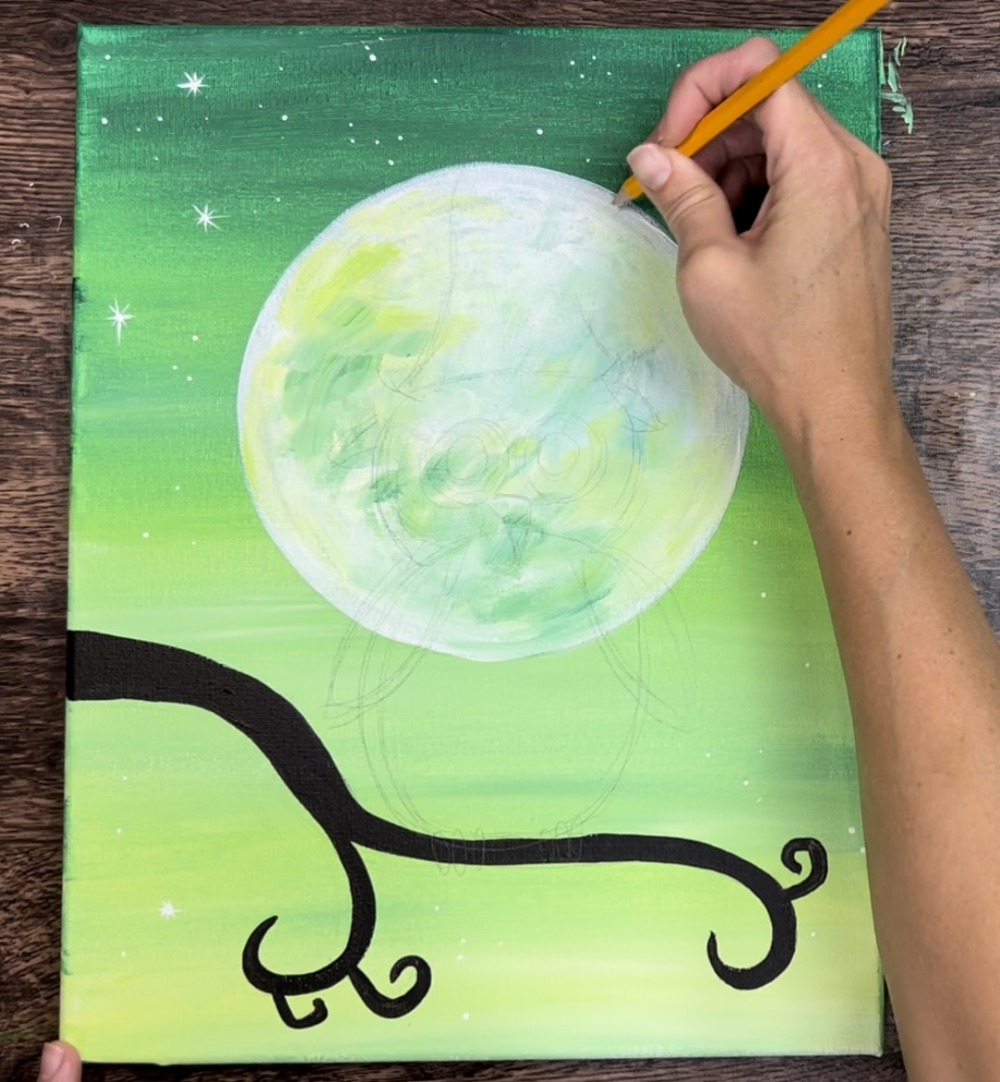
2. Draw and paint the moon
If you are using the traceable, transfer it now to the canvas.
To draw this…
You will need to either use a compass to draw a circle or find a circle object to trace on the canvas. My circle was approximately 7″ in diameter. You can do this the same or similar size.
Use a pencil to draw or trace your circle.
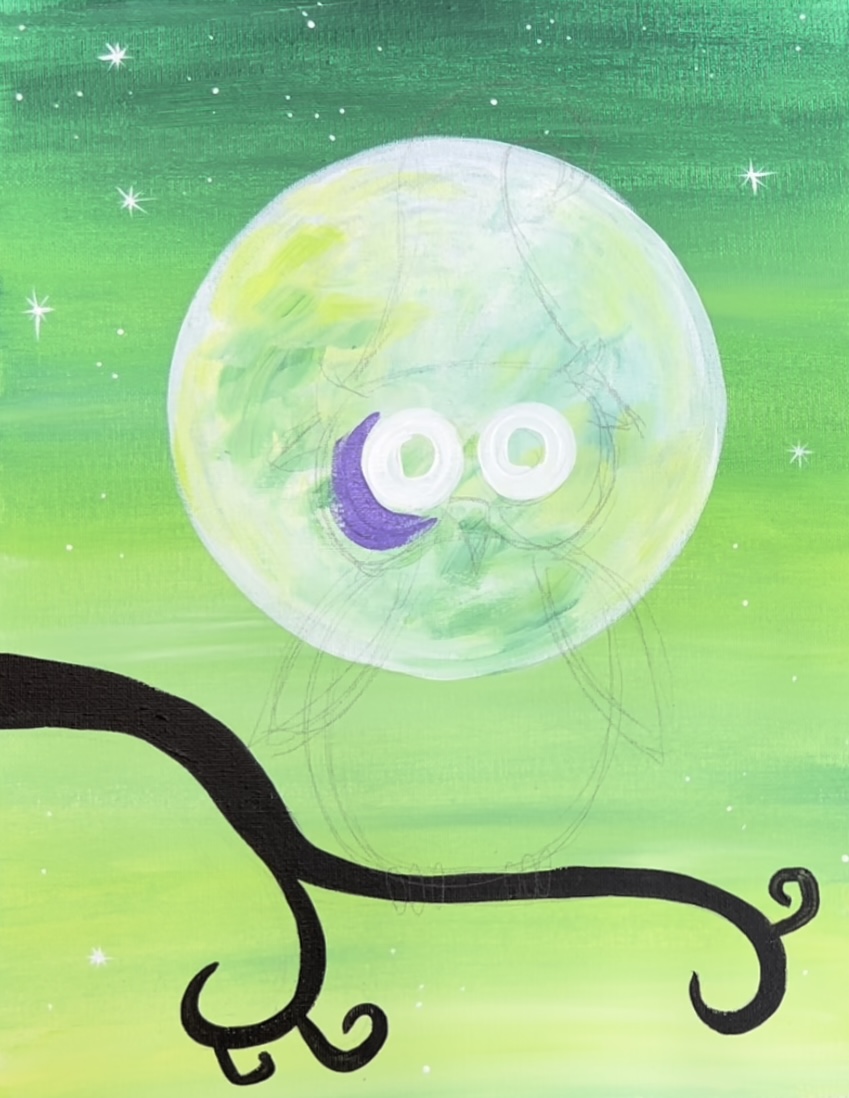
Then use a 12 bright brush to paint the moon titanium white. Paint the moon in short strokes going in a circular direction.

This moon does not have to be opaque. There can be some green still showing through.
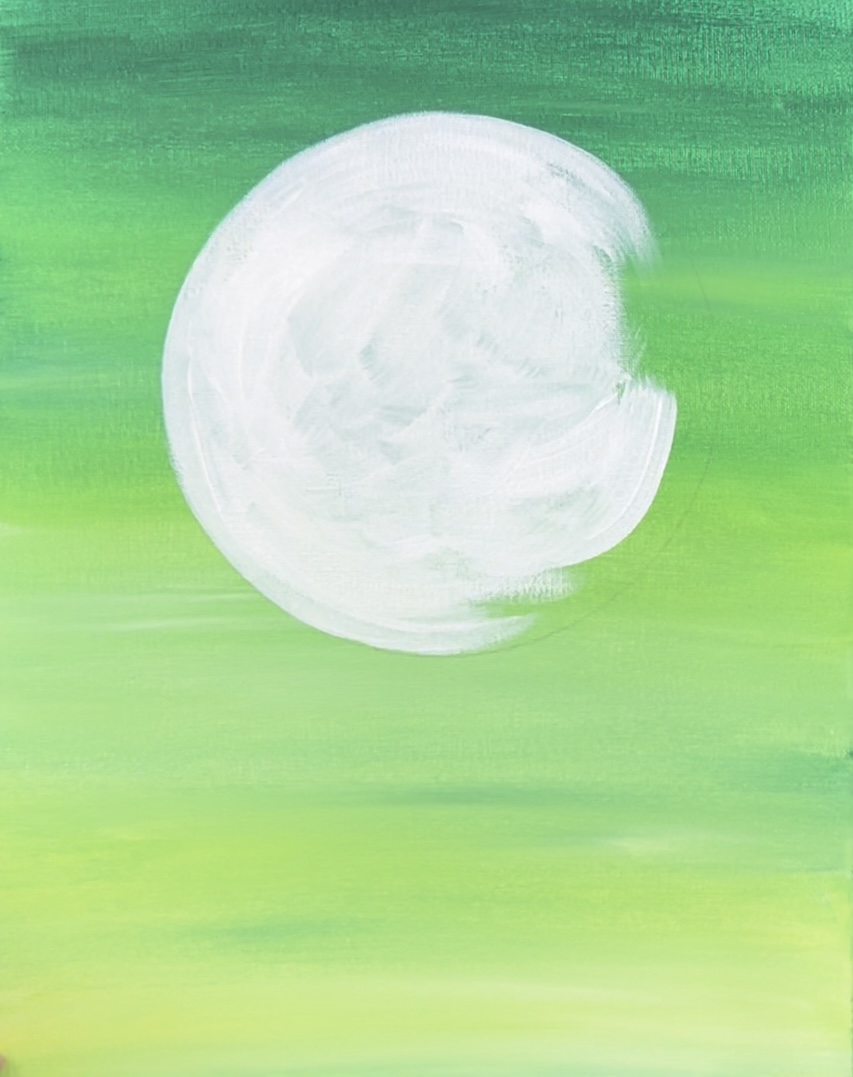
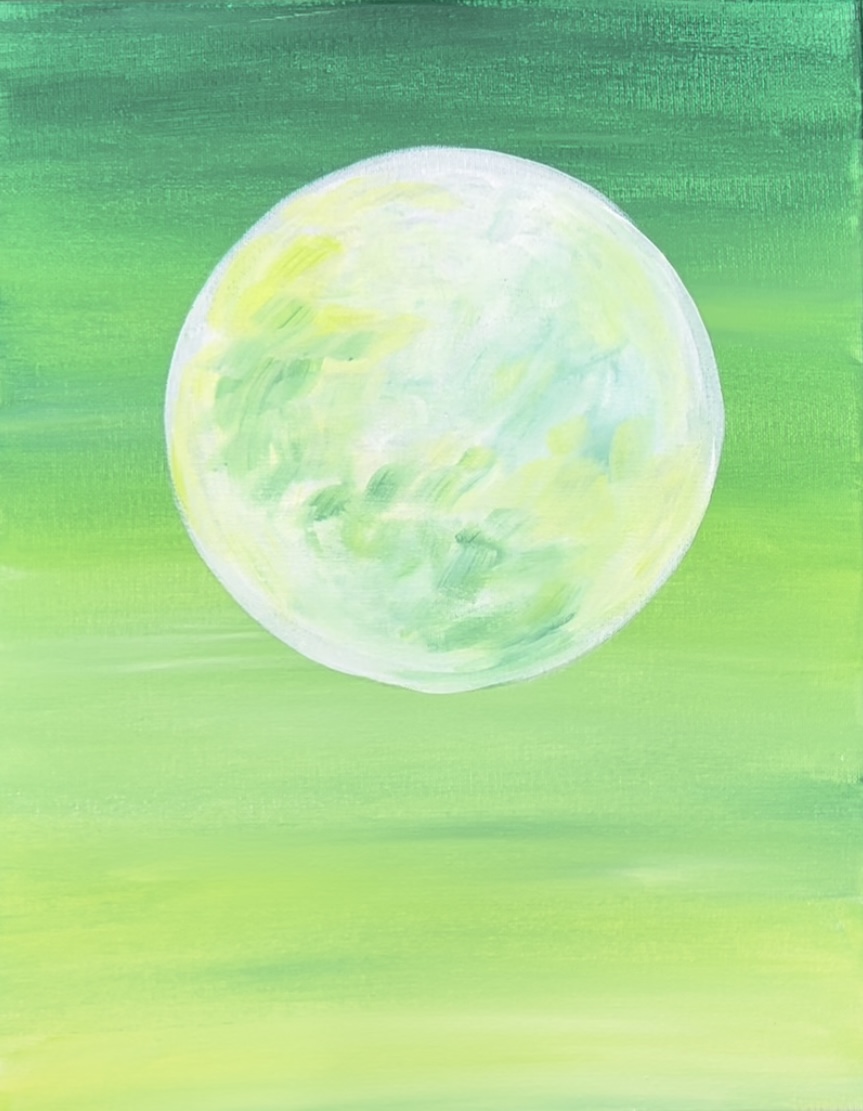
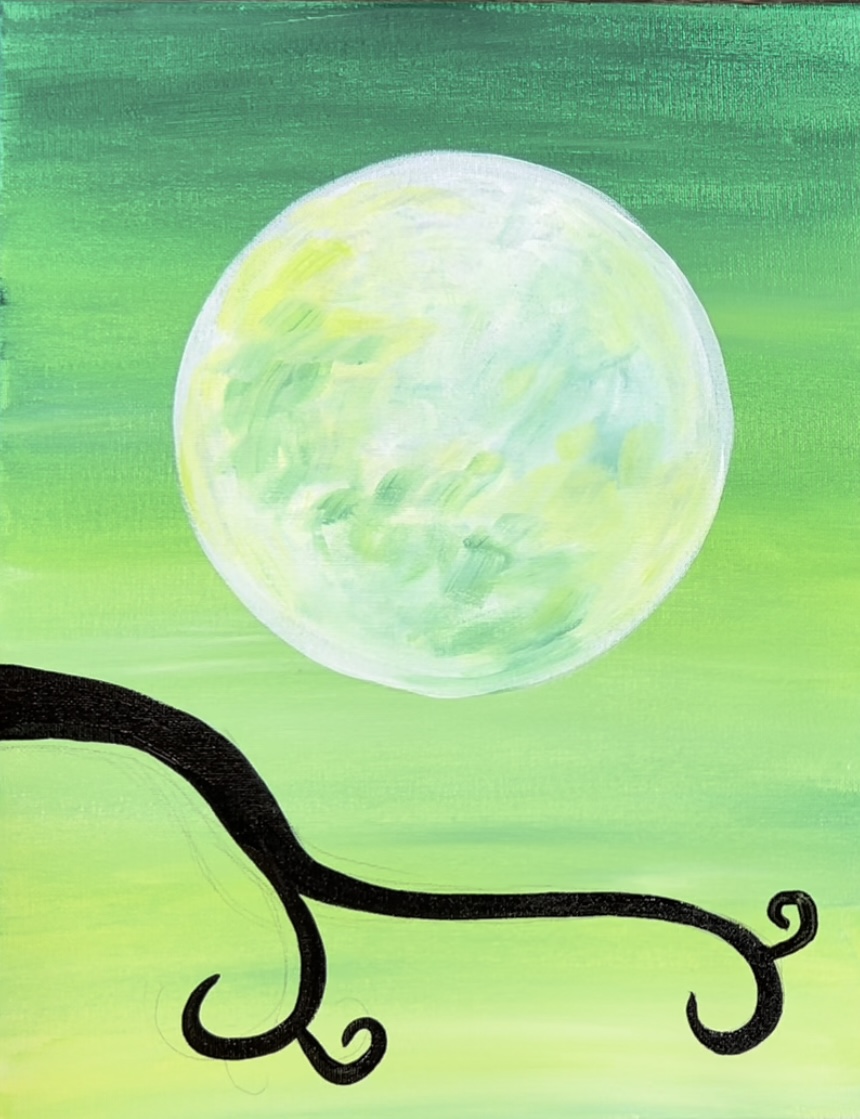
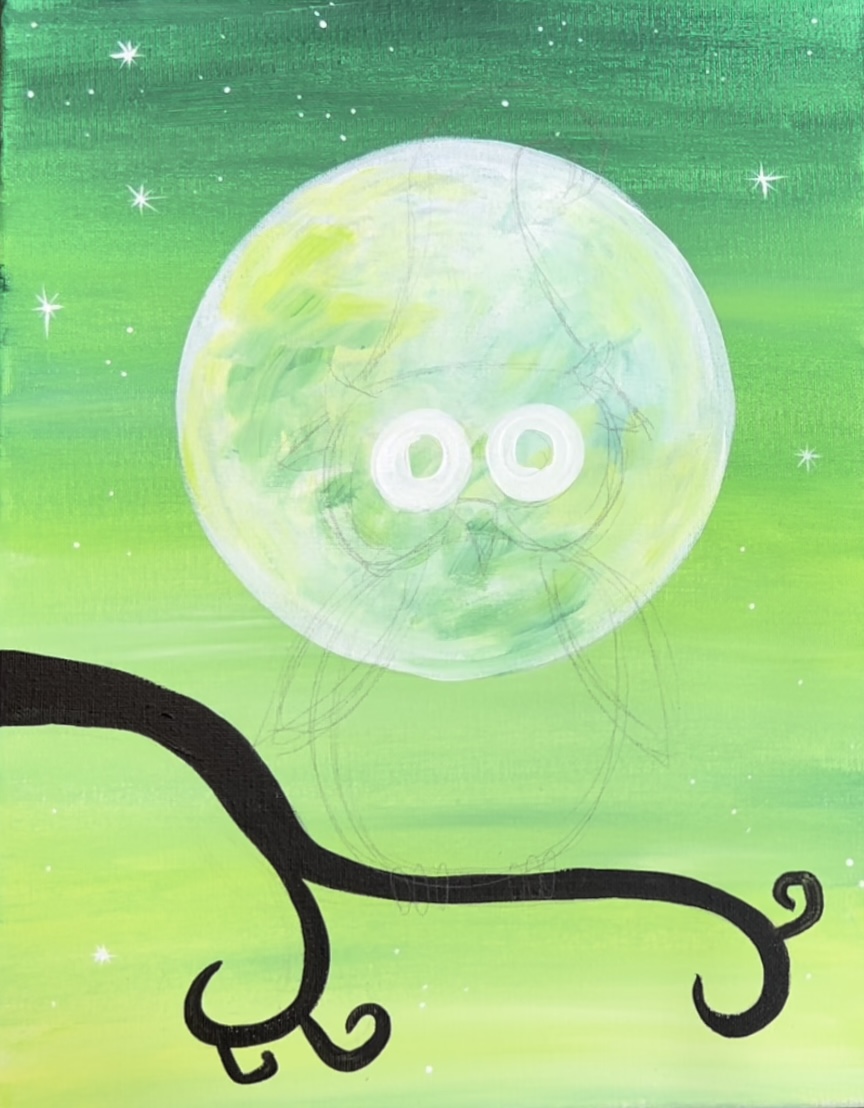
Optional: blend some green on the moon for shadows and craters. Do this with your 12 bright brush. Paint short strokes of brilliant yellow green. Paint clustered areas around the moon surface but don’t paint over all of the white.
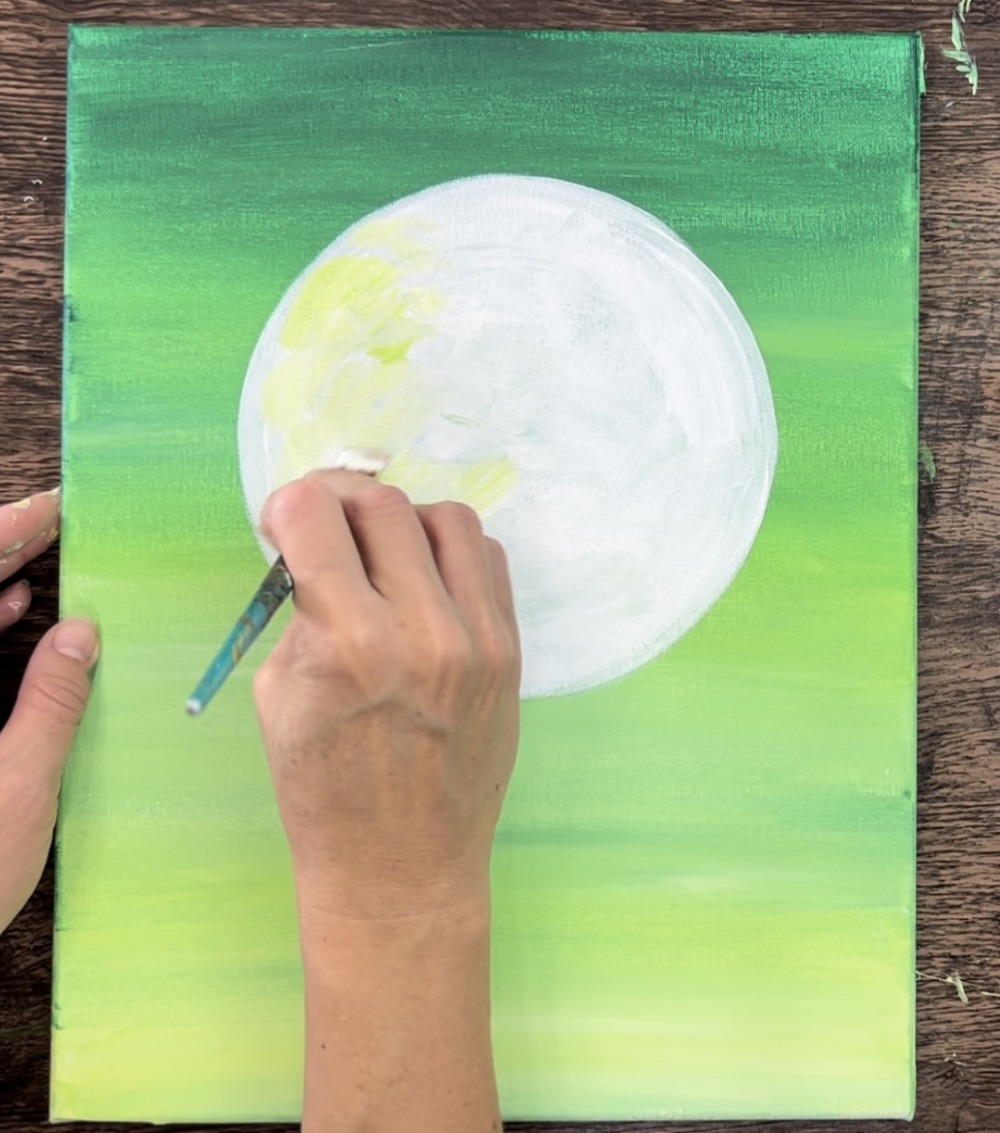
You can also blend some of the dark green into the moon. Make sure to keep the moon overall very bright and leave a lot of the pure white still showing, especially around the inner edges of the circle.
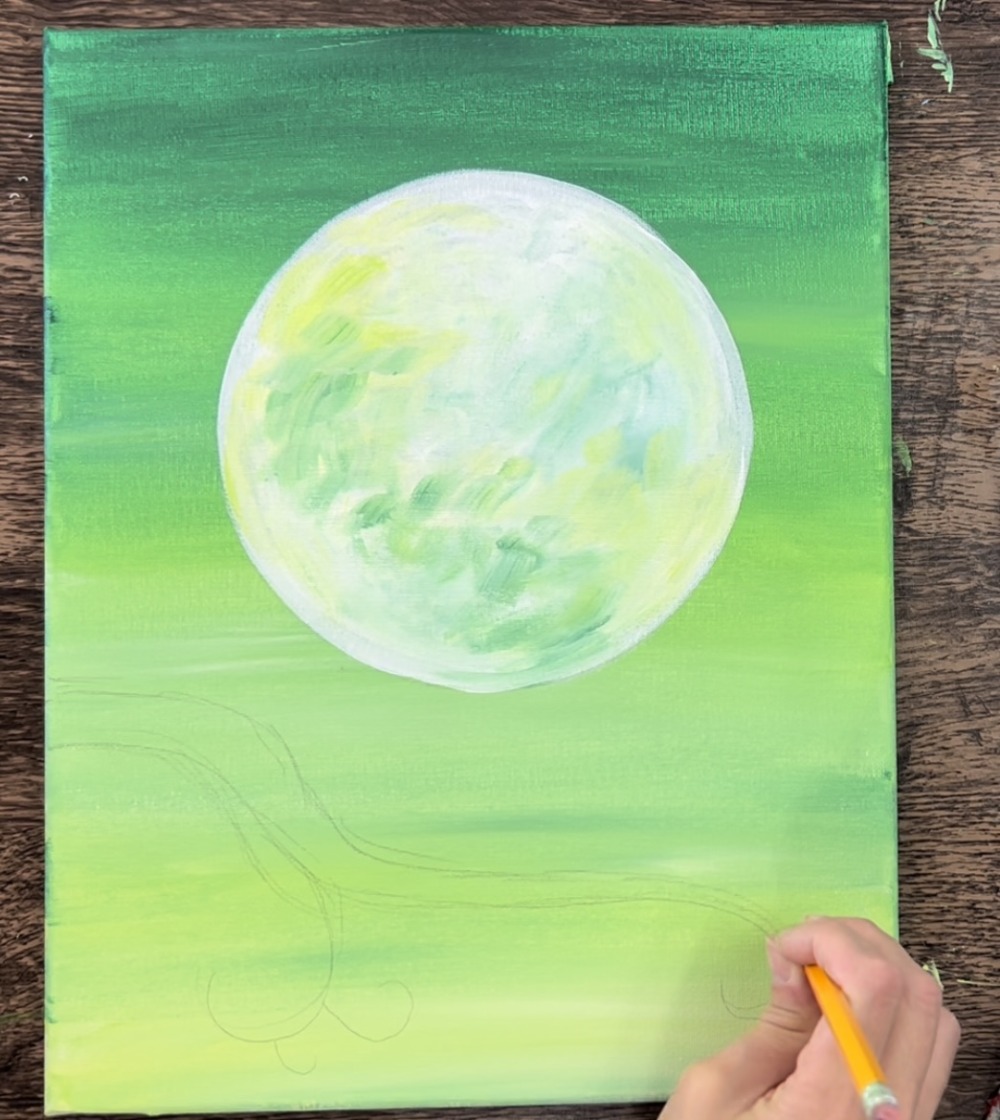
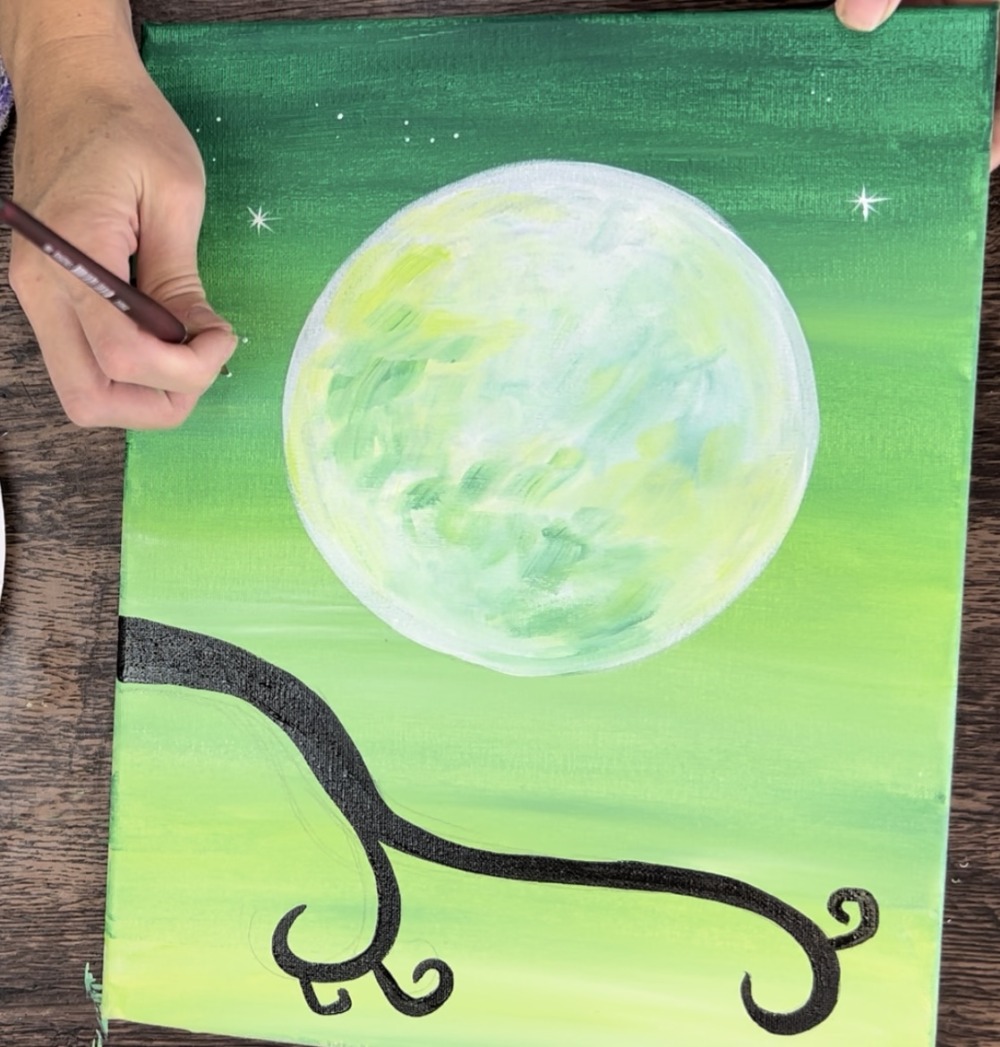
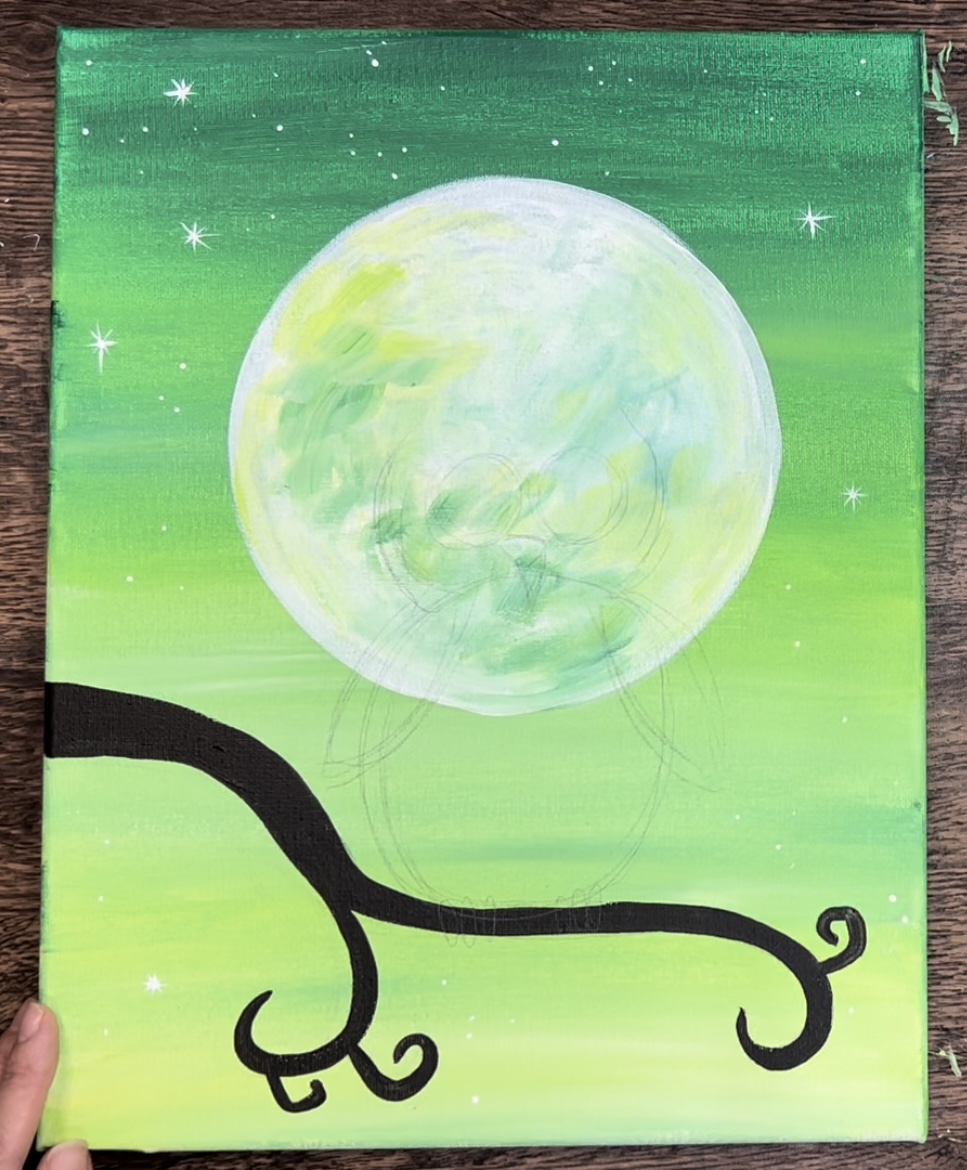
3. Draw and paint the tree branch
This is a whimsical and swirled tree branch. Use your pencil to lightly sketch this branch so that it is in the center area between the bottom of the moon and bottom edge of the canvas.
Then load your palette with mars black and burnt umber. Use the #4 round brush to paint the tree branch. It may help to loosen the paint down with a tiny bit of water so you can make the branches flow more easily.
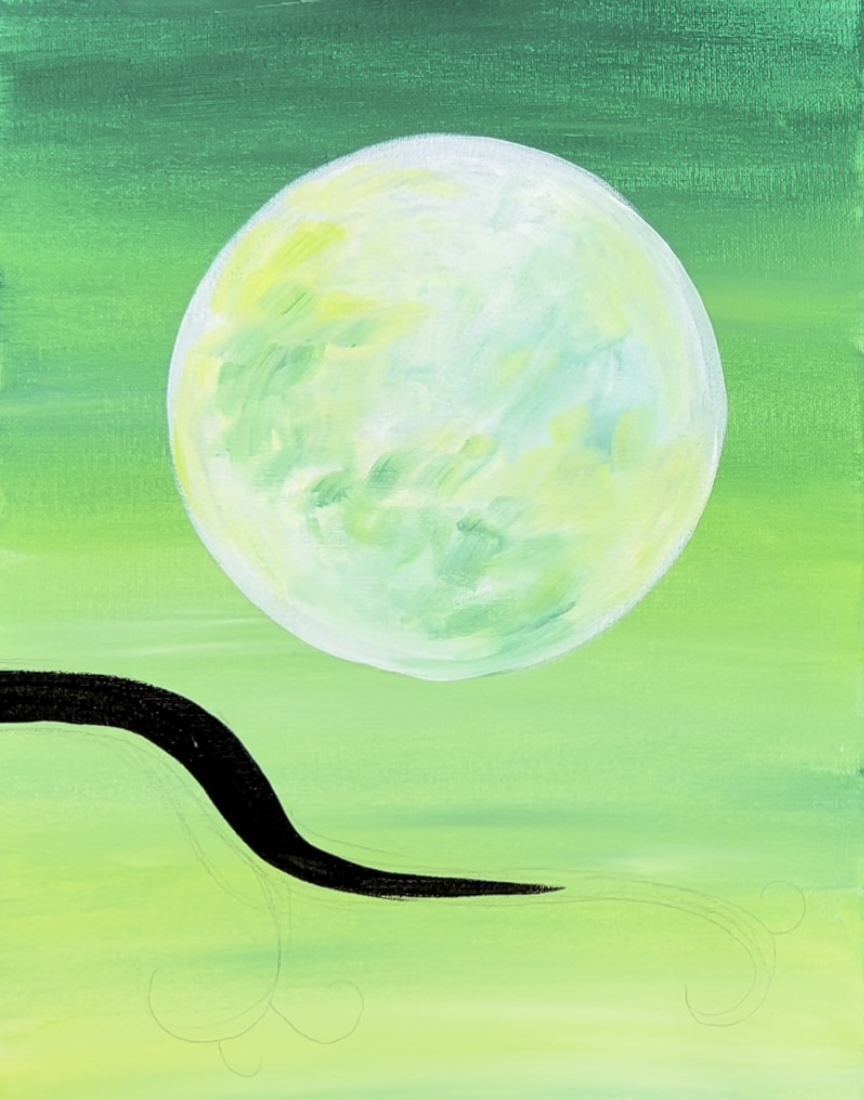
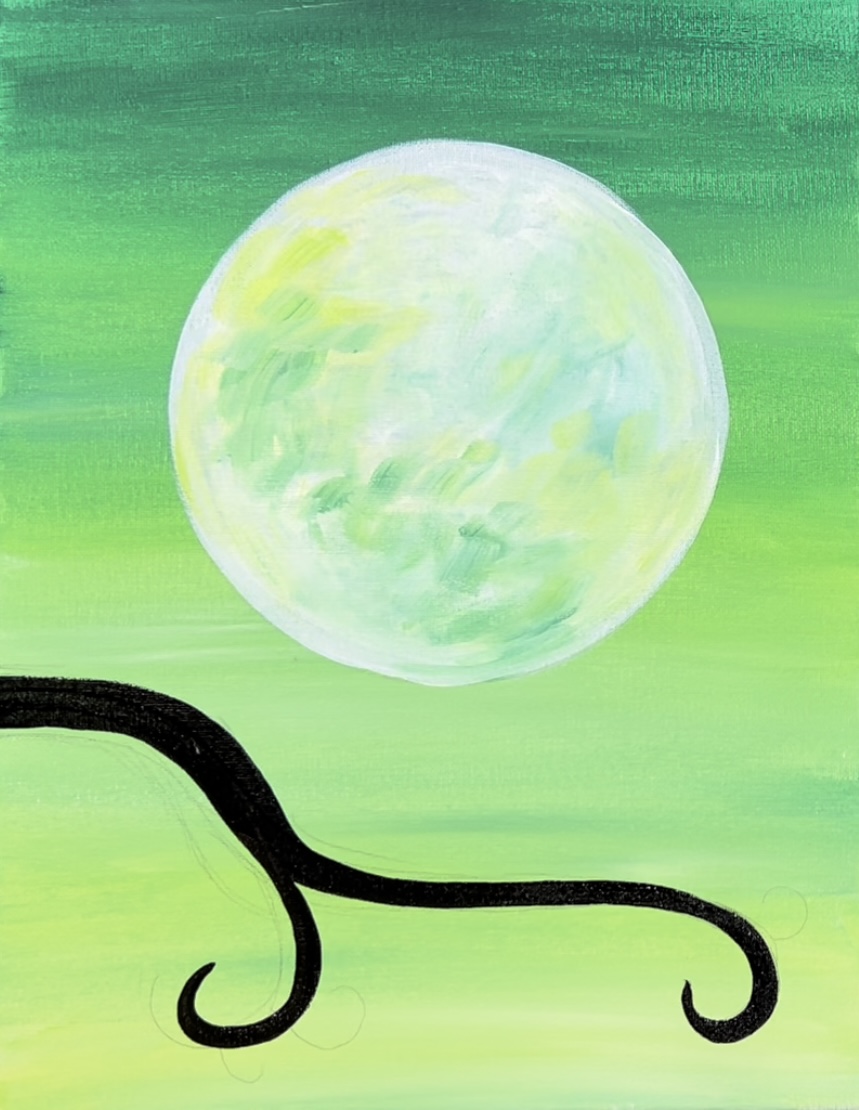
Swirly the tips of the branches to create a whimsical effect. If needed, switch to a much smaller brush to get the smaller points of the tree branch.

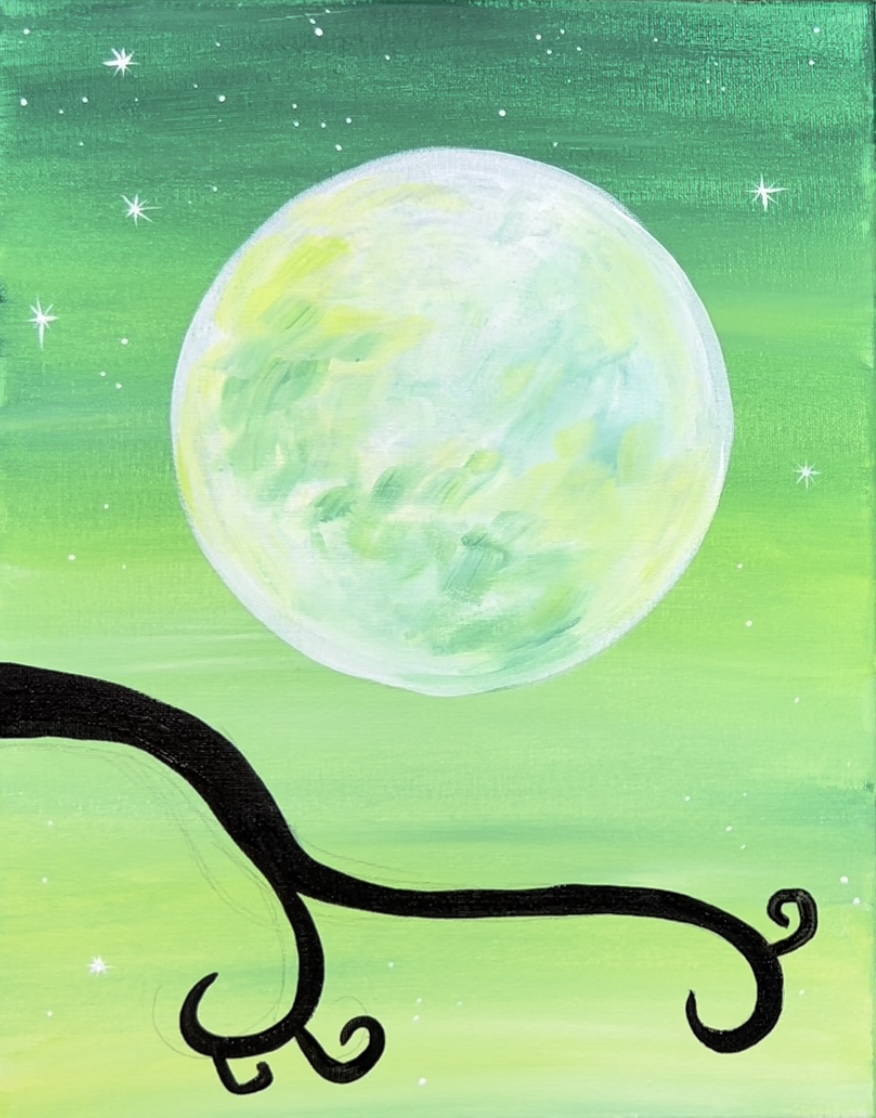
4. Paint The Stars
Use a very tiny brush to paint the stars. I used my #8 round brush (Princeton velvetouch) because it has a very fine pointed tip that can be used to paint the thin lines.
Paint a variety of diamond-like stars and clusters of little dots all throughout the sky.
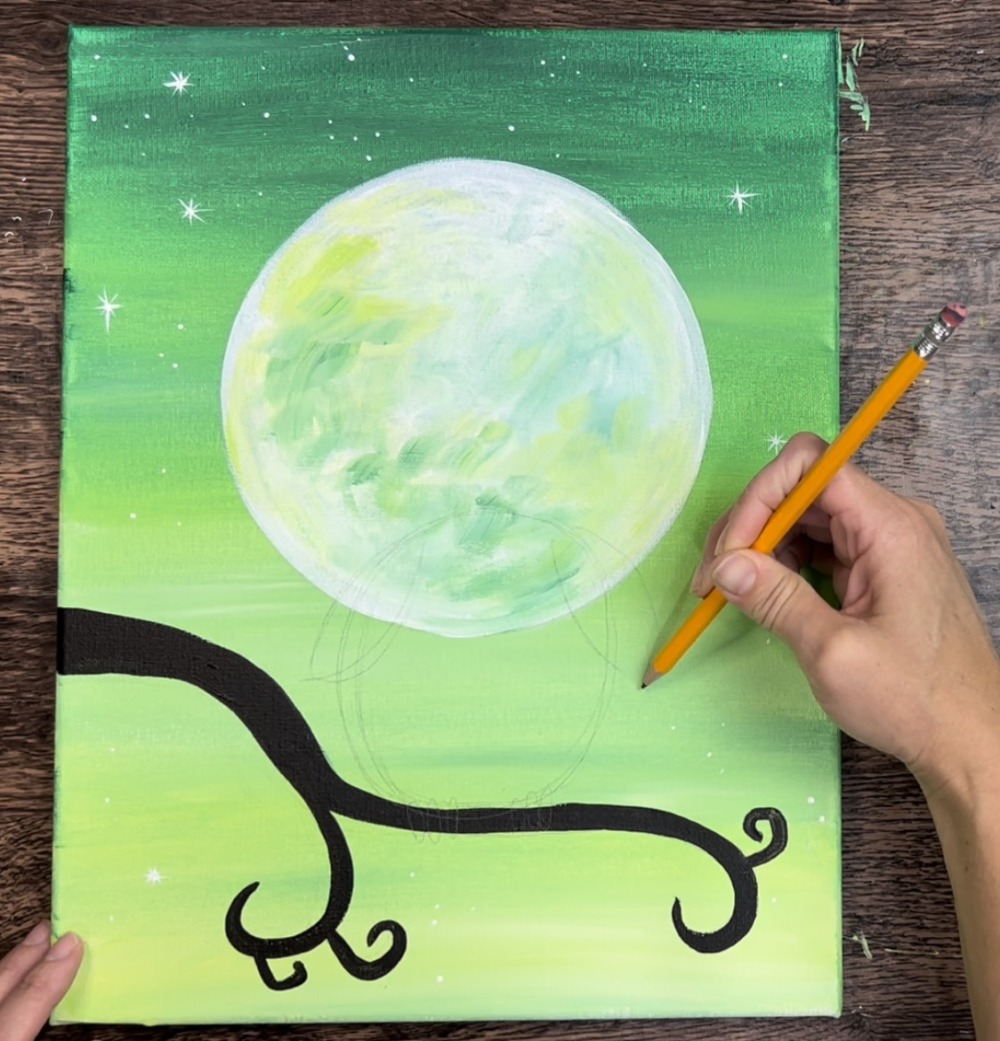
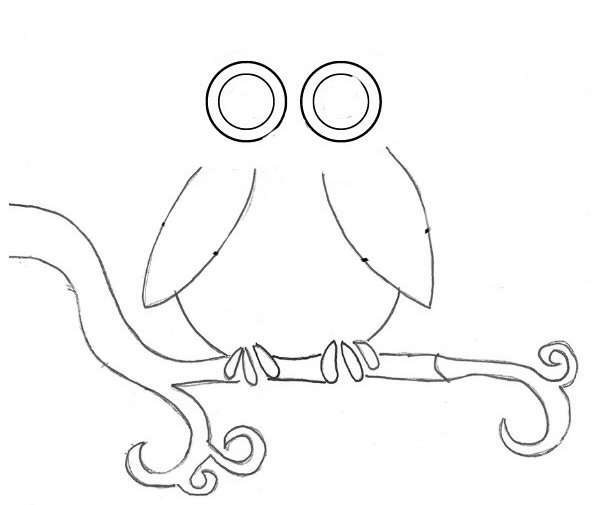
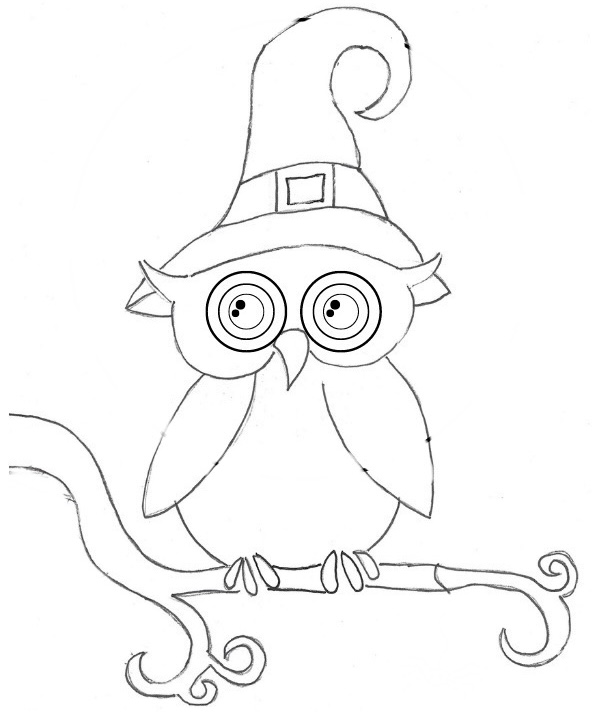
5. Draw the owl
Use a pencil to sketch the owl. Start with a large oval that touches the top of the branch and overlaps the bottom quarter of the moon.
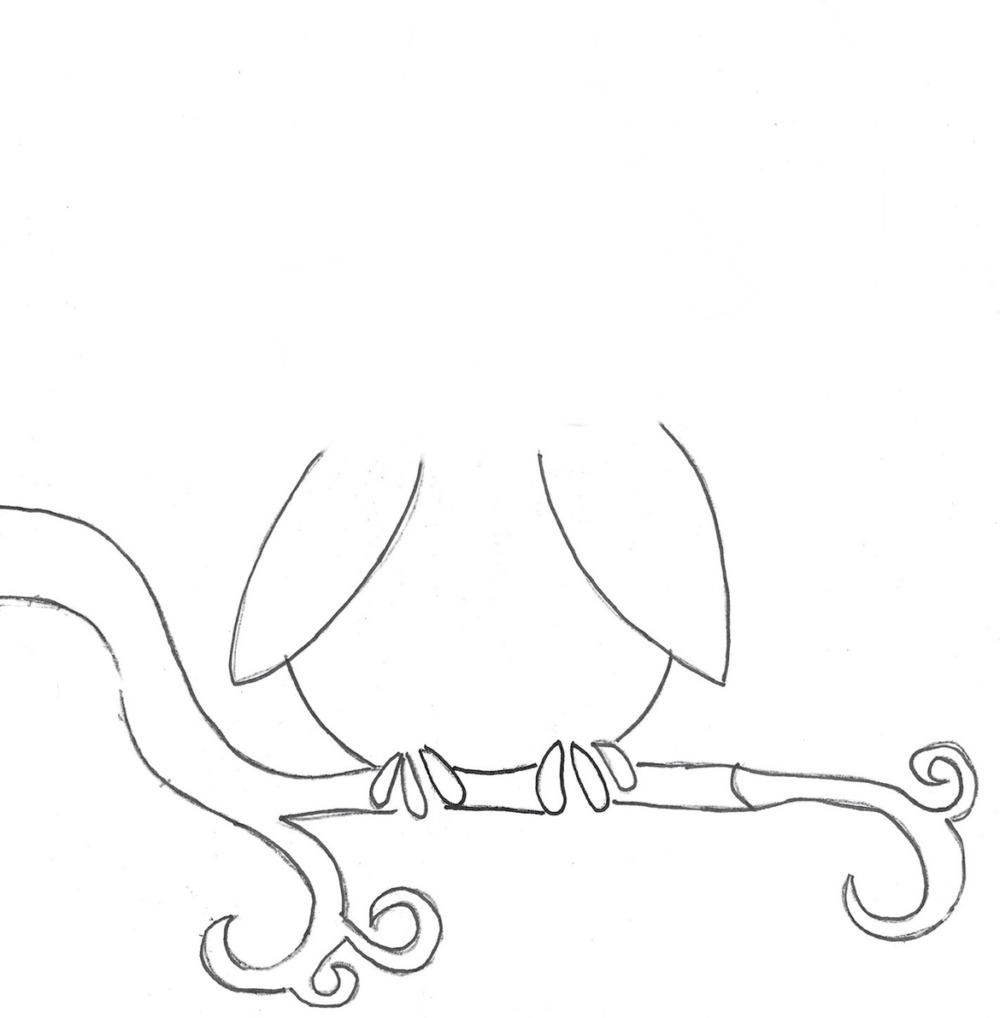
Then draw two elliptical/pointed shapes on each side of the oval for the wings.
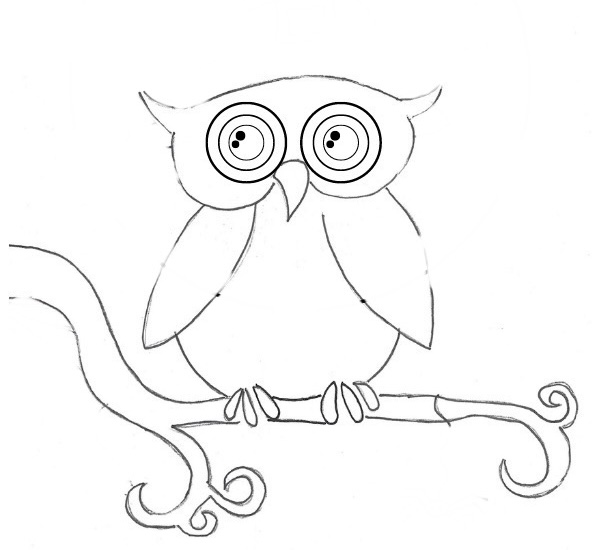
Then sketch the head, ears and beak. Draw two curved lines on both sides of the eyes. Draw two pointed shapes on the top of the head. Then draw a triangular shape below each of the eyes.

Then draw the hat. Draw the bottom of the hat first so that the bottom line goes behind the top of the owl’s head. Then draw two curved lines on each side that curve up and spiral to a pointed tip.

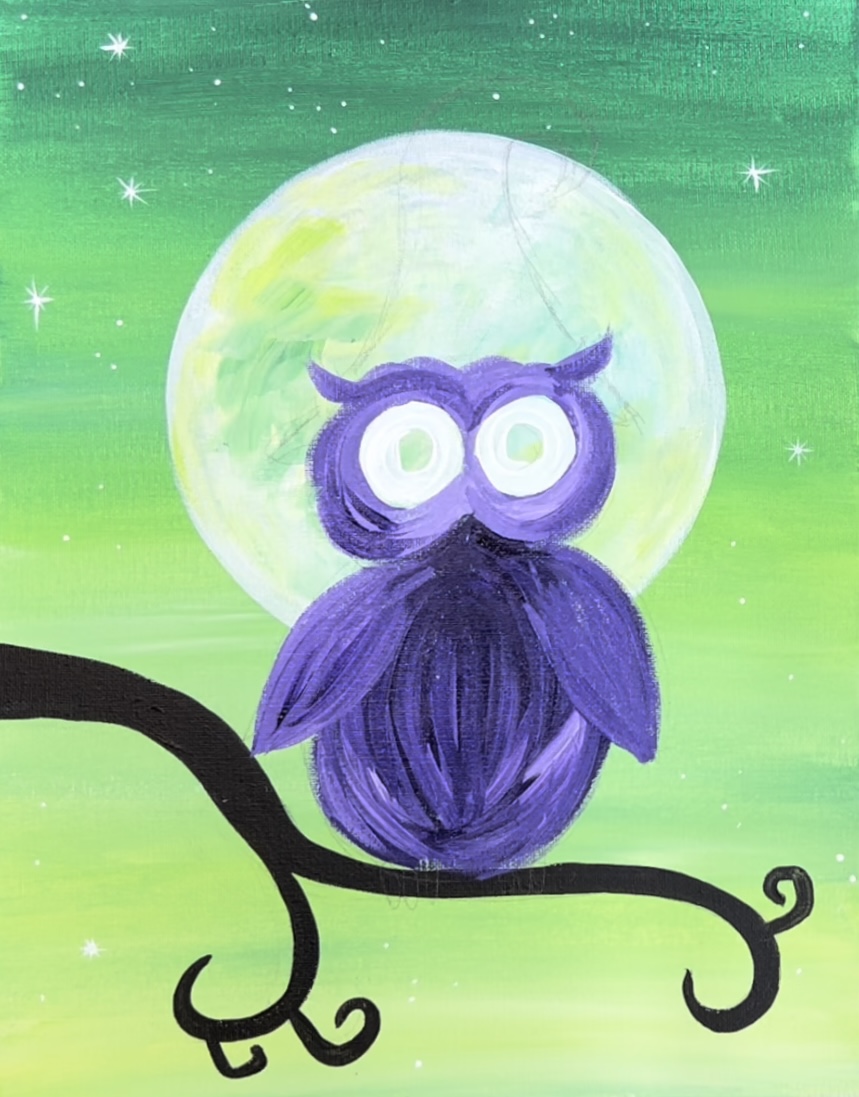
6. Paint the owl
Start with the eyes. Use titanium white and a #4 round brush to paint the doughnut shape of both of the eyes.
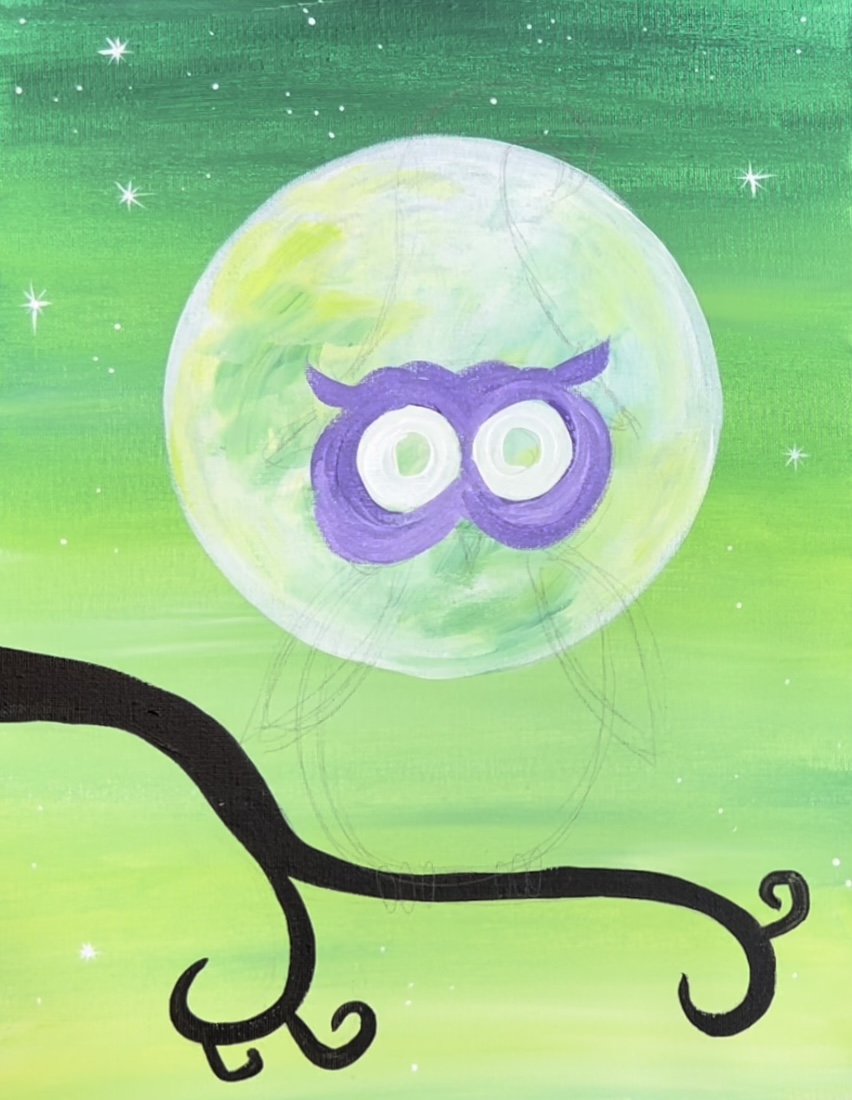
Then mix dioxazine purple with titanium white (about equal amounts) to make a lighter purple.
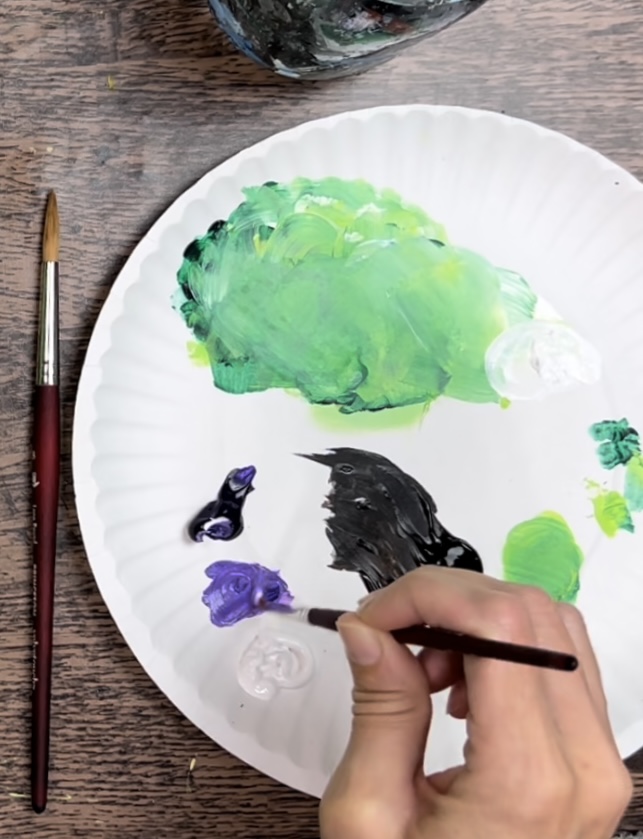
Use the light purple and the #4 round brush to paint around the two eyes. Paint in contouring strokes that go around the shape of the eyes. Also, do this in short strokes to create a sort of feather texture.
Paint around both eyes, paint the top forehead region and paint the ears.
Next, load your brush in just the dioxazine purple. Paint the body of the owl with this darker purple. Paint in short, contouring strokes. If needed, switch to a larger brush to fill up this larger area.
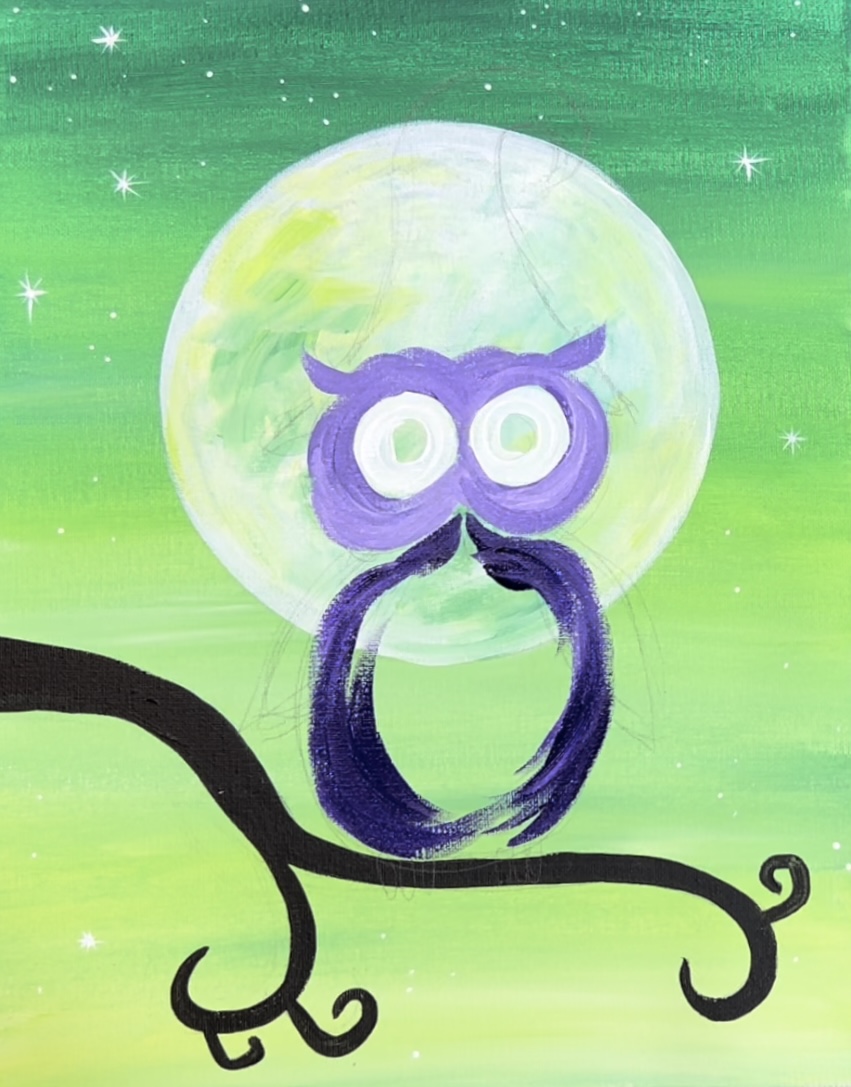
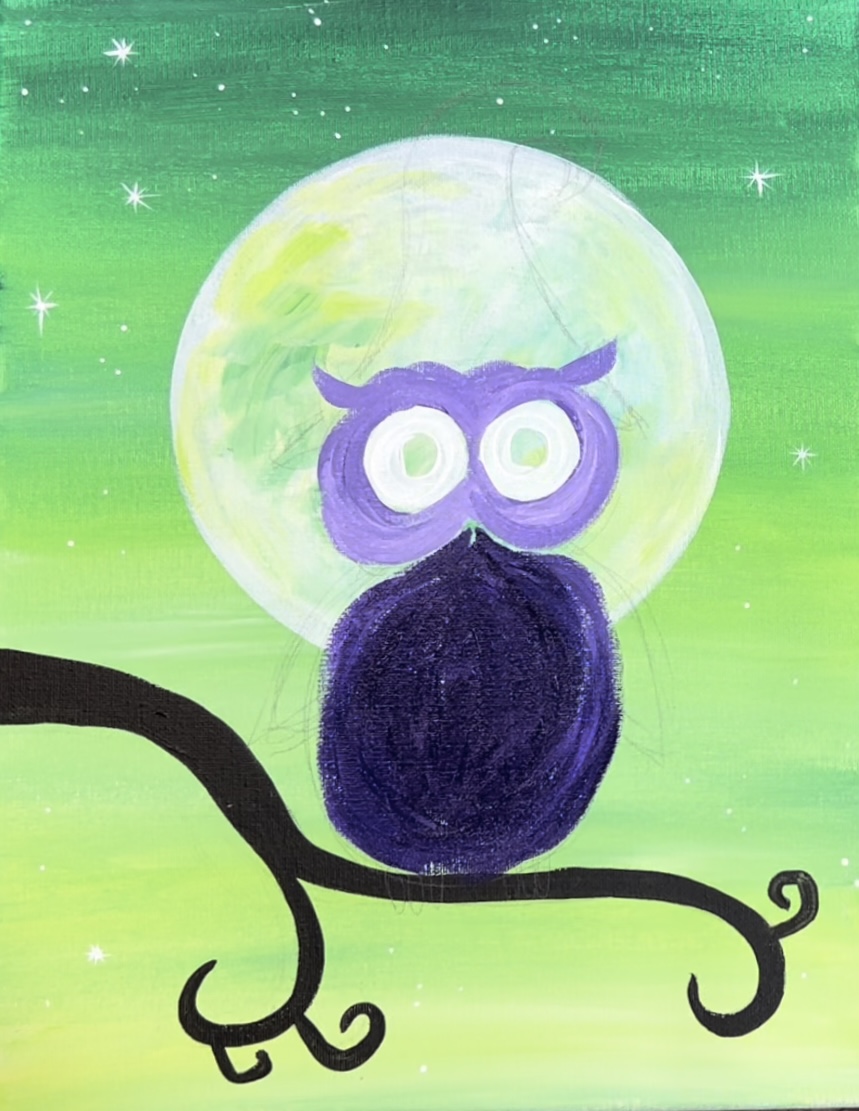
Before this purple dries, blend in some lighter purple over it. Paint in short, curved strokes that form the feather texture.

Then paint each of the wings. Do the wings with a slightly lighter purple (close the the purple in the head). This will allow the wings to stand out and have contrast against the dark body.
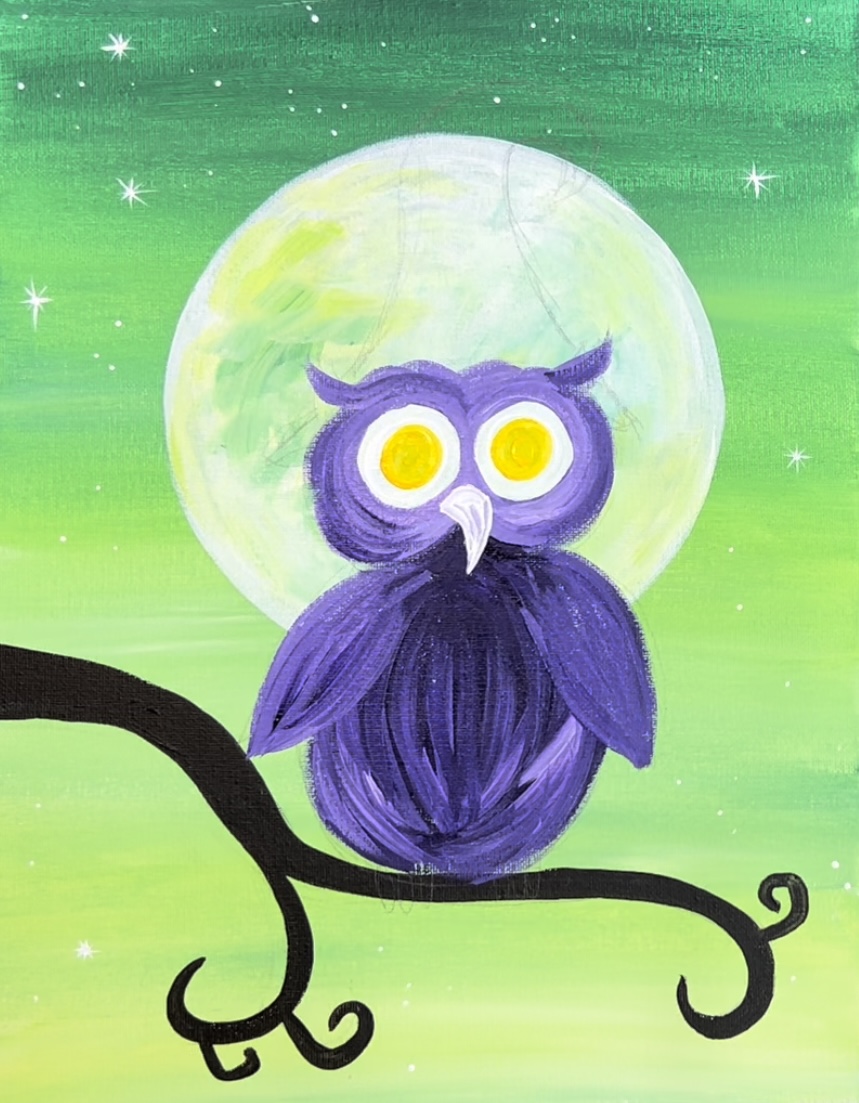
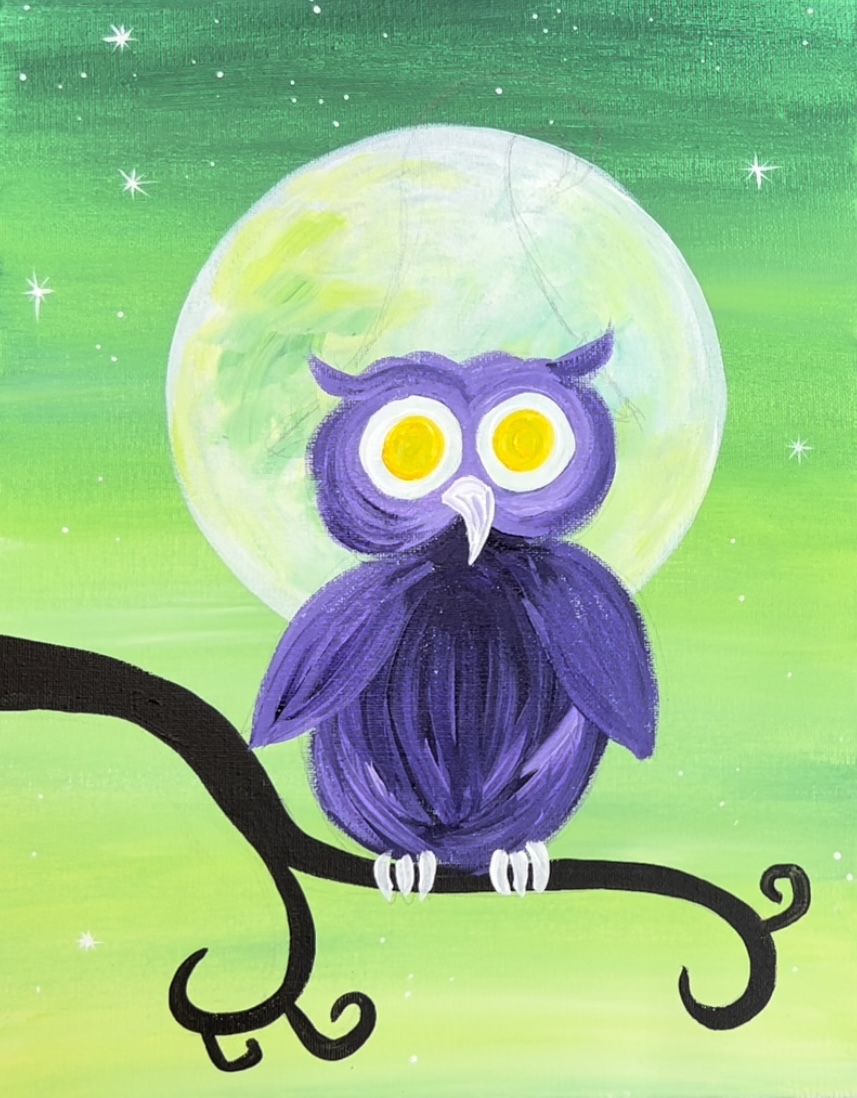
Then use titanium white to paint the shape of the owl’s beak. This is painted white first so that the orange will show up bright against the dark.
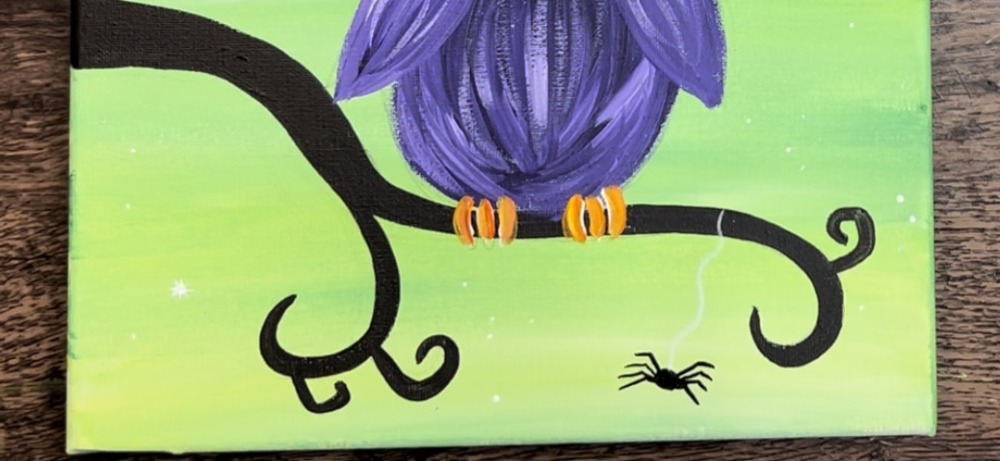
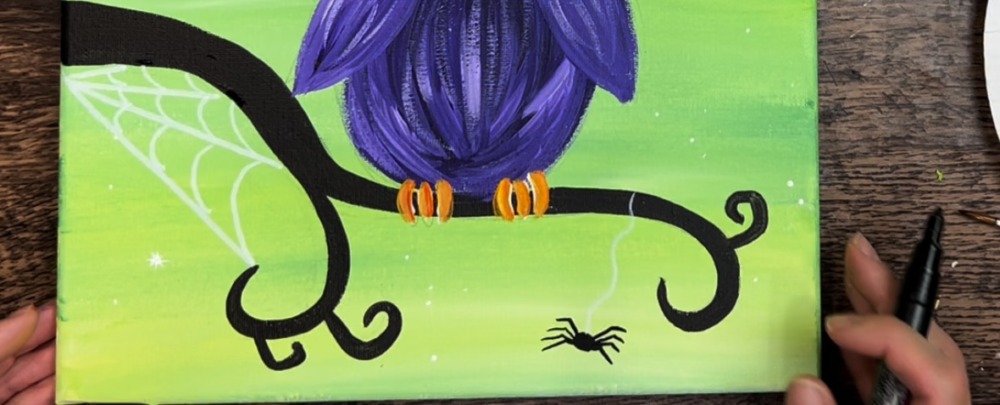
Then paint the claws. Do this with titanium white and a number 4 round brush. Paint three oval shapes side by side that overlap the branch.
7. Paint the witch hat.
Use your #4 round brush and a combination of mars black and titanium white to paint the witch hat. Start at the bottom of the hat with just black and outline the part of the hat that goes behind the owls ears.
Then loosely outline the shape of the witch hat with the black. Fill the inner part of the hat with a gray/black combination and go in a curved direction. Load your brush with a tiny bit of white (while the black is still on your brush). This will allow the black to gently blend with white to create a variation of black and gray.
I had the hat be slightly lighter (more gray) on the bottom and then get more darker on the top. Make the strokes go in a curved horizontal direction to give the hat more form.
You’ll need to wait for the hat to dry before adding anymore details to the hat.
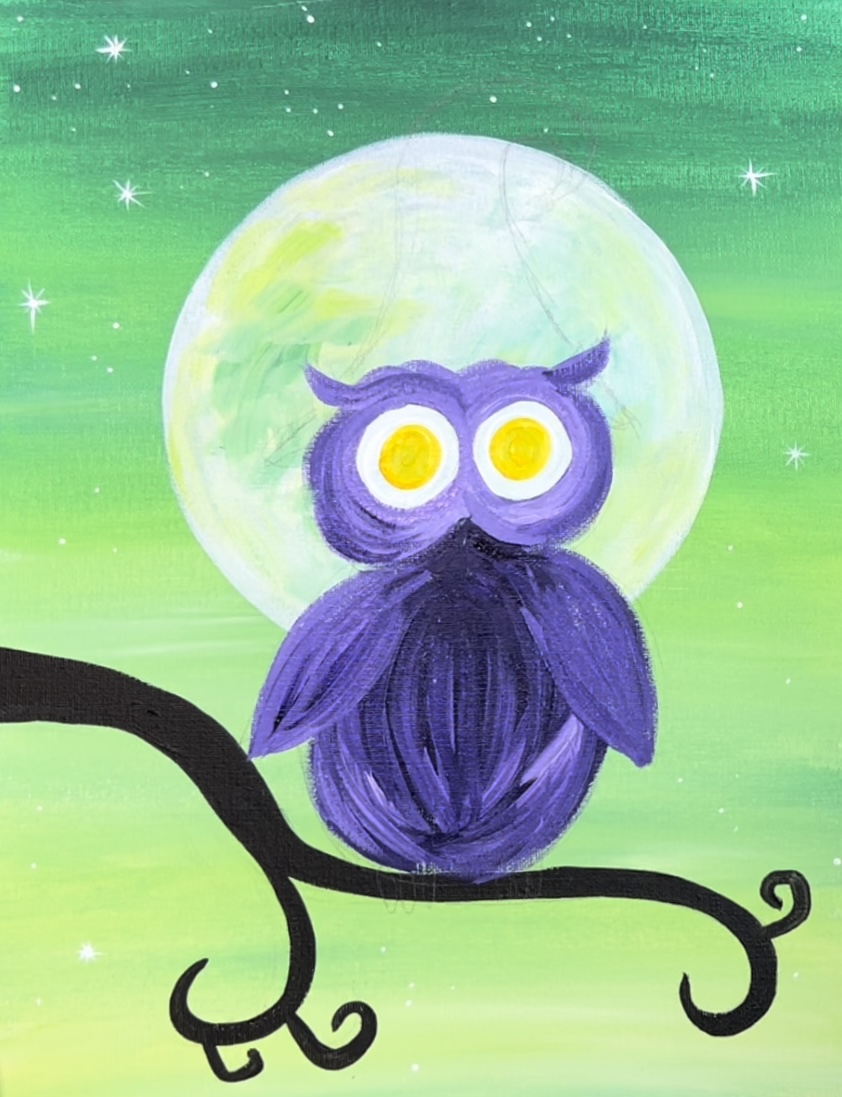
8. Paint more details on the owl
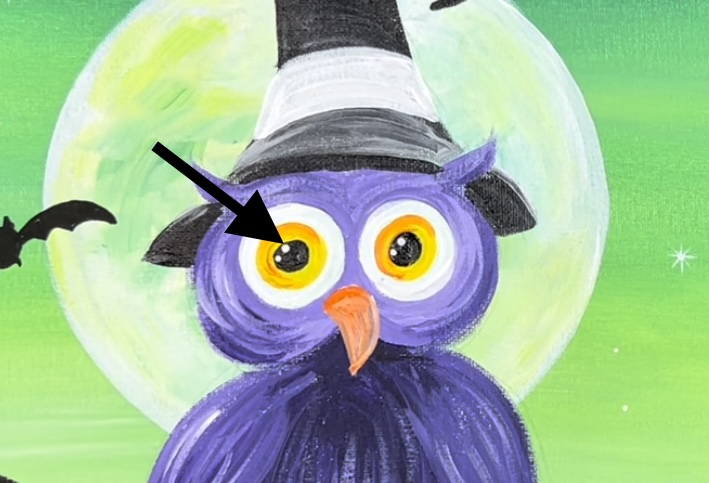
If the eyes are dry, use a #4 round brush and mars black to paint a small black circle in the center of each of the eyes.
Then paint the black and claws with cadmium orange hue. Additionally, add a small amount of orange mixed with yellow on the left part of the eyes (over the yellow area). This gives the eyes some golden color variation.

9. Draw details in the sky with paint pens
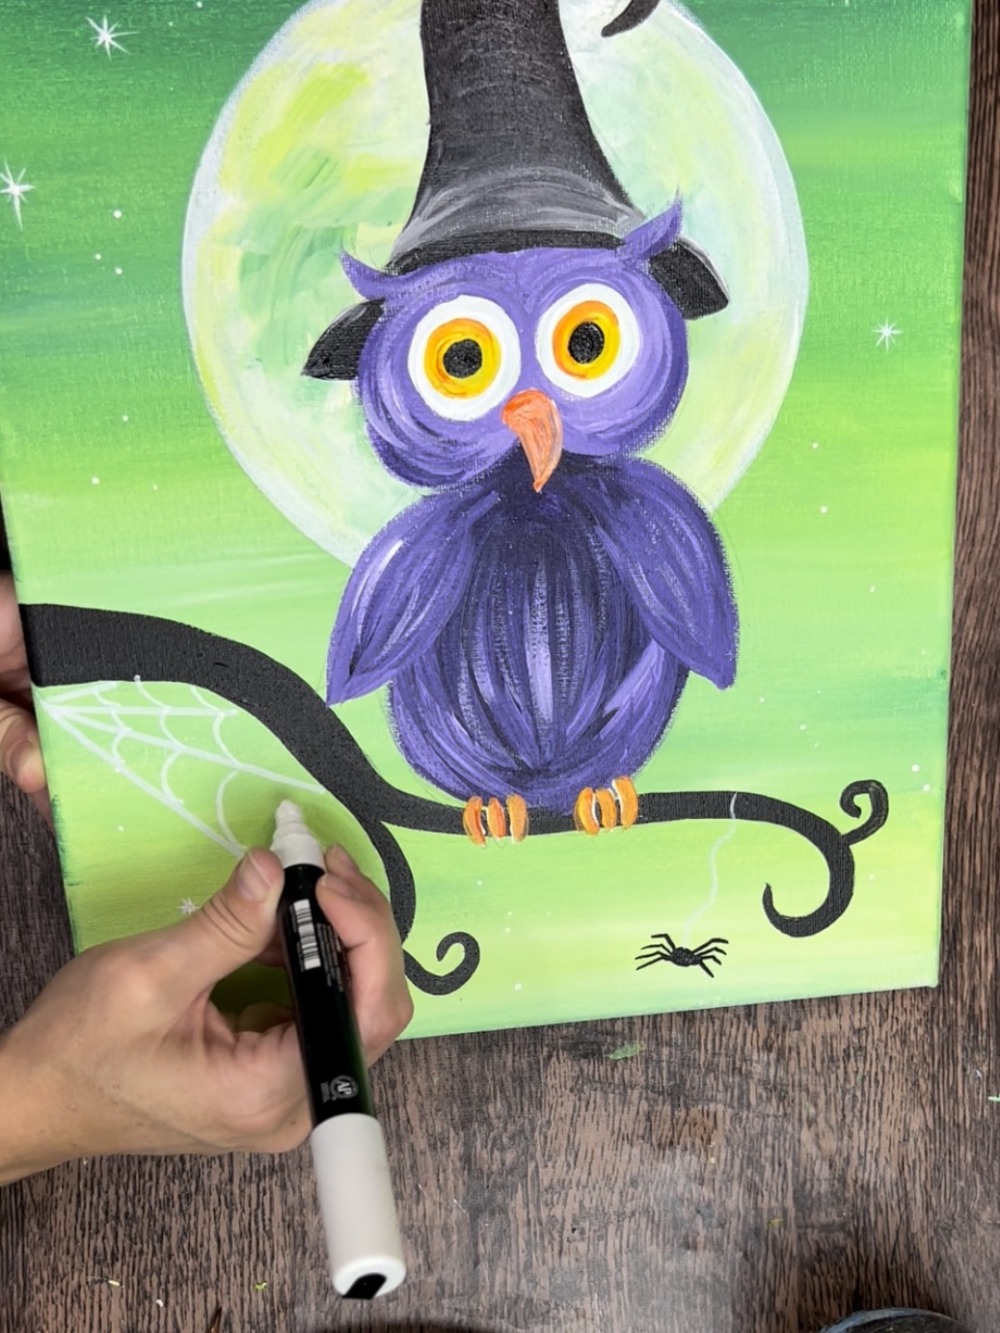
Use a black and white paint pen to draw the spider web and spider hanging from the branch. If you don’t have paint pens, you can do this step with a small round brush and black and white paint.

Use the white pen to paint a spider web that attaches to a spider that is drawn with the black paint pen.
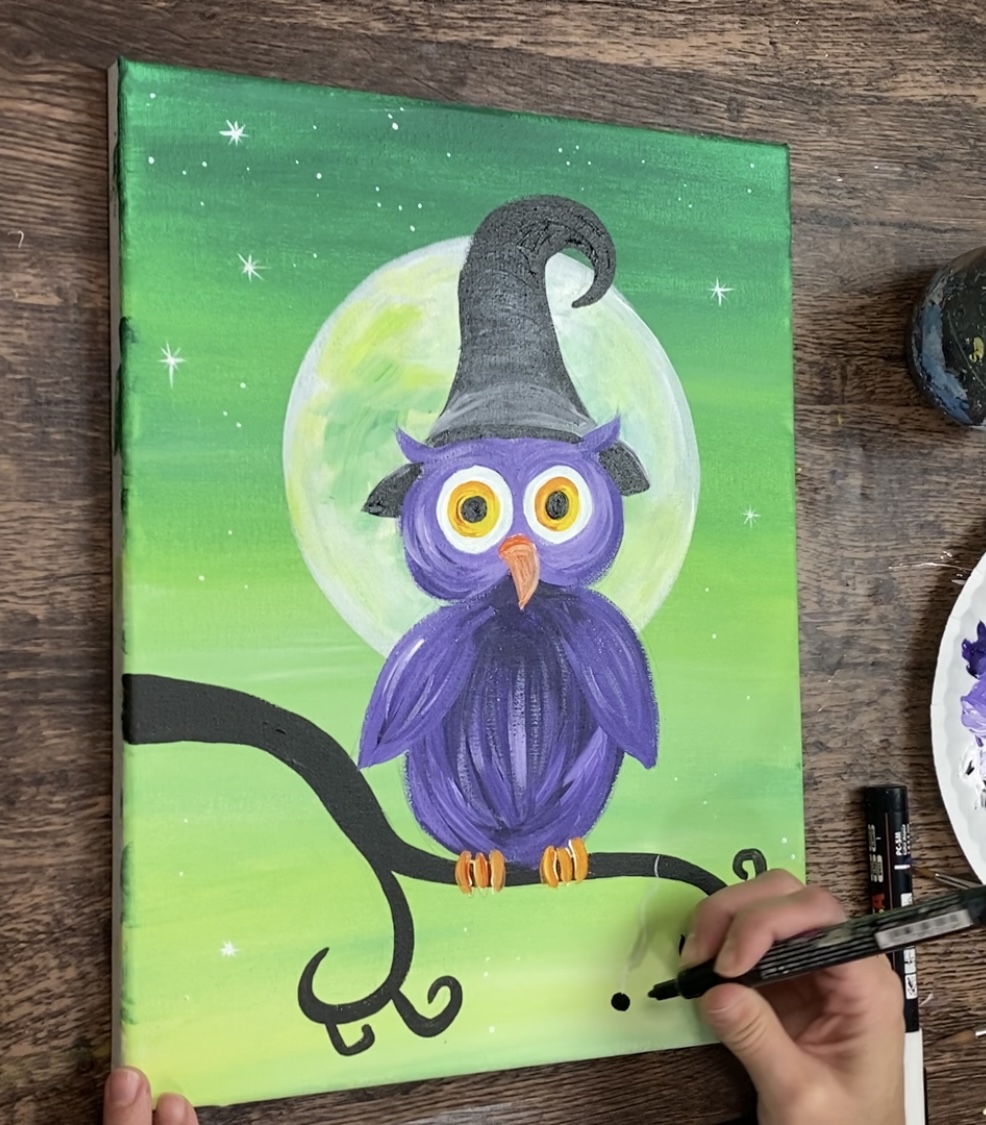
Then draw a spider web that is embedded under the left part of the branch.
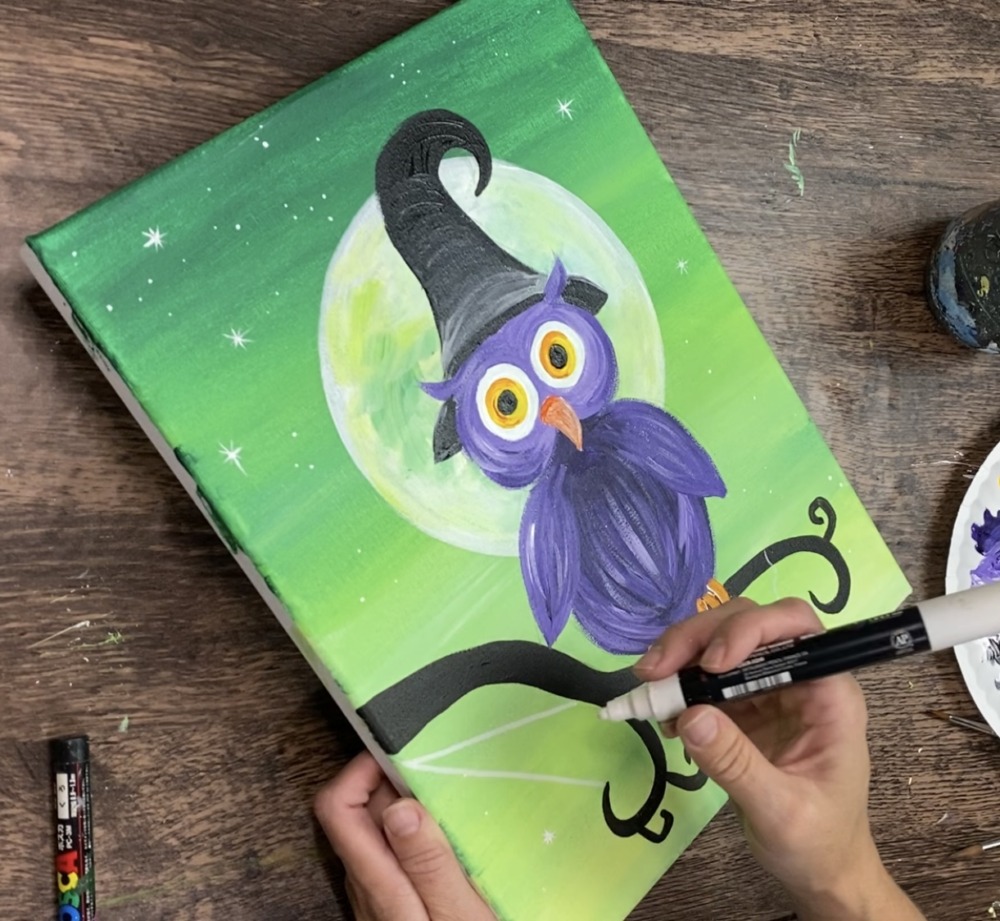
First draw the diagonal lines that each meat at a point under the top left corner region under the branch. I did four lines.
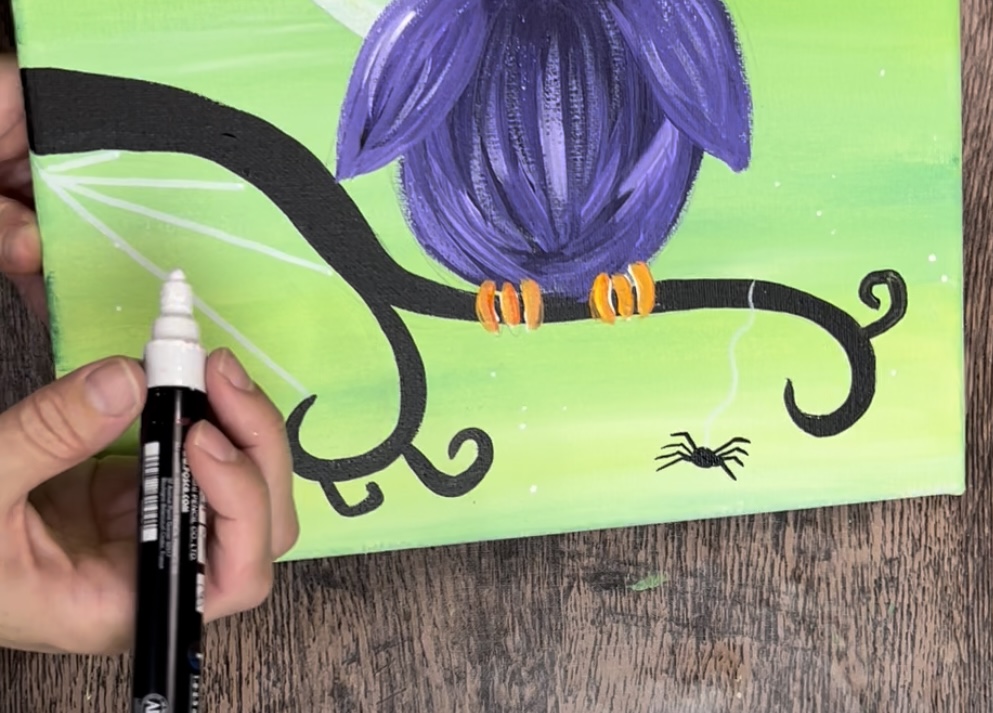
Then draw curved webbed lines in between each of the diagonal lines.
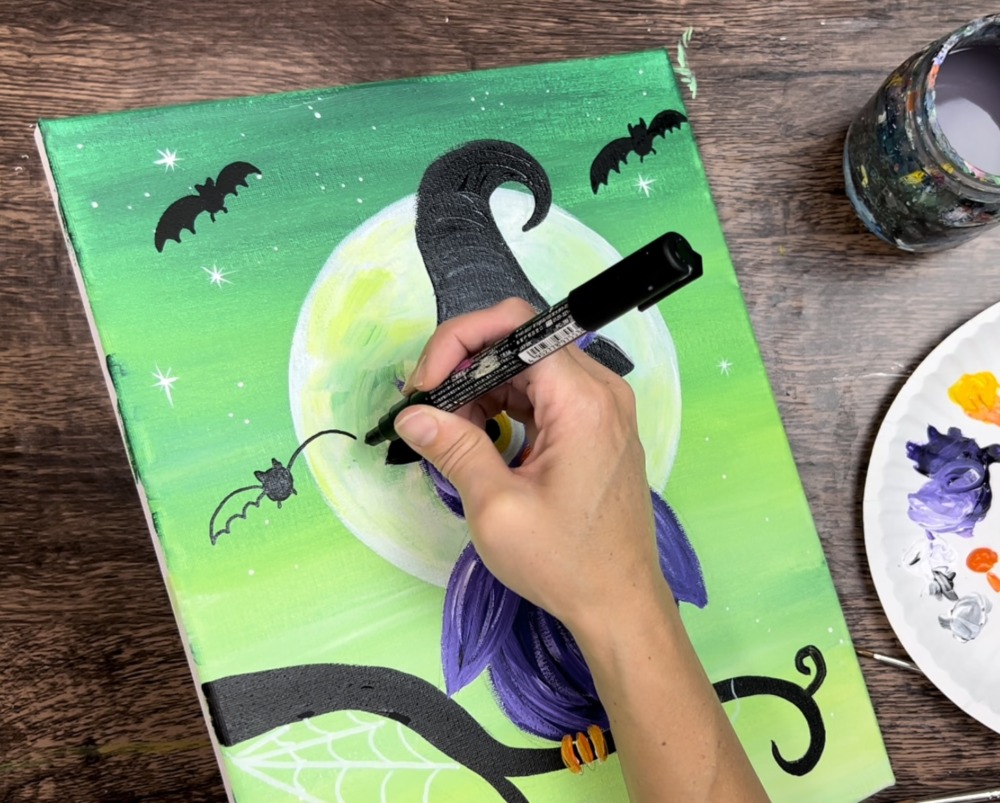
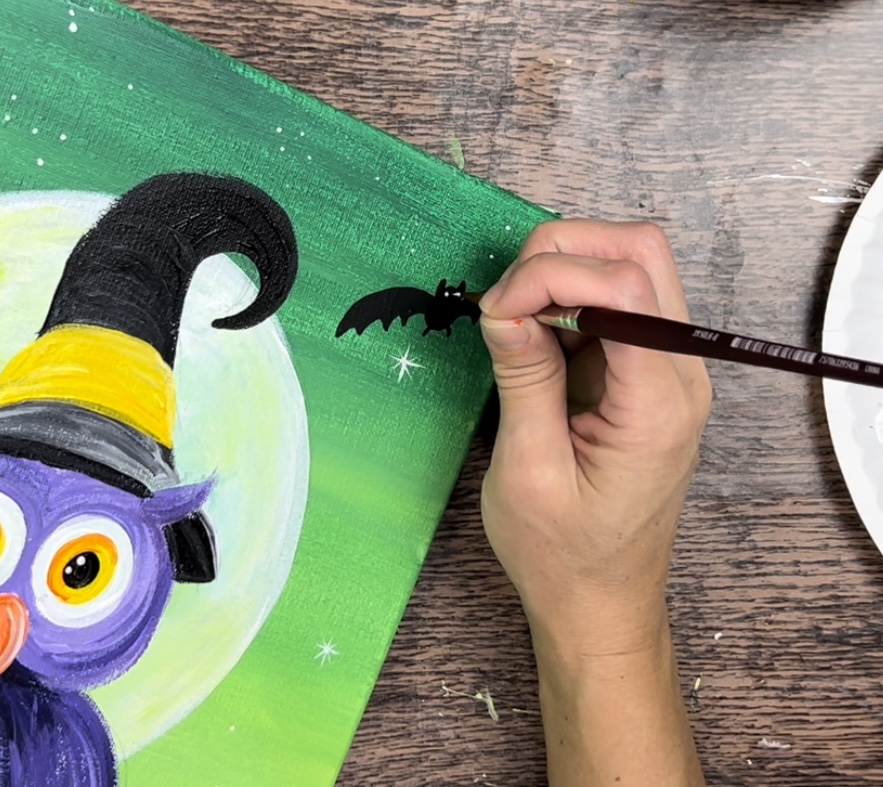
Next, draw the bats with the black paint pen. Start by drawing a small oval for the body, two little legs hanging down and two triangular ears on top.
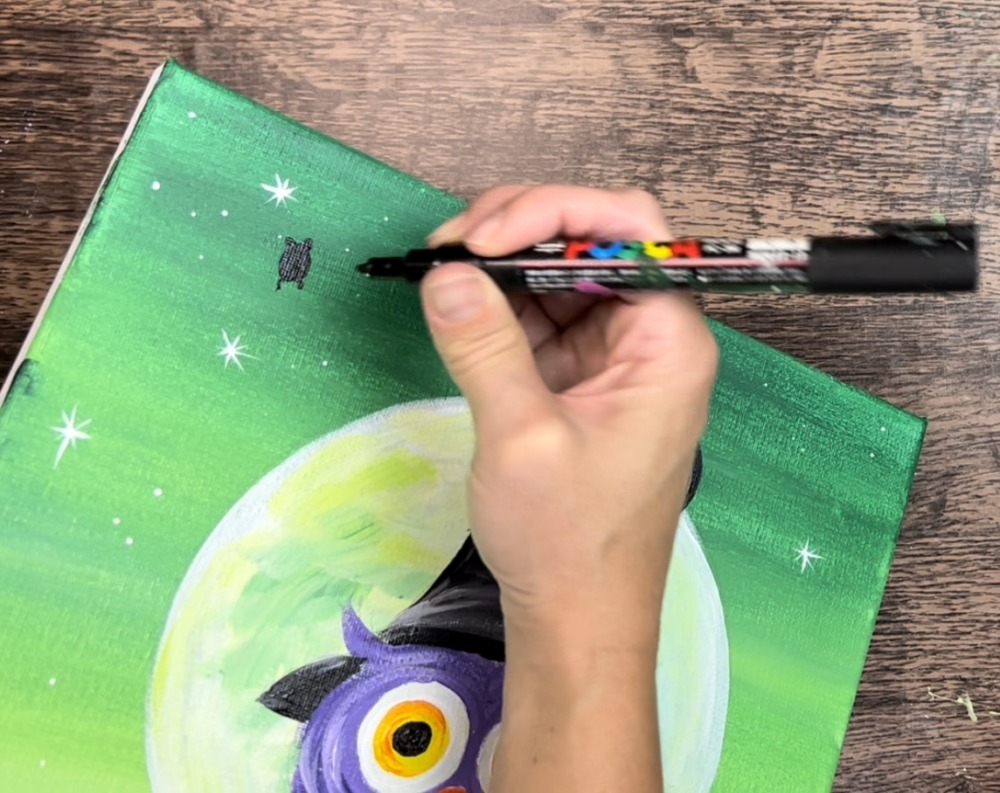
Then draw the bat wings on each side and fill in with solid black.
Draw multiple baths throughout the sky that are flying at different angles.
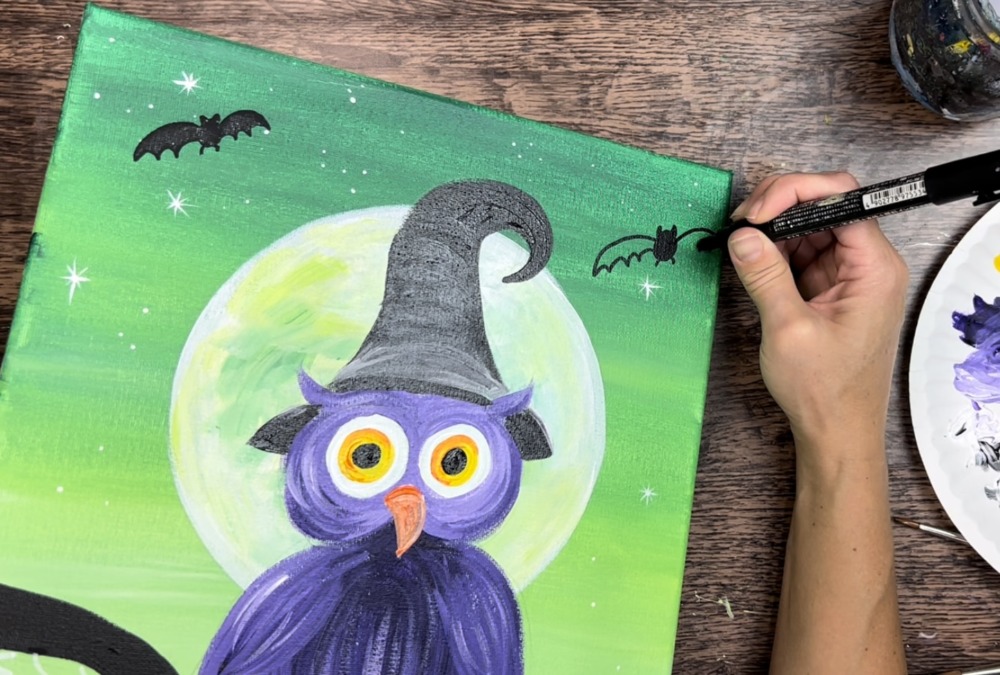
You can also have a bat overlapping the moon. m
10. More detail work in the eyes and hat
Use your #4 round brush to paint two small white dots in the left part of the eyes. The top dot is larger than the bottom dot and it goes at a diagonal.
Additionally, paint a white band on the bottom area of the hat. This will be painted yellow after it dries.
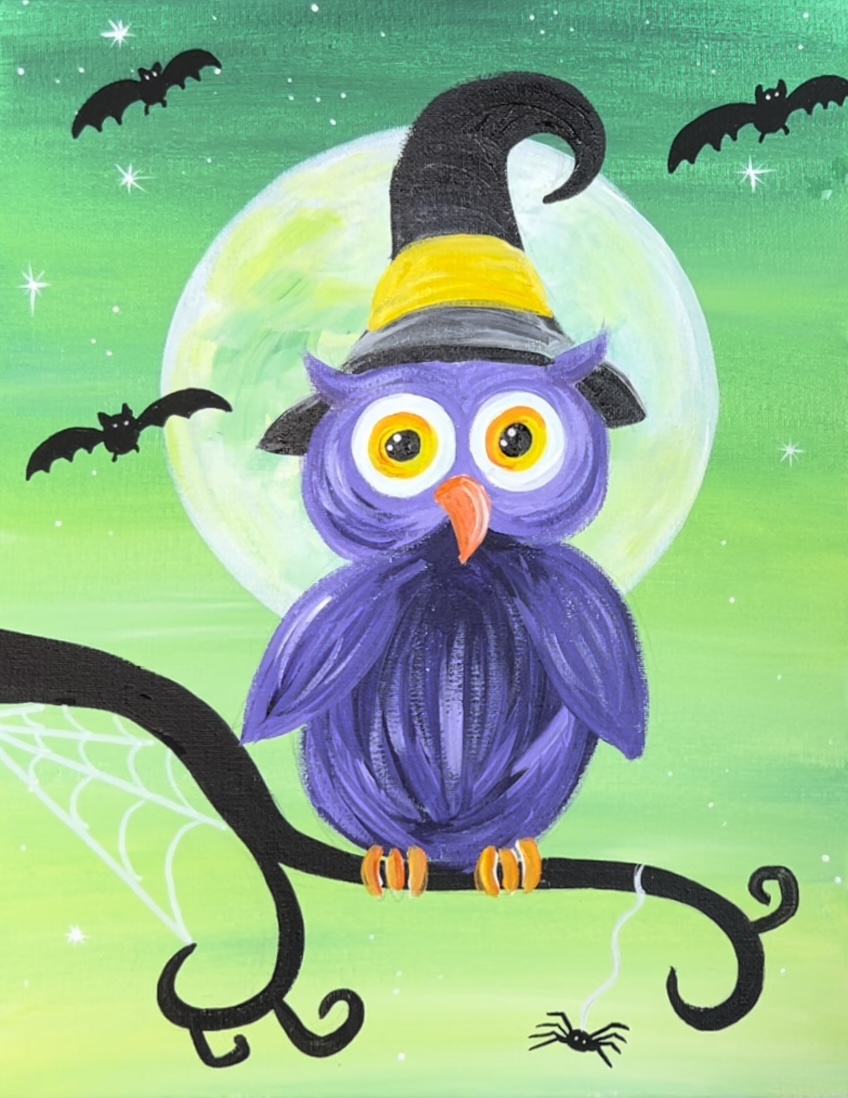
After the white band dries, paint it with cadmium yellow medium.
Also, use titanium white and the tip of either of your round brushes to paint little dot eyes on each of the pats and spider.
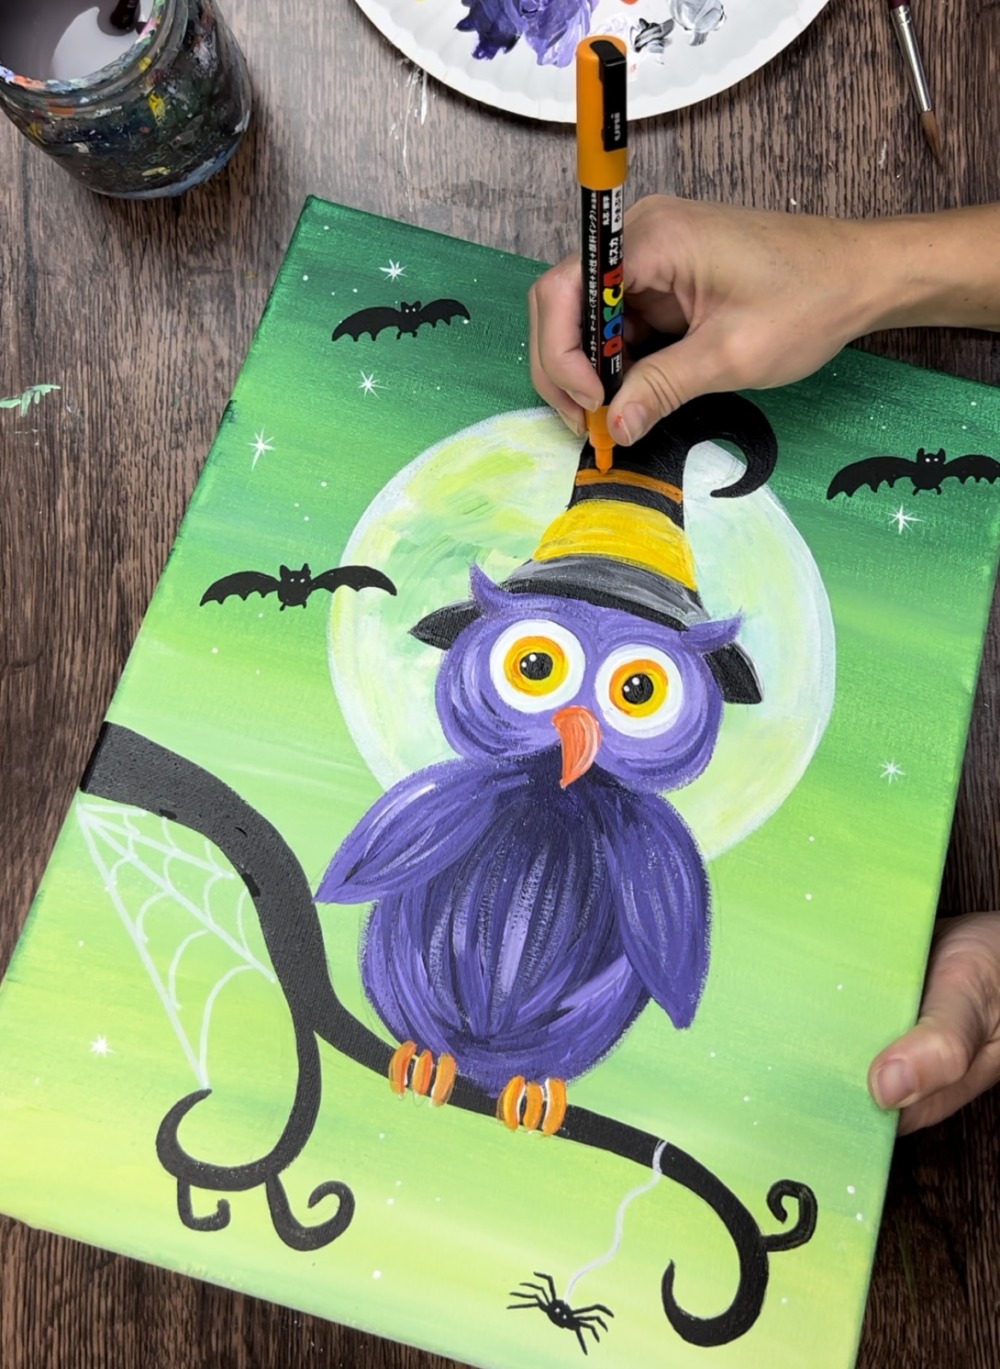
Then use an orange POSCA paint pen (or orange paint) to paint stripes along the hat.
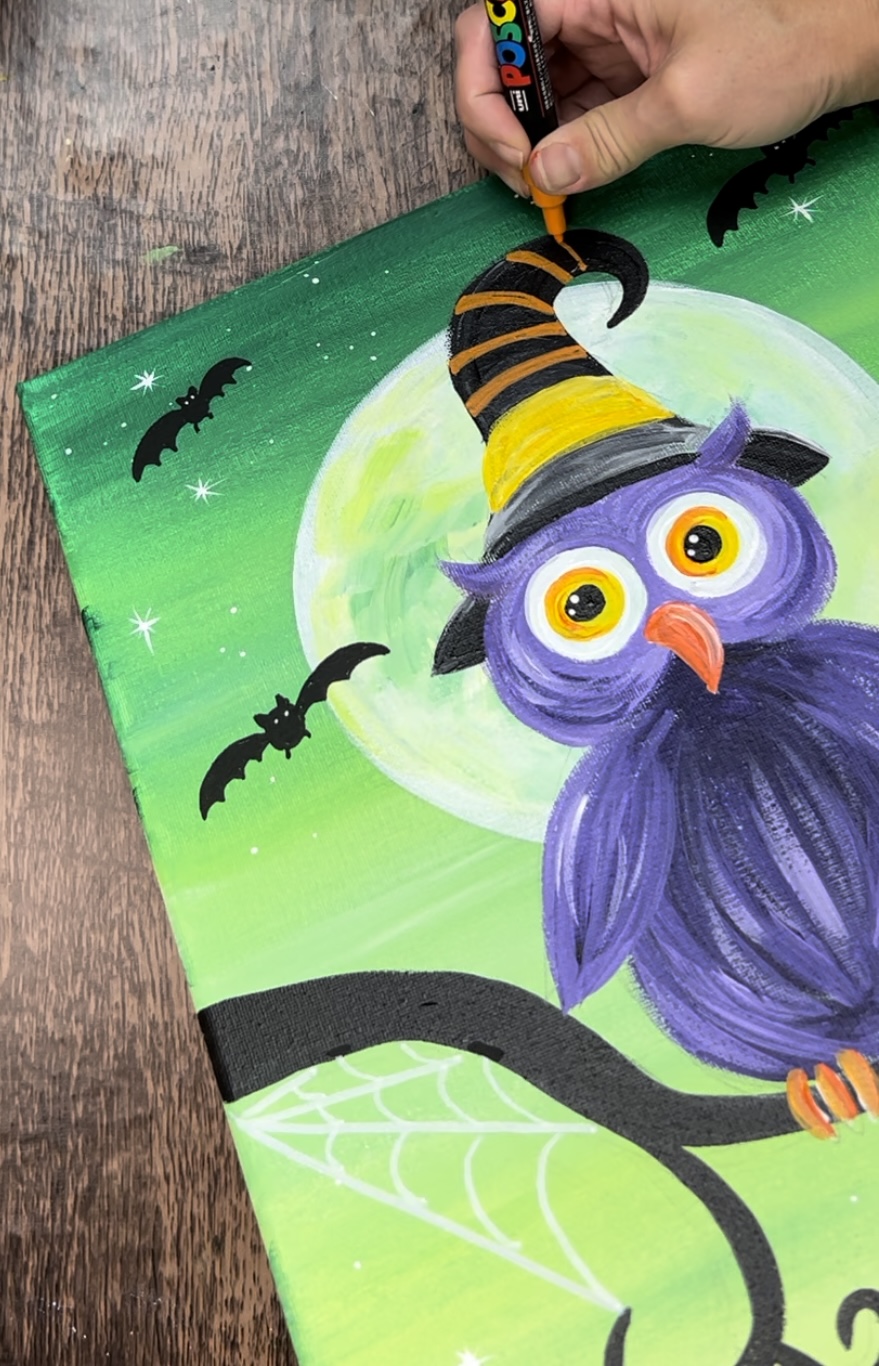
Use the black paint pen to paint the buckle on the hat. Draw a square shape.

Then paint white on the top and left of the square edges for the highlight of the buckle.
Finished
Share Your Art Here


