

Would you like to save this?
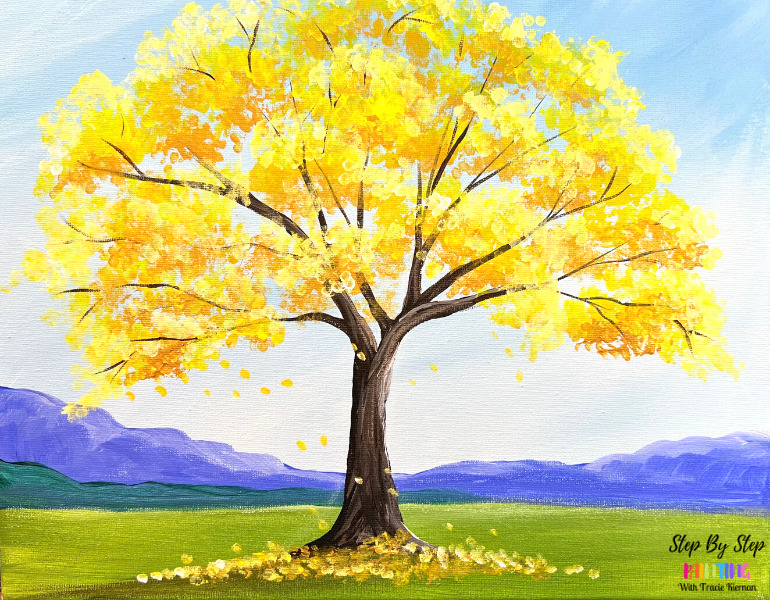
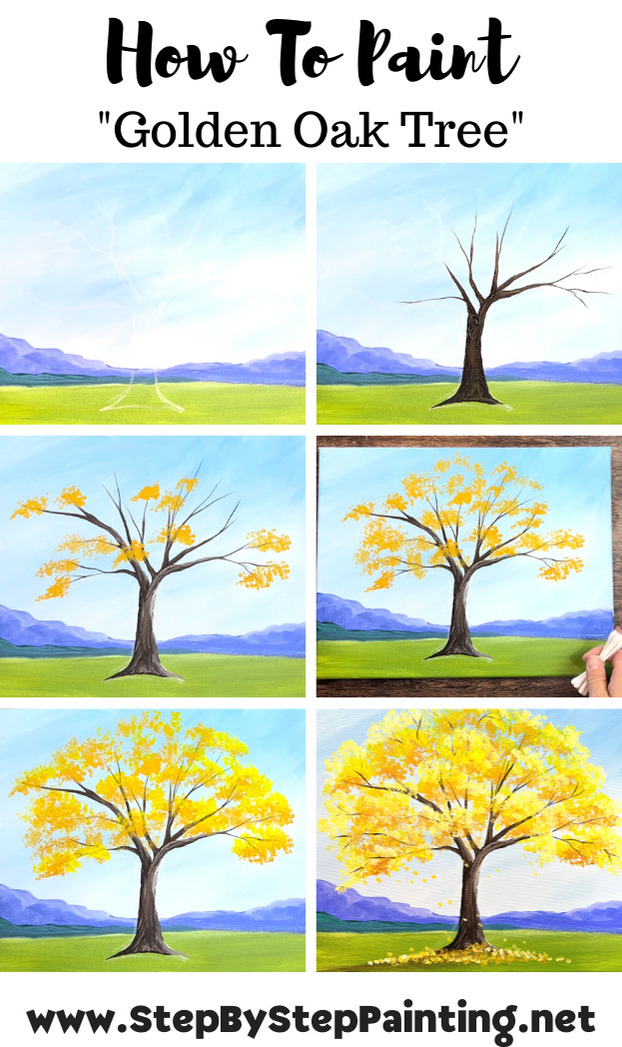
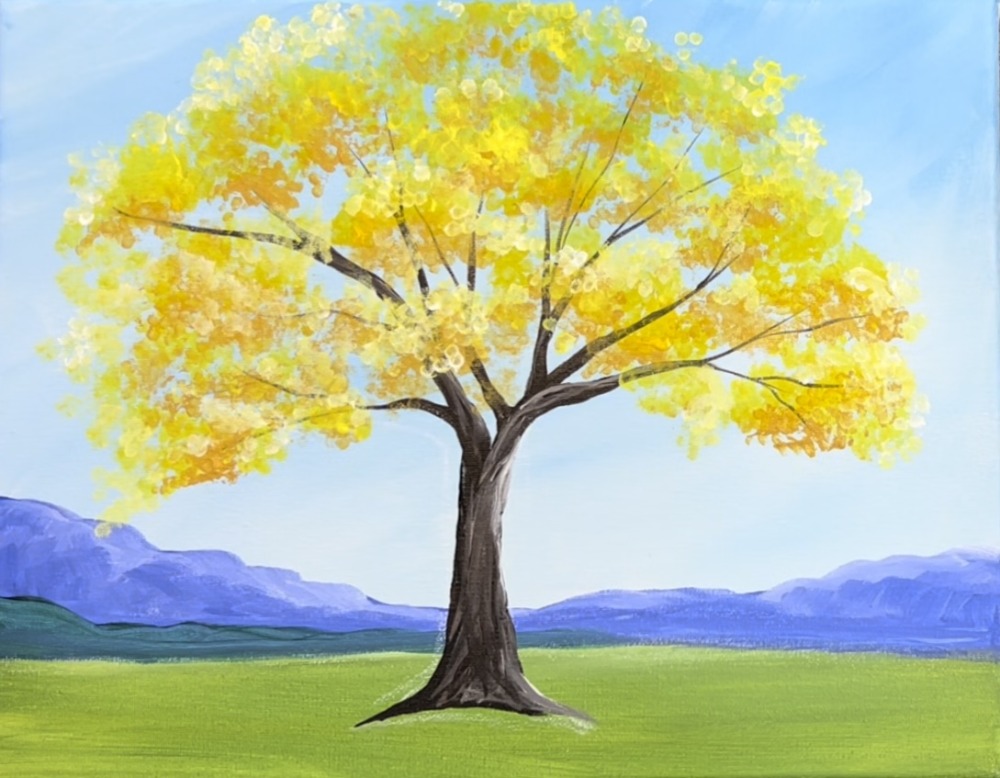
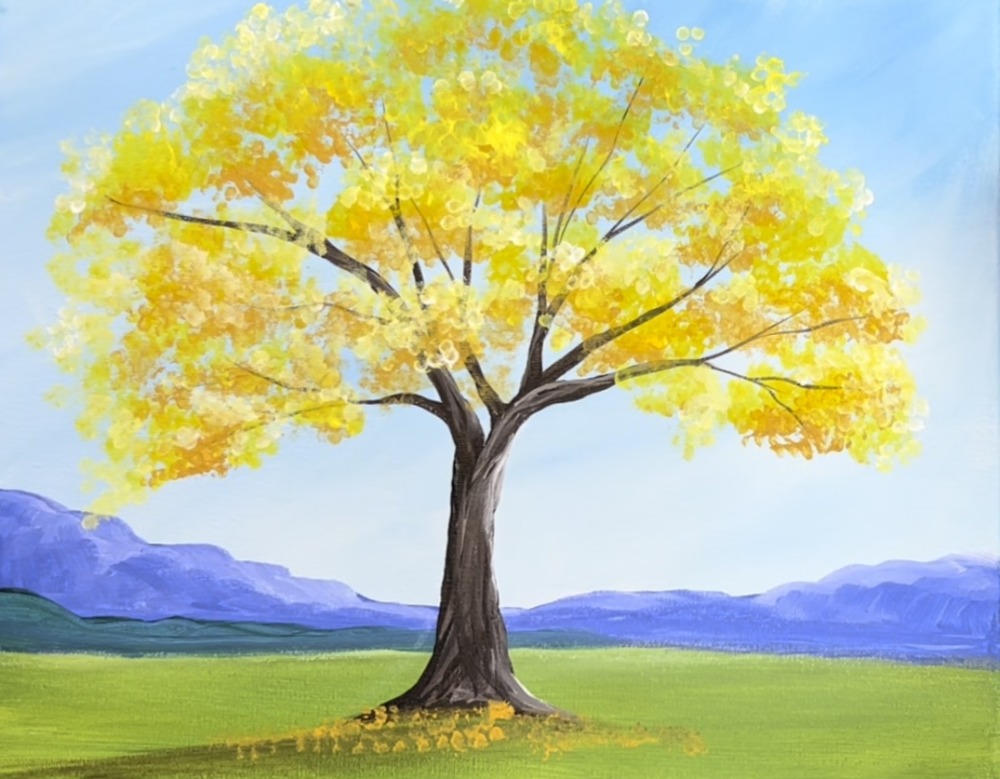
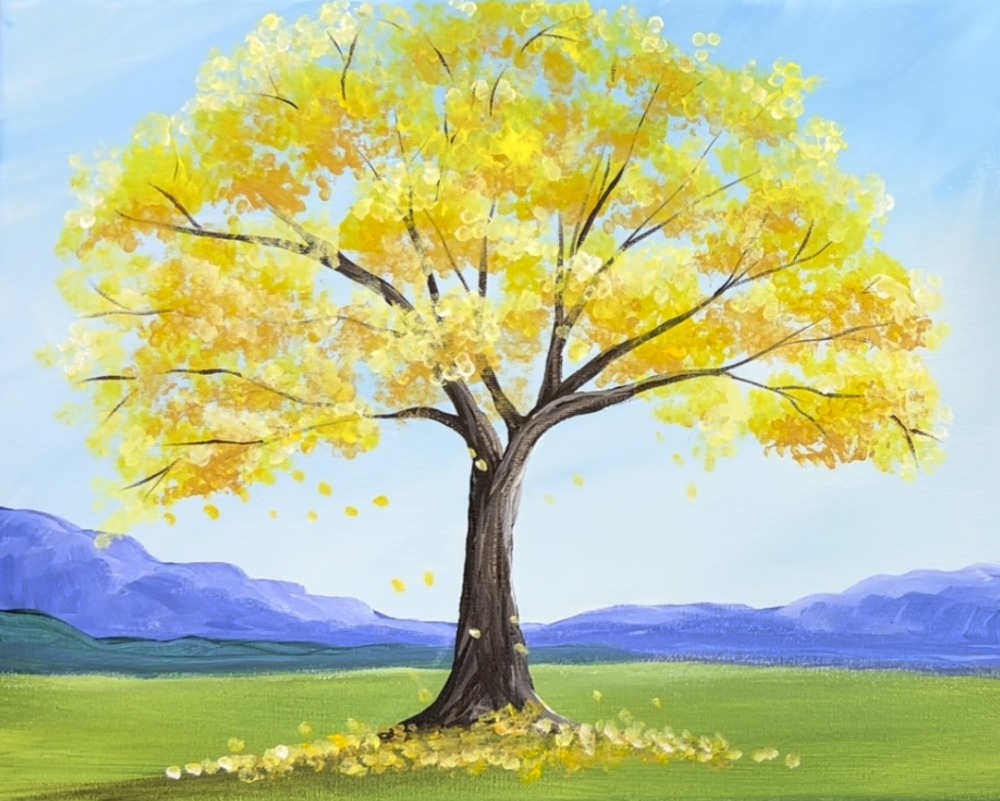
This fall tree acrylic painting tutorial will demonstrate how to paint a beautiful golden oak tree!

I will be demonstrating techniques for painting branches as well as showing your an easy trick you can do to paint the fall foliage.

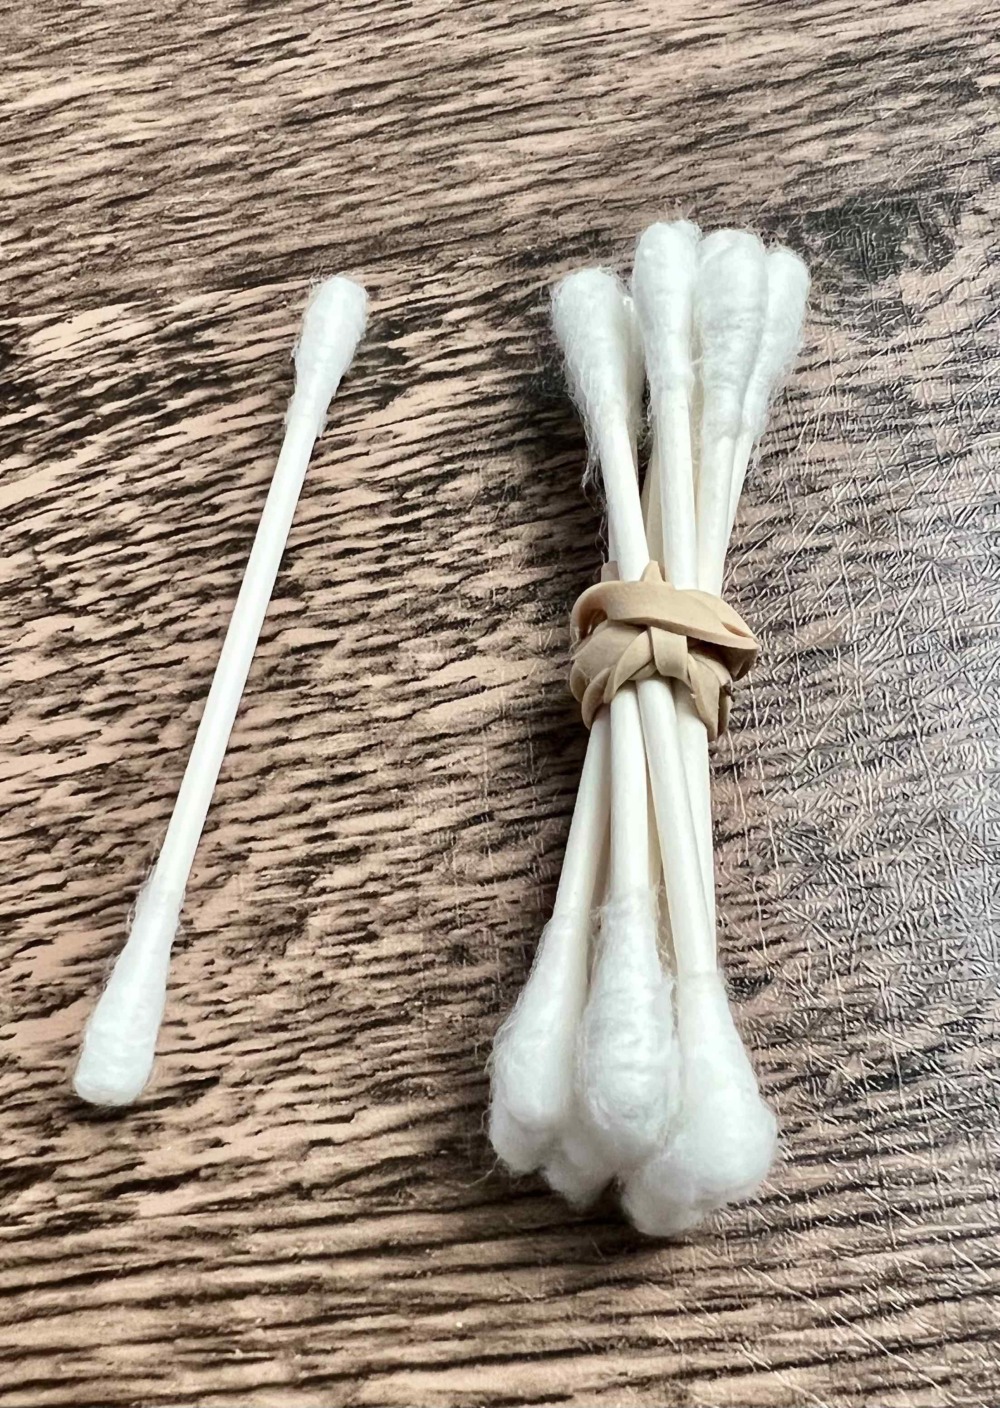
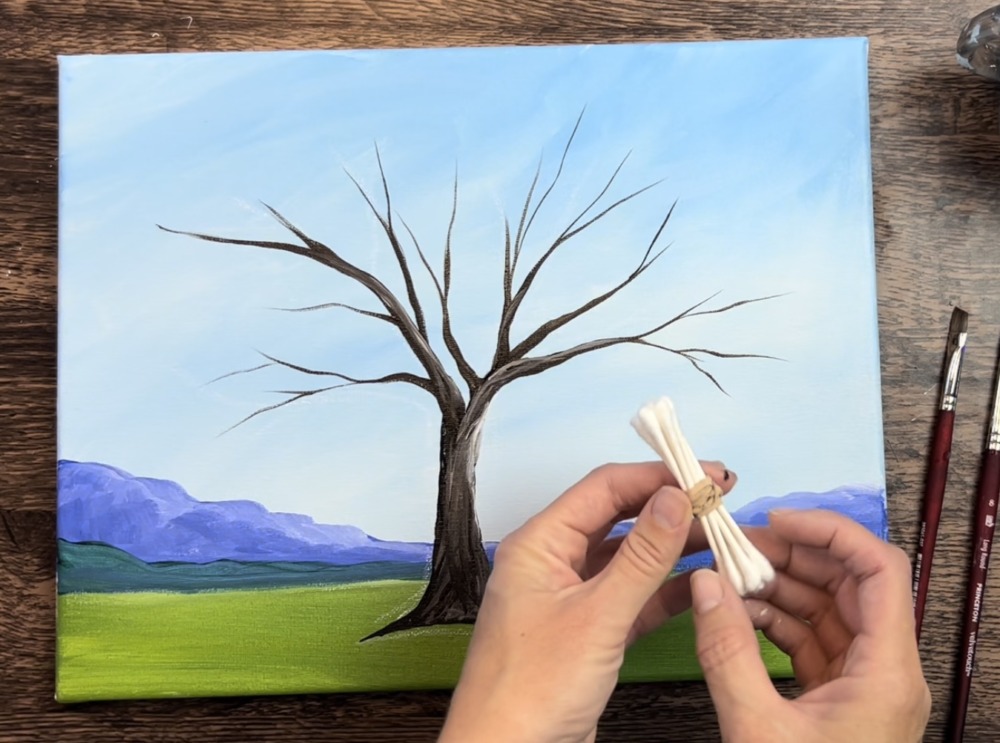
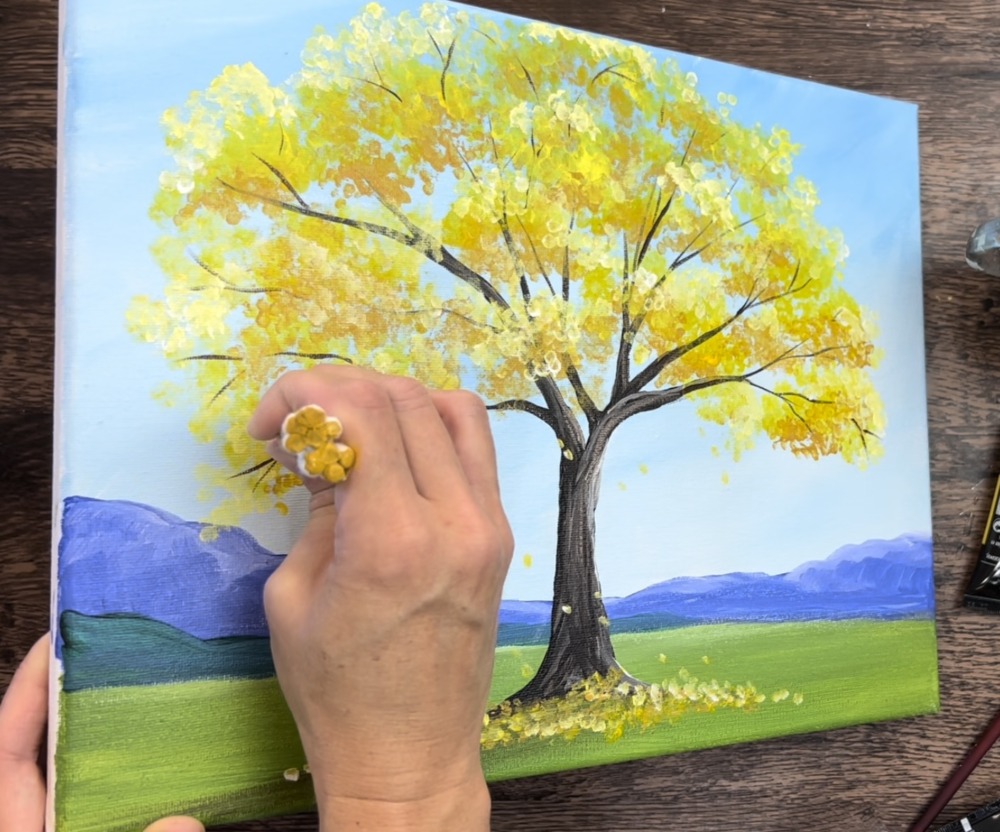
The leaves on this tree were done using a bundle of q-tips! This painting technique of using q-tips is so simple and makes for stunning and effective results! Simply gather about 6-9 of them and tie them together with a rubber band.
The background of the painting is kept simple so we can focus on the tree.
Enjoy and happy painting!
Materials
How To Paint A Golden Oak Tree

Learn how to paint a golden oak tree. This acrylic tutorial demonstrates how to use q-tips to paint beautifal fall leaves.
Materials
Colors
- Titanium White
- Cerulean Blue
- Ultramarine Blue
- Brilliant Purple
- Deep Green Permanent
- Yellow Oxide
- Cadmium Yellow Medium Hue
- Cadmium Yellow Light Hue
- Burnt Umber
- Mars Black
Brushes
- 3/4" Flat Wash Brush
- 3/8" Angle Brush
- #8 Round Brush
- Q-Tips Tied In A Bundle
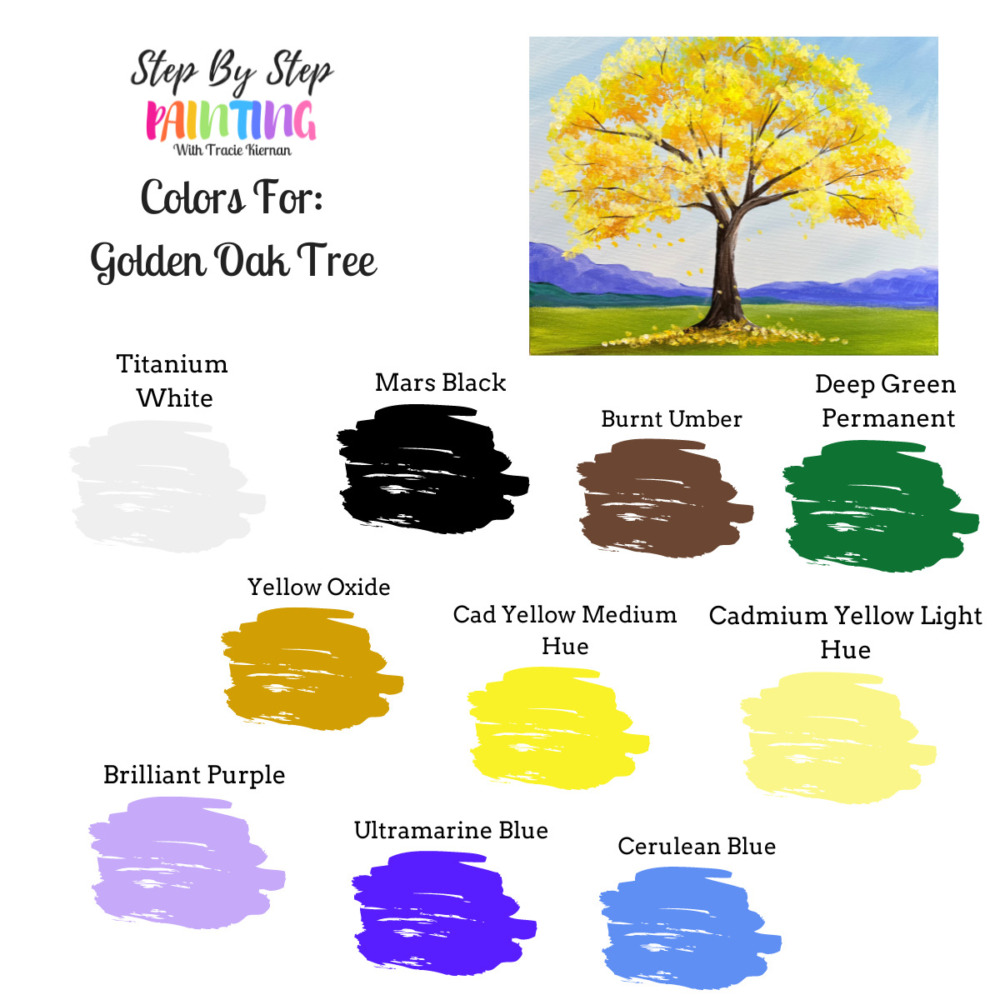
Color Palette
There are a lot of colors in this one! If you need to simplify the palette, you can omit: brilliant purple (mountains stay blue), cerulean blue (use ultramarine and white to mix light sky color) and cadmium yellow light hue (mix white into the cad yellow medium).
I used Liquitex BASICS acrylic paints for this painting. If you are using a different brand, you can use the color chart below to help you match colors:
Using Craft Paints?
If you are using craft paints such as Apple Barrel Craft Paints, I would recommend subbing to these colors. Colors listed are not an exact match but come close. You can also use the color chart above to help match:
- White
- Black
- Burnt Umber (or Nutmeg Brown)
- Green Clover
- Kings Gold
- Sunny Day
- Bright Yellow
- Lilac Mist
- Award Blue
- Blue Cotton
Directions At A Glance:
Video
Step By Step Instructions
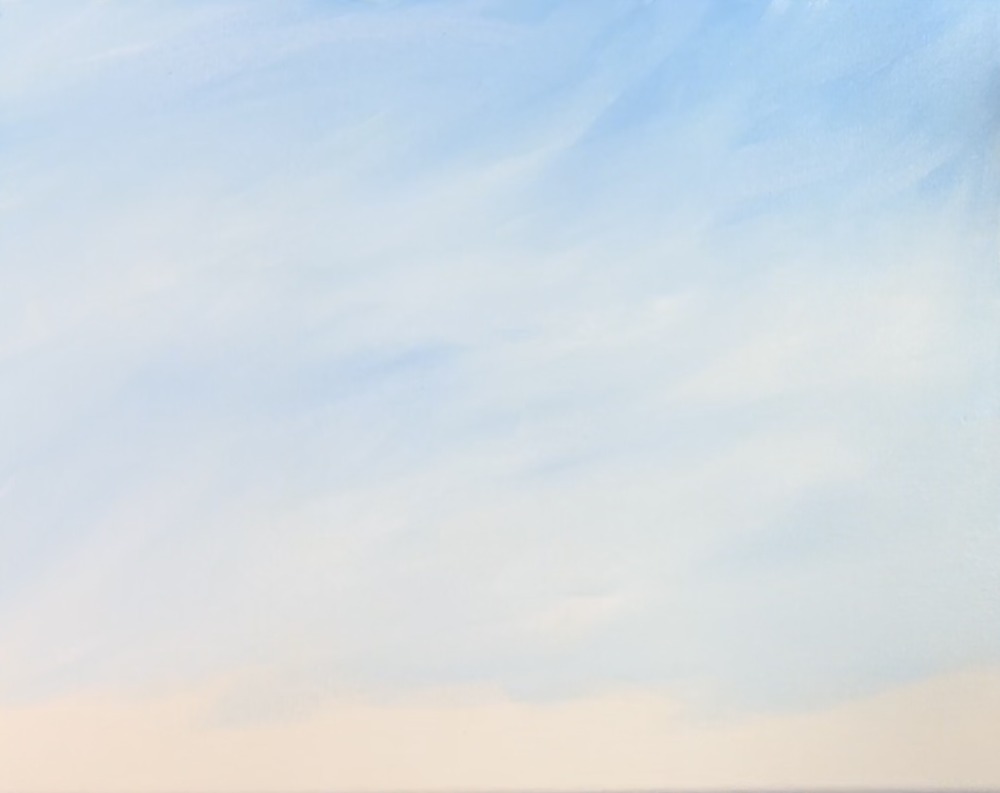
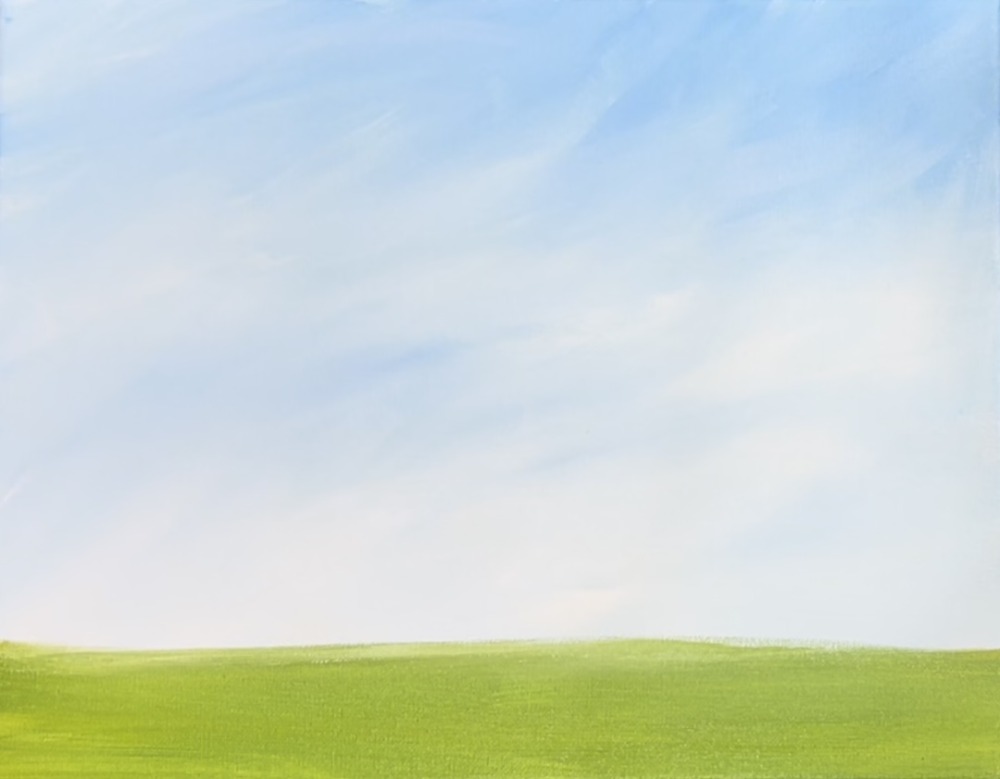
1. Paint The Sky
Use a 3/4″ wash brush and paint the canvas a very light blue color using cerulean and titanium white. Mix about 2 parts white to 1 part blue. Start at the top. Paint in expressive angled strokes to blend your white and blue.

As you work your way down the canvas, gradually add more white into your sky. Go almost all the way down and leave about an inch gap of space on the bottom.
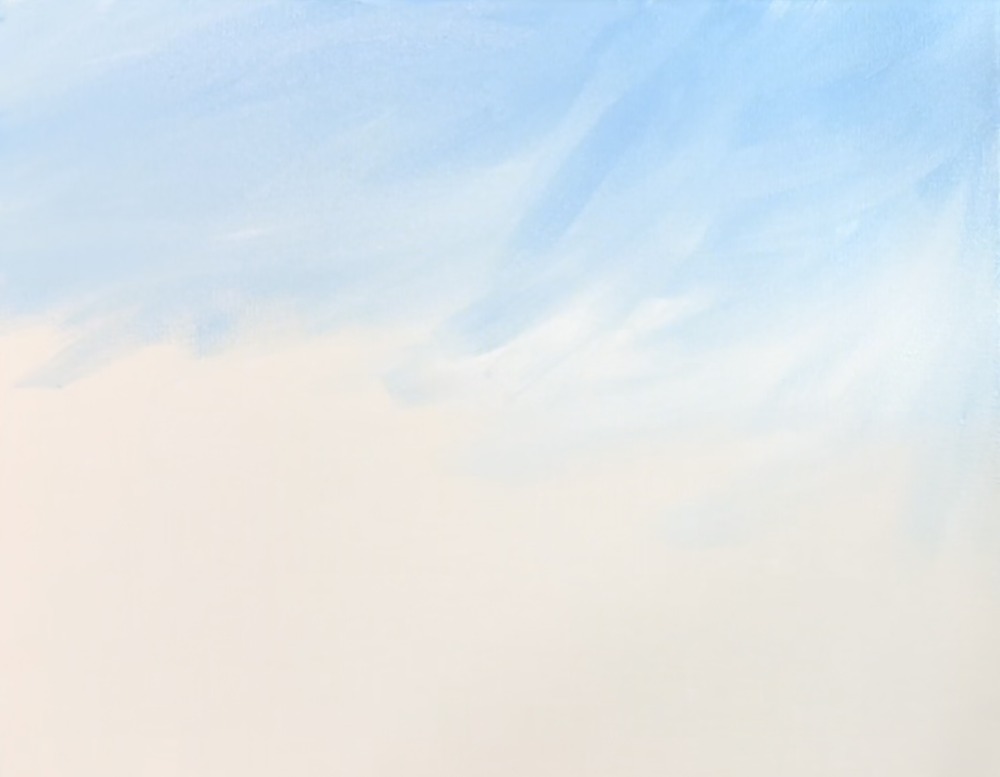
Sky is painted in angled strokes with a gentle gradiant blend of the blue and white!
2. Paint The Ground
Load your palette with deep green permanent and yellow oxide. Mix both of those colors together equally. You’ll get a golden green color.
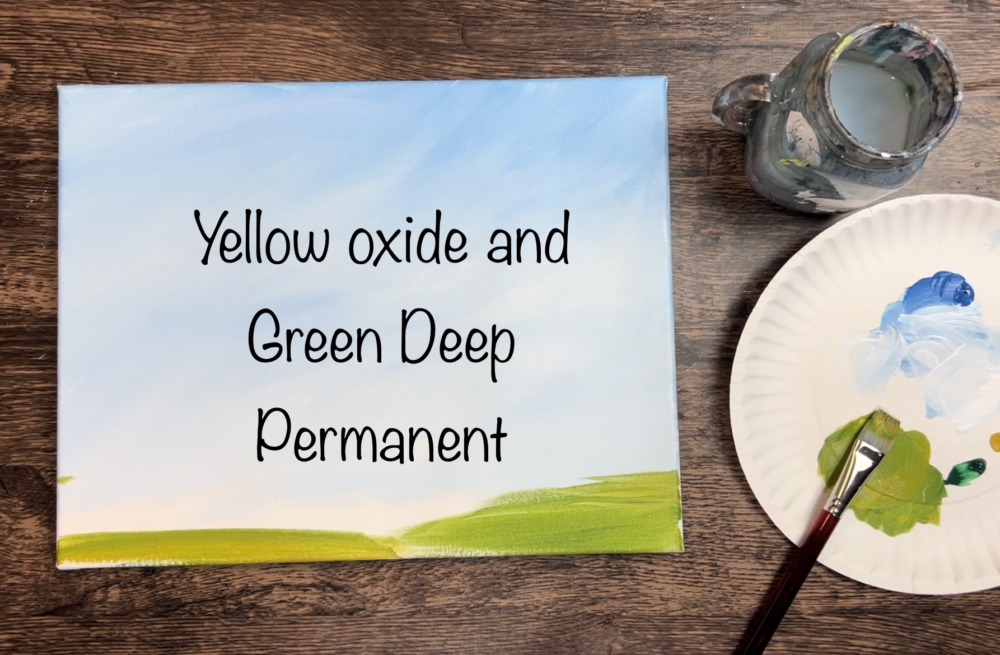
Use a 3/4″ flat wash brush to paint the bottom of the canvas. Make about two inches of land from the bottom of the canvas.
3. Paint Mountains
Next, mix equal amounts of ultramarine blue and brilliant purple. Use your 3/4″ flat wash brush to paint a mountain range above your green land area. Start on the left at about 4″ from the bottom of the canvas.

Paint a long, lightly bumpy line that dips down in the center and then slightly up on the right. Then fill in the mountain with the blue-purple color.
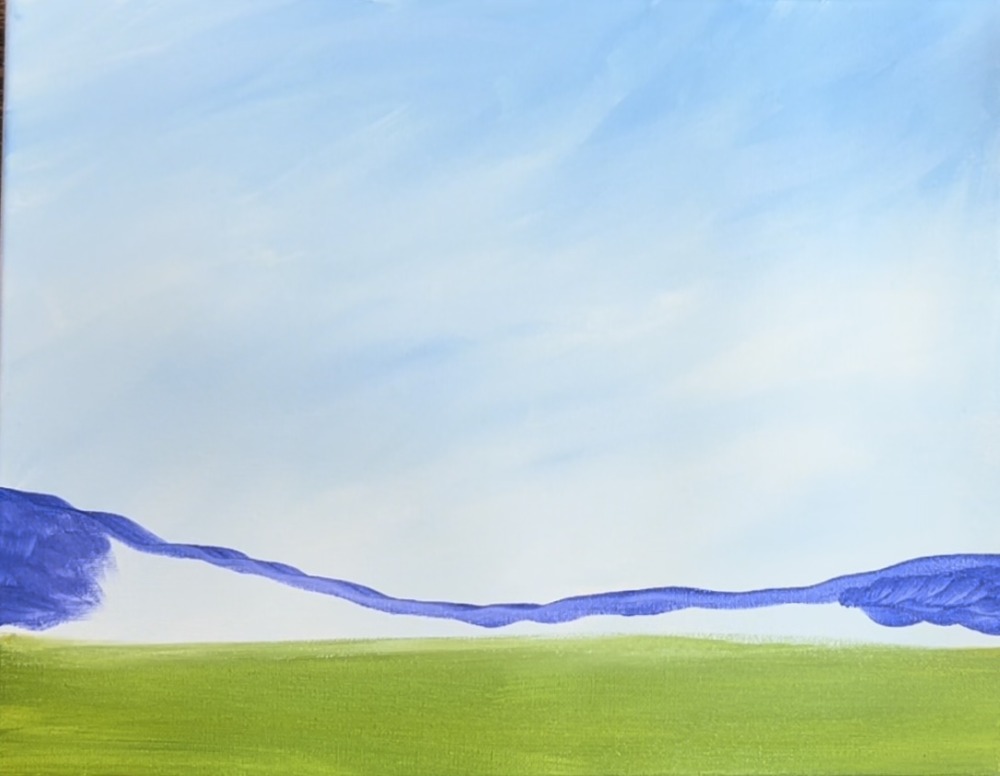
Optional: add a tiny bit of white on your brush to make the top part of the mountain look a little bit lighter. Blend it so the bottom of the mountain is slightly darker. I used short, expressive strokes to paint the mountain.
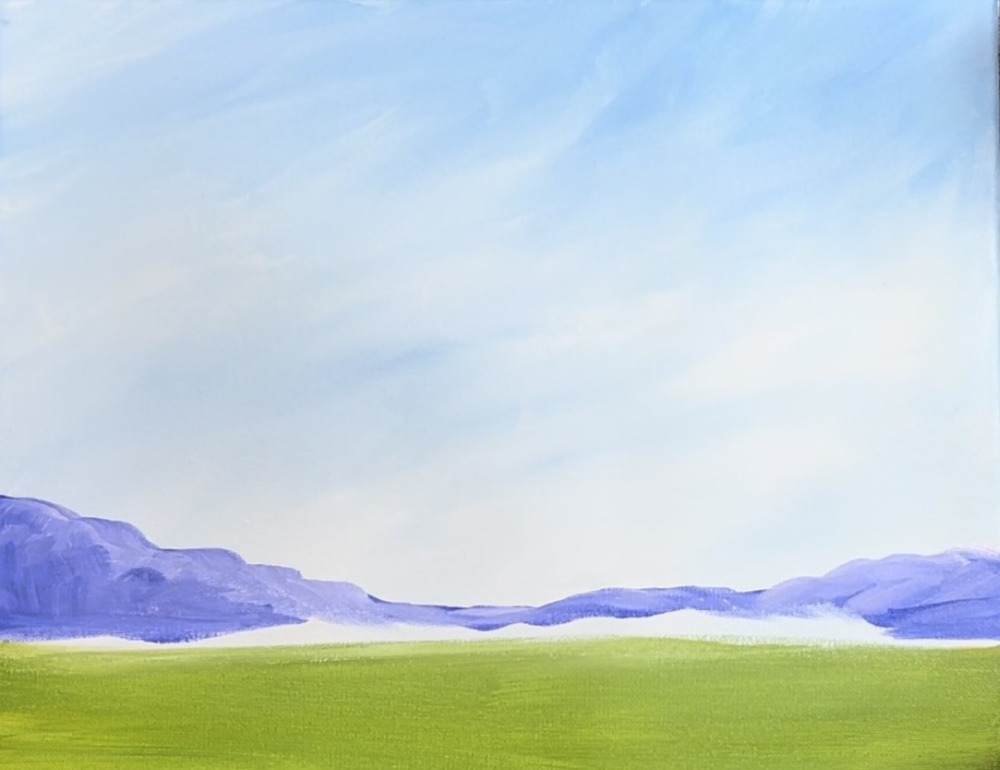
Next, wipe your brush off. Load it into deep green permanent and paint a small mountain range below the purple range.
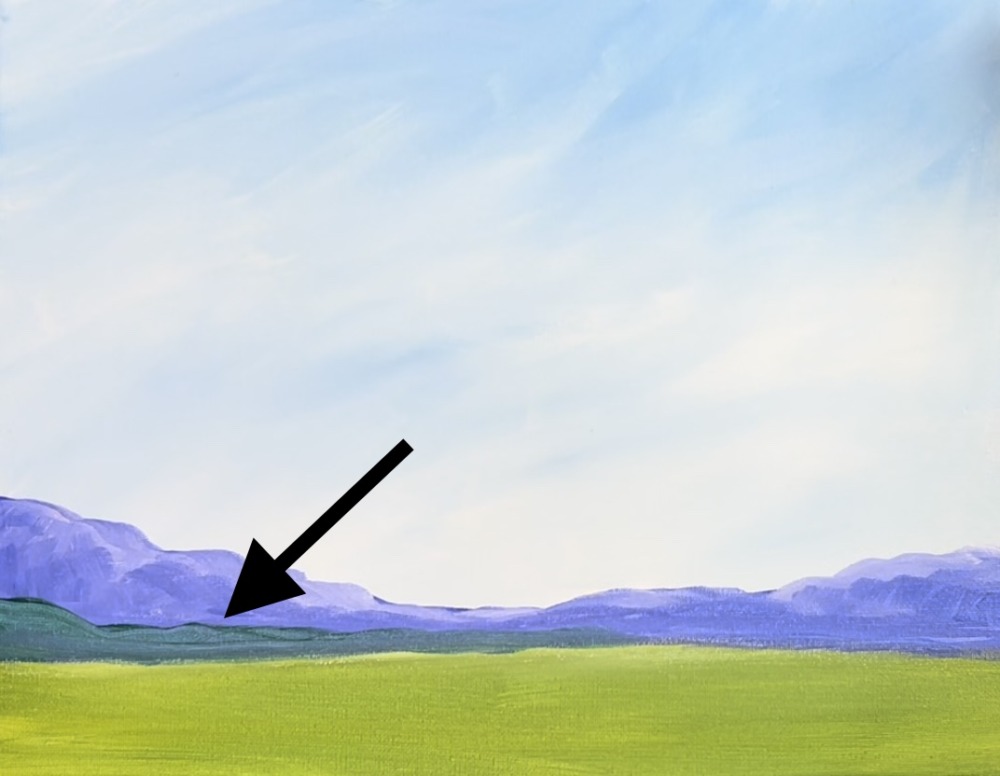
Wait for this to dry before going onto the next step.
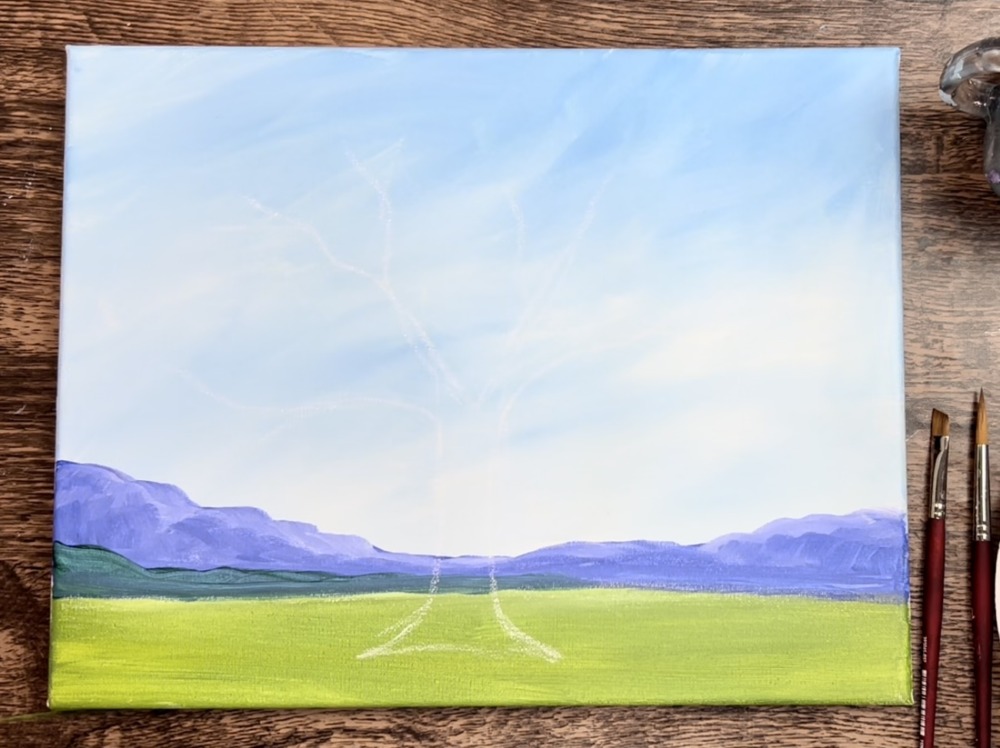
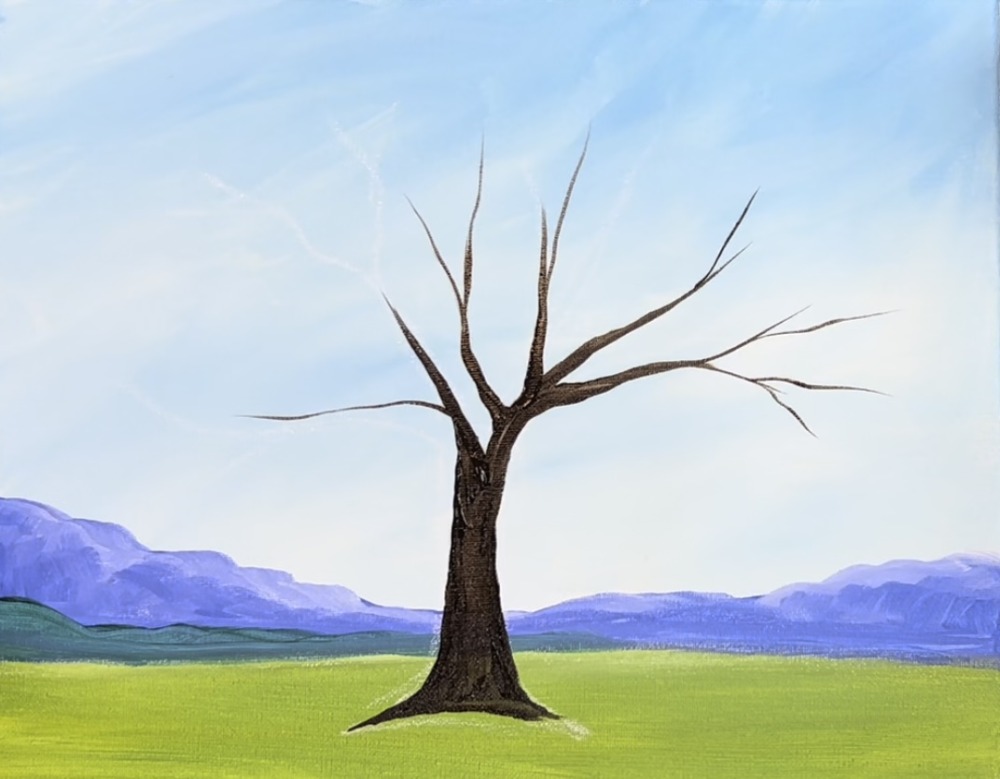
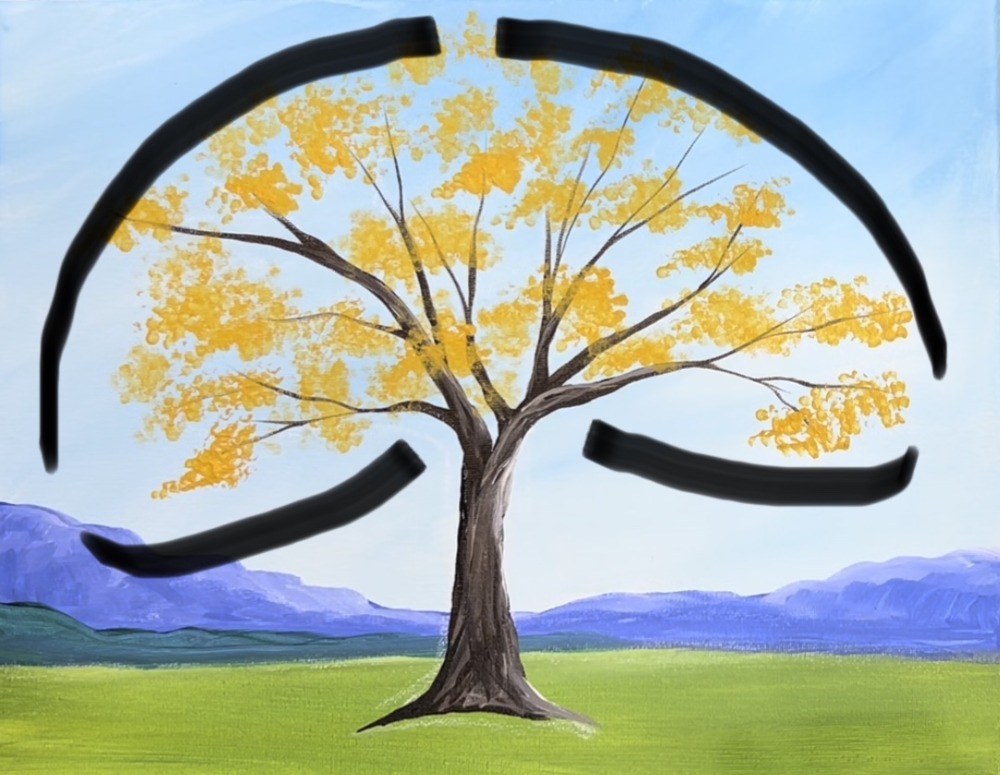
4. Draw Tree
You can skip this step if you are okay painting the tree without a guideline. However, the chalk drawing helps to establish that shape of the tree and direction of the branches.
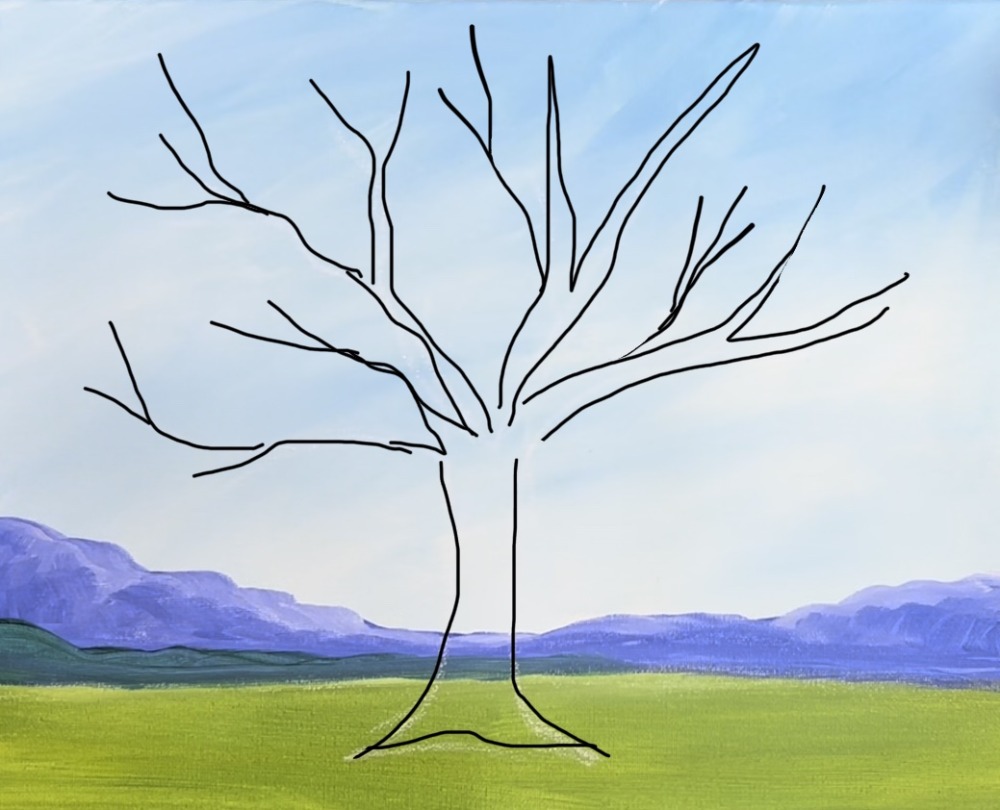
Use a piece of white chalk to draw the tree. Draw a large trunk in the center of the canvas in the middle of the green land. Draw the trunk so that it flutes outwards and goes narrow upwards.
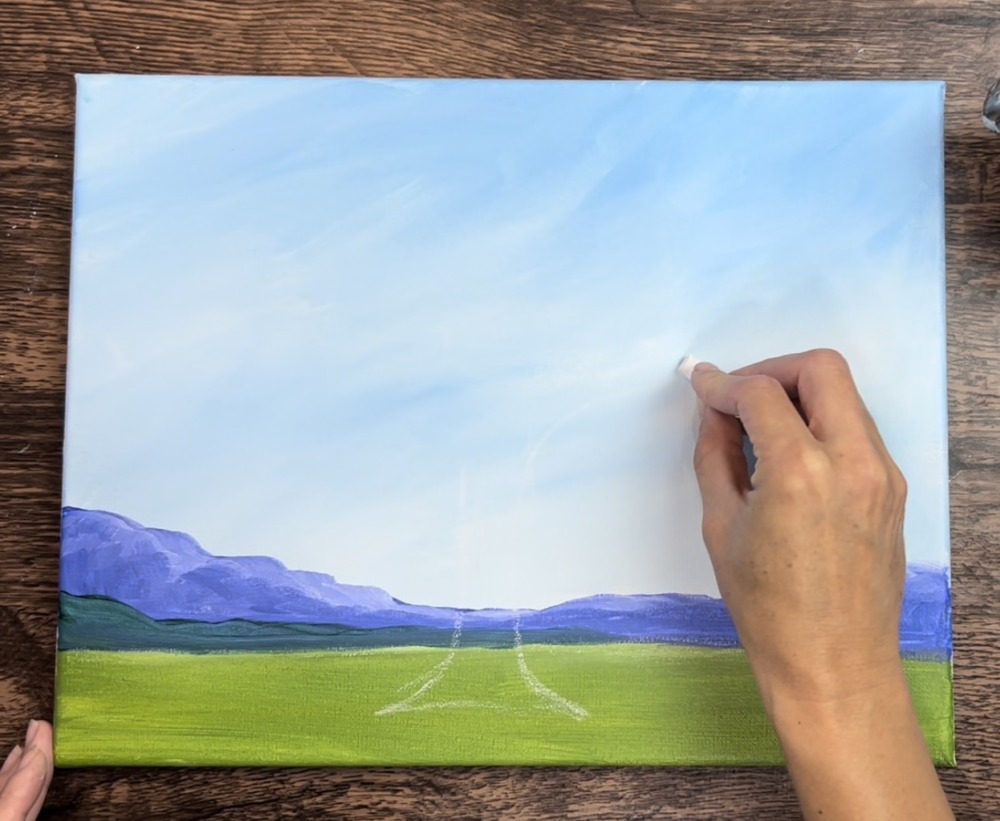
Draw 4-5 main branches that start splitting apart at about the top of the mountain range. Then draw “Y” branches that split apart from the main branches.
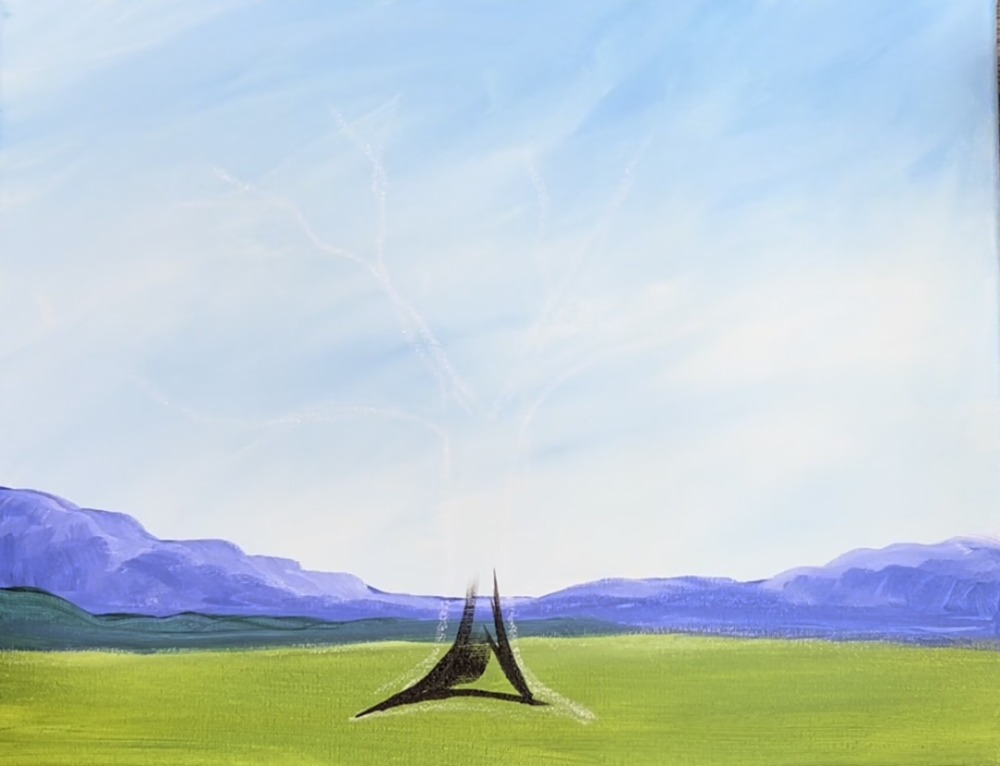
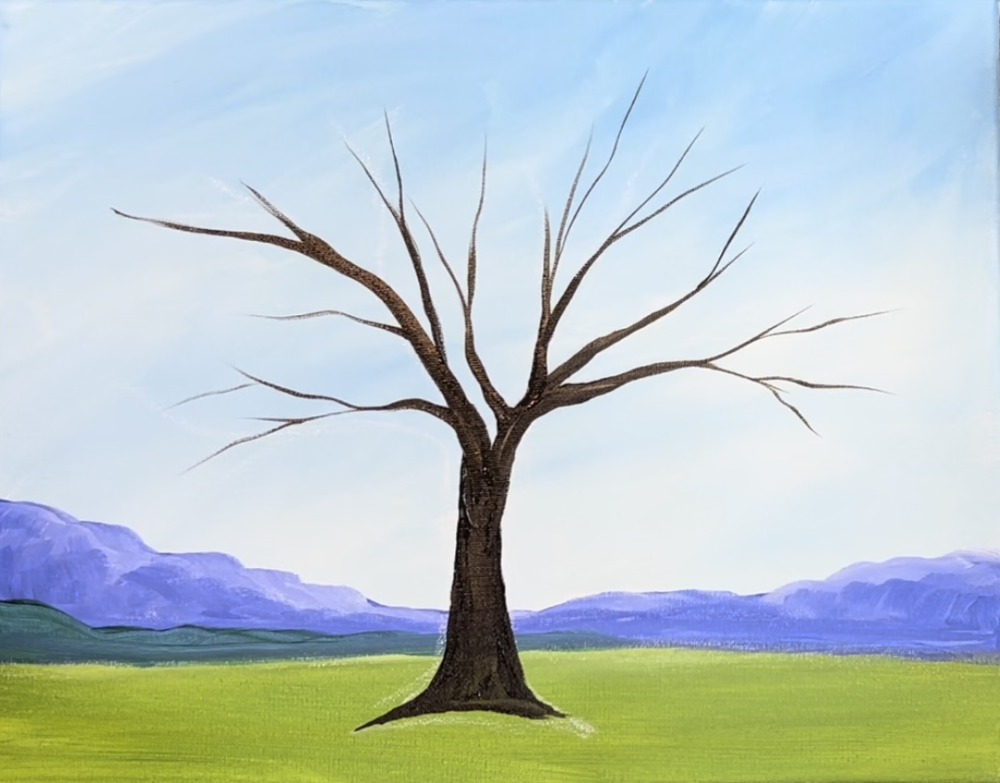
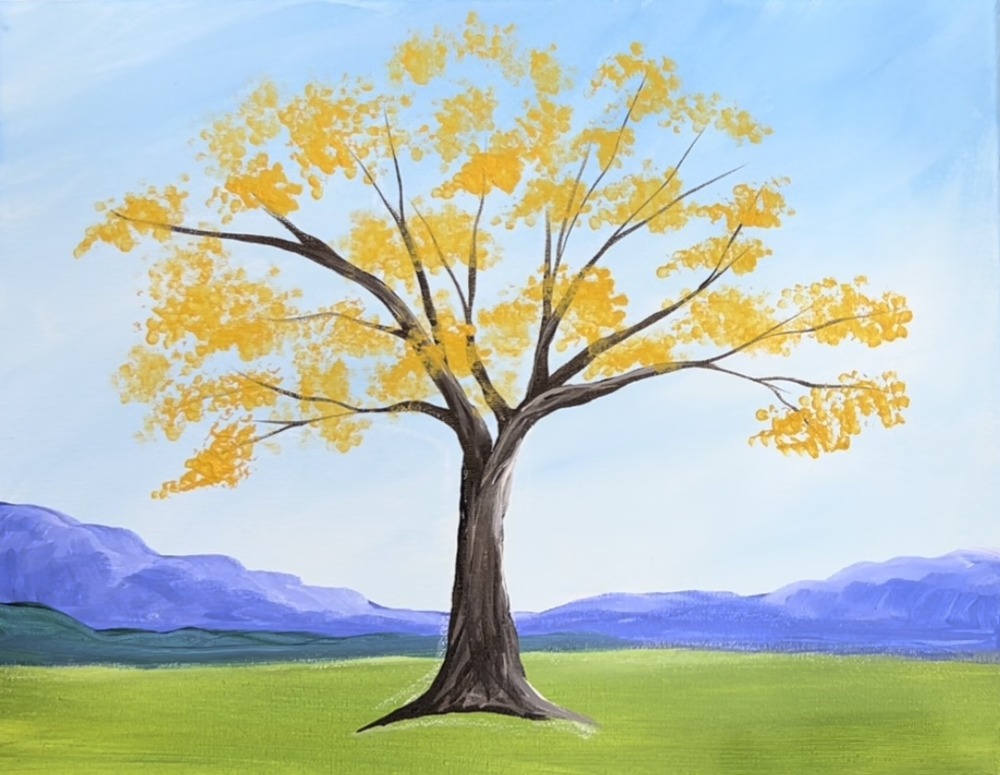
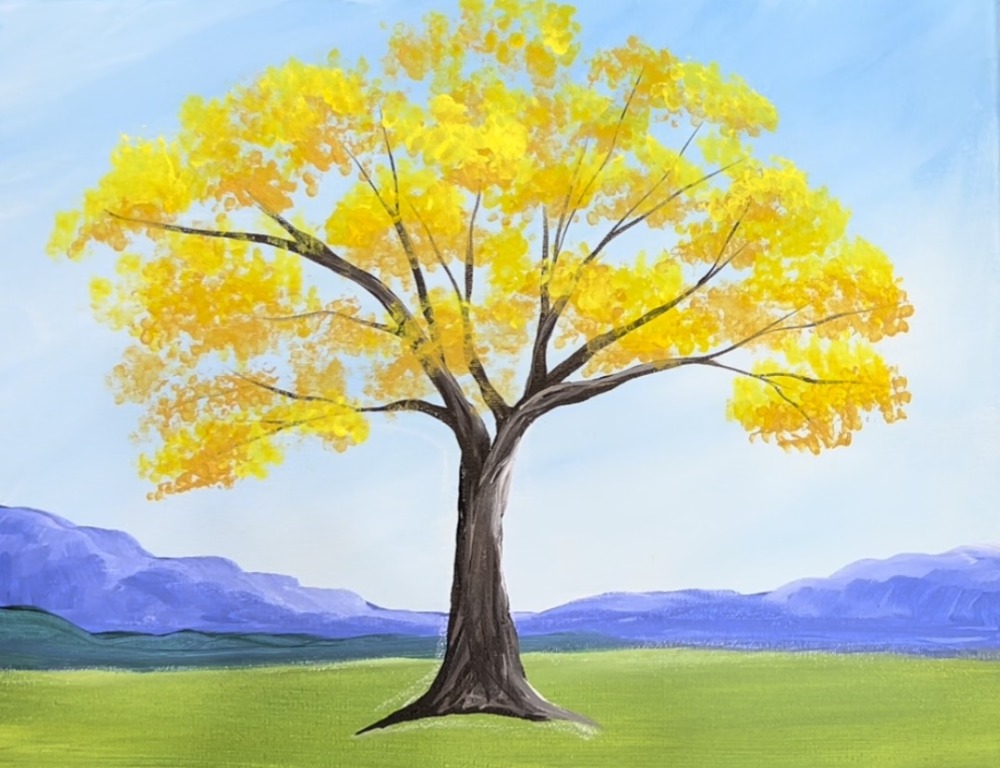
5. Paint Tree
I used both a 3/8″ angle brush and #8 round brush to paint the tree. The 8 round has a very thin tip to the bristles which was helpful for painting the very thin points.
Load your palette with burnt umber and mars black. Double load your brush in both of the colors. The two colors will blend on the canvas to make a varied dark brown.
Use your 3/8″ angle brush and slowly paint the outer edge of the trunk area. Then fill it in using vertical strokes.
Paint the main branches. Each branch should start out slightly thicker and then get thinner and go to more of a point as it reaches the tip. You can achieve this effect by releasing the pressure on your brush to allow your paint stroke to go thinner.
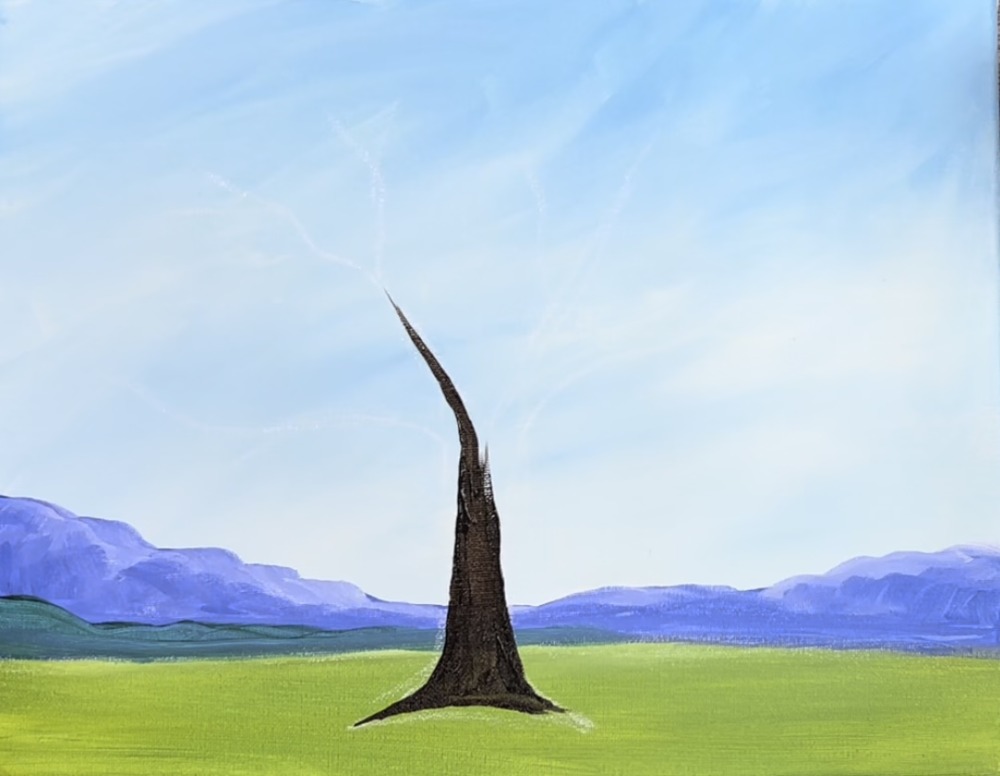
Continue to paint each of the “Y” branches. Switch to the #8 brush for the thinner tips of the branches.

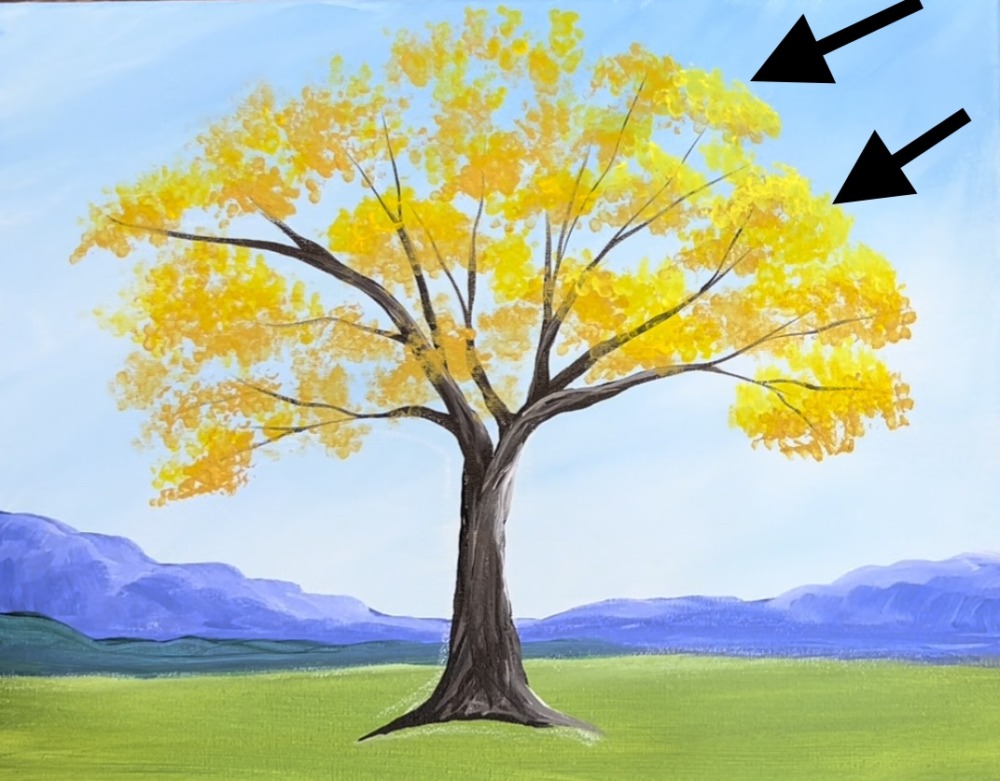
The tree canopy will be large and wide. Make sure you extend your branches out to most of the sky area.
If you want to add highlight onto your tree, add a small amount of white into your brown. Then do wet on wet blending on the right side of the tree trunk. Blend this white gently with your brown and do short, vertical strokes. If if is turning too brush, mix more brown into your white so it isn’t as bright white.
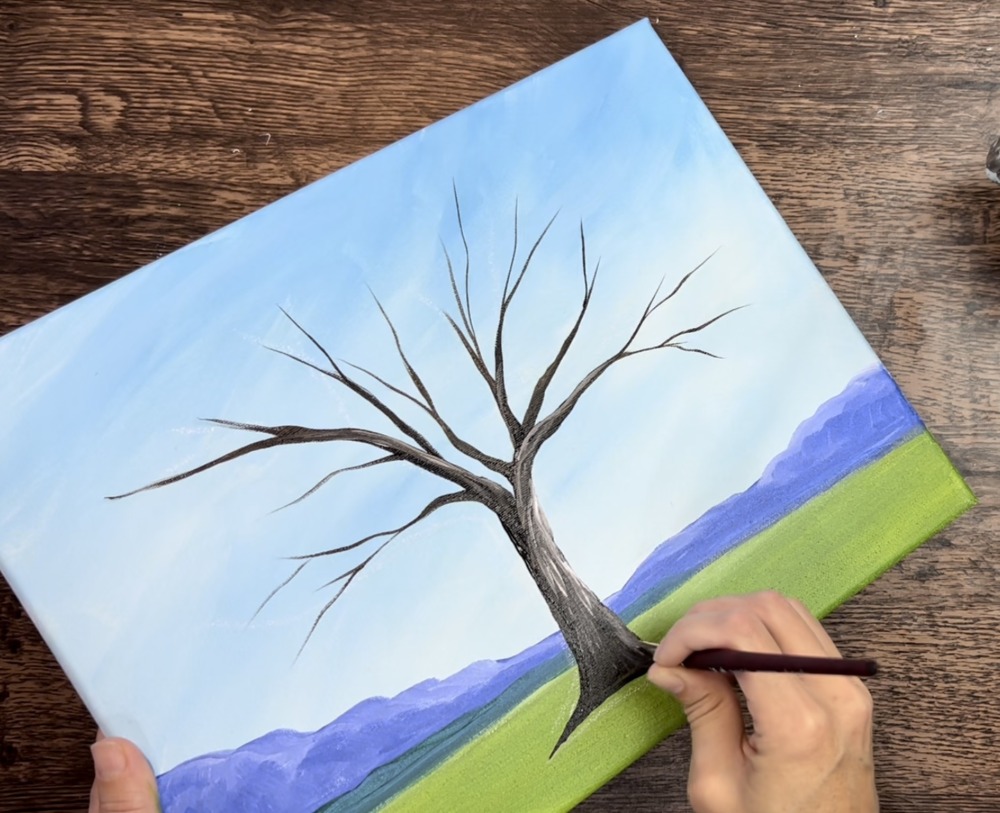
Just do the highlight on one side of the tree and leave the other side dark and shadowy. You can highlight some of the main branches too.
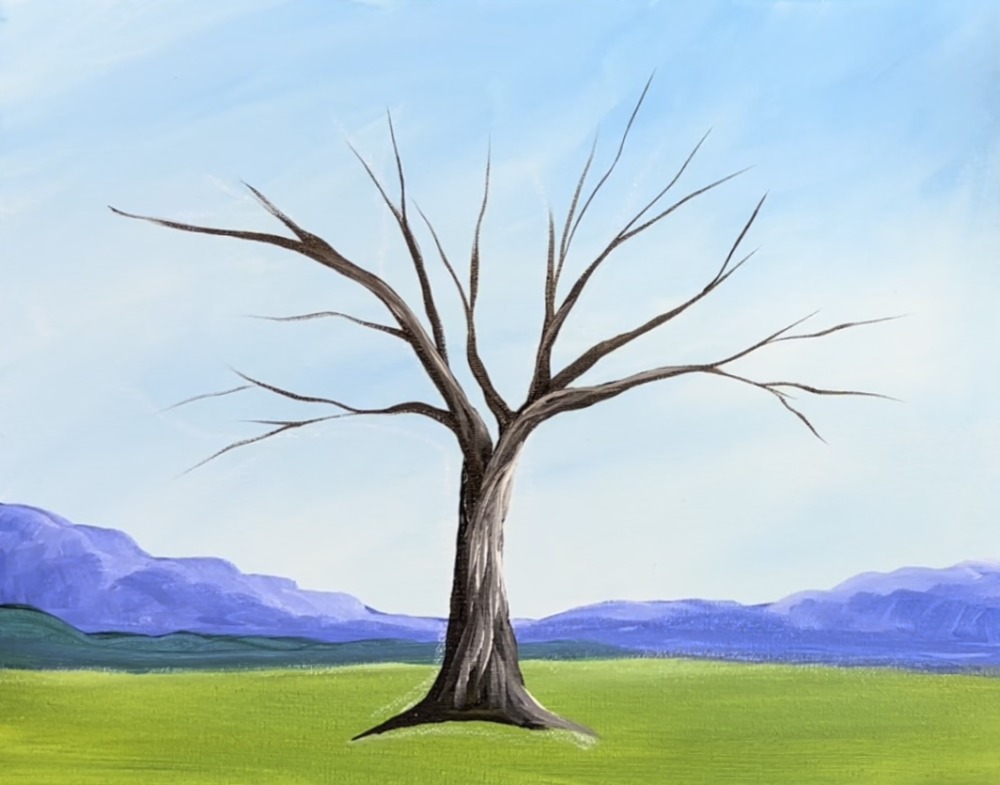
Wait for this to dry before going onto the next step.
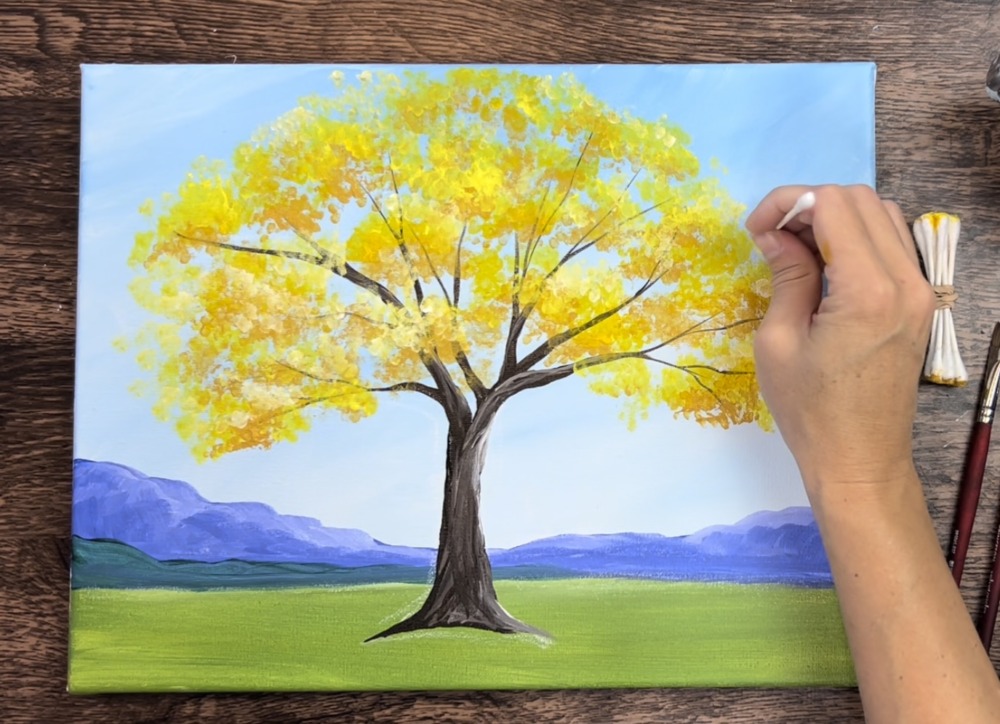
6. Paint Tree Leaves With Q-Tips
To do this technique, you will need to form a bundle of q-tips. I recommend gathering a bundle of 9-10 cotton swabs and binding them together with a rubber band.
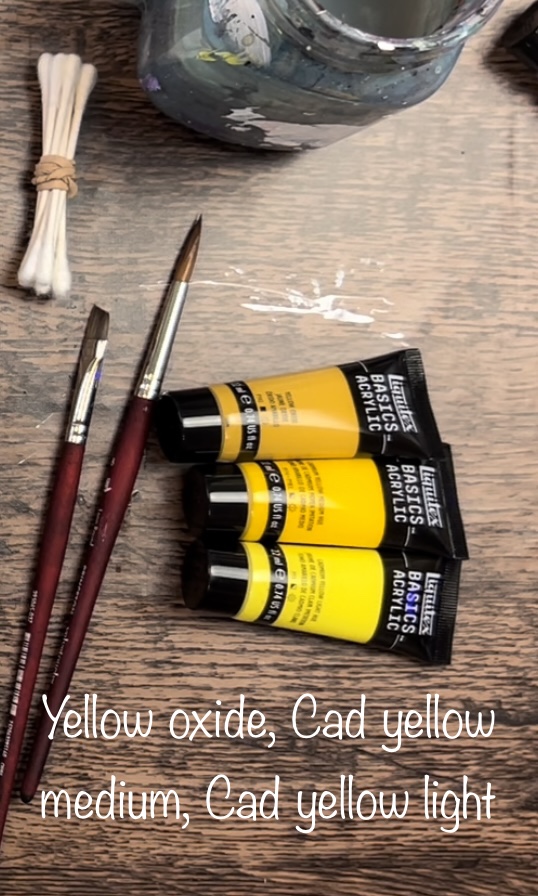
Next, load your palette with three different types of yellow. You will need a dark yellow, a medium yellow and a light yellow. I used: yellow oxide (dark), cad yellow medium hue (medium) and cad yellow light hue (light). Also, you will be doing a fourth brighter yellow by mixing the cadmium yellow light with titanium white.
Next, load your q-tip bundle into the darker yellow. Paint bundles of leaves on the tips of the branches and all throughout the tree. You will need to paint separate cluster areas of these leaves.
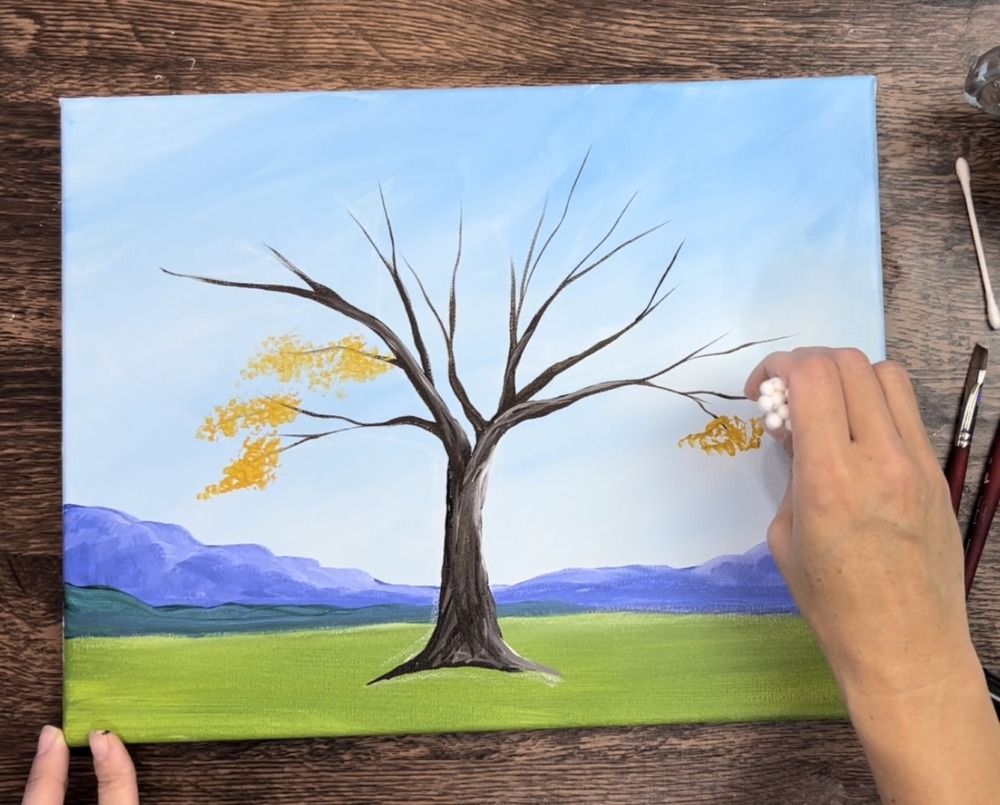
Each cluster should look slightly different. Some are larger and some smaller. You can overlap the tips of the branches as well as put clusters in the middle of the tree branches.
Pay particular attention to the shape of the tree. It should be rounded at the top and its canopy reaches outward to the left and the right.
Next, flip your q-tip bundle over. Load it into the cadmium yellow medium color (your middle yellow).
Paint this layer of yellow over your dark layer but do not cover all of it. Paint it towards the top and the sides of your darker bundles. You want a lot of your dark still showing in order to create depth and shadow in your tree.
Then use the same side of your cotton swabs to add the brighter yellow (cad yellow light hue). You don’t need to create a new cotton bundle for this lighter color (unless you want to). Paint another lighter layer on the edges of the bundles. Leave a lot of the medium and dark yellow still showing through.
Next, mix white with cadmium yellow light hue on your palette. Use this color to paint a fourth layer of leaves on your tree.
Use a single q-tip to paint individual leaves. You can add these single leaves on the outside edges of your tree canopy and a few sole leaves throughout the tree. I did this with the cad yellow light mixed with white (your brightest yellow).
7. Paint Shadow
Use your 3/4″ flat wash brush to paint the shadow of the tree. On your palette, mix equal amounts of deep green permanent, yellow oxide and burnt umber. Thin it down a little bit with water. Then use your 3/4″ wash brush to paint a diagonal shadow area from the bottom of the tree roots to the lower left edge of the canvas.
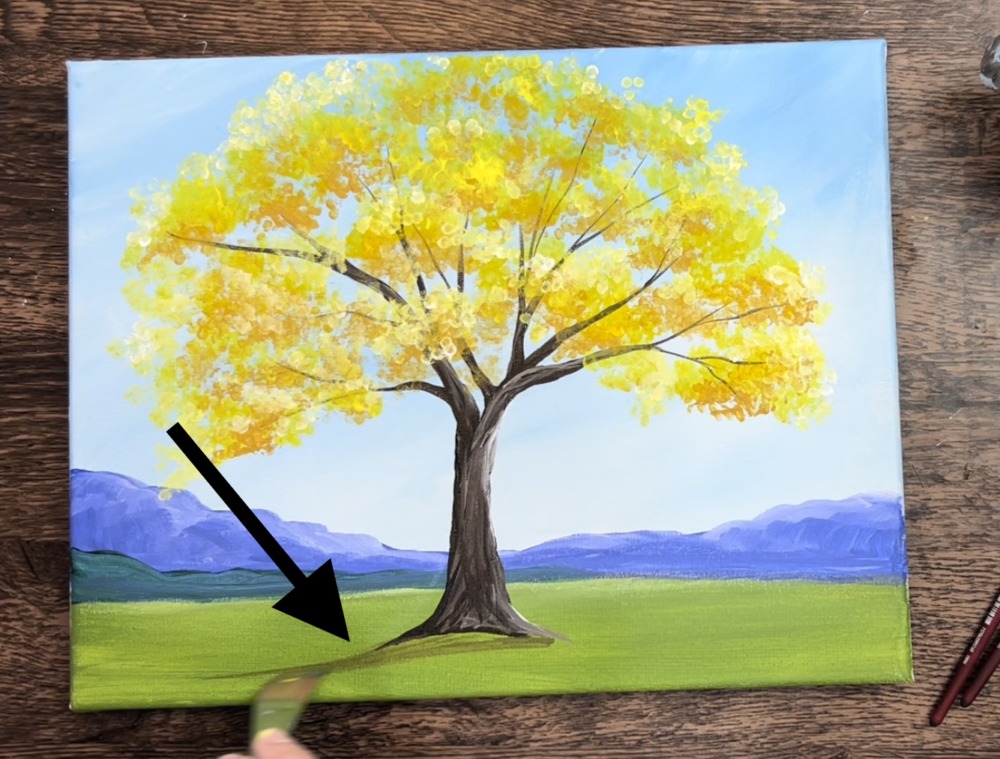
This shadow layer should be very thin and somewhat transluscent.
8. Paint Leaves On Ground
Use your bundle of q-tips to paint the leaves on the ground. Start with the yellow oxide (darkest yellow). Paint the bundle of leaves just at the base of the roots and a little bit to the left and right under the tree canopy.
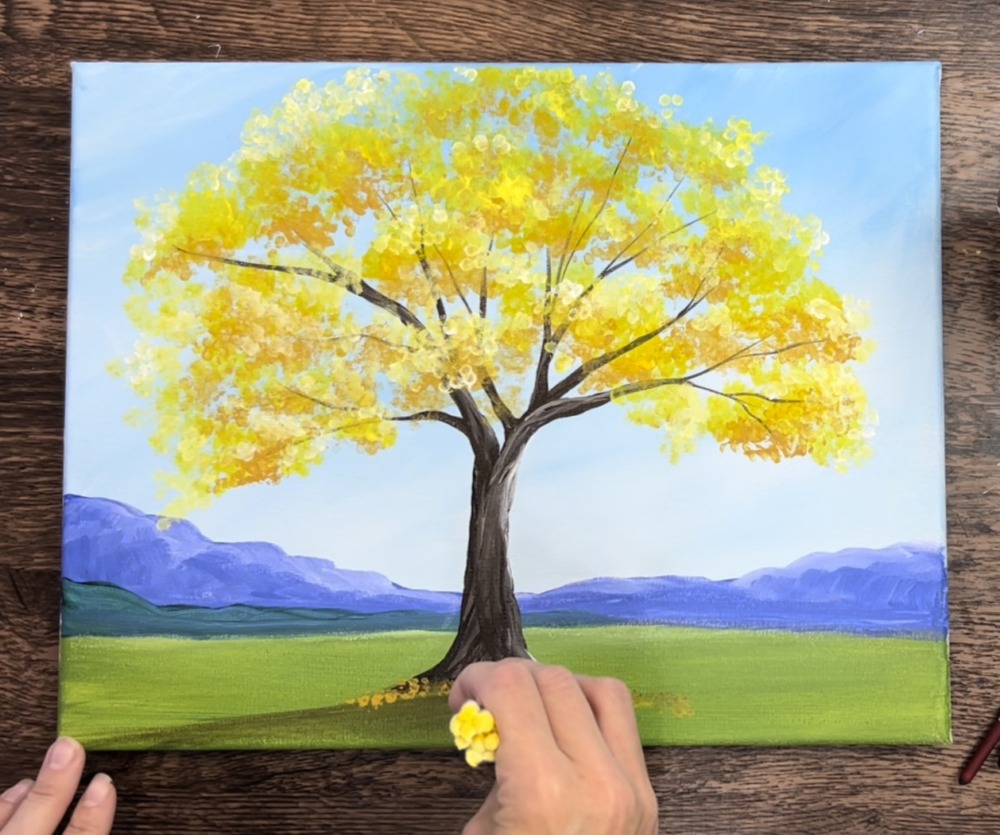
Build this layer of leaves with each lighter yellow. For your next layer, paint cadmium yellow medium and then add cadmium yellow light. If needed, use your individual single q-tip to create smaller bunches of leaves on the ground.
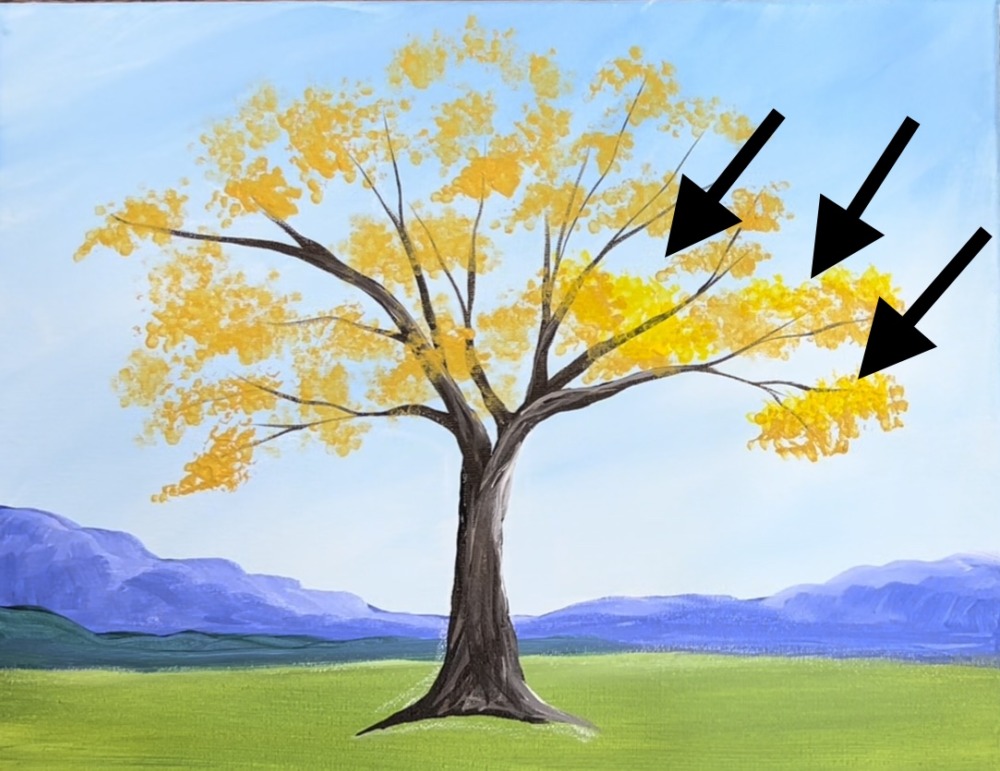
9. Touch Up Branches & More Leaves
Use your #8 round brush to paint more thin branches that may be overlapping some of your leaf bunches. This helps create more dimension in your tree.
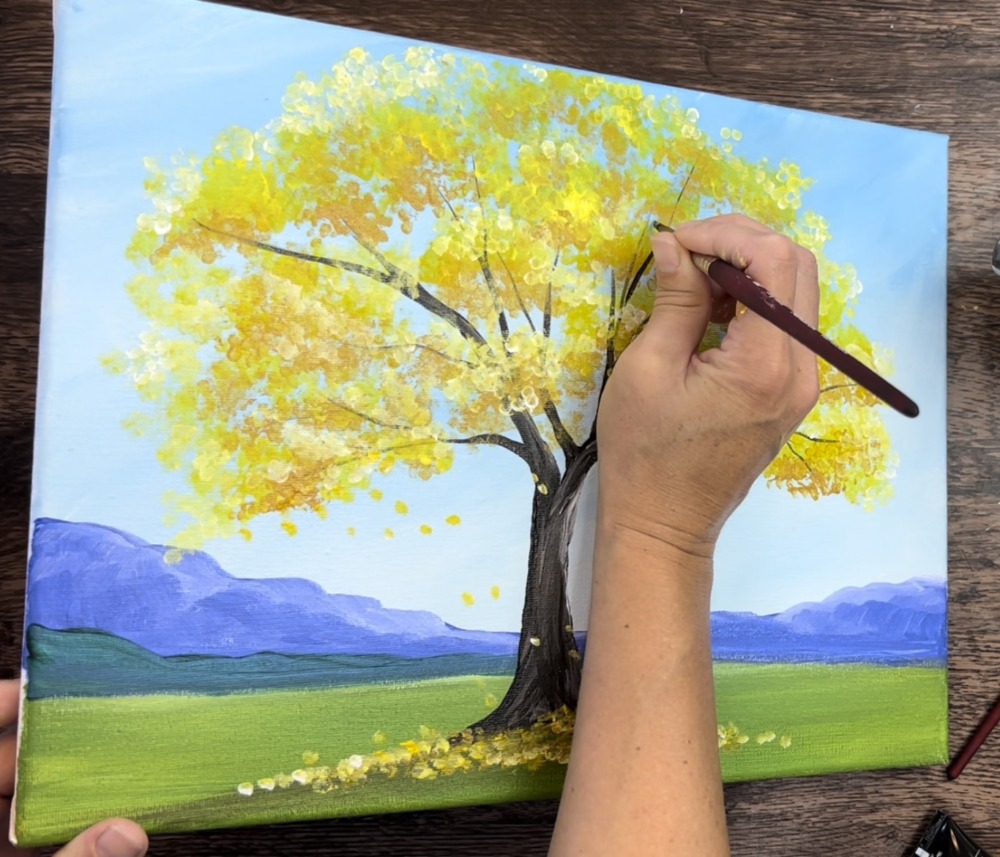
These extra small branches should be broken and not exactly connected to the main branches because most of the leaves are overlapping.
Then paint more leaf bundles if needed.
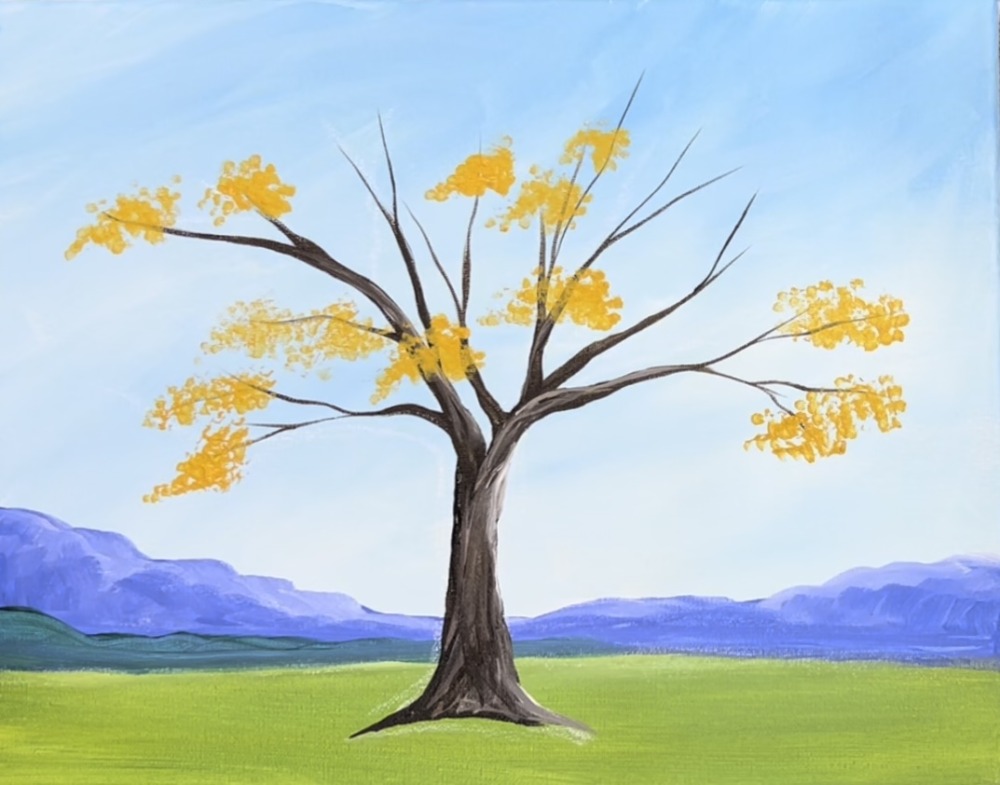
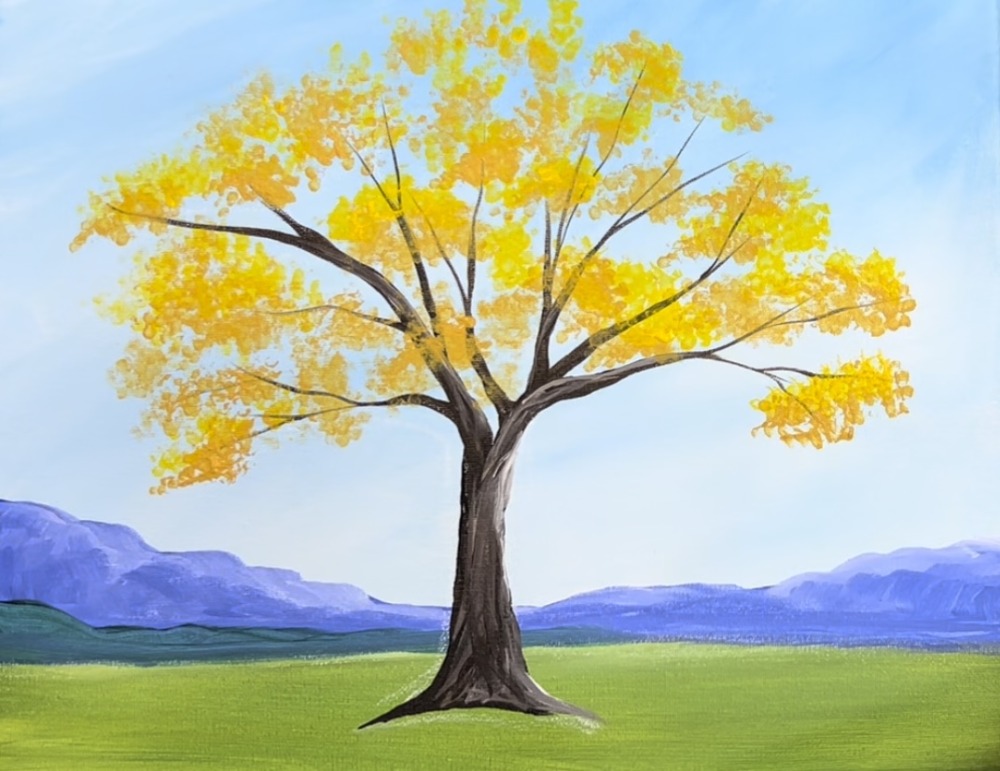
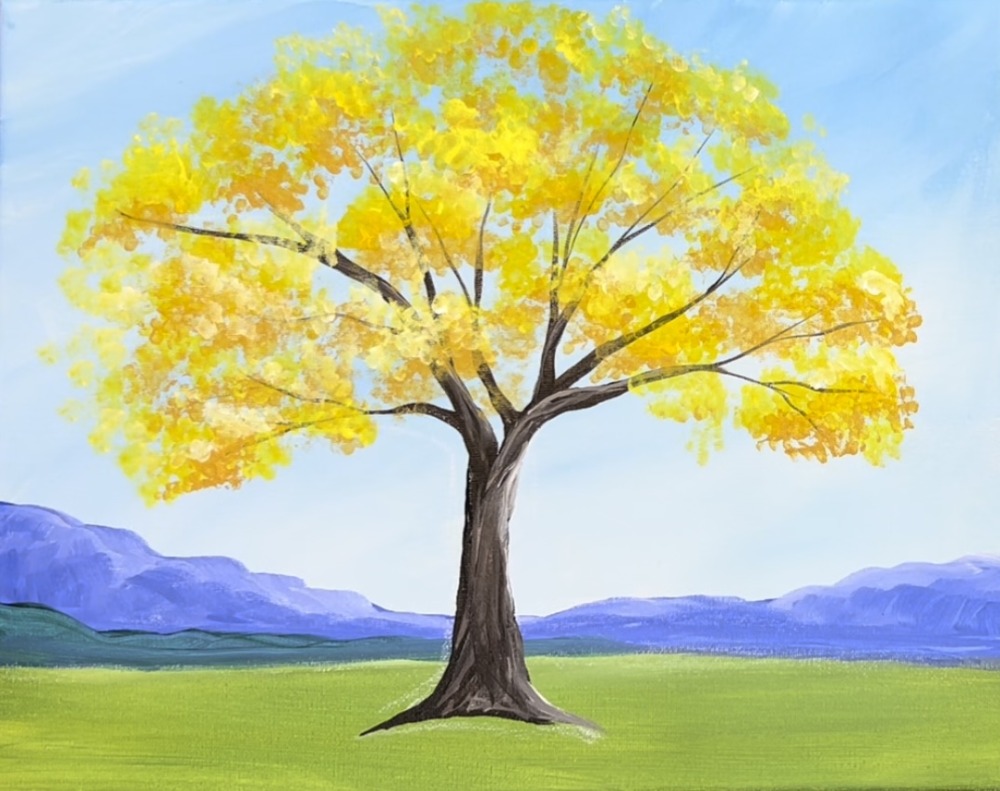
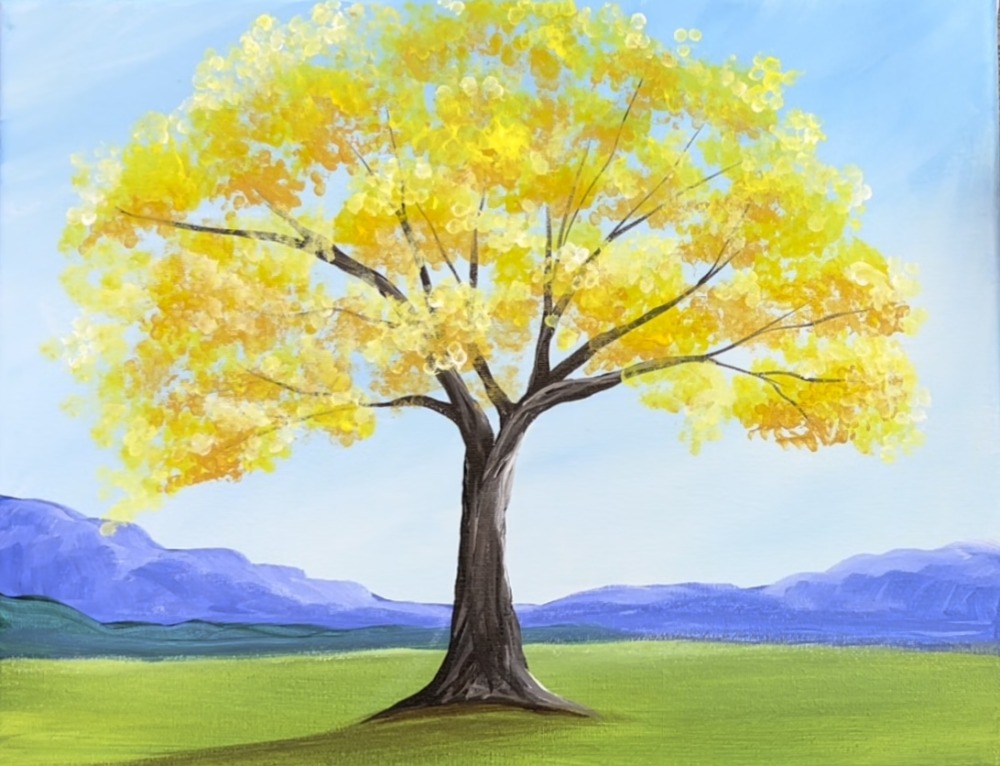
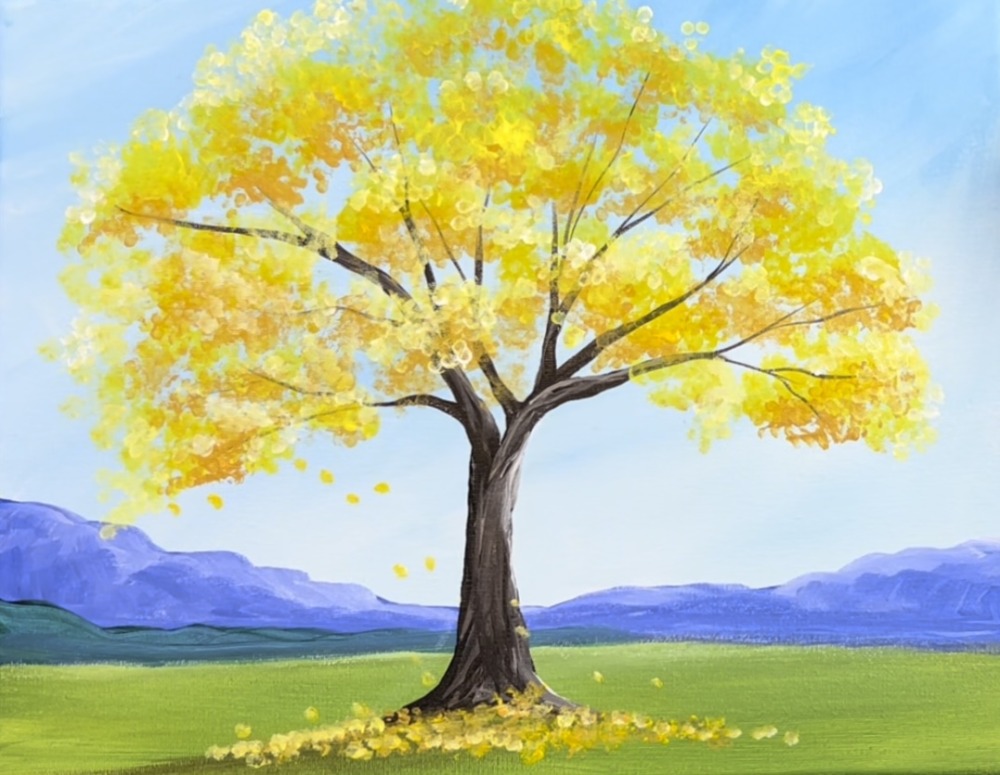
Finished
That’s it! Sign your name and show if off! A beautiful fall tree painting!
Share Your Art Here


It’s beautiful! I can’t wait to paint this one! Is there a traceable for the tree?