
Would you like to save this?
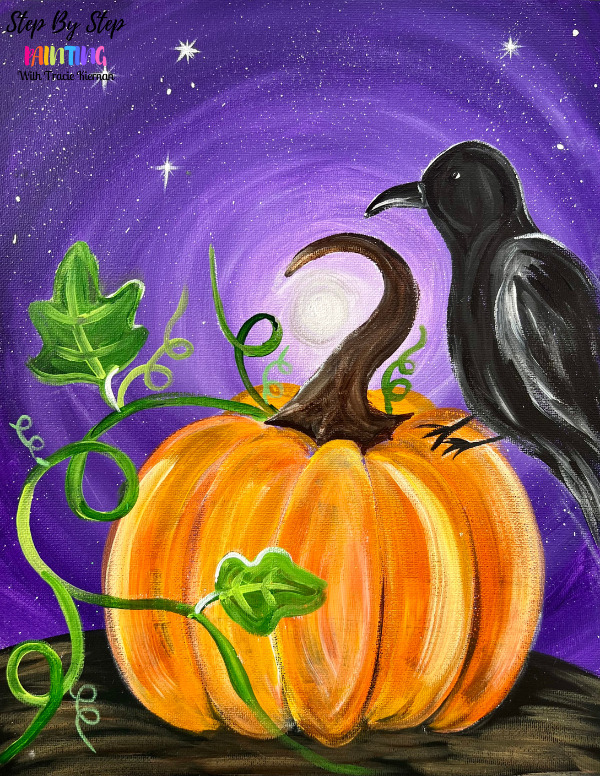
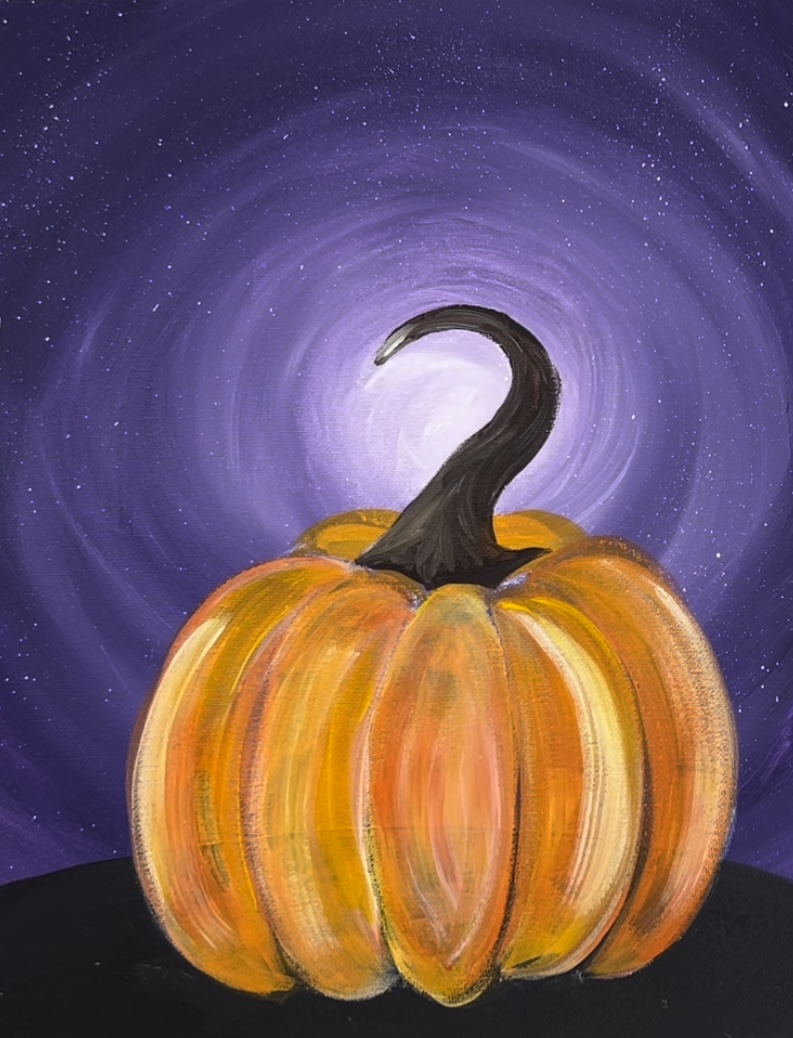
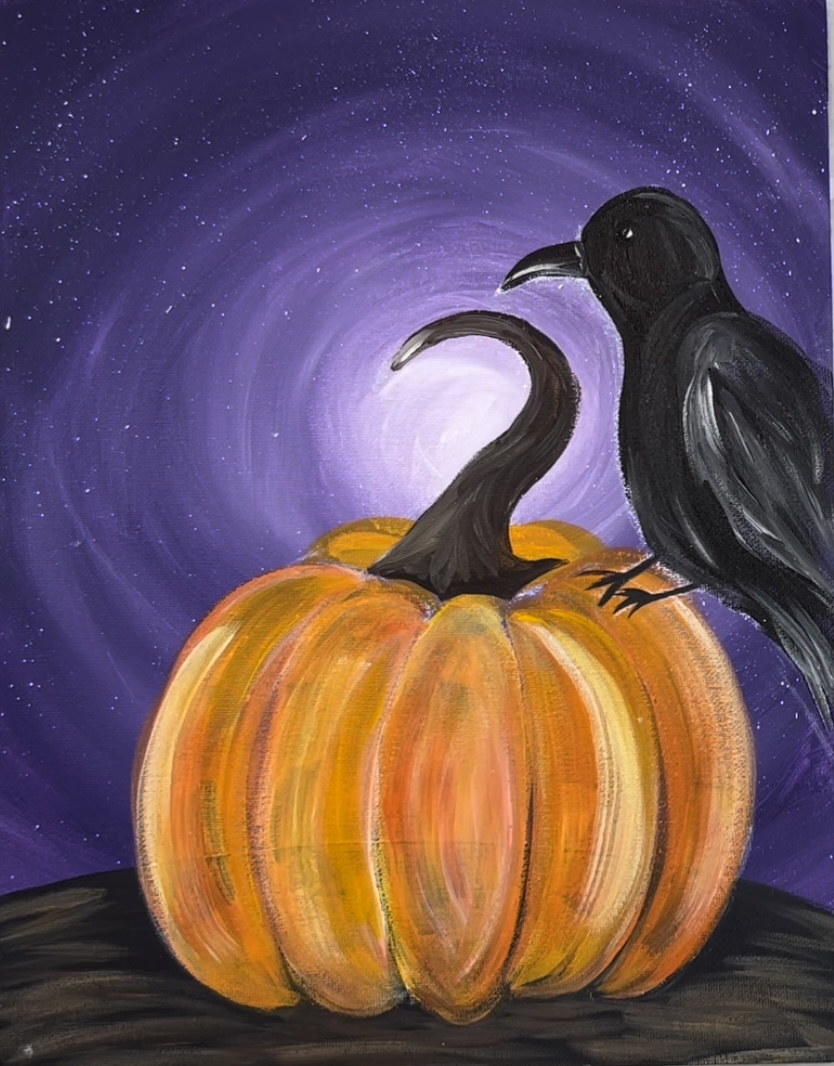
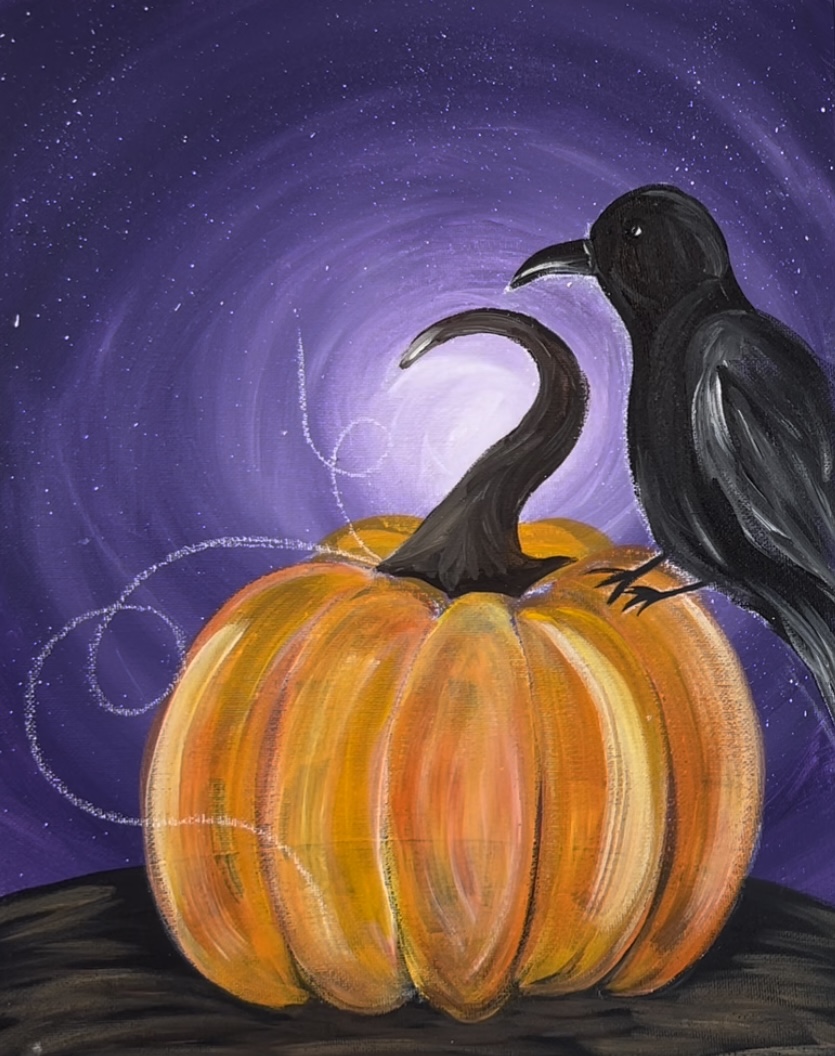
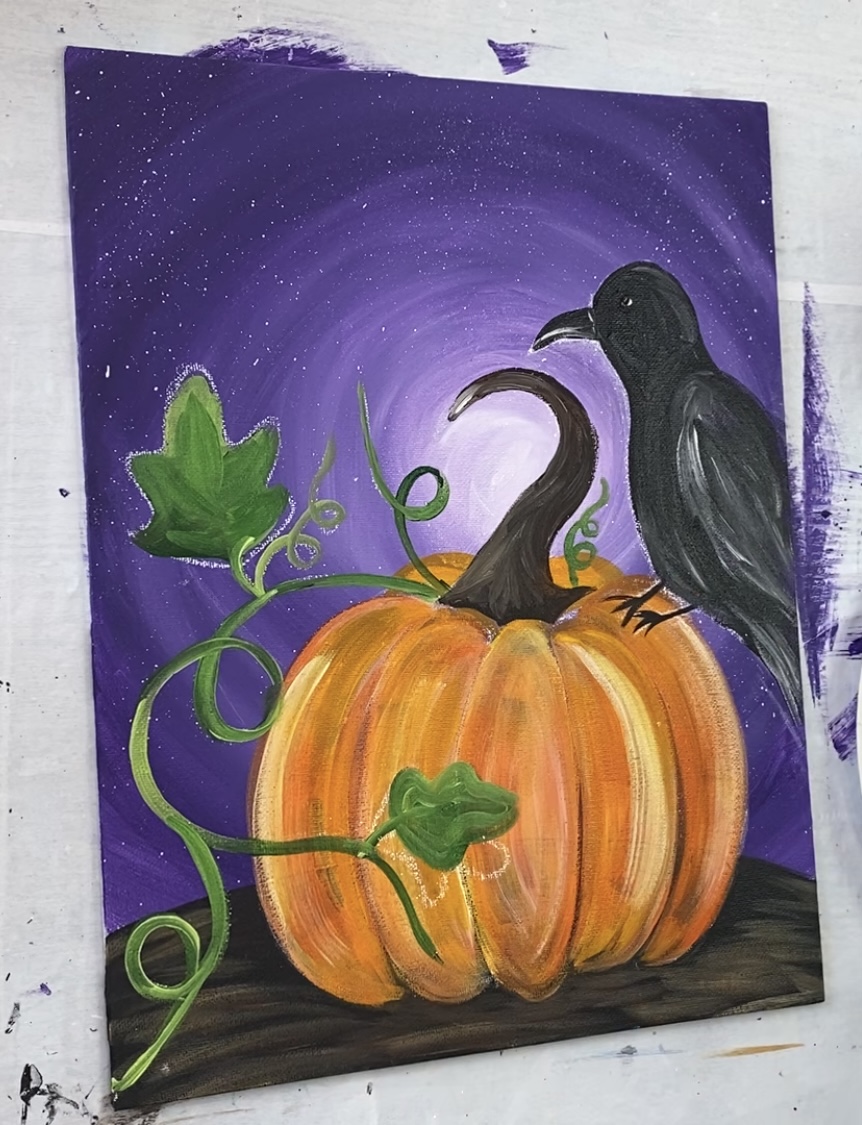
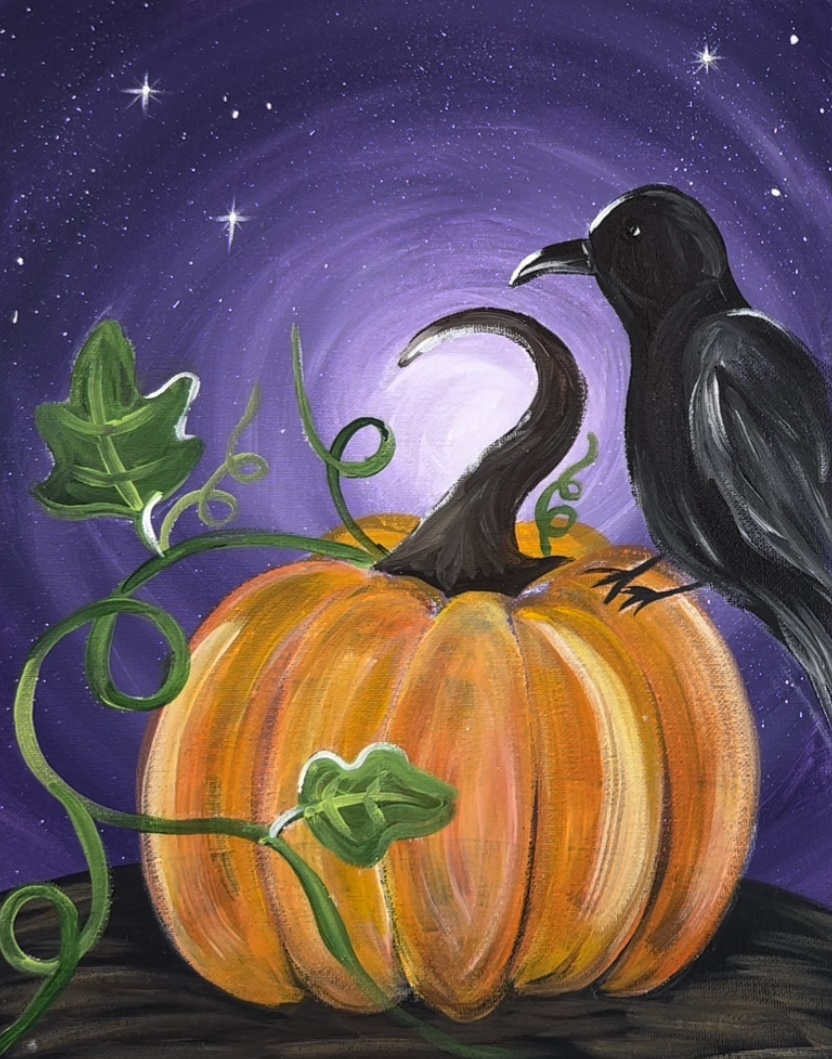
Paint a whimsical pumpkin with spiraling vines and a black raven perched on the top! This tutorial can be used for your fall and/or Halloween decor. I love the bright “dioxazine purple” swirling sky in the background!
If you want to make this more of a Halloween painting, you can add a face onto the pumpkin to make it look like a jack-o-lantern. Check out my tutorial: how to paint a jack-o-lantern to learn techniques for painting the pumpkin face.
You can also add bats in the sky for a truly spooky & pretty combination!
Enjoy and happy painting!
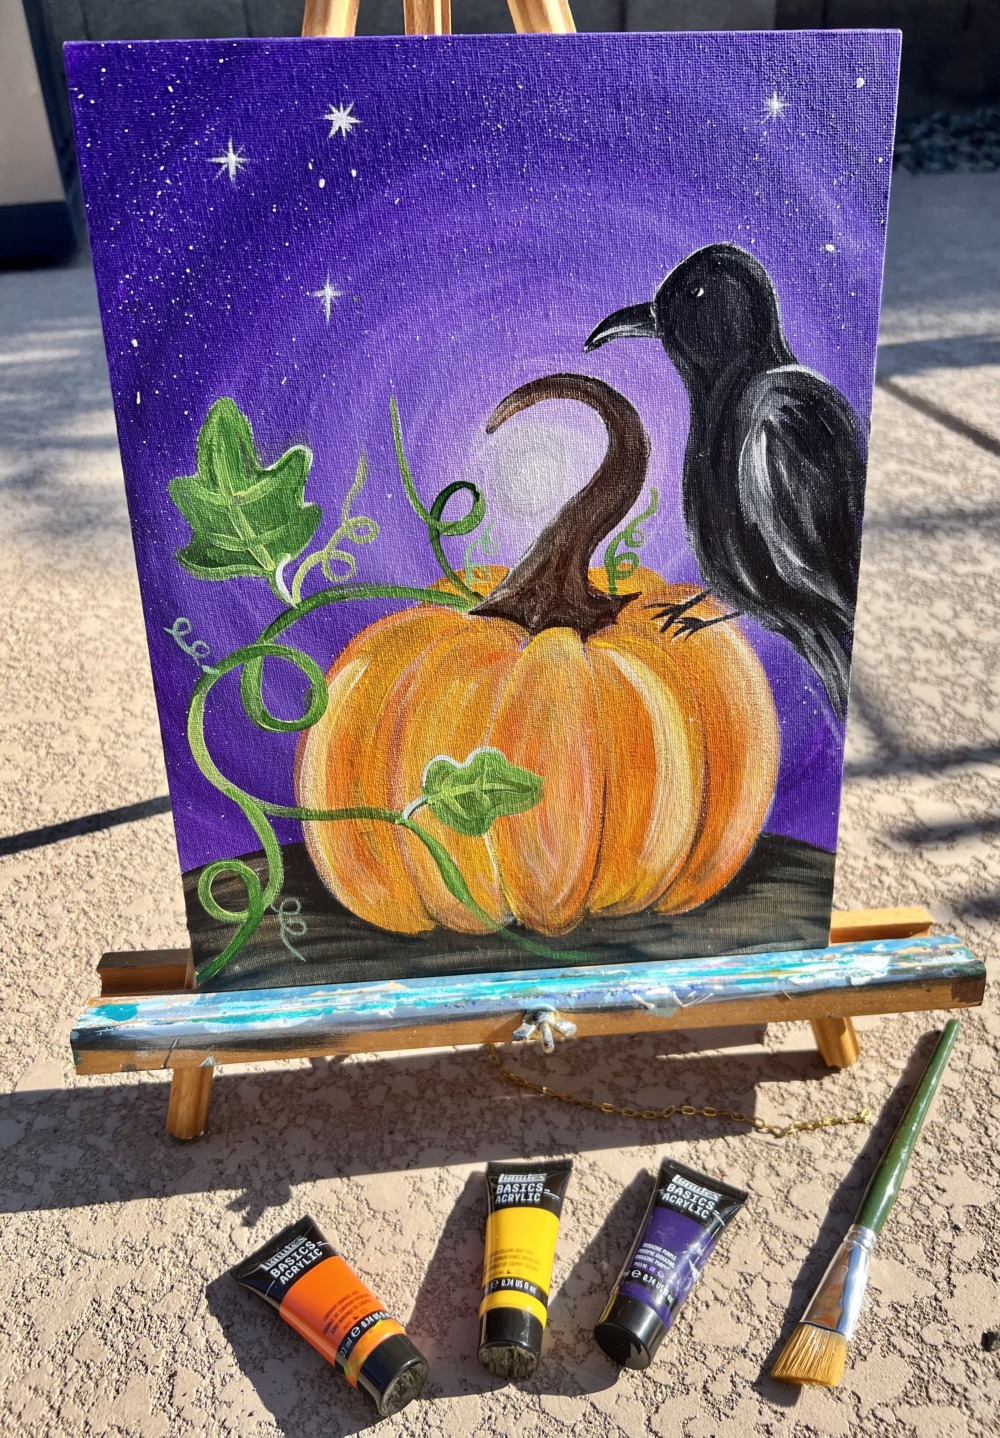
Materials Needed
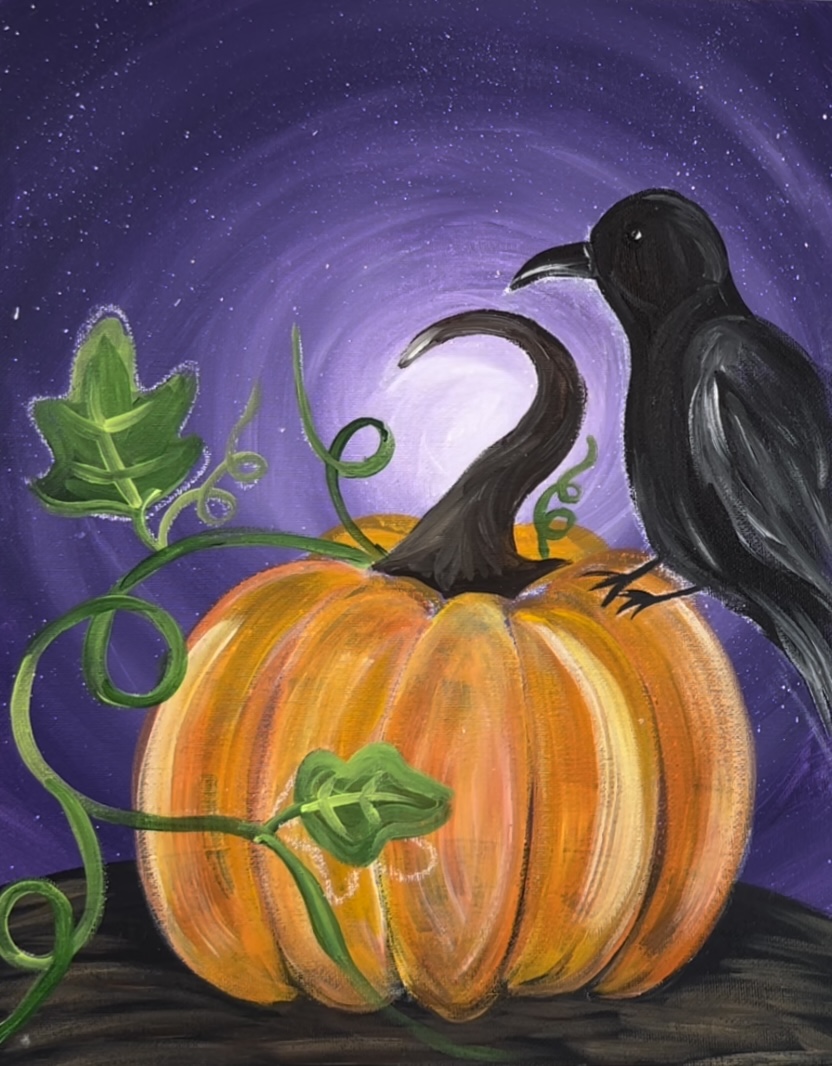
"Raven On A Pumpkin" - Acrylic Painting Tutorial
Learn how to paint a swirly purple sky with a whimsical pumpkin and a raven.
Materials
- 11 x 14 Canvas
- Acrylic Paints
- White Chalk
- Optional Traceable (I demonstrate how to draw in the tutorial)
- Paint Brushes
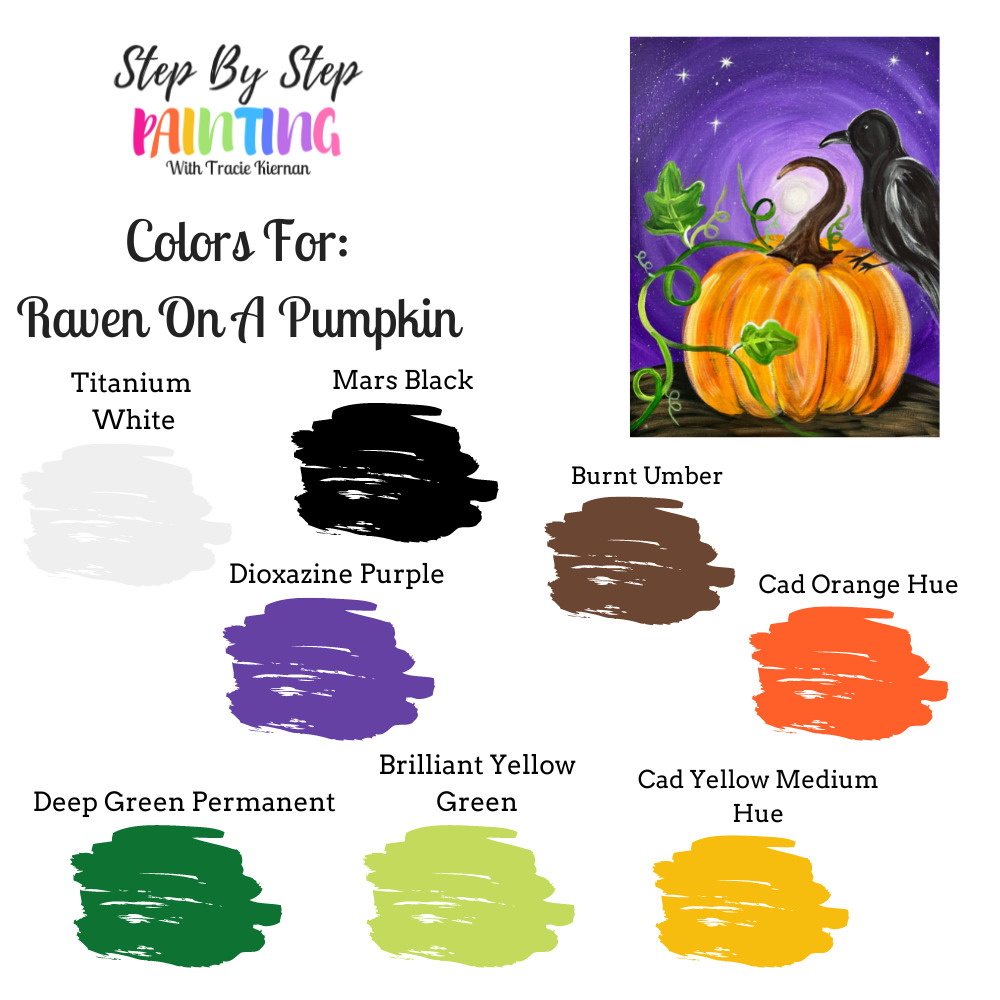
Colors
- Titanium White
- Mars Black
- Dioxazine Purple
- Brilliant Yellow Green
- Green Deep Permanent
- Cadmium Yellow Medium Hue
- Cadmium Orange Hue
- Burnt Umber
Brushes
- 3/4" Flat Wash
- #12 Bright
- #4 Round
- 5/0 Tiny Brush
- Toothbrush For Splatter Star Effect
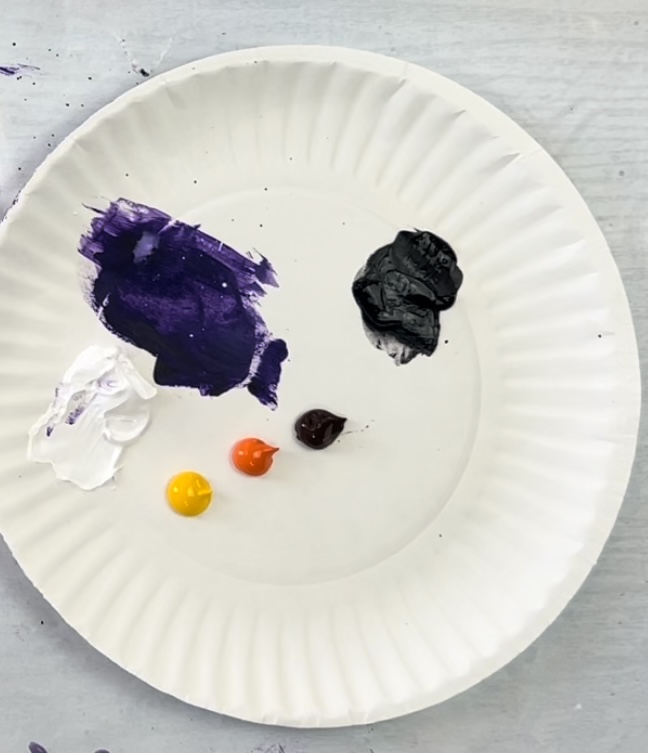
Color Palette
I used Liquitex BASICS acrylic paints for this painting! If you are using a different brand of paint, use the color chart below to help you sub your colors.
Craft Paint Conversion
If you are using Craft Paints such as the Apple Barrel Paints, I would recommend subbing to these colors:
- Black
- White
- Nutmeg Brown
- Purple Iris
- Jack O Lantern
- Holly Branch
- New Shamrock
- Yellow Flame
Traceable
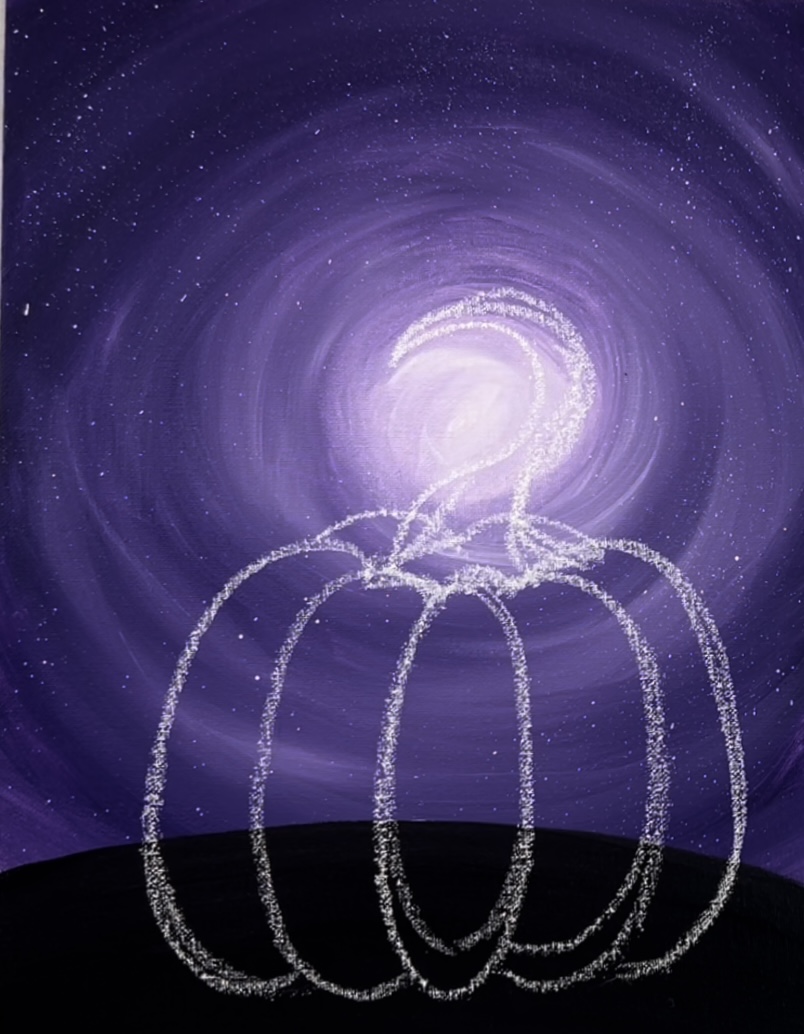
This is optional! I will show you how to draw the design with a piece of chalk! Click the image to download the .jpeg or click the PDF download link below.

Directions At A Glance
Video
Step By Step Directions
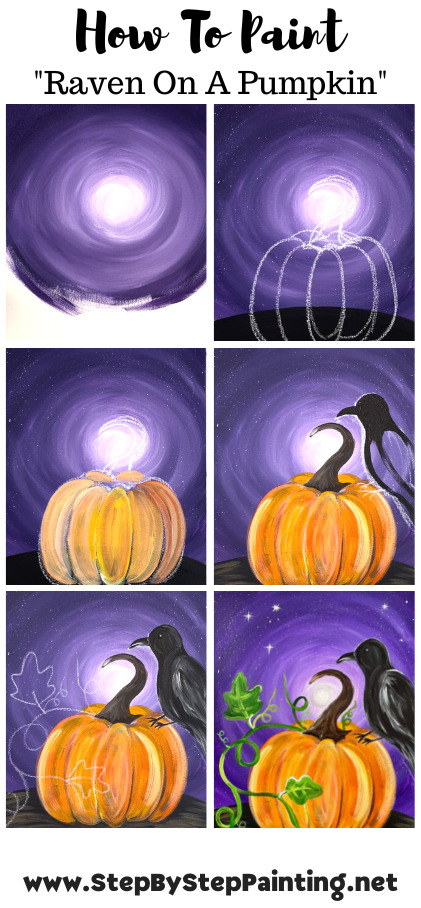
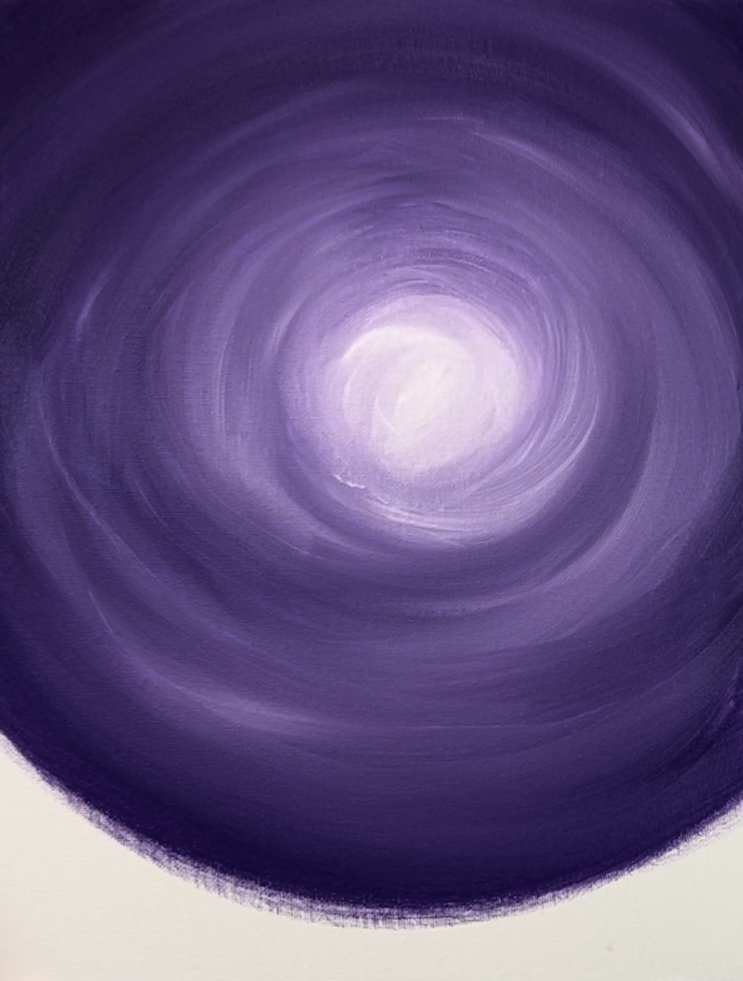
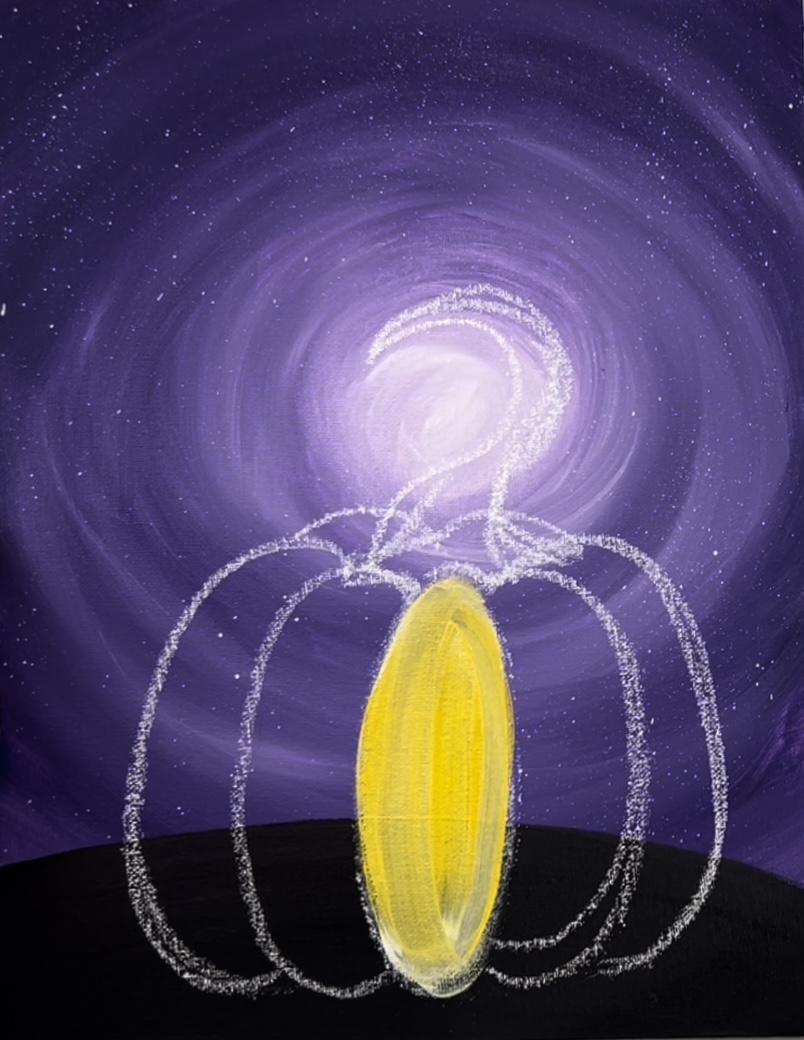
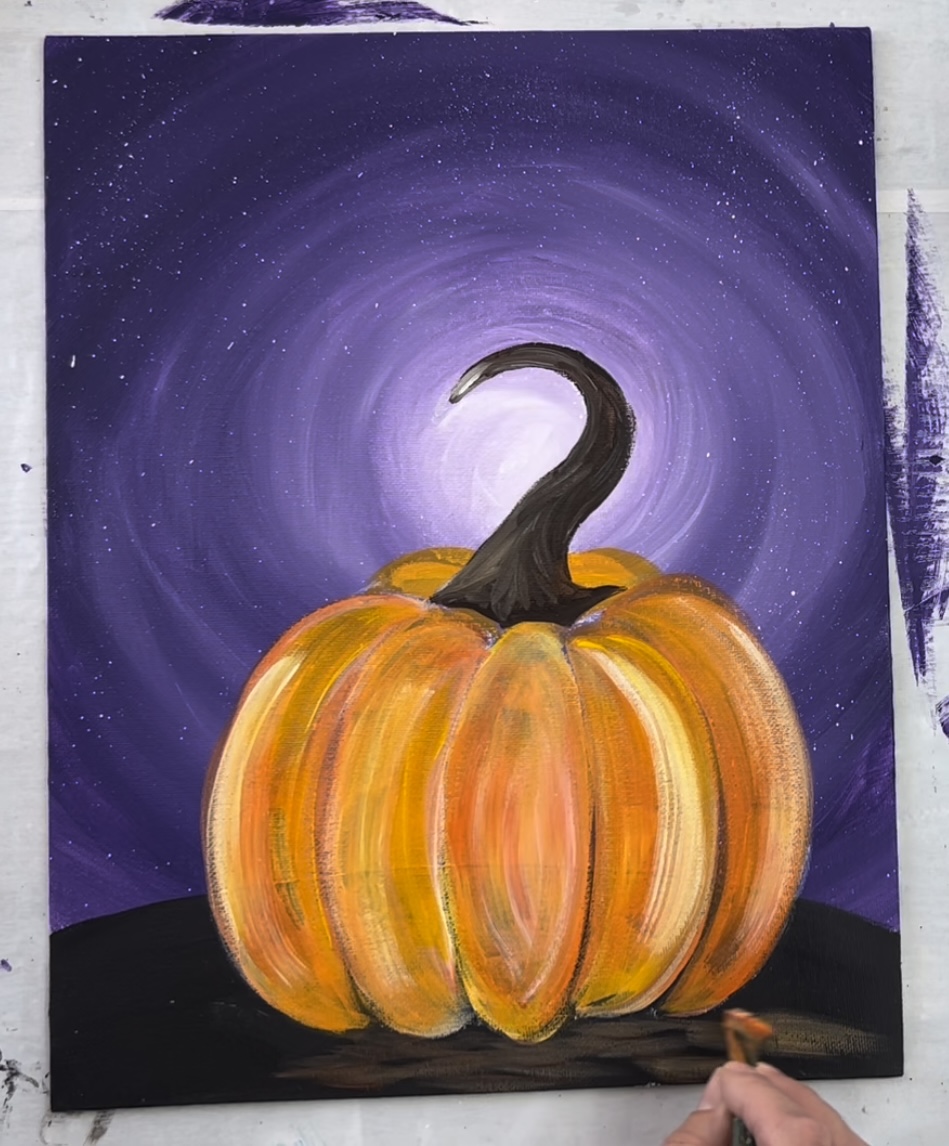
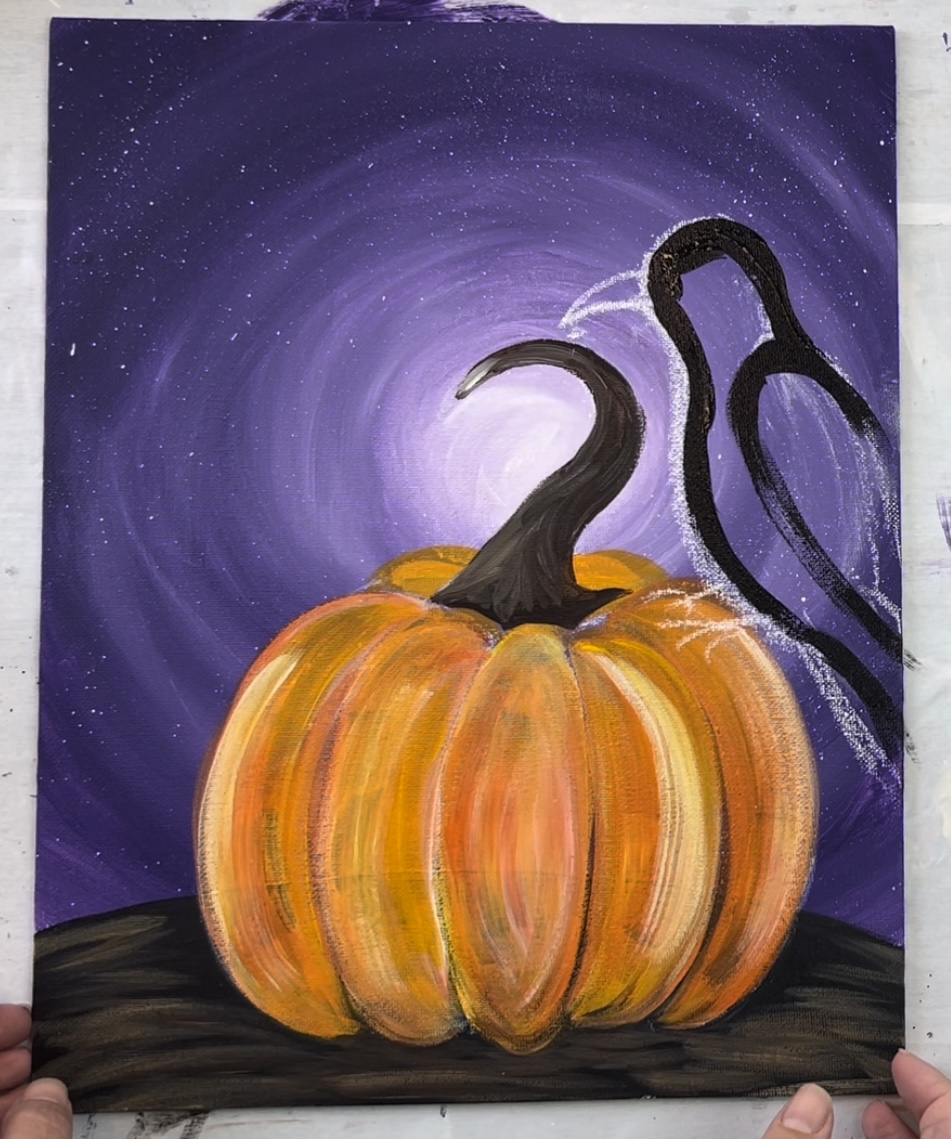
1. Paint the purple sky background
The background of this painting is a blended swirled sky background consisting of the two colors: dioxazine purple and titanium white. The purple and white is blended around a small moon. This moon is not in the center of the canvas. It is about 2/3 the way up the canvas.
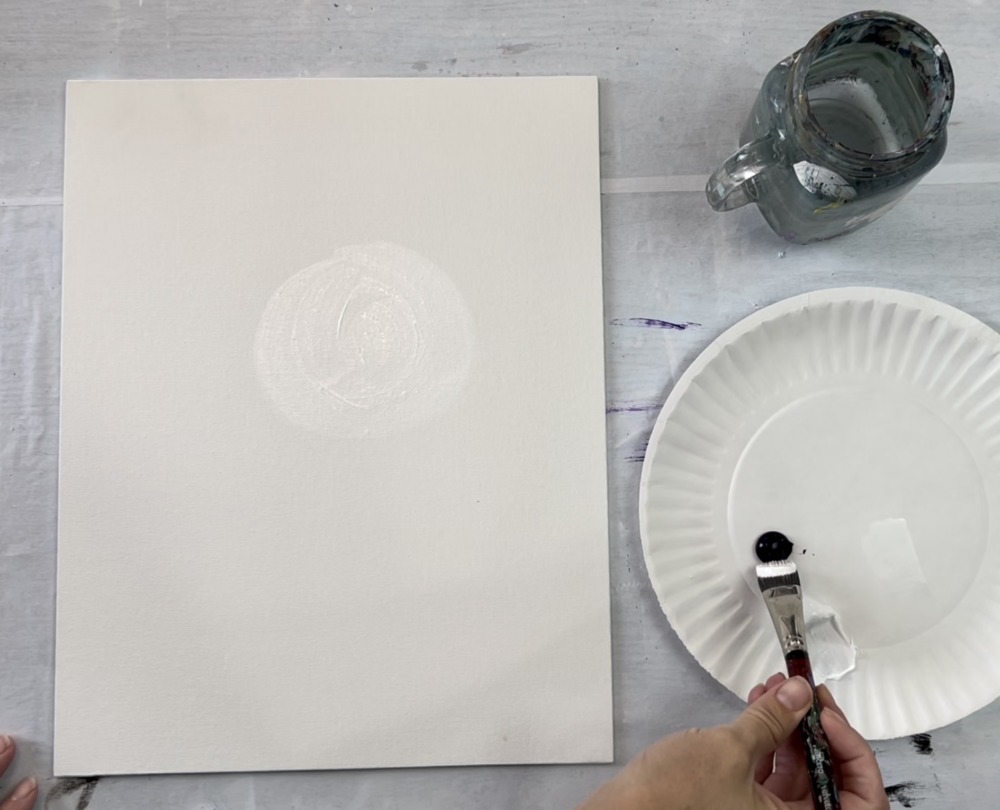
Position your canvas vertically. Load your 3/4″ flat wash brush in titanium white. Paint a white circle in the middle top area of the canvas. Paint this circle about 4-5″ inches in diameter. Note: the circle is painted larger than the end result so your white can be used to blend the purple in the next step.
Next, load a very small amount of purple on the tip of your flat brush. Note: diaxozine purple is a strong and dark purple. Use only small amounts at a time to blend this!
Paint the purple in a circular direction around the white circle. Gently blend the purple inwards.
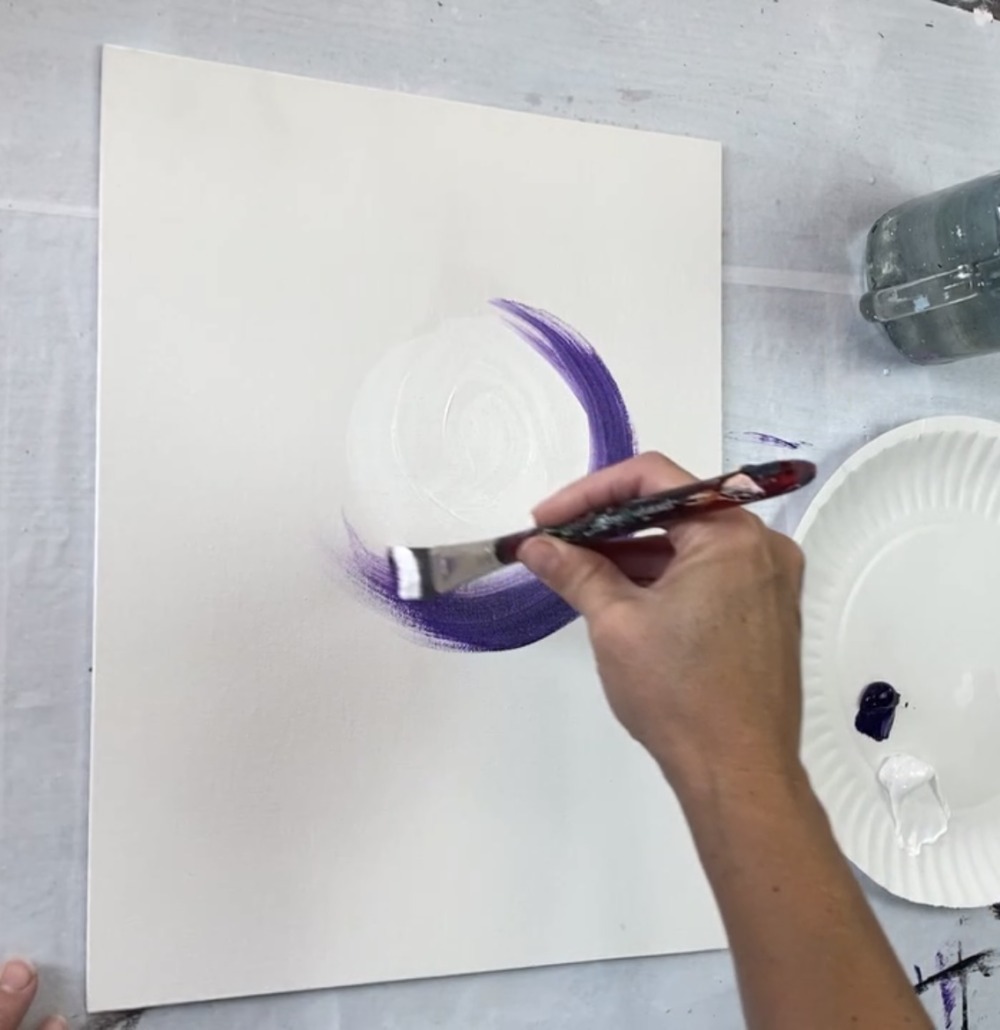
Allow your circle to become a very light purple and keep the center as bright as possible. Avoid adding too much purple inside the small circle. Then gradually add more purple and paint in circles, blending the color outwards.
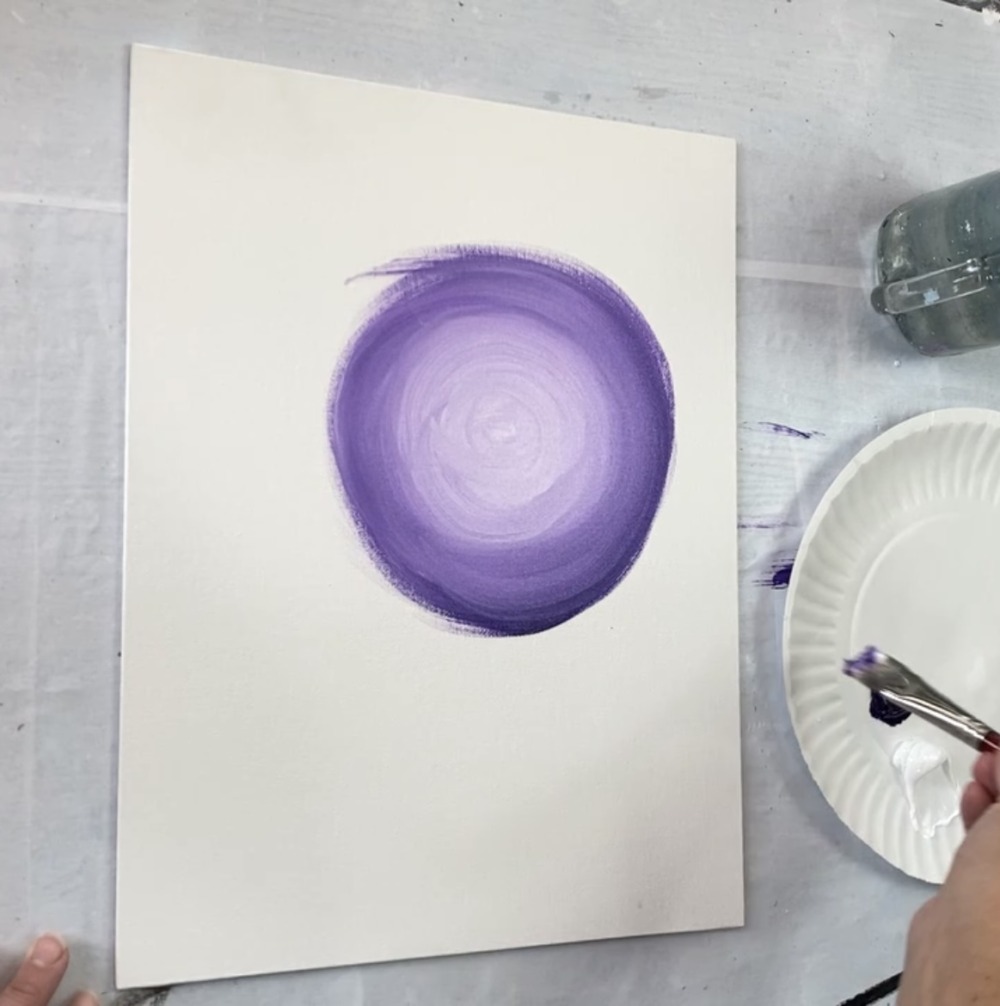
Add more purple to your brush. Continue to paint in circles.
You can also add bits of white to your brush to help the background blend. The white also adds to the “un-blended” and “swirled sky” effect.
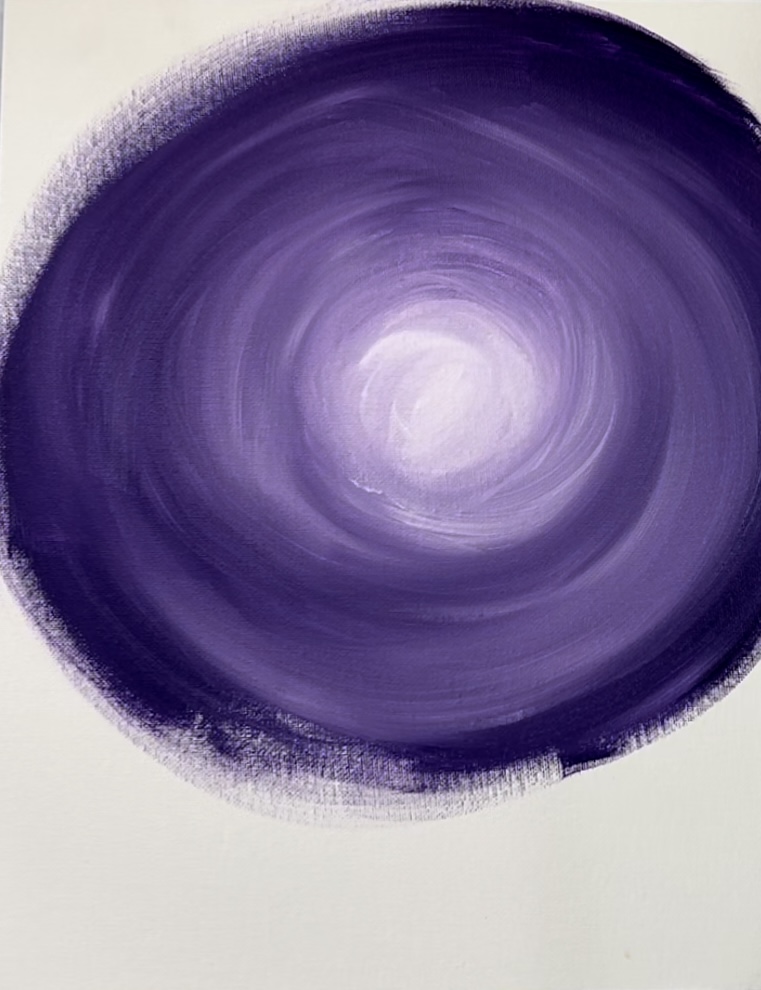
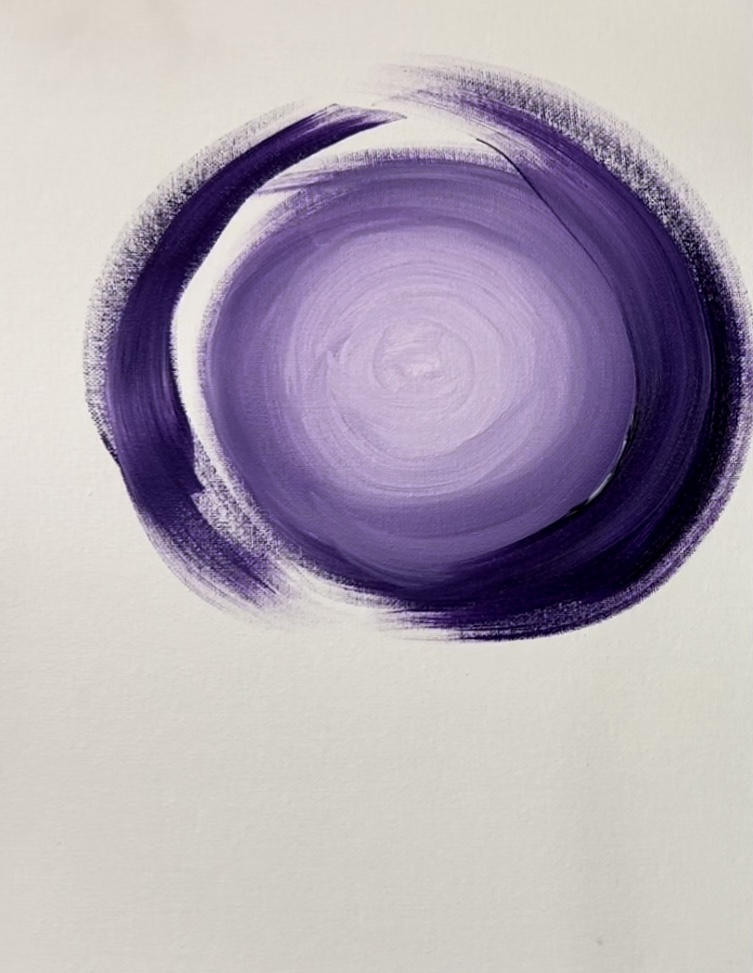
Paint the outer edges and corners of the canvas with pure dioxazine purple so it appears darker.
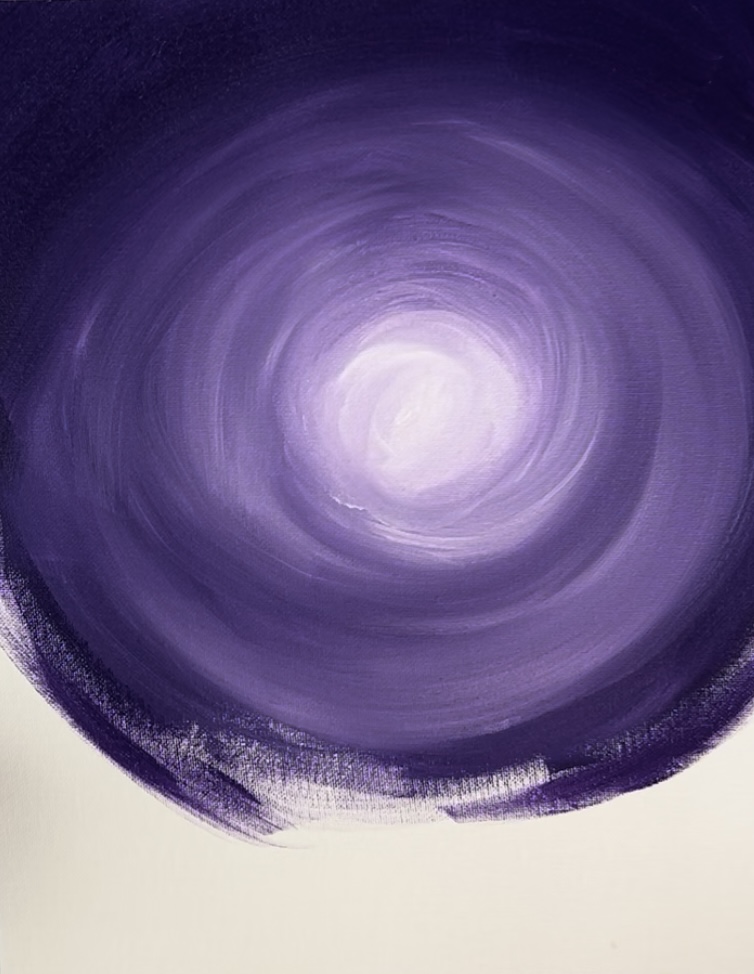
Leave a small gap at the bottom of your sky for painting the ground in a later step.
2. Paint Stars
Use a toothbrush (or flick white off your 3/4 flat brush) to paint the stars. Load a slightly watered down amount of white onto the brush. Test out a separate surface first. The paint should not be dripping and it also should not be too thick.
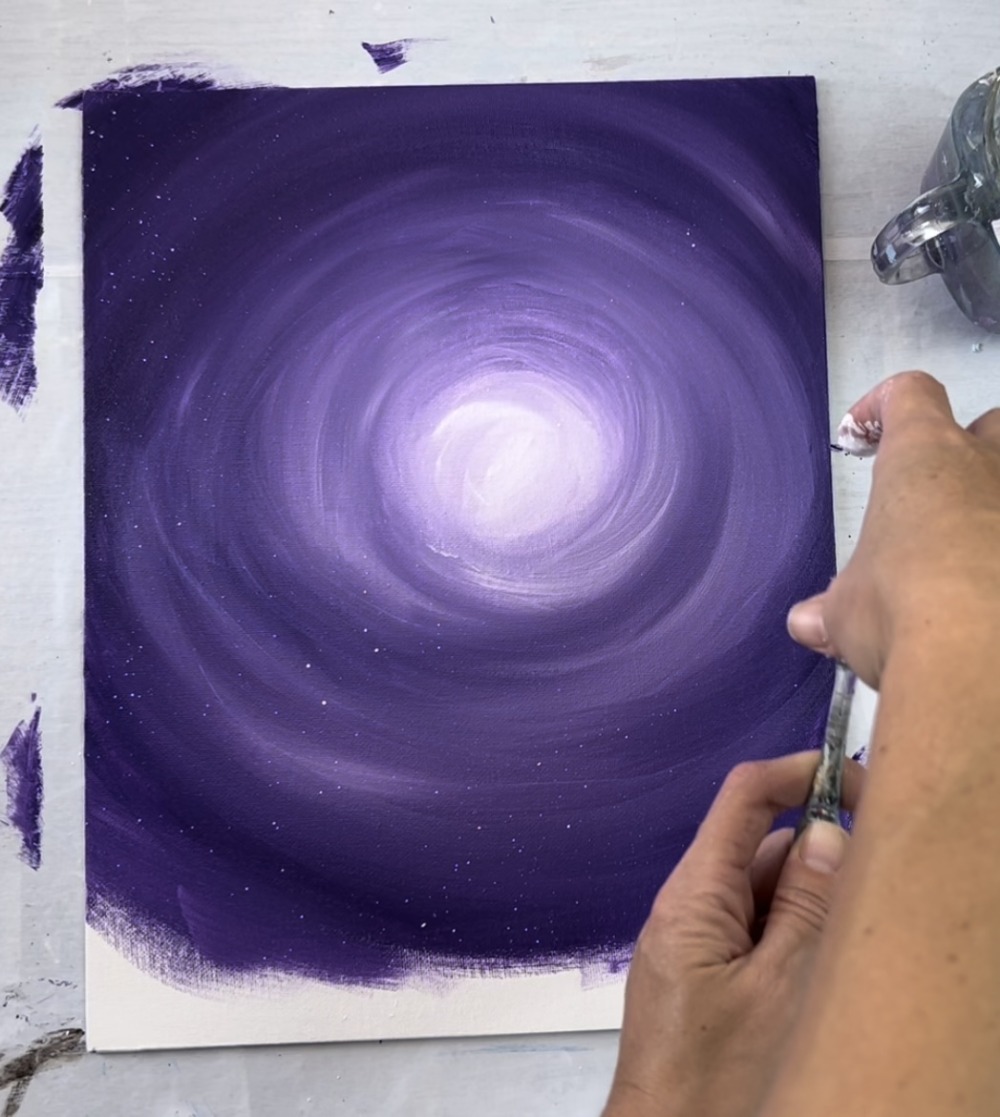
Flick the brush so small specks of white paint splatter on the canvas.
3. Paint Hill
Next, load your palette with mars black. Use your 3/4″ flat wash brush and paint a hill. The hill is about 2-3 inches on each side and elevates slightly in the middle.
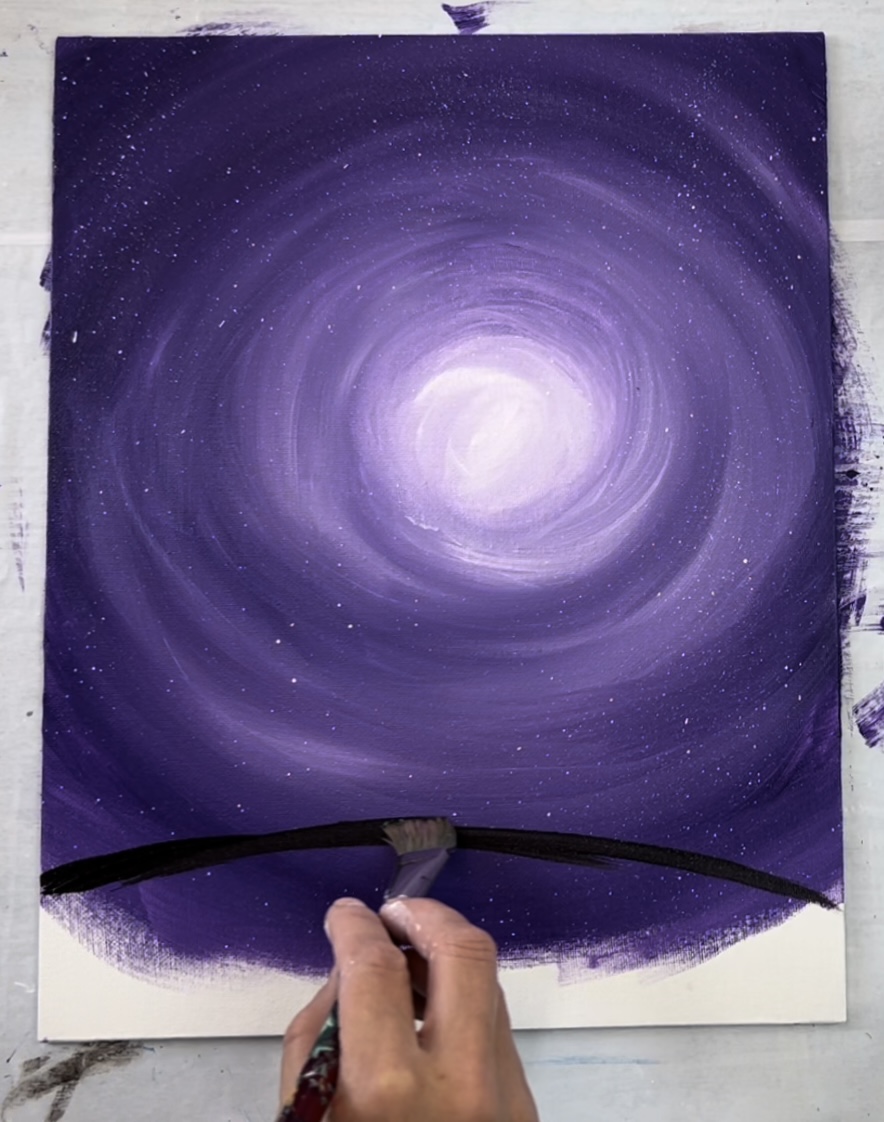
Add a tiny bit of water into the black to help spread the paint easily.

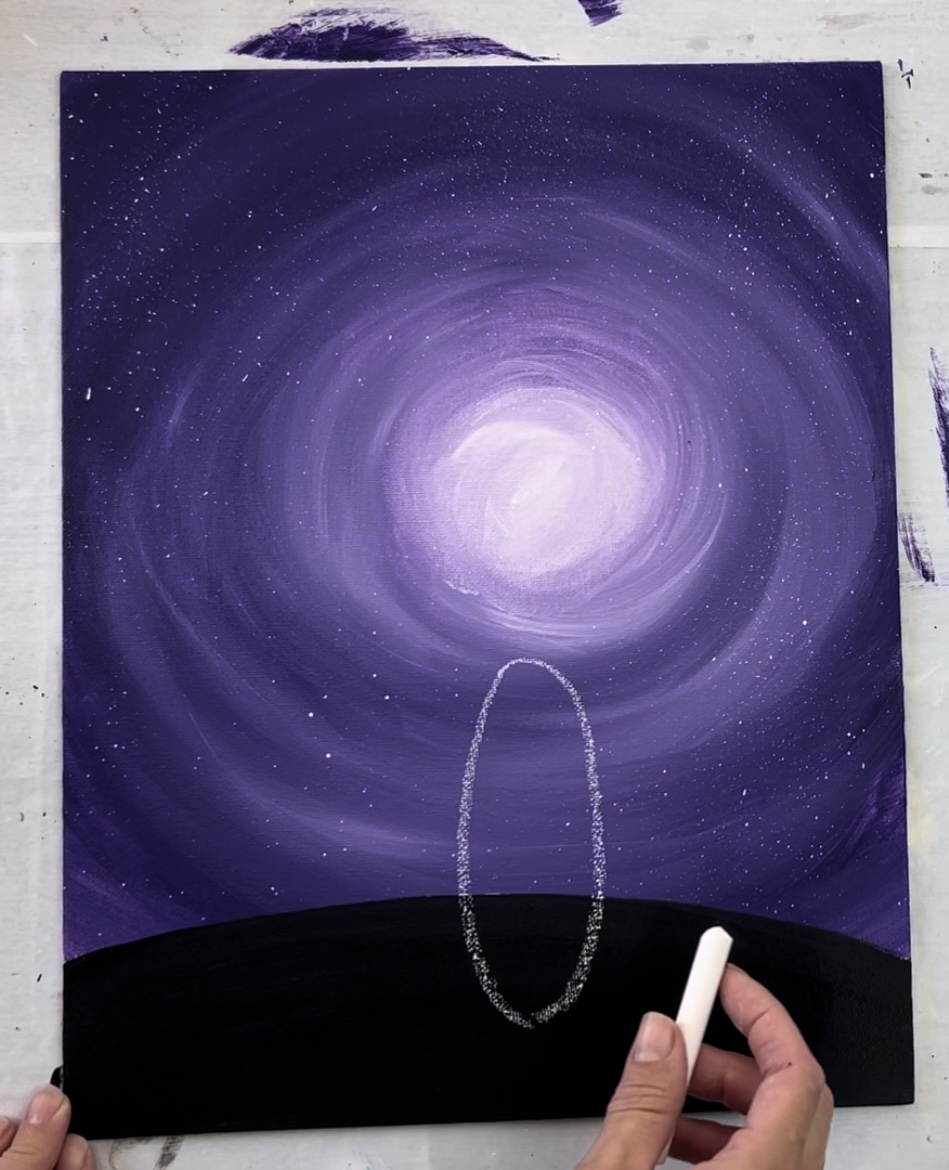
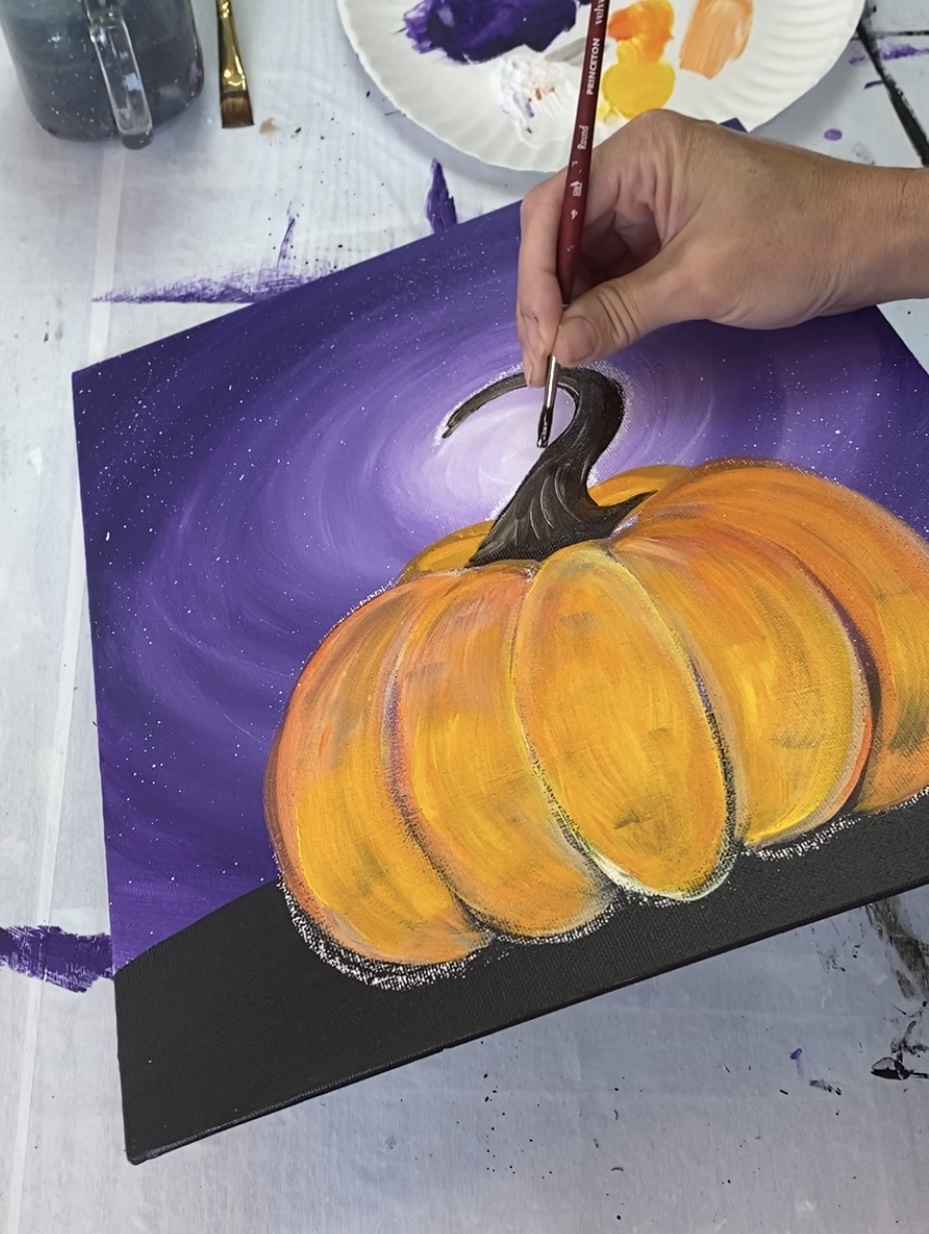
4. Draw Pumpkin
Wait for this to be dry before drawing the pumpkin. If you are using the template, I recommend using white graphite paper to transfer the design. If you are drawing this, I recommend using a white chalk pencil or a regular piece of chalk.
Start your pumpkin on the black hill area (about an inch from the bottom edge of the canvas). Draw the middle oval of the pumpkin. This is a long elongated oval and the top reaches just under the bright white circle in the sky.
Then draw two more curved lines on each side of the oval.
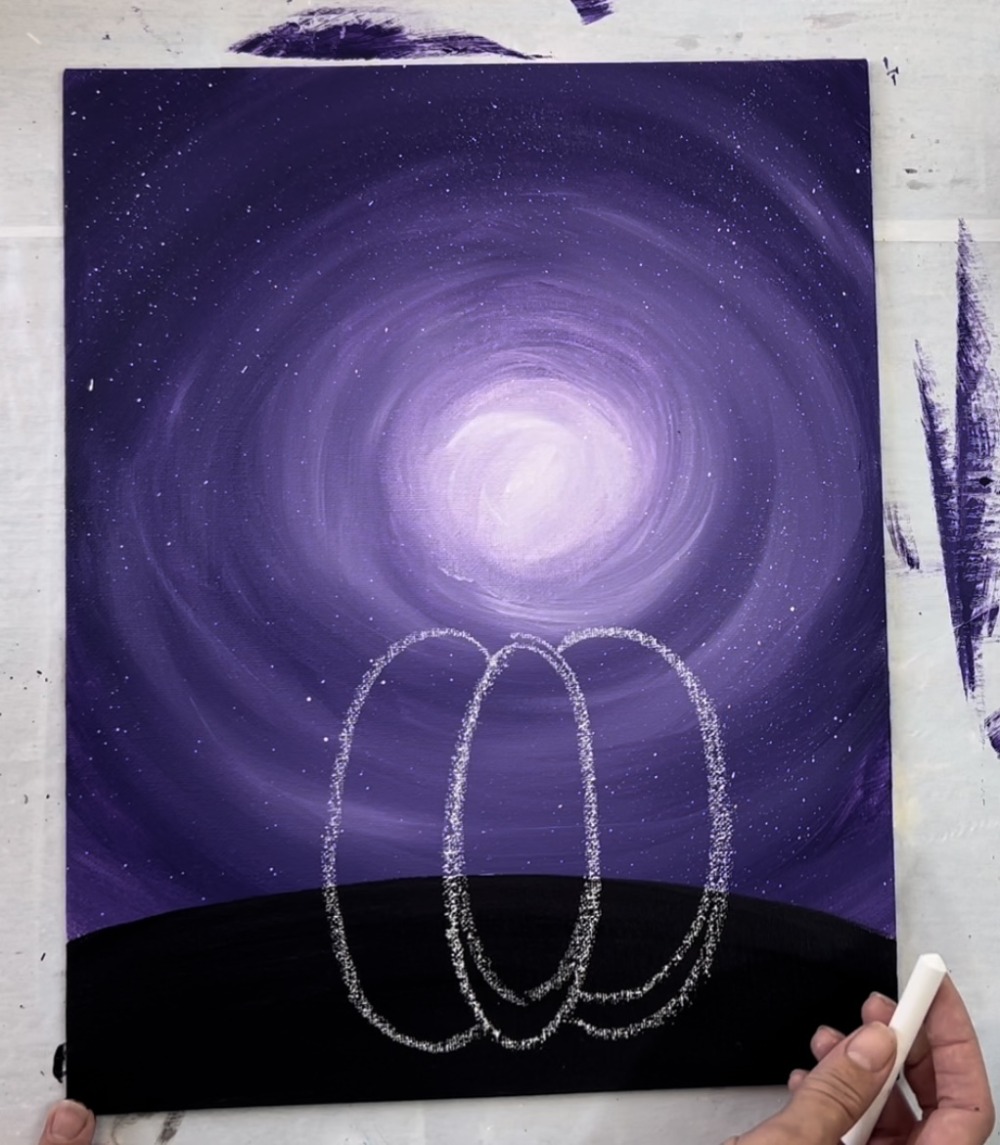
Then draw two more curves on each side. For the back of the pumpkin, draw two smaller bumps on the top of the pumpkin above your 5 bump shapes.
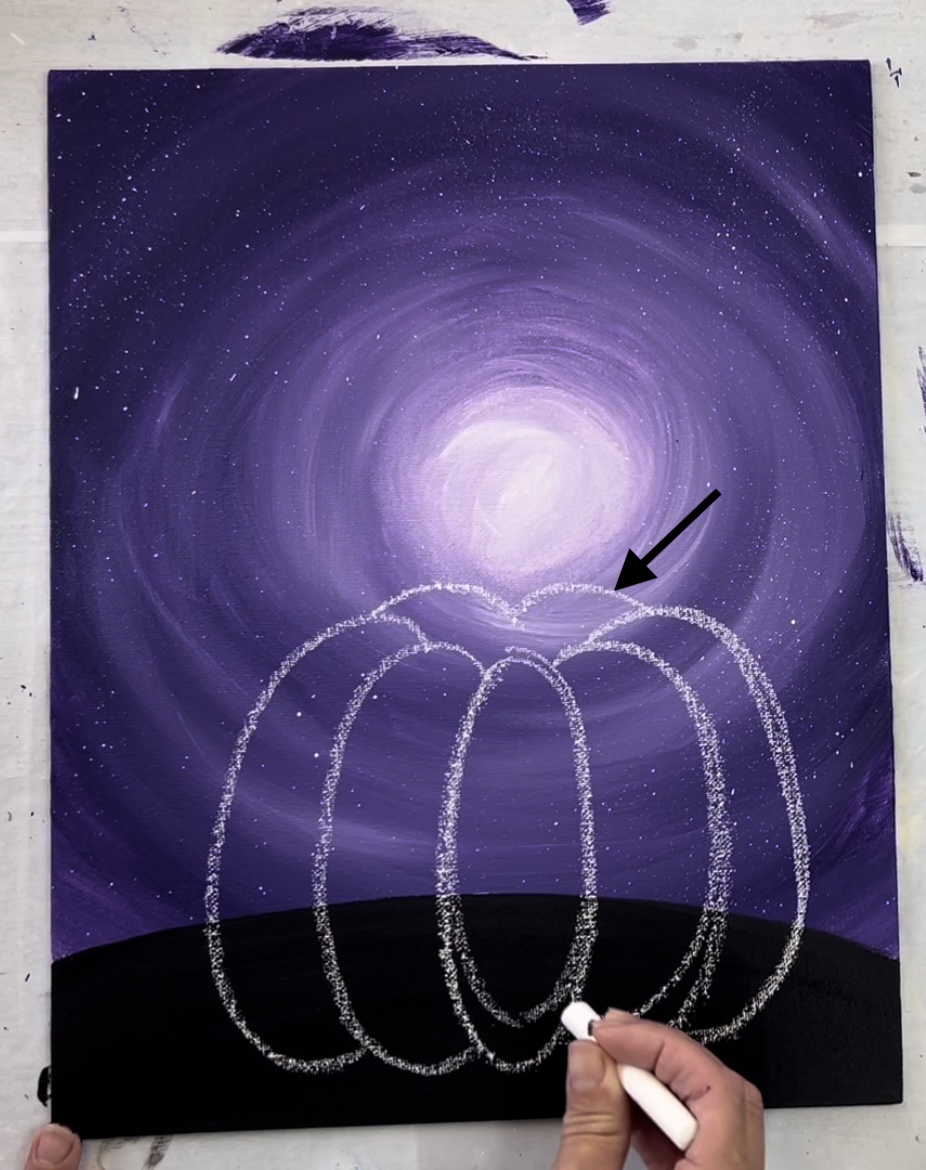
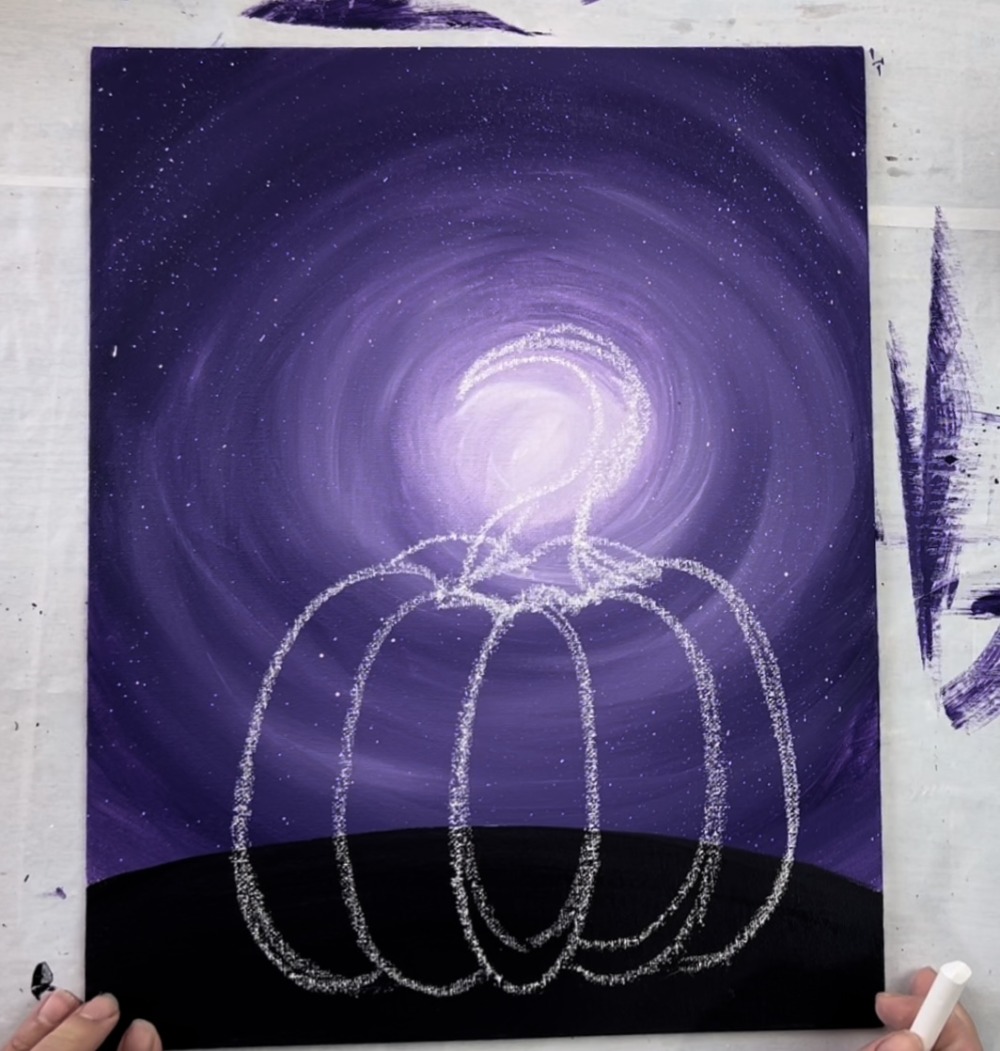
Next, draw the stem of the pumpkin. The bottom of this stem should line up with the top of the front 5 bump shapes. Curve your stem around the white circle in the background. (Note: if you stem doesn’t line up with the white circle in the background, that is okay!)
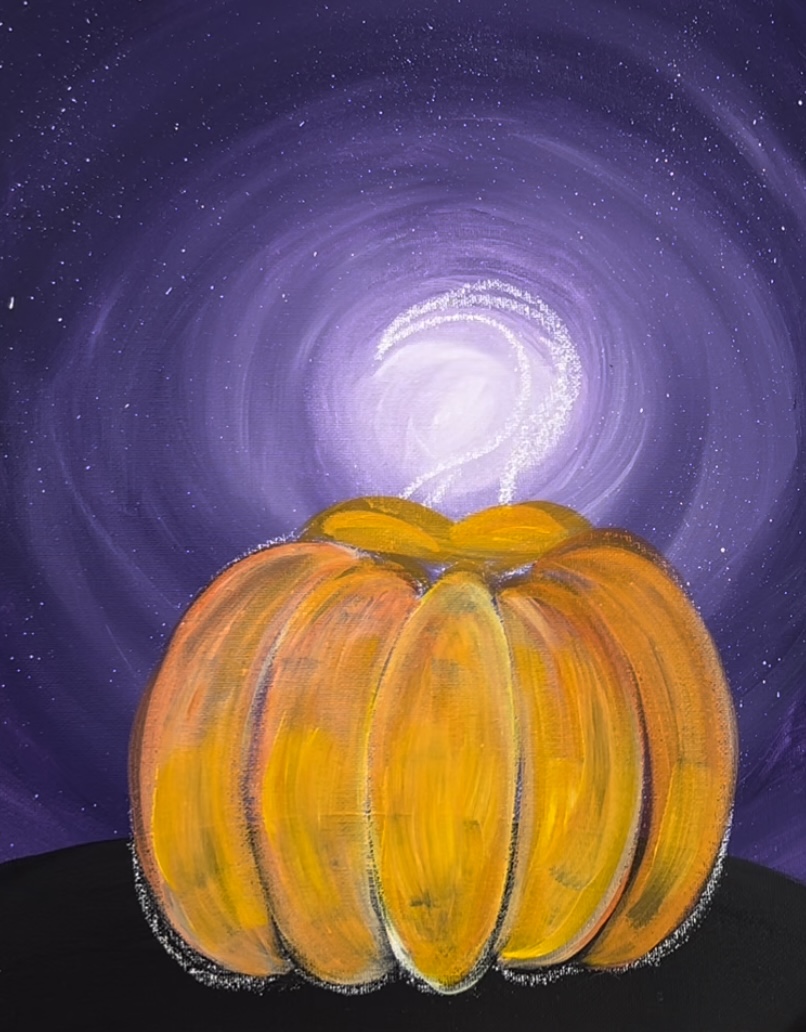
5. Paint Pumpkin First Coat
Load your palette with: cadmium orange hue, titanium white, cadmium yellow medium hue and burnt umber.
Use a 12 bright brush. Load it into equal parts titanium white and cadmium yellow medium hue. Paint the middle bump of the pumpkin first.
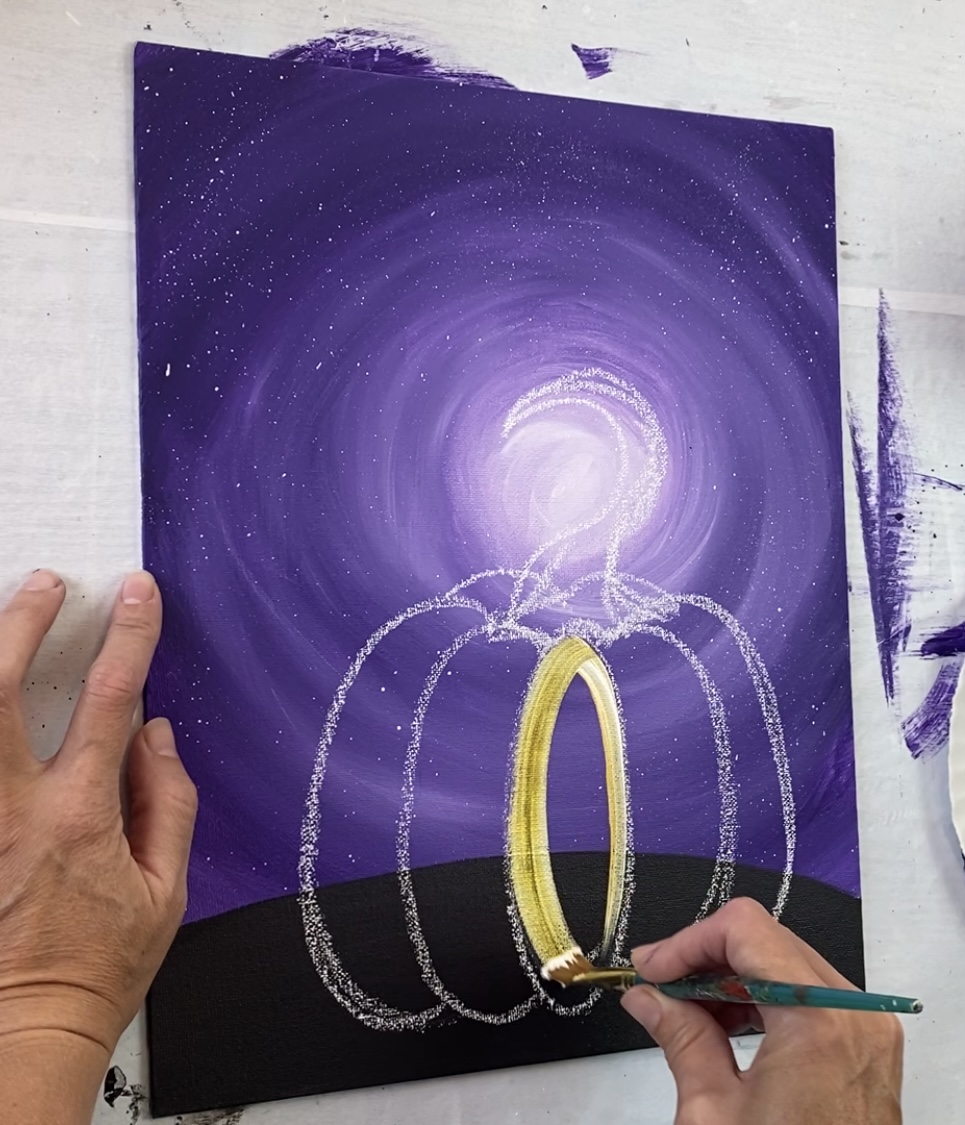
Your strokes should go in a vertical direction curving with the shape of the curves.
Next, paint the bumps on the left and right. This time, load your brush with some of the orange. This helps the bumps to stand out from each other when you vary the colors.
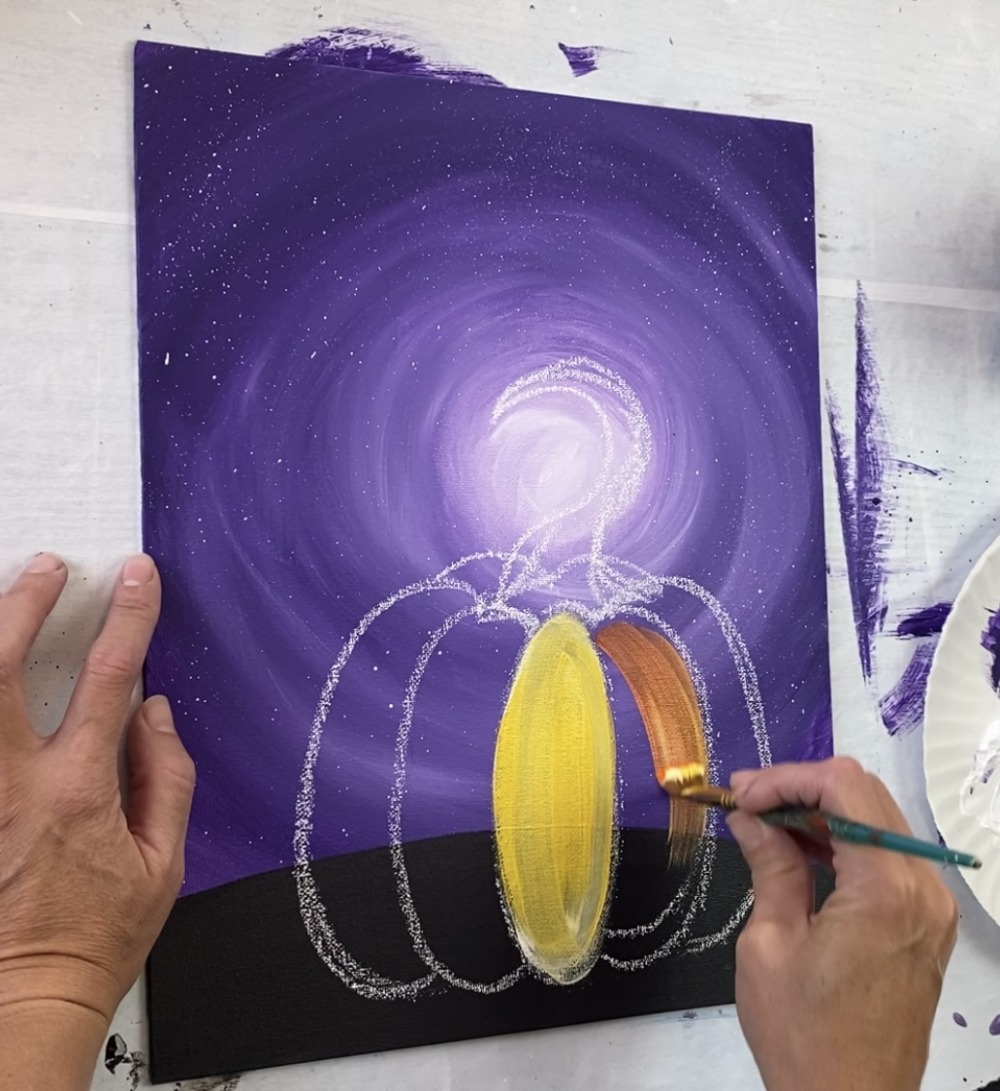
Make sure you are loading your brush with titanium white plus the color. The white will help cover the dark background so it isn’t showing through the pumpkin.
You will still see dark through the pumpkin as this is the first coat. You will be doing a second and third coat. Also, make sure you are painting in a curved and vertical direction. Try to start at the top of each bump and stroke down in a curved direction. Try not to over blend the yellow, orange and white.
Leave a tiny slither of a gap between each of the pumpkin bumps. The dark background between the bumps will hep create the shadows between each of the pumpkin bumps.
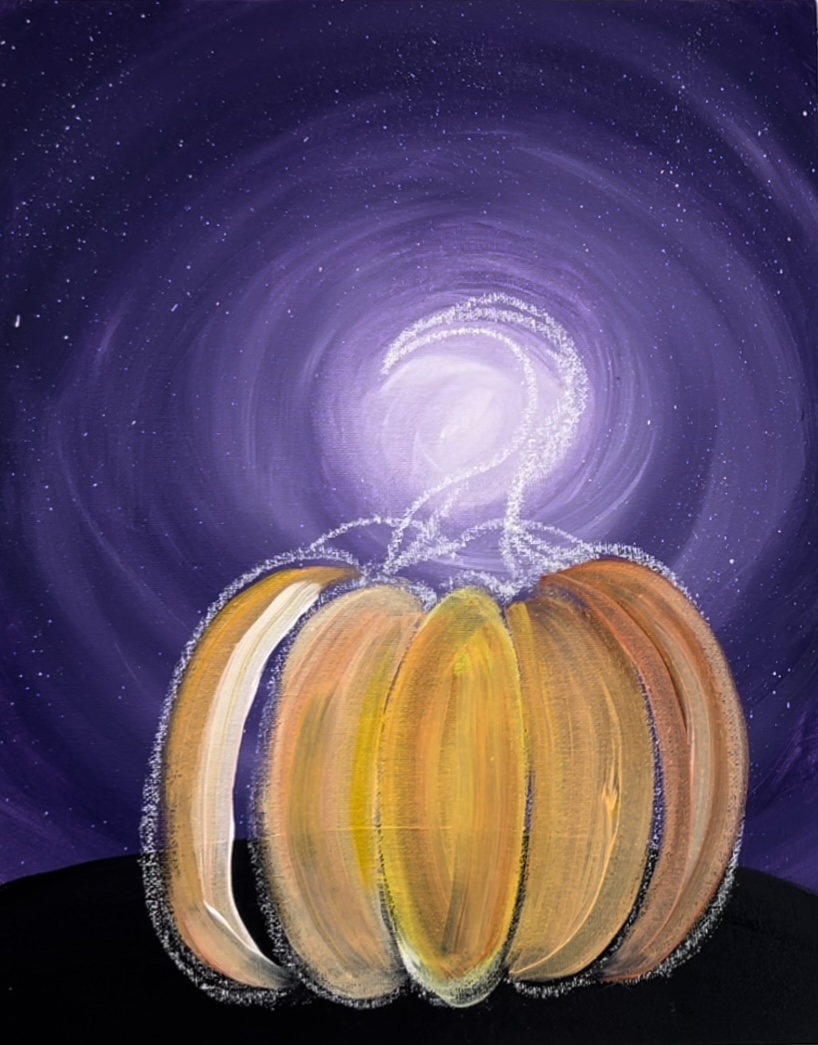
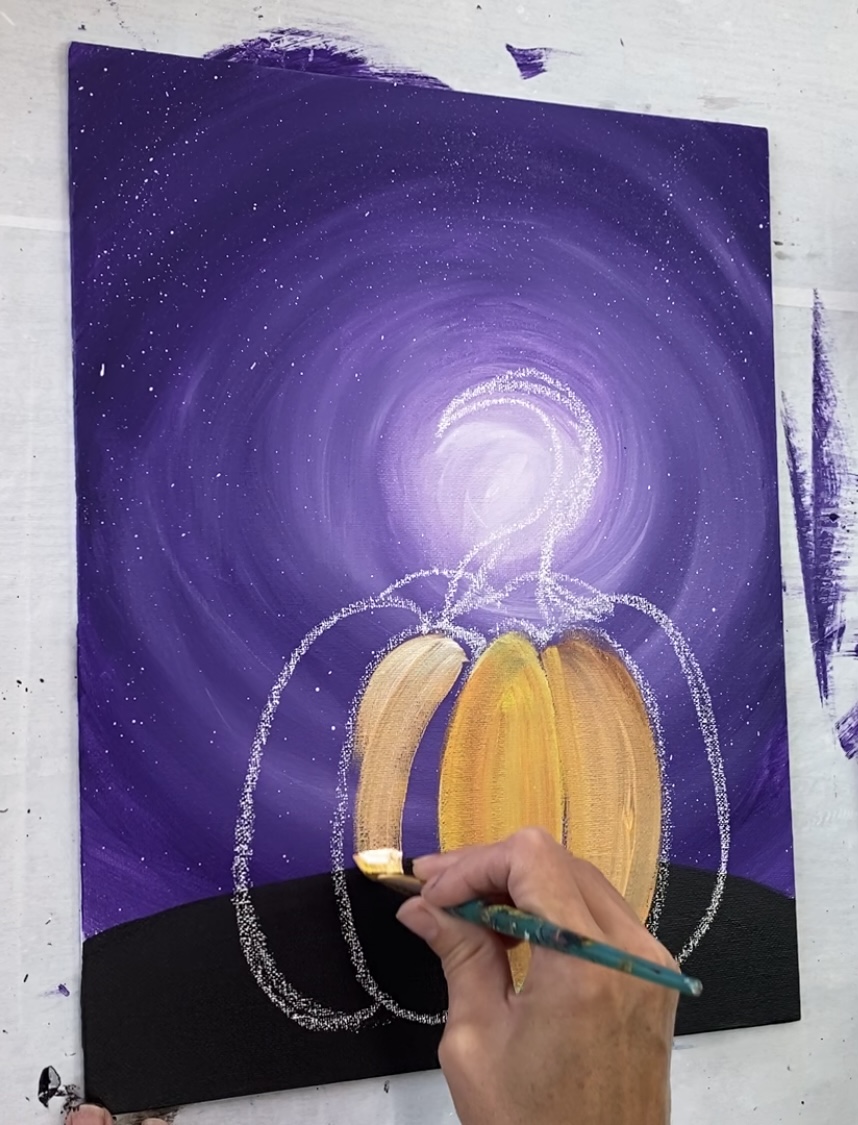
After painting each bump (including the back bumps), add a second coat of paint. Add more orange this time around if you want your pumpkin to be more of a bright orange.
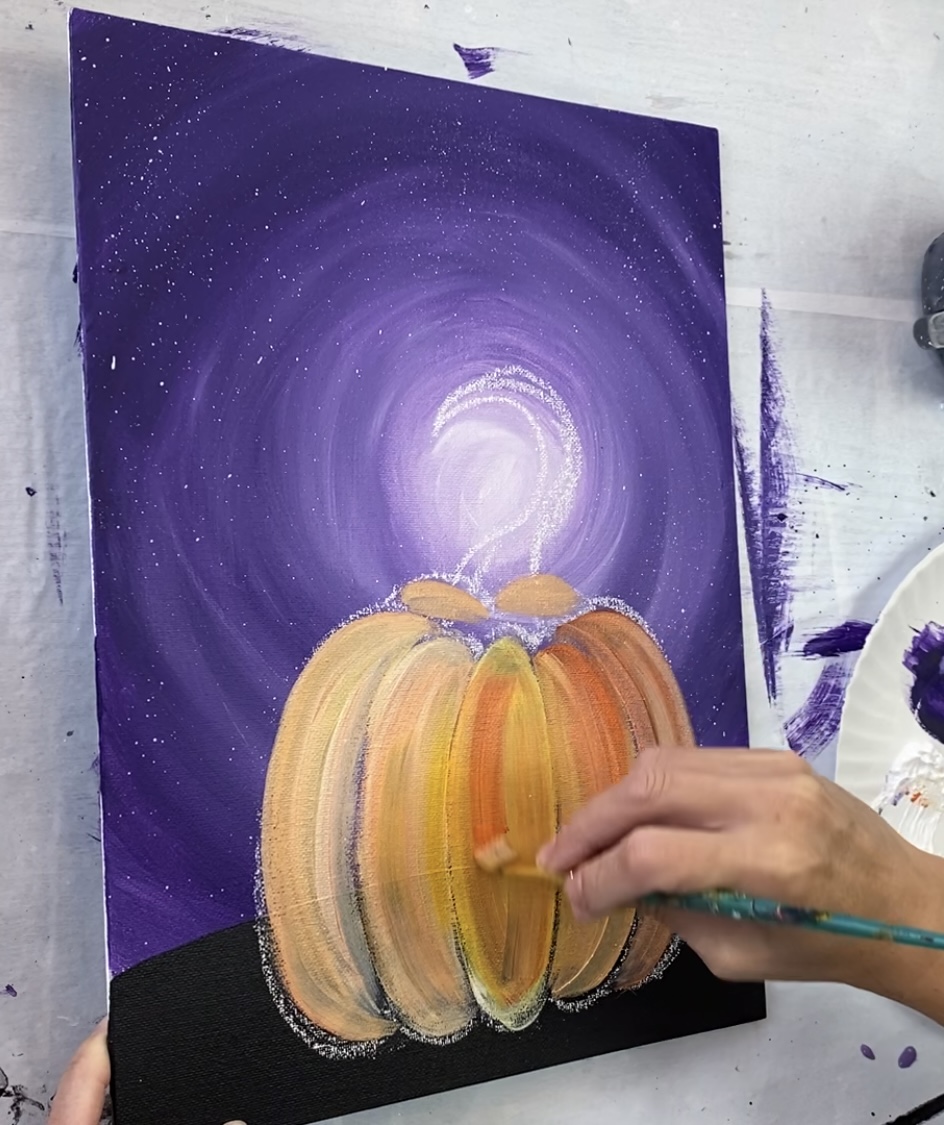
Also, add more yellow and white if needed. You may need to do a third coat if the black hill is still showing through. Wait for this coat to dry before doing that.
6. Paint Pumpkin Stem
Use a #4 round brush and burnt umber to paint the stem.
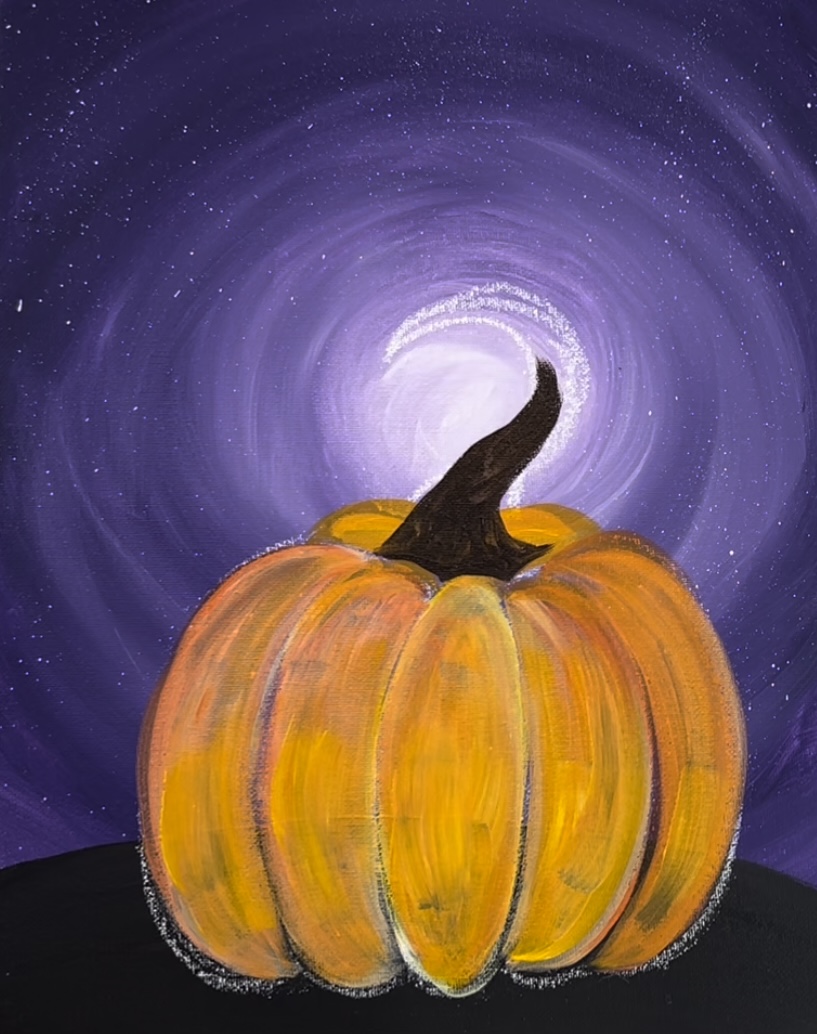

If you want some texture in the stem, add tiny amounts of white into the brown and gently blend it with the brown with short and curved strokes.
After your pumpkin dries, use a wet wipe to gently erase any chalk that may be showing through.

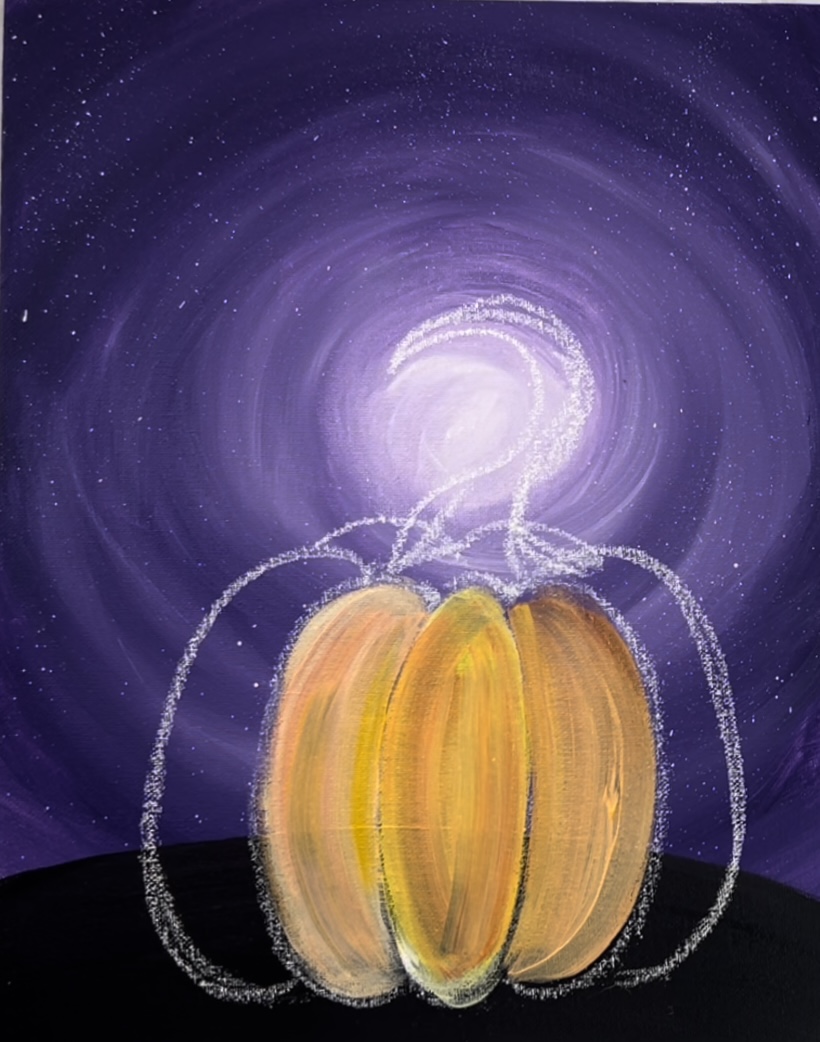
7. Paint Pumpkin Third Coat
If needed, paint a third coat onto the pumpkin.
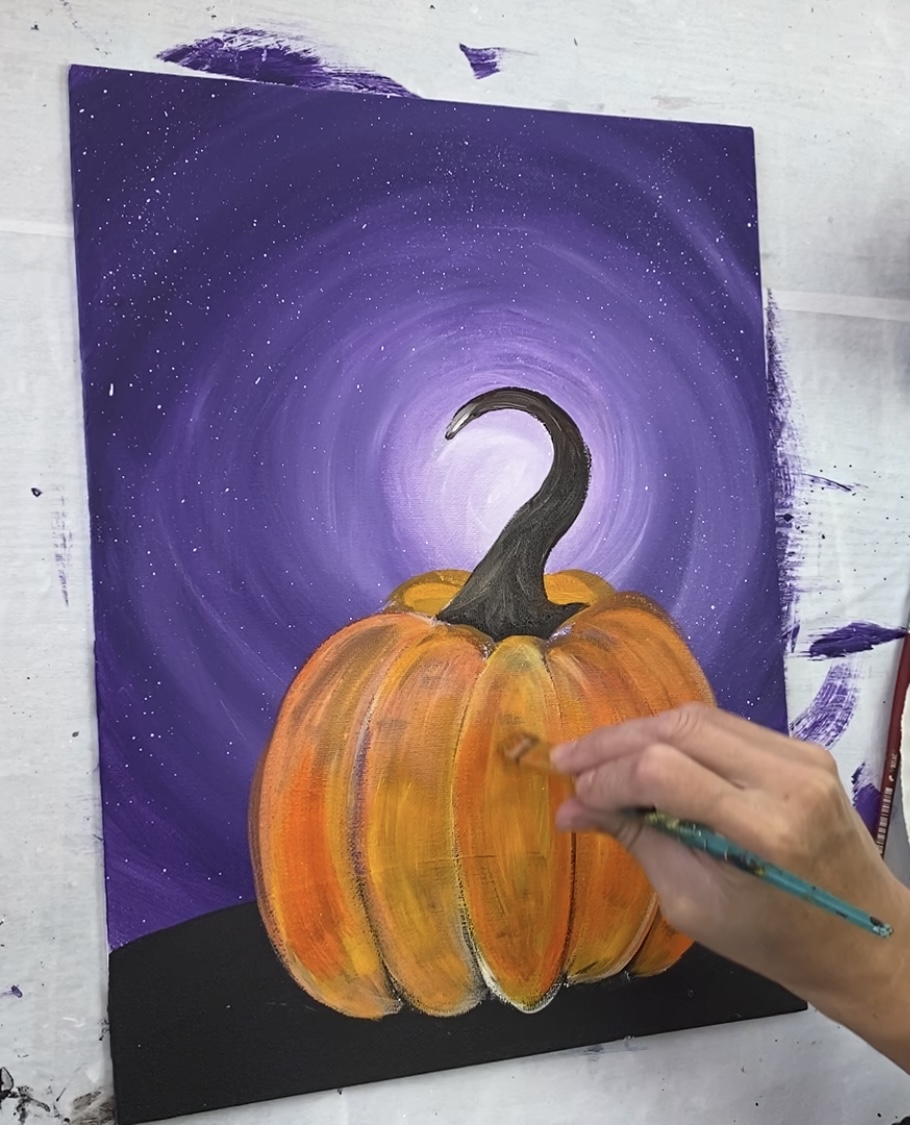
To add “highlights” to the pumpkin, use titanium white mixed with the yellow. Stroke with one stroke in a curved direction on one side of some of the bumps.
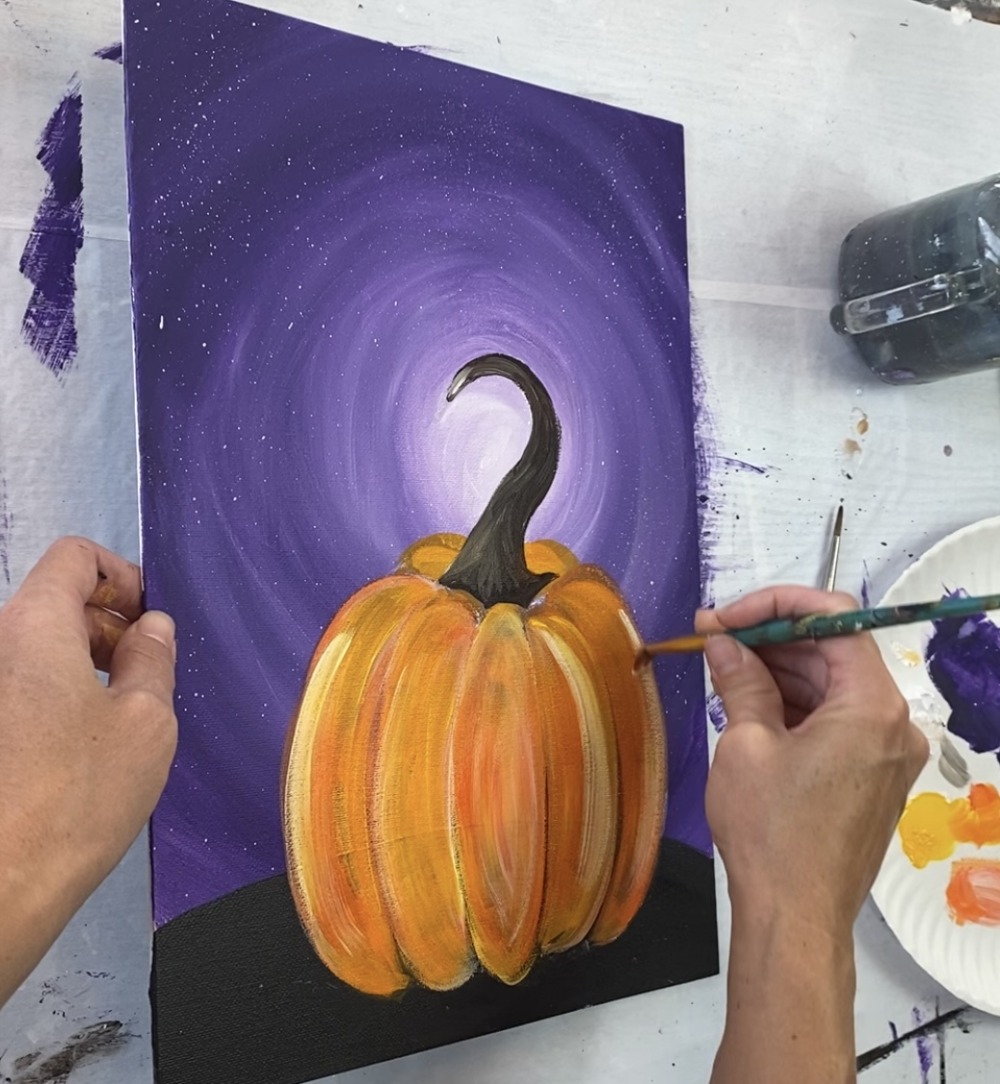
You can also “dry brush” some of the lighter colors on the pumpkin. This means only loading a small amount of paint on the brush and stroking it in a curved direction. The color underneath will still show through the dry brush.
8. Paint Brown Ground Texture
Use a #12 bright brush and burnt umber to paint some brown texture on the ground. Add a tiny bit of white into the brown if needed for it to show better. Paint short left and right strokes around the pumpkin and all along the hill.
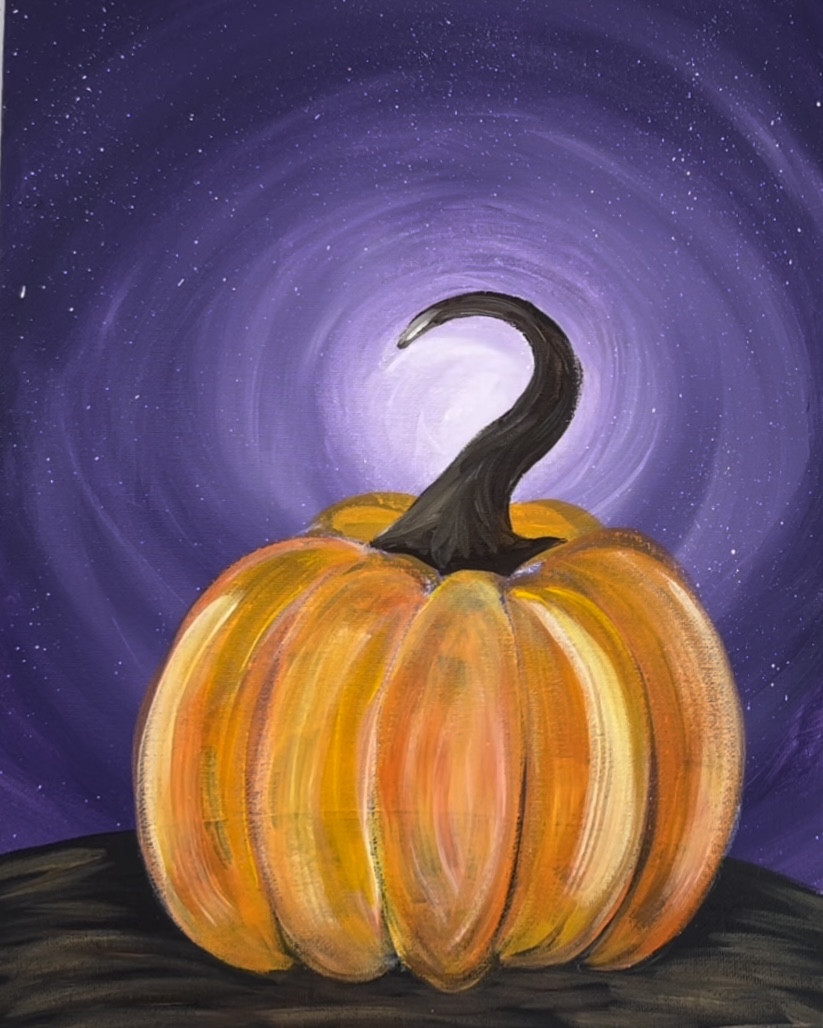
9. Draw & Paint Bird
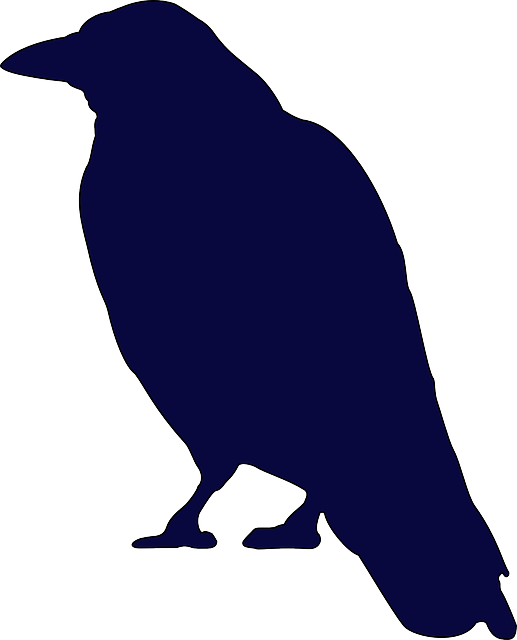
Reference photos for the raven. You can use the photos below to help you get the shape and body outline drawing of the raven.
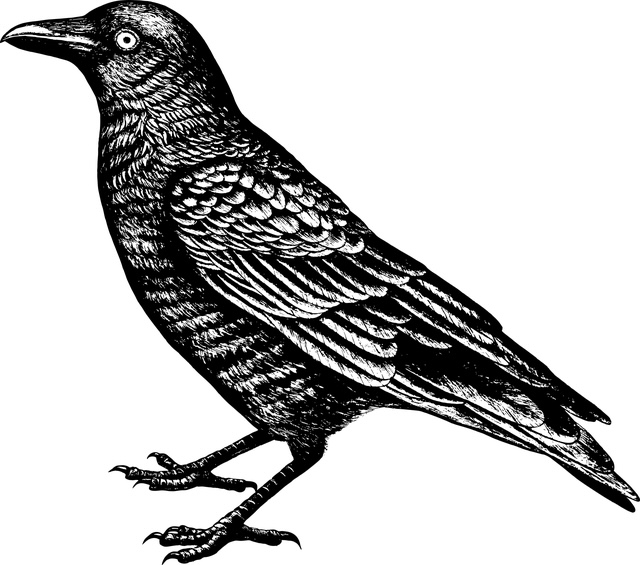
Use a piece of chalk to draw the bird. Start with a circle for the head and draw its beak.
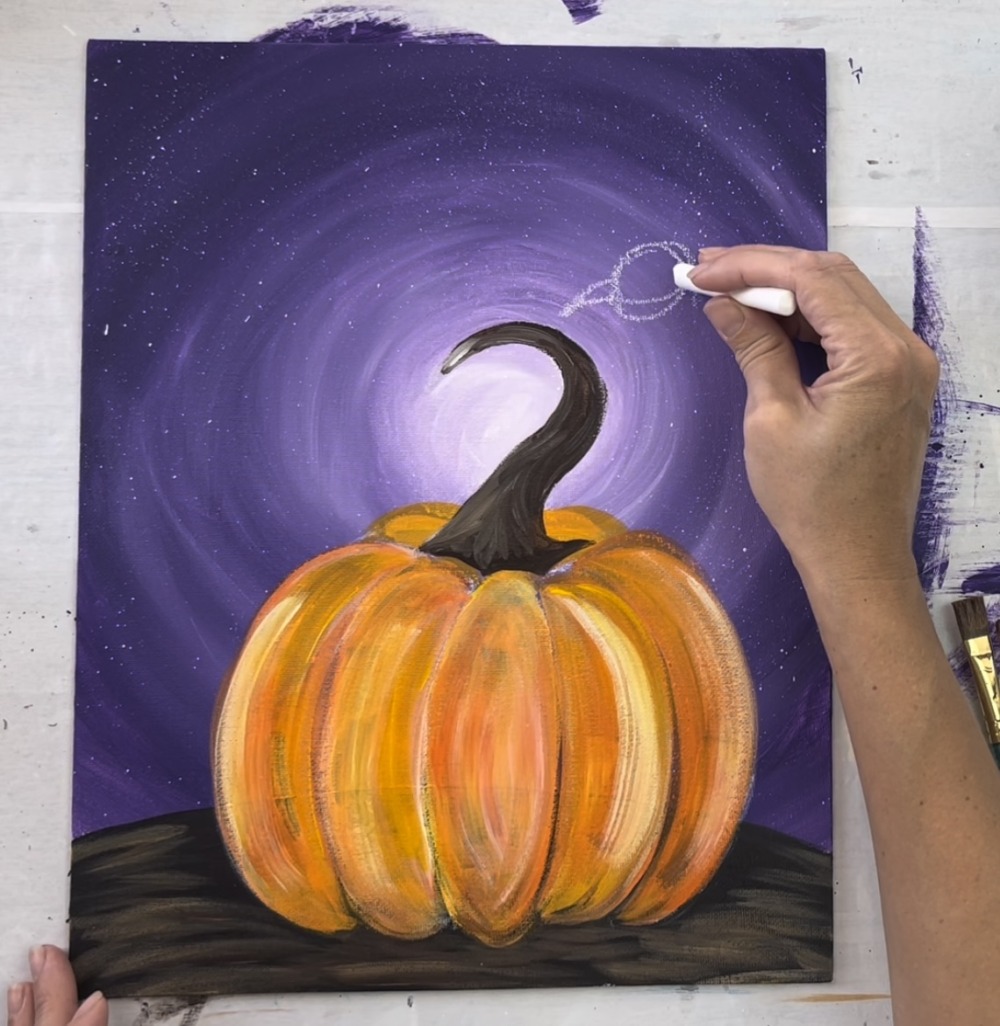
Then draw the body.
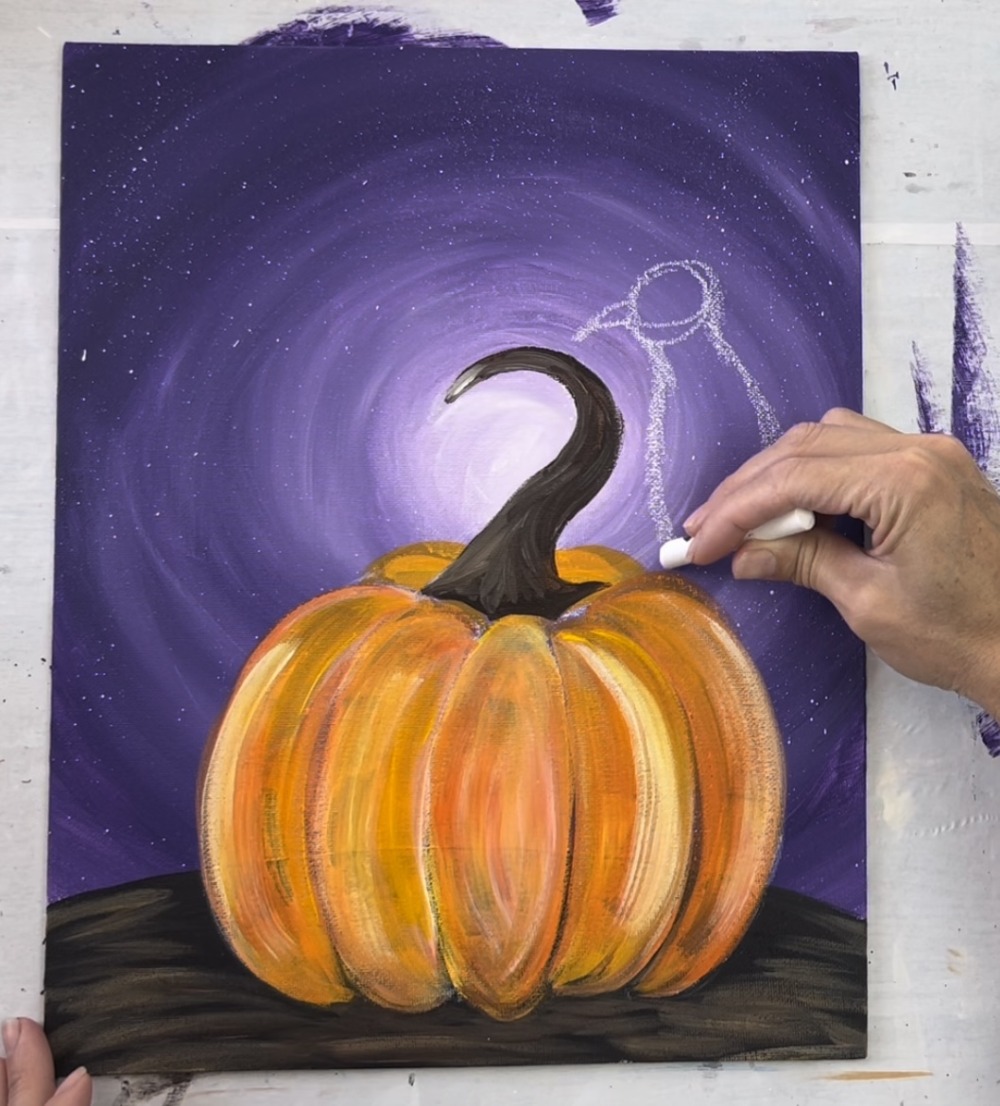
Draw the tail and the bird feet. Do this drawing in a very sketch-like style. You’ll be able to erase the chalk as needed.
Then draw the side wing. Erase unwanted chalk marks.
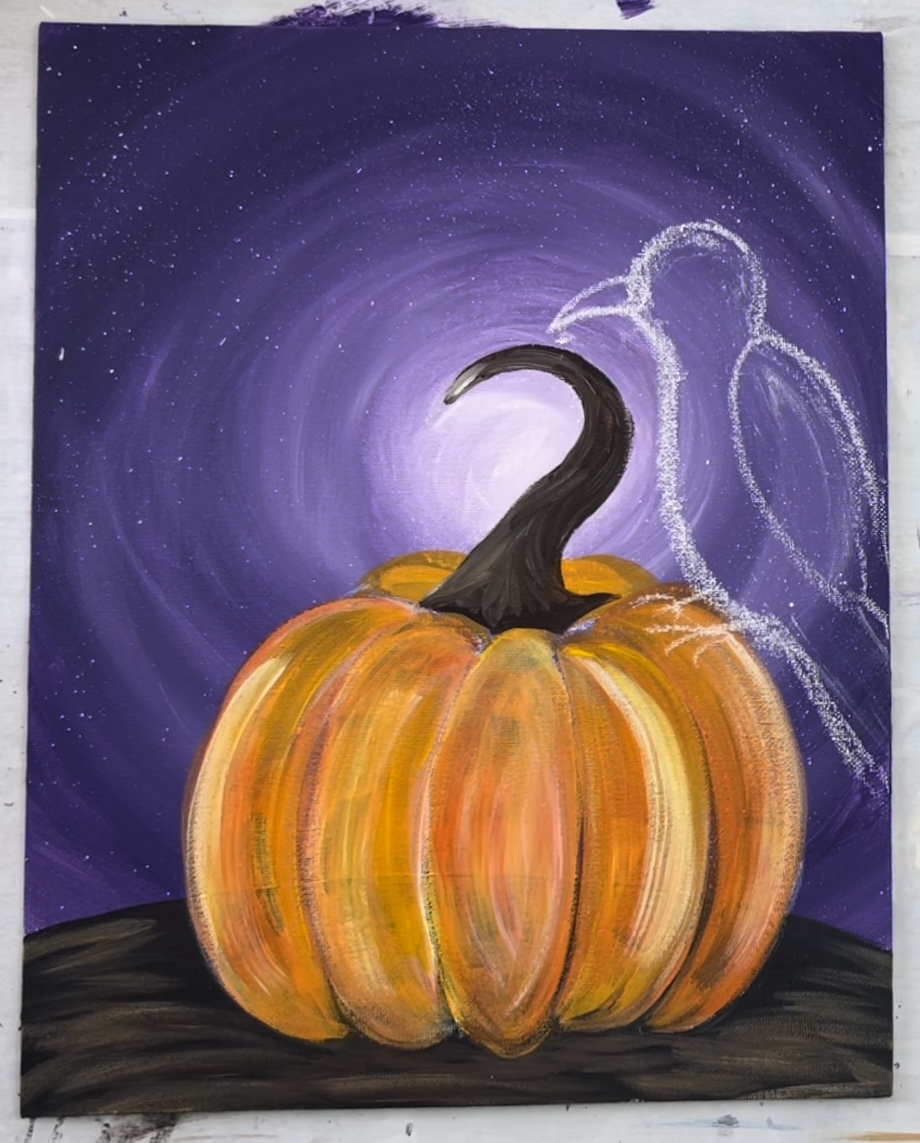
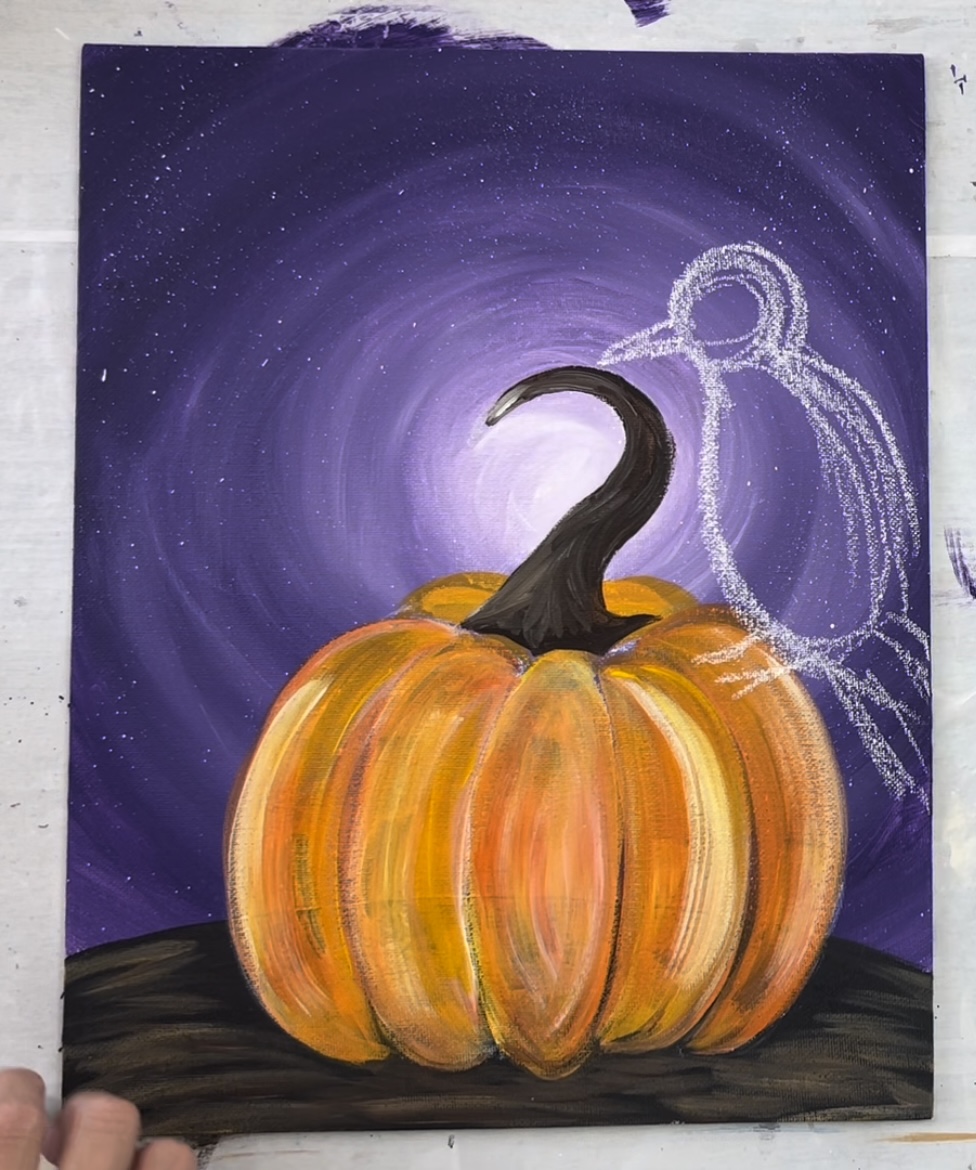
To paint the bird, use mars black and titanium white and your #4 round brush. Start by using just the mars black to loosely outline the shape of the bird and its side wing.
Fill the beak and the head in solid black.
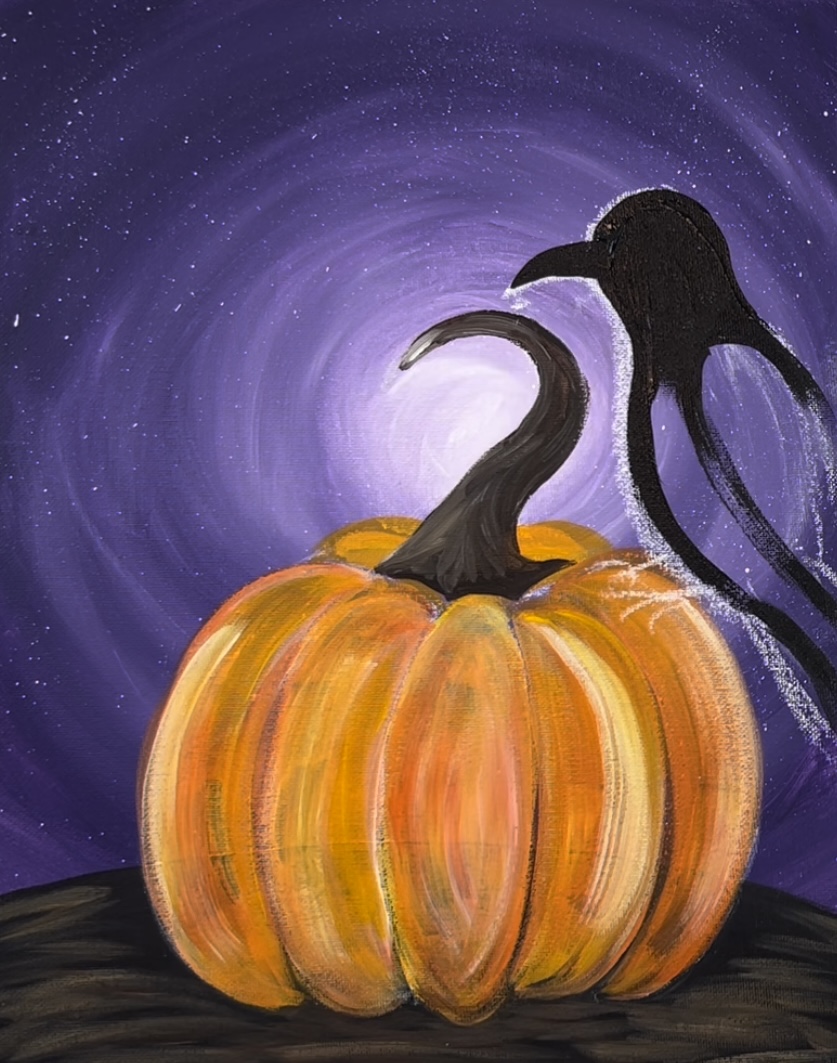
Then add bits of white to the tip of your brush. Paint the wing using short curved strokes and let the white and black blend together. This will create a gray feather texture. Leave the belly area dark and the wing and tail area a tad bit lighter so it stands out.
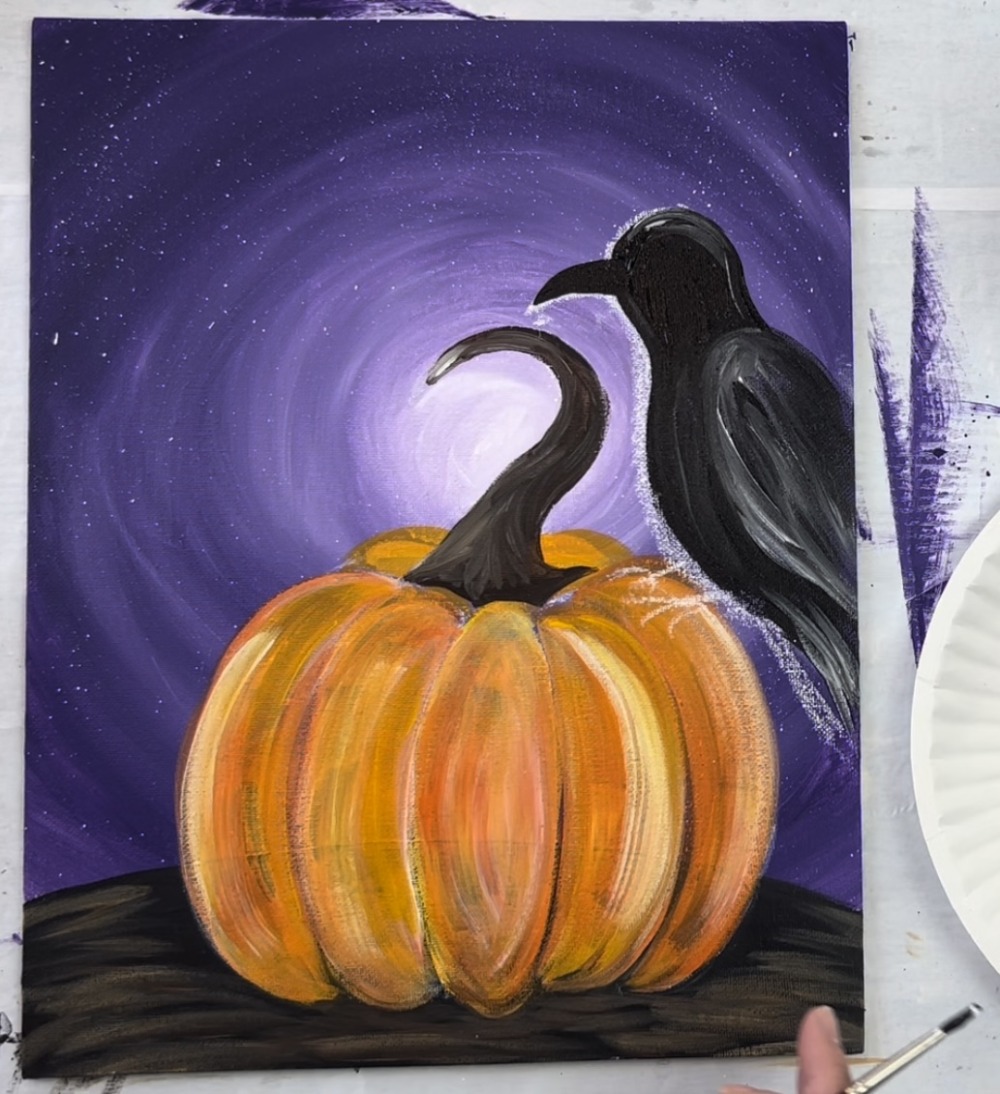
Then paint the legs of the bird using the 4 round brush (or a smaller brush if needed). Add white to the tip of your brush and paint one small dot for the eye.
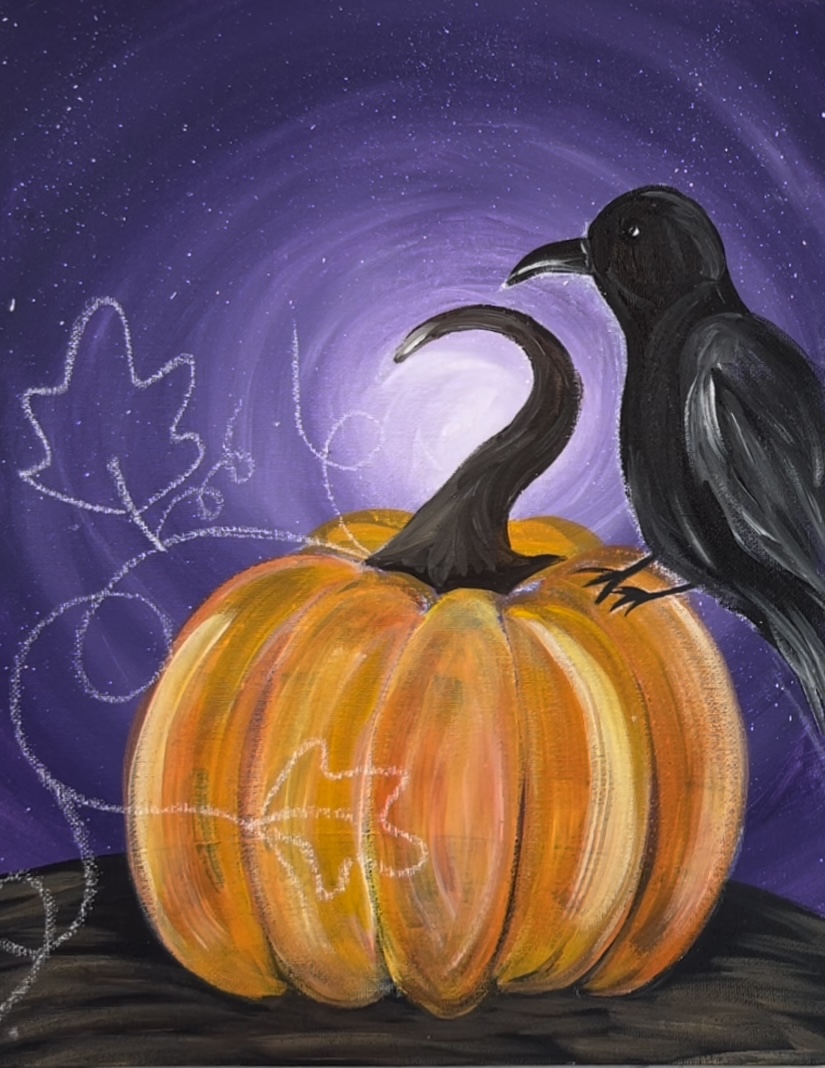
10. Draw & Paint Pumpkin Vine
Use a piece of chalk to draw the pumpkin vine. Draw a curly line going up from the base of the pumpkin stem. Then draw a curved line that is longer and wraps/overlaps the front of the pumpkin.
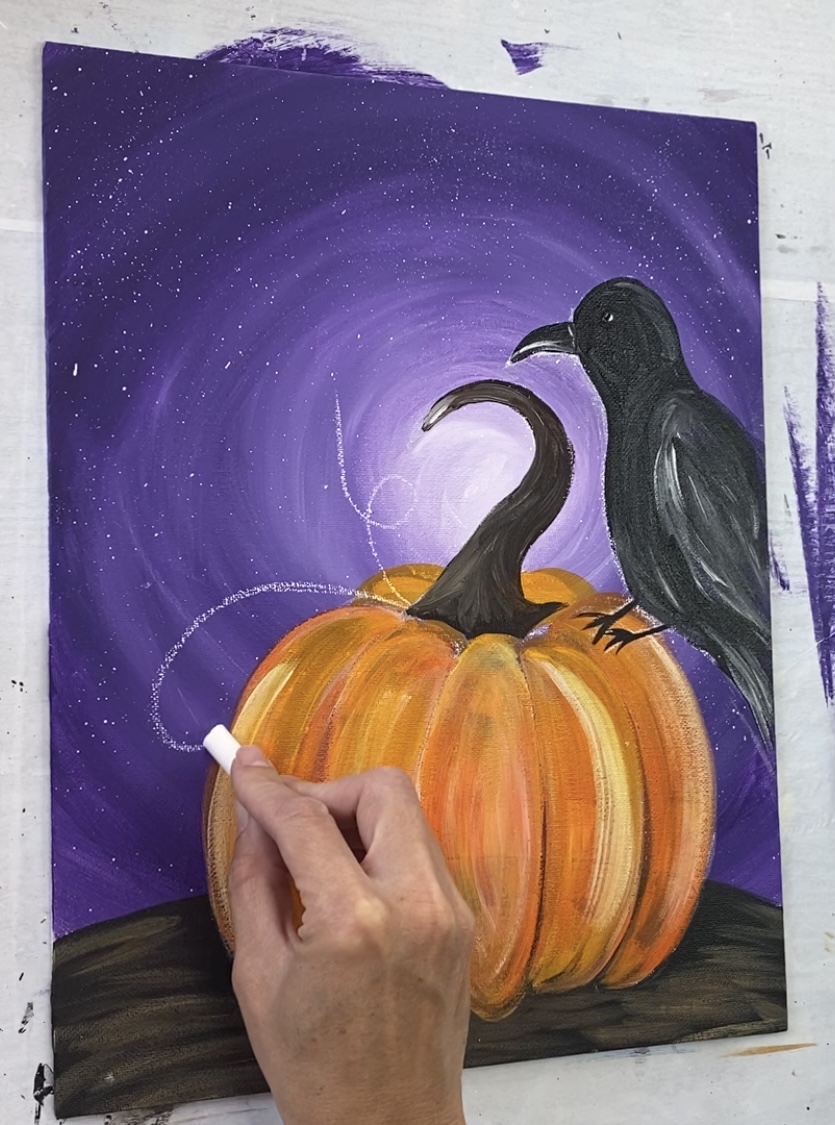
Remember, chalk will erase! So if you mess up on your vine or want to position it differently, you can always adjust.
Draw the pumpkin leaves on the vine as well.
Next, load your palette with brilliant yellow green and deep green permanent. Use a #4 round brush and load it into both of the greens. Loosely paint the vines of the pumpkin.
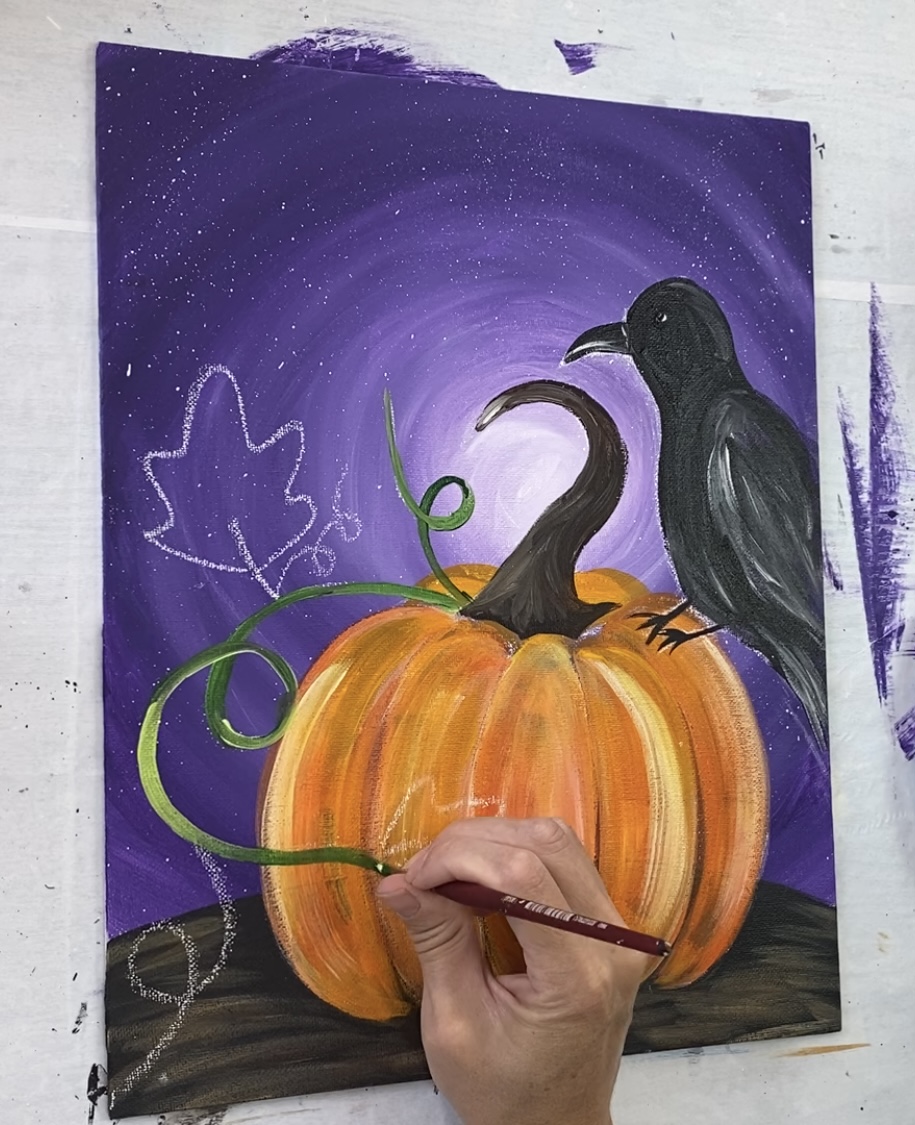
Let the colors fade from light to dark. The brilliant yellow green will be opaque and bright enough to show over the dark background.

Then paint the leaves of the pumpkin. Use a combination of both of the greens and let the lights and darks gently blend together to create a variation of color.
Then paint vein lines on your pumpkin leaves.
Erase extra chalk lines after your paint dries.
11. Paint Stars
Use a tiny 5/0 round brush to paint diamond/twinkle stars. This is a good way to fill up empty space in the sky area.
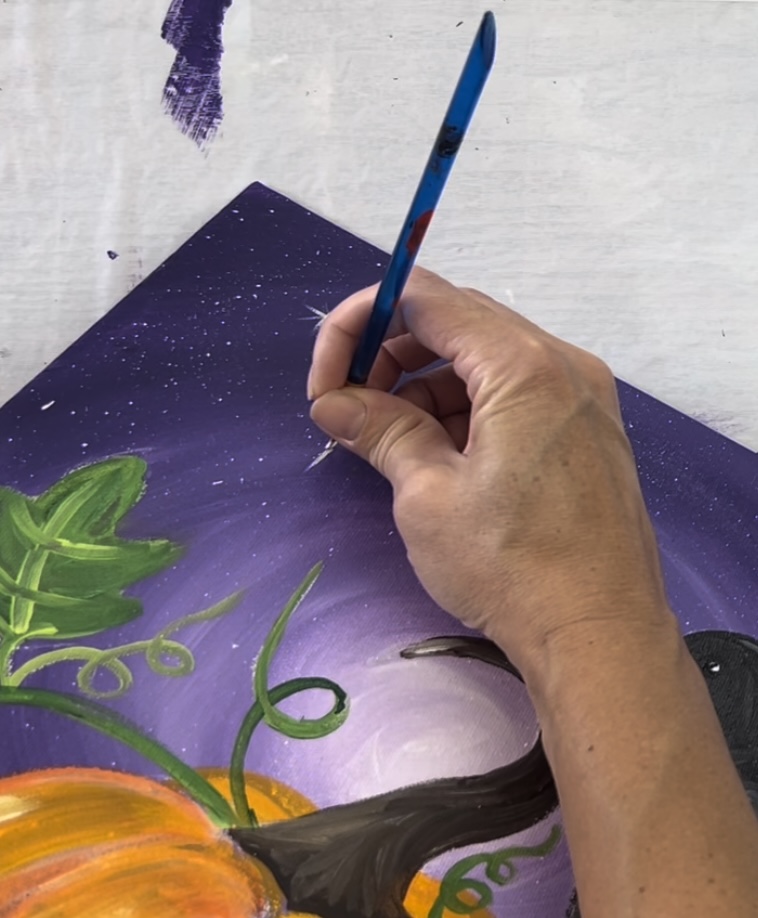
Paint a vertical and horizontal line with a bright dot in the center. Then paint diagonal lines extending from the center. Try to make the ends of each of the points go to a point. You’ll need to release the pressure very quickly on the brush for the line to fade to a point.
Paint as many diamond stars as you want in the sky.
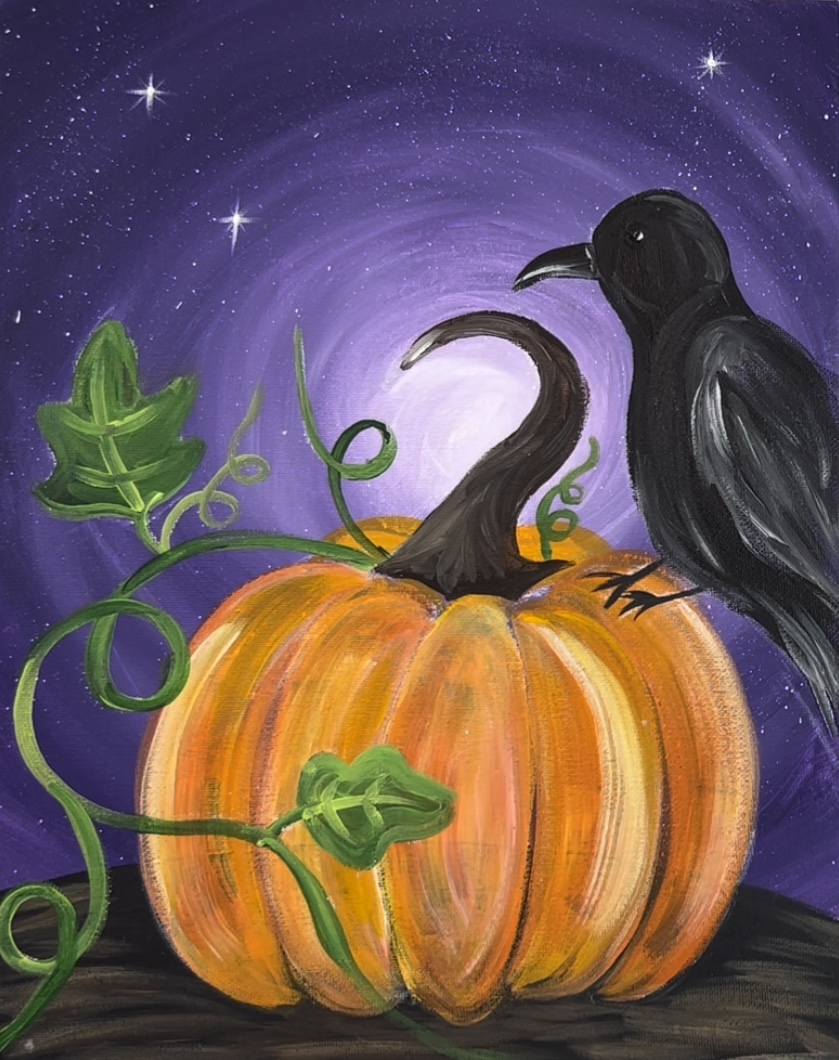
Then loosely highlight the edges of the bird, stem and leaves. Use the tiny round brush and titanium white to do this. When you highlight the edges, you do not need to outline everything. The highlighting is especially helpful to add more contrast with the bird against the dark background.
Finished!
Sign you name and show it off!

Share Your Art Here:


