

Would you like to save this?
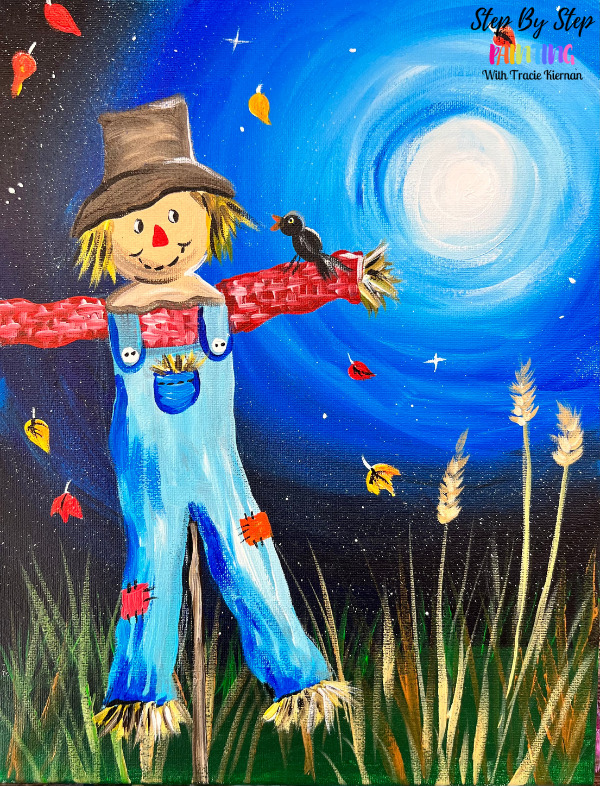
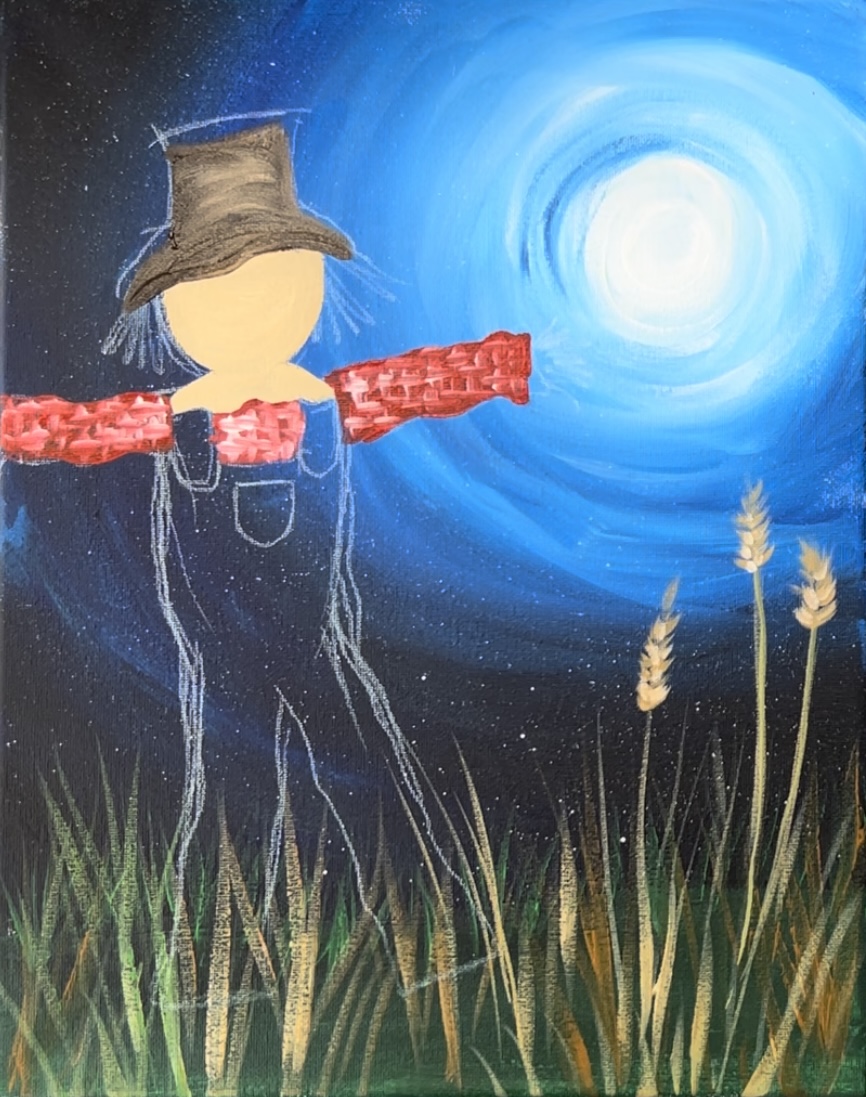
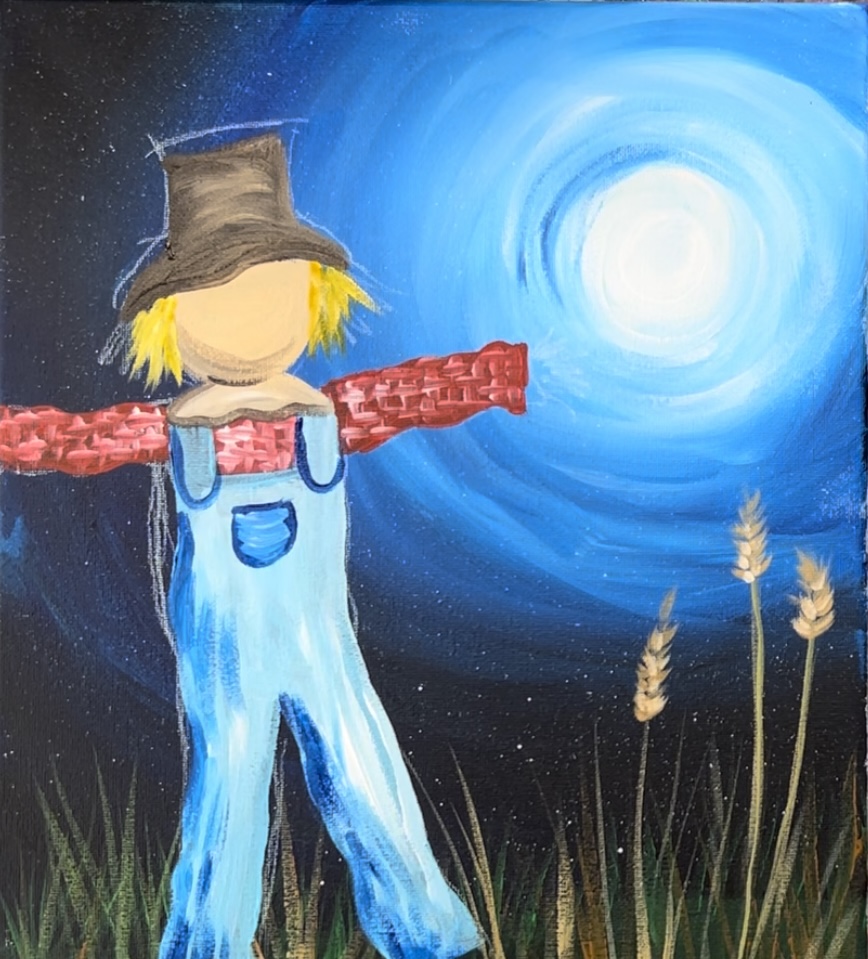
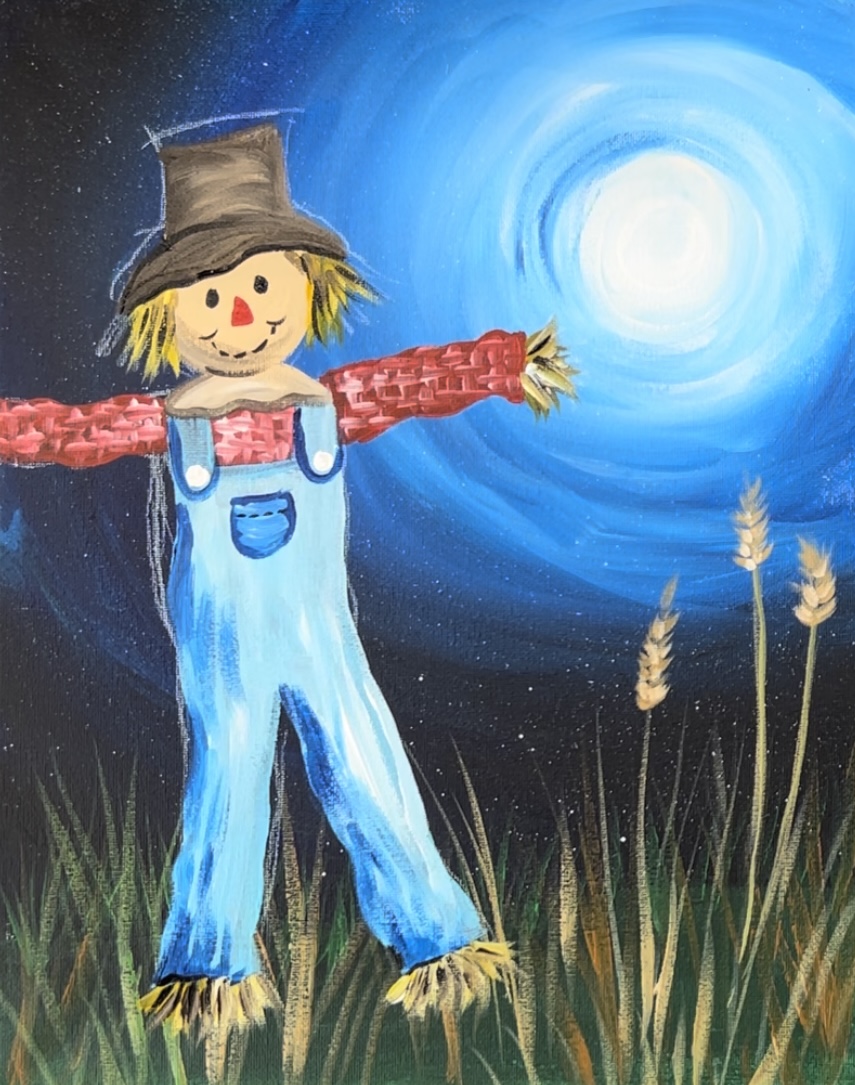
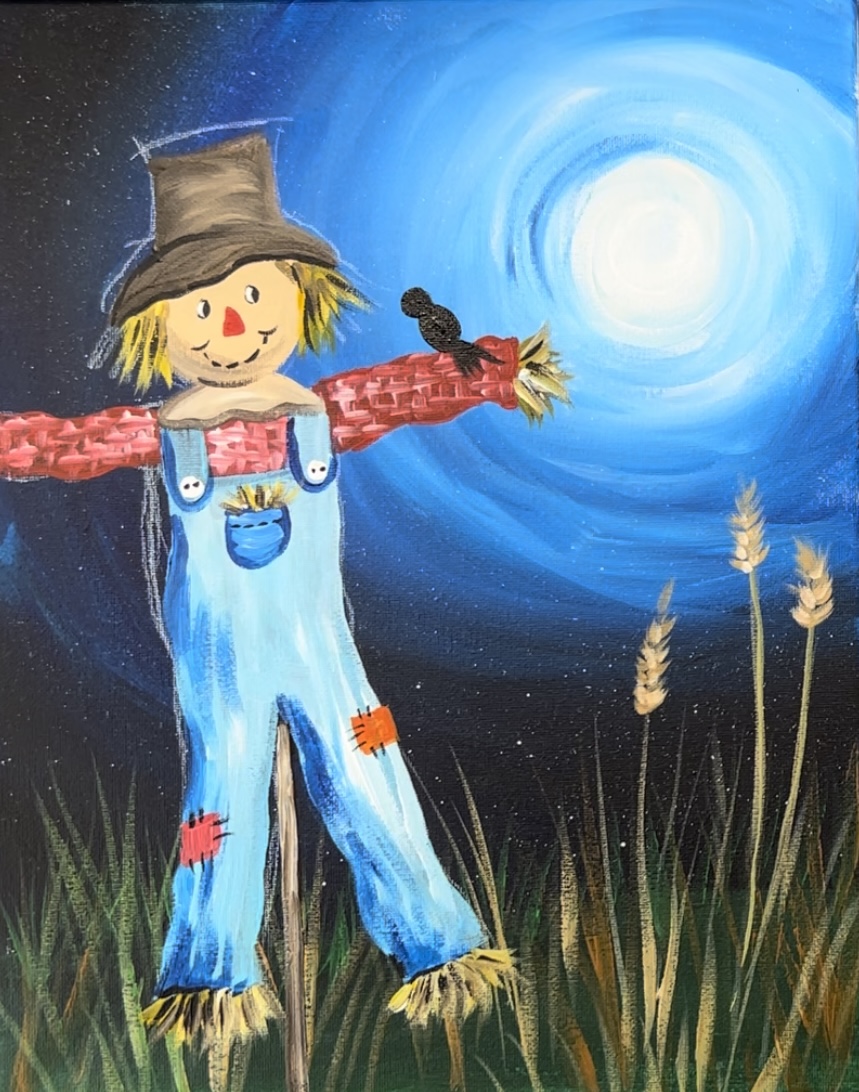
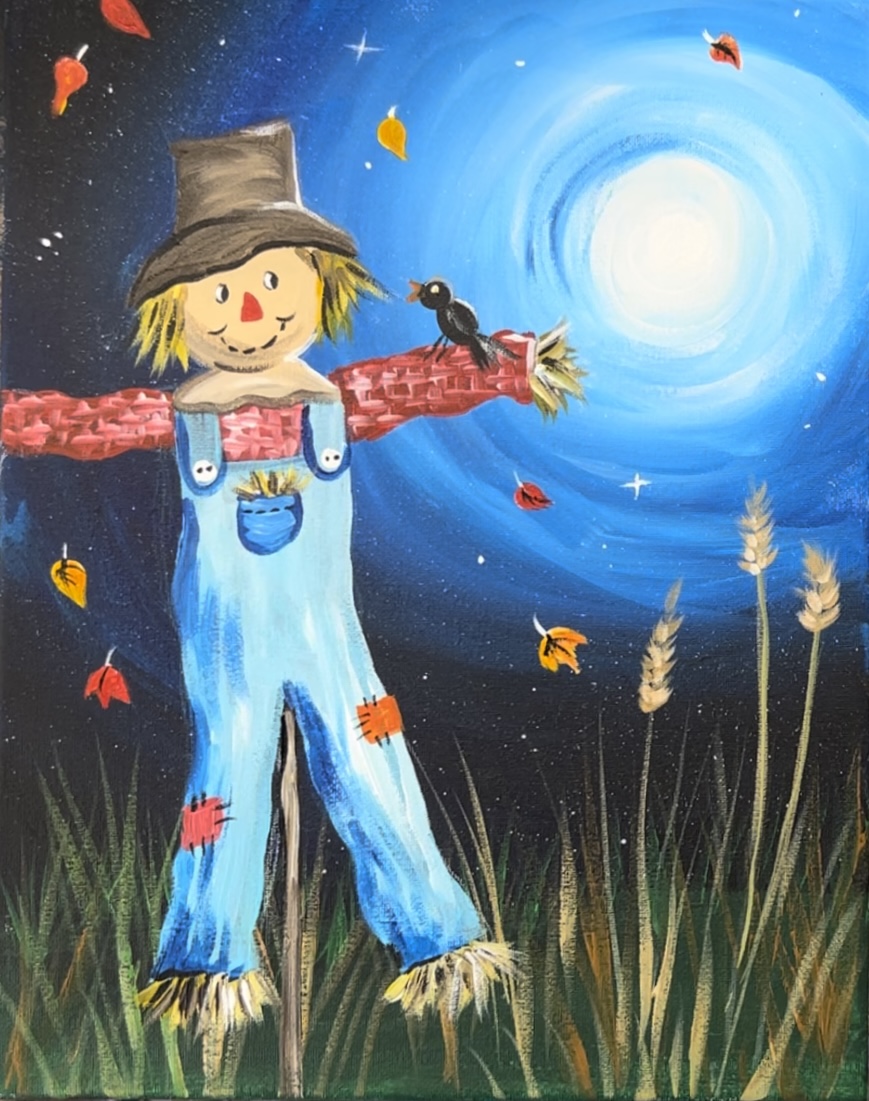
Learn how to paint an adorable scarecrow at night on an 11 x 14 canvas with acrylics!
This tutorial includes an optional tracer for the scarecrow but I will also be showing you how to draw it with a chalk pencil!
Enjoy and happy painting!
Materials List:
How To Paint A Scarecrow At Night - Step By Step Tutorial
Materials
- 11 x 14 Canvas
- Acrylic Paint (I use Liquitex BASICS)
- Paint Brushes
- White Chalk Pencil
- Optional Tracer
- Optional Graphite Paper If Using Tracer
Colors
- Titanium White
- Mars Black
- Raw Umber
- Raw Sienna
- Cadmium Red Medium Hue
- Cadmium Yellow Medium Hue
- Hookers Green Hue Permanent
- Phthalo Blue
- Light Blue Permanent
- Light Green Permanent
Brushes
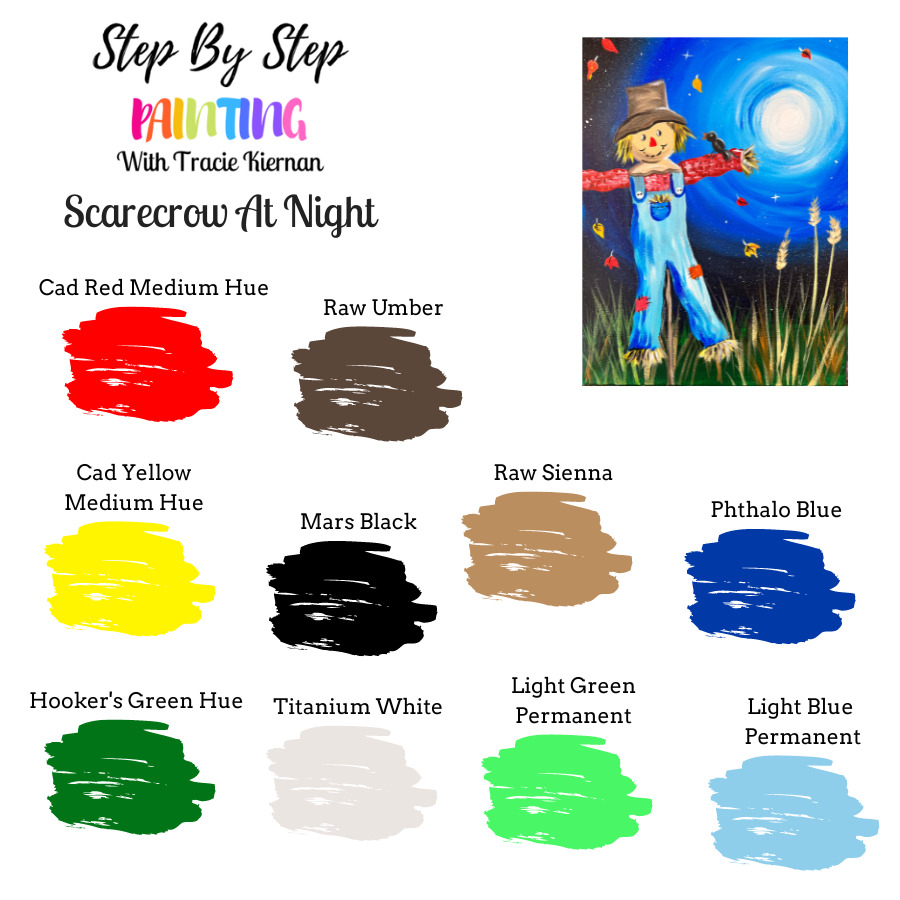
Color Palette:
I used Liquitex BASICS acrylics for this tutorial. If you are using a different brand, you can use the color chart below to help you match colors.
Craft Paint Conversion:
If you are using craft paints such as Apple Barrel Craft Paints, I would recommend subbing to these colors:
- Black
- White
- New Shamrock
- Holly Branch
- Flag Red
- Melted Chocolate
- Nutmeg Brown
- Too Blue
- Parrot Blue
- Bright Yellow
Directions At A Glance:

Traceable
This tutorial requires drawing the scarecrow. Drawing a scarecrow is rather simple with basic shapes and lines. If you would like to use a template instead of the drawing, you can download this printable and trace it onto your canvas. Because this painting has a dark background, I recommend using white graphite paper to transfer the scarecrow.

Video:
Step By Step Instructions:
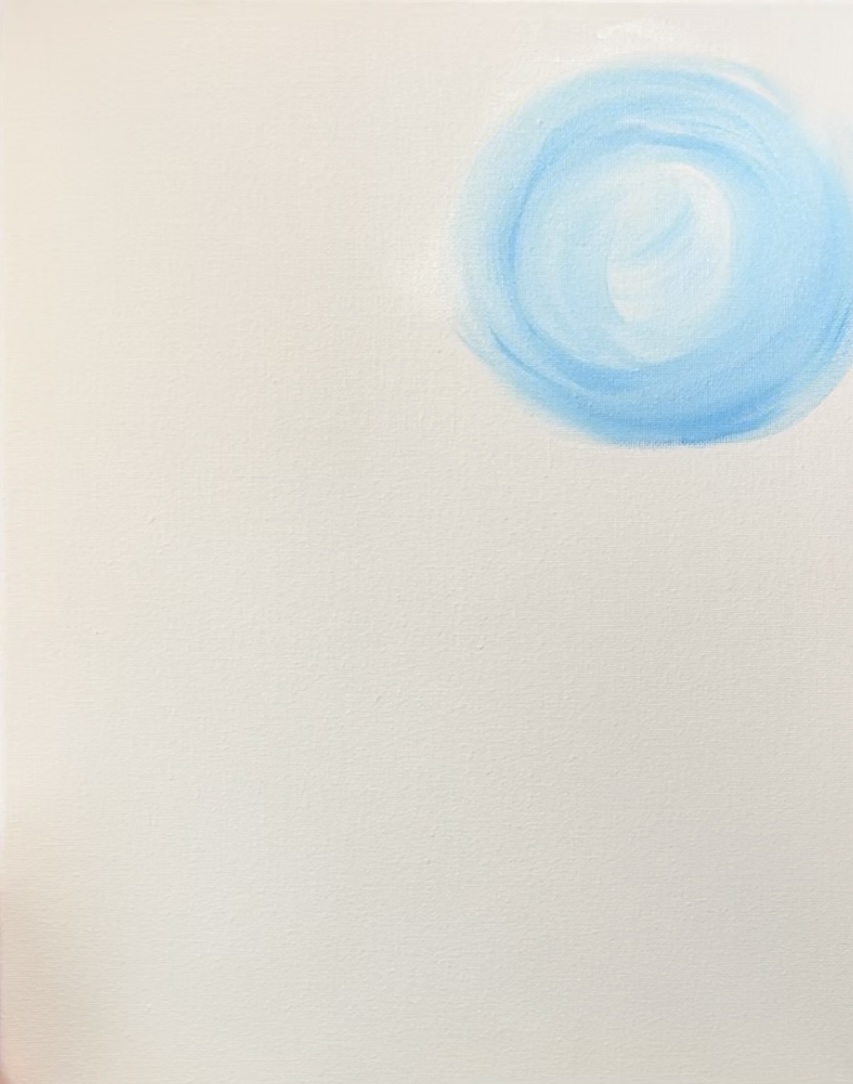
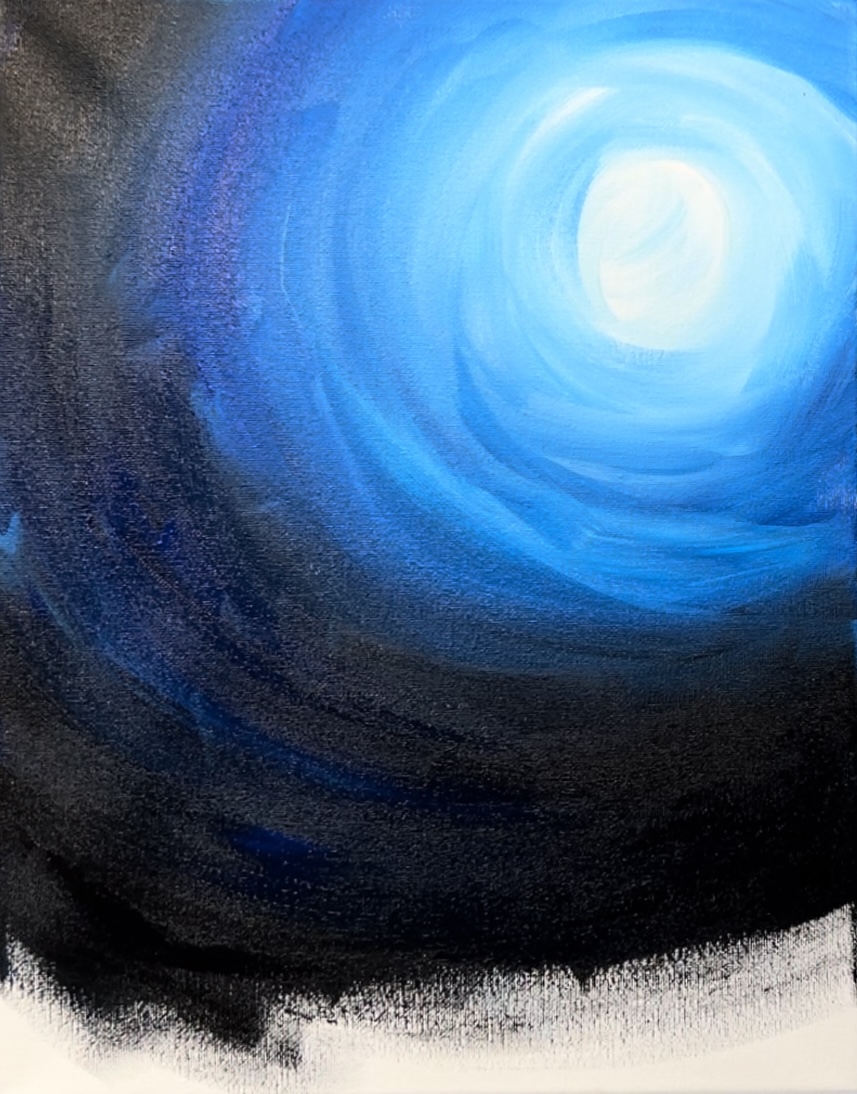
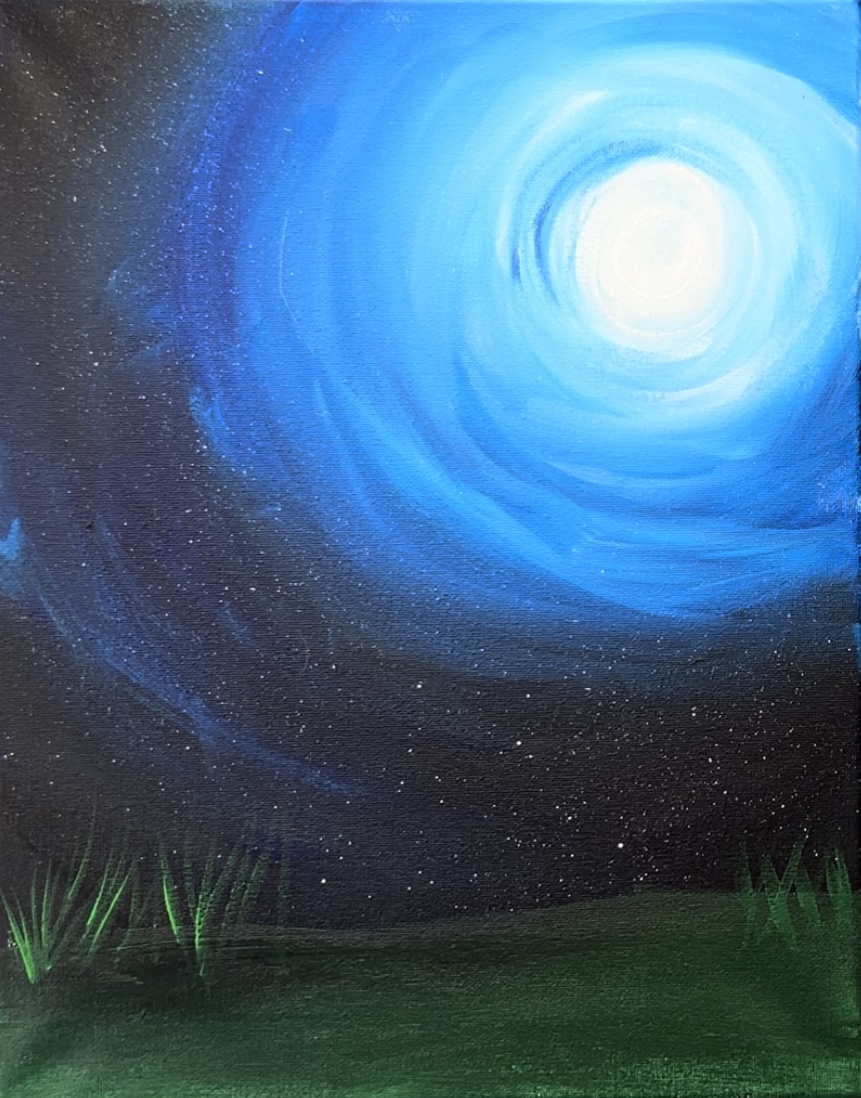
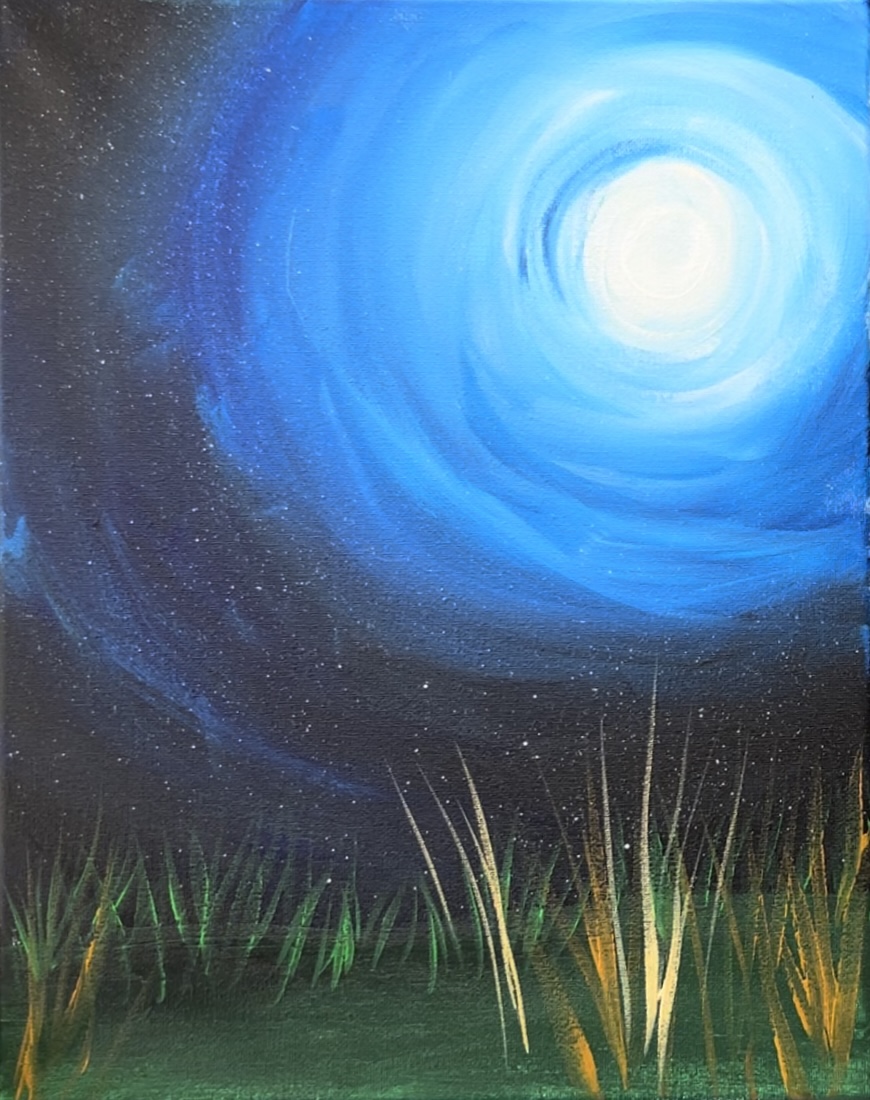
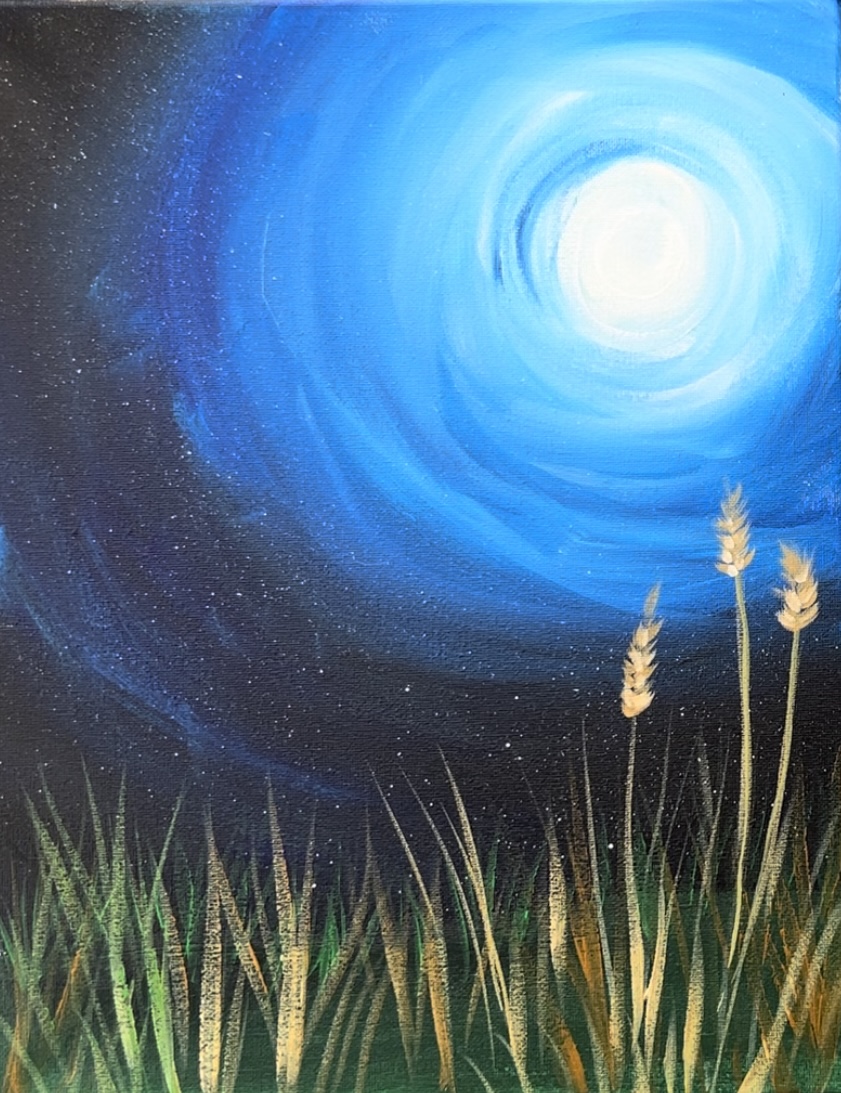
1. Paint the sky
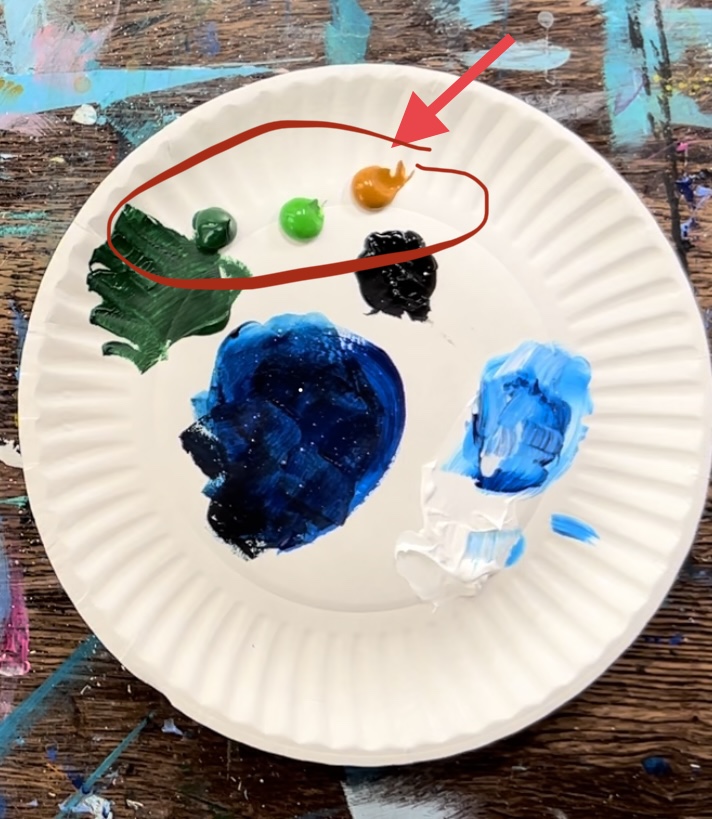
Load your palette with the color: titanium white, pthahlo blue and mars black.
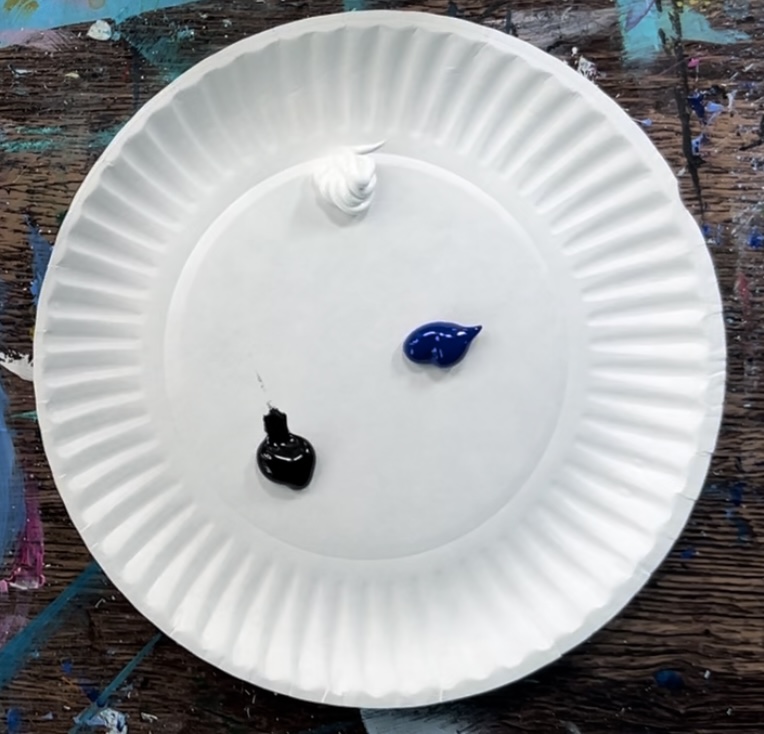
Load your 3/4″ flat wash brush in water and “pat it dry”. Load it into titanium white paint. Then paint a circle in the upper right corner of the painting. This circle needs to be about 5-6″ in diameter.

Then, without rinsing the brush, add a tiny bit of phhtalo blue onto the brush. Gently blend it into the white. Paint in circular strokes and blend the colors on the canvas.
Keep painting in circles around the initial white circle. Add more phthalo blue to your brush as you blend this sky so that it gets darker.
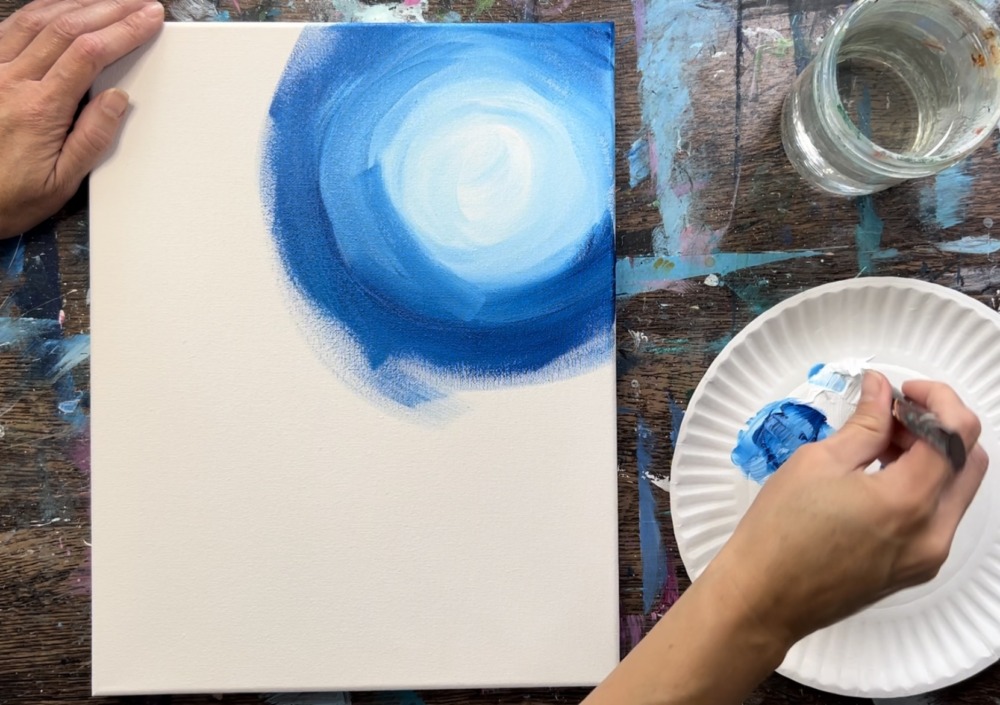
Continue to blend phthalo blue until you get to “almost” the edge of the canvas.
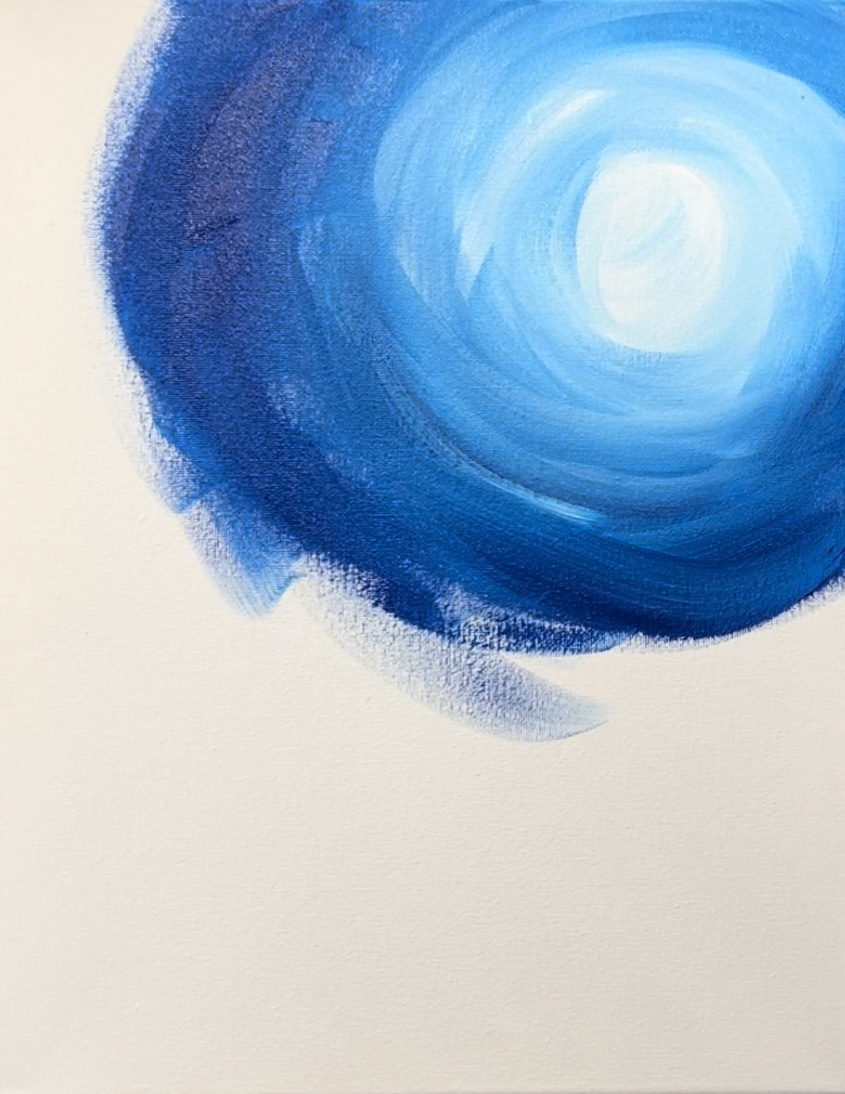
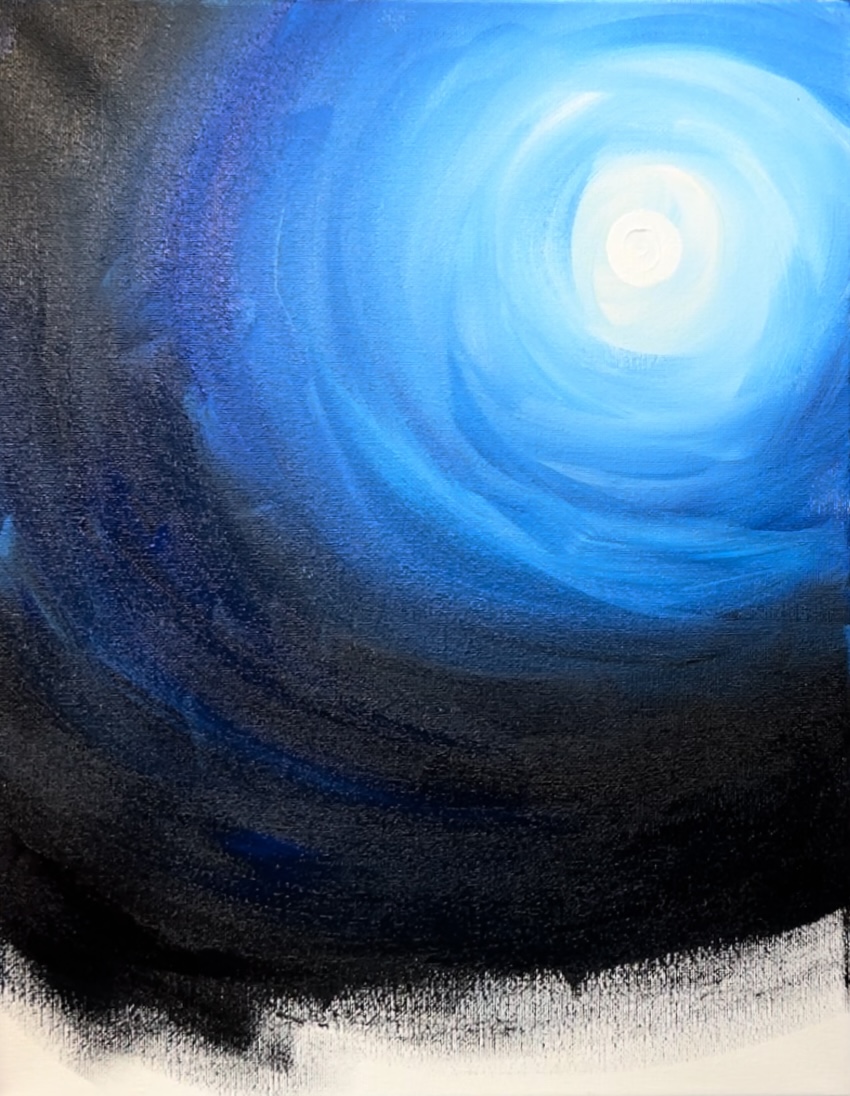
Then, without rinsing the brush, add a small amount of mars black to your brush and blend that gently into the sky.
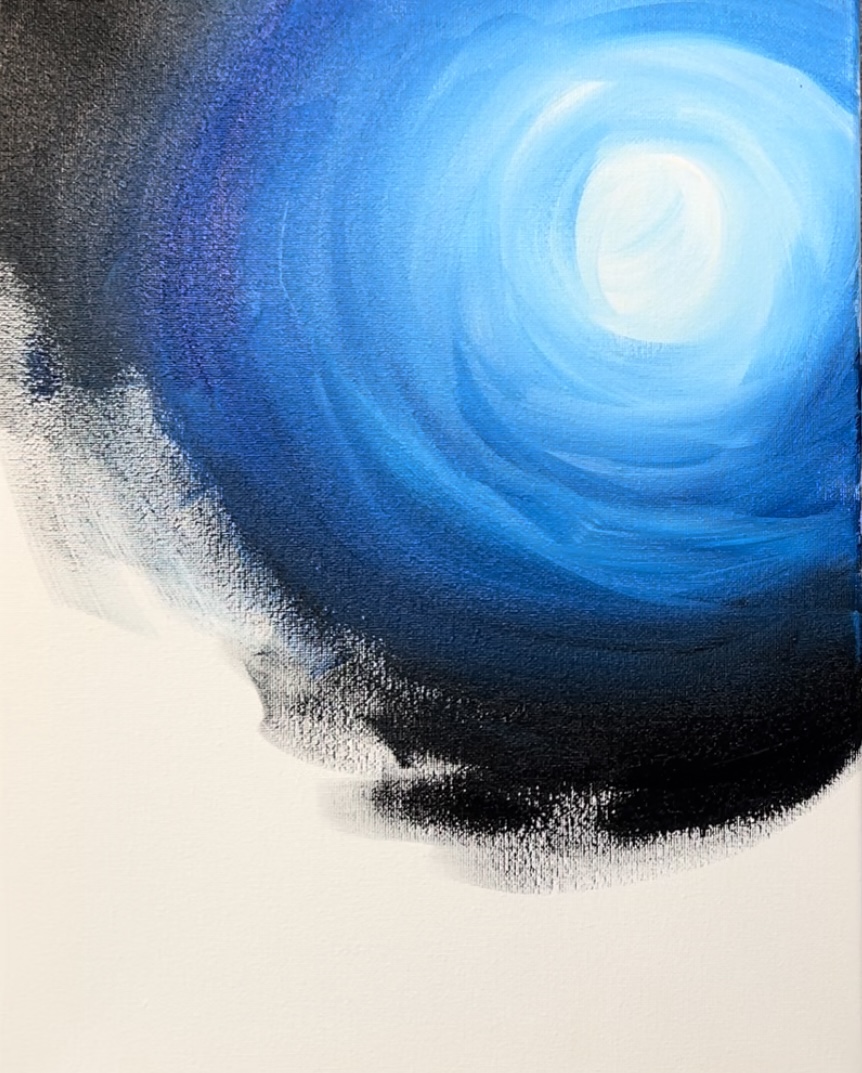
Be careful not to add too much black to the parts of the sky that are supposed to be bright blue. If needed, add more phthalo blue to your brush and blend that. Leave about an inch gap on the bottom of the canvas.
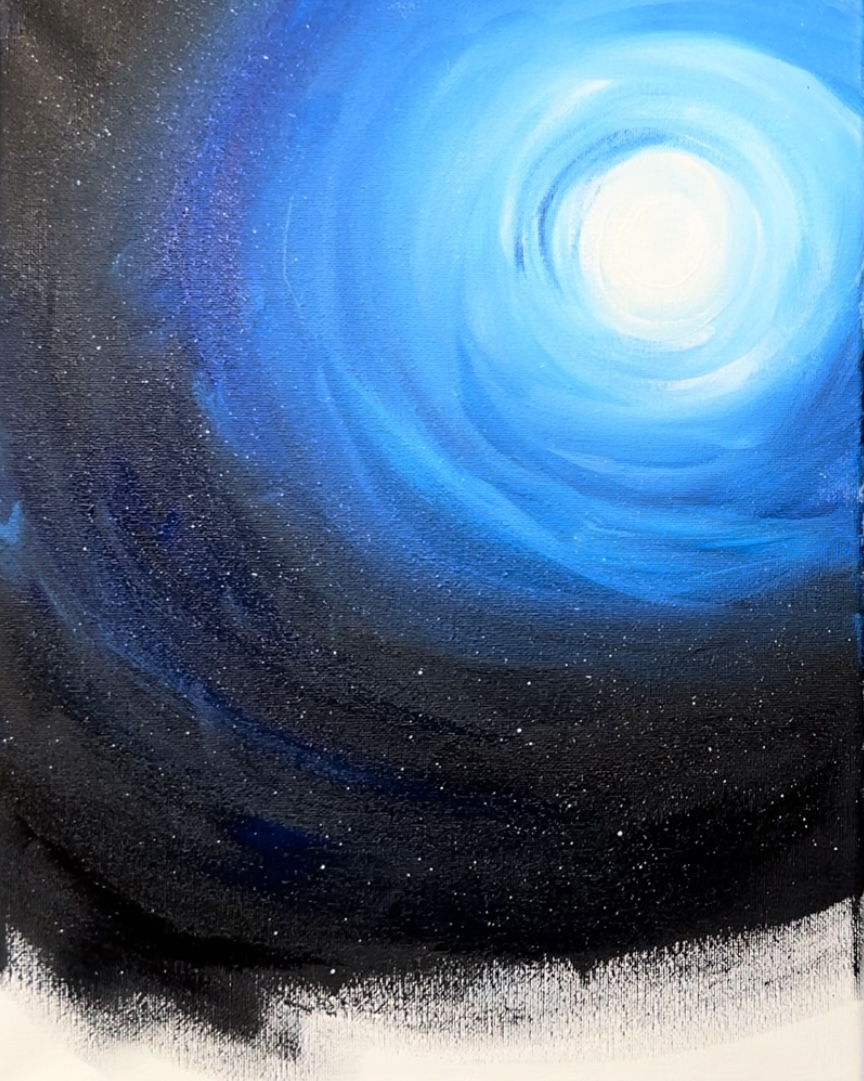
If needed, go back with a #4 round brush and titanium white and paint a pure white small circle for the moon.
Use a toothbrush to splatter paint white specks of stars all over the sky.
Tip: load a very small amount of water into the white paint so that it thins down a bit. Test a separate surface first before splattering the paint. You don’t want the paint to be too watery and your don’t want it to be too thick.
2. Paint The Ground Area
Load your palette with hooker’s green hue permanent. Use a 3/4″ flat wash brush to paint the ground. This is about a two inch area that is painted solid green. Do this with horizontal strokes. You can also make this ground area slightly “hilly”.
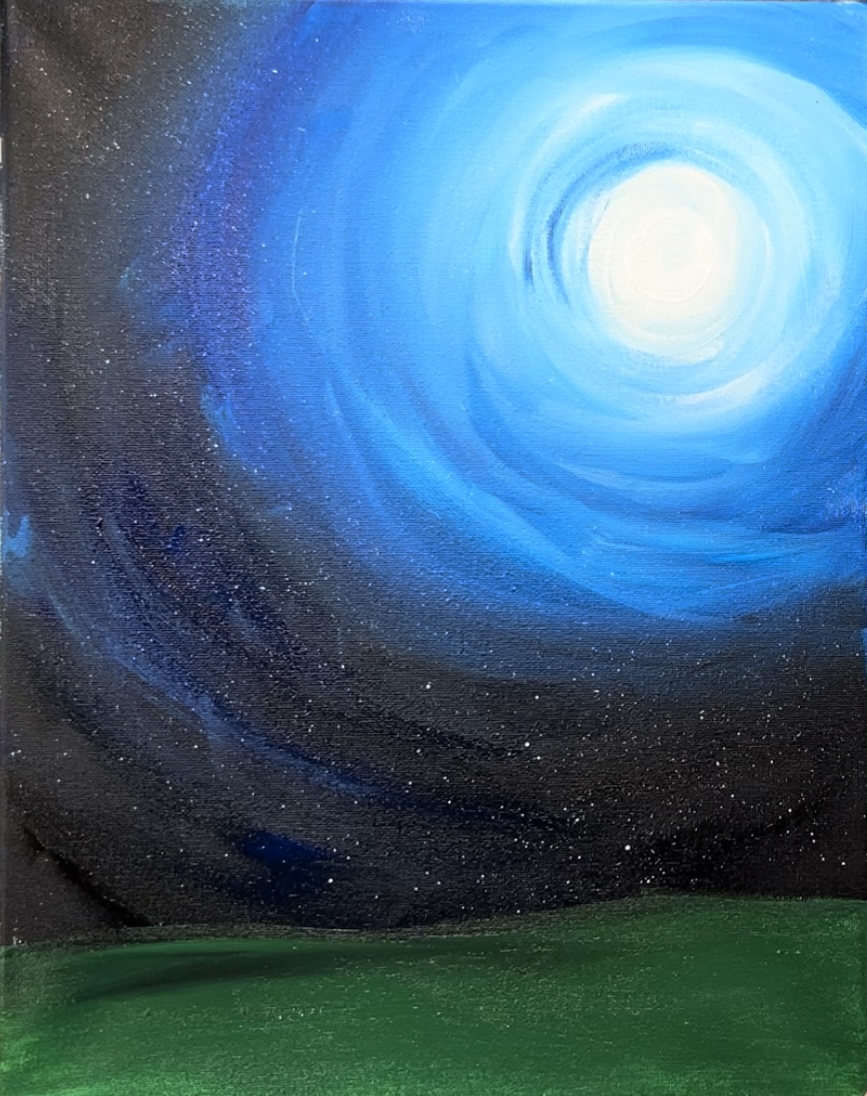
Let this dry before going onto the next step.
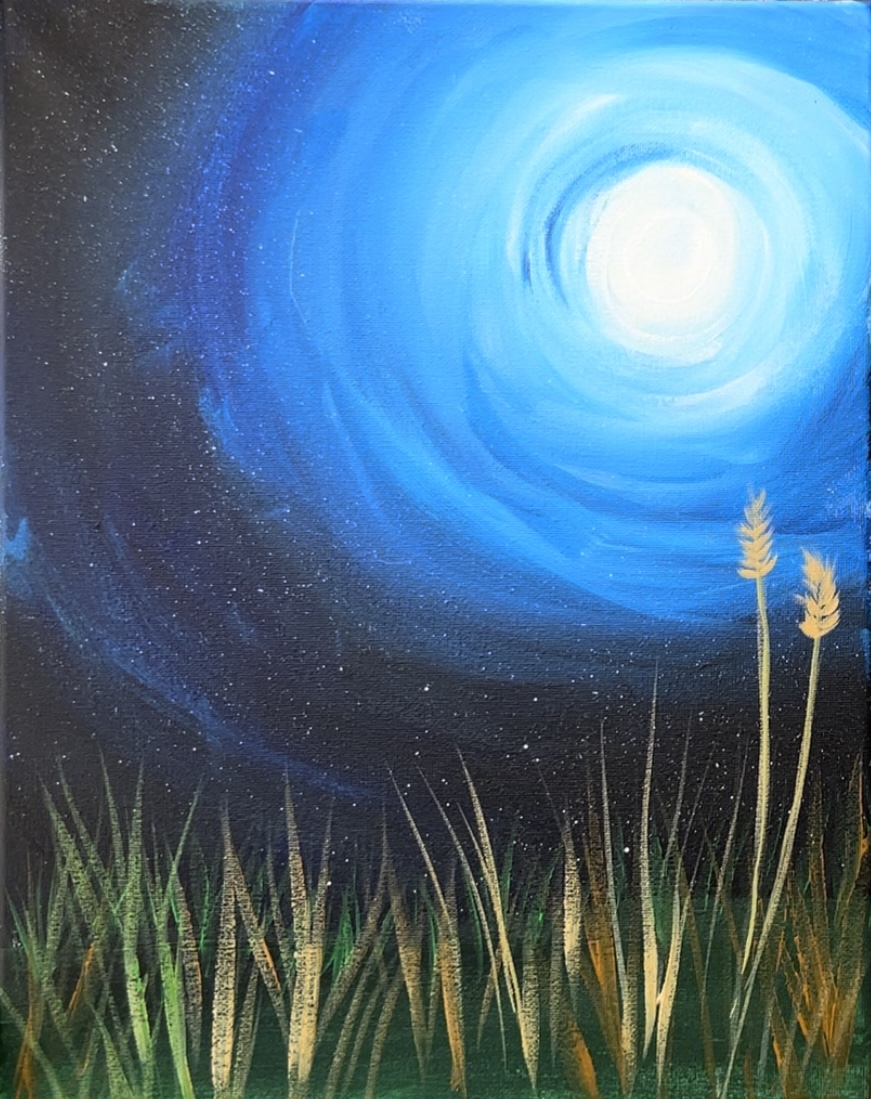
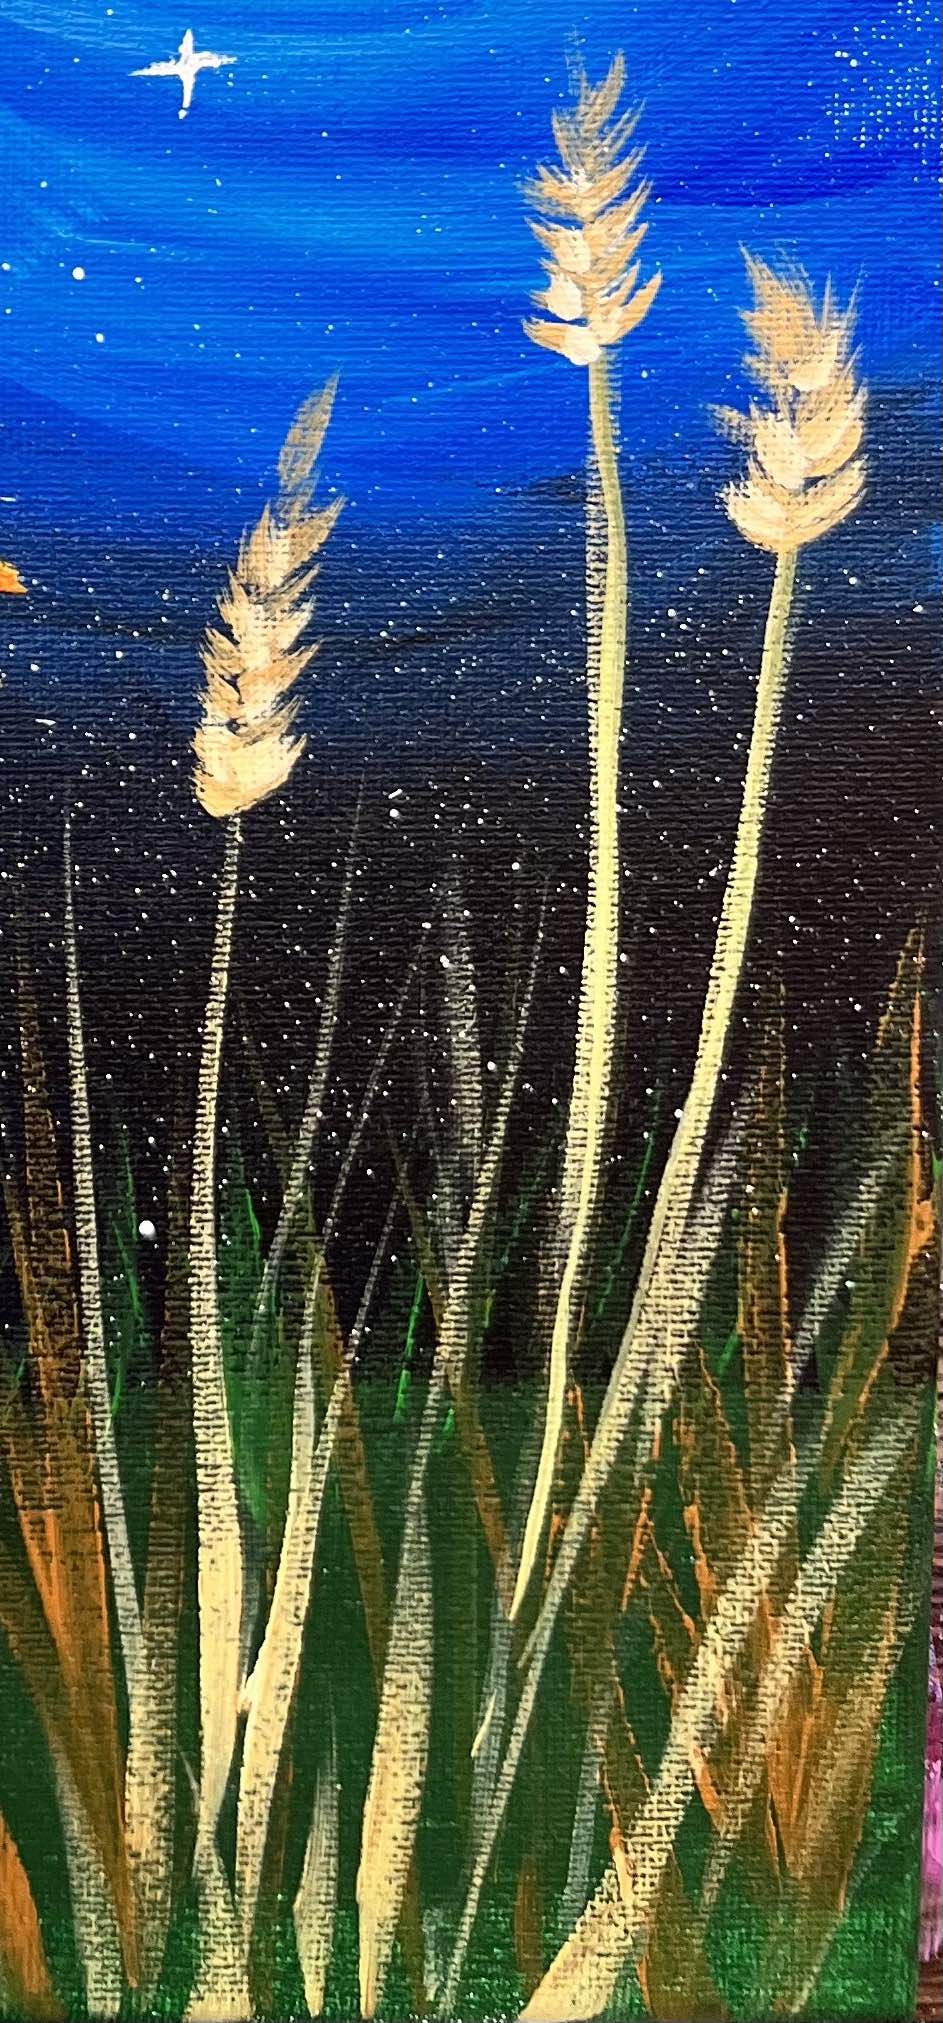
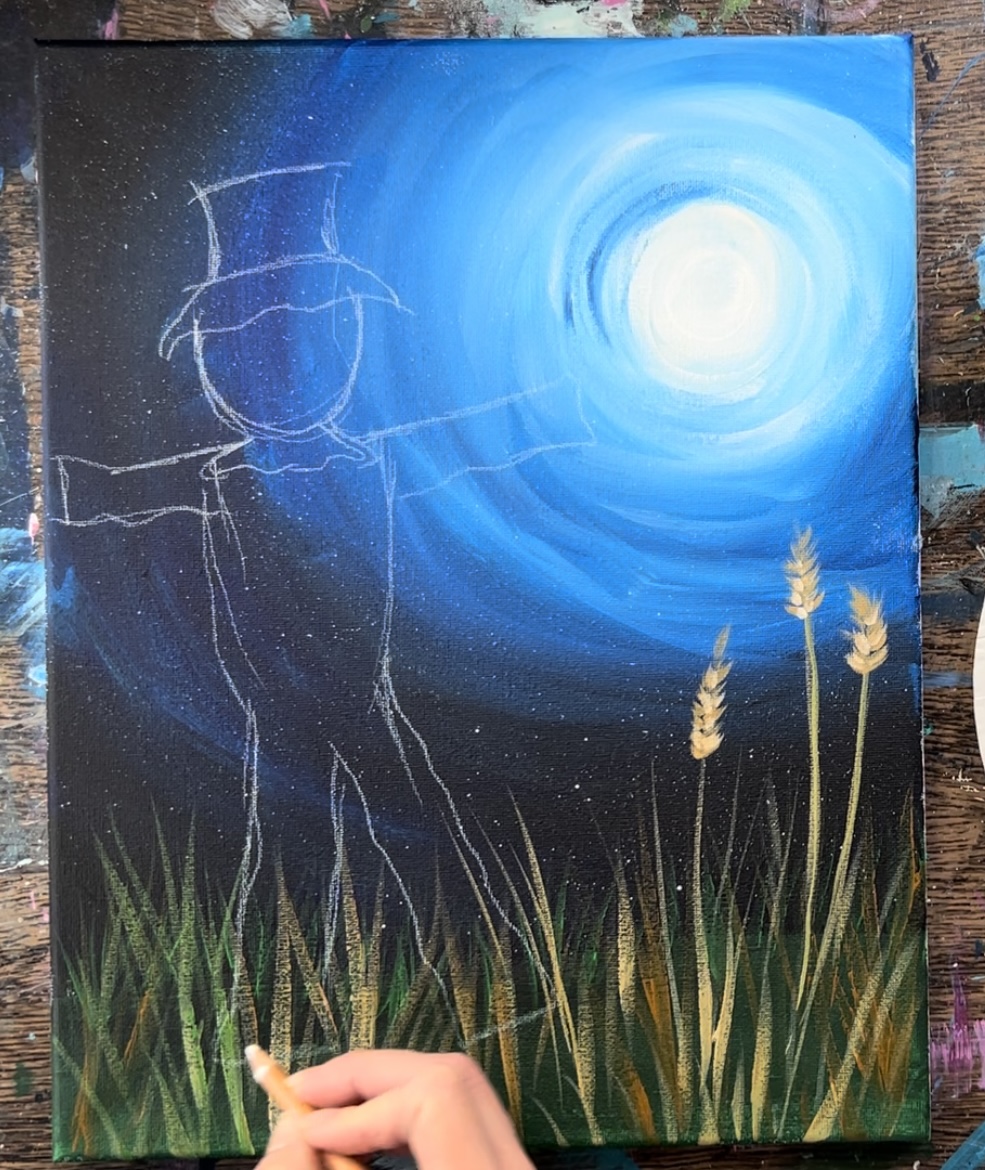
3. Paint wheat/ grass field
Use a 3/8″ angle brush for this step. Load your palette with the colors: raw Sienna, light green permanent and hooker’s green hue.
Load your 3/8″ angle brush in both of the greens. Start in the back of the green land area and paint medium sized grass blades that go up and over the “horizon line”. Paint a row of these grass blades going in different directions.
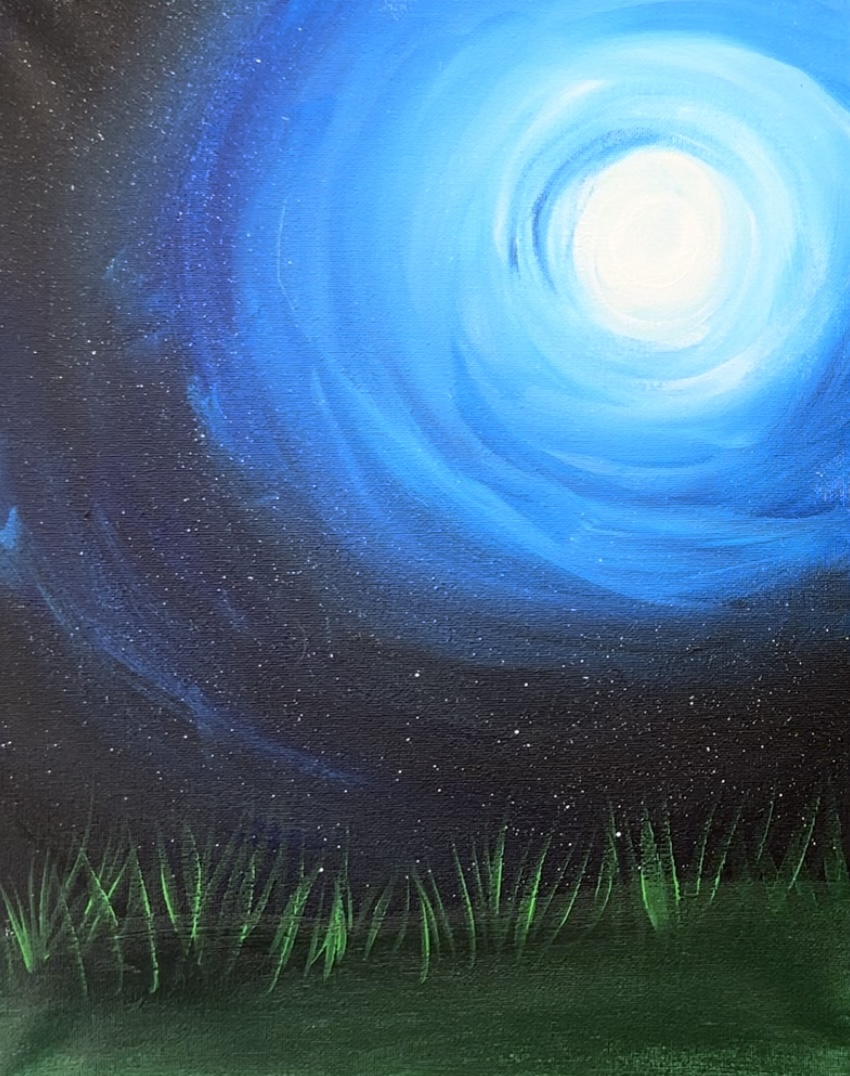
Then create a second row of grass/ wheat blades starting from the bottom edge of the canvas and going up above the horizon line. Use a combination of the raw Sienna and the different greens.
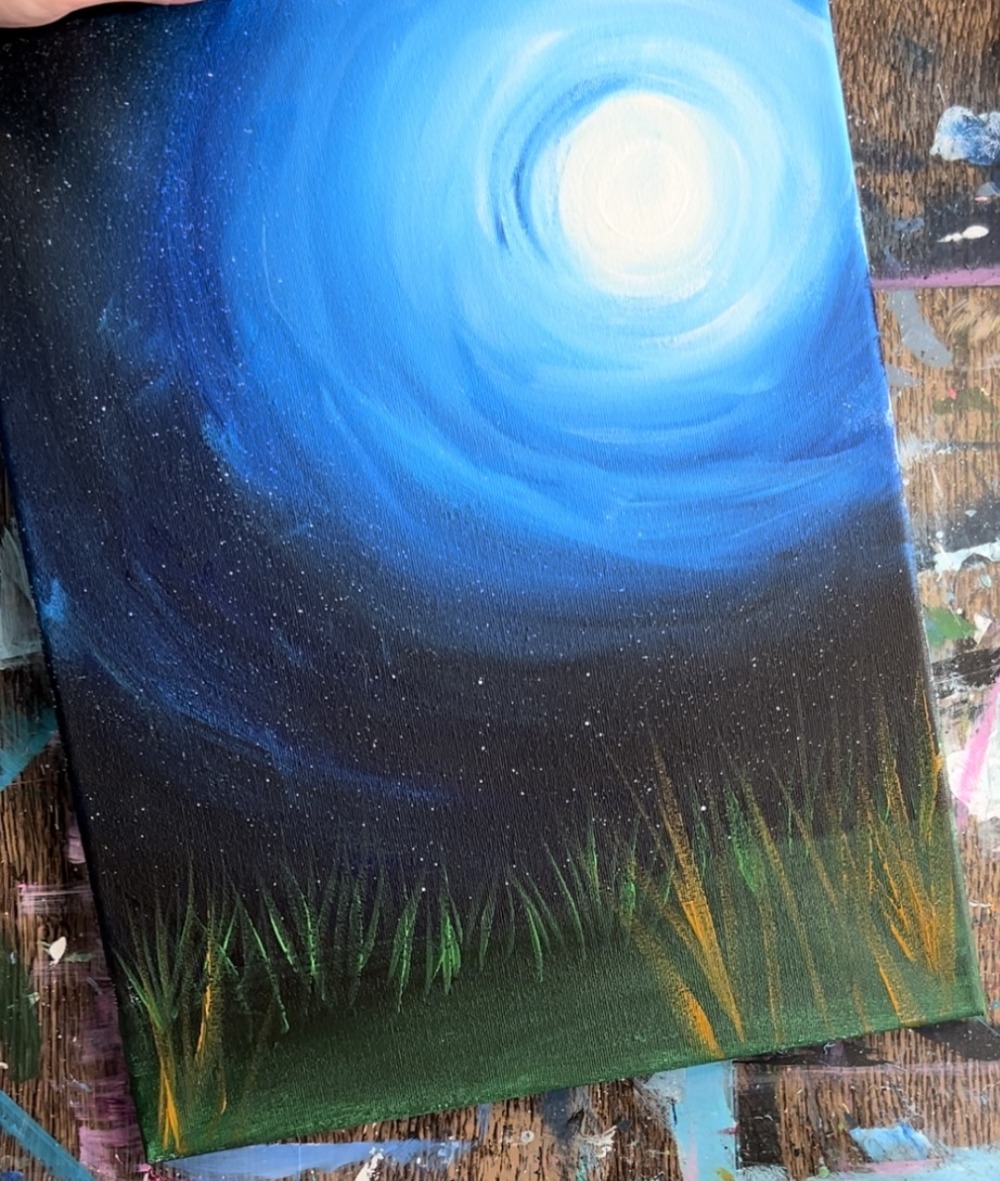
Also, add a small amount of titanium white to some of this color and it will brighten it.
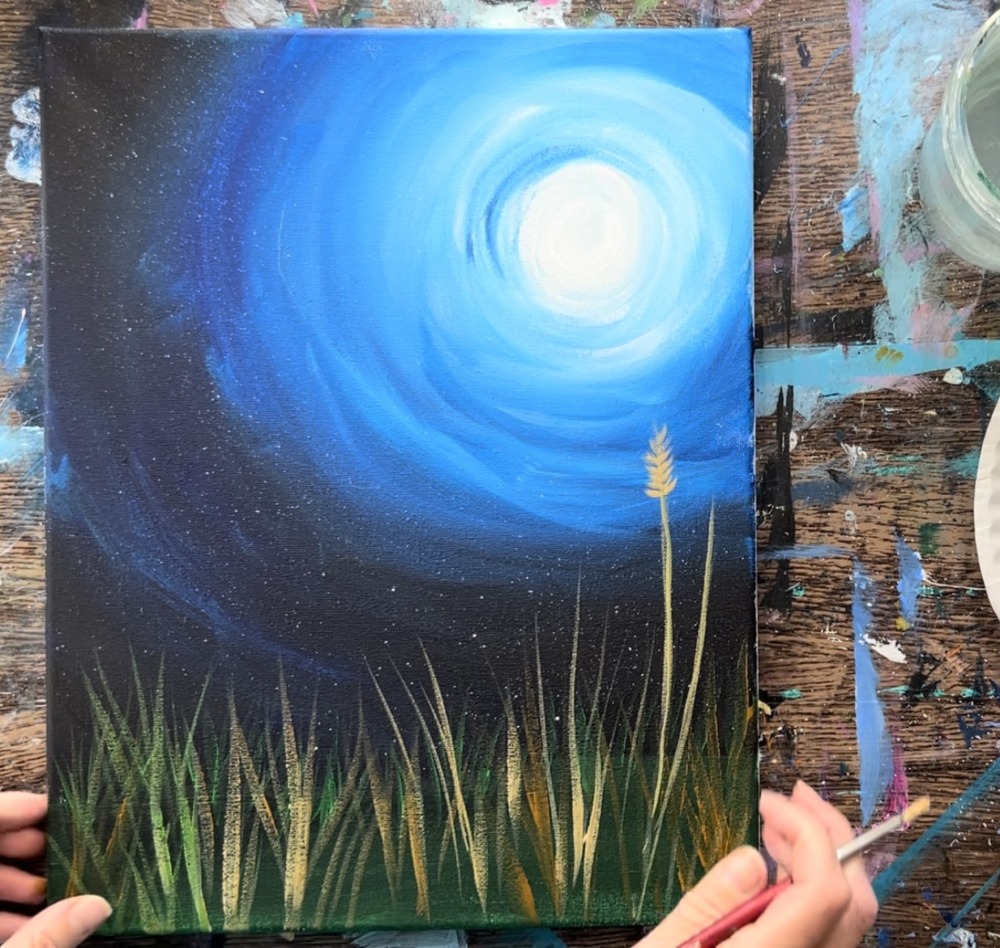
Paint a few wheat plants that are taller/ longer on the right side of the field.
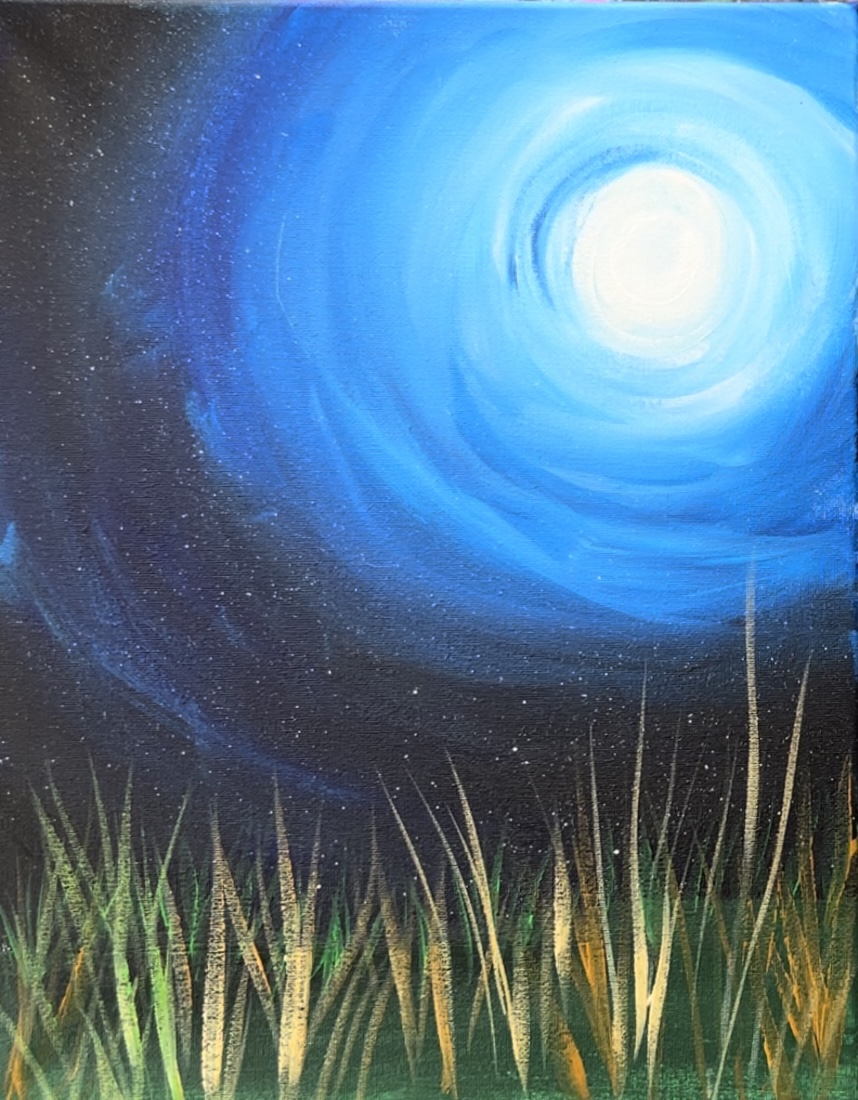
Then use a #4 round brush to paint little grains on some of the wheat lines. Paint little “teardrop” shaped strokes going upwards. Do this with raw Sienna mixed with a little bit of titanium white.
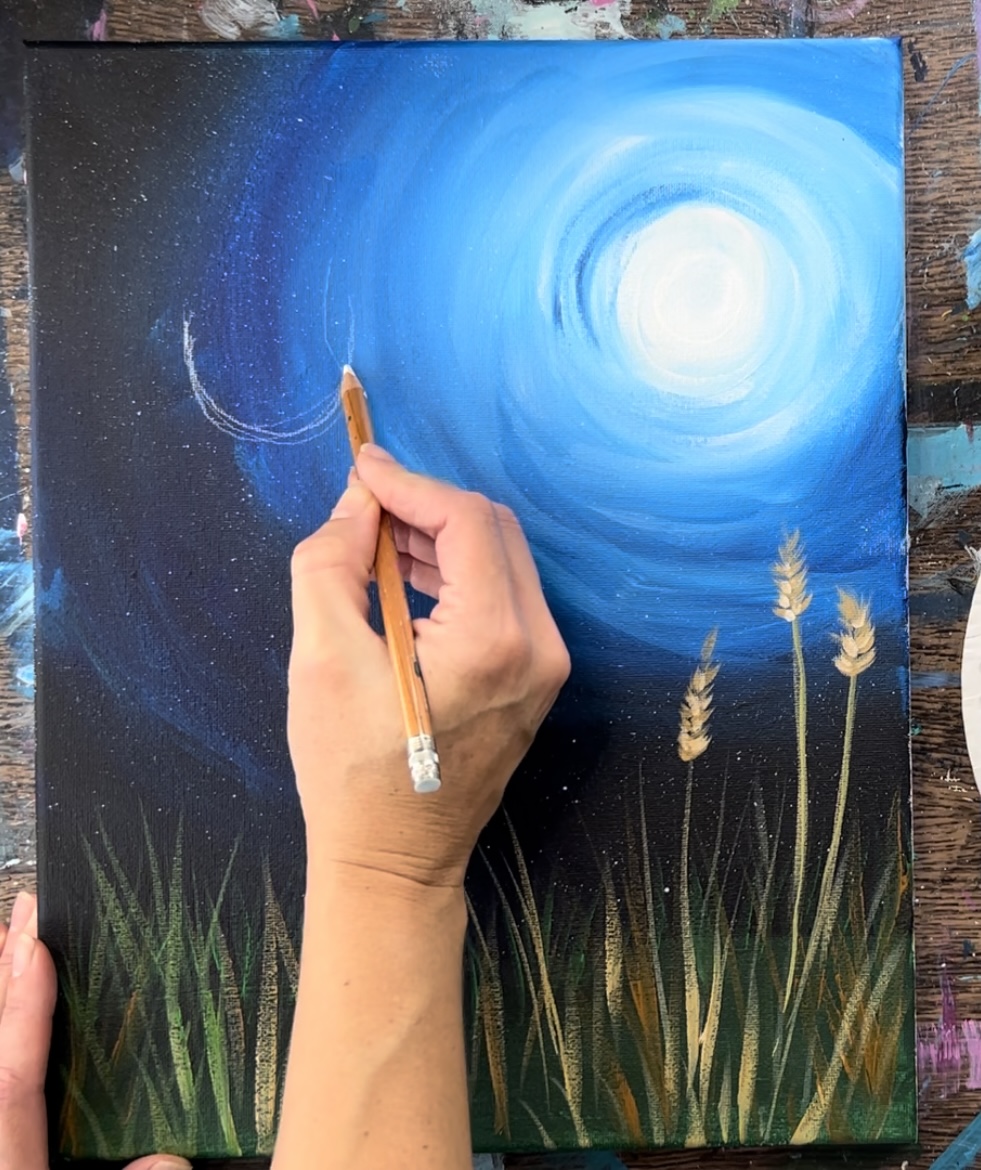
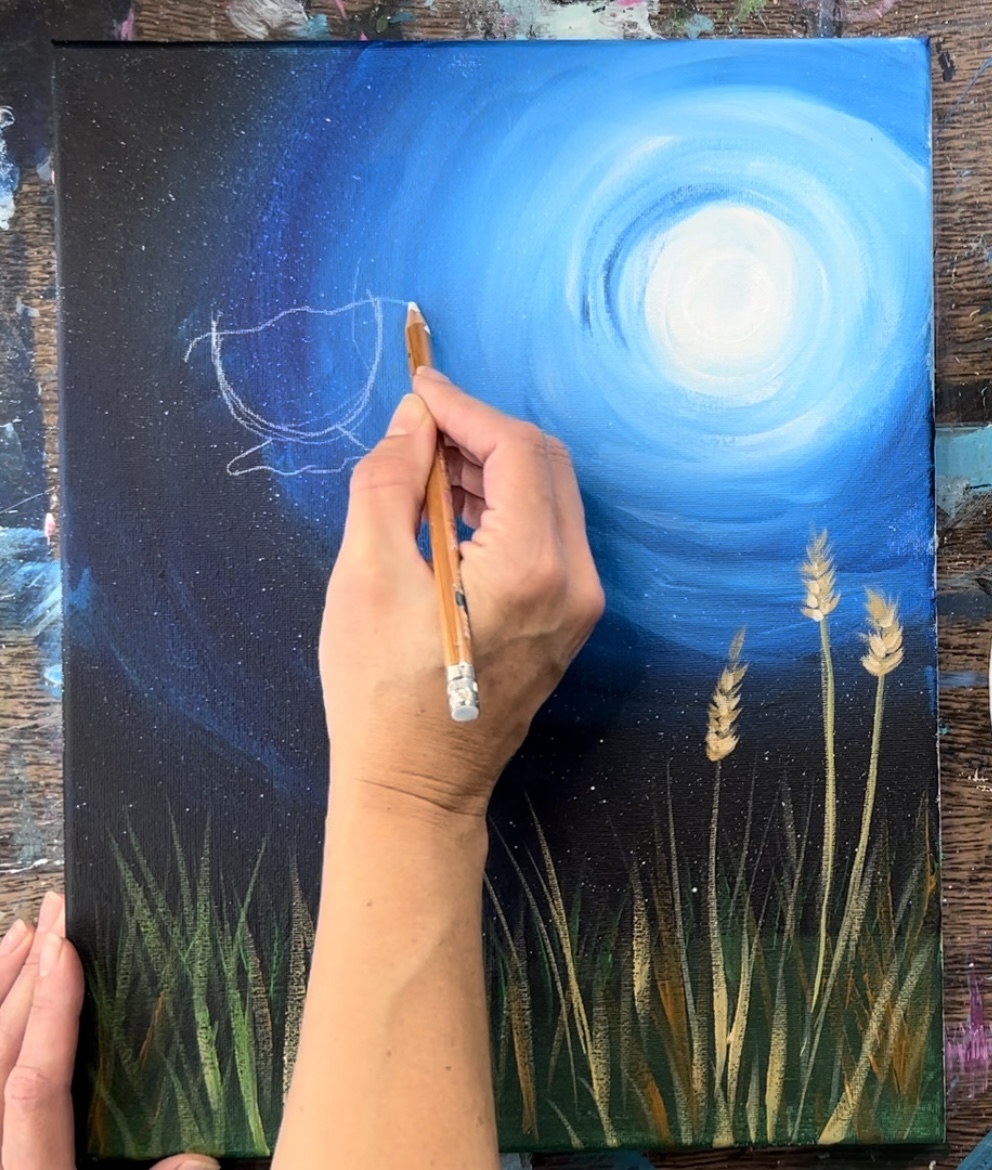
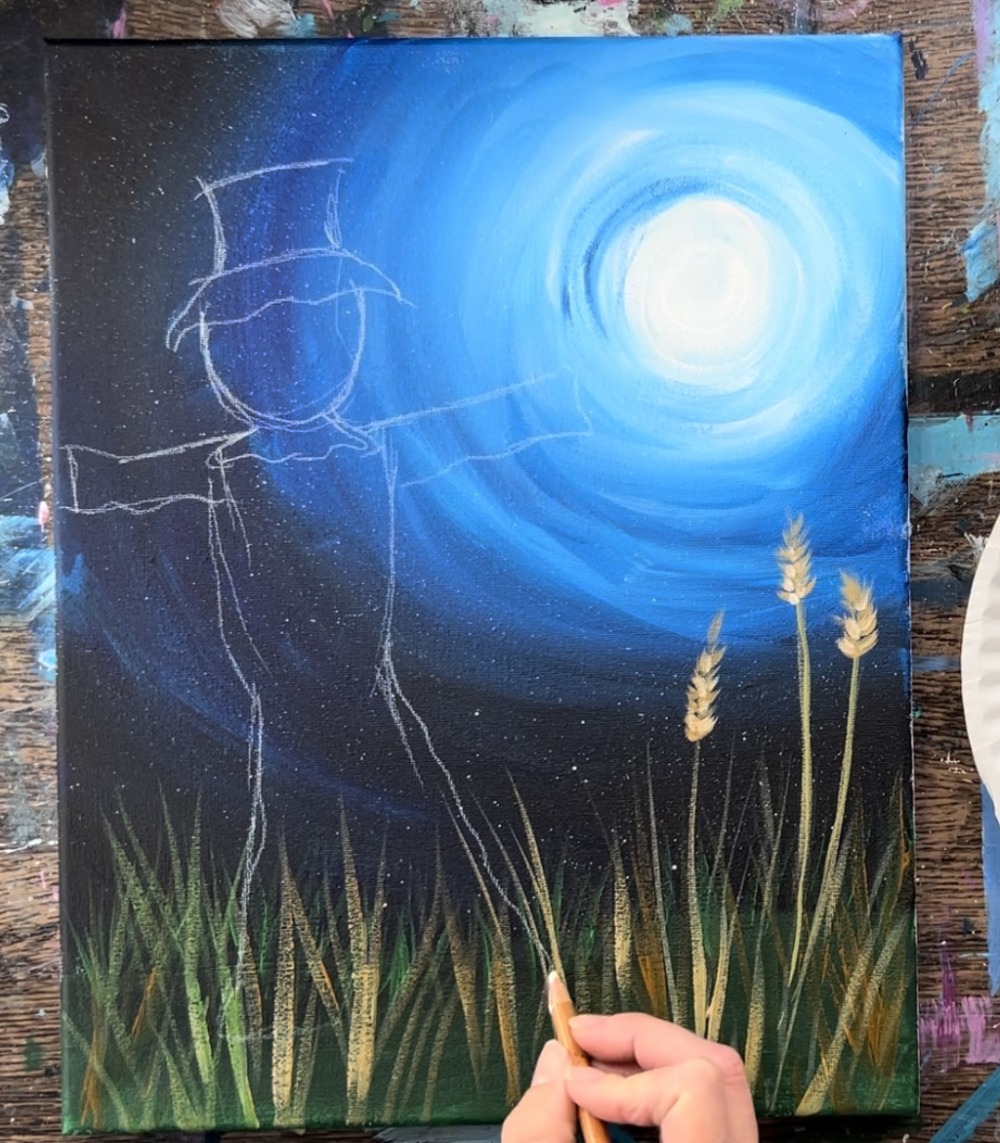
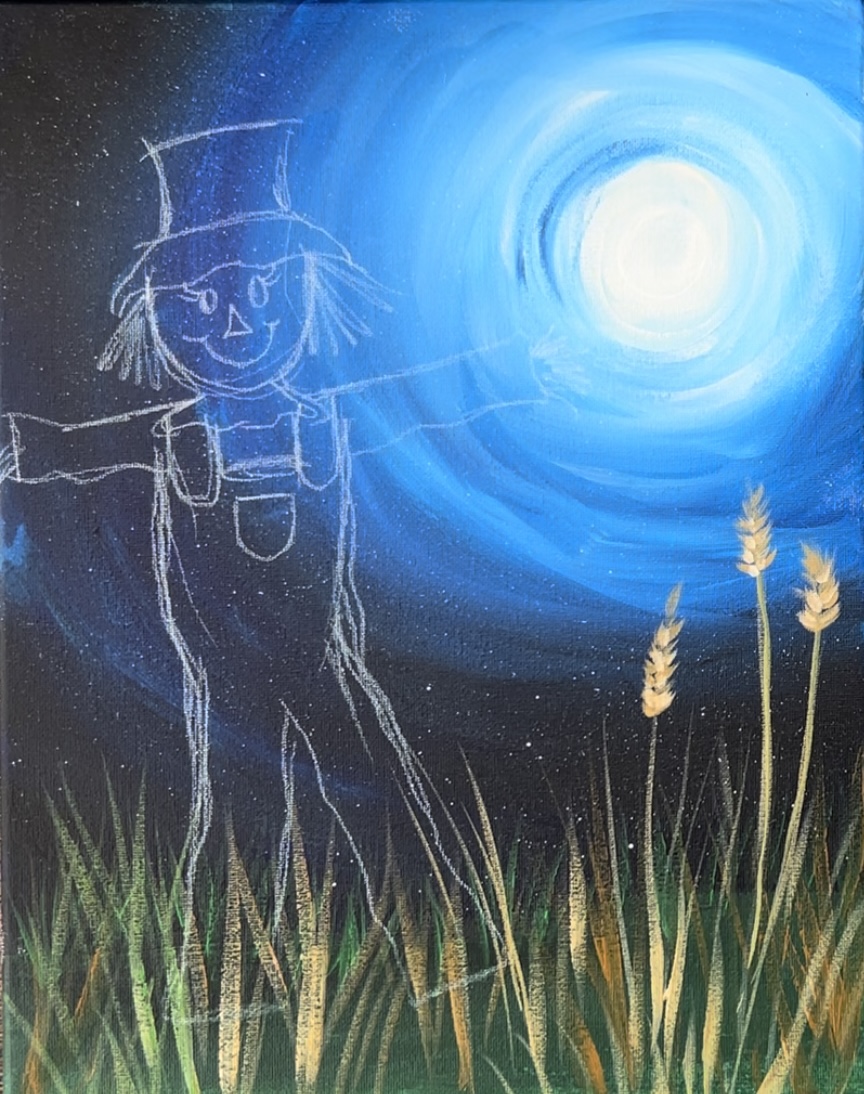
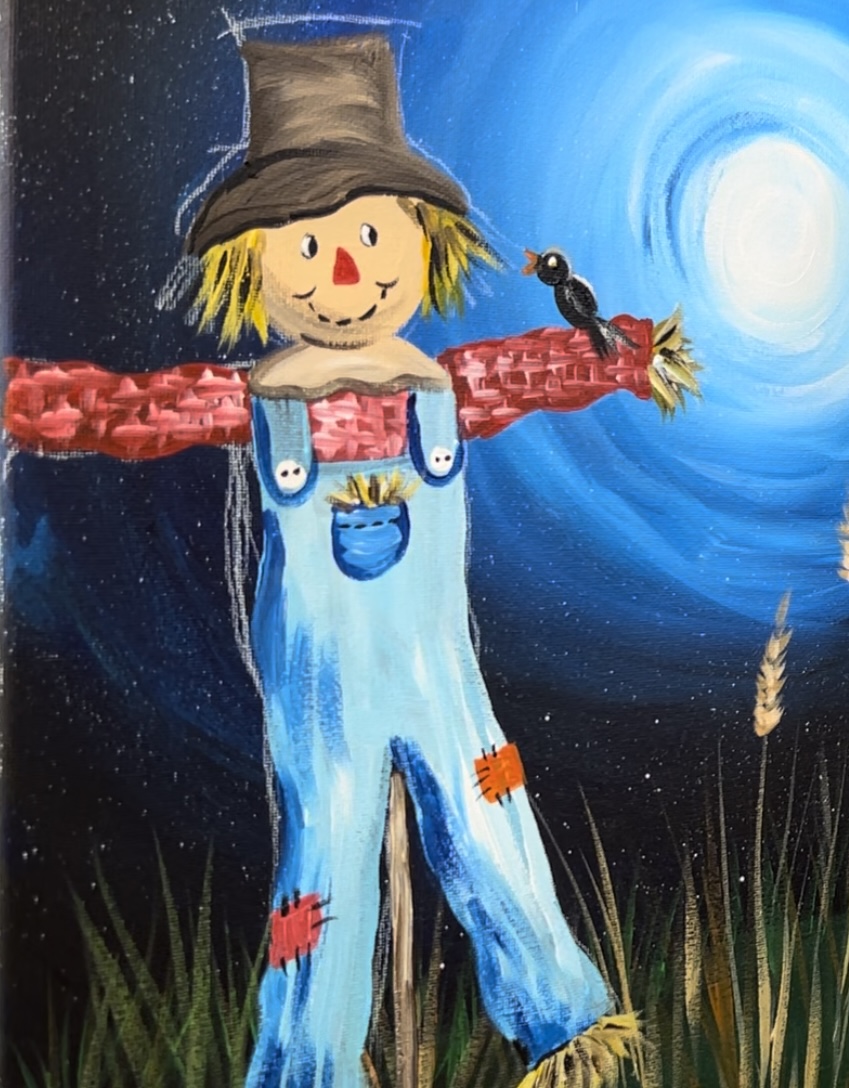
4. Draw Scarecrow
I recommend using a white chalk pencil for this drawing. If you are using the traceable template, I recommend using white graphite paper and placing that below the printable and then tracing it on the canvas.
Start by drawing a “U” line for the head of the scarecrow. This should be placed high in the canvas to the left of the moon (almost at the same height of the moon). You’ll want to make sure you leave enough space for drawing the entire body of the scarecrow.
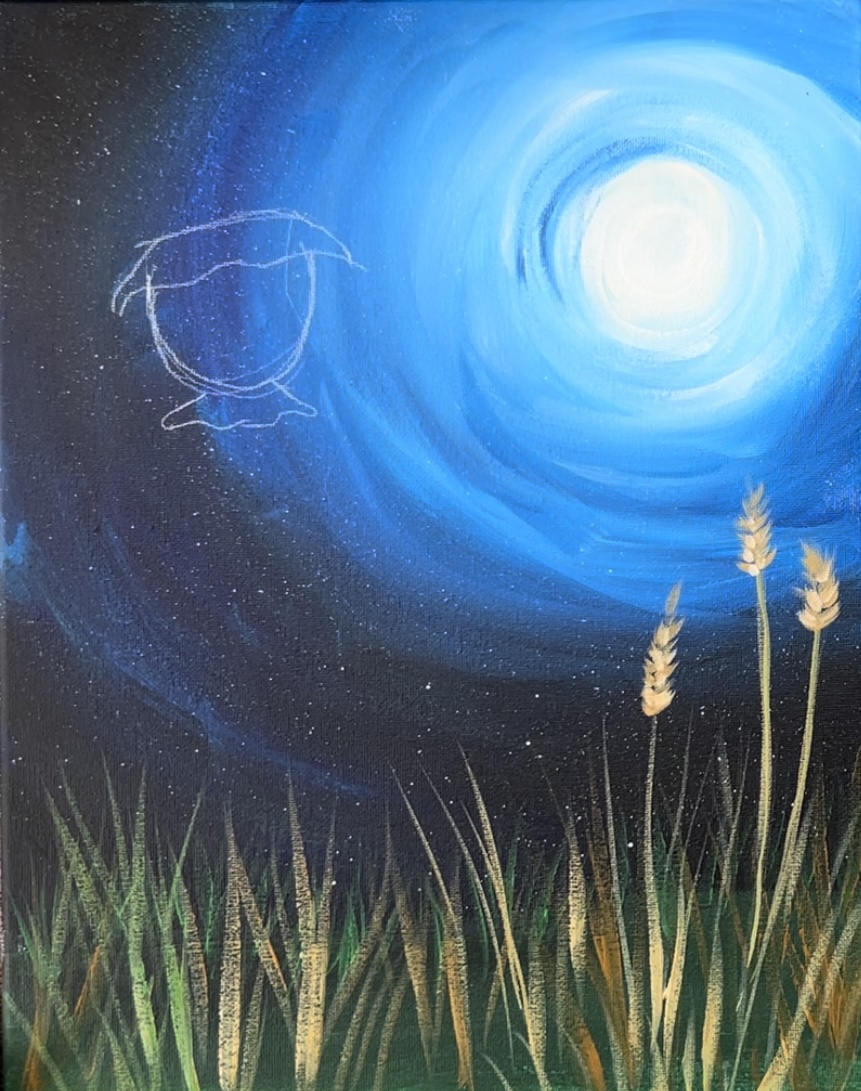
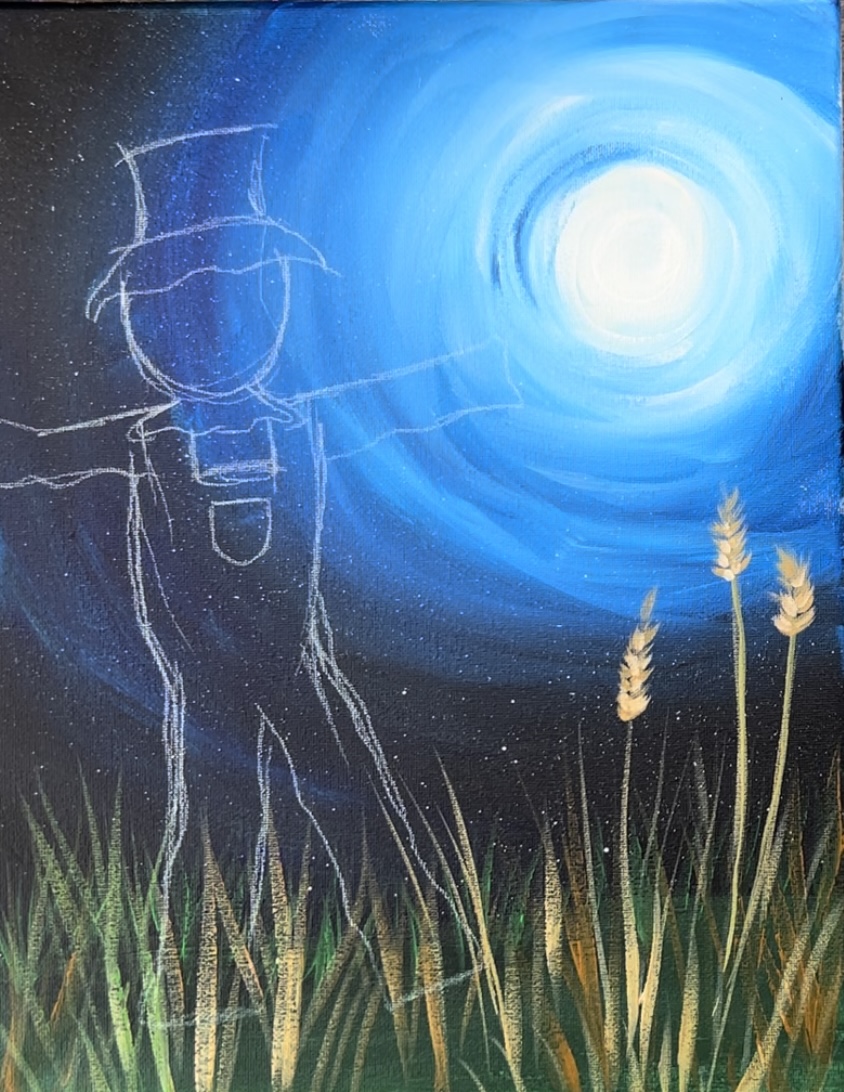
Then draw the neck area that ties/ gathers.
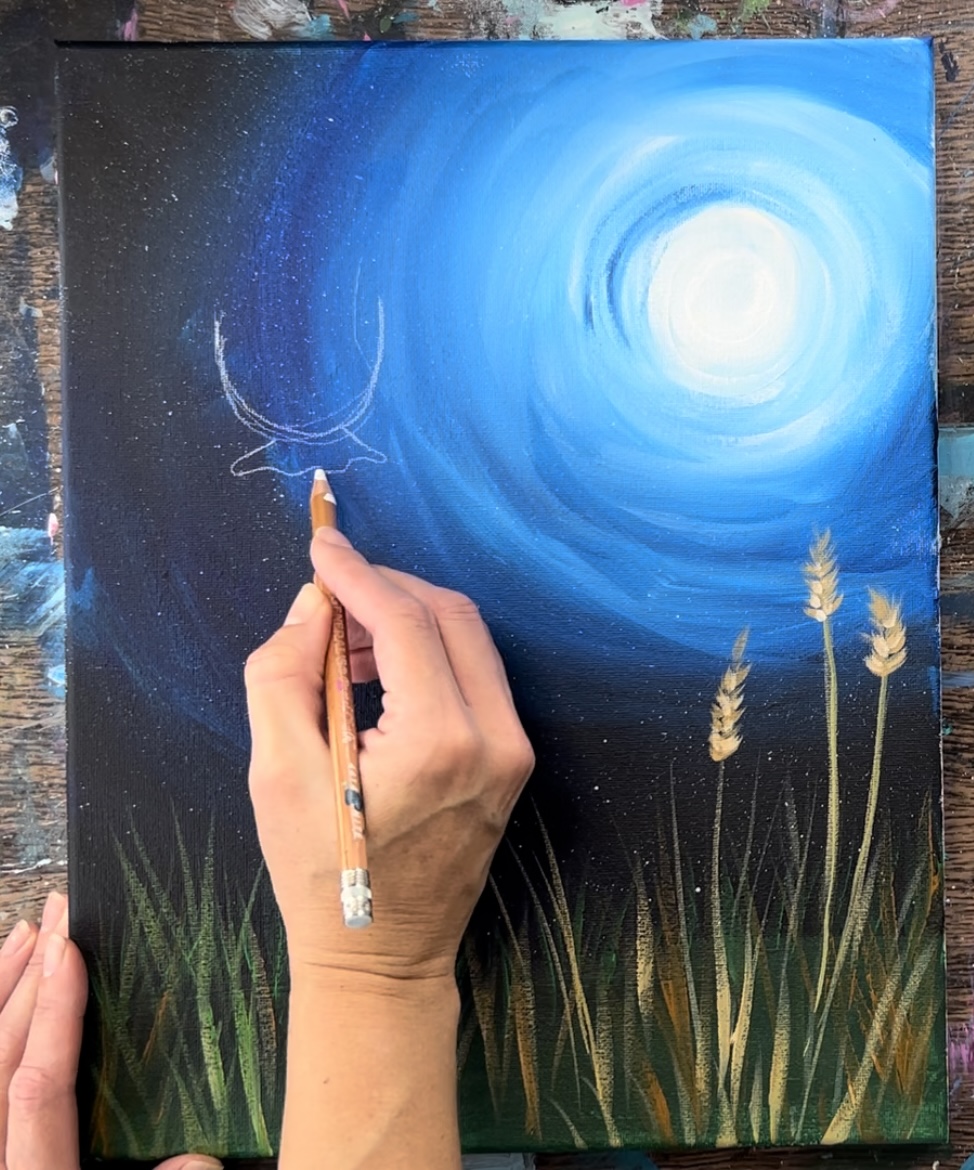
Draw the bottom of the hat to goes slightly diagonal/ wavy on the top of the head.
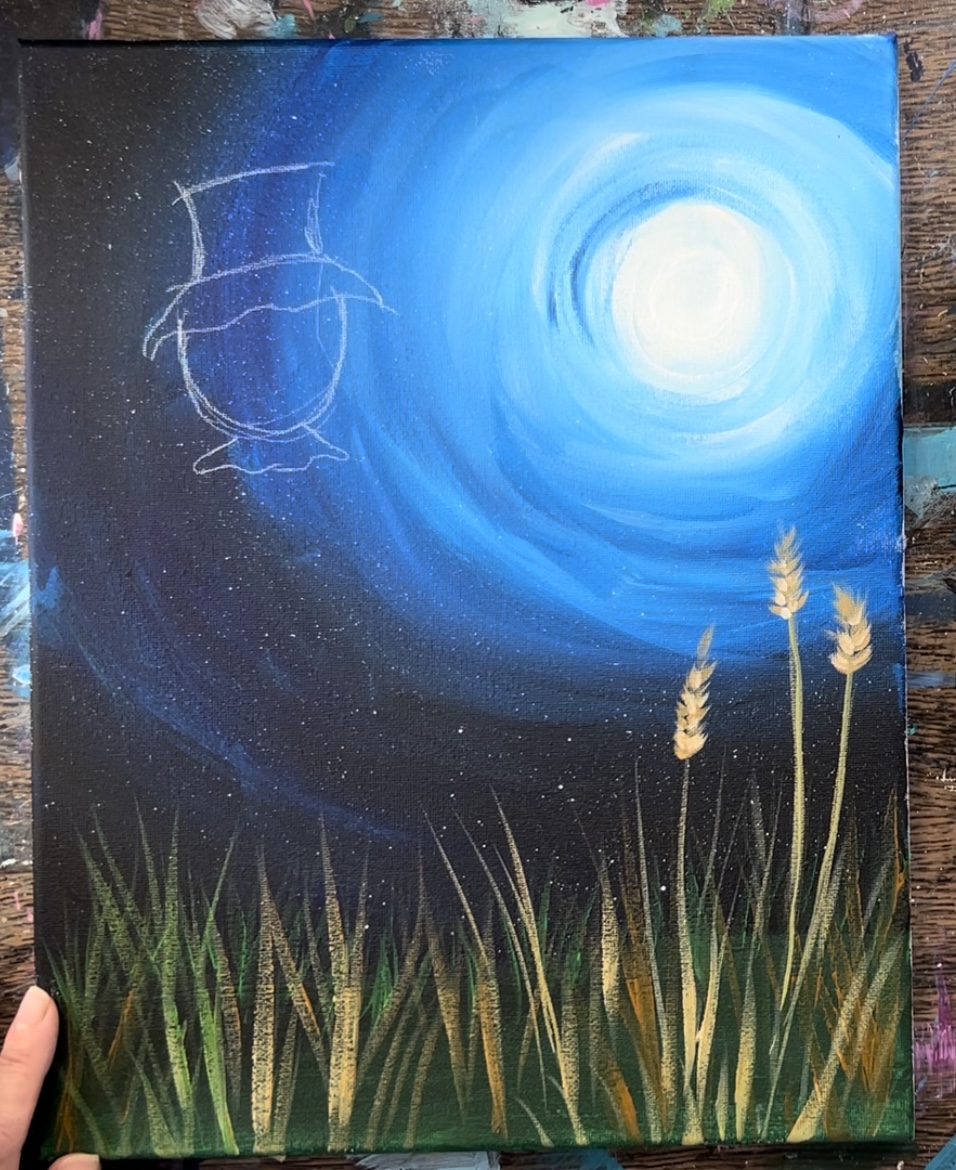
Sketch the brim of the hat.
Then sketch the top part of the hat.
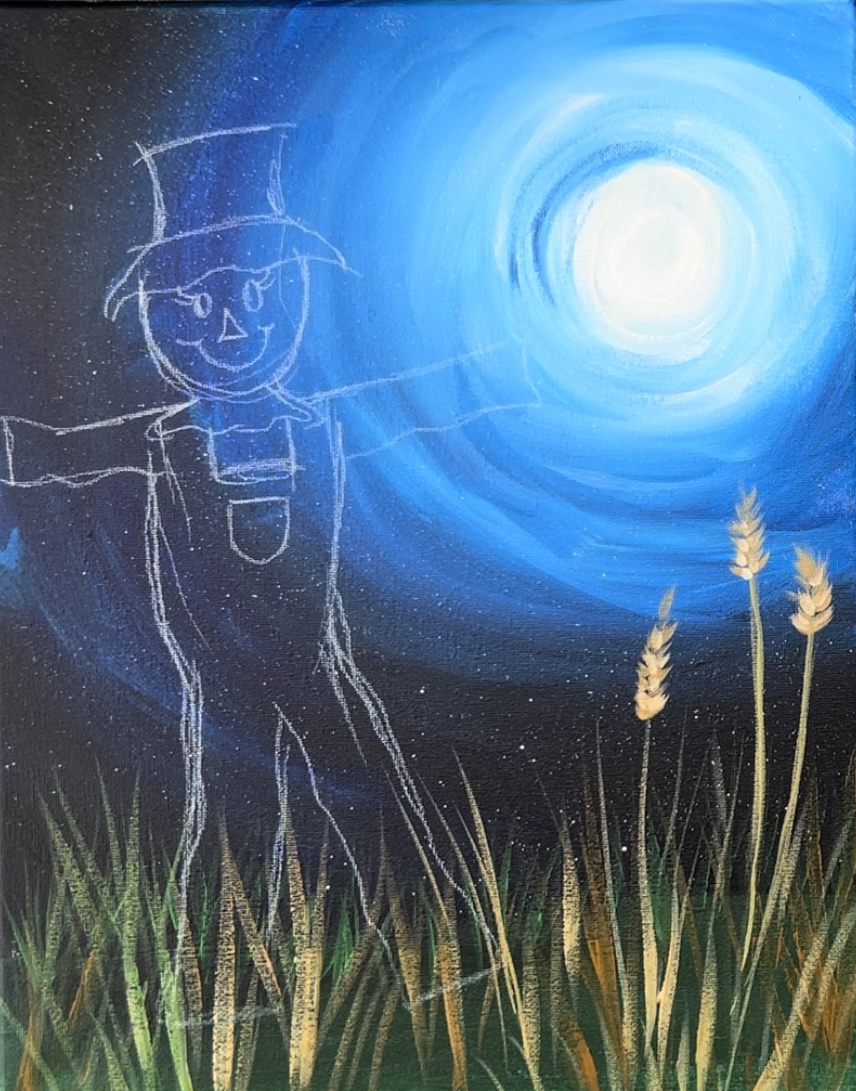
Draw the right arm so it is going diagonally slightly upwards.

Draw the second arm going slightly diagonally downwards. Mine ended up going off the canvas.

Draw the upper body, torso.
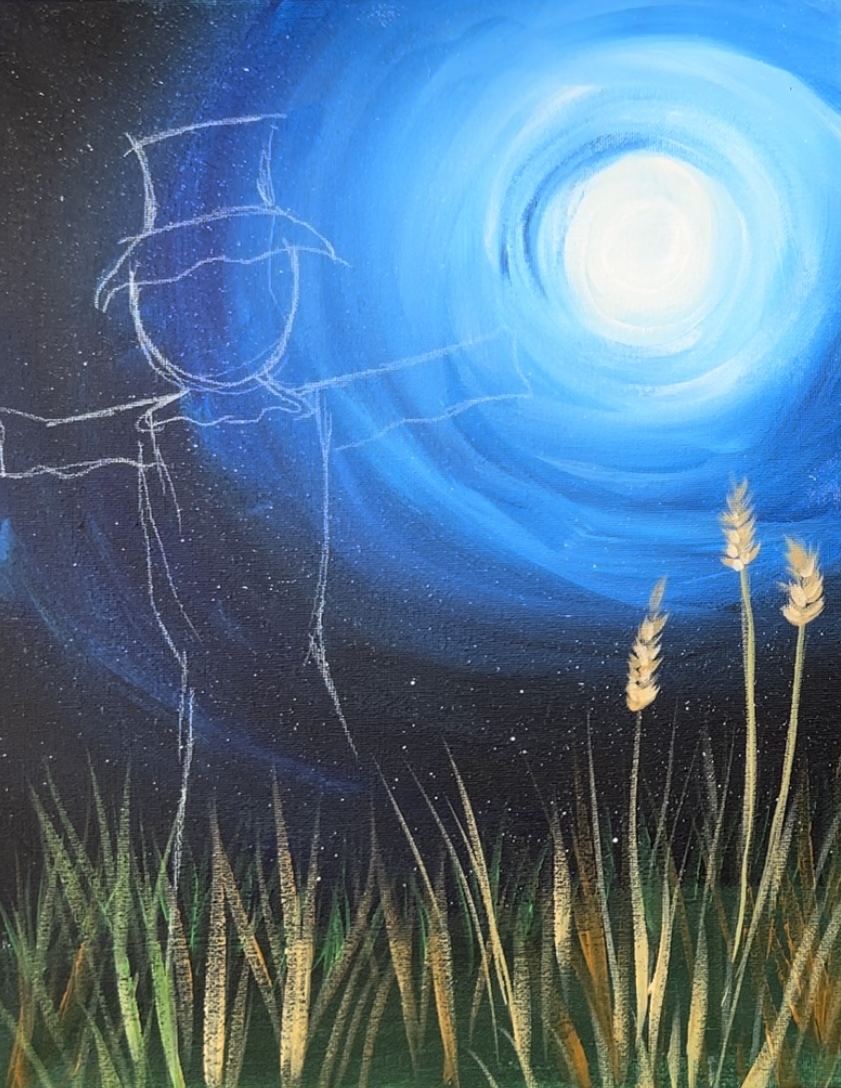
Then draw the pant legs.
Draw a half circle for the pocket and a boxed in area at the top to create the straps of the overalls.
Next, sketch the face and hair.
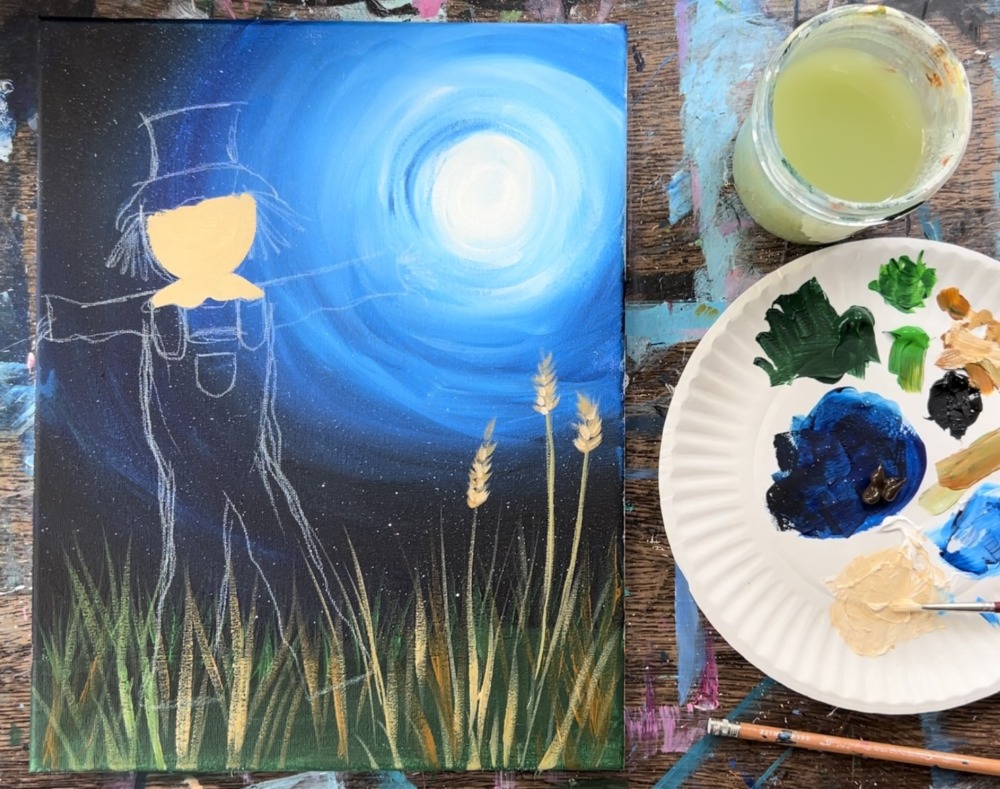
5. Paint the scarecrow head, hat and shirt
Load your palette with raw Sienna and titanium white. Mix equal parts raw Sienna and titanium white together. Then use a #4 round brush to paint the head/ neck area of the scarecrow. You will be painting over the drawn facial features and that is okay.
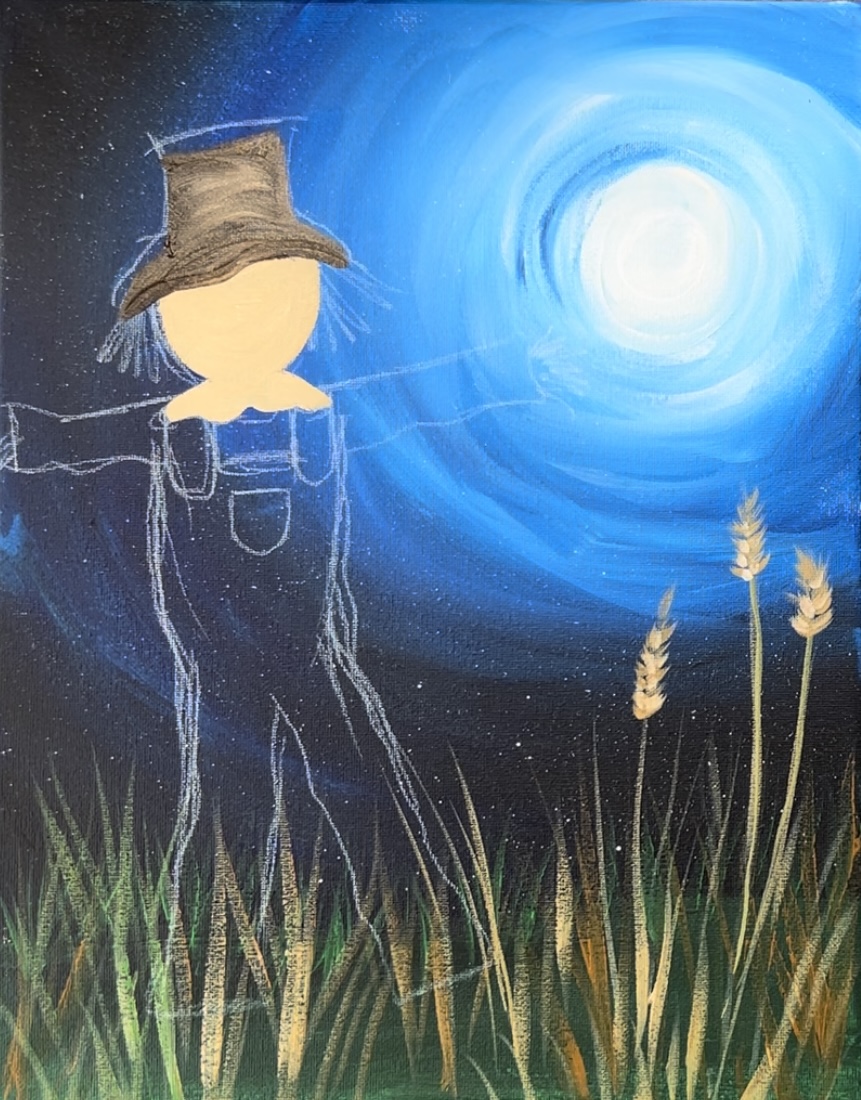
Then load your palette with raw umber. Without rinsing the brush, paint the scarecrow hat using curved strokes that gently blend with the tan color that is already on your brush.
Then rinse the brush. Load it into cadmium red medium hue. Paint the leaves of the scarecrow.
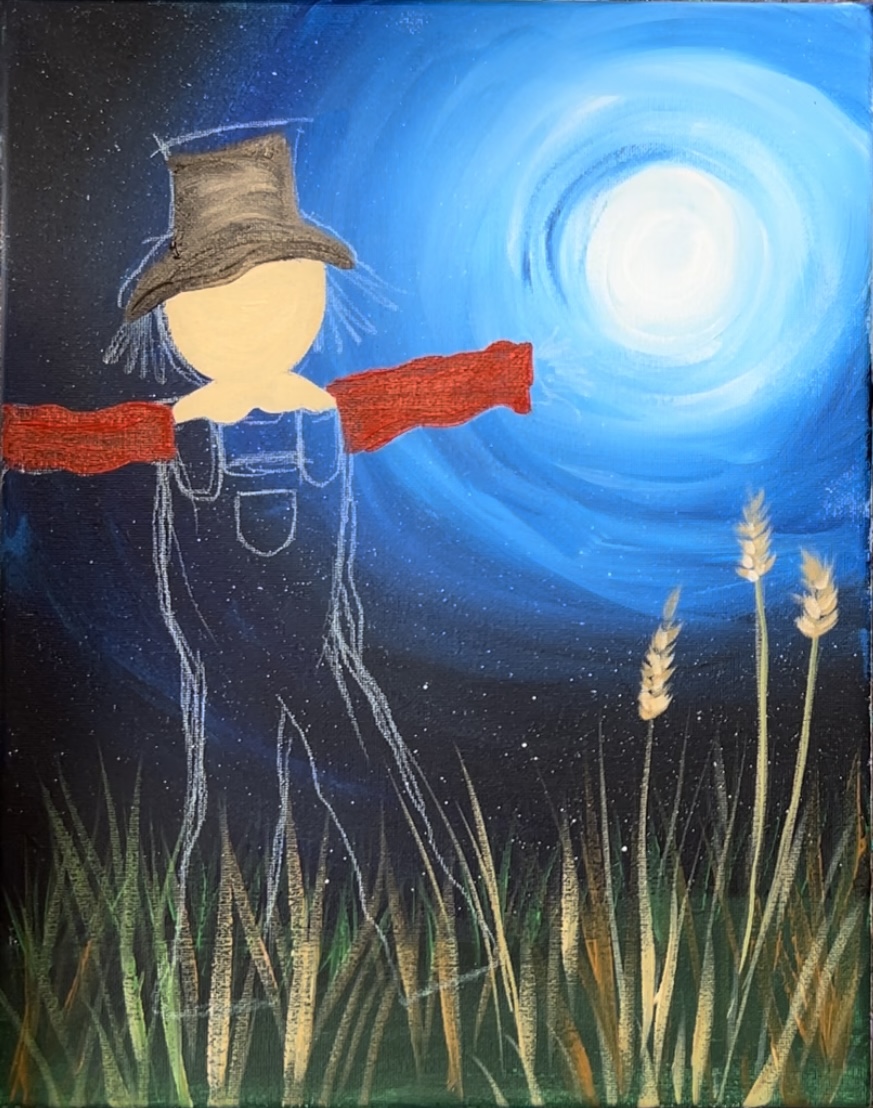
Then load the tip of your brush with titanium white. Before the red of the sleeves dry, paint little “+” marks on the sleeves. This will blend gently with the red but also give it a little bit of plaid texture.

Repeat this to paint the part of the shirt between the overall straps.
6. Paint overalls
Use a 3/8″ angle brush and the two colors: light blue permanent and titanium white to paint the first layer of the overalls. Double load the brush in both the blue and the white. Paint it in mostly vertical strokes.
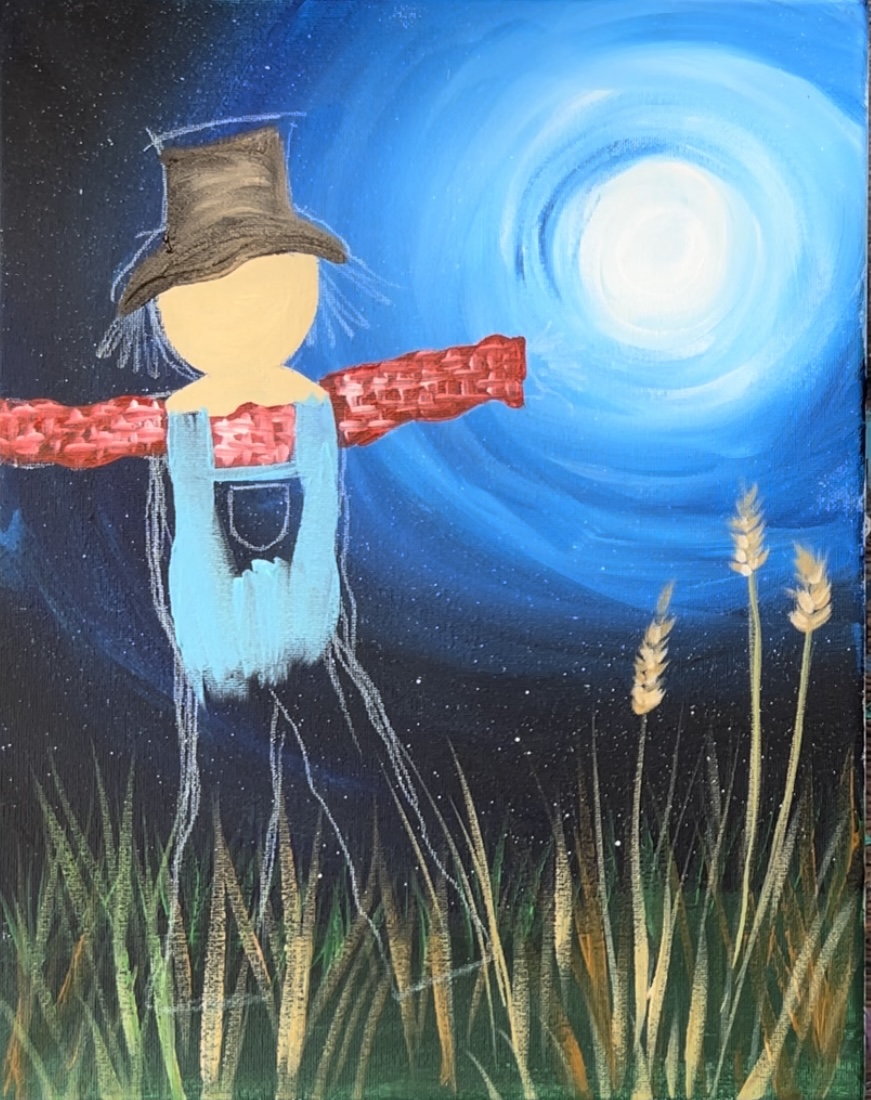
Gently blend more white into it as needed but don’t over blend. The streaks of white will give it more of a “rustic look”.
Then load phthalo blue on your palette. Add more detail to the overalls by using the #4 round brush to paint two curved lines for the straps of the overalls. Then paint the pocket shape. Also, dry brush a few vertical marks with this dark blue on the left side of the overalls including the pants. Doing this just on the left side gives the overalls more of a shadowy look.
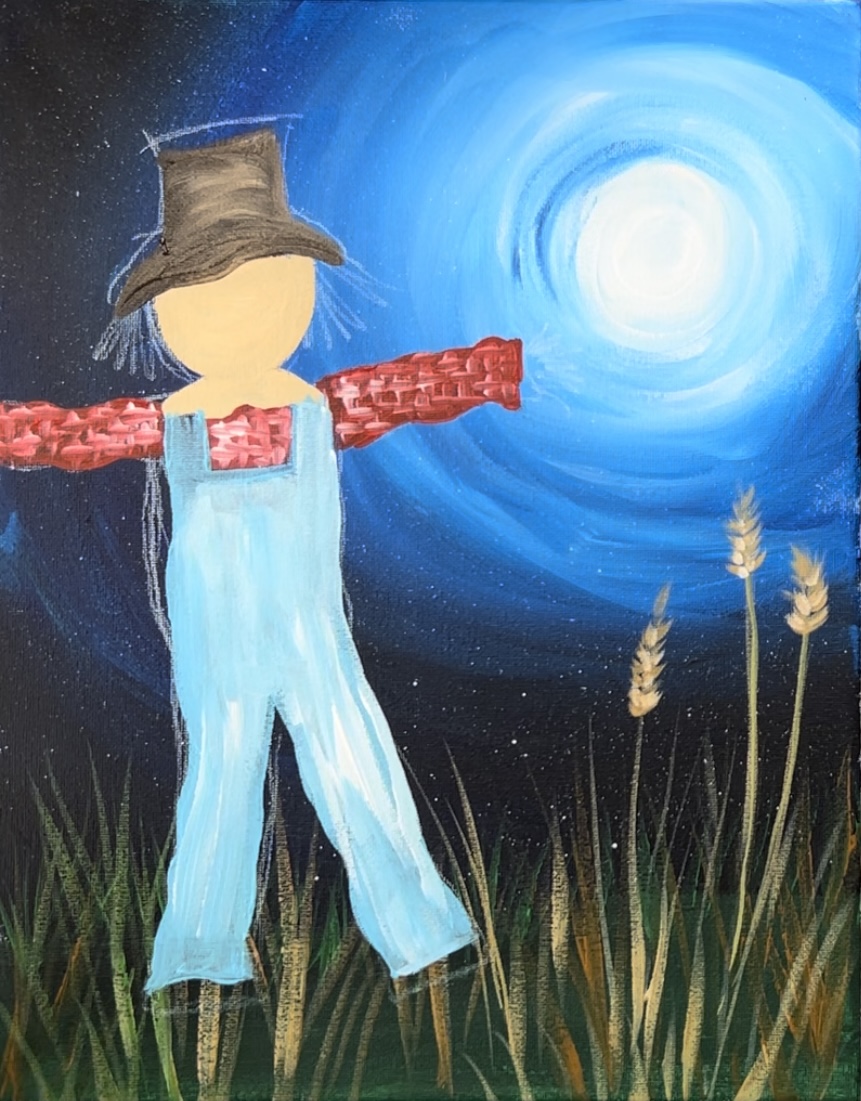
7. Paint straw hair/ hands/ feet
Load your palette with cadmium yellow medium hue. Use the #4 round brush to paint diagonal marks on the left and right side of the hat. This will create the straw hair.
Then add a little brown into this and let it slightly blend. Add a little white as well. This will create different variations in the straw color. Also, paint the straw coming out of the sleeves and pant legs.
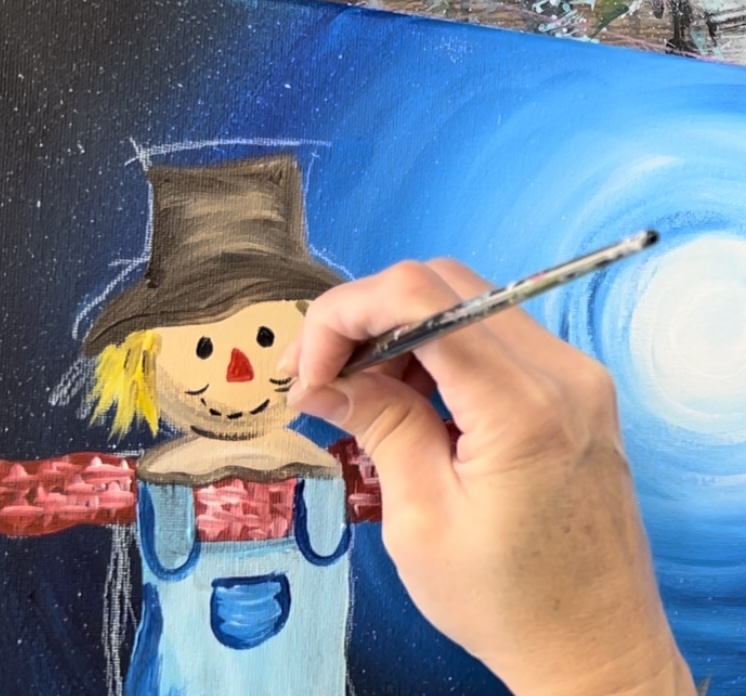
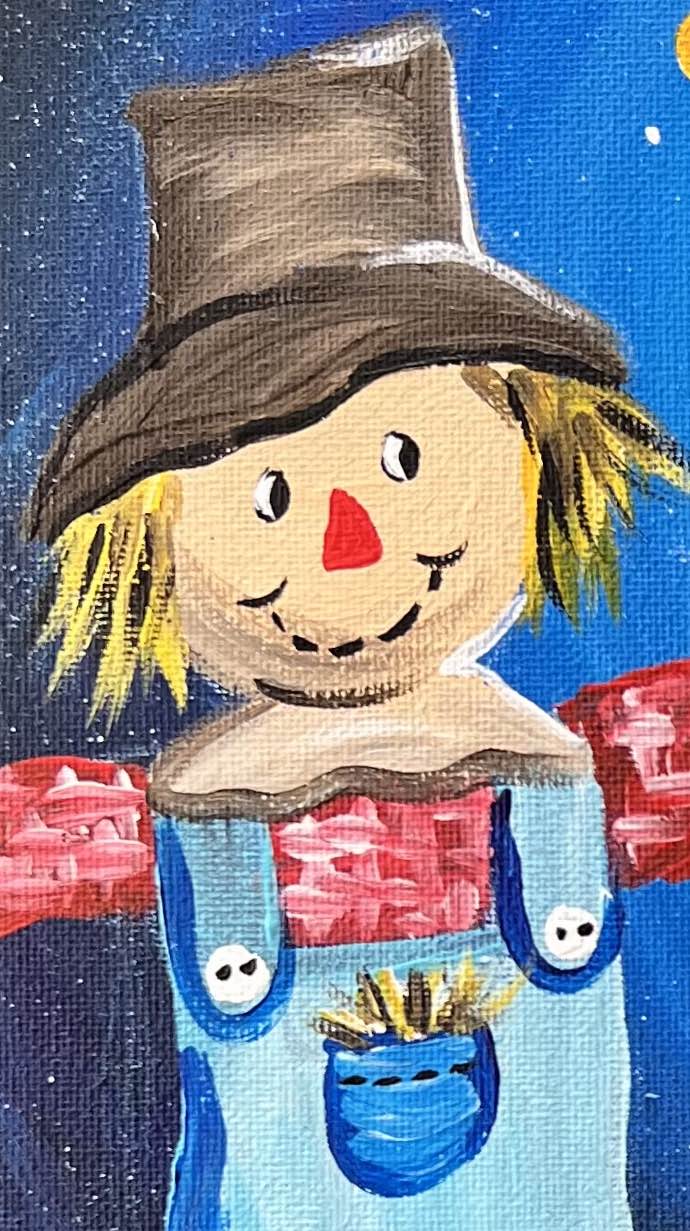
8. Paint Face
Use a tiny detail brush to paint the face. You can also do this step with paint pens because of the level of detail.
Use mars black to paint two oval eyes and a stitch-like mouth. Use the cadmium red medium hue to paint a triangular nose.
After the black in the eyes dry, paint two curved white lines inside the eyes. This will make it look like he is looking towards the right.
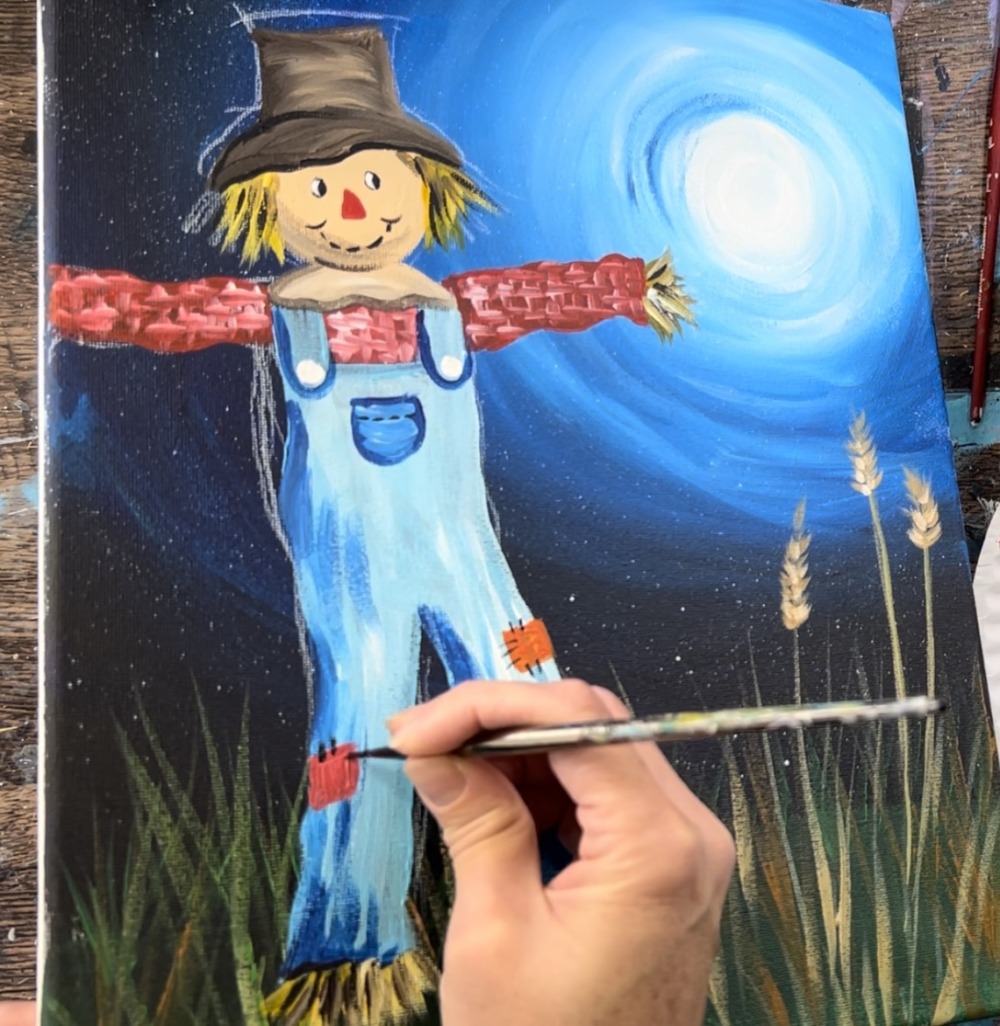
9. Paint patches
Use the liner brush to paint little square patches on the overalls. I used cadmium red medium hue for one patch and then mixed an orange (red and yellow) for the second patch.
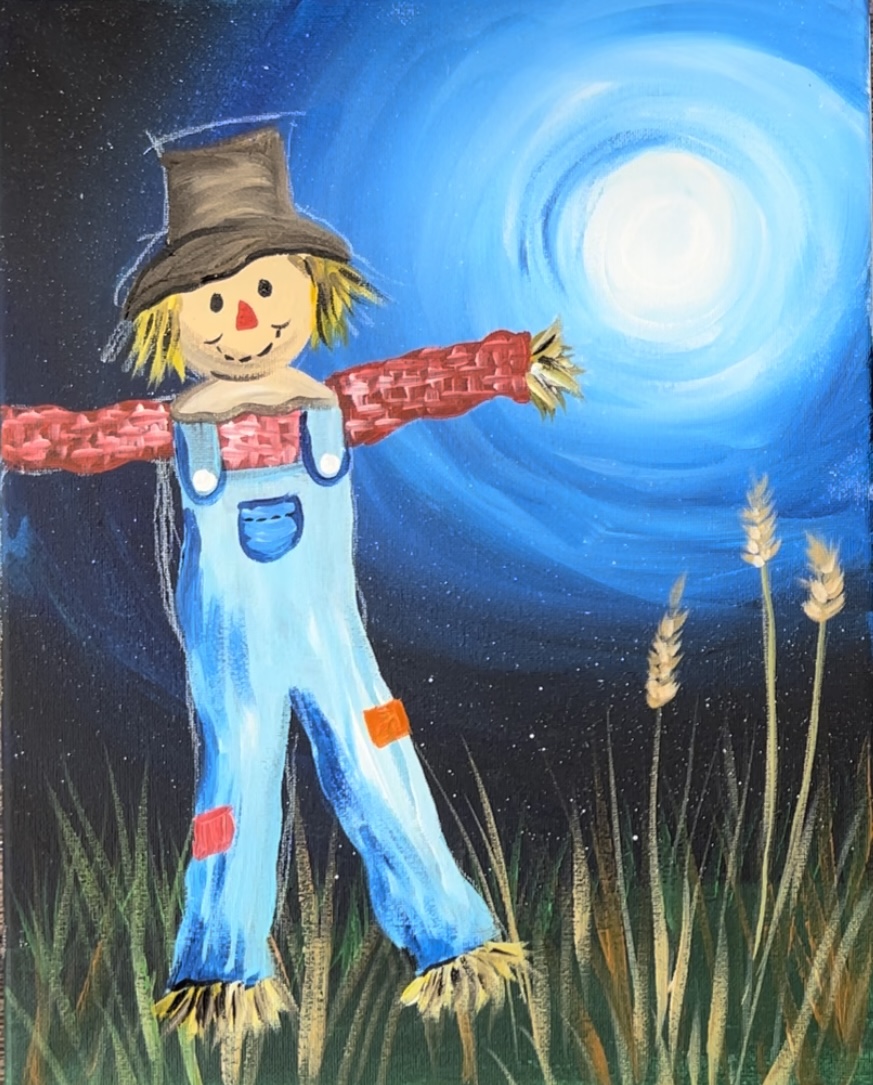
Then use mars black to paint little dash lines for the stitches of each of the patches.

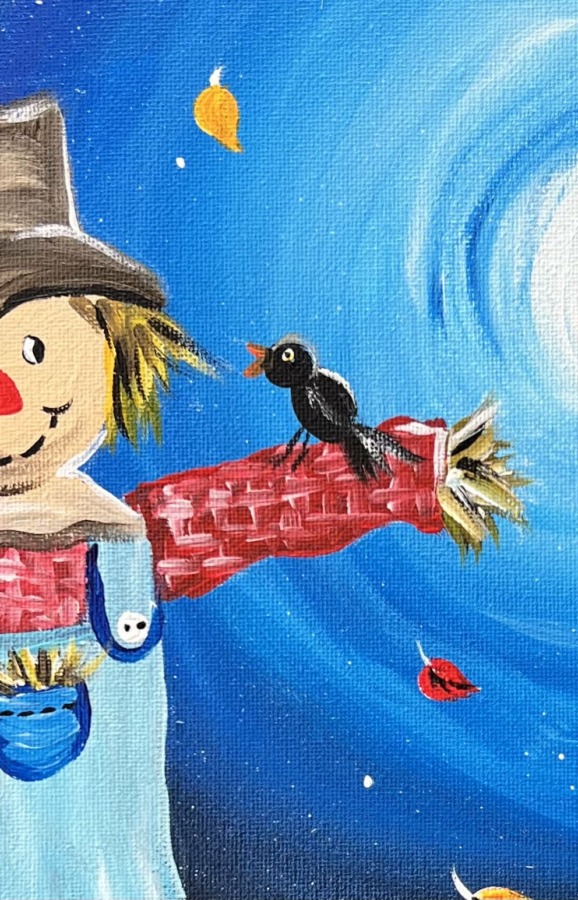
10. Paint Black Bird
Use mars black to paint a simple black bird on the scarecrow’s sleeve. Paint an oval for the body, circle for the head and little diagonal lines for the tail.
Then use orange (mix yellow and red) to paint the bees. Paint a little white dot in the center of the head for the eye.
Paint little diagonal black lines for the legs. Also, add a little white highlight on the far right of the head and body.
11. Paint leaves
I painted the leaves white first so they would show up bright against the dark background. You can do this too or us paint the leaves without doing a white layer first.
Use the tiny detail brush to paint the leaf shapes all throughout the background. I did mostly rounded/ pointed shaped leaves but some were more of a maple leaf shape. I also painted them so they were going in different directions so it looks like the wind is blowing in the background.

After the leaves dry, paint them with red, orang and yellow.
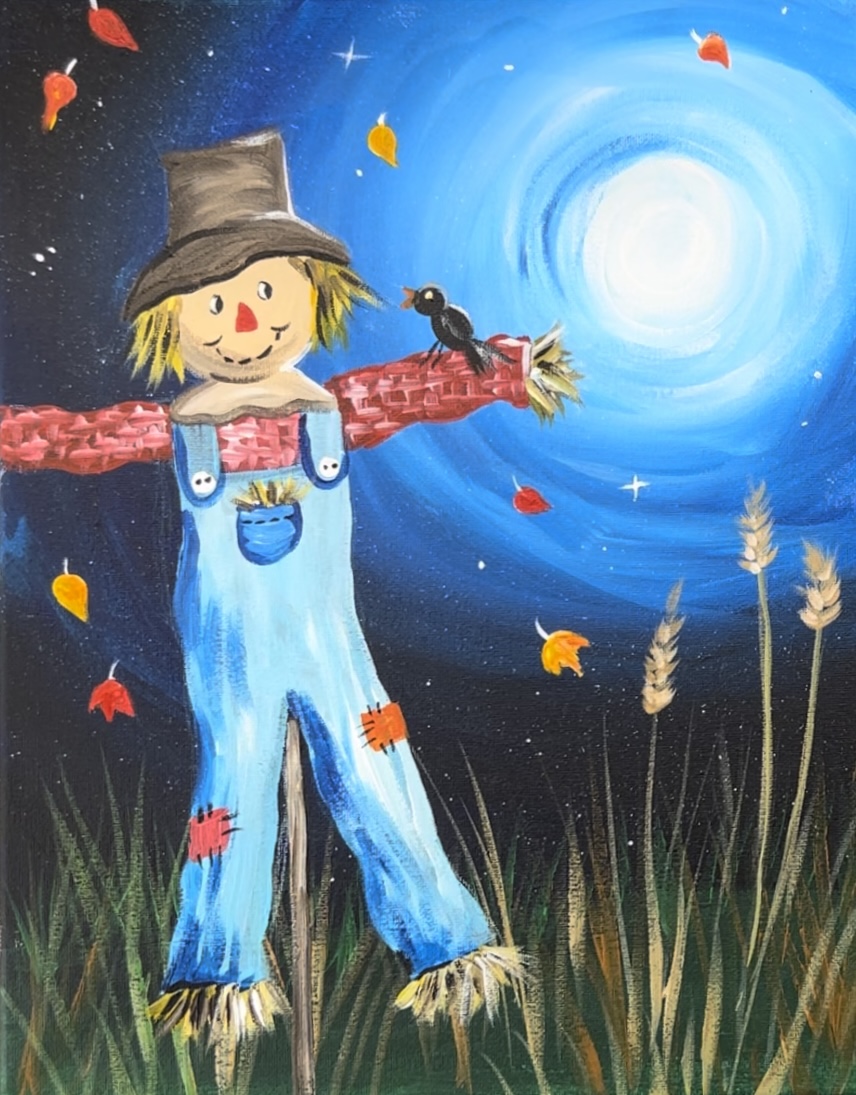
Another additional detail you can add are more stars in the sky such as diamond/ twinkle stars. You can also do little lines on the leaves.

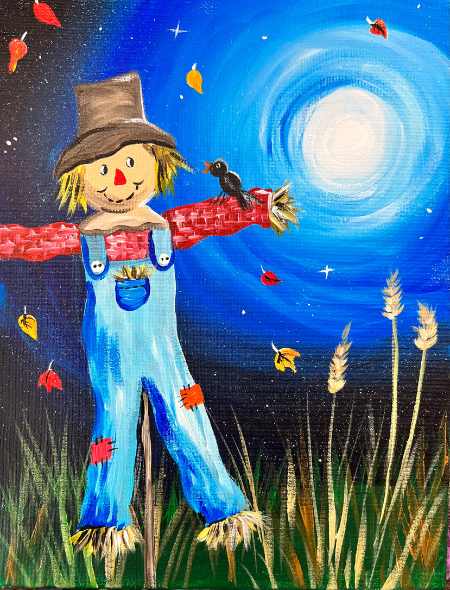
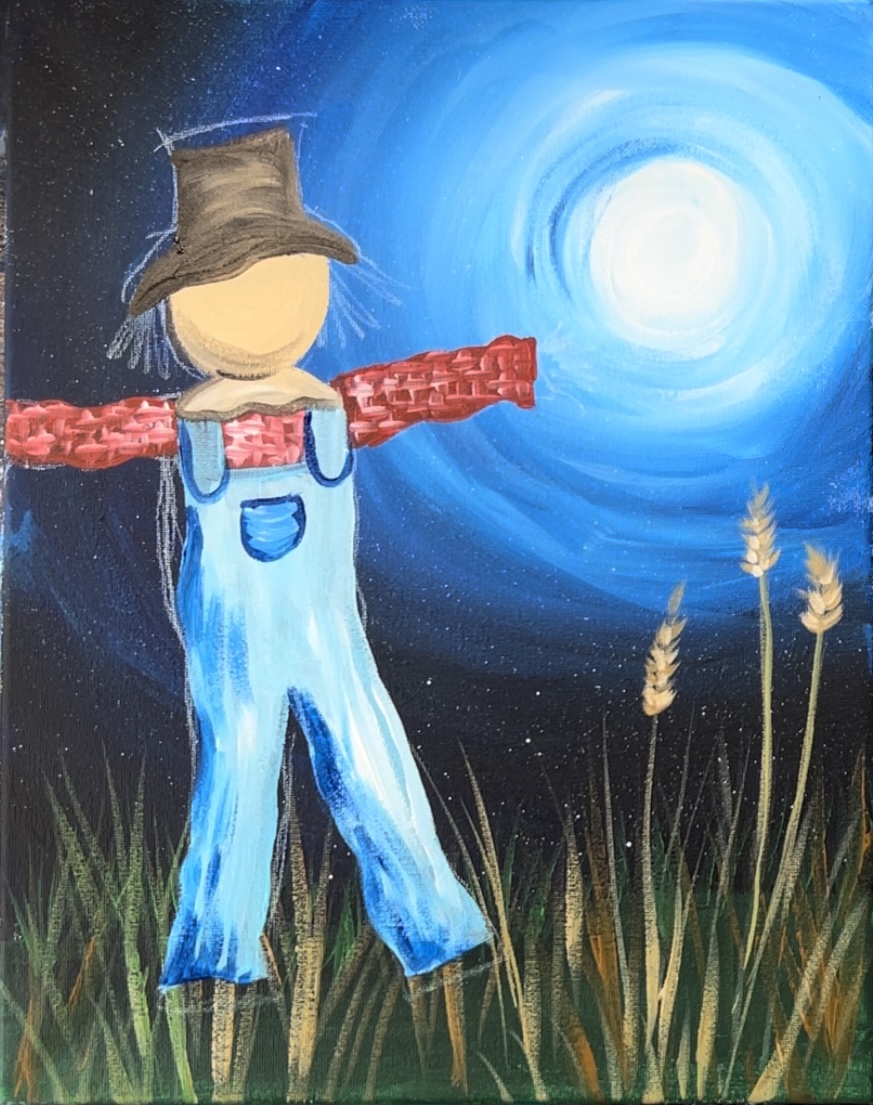
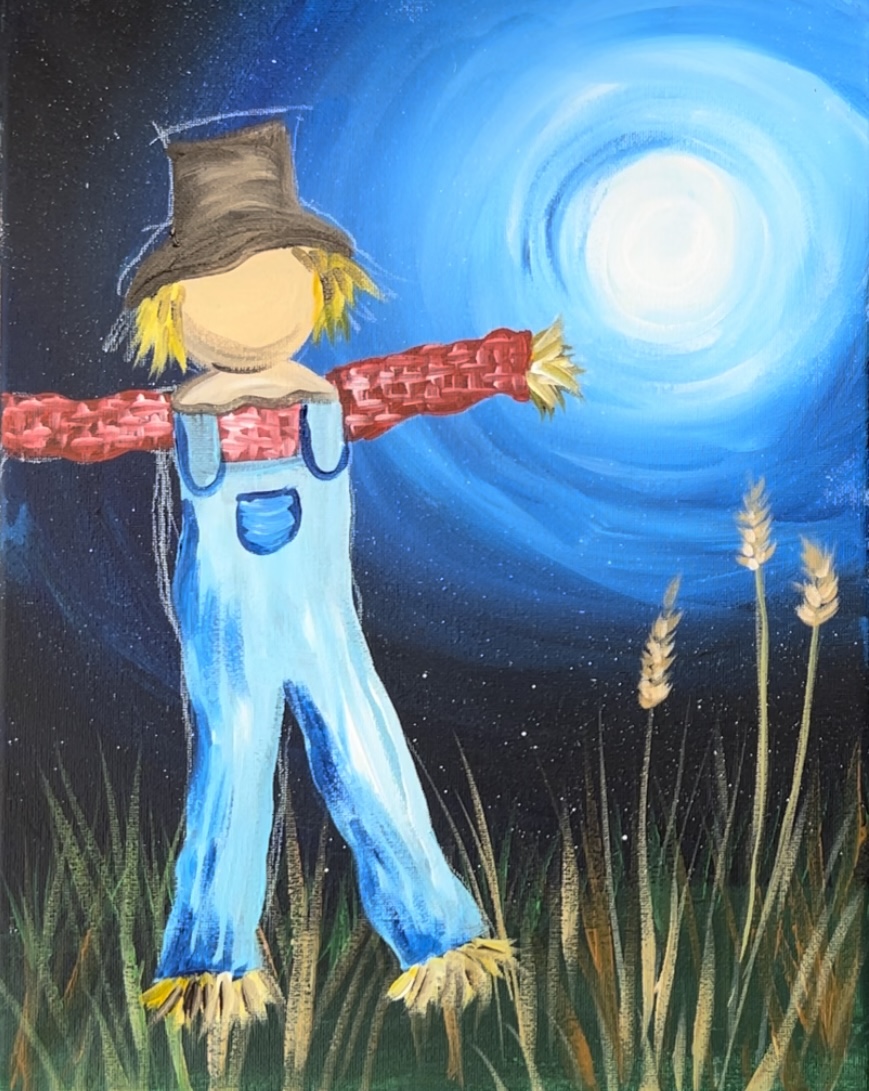
Finished!
