


Would you like to save this?
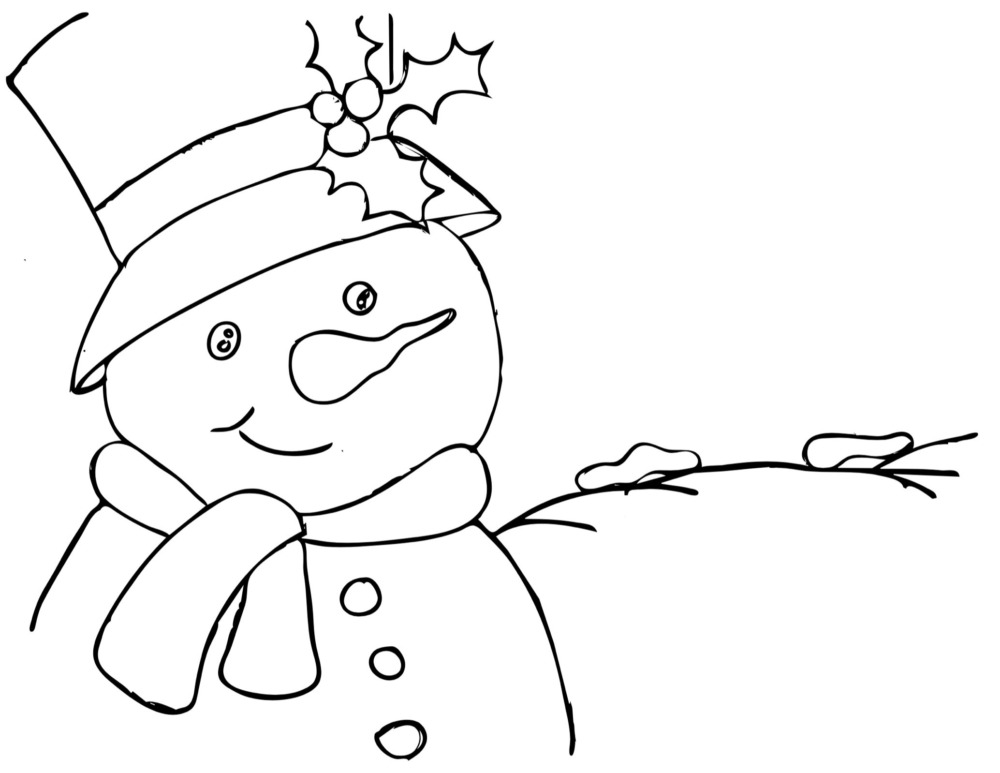
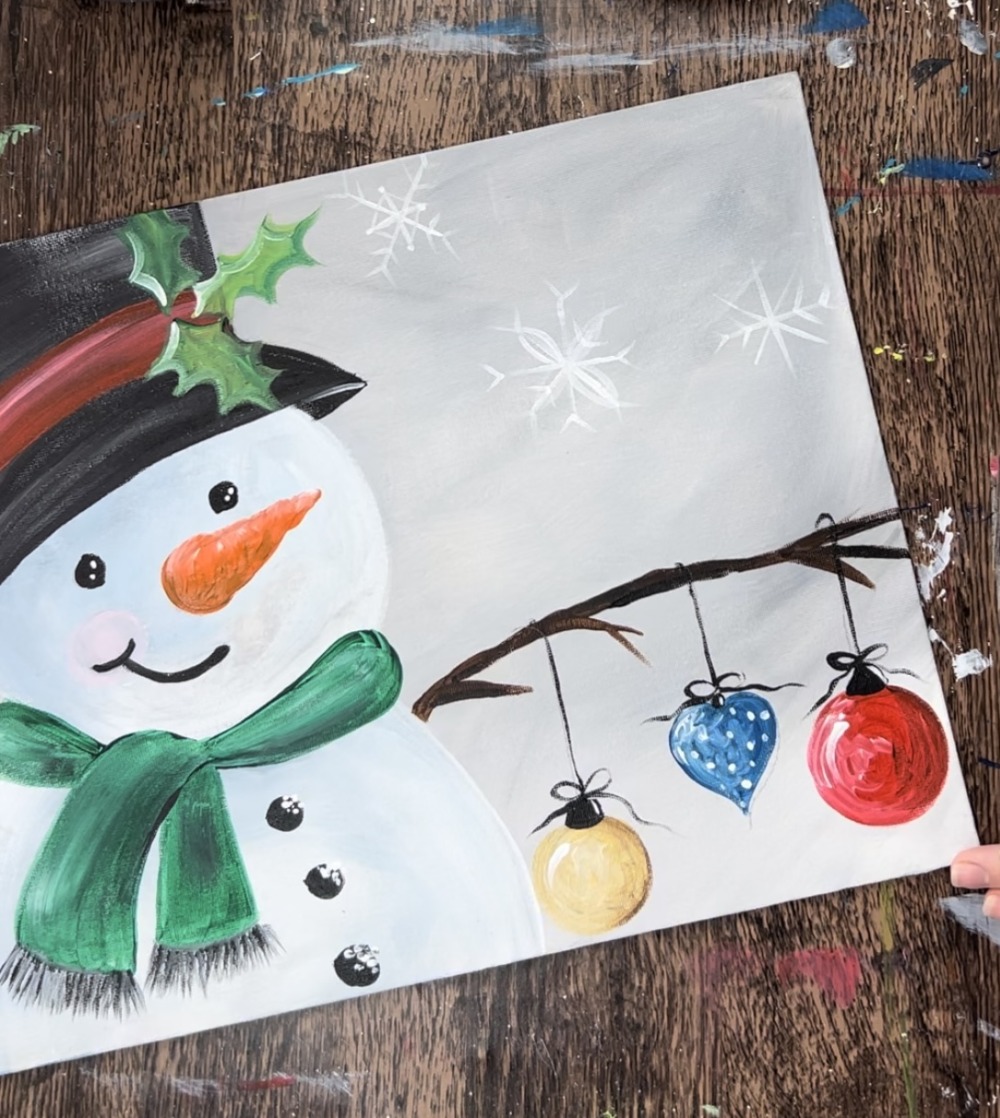
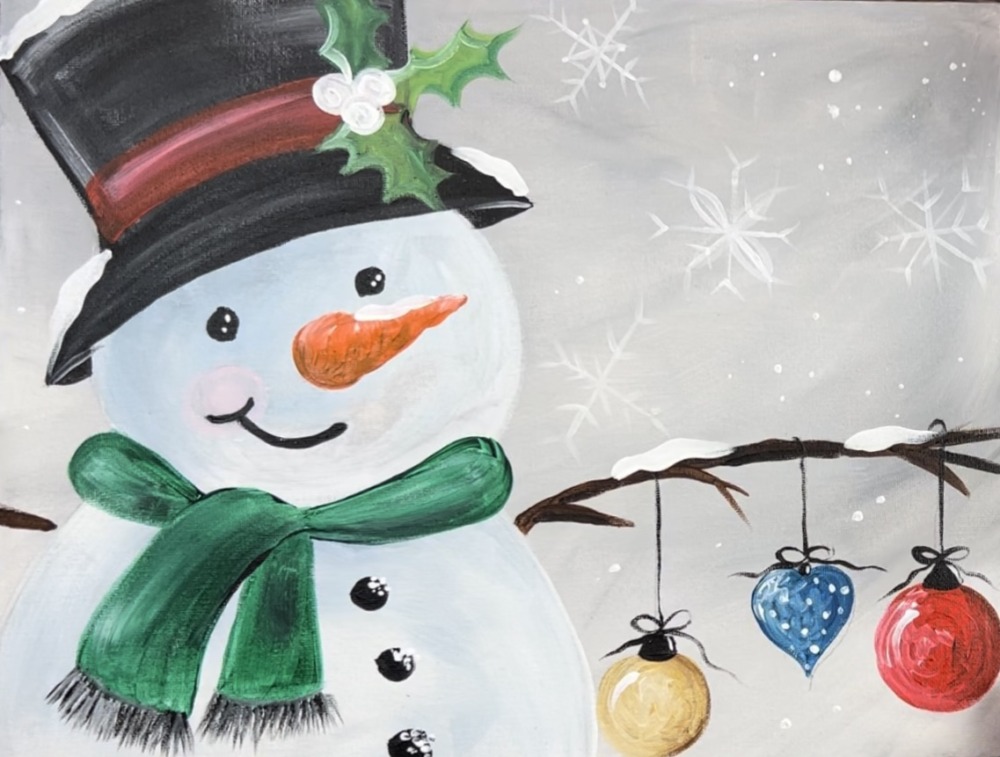
This acrylic painting tutorial will demonstrate how to paint an adorable snowman with ornaments hanging from its arm.
This painting can be customized! Add names to the ornaments and change the colors!
Enjoy and happy painting!
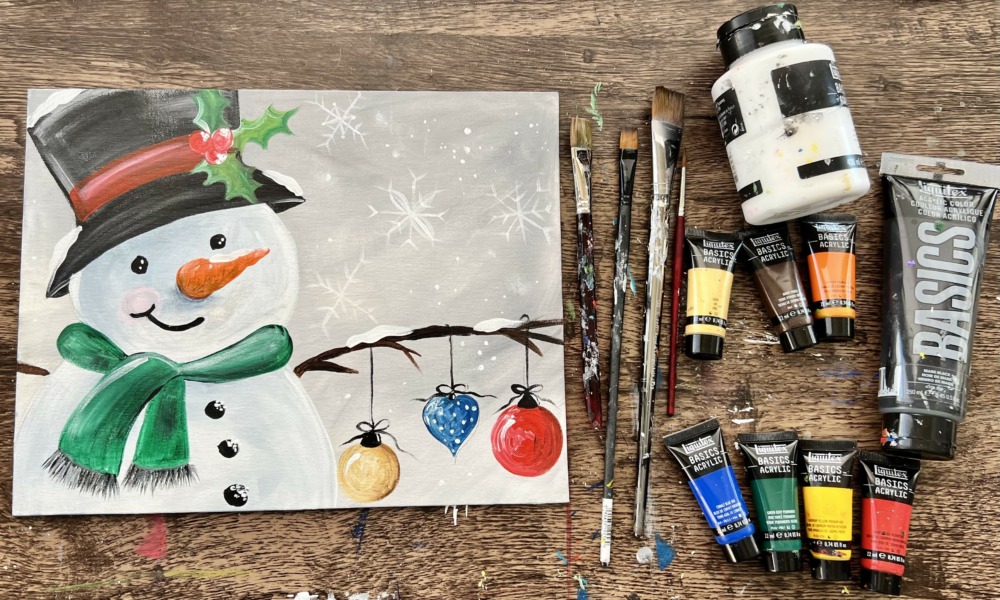
Materials
How To Paint a Snowman With Ornaments
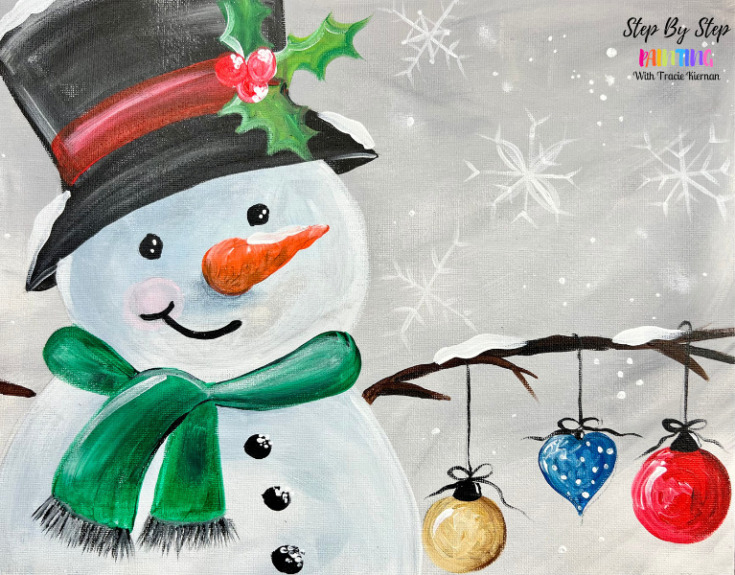
Learn techniques for painting an adorable snowman with acrylics on canvas.
Materials
- 11 x 14 Canvas
- Acrylic Paint
- Brushes
- Paint Palette
- Water Cup
- Soft Towel
- Pencil & Eraser
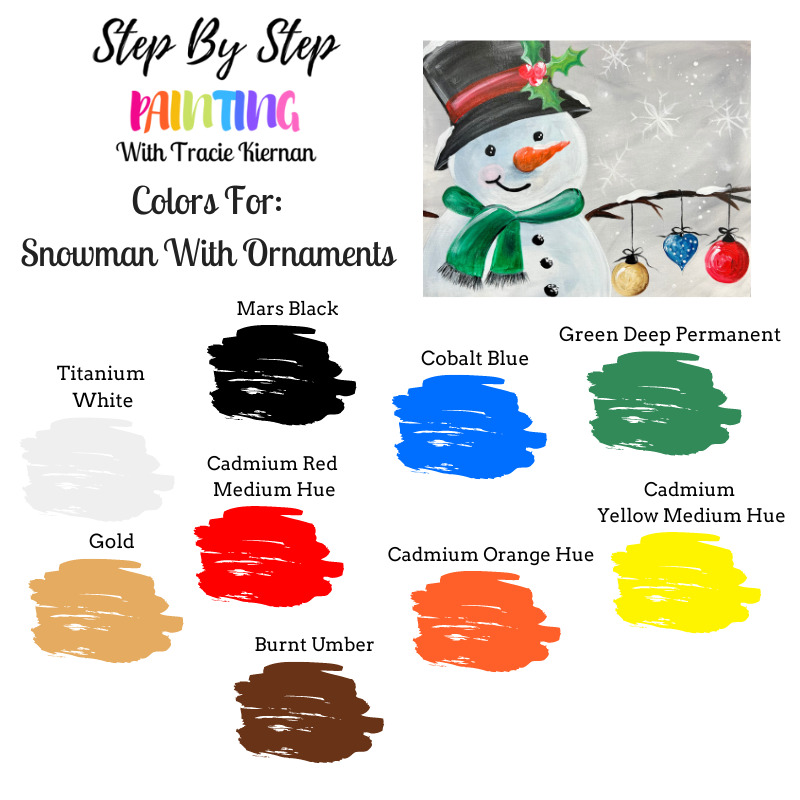
Colors
- Cadmium Red Medium Hue
- Cadmium Medium Orange Hue
- Cadmium Yellow Medium Hue
- Green Deep Permanent
- Cobalt Blue
- Mars Black
- Titanium White
- Burnt Umber
- Gold (optional)
Brushes
Download this tutorial!

Color Palette
I used liquitex BASICS acrylic paints for this. Feel free to use whatever brand you have on hand! If you are subbing paint colors, you can use the chart below to help you convert:
Using Craft Paints?
If you are using craft paints such as Apple Barrel Craft Paints, I would recommend subbing to these colors:
- White
- Black
- Bright Blue
- Holly Branch
- Gold
- Flag Red
- Jack O Lantern
- Bright Yellow
- Melted Chocolate
Directions At A Glance

Video
Step By Step Instructions
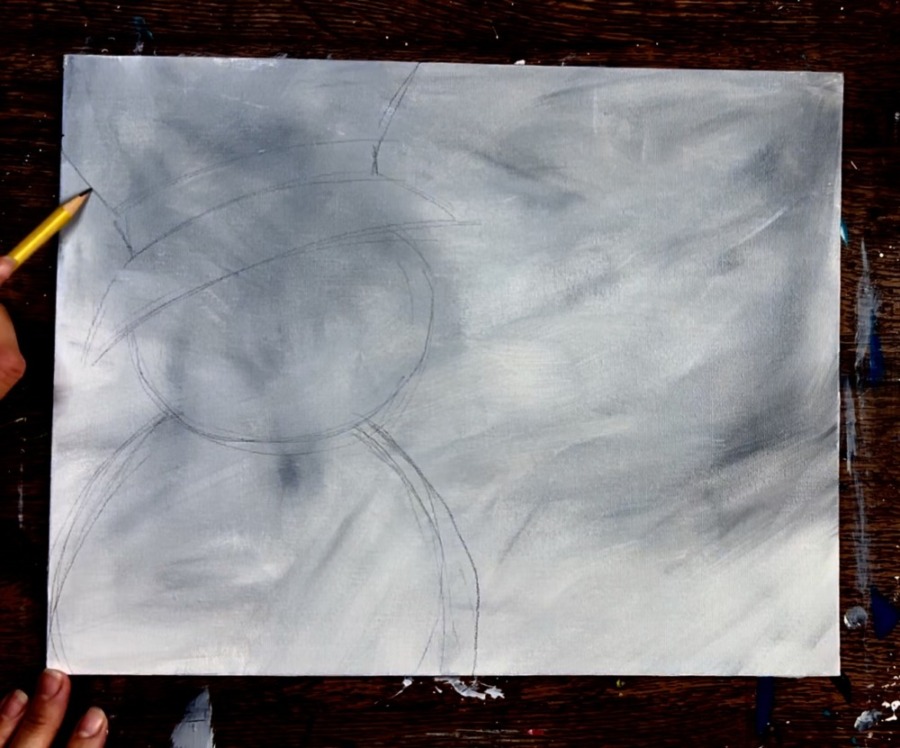
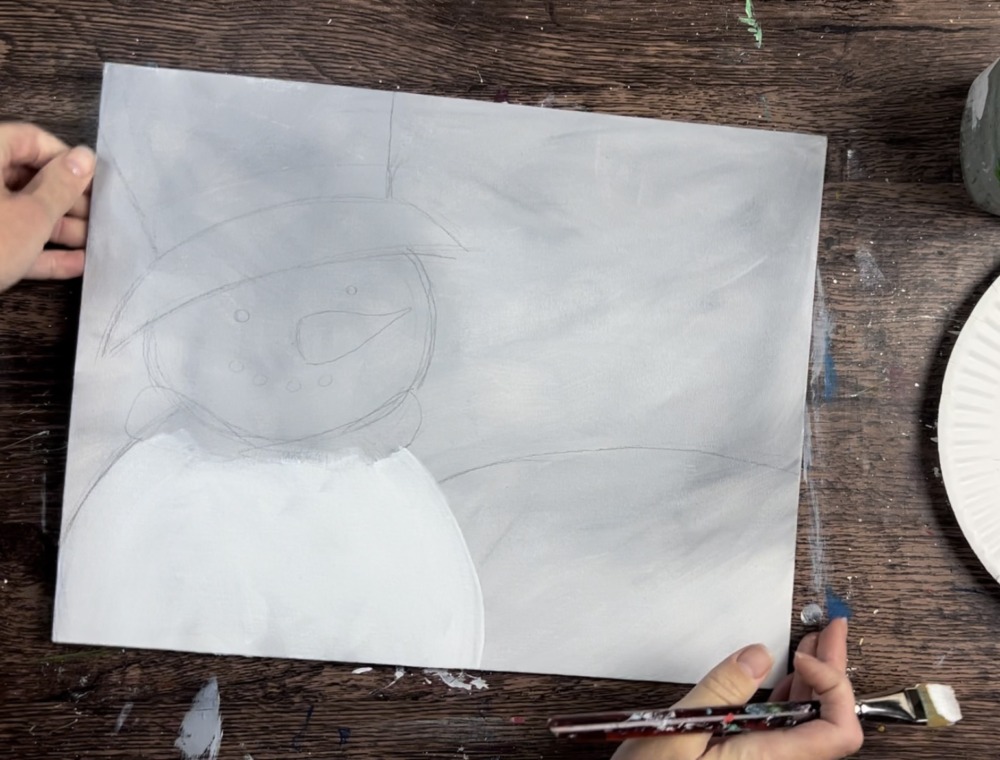
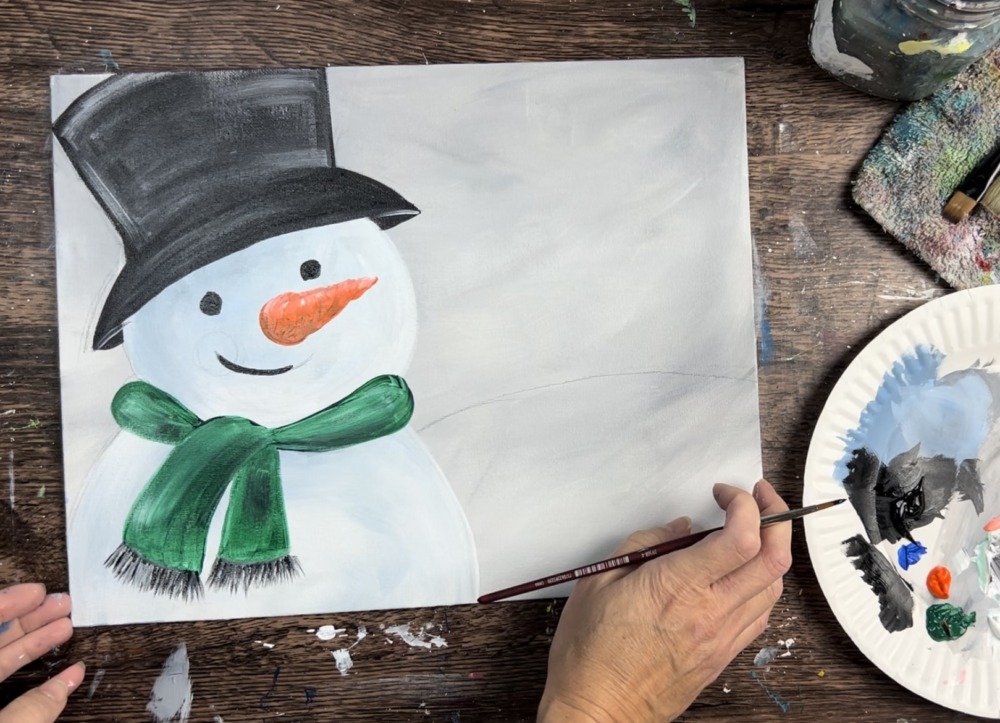
1. Paint the background
Load your palette with mars black and titanium white. Use a 1″ flat brush (or 3/4″ flat brush). Load it into mostly white but add a tiny bit of black to the corner.
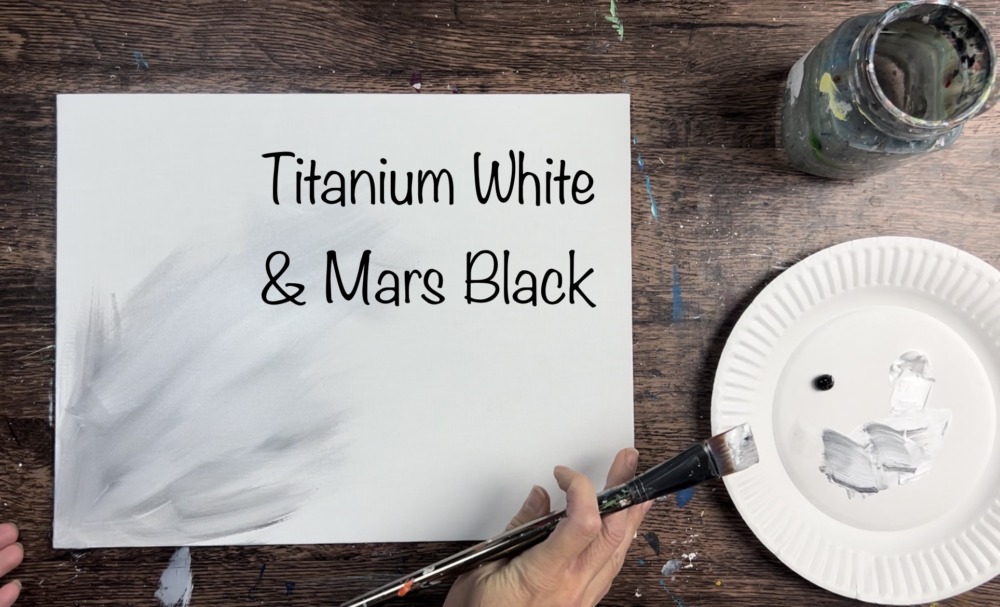
You will be blending the white and tiny bit of black onto the canvas to make a medium to light gray background. Paint in large angle strokes that blend right onto the canvas.
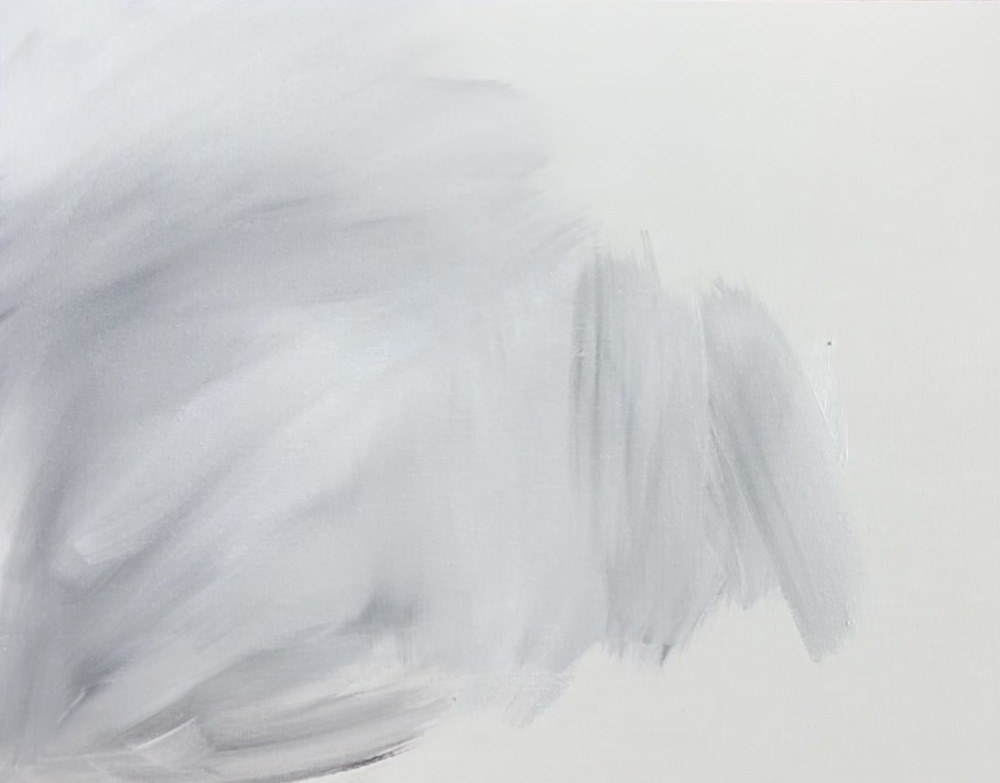
Fill your entire canvas with this abstract gray background. Try not to over blend the paint. You will have areas that are a little darker and some that are lighter. Overall, the variations of gray should blend smoothly. This should be a thin layer of paint as well.

Let this dry before going onto the next step.
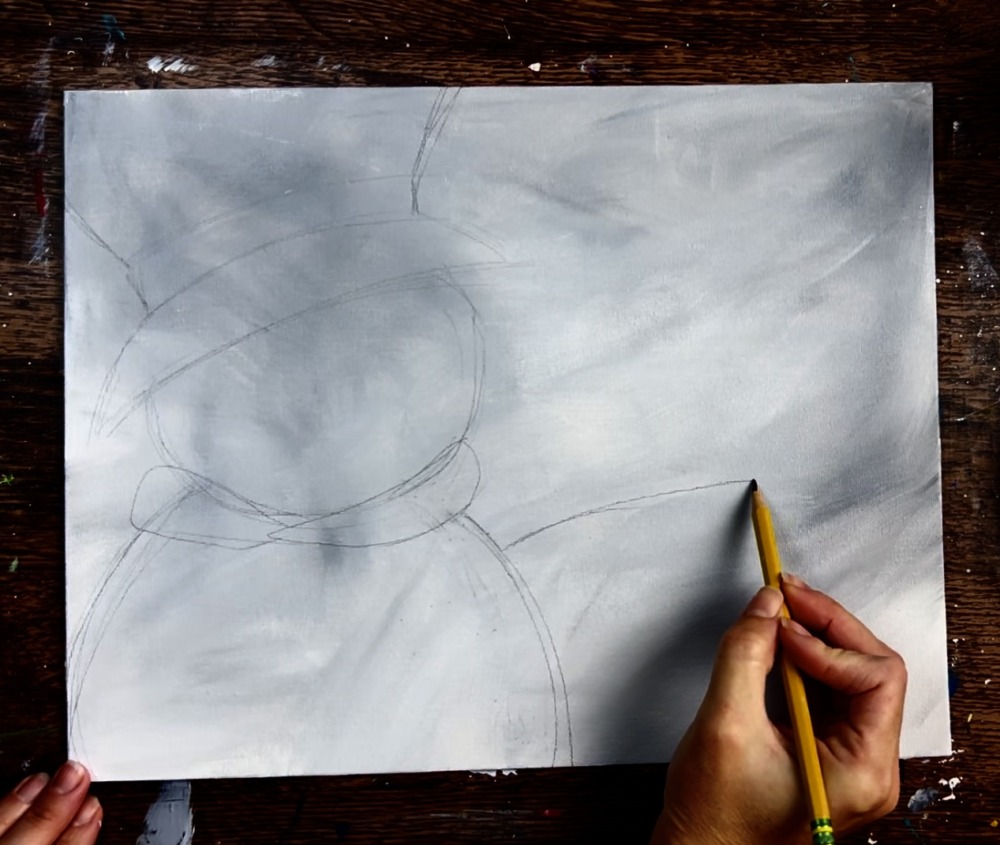
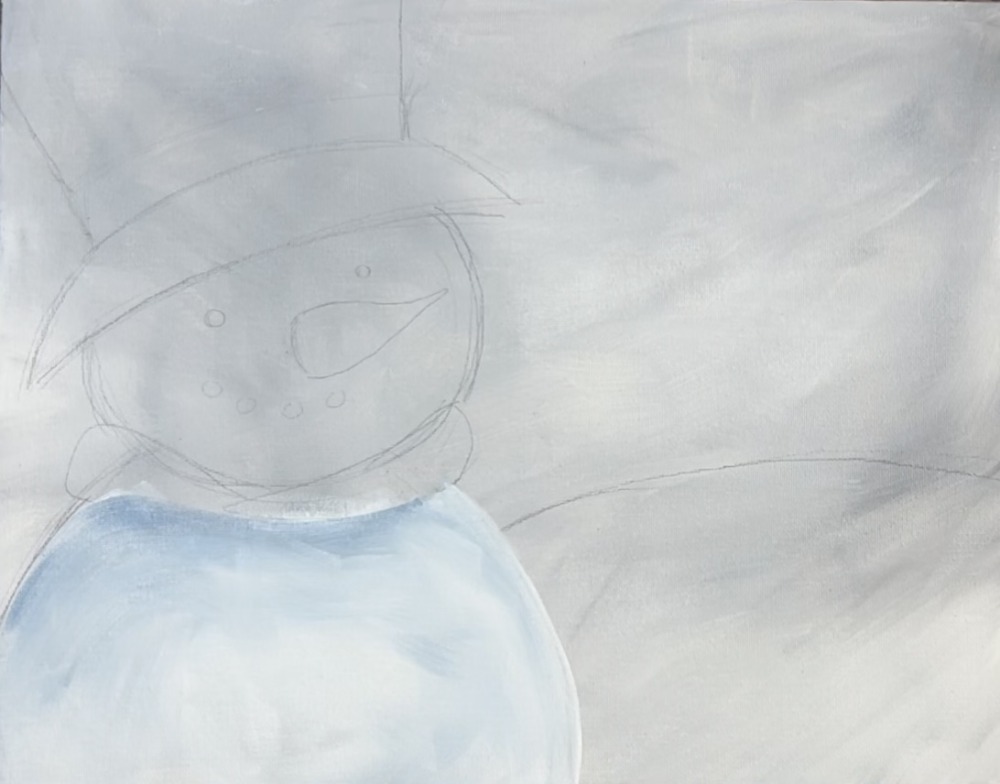
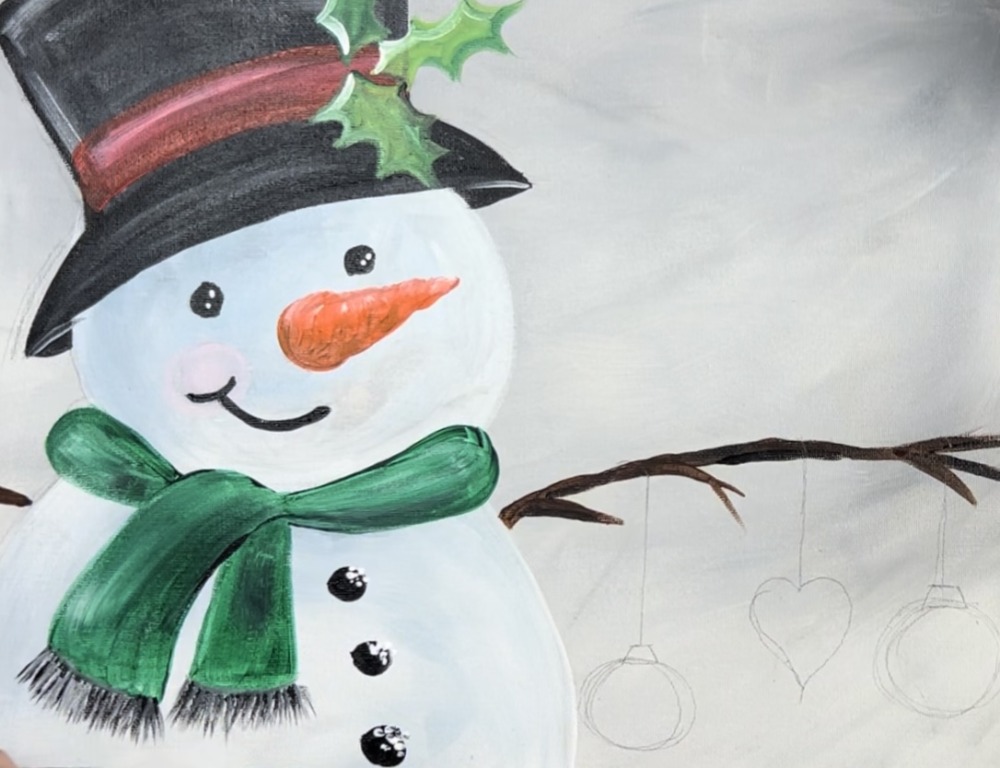
2. Draw The Snowman
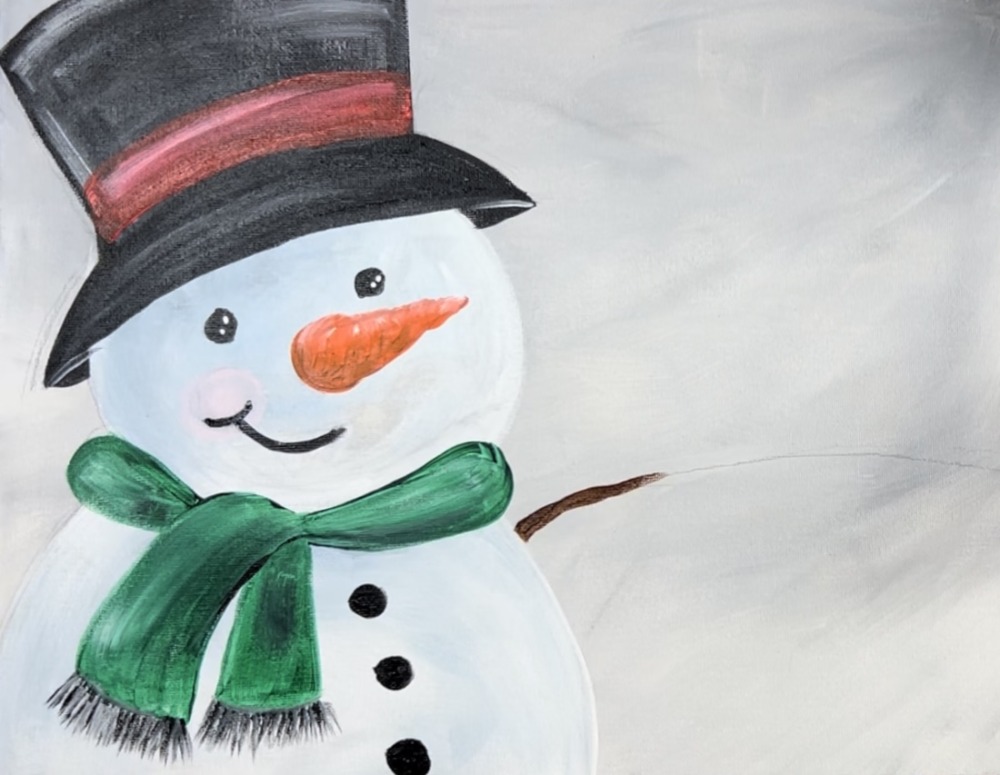
Next, draw the snowman. You will be using a pencil or a piece of chalk to draw the basic shapes of this snowman! The snowman is on the left half of the canvas and his arm expands across the right side. Keep that in mind when drawing this.
First draw a large semi-circle shape in the lower left corner.
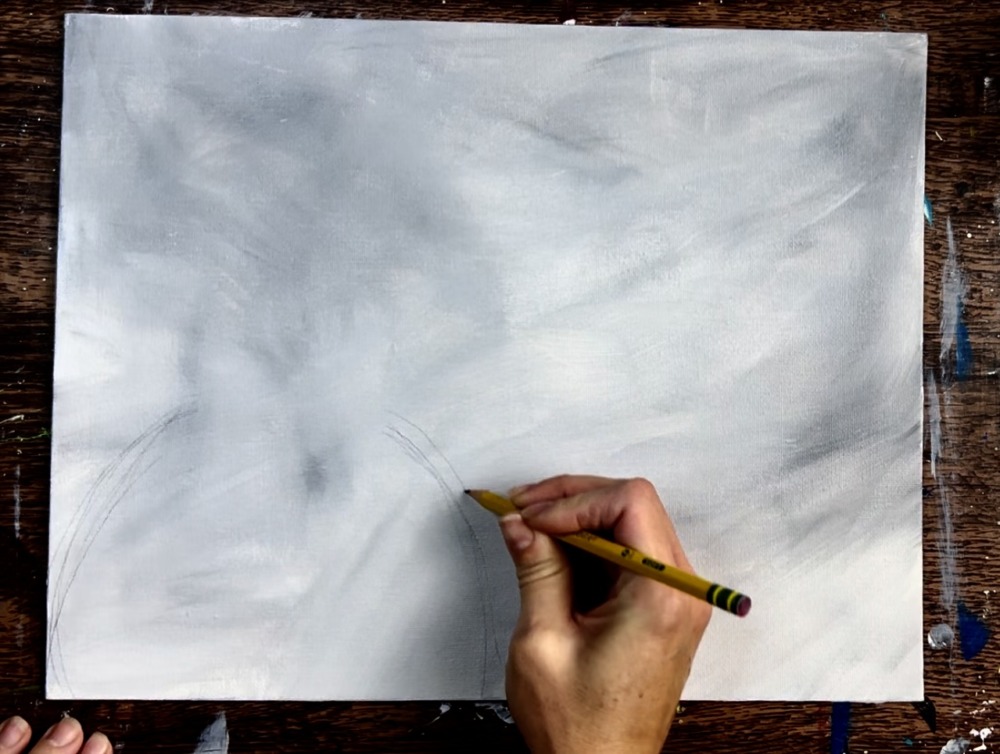
Then draw the head so that it is a smaller circle that slightly overlaps the snowman circle you first drew. Draw a slanted line that overlaps the top of the head circle. This will be the bottom of the hat.
Next, draw the bottom brim and two slanted lines to form the top hat shape. These lines can go off the canvas. You can also draw the hat band.
Then draw the scarf. You can do a simplified version of this scarf by just making a curved shape that overlaps where the two circles join. For an advanced version, draw to curved shapes that go to a point towards the left. Later on, you will paint the piece of the scarf that folds over where these two shapes join together.
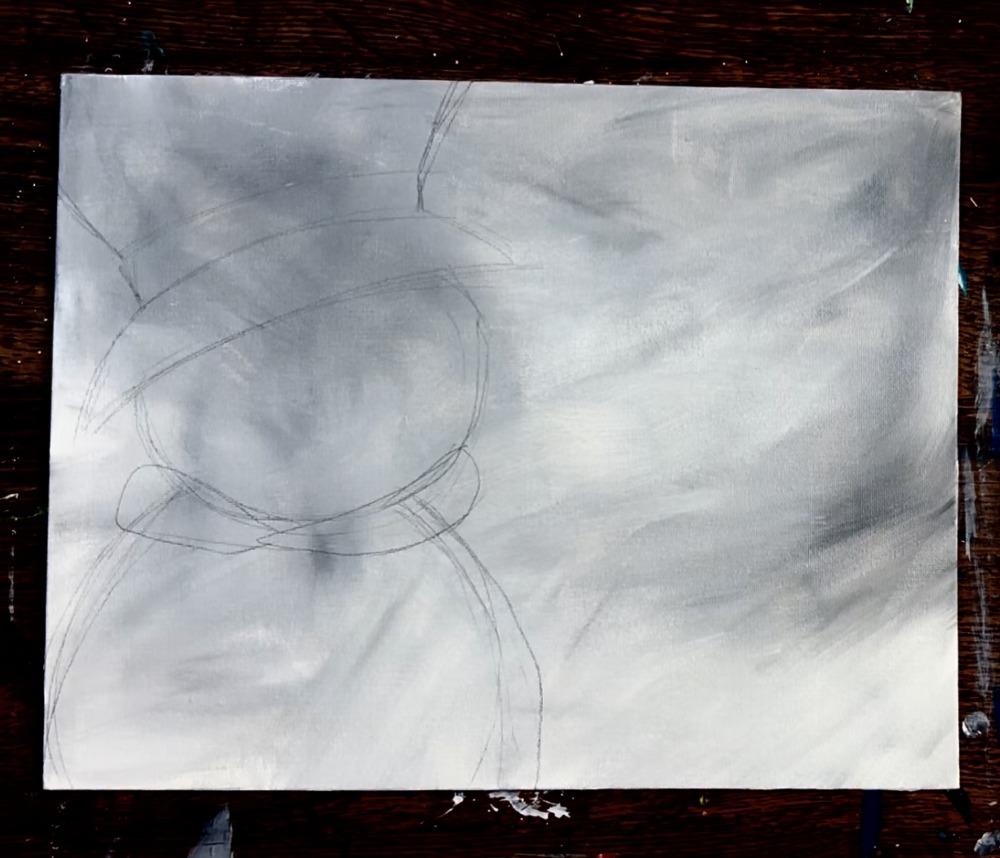
Then draw a long line that starts just under the scarf and goes all the way across the canvas to the far right.
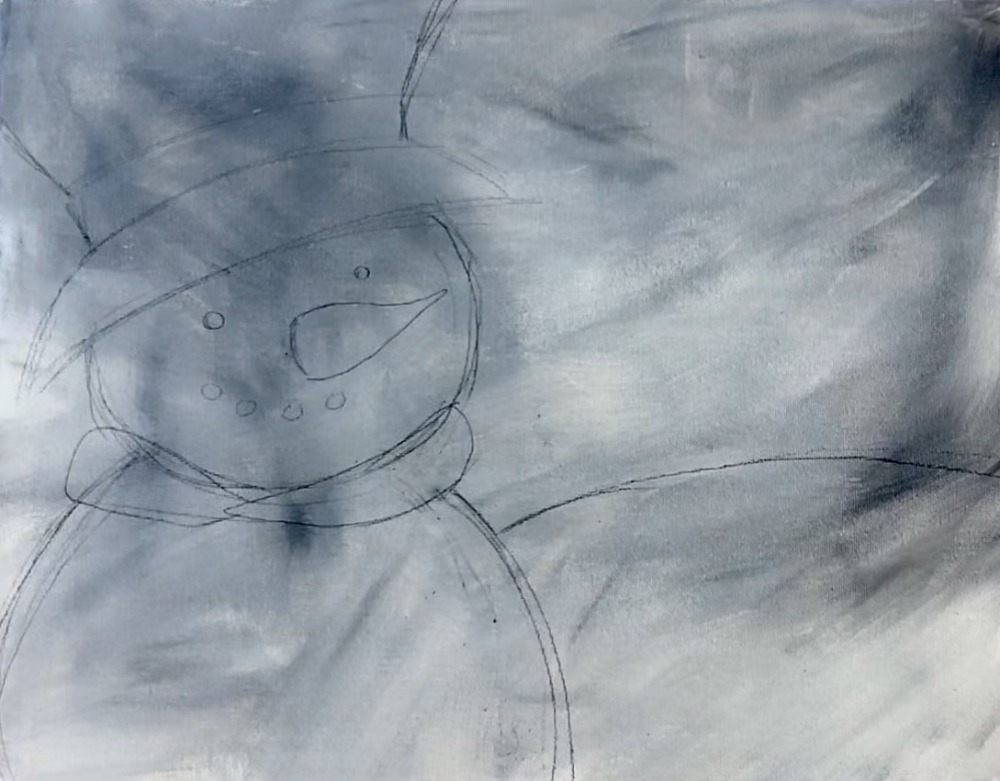
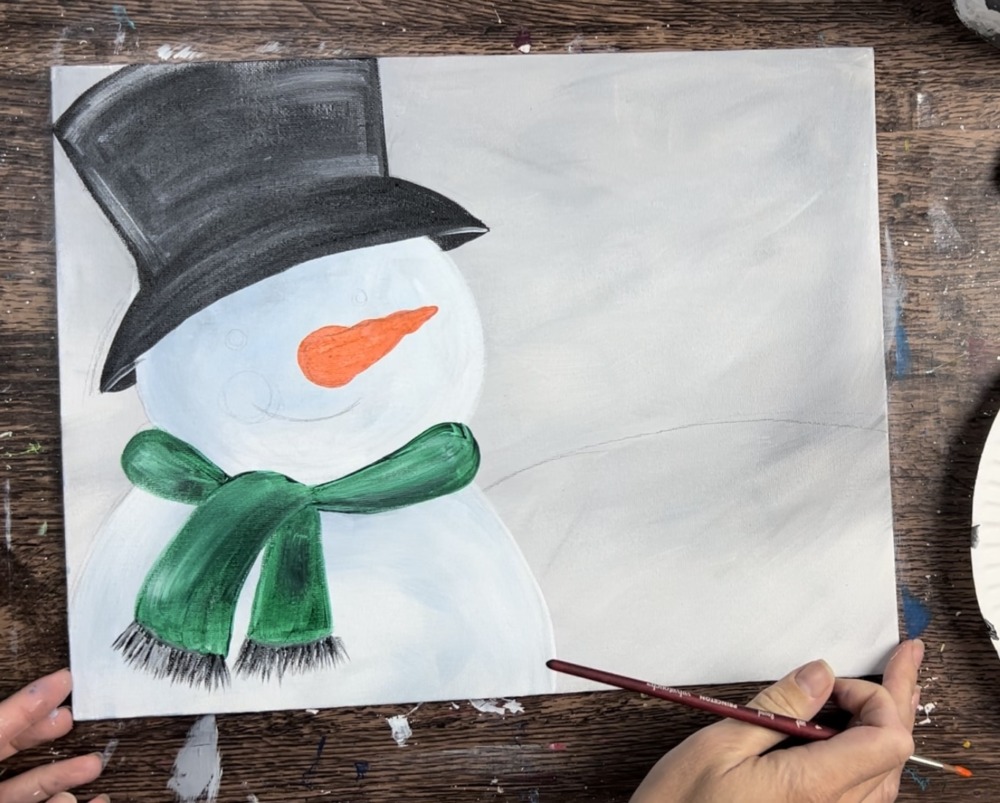
Draw the facial features such as the carrot nose, eyes and mouth. Note, the eyes go parallel to the hat in a diagonal direction and so does the carrot nose.
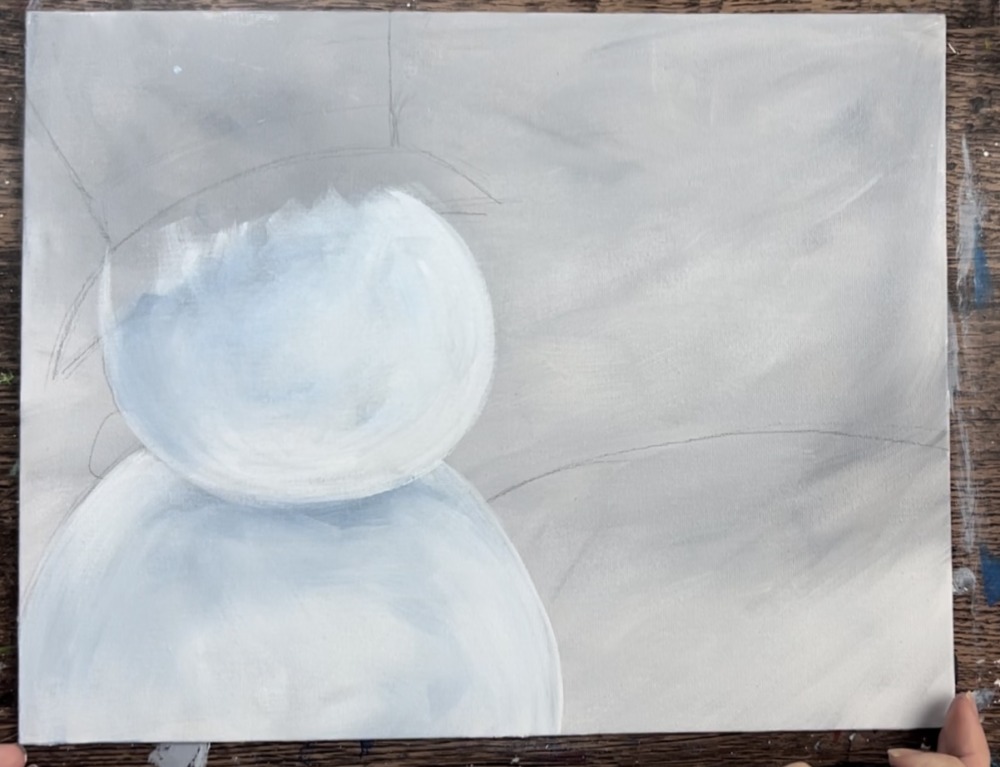
3. Paint Snowman
Tip: if you are simplifying this painting you don’t have to do the shading part of the snow! You can leave the snowman solid white…
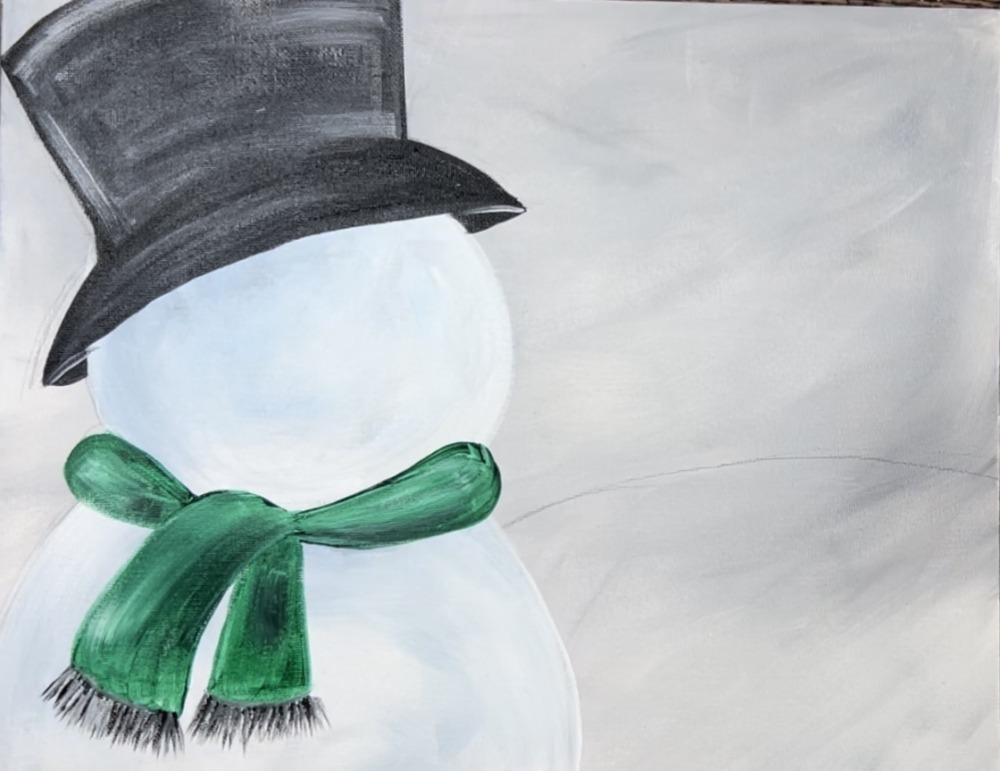
Use the 3/4″ flat wash brush and titanium white. Paint to bottom circle first. Paint the strokes in a circular direction to form the shape of the circle. For now it is solid white. We will do shadowing in the next step.
Next, mix a light blue gray color on your palette. Mix about equal parts mars black and cobalt blue plus titanium white to lighten the color until it is a light to medium blue-gray color.
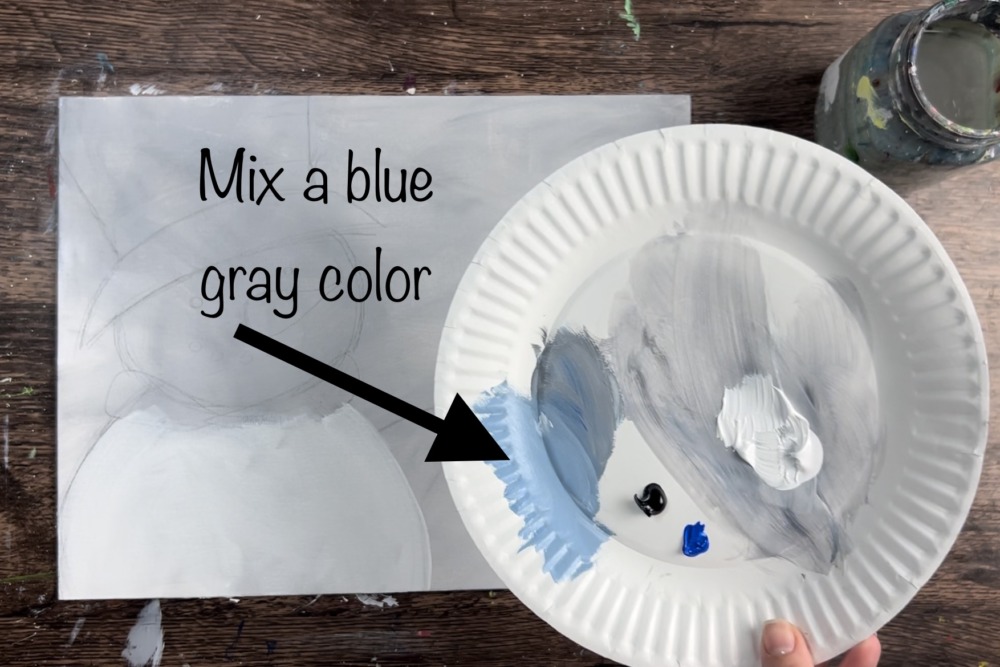
Load that blue gray color on the tip of your brush and paint under the scarf. Tip: only load a small amount on the tip of the brush. It’s easier to blend paint when there is less paint loaded on the brush.
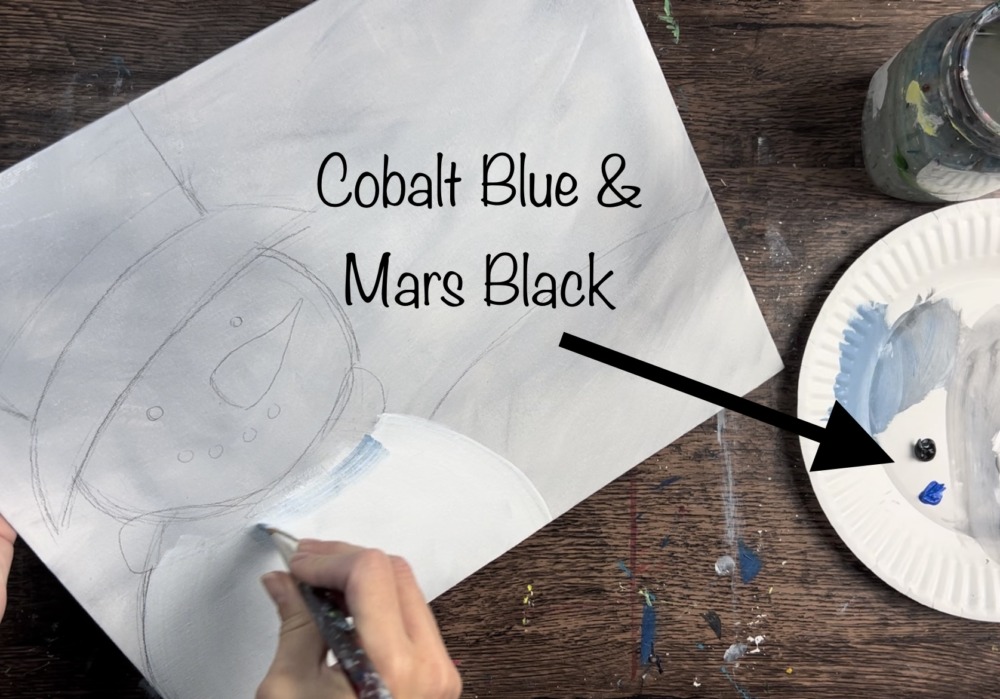
Apply it under the scarf area and on the left and right of the snow but leave the center part of the circle white. Blend it into the white either by blending it with the white that is on the canvas and not dry or adding more white to you brush and blending that shadow color in.
The direction of the strokes should go in a curved direction on the sides of the circle and the strokes should be more rounded and circular in the center of the circle. This helps to create form on the snowman.
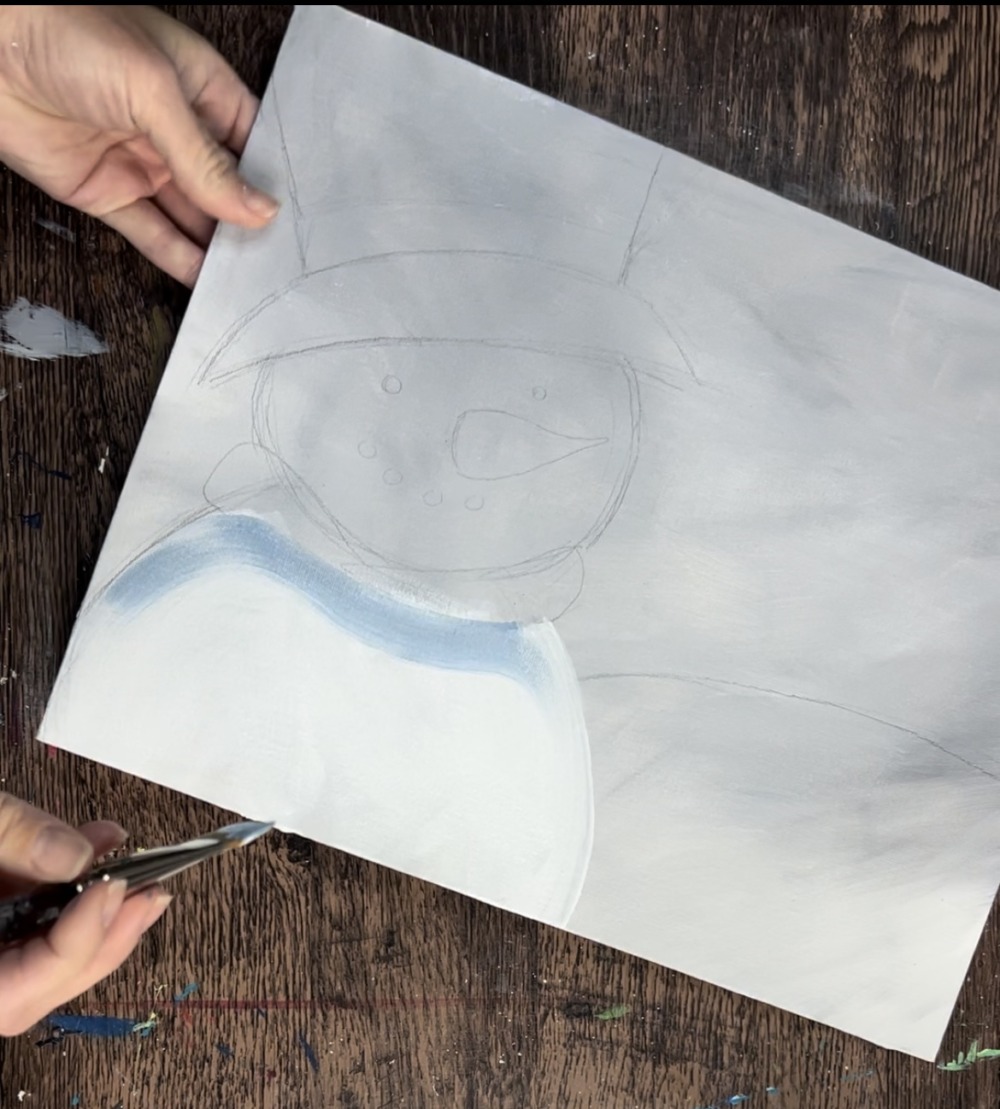
Then repeat this for the top circle. Paint this circle so that it overlaps the bottom circle. Paint it a solid coat of titanium white using the 3/4″ flat wash brush.
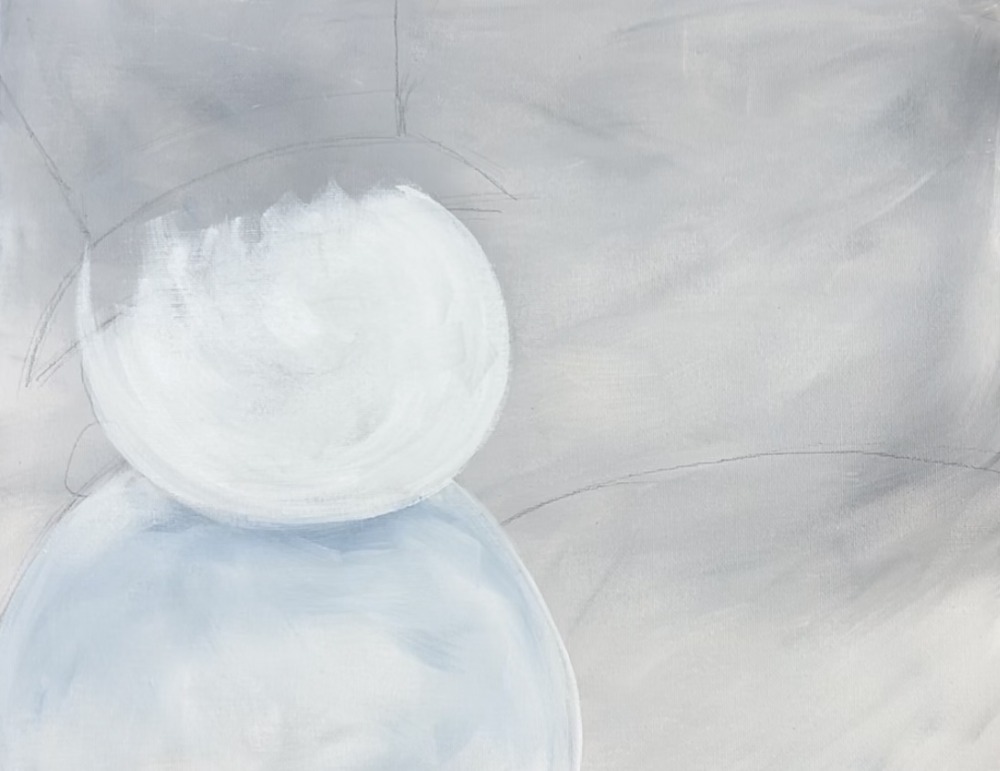
Next, add the blue-gray shading. Blend it into the white on the tup under the hat and on the left part of the circle. Leave the right part of the circle and the bottom of the circle bright white.
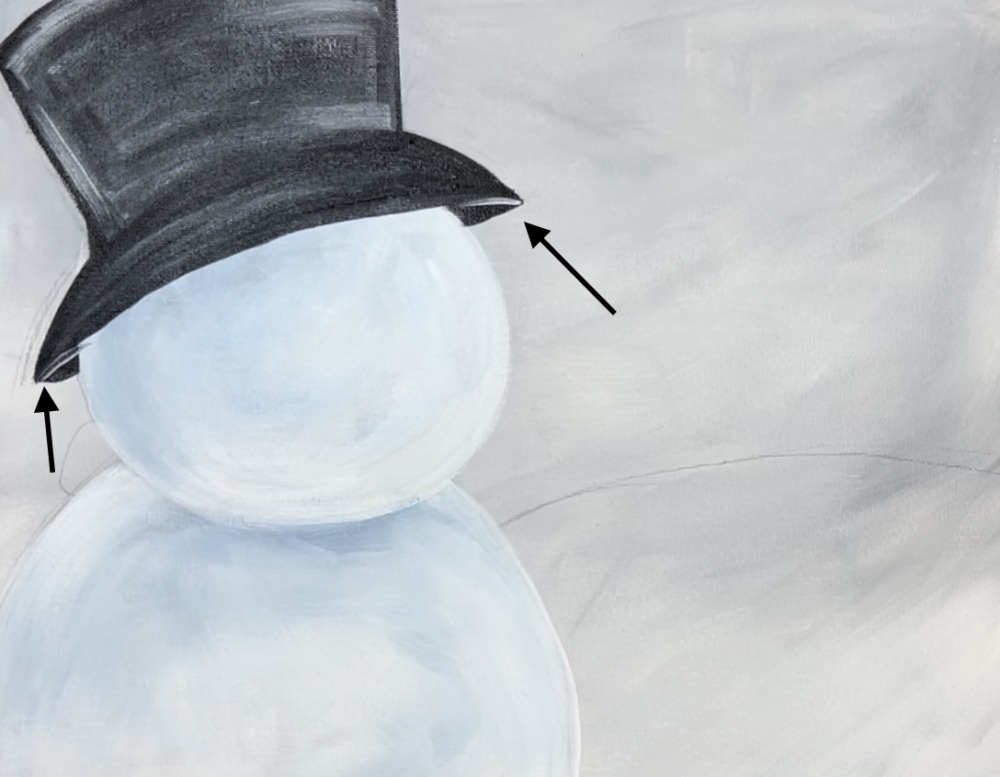
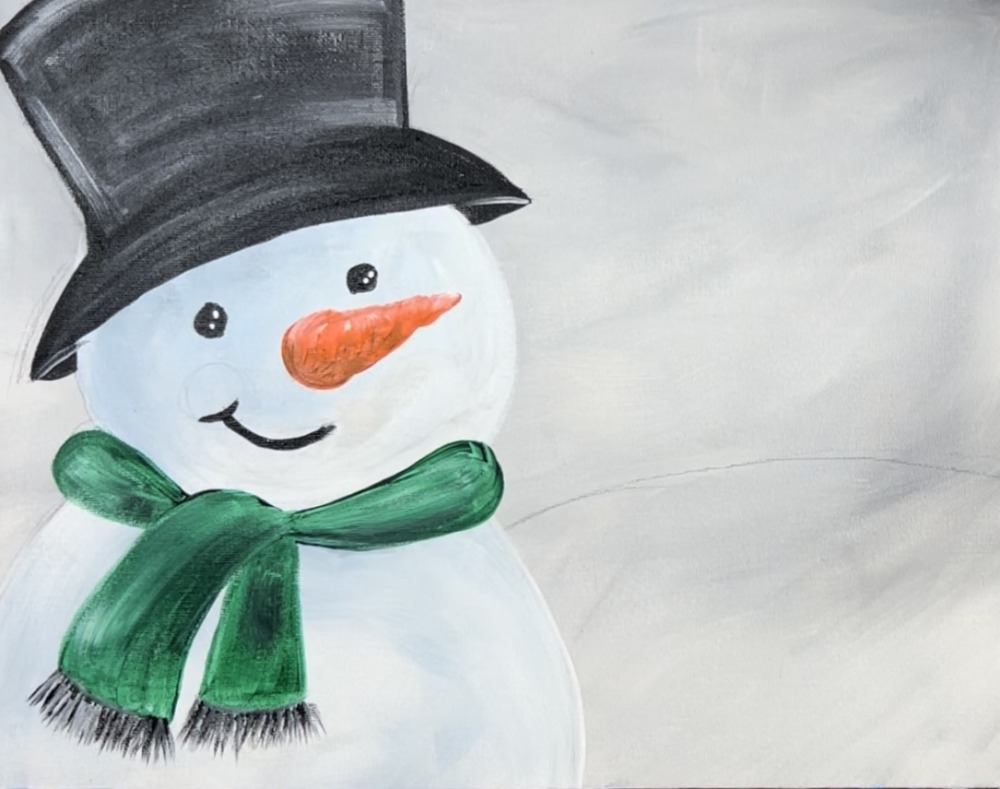
4. Paint Hat
Use mars black and a 3/4″ flat wash brush to paint the hat. Start on the bottom and paint the brim. Then use the tip of your flat brush to outline the shape of the hat.
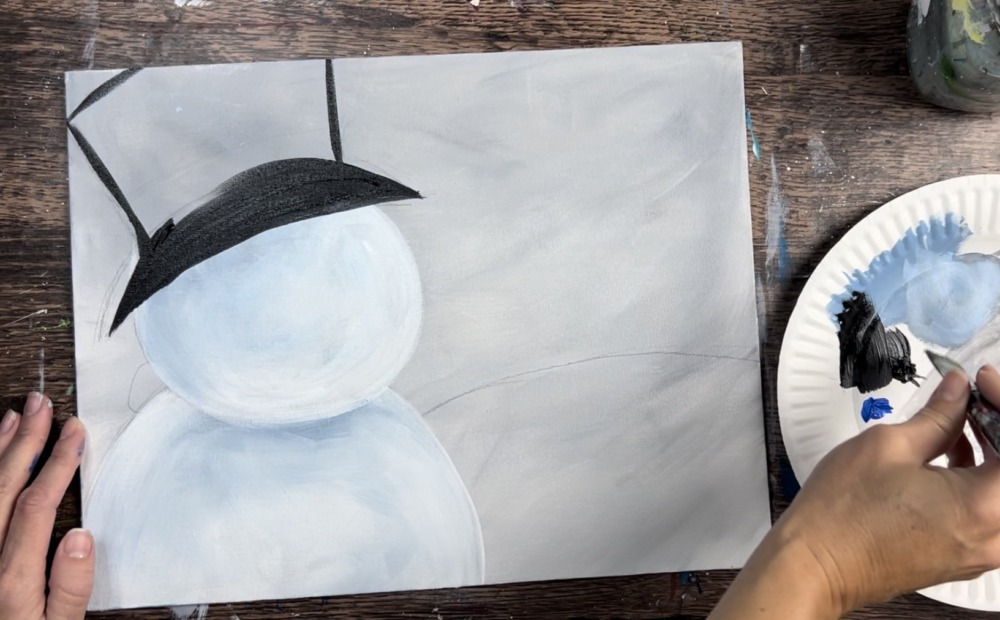
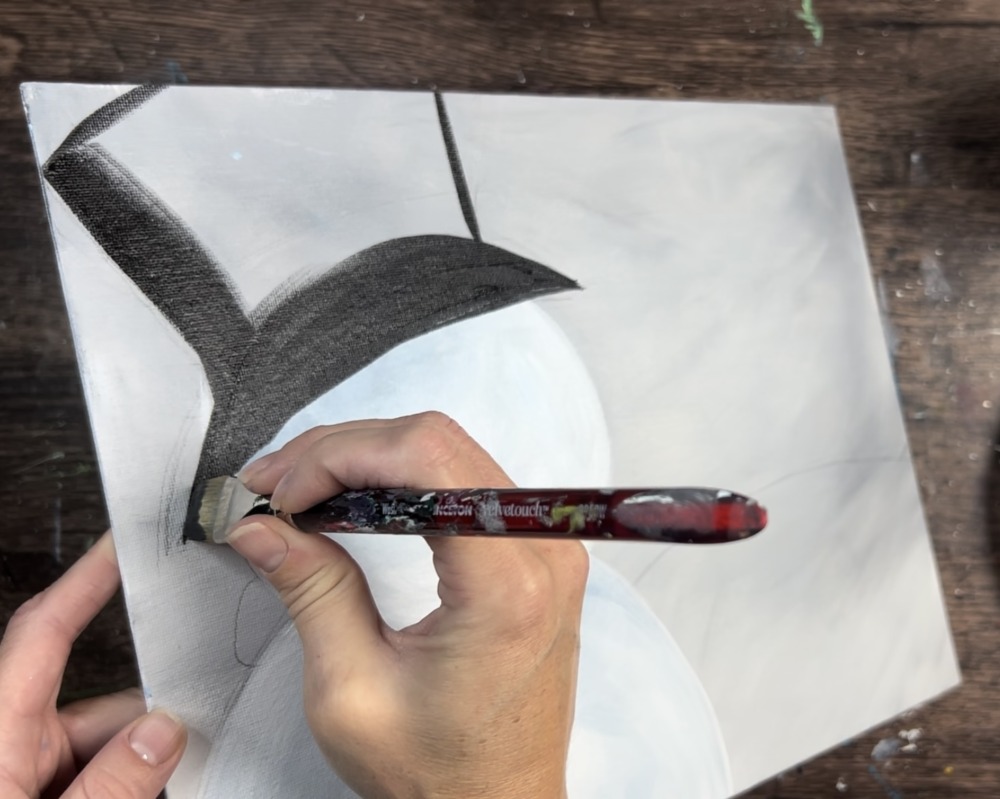
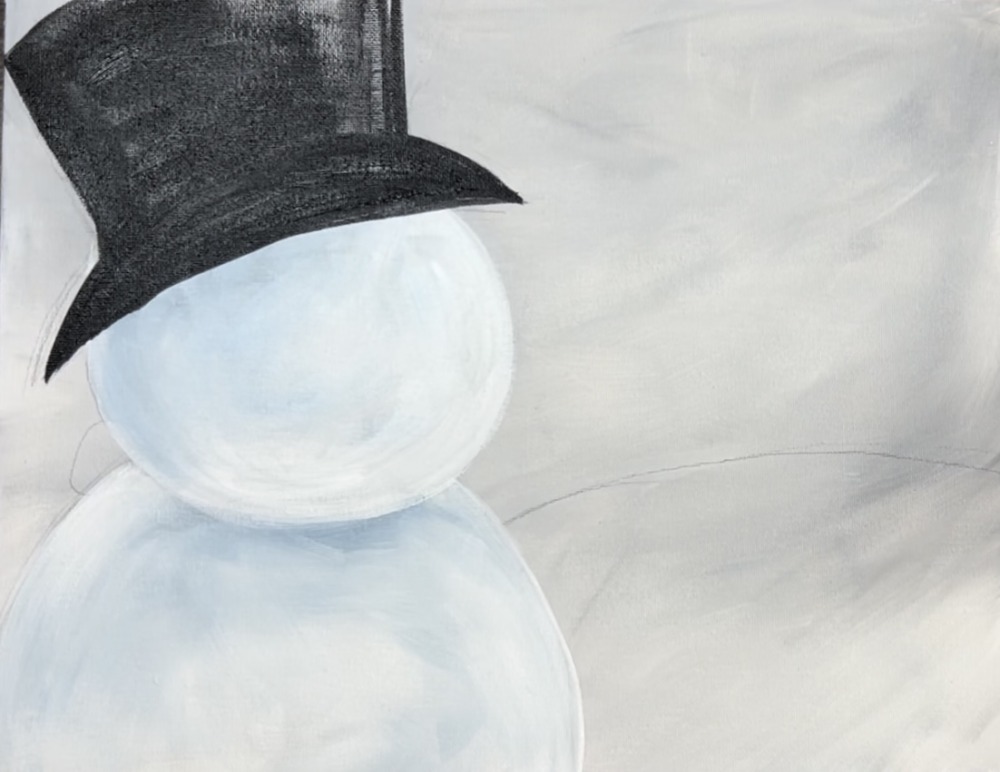
Before the black dries, rinse and dry your brush. Load a small amount of white onto the top of the brush.
Then “dry brush” the white over the hat and go in a curved direction. This will give your hat some form.
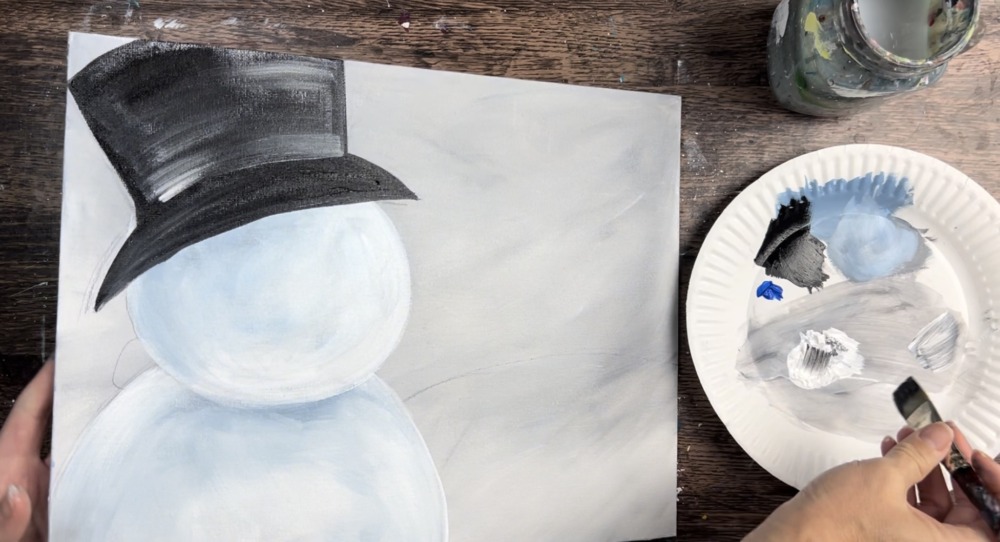
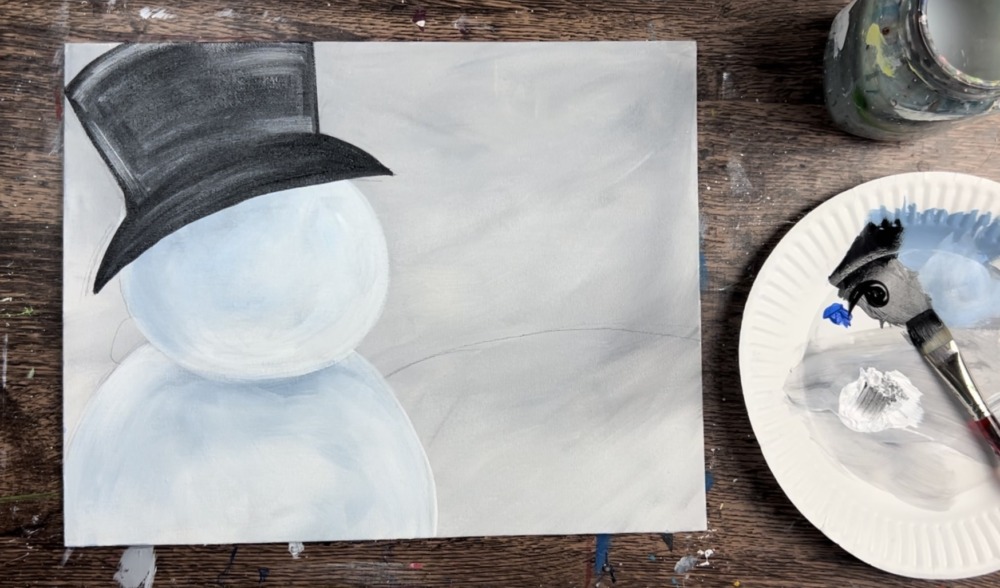
Use a round brush to paint the back part of the hat that goes behind the snowball head. Then use titanium white to outline the line so that it stands out.
5. Paint scarf
Tip: it may be helpful to “redraw” this scarf to help you get the shape of the painting down.
Use a 12 bright brush and green deep permanent to paint the scarf of the snowman. Paint two curved shapes that go to a point and meet in the middle left area between the snowman head and body.
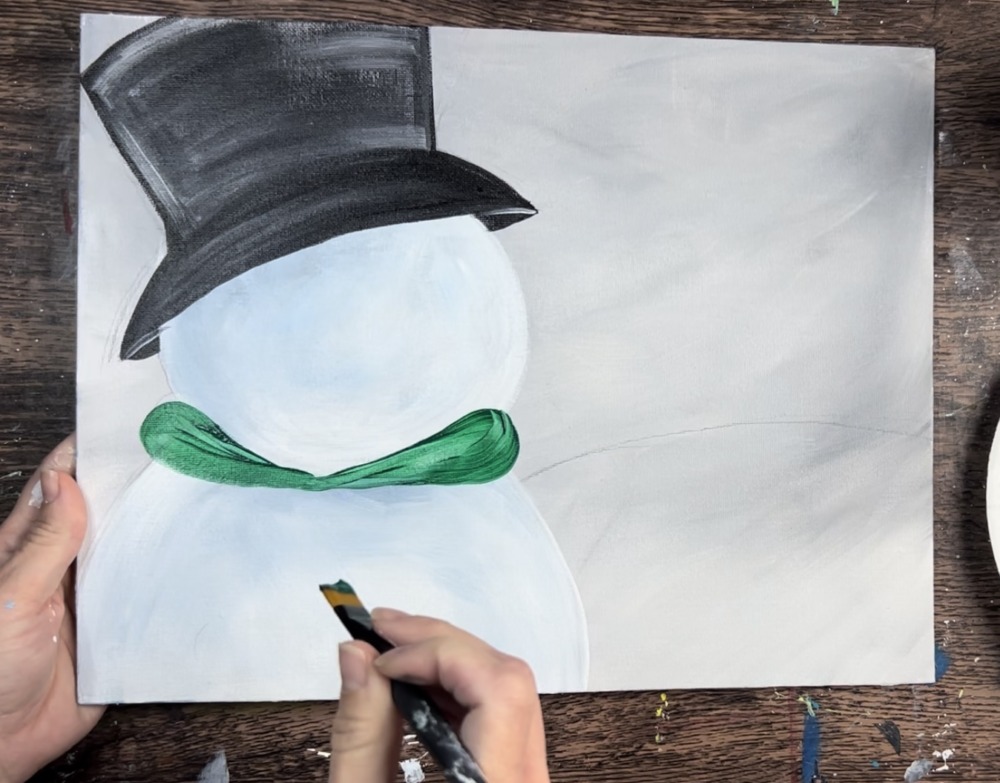
Then use the tip of your 12 bright brush to paint the piece of scarf that is hanging down.
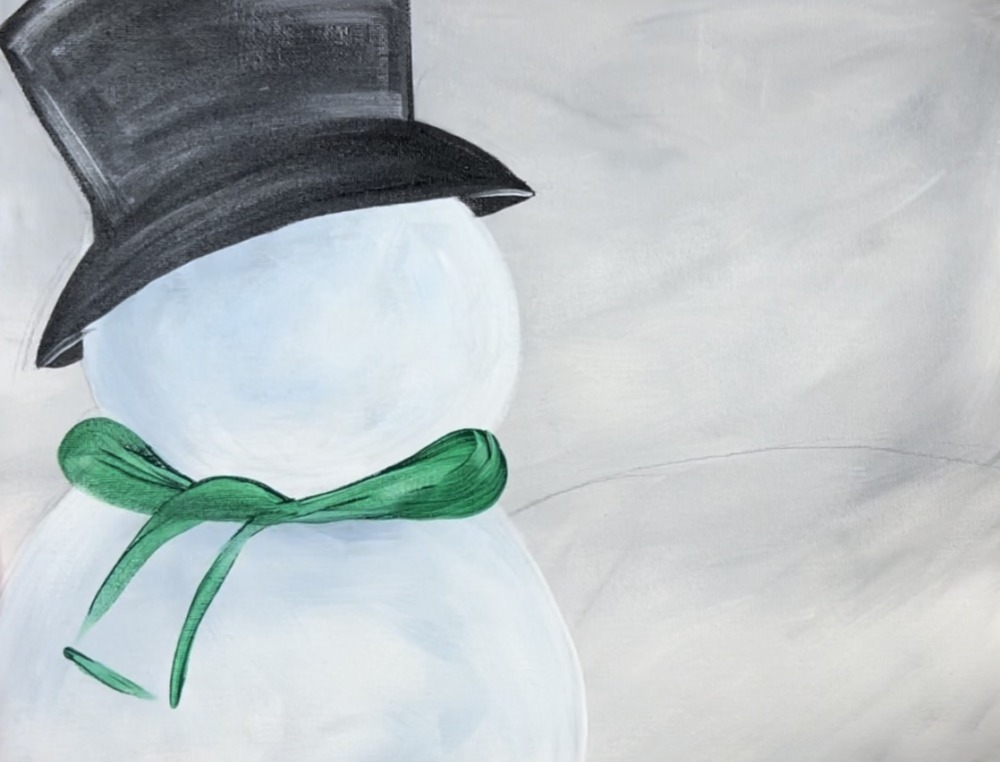
Fill in the shape of the scarf using the full width of the brush and go in a curved direction.
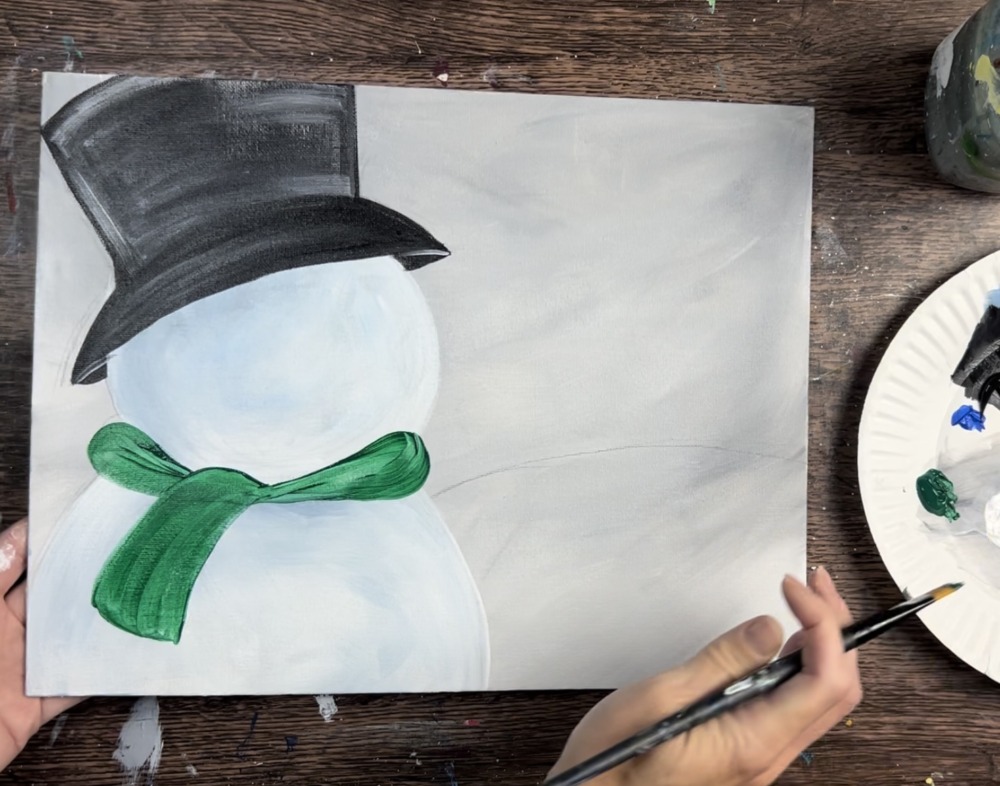
Then paint a second scarf piece that is behind the first one. This piece is going in more of a straight direction and not curved.
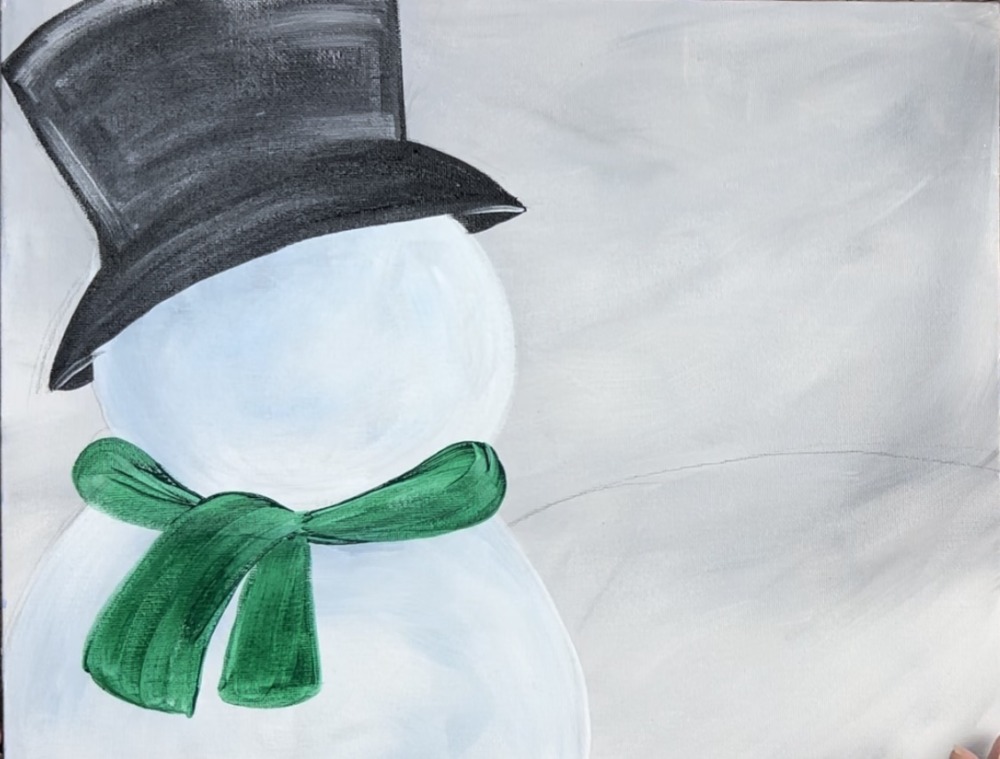
Then paint the fringe of the scarf. Load the 12 bright brush in a small amount of mars black. Then use just the tip of the brush to create little vertical marks that are hanging off the side of the scarf.
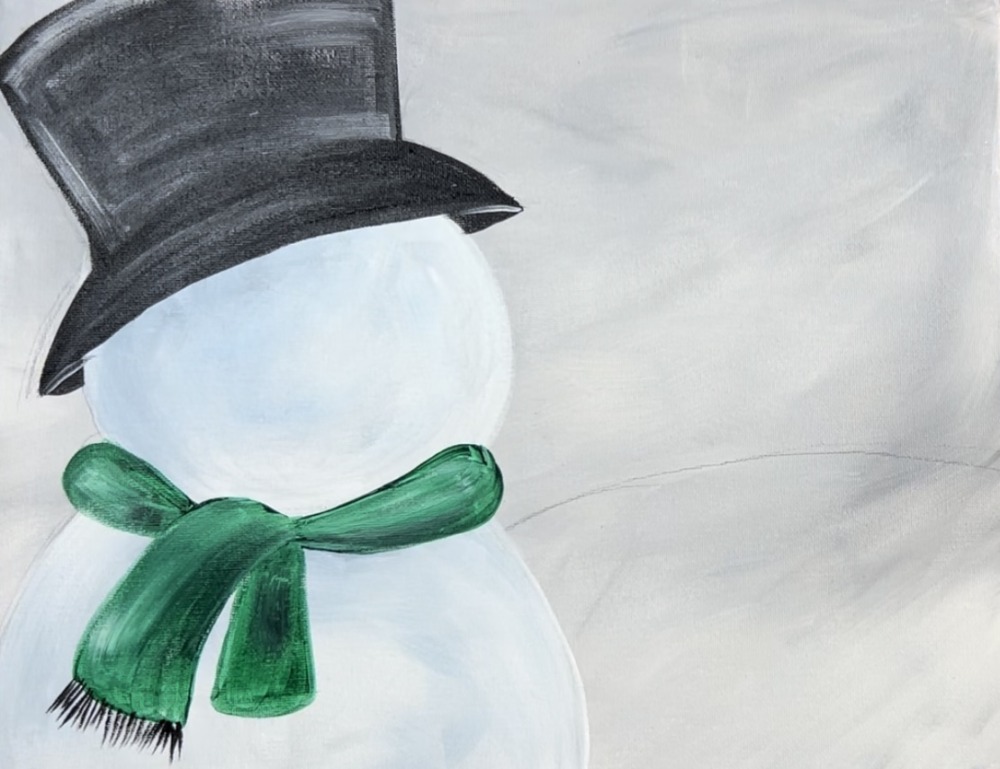
Do this to the second scarf piece.
6. Draw & paint facial features
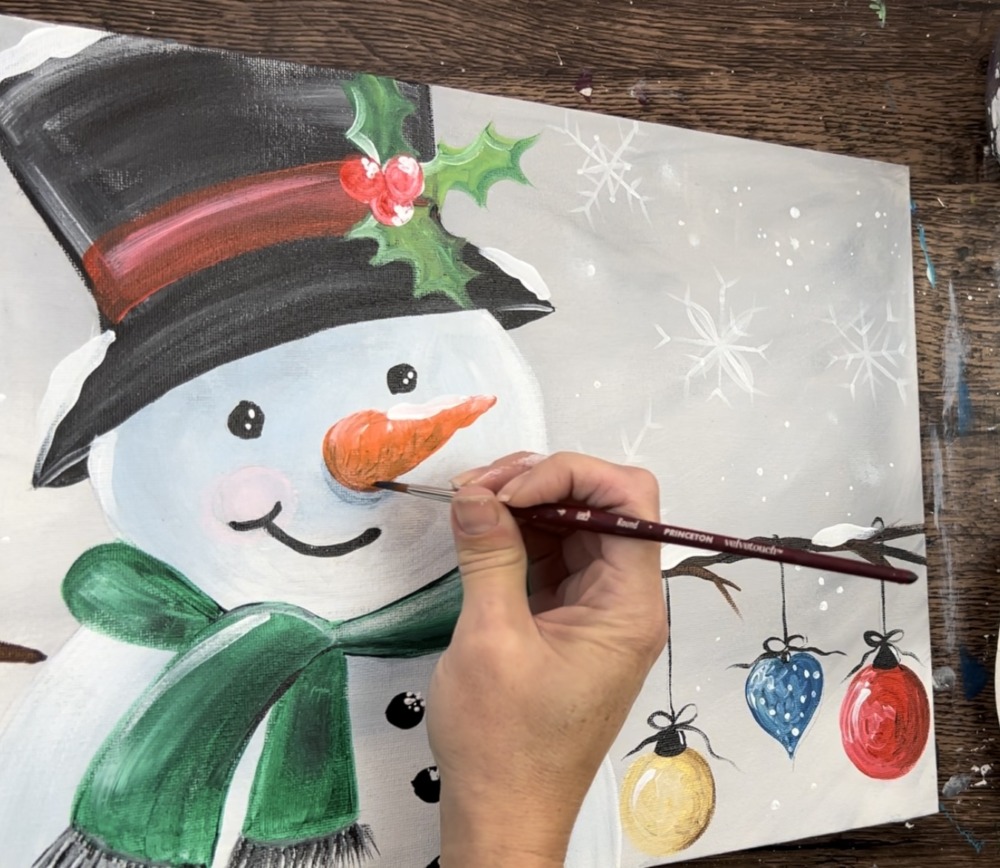
Next, use a pencil to go over the facial features that were painted over. Re draw the nose, eyes and mouth. Note: this time around I simplified the mouth. However, if you want you can make a coal mouth instead.
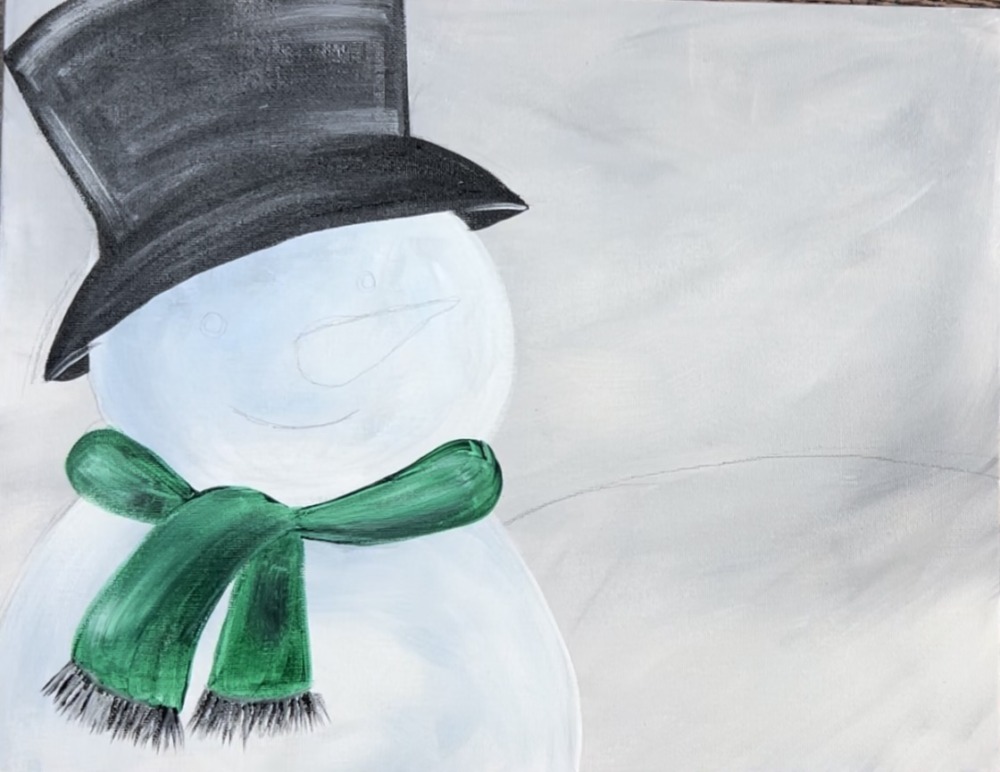
Use cadmium orange hue to paint the nose using a #4 round brush.
Optional: add a bit of highlight on the top part of the nose. Take the white and drag it from the top down in a curved direction.
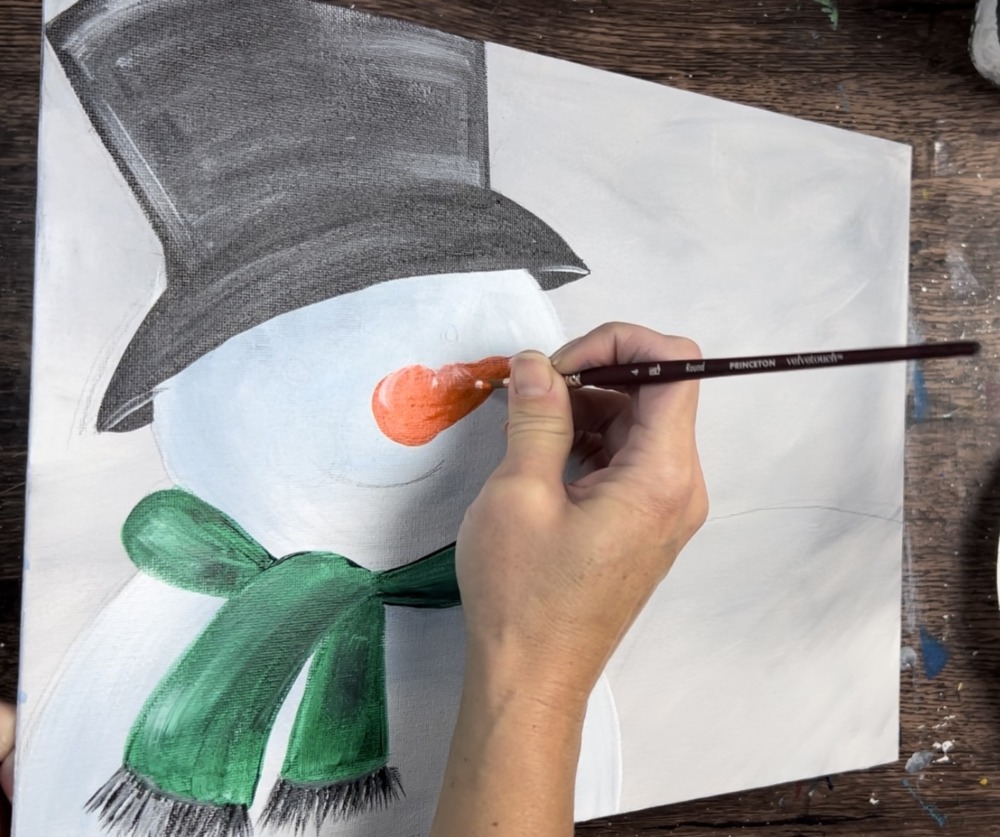
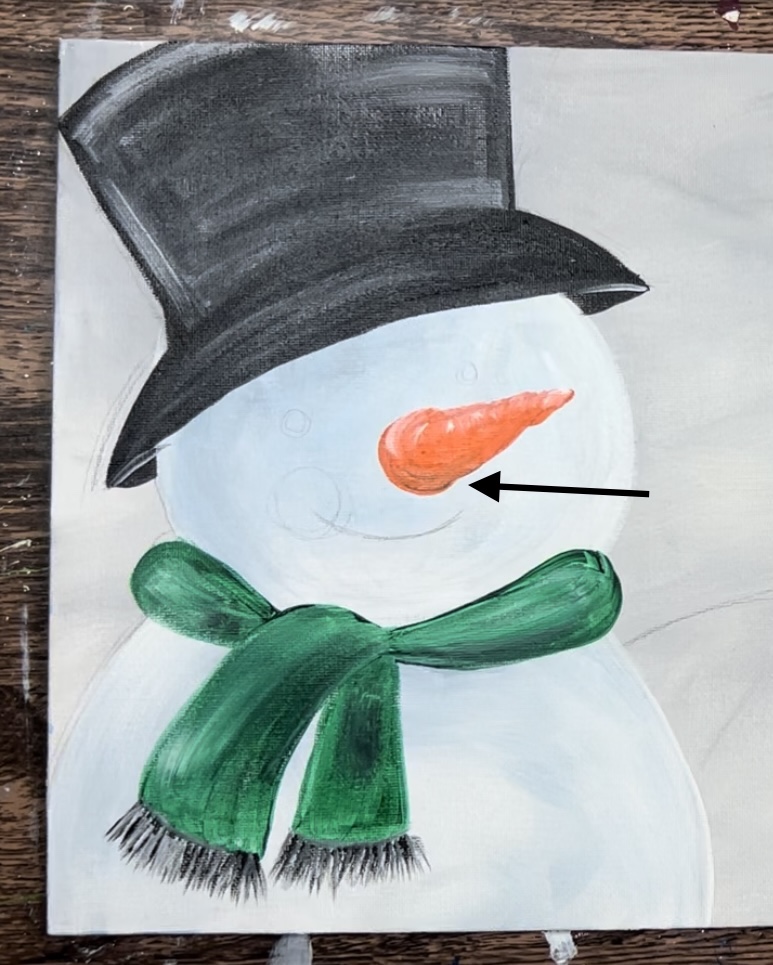
Additionally, you can add shadow on the bottom of the carrot. To create a “shadow color”, mix orange with green on your palette. It will make a muddy color but this can be used to create shading on the bottom of the carrot.
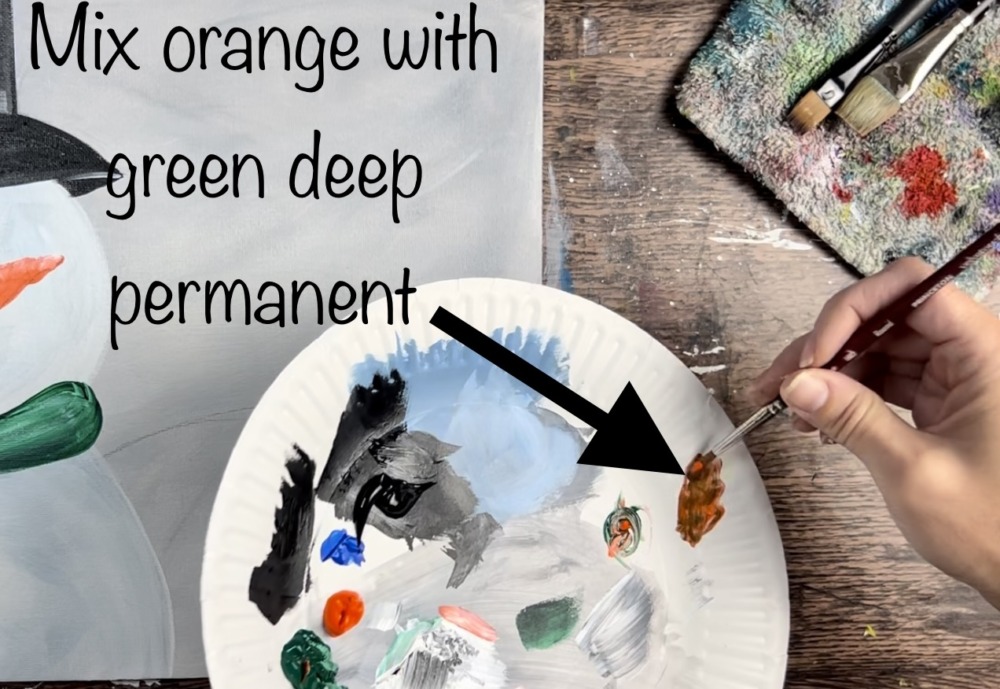
Blend this muddy orange color just on the bottom area of the carrot nose and mix it with the rest of the orange in the middle of the carrot.
Then use mars black to paint the mouth.
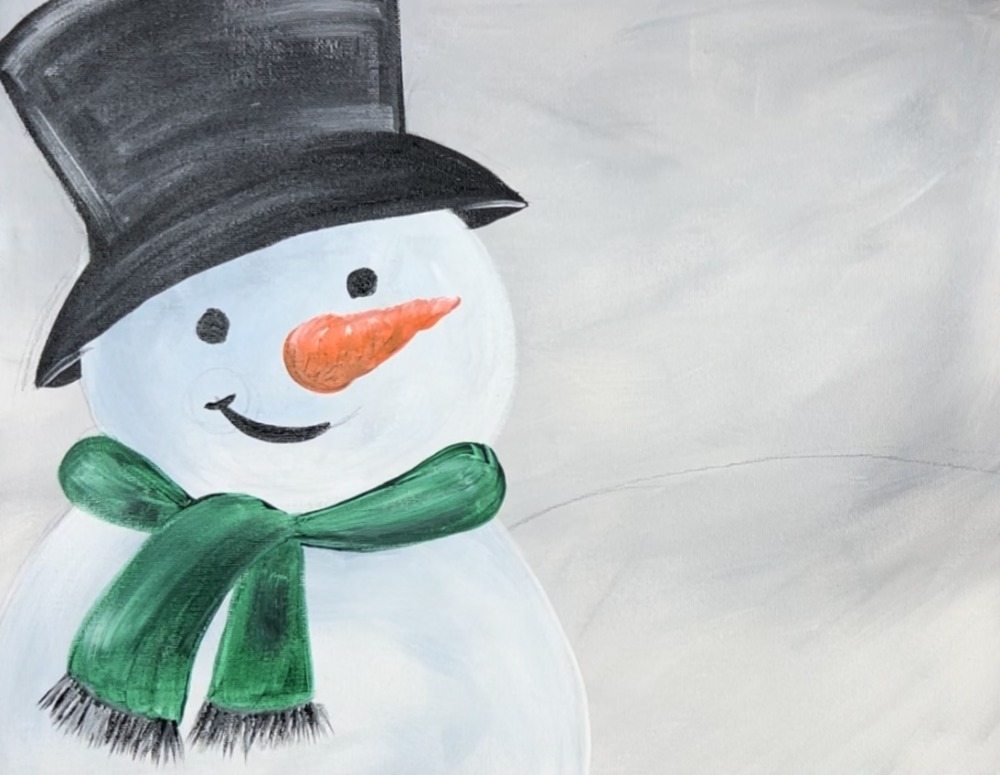
Use titanium white to paint two white dots on the eye going in a diagonal direction.
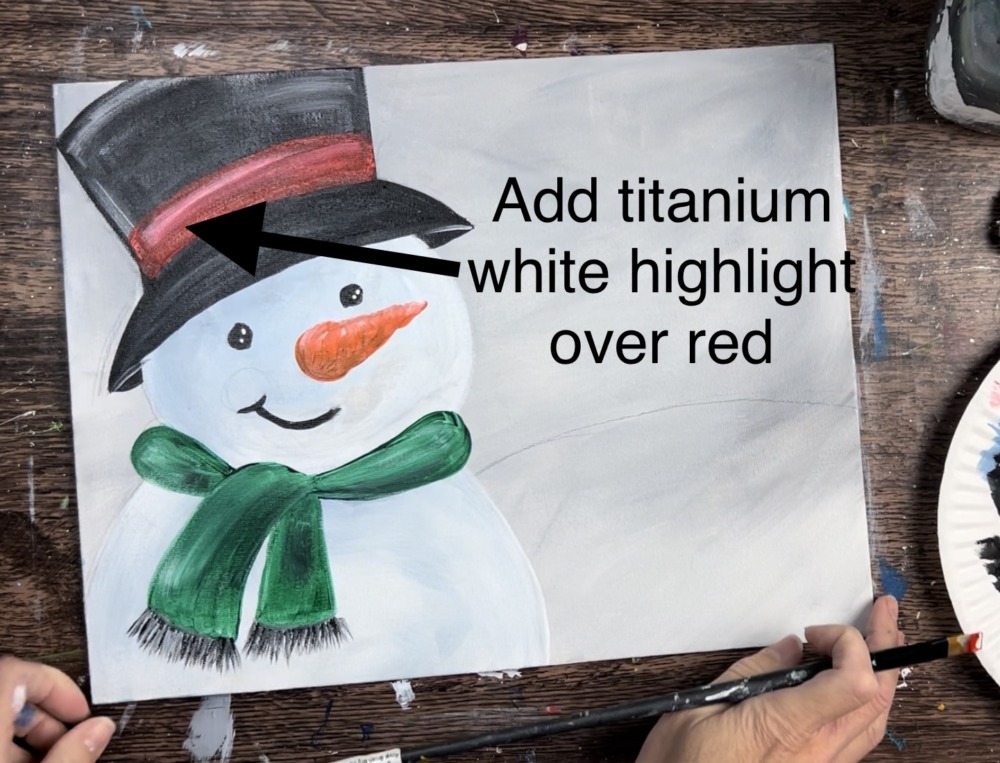
7. Paint band on hat
Use the 12 bright brush and cadmium red medium to paint the band of the hat. Paint it in a curved direction.

Then before the red dries, add a dry brush layer of titanium white over the red band.
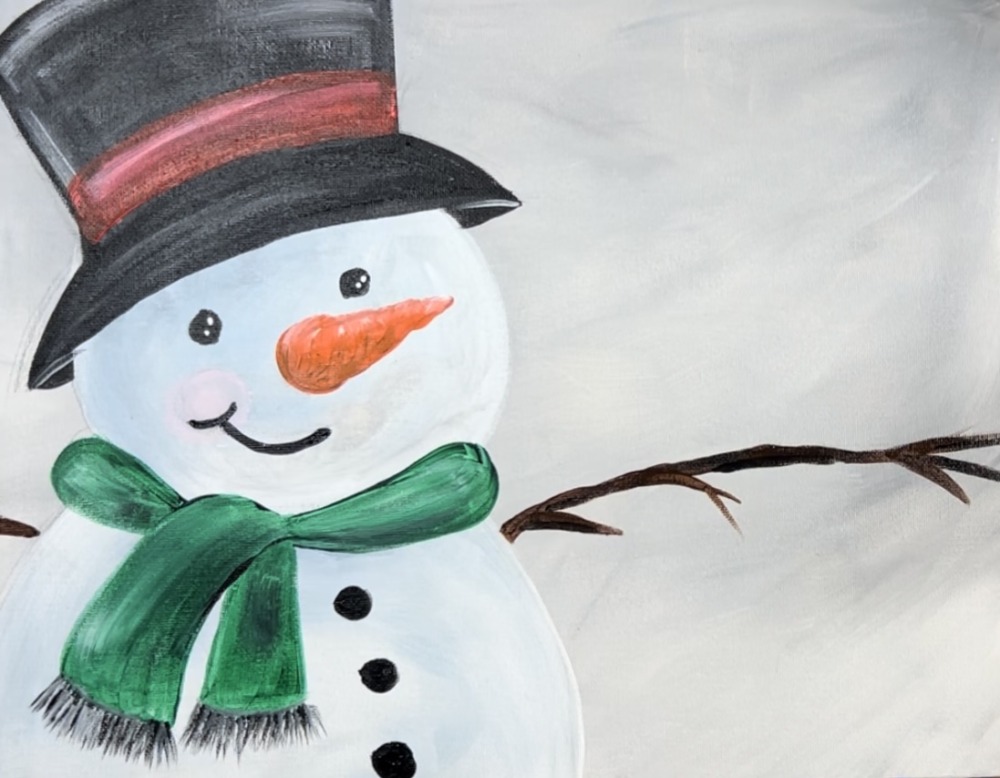
8. Paint Stick Arms
Use burnt umber and the #4 round brush to paint the arms.
Paint the stick loosely so the edges of the branch are kind of uneven. Then paint small branch pieces hanging down.
9. Paint Holly Branches
Mix the green deep permanent with cadmium yellow medium hue and titanium white to make a light yellow-green color.
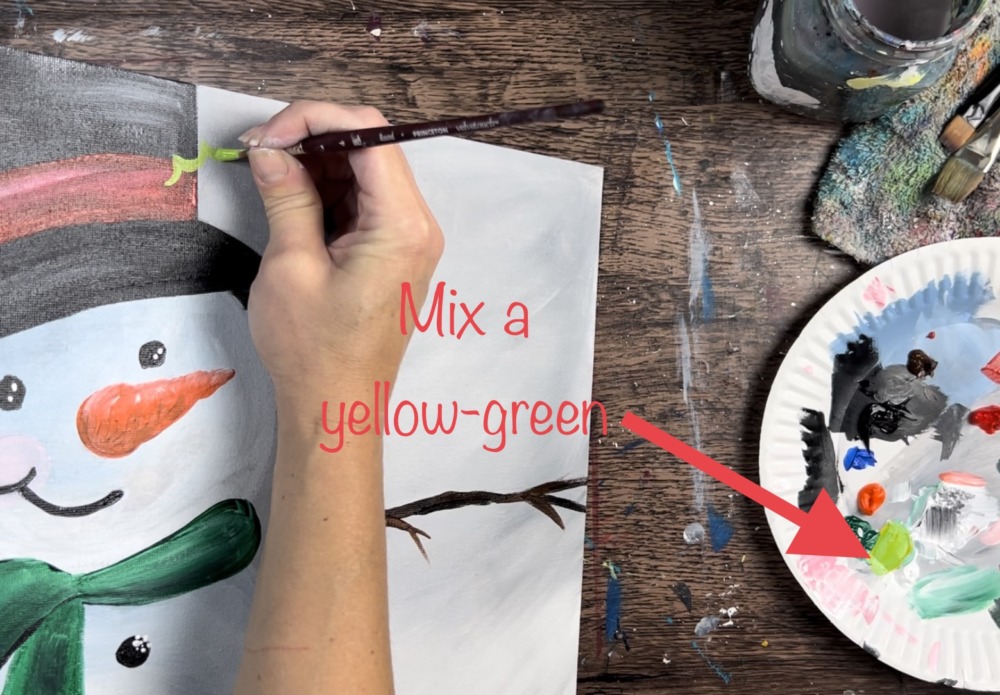
Use the #4 round brush to paint the holly leaves. Paint the leaves so that the edges go in an inverted curved direction. Vary the color so that the green-yellow and white sort of blend together.
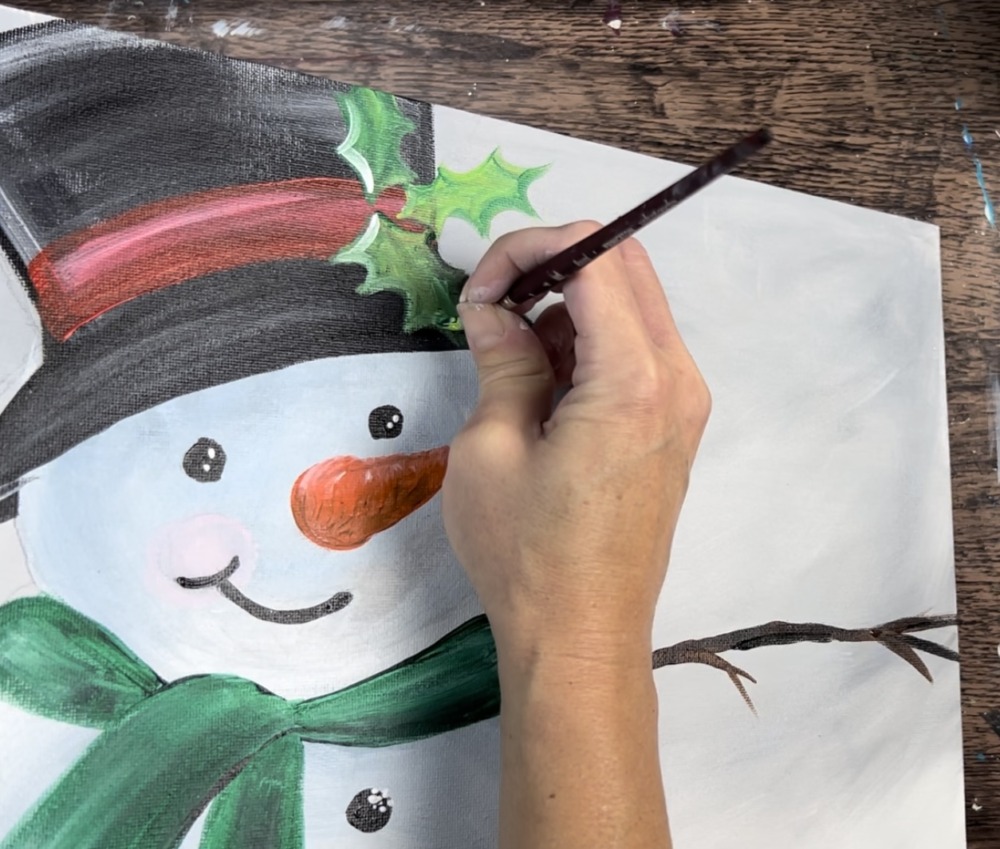
Leave the middle part blank for now as the green leaves dry. You can paint the red berries in a later step.

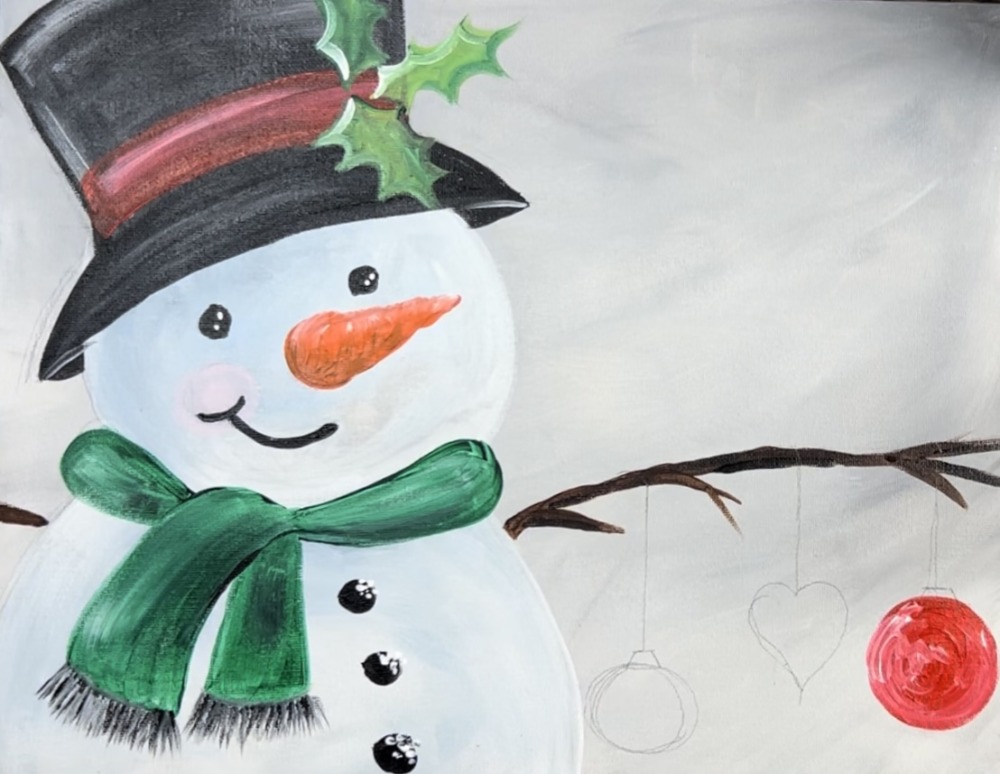
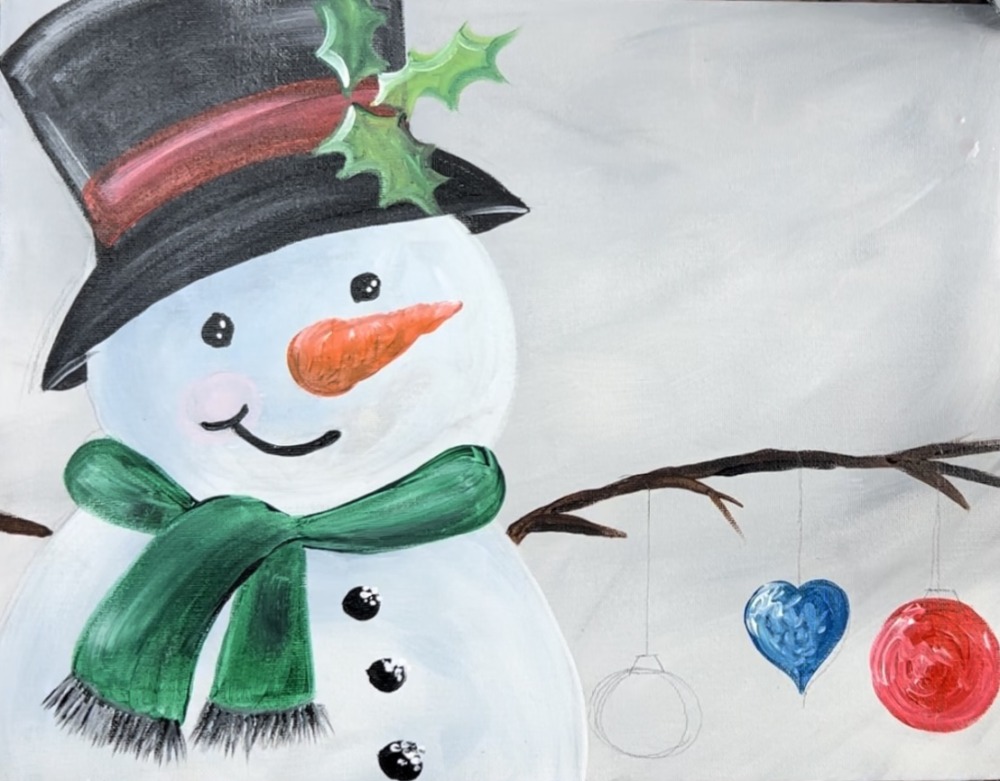
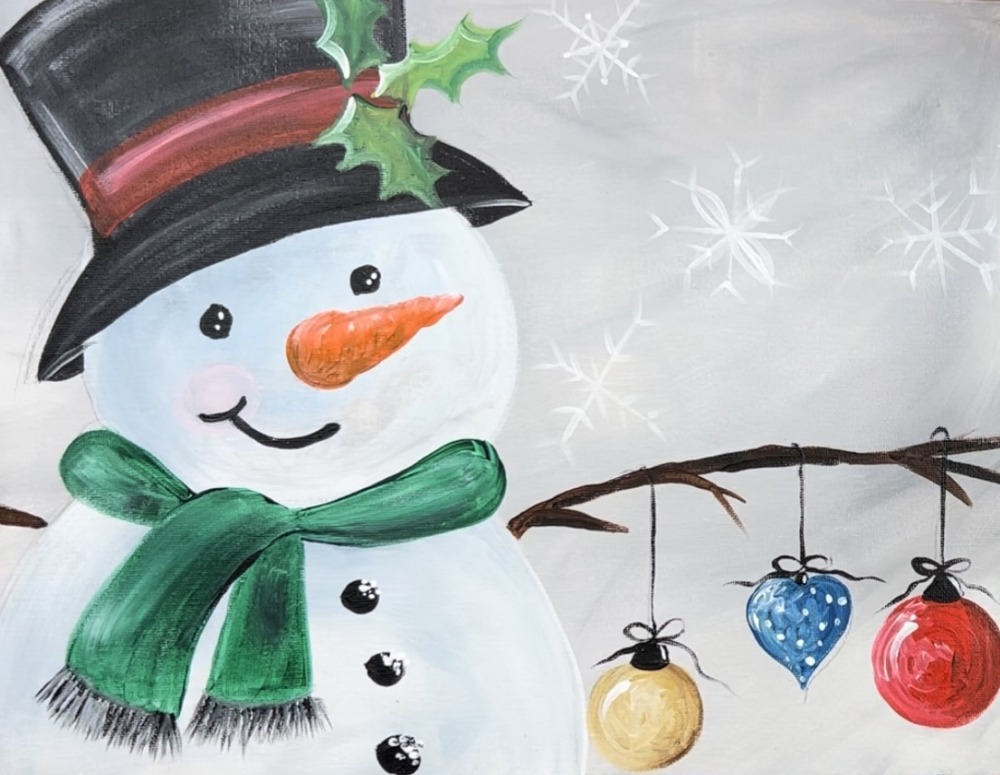
10. Draw and paint ornaments
Use a pencil to draw the ornaments. Draw three vertical lines under the stick. Then draw the three ornament shapes. You can change these shapes to different ones if you’d like! You can also add more or less ornaments.
Then paint each individual ornament. Use the #4 round brush and cadmium red medium (or a custom color) to paint the circle ornament. To highlight the ornaments, add a little bit of titanium white on the left side of the ornament and blend it into the rest of the red.
Then paint the blue ornament with cobalt blue. Add white highlight to the left side of that ornament and blend it in.
Then paint the left circle ornament with gold (optional color). Add white highlight to the left side of the gold. Then add darker color on the right side. To make the darker color, mix a little burnt umber into the gold. Then paint a little curved slither of this dark color on the right side of the circle and blend it into the rest of the gold.
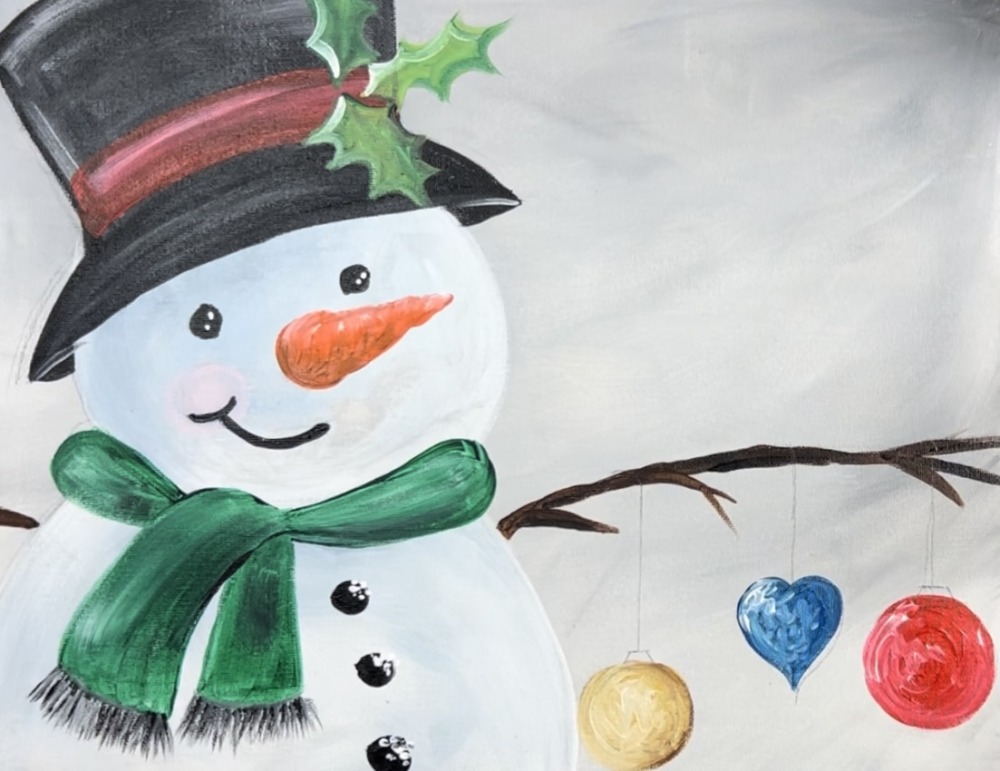
Then use mars black to paint the tops of each of the ornaments. Paint a vertical string line that goes down to the ornament top piece. Paint a trapezoid shape on the top of each of the ornaments.
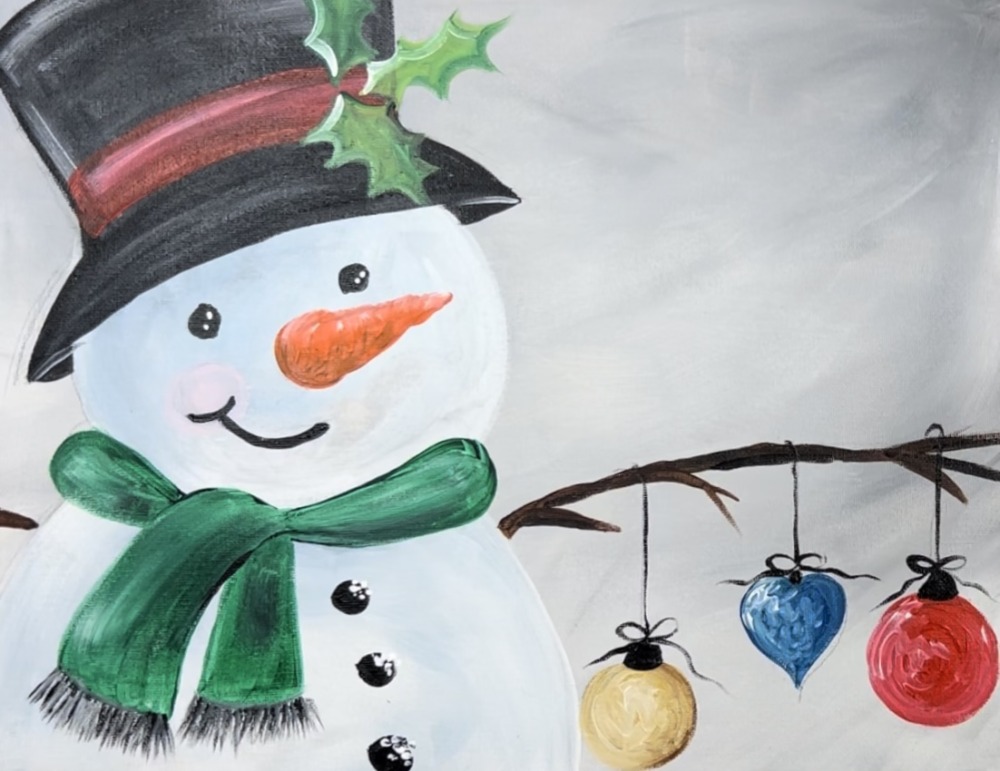
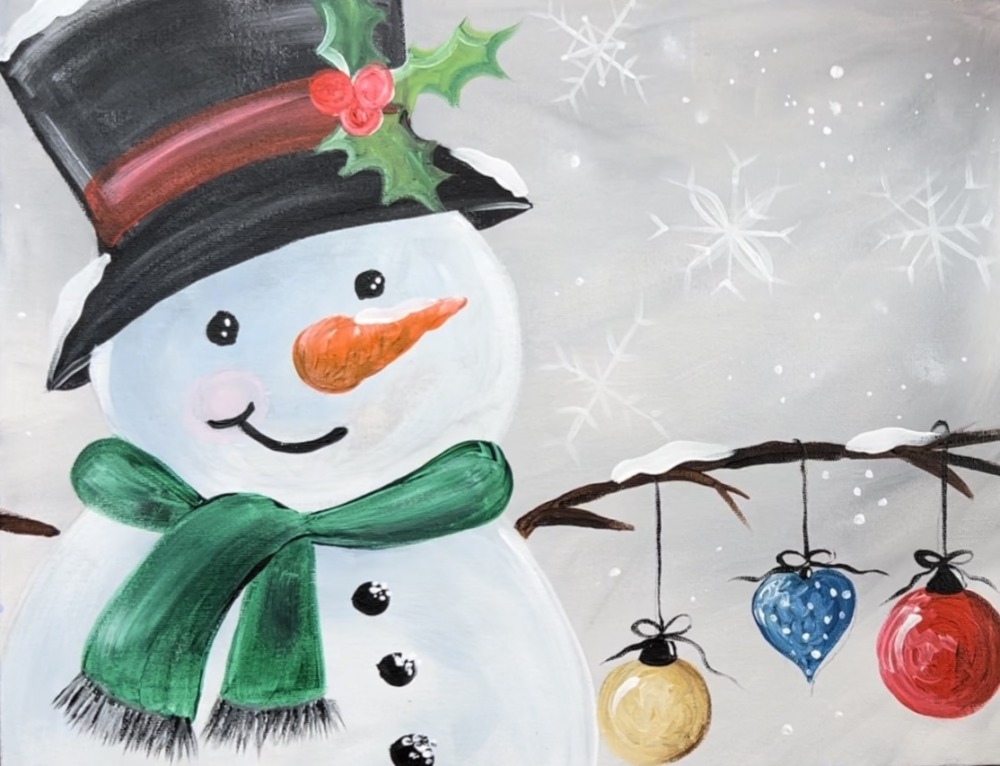
You can decorate the ornaments! I did little white dots on the heart ornament. Additionally, I added a small white curved line to highlight the circle ornaments. This white curved line was added on the left.
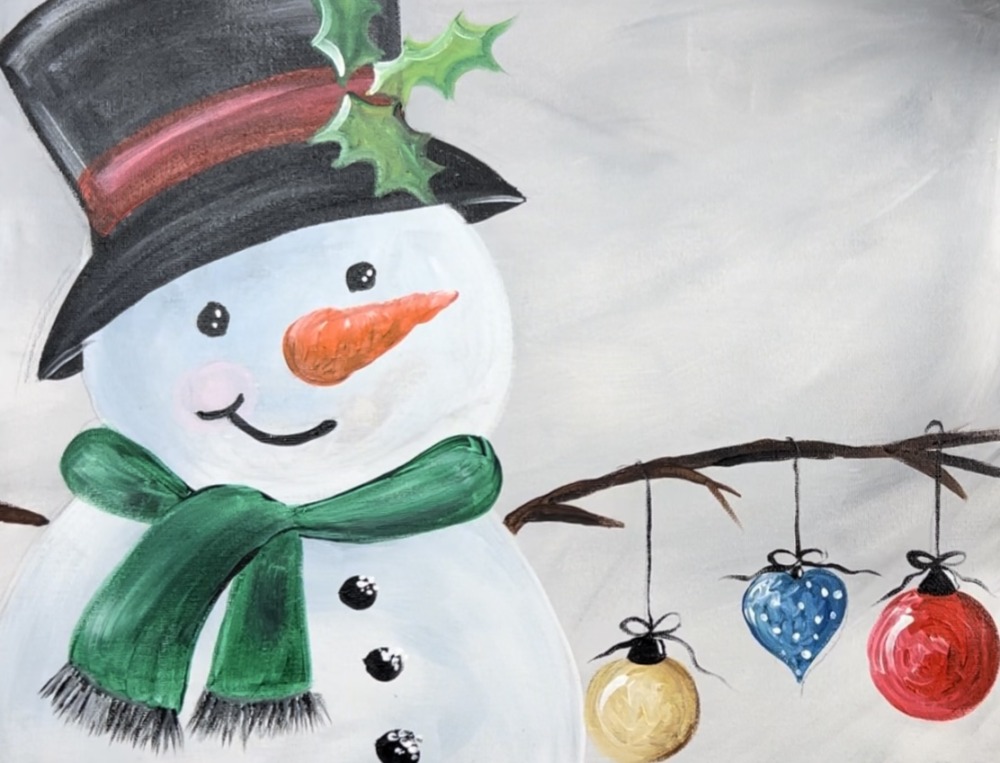
11. Draw and paint snowflakes
Use the #4 round brush and titanium white to paint snowflakes. Paint an “x” then paint a vertical line and a horizontal line through the “x”. Then paint diagonal lines on the ends of each of the points.
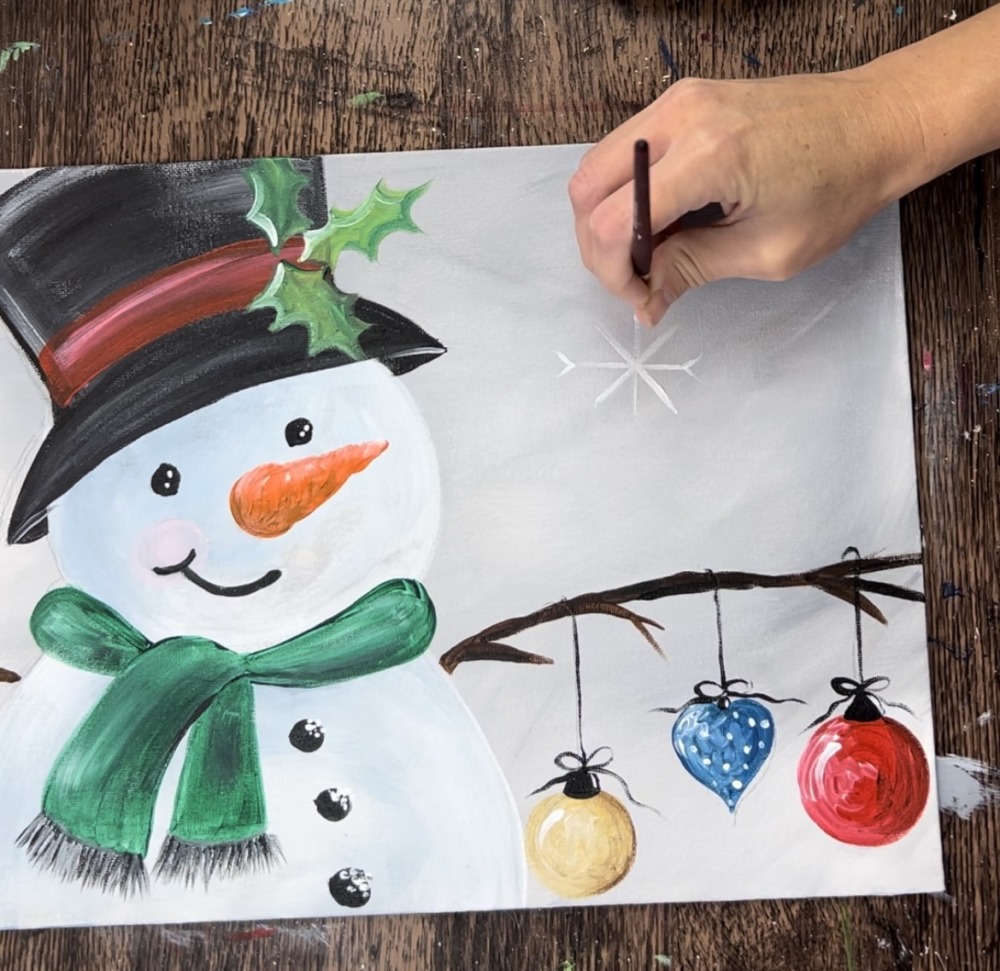
Add intricate details to each of the snowflakes such as curved lines, dots, etc.
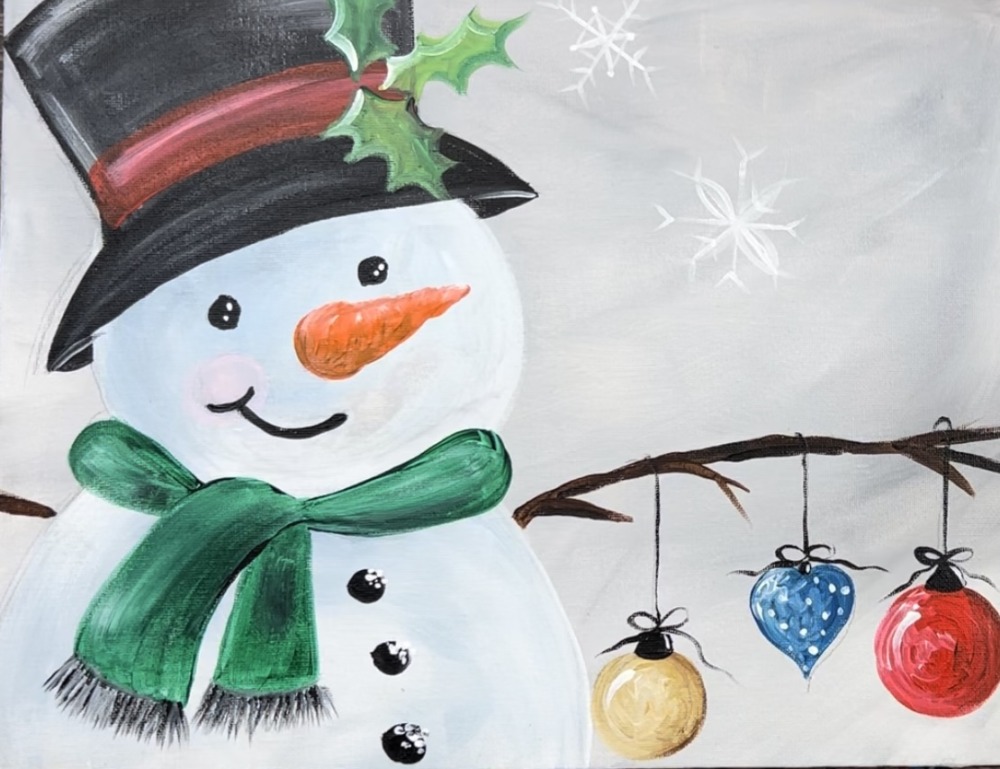
Paint these snowflakes in various areas around the background. Tip: thin down the titanium white with a little bit of water to loosen the paint. This helps to get it to flow better.
Additionally, use the #4 round brush to paint little dots of snow flurries throughout the background. Make sure you paint these in clusters. Some of the dots are smaller and some are a bit larger.
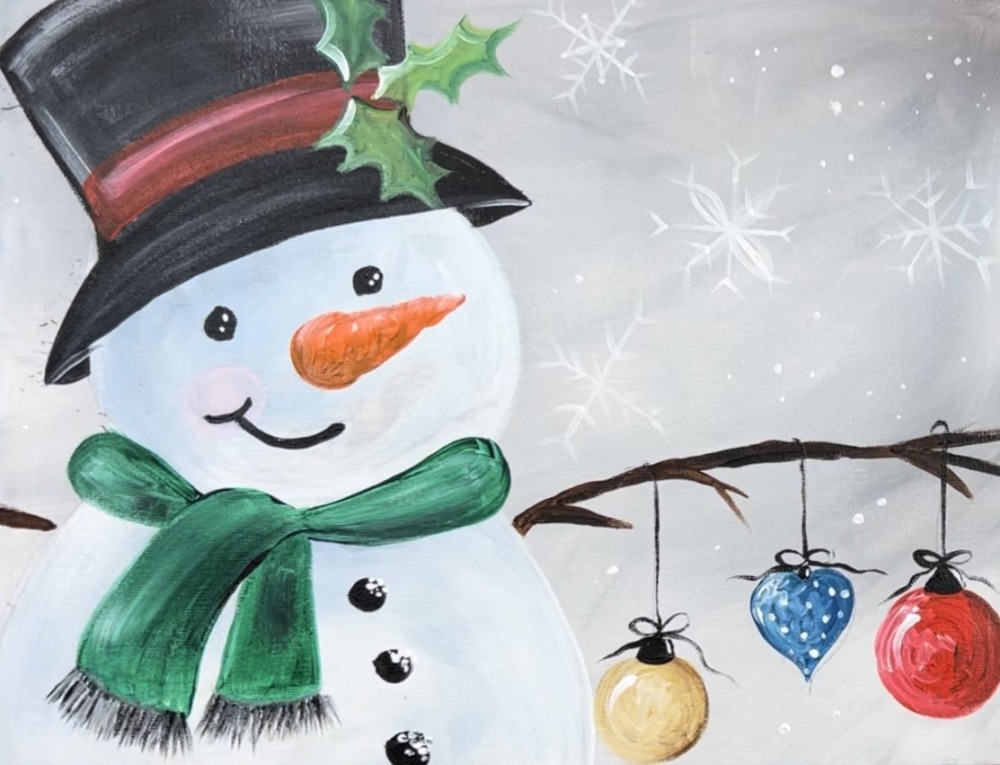
12. Paint snow on arm & paint holly berries
Use the #4 round brush and titanium white to paint little clumps of snow on the arm.
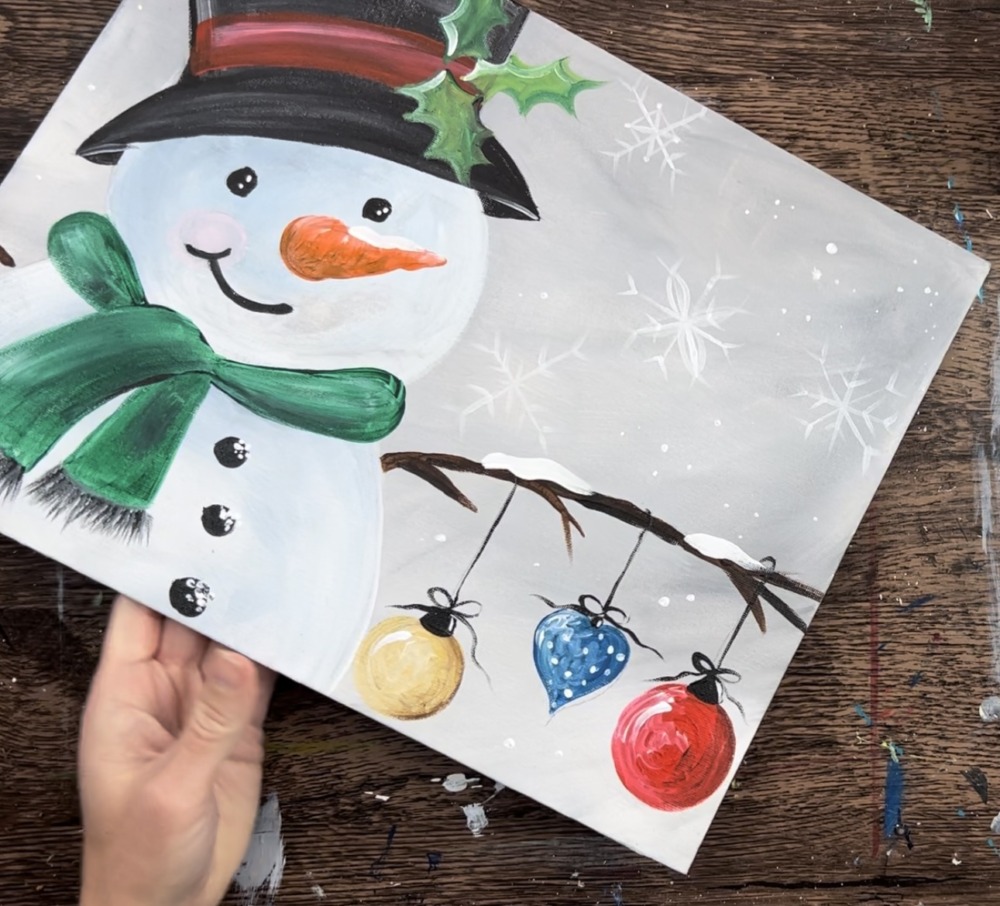
Paint little clumps of snow on the snowman hat as well. Then paint three circles for the holly berries.
After the white circles dry on the holly berries, paint them with the cadmium red medium hue.
As a final touch, you can add a little shadow under the snowman nose. To do this, water down a little cobalt blue and mars black (like the shadow color created earlier to paint the shadow on the snowman but darker). Then use the round brush and paint a little “smudge” under the base of the carrot. This should be very thin and translucent. Use your finger to smear it a little.
Finished
Hi Tracey!
I followed your tutorial to paint the Snowman with ornaments, and I am going to give it as a present to my family. Because I am an English learner, this has been like a CLIL class. You’re very talented. It is the first time I have painted, and my brushes were a little bit too small, but I look forward to making more paintings next winter holidays. Thank you very much!