
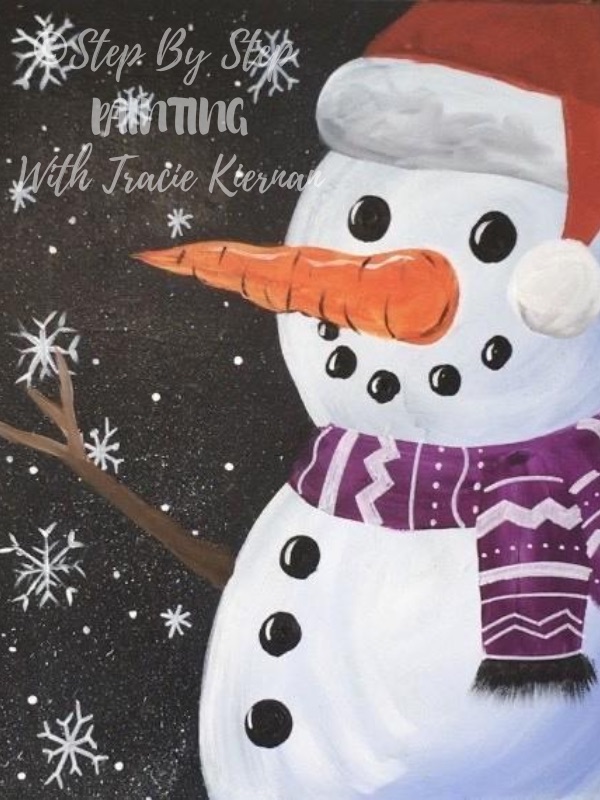
How To Paint A Snowman At Night
Learn how to paint this adorable snowman painting with a night sky background!
This painting is super easy and can be customized with different colors and decor such as a different color scarf or hat.
It’s also a great painting you can do with the kids!
Would you like to save this?
The background of this design utilizes the color “Payne’s Grey” which is similar to black only it’s lighter. It reminds me of chalkboard color.
If you don’t have Payne’s gray you can use Mars Black or Ivory Black or even mix a tiny bit of white in the black to create that lighter look in the black.
If you have a painting you’ve messed up on you can easily paint over it with the Payne’s Grey (or black) to do this snowman painting!
I also used a white Posca paint pen in this snowman painting. The designs on the scarf and some of the smaller snowflakes were easily done with this pen!

![]()
Enjoy and happy painting!!
This post contains affiliate links.
Materials
How To Paint A Snowman At Night
Learn how to paint a snowman at night in this easy to follow tutorial. This is a great one you can do with the kids as well!
Materials
- 11 x 14 canvas
- Acrylic Paint
- Brushes
- White Chalk
- Tooth Brush
- White Paint Pen
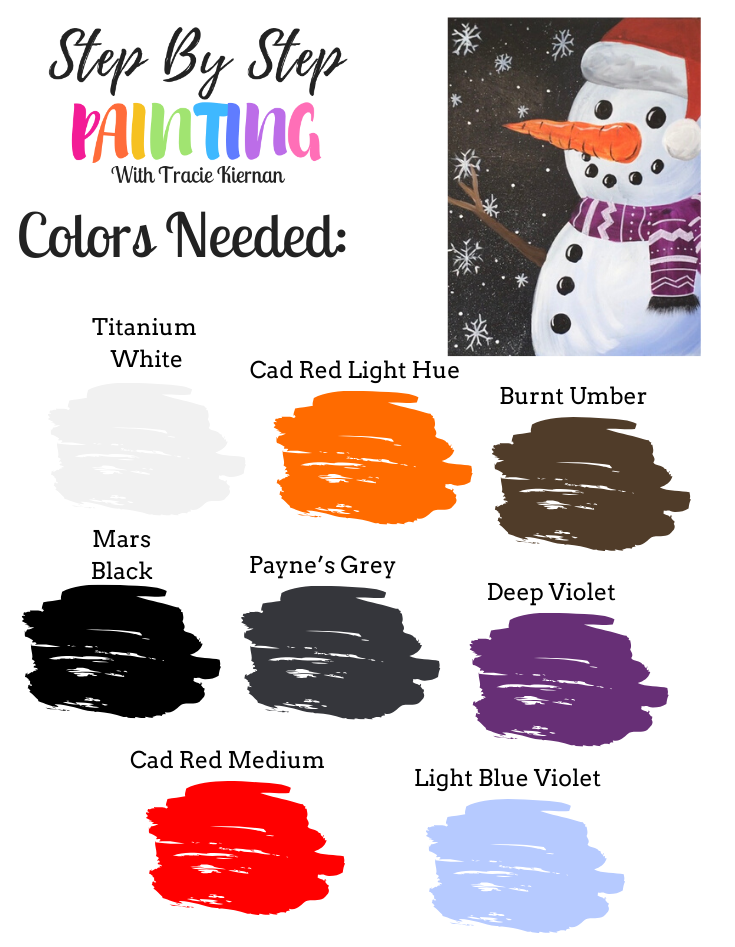
Colors
- Cad Red Medium (or Pyrrole Red)
- Cad Red Light (or Cad Orange Hue)
- Light Blue Violet
- Deep Violet (scarf color can be customized)
- Titanium White
- Mars Black
- Burnt Umber
- Payne’s Grey (use to paint background. Sub mars Black if you don’t have Payne’s grey)
Brush Sizes
Instructions
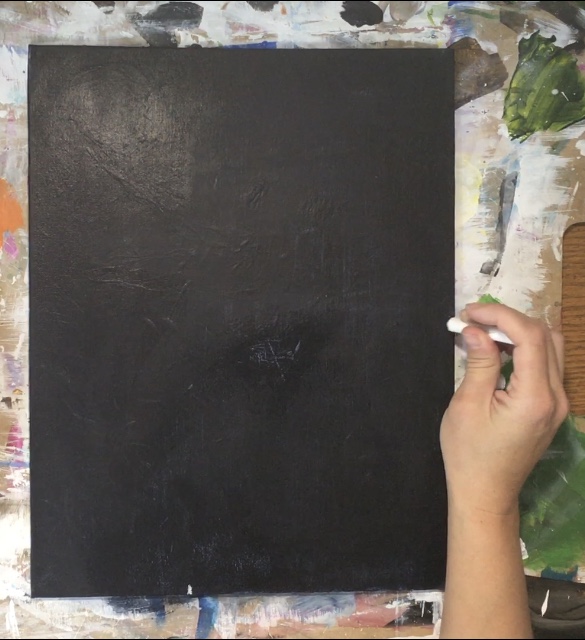
- Paint the canvas Payne’s Grey.
- Draw the snowman circles with chalk.
- Paint the snowman circles white
- Paint the shadow on the snow with light blue violet.
- Paint the snowflakes in the sky.
- Paint the scarf and hat.
- Paint the eyes, nose, buttons and arm.
- Decorate the scarf and add highlights to the coal and nose,
Notes
This design can easily be done on all sizes of canvases!
Recommended Products
As an Amazon Associate, I earn from qualifying purchases. As a Michaels Affiliate, I earn from qualifying purchases.
Color Palette
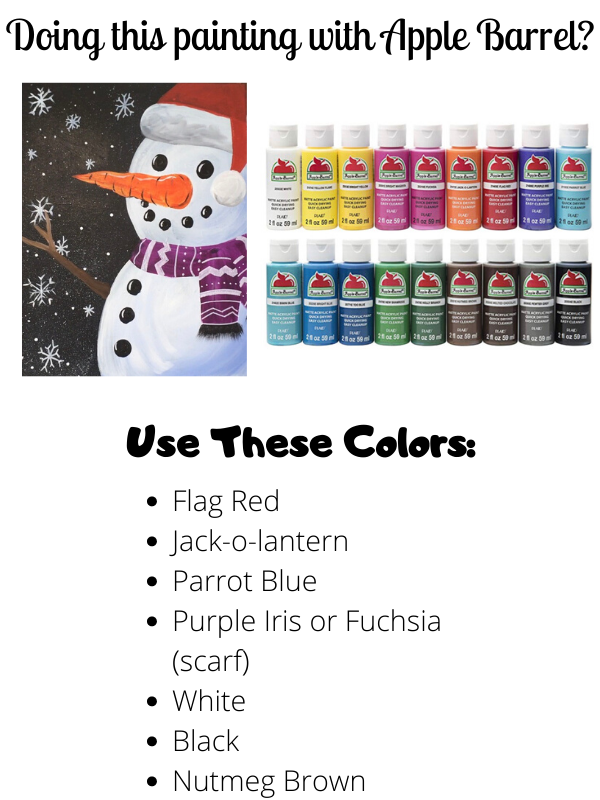
Apple Barrel
If you want to do this with the Apple Barrels see my color suggestion chart below.
The only difference may be the Paynes gray but you can try mixing gray with the black to lighten the black for the background up.
Directions At A Glance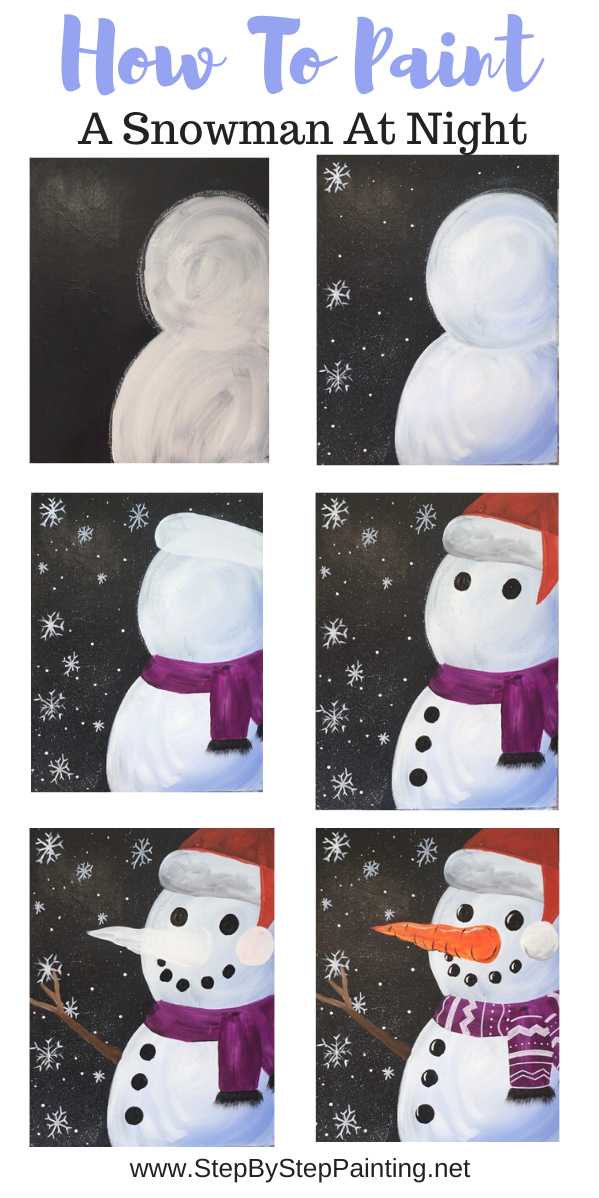

Video For Snowman Painting
Step By Step Directions
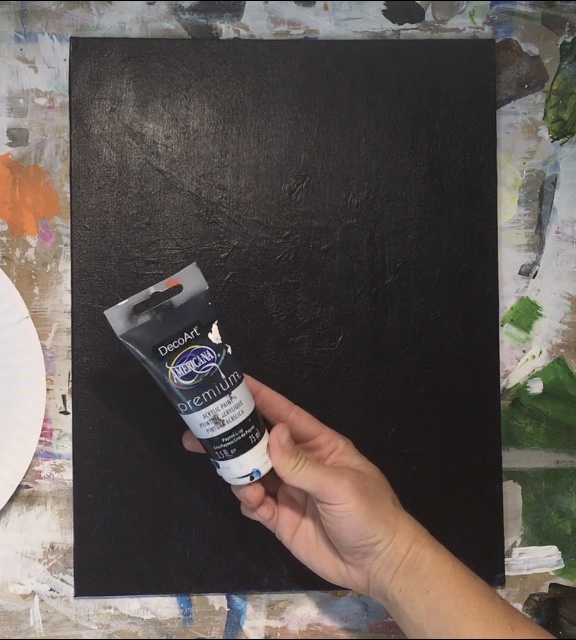
1. Paint the canvas Payne’s Grey
First you will need to paint an entire canvas with Payne’s Grey. I recommend using a large wash brush for this step.
Paint a nice, even coat. I used the DecoArt Americana Premium Payne’s Grey.
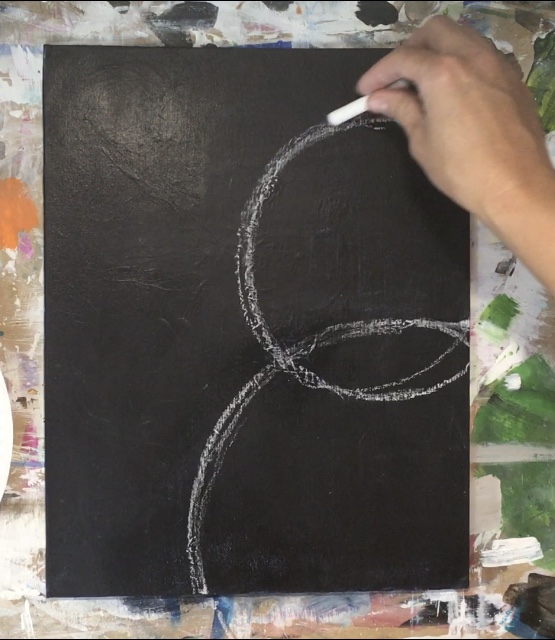
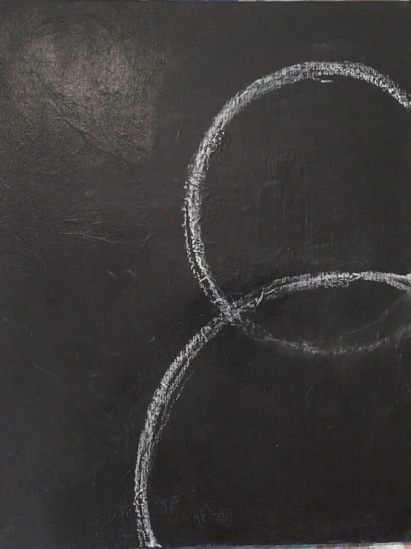
2. Draw the snowman with chalk
Next use a piece of white chalk to draw the snowman.
The bottom snowball is large with “one hand width” of space left on the bottom.
Measure about a hand width and make a mark with your chalk.

Then make another mark at about the halfway point up the canvas.
Then connect these two marks and form a large circle.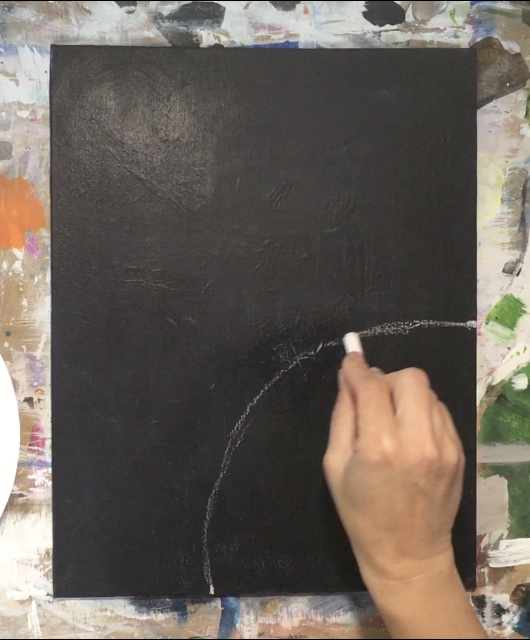
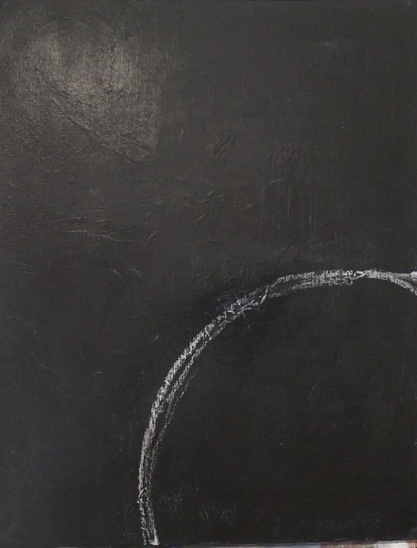
Next draw the smaller circle (head) so that it slightly overlaps the larger circle.
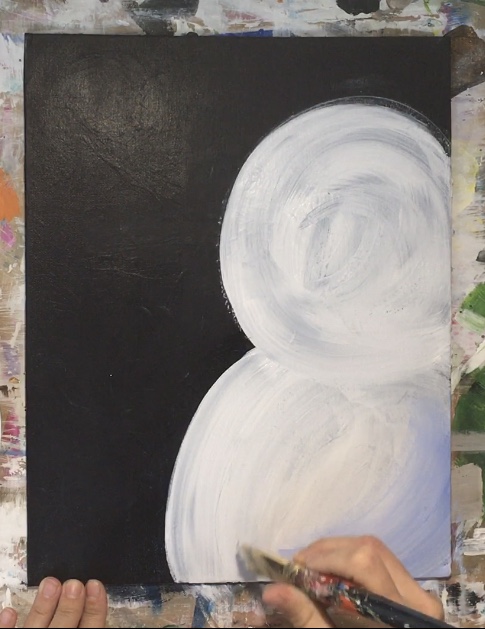
3. Paint the first layer on snowman with titanium white
Load a 3/4″ wash brush in titanium white.
Fill in both of the circles with the white. Paint in circular strokes forming the circle. 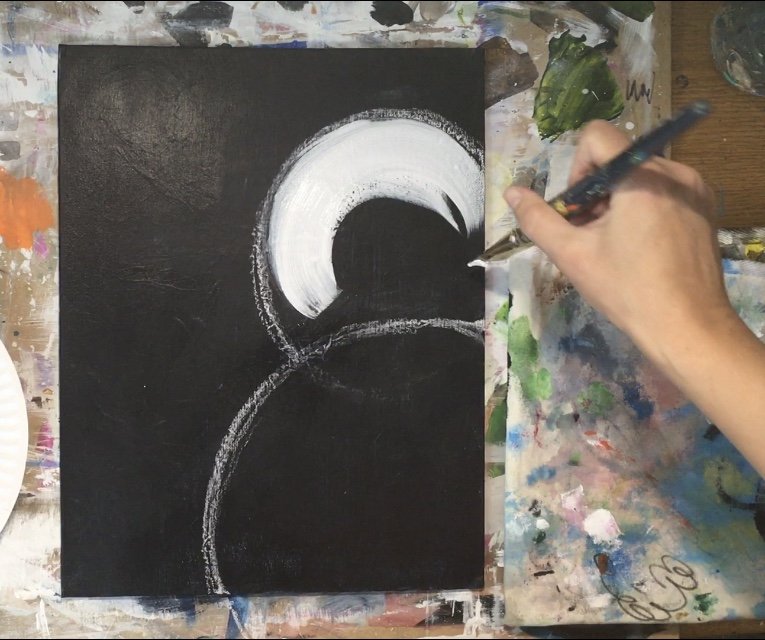
I started with the top and then painted the bottom.
Then I did a second coat and started at the bottom and then did the top.
Essentially the top needs to look like it’s overlapping the bottom, which we will define in the next step with “shading”.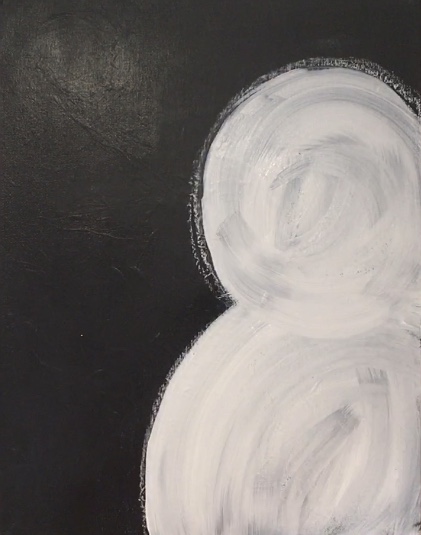
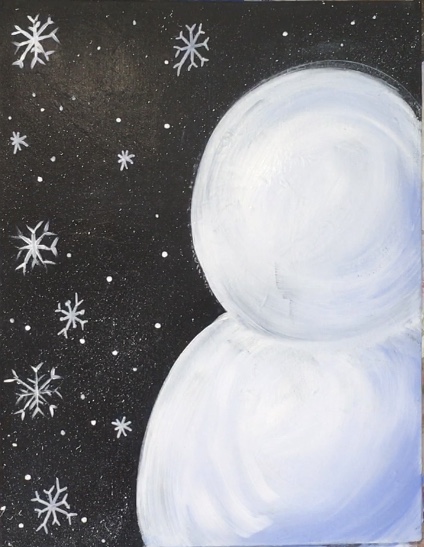
4. Add light blue violet for shading
Do not rinse the white off your brush.
To do the shading, add a little bit of light blue violet to your brush.
Start at the lower right of the snowball and paint a curved stroke so that it blends with the white on your brush (and also the white on the canvas that isn’t dry yet). 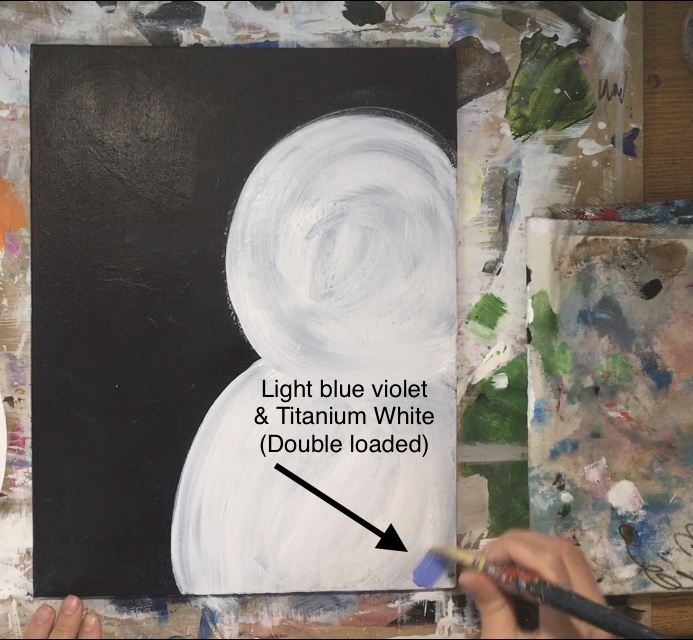
Blend it back in with the white so the light blue violet gets lighter and turns back to white as your work your way to the upper left part of the circle.
You may add more white to your brush to help with the blending.
Do the same with the top circle. When you blend this part of the circle, make it so the top circle is overlapping the bottom.
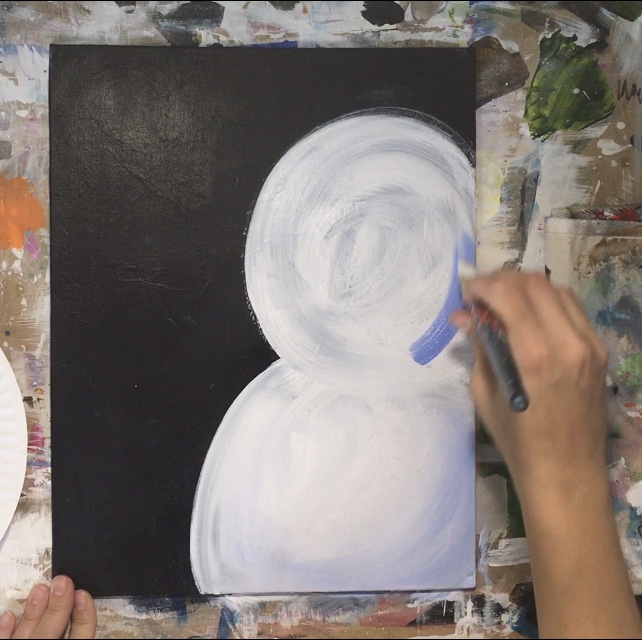
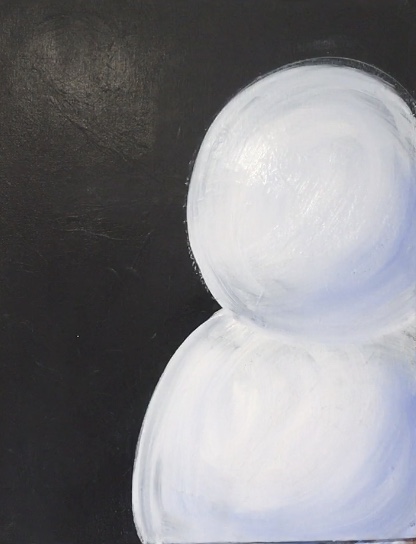
Light blue violet is blended in with the white only on the lower right side of both of the circles.
5. Paint the snow and snowflakes
For the snowflakes I did a combo of the 10/0 liner brush, the toothbrush and a paint pen.
First start with the liner brush (or the paint pen if you prefer) and paint titanium white snowflakes around the sky. 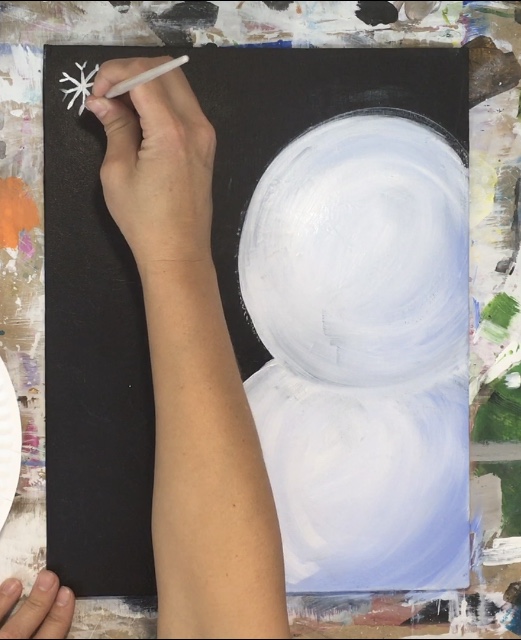
Paint little dots representing snow.
You can do this by stamping the back of your paint brush handle.
Then use your toothbrush to flick little specks of snow all over. 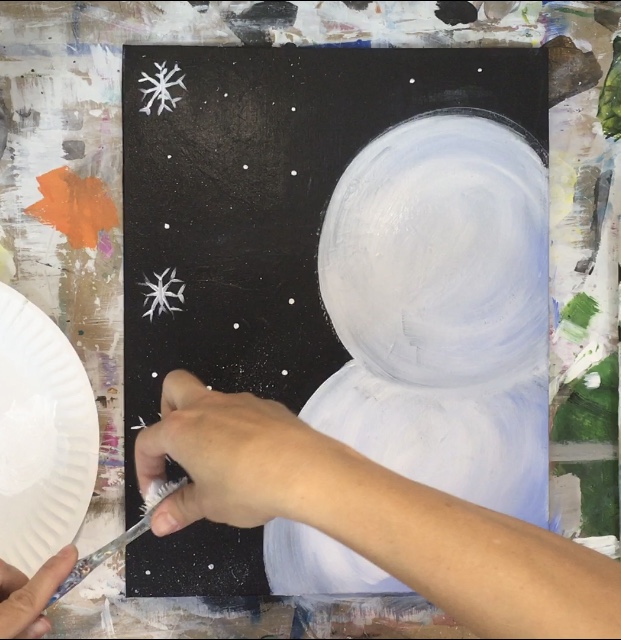
Tip: with the toothbrush it sometimes helps if you wet it first (then pat it dry so it’s not dripping) and load it with the white. Always test out the splatter away from the canvas first to make sure it won’t drip all over your canvas.
Then I took a paint pen and drew on some more snowflakes.
The paint pen really helps with this step because you have more control of the intricate lines. 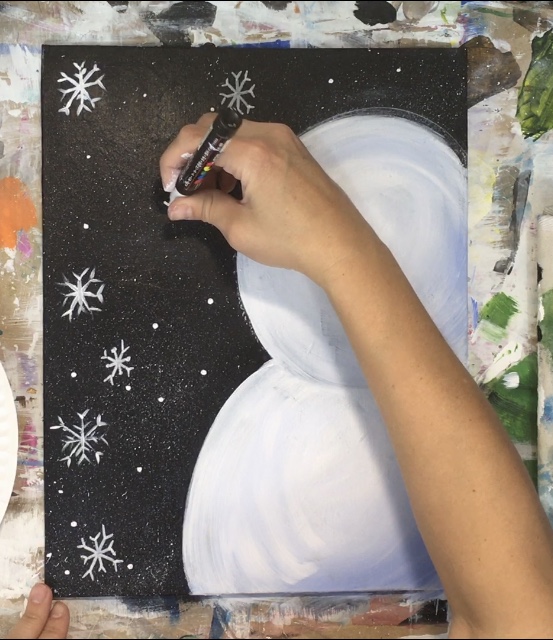
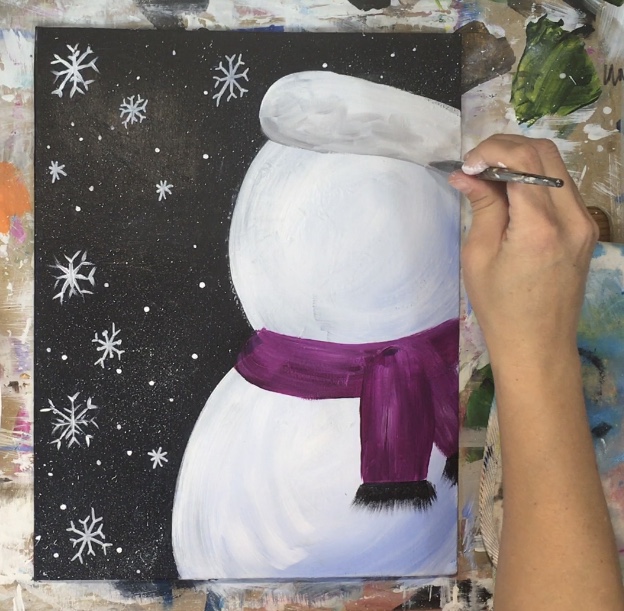
6. Paint the scarf
For the scarf I used a 3/4″ wash brush and deep violet.
Paint about the width of the brush, the scarf in between the head and the body. 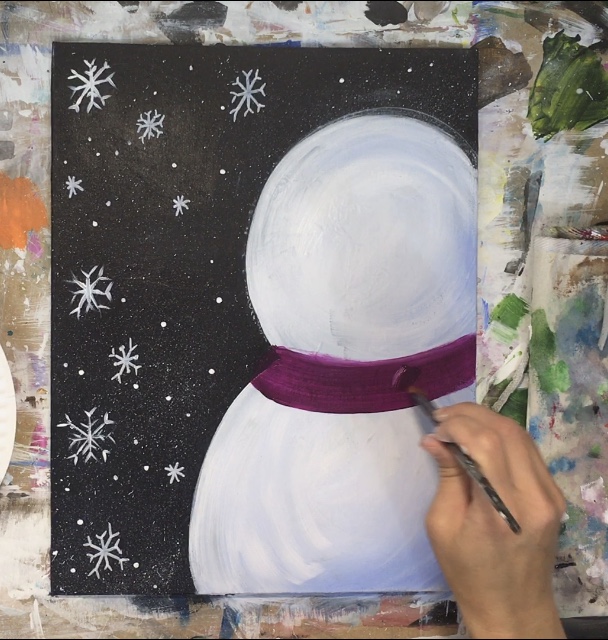
Then I switched to a #12 bright brush to paint the parts of the scarf hanging down.
You can also add a bit of white into this purple to make it a bit brighter (simply load a little white on your brush that already has the deep violet on it). 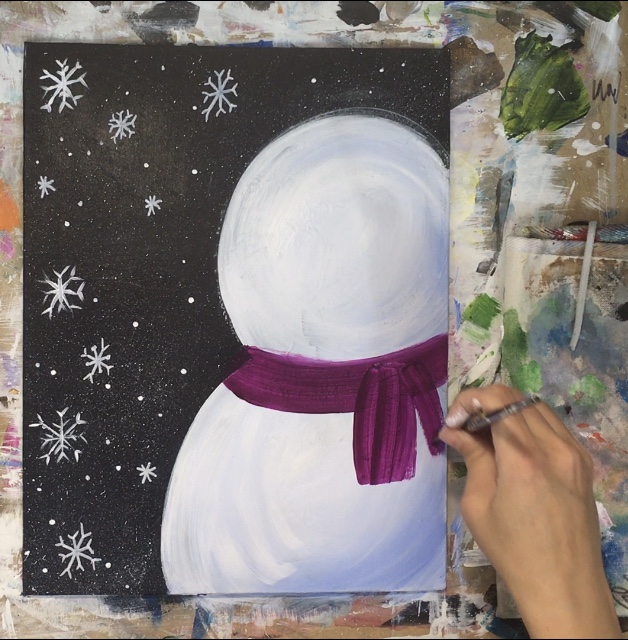
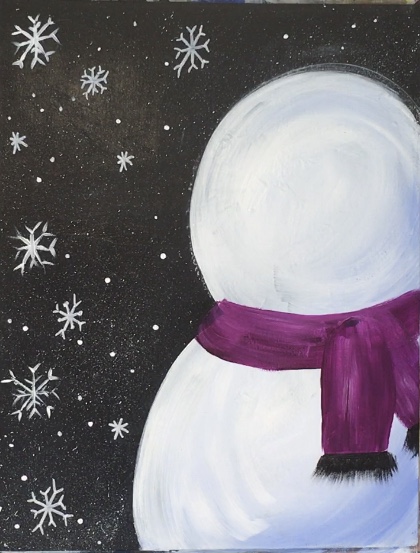
To do the “frill” on the scarf, use mars black and the full width of the 12 bright brush to drag down the strokes slightly using the full width of the brush (make them kind of dry and feathery).
You can also use a round brush for this step to paint the little lines hanging down.
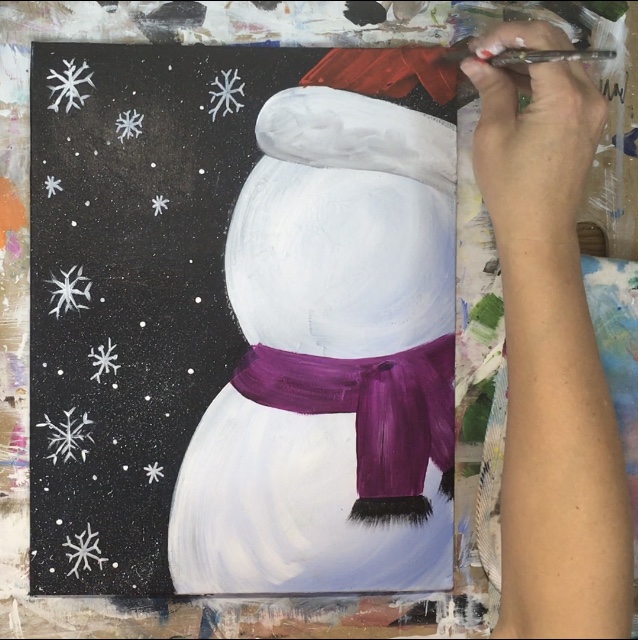
7. Paint the hat
Next use a 12 bright brush and titanium white to paint the bottom of the Santa hat.
Paint it so that it overlaps the head and curves around. 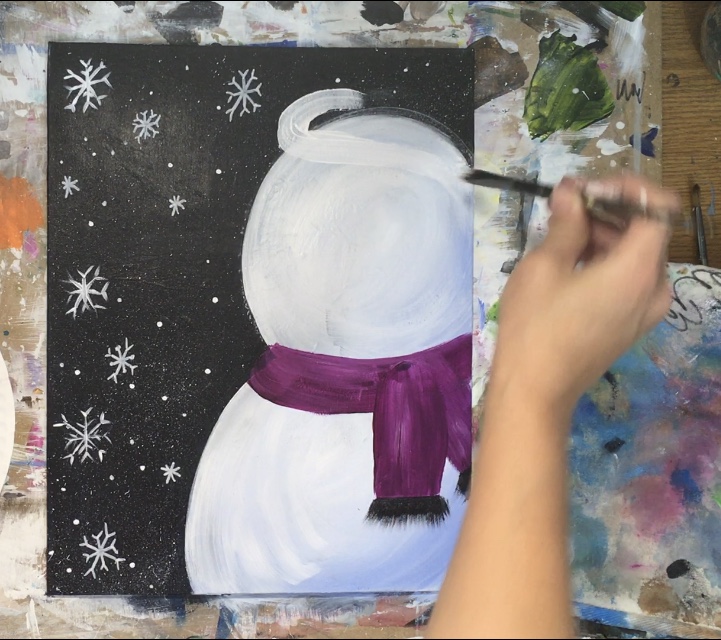
The shape of the white part of the Santa hat is sort of an oblong rectangle. 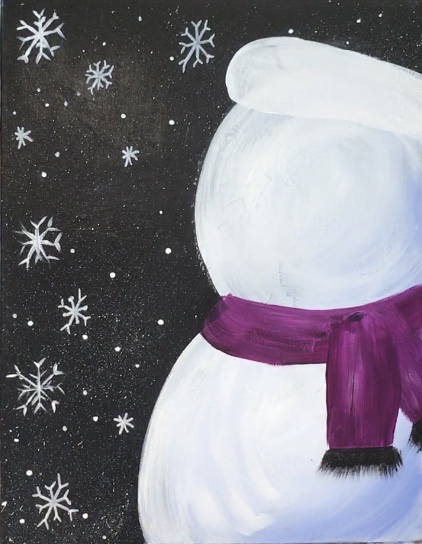
Then (optional) you can do a little “shading” with the mars black.
Dip a tiny bit of black into the brush that already has the white on it. Blend it in slightly on the bottom of the hat.
Next rinse your brush and load it in cad red medium.
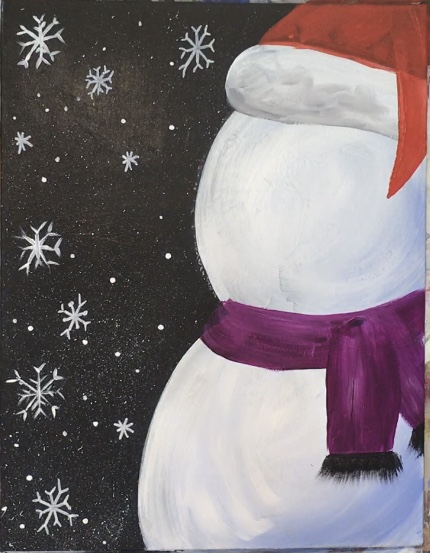
Paint the top portion of the hat. You may need a few coats for this cadmium red because it’s rather translucent.
Then paint the triangular point of the hat hanging down.
8. Paint the buttons and eyes
For all the coal circles I used mars black and a #4 round brush.
I did the two eyes and three buttons but did not do the mouth yet. 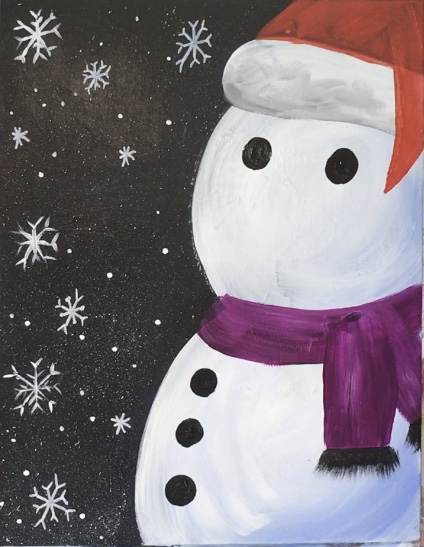
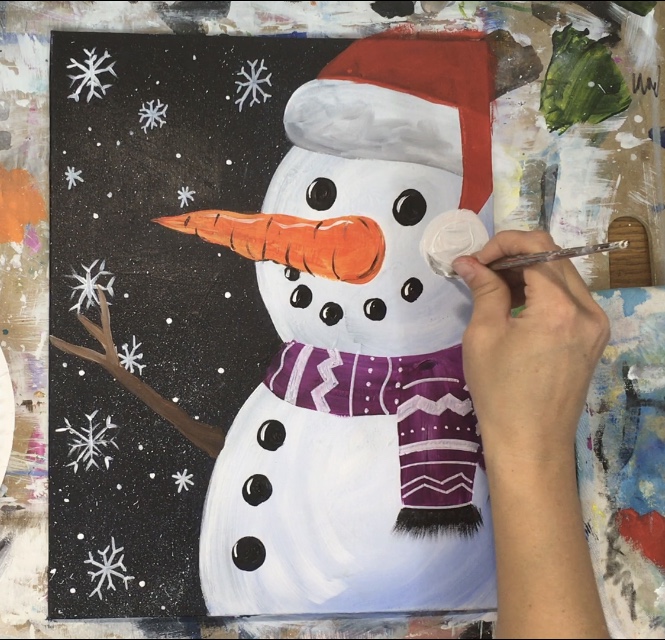
9. Paint the nose base layer
Then with a #12 bright brush, I painted the nose titanium white.
This is because the orange would not be opaque enough to show up over the black.
When this white dries, I painted orange back over it. 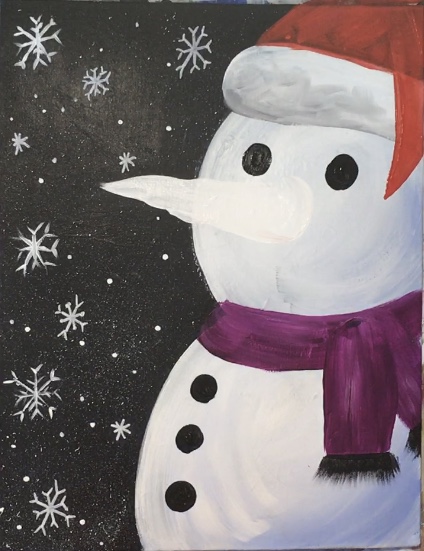
10. Paint the mouth
For the mouth, paint mars black circles (under the nose) with the round brush.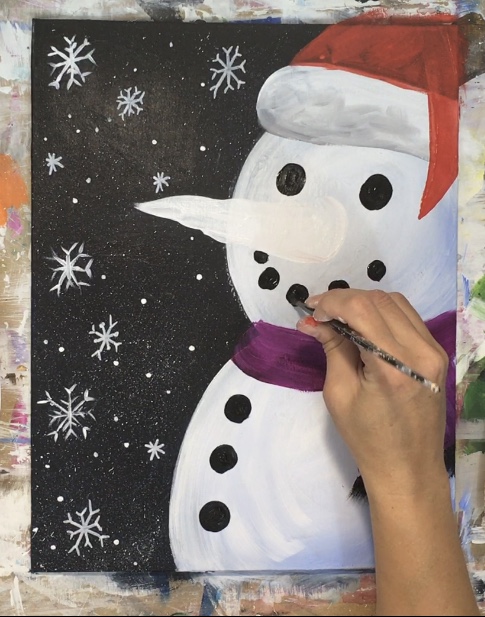
11. Paint the arm
The arm was painted with a round brush and the colors: burnt umber and titanium white.
Basically load your brush in the burnt umber and a little bit of titanium white.
This helps to lighten the brown and help it show up on the black.
**Oh and also I painted a circle on the tip of the hat with a round brush and titanium white. 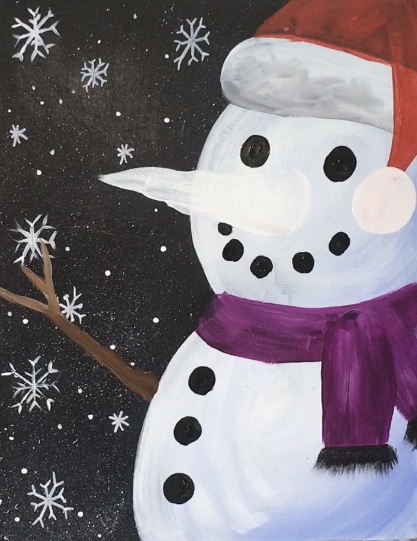
12. Paint the nose orange
Then if the white part of the nose is dry, paint it over with cadmium red light hue (or cad orange). 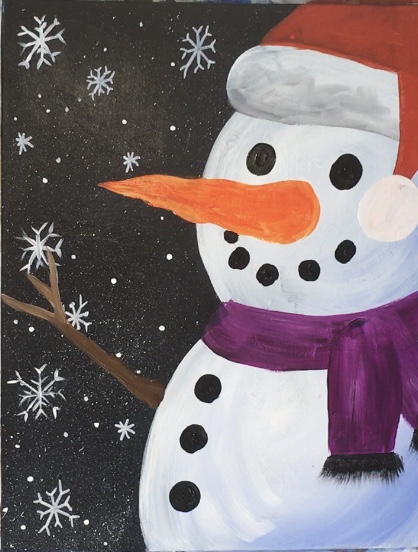
13. Add highlight to coal and nose
Using a 10/0 liner and titanium white, paint the highlight on the left side of all the coal circles.
Also paint a little white line on the top of the nose. 
Then (optional) use mars black and the 10/0 liner to paint the black lines on the carrot.
14. Decorate the scarf
For the scarf I used a white paint pen due to the intricate designs.
If you don’t have a paint pen, you can use your 10/0 liner and titanium white. I did a pattern of different kinds of lines. 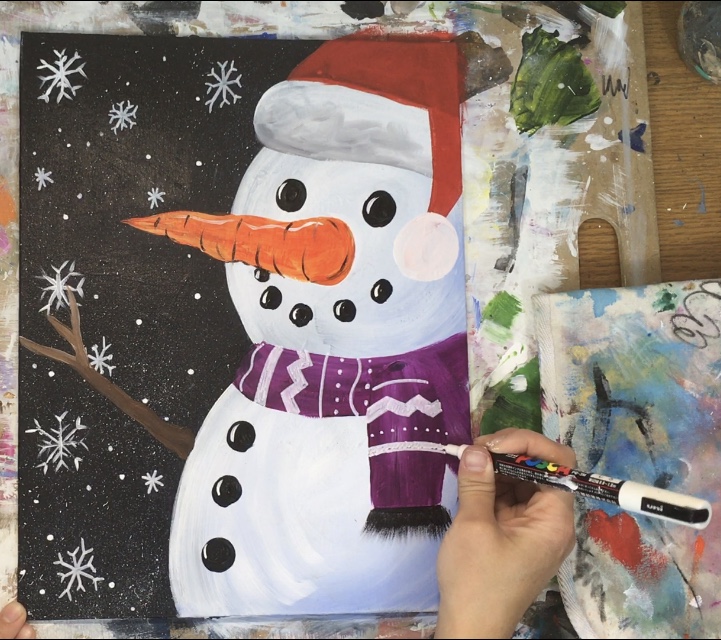
15. Add some shading to the hat (optional)
Then (optional) I went back over the white circle on the tip of the Santa hat and added a bit of mars black mixed with titanium white on the brush to create some light shading on the bottom.
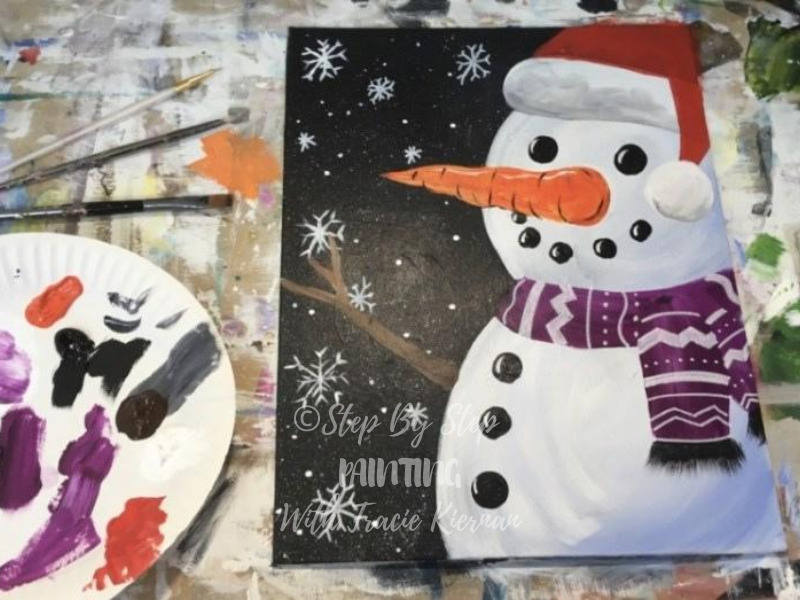
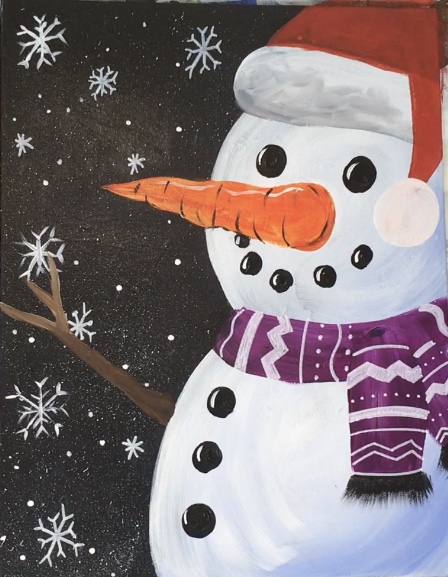
Finished!
Tracie- I am still following you and looking at all your work..it is so FUN and whimsical..you make all of us better artists with your instruction.. Your tutorials are very smart and well written and the photos sync with the directions perfectly.. During the Summer when I was ready to do your flipflops- My Birthday newsflash- was that I was going to be a grandmom..and Valentina arrived in September..She is going on 2 mos now..and I’m going to do this snowman and dedicate it for her 1st Christmas..And you have also inspired me to now want to paint on glass and do a Christmas plate for Santa & his reindeer..I am Christian, and would love to see you lead us in a Nativity tutorial..God would just bless your work and increase the work of your hands in all things.. I would just love to paint one- and trying to figure where to begin..I am also working on an angel..Happy Thanksgving to you & your loved ones!
Hi Donna! I’ve had quite a few requests for a nativity scene and I’m hoping to get one designed for this season. Thanks for the inspiration! Congrats on your grand baby!! It also sounds like you have a lot of great painting projects going too!! ?
Hi Tracie. I am looking for a simple spring, summer and fall painting tutorials. If you have any, please share with me. I am repurposing ceiling fan blades, your step by step tutorials are fantastic. Thanks
Hi Tracie. I am looking for a simple spring painting. I will be painting it in a ceiling blade. If you could suggest something, I would be great-full. Thanks
Hi Ginny! All my Spring paintings are here: https://stepbysteppainting.net/spring-painting-tutorials/
Hi Tracie!
Thank you for another fantastic painting tutorial!! This snowman is adorable, and I can’t wait to paint him. I’m with Donna on the Nativity painting! It’s been pretty frustrating trying to find one suitable for beginners. I haven’t found one yet. Even just a silhouette would be awesome! Thank you for considering it.
I do have a quick question. Have you ever splattered snow using glitter craft paint?? I didn’t know if it would be a bad idea because of the chunks of glitter in the paint. If it would turn out like I see it in my head 😉 , then it would look like glistening snow!
Thank you for any advice you have for me. And a giant THANK YOU for offering such great, family friendly, free tutorials!!!!
Julie
Hi Julie! I have not tried splattering glitter paint for snow. You can always test a surface to see what happens but if the glitter isn’t fine enough, it may not show. I imagine the larger dots of snow would have the glitter show up. Nothing wrong with experimenting, I say definitely try it out!
Hi Julie- I recommend trying /testing it on small $1 canvas you get at the Dollar store..this way you don’t mess up your snowman..I do a lot of decoupage on canvas..I can even print a picture to white tissue paper ( yes the gift kind) and decoupage it to a canvas & then add acrylic paints..I have painted glitter while the surface was wet- and then- if it looked too much- just turned it over and shook it off..so try a small bottle of glitter..I have done this on angels and it came out great.
Tracie- how about a Gingerbread guy & girl? I picked up a plate at JoAnns..and I’m like- I CAN Paint that!! 🙂 it was on a red background..maybe a cookie plate set for Santa & ivy framing..just another suggestion 🙂 We LOVE you!!
And I’m on my 3rd knit baby blanket..and I work F/T..so who needs sleep? LOL
Hi!
I love your painting tutorials! Can I use a black canvas for this one?
Thanks!
Yes of course a black canvas would be great for this one!
Thank you so much for sharing your art knowledge with us! You make me want to try everything. I tried practicing your truck this afternoon and it was so much fun!
You’re welcome Cindy! Glad you are enjoying!
THANK you from the Cormier Family. Both my children (6 & & years old) enjoyed this! and me too.
You’re welcome!!
Thank you so much for the wonderful step by step video! In these crazy times, I was able to gather my daughters, granddaughter, and mom to have a painting party. We had fun and enjoyed our results very much. Thank you!!
Sounds like you had an enjoyable time! You’re welcome Tricia!!
Hii Tracie
I love your paintings and I am really inspired from them .I wish to ask you if I can draw the same drawings with oil pastels and upload on yt . Waiting for your response . Thanks a lot
Thanks so much! Yes you can do these with oil pastels and upload to YouTube! Just be sure to give a shout-out, thanks!
Loved painting with you.Think mine turned ok