
How To Paint A Cute Rudolph
Would you like to save this?
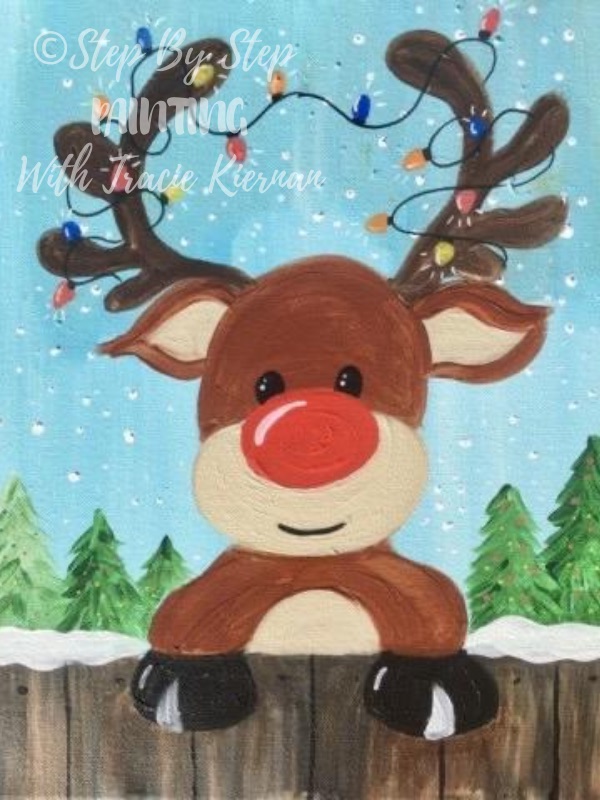
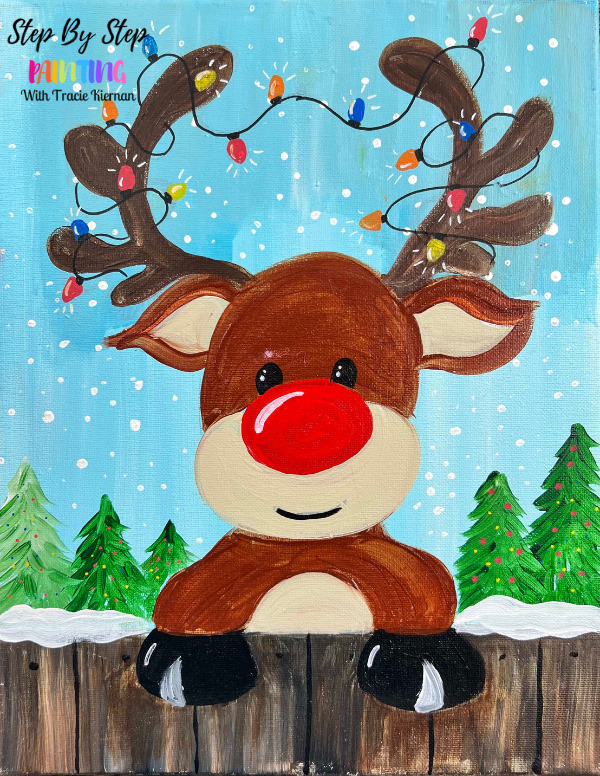
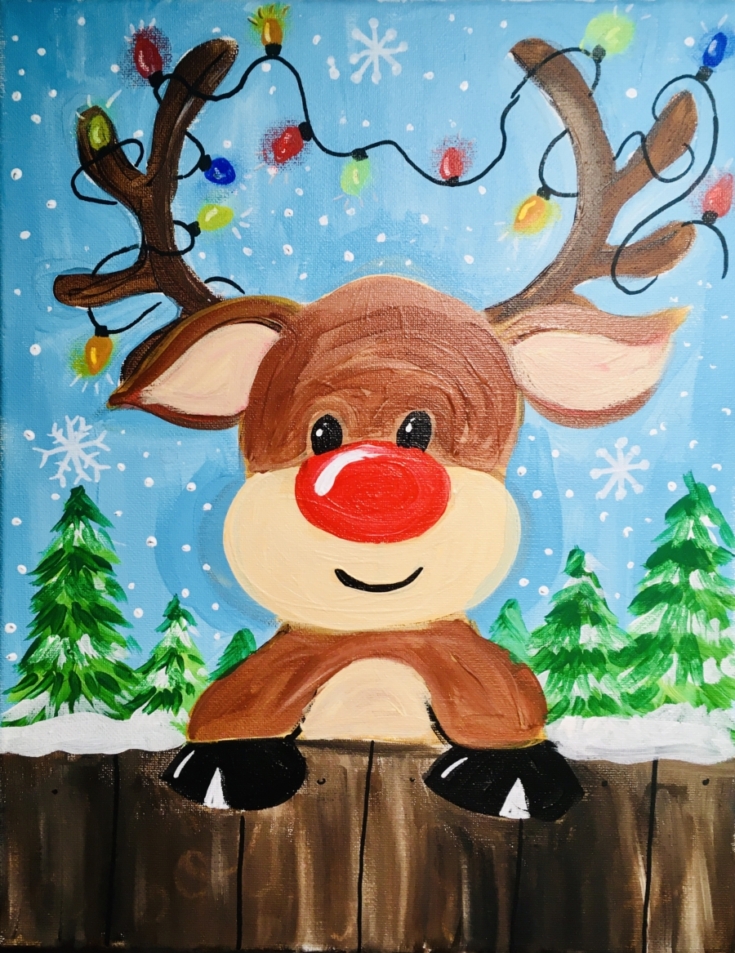
This is an adorable Rudolph The Red Nose Reindeer painting you can do with your kids or as an addition to all your Christmas canvas paintings!
Learn how to draw this Rudolph OR use my traceable! Then paint the design using my step by step guide.
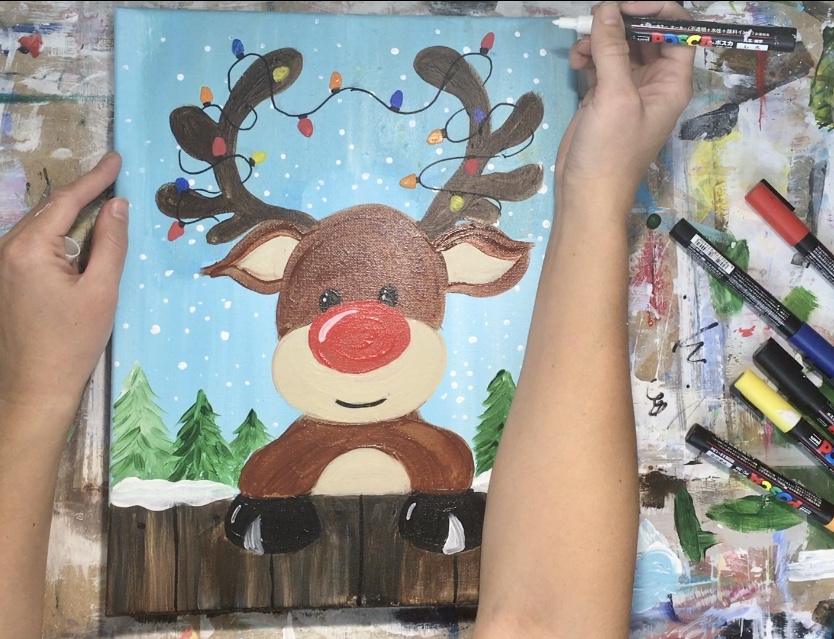
I used quite a few colors in this one! A few were only used sparingly because of the lights. Also on one trial I did the lights with a 10/0 liner and acrylic paint.
Then I did another trial with the POSCA paint pens. I found the paint pens easier for these small details.

![]()
Enjoy and happy painting!!
Materials
How To Paint A Cute Rudolph
This adorable Rudolph painting is very easy and fun for the whole family and the kids! Learn how to draw the Rudolph step by step or use my provided traceable. Then paint it in using my step by step directions.
Materials
- Canvas 11 x 14
- Acrylic Paint
- Brushes
- Graphite Paper
- Traceable
- Paint Pens (optional)
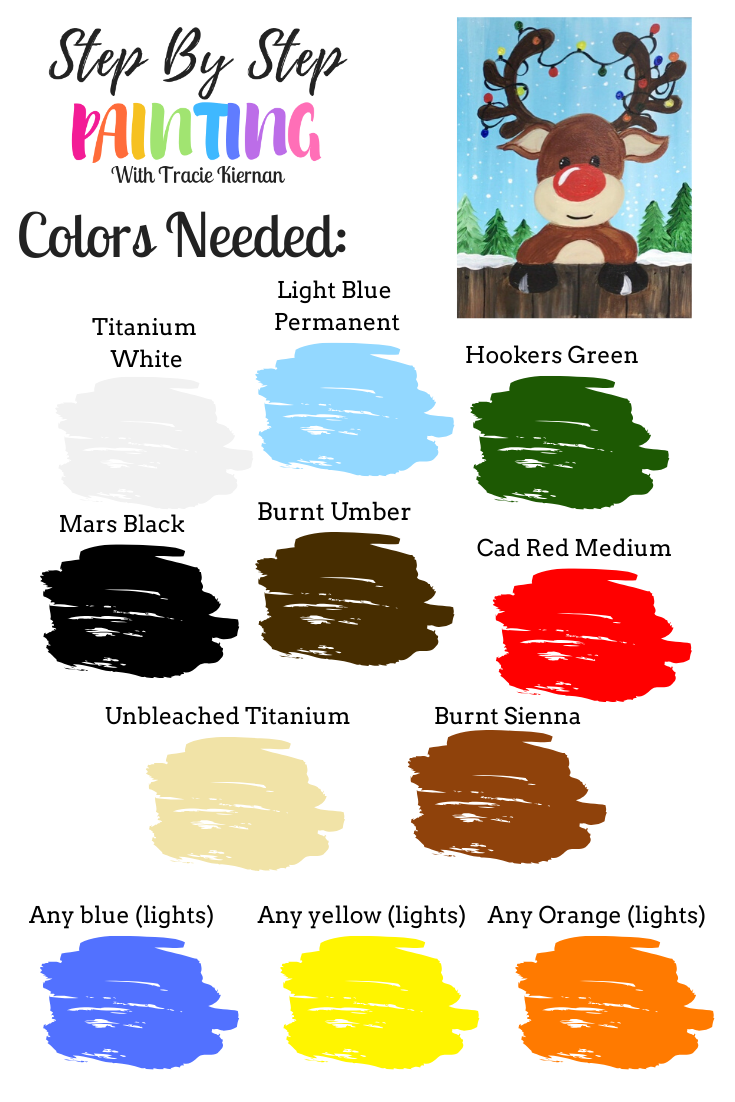
Colors
- Light Blue Permanent
- Titanium White
- Mars Black
- Burnt Umber
- Burnt Sienna
- Unbleached Titanium
- Pyrrole Red
- Hookers Green
- (Optional colors for lights) Cad Orange, Cad Yellow & Primary Blue
Brushes
- 3/4 wash
- 12 Bright
- 4 Round
- 10/0 Liner (Or Paint Pens)
Instructions
- See full tutorial for complete step by step directions or watch on YouTube: https://youtu.be/qw7-FtIJj0E
Recommended Products
As an Amazon Associate, Michaels Affiliate and a member of other affiliate programs, I earn from qualifying purchases.
Color Palette
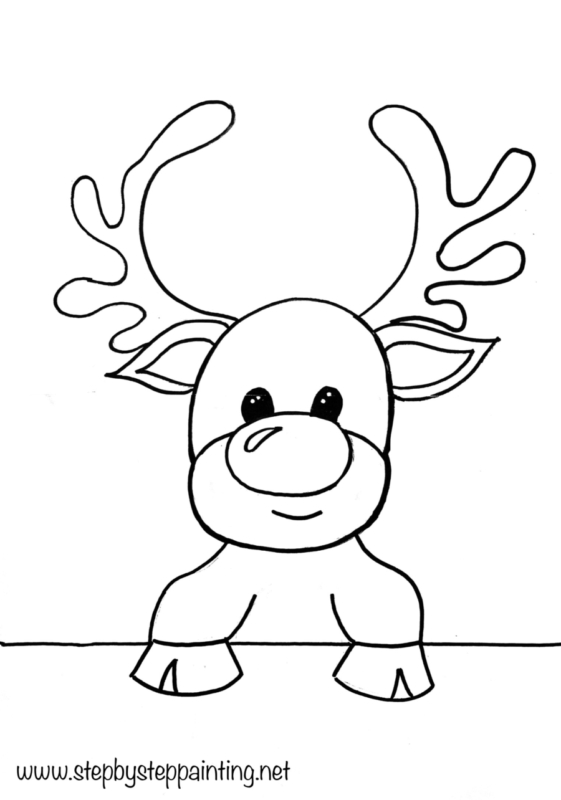
Traceable
Directions At A Glance
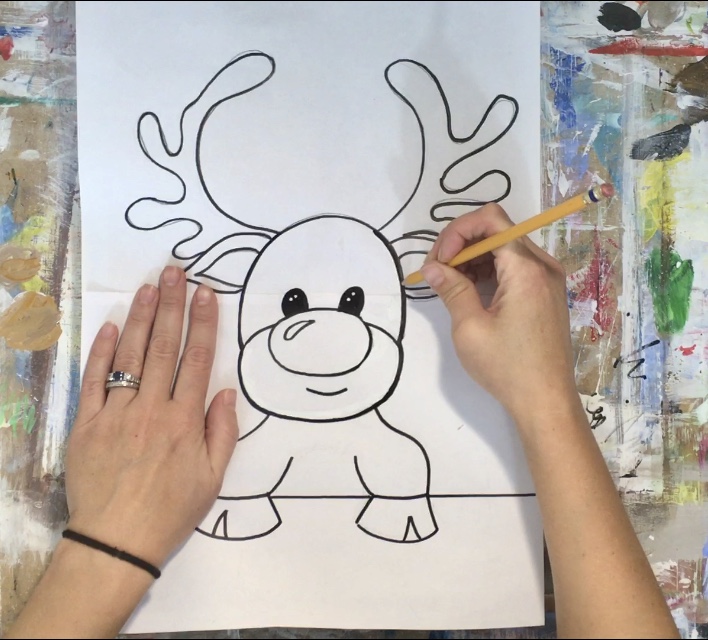
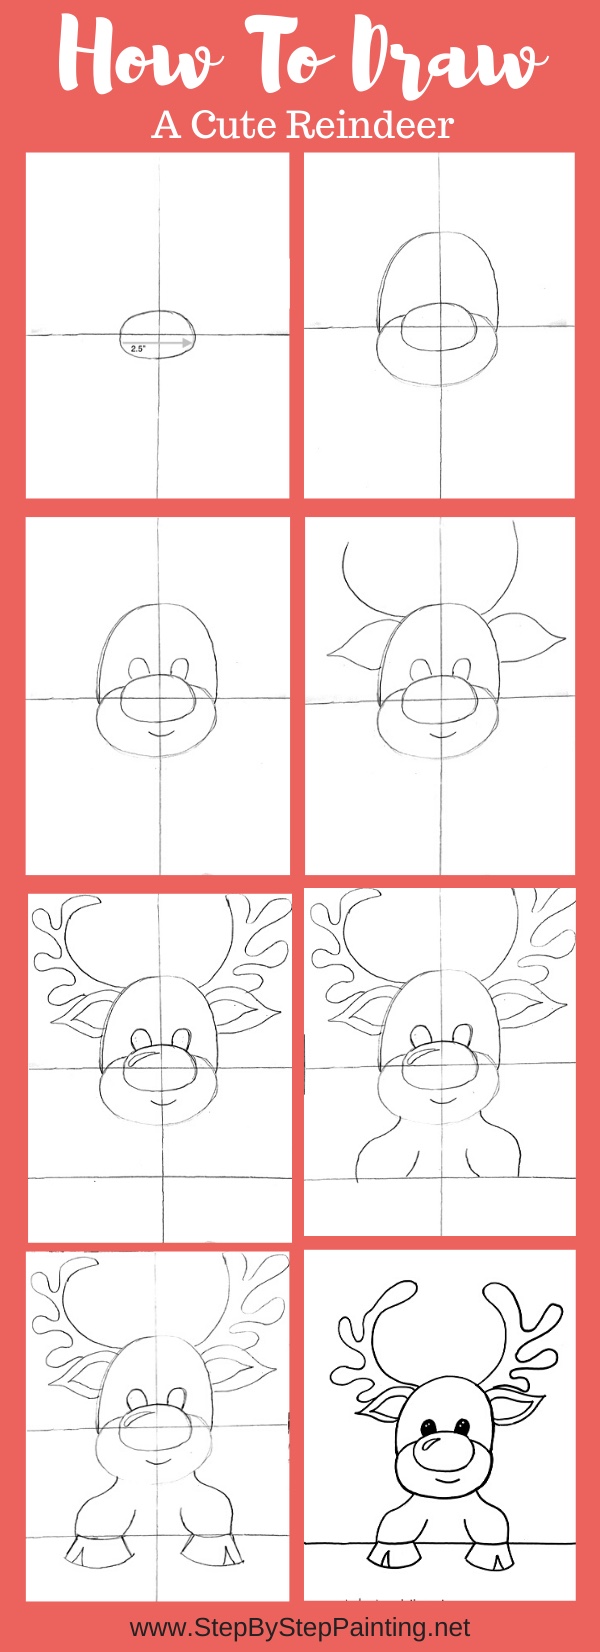
How To Draw This Rudolph
You can either draw on canvas after you paint the background or draw on paper and transfer your drawing using graphite paper. I usually draw on sketchbook paper and transfer.
To see this how to draw a Rudolph on a separate tutorial here.
Video
Step By Step Directions
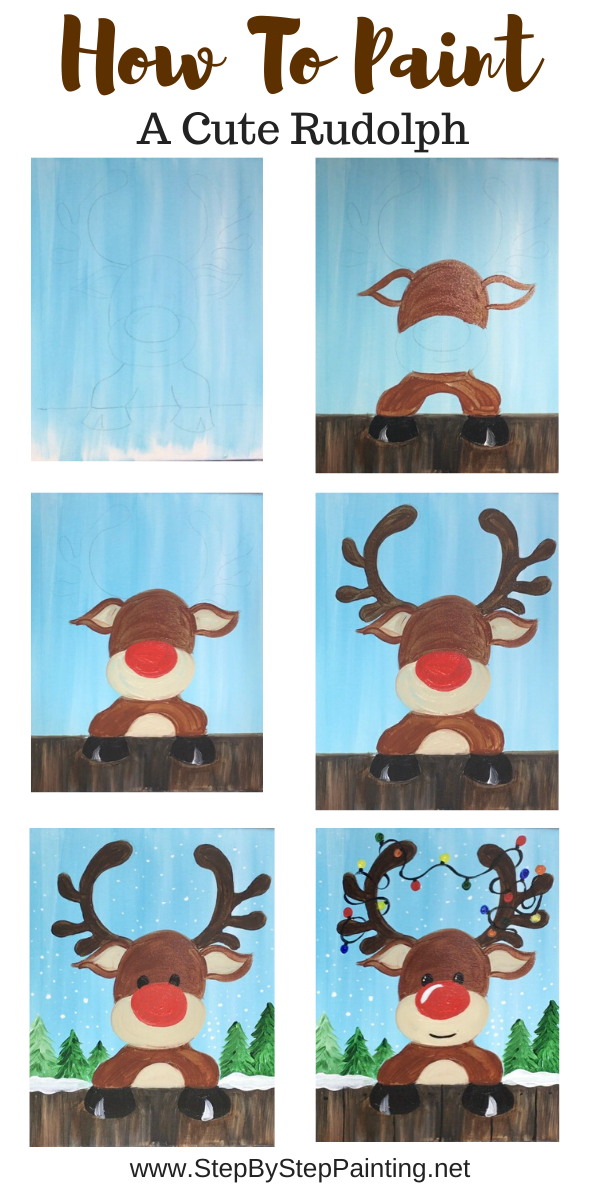
1. Paint the canvas blue
You will need a 3/4″ wash brush and the colors light blue permanent and titanium white. Dip your brush in the water but leave it kind of wet. Then double load the brush in both titanium white and light blue permanent. Paint up and down strokes to achieve a light blue, streaky white background. 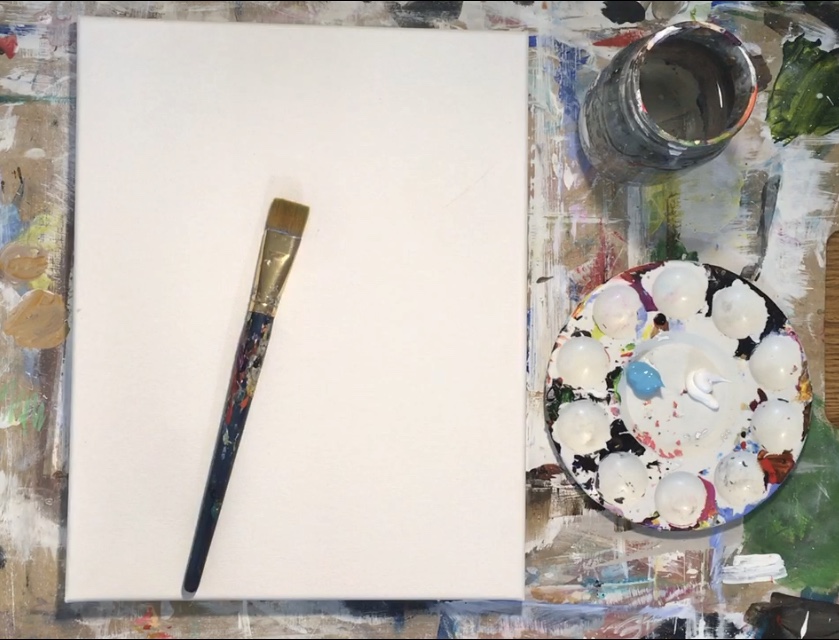
Since water was left on the brush, it should flow and spread very fast.
2. Draw or transfer the reindeer onto the canvas
If you’re using my traceable, print it out and use a sheet of graphite paper to draw the design and transfer it to the canvas. Note: for 11 x 14 size painting like this one, you’ll need to print the double sheet traceable and tape it together. 
I find it’s always easiest to transfer the drawing with he canvas flat on the table. Using a dull pencil and pressing firmly helps transfer the design dark enough to see. 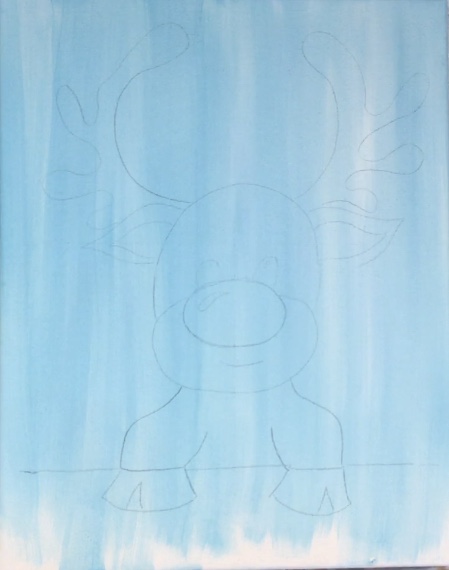
3. Paint The Wood Fence
Doing the faux wood look may look hard but it’s so simple! All you need to do is load your 3/4″ flat brush with the main color (burnt umber) and load the two corners with white and black. Then paint up and down using the full width of the brush. Your colors will blend together to resemble the different colors in old rustic wood. 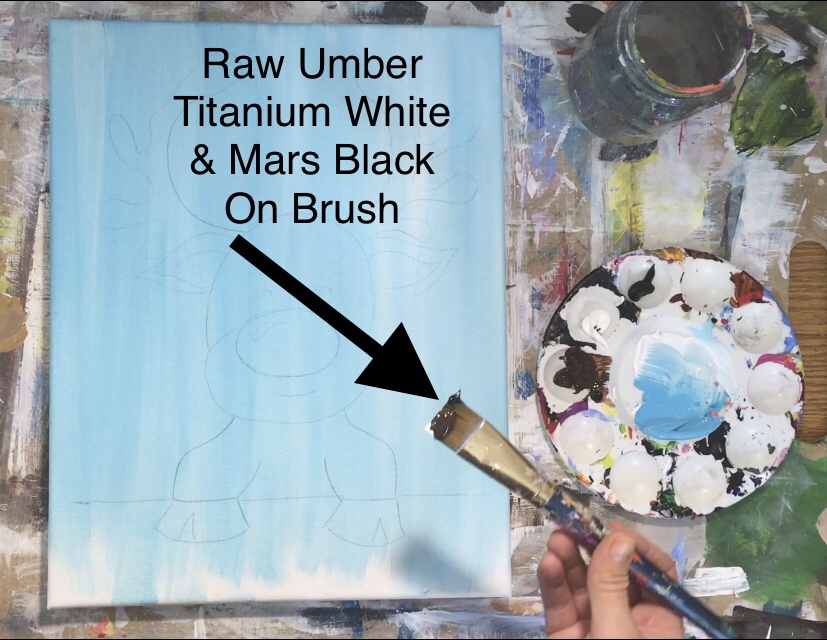
Note: the graphic above says “raw umber” but I actually used “burnt umber”.
Fill in the entire fence area but don’t paint over the hooves (unless you want to…you can always repaint the hooves later). 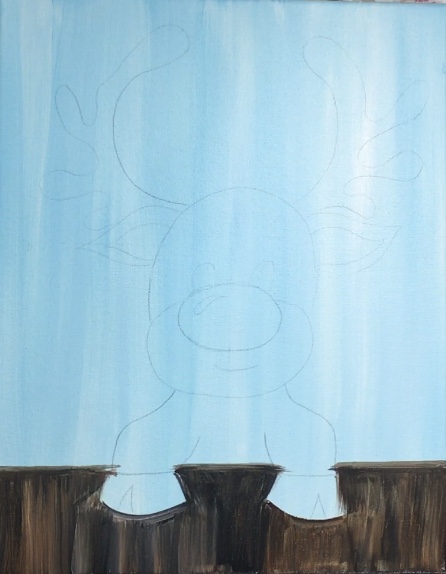
4. Paint the hooves and brown area of the reindeer
The next steps are really simple! Paint in the lines like you are painting a coloring book. I recommend using a #4 round brush for these steps. I started at the hooves and painted them solid mars black. The little triangle in the middle of the hooves were painted white, however, the white mixed with the black to make it look gray. 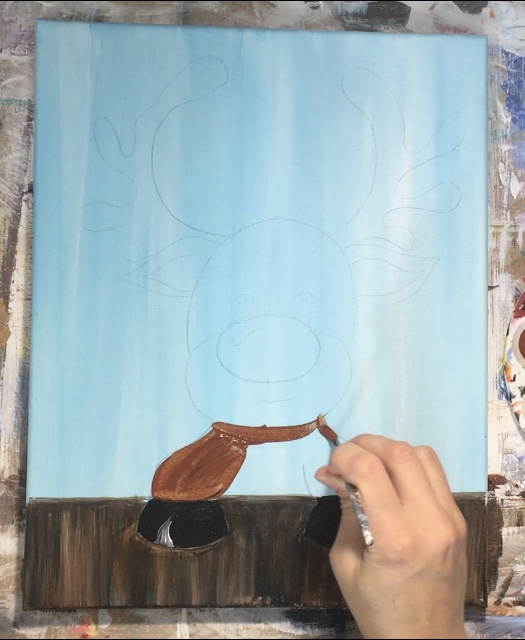
The brown part of the reindeer was done with burnt sienna. 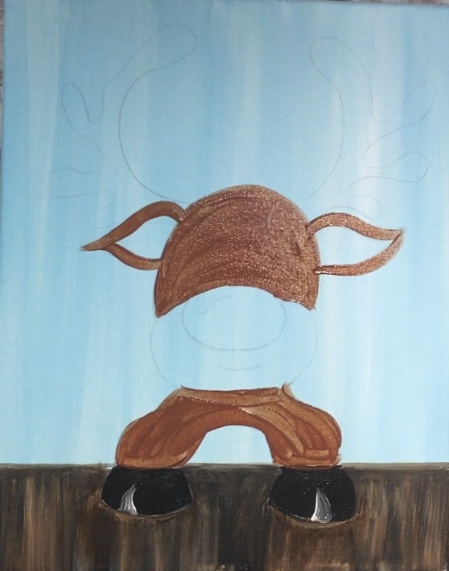
Next I did the lighter parts with unbleached titanium. This includes the inner part of the ears and the mouth area.
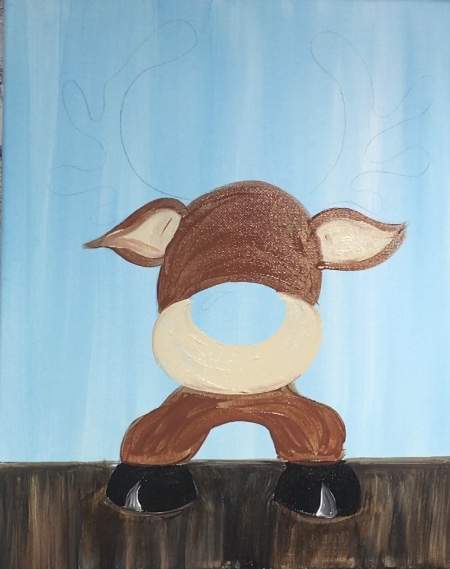
Then I did the nose with pyrrole red. The stomach area was also done with unbleached titanium.
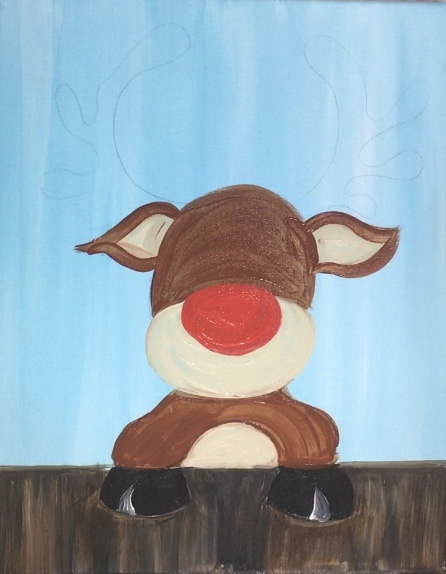
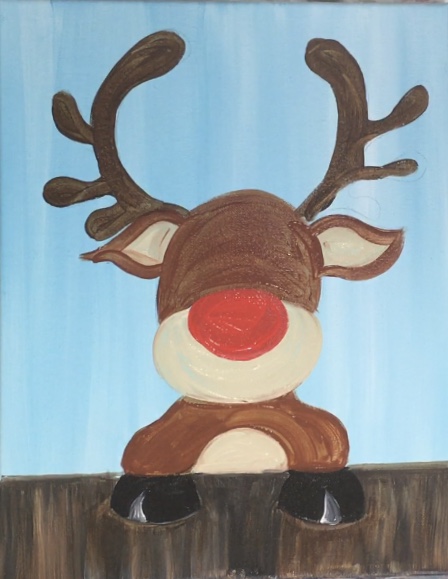
Next the antlers were done with burnt umber (the darker brown).
5. Paint The Trees
Because the reindeer needs to dry before adding the details, I went ahead and did the trees. Use a round brush and the color hookers green. Start at the top of the tree and stroke downwards forming the shape of a Christmas tree. 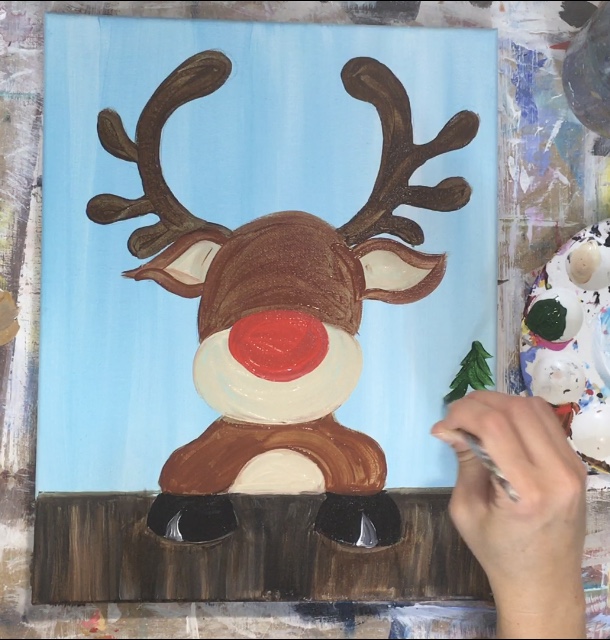
Then add a tiny bit of white to your brush and do the next tree. Just by adding this white, you get the green and white to mix together on the canvas to make a lighter color tree. 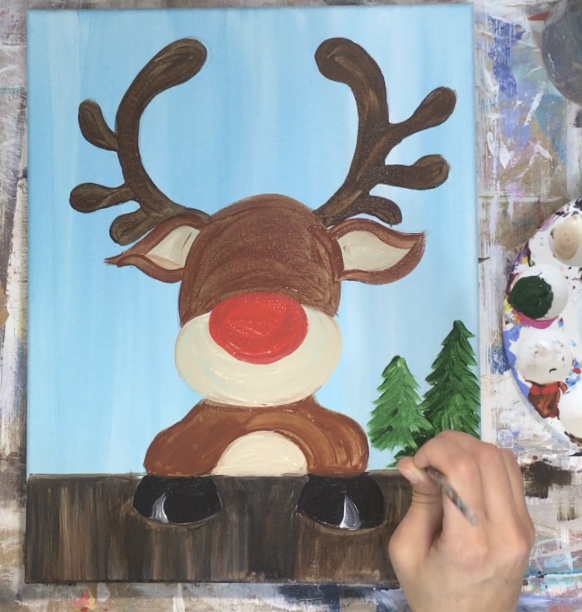
I did five trees all of different sizes and green/white variations.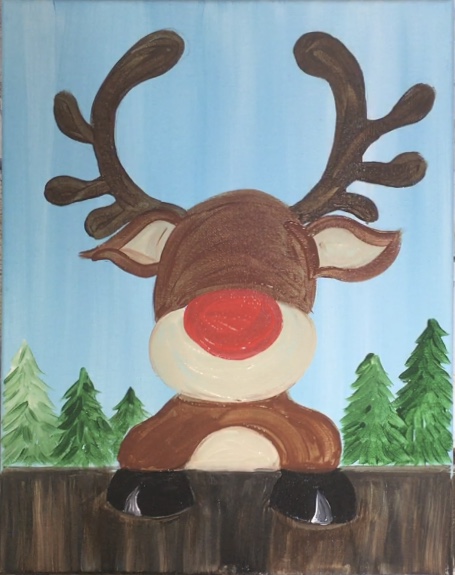
6. Paint Snow On Fence
Next I did snow with my round brush and titanium white. I painted this along the fence line (it’s implied that the snow is on top of the fence). 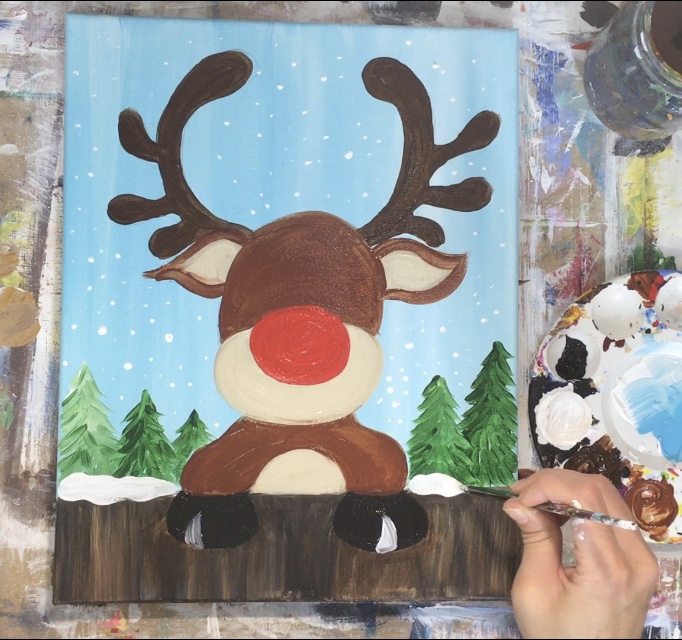
7. Paint eyes and mouth
By now the reindeer should be dry but if it isn’t, use a blow dryer to dry it. Then use your round brush to paint the eyes and mouth mars black.
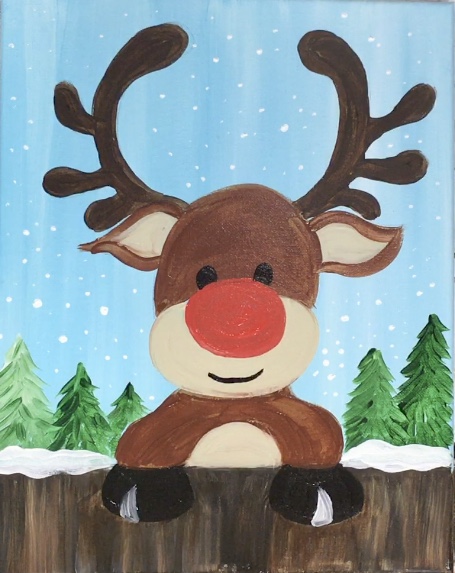
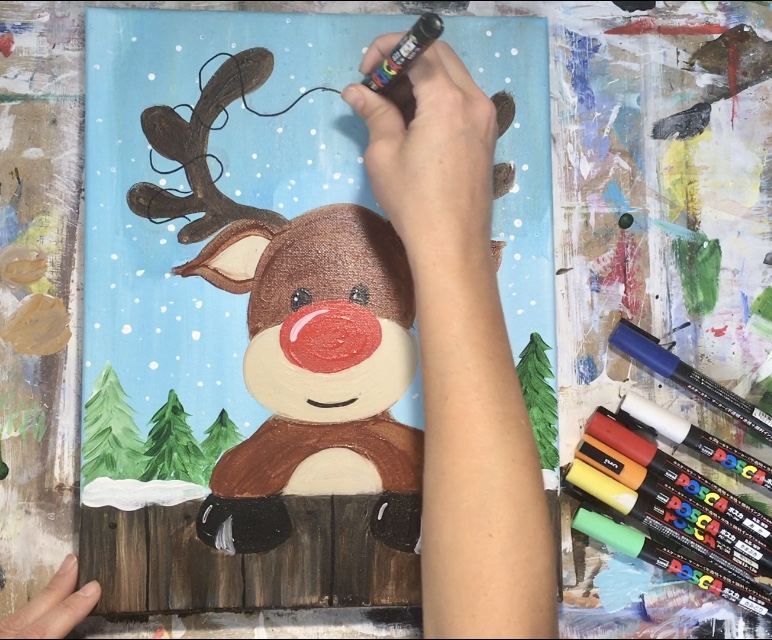
8. Paint String Lights
Here is where you can use either POSCA paint pens or the 10/0 liner and acrylic paints. I did it both ways and they both created different effects. Start with black and draw or paint a string that wraps around the antlers and connects both of them. 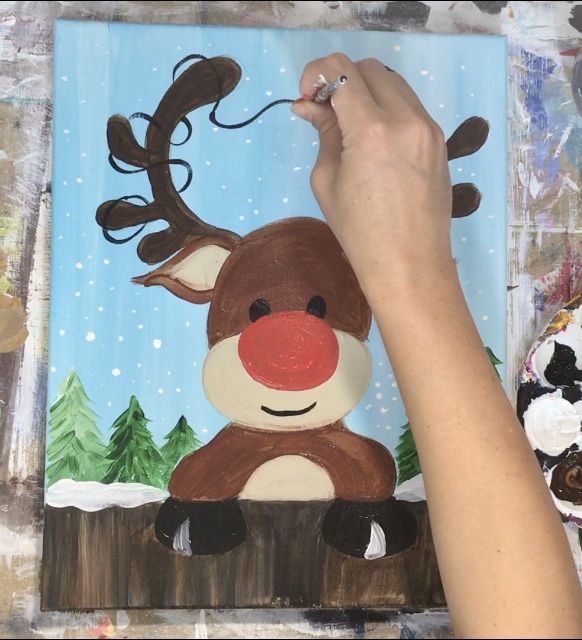

Then paint the lights. For the brush and paint method, I found it easier to just paint circles. Do one color at a time and paint them sparingly throughtout the stringed area.
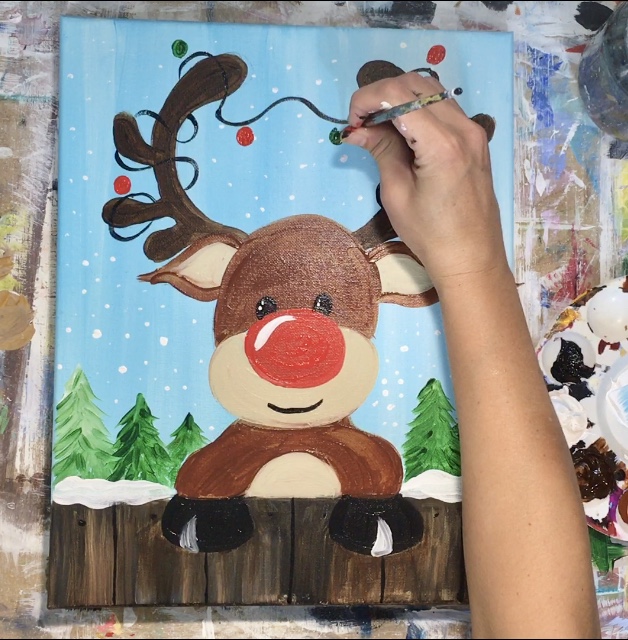
For the POSCA method, I drew actual light shapes, leaving a gap between the light and the string. 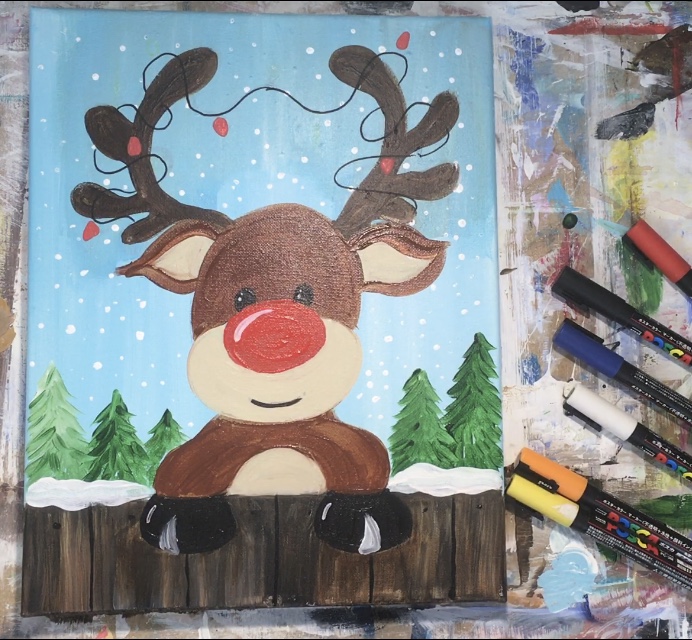
Then paint or draw a black little square that connects the lights. I did lights of all different colors – orange, yellow, red, blue and green. Then when the paint of the lights are dry, paint a little white highlight line on all the bulbs.
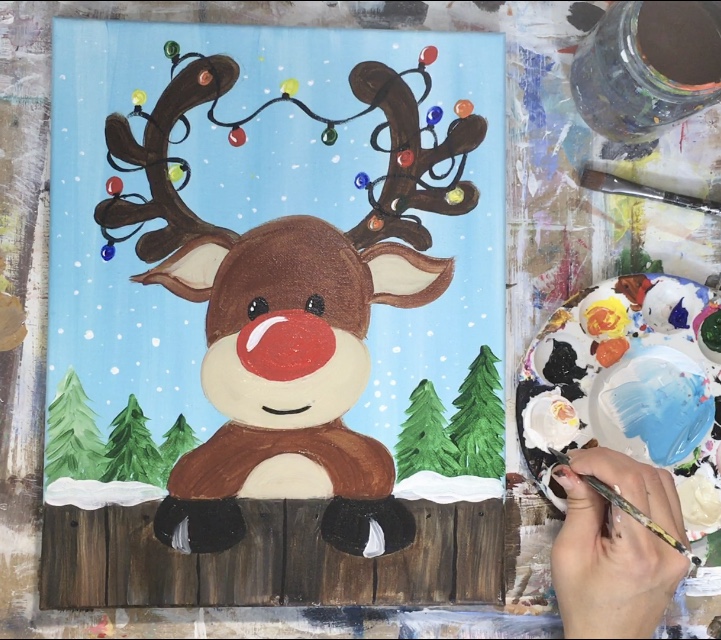
And you’re finished!!
Easy instructions for artists of all ages.
Thank you so much for providing these fun and creative instructional crafts! I love that they’re accessible, and appreciate you’re willingness to share them.
Afterschool Program Leader, NL
You’re so very welcome!!!
This is so cool! Can’t wait to try it out for Xmas this year!!!!