
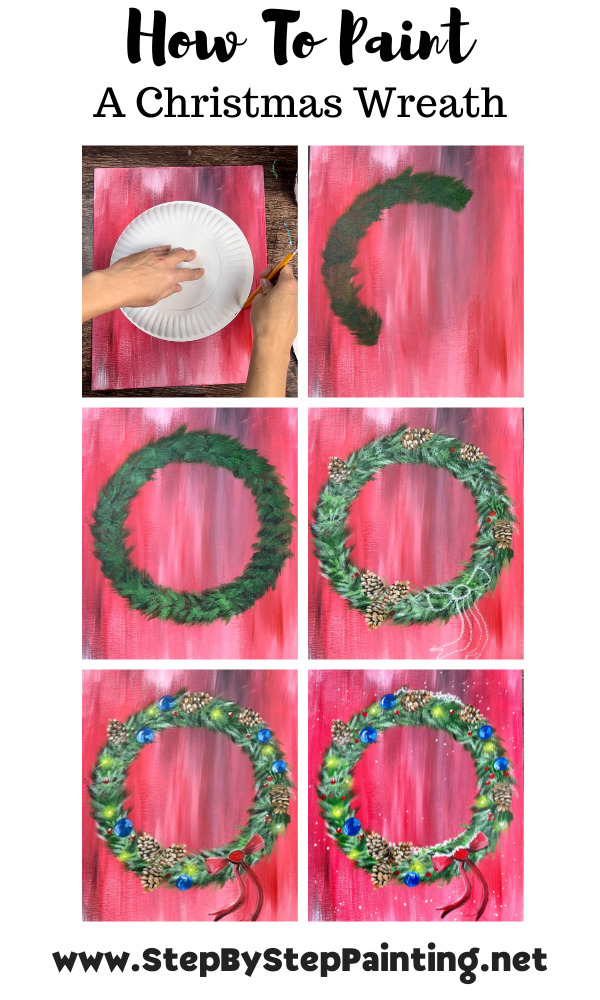
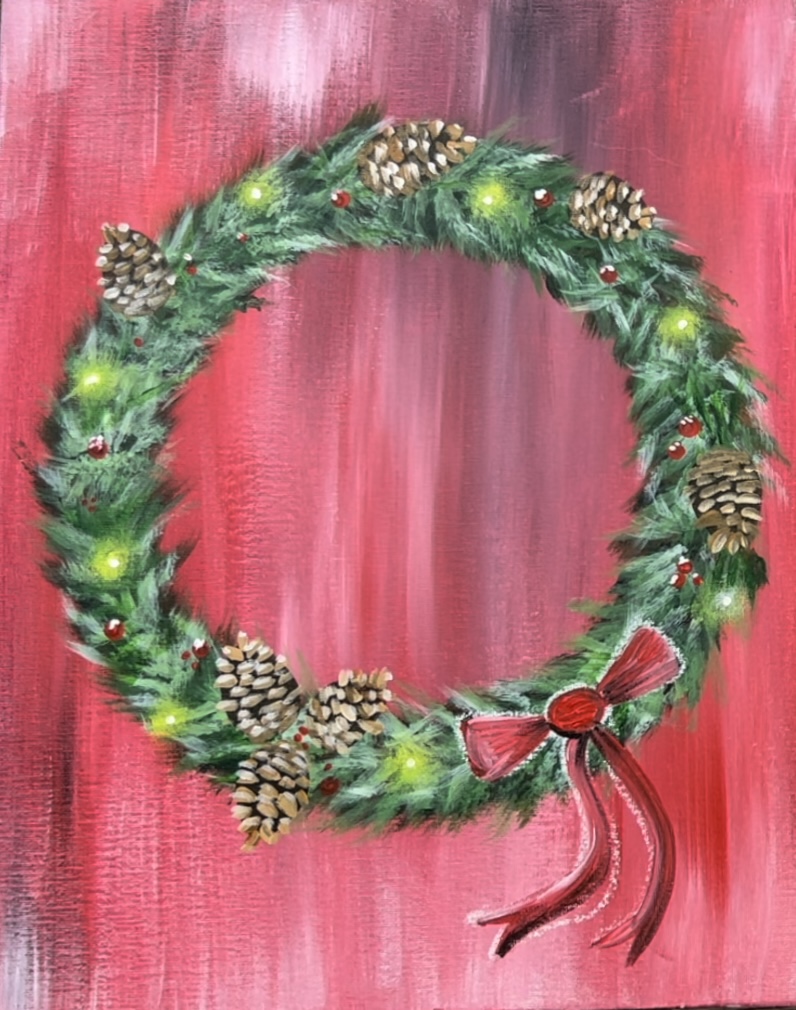
This tutorial will demonstrate techniques used to paint a Christmas Tree Wreath!
I will be going over how to paint the green pine needles using a layering technique as well as how to paint the decorative pine cones and shining lights!

Would you like to save this?
You can customize the background of this by changing the colors (gray, light blue and black would look nice!). You can also change the colors of the ornaments and lights or even add a monogram letter or quote inside the wreath.
Enjoy and happy painting!
Materials Needed:
How To Paint A Christmas Wreath
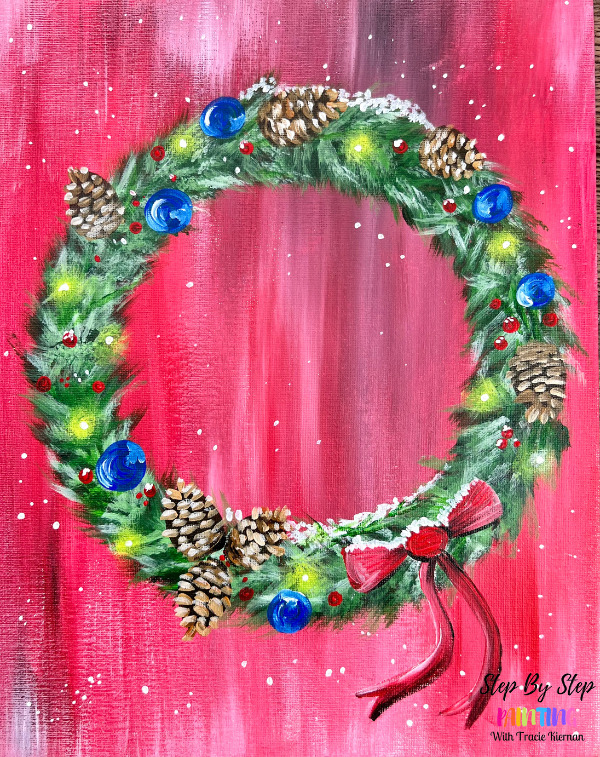
Learn techniques for painting a Christmas wreath with acrylics on canvas.
Materials
- Acrylic Paint
- 11 x 14 Canvas (this design works on any size!)
- 9" paper plate to trace & 7" paper bowl to trace
- Pencil
- Chalk (to help draw bow)
- Brushes (only two brushes for this tutorial!)
Brushes Used
Colors
- Titanium White
- Mars Black
- Alizarin Crimson Hue Permanent
- Cadmium Red Medium Hue Permanent
- Cadmium Yellow Light Hue
- Hooker's Green Hue Permanent
- Raw Sienna
- Cobalt Blue
Color Palette:
I used Liquitex BASICS Acrylic Paints For This Painting. If you are using a different brand, you can use the color chart below to help match colors.

Using Craft Paints?
If you are using craft paints such as the Apple Barrel Craft Paints, I would recommend these colors:
- Black
- White
- Flag Red
- Nutmeg Brown (mix white into it to lighten it up)
- Holly Branch
- Bright Blue
- Bright Magenta
- Yellow Flame
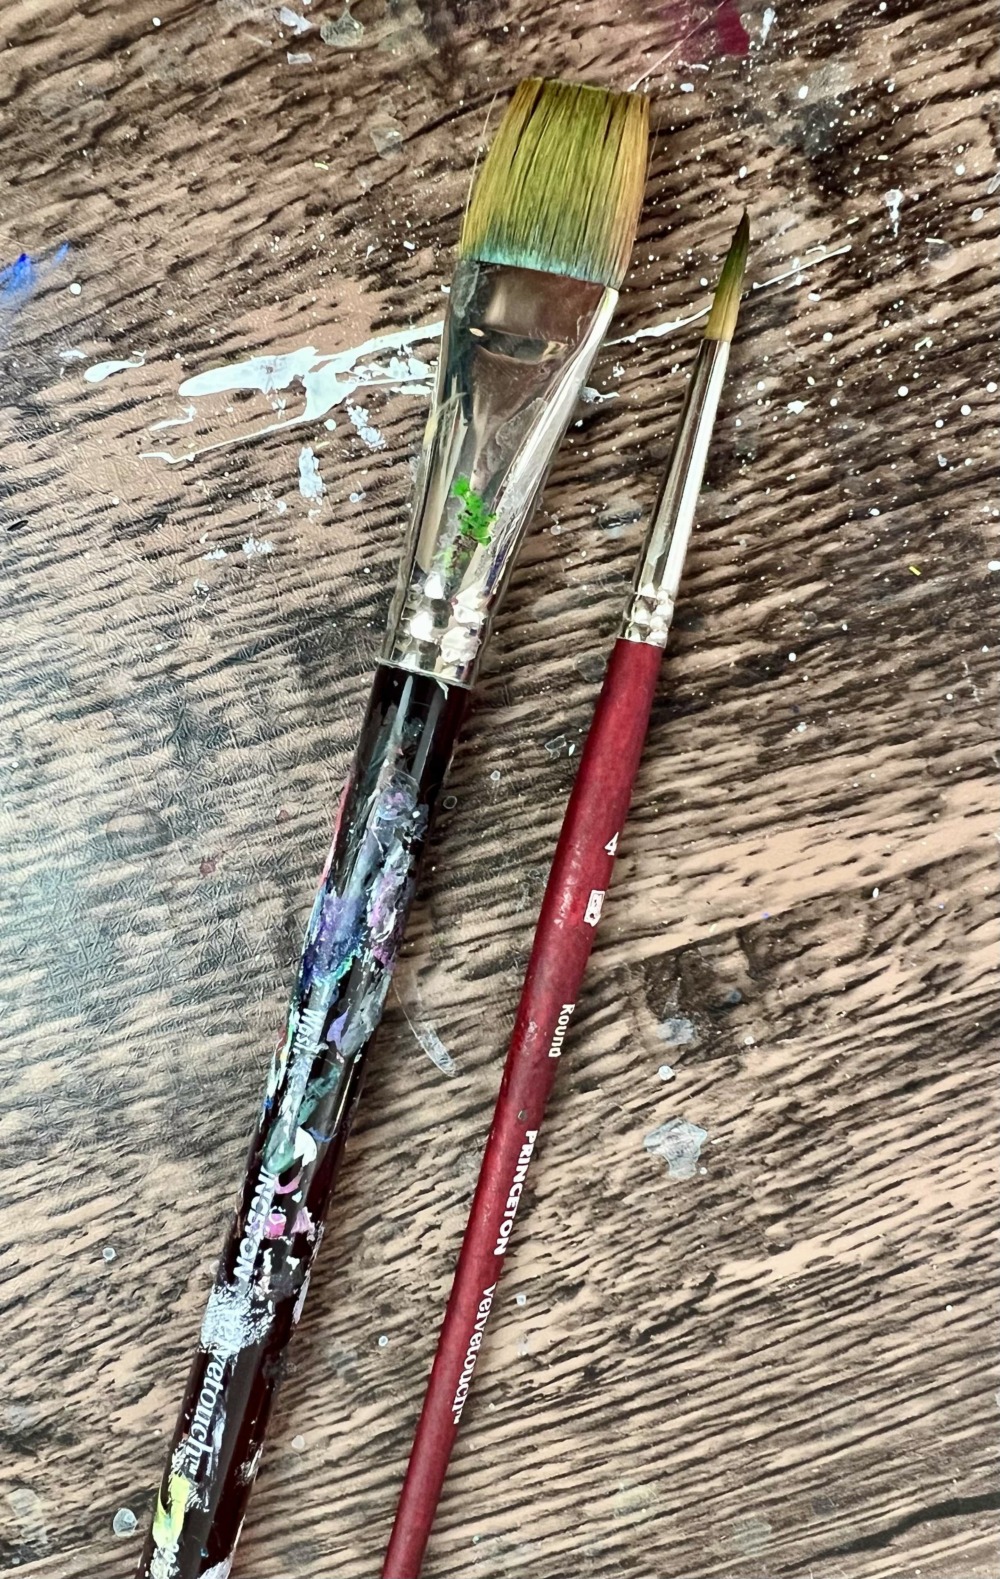
Only Two Brushes!
I used only two brushes for this painting. I used a 3/4″ flat wash brush for the background and pine needles and I used a #4 round brush for all the detail work.
Both of the brushes are Princeton Velvetouch from this pack.
No Traceable For This!
We will be tracing a 9″ paper plate for that circle and I will guide you through the rest! If you don’t have a paper plate, you can use a compass or another similar size circle.
Directions At A Glance
Video
Note: for some reason, the end of this video at the blue ornaments is cut off. You can see that step written out at step 10 in the written directions below.
Step By Step Instructions
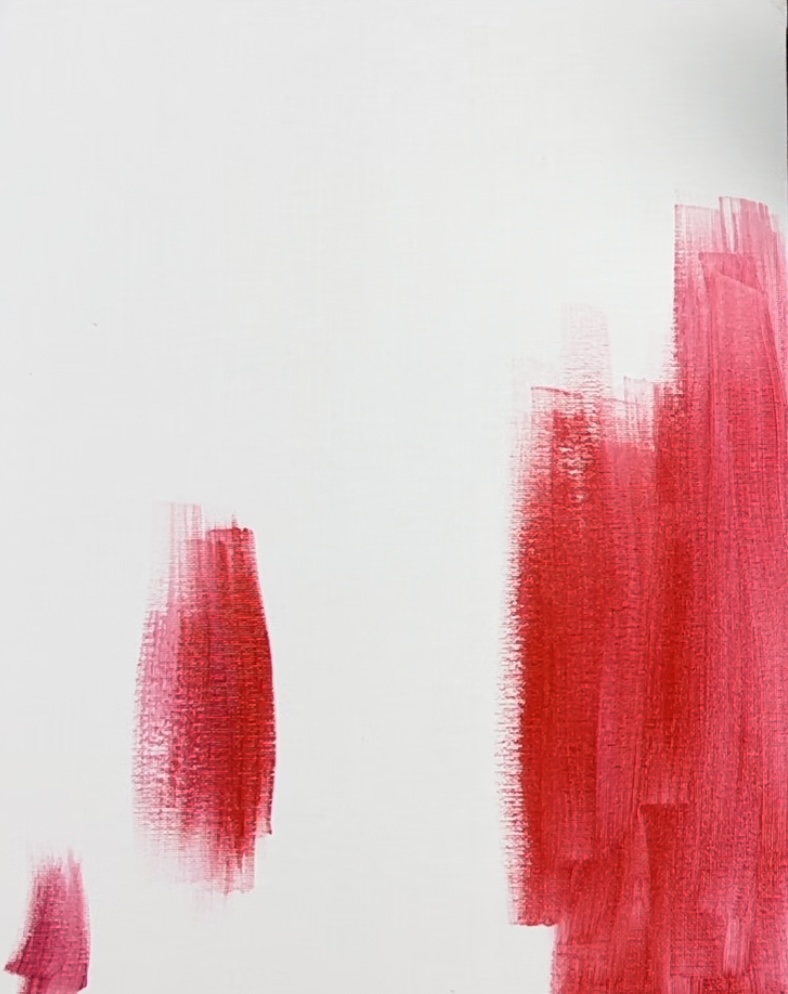
1. Paint the rustic red background
Load your palette with titanium white, alizarin crimson, cadmium red and mars black. You will be using that combination of color to create a blended background.
Start by loading your brush into the alizarin crimson.

Paint vertical strokes throughout the canvas.
Blend in the cadmium red medium, a little bit of titanium white and very tiny bits of black. Be very careful with the black because it could spread fast and make the background too dark.
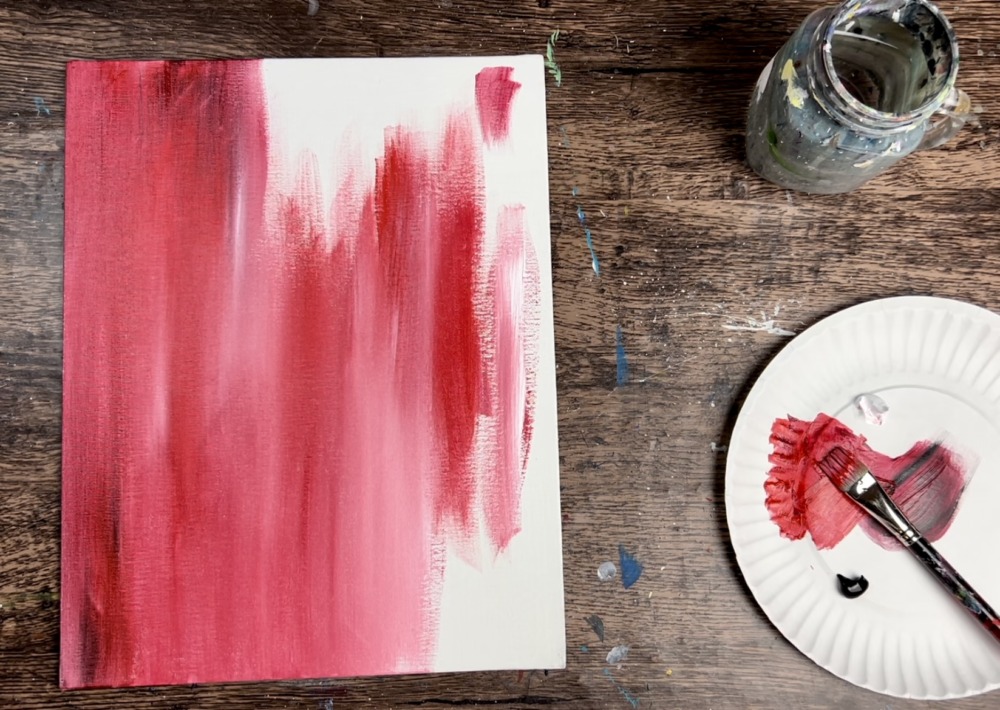
Create a blended rustic look by not blending the colors all the way. Add different amounts of the alizarin crimson and the cadmium red throughout the painting. Add bits of black to darken some areas up. Add white throughout as well.
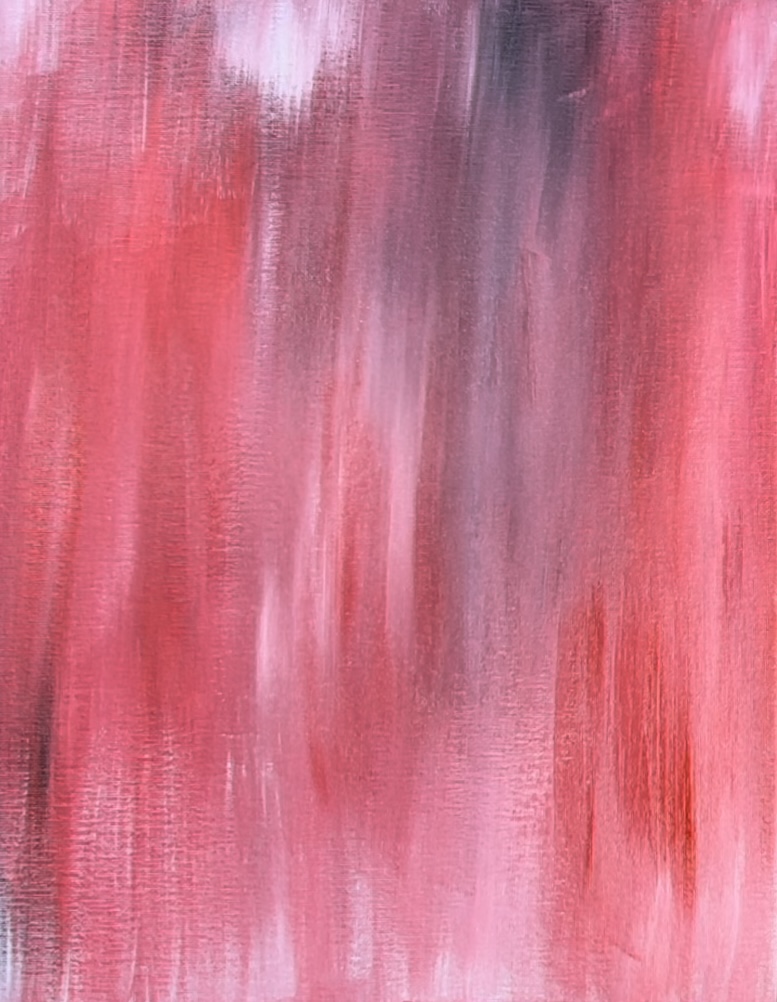
Let this dry before going to the next step.
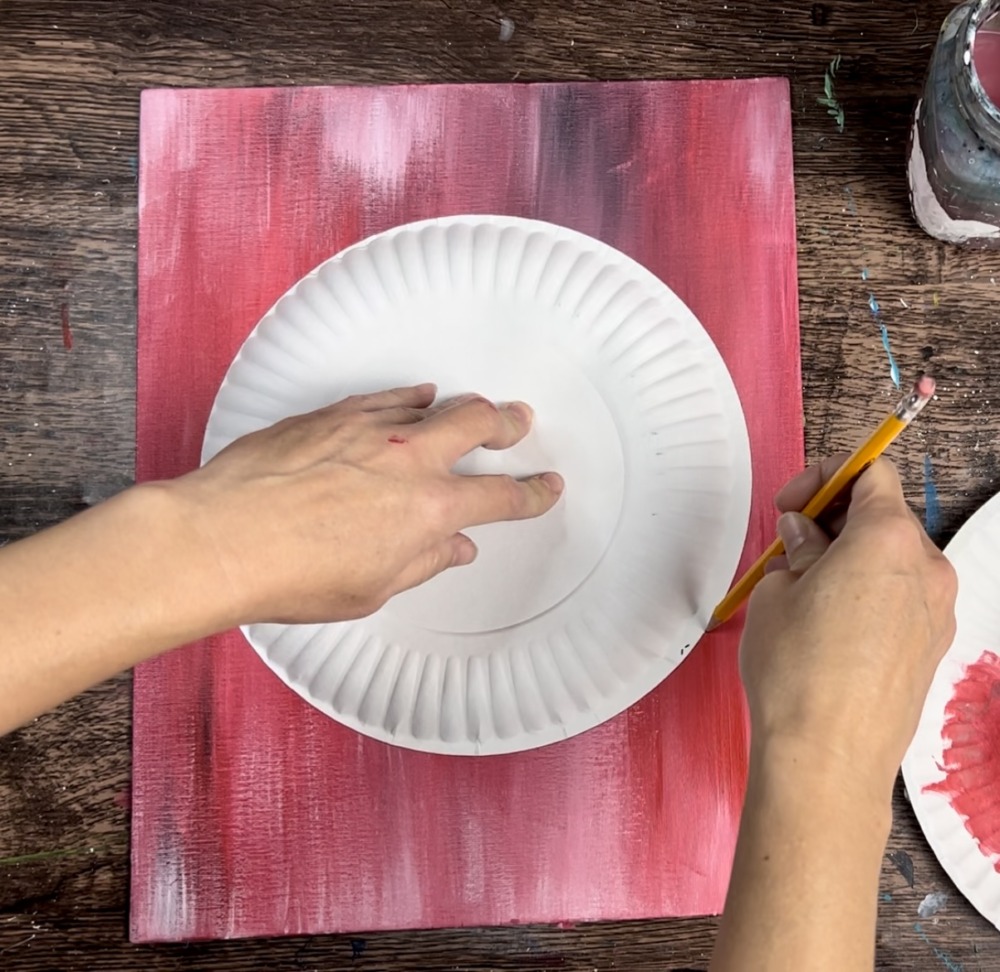
2. Draw two circles
I used a 9″ paper plate and a 7″ styrofoam bowl to trace this! You need to create a large circle and a small circle to help you with the boundary of this wreath. You can also use a compass for this or find a similar size circle…
First trace the outer circle (larger).
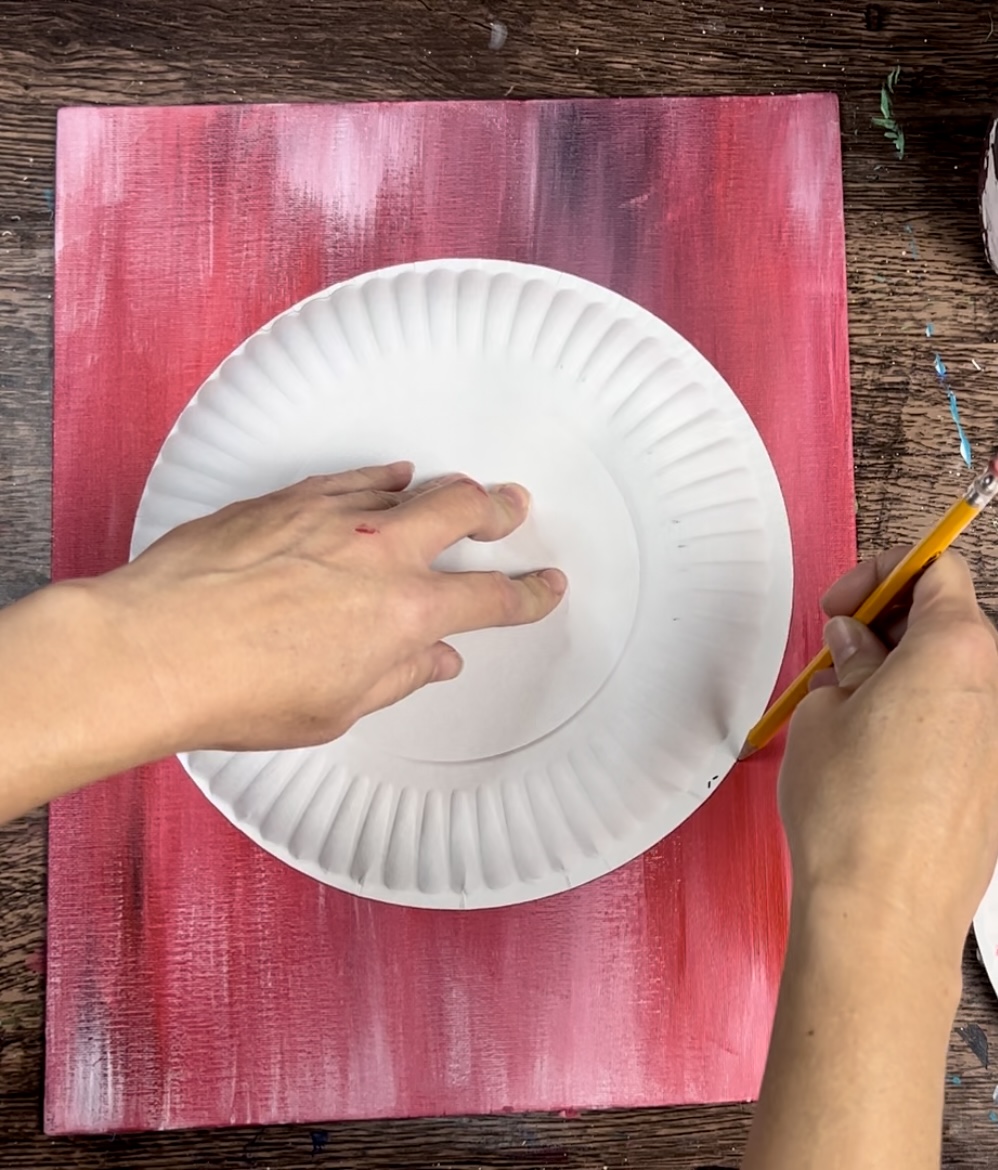
Then trace the inner circle (smaller). If you want your wreath to be thicker, I recommend finding a smaller circle to trace for the inner circle.

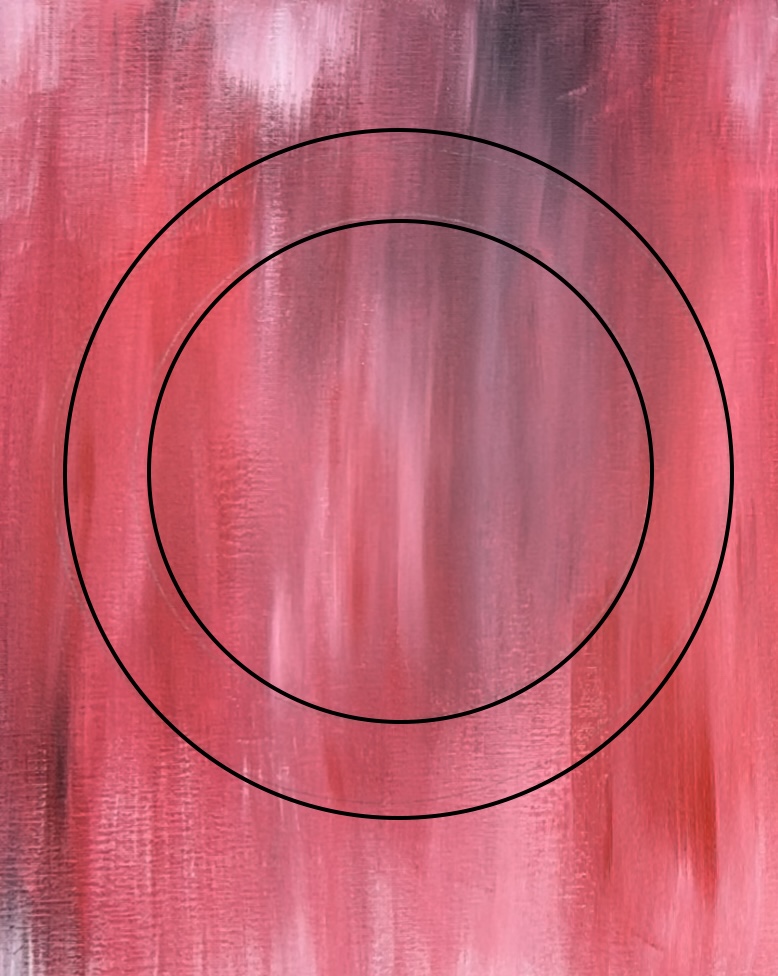
Two circles are now drawn on the canvas to help you with the boundaries of the wreath!
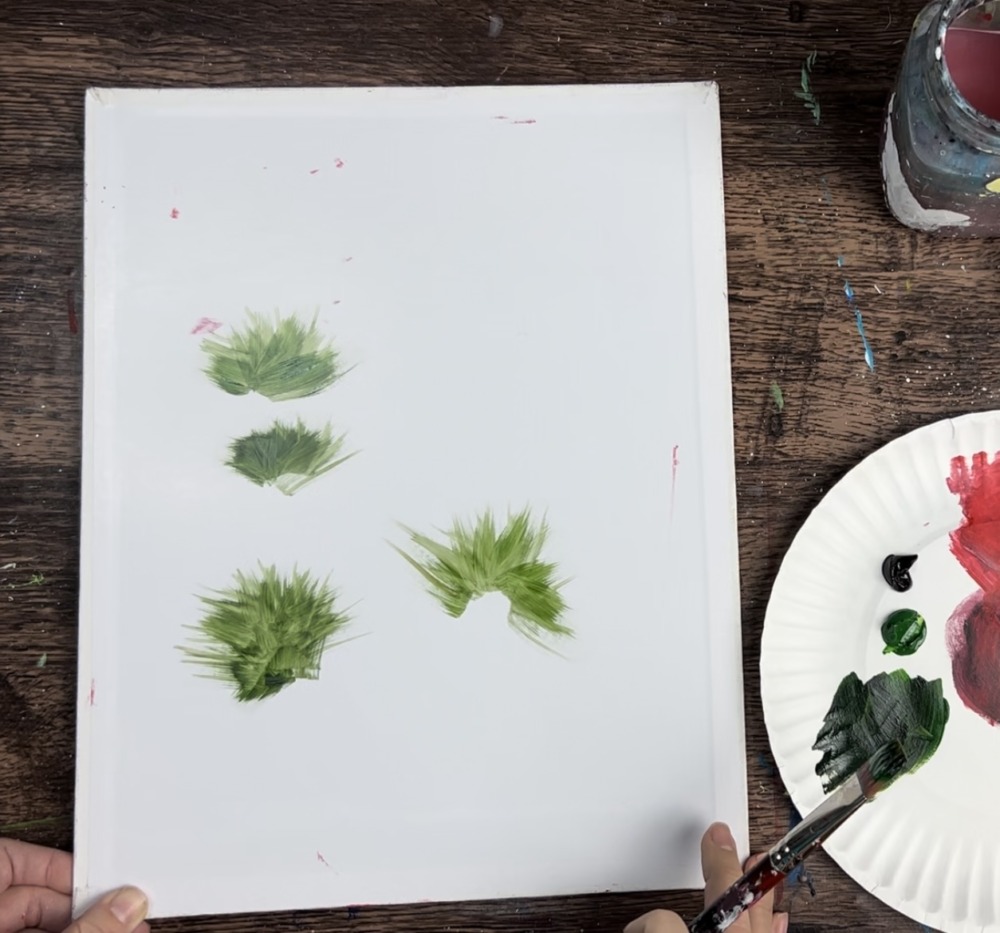
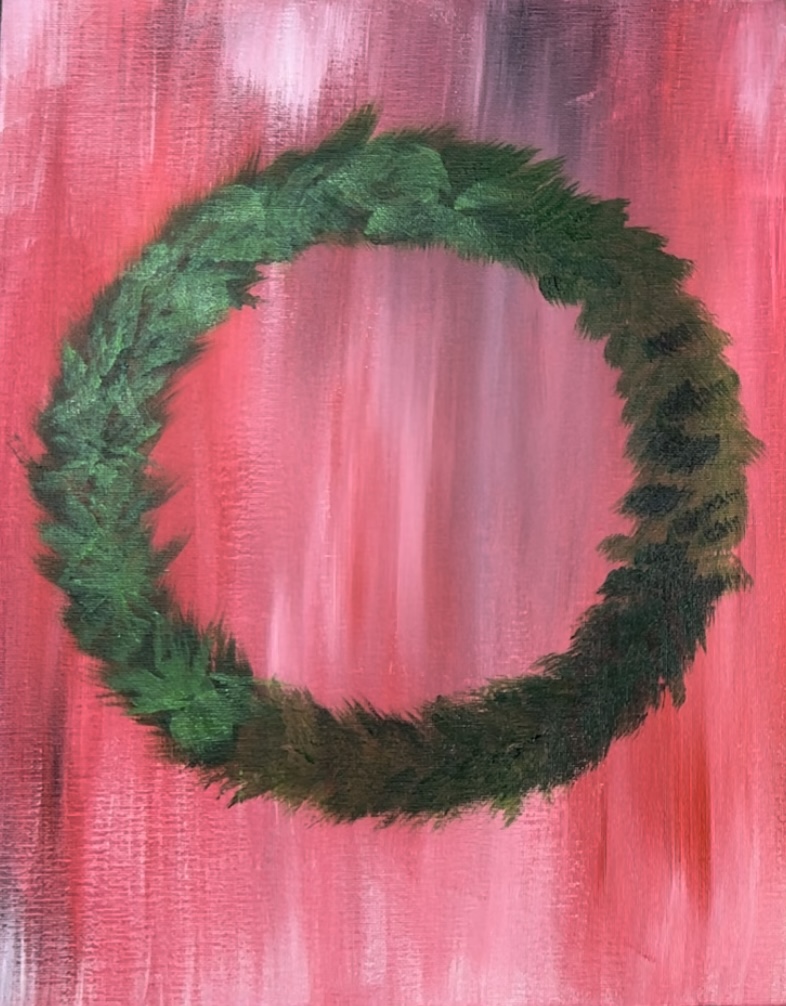
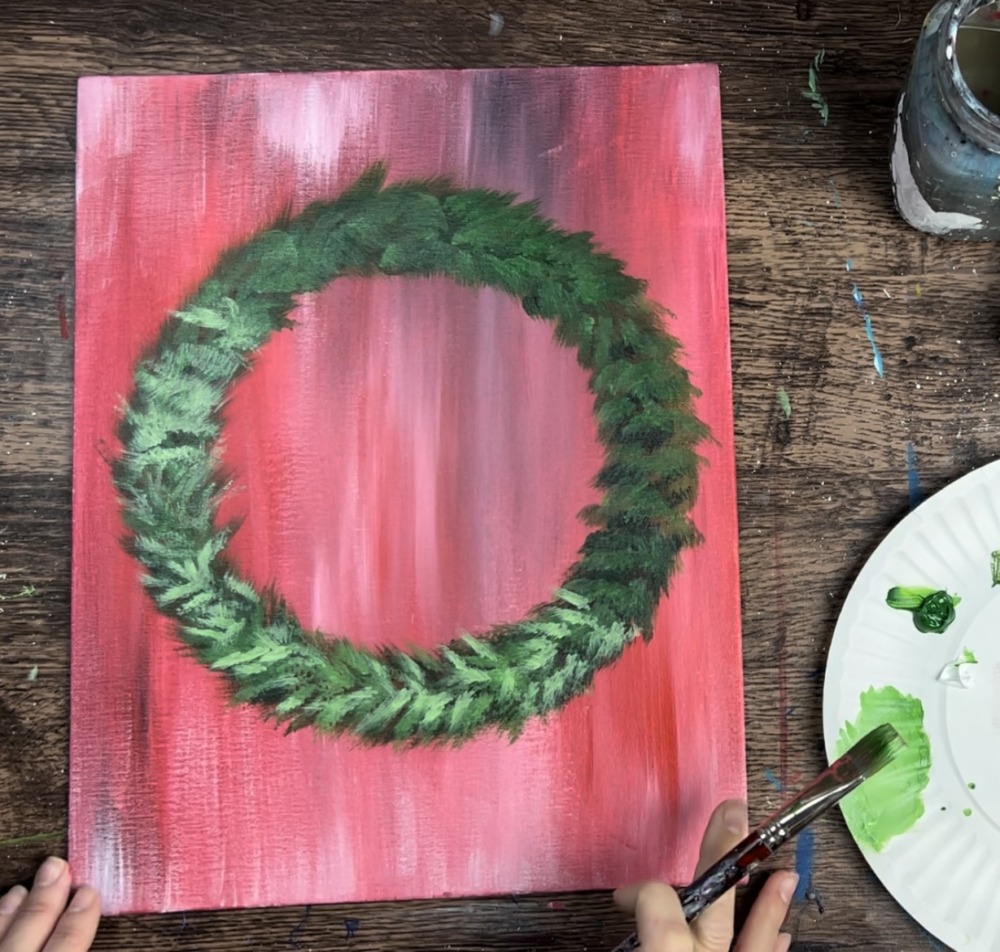
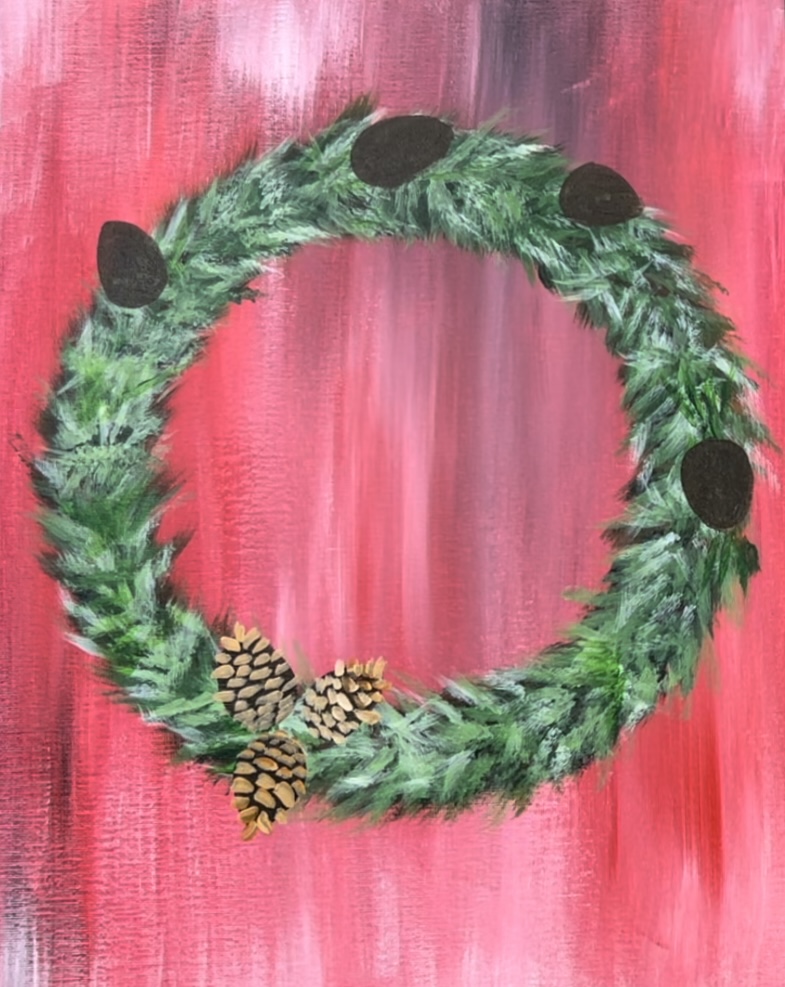
3. Paint dark green pine needle layer
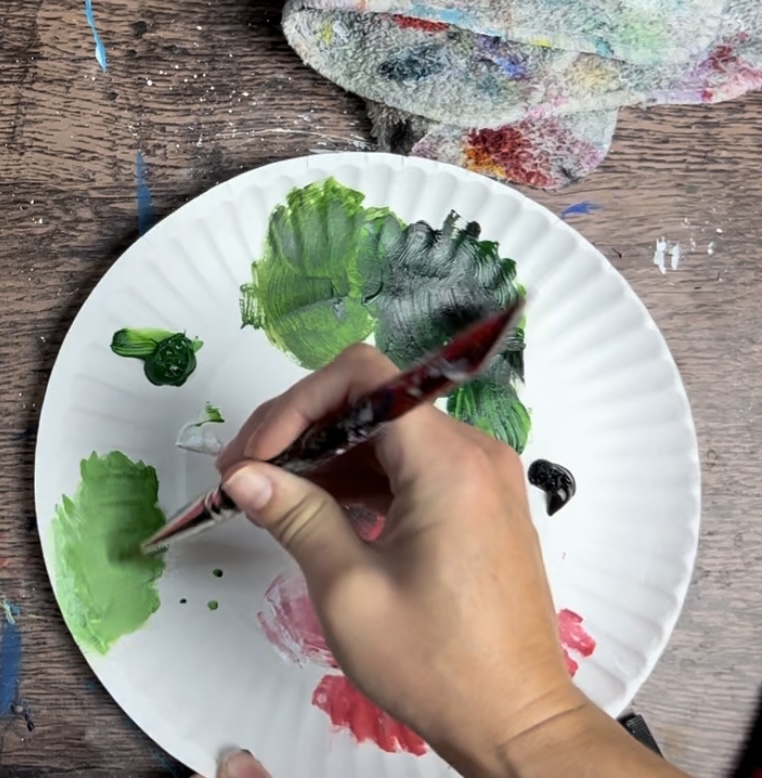
Next, load your palette with hooker’s green hue permanent, mars black and titanium white.
Do a practice session on the back of your canvas or on a separate sheet of paper. You will be using the 3/4″ flat wash brush to create this effect. Load just the tip of your brush into the green.
Next drag the brush tip to create feathery strokes that represent the pine needles. Overlap your strokes so they go in different directions.

Practice creating these strokes all throughout the back of the canvas.
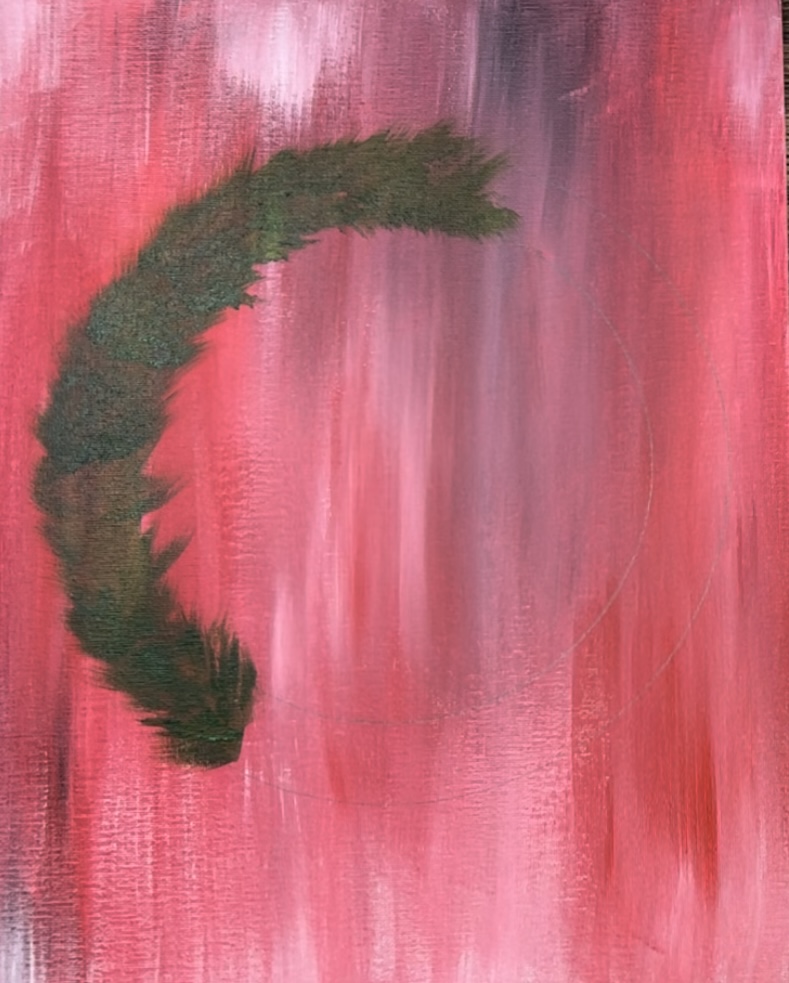
Next, mix a very dark green on your palette. Add tiny bits of black into the hooker’s green hue permanent.

Next, pick a spot on the wreath and start painting your pine needles. You want the direction of the strokes to go diagonally all the way around the circle. It’s okay if your strokes do go outside of the lines.

However, you want to stay consistently along the two circle boundary area you created.
Continue to paint your first layer of pine needles all the way around the donut.

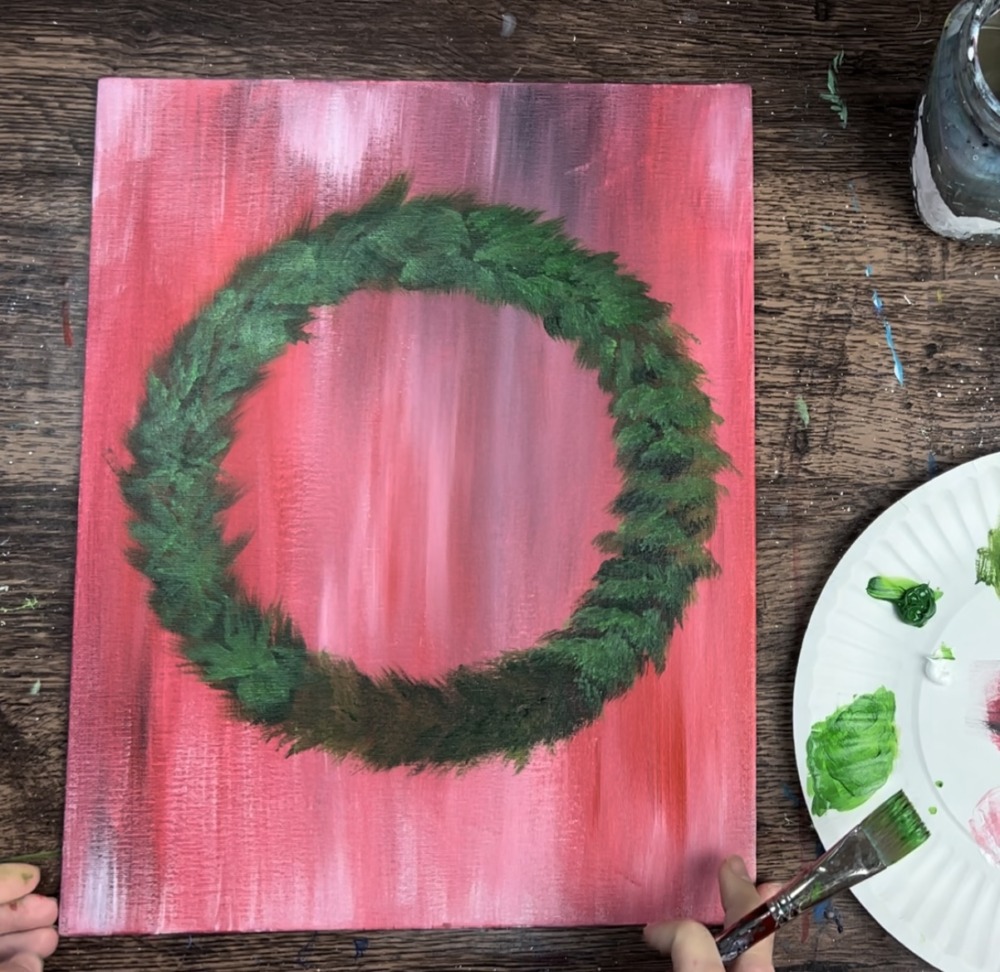
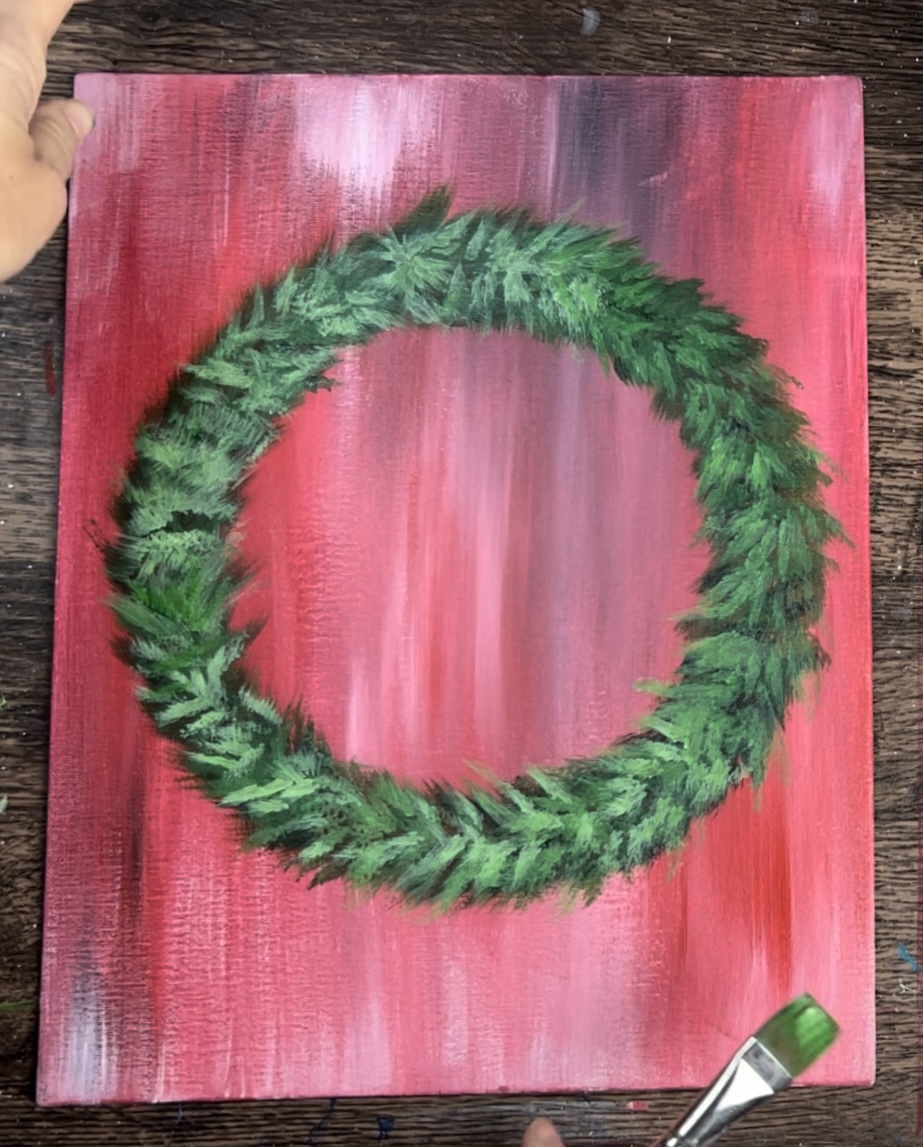
4. Add middle green layer
Next, rinse and dry the 3/4″ wash brush. Add a small amount of titanium white into the hooker’s green hue permanent so that it becomes a medium green.

You will be adding a second layer over the first dark layer. You will be painting the exact same style strokes but not covering all of the dark colors. The dark colors that are showing through serve as shadowing for the wreath.
As you add this medium green tint, you will notice some depth and form starting to take shape on your wreath!
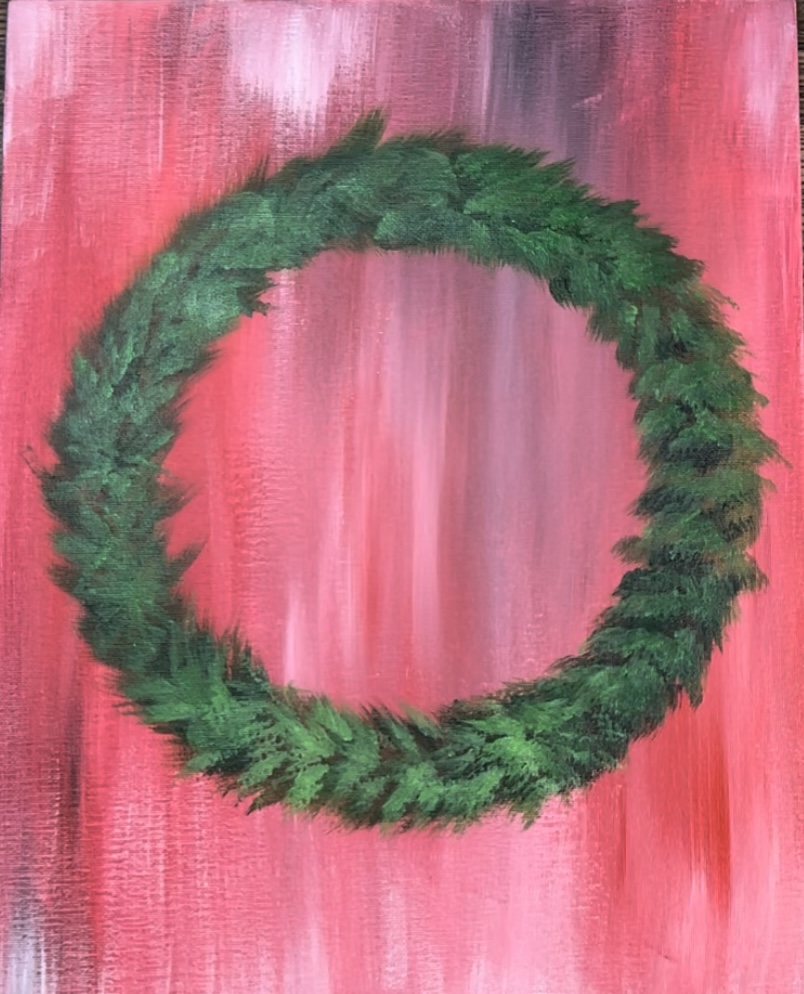
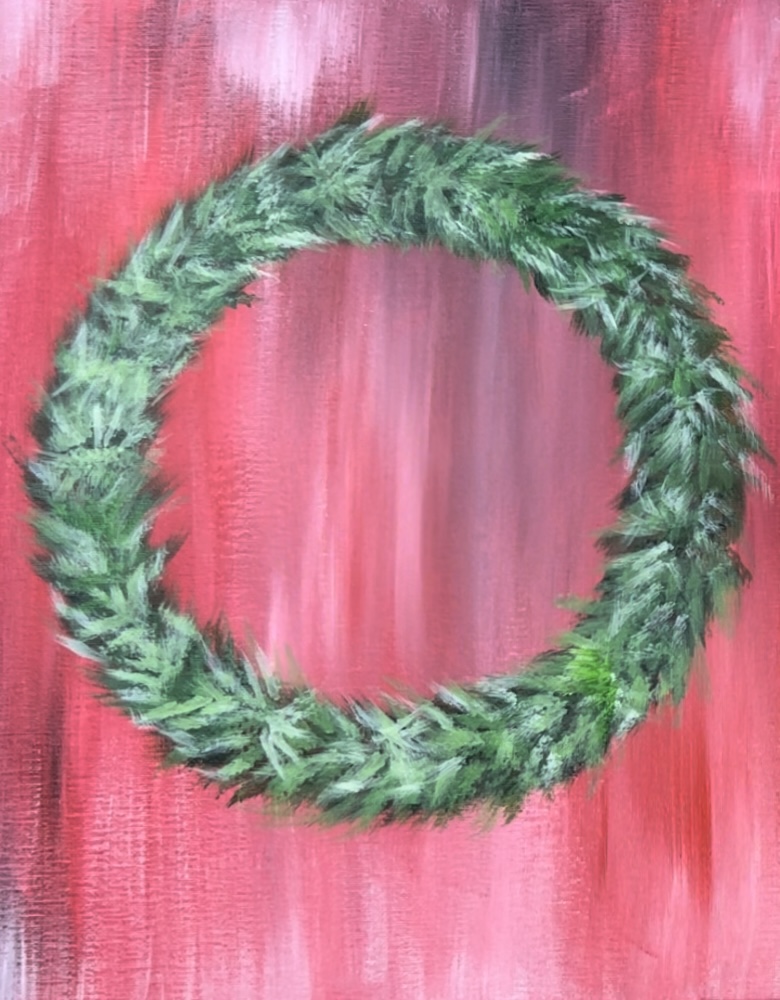
5. Add light green layer
Next add more titanium white to your medium green color on your palette to make a light green.
Add your third layer. You will be adding less of this color because you still want a lot of that medium and dark green color to show through. Remember, it is okay if your strokes go outside of the boundary line. This helps to give the wreath texture.
6. Add white layer
Finally, add a fourth layer using just white. If it is too bright, add a bit of green into it to dim it down a bit. You only want a few of your strokes to be this bright color.
7. Paint pinecones
In this next step, we will be painting the decorative pinecones! I suggest practicing these on the back of your canvas first.
Start out but painting a dark cone shape. To create this dark color, mix about 1 part raw Sienna to 1 part mars black. Add more raw Sienna if it is too dark. This will create a dark brown color.
Use the #4 round brush to paint a cone shape.
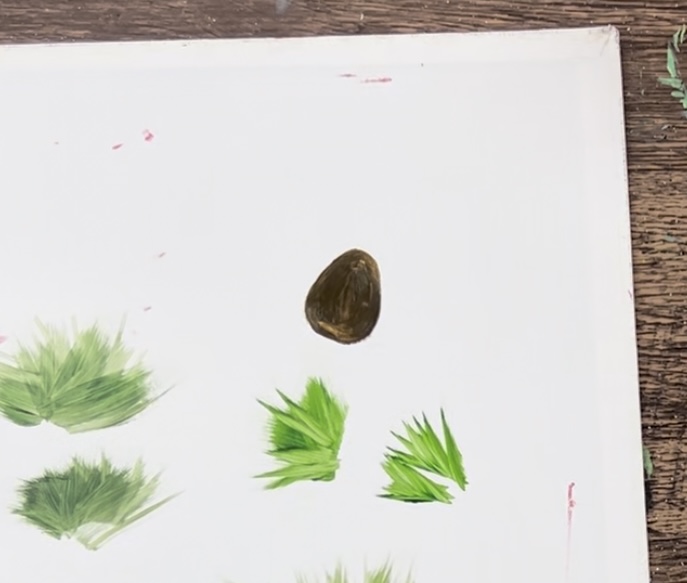
Next, rinse the dark brown off of the round brush. Let the dark brown dry a little. Then load the tip of the brush into raw Sienna. Start out by painting the top scale pieces of the pinecone that are sticking out in a vertical/diagonal direction.

Then paint the remainder of the scale pieces using small horizontal strokes going in a staggered formation. Your strokes can go off the edge of the dark cone layer. As you work your way down to the back, your strokes will be closer together and smaller.
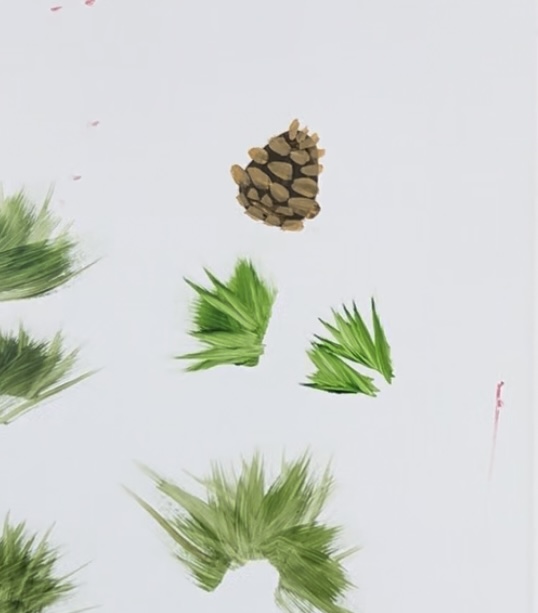
Then add another layer on top of that raw Sienna layer. Mix about equal amounts of white with the raw Sienna. Then paint just the top part of each of the scale pieces.
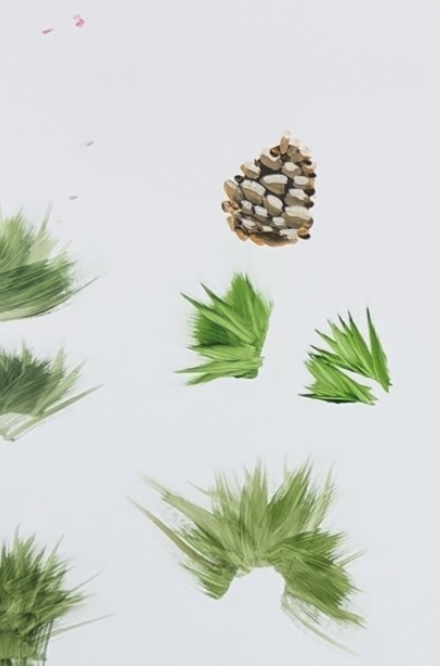
Make sure much of the dark cone layer is still showing between all of your scale stroke pieces!
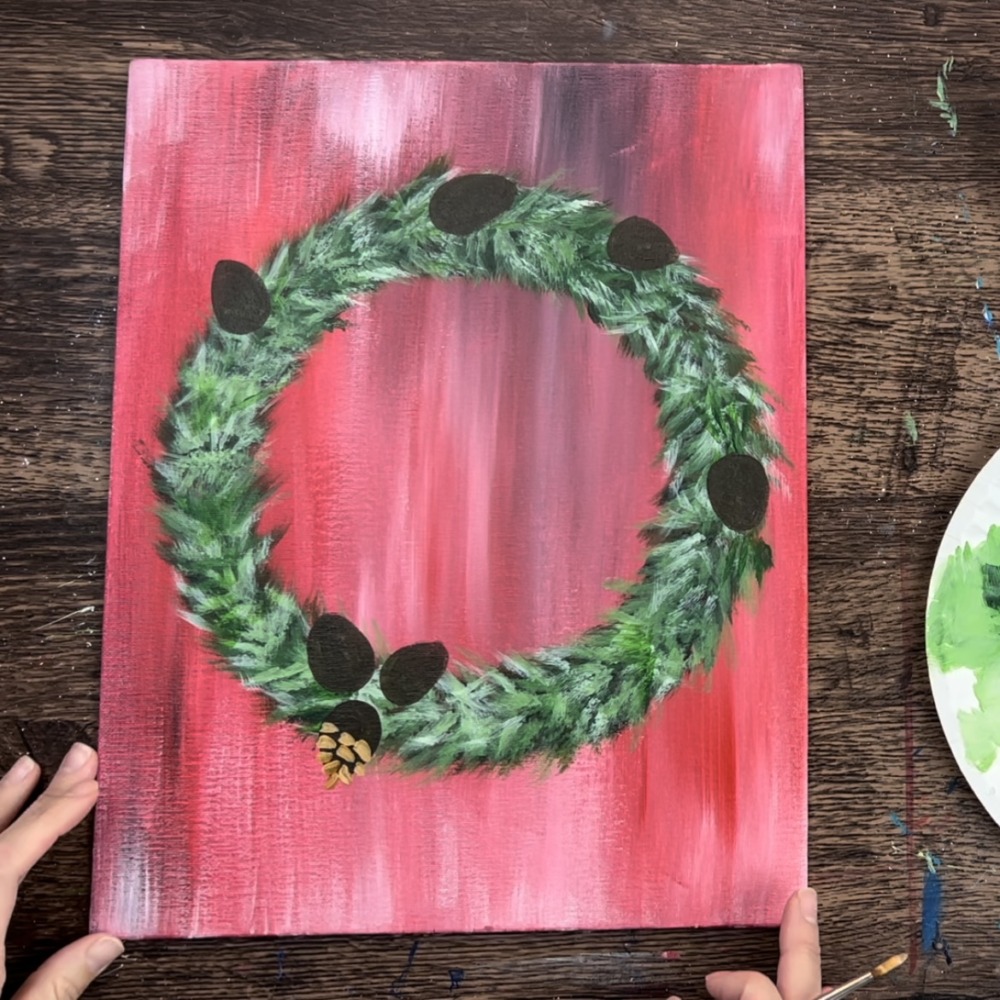
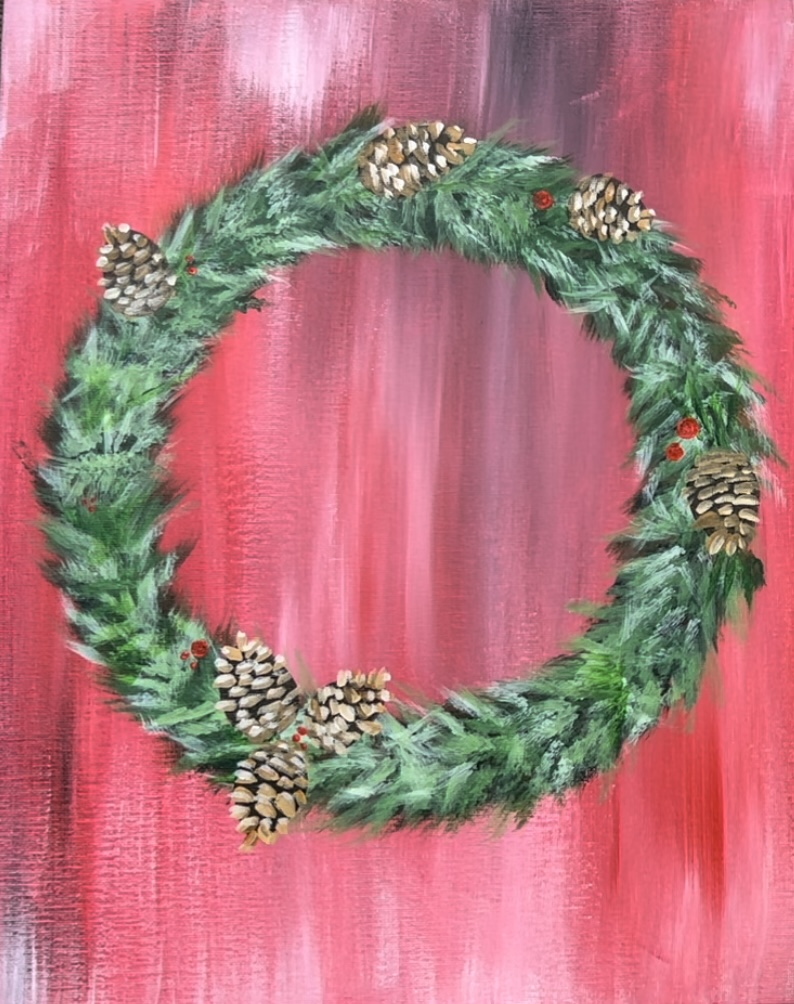
Now let’s paint these on the wreath…
Paint all of your cone pieces. You can tilt the pinecones different directions, group them and vary the sizes.


Then let this dark layer dry. Load your brush in the raw Sienna and paint the scale pieces.

Do this to each of the pine cones.
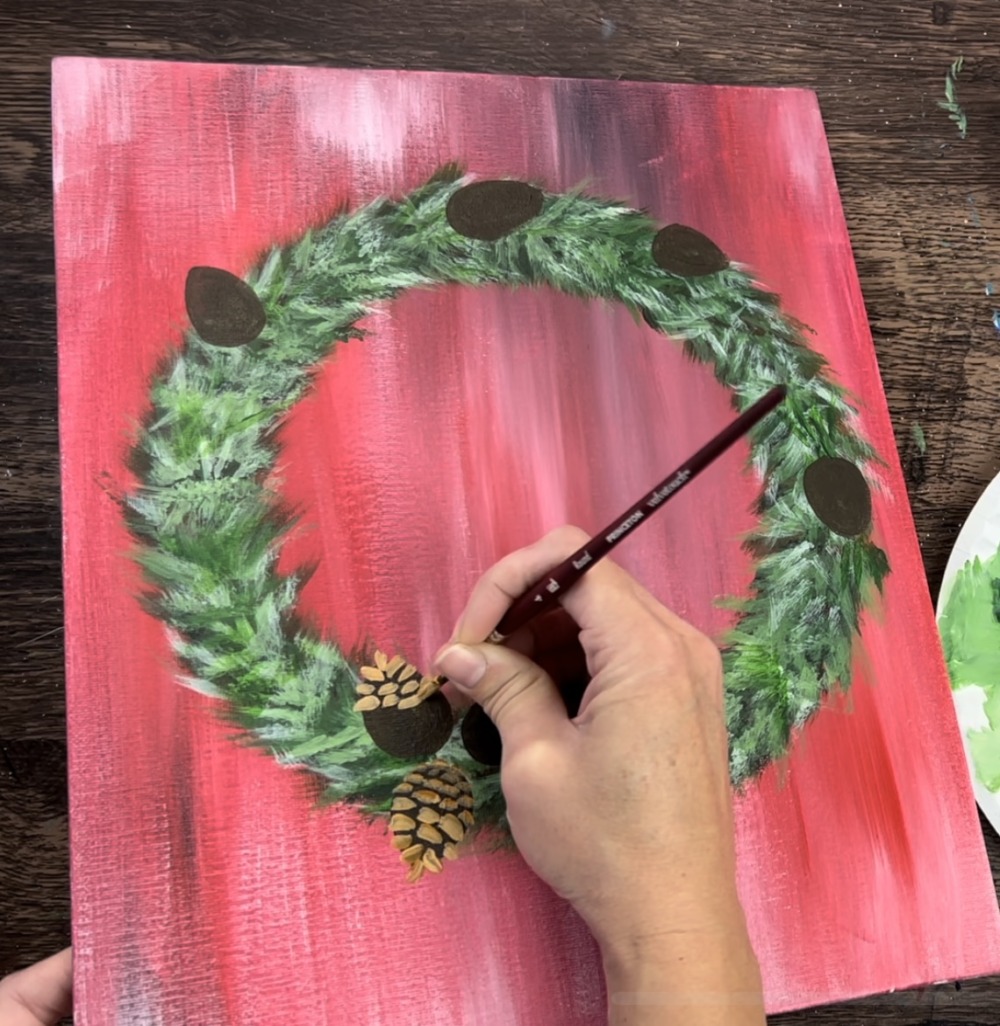

Then add your lighter layer on top. You don’t need to do this to all of your scale pieces but doing this to some will make it look like some snow is landing on these pinecones.

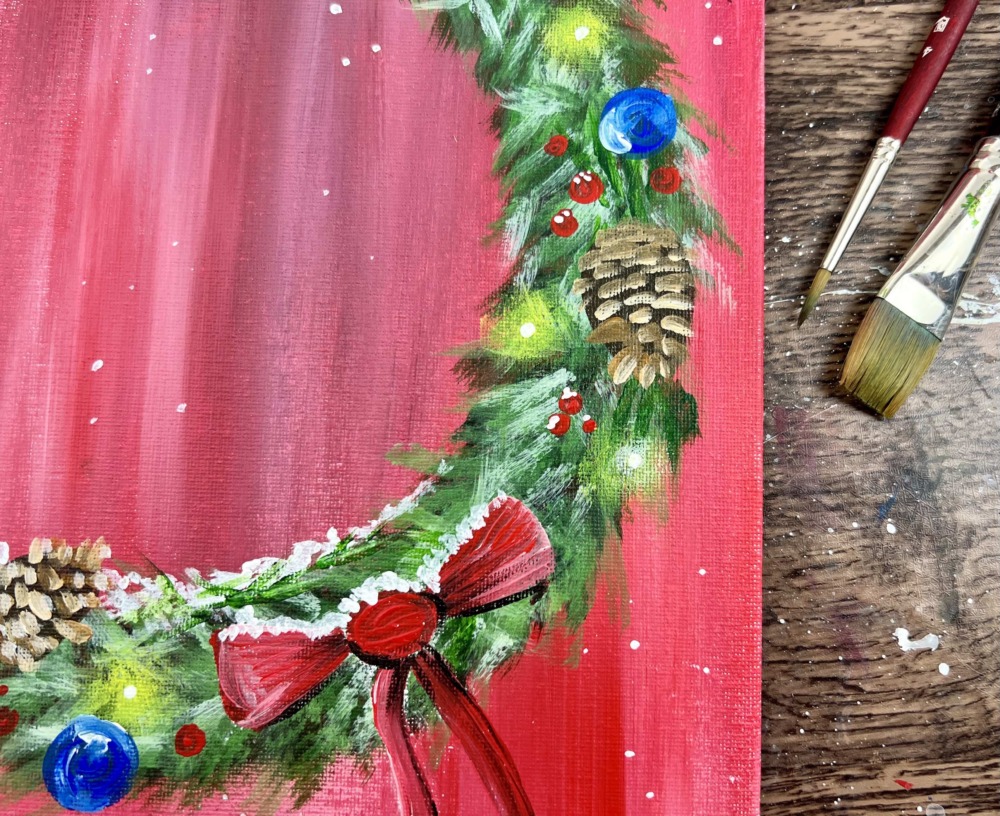
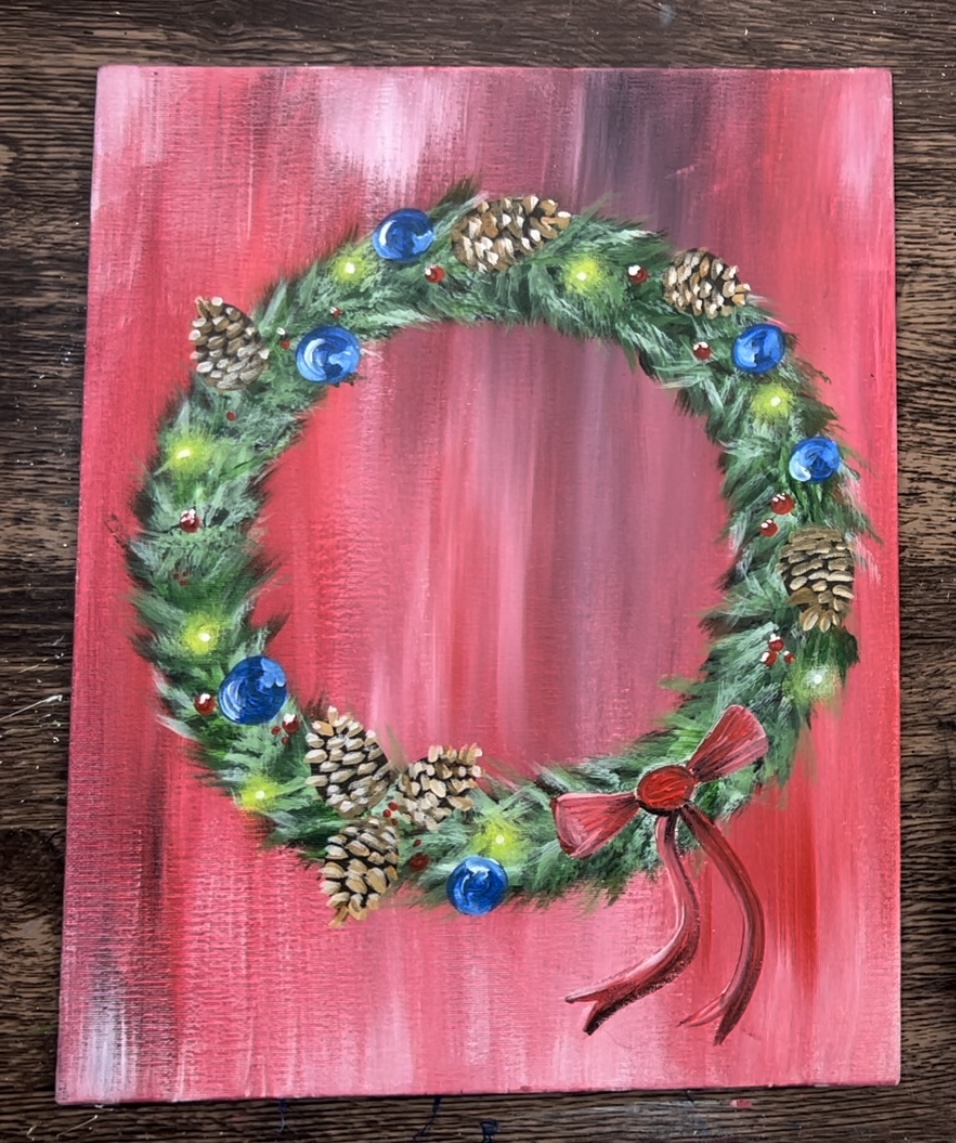
8. Paint berries and bow
Use your #4 round brush and cadmium red medium hue to paint small clusters of circles and tiny dots throughout the wreath.
Then add tiny titanium white dots on the tops of each of the circles.
Use a piece a chalk to draw the bow.
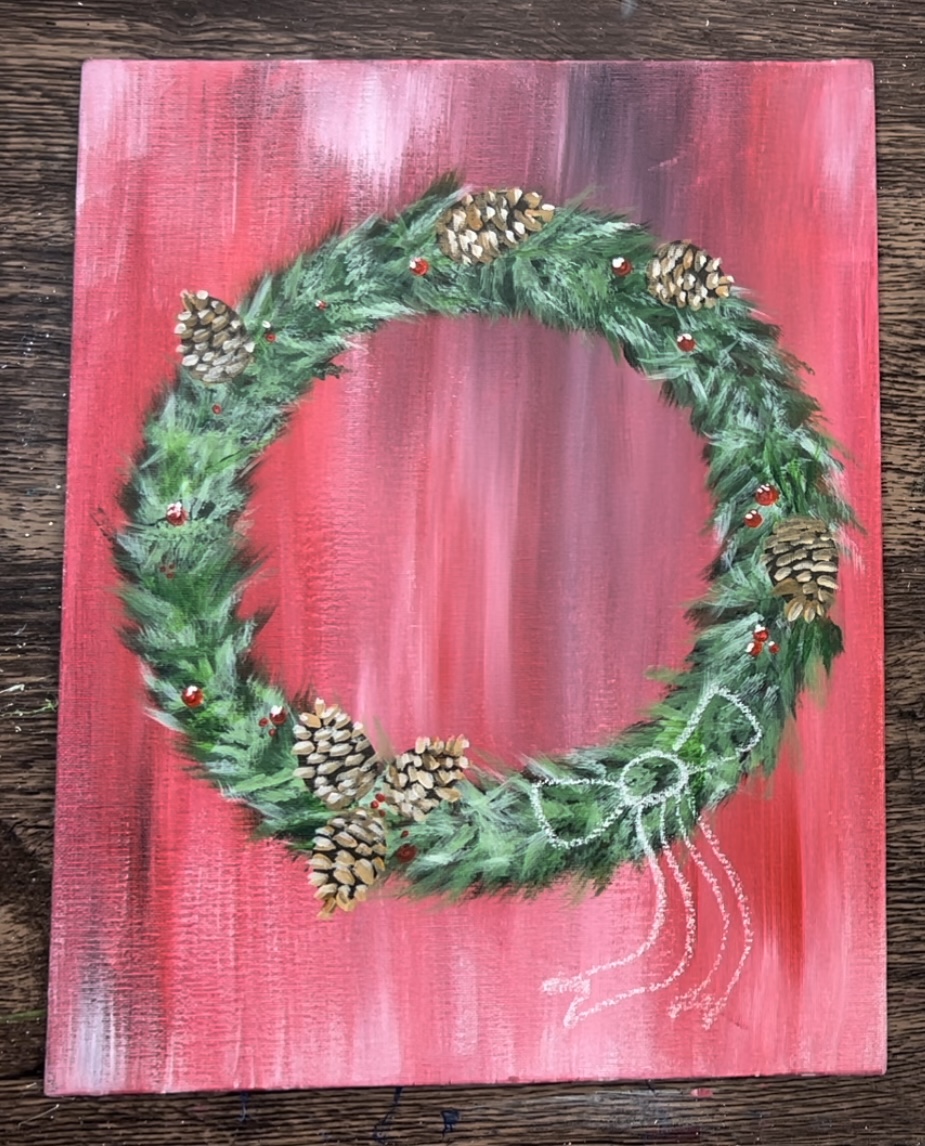
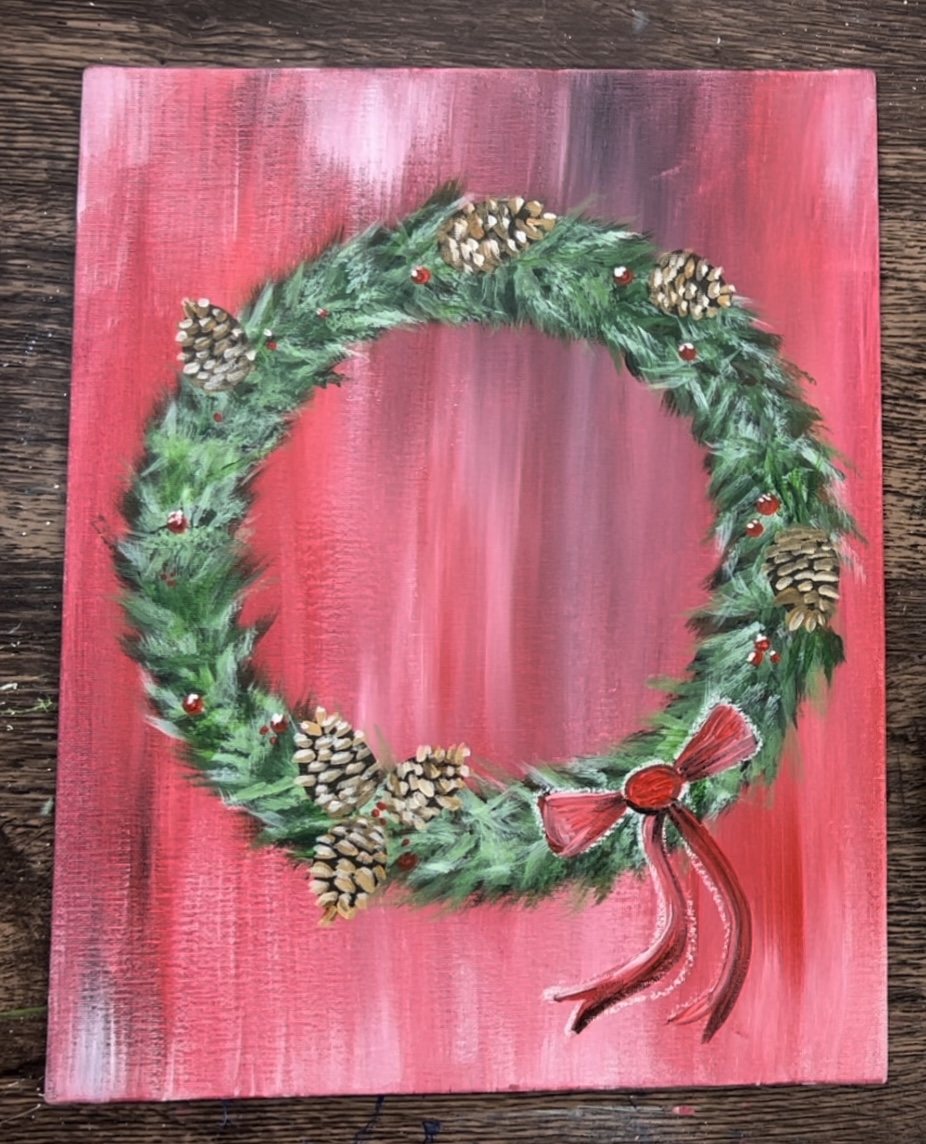
Then use the #4 round brush and cadmium red medium to paint the bow. Use mars black to paint shading along the edges of the bow hangs and triangular pieces. Use titanium white to help highlight parts of the bow.
9. Paint lights
You can opt for colored lights if you want! To do the color lights, you would follow the steps below but paint the glowing circles different colors.
Use the #4 round brush and cadmium yellow light to paint tiny circles throughout the wreath. Use your index finger to press and smear the color so that is becomes blurry and fades out.

Then use your #4 round brush to paint a white dot in the center of each of the glowing yellow circles. This will make it look like the light is lighting up.
10. Paint ornaments
You are also welcome to change the color of these ornaments. I used the color cobalt blue.
Use the #4 round brush to paint small circles (these are slightly larger than the lights) throughout the wreath.
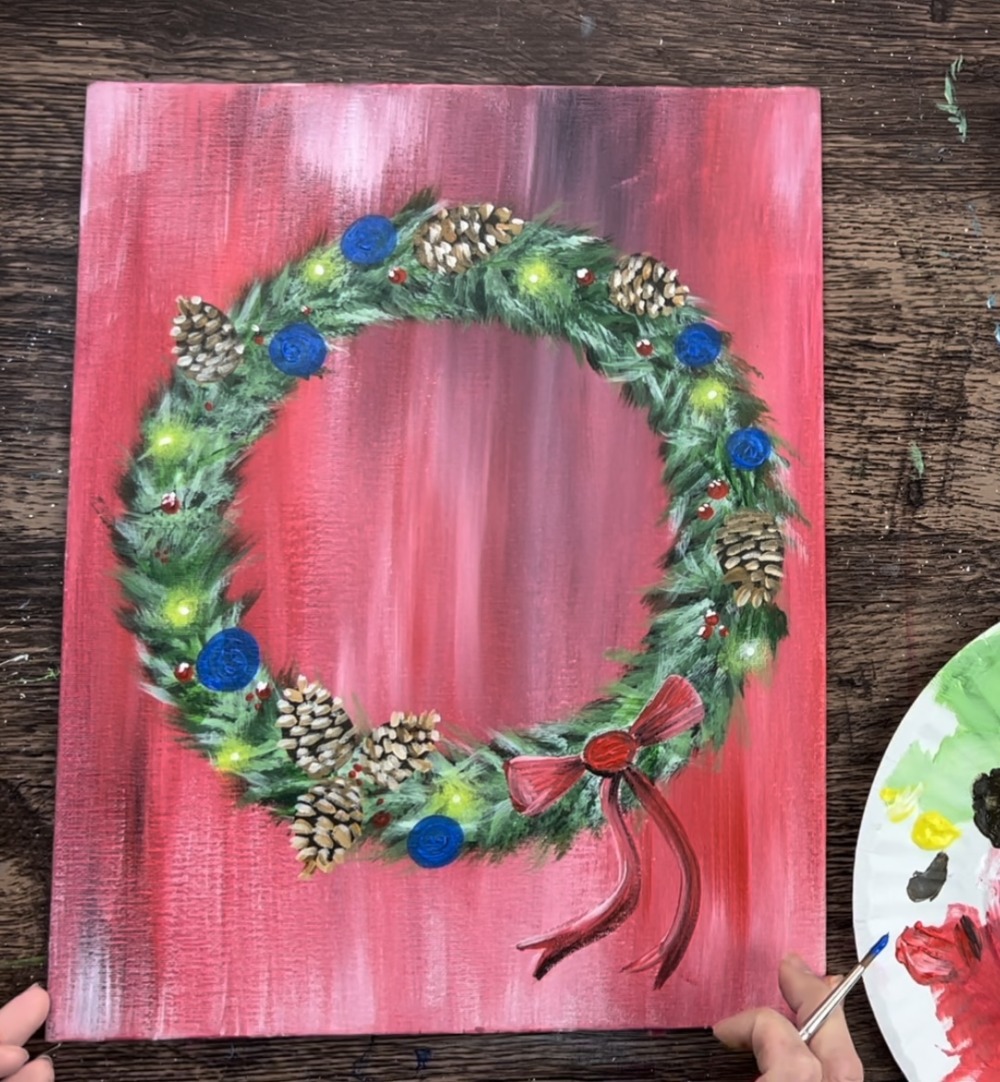
Then use titanium white to paint the highlight on each of the circles. If you do the highlight before the blue dries, it will blend with the blue creating a shiny/ reflective effect.
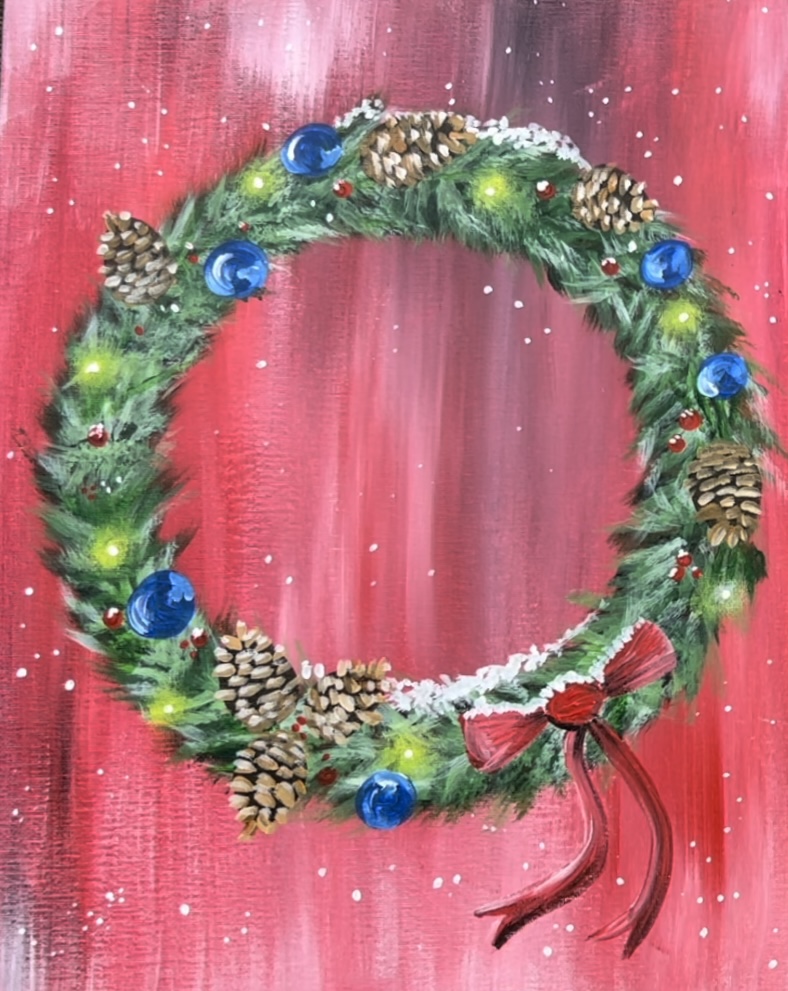
11. Paint snow
Use titanium white to paint snow dots all throughout the background and some even overlapping the wreath. When you paint these snow dots, paint them in clusters to mimic falling snow. Some dots might be larger and some smaller.

You can also paint clusters of snow dots along the top of the bow, top of the wreath and inside bottom of the wreath.

Some other details you can add to your wreath: a poinsettia, holly leaves, different colors ornaments. You can also add decorative snowflakes in the background!
Finished!

Share your art here:


