

Four Seasons Painting – With Salvador Acrylic Paint Kit
Would you like to save this?
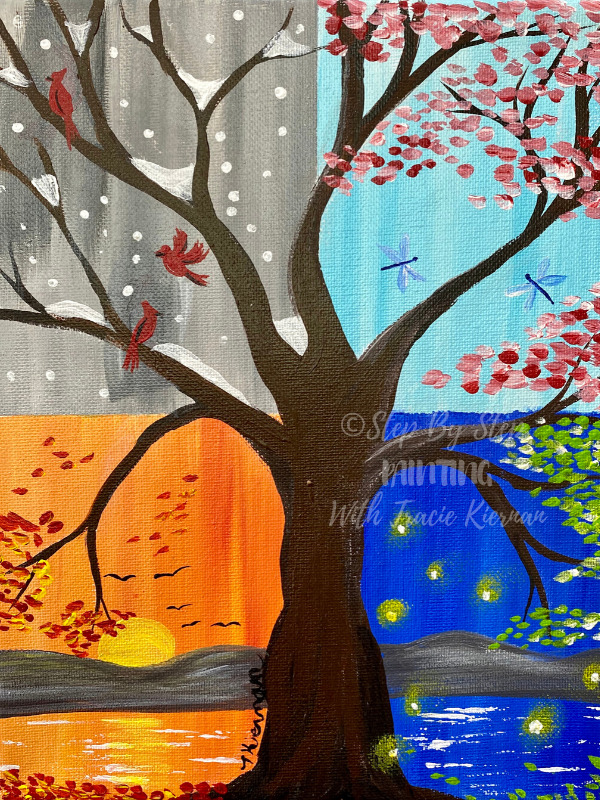
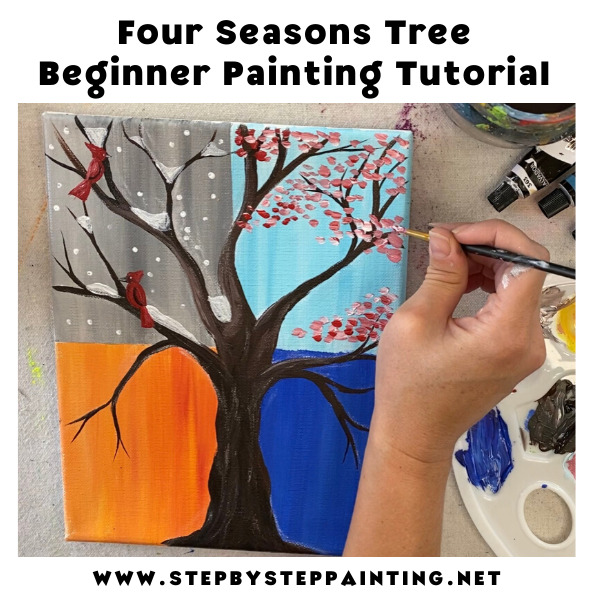
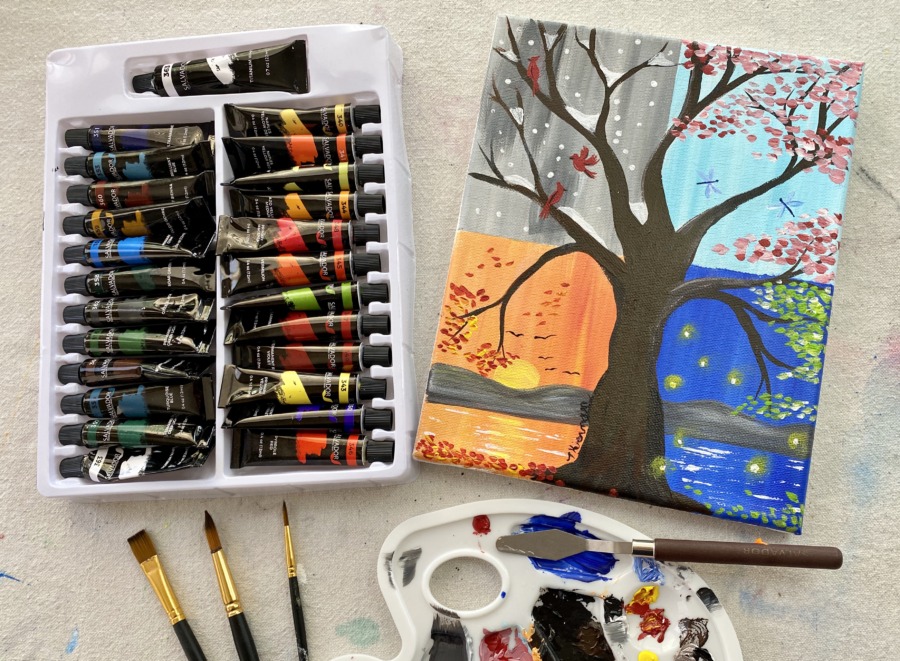
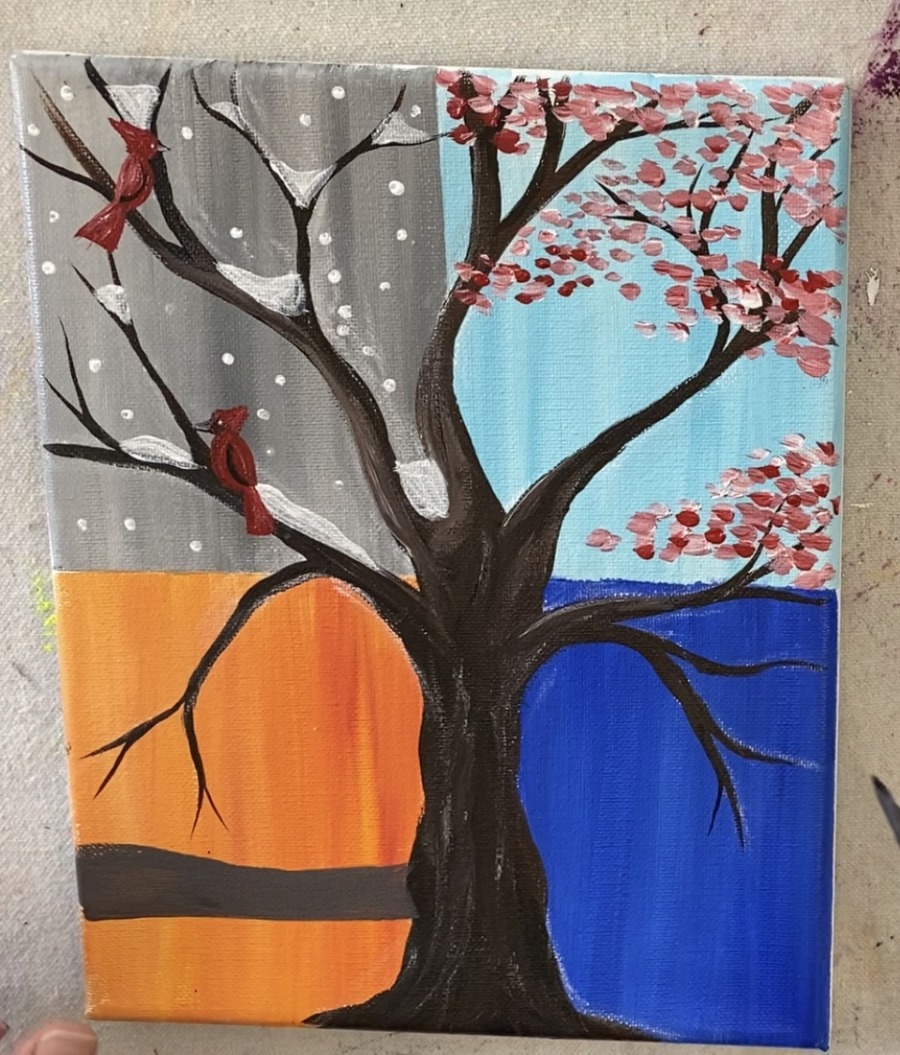
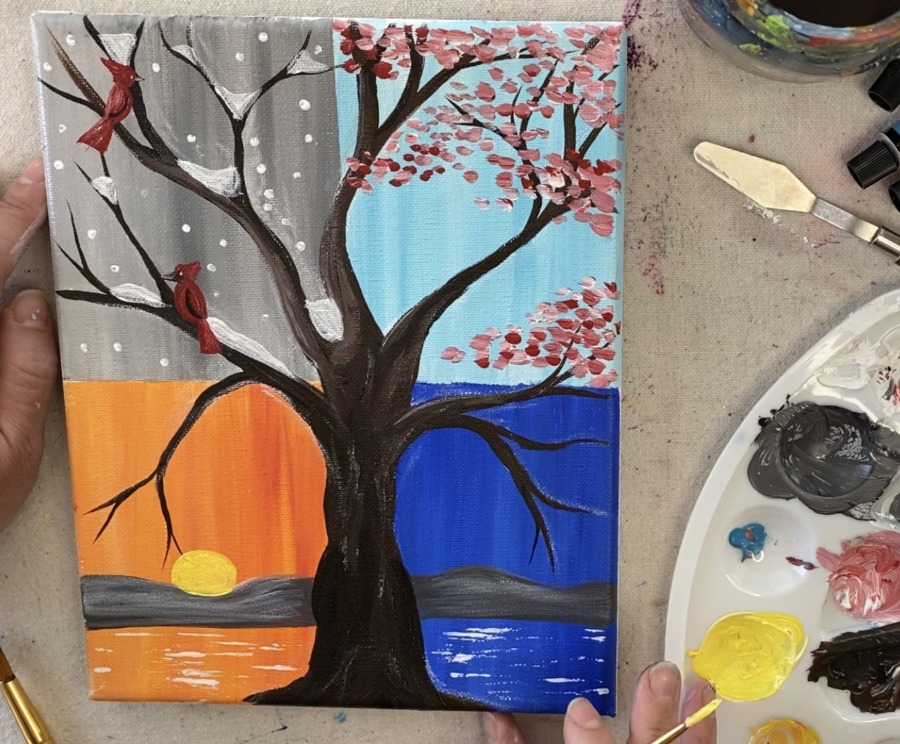
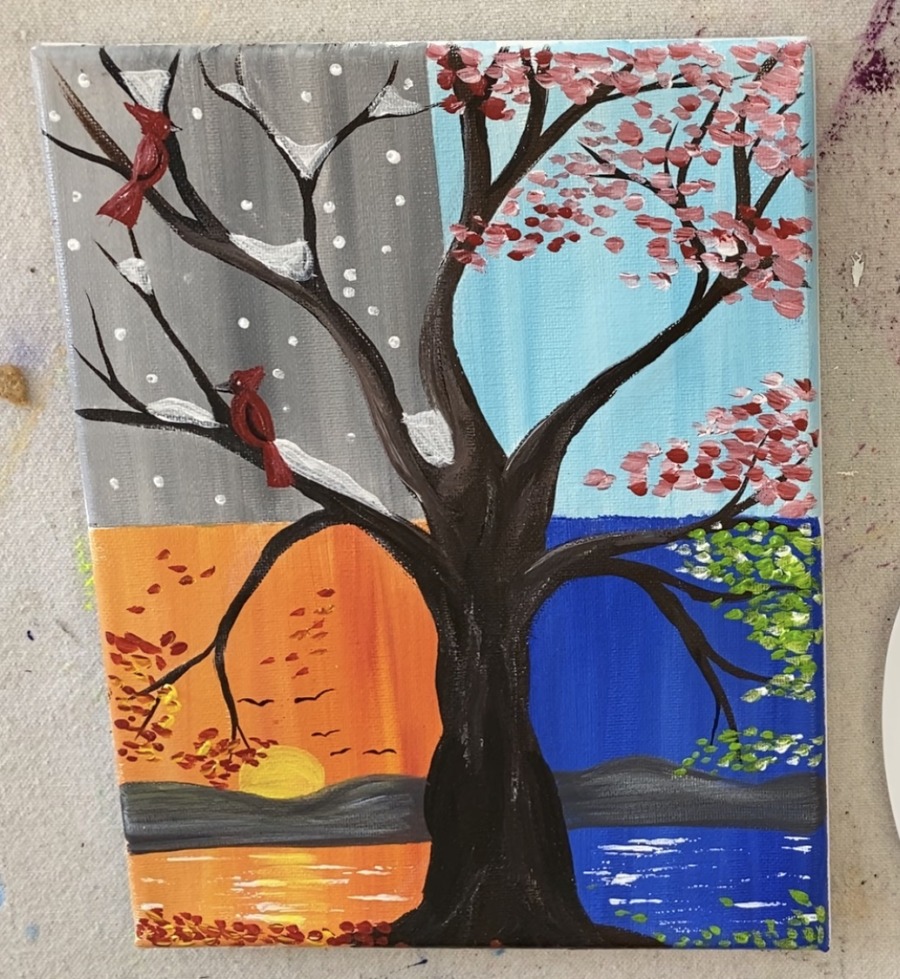
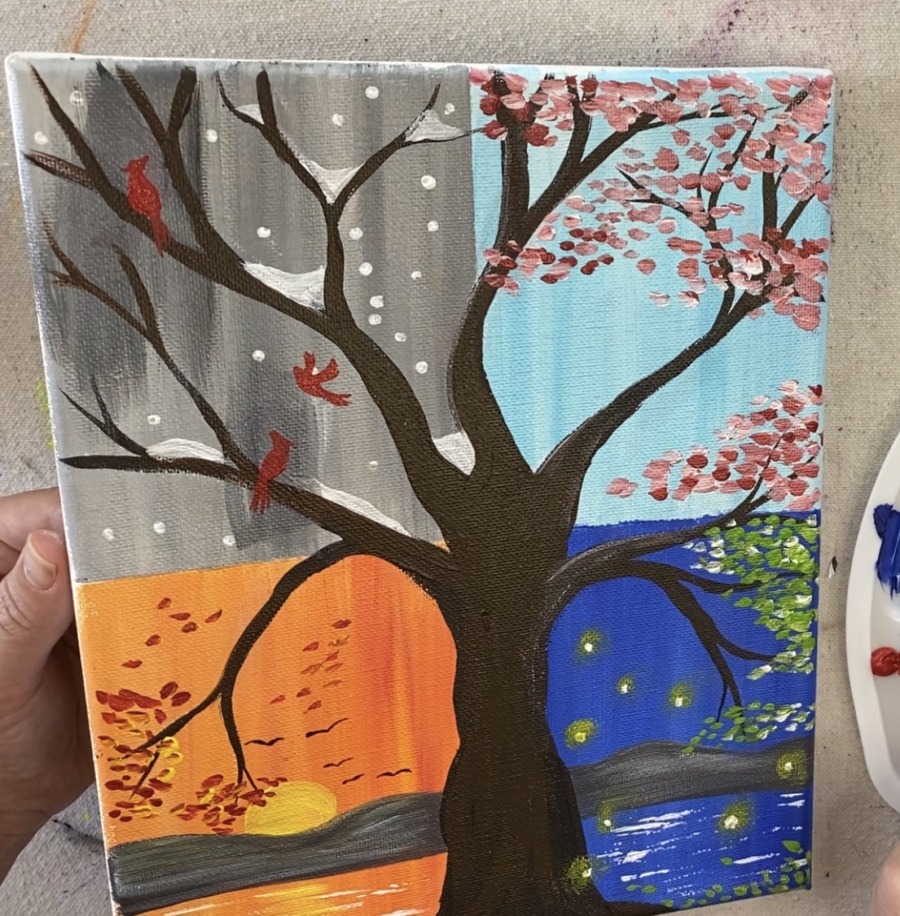
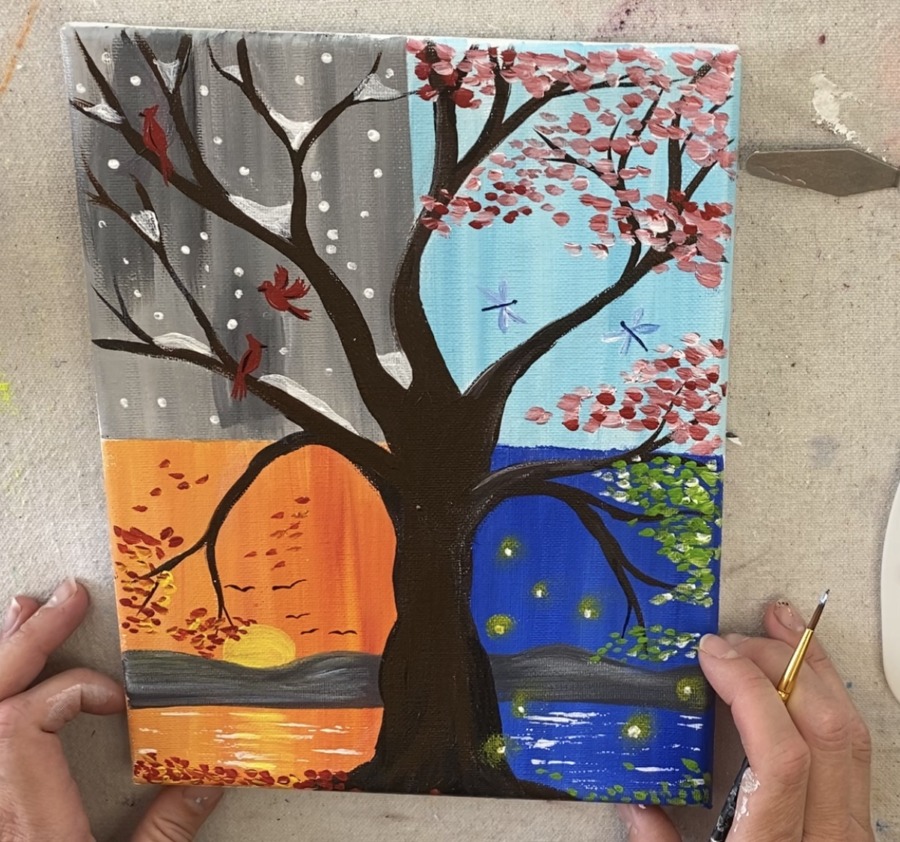
Learn how to paint a four seasons tree with acrylic on canvas!
Each quadrant of this painting represents a different season out of the year. You will be applying different acrylic painting techniques in this painting using a wide variety of brushes and colors.
I have been wanting to paint a four seasons tree for awhile now! I love all the details like the little dragon flies in the spring quadrant and the fireflies in the summer one! You can have fun and add fun little custom details as well.
This post contains affiliate links.
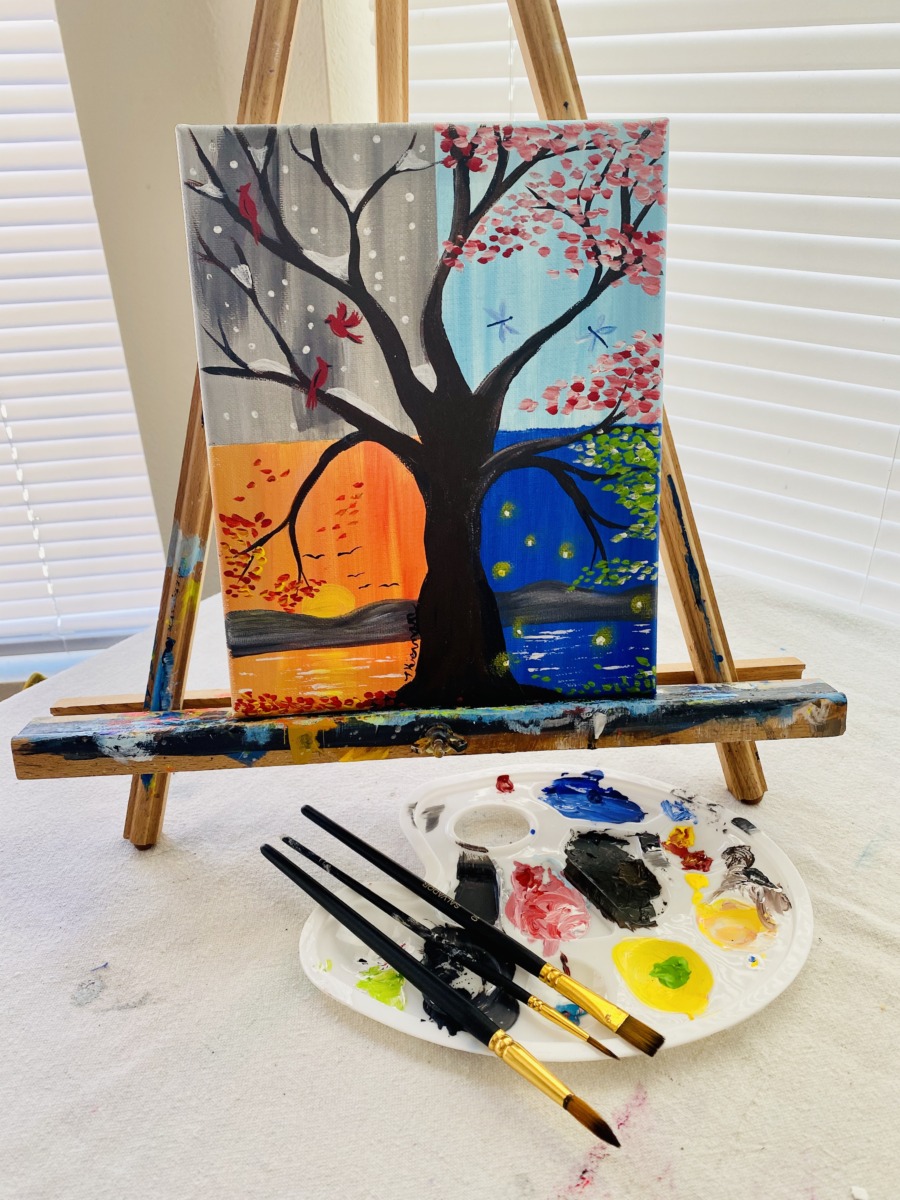
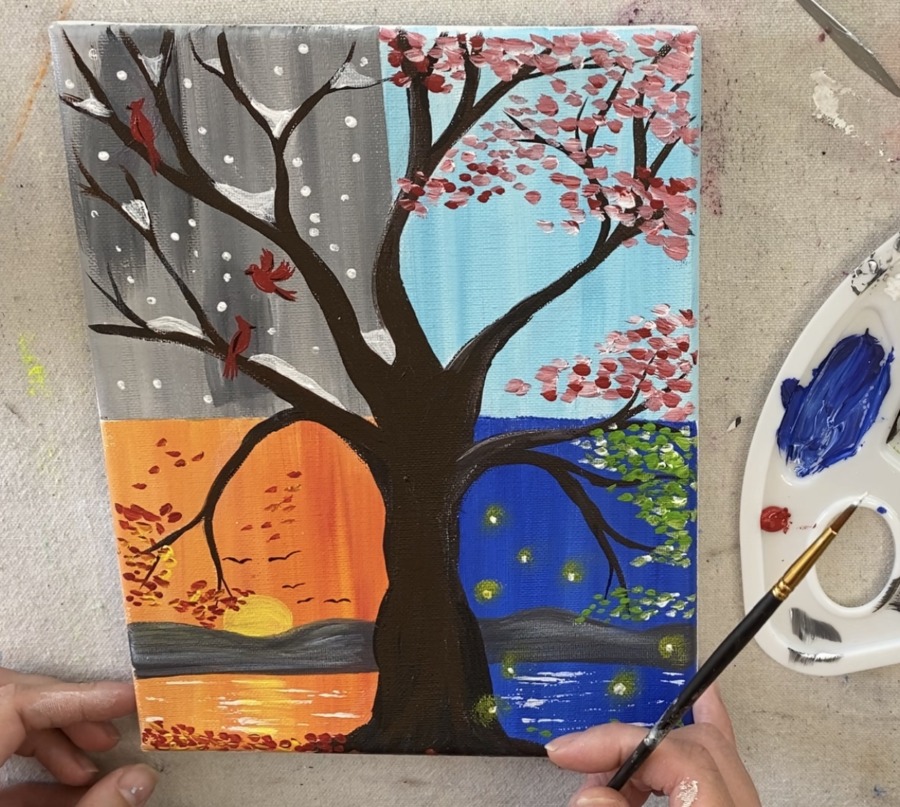
I did this on an 8 x 10 stretched canvas. This design can be done on any size canvas – 11” x 14”, 16” x 20”, you name it! I also did this with Salvador acrylic paints!
I want to thank Salvador for this fun product collaboration!
This blog post tutorial is highlighting their paint kit product along with the tutorial. I did receive a free product for this post, however, all opinions are my own.
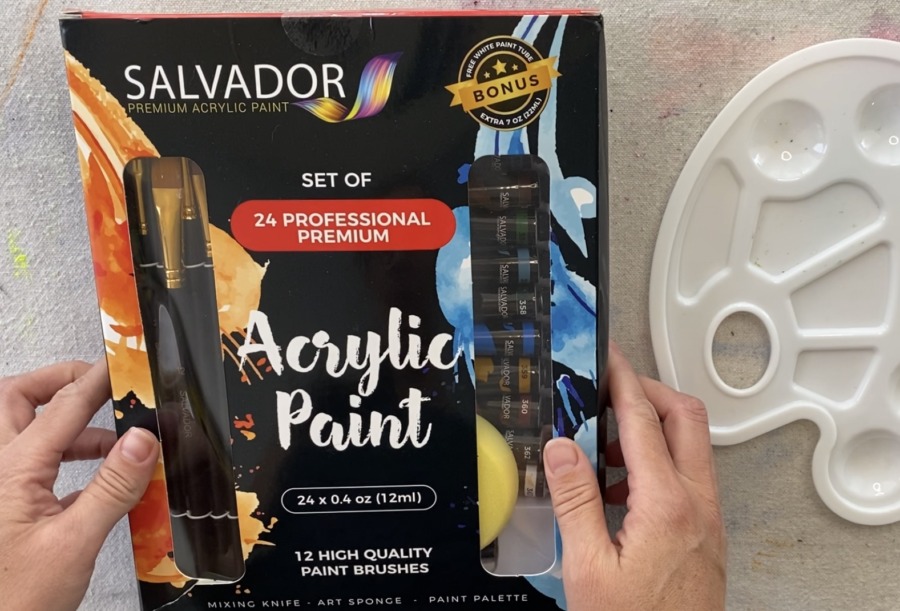
If you are a beginner looking for a tutorial to do and a little nervous about buying a whole bunch of acrylic painting supplies separately, you would enjoy this complete kit!
It comes packaged in a bundle with a palette, 24 acrylic paint tube colors, a palette/mixing knife, 12 brushes, and an art sponge.
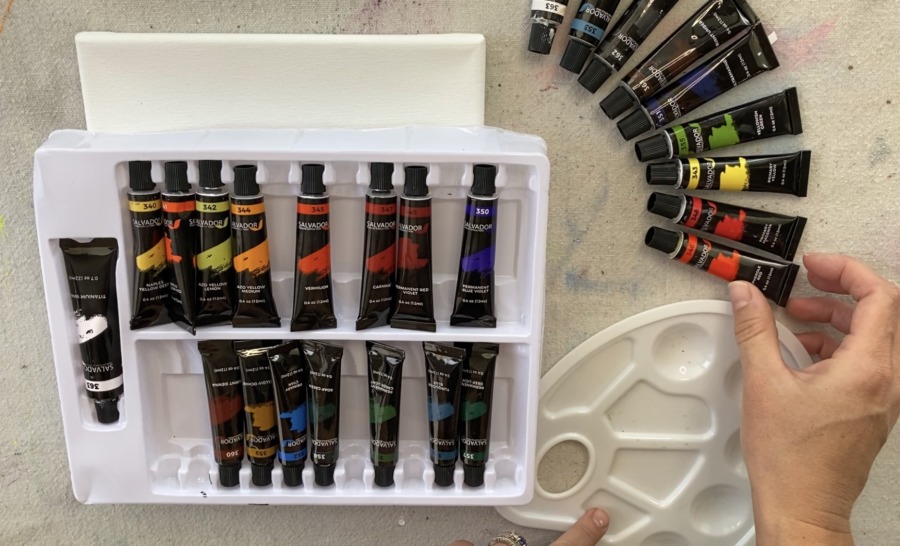
The paints are in little .4 oz tubes with a wide range of colors. The thickness of the paints are a thick, buttery consistency. I was able to work the paints into a thinner consistency just by adding a little water. Also, the paint kept its form with each stroke which is nice for adding expressive strokes and texture!
Although I did not do extensive testing, the coverage and flow seem to be great on these and I did not need to apply multiple coats of paint for coverage.
The only downside about these tubes is how small they are. For someone like myself that paints A LOT, this would not last very long for me. However, I do see that Salvador sells refill tubes in the black, white and primary colors so that may be something to look into!
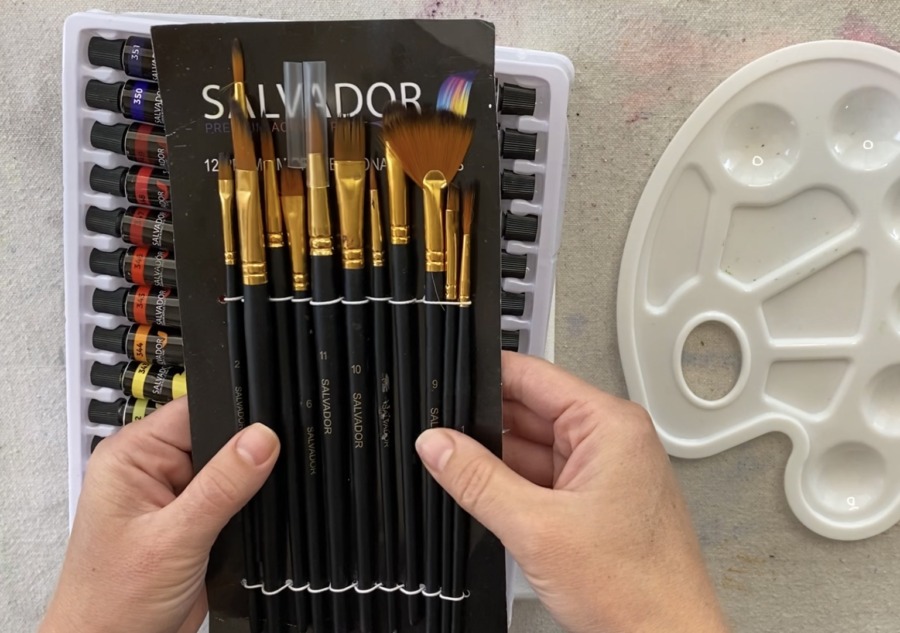
The brush set comes with a wide variety of brushes! I used four different ones for this tutorial. They seem to be fairly decent brushes with a nice range in flats and rounds and a fan brush.
Overall, I think its a great starter kit at a great price. Maybe you’ve been using craft paints and want to dip your toes in some professional quality paints. Or maybe you want to gift your budding artist friend an all inclusive acrylic paint set (and tell them about this tutorial)!
Either way, it would be fun to try out something new. I definitely enjoyed painting this 4 seasons tree with this kit and you will too!
Enjoy and happy painting!!
Materials
How To Paint A Four Seasons Tree
Learn to paint a four seasons tree! Each quadrant of this painting represents a different season out of the year! You will be applying different acrylic painting techniques in this painting using a wide variety of brushes and colors.
Materials
- Salvador Acrylic Painting Kit (which includes paints, brushes, palette, palette knife)
- 8 x 10 Canvas
- Chalk (optional)
- Traceable (optional)
- Masking Tape
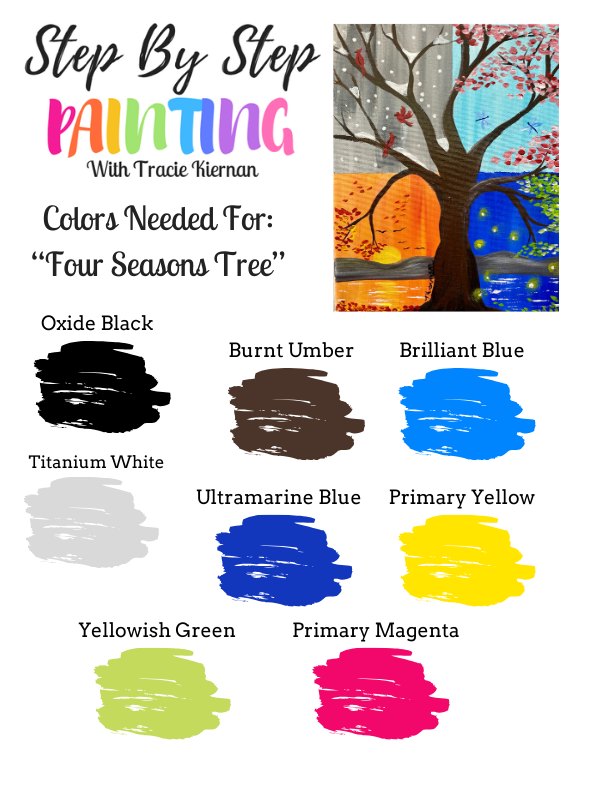
Colors
- Titanium White
- Oxide Black
- Burnt Umber
- Brilliant Blue
- Ultramarine Blue
- Primary Yellow
- Yellowish Green
- Primary Magenta
Brushes
- #10 Flat
- #11 Round
- #3 Round
- Palette Knife
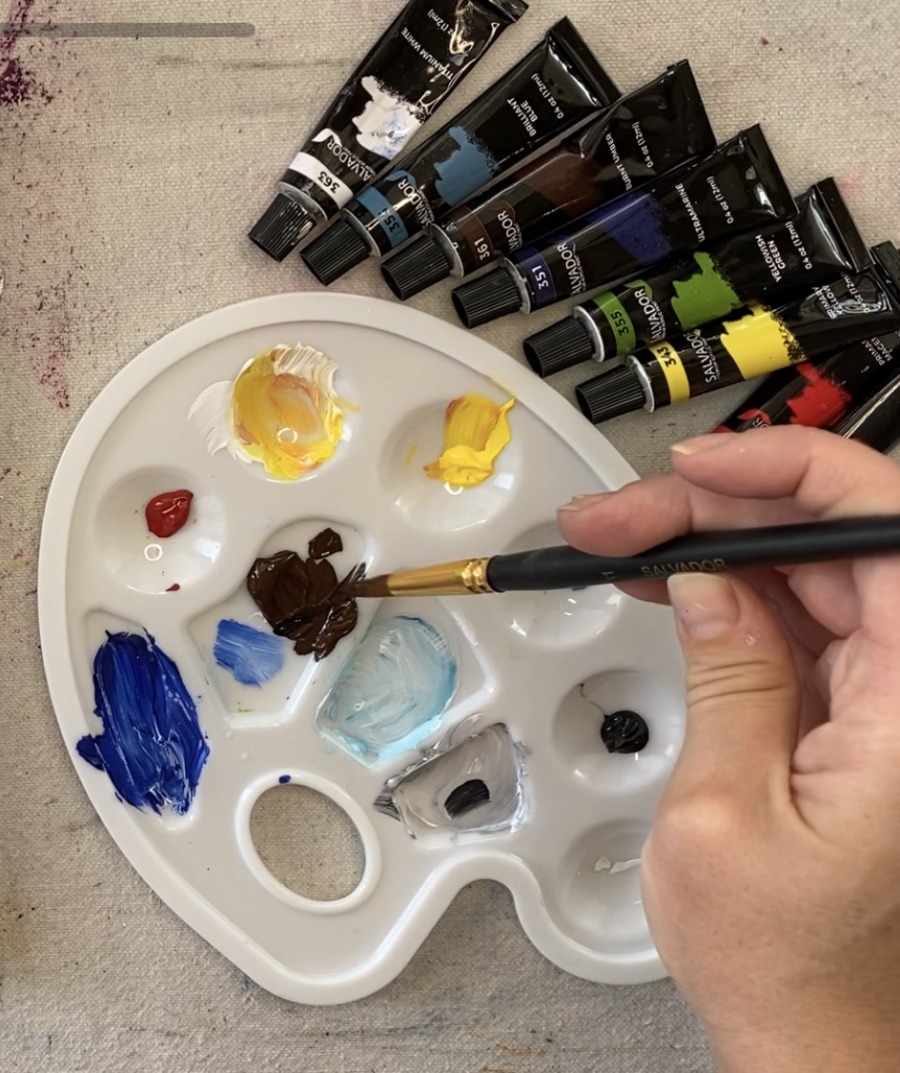
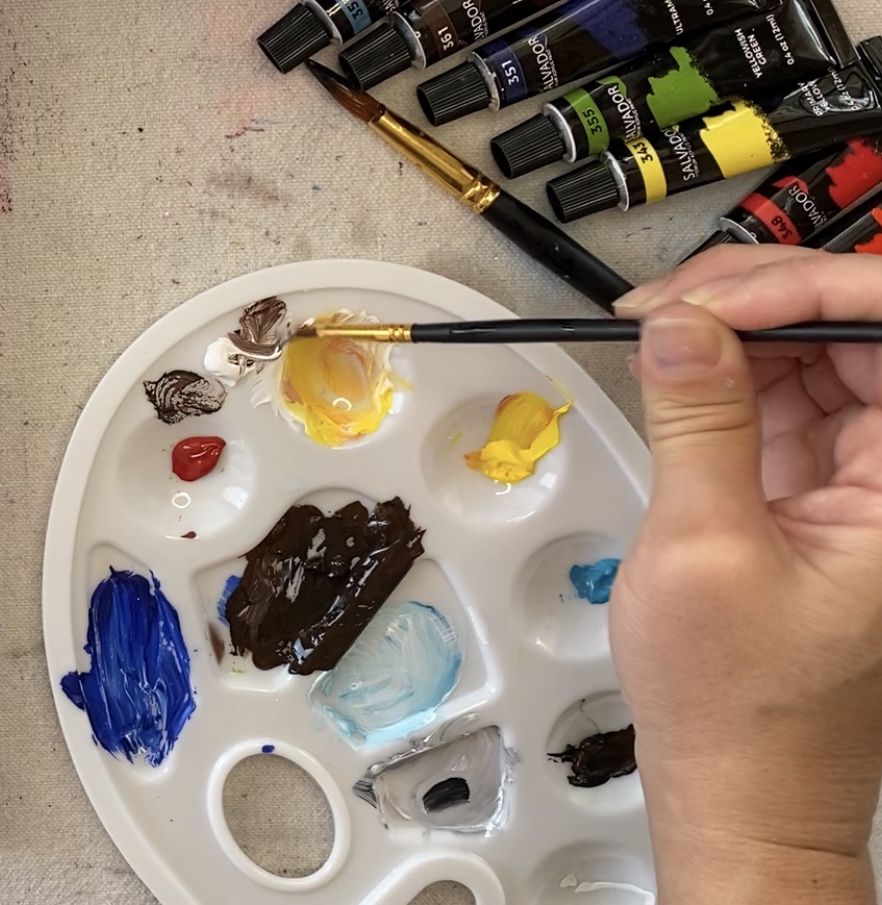
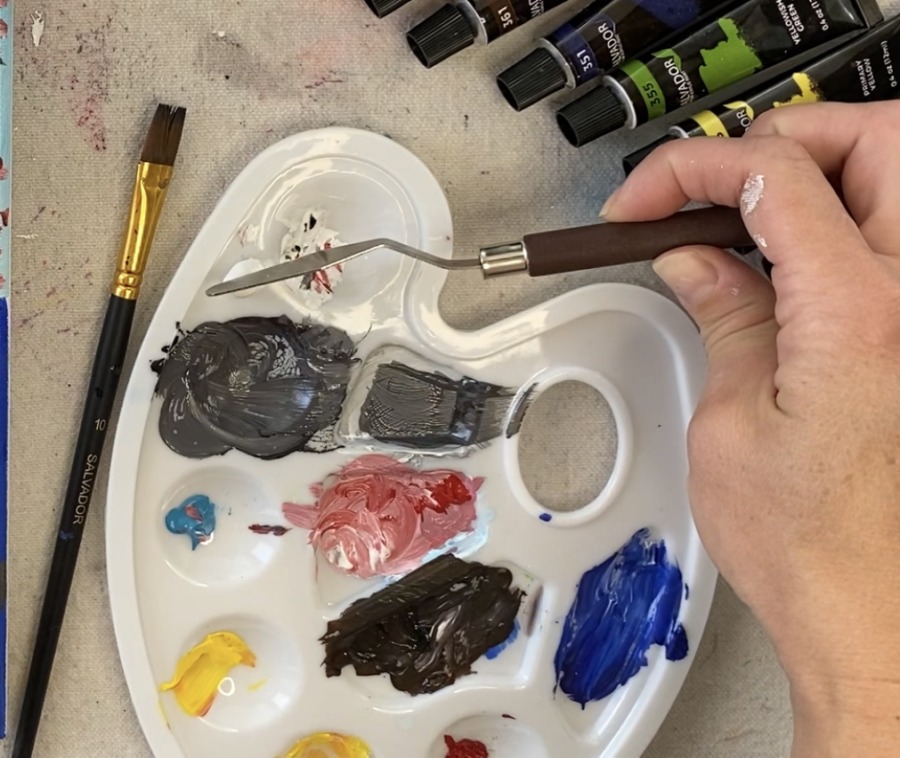
Color Palette
Brushes
I used the #11 Round, The #10 Flat & The #3 Round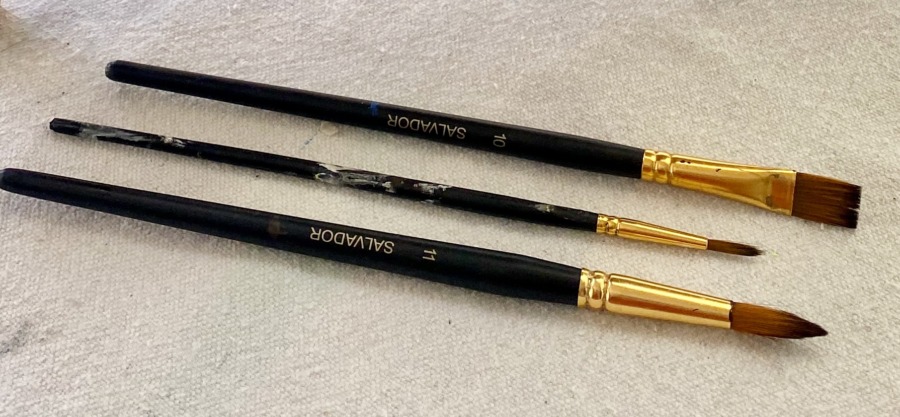
Video
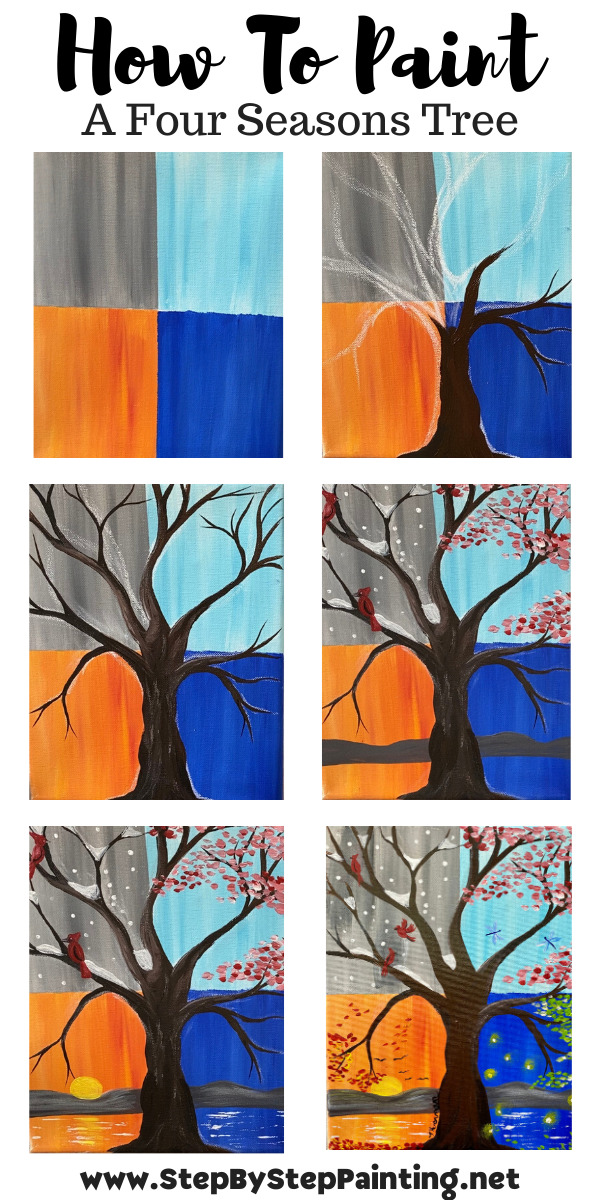
Directions At A Glance
Traceable
You can draw this tree with chalk or use my traceable. This traceable is set to an 8×10 canvas, so print on standard size computer paper. You can also resize it for larger canvases. 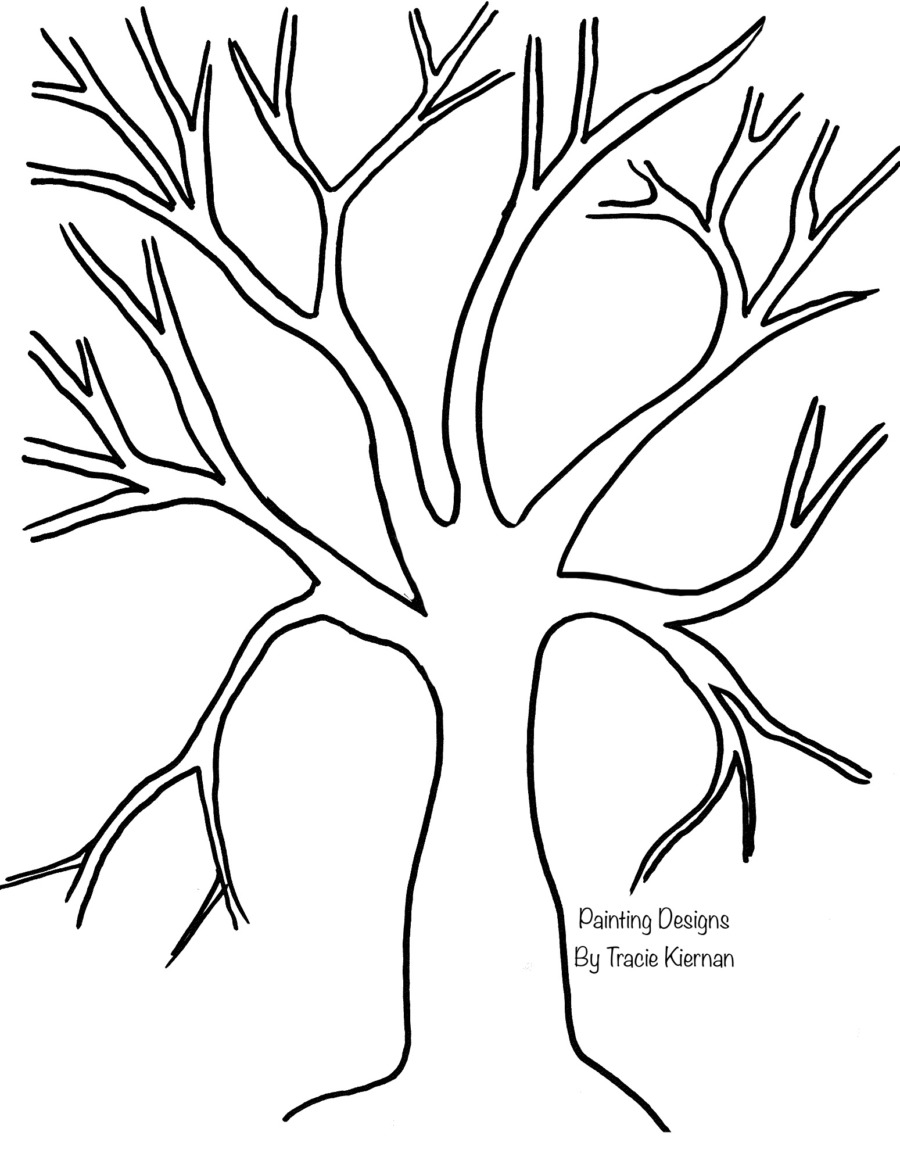
Step By Step Directions
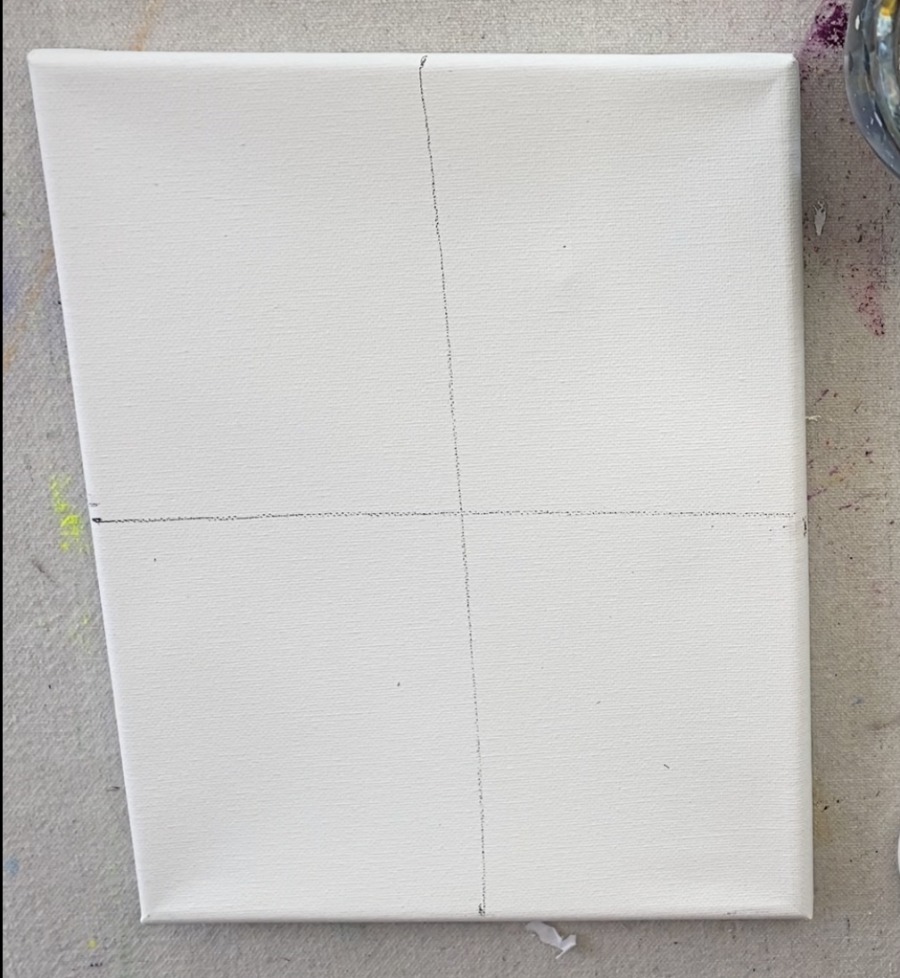
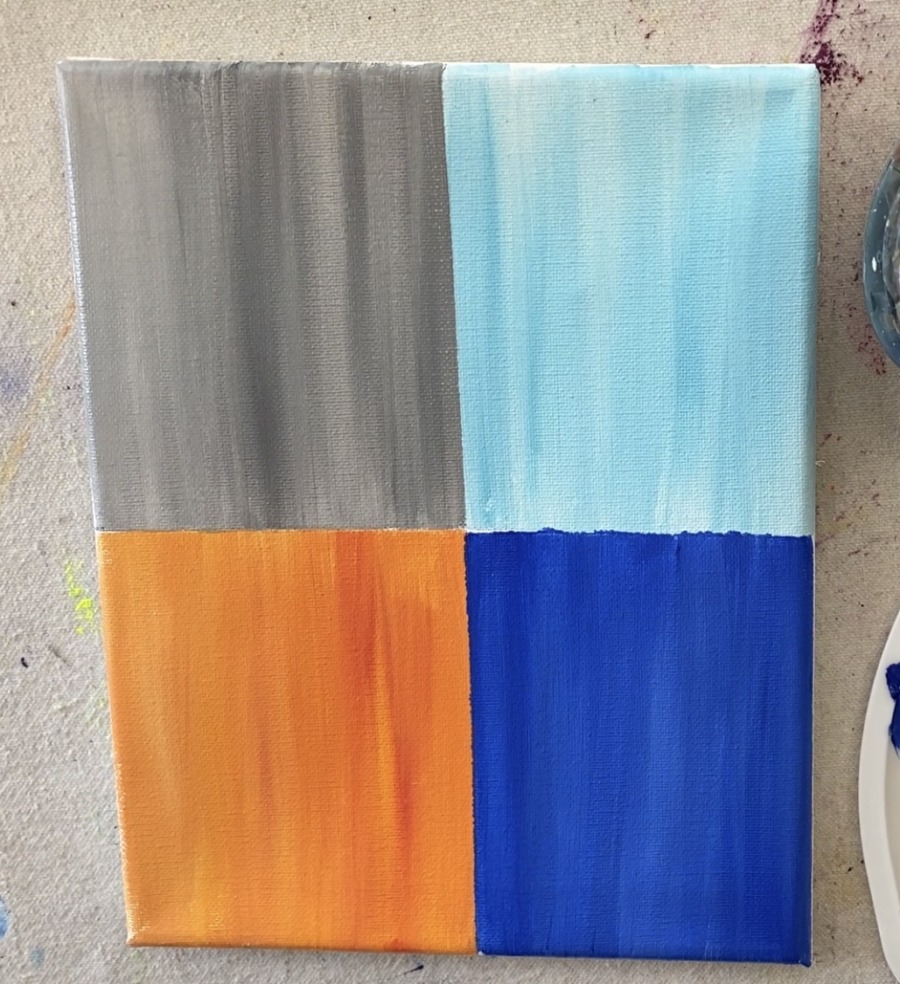
1. Divide your canvas into quadrants
Since I am working on an 8“ x 10“, I marked the 4” point and the 5” point and divided it up with a pencil and ruler.
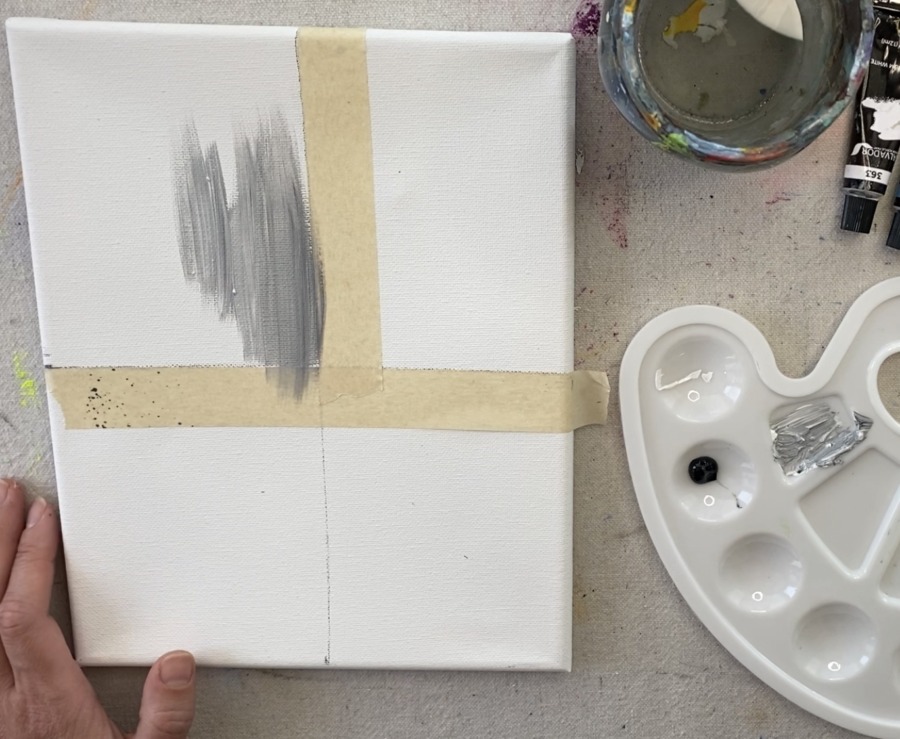
Then I used masking tape to mask off the upper left quadrant.

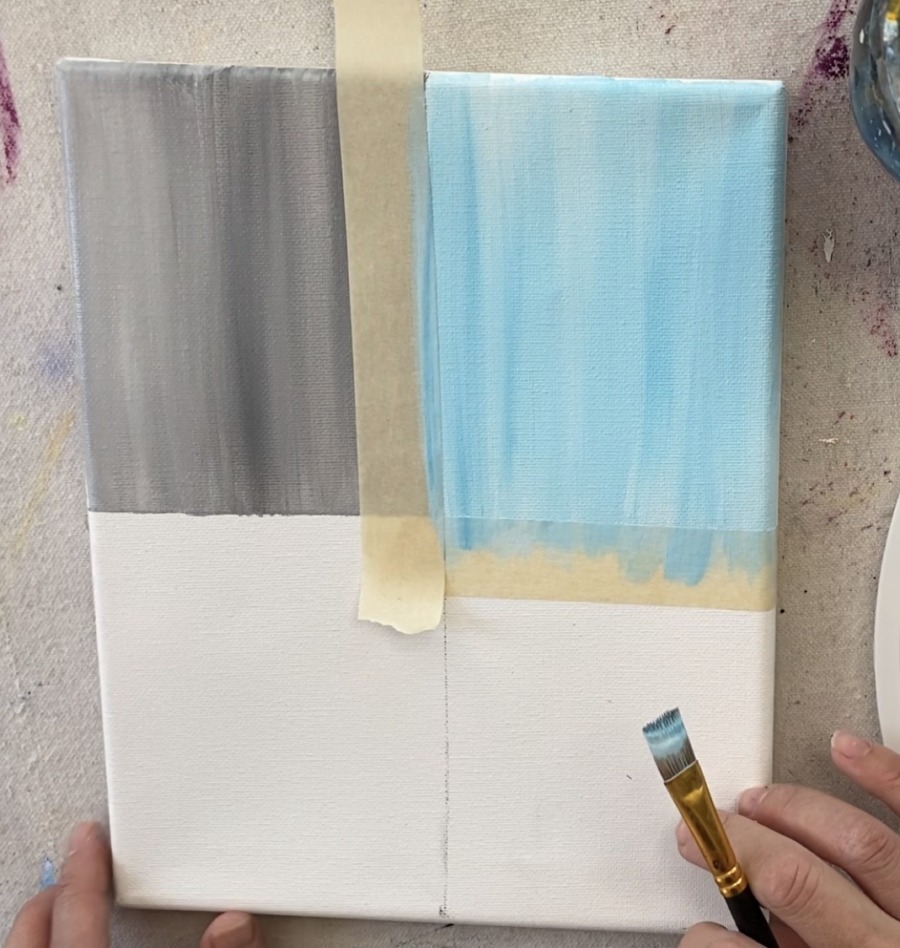
2. Paint each quadrant a separate “wash” color
Each quadrant is a “wash” of a different color combo. A wash is a thinned down area of acrylic paint to fill a large area.
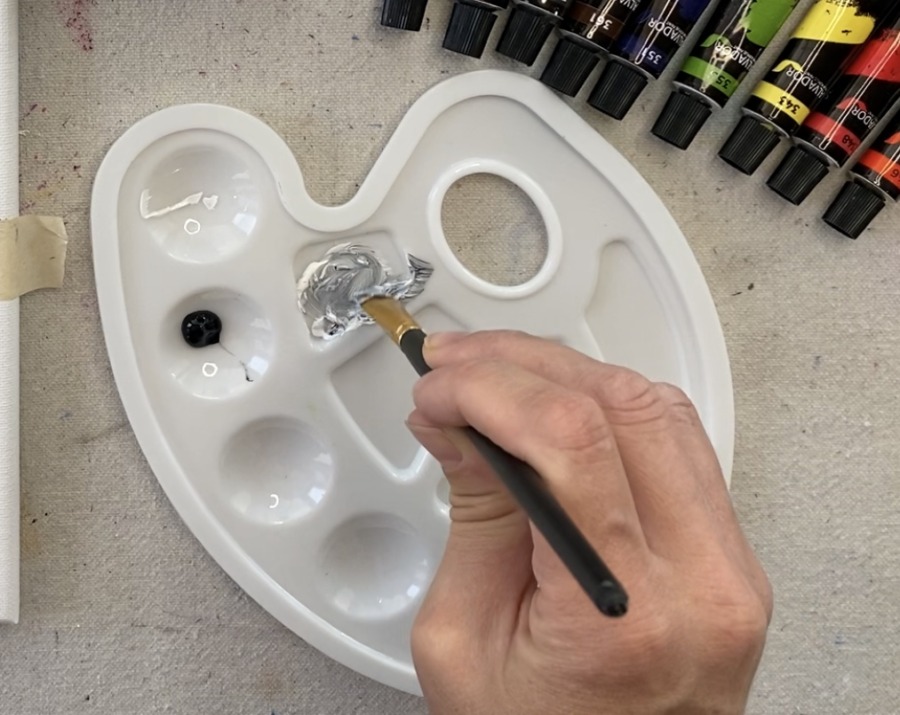
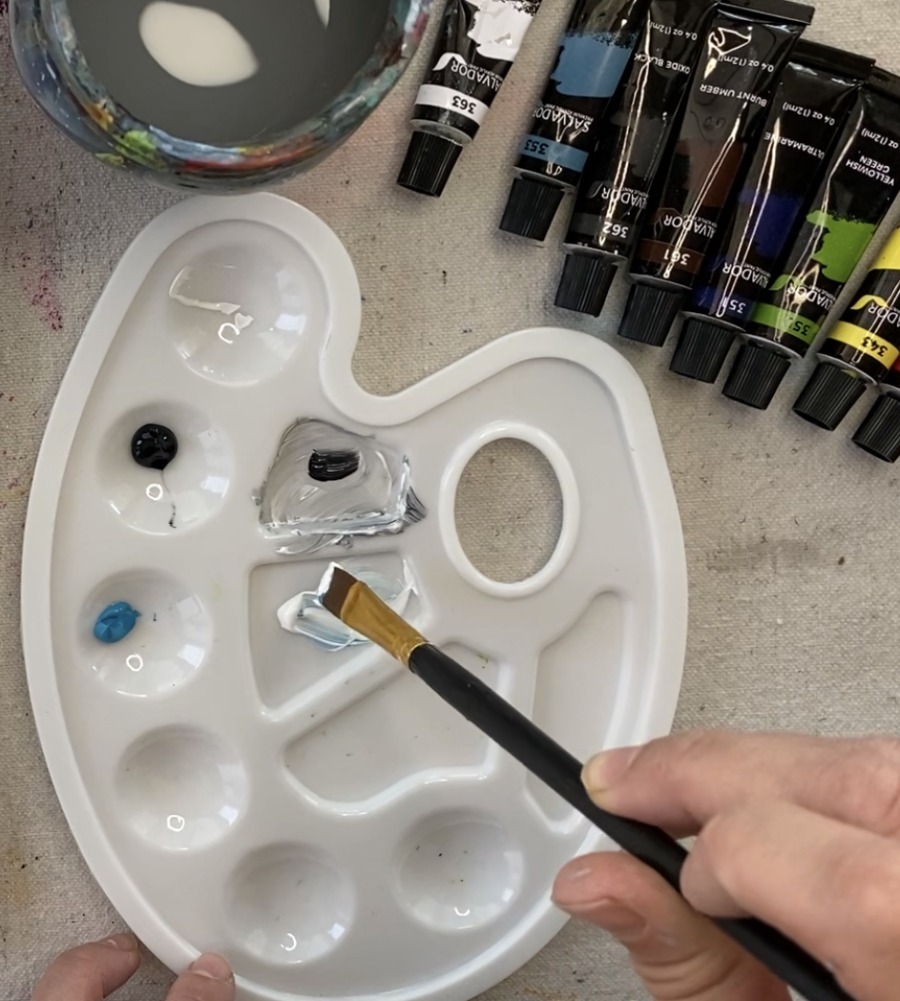
In the winter quadrant, I used titanium white and oxide black. Load your #10 flat in a lot of white and only a tiny amount of black. Mix the two colors on your palette but not all the way. Then thin it down with a bit of water.
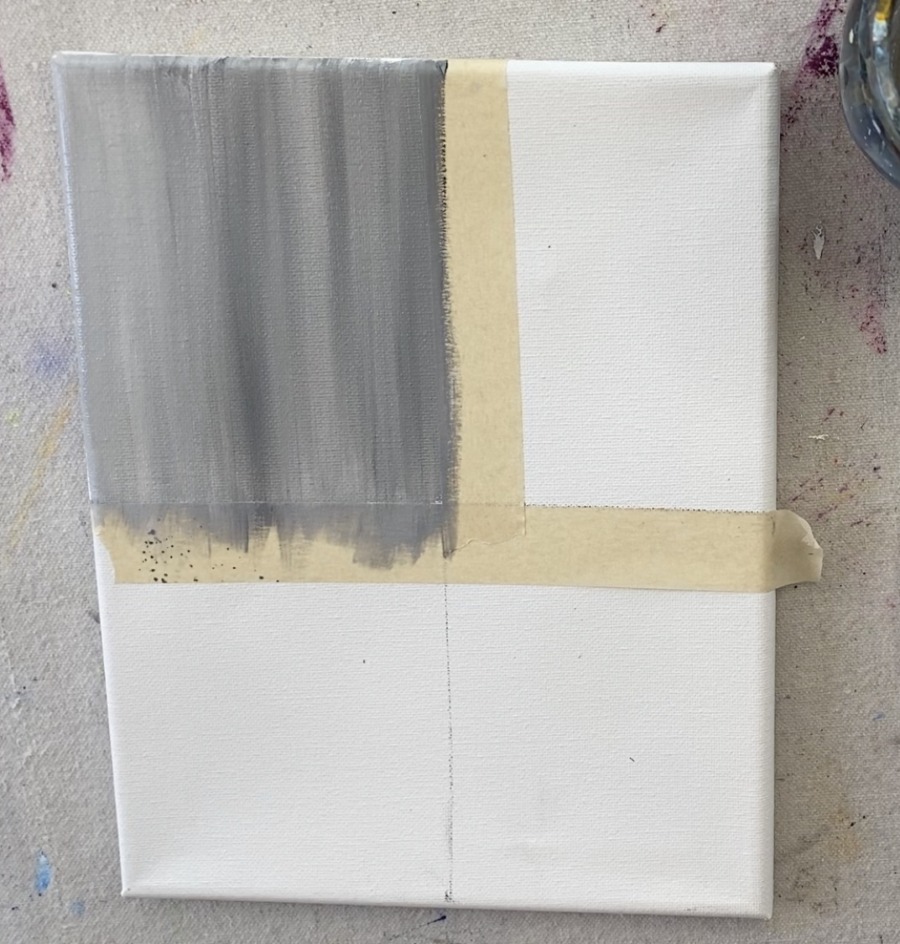
Paint up and down strokes filling the entire quadrant. If it all turns a solid gray that is fine! You can go back and add more streaks of the black or the white to give it that abstract “streaky” look.
Hint: This is the exact same technique background I did in my Spring Bicycle Painting.
To do the spring quadrant, I used this same wash technique but with titanium white and brilliant blue. Again, use more white than the blue to create the light blue color and go back and add streaks of white or blue.
Tip: move your masking tape each time when you paint each quadrant to get your crisp line. Be careful when applying the tape to the wet area of the painting, allow it to only rest gently on the painted area.
For the fall quadrant, I used primary yellow, titanium white and a little primary magenta. That primary magenta is strong so only use a little bit of it!
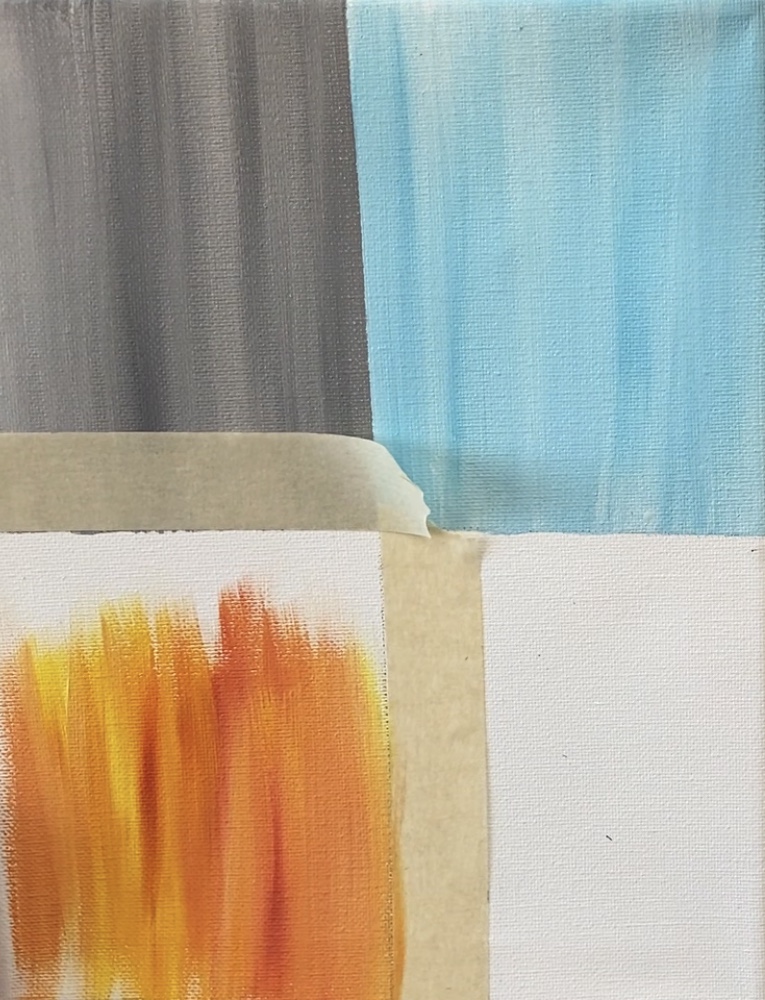
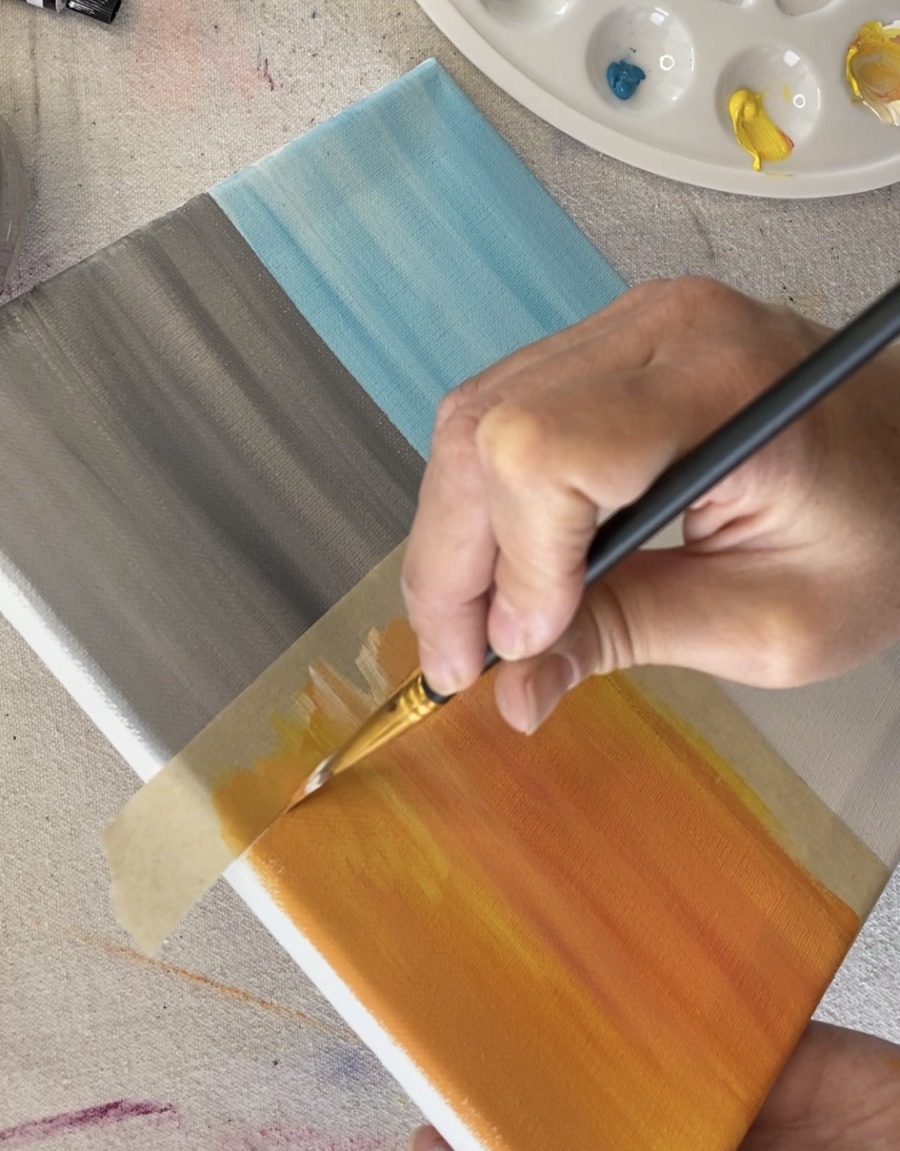
Finally, for the summer quadrant, I used ultramarine blue and a little titanium white.
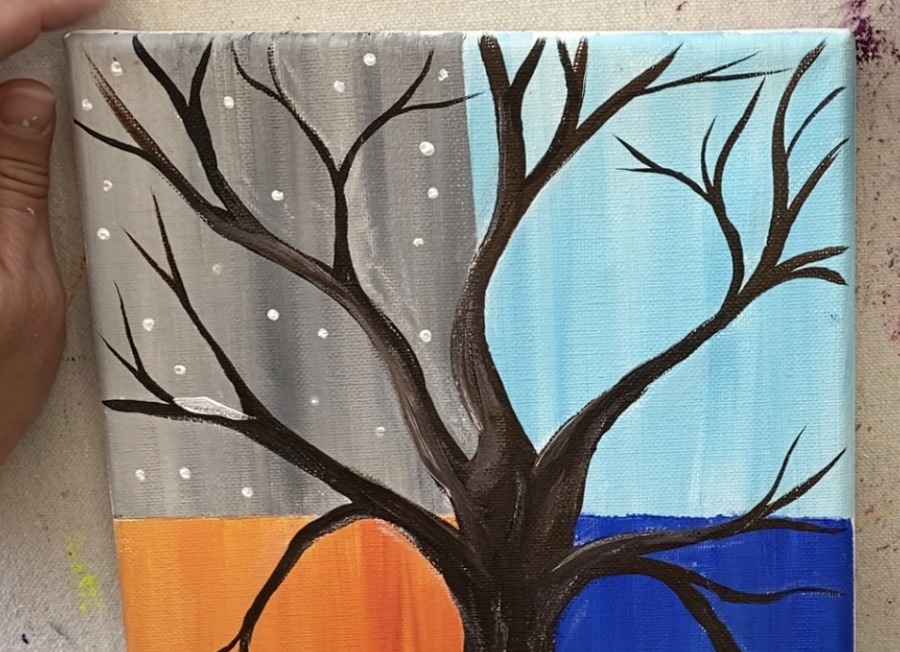
3. Draw the tree with chalk or use my traceable
Let your painting dry (about 30-45 minutes) before continuing. I found that this paint dries a little slower, which is actually a great thing especially for someone that likes to spend extra time blending!
Then draw a tree using chalk! I like to use chalk because it shows up nicely and is easily erasable, however, you can use pencil.
You can also use my traceable to transfer your tree to the painting (so no drawing skills required).
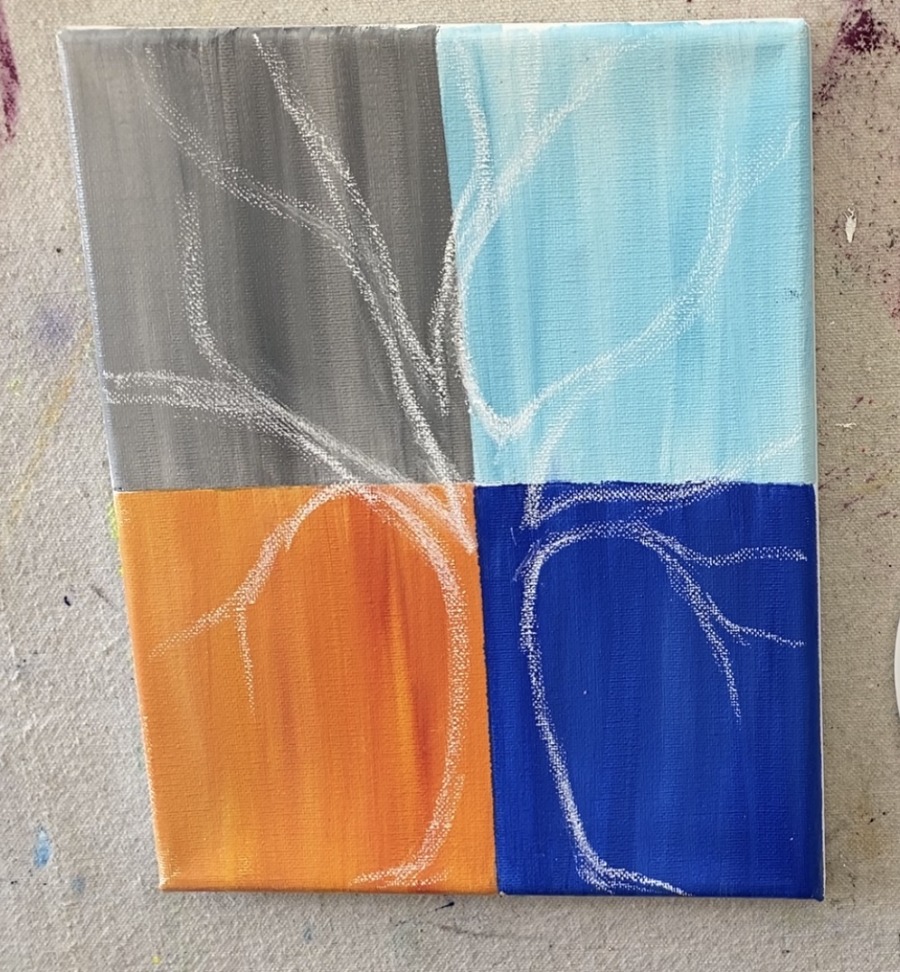
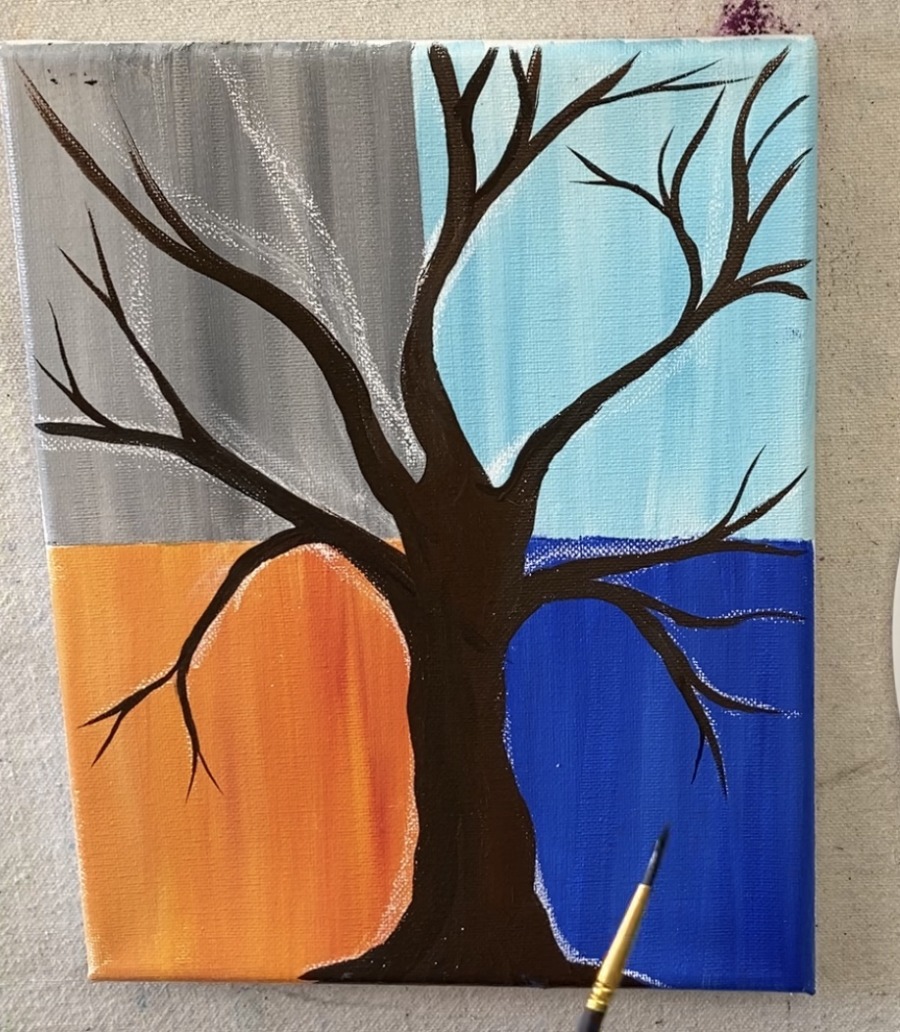
Start at the bottom of the tree with a wide base and then have your trunk thin out as you go to the top. Then have your branches “branch out” in different directions.
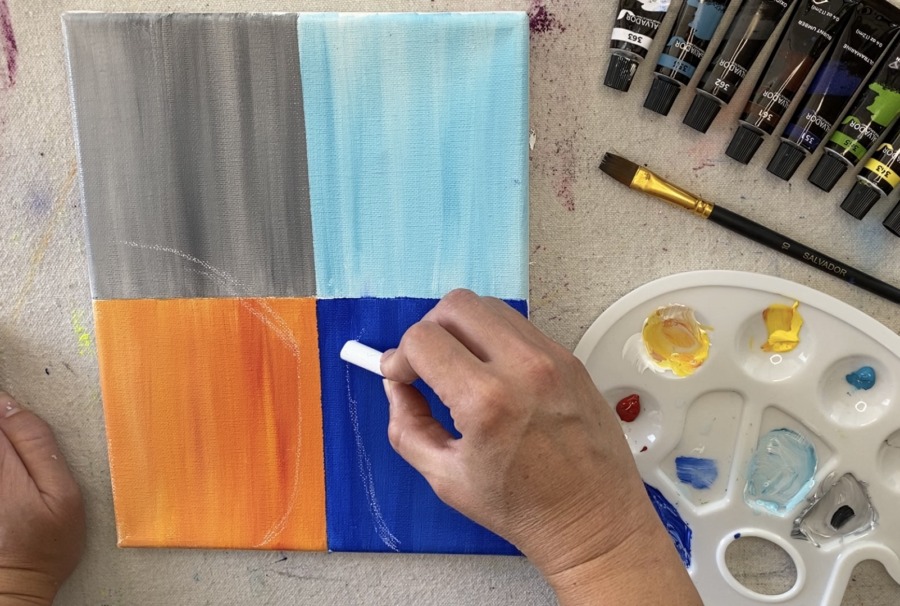
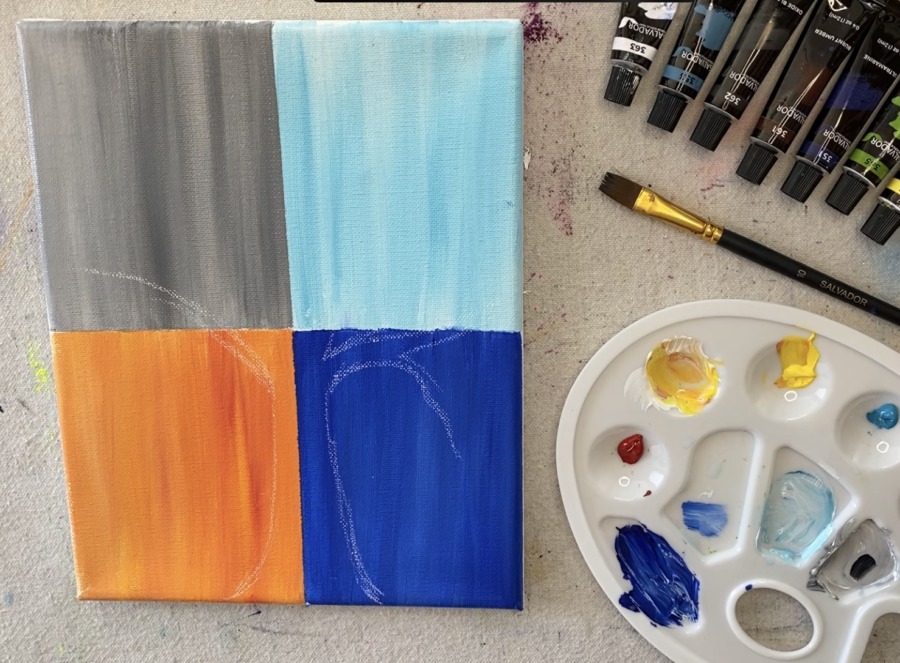
As you render your tree drawing, you can use water to erase lines that you do not need. Make sure you have branches going in each of the quadrants.
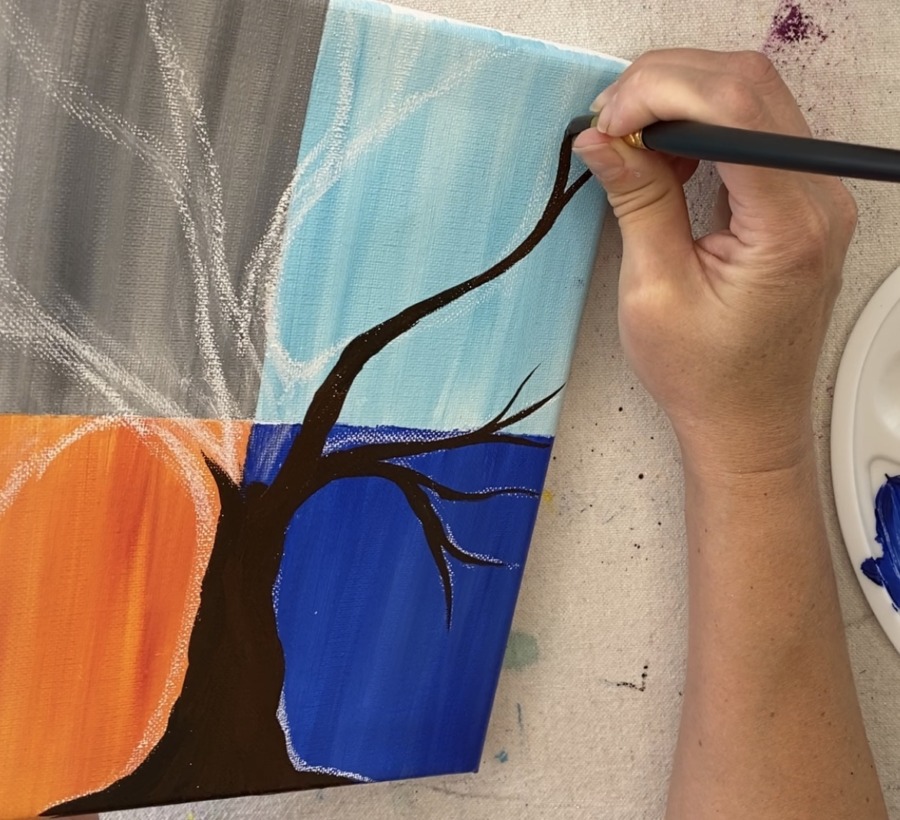
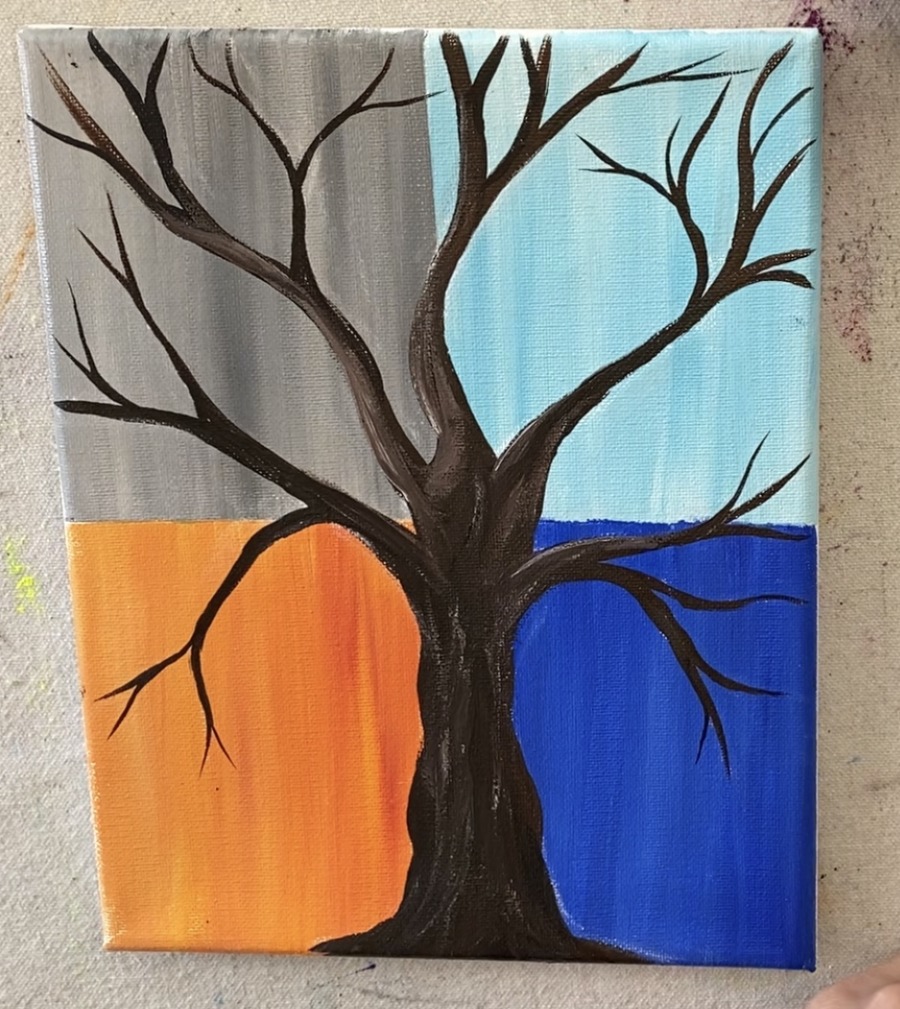
4. Paint the tree
I painted the tree burnt umber and oxide black. Basically, on my palette I mixed the two colors (about 4 parts brown and 1 part black) but not all the way.
I like having colors sort of blend themselves on the canvas so I don’t typically mix my colors all the way on my palette.
Paint your tree in using that large #11 round brush. I actually really liked using that brush for this tree!

The great thing about this big round brush is that you can vary the thickness of your branches. For example, when you want a thick stroke you would press on the brush more firmly. For thinner strokes (like when the branches go thin), you would just just the small tip of the brush.
Tip: to increase the flow of the paint, swirl a little water into the paint on your palette. This helps to create a nice flowing consistency of the paint which is helpful for painting branches.

Use the smaller #3 round brush for the really tiny branches.
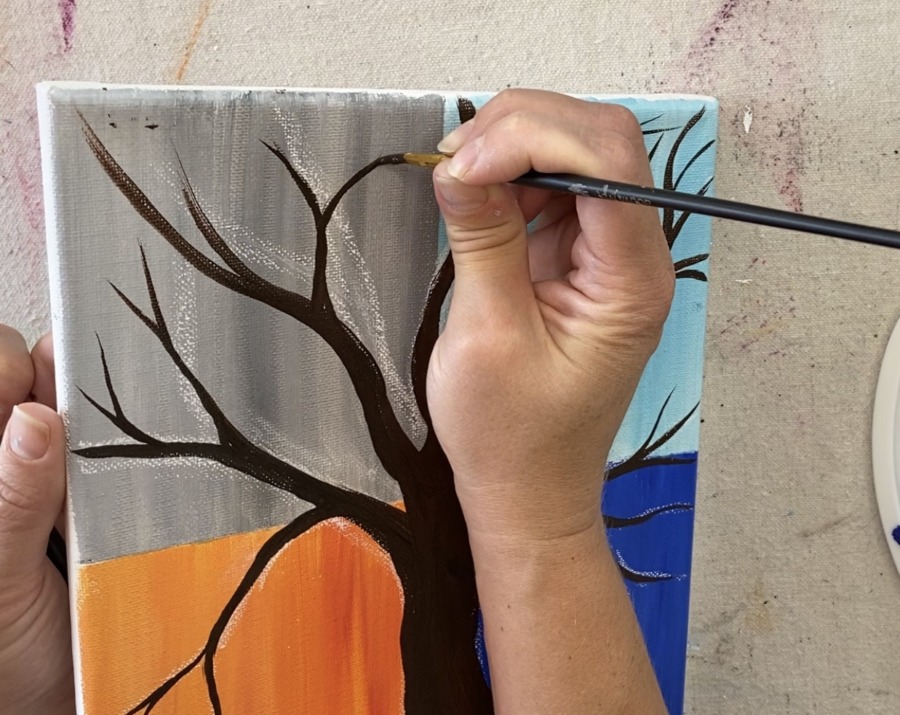
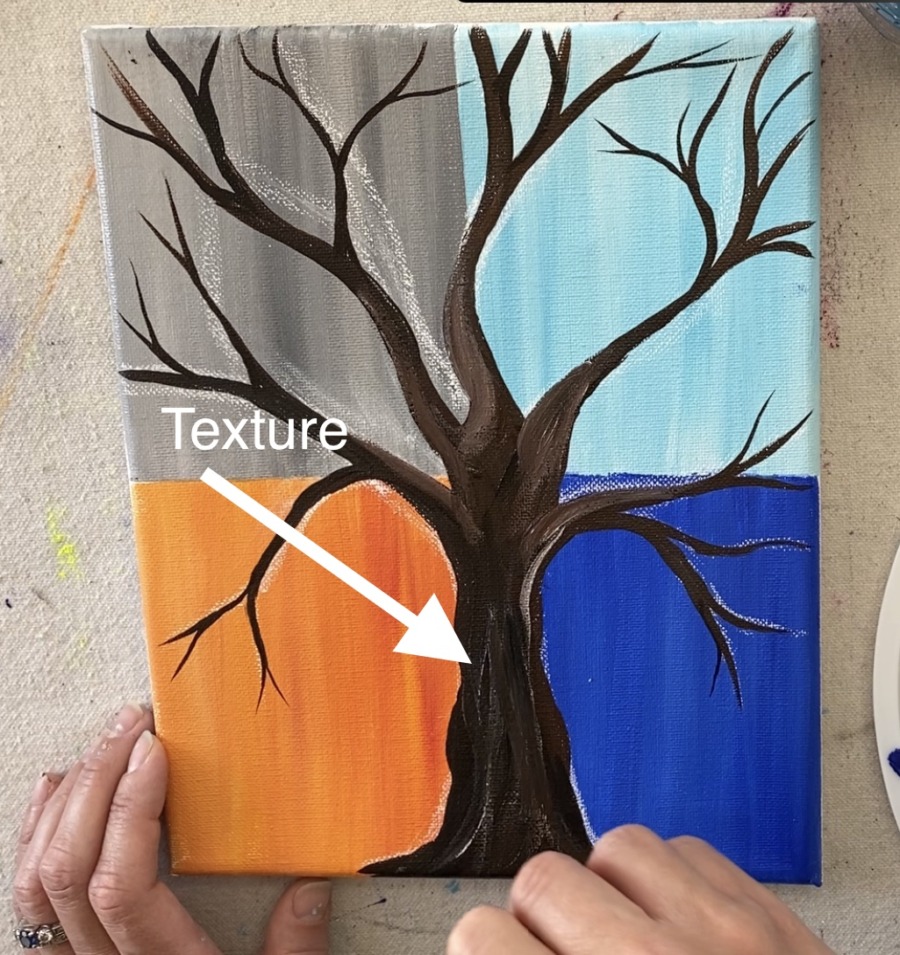
Optional: add a little light brown texture and highlight to your tree. On your palette, mix a little white into the burnt umber.
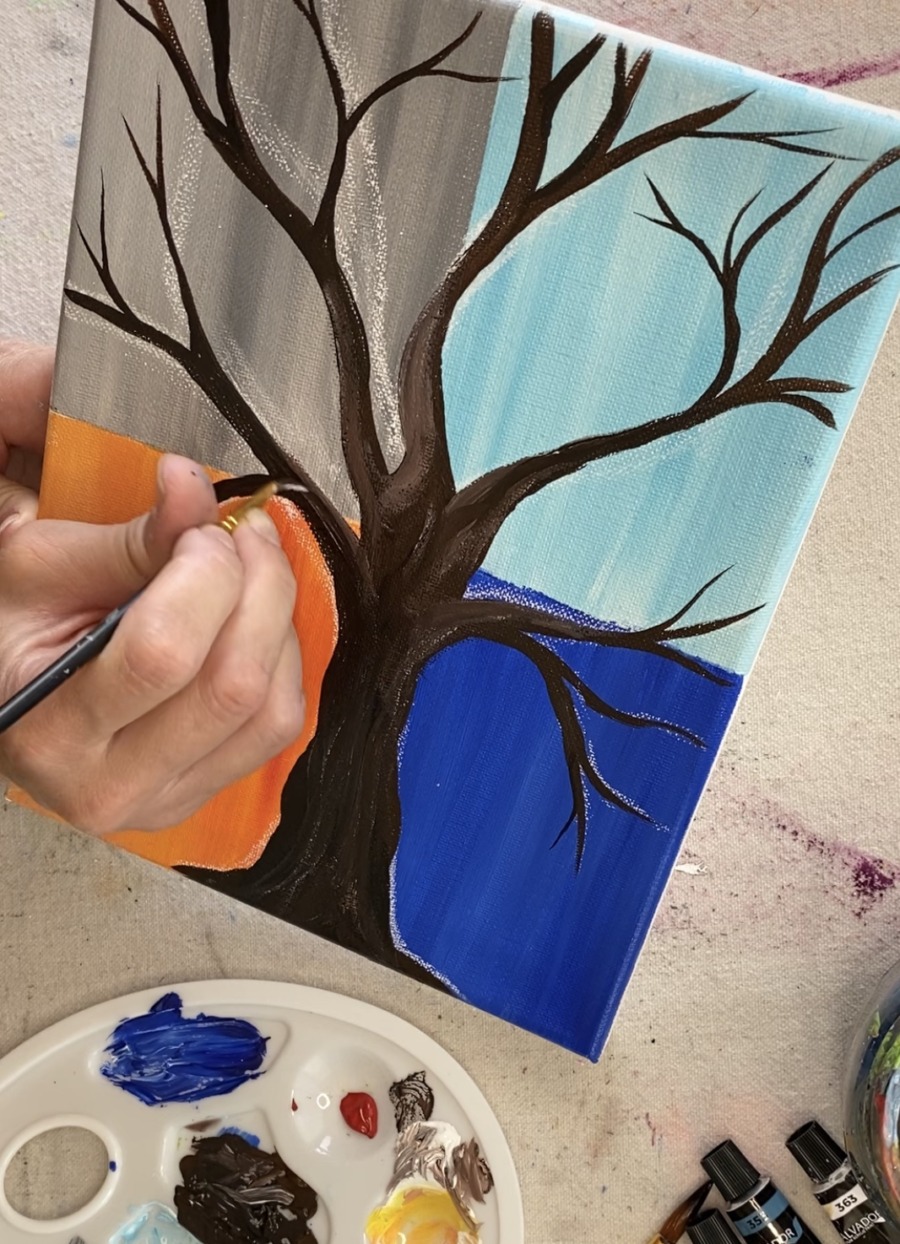
Paint some areas at the edges of the branches with the lighter brown and blend back into the darker brown.
Paint some “texture” long wavy strokes of this lighter brown on the large part of the trunk.
After your branches dry, erase any lingering chalk lines with a wet brush.
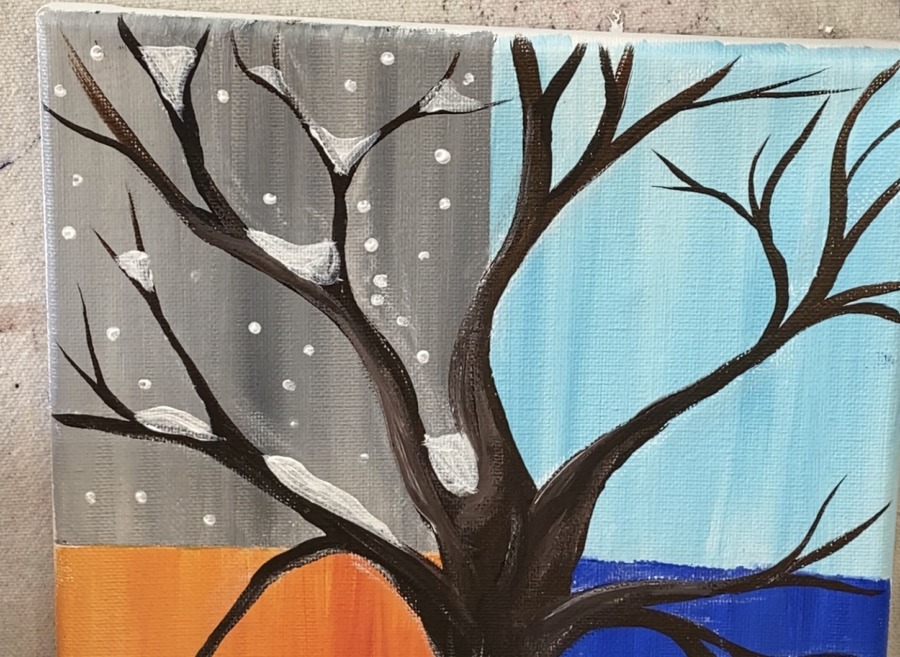
5. Paint the snow in the winter quadrant
For the snow, I simply used the back of the paint brush handle of the #3 round brush to stamp titanium white dots.
Then I used the #3 round brush to paint the snow on the branches.
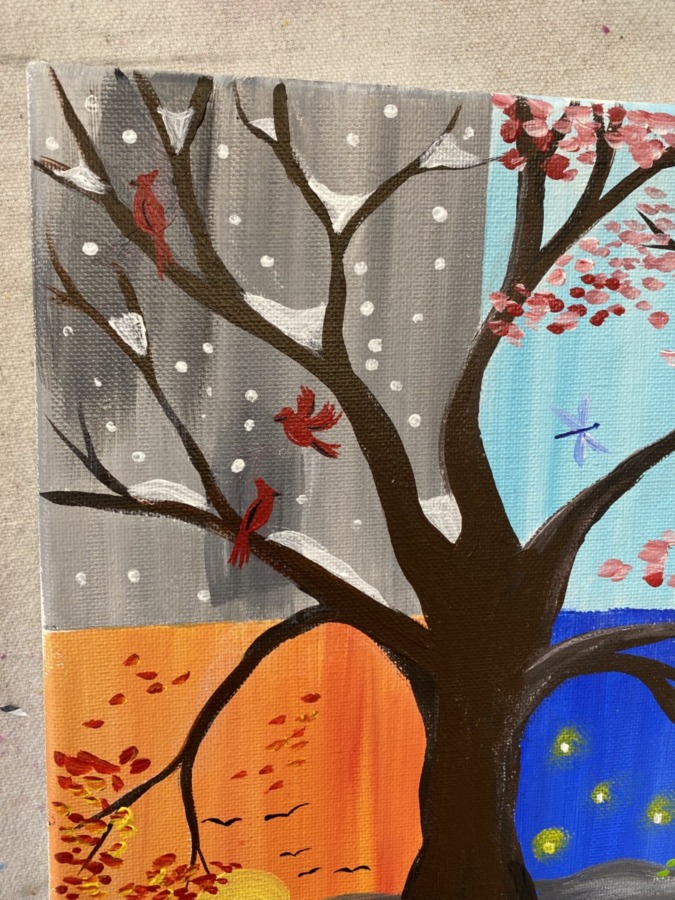
6. Paint the cardinals
Use that small #3 round to paint the cardinals. I used primary red for these birds.
It helps to look at some clip art of cardinals when doing these cardinal shapes. But they are basic shapes. A half circle for the body, long triangle for the tail, circle for the head and a triangle pointed shape on the back of the head.
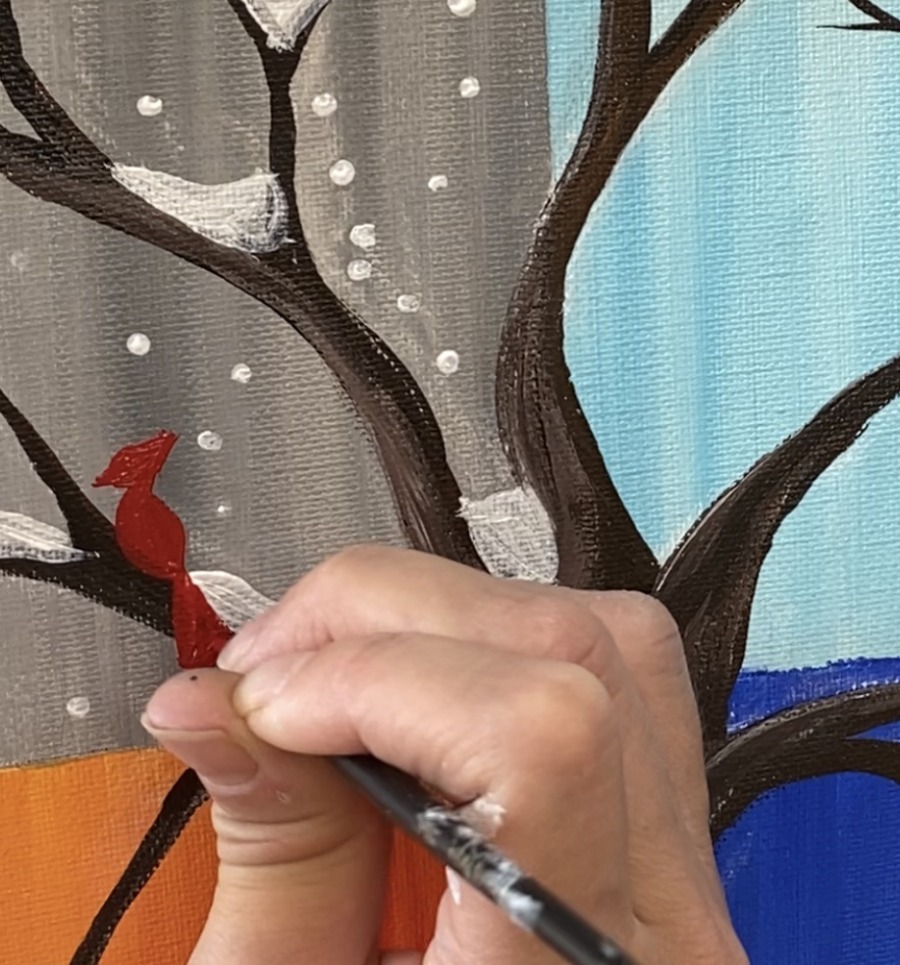
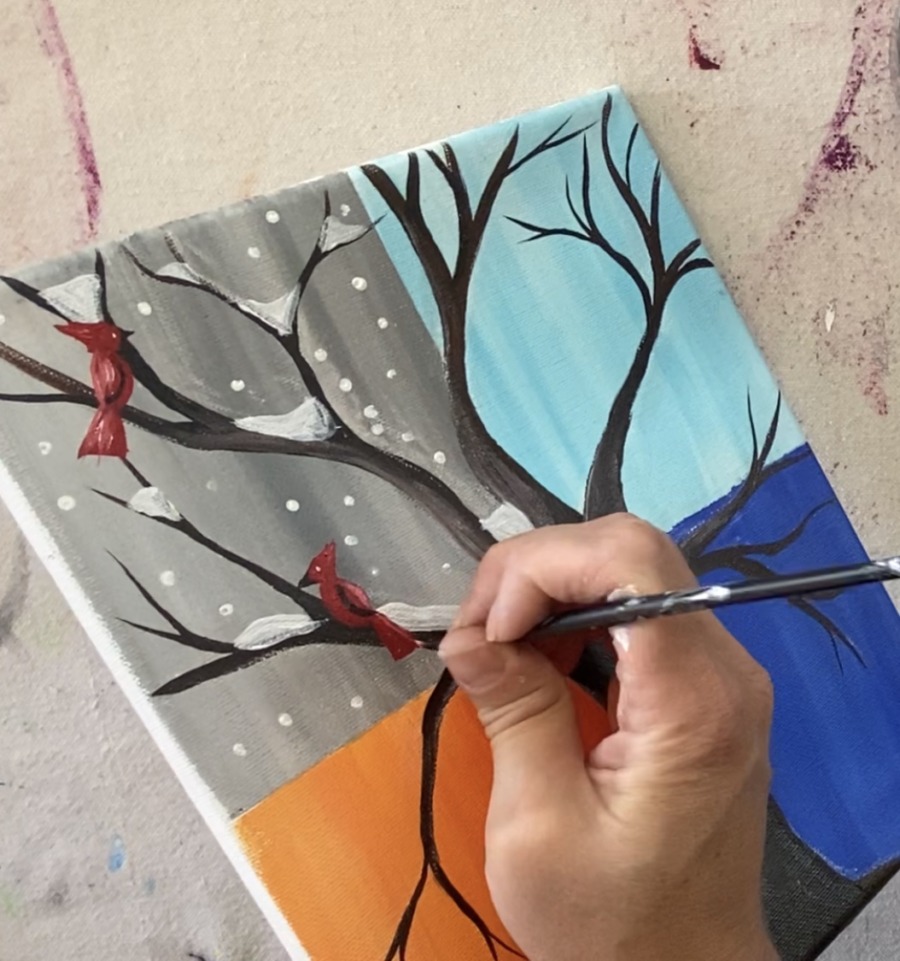
I did some outlining of the wings with black as well as the beak. I also added a little white into the red for some texture.
Note: At the end of this post I changed the cardinals to be smaller. So you can scroll down to see what I did in the end.
7. Paint the cherry blossoms in the spring quadrant
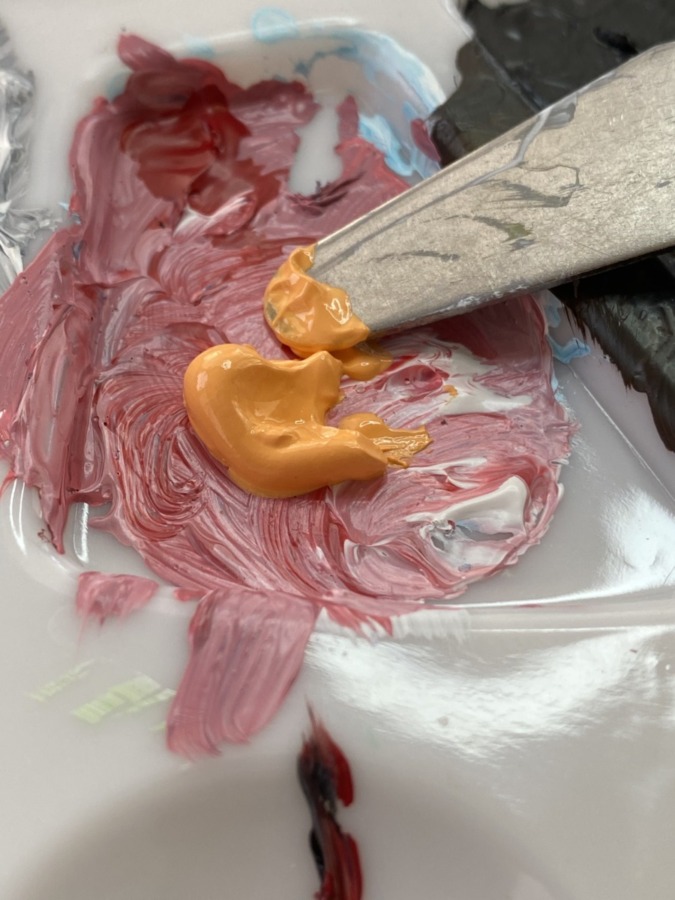
For cherry blossoms, I needed to make a pink on my palette because there was no pink in this set.
Making pink is easy! I mixed primary magenta with a little titanium white until it turned to a lighter color. Then I mixed a TINY bit of brilliant blue into it to give it more of a purple undertone. You don’t have to add the blue if you don’t want to.
Keep mixing until you get a nice solid dark pink color.
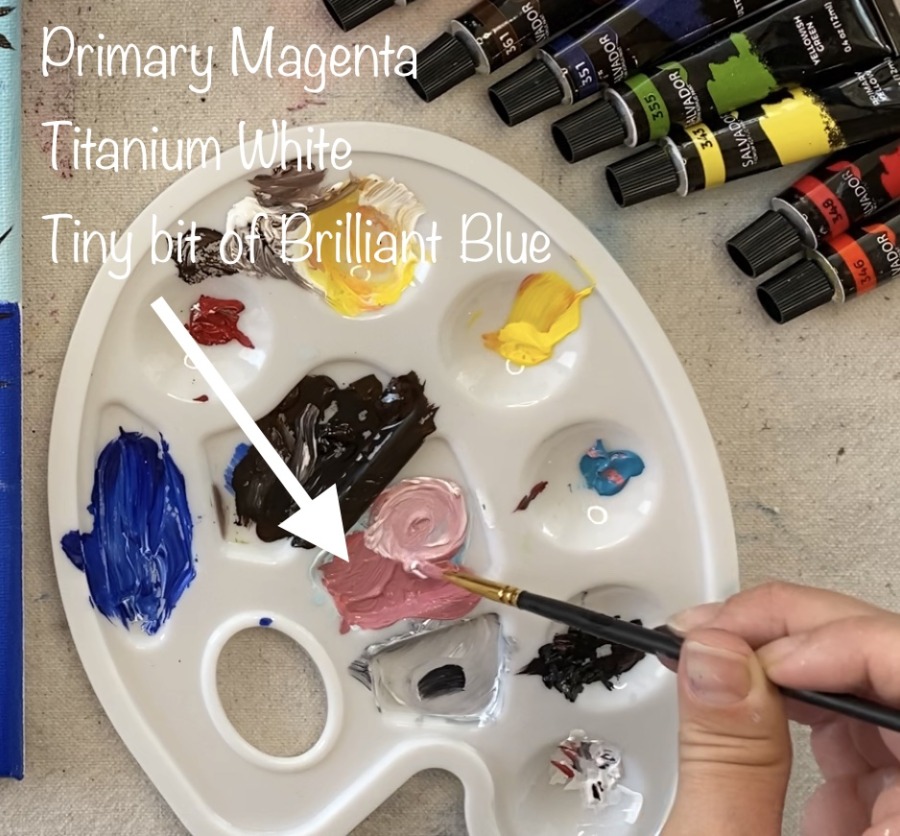
Then mix a whole bunch of titanium white into that color next to it so you have a light pink and a dark pink to work with. If you look at the picture of my palette you will see the two different pink tints I made.

Use your #3 round brush to paint little clusters of dots onto the branches. It looks best when the dots are varied in color so use both that light pink and dark pink. You may also use just white or just primary magenta to get even more tints of that pink.
It looks best when the dots are all different ranges in that pink tint!
The one thing I loved about this paint is that the stroke was able to hold its form! Therefore adding texture with these cherry blossoms was a nice effect.
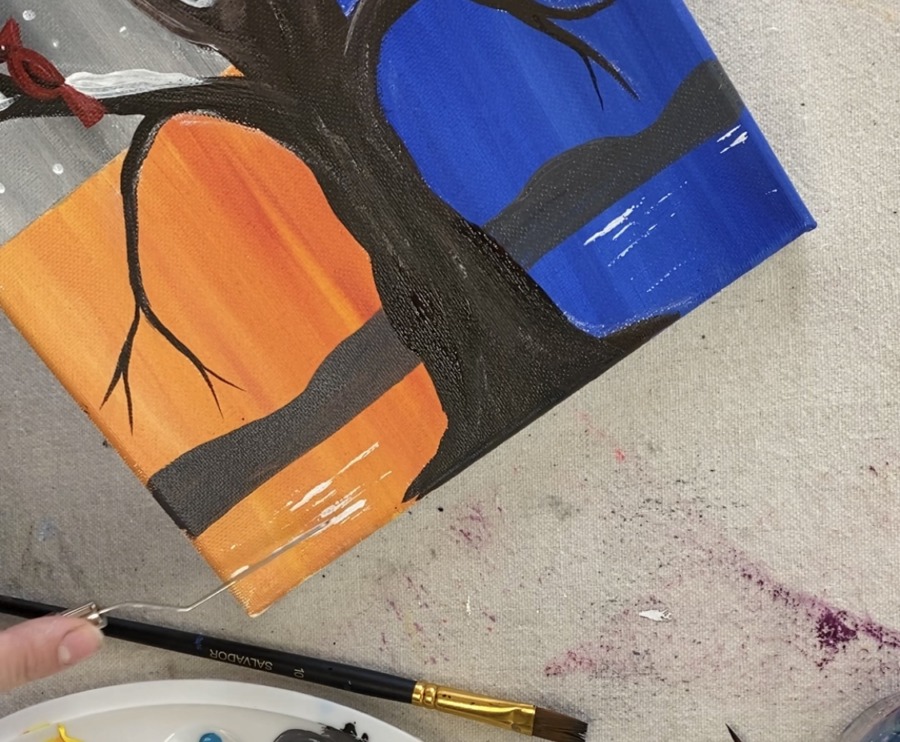
8. Paint the mountain in the Fall and Summer Quadrants
For the mountains, I mixed a gray on my palette and thinned it down with a little water.
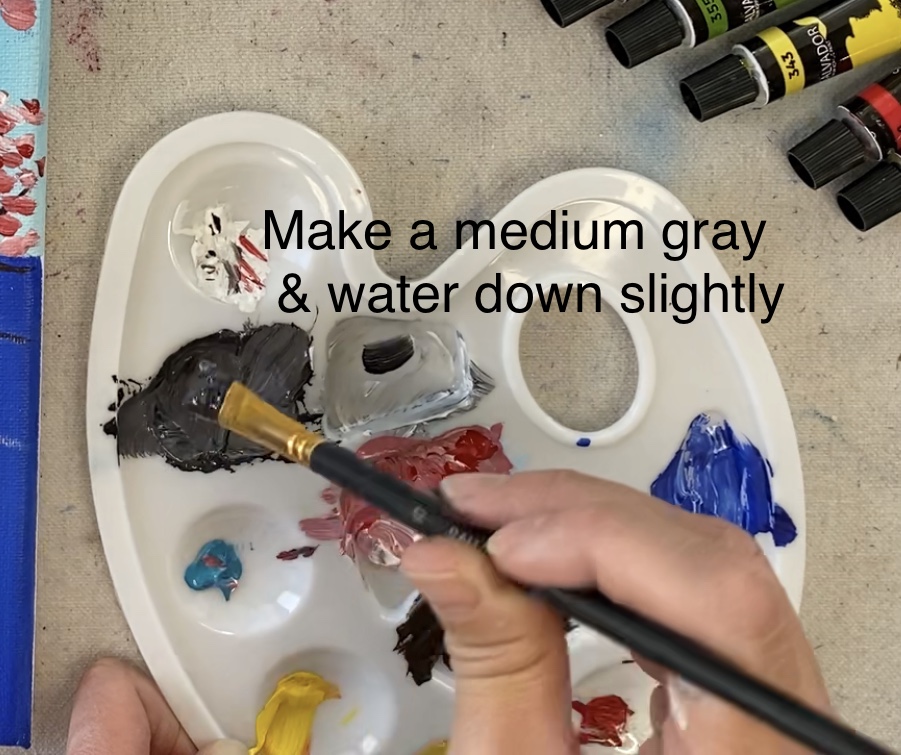
Paint the mountain so you have a straight horizontal line going across the bottom two quadrants. Then make the mountain wavy on top. I used the #10 Flat for this step.
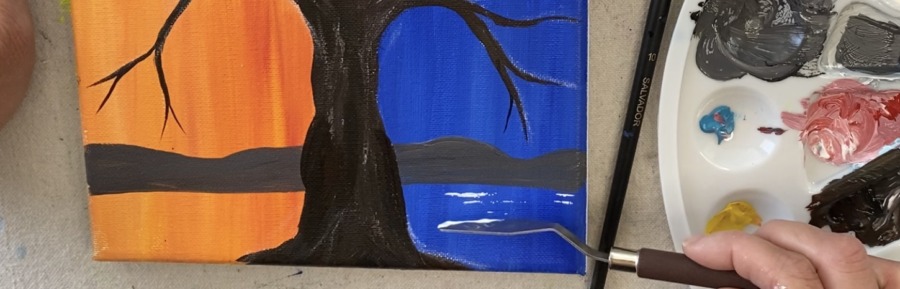
9. Paint the water in the Fall and Summer Quadrants
Use that palette knife and titanium white for this step! I told you we would be doing a wide range of techniques in this painting!
Scrape on some white on the side edge of the palette knife. Then use it to paint horizontal lines in the water.
The thing with the palette knife is it provides texture rather than smooth brush strokes. When you are applying it, your line won’t turn out the same each time depending on how much paint is on the side of the knife. You will just need to let go of that control for awhile and let your palette knife do it’s thing!
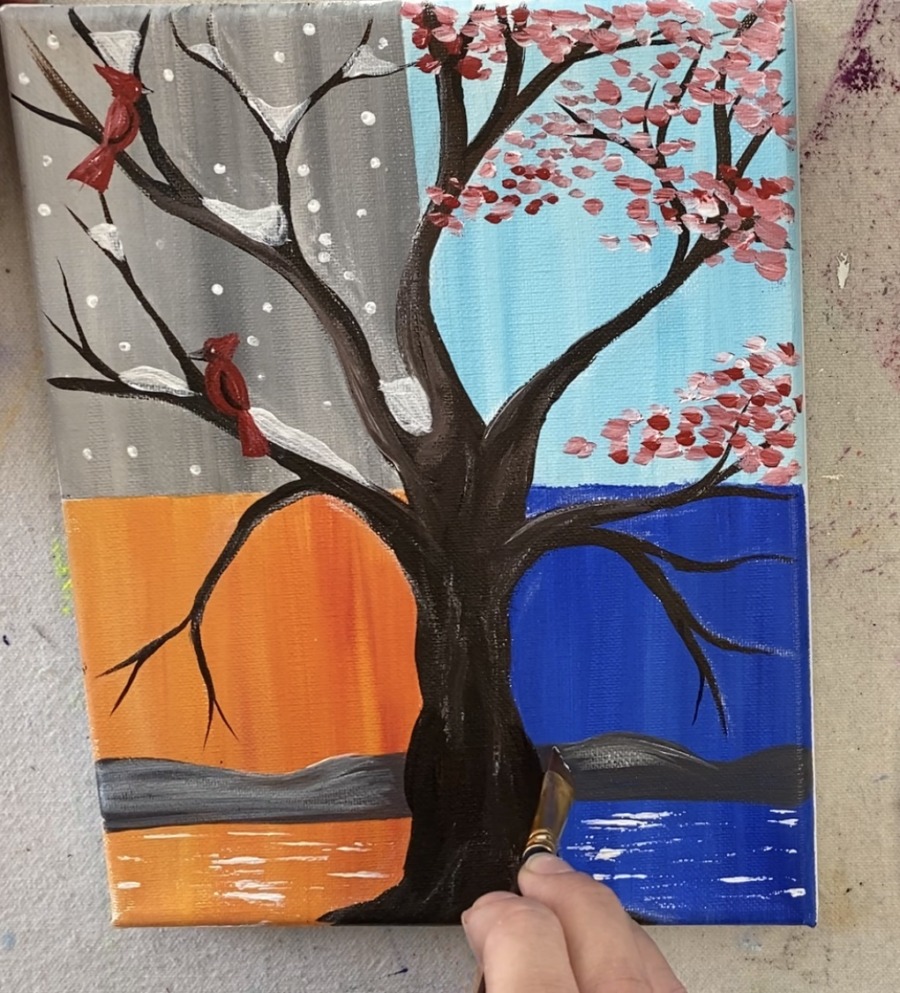
Then I decided to add a little white on the mountain. For me, that gray was still wet so I was able to blend the white in with it.
However, if it is too dry, you can add this white “dry brush style”. That means, add white to your brush but wipe the paint off so only a little paint is on the brush and when you make the stroke it will appear translucent.
I added the white all over and gently blended it into the gray.
10. Paint the Sun
For the sun, I used primary yellow mixed with titanium white. Use the small #3 round brush for this step to paint a circle going down behind the mountain.
Then I painted some reflection lines in the water under the sun using this yellow and white combo.
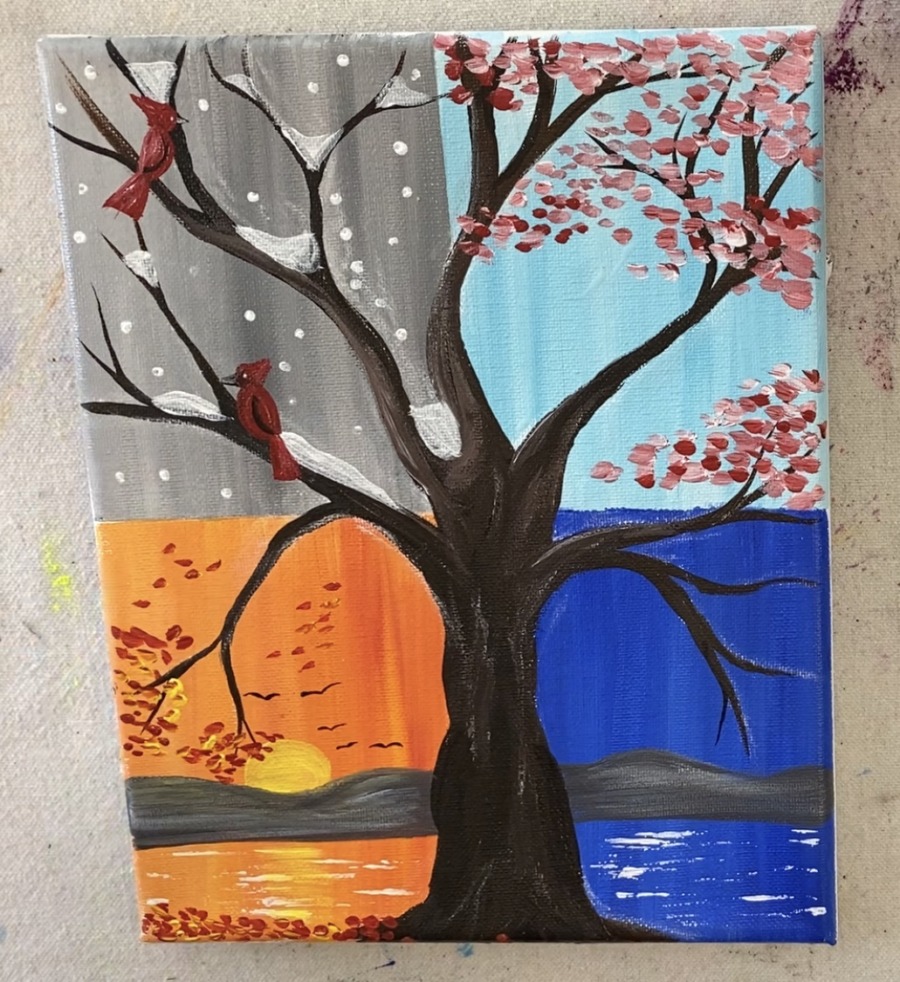
10. Paint the Fall Leaves
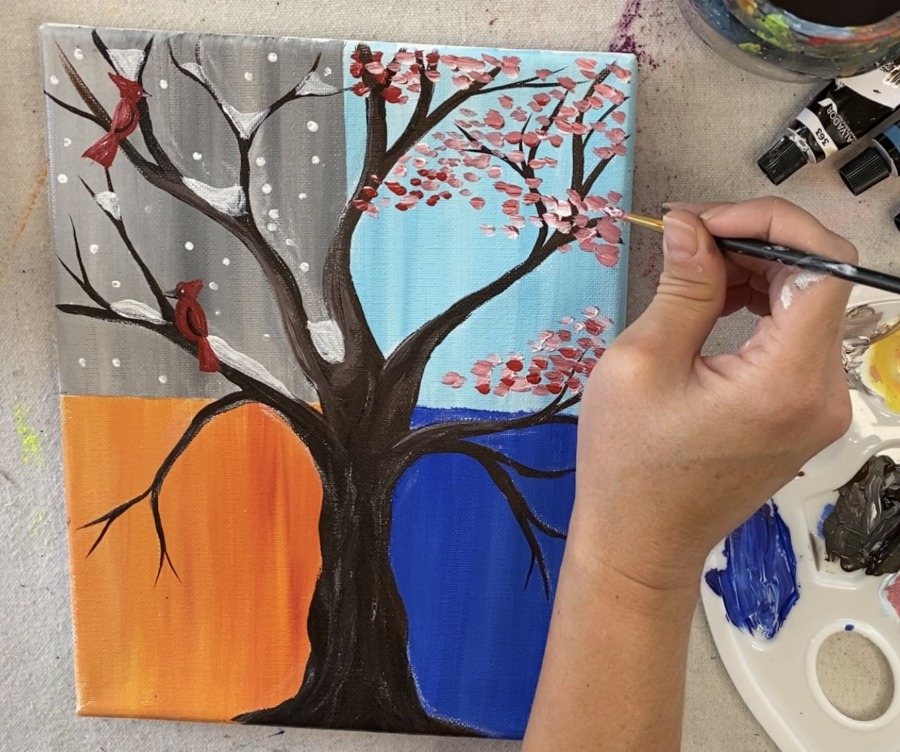
For the fall leaves, I used a combination of yellow and primary magenta and painted dots.

I also painted dots on the very bottom of the painting and added birds! I did those birds with black and the #3 round brush. It may help to water the black down slightly to get a nice thin line. Use the very tip of that round brush!
12. Paint the Summer Leaves
For the summer leaves, I used yellowish green and some titanium white.
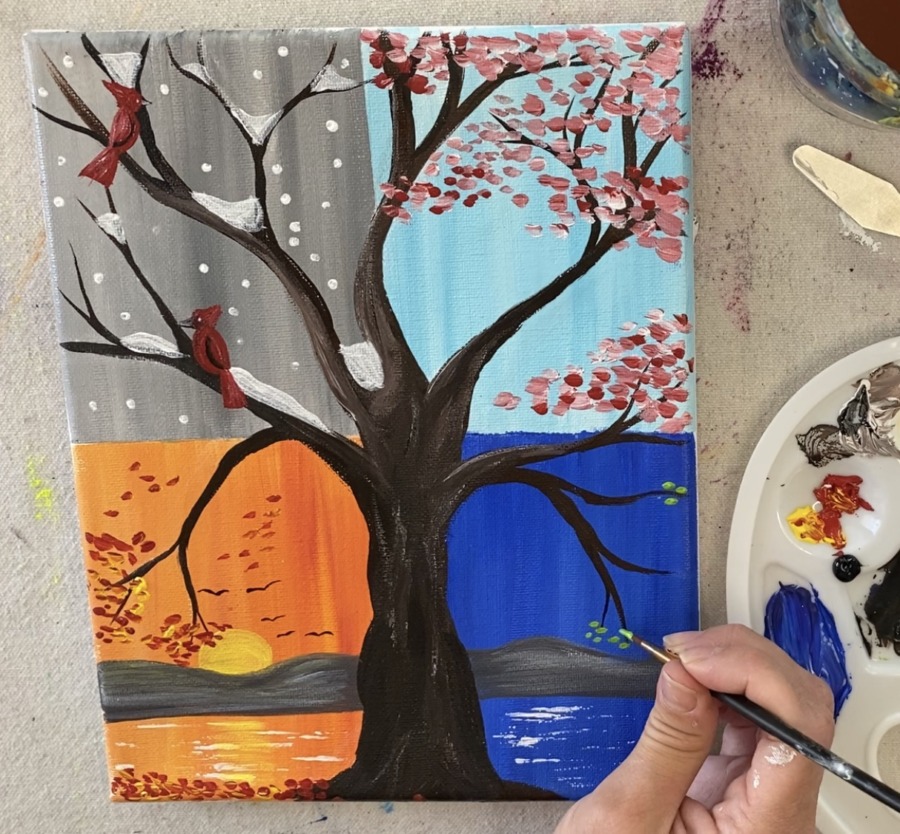
I also made some leaves on the bottom of the painting.
13. Paint the fireflies
For the fireflies, I used the exact same technique that I did in my firefly mason jar tutorial.
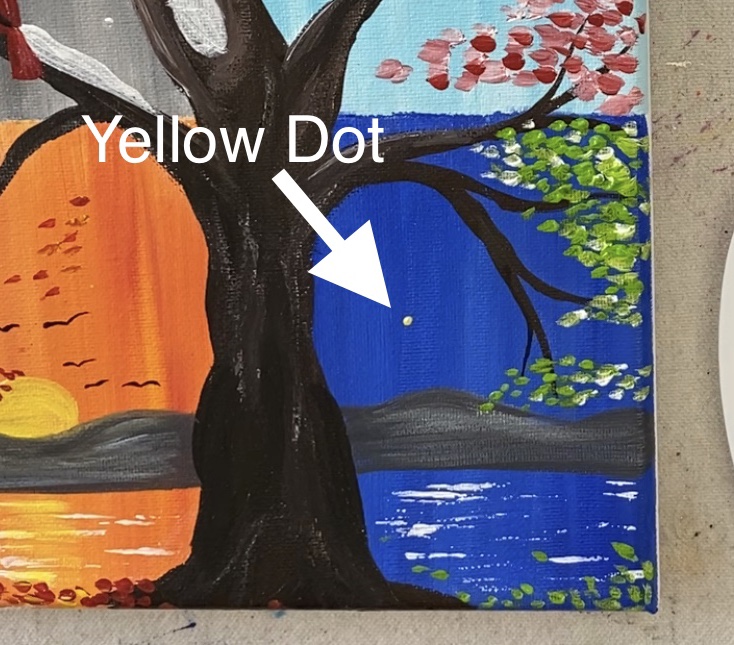
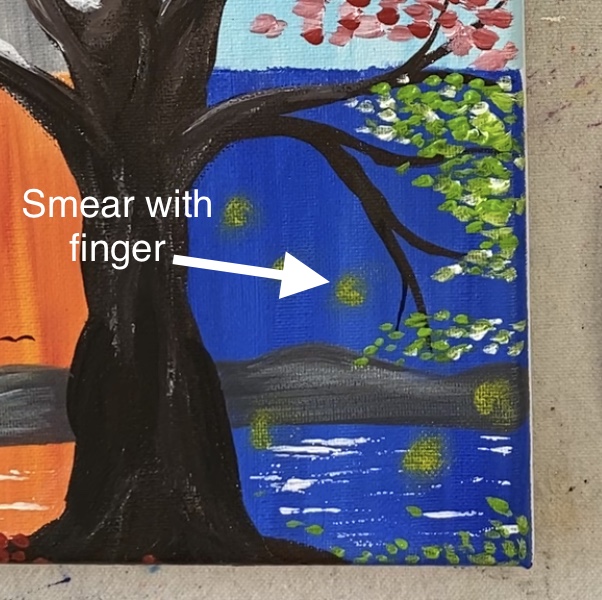
Make a dot with yellow then use your finger to smear it.
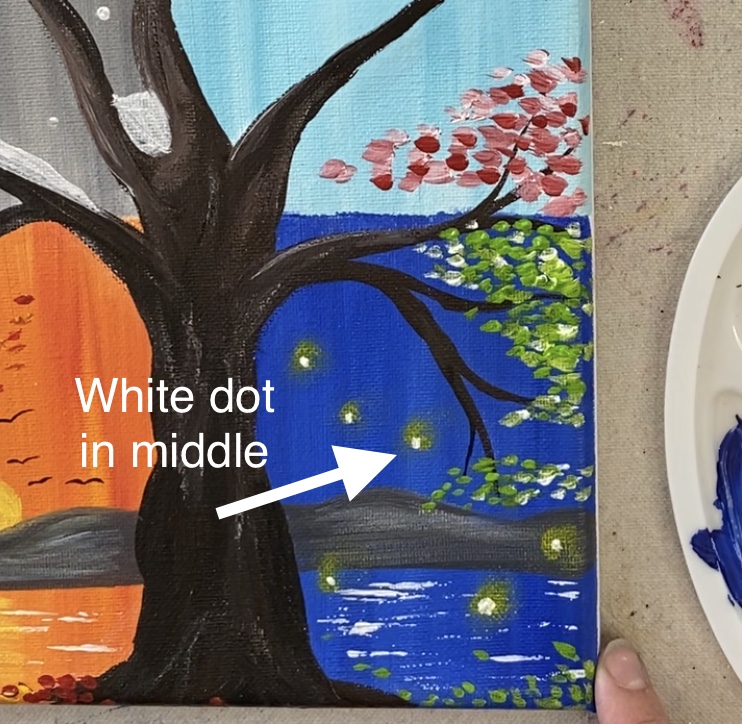
Then add a little white dot in the middle.
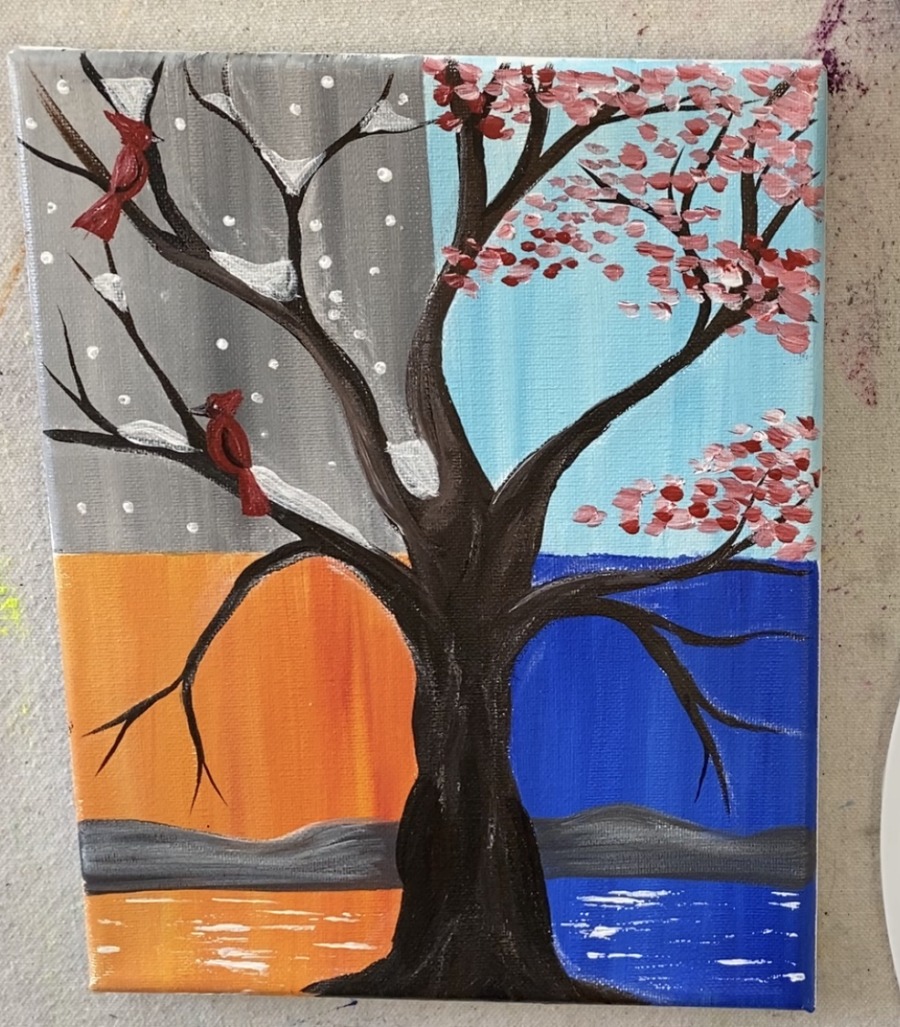
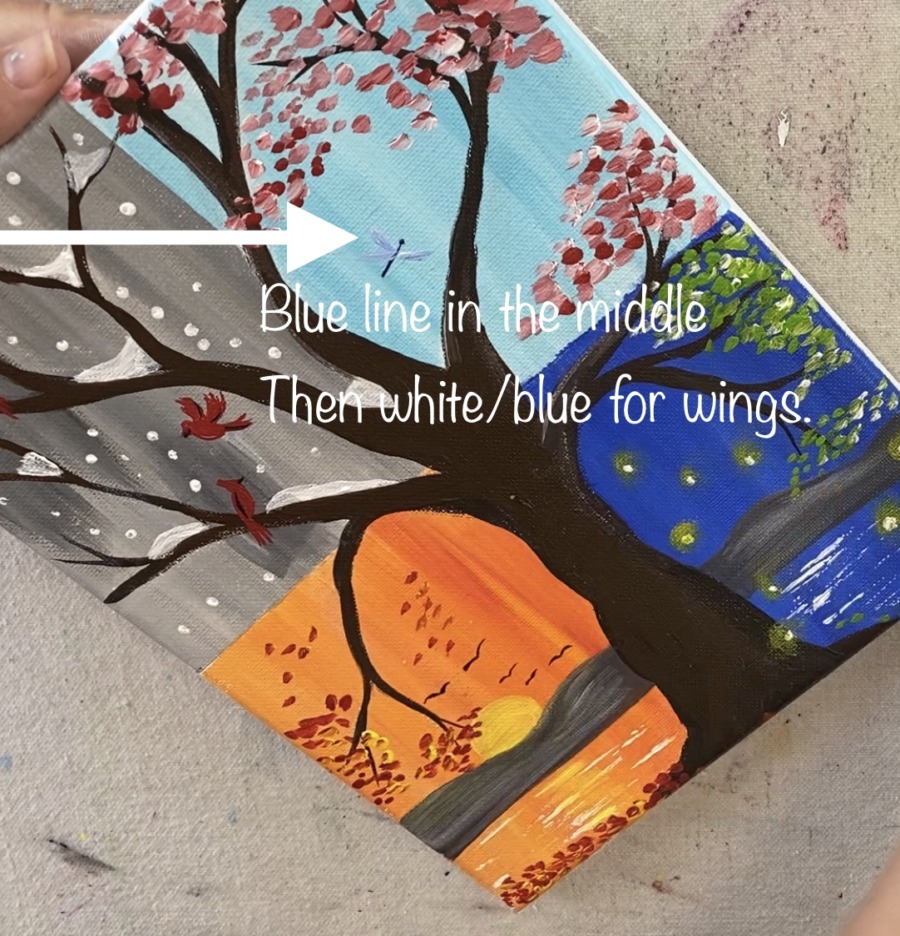
14. Final touches + Paint the dragonflies
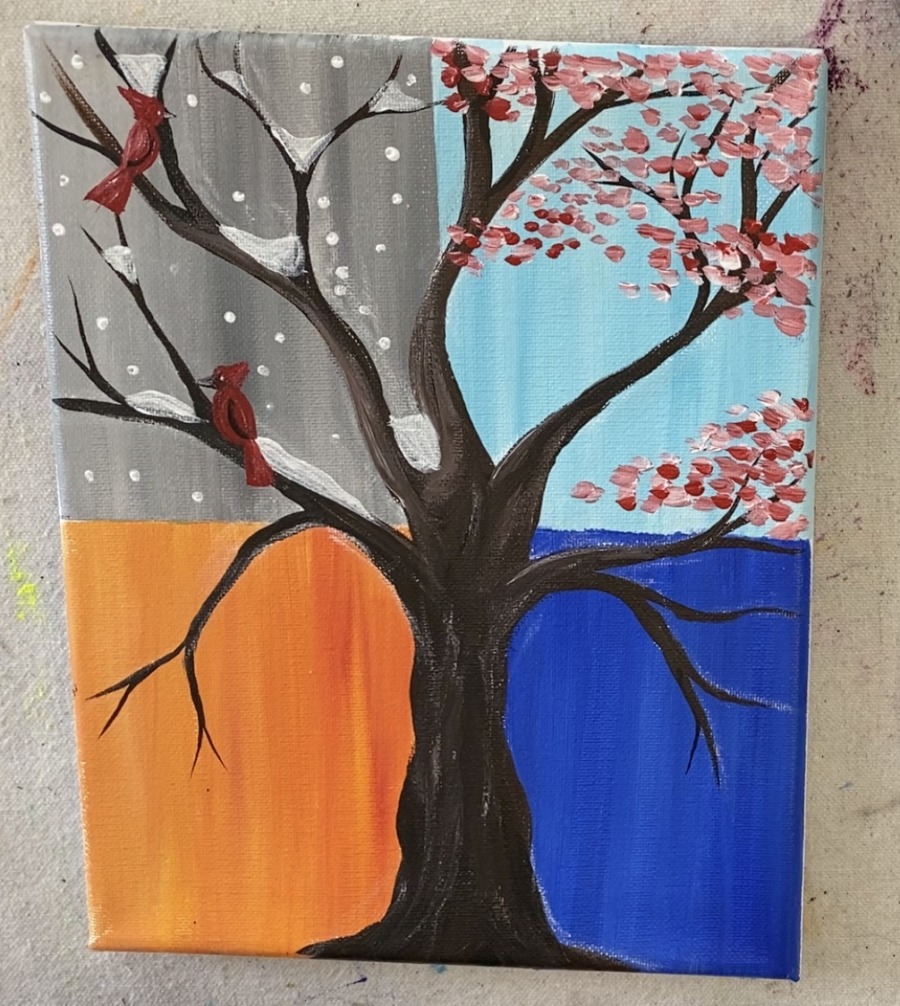
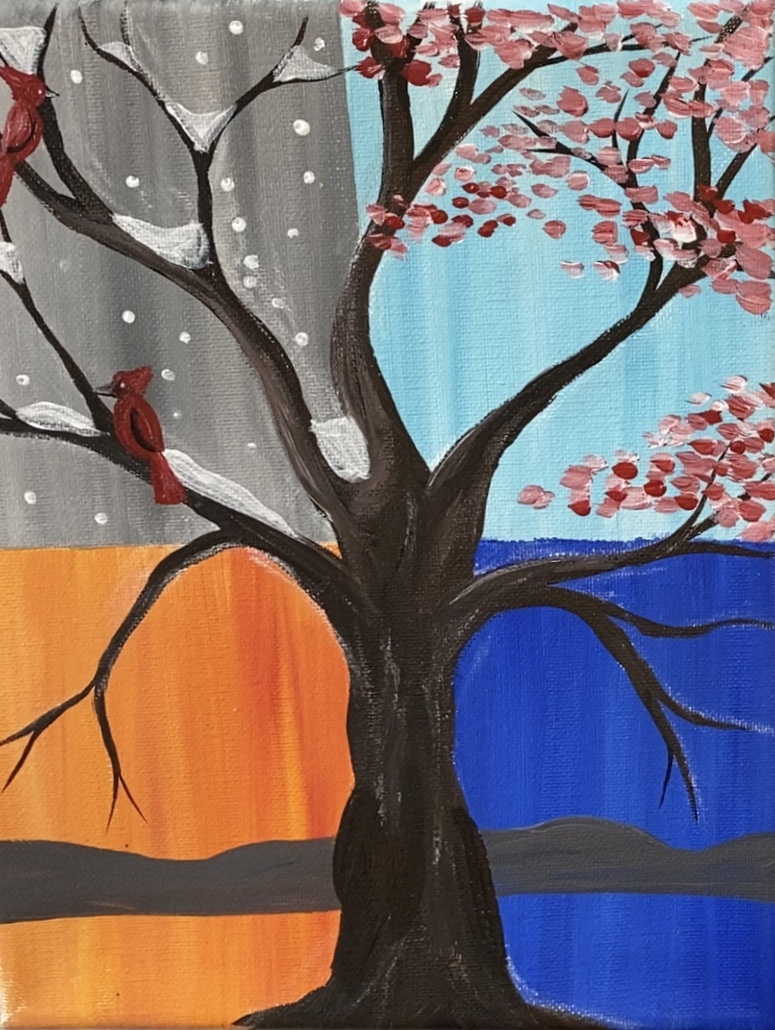
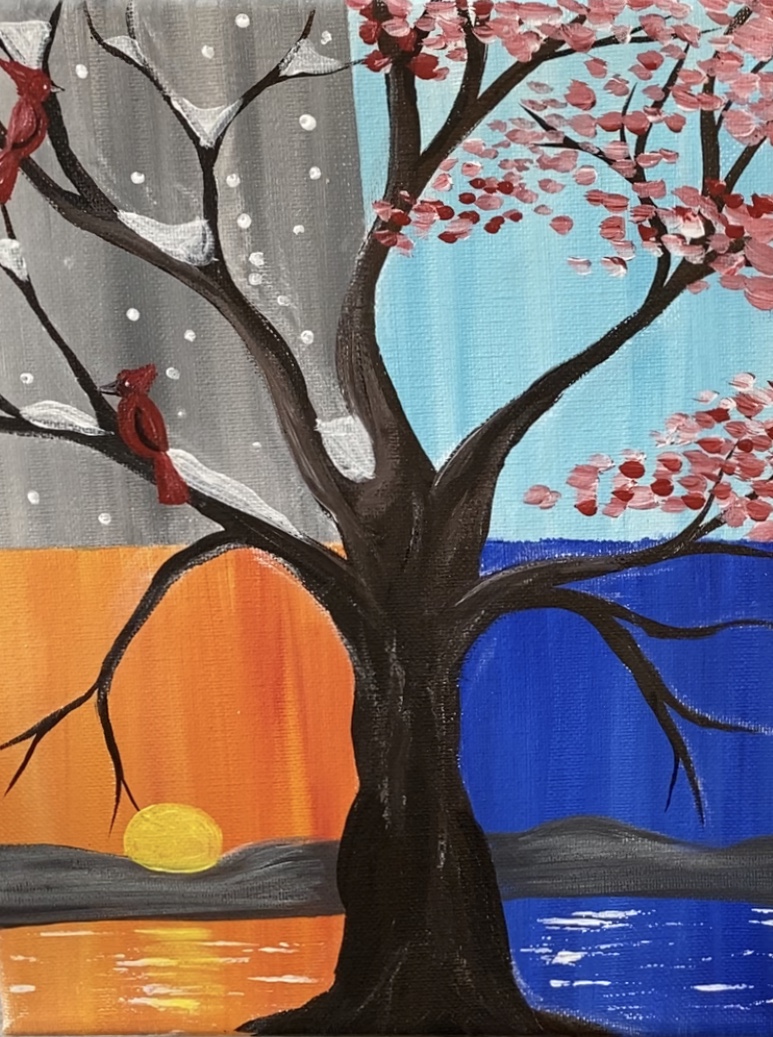
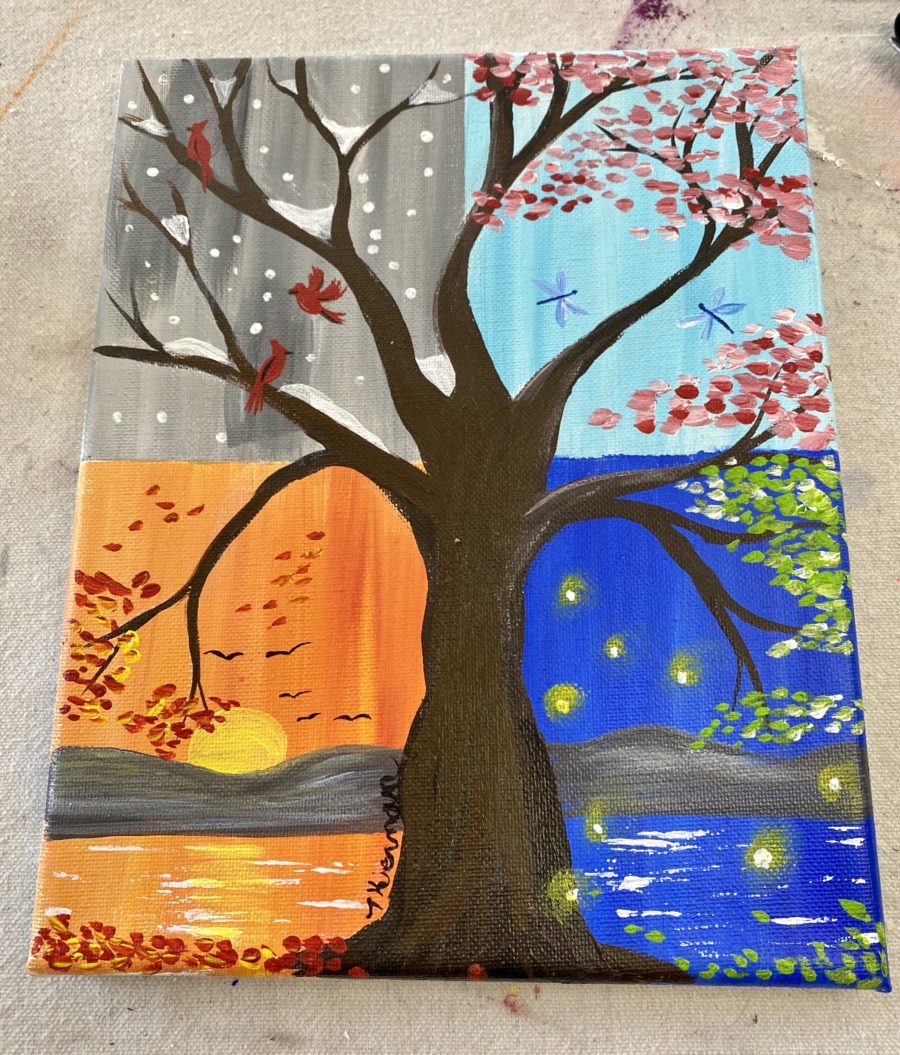
I decided my cardinals were too big! You don’t have to change yours but I painted over mine just to make them smaller. This was also a great test of the paint’s coverage! I literally only needed one coat of gray to cover that red!
I made a flying cardinal as well and added black for the beaks and a little curved black line for the wings.
I used ultramarine blue and titanium white to paint the fireflies. Start by painting the line in the middle. Then paint the wings with white and a little blue.
I did not rinse the blue off my brush when switching to white. That created the light blue effect in the wings.
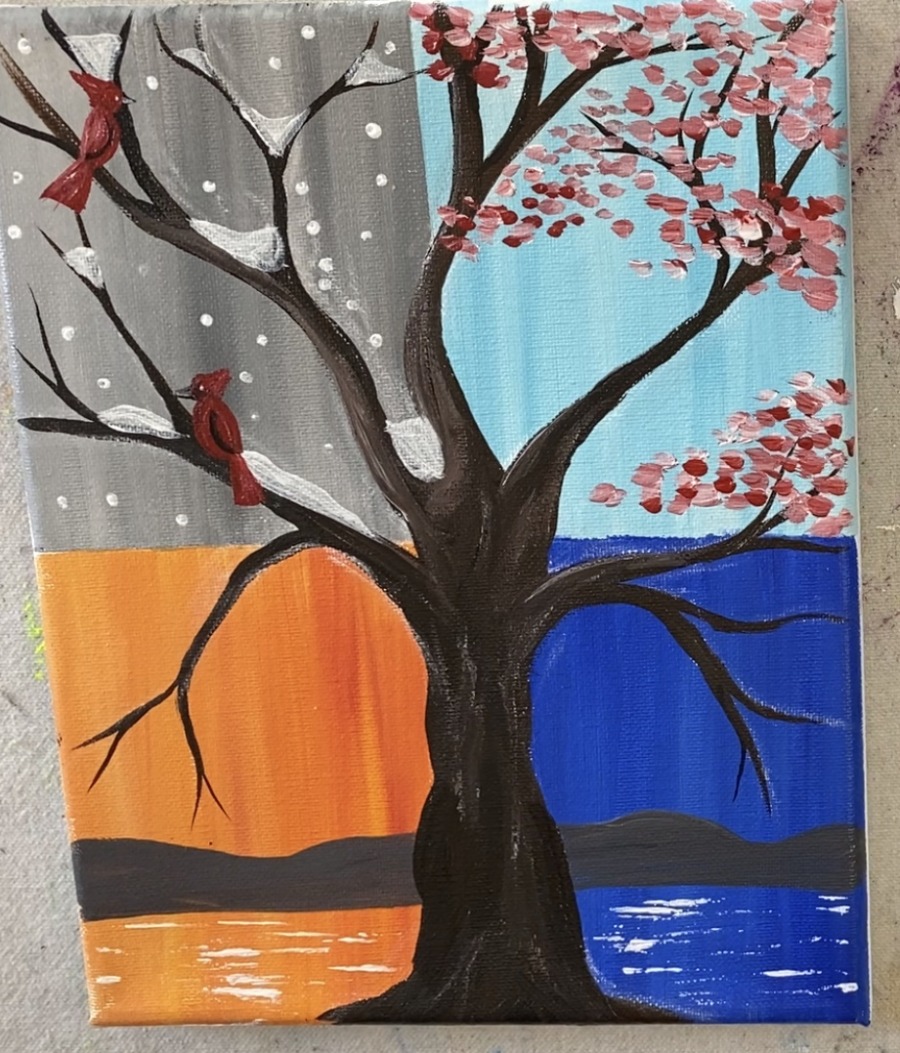
Finished!
Sign your name and show it off! Click on one of the social links below to share your painting. I can’t wait to see yours!
Share Your Art Here


I love this painting tutorial, but half way through step 9 the pictures are not visable.
Thanks for letting me know Michelle! I will look into what is happening with this tutorial.