
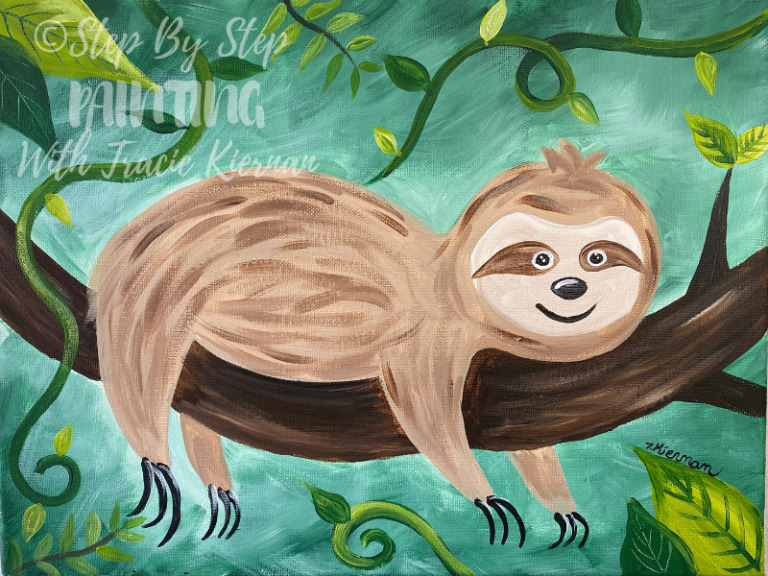
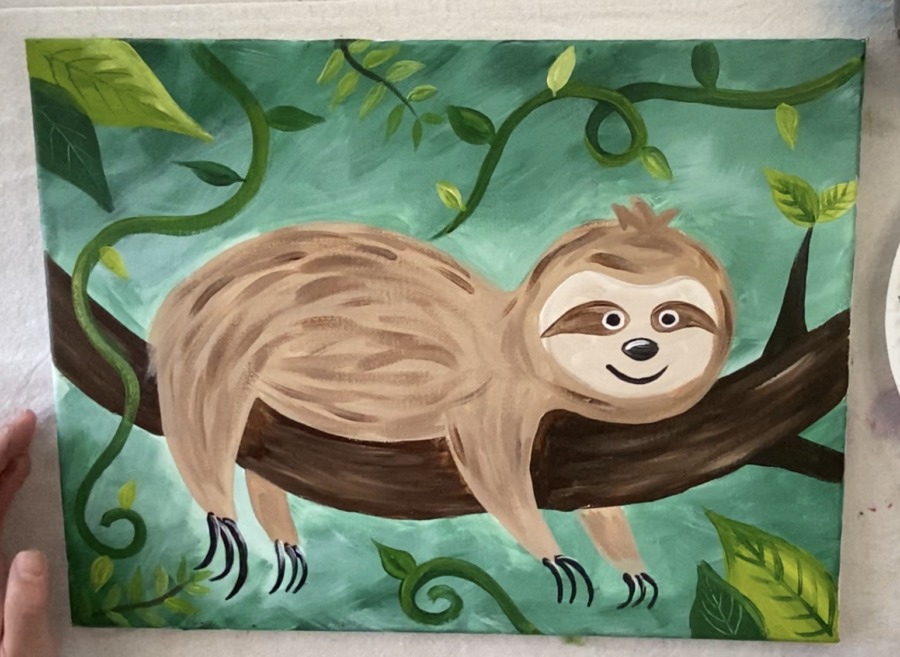
Sloth Painting – Step By Step
Learn to paint a cute sloth on a branch with vines and leaves in the background!
Would you like to save this?
This is a fun tutorial you can do with your kids and learn fun facts about sloths. They are native to the tropical rainforests of Central and and South America.
They are considered the world’s slowest mammal and can sleep up to 20 hours a day! Also, did you know there are a species of sloths that have two toes and another species that have three toes?

I hope that you enjoy painting this three toe sloth!
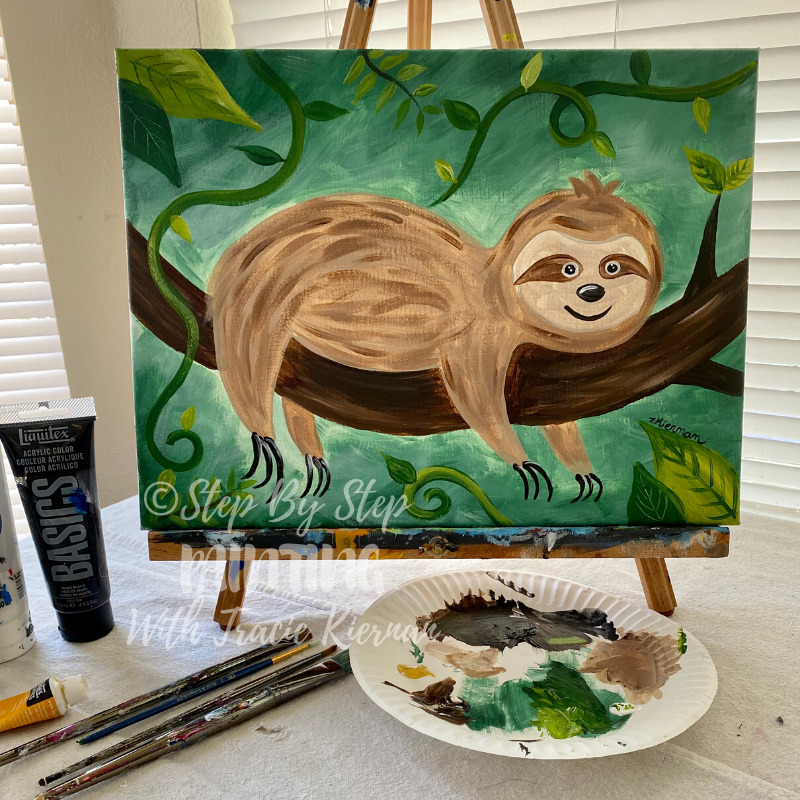
Materials
Learn To Paint A Sloth

Learn how to paint a cute sloth on a branch with beautiful tropical rainforest leaves in the background.
Materials
- 12” x 16” Canvas
- Acrylic Paints
- Brushes
- Traceable
- Graphite Paper
Colors
- Hookers Green Hue Permanent
- Light Olive Green
- Titanium White
- Mars Black
- Burnt Umber
- Naples Yellow
Brushes
Color Palette

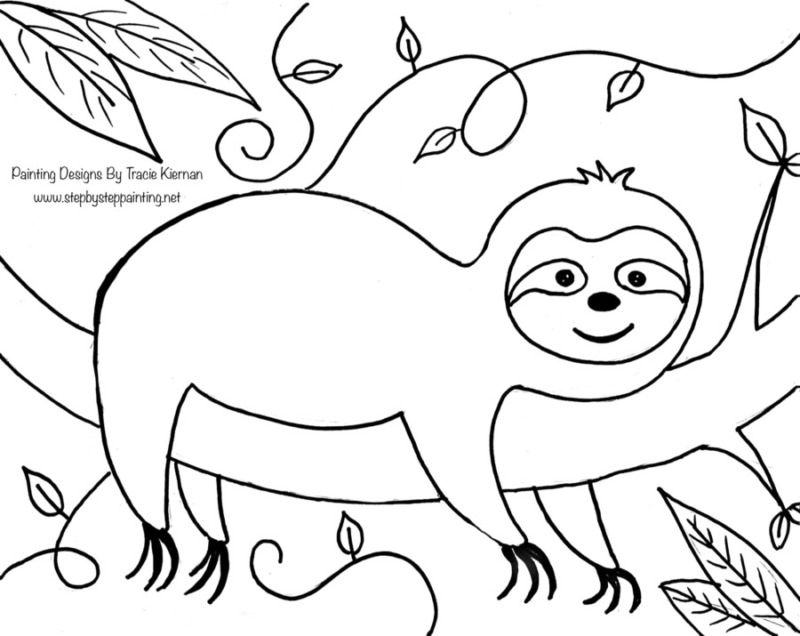
Traceable
Download 12 x 16 Sloth Traceable
Directions At A Glance
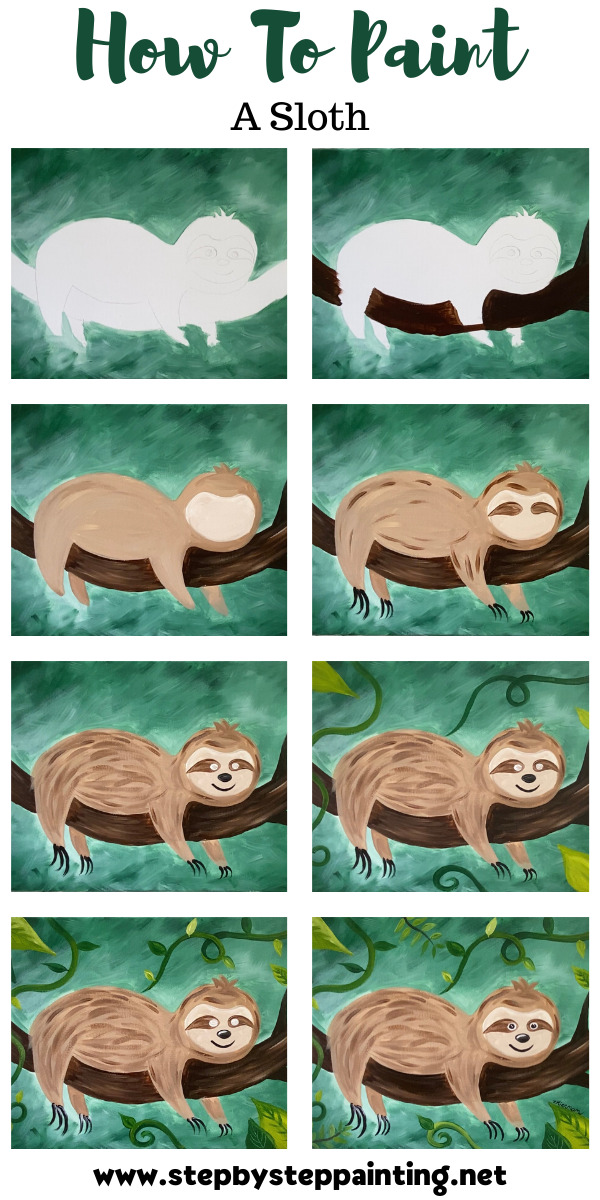
Step By Step Directions
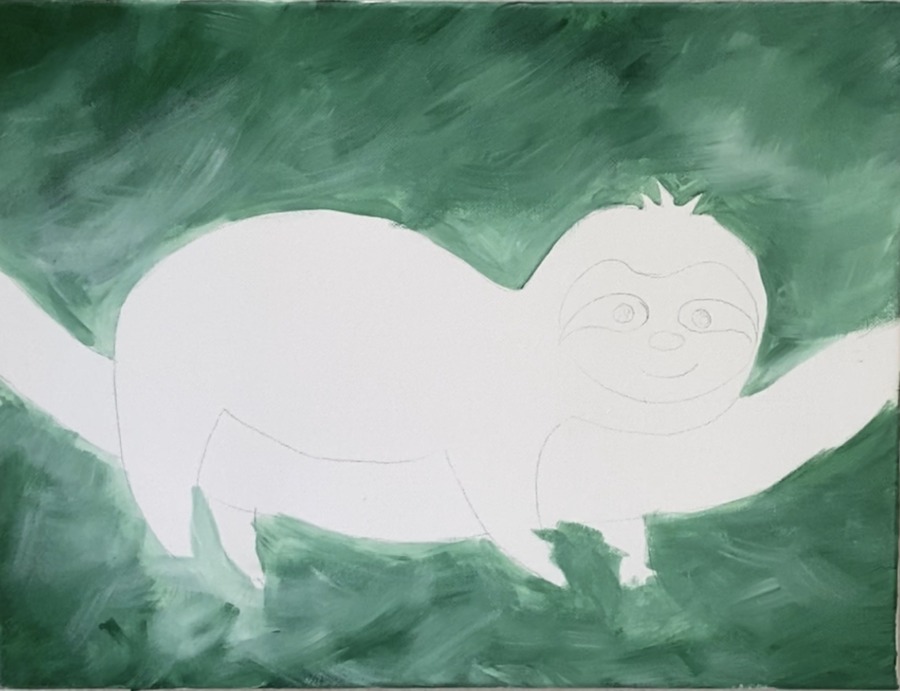
1. Transfer the traceable to canvas (or lightly draw your sloth and branch)
I did this painting on a 12 x 16 canvas so my sloth drawing was resized accordingly to fit that size! This one is printed on four sheets and taped together.
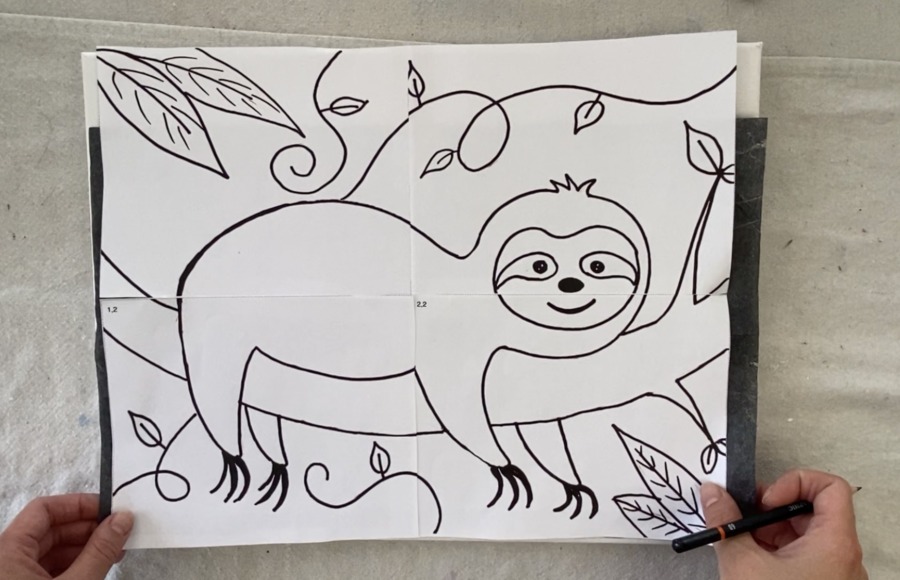
Use a sheet of graphite paper below the sloth drawing and trace it onto the canvas so it transfers.
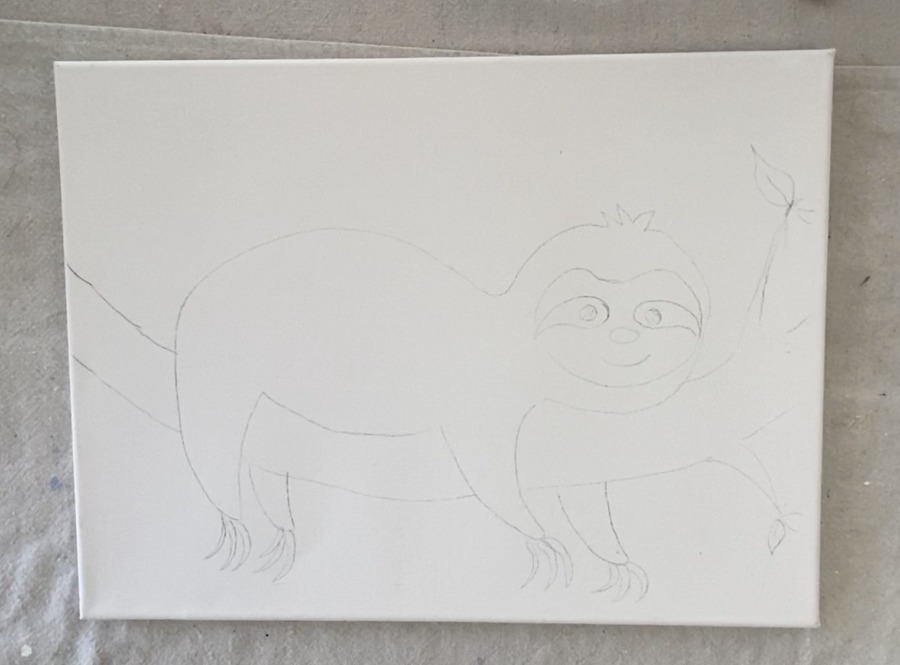
When I transferred mine, I did not do the leaf and vine drawing, only the sloth and the branch. I knew I was going to paint my background color over all those leaves and vines so it was easier this way.
If you want to transfer the leaf and vines, paint your background first and then re-transfer them after the background dries.
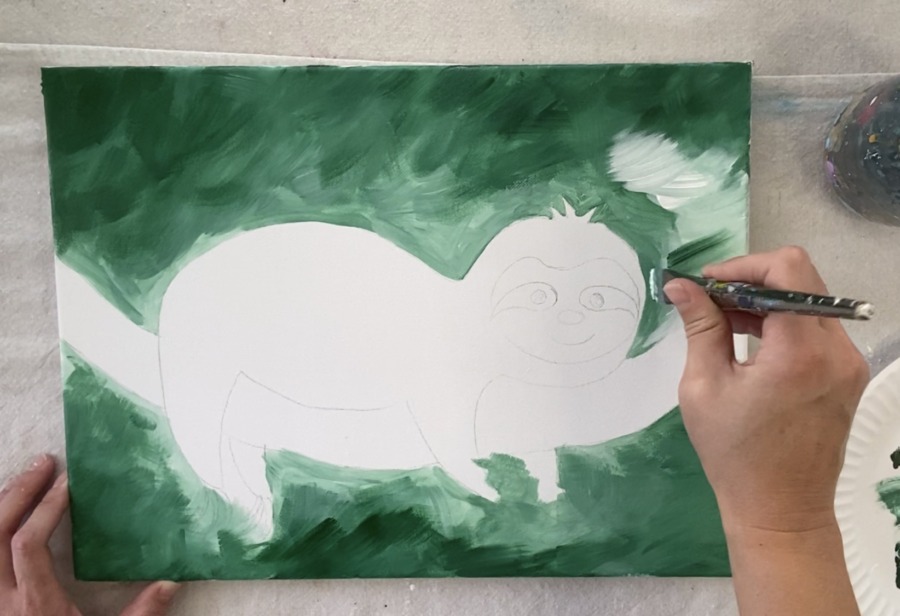
2. Paint the background around the sloth
For the background, I used a combination of titanium white and hookers green hue permanent. I also used a few different brush sizes. For the small areas, I used my 4 bright and 4 round brushes. For the large areas, I used my 3/4 wash brush.
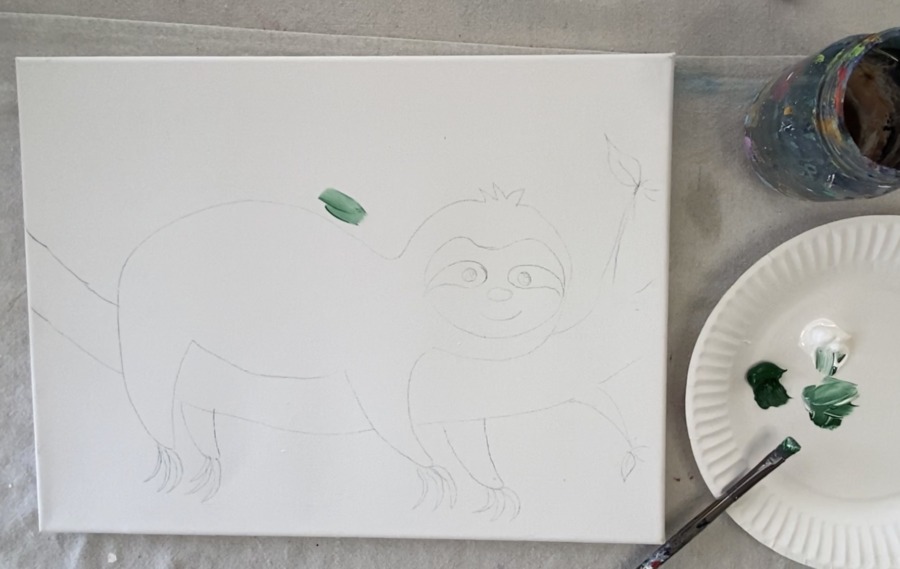
Start by double loading your brush in white and some green. You will need to use more white than green at first. Make some cross hatching strokes so the colors blend. I started above the sloth’s back.
This background technique is very similar to the technique I did in my Cardinal Painting.
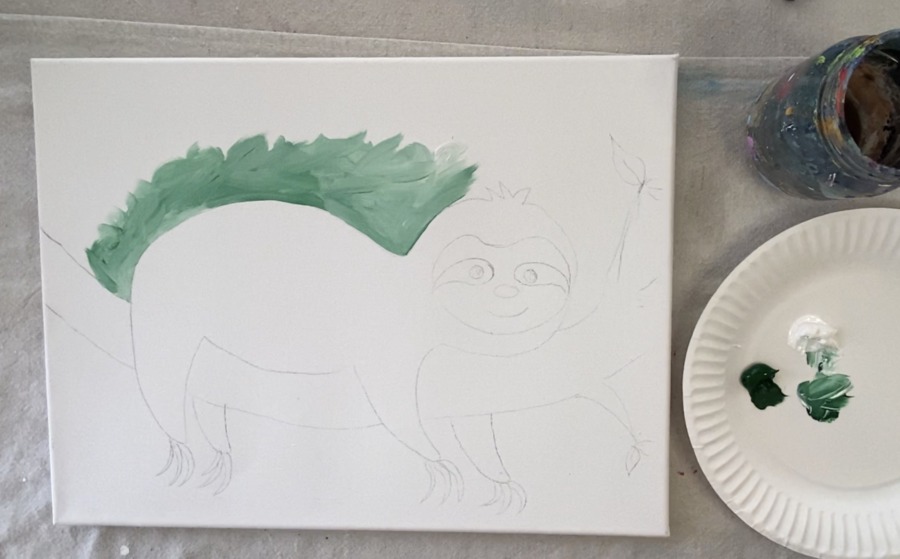
This is an abstract background that blends the white and green. The area around the sloth is lighter and has more white. The areas`a closer to the corners and edges are darker and have less white but more green.
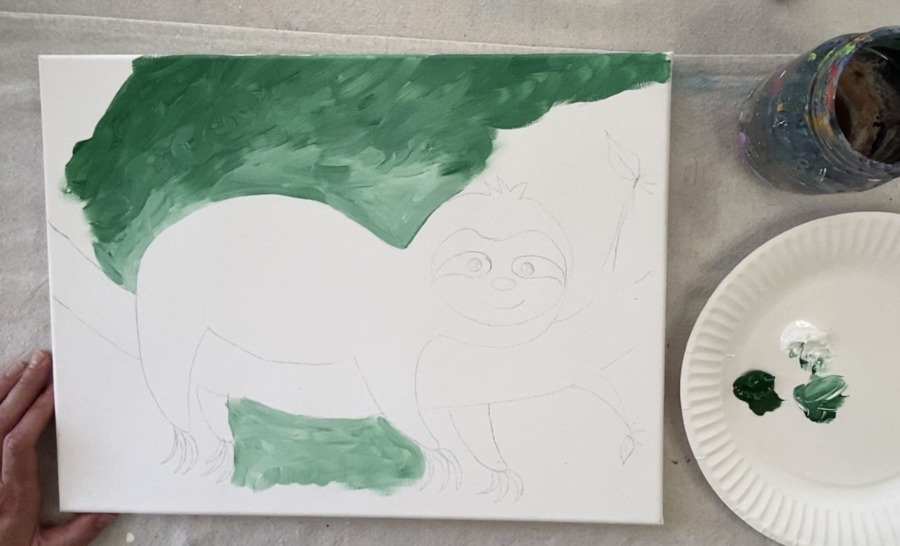
You can do “x” strokes, circle strokes, a combination of the two, etc. The point is to allow the colors to blend on the canvas to create different tints of that green. Go around the sloth and the branch the best you can.
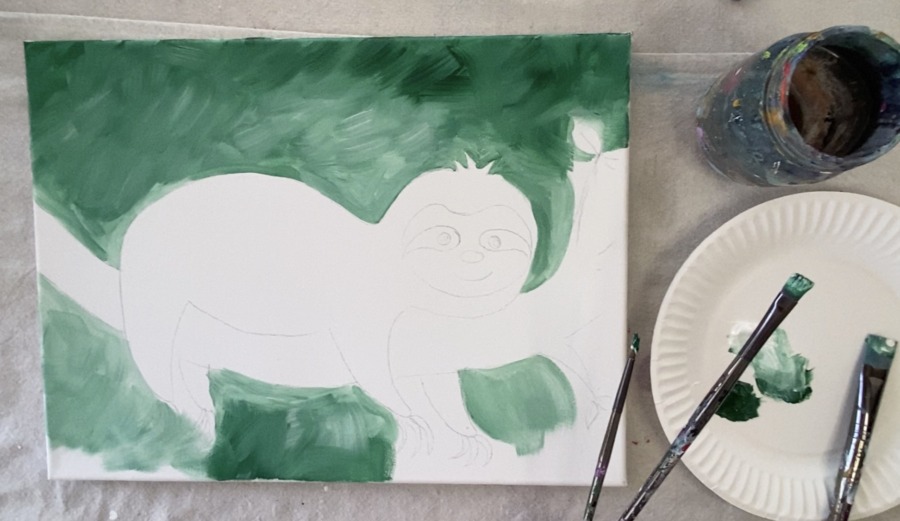
Again, use your smaller brushes to get into the smaller areas around the sloth.
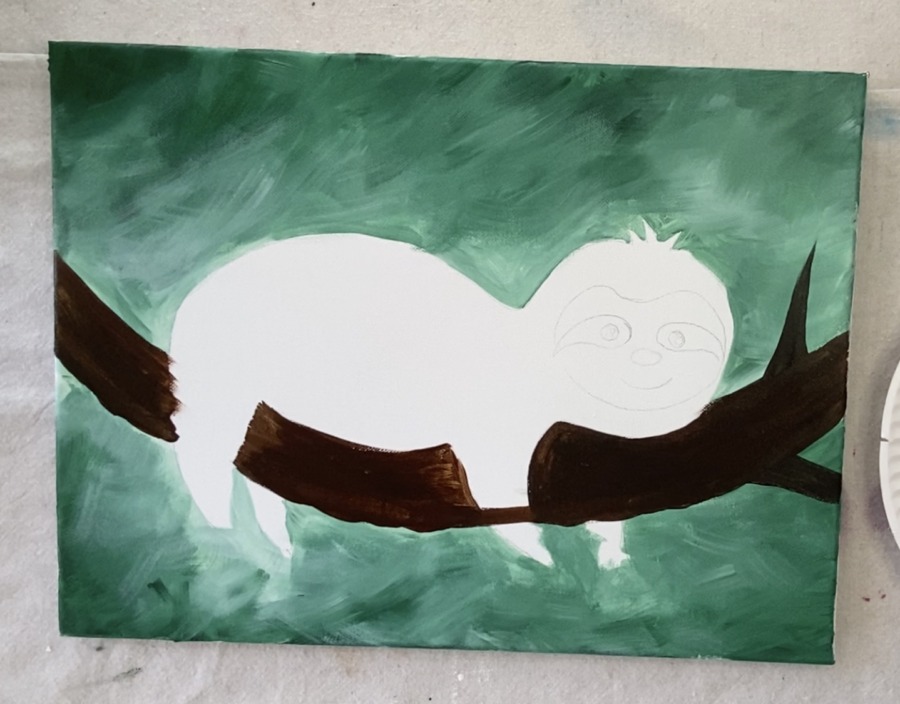
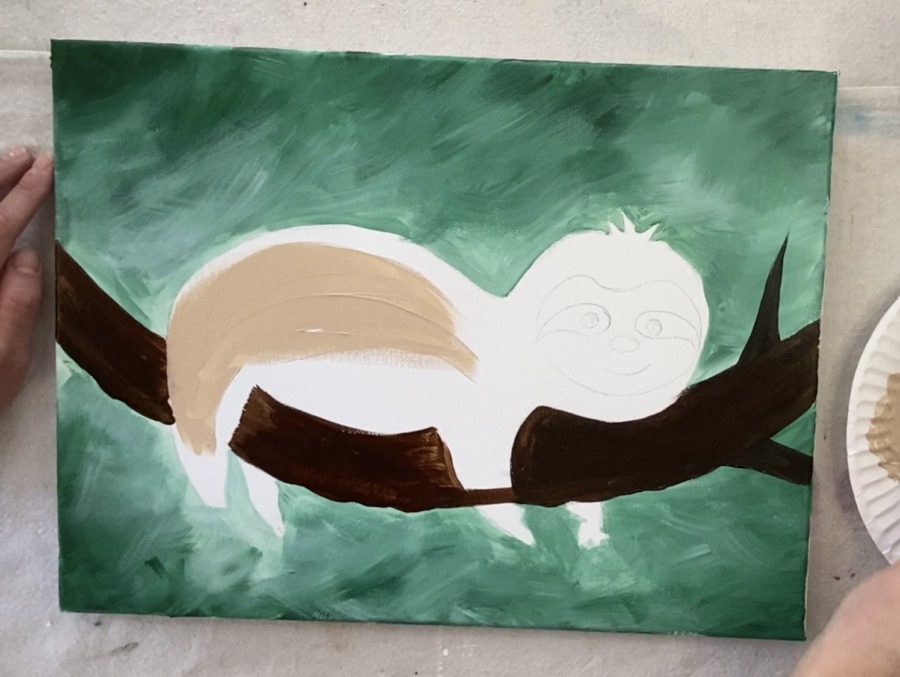
3. Paint the branch
The branch was painted a combination of burnt umber with a little mars black mixed into it.
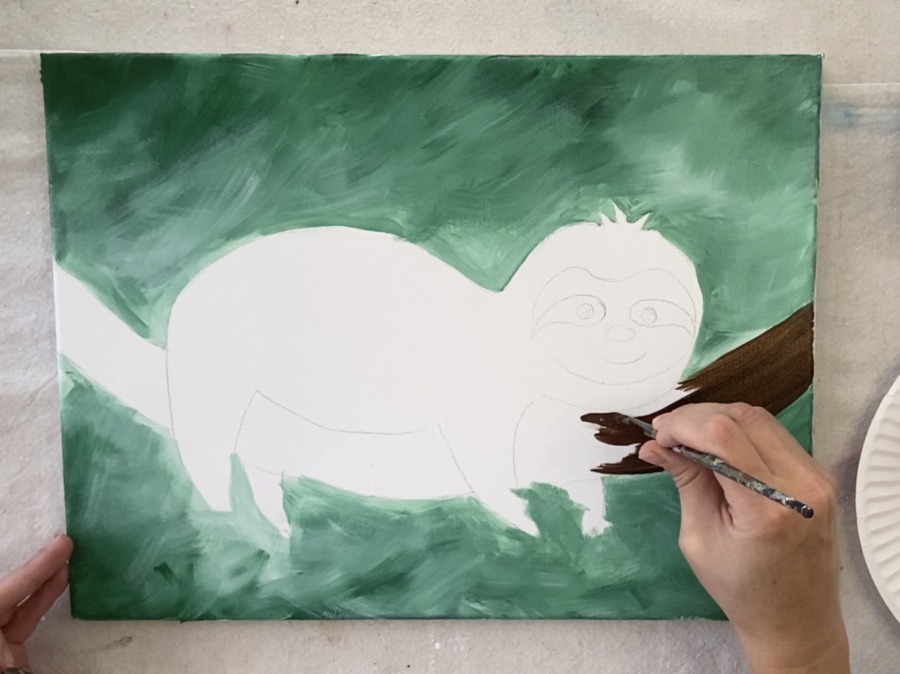
Use any of your brushes (I used the 4 bright) to paint that shape in and have your strokes contour or go in the direction of the branch. Since this branch is curved, that is the direction my strokes went.
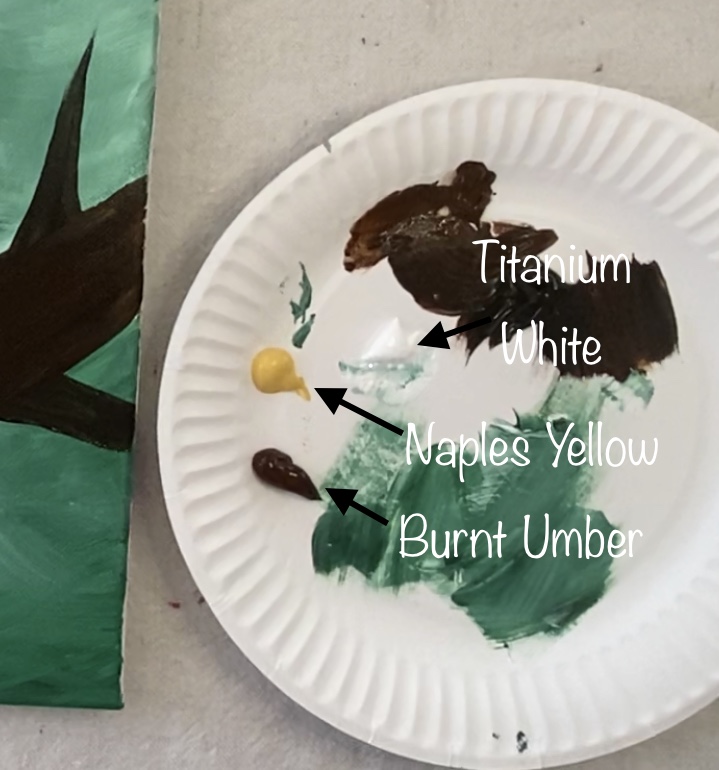
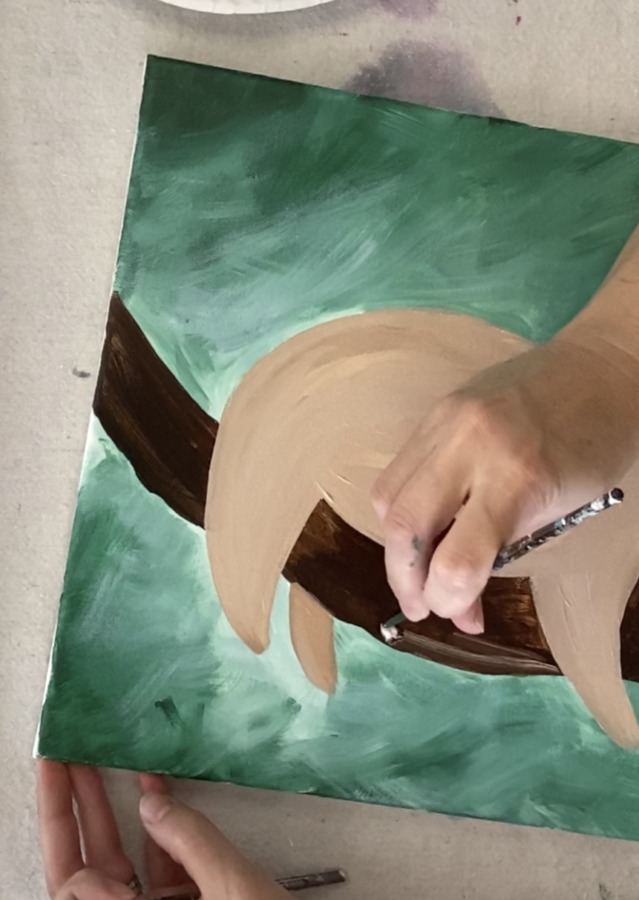
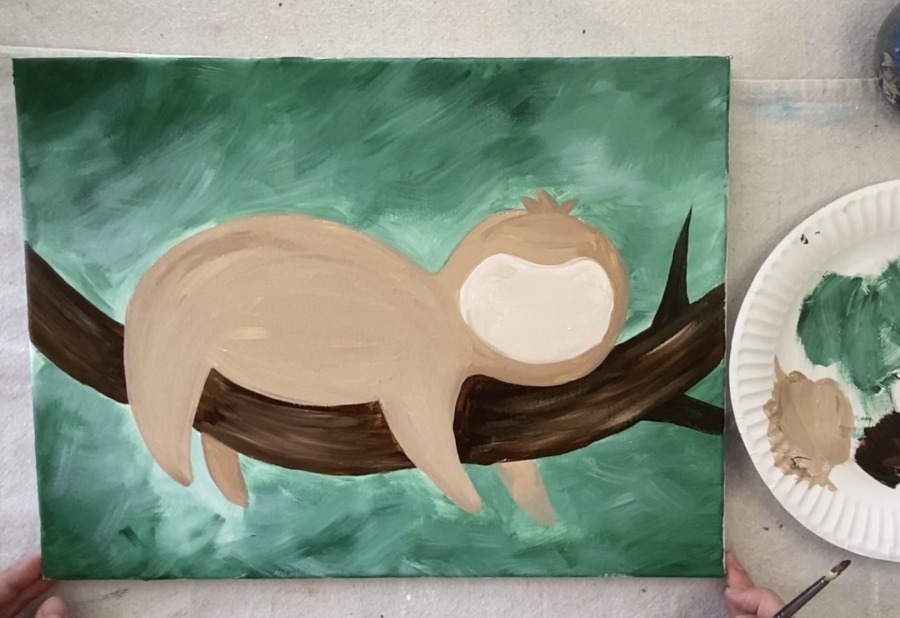
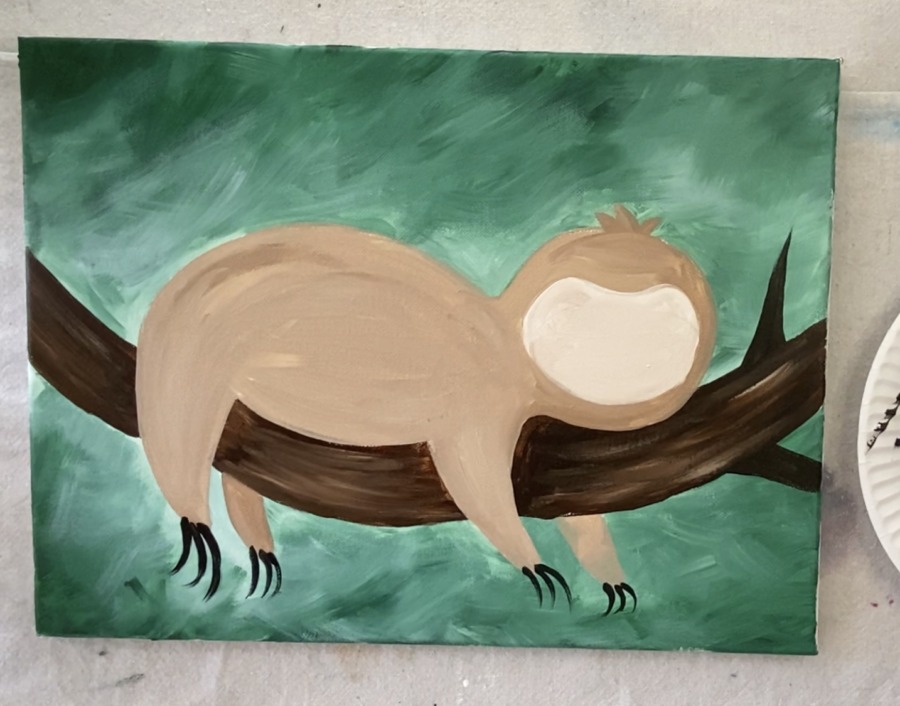
4. Paint the base layer of the sloth
The main part of the sloth is a light brown color. To make this color, I mixed white with burnt umber and some Naples yellow hue. The ratio was about 2 parts white, 1 part Naples yellow and 1 part burnt umber. However, this does not need to be exact. Mix your colors to make a light golden brown.
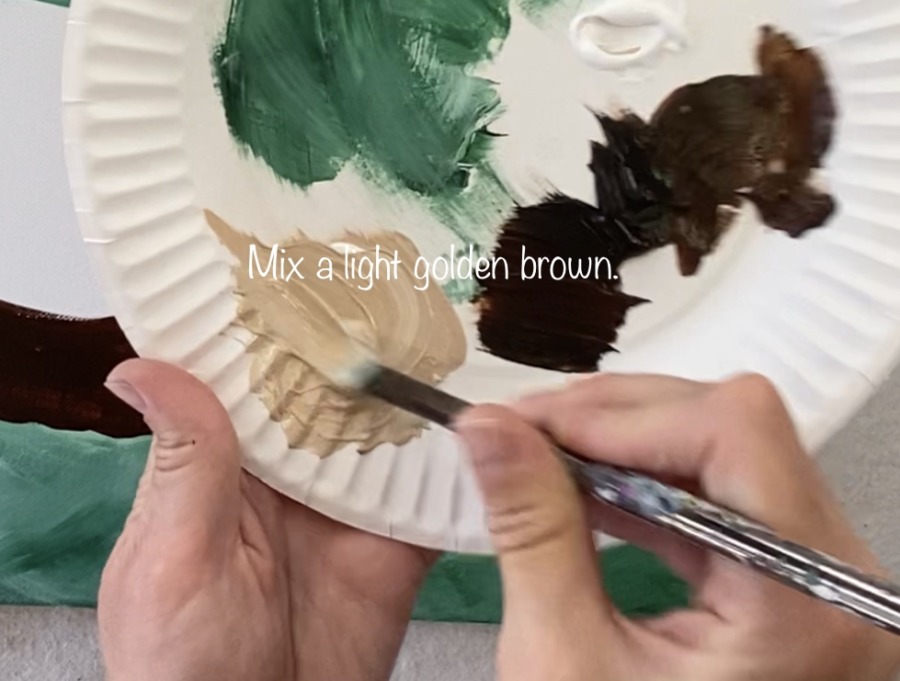
Paint the sloth’s body, legs and around the face. I used the 4 bright brush for this.
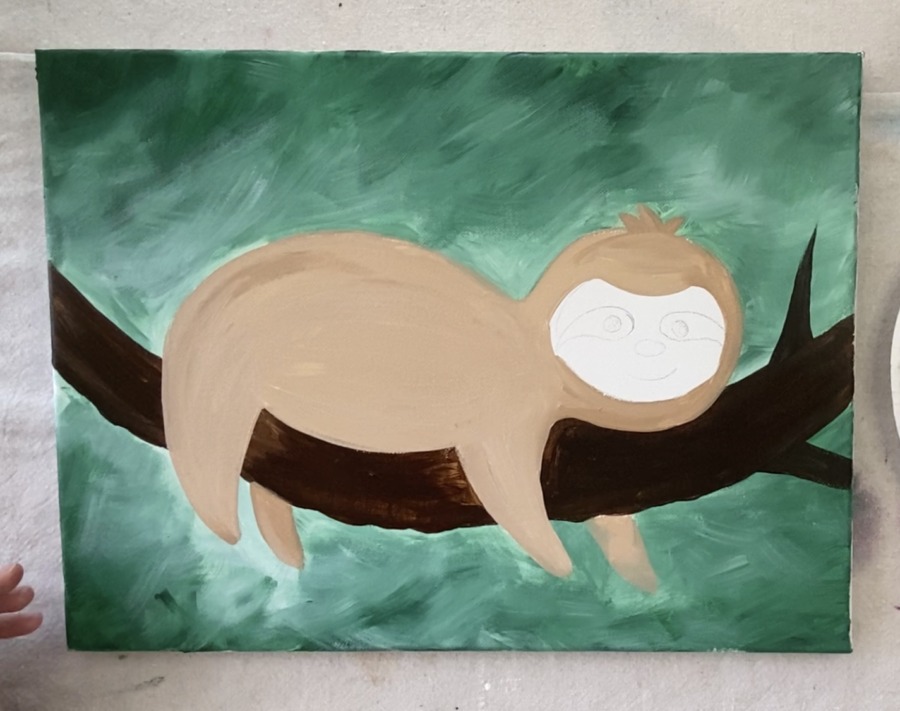
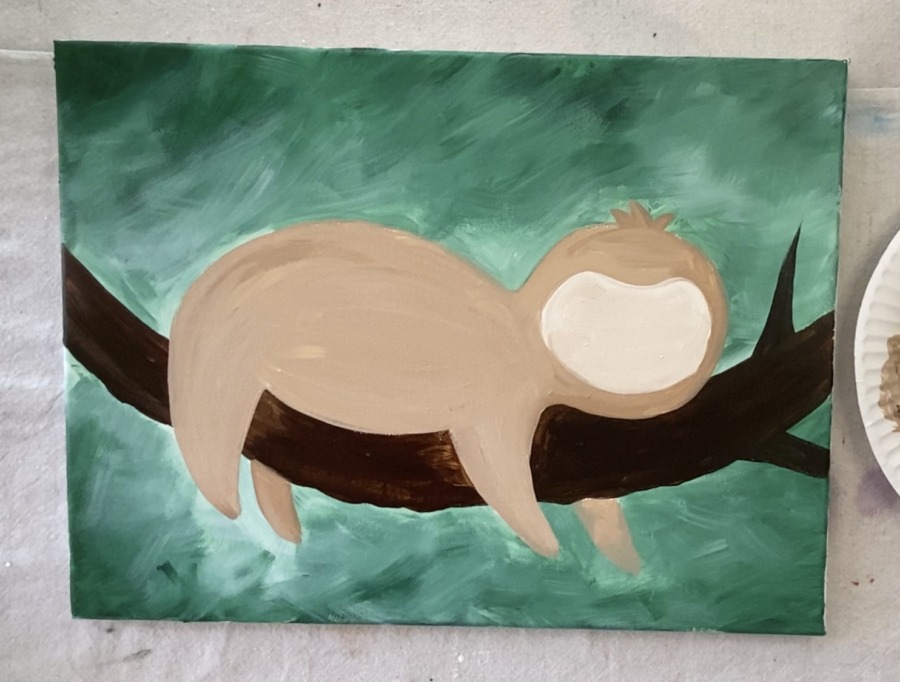
5. Paint face
Then make an even lighter version of that light brown color by mixing more titanium white into it until it turns lighter. Paint the face this color.
6. Add texture to the branch
Using that same color you used for the face, add that to the branch. Paint some lines on the branch to give it some texture and highlight. I used the #4 round brush for this.
Your branch may or may not be dry. Mine was still kind of wet so the light color blended into the dark colors of the branch. Just gently paint strokes of the lighter color going in the curved direction of the branch.
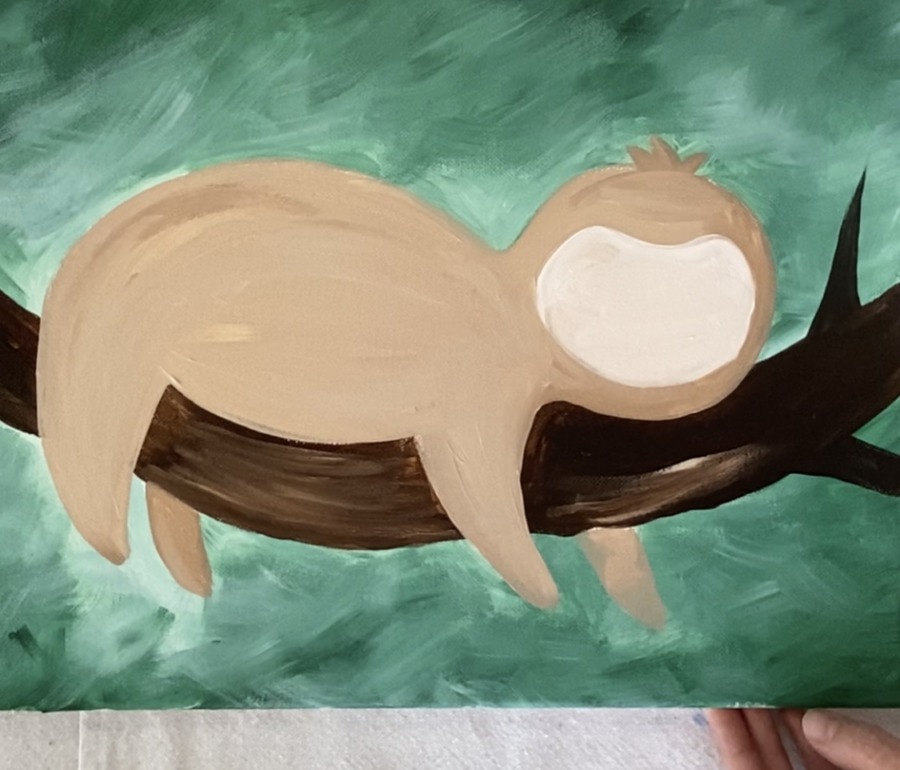
If your branch is dry, you can paint the lighter brown onto it and then add some more dark brown into it to give it that blended look.
The point is to give the branch some more color variation rather than it being solid dark brown.
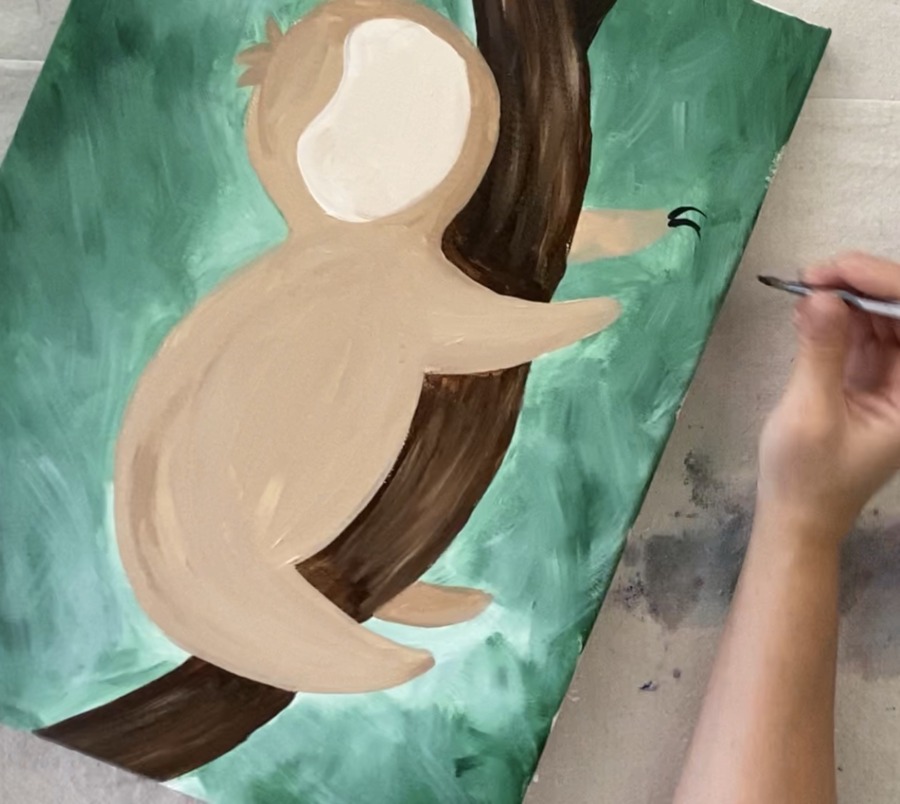
8. Paint the claws
Using a 4 round brush, paint the claws using mars black. To get that black to flow a little, add a bit of water to the black. Press kind of hard at first and then have your stroke go to a point at the tip of the claw.
9. Paint the face & fur texture
For the area around the eyes, I mixed a darker brown by mixing some burnt umber with a little white.
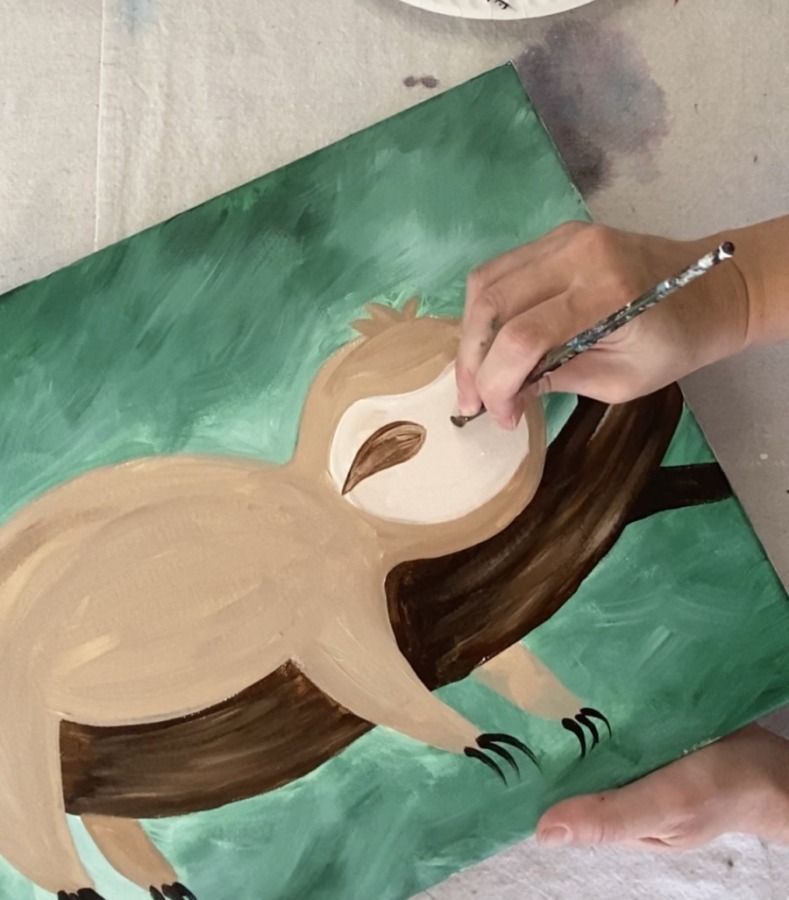
Paint the eye shapes.
Then use that same color to paint the fur texture. Paint curved lines around the sloth that sort of contour with the shape of the back and legs. Paint some fur around the face as well.
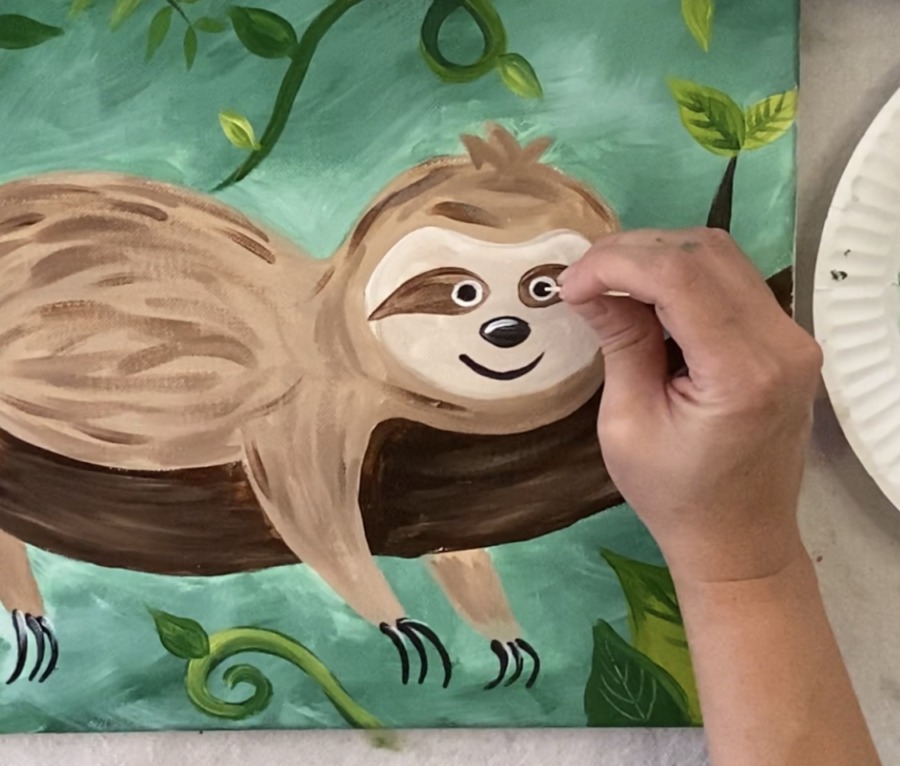
10. Paint face details
Then use black to paint the nose and mouth. Use your 4 round brush for this.
Paint some more fur texture as well (with that brown).
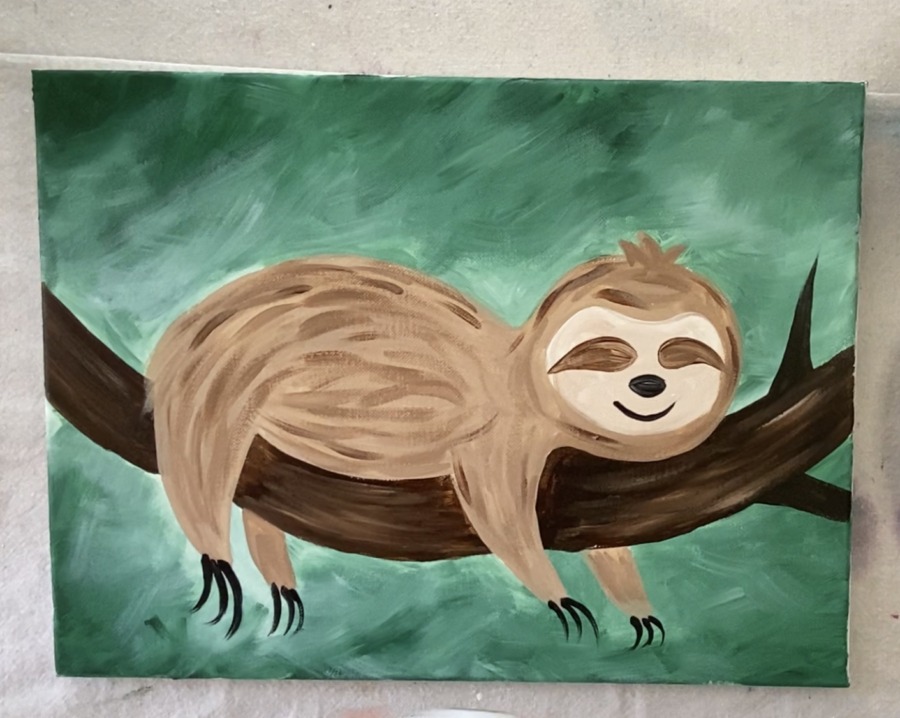
Then use your round brush to paint the white eyes.
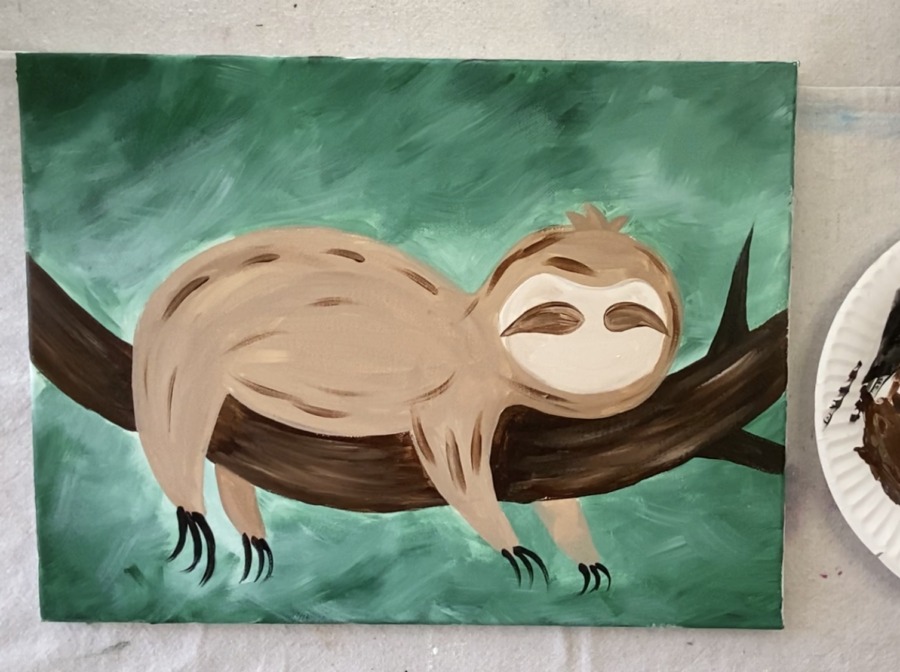
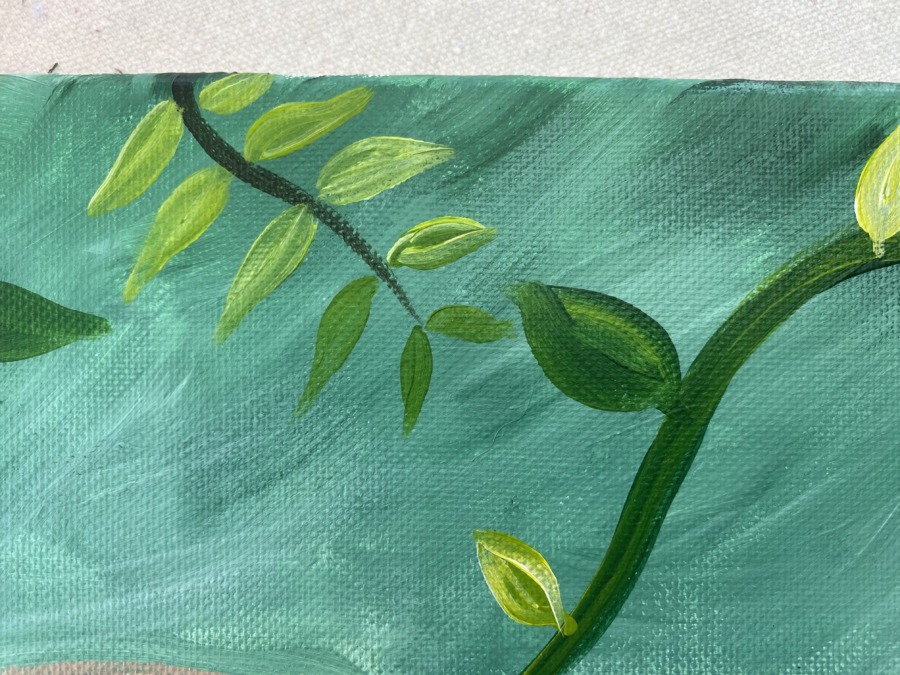
11. Paint leaves & vines in the background
For the leaves and vines, I used a combination of light olive green, hookers green hue permanent and a little titanium white. That light olive green color is very bright and pretty against the color of the background.
I painted the two small leaves on that branch with light olive green.
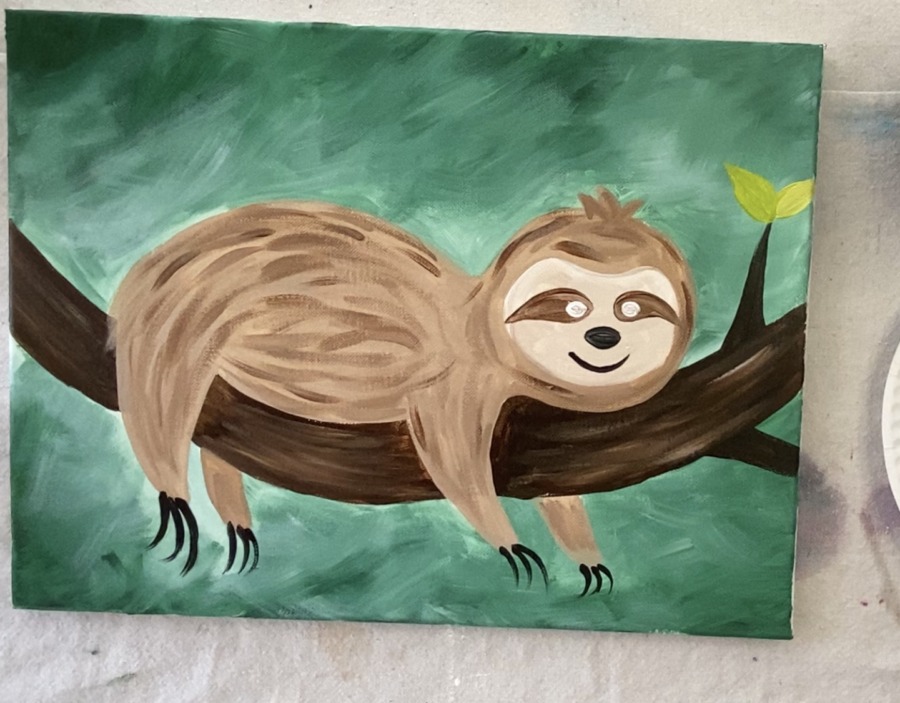
Note: If it doesn’t show up opaque or bright enough, you can add a bit of titanium white into it.
Paint the large leaves in the corners with light olive green.
Paint the vines using hookers green and the round brush. To get that dark green to flow when painting long flowing lines for the vine, add a bit of water into the paint.
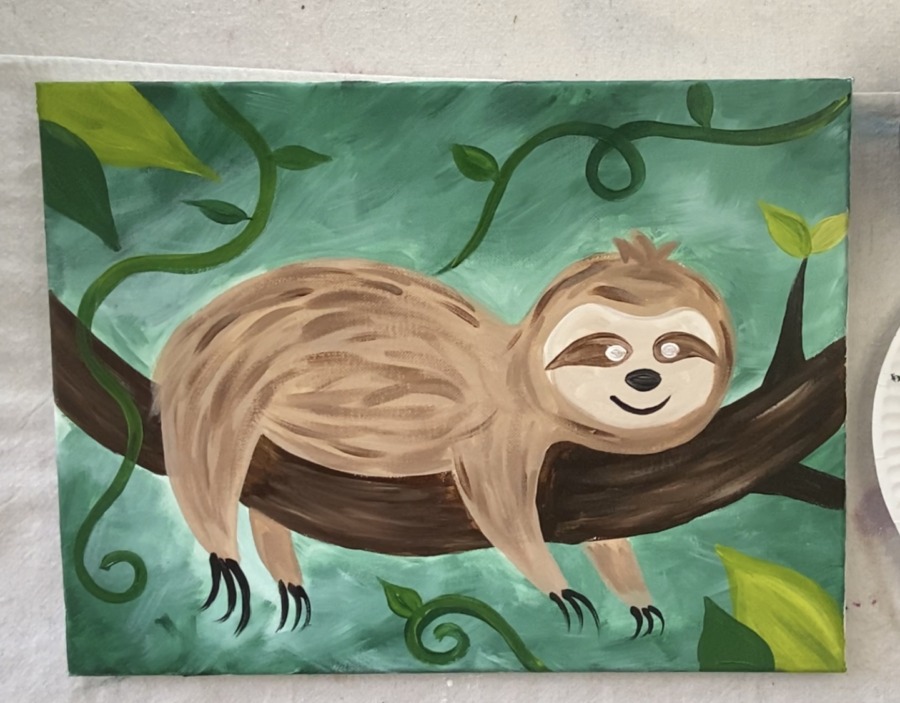
Paint smaller leaves on the vines.

Add lines to the leaves by either scraping them with the back of your paint brush handle or painting them with a smaller round brush and darker green paint. Note: the scraping only works when the paint is still wet.

If you look closely, I added some highlights to the sloth! Paint a little white curved line on the nose as well as on the claws.
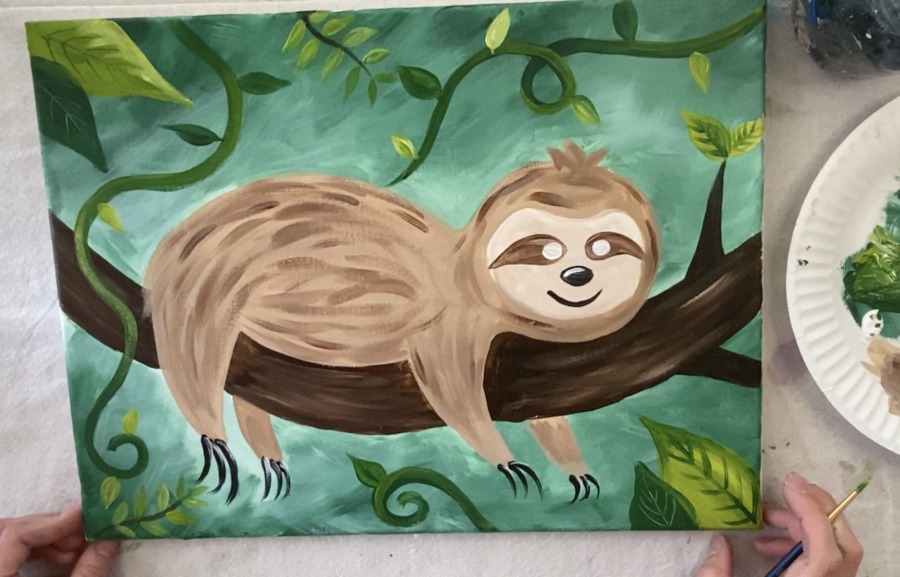
I also painted some different kinds of leaves! For the middle line of the “pronged leaves” on the top and bottom, I used dark brown. Then the little leaves were painted with the light olive green and a little white for color variation.
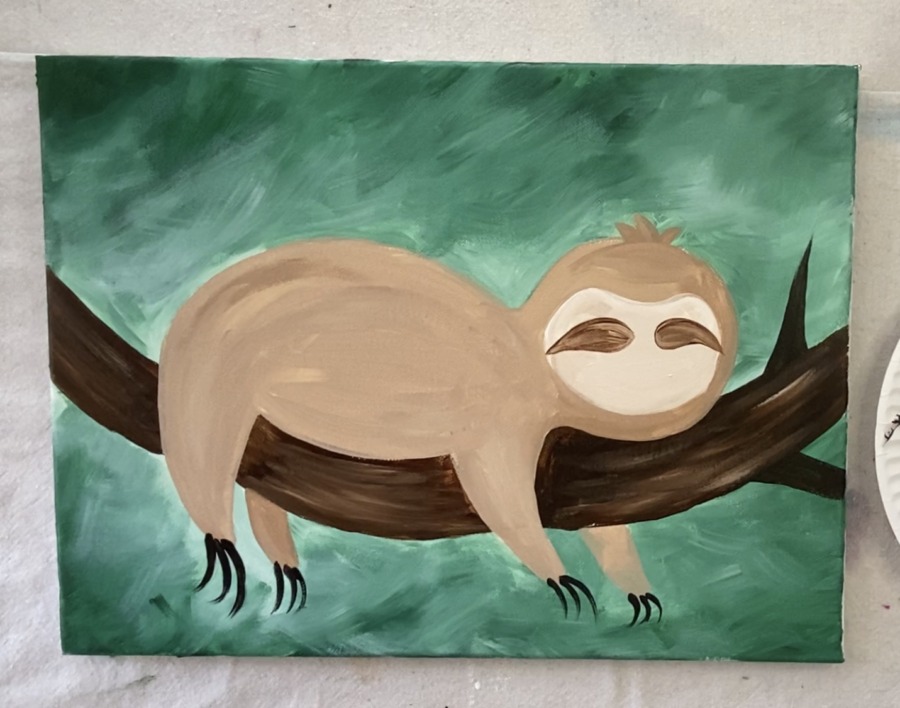
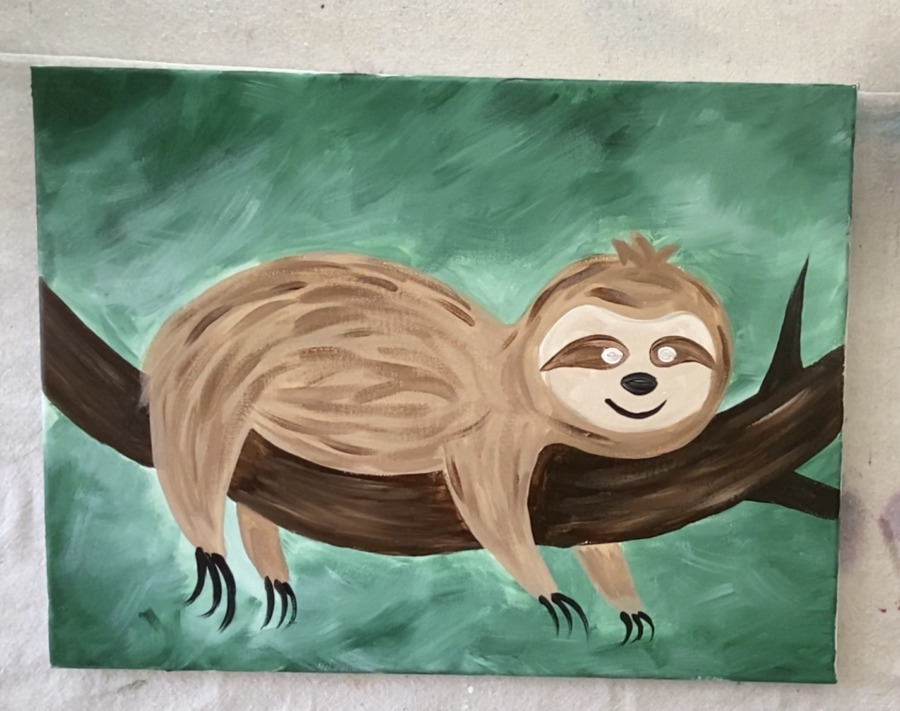
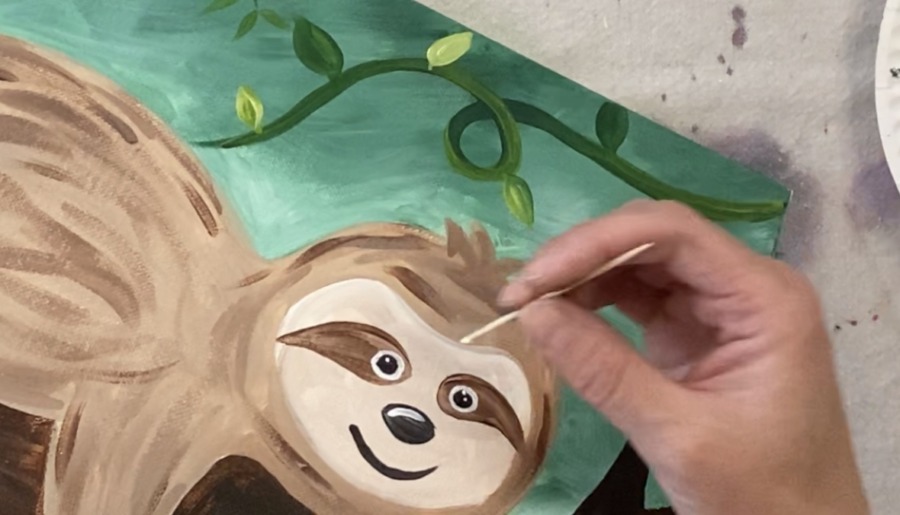
7. Paint the face details
Paint the inner part of the eyes with mars black and then wait for that to dry.
Use a very tiny spotter brush, the back of your handle or a toothpick to paint two white dots inside the eyes. I actually used a toothpick for this step!
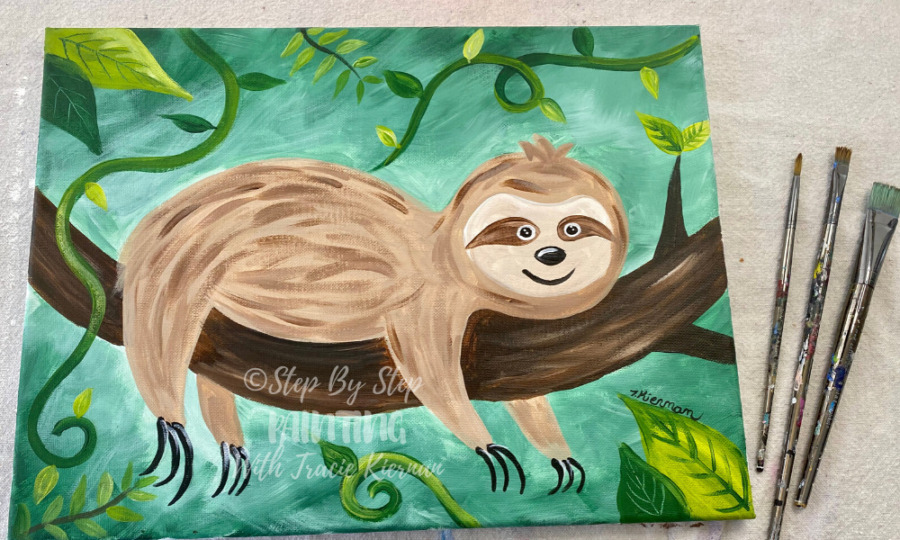
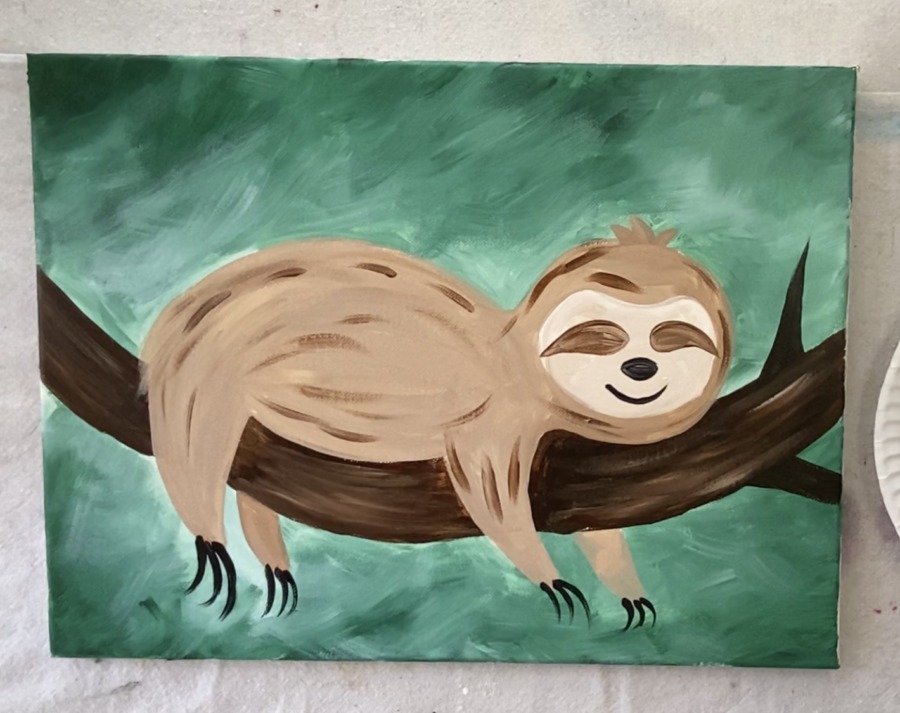
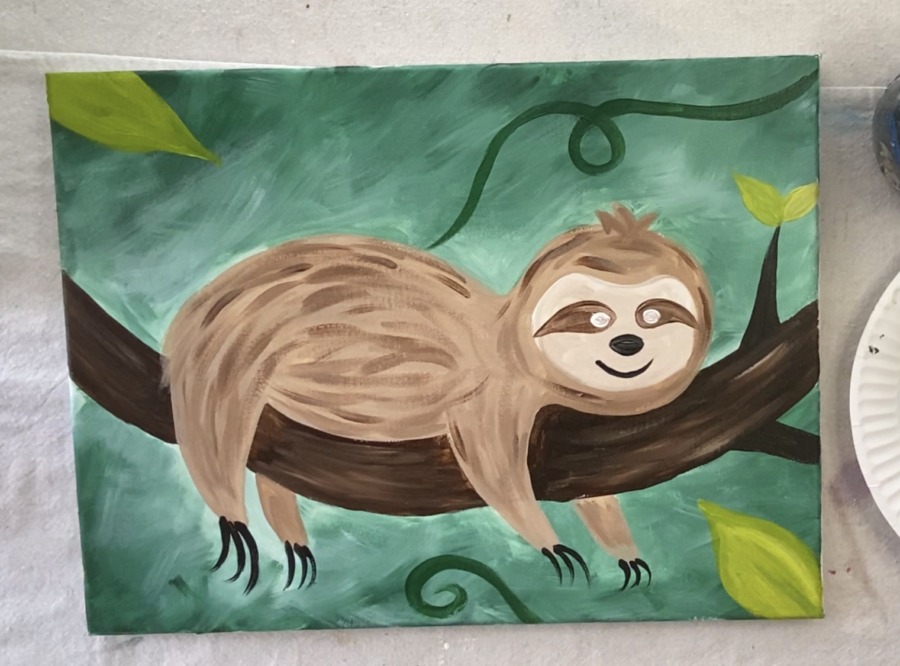
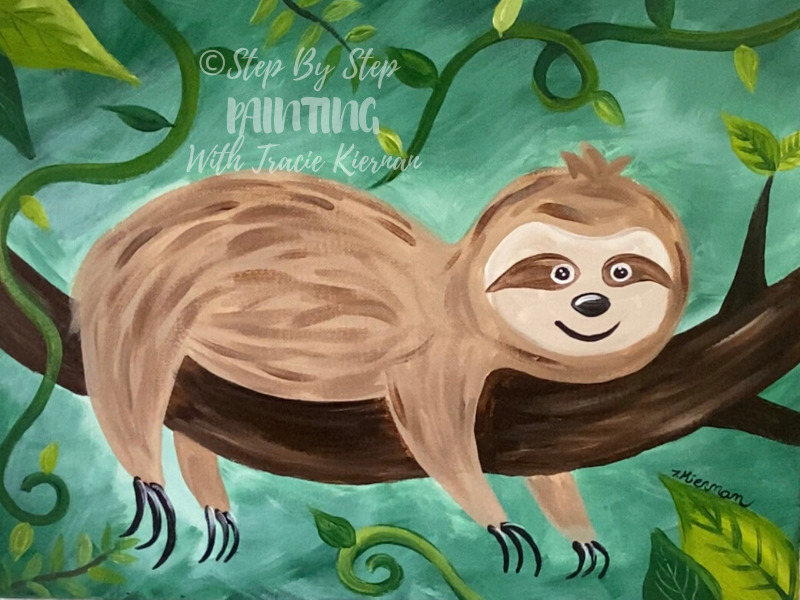
Finished!
Sign your name and show it off!!
Read More Articles- Sloth Drawing