

Panda Painting Tutorial
Would you like to save this?
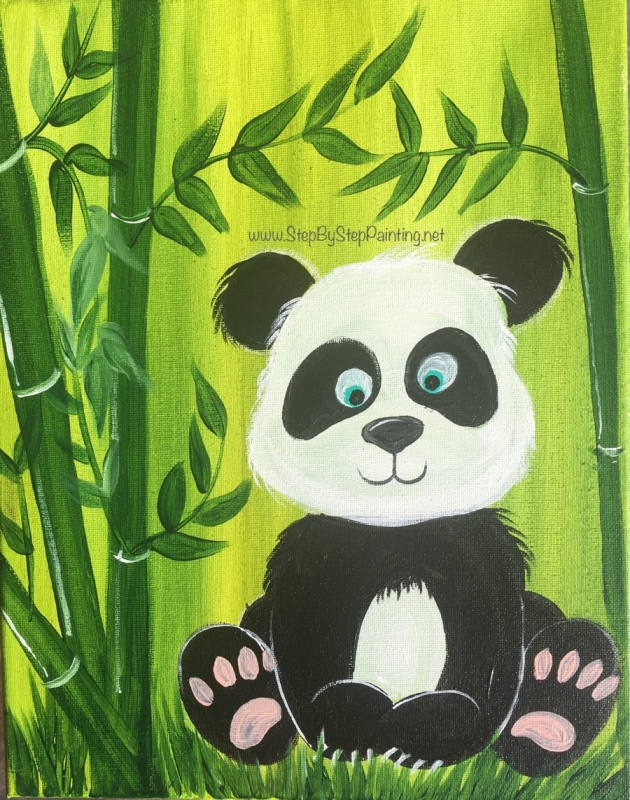
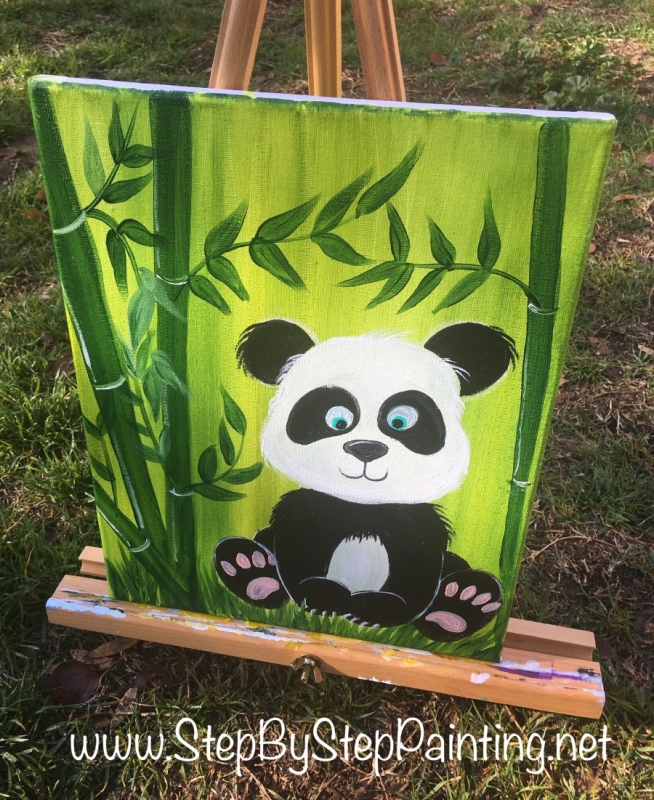
Perfect painting for the panda lover! Learn how to render your own panda painting.
If you’re a beginner, you’ll enjoy learning how to paint this super easy and adorable cartoon panda.
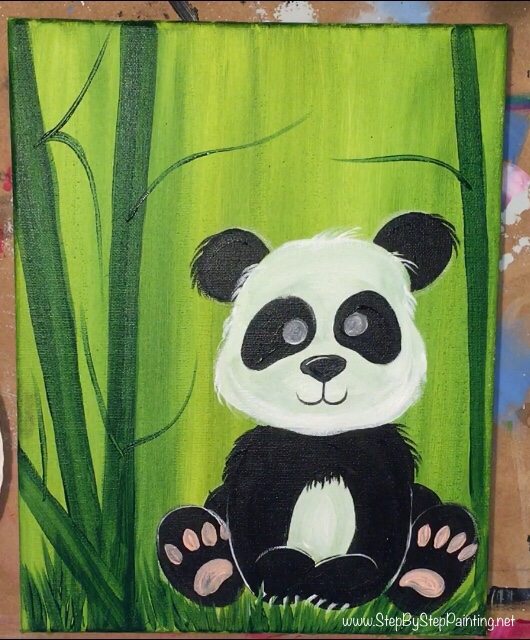
You’ll paint this beautiful golden green wash background with some dark green bamboo next to the panda.
This is an excellent painting you can do with your kids!
I provide you with a free traceable that you can print on standard size computer paper and transfer onto the canvas.
You may also choose to hand draw a panda as well with a piece of chalk!
Enjoy and happy painting artists!
Materials Needed For Panda Painting:
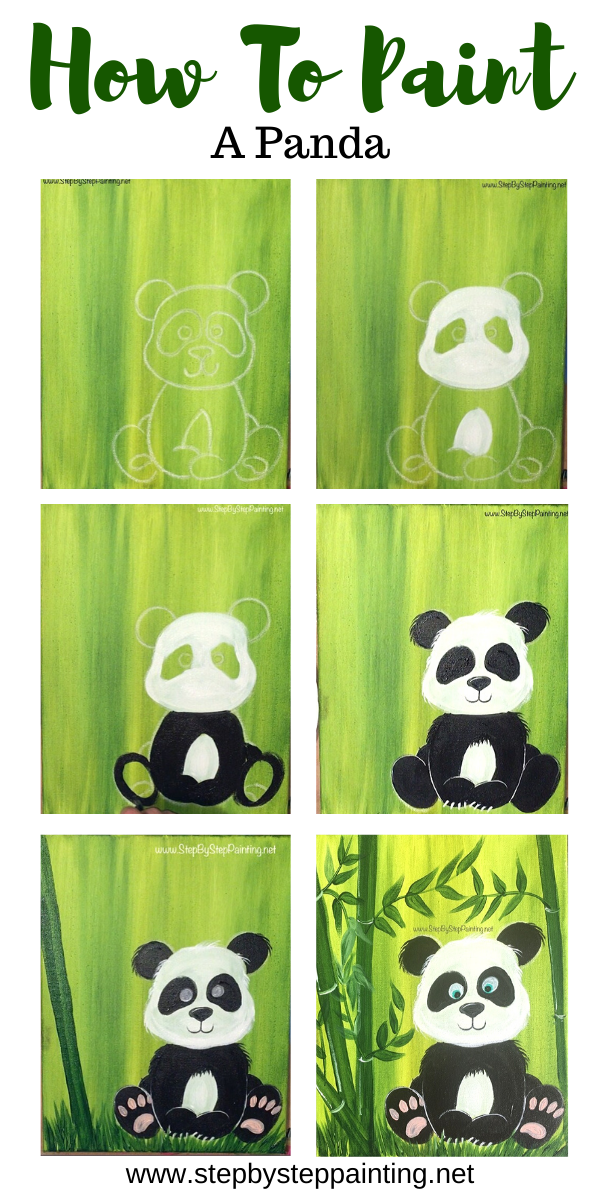
How To Paint A Cute Panda
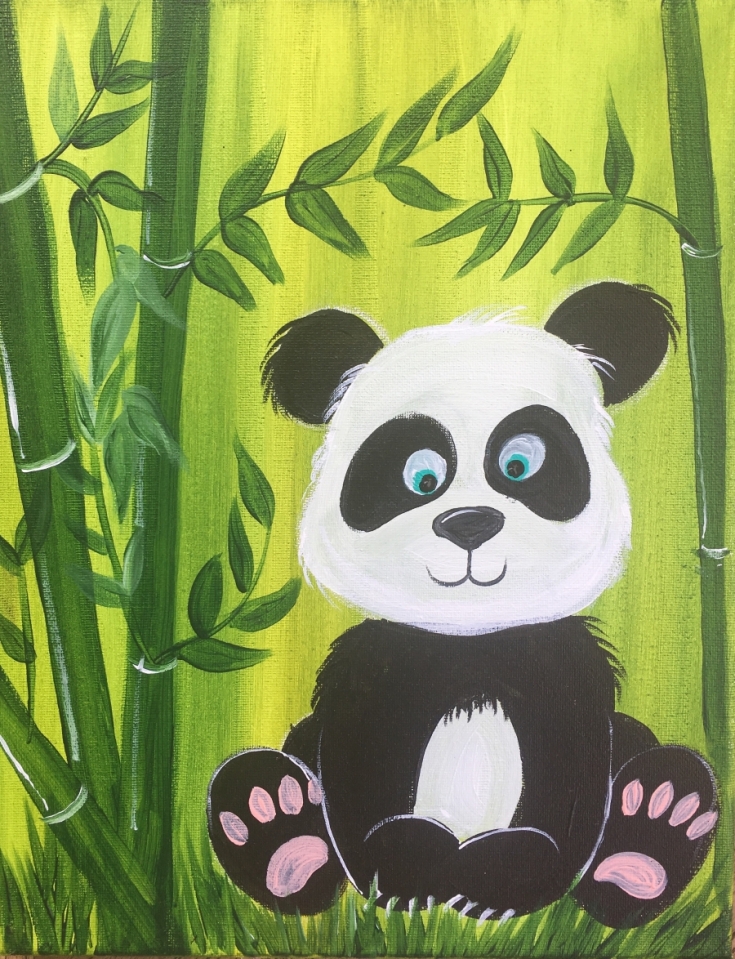
Learn how to paint this cute Panda. This acrylic painting tutorial includes a free traceable of a panda. It is a very easy painting and one that you can do with kids!
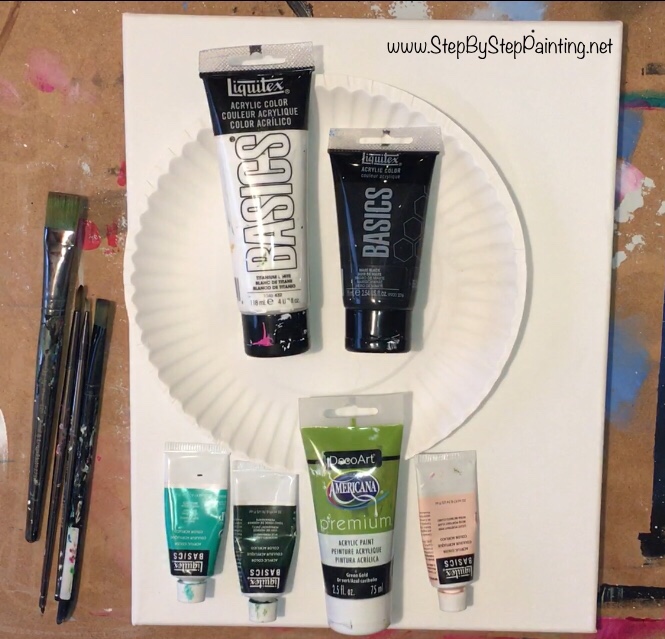
Materials
Basic Supplies
- 11" x 14" canvas
- Acrylic Paint
- Paint Brushes
- Traceable (you're also welcome to free draw the panda!)
- Chalk (Optional)
- Graphite Transfer Paper
Colors
- Titanium White
- Mars Black
- Hooker's Green
- Green Gold (DecoArt)
- Light Portrait Pink
- Bright Aqua Green (Optional)
Brushes
Instructions
- Paint the entire canvas a wash of green gold mixed with hookers green.
- Transfer the panda traceable or draw the panda onto the canvas.
- Paint the white areas of the panda with titanium white.
- Paint the black areas of the panda with mars black.
- Paint some fur texture on the panda.
- Lightly outline the legs of the panda with white.
- Paint the bottom of the feet with light portrait pink.
- Paint the grass with hookers green.
- Paint the bamboo with hookers green.
- Lightly outline parts of the bamboo with titanium white.
- Paint facial details on the panda including eyes, nose and mouth.
Color Palette For Panda Painting:
*Note: I used “Green Gold” by DecoArt and the other were Liquitex BASICS. If you do not have green gold, you can try: light olive green, light green permanent or billiant yellow green by BASICS. 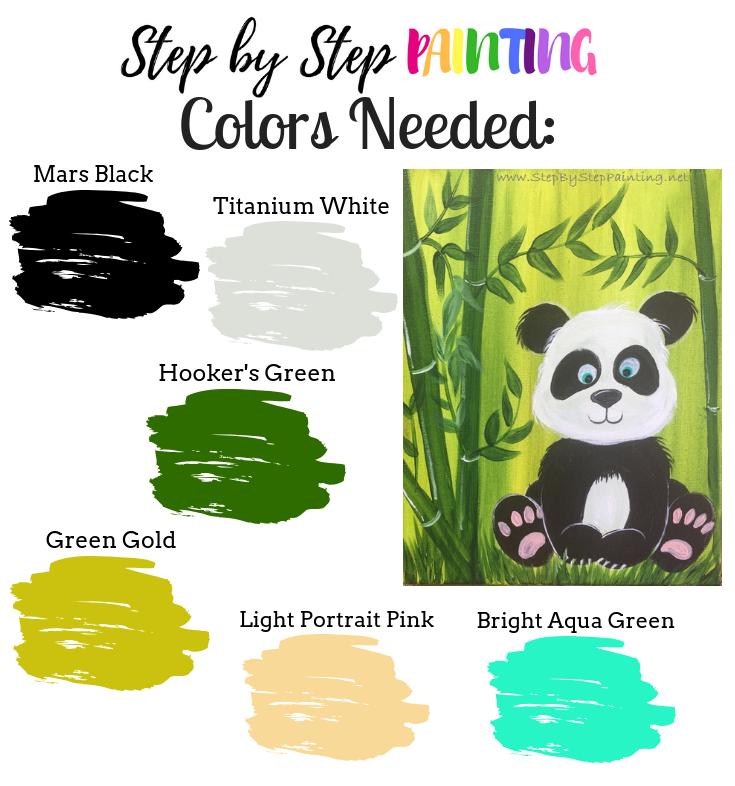
Traceable:
Directions: print on standard 8.5″ x 11″ computer paper. 
Directions At A Glance:

Video:
Step By Step Directions:
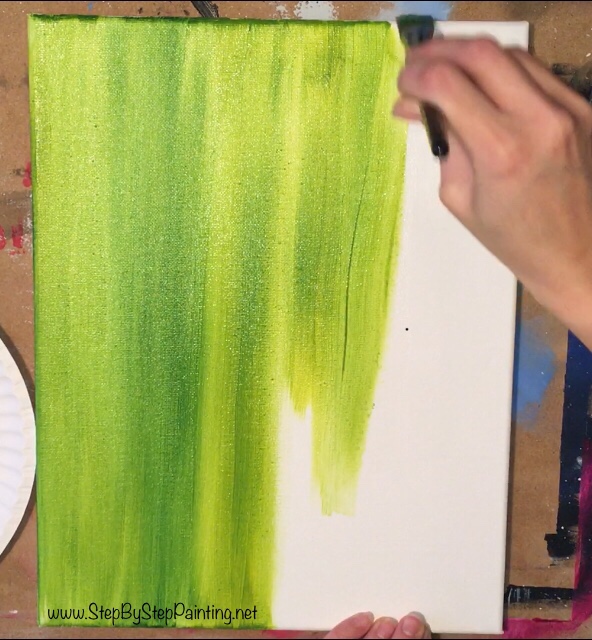
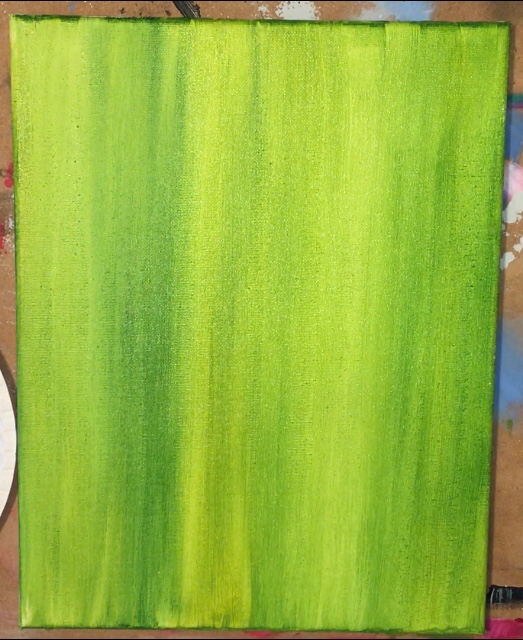
1. Paint the green background
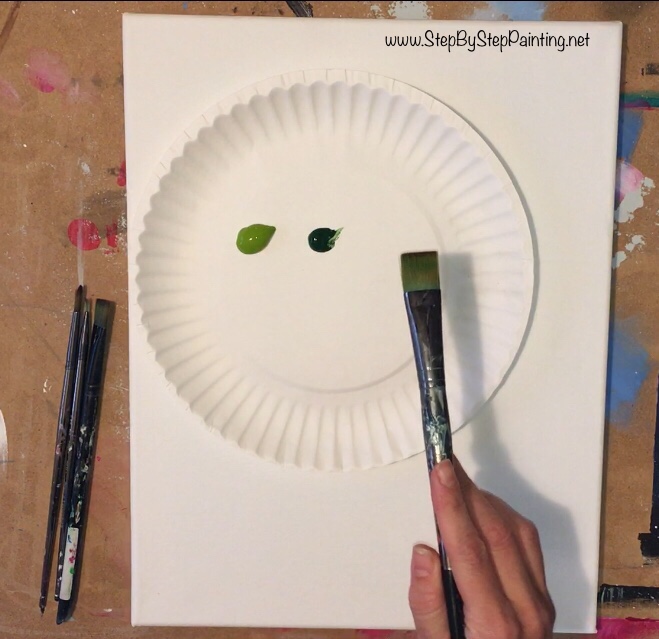
You will need a 3/4″ flat brush and the colors green gold and hooker’s green.
Start by dipping your brush in the water and applying a light wash of water on the canvas.
The reason to do this is because the background is supposed to be very “light” and “thin”. The water helps the paint spread a little faster. 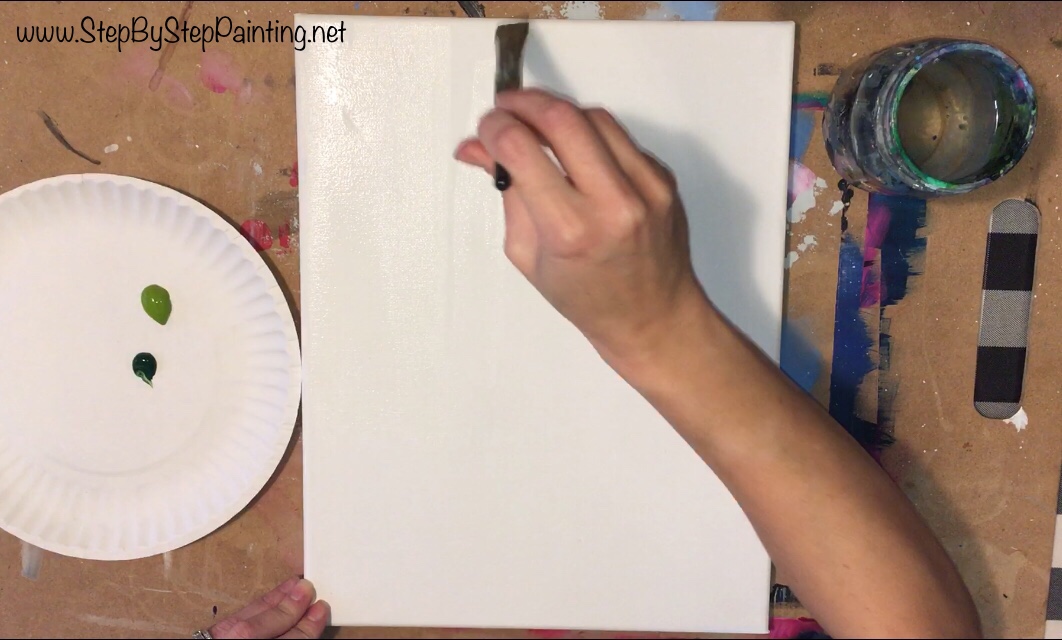
Then double load your brush (dip it in both colors) in the hooker’s green and green gold.
Paint all up and down strokes on the canvas. Make sure to apply the paint evenly but also the paint colors should look unmixed.
The background will not be one solid color of green, it will have areas of light and dark. 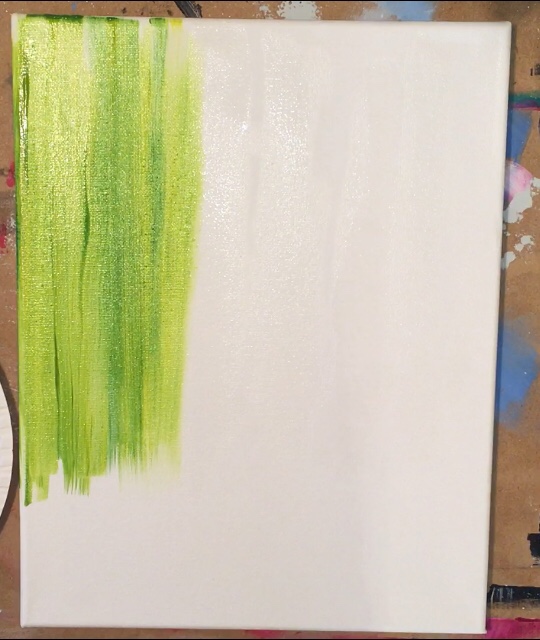
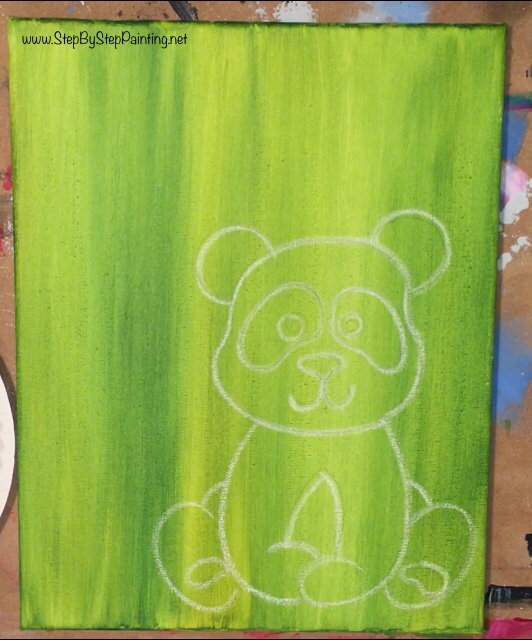
2. Transfer (or draw) the Panda to the canvas
Place a sheet of graphite paper under the panda and trace over the print out. The Panda will transfer to the canvas.
You may also try to free draw the panda on the canvas with a piece of chalk. 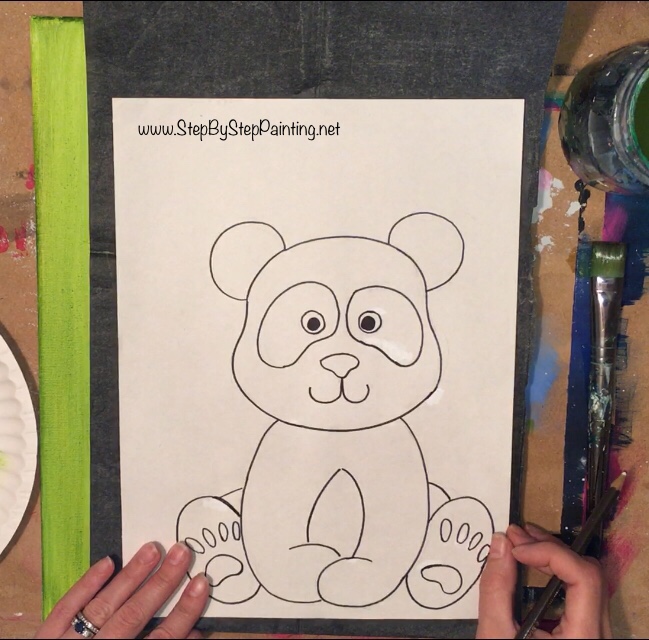
Then (optional) use a piece of chalk to draw over the panda.
This may be helpful if you are painting with a child so he or she can see the panda better.
You may also try outlining it with a sharpie or a paint pen. For the purposes of demonstration – I outlined the drawing with chalk so that you can see where I am painting. 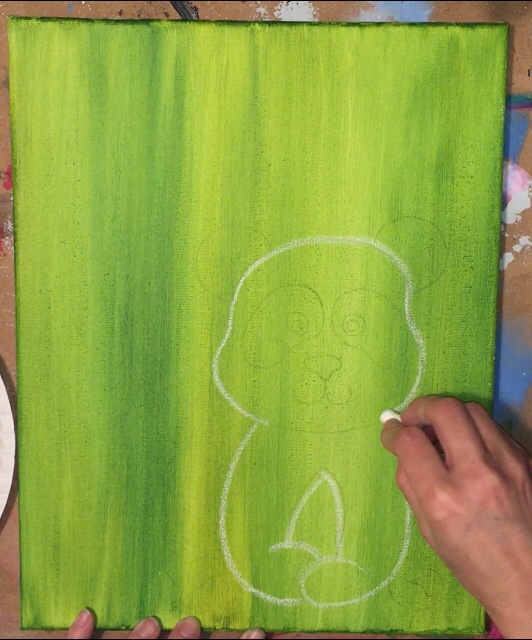
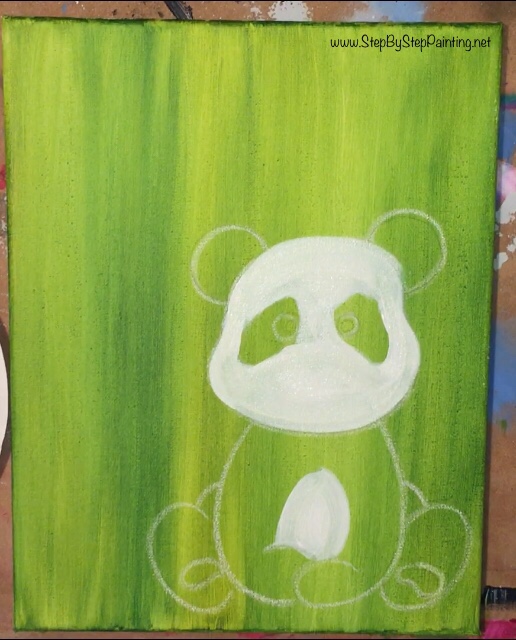
3. Paint the white areas of the panda
I used a #12 Flat brush to do this but you may wish to use a round brush.
Basically paint in the white areas of the panda.
It’s okay if you go outside the lines a bit too around the eyes! This can be fixed later when you paint the black. 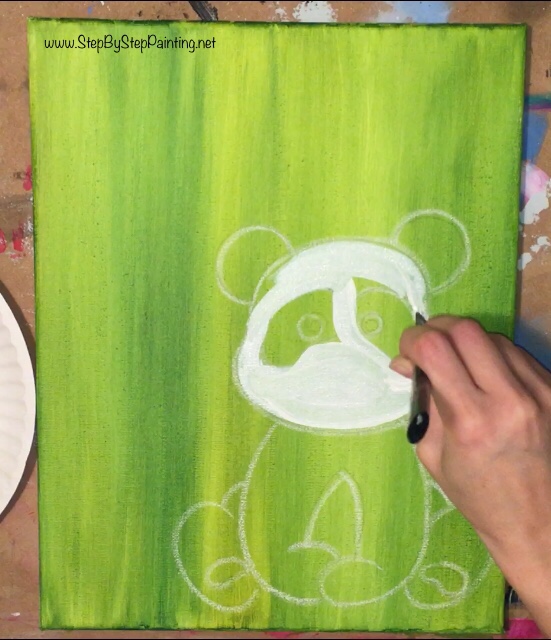
4. Paint the black areas of the panda
Then fill in the black areas.
I used both a #12 flat brush for the legs and feet and a #4 round brush for the black area around the eyes as well as the ears and the nose.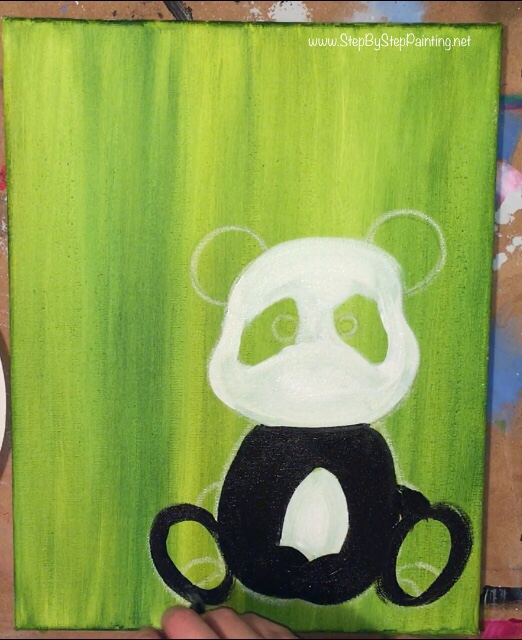
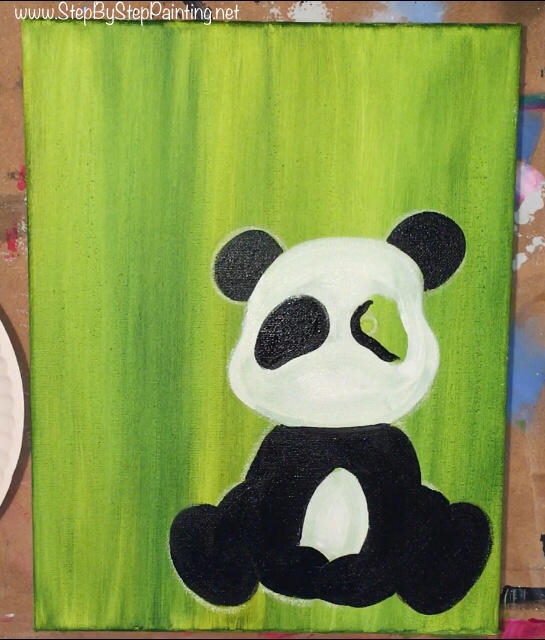
Then I used a 10/0 liner to paint the mouth under the nose.

5. Optional: paint some fur extending out to make the panda look a little “fluffy”
I used a 10/0 liner to do this.
Basically, paint some fur sticking out from the ears by painting little arc strokes that go in the direction of the shape. 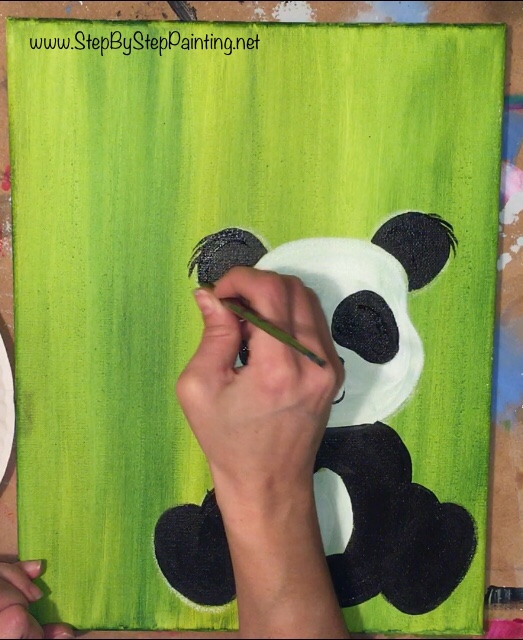
I did fur sticking out of the ears, the top of the chest area, shoulders as well as white fir sticking out on the top of the head & bottom of the ears.
I also made one white highlight line on the nose (it’s all about the details!). 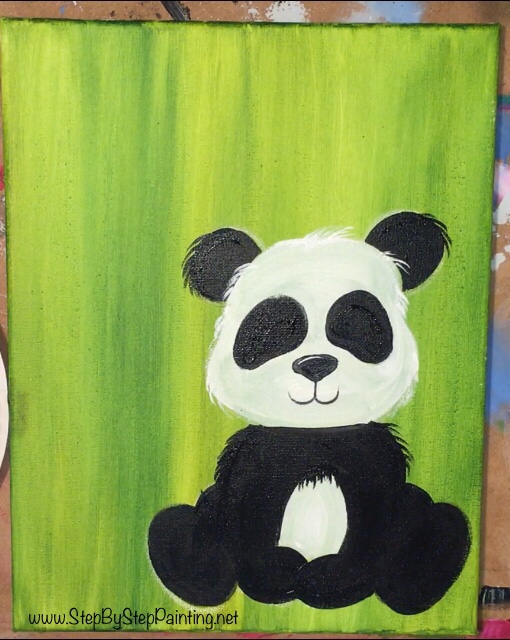
6. Lightly outline the leg area of the panda with white
Use the 10/0 liner and titanium white to lightly outline the legs and feet of the panda so you can see where the feet are overlapping.
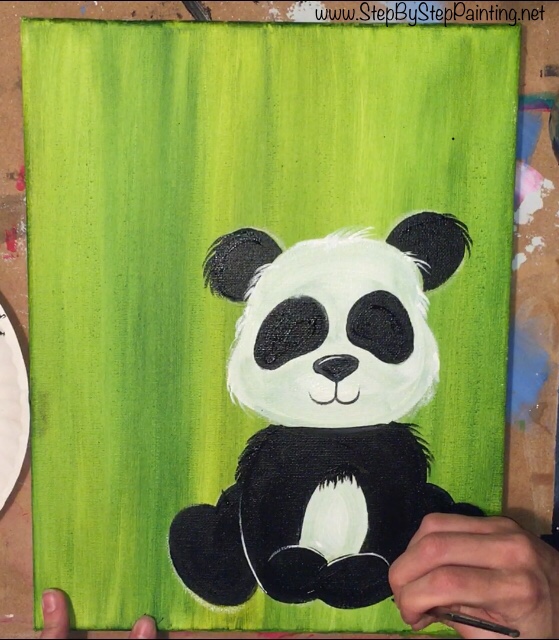
Also, outline the ovals on the feet a bit. Then paint little triangles for the claws on the front feet. I did four on each foot. 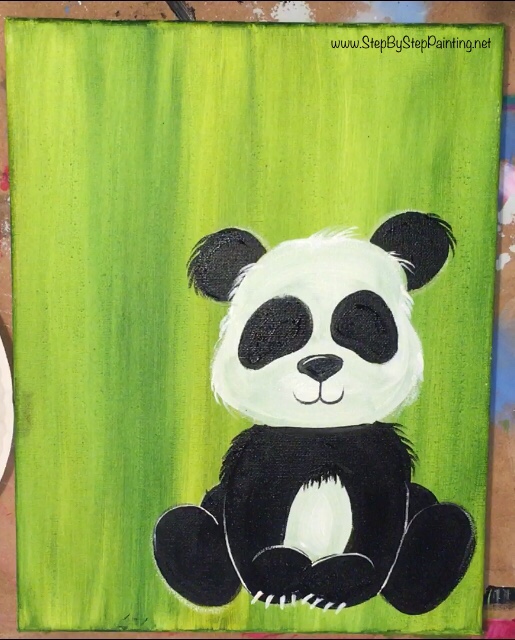
7. Paint the bottom of the feet
I used the color light portrait pink and a #4 round brush.
Basically paint the shapes of the bottom of the paws. See picture below. 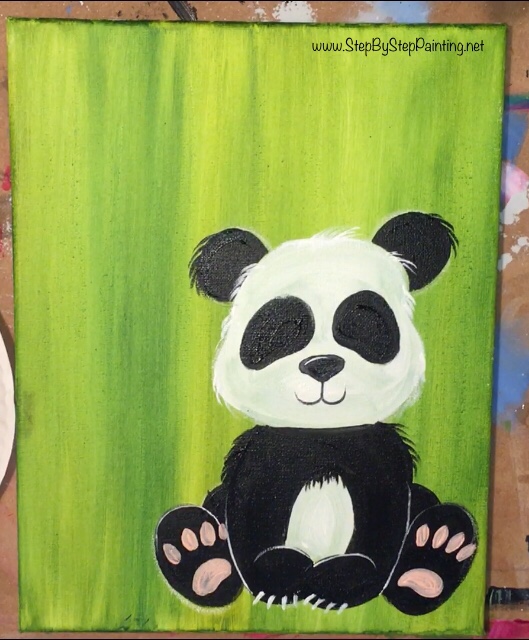
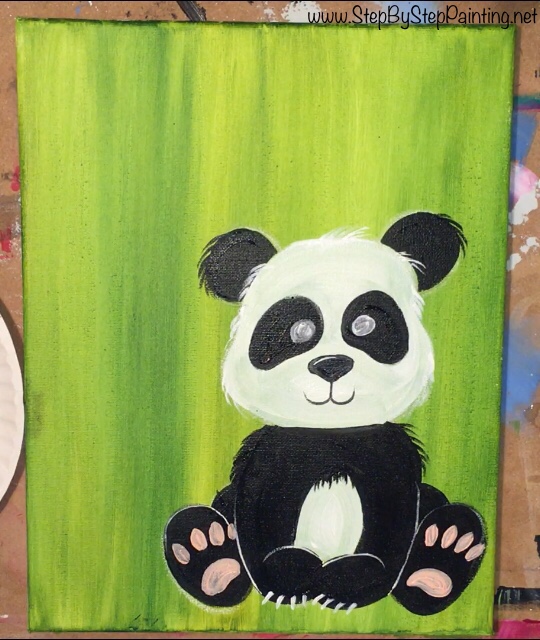
8. Paint two white circles for the eyes
Use a round brush (or your finger!) to paint two small white circles for the eyes.
These will need to dry before painting any more details in the eyes.
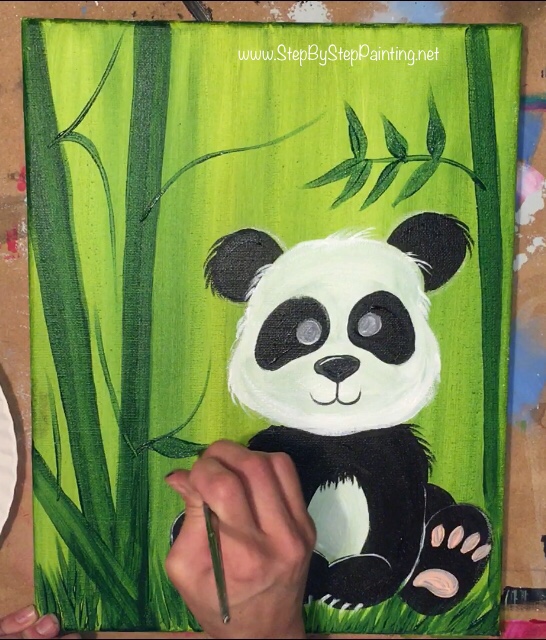
9. Paint grass
Next I used the side of the #12 flat brush to paint grass.
I used the color hooker’s green which is that dark green color.
It should be dark enough to show up against the background because this green won’t be watered down.
Basically paint up and down strokes to represent the blades of grass. You can overlap the grass over the panda a bit to make it look like his is sitting in the grass. 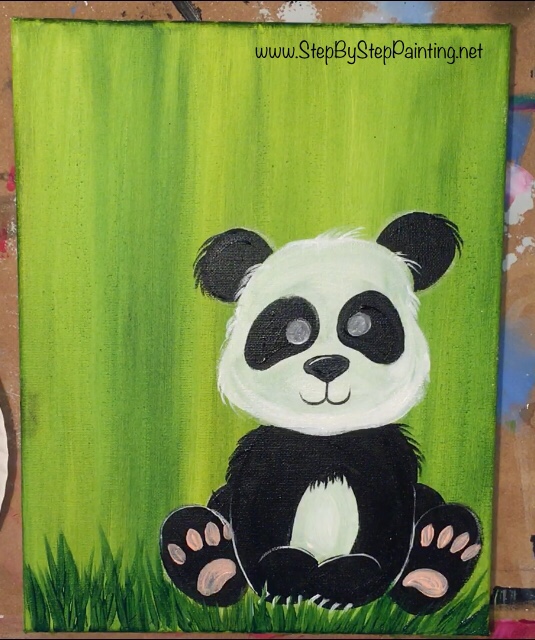
10. Paint bamboo
Then I used the #12 flat brush and hooker’s green to paint the bamboo.
Use the full width of the brush to paint a long slightly diagonal thick line. 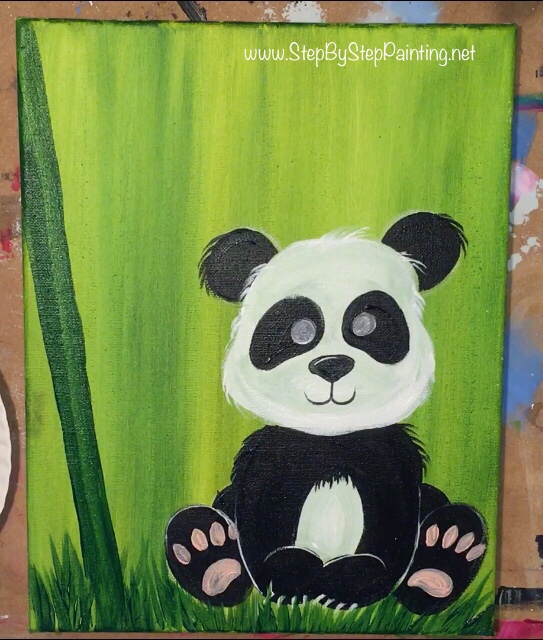
Paint a few more bamboo lines and vary their thickness and angle so they all look different.

Then use the tip of that same #12 flat brush to paint thin lines branching out from the bamboo sticks.
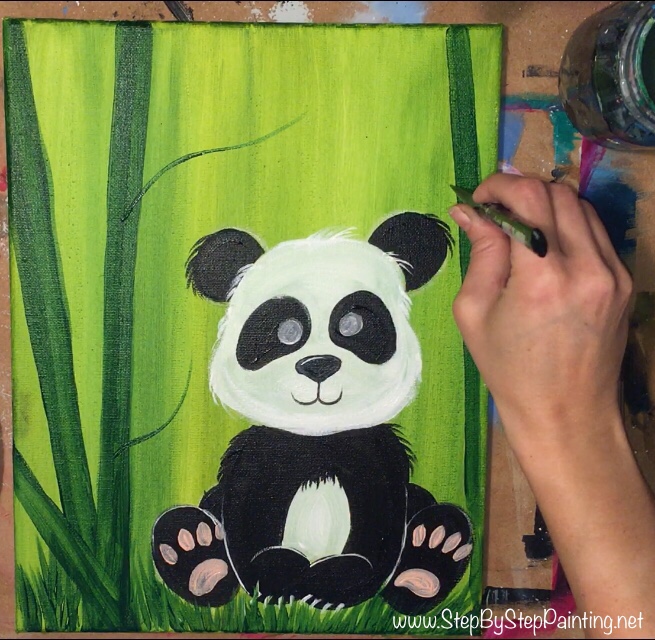
Next switch to a #4 round brush to paint the bamboo leaves on the branches that you just painted.
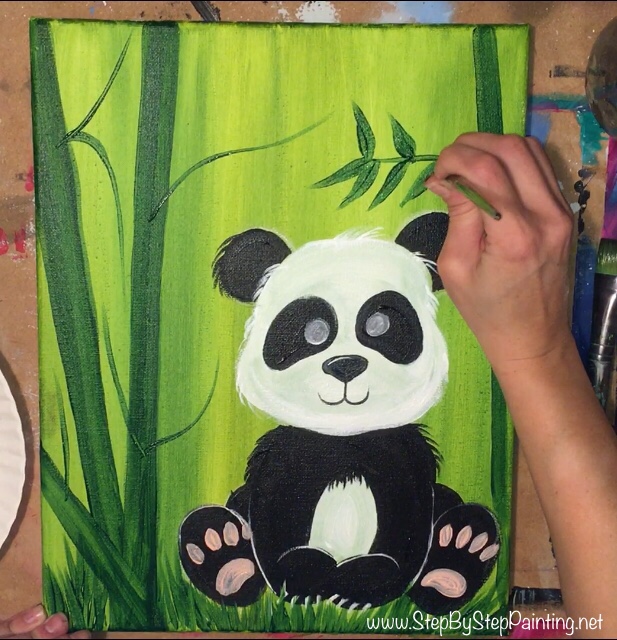

Then I painted little white “divider lines” on the bamboo sticks. See picture below: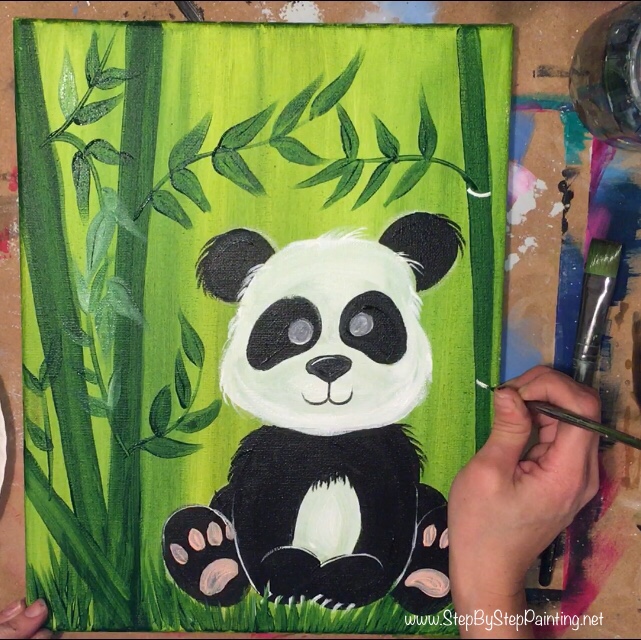
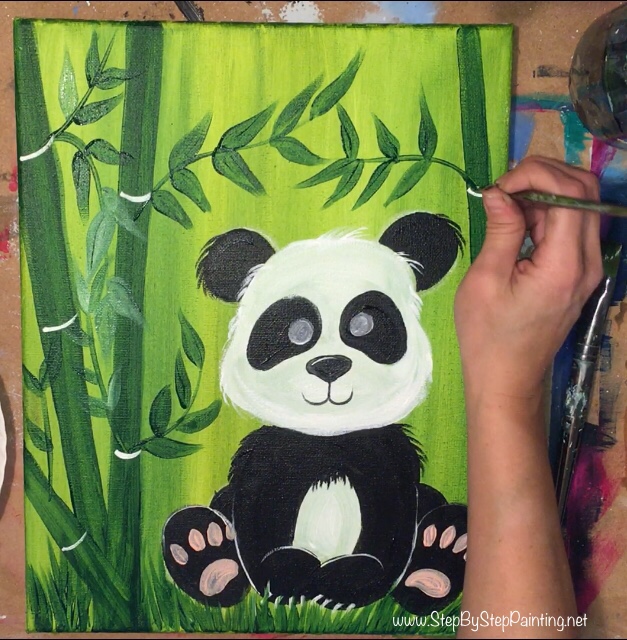
Then, if you look closely below, I painted a thin white line on the left side of the bamboo stalk.
I only did this in some areas (not all). Its a very subtly white line, almost like a highlight. 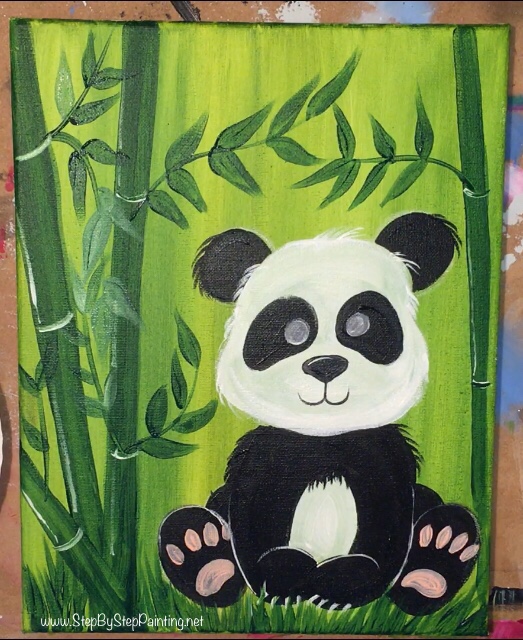
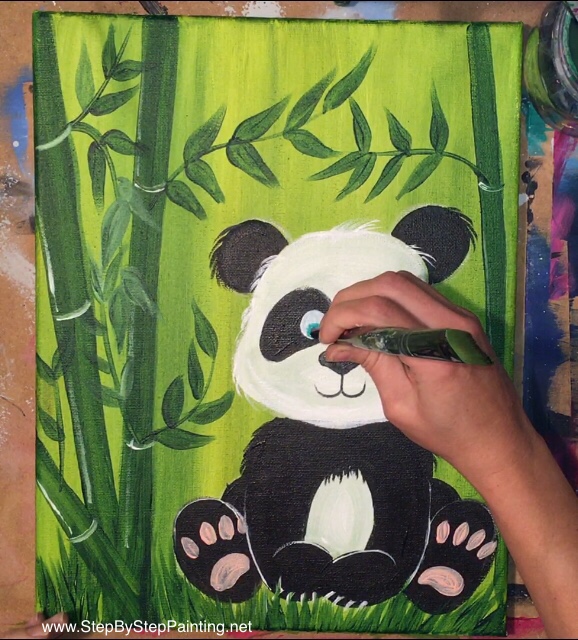
11. Finish the eyes
Now that the white part of the eyes are dry, you may go in and paint some more details in the eyes.
I made my panda have blue eyes so I used the color bright aqua green.
And instead of a brush, I used my finger to paint the inside of the eyes.
You’ll want to wait for that layer to dry before adding the black pupil in the middle. I did that by stamping the back of a paint brush with black. 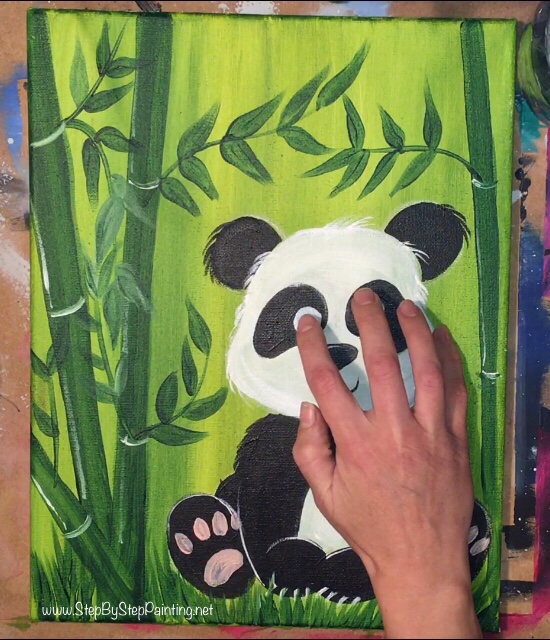
Would you like to save this?
Finished!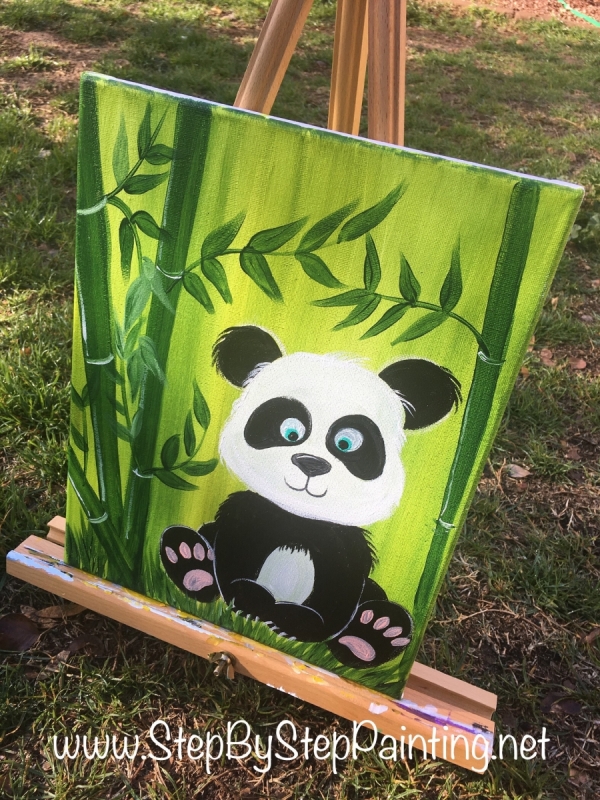

Sign your name and show off your cute panda painting!
I hope you enjoyed this tutorial.
If you’d like to share, do so by posting it on Facebook or on a Pinterst Pin! You can also direct message me on the Facebook Page.


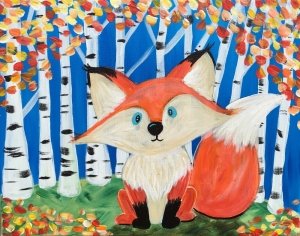
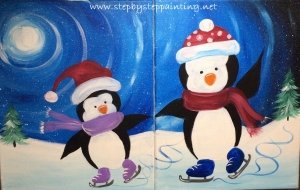
Other Cute Animal Paintings:

I love your paintings, and am thankful that you made this website. I really live to paint, even though i don’t do it often. Whenever i paint though, it always ends up abstract. I really wanted to paint something realistic looking, so i’m very glad that i found your website.
Thanks Abby!
Hi Tracie,
Do you know if there’s some type of chart on line that lists the paint colors for different brands? For instance hookers green in liquidex is what color with other brands?
Hi Jeffrey, you can check here: https://stepbysteppainting.net/conversion-for-paint-colors/ Also, there is a chart Ive seen out there on Google that has some more color conversions.
Do you have printable instructions/steps for panda and other tracings?
I thoroughly appreciate your well thought out, step by step instructions, accompanied by a picture of each step. I find these much more simple to follow, at my own snails pace, than other tutorials I have tried to follow. It also allows me to step back and assess my work frequently, and the opportunity to ‘fix’ as I go and not fall behind. Thank you so much. LOVED the panda!
Glad you are loving the tutorials Susan!! Thanks so much!
I just started painting as a way to relax and something to do for myself. I’ve looked for online tutorials and many are video tutorials which I don’t find as easy to follow. I also hate having to stop the videos so much. I absolutely LOVE your step by step tutorials. They are really well done and I’ve been having so much fun painting pictures for my kids bedroom doors. I did the panda for my 5 year old who loves pandas. Thank you so much! I can’t wait to see new tutorials. <3
You’re so very welcome!!