
Would you like to save this?
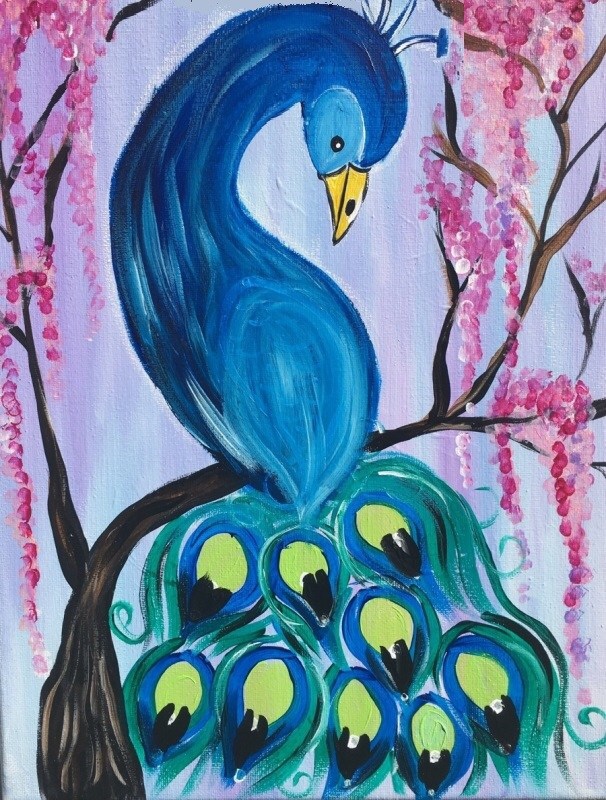
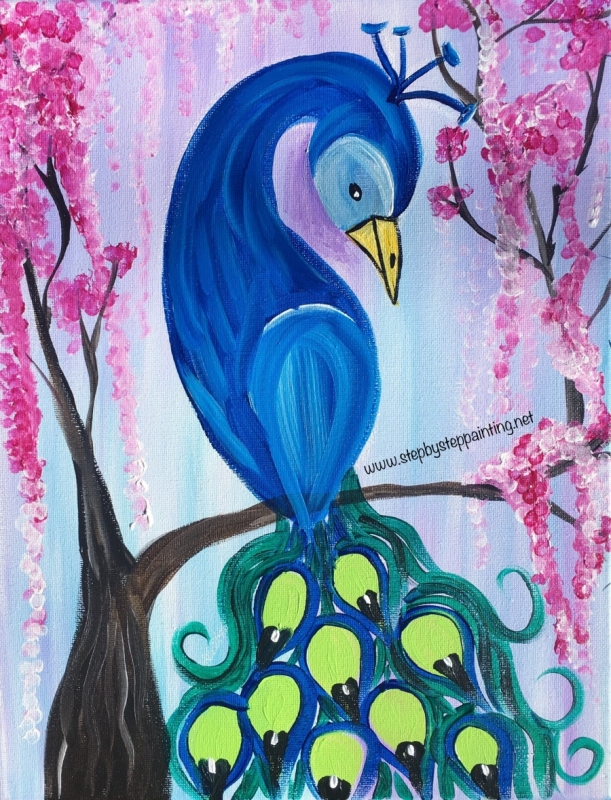
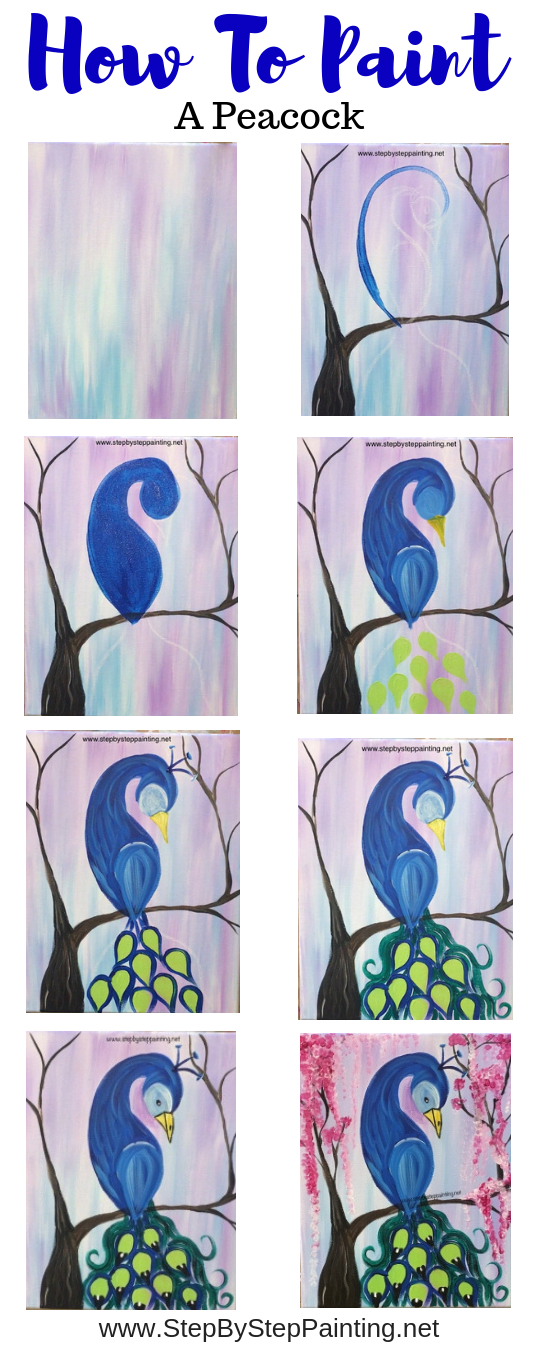
Peacock Painting Tutorial
Learn how to create this peacock painting step by step.
This is a very easy acrylic canvas painting that you can learn how to do at home.
This painting starts with a very simple background wash of pastel purple and blue. Then you will paint a branch and the peacock’s deep blue body.
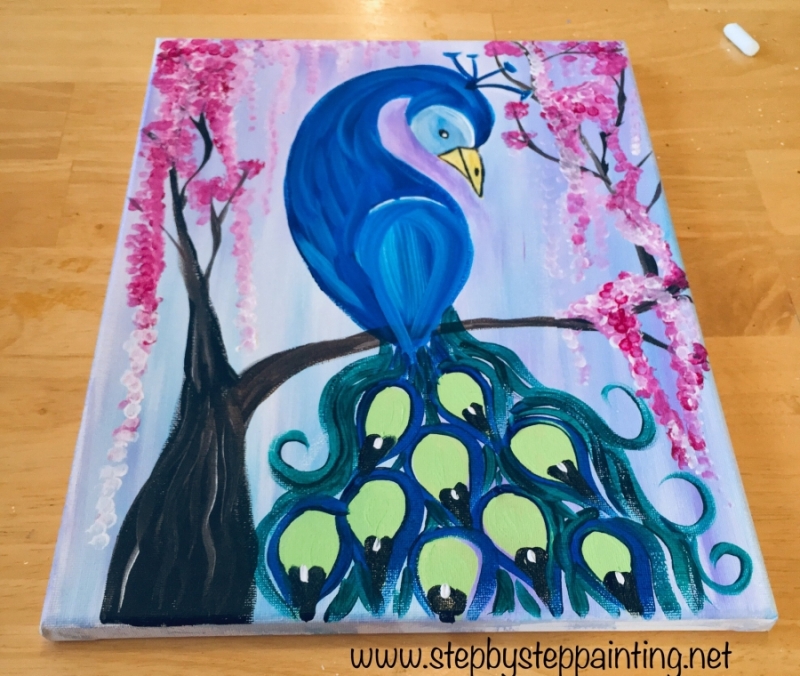
You will learn how to paint the intricate design in the peacock’s tail using a round brush and several shades of green and blue.
Finally, the flowers were painted with q-tips and dotted with two shades of magenta as well as white.
Enjoy and happy painting artists!
See Other Bird Painting Tutorials:

Materials
How To Paint A Peacock
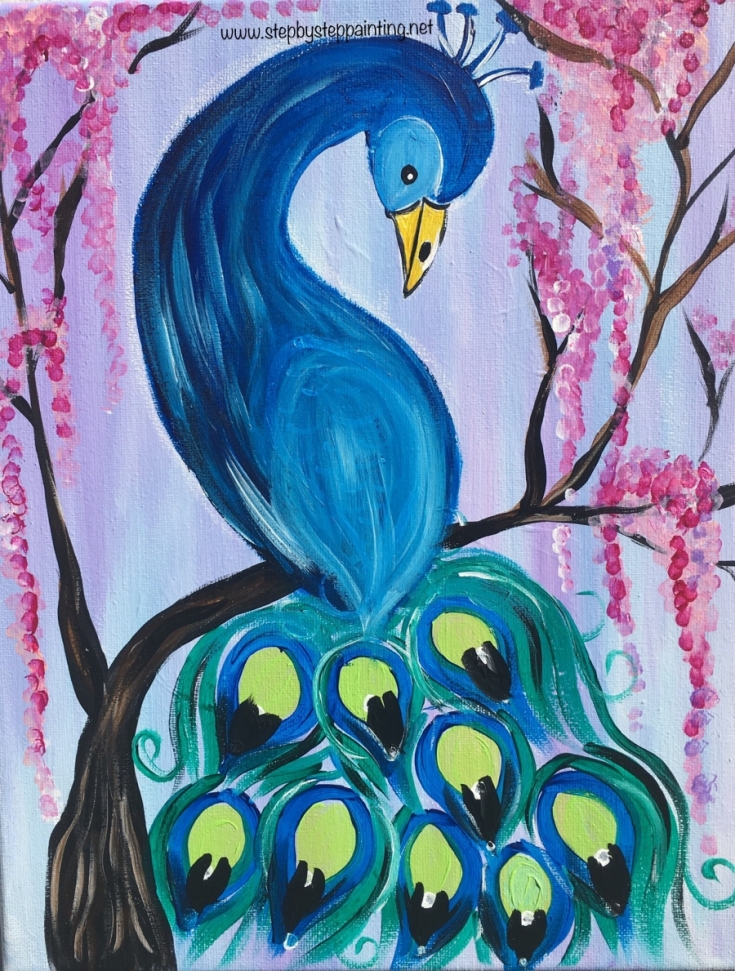
Create a peacock painting step by step using acrylic paints. This painting tutorial I is intended for the beginner painter.
Materials
Basic Supplies
- 11" x 14" Canvas
- Acrylic Paint
- Paint Brushes
- White Chalk
- Q-Tips
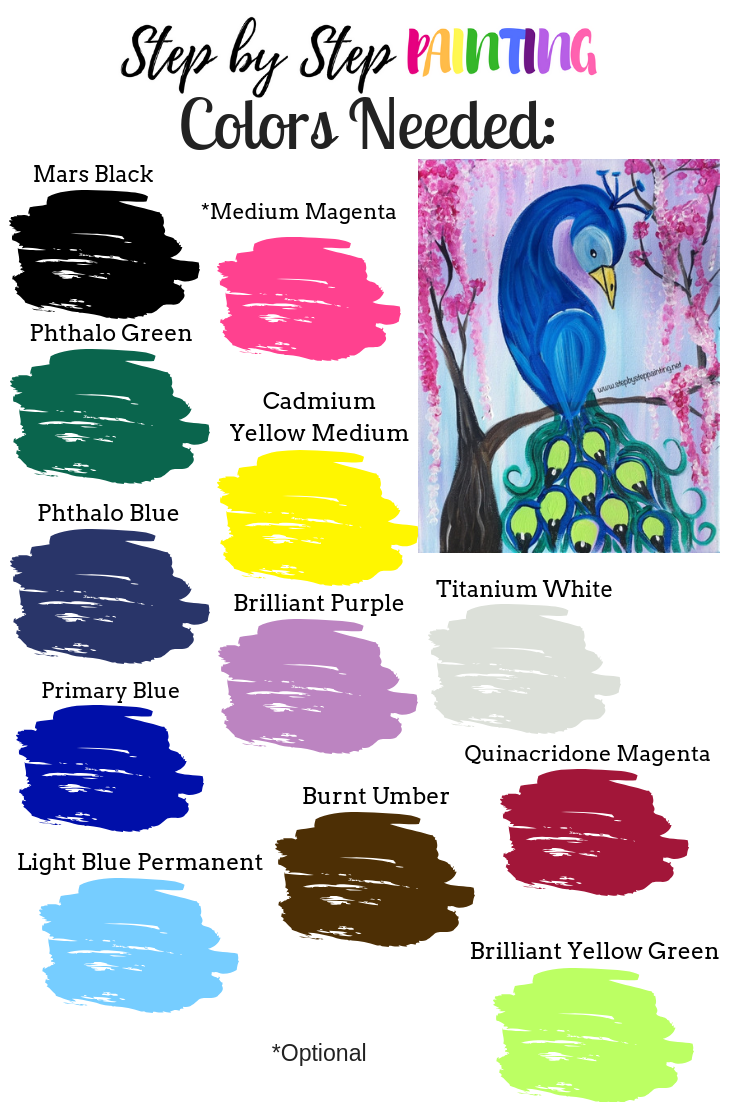
Colors
- Mars Black
- Titanium White
- Quinacridone Magenta
- Medium Magenta
- Cadmium Yellow Medium
- Brilliant Yellow Green
- Phthalo Green
- Primary Blue
- Phthalo Blue
- Burnt Umber
- Light Blue Permanent
- Brilliant Purple
Brush Sizes
Recommended Products
As an Amazon Associate, Michaels Affiliate and a member of other affiliate programs, I earn from qualifying purchases.

Color Palette
Traceable For Peacock Painting:
Print this on standard size computer paper. Trace it with graphite paper or free handed. Make sure you paint the background and tree first. See instructions for further details. 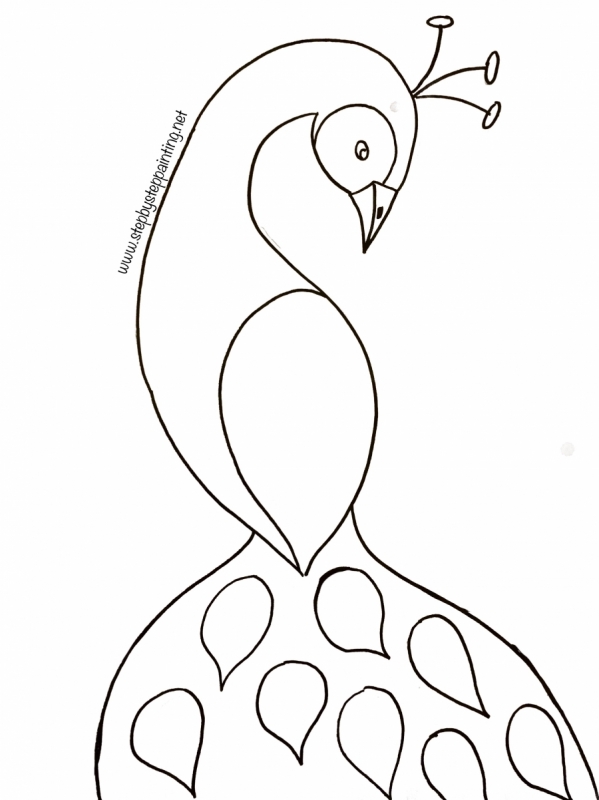
Directions At A Glance:

Video For Peacock Painting:
Step By Step Directions For Peacock Painting:
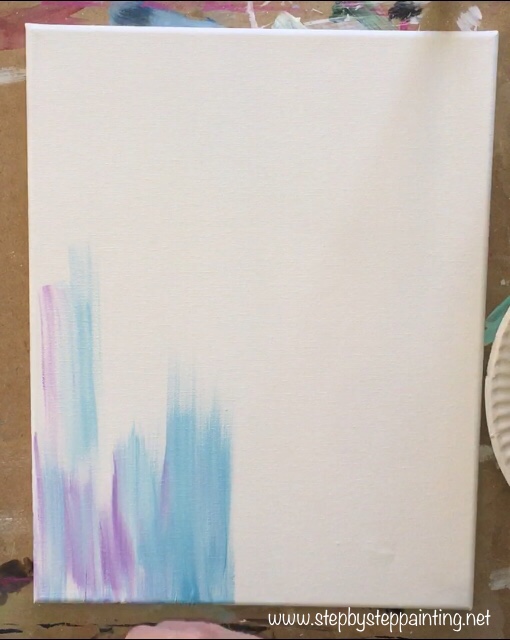
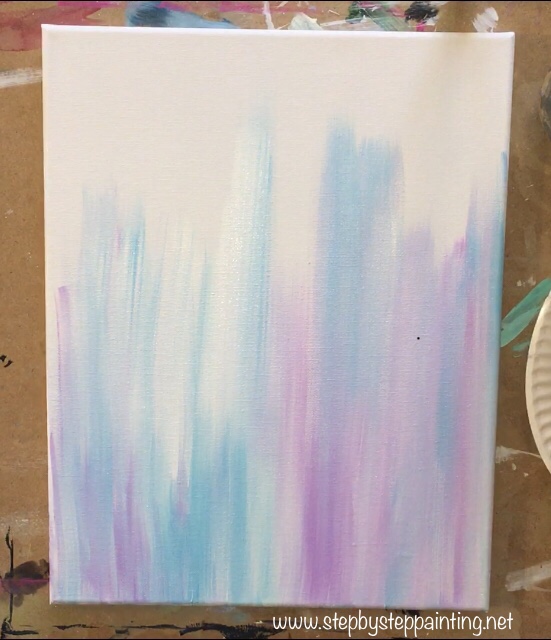
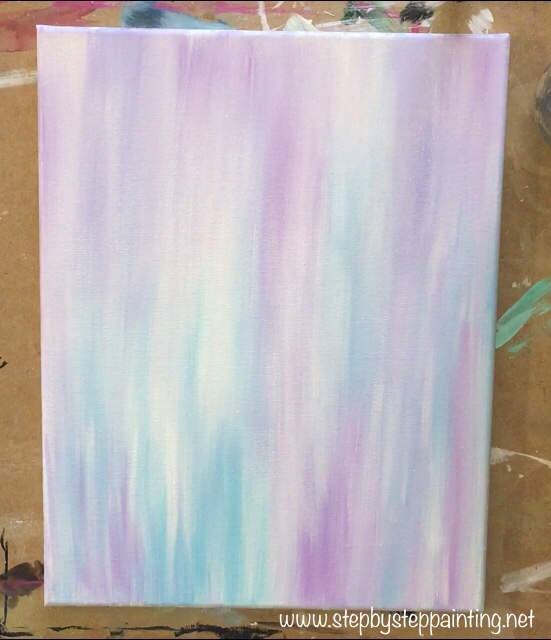
1. Paint The Background
You’ll need a 3/4″ flat brush and the colors brilliant purple and light blue permanent.
Triple load the brush in white and dip the corners in brilliant purple and light blue permanent (so that all three colors are loaded on your brush).
Paint up and down strokes on the canvas.
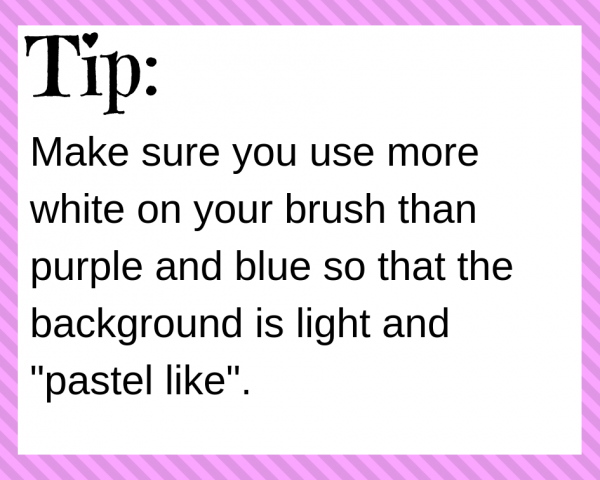
Let the colors blend on the canvas to a pretty pastel, mixed abstract background.
When you reload the brush, load it in the white and the other colors but you can decide if you like more purple, more blue, etc. 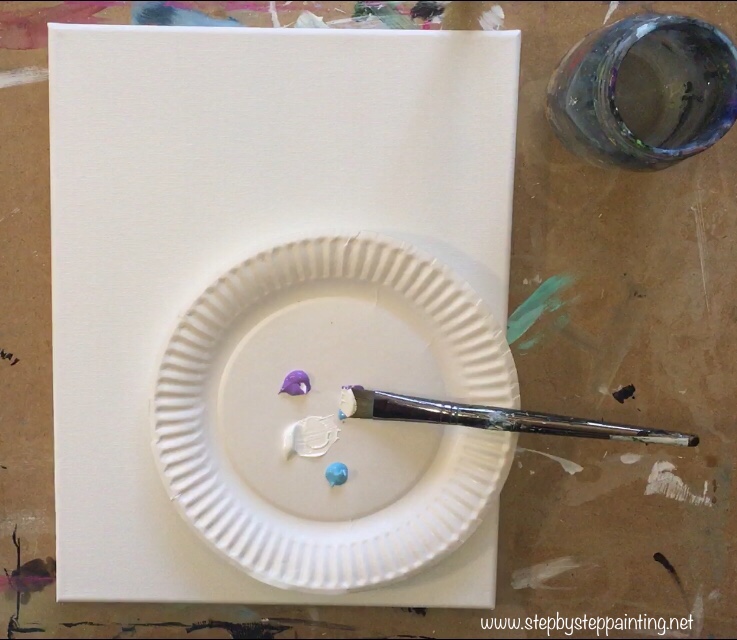
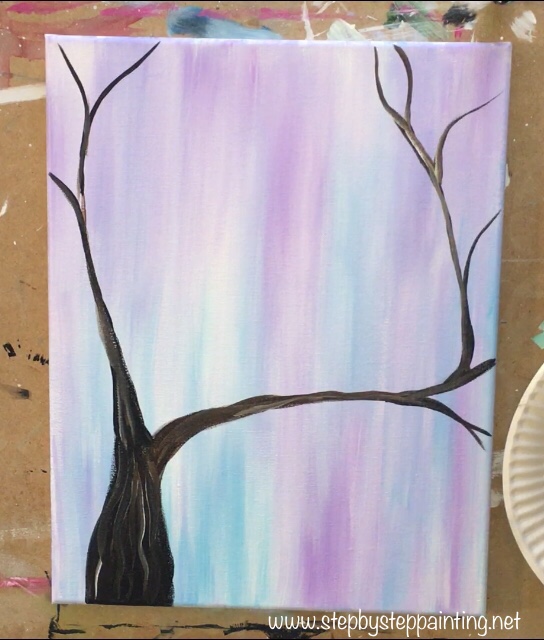
2. Paint the tree
You’ll need a #12 flat (1/2″ flat) and the colors burnt umber and mars black.
Basically, double load the 12 brush in both the black and the brown. Start at the lower left corner and pant a large thick triangular branch shape that quickly gets thinner as it goes horizontal.
Only go about a third of the way up the canvas with this brush because you need to leave enough space for the peacock. 
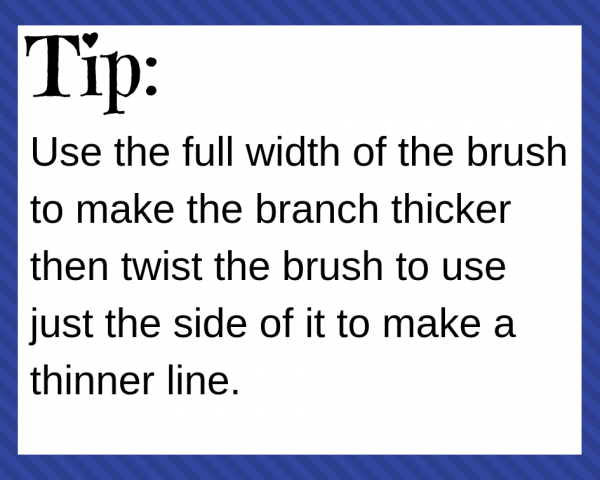
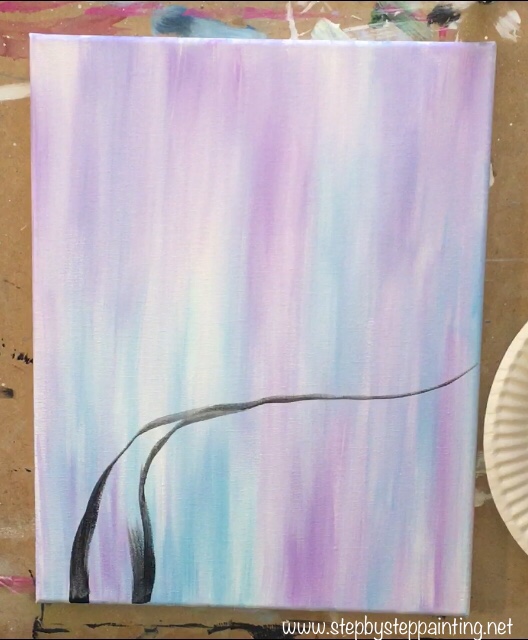
Paint more branches going vertical. Use the side of the brush to make the line thinner.
Continue dipping it in the brown as you paint the tree branch. Make sure each tip of the branch goes to a thin point.
You can use a smaller round brush to help you with this if needed.
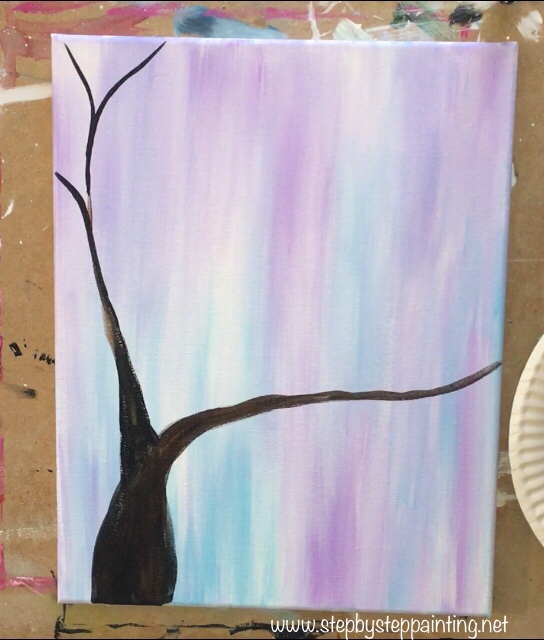
To get texture on your branches, dip the tip of your brush in white (without rinsing it).
Then lightly apply vertical strokes on the branches. The white will blend with the wet paint creating texture in the tree. 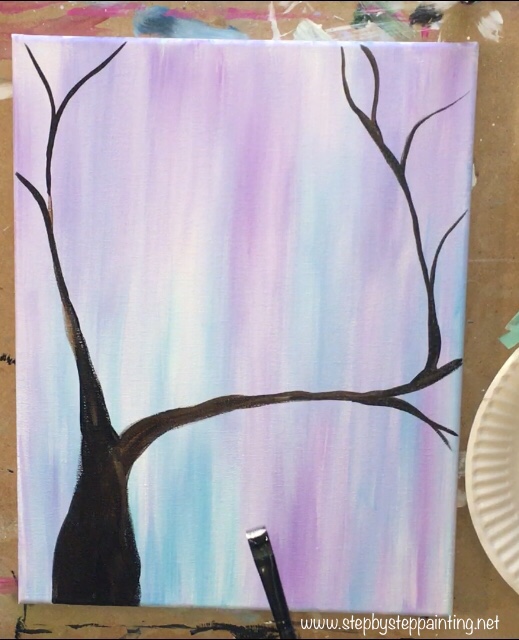
3. Draw or transfer the peacock onto the branch.
Before I drew the peacock onto the canvas, I sketched it out on a piece of paper.
You can do the same to practice drawing the peacock.
Or you can use my template download found here. If you are drawing the peacock free-handed onto the canvas, I recommend using a piece of chalk to do so. 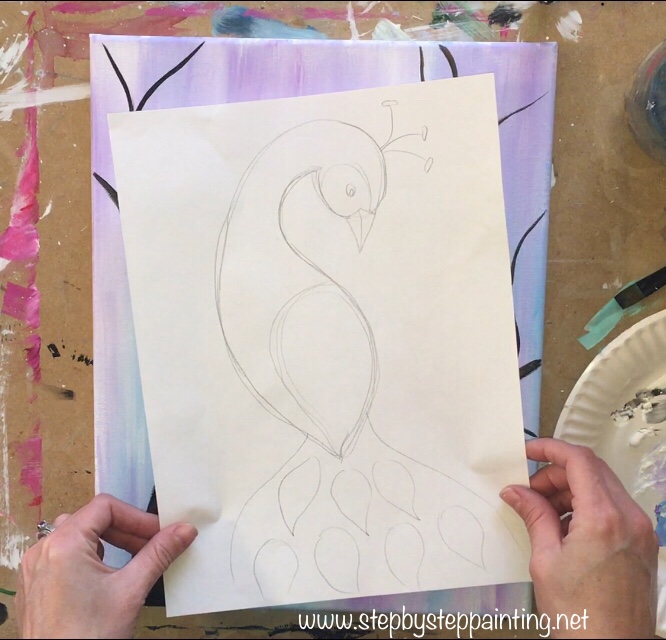
Use a piece of chalk to draw the head, neck and body. The bottom of the body comes to a point like an upside down tear drop and I made this point overlap the tree branch.
The head is an oval shape and the neck goes in a curve. 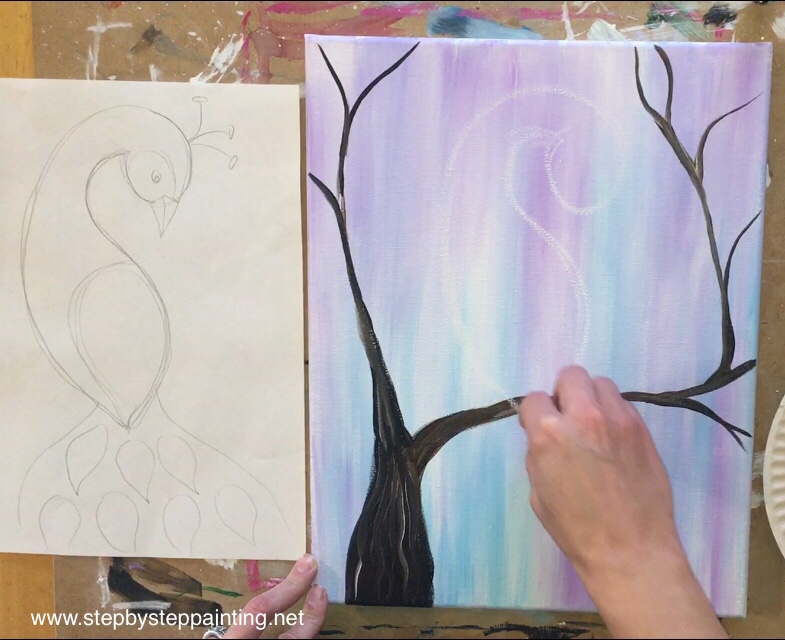
Then draw two wavy lines that form almost a triangle (starting out narrow and ending wide on the bottom).
This will be the area that we will paint the tail feather designs in later. 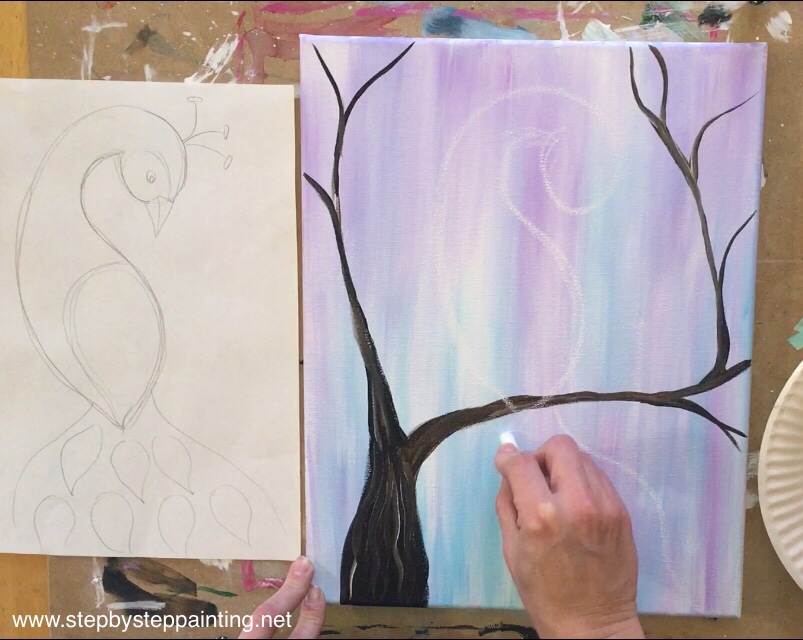
Then draw some details in the head like the circle that forms around the eye, the beak and the head feathers. 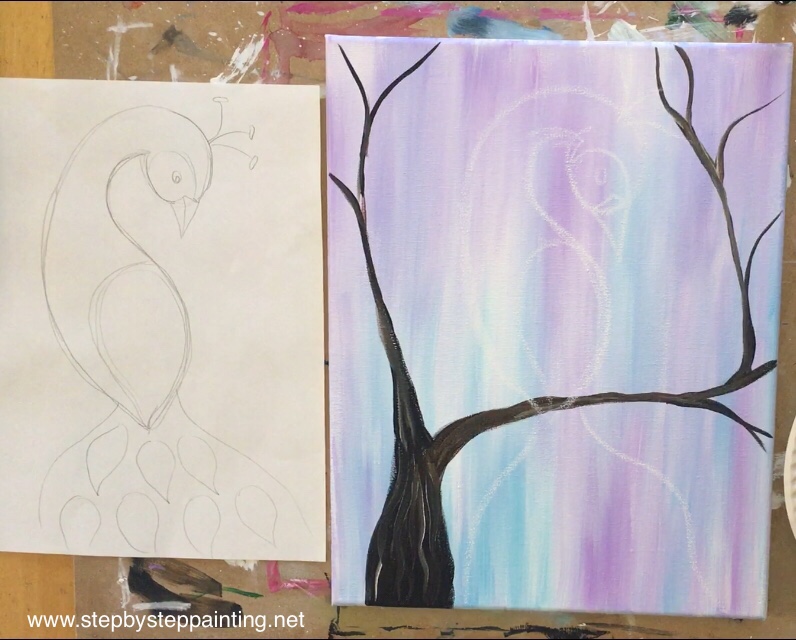
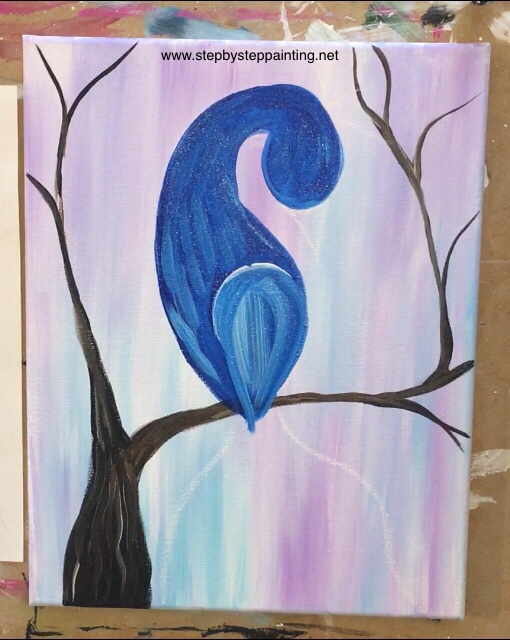
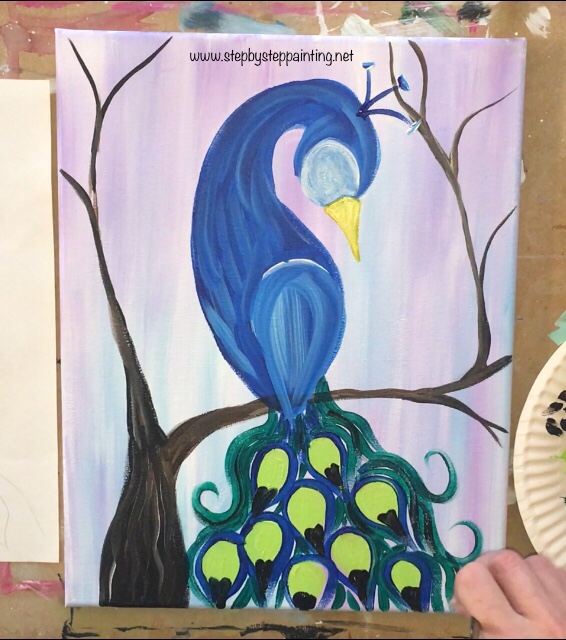
4. Paint the base color of the peacock.
I used my #12 brush for this and the color primary blue.
Start out by outlining the shape of the peacock’s body using the tip of the brush on its side.
Then fill in the entire area with the primary blue.
Let your strokes contour and go in the direction of the shape you are filling in. You can use the full width of the brush to paint in the large areas of the body. 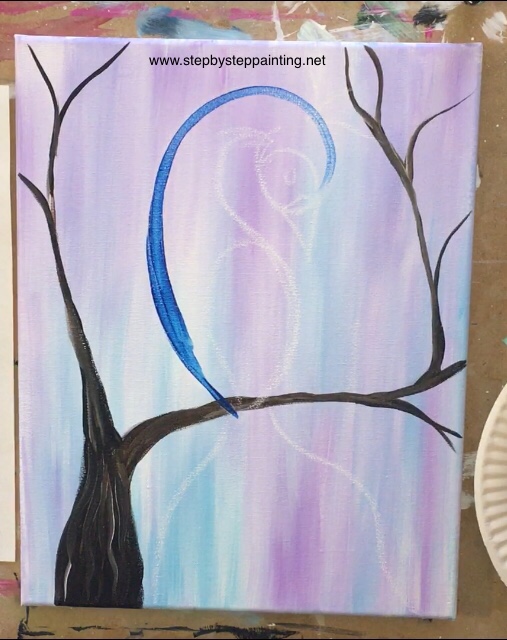
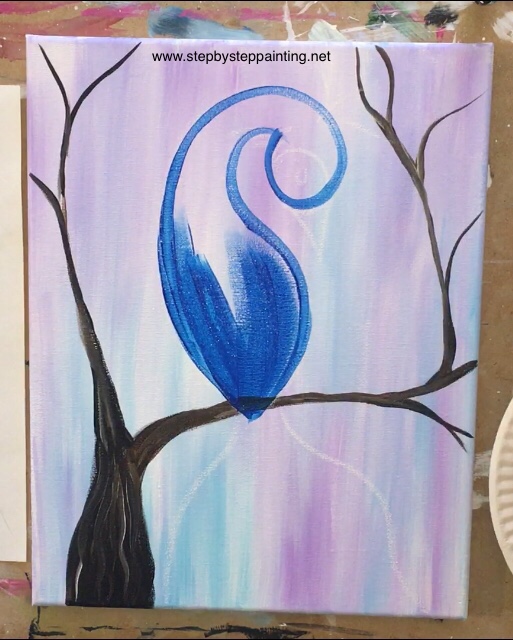
5. Paint more depth to the peacock’s body & paint a side wing
Next do a tiny bit of shading on the peacock’s body by adding phthalo blue on the left side of the body area and blending it in with the rest of the primary blue.
This just makes the area on the left a tad bit darker/ another layer of blue onto the peacock to make it a deeper blue.
You may need to do extra layers of paint where the peacock overlaps the branch. 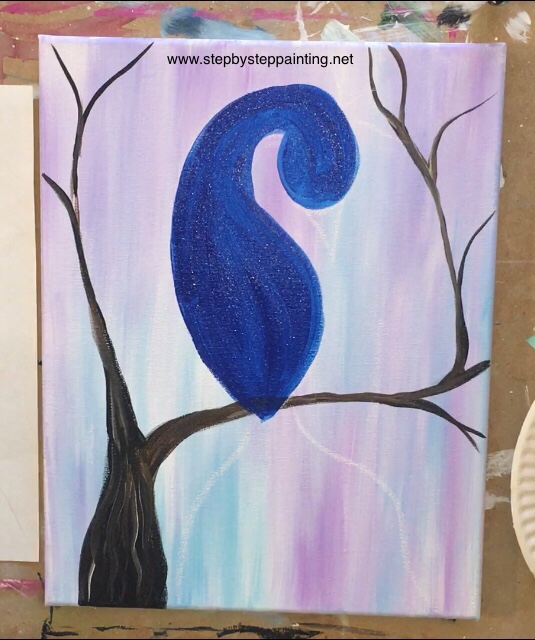
Next wipe off your brush (you don’t have to clean it) and dip it in the white. Paint an upside down tear drop shape for the peacock’s side wing.
Your white will blend in with the blue and that is okay.
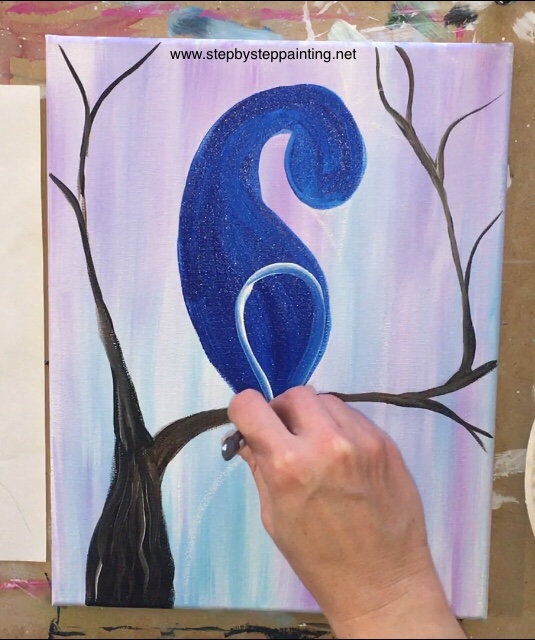
Fill in that teardrop shape, contour your strokes to go in the direction of the shape.
Let the white blend in with the blue to make an unmixed color. 
Optional: To add a bit of texture to the peacock’s body, paint small strokes of white and blend it in with the blue. 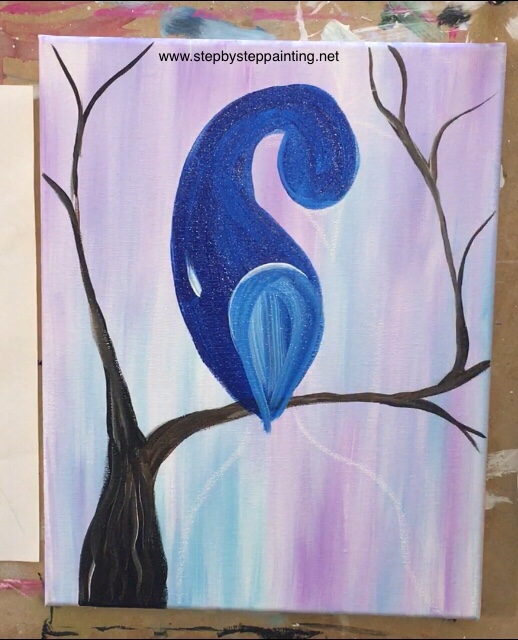
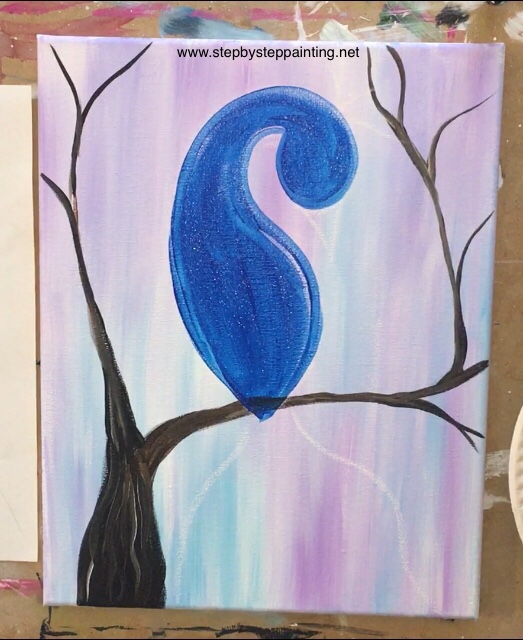
6. Paint a circle on the head (where the eye will be) and paint a beak.
Then paint a circle in the head with the white and let it blend with the blue to make a light blue.
Note: I am still using the #12 flat here although you may wish to switch to a #4 round at this point because this is a small area to paint that circle in. 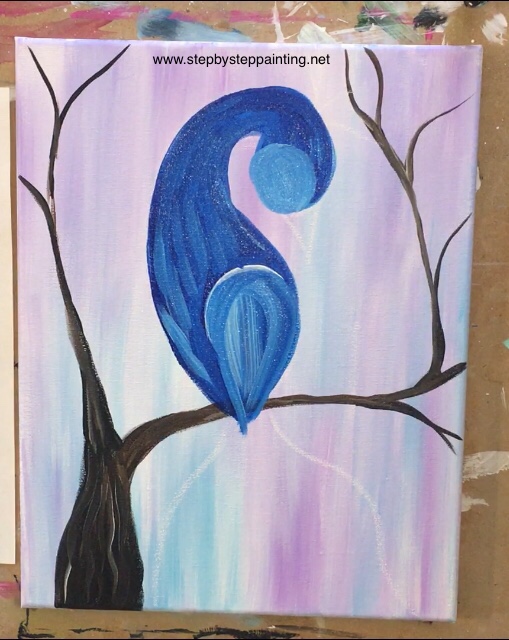
Then use a #4 round brush and cadmium yellow medium to paint the beak.
The yellow will show up translucent so you’ll need to paint a few layers here. If you wish, add a bit of titanium white to the yellow to make it more opaque (I did this in a later step). 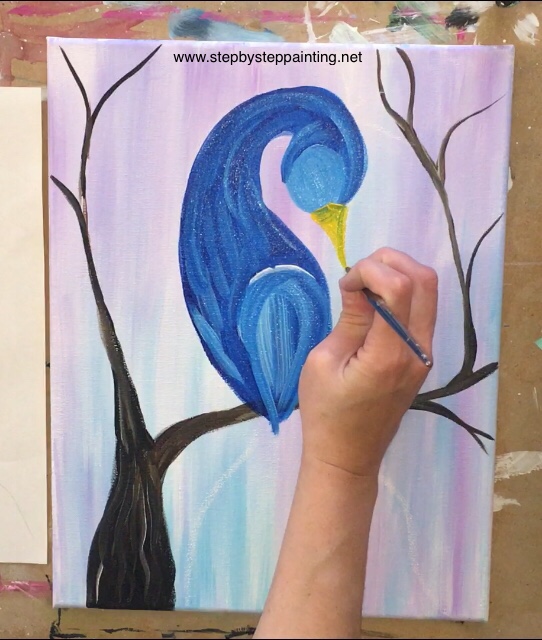
7. Paint the peacock tail
To do the peacock tail, I started with the color brilliant yellow green and a #4 round brush.
Paint an upside down tear drop shape. Then fill it in with several layers of that brilliant yellow green so it’s nice and bright. 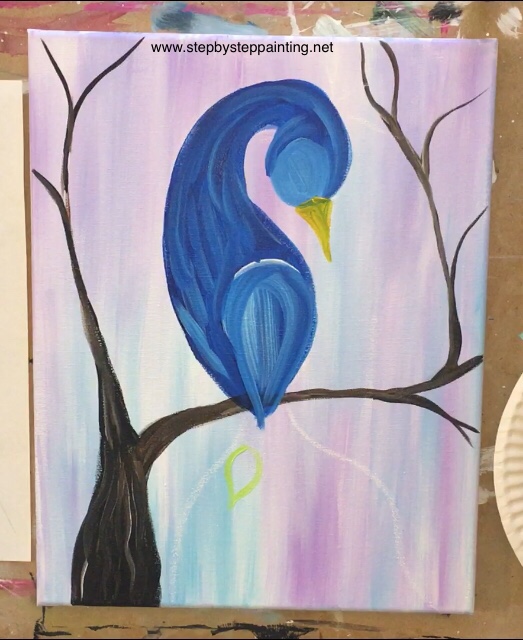
Continue painting these upside down tear drop shapes so that they go in an almost “brick like” formation. 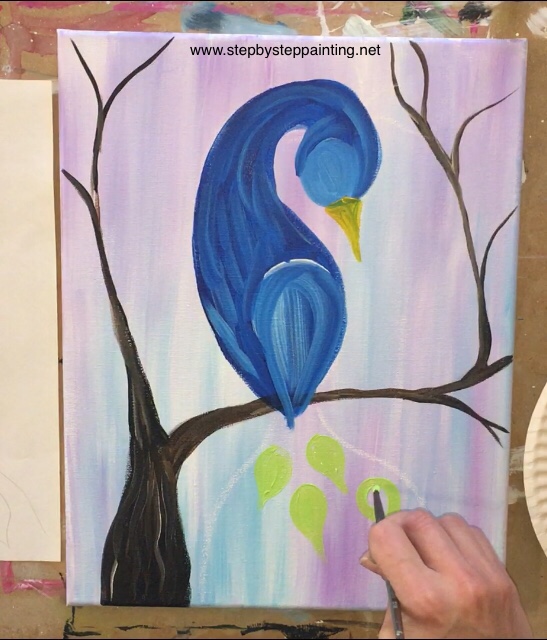
I ended up painting nine of these shapes. You may end up with the same amount or more or less.
Just make sure you stay inside of the two wavy lines that you drew with the chalk. 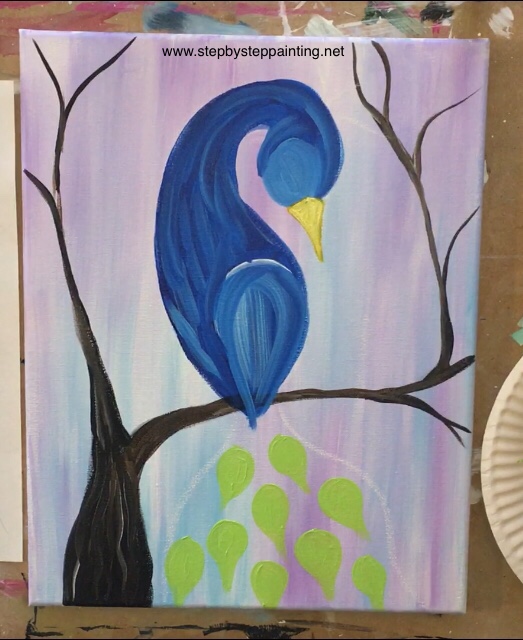
Before continuing on with the rest of the tail, I painted the head feathers on the peacock.
I used a #4 round brush and the color phthalo blue with a bit of white on the tip of those feathers.
I also made the circle in the head area a bit lighter with white and also lightened up the beak by adding titanium white to the yellow.
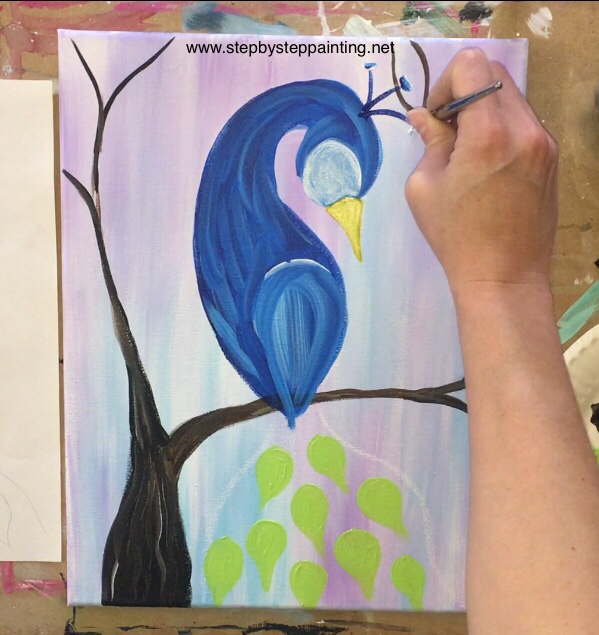
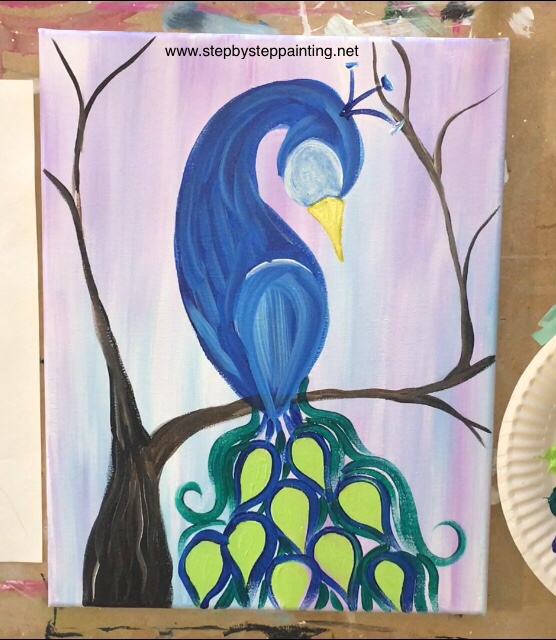
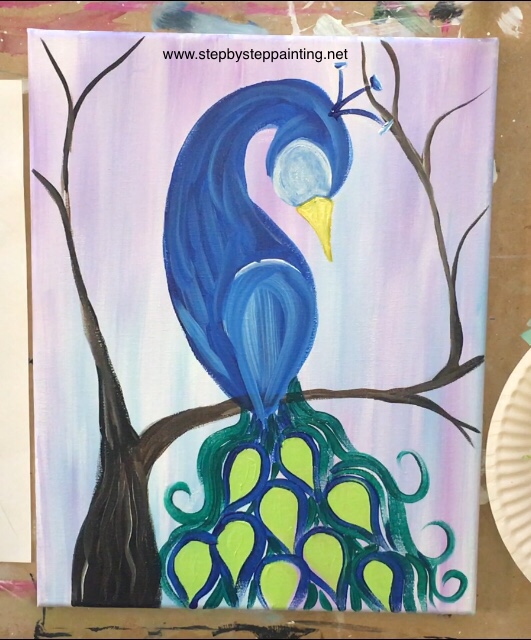
Then proceed back to the tail feathers (now that the green is a bit dryer).
Outline each of the teardrop shapes with pure phthalo blue. I did this with a #4 round brush. 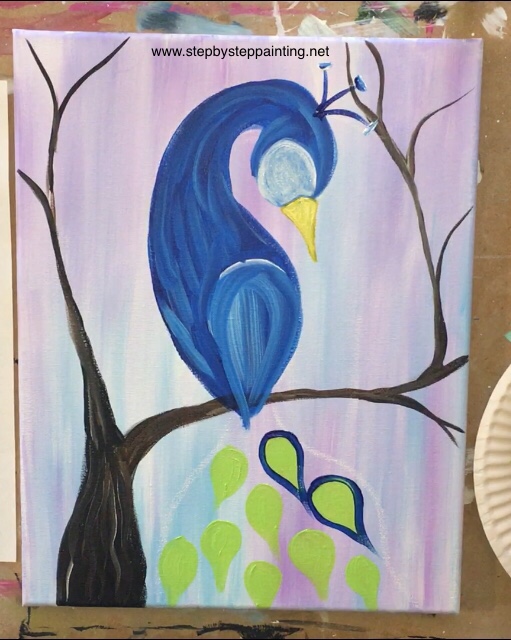
If your blue overlaps the green slightly (mine did) then that is okay!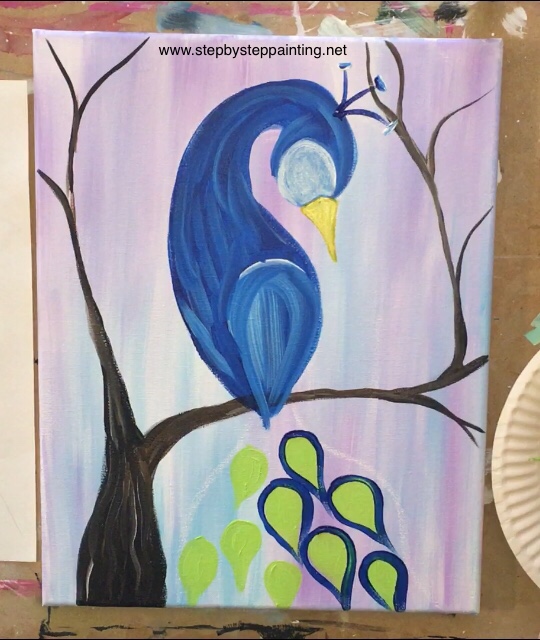
I also extended the bottom part of the peacock’s body with some strokes of phthalo blue.
This just helped the tail look like it is attached to the body. 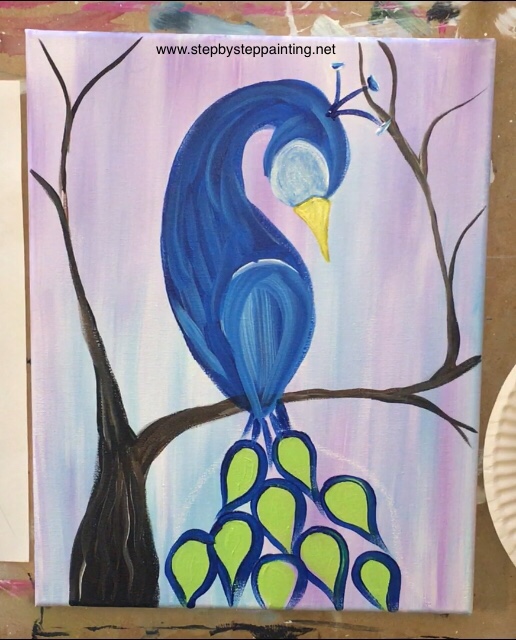
Next completely rinse and dry your brush. Add phthalo green (which is a perfect peacock green by the way).
This time outline the blue lines but make them more loose like peacock feather strands. I did more than one row of this phthalo green.
Some of the phthalo green lines go in a spiral on the edges of the tail.
Continue filling in all the gaps with this phthalo green making strokes that contour around the initial teardrop shape. 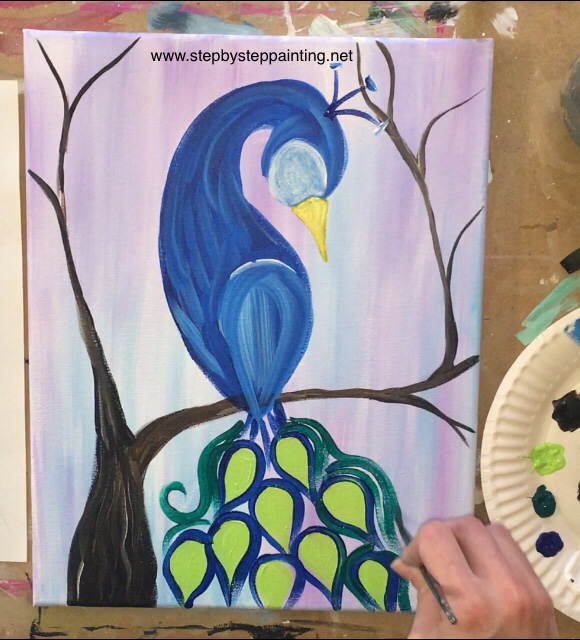
Next completely rinse your brush and load the tip in mars black.
On the bottom tip of all the brilliant green teardrop shapes, paint a small narrow heart shape where the point of the heart aligns with the point of the teardrop shape. 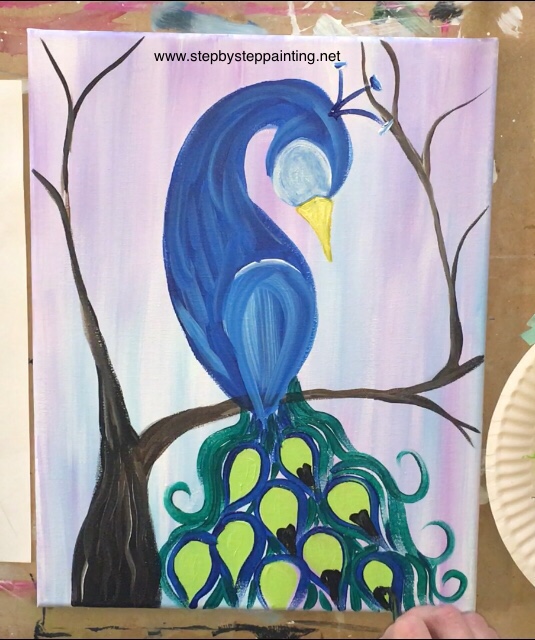
Optional: to add a bit more depth to the tail, you can paint a few contour strokes of black over some of the phthalo green strokes.
9. Paint details on the beak and eye as well as a white dot on all the black “heart shapes” on the tail.
Next I used a 10/0 liner and mars black to outline the beak shape and middle line of the beak. 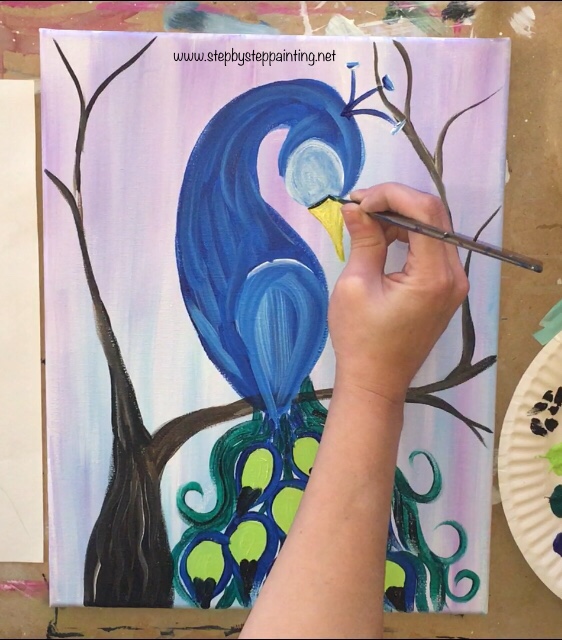
Then I painted an oval for the eye and a small black mark on the right side of the beak towards the tip.
I also painted a white dot on the top of each of the “heart shapes” on the tail feathers. Just make sure your black is dry (or almost dried) when you do these dots. 
10. Use Q-Tips and the colors quinacridone magenta, medium magenta and titanium white to paint the flowers in the tree.
Note: you can probably skip the medium magenta here and just use quinacridone and white.
Basically dip your q-tip (or q-tips if you prefer using more than one at a time) and dip them in the color quinacridone magenta.
Paint little dots that look like they are hanging off of the branches in strings. Just stamp the q-tip up and down! 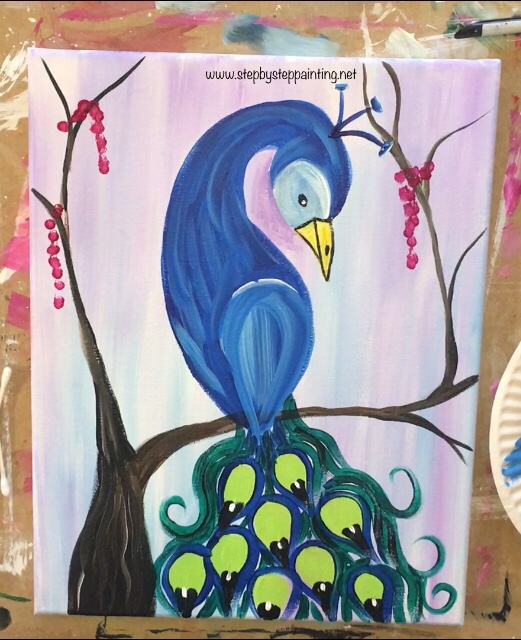
Dip your q-tip in the other two colors – white and medium magenta.
Continue to build off of the “stings” by dotting more paint to create bundles of flowers that look like they are hanging off the branches.
Adding areas of dark quinacridone and lighter magenta creates depth in these floral bunches. 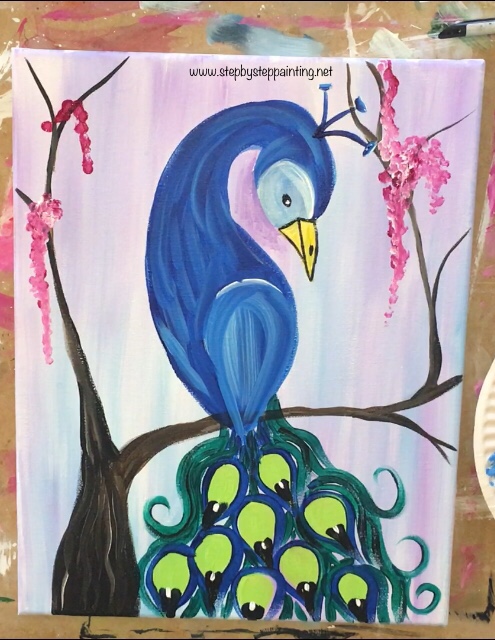
Continue painting dots and vary your colors so some areas are light and some areas are dark. 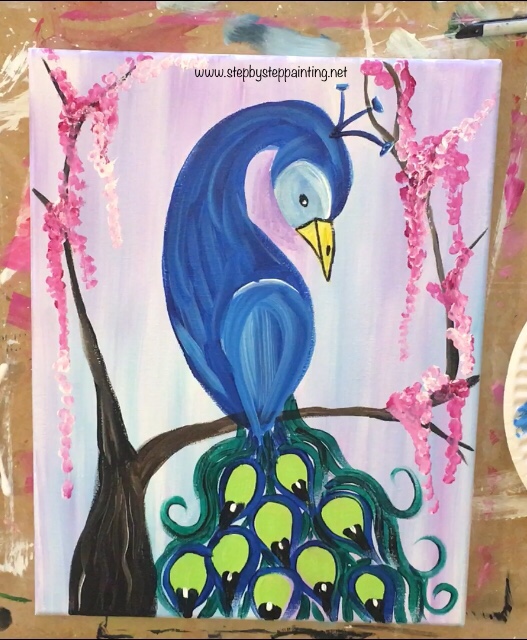
Adding more lighter strings of dots make the floral bundles look like they are further in the distance.
I did this in the area above the peacock’s head on the left. 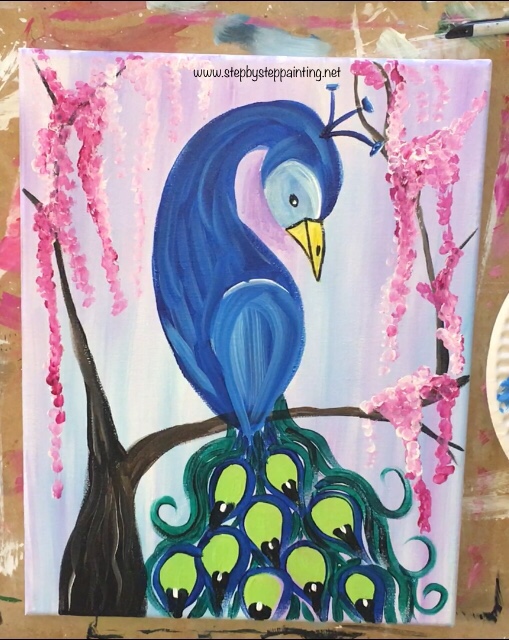
You can also go back and add more branches to the tree. I did (and overdid the branches a bit). 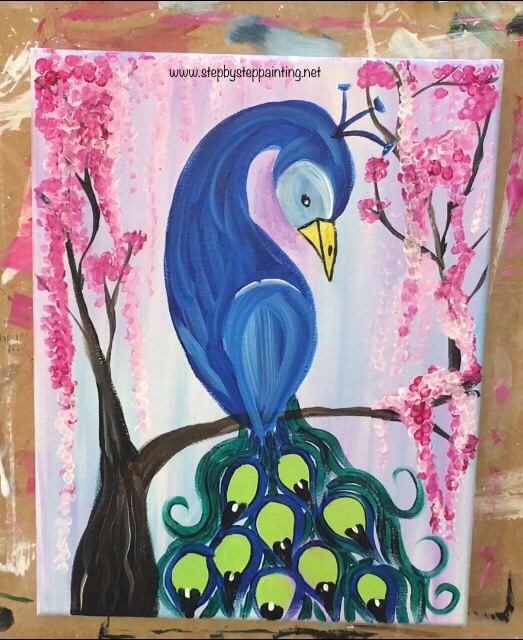
Finished!
Would you like to save this?
Did you do this painting? Share your art here:


Looove it!
Thanks Letice!
I love your instructions ..I am having fun with all your patterns. Would show some of my paintings but not equipped for that. Thanks
Thanks so much Mary!