
Would you like to save this?
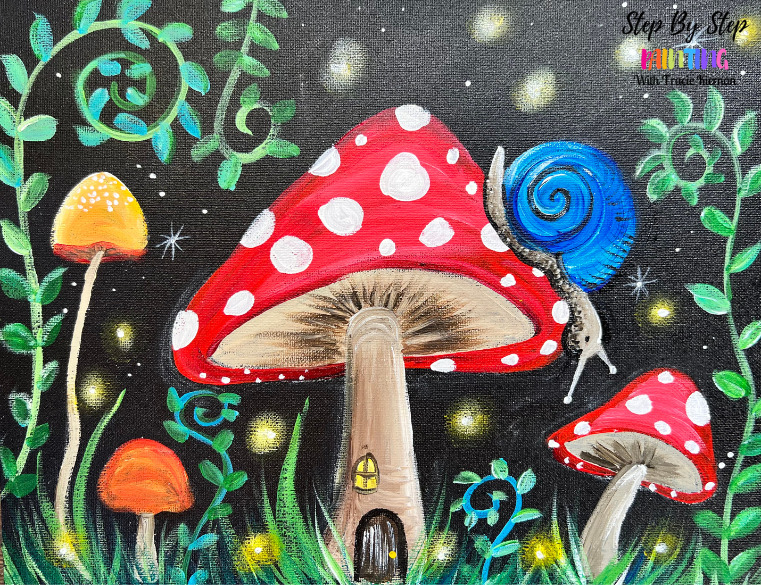
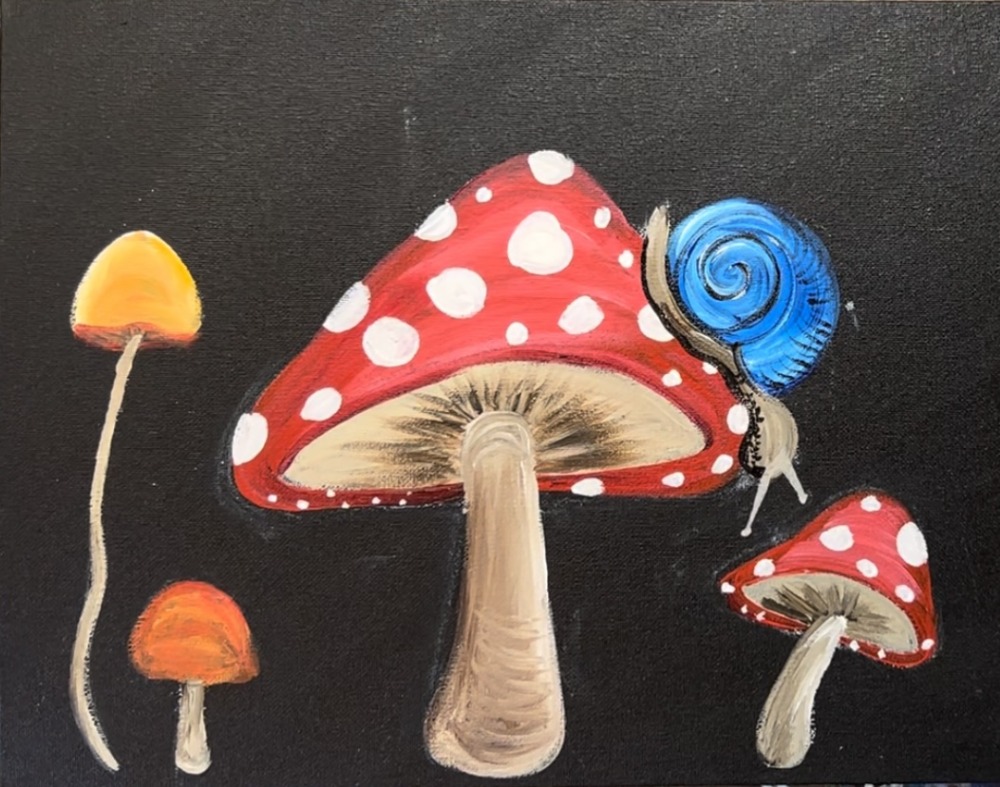
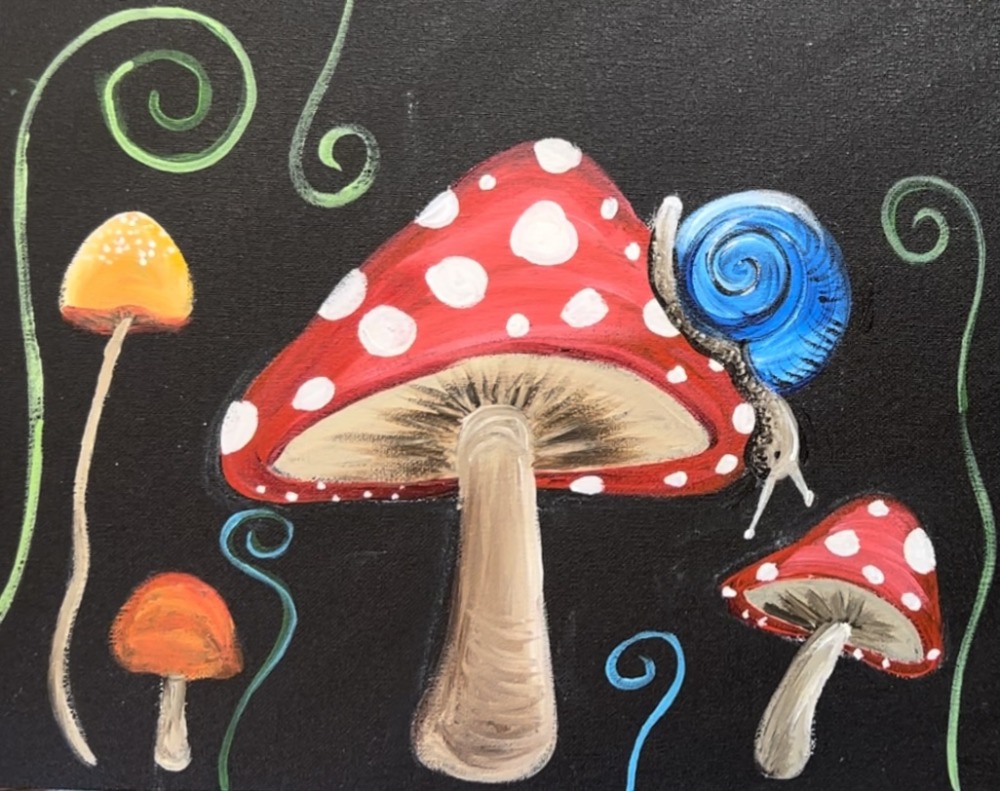
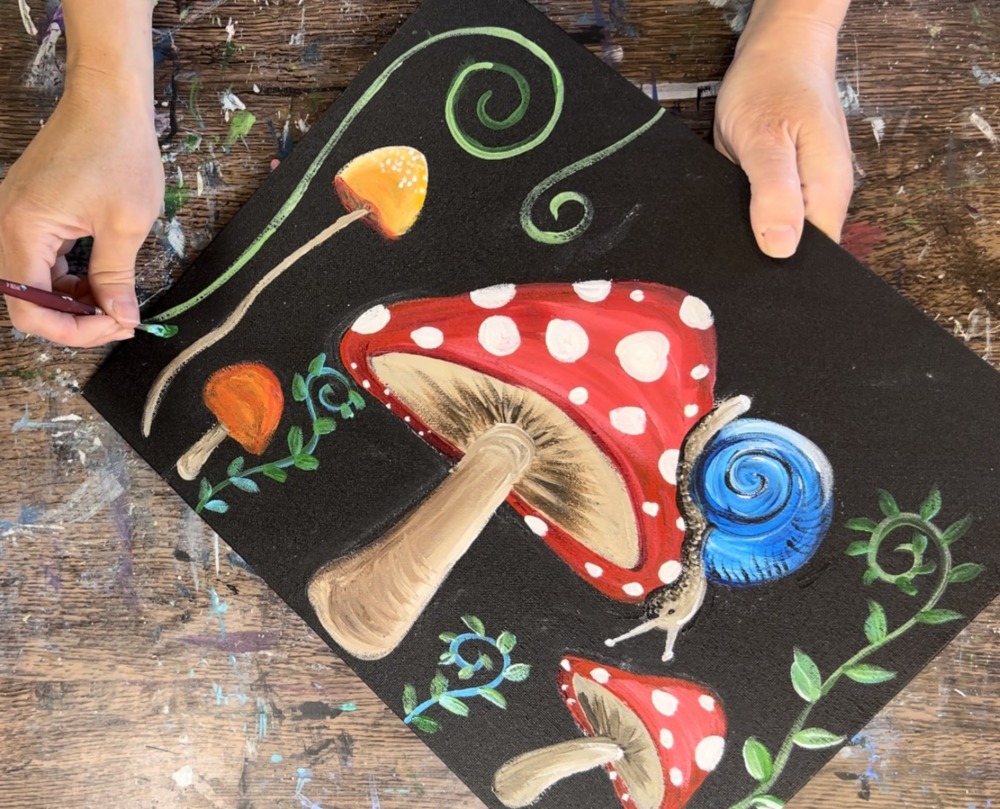
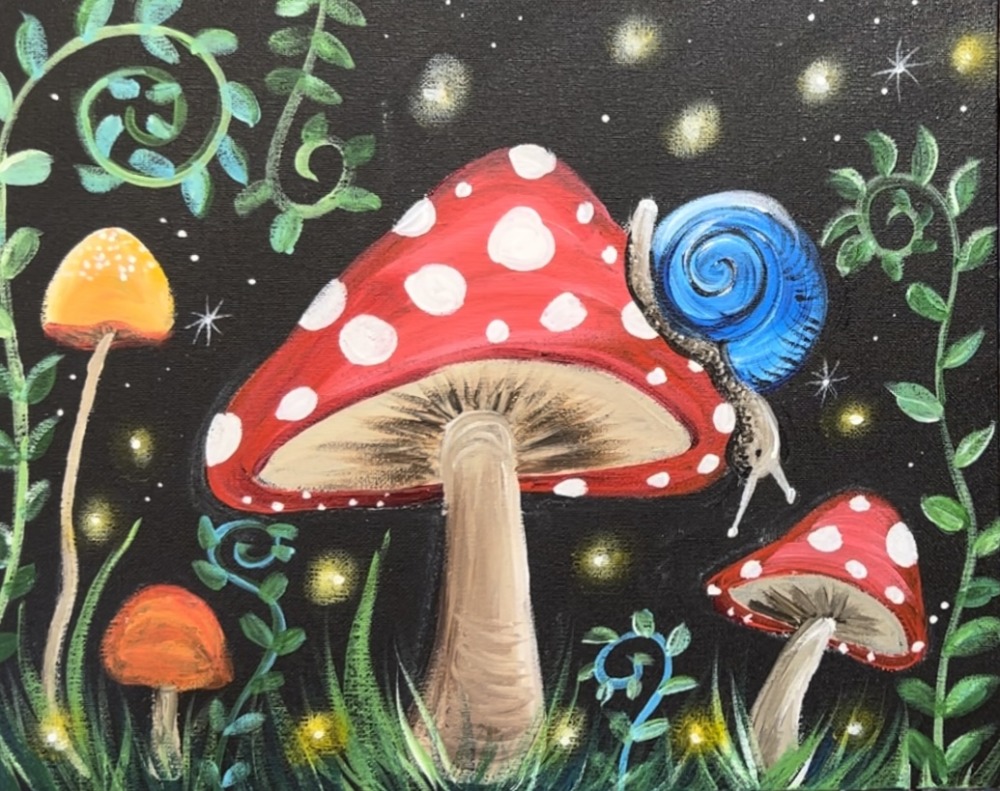
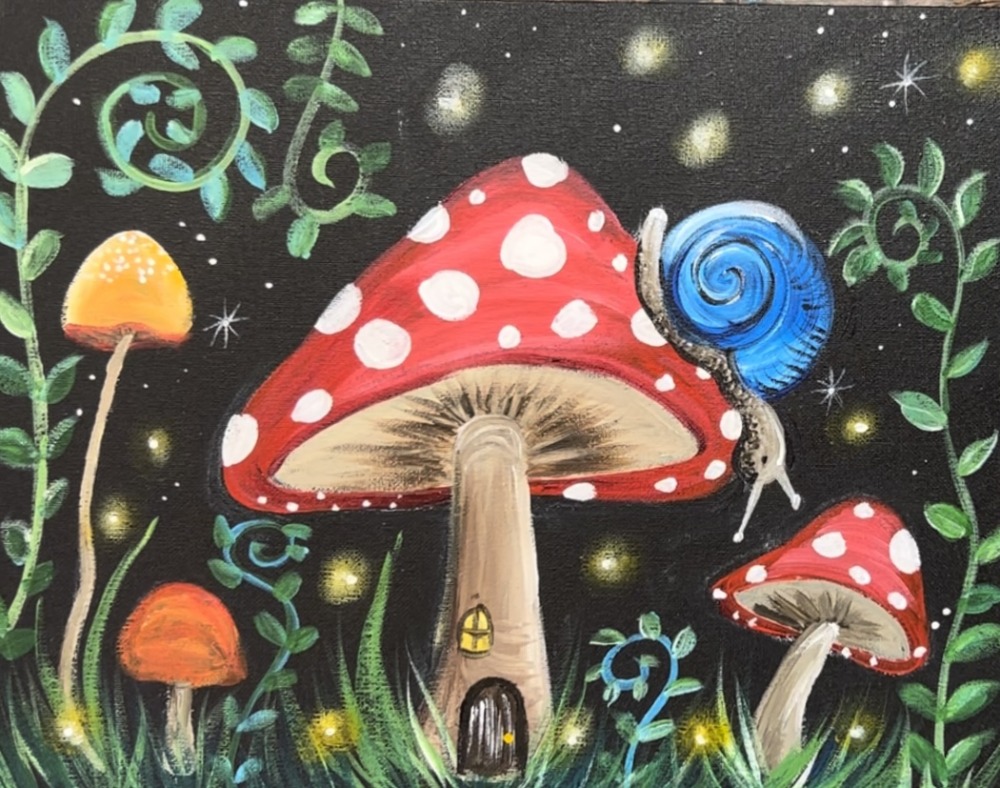
Paint a whimsical mushroom landscape with fairy door and snail. This tutorial can be customized with unique colors and features such as different style fair doors and flying insects!

This particular painting is done on a black canvas for the base. I love painting a canvas black because you don’t have to paint the background and it provides for bright contrasting colors!
It’s also a great way to recycle a mess up painting. Simply paint one coat of black paint over the painting and you have a fresh canvas to work on!
Sometimes I like to used the Apple Barrel to get a matte finish (for the background). This time around I used the Liquitex BASICS to get more of a satin finish for the background. Use a 3/4″ flat brush or any size flat brush to paint the canvas one coat of black.
Enjoy and happy painting!
See Also…
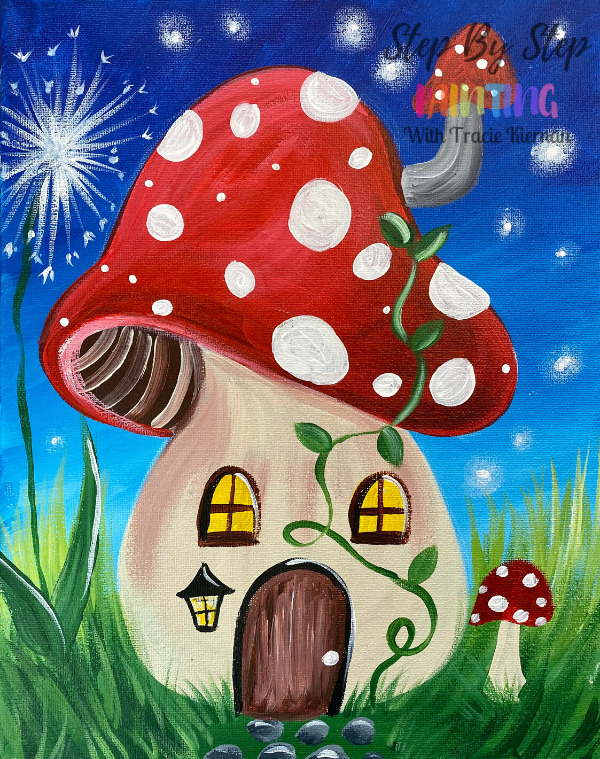
If you love mushroom paintings, you’ll want to learn how to paint this one too!
Materials
- 11 x 14 Canvas (or any canvas size) Painted Black
- White Chalk
- Wet Wipe or Soft Wet Paper Towel (for erasing chalk)
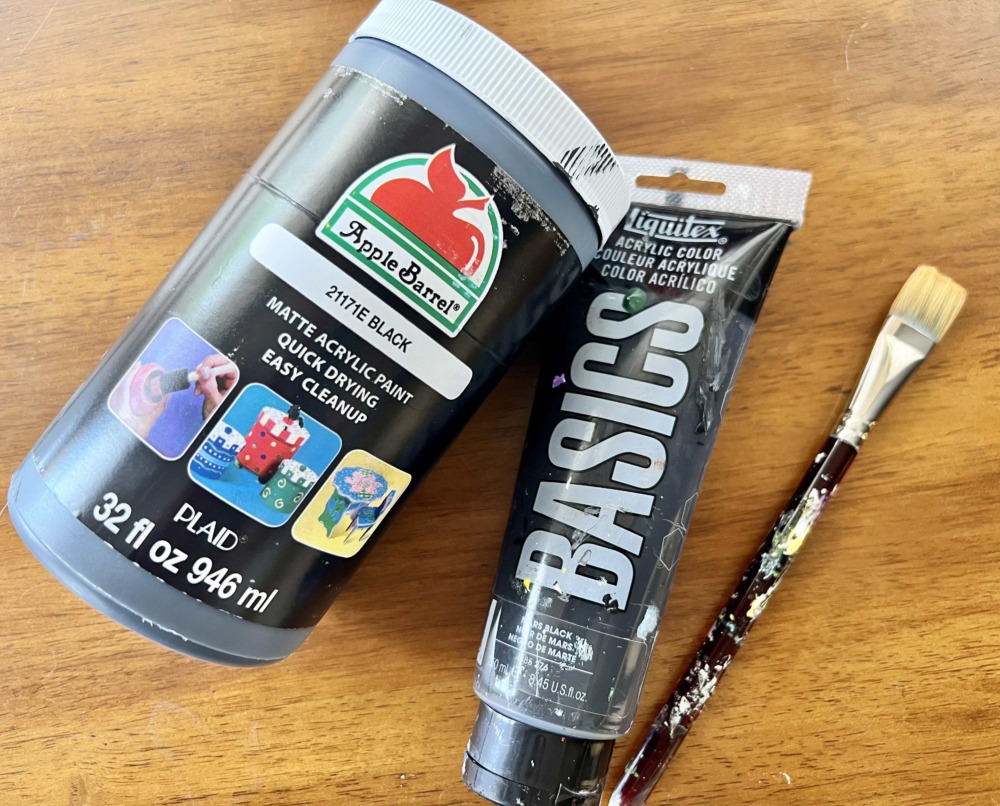
- Acrylic Paints (Liquitex BASICS)
- Acrylic Paint Brushes
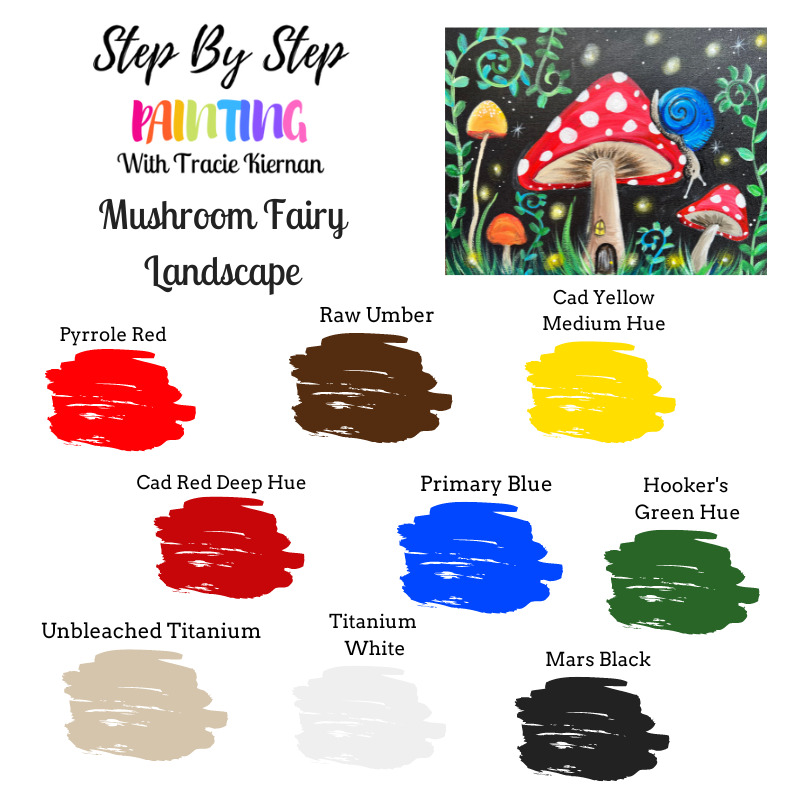
Colors
- Titanium White
- Mars Black
- Pyrrole Red
- Alizarin Crimson Hue (optional)
- Cadmium Yellow Medium Hue
- Hooker’s Green Hue
- Primary Blue
- Raw Umber
- Unbleached Titanium
Brushes
- 3/4″ Flat Wash (from this pack)
- 12 Bright Brush
- 4 Round Brush (from this pack)
- 8 Round Brush (from this pack)
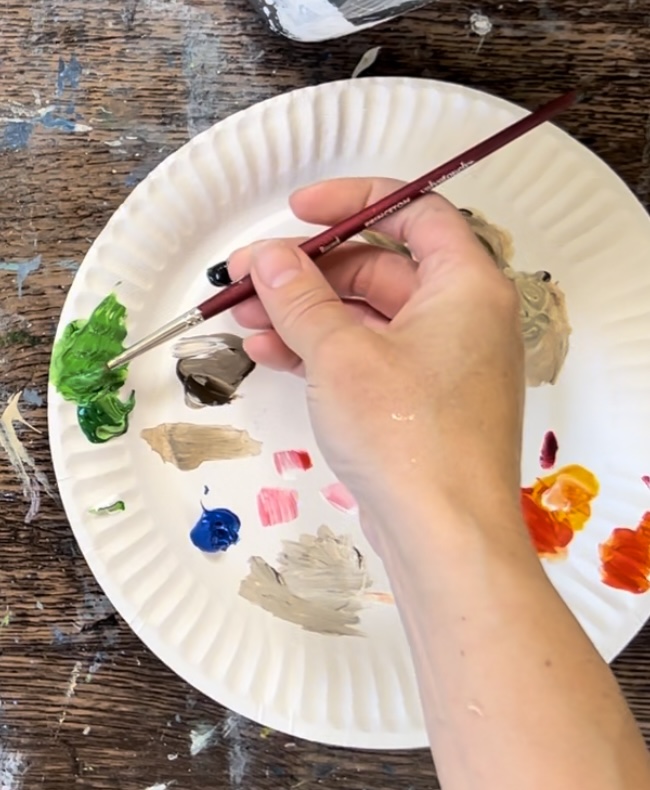
Color Palette
I used Liquitex BASICS for this painting. If you are using a different brand, use the color chart below to help you match colors. Note: the color chart says “cad red deep”, however I used alizarin crimson. This is also an optional color as it’s only used sparingly!
Craft Paint Conversion
If you are using craft paints, such as Apple Barrel, I would recommend subbing to these colors:
- Black
- White
- Any Beige Color
- Bright Blue
- Holly Branch
- Flag Red
- Bright Yellow
- Melted Chocolate
Directions at a glance:
Video
Step By Step Directions
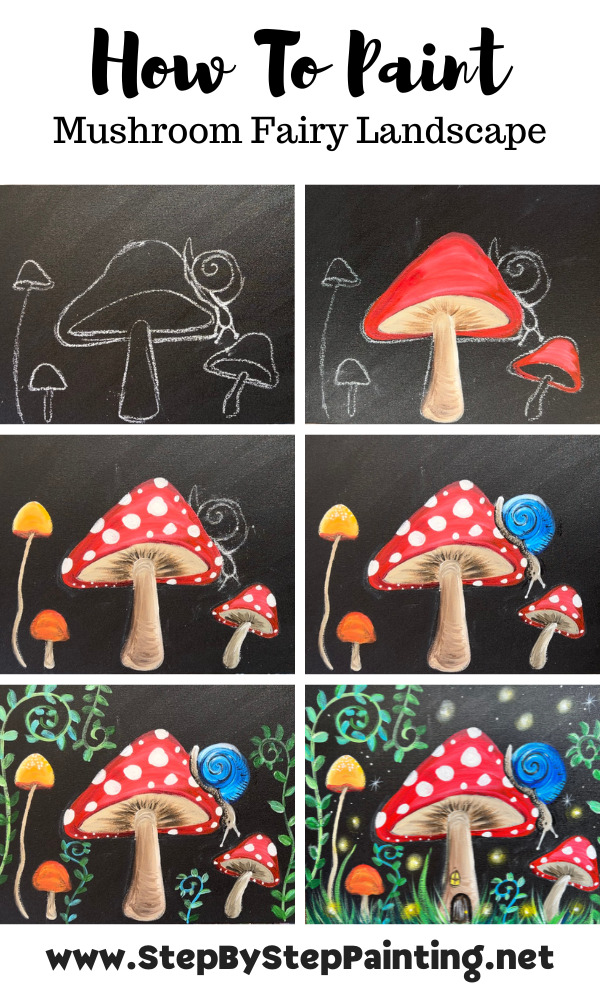
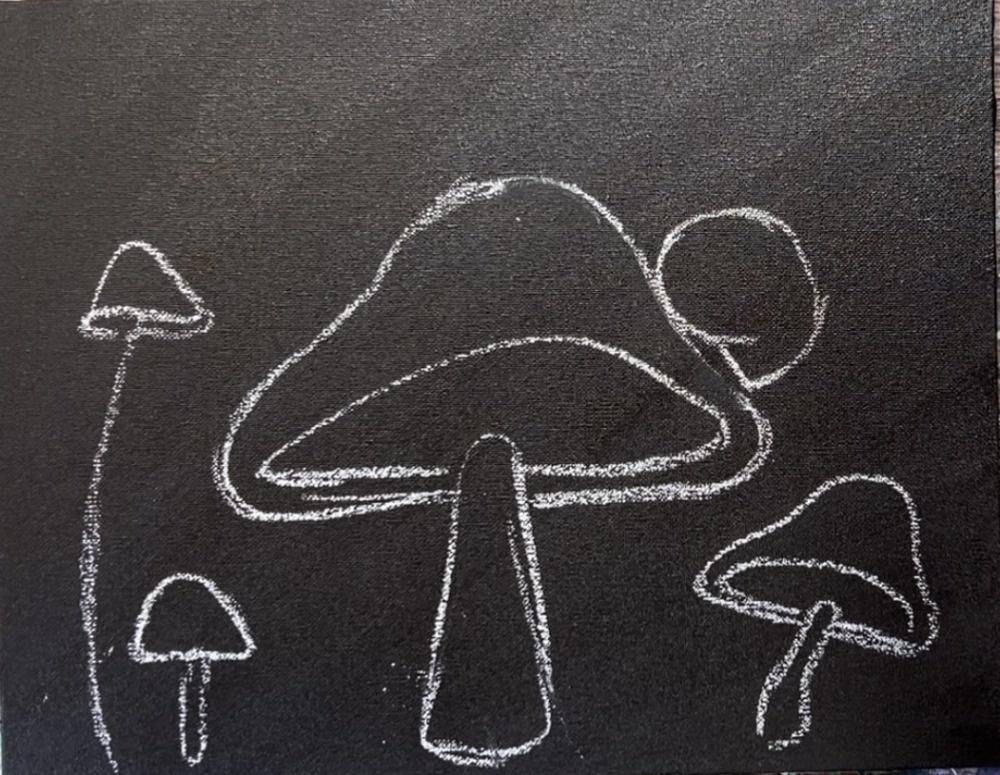
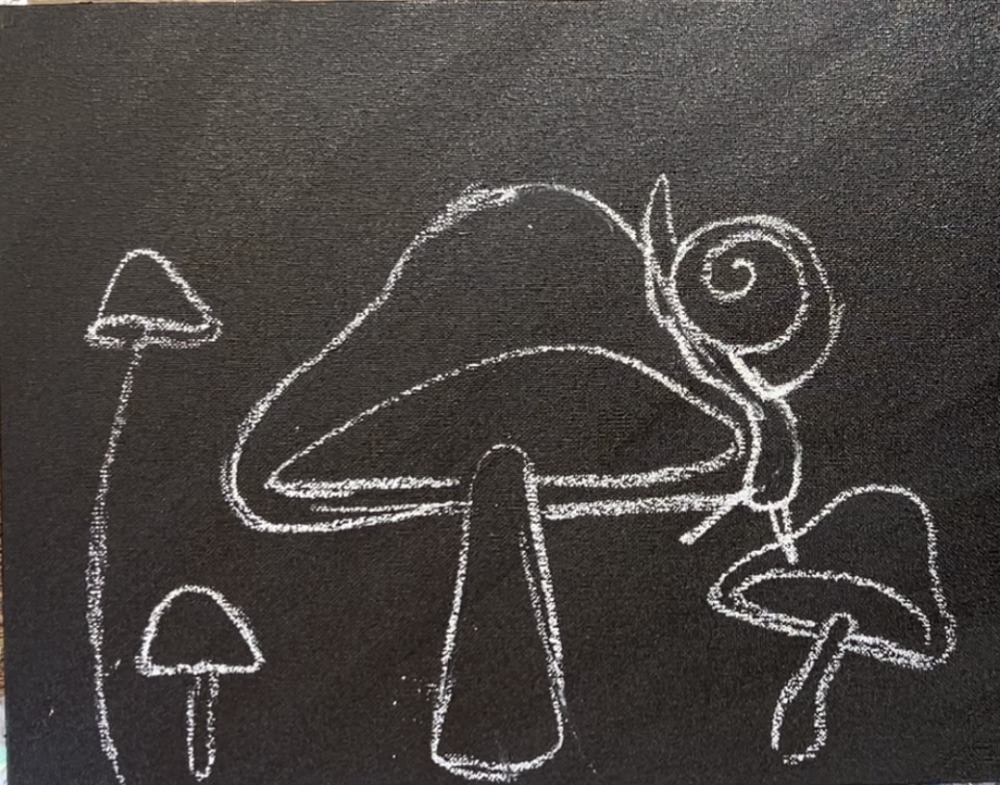
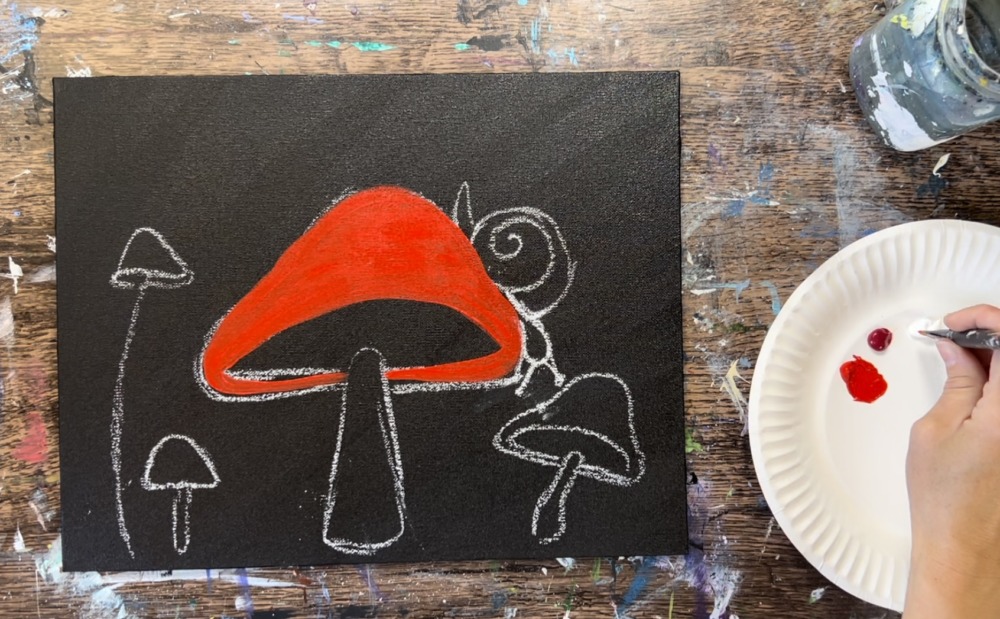
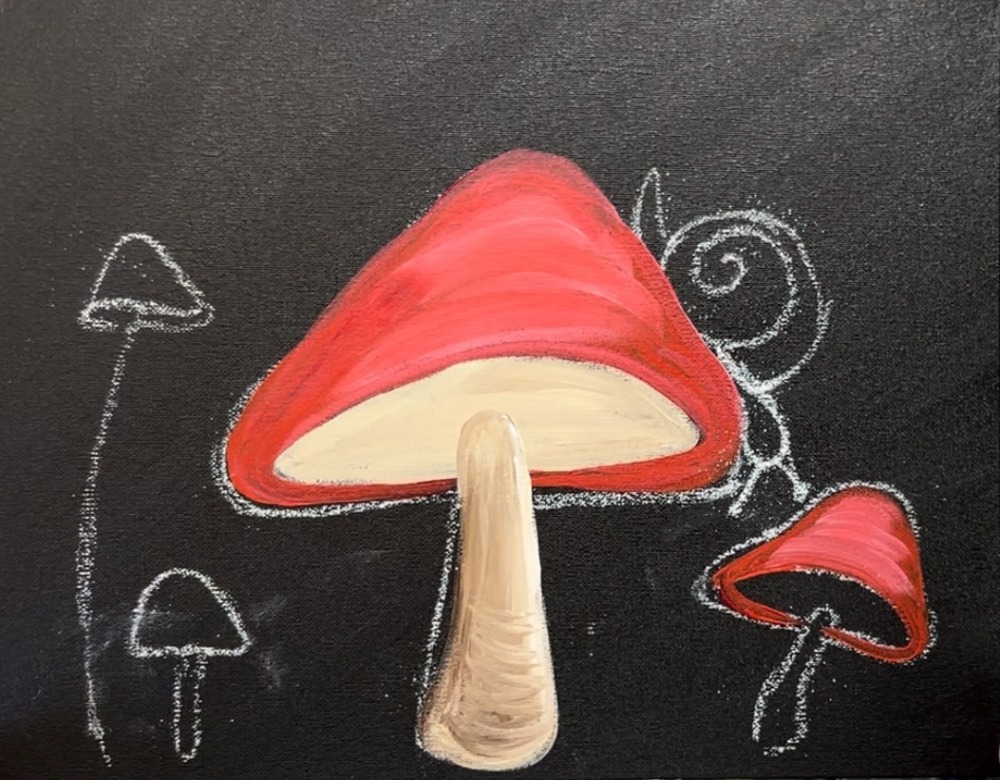
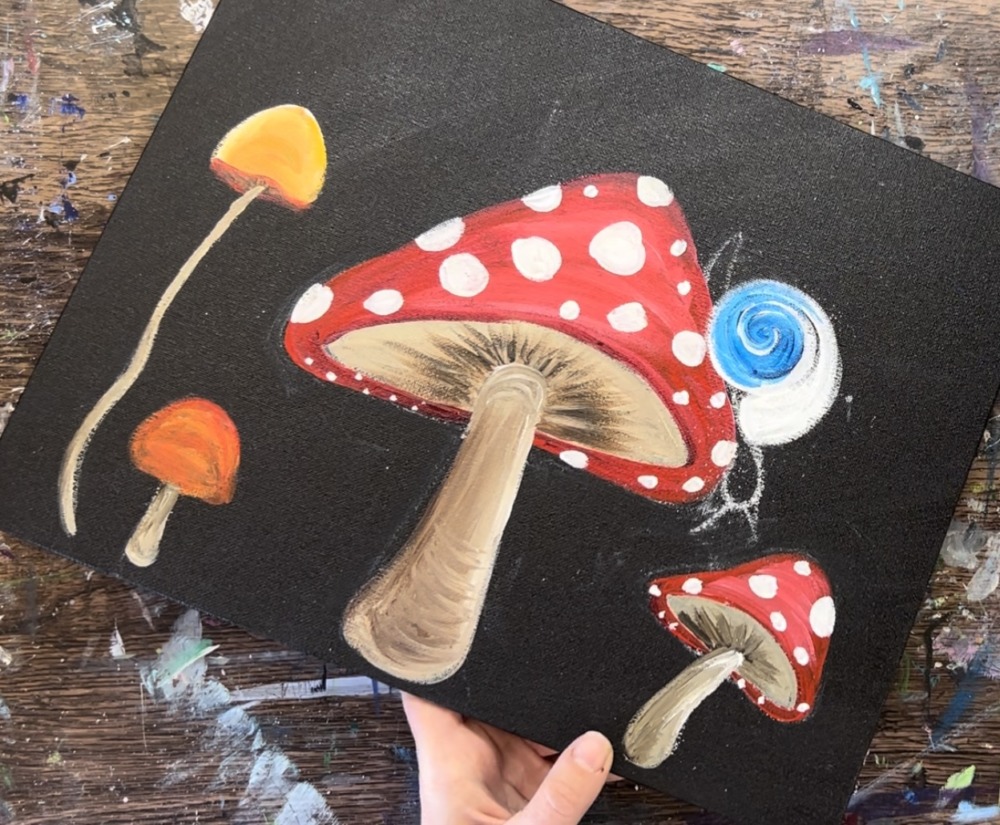
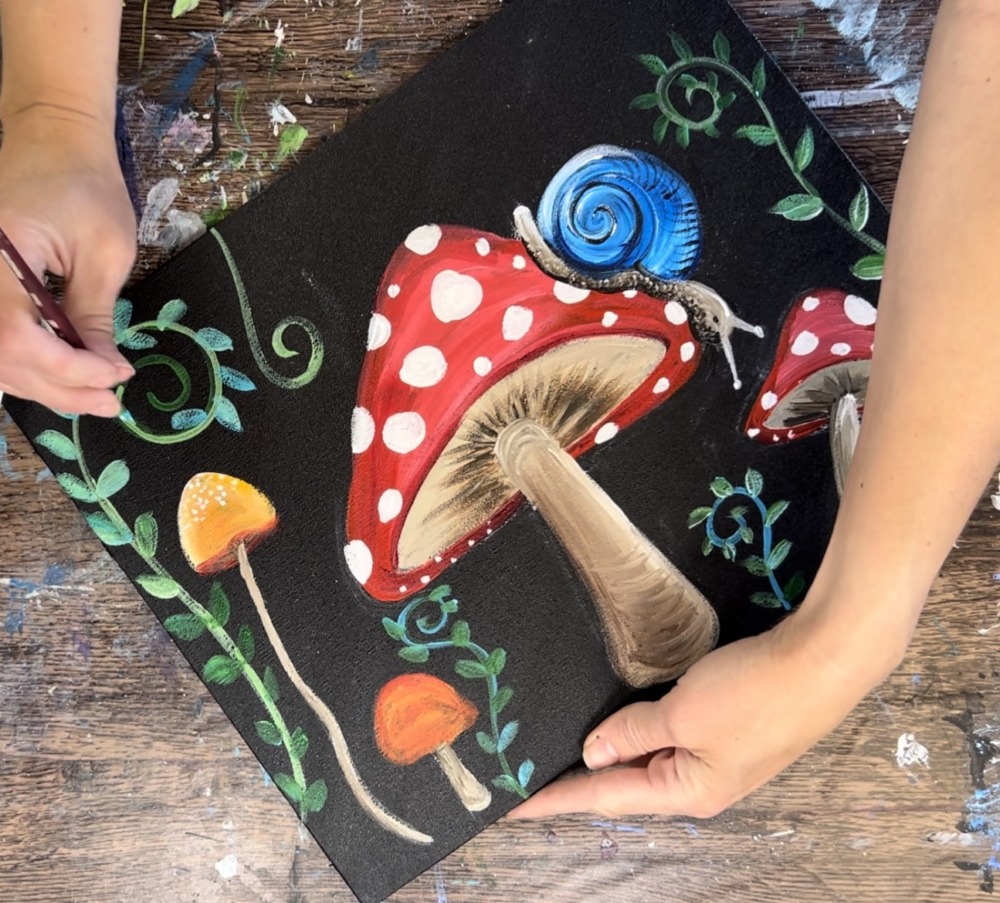
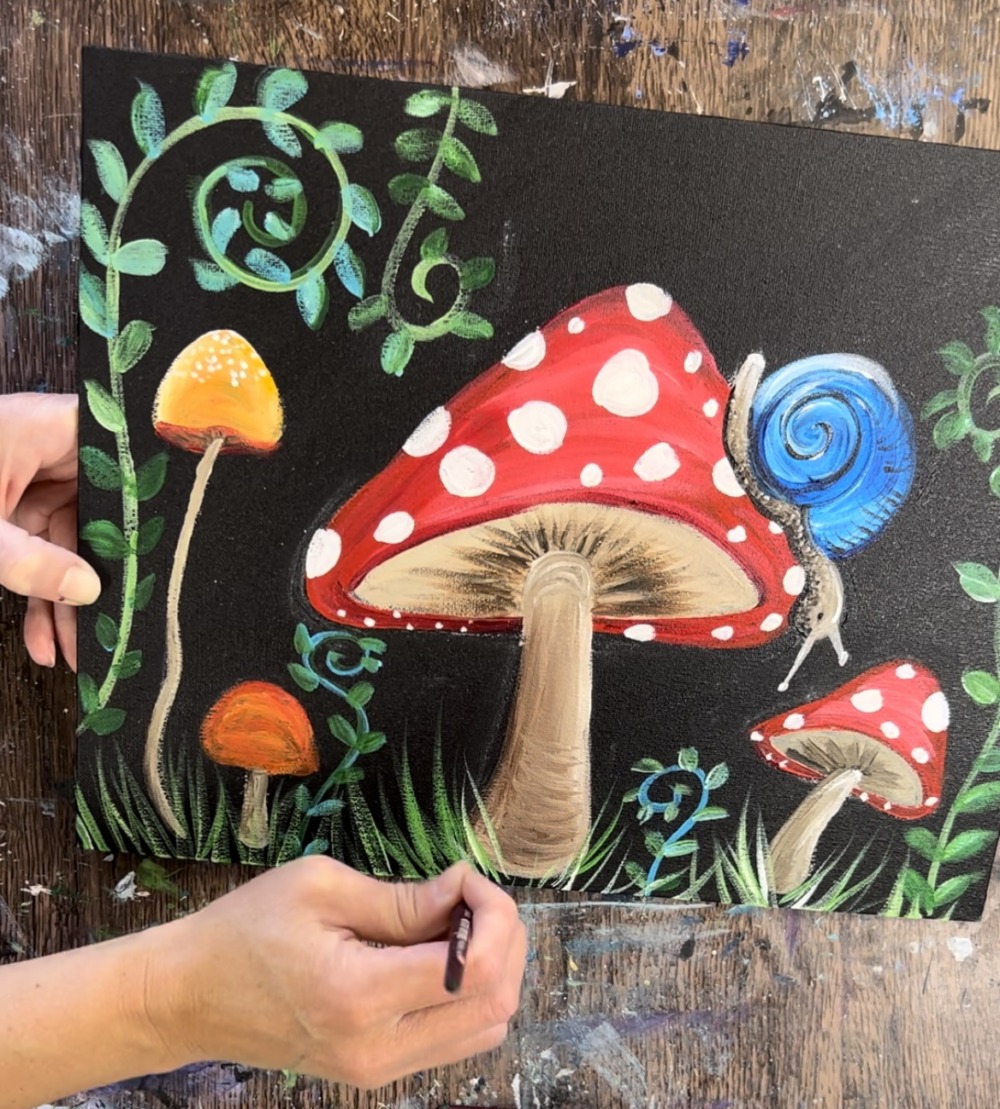
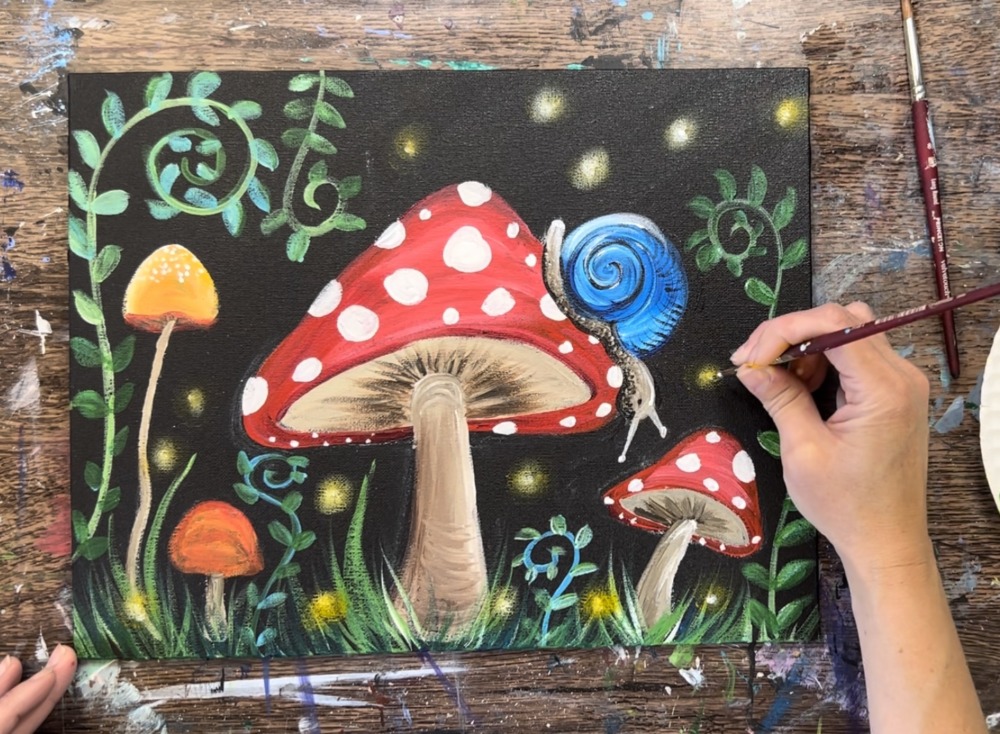
1. Draw Mushrooms & Snail
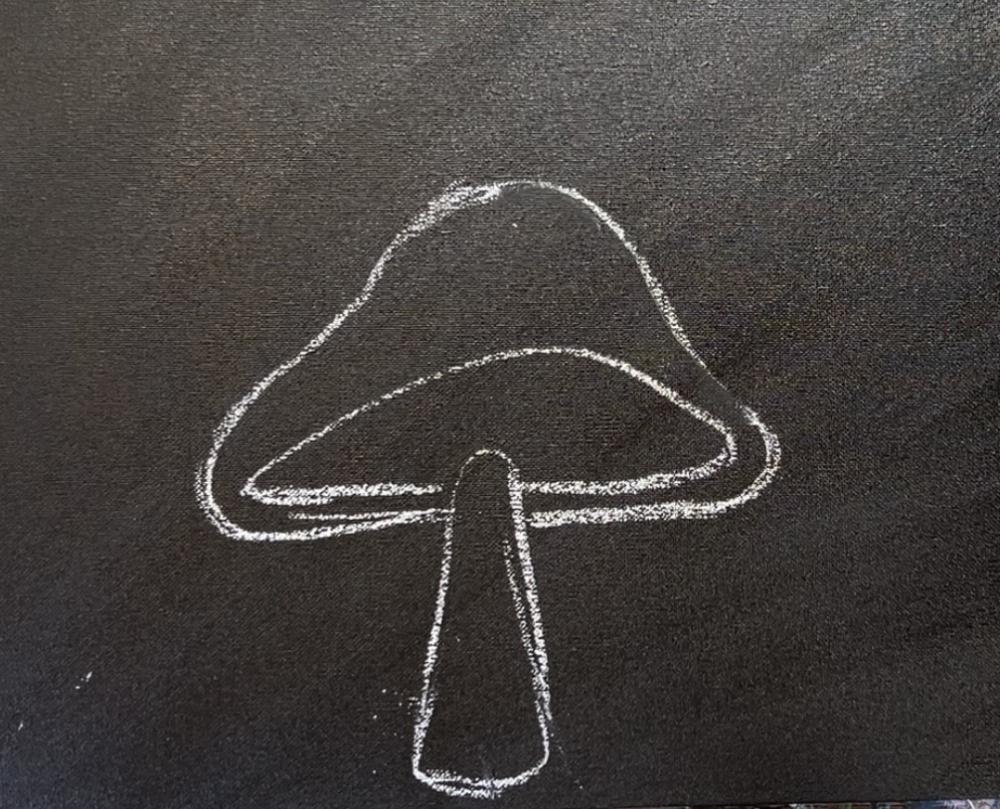
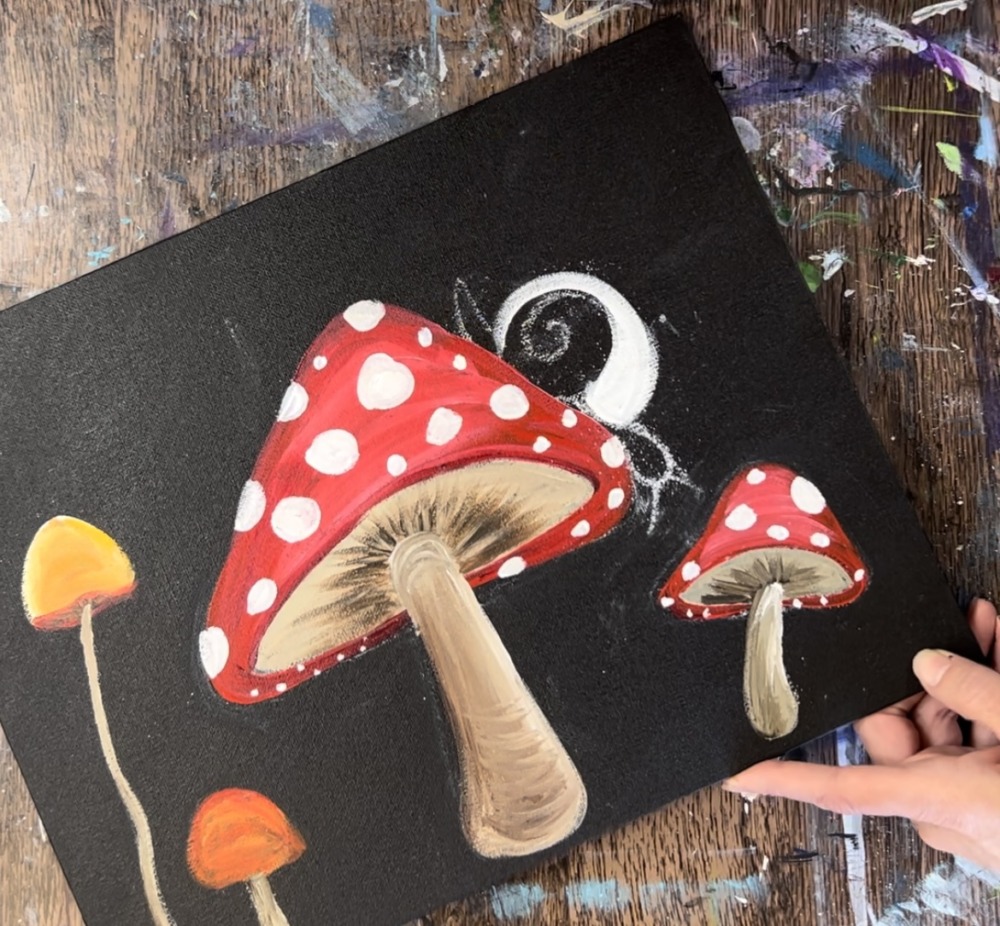
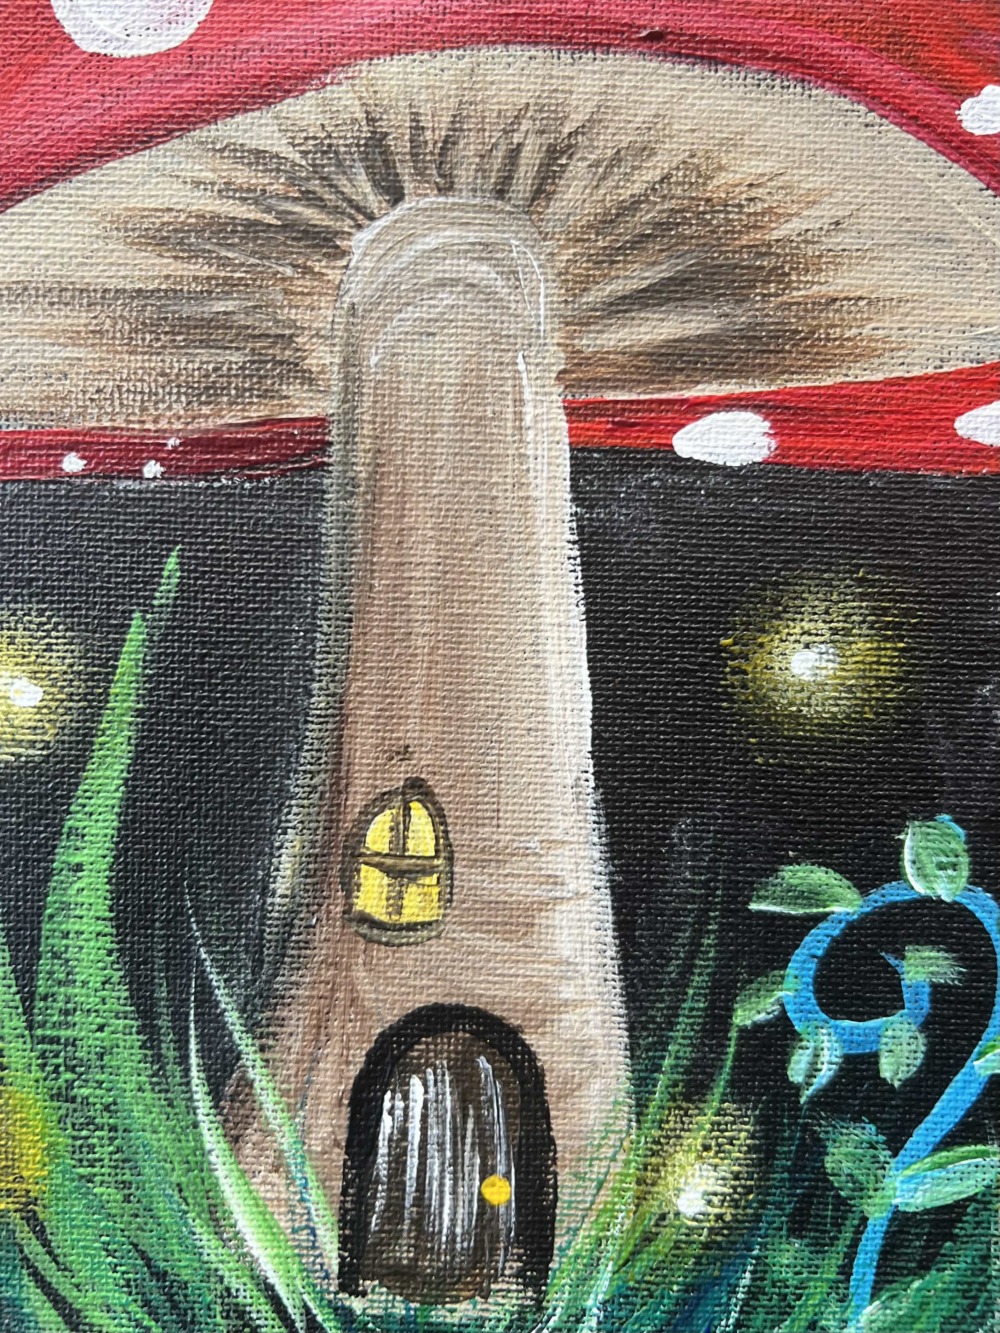
Use a piece of chalk to draw the layout of the painting (the mushrooms and snail). Start by drawing the stem of the mushroom so that it is very close to the bottom edge of the canvas. Then draw the top of the mushroom so that it overlaps the stem.
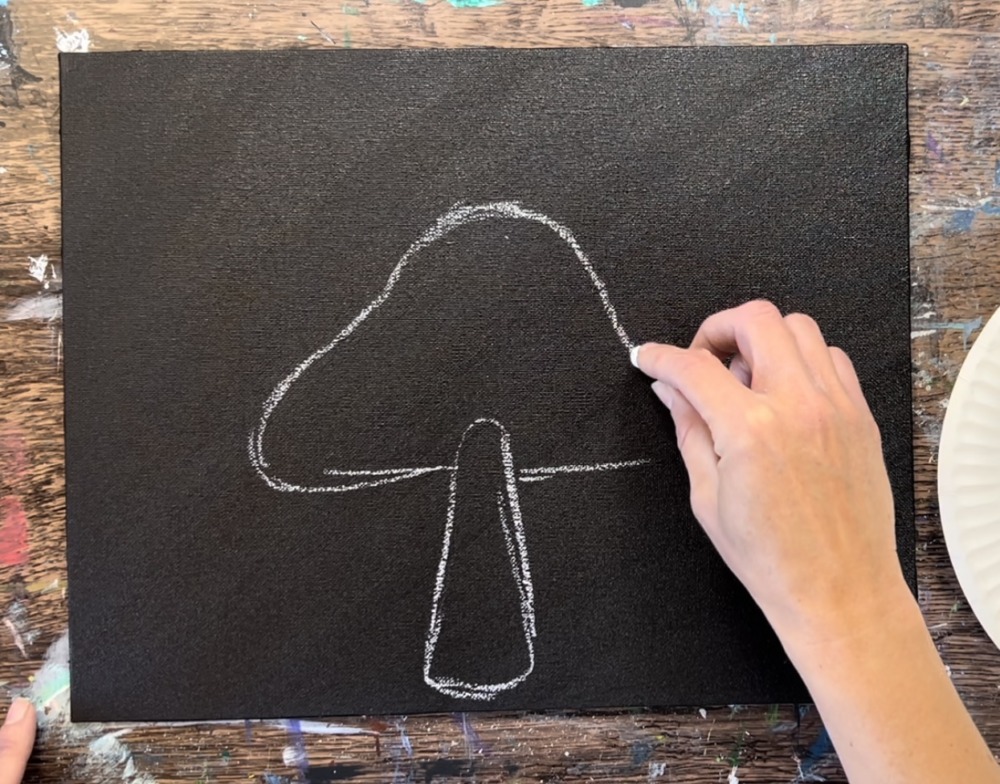
Then draw a “saucer shape” for the opening the mushroom that overlaps the stem.
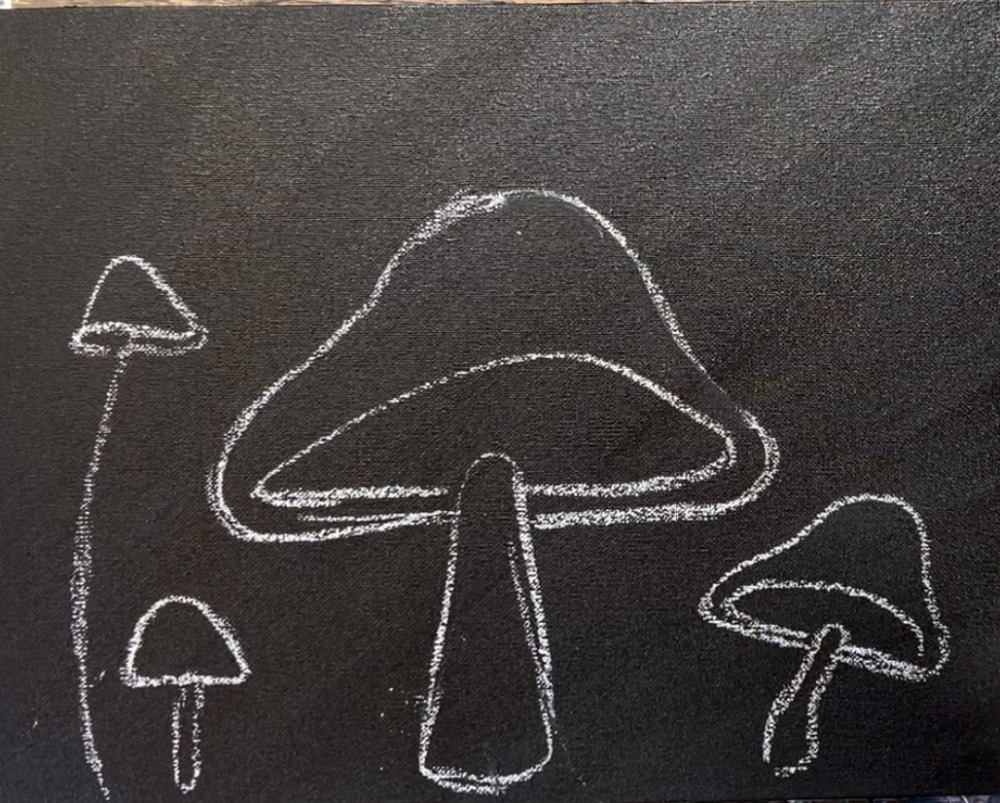
Then draw two more mushrooms. Draw a smaller one of similar style on the right and then draw a more simplified one on the left.

You can change these if you want to make them different styles or heights! I did one more smaller mushroom on the left but with a longer stems.
Then draw the shell of the snail. Draw a large circular shape with a flat opening on the lower right.
Then draw a spiral that sways slightly to the left of the shell.
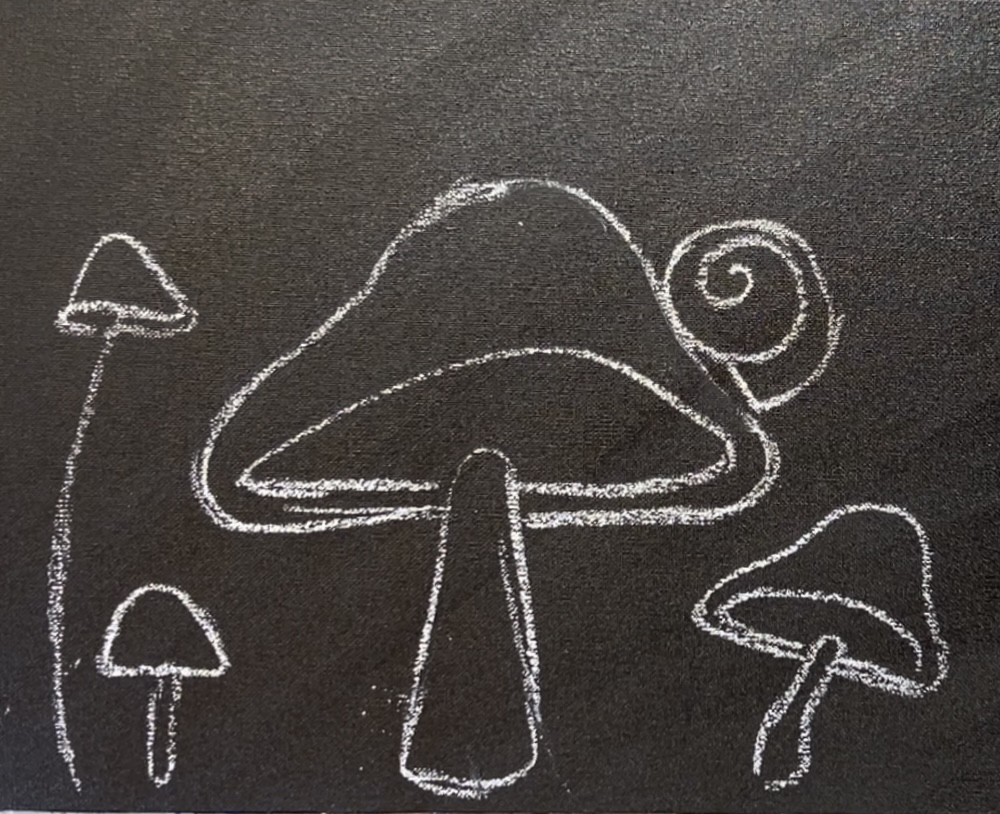
Then draw the tail, foot, head and tentacles of the snail.
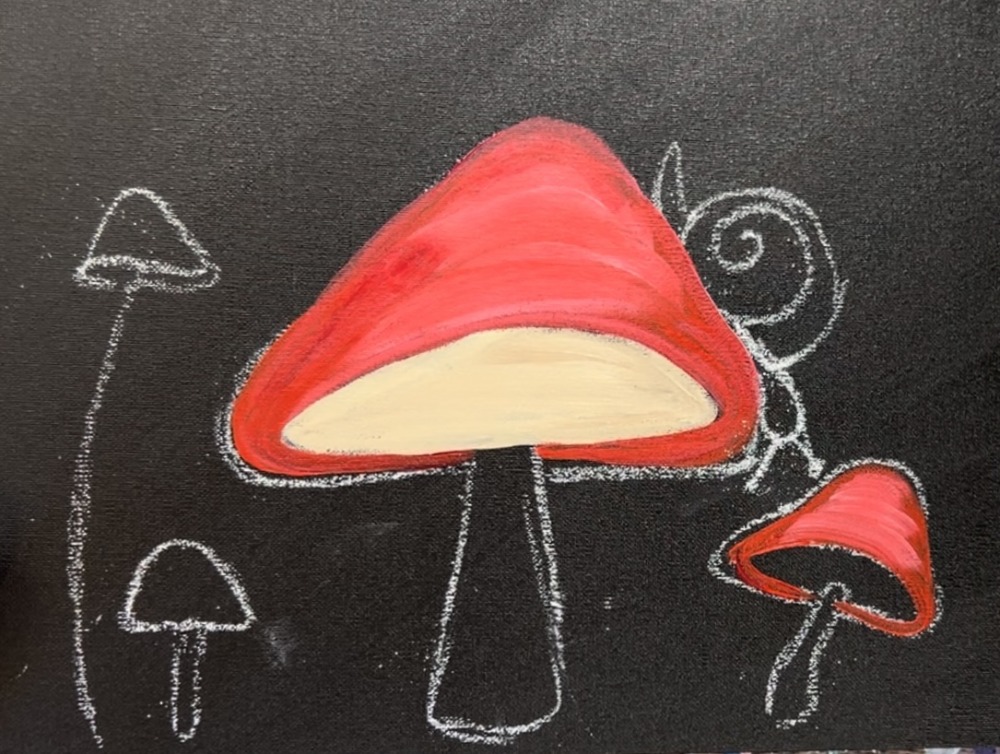
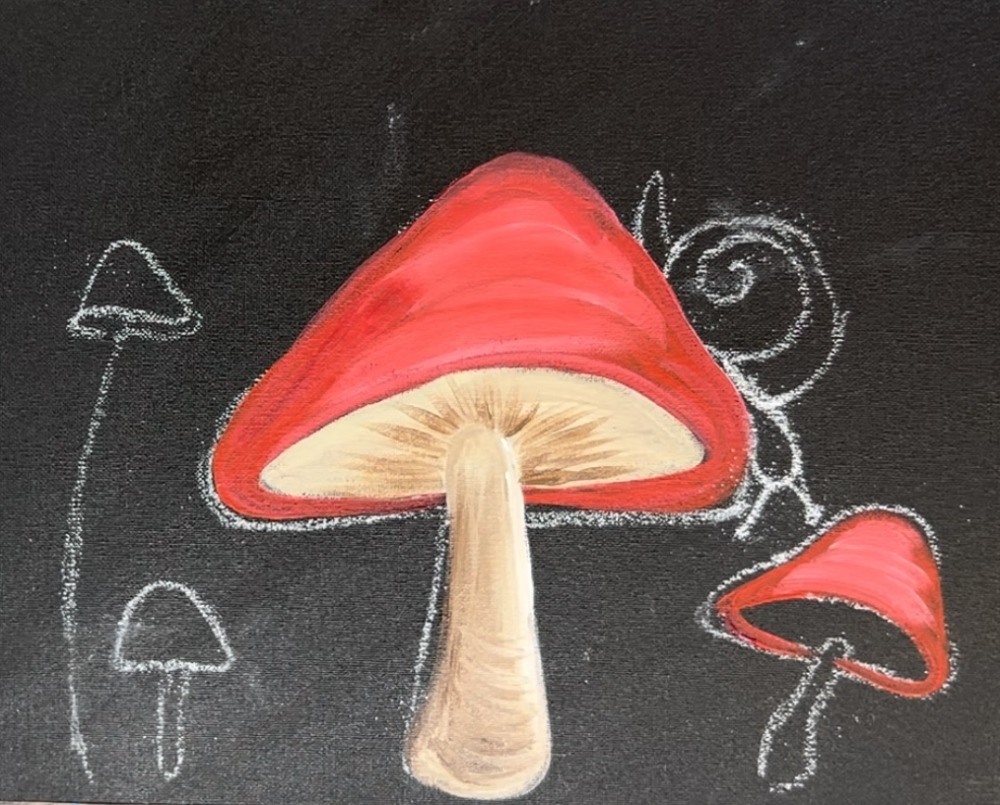
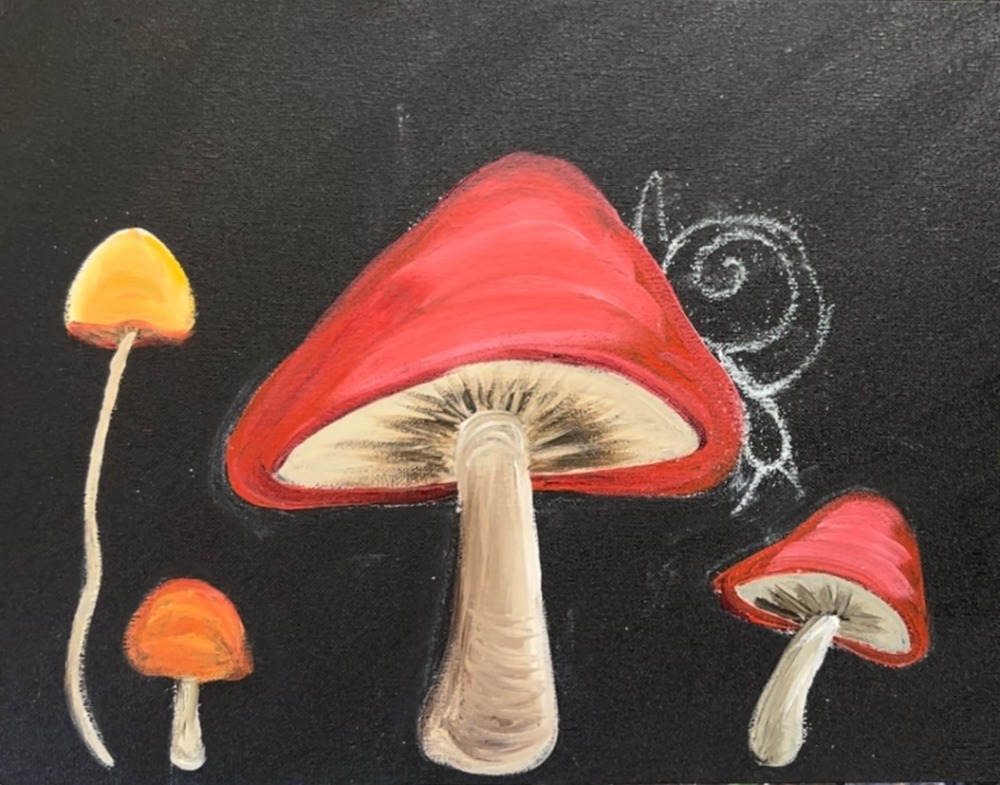
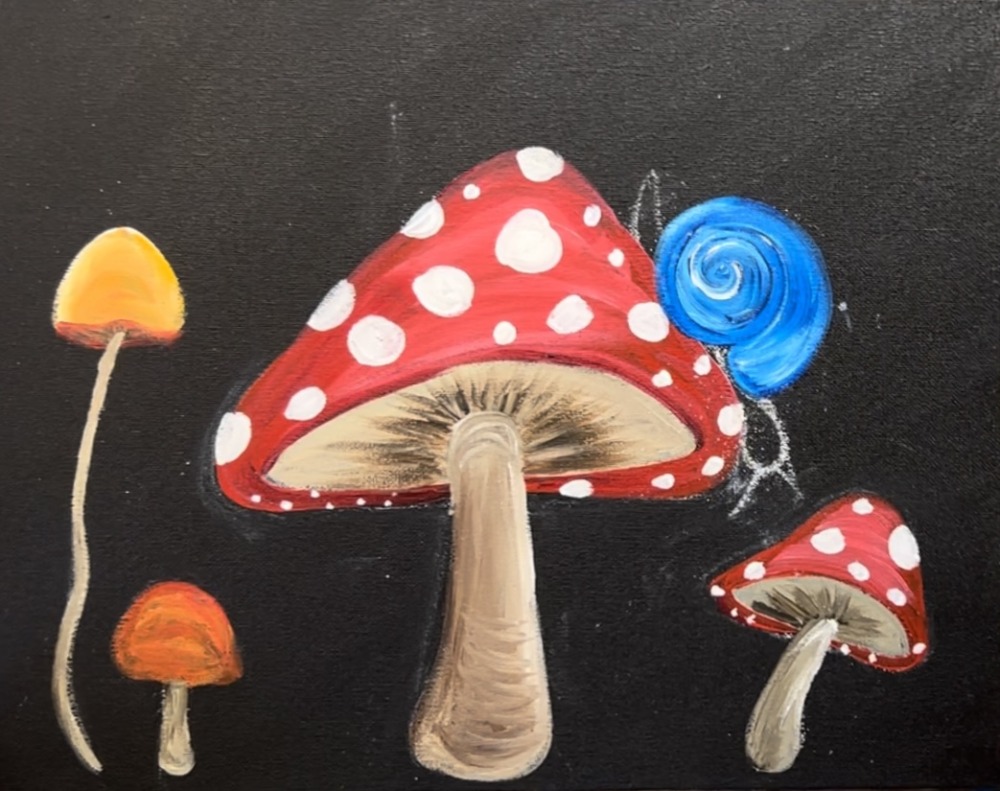
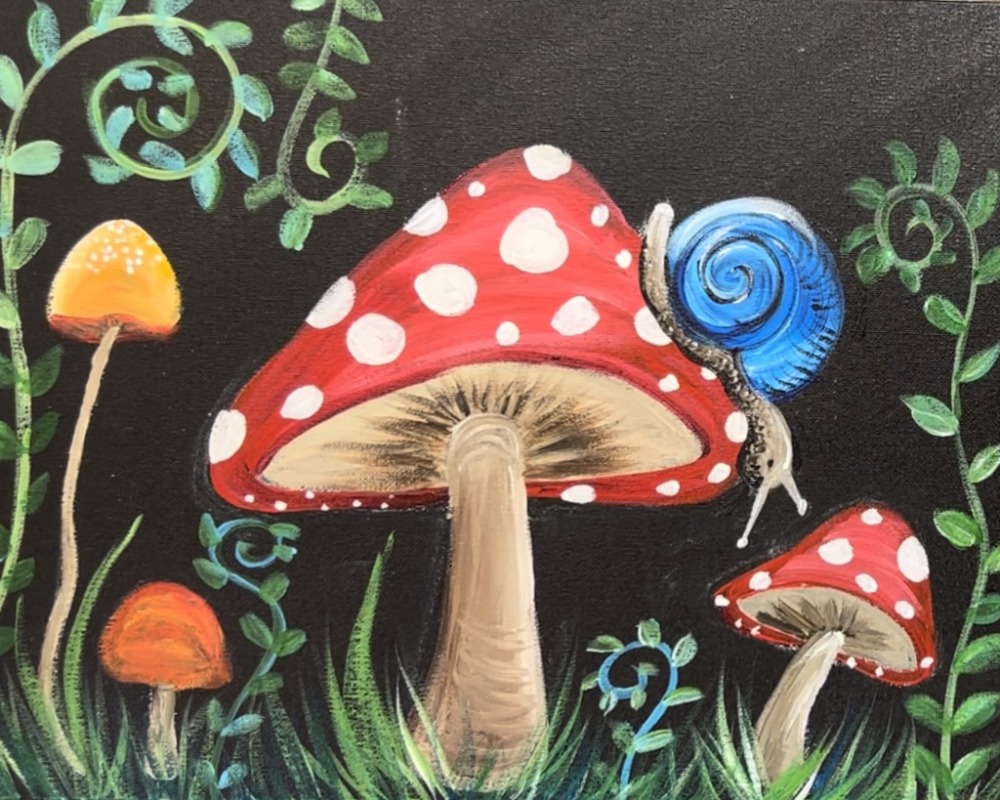
2. Paint Tops Of Red Mushrooms
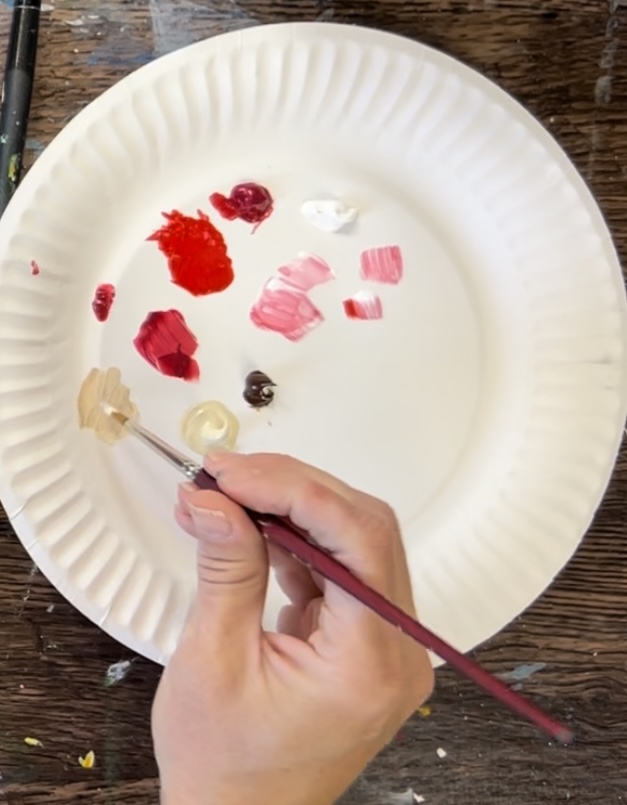
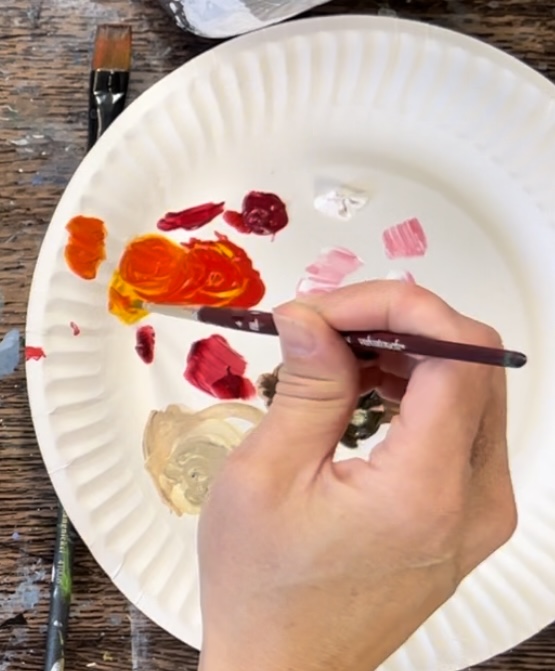
Load your palette with: pyrrole red, alizarin crimson (optional) and titanium white.

Use the 12 bright brush and just the pyrrole red to paint the top piece of the mushroom solid red.
Note: if you are using a different color other than this type of red, you may need to paint the top of the mushroom white first, let it dry and then paint it red to ensure the red shows up bright.
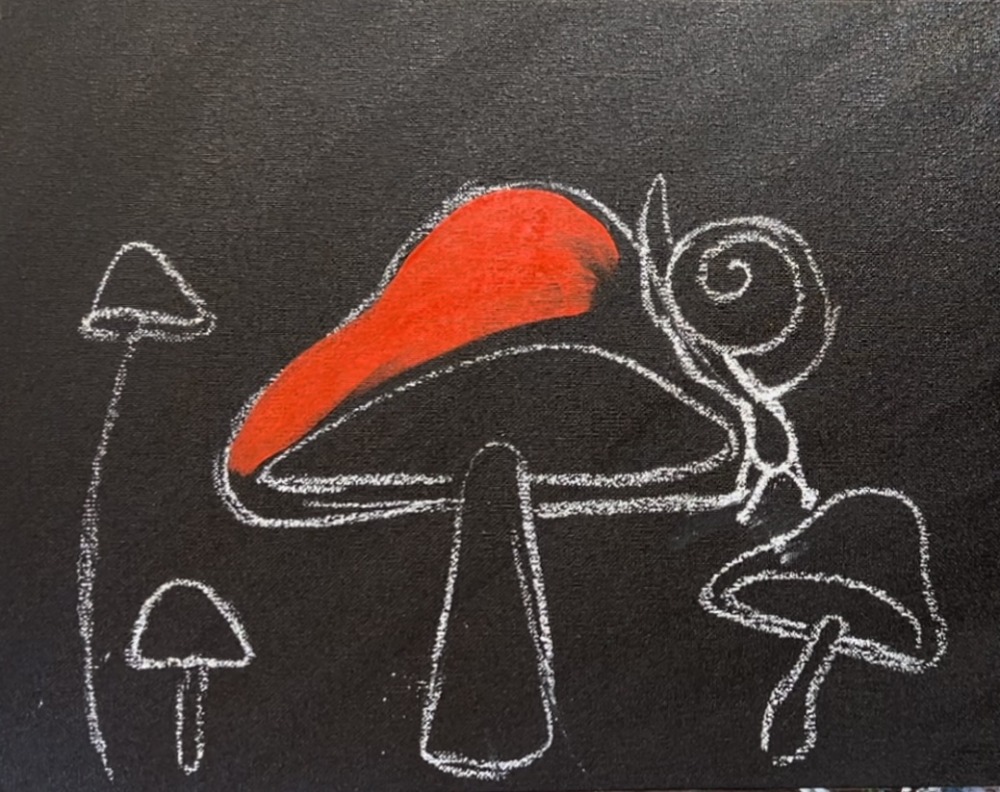
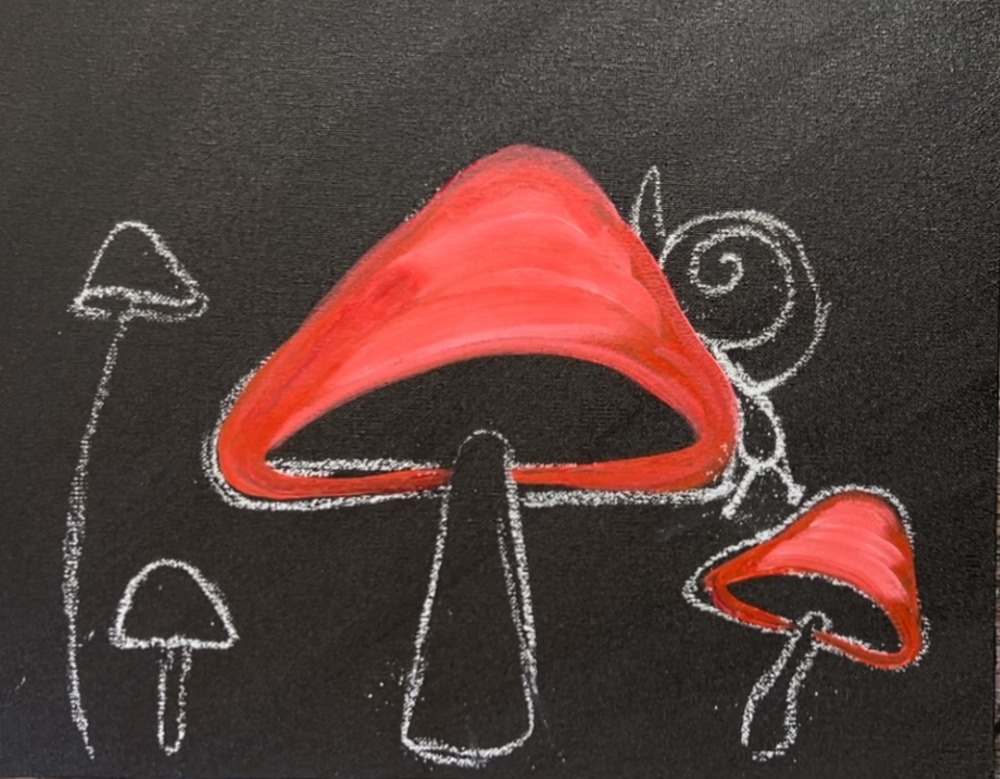
Before this red coat of paint dries, load your brush in a small amount of titanium white (without rinsing the brush).
With this little bit of white, paint the center part of the mushroom top. Paint curved strokes and let that white gently blend with the red. This will lighten that area up and give it more highlight/ three dimensional look.
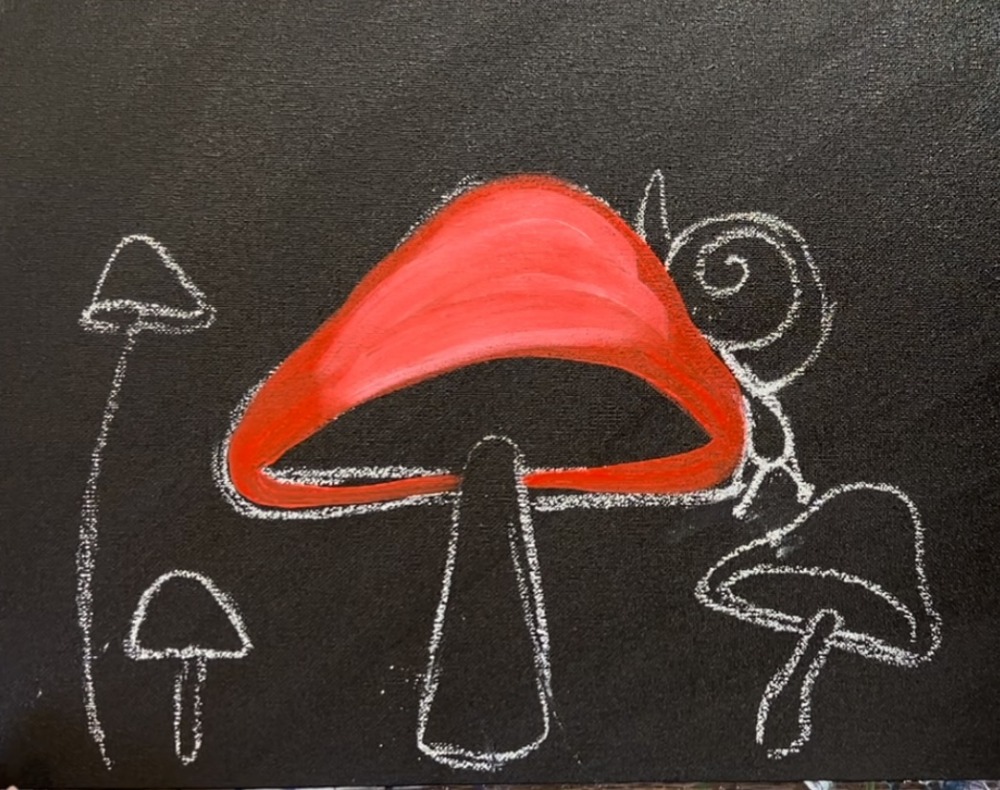
Use the alizarin crimson hue permanent to paint the bottom and sides of the mushroom. This will make the red slightly darker on the edges. Note: this makes a very subtle difference which is why I made this color optional in the end.
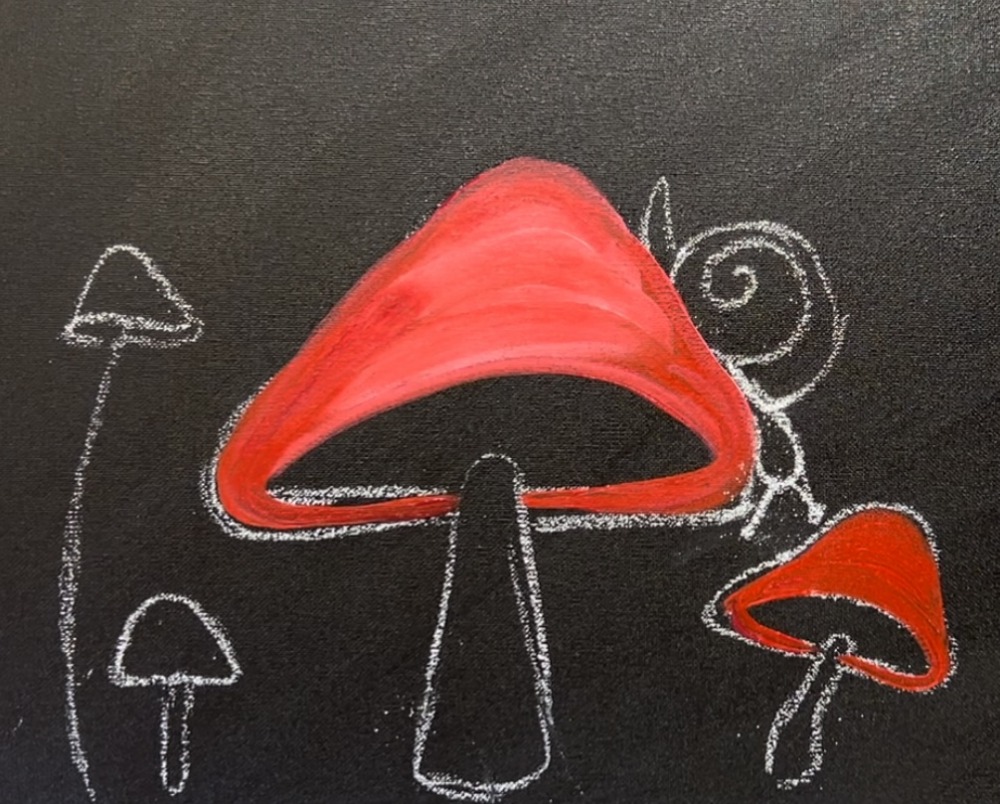
Repeat this technique for the smaller red mushroom on the right.
3. Paint Inside & Stems Of Red Mushrooms
Load your palette with unbleached titanium and raw umber. Mix a little bit of that brown into the beige on your palette.
Then use the #4 round brush to paint the entire inside under part of the mushroom a solid coat of this color.
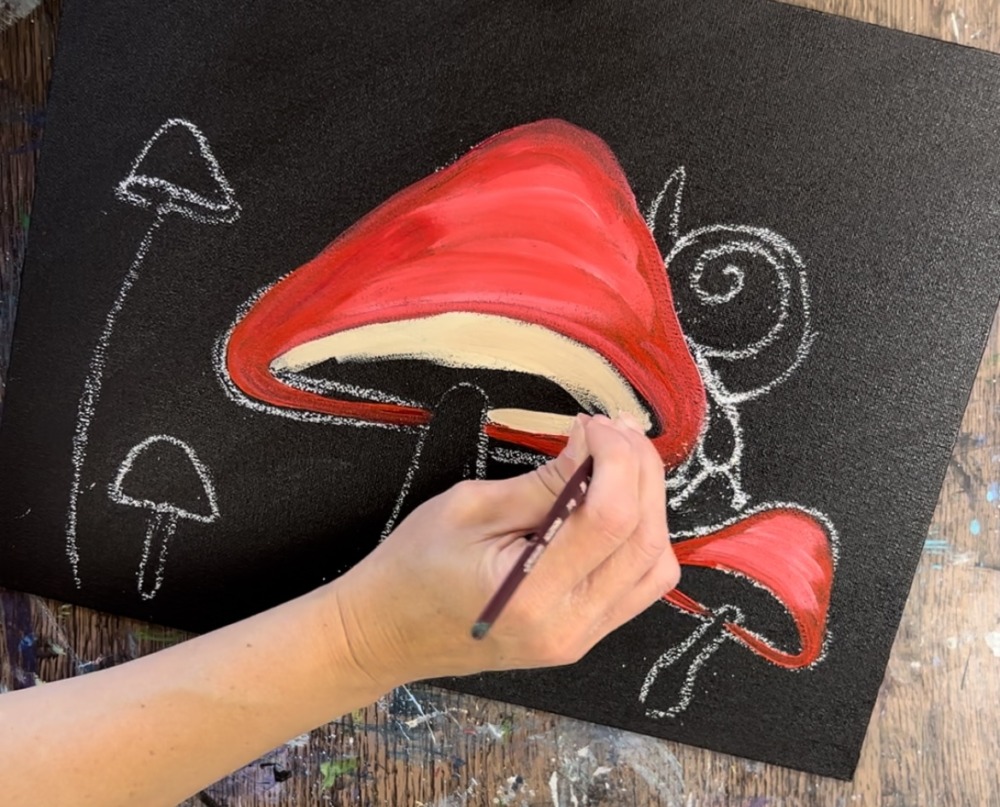
To paint the stem, add more brown into the color you just used. This needs to be a little darker so that it stands out. Use the #4 round brush to paint the stem.
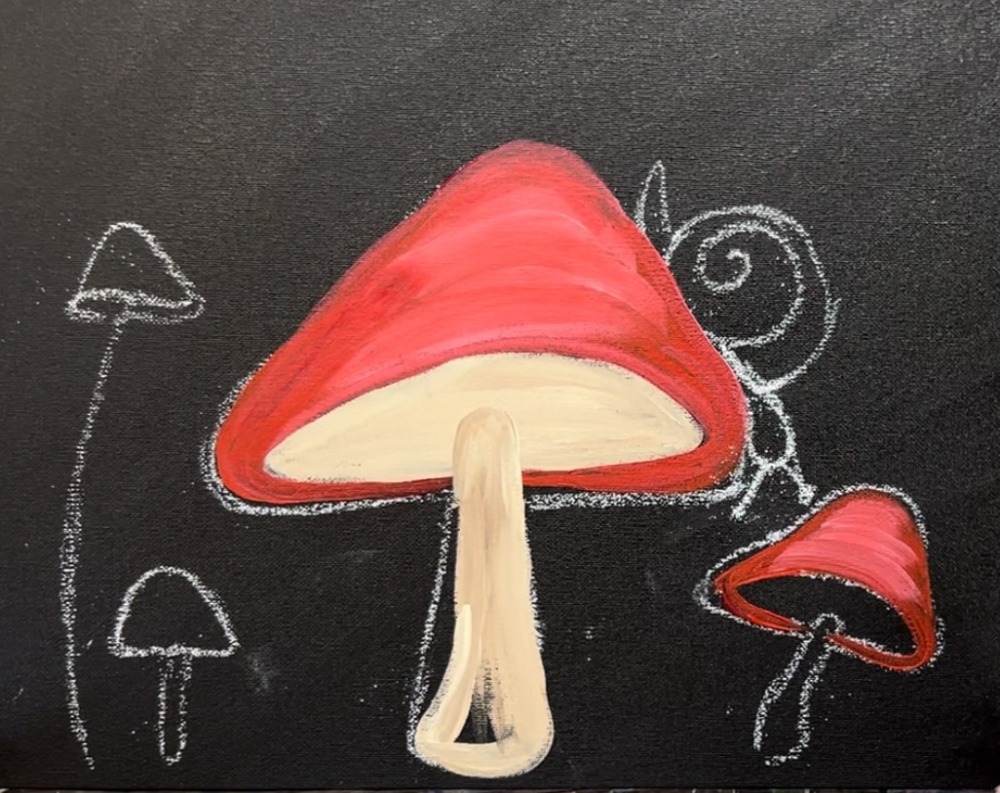
Add a little bit more raw umber on the left side of the stem. Then paint curved strokes on the stem to make this look like it is a little more 3D/ gives it more form.
Then paint diagonal strokes on the top under part of the mushroom. Do this with the #4 round brush and just the raw umber color. Paint diagonal lines that go all the way around the top part of the stem. It may blend with the beige if that layer isn’t dry yet.
Add a second coat to make it slightly darker. Again, these are diagonal lines that go in an array around the top part of the stem.
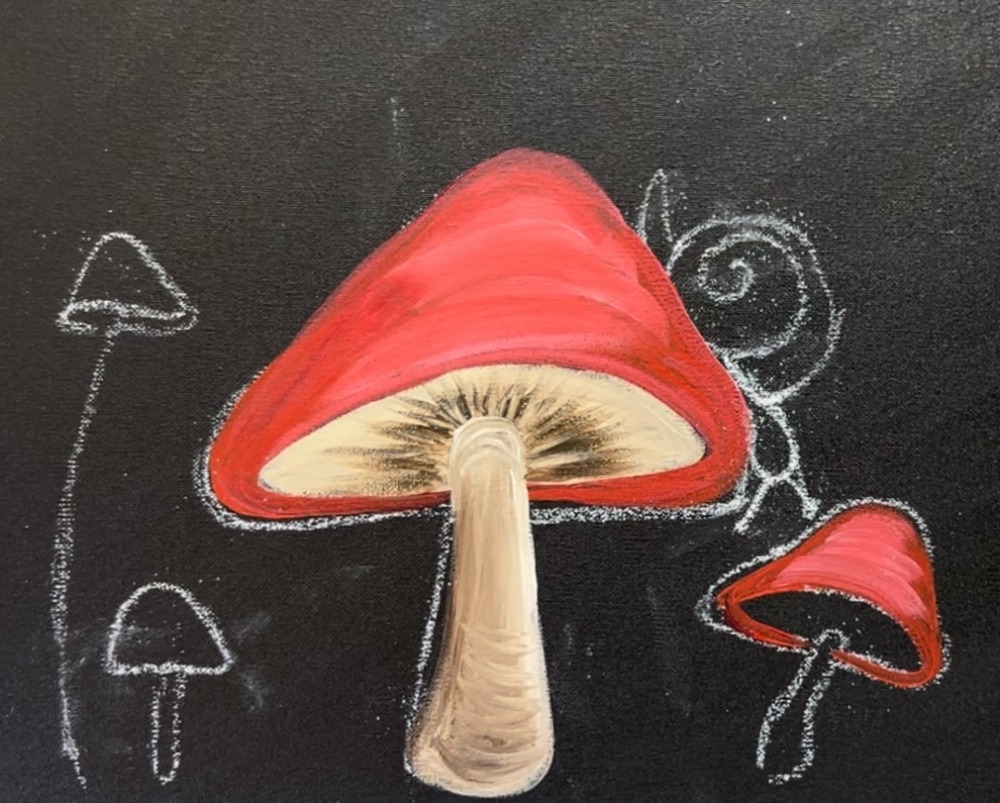
Repeat this painting technique of the stem and underside for the smaller mushroom on the right.
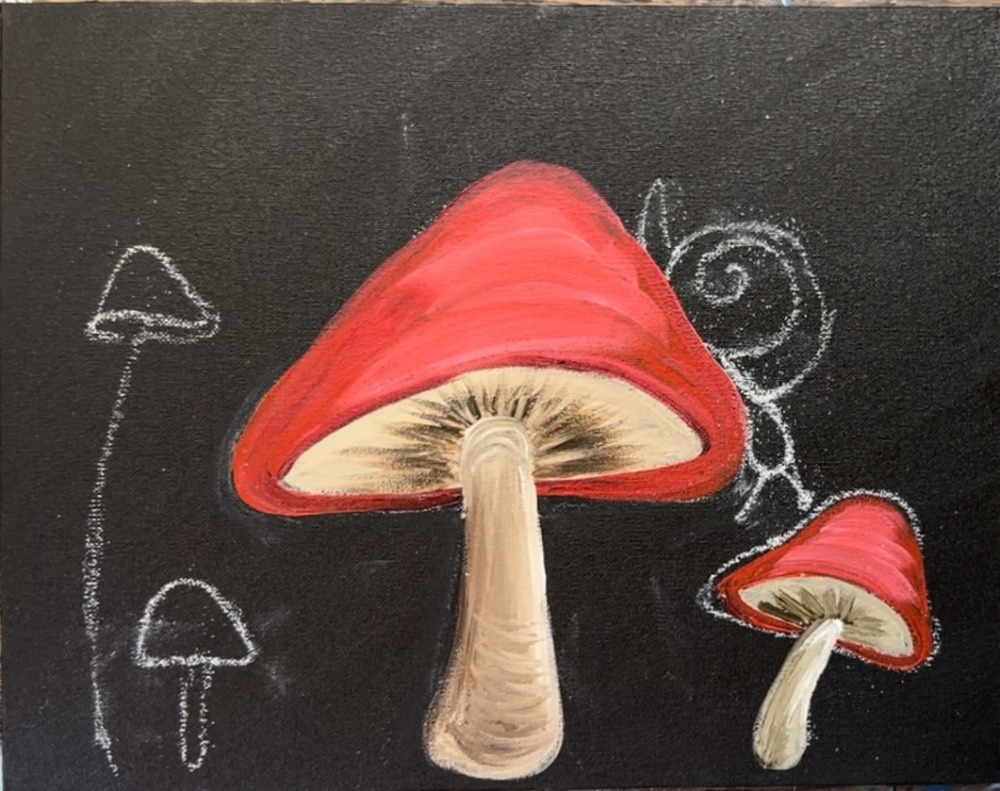
4. Paint Smaller Mushrooms
Load your palette with cadmium yellow medium hue. Mix a small amount of pyrrole red into the yellow to make orange.
Paint the two smaller mushrooms on the left with the orange color. If the color does not show up bright, add a small amount of titanium white into the color to brighten it. The tall mushroom on the left ended up being more yellow than orange.
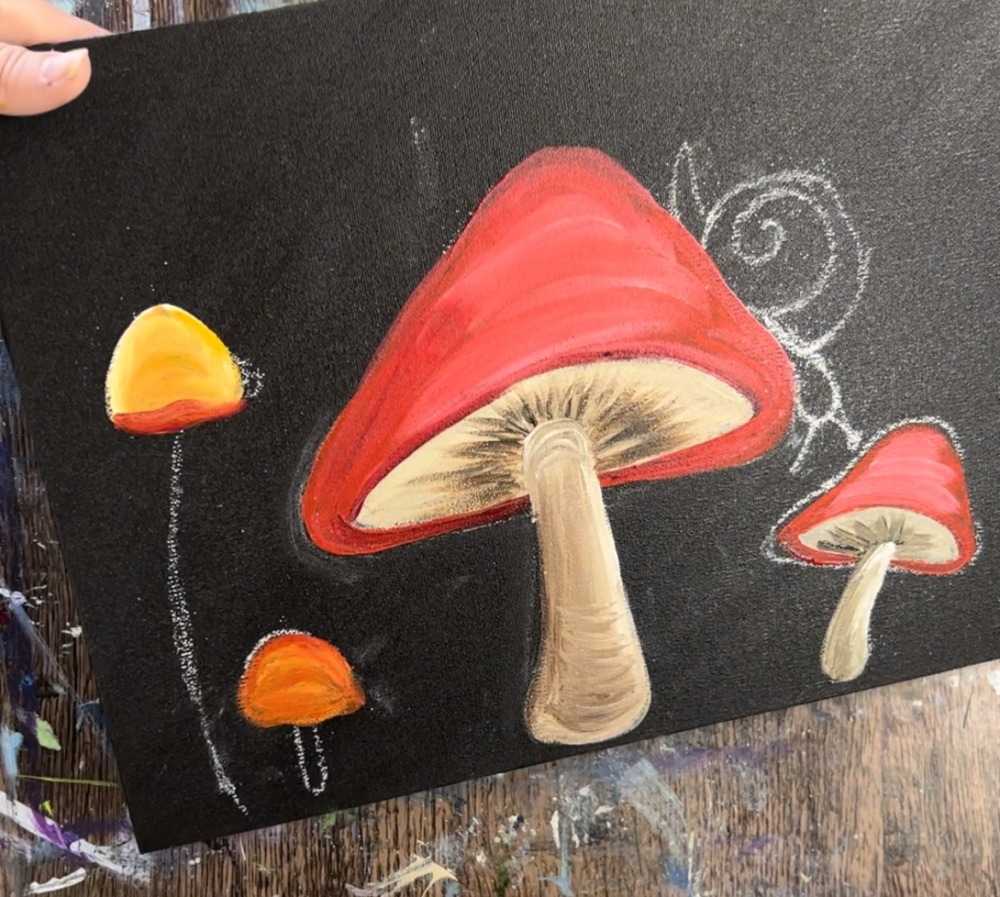
Then use the beige color and the #4 round brush to paint the stems.
5. Paint Spots On Red Mushrooms
Make sure the red of the mushroom is dry before painting these spots. Use the #4 round brush and titanium white to paint various size spots on the mushroom.
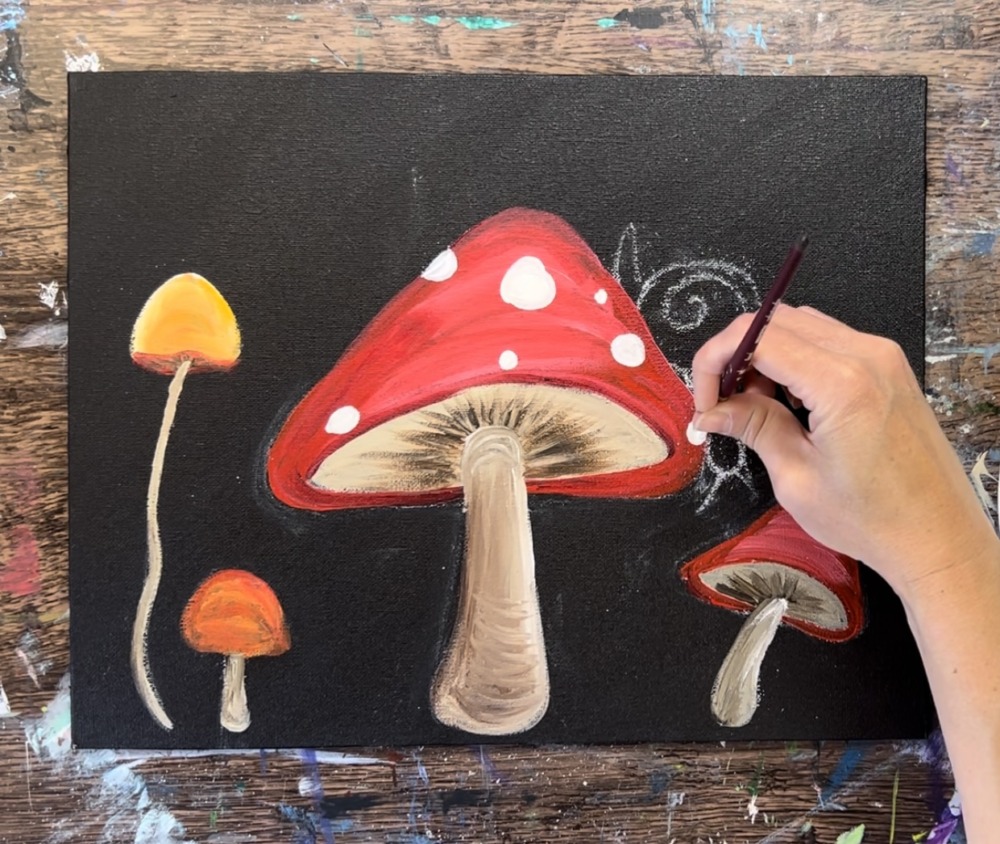
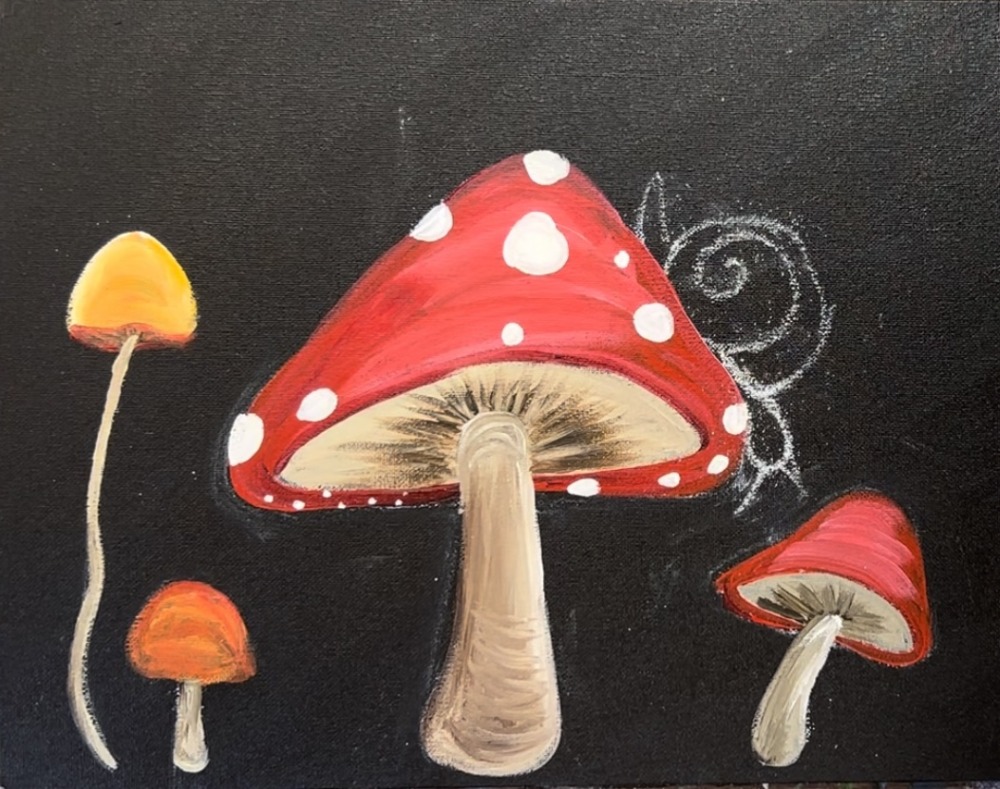
Repeat this for the mushroom on the right.

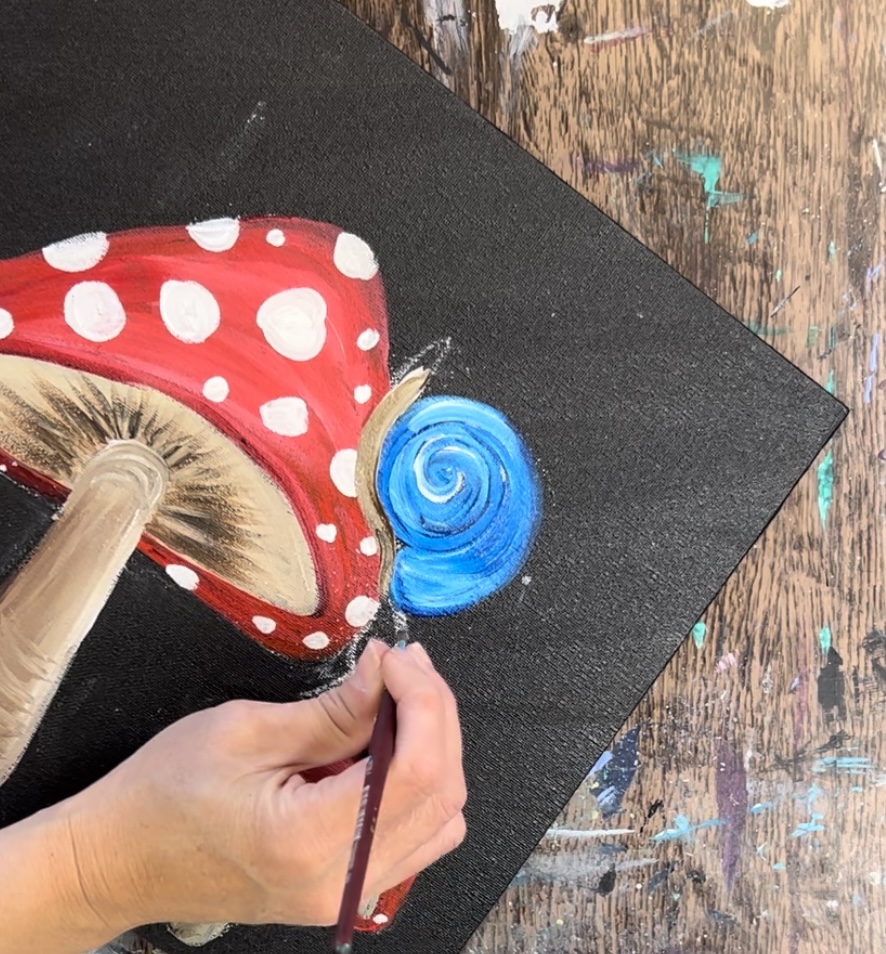
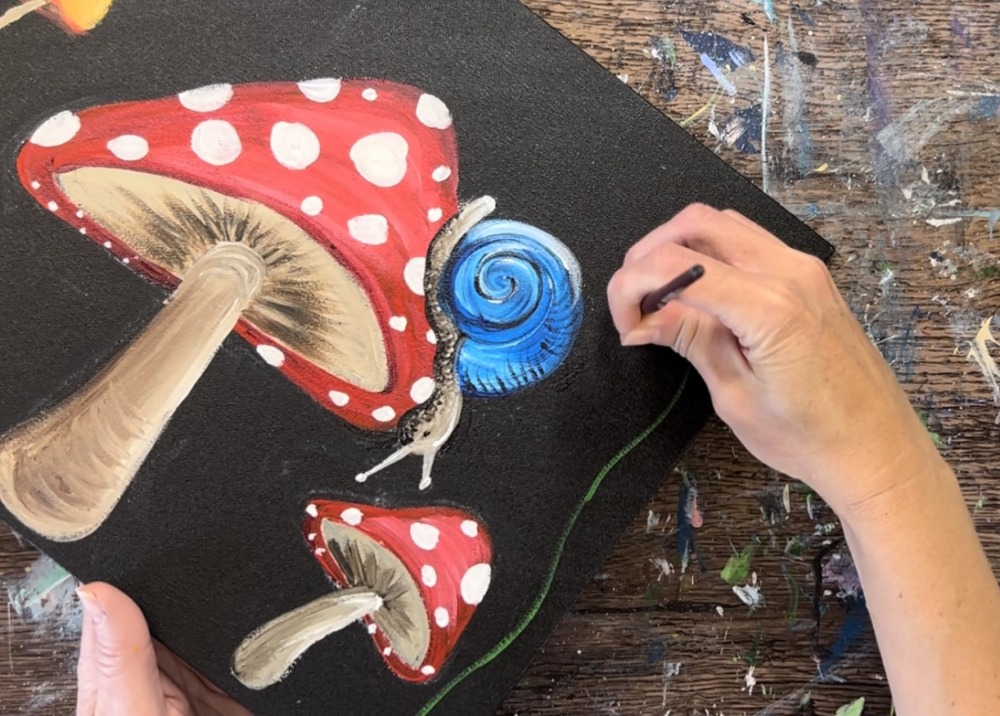
6. Paint Snail
Use the #4 round brush and titanium white to paint the shell of the snail. This will “prime” it so that the blue will show up nice and bright.
Paint the flat opening part of the shell and then outline the spiral shape. I kept a lot of the black showing so the spiral design would not go away.
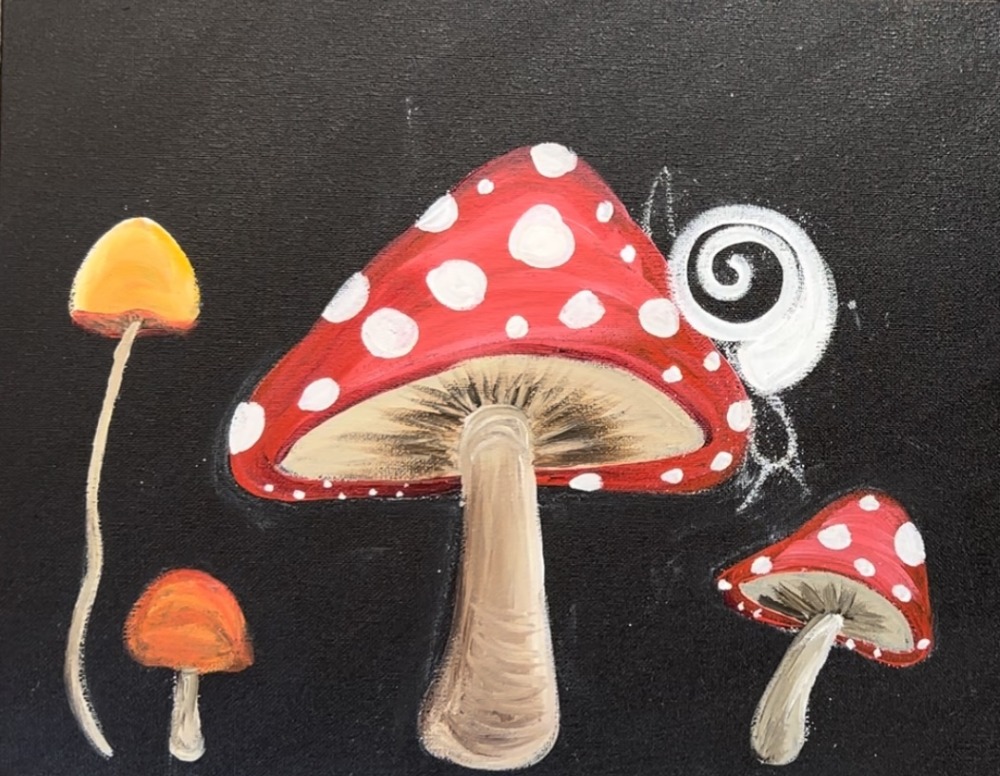
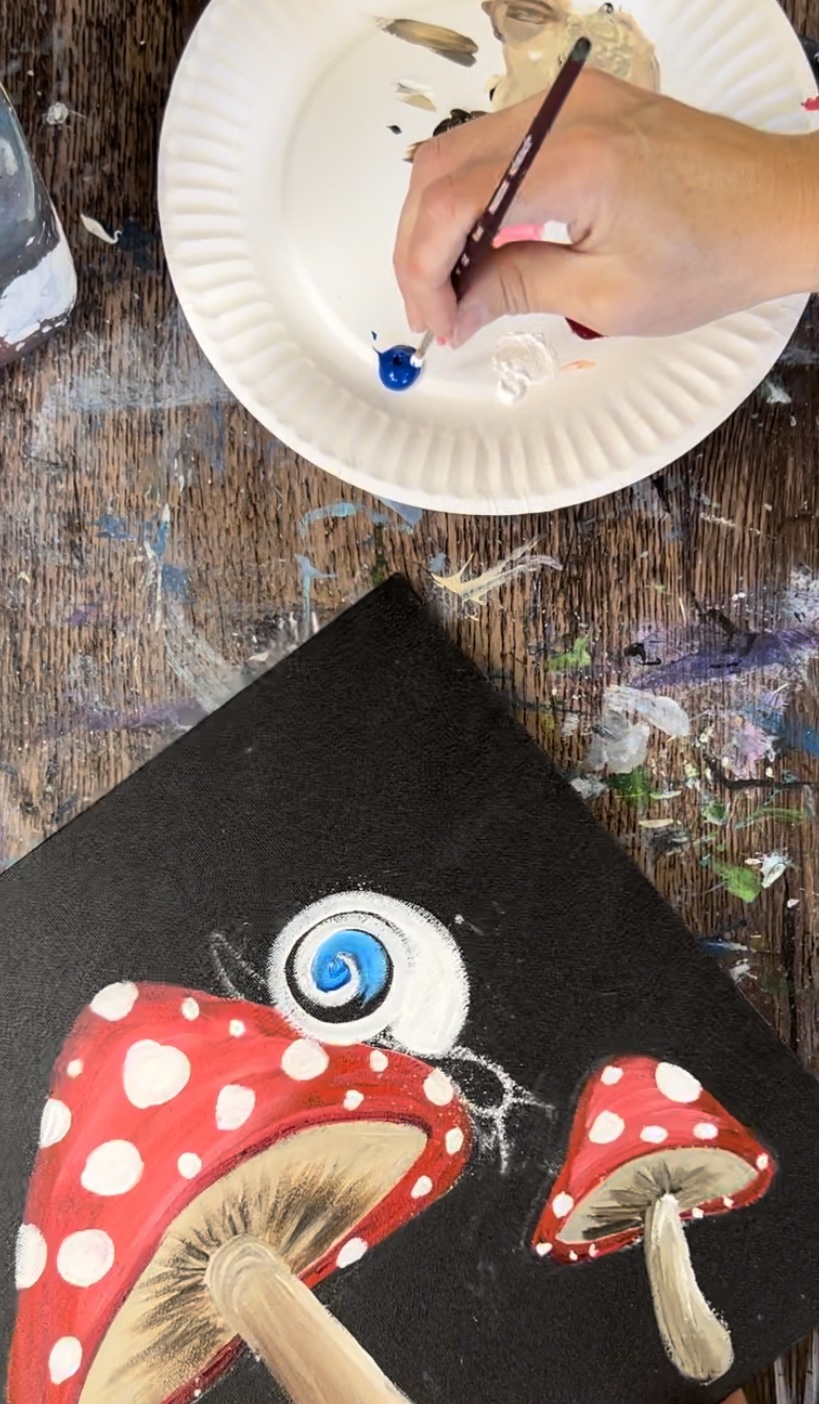
Then load your palette into primary blue. Use the #4 round brush to paint the spiral part of the shell trying not to loose the spiral design. Leave a little bit of the white still showing.
Then mix titanium white with raw umber on your palette. Paint the “foot” of the snail, the tail and the head.
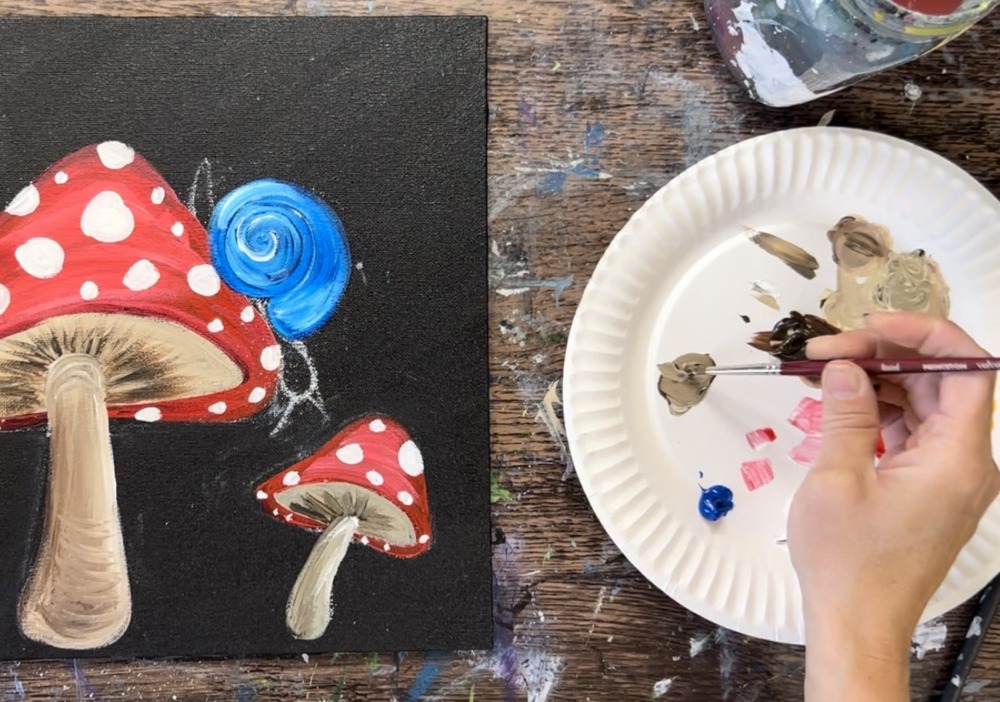
Paint the tentacles and eyes.
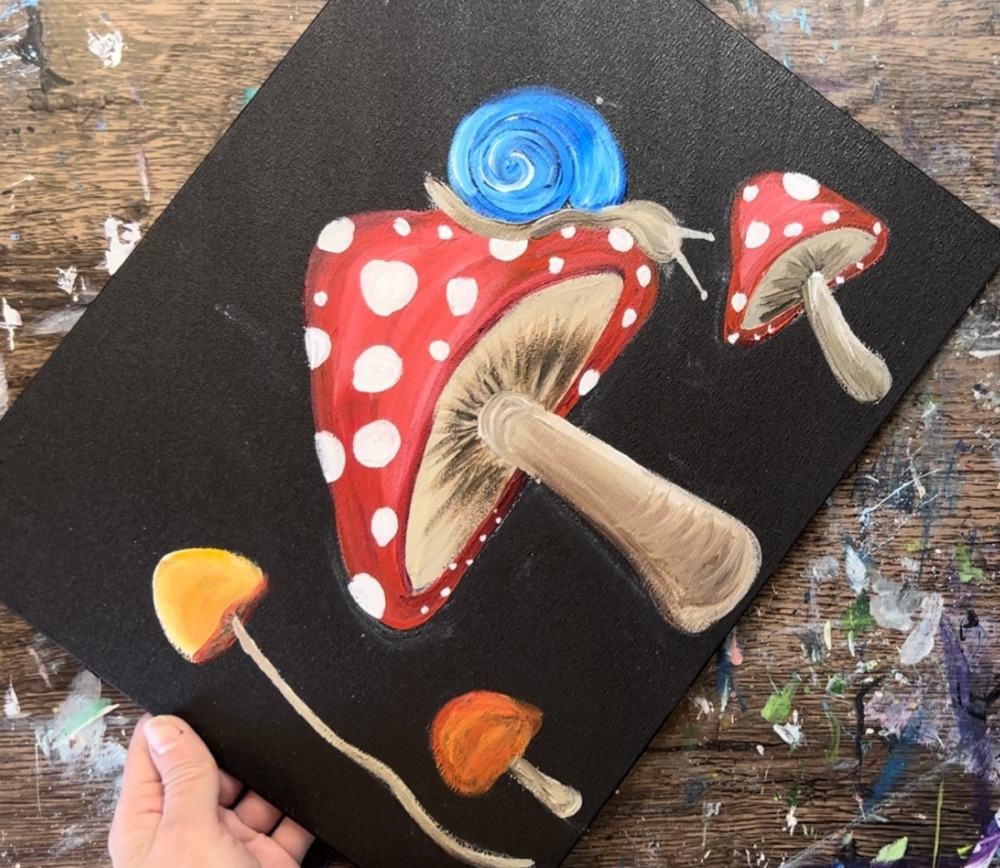
Then load your palette with mars black. Use the #4 round brush to “stipple” little black dots on the bottom edge of the snail “foot”.
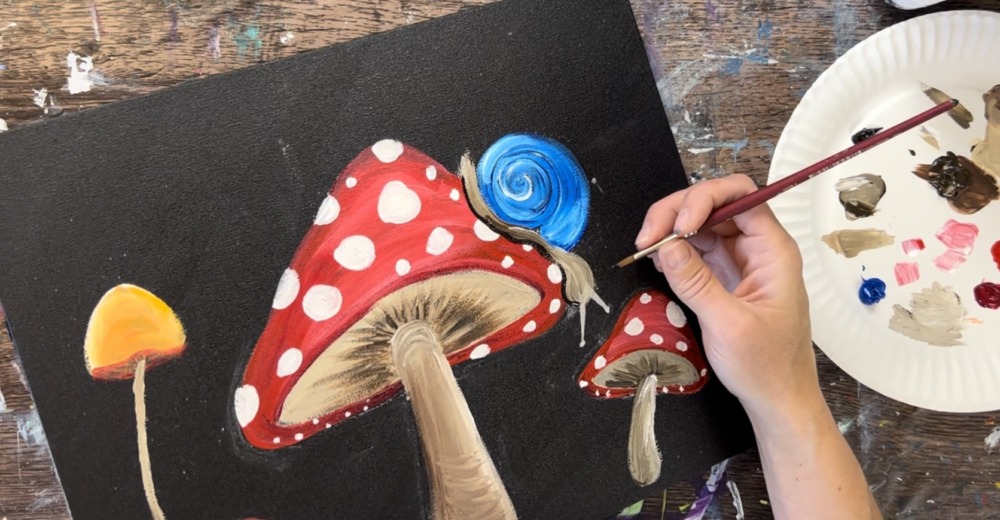
This gives a little bit of texture on the bottom.
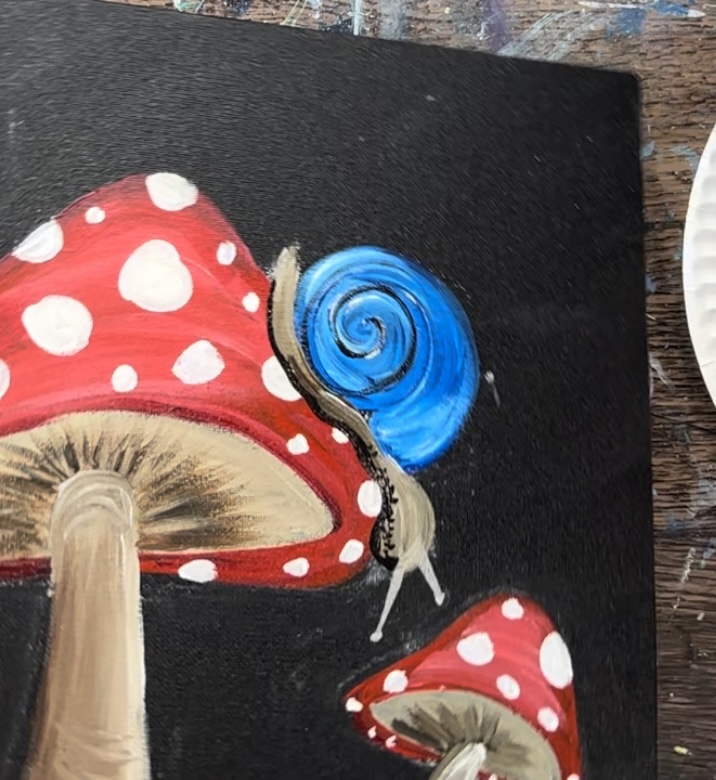
Next, use the mars black to lightly outline the spiral on the shell. Add very small curved lines on the far right edge of the shell.
7. Paint Ferns
Load your palette with hooker’s green hue permanent and titanium white. On your palette, mix the white into the green. This is important so the green will show up bright on the canvas.
Use the #4 round brush to paint the center lines for all of the ferns.
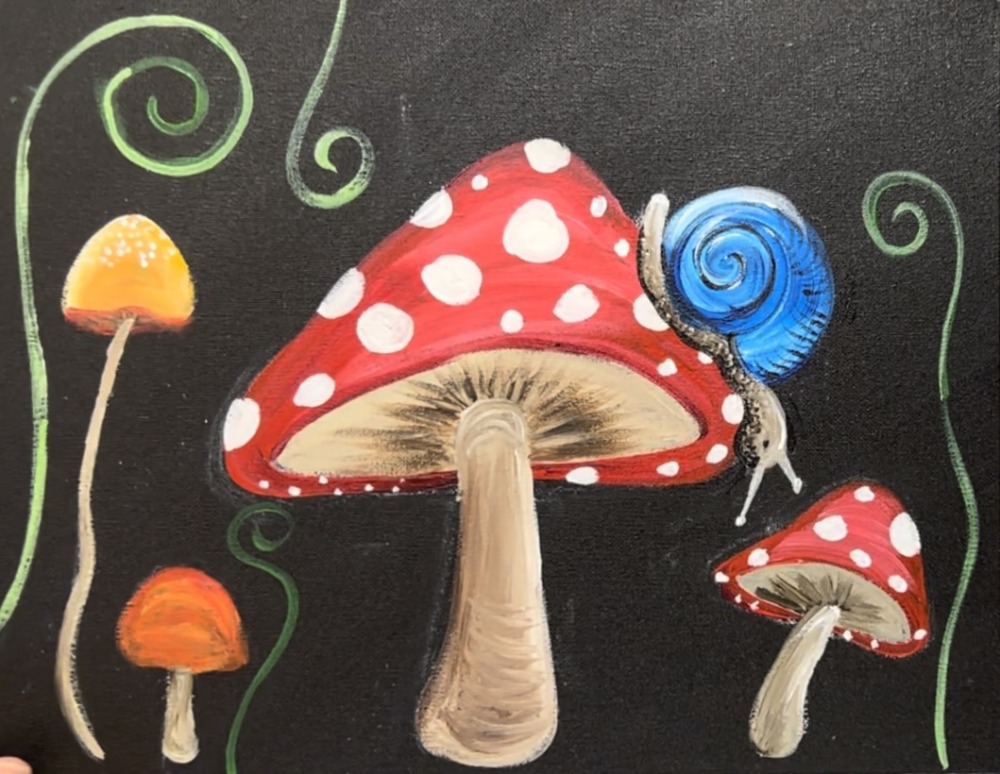
You can also add some blue into some of the fern lines.
Paint the leaves on the fern lines using a #4 round brush. Use a combination of green mixed with different amounts of titanium white.
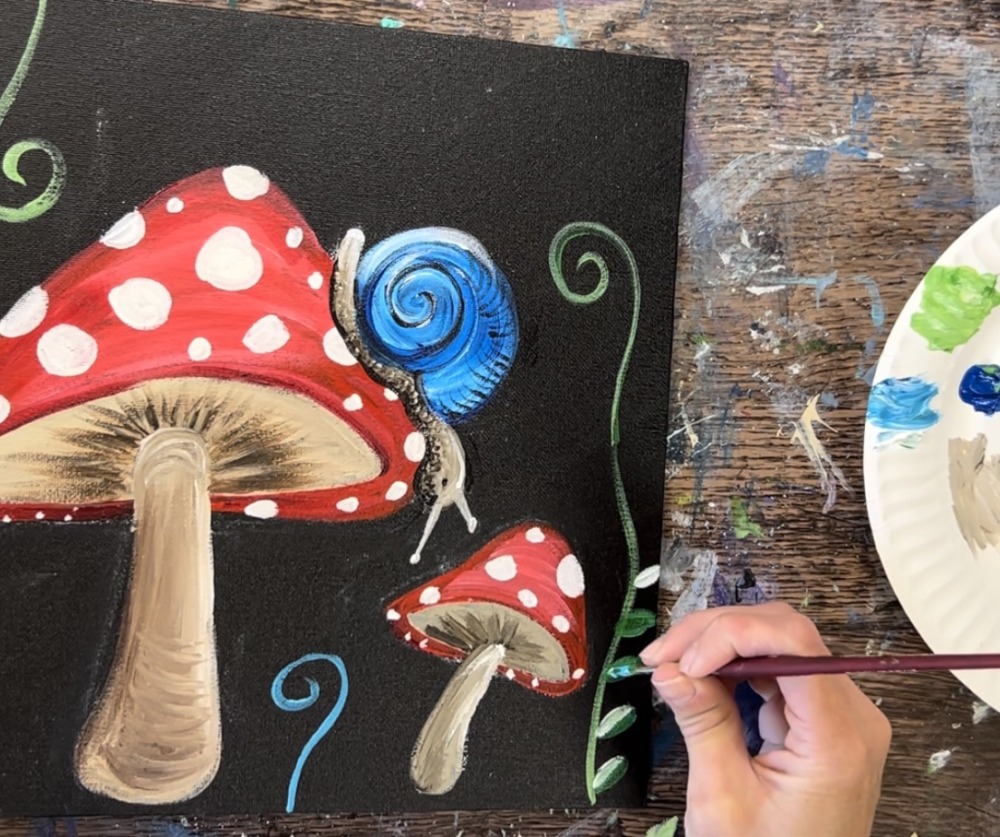
These are all basic oval pointed leaves. Paint them on both sides of the fern line.
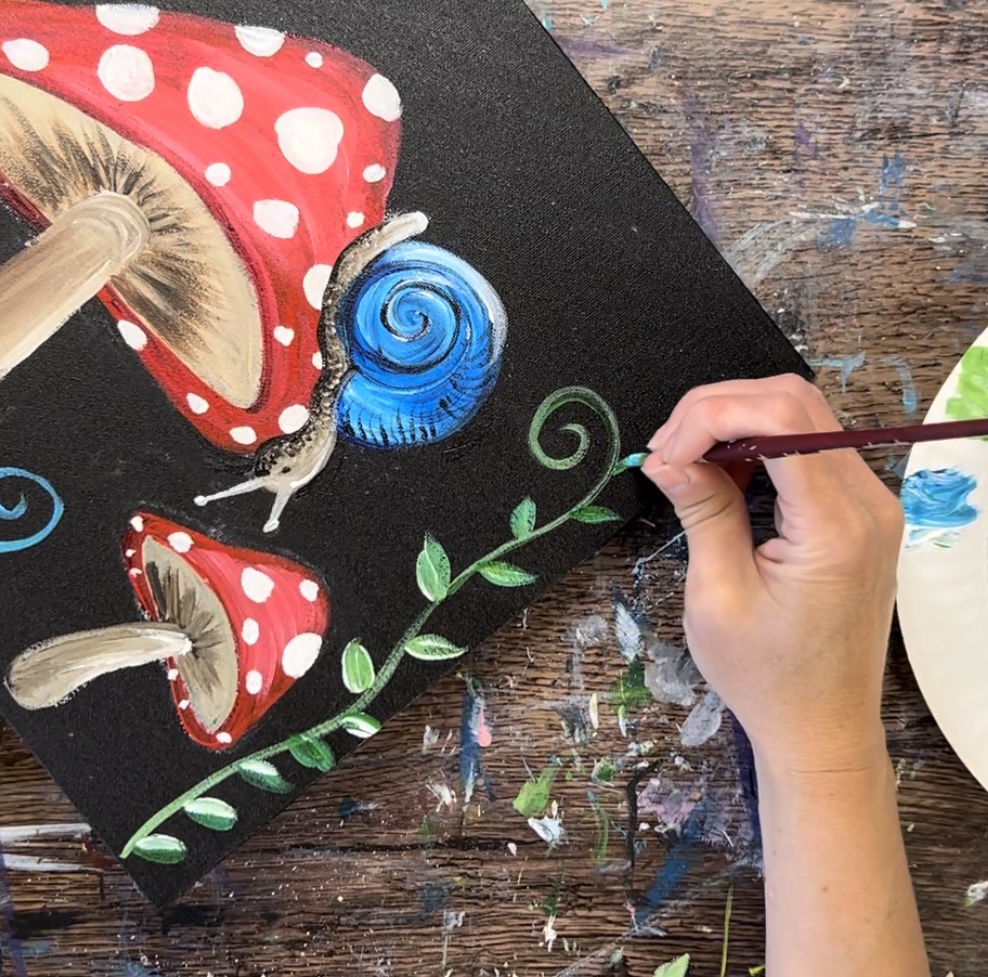
When you get to the tip of the fern where it curves, you can paint leaves just on one side of the line.
Repeat this for each of the ferns.
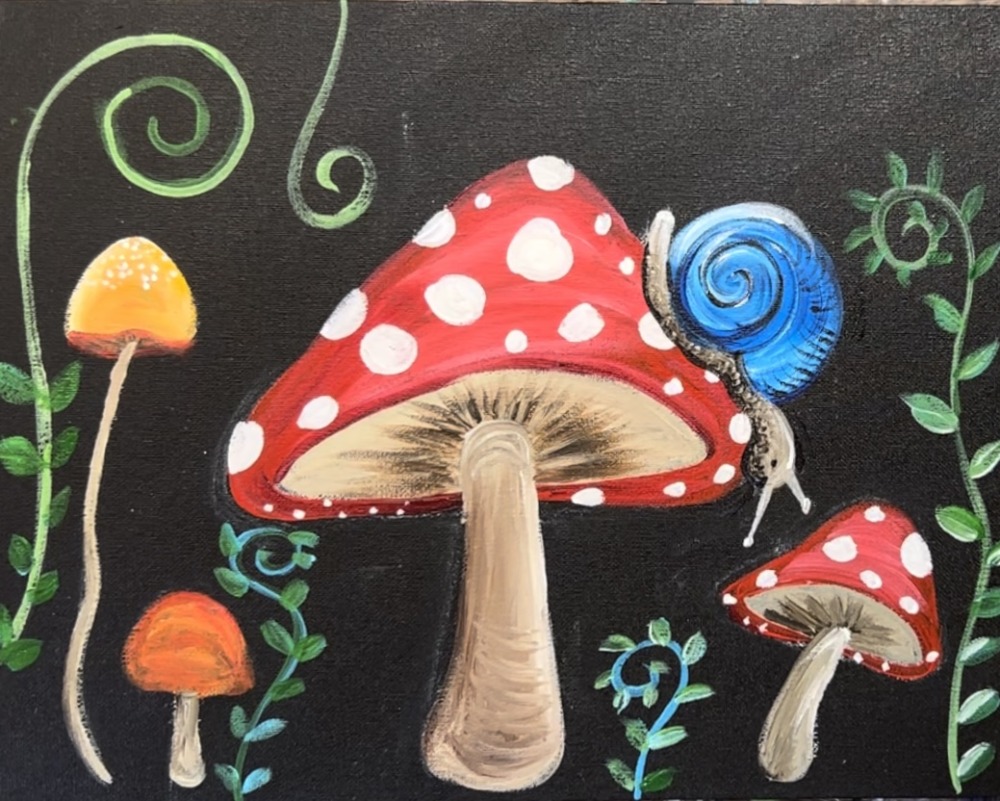
8. Paint Grass
Use a #8 round brush to paint the grass. On your palette slightly water the hooker’s green hue permanent down and add a small amount of titanium white into it.
Use just the very tip of the brush to paint grass blades.
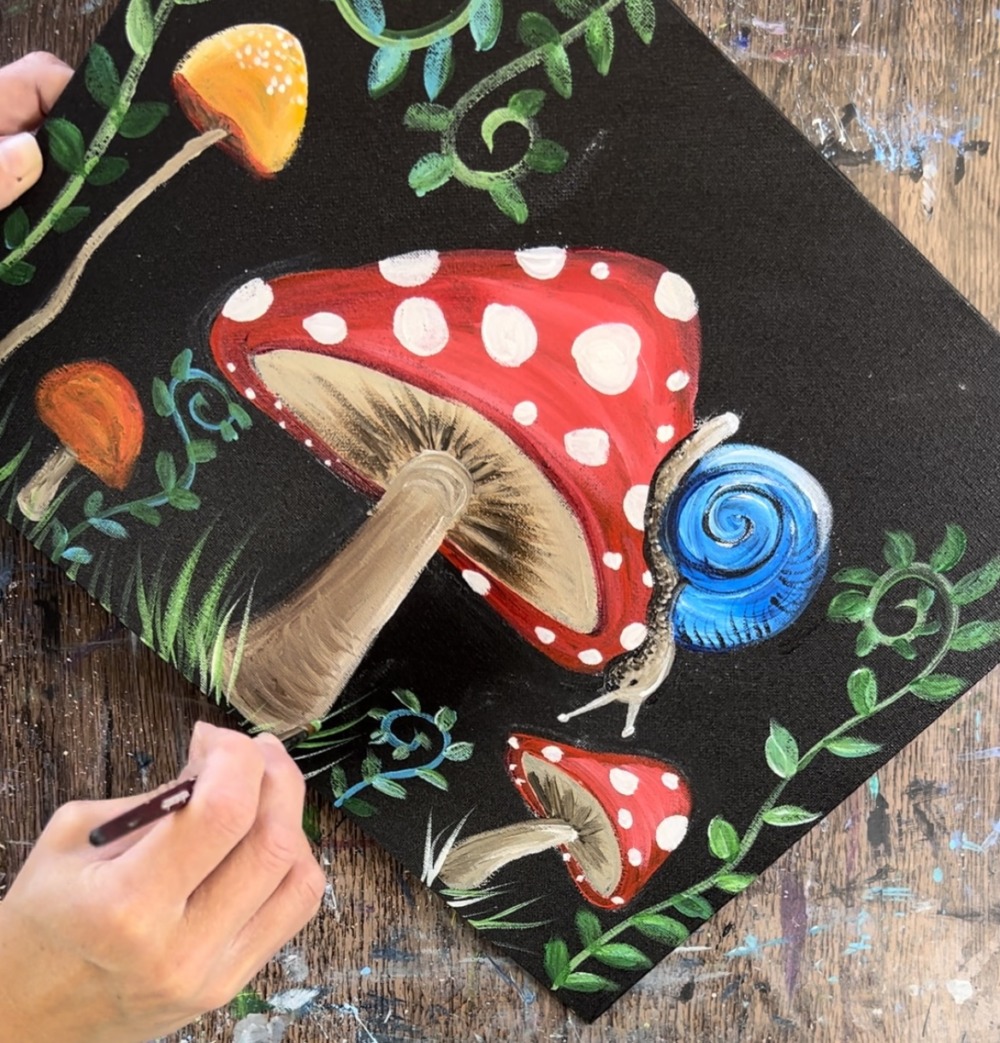
Paint the grass blades so that they sway opposite on each side of the mushroom stems. Vary the color. Some of the grass blade strokes will be lighter with more white, some darker with more green. You can also add some blue into the grass as well.
Make some grass blades that are larger and thicker. If you will be painting a fairy how door, leave the bottom of the mushroom stem not covered by grass.
9. Paint Fireflies/ Fairy Lights
Use cadmium yellow medium hue to paint fireflies or fairy lights. The easiest way to do this apply a tiny amount of the yellow paint to the tip of your index finger and paint small, blurry circles. Make sure you only apply a small amount. The circle should be translucent and “blurry”.
Paint the blurry lights throughout the painting.
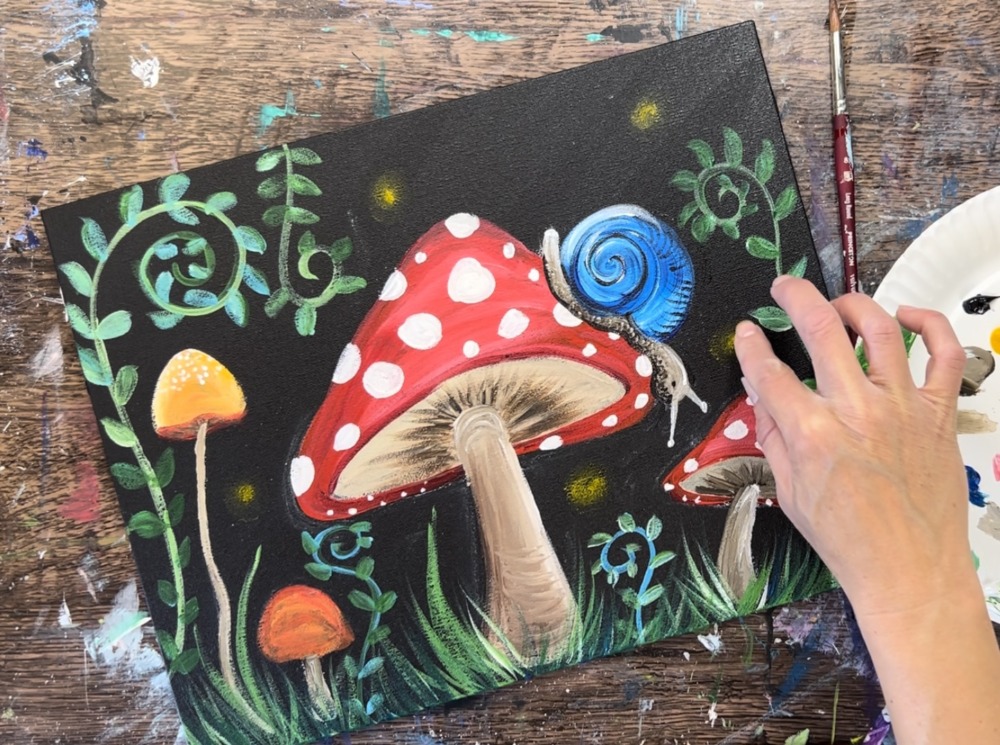
You can overlap some of the grass blades on the bottom area as well.

Then take the #4 round brush and load a small amount of titanium white on the tip of the brush. Paint a small white dot in the center of all of the circles. This will make all the lights look very bright in the center.
You can also use the titanium white to paint little white star dots and star bursts throughout the sky area.
10. Paint Door & Window On Large Mushroom
For the door, use raw umber and the #4 round brush. Paint a stretched semi-circle shape. Then outline it with mars black for the frame.
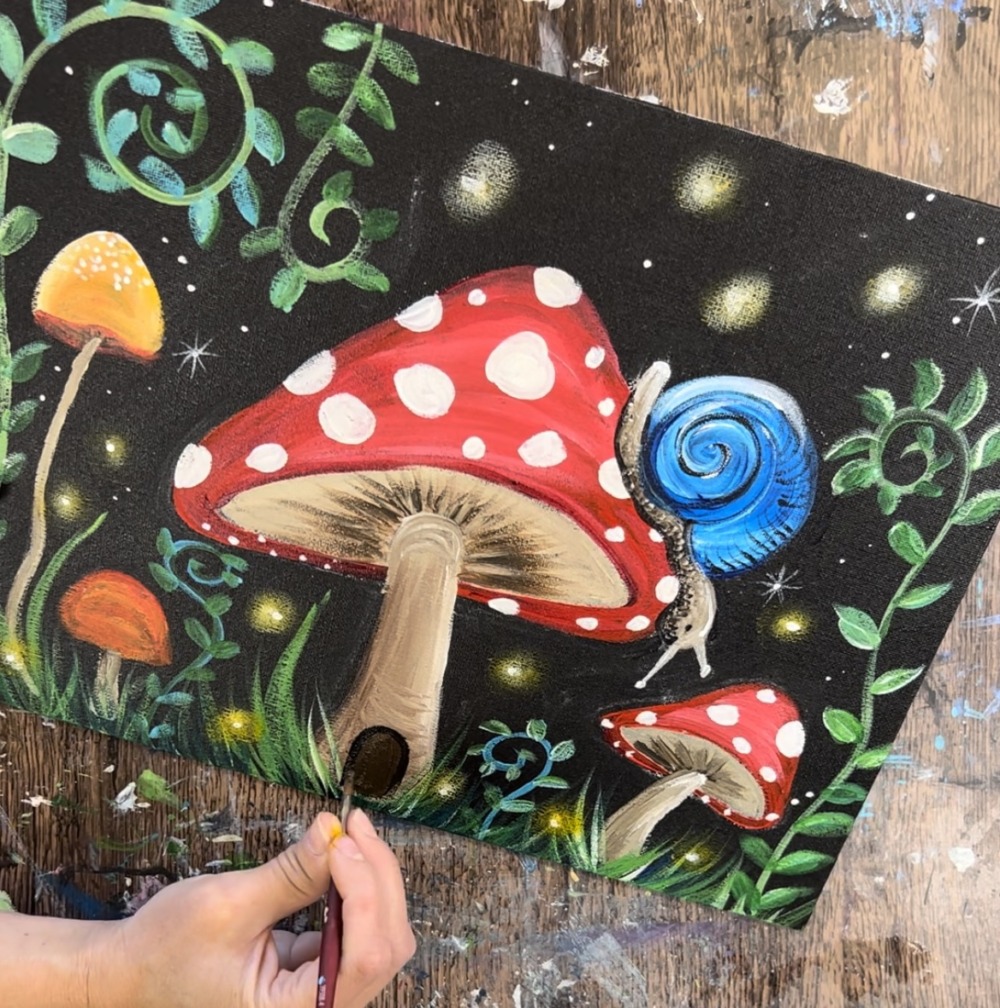
Next, use titanium white to paint vertical lines on the door that slightly blend with the brown. Then use cadmium yellow medium hue to paint a tiny doorknob.
To do the window, mix cadmium yellow medium with titanium white to make a bright yellow. Paint a semi-circle shaped window. Then paint the window frame with raw umber.
Finished!