
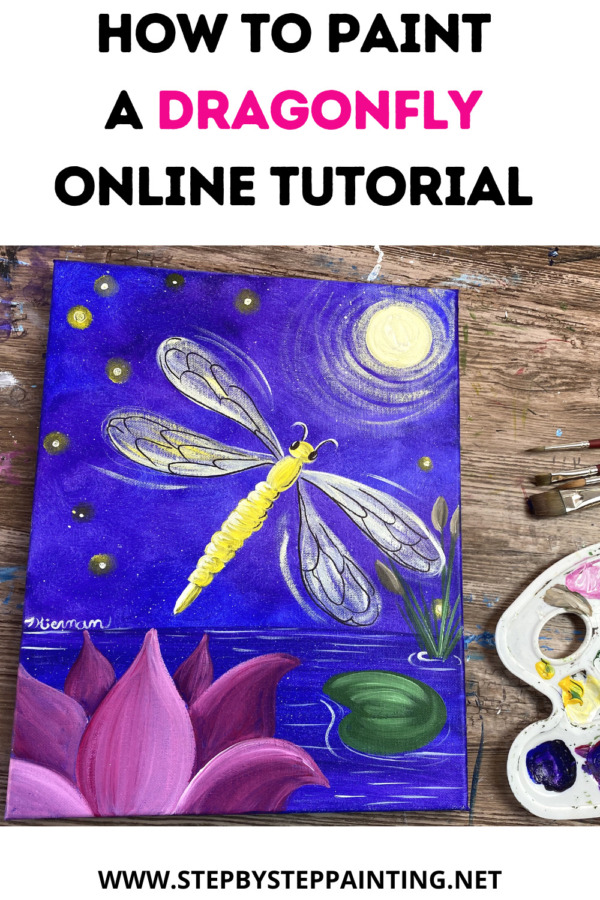
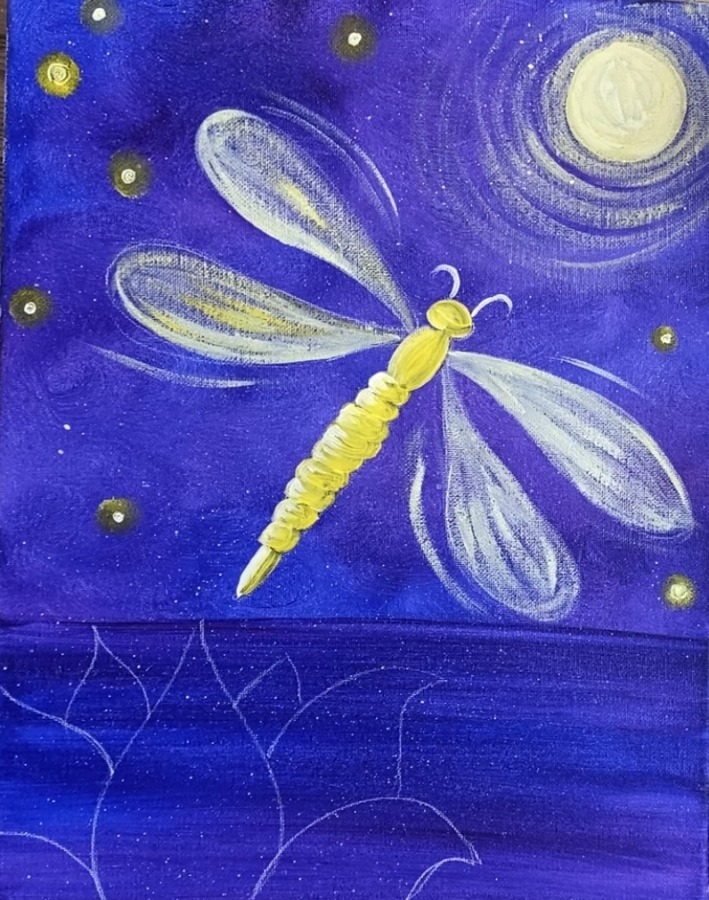
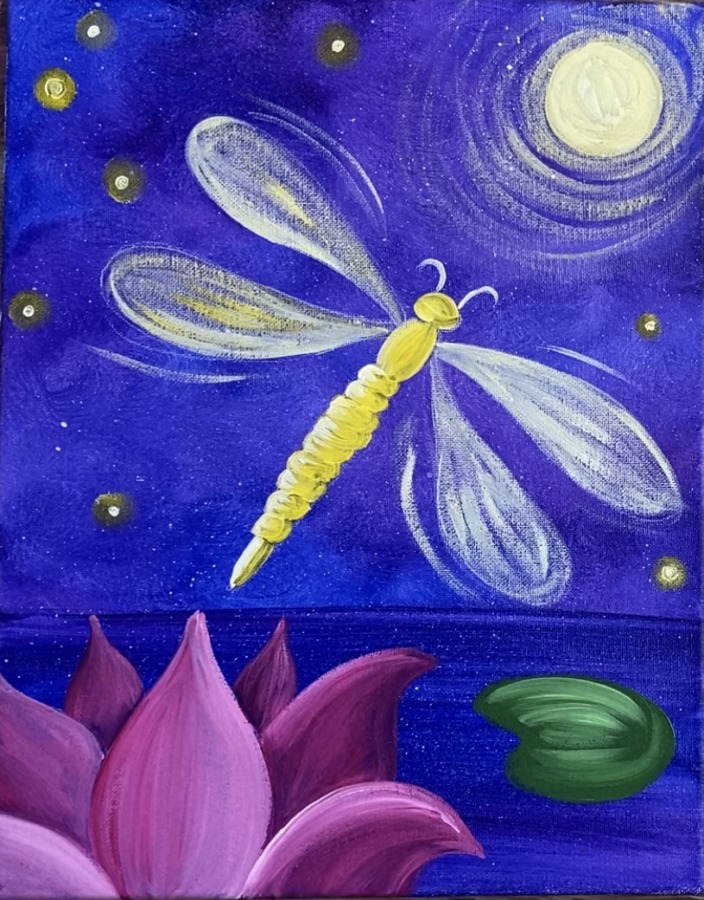
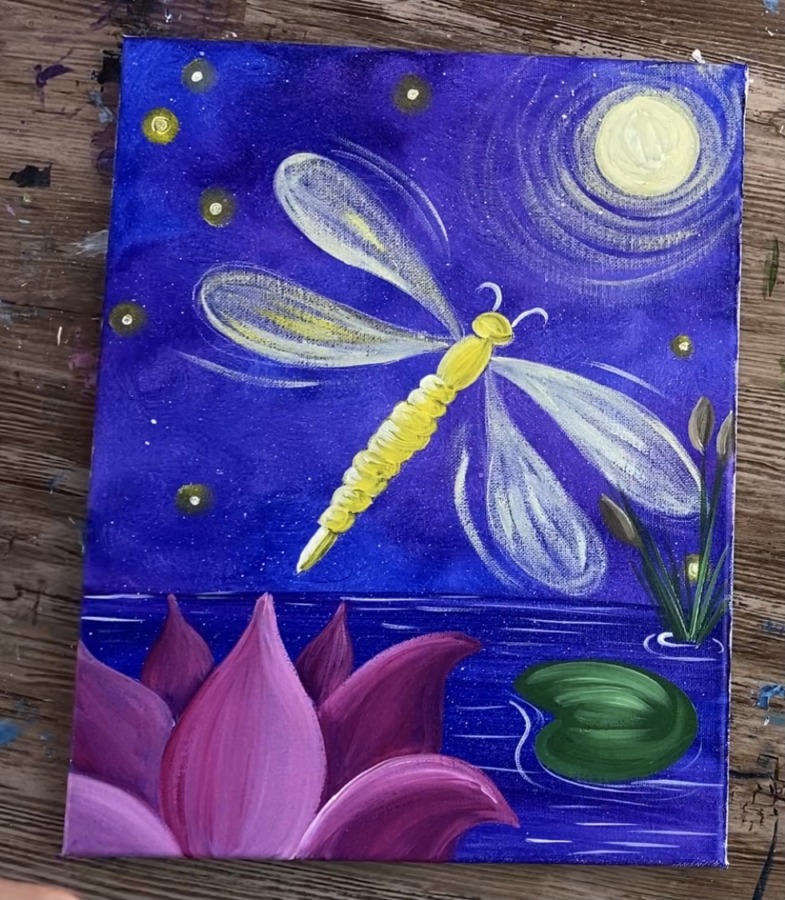
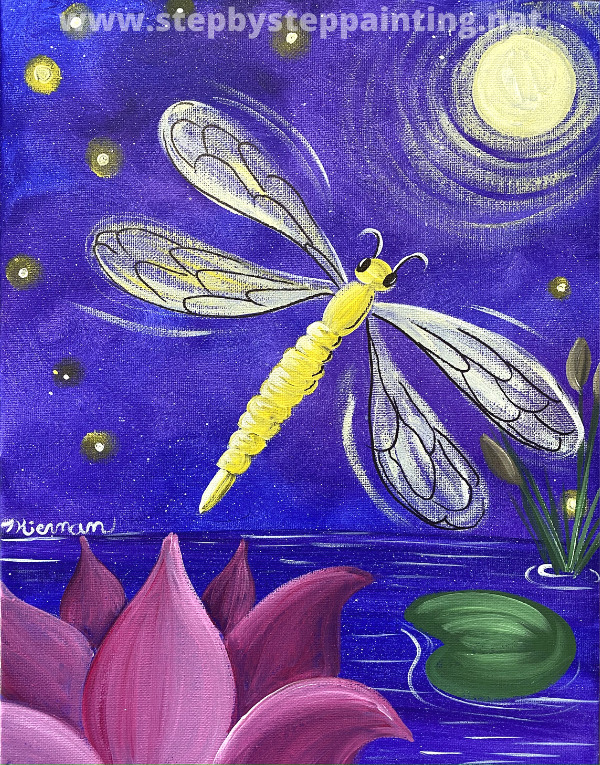
Learn how to paint a pretty dragonfly over a lotus! This is a beginner friendly acrylic painting tutorial.
Would you like to save this?
There will be a traceable for this painting, however, it is not required. I will show you how to draw the dragonfly and the lotus using a chalk pencil.
Enjoy and happy painting!
Materials
How To Paint A Dragonfly Over Lotus Pond
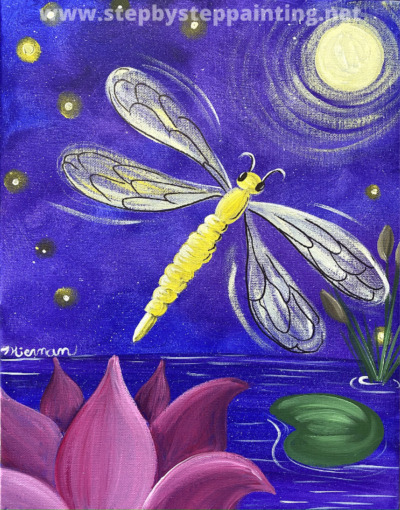
Learn to paint a dragonfly over a lotus pond. This is a beginner friendly acrylic painting tutorial.
Materials
- 11 x 14 Canvas
- Acrylic Paint
- Paint Brushes
- Sharpie, Black Paint Pen or Fine Point Paint Brush
- White Chalk Pencil or White Chalk
- Optional Traceable
- Optional Graphite Paper
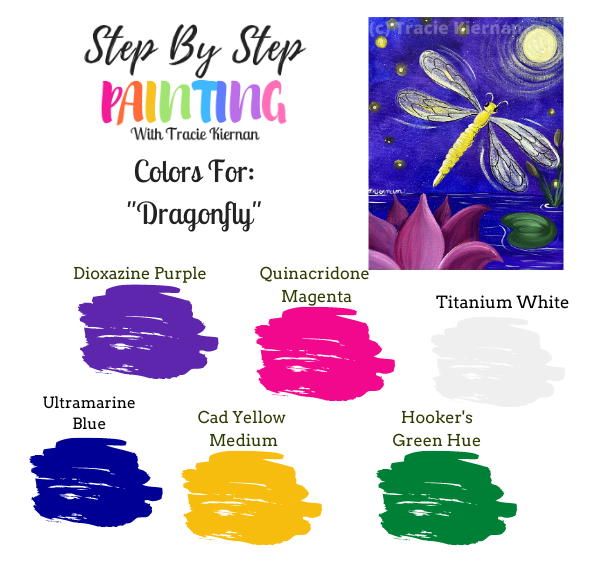
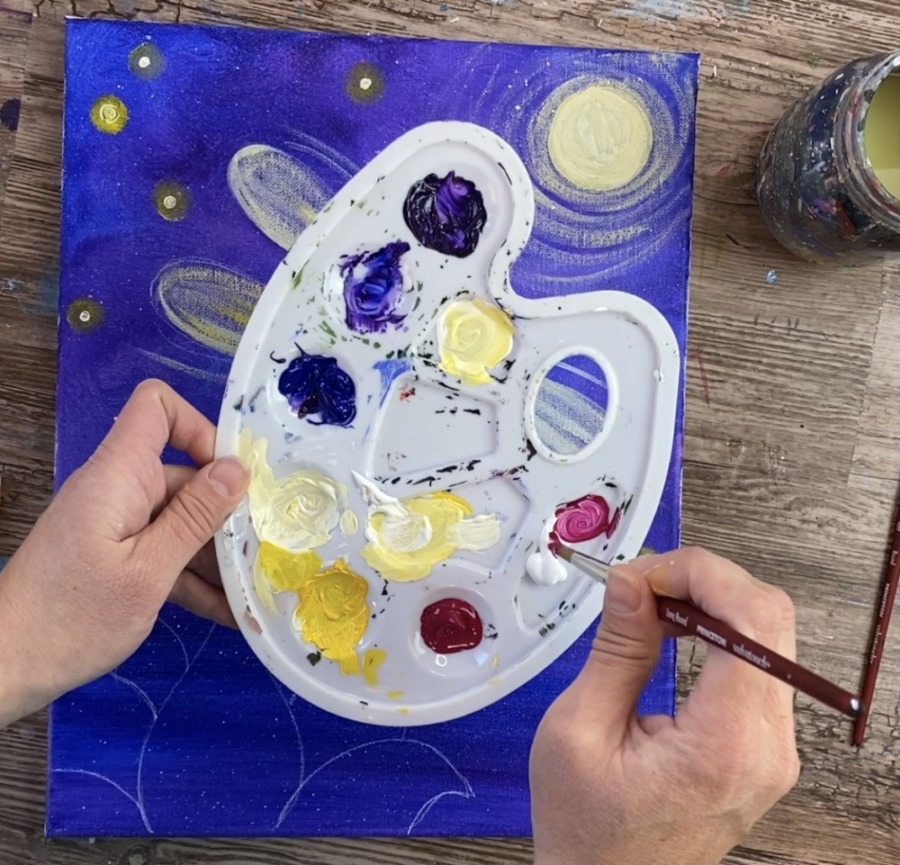
Colors
- Dioxazine Purple
- Ultramarine Blue
- Titanium White
- Quinacridone Magenta
- Cadmium Yellow Medium Hue
- Hooker's Green Hue Permanent
- Optional: mars black if not using sharpie or paint pen
Brush Sizes
Instructions
- See full tutorial on www.stepbysteppainting.net!
Color Palette
Traceables
Directions At A Glance

Video
Step By Step Directions
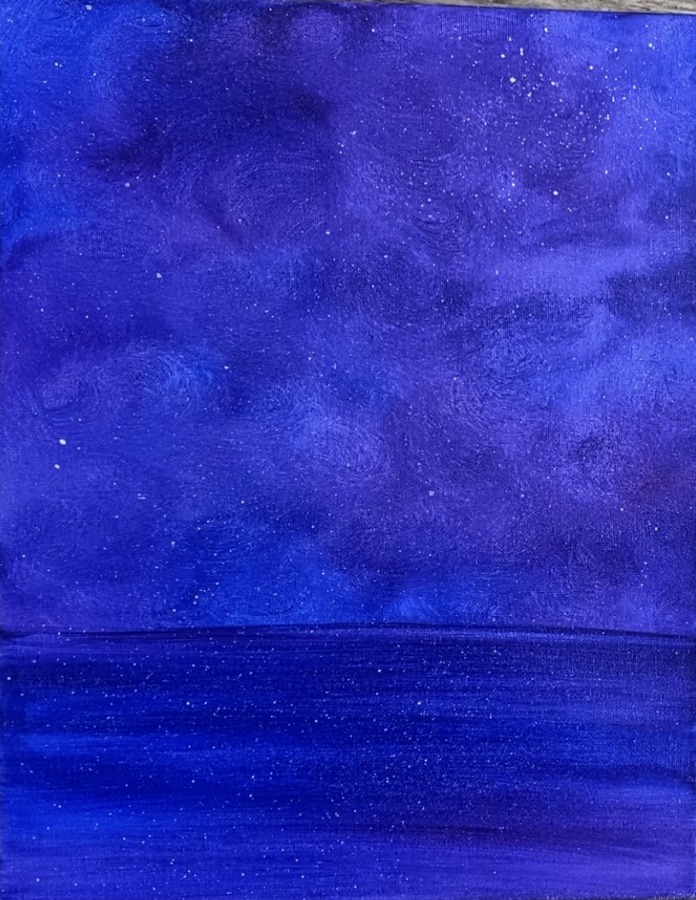
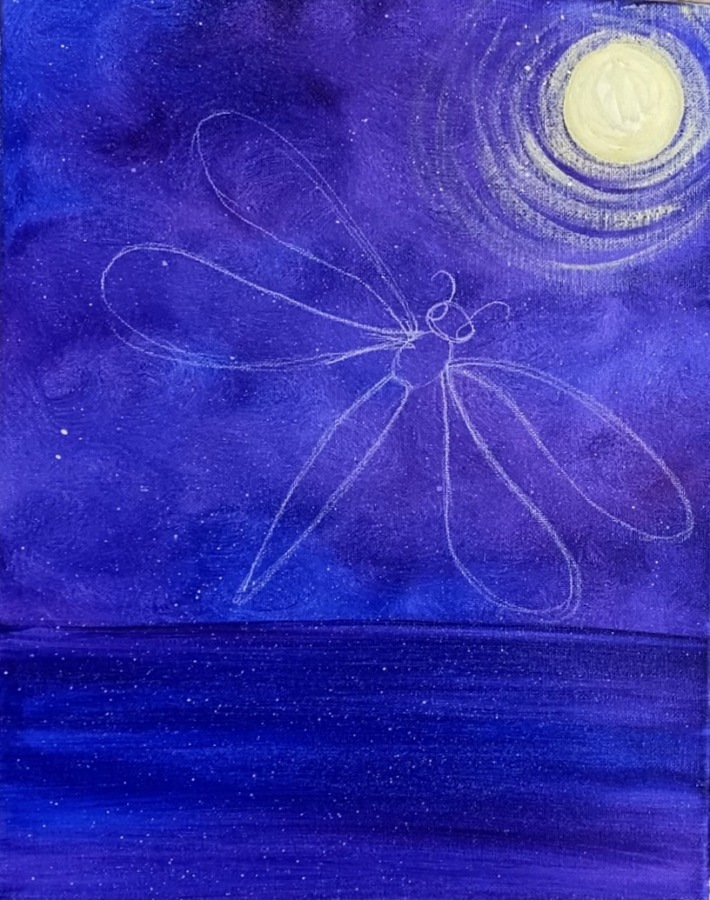
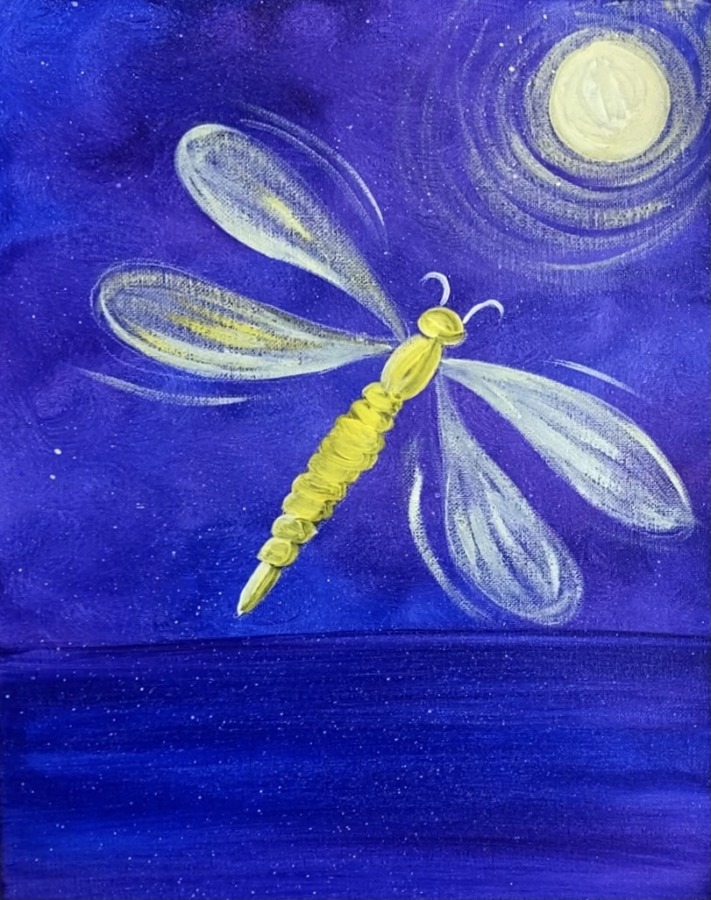
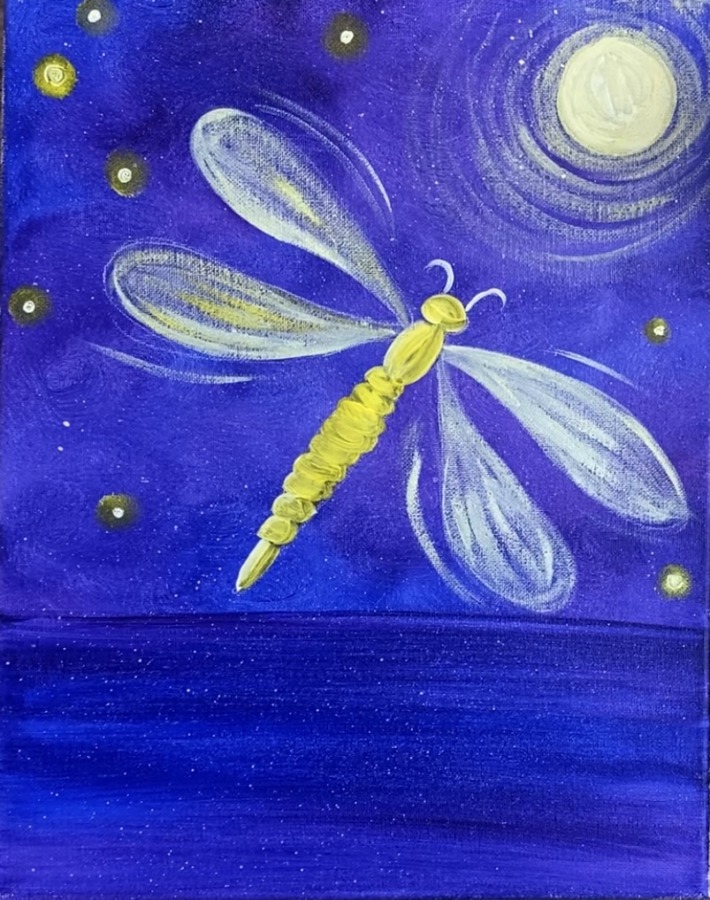
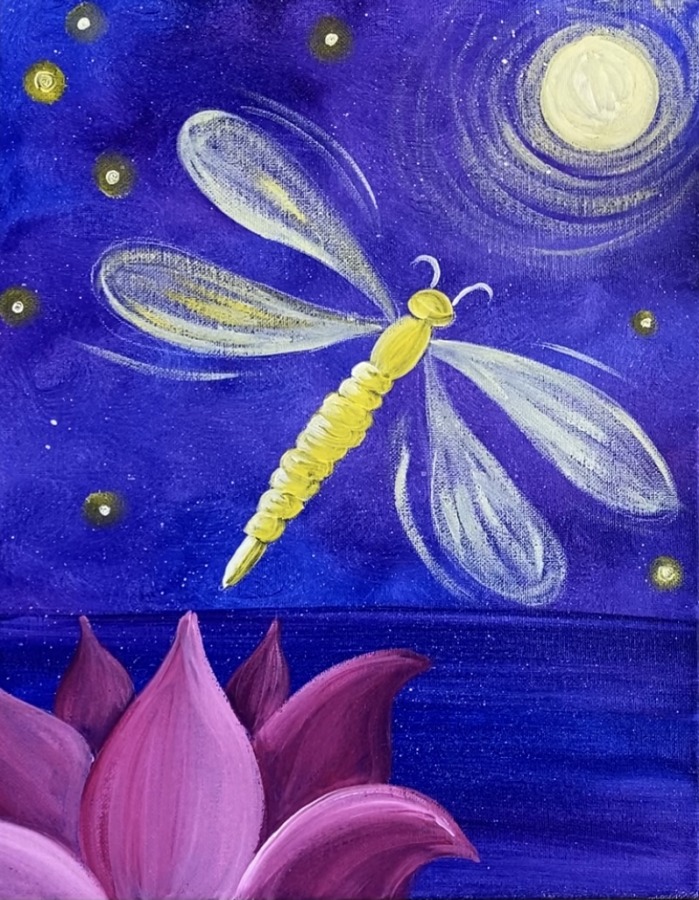
1. Paint the background sky & water
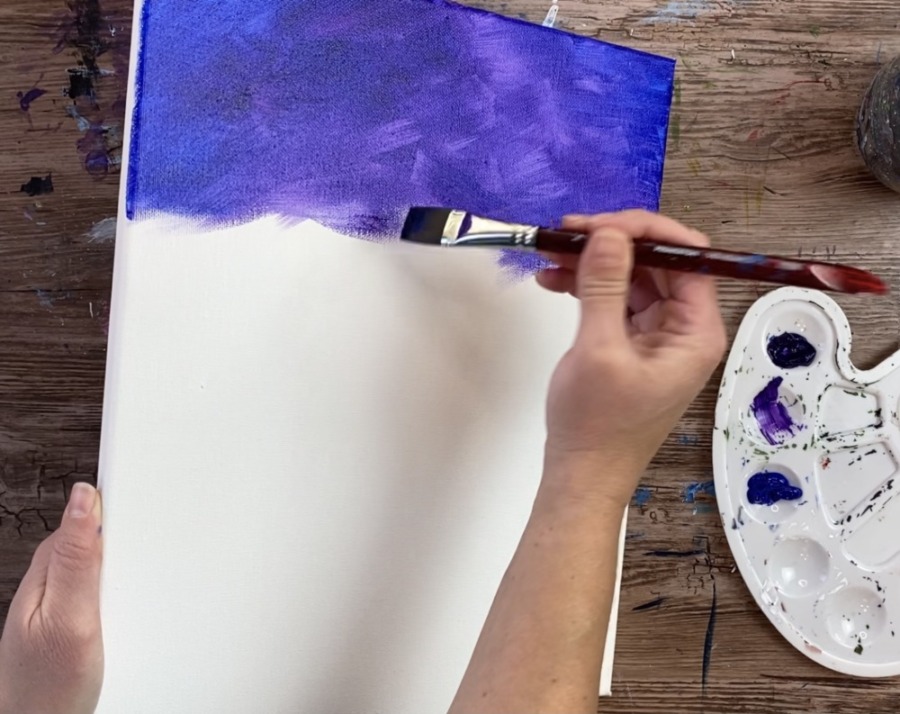
The entire background including the sky and water consists of the two colors: dioxazine purple and ultramarine blue.
Use a 3/4″ flat wash brush to apply a little ultramarine blue and then some purple onto the canvas.
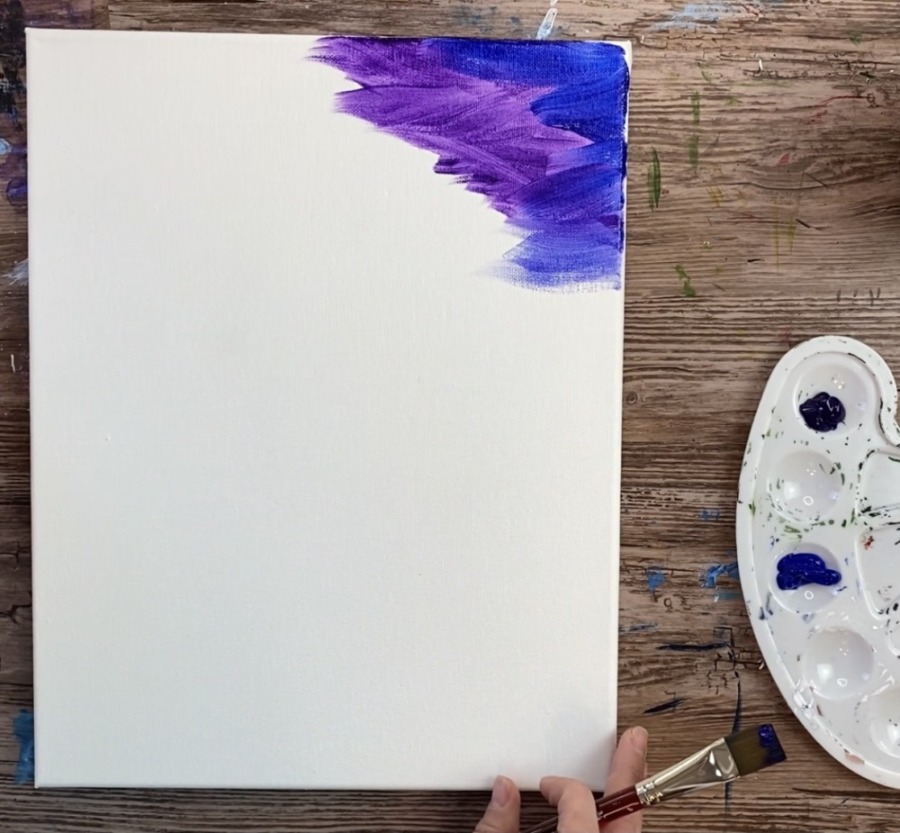
I did more blue on the sides and more purple in the middle of the canvas. Use the 3/4″ wash to do short angular strokes.
Go about 4-5 inches down the canvas then grab a mop blending brush (I use a makeup brush).
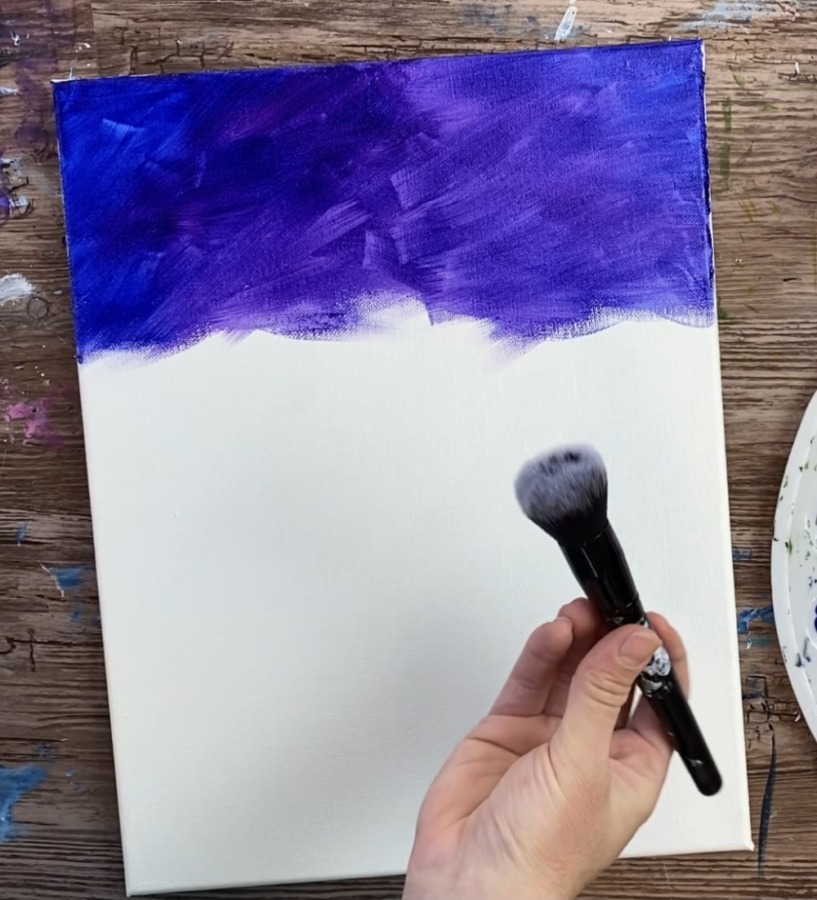
Smooth out your strokes and blend your colors by using the mop brush in small circular motions.
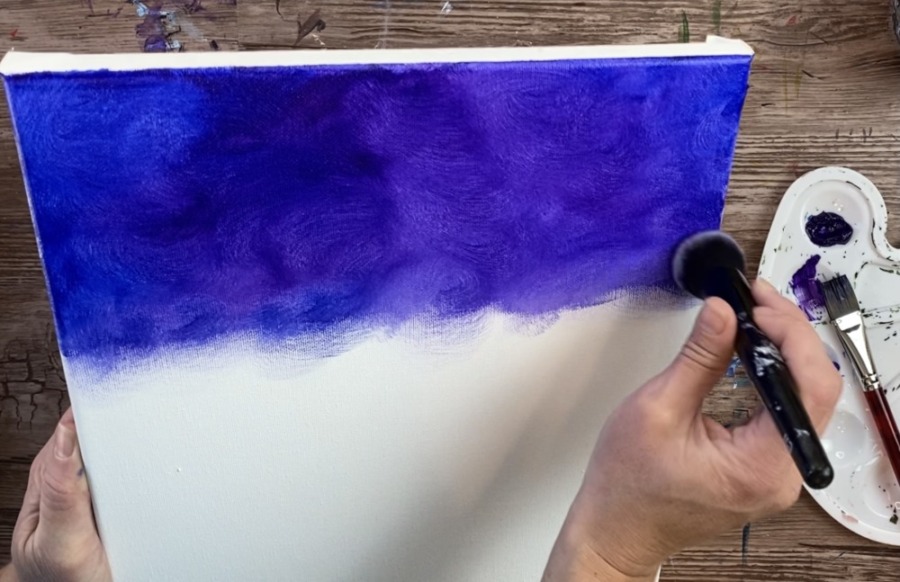
Repeat this step of adding the purple and blue with the flat brush and then blending the colors in with the blending brush.
Go almost all the way down the canvas, leaving a small gap on the bottom.
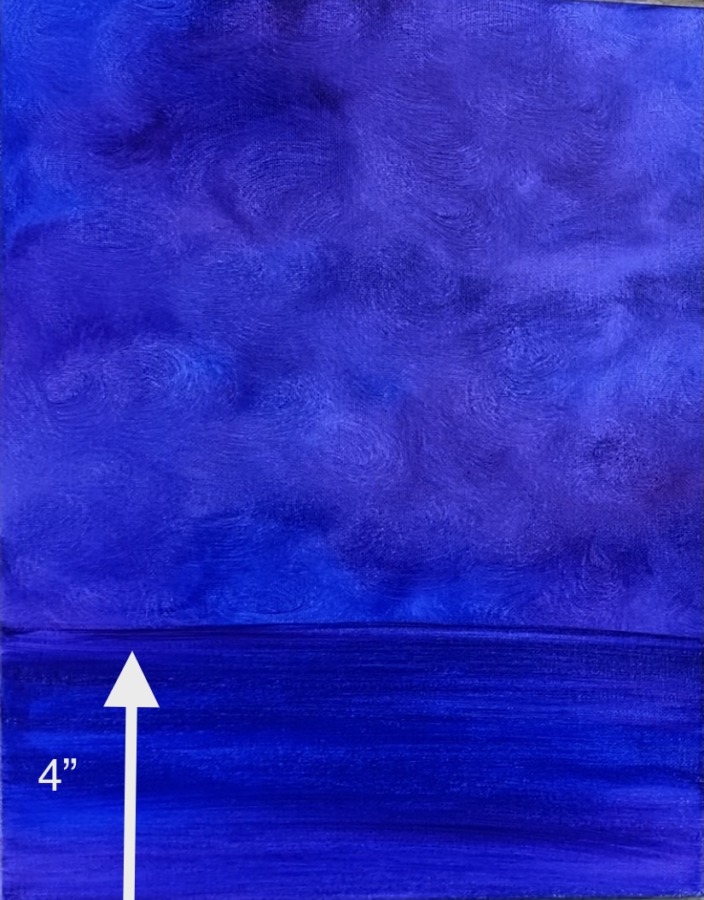
Then paint the water area using just the 3/4″ flat wash brush. Double load it in both the blue and the purple. Paint left and right horizontal strokes across the bottom of the canvas.
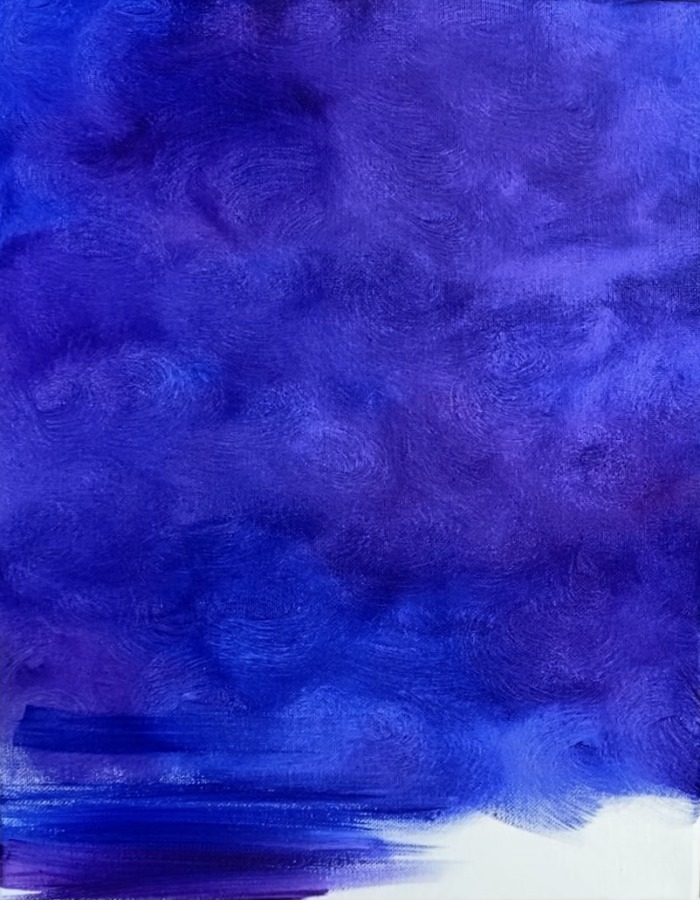
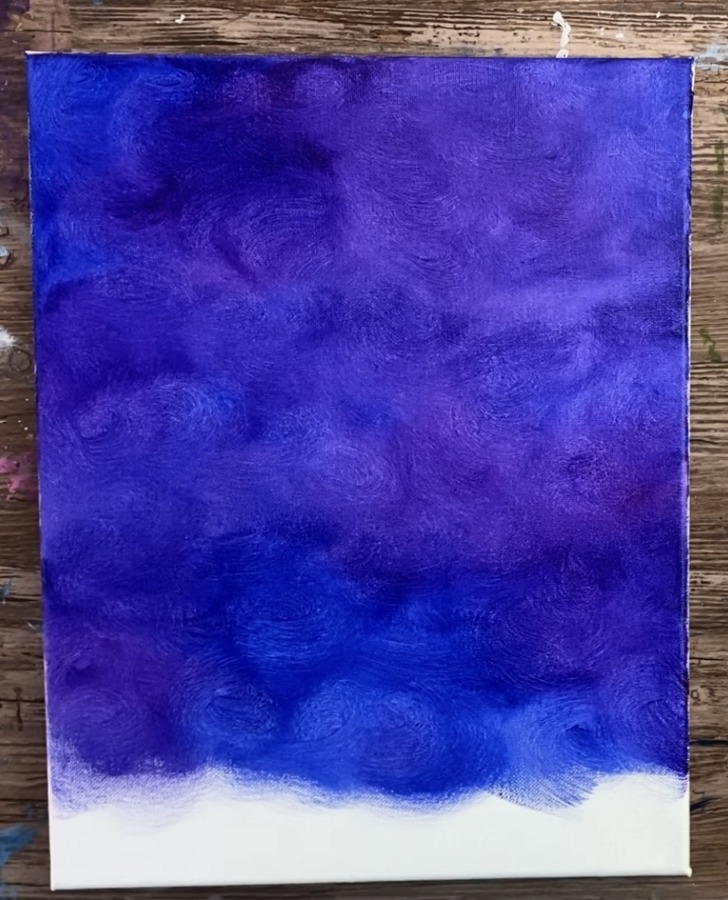
You can paint over the sky if needed. I decided my water area was going to be about 4″ from the bottom of the canvas.
2. Splatter Paint Stars
Then do splatter stars! I use a toothbrush to do this effect. First slightly wet the brush (it shouldn’t be dripping).
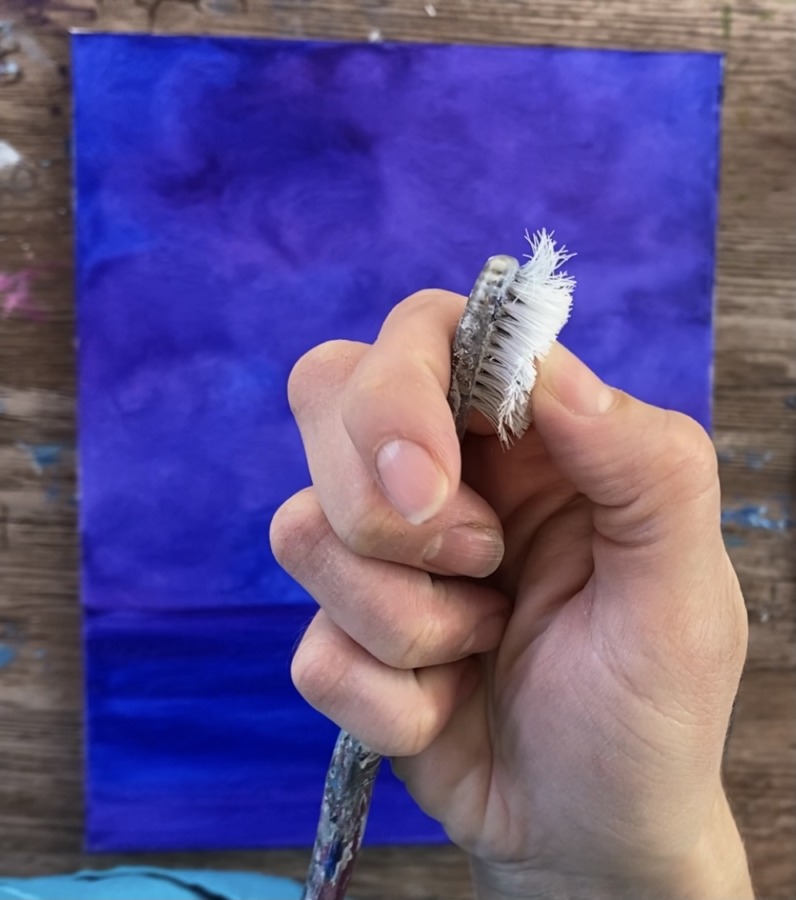
Then apply a small amount of titanium white paint to your brush. Practice a separate area first before splattering the stars on your canvas. You want the consistency to be not too thick but not too thin either.
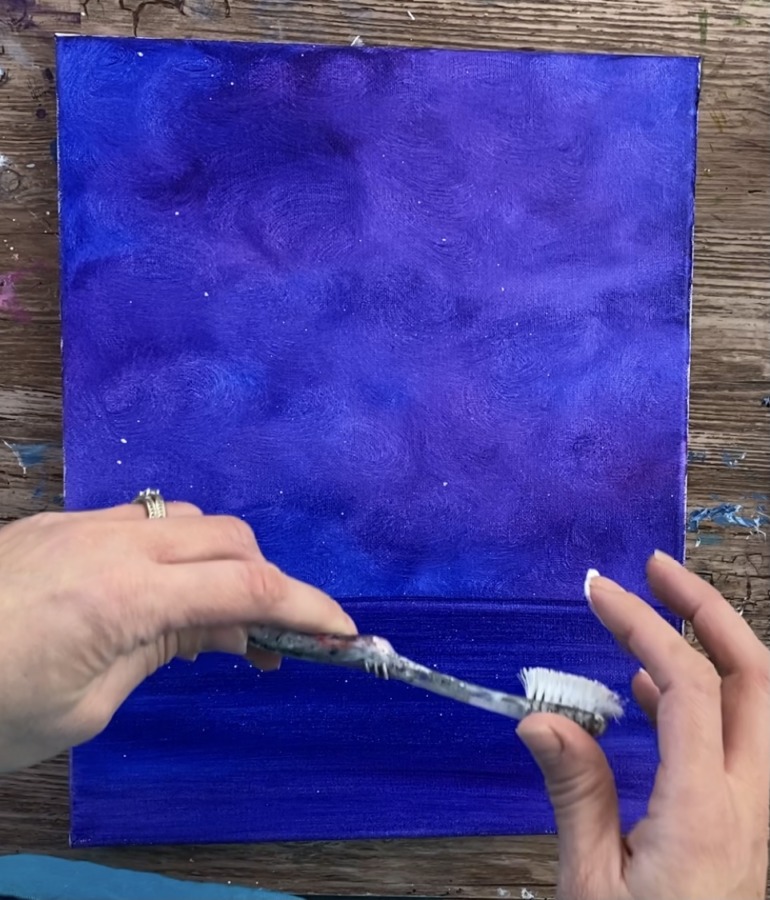
Apply the white splatters all over, even over the water area. Your entire painting will look kind of like a galaxy! Let all this dry before going to the next step.
3. Paint a Moon & Dry Brush Moon Beams
For the moon, I used a #8 round brush. On your palette, mix about equal amounts of titanium white into cadmium yellow medium hue. This will make a pale, opaque yellow.

Then paint a circle in the upper right corner of the canvas.
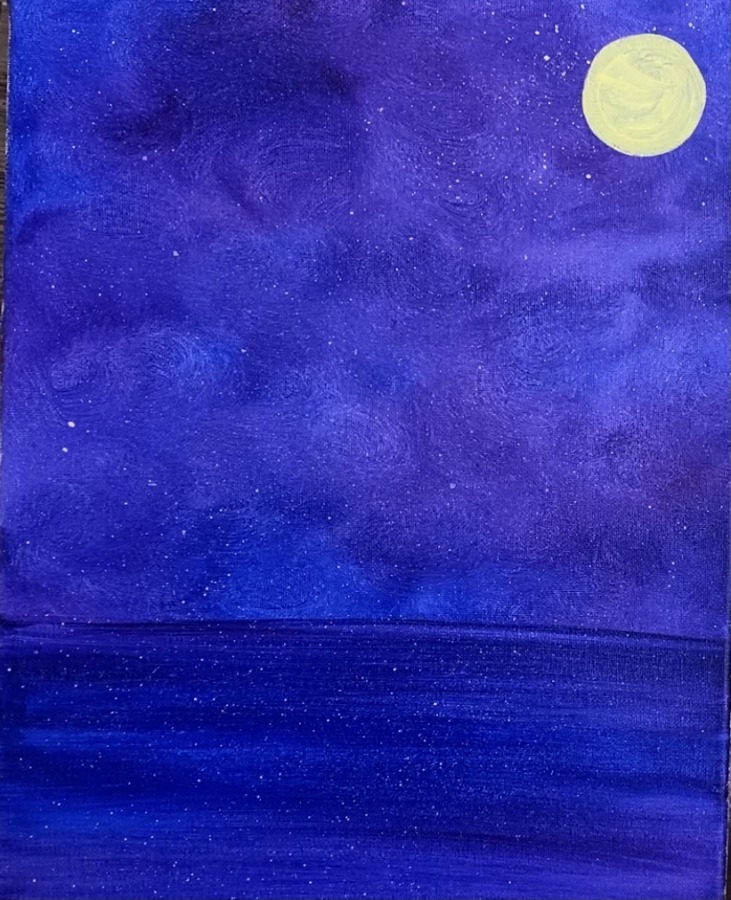
Then wipe off your brush with a paper towel or rag. This is because the “moon beams” that go around the moon will be “dry brush style”.
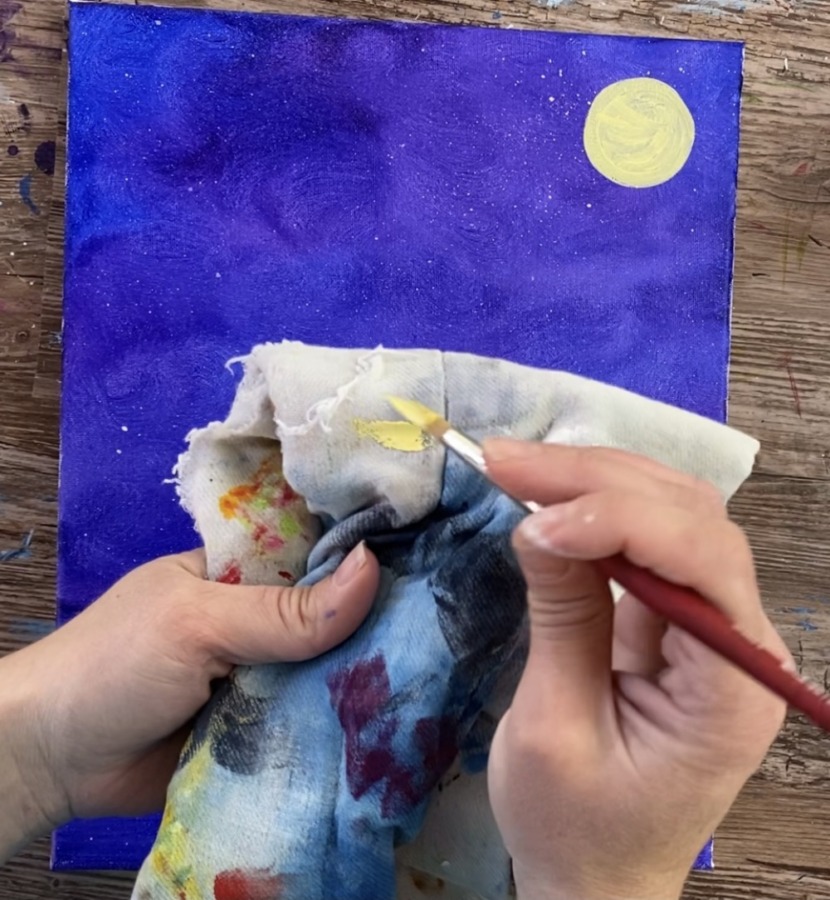
Paint circular strokes going all around the moon. The paint should be dry, feathery and see through because there is hardly any paint on your brush.
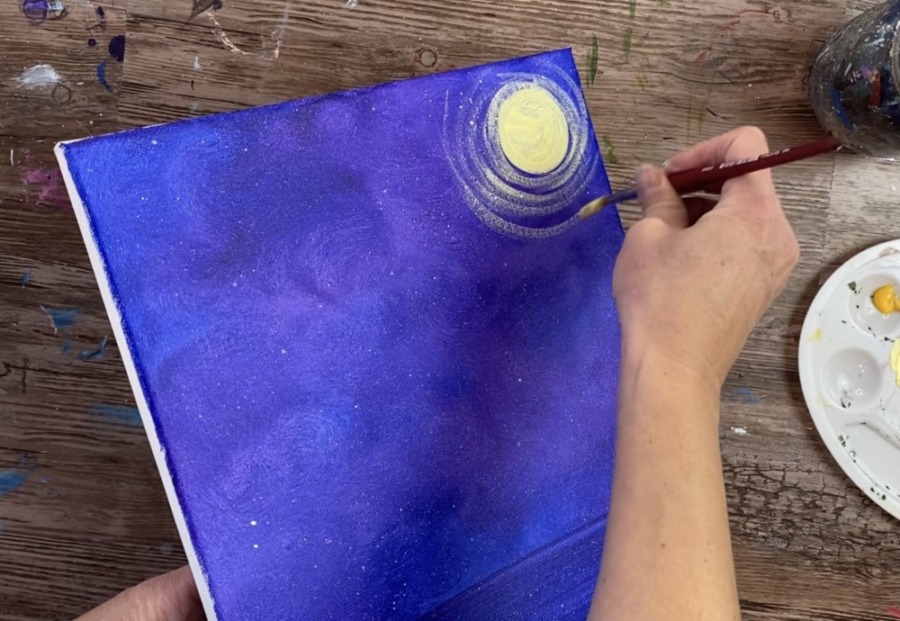
You can go out as far as you want with the moon beams. Also, it is okay if some areas of your brush strokes seem brighter than other areas. With dry brush style, sometimes it is hard to control the intensity of the paint.

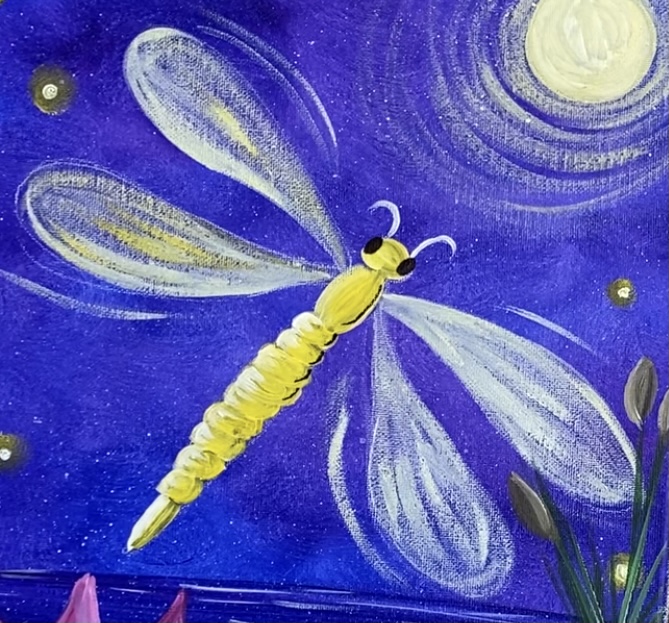
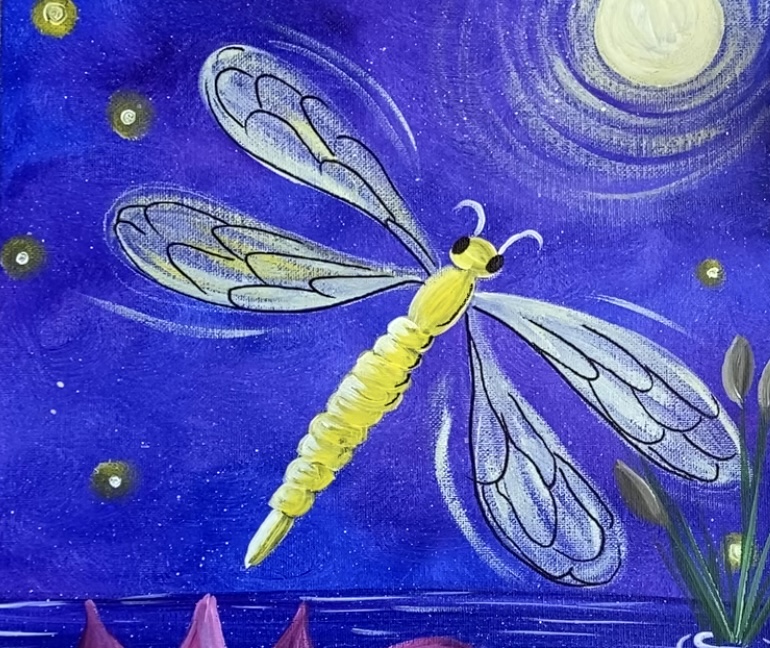
4. Draw the dragonfly
Either use the provided traceable or draw the dragonfly free-handed. It is a fairly simple drawing to do! I used a white chalk pencil and it showed up nicely against the dark background. If you are using a traceable, you may need to use white graphite paper.
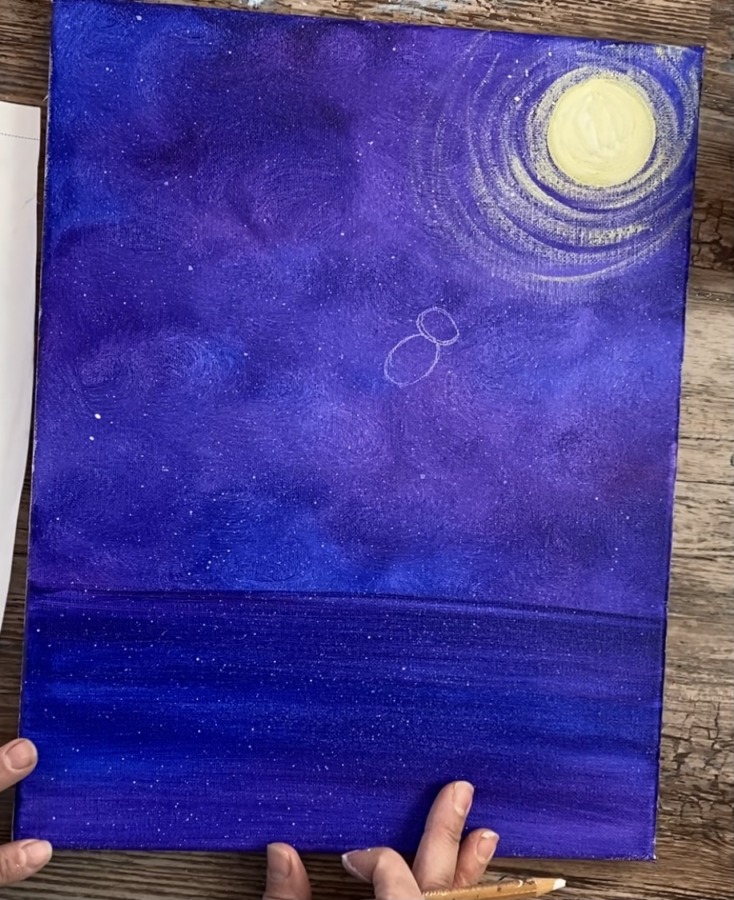
First draw a small oval for the head and then another oval for the thorax.
Then draw the eyes, antennas and a long pointed oval for the abdomen.
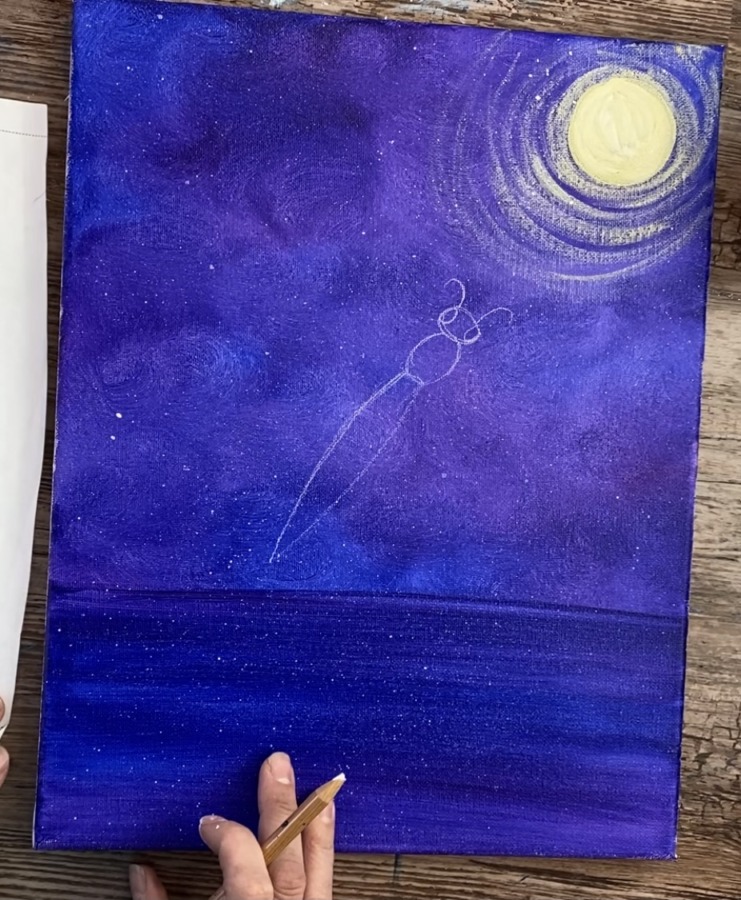
Next draw the wings. Draw two curved lines that are the same length on both sides (think symmetry here). They need to be going diagonally.
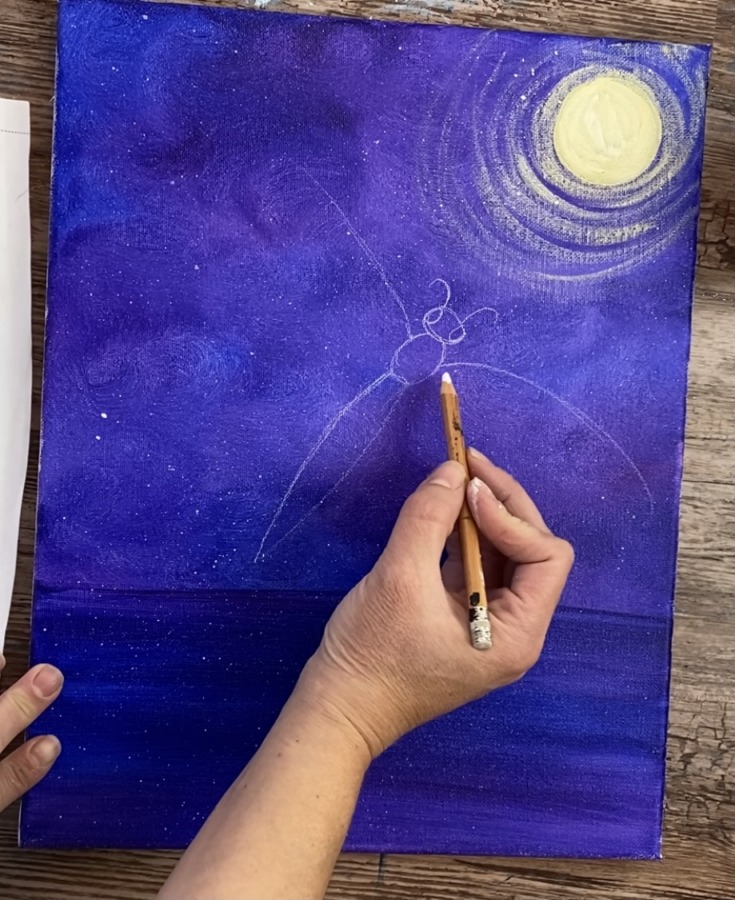
Then draw the curved lines for the bottom of the wings and have each wing come to a point as it hits the “thorax” of the dragonfly.
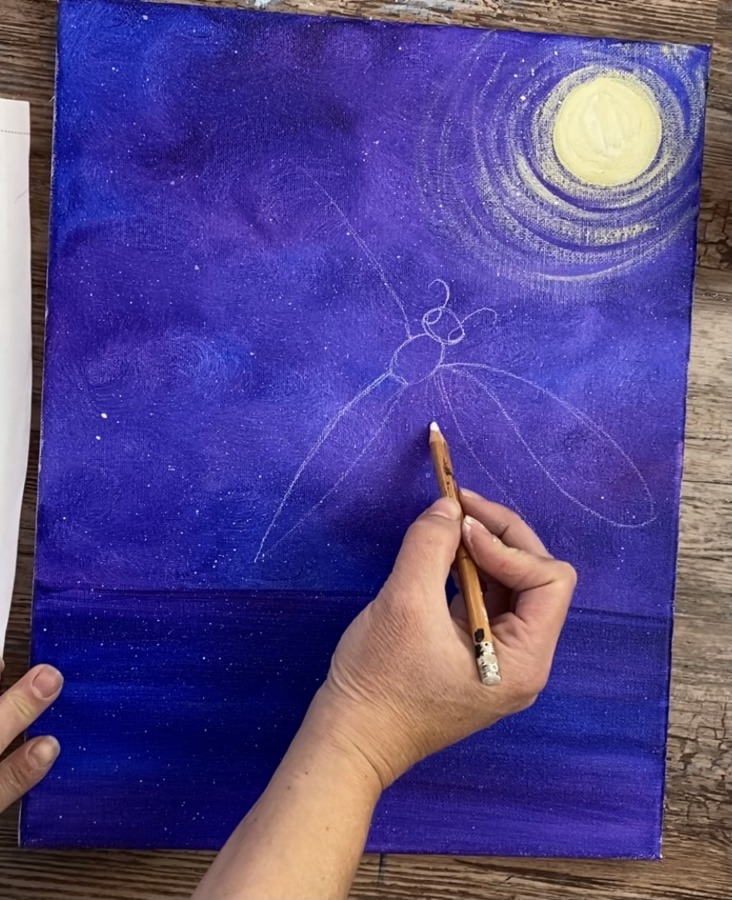
The great thing about this chalk pencil is that you can erase, sketch and get nice thin lines for your drawings!
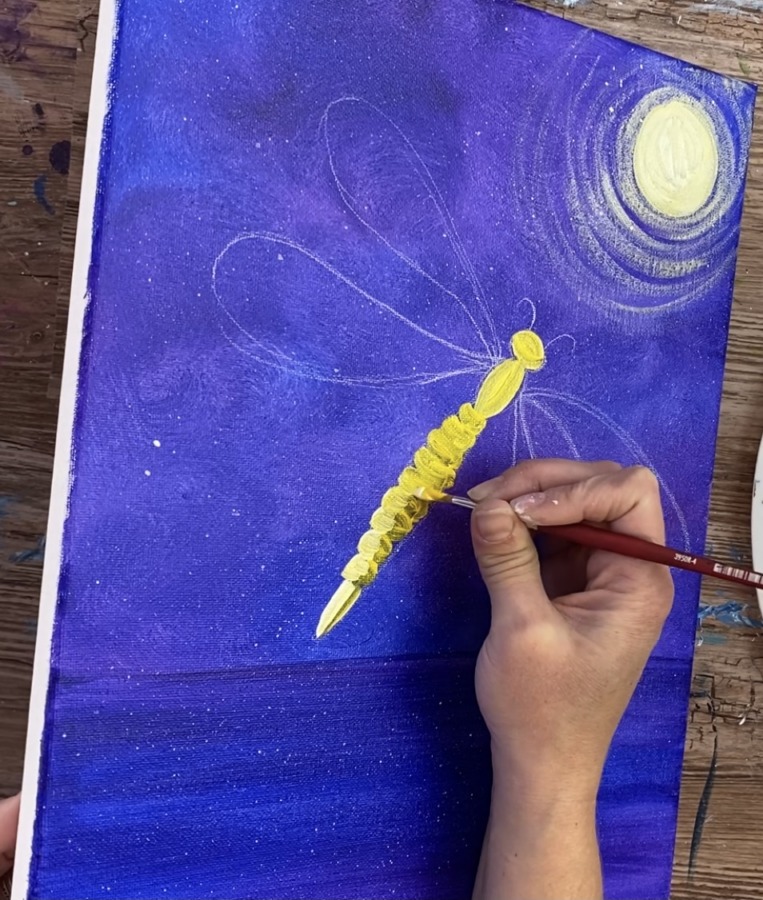
5. Paint the dragonfly
Use a #4 round brush and the colors cadmium yellow medium and titanium white. Mix a little bit of white into the yellow (this makes it opaque and so the yellow shows up against the dark background).
Paint the head, thorax and abdomen. For the bottom part of the dragonfly (the abdomen), I did short curved strokes going left and right down the abdomen until it comes to a point.
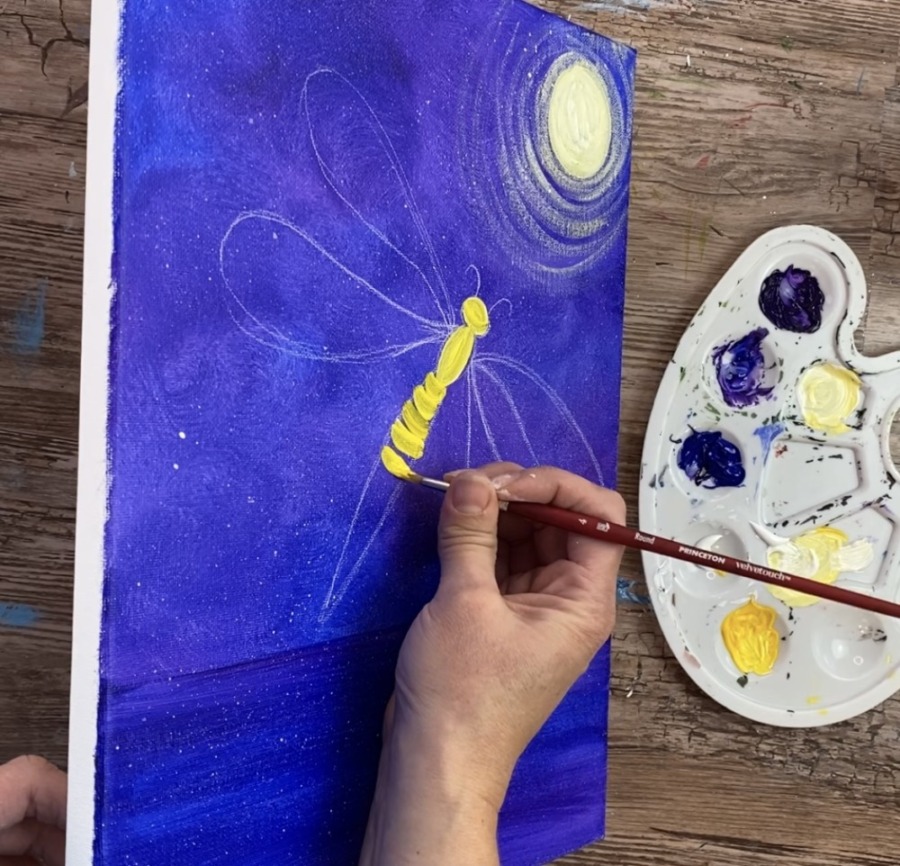
Then add a bit of white on one side of the dragonfly’s abdomen. Not too much white so it takes over but a little pop of white that blends with the yellow to give the dragonfly some depth.
Tip: if your yellow did not provide enough coverage over the dark purple, you may need to do a second or third coat.
The wings are painted “dry brush style”. That means you are loading your brush in the paint and wiping it off with that towel (the same way you did the moon beams).
Mix a tiny bit of yellow into titanium white so that it turns to sort of an off white or super light yellow color. Use your round brush and load it in that color and wipe it off with a towel.
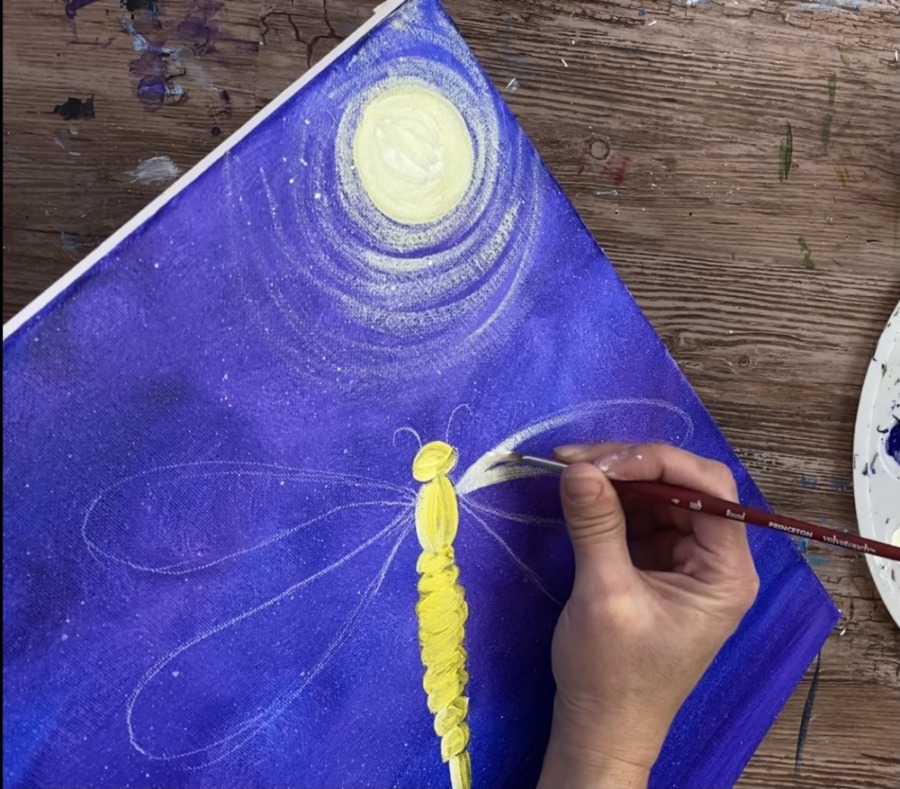
Paint the wings in with the dry brush style. Your strokes go in the direction of the wings but the paint itself should show up translucent. You should still see a lot of that dark background showing through the wings.
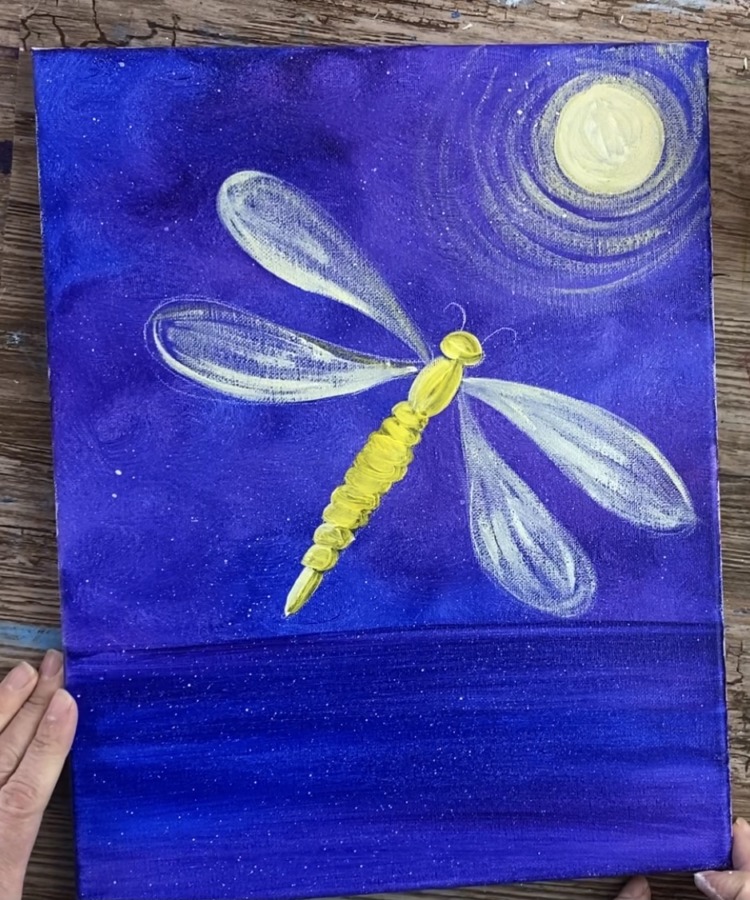
I decided to add a pop of yellow dry brush to some of the wings. Then I did some “motion lines” dry brush on the top and bottom of the outside of the wings. Also, the antennae were painted white white (not dry brush, just a regular stroke).
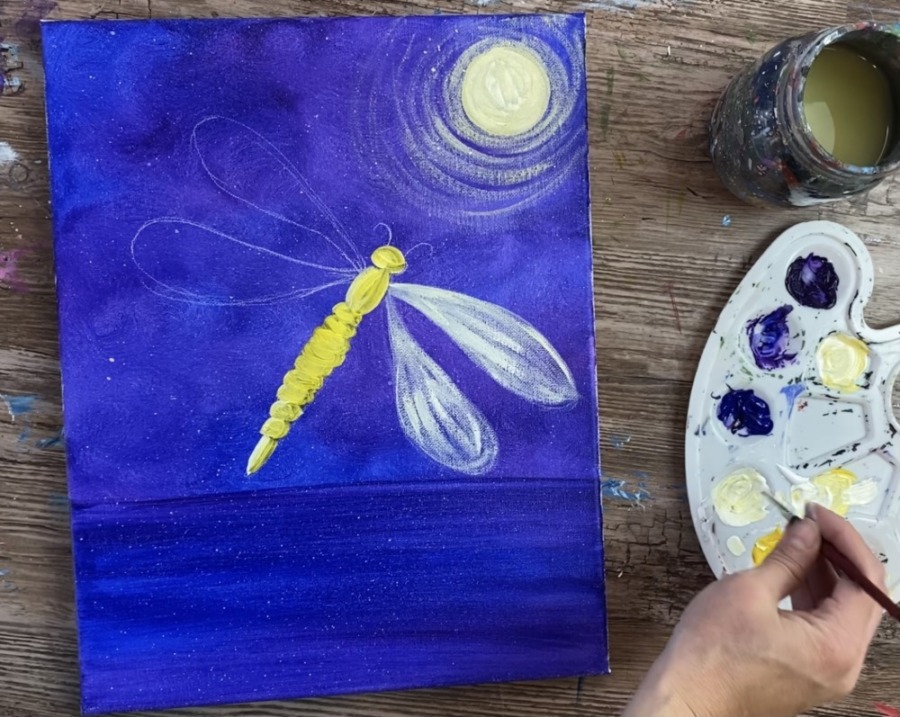
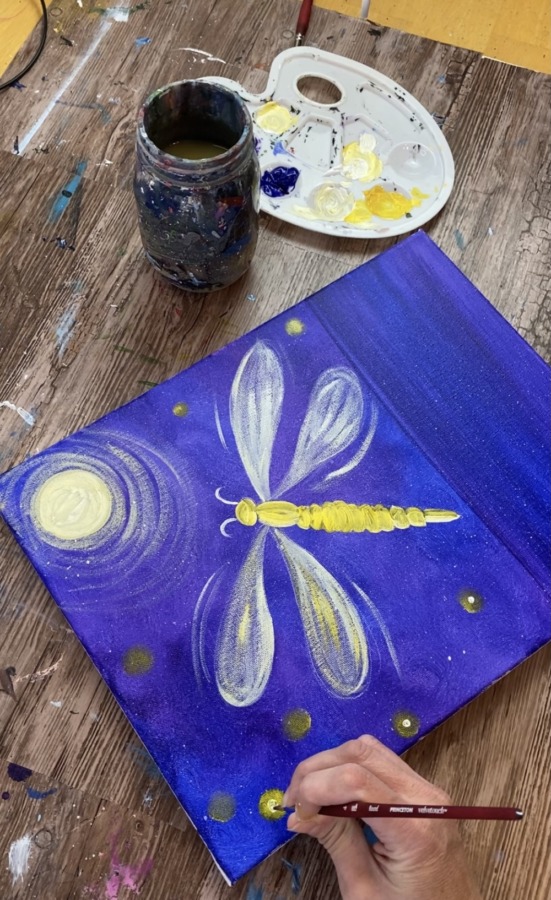
6. Paint lightning bugs with finger & brush
Use your index finger and dip it into just cadmium yellow medium. Press your finger on the canvas forming a small circle. The circle should be kind of bright in the middle and “smear” out a little on the outside. To create this effect, you only need a small amount of paint on your finger.
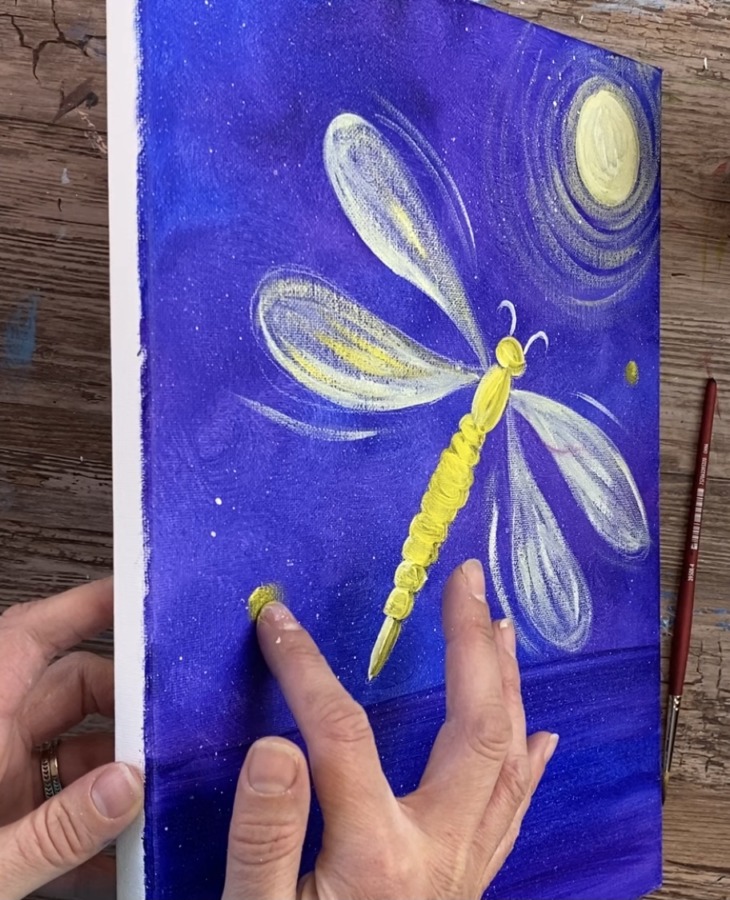
Paint as many lightning bug circles as you want all around the canvas.
Then use a #4 round brush and dip the tip of it into just titanium white. Paint a small white circle in the center of all your stamped lightning bug yellow circles.
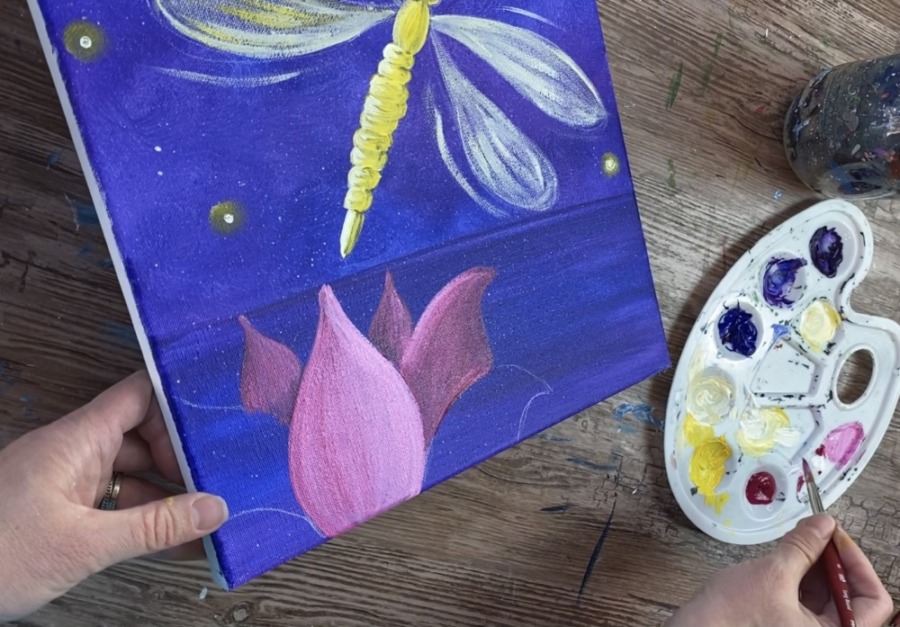
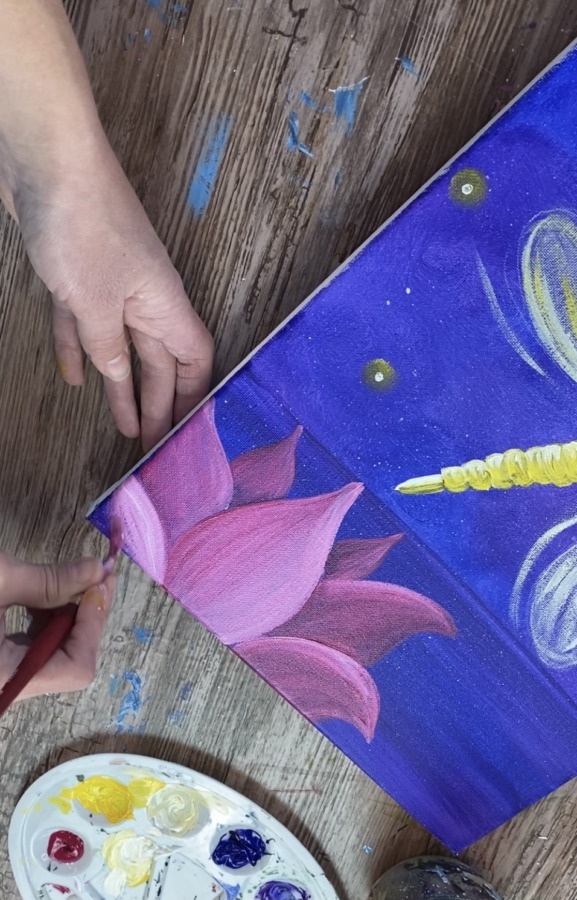
7. Draw & paint the lotus flower
I used a white chalk pencil to draw the lotus. Start with the middle petal and draw a large teardrop shape.
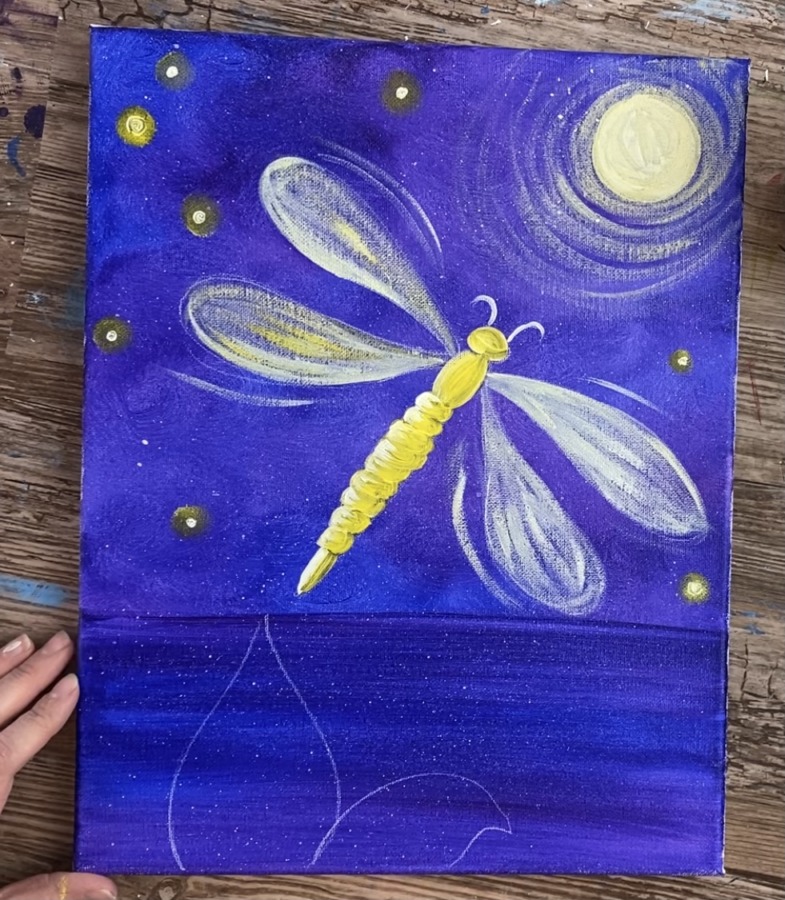
Then draw two more petals curving down on each side of the large center petal.
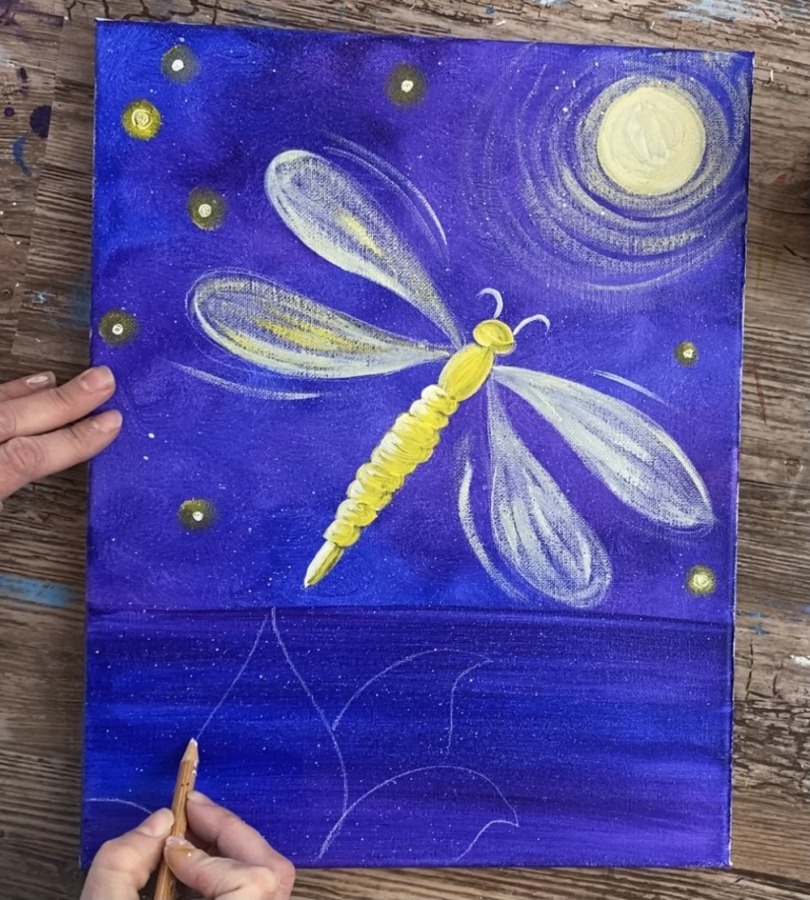
Then draw two back petals and then two more petals in the very back.
To paint the lotus in, use either the #8 round brush or a #4 round brush. Load your palette with quinacridone magenta and titanium white. Mix a medium shade of pink by mixing about 3 parts magenta & 2 parts white.
Paint the larger petal in the middle with this pink tint.
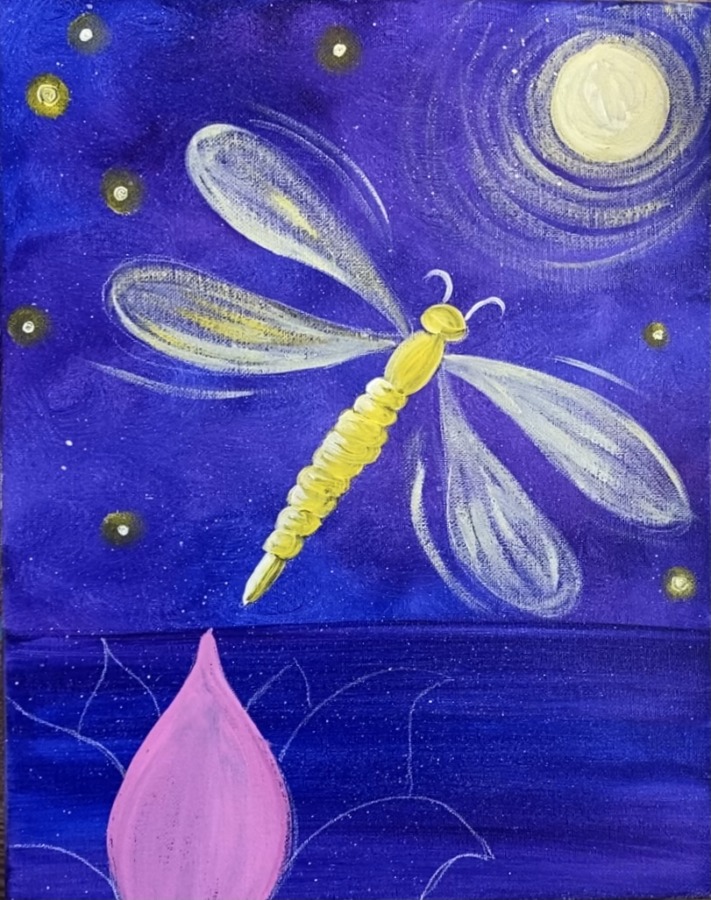
Then add some more magenta on the left side of the petal and blend it in. Then paint the very back petals with more quinacridone magenta so they appear darker than the front petal.
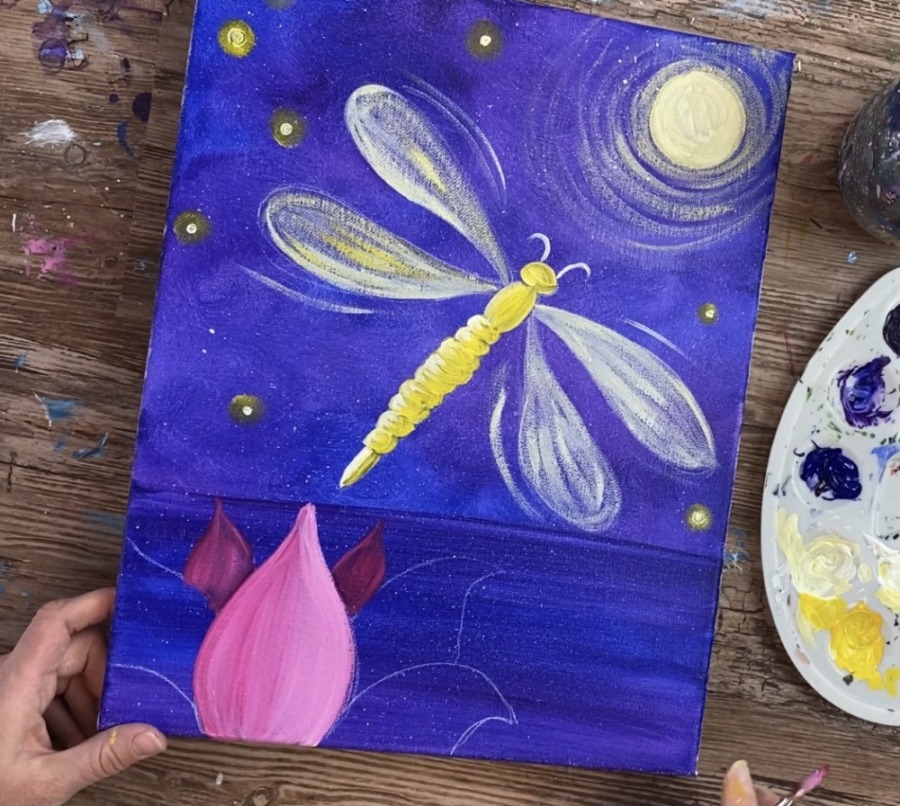
Next paint the second row of petals. This time paint them a dark shade of pink (same as the back petals) but add some lighter pops of pink on one side of the petals so they stand out.
Then paint the very bottom front petals. Tip: you pick one side of each of the petals to be light or dark, that way they all will stand out from one another.
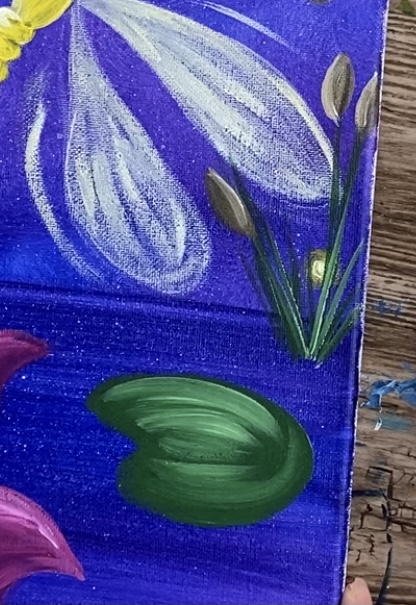
8. Paint lily pad & cattails
To do the lily pad, mix on your palette hooker’s green hue permanent with a little bit of yellow and white (to lighten the green). Then use your #4 round brush to paint a lily pad shape.
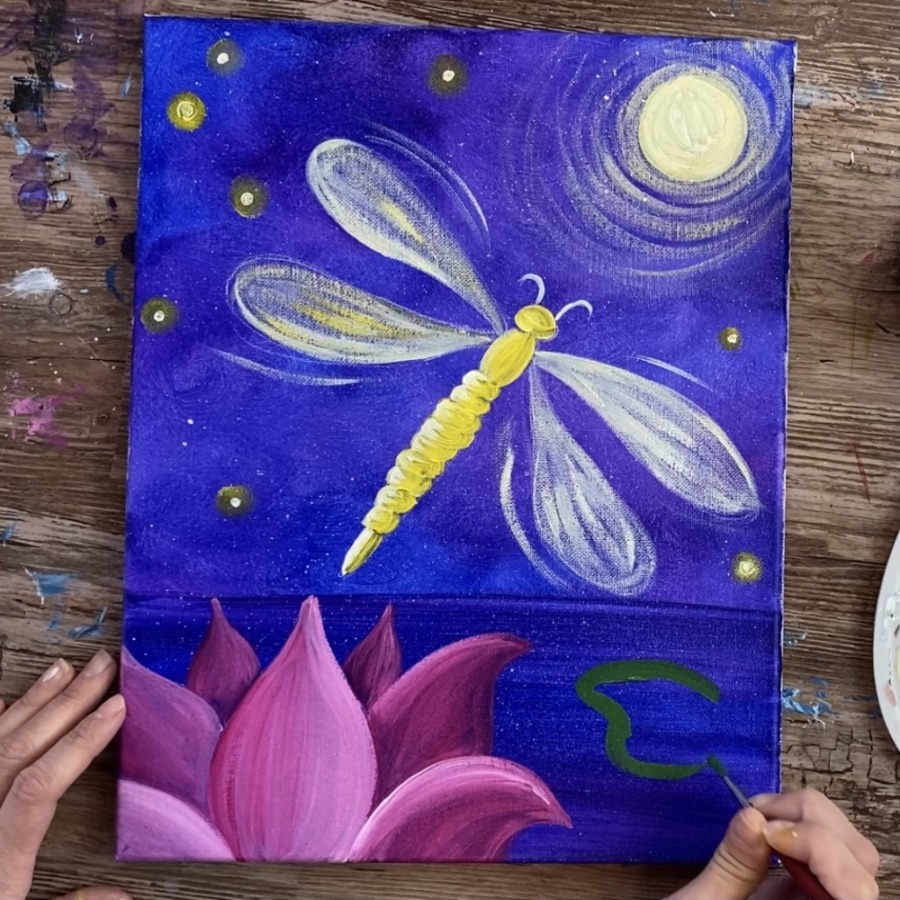
Paint the lily pad in solid green. Then add a little bit of white to your green to lighten it up and paint a few curved strokes of green at the top of the lily pad for highlight.
For the cattail grass, I used a 3/8″ angle brush. You can also do this step with a round brush. Use the same green you used for the lily pad and paint a few strokes of grass blades sticking up out of the water. You can add a pop of white in there to get the green to be brighter.
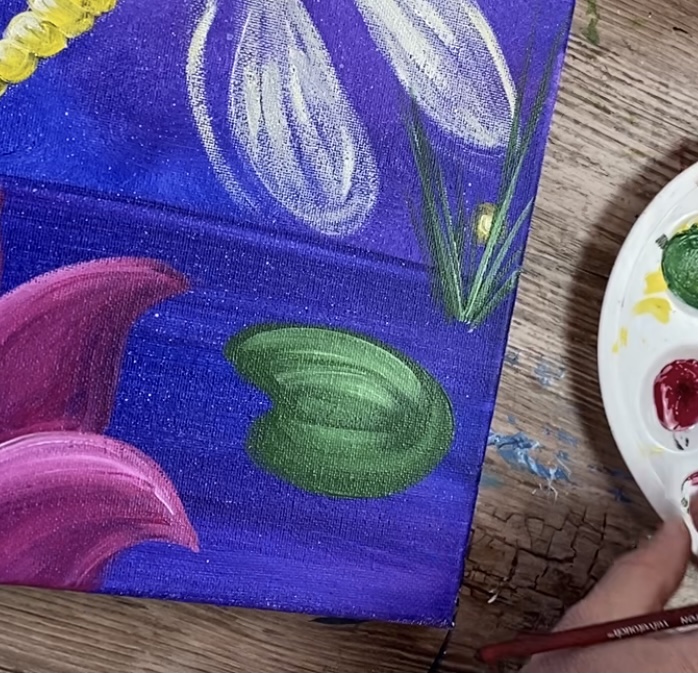
Then paint some ovals on the top of the cattails. You can use brown paint or mix a brown on your palette.
To make brown, mix yellow, green and quinacridone magenta together. Do about equal amounts of those three colors and then add a pop of white in there.
Paint brown ovals on the top of some of the grass blades.
9. Paint water reflections
For the water lines, I used the 3/8″ angle brush for this step but a round brush works too. Paint horizontal white marks in the water area. Then paint curved lines that go around the bottom of the grass and lily pad.
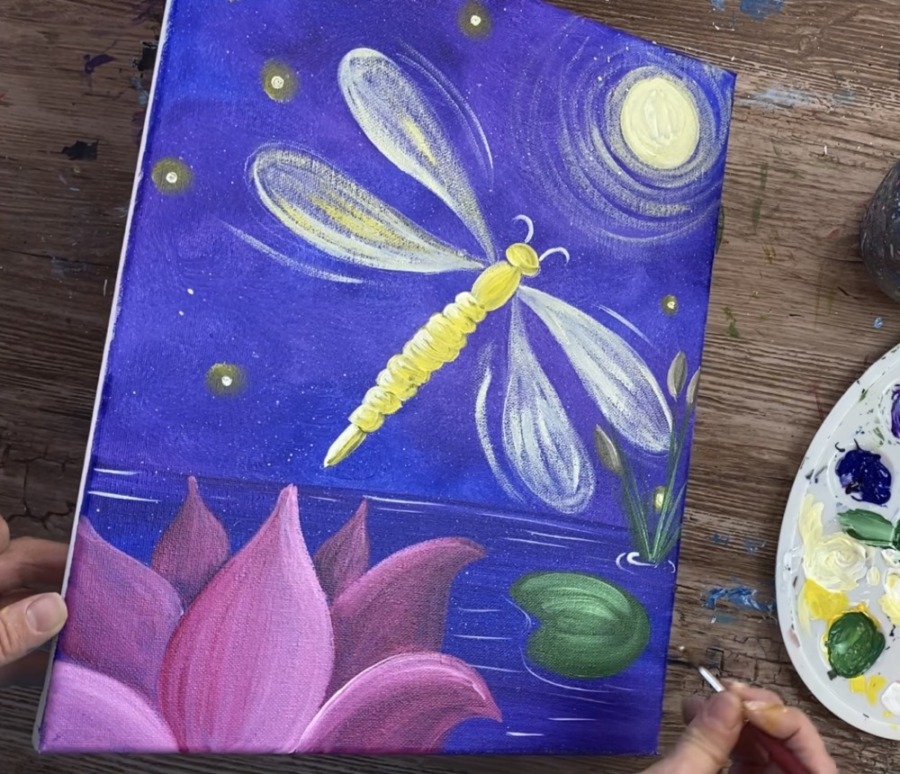
10. Draw or paint eyes & vein details on wings
For this detailed step, I used a black sharpie. A black paint pen works great (I was out of my black paint pen so that’s why I grabbed a sharpie). Alternatively, you can do this with a tiny round brush and mars black paint.
Start by drawing two ovals on the side of the head for the eyes.
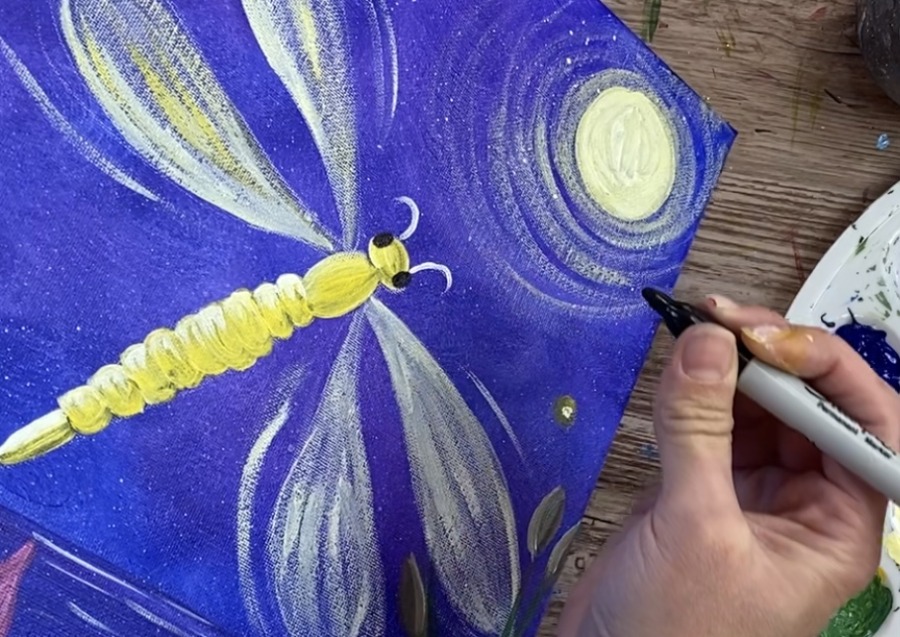
Then paint curved lines on the right side of the thorax and a few curved lines on the right side of the abdomen.
Next do the vein details on the wings. Draw loose, long oval shaped lines that go in the direction of the wings.
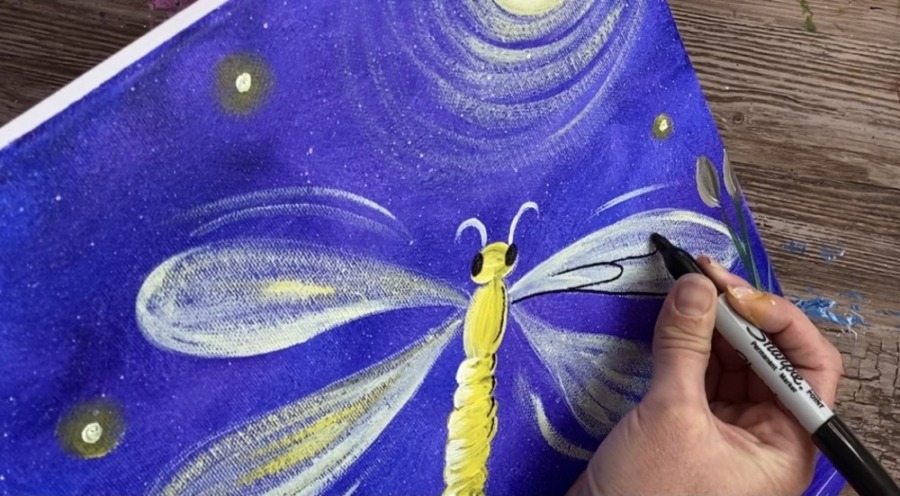
The lines sort of stagger each other like bricks or dragon scales.
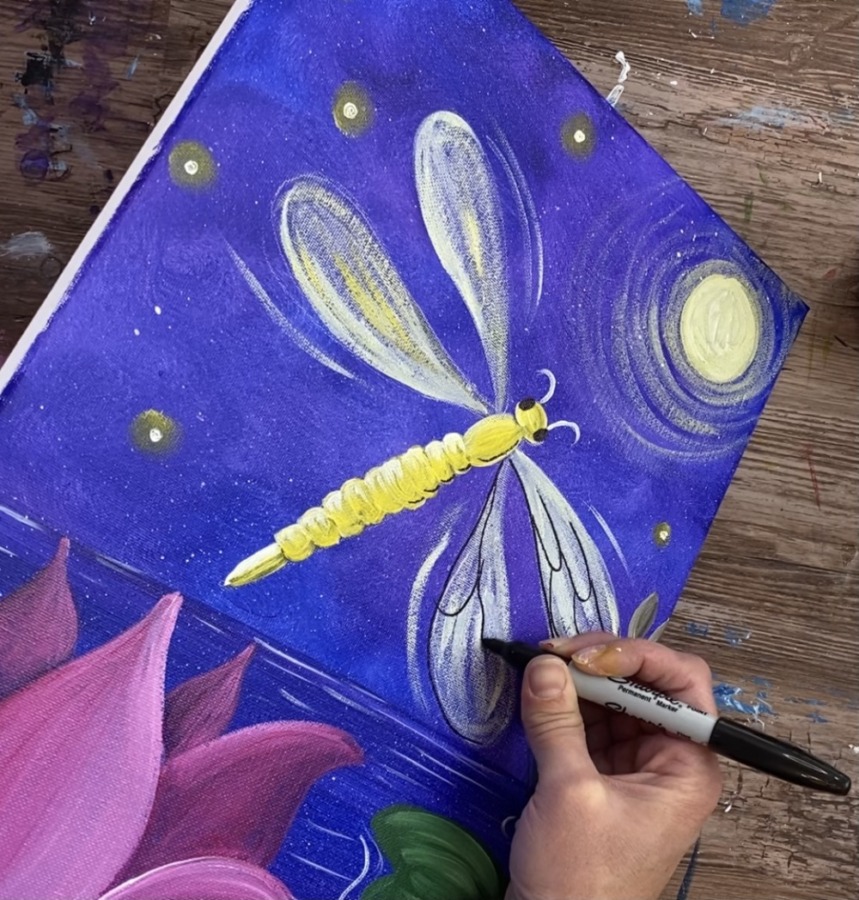
Tip: These line should be very loose. Hold the pen very lightly and try not to press too hard.
Finished!
Sign your name and show it off!
Share your art here!


