

Would you like to save this?
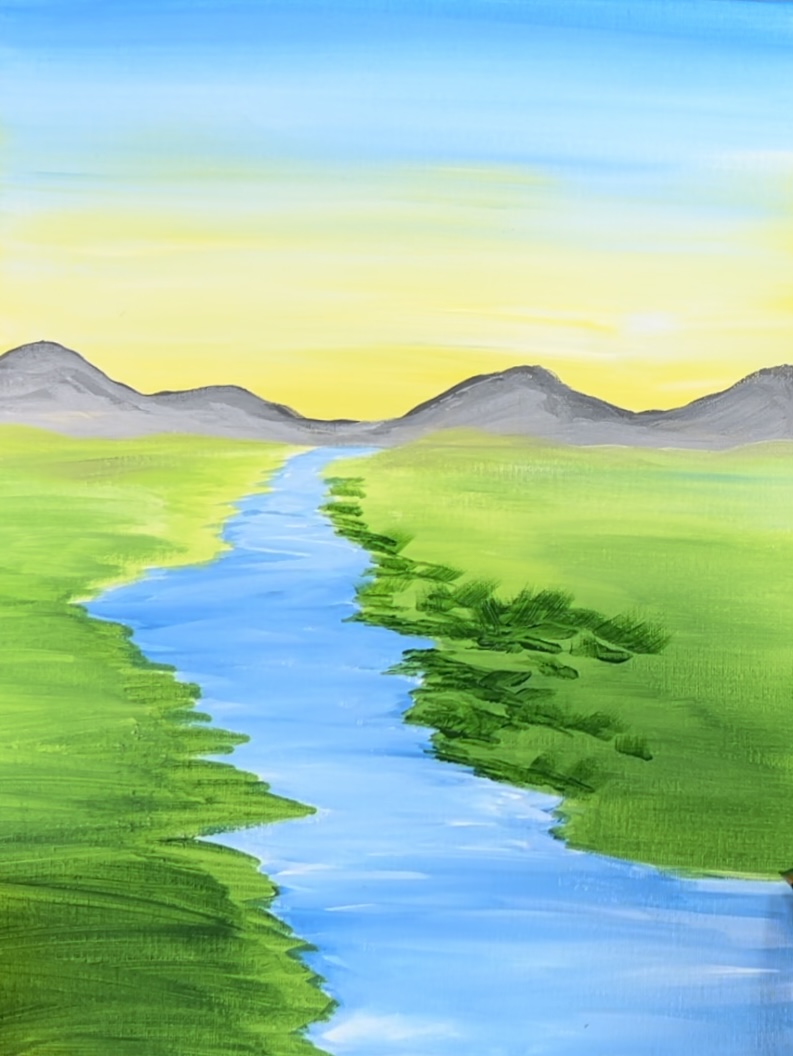
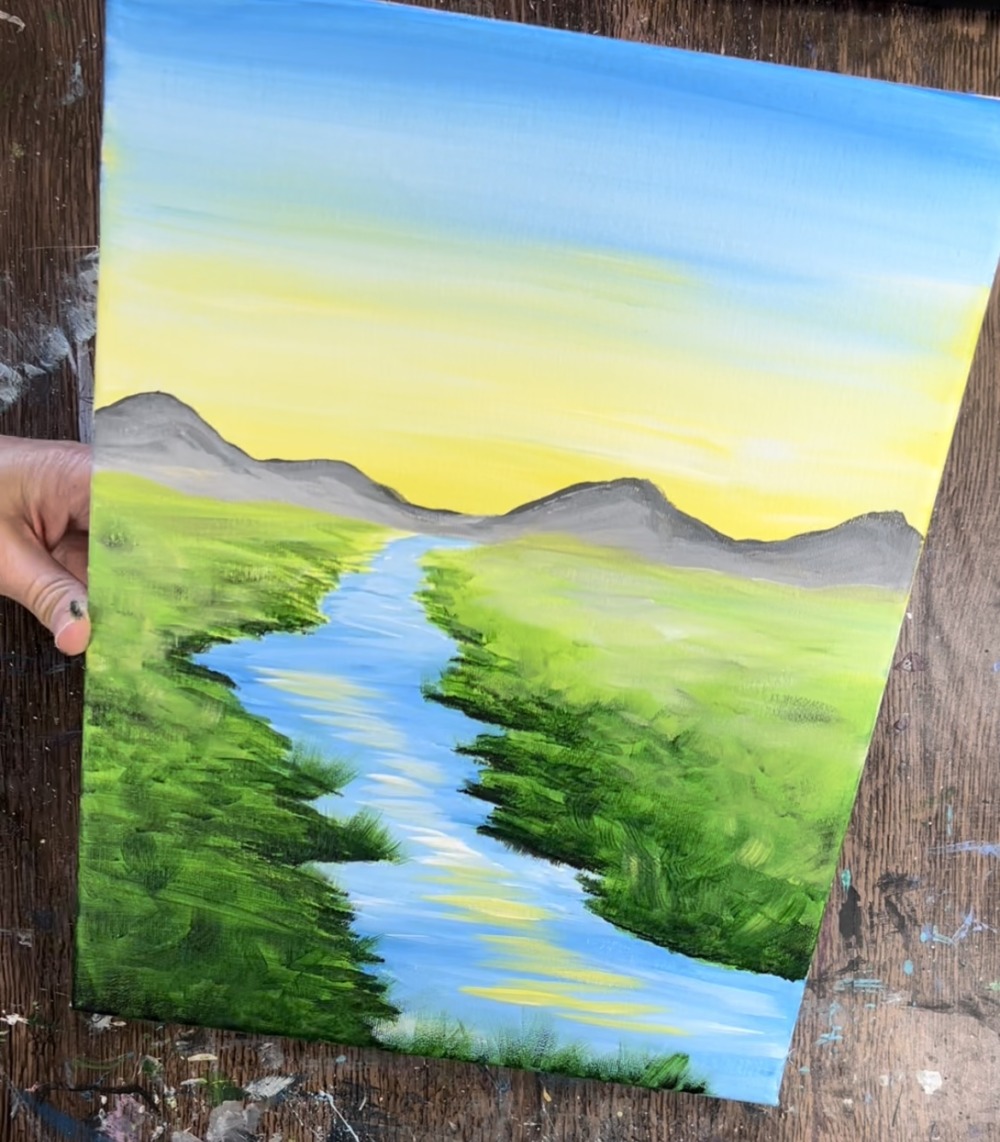
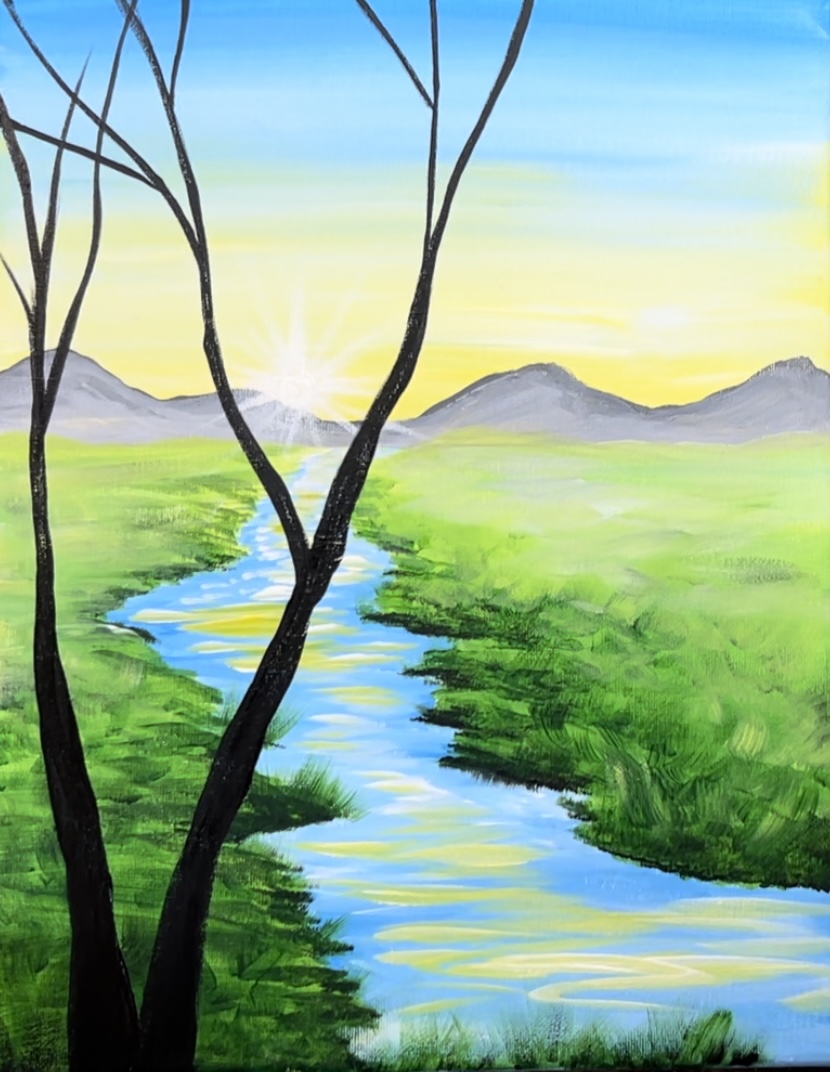
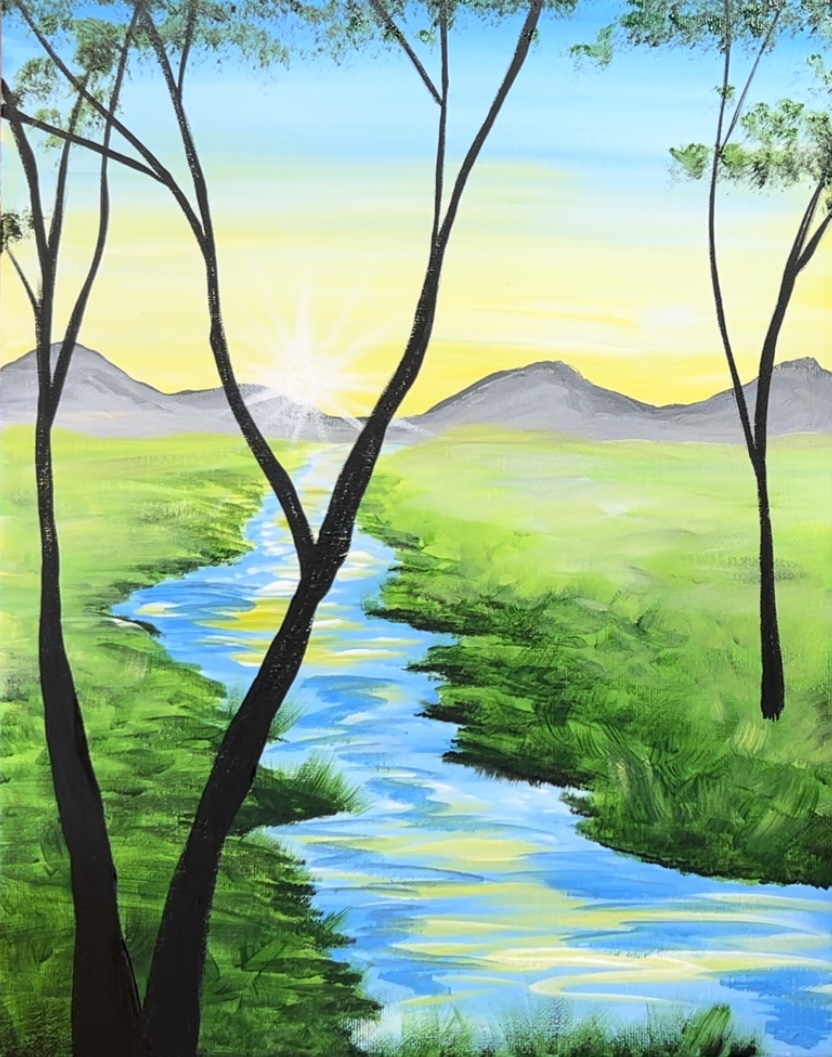
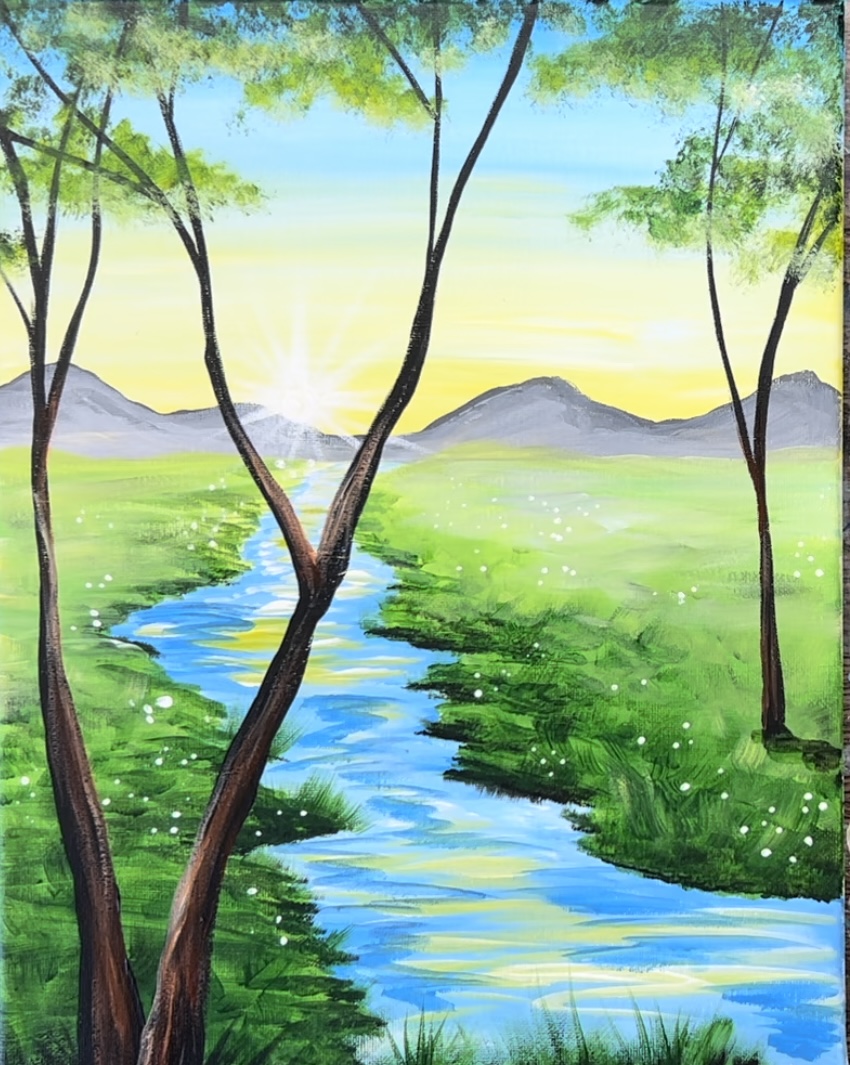
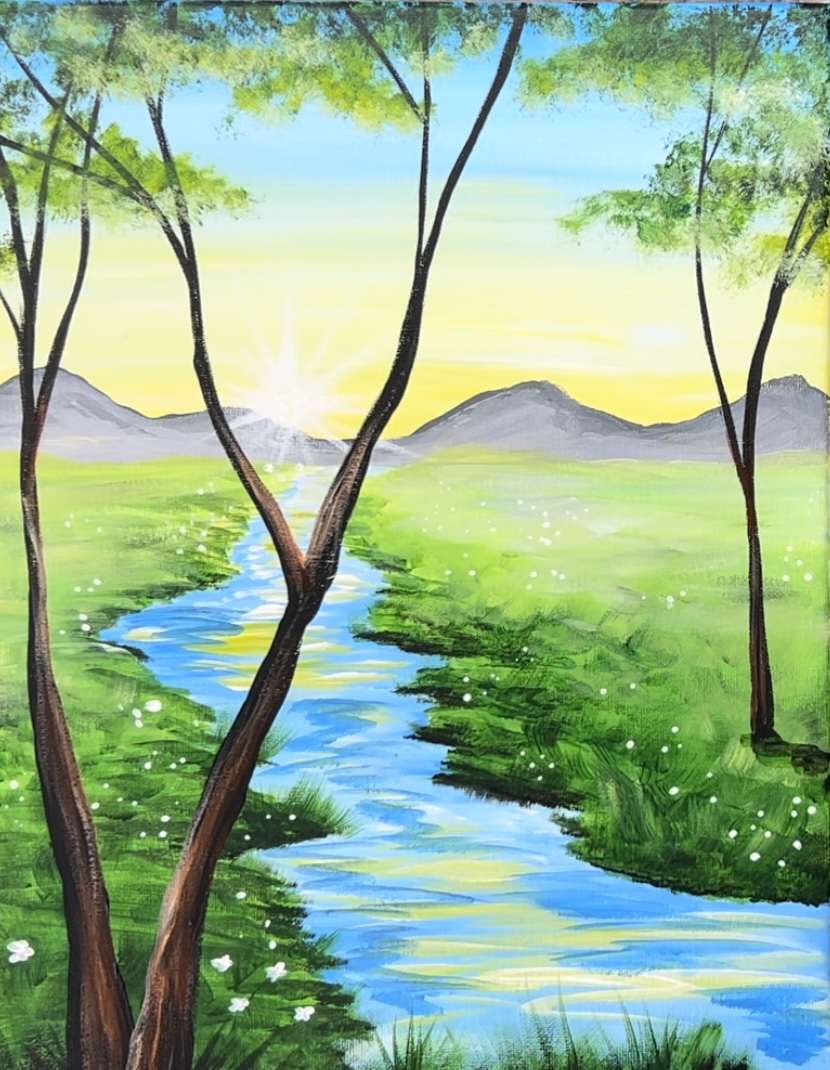
Learn how to create your own spring landscape painting. Paint a pretty green river bank with glowing yellow sunset or sunrise. Add purple laurel to the edge of the river and learn techniques for painting trees and mountains.
Enjoy and happy painting!
Materials
Morning Glory Landscape - Acrylic Tutorial
Learn how to paint a Spring landscape with blue river and trees.
Materials
- 11 x 14 Canvas
- Acrylic Paint
- Brushes
- Water Cup
- Palette (I use paper plates)
- Covered workspace
- Ruler & Pencil
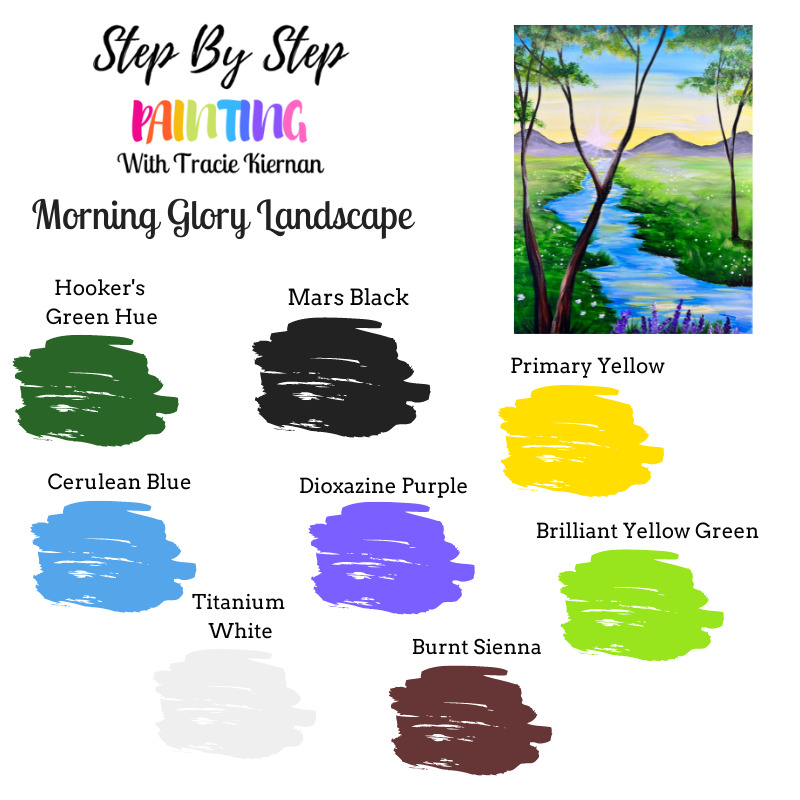
Colors
- Titanium White
- Mars Black
- Primary Yellow
- Hooker's Green Hue Permanent
- Brilliant Yellow Green
- Dioxazine Purple
- Cerulean Blue
- Burnt Sienna
Brushes
- 3/4" Wash Brush
- 12 Bright Brush
- 4 Round Brush
- Bristle Brush For Stippling Textures (or stencil brush)
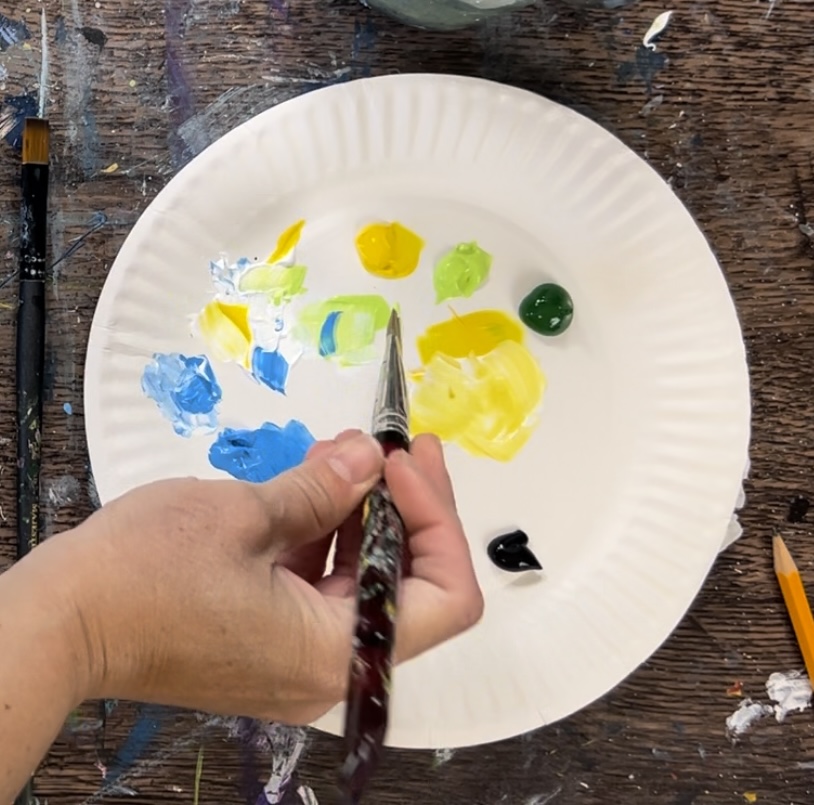
Color Palette
I used Liquitex BASICS acrylics for this tutorial. If you are using a different brand, I would recommend using the chart below to help you match colors.
Using Craft Paints?
If you are using craft paints such as the Apple Barrel Craft Paints, I would recommend subbing to:
- Black
- White
- Holly Branch
- Bright Blue
- Purple Iris
- Bright Yellow
- New Shamrock
- Nutmeg Brown
Directions At A Glance
Video
Step By Step Instructions
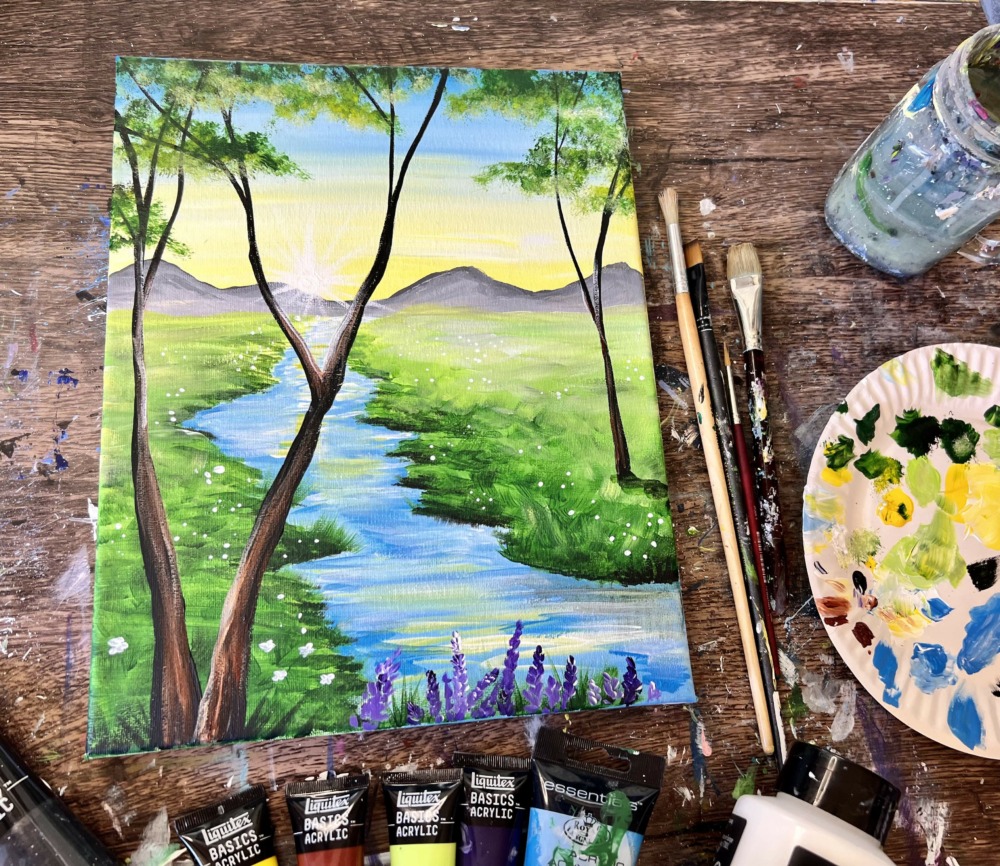
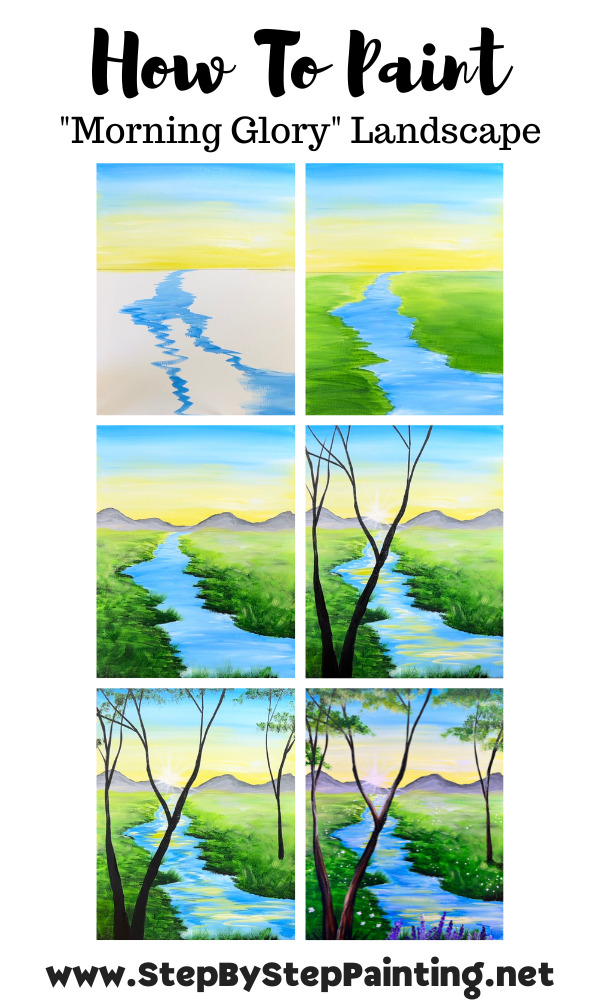
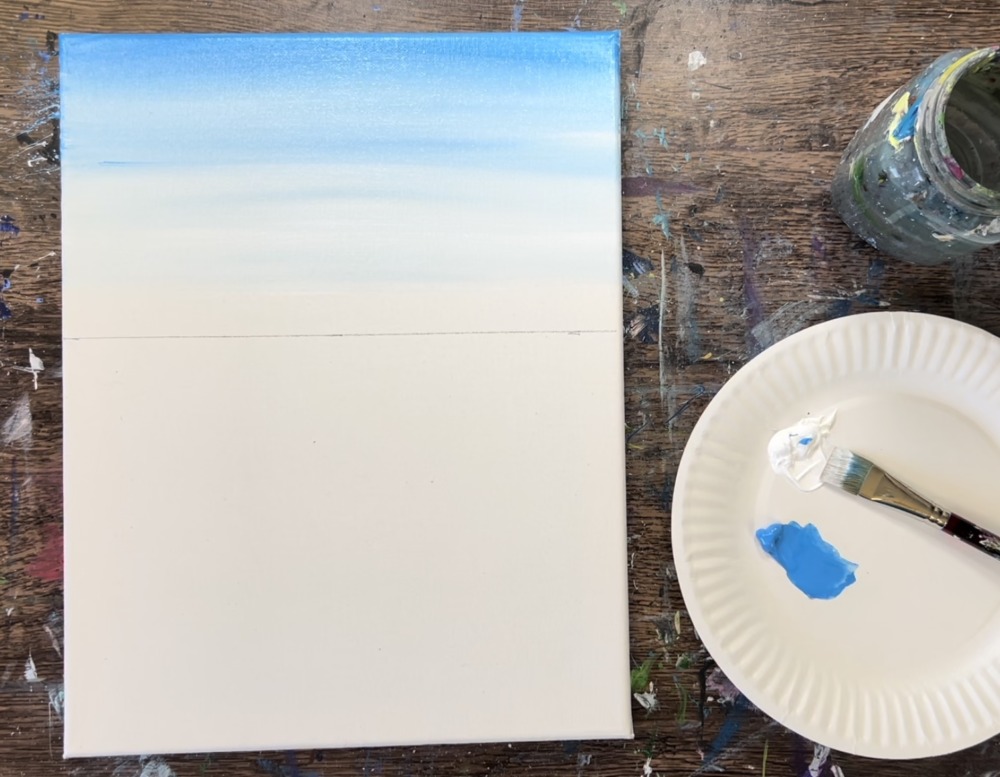
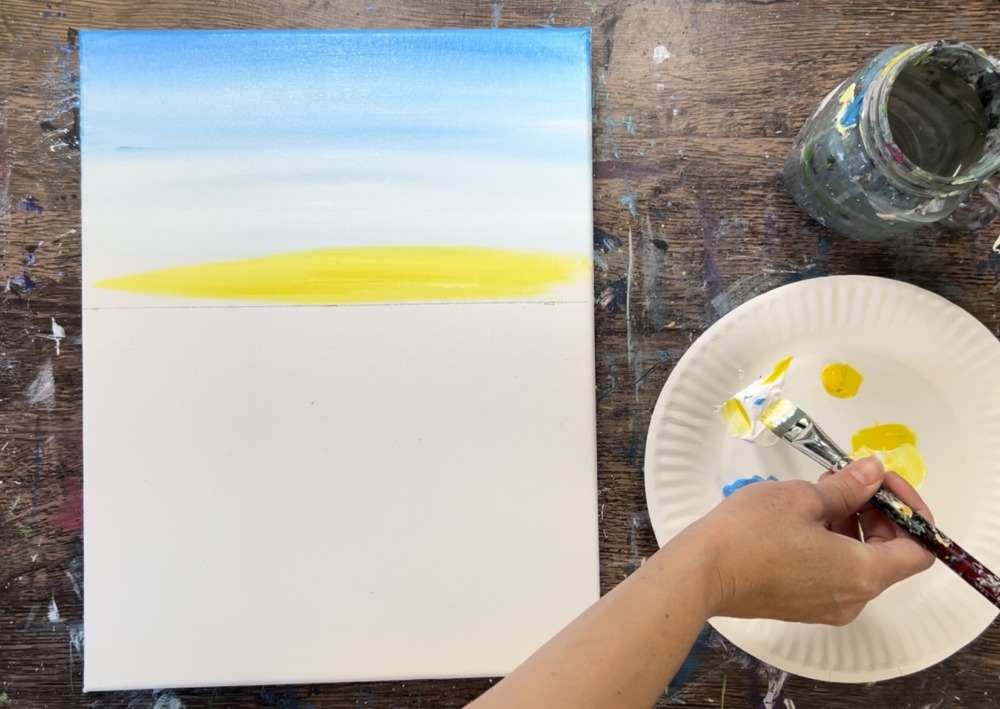
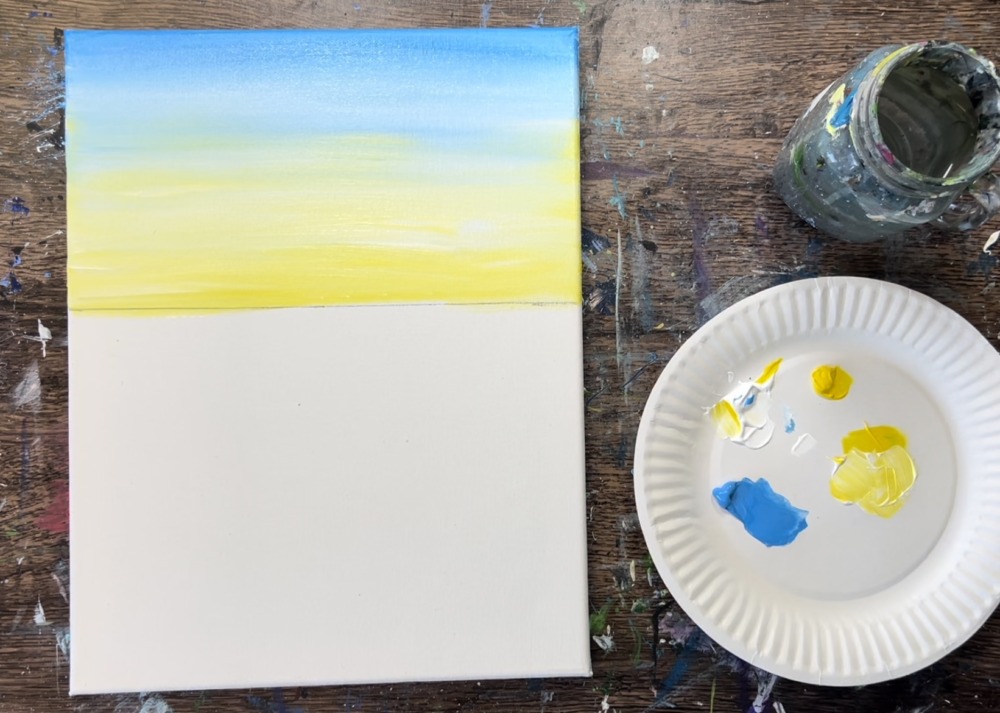
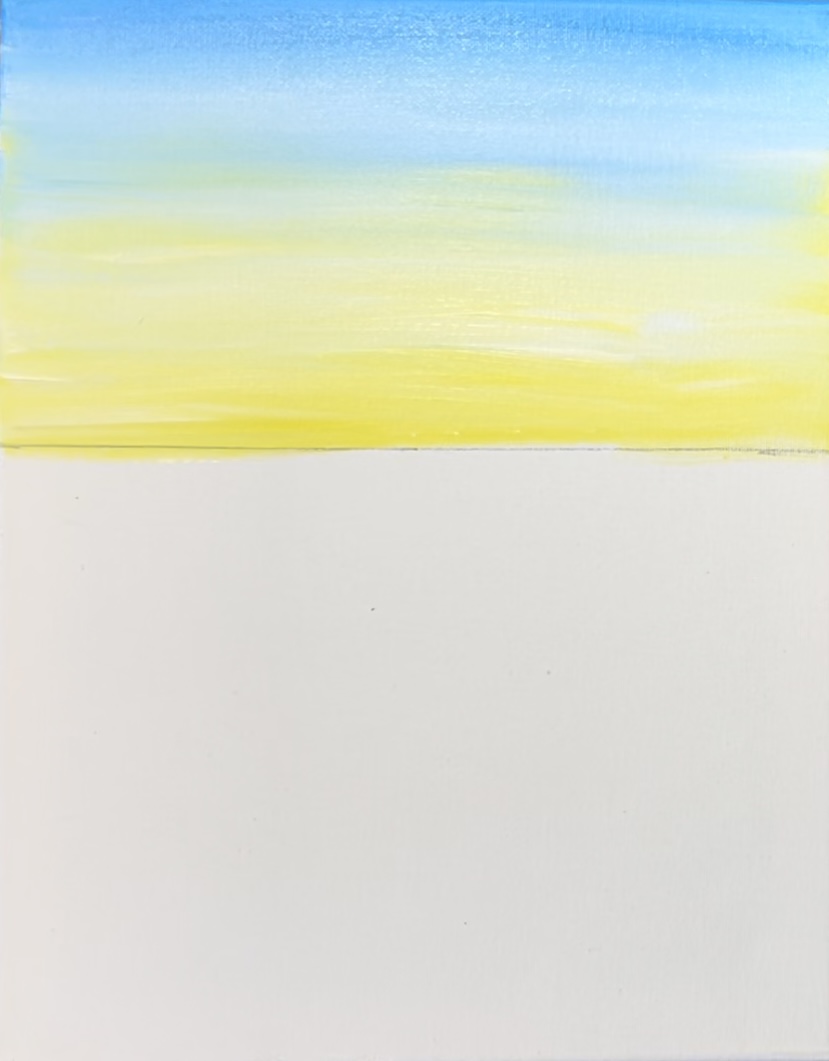
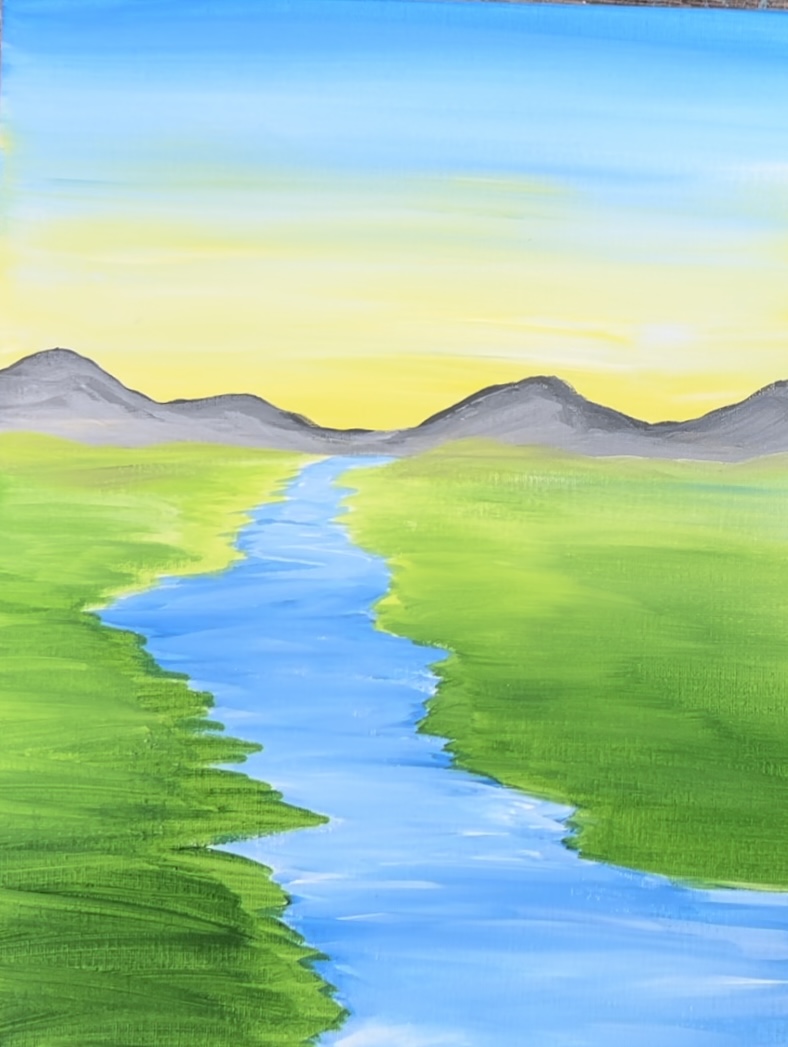
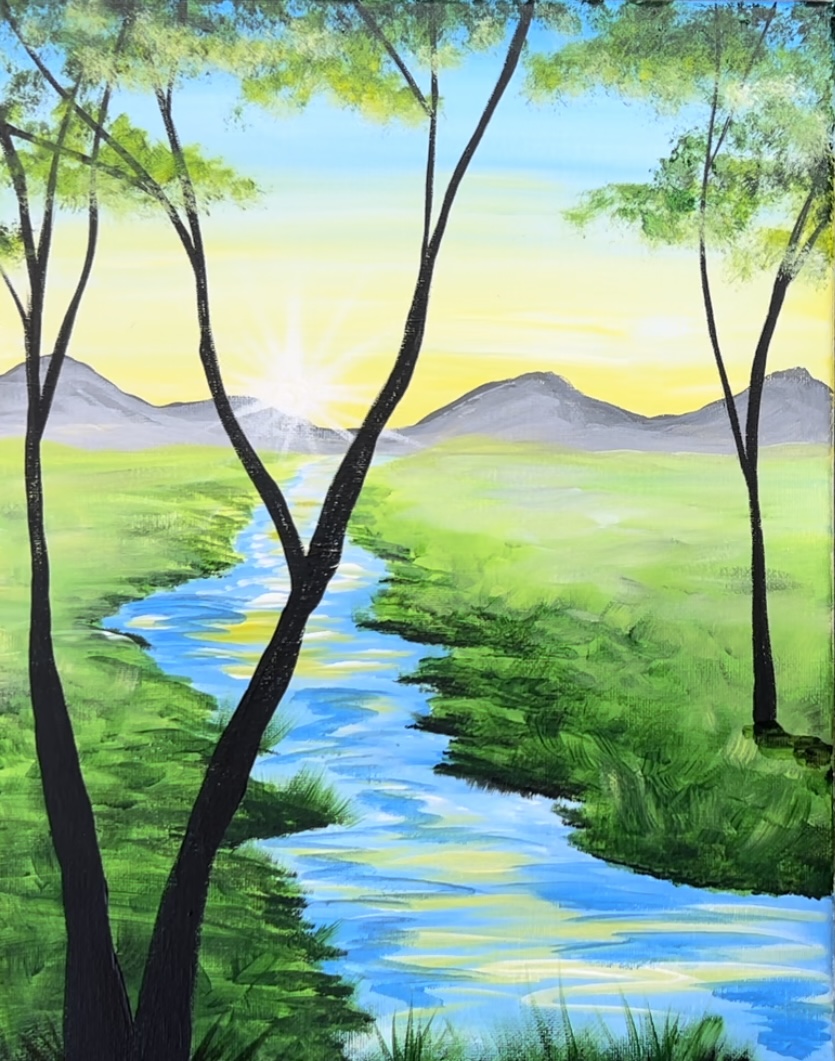
1. Paint Sky
Load your palette with cerulean blue & titanium white.
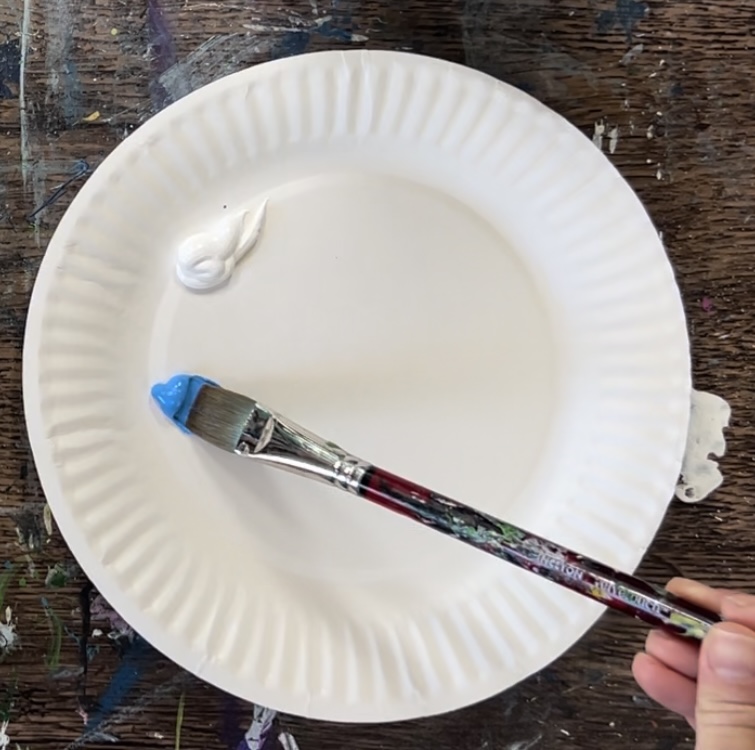
Load the 3/4″ flat wash brush into cerulean blue and start at the top of the canvas. Paint left and right strokes going all the way across the canvas. Then gently blend in titanium white so the blue gets lighter.
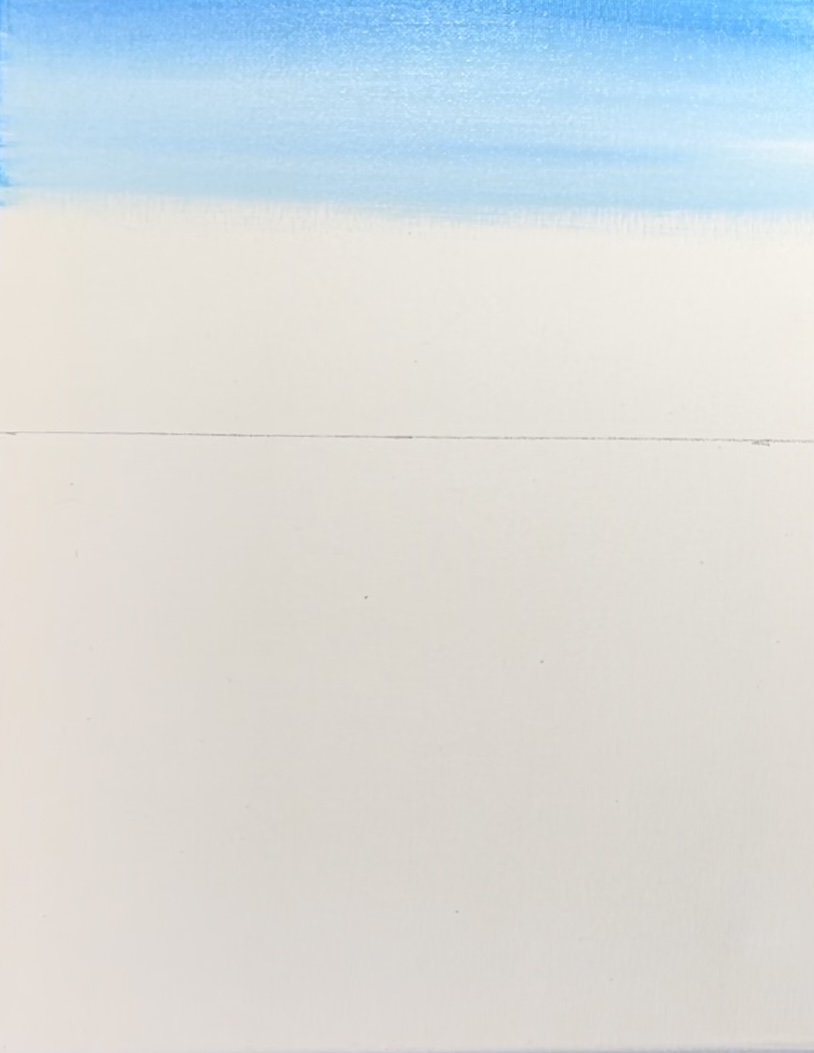
When you get to about the halfway point, wipe off the brush. Then load it into just titanium white. Paint titanium white the rest of the way down the canvas.
Then load your palette with primary yellow. Mix white and primary yellow together on your palette (about equal amounts). Then start at the bottom just above the horizon line. Paint left and right strokes blending the yellow up into the white and blue area. Try not to over blend or you will get a green area in the sky.
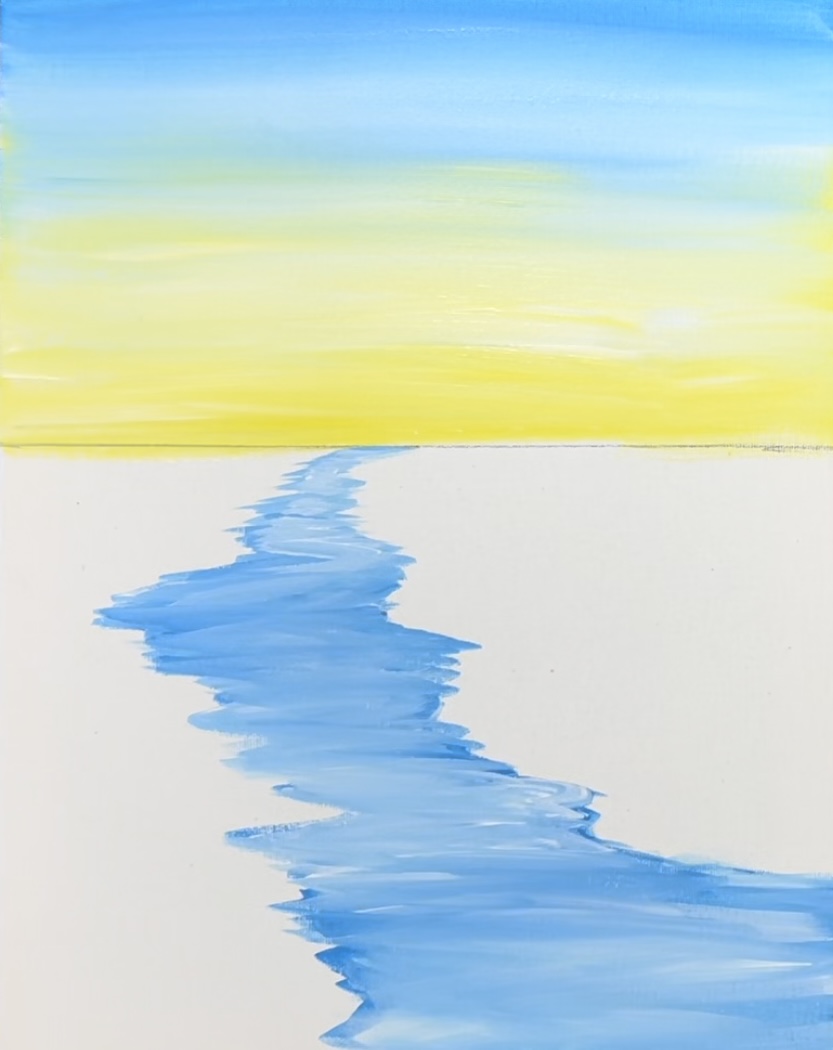
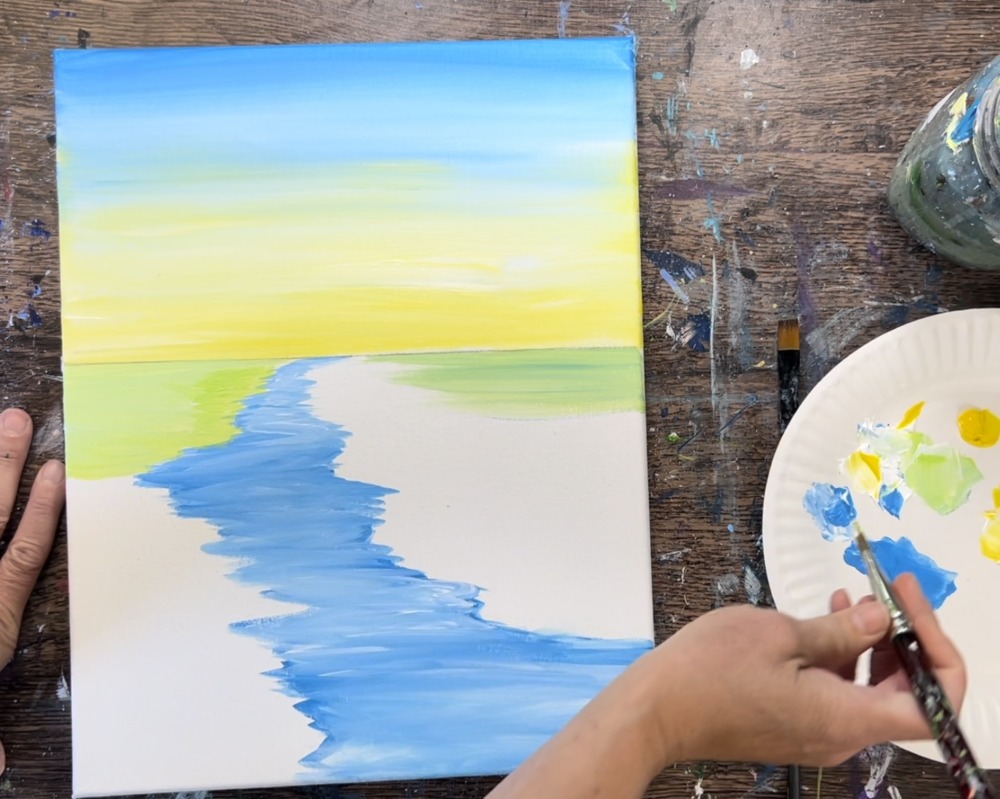
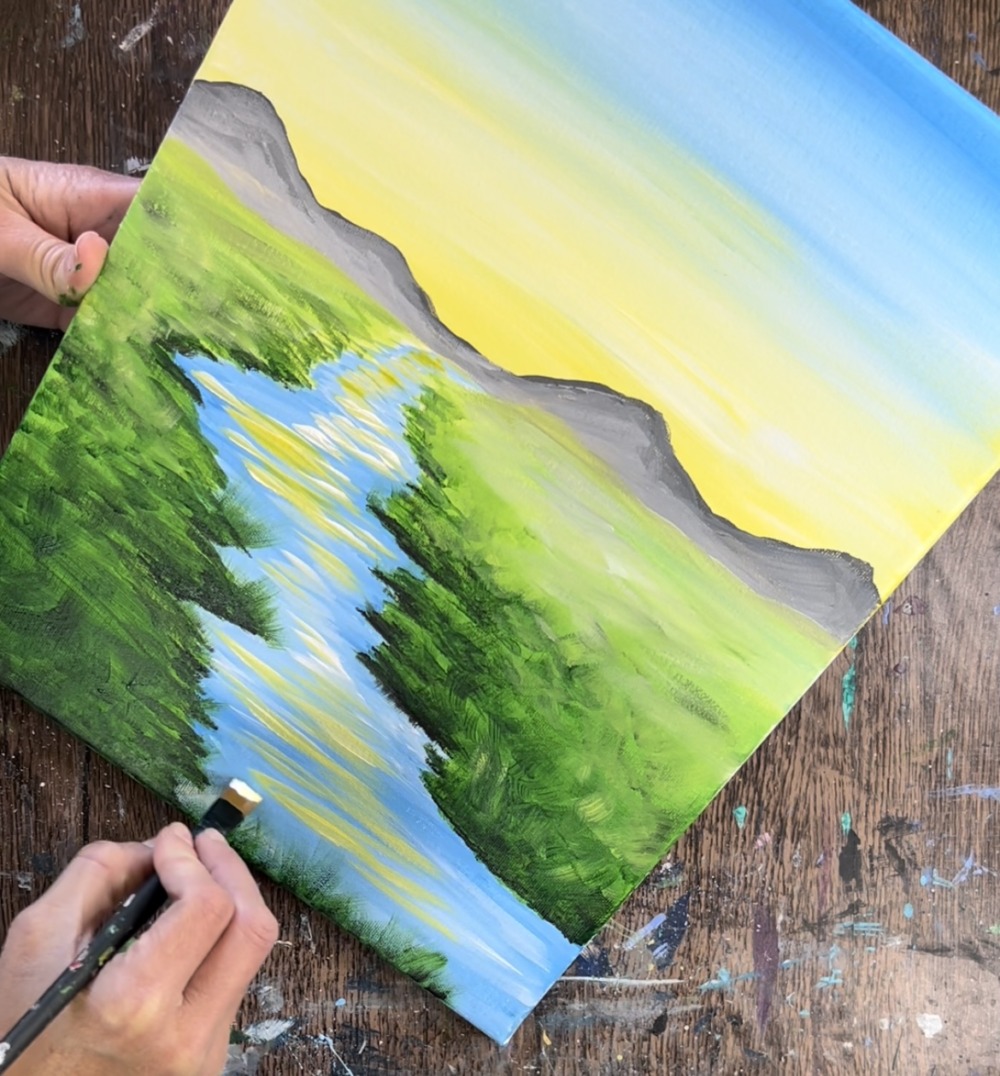
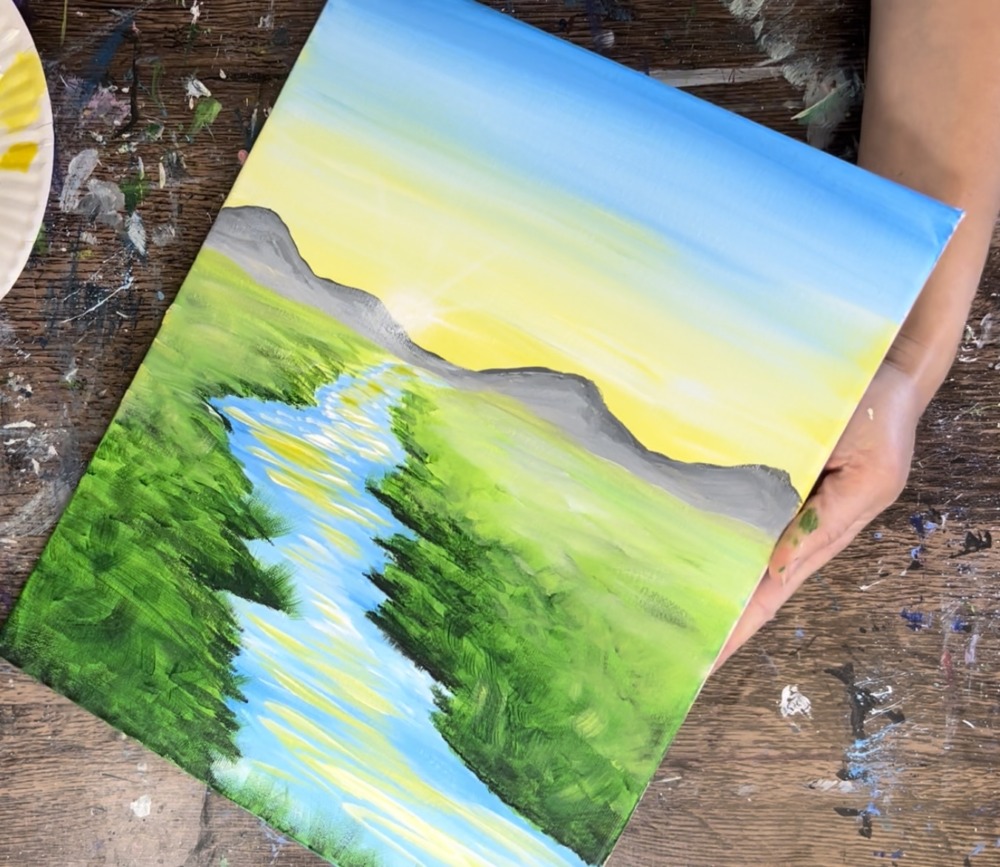
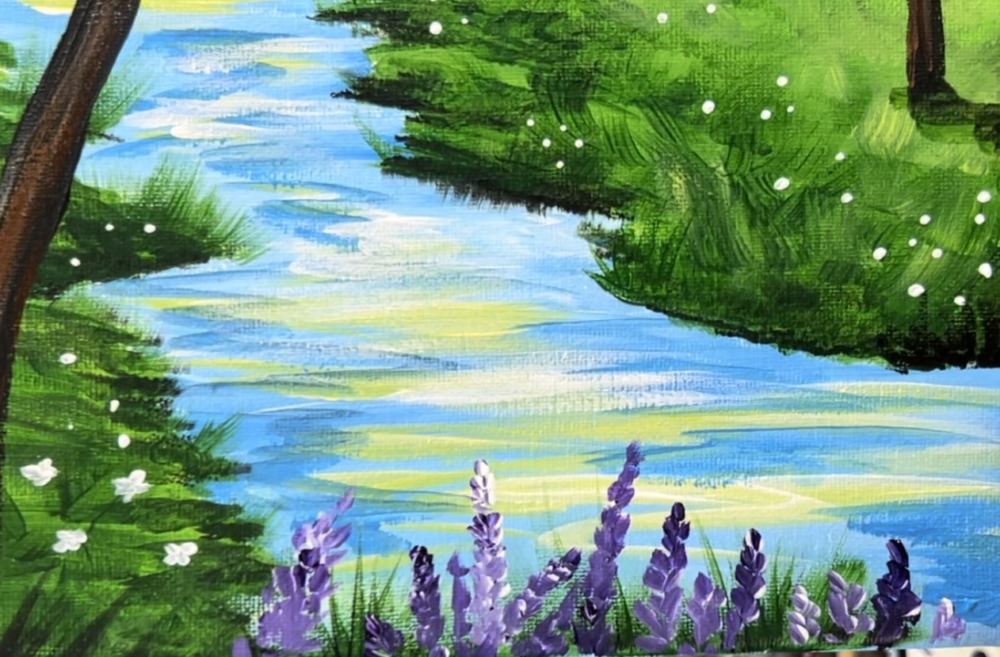
2. Paint River
Use the 12 bright brush to paint the river. Mix equal parts cerulean blue and titanium white on your palette. Start at the horizon line, off-centered towards the left. Use the very tip of your brush to paint left and right strokes.
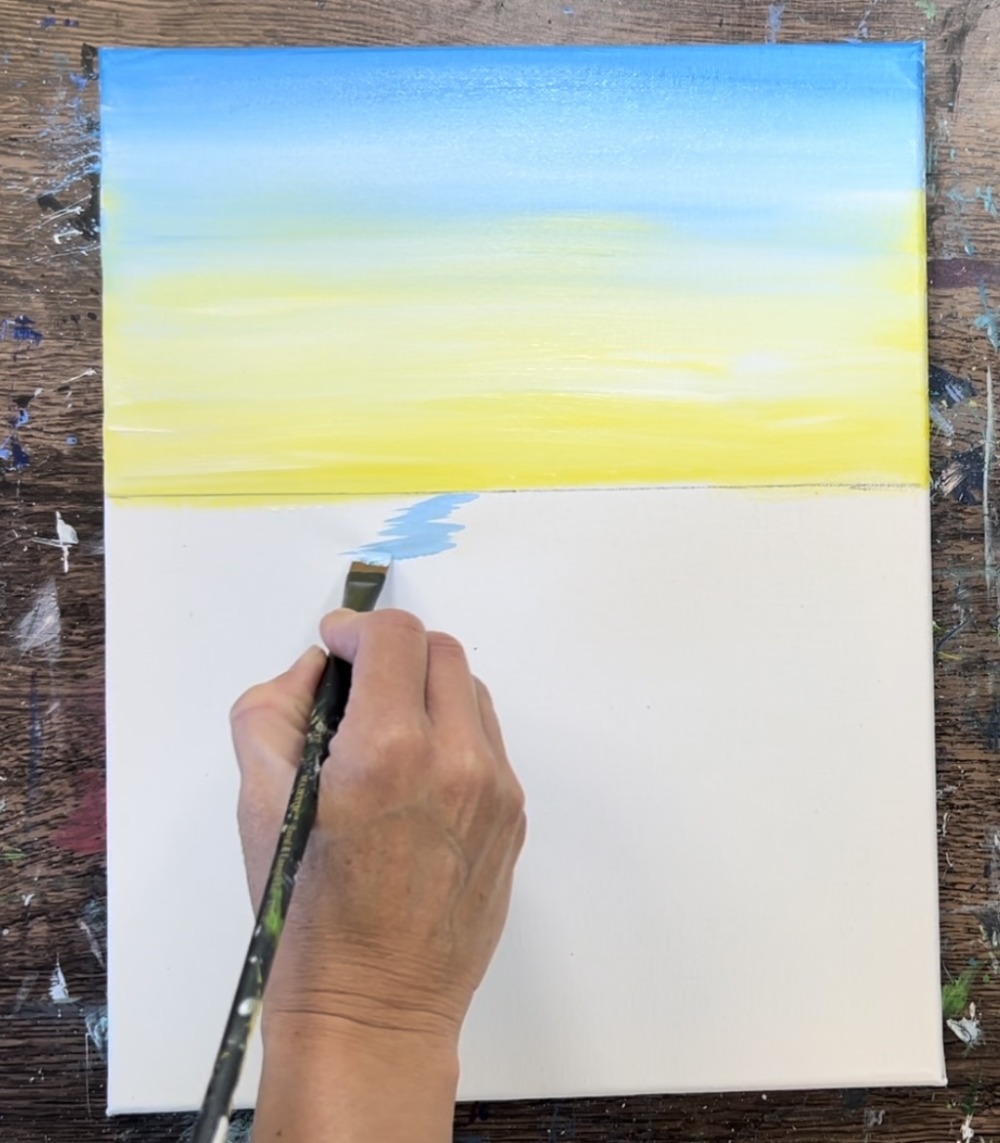
Wiggle your hand left and right to form the shape of the river. This river shape should be very narrow further away and then get wider is it approaches the bottom of the canvas.
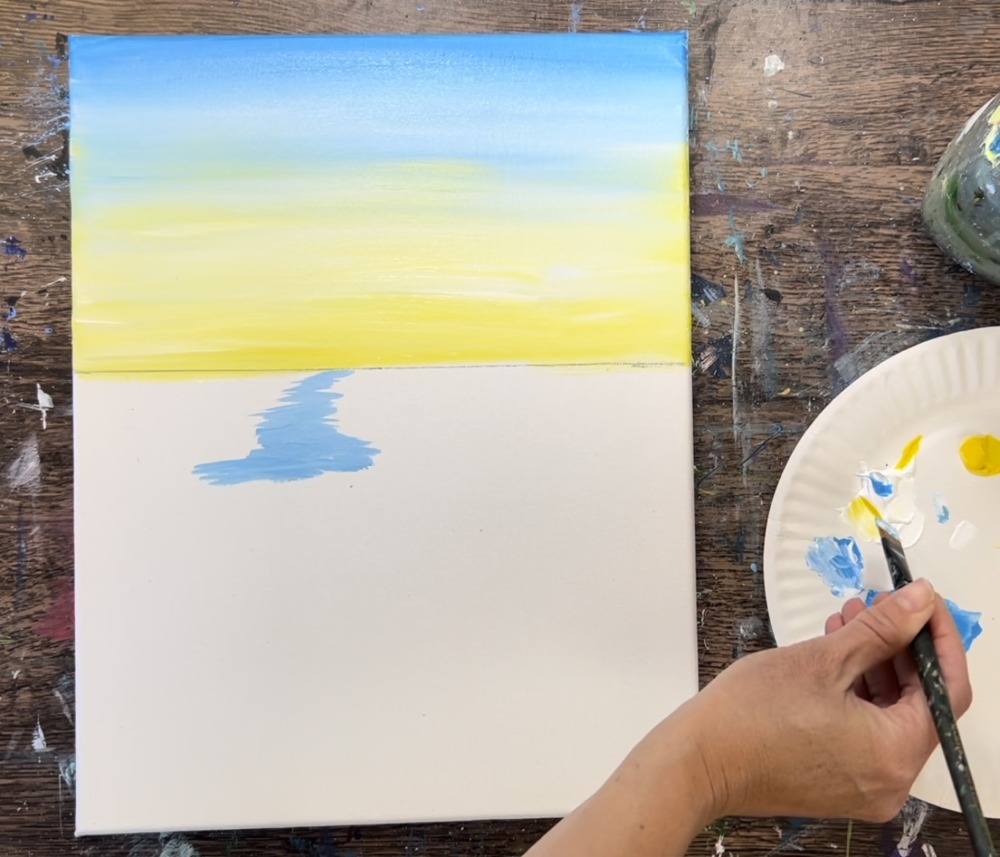
This river extends to the bottom of the canvas and the bottom left corner becomes all water.
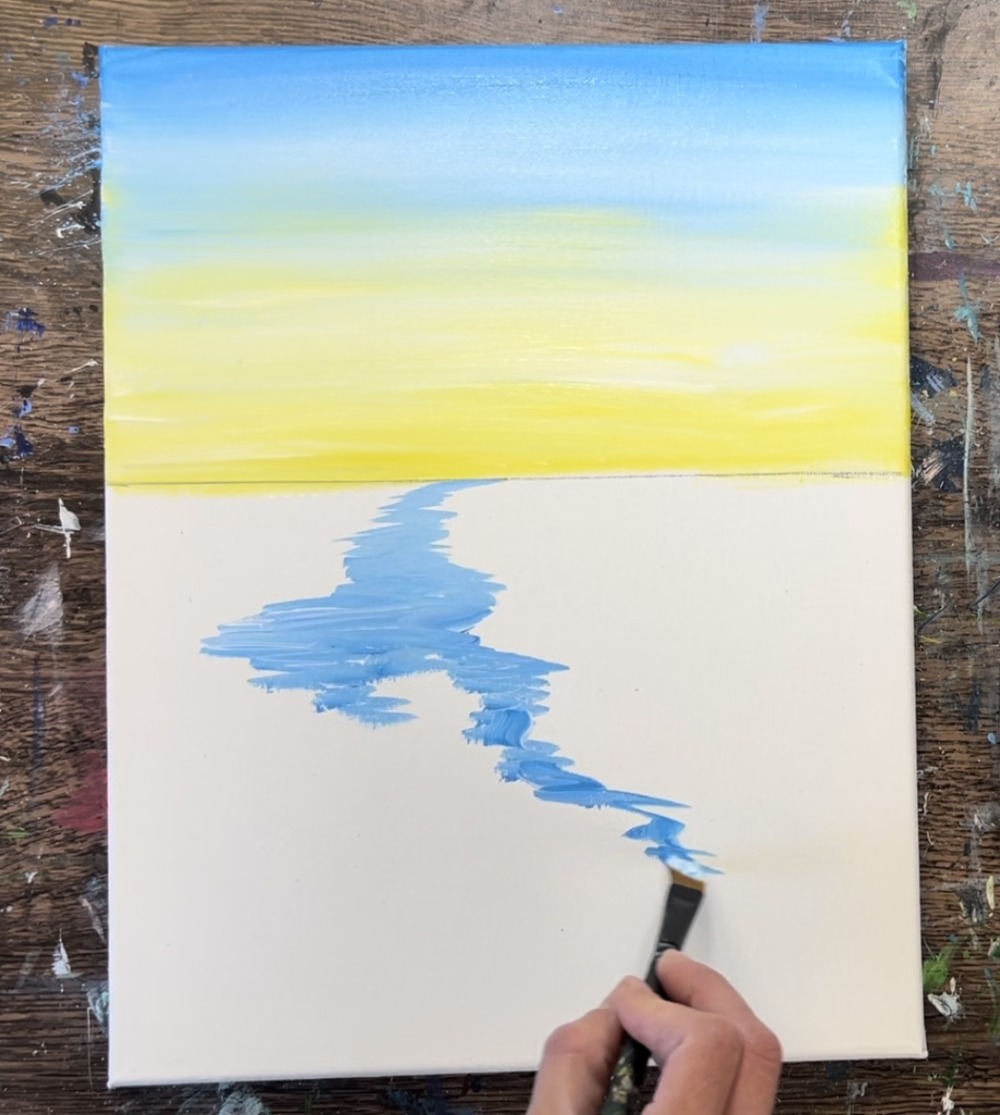
Fill the river with left and right strokes using equal parts cerulean blue and titanium white.
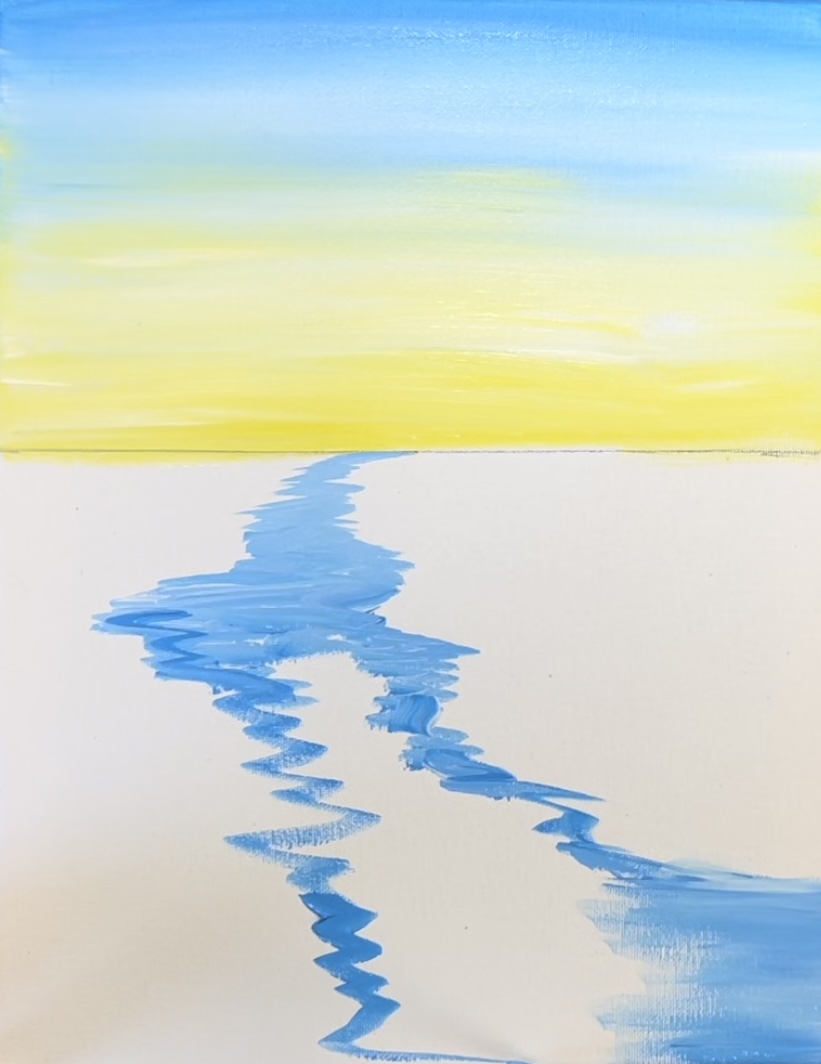
Gently blend more white into the blue but not all the way. Leave white streaks still showing throughout the river.
3. Paint Green Land Area
Load your palette with brilliant yellow green, hooker’s green hue permanent and mars black.
Mix a very light “spring green” color on your palette by mixing about equal parts titanium white and brilliant yellow green together.
Use the 3/4″ flat wash brush and start below the horizon line. Paint left and right strokes to fill the top of the land with this light green color.
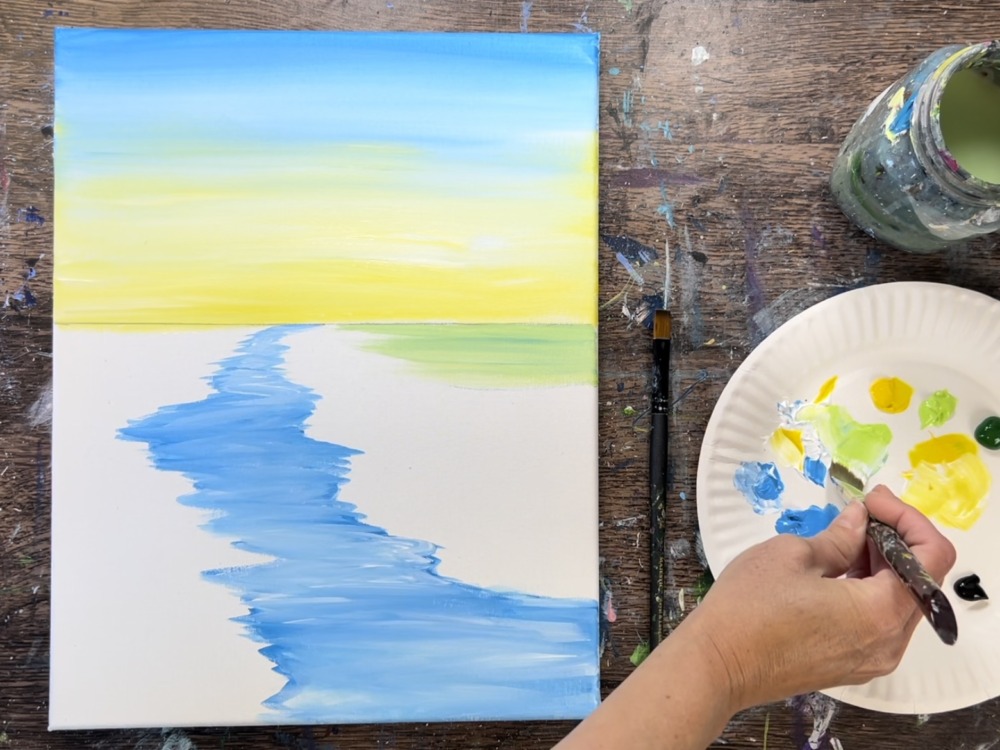
Do this on both sides of the river. Fill in the land as close as possible to the river.
As you work your way down, gradually add the darker green (hooker’s green hue) so the land becomes darker towards the bottom.
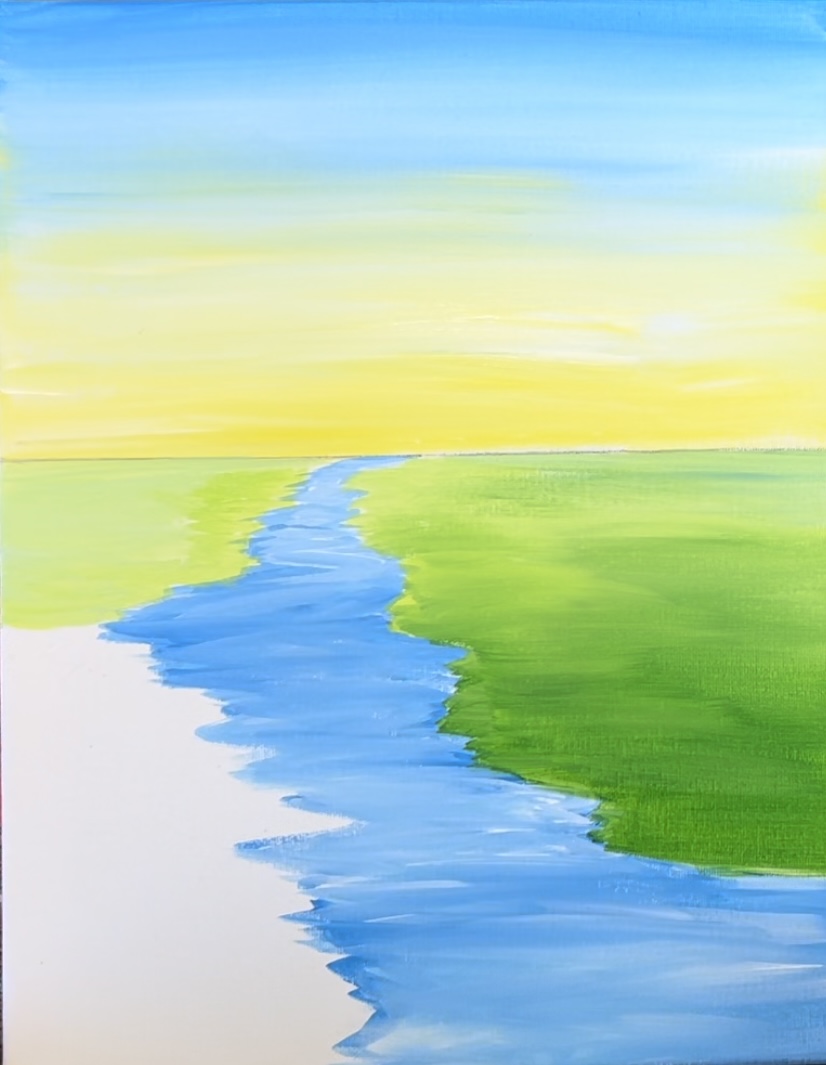
Paint the land on both sides of the river making sure the green is lighter further away and darker towards the bottom.
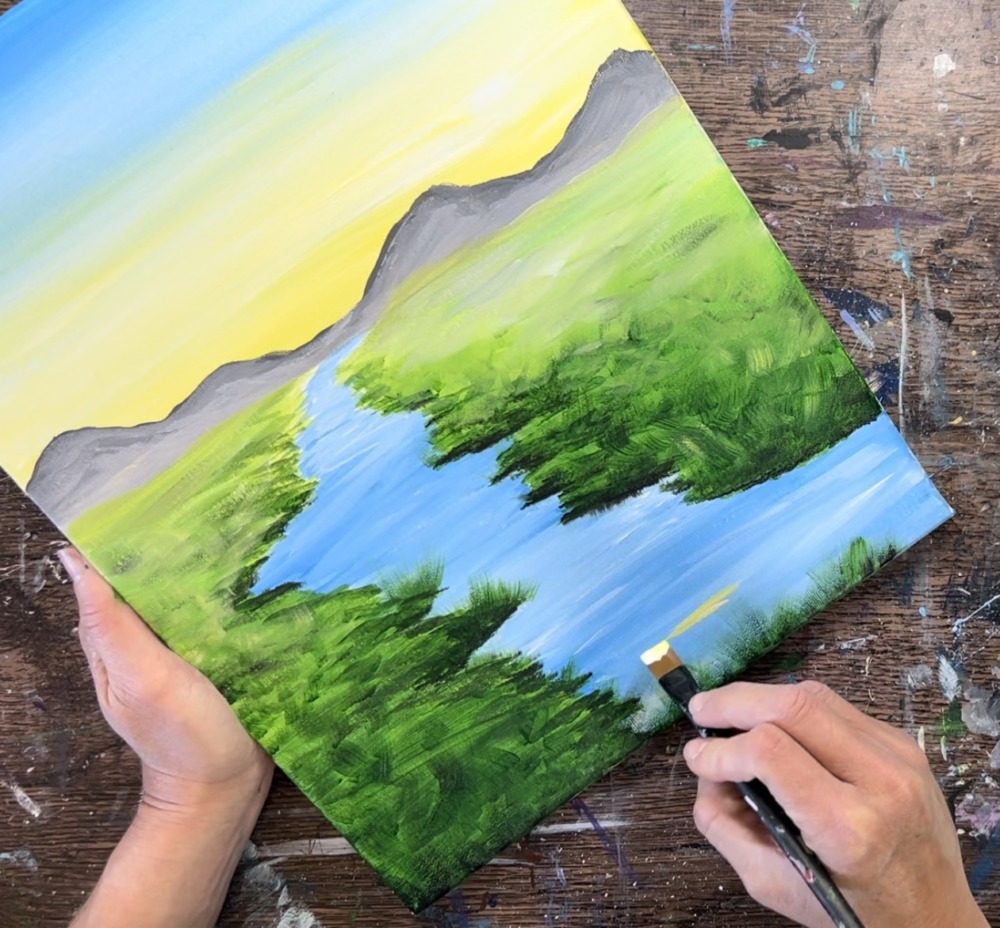
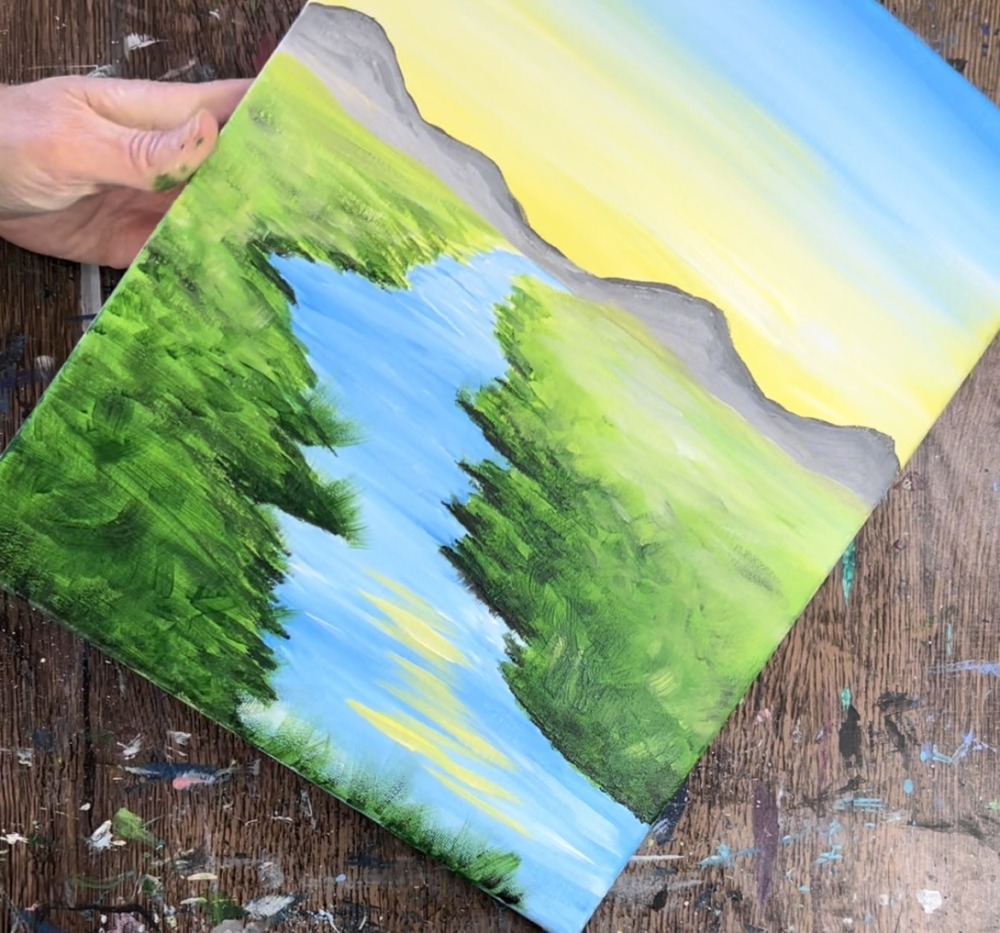
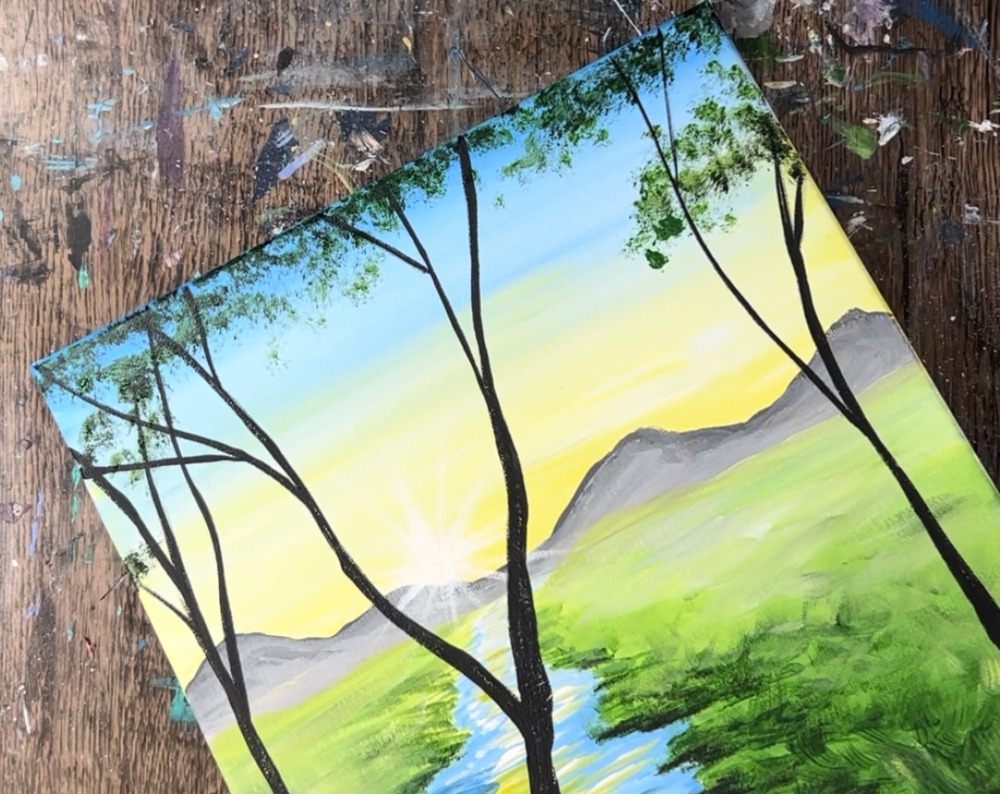
4. Paint Mountains
Mix equal parts mars black and titanium white on your palette. Use the 12 bright brush to paint the mountain range line. I did four peaks of varying heights. The edge of this line is not smooth and is a little wavy.
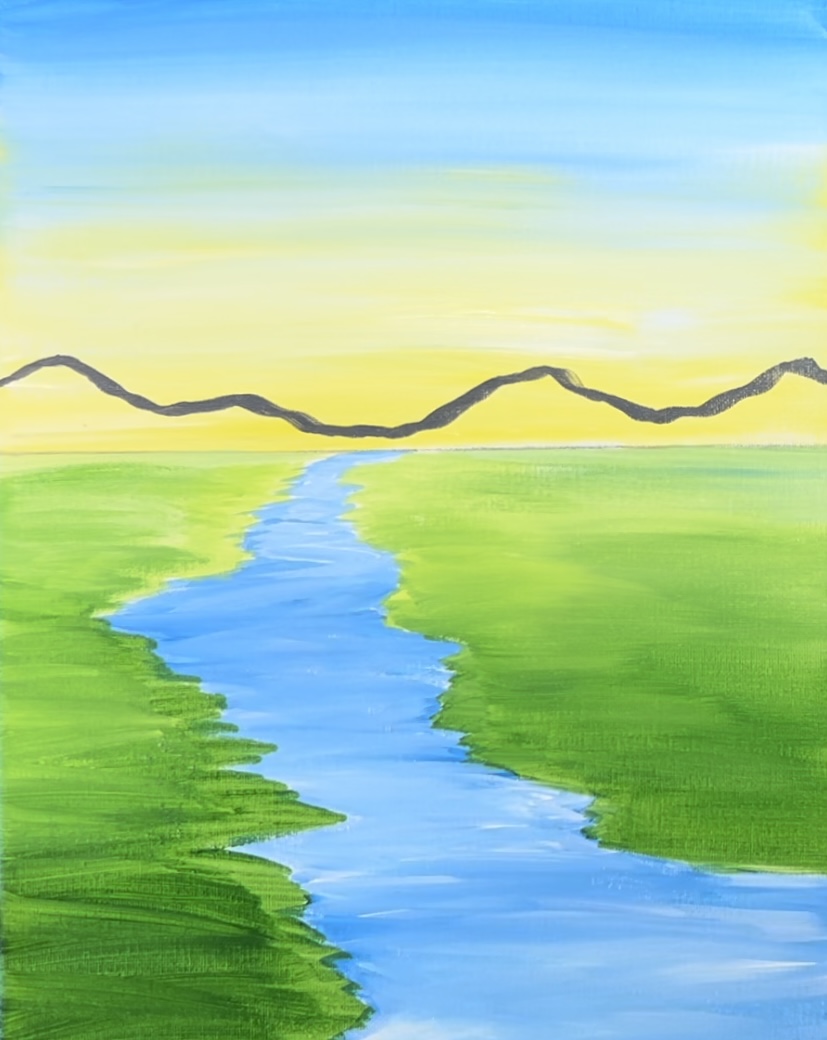
Then fill the mountain range in so the top of the mountain is darker gray and the bottom blends to a lighter gray. To get it to go to a lighter gray, add more titanium white to your brush and blend it on the bottom of the mountain.
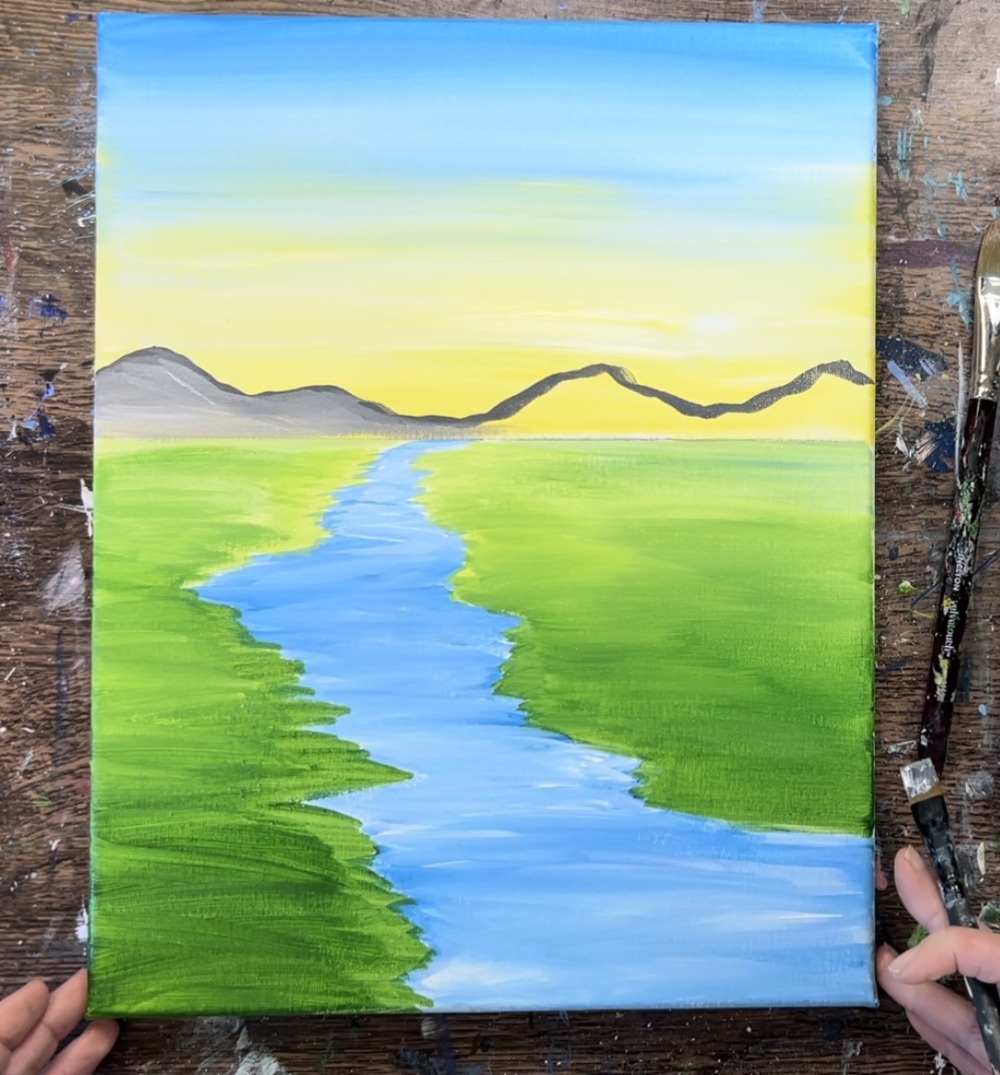
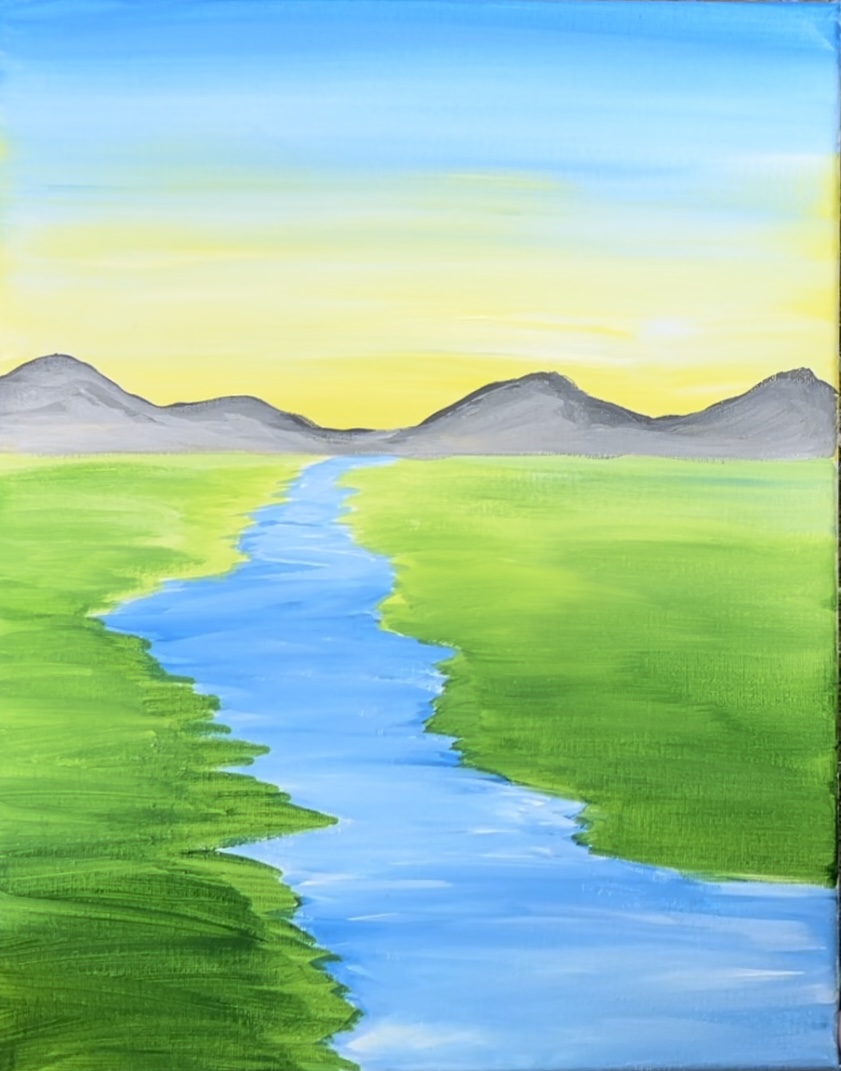
Then wipe the 12 bright brush off. Load it into brilliant yellow green. Paint the green land area so that it overlaps part of the base of the mountain. In other words, extend the land area up a bit so it is slightly hilly way in the distance.
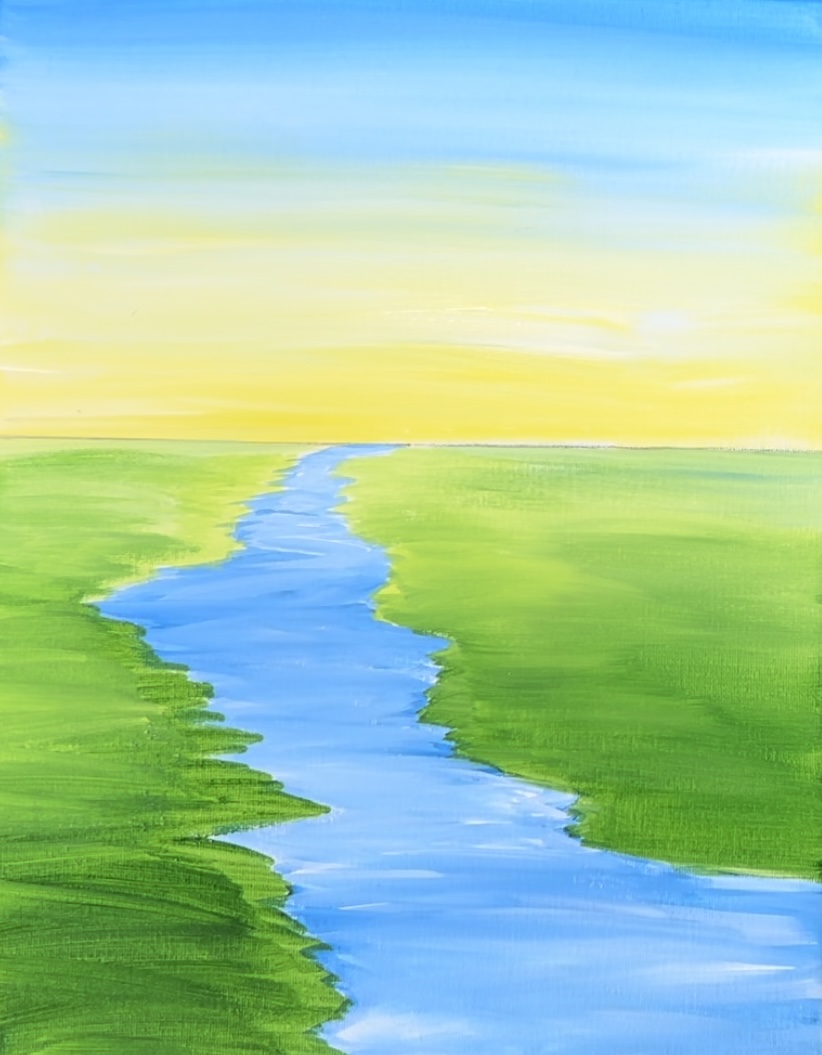
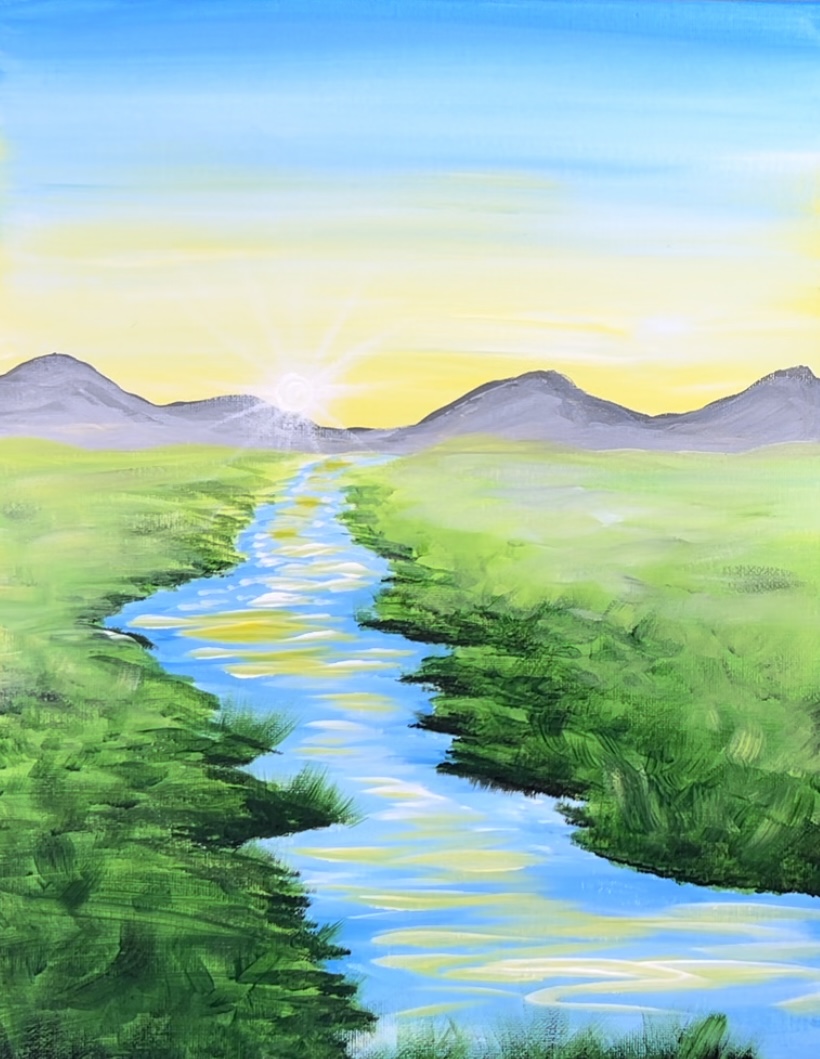
5. Paint Texture On Land (optional advanced step)
Use a 12 bright brush and hooker’s green hue permanent to paint texture in the land. Use the tip of the brush to “stamp” texture in the landscape. Start on the edge of the river (the river banks). Paint this green on the horizontal edges.
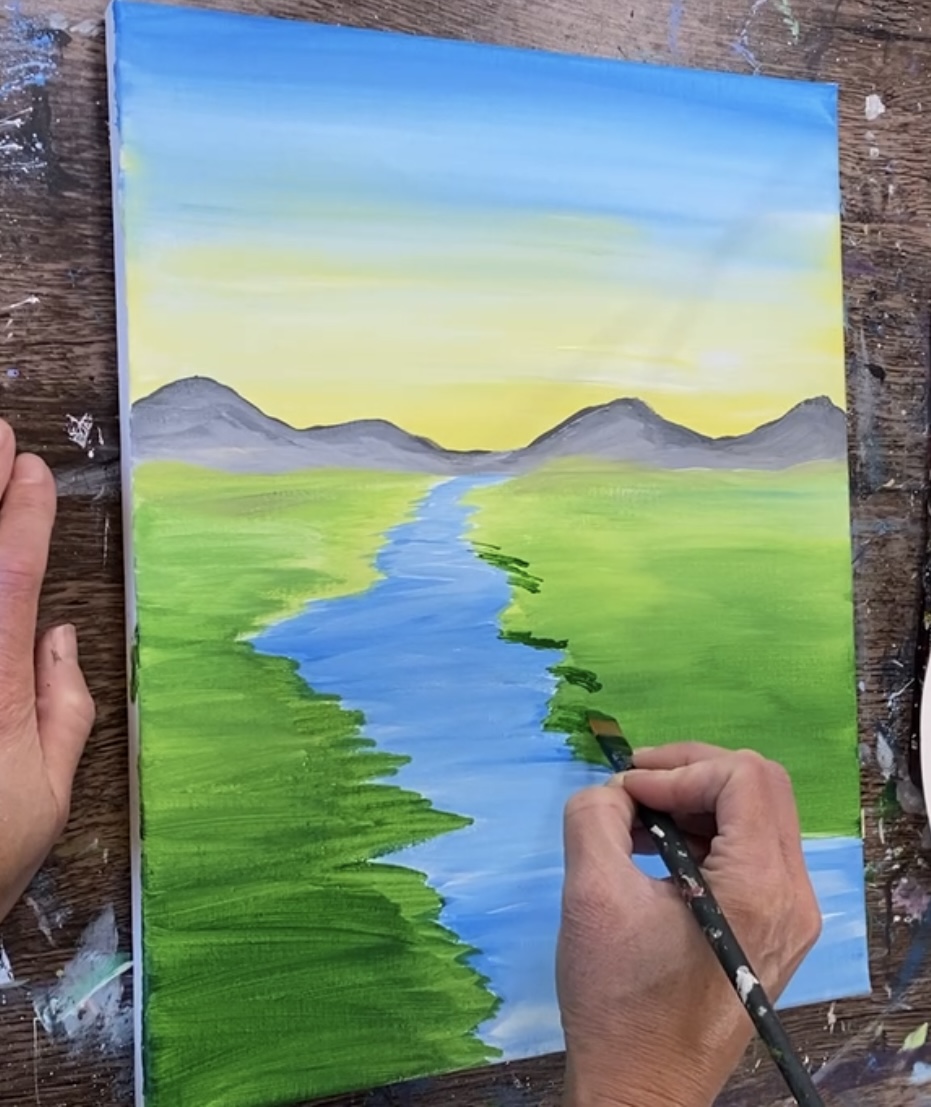
Paint textures in the middle and bottom area. You can also drag the full width of the brush upwards to create grass textures.
Add very tiny bits of mars black to the very tip of the brush. Then “dab” the tip of the brush just on the very edge of the river bank to make this darker and more shadowy.
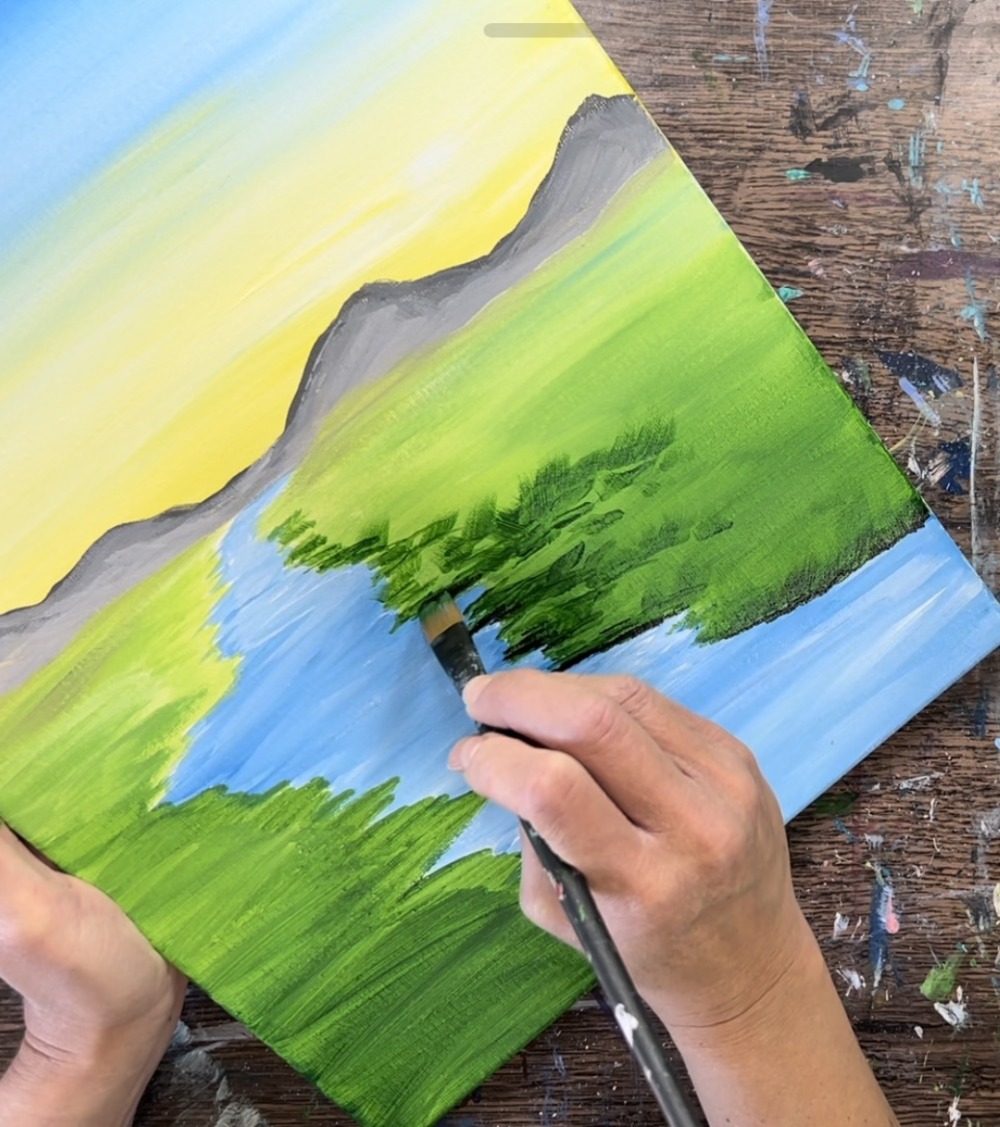
Repeat this on the other side of the river. You can also add lighter green into the texture areas as well. Try to keep the land that is way in the distance lighter and flatter.
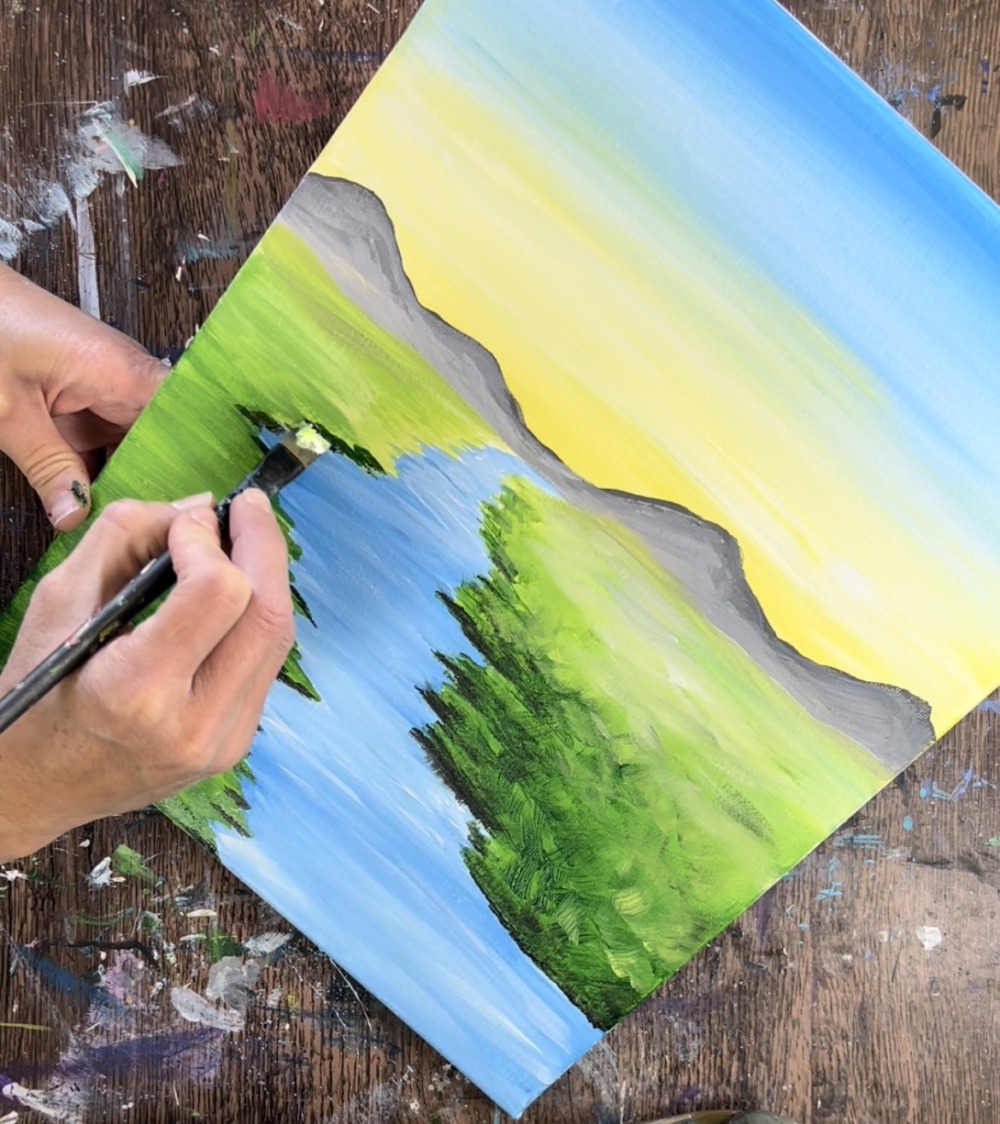
Add grass strokes on the bottom that overlap parts of the river. To do this, drag the full width of the 12 bright brush upwards in different angles.
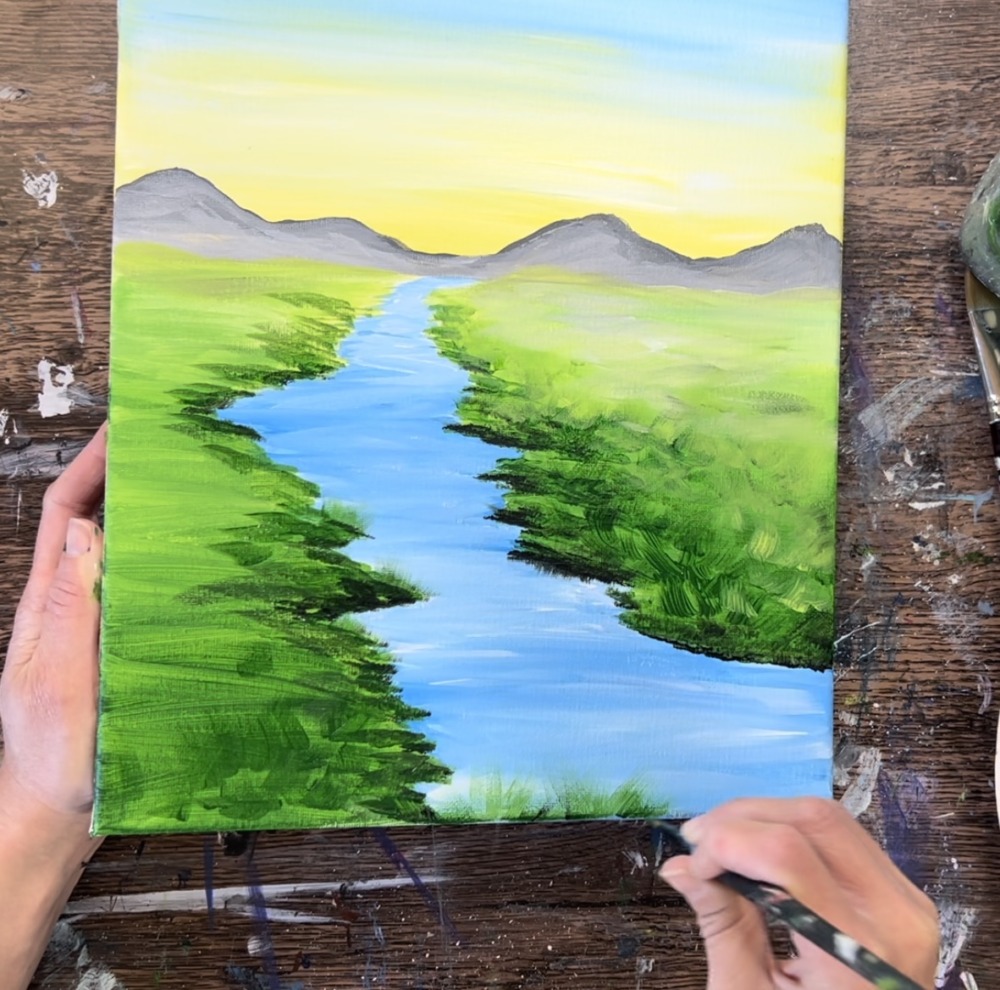
Add darker texture strokes on the bottom left area of the painting by using the hooker’s green hue with a tiny amount of mars black.
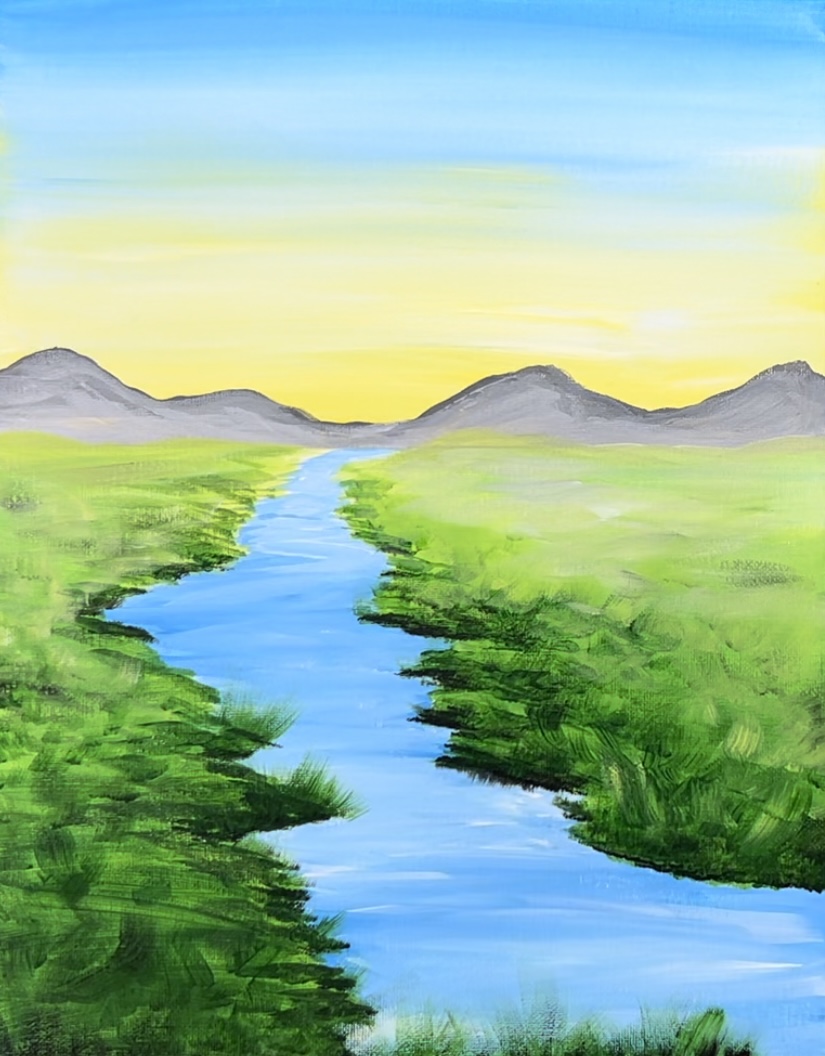
6. Paint Water Lines/ Reflection From Sky
Use a clean and dry #12 bright brush. Load it into equal parts primary yellow and titanium white. Paint left and right strokes to create water line reflection in the river.
Do this very loosely throughout the river area. Try not to cover all of the blue in the water.
Add strokes of titanium white in the water area as well.
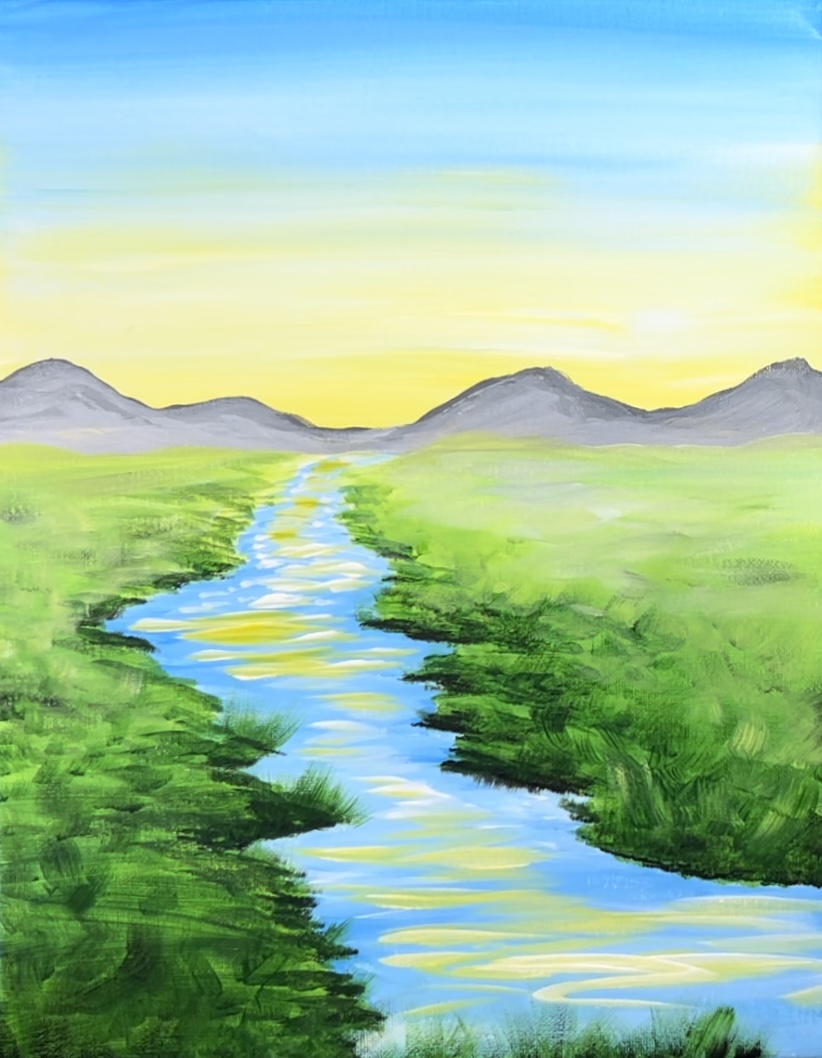
7. Paint Sun
Use a #4 round brush and titanium white. Paint a very small circle on the edge of the mountain range just left of the end of the river.
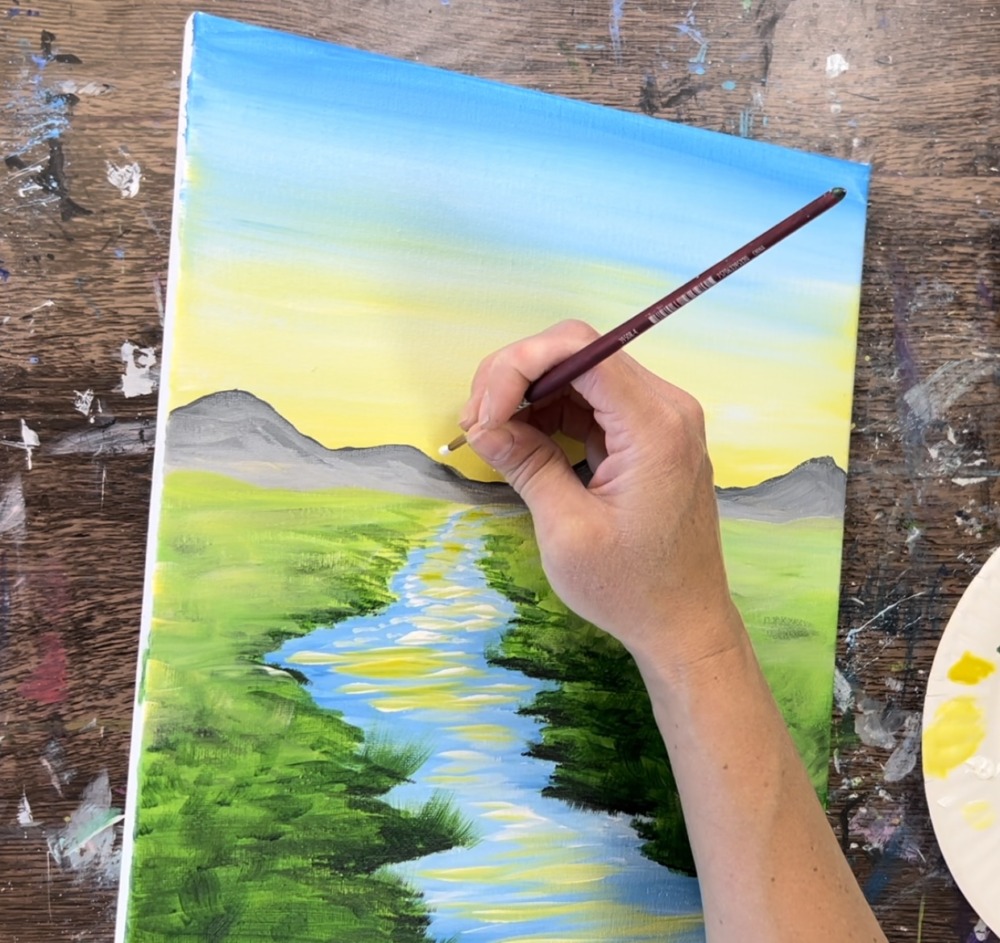
Then take your finger and smear the circle so that it becomes a “blurry glow” that overlaps the sky and part of the mountain range.
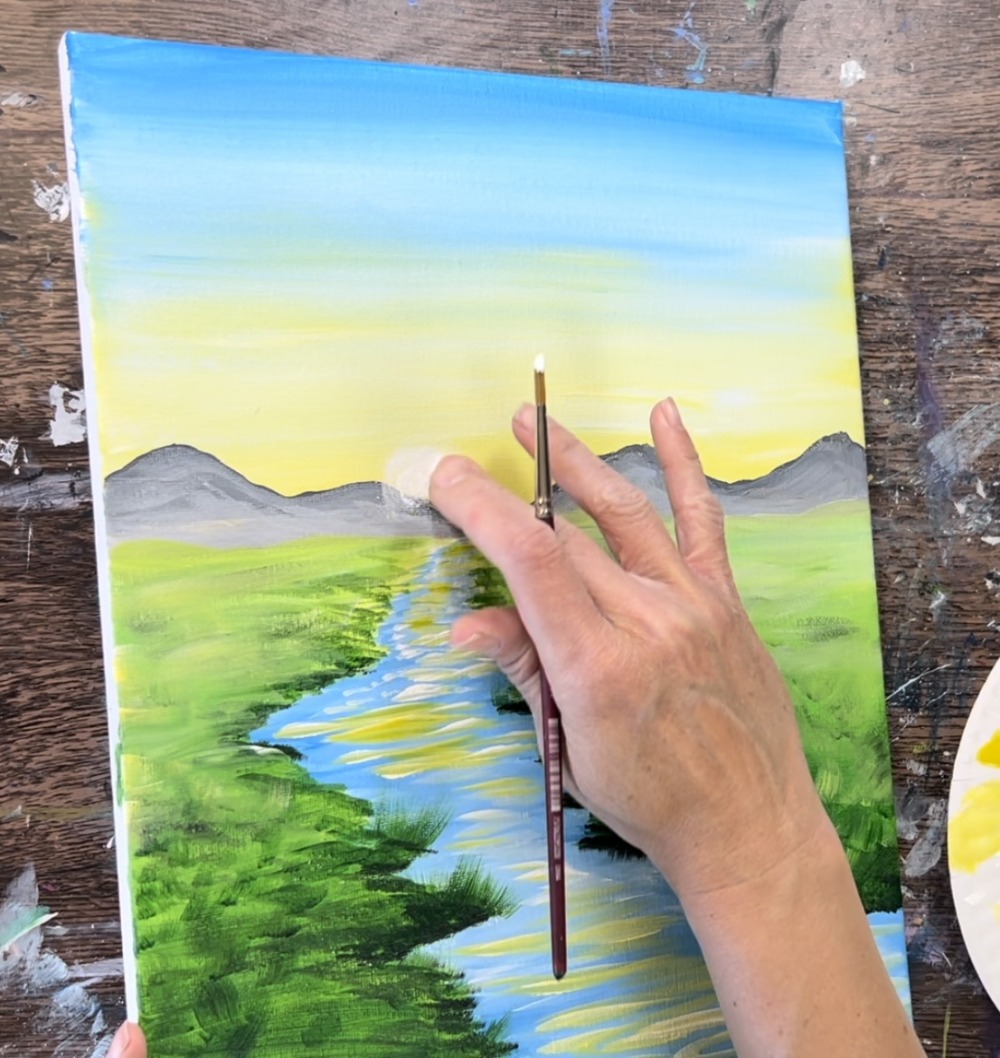
Then take your #4 round brush and drag the “sun rays” in a circular direction all around the circle. These rays are “dry brush” style. This means you only load a very small amount of white on your brush and drag it quickly outwards from the circle to form each of the rays. If you load too much white on your brush, you won’t get the effect that the rays are glowing (you don’t want the white to be too opaque).
Then paint a solid white circle for the actual sun. This should be smaller than the original “glow” you painted and smeared with your finger.
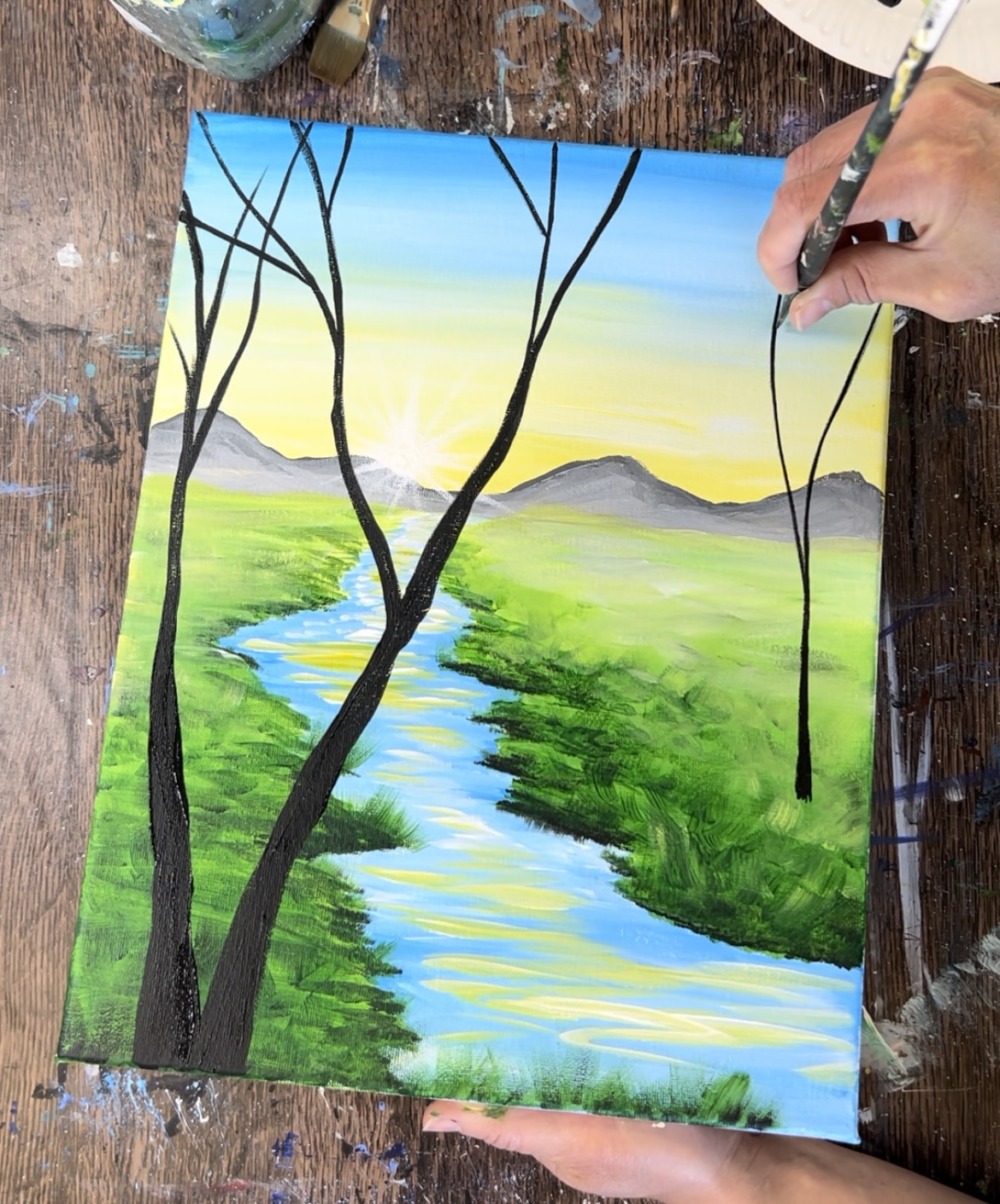
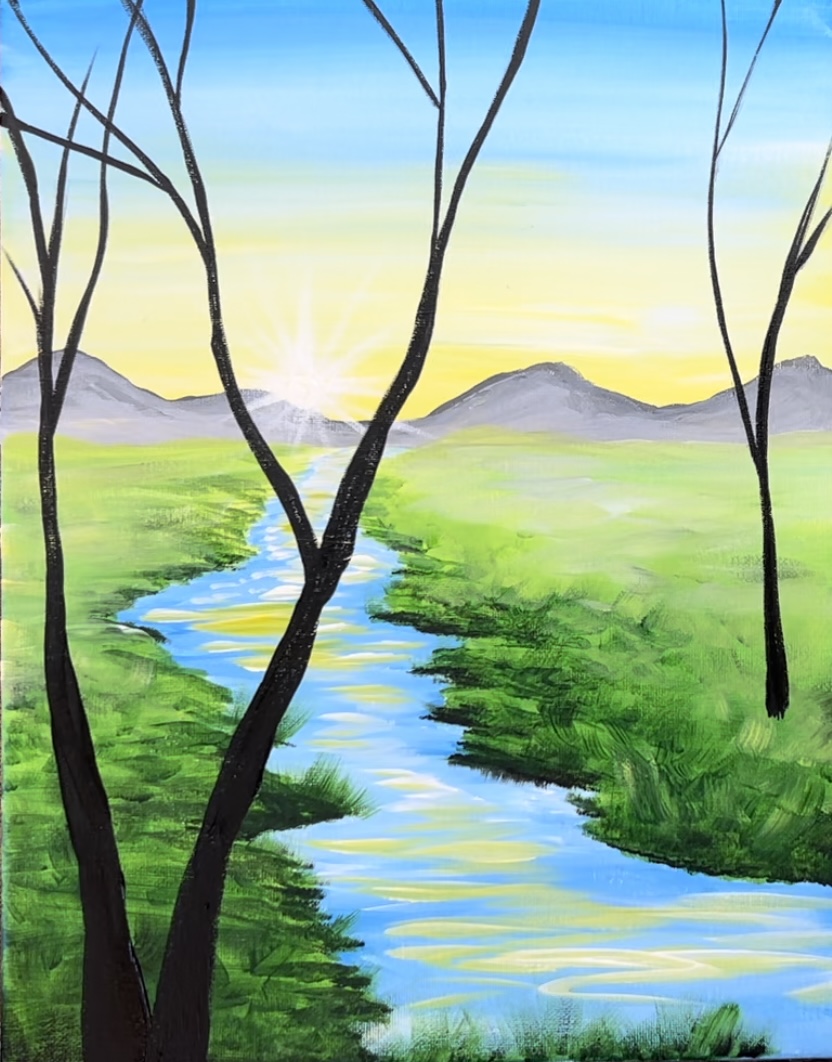
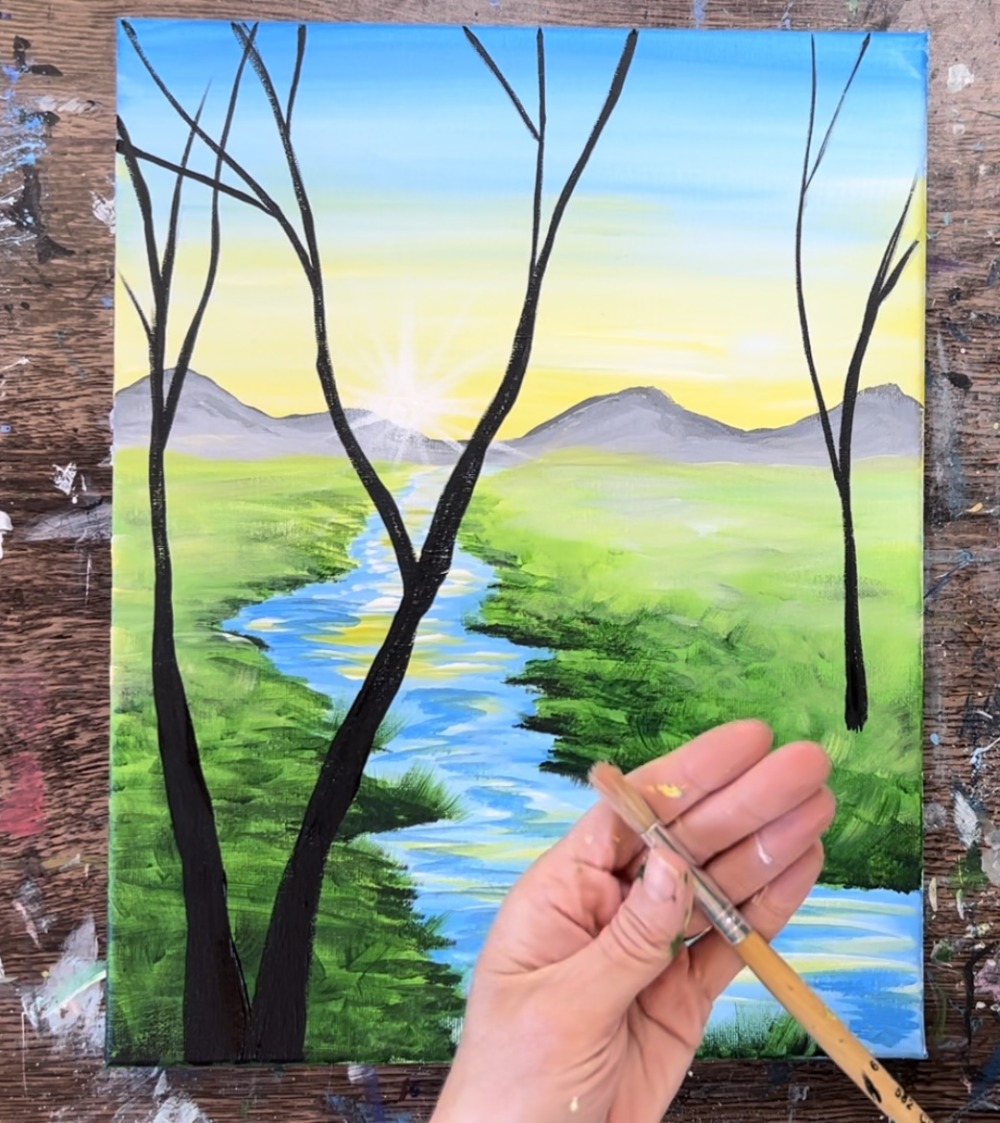
8. Paint Trees
Load your palette with mars black. Add a very small amount of water to it to thin it down a bit. Use a 12 bright brush. Paint the first tree that divides the landscape from the bottom, across the river and off the canvas in the middle top of the sky. It may be helpful to draw this with chalk or pencil first.

Make sure the base of the tree is wider. The trunk gets thinner as it splits into a “wishbone shape” with the sun in between the branches. To get the thinner branches, use the brush on its side to paint thinner lines.
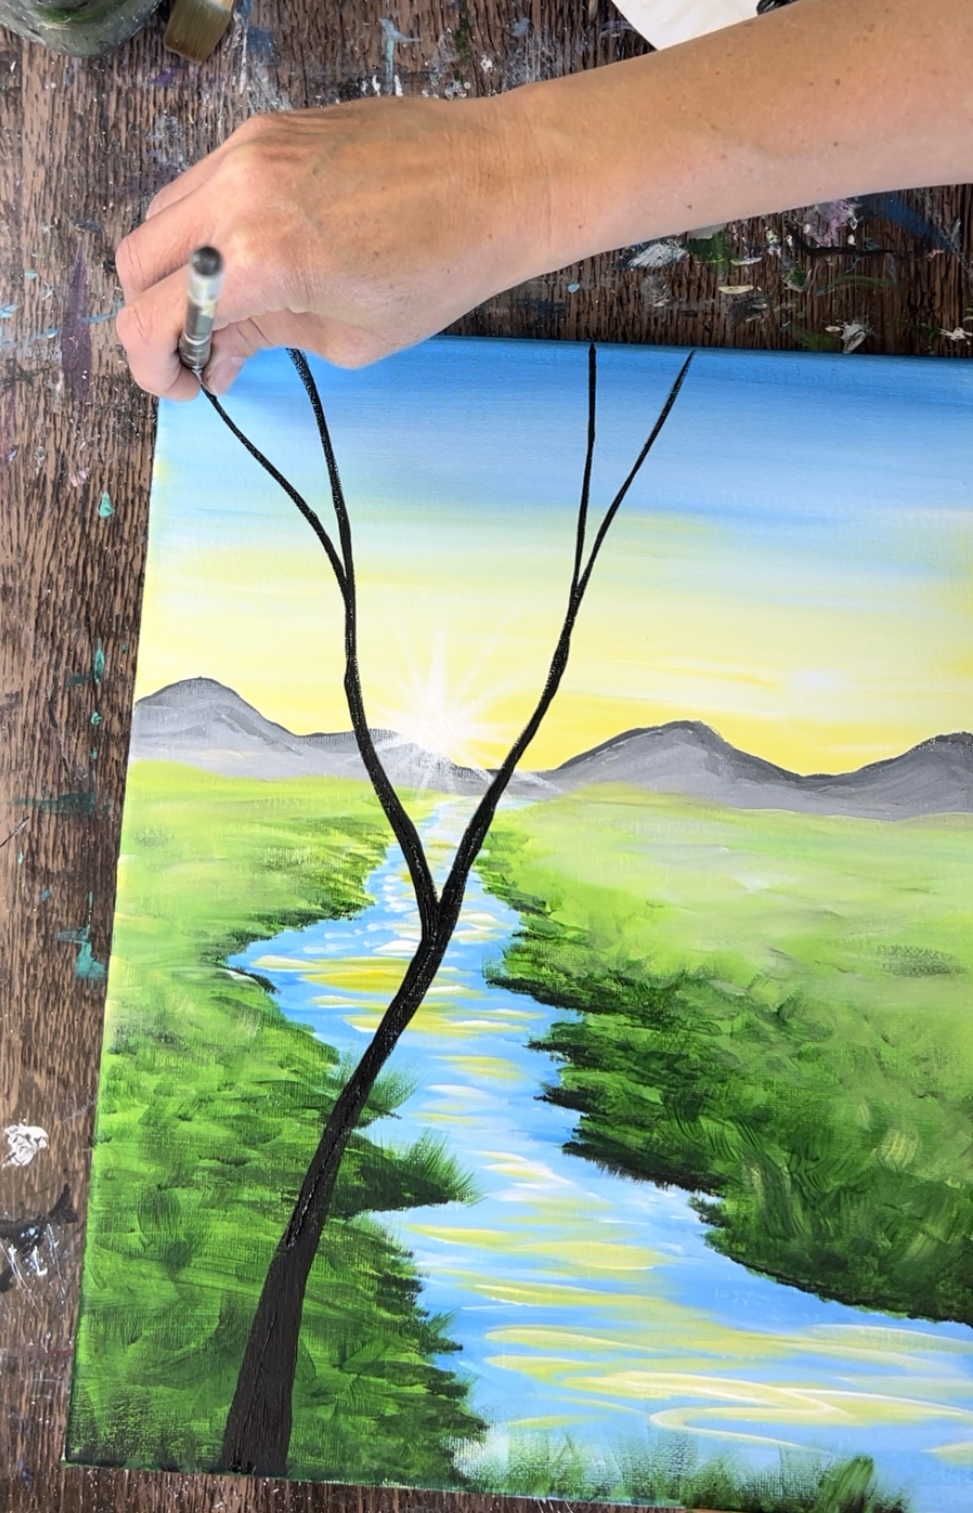
Then paint a second tree. This one’s base is right next to the first one but it sways to the left. The branches of this tree may have to overlap the branches of the first tree. Make sure the branches of both of these trees go all the way to the top edge of the canvas.
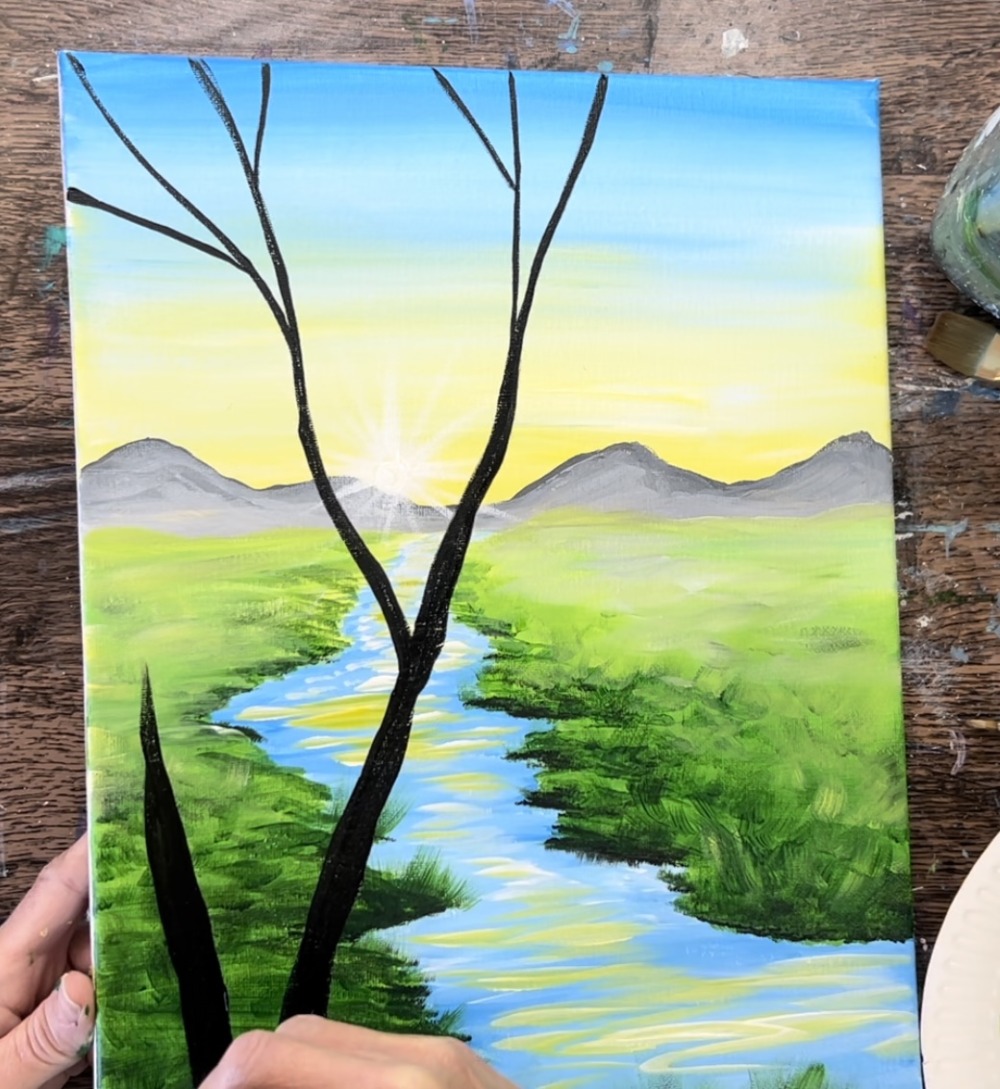
Paint a third three on the right side of the canvas. This one is a little further away so make sure the trunk is thinner than the other two trees. Also, make the branches go all the way to the top of the canvas.
To paint the foliage on the top of the trees, use a round bristle brush for texture. If you don’t have this type of brush, you can bundle q-tips together to create a similar effect.
Load the tip of the brush in a small amount of mars black and hooker’s green hue permanent. Then “dab” the brush in the top area of the tree canopy.
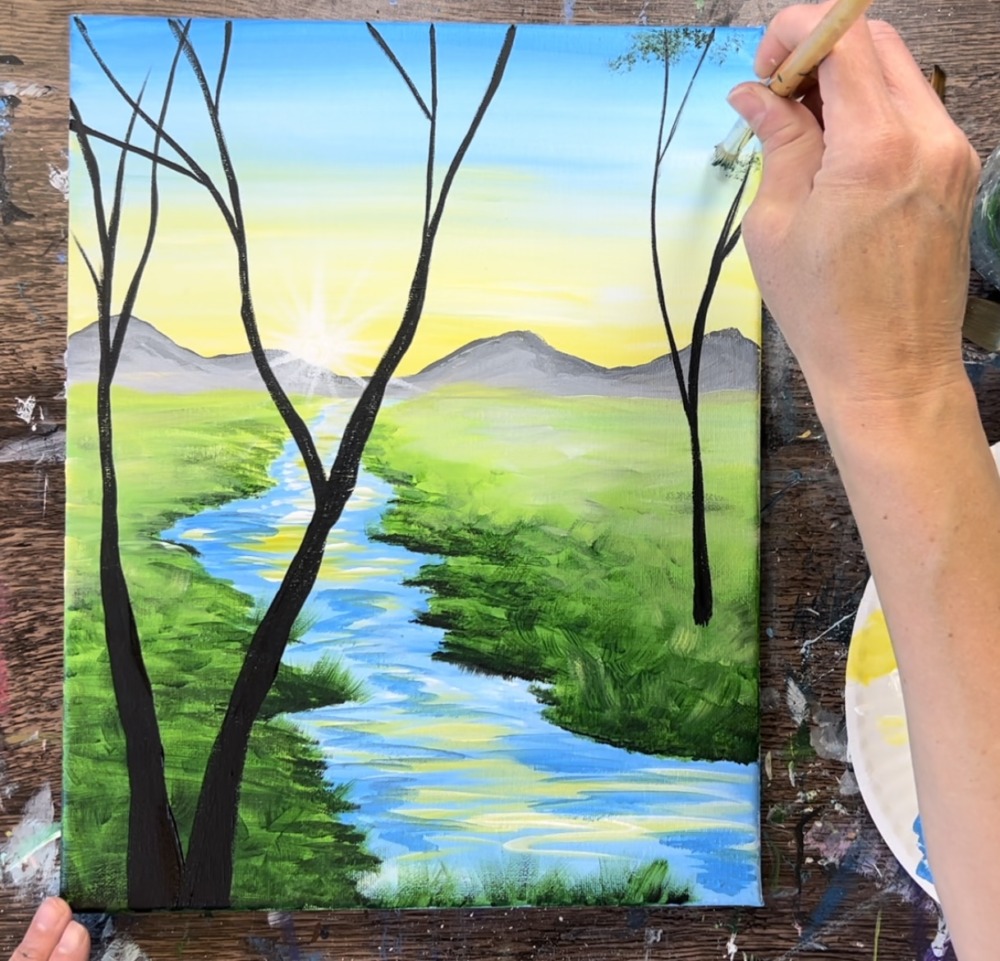
This first layer should be a very dark green.
Then wipe the brush off. Load it into just hooker’s green hue and add more pure green but don’t cover all of the black.
Then load the brush into some yellow. This will make a yellow green in the tree canopy. Paint the bottom edges of the tree foliage so that the top parts are dark and the bottom parts get slightly lighter.
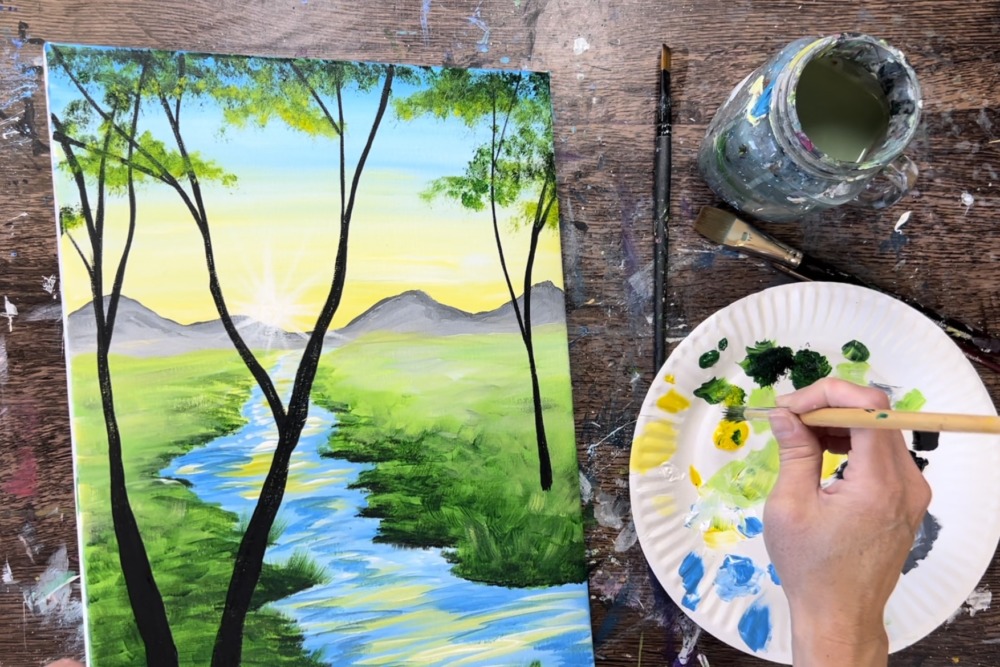
Then load into a little bit of titanium white. This will make a lighter green. Dab the brush in the bottom areas of the foliage so that the very bottom parts are lighter. Leave the top parts much darker.
To add “color and highlight” to the tree trunks, load your palette with burnt Sienna. Mix a little bit of titanium white into the burnt Sienna. Then use the #4 round brush to loosely paint this lighter brown on the trunks. Paint upwards strokes creating bark texture. Leave most of the black still showing through.
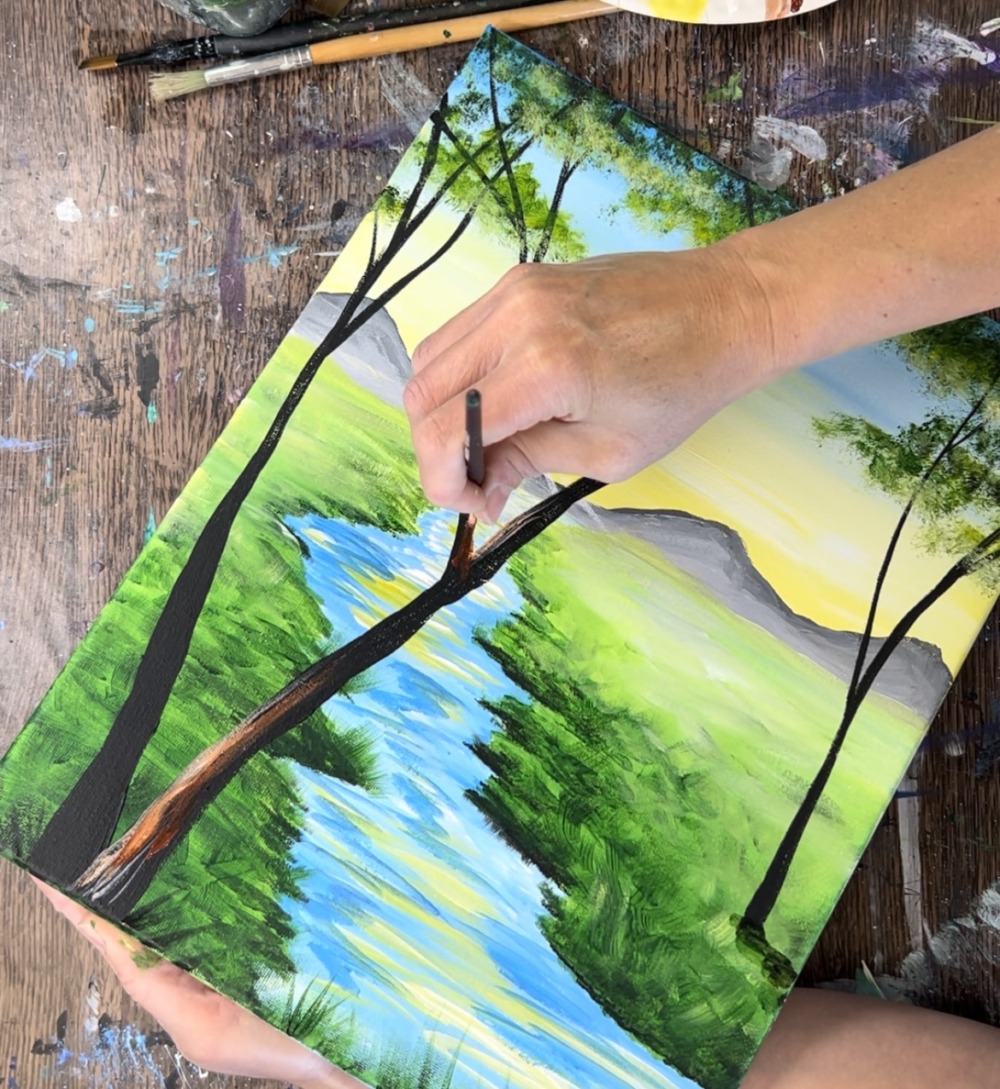
Paint this lighter brown on the edges of the trunks, especially on the inner edges of the part of the trunk that splits into two.

9. Paint white flower dots
Use the round brush and titanium white to paint little white flower dots all throughout the field. The closer to the bottom you are, the larger the dots should be and more spread apart.
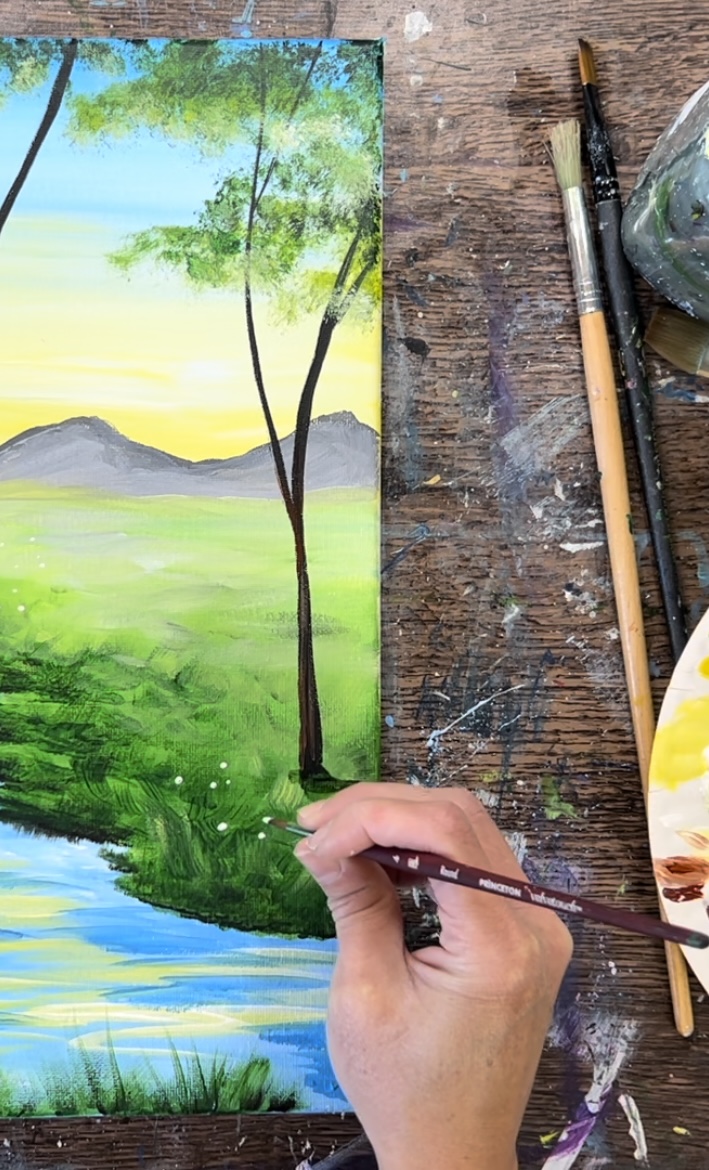
Further in the distance, the dots are smaller and closer together.
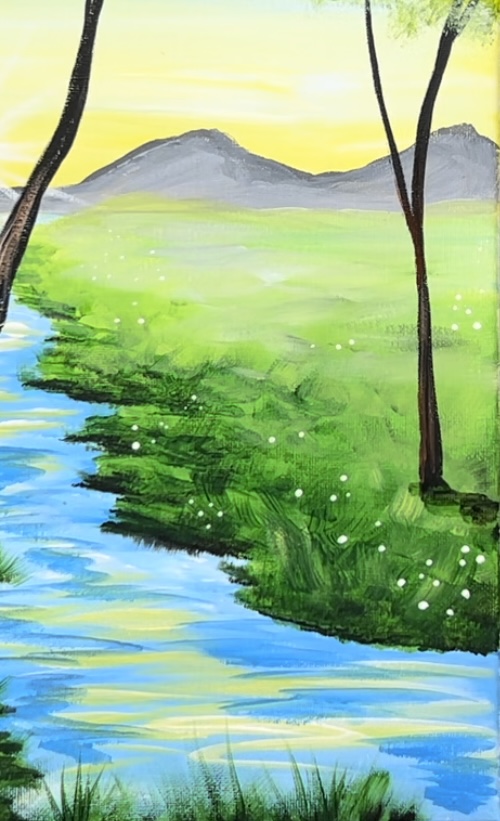
Do this on both sides of the canvas.
You can also paint actual four or five petal white flowers on the very bottom left of the canvas.
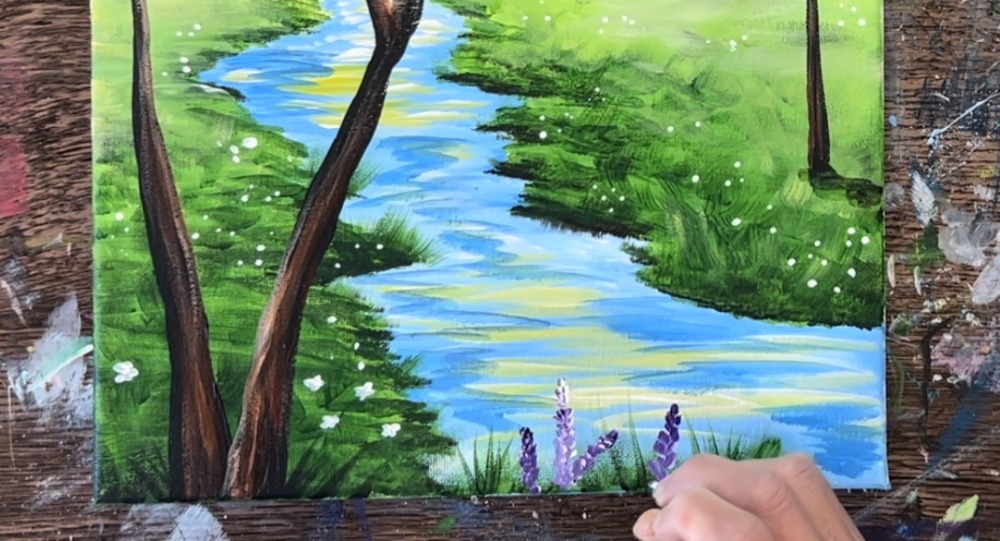
10. Paint Lavender
To do the lavender, load your palette with dioxazine purple. Use the round brush and “double load” the brush in both purple and titanium white.
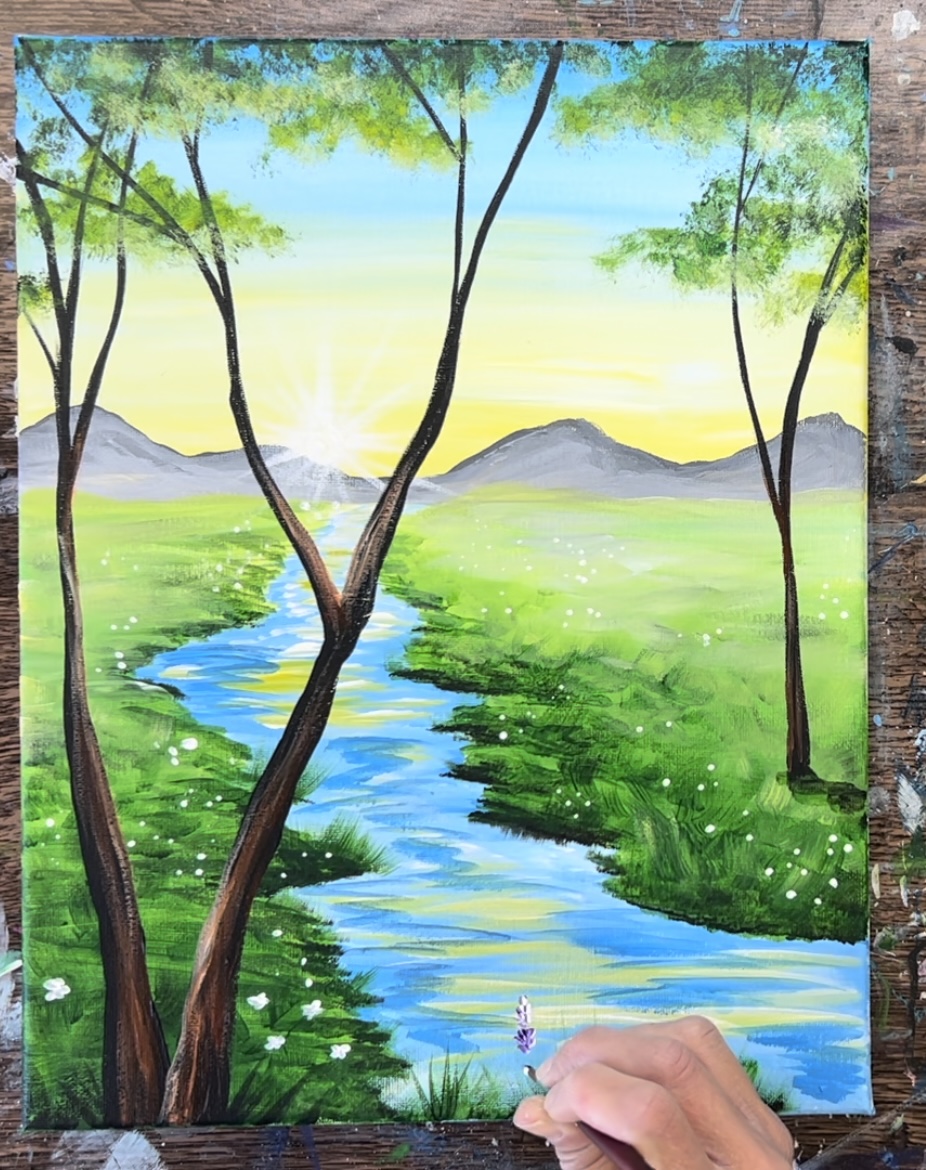
Create columns of purple strokes that slightly overlap each other as you work your way down. Make the columns of purple flowers go at different angles and very the density of the purple by adding different amounts of purple and white to the tip o your brush as you go to re-load.

Finished
Add touch ups as needed! That is it! Sign your name and show it off!
