

Would you like to save this?
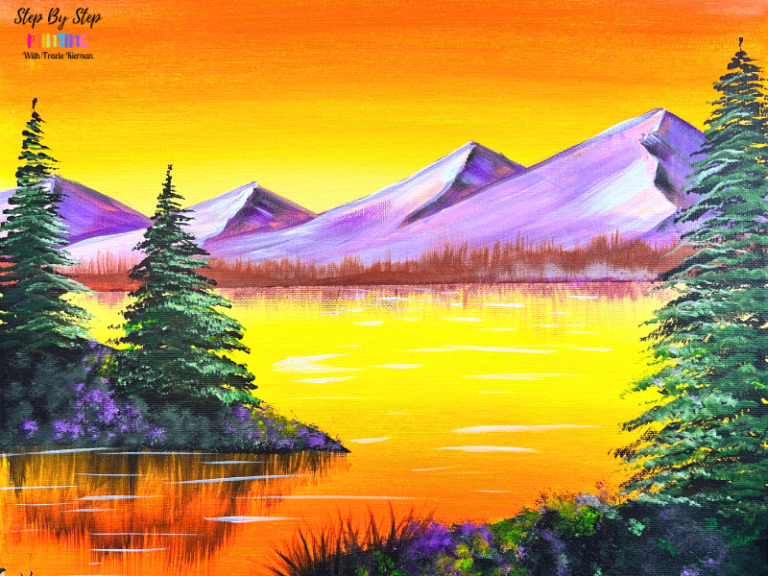
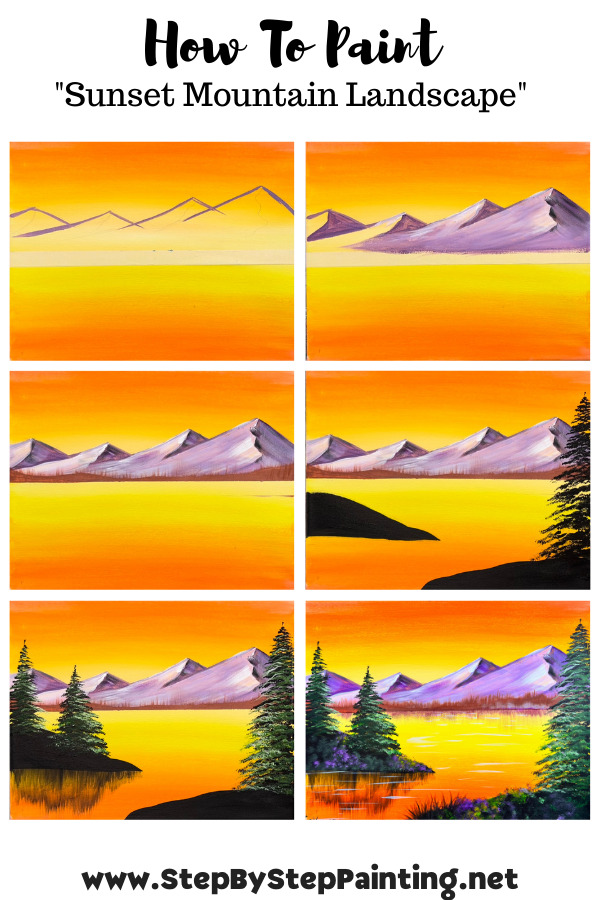
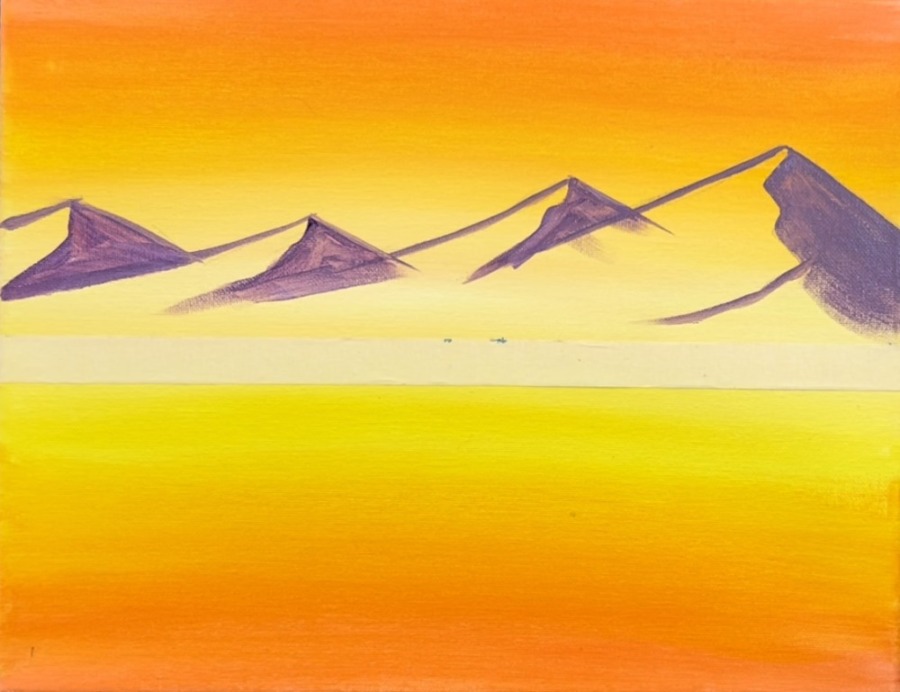
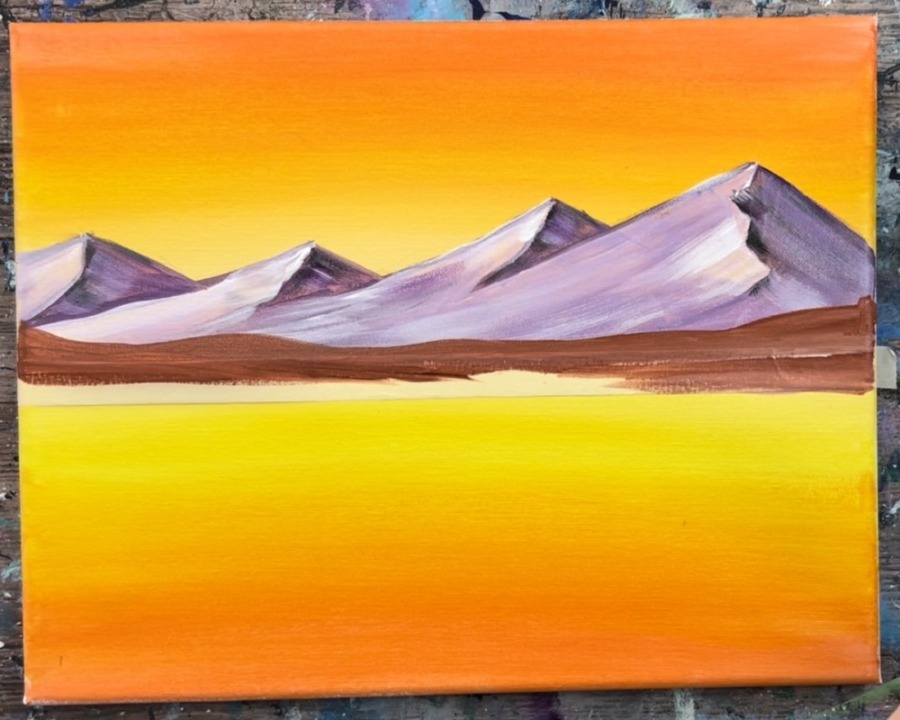
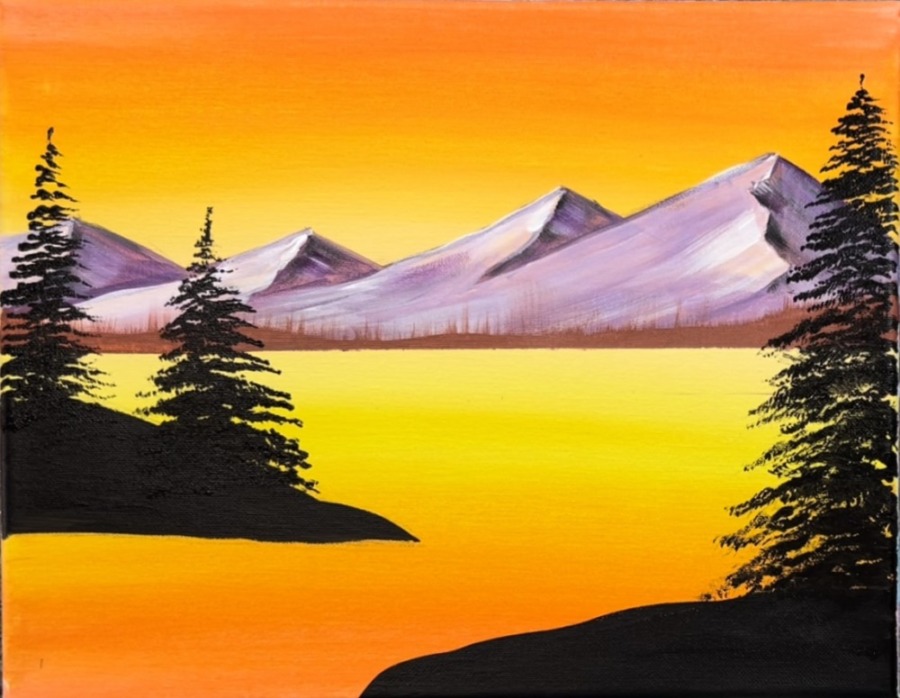
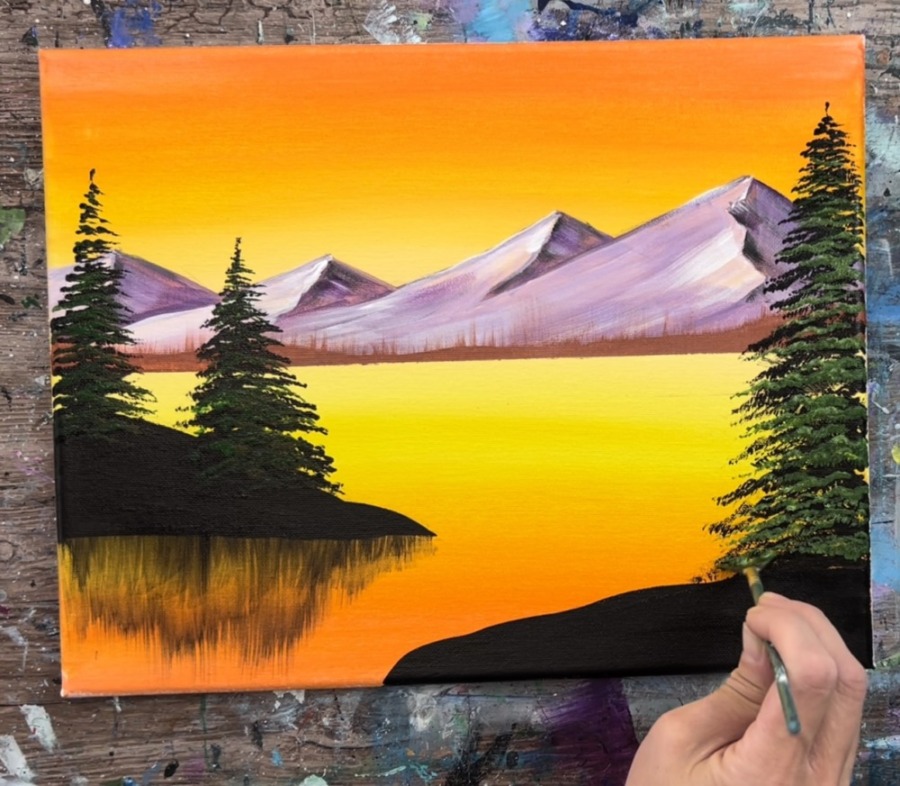
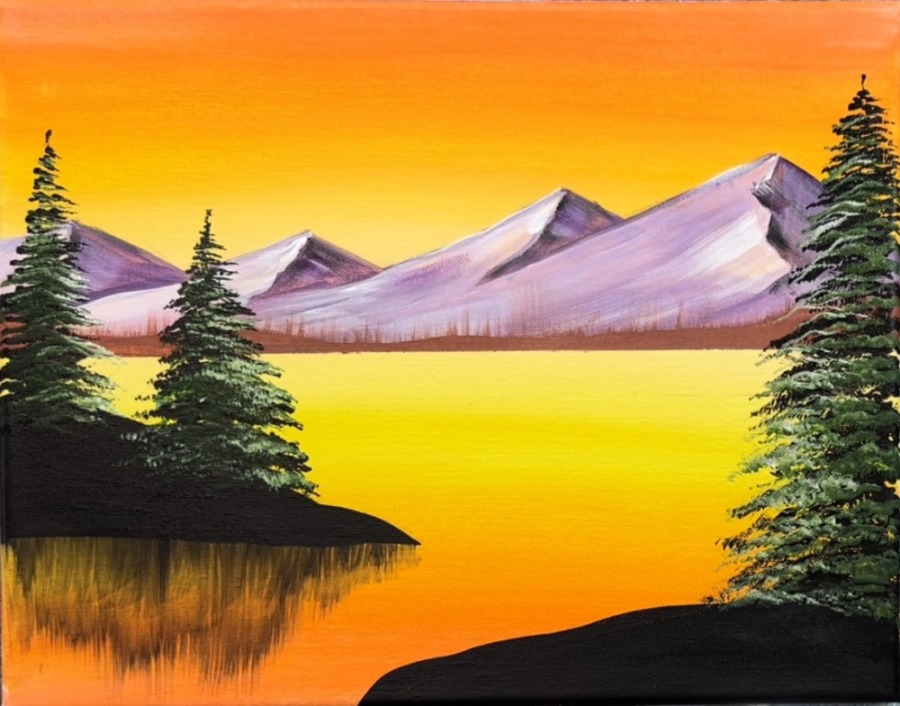
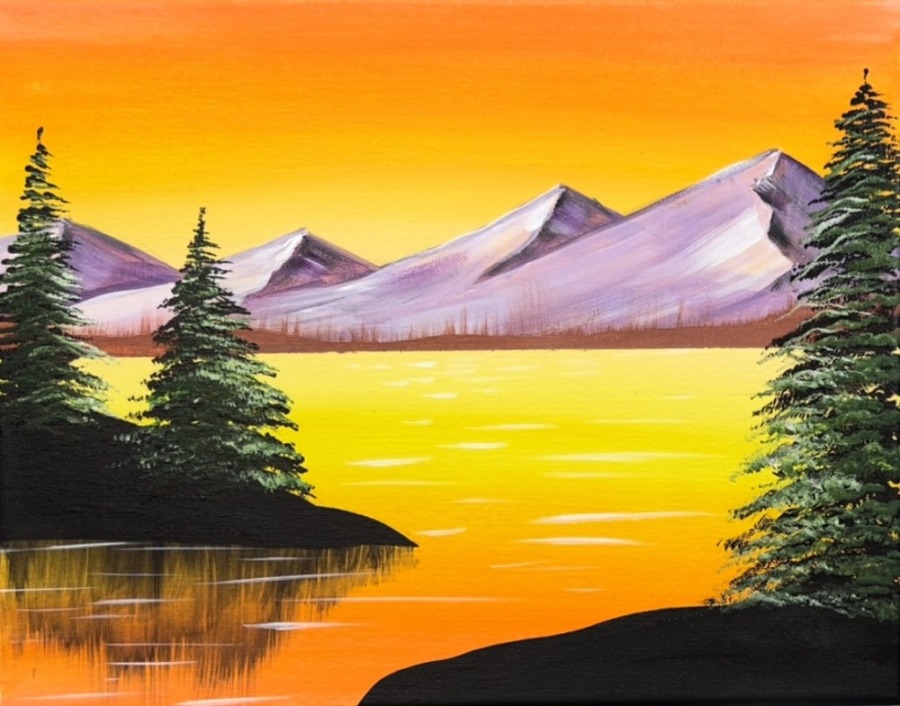
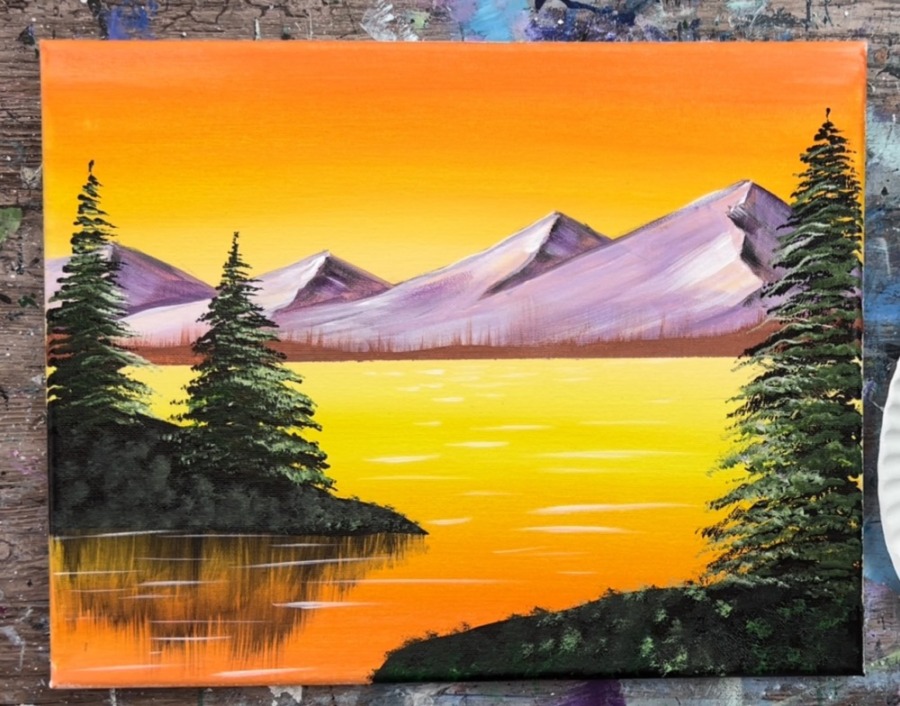
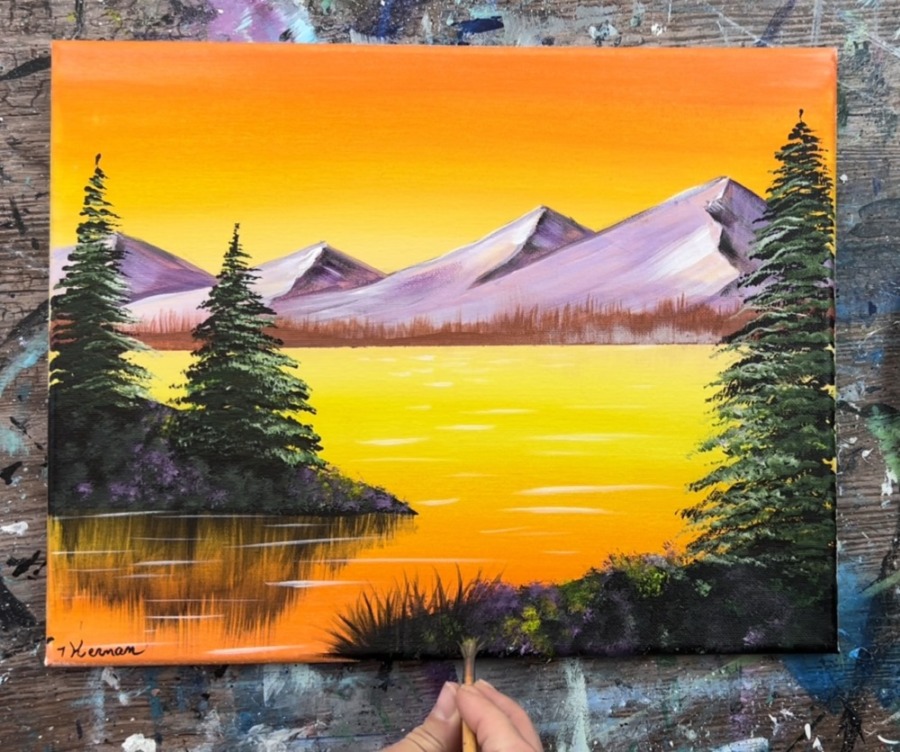
This acrylic painting tutorial will demonstrate how to paint a vibrant orange and yellow sunset sky reflecting over a lake with purple mountains in the distance and trees!
I love the unique color scheme in this painting! I’ve bene using a lot of dominantly blue painting designs lately and decided to switch things up a bit. If you wanted to do this same design as a day time landscape with blue sky, you could still follow the directions as described but use blue and white instead of orange and yellow.
The tutorial uses the fan brush to paint the trees. If you need extra practice on your fan brush tree technique, you can check out my post here about that!
Enjoy and happy painting!
Materials
Sunset Sky Mountain Landscape - Acrylic Painting Tutorial
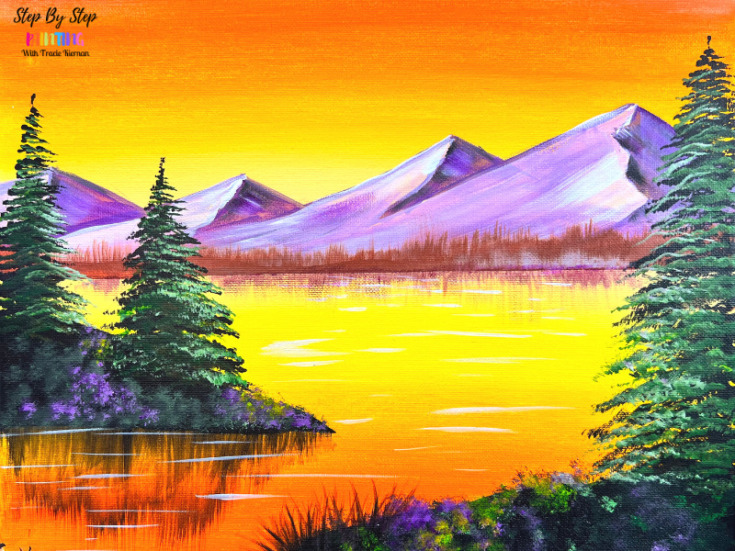
Paint a vibrant orange sky reflecting over a lake in this landscape painting.
Materials
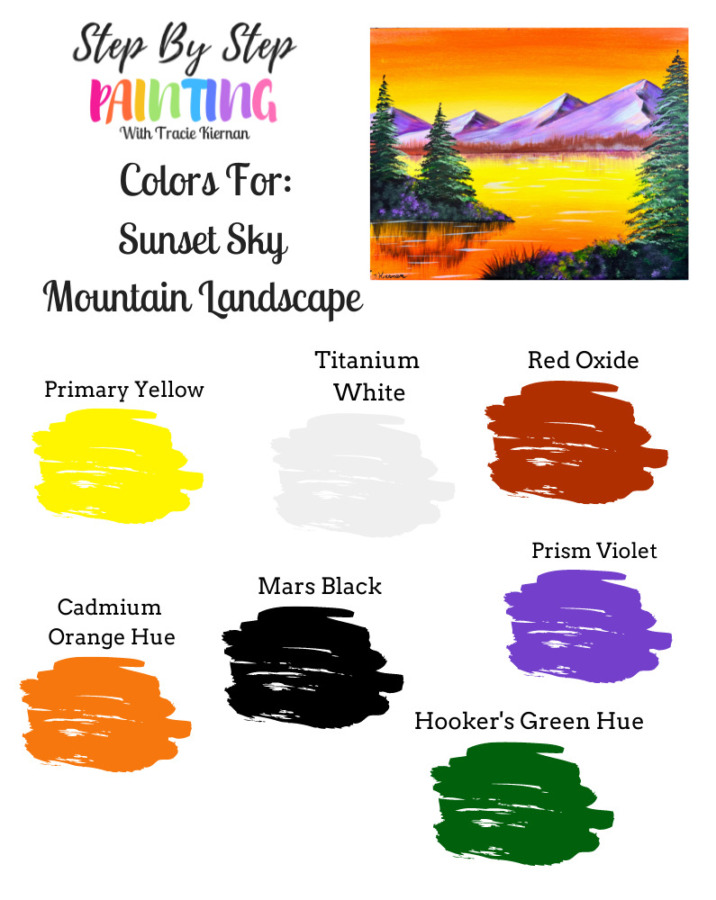
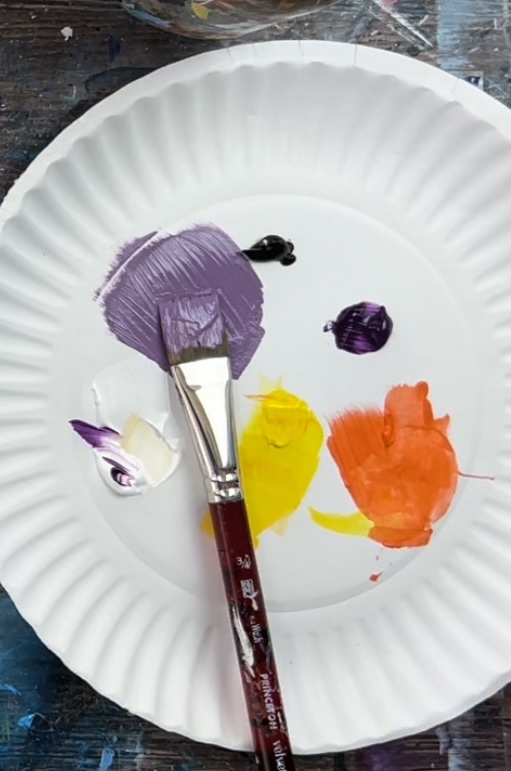
Colors
- Cadmium Orange Hue
- Primary Yellow
- Titanium White
- Prism Violet
- Mars Black
- Red Oxide
- Hooker's Green Hue Permanent
Brushes
- 3/4" Flat Wash
- 12 Bright (optional)
- 3/8" Angle Brush
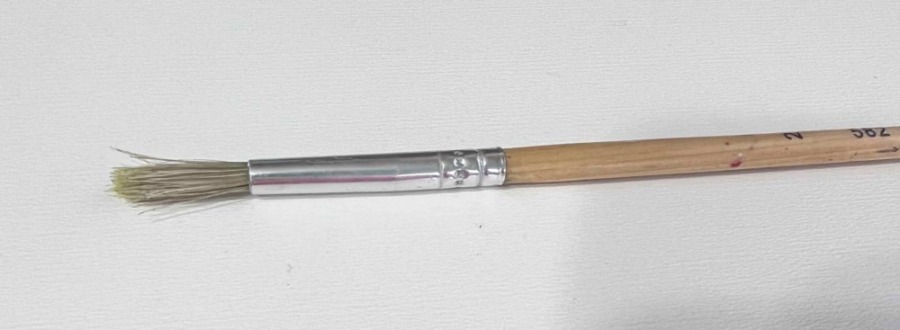
- Round Bristle Brush
- Fan Brush
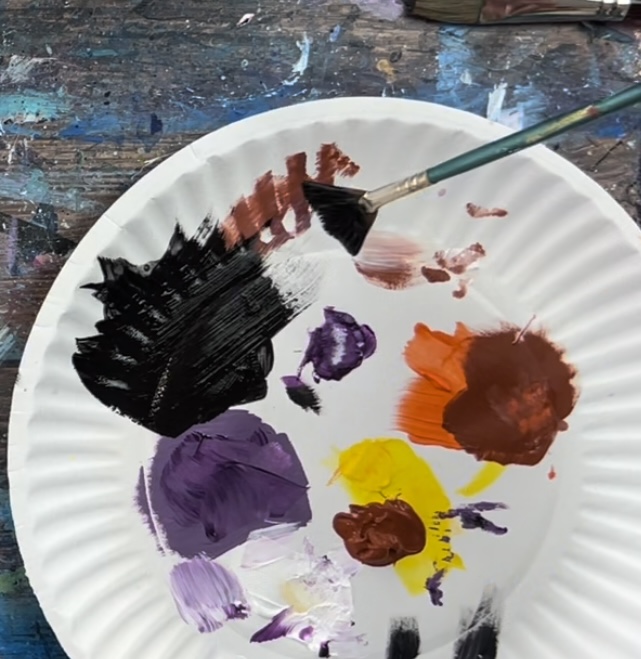
Color Palette
I used Liquitex BASICS acrylics for this tutorial. Brand colors can vary. Therefore, if you are using different paints, you can use the color swatch below to try to match the colors.
Using Craft Paints?
If you are using craft paints such as the Apple Barrel Craft Paints, I would suggest subbing to these colors:
- White
- Black
- Bright Yellow
- Nutmeg Brown
- Purple Iris
- Holly Branch
- Jack-O-Lantern
Directions At A Glance
Video
Step By Step Directions
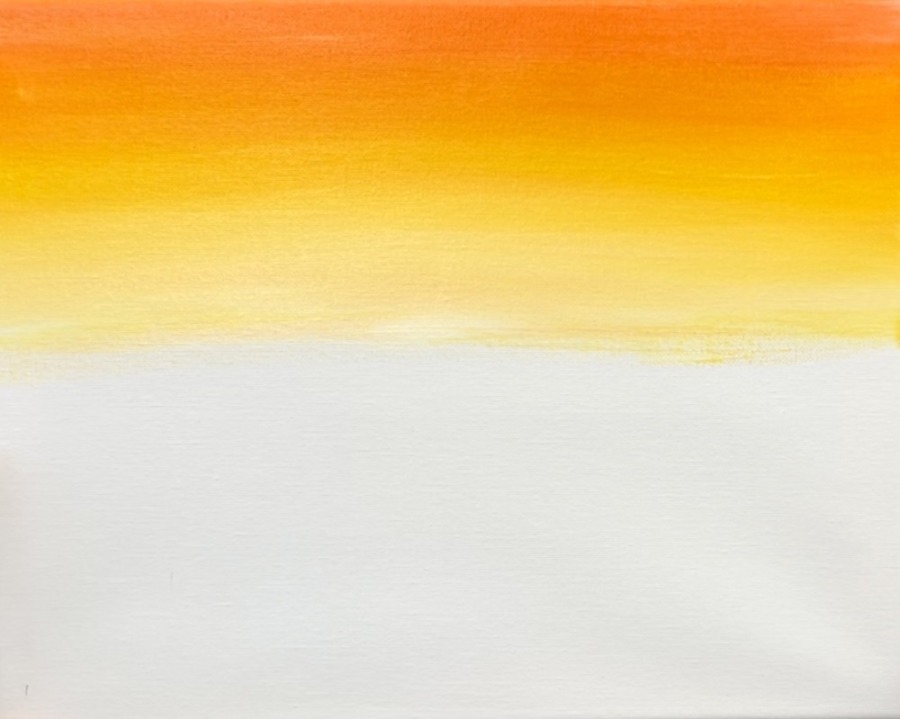
1. Paint Sky And Water
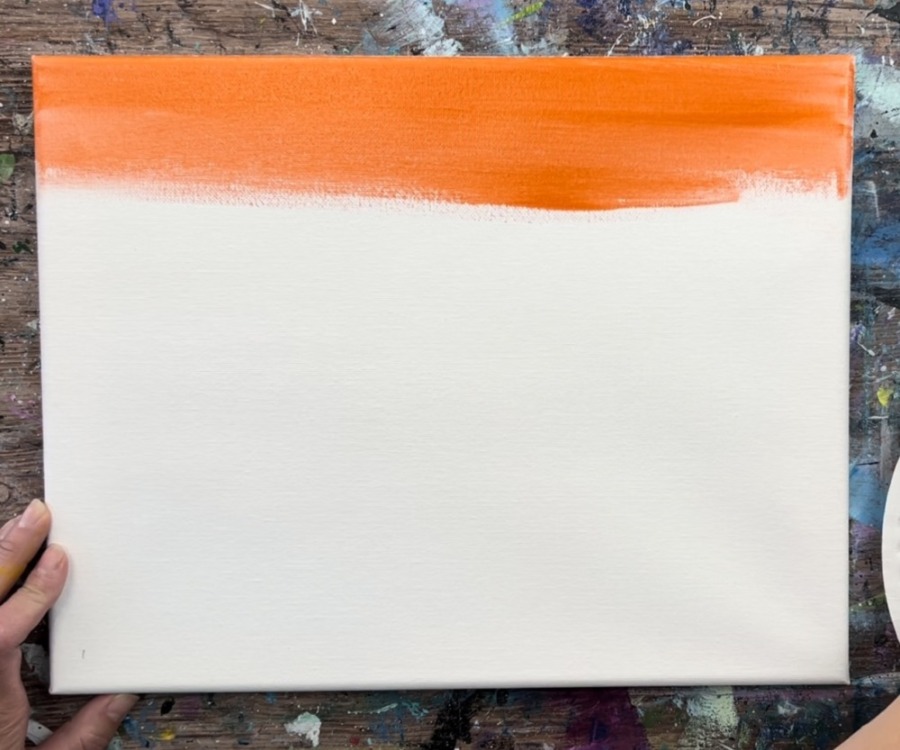
Position your canvas horizontally. Then use your 3/4″ flat wash brush to apply a thin layer of water on the canvas by brushing it left and right across the entire canvas.
Alternatively, you can use a fine mist sprayer to dampen your canvas. This should be a very thin layer of water and not soaking wet. This will help blend the background and ensure the first layer is a thin “wash” of paint.
Then load your palette in the colors: cadmium orange hue, primary yellow and titanium white. You will be painting a gradient of orange that blends to yellow and then blends to a very light yellow in the center of the canvas and then mirrors down to yellow and then orange again on the bottom.
Start by loading your clean 3/4″ flat wash brush in cadmium orange hue. Paint left and right strokes starting at the top of the canvas and work your way about 3 inches down the canvas.
Then wipe your brush off with a towel but do not rinse. Load the brush in primary yellow. Blend the yellow with the orange by applying the yellow below the orange and gently blending up. Leave the top of your sky the pure orange color.
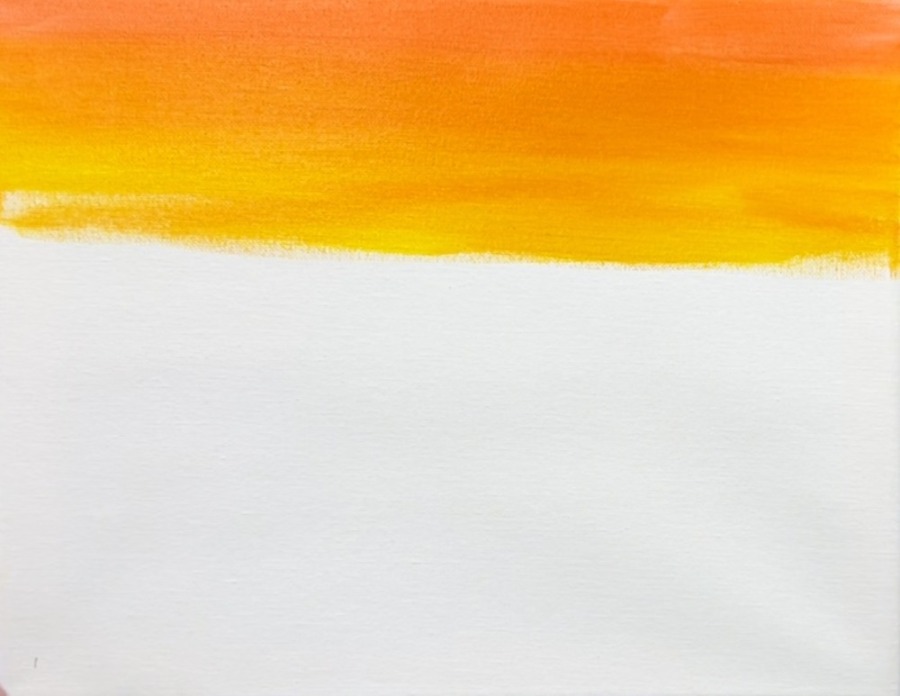
Go down a few inches with the yellow and then dry your brush off. Load the brush in titanium white and blend that with the yellow. Continue down the canvas all the way to the center point. If needed, measure the center of the canvas (5.5″ if using 11″ x 14″). Your center is the “horizon line” and it should be a bright and light yellow.
Then completely rinse your brush of all the paint and start new again! Load your brush with primary yellow and a little bit of titanium white. Blend that down the canvas. You are basically mirroring the top of the canvas (the sky).
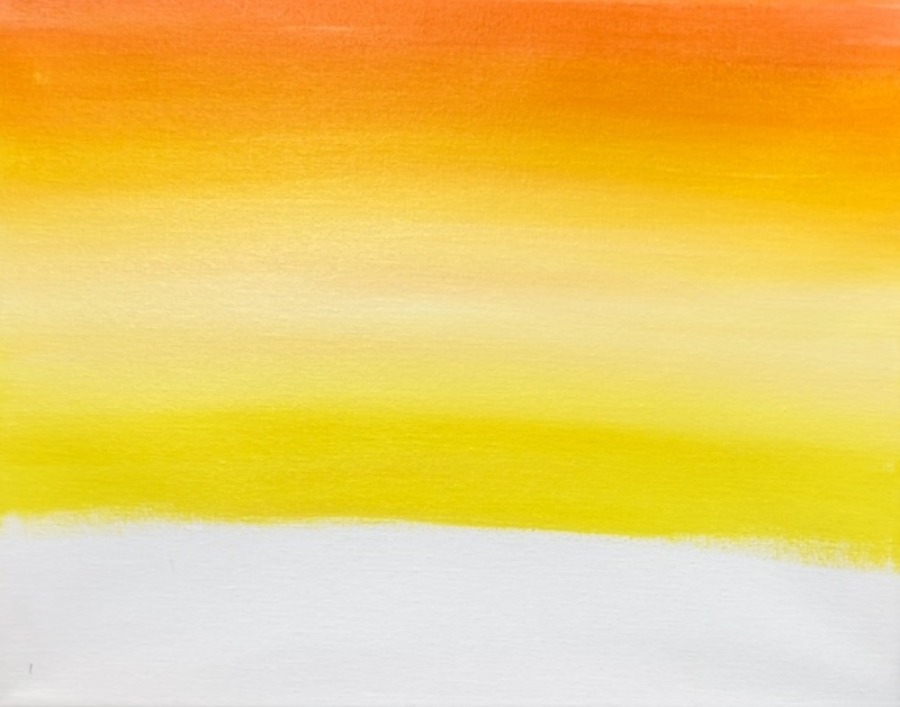
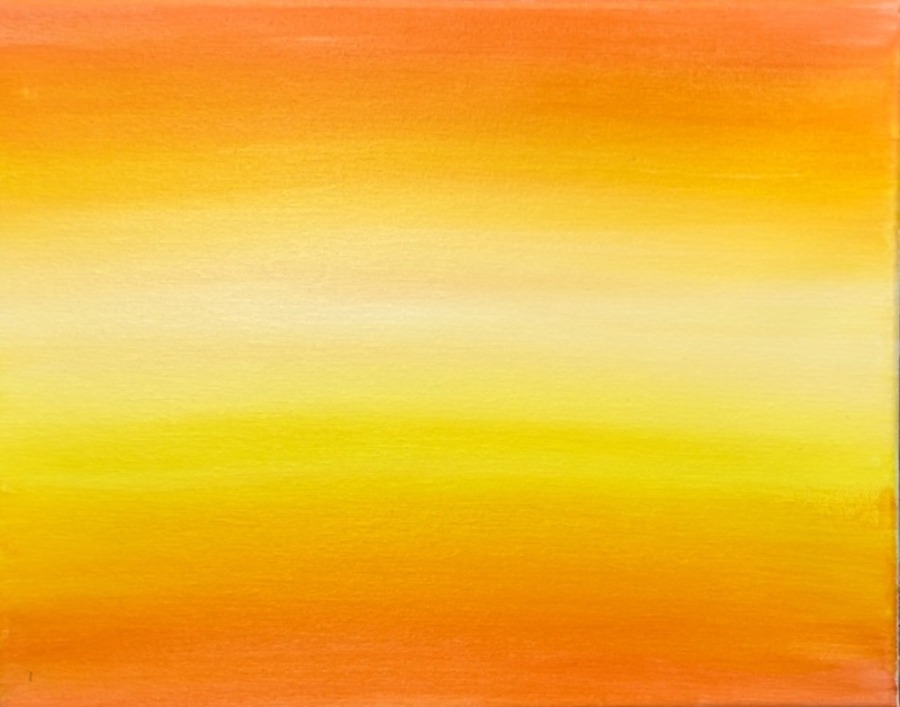
Continue to paint down to the bottom of the canvas until your yellow blends to the orange and then a pure orange on the bottom. Let this background dry before proceeding to the next step.
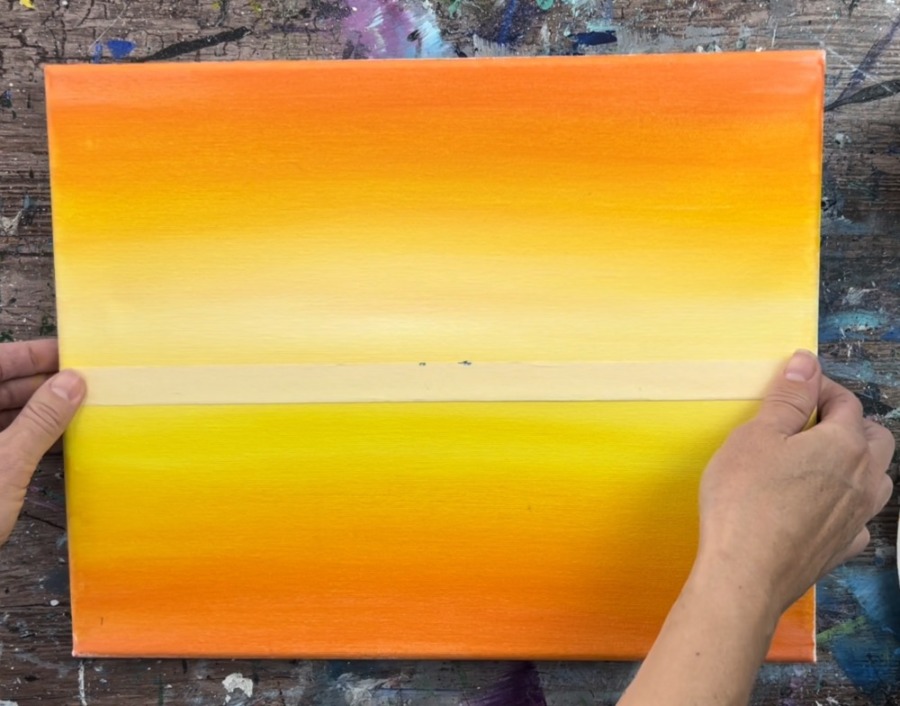
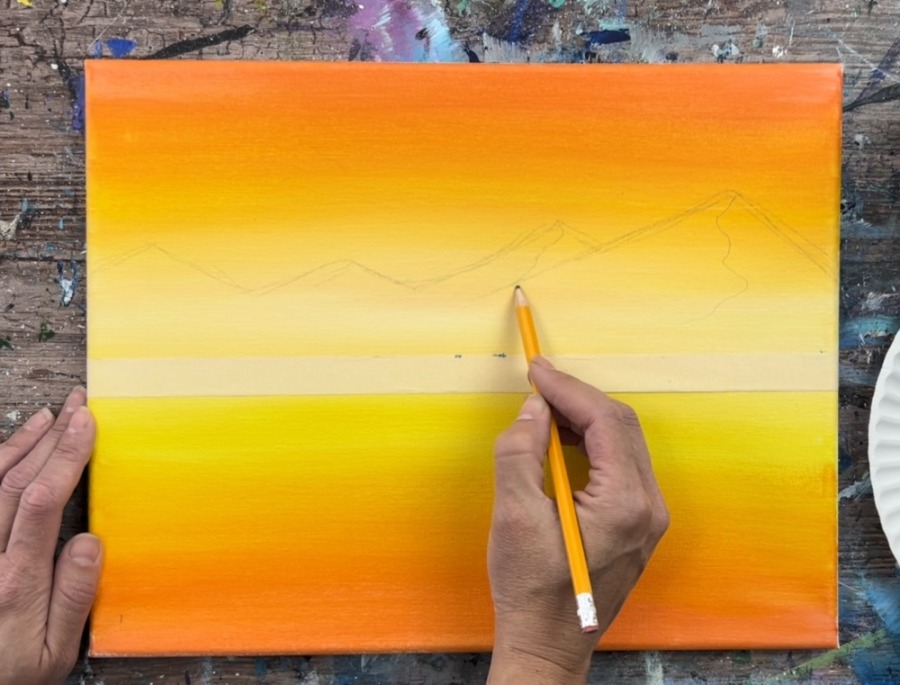
2. Apply Painters/ Masking Tape
Measure the exact center of your canvas. Then place masking tape along the center. The top edge of the masking tape is the center line.
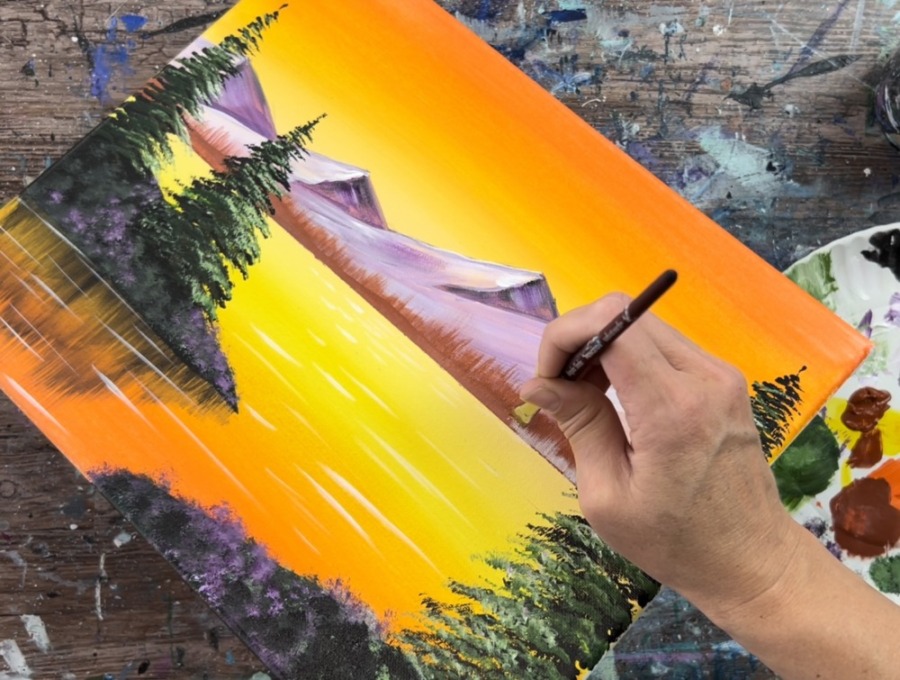
3. Paint Mountain
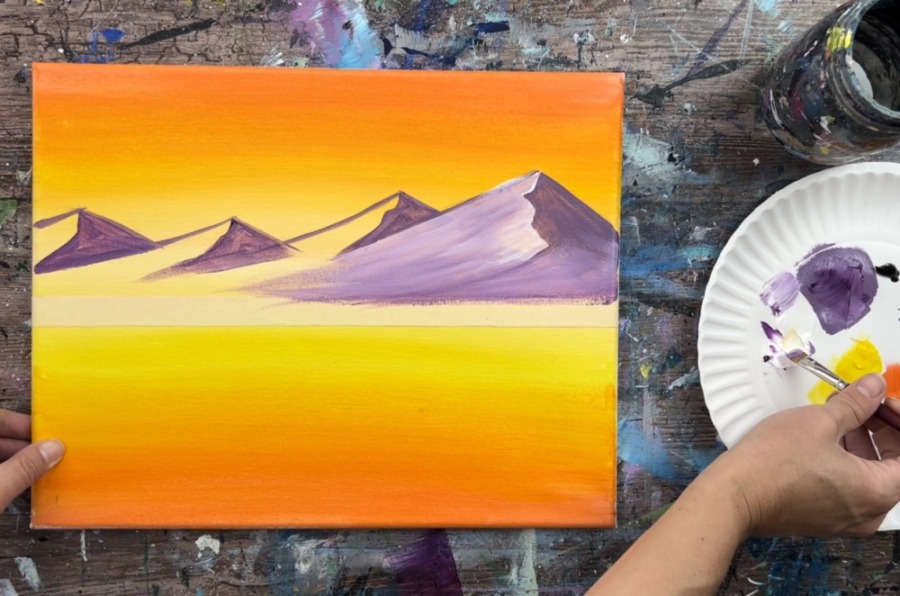
Load your palette with prism violet, titanium white and mars black. Mix a purple-gray on your palette by mixing 3 parts prism violet, 1 part mars black and 3-4 parts titanium white. This should look like a purple-gray color. Add more bits of white or black if needed.
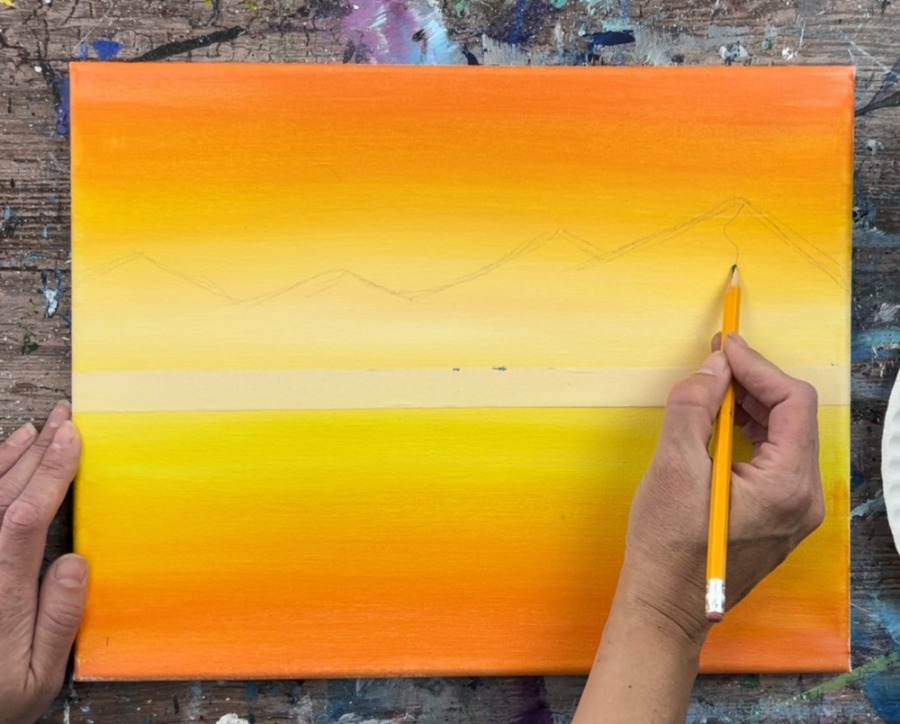
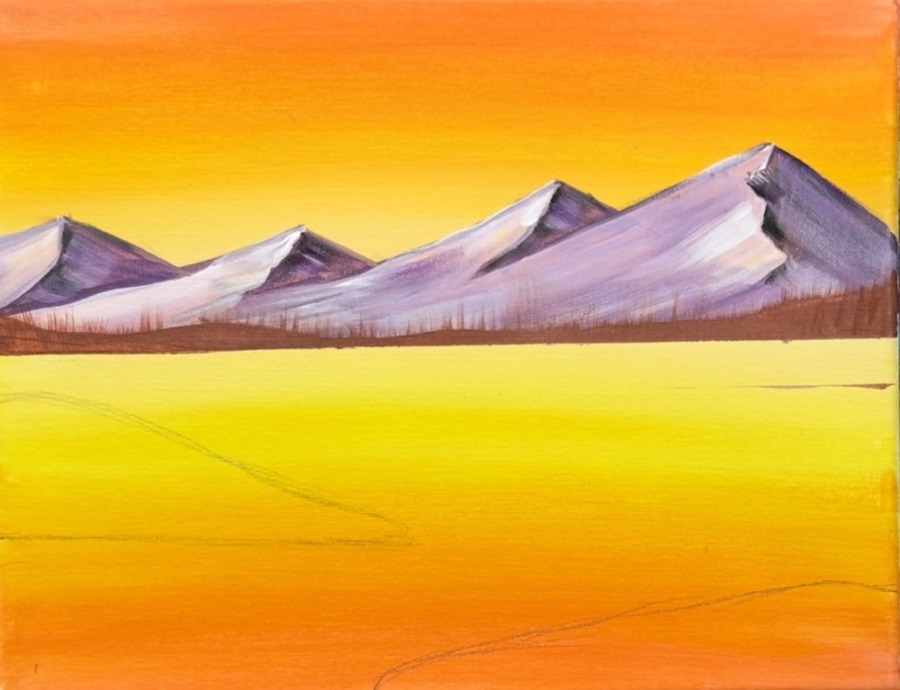
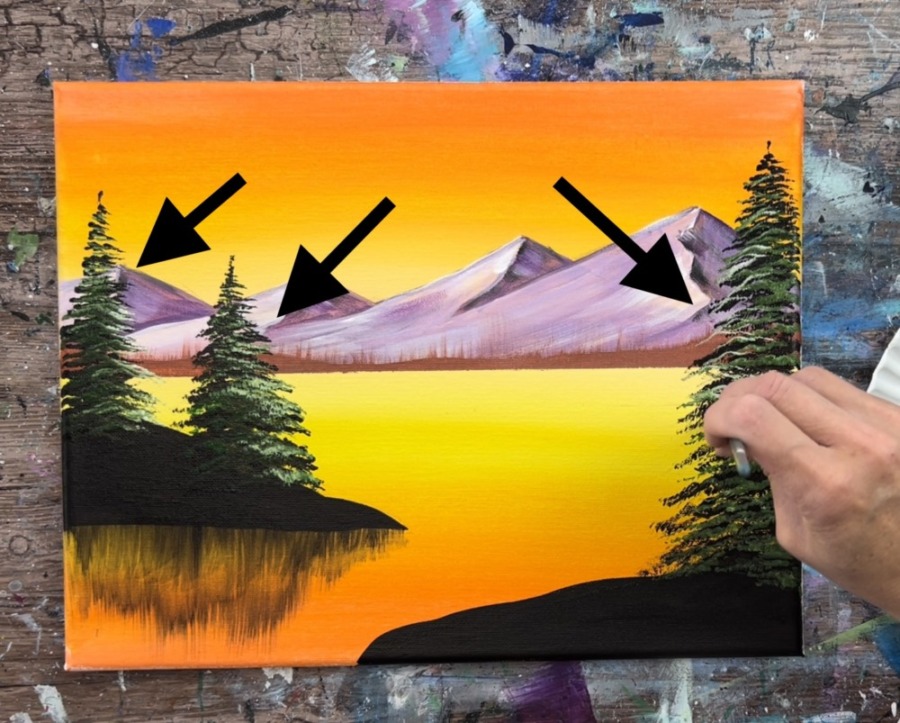
Next, use a pencil to draw your mountain peaks. Start on one side of the canvas and draw angled lines that go to a point. I did 4 mountain peaks. None of the lines on the mountain drawing touch the horizon line.
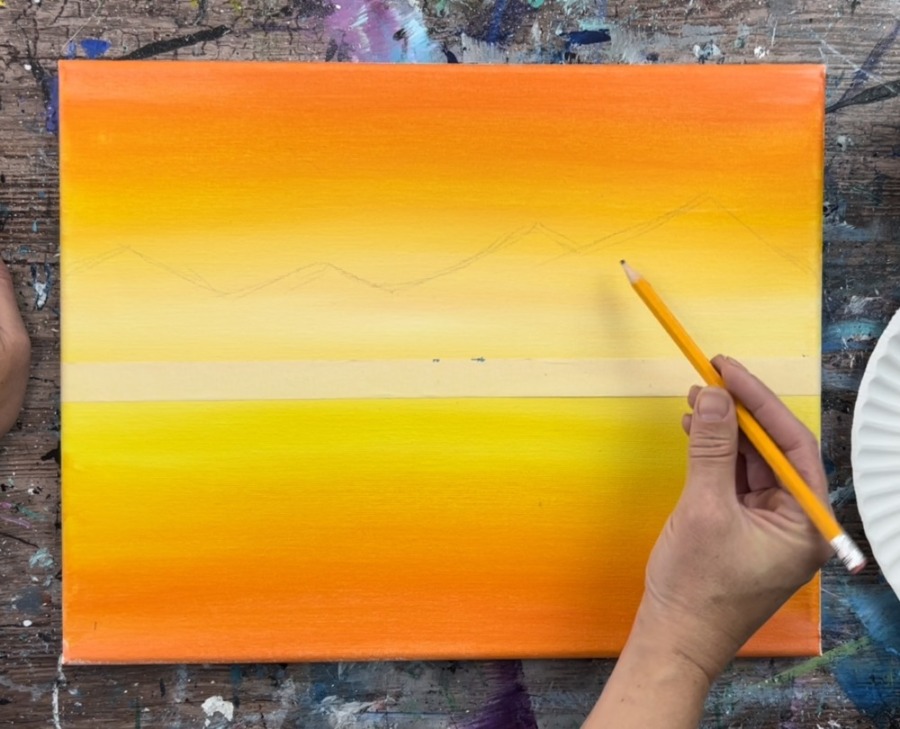
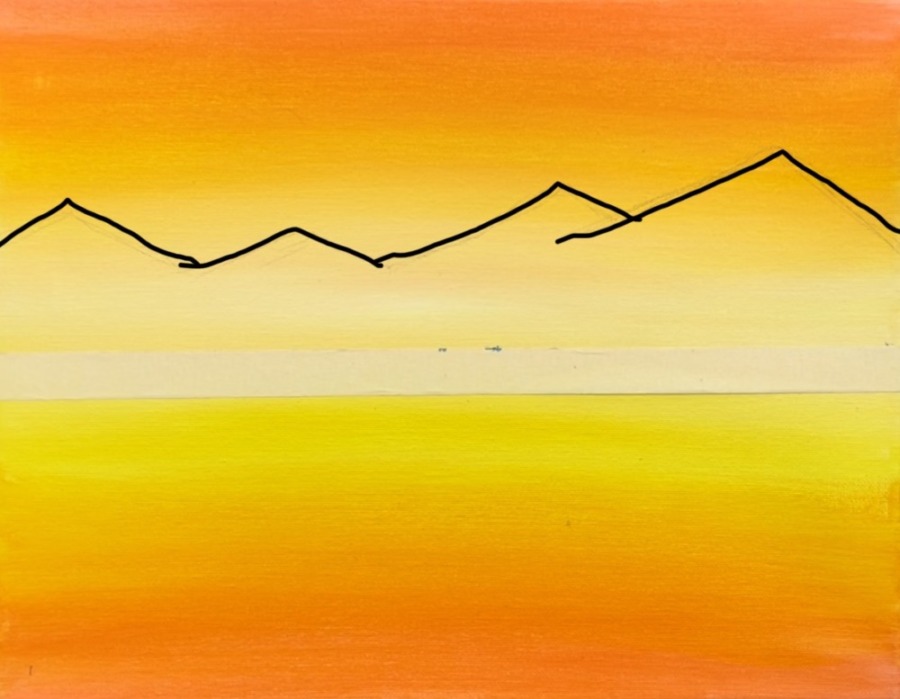
Then divide your mountain peaks. This will help you with painting the shadows on the mountains. On the top of each of the peaks, draw a wavy line that starts on the tip and goes in a in a vertical direction and then slightly to the left.
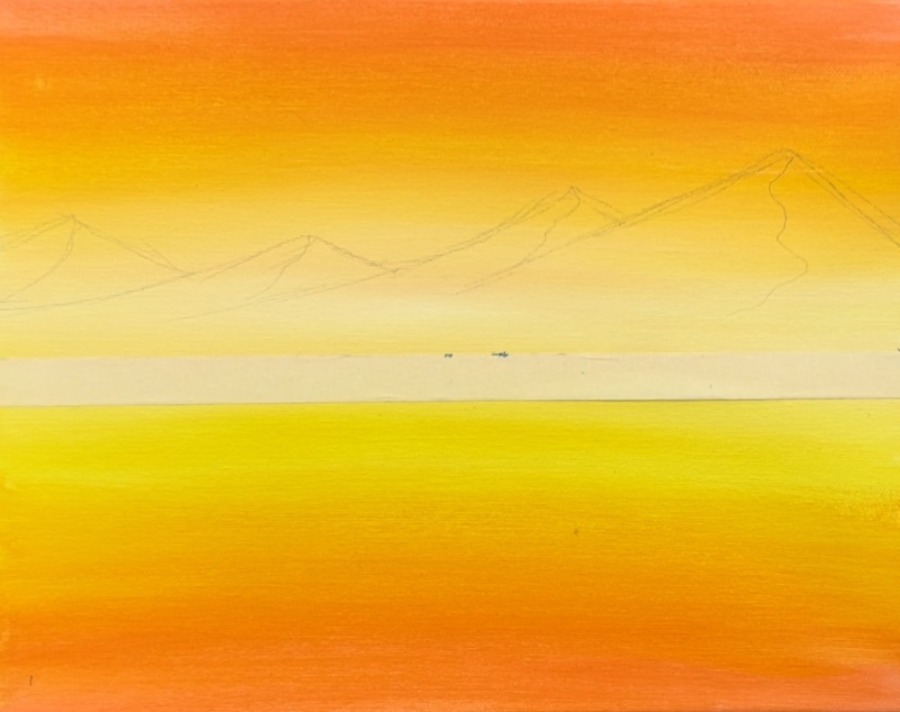
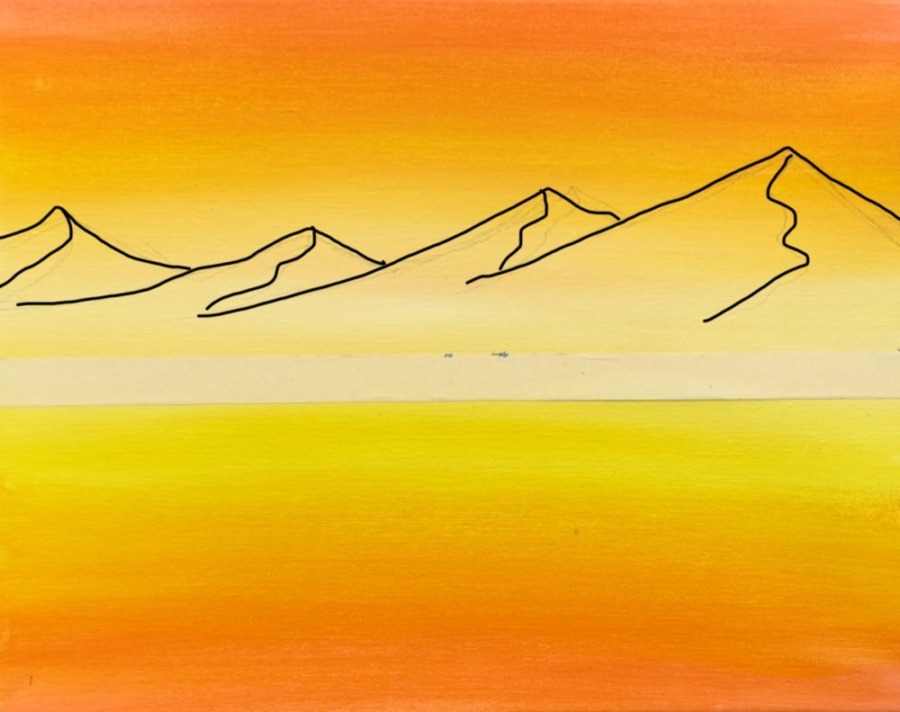
Next, use either your 3/4″ flat wash or 3/8″ angle brush and the purple-gray color to loosely outline the edges of your mountain peaks as well as the diagonal edge that overlaps the mountain next to it.
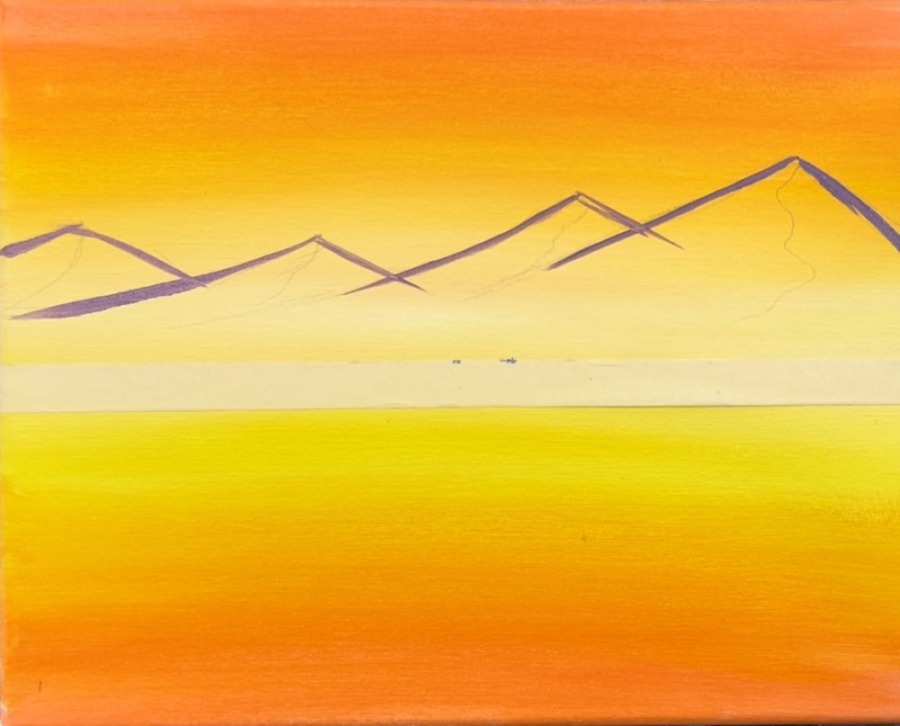
Use either your 3/4″ flat wash or smaller brush (angle or flat brush) to paint all of the right side of your mountains with the purple-gray color. Paint this very thinly. Add a bit of water if needed so it isn’t that thick. Paint in a diagonal direction down the mountain peak.

Then wipe your brush off but do not rinse. Load the tip of the brush in a small amount of titanium white. Repeat the technique used for painting the left side of the mountain but make the direction of your stroke go in the opposite direction (diagonal to the left).
The color should still have some purple in it because you did not rinse your brush off all the way. If it is appearing to bright white, add some purple in it. You want enough contrast to where the right side of the mountains looks dark and shadowy and the left side looks bright but not white like snow.
Note: The base of the mountain on the dark side also sways to the left. Also, you can vary your colors a bit by adding some more purple to your brush. Just remember to keep enough contrast between the light and dark of the mountain sides.
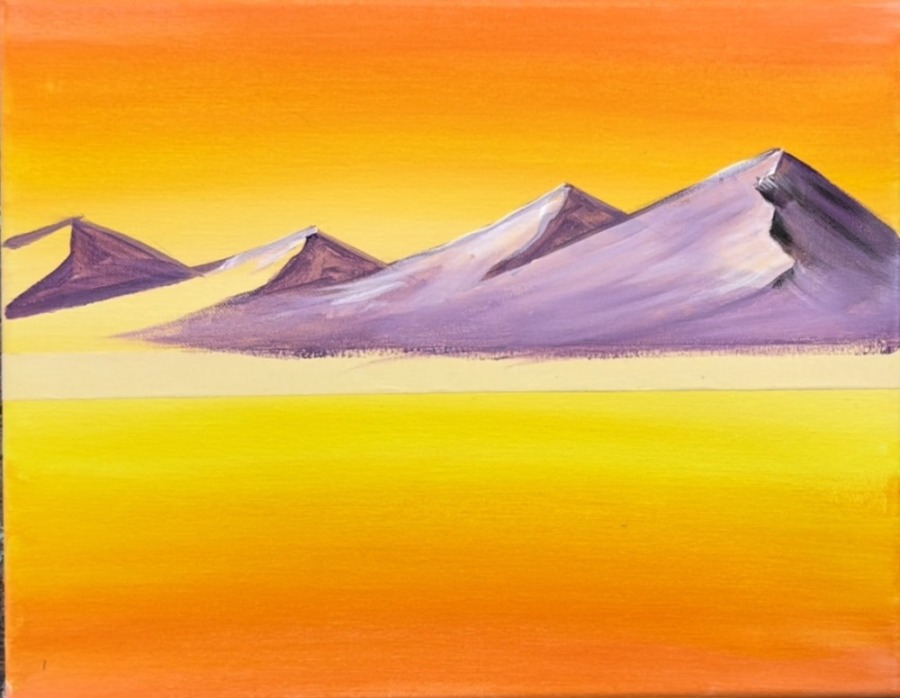
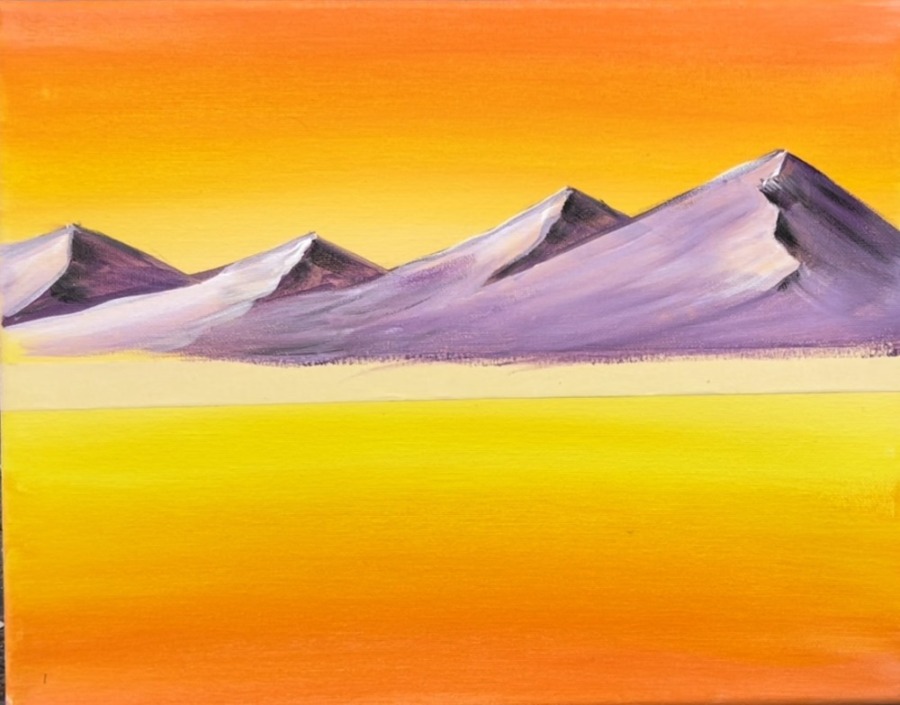
Continue to fill the mountain peaks with the lighter color on the left. Stroke diagonally down to the base of the mountains (the top of your paint tape line).
4. Paint Tree Line
Load your palette with “red oxide”. Use your 3/4″ flat wash to paint a wavy line on the base of your mountains. This will be the reddish-brown treelike seen way in the distance.
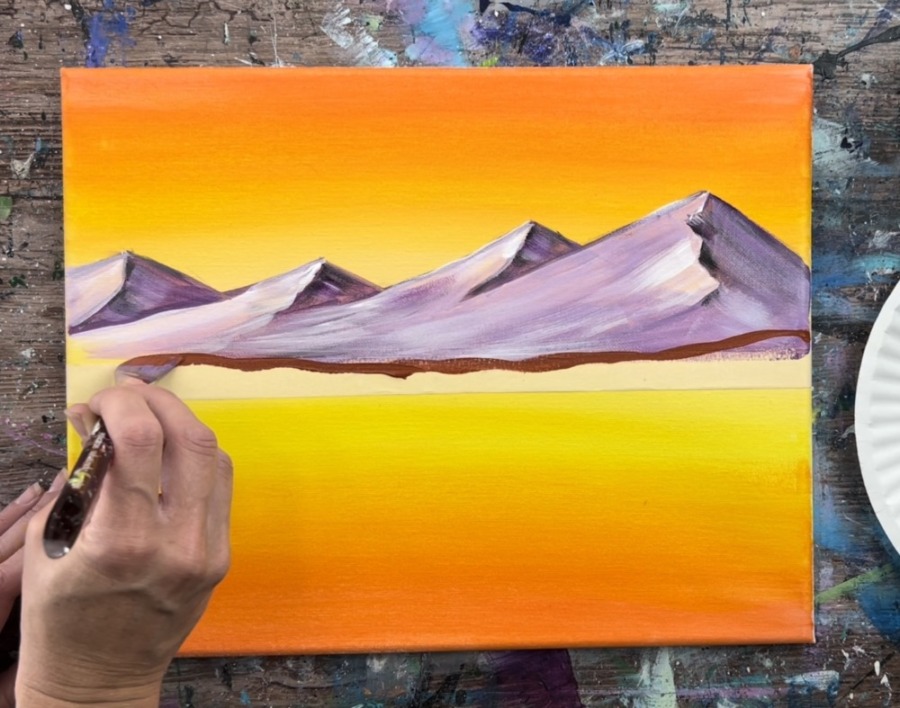
Optional: add a small amount of white on the base of this and blend it up.
Then wipe your brush off with a towel. Use the tip of the 3/4″ flat wash brush to gently drag paint upwards to create the impression of trees way in the distance.
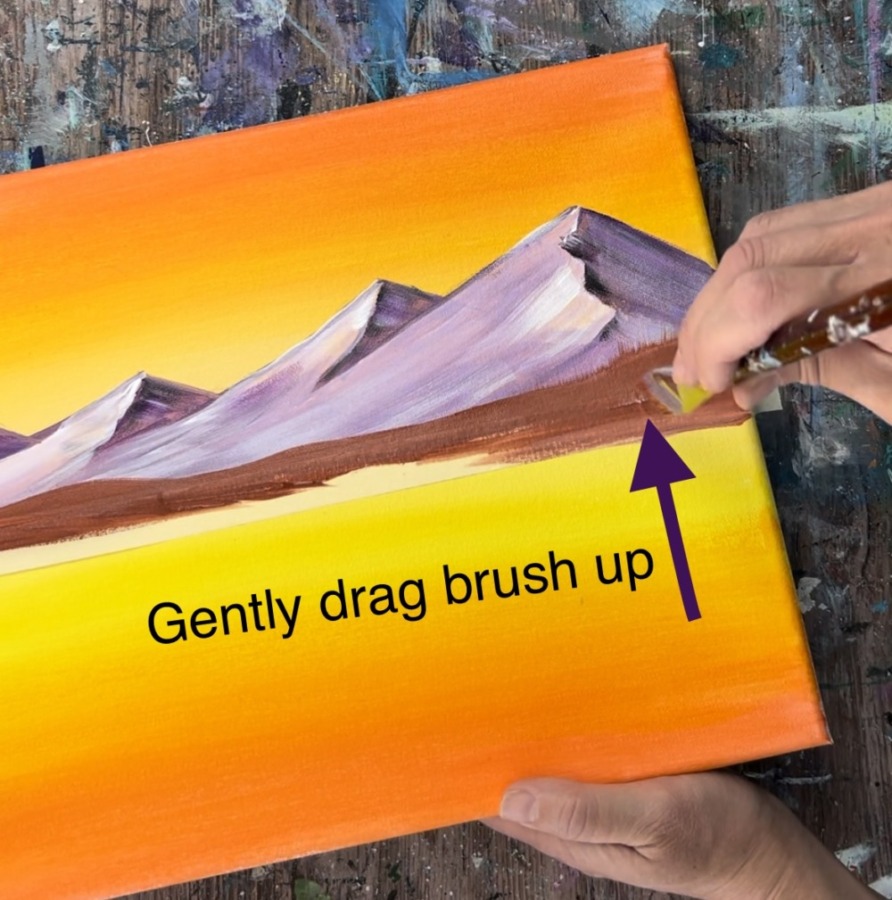
This will create texture above that wavy line. We will add another layer and color to this in a later step.
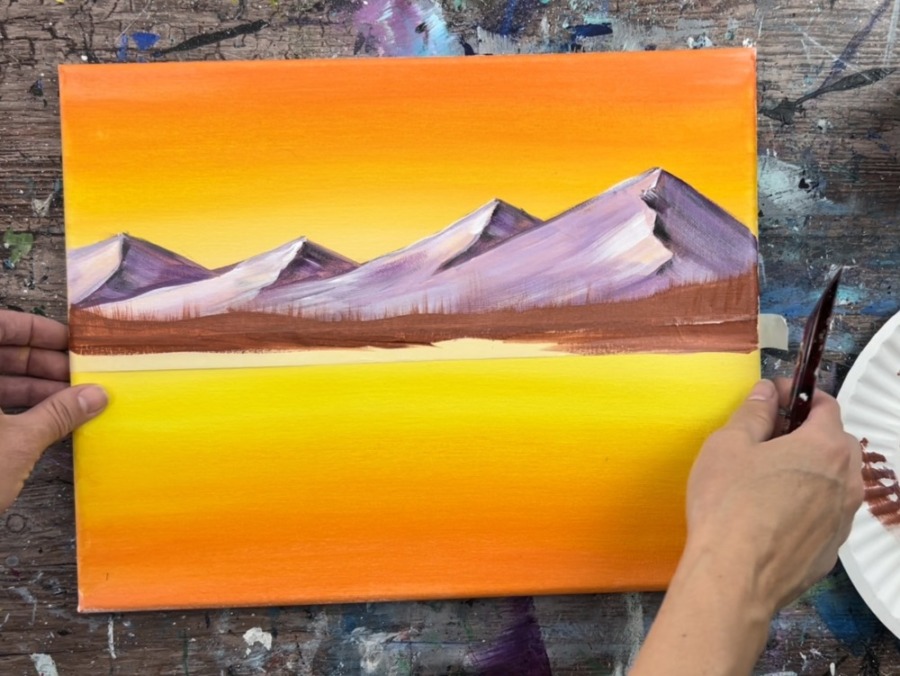
Then gently remove your tape line.
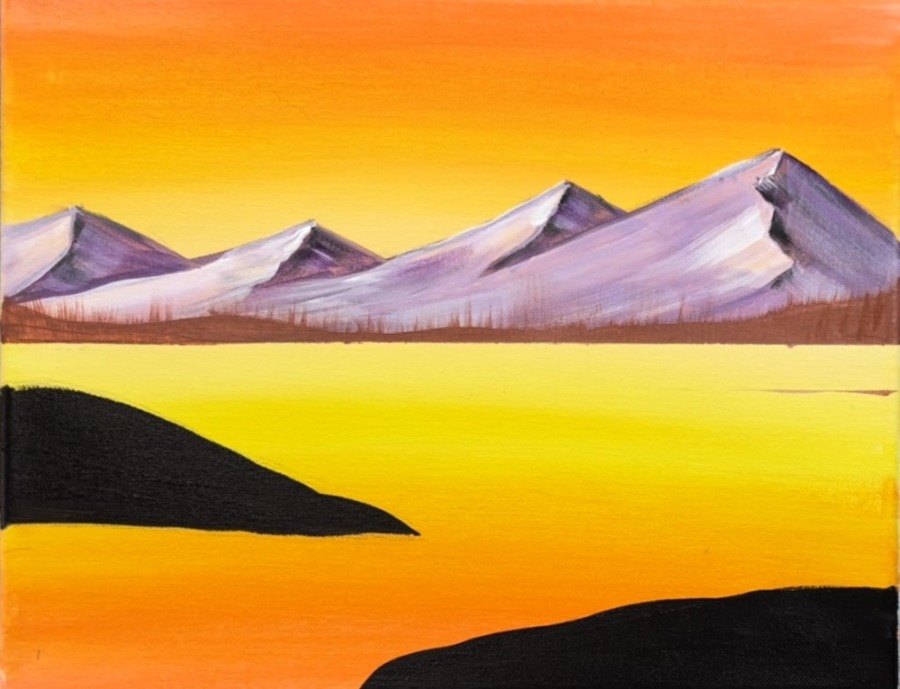
5. Paint Land/ Peninsula
Lightly draw a peninsula section of the land in the middle of the lake on the left side. This piece of land extends almost to the center mid-point of the lake. Then draw another land area in the lower right region that extends a little past the counterpoint.
Then paint the two land pieces a solid coat of mars black. You can use any brush to paint those in.
6. Paint Pine Trees
Use a fan brush and mars black. Slightly water the black down.
Load the fan brush in the black and make sure the bristles are evenly spread apart. Also, make sure there is enough paint on the tip/edge of the bristles.
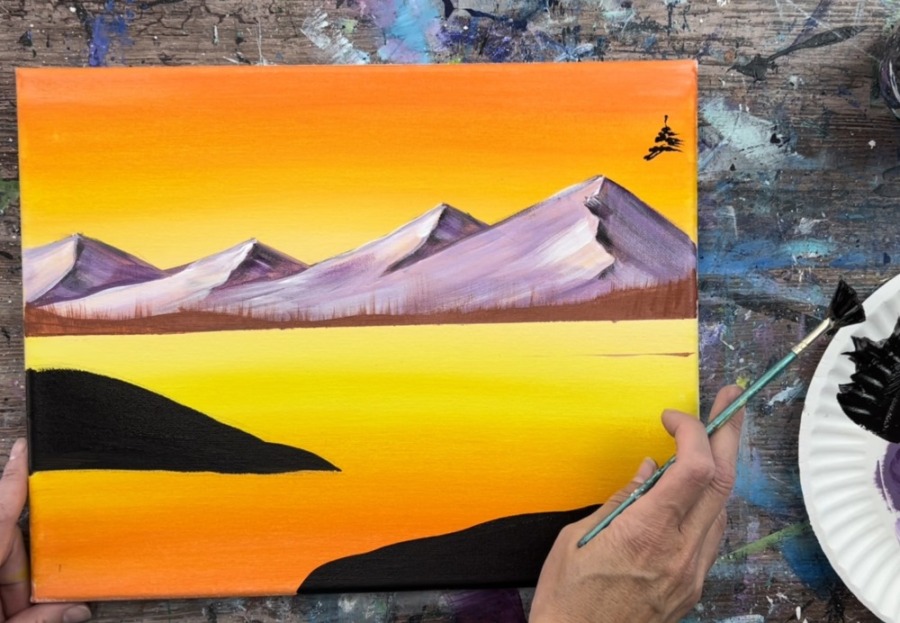
Start on the right top of the canvas area above your mountain peaks. Make a small vertical mark. Then angle the brush to use only a small portion of the bristles. Tap the tip of the bristles to form the tree top. Go in a zig-zag direction and allow your tree to get wider as you work your way to the bottom.
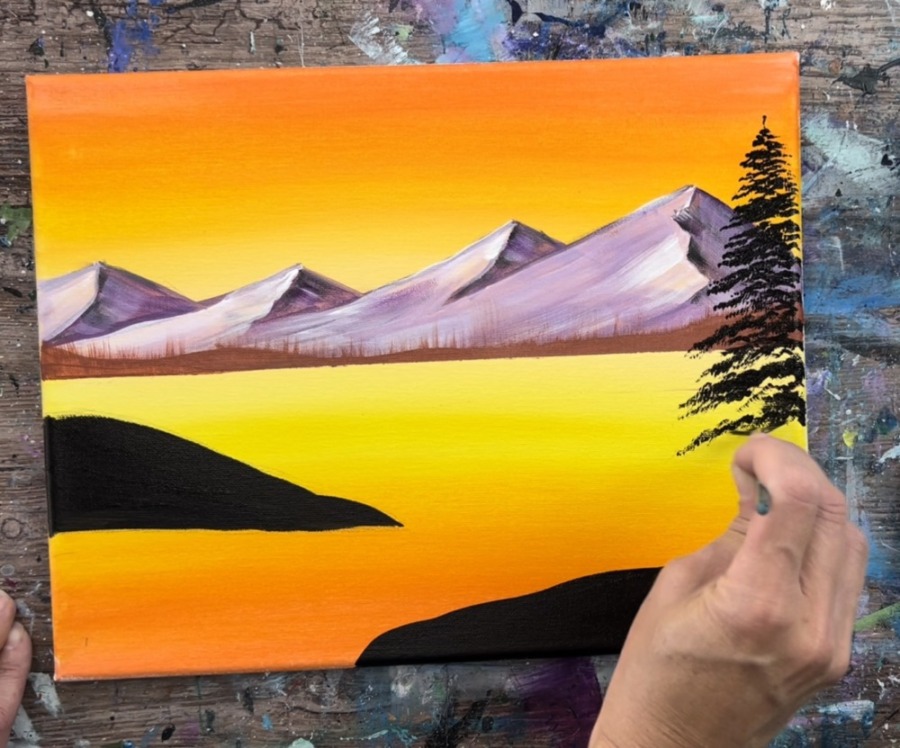
Continue to paint in a zig-zag direction forming the shape of the tree and go all the way to the bottom black land area.
Repeat this step for the two trees on the left on top of the peninsula.
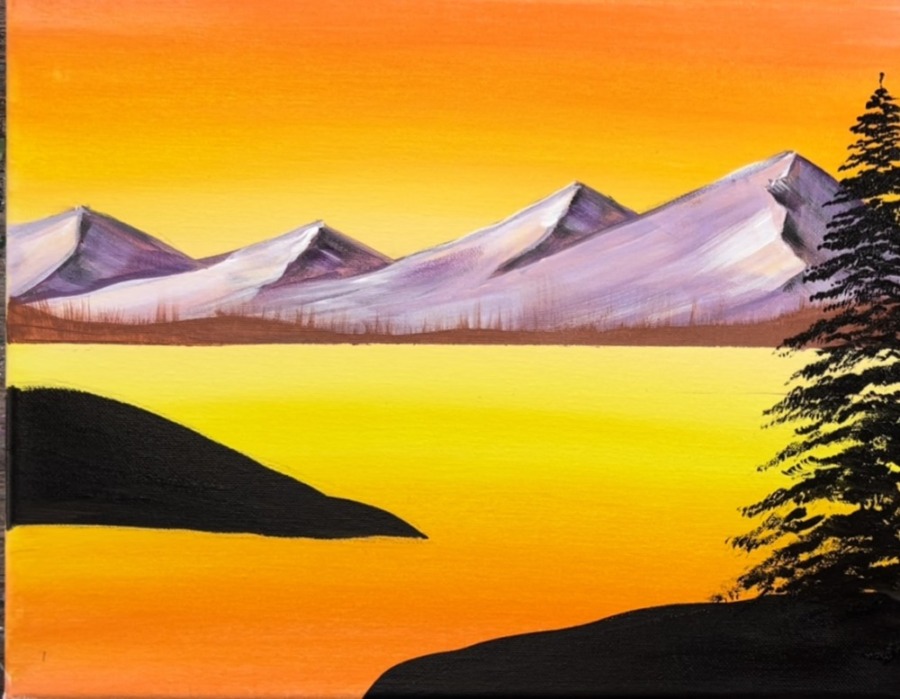
7. Paint Reflection
Water down mars black to a water color consistency. Load a small amount on your 3/4″ flat wash brush. Gently stroke down under the peninsula with the trees. You should get a stroke that is very translucent and thin. If it is showing up too dark, wipe some of the paint off the brush.
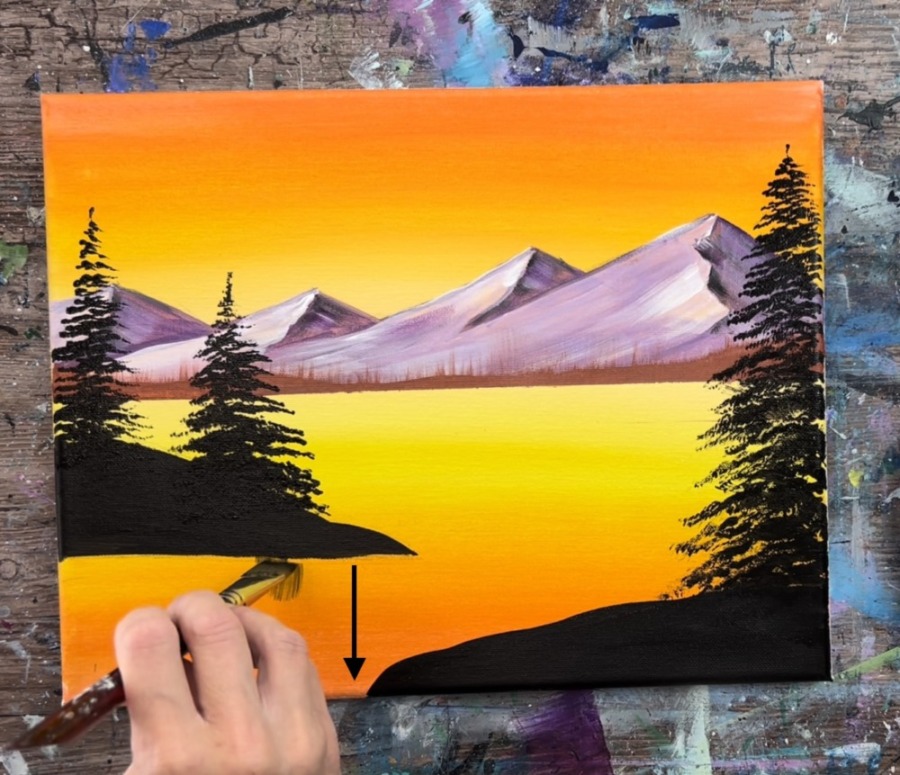
Form an upside down domed area below the peninsula with this watered down paint using all up and down strokes.
You can go back and add a second or third layer to this. I made the top part of the reflection (closest to the land) slightly darker by adding a bit more black. Try not to cover the orange completely but leave about 50% of it showing through. This will create the illusion of a reflection.
8. Add Green/ Highlight To Trees
It’s okay if the black layer of the trees is not completely dry yet but it shouldn’t be soaking wet or thick. If it is, let it dry just a bit more.
Load your clean fan brush in hooker’s green hue permanent and a tiny bit of red oxide. Adding the red oxide to the green will darken it a bit more and make the green look deeper/ more natural.
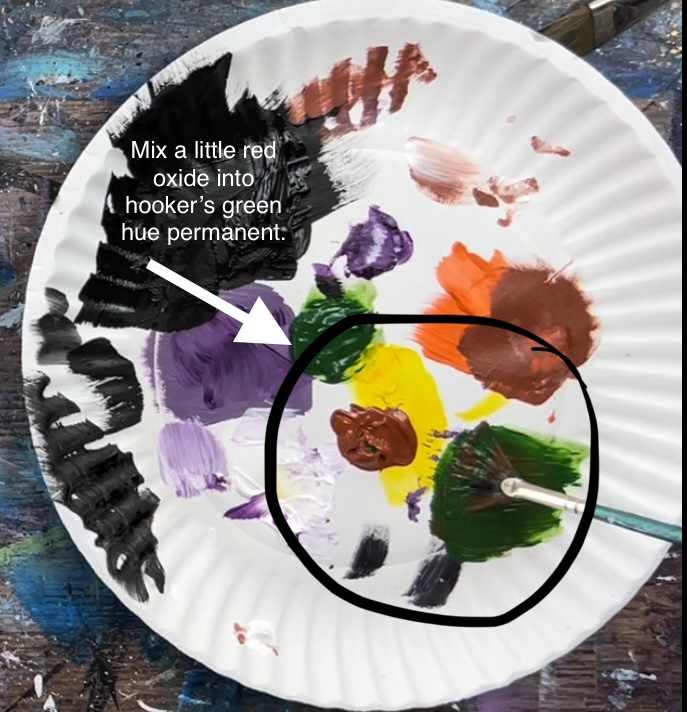
Then add a layer of this dark green over your black. Try not to cover all the black but leave a lot showing through. This will create depth with your tree.
Next, add a small amount of titanium white into your green & red oxide mixture on your palette. Add a third layer with this lighter green. This time, add it to the left side of the tree on the right and the ride sides of the trees on the left. This will highlight your trees and give them even more depth.
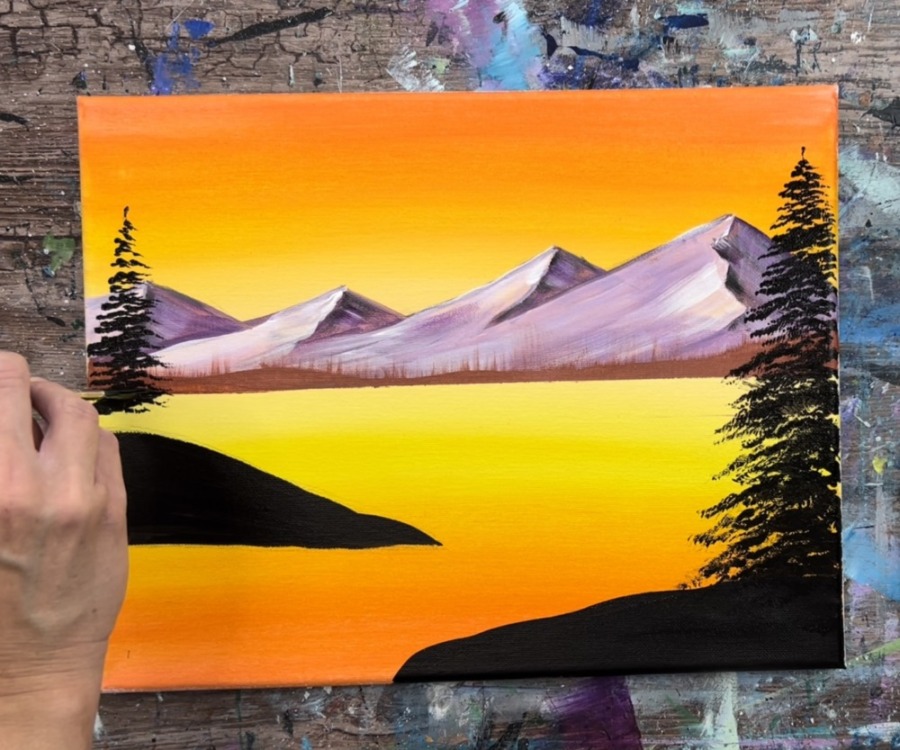
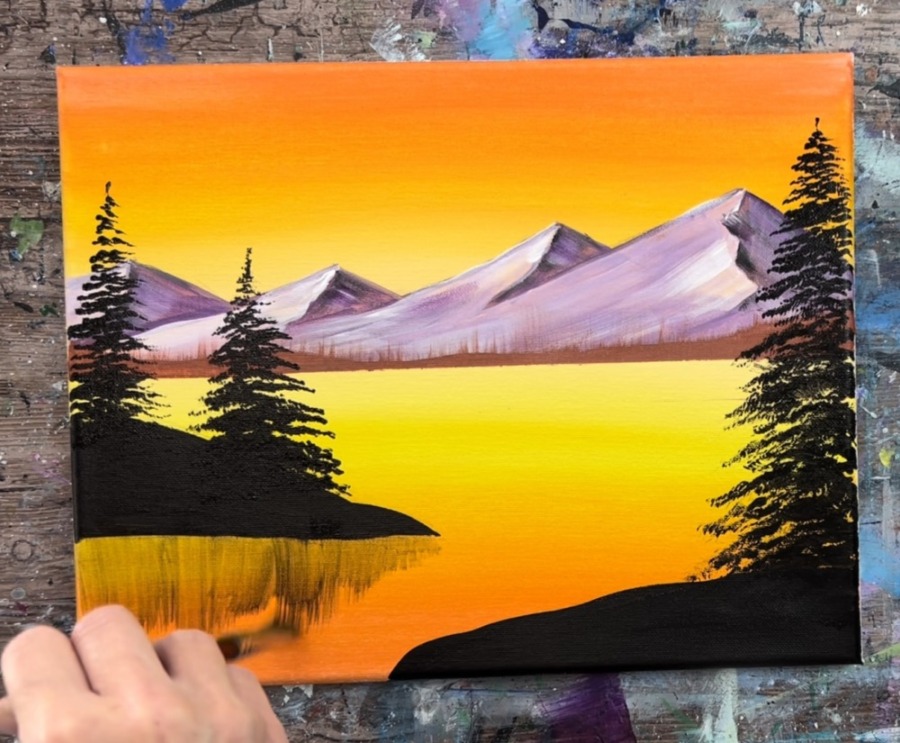
9. Paint Water Reflection Lines
You can use any flat brush for this or your 3/8″ angle brush. Paint very thin titanium white lines throughout the lake area. Paint smaller, more densely close together lines in the distance and larger, more stretched and sporadic lines closer to the bottom. Paint lines over your black reflection area as well.
10. Paint Foliage/Floral With Bristle Brush
For the floral/foliage texture on the land areas, I used a bristle brush. This is a brush that has scratchy textured bristles (not soft). The scratchy bristles help create texture especially if you stipple just the tip of this brush.
Load the tip o this brush in a small amount of the hooker’s green hue permanent mixed with white color (same color you used for the trees). Then stipple the brush on the land and create cluster blotches of foliage.
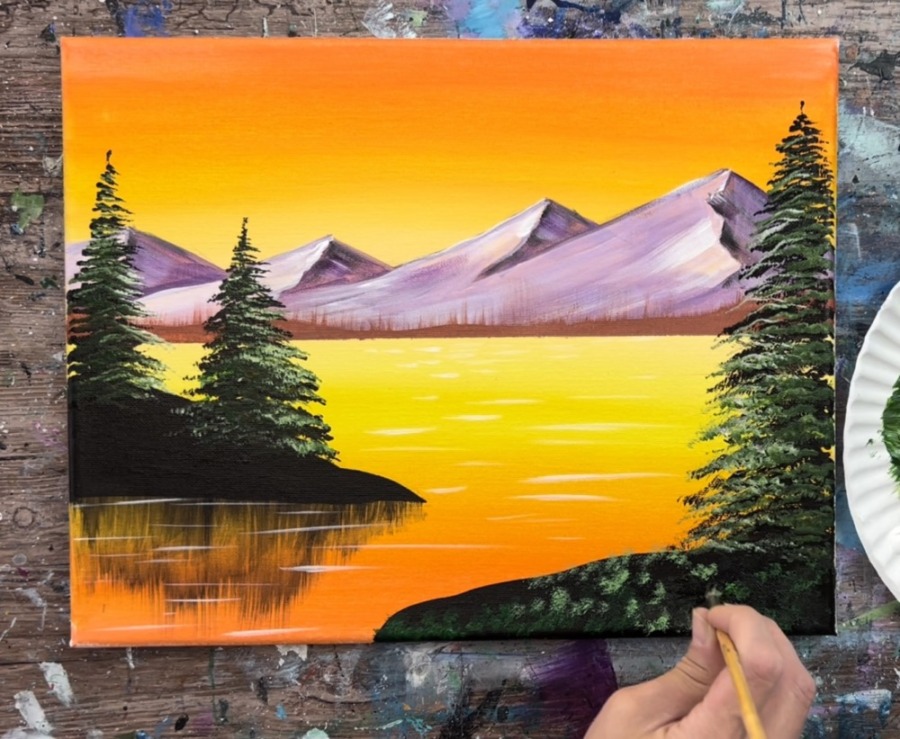
Go back with black to darken it. Try not to make it too bright because this is suppose to be a dark and shadowy area.
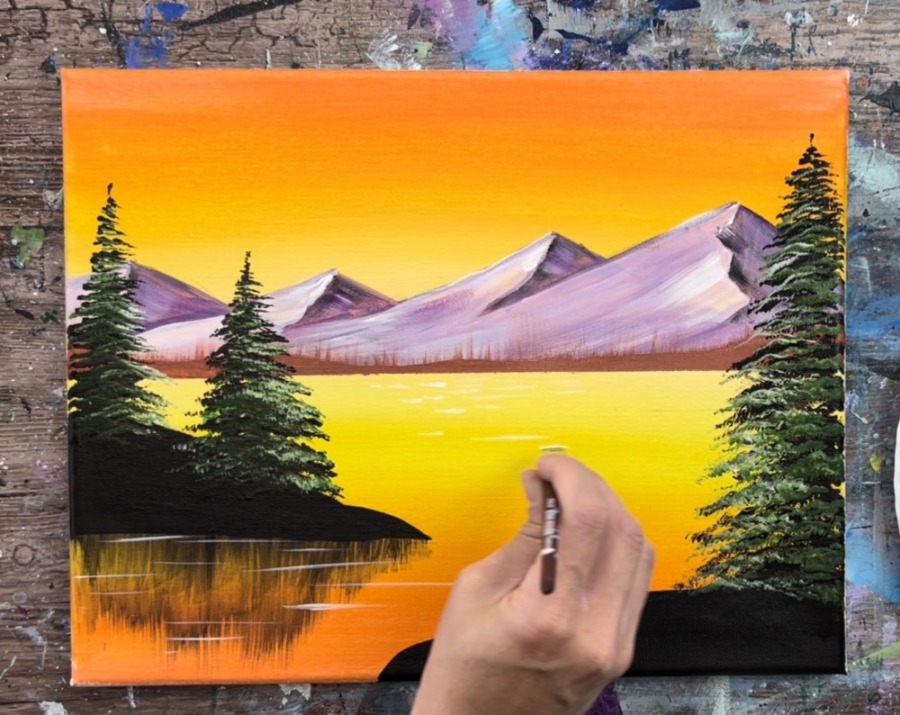
Then add greenery texture to the peninsula.
Then go back in with a layer of prism violet mixed with a little white to add purple flowery clothes on the land.
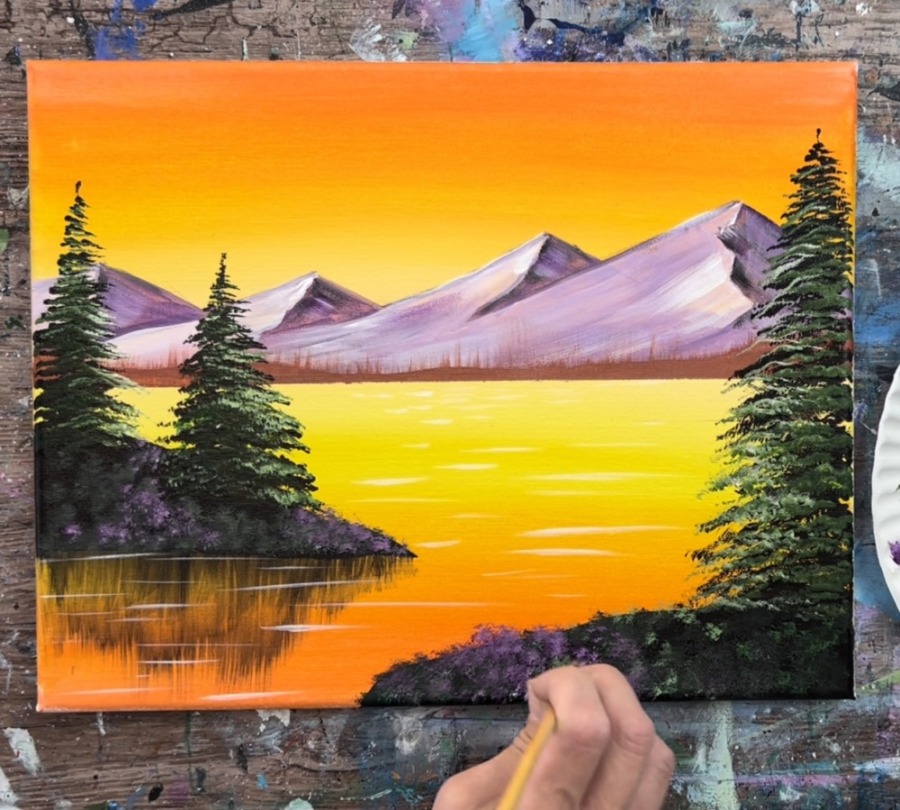
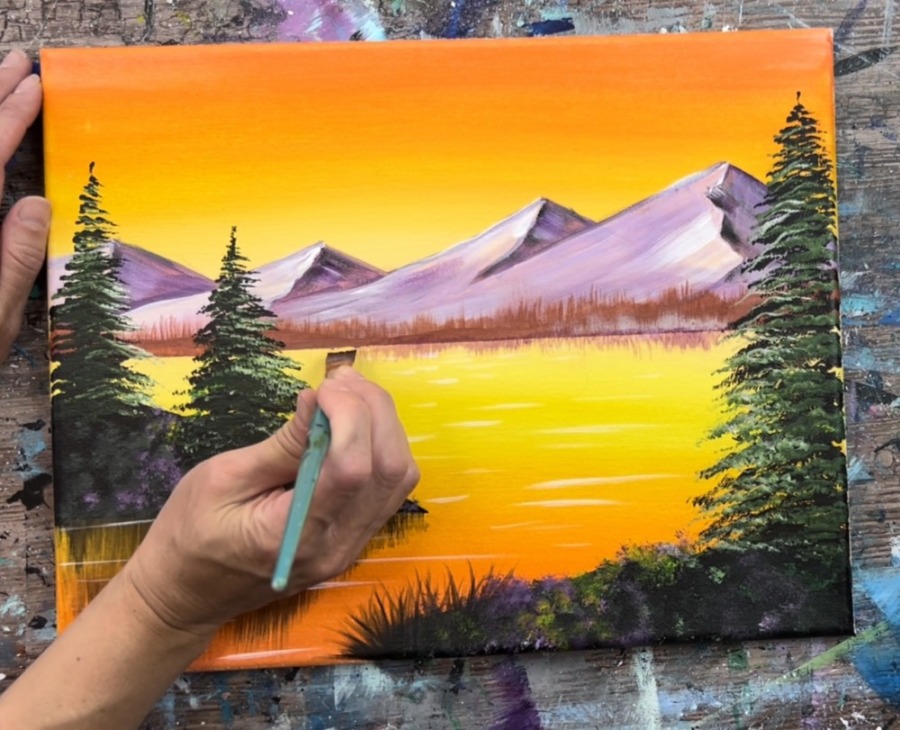
11. Final Touches
These “final touches” are optional and are all about adding more details to your landscape painting. Use your 3/8″ angle brush and prism purple mixed with a tiny bit of white to paint another tree line layer.
Do this “dry brush style” by only loading a small amount of paint to your brush and wiping some of it off. Then drag a layer of paint up and down going across the horizon line under your red oxide tree line.
Another detail you can do is add some yellow to your land area on the bottom and peninsula. Do this with your round bristle brush loaded with a small amount of primary yellow.
Then you can use a smaller flat brush (I used a 12 bright) to create some reflection under your horizon line. I did this with just prism violet and “dry brushed” vertical strokes under the tree line. I did not want to loose too much of that yellow so I did this only subtly.
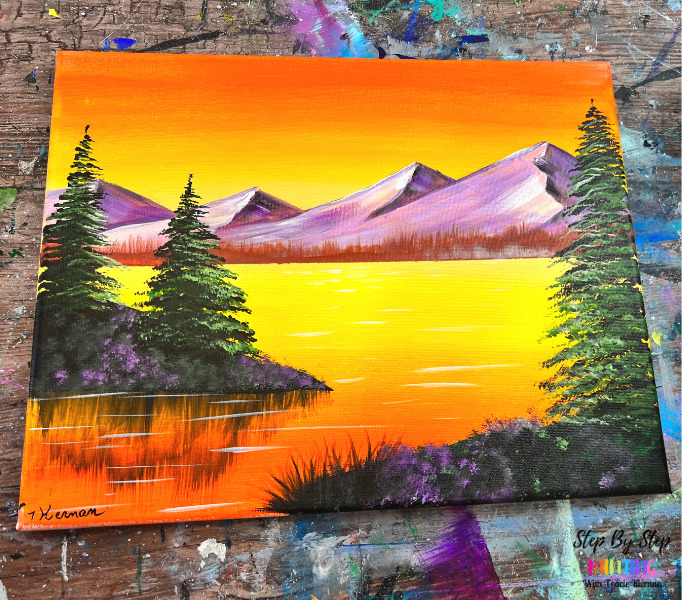
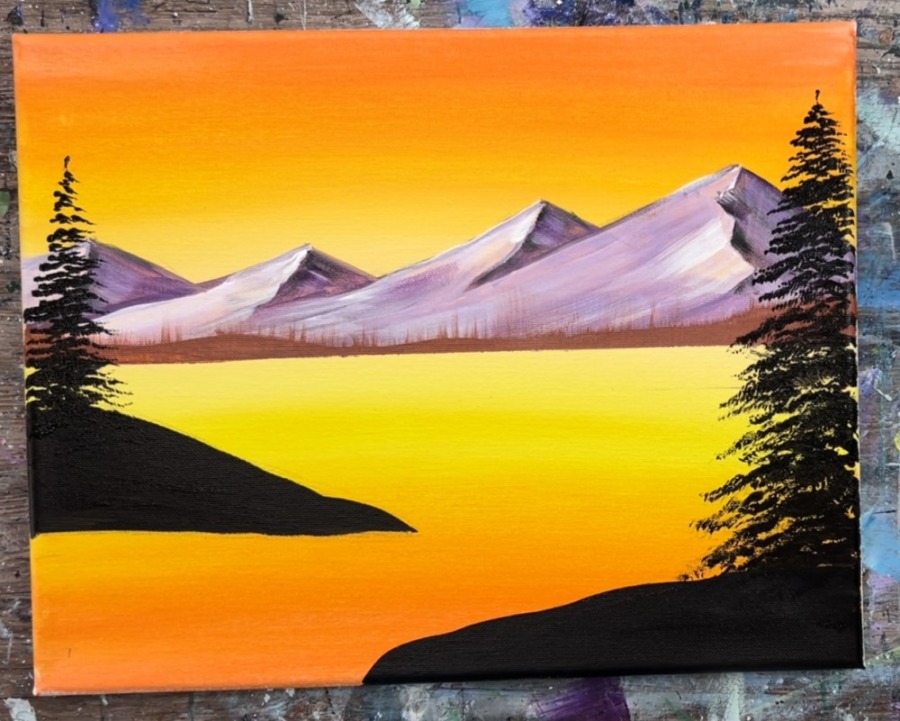
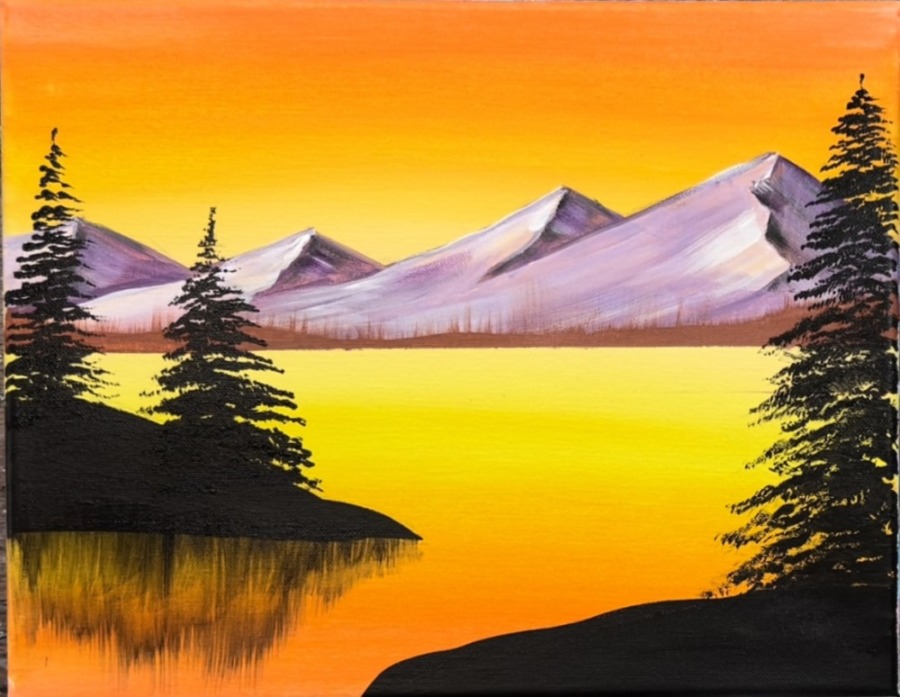
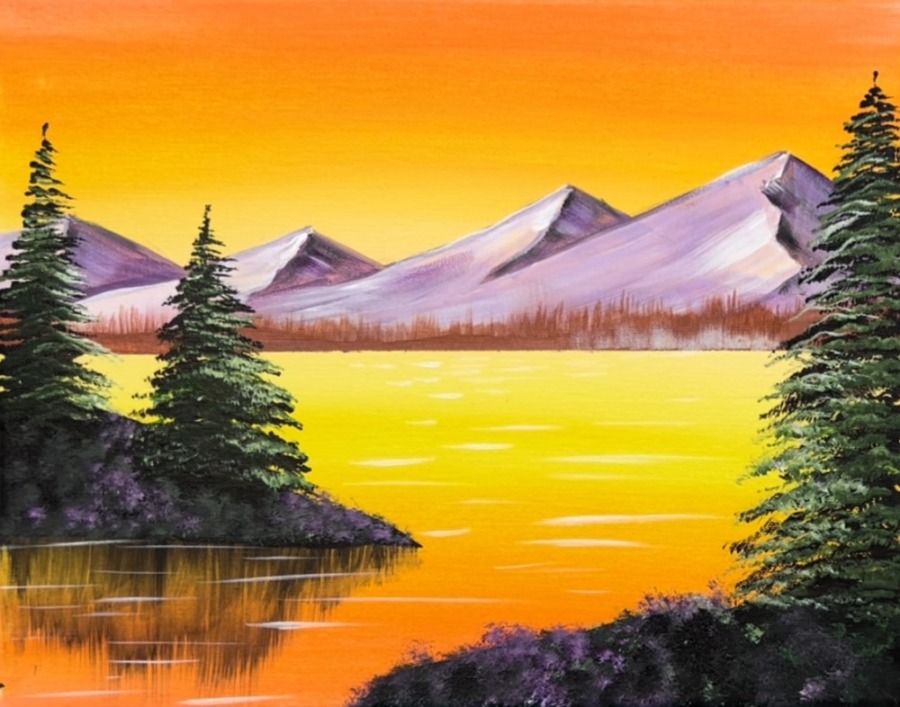
Finished!
Sign your name and show it off!

Share Your Art Here:


