
Would you like to save this?
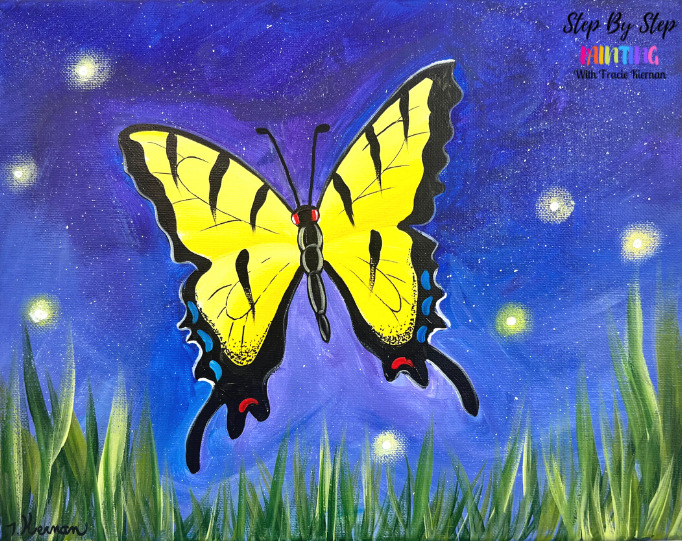
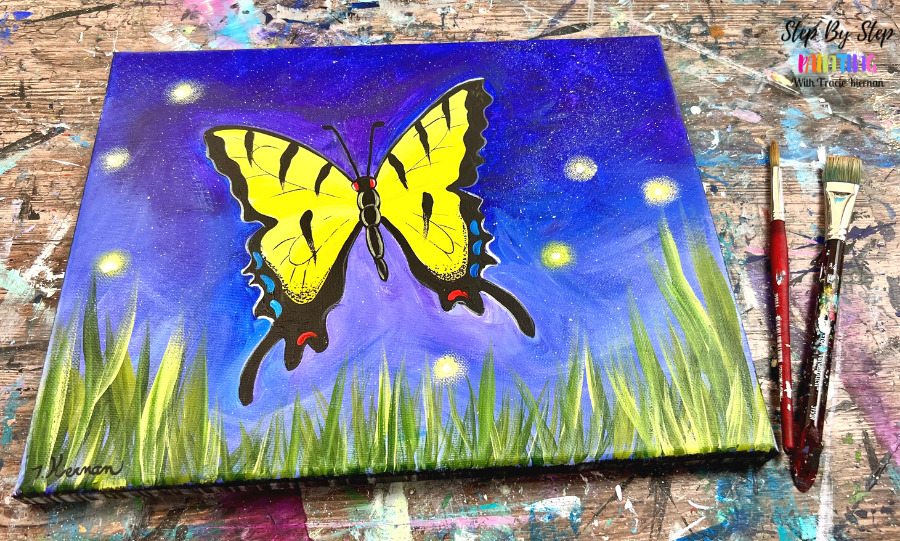
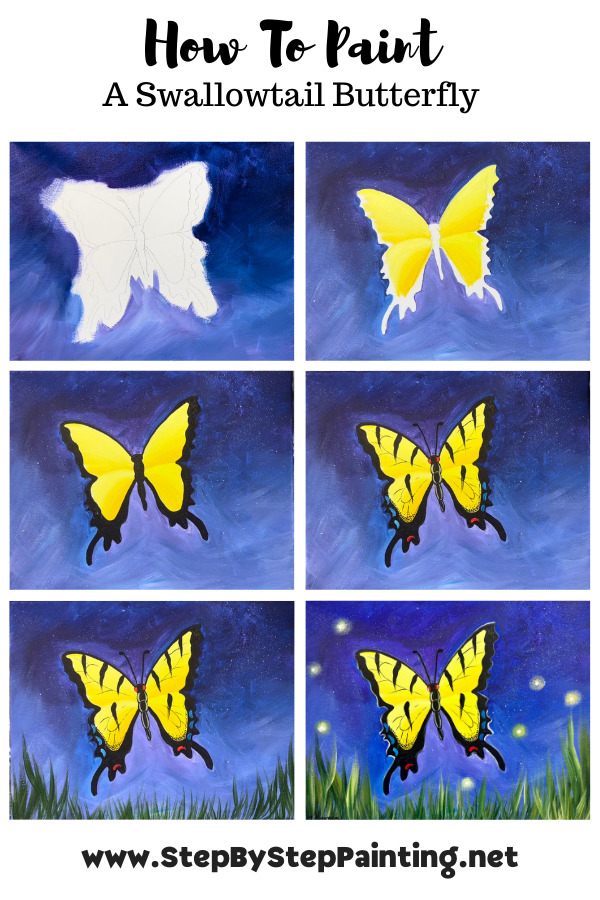
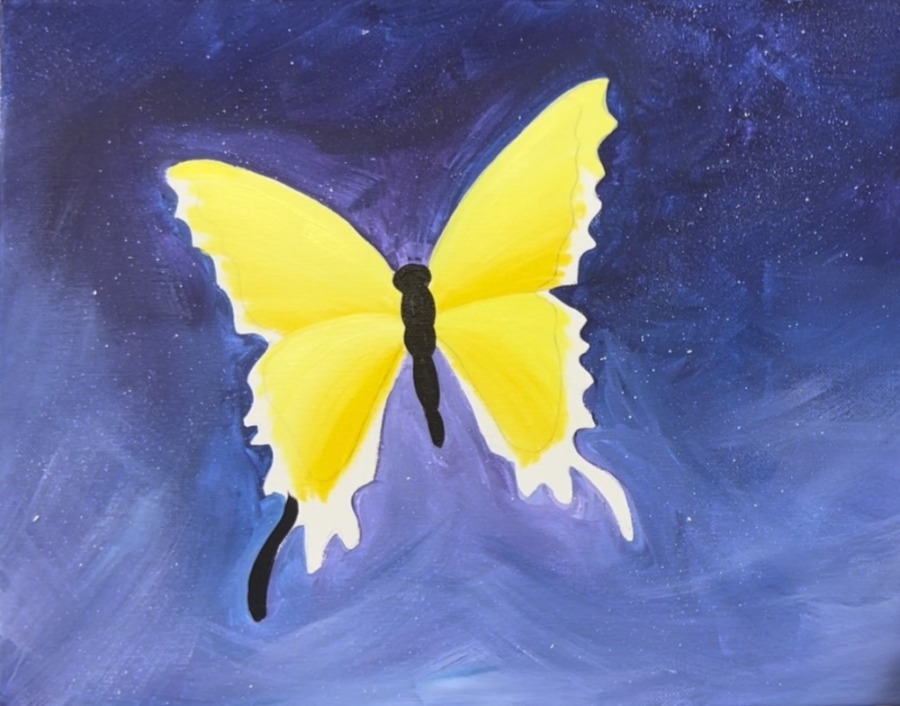
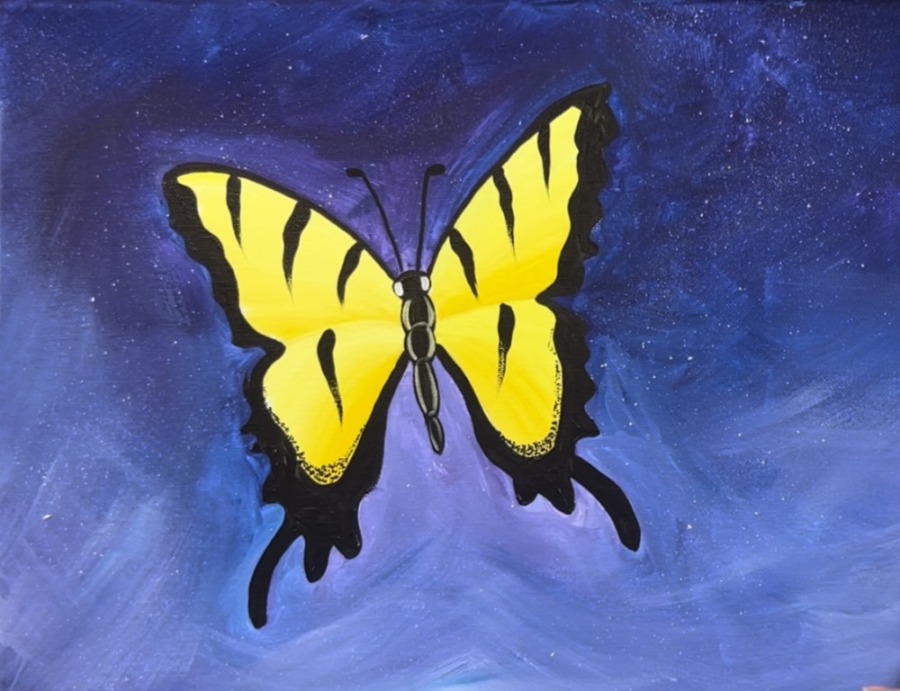
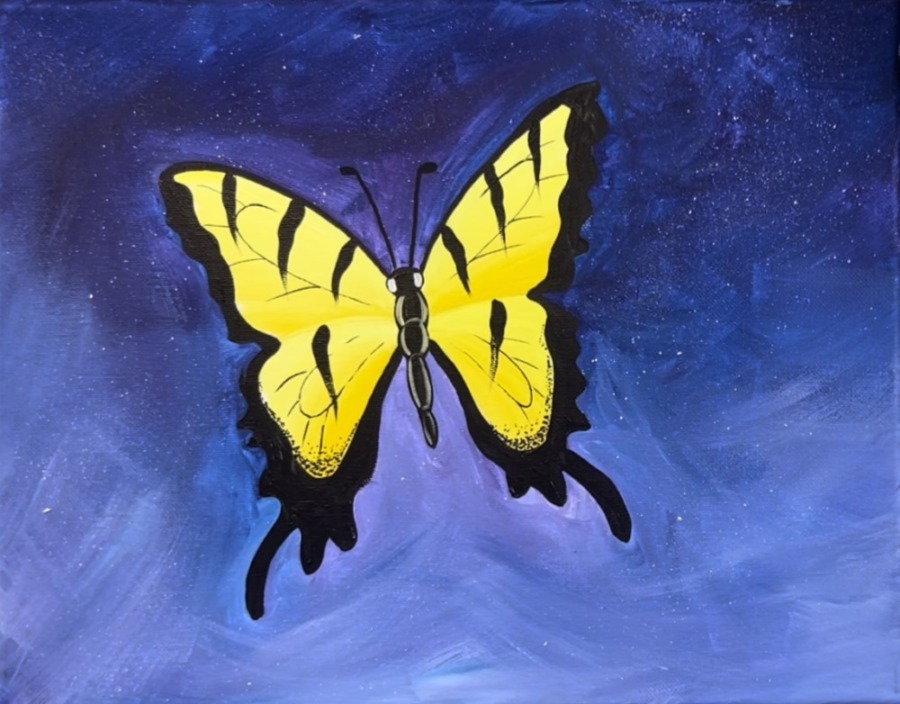
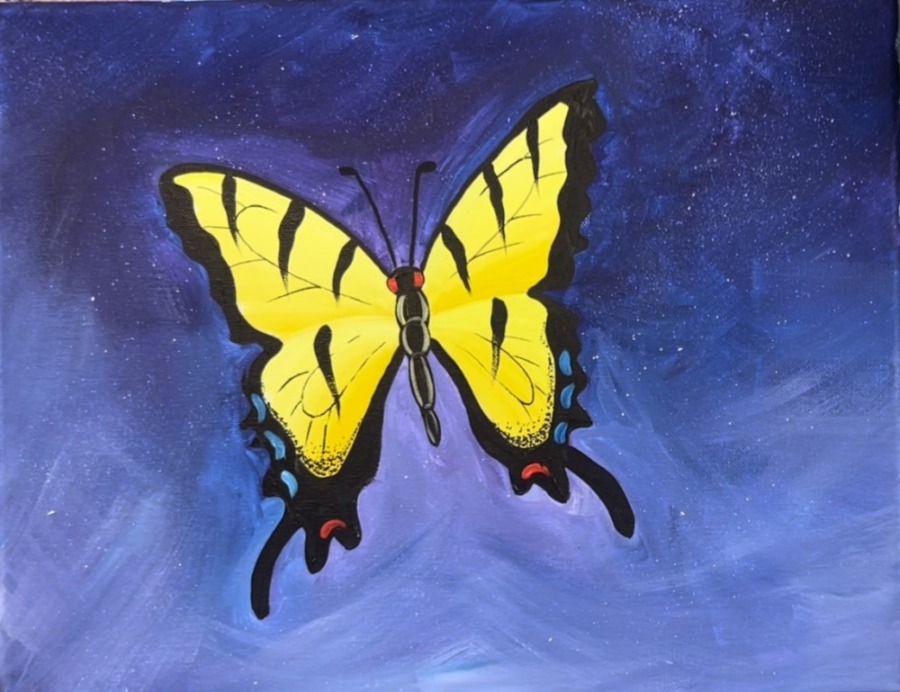
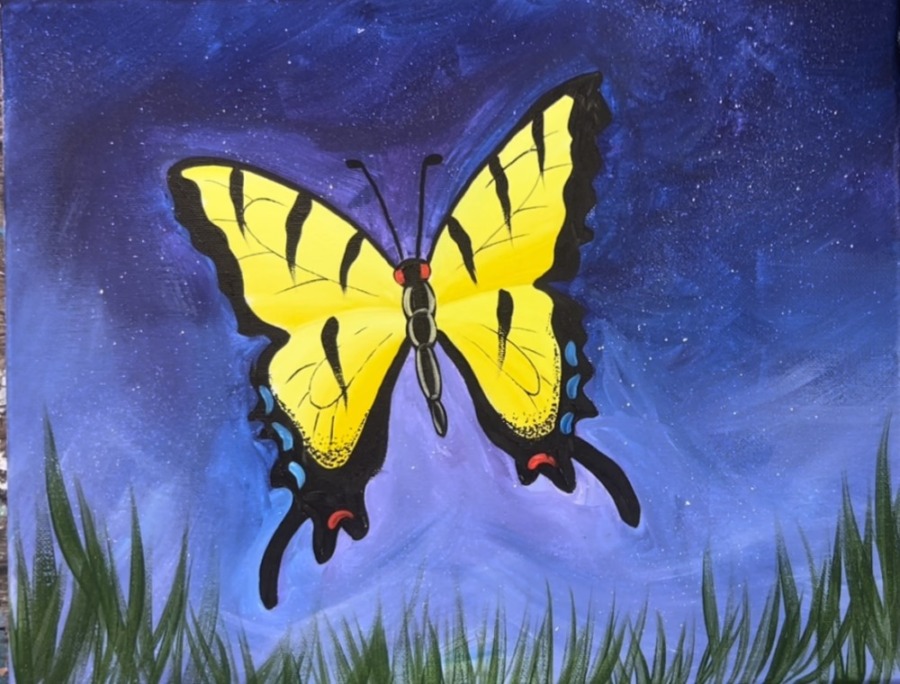
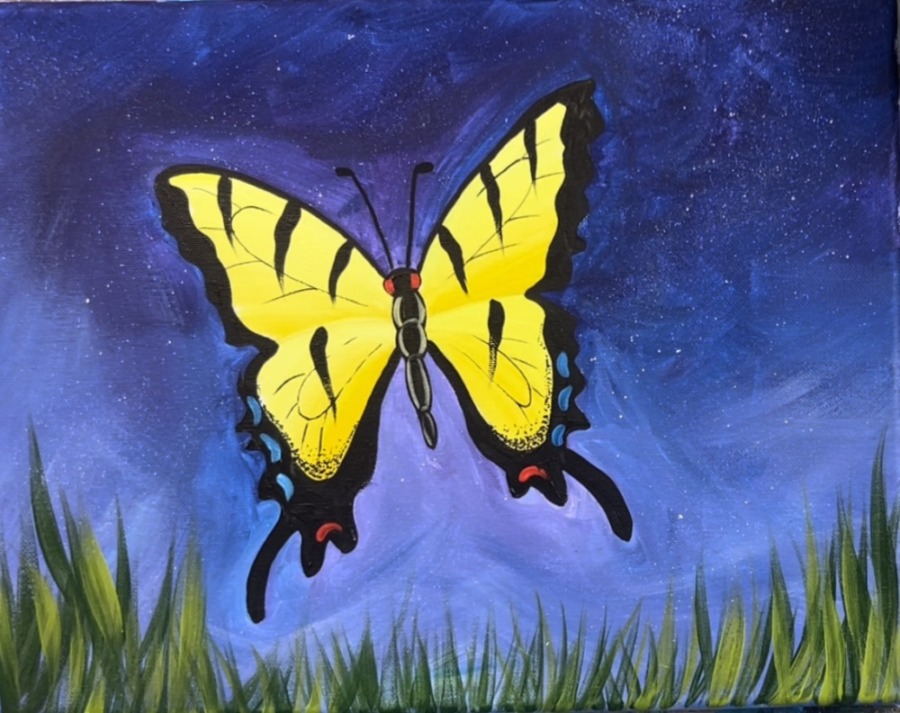
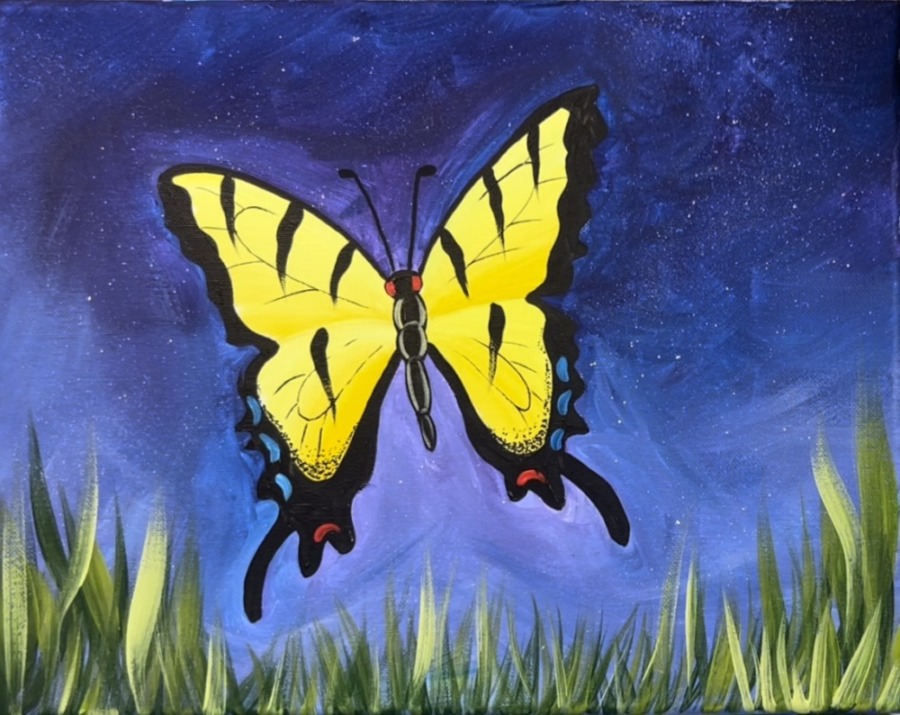
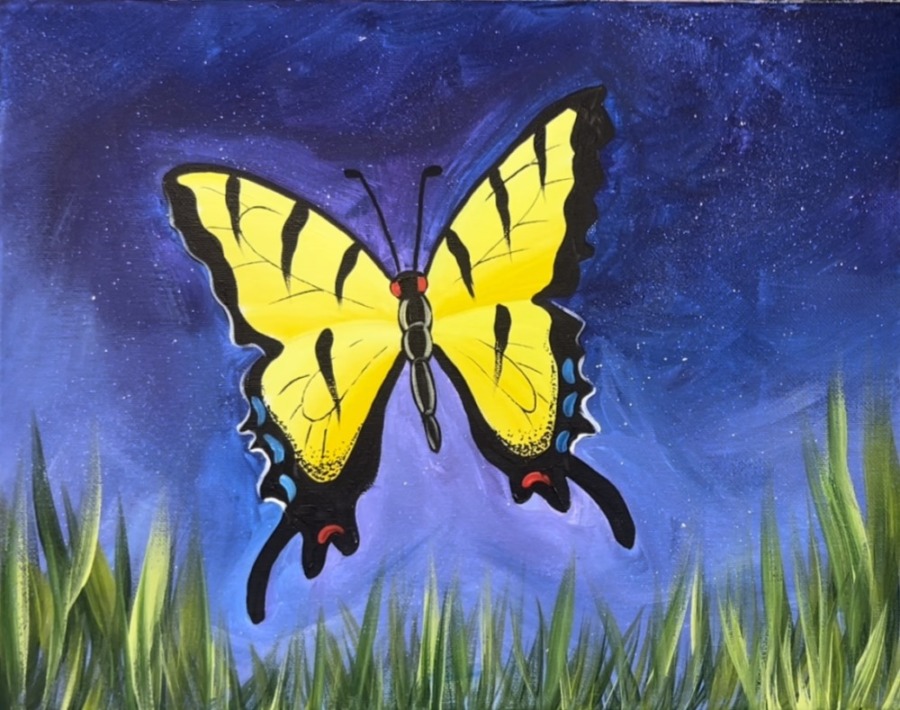
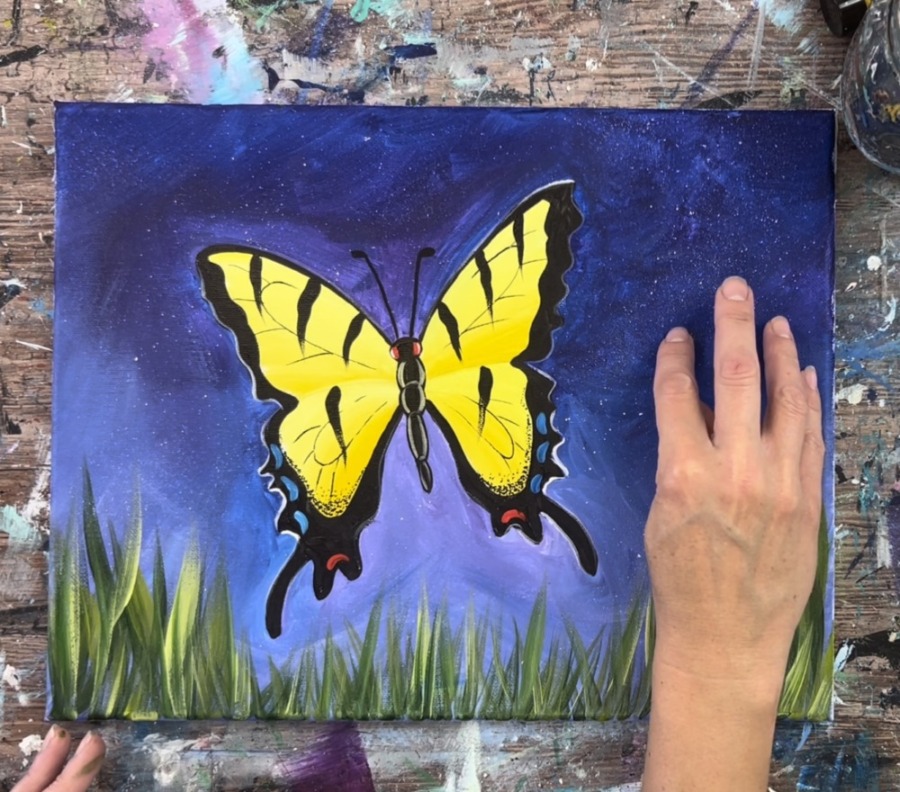
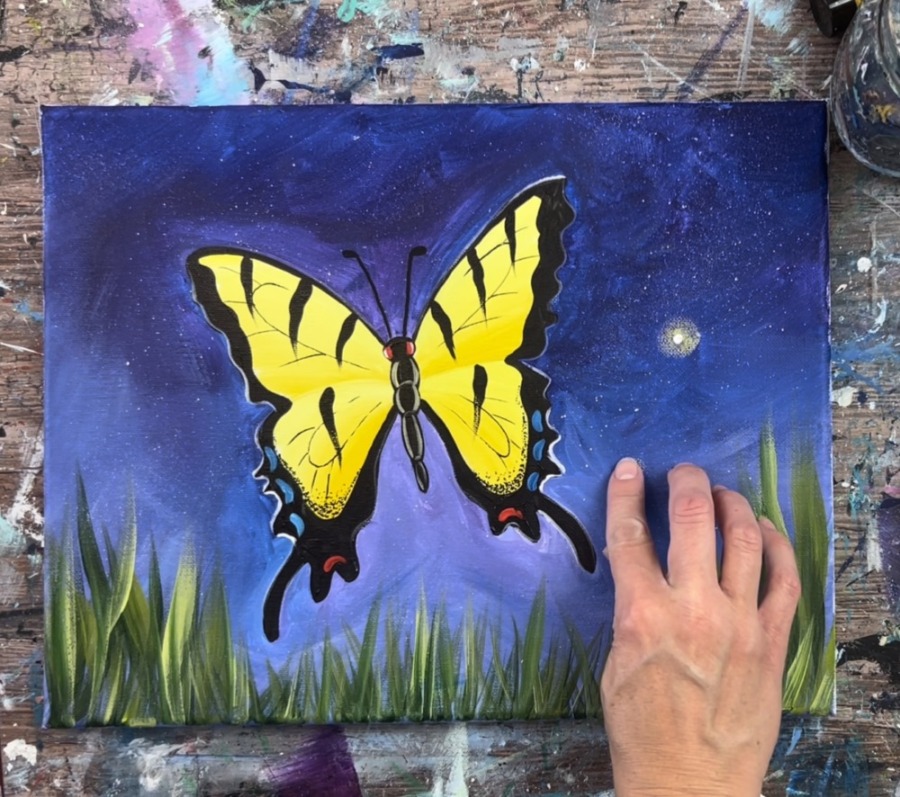
This tutorial demonstrates how to paint a swallowtail butterfly with a dark bluish purple background. I love the contrast of the yellow against the blue in this painting!
Swallowtails are my favorite type of butterfly! The black and yellow are such a pretty combination with small pops of other colors.
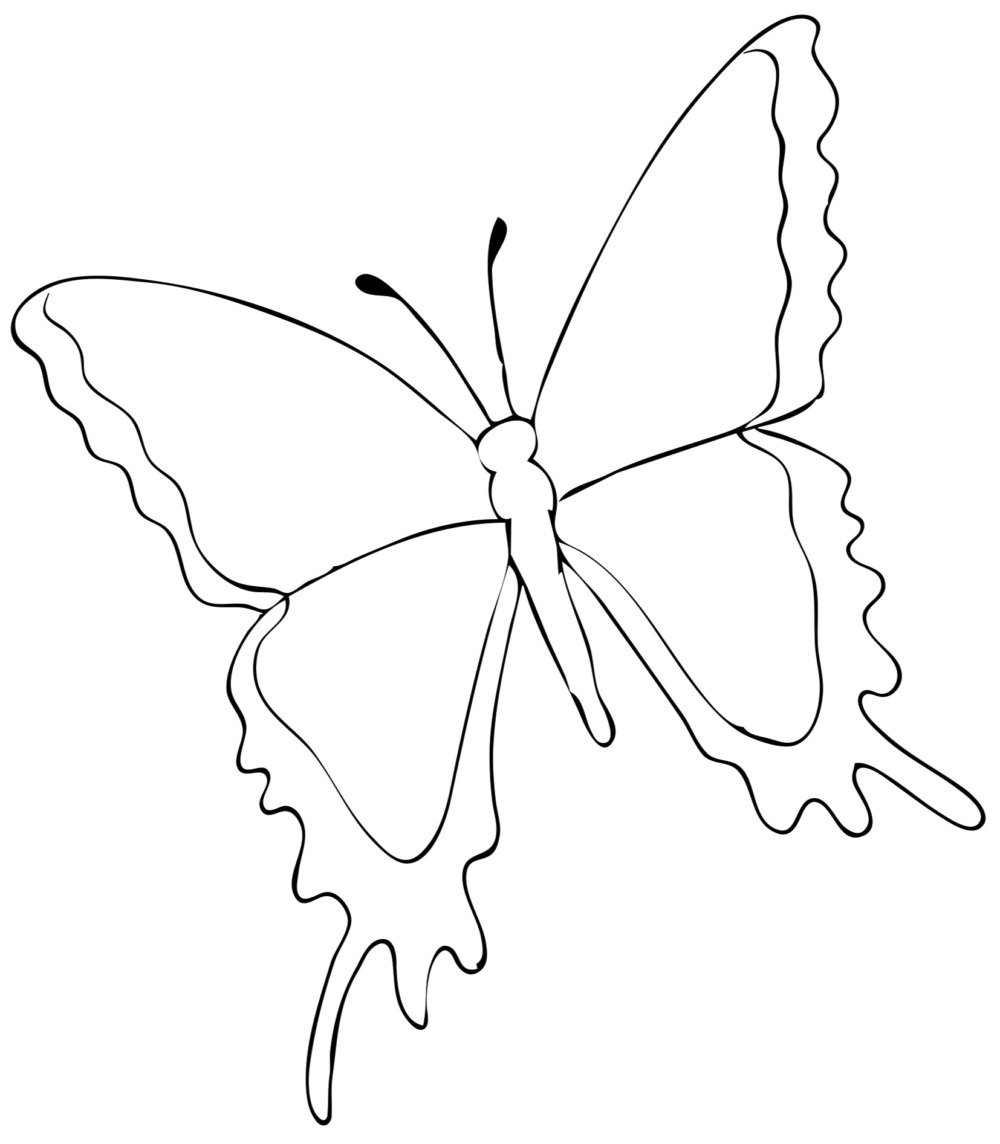
This tutorial includes a traceable you can use for your butterfly. If you want to draw the butterfly, you can see my “How To Draw A Butterfly” post here. The only difference is you can draw the “tails” on the bottom of both of the wings.
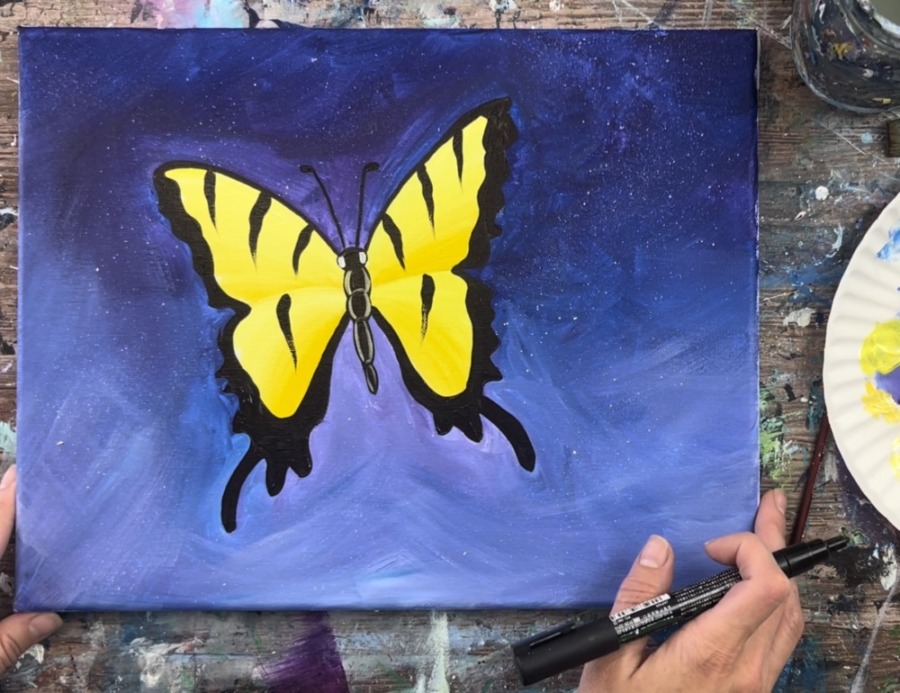
Also, a black POSCA paint pen was used for some of the intricate details on this butterfly. I used the Medium Tip paint pen and I purchased it from Amazon. POSCA paint pens are water based paint markers that can be used on your canvas paintings for detail work.
Enjoy and happy painting!
Materials Needed
How To Paint A Swallowtail Butterfly
This acrylic painting tutorial will demonstrate how to paint a swallowtail butterfly with acrylics on an 11 x 14 canvas.
Materials
Brushes
- Toothbrush For Optional Splatter Star Paint
- 3/4" Flat Wash Brush
- #8 Round Brush
- #4 Round Brush
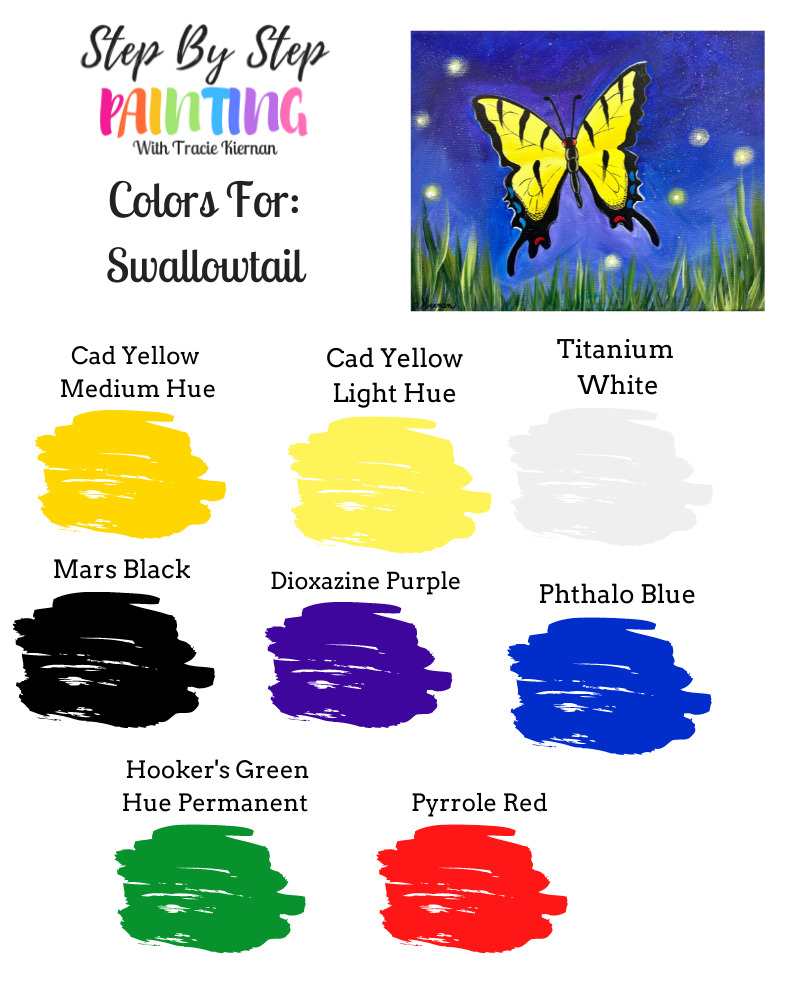
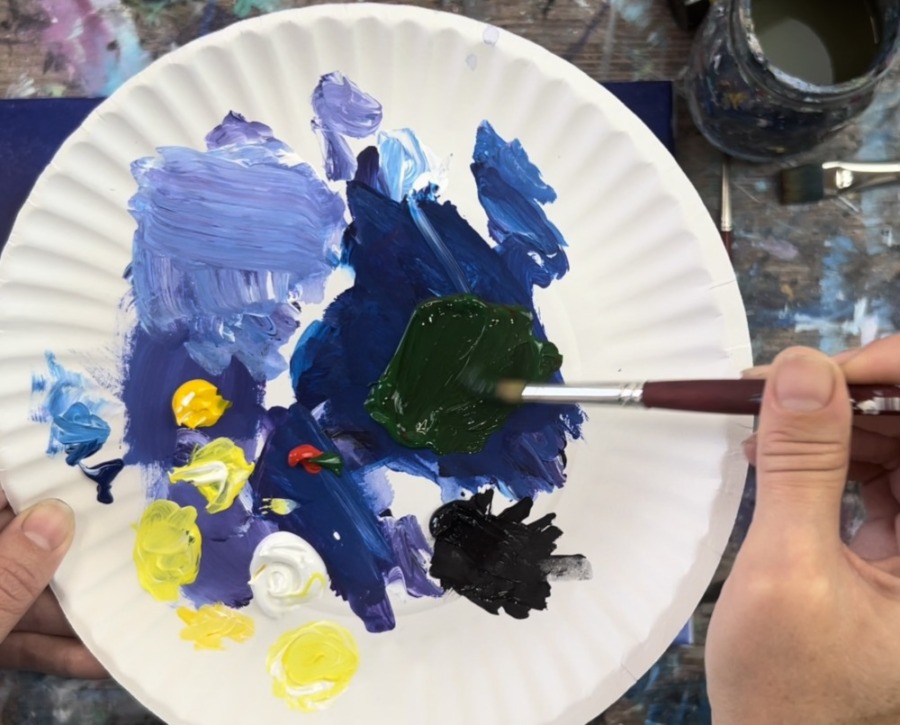
Colors
- Titanium White
- Cadmium Yellow Medium Hue
- Cadmium Yellow Light Hue
- Mars Black
- Pyrrole Red (Or Cadmium Red Medium Hue)
- Phthalo Blue
- Dioxazine Purple
- Hooker's Green Hue Permanent
Color Palette
I used Liquitex BASICS acrylic paints for this tutorial! If you are using another brand of paint, you can look at the color swatch below to help you match colors.
Using Craft Paints?
If you are using craft paints such as the Apple Barrel Craft paints, I would suggest subbing for these colors:
- Bright Yellow
- Yellow Flame
- White
- Black
- Purple Irish
- Too Blue
- Holly Branch
- Flag Rad
Traceable
Directions At A Glance
Video
Step By Step Instructions
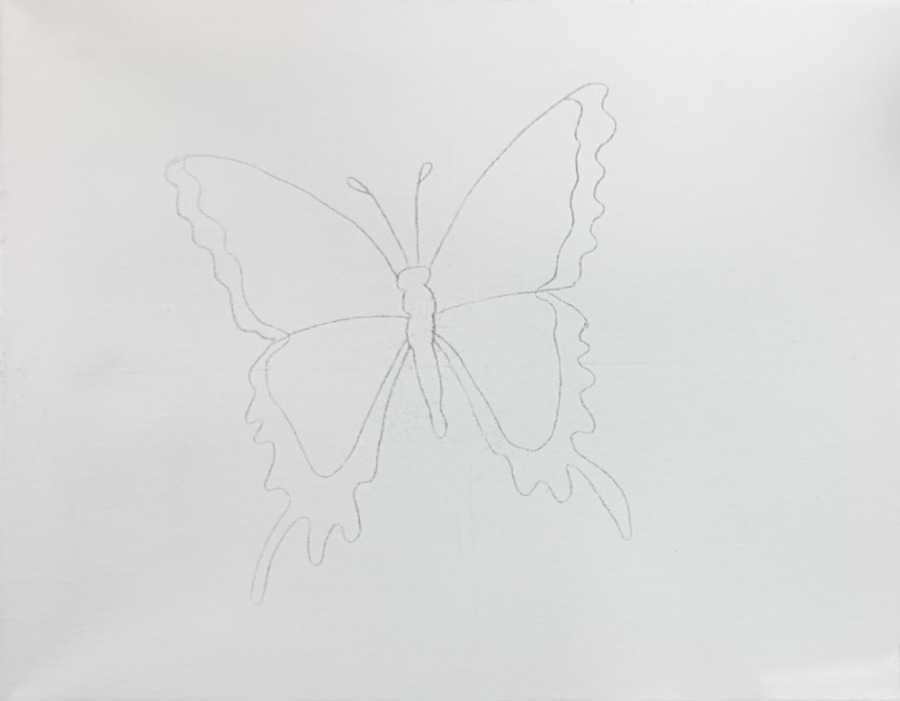
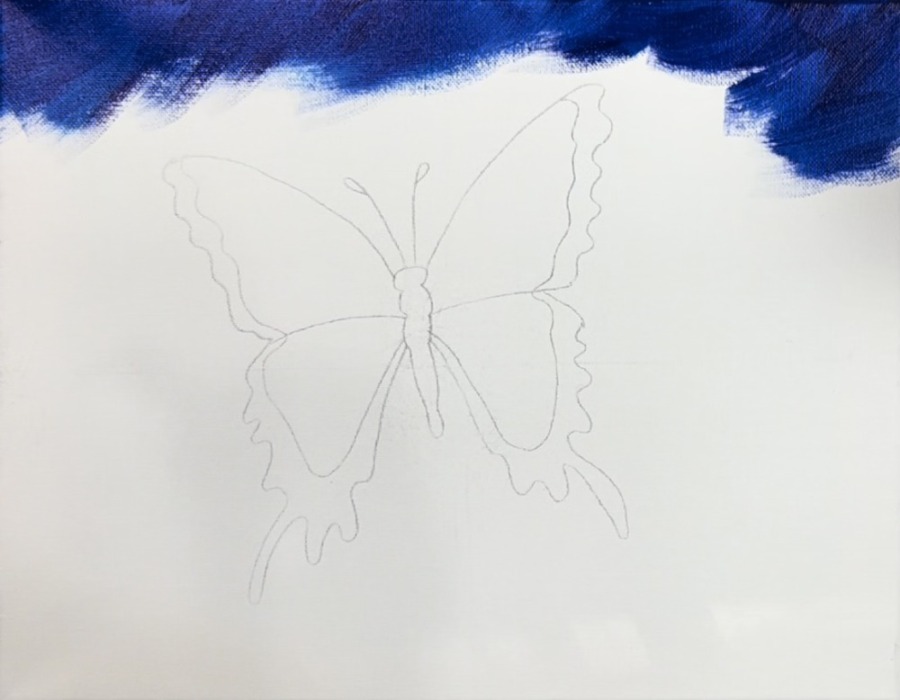
1. Trace Or Draw The Butterfly
You can download and print this free butterfly template here!
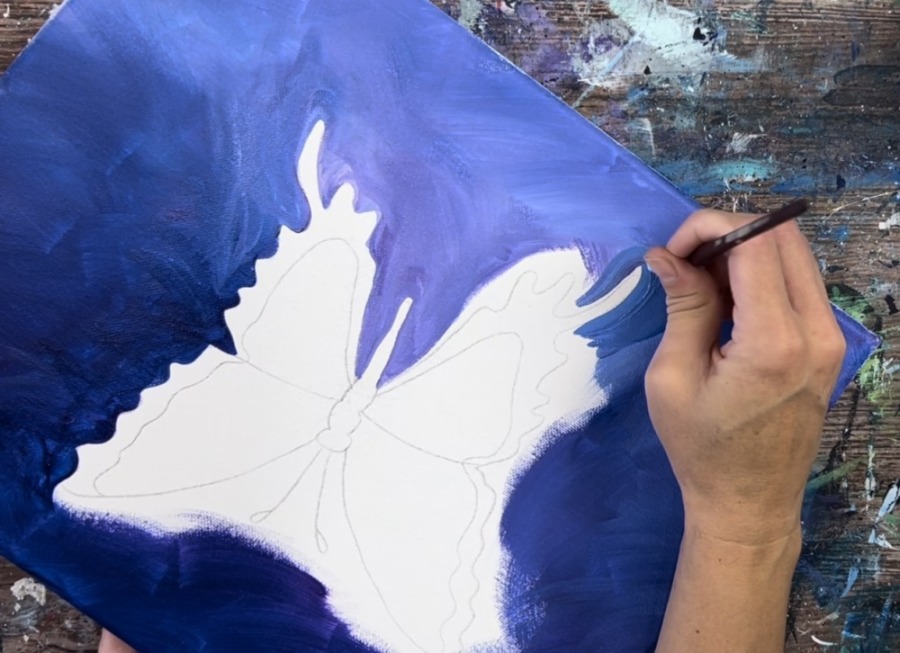
Position your canvas so that it is horizontal. Then place a sheet of graphite paper shiny side down on your canvas. Position your traceable template so that the butterfly is slightly angled to the left (paper angles slightly to the right).
Alternatively, you can position your butterfly anywhere on the canvas.
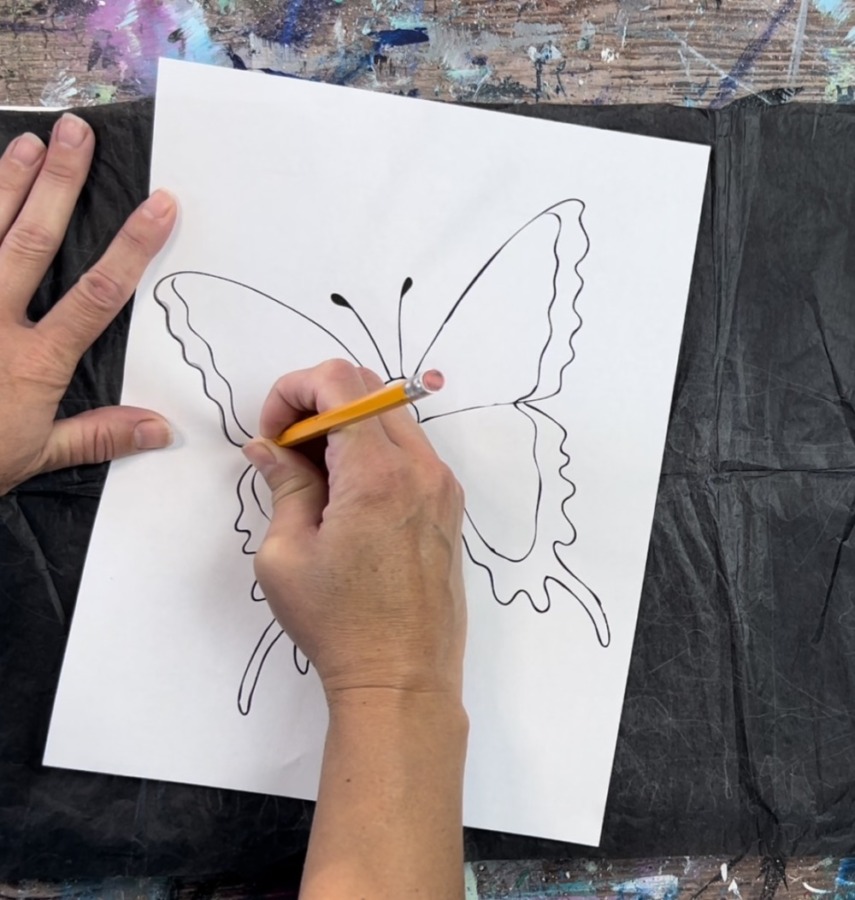
Press firmly and trace to transfer the design.
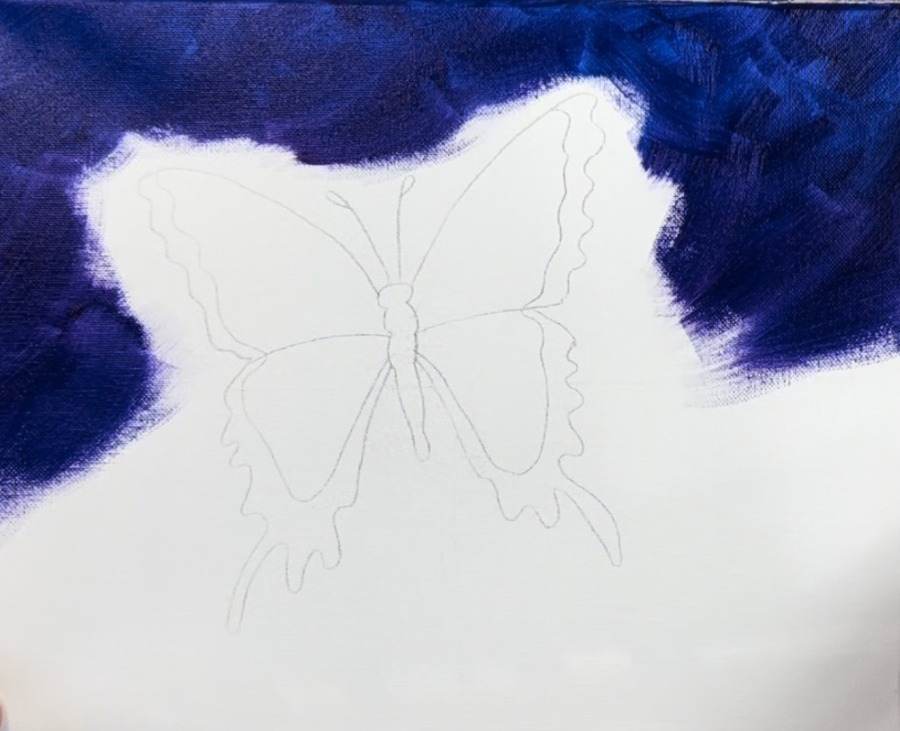
2. Paint The Background
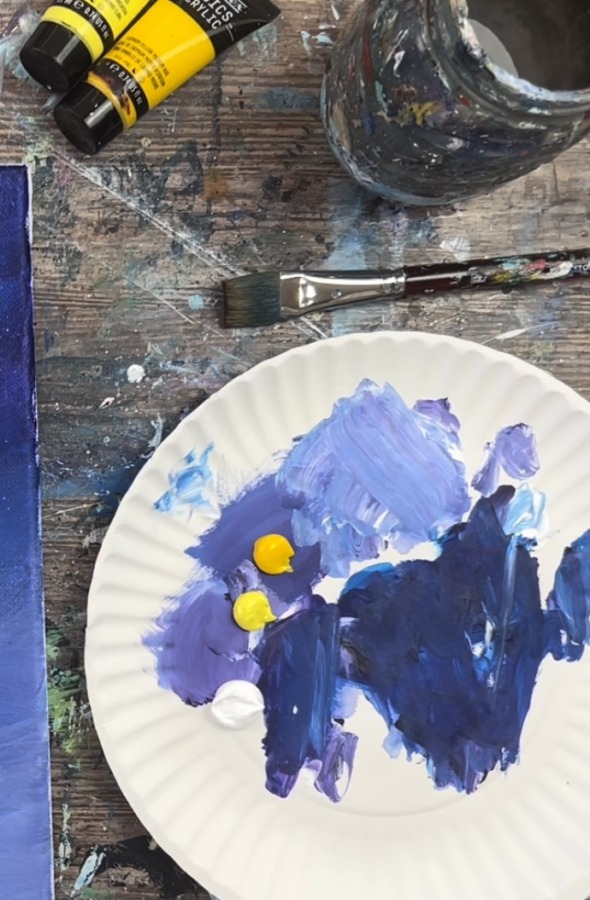
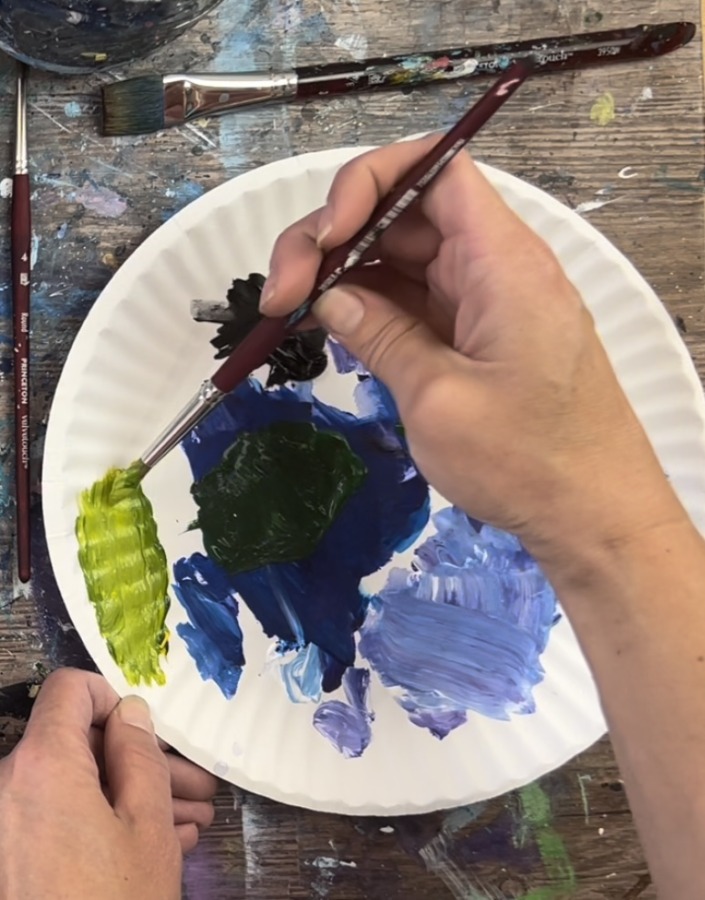
Load your palette with titanium white, phthalo blue and dioxazine purple. Use your 3/4″ flat wash brush. Load your brush in the water and gently tap it dry. Then apply equal amounts of blue and purple to your brush.
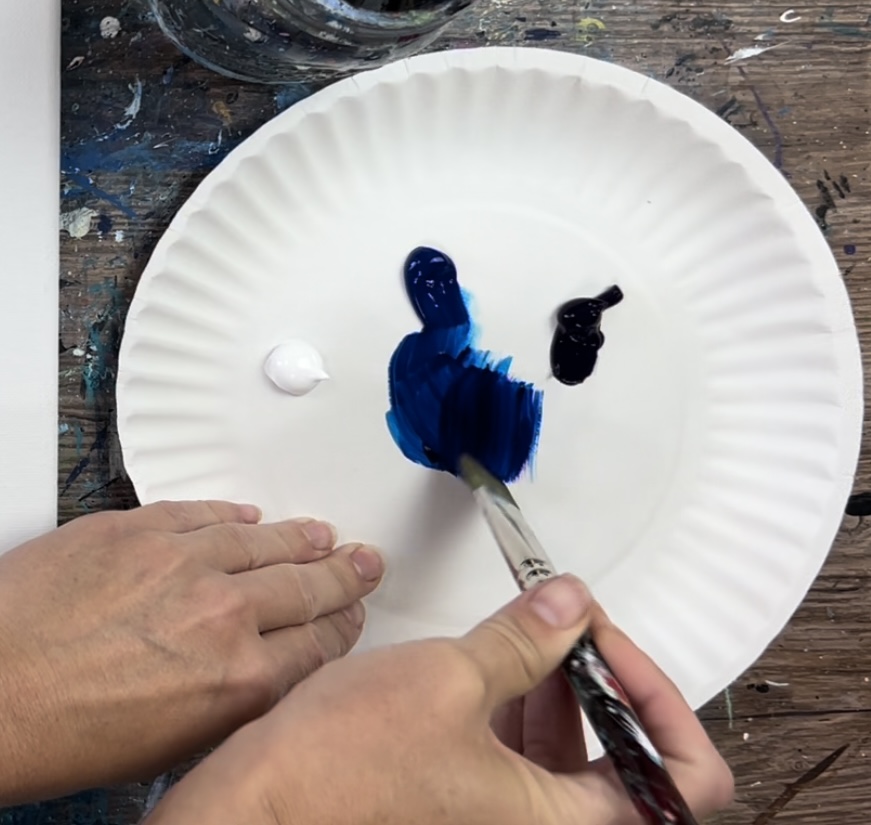
Use your brush to paint cross hatching “expressive strokes”. The purple and blue will blend on the canvas.
Go around the butterfly and paint as close to the wings as possible. You will be using a round brush to fill in the negative space closest to the lines in a later step. Go down about halfway with this blue and purple combination.
Then load the tip of your brush in white (wipe it off if it is over loaded with paint). Blend white on the bottom area. This will turn into a light blue-purple color.
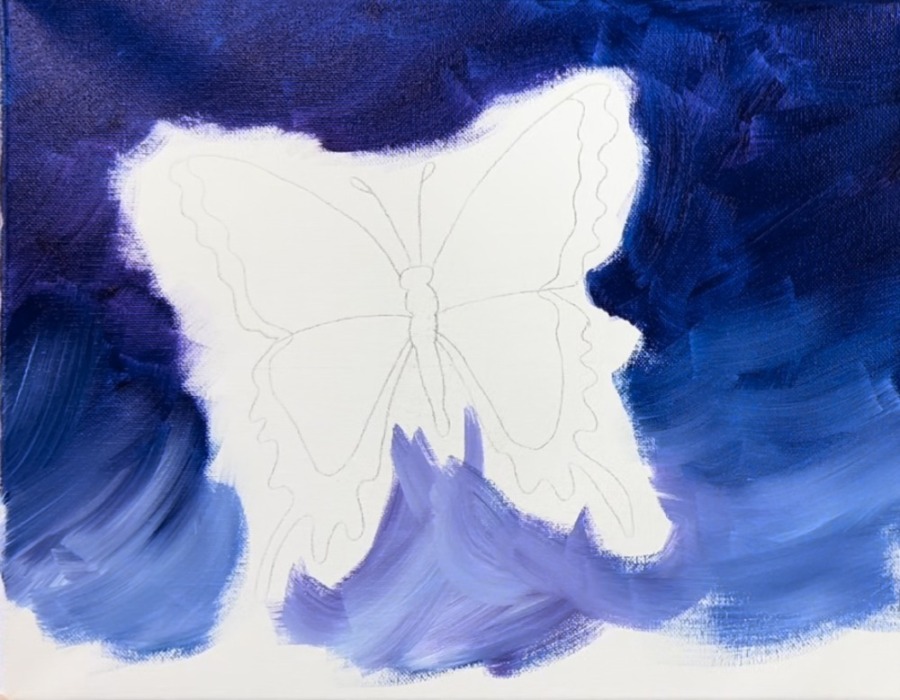
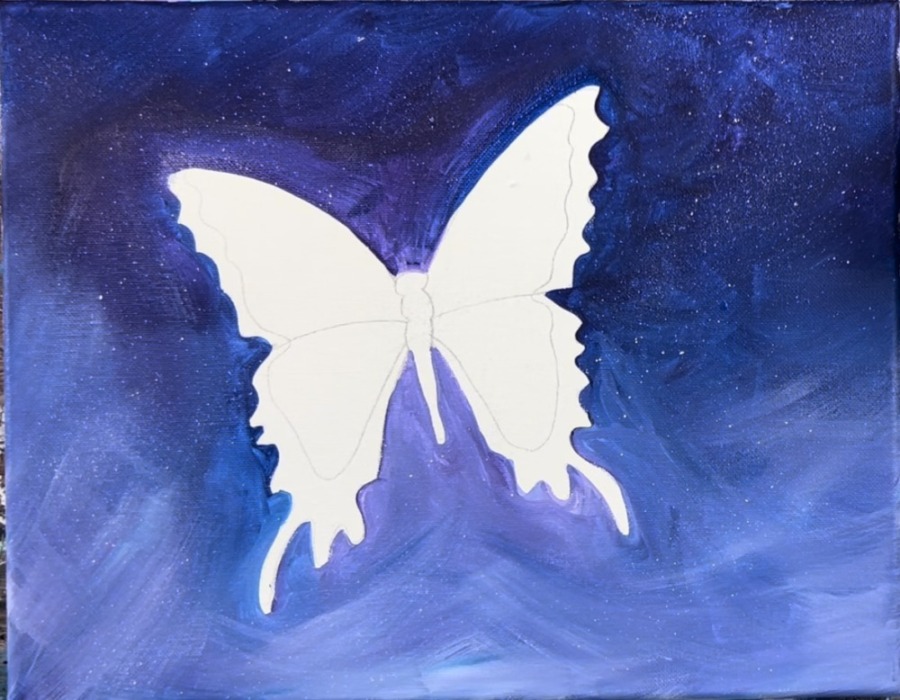
Fill the rest of the bottom with this lighter color and blend up into the darker area. You should have a sky that is darkest at top and lighter towards the bottom.
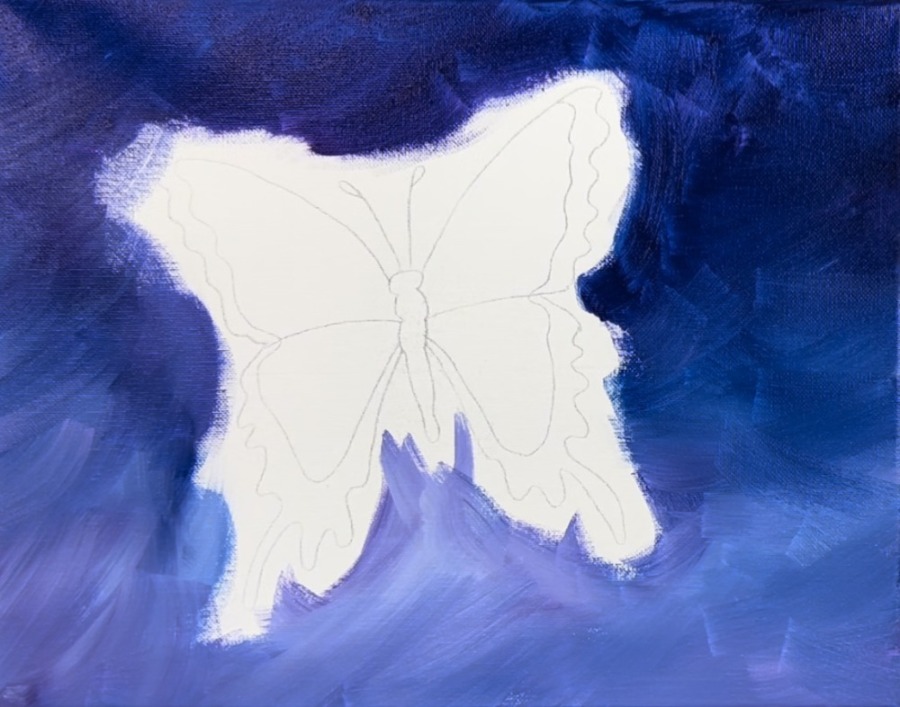
Next, use your #4 round brush to fill the negative space around the butterfly wings.
Try to match the color as close as possible but it doesn’t have to be an exact match. You can also use your 3/4″ flat wash brush to help blend the colors outwards/ soften your round brush strokes.
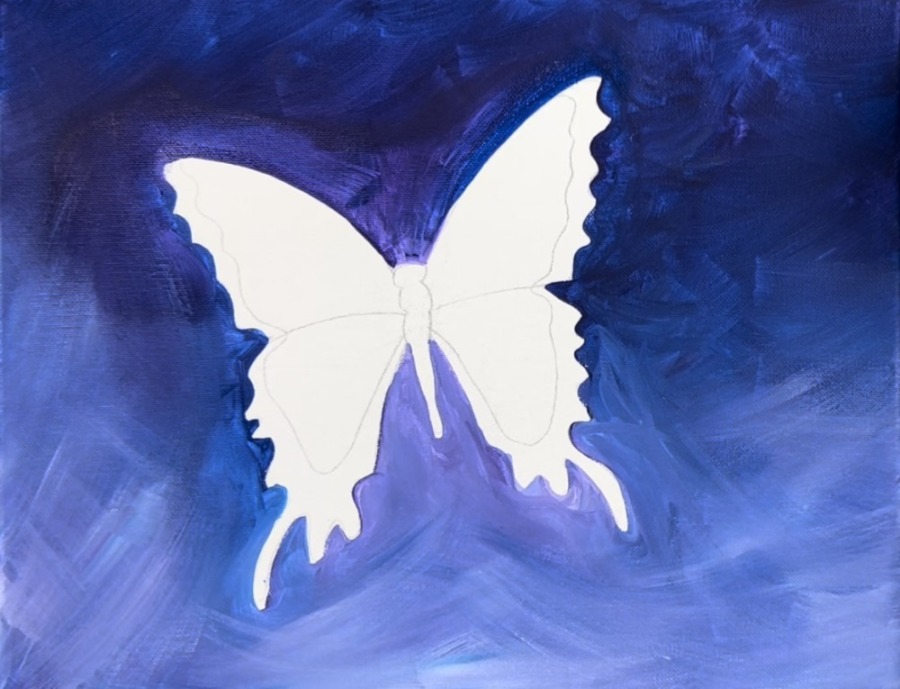
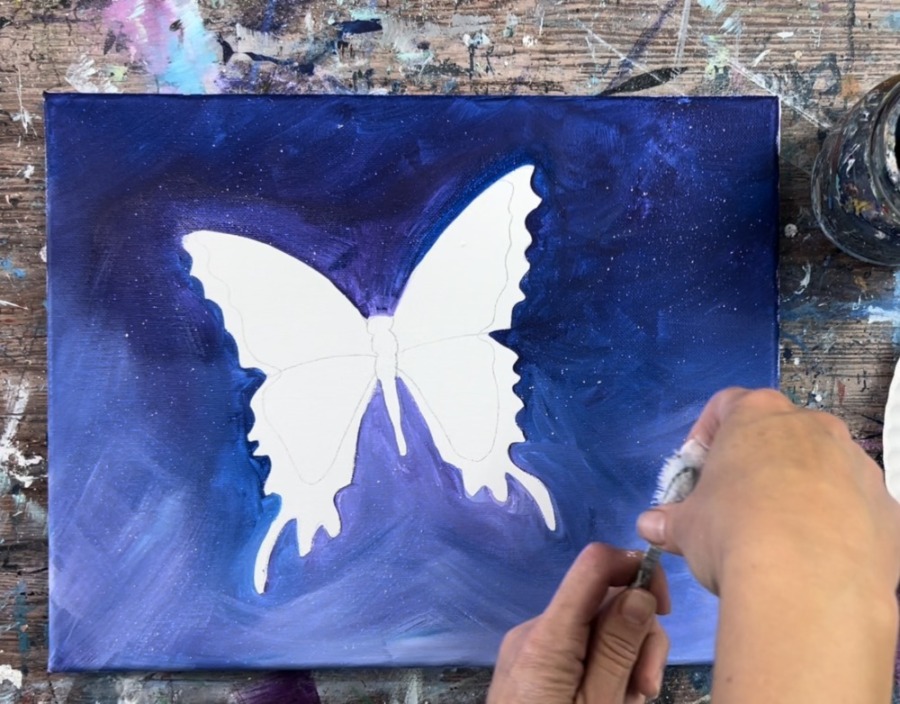
Then do a “splatter star” technique with an old toothbrush. Slightly water down white and then load it into the brush. Flick the brush so little fine specks of stars splatter on the canvas.
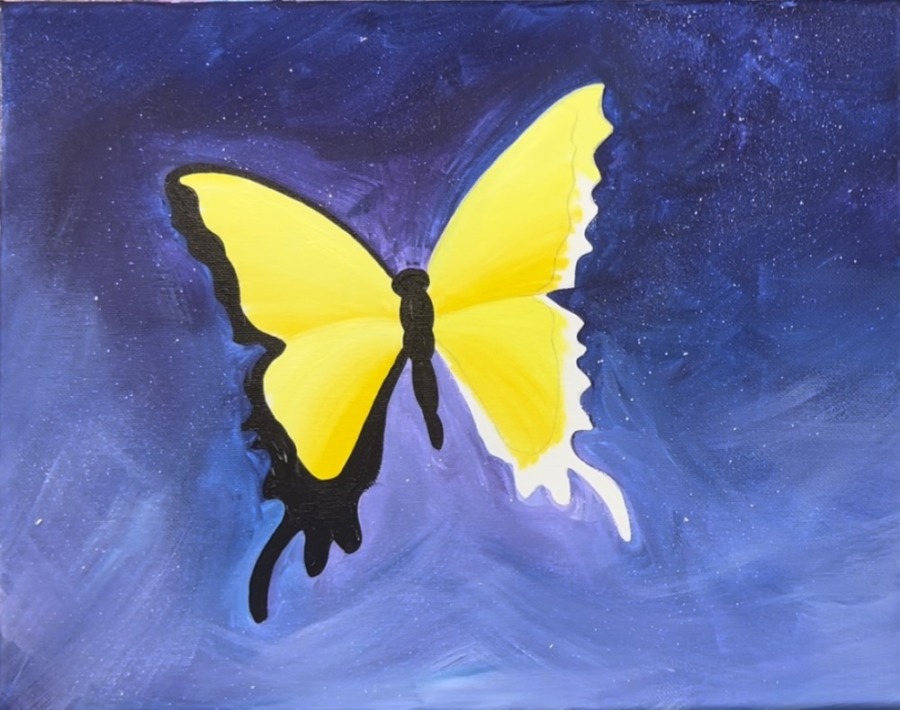
3. Paint the Yellow Wings
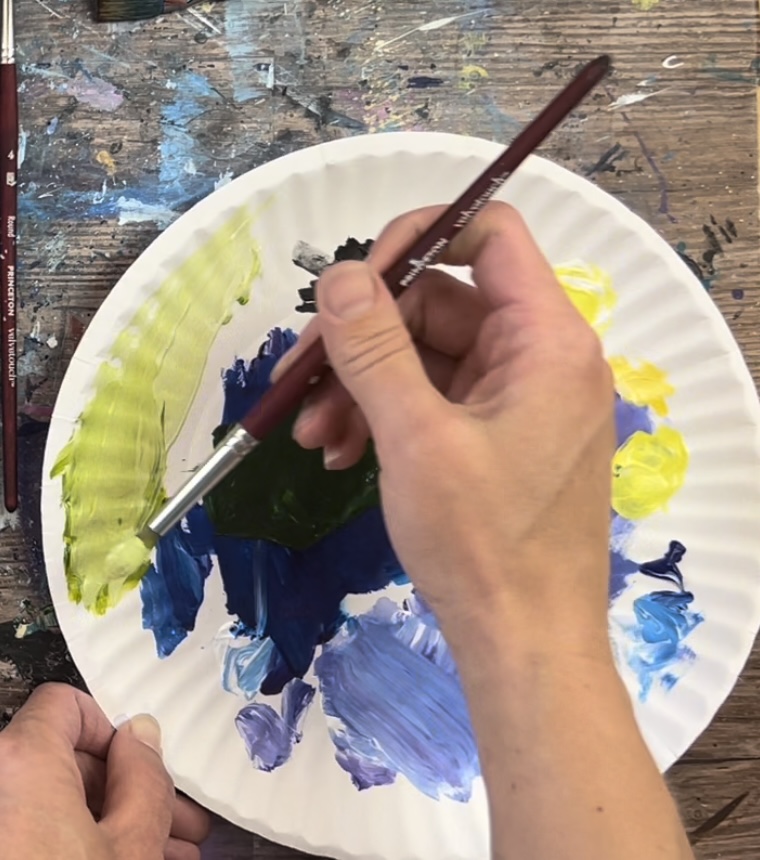
Load your palette with cadmium yellow medium hue and cadmium yellow light hue. Also freshen your titanium white if needed.
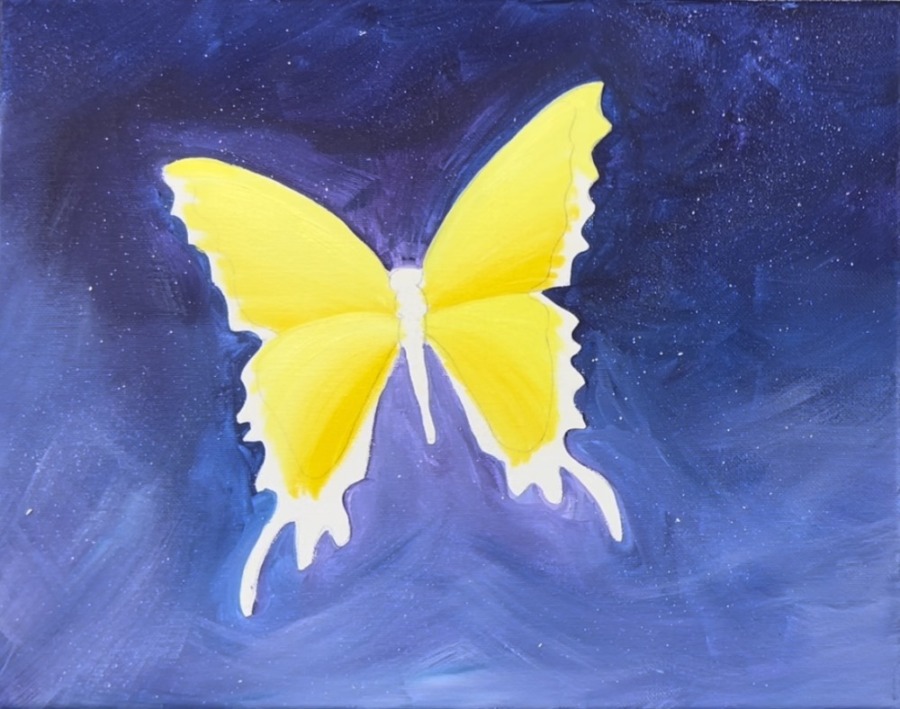
Use your #4 round brush. Mix equal parts titanium white and cadmium yellow light hue to make a pale yellow. Start at the top of the butterfly and paint in a curved direction. Each stroke should go from the center to the edge of the wing.
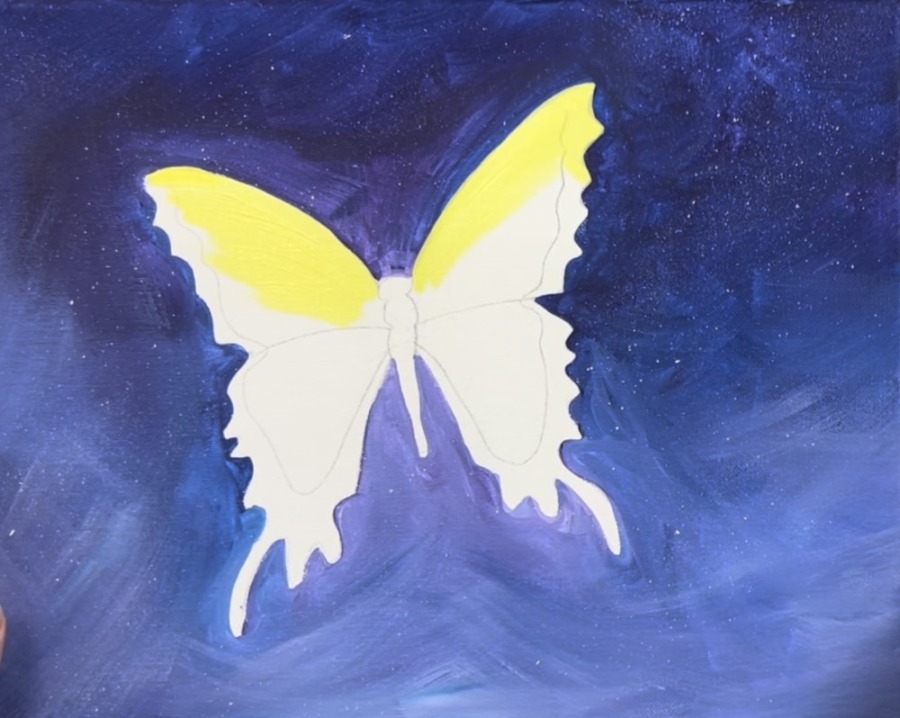
Then load your brush with cadmium yellow medium hue. Blend this darker yellow at the bottom mid section of the wing and then blend it upwards. This will allow the top of the wings to be the lightest and the bottom middle line area to be slightly darker.
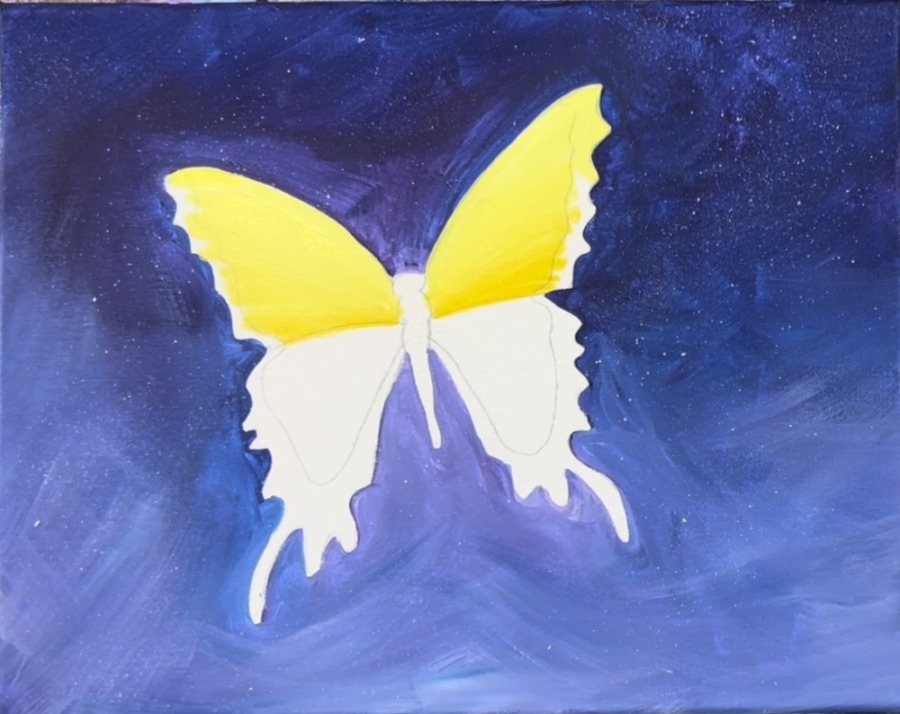
Repeat this for the bottom part of the wings. Make sure the top part is the pale yellow so there is contrast against the bottom part of the top wings. Then blend the darker yellow on the bottom.
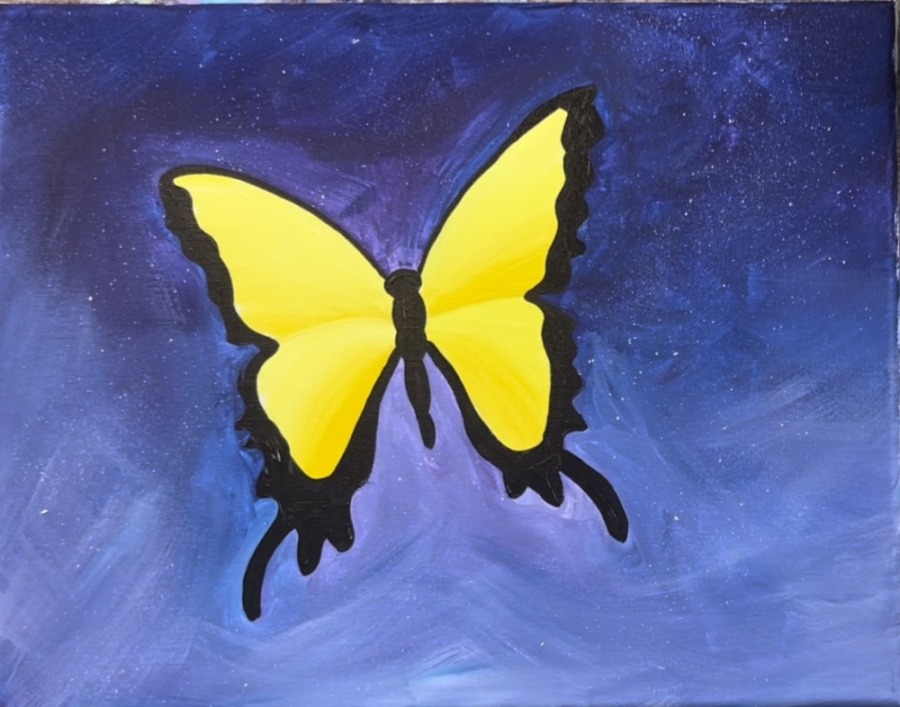
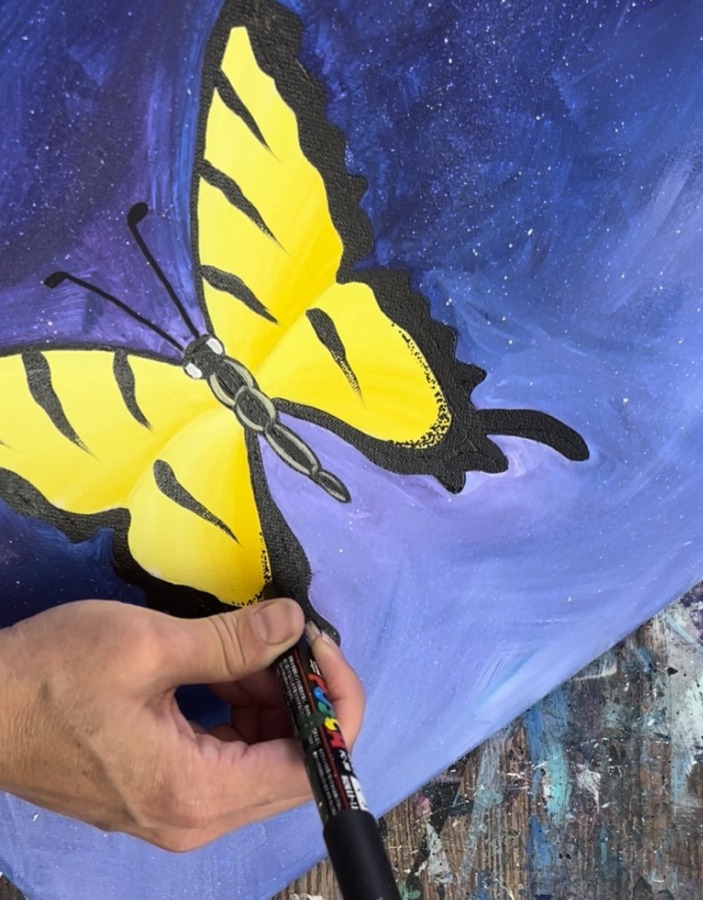
4. Paint The Black Edging & Thorax/Abdomen
Load your palette with mars black. Use your #4 round brush to paint the center body & head of the butterfly.
Then paint the tail and black border around the yellow. This border line should already be defined by the drawing and your lines should still be visible.
Carefully paint the entire border paying close attention to the curved edges.
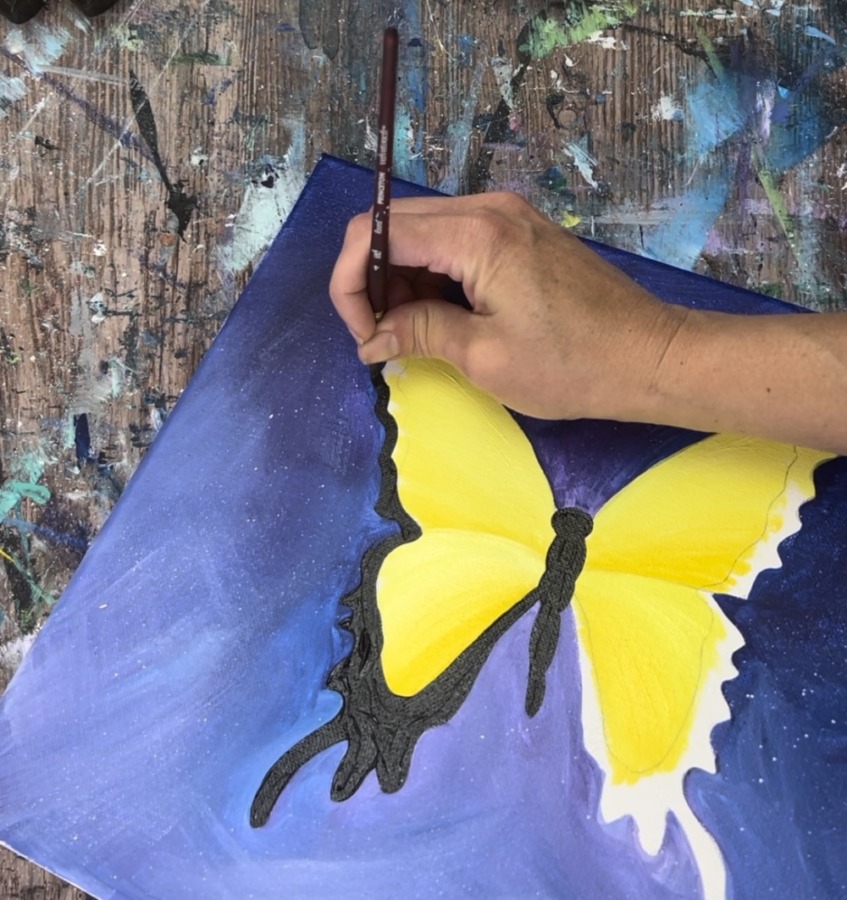
Paint a thin black line at the top of the wings.
Repeat this for each side of the butterfly.
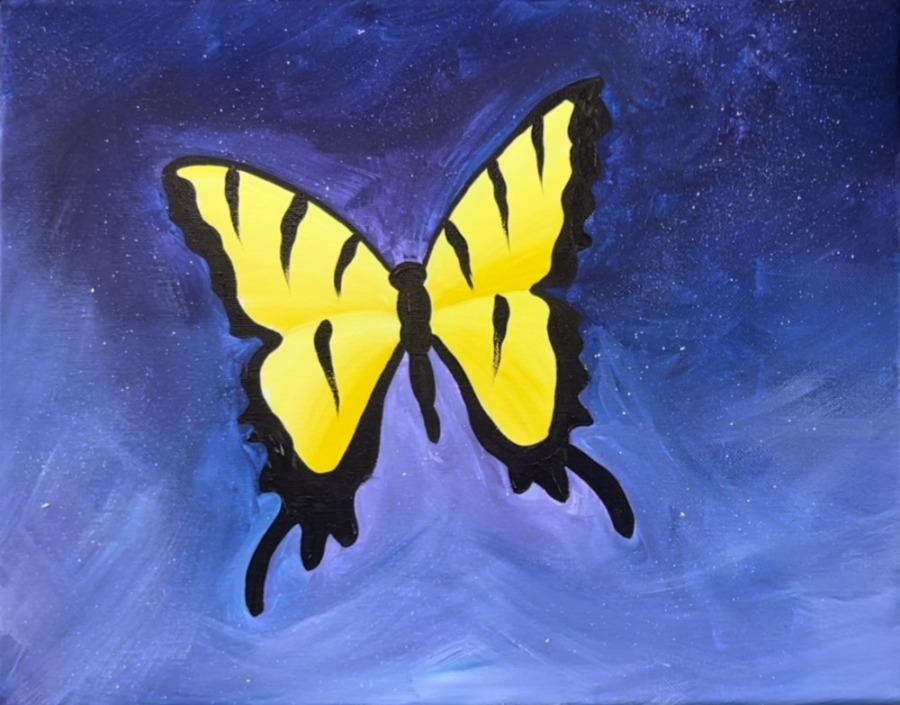
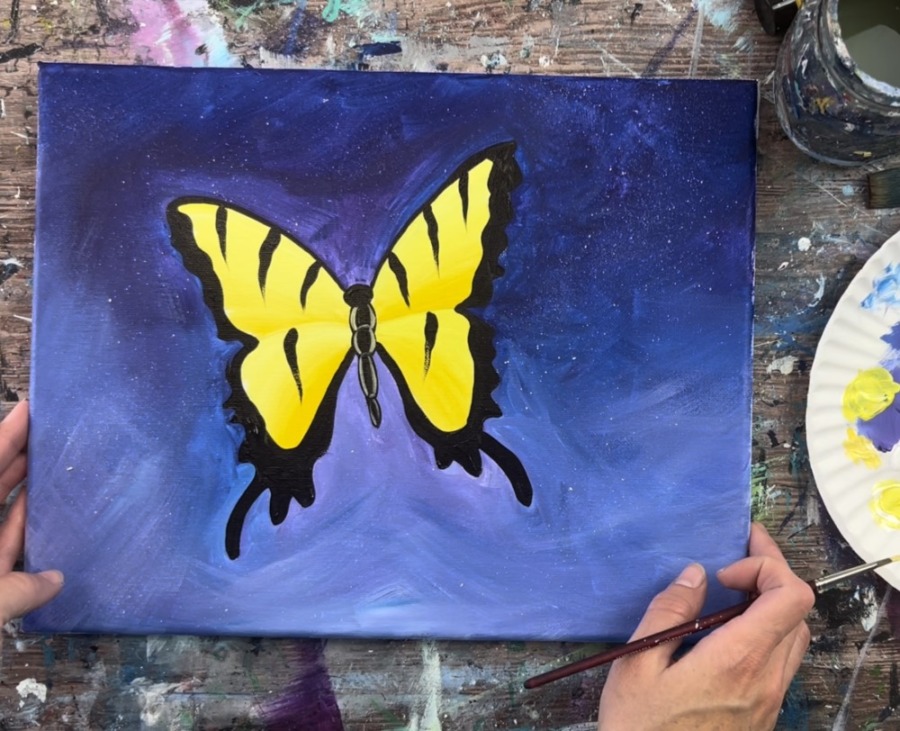
5. Paint The Black Stripes
Paint three stripes on the top of each side of the wings. To do this, press kind of hard with your round brush to start. Then wiggle your brush a little and release the pressure so that it goes to a tip at the bottom.
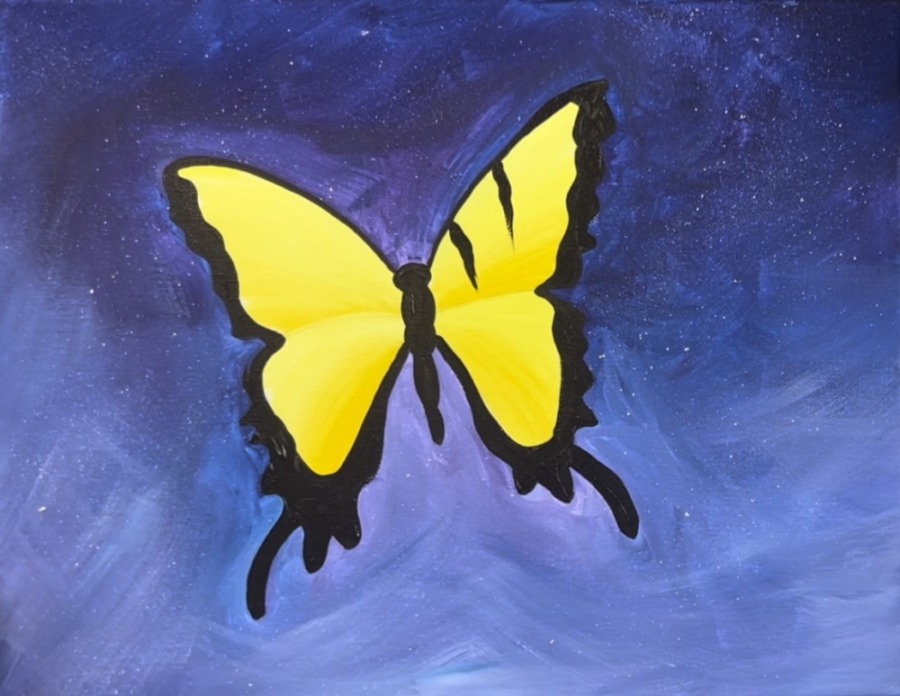
Repeat this on each side of the wings. Then paint two more stripes, one on each side, of the bottom part of the wings.
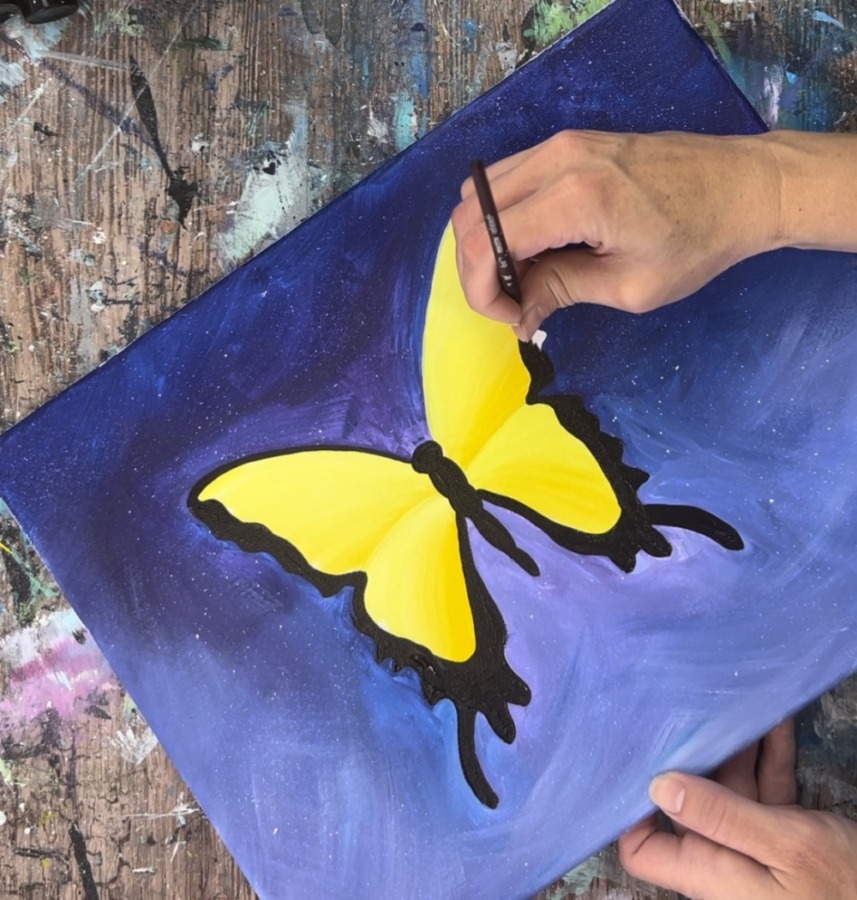
6. Paint Antennae, Eyes and Abdomen Details
There are quite a few intricate details on this butterfly that all come together to make it look very beautiful!
The first detail I did was loosely outline the inside of the thorax/abdomen (body) of the butterfly. I did this with a #4 round brush and pale yellow (cad yellow light mixed with white). Then I loosely outlined the inner part of the shapes leaving a but of black outline on the edges.
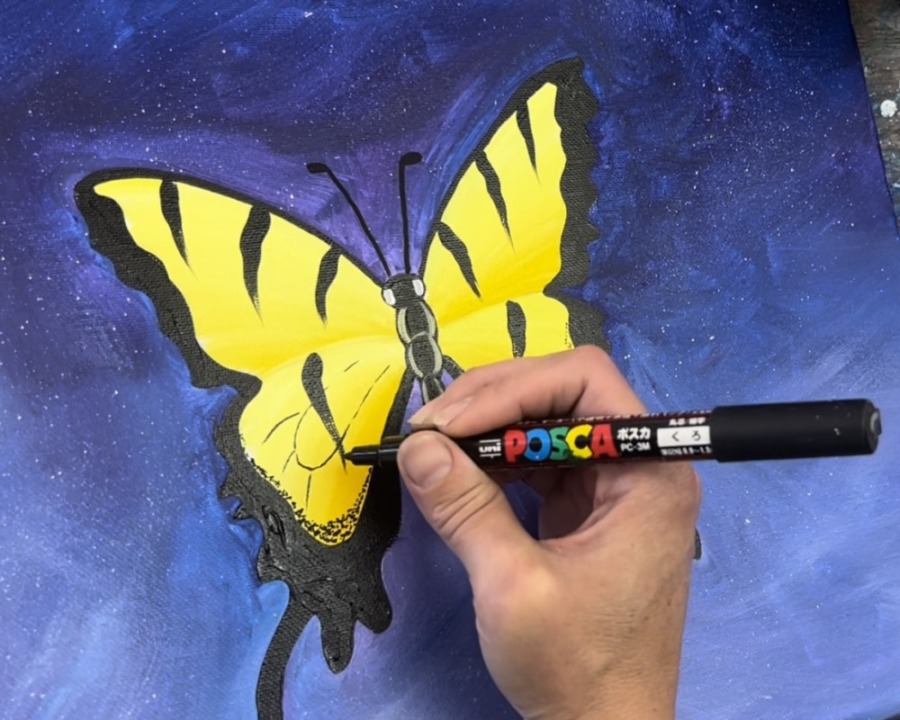
Next, use your round brush to paint two small ovals on each side of the head for the eyes. Then use your POSCA pen to draw the antennae. Draw two slightly diagonal lines and then two small oval shapes on top of each of the lines.
7. Paint Vein & Dot Details
Next, use your paint pen to do little dots on the bottom curved area of each of the wings. This will make it look like your yellow is fading into black in that area.
Do the dots a little thicker on the bottom and thinner up to the sides of the butterfly wings next to the black border. I did not do any dots in the top sections of the wings.
Then use your paint pen to draw the veins of the butterfly. The trick with this is to hold your pen very lightly and draw very loose lines. These lines do not have to be solid and continuous.
Start on the lower left wing and draw a stretched “C” line going in the direction of the wing angle.
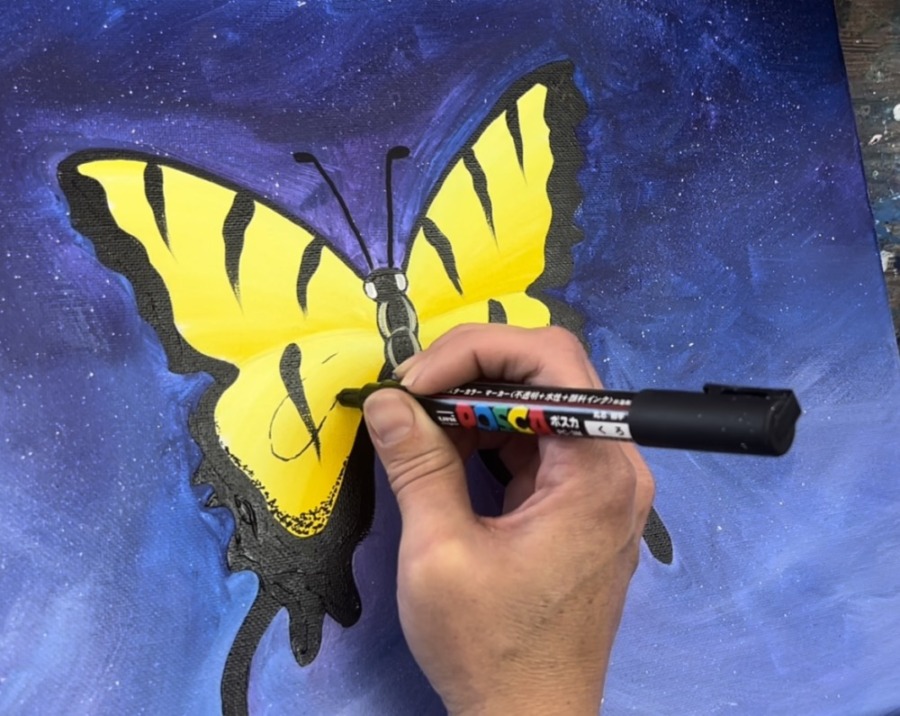
Then draw 4 diagonal lines extending from that loop line.
Repeat this for the lower right of the wing, except, draw it so it mirrors the first vein design.
Then draw a similar design in the upper right wing along with four diagonal lines extending from the loop line. Remember, the line does not have to be continuous. It is loose/ broken.
Repeat for the left wing.
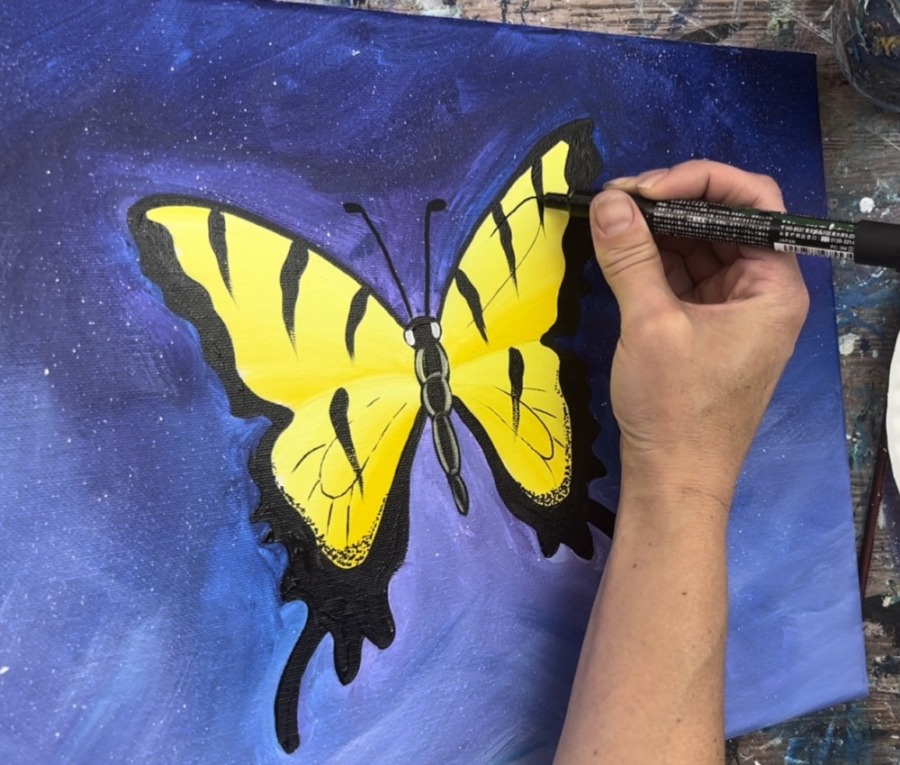
8. Paint Eyes & Color Detail
Next, load your palette with a very tiny amount of pyrrole red. Use your #4 round brush to paint the eyes. Then paint two red curved lines on the bottom of the wings.

Next, paint three phthalo blue curved lines on the bottom right and bottom left of the wings.
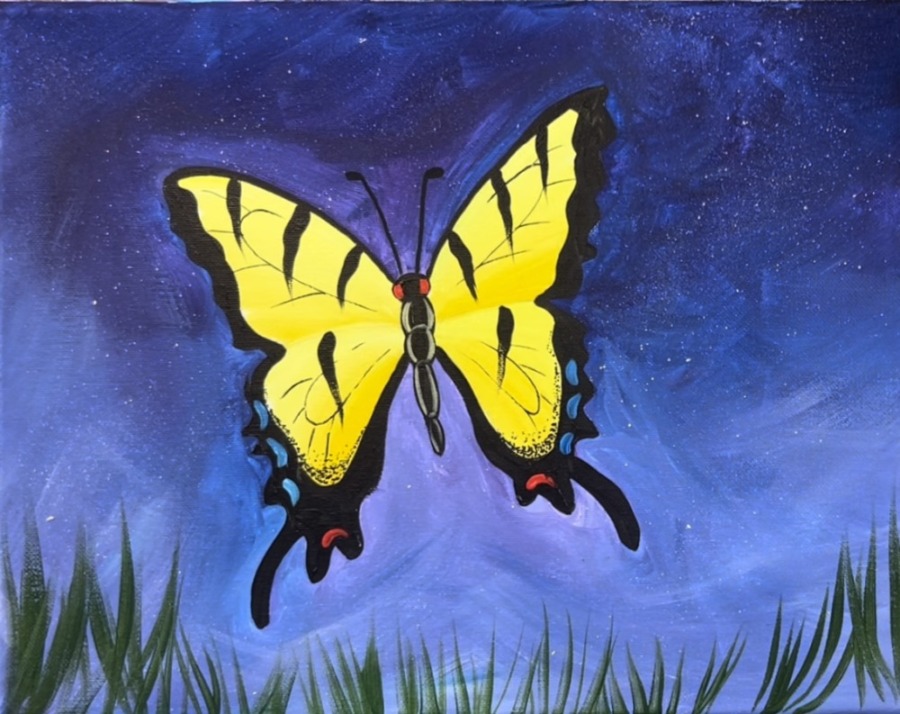
9. Paint Grass
Load your palette with hooker’s green hue permanent. Mix 5 parts green, 2 parts red and 1 part black. This will make a very dark green. You will be painting grass in layers starting from a very dark green layer to a very light green layer.
Use your #8 round brush to paint the grass. Start at the bottom and stroke upwards to make the grass point go to a tip. Paint in different angles and different heights.
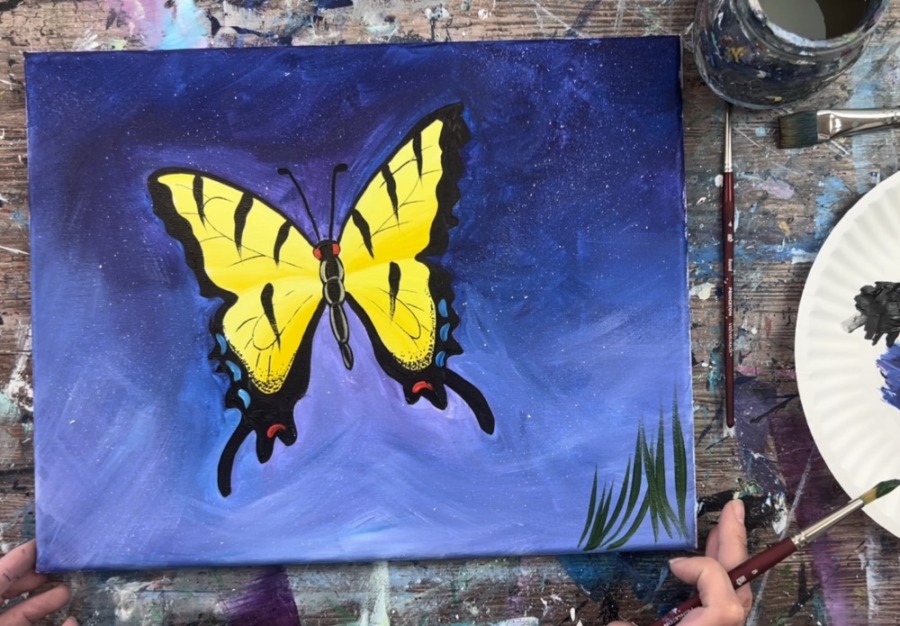
I made the grass in the middle shorter and the grass on the left and right longer.
This grass blade technique is achieved by pressing firmly with the brush at first and then releasing the pressure to allow your stroke to go to a point. It may also be helpful to add bits of water onto the brush and paint to help get the paint stroke to “flow”.
Next, add cadmium yellow medium to your green on your palette and a small amount of titanium white. This will make a green that is lighter than your darker green.
Then repeat the grass blades painting technique. Apply a lighter layer with this light green but do not cover all of the darker green grass blades.
Next, mix a little more white into your green to make your lightest green color. Paint a third layer but do not cover all of your dark and medium green grass blades.
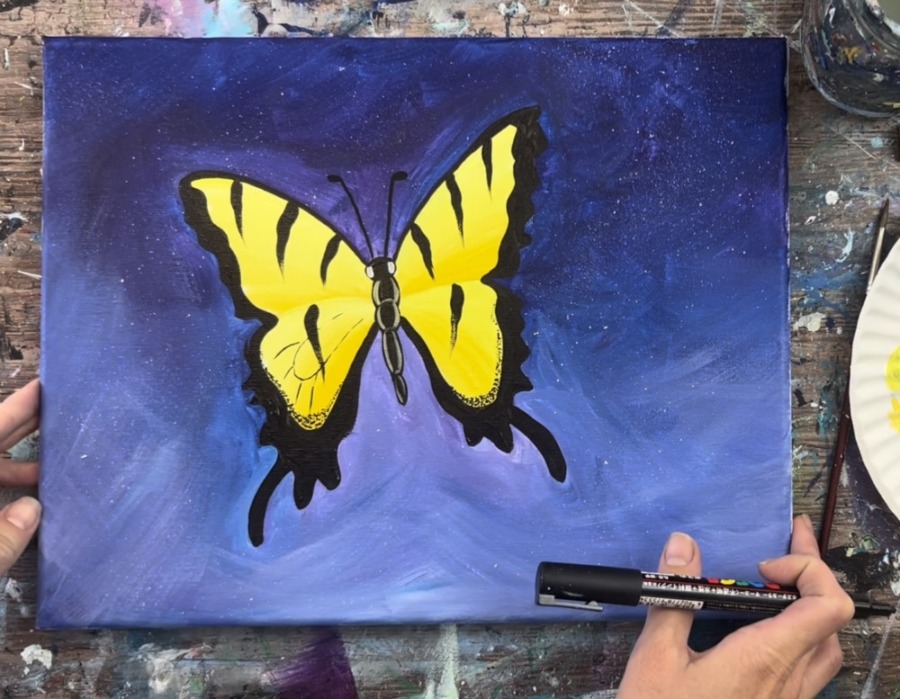
10. Paint White Edging On Wings (optional)
Use your #4 round brush and titanium white to paint a very thin outline along the outer edges of the wings (outside of the black). This will provide a small amount of contrast for the wings since the background is so dark.
You do not need to outline all of the wings, just some parts of the outer black area.

11. Paint Fireflies (optional)
To do fireflies, load your palette with cadmium yellow medium and titanium white. Mix about equal parts of the yellow and white together. Then use your finger tip to apply a very small amount of paint and press your finger and form a circle.
This should create a small blurry circle.
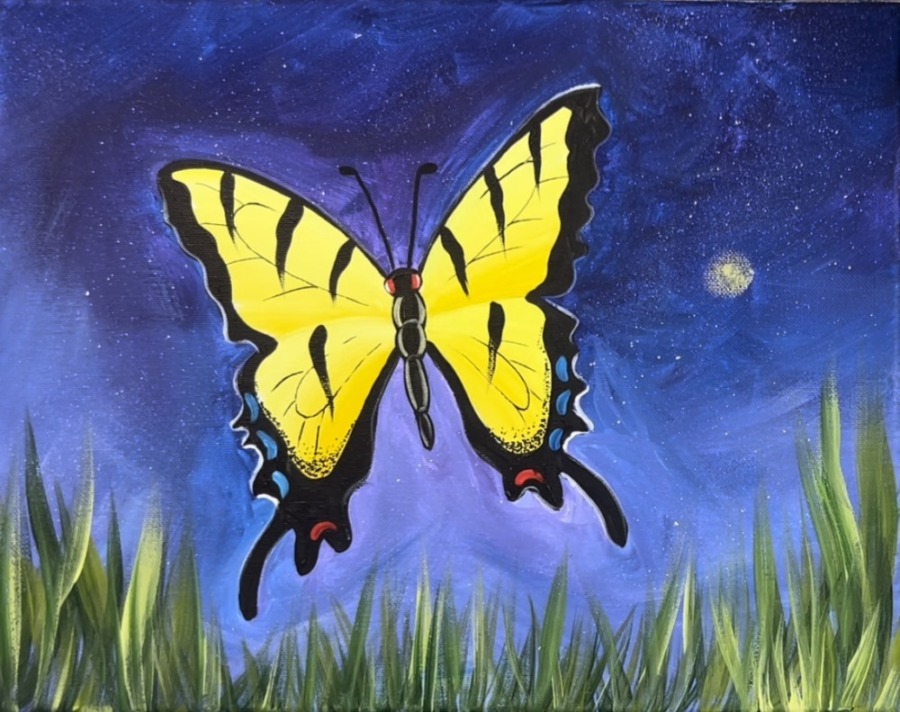
Then use your #4 round brush to paint a small white dot in the center of the circle to make it look like it’s glowing.
Repeat this multiple times to create as many fireflies as you want!
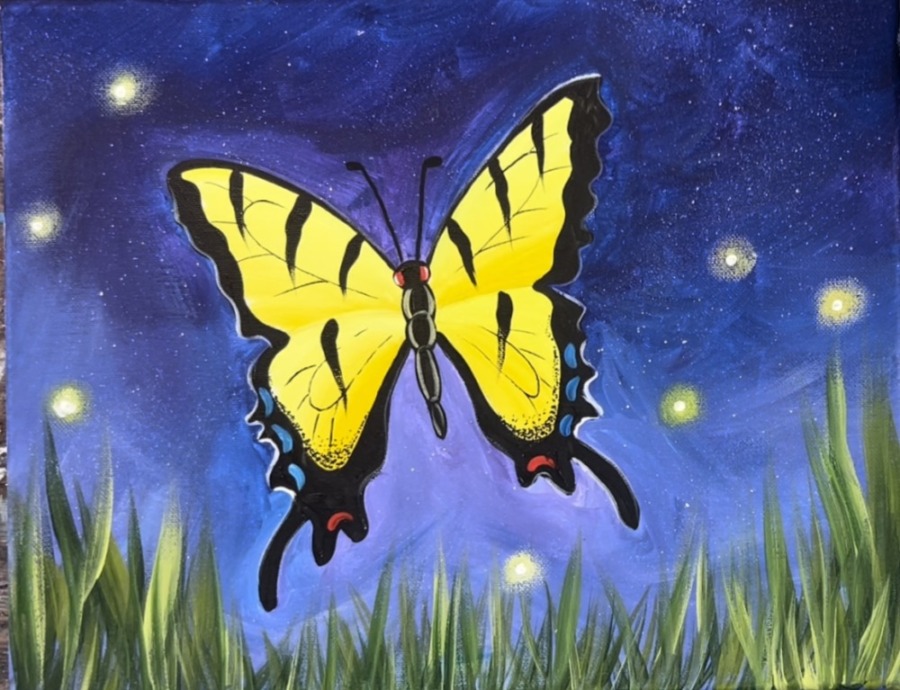
Finished!
Share Your Art Here!


