
Would you like to save this?
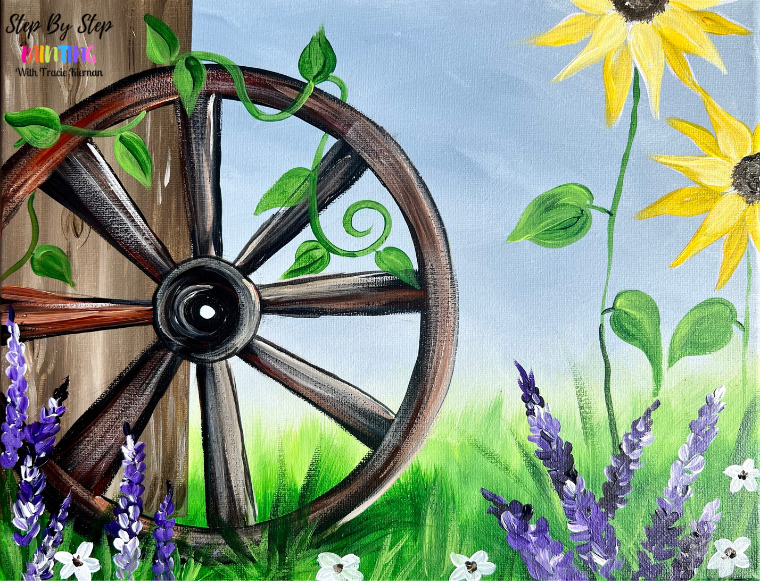
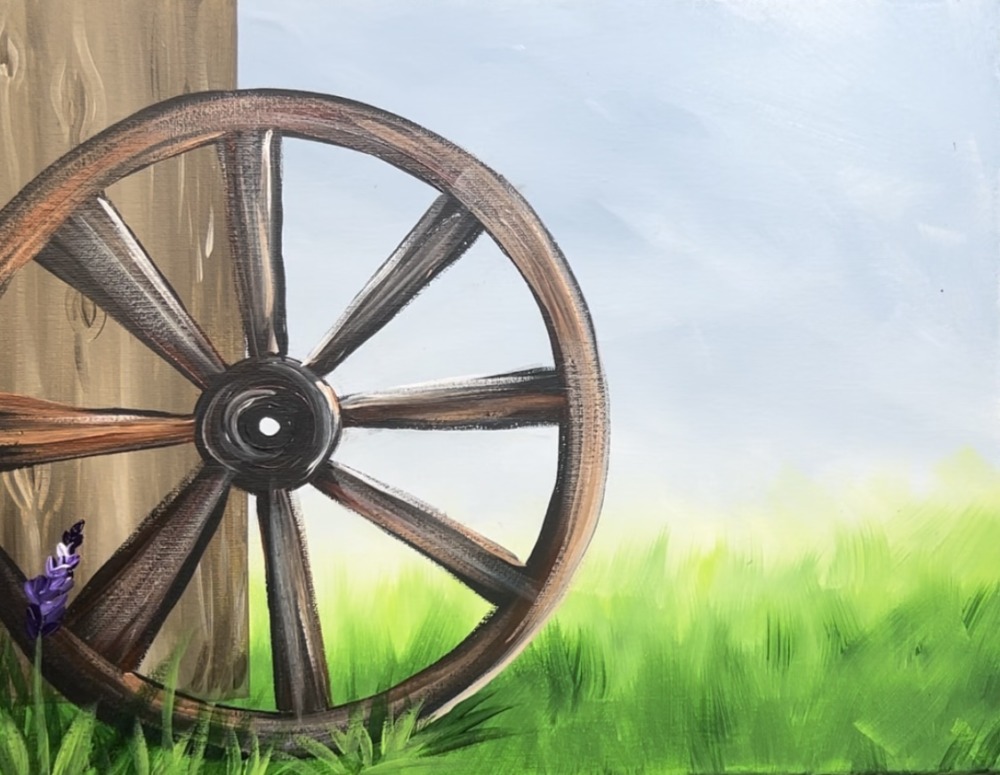
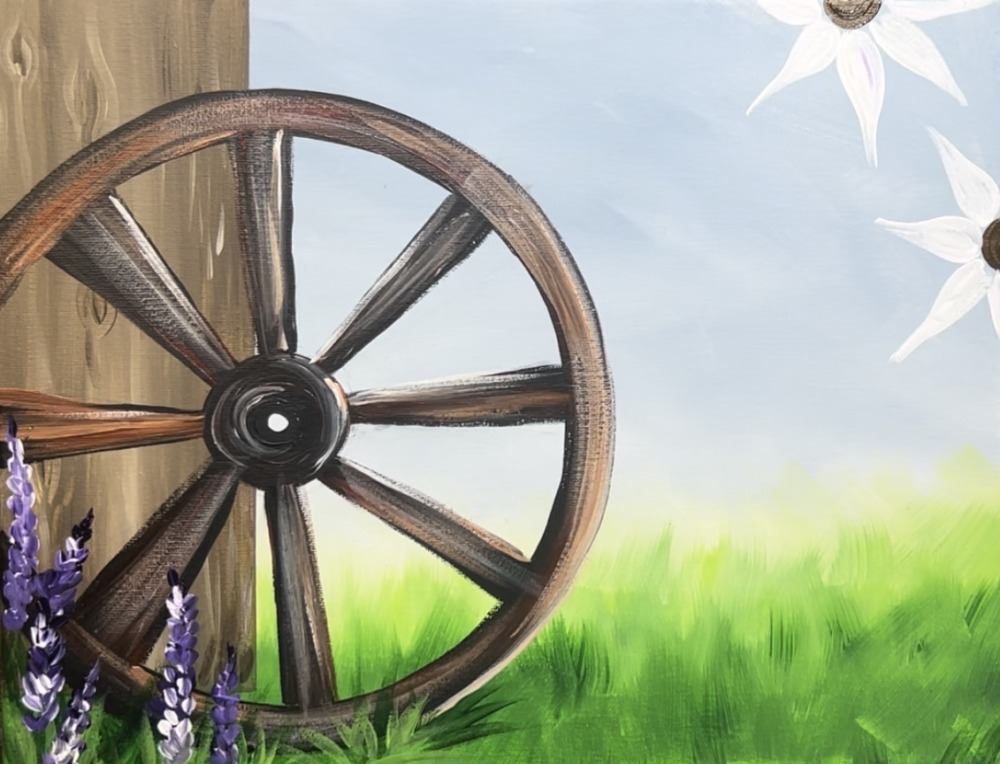
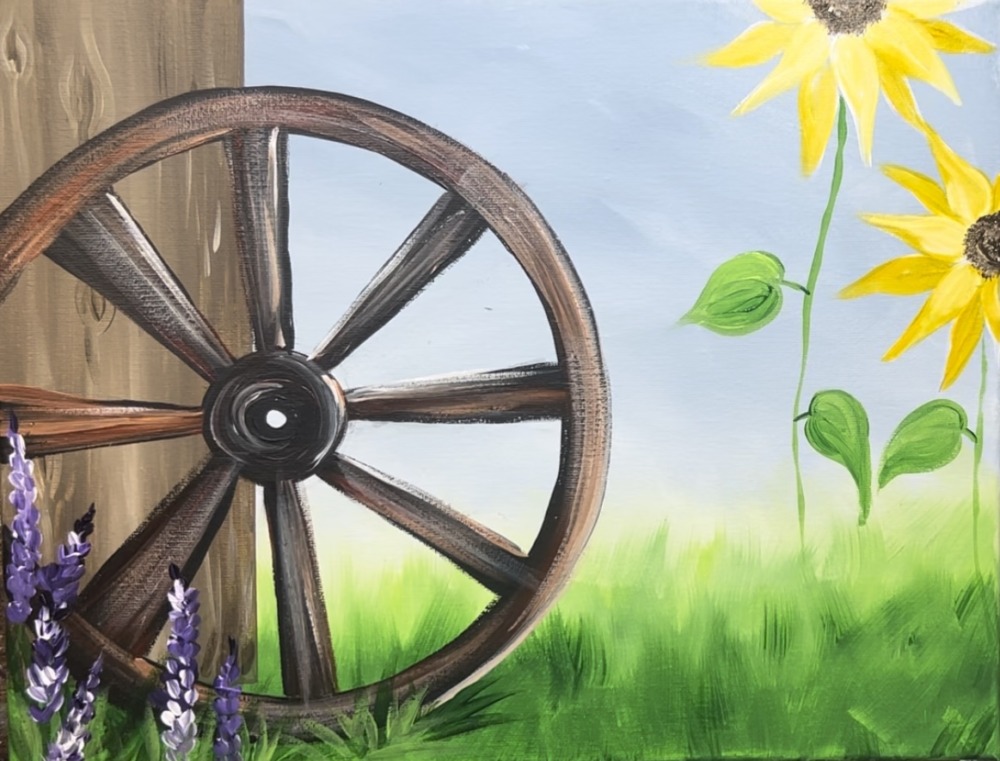
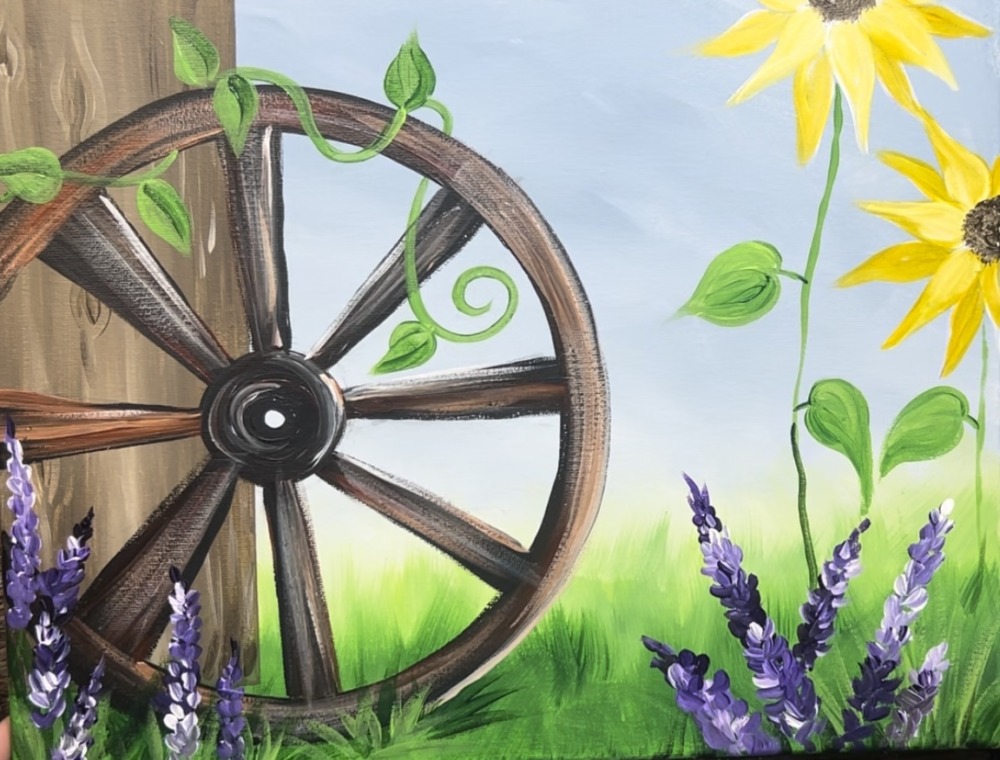
Learn how to paint a rustic Spring Wagon wheel with lavender, sunflowers and a vine.
This tutorial demonstrates basic techniques for painting the wood look of the wheel and post. We will also be practicing painting grass and various simple floral painting techniques.
Enjoy and happy painting!
Materials Needed
How To Paint A Wagon Wheel

Learn how to paint a wagon wheel with Spring Flowers.
Tools
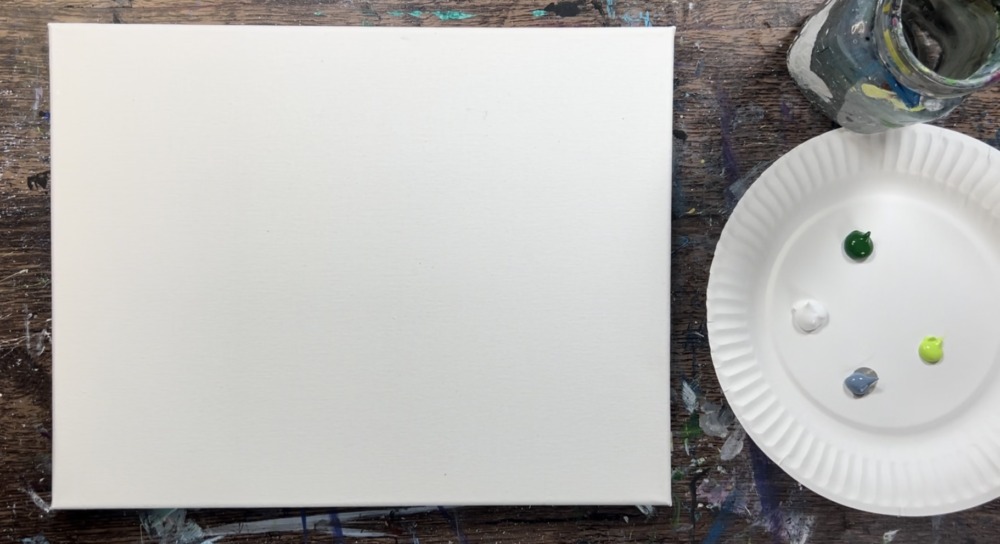
- 11 x 14 Canvas
- Acrylic Paint
- Brushes
- Pencil
- Paper Plate To Trace (9" or similar size)
Colors
- Titanium White
- Mars Black
- Raw Umber
- Burnt Sienna
- Blue Gray
- Hooker's Green Hue
- Brilliant Yellow Green
- Dioxazine Purple
- Cadmium Yellow Medium Hue
Brushes
- 3/4" Flat Brush
- 12 Bright Brush
- 4 Round Brush
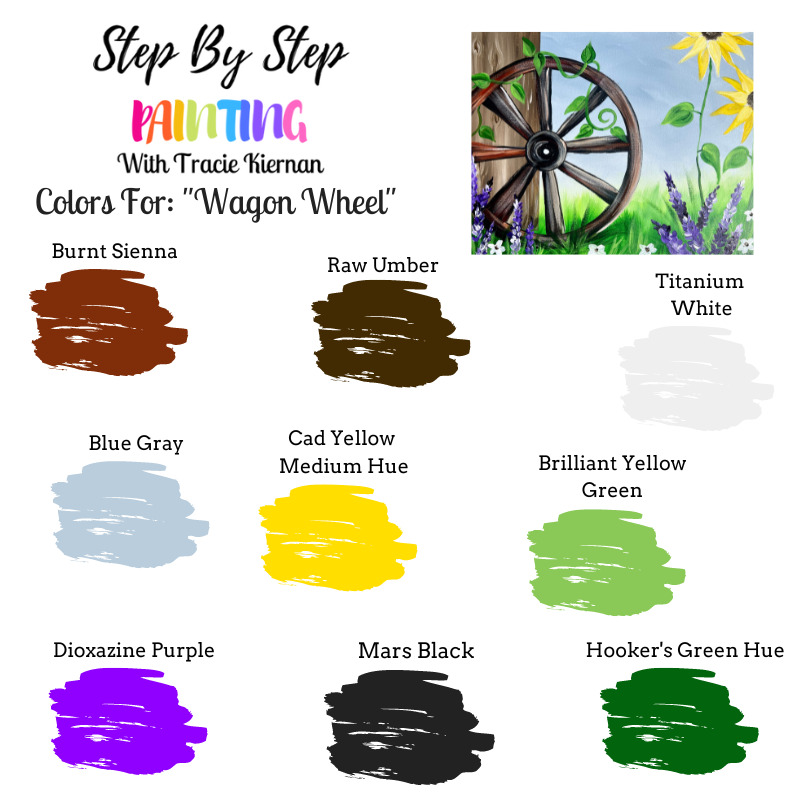
Color Palette
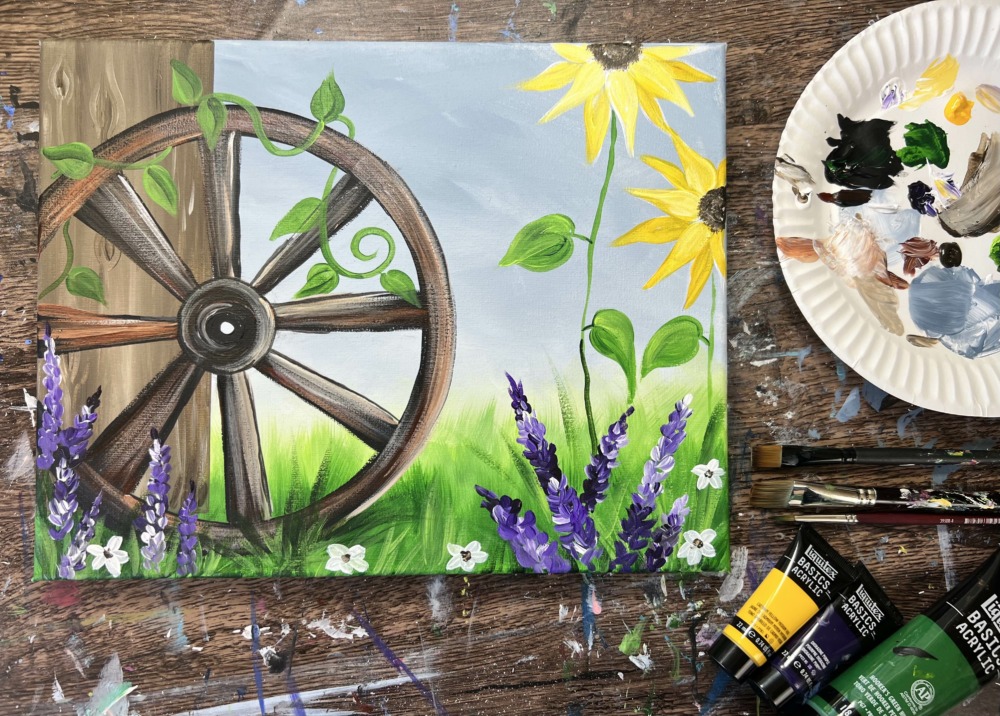
I used Liquitex BASICS acrylic paints for this painting. If you are using a different brand, I would recommend looking at the color chart below to help you match your colors!
Craft Paint Conversion
If you are using craft paints such as the Apple Barrel Craft paints, I would recommend subbing to these colors:
- Black
- White
- Holly Branch
- New Shamrock
- Bright Yellow
- Purple Iris
- Melted Chocolate
- Nutmeg Brown
- Parrot Blue (mix with white to lighten)
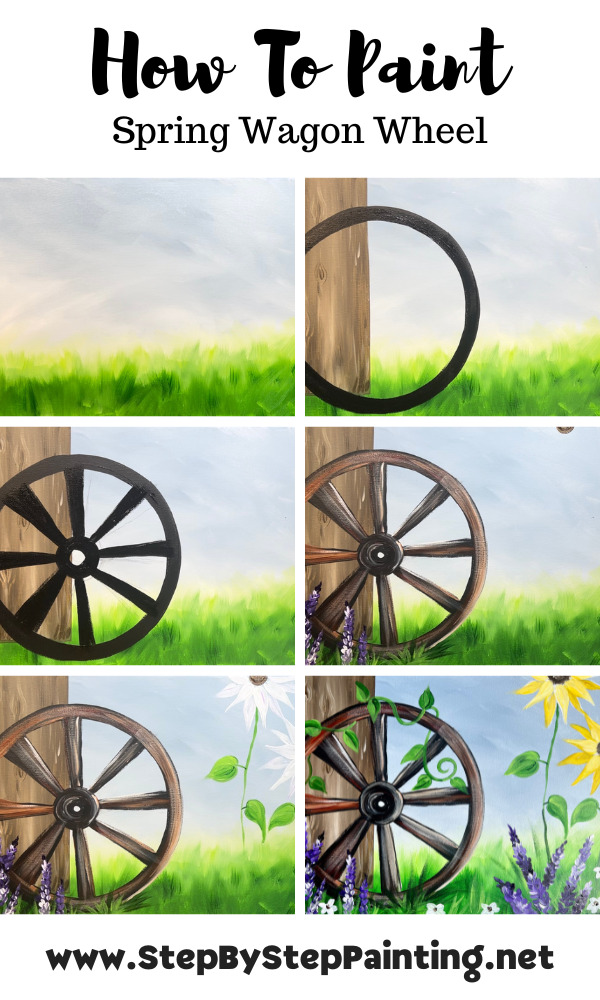
Directions At A Glance
Video
Step By Step Instructions
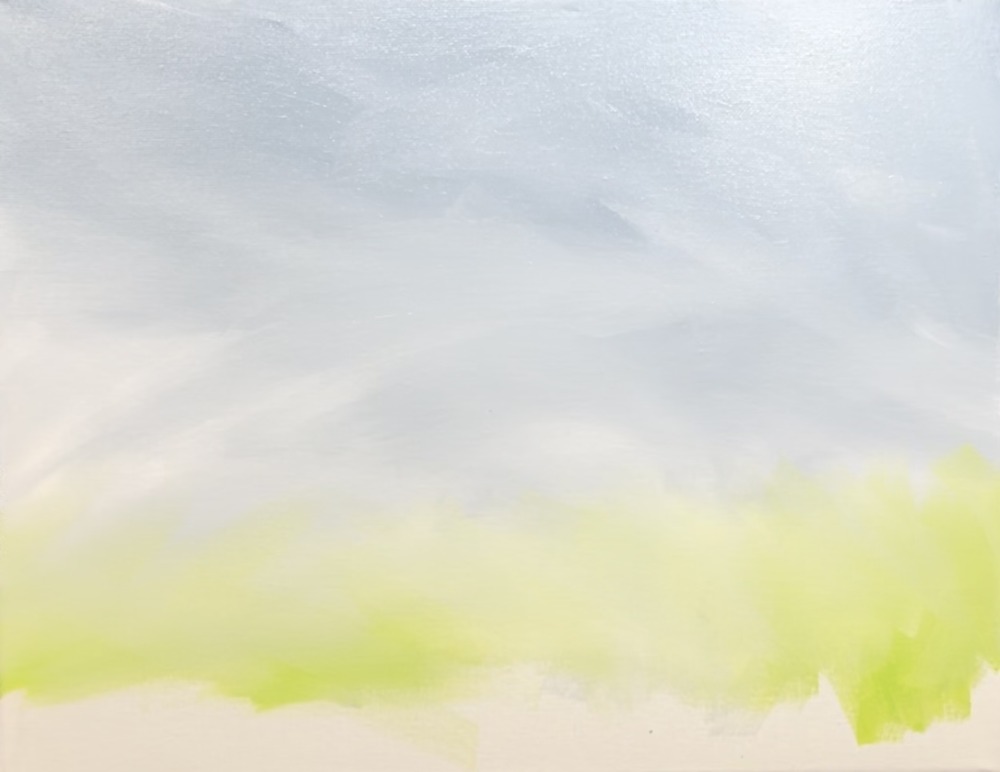
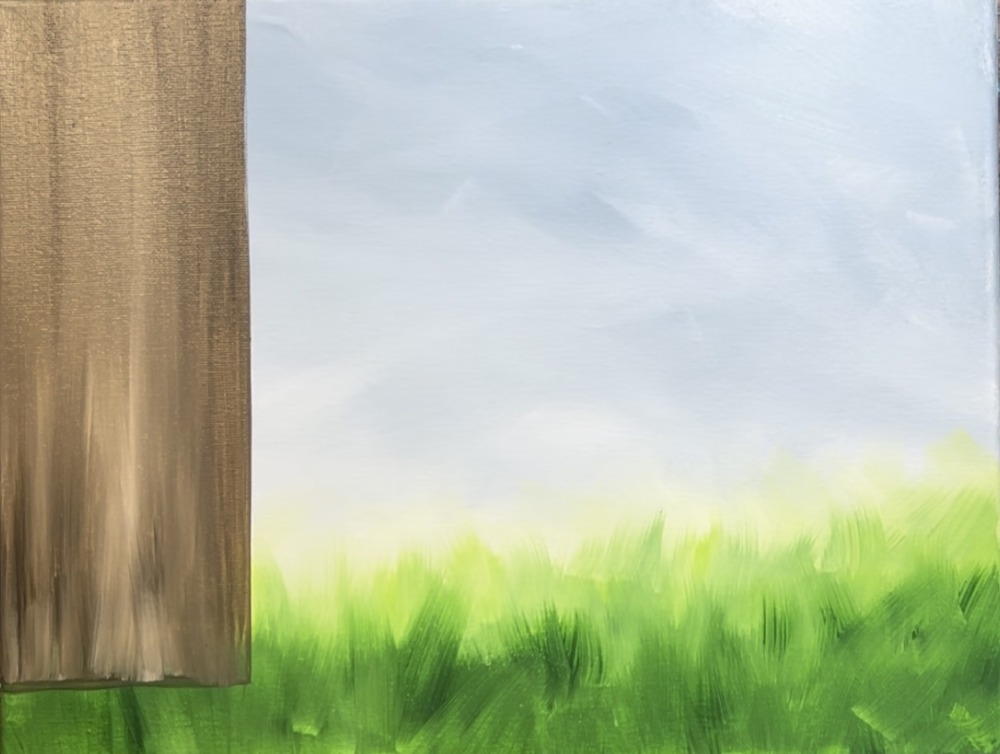
1. Paint Sky & First Grass Layer
Load your palette with the colors: hooker’s green hue permanent, titanium white, blue gray and brilliant yellow green.
Use the 3/4″ flat wash brush. Mix about equal parts titanium white and blue gray. Start at the top of the canvas. Apply the blue gray color with different angle strokes that blend on the canvas.
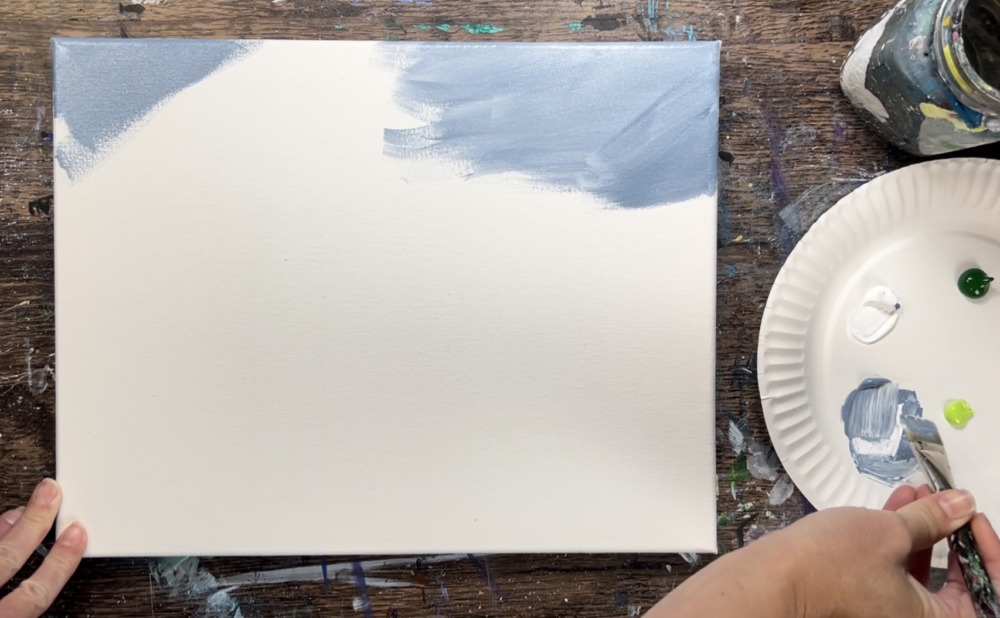
Fill the canvas with angle strokes. As you work your way down, gradually add more titanium white to your brush so the sky color gets gradually lighter.
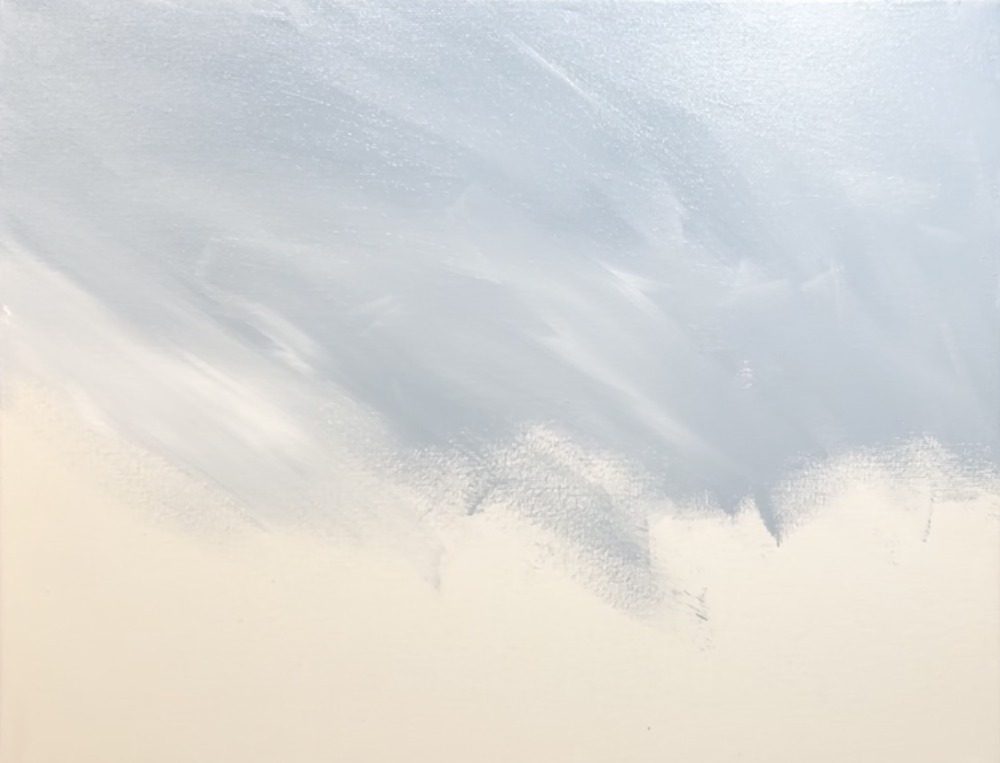
As you get to about the halfway point down the canvas, add a lot of titanium white to your brush so that this area of the sky is very light in color. Leave about an inch of blank space left on the bottom of the canvas.
Next, rinse the brush and dry. Load it into brilliant yellow green. Gently blend the light green into the light blue area (bottom). Do this with the same kind of strokes and create a sort of “horizon line” with this green across the canvas.
Paint short, angle strokes and wood your way down to almost the bottom of the canvas with this brilliant yellow green.
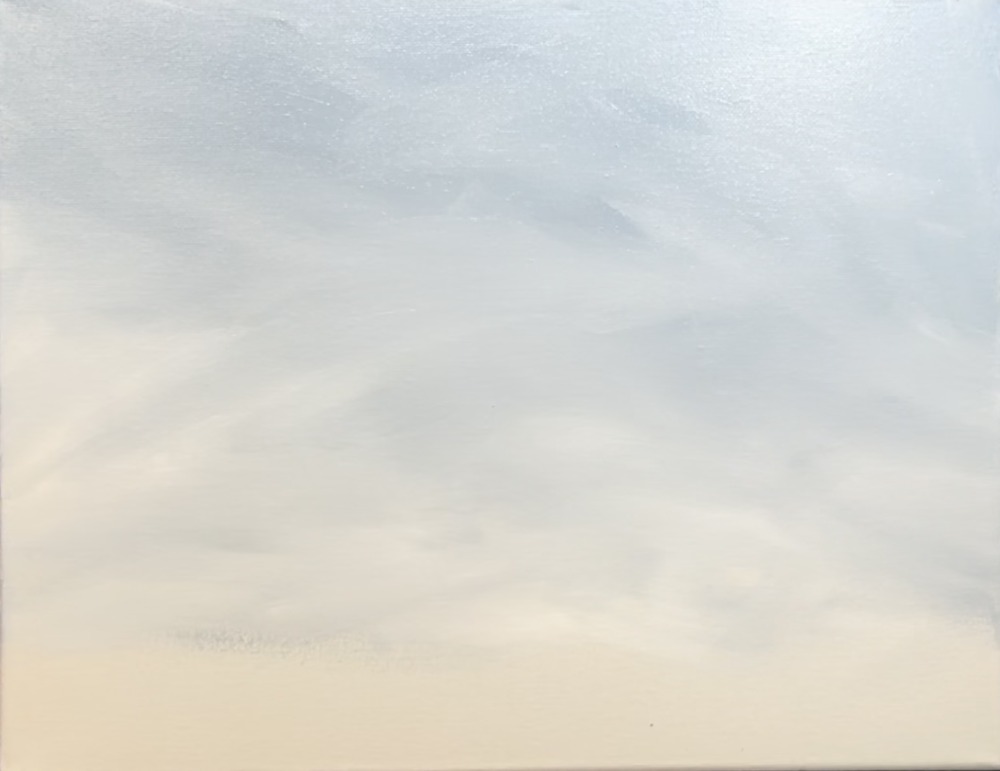
Then load the brush in hooker’s green hue permanent. Paint short, choppy strokes that go in the direction of grass blades (some strokes are vertical and some are diagonal).
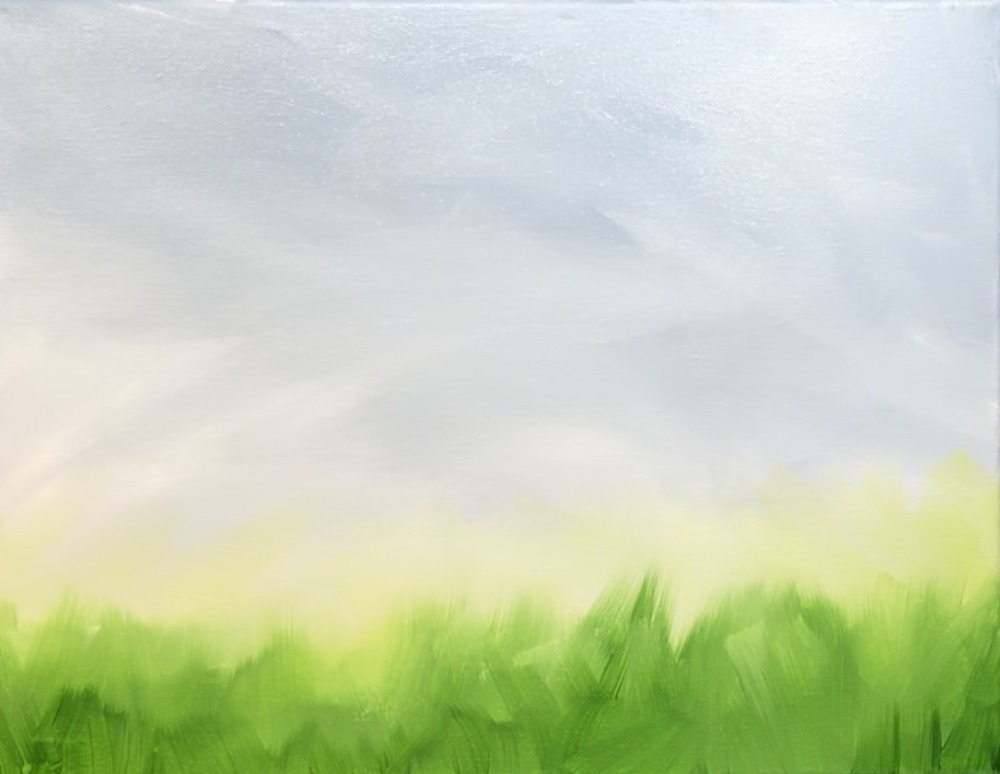
Add more of the darker green on the bottom. As you paint each “row of green”, the paint strokes overlap the previous row creating the impression of a grassy area.
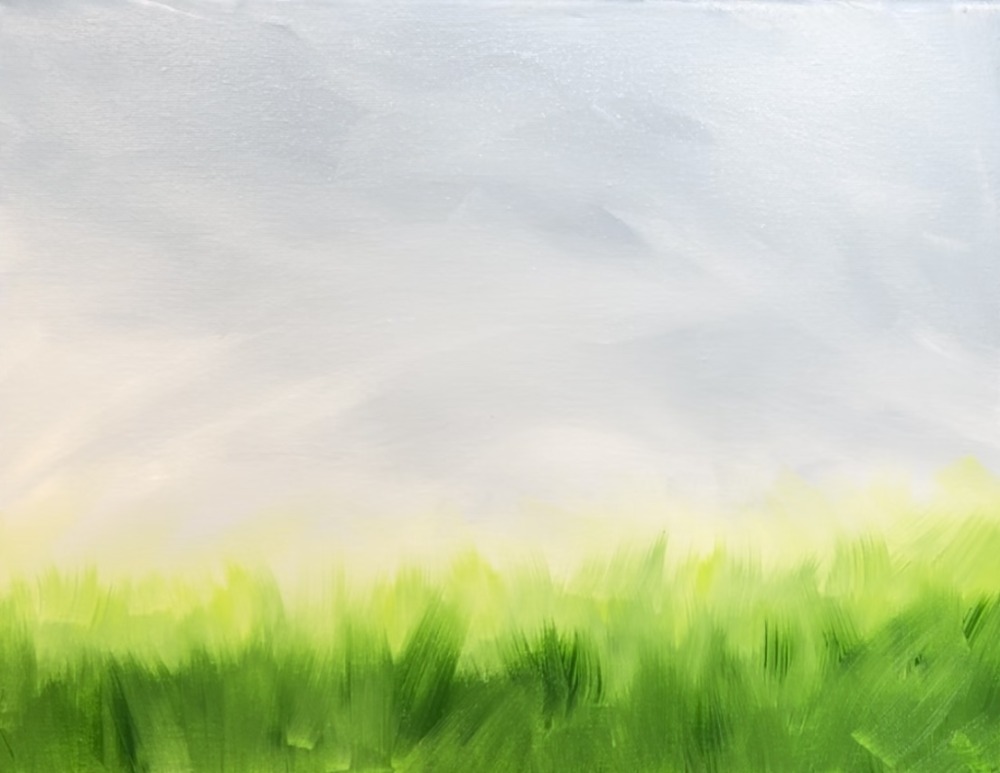
Let this dry before proceeding to the next step.
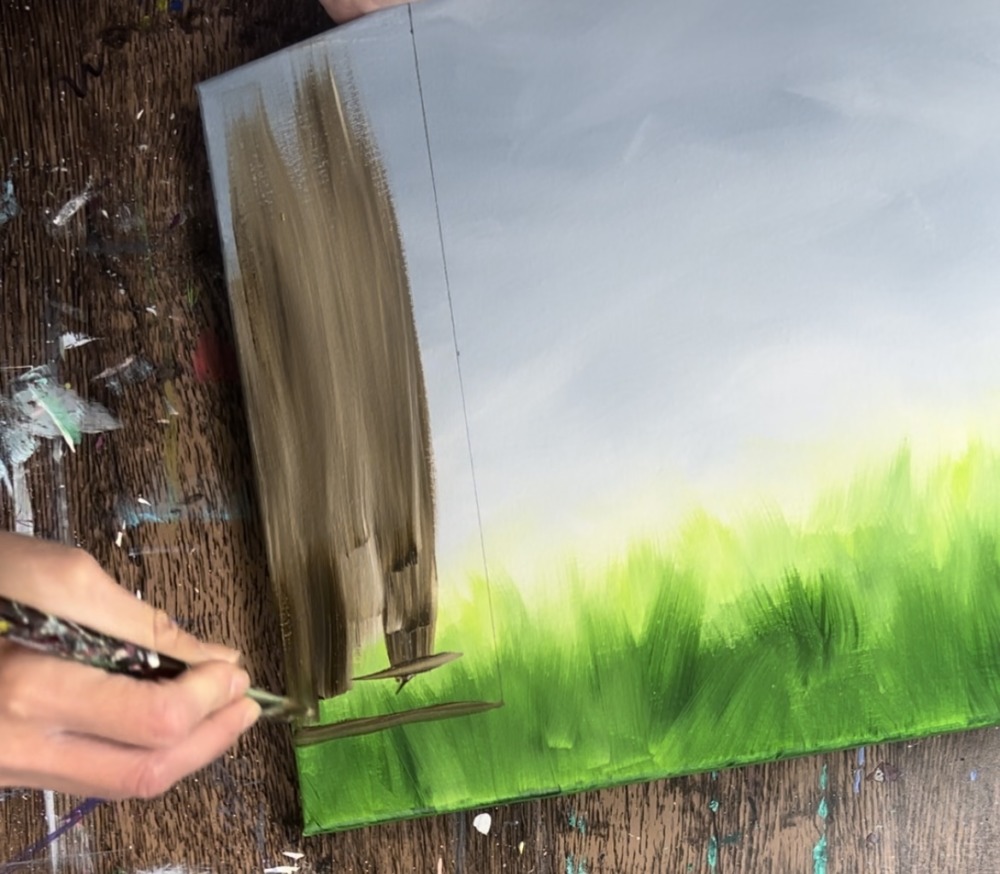
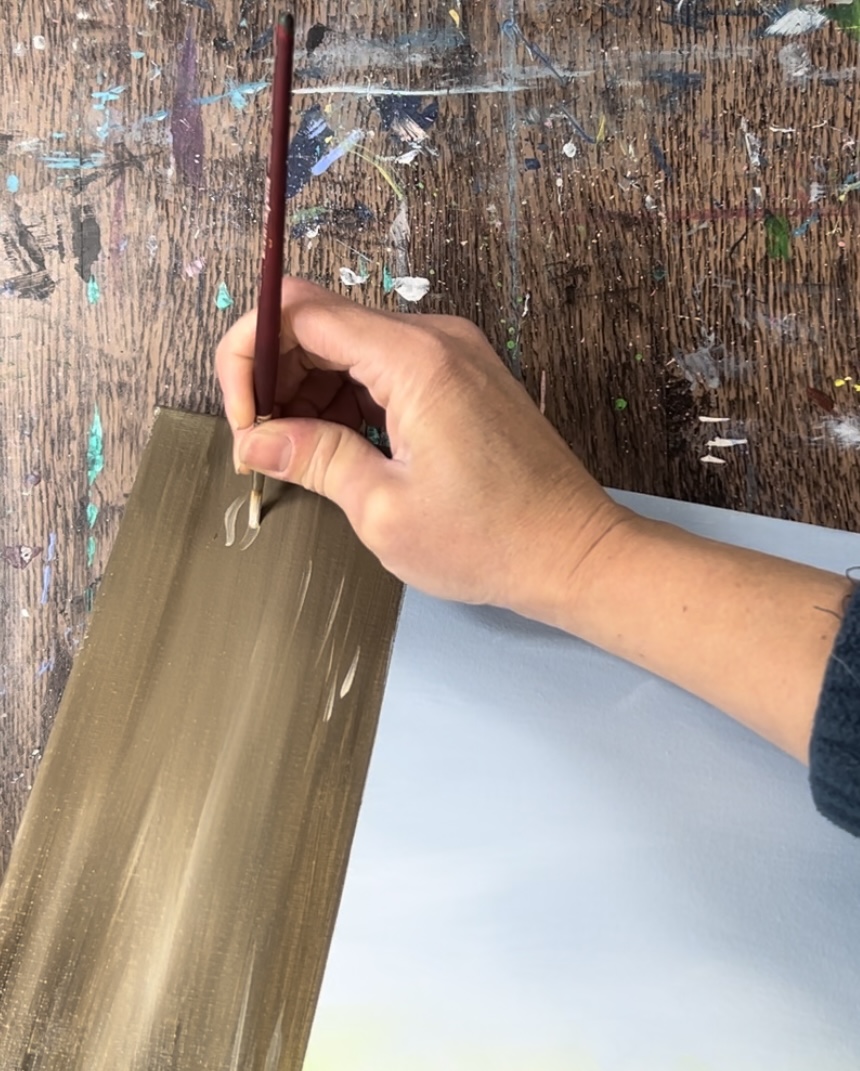
2. Paint Wood Beam
Use a ruler to measure 3.5″ from the left of the canvas and draw a vertical line using a ruler.

Leave about an inch and a half of space on the bottom of the canvas and draw a horizontal line.

Then load your palette with the colors: raw umber and titanium white. Use your 3/4″ flat wash brush and load it into raw umber and a small amount of titanium white.
Use the full width of the brush to paint vertical strokes. Allow the dark brown to gently blend with the white. Add more brown if needed. It should be a medium to dark brown. Try not to over blend the white into the brown. The streaks of white and light brown give it that “faux wood” look.
Next, use a #4 round brush to paint wood grain texture. Start by using a lighter version of the brown (add more titanium white into the raw umber). Then paint vertical strokes and a few wood knot shapes.
Paint contouring strokes around the wood knot shapes.
Paint a few knots and vertical texture strokes that are a shade darker than the wood post (use just raw umber and don’t mix any white into it). If needed, you can add a small amount of black into the brown to make the wood grain even darker.
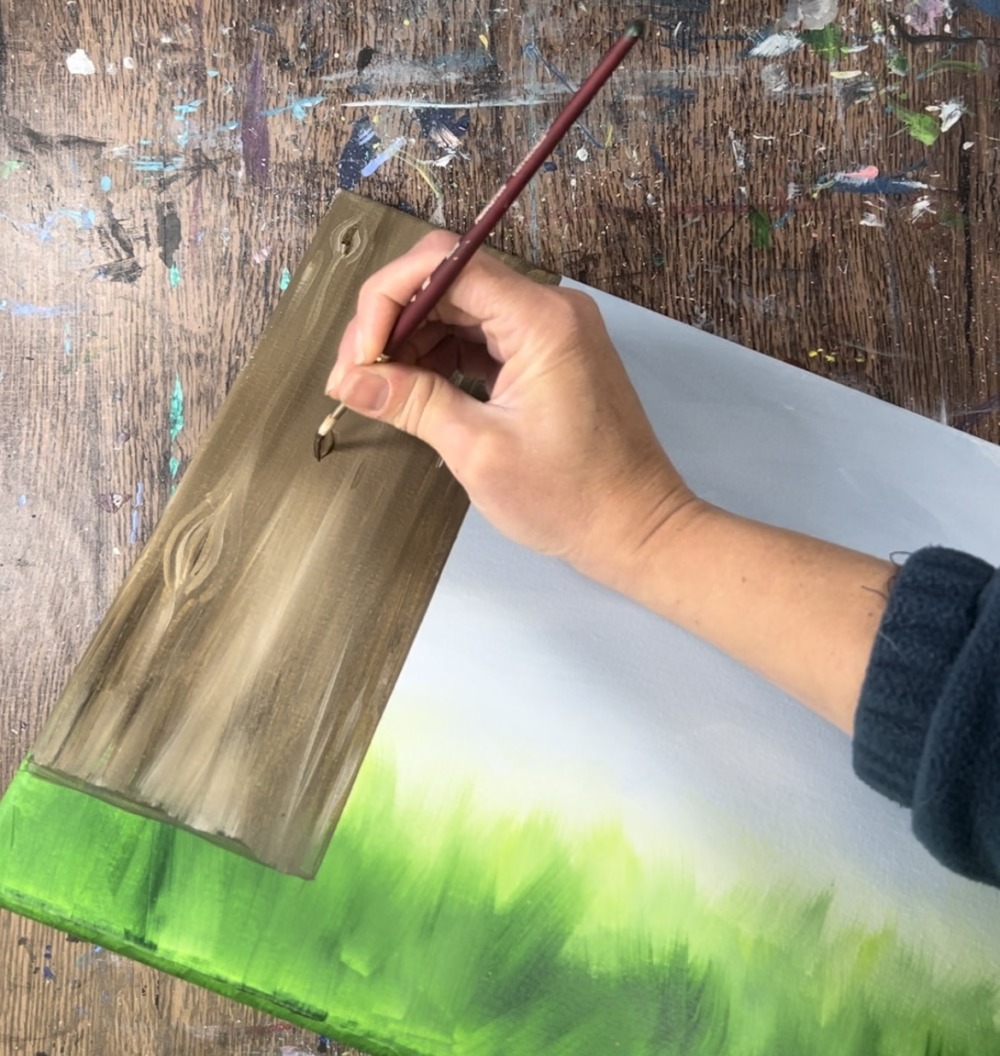
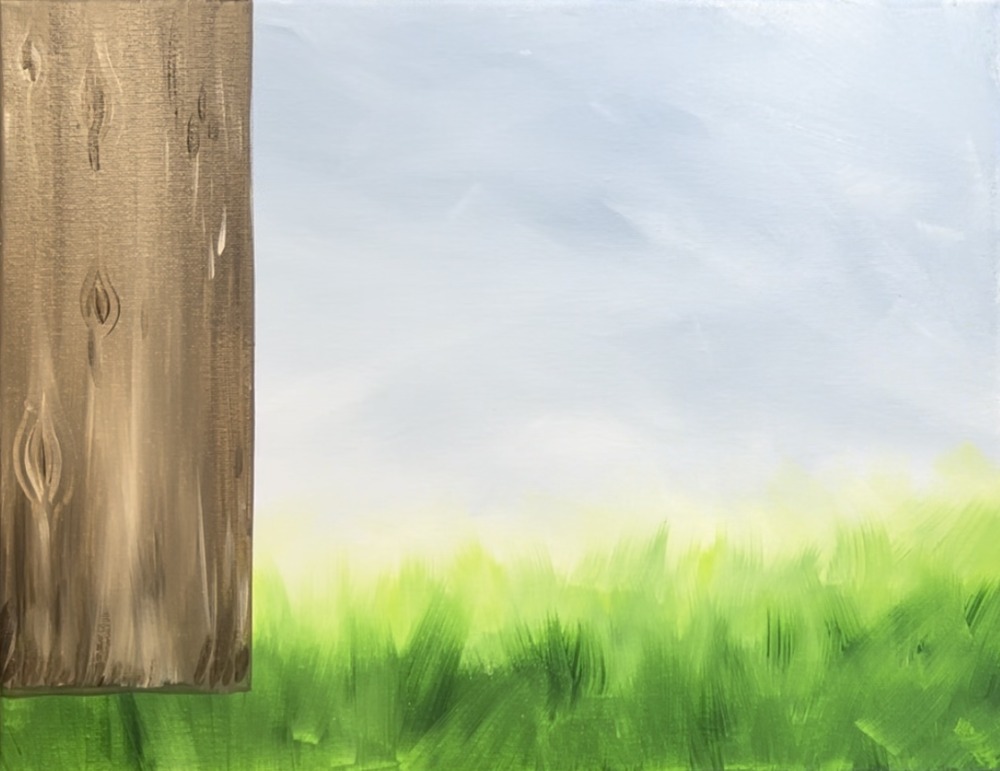
Wait for this to dry before proceeding to the next step.
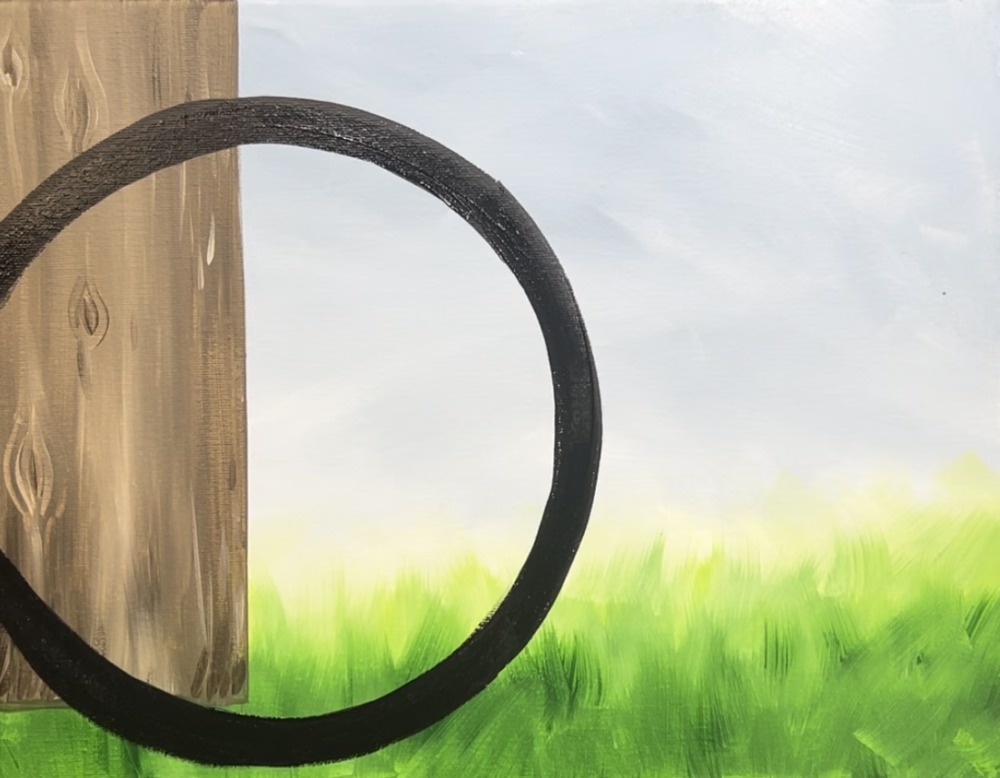
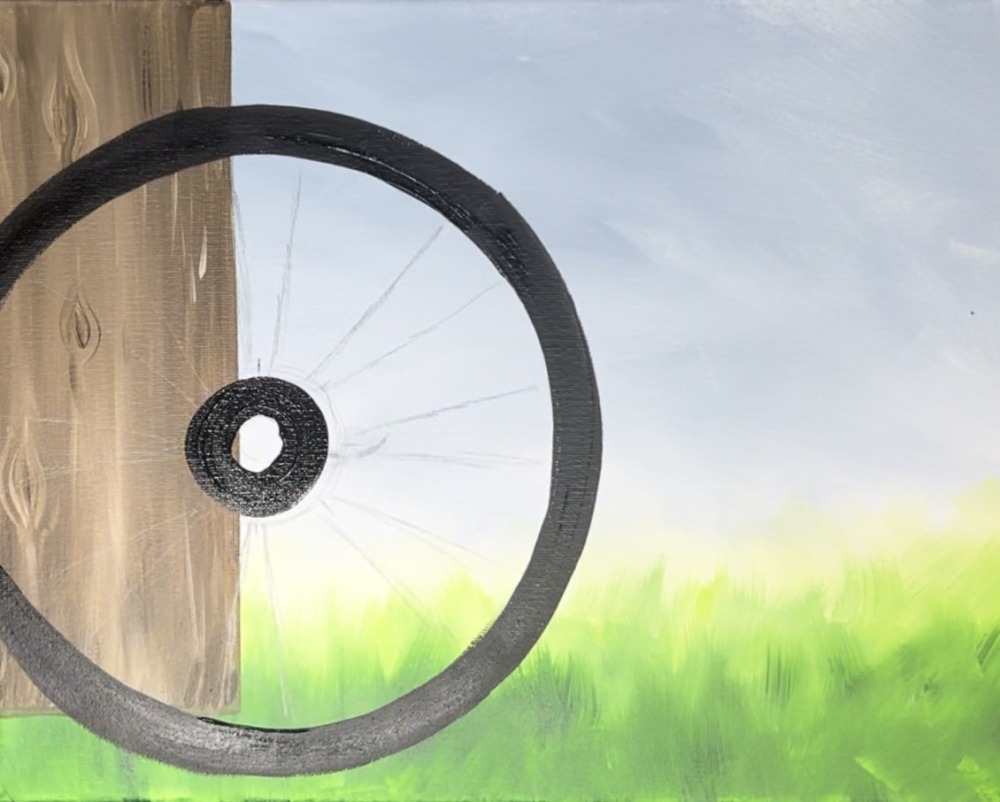
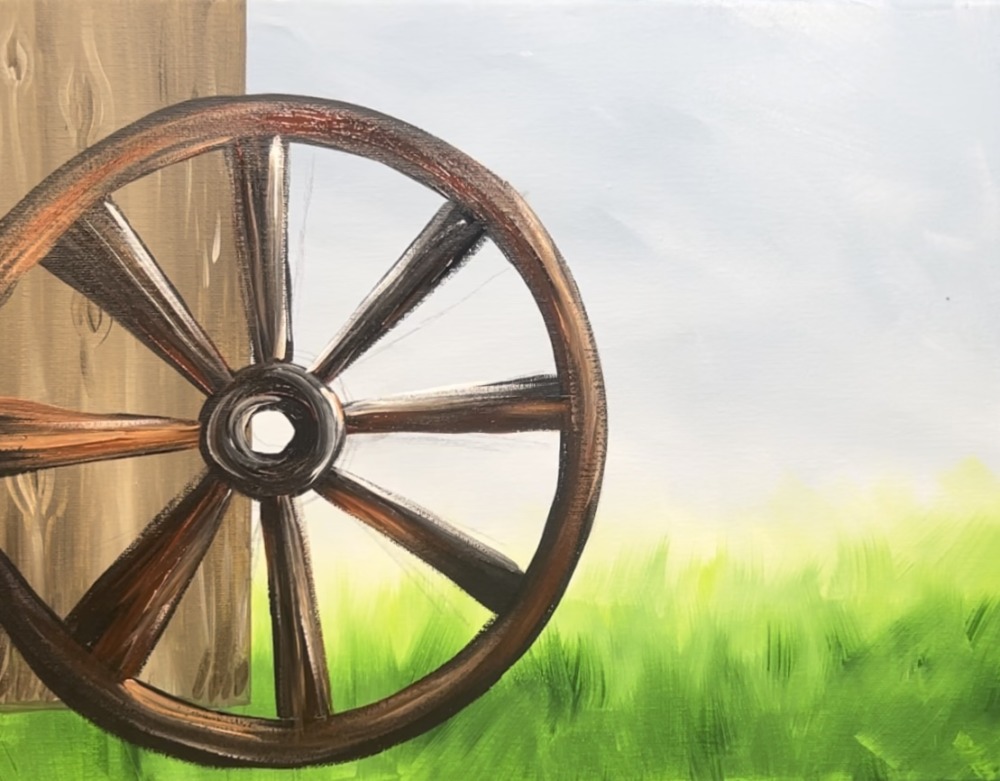
3. Draw & Paint Wagon Wheel
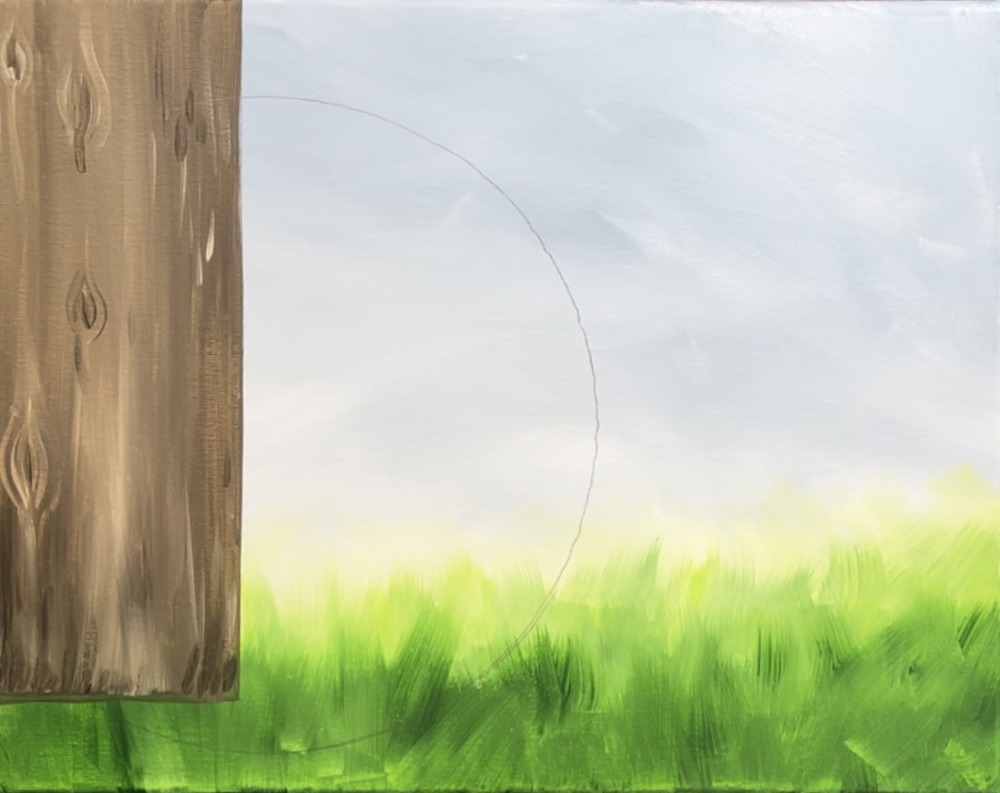
Use a 9″ paper plate to trace a large circle. If you don’t have a 9″ paper plate, find something of similar size to trace. You can also use a drawing compass for this. Place the circle so that part of it is going off the edge of the canvas.
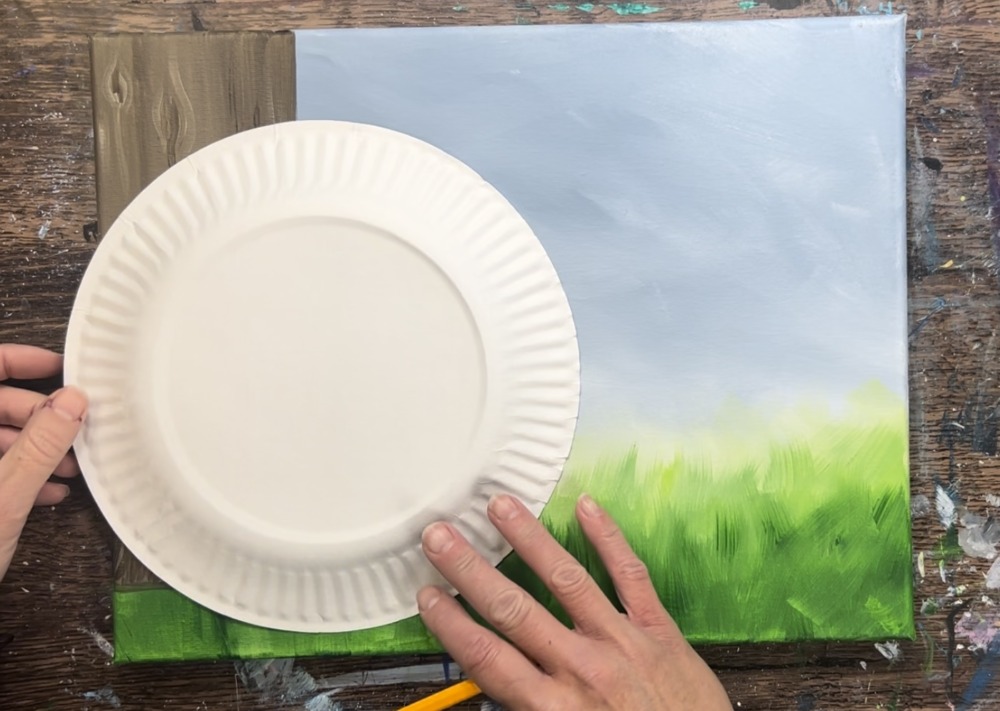
Draw firmly with a pencil.
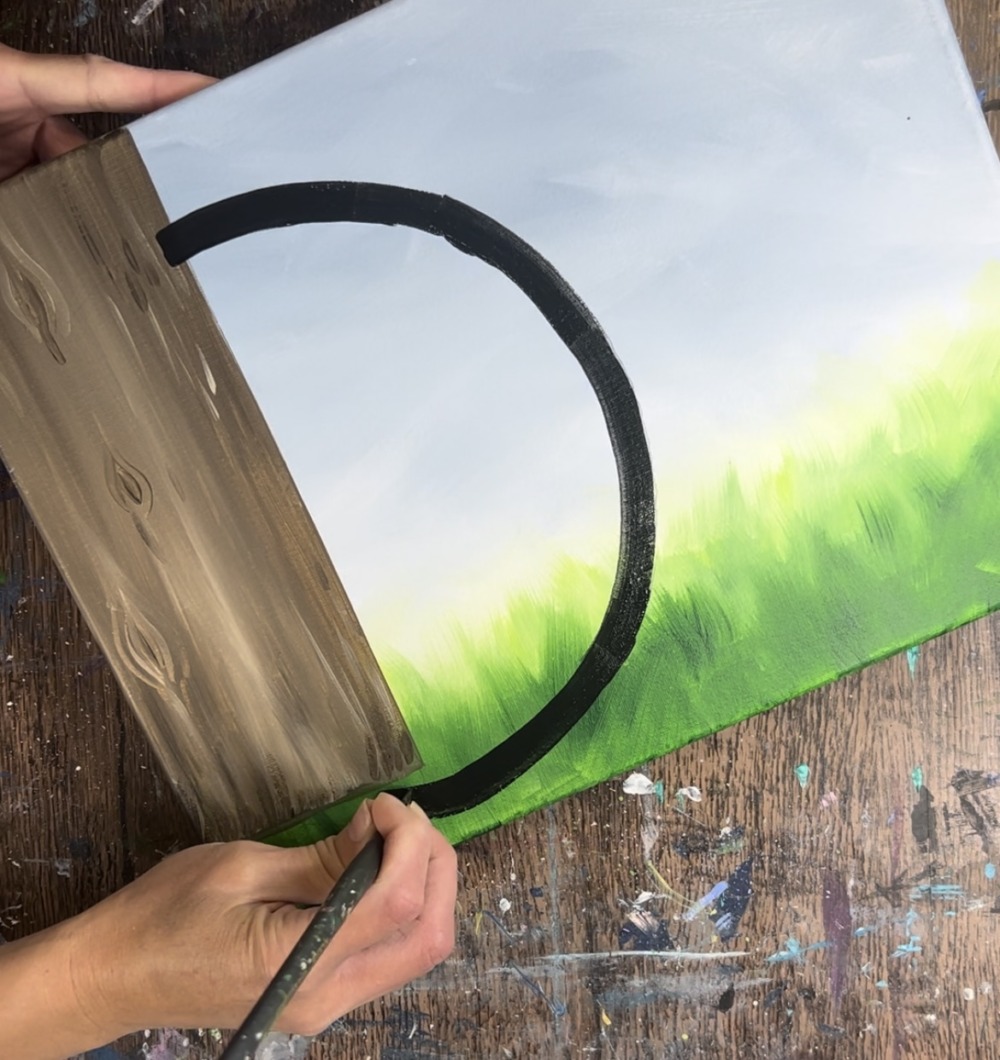
Next, load your 12 bright brush (1/2″ flat) into mars black. If needed, add a small amount of water to the paint to help with the flow. Use the full width of the brush to paint the inner part of the circle.
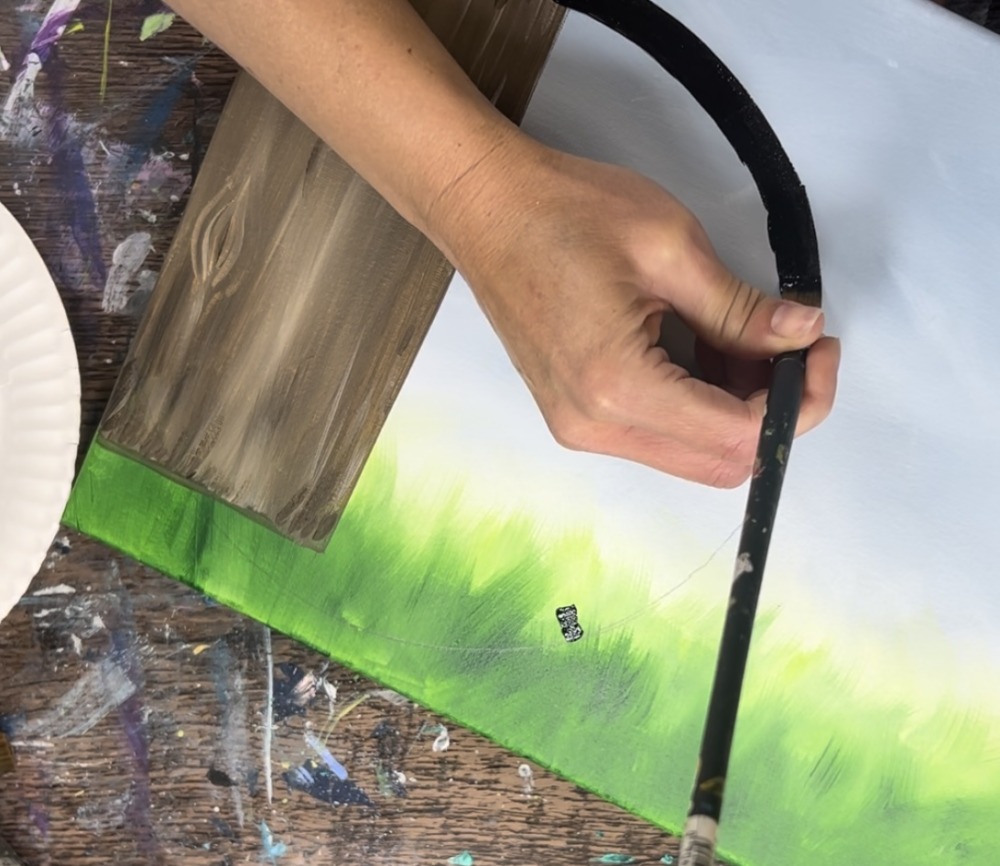
Carefully drag the width of your brush in a full circle just on the inner part of the line you drew with pencil.
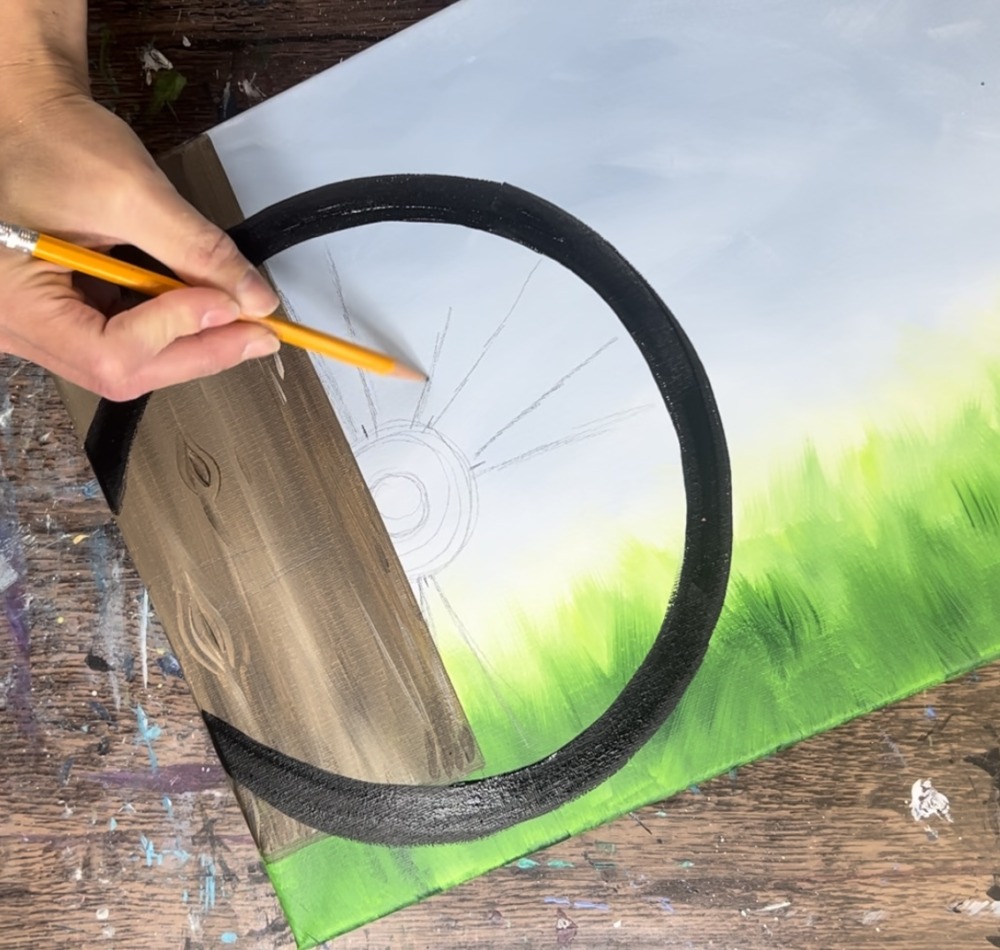
Then sketch the center hub. Locate the center of the wheel and draw a doughnut shape. Then make four tick marks at the top, bottom, left and right of the circle. This will divide your circle up into four areas for the first four spokes.
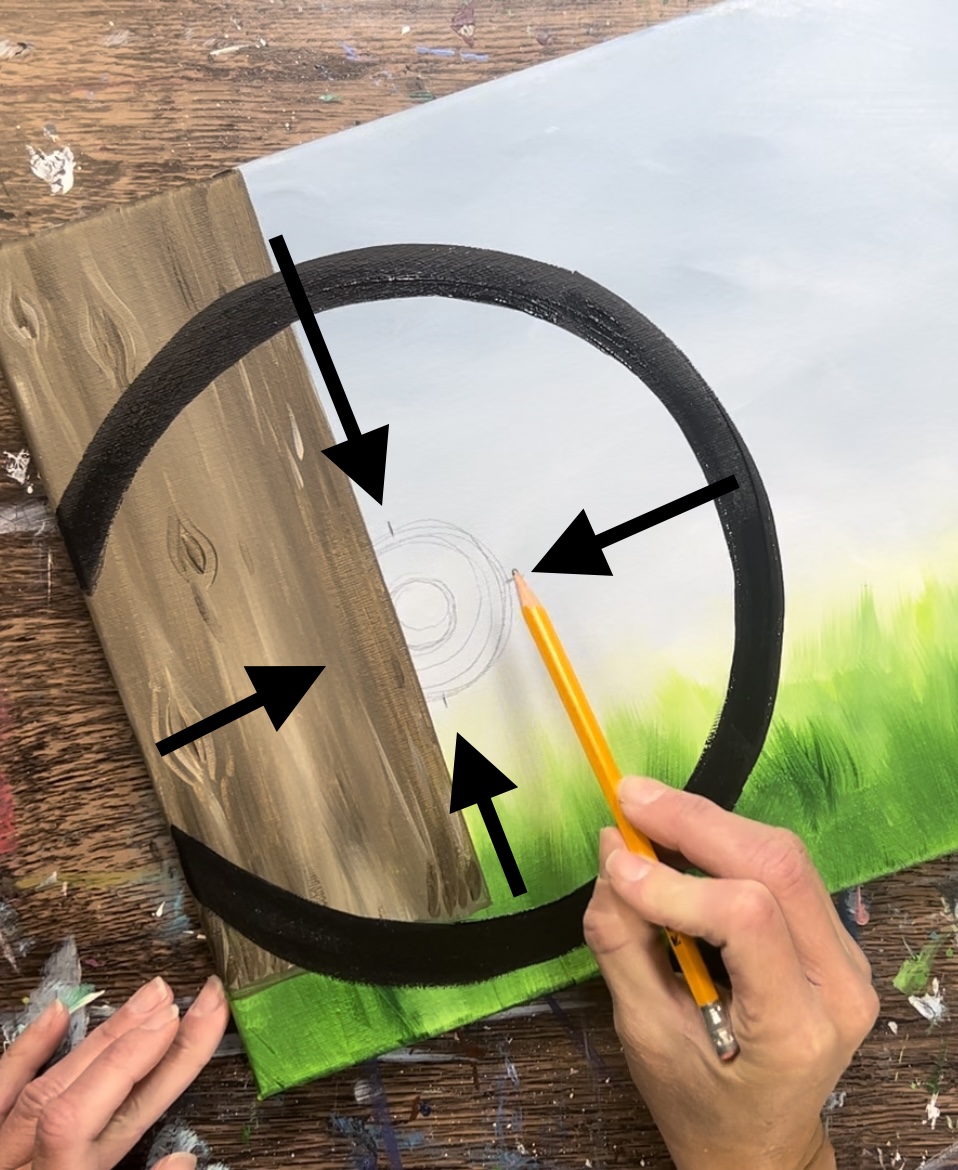
Then draw four spokes extending from each of those tic marks.

Then, in between each of the spokes, draw another spoke. This will make for a total of 8 evenly spaced spokes. Spacing, however, does not have to be perfect!
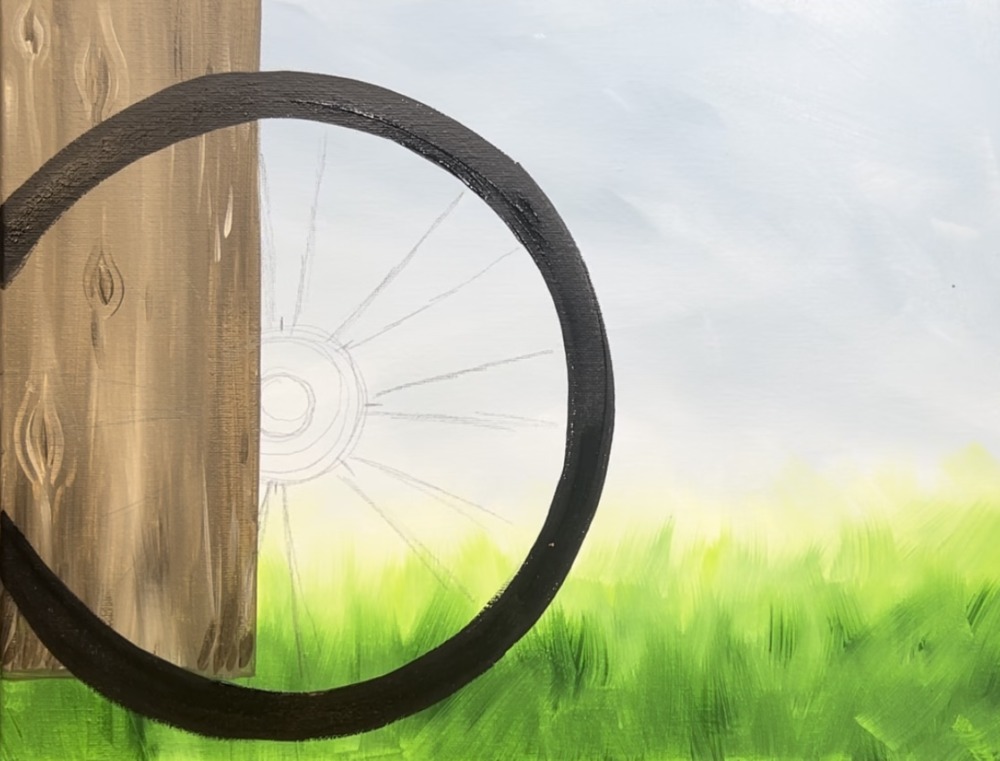
Use a #4 round brush and mars black to paint the center hub of the wheel.
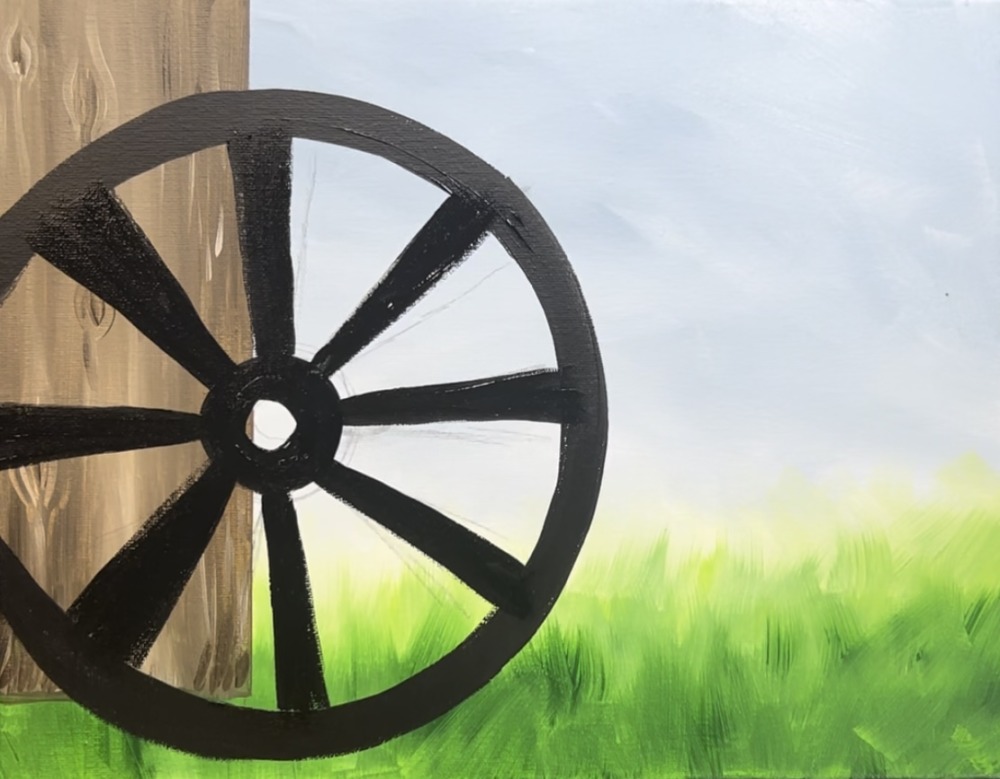
Then paint each of the spokes. Note that each spoke starts out slightly more narrow and then gets slightly wider on the edge that attaches to the outer part of the wheel. I found it easier to paint the top, bottom, left and right spokes first and then the diagonal ones in between those.
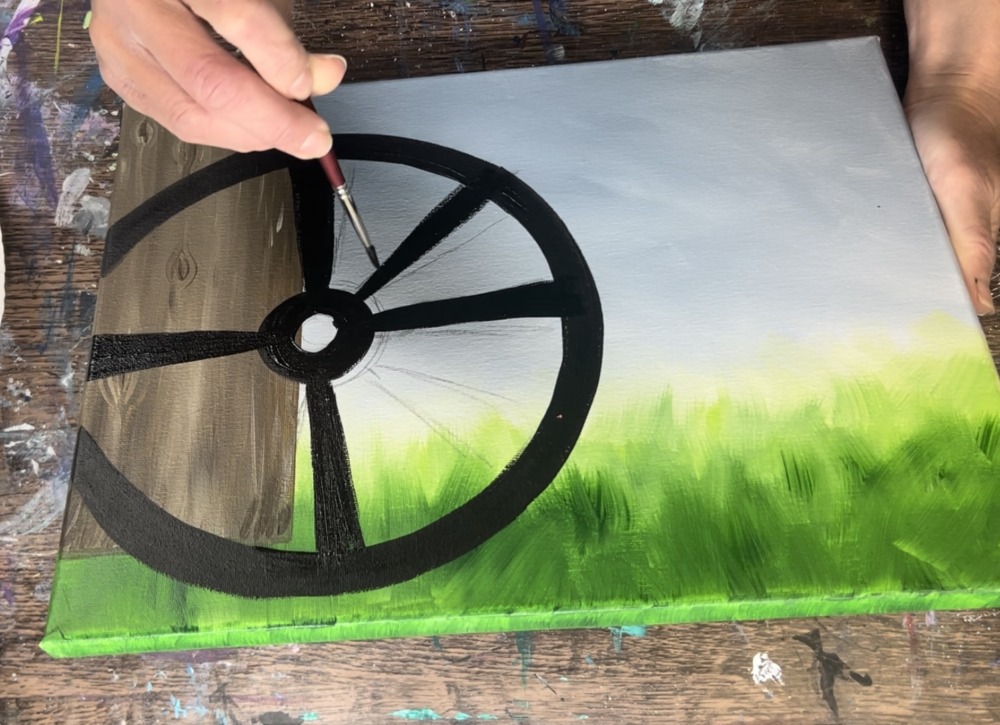
It’s okay if each spoke isn’t the same thickness.
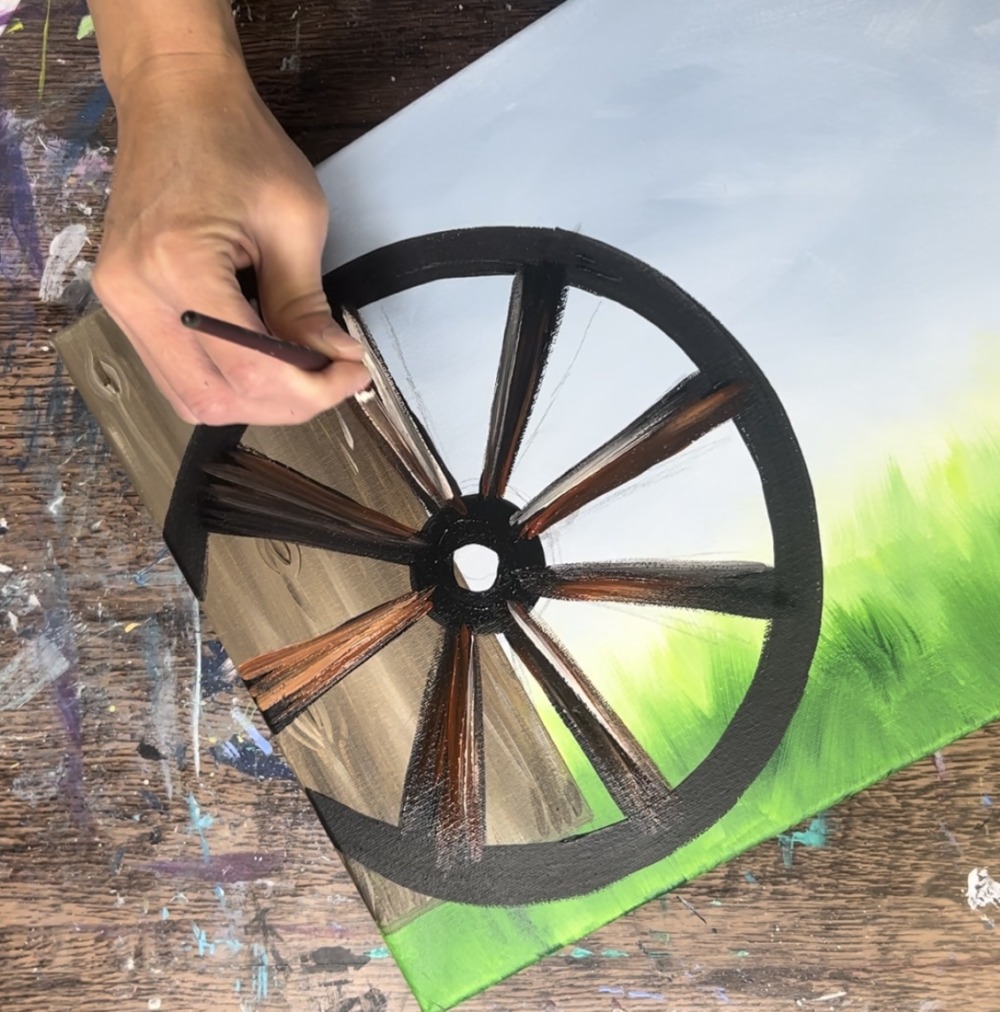
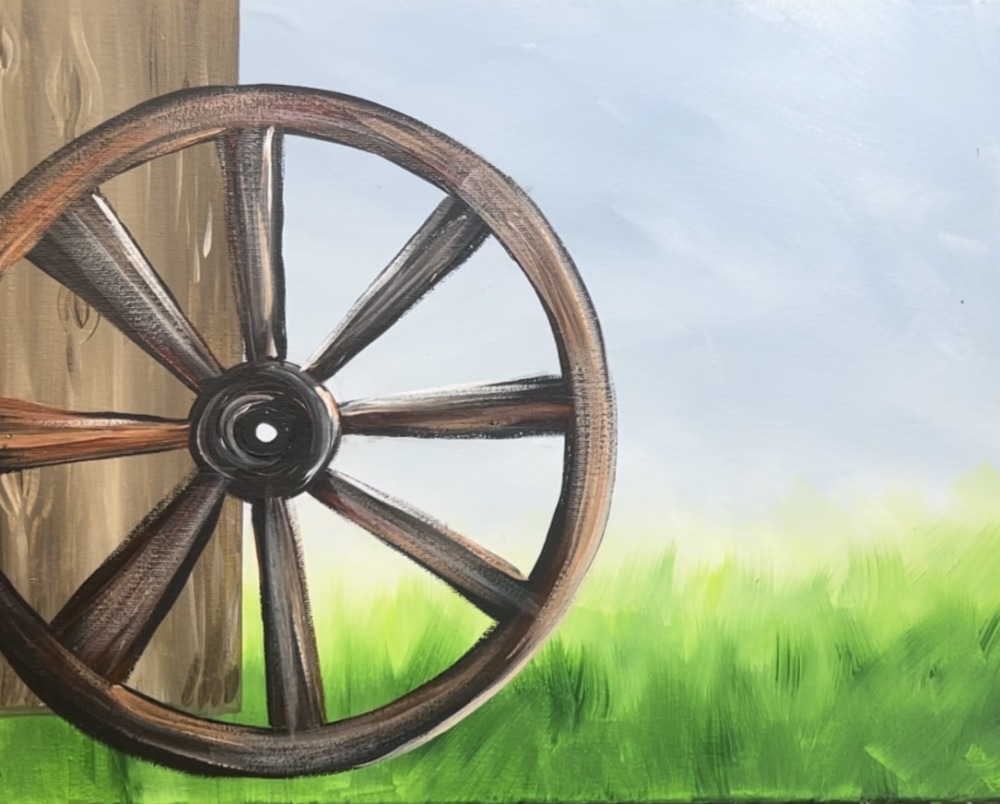
You do not need to wait for the black to dry before going to this step. Load your palette with burnt Sienna. Then load the burnt Sienna onto the #4 round brush. Paint the burnt Sienna using long strokes that go in the direction of the spoke. You want to do long strokes without covering all of the black. This is almost the same technique that was done on the wood post in the background to create the faux wood texture.
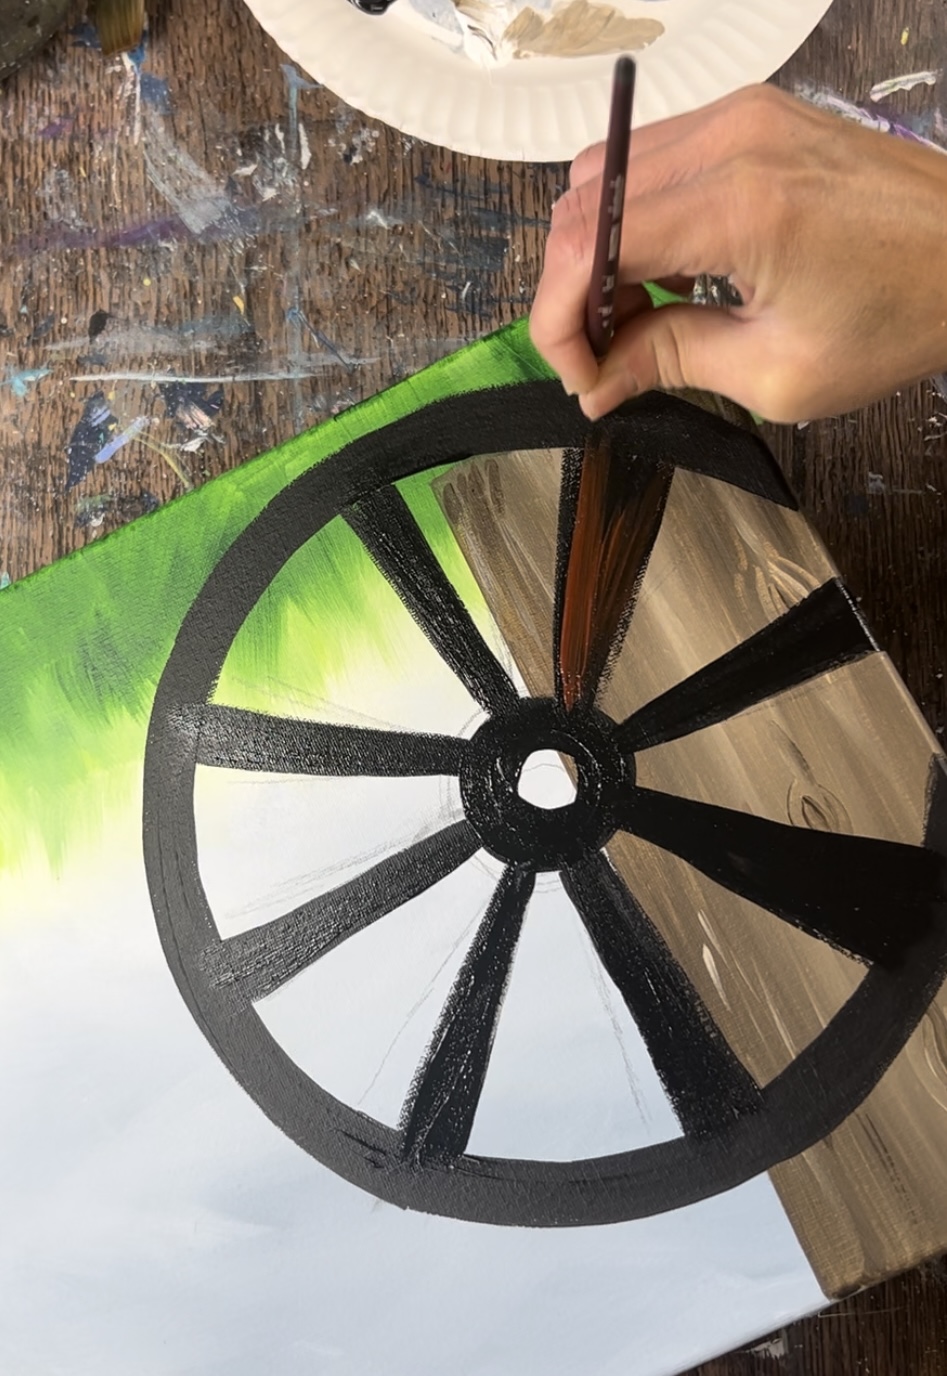
Do this to each of the spokes. You may also utilize the titanium white and gently blend some of the white into the brown but don’t blend all the way. Try not to cover up all of the black. Because the under layer of this wheel is black, it allows it to have enough contrast against the wood post behind it.
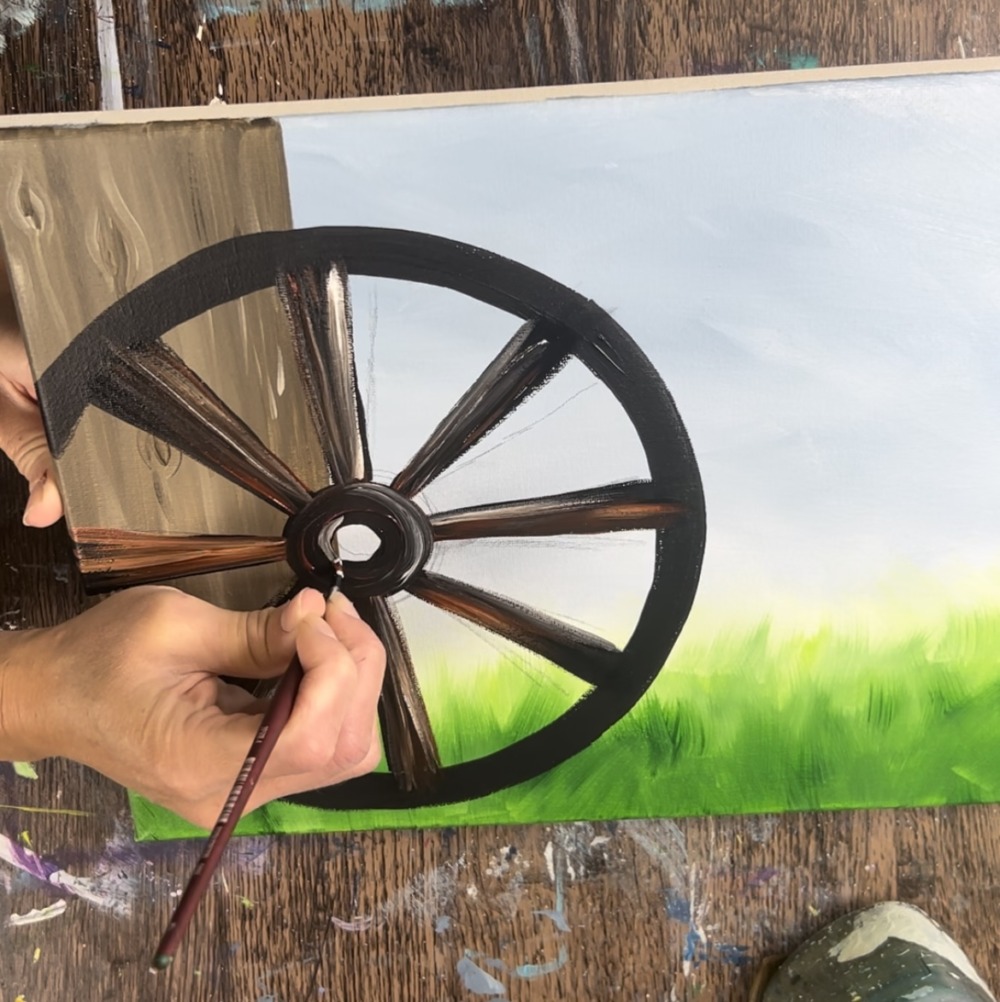
Then paint the center hub of the wheel using the same technique (use burnt Sienna and titanium white). Paint in a circular direction.
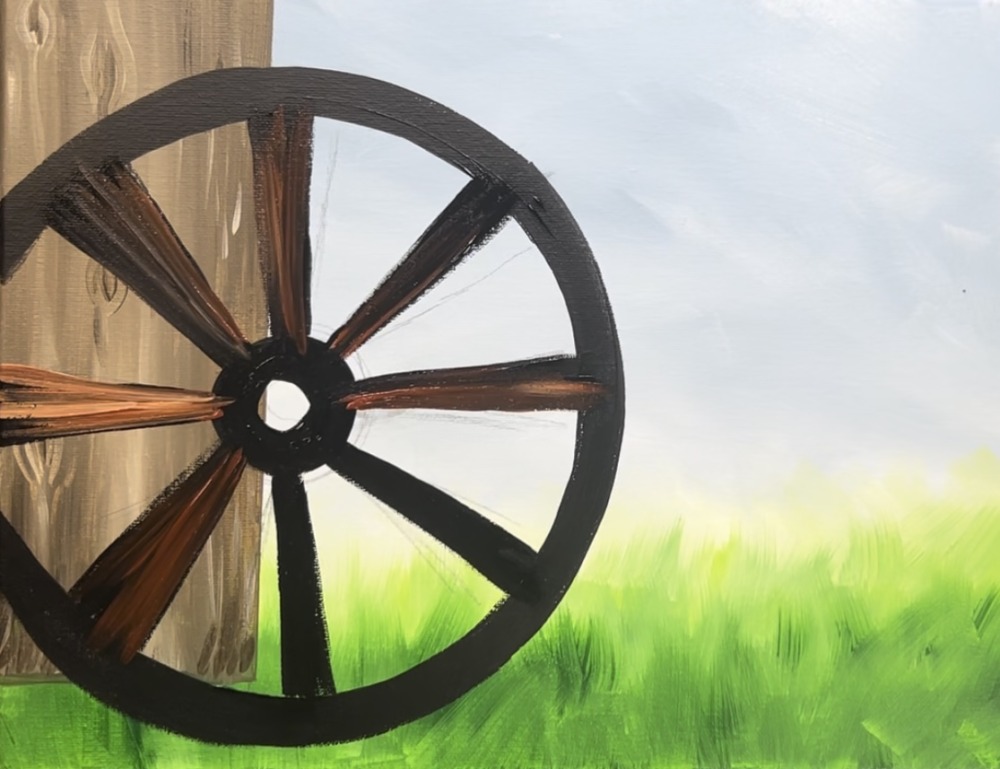
Then paint the outer part of the wheel (the large circle) using the same technique. Apply burnt Sienna to the brush and paint in a circular direction. Try not to cover all of the black.
Add small amounts of white into the burnt Sienna so that it blends. Be careful not to make the outer part of the wheel too light, you still need it to have enough contrast against the background.
Add more black to the center hub but leave a very small circle open in the middle. Then loosely add more mars black to the edges of the spokes to define the edges. You can also use a black paint pen for this.
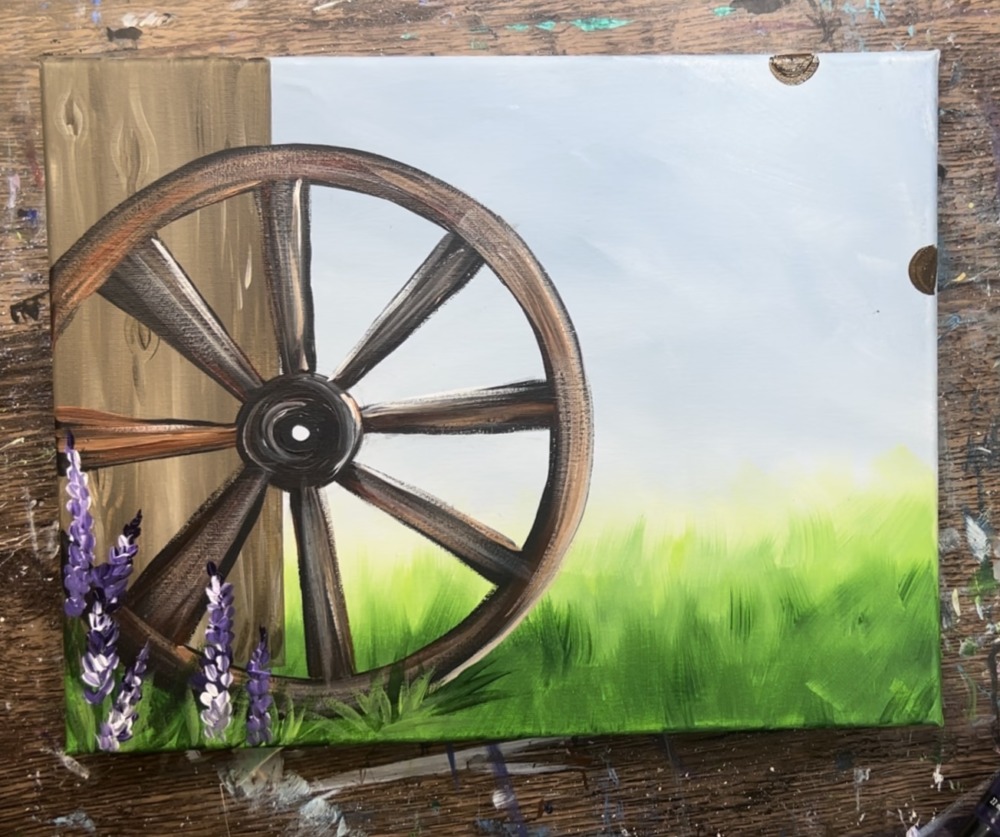
4. Paint Grass At Bottom Of Wagon Wheel
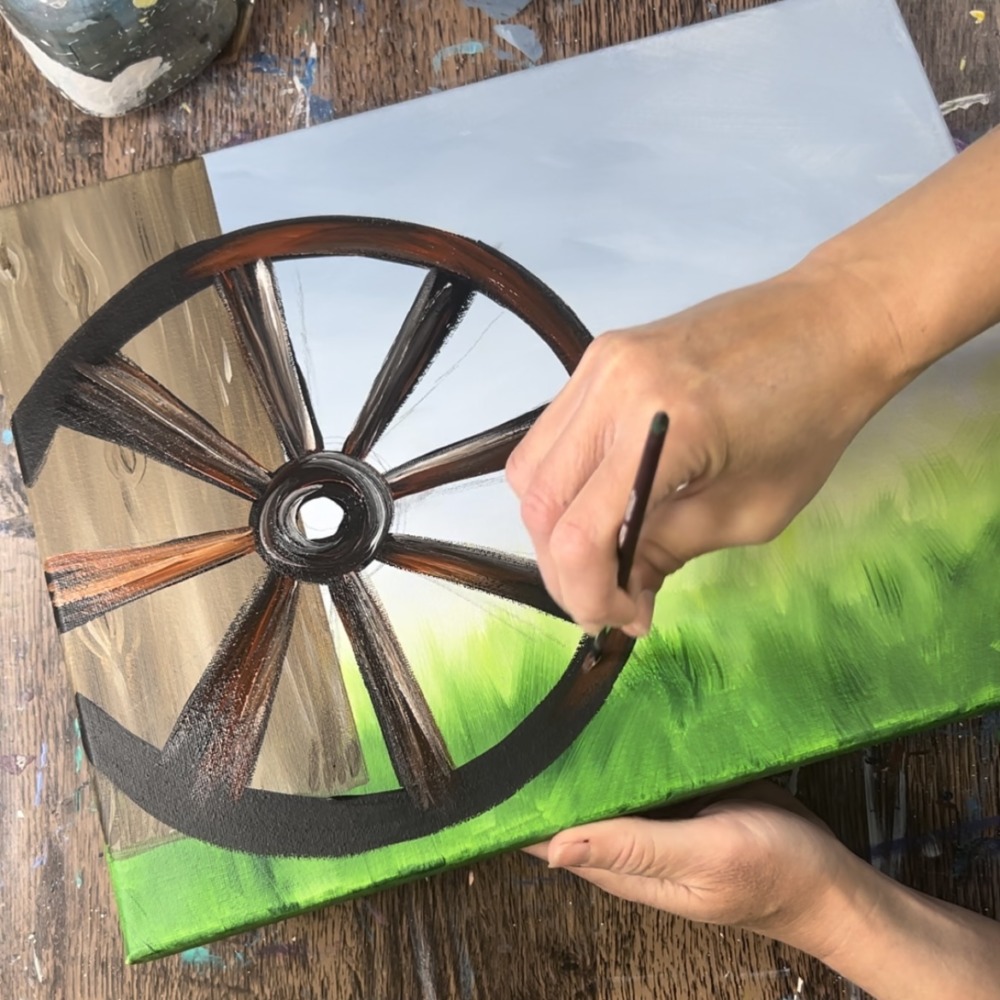
Load your palette with hooker’s green hue permanent, mars black and brilliant yellow green. Use the #4 round brush. Mix a very small amount of mars black into the hooker’s green.
Paint small angle grass blade strokes that overlap the bottom of the wheel. The overlapping will make it look like the wheel is nestled in the grass! You can also paint gras blades that are going behind the wheel and larger grass blades in the lower left corner.
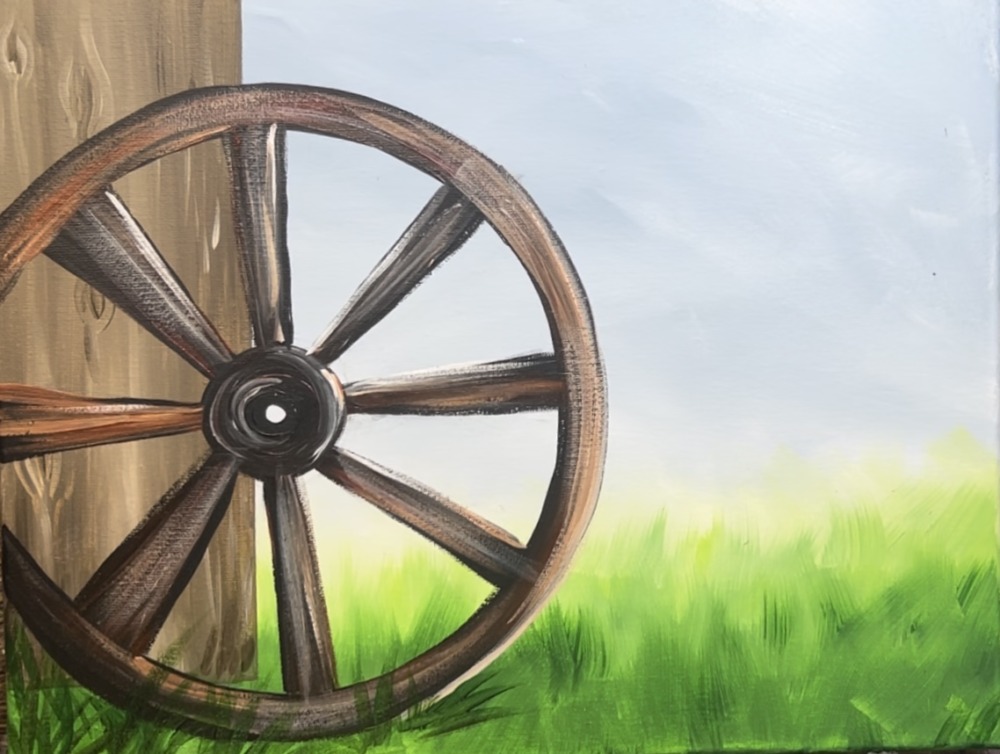
Repeat this step but add brilliant yellow green to your brush. Paint a second layer with this lighter green but do not cover up all of the dark green layer. Paint a few grass blade strokes that are much longer. This will help set the stems for the lavender in the next step!
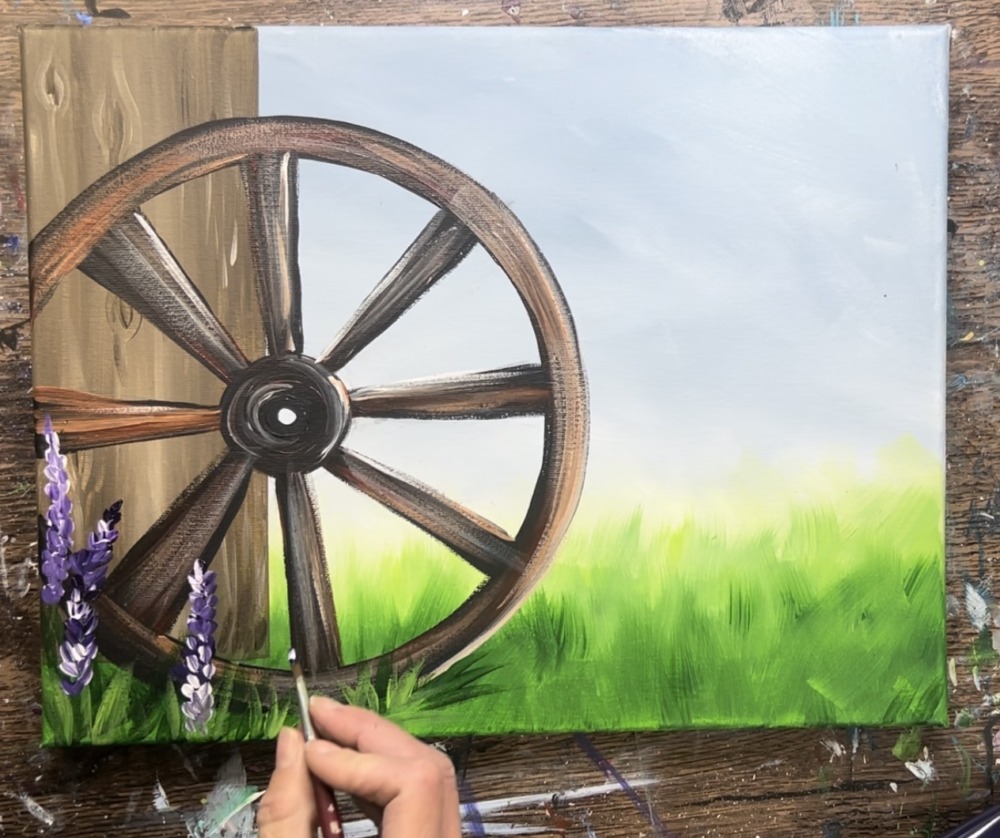
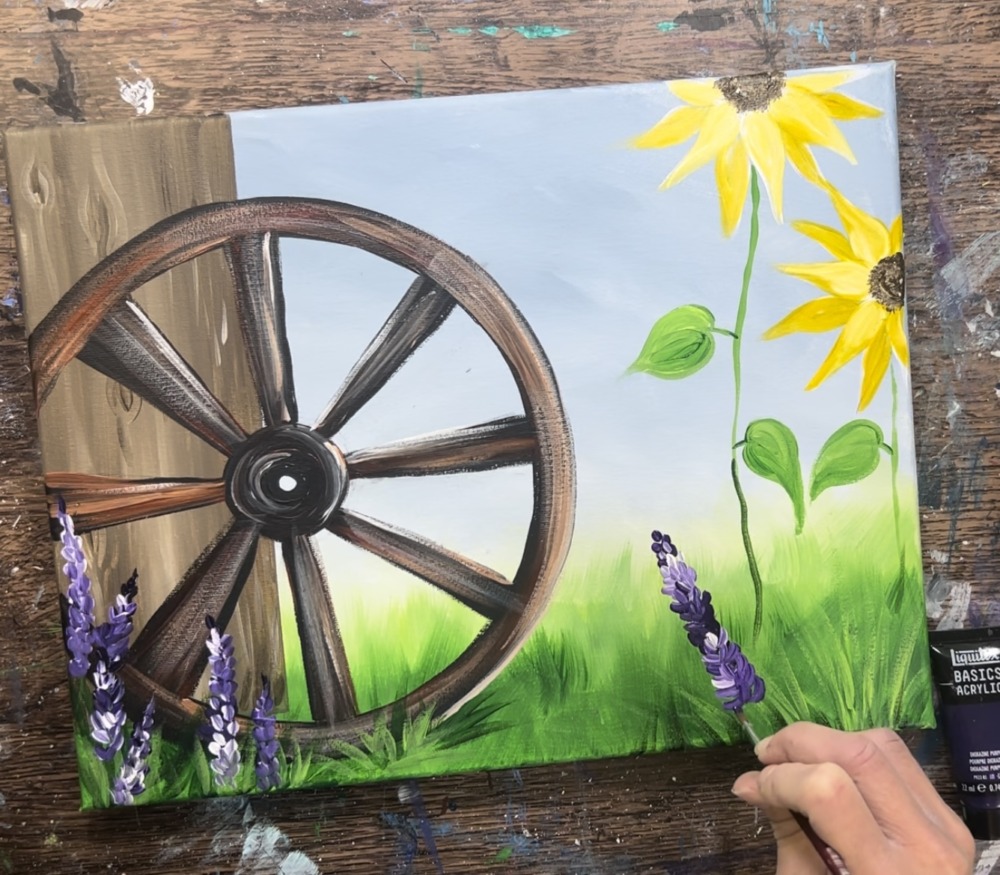
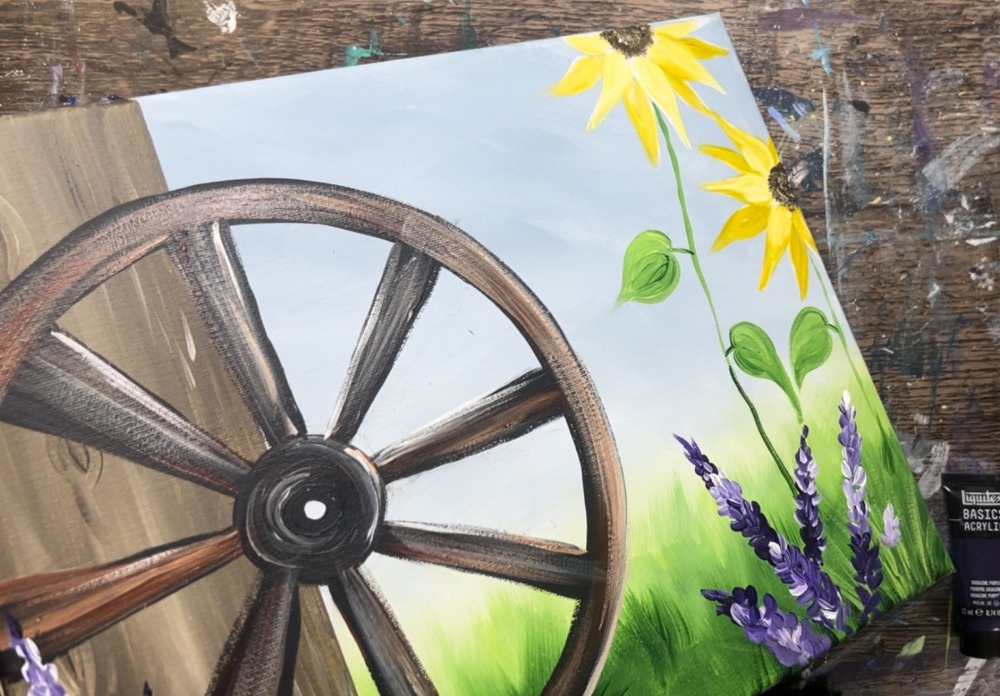
5. Paint Lavender
Load your palette with dioxazine purple and titanium white. Paint the lavender flowers one at a time. Start by painting a very small stroke with the purple. Then load titanium white in your brush. Paint small strokes that overlap the previous strokes. Create a column of these small purple strokes.
Repeat this to create multiple vertical columns of lavender going in different angles.
Be sure to paint a variety of purple and yellow tints to create really pretty contrast. Some of the lavender pieces are lower in the canvas.

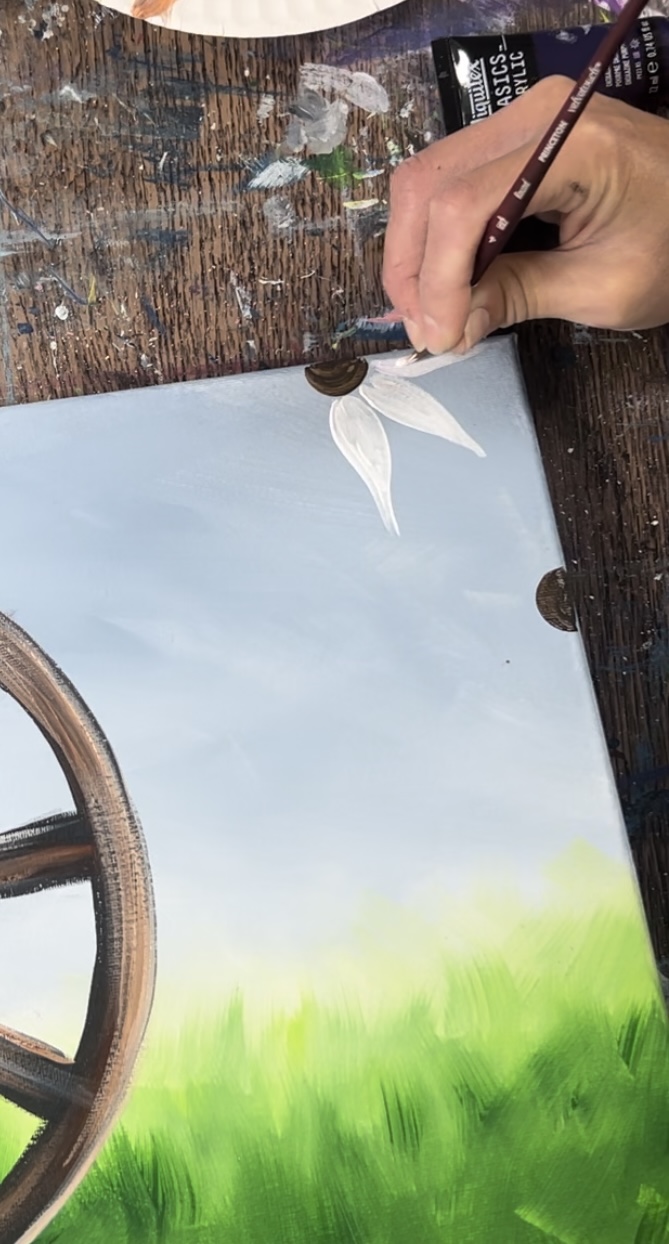
6. Paint Sunflowers
There will be lavender on the right side of the canvas, however, it is recommended to paint the sunflowers first.
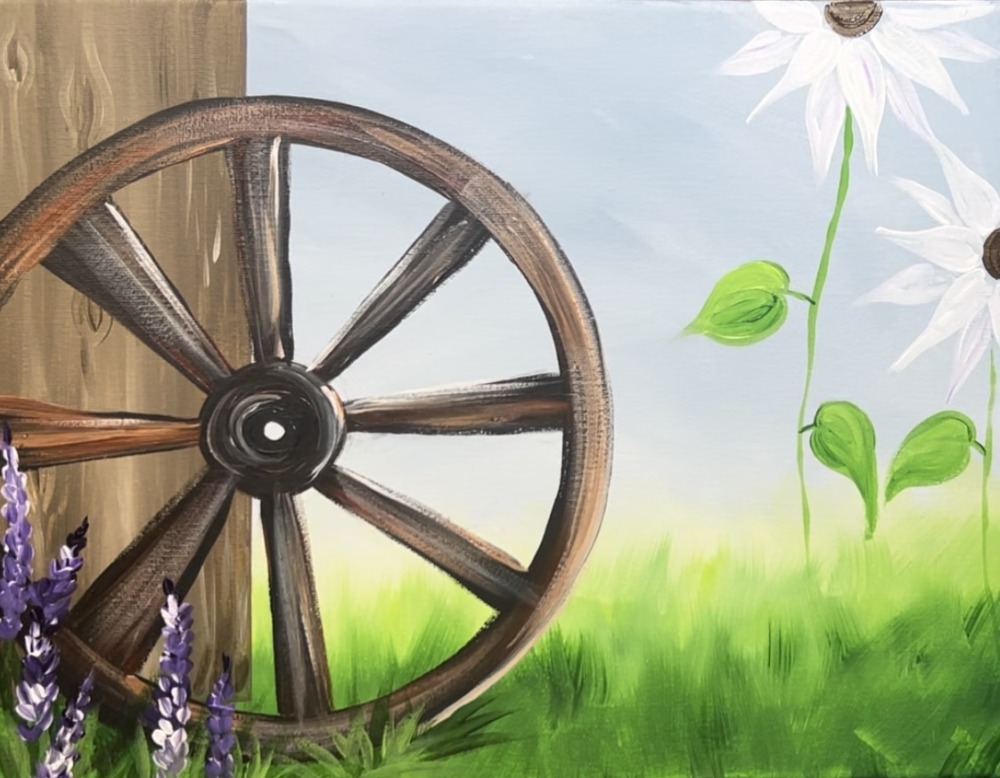
Start by painting the centers of the sunflowers with raw umber. These circles are going off the sides of the canvas.
Then use the #4 round brush and titanium white to paint each of the petals of the sunflowers. The petals are rounded at the base and go narrow and pointed at the tip. The petals are painted white first as a primer to allow for coverage. When the white dries, you will paint them yellow.
Paint the front petals first and then paint the back petals.
Then use the hooker’s green hue permanent to paint stems and leaves. The stems go down to the grassy area and sort of disappear. Then paint the sunflower leaves which are almost a heart shaped leaf. Add a little brilliant yellow green on the leaves as well.
Then use cadmium yellow medium hue to paint the white petals yellow. Add a little titanium white into the yellow for the front petals so that the front petals are lighter.
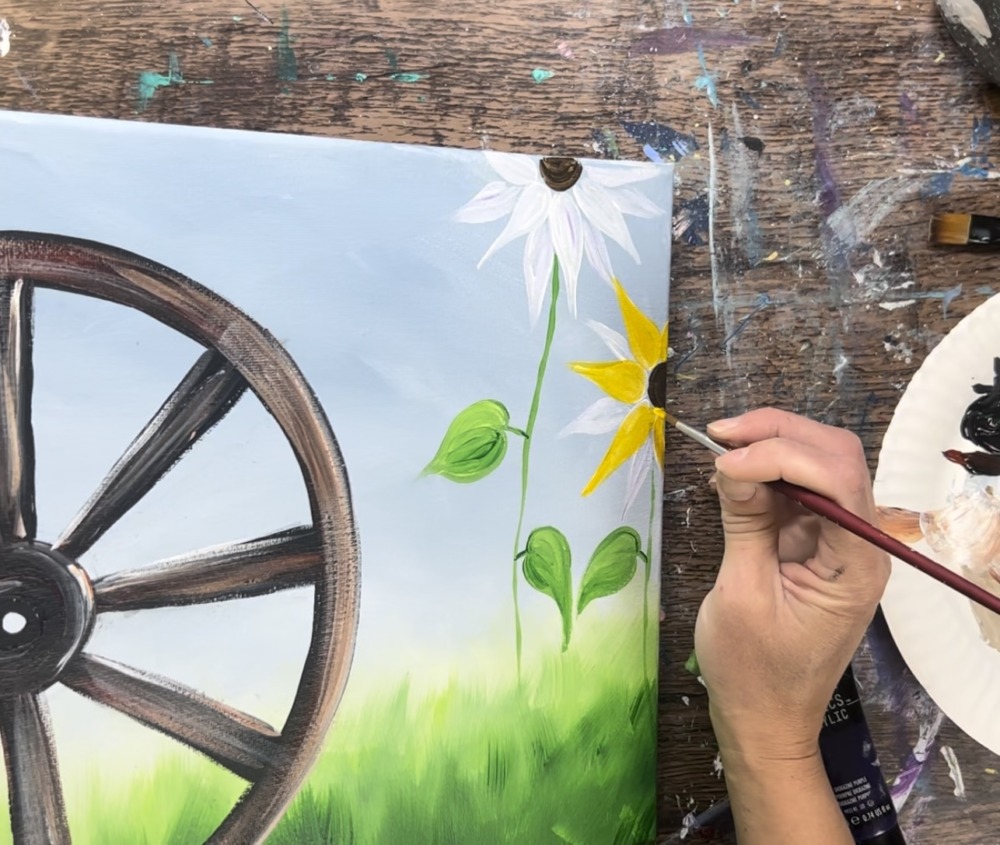
Then paint the back petals.

Next, use the tip of the #4 round brush and raw umber to “stipple” dots in the centers of the sunflowers. Allow the circumference of the circle to slightly overlap the base of the petals.
7. Paint More Lavender
Repeat the lavender painting technique from earlier to paint another set of lavender flowers in the lower right of the canvas.
Paint them going at different heights and different angles.
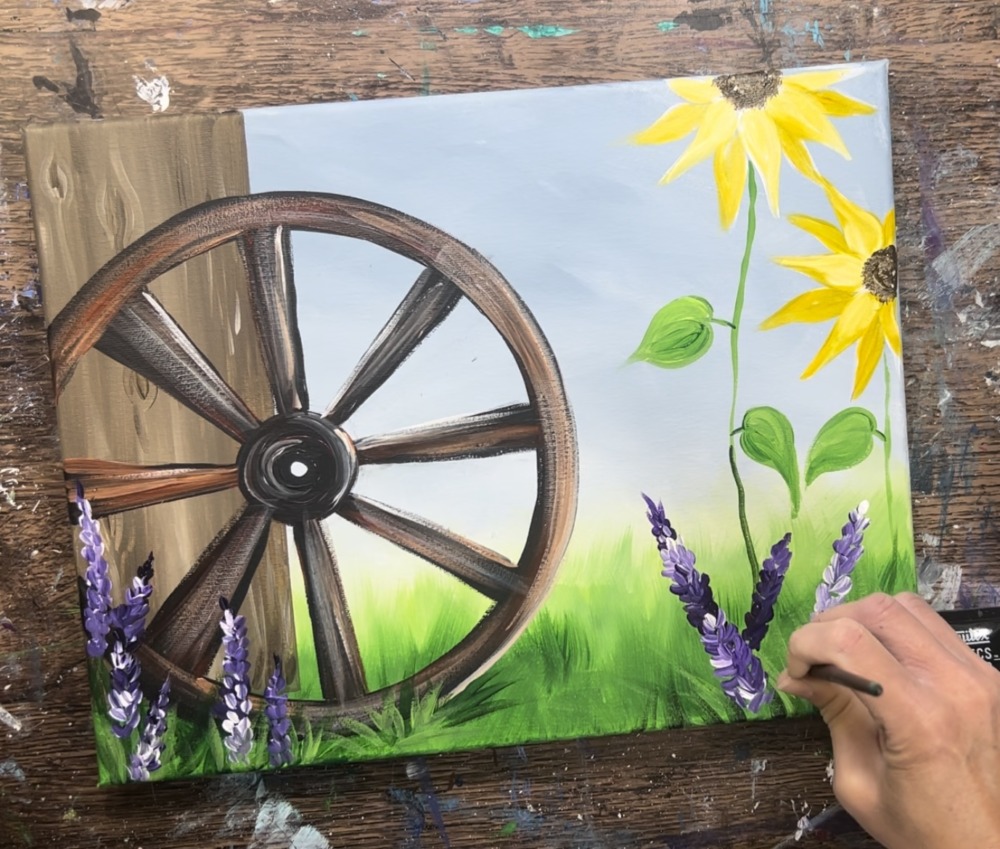
You don’t need to paint stems on any of these lavenders unless you want to! If needed, you can paint more grass blade strokes in that area.
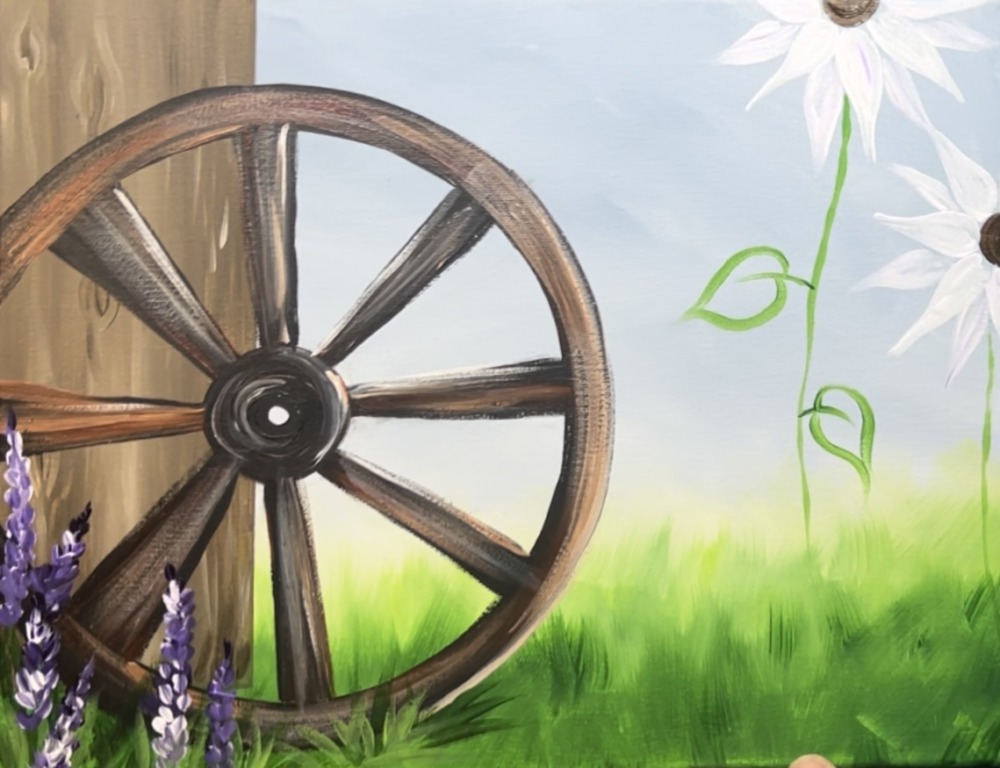
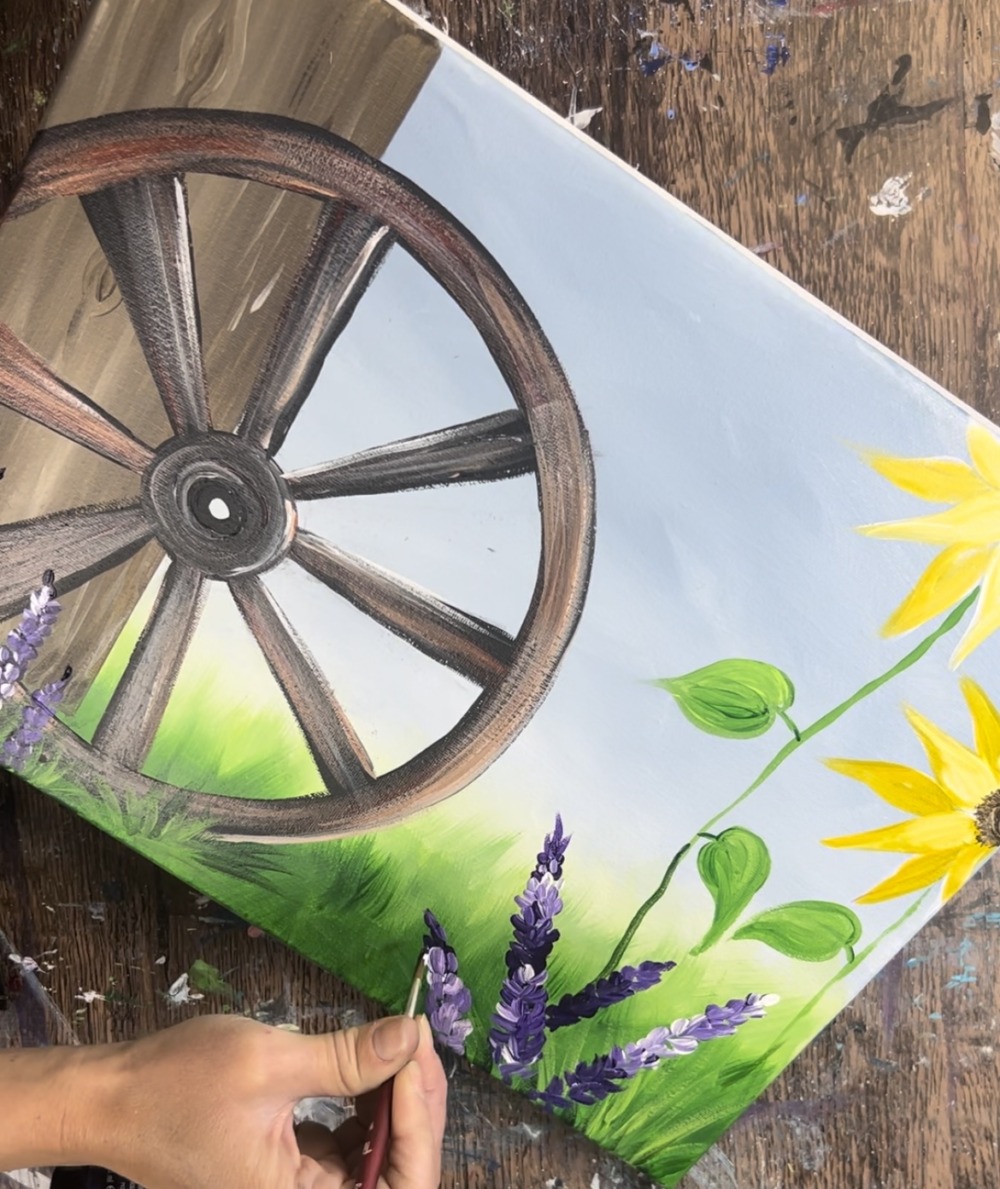
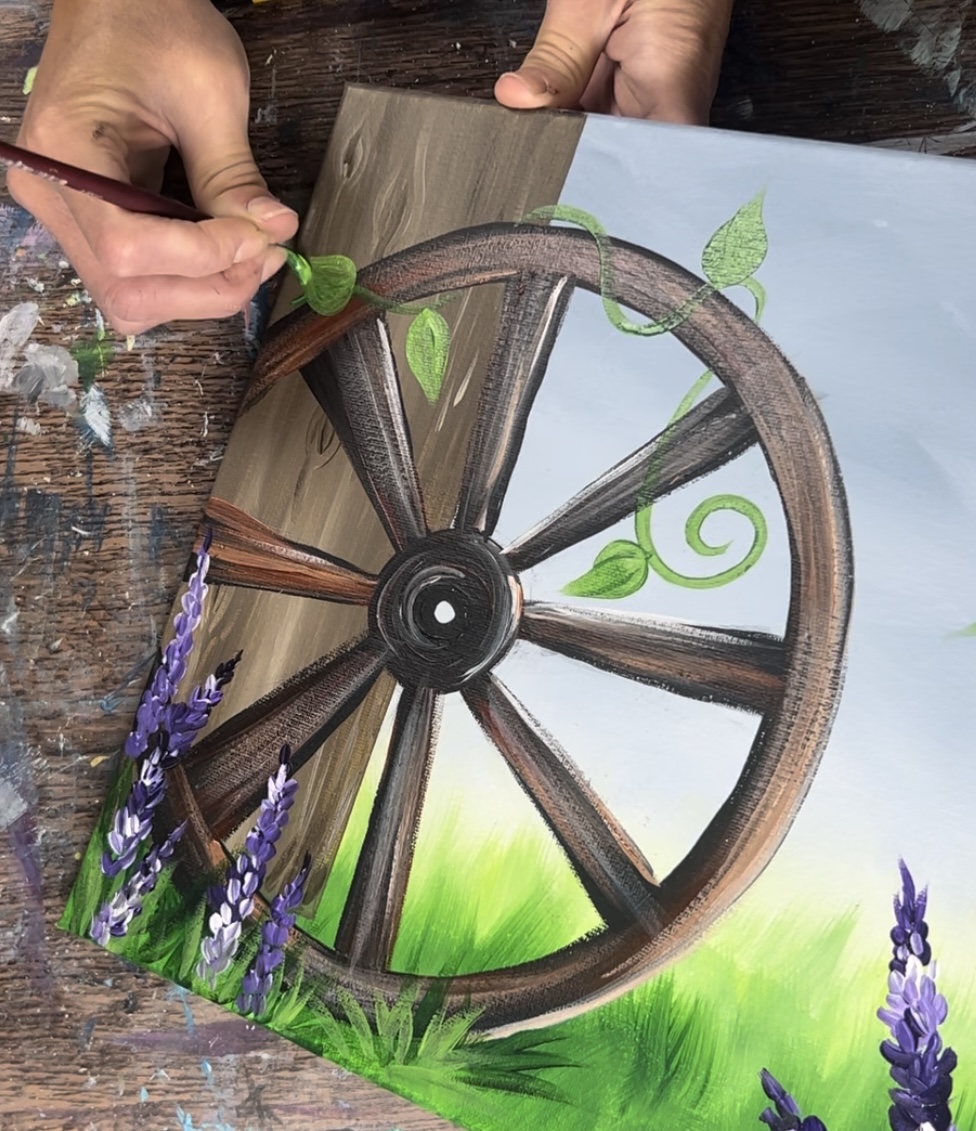
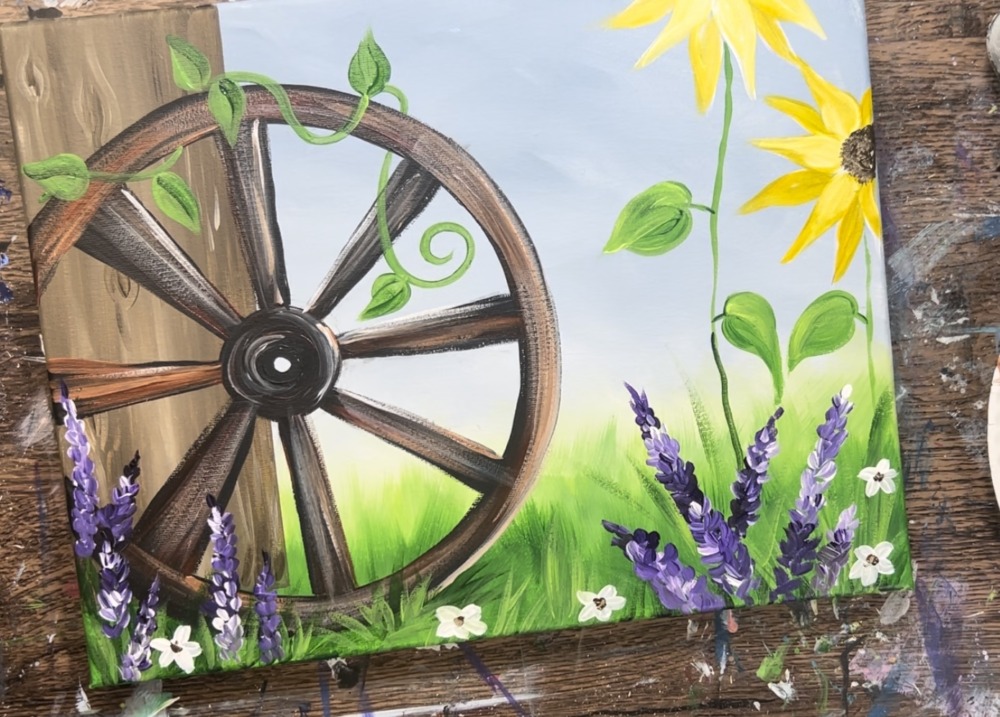
8. Paint Vine
Mix about equal parts brilliant yellow green with hooker’s green hue permanent. Then use the #4 round brush to paint a vine that wraps around the top of the wheel.
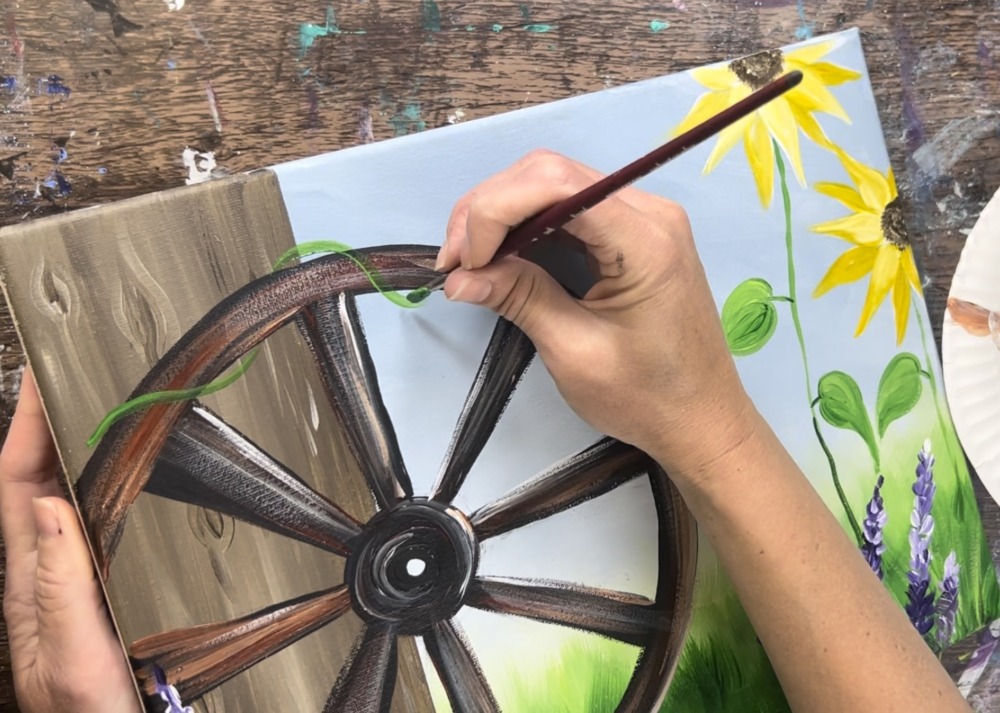
I made my vine drop down on the top right and then swirl back up. Then paint simple round/ pointed leaves attached to the vine. To lighten the green more, you can add titanium white or brilliant yellow green to it. You may need a few coats of this green to get good coverage, especially in areas that are darker.
9. Paint Little White Flowers
As a final touch, you can paint little 5 petal white flowers in the bottom area. These simple flowers don’t need stems or leaves, they can be floating.
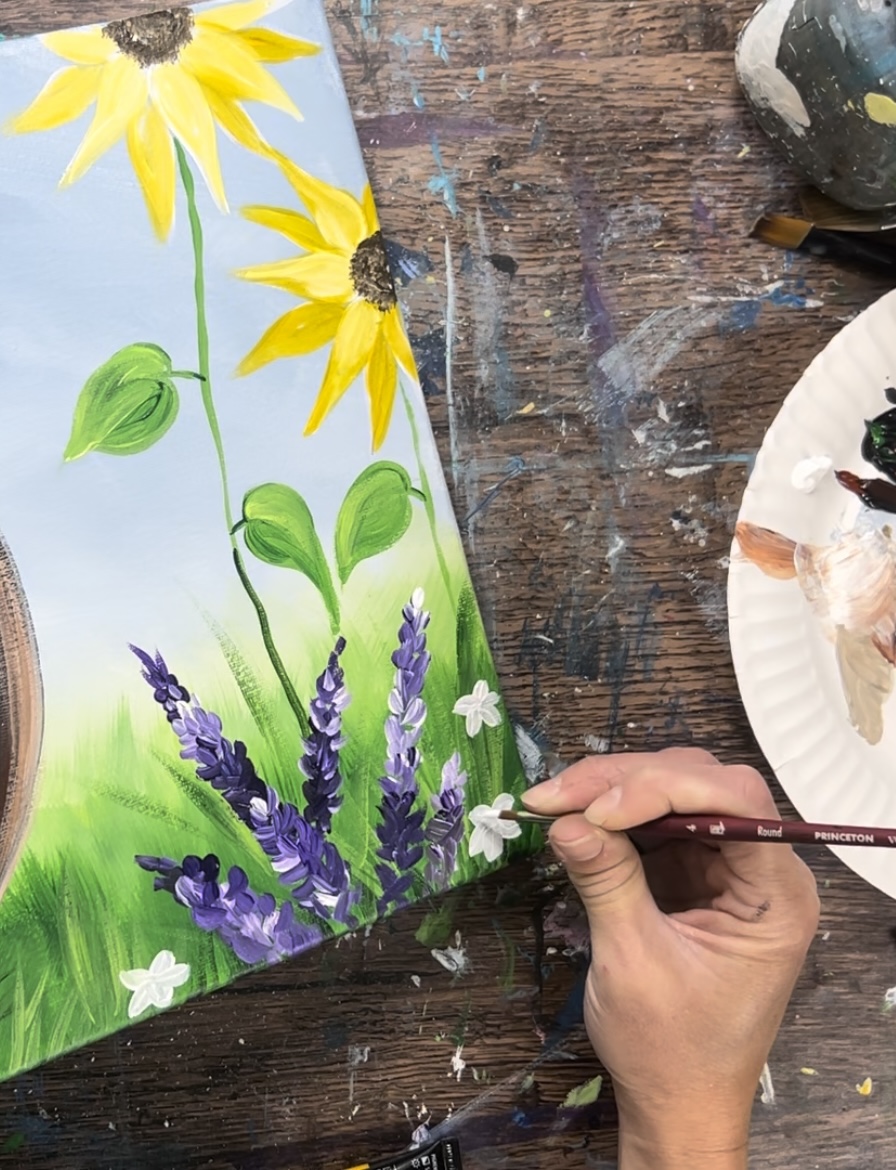
Then add a little brown dot in the centers of the flowers.
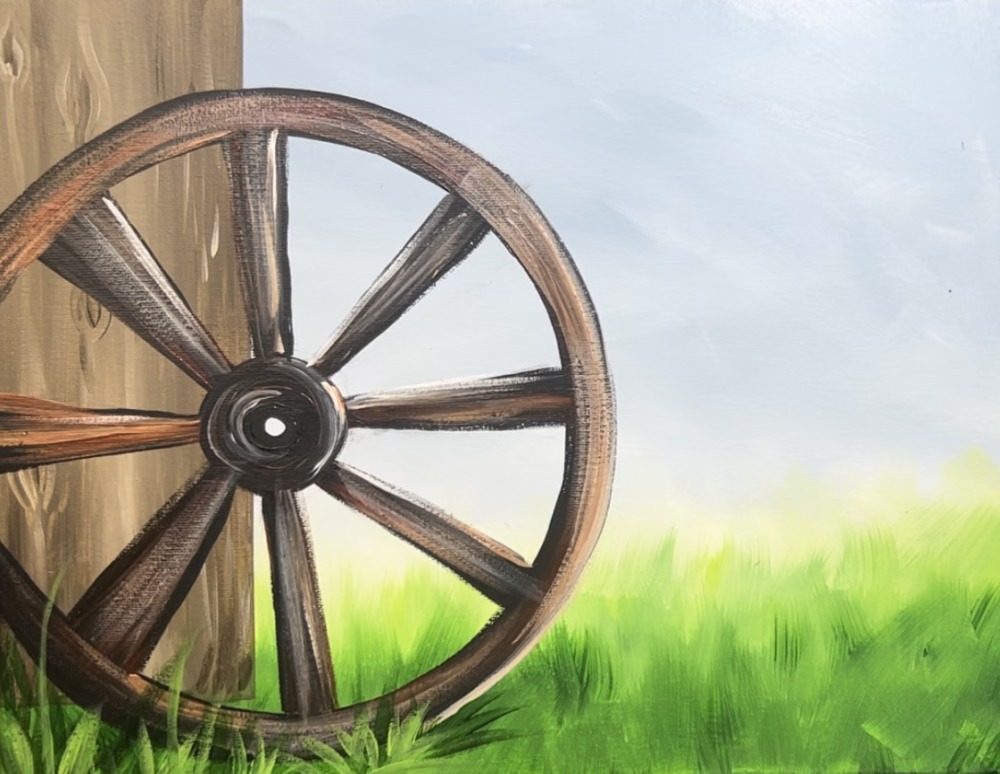
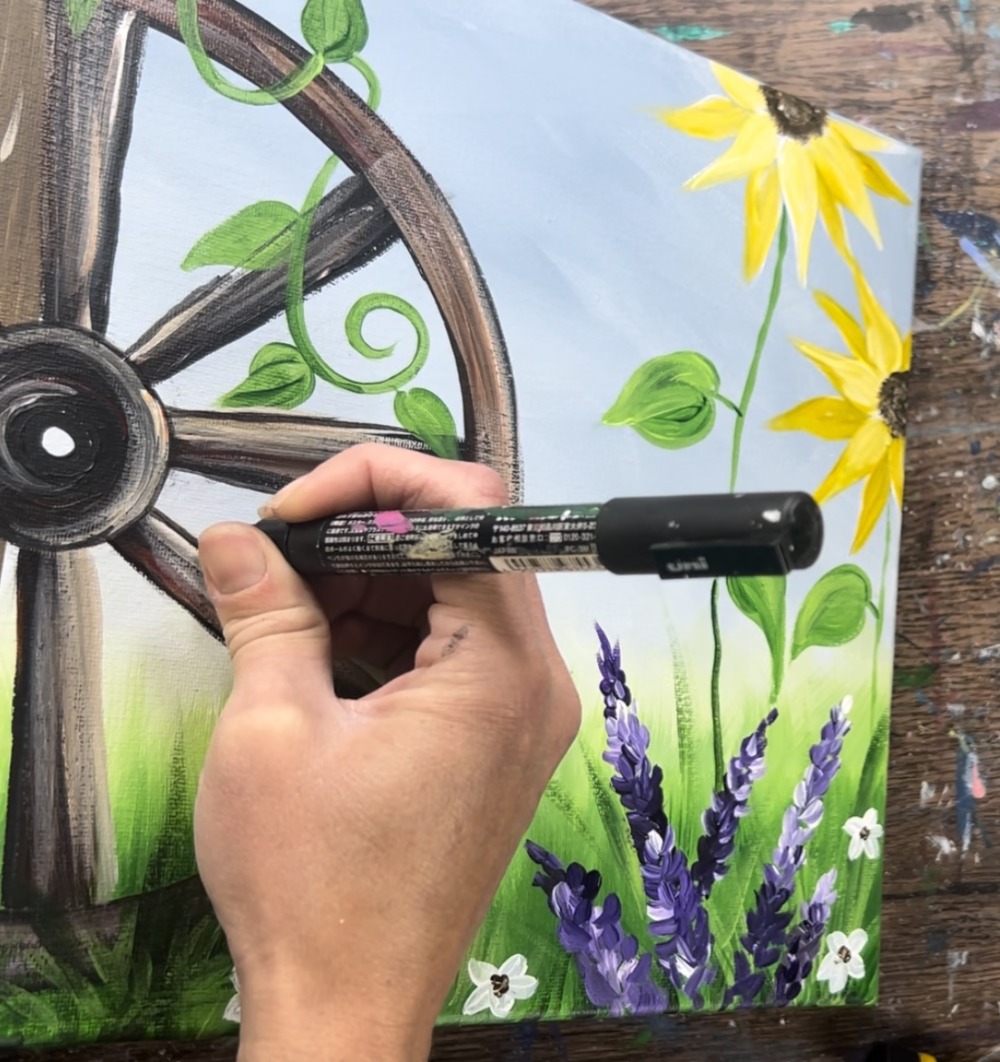
10. Touchups As Needed
If needed, use the black paint pen to outline parts of the wheel to help define it a bit more. This is completely optional and I don’t recommend outlining all the wheel. Just the darker edges and parts of the wheel that need to stand out a bit more (especially the part that is against the wood post).
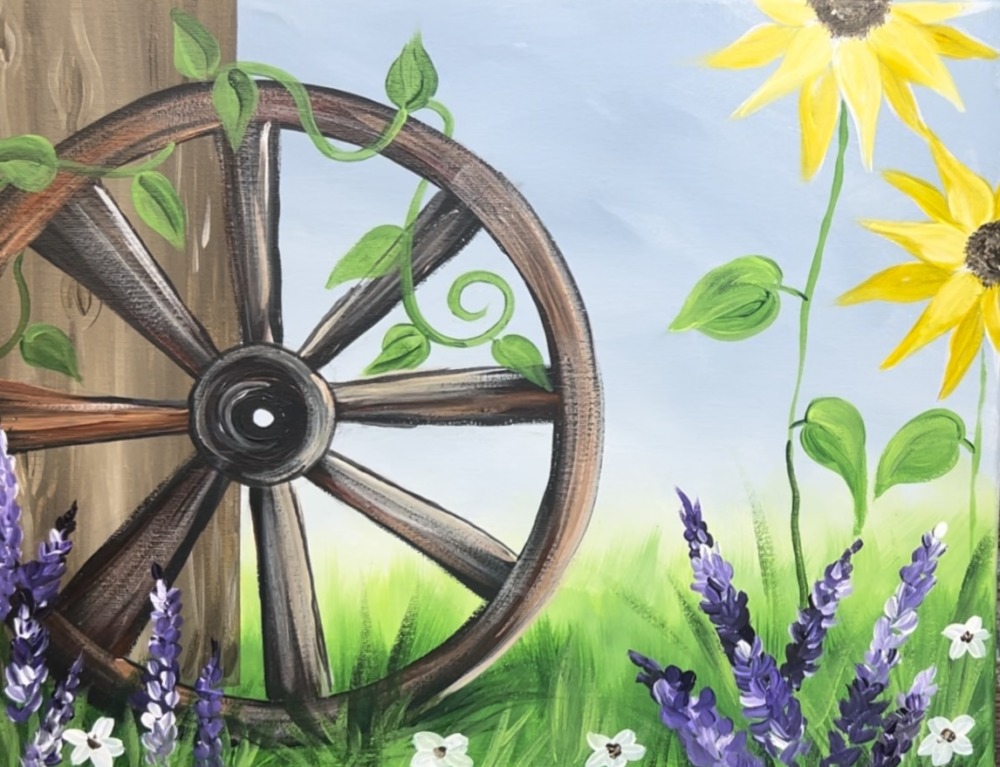
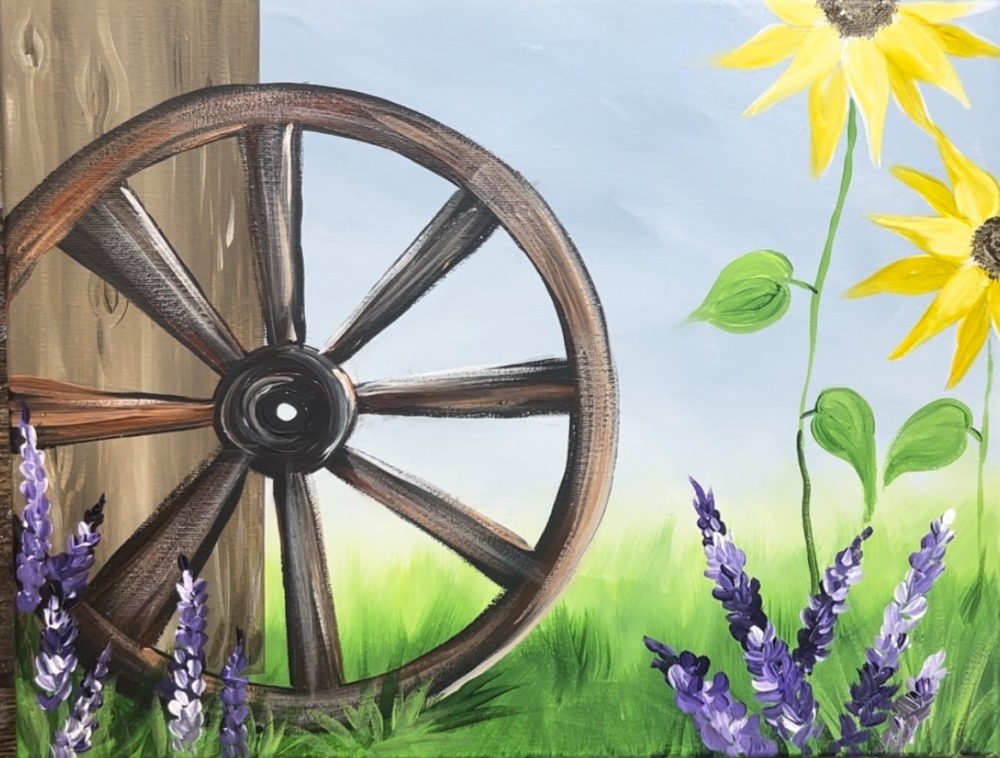
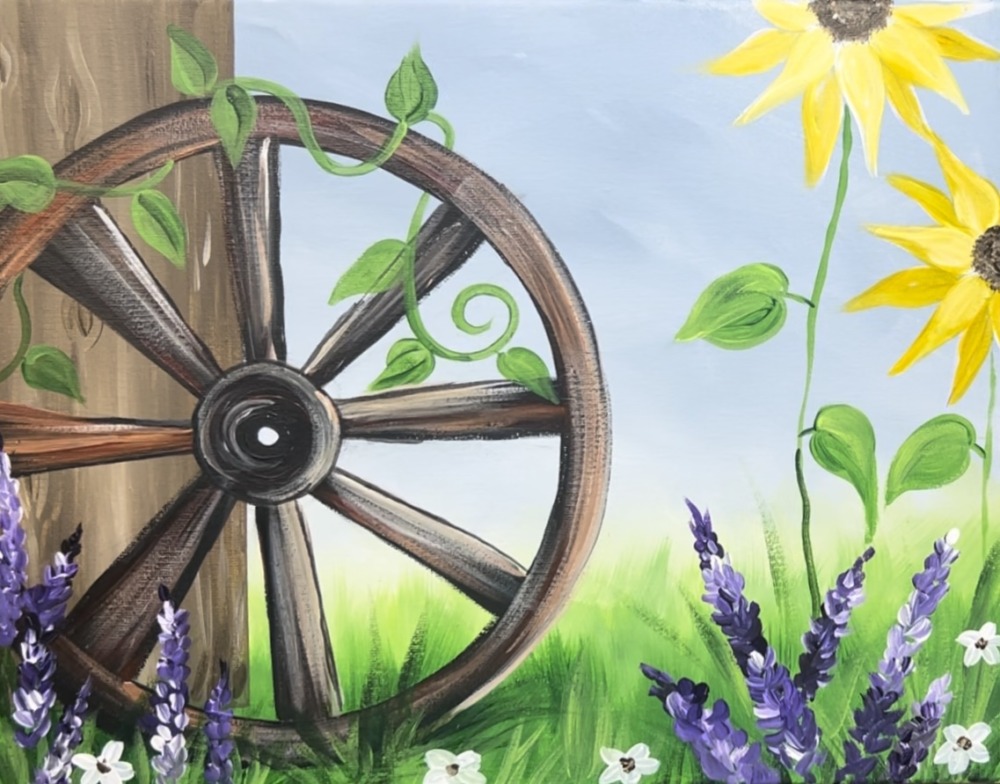
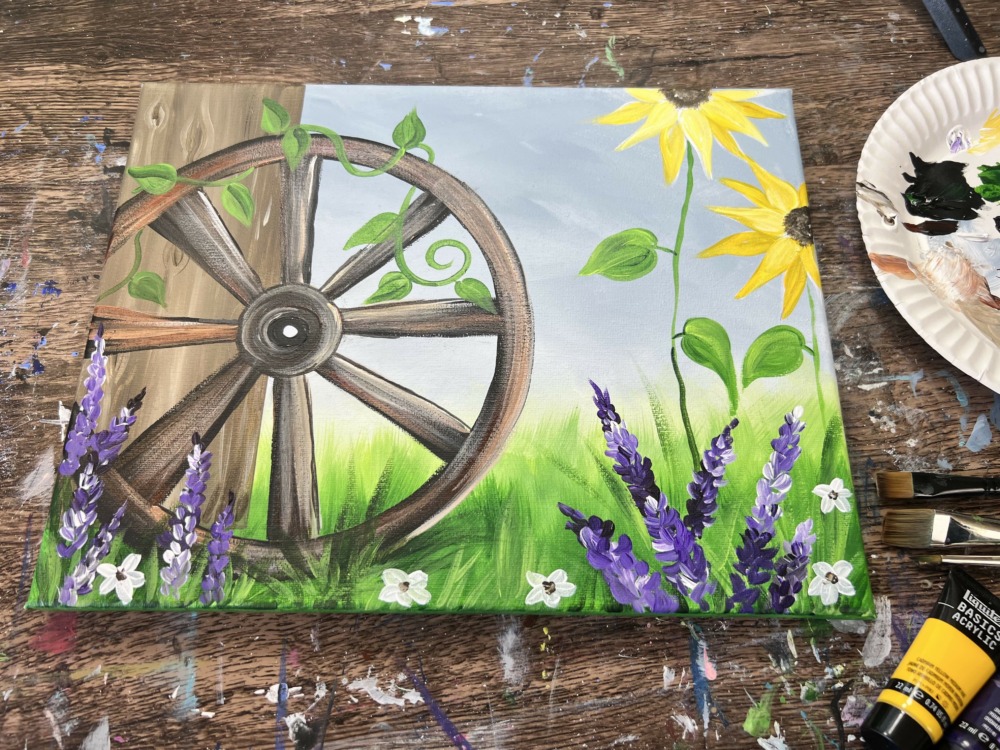
Finished
See Also