

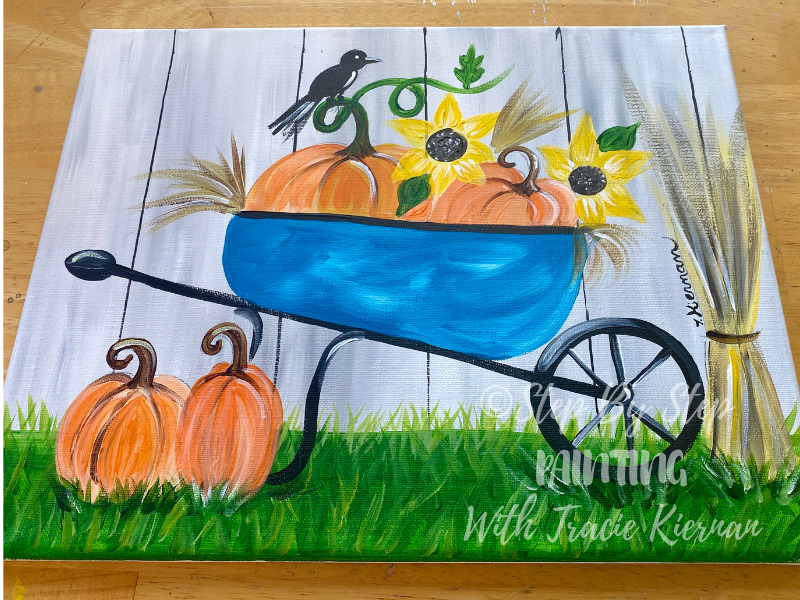
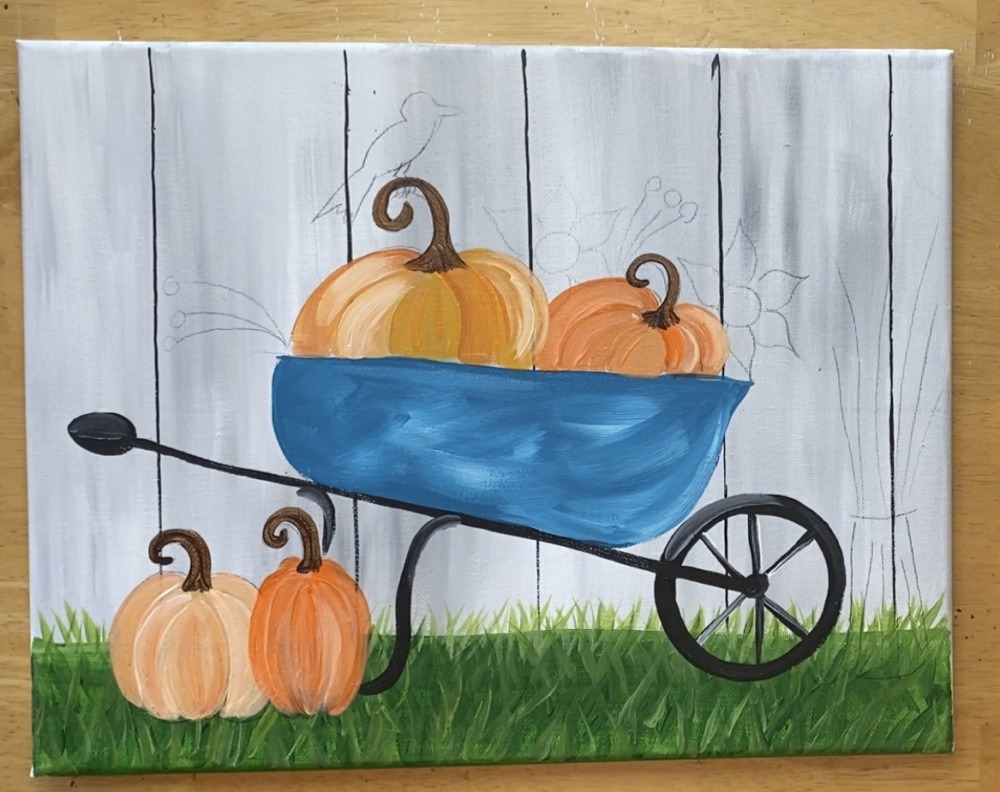
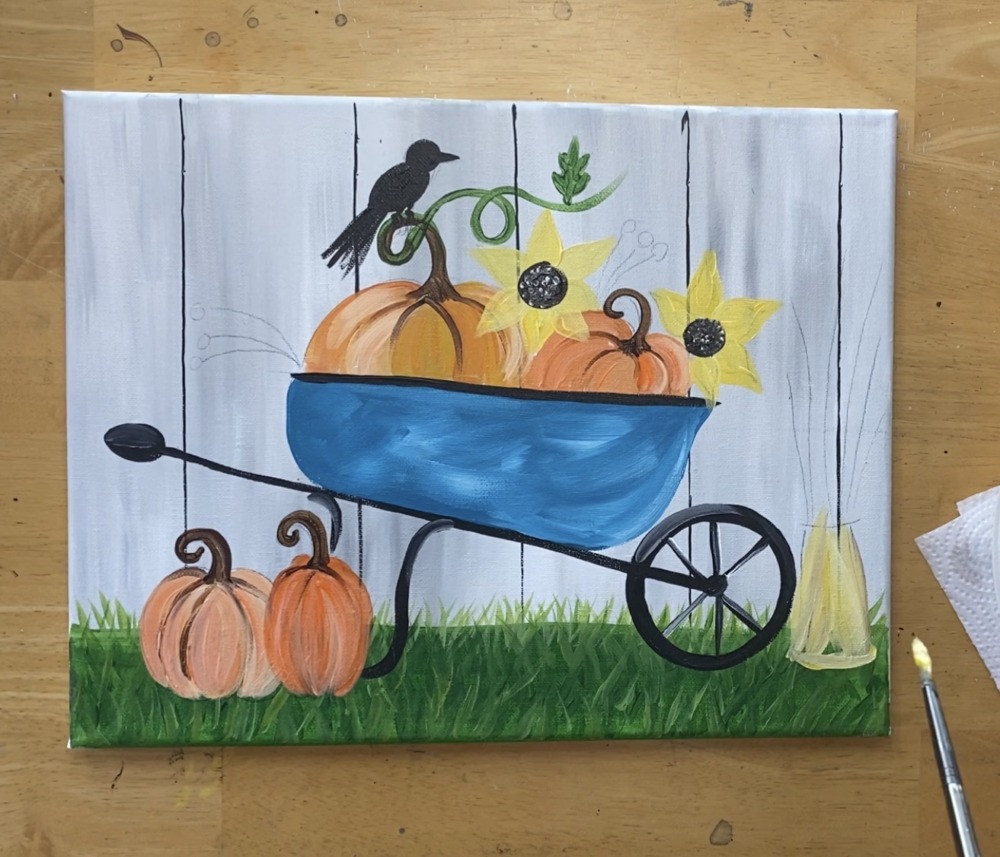
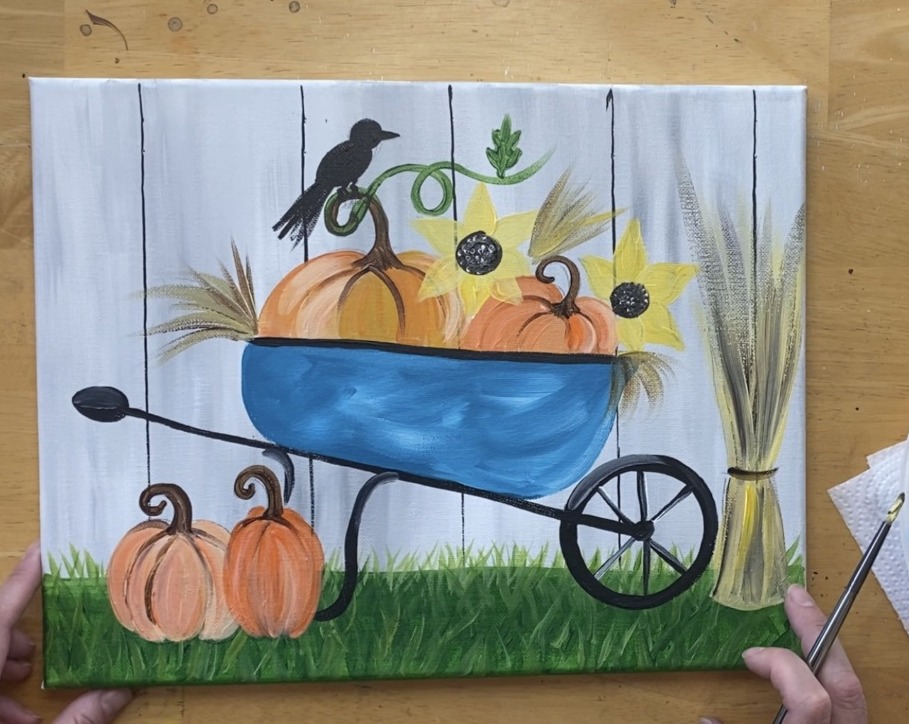
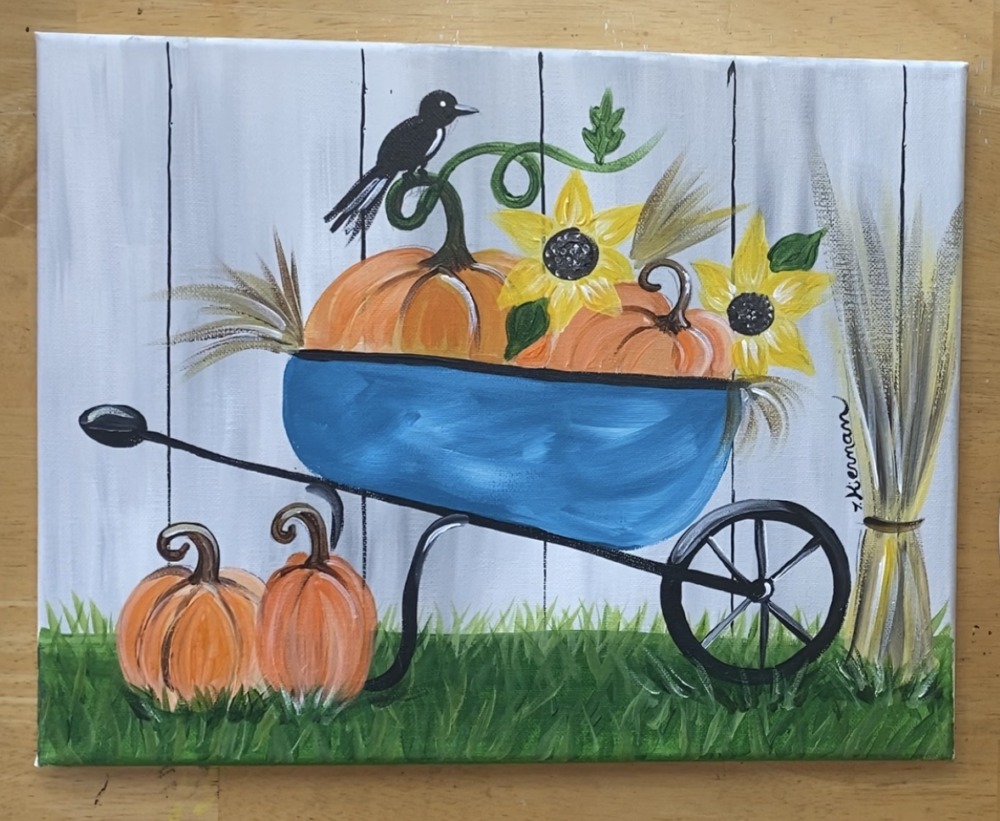
Learn to paint step by step a Fall Wheelbarrow Painting with a gray rustic fence in the background and green grass!
Would you like to save this?
This acrylic painting tutorial is a “medium” level painting but it comes with a tracer so you do not have to draw the wheelbarrow! I encourage you to try it if you are a beginner! The video is also very detailed 🙂
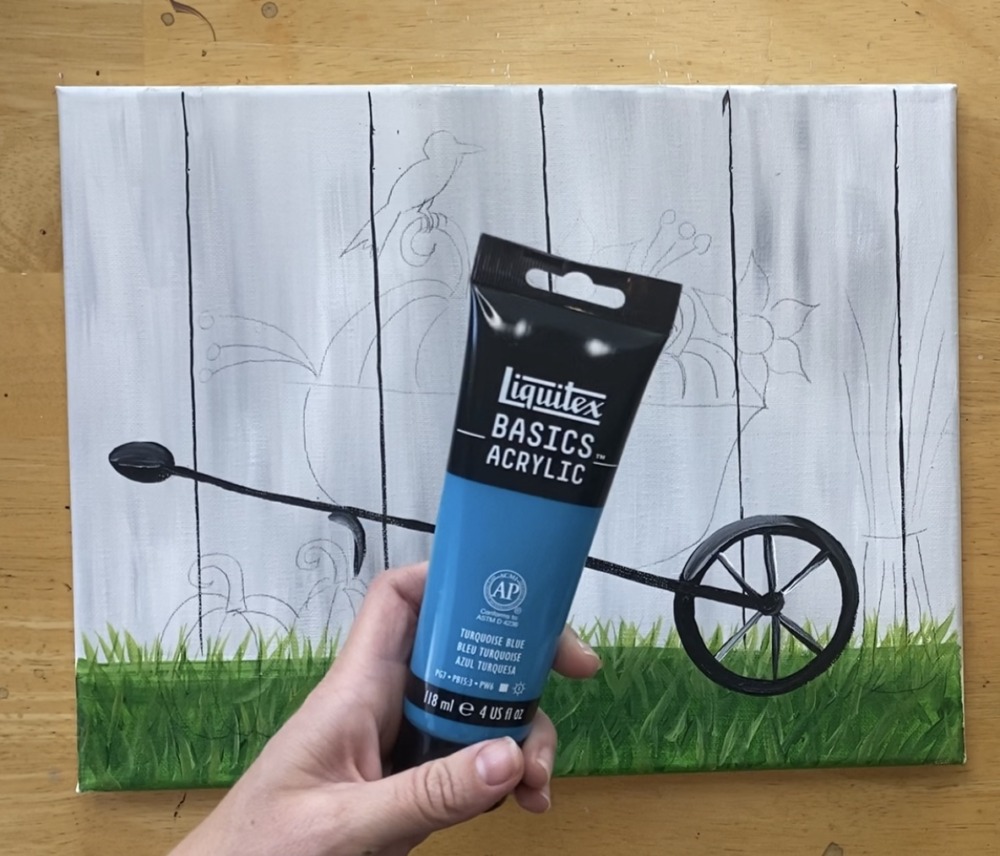
I used the color “turquoise blue” by Liquitex BASICS for the wheelbarrow. It’s one of their newer colors they recently added. If you do not have this color, you can use any dark turquoise color, bright aqua green or customize your wheelbarrow color!
Enjoy and happy painting!
Materials
How To Paint A Fall Wheelbarrow
Learn to paint a Fall Wheelbarrow step by step with acrylics! This tutorial comes with a tracer for the wheelbarrow and pumpkins.
Materials
- Acrylic Paints
- 11 x 14 Canvas
- Tracer
- Graphite Paper
- Pencil
- Ruler (I recommend t-square)
Colors
- Neutral Gray Value 5 (Or any light to medium gray)
- Titanium White
- Mars Black
- Cadmium Orange Medium Hue
- Cadmium Yellow Medium Hue
- Hooker's Green Hue Permanent
- Turquoise Blue
- Burnt Umber
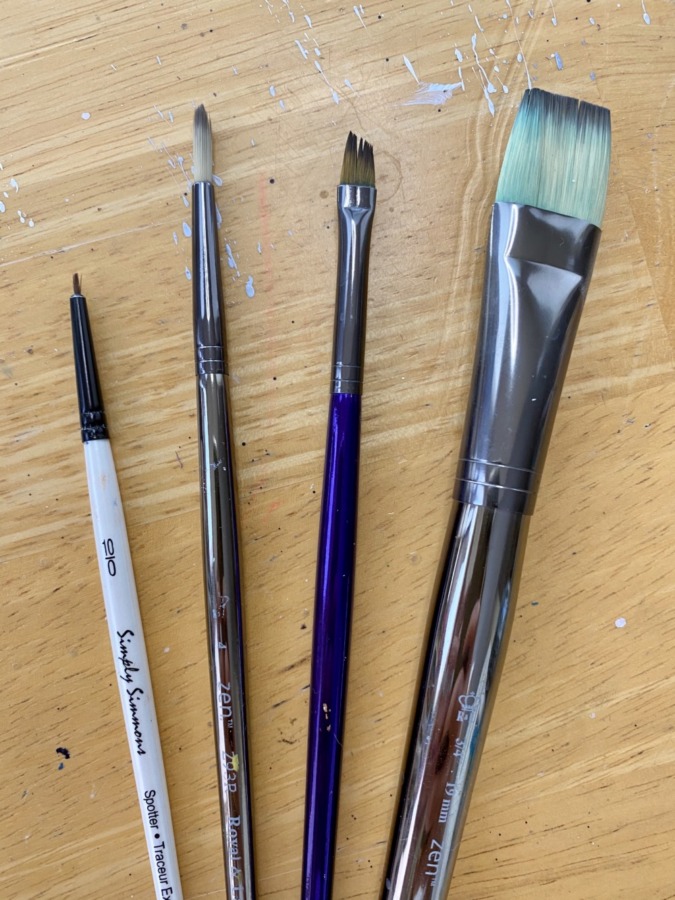
Brushes
Instructions
- See tutorial for full instructions!
Color Palette

Brushes
Traceable

Directions At A Glance
Video
Step By Step Directions
1. Draw a horizontal line at the 2″ mark up the canvas
Use a T-square ruler or straight edge to draw a horizontal line at about the two inch mark up the canvas. The canvas is also going in the horizontal/ landscape mode.

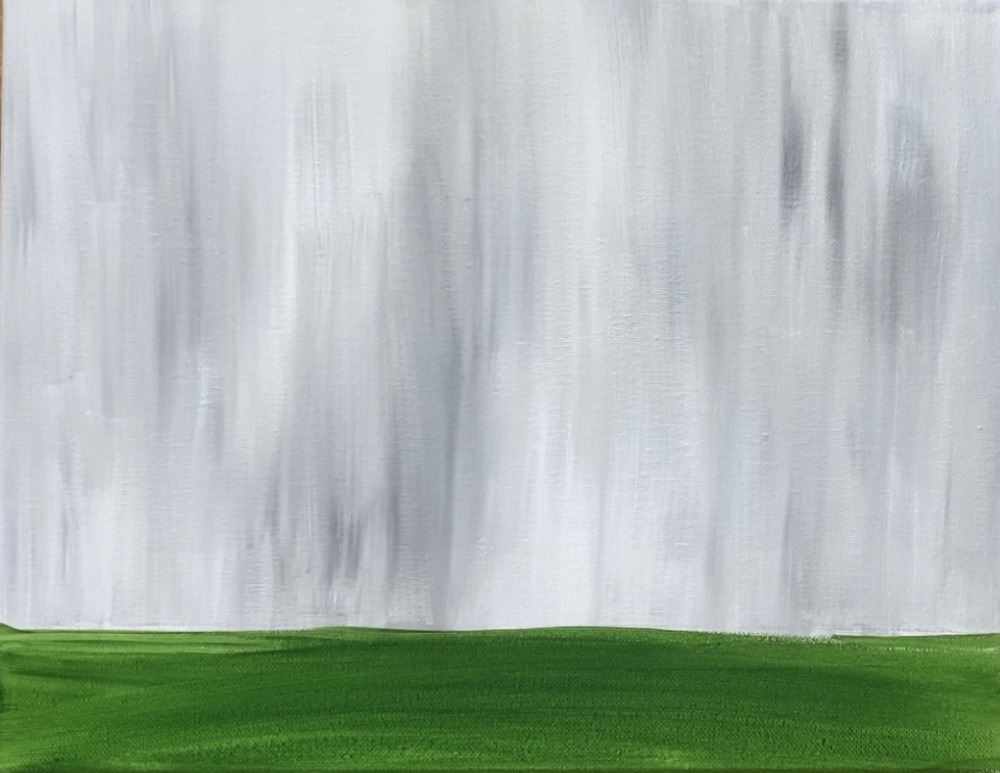
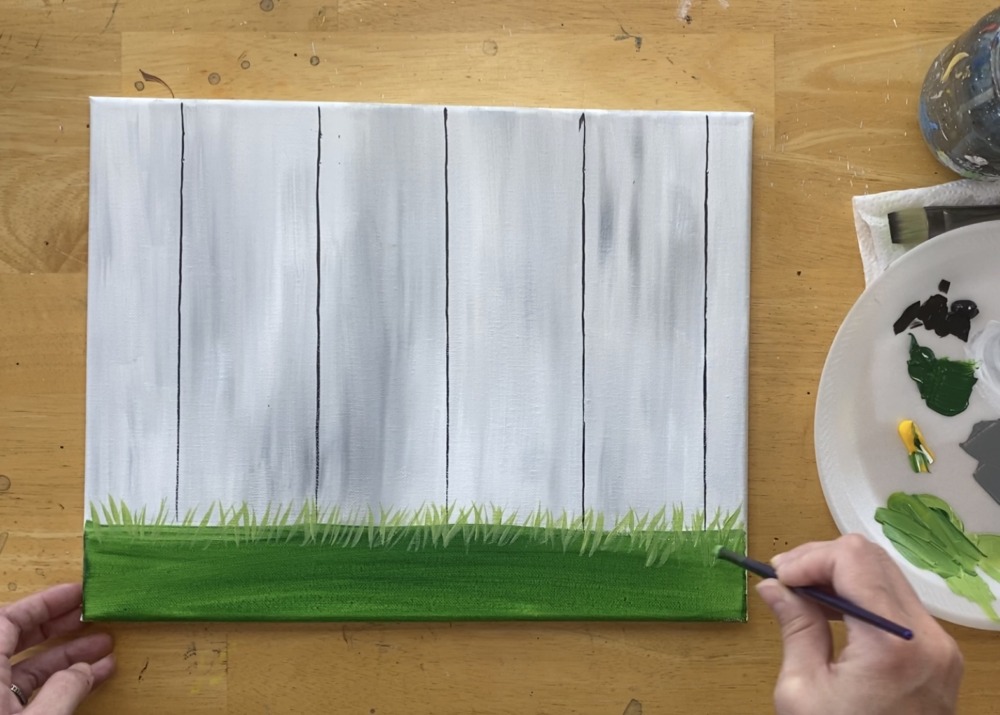
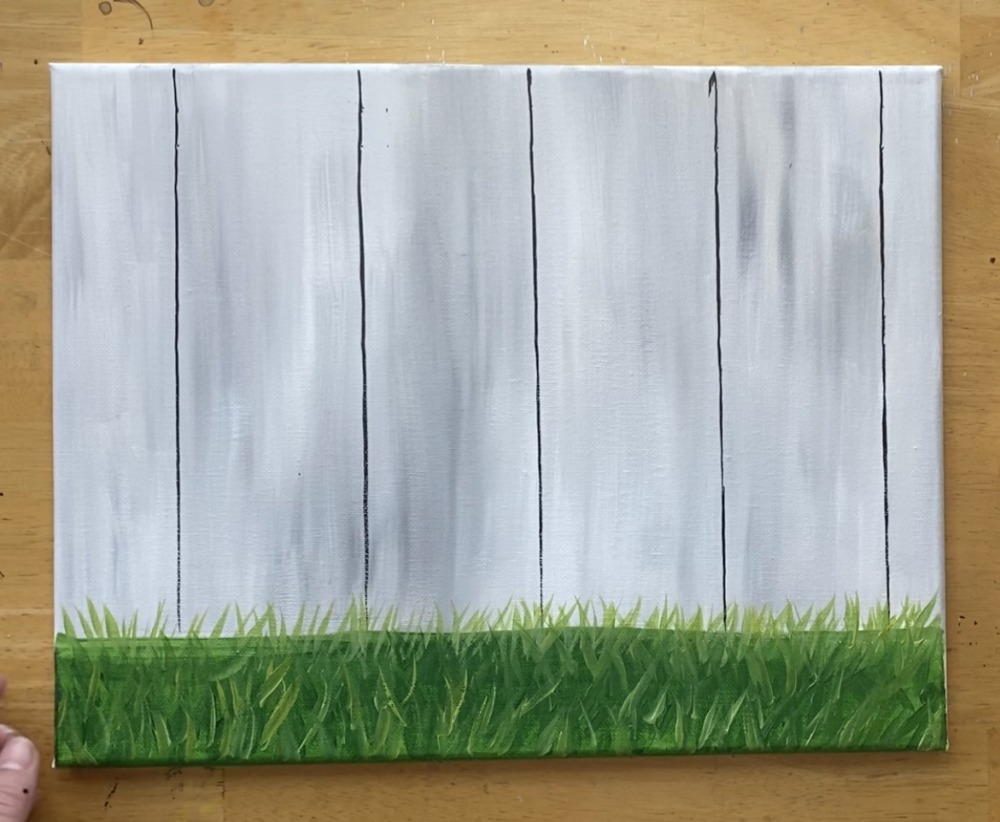
2. Paint the fence
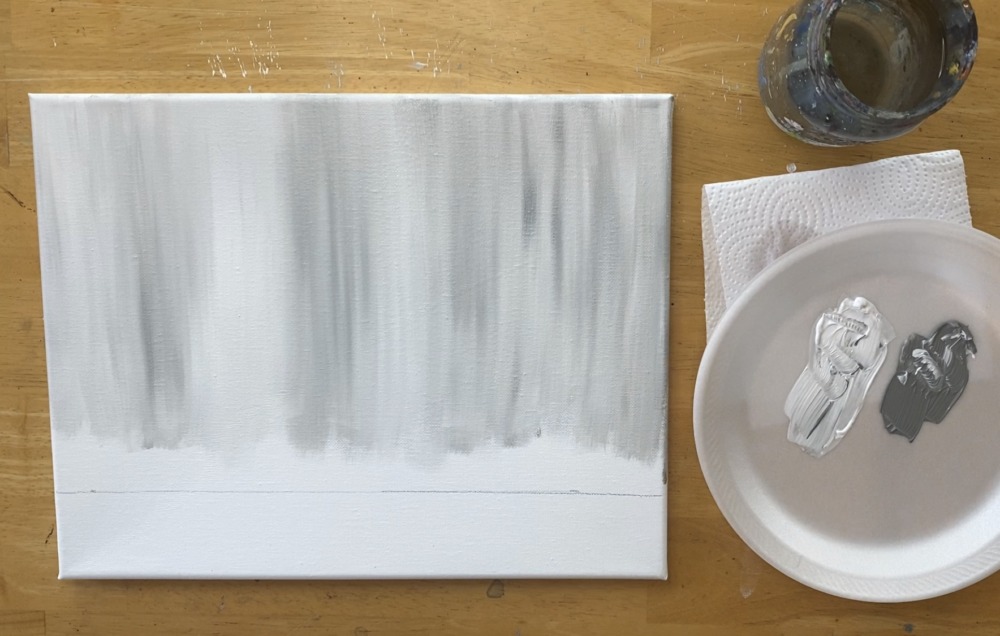
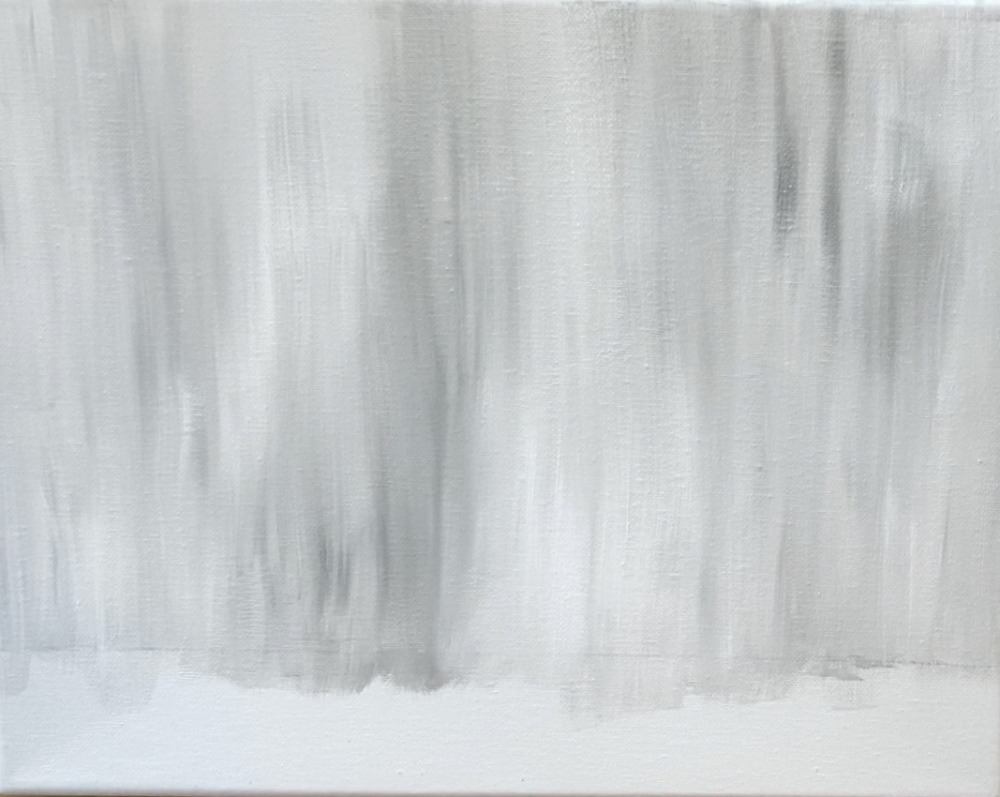
Load your palette with neutral gray value 5 and titanium white. Load your 3/4″ flat brush in the gray and load the corners in the white.
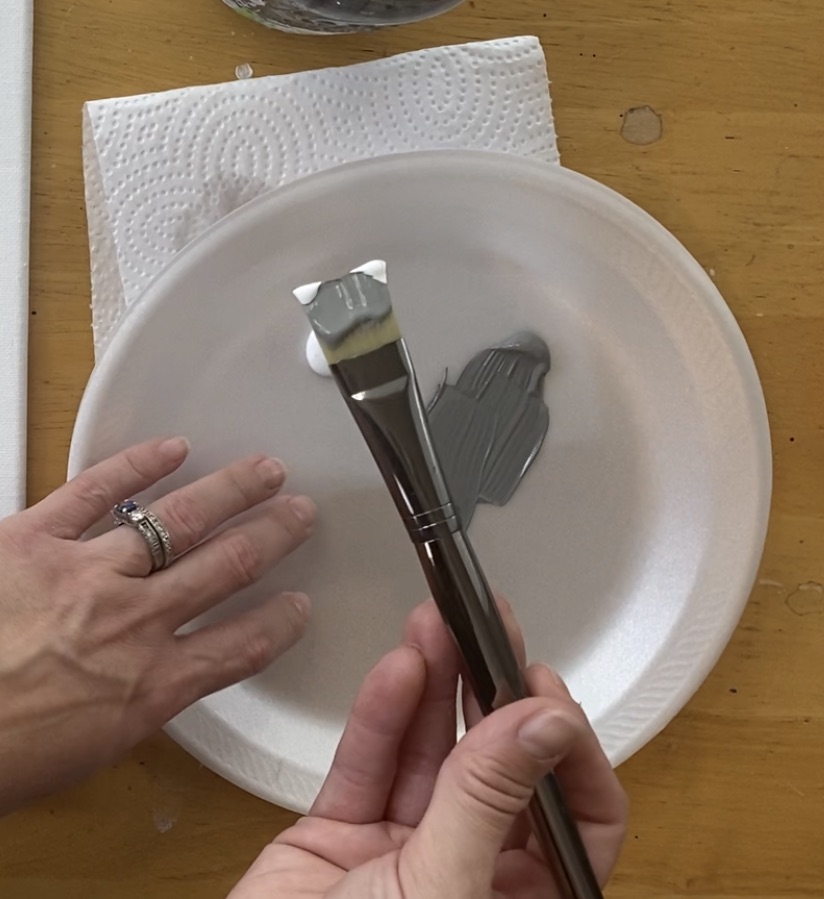
Then paint all up and down strokes with this gray and white combination. Let the gray and white blend together to create a streaky, unblended look. If you need to add a bit of water to the gray and white, you may! This will help increase the flow of the paint.
3. Paint the bottom area with hooker’s green hue
Use your 3/4″ wash brush and hooker’s green hue permanent. Paint left and right strokes with this green going all the way across the canvas.
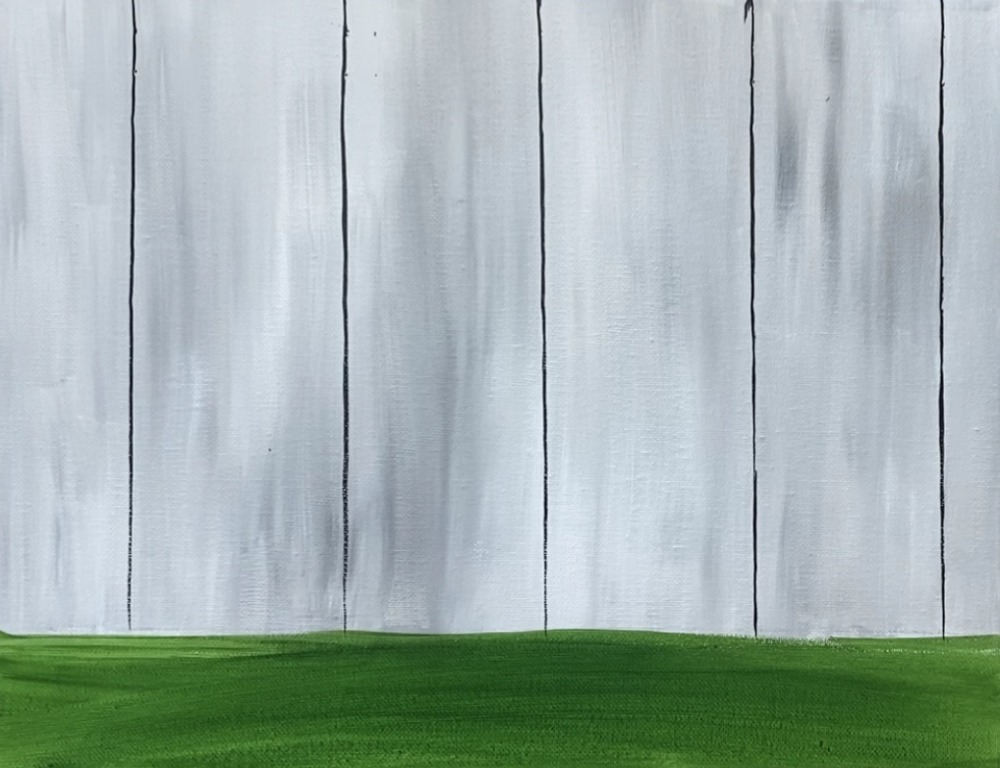
4. Paint vertical lines on the fence
Use a t-square and your 1/4″ angle brush. Load your angle brush in mars black (you can slightly water down the black). Paint vertical lines about 3-4 inches apart.
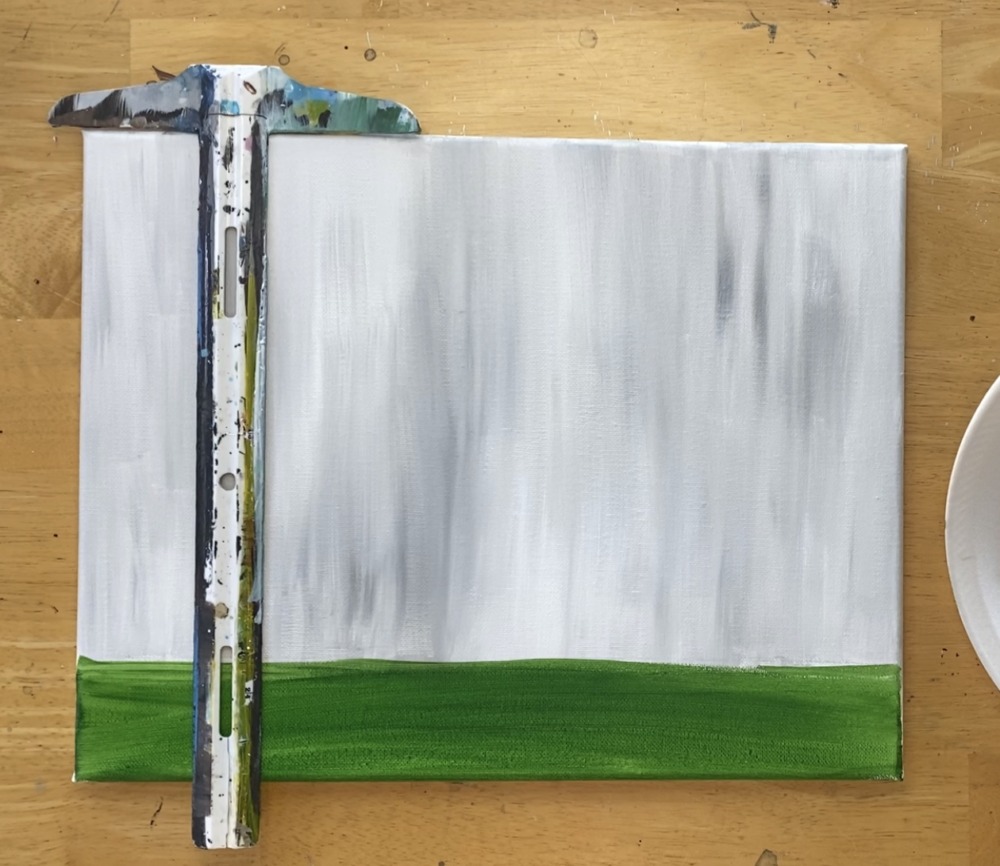
Use the t-square to paint each of the vertical lines. The angle brush helps paint vertical lines but it is okay if they are a bit “wobbly”.
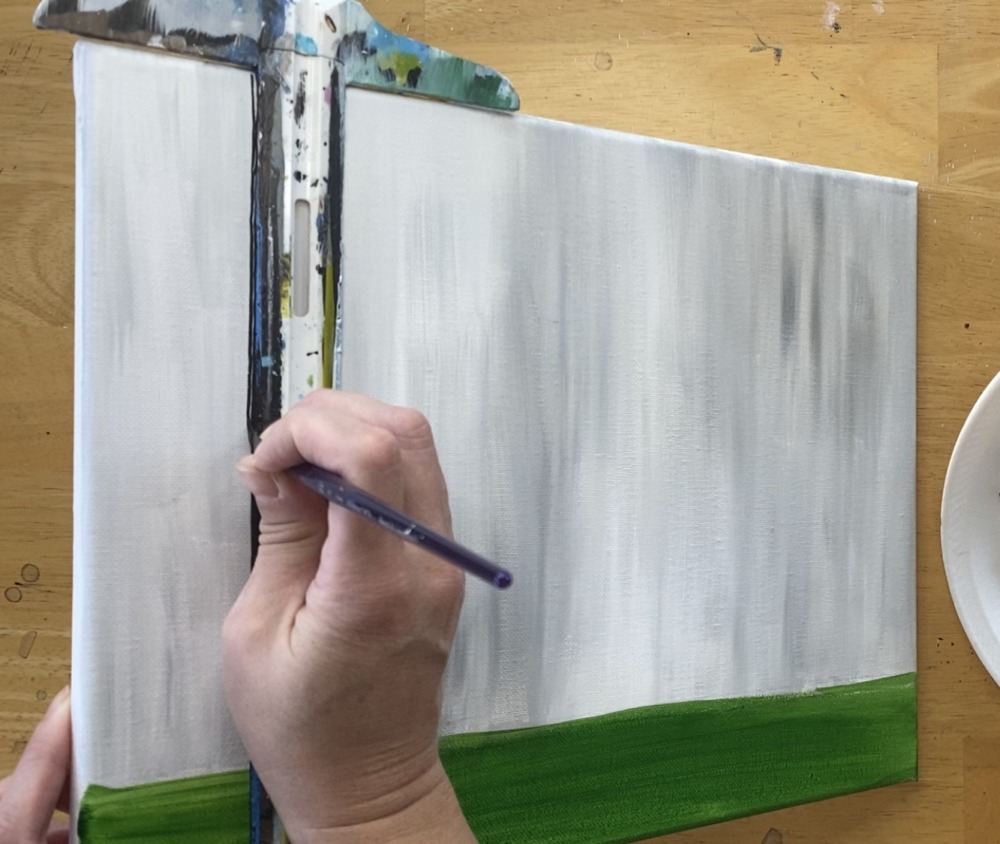
I did a total of 5 vertical lines.
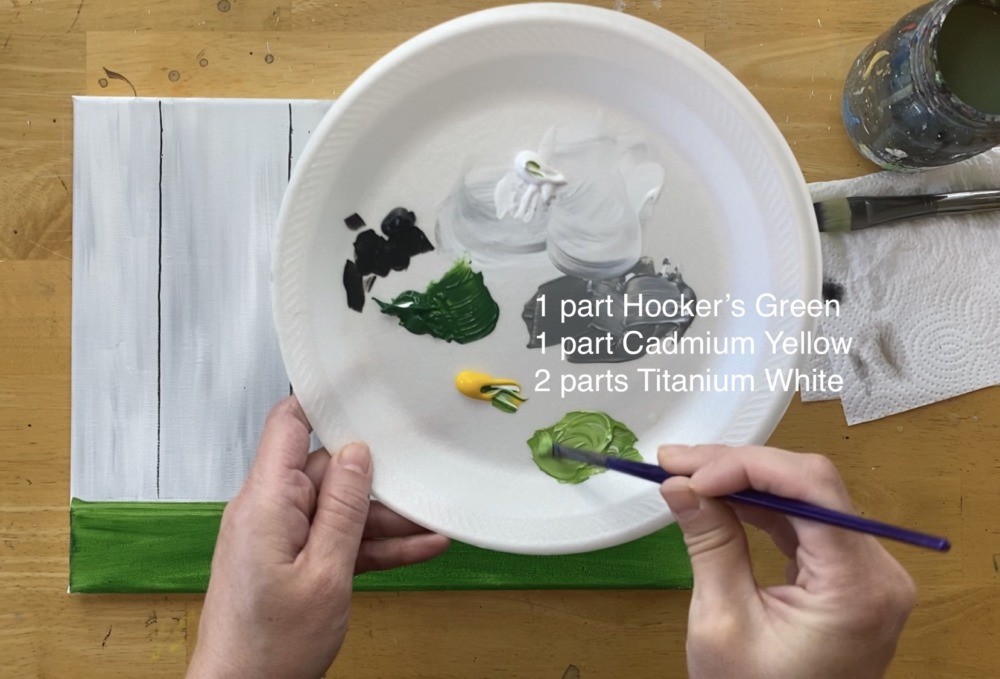
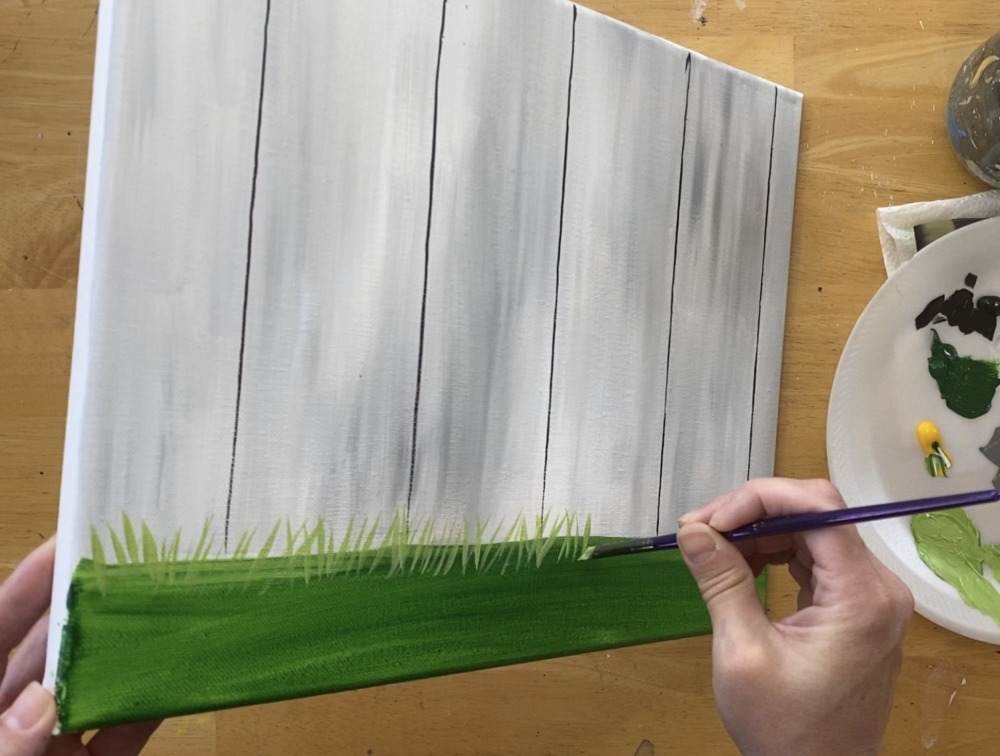
5. Paint the grass
First mix a light green color on your palette. To do this, mix about 1 part hookers green hue with 1 part yellow and 2 parts white (doesn’t have to be exact). This will make a light yellow-green color.
Use your 1/4″ angle brush to paint the grass. Start each blade by stroking from the base and going up. The angle brush helps with this technique because it will create that thin, pointy grass blade stroke!
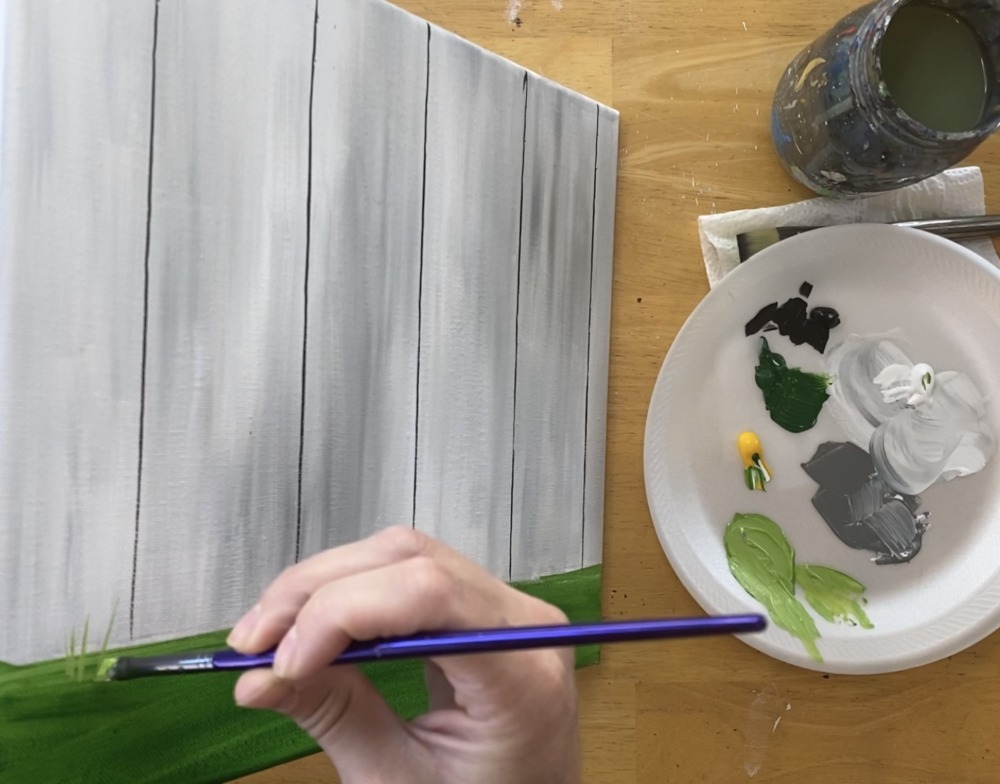
Paint more grass blades going all the way across. These light green grass blades are further back and they overlap the fence slightly. They also go in different angled directions.
Then do another row of grass blades and add a little more hookers green hue to your brush. Continue to paint grass blades that overlap each other and go in different directions.
Make about 3-4 rows of grass blades that overlap each other. The ones on the bottom have more hookers green hue although you can add different variations of yellow, green and white to your blades to give it more color variation.
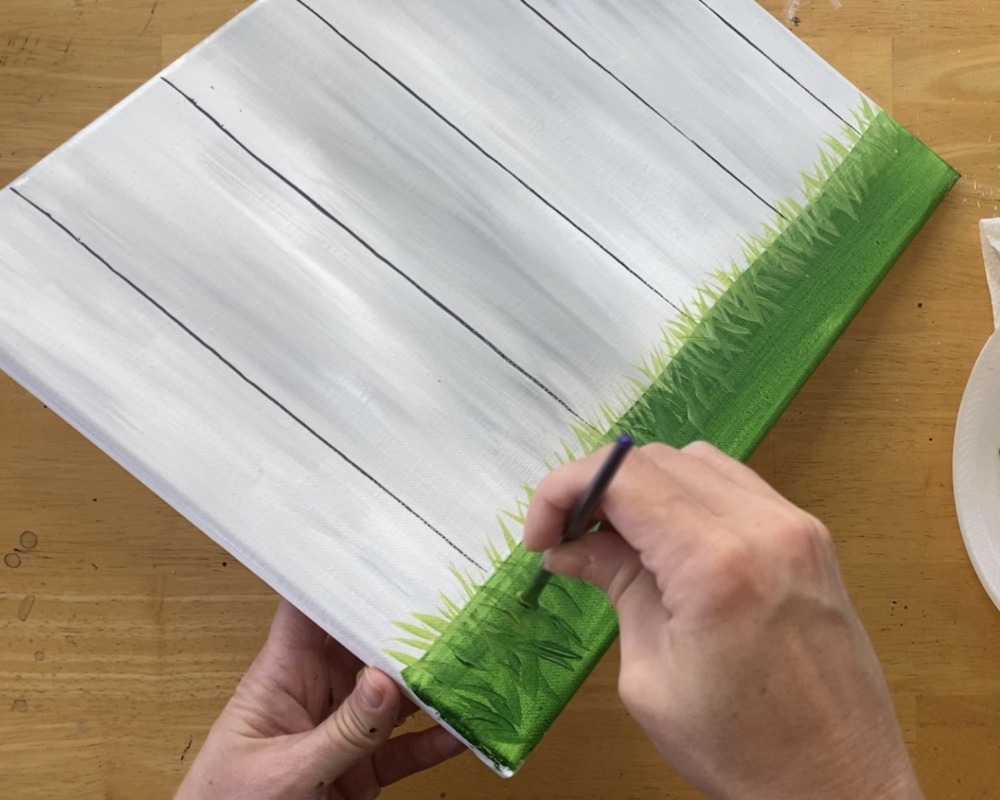
This does take some time! But after awhile it gets faster because you are painting strokes fast and going in all different directions. You can also add some lighter colors in the bottom area and darker colors in the back area.
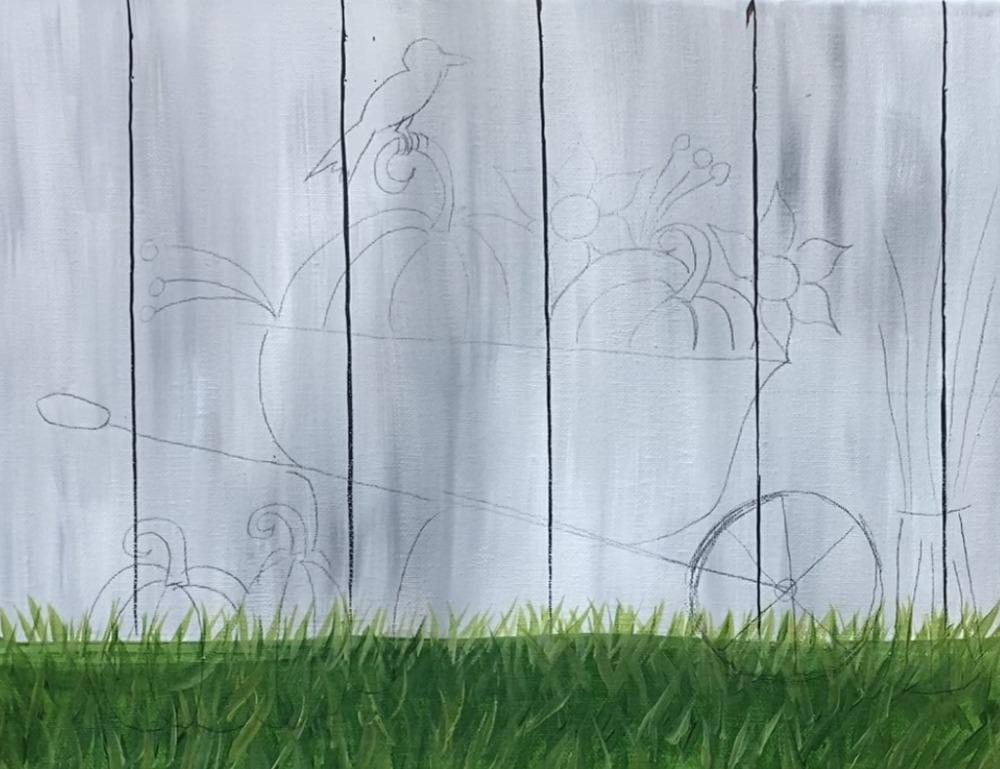
6. Transfer your design
Before you do the transfer, make sure your painting is completely dry. You can use a hair dryer or take a break and come back.
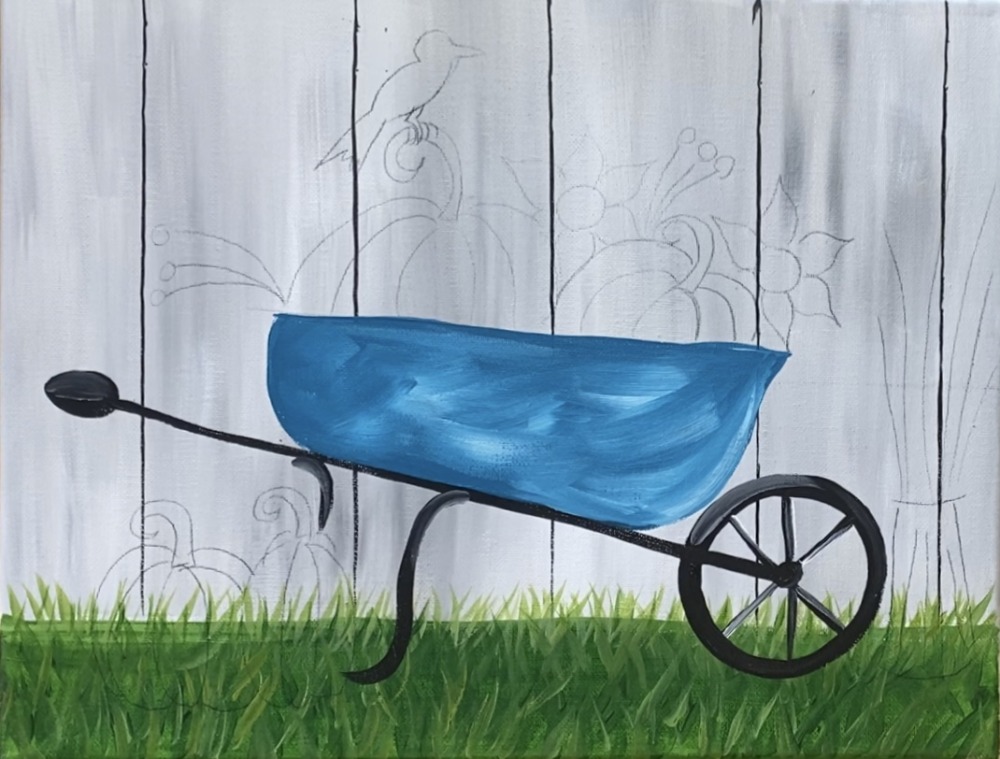
Place a sheet of graphite paper under the tracer and trace the design. Note: I changed the design on this one and took out the berries.
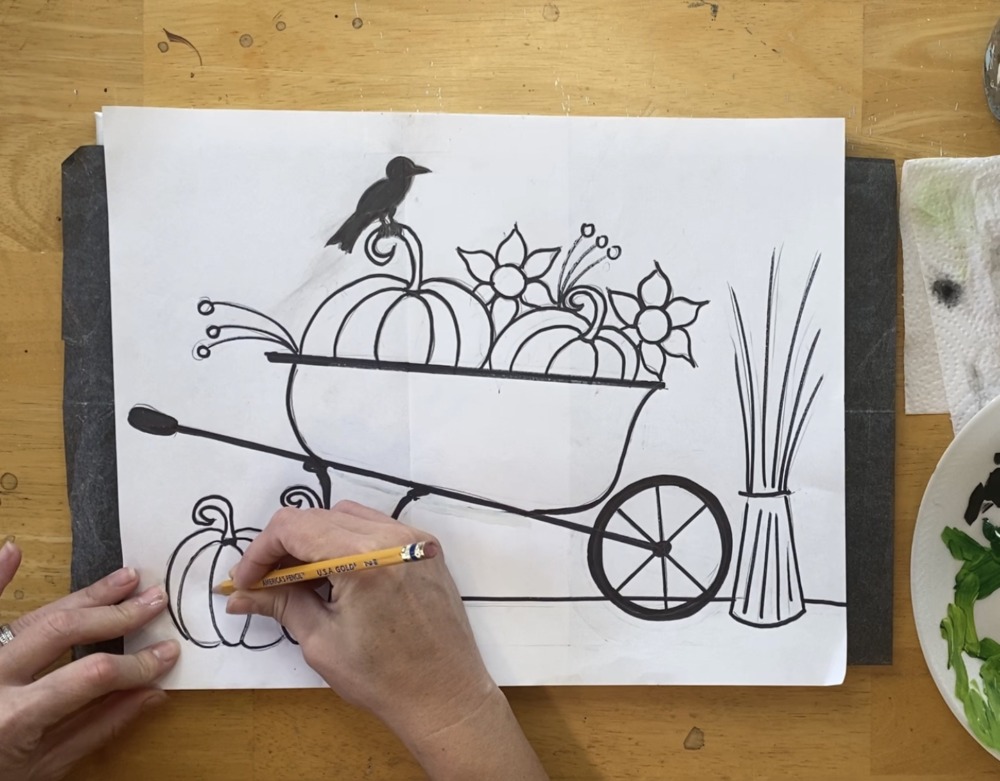
When you trace, make sure you are pressing firm and working on a flat surface.
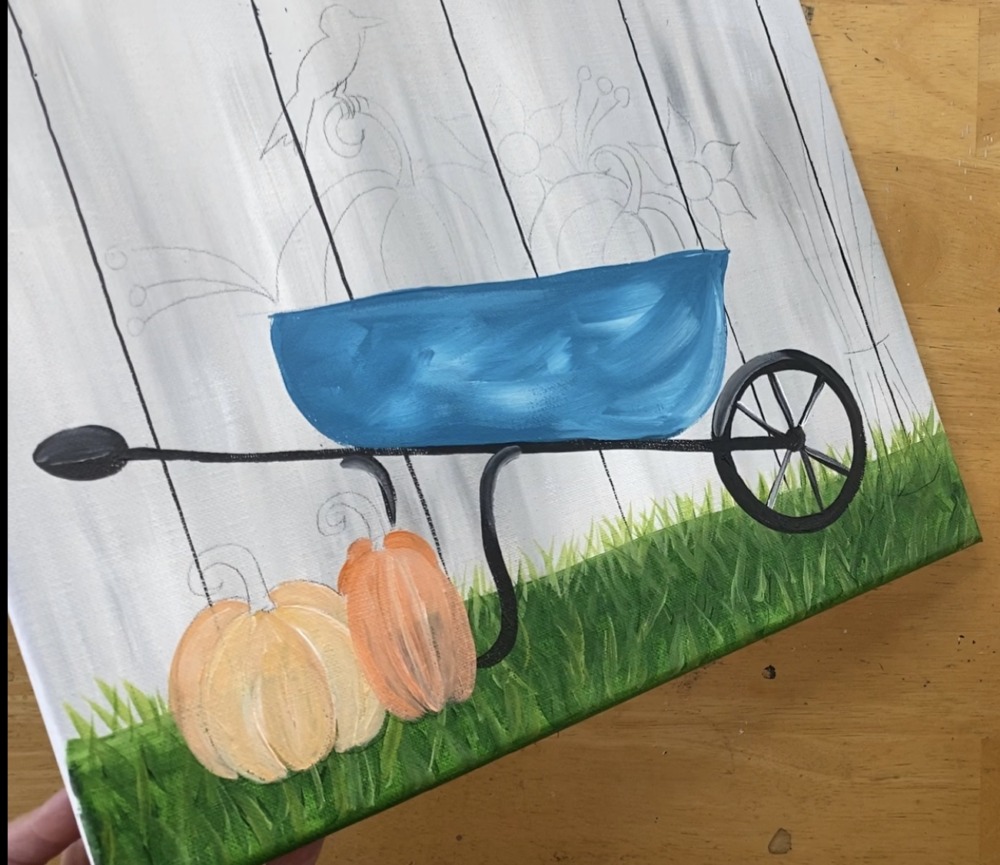
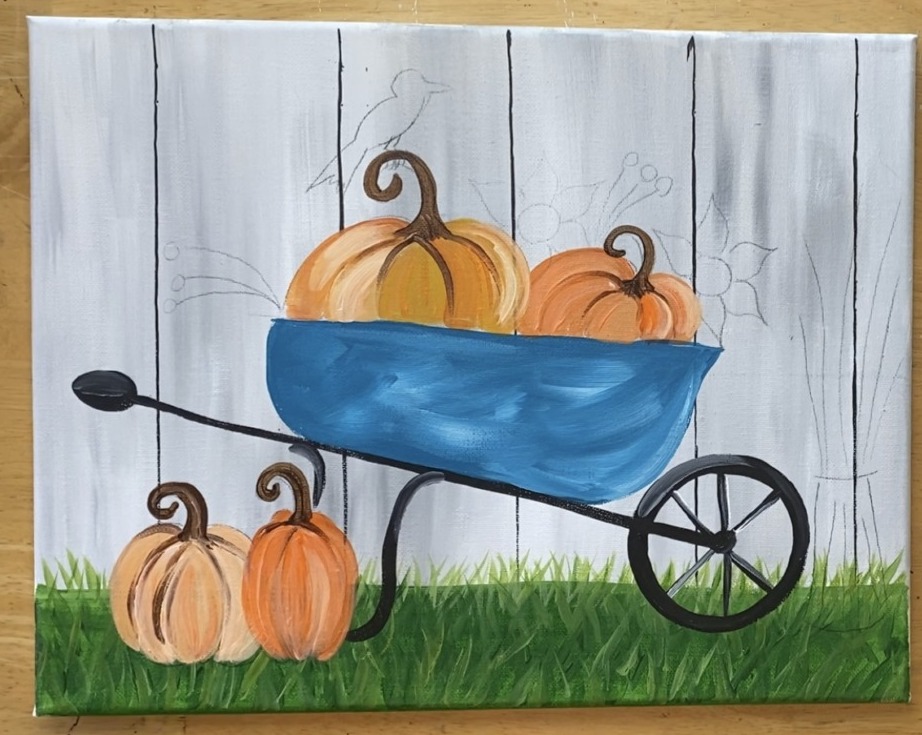
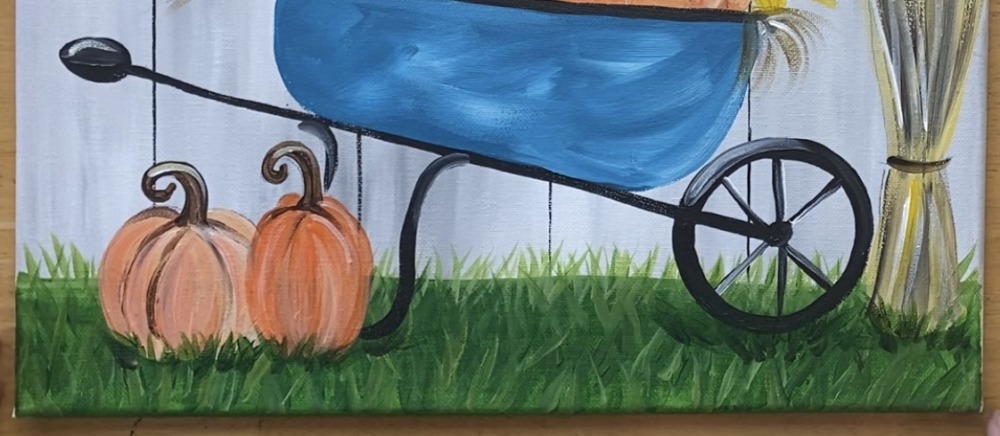
7. Paint the wheel, base and handle.
Use your #4 round brush and mars black. Add a little water to the black to get it to flow a bit. Paint the wagon wheel and spokes.

Then paint the handle and base all with mars black and that #4 round brush.
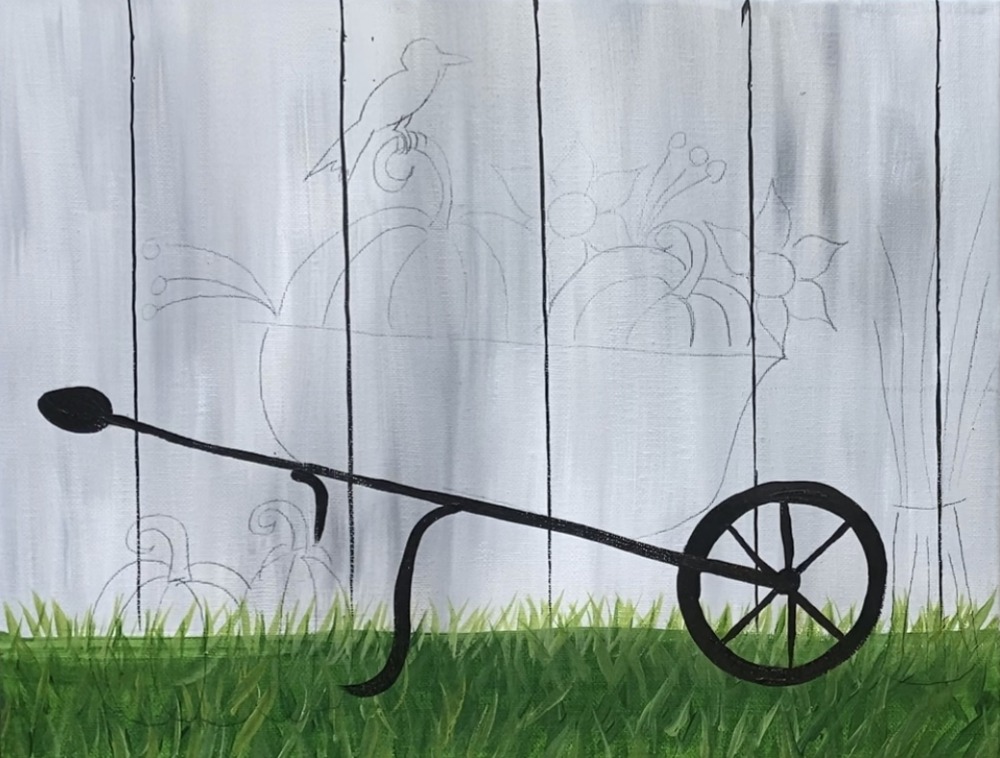
Then add some “highlight” to the wheel. Do this by mixing a little bit of white to the black to make a lighter gray color. Add some of this gray to the upper left part of the wheel and the upper part of the handle.
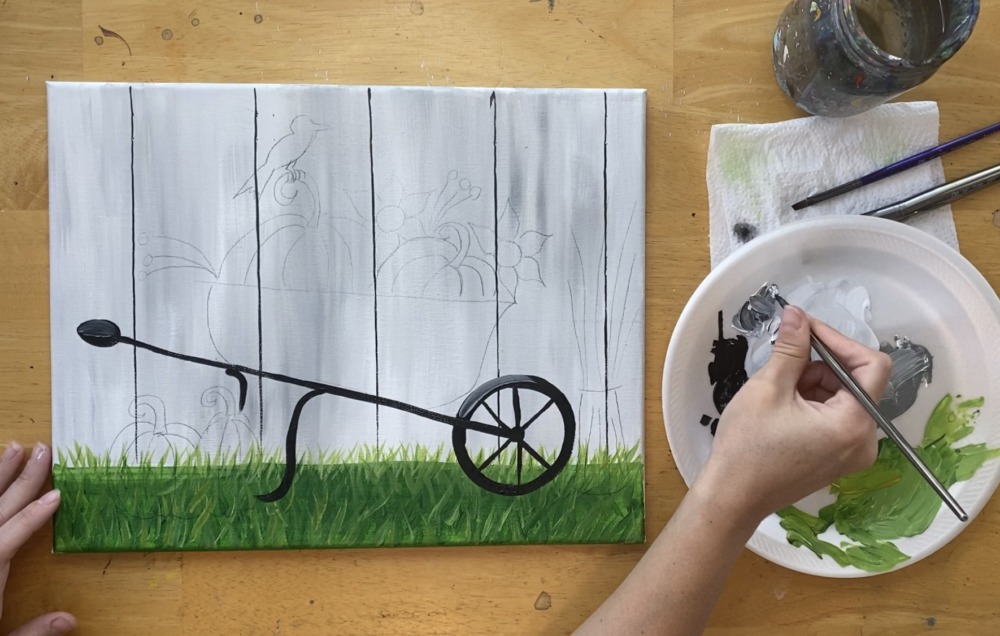
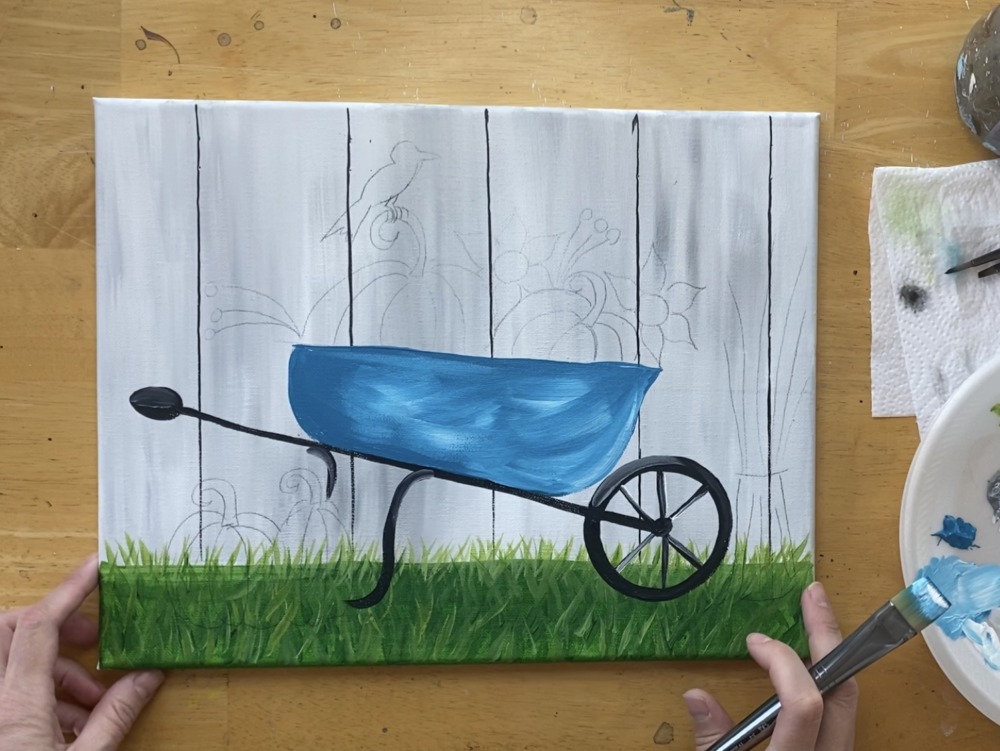
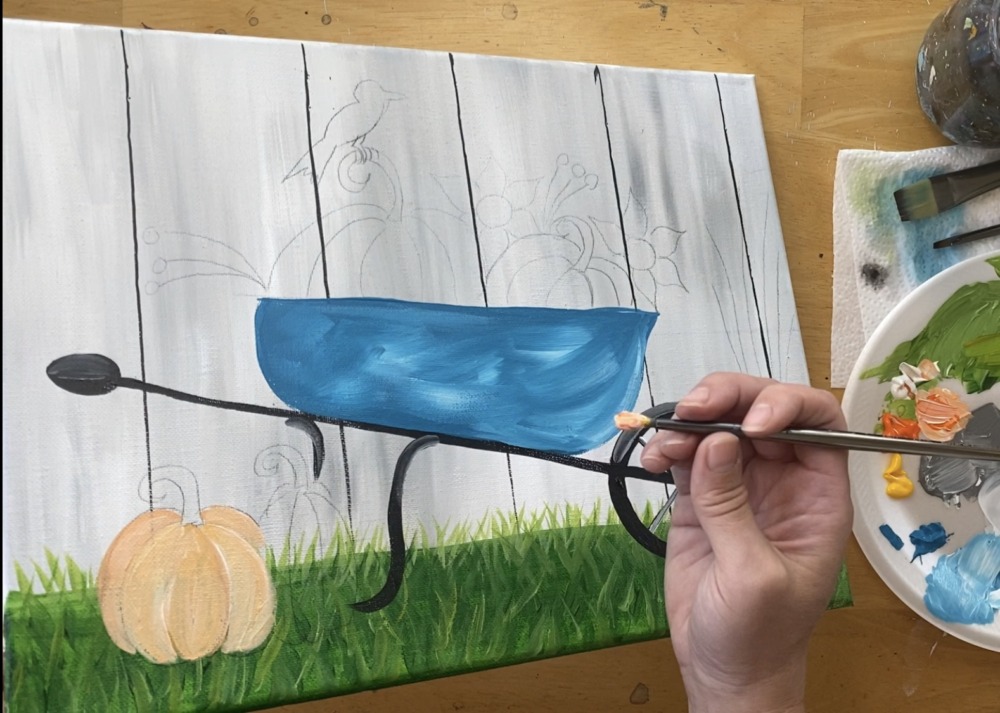
8. Paint the wheelbarrow turquoise
I used the color turquoise blue by Liquitex BASICS. If you do not have this color, you can use any dark turquoise color or even a custom color!

Use your 3/4 flat brush or your #4 round brush (or both) to paint the wheelbarrow shape turquoise.
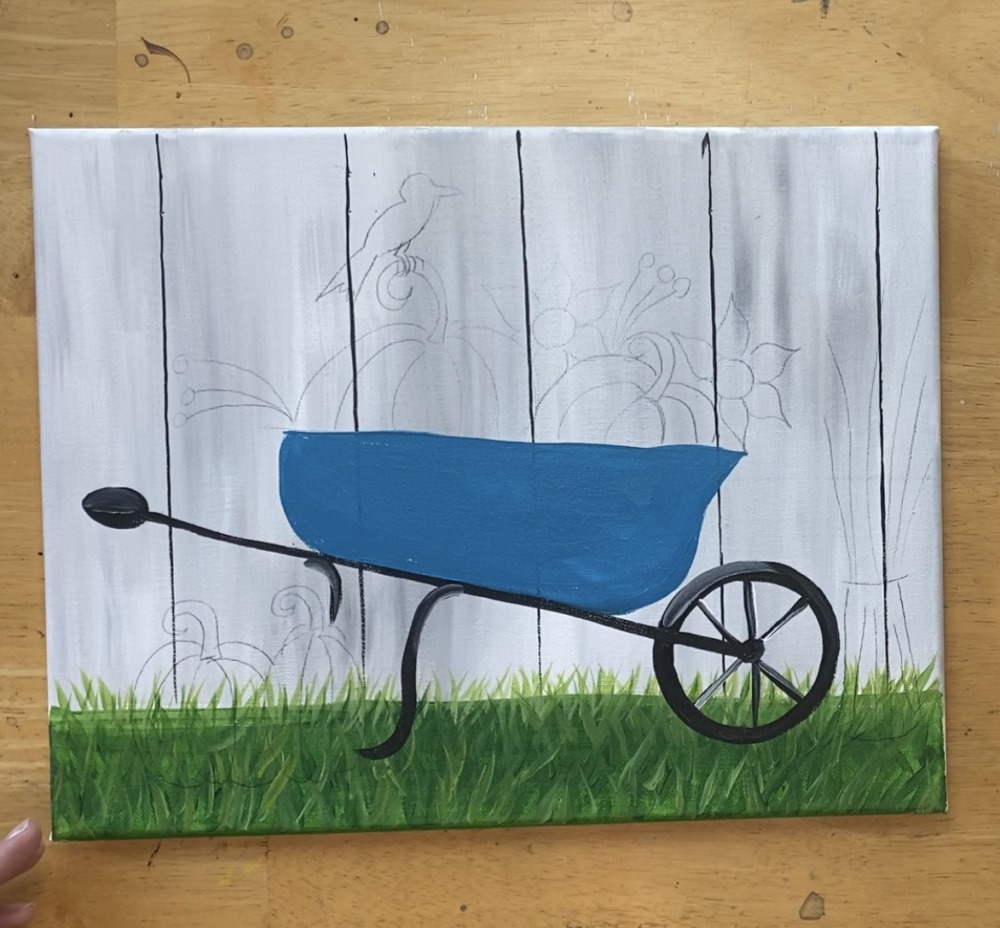
Then load a little white on your brush (or mix white and turquoise on the palette). On the right side of the wheelbarrow, add the white to blend with the turquoise. You want to make the wheel barrow lighter in this area.
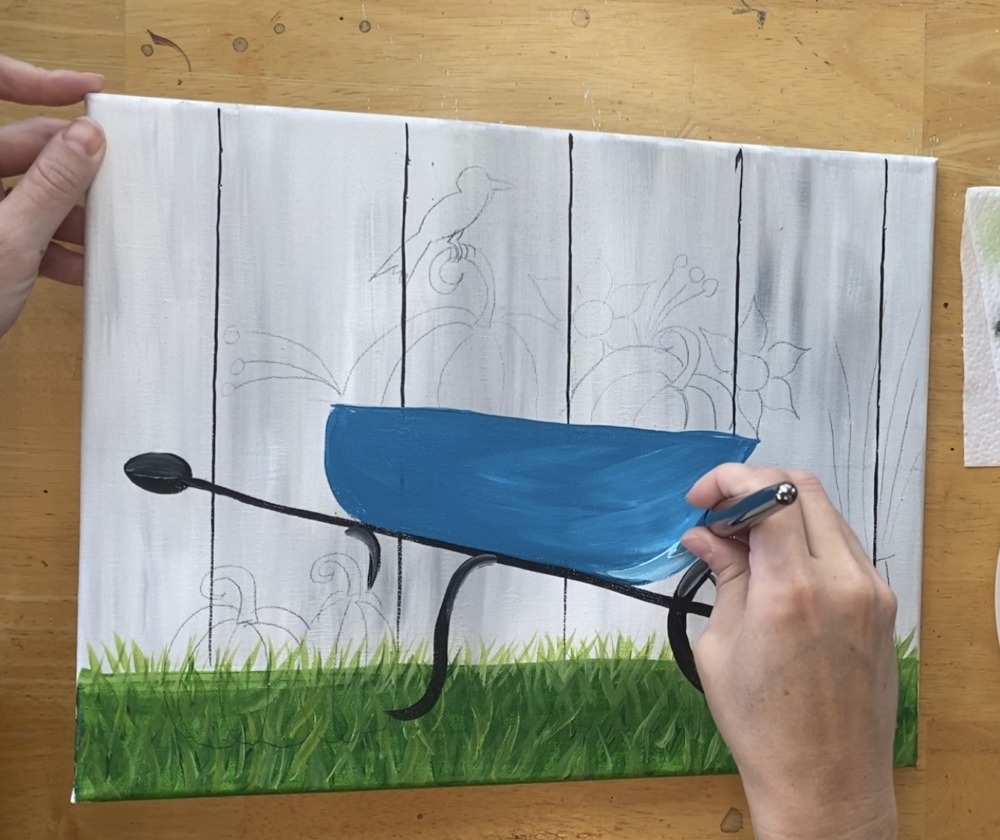
Paint sort of “x style strokes” on the wheel barrow (right side) and a little more in the middle. This gives the wheel barrow some interesting color.
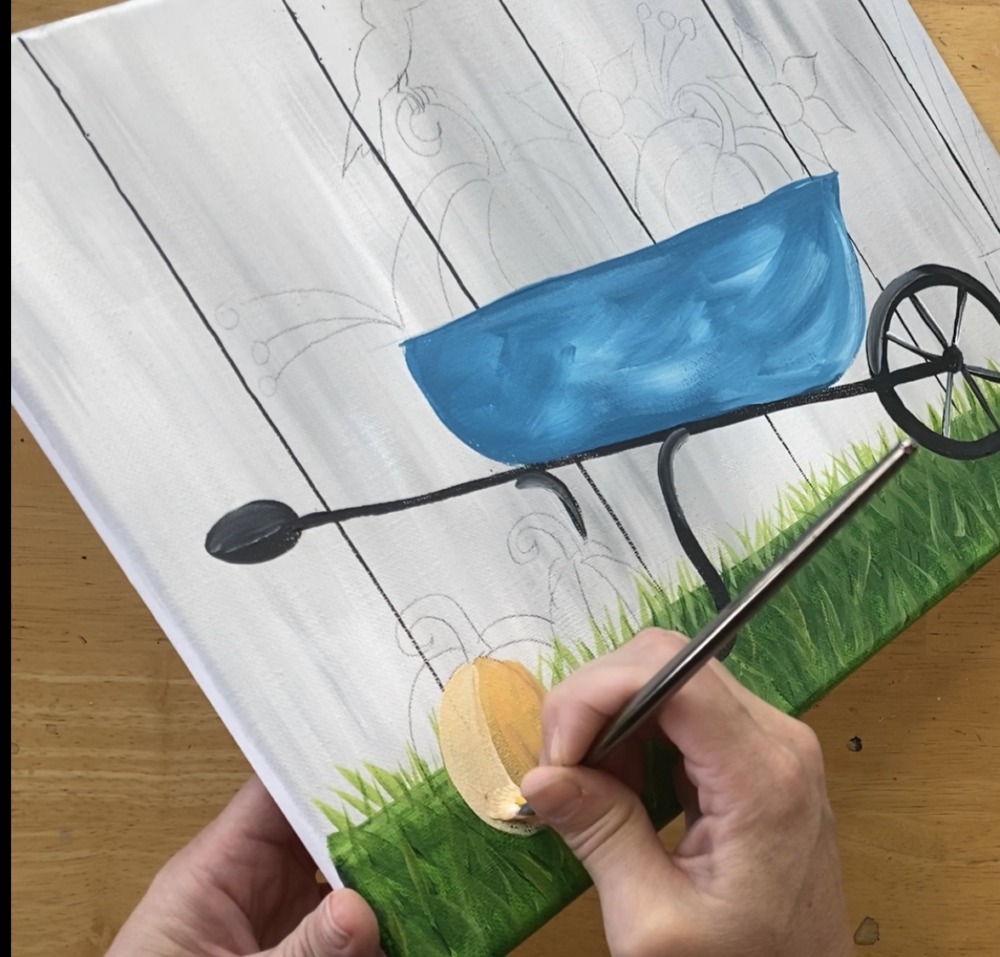
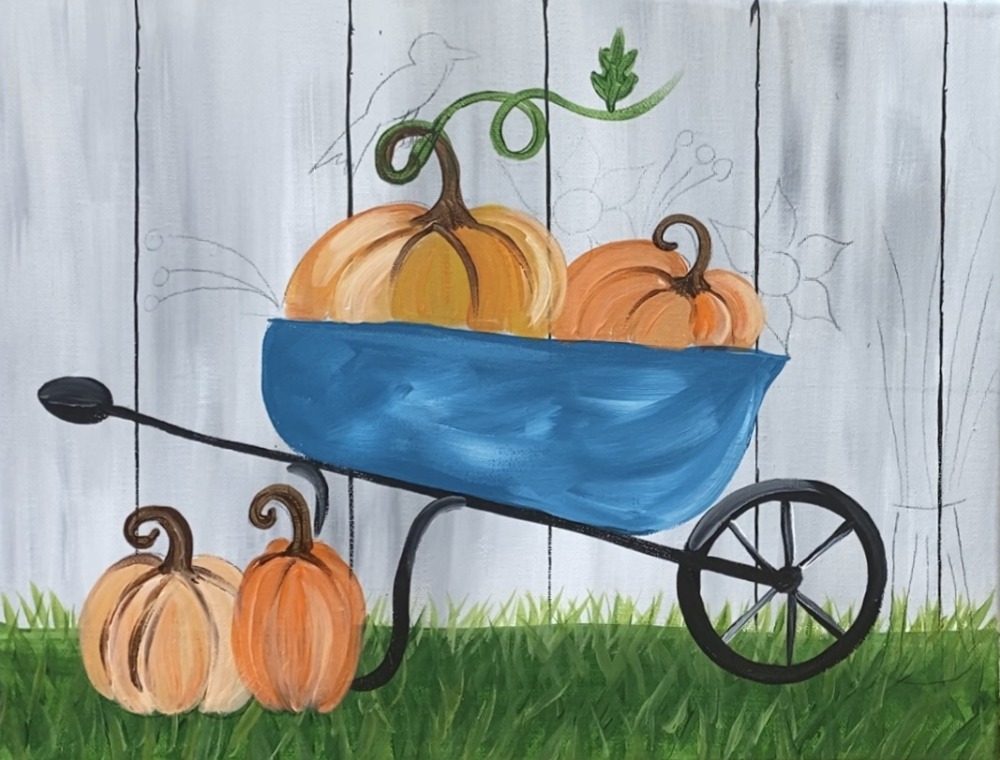
9. Paint the pumpkins
Use your #4 round brush. Also on your palette, load: cad orange hue, cad yellow medium and titanium white. Mix the three together to make a light yellow-orange color.
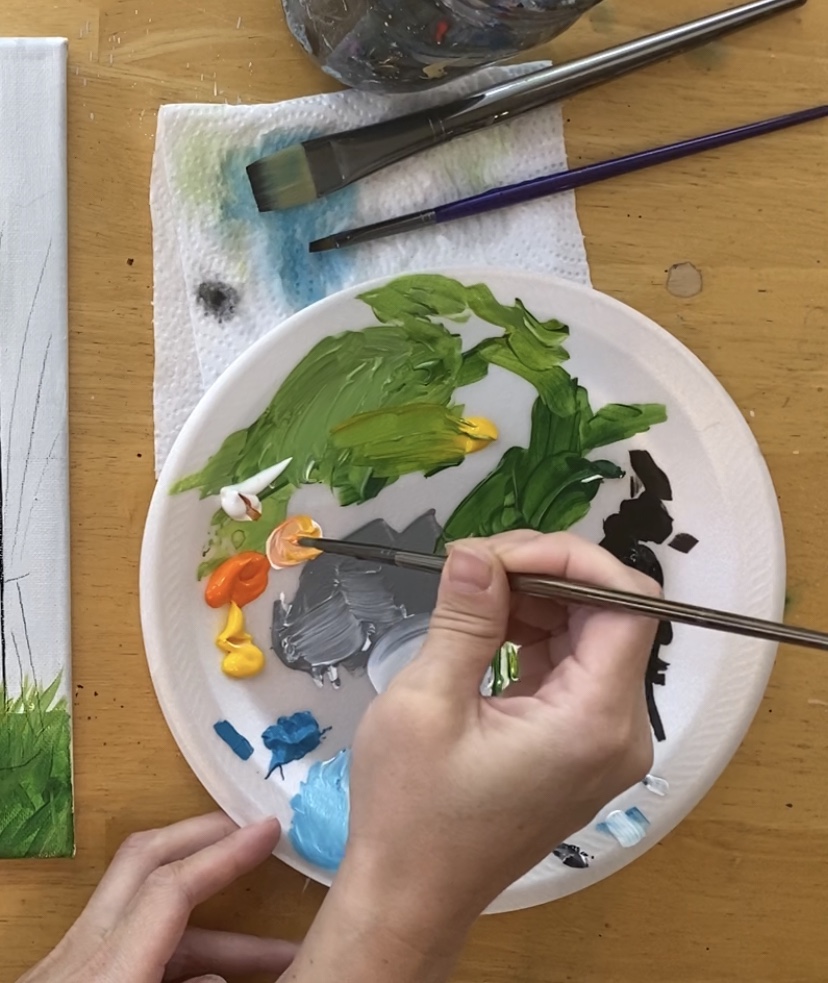
Paint each of the pumpkins. When I paint pumpkins, I like to do one bump at a time. I take my round brush and stroke from the top to the bottom. If the bump is “curved” then you curve your stroke. Also, each bump is a slightly different color.
To vary the colors of your pumpkin bumps, add more orange or yellow to the paint.
The pumpkin next to it had more orange in it. On my palette, I just mixed a little orange to the orange-white-yellow combo. You can do this to! Or you can customize the colors of the pumpkins.
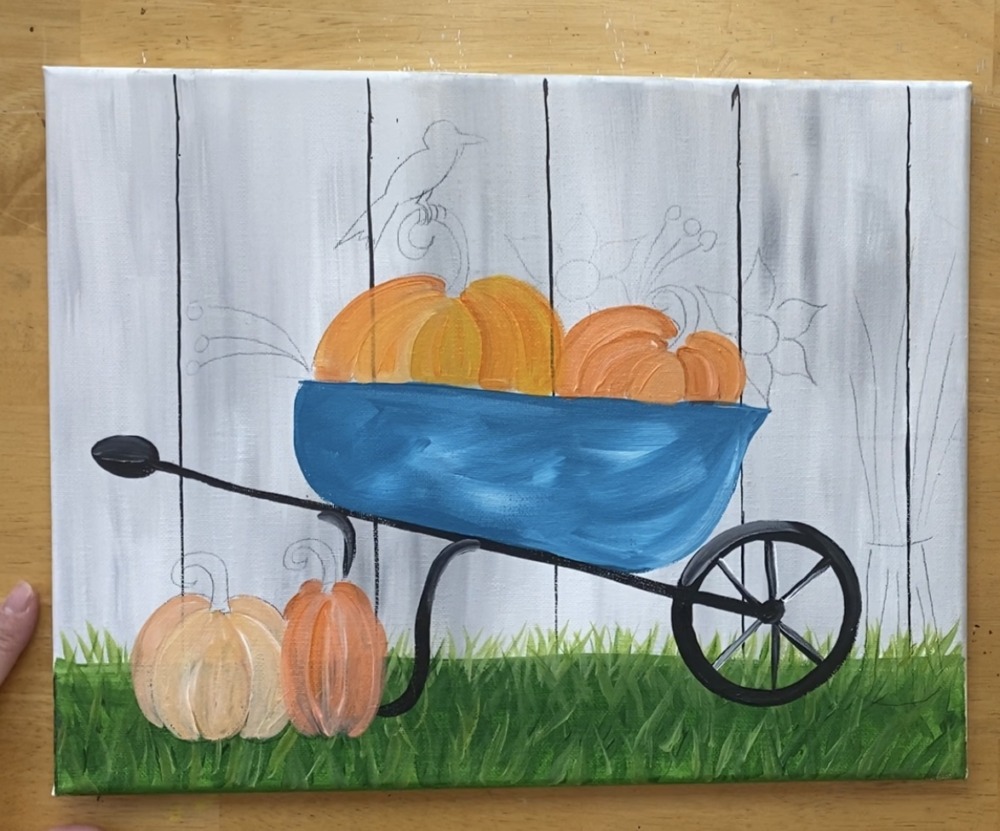
Note: I had “coverage issues” here! The orange/yellow was translucent so I could see the grass and fence through it! I had to do multiple coats to get it to completely cover. A way around this could be painting the pumpkins solid titanium white first and then painting them in.
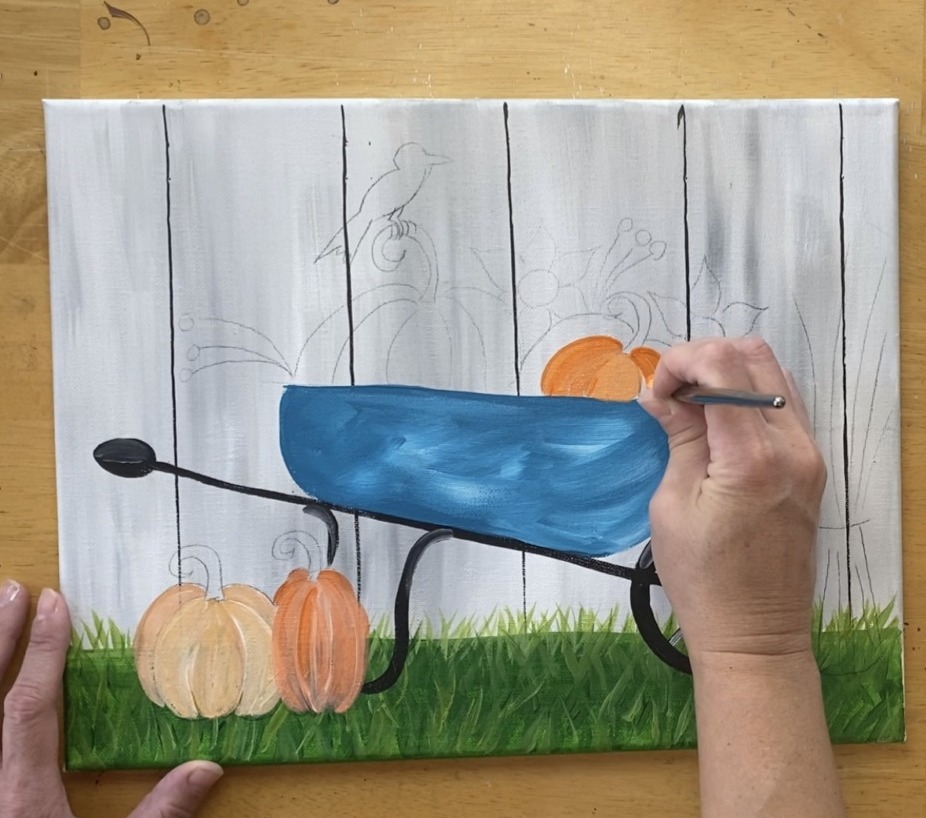
Paint the larger pumpkins in the wheelbarrow using the same technique. These pumpkins were a little more orange. The larger pumpkin on the left was a little more yellow.
Then paint the stems using the #4 round brush (or 3/0 brush) and burnt umber.
Optional: paint some darker lines on the pumpkins where the bumps are. To do this, use either your 4 round or 3/0 round and burnt umber. Start at the top and stroke down. I did not make my brown lines go all the way down, only about half way down.
Also note, there are some strokes of very light orange on some of the pumpkin bumps. I did this to add some more contrast in the pumpkins.
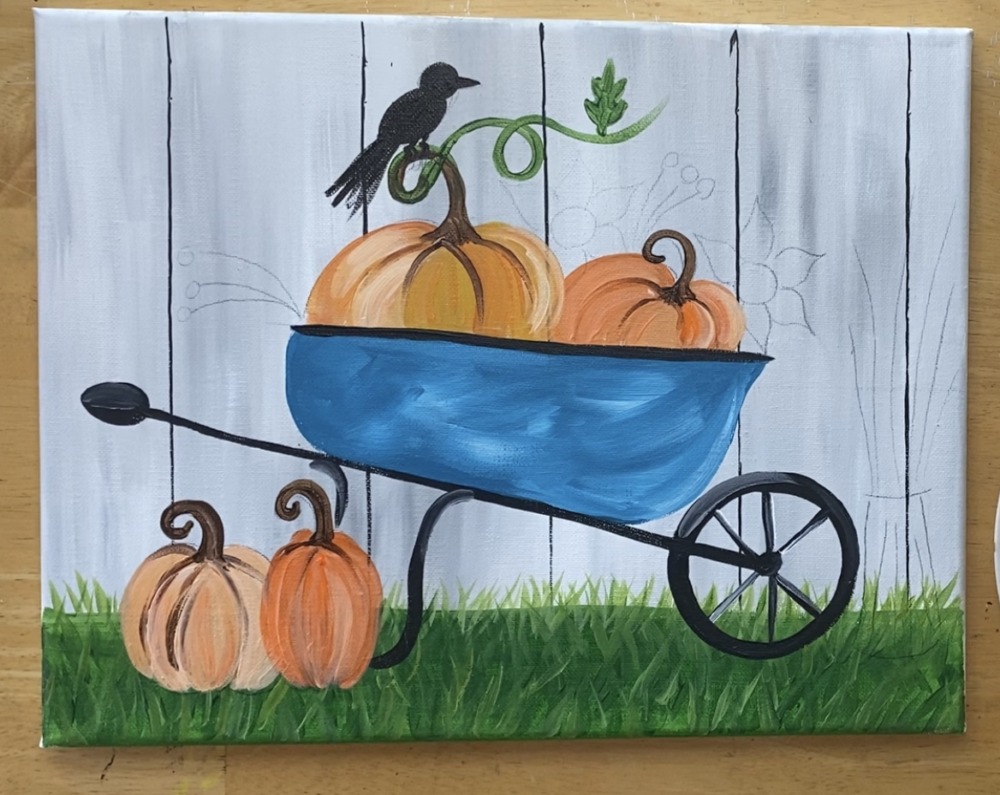
To do the vine, I used hookers green and my #4 round brush. I had my brown stem turn into a green vine and I spiraled it to the right.
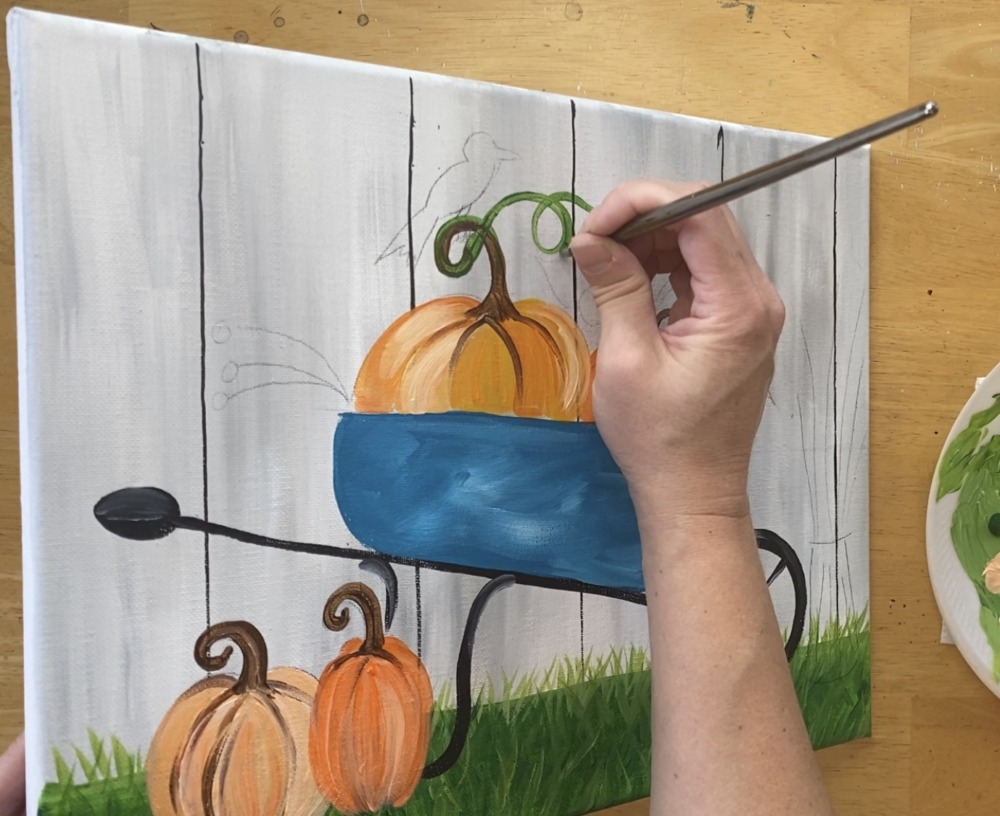
Then I added a leaf on the vine with the hookers green.
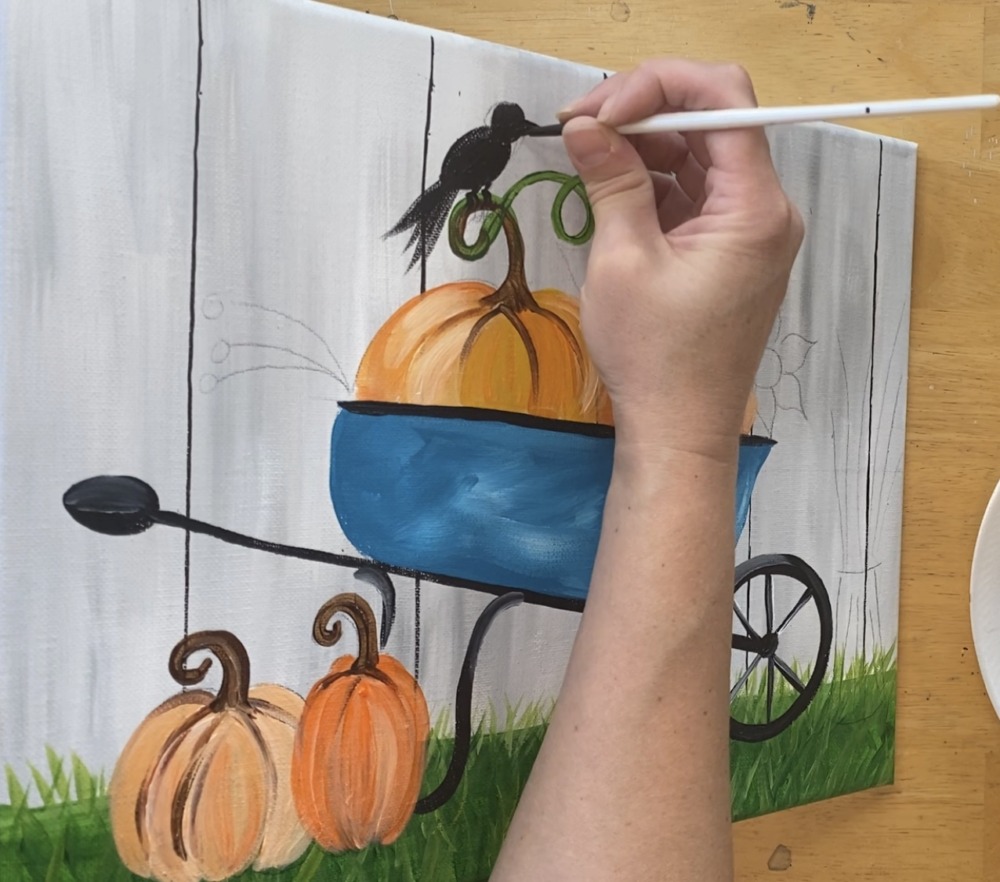
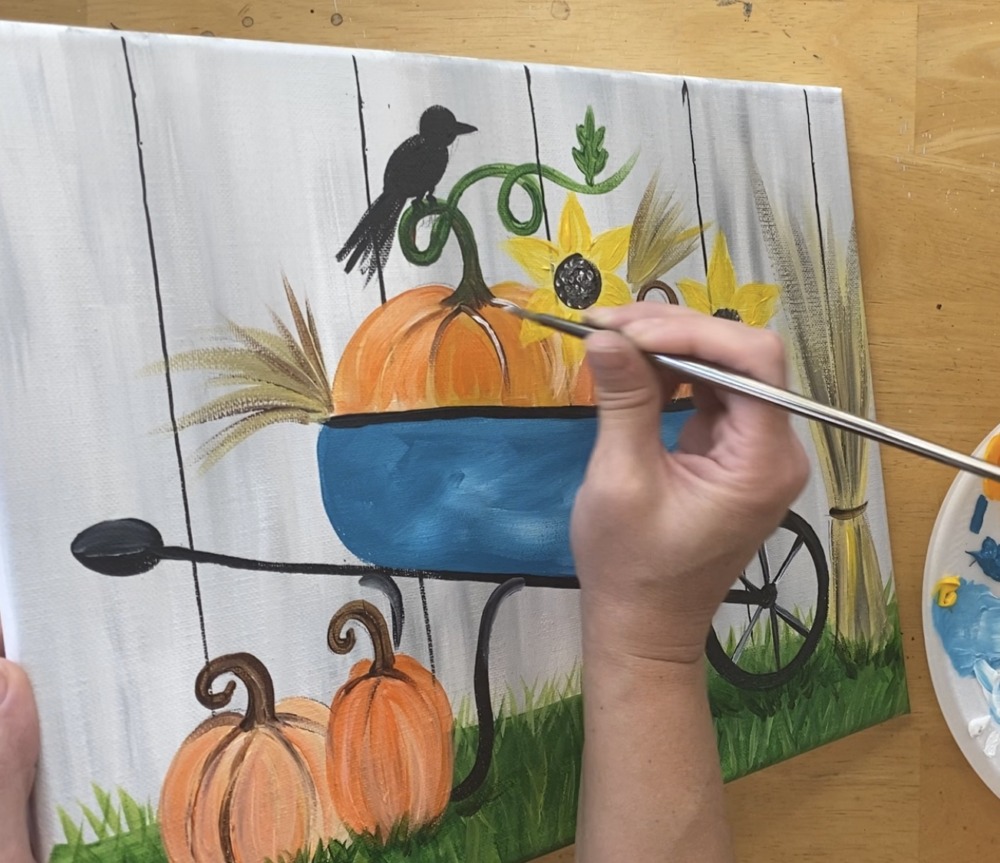
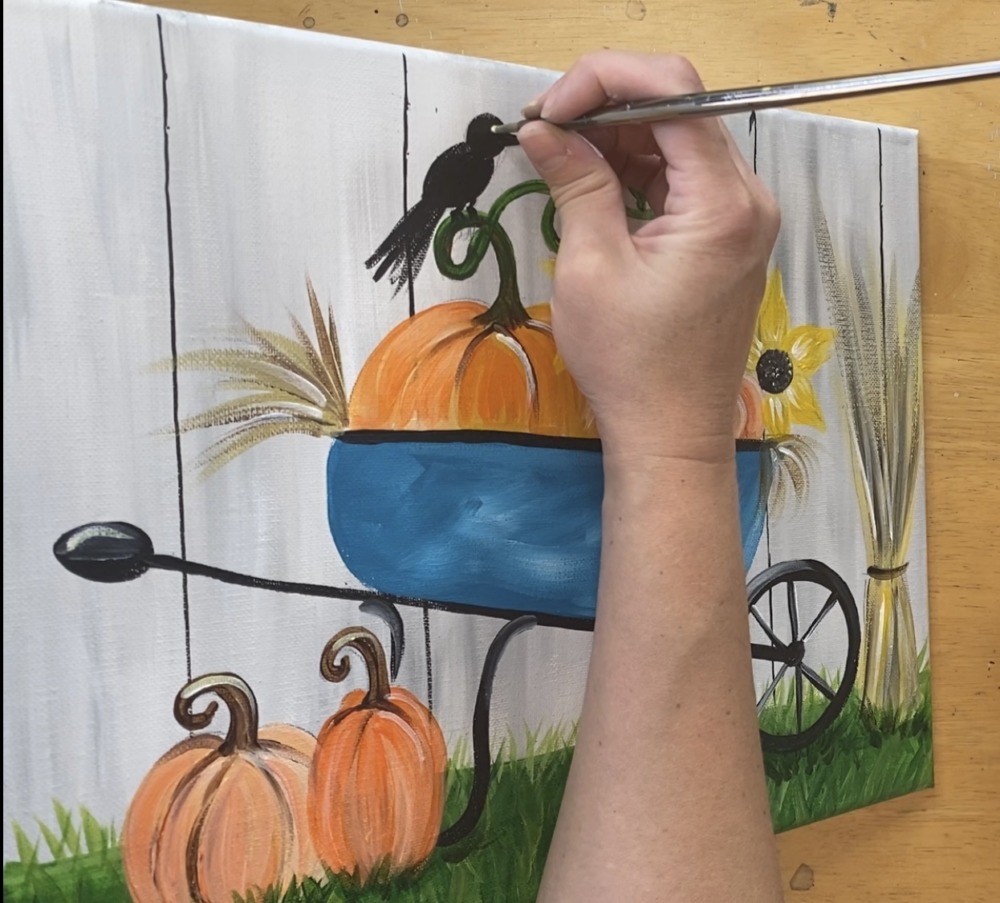
10. Paint the crow (or grackle)
I used the 3/0 round brush to paint the bird solid mars black. You will need that smaller brush to get the beak and leg details!
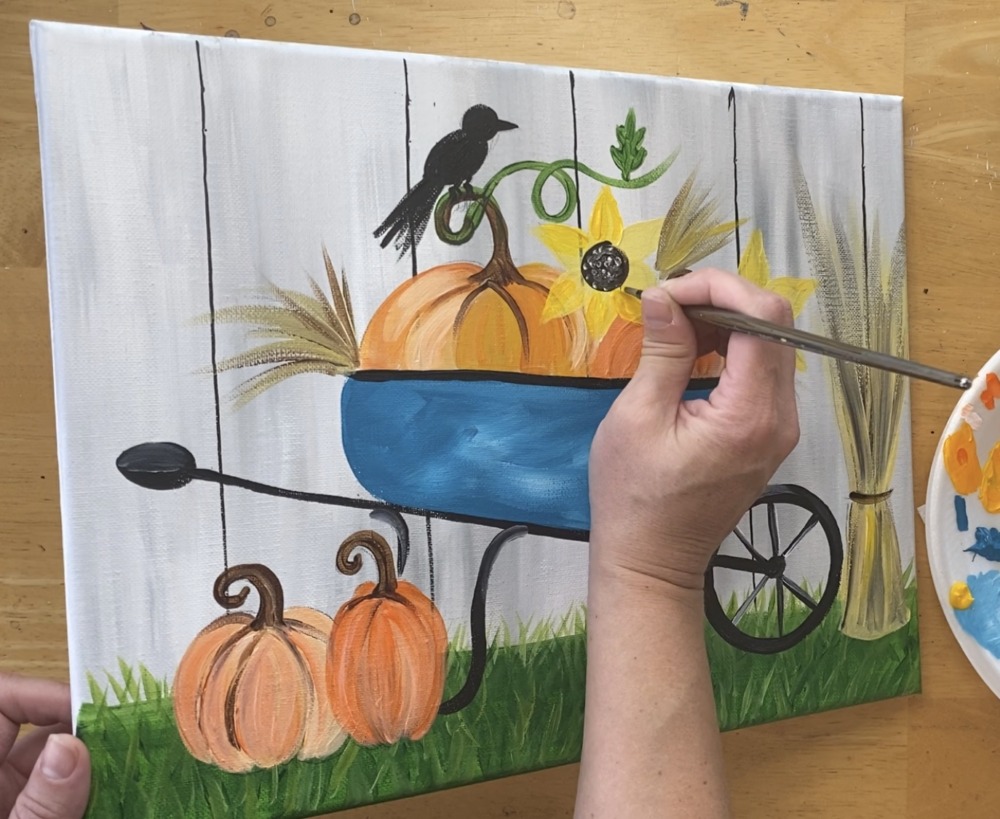
11. Paint the sunflowers
For the sunflower, use either your #4 round brush or 3/0 round brush. Mix white and yellow together (about equal amounts) to make a light yellow. The white also helps with coverage.
Paint the petals of the sunflowers.
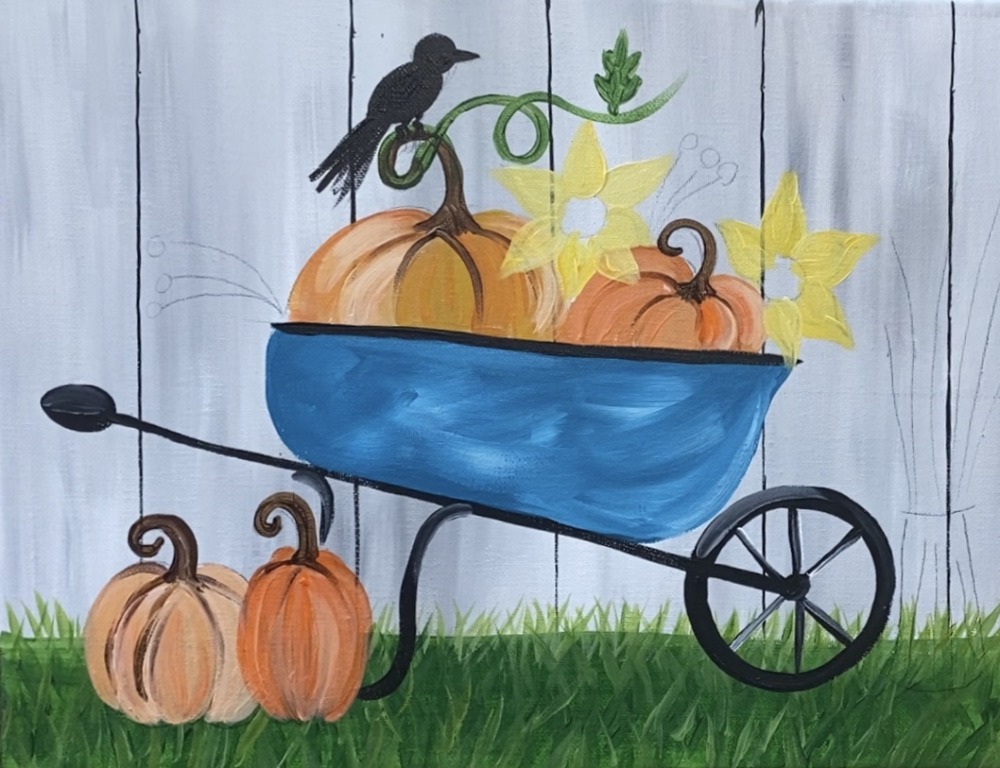
Then mix a little black and brown together to make a very dark brown. Paint the brown circle in the center of the sunflowers.
Next use your spotter brush to paint little white dots in the center. It is okay if the dark brown is not dry all the when when you do the dots.
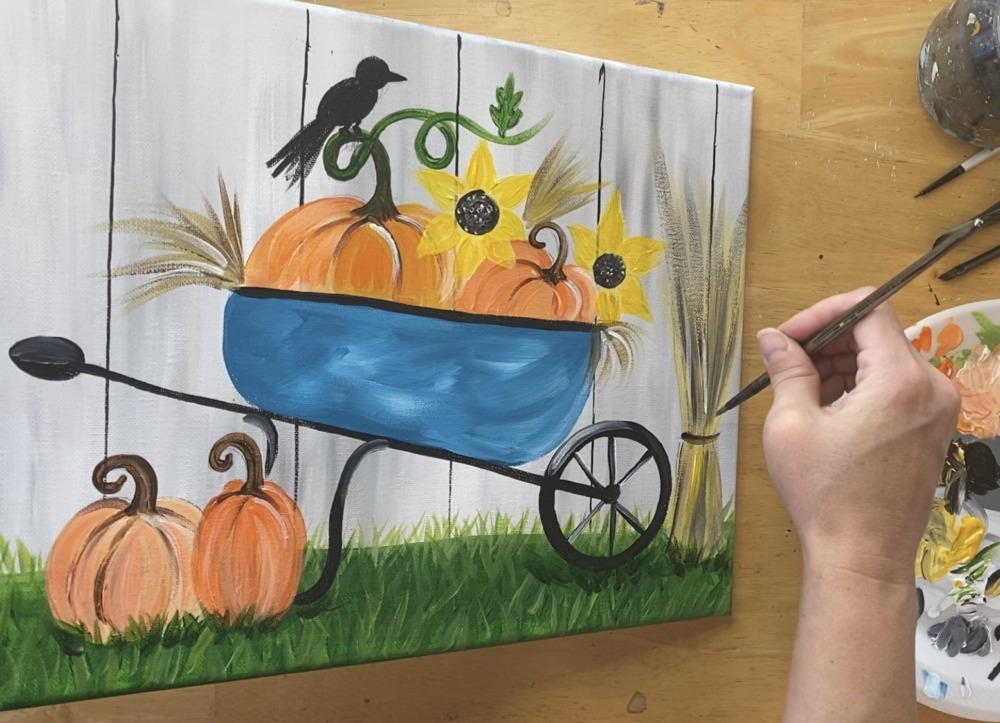
12. Paint the hay
For the hay, I mixed on my palette some cadmium yellow medium, titanium white and a tiny bit of burnt umber. This will make a medium sort of straw color.
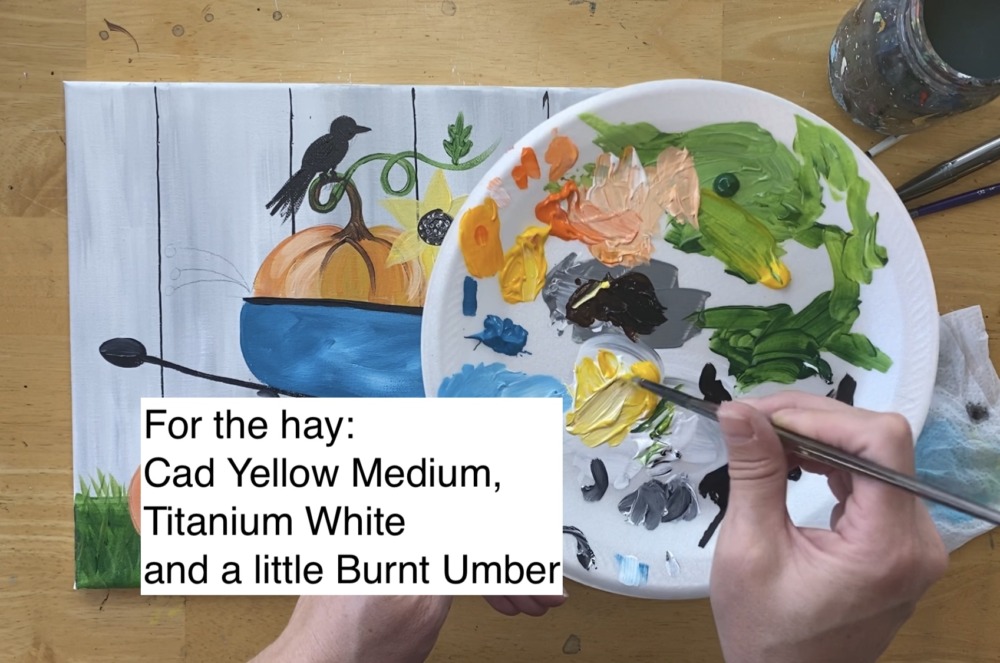
Paint the hay on the right side of the barrow. I did not mix my color all the way on my palette so I got a little “variation” in color in this area. Use your 4 round brush and make quick strokes that sort of fade away towards the top of the hay.
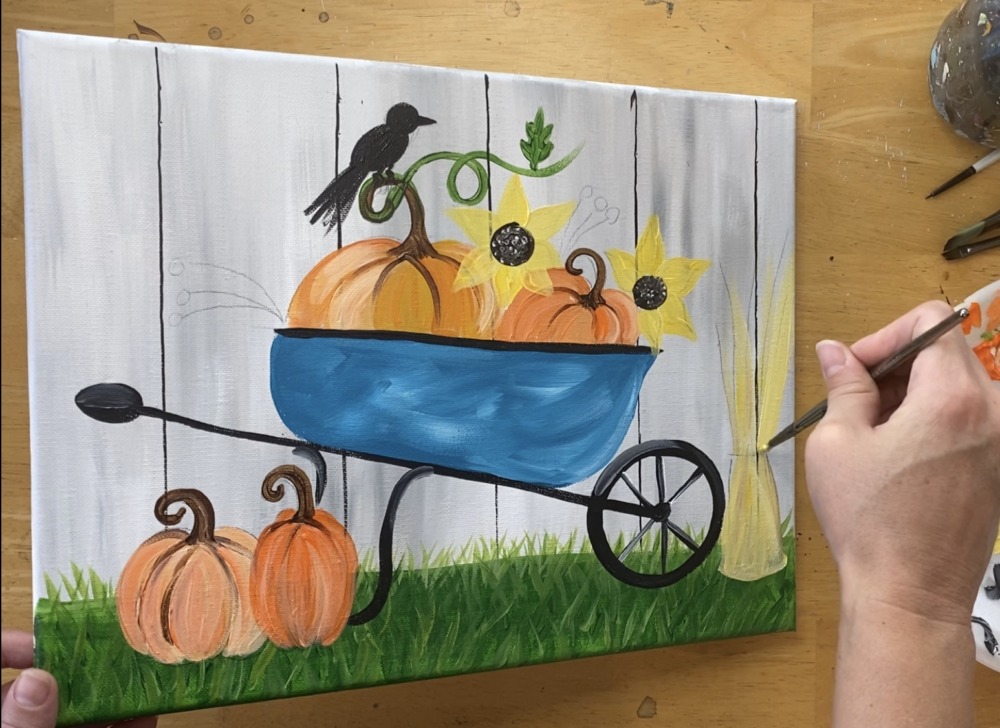
Then load your brush in a little brown and add some brown strokes over the hay. Just a few strokes but don’t cover all the yellow!
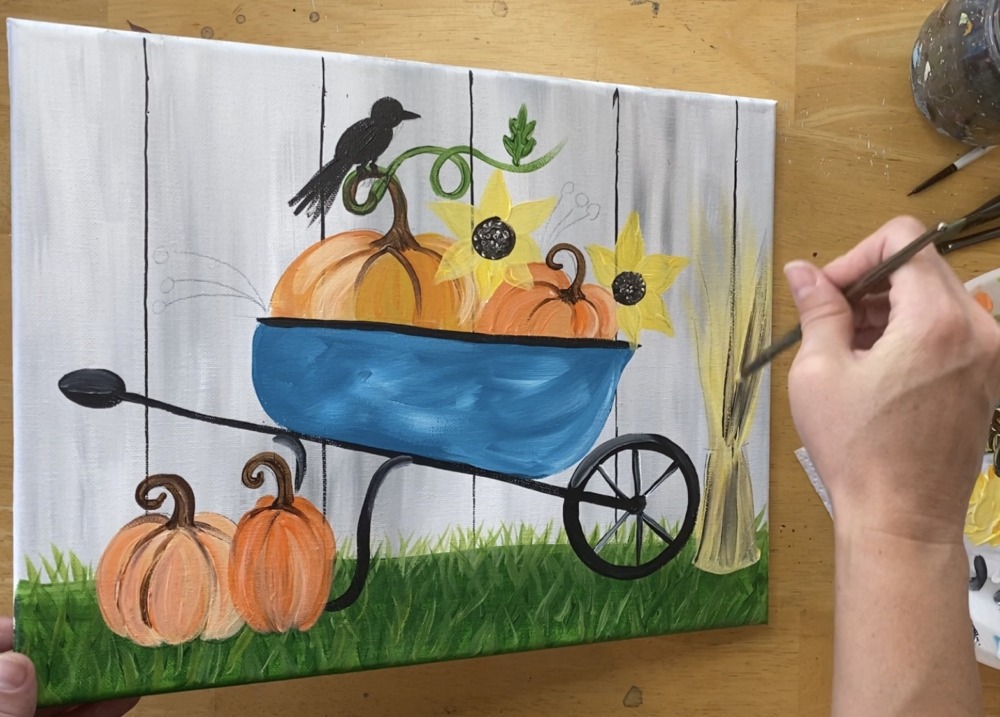
Paint the “tie” with burnt umber. Also, paint some hay sticking out of the wheelbarrow! I did this using the same technique of starting with that yellow “hay color” and then adding a bit of brown to it. Use your round brush and make quick strokes that fade away at the end.
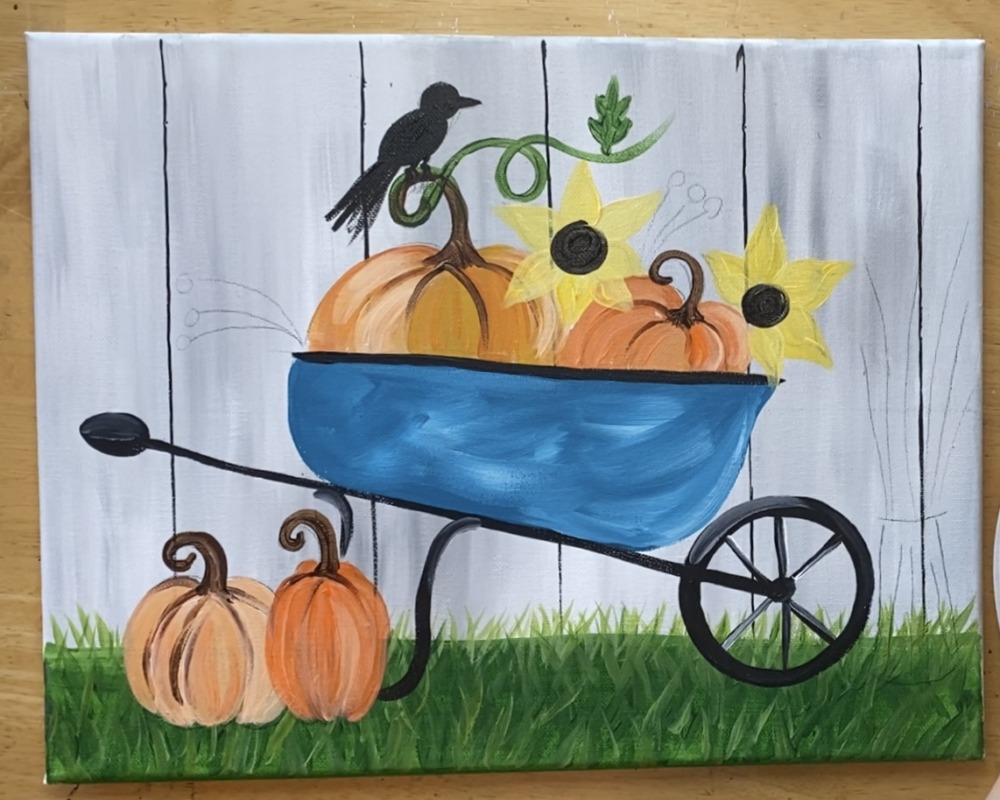
13. Do some final touch ups
Next paint a second coat on the sunflower petals (if needed). I wanted my petals to be brighter so I did a solid coat of cadmium yellow with no white.
Make some grass cover some of the base of the pumpkin, wheel and hay. Do this by using just hookers green or adding a tiny bit of black or brown to the green to make it darker. Have your blades of grass sort of overlap the objects.
Then I added some “white” highlight lines in some areas of my painting that I wanted to add more contrast to. I used my 4 round brush and added some white on the pumpkins.
Then I added some white lines on the hay.
And I did an eye on the bird.
I also did white highlight on the bird’s beak, belly and tail area. Also note, there are white lines added on the sunflower petals and some of the pumpkin stems!
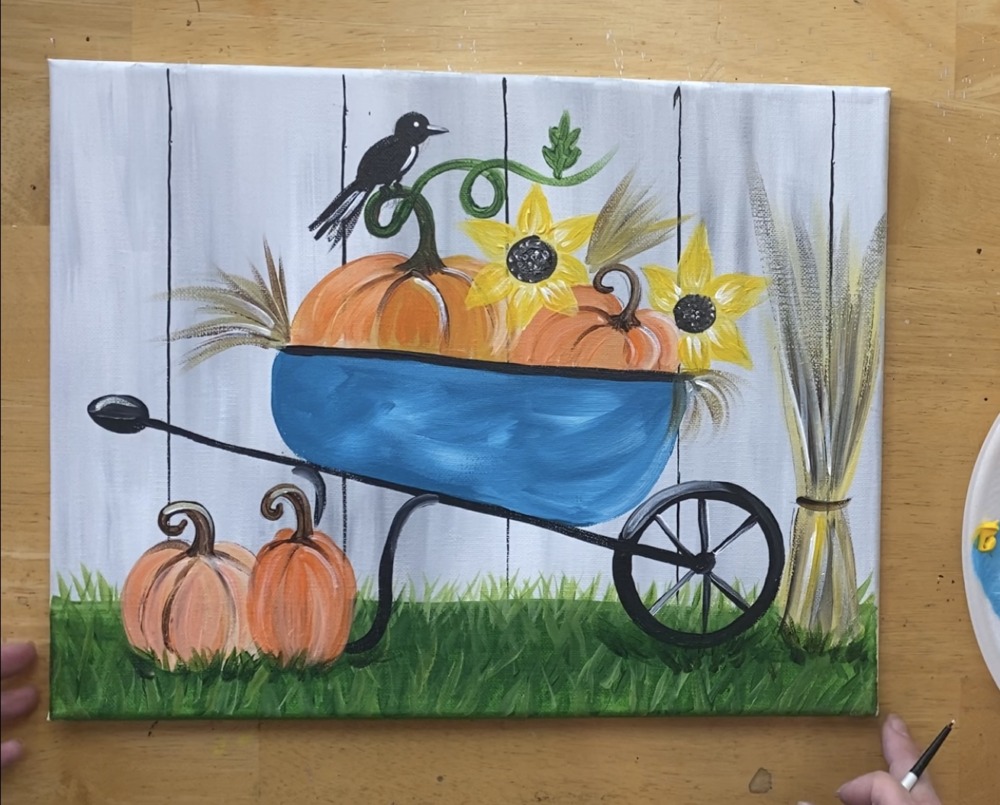
I love adding subtle white outline/highlight areas to my paintings because it adds that bit of “contrast” to make the painting pop a bit.
Finally, I painted two leaves next to the sunflower! I did this with my round brush and hookers green hue permanent.
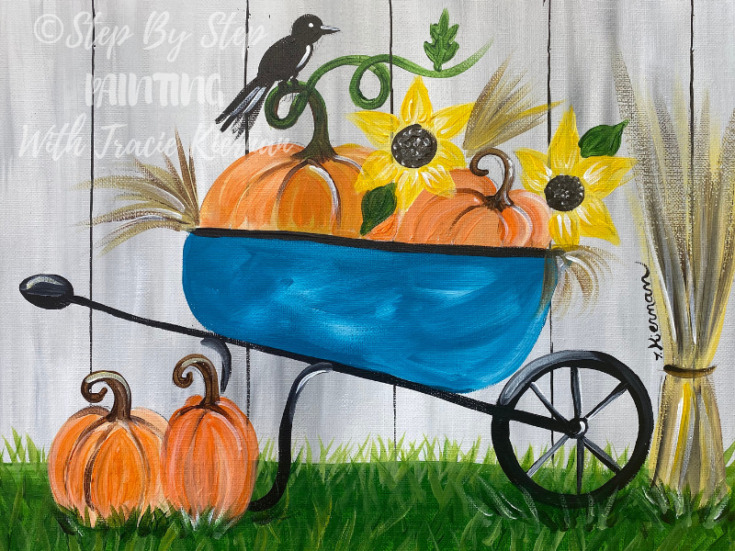
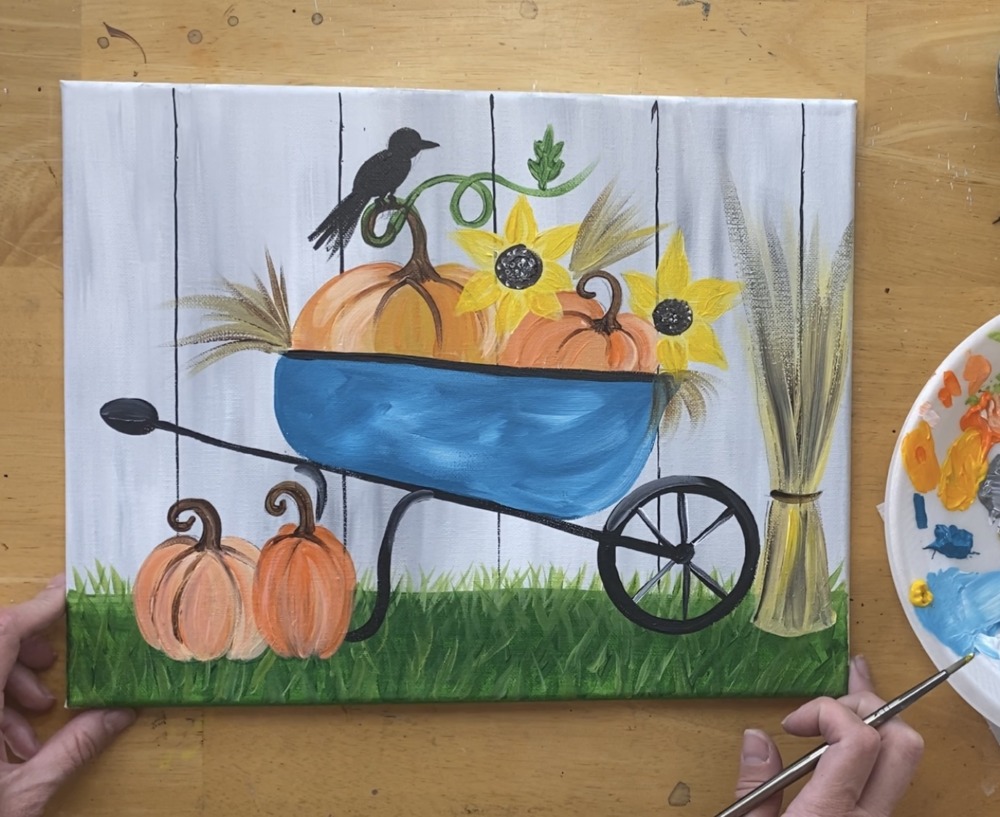
Finished!
That’s it! Sign your name and show it off!

Share Your Art Here!


I painted this probably fall of 2020 and love how it turned out even though I only used basic kid paints (think name brand in drop-proof plastic bottles in primary colors). I absolutely love how it turned out, so I’m back on your site for a summer painting now that I have a bit of free time again. There are so many great ones to choose from, and I’m confident they will all be wonderful just like the easy wheelbarrow directions. Thank you for sharing your talent.
Hi Tracey! Glad you enjoyed doing this one! There are so many to choose from now! Hope you enjoy your painting time!