

Would you like to save this?
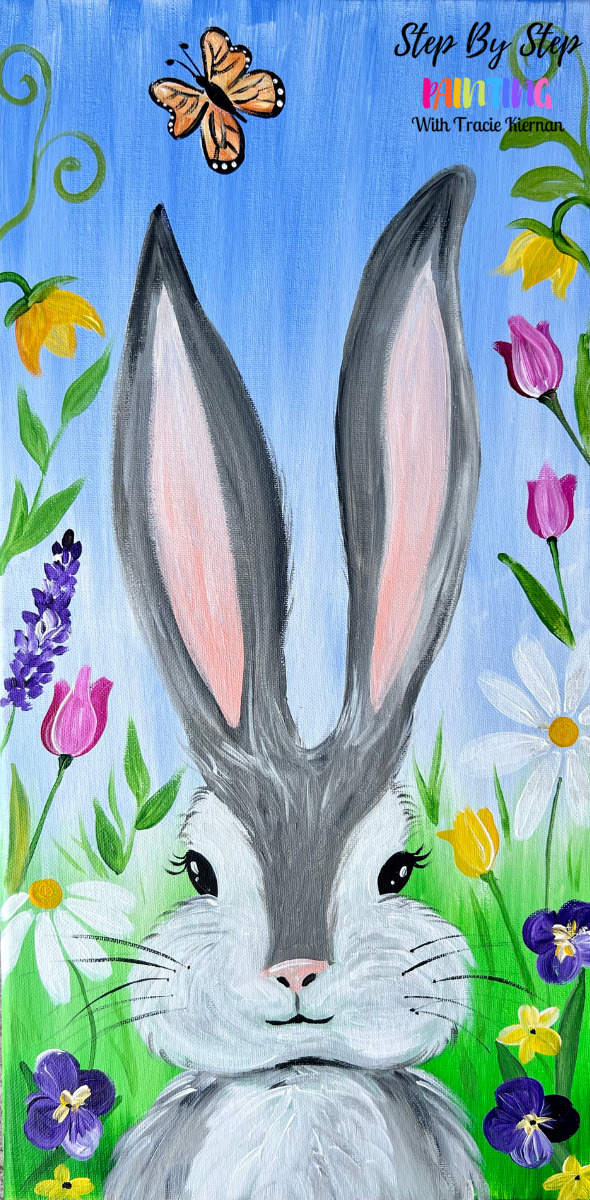
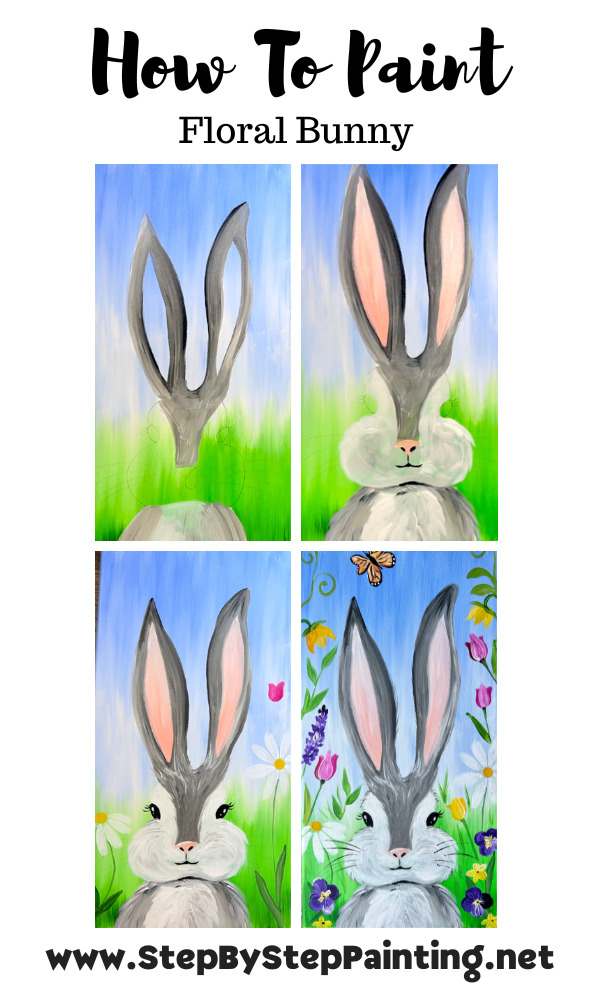
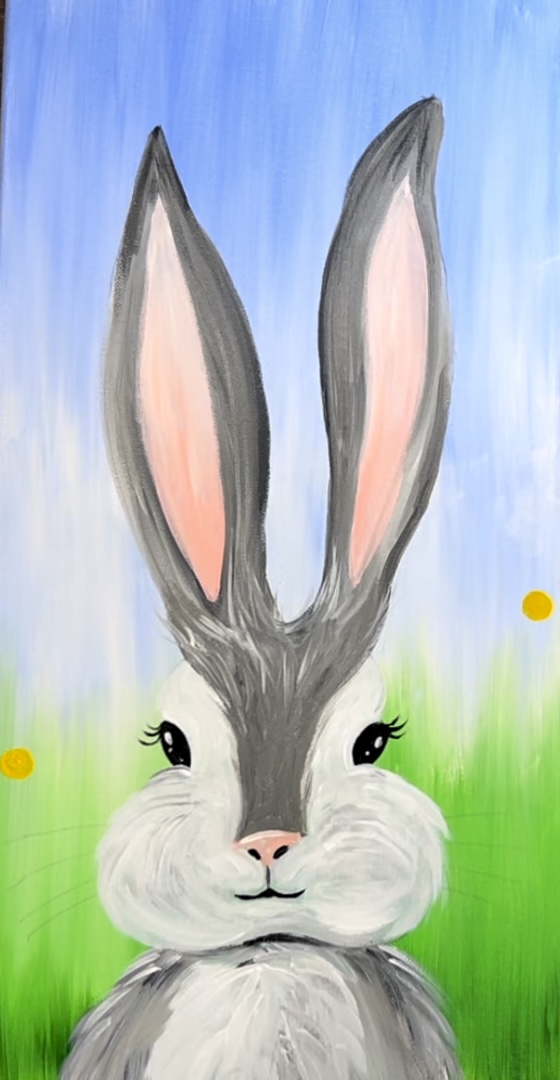
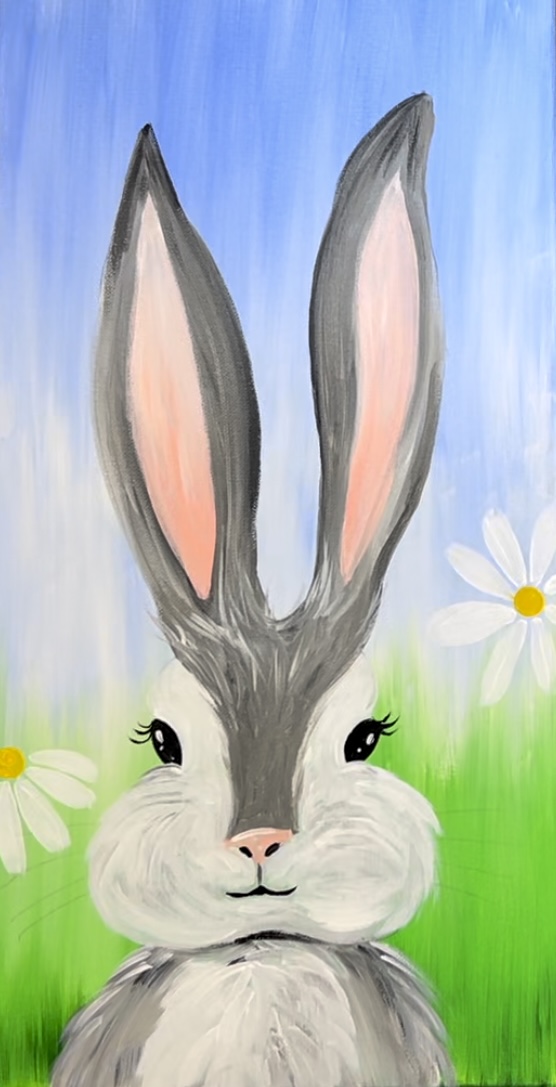
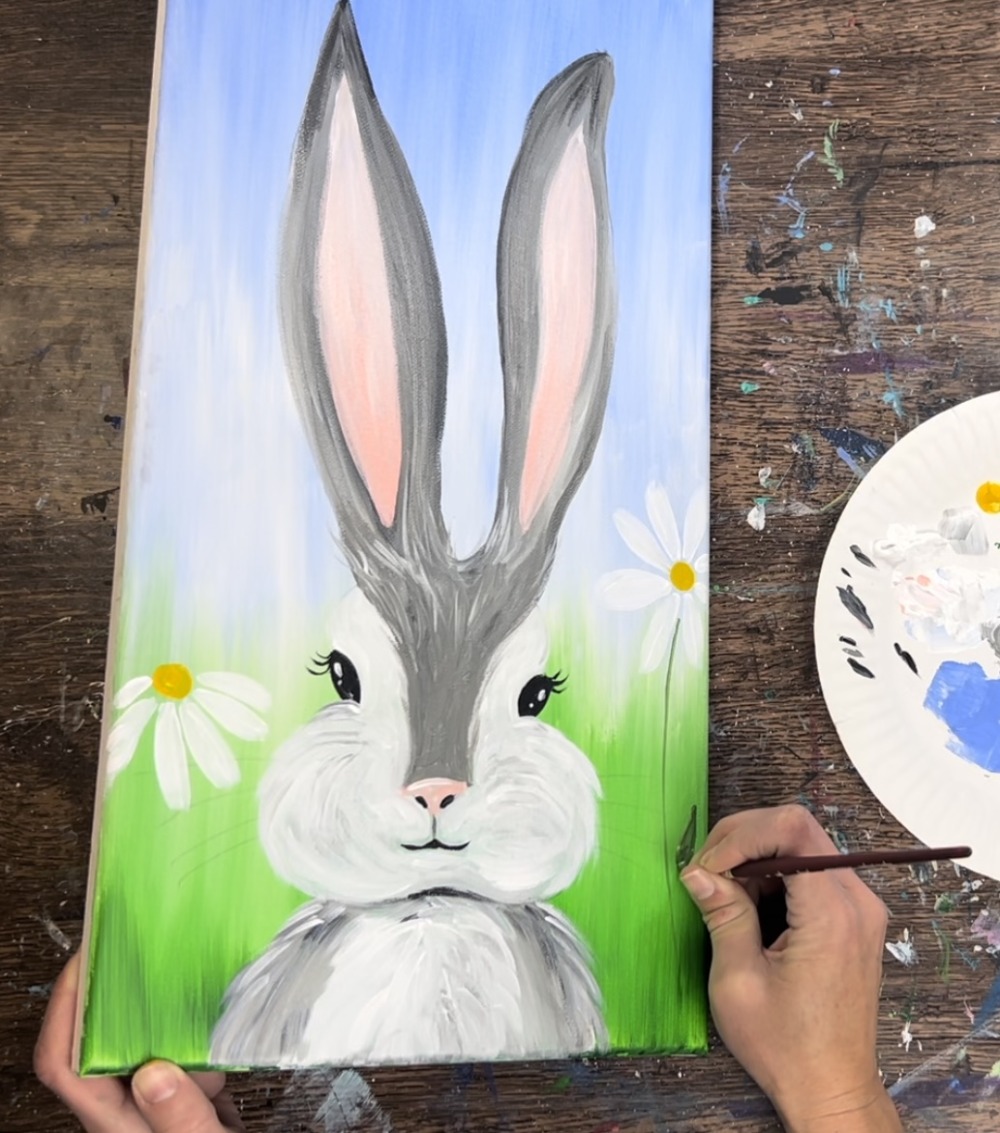
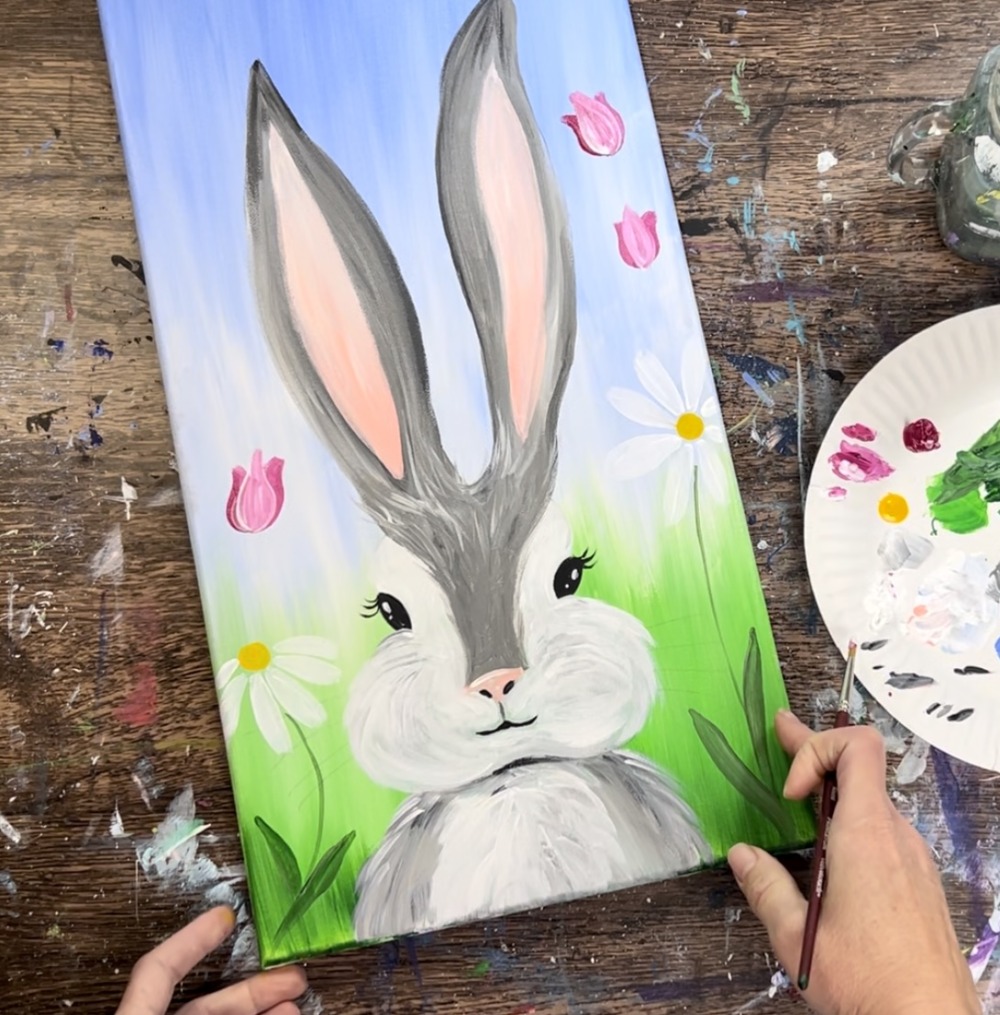
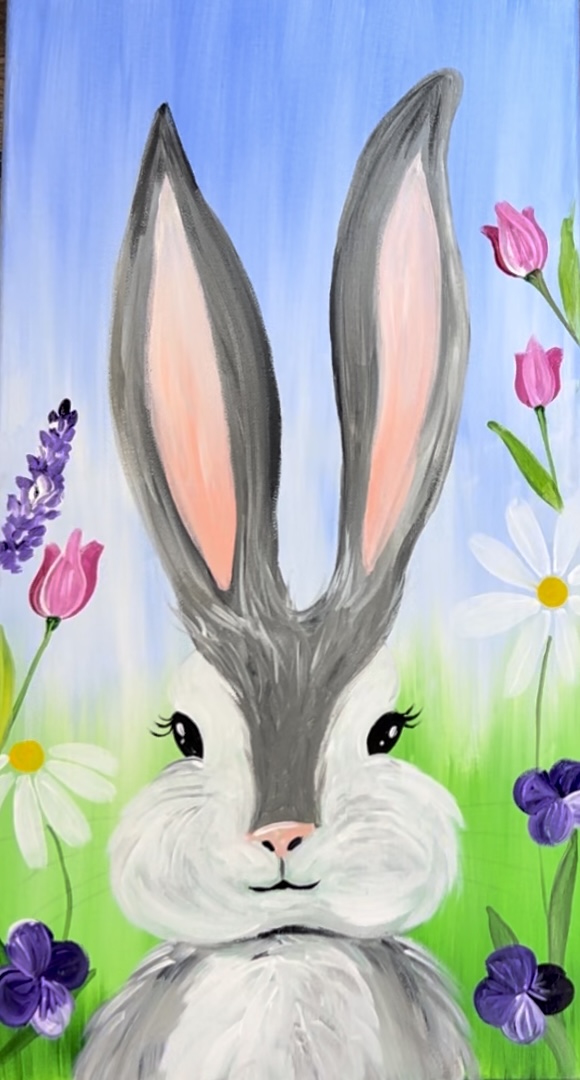
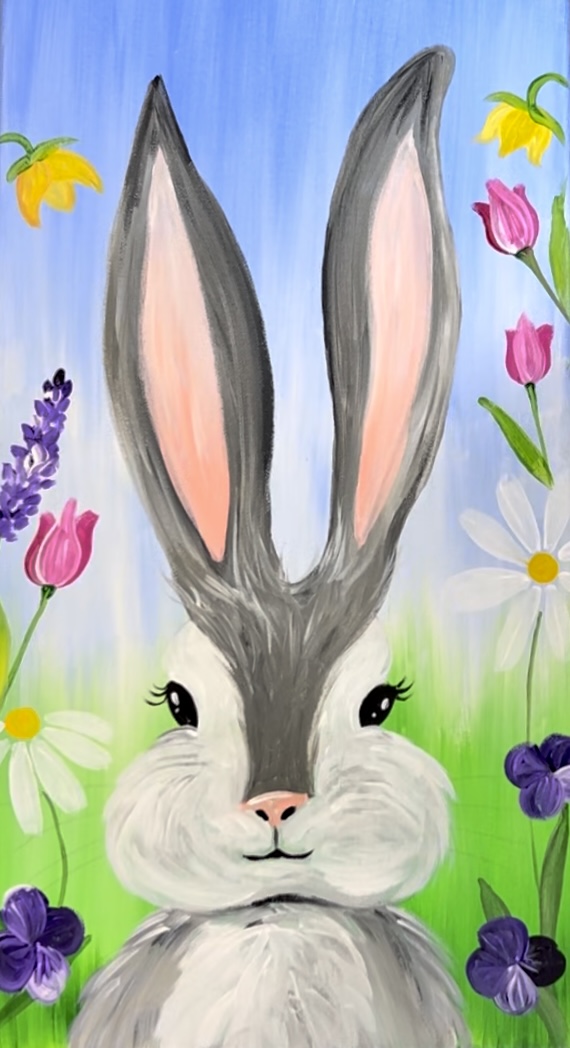
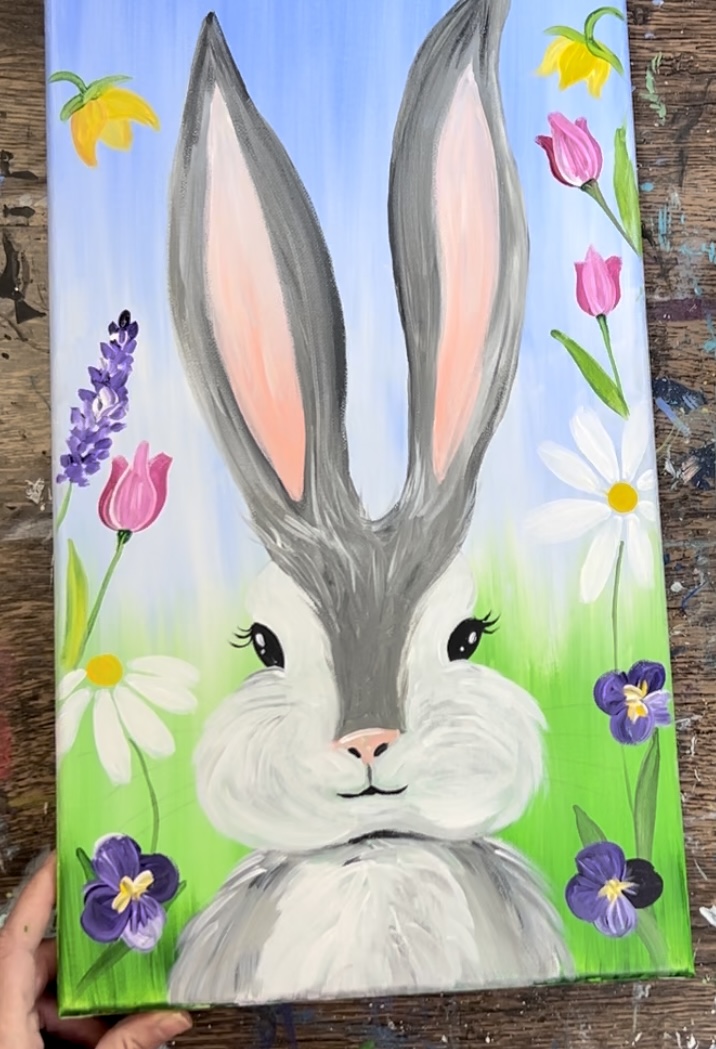
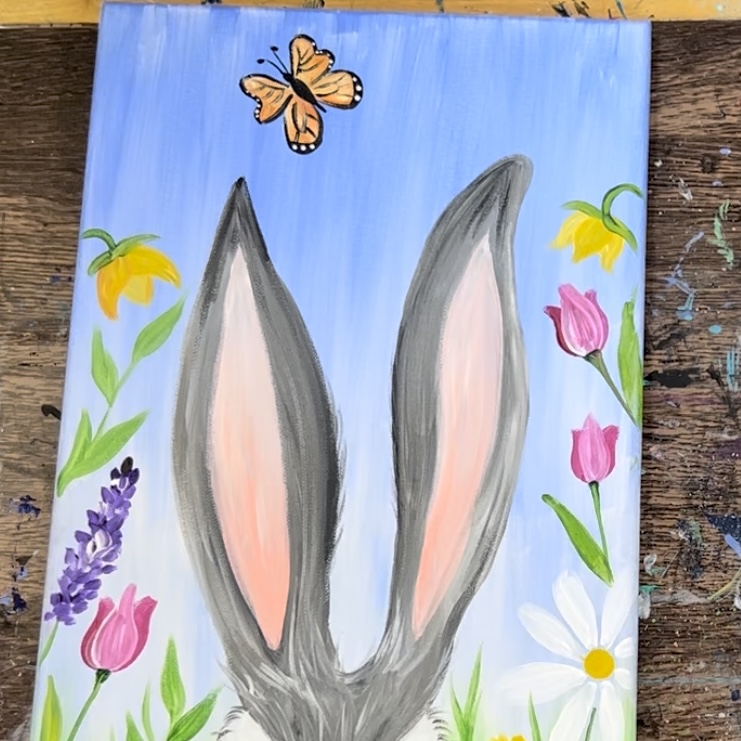
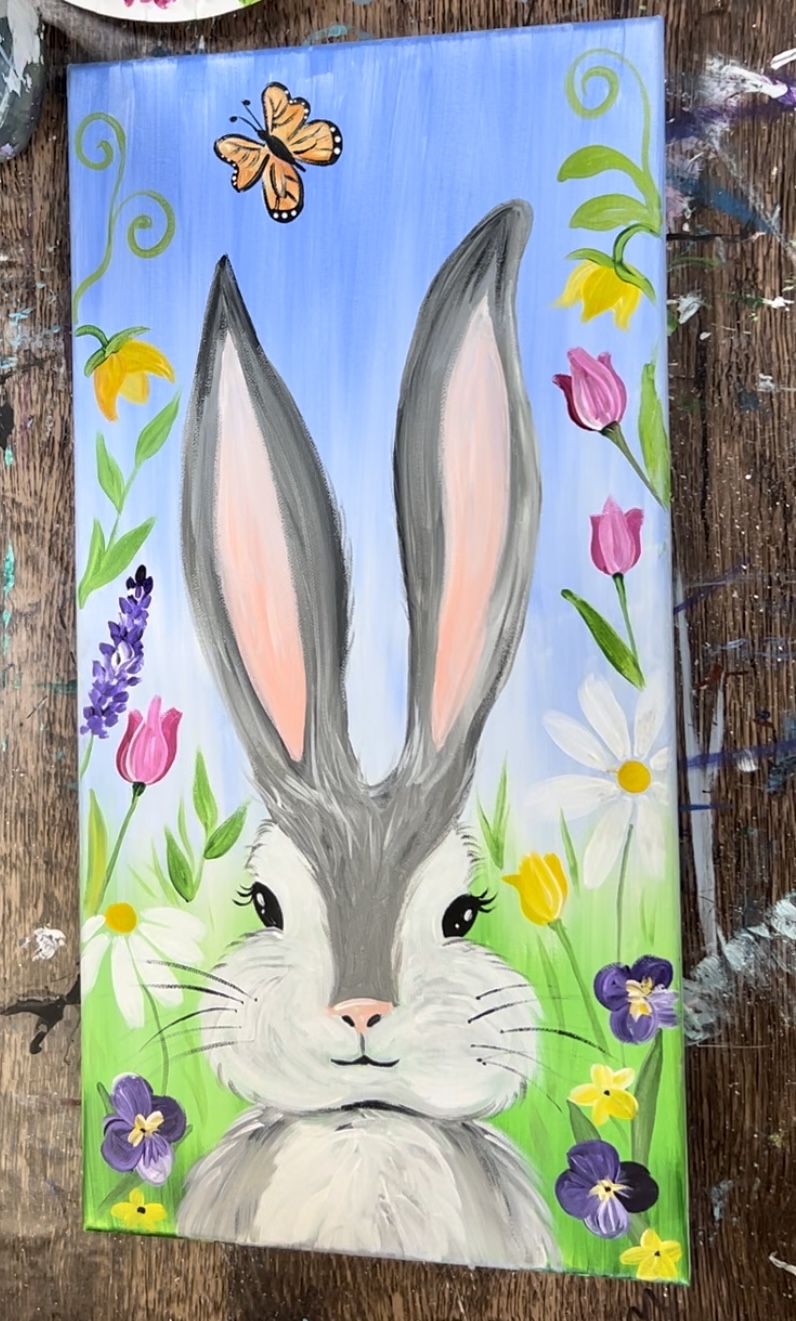
Learn how to create a rabbit painting. This tutorial will show you how to paint a detailed bunny rabbit on a long 10 x 20 canvas. You’ll also be learning techniques for how to paint simple flowers and grass in the background.
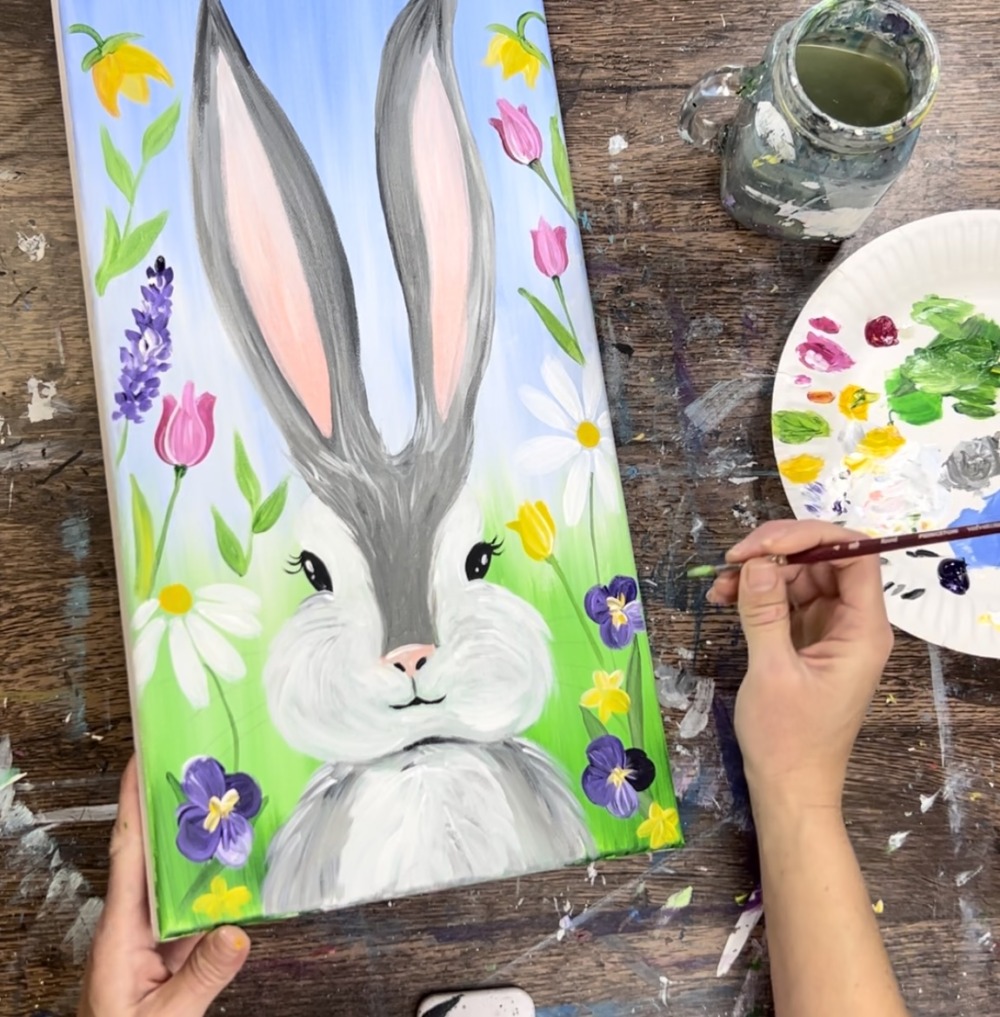
This is a very detailed painting that may require multiple painting sessions! The video tutorial is nearly an hour long, which means the actual painting could take over two hours.
You are also welcome to simplify this and not do as many flowers or add as much texture detail into the rabbit.
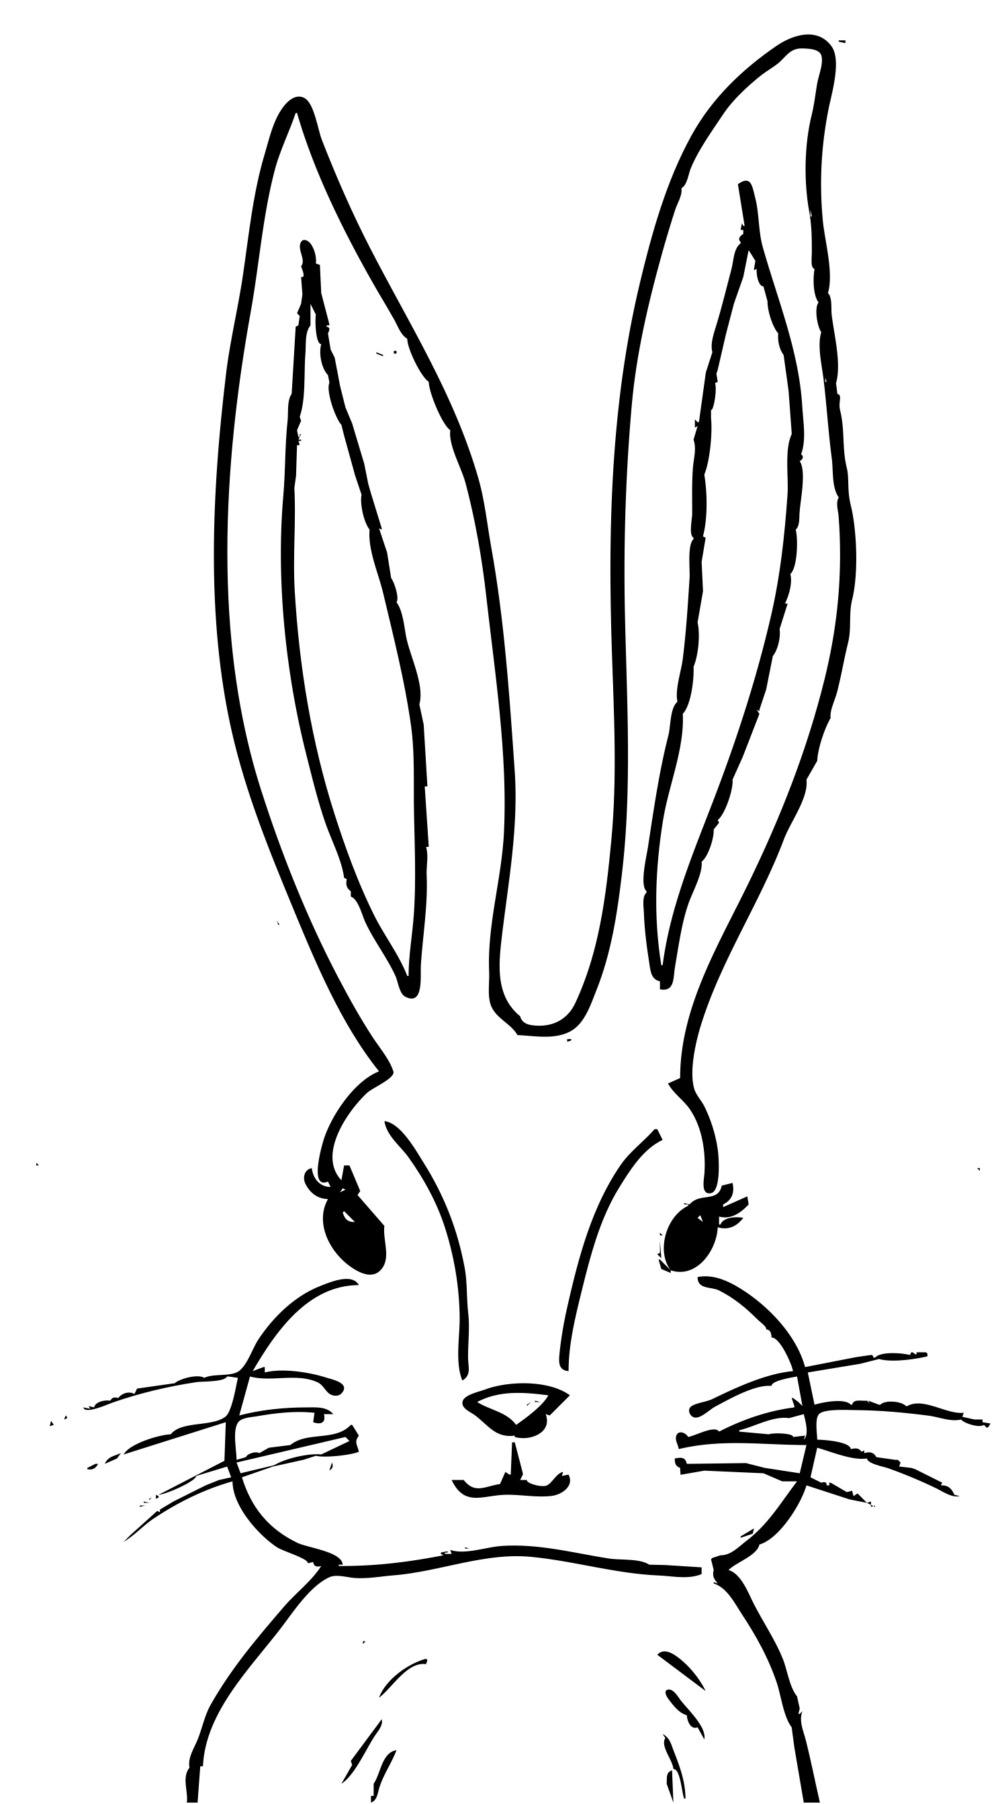
I am using a traceable template in this! I found using the template helps get the proportion of the bunny’s face and ears right because we are working on a long style canvas. Of course, you are welcome to draw this out yourself if you don’t like using the templates.
Enjoy and happy painting!
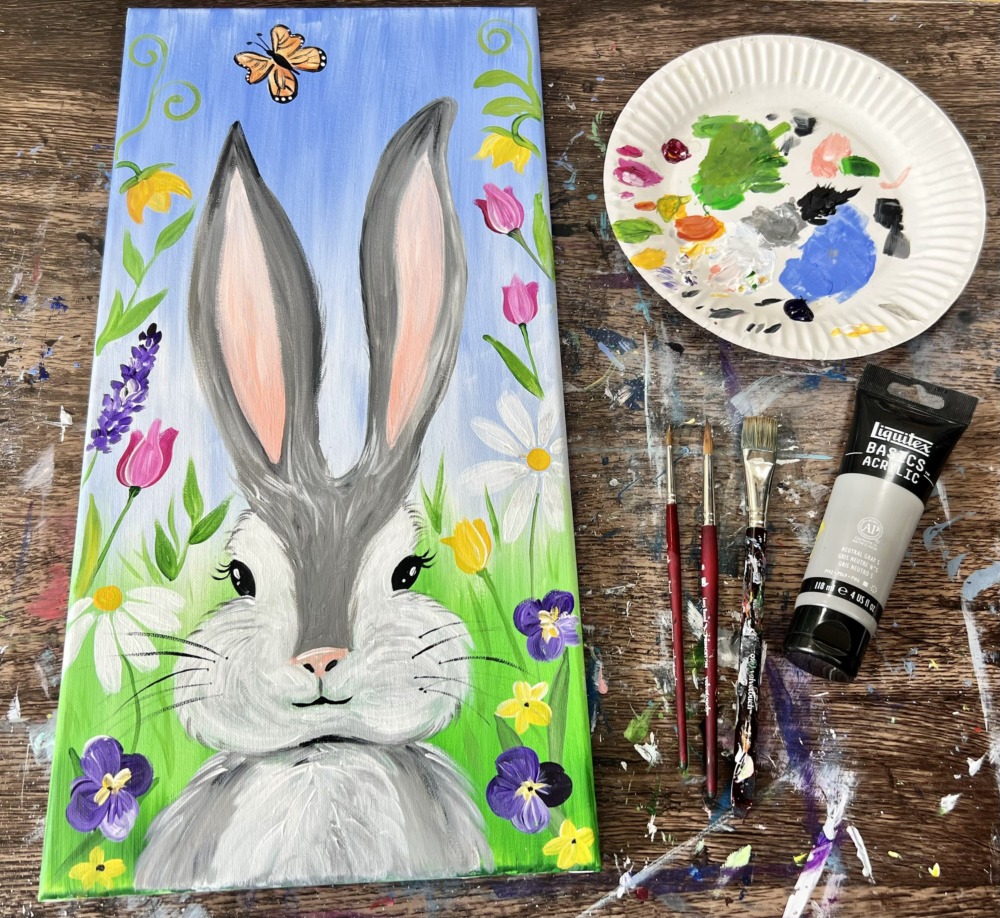
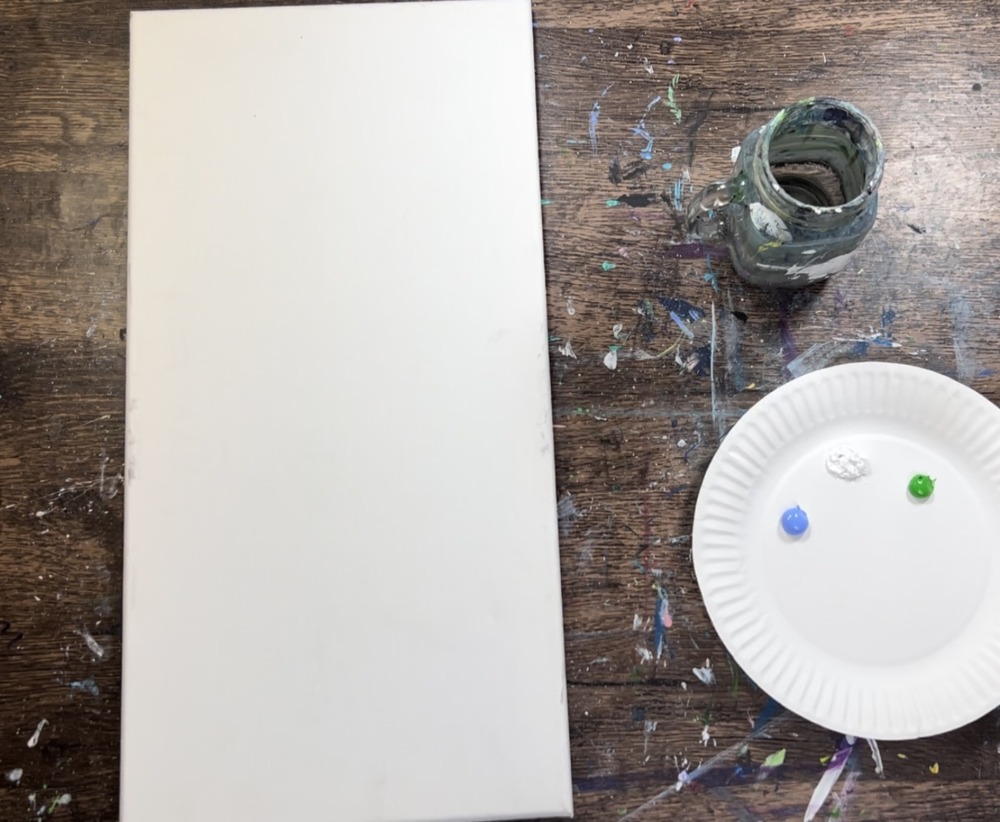
Materials Needed
Floral Easter Bunny Acrylic Painting Tutorial
Paint a gray and white Easter bunny on a 10 x 20 long canvas. This tutorial will demonstrate how to paint basic flowers as well as a detailed bunny with long ears.
Tools
- 10 x 20 Canvas
- Acrylic Paint
- Brushes
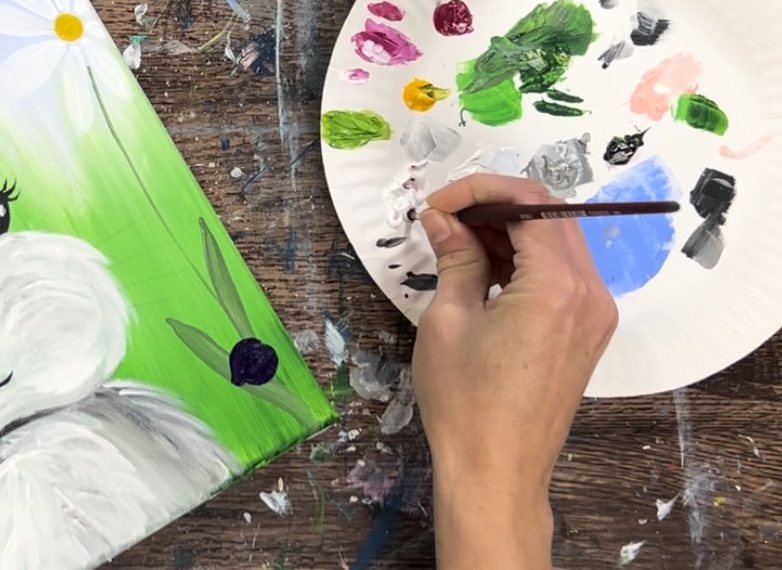
- Paint Palette (I use a paper plate)
- Water Cup
- Pencil
- Traceable
- Graphite Paper
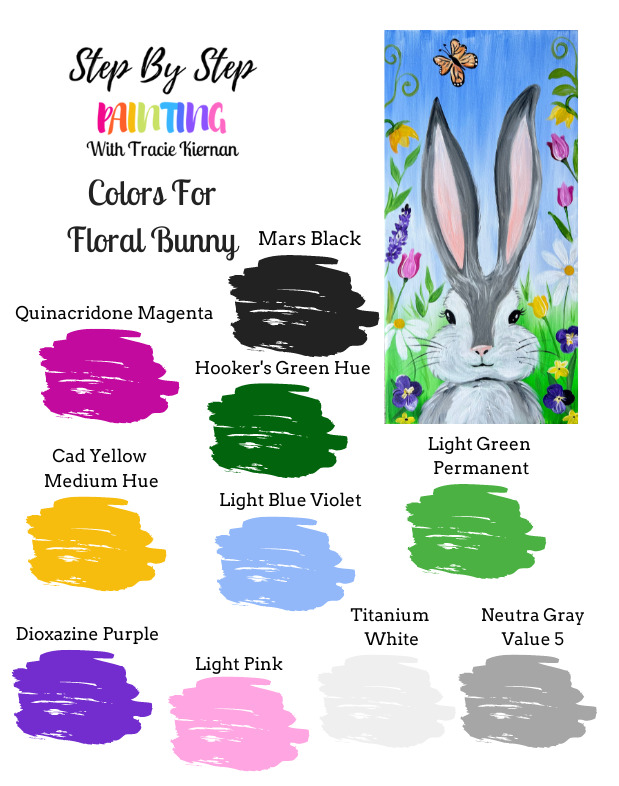
Colors (I use Liquitex BASICS)
- Titanium White
- Mars Black
- Neutral Gray Value 5
- Light Blue Violet
- Light Green Permanent
- Hooker's Green Hue Permanent
- Quinacridone Magenta
- Cadmium Yellow Medium Hue
- Dioxazine Purple
Brushes (I use Princeton Velvetouch)
Color Palette
I used Liquitex BASICS acrylics for this painting. If you are using a different brand, you can look at the color chart below to help you convert colors.
Using Craft Paints?
If you are using Apple Barrel Craft Paints or something similar, I would recommend subbing to:
- Fuchsia
- Black
- Holly Branch
- New Shamrock
- Bright Yellow
- Parrot Blue
- Purple Iris
- White
- Pewter Gray
Traceable
This traceable is to be printed on three sheets to tape together to fit a 10 x 20 canvas.
Directions At A Glance
Video
Step By Step Instructions
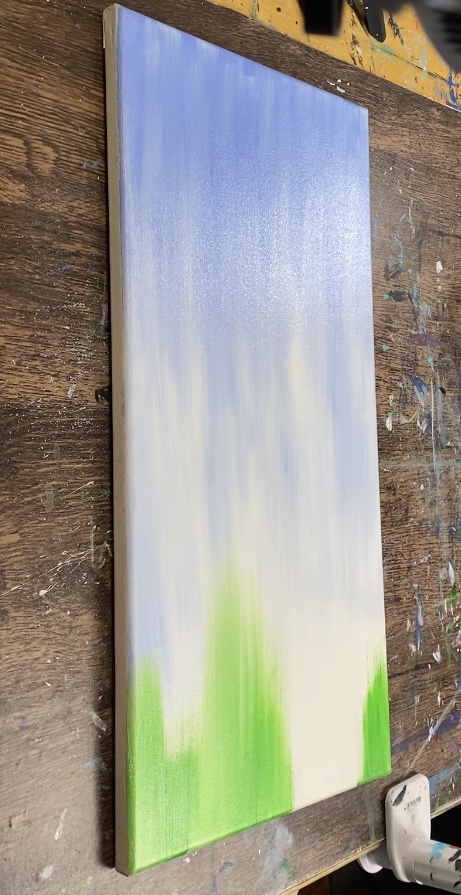
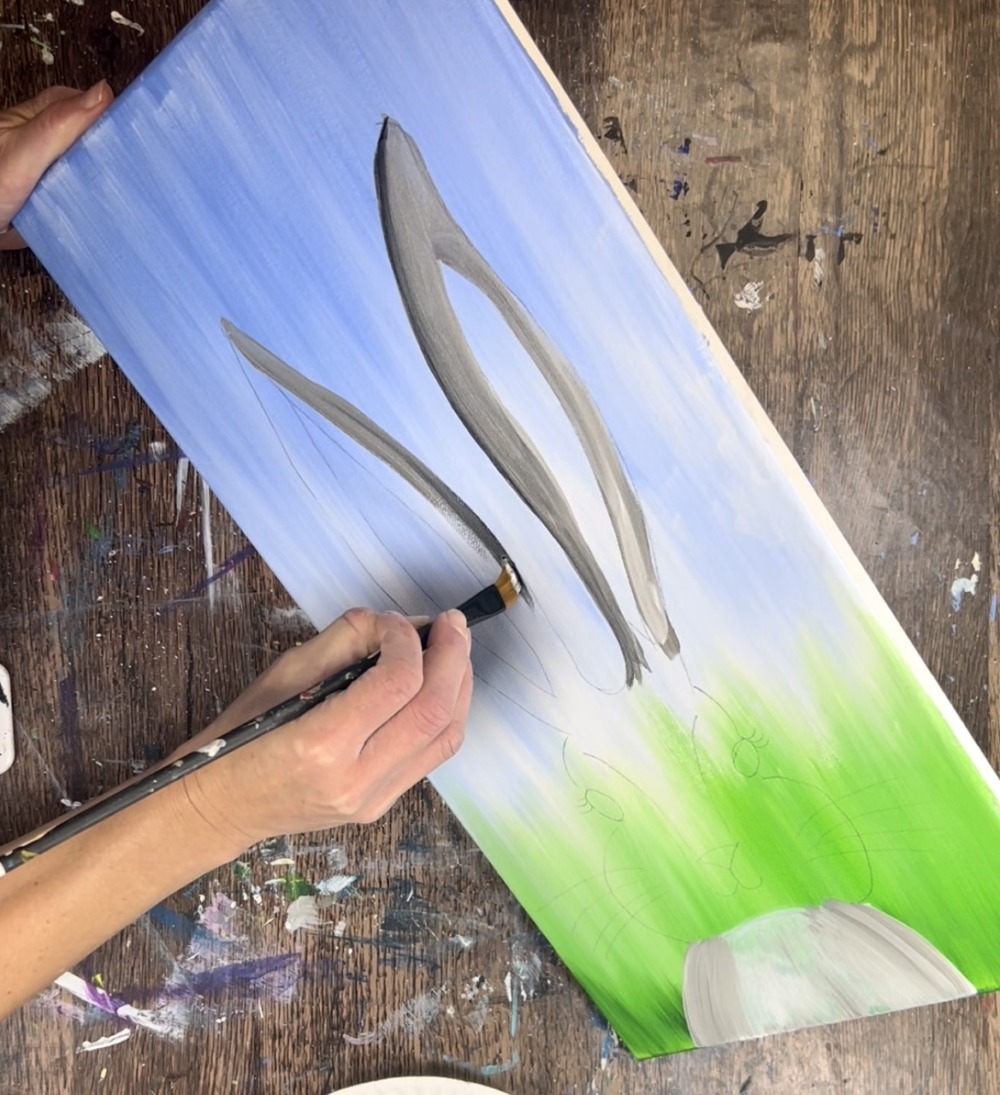
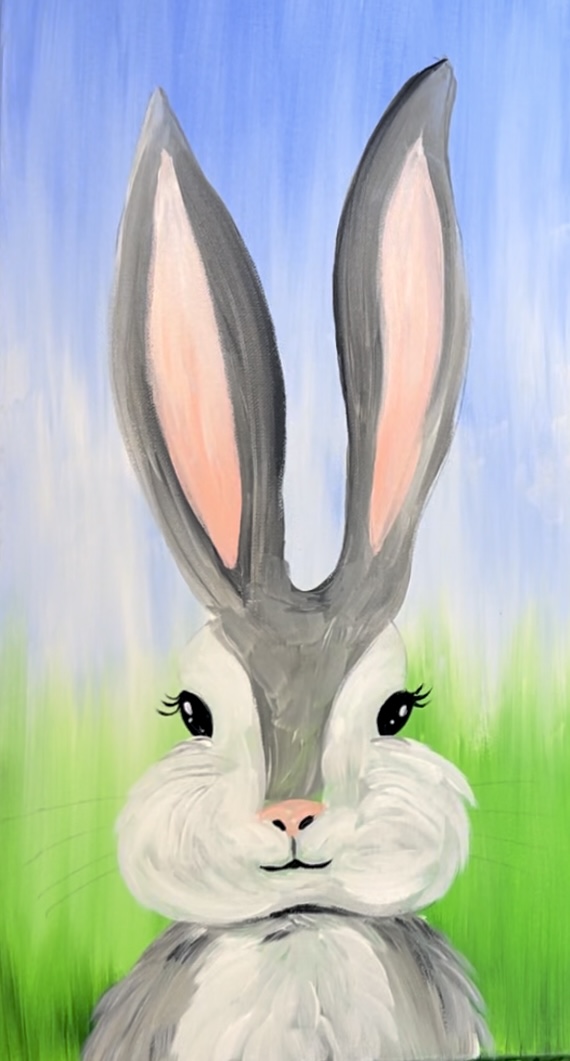
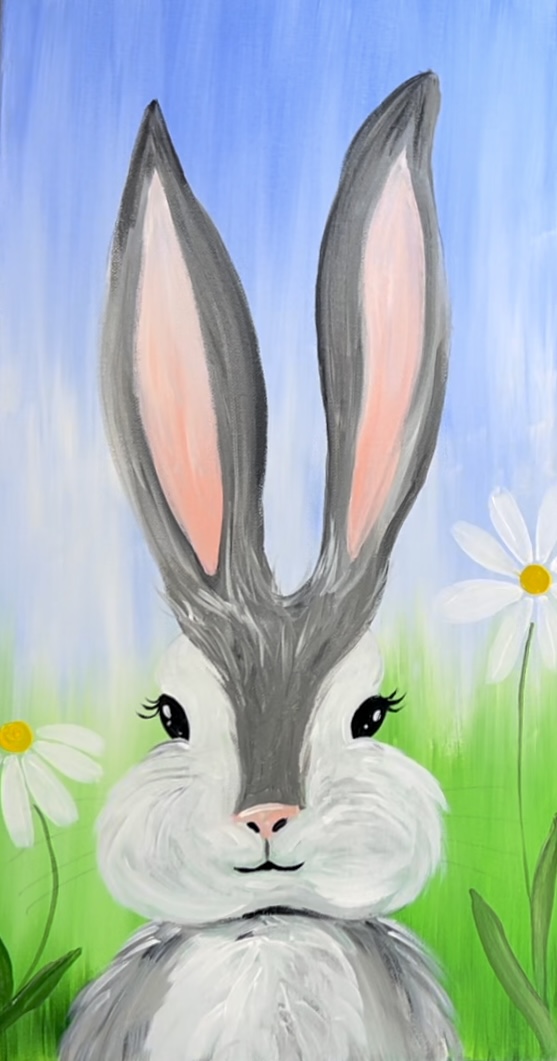
1. Paint Background
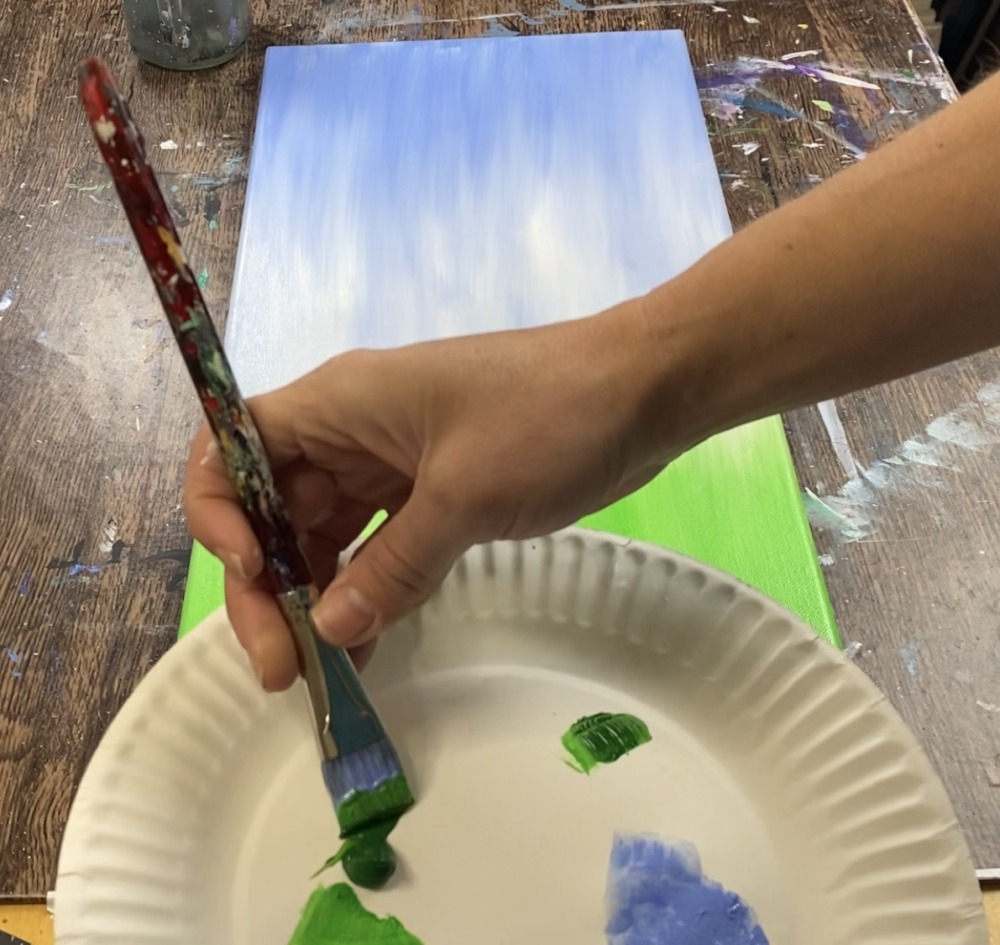
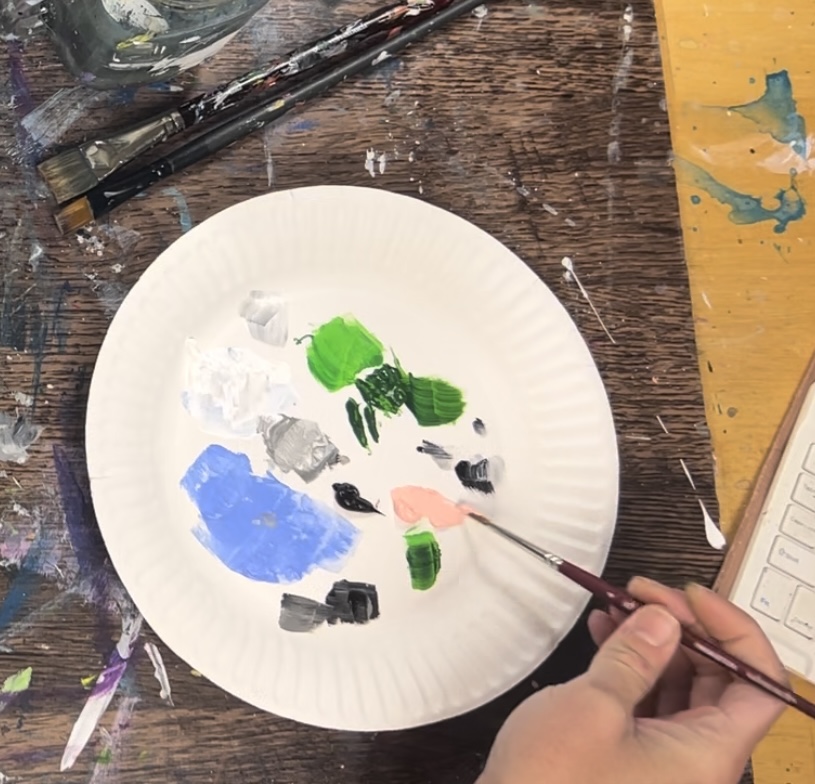
Load your palette with the colors: light blue violet, titanium white and light green permanent.
Use a 3/4″ flat wash brush. Start at the top of your 10 x 20 canvas. Paint full width vertical strokes with just the light blue violet color.
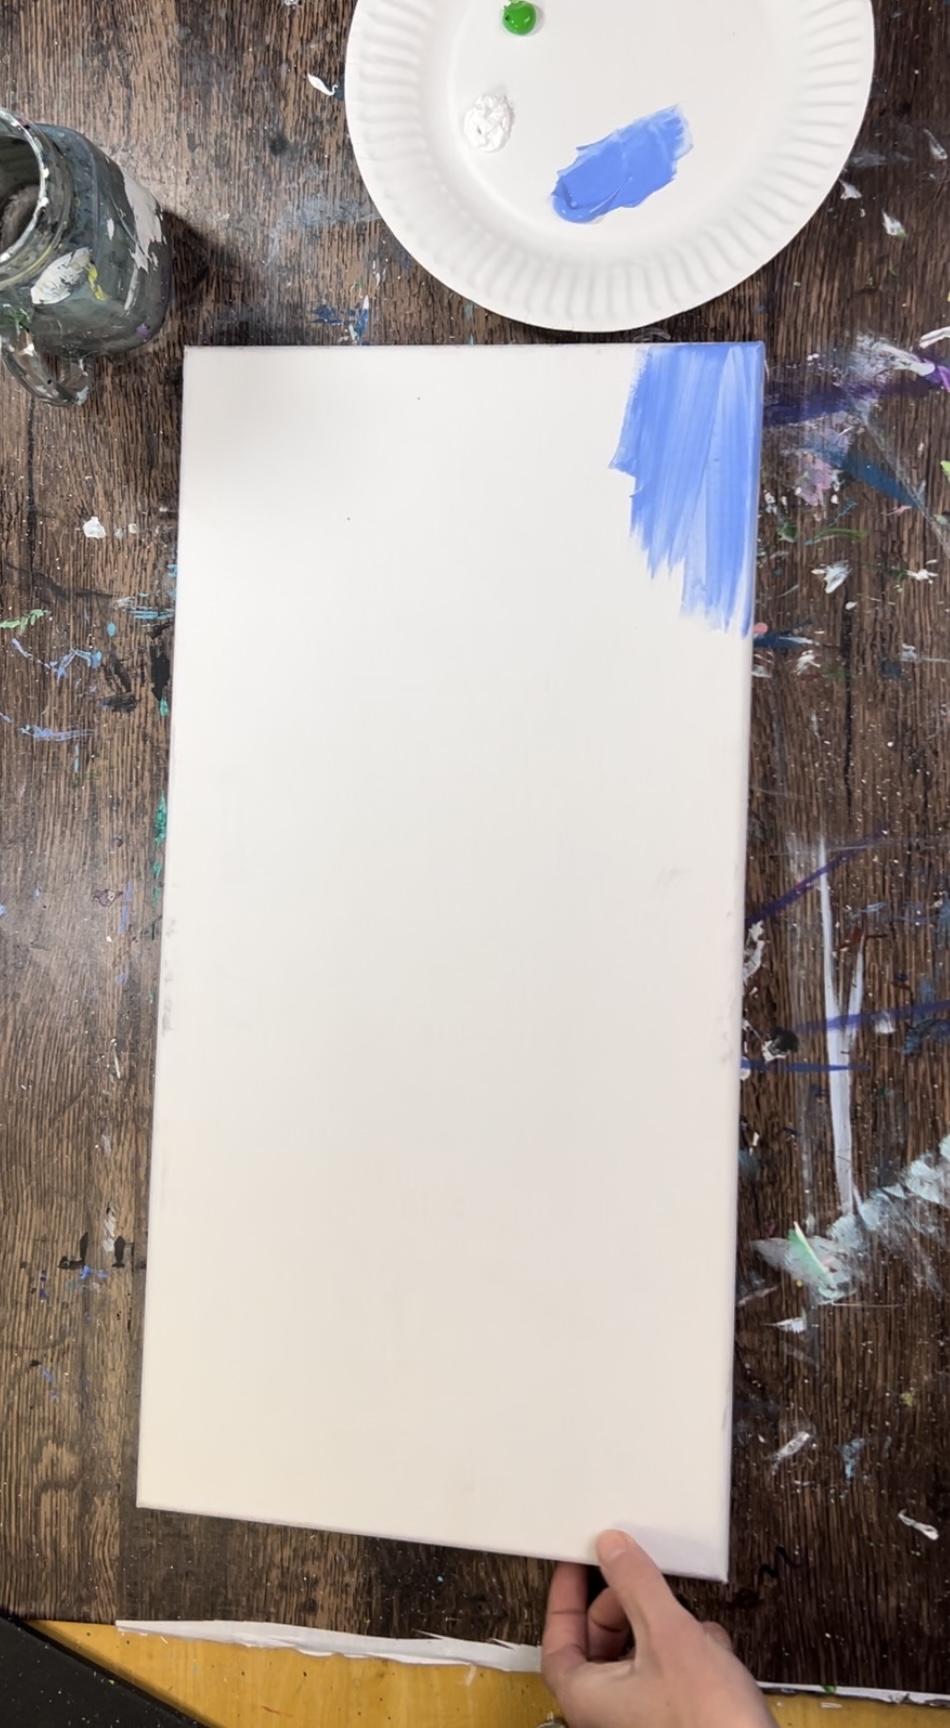
Go down to about a 1/3 of the top of the canvas. Then, without rinsing your brush, load a small amount of titanium white on the tip of the brush. Then blend white with the blue. Go down about another 1/3 of the canvas.
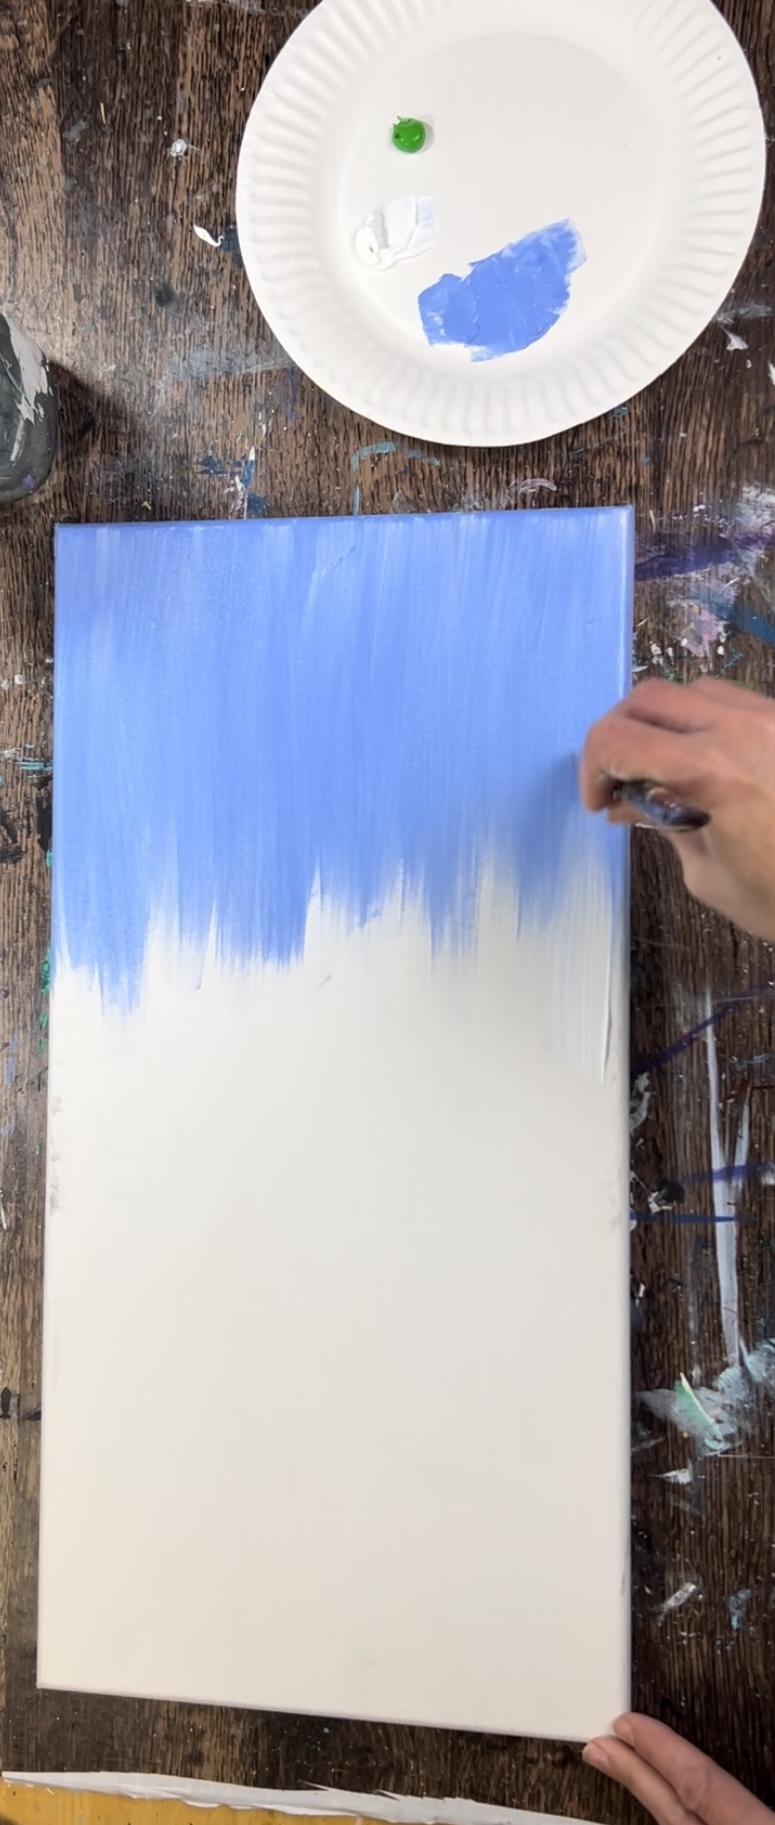
Allow the sky to get lighter as you work your way down. The blue and white do not have to blend smoothly together, it’s okay if there are streaks of un blended color. Add more white as you go down to the bottom portion of the canvas so that part is much lighter.
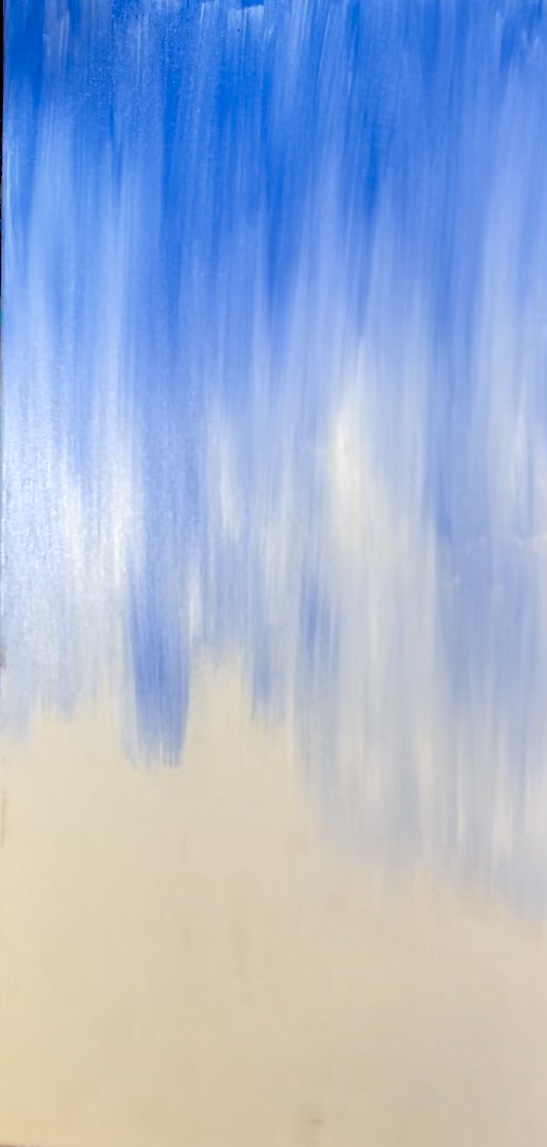
Next, wipe the paint off of your brush. Then load it into just the light green permanent color.
Then blend the green up into the white/blue area. Use full width vertical strokes with uneven edges at the top. It’s okay if the green blends with some of the white and blue. The green area is about 6″ high but does not have to be even throughout.
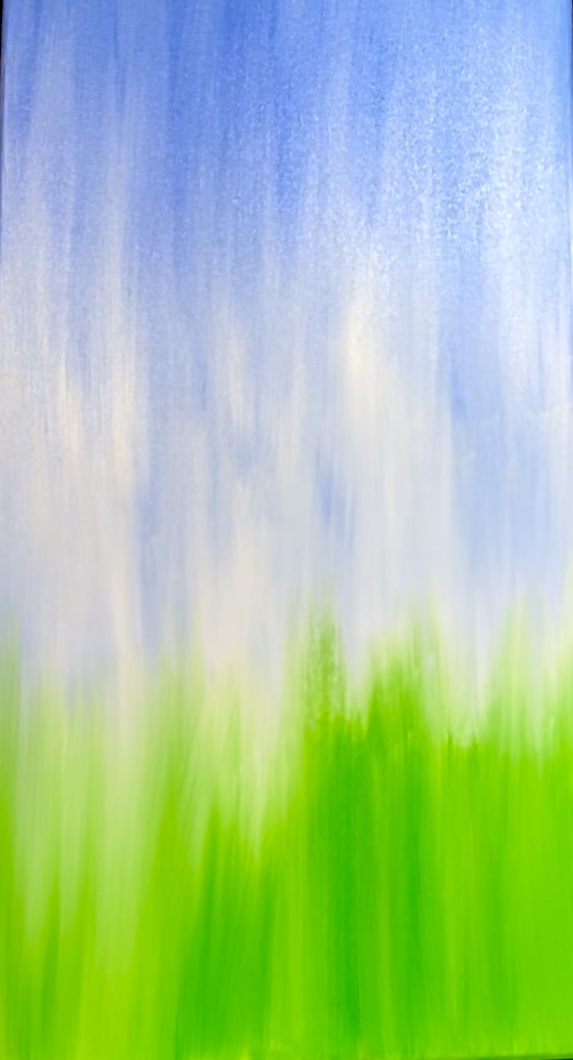
Next, load your palette with hooker’s green hue permanent. Add the dark green on the tip of your brush. Then paint that darker green color on the bottom edge of the canvas and drag it up into the rest of the color. Make sure that area is slightly darker.
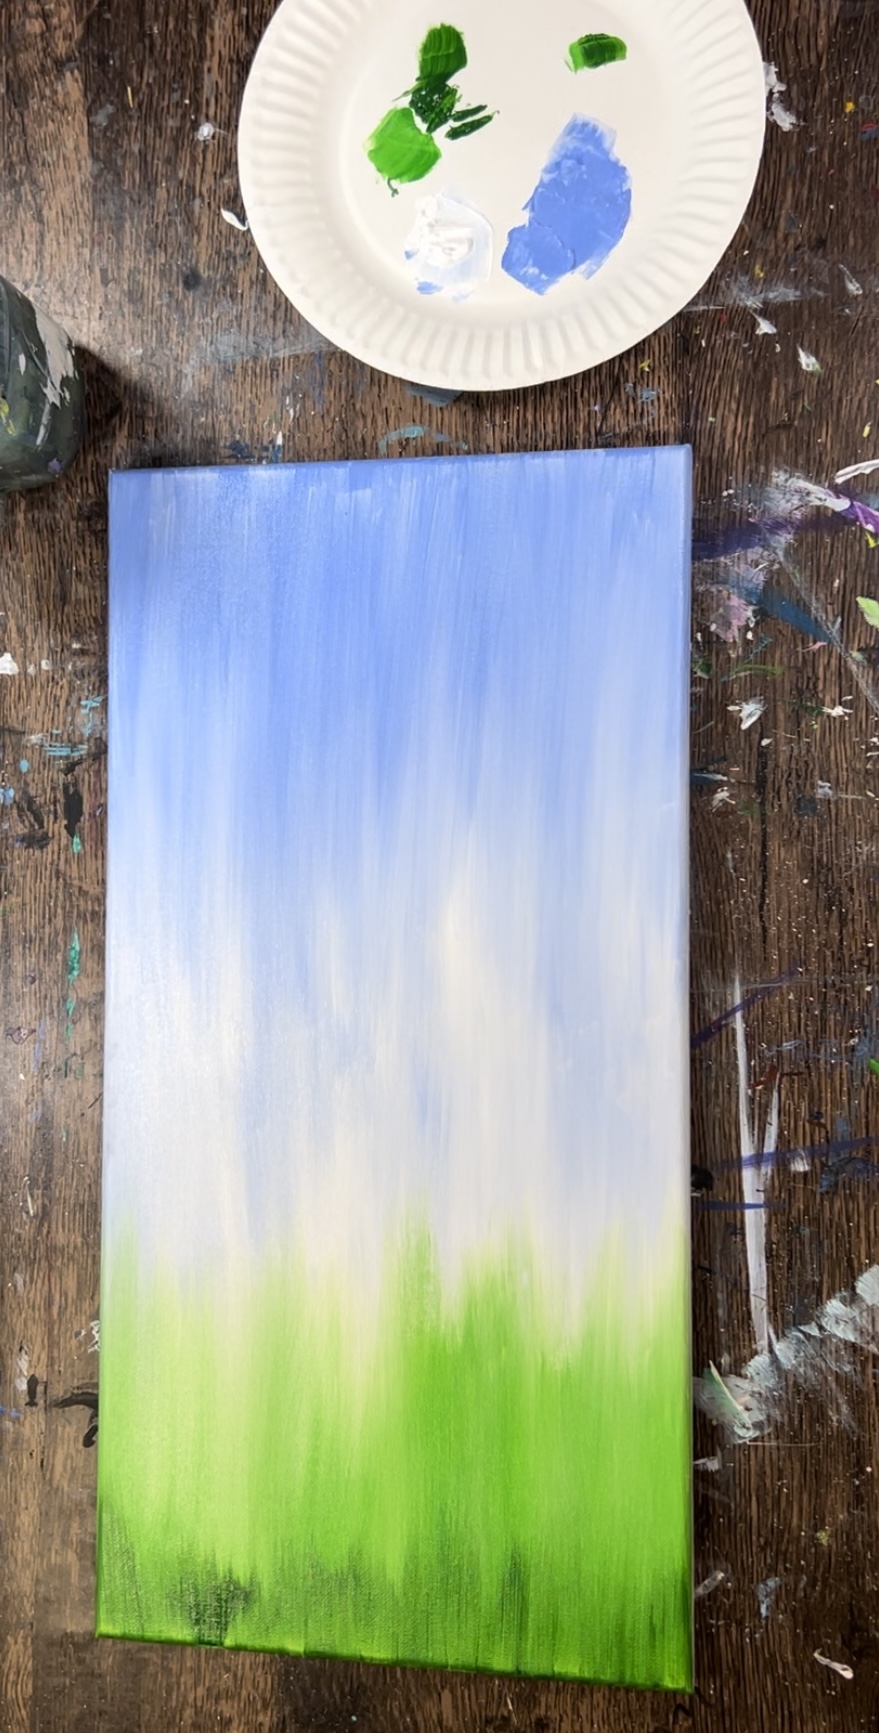
Let this dry before going onto the next step.
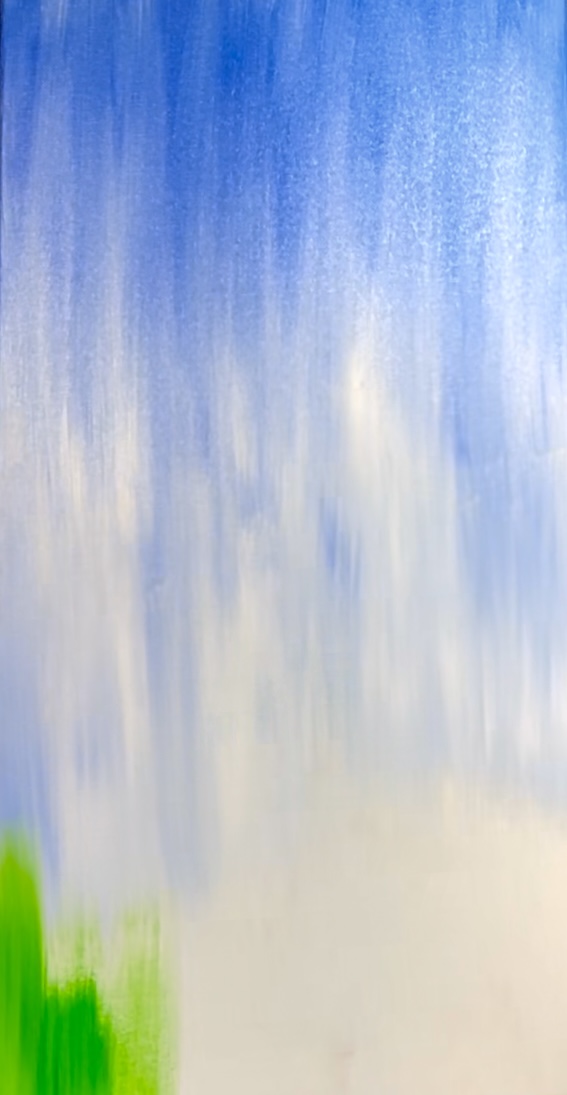
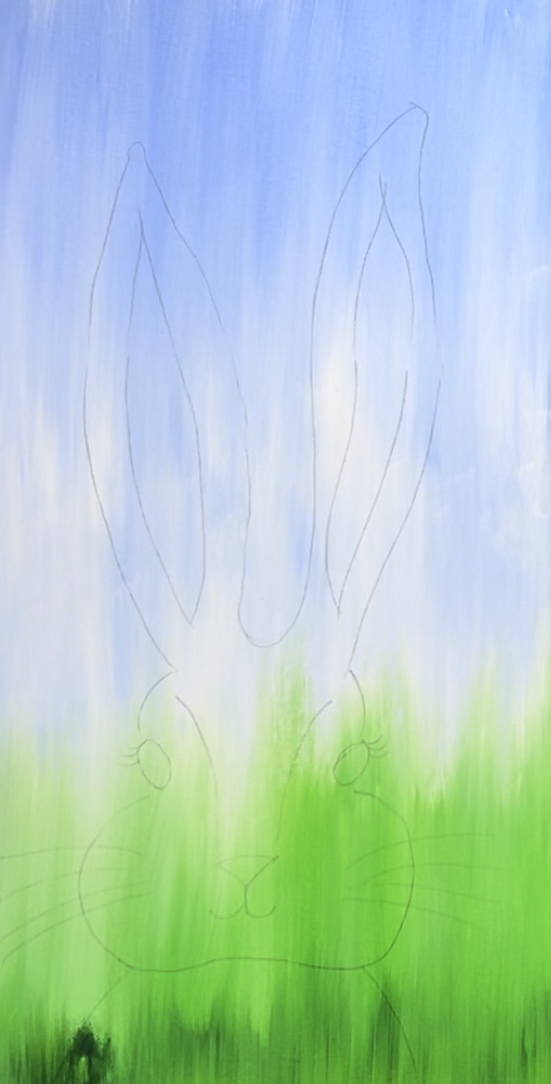
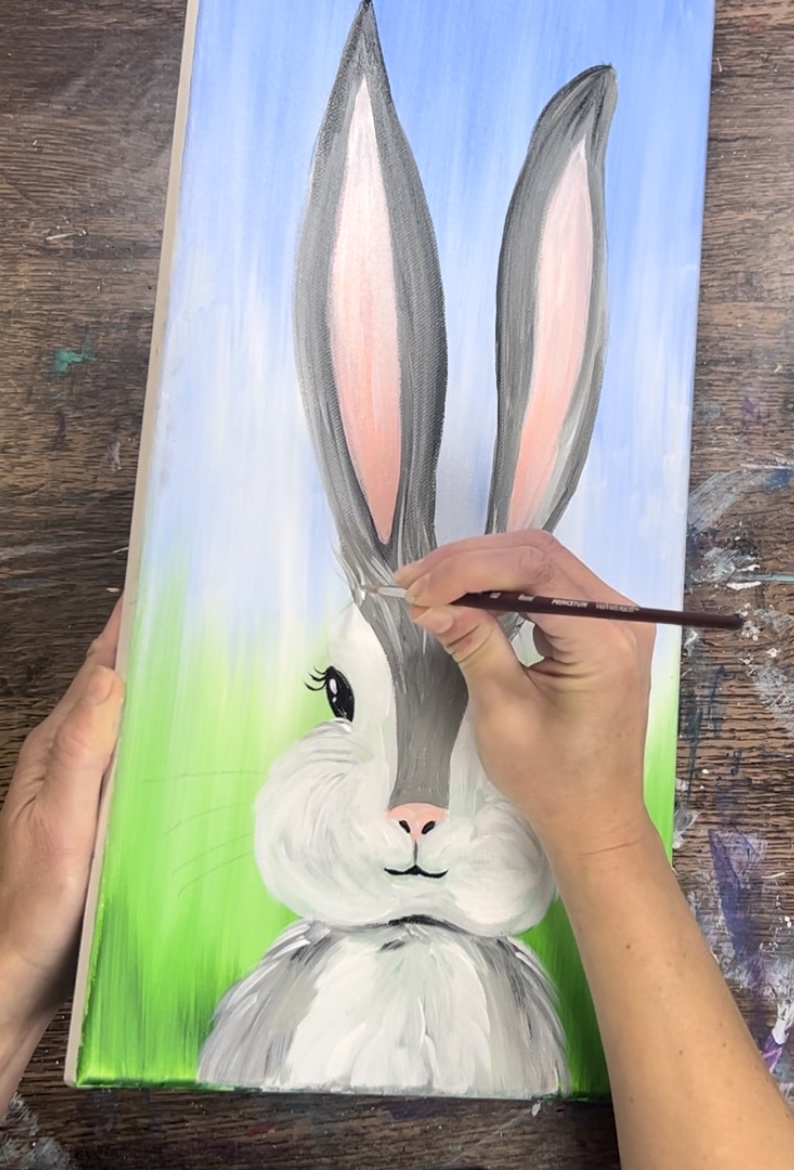
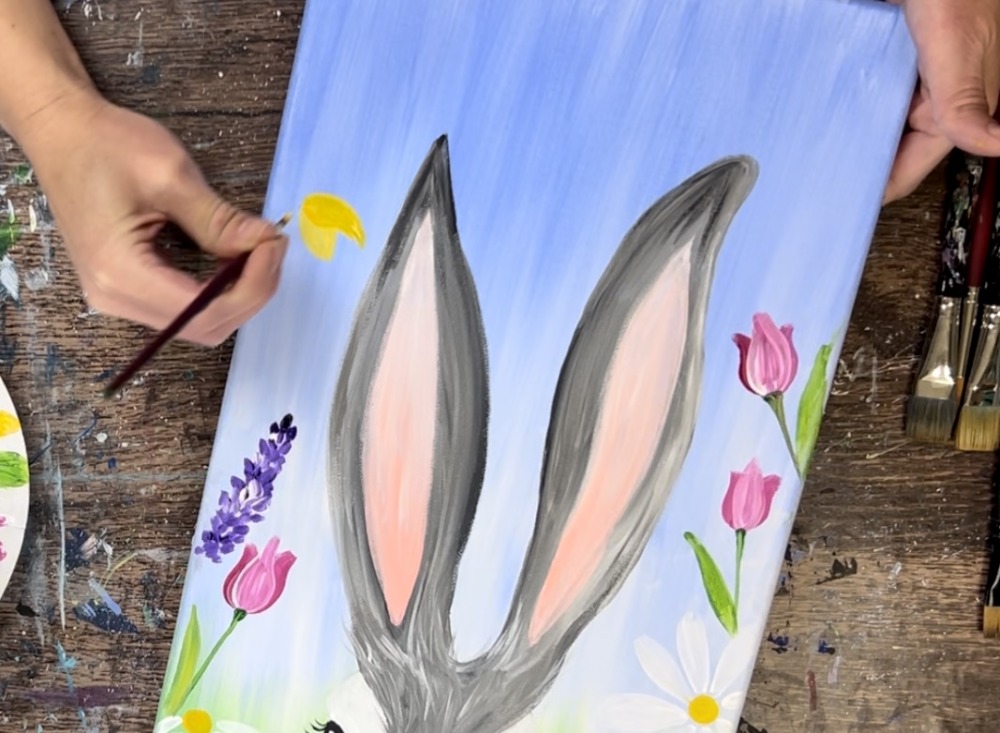
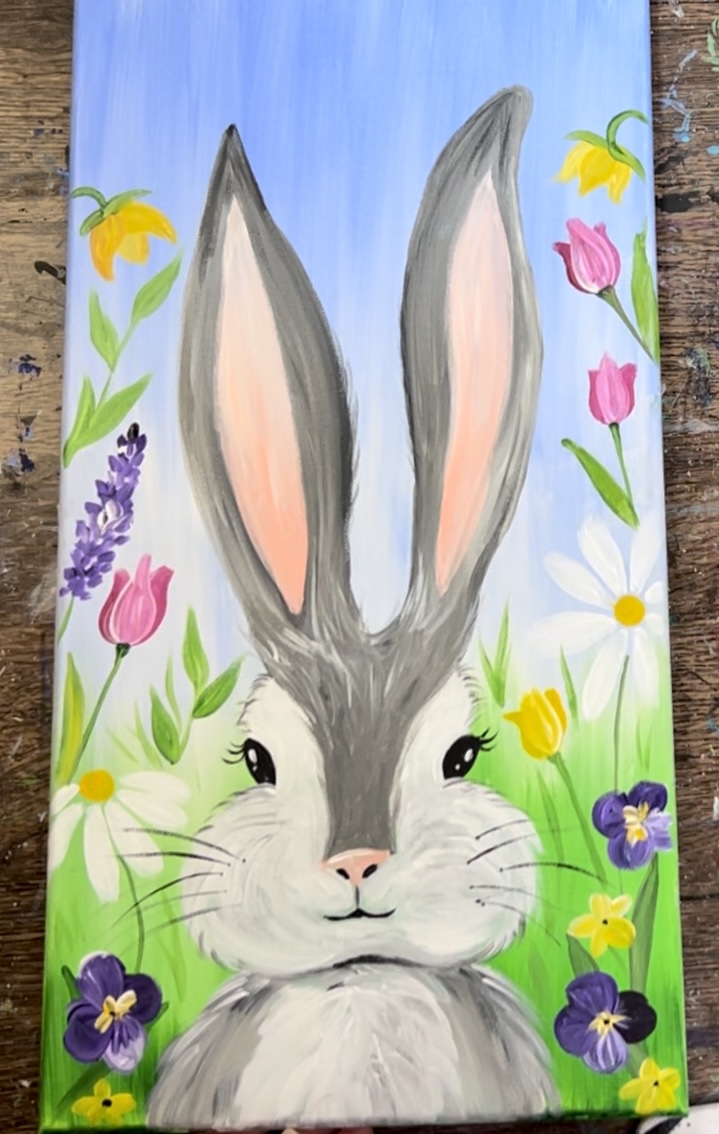
2. Transfer Bunny Template (or draw bunny)
Print the bunny template and tape the three sheets together. This will allow it to fit on the 10 x 20 canvas. Position the bunny so that it is lined up with the bottom of the canvas. There will be about 4″ of space above the ears.
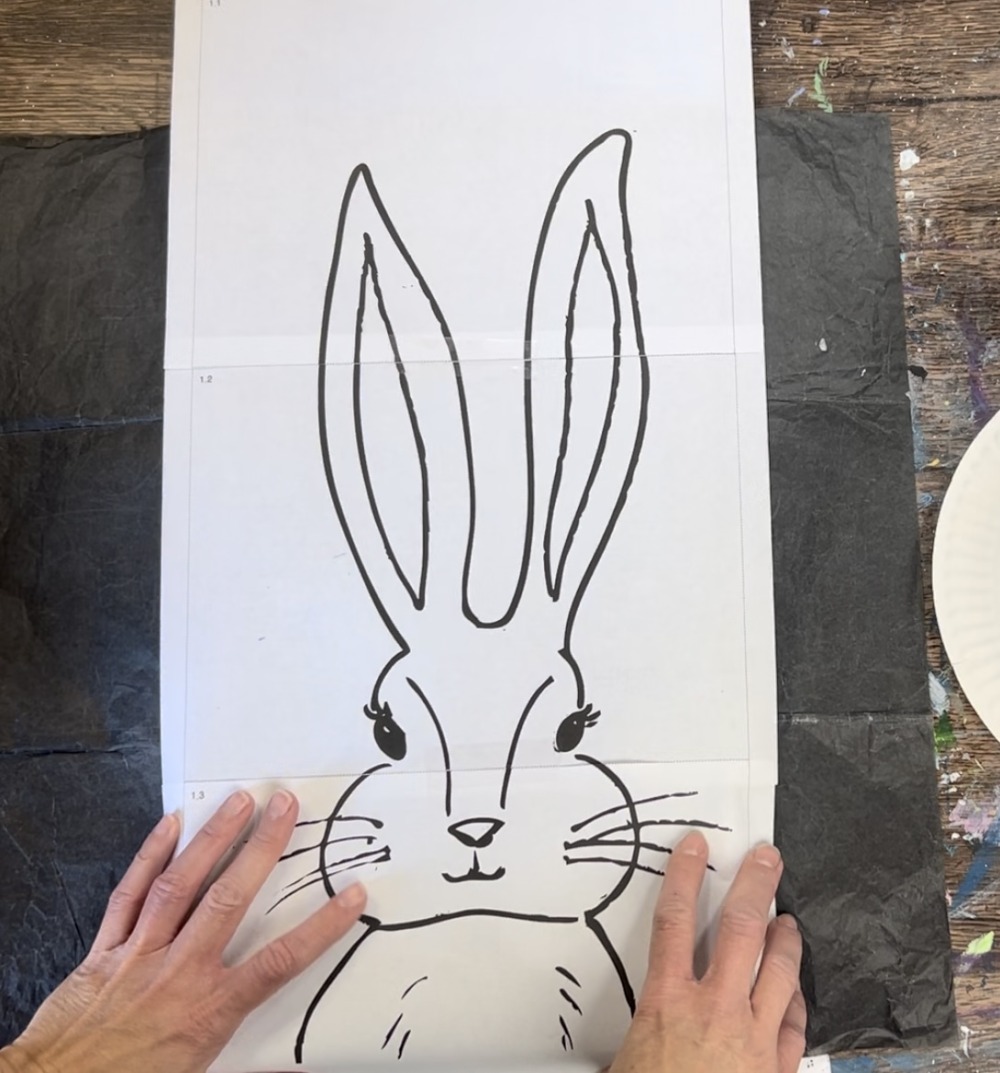
Place a sheet of graphite paper below the bunny template and then trace the design so that it transfers to the canvas.
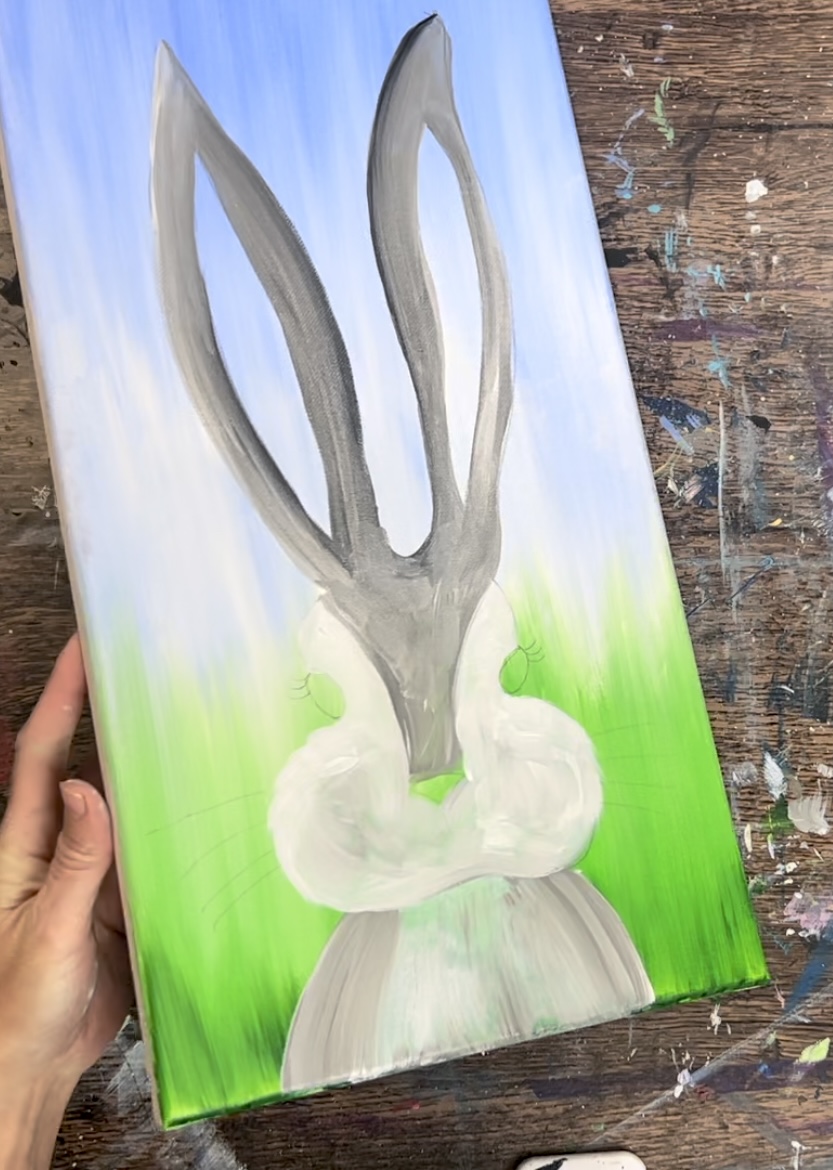
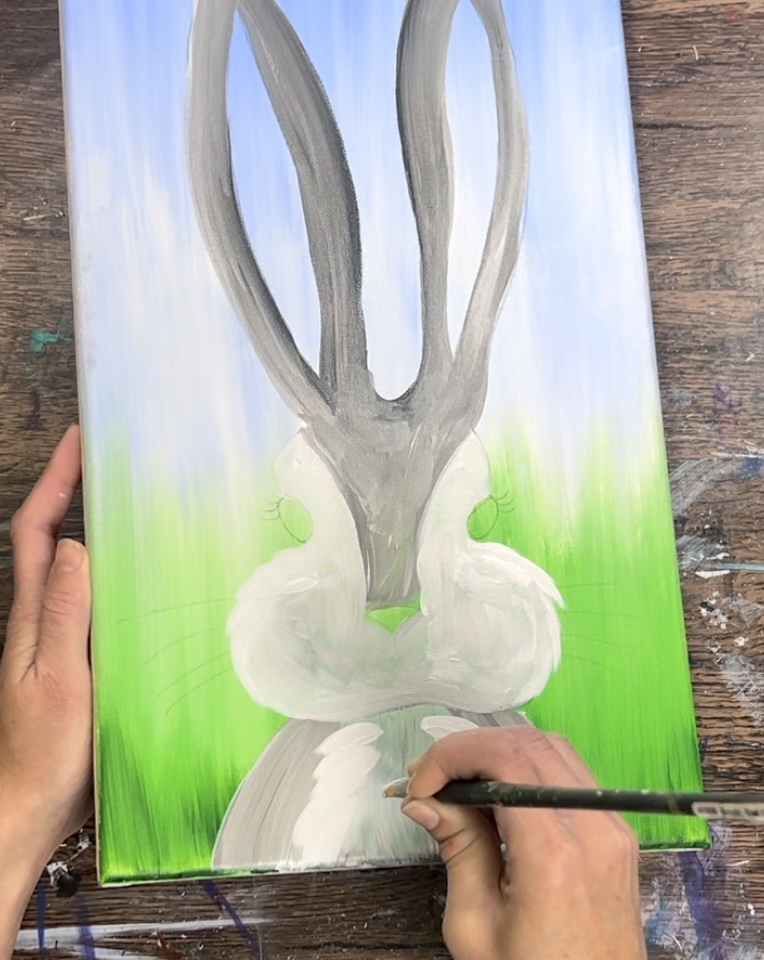
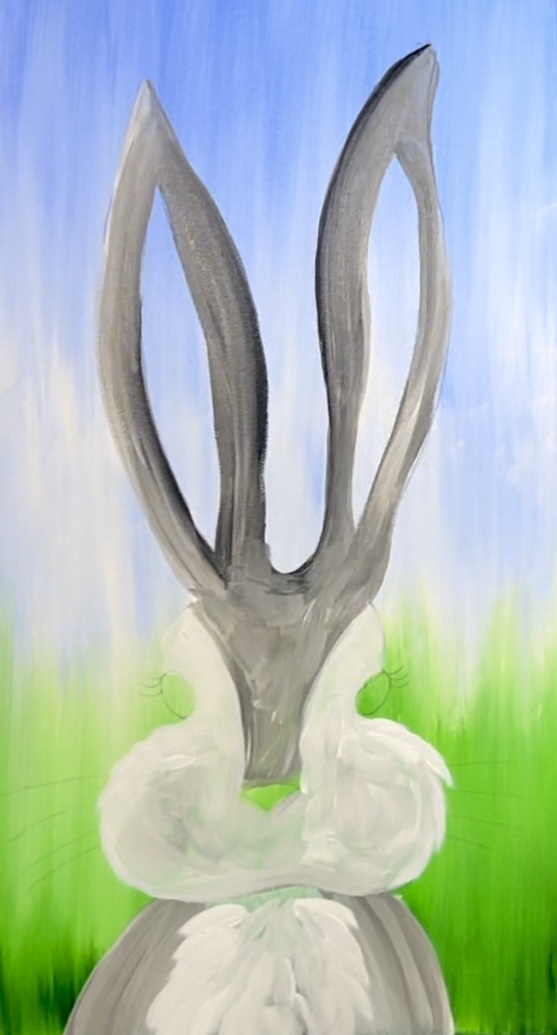
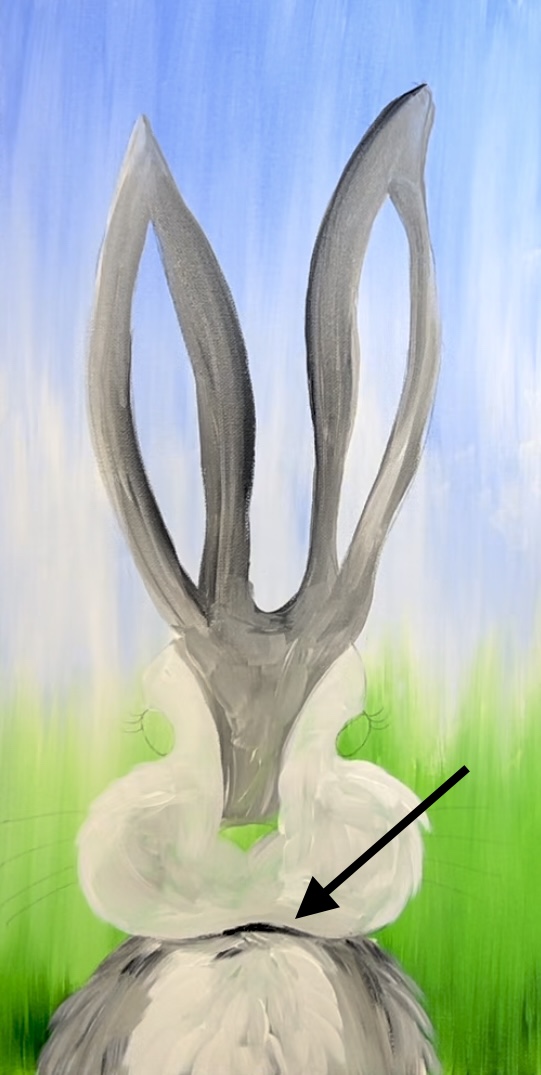
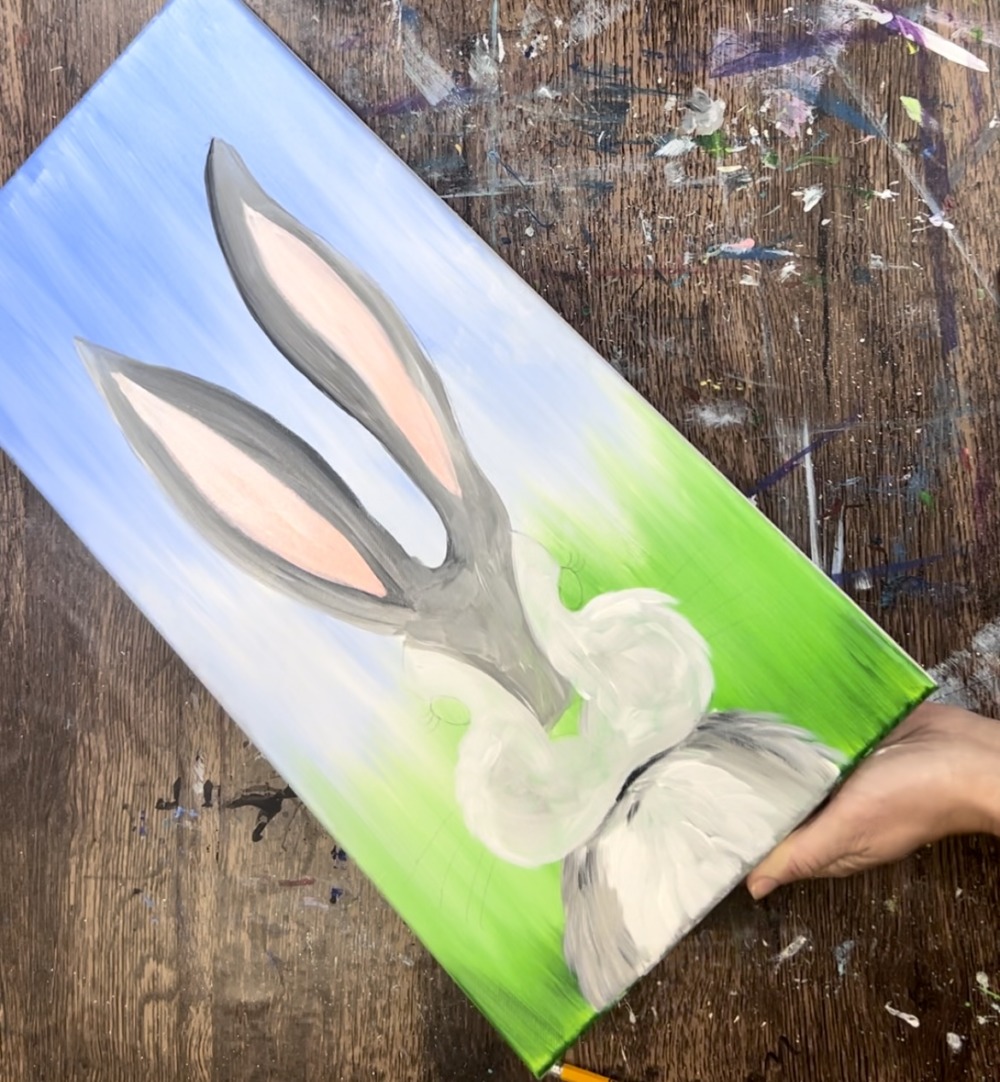
3. Paint Body and Ears
Load titanium white and neutral gray value 5 onto your palette. Use the 3/4 flat brush to paint the body/chest area of the rabbit. Paint a solid coat of the white.
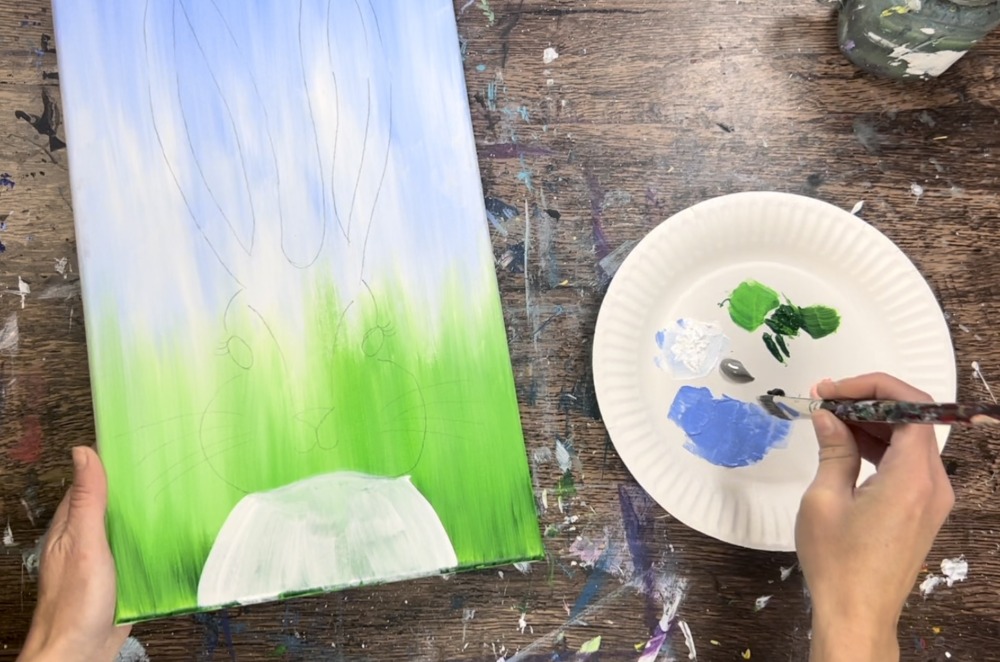
Then load your brush into neutral gray value 5. Paint the left and right side of the rabbit but leave the center part mostly white.

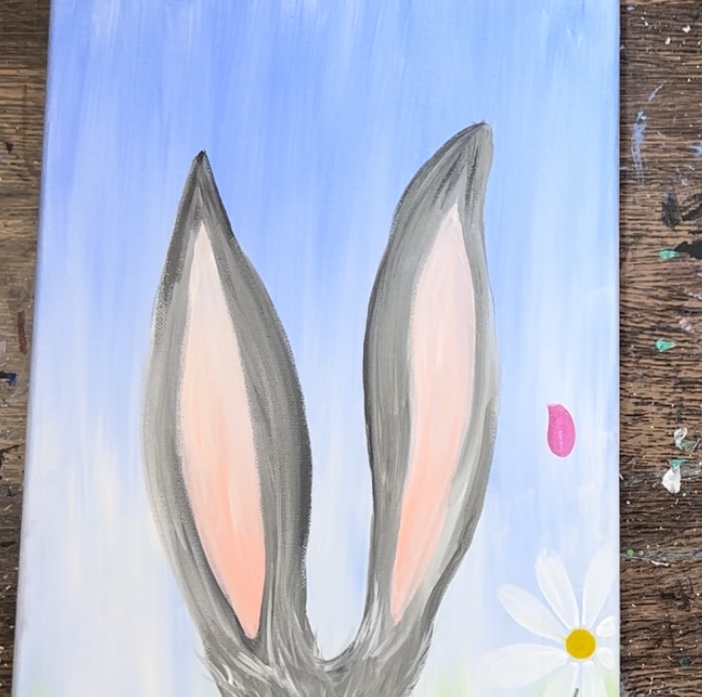
Use a #12 bright brush (1/2″ flat) to paint the ears. Load your brush in just the neutral gray value 5 color at first. Paint the ear but leave the inner part blank.
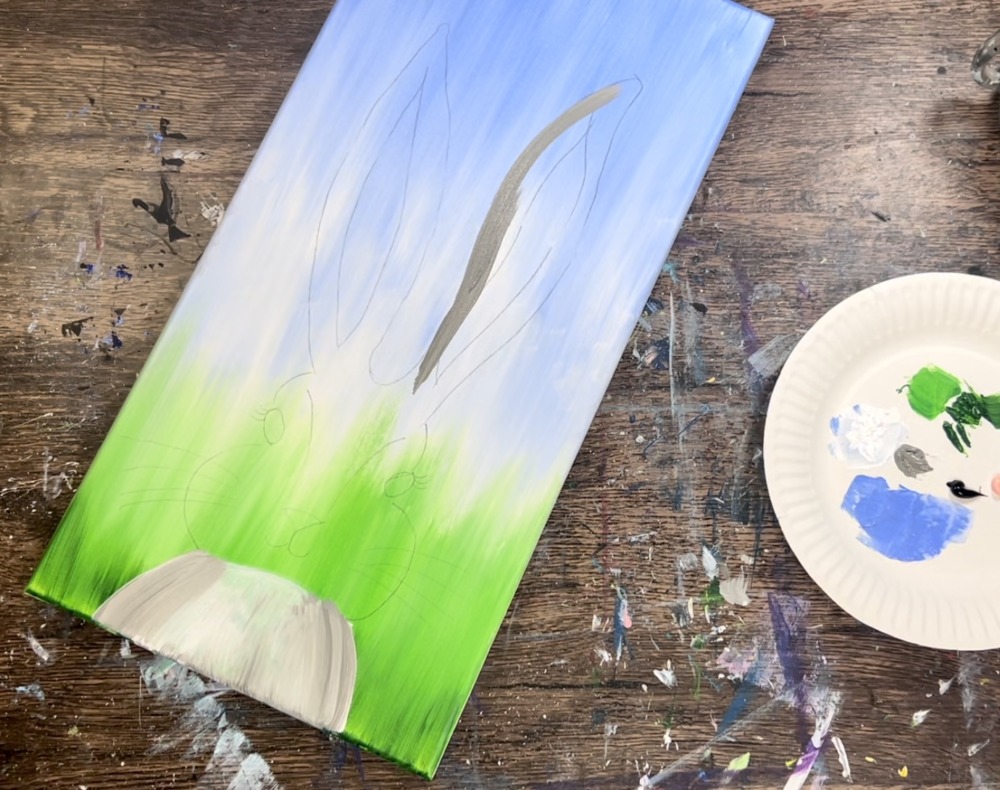
Add a little black to the brush and blend some of the black into the gray along the edges of the ears.
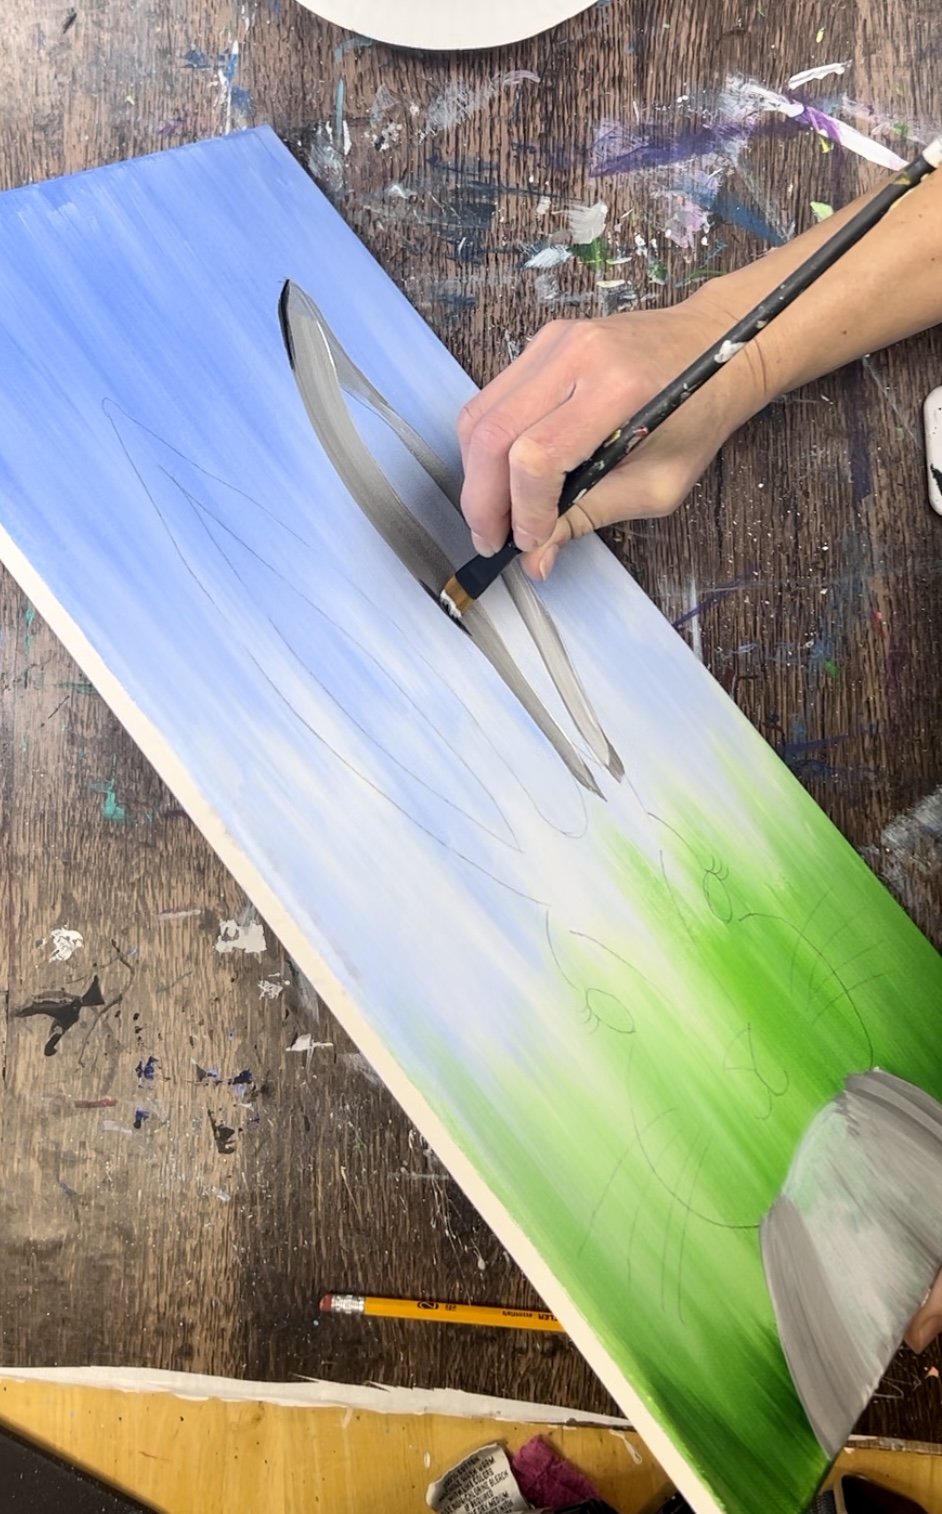
Add a little titanium white into the gray as well and blend it in. Then paint the second ear.
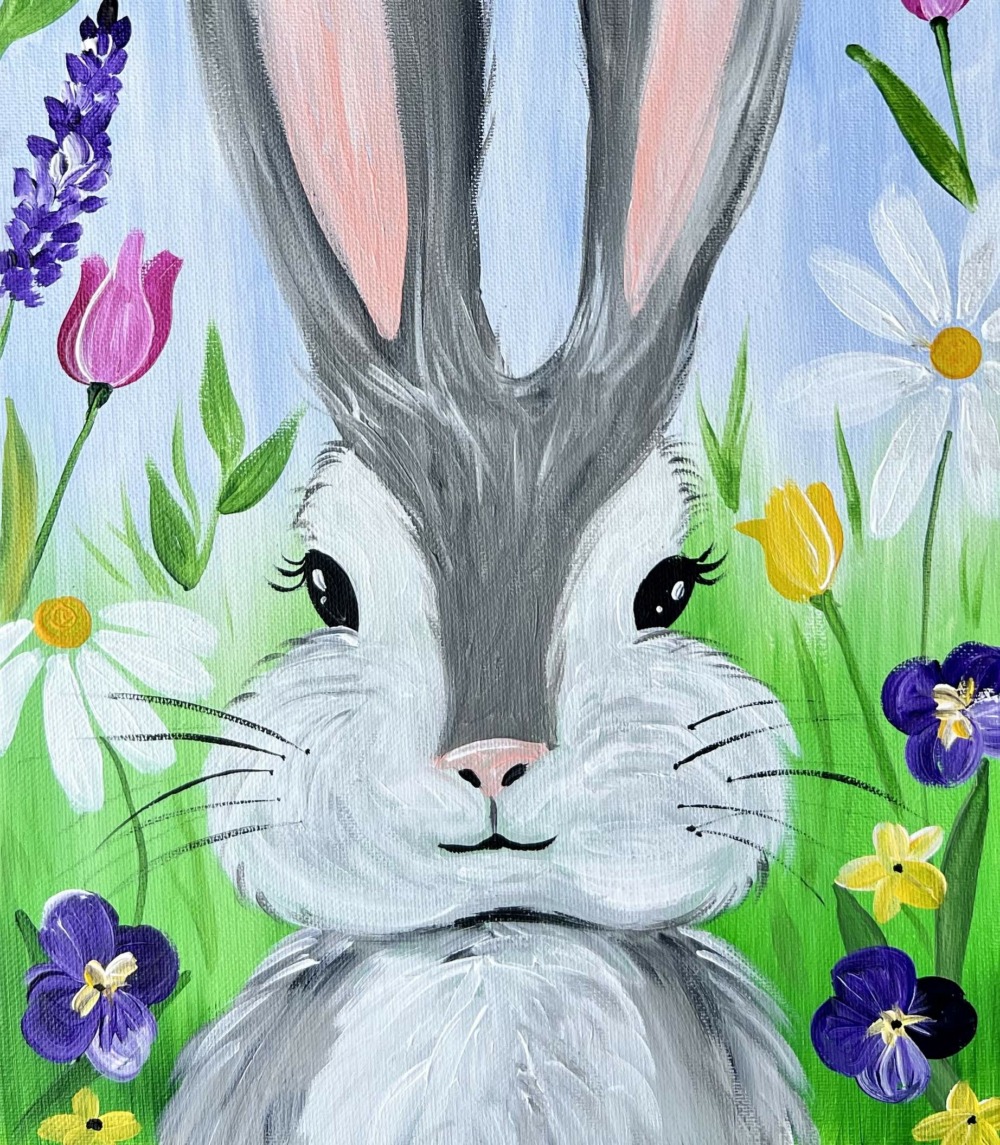
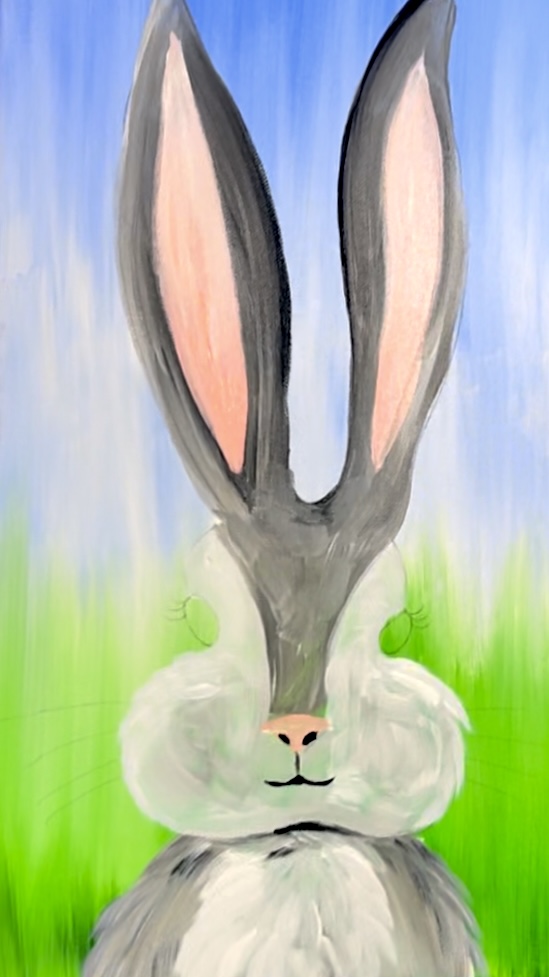
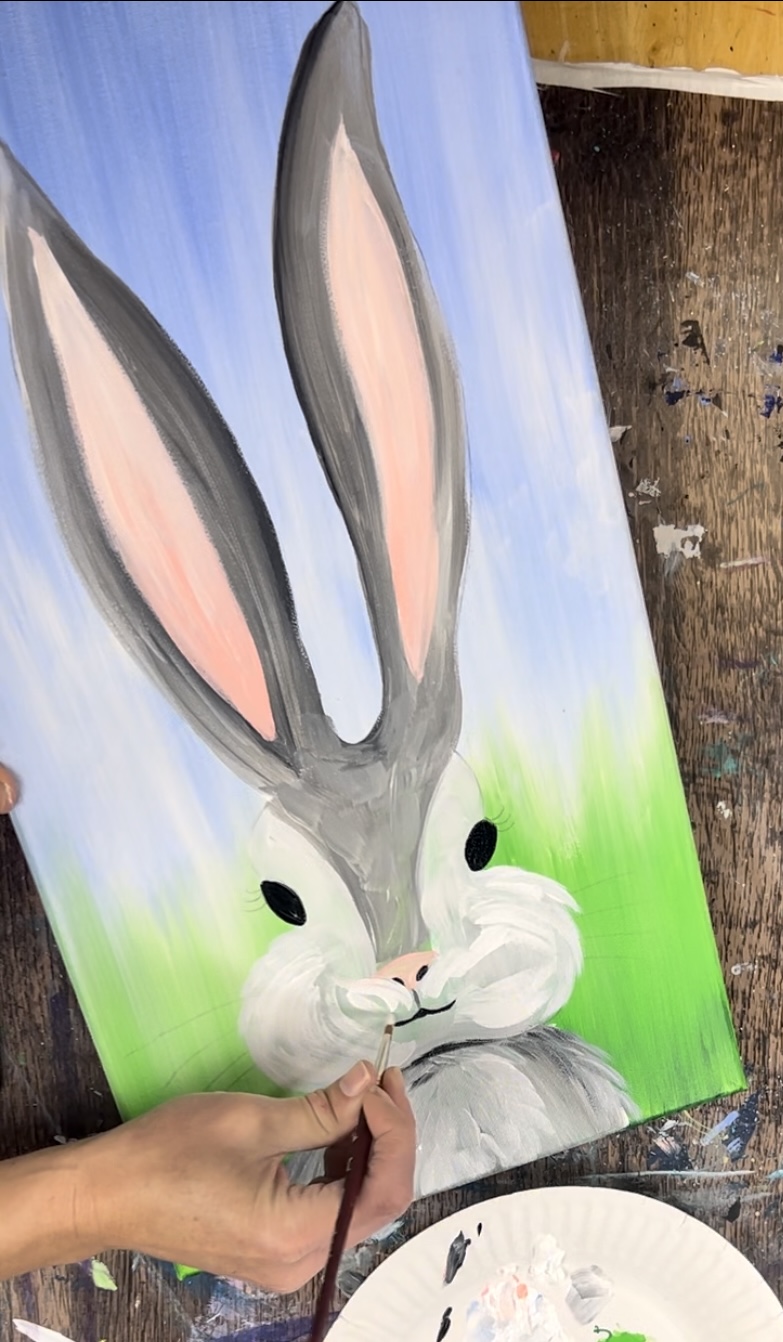
4. Paint Head
Use the #12 bright brush and the neutral gray value 5 to paint the bridge of the nose in the face area.
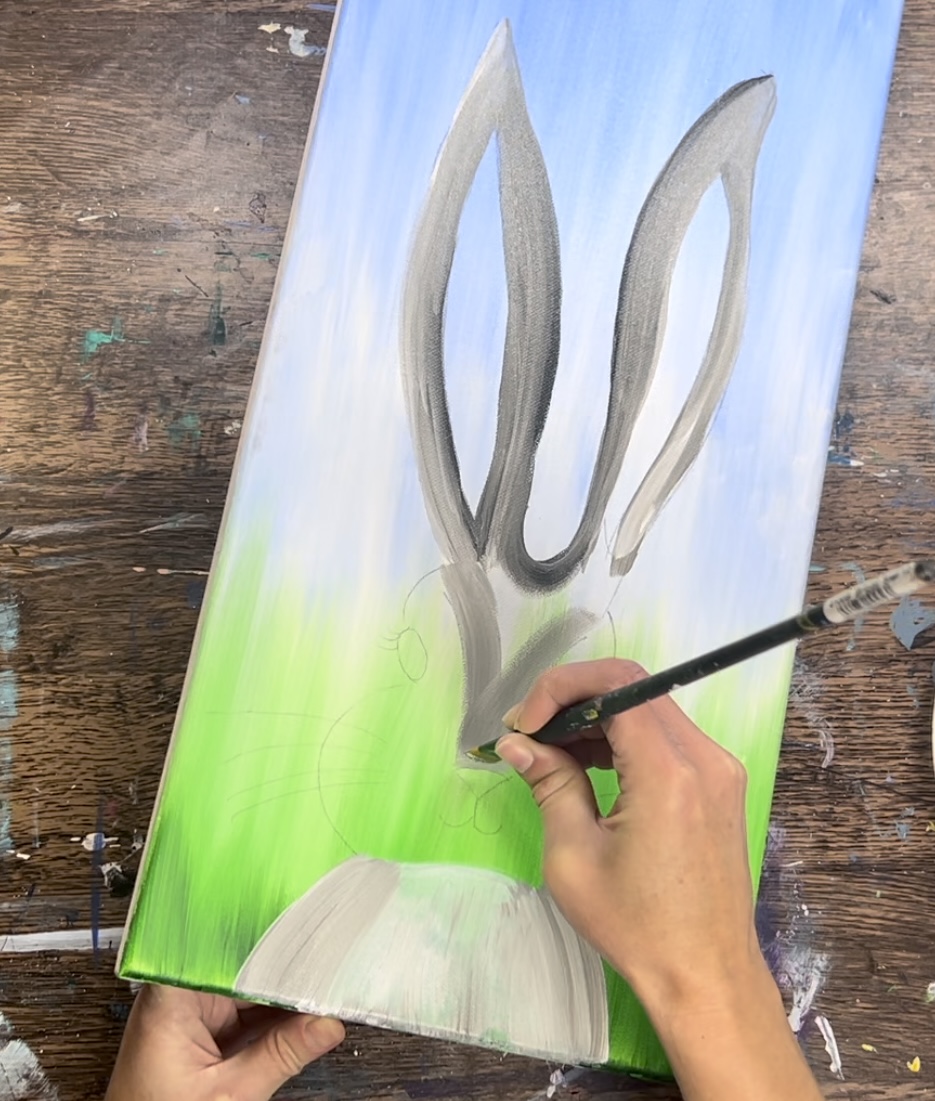
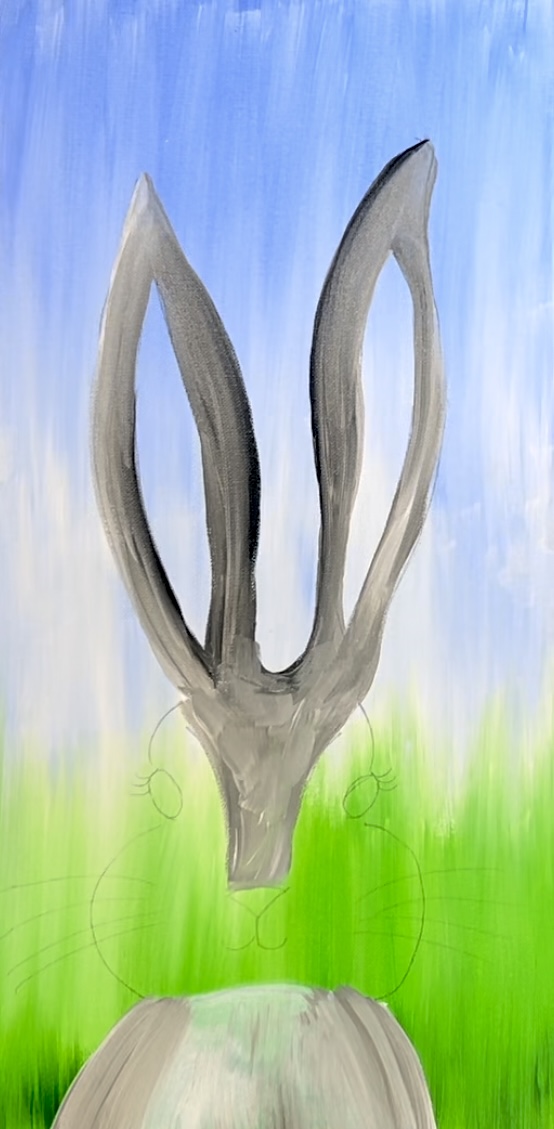
Then wipe the brush. Load it into just titanium white and paint the cheeks and everything around the nose and eyes.
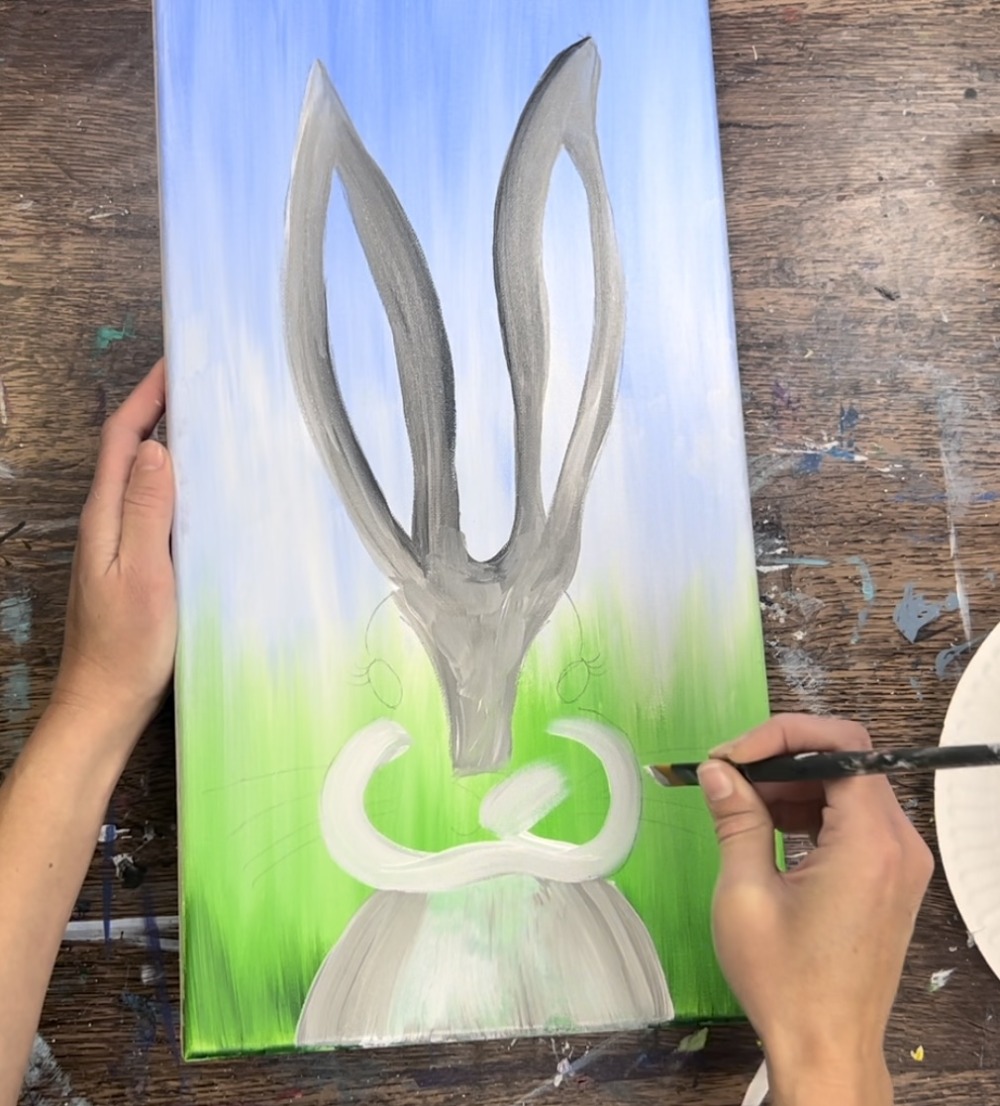
It’s okay if this white turns slightly gray but make sure it is lighter than the gray on the ears and above the nose. Paint in short, sort of choppy strokes to create some fur texture.
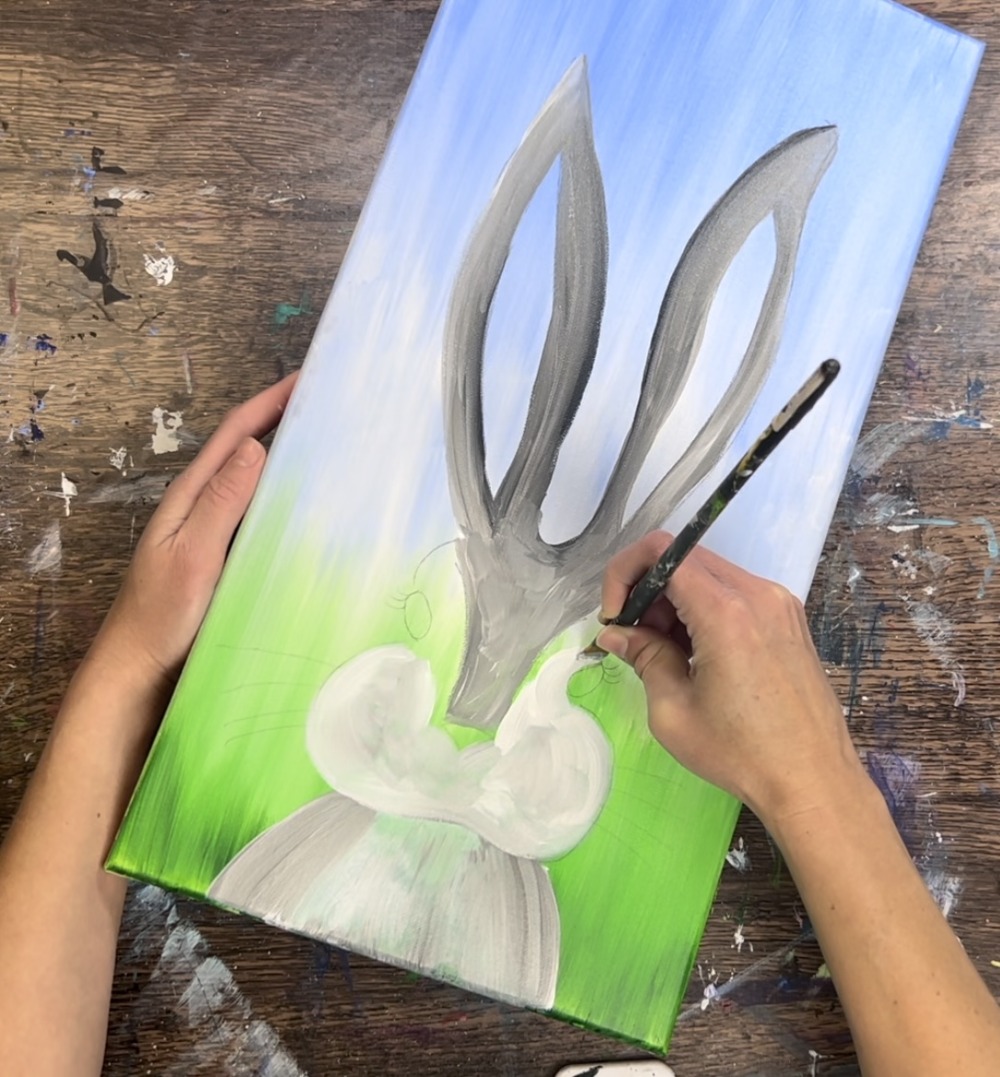
Paint around the eyes.
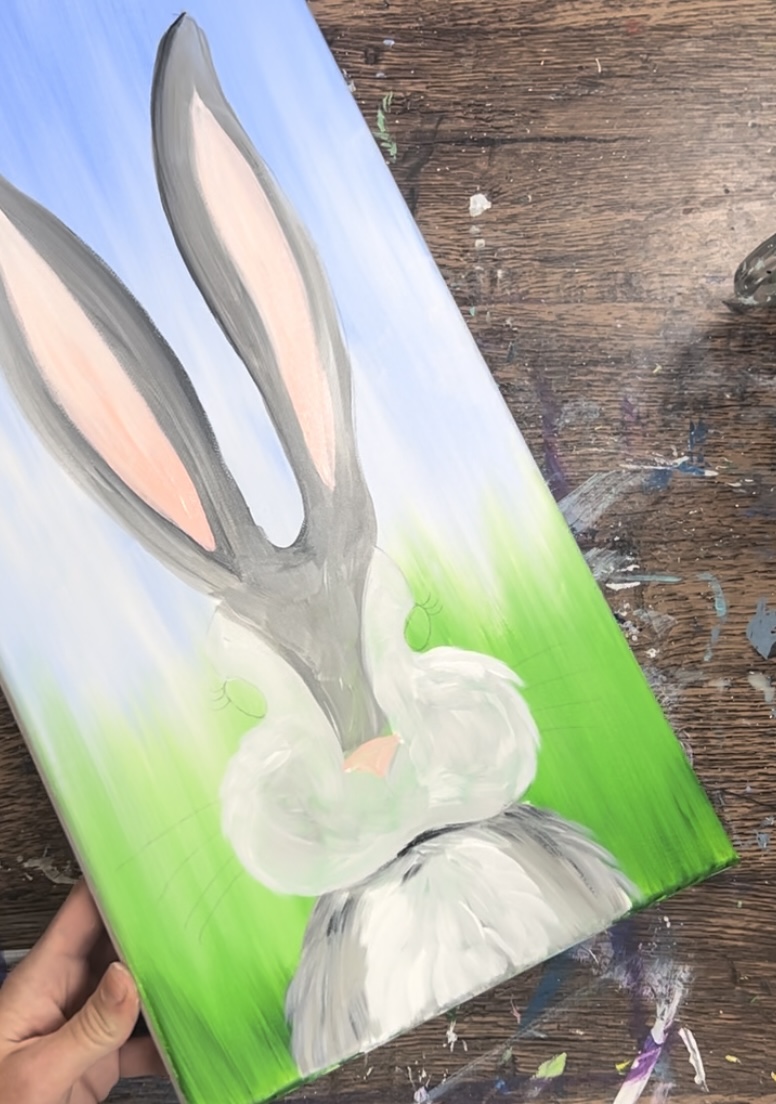
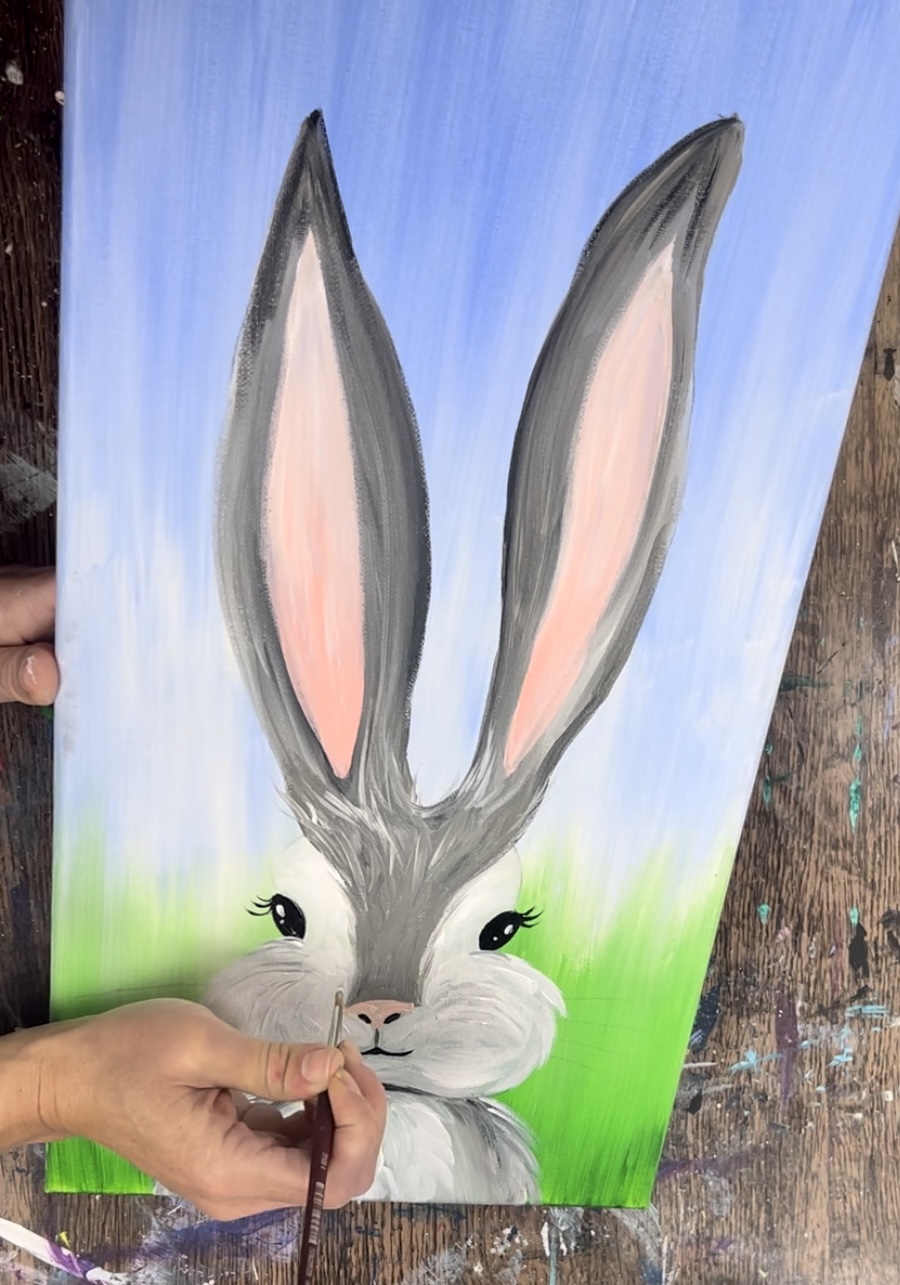
5. Add Fur Texture
Use titanium white and the 12 bright brush. Load the white just on the tip of the brush. Then paint short, angle choppy strokes in the chest area of the rabbit. Allow some of the strokes to overlap parts of the gray.
Next, add a very small amount of black to your brush and add a tiny bit of black in the area under the checks. Do very short strokes that blend with the white. If it is too dark, add some white to it to make it more of a darker gray.
6. Paint Inside Ear
Load your palette with light pink. Use the #4 round brush and mix a small amount of white into the pink.
Then paint the inside of the bunny’s ears. Allow the pink to blend to different tints (some darker, some lighter).
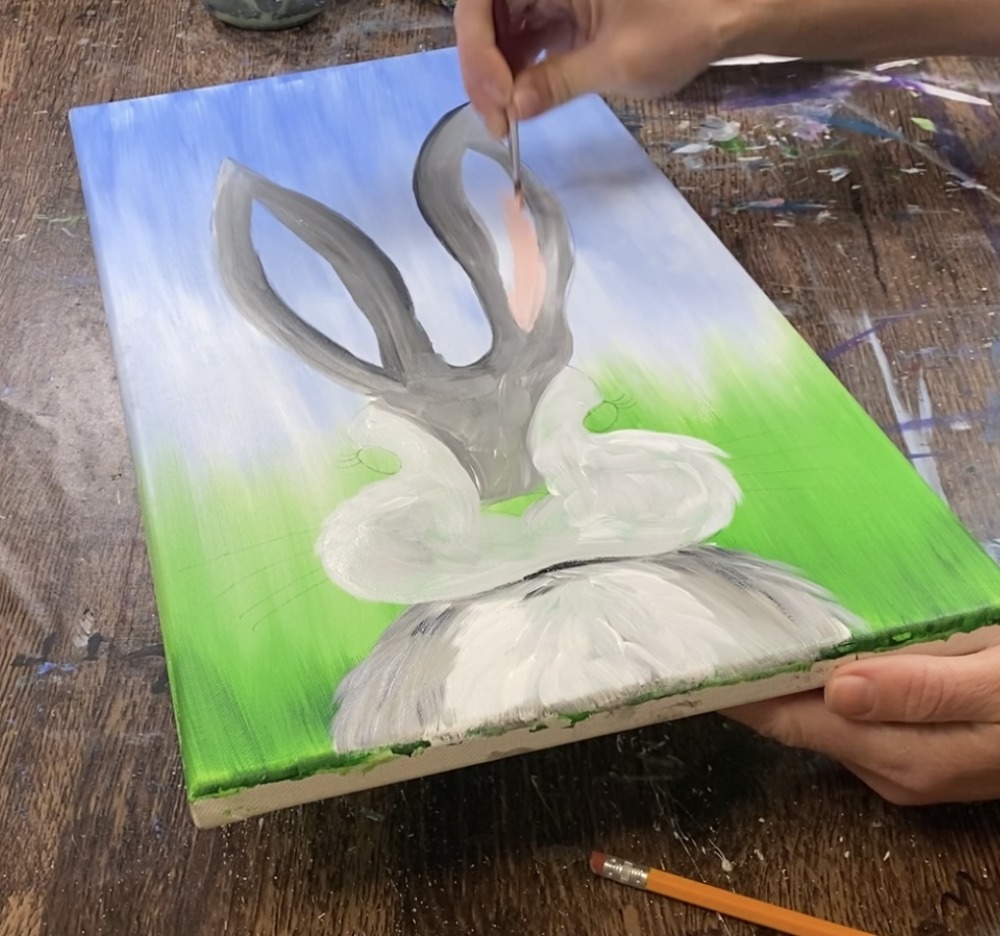
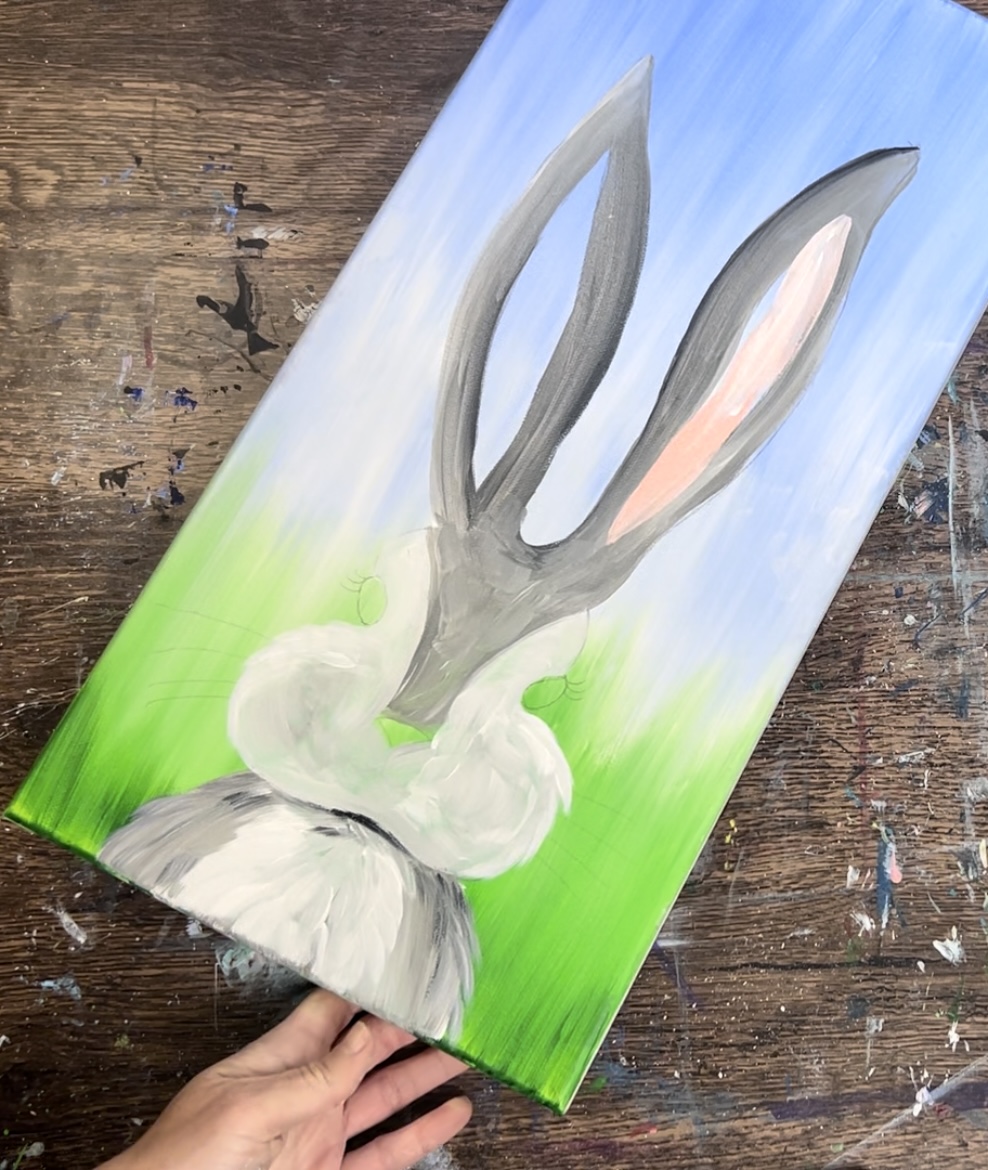
Paint both of the inside of the ears.
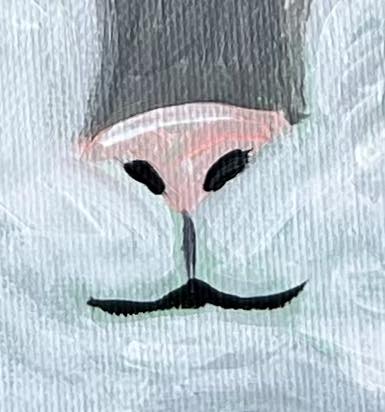
7. Paint Nose & Mouth
Then paint the nose with the light pink.
Next, load a very small amount of black on the tip of your brush and paint a very thin vertical line just under the nose. Also, paint two curved strokes on the bottom of the nose for the nostrils.
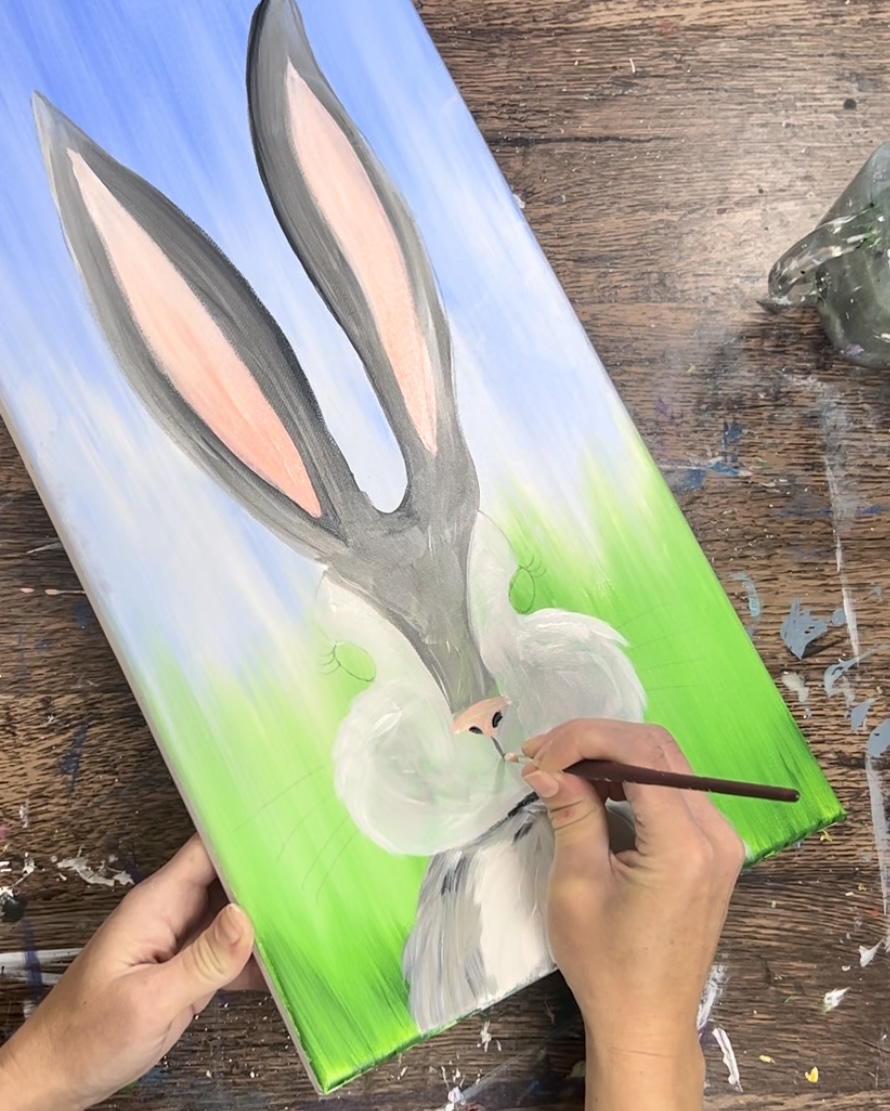
Then paint the mouth by painting two curved lines that attach to the vertical line.
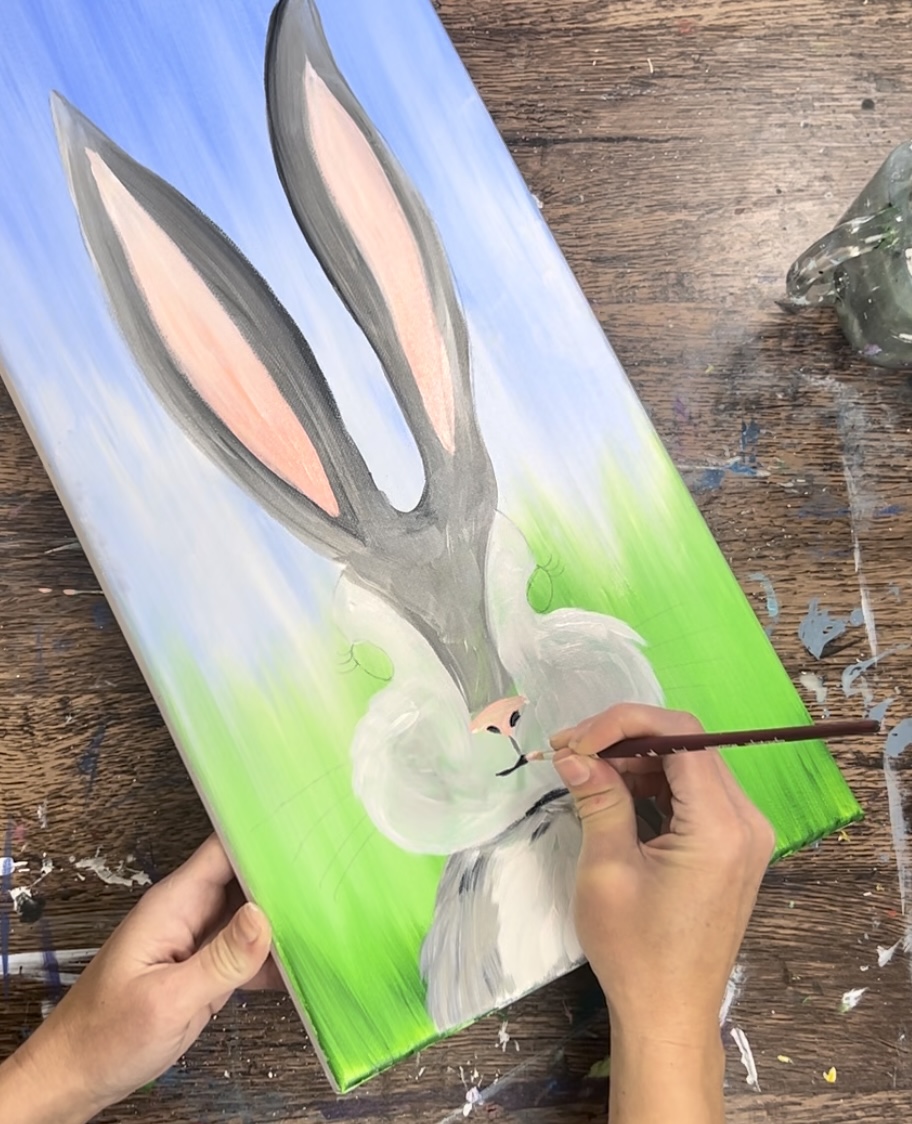
Add a little extra black in the center just under the vertical line.
Tip: if the #4 round brush is too thick of a brush for this step, try using a very thin round brush or a black paint pen.
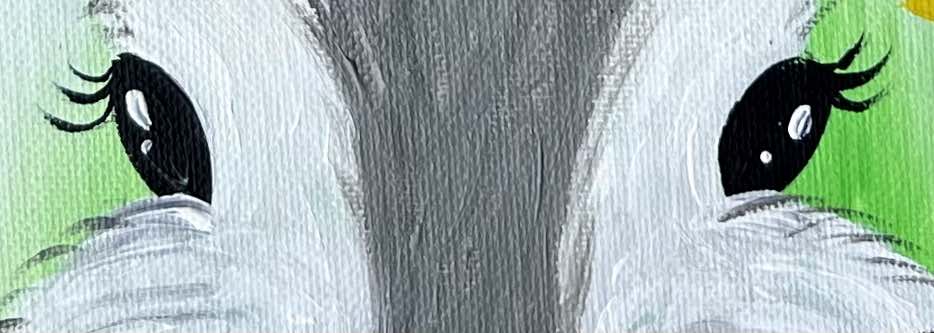
8. Paint Eyes
Next, paint the two eyes solid black. These are two ovals that go in a diagonal direction outwards on the side of the head.
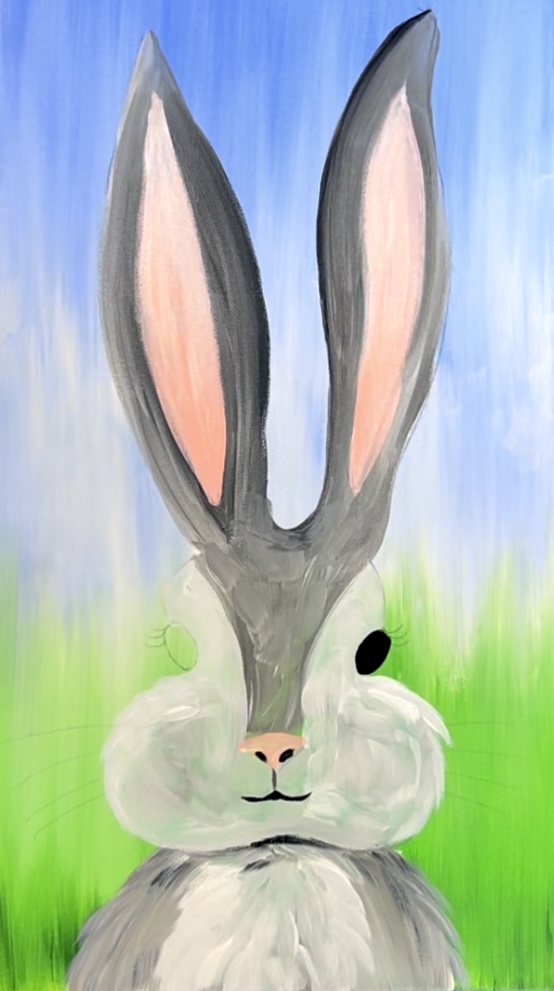
Let this dry before doing more detail work on the eyes.
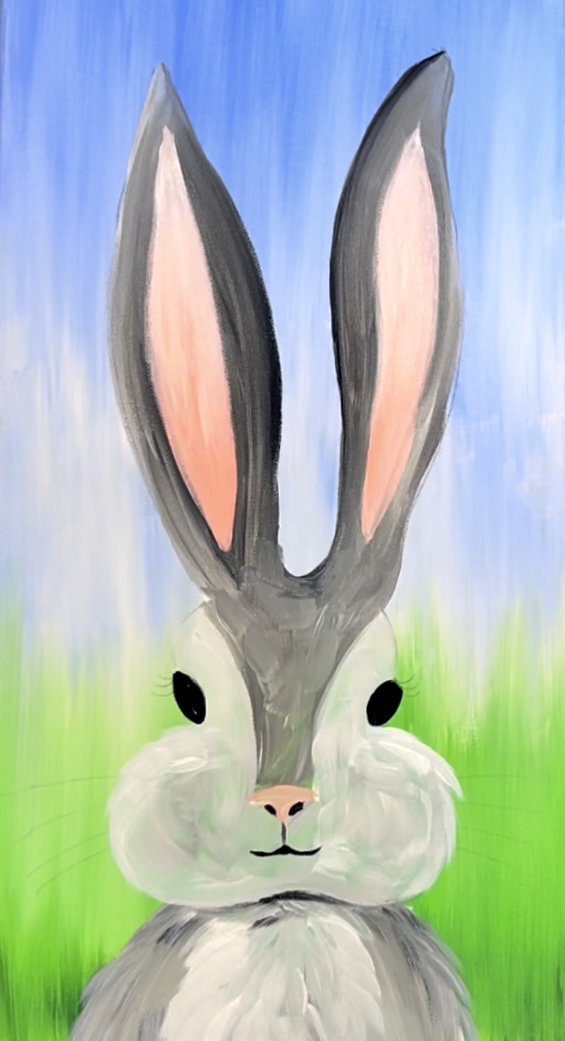
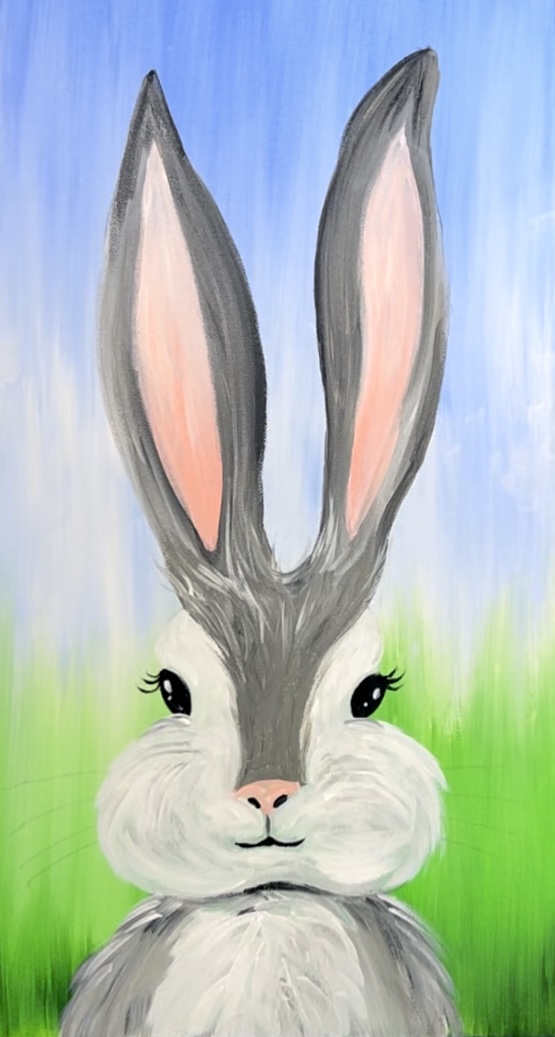
9. Paint Second Coat Of Fur Texture
Use titanium white and a #4 round brush to add texture to the cheeks of the rabbit and head area. Paint in curved, texture strokes that are short. This will give fur texture in that area. Try not to cover all of the first layer of paint.
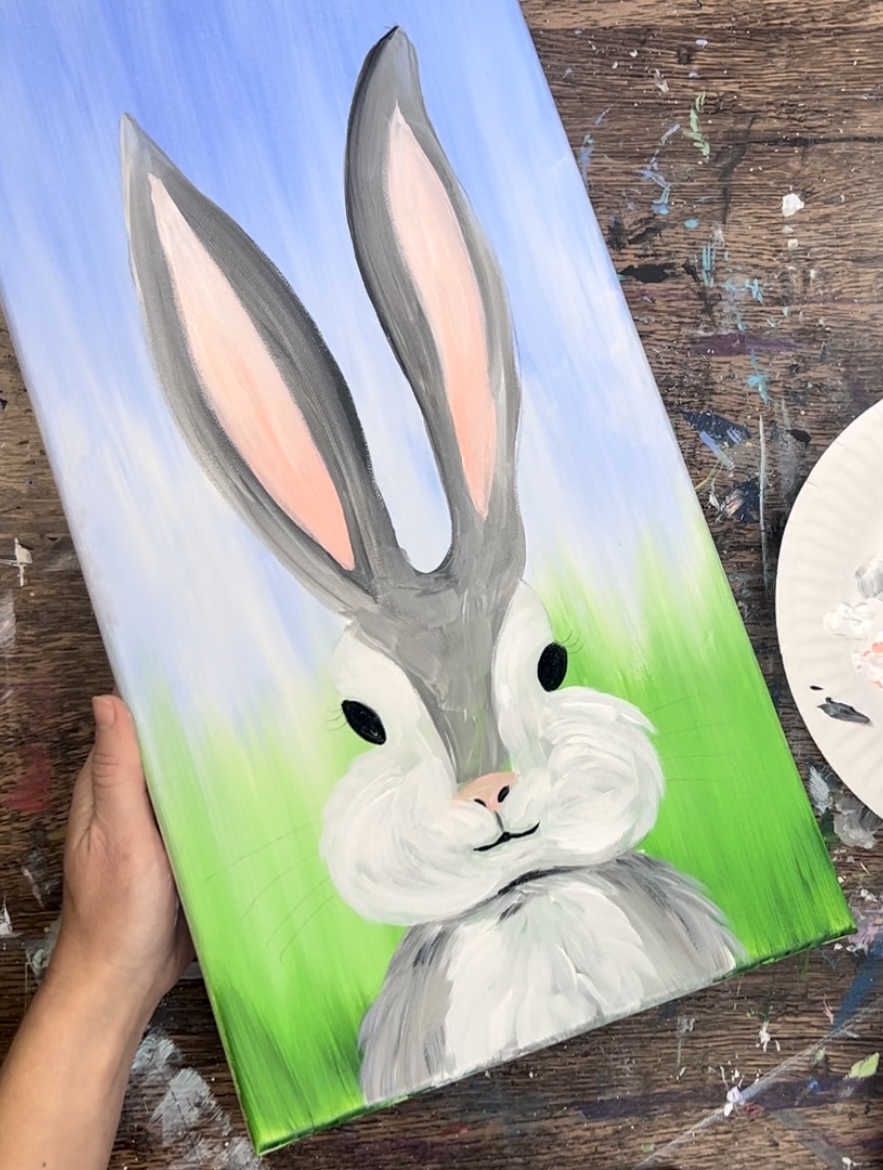
10. Paint Highlight On Eyes, Eye Lashes & More Fur Texture
If the first layer of the eyes are dry, use titanium white to paint two white highlight dots. One of the dots is larger and going in more of a vertical direction and the other is a very small dot.
Next, use the tip of the #4 round brush (or another brush that has very thin bristles or a black paint pen) and paint the three eye lashes on each of the eyes.
Then wipe the brush off. Load it into titanium white and paint the top of the cheeks so that they overlap the bottom part of the eyes just slightly.
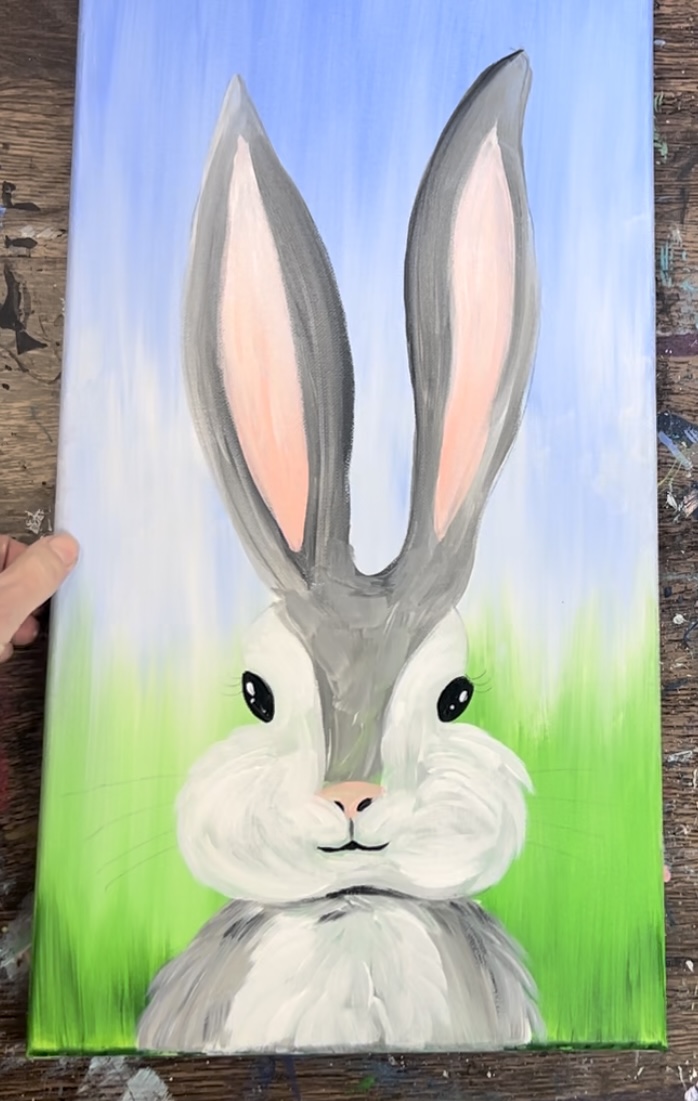
11. Paint more fur texture (optional)
You can skip this next step! It requires using the round brush and a lighter color than the color below (for example white or super light gray over the medium gray) to paint fur texture strokes.
To do this, I used my #4 round brush and titanium white mixed with a little bit of gray. Then I painted fur strokes in the gray area of the bunny’s face.
That lighter color will show up against the darker gray behind it. Paint short curved lines that contour and go in the direction of the shape. You can also allow the paint lines to go outside the edges of the shape a little.
Paint more fur lines on the edges of the bridge of the nose. There are also fur texture lines done with titanium white done on the edges of the cheeks.
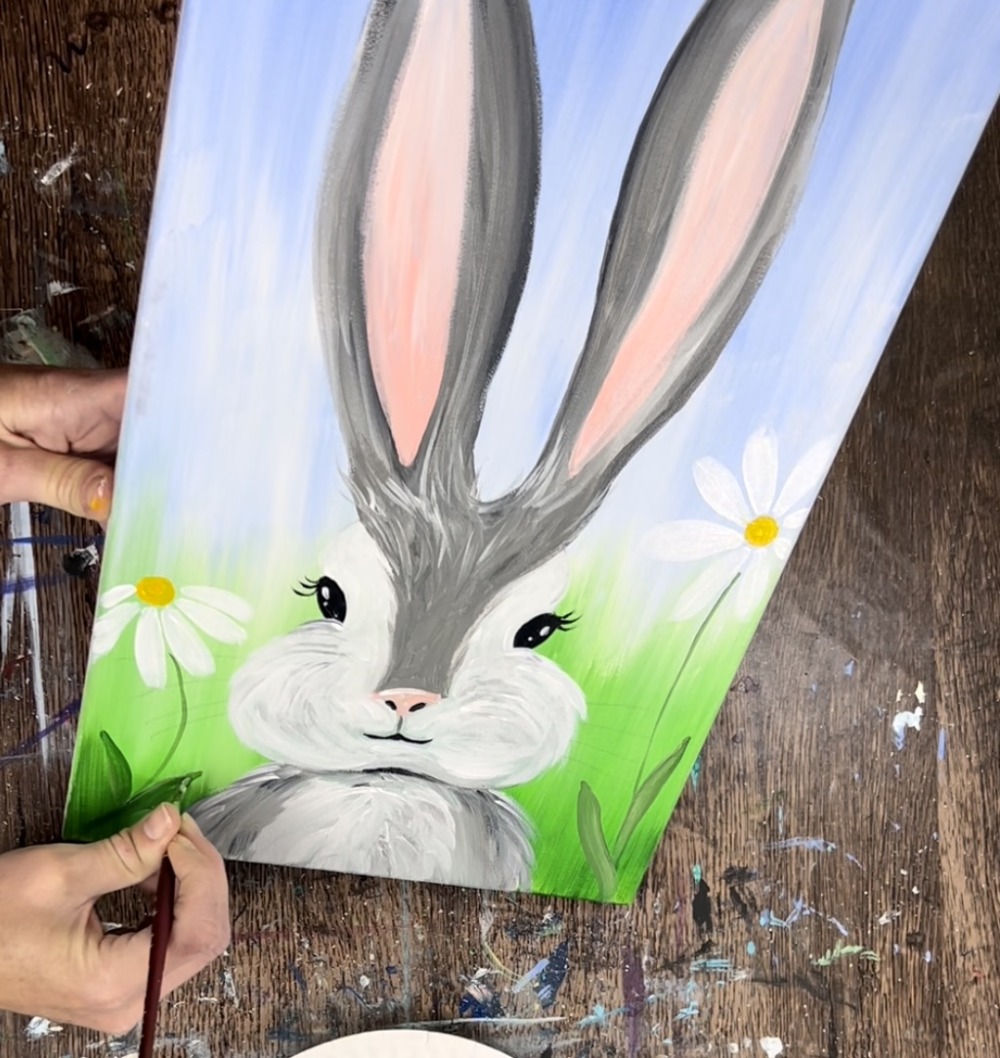
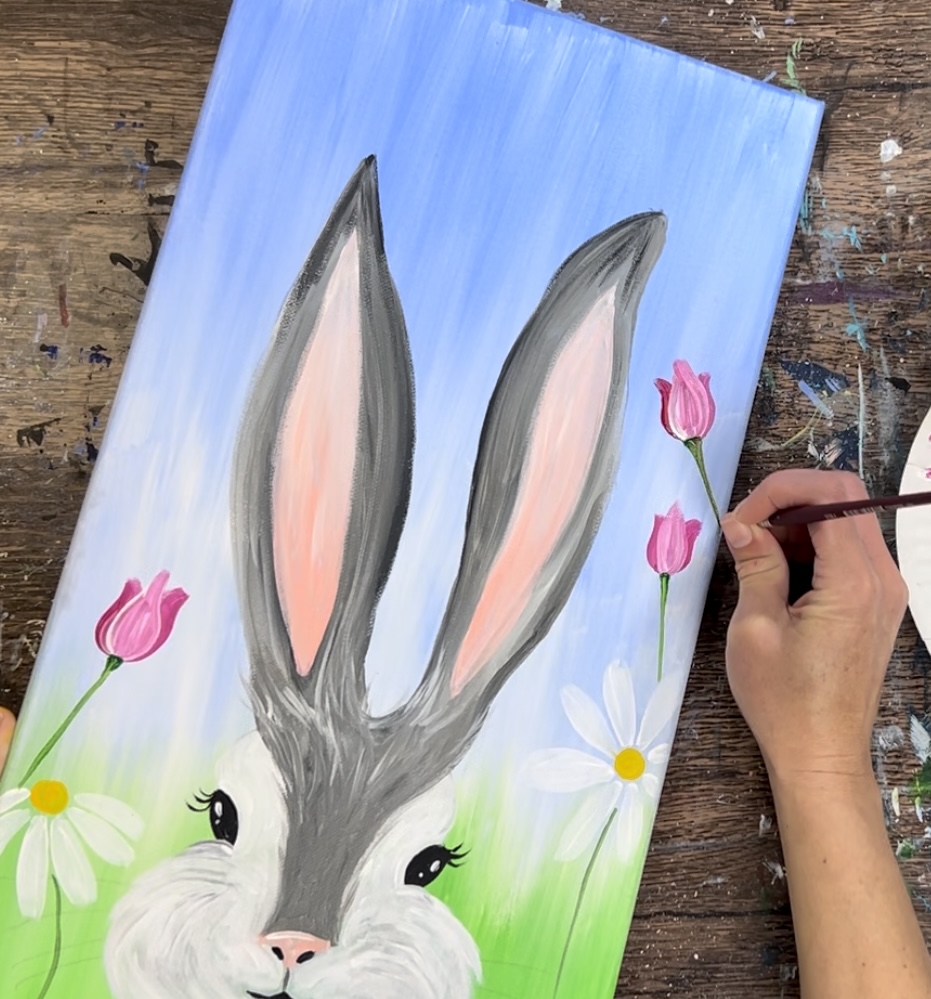
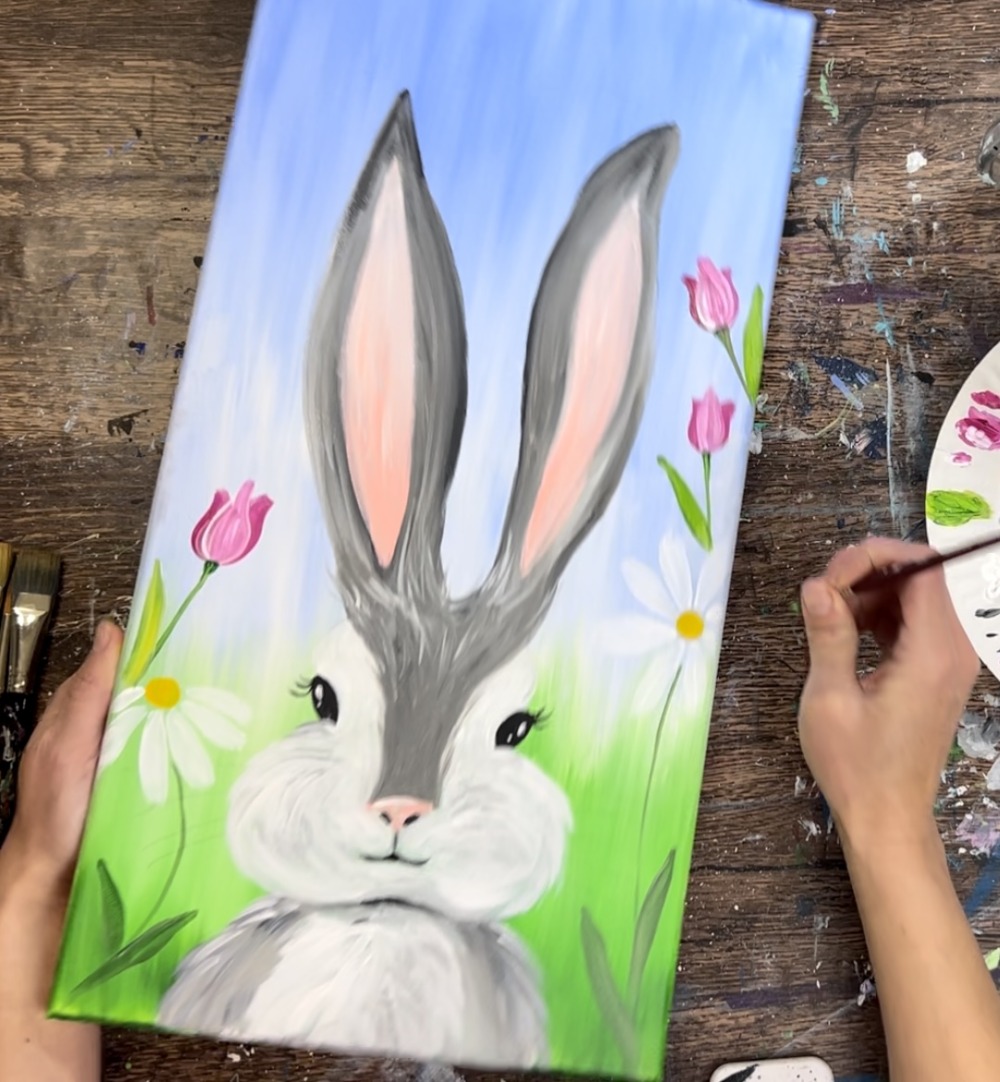
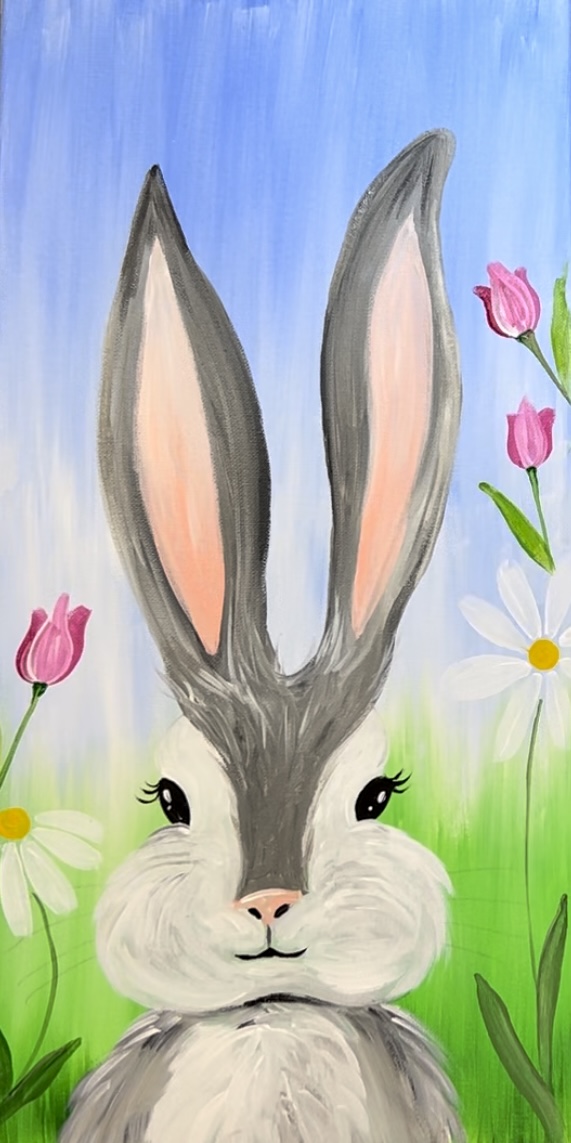
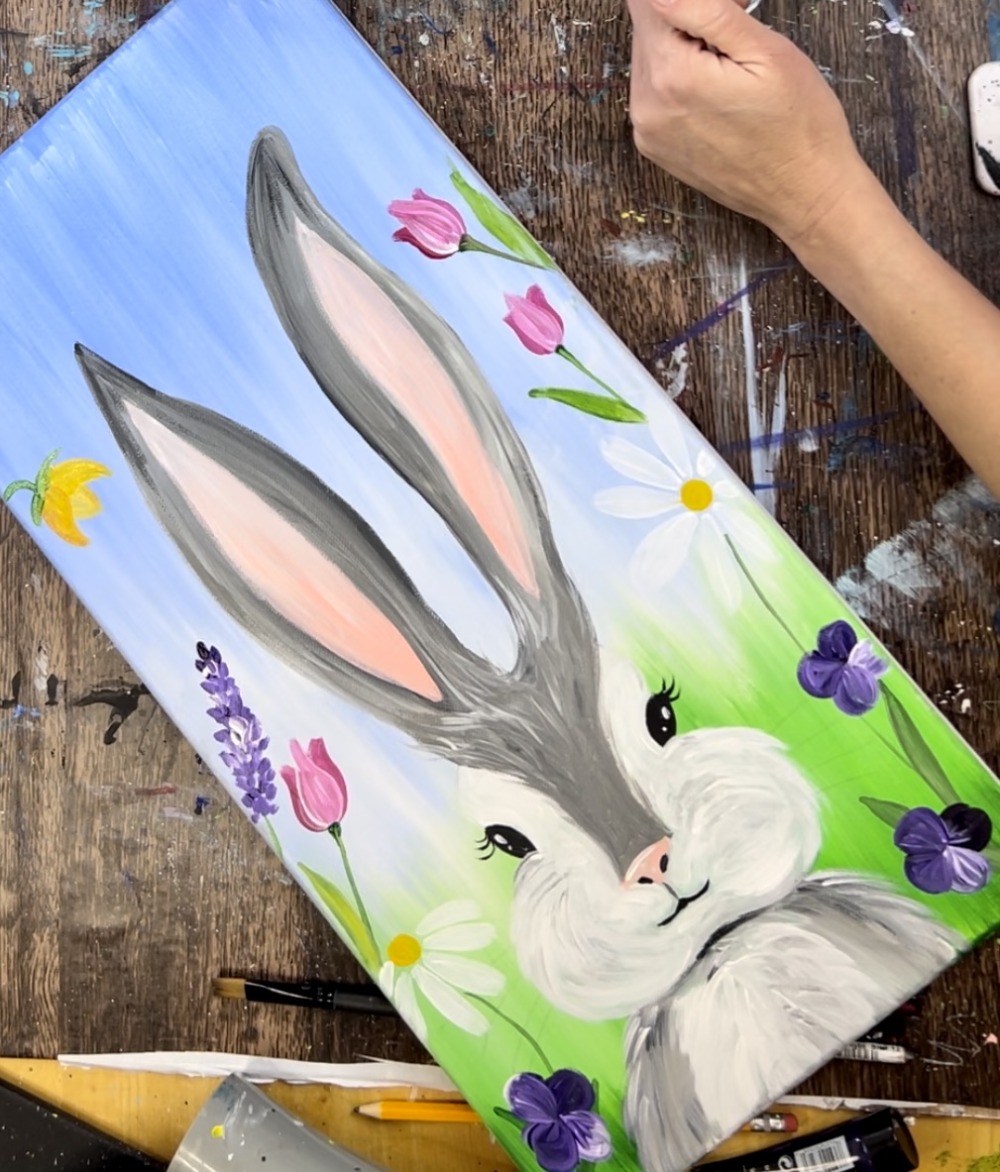
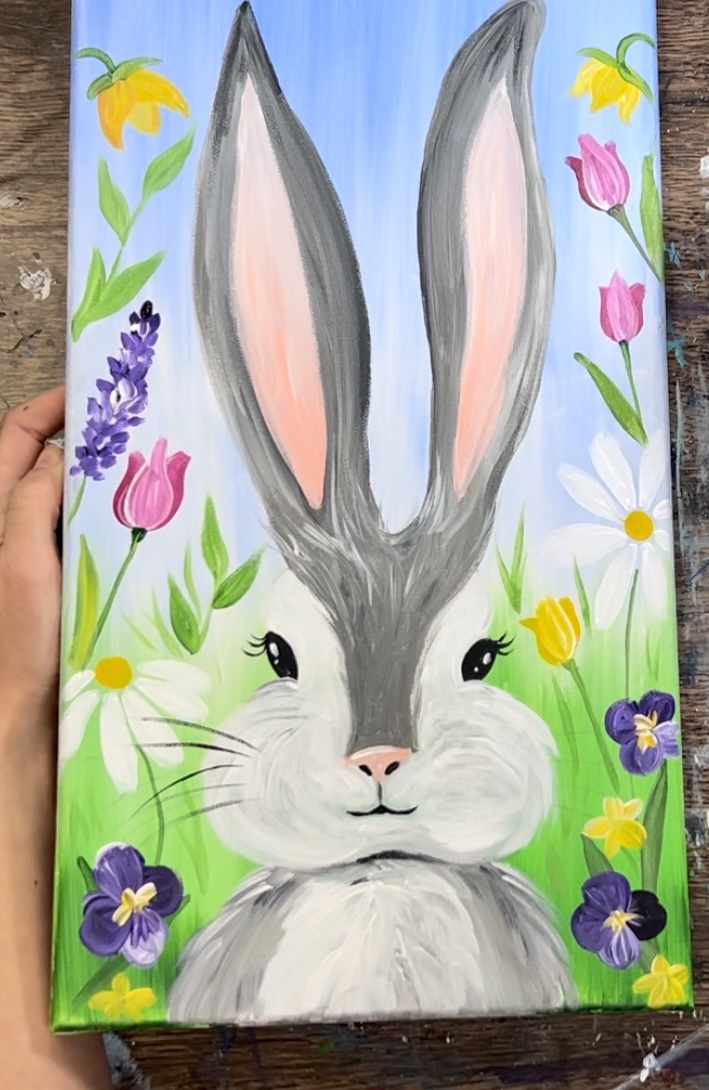
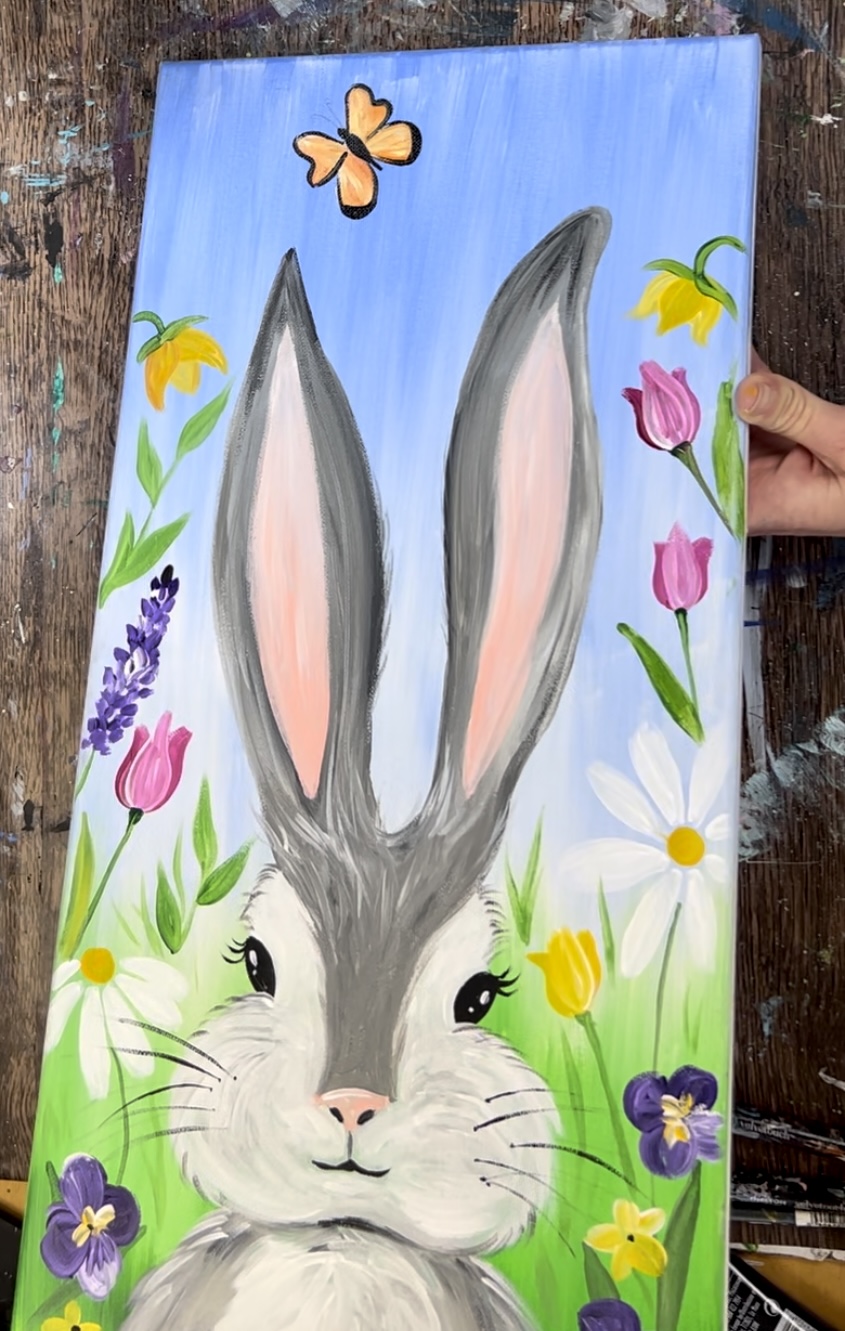
12. Paint Daisies
Load your palette with cadmium yellow medium. Then use the #4 round brush to paint two circles. These will be the centers of the daisies.
Next, use titanium white to paint the petals of the daisy. Each of the petals have a narrow base and the petal becomes wider and more rounded at the edge.
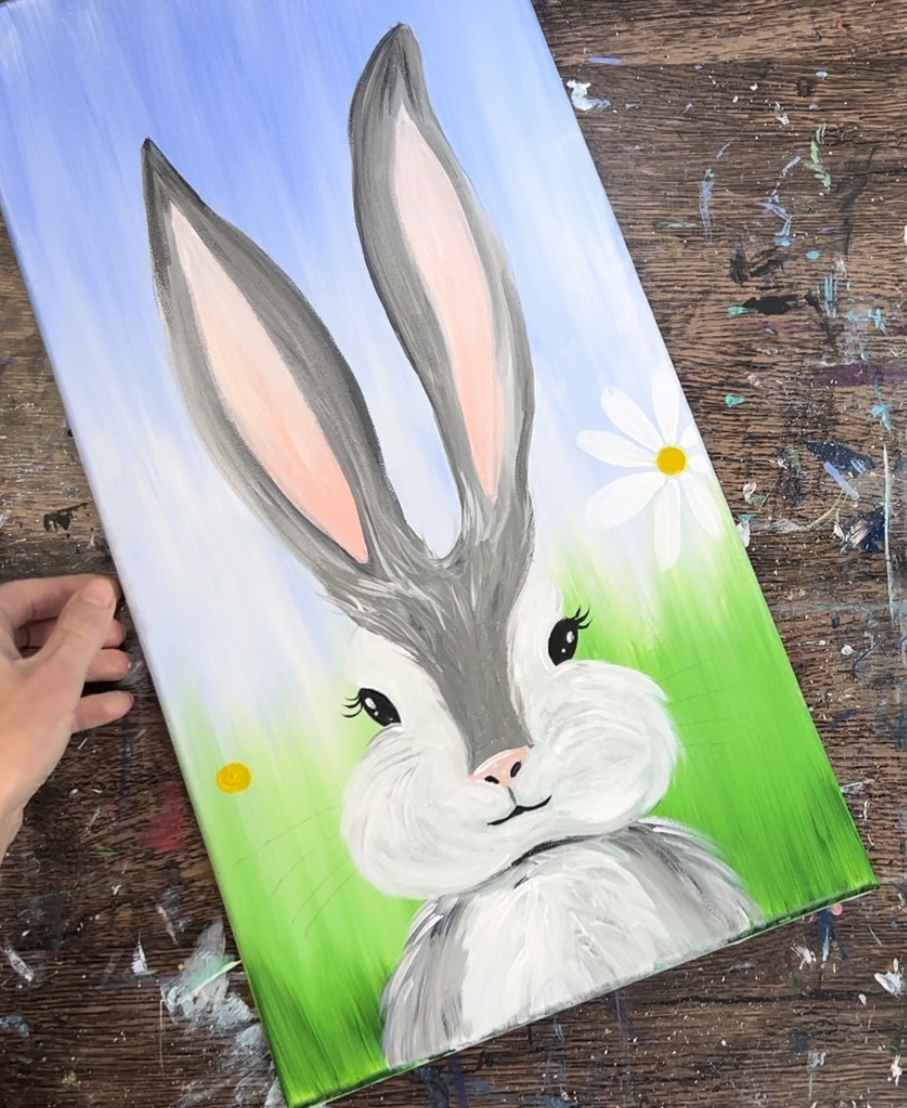
The left daisy was painted on its side and the right daisy is a full frontal view.
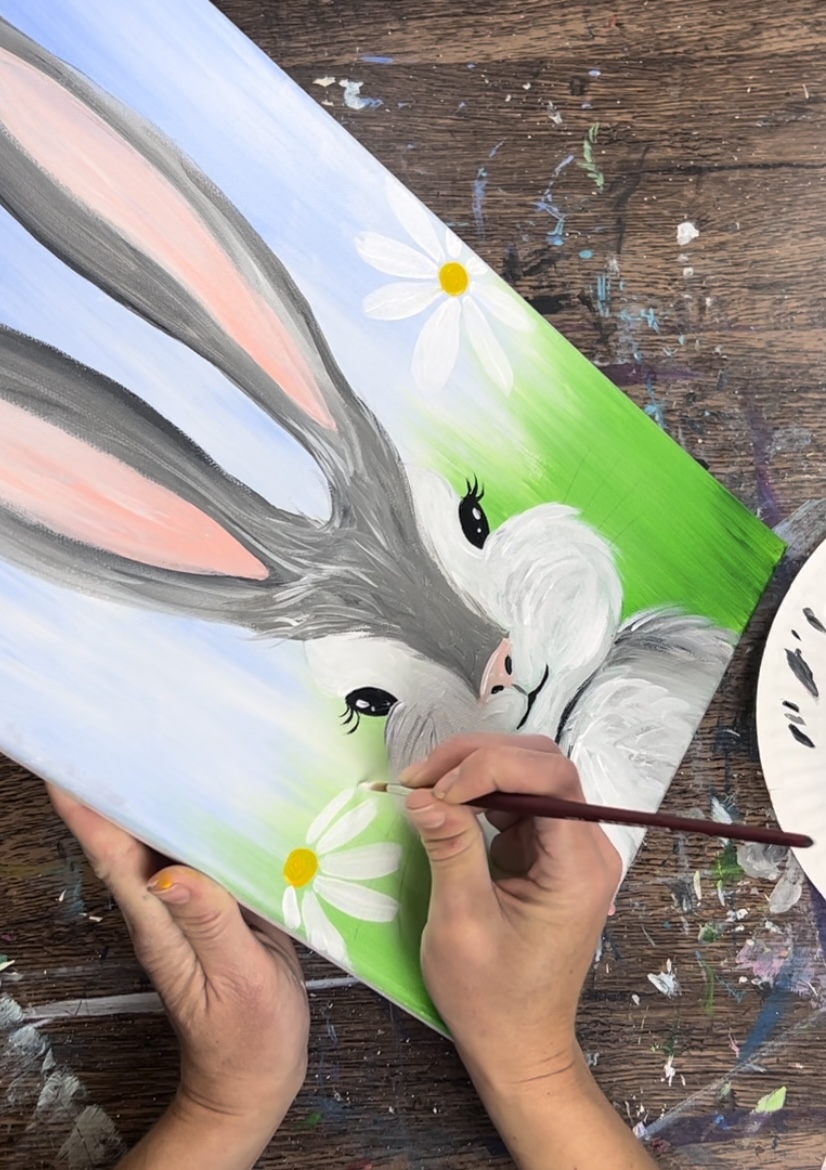
To paint the stems, you’ll want to mix a green that is darker than the green in the background. Use the #4 round brush to paint ver thin lines that go from the bottom of the daisy flower to the bottom of the canvas. Then paint several leaves.
I did two daisy leaves on each side of the stem.
13. Paint Tulips
Load your palette with quinacridone magenta. Mix a small amount of quinacridone magenta into titanium white to lighten the magenta.
To paint the tulips, you’ll need to paint three tear drop shapes that overlap each other. Paint one teardrop that slightly leans to the left. Then either lighten or darken the magenta in the second teardrop and paint it so it overlaps the first teardrop.
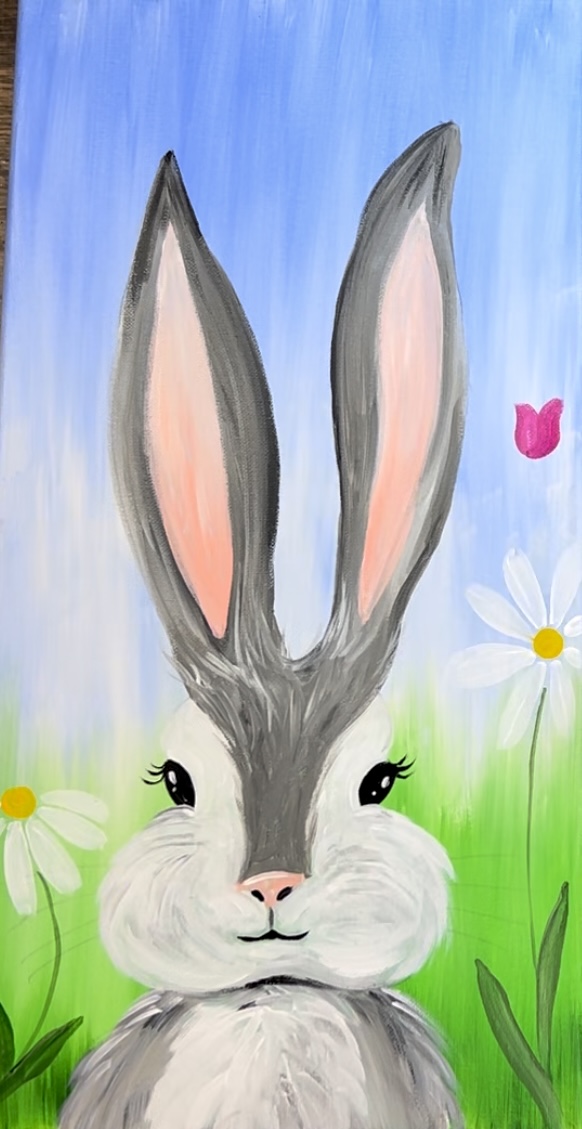
Then lighten or darken the third teardrop and paint it so it overlaps the first two teardrops. This one should be going vertical.
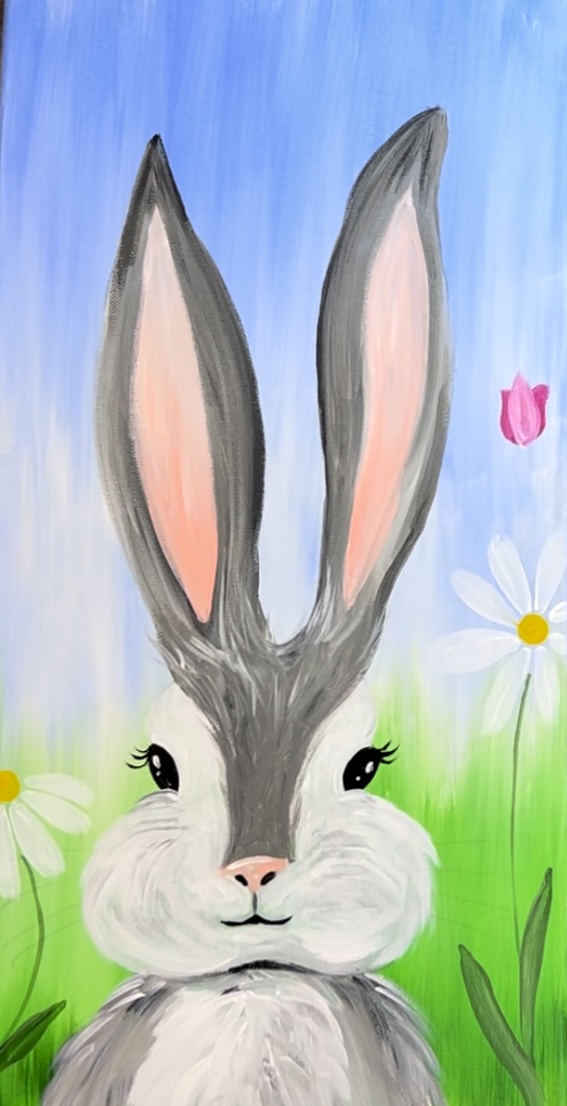
Repeat this technique to paint several tulip heads. I did two on the right of the rabbit and one on the left.

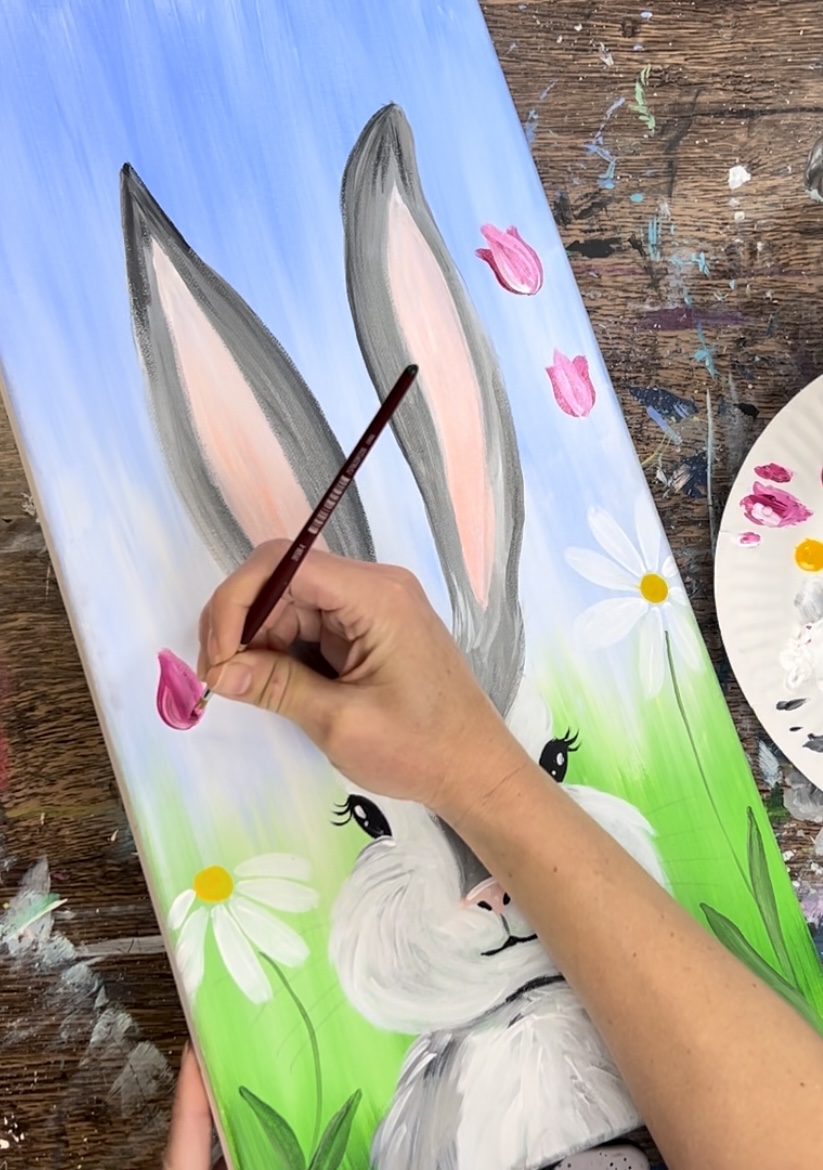
Paint long, elongated tulip leaves with the same hooker’s green hue and yellow mix and your #4 round brush.
14. Paint Pansies
The pansies are done with dioxazine purple and titanium white. Use the #4 round brush to paint 4 petals that are all overlapping each other.
Each petal has a slightly different variation of white to purple. In other words, double load your brush in white and purple for one petal, then add more purple for the next petal and more white for the next petal, etc.
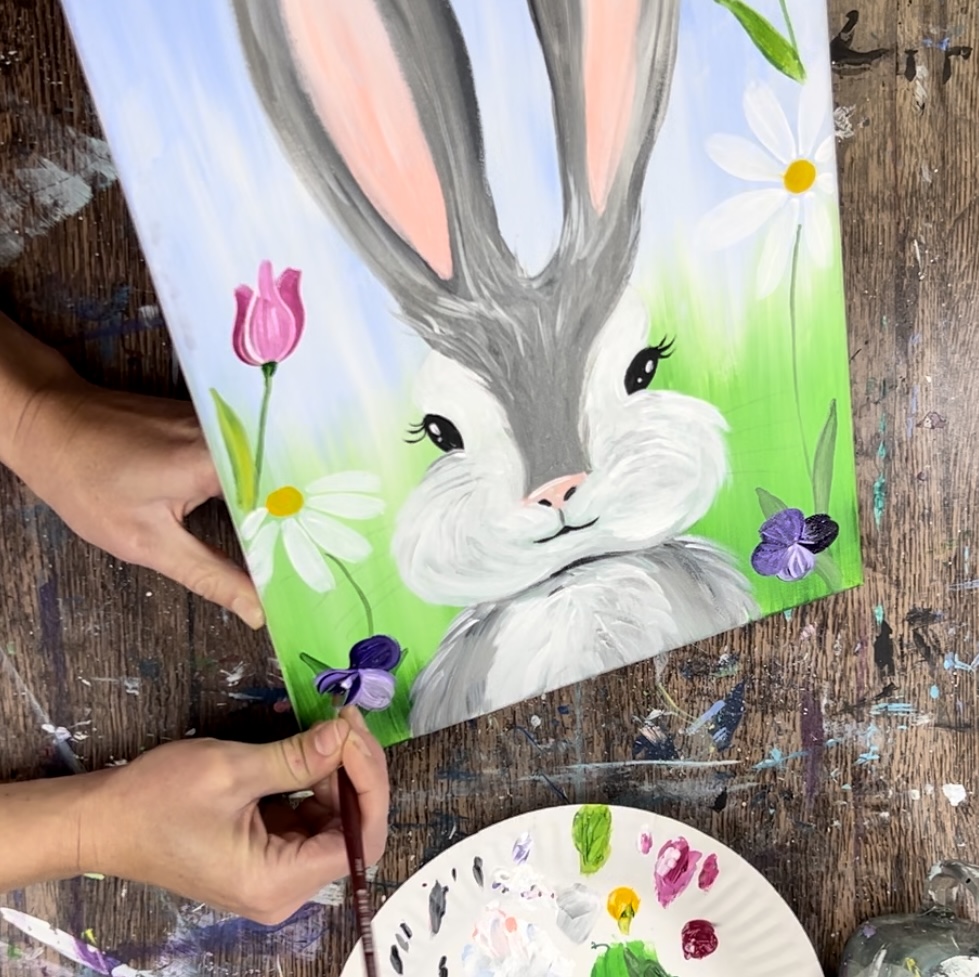
I did two pansies on the right and one on the left.
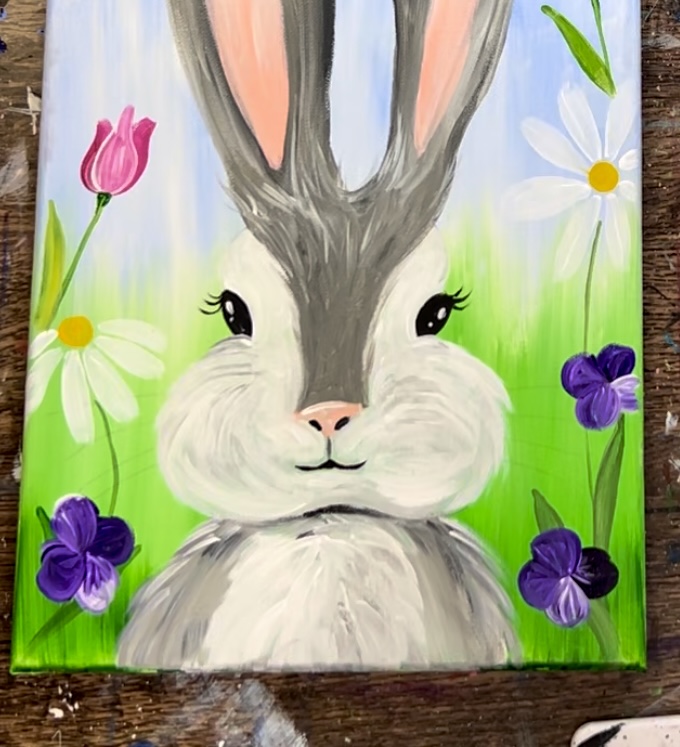
15. Paint Lavender
To paint the lavender, double load your #4 round brush in dioxazine purple and titanium white. Start at the top and paint small vertical strokes each overlapping each other. Let the white and purple blend on the canvas to create different variations in the purple.
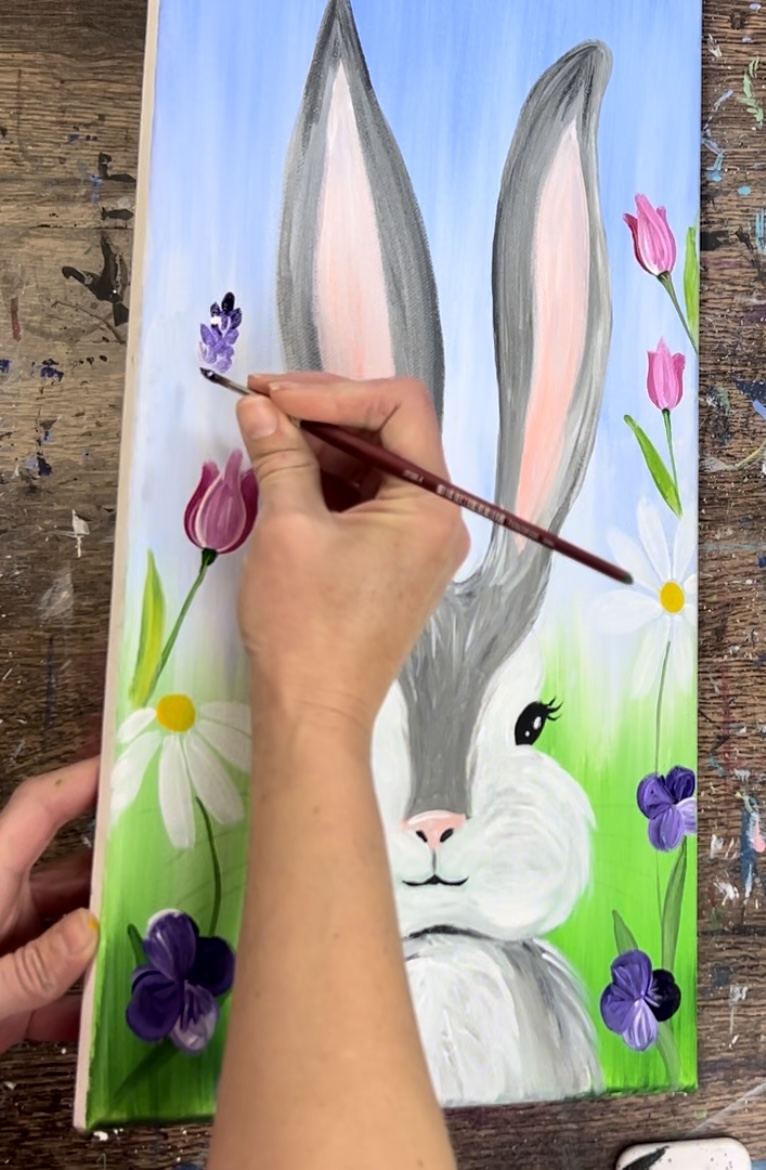
Form a column cluster of these little petal flowers. I did one column that is going diagonal on the left and off the side of the canvas.
16. Paint Yellow Bells
The next kind of flower I did was an upside down sort of yellow bell flower. This flower is done using the same technique as the tulip, only the flower is upside down. I used cadmium yellow medium hue and painted three teardrop shapes that overlap each other. Each teardrop shape petal is slightly different with different amounts of white and yellow.
Then paint a small set of two leaves at the base of the flower and a stem that curves down and connects the flower.
I did one yellow bell flower on each side.
Also…I painted some yellow in the center of each of the pansies. To do this, load yellow and white on your #4 round brush. Then paint a small starburst style stroke in the center of the pansies.
17. Paint More Leaves, Grass & More Flowers As Needed
Continue to add more leaves and even blades of grass as needed throughout the background. You can add as much or as little as you want!
I did a set of leaves next to a small stem on the left between the tulip and the yellow bell. I also did another one on the left of the rabbit’s eye.
You can also paint little grass blades in the background.
18. Paint Whiskers On Rabbit
When you are finished with all the flower and grass details in the background, use a very fine pointed brush (I used a #8 round brush) to paint black whiskers. You can also do this step with a black paint pen. Paint several black lines that start a little inwards on the cheeks and stroke quickly outwards.
Do this on both sides and at the base of the whiskers, paint a very tiny black dot.
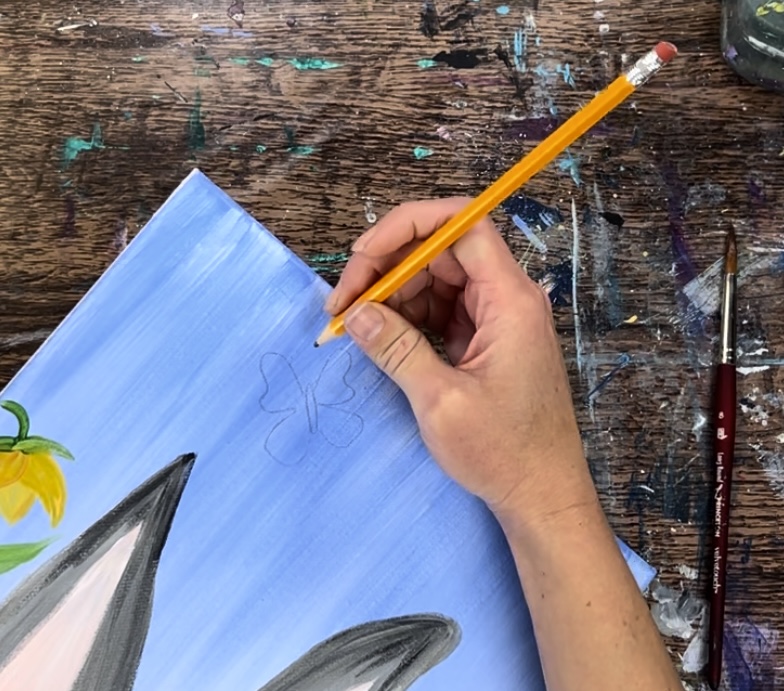
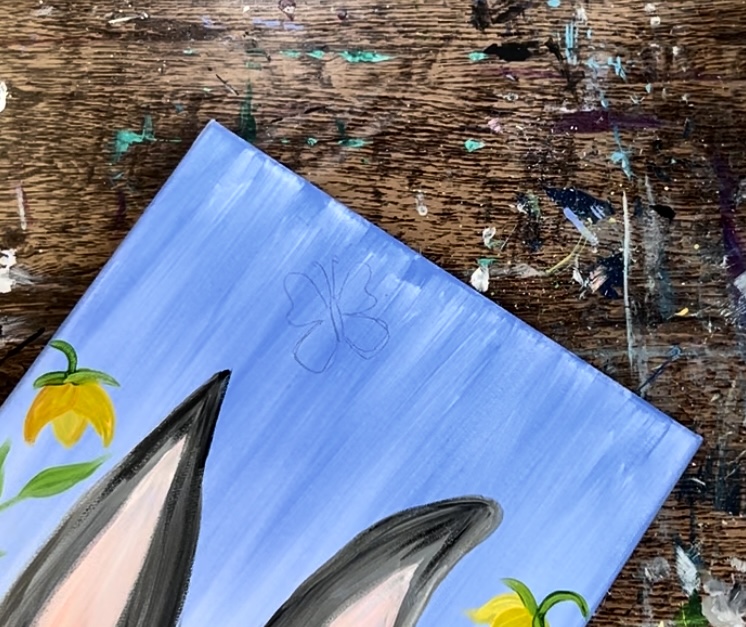
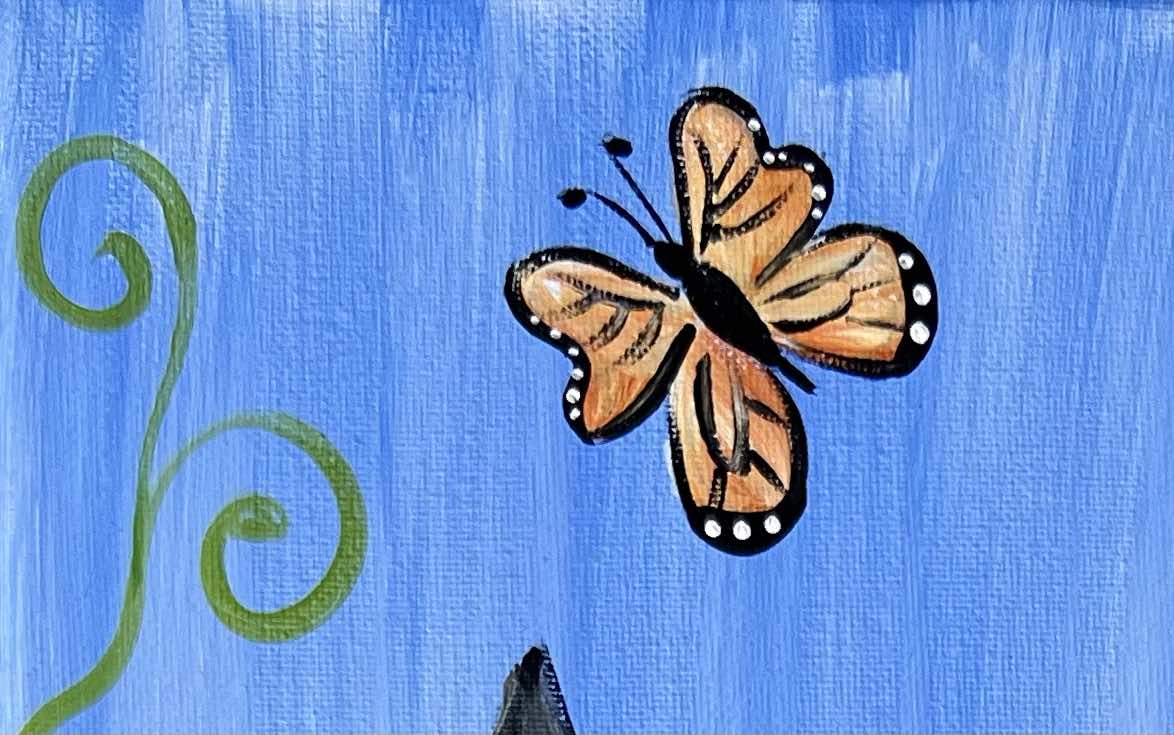
19. Paint Butterfly
If you want to fill some of the area at the top, you can draw and paint a butterfly.
I first used a pencil to draw a basic butterfly shape.
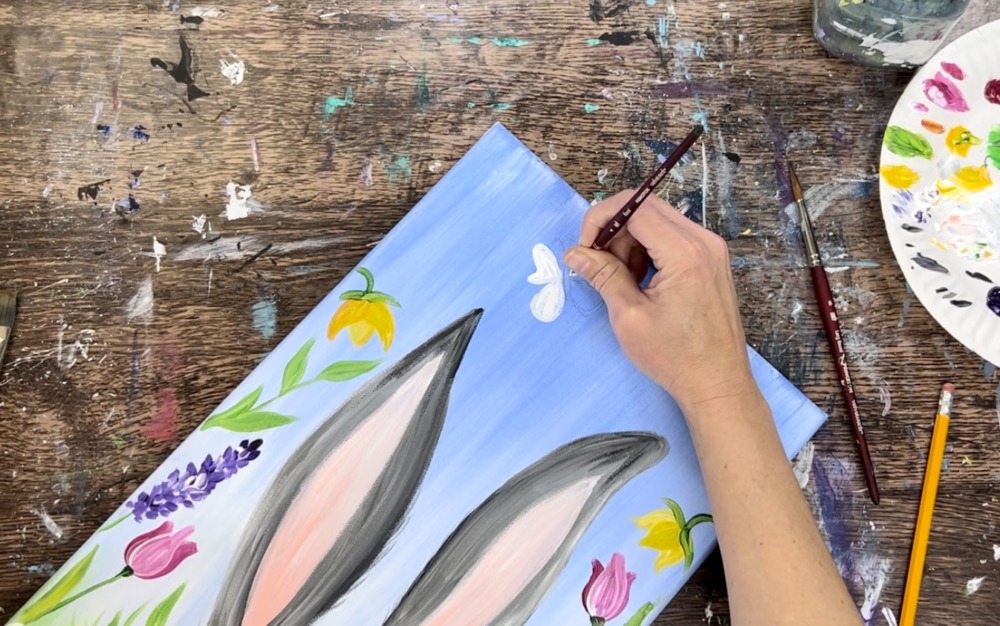

Next, mix an orange on your palette by mixing 1 part quinacridone magenta to 3 parts cadmium yellow medium hue. This will make a bright orange color. Paint over the white of the wings with the orange.
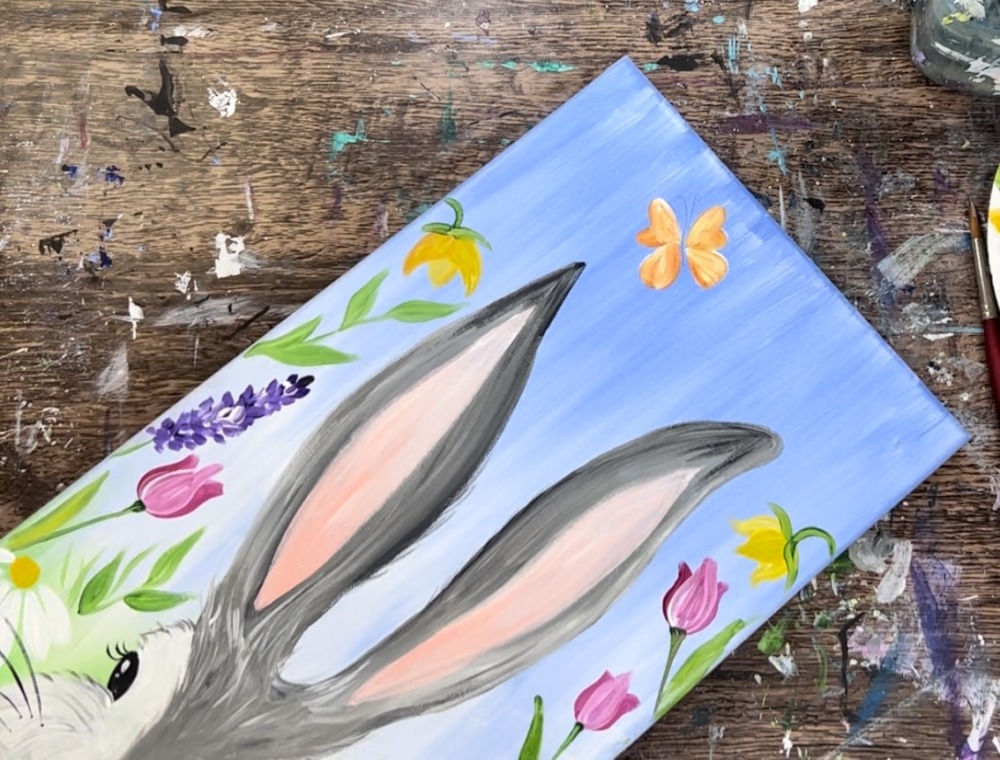
Then use mars black and the #4 round brush to paint a border around the butterfly wings. Paint the center body of the butterfly.
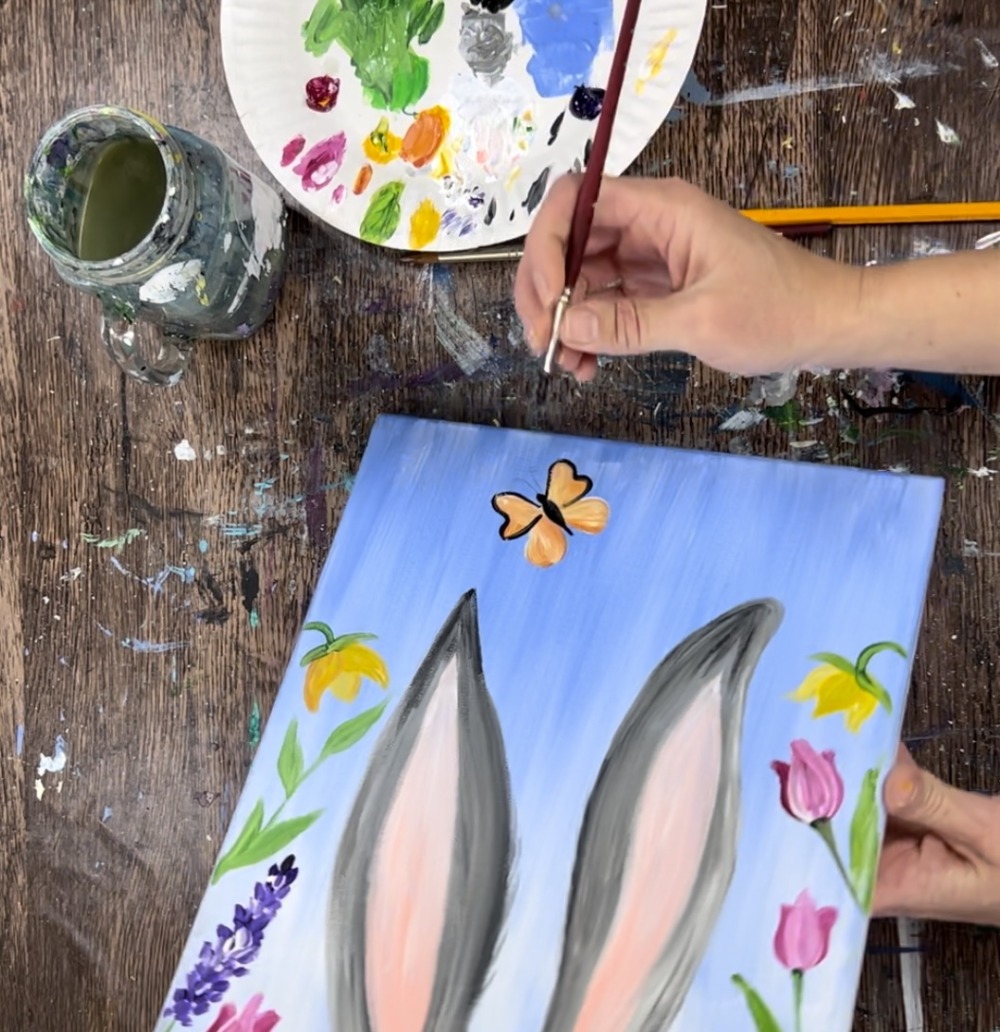
Then paint the antennae and veins on the butterfly. If it helps, you may need to use a black paint pen or a very tiny round brush. Divide up the wings using very thin vein-like lines.
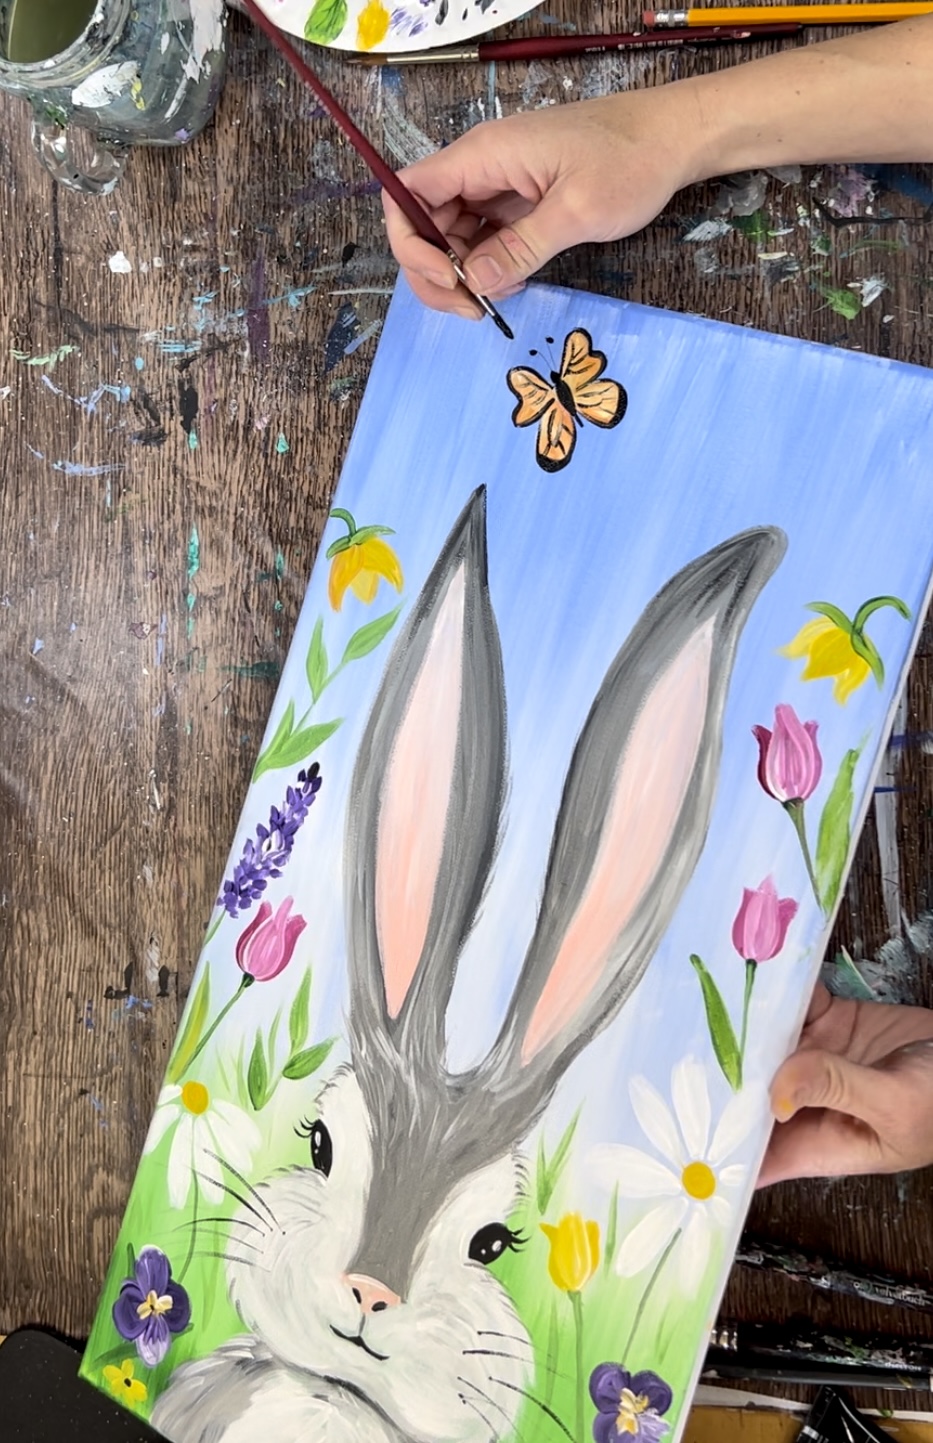

Then use titanium white to paint little white dots over the black border parts of the butterfly.
20. Final Touches…
As a final touch, I used the green on my palette (mixed with some yellow) to paint some curly vines going up high in that sky region above the flowers.
Finished!