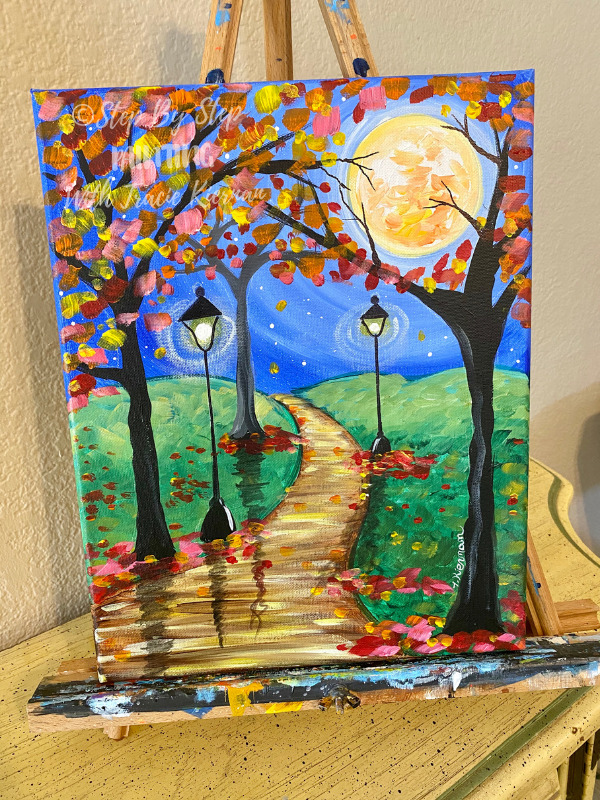
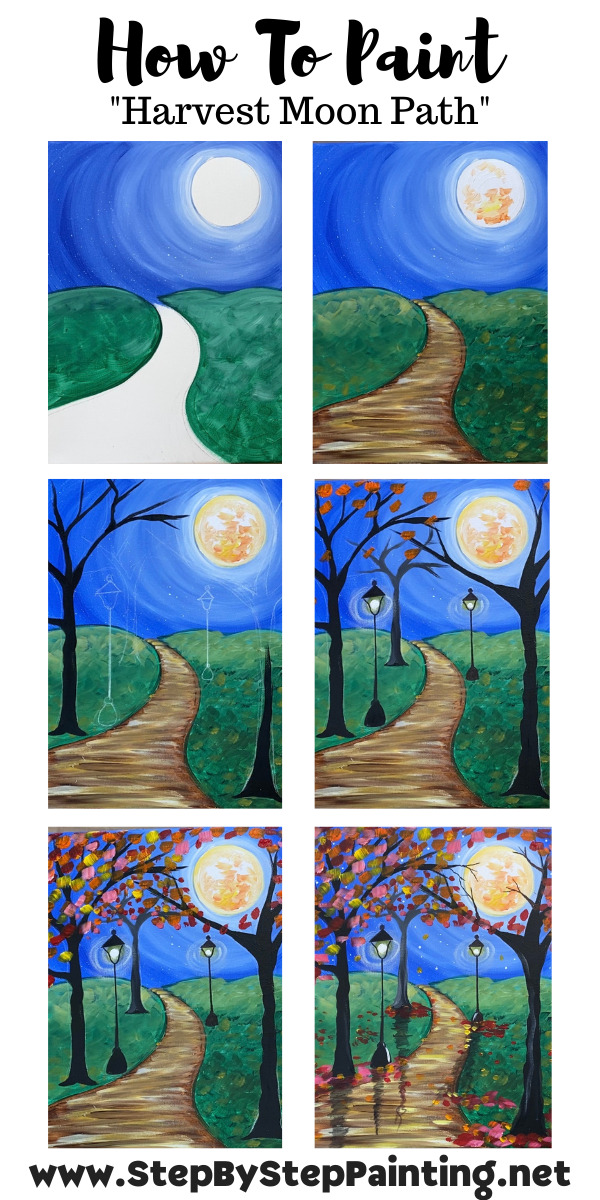
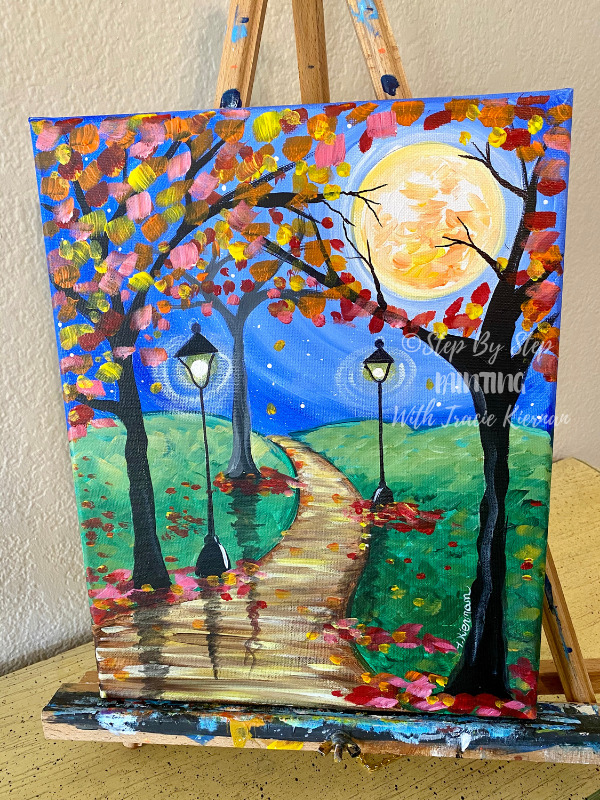
Learn to paint a path in a park under fall trees with two lampposts and a harvest moon in the sky!
I would love to take a stroll down this park and smell the crisp fall air! It looks like it might have rained and cleared.
Would you like to save this?
The style of this painting is really loose and expressive/ impressionistic. You do not have to worry about realism!
Enjoy and happy painting!
Materials
How To Paint Harvest Moon Path
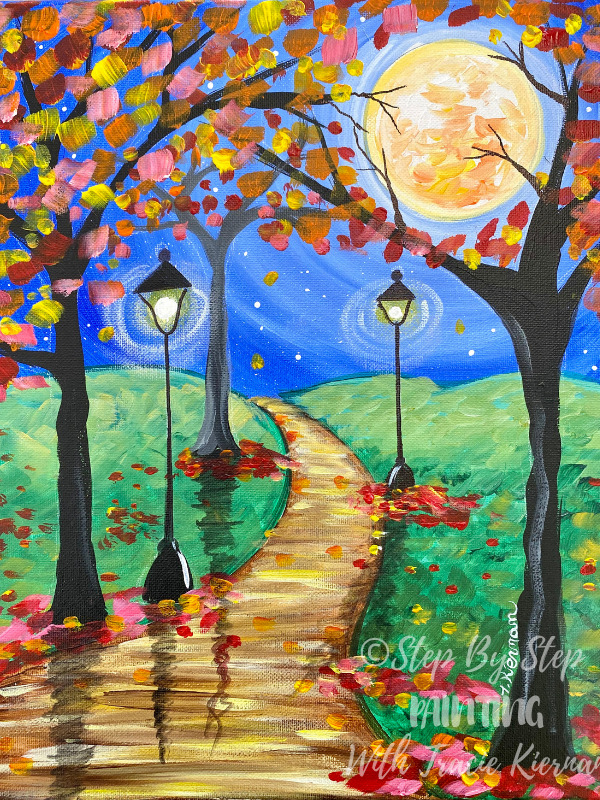
Stroll down "Harveset Moon Path"! This acrylic painting tutorial will guide your through the steps on how to render a fall path landsape painting.
Materials
- Acrylic Paint
- 11 x 14 Canvas
- Brushes
- White Chalk Pencil (or chalk)
- T-Square Ruler (optional but helpful)
- Sharpie or Black Paint Pen (optional but helpful)
- Toothbrush to splatter stars (optional)
- 3" Circle To Trace (or free hand a circle)
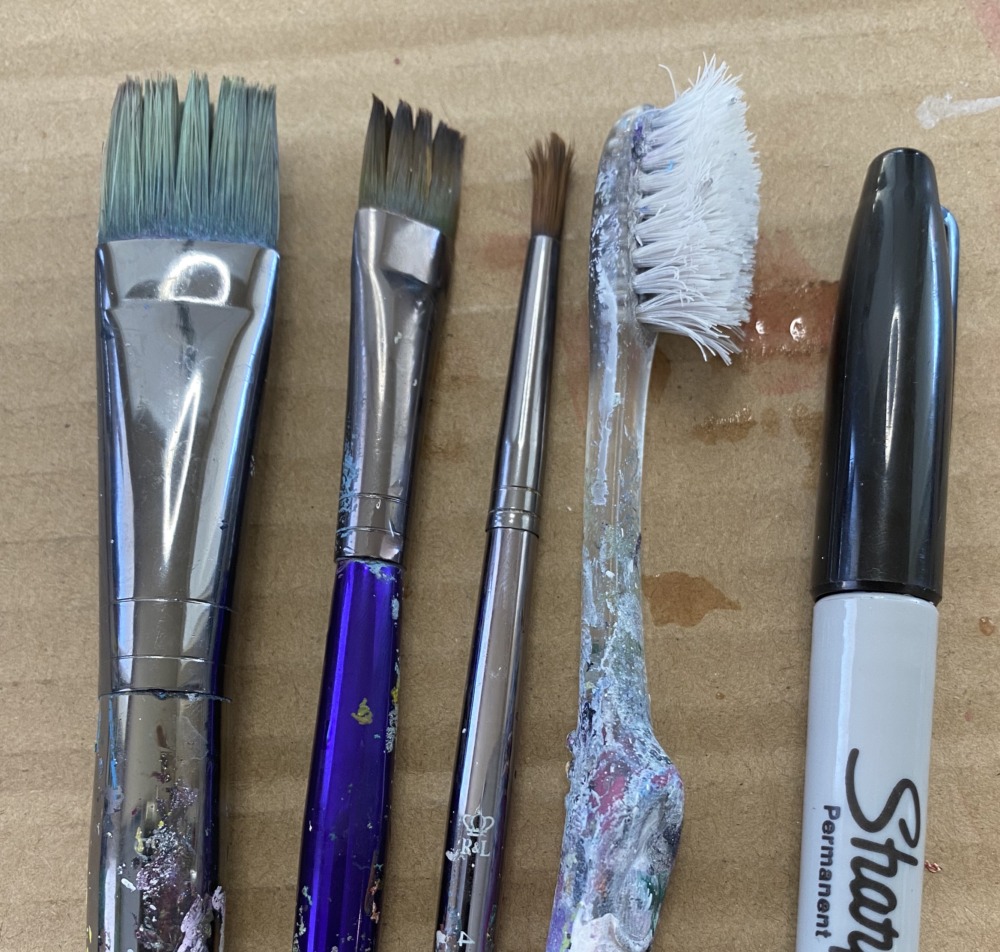
Colors
- Titanium White
- Mars Black
- Napthol Crimson
- Cadmium Orange Hue
- Primary Yellow
- Deep Green Permanent
- Ultramarine Blue
- Burnt Umber
- Yellow Oxide
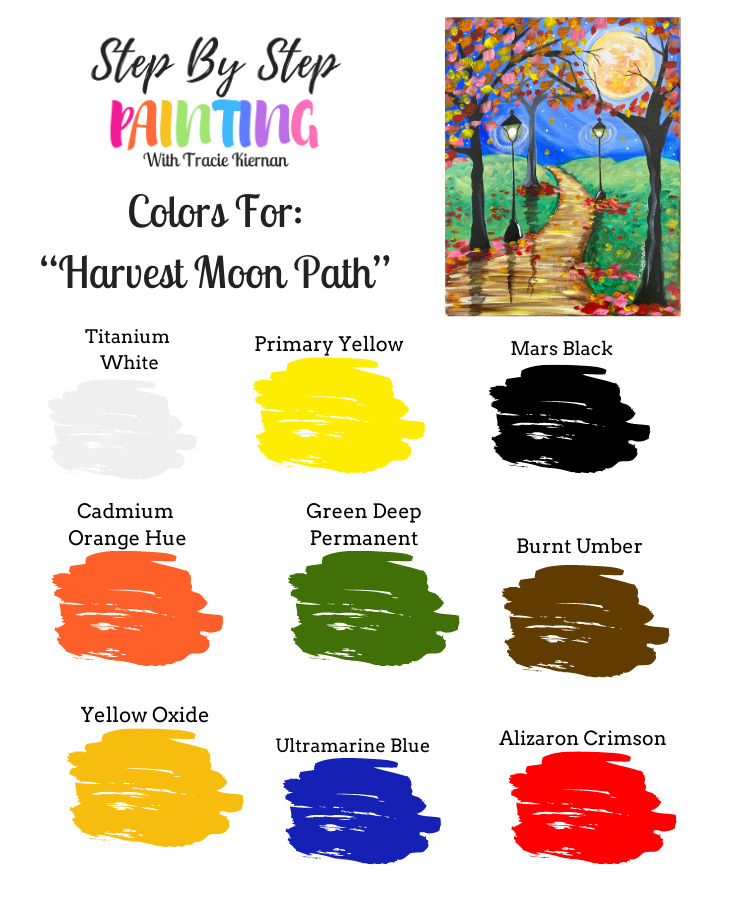
Brushes
Instructions
- See tutorial below for full instructions!
Brushes
Directions At A Glance
Video
Step By Step Directions
1. Draw a circle & horizon line
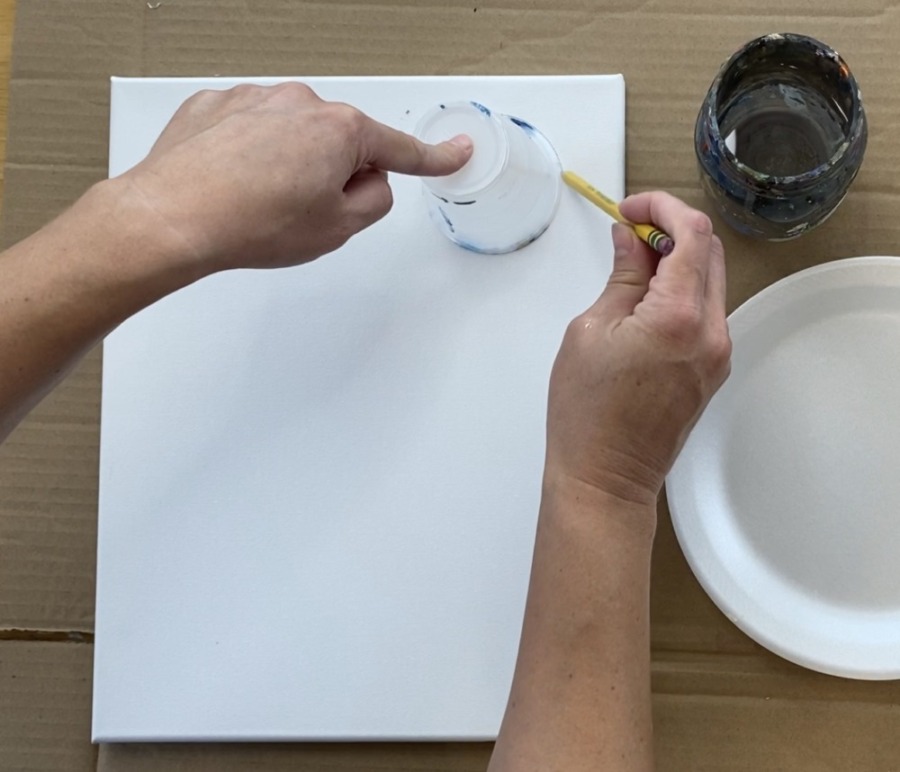
I used a 7oz cup for this, so about 3″ in diameter. In the upper right hand corner of the painting, trace or draw a circle.
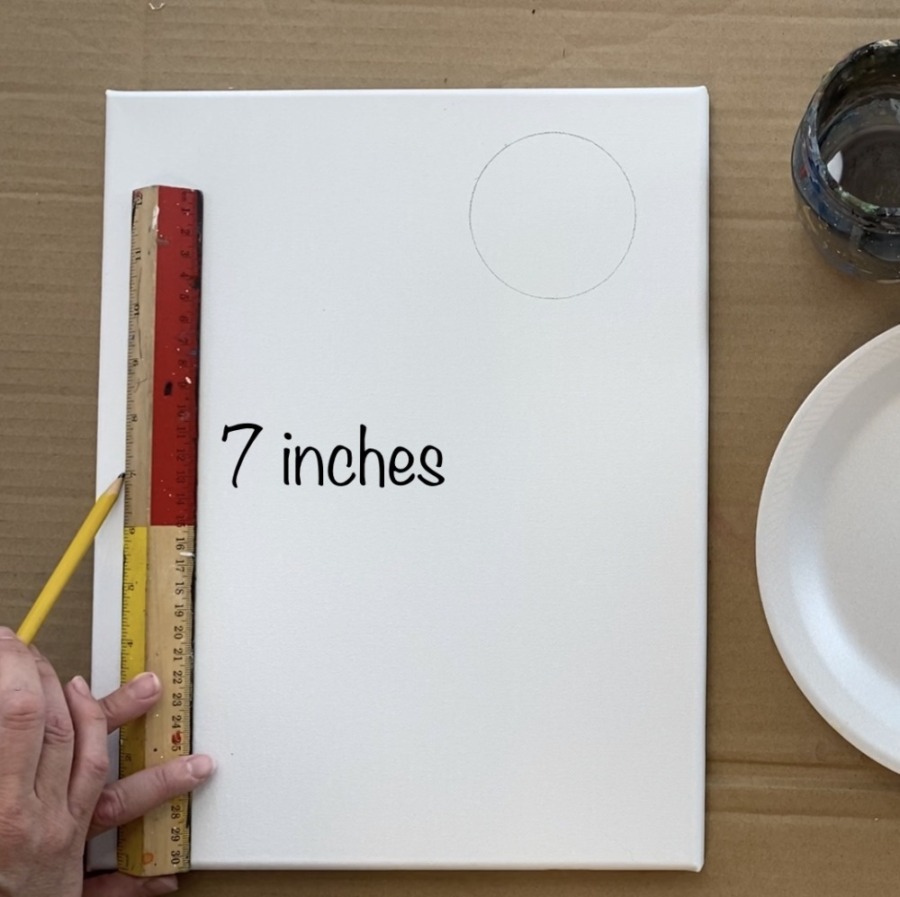
Then measure about 7 inches up from the bottom of the canvas. This will be where the horizon line lives.
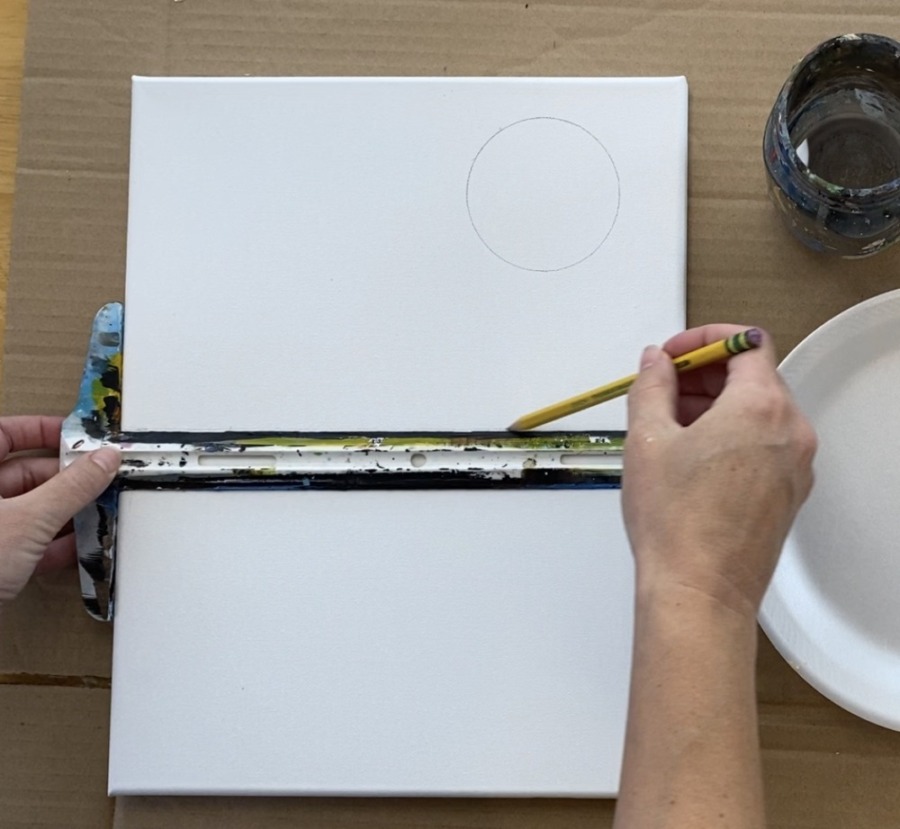
Use a t-square ruler (or eyeball it) and draw a straight line across the canvas.
2. Paint the sky around the moon
Load your palette with titanium white and get your 3/4″ wash brush ready! Paint a ring around the moon using the white and the wash brush.
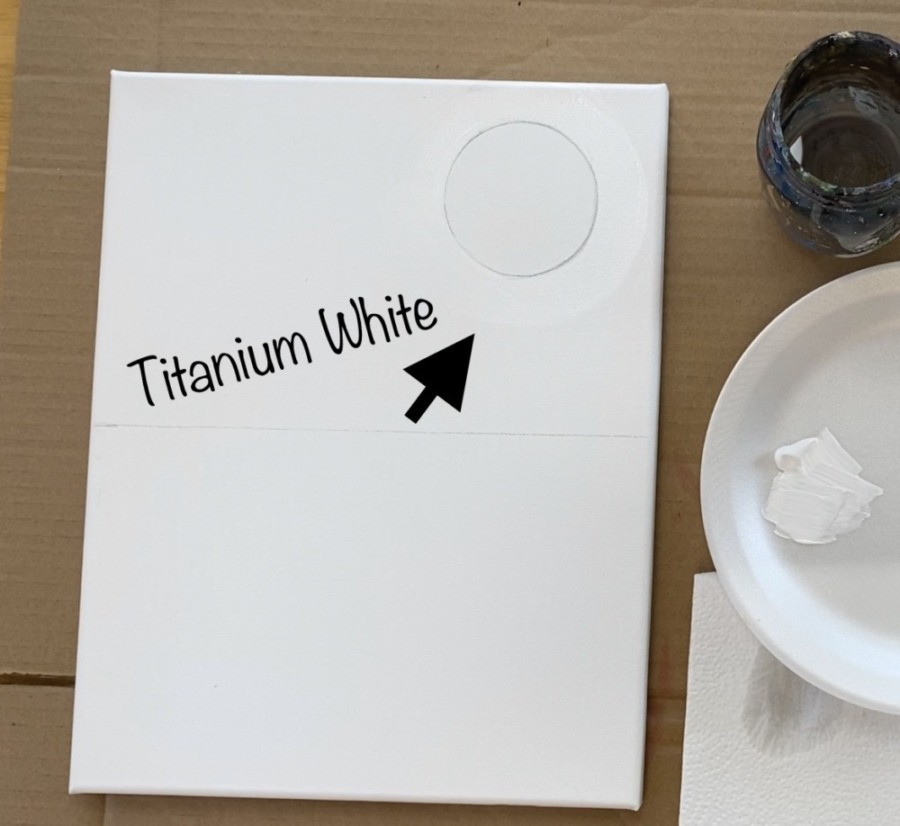
Then load your palette with ultramarine blue. Without rinsing the white off your brush, load a small amount of blue on your brush and GENTLY blend it into the white leaving the area closest to the moon very bright and light blue.
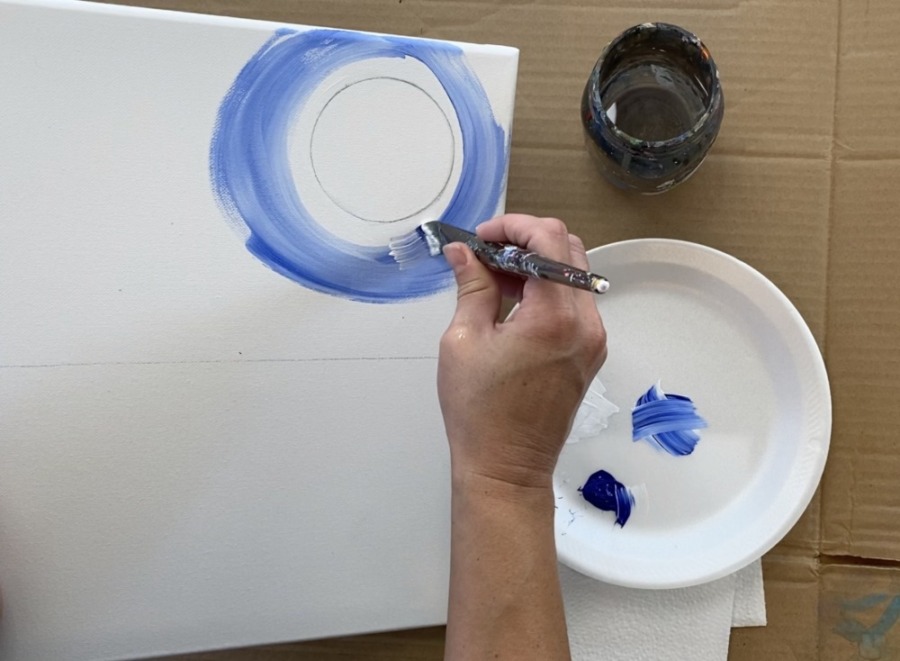
Paint in circular strokes going outwards from the moon. As you go further from the moon, add more ultramarine to your brush and less white so the sky gradually gets darker.
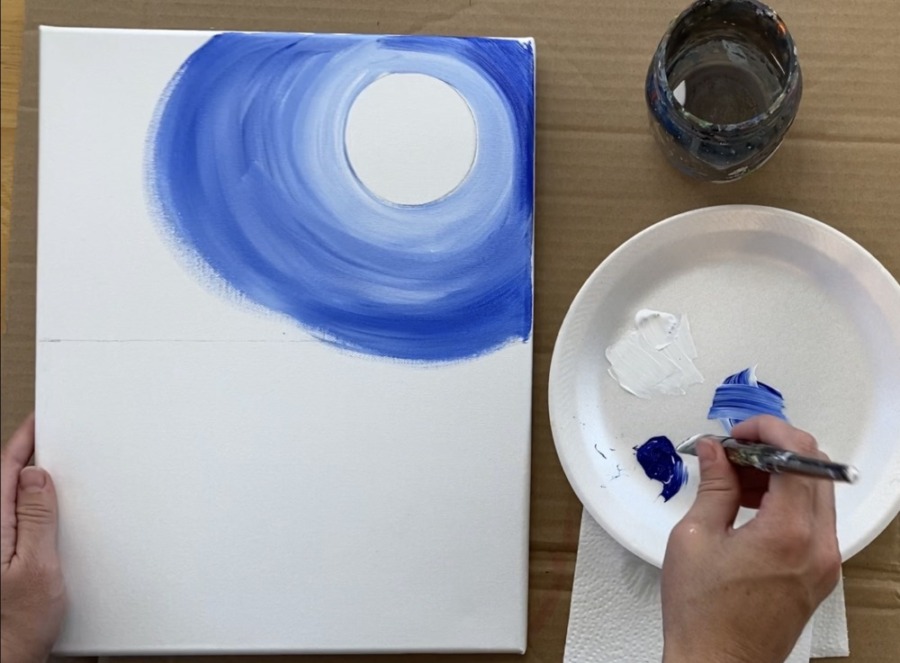
You do not have to perfectly blend this! Leaving it unblended and “streaky looking” is okay! Remember, most of the sky will be covered with branches so any flaws in the sky won’t be entirely evident.
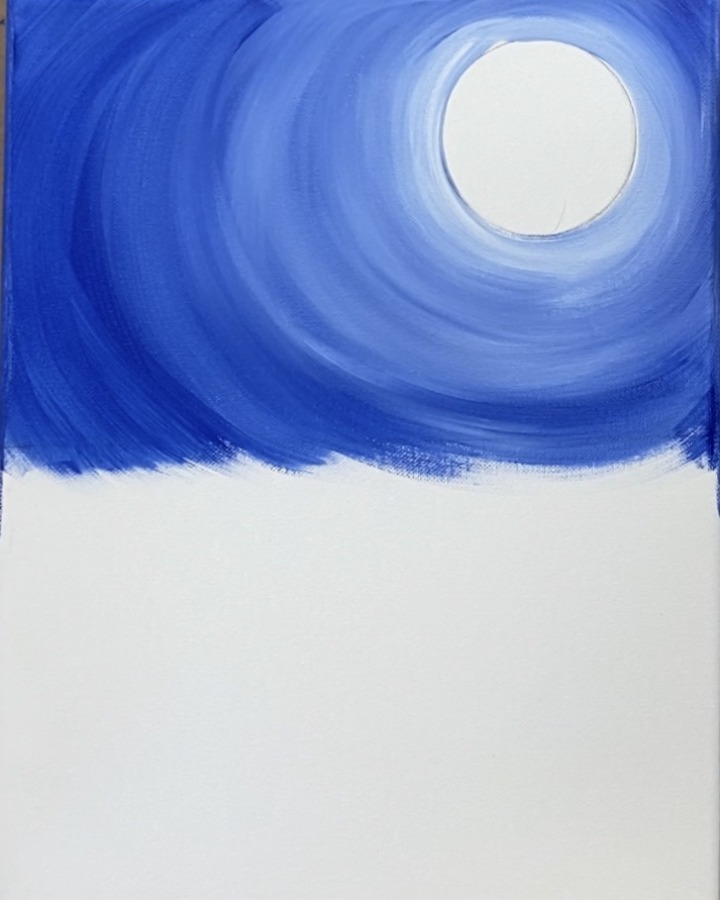
Also, it is okay to go under the horizon line.
3. Splatter paint stars
Next use a toothbrush to splatter paint some stars. What I like to do is slightly wet the brush first and then add a small amount of white. Test it on another surface until it splatters to the right consistency.
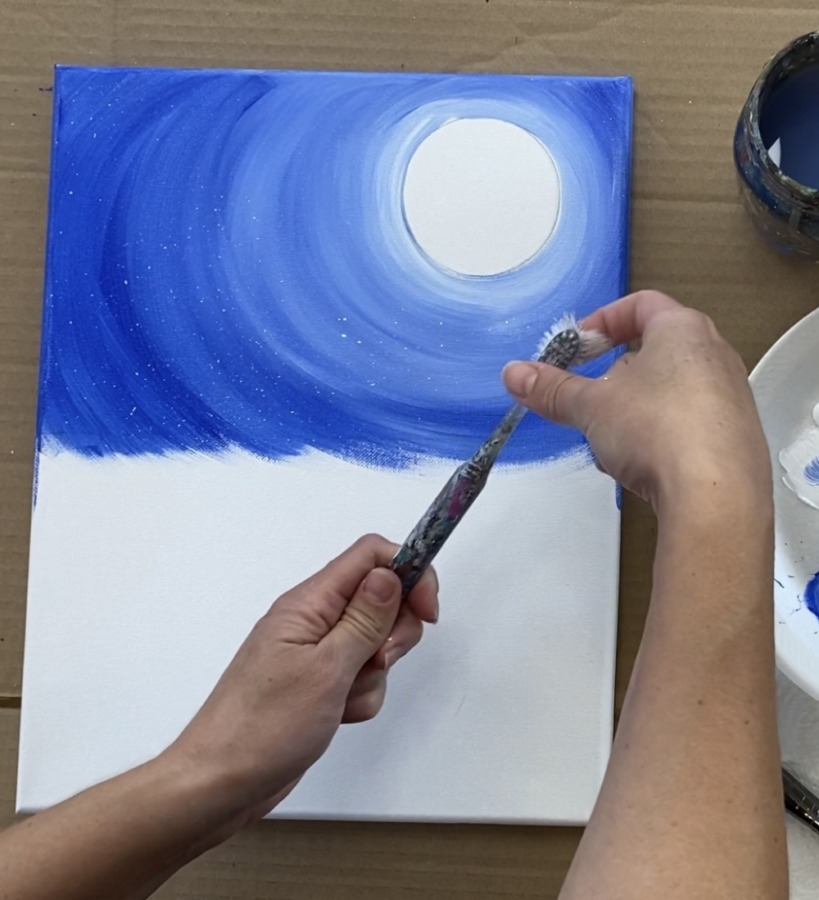
4. Draw the path
Next use a pencil to draw your path. I made a curvy path that starts wide at the bottom and goes smaller in the distance. You may need to sketch it out a few times and possibly erase until you get the path you like!
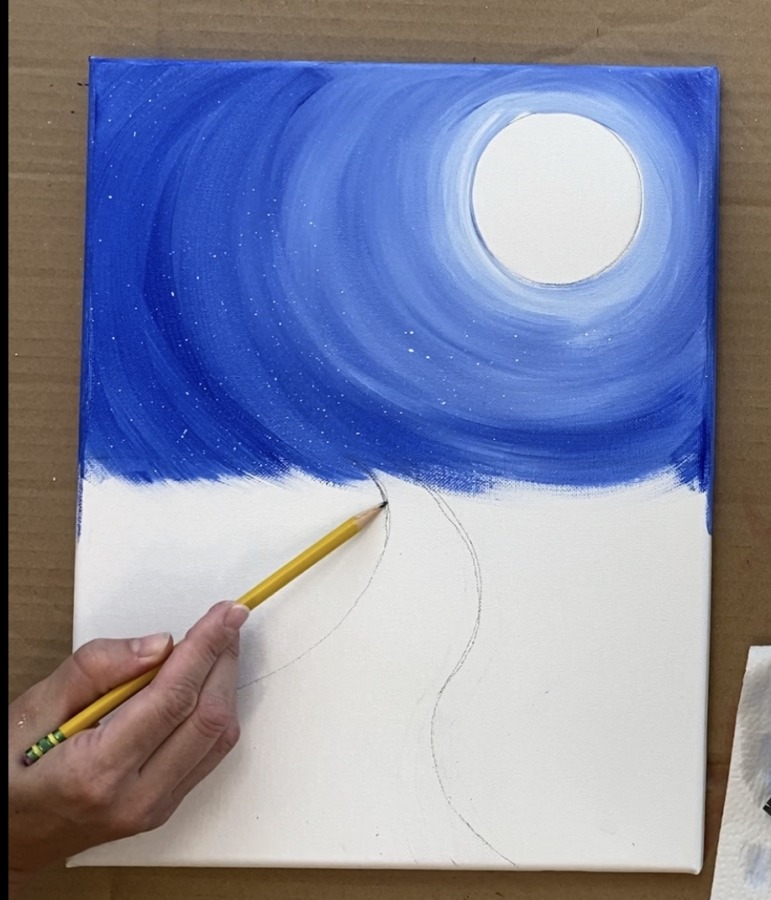
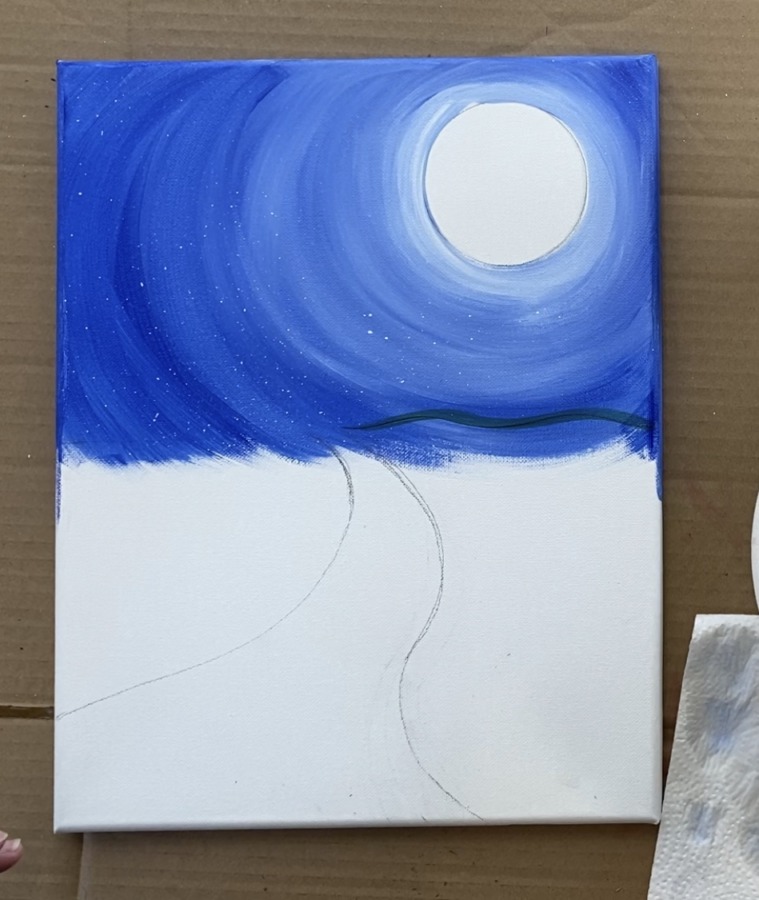
5. Paint the land (base layer)
I painted three layers of paint for this land! The first layer is basically filling all of the area in with deep green permanent.
Use your 3/4″ wash brush. Start by painting a hill that goes slightly above the horizon line. It will look dark because you are painting over that dark blue.
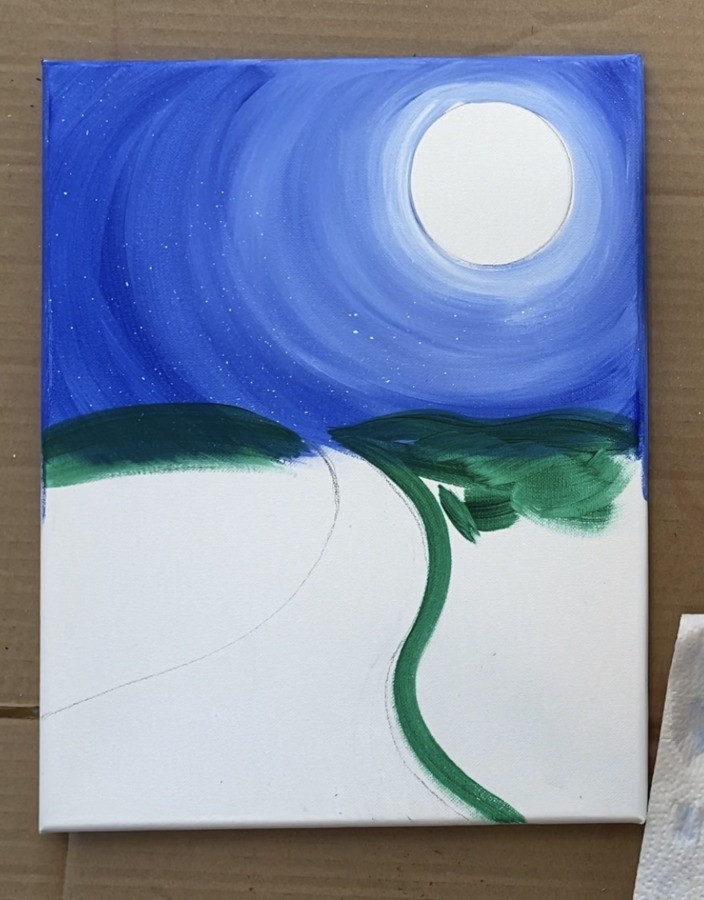
Fill the rest of the area in with short choppy strokes that go in different directions. If you do not like the texture here, you can also do this with long, wavy stroke lines or horizontal strokes.
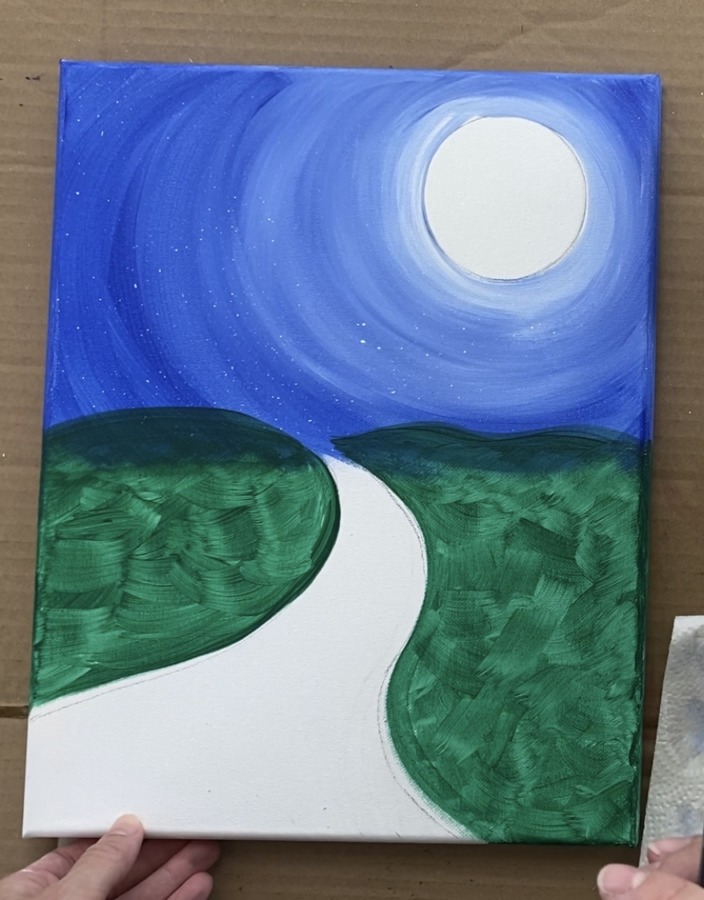
6. Paint second layer on land
Then I painted a second coat using light green permanent mixed with a little titanium white (about 1:3 of white to green).
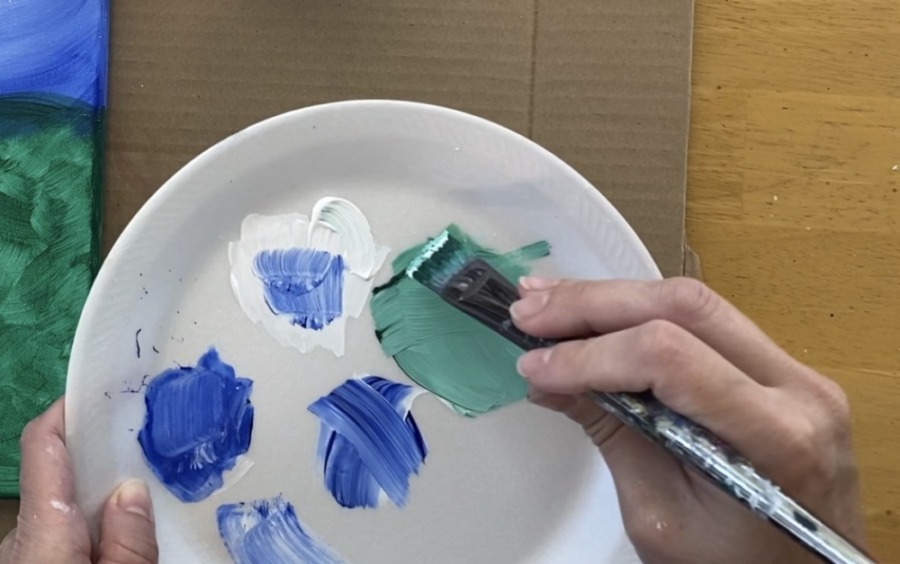
Start at the hill with this light green and paint down. The trick is to get the white to run out as your work your way down. You want your land to be lighter far away and darker towards the bottom.
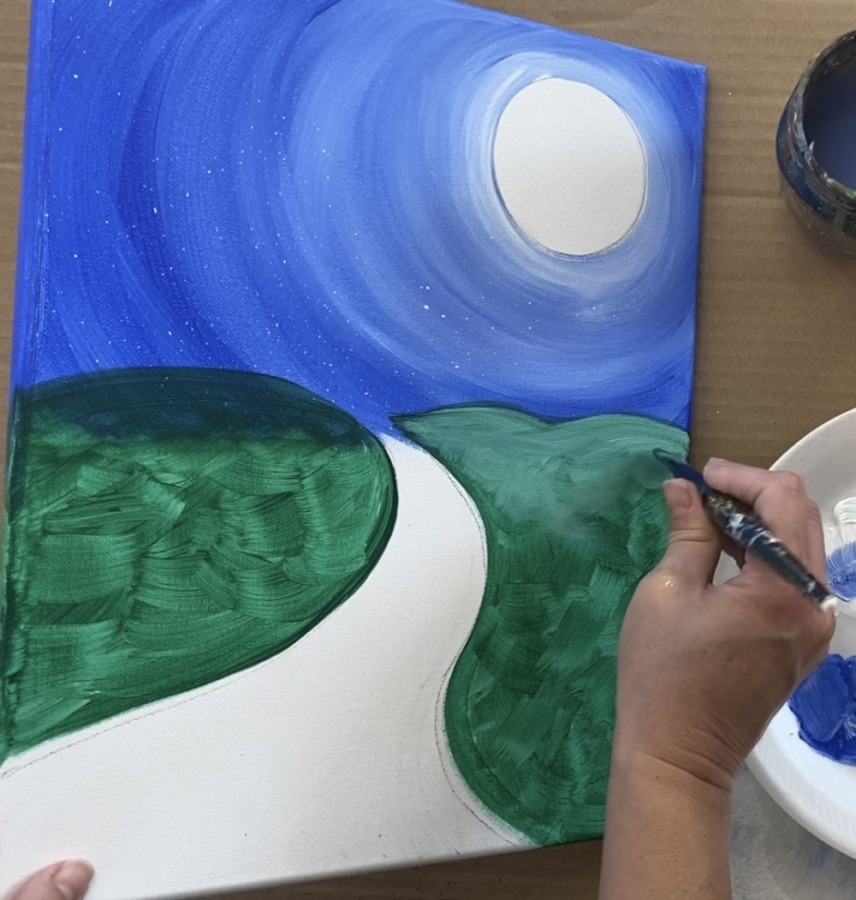
Since my first layer wasn’t dry all the way, this light green blended with it slightly.
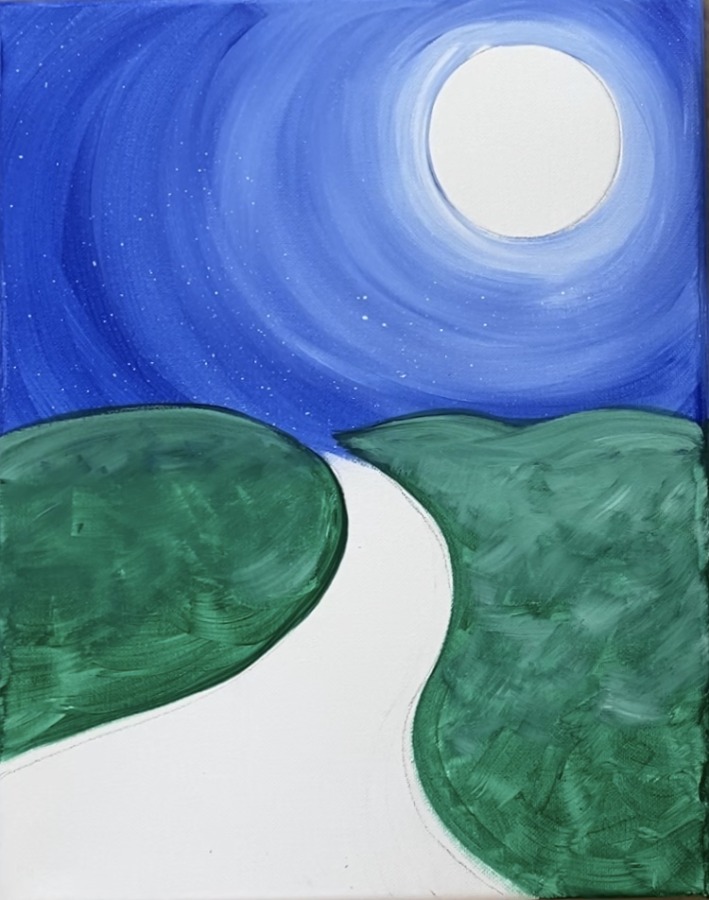
A third layer is added layer but for now I decided to let this dry.
7. Paint the path
The path is also painted in layers! The first layer is solid burnt umber. I used my 3/4″ wash brush but also my 12 bright brush (for smaller areas).
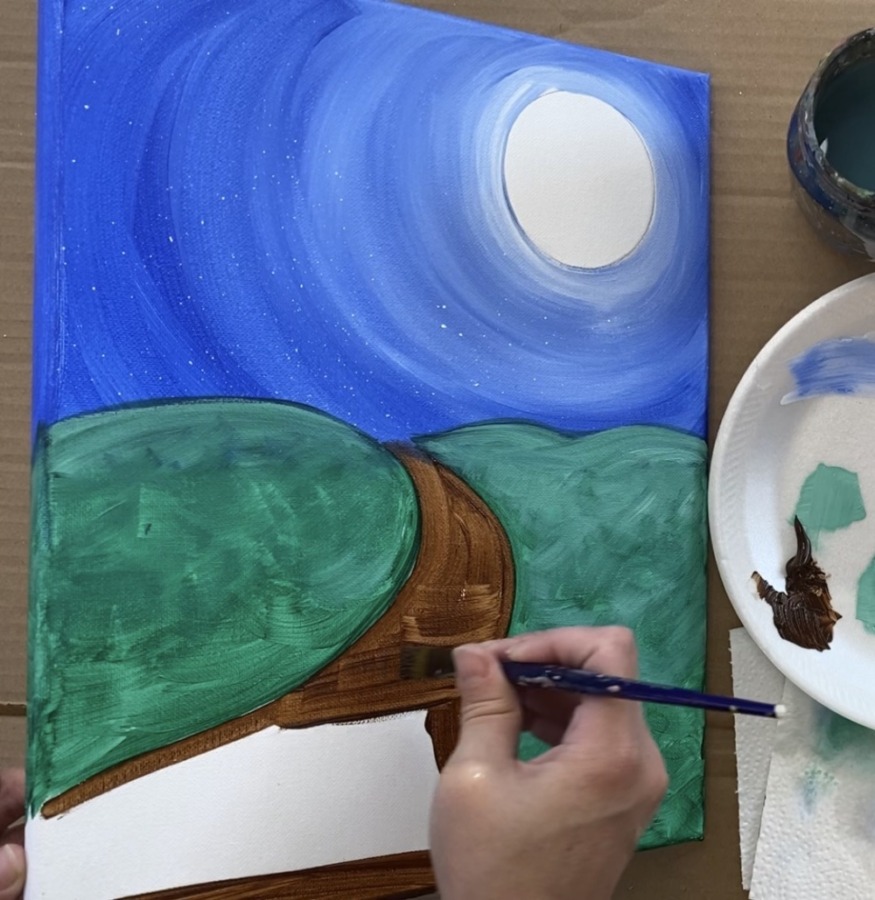
Try to paint left and right strokes all along the path. You can outline the edges if needed.
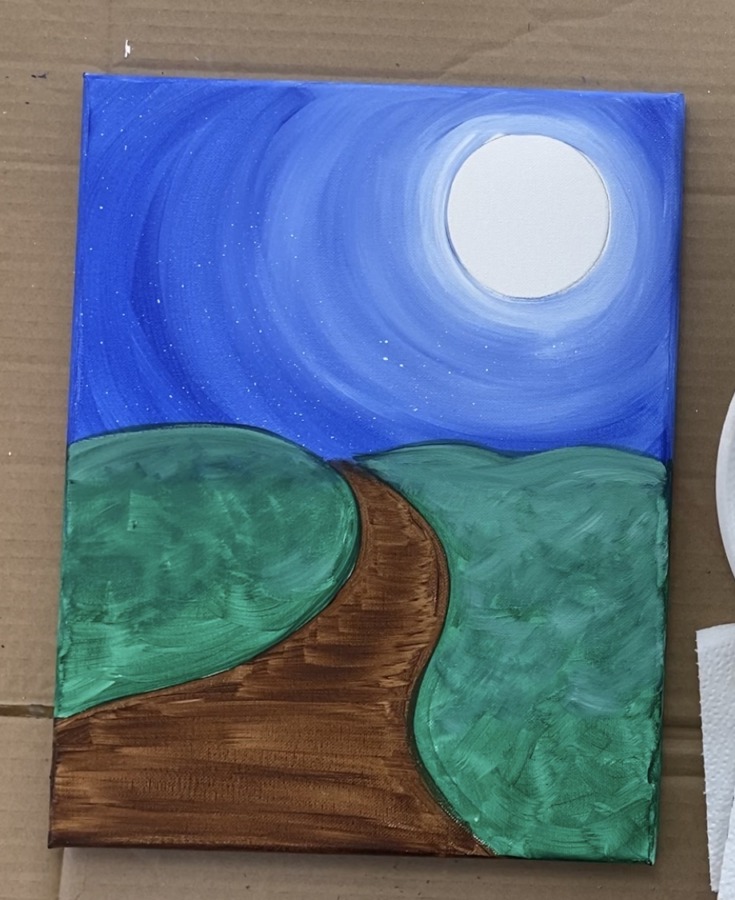
8. Paint third layer on land
For the third layer of the land, I mixed on my palette deep green permanent with a little bit of white and yellow oxide. This was about 4:2:1 of green to yellow to white.
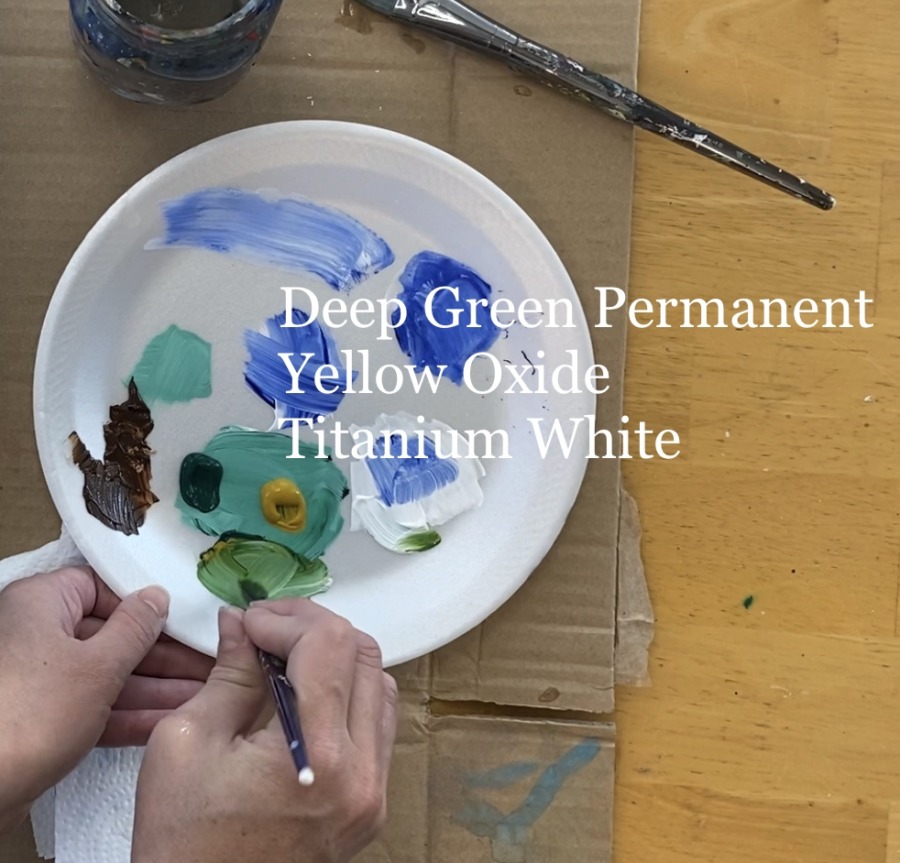
I started at the back (using my 12 bright brush) and painted short choppy strokes again.
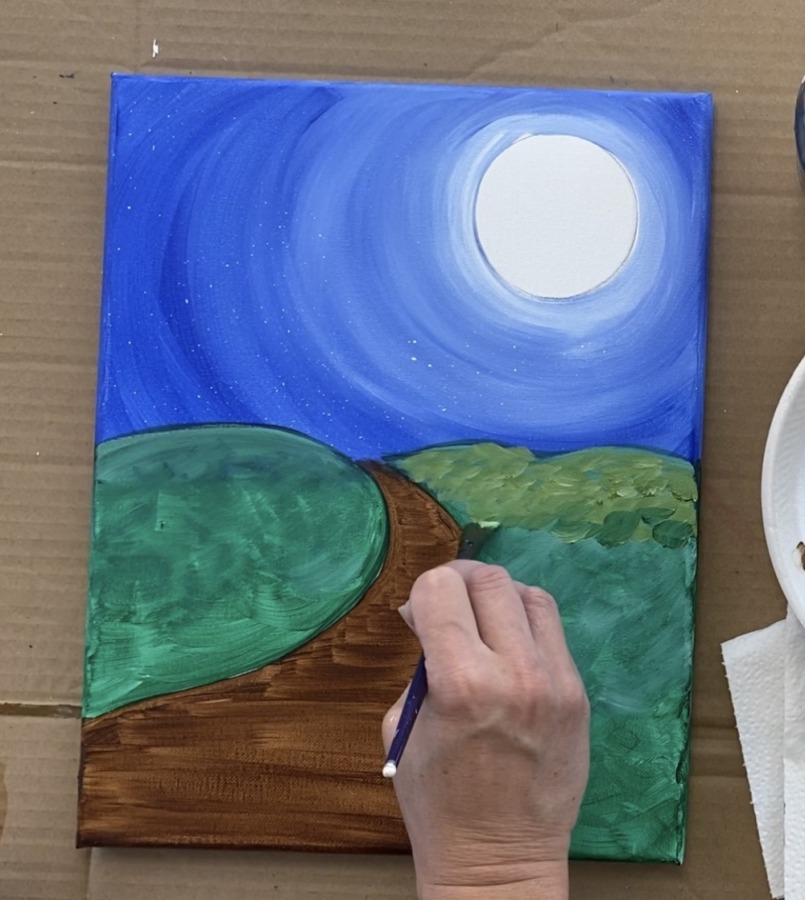
As you work your way down, load your brush in more deep green permanent so it gets darker. Do more short, choppy strokes.

Keep adding more deep green permanent to your brush and go all the way to the bottom. The land should be lightest far in the distance and darker on the bottom.
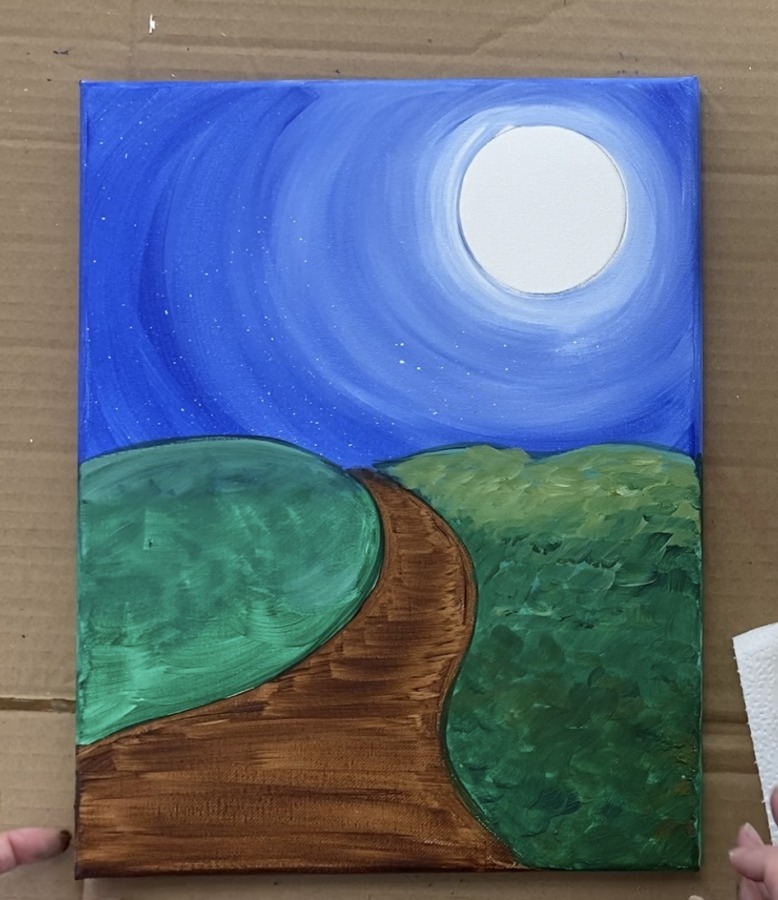
If you want, you can add a tiny bit of brown to the green to make it even darker on the bottom.
Do the same thing to the left side of the path!
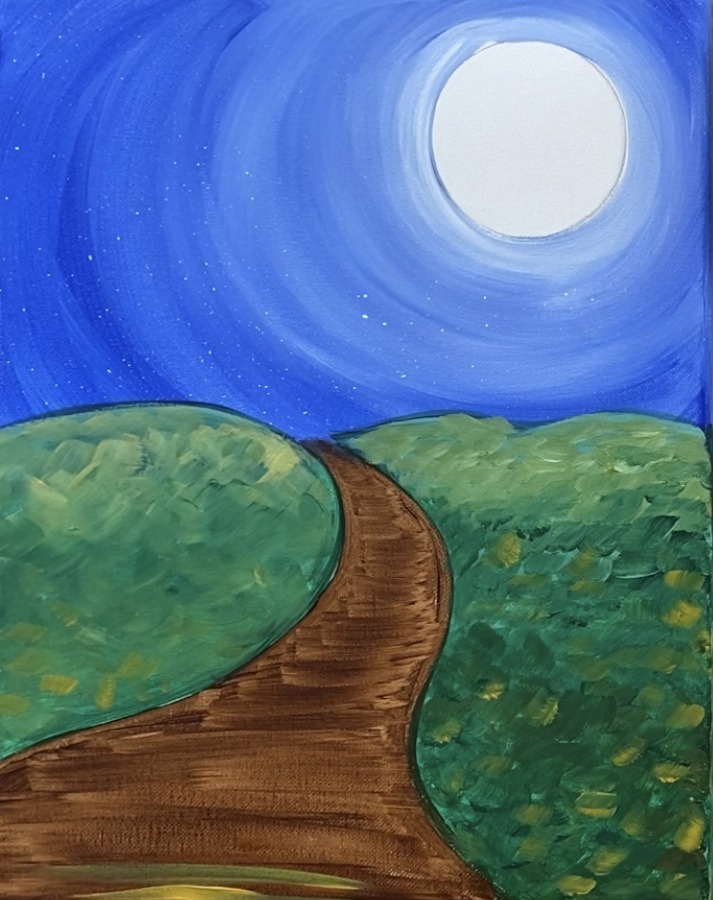
Then I decided to add a few random strokes of just yellow oxide sparingly all throughout the land just to brighten it up a bit!
9. Paint yellow oxide & white on path
To brighten the path up, add yellow oxide using the 12 bright brush and painting left and right strokes. Don’t cover all the brown, just make “expressive” horizontal strokes.
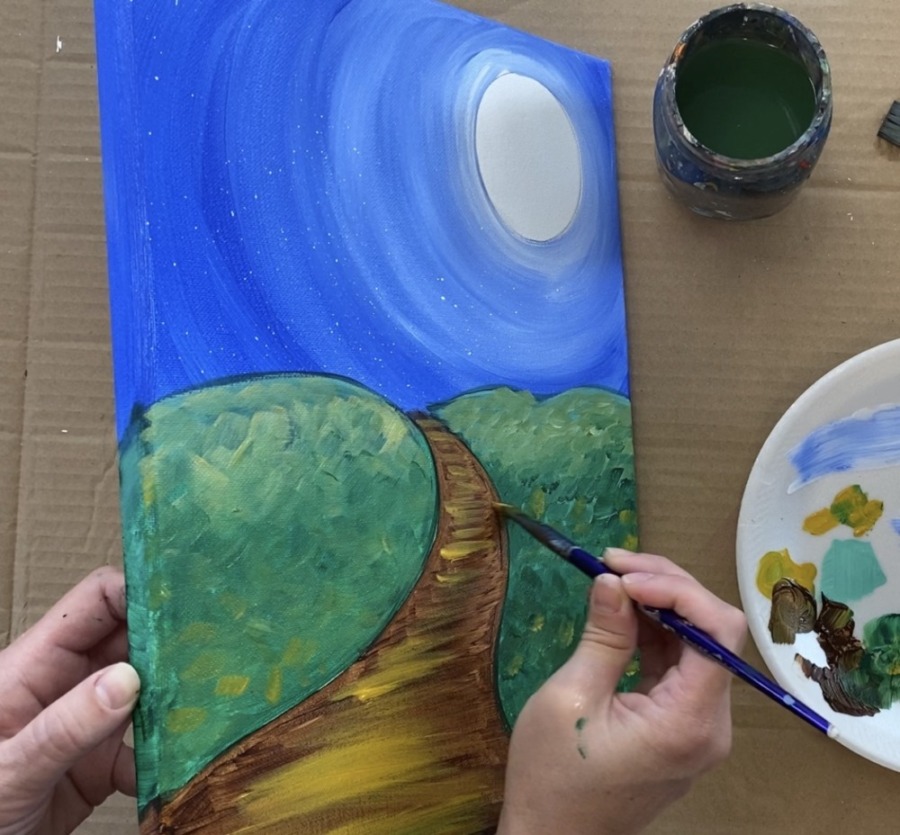
To brighten it up even further, add a bit of titanium white into the yellow oxide and add that third layer. Again, do not try to cover all the brown.
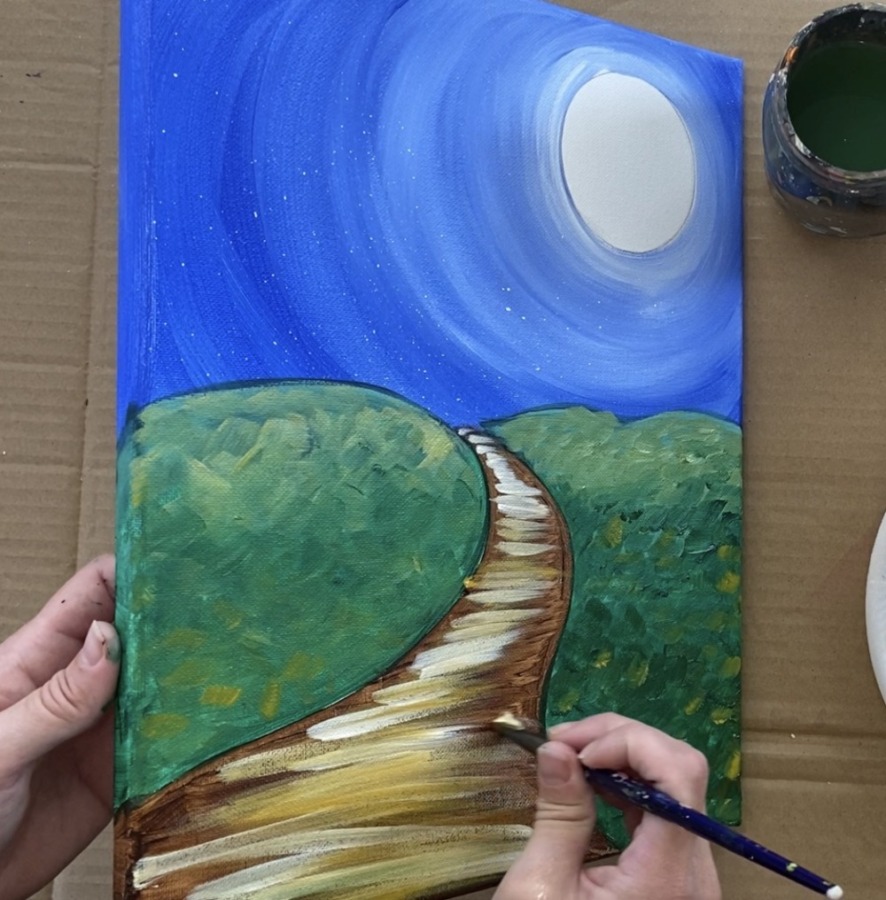
If there is too much white, go back over it with more yellow oxide or more burnt umber.
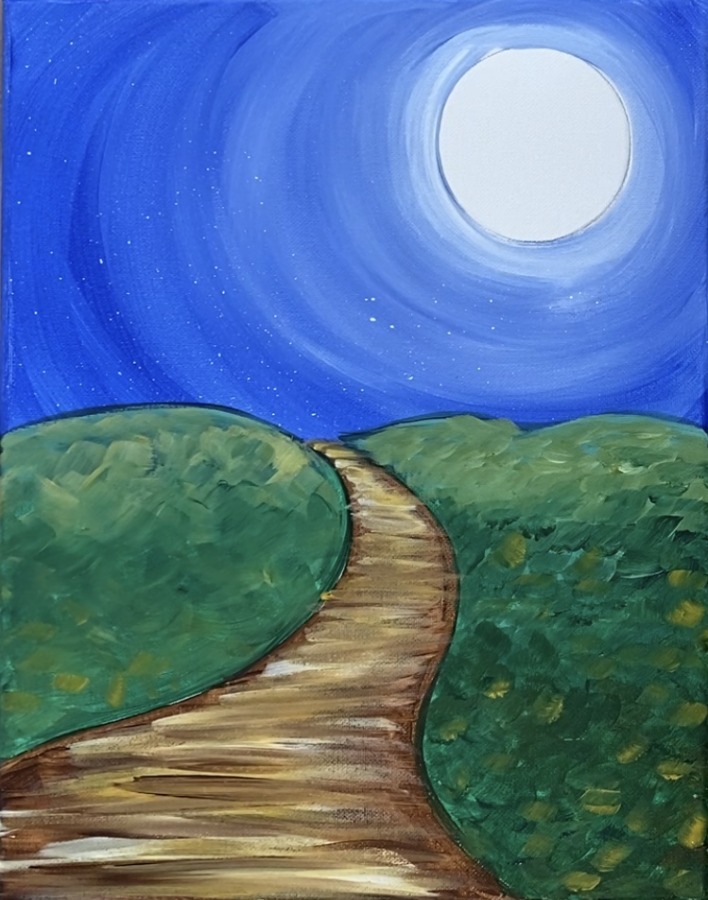
10. Paint short strokes on moon to make texture
First paint the moon a solid coat of titanium white!
Then, to do the moon texture, use your #4 round brush. Start with primary yellow and titanium white. Paint short, choppy strokes to make the texture of the moon.
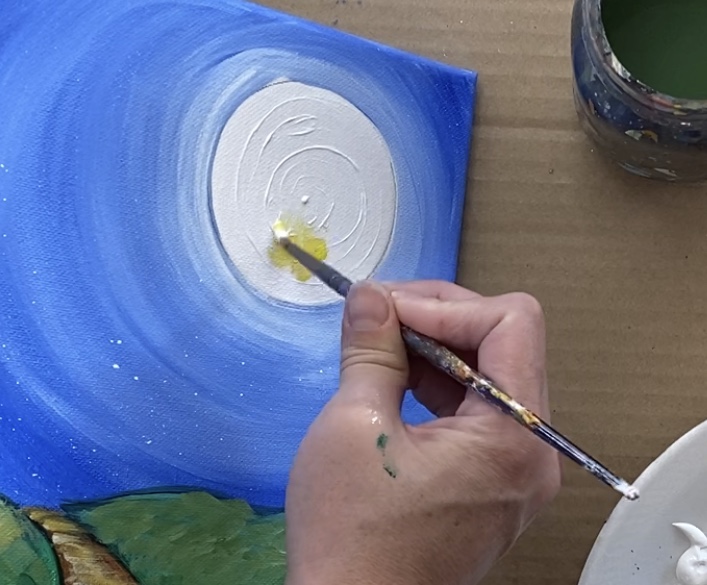
Then add a bit of cadmium orange hue into it. Again, short choppy texture strokes. Try to do these in clusters and do not cover the entire moon.
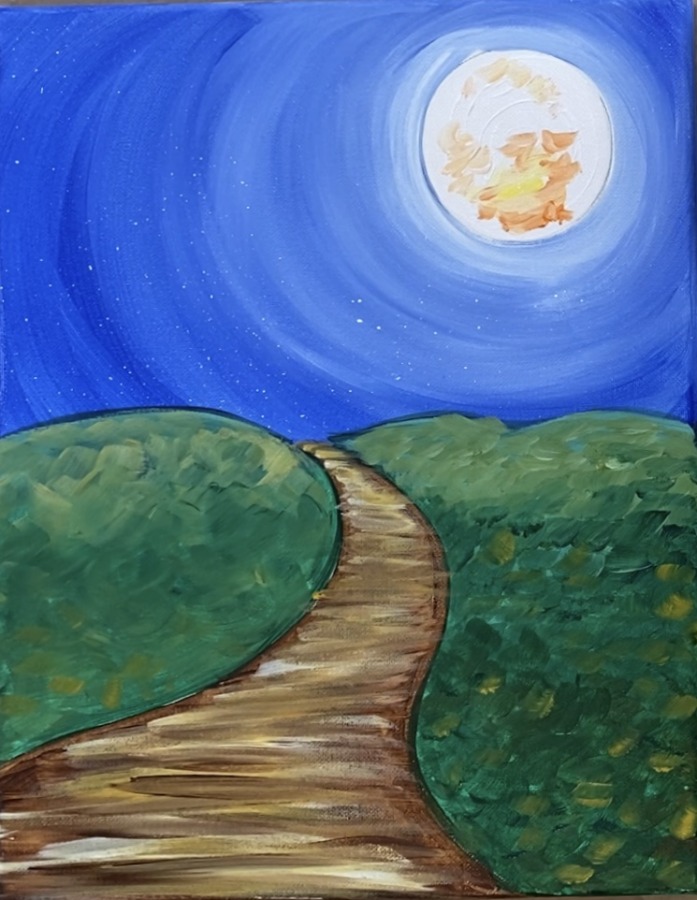
Outline the outer inside of the circle with yellow mixed with white. Try not to completely cover all the white on the moon.
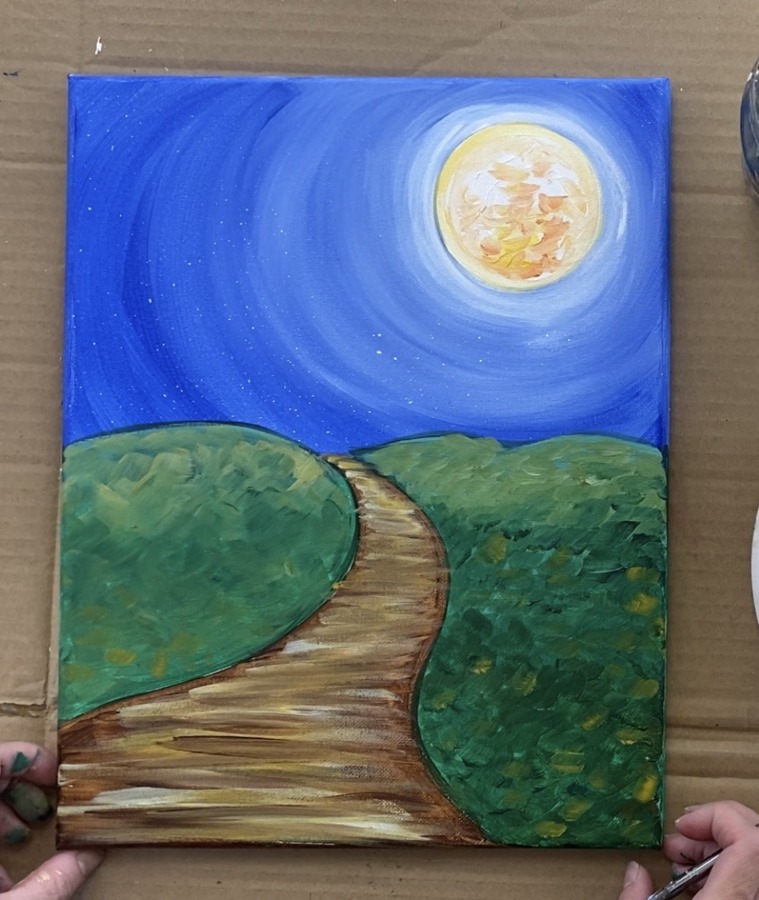
11. Draw trees and lampposts with white chalk pencil (or chalk or regular pencil)
I drew my trees with a white chalk pencil! If you do not have a white chalk pencil, you can use regular chalk or a regular drawing pencil. Start by drawing a vertical trunk that branches out into three smaller branches.
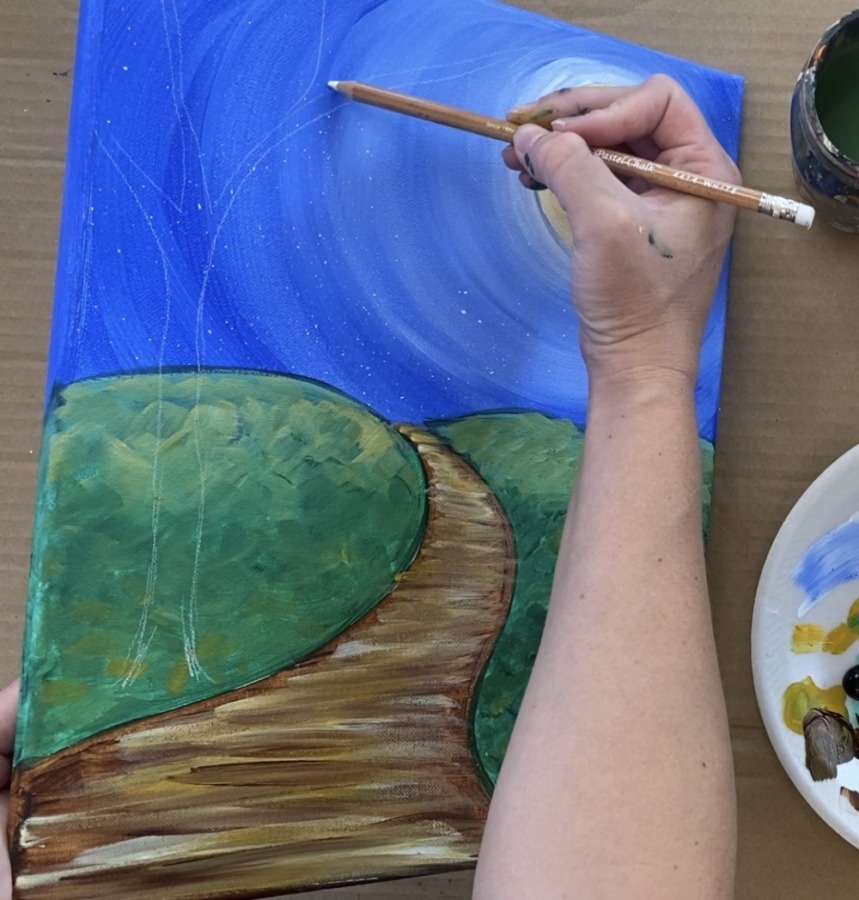
Then lightly draw a few more branches. Draw a second tree further up the path. This second tree is smaller with a thinner trunk.
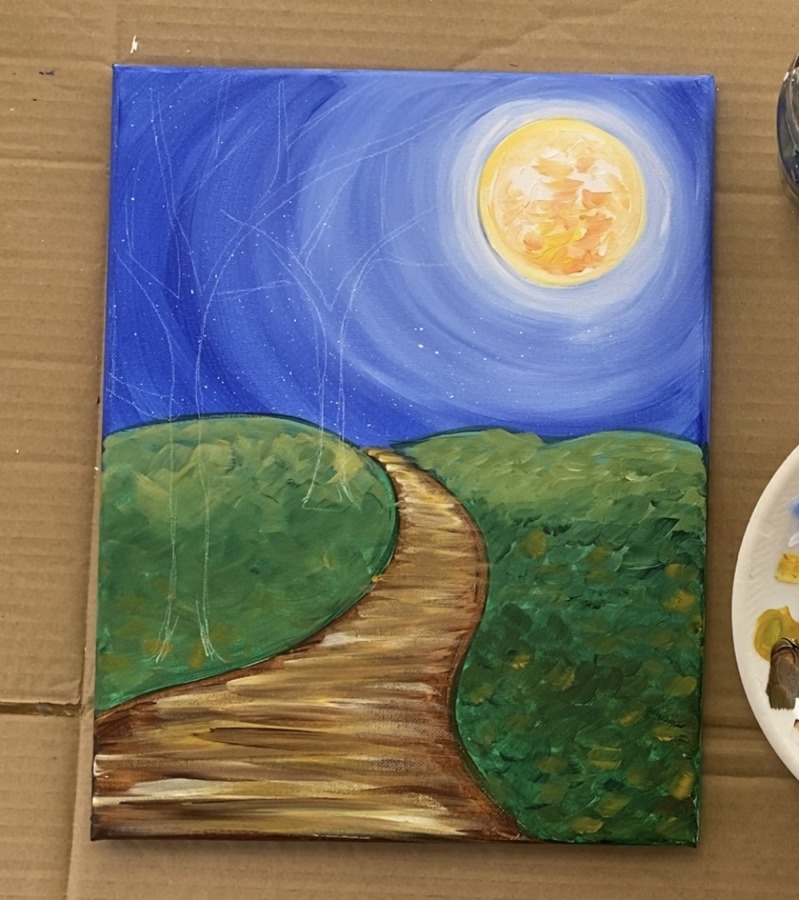
Draw a third tree on the right. This tree is larger with a slightly wider trunk and the branches go nearly all the way to the top of the canvas. Try to draw your branches so they go around the moon.
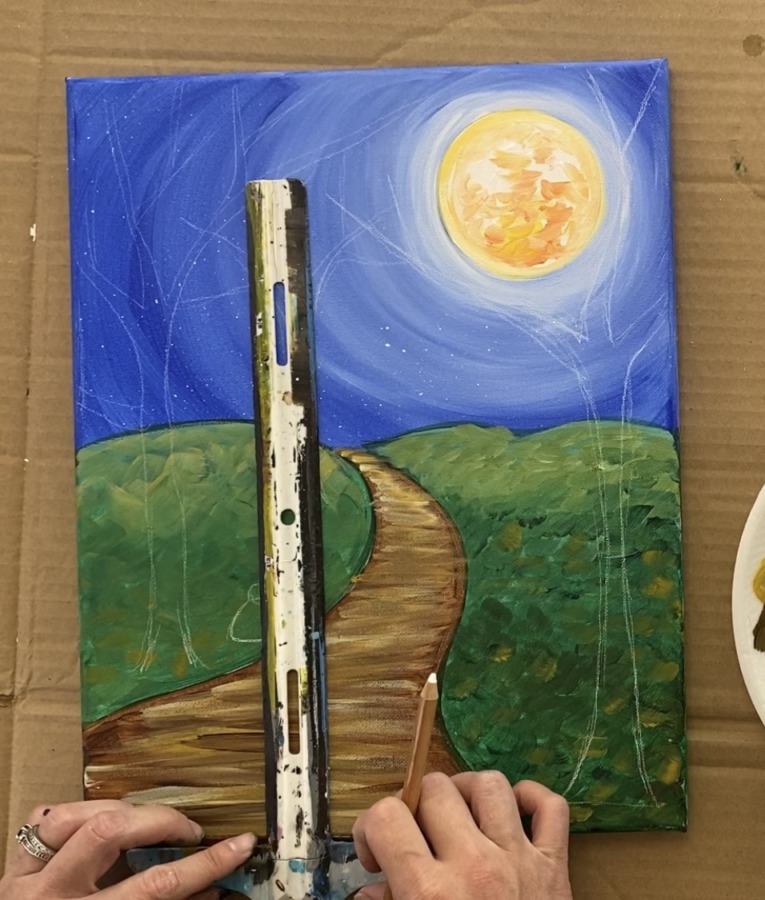
To draw the lampposts, it is helpful to use a t-square ruler to get the post to be completely vertical. For the base, draw a triangle with curved edges and a circle on the top of the triangle base.
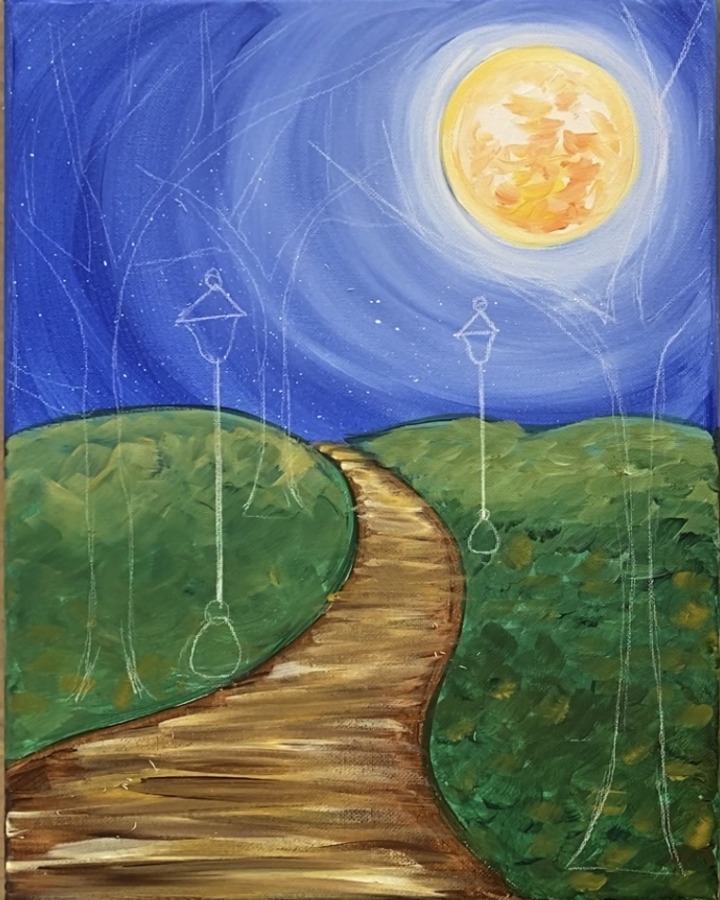
For the lamp shape, draw a letter “U” with a triangle on top and then a small circle on the top of the triangle!
Tip: sometimes it is fun to look at different lamppost designs. Do a quick google search and see if there are any other styles of lampposts you would like to draw instead.
12. Paint trees
The trees are painted mars black. Use a #4 round brush and slightly water down the black so it is not thick but a nice, flowing consistency.
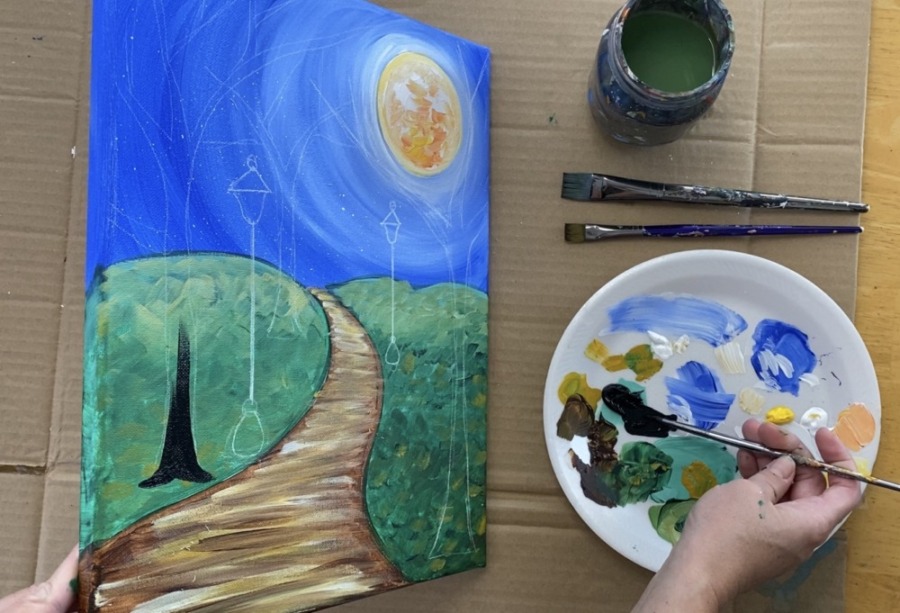
Start at the base of the trunk and paint upwards. When you paint the smaller branches, you will need to use more of the point of your round brush to get the thinner strokes.
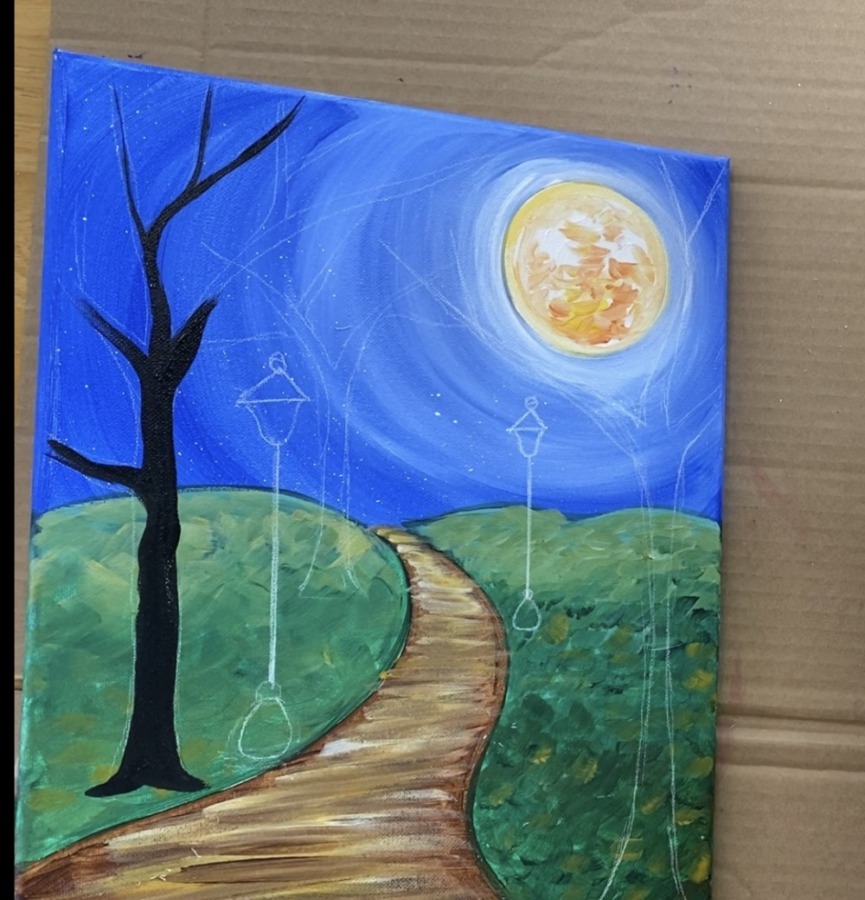
The small branches are much easier to create if your black is watered down. That way, you can get it to flow to a point.
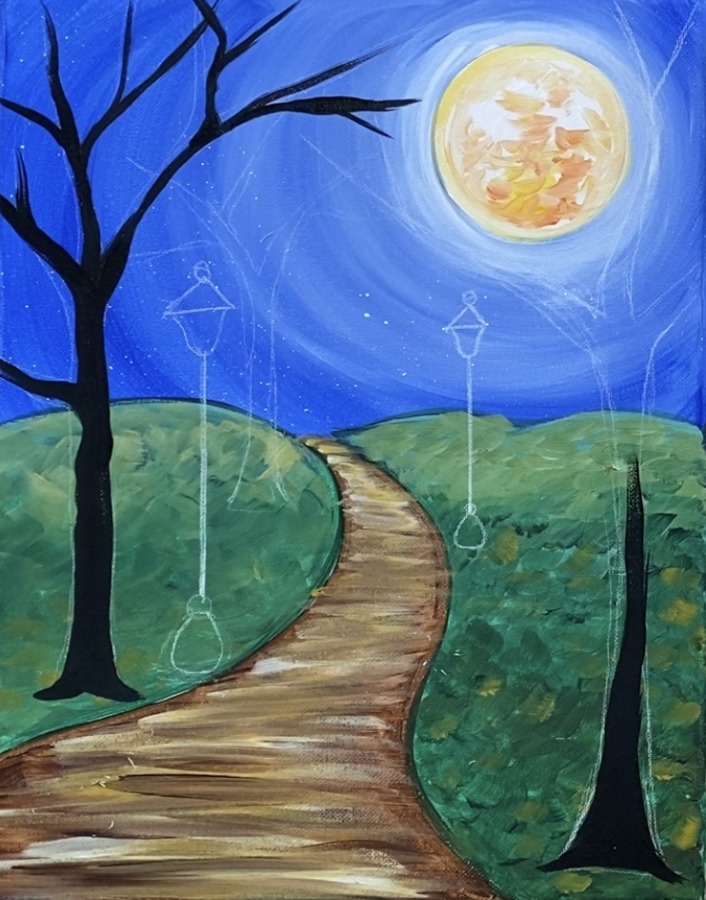
It is okay if you go outside your drawing line or create new branches you did not draw! That white chalk will erase later.
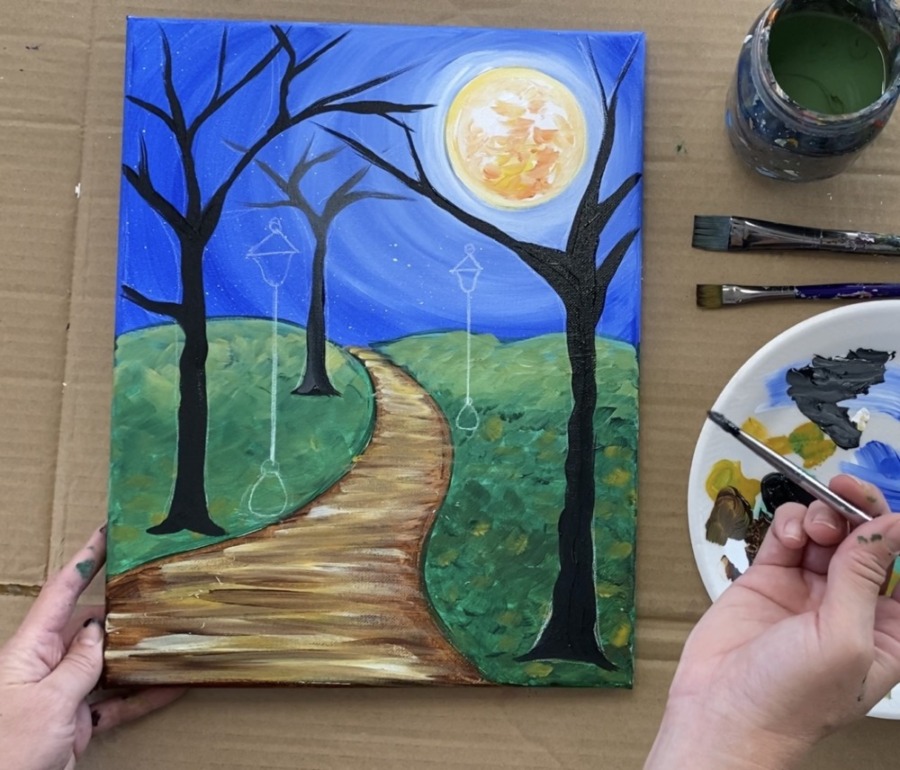
For the smaller tree in the distance, I actually added a bit of white to it to make it a dark grey. This gives the impression that it is further away.
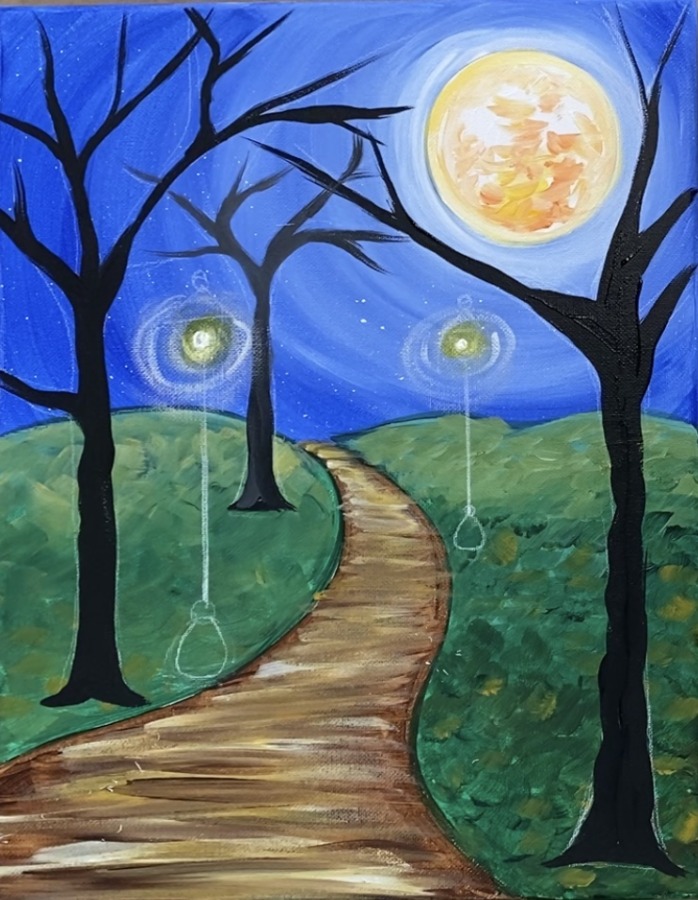
13. Paint lights
Next I did the lamppost lights! I found it easer to paint the actual light first and then the black part of the lamppost. Start by painting a yellow dot on the middle and using your finger to smear the dot.
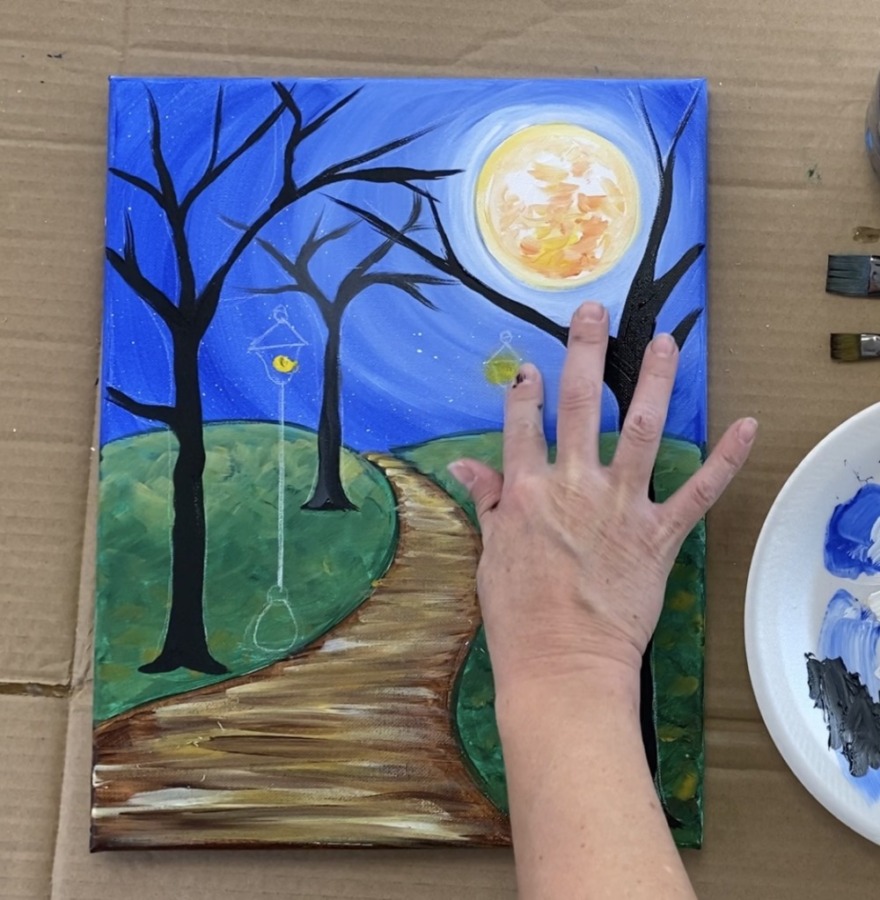
Then after smearing the dot, add a white dot in the middle!
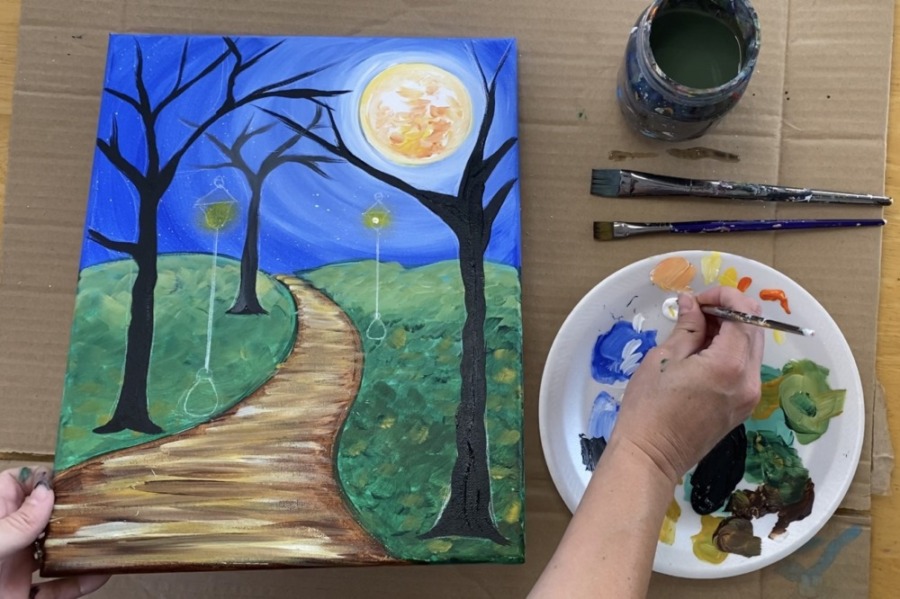
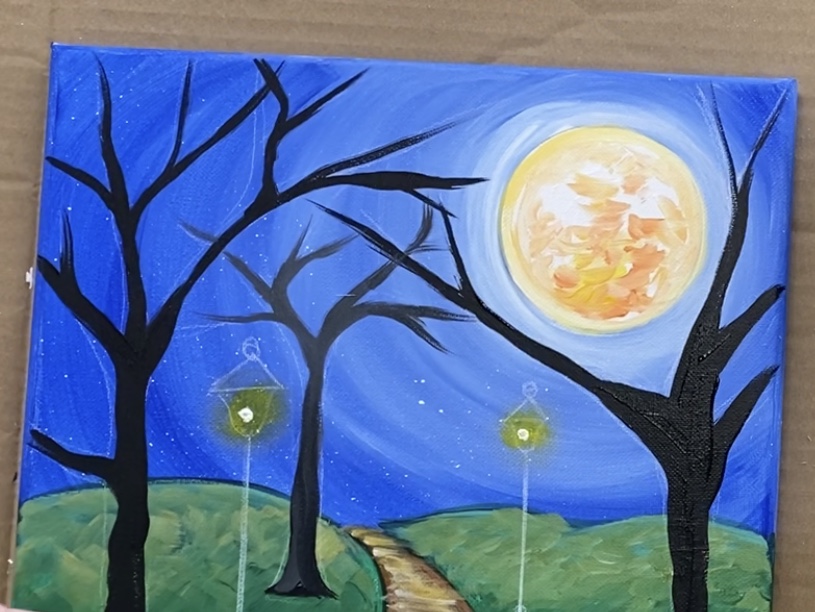
Smear the white dot slightly with your finger. Then add another final white dot in the middle.
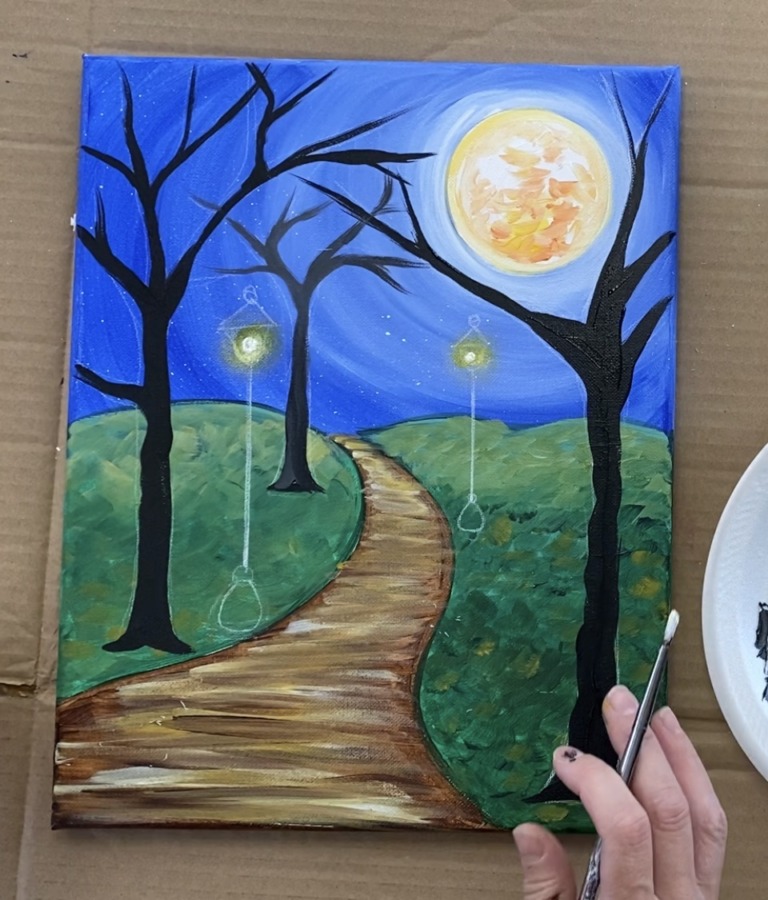
To create the impression the light is glowing, do dry brush strokes around the light. Load your round brush in white and then wipe it off with a paper towel. Gently paint rings radiating around the white. This should look light and dry!
If it is too white, wipe off more with a paper towel.
14. Paint lampposts
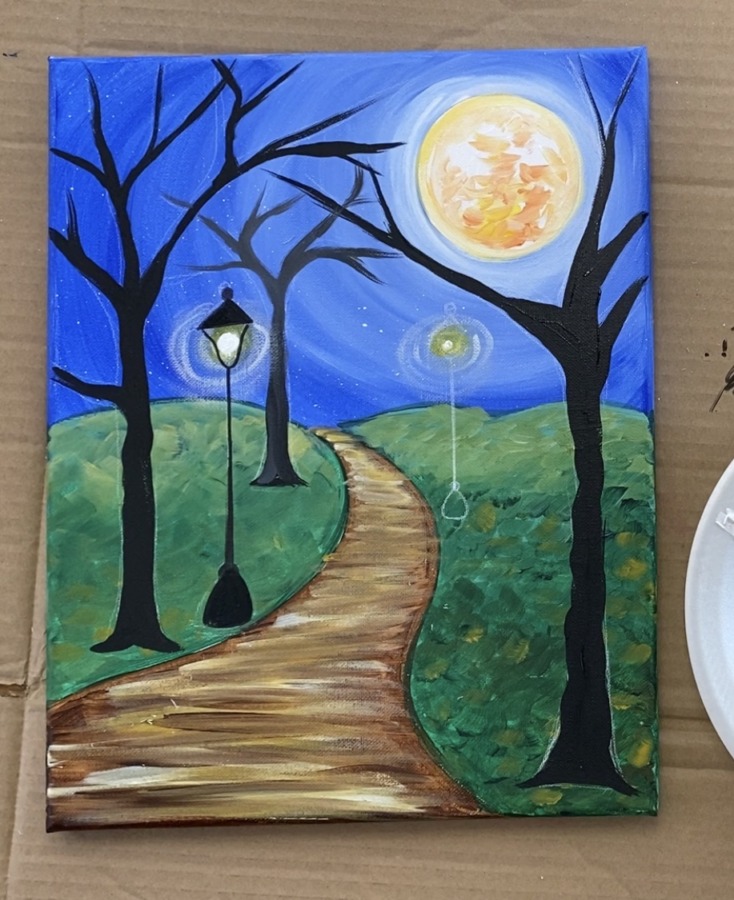
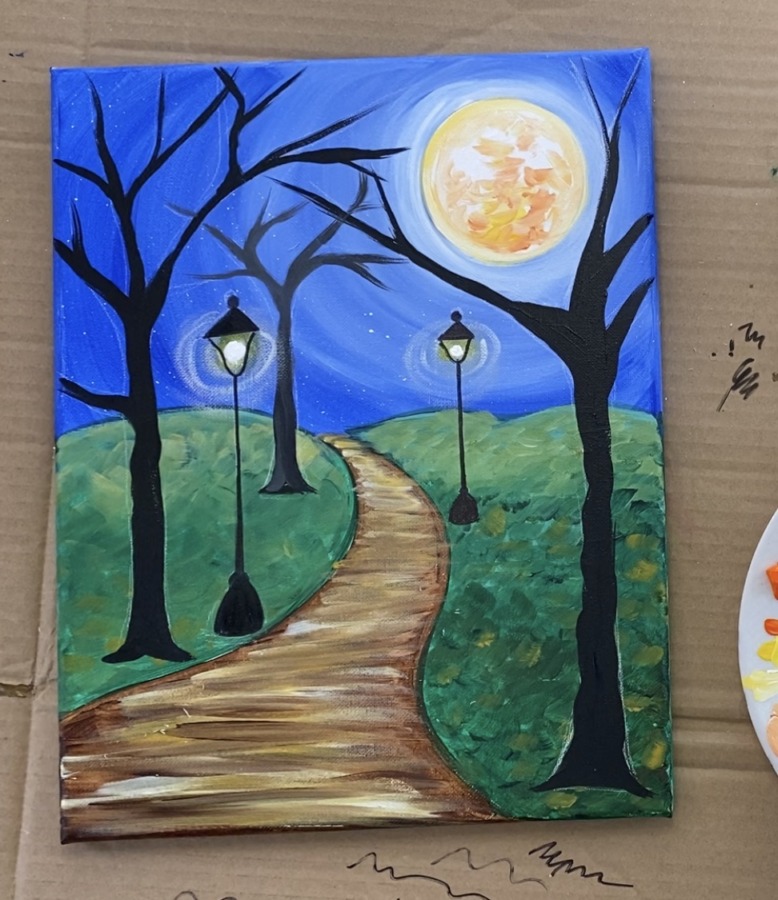
I found it easiest to paint the lamppost with a black paint pen or sharpie! This allows for great control of that vertical line and intricate lamppost shape.
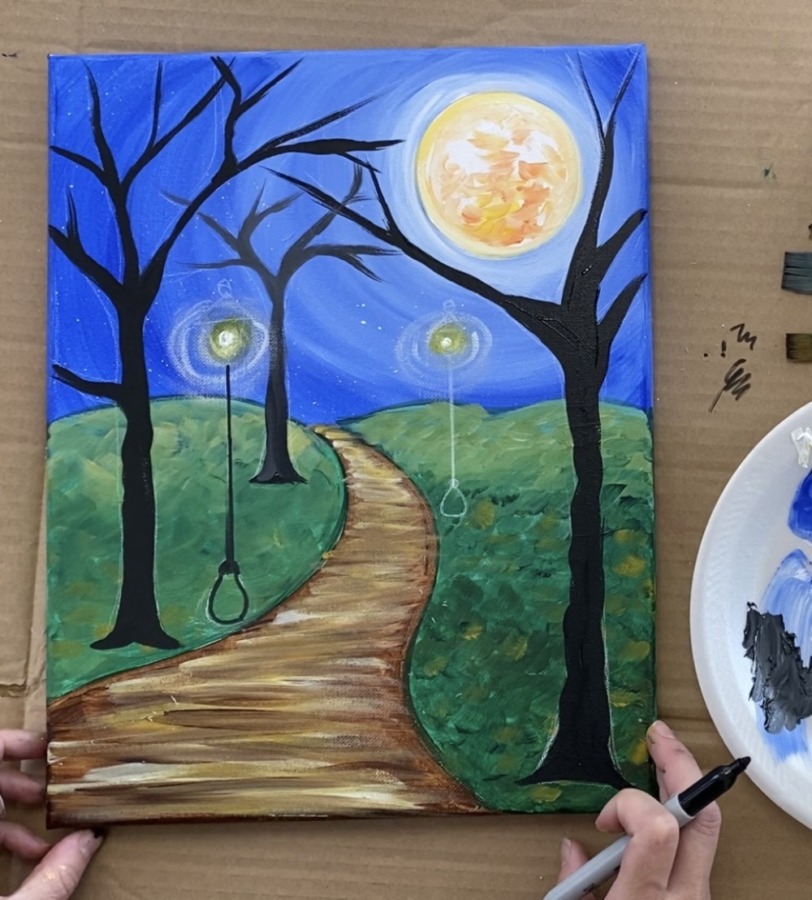
You can paint the base with a round brush if you prefer and the pole with a very detail 5/0 round brush!
15. Paint leaves
This was my favorite part! Load your palette with cadmium orange hue, primary yellow and alizarin crimson. Use your 12 bright brush and all three of those colors to “flip flop” the brush to make the leaf strokes.

I started with orange and then added yellow and red! You do not need to rinse the brush off between colors. Make your leaves all over the branches. You can also use your round brush for the smaller tree in the distance.
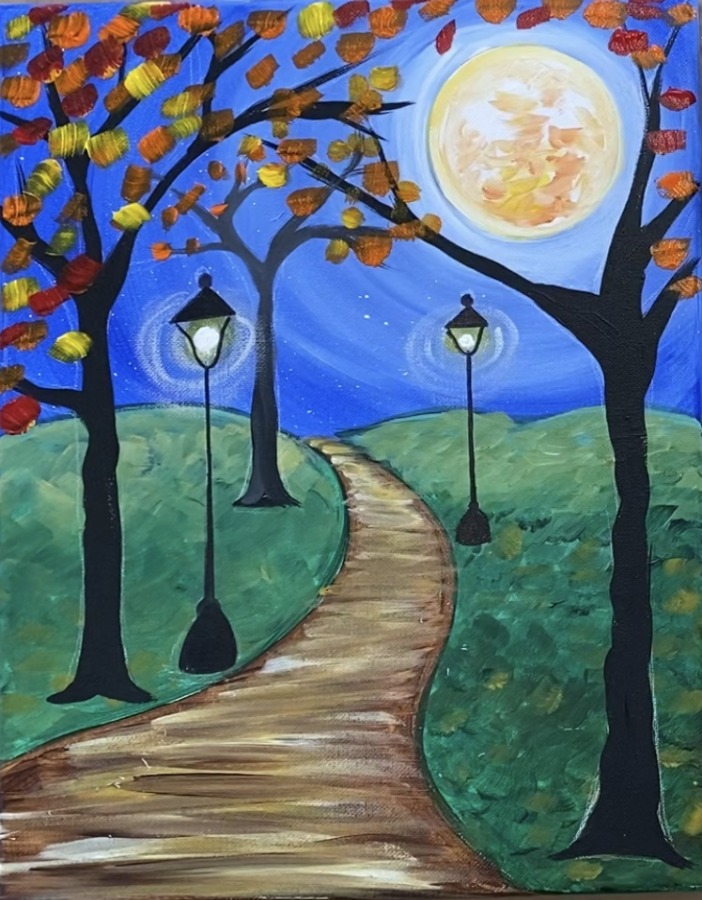
I also added a bit of white to the red to make it a pretty pink shade. Use a variety of colors in the leaves. You can have fun by mixing different yellows and reds and oranges together plus the white.
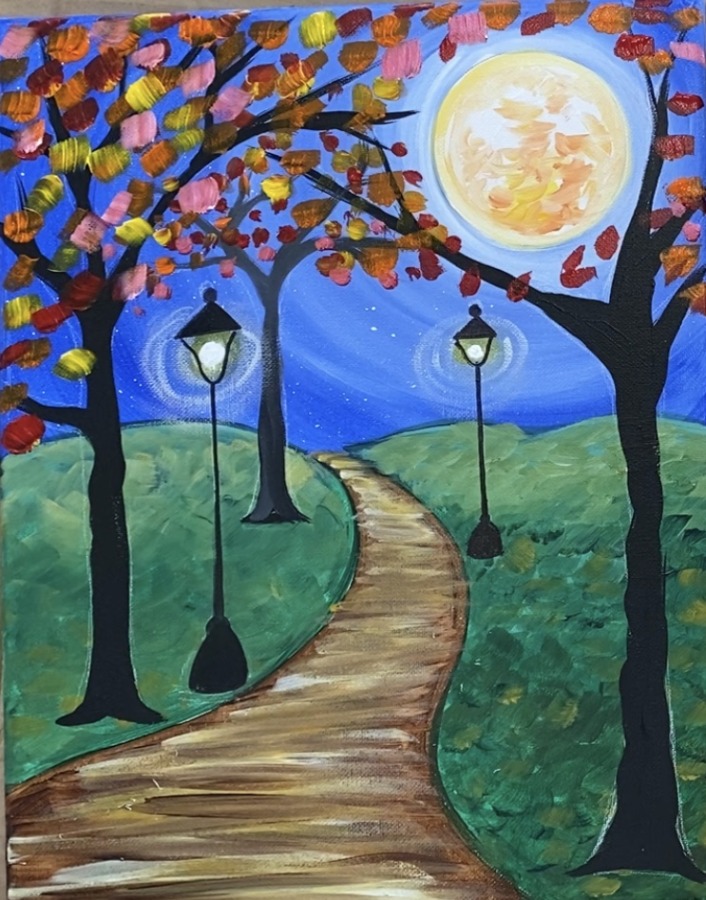
Paint leaves on the ground using the same technique! I did piles of leaves bunched up at the base of the lampposts and the trees.
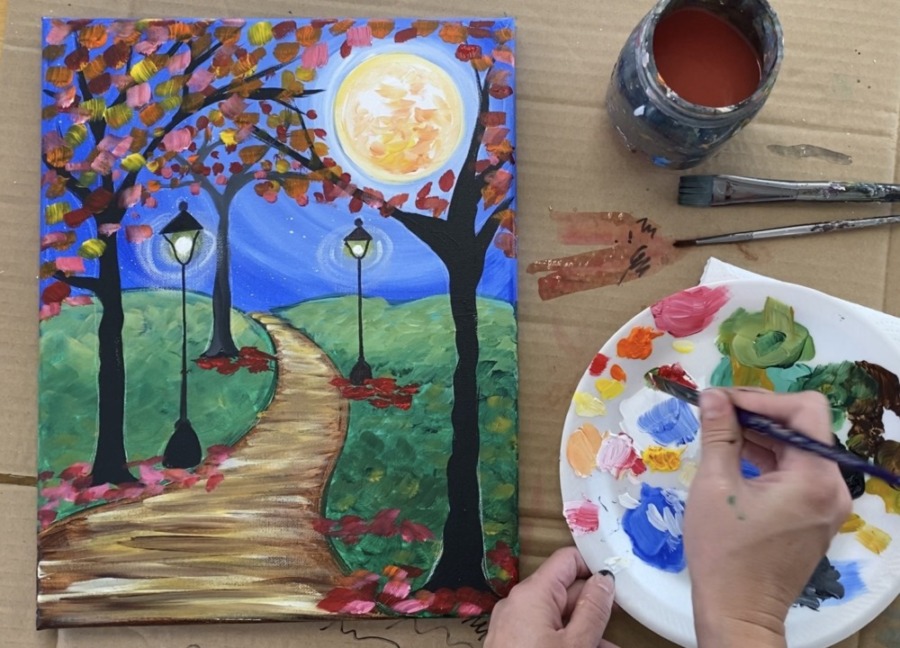
I also did a few leaves falling and a few here and there on the path and grass area.
16. Paint a few more branches and shadows
I decided to use my sharpie to add some small, detail branches that overlapped some of the moon.
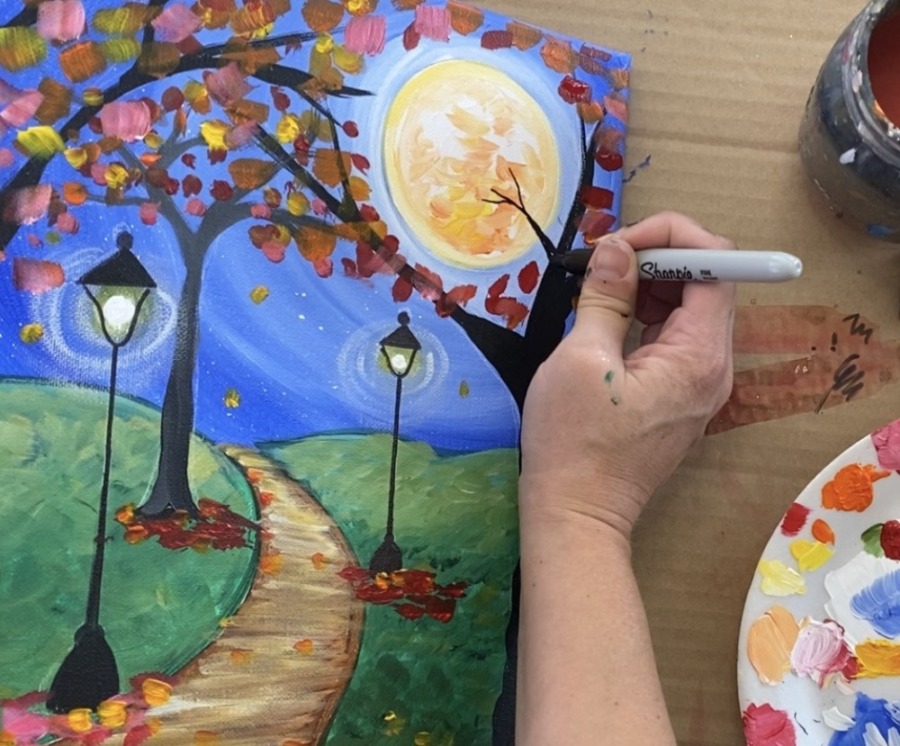
This helps to kind of connect the moon into the painting but not cover it completely.
You can decide to stop at this point if you want! Or you can continue on to the next step and paint some shadows.

For the shadows, I watered down my mars black to a very “water color like” consistency. You want it to become semi translucent.
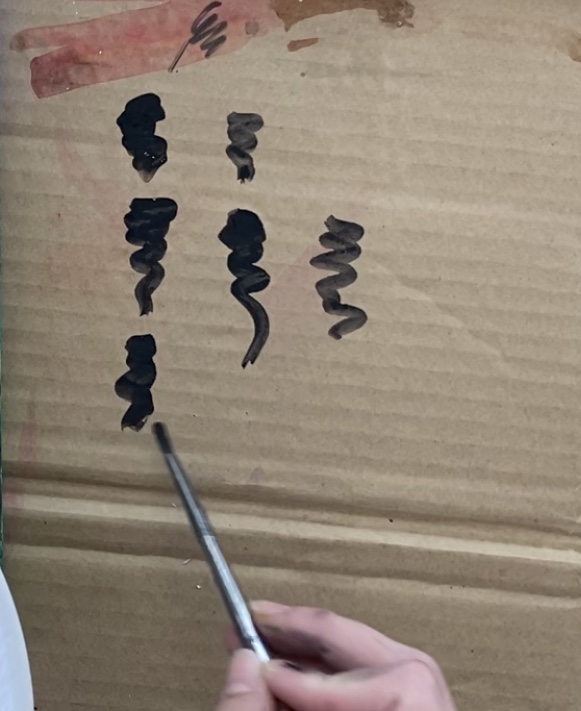
To paint the shadows, I took that watered down black and my #4 round brush and painted very loose zig-zag strokes going in a vertical formation. I did this under the trees and the lampposts.
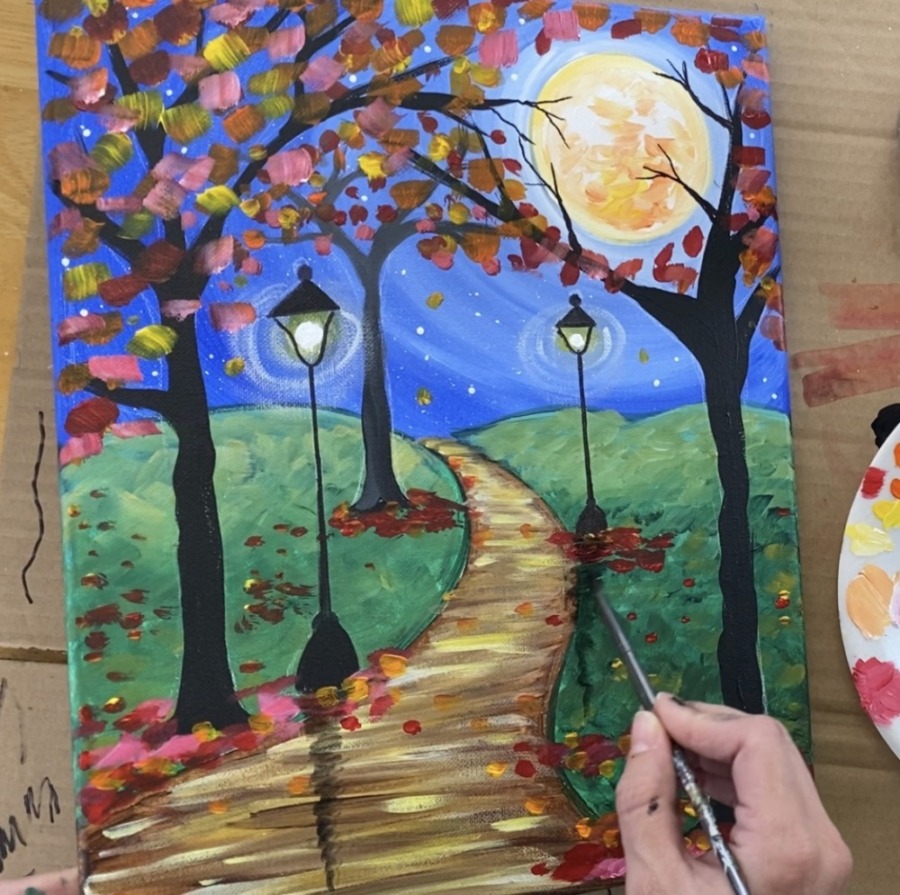
Also notice that I added a few stars in the sky! I did this with the round brush and just painted white dots that show through some of leaves in the sky.
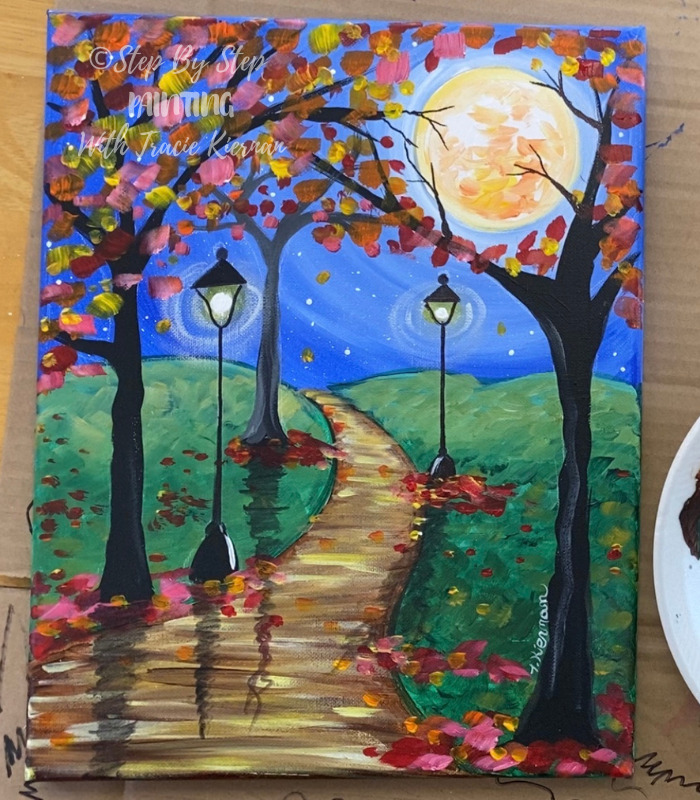
Finished!
Sign your name and show it off!


Thanks so much for the free picture by picture tutorial. Also, so appreciate your through instructions, such as brush info. As a new painter with little skill, I look forward to joining the FB group and getting tips and info.
You’re welcome Nancy!
I can’t thank you enough for all your beautifully done paintings, I have a disease that has slowed me down considerably and I’m fairly new to acrylics but you have demonstrated these so well that I’m not intimidated and I’m having fun! I love your style, thank you for sharing!
Thank you so much Andrea for your kind words! I’m so glad you are enjoying these paintings and they are helpful for you. You are welcome!
Andrea, I couldn’t agree more. I could have written this!
Thanks Tracie. I really enjoy your paintings ?
I have just discovered your site and as a fairly new painter was able to paint your owl on a lamp post. It is so cute. Thank you.
You are so kind and painstaking. Feel so confident with you showing step by step. Very nice of you. Thanks for the tutorials pls continue the good work
Handshake
Aban Vandrevala
Mumbai