

Would you like to save this?
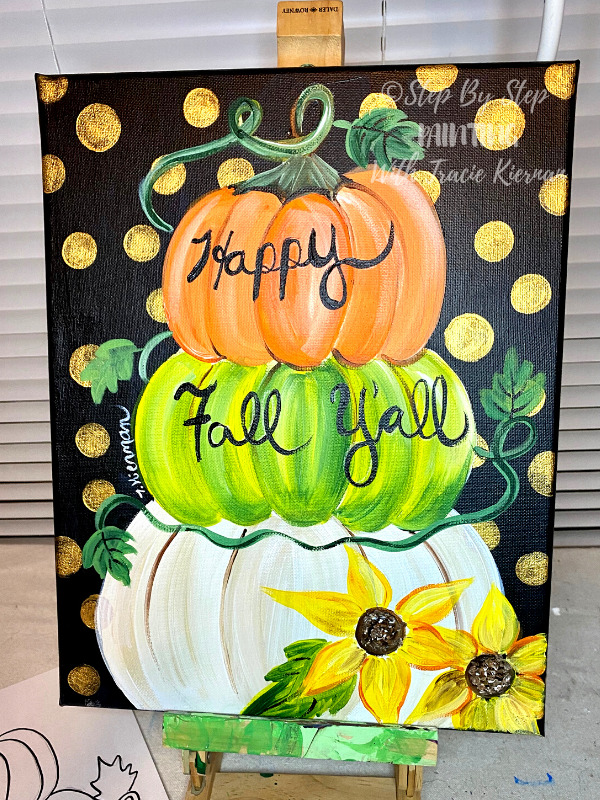
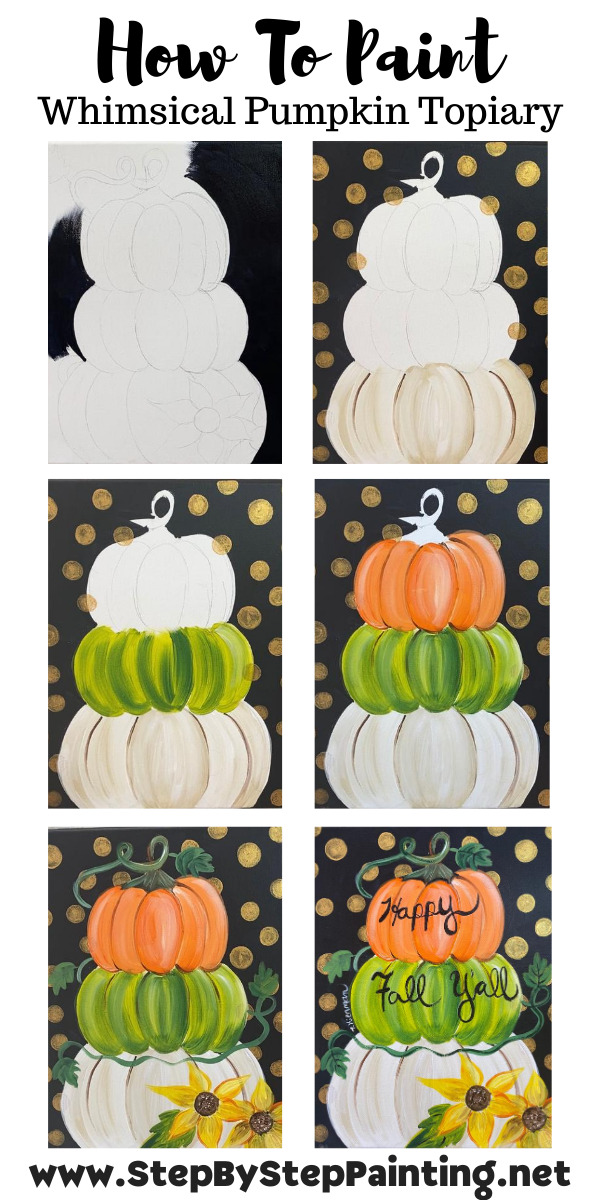
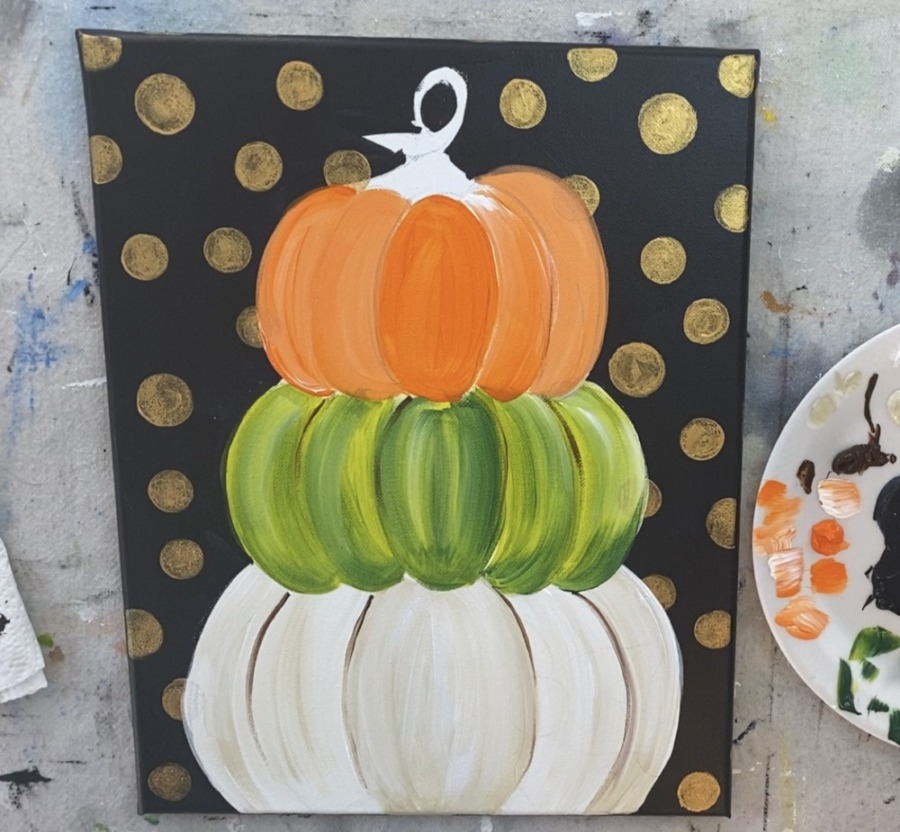
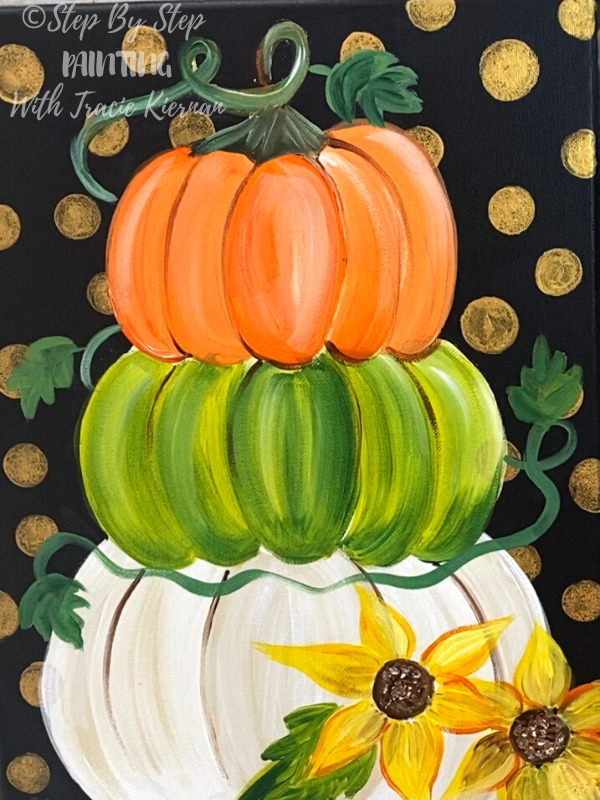
This acrylic painting tutorial for beginners will show you how to paint a stacked pumpkin (topiary) with fun whimsical fall colors!
For the background of this painting, I did Payne’s Grey with Gold Polka Dots. However, if you do not have Payne’s Grey, you can use any black color such as mars black.
The circles were all painting with foam pouncers.
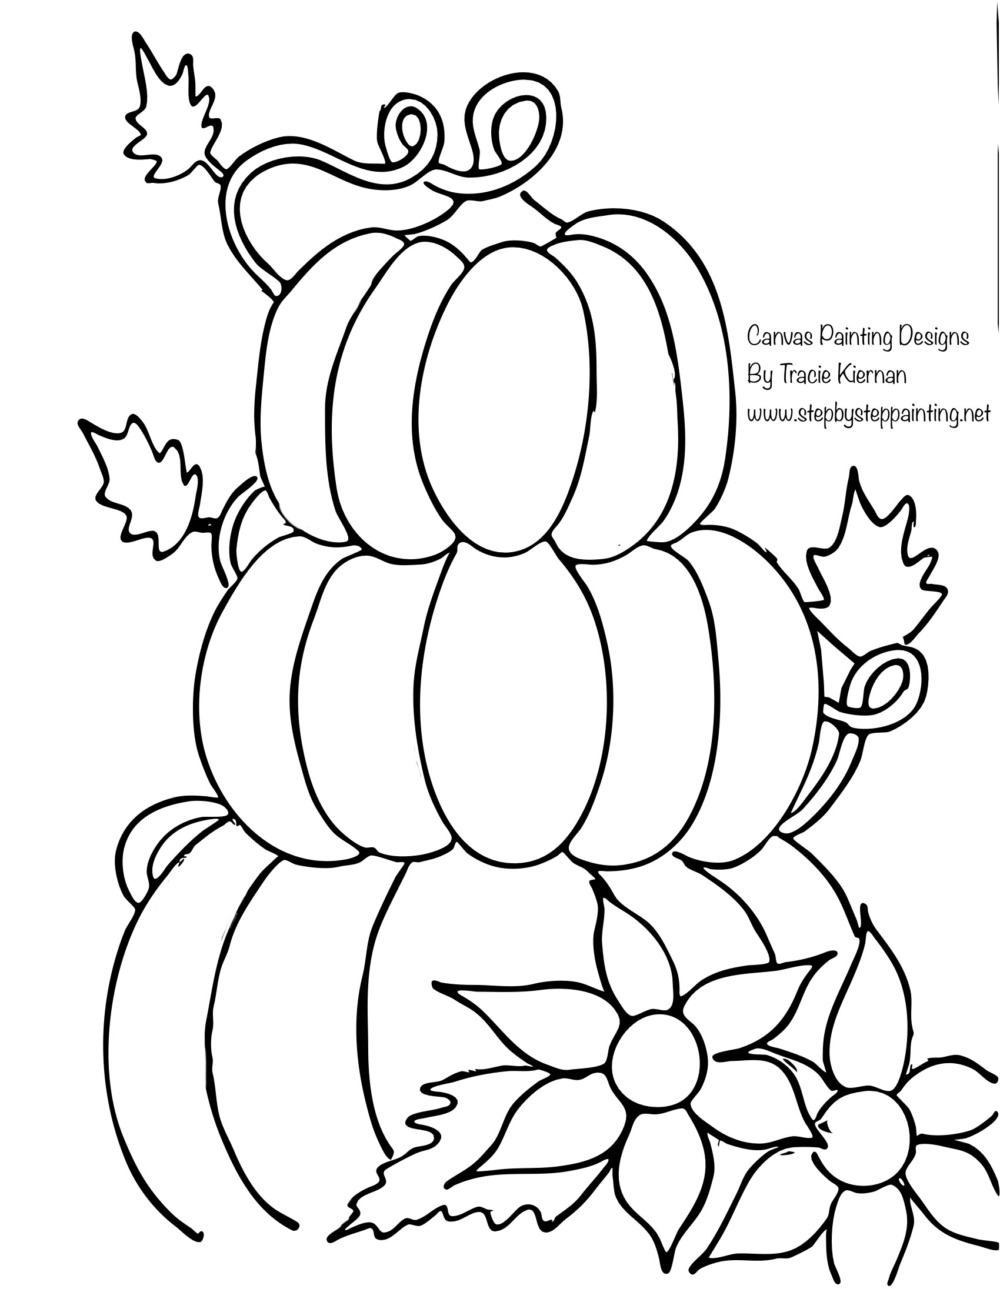
This tutorial includes a traceable of the topiary that you can transfer to your canvas. You can download the traceable in my traceable library or scroll down to the materials section of this post.
Enjoy and happy painting!
Materials
How To Paint A Whimsical Pumpkin Topiary
Learn how to paint a fun and whimsical pumpkin topiary fall painting with acrylics on canvas.
Materials
- 11 x 14 Canvas
- Acrylic Paints
- Brushes
- Foam Pouncers (optional but helps with circles)
- Pencil
- Traceable
- Graphite Paper
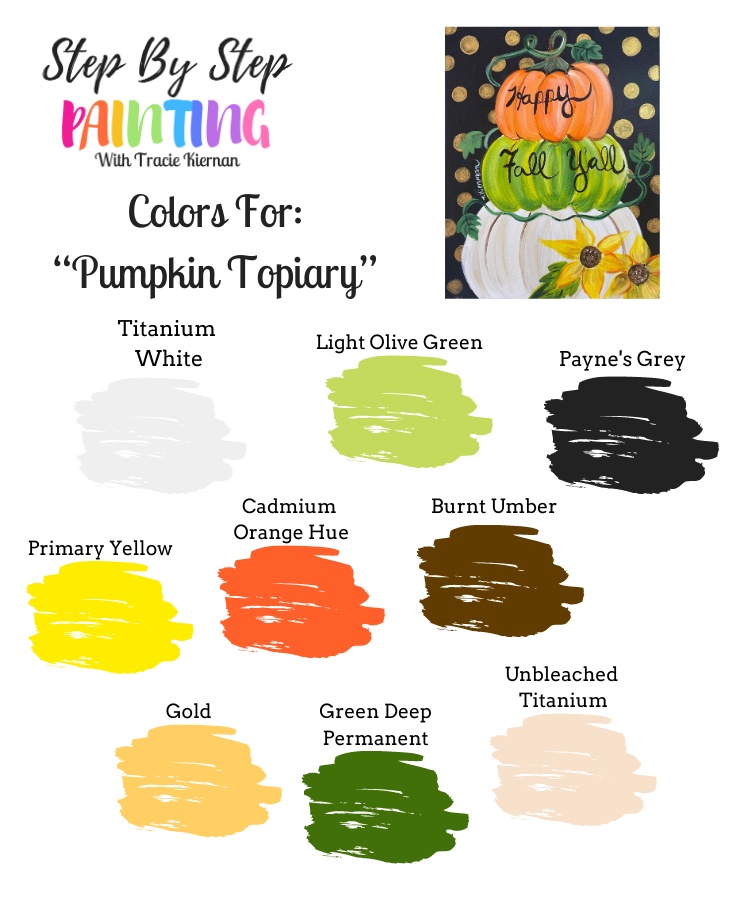
Colors
- Titanium White
- Payne's Grey
- Cadmium Orange Hue
- Light Olive Green
- Deep Green Permanent
- Burnt Umber
- Gold
- Unbleached Titanium
Brushes
Instructions
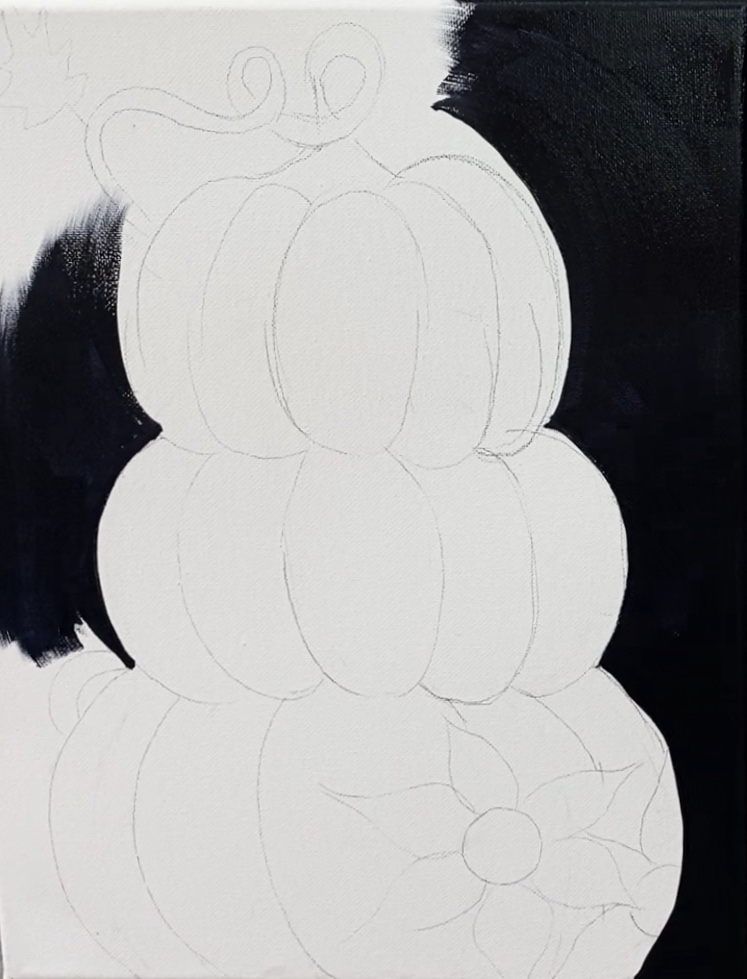
- Use traceable to transfer design onto the canvas or lightly draw the pumpkin topiary.
- Paint the background payne's grey and let the painting dry.
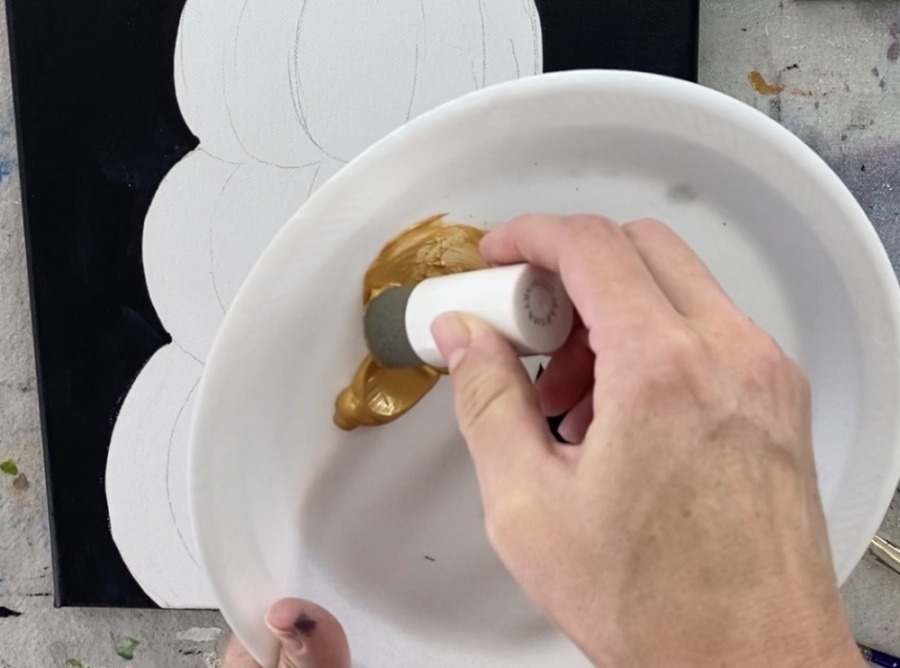
- Use foam pouncers and gold paint to paint the polka dots.
- Paint the pumpkins starting from the bottom and going upwards.
- Paint the white pumpkin with unbleached titanium and titanium white. Use a 12 brigh brush for the pumpkins and paint each pumpkin bump one at a time.
- Paint the green pumpkin with light olive green and deep green permenent.
- Paint the orange pumpkin with cadmium orange hue and titanium white.
- Paint the stem and pumpkin leaf vine.
- Paint the sunflowers.
- Paint the words.
Color Palette
Brushes
Traceable
If you do not prefer using the traceable, lightly draw the pumpkin topiary with pencil onto the blank canvas first.
Directions At A Glance
YouTube Video
Step By Step Directions
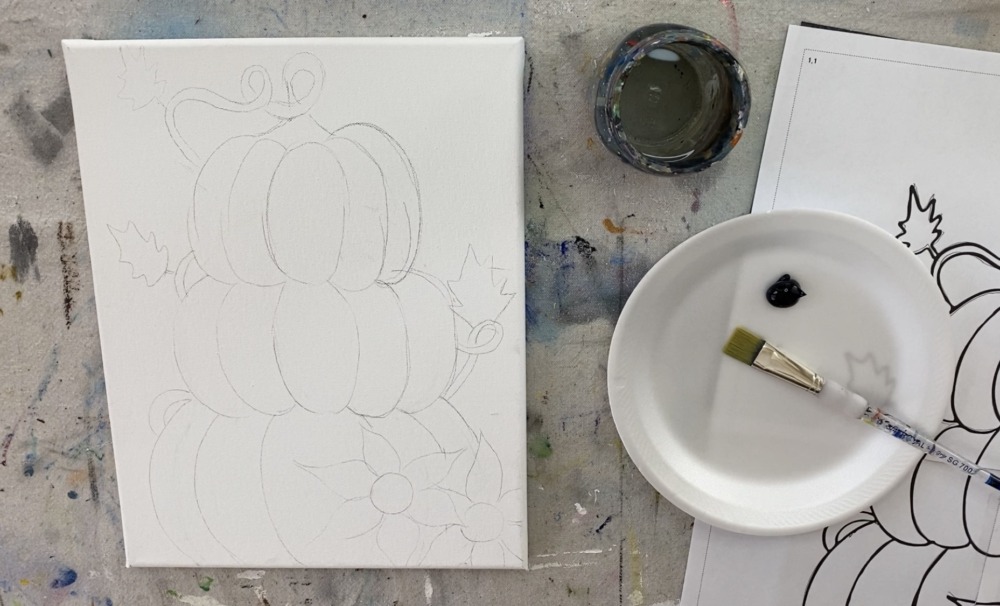
1. Draw or trace the topiary onto the canvas
Lightly draw with a pencil or use the traceable to transfer the design.
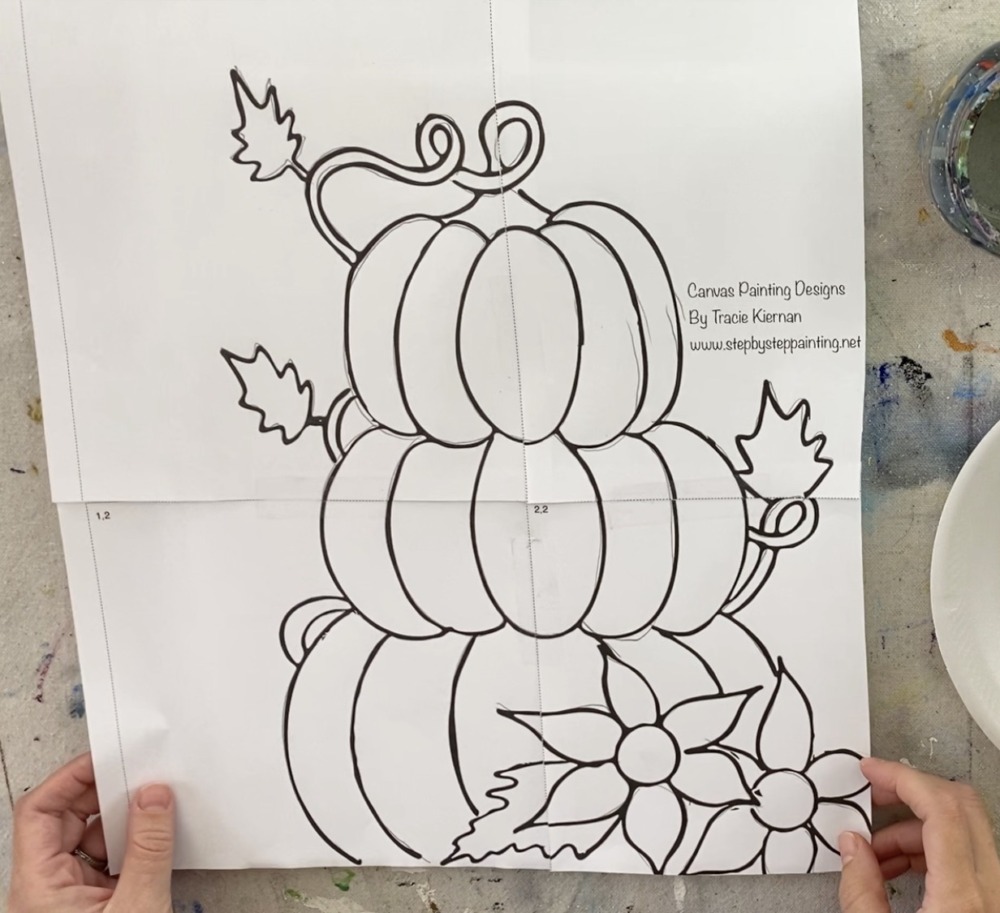
The traceable is on multiple sheets to tape together. Cut off some of the dotted lines and position it so it fits on the 11 x 14 canvas. b
Place a sheet of graphite paper below the pumpkin and trace the design. It will transfer to the canvas.
2. Paint the background around the pumpkin *payne’s grey
*Note: if you do not have payne’s grey, you can use mars black or any black.
To do the background, I used a 3/4″ flat wash brush and the color payne’s grey. Water it down SLIGHTLY to let it flow well.
Paint all around the pumpkin drawing and on the sides of the canvas. If you have to paint over the stem and some of the sunflower petals that is fine!
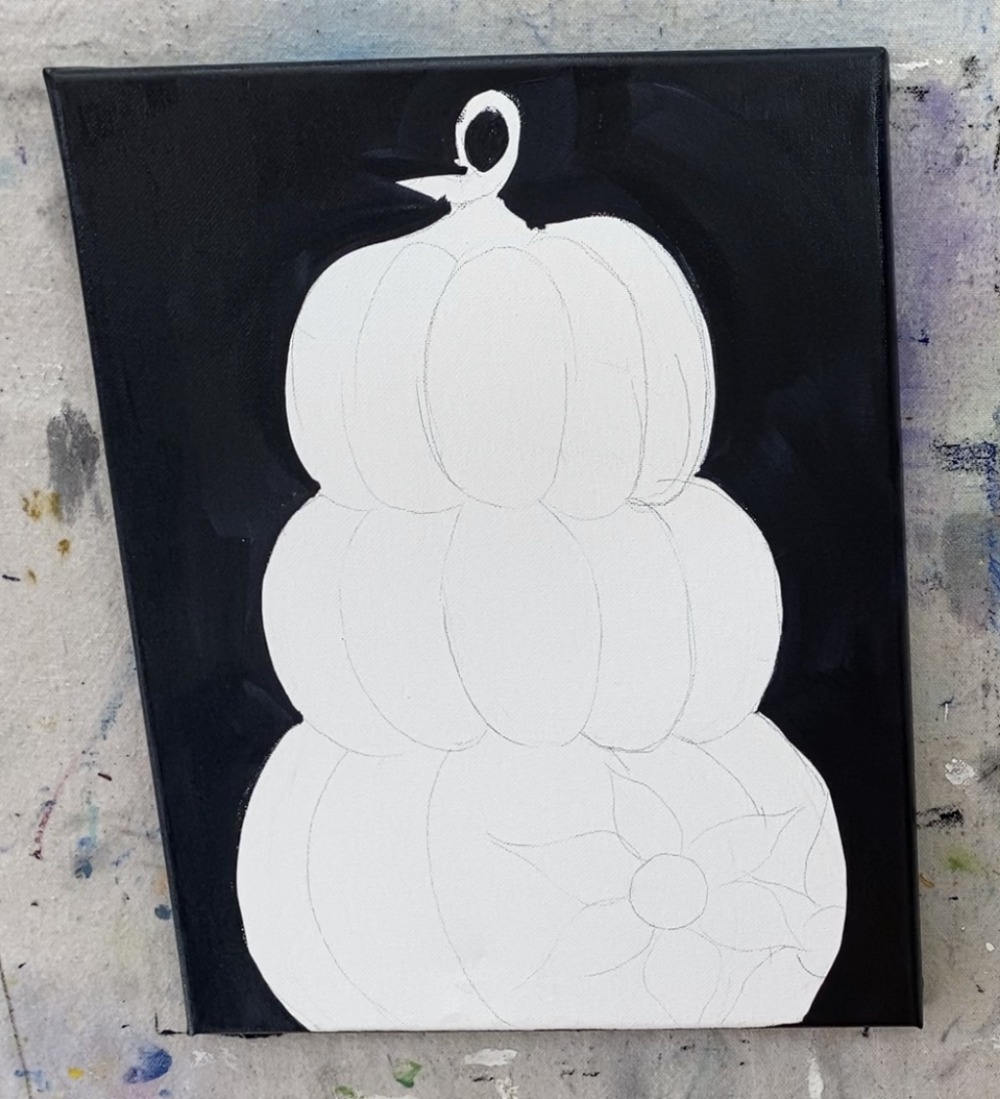
Let this dry before going on to the next step.
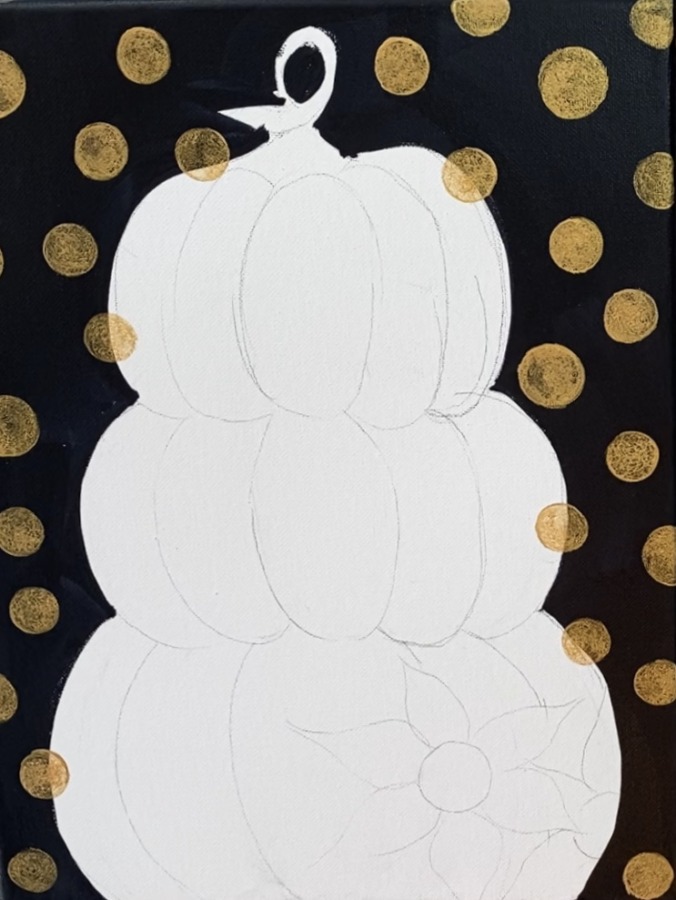
3. Use pouncers and gold paint to paint the polka dots
For the polka dots, I used the Martha Stewart Foam Pouncers! These are a lot of fun to use! I mainly use them for doing polka dot circles or wherever else you would like a perfect circle to be.
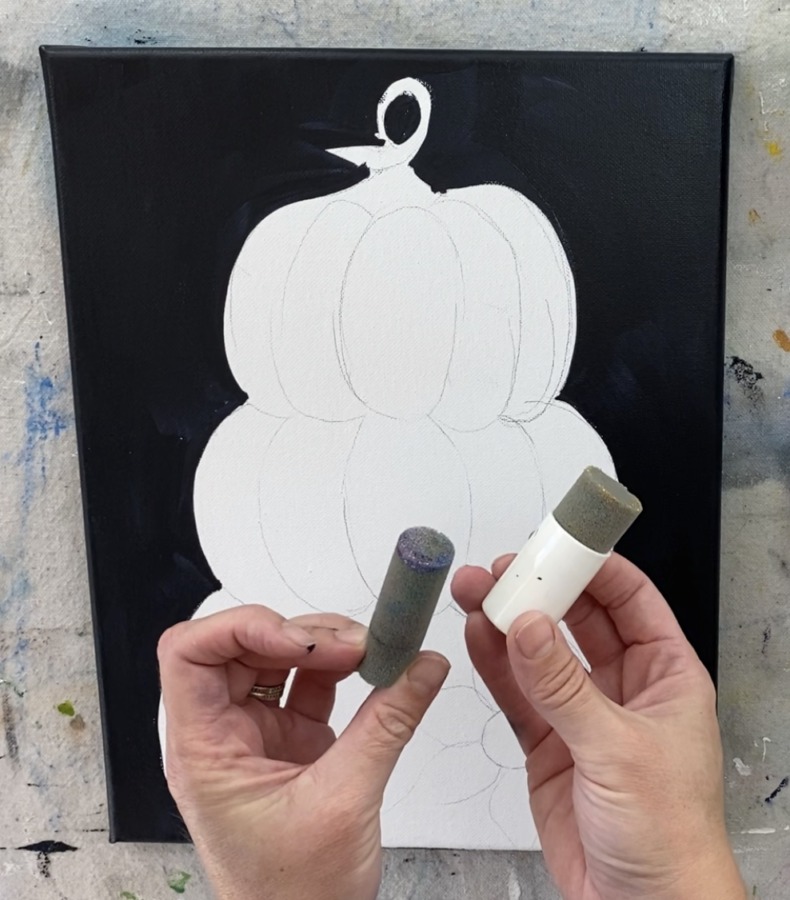
Load the foam pouncer in the gold paint. Then press and twist as you paint each circle. Try not to overload the sponge when you are loading the paint.
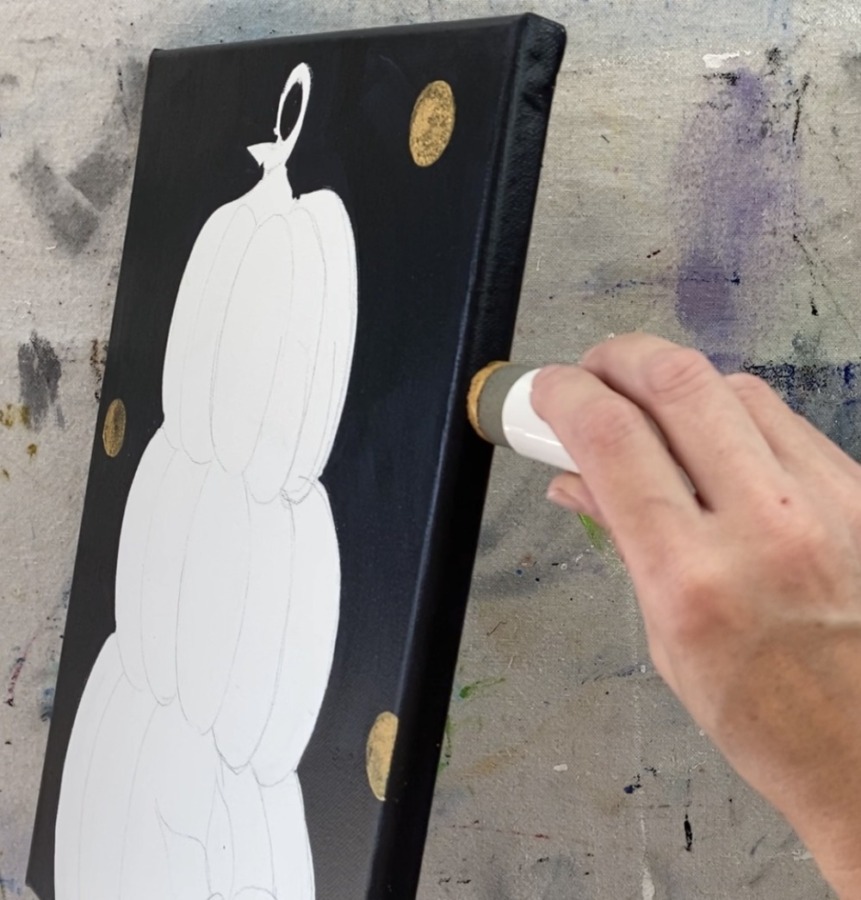
I used two different size circles, both medium/ small sized. Make your dots everywhere! Some dots are going off the canvas, some overlapping behind the topiary and some on the side of the canvas.
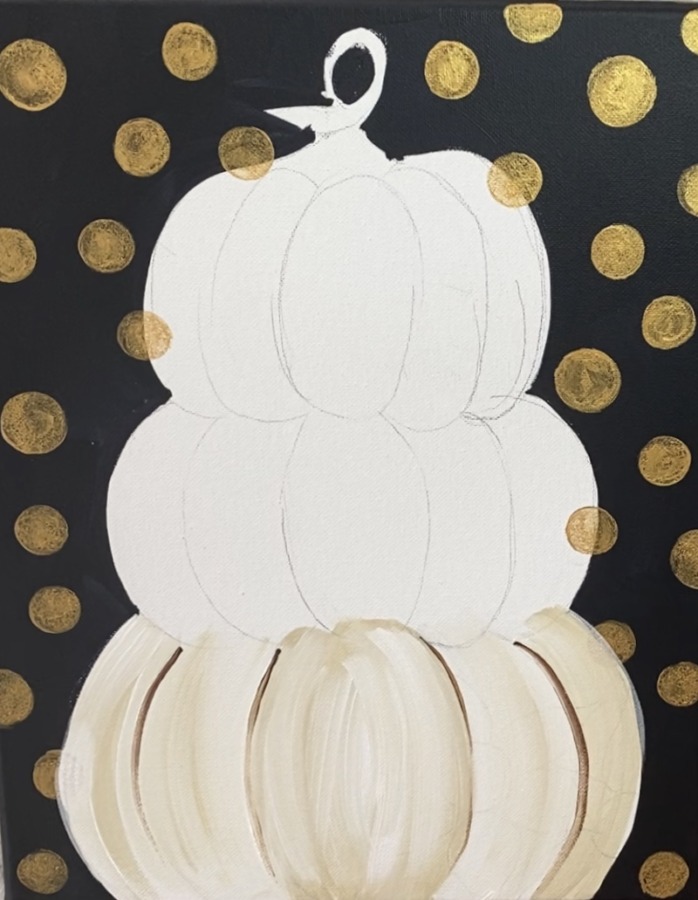
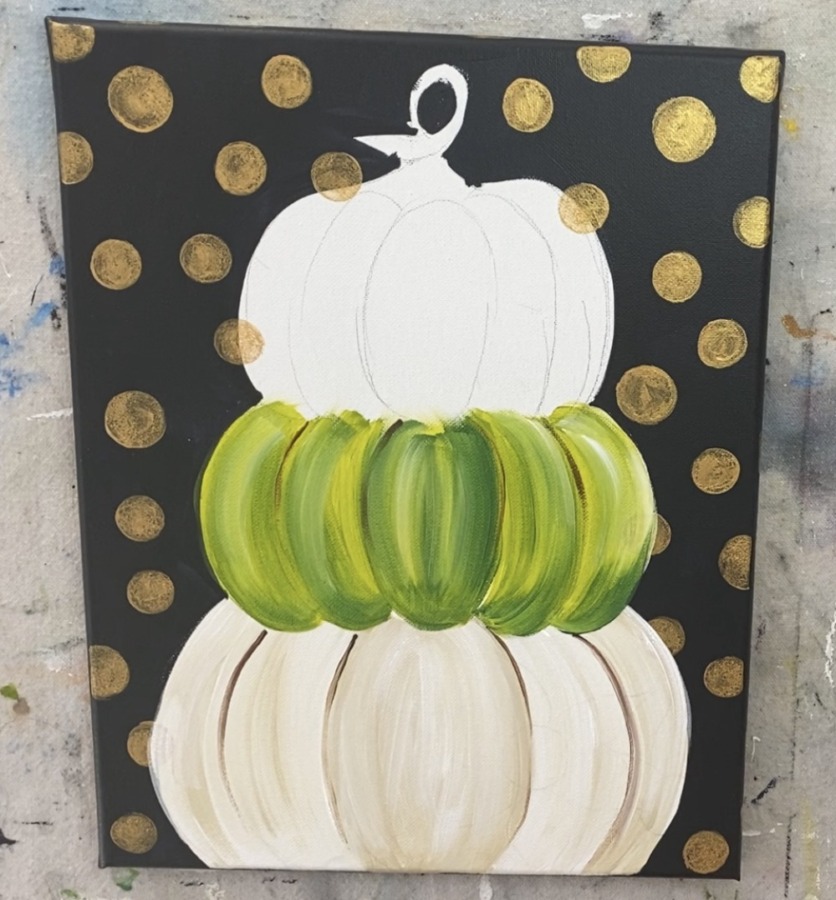
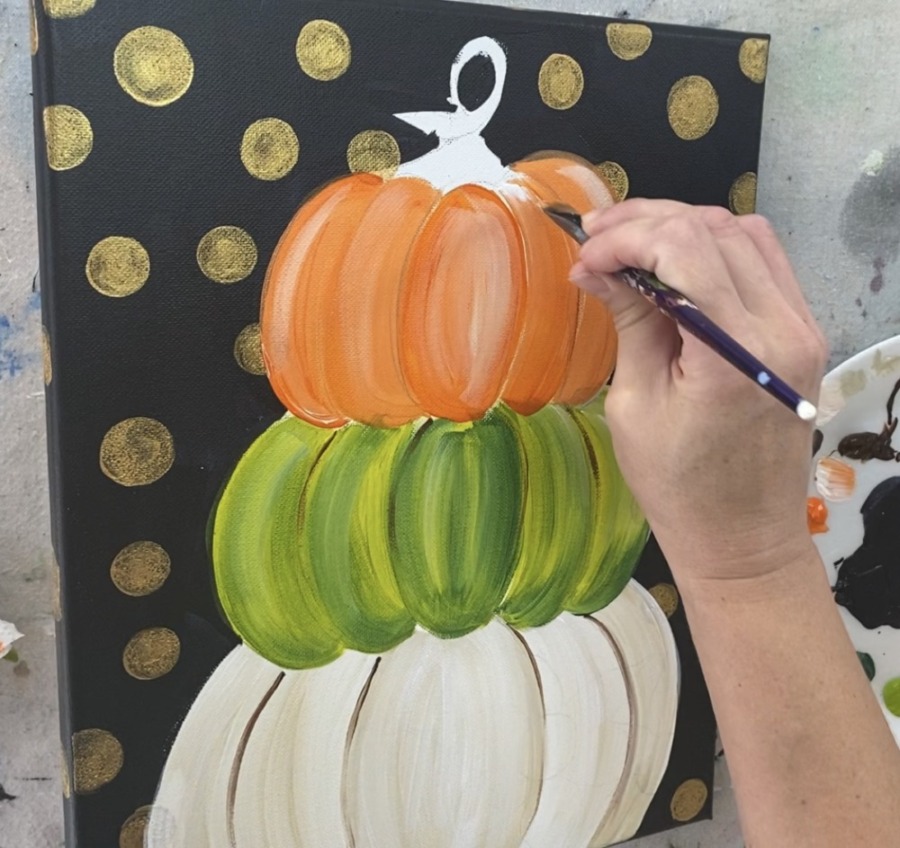
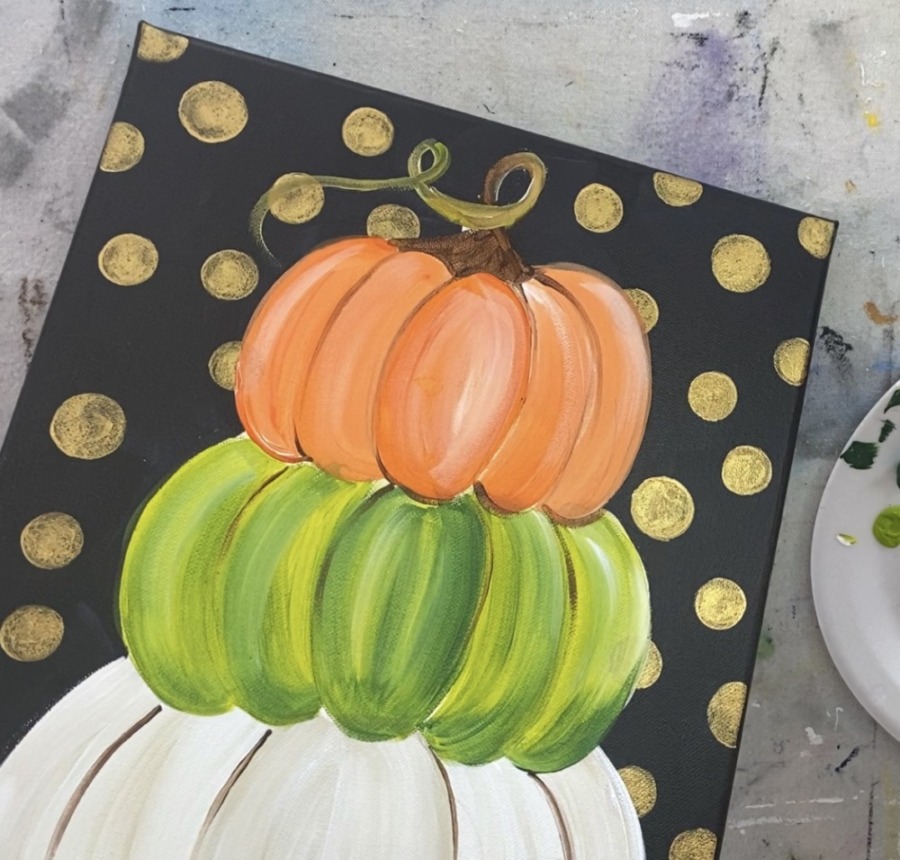
4. Paint the white pumpkin
The pumpkin was done with unbleached titanium, titanium white and a #12 bright flat brush. When I paint pumpkins, I like to do one bump at a time. For this one, I started with the bump in the middle.

Use the full width of the brush, start from the top of the pump and stroke all the way down. The stroke should curve and contour with the shape. Fill in the entire middle bump area.
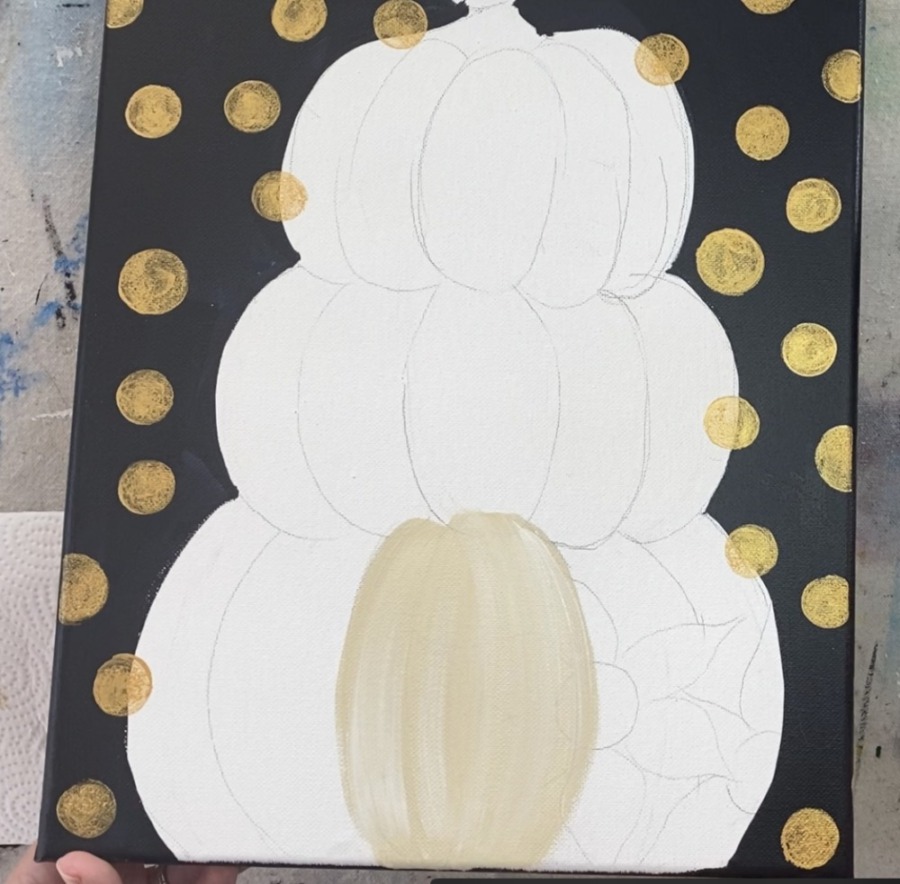
Then wipe your brush off and load your brush in some titanium white. Make more curved strokes with the white so it blends with the unbleached titanium.
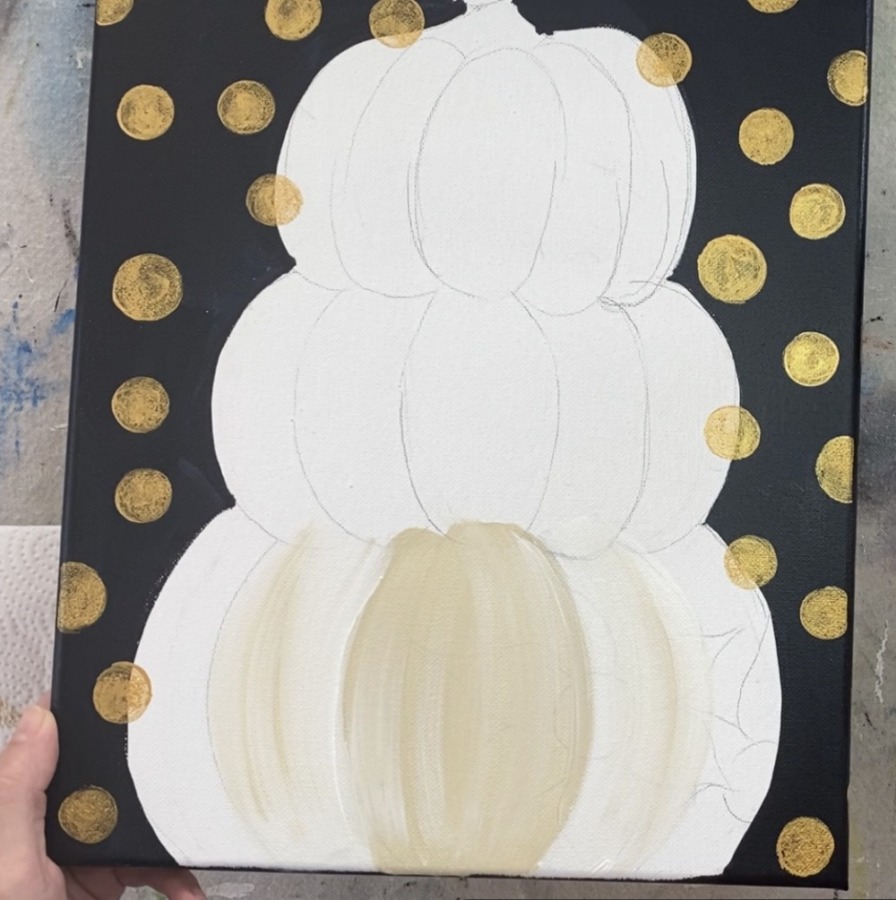
Then paint the next two bumps. This time I used more white and a small amount of unbleached titanium. You will make the bumps on the pumpkin stand out simply by changing the amount of beige to white you are using.
Also, make sure you are curving your stroke so it forms the shape of the pumpkin.
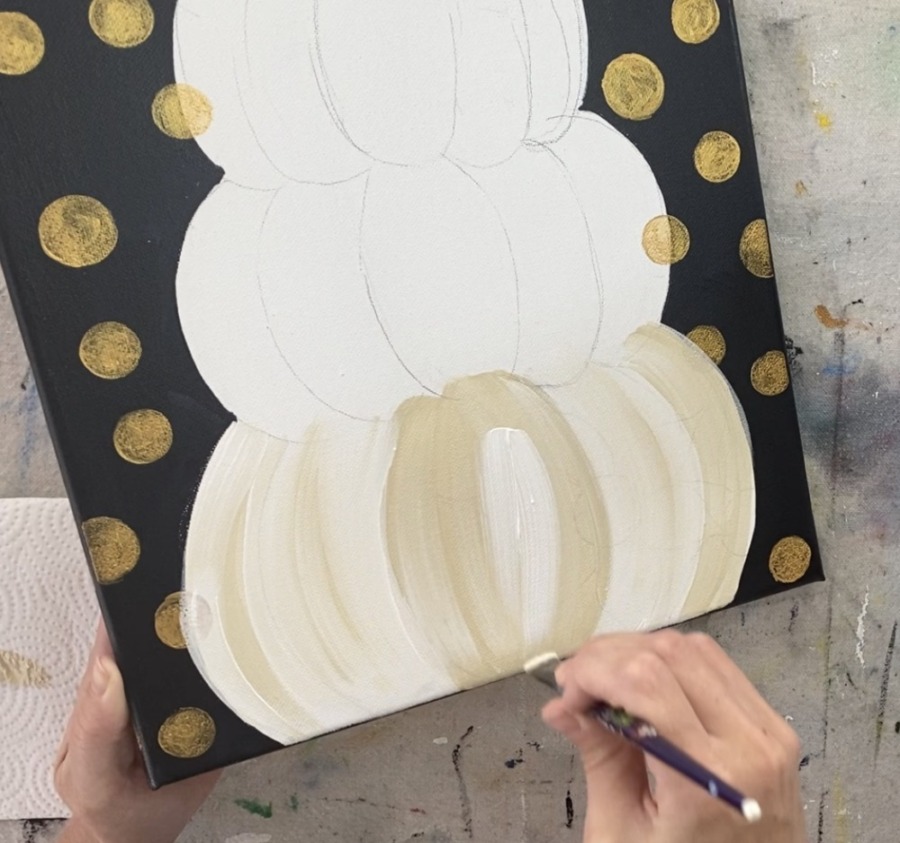
Continue painting each bump of the pumpkin. I also added a few more white strokes in the middle.
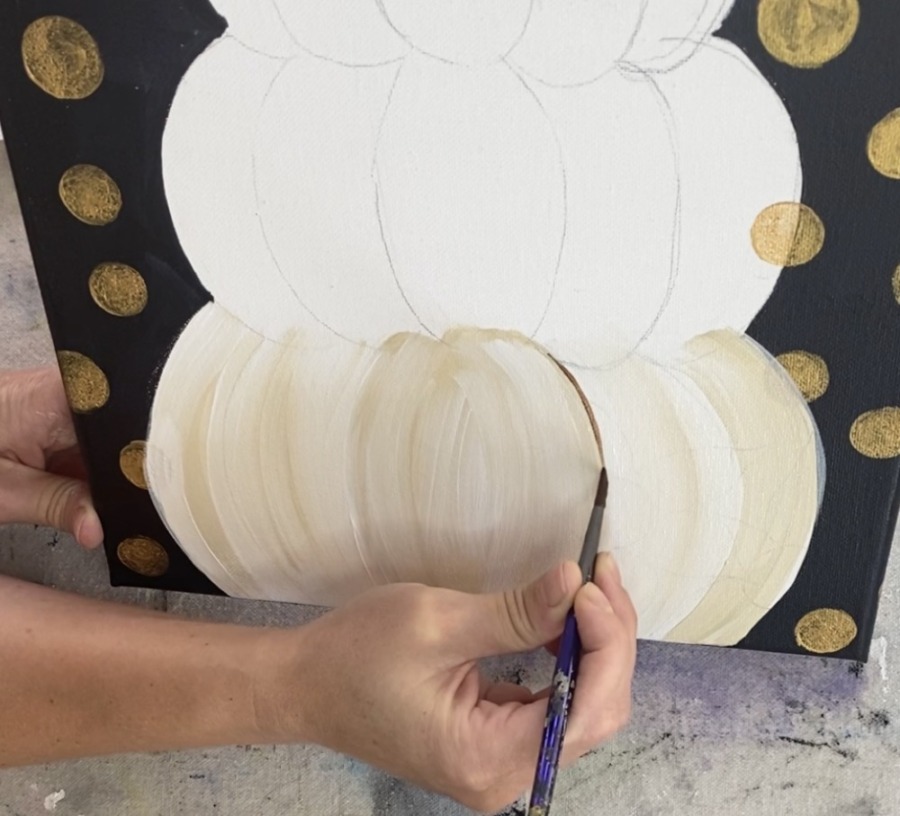
Then switch to your #4 round brush and load some burnt umber onto your palette. Load the tip of your brush into the brown. Paint the lines that are in between the bumps but you do not have to completely outline the line. I did mine from the top and I stroked down until my stroke ran dry and I stopped.
Lightly paint this brown line in between each of the bumps.
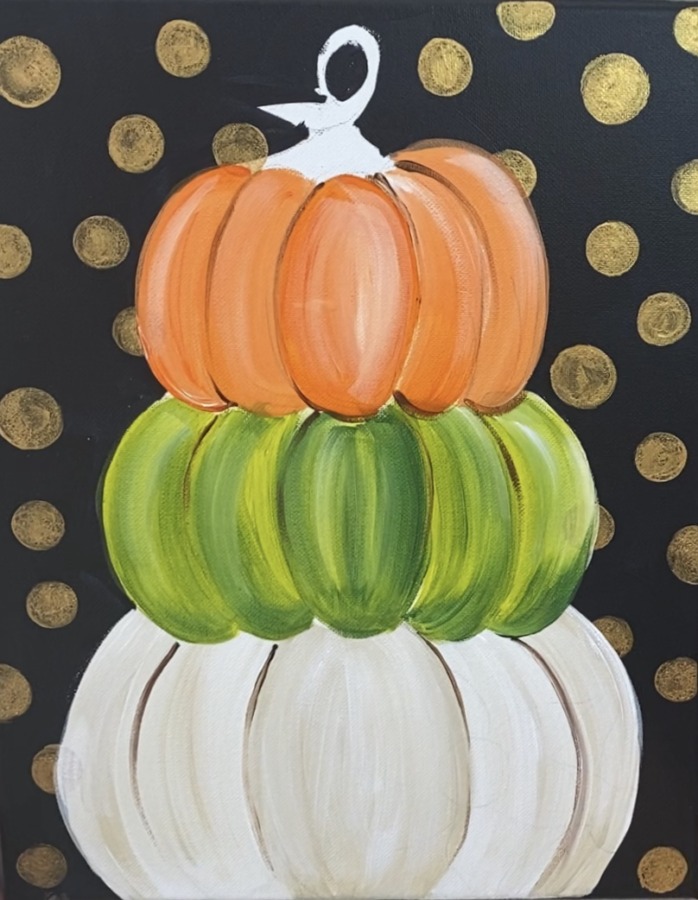
5. Paint the green pumpkin
Next use your 12 bright brush and the color light olive green, deep green permanent.
This time I did all the bumps with light olive green starting from the far right bump (note you do not have to always start with the center bump, sometimes I start with the far right or left).
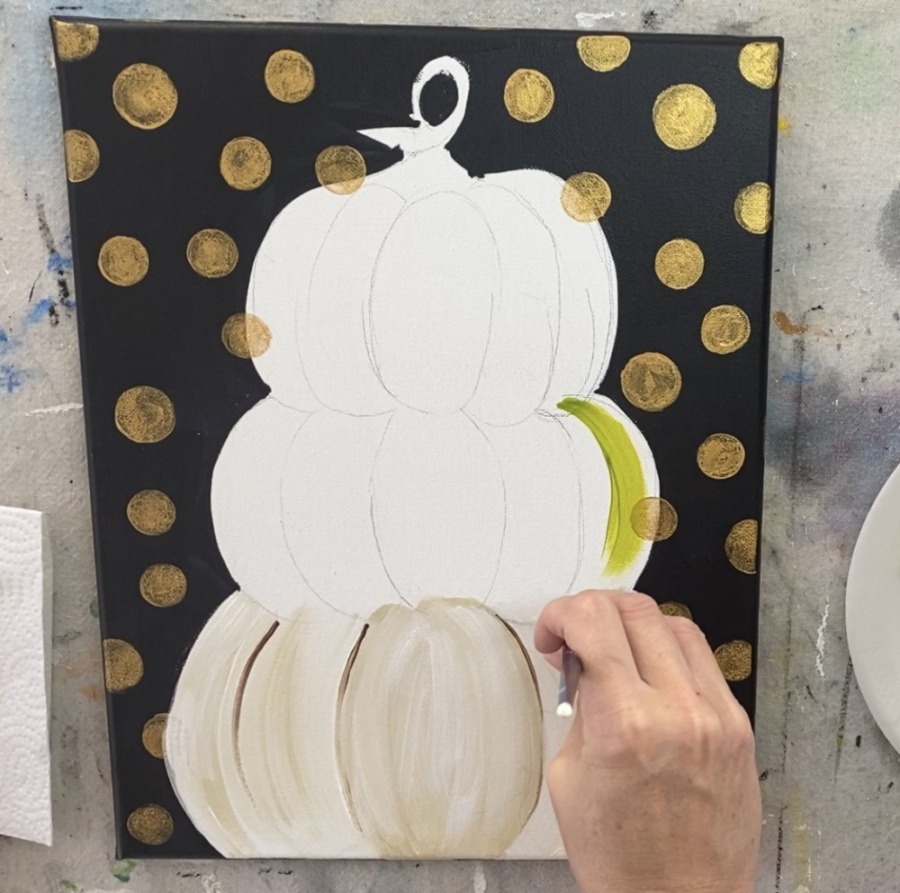
Start from the top of each bump and stroke down. Note: the green pumpkin is overlapping the white pumpkin so you should paint the bottom bumps so they overlap.
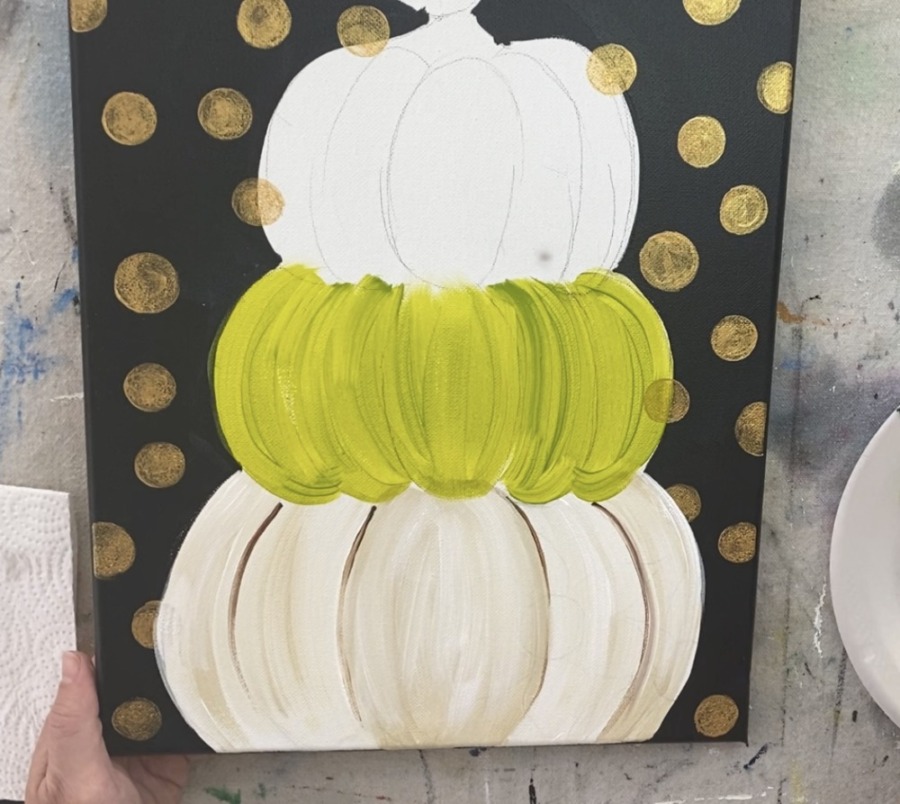
Then go back over your light green color with green deep permanent (darker green). Let that darker green blend with the lighter green. You do not have to completely cover the lighter green up, just let the colors sort of blend and do their thing.
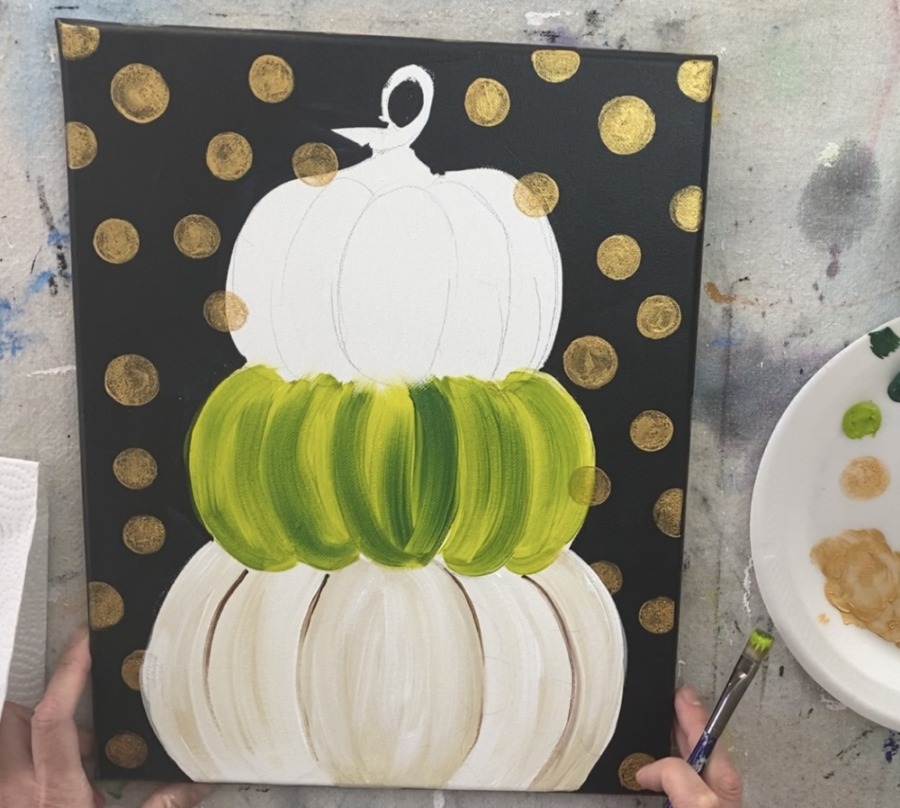
Then add some strokes of white onto the green pumpkin. Just a few strokes!
Also, use your 4 round and burnt umber to lightly and thinly paint the brown lines between the bumps.
6. Paint the orange pumpkin
The orange pumpkin was done with cadmium orange hue and titanium white. Do this pumpkin the same way you did the other pumpkins.
Start by painting one of the bumps cadmium orange hue.
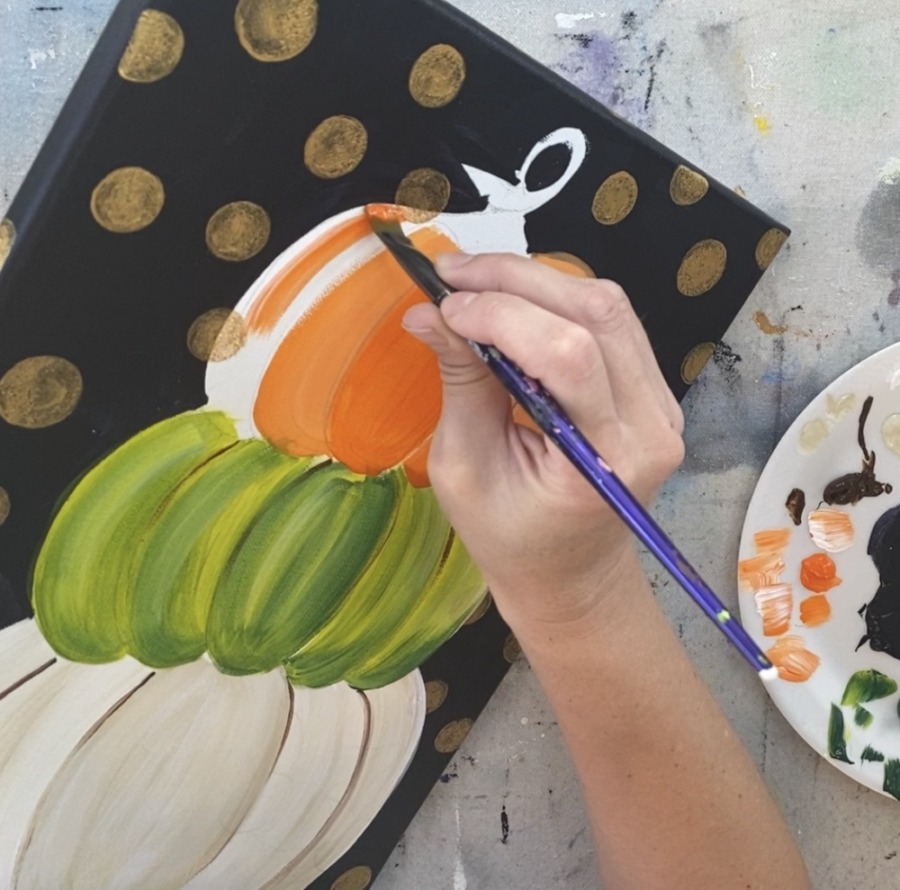
Then add white to your brush and paint the next few bumps so the orange and white blend together. Each bump can be different variations of orange and white. Also note that the orange pumpkin bottom bumps overlap the green pumpkin.
Then add some strokes of white onto the orange pumpkin.
And do those same brown lines again with your 4 round brush. I also outlined the bottom bumps lightly with the brown.
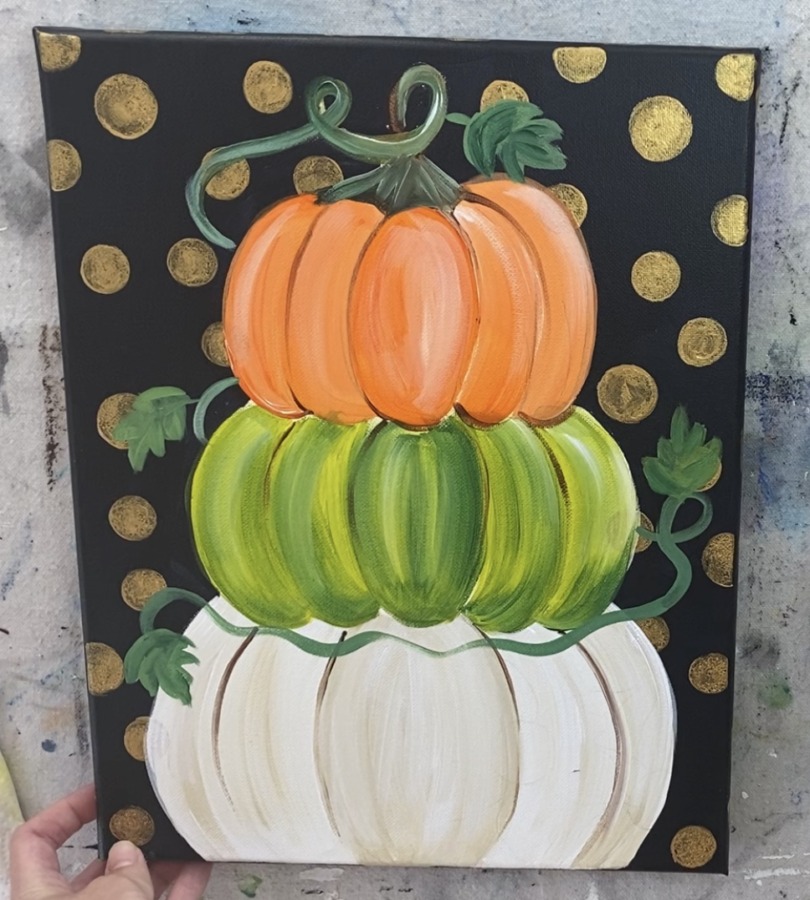
7. Paint the stem, curly vine and leaves
The stem was painted using the 4 round brush and burnt umber. I also added a whole bunch of green to the stem and had it curl and transition into a green vine.
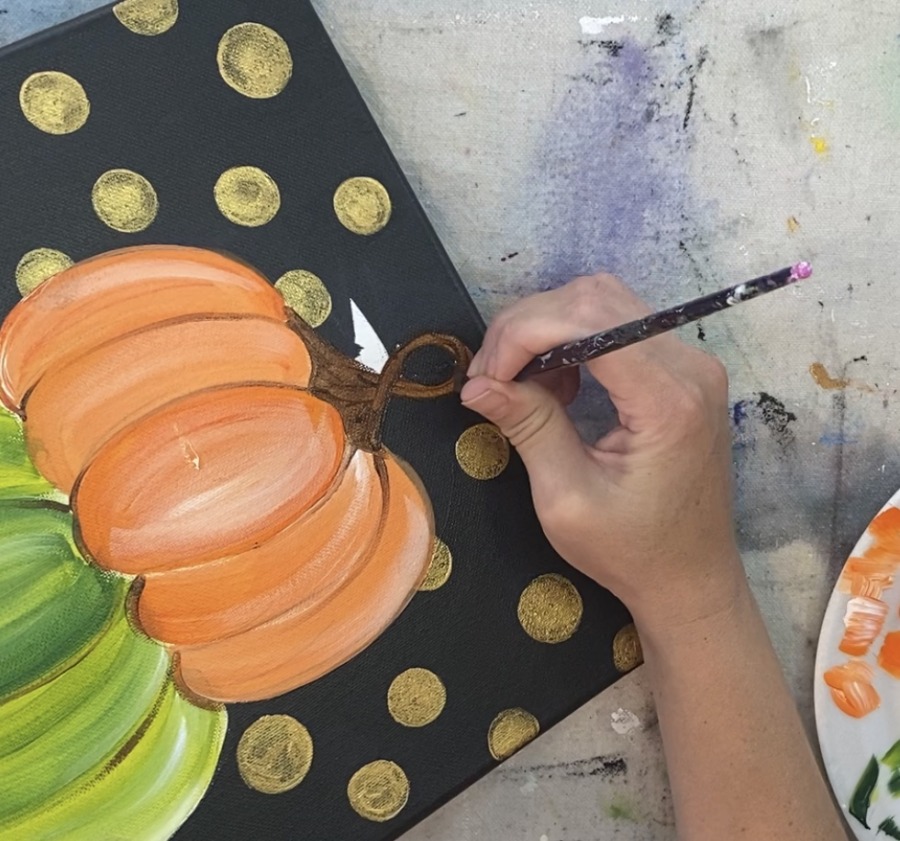
Basically after I painted the stem that attaches to the orange pumpkin, I loaded green deep permanent to my brush and had the vine curl.
To get that green to show up better against the dark background, add titanium white to it. Have your vine curl around the pumpkin and come back in front of the bottom white pumpkin.
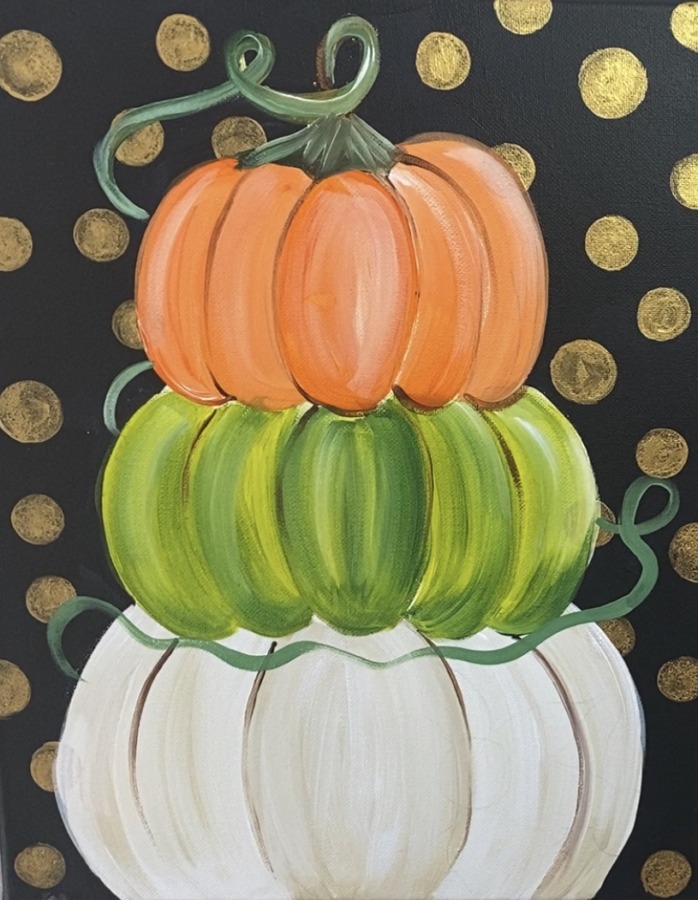
You can add various amounts of olive green to this vine too and titanium white! That white is what is going to make the green show up better versus if you just painted the vine with green and no white mixed into it.
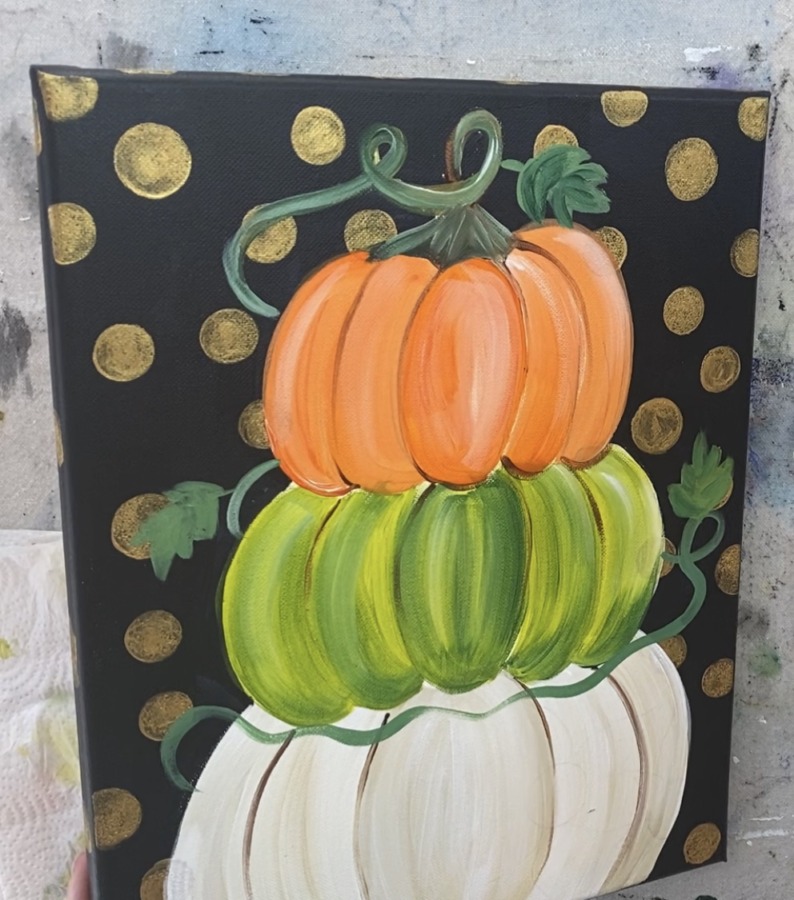
Then paint the leaves. If you feel more comfortable, you can retrace the leaves onto your canvas or lightly draw them with pencil before you paint them in. I used my #4 round brush and the same greens to paint the leaves.
8. Paint the sunflowers
First I painted the middle circles of the sunflowers. I used my #4 round brush and burnt umber.
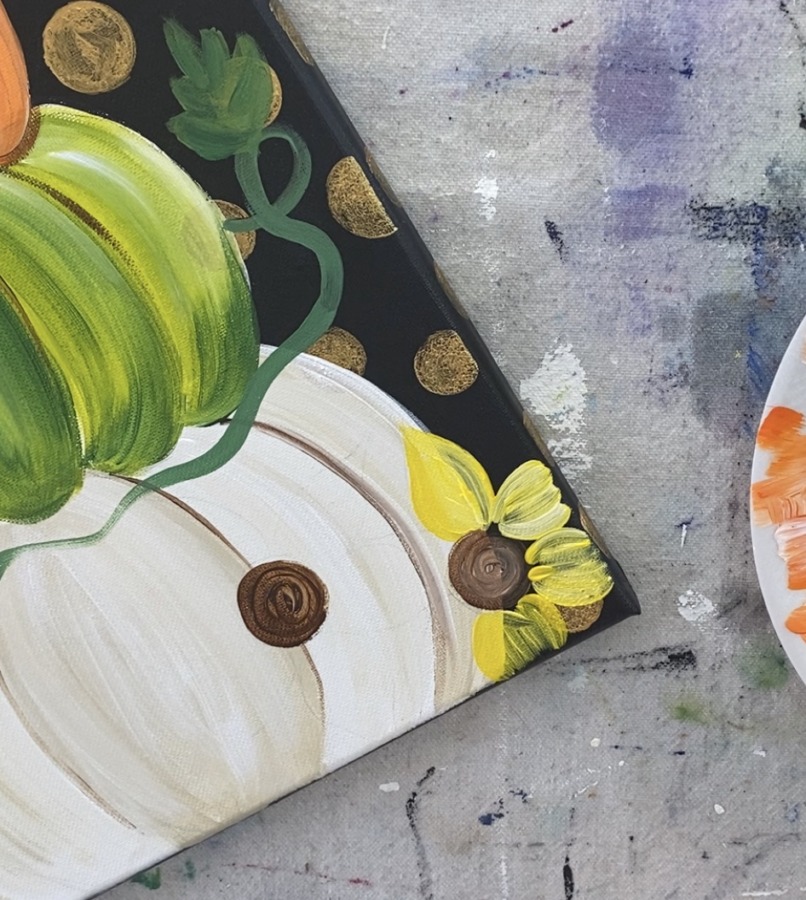
Then I did the petals with primary yellow mixed with some titanium white. Mixing the white in the yellow is key to getting that yellow to be opaque. I did have to still add a few coats to the petals so they showed up more solid.

Add a few streaks of brown into the petals. Also, paint white and brown dots over the middle circle using your 4 round brush.
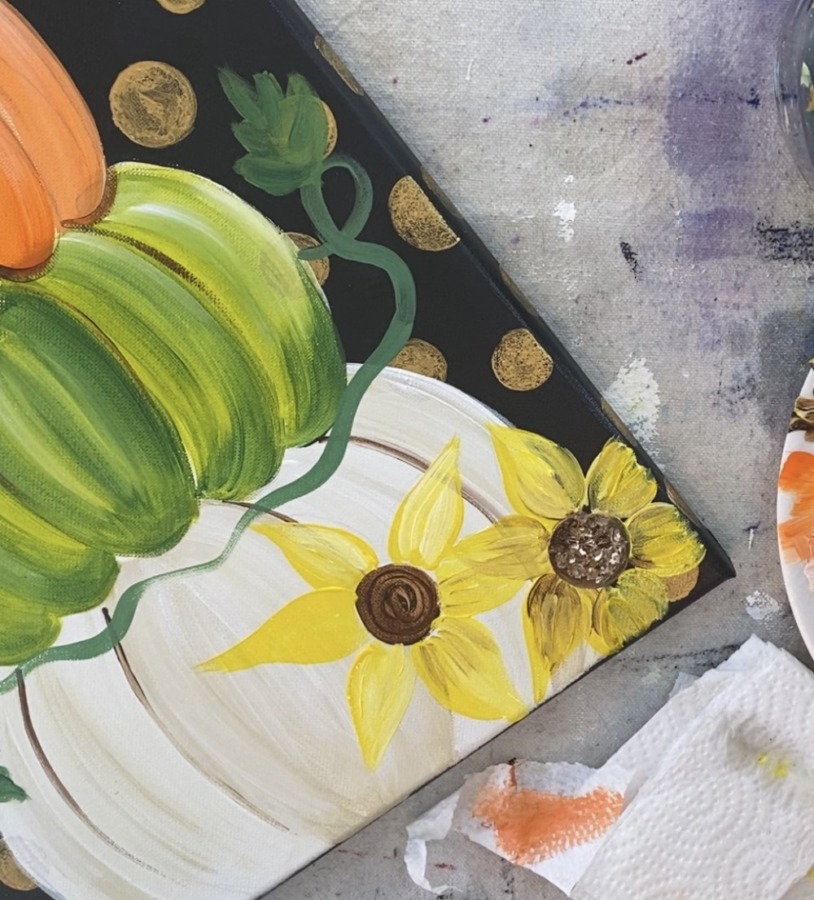
Then paint the next sunflower using the same color combo of the yellow and the white with a few streaks of brown.
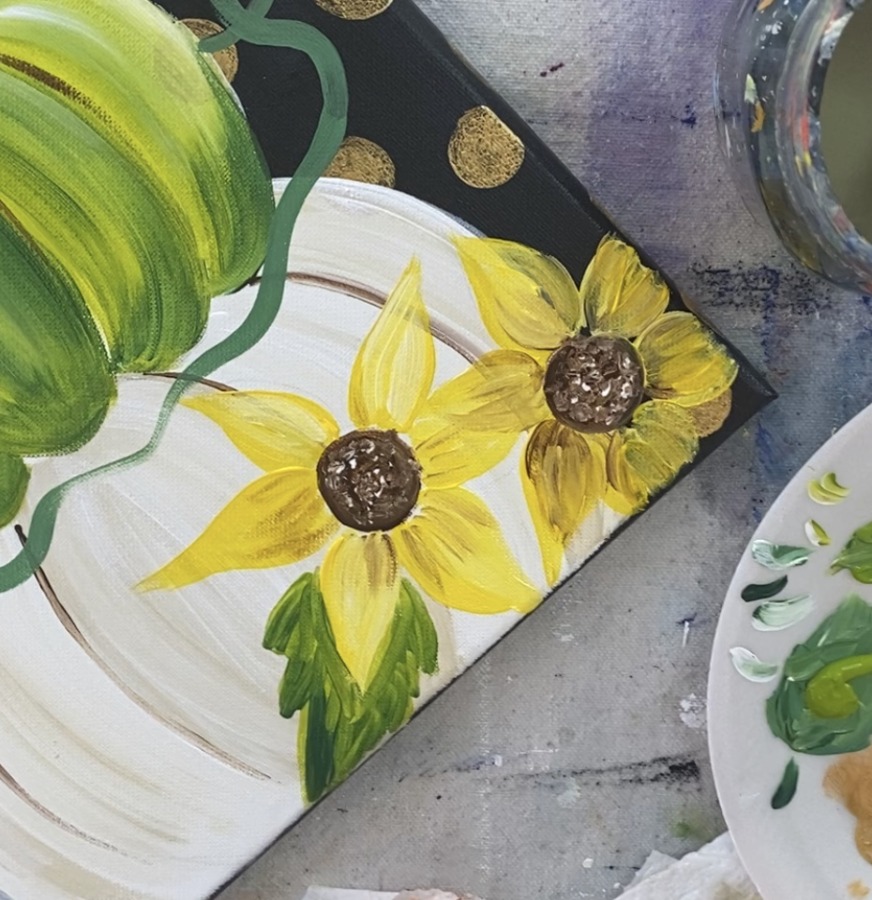
For the leaf, I used light olive green and green deep permanent. Use your round brush to outline the leaf shape and then fill it in. You can also lightly draw your leaf first and then fill it in.
To get your sunflowers to “pop” a bit, use your round brush and slightly outline the petals with cadmium orange hue.
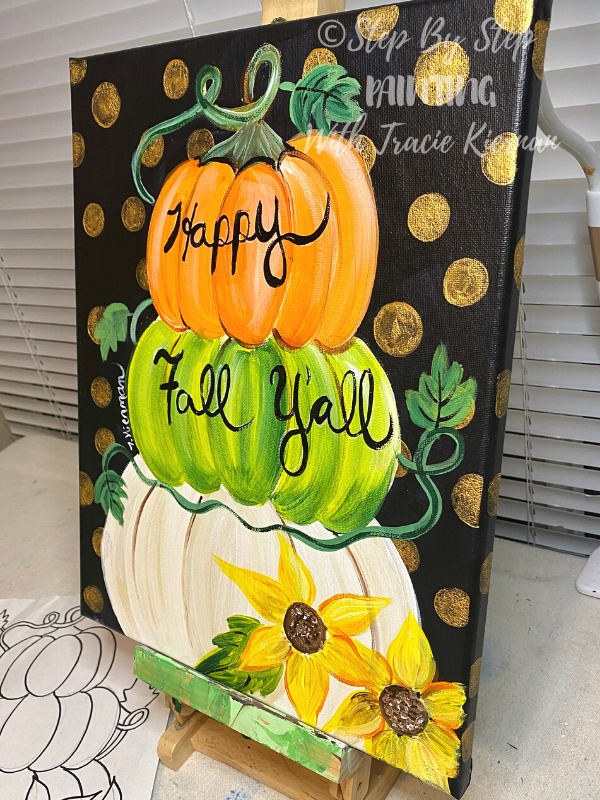
The topiary is done! Note that if any of your gold spots are showing through the pumpkin (if you look closely some of my dots still show on the white and green pumpkin edges), you can simply paint a second or third coat of paint over them so the pumpkin is completely covering the dots.
9. Paint the words (optional)
To sketch out my word, I used a white chalk pencil! You can also get super fancy and print out a font and a word/quote. See my post about how to do that here.
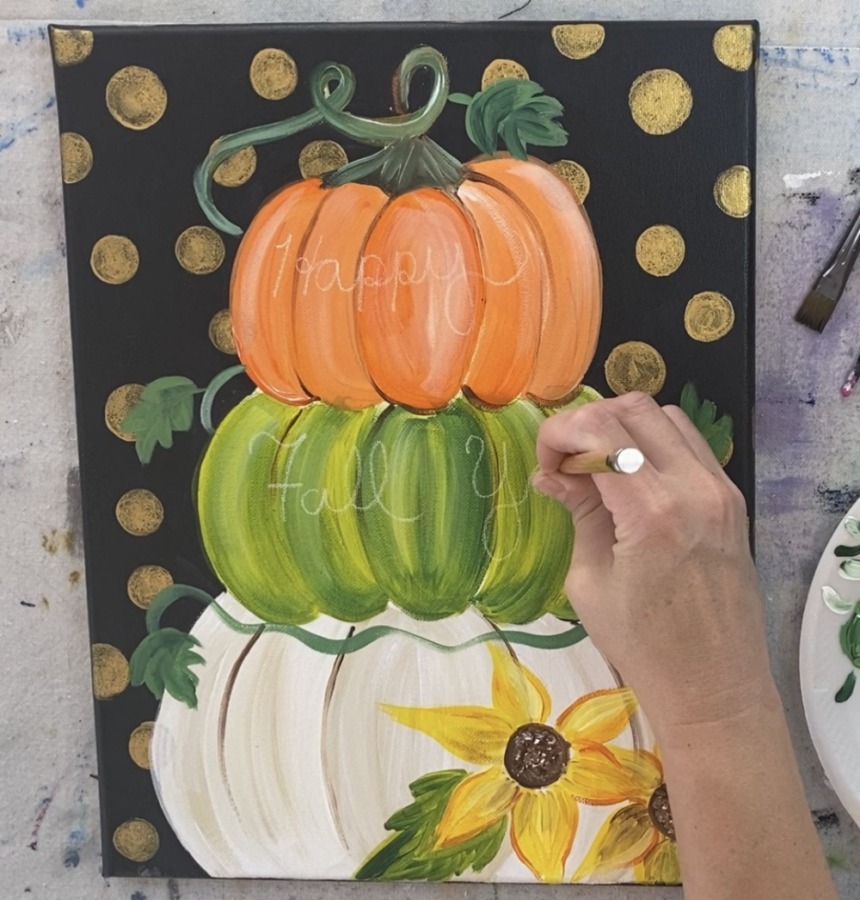
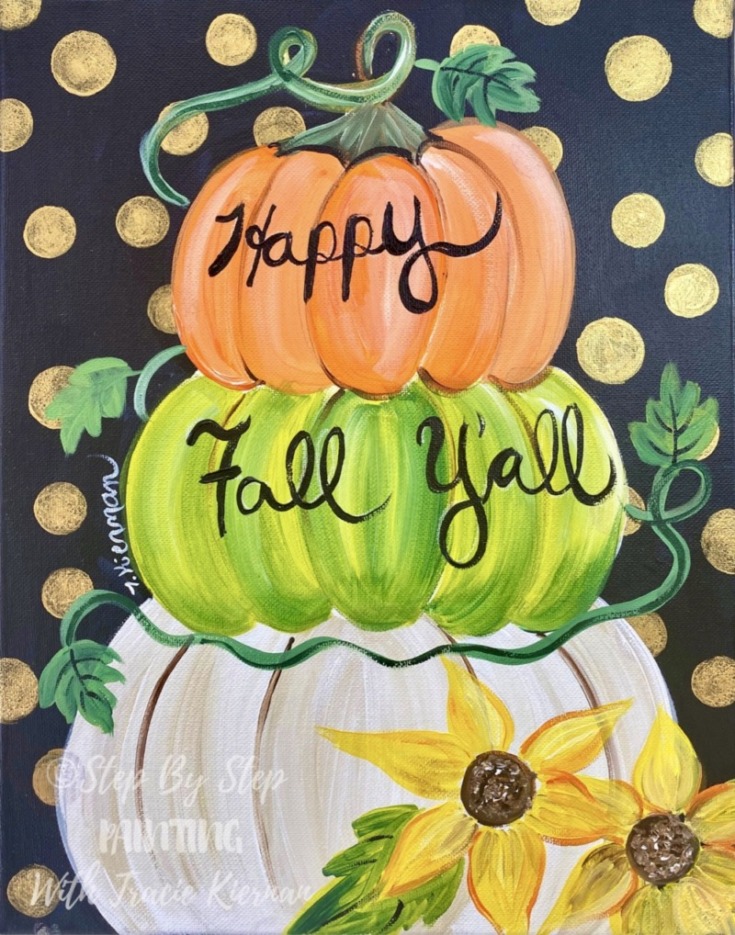
I trusted my handwriting this time around and wrote in “Happy Fall Y’all” in cursive.
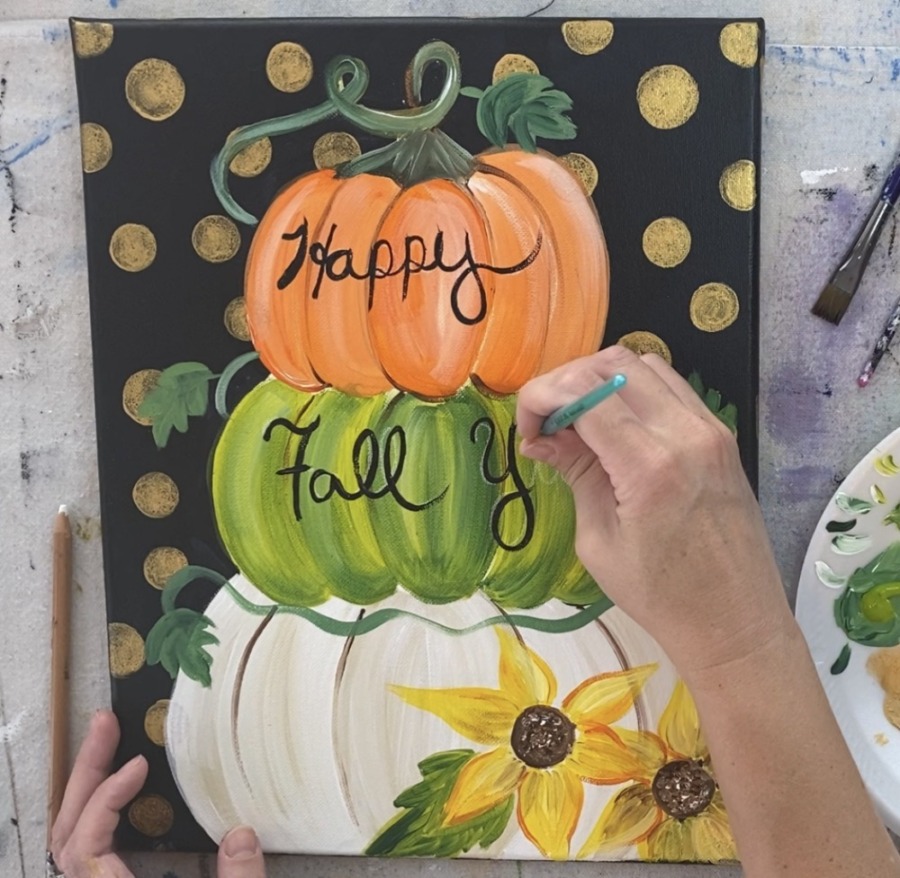
Then I used a #0 round brush to paint over the letters with payne’s grey. After the paint dries, the white chalk pencil lines will erase.
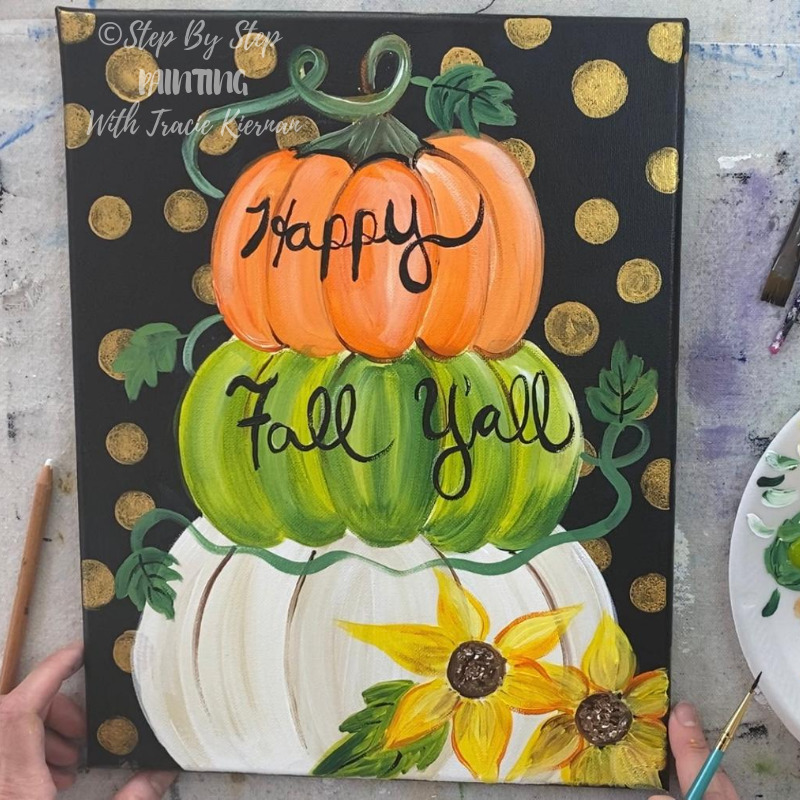
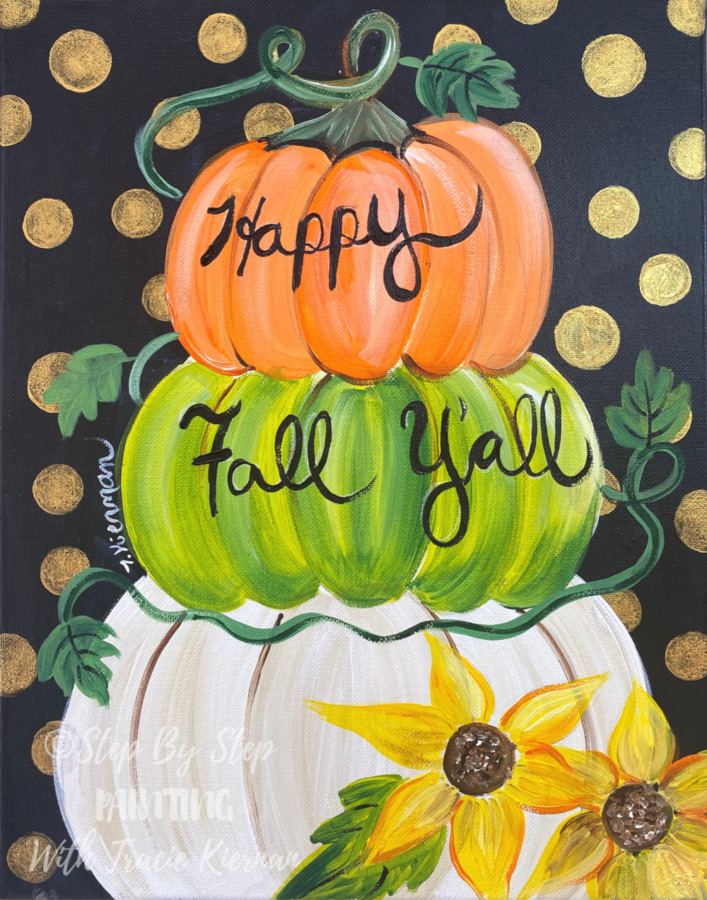
That’s it! Sign your name and show it off!
Finished!
Do you have any color suggestions to replace light olive green? I have the 48ct liquitex basics and also I have a few greens in Appel barrel.
Great question! You can use a light green permanent and mix some light green permanent into it. It won’t be the olive green but you can get a nice medium green from that. Any green in Apple barrel can work too.
Thank you , I ended up mixing light green with brilliant yellow green and got pretty close.
Sounds great! Thanks for sharing your experience of using those two colors!
??? love it!!!!! thanks for sharing?
I just came across your pumpkin topiary. Your directions are very explicit. Thank you. I want to get started on this project on a rainy day. I better hunt up the materials that I know I have in my crafting tubs. Hello craft room floor.