
How To Paint A Dragon & Castle Silhouette

Would you like to save this?
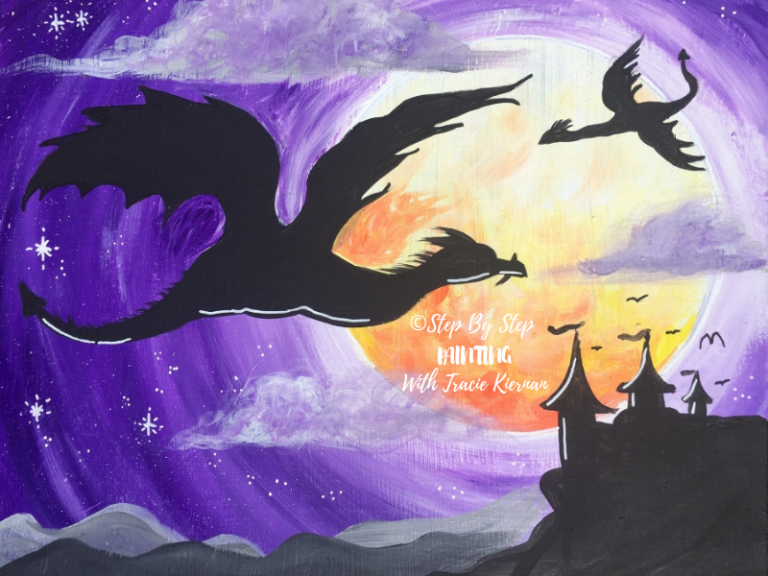
Learn how to paint a dragon flying in a mystical full moon sky. This is a beginner’s acrylic on canvas painting tutorial that anyone can learn how to do!

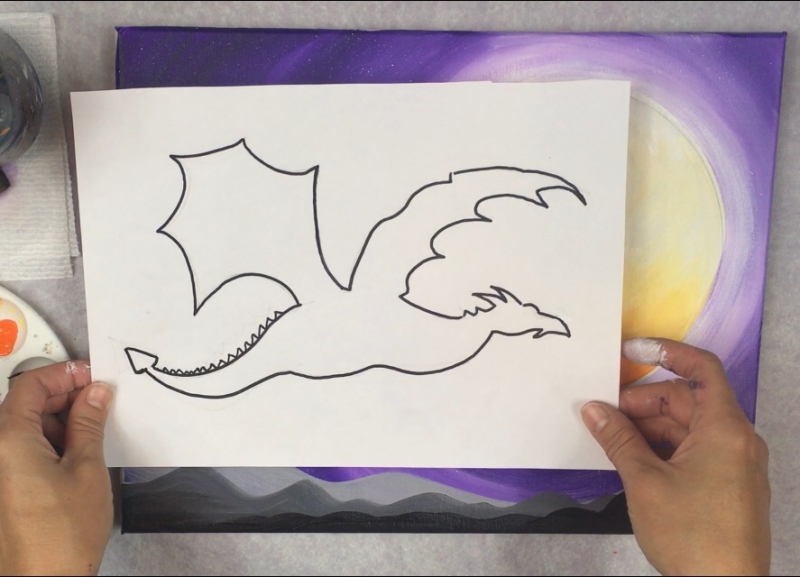
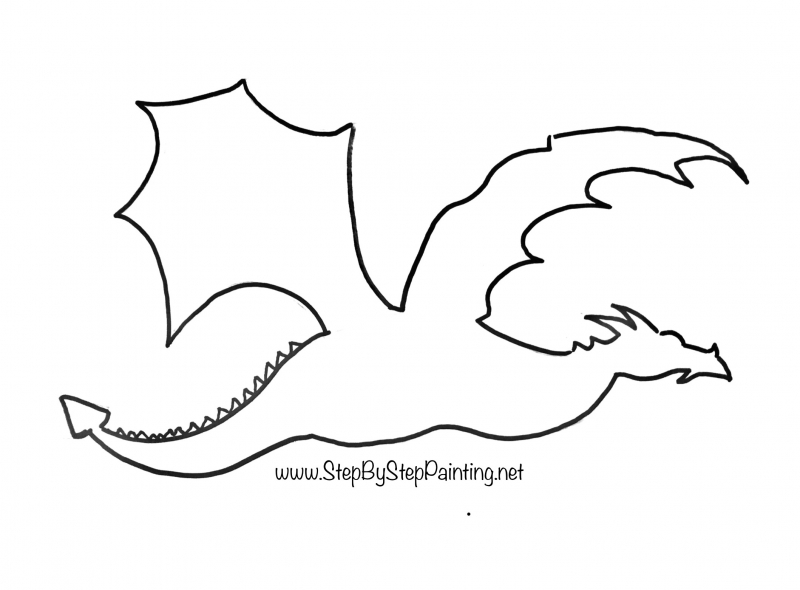
As with most of my tutorials, this one comes with a traceable! Simply print both on a standard size 8.5″x 11″ computer paper and use transfer paper to transfer the design. To get the free PDF download, go to my printable library.
Supplies You’ll Need:
How To Paint Dragons & Castle Silhouette

This beginner painting tutorial will guide you through the steps on how to paint a dragon silhouette with a castle and a full moon. Included in the tutorial are two traceables.
Color Palette: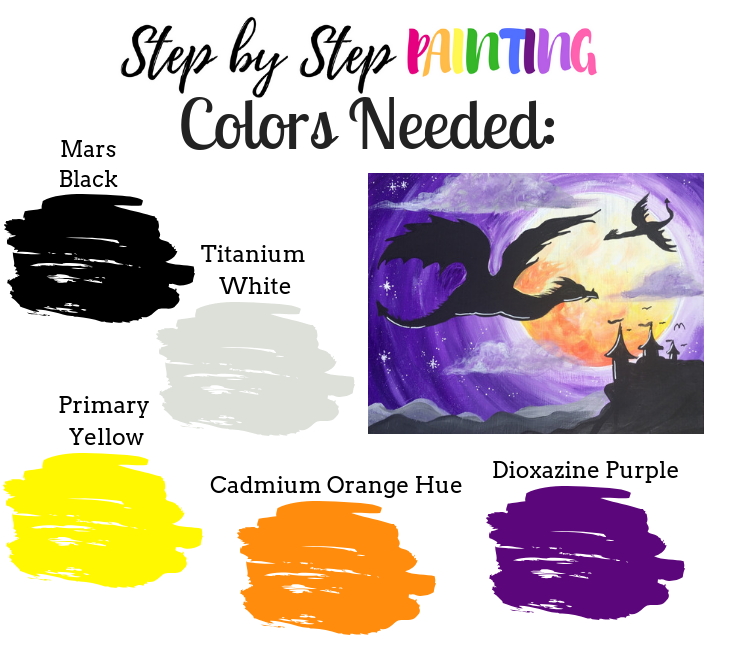

You’ll love the nice limited palette in this painting because there are only five colors.
I used only dioxazine purple and titanium white for the sky. For the moon, I used primary yellow, cadmium orange hue and titanium white. The silhouettes are mars black. The mountains are a mixture of titanium white and mars black. Finally, the clouds were done with both titanium white and dioxazine purple!
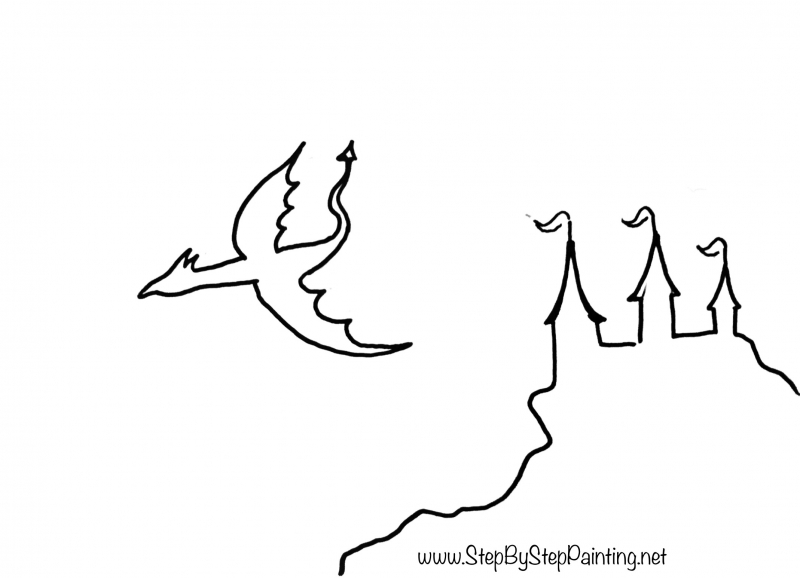
Traceable
Directions: print these on 8.5″ x 11″ paper if you’re painting on a 11″ x 14″ canvas. If you are painting on a larger canvas (16″ x 20″), you’ll want to scale the traceable up by about 50%.
To get the PDF download for these traceables, you’ll need to go to the traceable page here.
For more information about scaling up, see my post here.
Directions at a glance:


Video:
Step By Step Directions:
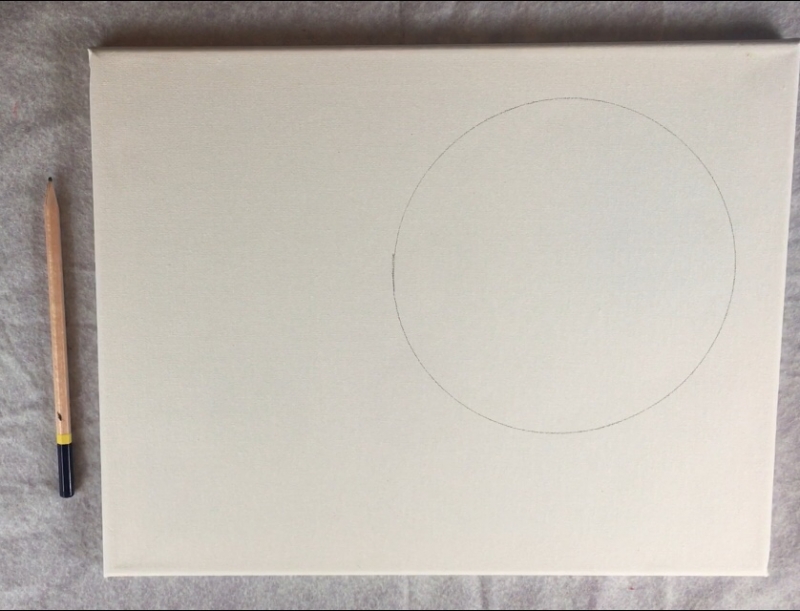
1. Trace a circle onto a blank canvas
For the size of this circle (on an 11″ x 14″ canvas) I used one of those circle palettes. The diameter of the one I used is 6.75″. You can find a similar size circle if you don’t own one of these. I positioned it about an inch offset from the top and far right. Use a pencil to trace the circle. 
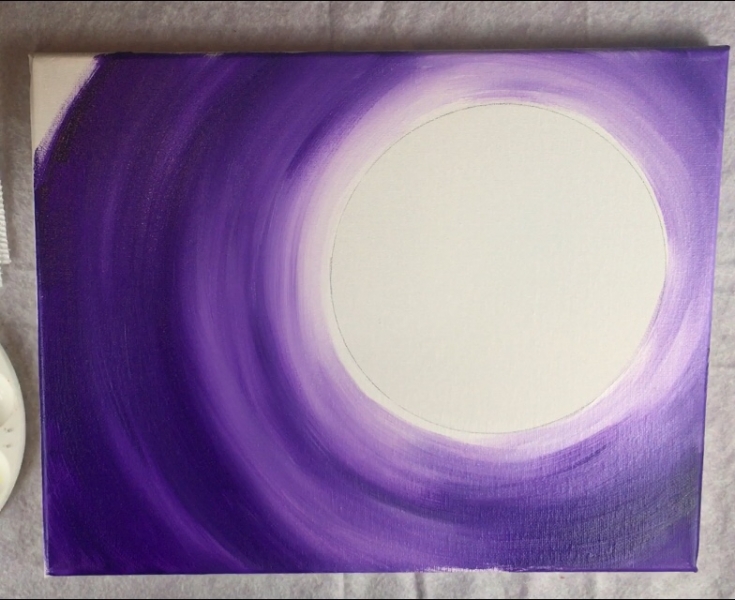
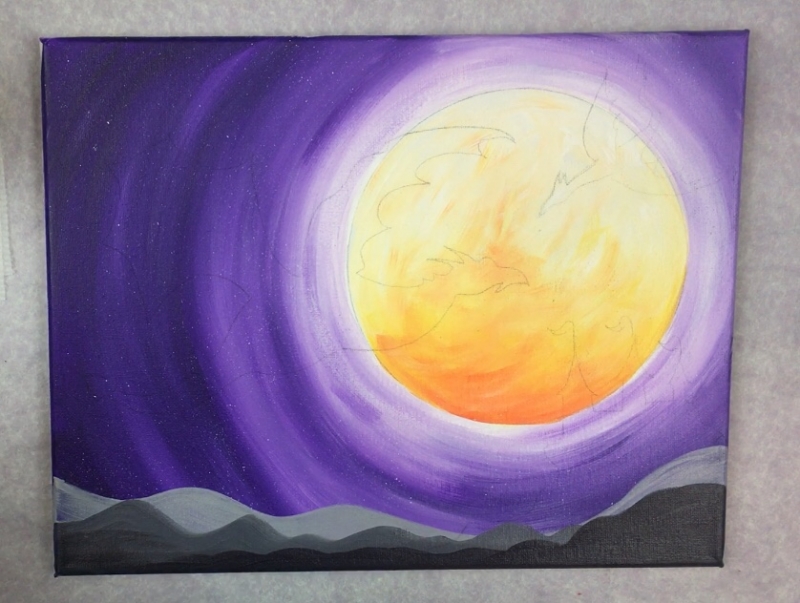
2. Paint the sky
Use a 3/4″ flat brush and titanium white to paint a ring around the moon. I used the full width of the brush and a thick coat of paint. We will be doing “wet on wet” blending so you want to work fast and keep that area wet. 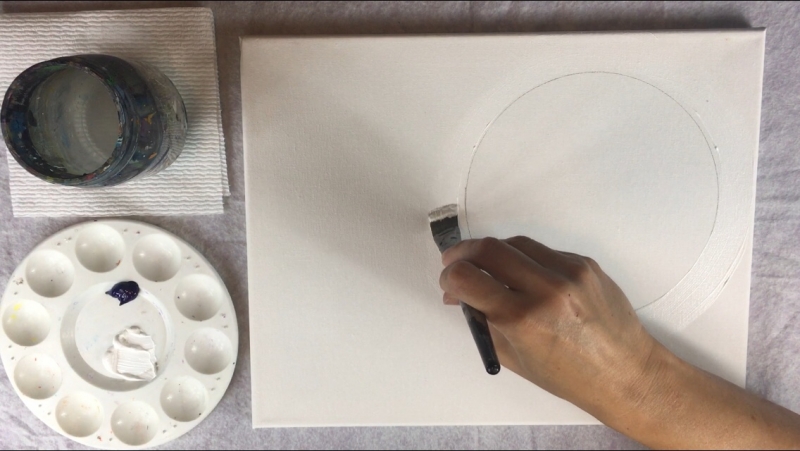
Next dip the corner of your brush (don’t rinse the brush off) in dioxazine purple.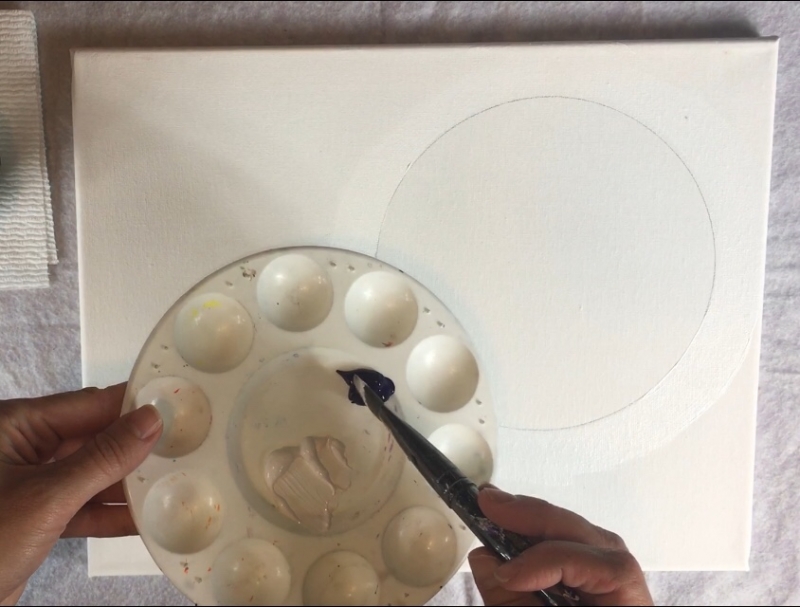
Drag that brush out on the palette a bit to get the colors to kind of mix together. 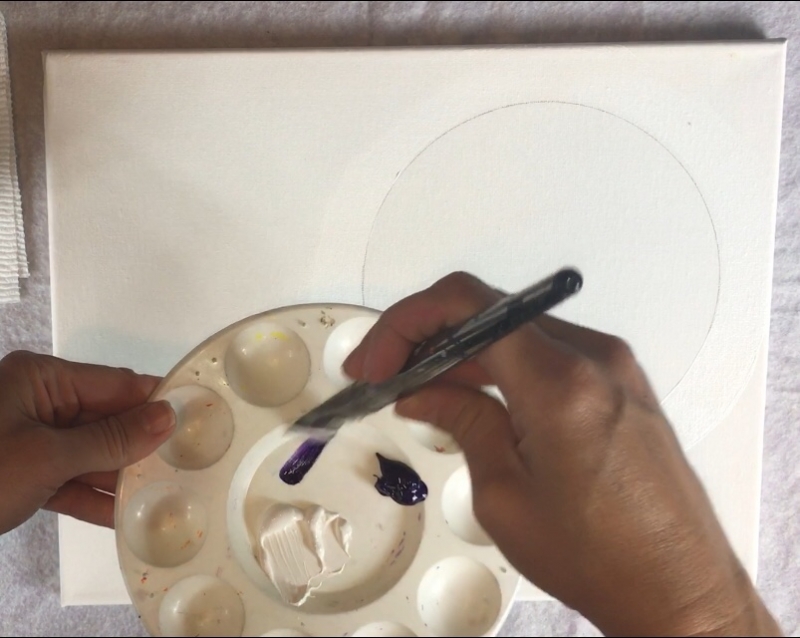
Paint next to that white ring allowing that bit of purple to blend with the white. This sky will gradually get darker as you approach the edges of the canvas and further from the moon. 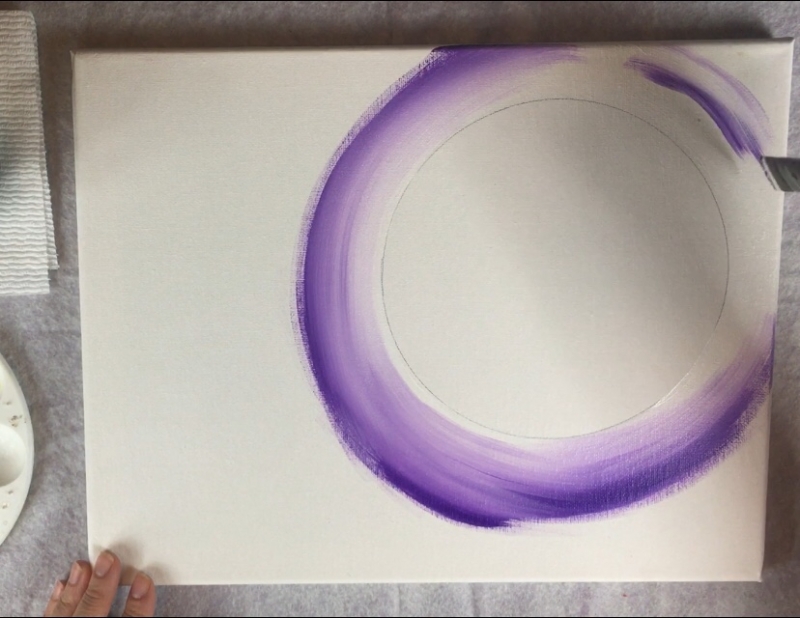
As you reload the brush, load it in more purple and continue to paint in circles/ rings around the room. The colors will blend on the canvas. You may dip your brush in a little white to get the color to blend more and be more of a medium tint of purple. The point is that the color will get more of a pure purple the closer you get to the edge. 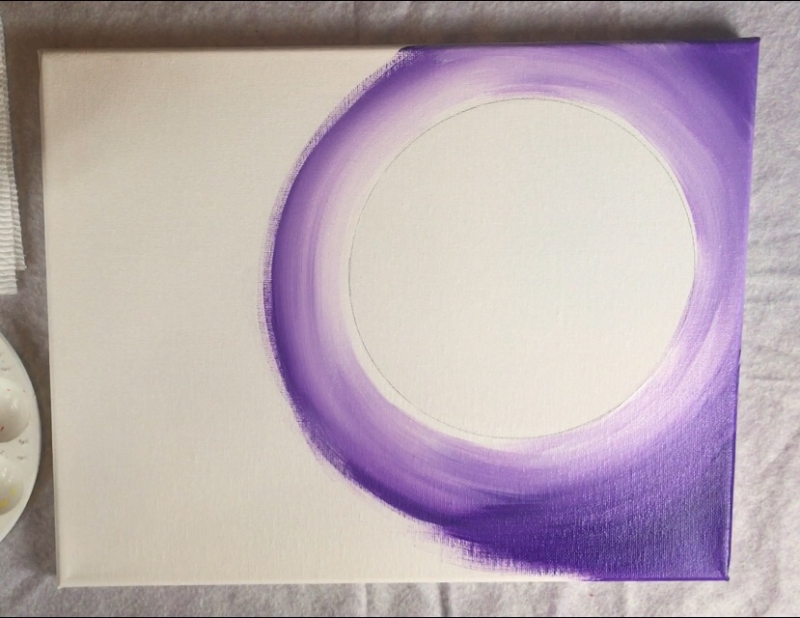
Keep painting in circles. As you get to the far left, make sure you are allowing that purple to get darker by not allowing any white to mix with it. 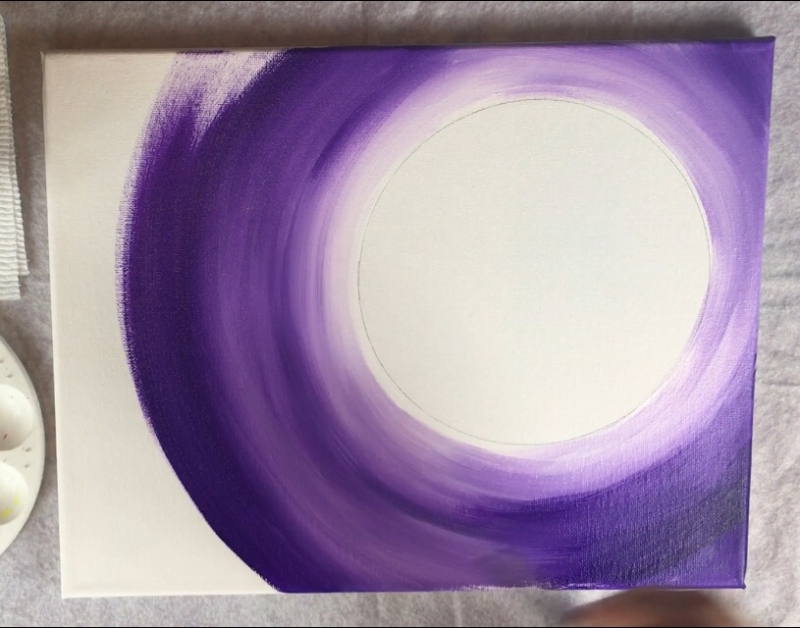
3. Paint the moon
This moon has pure orange at the bottom that blends to a pure yellow which blends into white at the middle and top. In other words, the darkest parts are on the bottom and lightest is at the top. To give the impression of “moon texture” I did short strokes that were going in all different directions.
To paint the moon, use a #12 flat brush and the colors: cadmium orange hue, primary yellow and titanium white. 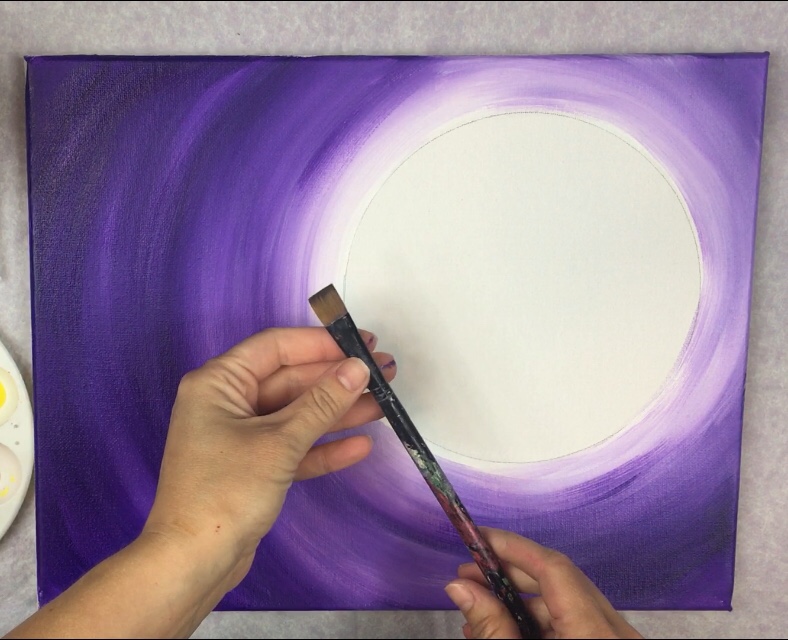
Dip your 12 flat in water and pat it dry. Load your brush with cadmium orange hue and outline the bottom area of the moon. 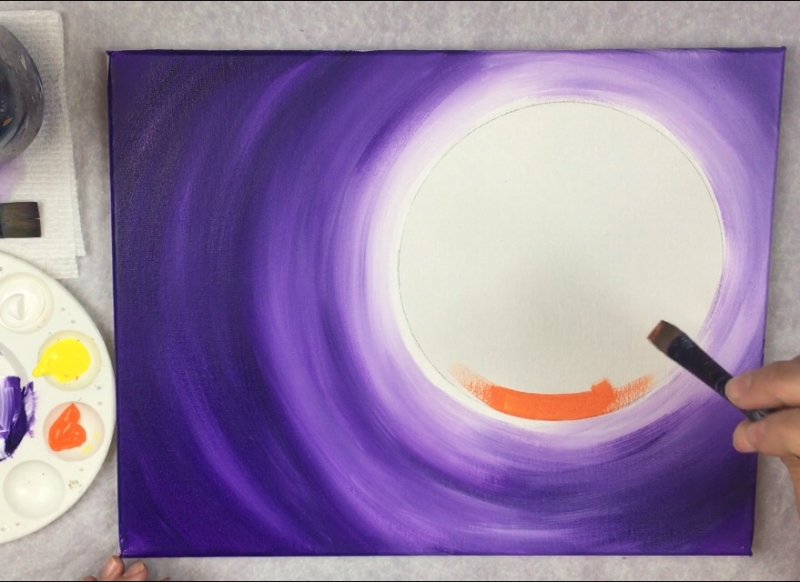
Next (don’t rinse your brush off) and load it with primary yellow. Change the direction of your strokes to little up and down and little diagonal strokes to blend the primary yellow with the cadmium orange hue. 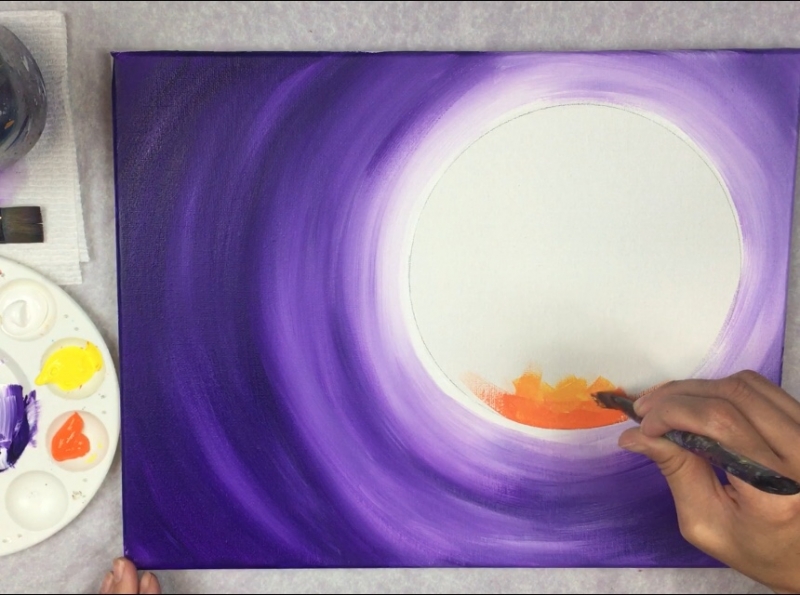
Keep blending yellow in with the orange so that the orange gradually blends and turns to pure yellow.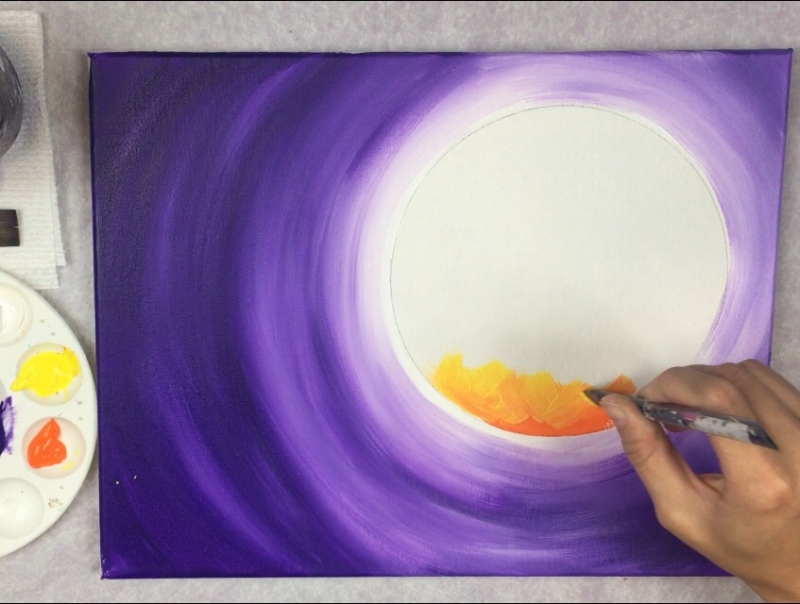
Go up about a quarter of the way up the moon. Tip: when you are painting the edges of the circle, it’s easiest to just outline that area of the moon using the full width of the brush. However, in the center, make sure you are doing the short strokes going in all directions. 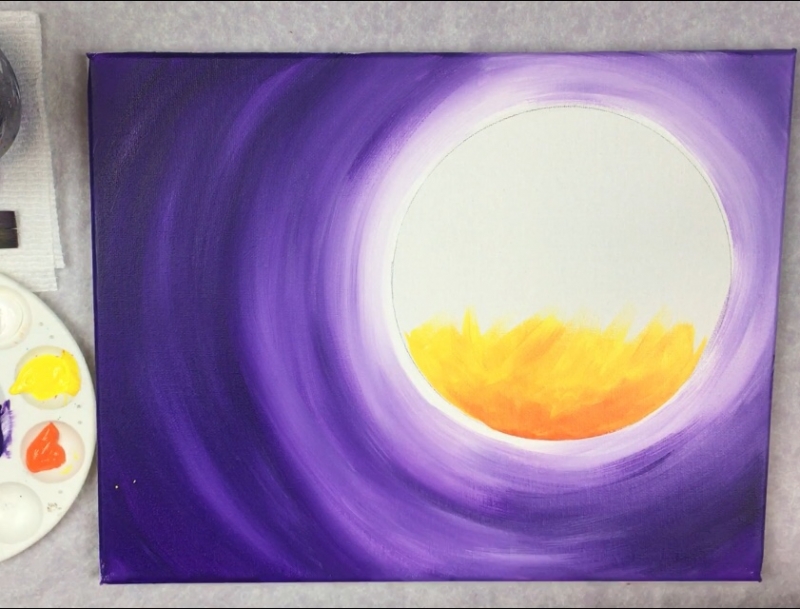
Then load your brush in titanium white without rinsing the brush. (Tip: if your brush is loaded with too much paint at this point, wipe the excess paint off but don’t completely rinse it off). Do the same type of diagonal short strokes blending that white with the yellow so that the yellow gets gradually lighter. 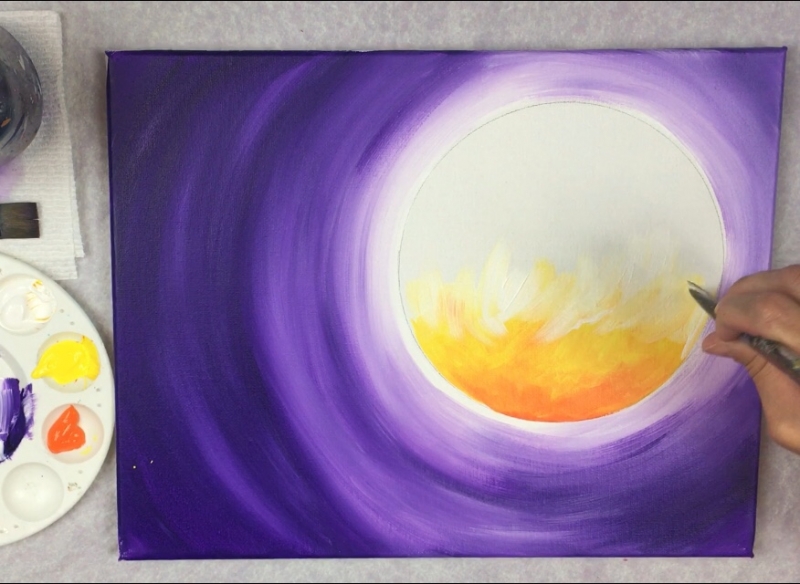
If you have some orange still on your brush and it is showing up at this point, that is okay! The point is we are painting “moon texture” which has different color variations of that yellow and orange.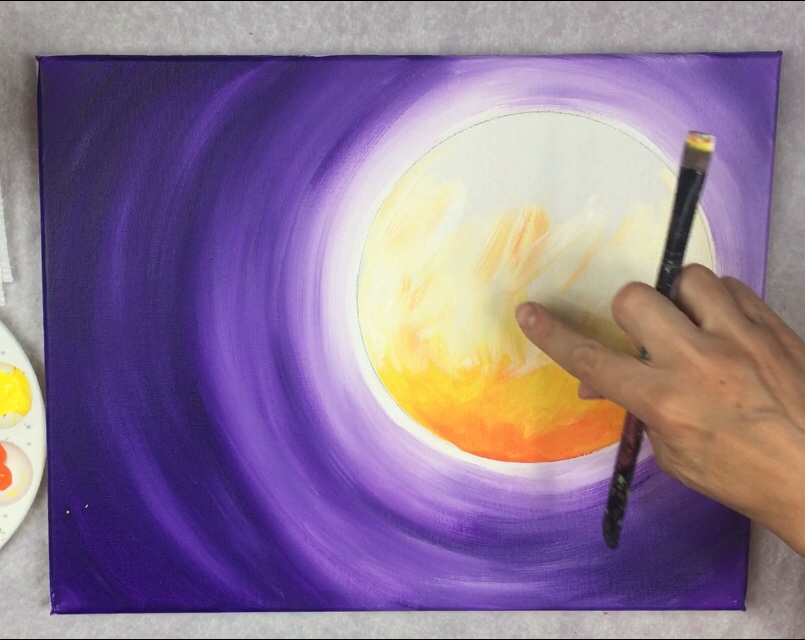
Continue to add more white as you work your way to the top of the moon.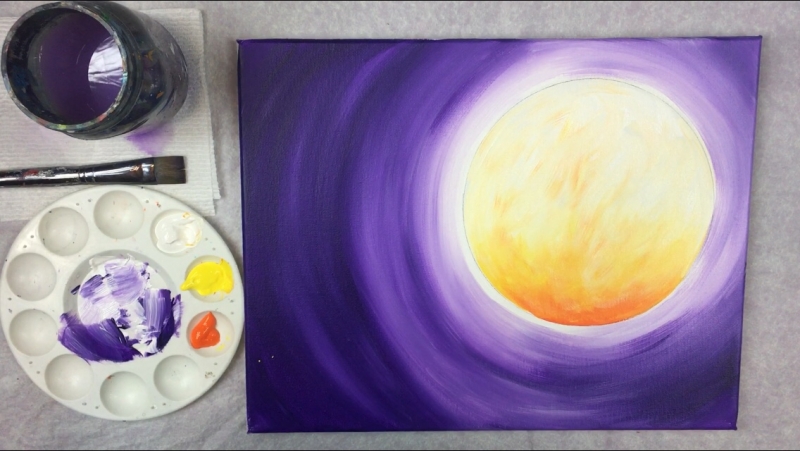
4. Paint stars
I used a toothbrush to splatter on the tiny stars. Make sure you practice the splatter separately before you actually do it on the painting. You’ll need the paint to be kind of thin but not dripping wet. I like to dip the toothbrush in water first and then pat it dry. Then dip it in the white. Flick the brush to create little specks of white dots that represent stars. 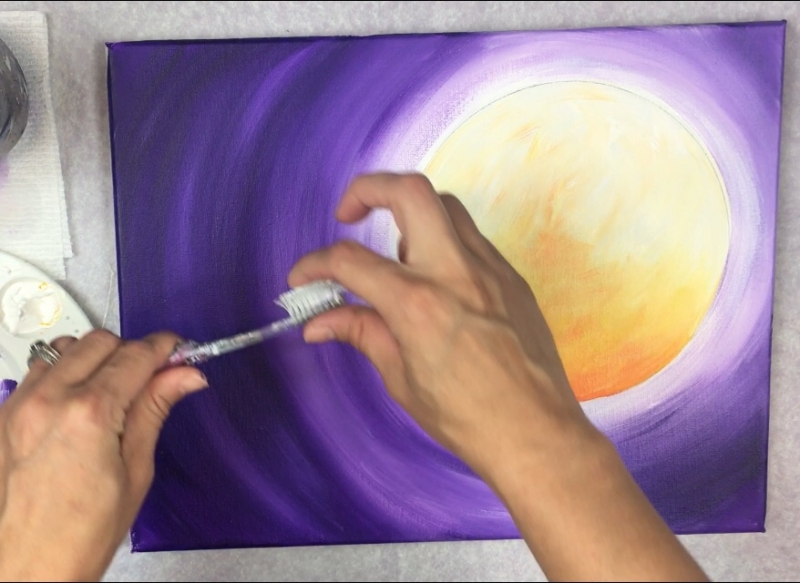
These dots will be really tiny. Later on in this painting, I go back with a white paint pen to do some larger stars. 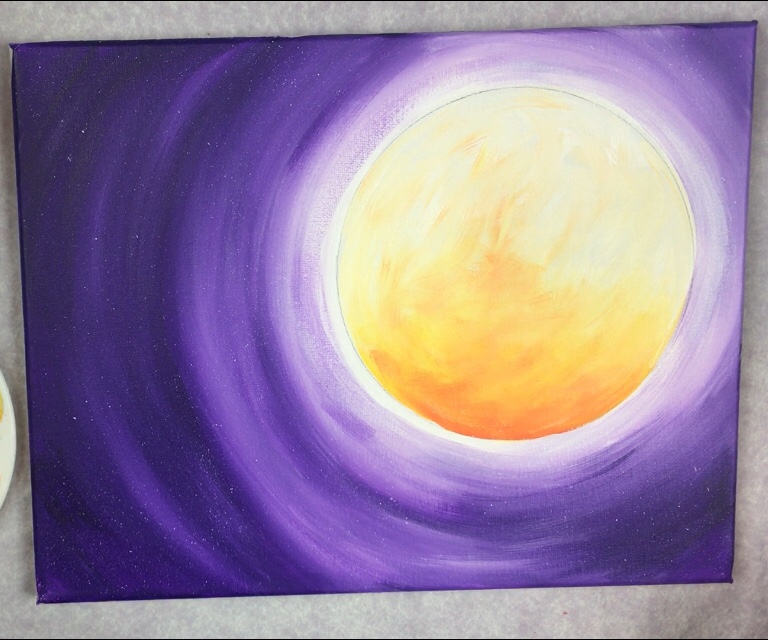
5. Paint the mountains
These mountains were done with three different colors: light gray, medium gray and black. I first mixed a light gray on my palette by mixing about five parts titanium white to one part mars black (doesn’t have to be exact, just make a shade of light gray). 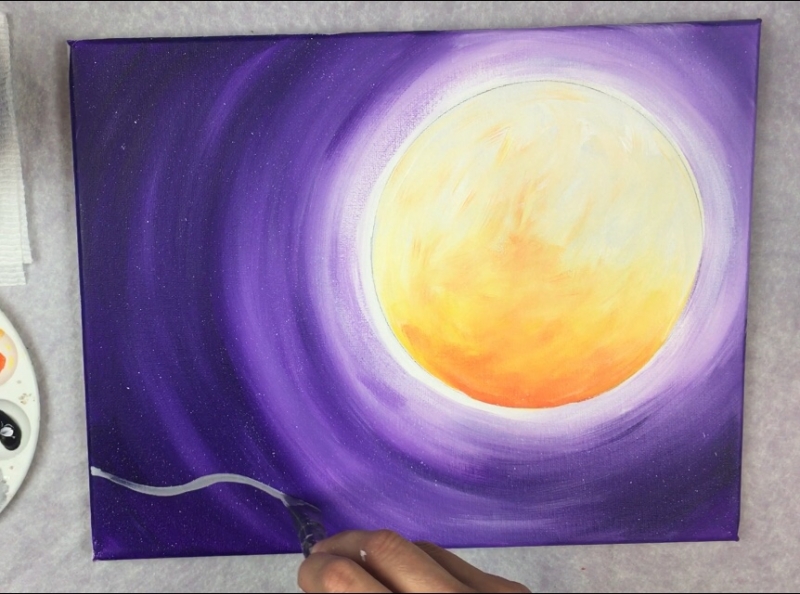
Paint a wavy line using the 3/4″ flat brush. Then fill that line in. You don’t need to fill it in all the way because there will be a middle and a bottom layer with darker shades.
Next make a medium gray on your palette and paint another layer of mountains. For this shade of gray, mix about 2-3 parts black with 5 parts white (again doesn’t have to be exact, just make a shade that is darker than the first shade). Paint a wavy mountain line below the light gray mountain. 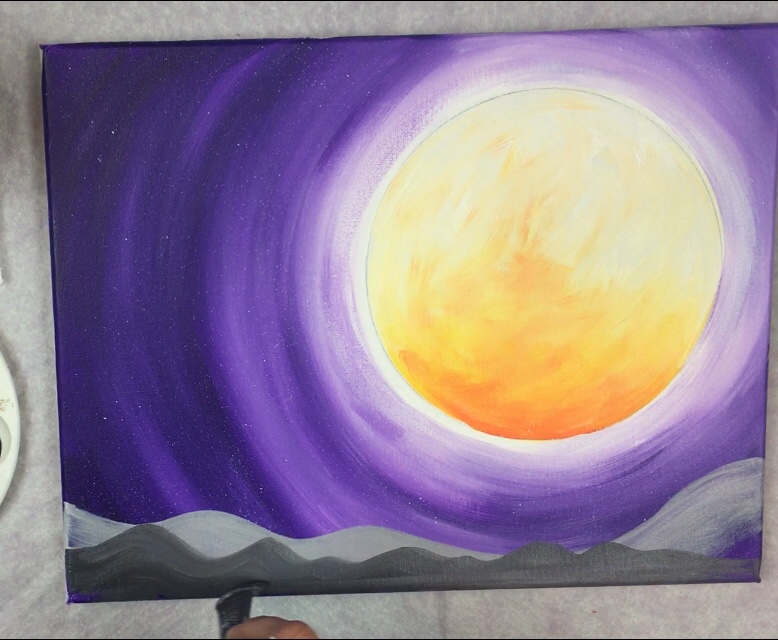
For the bottom layer of mountain, use pure mars black. At this point, don’t worry about the castle location because that will be added on with the traceable in a later step. 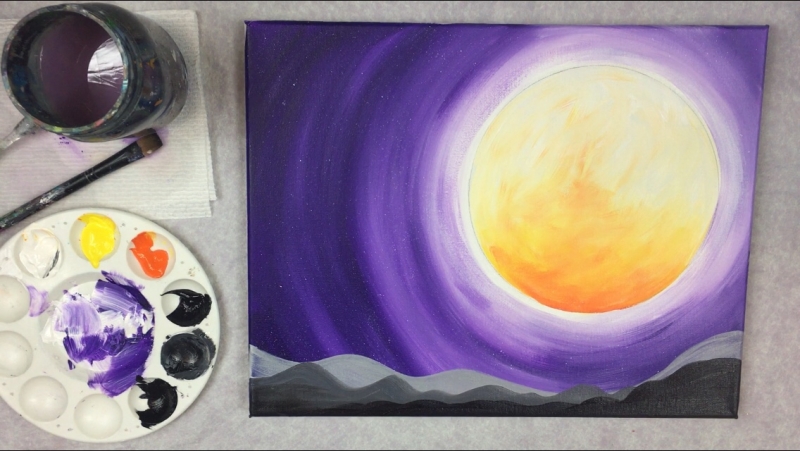
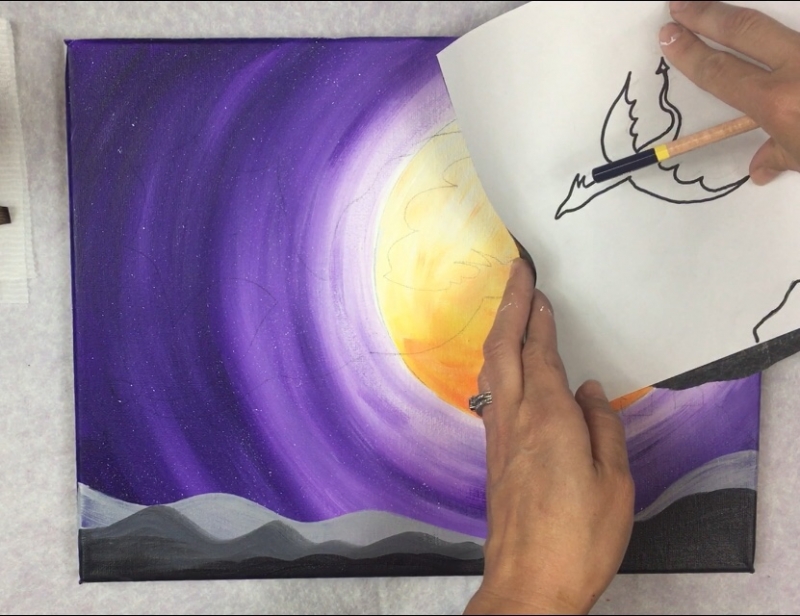
6. Trace or draw the dragons and castle onto the canvas
*If you are using the traceable, position it onto the canvas so the dragon is overlapping the moon. Then place a sheet of gray graphite paper below the dragon (shiny side down). Trace the drawing and it will transfer onto the canvas. *If you aren’t using the traceable, it is still recommended that you draw on a separate paper and transfer to ensure optimal placement and sizing.
Do the same for the castle and the small dragon. Note: the position of the small dragon is different than the traceable. I traced the small dragon in the upper right area of the canvas so that it also is overlapping the moon. 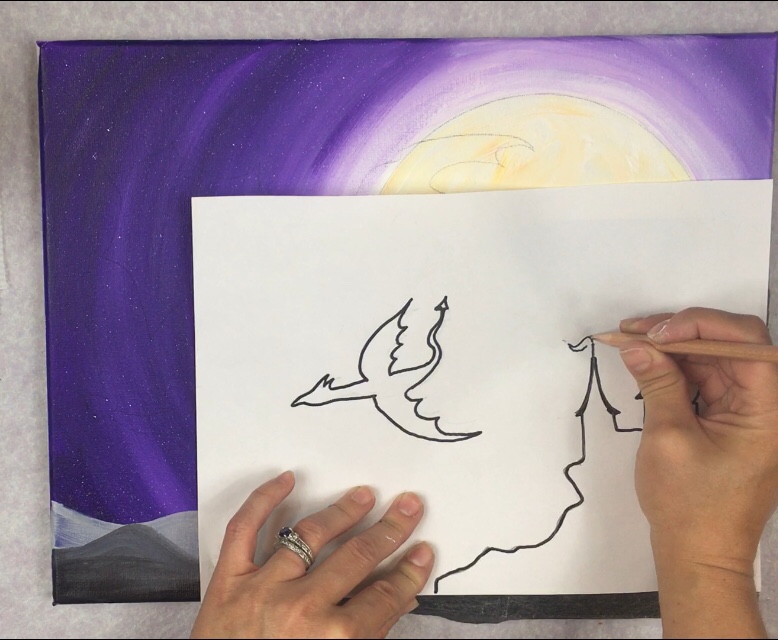
7. Paint the silhouettes with mars black
For this step I used a #4 round brush, a 10/0 liner and a black paint pen. Fill the larger areas with the larger round brush and the tiny areas with the liner. Use the paint pen for even smaller areas. 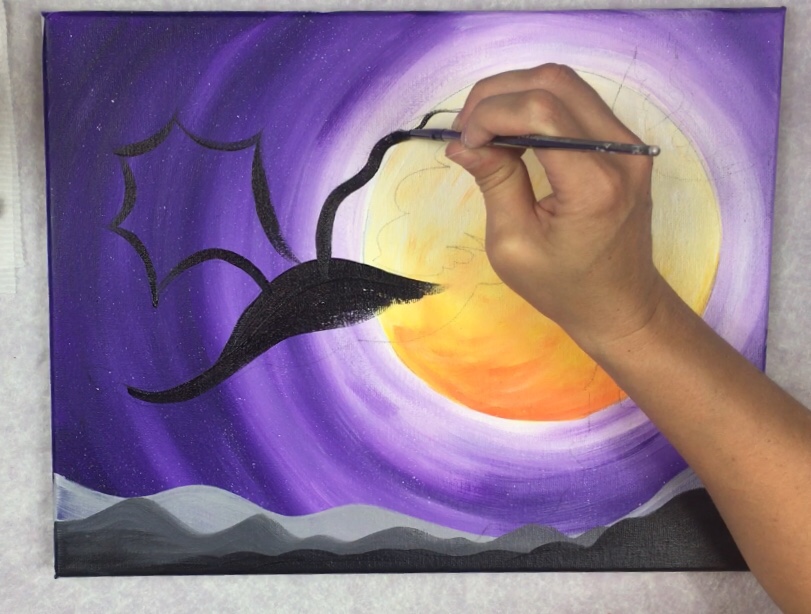
I used the paint pen for the flags and dragons by the castle. I also used it to fill in very fine details and points on the dragons. 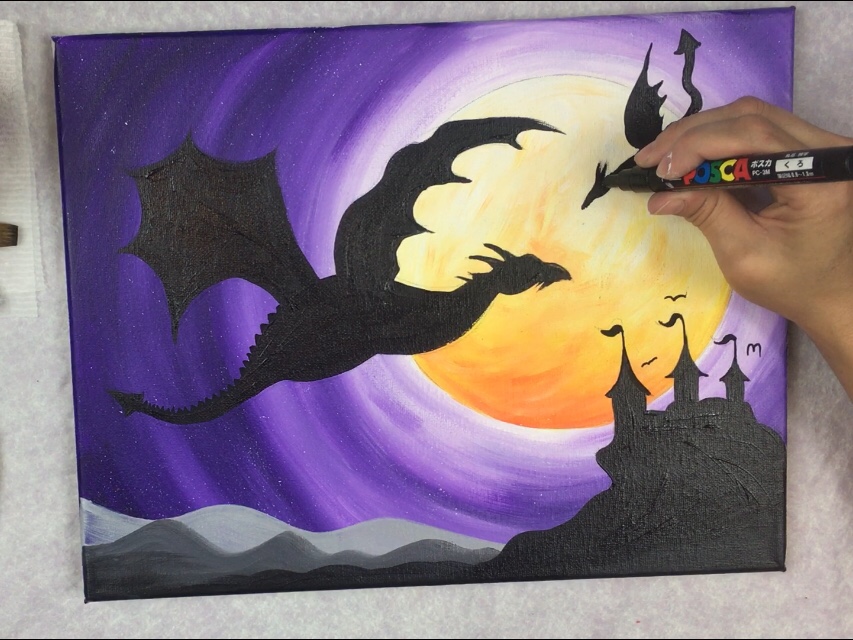
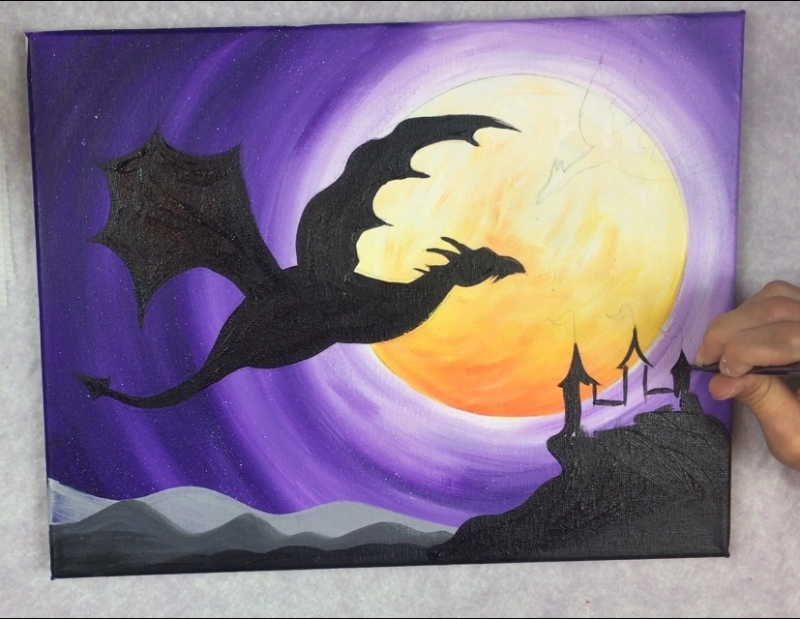
8. More details with a white paint pen
I used a white paint pen to paint some larger stars. I did cluster of dots. I also drew in some asterisks and diamond shape stars. 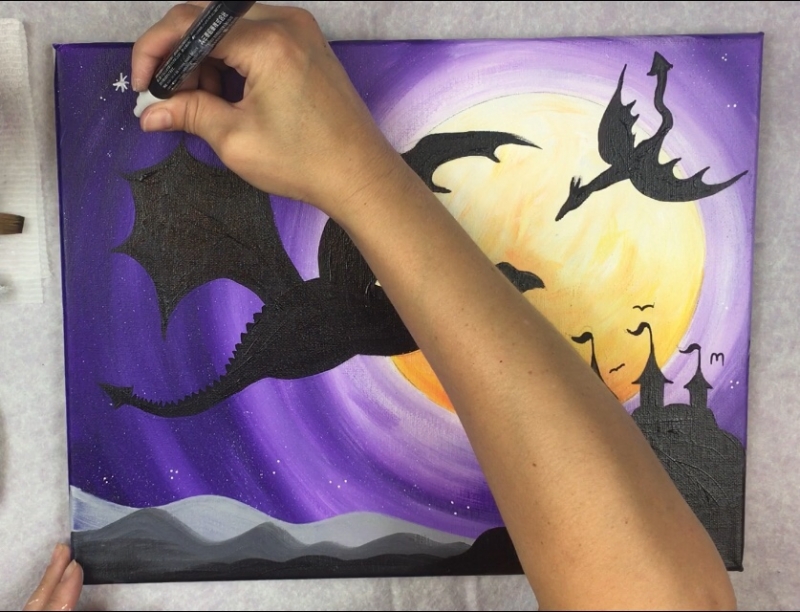
For the highlights, I used a white pen. I did white lines on the left sides of the castle. I also did some on the bottom parts of the dragon’s head, body and right sides of the wings (although later I ended up painting over them because I didn’t like them on the large dragon). 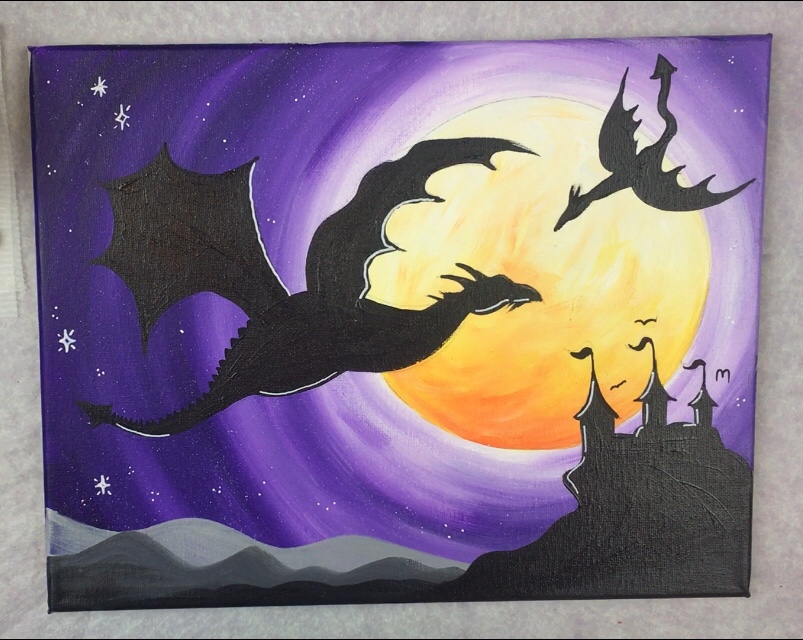
9. Paint the clouds
For the clouds, I used a very large round brush. The brush should be large, it should be soft synthetic bristles. Also, you can try this with a filbert brush. These clouds were done using “dry brush” style strokes. That means that I did not wet my brush first and I wiped off some of the paint after I loaded the brush. Your brush should be very dry with only a little bit of paint on it.
Load it with titanium white (and wipe off the excess). Paint in small circle strokes that form a cloud shape. The paint stroke should look fluffy, dry and see through. 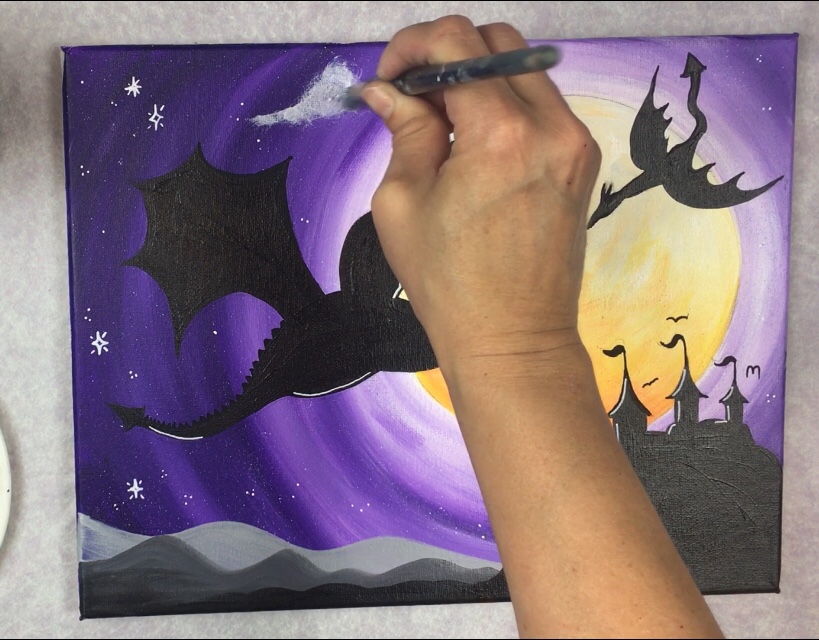
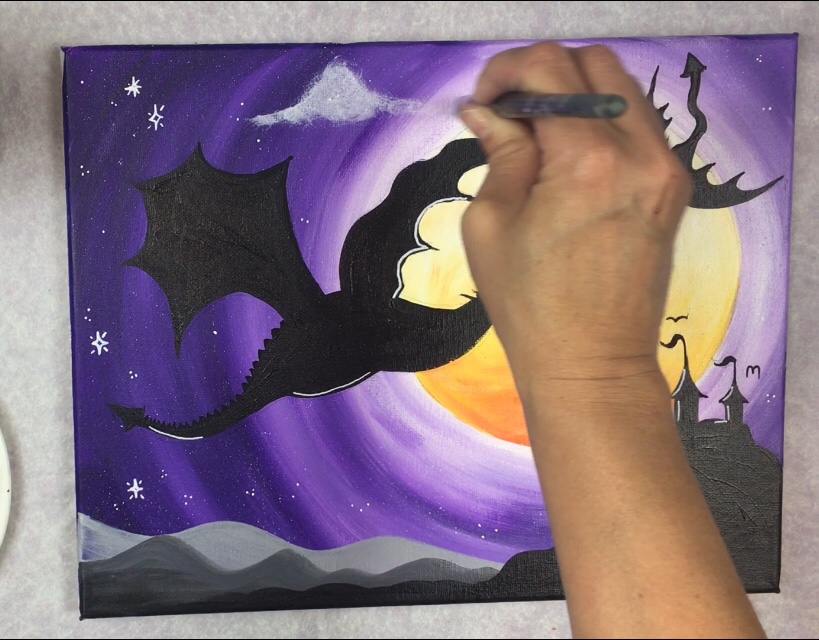
Add some more white onto your brush and paint again forming the shape. The cloud is lumpy on top and flat/ horizontal on the bottom extending over the moon. 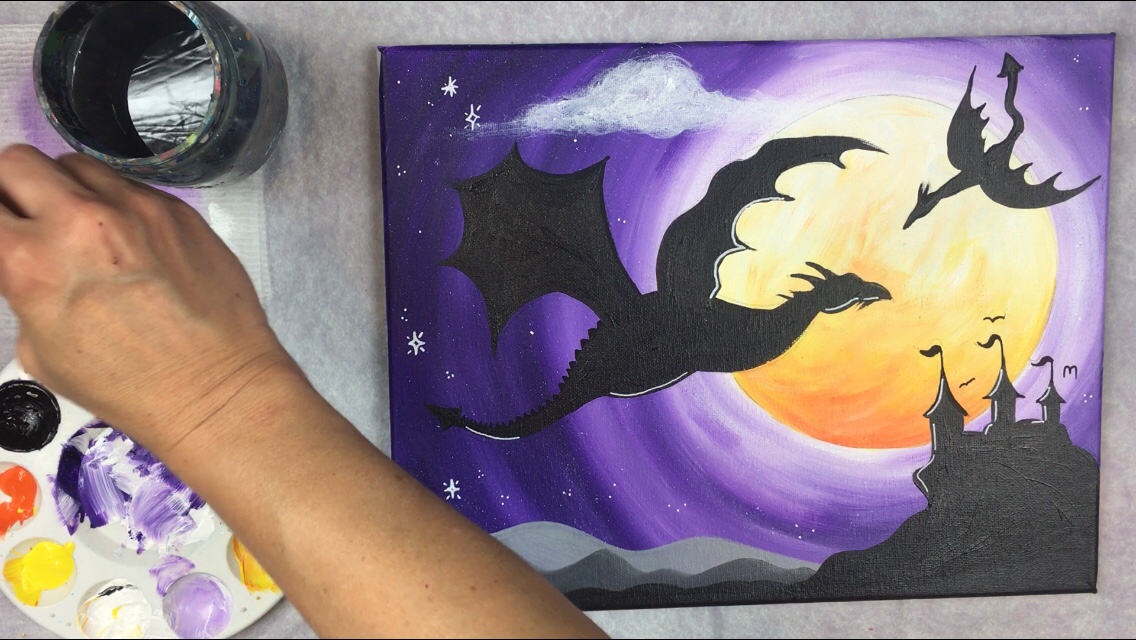
Then I added purple into this cloud. I loaded my brush in purple (no rinsing) and wiped off excess paint. I did the same thing (small circle strokes). 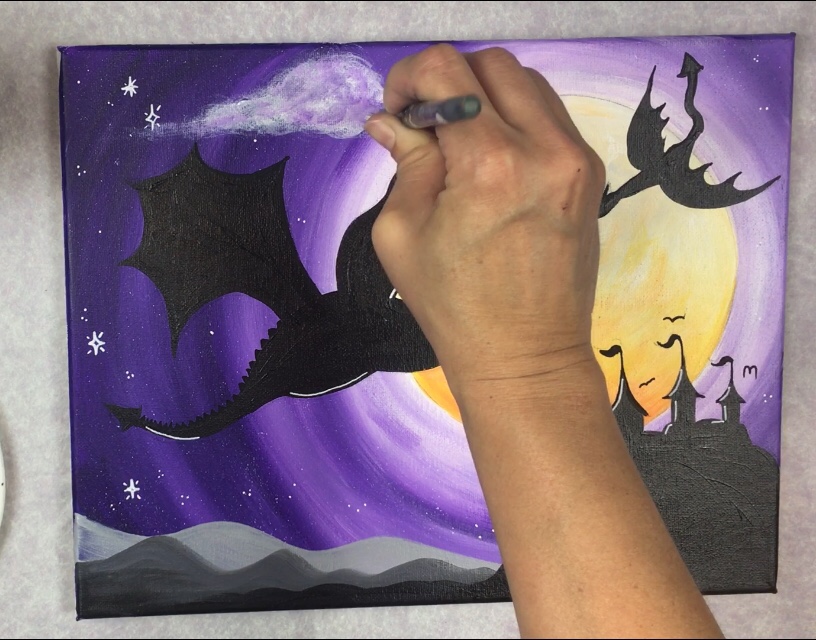
And we have a dry brush cloud of white and purple. 
I repeated this technique with the clouds three more times. One on far right side of the moon, one on the bottom left of the moon and one just above the mountains on the left. 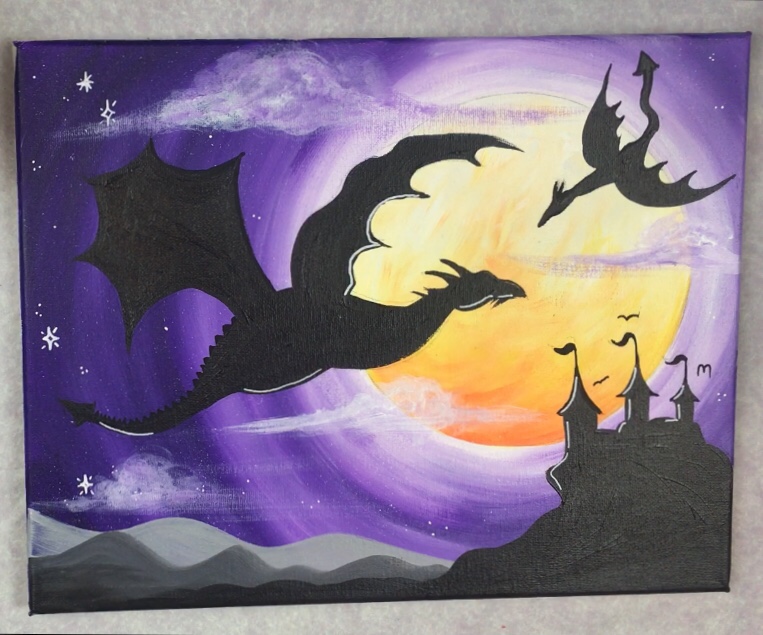
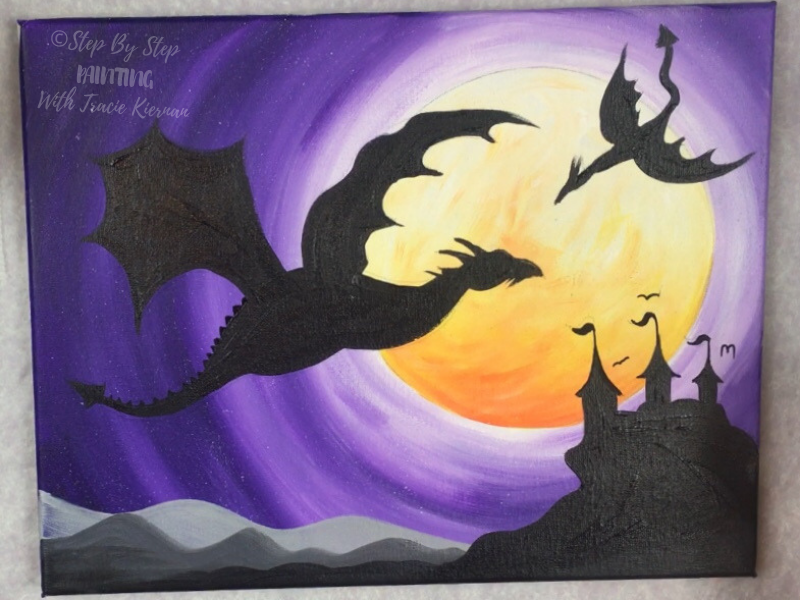
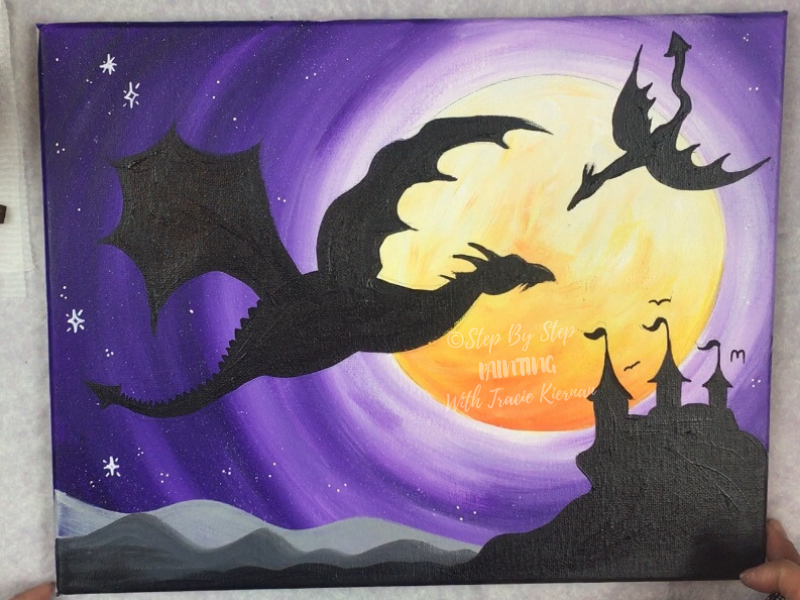
Finished!
That’s it! Sign your name and show it off! (Note: yes I did paint over the bottom highlight part that I did on the large dragon). 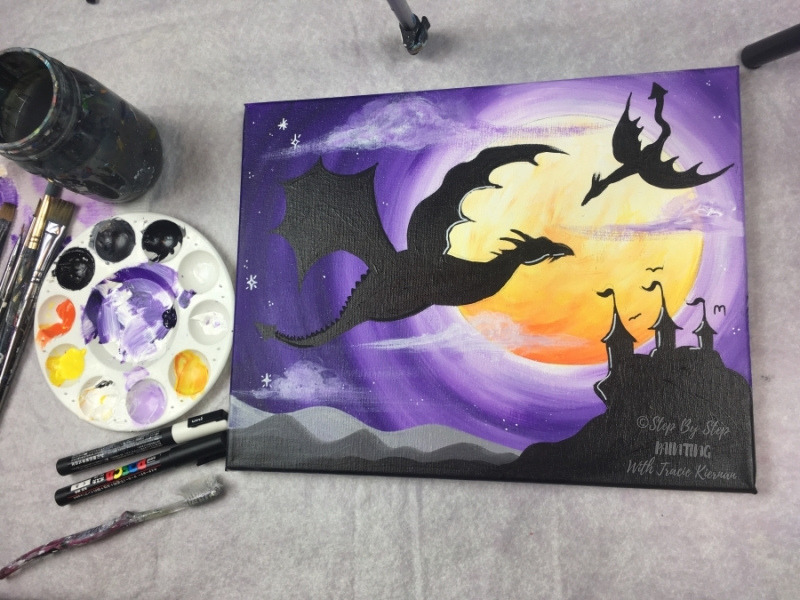
The outside pics I took make that dioxazine purple show up more blue! 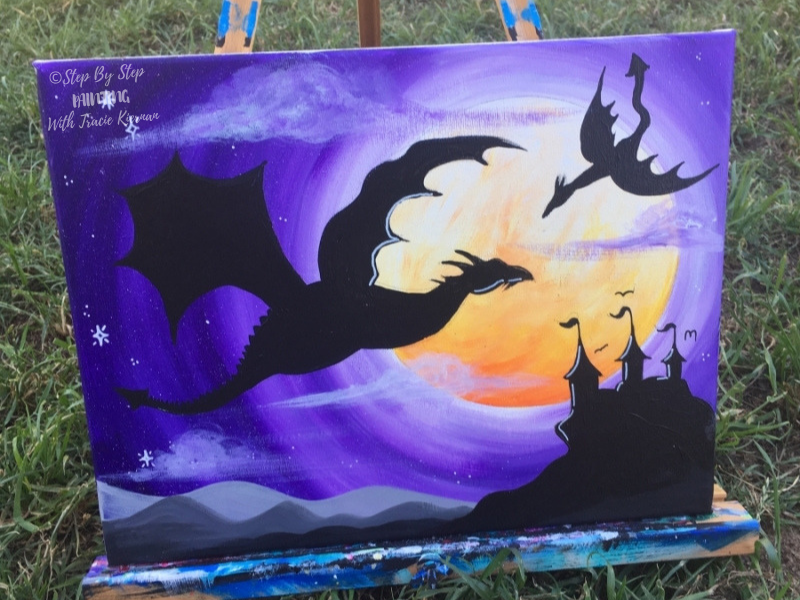
Share Your Art!
Share your art on social media. Be sure to tag me if you’d like me to see it! You can also email me your painting if you’d like!


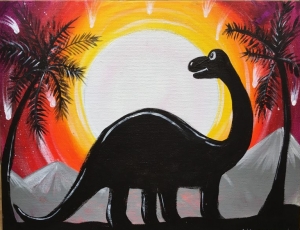
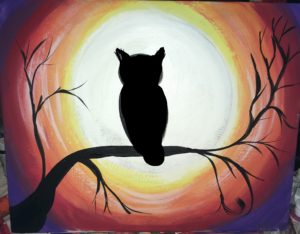
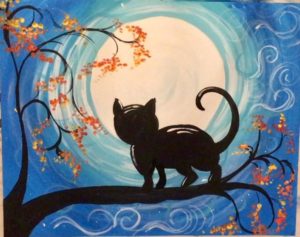
More Silhouette & Moon Paintings
Nice timing with GoT ending!♡
Wonderful, especially your explanation on how to make those elusive clouds!
Thanks Julie! I love dry brushing clouds – seems to make things easier because clouds are so tricky!