
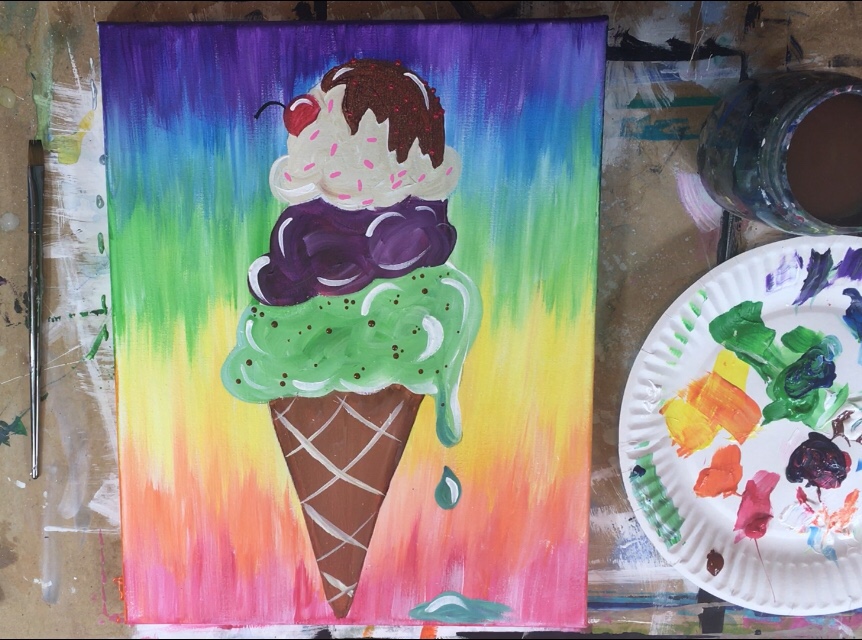
Ice Cream Painting
Learn how to make your very own ice cream painting with acrylics!
This is a great tutorial you can do with your kids and have fun mixing and matching different ice cream flavor colors!
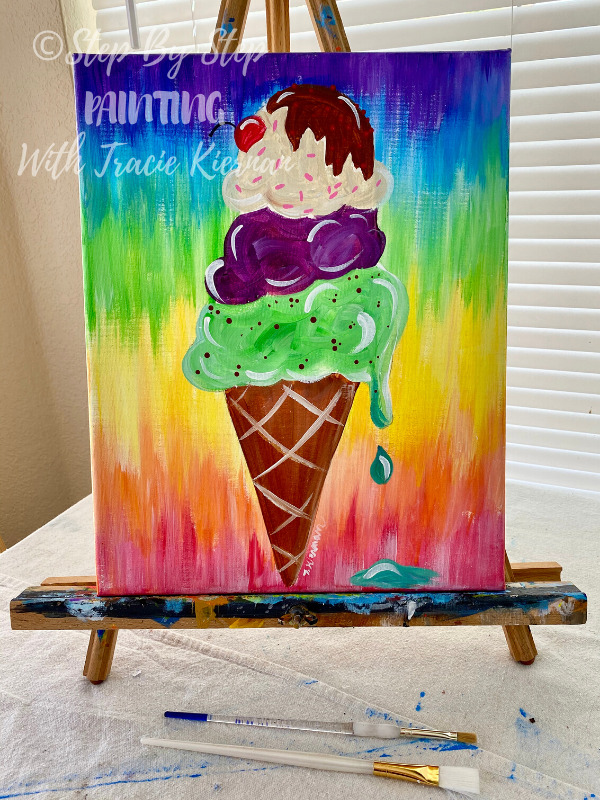
The rainbow tie-dye background is so fun and reminds me of art by Lisa Frank.
I was a 90s kid and I definitely had a collection of Rainbow colored everything Lisa Frank on all my school supplies!
The ice cream scoops and toppings can also be customized with your favorite colors and flavors.
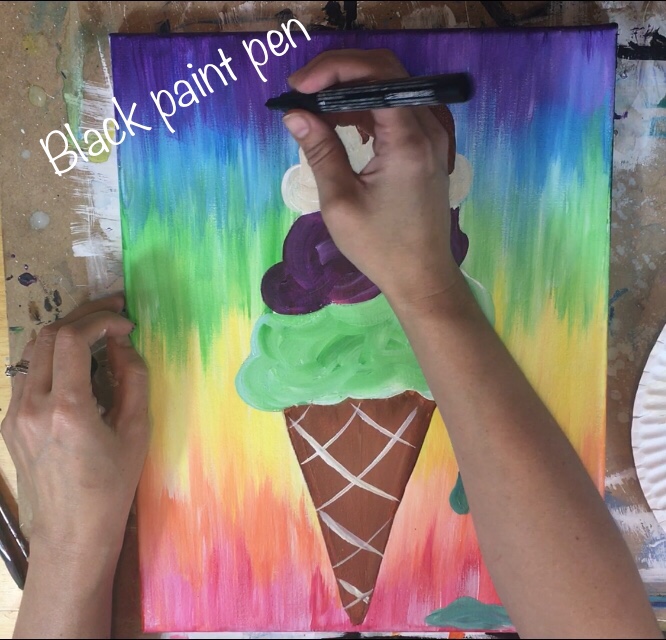
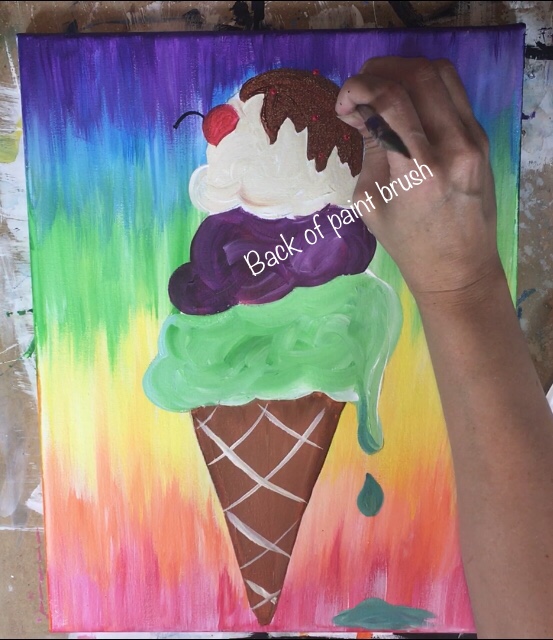
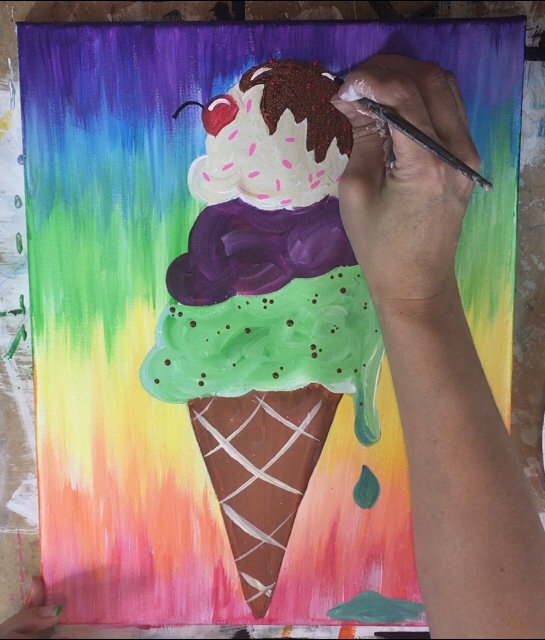
I used a paint pen for the sprinkles as well as the back of my paint brush to paint little chocolate chip dots on the green scoop.
This tutorial comes with a traceable of the ice cream so you won’t have to worry about drawing it. Enjoy and happy painting!
Materials
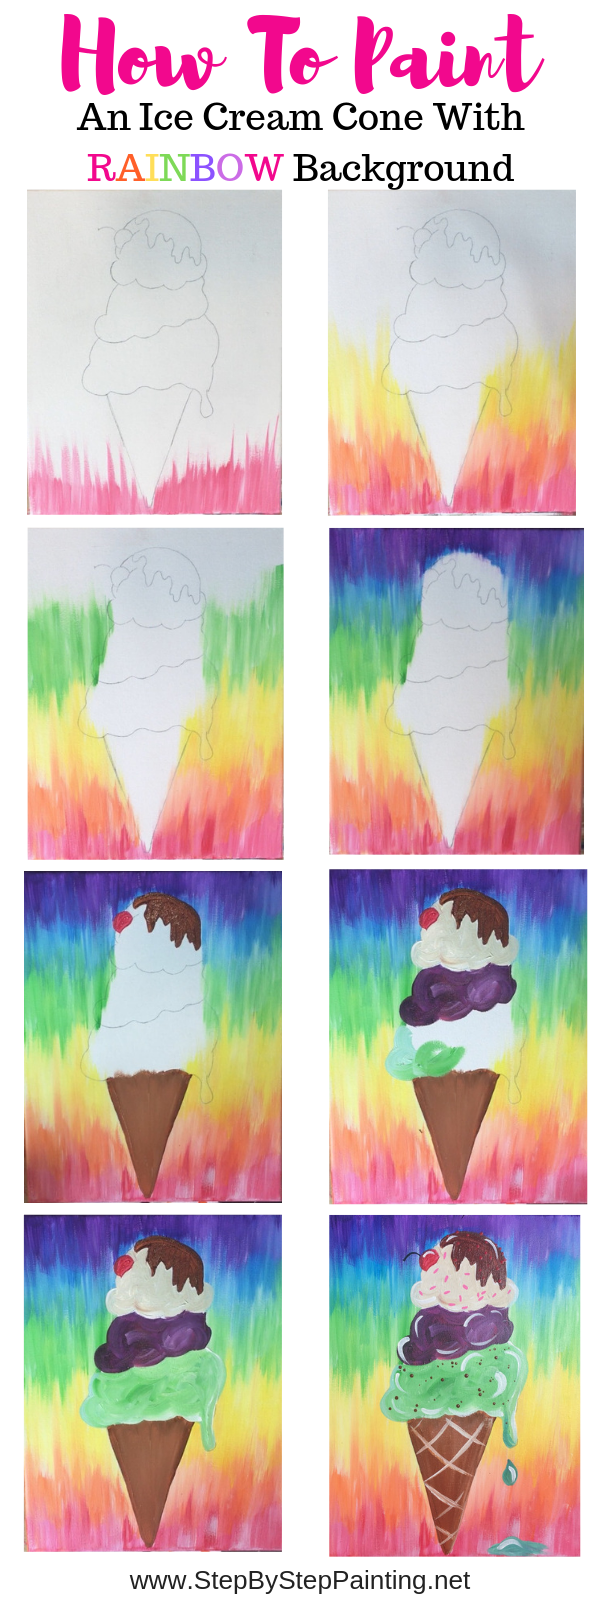
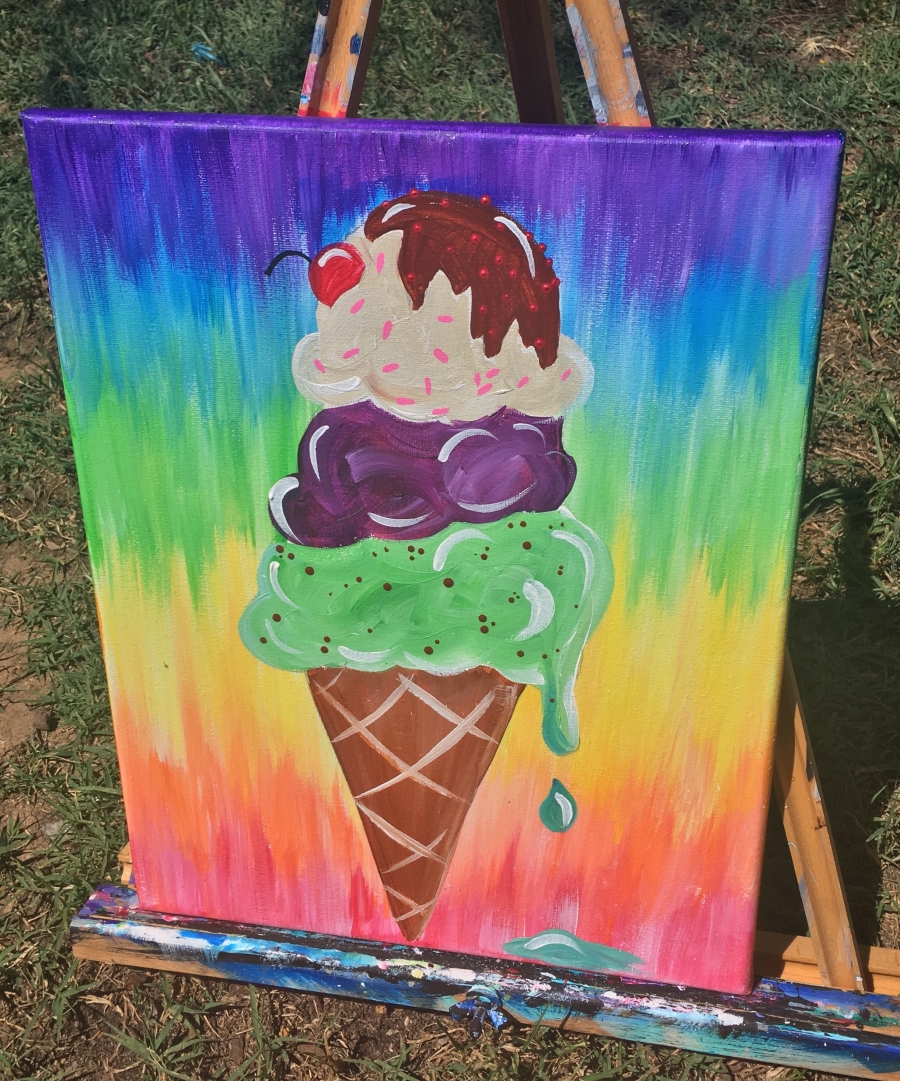
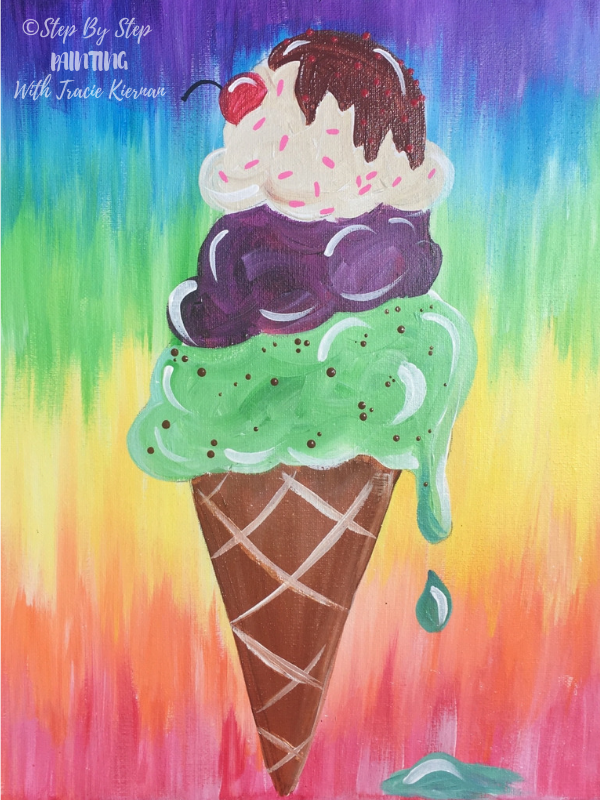
How To Paint An Ice Cream Cone
Learn how to paint a fun rainbow background with an ice cream cone. This is an easy summer painting that you can do with your kids, the ice cream lover in your life or simply to add a bright cheerful amusing painting to any room in your house!
Materials
Supplies
- 11" x 14" Canvas
- Acrylic Paint
- Brushes
- Water Cup
- Traceable
- Gray Graphite Transfer Paper
- Optional: Paint Pens (black and possibly other colors for sprinkles)
Colors
- Primary Red
- Cadmium Orange Hue
- Primary Yellow
- Light Green Permanent
- Primary Blue
- Dioxazine Purple
- Burnt Sienna
- Unbleached Titanium
- Titanium White
Brushes
- 3/4" Flat
- #5 Round
- #12 Flat
- 10/0 Round (Or paint pen)
Instructions
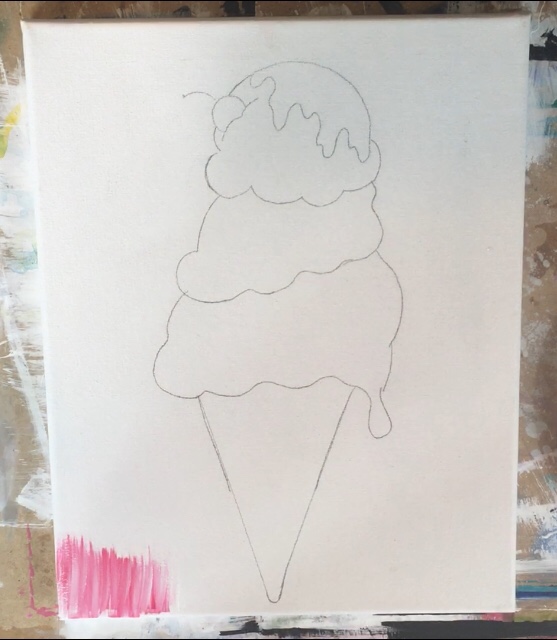
- Draw or transfer the ice cream cone onto your canvas
- Paint the rainbow background starting at the bottom with primary red and going through the spectrum up to purple.
- Paint the chocolate syrup.
- Paint the cone.
- Paint the cherry.
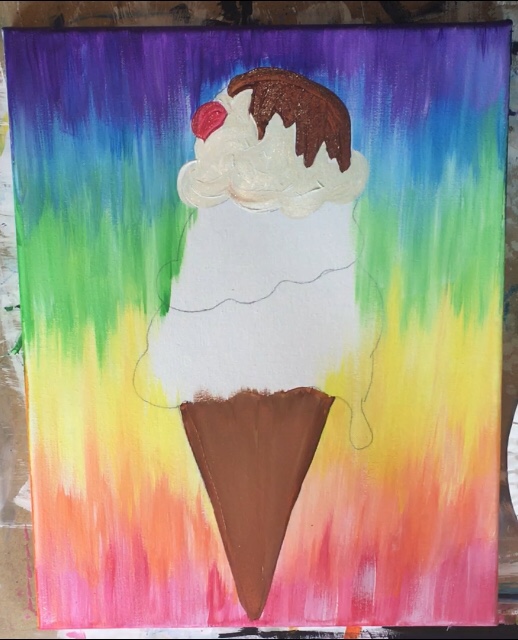
- Paint the vanilla top scoop of ice cream.
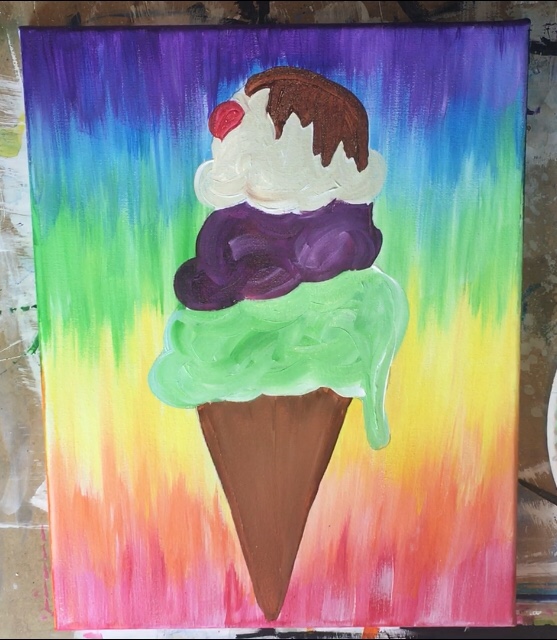
- Paint the purple scoop and then the green scoop.
- Paint the texture on the ice cream cone.
- Use a paint pen or fine brush to add sprinkles and other fine details to the ice cream.
- Paint some white highlights on the scoops and cherry.
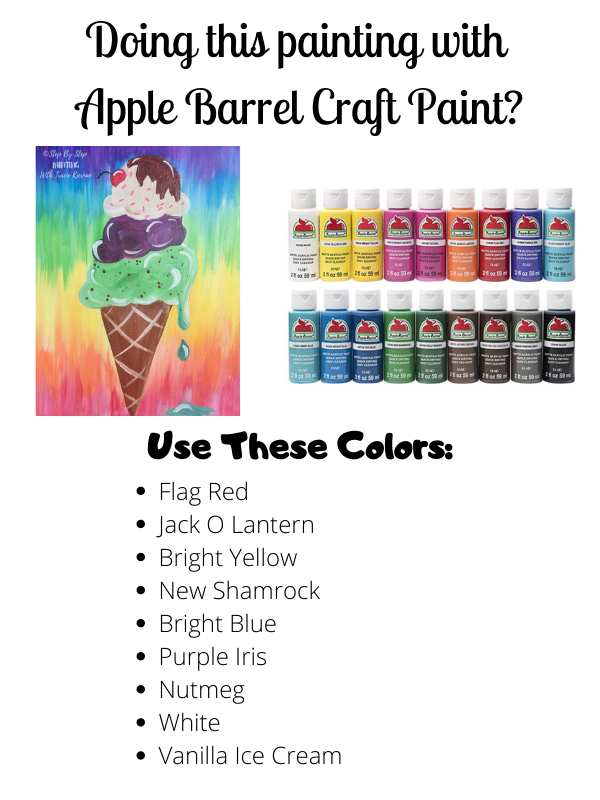
Color Palette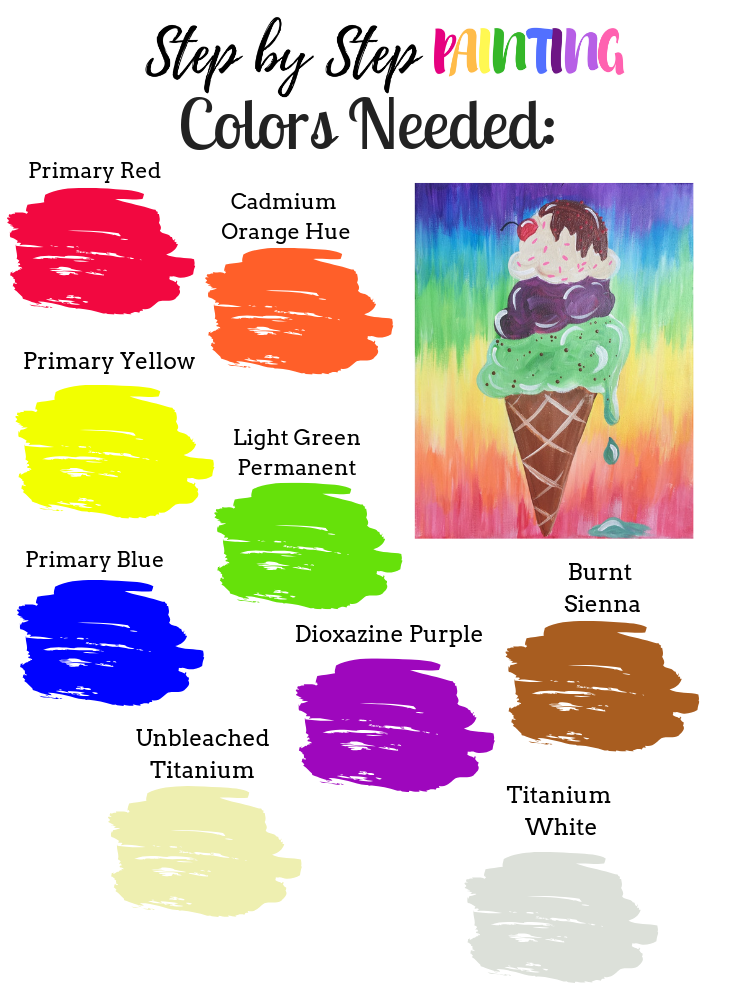

Apple Barrel Color Suggestions:
Traceable
Download PDF Traceable or click the image of the ice cream for the JPEG version. You will need to draw the bottom tip of the cone.
If you are using an 11″ x 14″ canvas size, just print the ice cream cone on a 8.5″ x 11″ computer size paper. If you are using a 16″ x 20″ canvas, increase the scale of this traceable by at least 50%.
Different sizes of this ice cream cone template are available in my PDF shop.

Directions At A Glance

Video
Step By Step Directions
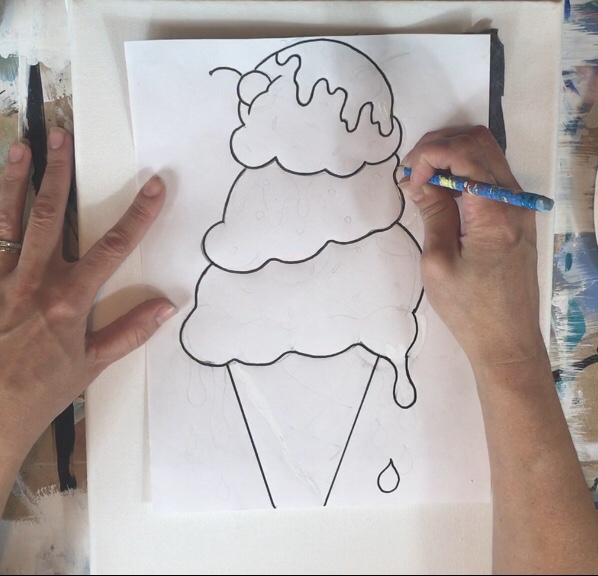
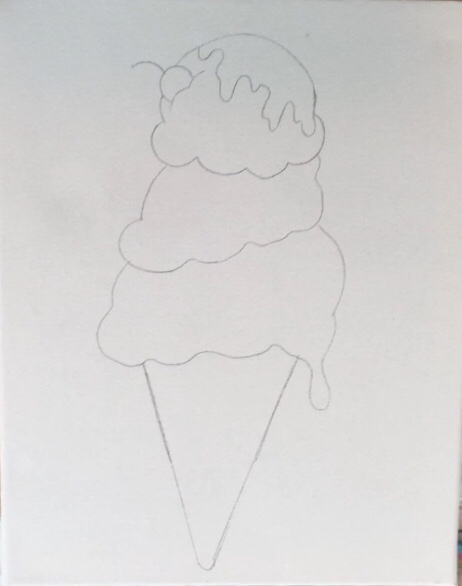
1. Draw/ Transfer The Ice Cream Cone To The Canvas
You’ll need the traceable for this, a sheet of gray graphite transfer paper and a pencil.
First print the traceable on a standard size sheet of paper (8.5″ x 11″).
If you’re doing this on a larger canvas, you’ll need to scale the traceable up in your print settings.
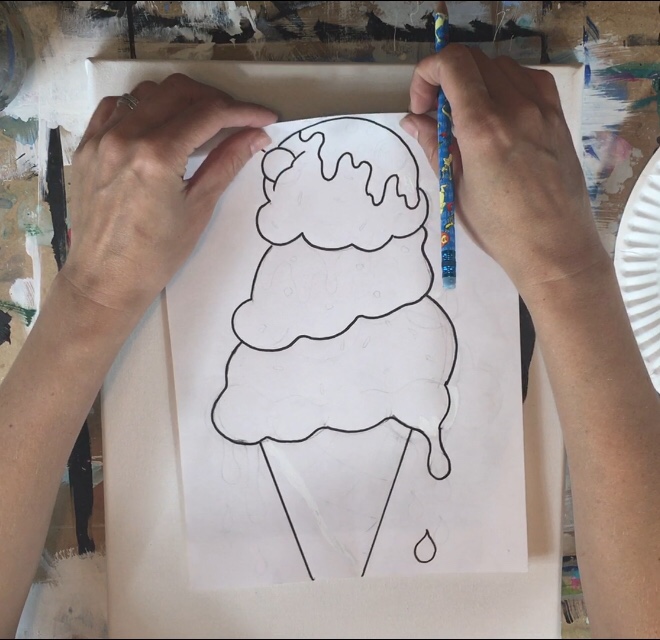
Position your ice cream cone so that the top scoop is about one inch from the top of the canvas.
Place a sheet of graphite paper underneath (shiny side down). Then use a standard pencil to trace the ice cream onto the canvas.
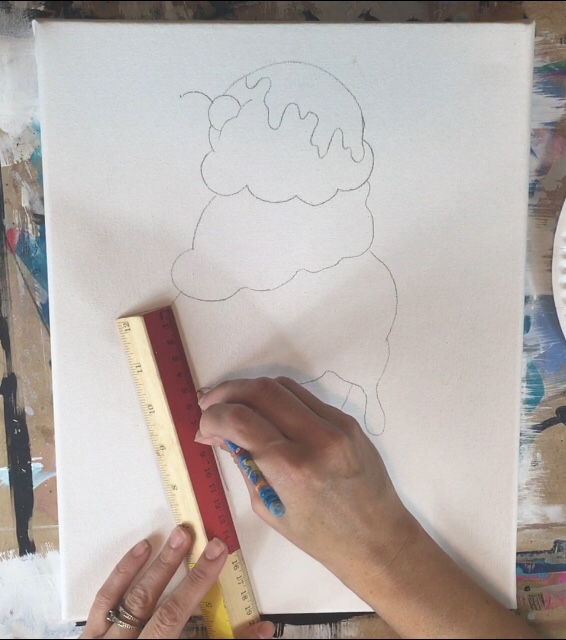
Because this traceable does not include the entire bottom tip of the cone, you can easily finish this.
Simply use a ruler or a straight edge to extend the cone to a point. I made my cone kind of rounded on the bottom.
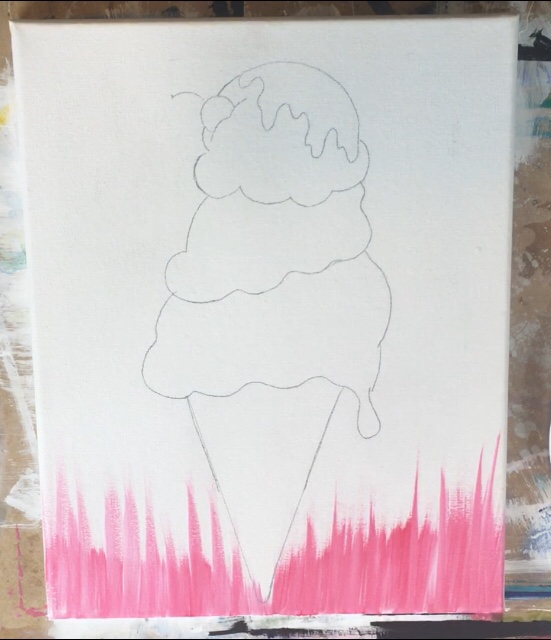
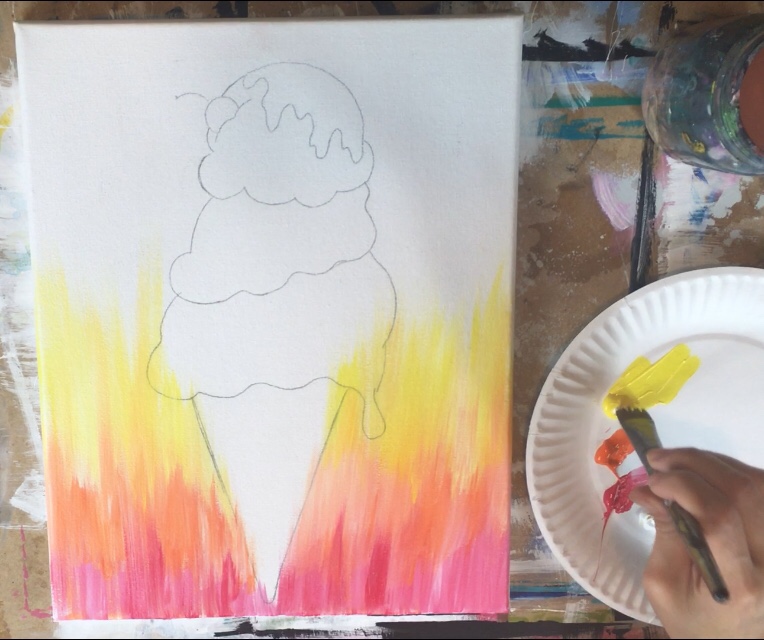
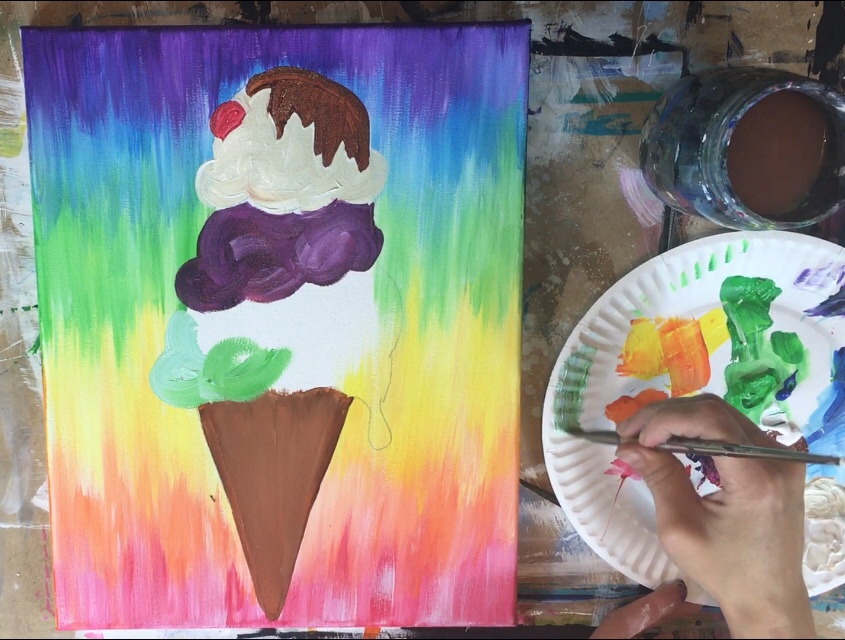
2. Paint The Background
To paint the background, I started from the bottom of the canvas and worked my way up in “rainbow order”. I used a 3/4″ Flat Brush. I also double loaded each of the colors in titanium white.
Adding titanium white to each of the colors helps to “blend the colors”. It also helps to lighten them a bit so the background is not so vibrant and dark. 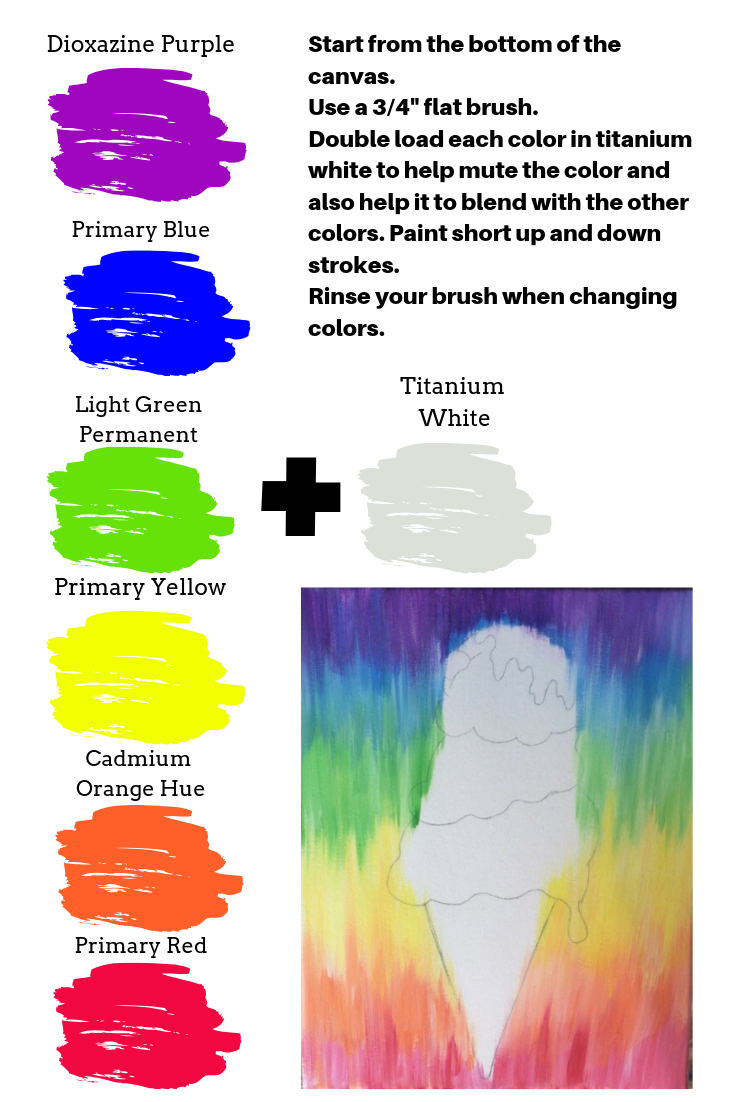
Start with the color primary red and titanium white.
Double load your brush in both colors (about 50-50). Then paint up and down strokes using the full width of the brush.
The colors should blend on the canvas to create a “streaky combo” of primary red and white.
If you find that the color is looking “too pink”, you can decide to load the brush with more primary red and less white.
Also, you can turn the brush so the strokes are vertical to create a different kinds of strokes. Go up with that red about 1/4 of the way up the canvas.
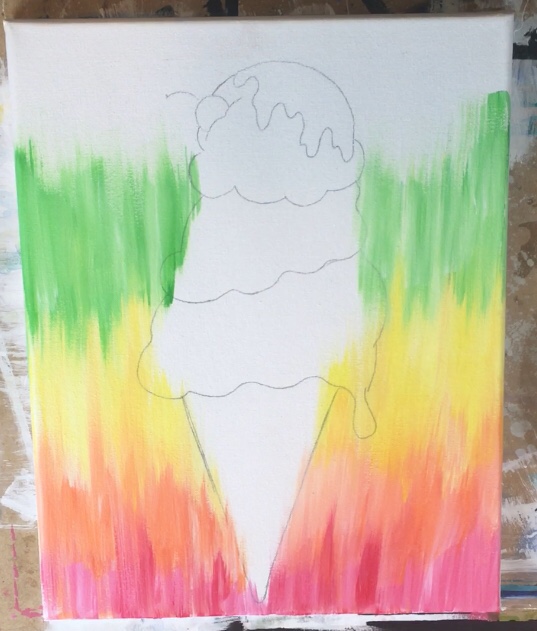
Next rinse your brush and pat it dry (not too dry but not dripping wet).
Double load the brush in cadmium orange hue and titanium white. Slightly paint over the red area to blend the orange in.
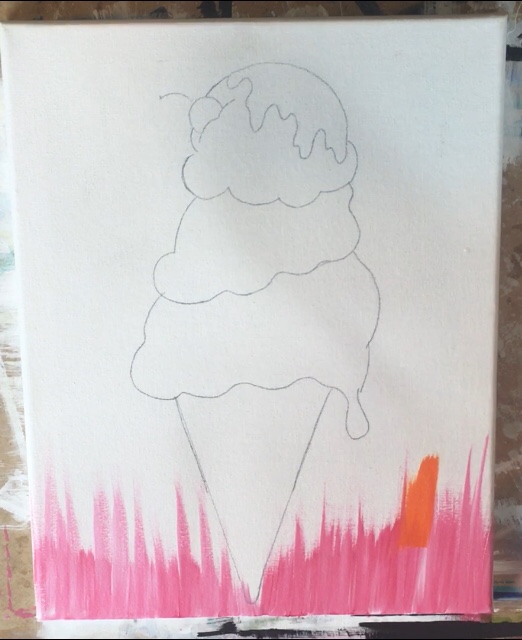
Paint the same types of strokes with the orange and go up to almost half way.
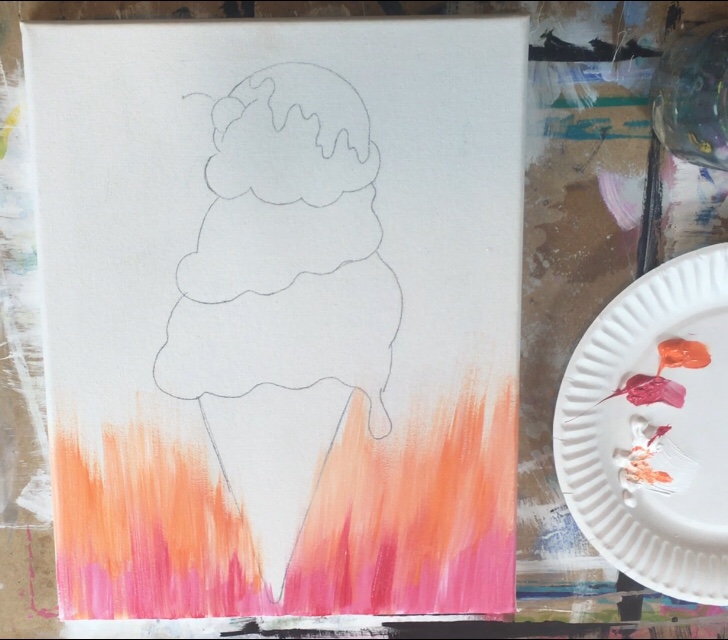
Next rinse your brush and pat it dry. Load it in primary yellow and titanium white. Paint slightly over the orange area to blend the yellow in.
Repeat the same steps for light green permanent and titanium white.
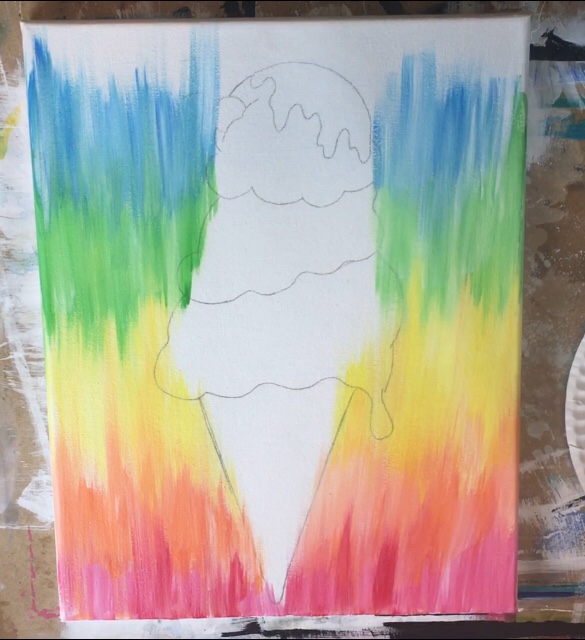
Repeat the steps for primary blue and titanium white.
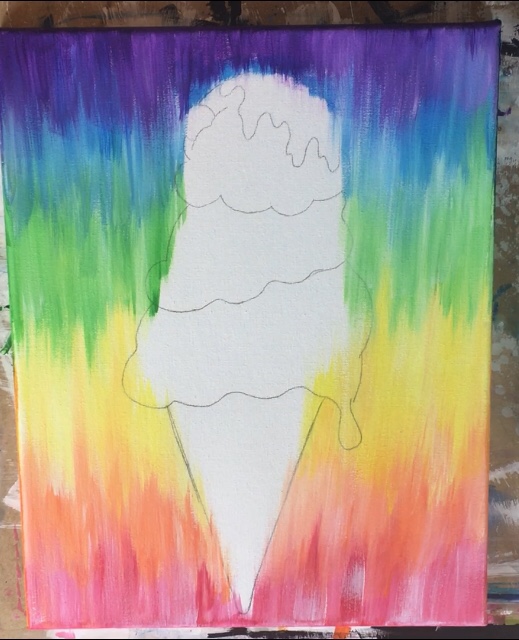
Finally, do the top edge of the canvas with dioxazine purple and titanium white. (Tip: not too much white in that dioxazine purple!)
3. Paint the ice cream cone
You can go in a different order of painting the ice cream cone, however, I will write the directions in the order that I went in. I started with the brown.
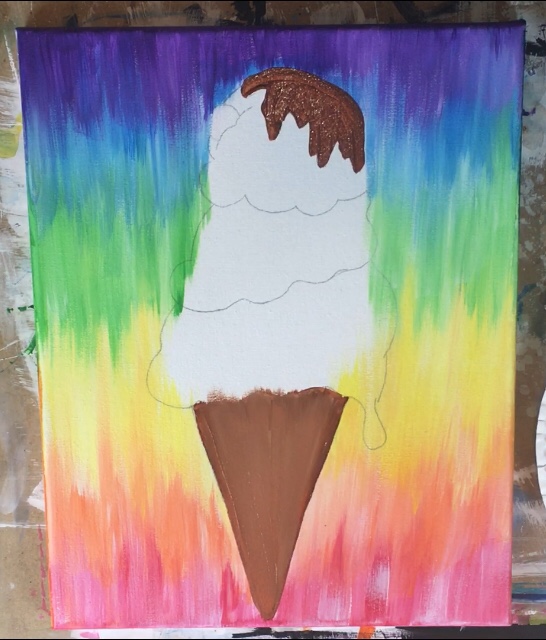
Paint the chocolate sauce in with burnt sienna and a #5 round brush (or any size round brush).
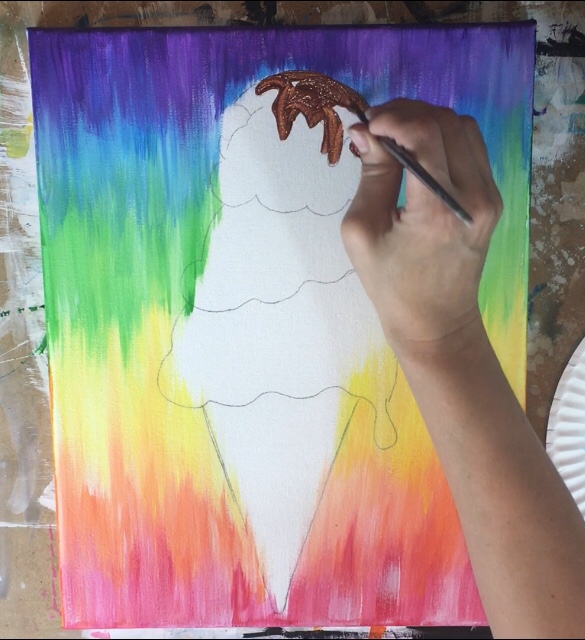
Then paint the ice cream cone using a #12 flat and burnt sienna.
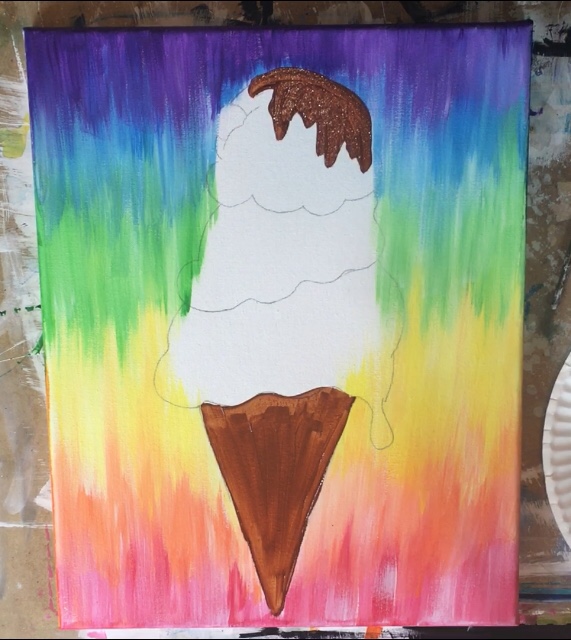
Then I decided to paint some unbleached titanium in the ice cream cone.
This blended with the burnt sienna that was still wet. It also helped the cone to look more opaque.
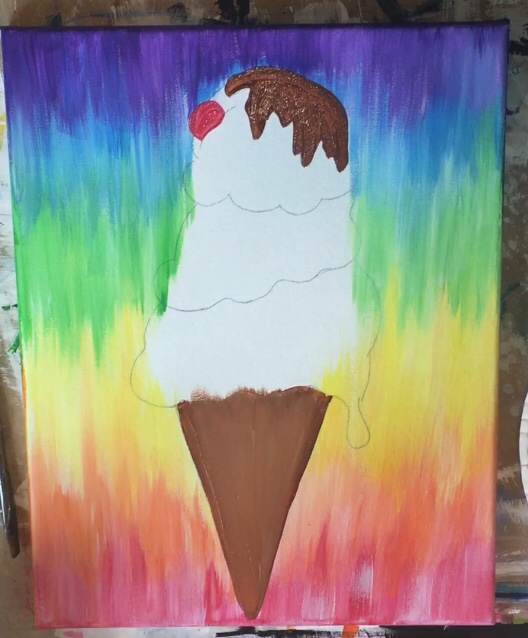
Next I painted the cherry with primary red and a round brush.
Then I painted the top scoop of the ice cream with unbleached titanium double loaded in titanium white.
I used a #12 flat brush for this step.
I double loaded my brush in both those colors but did not mix it all the way.
This is because I did not want the color to look solid but more unmixed/ swirled looking like ice cream.
When you paint these ice cream scoops, do so using “circular strokes” that kind of “contour” with the shape of the scoop.
I painted the next scoop with dioxazine purple mixed with primary red and a little bit of titanium white.
Because the dioxazine purple is so dark – that is why I mixed the primary red and titanium white into it.
Load your 12 flat in those three colors and paint in circular strokes. Let the colors blend on the ice cream scoop but not all the way.
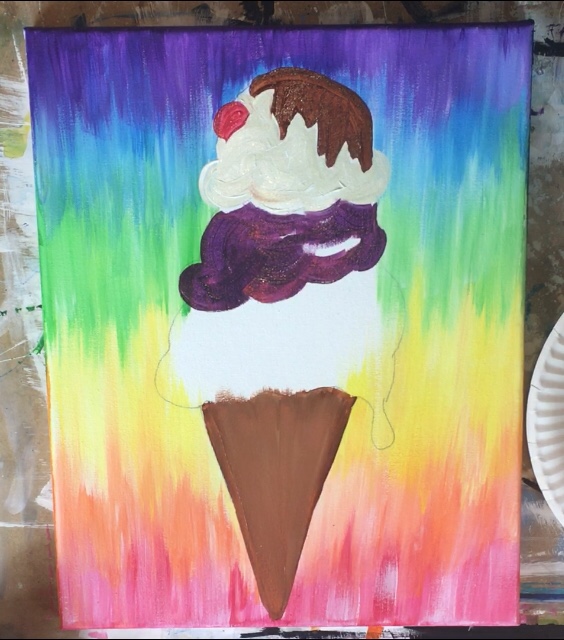
You can see in the purple scoop how the strokes are rounded. You can also see how that titanium white is in the purple but not blended all the way.
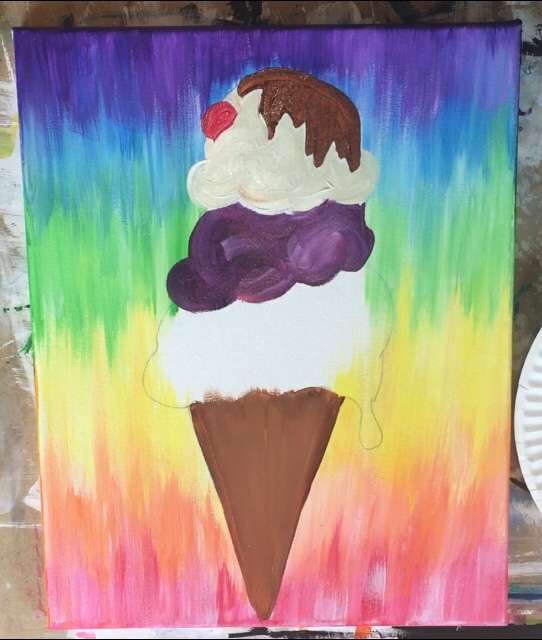
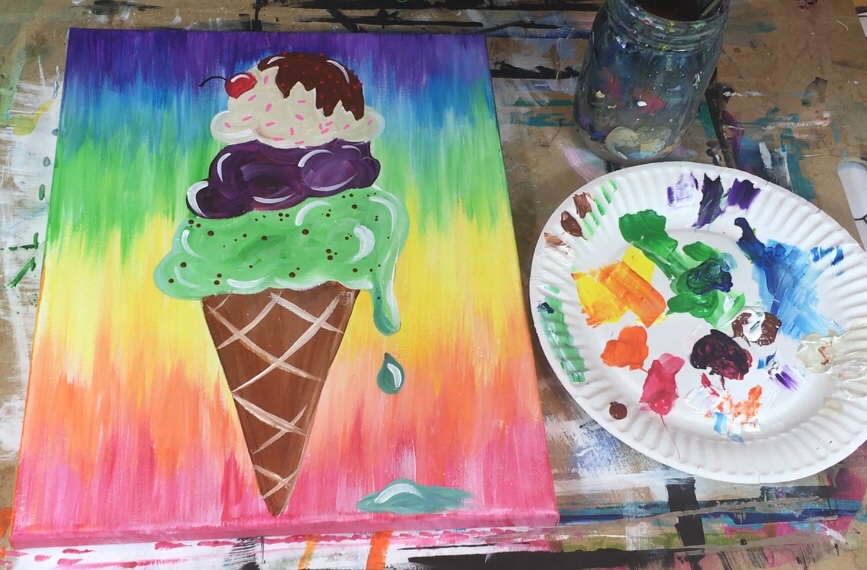
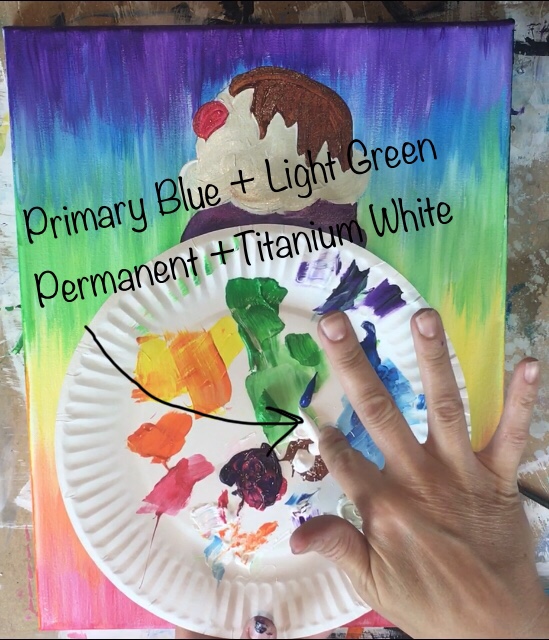
For the green scoop of ice cream, I mixed on my palette: light green permanent, titanium white and a little bit of primary blue.
You don’t need a lot of blue for this color – just a little bit. Below is a picture of my messy palette before I mixed the colors.
Swirl the strokes using the 12 flat brush. The colors were not completely blended all the way on this green scoop just like the other scoops.
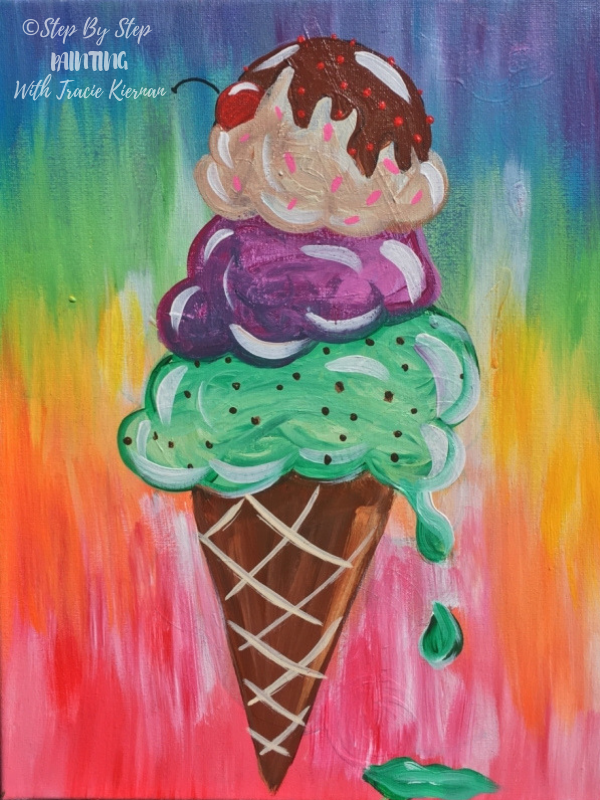
4. Paint all the fun details
Tip: before doing the details, make sure your ice cream scoops are completely dry!
For the ice cream cone “texture” lines, I used the tip of my #12 flat brush and the color unbleached titanium.
Using the tip, paint diagonal (and sort of curved) thin strokes going one direction.
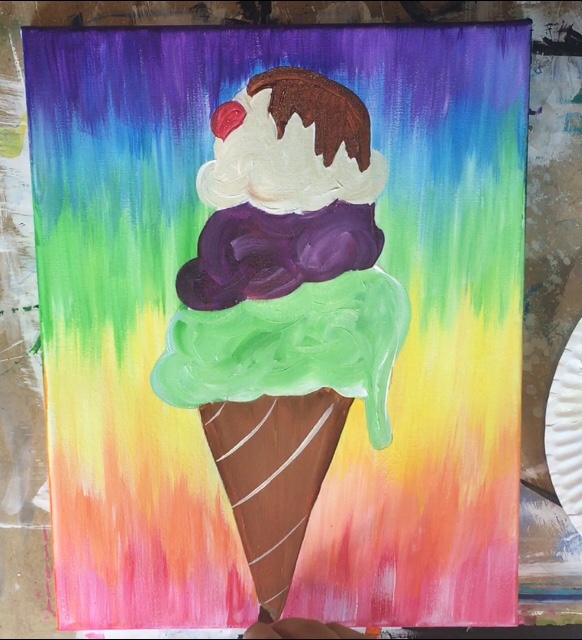
And then paint the lines going the other direction.
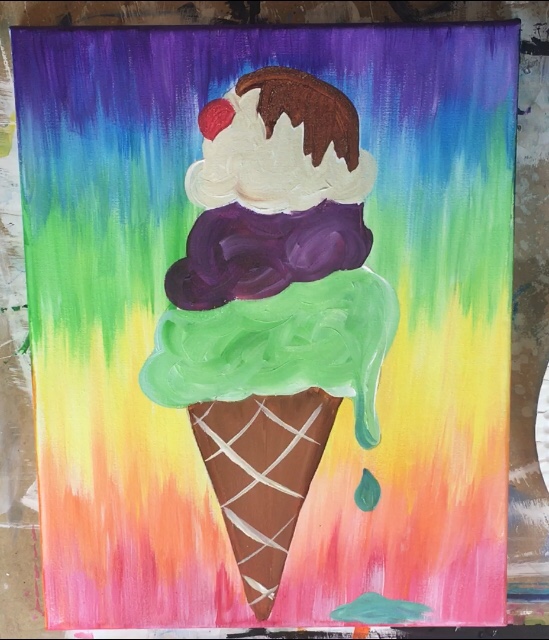
To paint the cherry stem, I used a black paint pen. If you don’t have a paint pen, you can use a tiny 10/0 round brush and mars black.
To paint the red sprinkles on top of the chocolate syrup, I used the back of the paint brush handle to stamp primary red dots to represent the sprinkles.
For the pink oblong sprinkles, I used a pink paint pen. You can use your 10/0 round brush for this step too if you don’t own paint pens.

To paint the chocolate chips on the green scoop, I used the back of my paint brush to stamp on burnt sienna dots in little clusters.
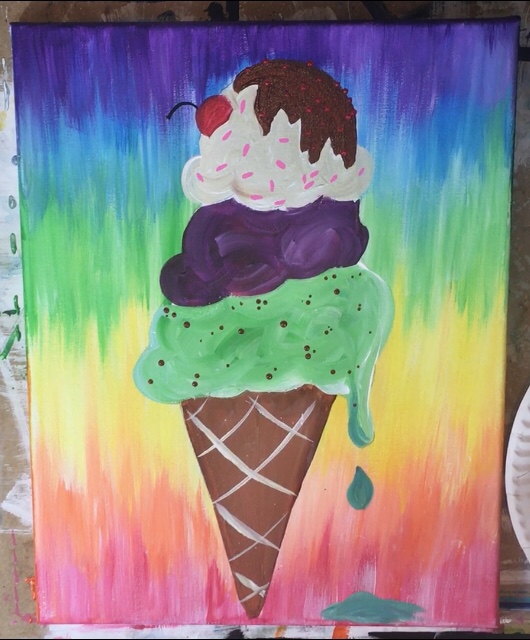
5. Paint some fun highlights!
This step seemed to get the entire ice cream cone to “pop a bit” because it is competing with the bold rainbow background.
To do the “highlights” I used my round brush and titanium white. Start at the top with the cherry and the chocolate syrup.
The highlights continued on each of the scoops and were both on the right and left sides.
Some highlights were painted at the bottom of the scoops and some at the top. This helps to make the ice cream look “fluffy” and rounded too!
Finished!!
i stop in often to peek for new paintings to do ! this one does not disappoint! thank you!! i love all your paintings and i love how easy you make it to mix and match them up….perhaps next i shall put a pineapple on a rainbow background!
Thanks Jess! I had a lot of fun with this one. A pineapple with a rainbow background would be pretty!
I don’t see a video on this. Is there one?
Also, do yo have any videos which I’m able to download?
Yep there is a video on this one and it’s not showing up. I’ll fix this for ya ASAP. Thanks for letting me know!
I did it try my best it came out great not perfect but it was my third time doing a painting.
Would love to be able to see the video for this one!
There is a video on this. Scroll down to the video section above the step by step directions.
For some reason the video doesn’t display on my iPad. I do see it in my iPhone though. Thank you…. love your work!
You’re welcome! Sorry about the video trouble.
My kids loved it! Thank you.
Could we do it on a 8×10 canvas? Would love to do this for my daughters 9th birthday but we are planning on having 8X10 canvases
Yes of course you can do this on 8×10!
Thank you Tracie for all your amazing tutorials I’ve started painting just before 1st lockdown with a flat mate who encouraged me I took to it straight away I’ve not stopped. Since!! My flat seems to be expanding with all my art work,paints,brushes, accessories,frames etc I absolutely love it also having found your tutorials so much fun I found my confidence growing as I can follow with great results. I also have a granddaughter Amelia who is 2 she loves it with her nanny!!great work Tracie and thank you once again can’t wait to do next one kind regards Penelope Alway. Ps I live in the UK so how do I apply to join or subscribe?
Hi Penelope! Thank you! And you are so very welcome, glad you’re enjoying the tutorials! I have many ways you can subscribe: https://mailchi.mp/337b24ea971a/step-by-step-painting-sign-up
Hi
Thanks your tutorial was very clear and perfect for my daughters Sunday program we hosted. Large group of 8 year olds were able to complete it and feel the satisfaction of the paint brush.
Ty
How do we post a picture?