
Learn how to paint a manatee!
Would you like to save this?
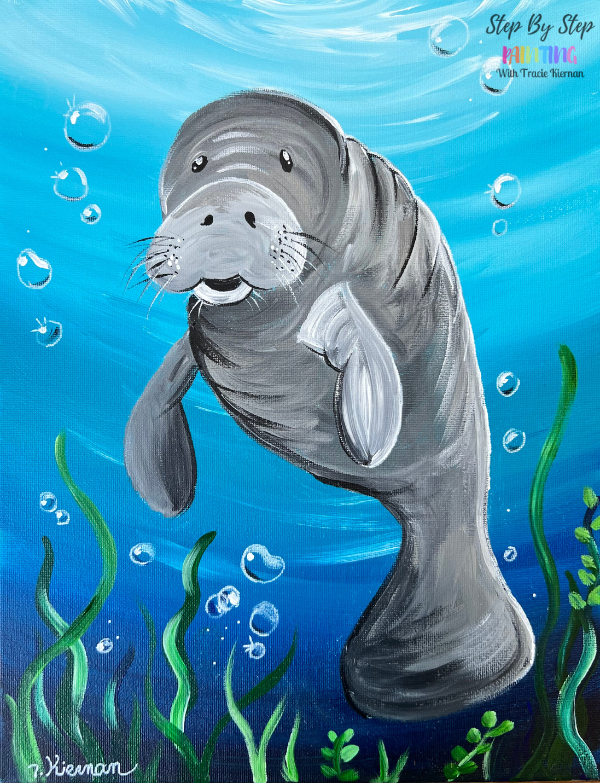
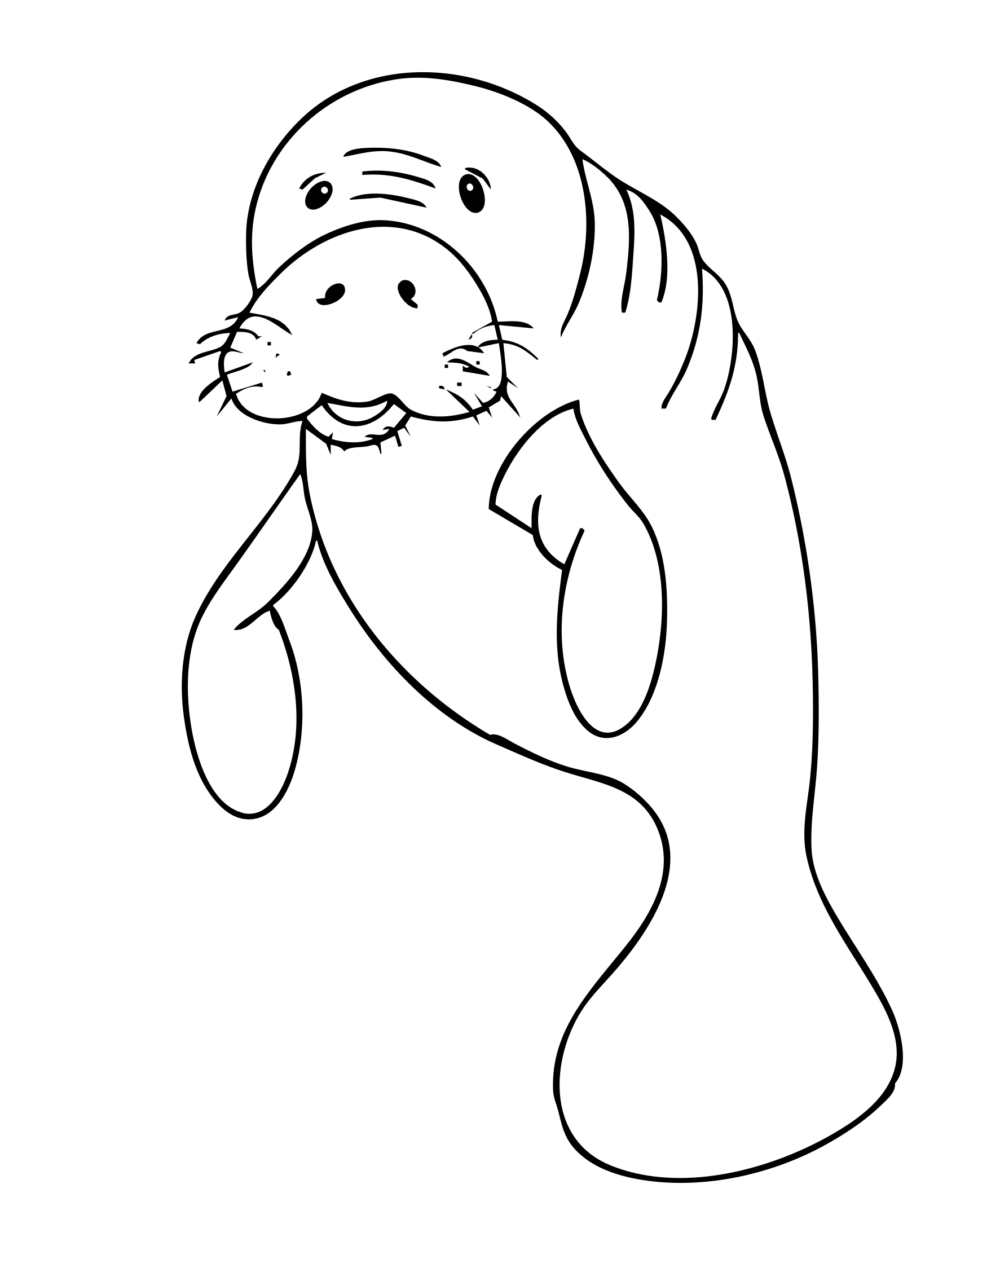
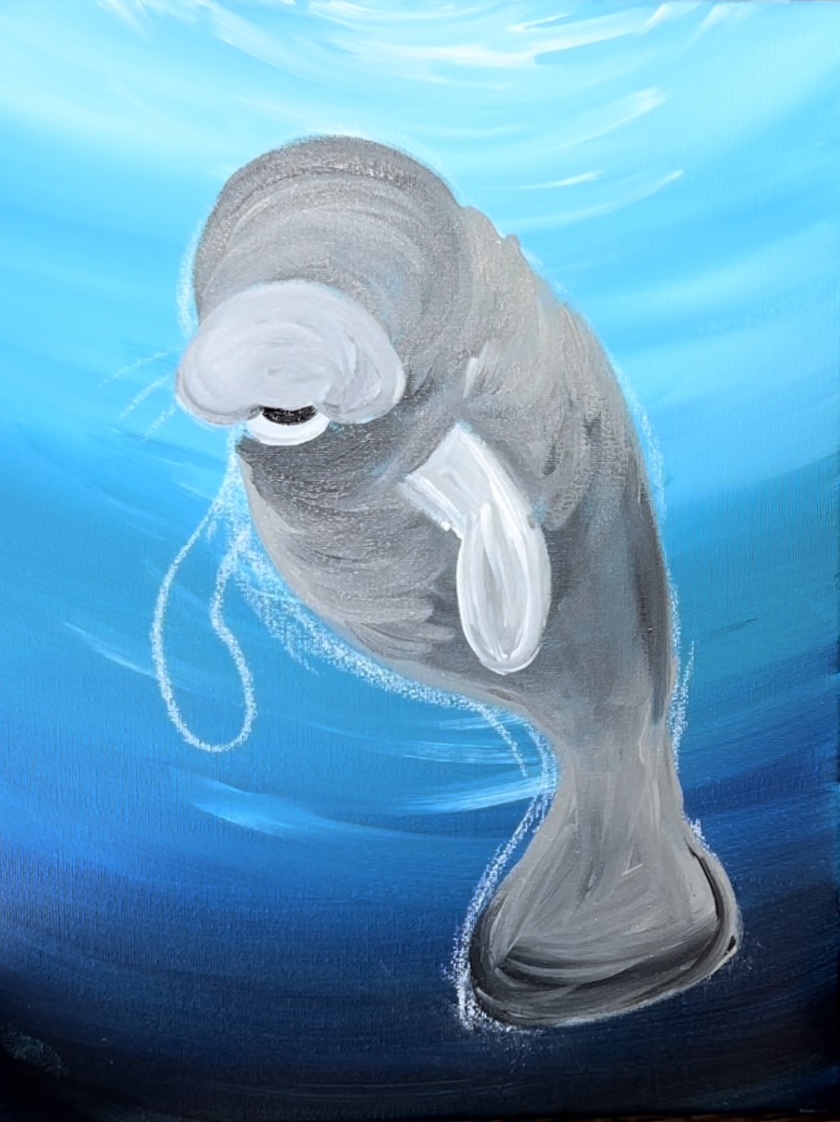
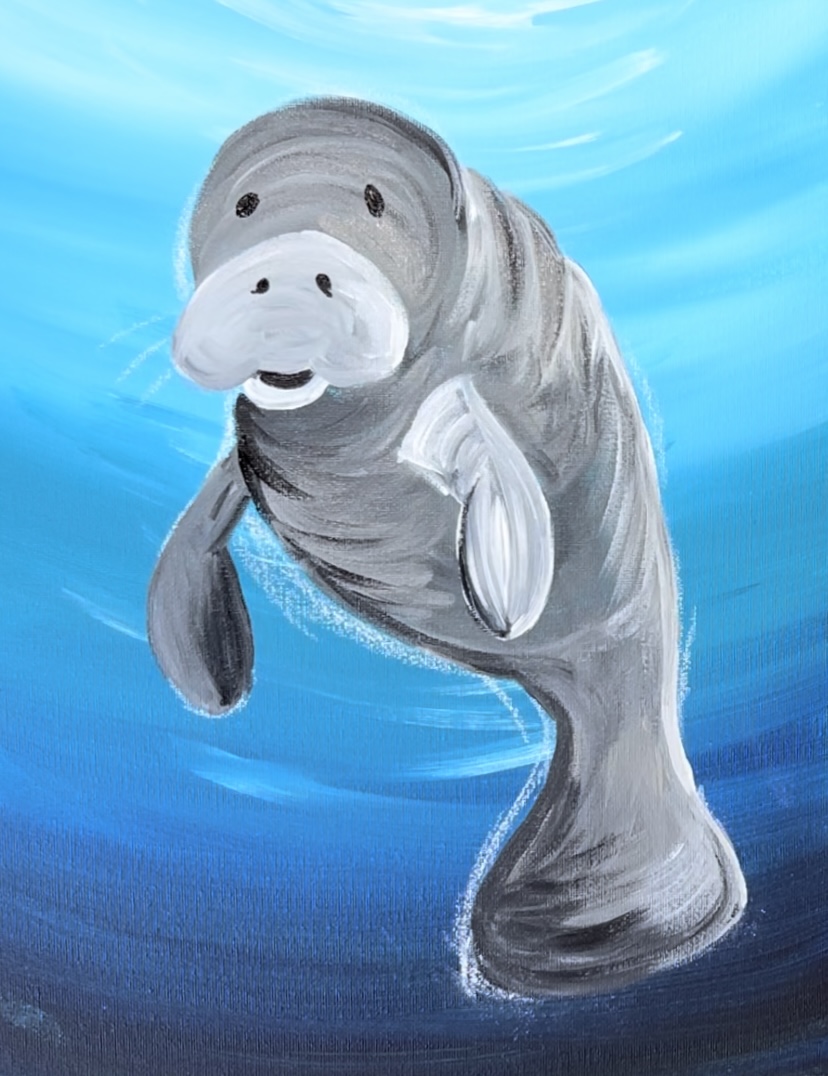
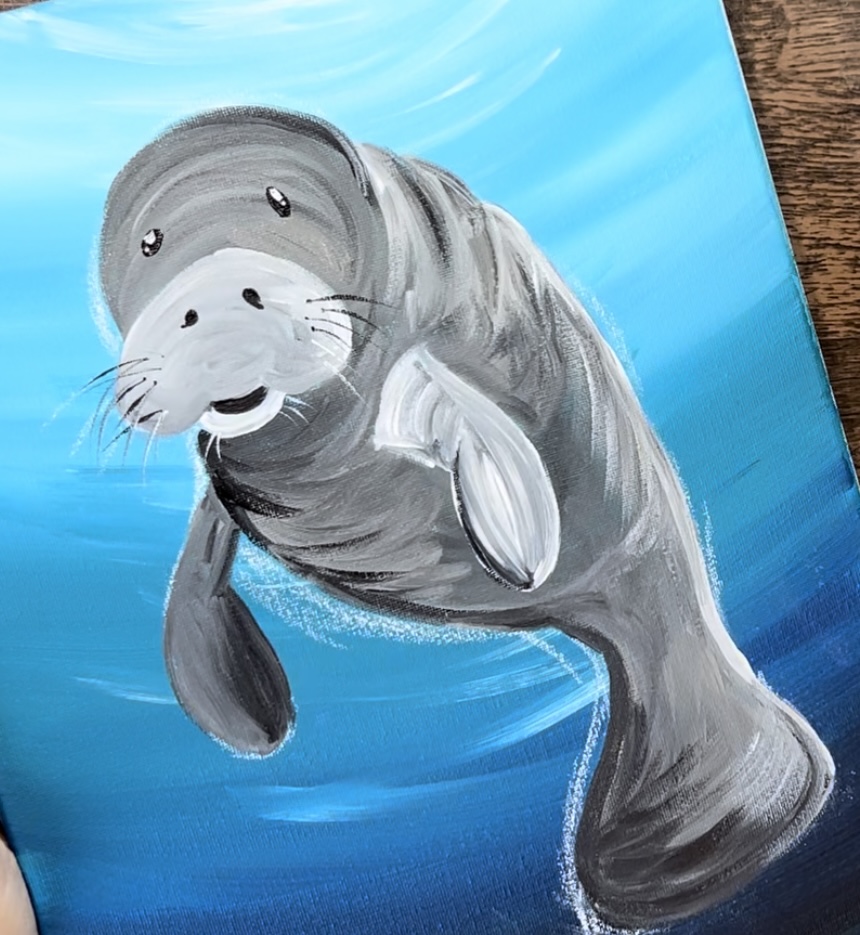
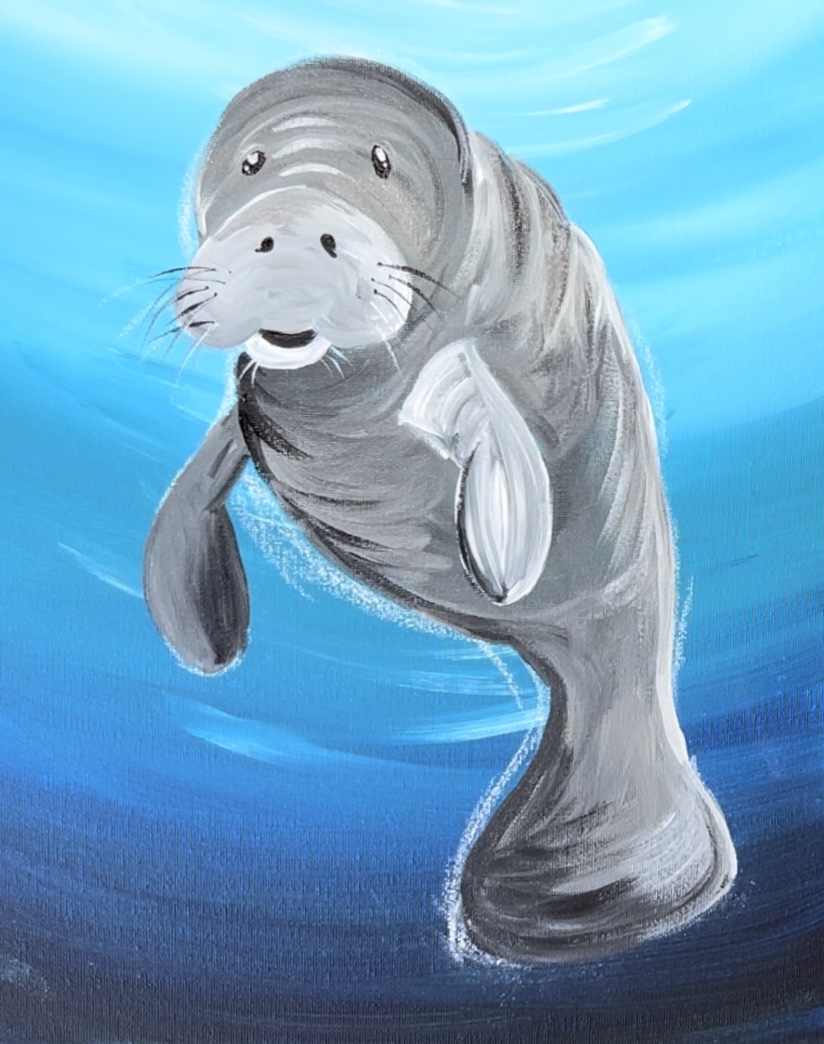
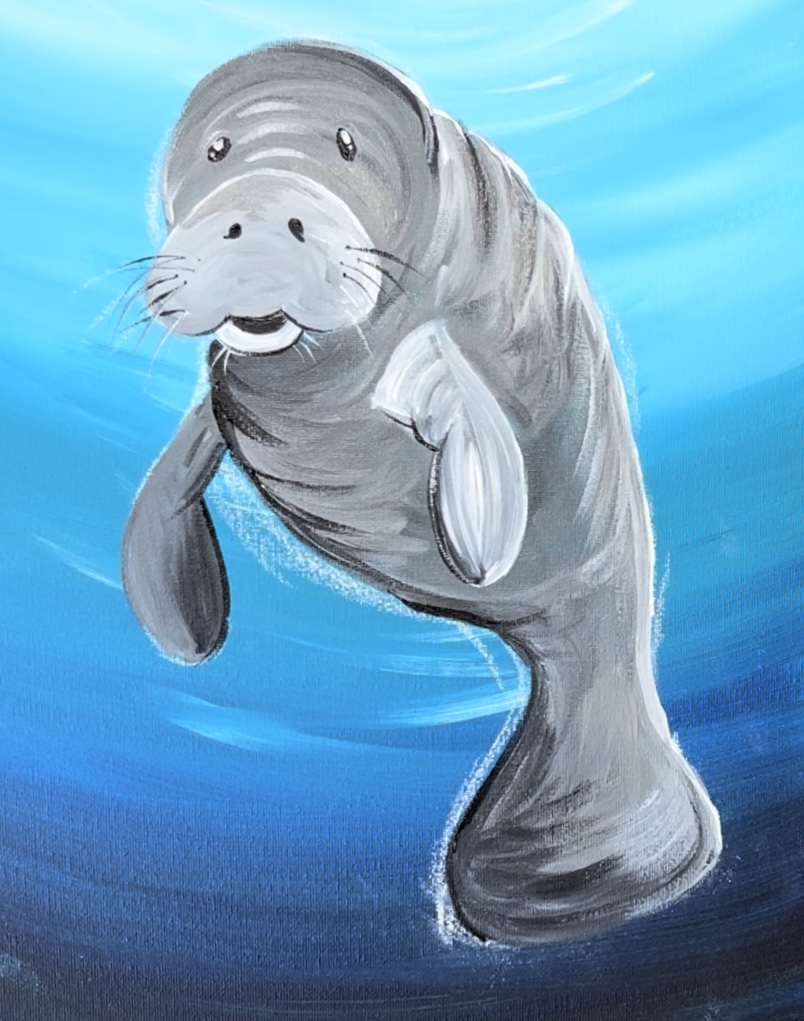
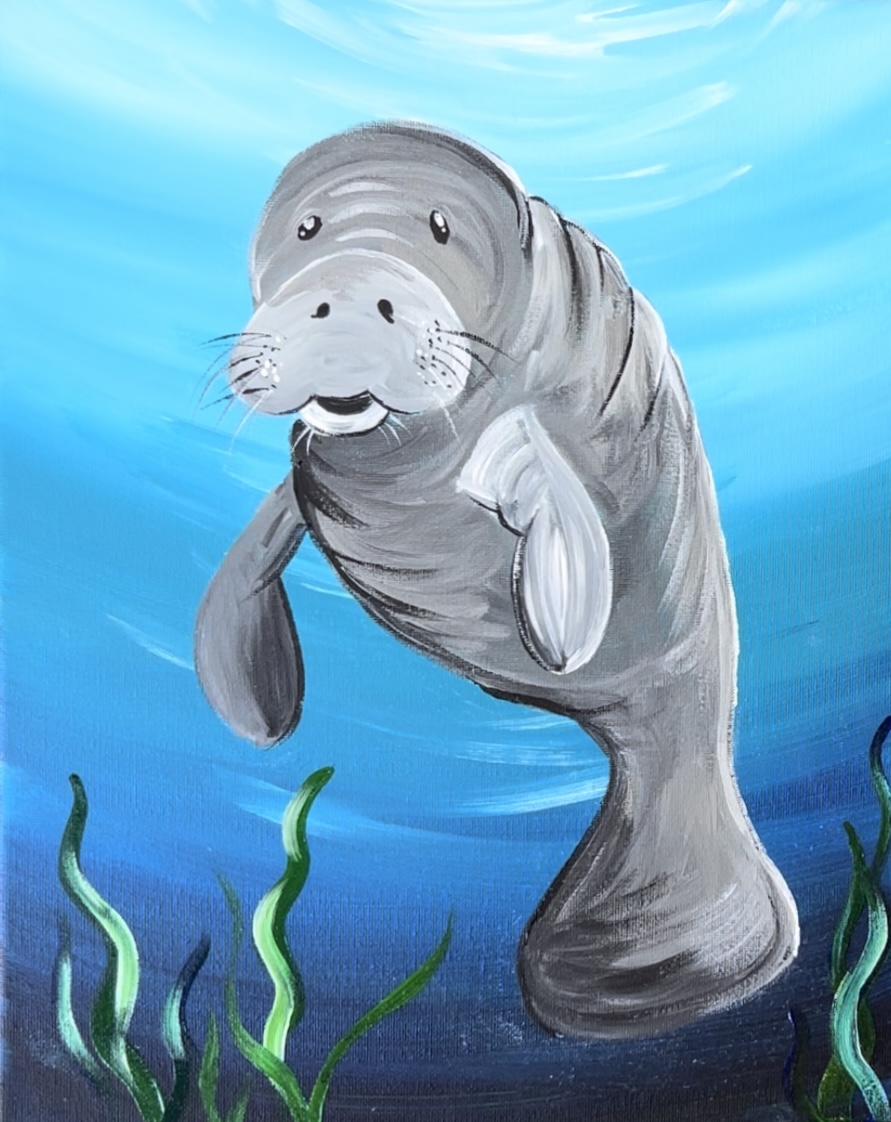
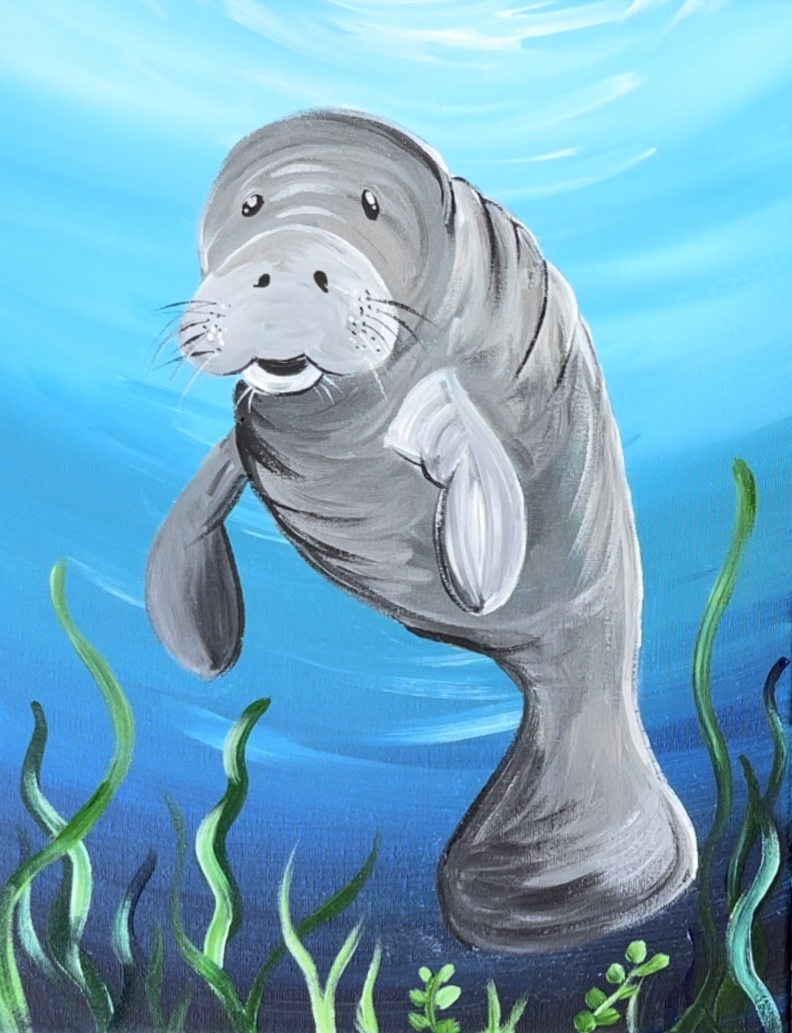
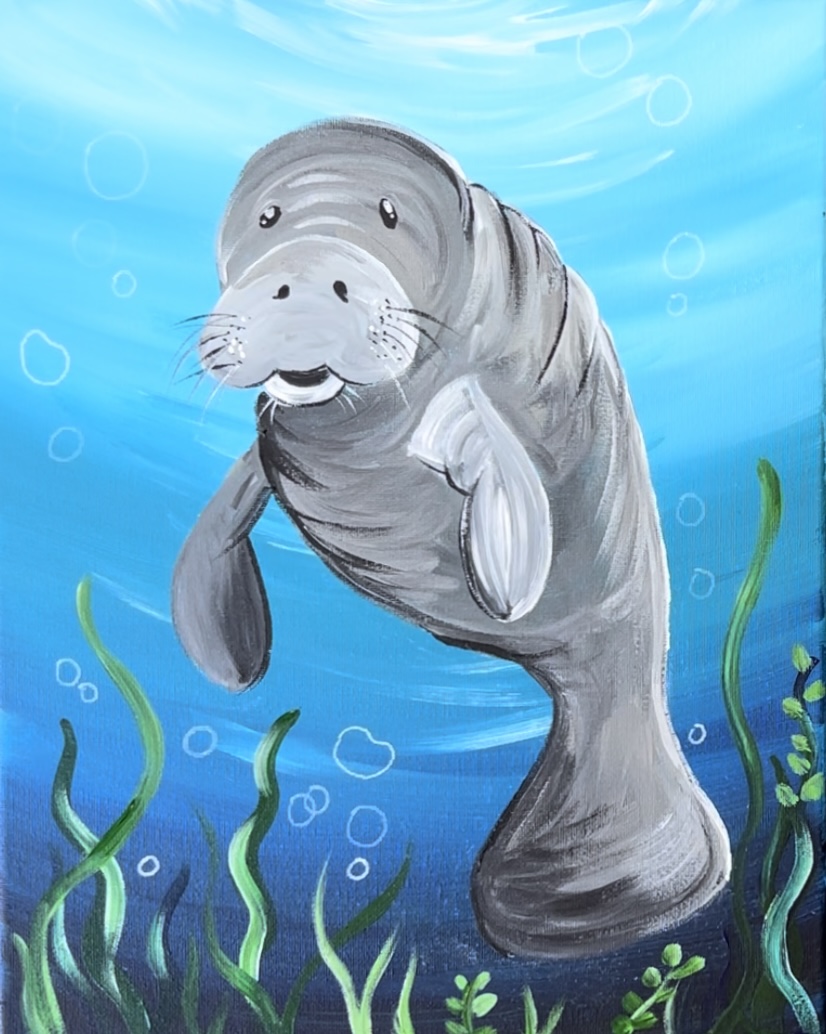
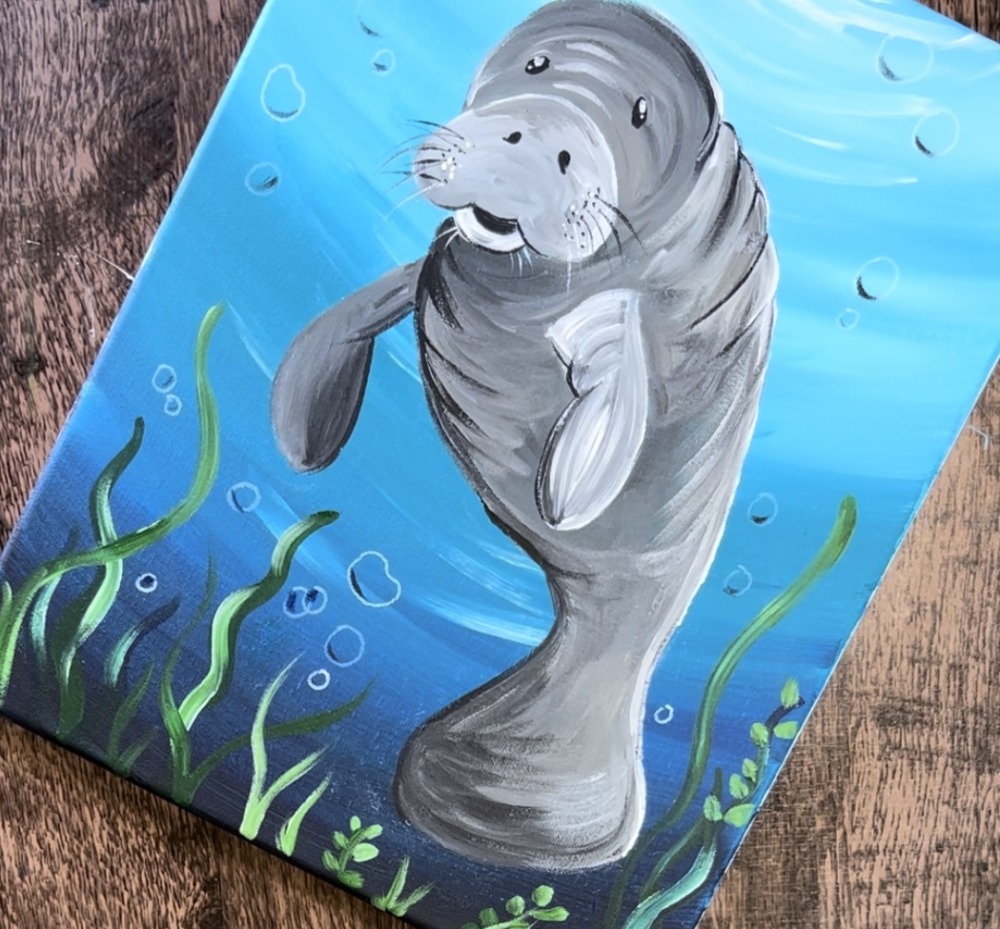
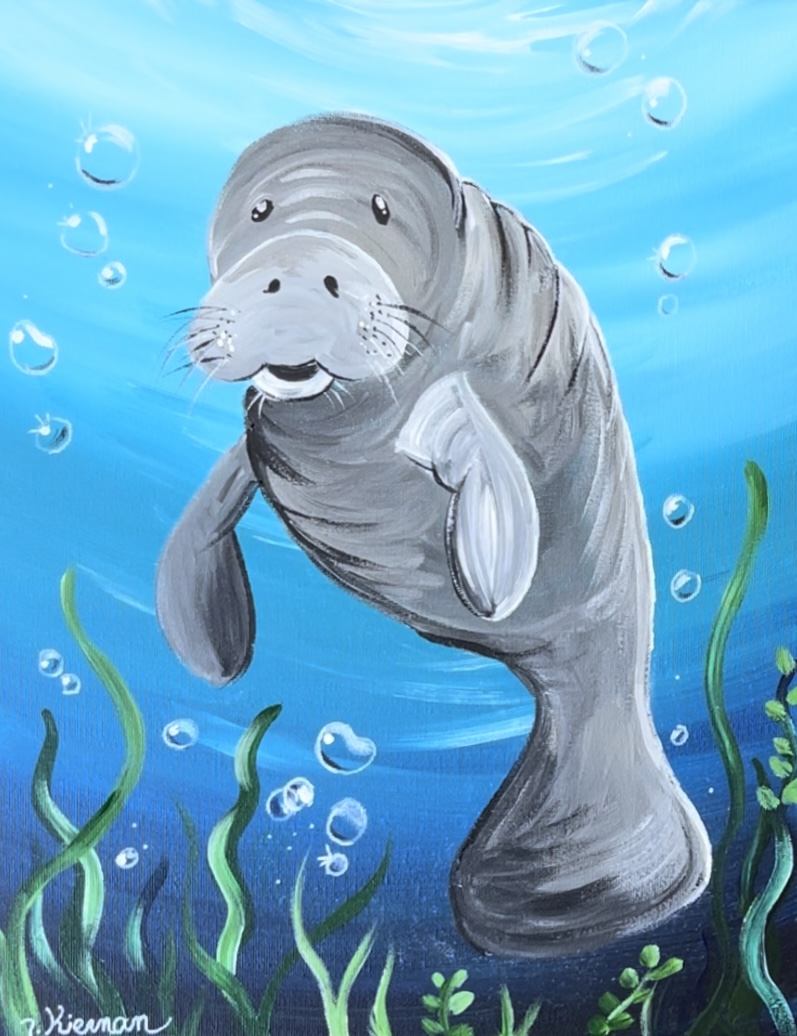
This is an intermediate level acrylic painting. I will be showing you how to draw and paint a manatee with acrylics on an 11 x 14 canvas. This one is a little bit of a challenge because of all the shading and highlighting in the grays of the manatee to create the folded skin texture.
You can simplify this by not rendering the gray as much. Just make sure you paint the snout and flippers a lighter color gray so they stand out. There is also an optional traceable template that you can use to help you with the drawing portion.
Enjoy and happy painting!
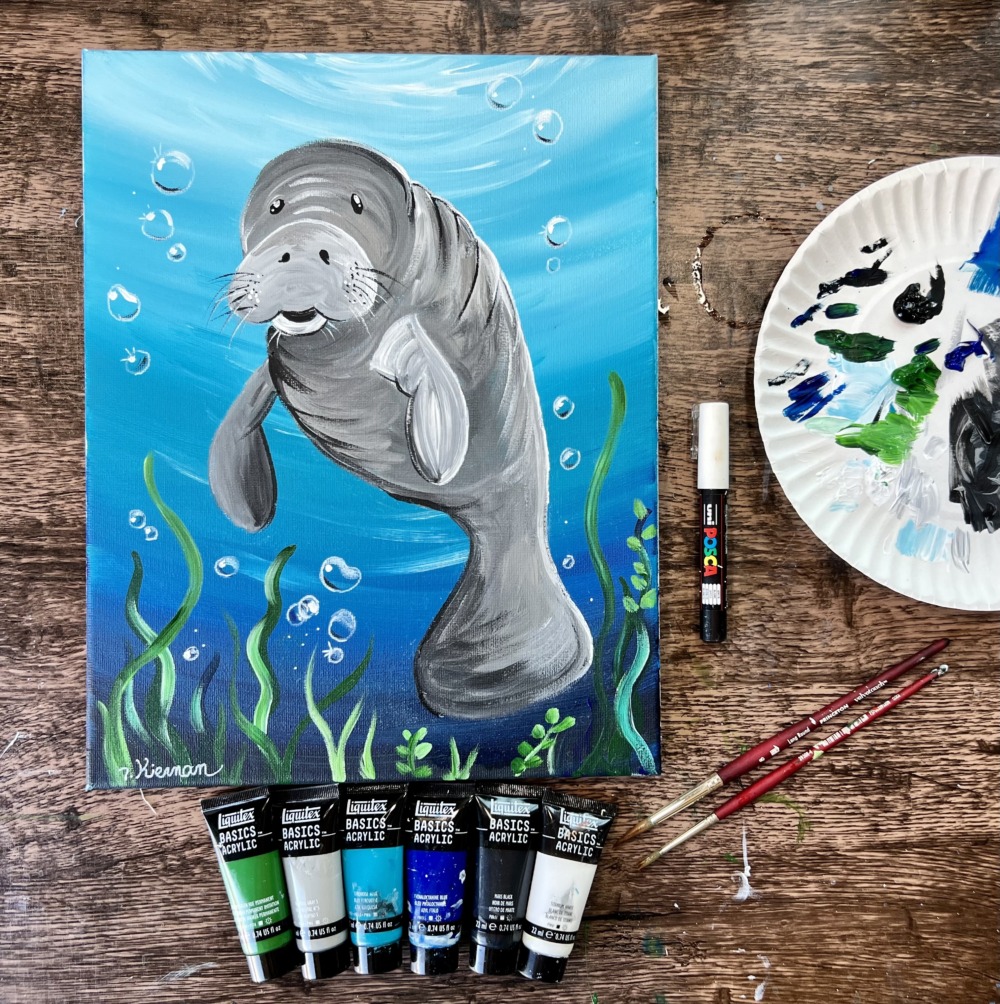
Materials
How To Paint A Manatee

Materials
- 11 x 14 Canvas
- Acrylic Paint
- Brushes
- White Chalk
- Water Cup
- Paint Palette
- White Paint Pen POSCA (preferably the fine tip)
- Graphite Paper If Using Traceable
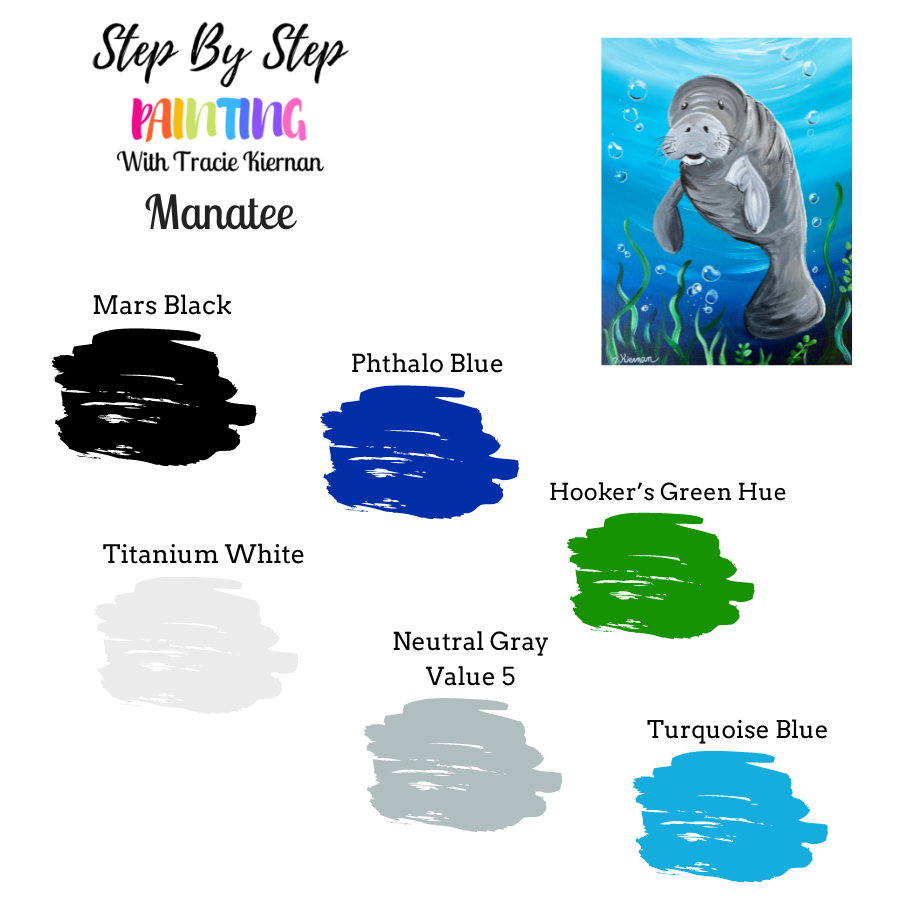
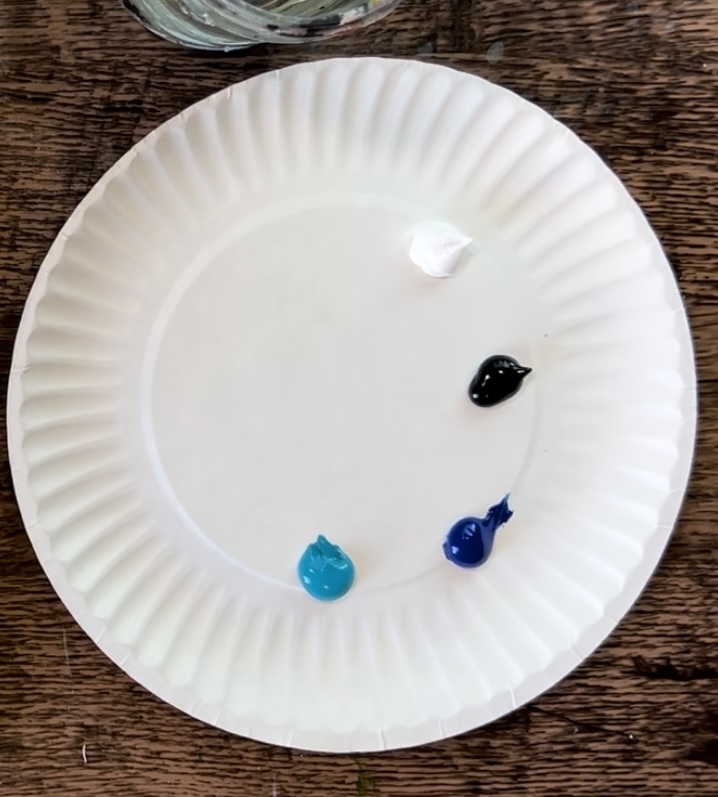
Paint Colors (I use Liquitex BASICS)
- Titanium White
- Mars Black
- Turquoise Blue
- Phthalo Blue
- Hooker's Green Hue Permanent
- Neutral Gray Value 5
Paint Brushes
Color Palette
Directions At A Glance
Optional Traceable
This manatee is sized to fit the 11 x 14 canvas.
Video
Step By Step Instructions
1. Paint Ocean Background
Load your paint palette with the colors: titanium white, mars black, phthalo blue and turquoise blue.
Start on the bottom of the canvas (canvas is in vertical mode). Load your 1″ flat brush in just the “mars black”. Paint an inverted curve on the bottom edge of the canvas.
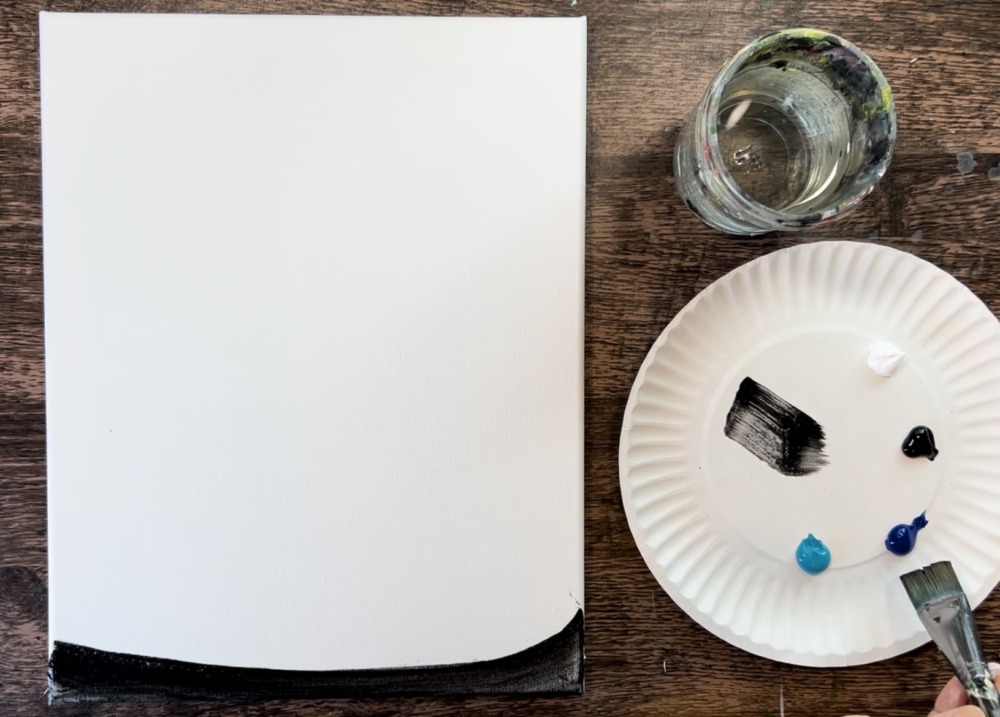
Go up only about 1″ and then wipe the black off the brush (you don’t need to rinse). Then load your brush into “phthalo blue”. Blend this dark blue color in with the black and continue to paint in an “downward curve” direction.
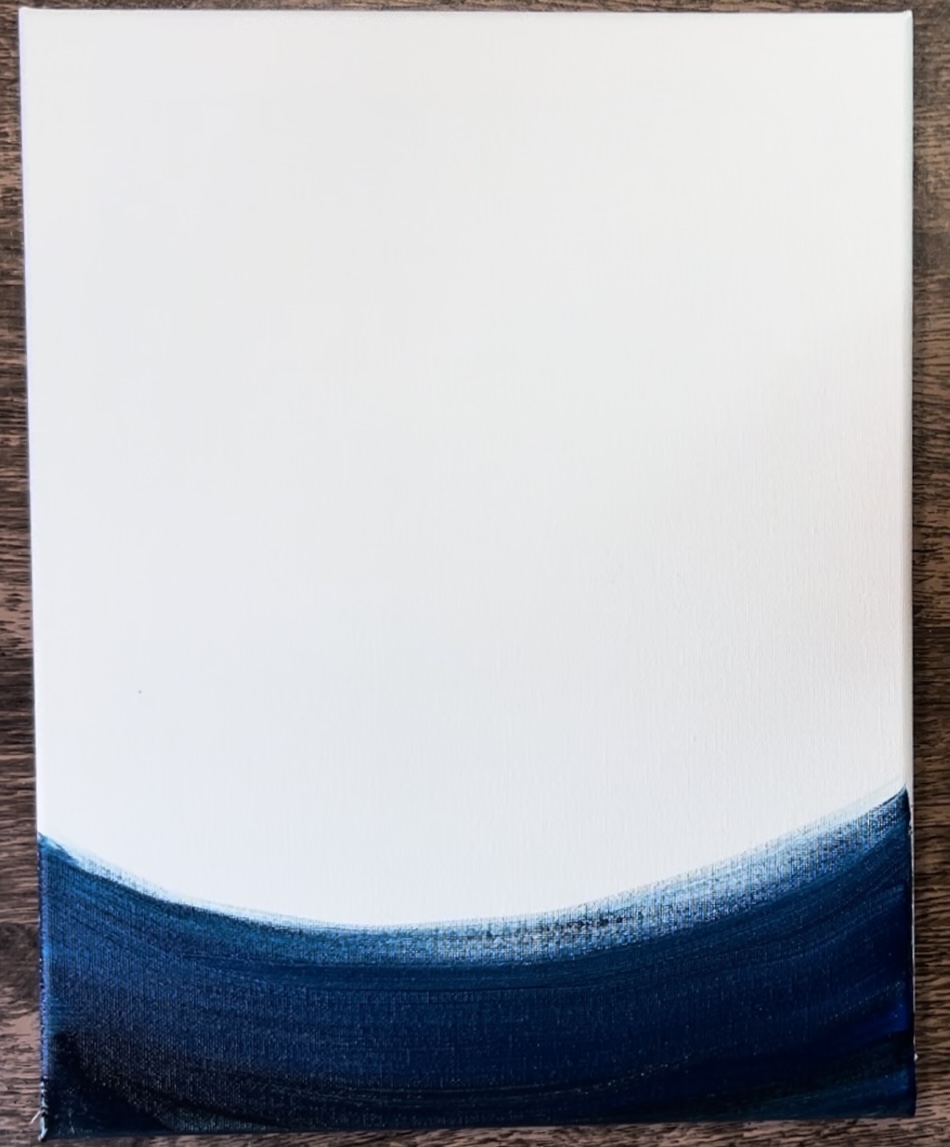
Go up a few inches with this phthalo blue. It should blend from black to dark blue. Then rinse the brush. Load it into “turquoise blue”. Blend the turquoise blue with the phthalo blue and continue to paint in the same direction.
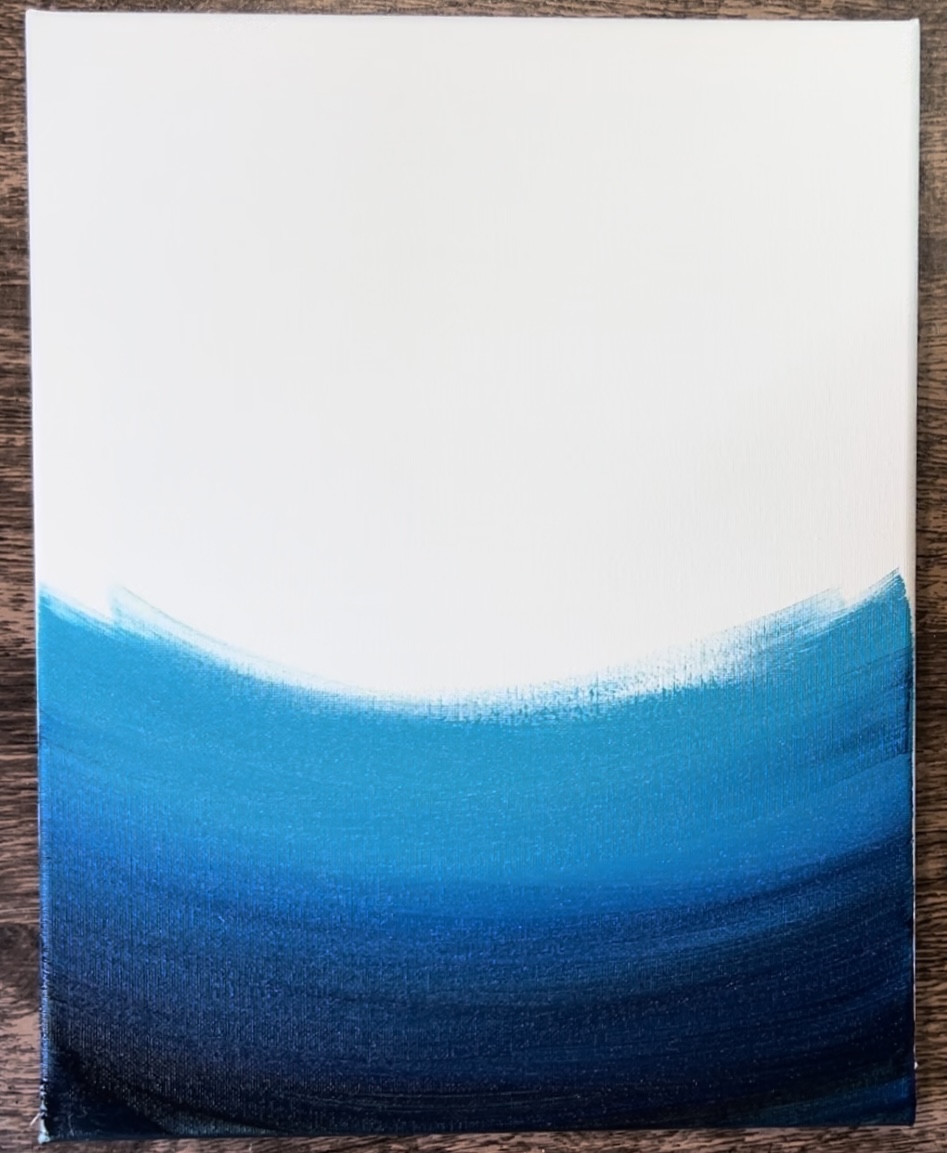
This time, go up to about the halfway point on the canvas. Then rinse or wipe the brush off (you don’t want any black or dark blue on the brush for blending the white). Load the brush in a small amount of white and blend it with the turquoise. It will turn a light aqua color.
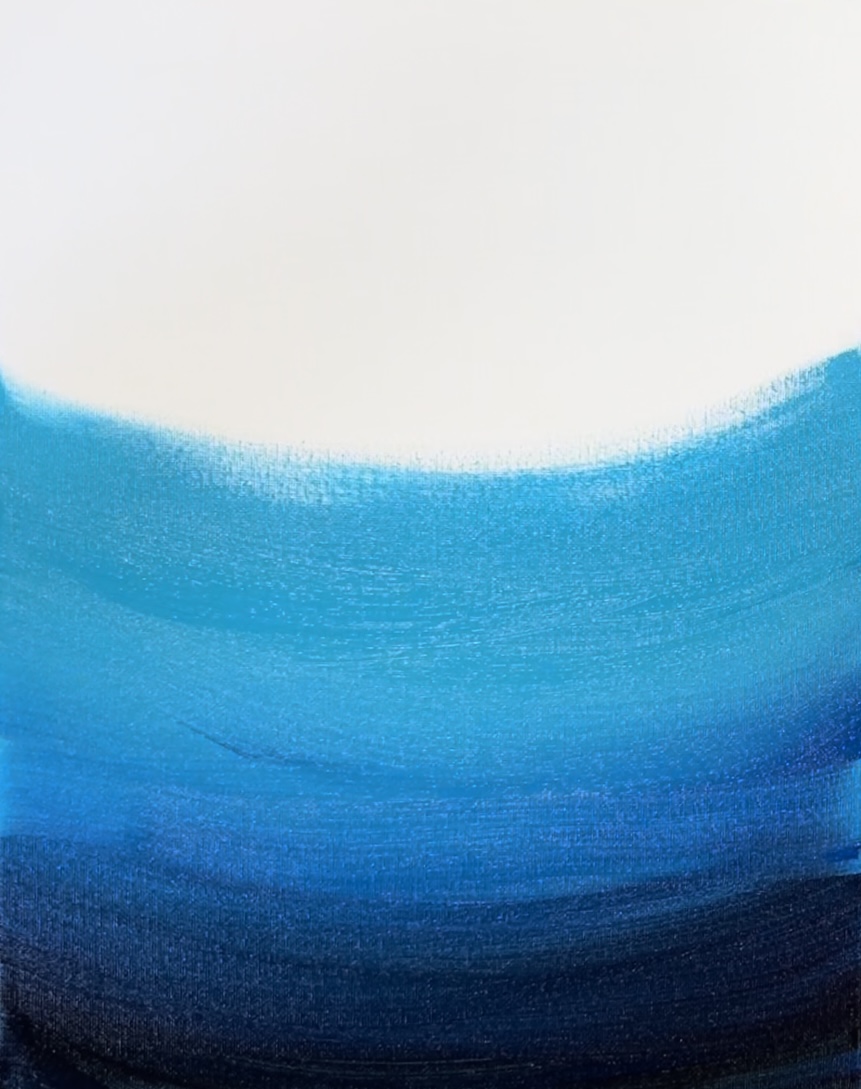
Continue to paint in a curved direction. As you approach the top edge of the canvas, you will want the water to get much lighter. Add more white to the brush and continue to blend and paint in a curved direction all the way to the top edge.
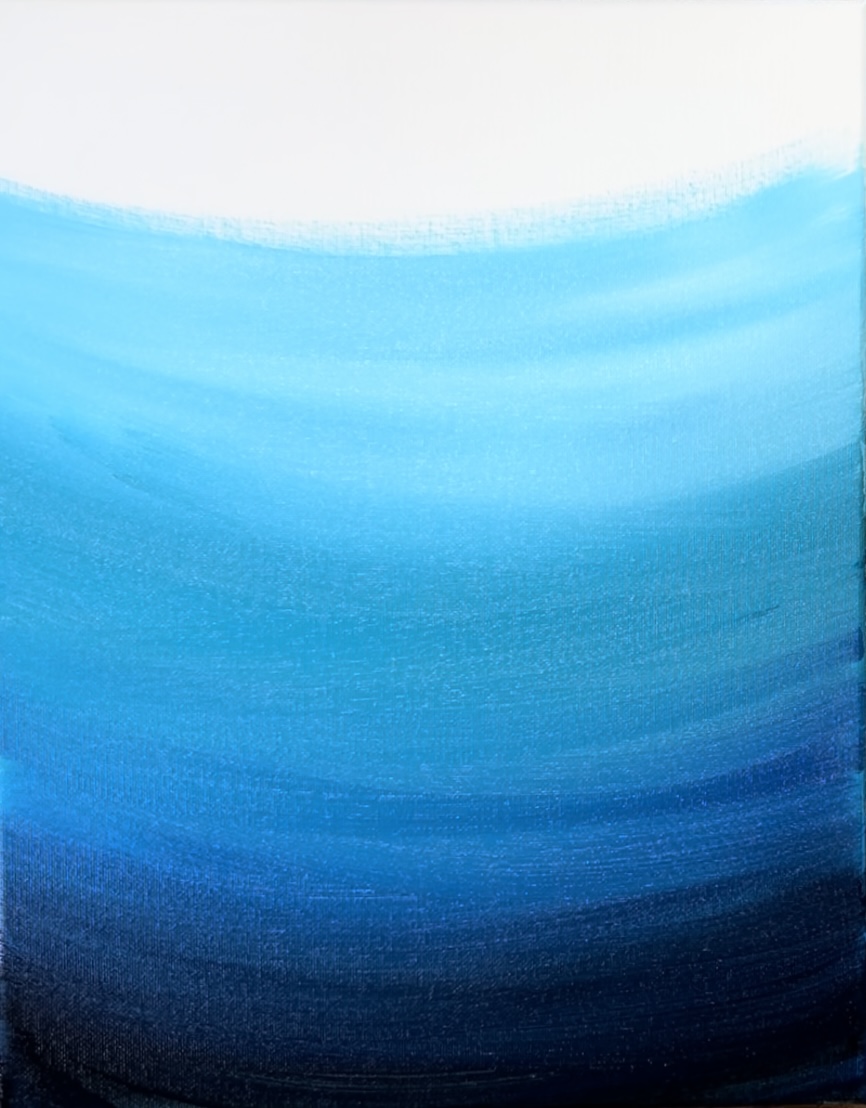
Your colors do not need to blend as a perfect gradient! In fact, it is okay to not blend them all the way.
Next, completely rinse and wipe the 1″ flat brush. Load it into just “titanium white”. Use the very edge of the brush to paint curved paint strokes in the middle area of the water. This will create some “light reflection” shining through the water. Do this all the way from the top down to the dark blue area. You’ll want to do this before the background dries. If it is dry when you do this, you can add a little bit of turquoise to the white so it isn’t too bright and blends a little better with the background.
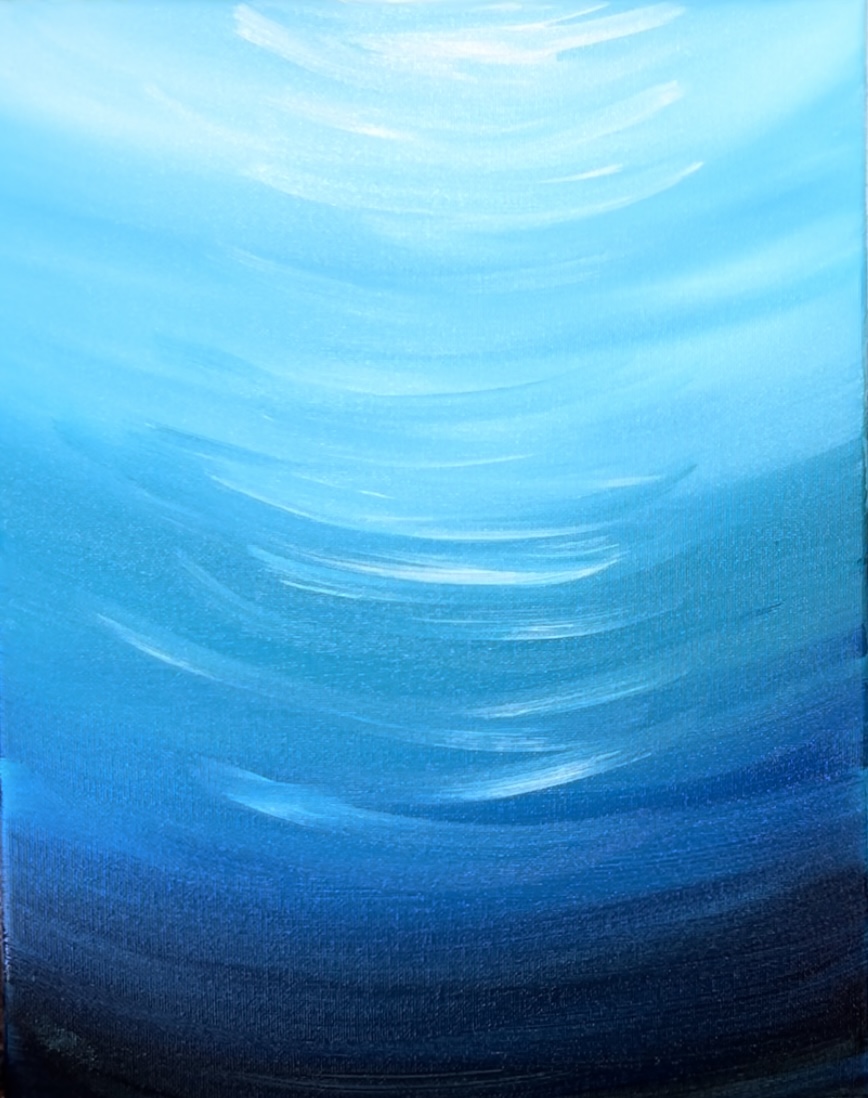
Wait for this to dry before going onto the next step.
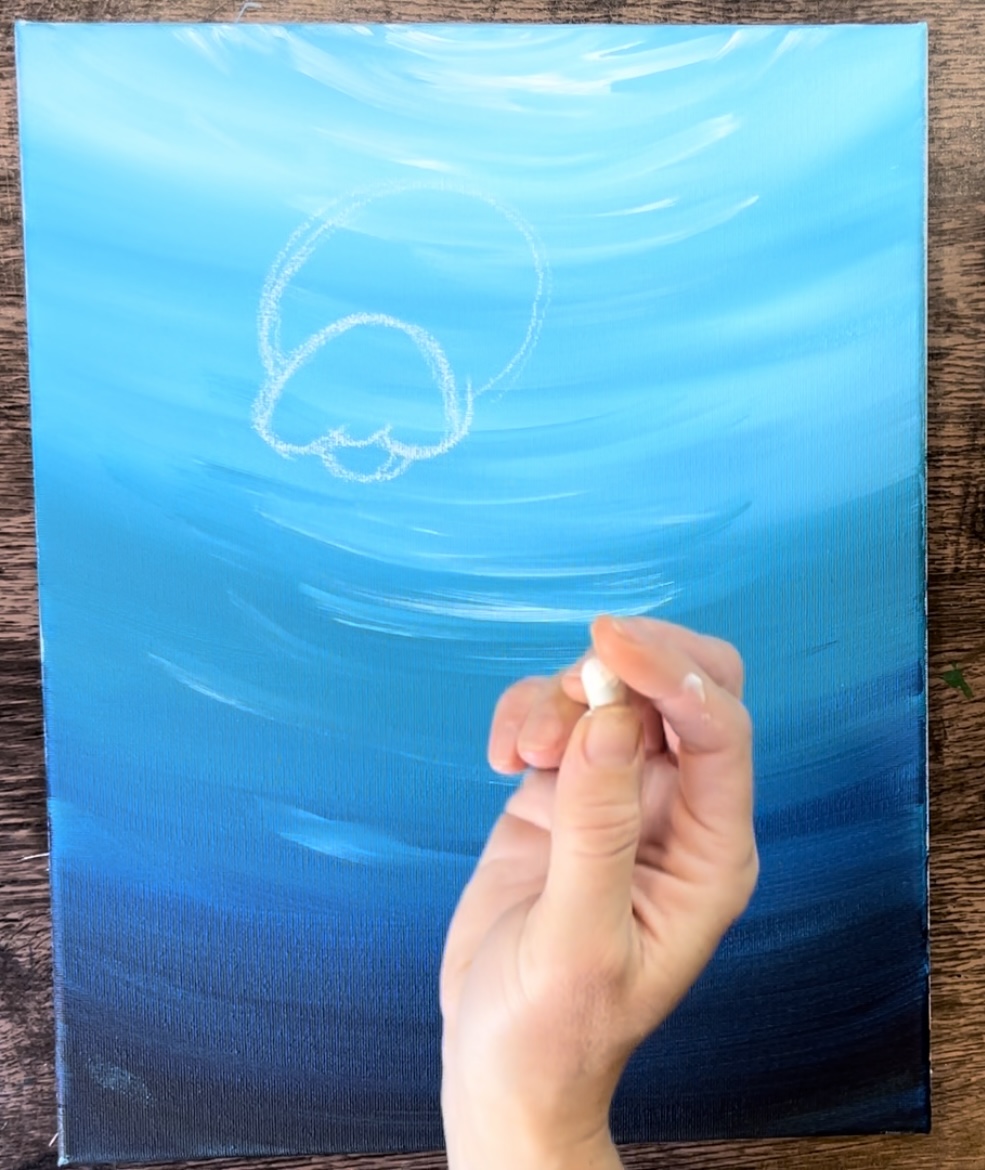
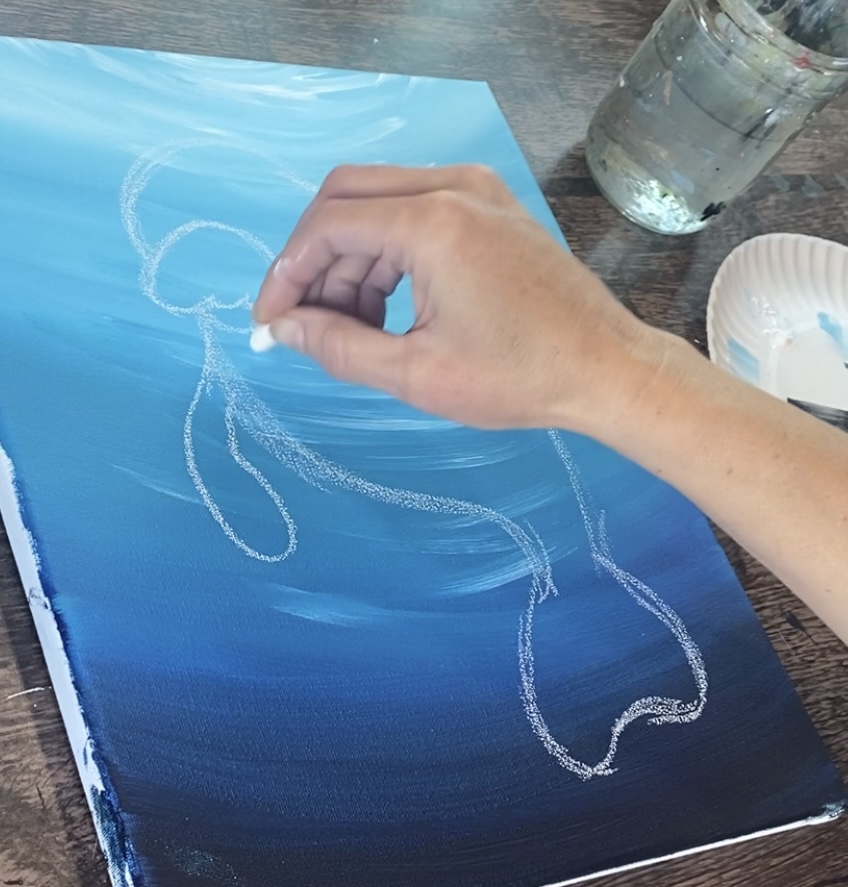
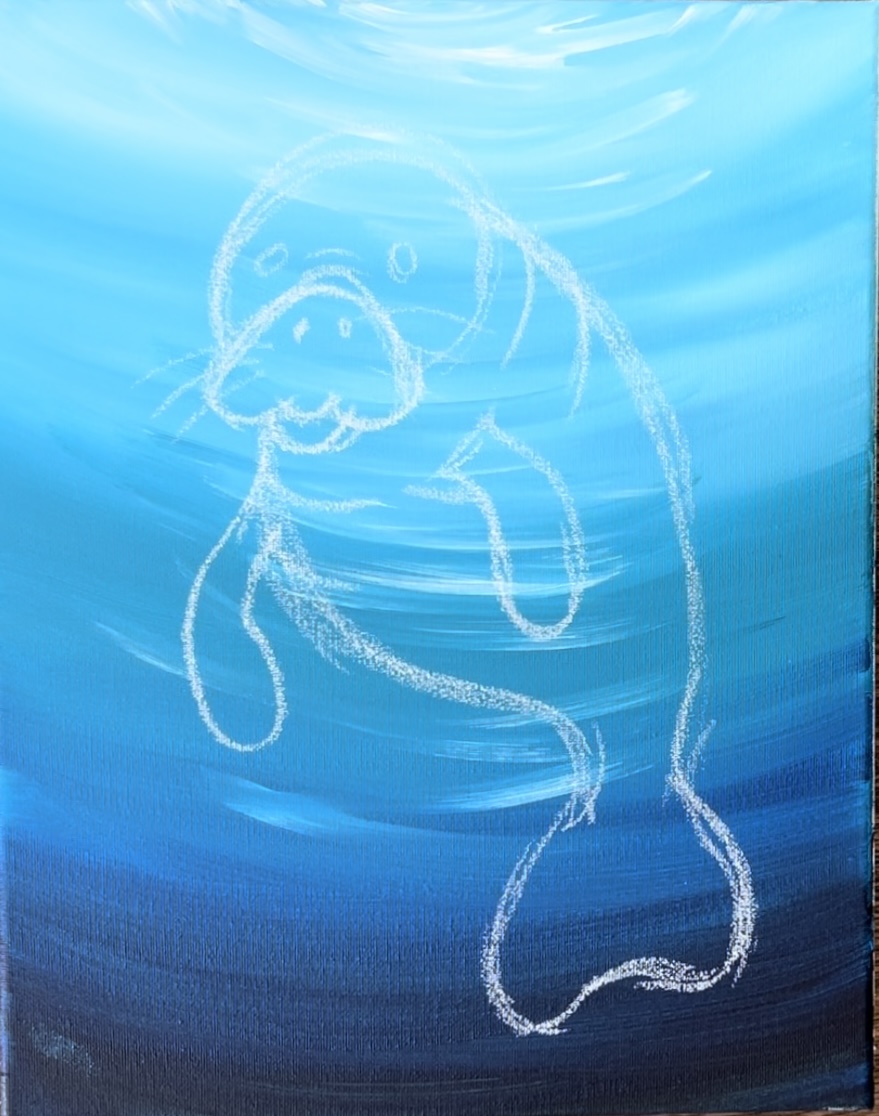
2. Draw Manatee
I drew this manatee with a piece of white chalk. If you are not doing the drawing portion, you can print out the traceable and transfer that to your canvas.
Start in the upper left area of the canvas. Draw the snout. It is a medium sized curved line with three small bumps (center would be the top part of its mouth).
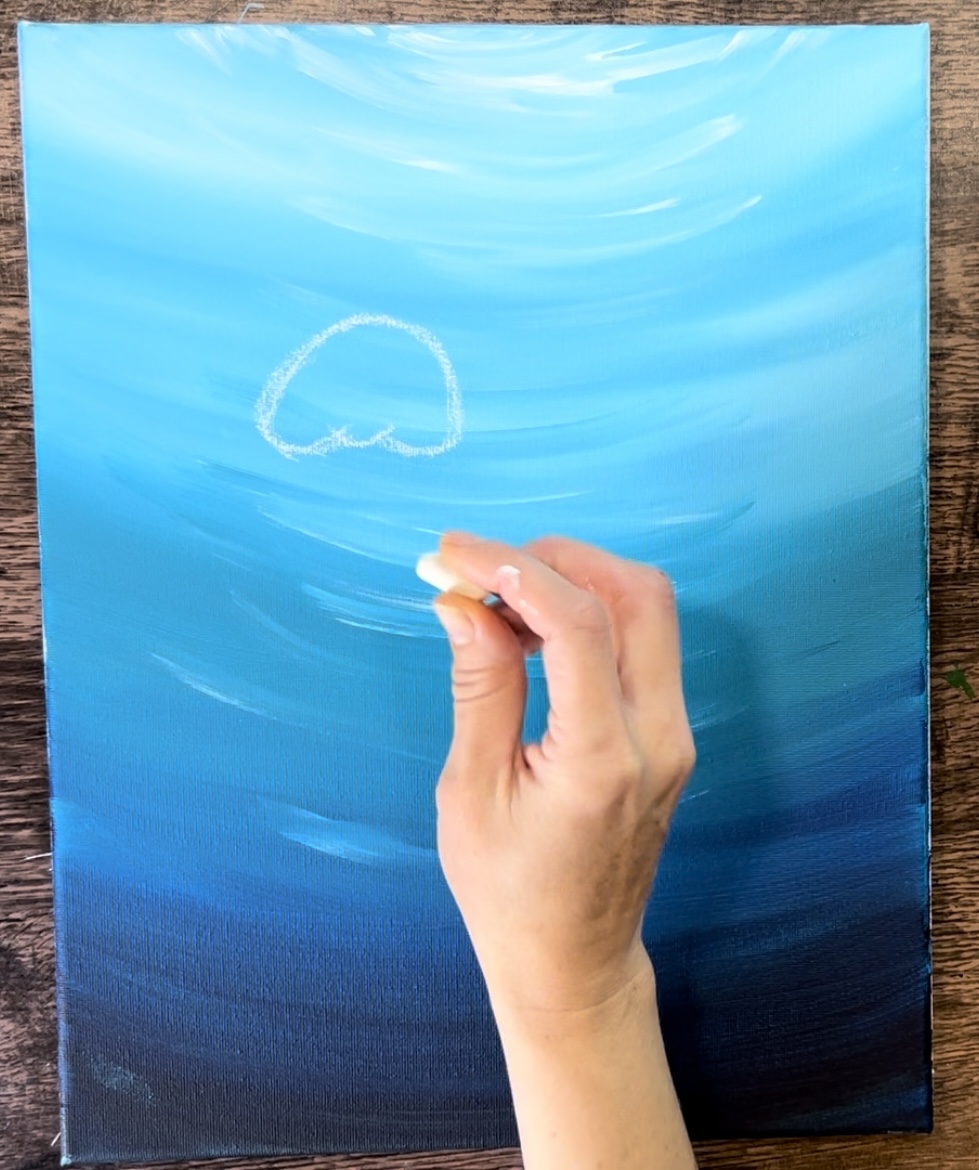
Then draw another small “bump” below for the bottom edge of its mouth.
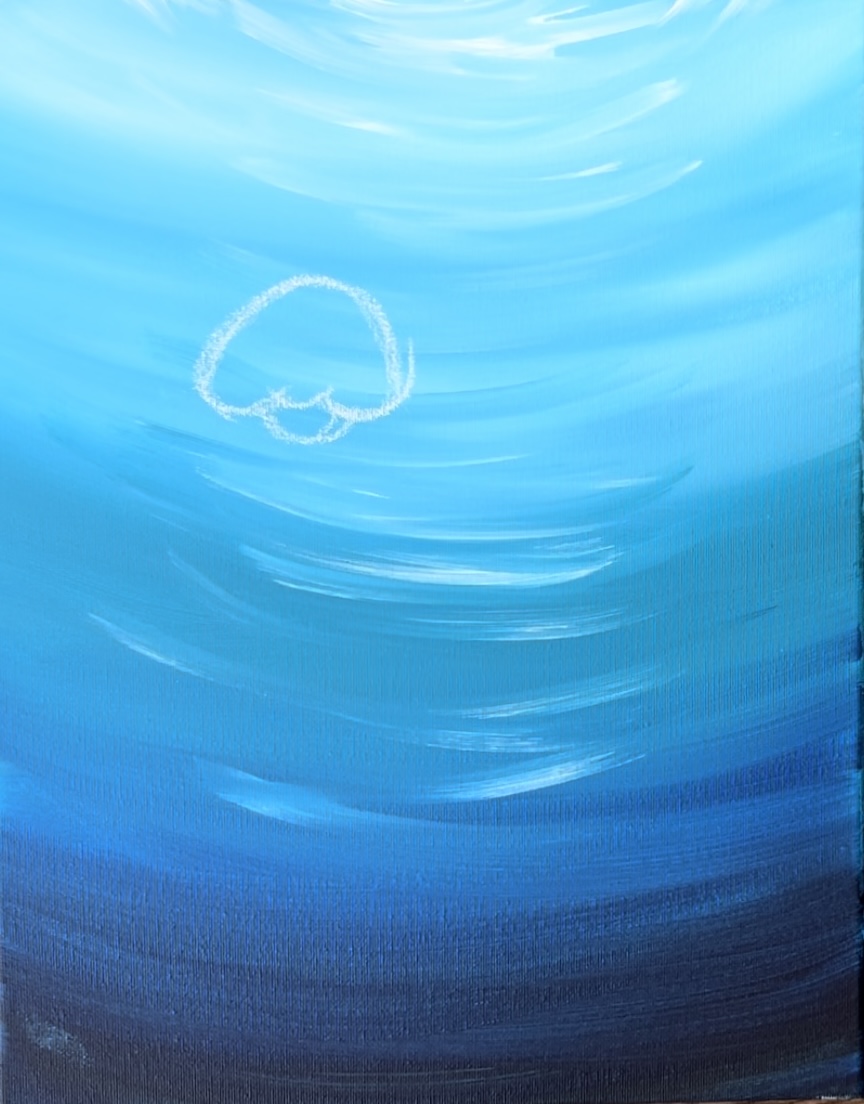
The head is a circular shape. Draw a circle that goes around and slightly more to the right of the snout area.
Then draw a long, slightly curved line for the back of the manatee. Go all the way down to the dark area of the ocean background.

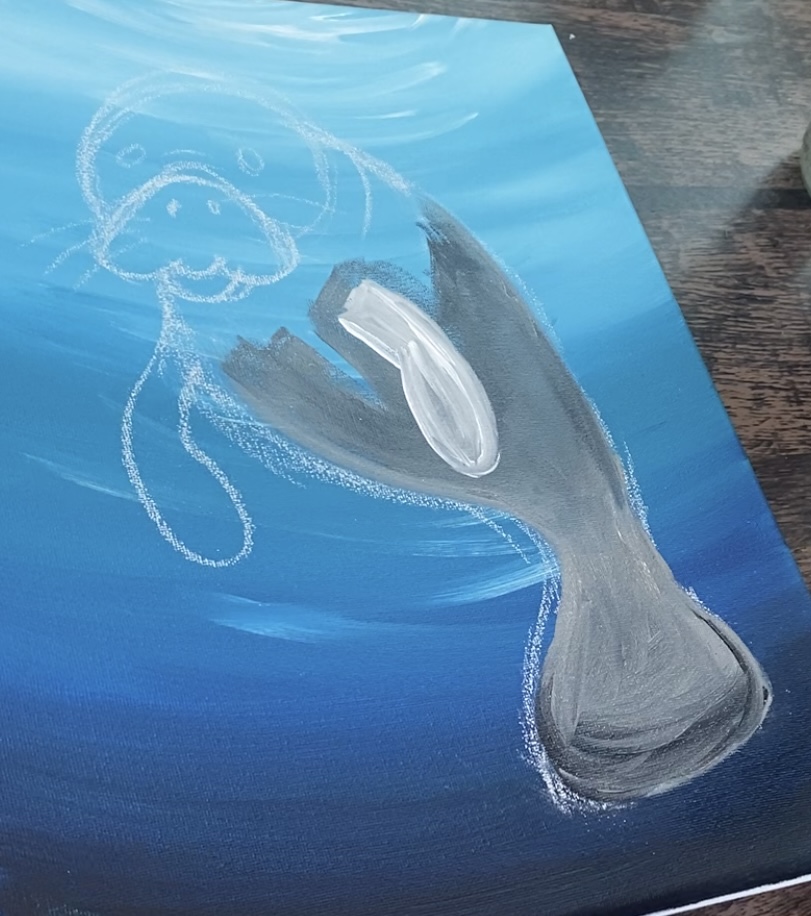
Draw the tail as it connects to the bottom of the back. I drew a wide set of two curved lines (this changes later in the painting to more of a flat line on the bottom of the tail).
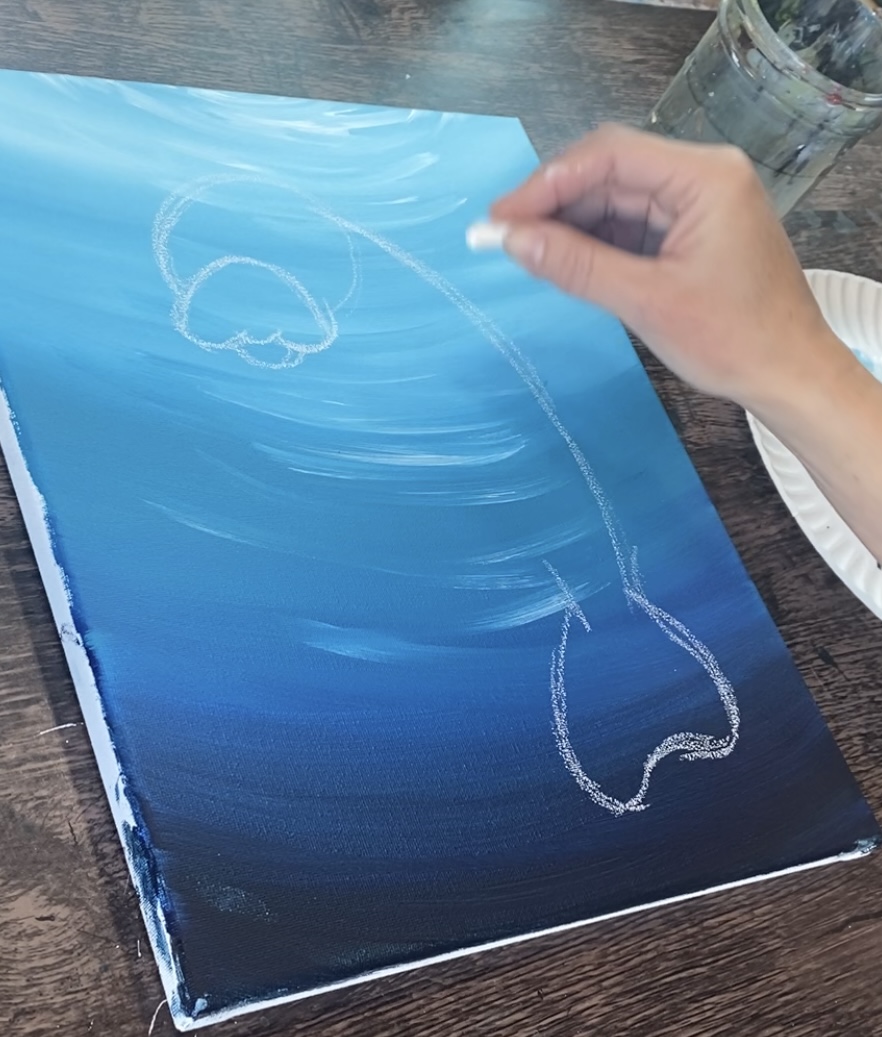
Then draw the belly region. Start under the snout and curve the line outwards and then allow it to become narrower towards the start of the tail.
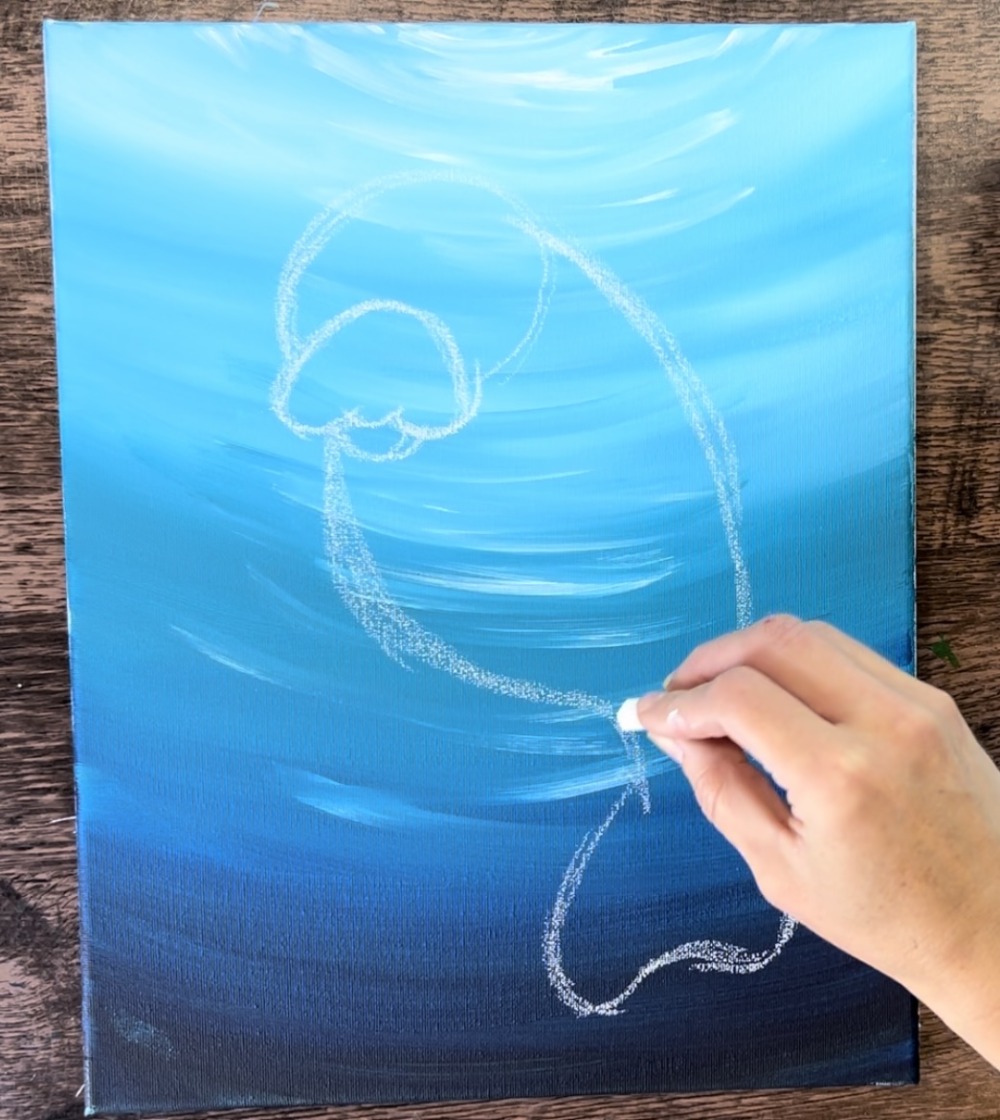
Draw the two flippers. One is sticking out on the upper left and the over overlaps the side of the body on the right. Note the shape of the flippers are rounded and slightly larger on the ends and a bit more narrower at the base.
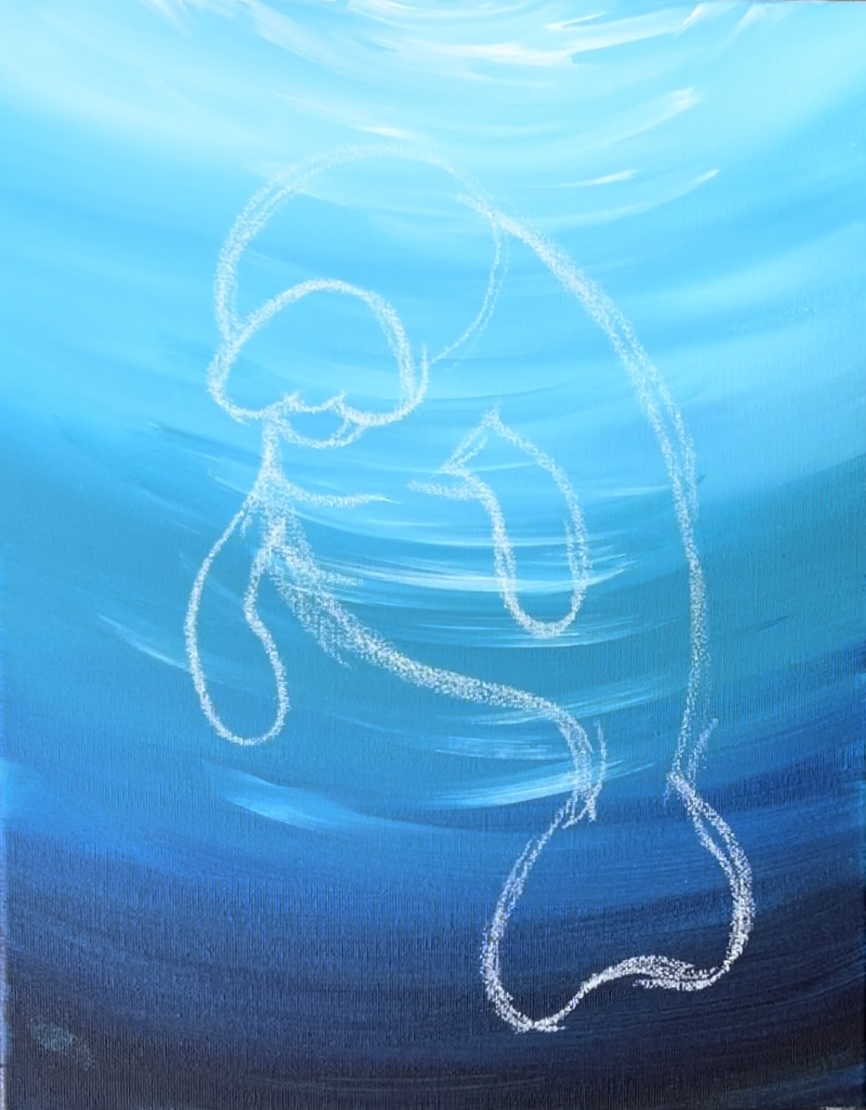
Draw some of the wrinkles, specifically the ones in the upper right area of the back just to the right of the head. Draw curved lines that go downwards and slightly go rounded and over the initial line of the back.
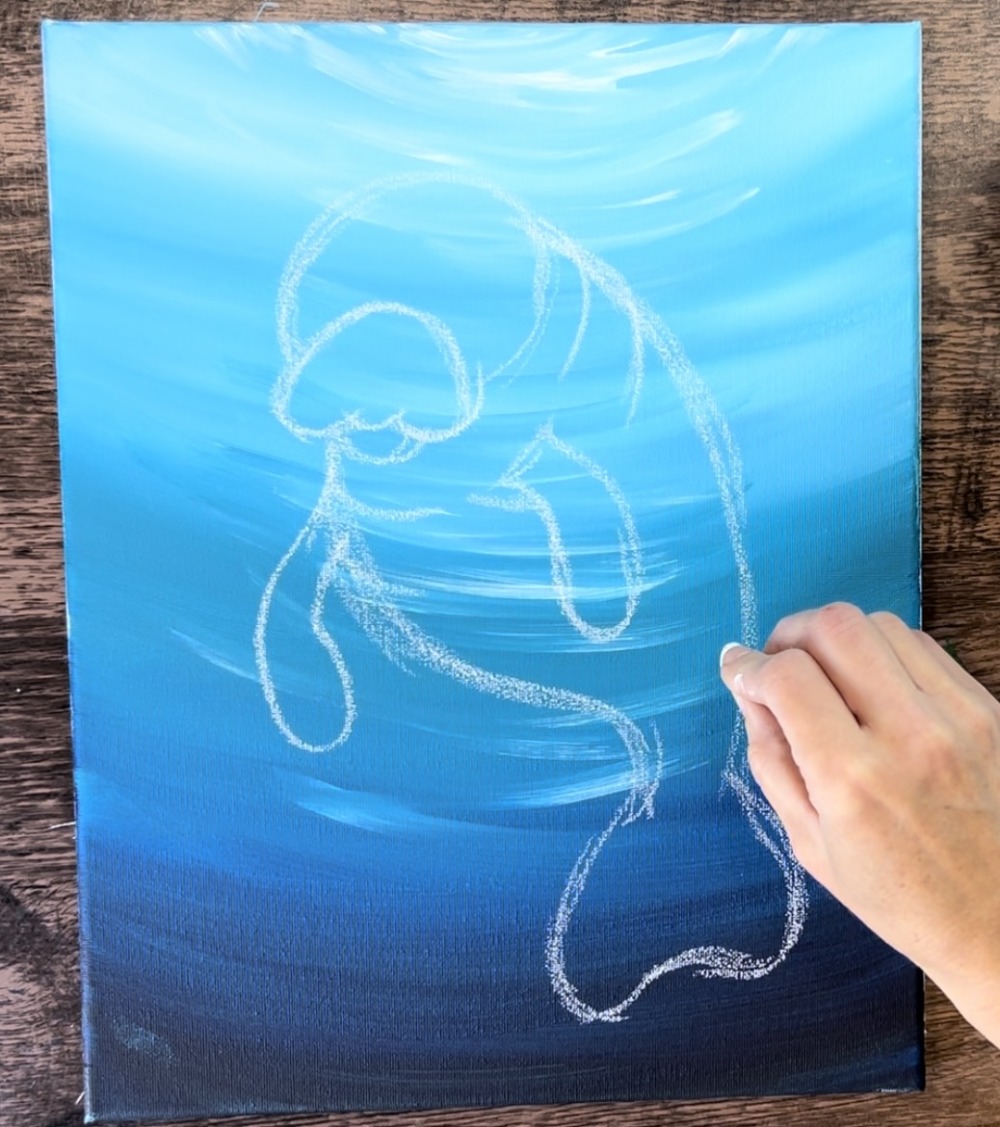
Draw a few more wrinkle curved lines in the middle above the snout. Then draw two ovals going slightly diagonal for the eyes.
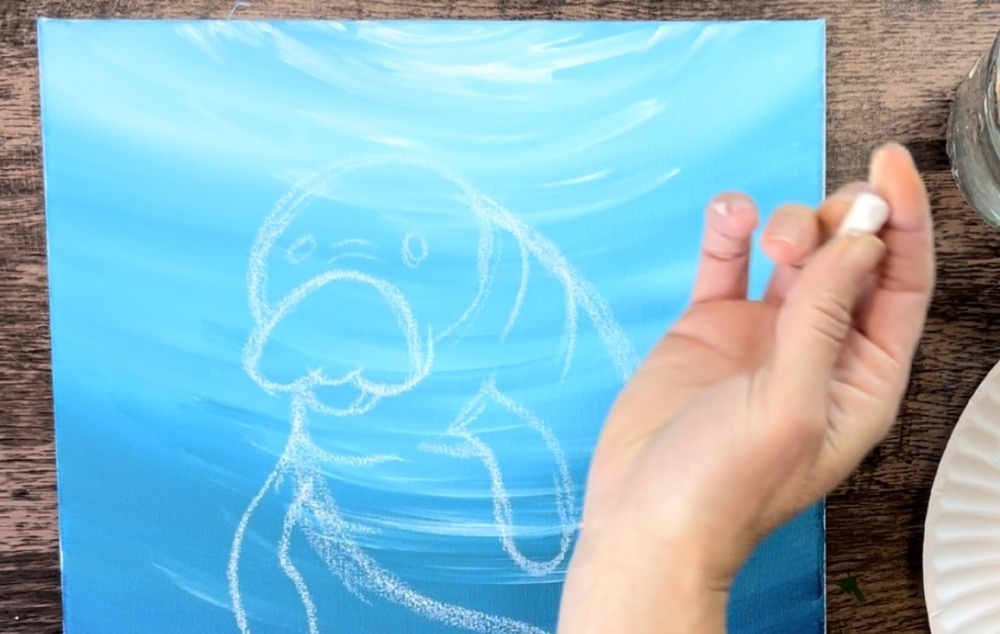
Draw two more curved marks for the nostrils. Then draw a few whiskers. We can paint more later.
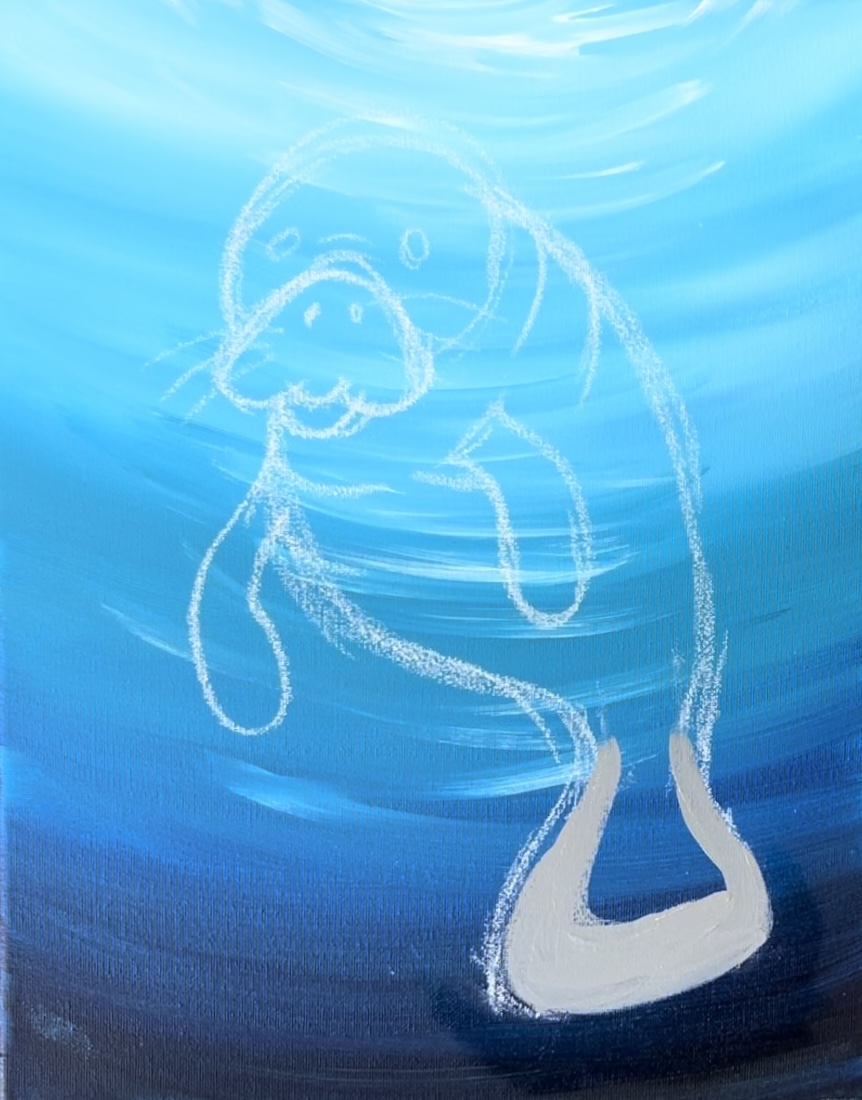
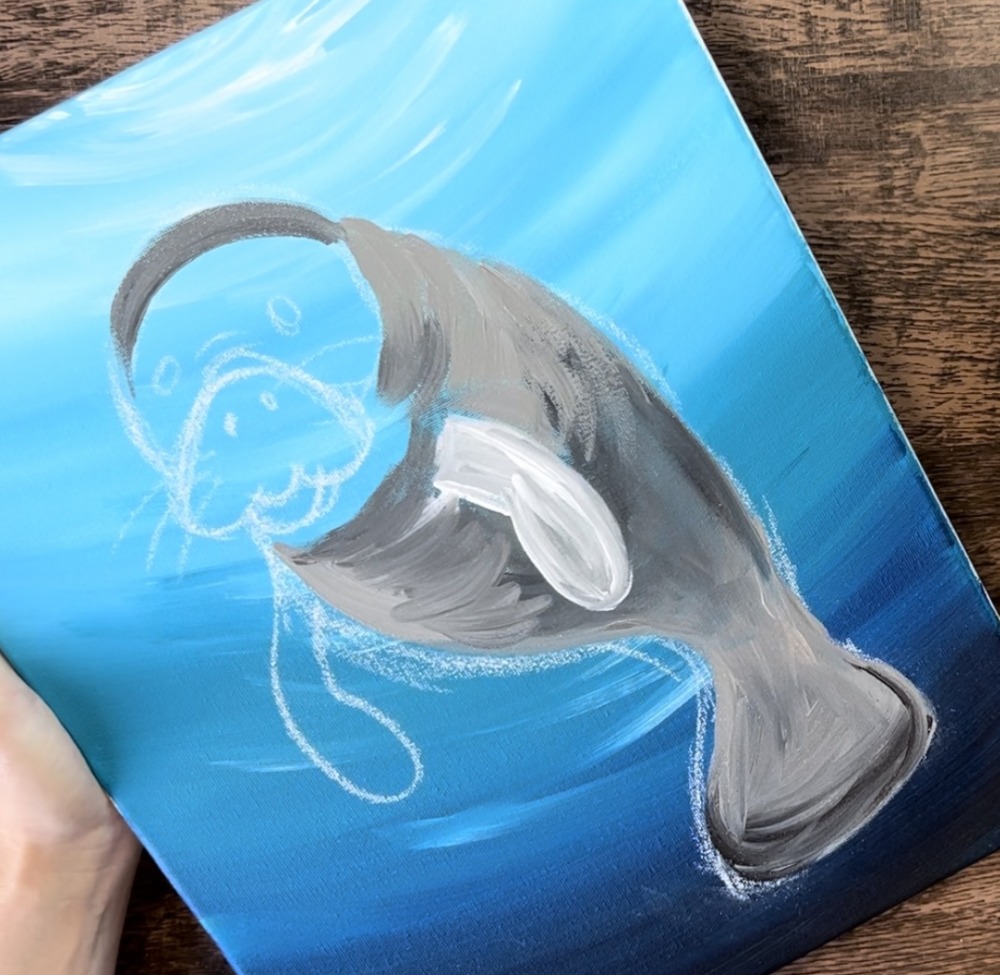
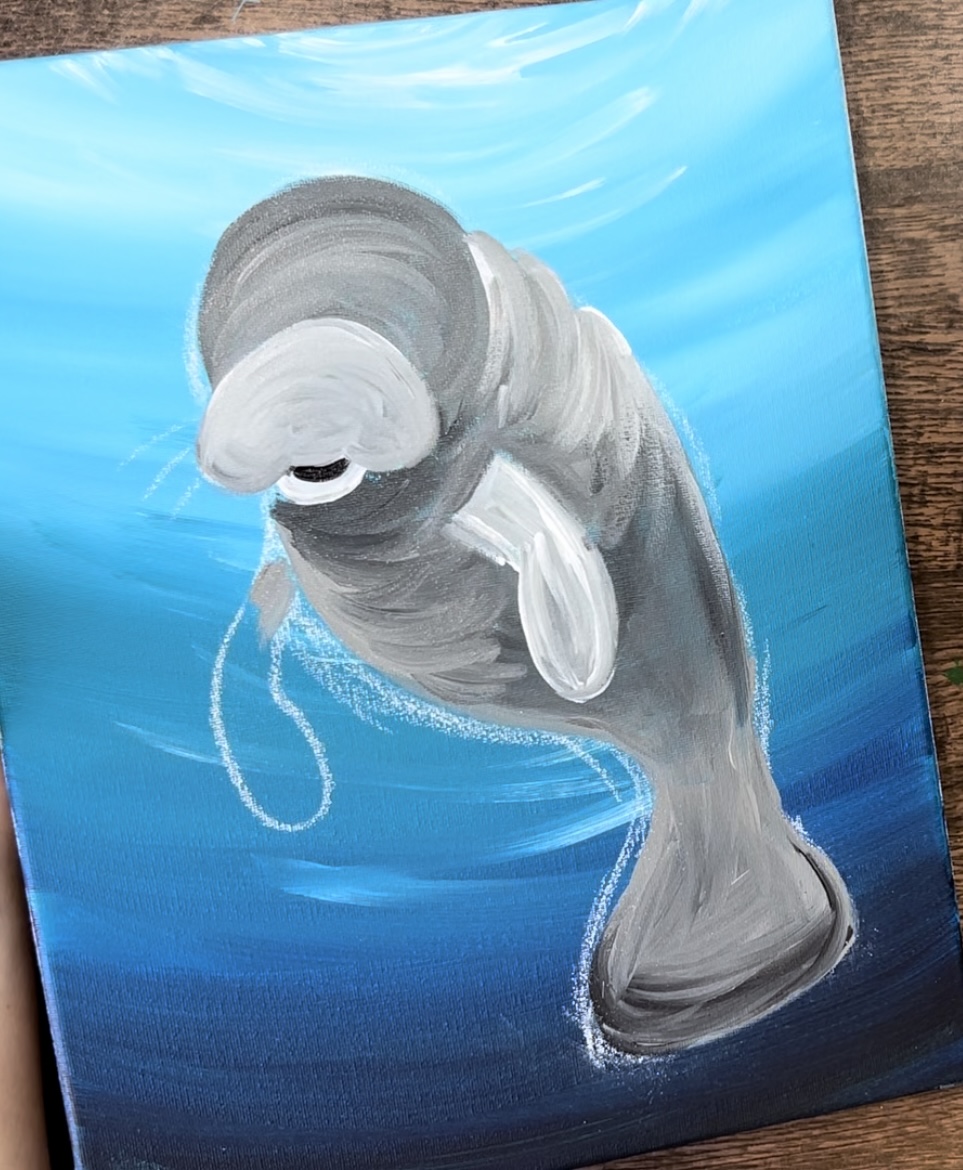
3. Paint Manatee
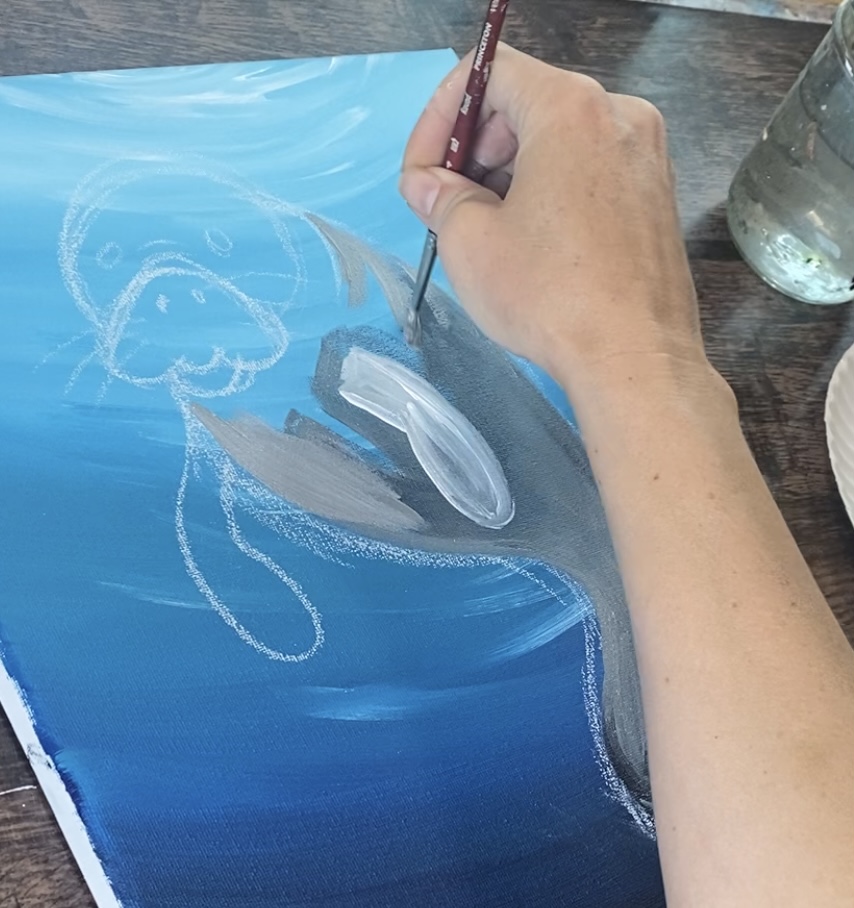
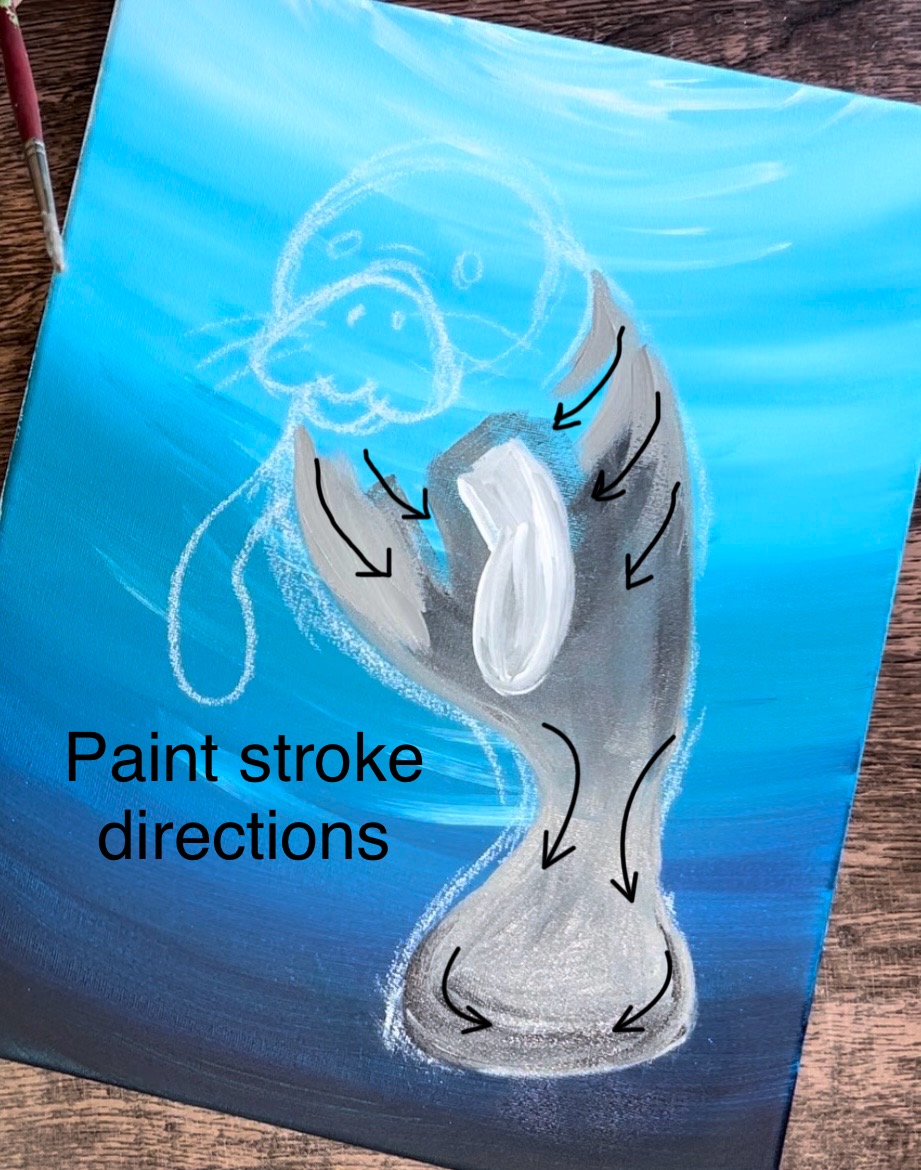
For painting the manatee, I mostly used the #4 round brush. For some of the larger areas, I used the #12 bright brush. I started on the bottom in the tail region and then worked my way up.
Load your paint palette with the color “neutral gray value 5”. If you don’t have this color, you can make a gray on your palette by mixing black and white together (a higher proportion of white so the gray will be a medium gray).
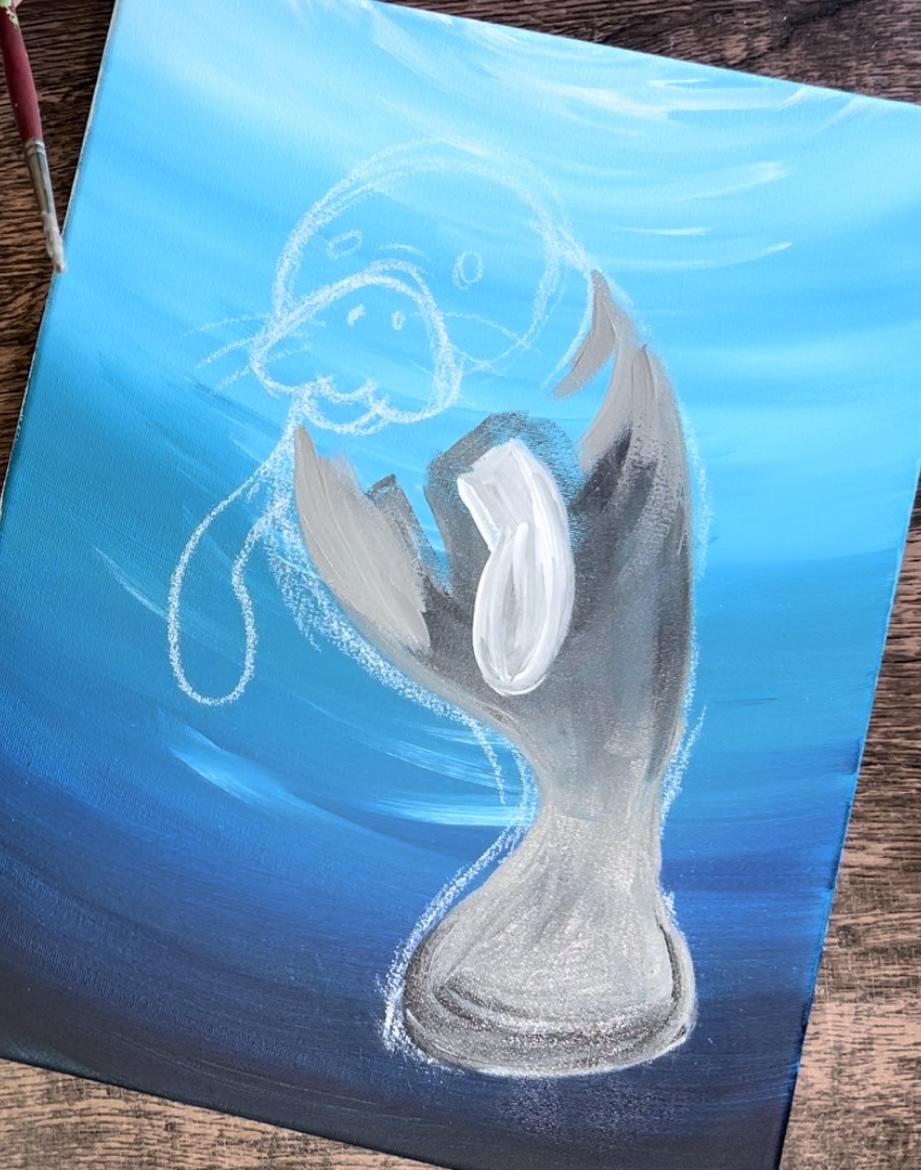
Start by outlining the shape of the tail.
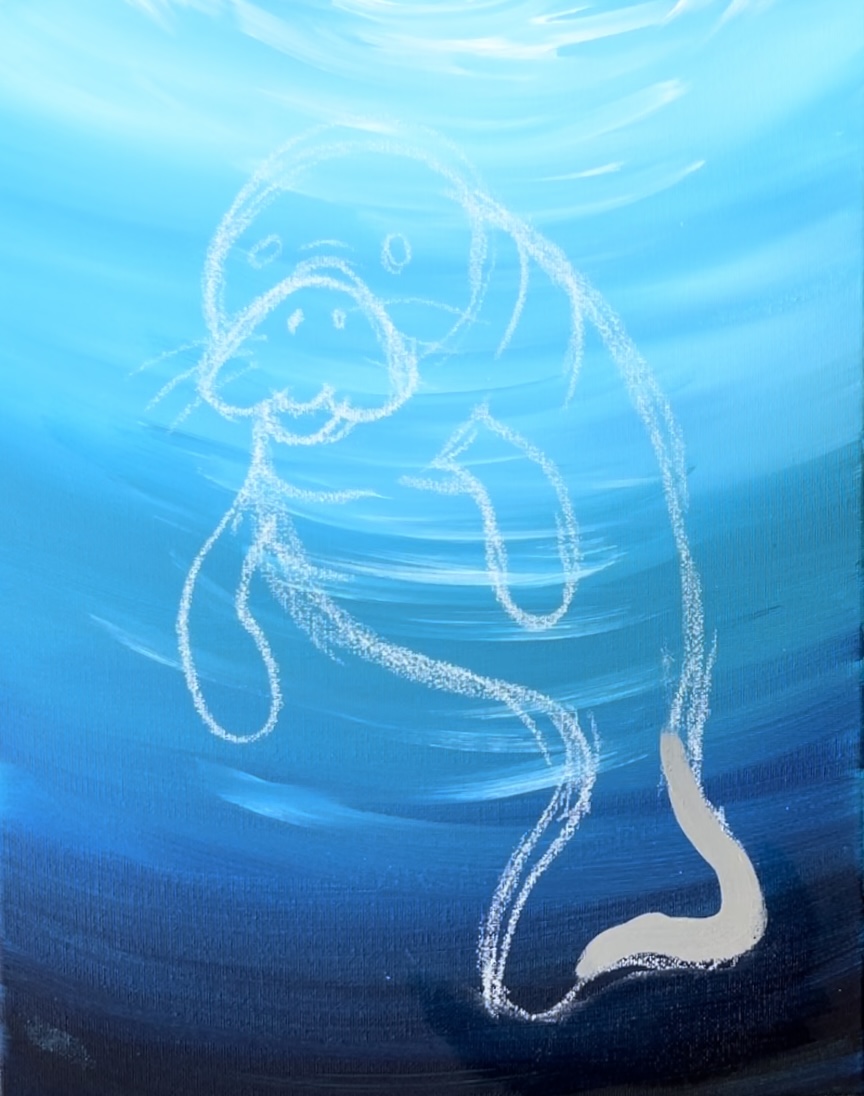
Then start filling it in. At this point, I made the tail more of a flat shape.
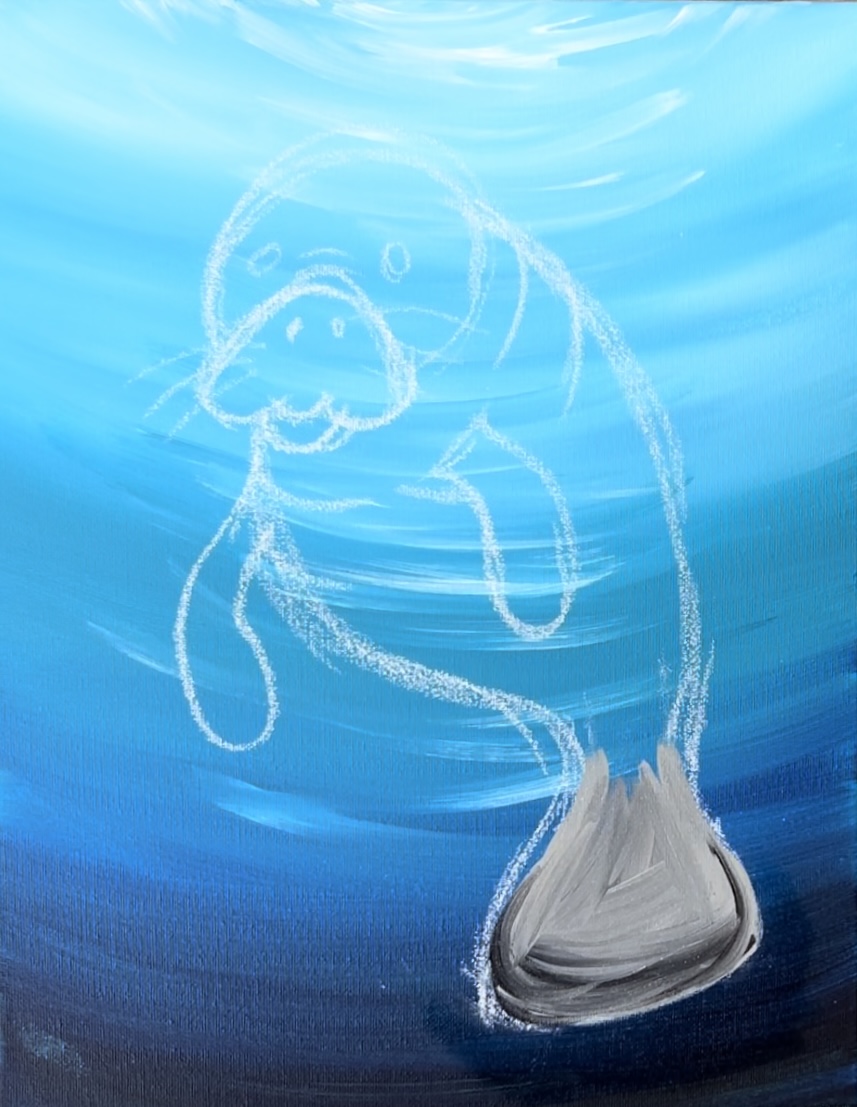
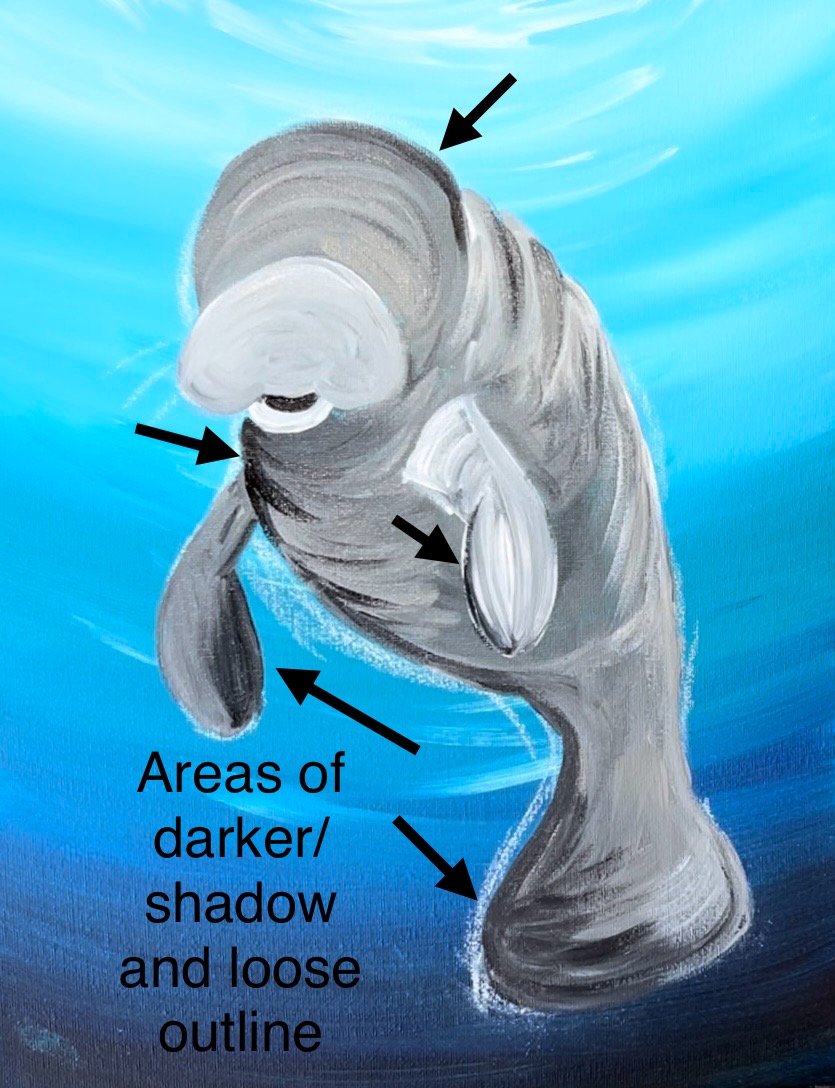
Next, we will need to blend some darker color in this. Manatees are gray, however, we will be using black and white to help it look more three dimensional and to allow for shading and highlighting.
Without rinsing your brush, load a small amount of “mars black” on the brush. Then blend the black on the very bottom edge of the tell and blend it into the gray. Make your paint strokes go in a curved direction in the shape of the tail.
Then, load your brush into the gray. Outline the back and belly curve.
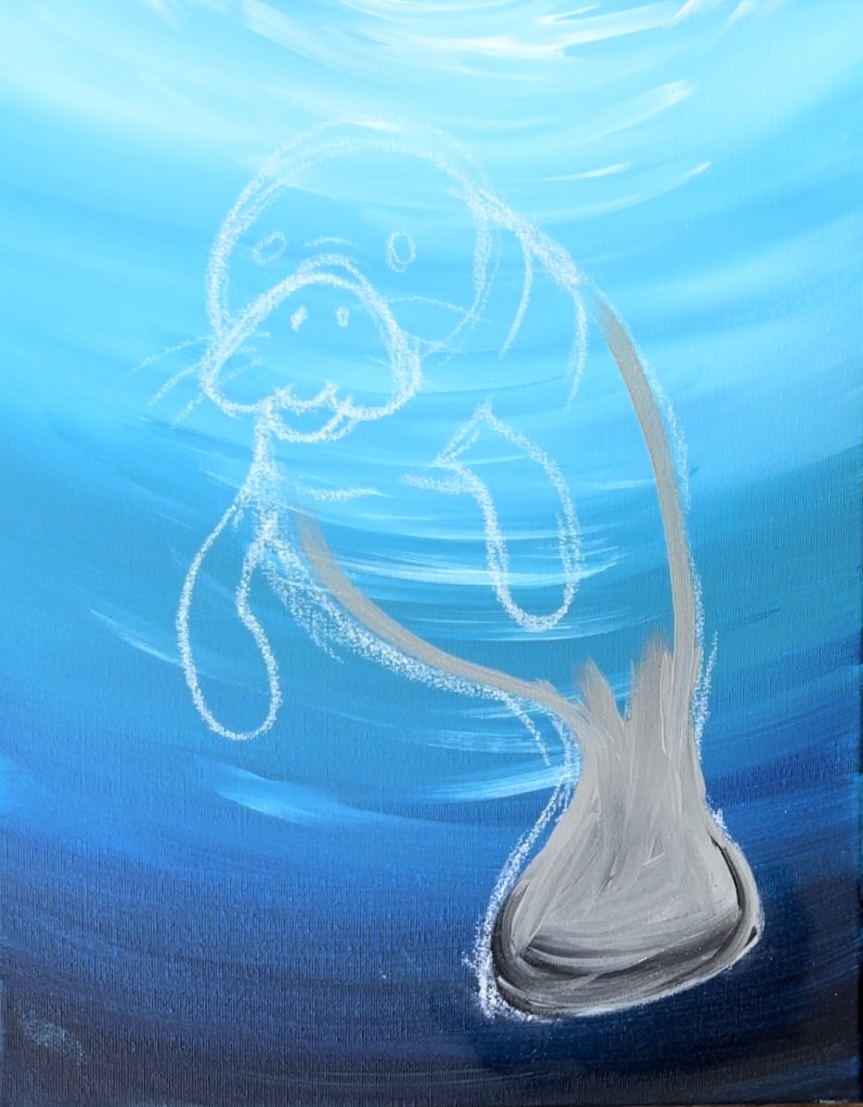
Woke your way inwards towards the flipper. Paint around the flipper. Add a small amount of black to your brush and blend it with the gray right onto the canvas. Make your paint strokes go in the direction of the shape of the manatee.
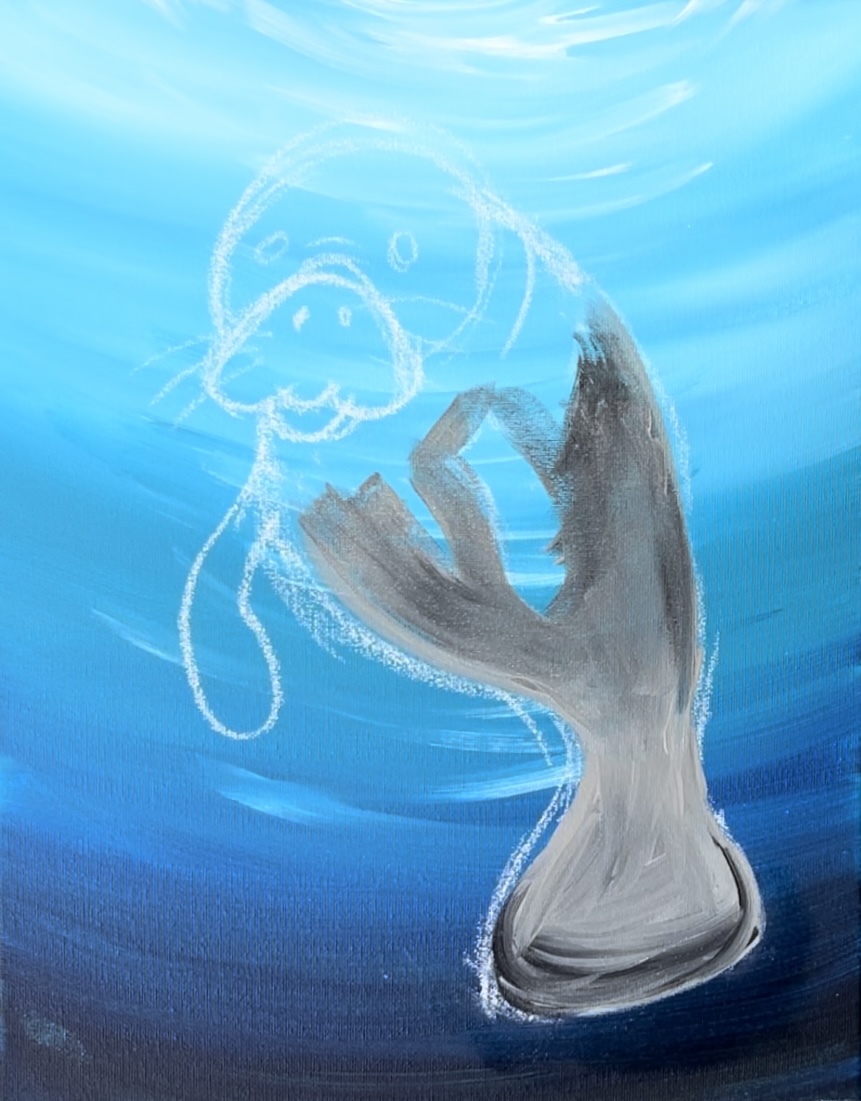
Paint the flipper a lighter gray. To do this, add “titanium white” to your brush with “gray” still on your brush. Outline the shape of the flipper and then fill it in solid. You can have some variations of color on the flipper and not blend it all the way. Just make sure it is lighter than the surrounding parts of the manatee so that it will stand out.
As you start to paint in the “wrinkle area”, make the direction of your paint strokes go in the direction of the wrinkle. In the picture below, I am using just the “neutral gray” to outline the wrinkle lines in the upper right part of the back.
Use variations of the gray (add some black to it) to fill the rest of the manatee in under the snout area and around the flipper.
Then paint the head. This is “neutral gray” with a little bit of black. Outline the shape of the head and then paint with curved paint strokes. Try not to blend the gray paint strokes all the way. Go in the direction of the shape of the head. Add a little bit of white into the gray as well.
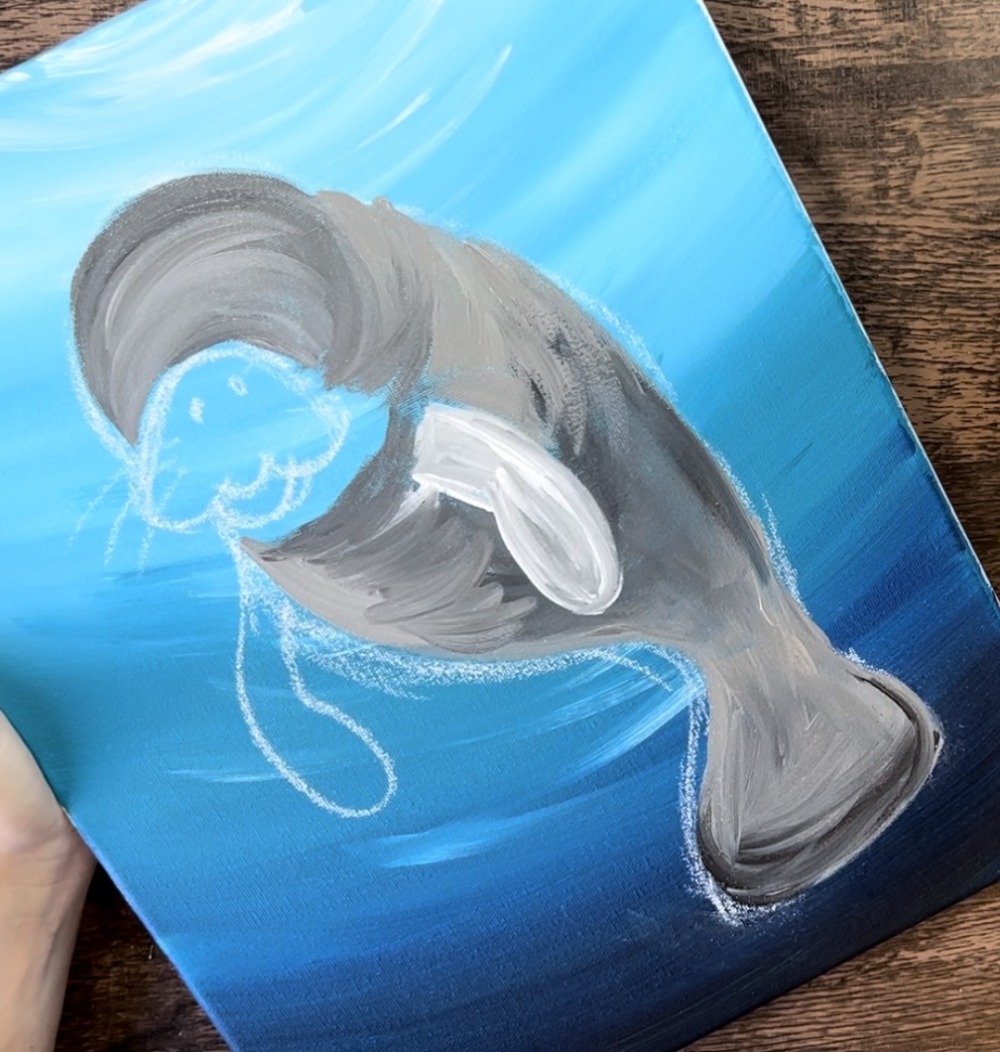
The area under the snout is going to be a darker gray. Add a little bit of black to the gray to paint this area.
Paint the snout. Use the same color you used for painting the flipper. Use titanium white with a little bit of the neutral gray. Outline the shape of the snout and then fill it in solid.
Paint the bottom curve of the mouth. Then use mars black to paint the inside opening of the mouth.
Paint the left flipper. I did this with neutral gray. You can make it darker or lighter if you want.
Next, do a little outlining with the “mars black”. Paint the wrinkles on the far left as they curve and slightly go inwards.
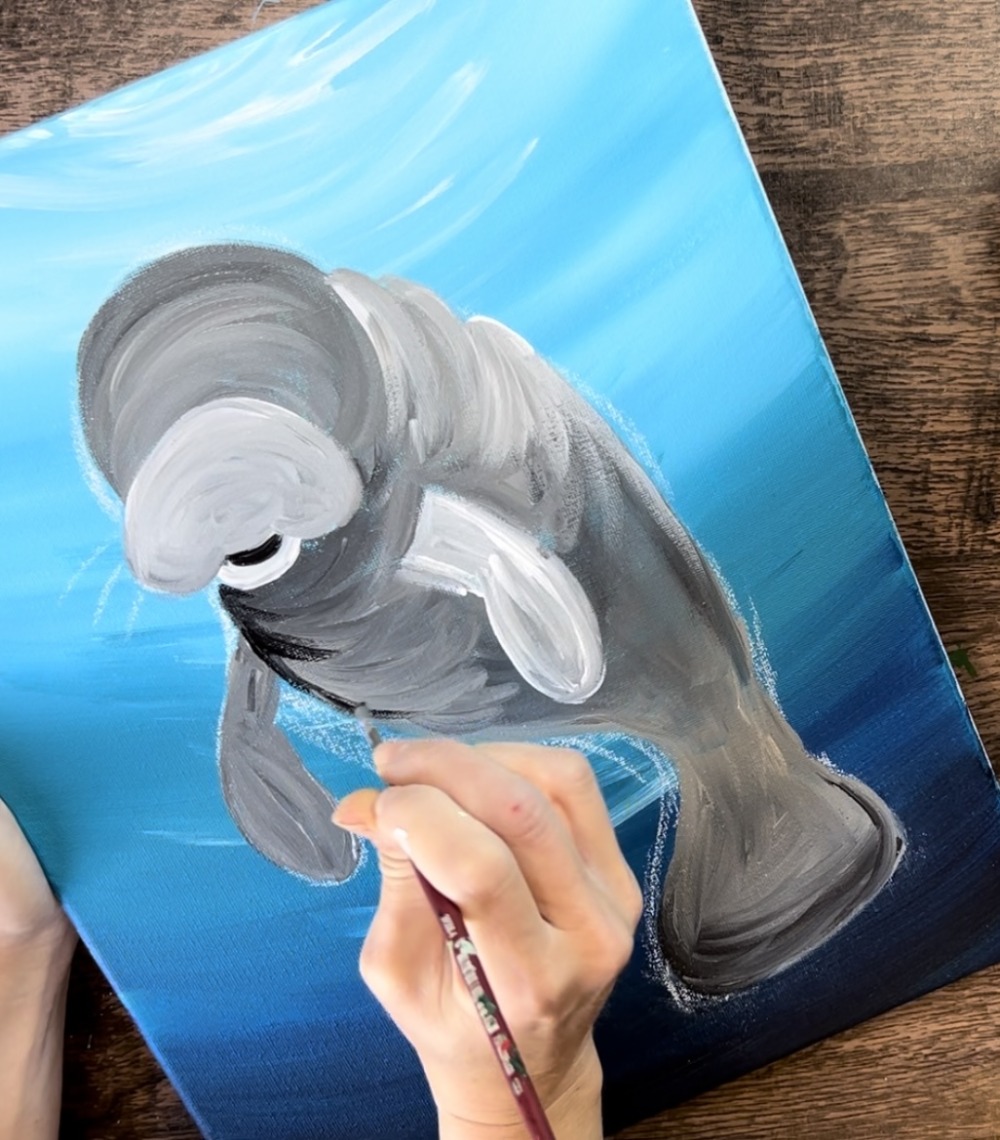
Then, use dark gray (mix a little black with neutral gray). Outline the left line of the belly and down to the bottom of the tail area.

Use this dark gray to outline the top right edge of the head and right side of the wrinkles. Outline the left of the flipper on the right. Then add a little bit of this dark gray on the right side of the flipper on the left.
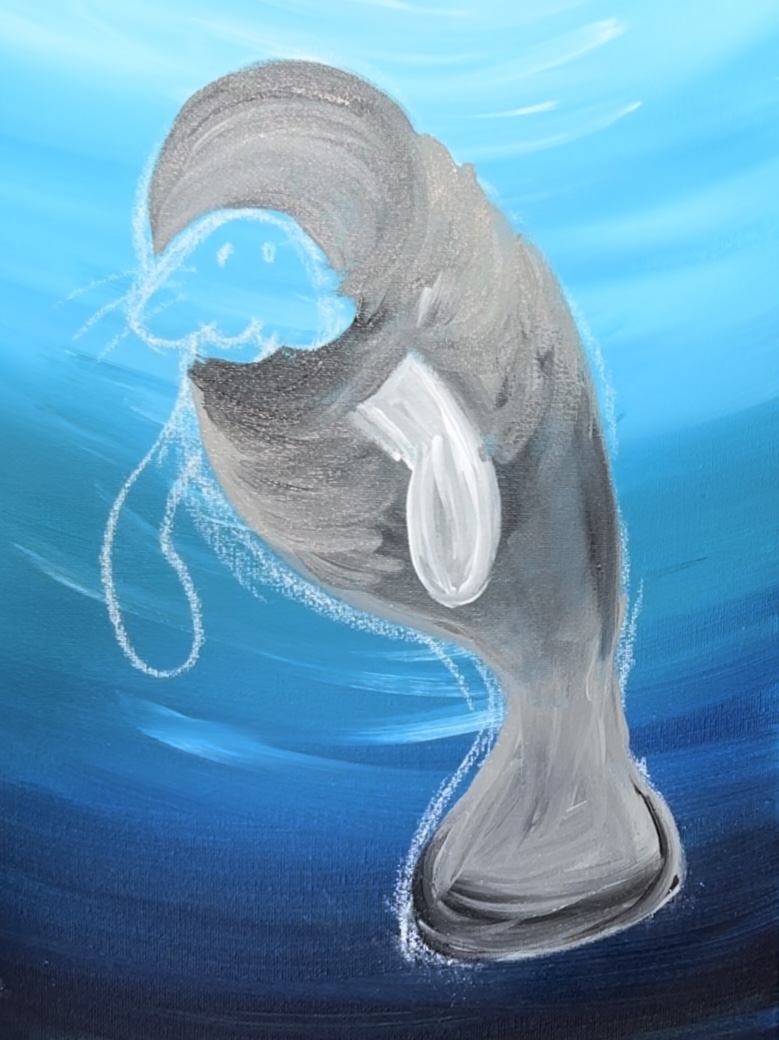
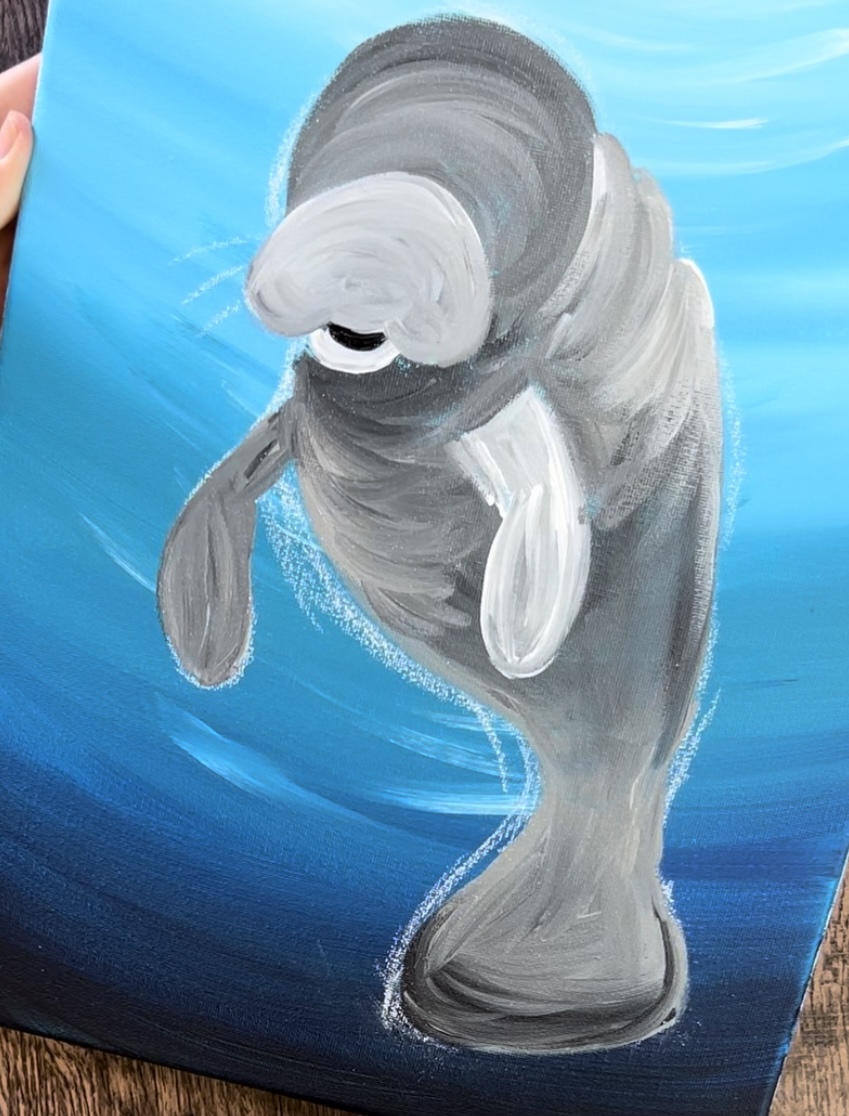
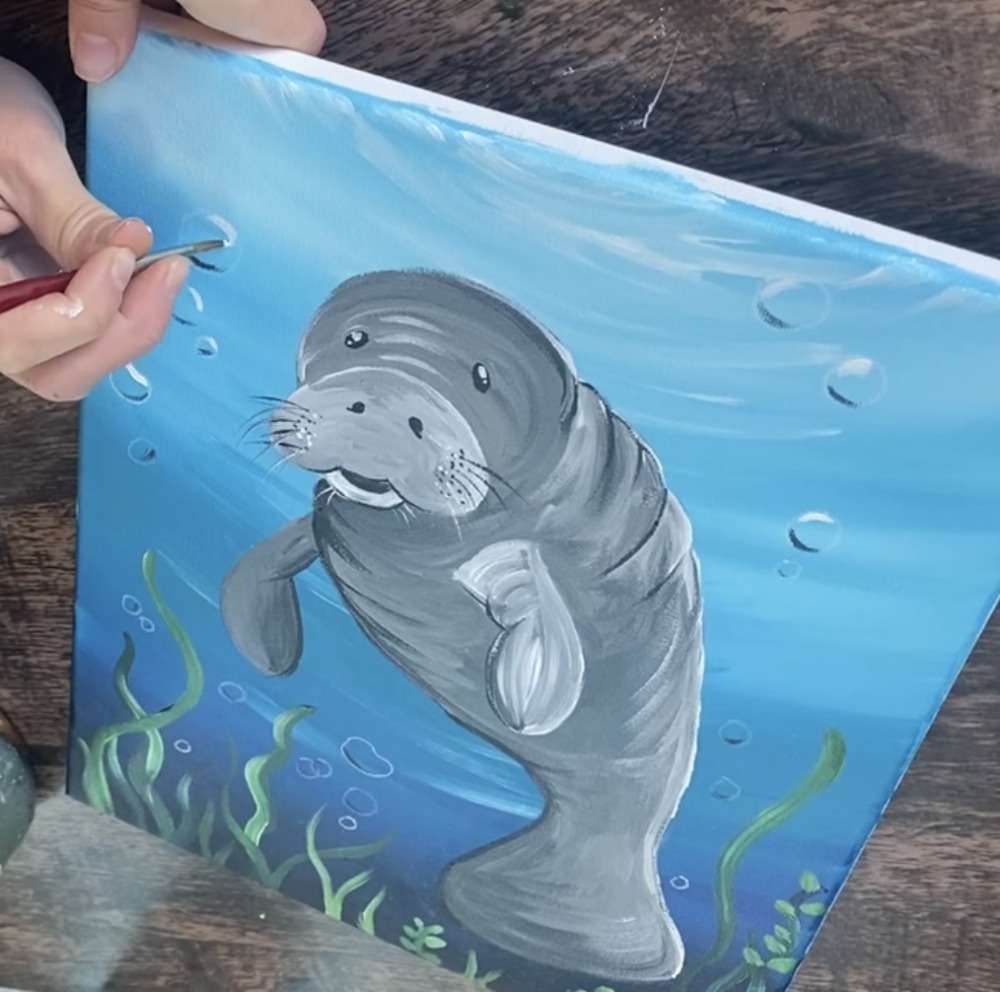
4. Paint Eyes, Nostrils and Whiskers
Use the #4 round to paint two oval shapes for the eyes. The shapes are going diagonally towards each other. Tip: I used the #4 round for this but a tiny detail brush, a sharpie or a black paint pen may be helpful for painting these small details.
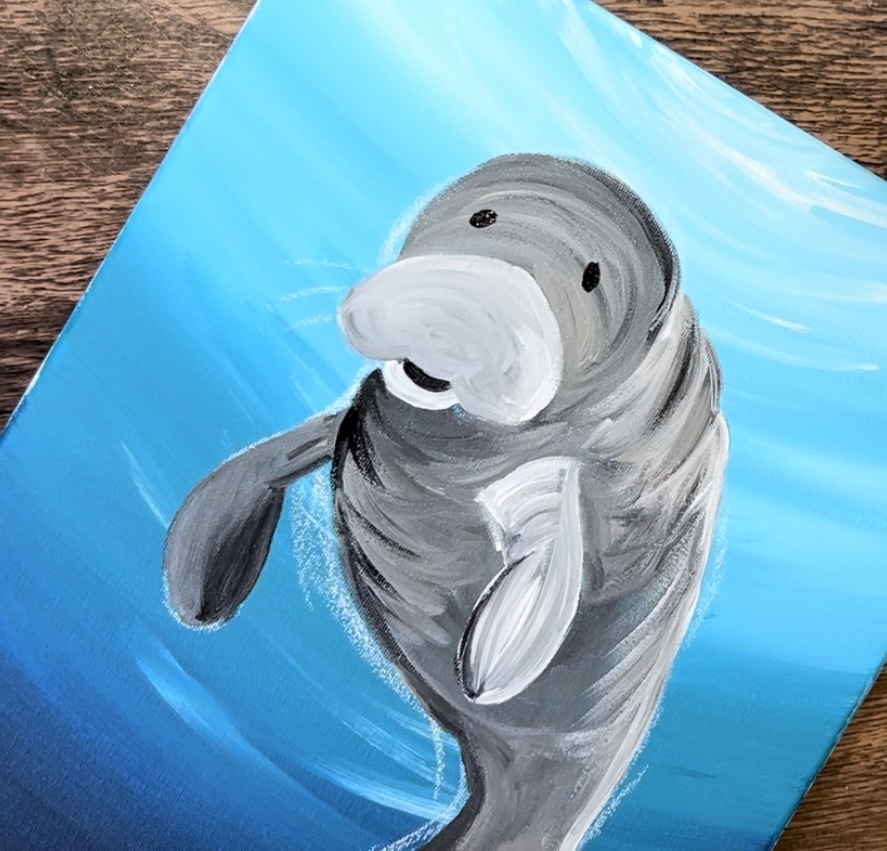
Paint the nostrils. These are two small circle/ comma shapes.
Then paint the whiskers. I used the #8 round brush because it has a very fine point to it. You can use that brush or a tiny detail brush or paint pen.
Start by painting little black dots on each side of the snout. Then paint curved black lines coming out from the dots. You can also use titanium white to paint some white whiskers (or a white paint pen). Paint a few whiskers on the bottom edge of the mouth.
If the eyes are dry, paint little white dots on the upper parts of the eyes. I did a larger dot on the top and a smaller on the bottom.
Use white mixed with a little gray (so it’s not too bright) to paint the wrinkles in between the eyes. These are three curved lines.
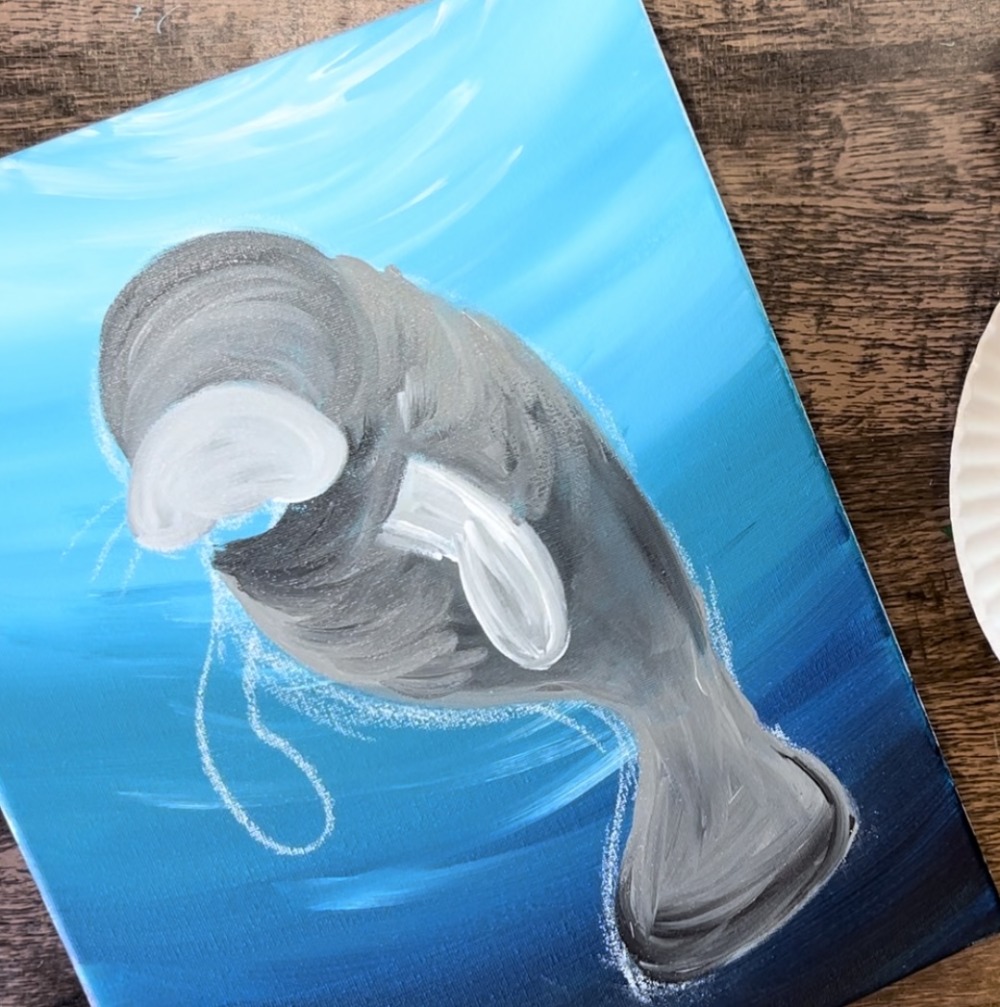
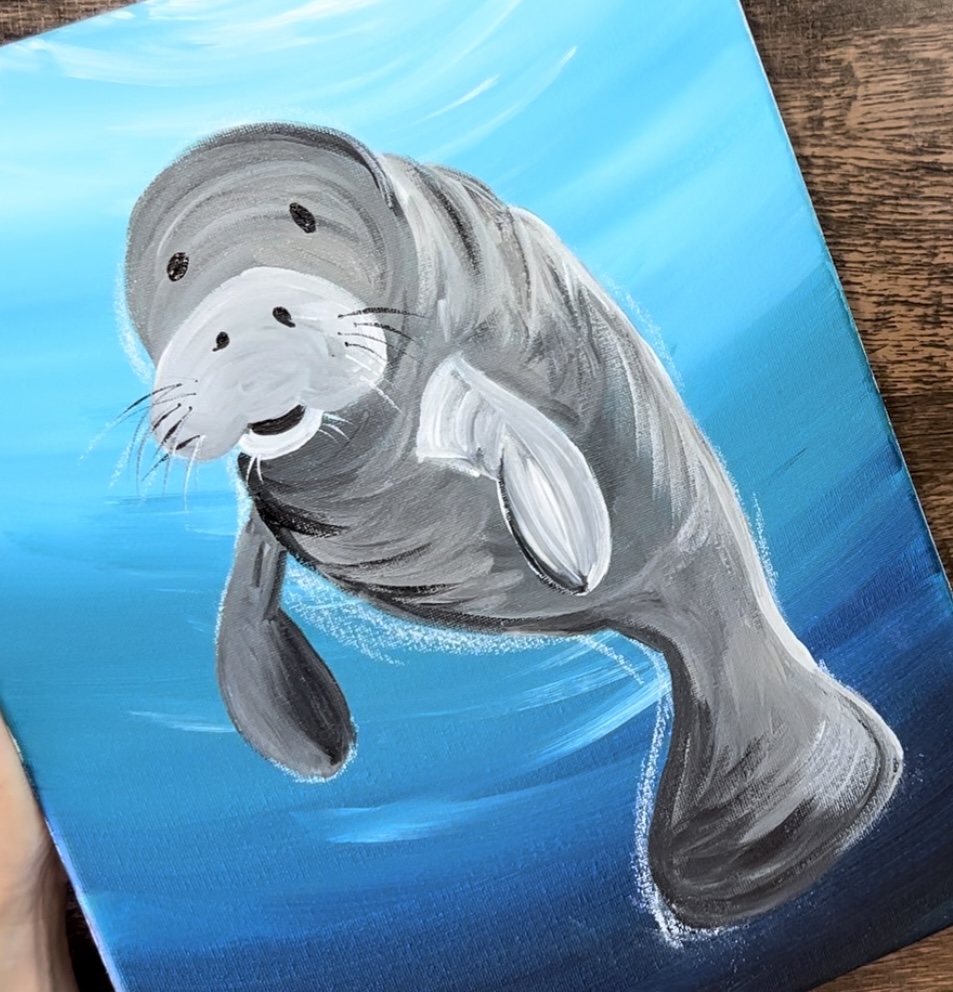
5. Loose Outlining & Other Details
I did a little more loose outlining to help define the manatee a bit more. ON the far left, I did black outlining on the belly region, the right side of the flipper on the left and the left side of the flipper on the right. I loosely outlined the bottom edge of the snout and mouth.
I also outlined the upper right wrinkles with very thin black lines (using the #8 round brush).

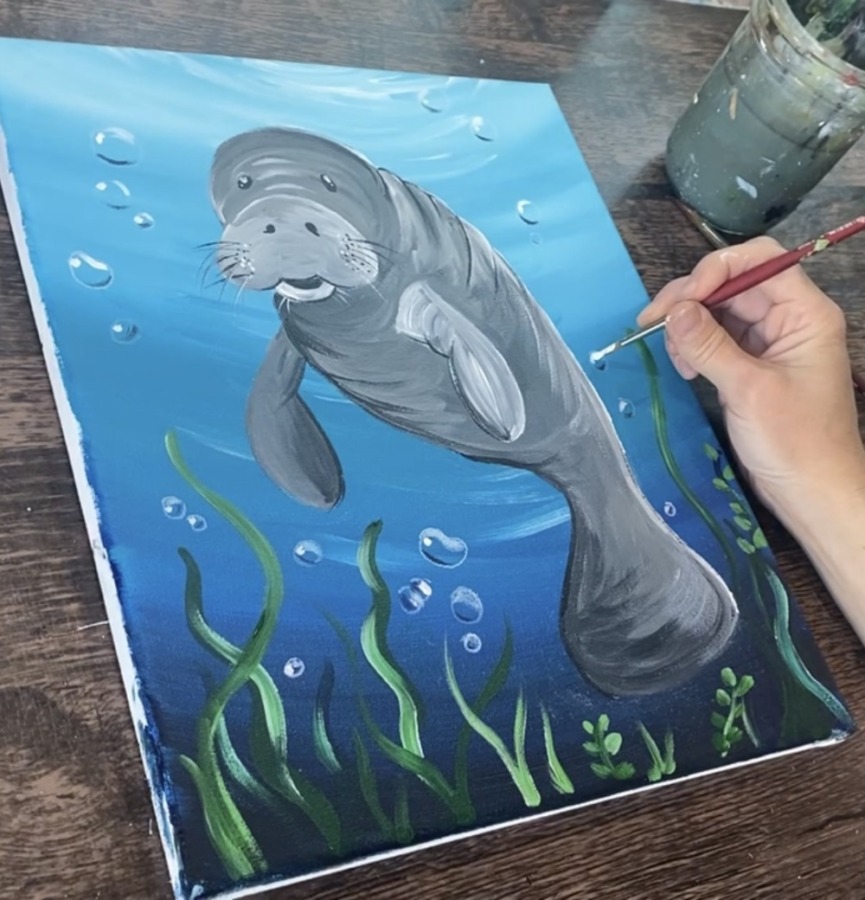
6. Paint Seaweed
Load your paint palette with the colors: “hooker’s green hue”, “phthalo blue” and “titanium white”. Use the #4 round brush to mix equal amounts for the blue and green together (it will make a dark teal).
Then paint wavy lines of seaweed on the bottom of the canvas. Vary the heights of these lines and have them “flow” different directions.
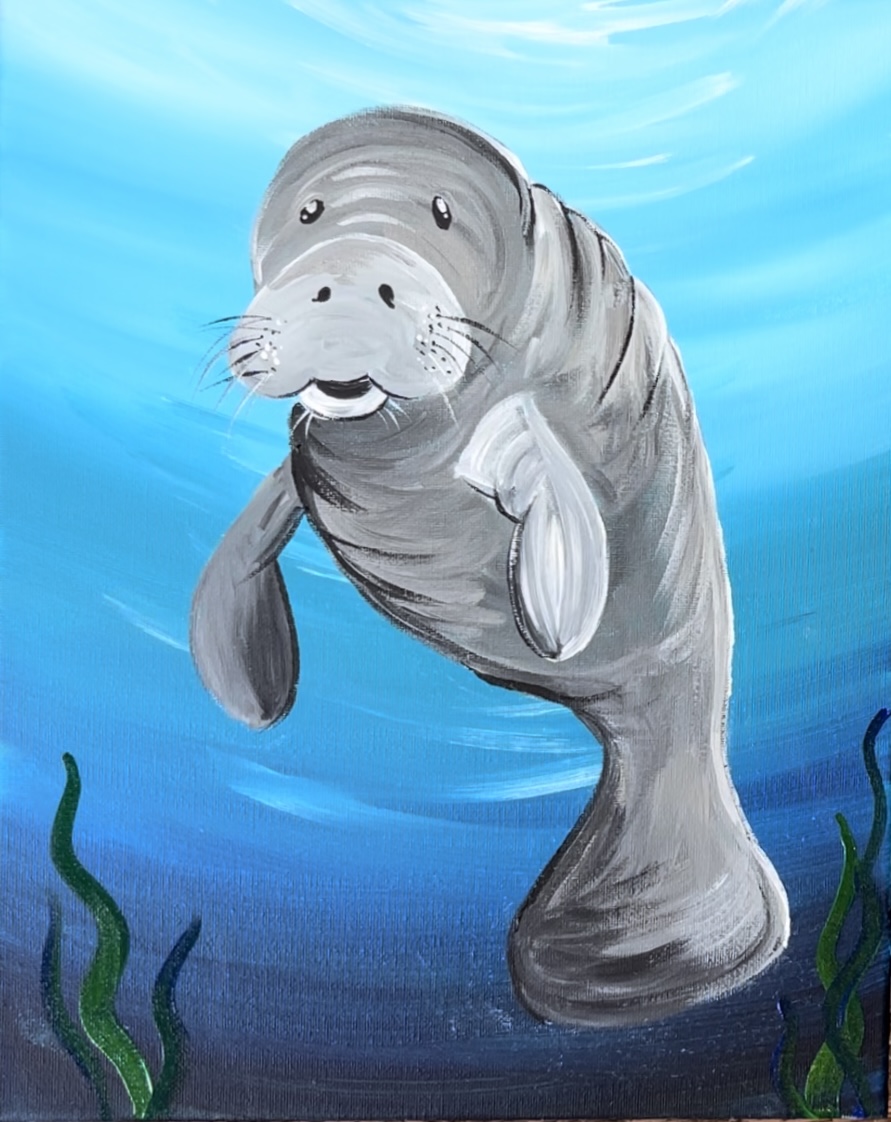
Also, vary the colors. On some of the seaweed strands, add a little more green. Then, without rinsing the brush, load your round brush in a little bit of titanium white.
Gently blend some of the white into some of the green of the seaweed. This will highlight some of the seaweed plants.
Continue to paint various seaweed plants. You can change up the style of seaweed by adding little rounded leaves to some of the wavy lines.
7. Paint Bubbles
For the bubbles, I used a white POSCA paint pen. This was helpful for the fine detail of the bubble shape. Draw various sized circles throughout the background of the water.

You can even make some of them more of a “kidney bean” shape.
Next, use the #4 round brush to paint dark shadow lines on all of the bubbles. I did this by mixing “phthalo blue” and “mars black” together. Then use the brush to paint a curved line on the bottom inside of all of the bubbles. You do not need to make this line a very thick, dark line. Try to make it thin and a little “see through” and “dry brush” style.

Rinse the brush off. Then use titanium white to paint a curved mark on the top inside of each of the bubbles. This curved line is also a little thin/ translucent.
Next, paint a little bright white dot on the top of each of the bubbles for a final highlight mark.
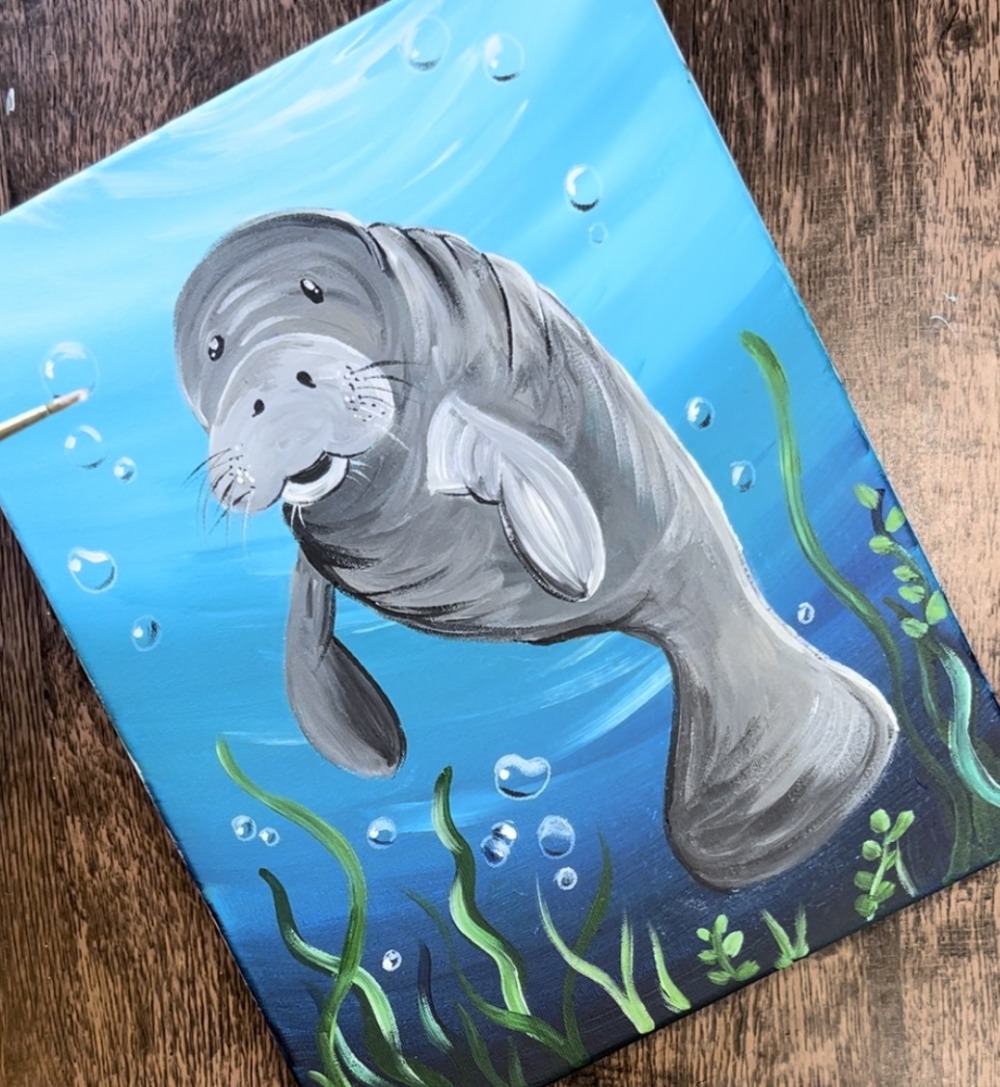
You can then use your white paint pen to outline each of the bubbles again. Then paint little “sparkle diagonal lines” on some of the bubbles towards the upper right of the circles. You can also paint little dots throughout the water area for “tiny bubbles”.
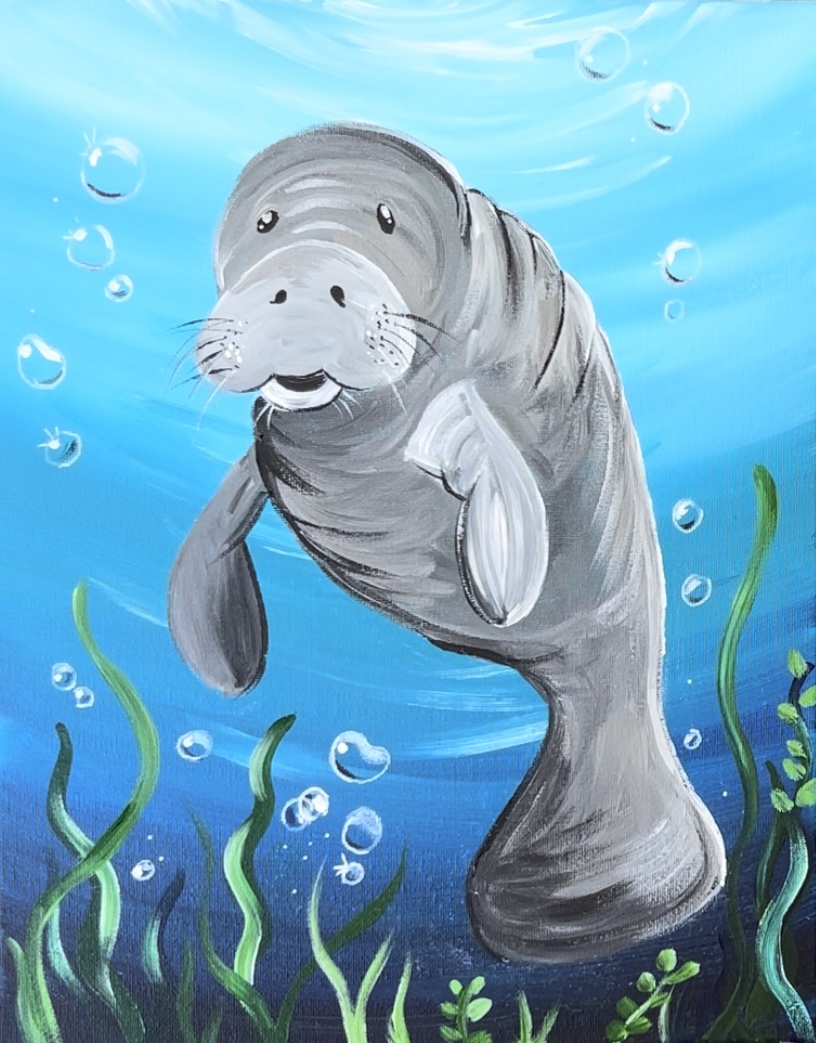
Finished!
Sign your name and show it off!

My kids wanted to try painting, possibly ornaments for the holidays.
I came across your website and just wanted to say these are amazing! I’m so grateful for you putting these tutorial online. Your step by step instructions are awesome! My boys are 9 and 11 and especially the 11 year old is ready to do things more on his own.
MY 9 year old loves manatees and I can’t wait to share this with him.
Thank you!
Shannon