Would you like to save this?
This tutorial will show you how to paint magnolia tree branches at night with a luna moth. A luna moth has beautiful light green wings, long tails and markings that look like eyes.
Magnolias are large fragrant blooms that grow on the ends of magnolia branches. We will be painting pink blooms, however, you are welcome to change the color of the blooms to white.
I do have an optional traceable template for this that you are welcome to use.
Enjoy and happy painting!
Materials Needed
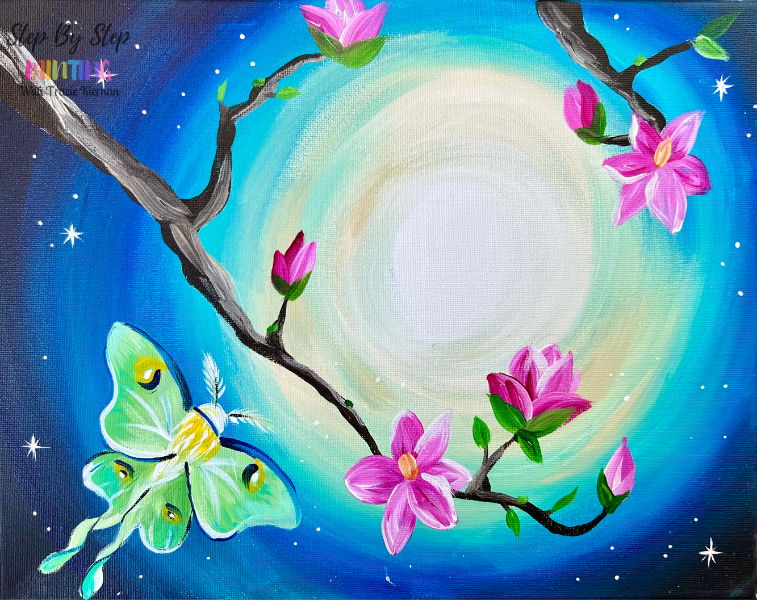
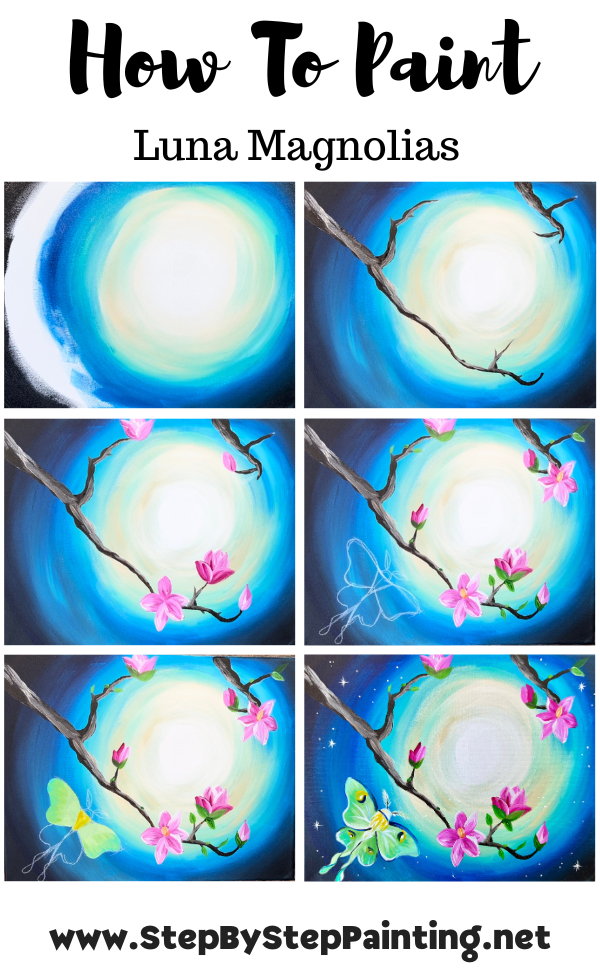
How To Paint "Luna Magnolias"

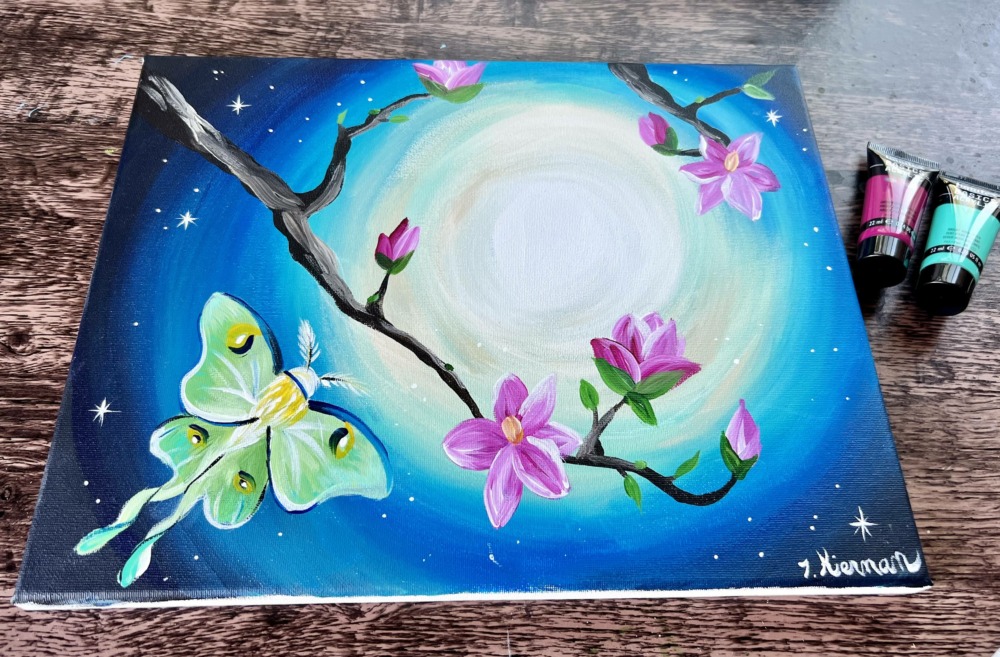
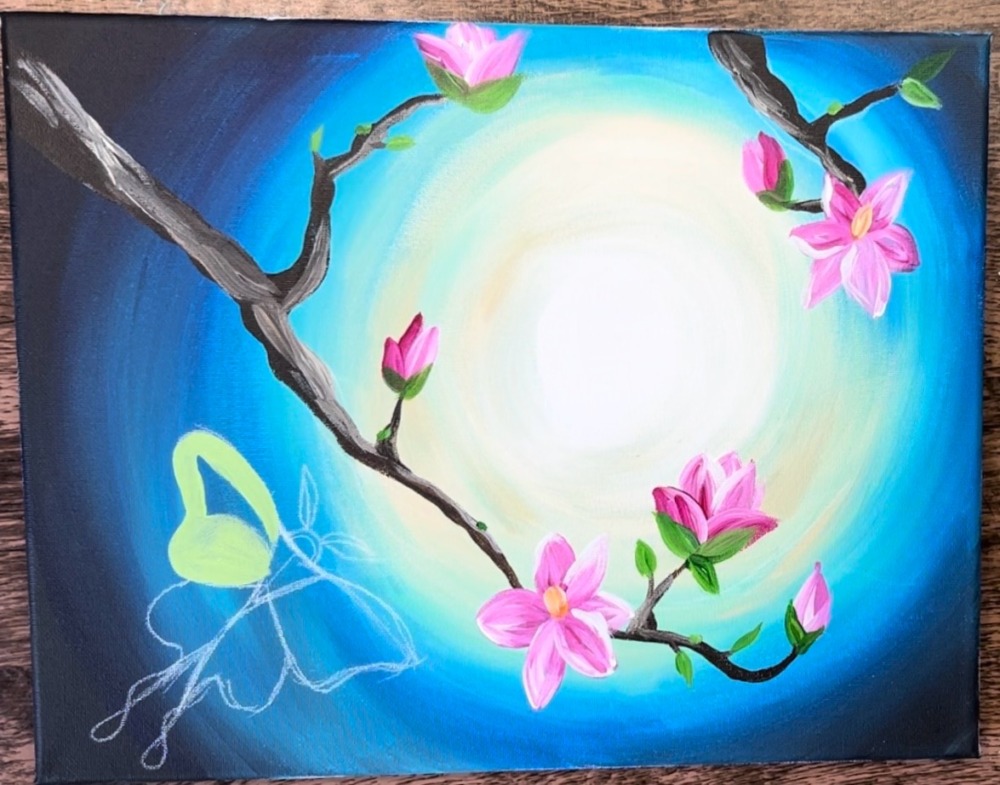
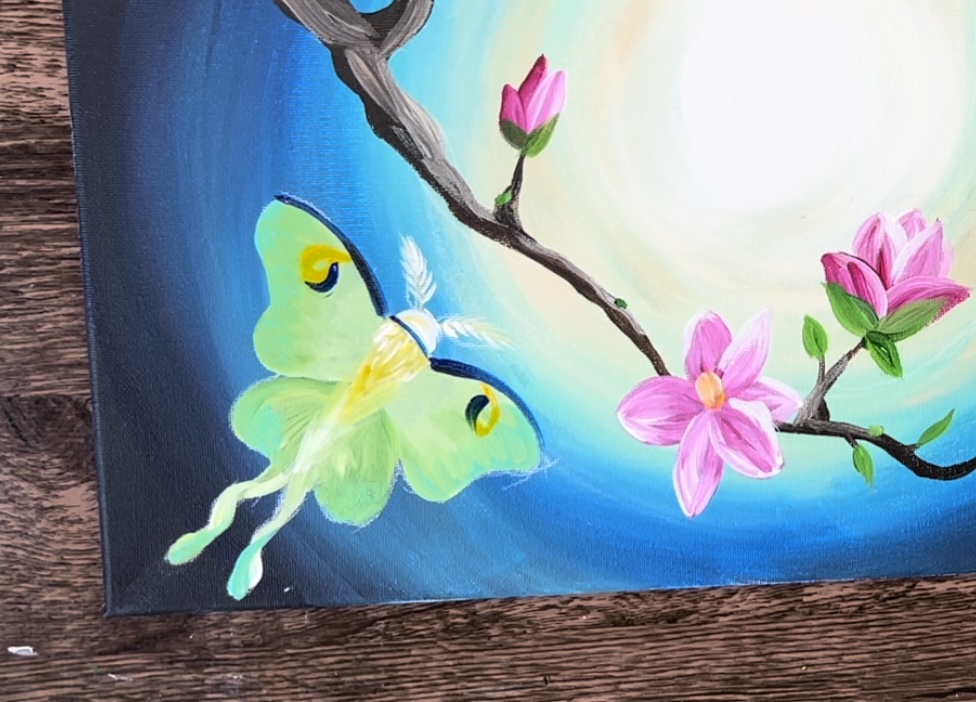
Paint a "Luna Moth" flying towards a moon surrounded by magnolia flowers.
Materials
- 11 x 14 Canvas (or any size)
- Acrylic Paint
- Brushes (Princeton Velvetouch)
- Pencil (I used a white chalk pencil)
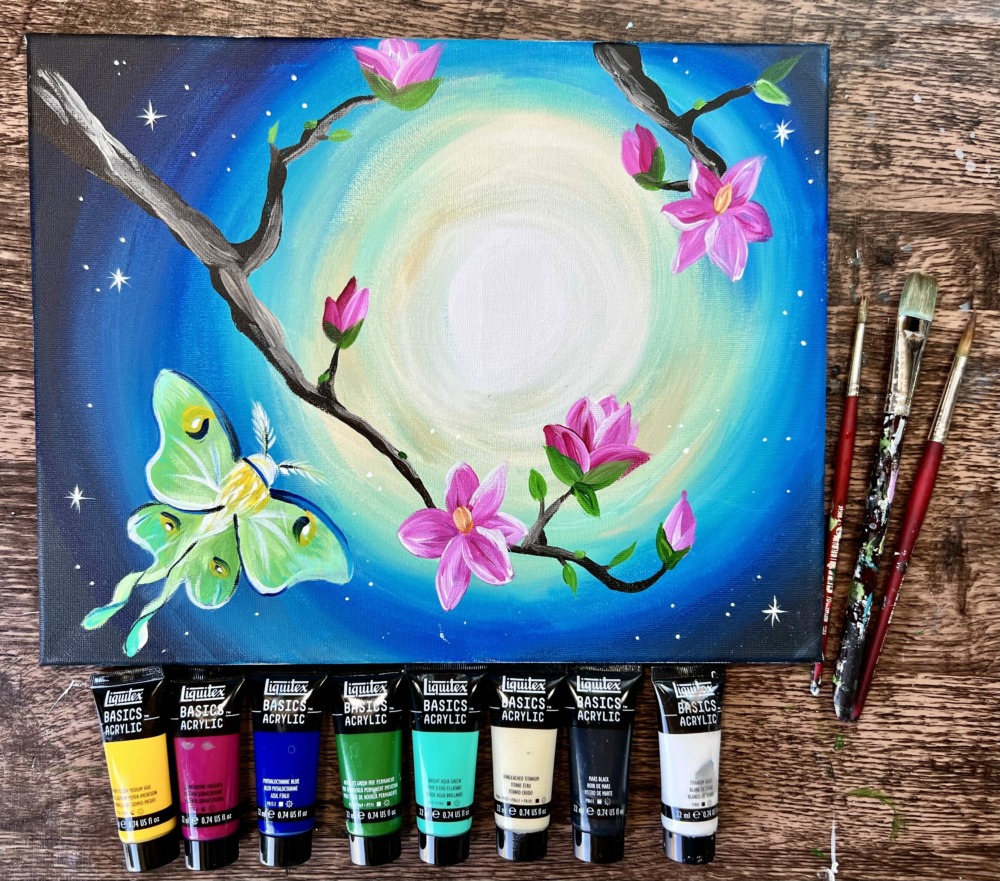
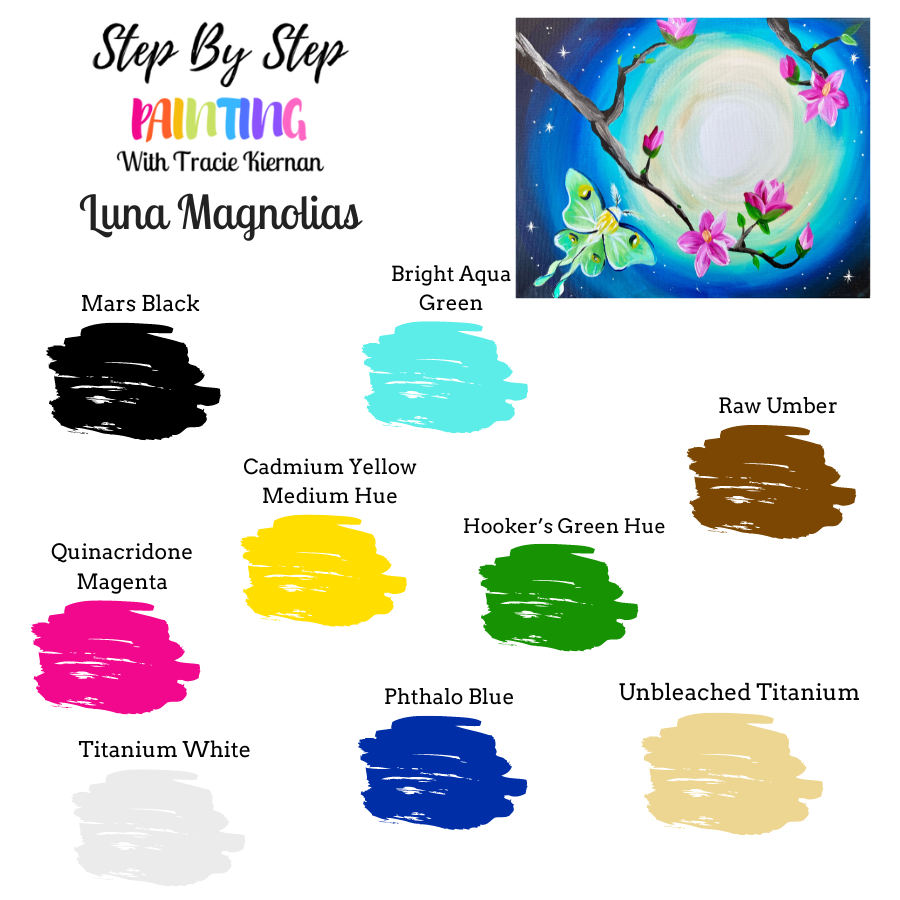
Colors
- Titanium White
- Mars Black
- Quinacridone Magenta
- Raw Umber
- Unbleached Titanium
- Hooker's Green Hue
- Cadmium Yellow Medium Hue
- Bright Aqua Green
- Phthalo Blue
Brushes
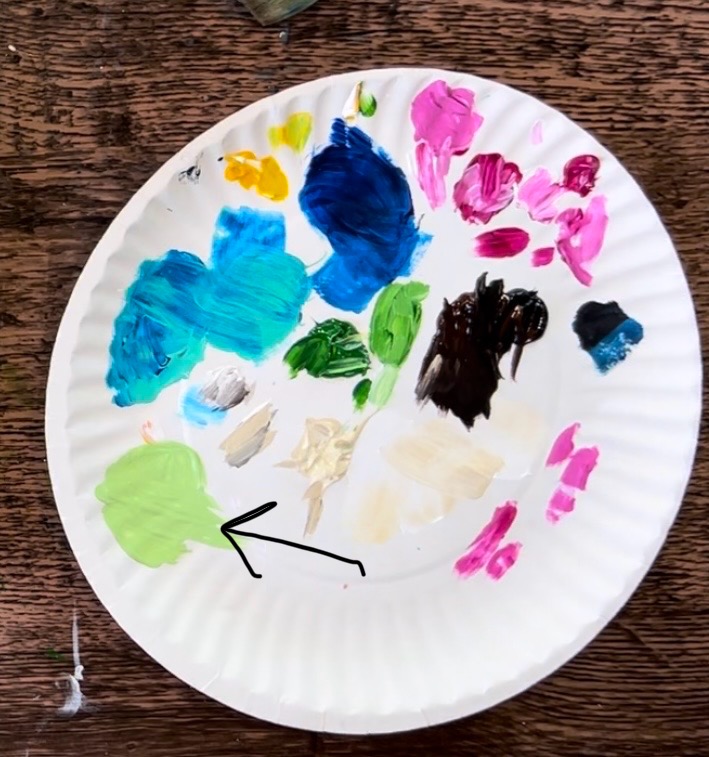
Color Palette
Directions At A Glance
Optional Traceable

Video
Step By Step Instructions
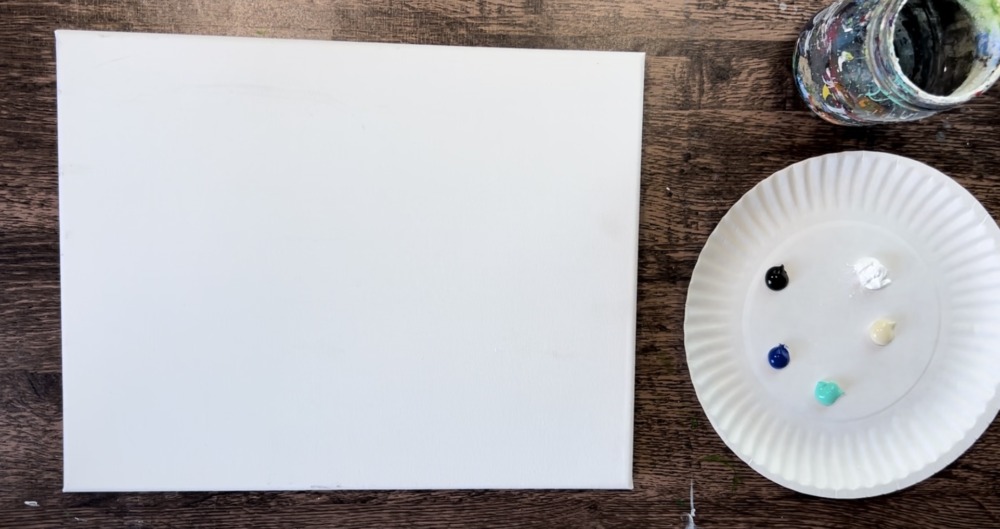
1. Paint The Sky
Load your paint palette with the colors: titanium white, unbleached titanium, bright aqua green, phthalo blue and mars black. These will be the colors we will blend into the sky.
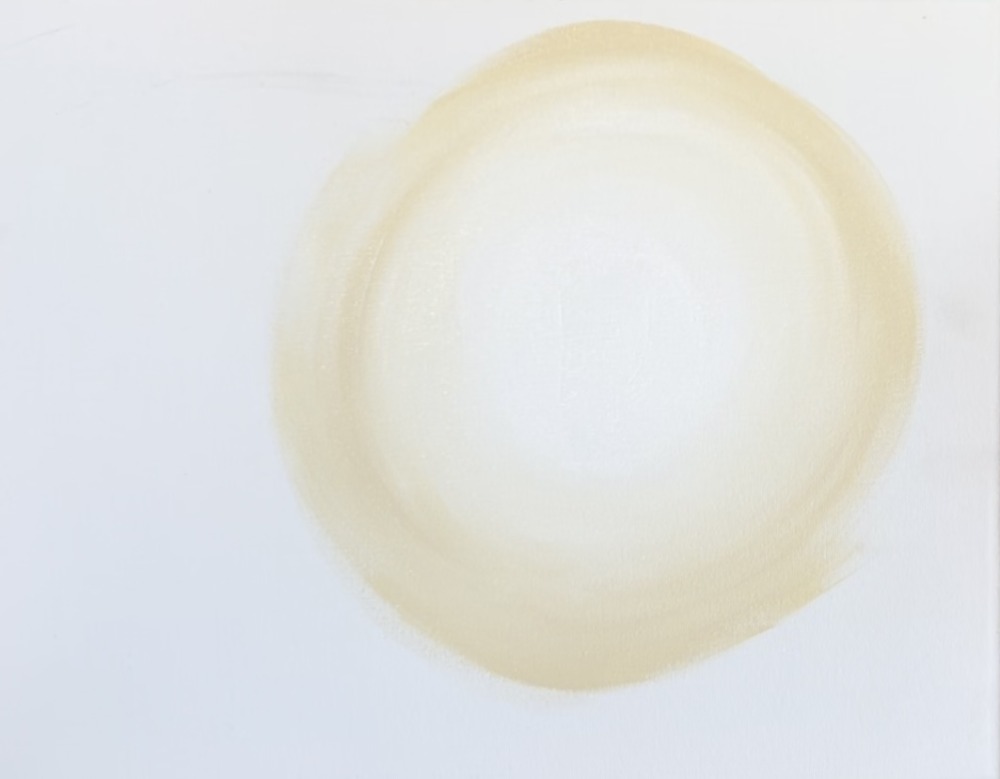
Load your 3/4 wash brush into “titanium white”. Paint a large circle in the upper right area of the canvas that is about 6″-7″ in diameter. This should be a relatively thick layer of paint.
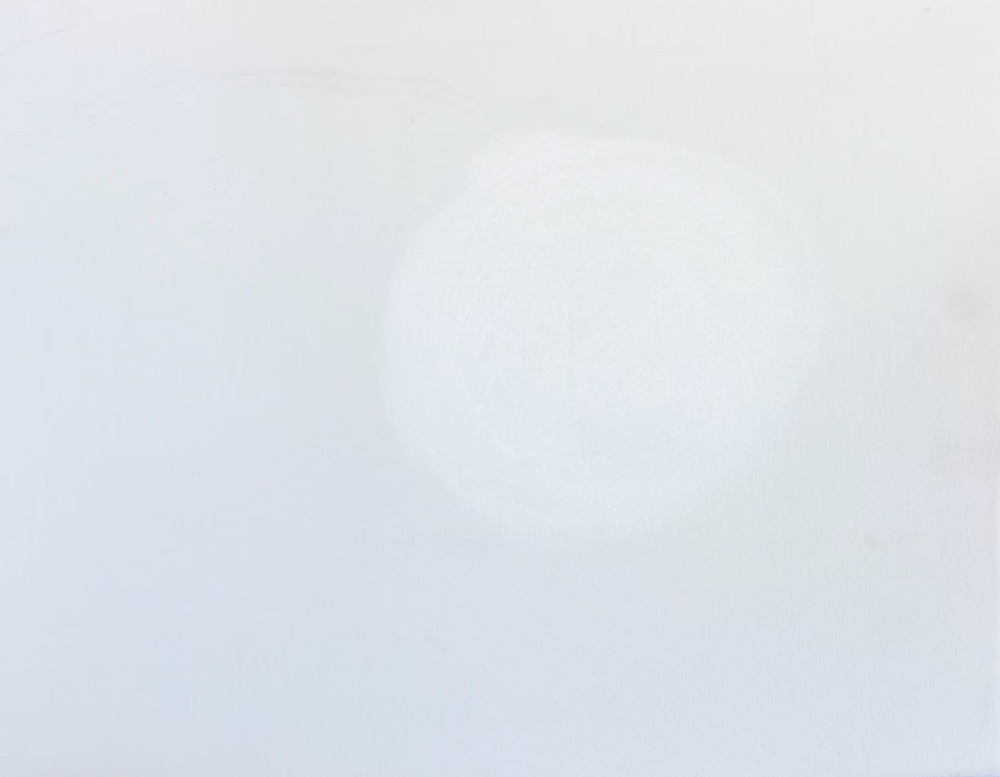
Then, without rinsing the brush, load a small amount of “unbleached titanium” onto your brush. Blend it into the sky by starting on the outside of the white circle and blend “wet on wet” into the white layer. Leave the very center of that circle bright white. Then blend more of the beige color outwards.
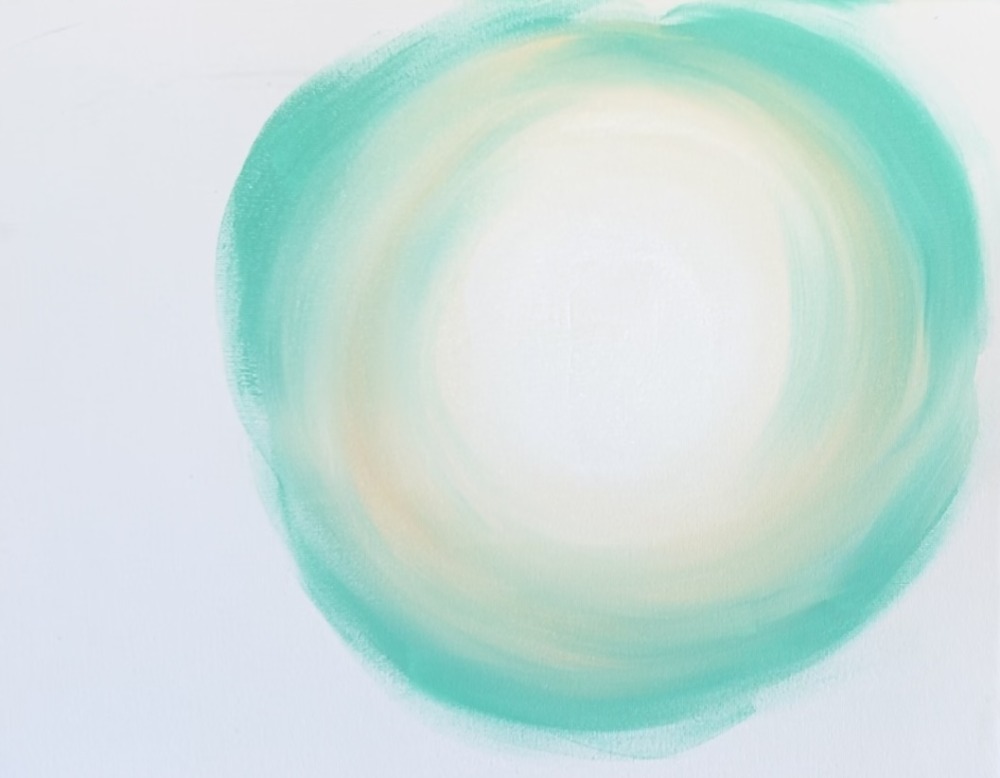
Then, without rinsing the brush, load a small amount of “bright aqua green” on your brush. Gently blend that aqua into the beige without over blending it. Then paint more aqua, working your way outwards in a circular direction towards the edges of the canvas.
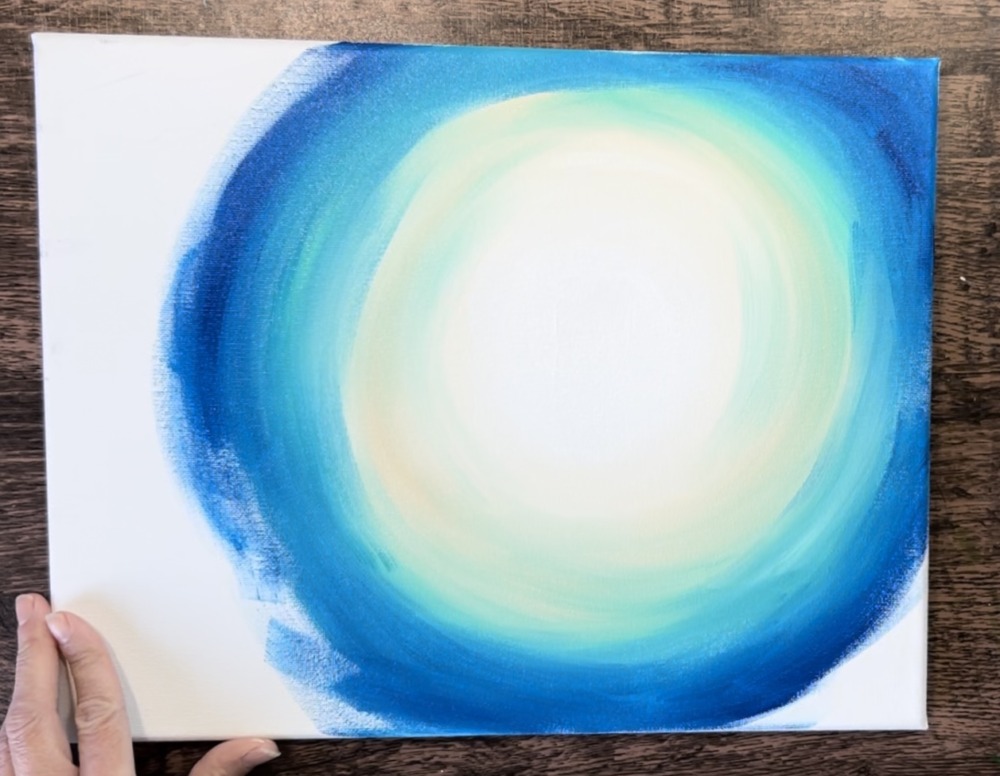
Without rinsing your brush, load it into “phthalo blue”. Gently blend this dark blue into the aqua without over blending it. Be very careful with this dark blue because it will take over too fast if you add too much to your brush!
As you approach the corners of the canvas, load a small amount of “mars black” onto your brush. Paint the corners with a very conservative amount of black. Blend the black into the blue and make sure you are still going in a circular direction. The far left of this sky has black so I skipped ahead and added black in this area too.
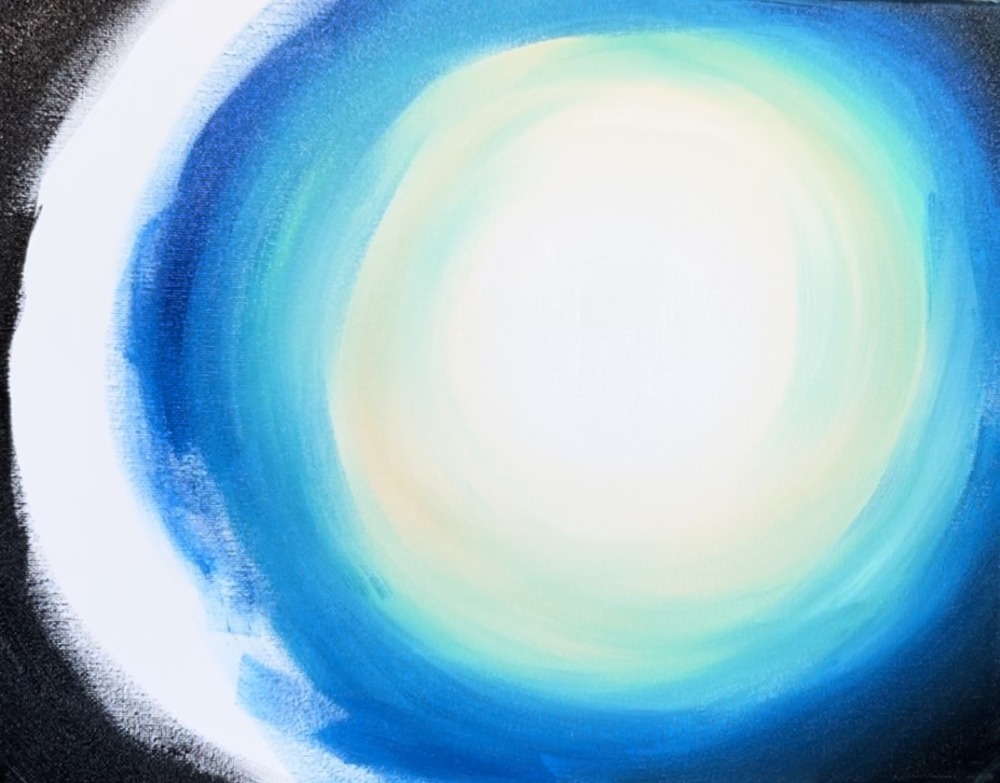
Then blend more of the phthalo blue into the black.
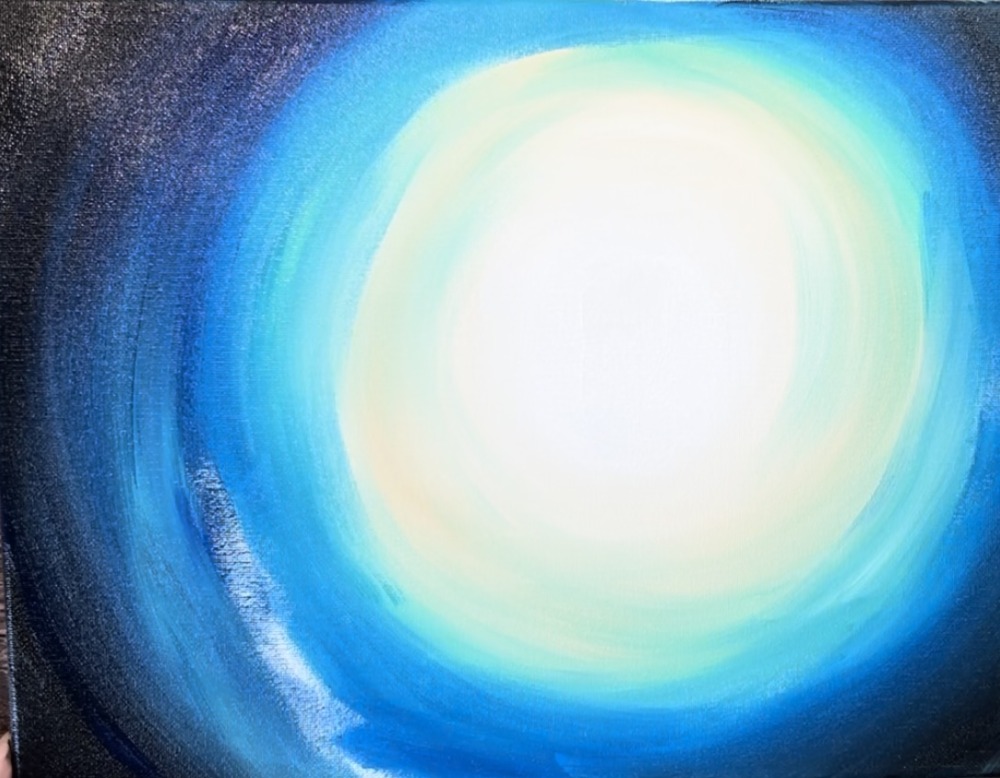
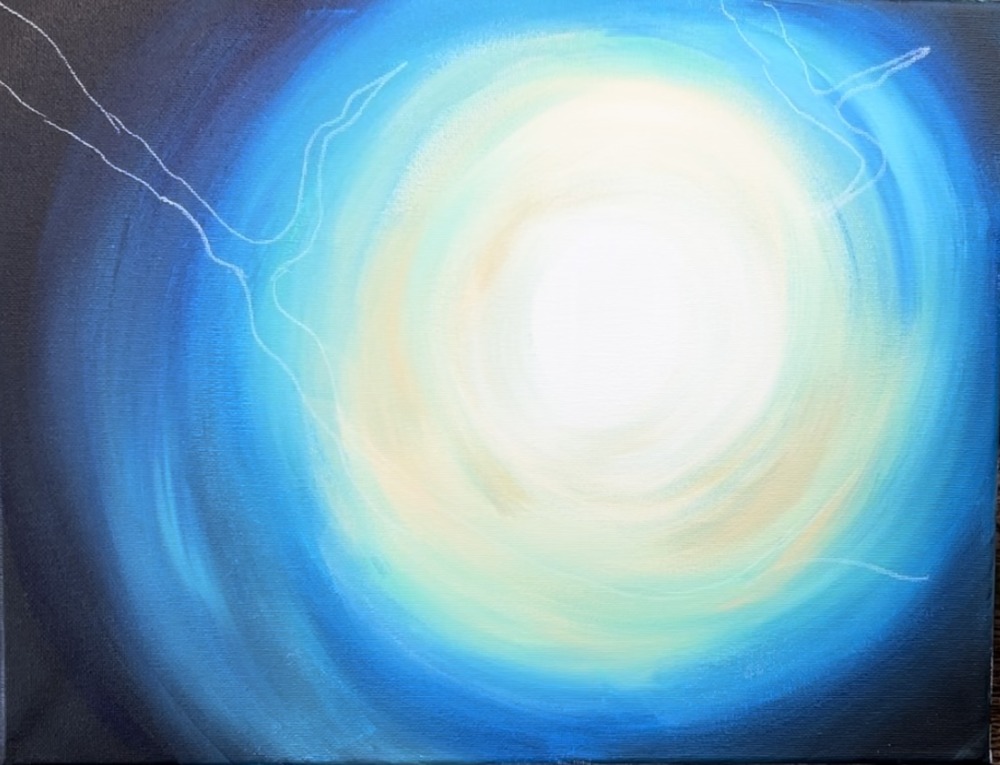
Gently blend the colors. Remember to not over blend all of the sky. If needed, go back and add more beige and/ or any of your other light colors. Make sure to leave the center moon bright white. If needed, you can go back and repaint the moon or even add details such as craters on the moon.

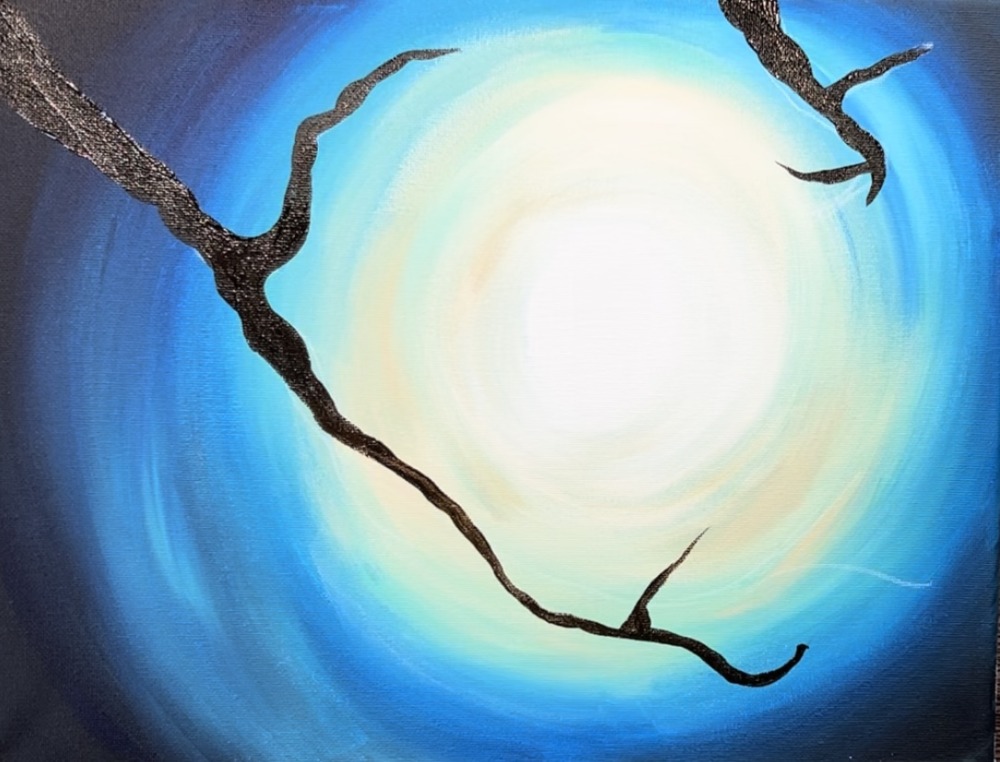
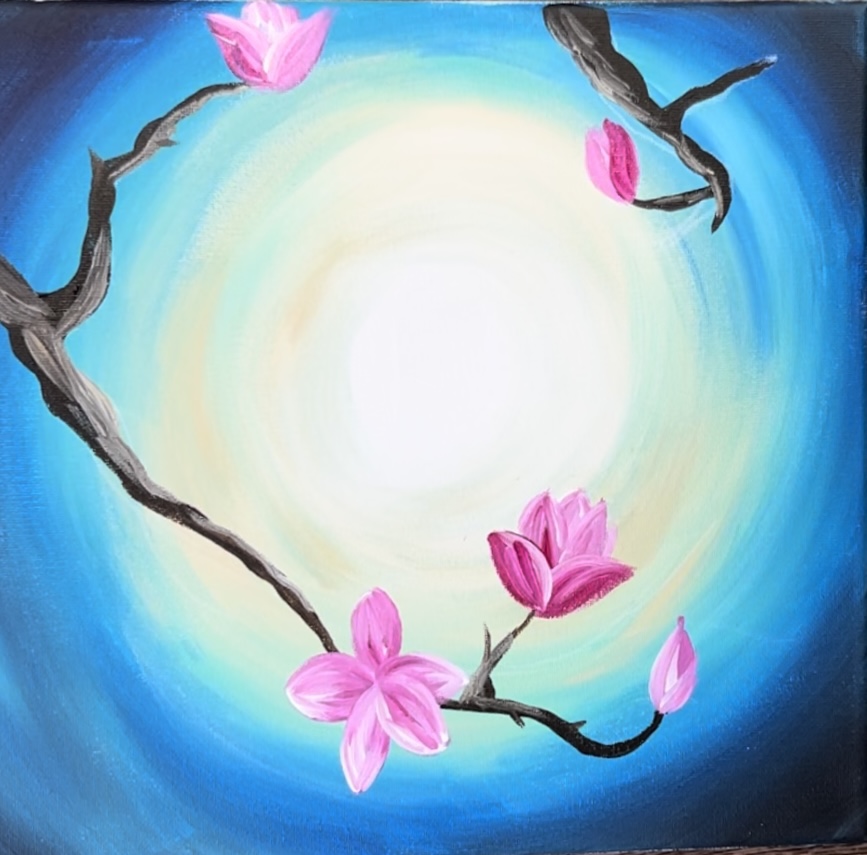
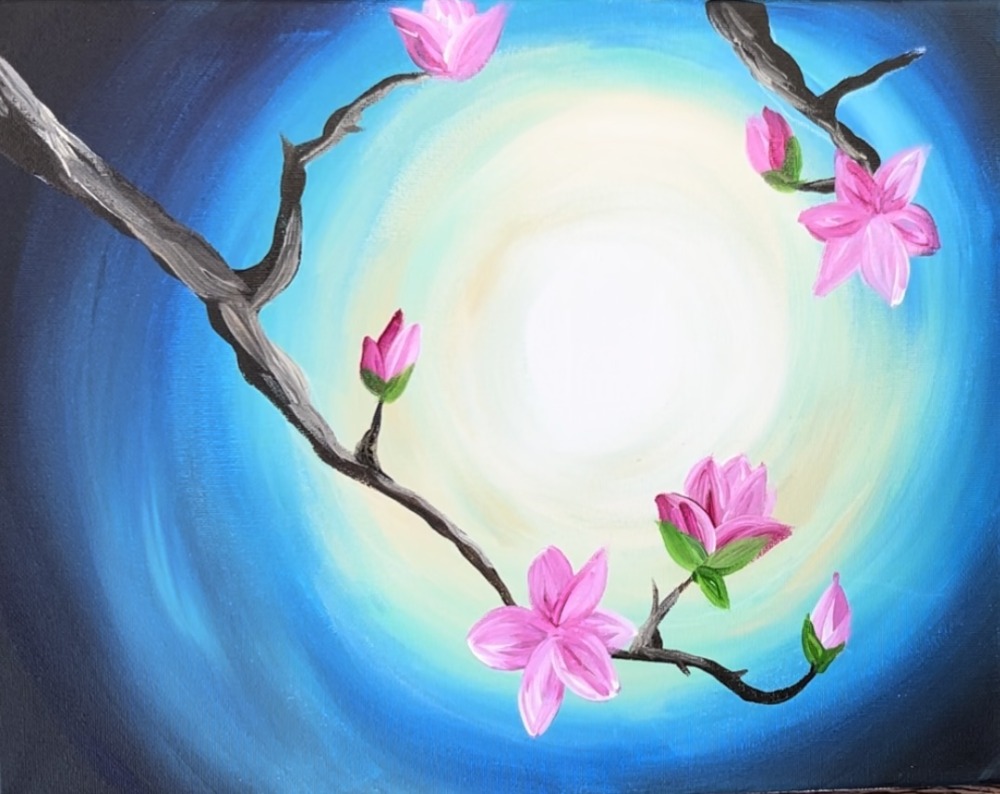
2. Draw & Paint Magnolia Branches
Wait for this to dry before going onto the next step. Use a white chalk pencil (or any pencil) to draw your branches. Magnolia tree branches are thin and twisty with all of the blooms pointing upwards. Draw a main branch on the left that swoops down under the moon. Then draw another branch on the upper right.
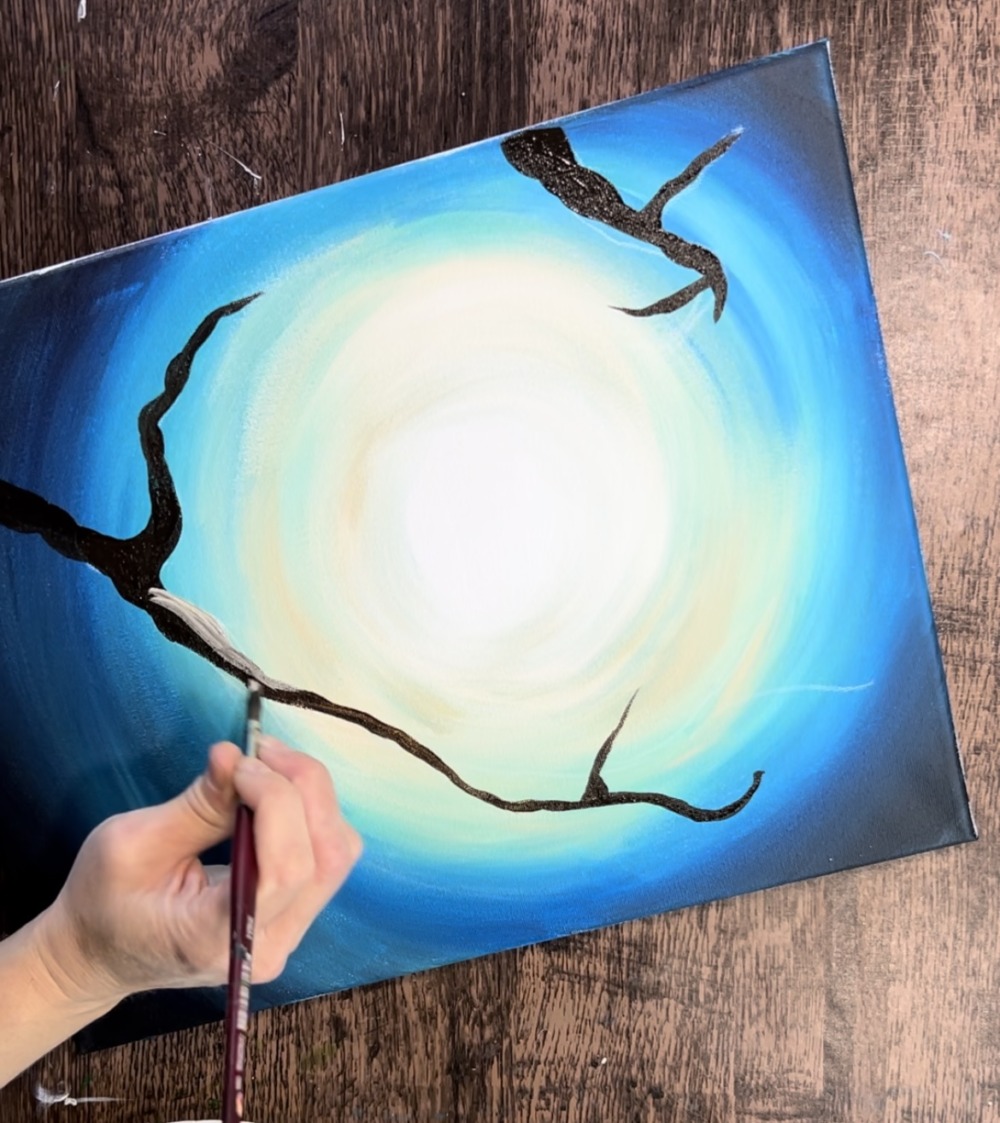
After drawing the branches, paint them in a solid coat of mars black/ raw umber. On your palette, mix equal amounts of black and brown together.
Then use the #8 round brush to paint the branches. As you are painting the branches, sort of “wiggle” your brush so the edges of the branches are a little wavy/ bumpy.
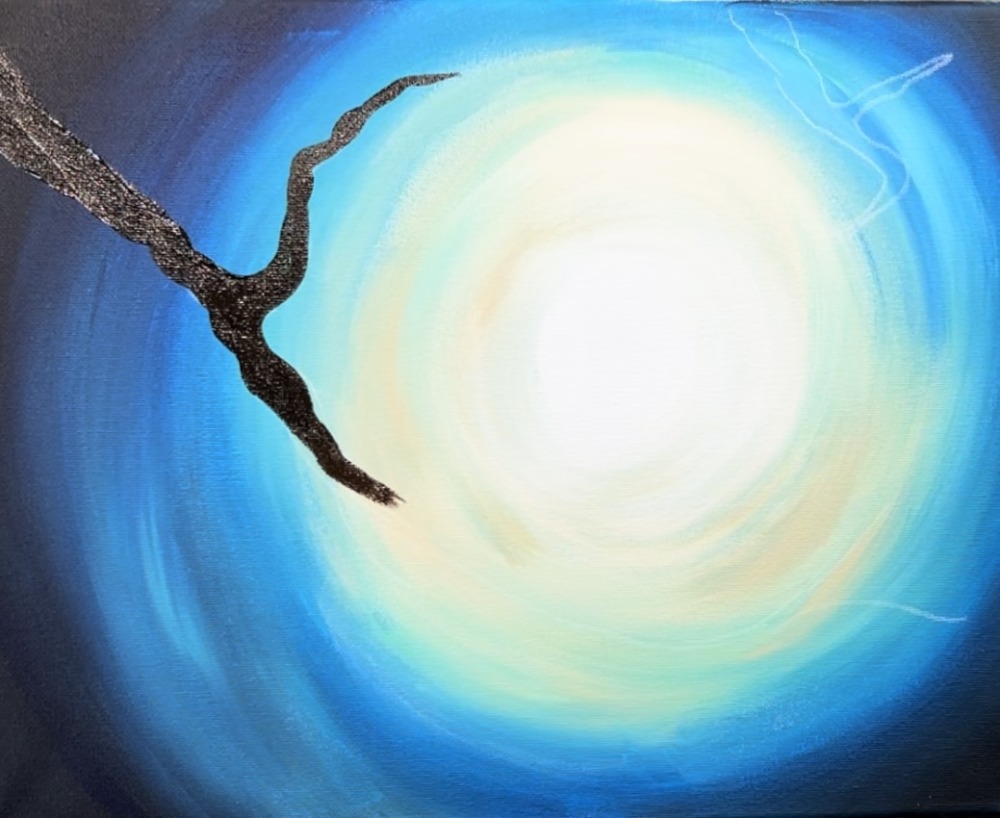
Use the small tip of the paint brush for painting the smaller points of the tree branches.
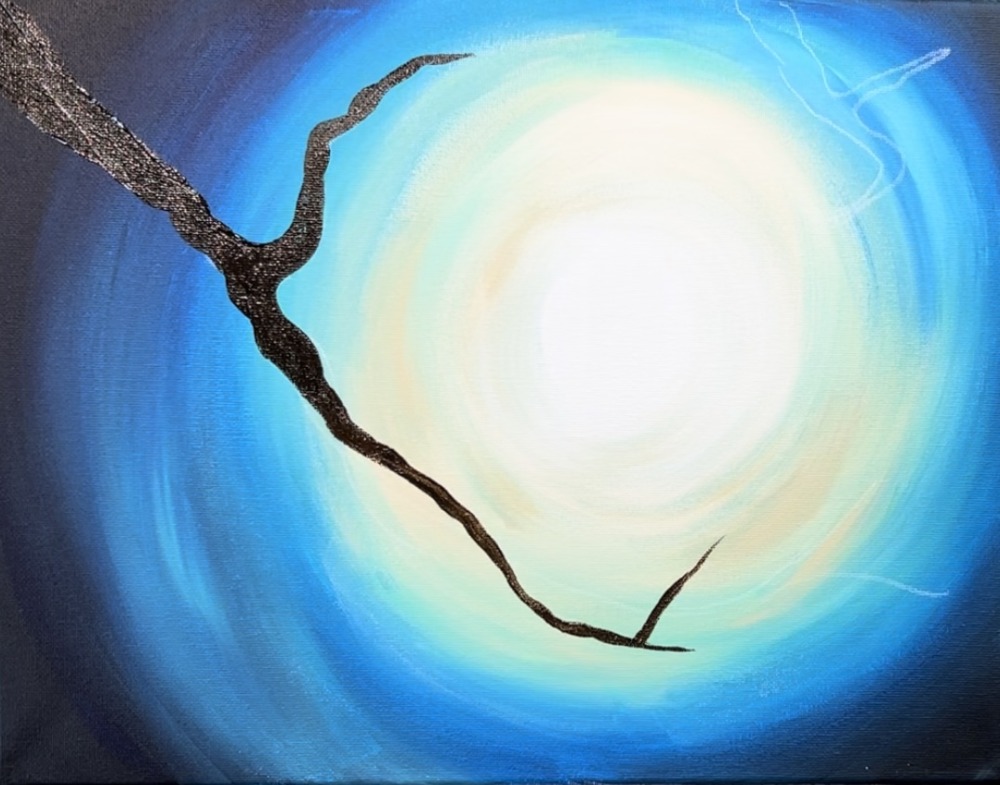
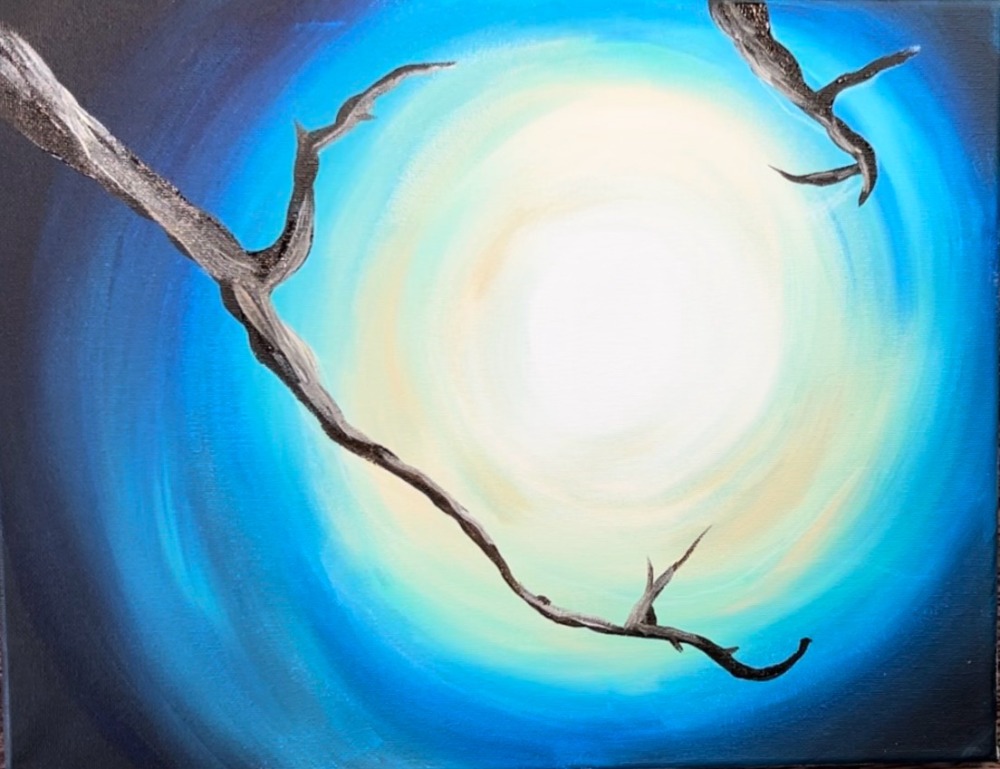
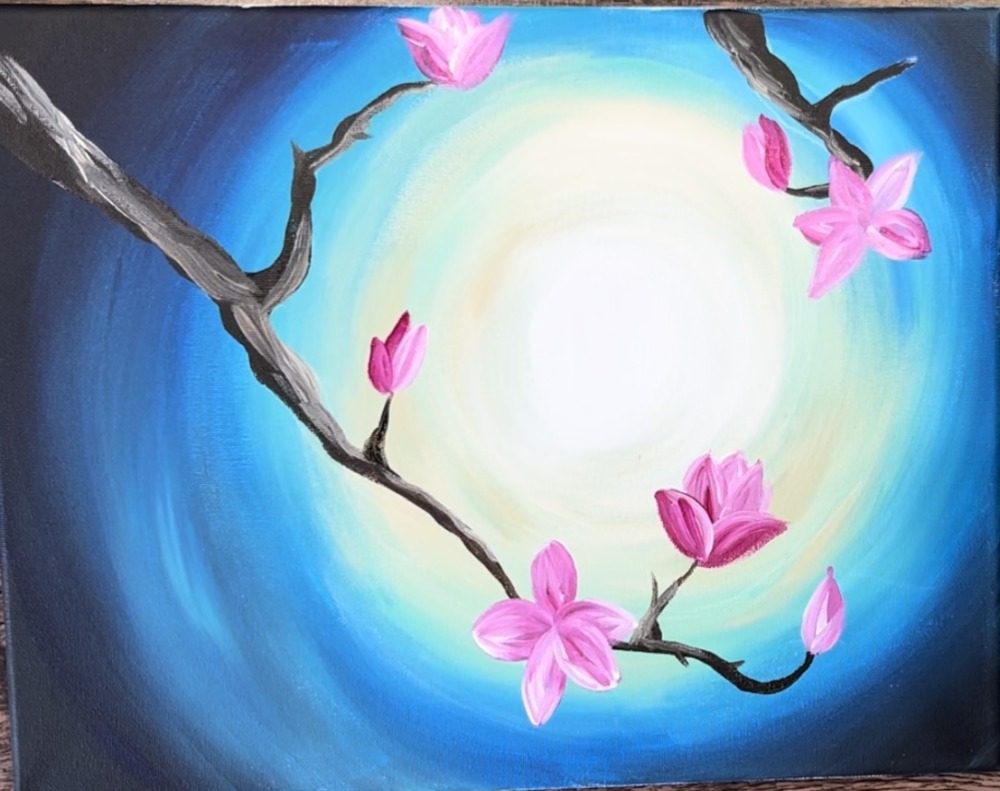
Highlighting the branches is optional if you are simplifying this painting.
To highlight the branches, mix a little “beige color” on your brush. You can rinse the black/brown off your brush or you can keep it as it will help to blend the color on the branches. Gently blend this lighter color on the edges of the branches that are facing the moon. Paint loose, wavy paint strokes.
Leave the darker part of the branch without the lighter color because this will be the shadowy side of the branch.
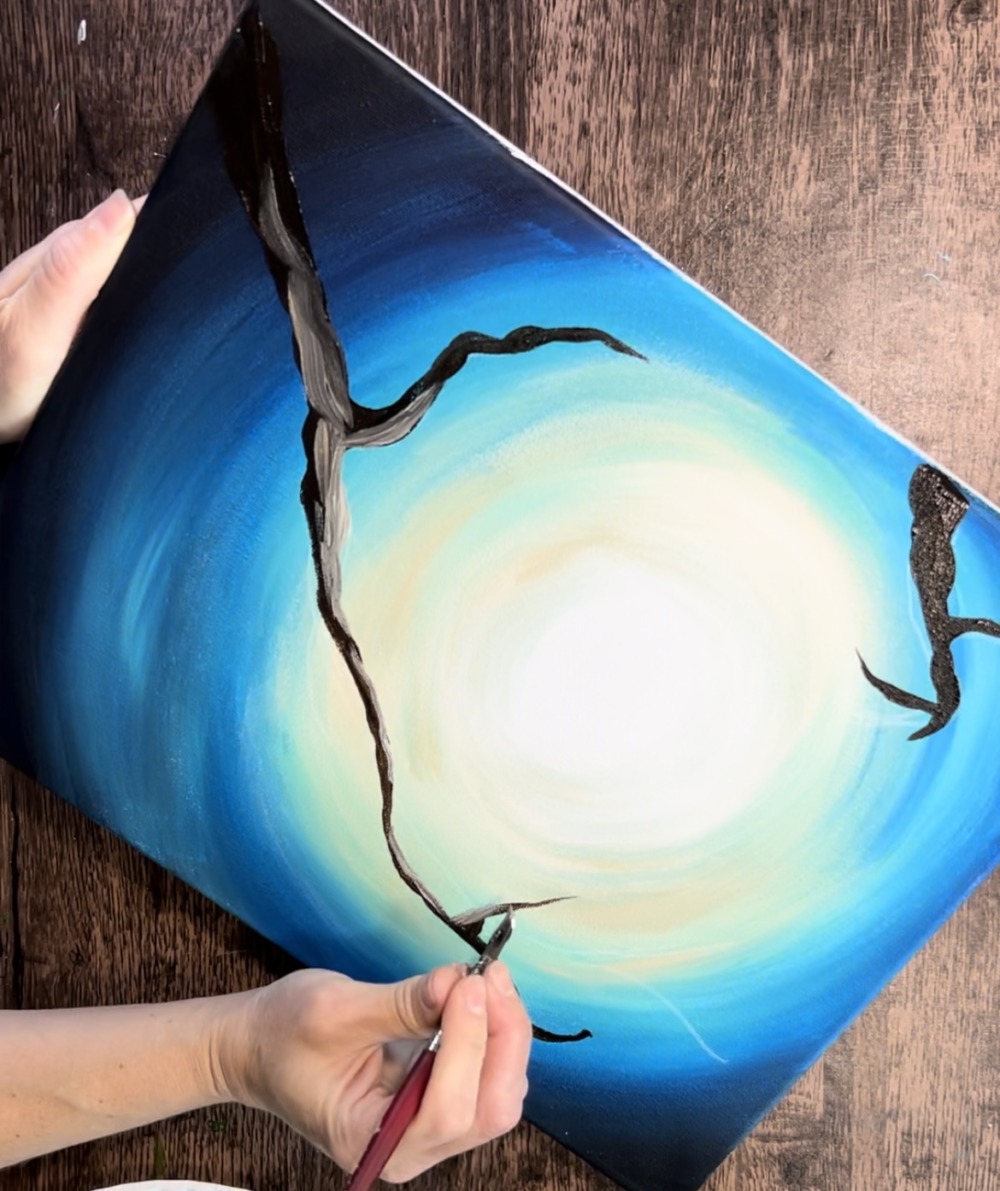
Do the same for the smaller branch in the upper left.
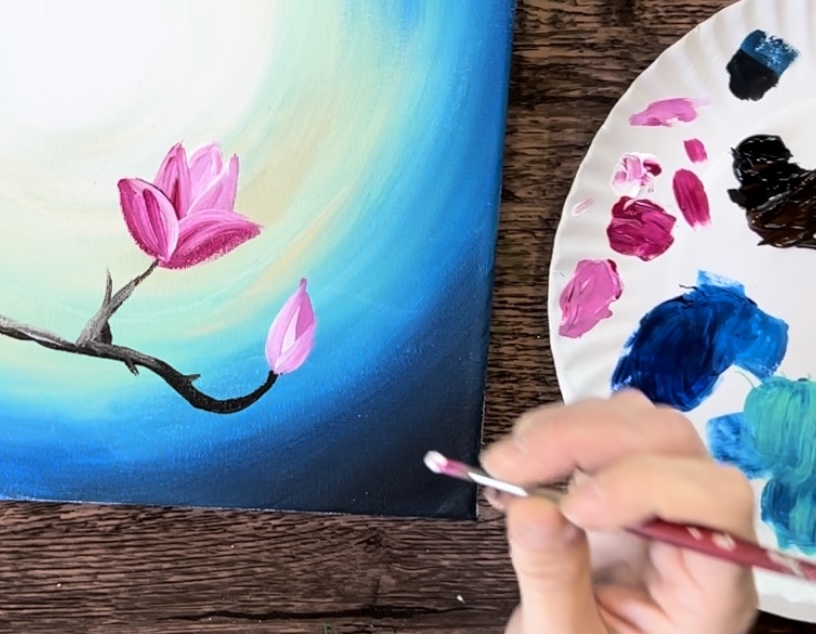
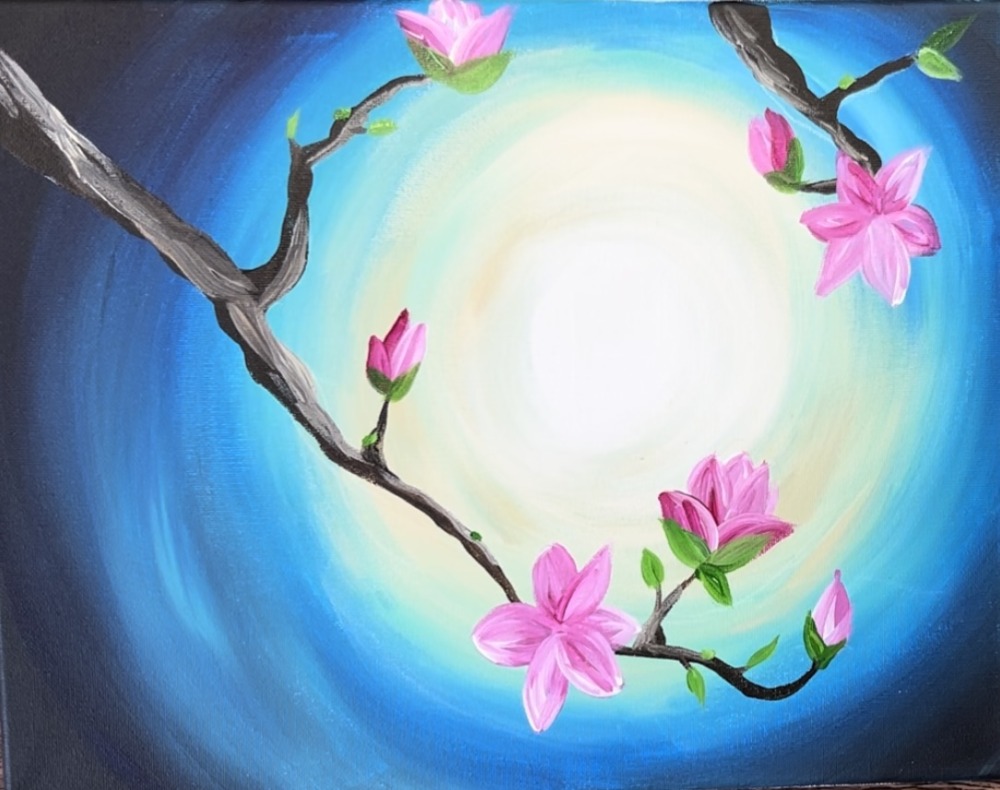
3. Paint Magnolia Flowers
Load your paint palette with “quinacridone magenta” and “titanium white”. Use the “#4 round brush” to paint your first flower bud. Paint a small teardrop shape with the magenta and white mixed together (it will make a lighter pink).
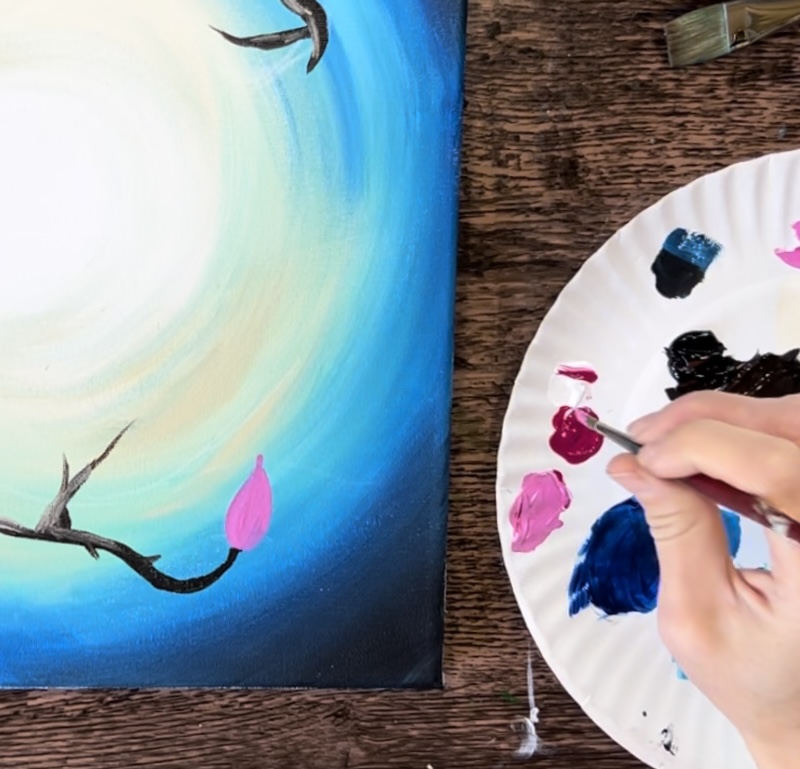
Then load your brush in a small amount of titanium white (without rinsing your brush). Paint a petal on the left of the bud but still sort of “hugging” the first bud shape. Then paint a second petal to the left of it. With each petal, you’ll want to “alter” the pink-white ratio so that each petal stands out.
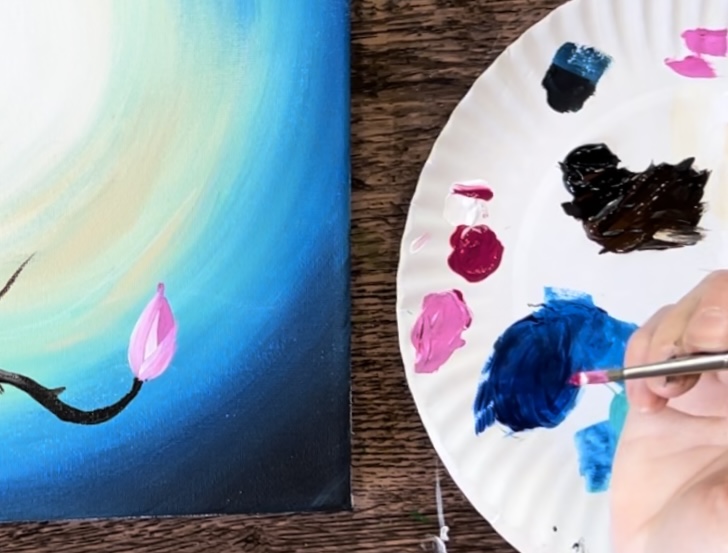
Next, paint another magnolia with blooms that are partially open. Paint a similar bud shape using the magenta and white.
Then load your brush into more of the magenta. Paint two more teardrop shapes that overlap your center petal.
Then paint another set of petals that or slightly more curving outwards.
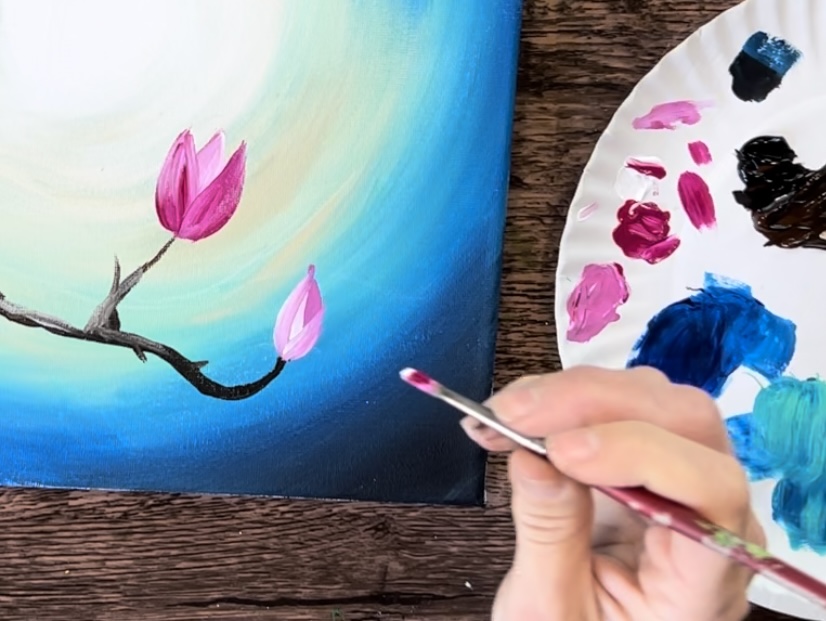
Paint a magnolia flower that is fully open. Do this by painting petals that slightly overlap each other but go in a full circle.
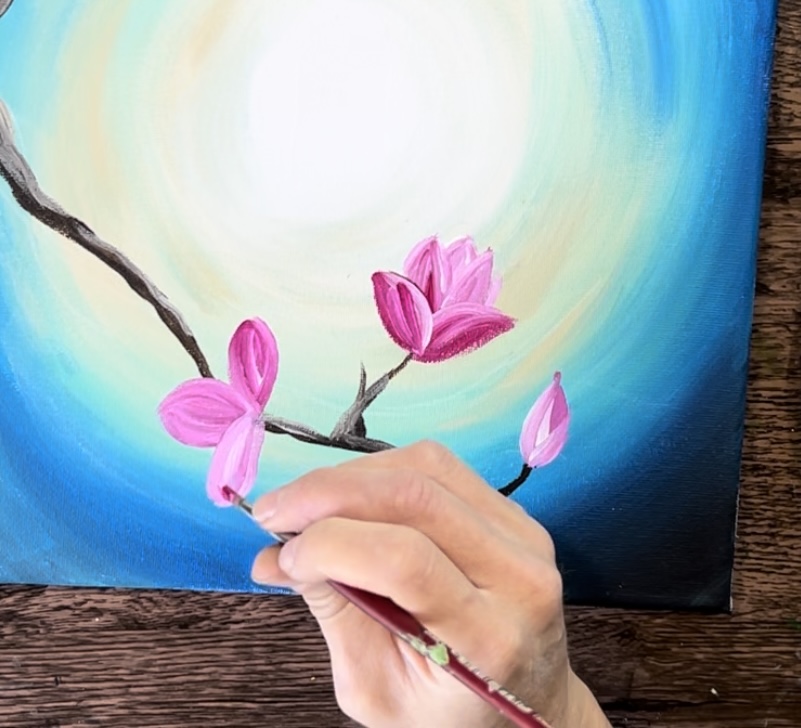
Continue to vary the magenta and white so that each petal stands out.

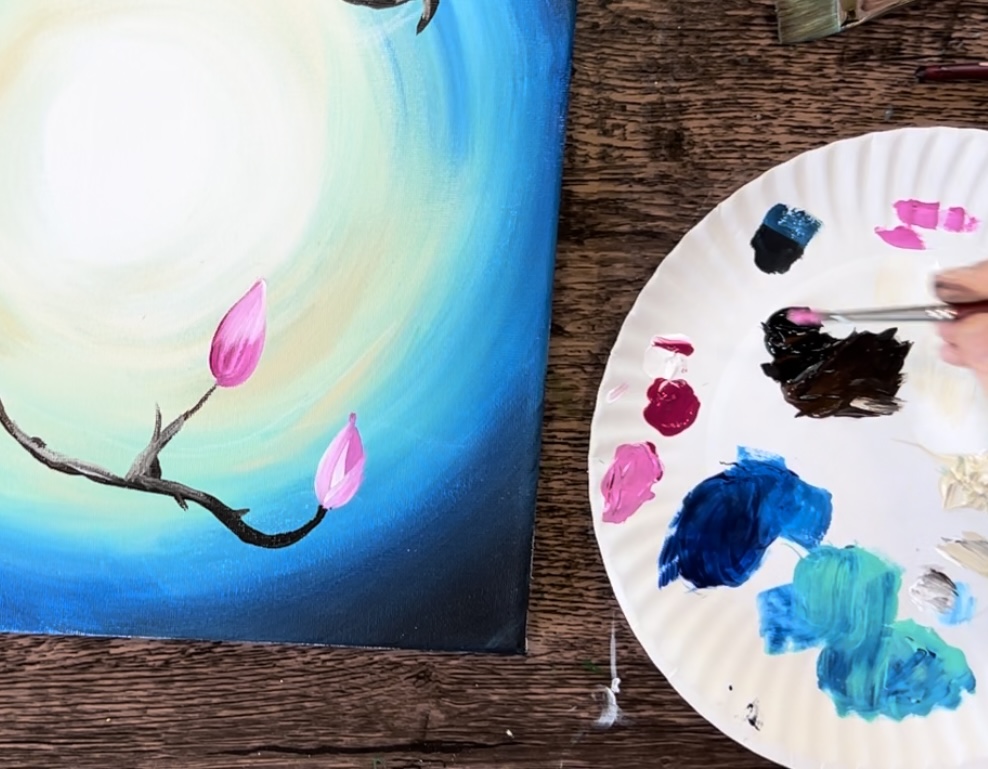
Paint another magnolia flower on its side and slightly open. Then paint another bud flower.
Paint another magnolia bud on the left (I added another small section of a branch).
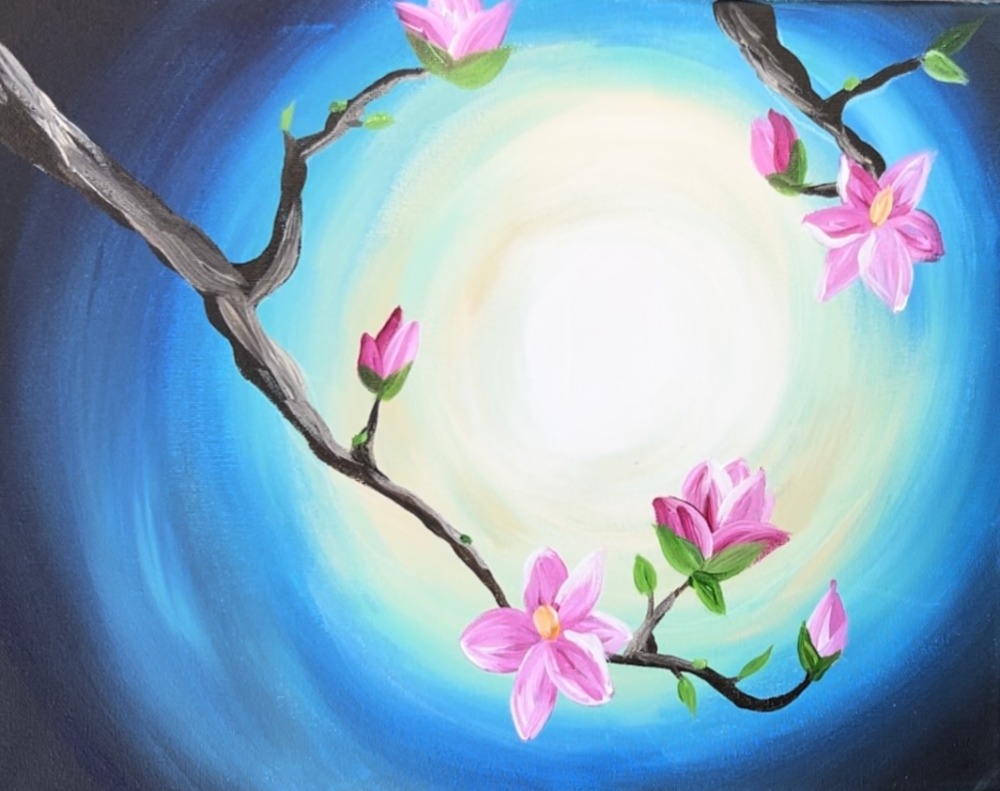
4. Paint Leaves
Load your paint palette with “hooker’s green hue”. Mix a little “titanium white” into the green. Use the #4 round brush to paint little leaves on the bottoms of each of the flower blooms/ buds.
Then paint a few small leaves on the ends of some parts of the branches. You can be minimalistic with these leaves.
Then, when your two opened blooms are dry, paint a small yellow oval shape in the center of the magnolias. Do this with yellow mixed with a little bit of white and use the #4 round brush.
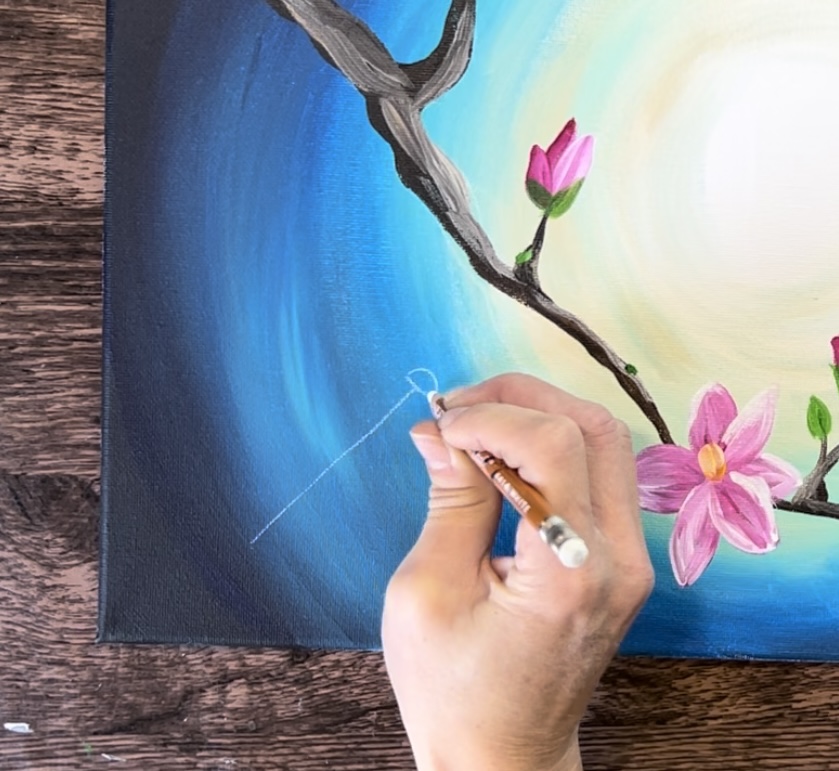
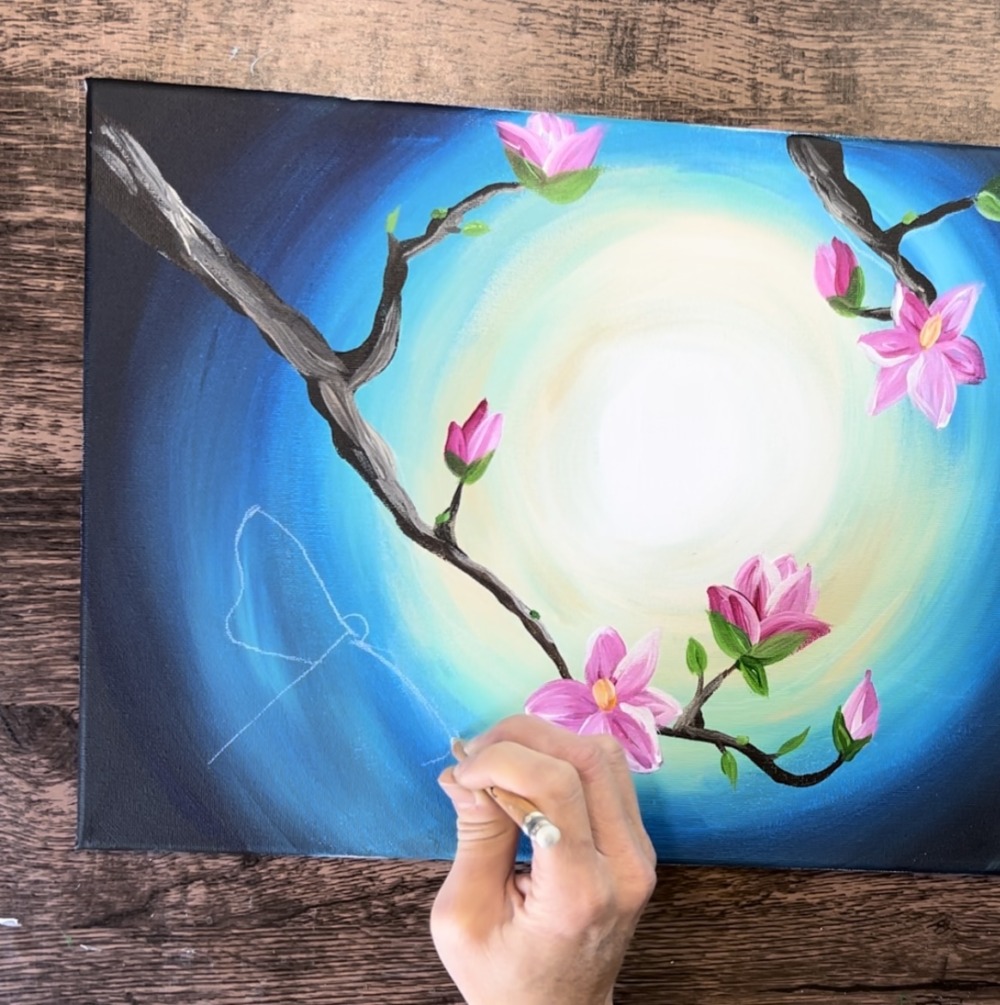
5. Draw & Paint Luna Moth
If you want to trace the moth on your canvas, you can print this out.

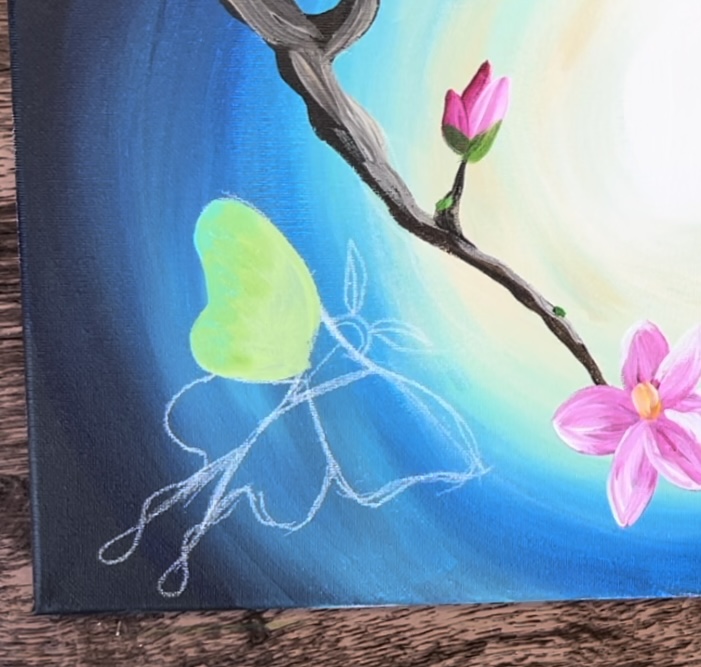
I used a white chalk pencil to draw the moth, however, you can use a regular drawing pencil. Draw a diagonal line in the lower left corner of the painting. The diagonal line is about 2.5″.
The wing span is about 5″ wide. Draw the two upper wings.
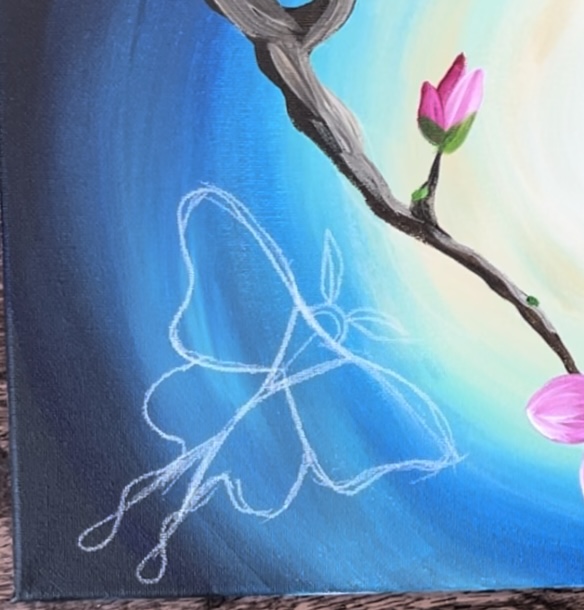
Draw a triangle in the middle then draw two curved lines for the bottom parts of the wings.
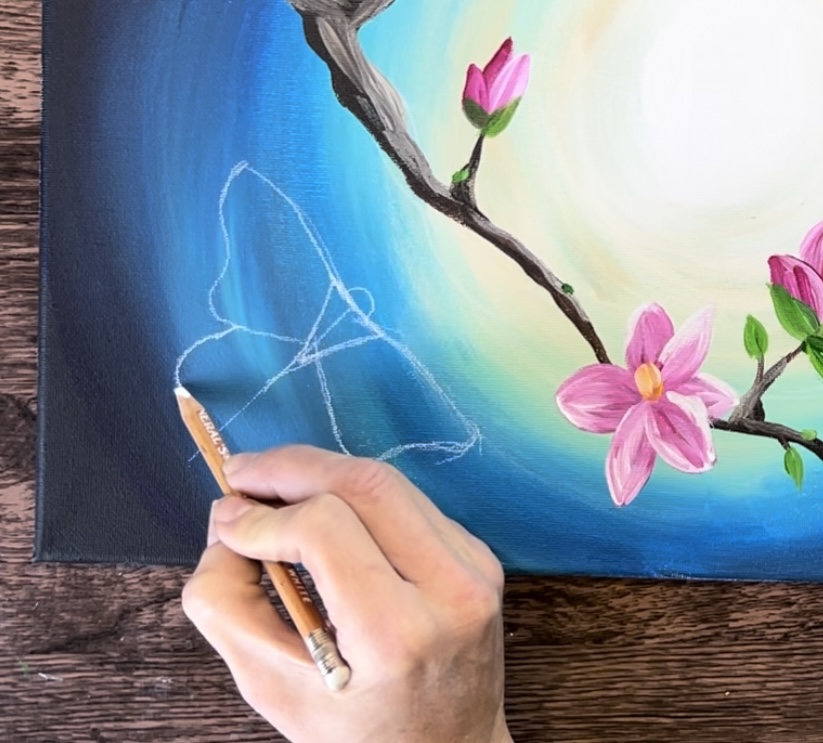
Draw the tail. These are two thin and twisting lines.
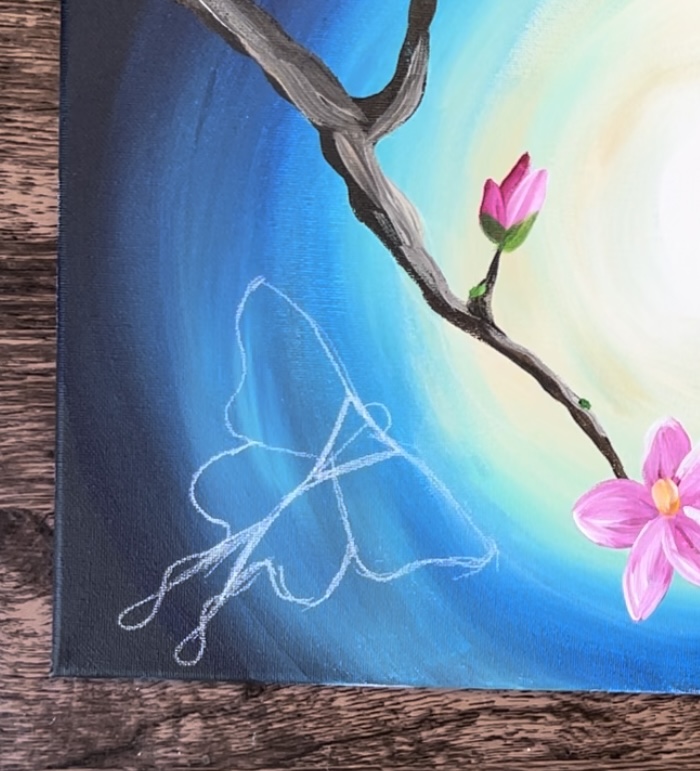
Then draw the antennae as two diagonal lines and form them into more of a leaf/ feather shape.
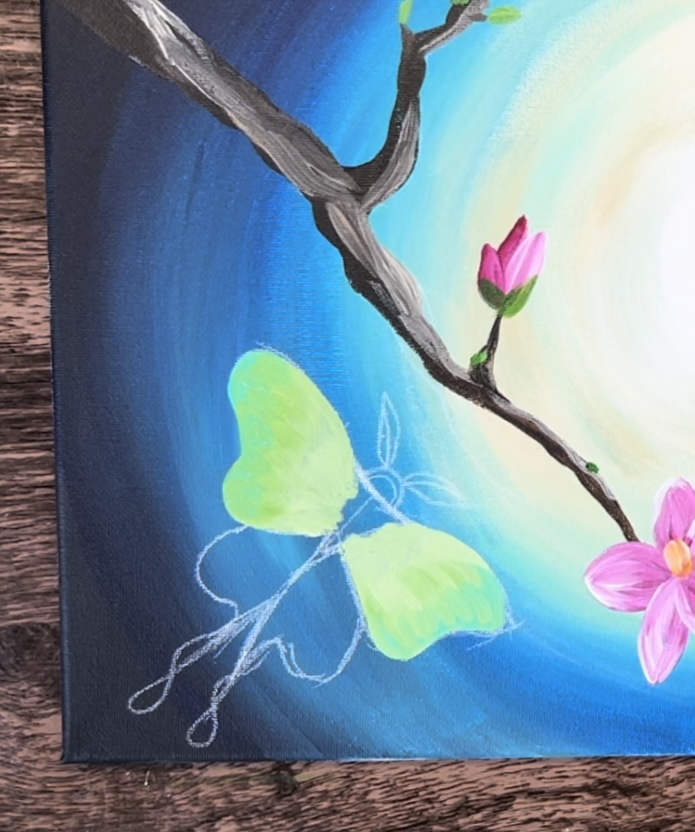
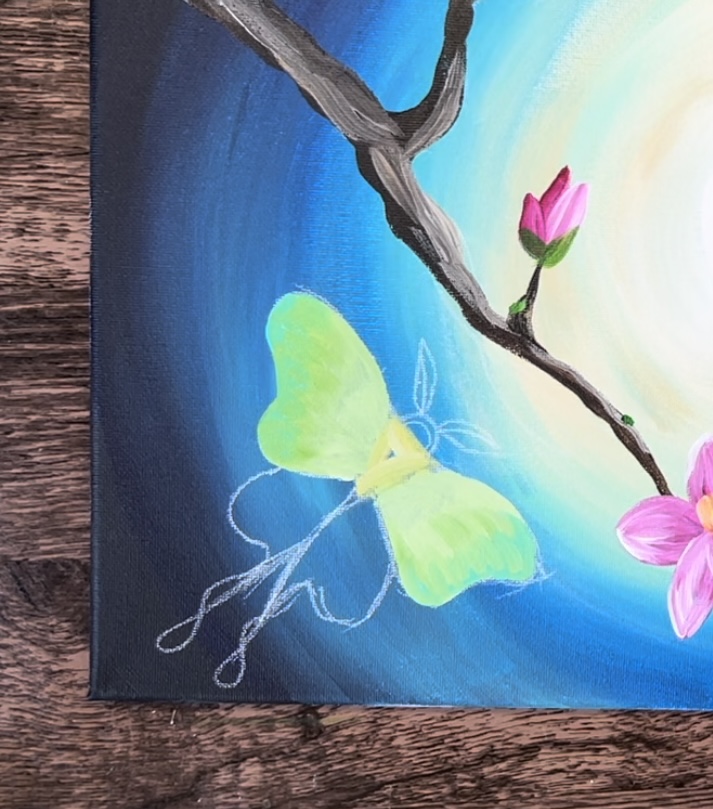
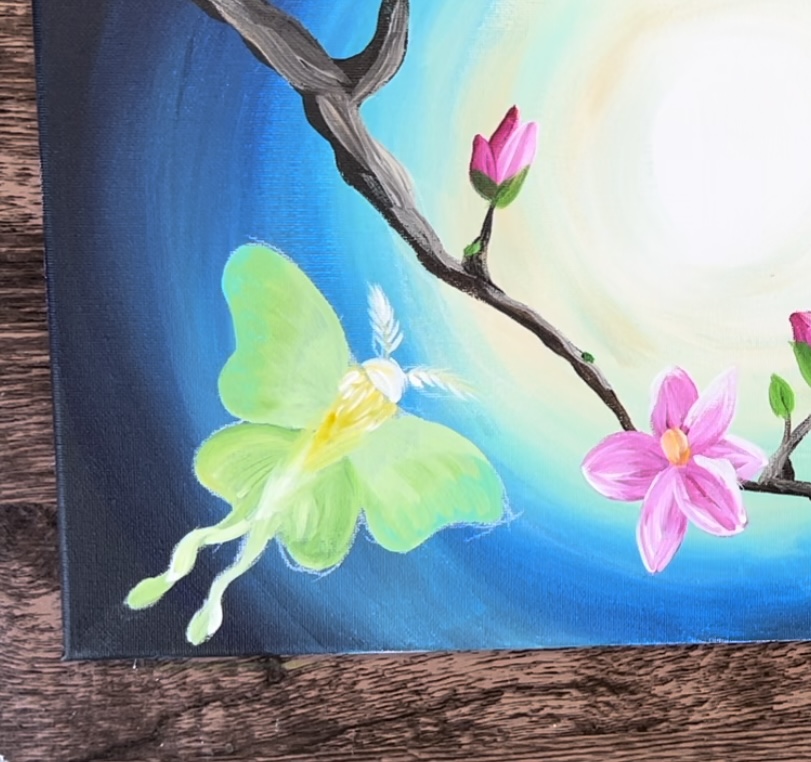
Then paint the moth using a #4 round brush. Mix a “light lime green” on your palette by mixing 1 part “cadmium yellow medium”, 1 part “hooker’s green hue” and 3-4 parts “titanium white”. This color does not have to be exact.
Paint the upper wings first. It is helpful to outline the shape of the wing first and then fill in solid.

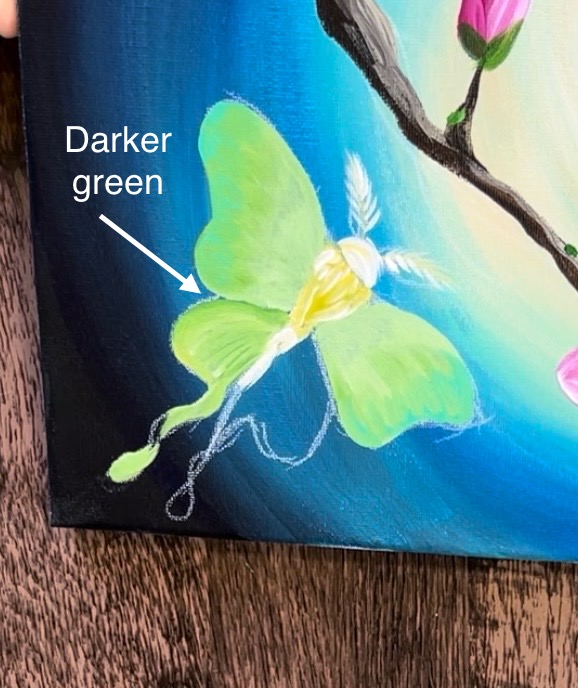
At the far left end of the butterfly wing, blend (wet on wet) a small amount of darker green (add more green to your light green). Then blend a little bit of “bright aqua green” into the far left edge of the wing. This will give the wing a really pretty color variation.
Repeat this on both wings.
Mix “cadmium yellow medium” and “titanium white” together to make a light yellow. Paint the upper triangular area/ abdomen.
Paint the “half circle shape” head titanium white.
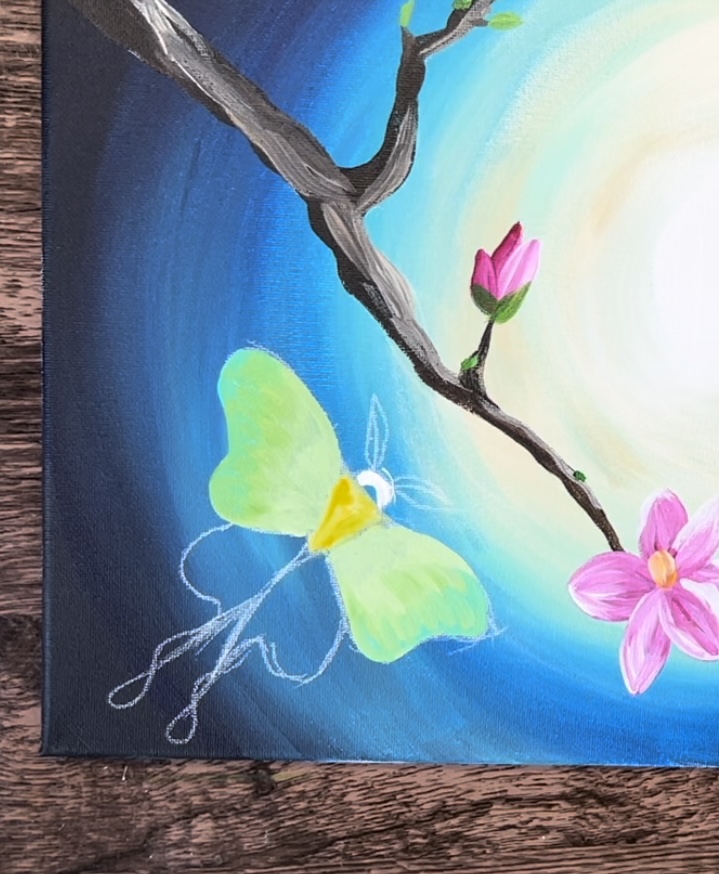
Paint the feathered-like antenna using the #4 round (or a detail brush if you have one). Paint the center white and then paint the little diagonal strokes white as well. If you want, you can add a little yellow into the white.
Paint the body of the butterfly and add a little bit of fur texture to it with white on top of the yellow layer.
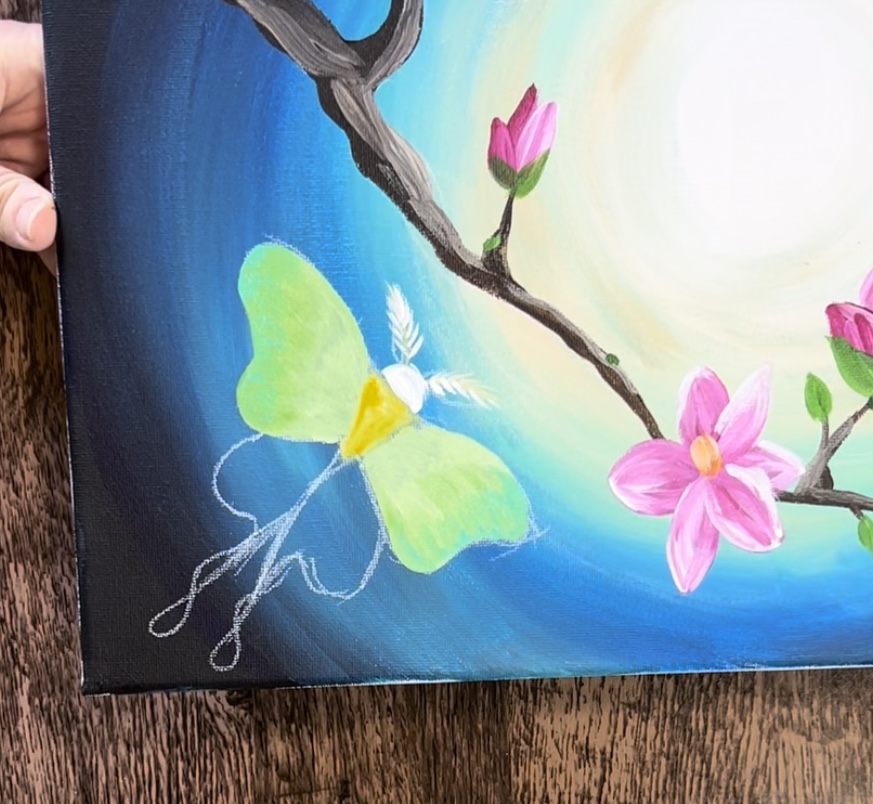
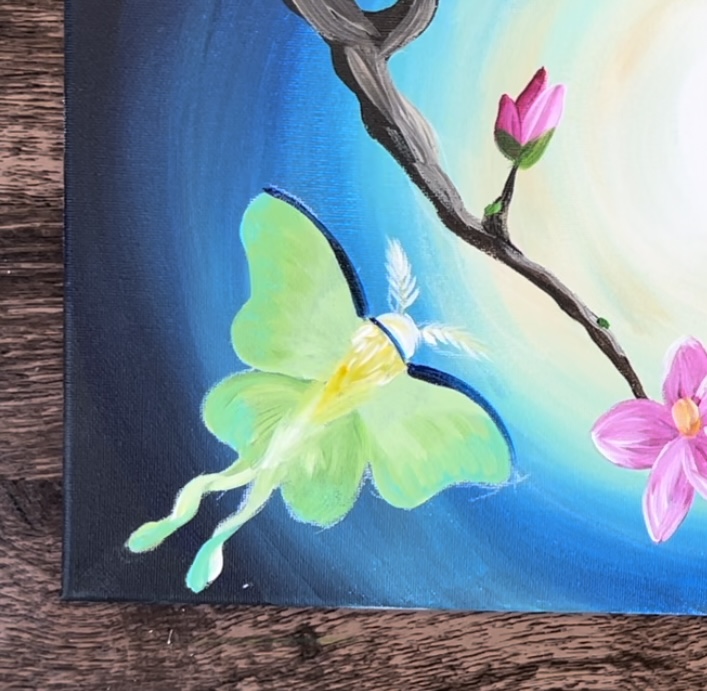
Paint the bottom sets of wings with the same green combination, only make the green slightly darker where it meets the top wings. This will create a little bit of shadow in that area.
Paint the tail. Add a little bit of white to the green and blend it with the green to create a “twisty” effect on the tail.
Add a little bit of aqua to the bottom of the wings and tail. Then use the color “phthalo blue” to outline the top edges of the wings.
Use the color “cadmium yellow medium” to paint the little “eye patterns” on the top left and right of the wings.
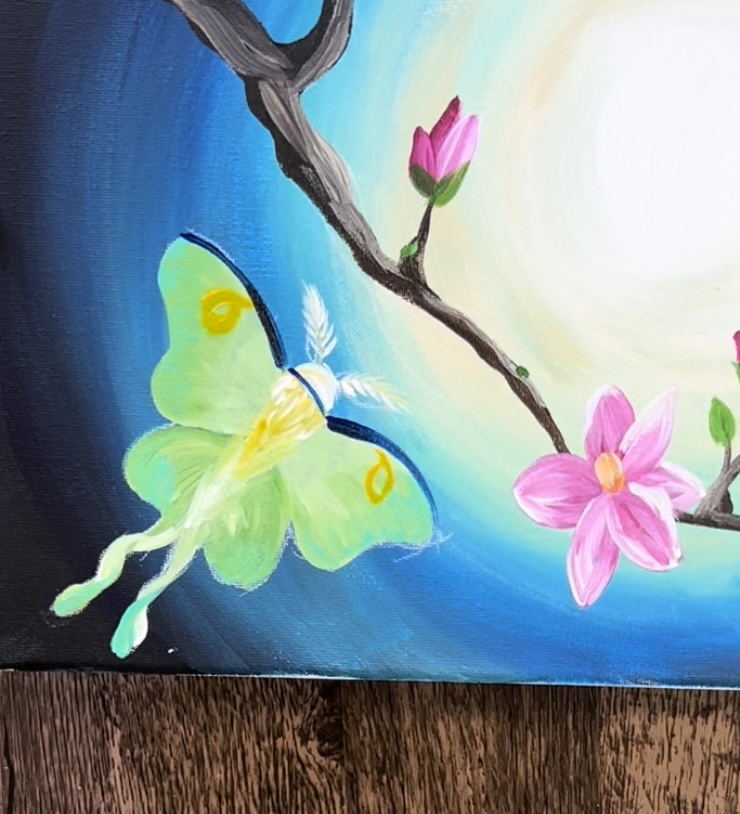
Then add a little bit of “phthalo blue” onto the inside edge of both of the eye patterns.
Paint another set of “eye patterns” on the bottom parts of the wings. Use yellow for the outside shape and add a phthalo blue dot in the center.
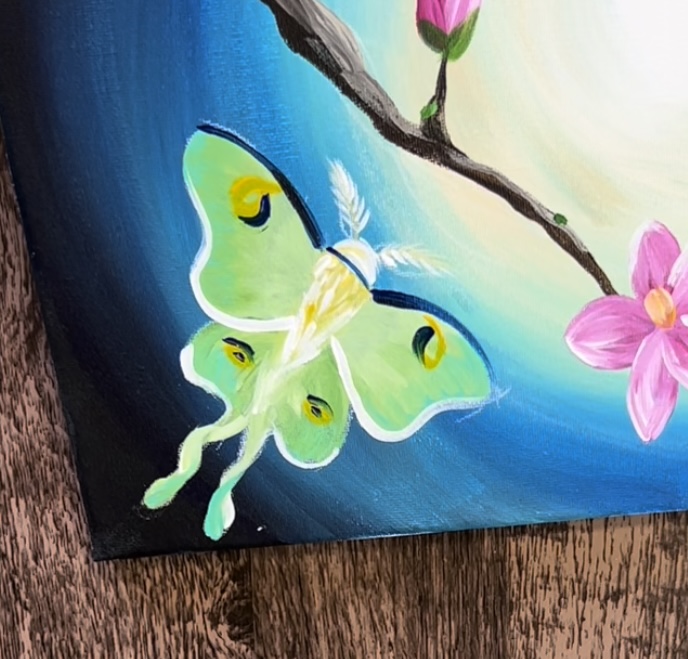
Then use titanium white to outline the bottom edges of the top wings.
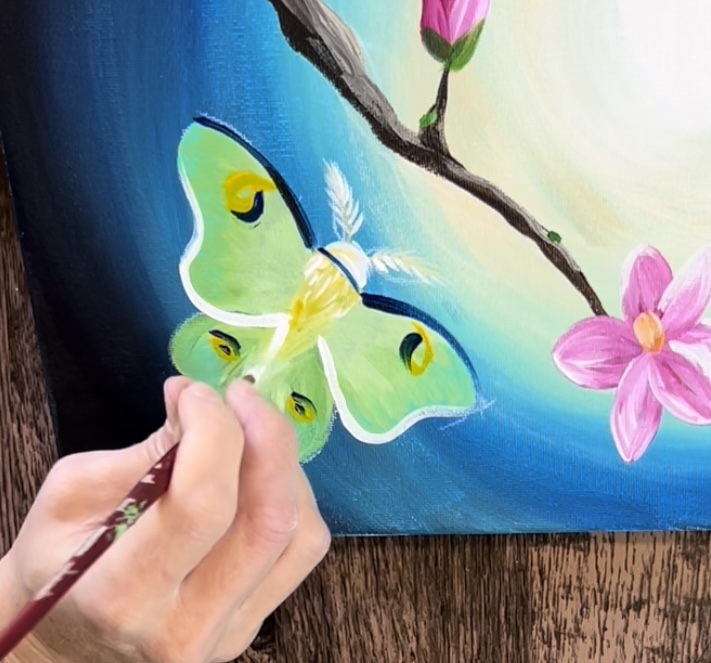
Outline the bottom edges of the bottom wings with titanium white.
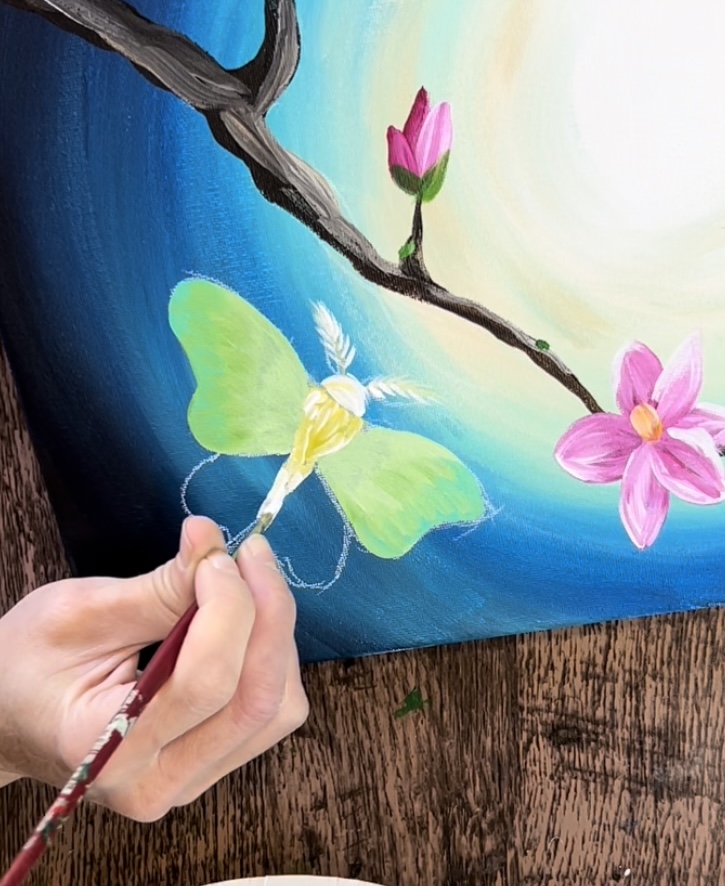
Optional: add vein lines on the wings using “titanium white” and either the #4 round brush or a tiny detail brush.
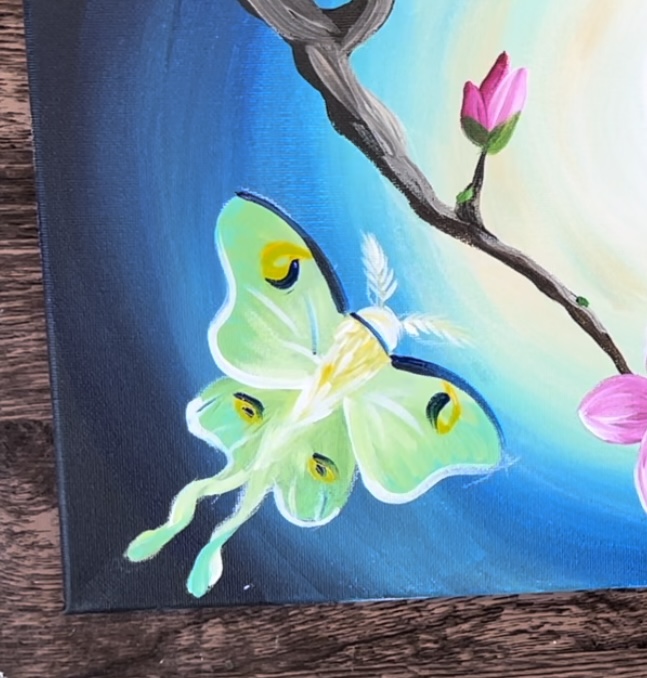
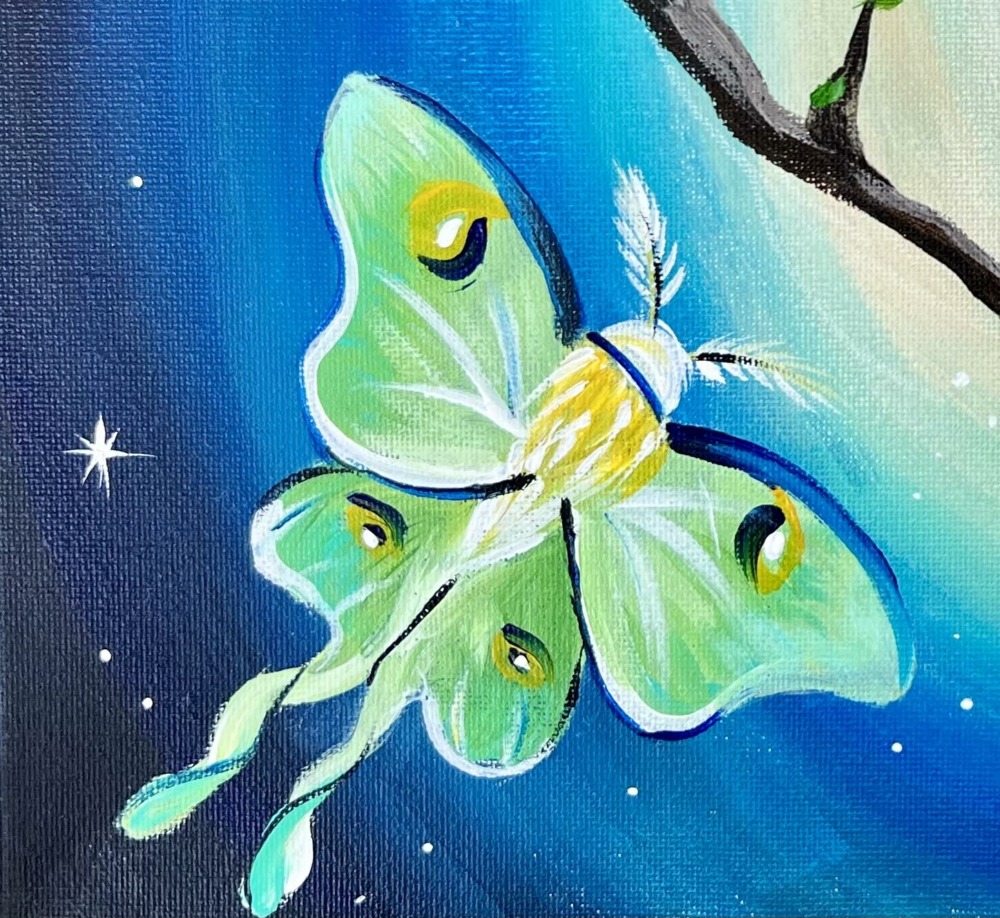
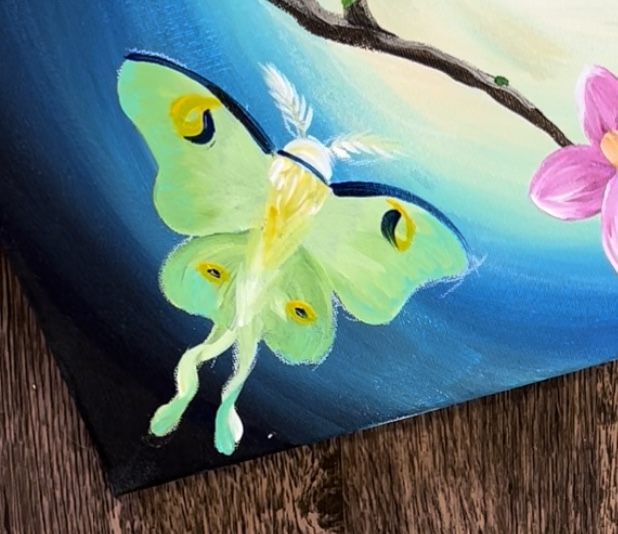
Here is an up close of the details of the moth. I also lightly outlined it with a thin “mars black” line. Specifically, I outlined the wings, parts of the tail and the center line of the antennae.
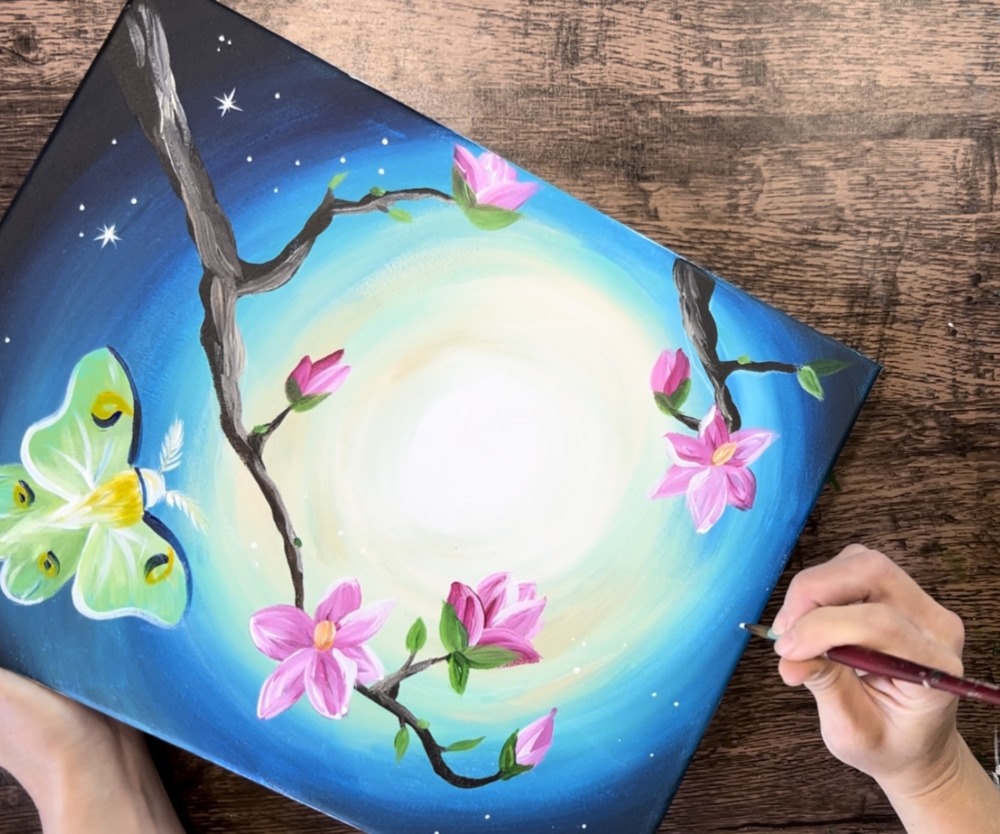
6. Paint Stars
As a final step, use the #8 round brush (for its fine point) to paint little starts with titanium white. Paint a mixture of tiny clusters of dots as well as little diamond star shapes.

If you don’t have the #8 round brush, you can use a tiny detail brush or even a white paint pen.
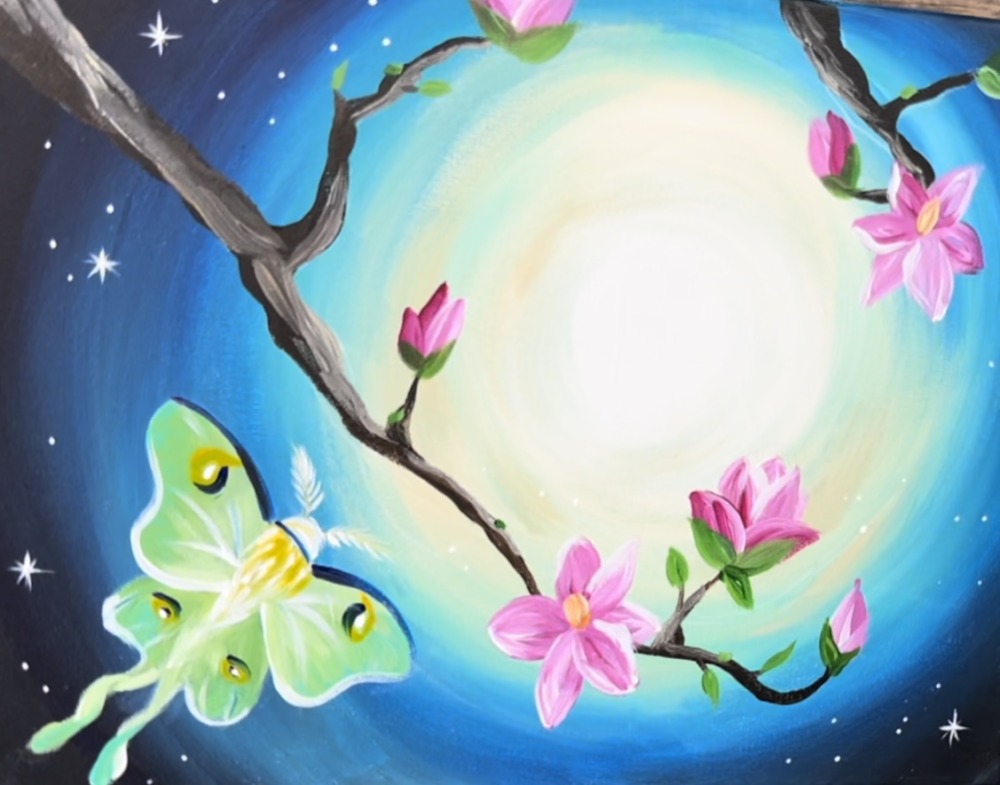
Finished!
Sign your name and show it off!