

Would you like to save this?
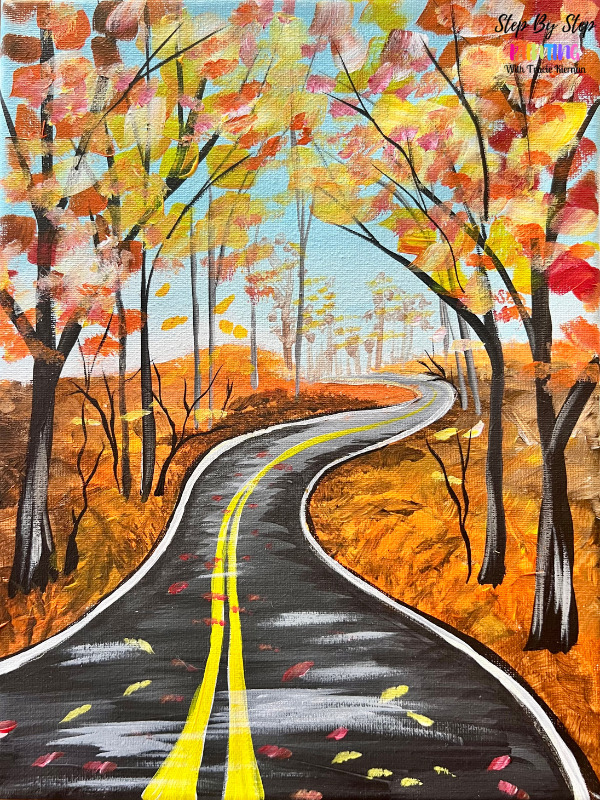
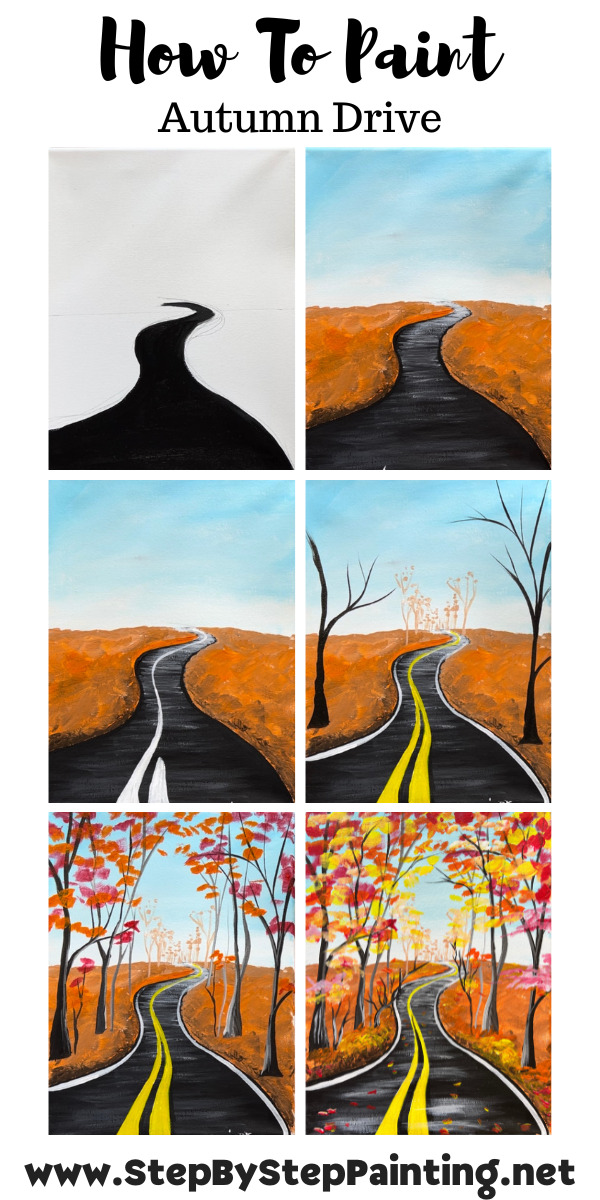
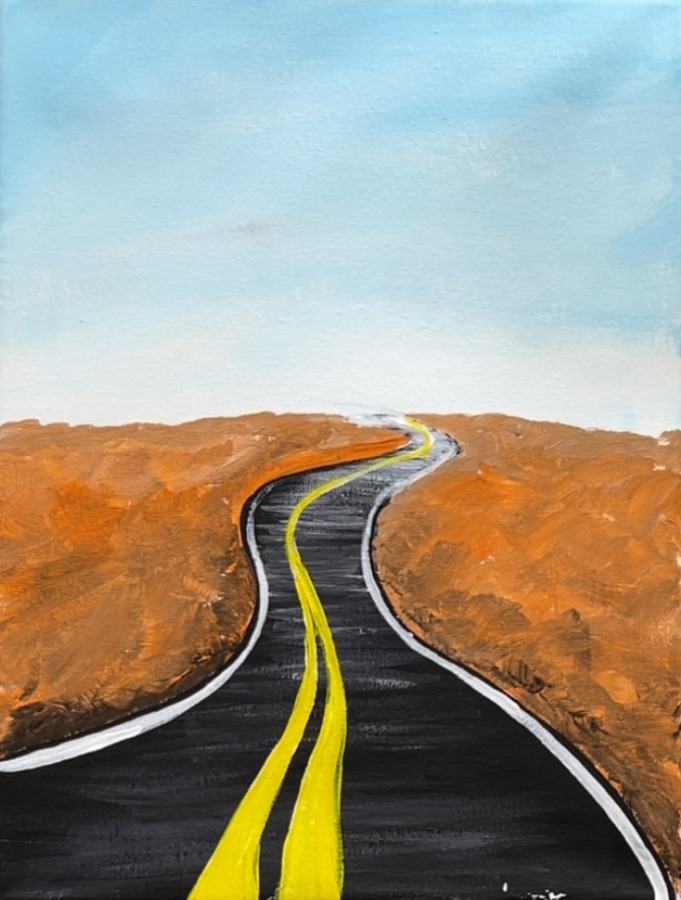
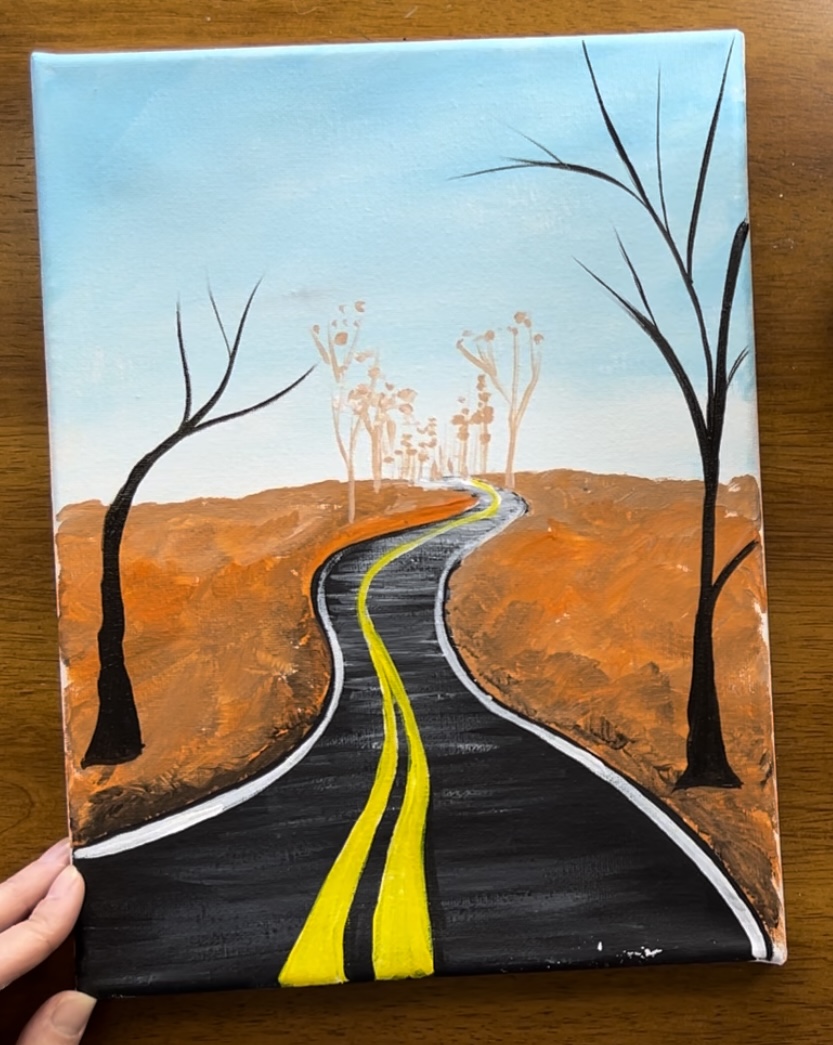
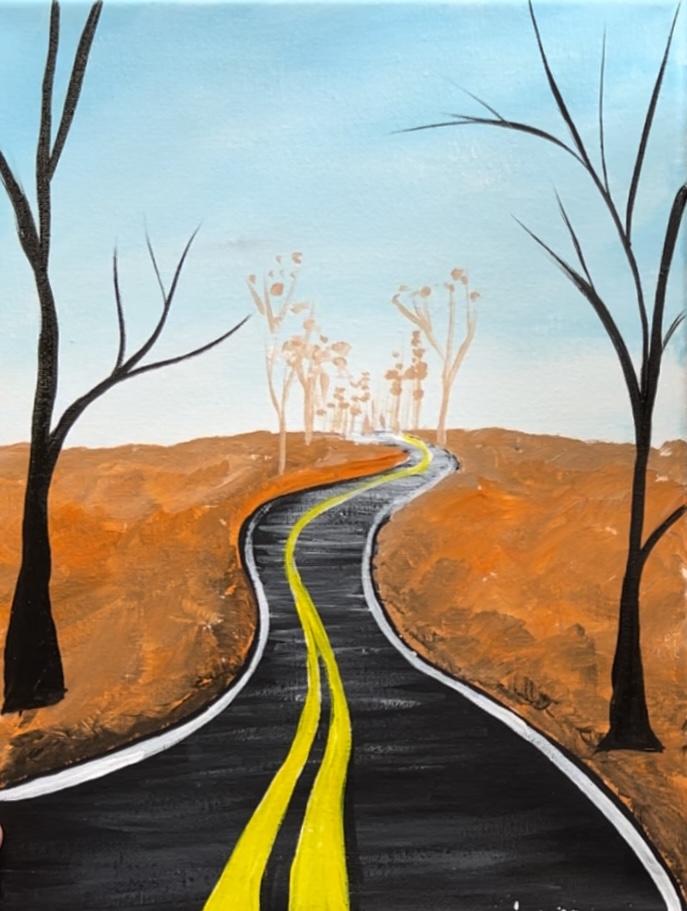
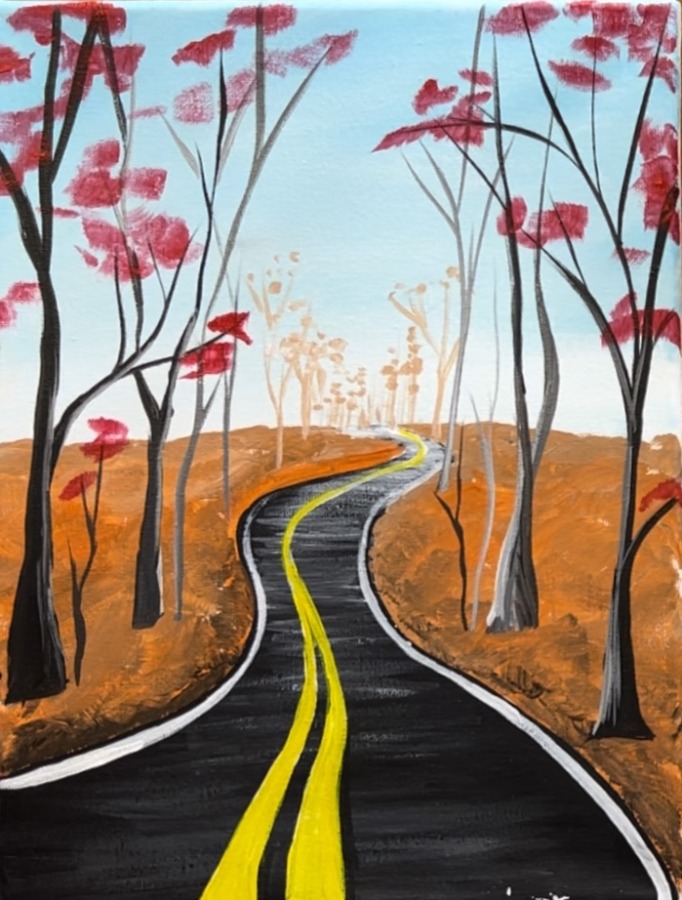
“Winding Autumn Drive” is demonstrated on a 9 x 12 canvas with acrylics! This painting tutorial shows you how to paint a street in between an autumn forest with colorful fall leaves.
The design can work on any size canvas! It also looks really good when you paint the sides of the canvas on this one.
Enjoy and happy painting!
Materials
How To Paint "Autumn Drive"
Paint a curving street throuhg an autumn forest.
Materials
- 9 x 12 Canvas (this design can work on any size)
- Acrylic Paint
- Brushes
- Pencil
- Paint Palette
- Protected Work Surface
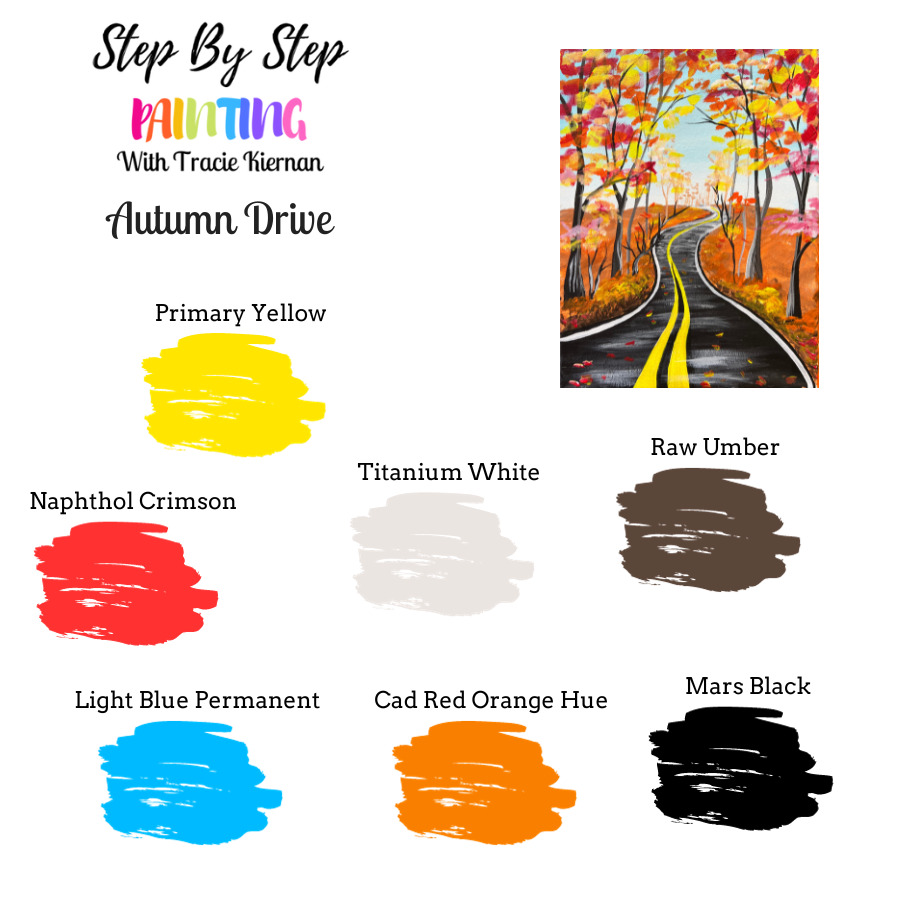
Colors
- Titanium White
- Mars Black
- Raw Umber
- Primary Yellow
- Napthol Crimson
- Cadmium Orange Hue
- Light Blue Permanent
Brushes
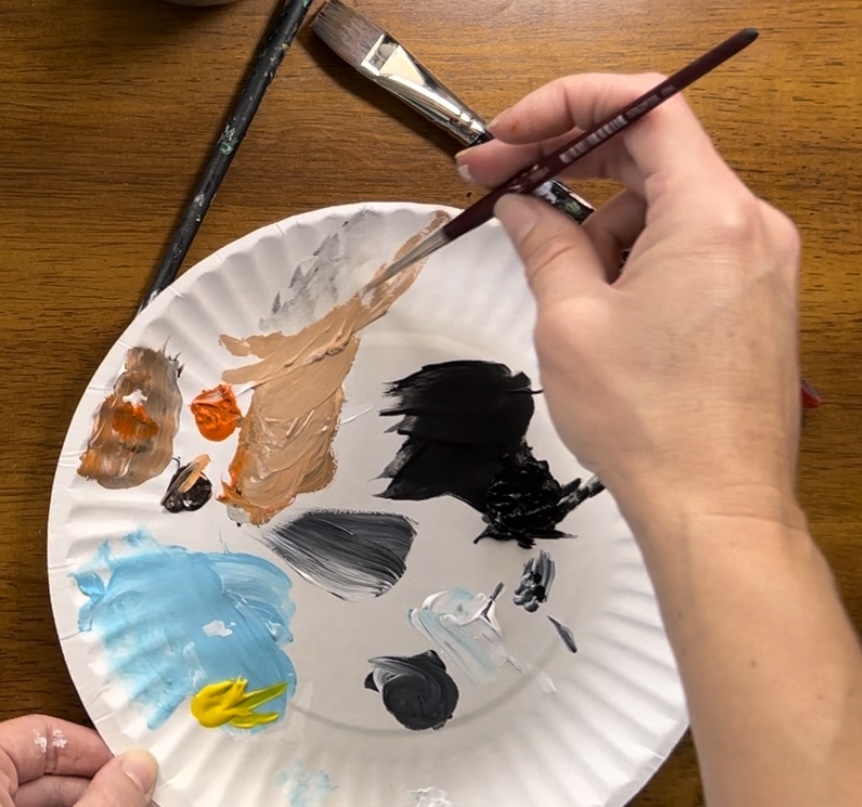
Color Palette
I used Liquitex BASICS acrylics for this painting. If you are using a different brand, try using the color chart below to help match colors.
Craft Paint Conversion
If you are using craft paints such as Apple Barrel Craft Paints, I would recommend subbing to these colors:
- Red
- Yellow Flame
- Yellow
- Black
- Flag Red
- Jack-O-Lantern
- Nutmeg Brown
Directions At A Glance
Video
Step By Step Directions
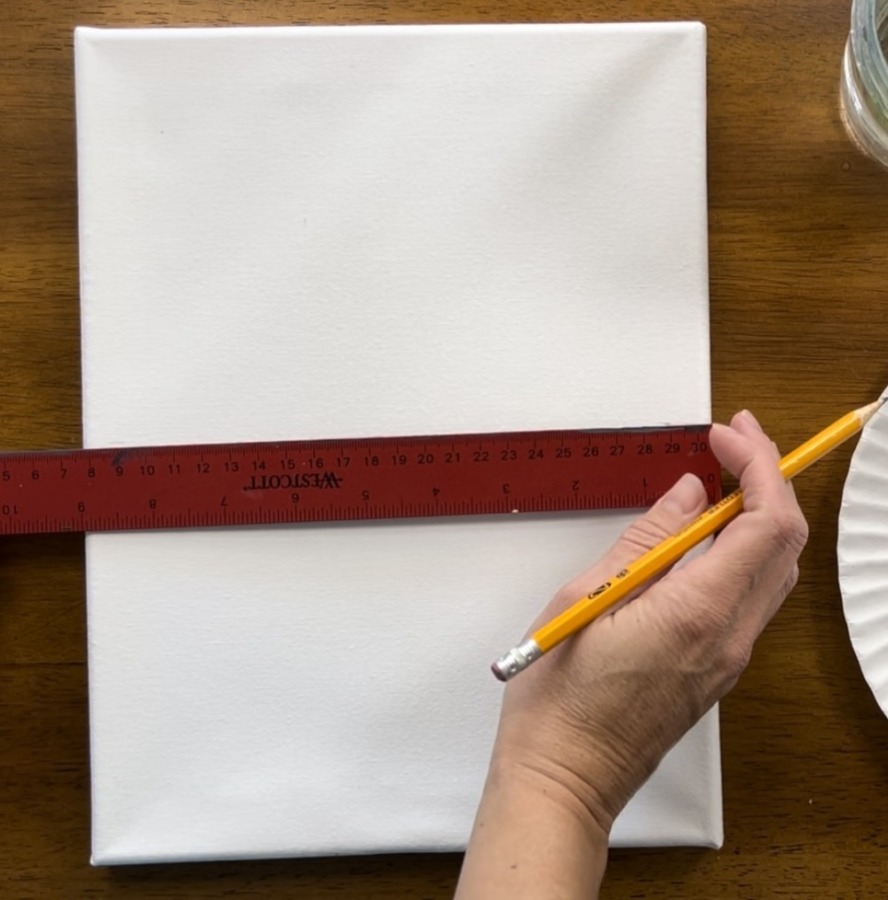
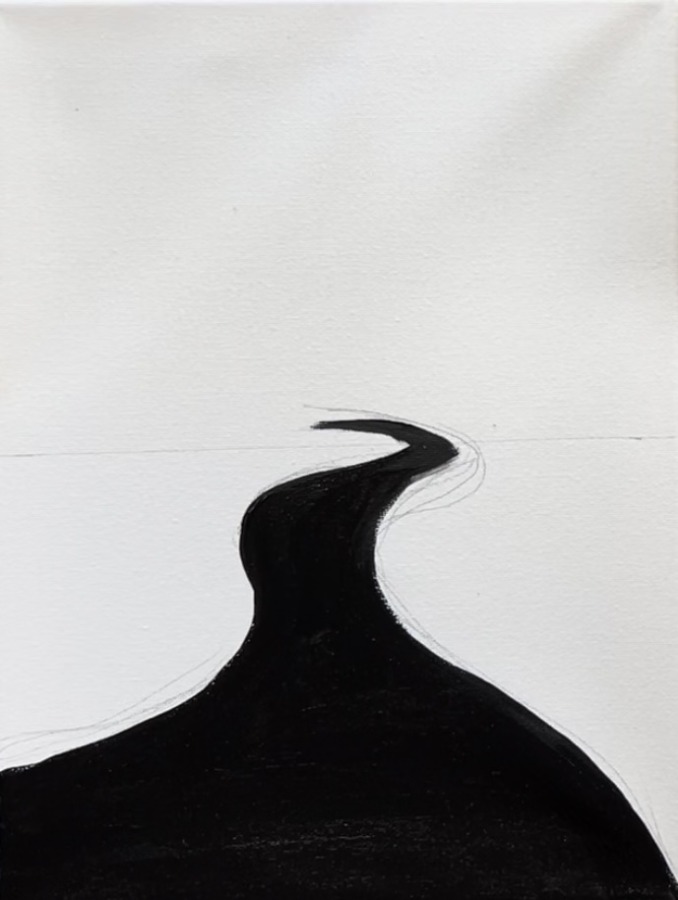
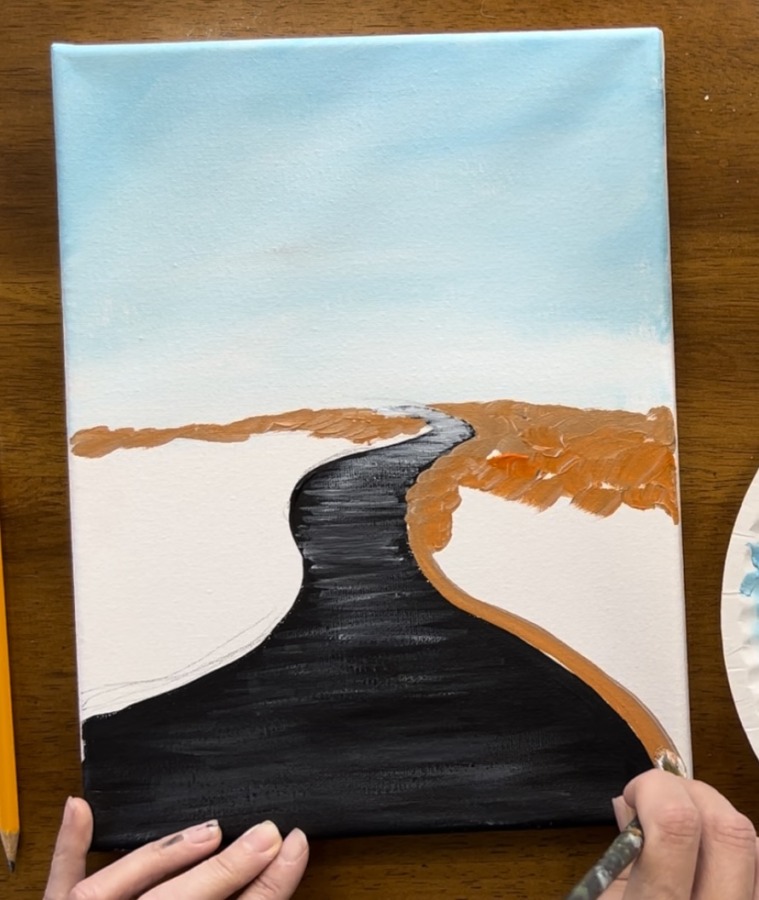
1. Draw Horizon Line and Road
Position your canvas vertically. Use a regular pencil and a ruler to locate the center of the canvas. Since I am working on a 9 x 12 canvas, I measured 6″ and drew a horizontal line down the center. This will be the horizon line of the painting.
Then lightly sketch the road. This is a twisting road that starts very wide at the bottom of the canvas. I started my left line about an inch and a half up from the left corner of the canvas. The right line of the road starts at about the corner. You are welcome to change the placement of this road.
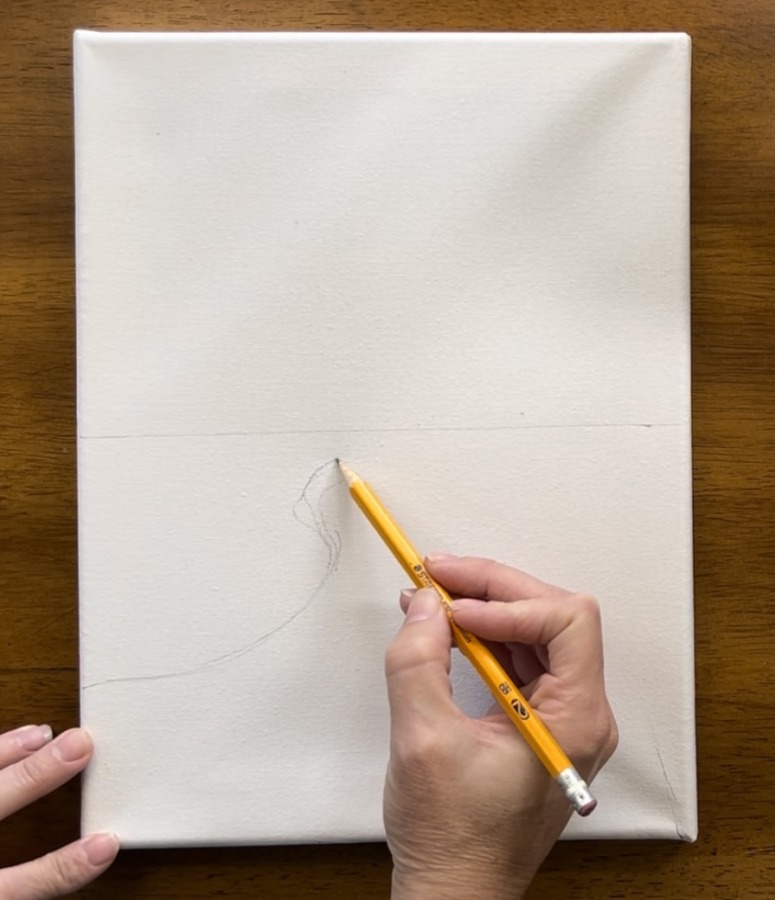
Then curve this line as it goes very narrow in the middle of the horizon line. I actually had the end of this road go a little above the horizon line to suggest the land sort of elevates up a bit.


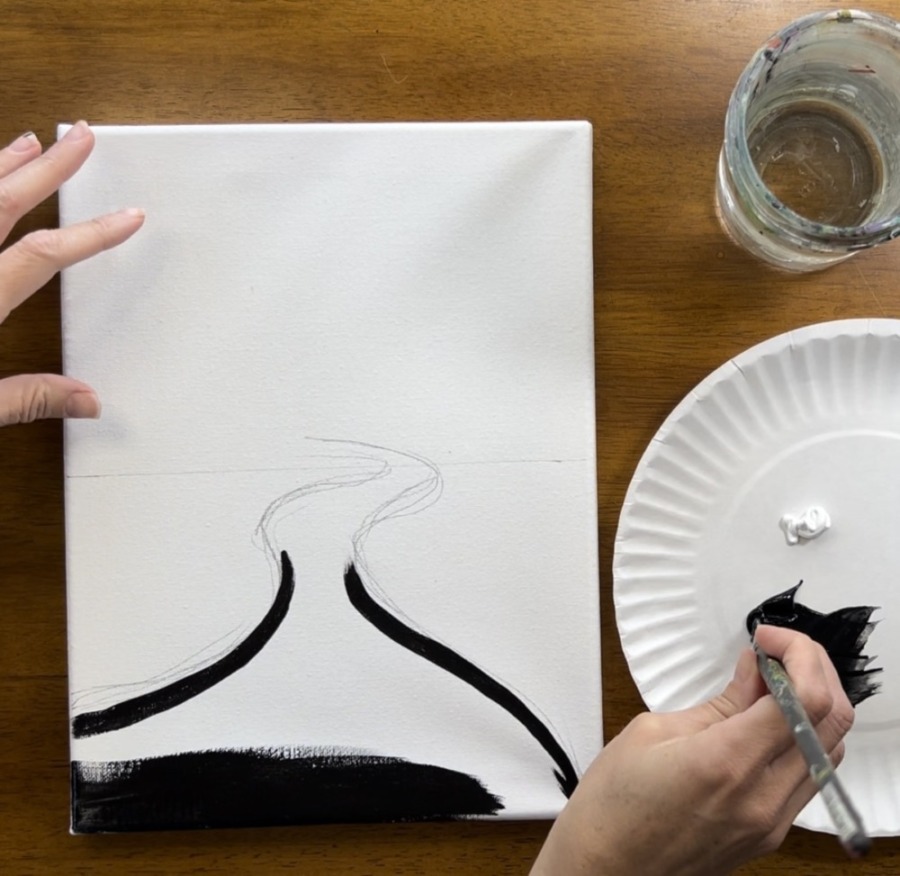
2. Paint Road
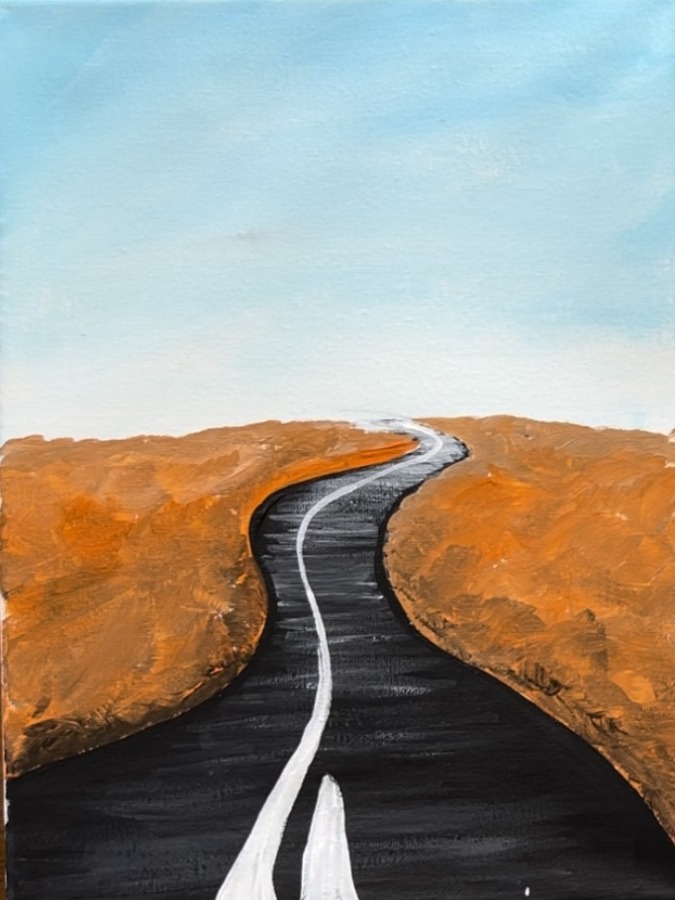
Load your palette with mars black and titanium white. Use a 12 bright brush to paint the shape of the road solid black. It may be helpful to outline the edges of the road and then fill in solid. When you fill the road in, do so with left and right horizontal strokes.

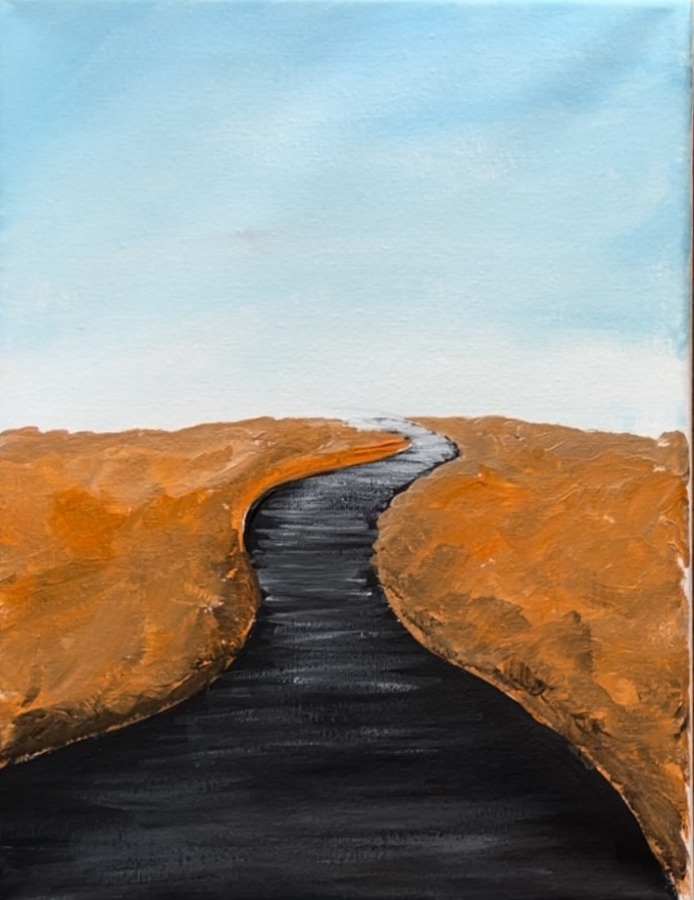
Next, use a #4 round brush and titanium white to lighten the road that is furthest in the distance. Load a small amount of titanium white on your brush and paint left and right strokes. This should be a very light gray color. If it is not slightly blending with the black layer below, add a small amount of black to the brush to make it a very light gray (but not pure white).
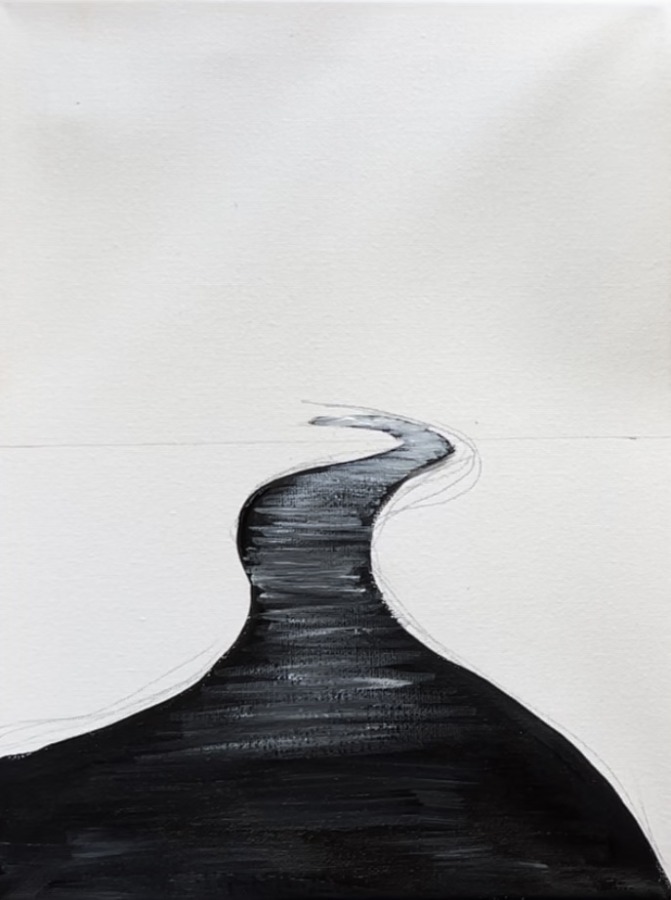
Then paint left and right strokes and allow your gray to get darker as you go to the bottom of the canvas. If needed, add more black to your brush to darken your left and right strokes.
The idea is to make the road very light in the distance and very dark on the bottom.
3. Paint Sky
Load your palette with the colors: light blue permanent and titanium white. Then use a 3/4 wash brush to mix equal parts titanium white and light blue permanent together. This will lighten the blue.
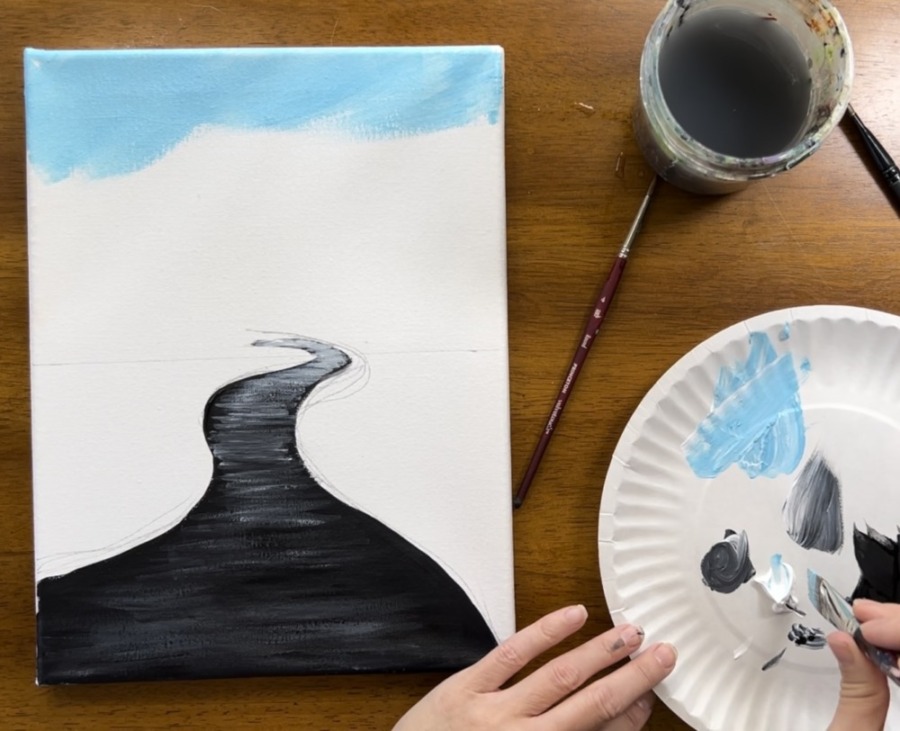
Use the 3/4 wash brush to paint angled strokes starting at the top of the sky. Then work your way down to fill the entire top area above the horizon line with blue. Add more titanium white as you work your way to the bottom so the blue gets lighter and lighter.

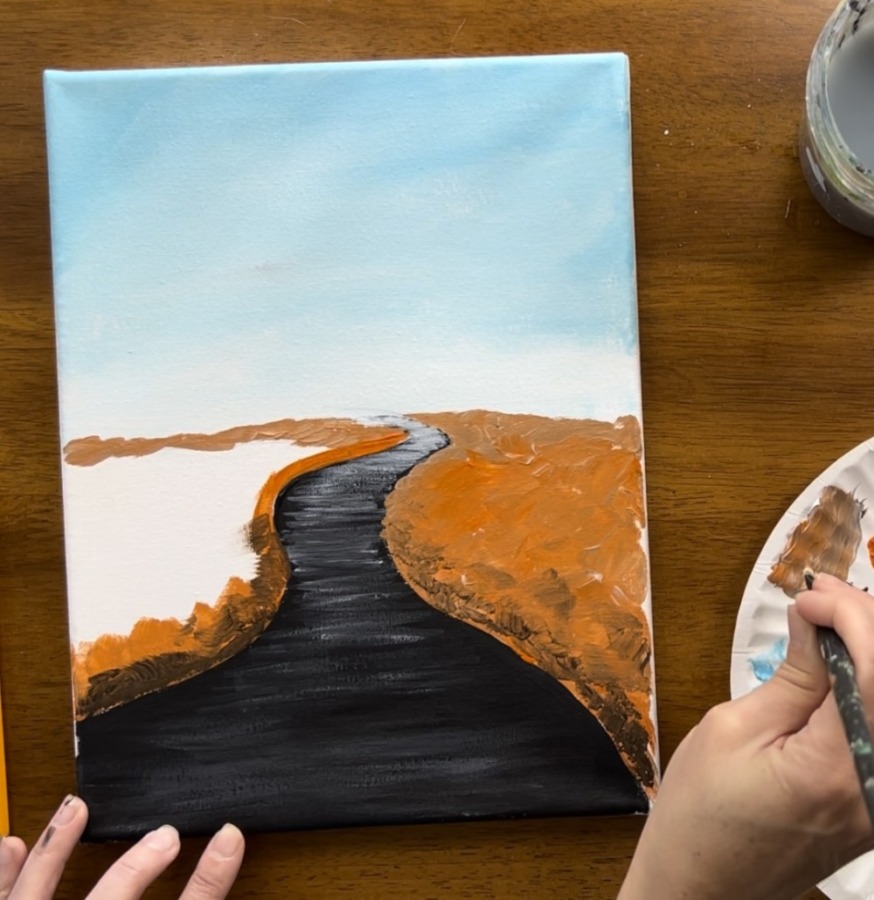
4. Paint Ground Area
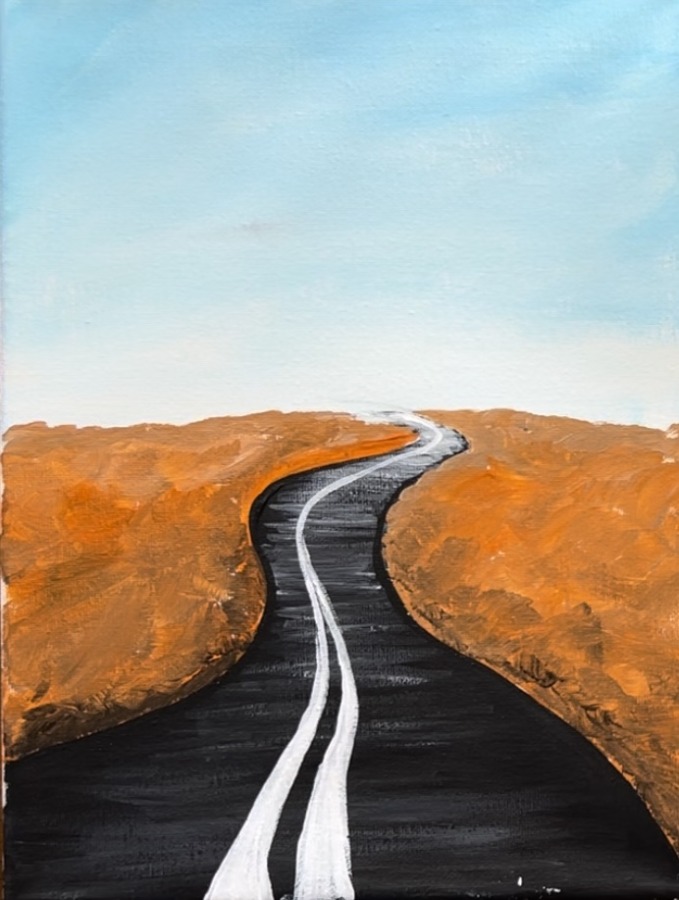
Load the colors: raw umber, cadmium orange hue and titanium white onto your palette. Mix a light orange-brown colors by mixing equal parts of each of the colors. If needed, add a bit more white to it to lighten it up.

Next, use the 12 bright brush (1/2″ flat brush) to paint short, choppy strokes starting at the land furthest in the distance (just under the horizon line).
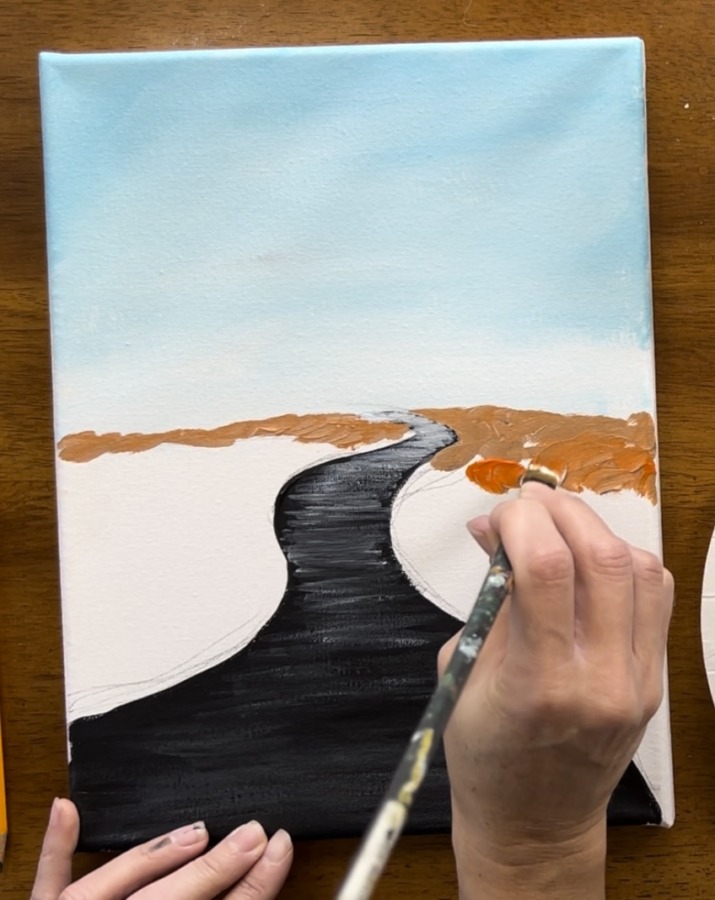
As you work your way down, add more orange and brown to your brush to gradually darken your land. Try to go around the road as much as possible. You can lightly outline the outer edge of the road with your orange color to help you “cut in” on the negative space around the road.
Fill the rest of the land area with choppy, short strokes. The goal is pretty much to cover all of your blank canvas and also create “texture” with the different colors and choppy strokes.

Do the same thing on both sides of the road.

Use the color “raw umber” to add darker strokes in the land area closest to the road. Gentle mix that with the orange color.
If needed, go back and touch up the edges of the road with black and a round brush so that none of the land actually overlaps any part of the road.
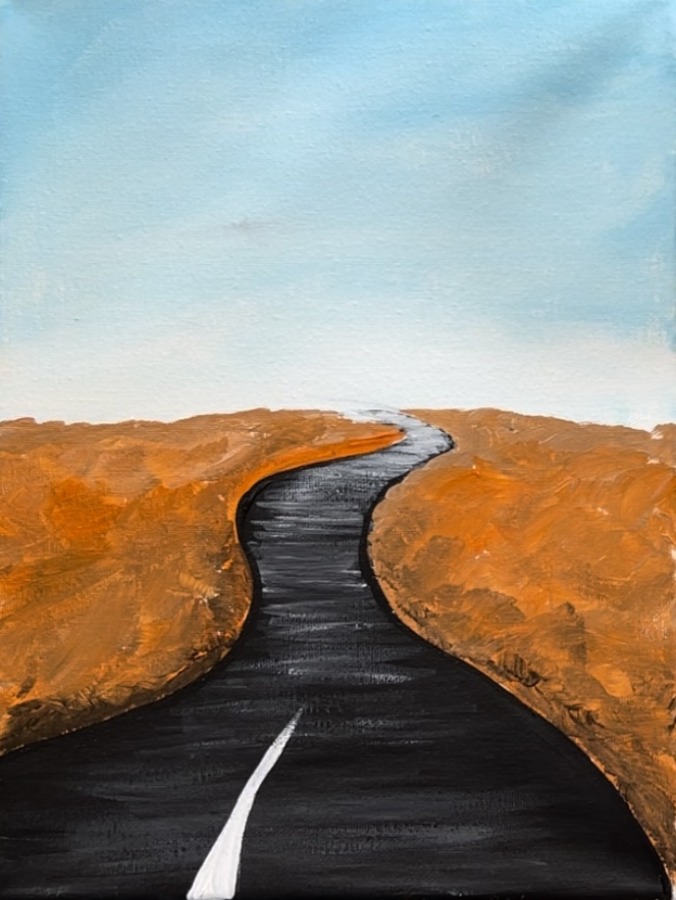
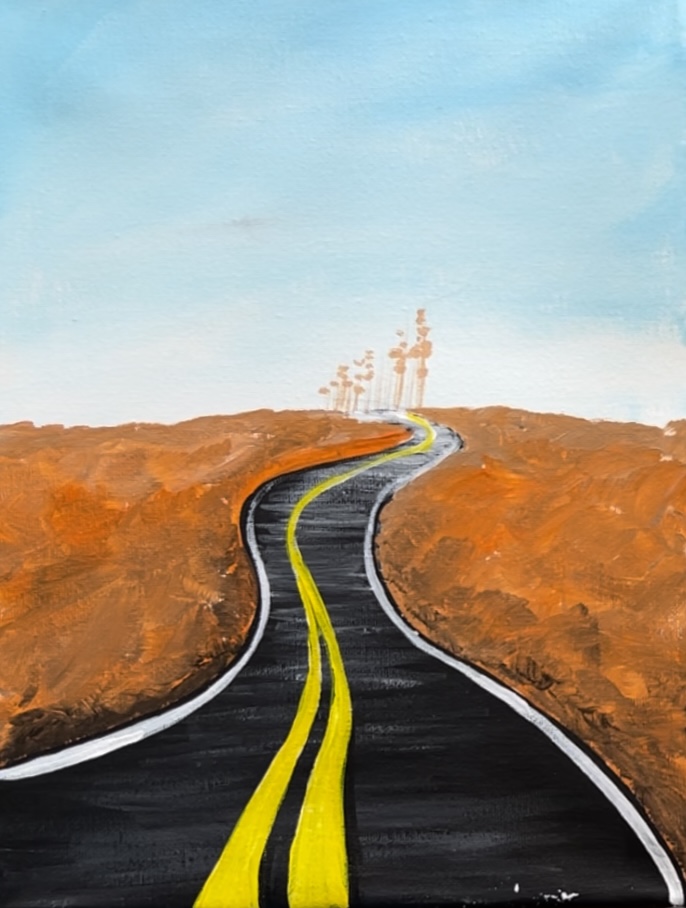
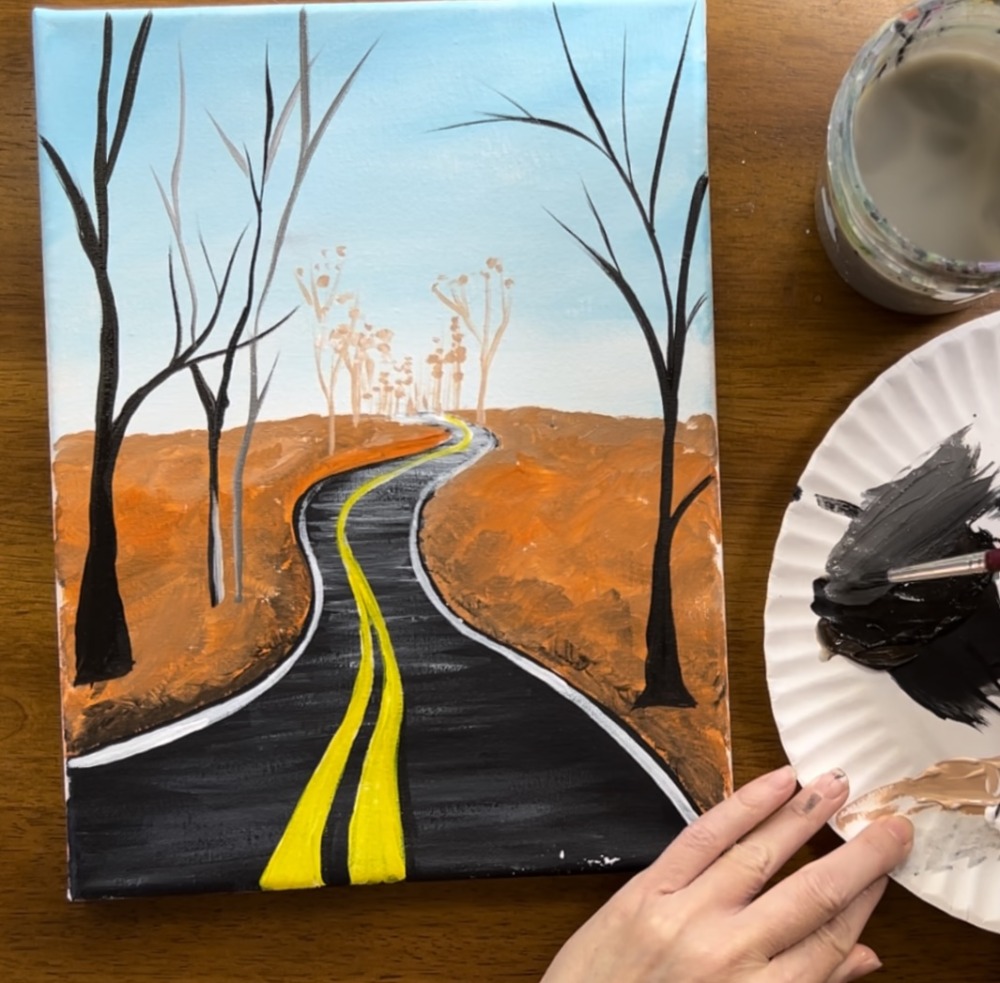
5. Paint Lines On Road
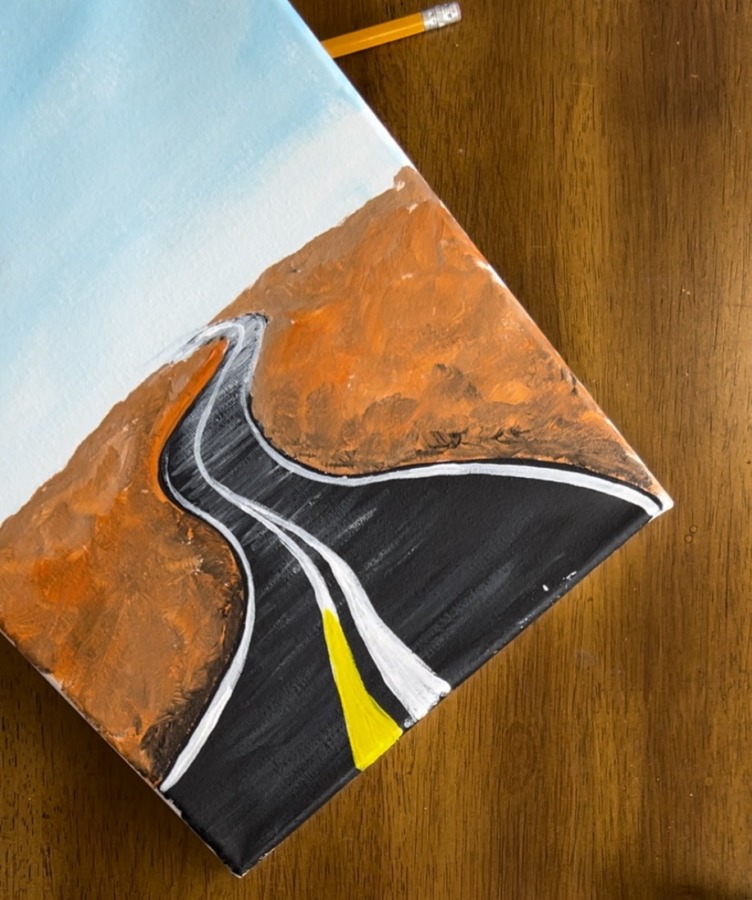
Make sure the road is dry before doing this step. Use a #4 round brush and titanium white to paint the first line that is on the left. Start at the bottom of the road and paint a triangular shape that starts sort of wide at the bottom and then goes to a narrow point.
Then go to the end of the road (the “vanishing point”) and paint a thin white line that connects to your “triangle” shape.

Adjust this line if needed. It should look wider at the bottom and then go very narrow very quickly as it goes further away on the road.

Repeat this for the second line.
This time, this line eventually merges with your first line as it goes further in the distance and then there is an illusion that it becomes just one line.
Next, use the #4 round brush (or a tiny detail brush) to paint a white line on each edge of the road. Leave a “slither” of black line on the furthest edge of each side of the road.
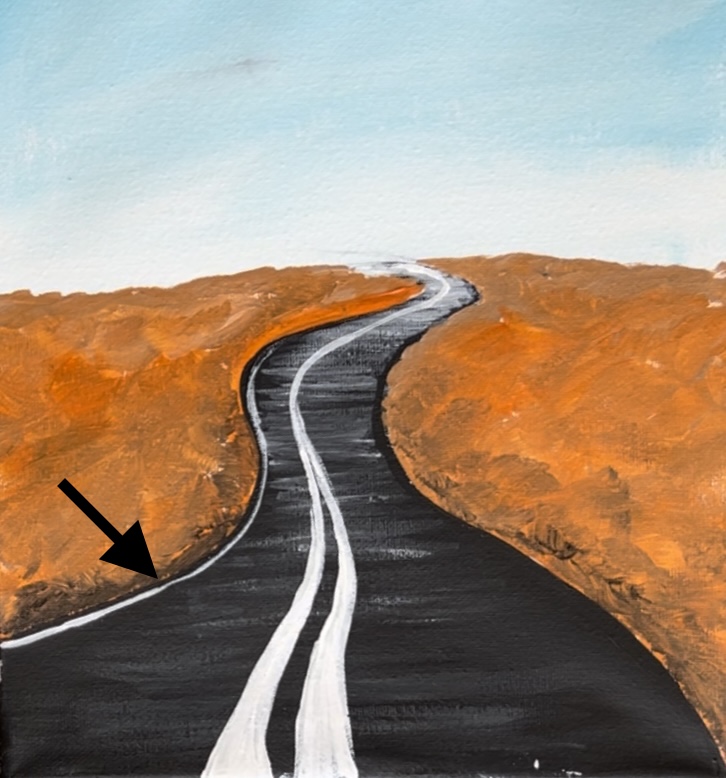
Allow this line to be slightly thicker on the bottom of the canvas and thinner further away. Do this on both sides of the road.

Let this white dry for a bit before continuing onto the next step of painting the center lines yellow.

Load your palette with primary yellow. Use your #4 round brush and primary yellow to paint yellow over the white layer the exact way you painted it.
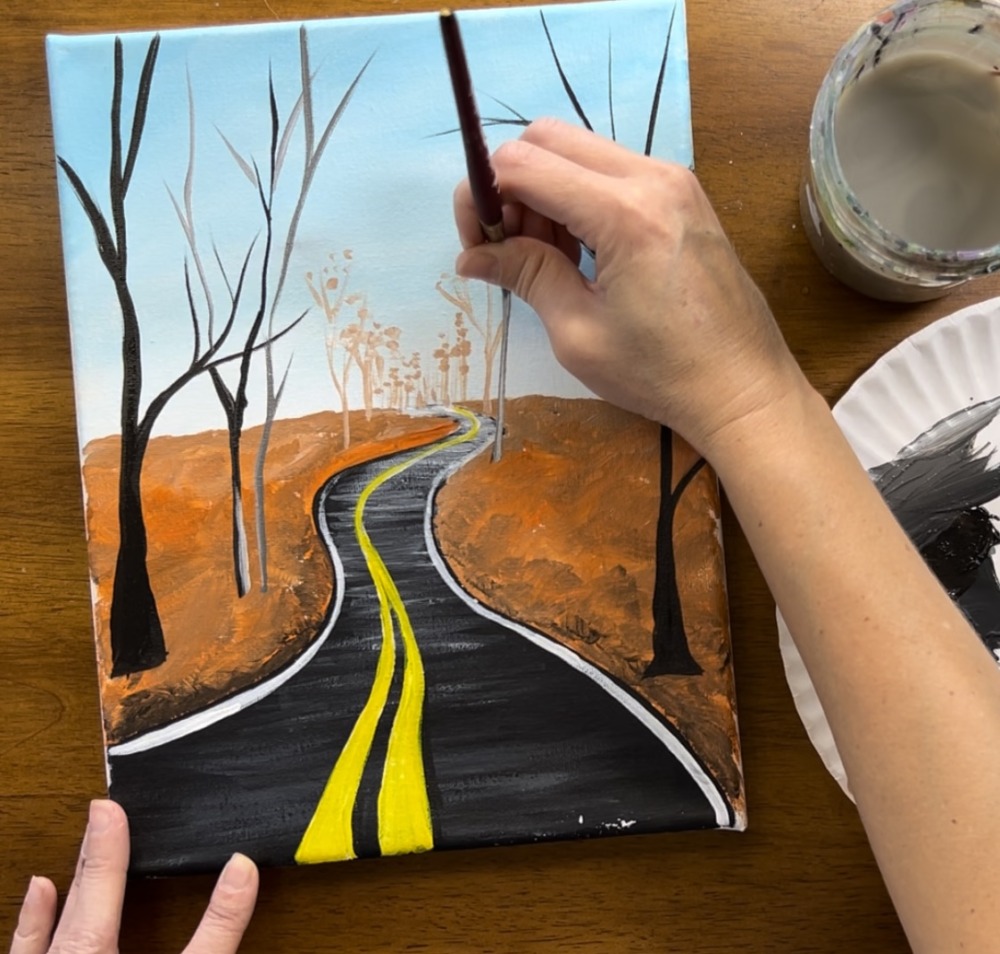
6. Paint Far Away Trees
Use a #4 round brush (or a detailed small round brush) to paint abstract trees in the distance. These trees need to be a very light brown-orange color. On your palette, mix white with a small amount of brown and orange until you get a light orange-brown color lighter than the color of the land.
Use the tip of the brush to paint thin and very short vertical lines for these trunks in the distance.
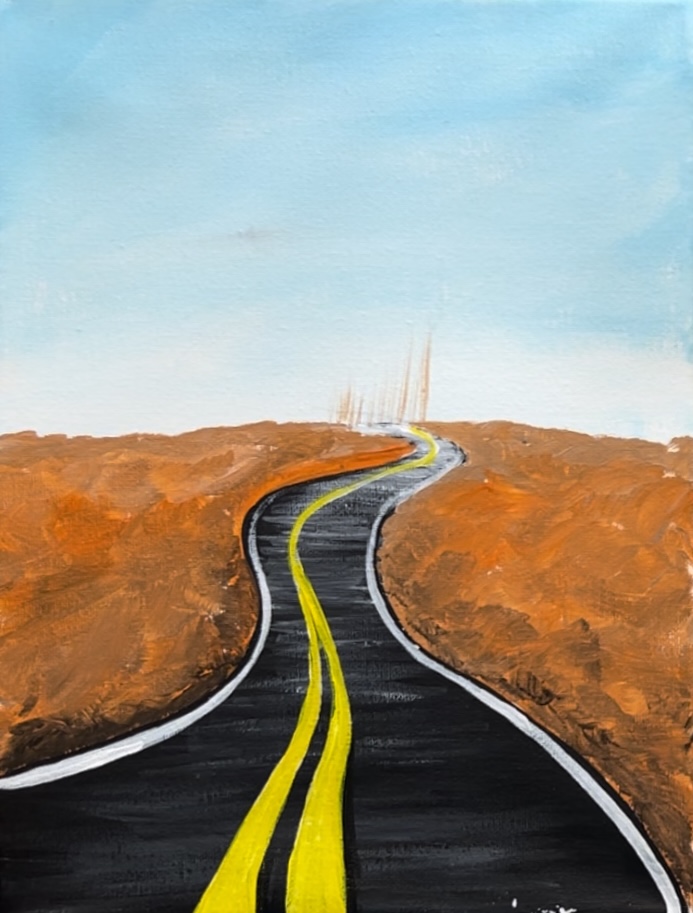
Then use the tip of the brush to paint little dots/leaves on these lines. You don’t have to do this to all the lines. Remember, these are very far away trees so they look very abstract.
Paint a few taller trees (but not too tall). You can add branches to some of these taller trees. Remember, these are still far away so still look a little abstract.

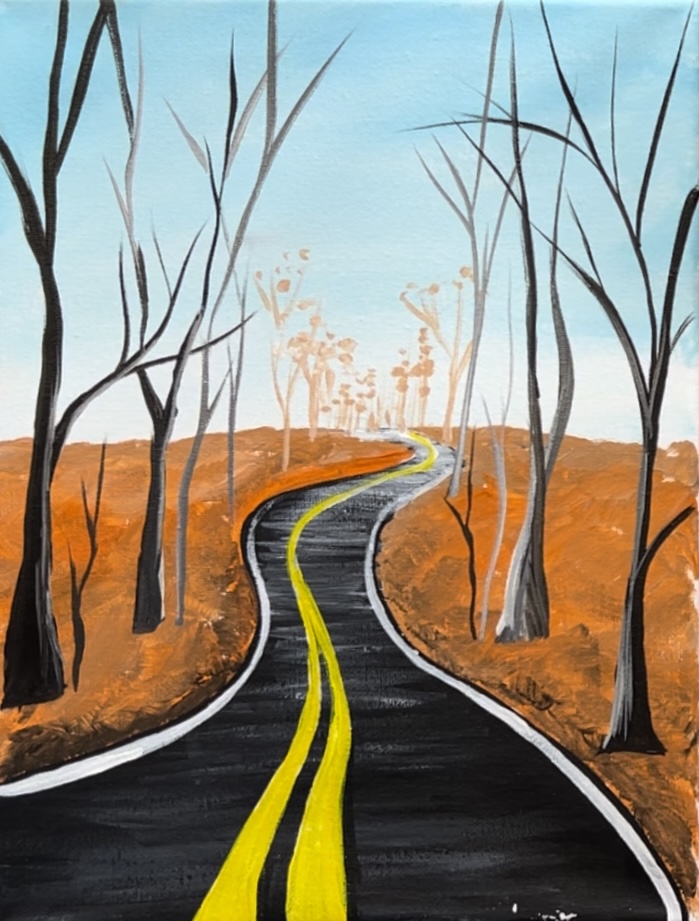
7. Paint close up trees
Load your palette with “raw umber” and “mars black”. Use the #8 round brush and load it into the water then load it into the brown and black. Use the water from the brush to slightly thin the paint down (this helps with the flow of the paint for painting trees).
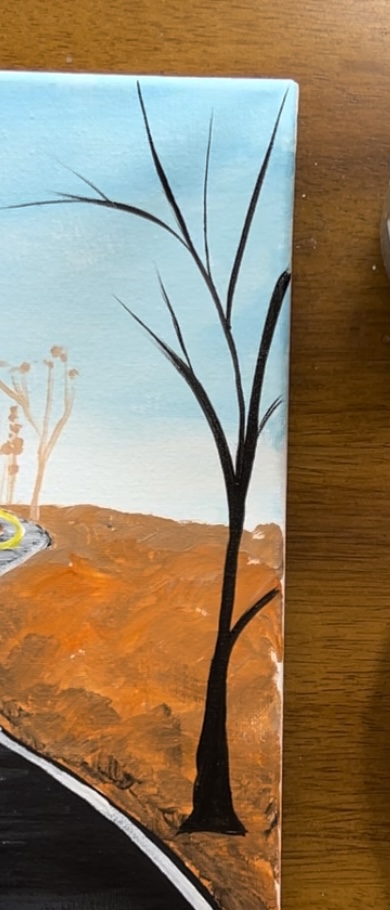
Paint the first tree on the right side of the road. Paint the base of the tree trunk so that it flutes out a bit and then goes narrow as you work your way upwards. Paint the branches so they are thin. To do the thin branches, use lighter pressure on the tip of the bristles.
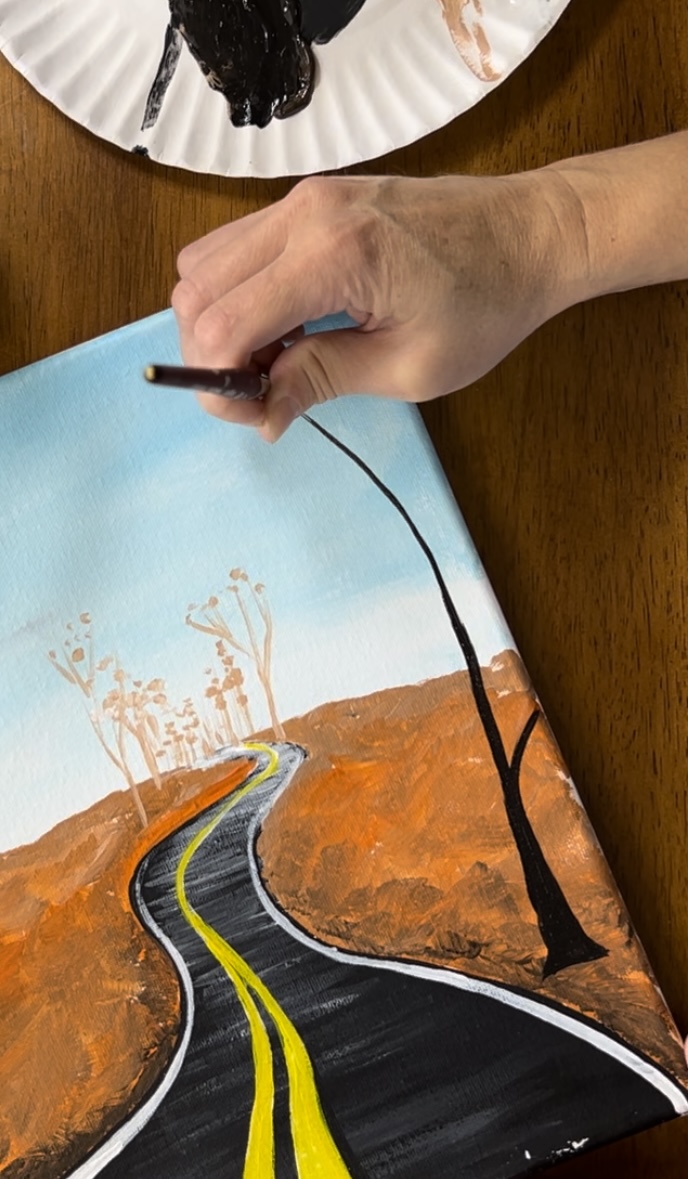
This tree is very large with branches that go all the way off the top edge of the canvas. Continue to paint multiple branches on this large tree.
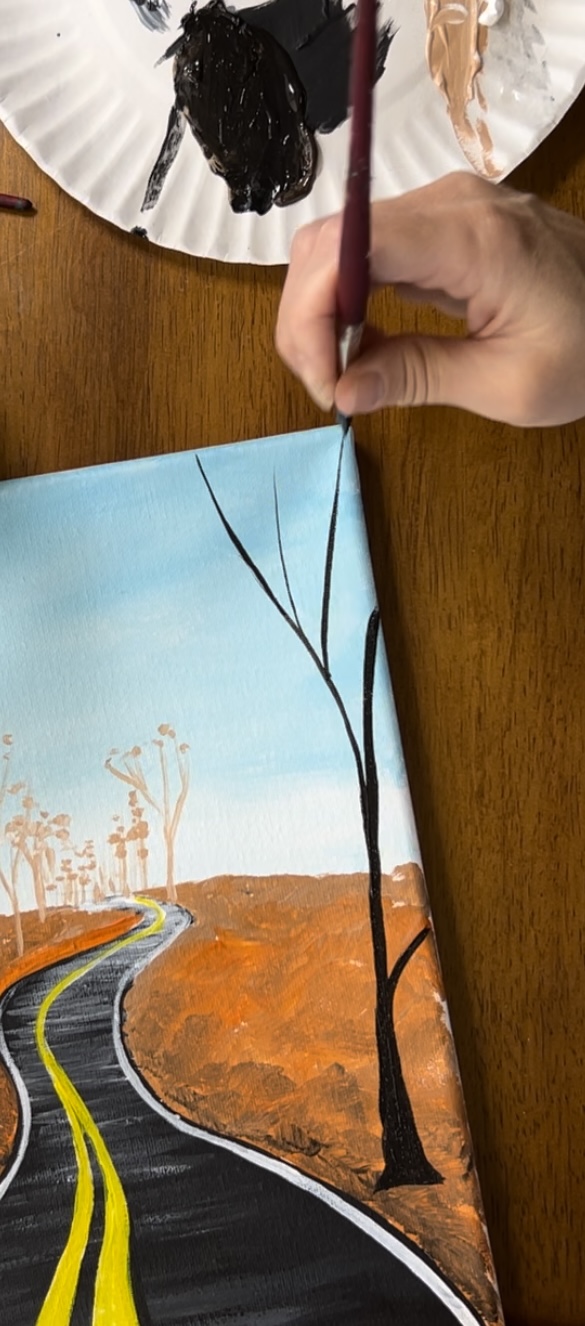
Repeat this for another tree on the other side of the road.
Next, paint medium size trees between your large trees and your “far away trees”. Mix a little white with your brown-black to lighten the color but don’t make it as light as the far away trees. Make these trees slightly thinner and slightly shorter.
It’s okay if your branches end up looking messy and all tangled up together!
Optional: add some highlight on one side of the trees. Mix a little white into the black/brown to make a lighter color. Use the tip of the 8 round brush to paint vertical strokes on one side of the tree to highlight the trunks and one side of the branches.
8. Paint Leaves
Load your palette with naphthol crimson, primary yellow and cadmium orange hue.
Use a 12 bright brush. Load the tip of the brush into the red and paint short, angle strokes in bunches on the ends of the branches.
Then load cadmium orange hue onto your palette. Paint bunches of orange strokes throughout the tree area and the ends of the branches. You will notice an opening in the center above your “far away trees”. For the most part, I left that area open with blue sky and no leaves.
Next, load your palette with yellow and paint little strokes of yellow leaves. You can also mix your yellow with titanium white to make bright yellow leaf areas. Mixing the white with the orange and the red also make lighter color variations in the leaves. Paint as many leaves as you want!
9. Paint more color/ texture on the ground
This step is optional. You can use the yellow to paint little rounded texture strokes on the base of the larger trees in the front to make it look like those three bases are slightly covered. I did this with a 12 bright brush.
10 .Paint Reflection On Road & Leaves On Road
Use a 12 bright brush and titanium white to dry brush some left and right strokes in the road. You can cover some of the yellow line with this dry brush mark.

Dry brushing this white will make the road look a bit shiny. Then you can use as #4 round brush to paint little colored leaf dots in the road. I only did a few so it wouldn’t look too messy on the road!

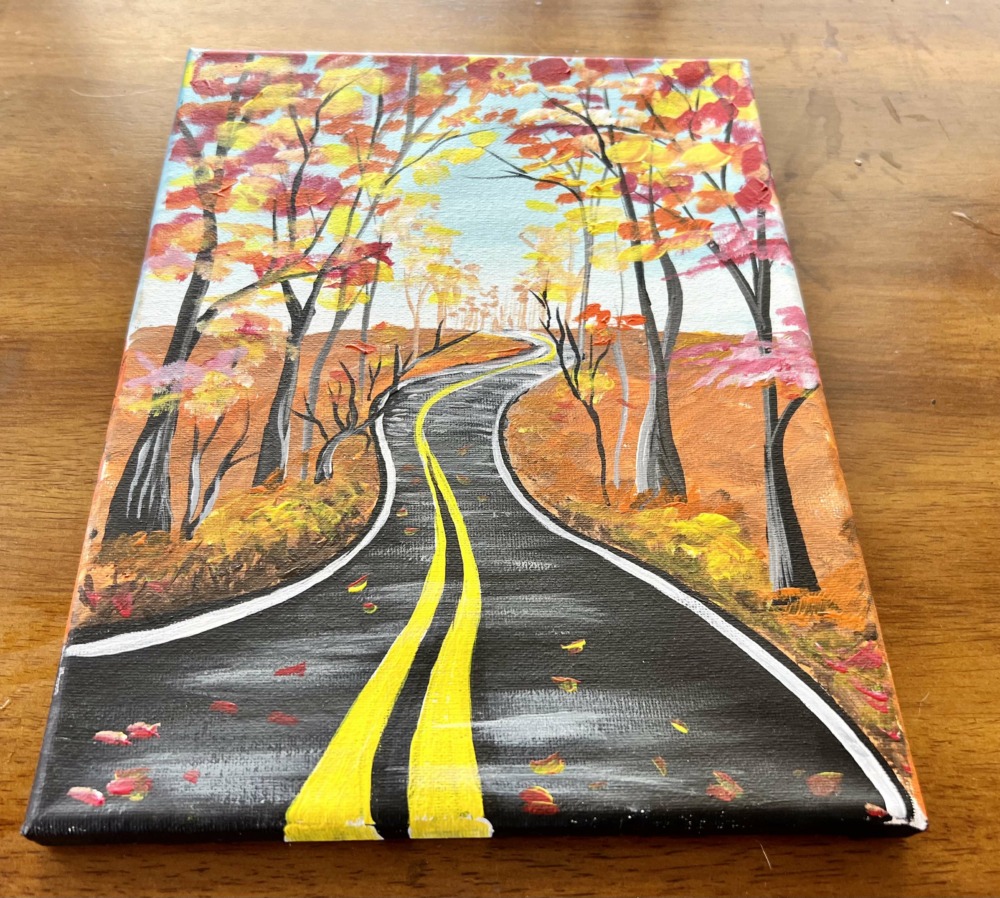
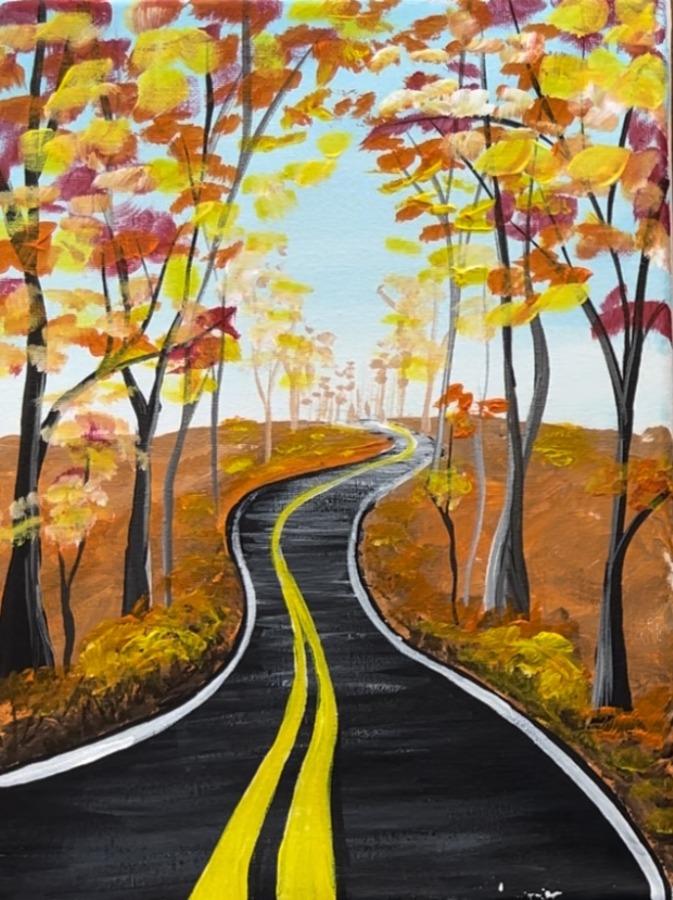
Finished!
That’s it! Sign your name and show it off!

Such a nice tutorial. I am going to paint his one soon. I wish you sell a package of paints, brushes and canvas that you use in each tutorial. I have a hard time finding all the colors that you use. I use whatever I can find so it ends up being different than yours.