
Would you like to save this?
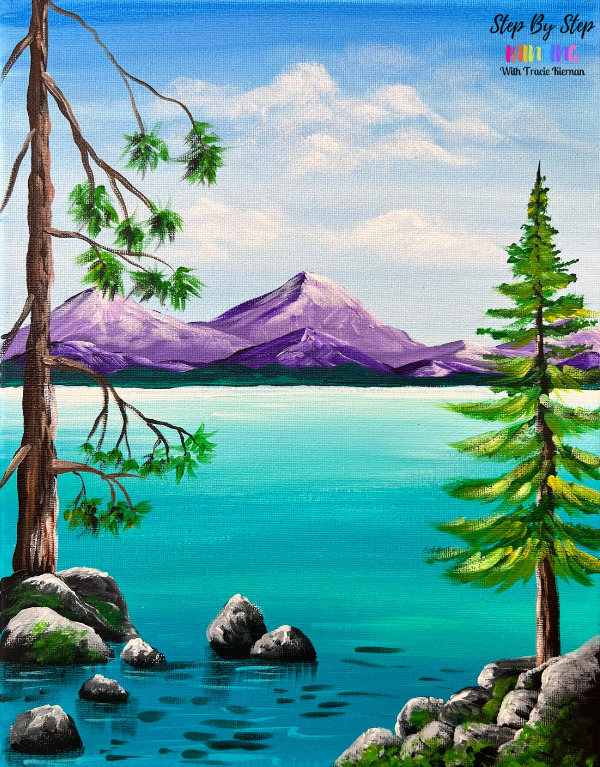
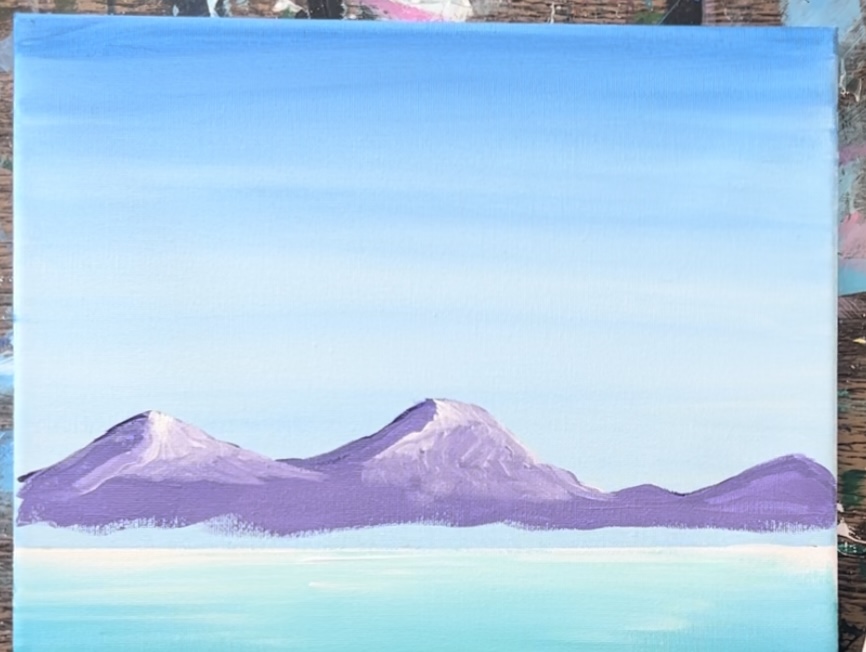
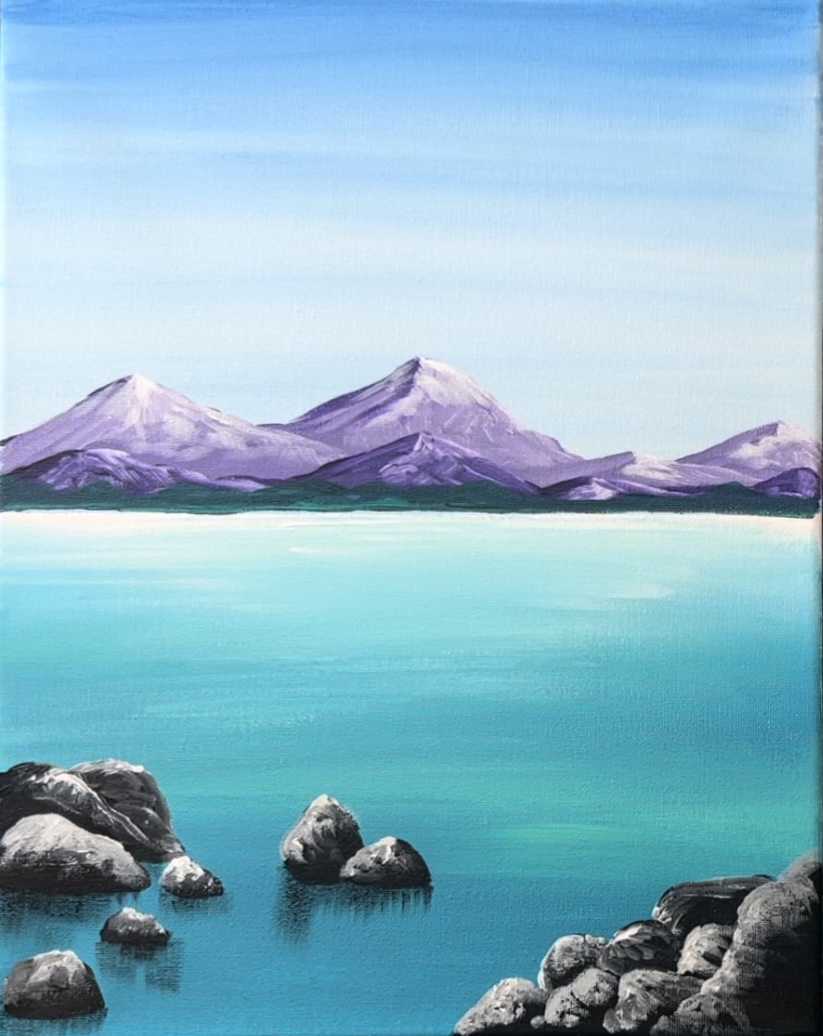
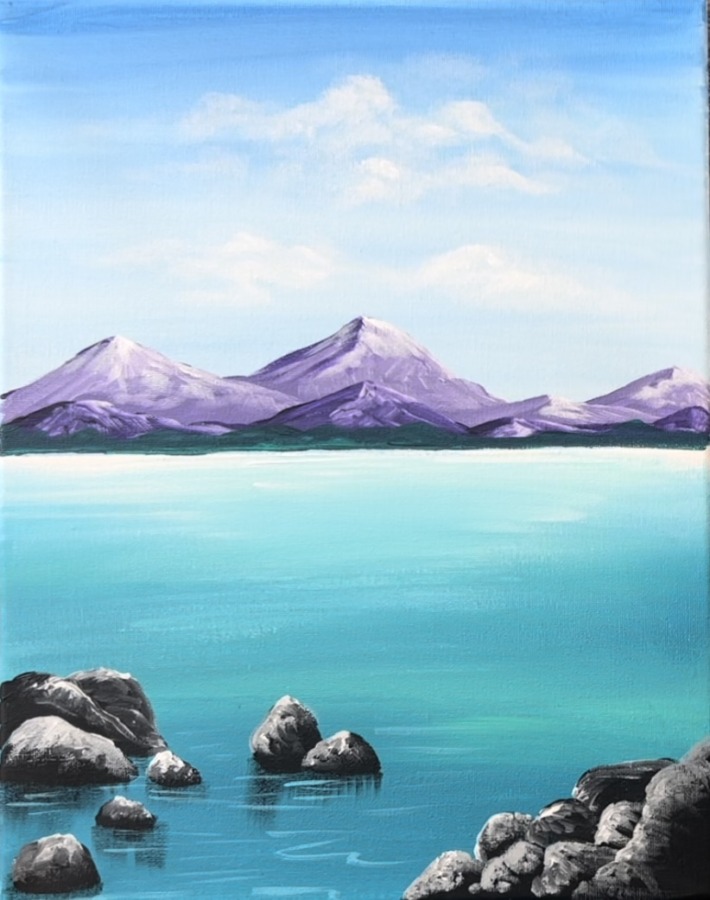
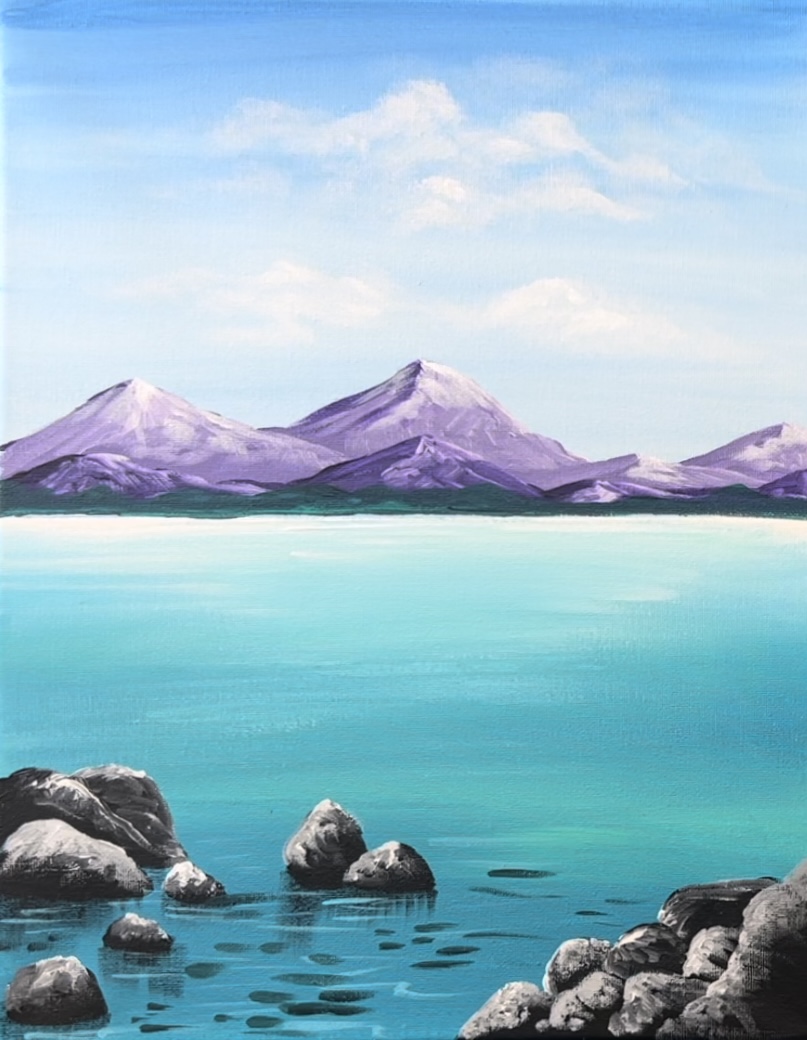
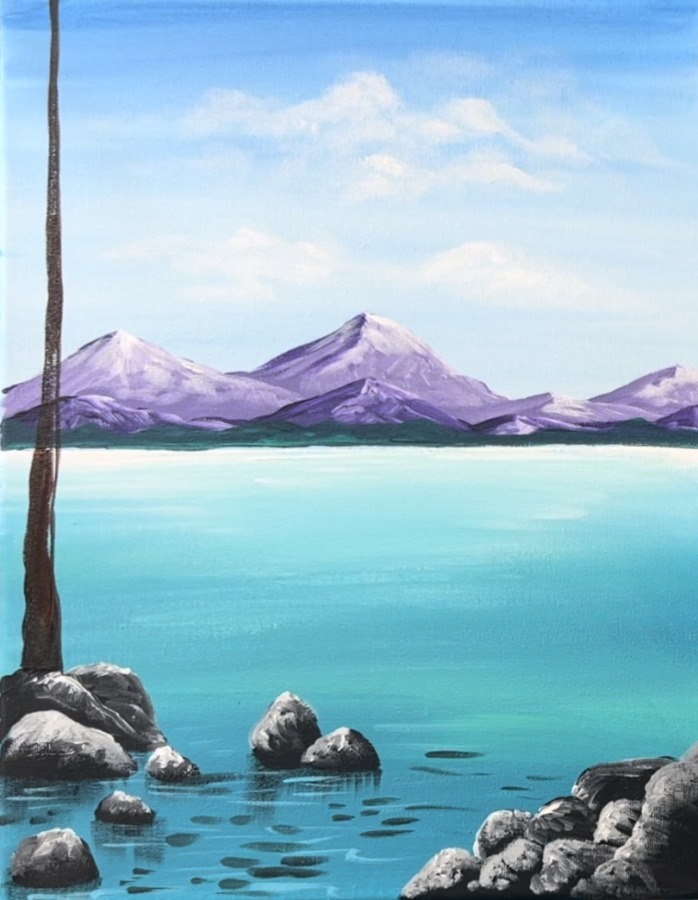
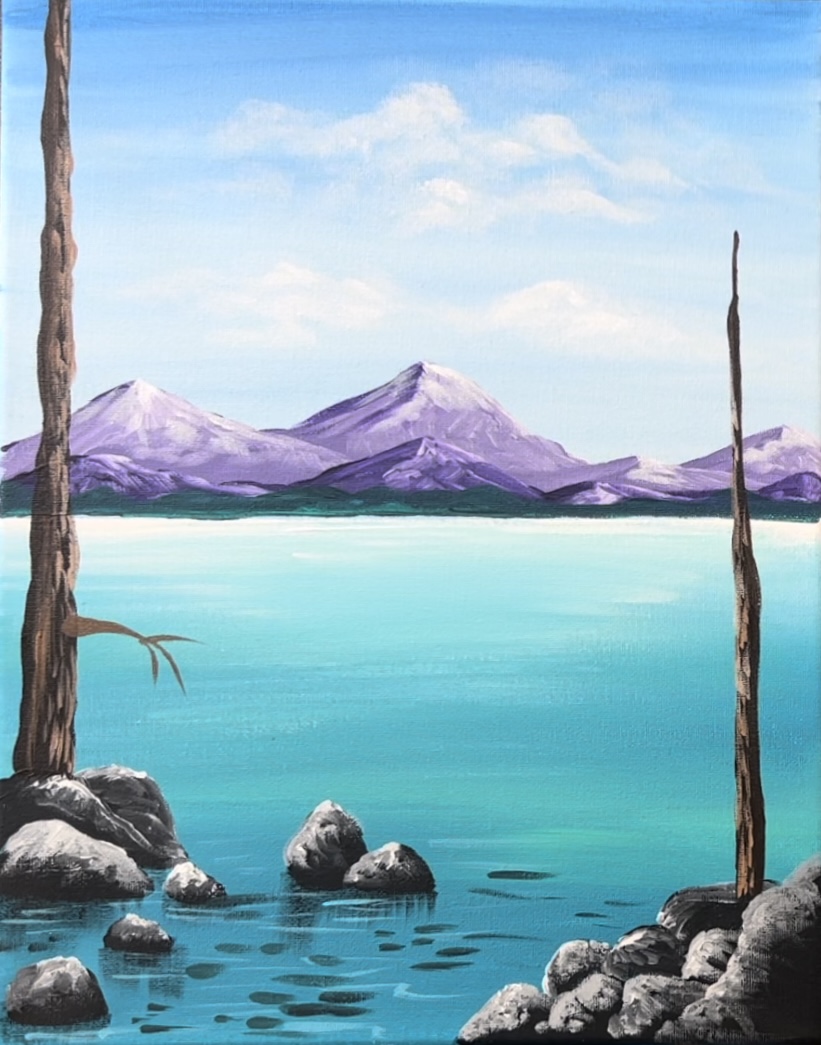
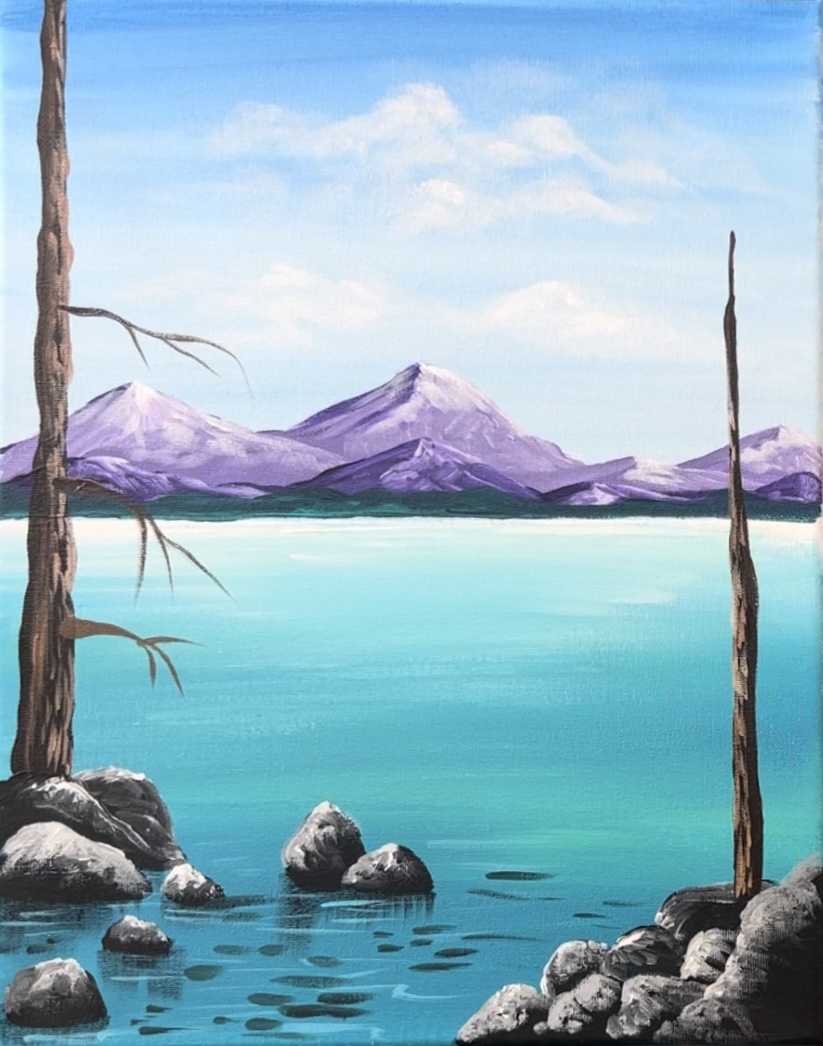
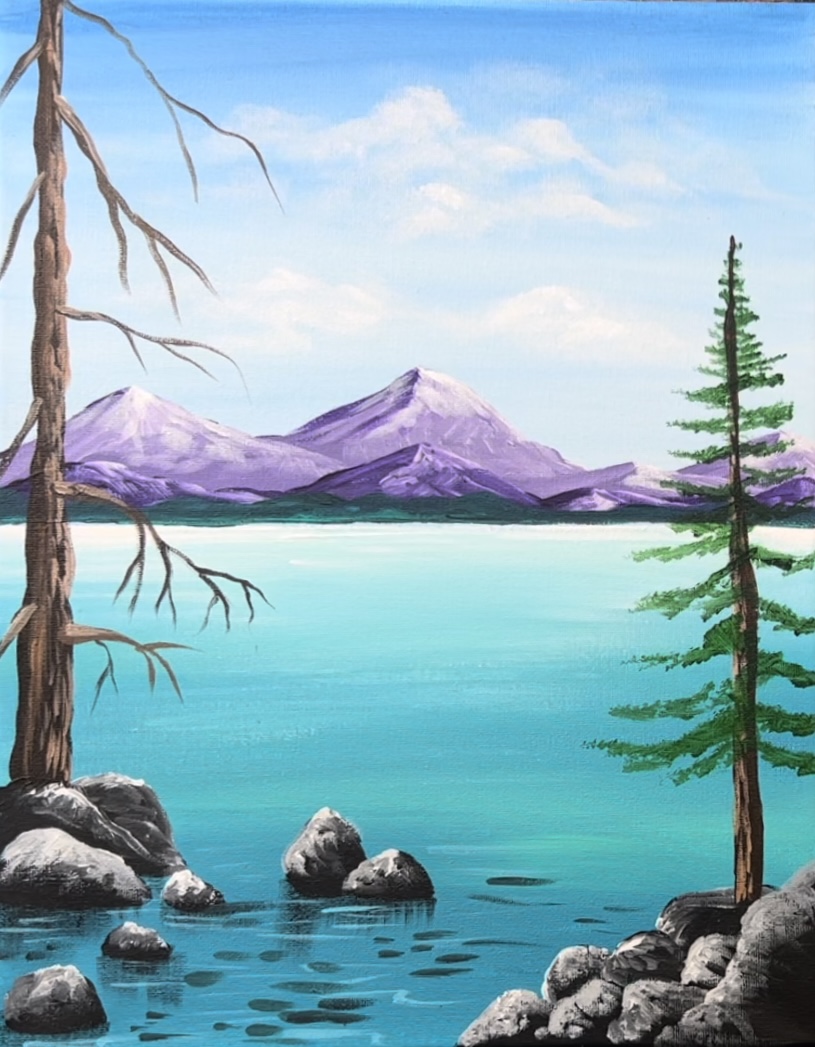
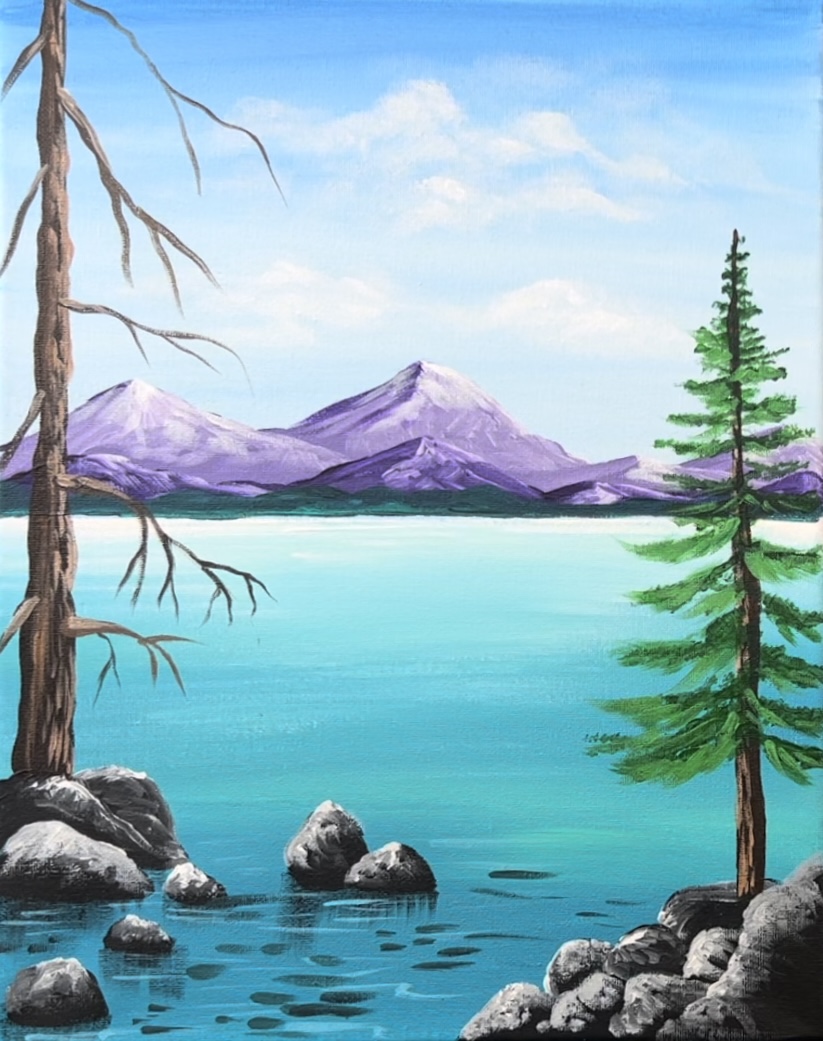
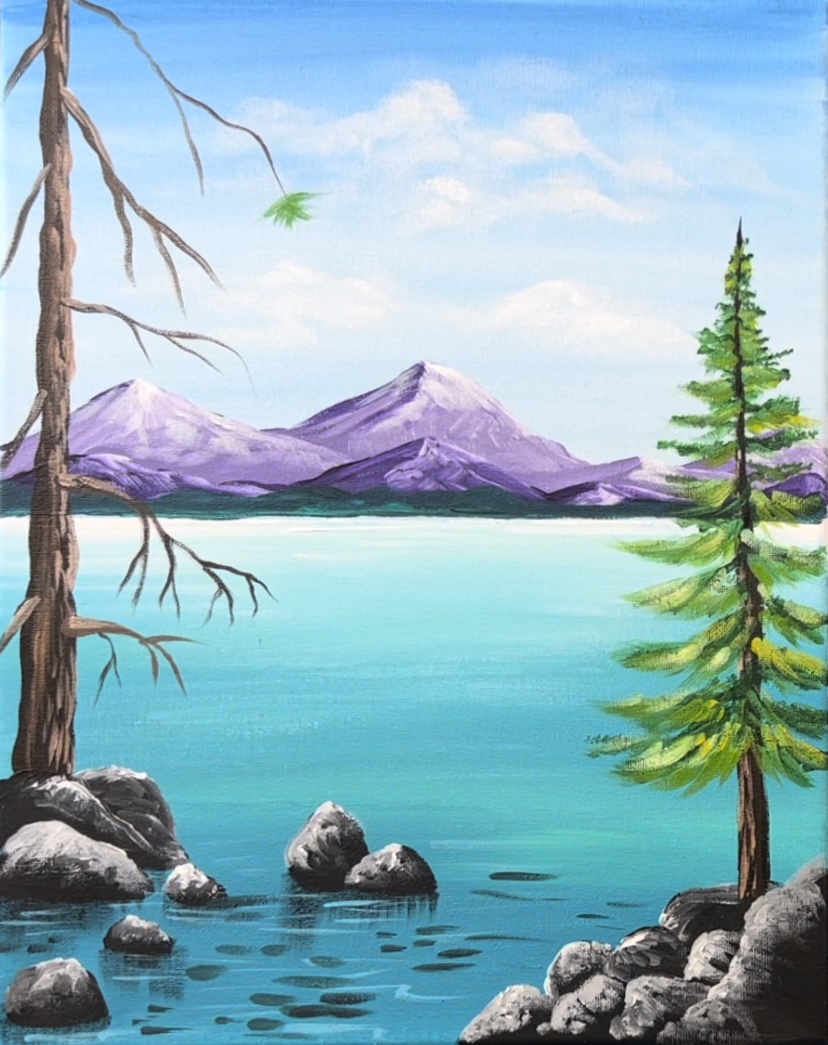
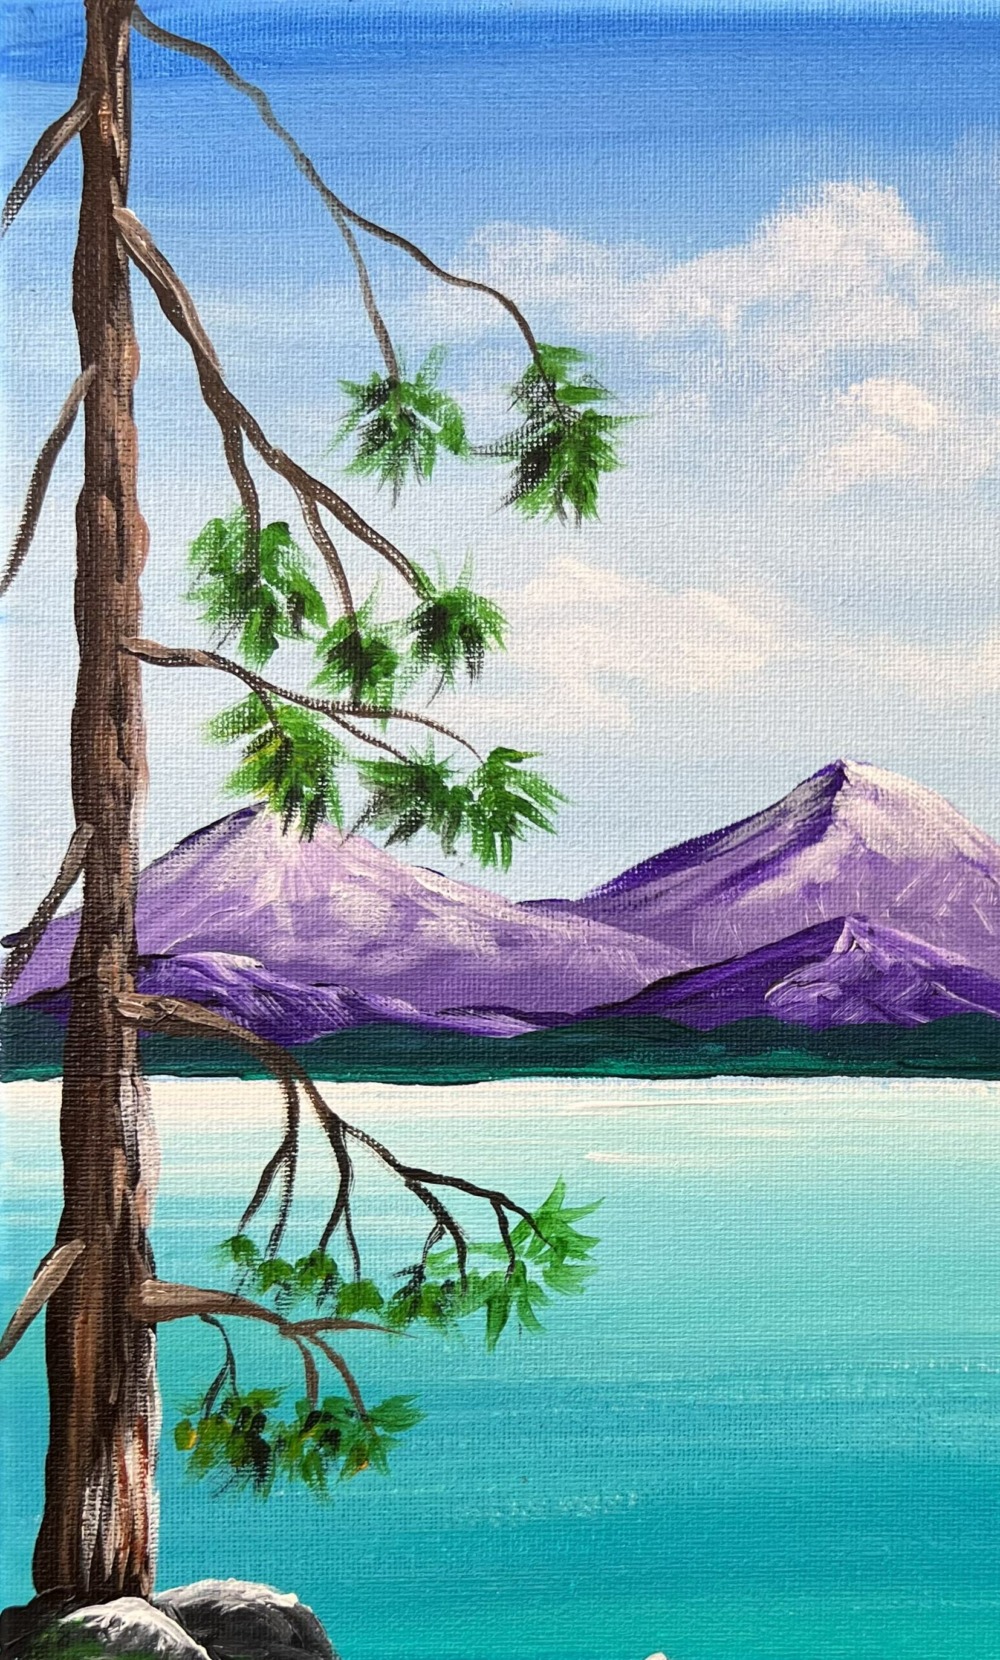
Let’s paint a “Lake Tahoe” landscape scene! This acrylic painting tutorial is a little bit of a challenge painting especially if you struggle with painting trees. I am taking these two trees up a “little notch” and adding more detail to them than the typical tree I do in my landscape paintings!
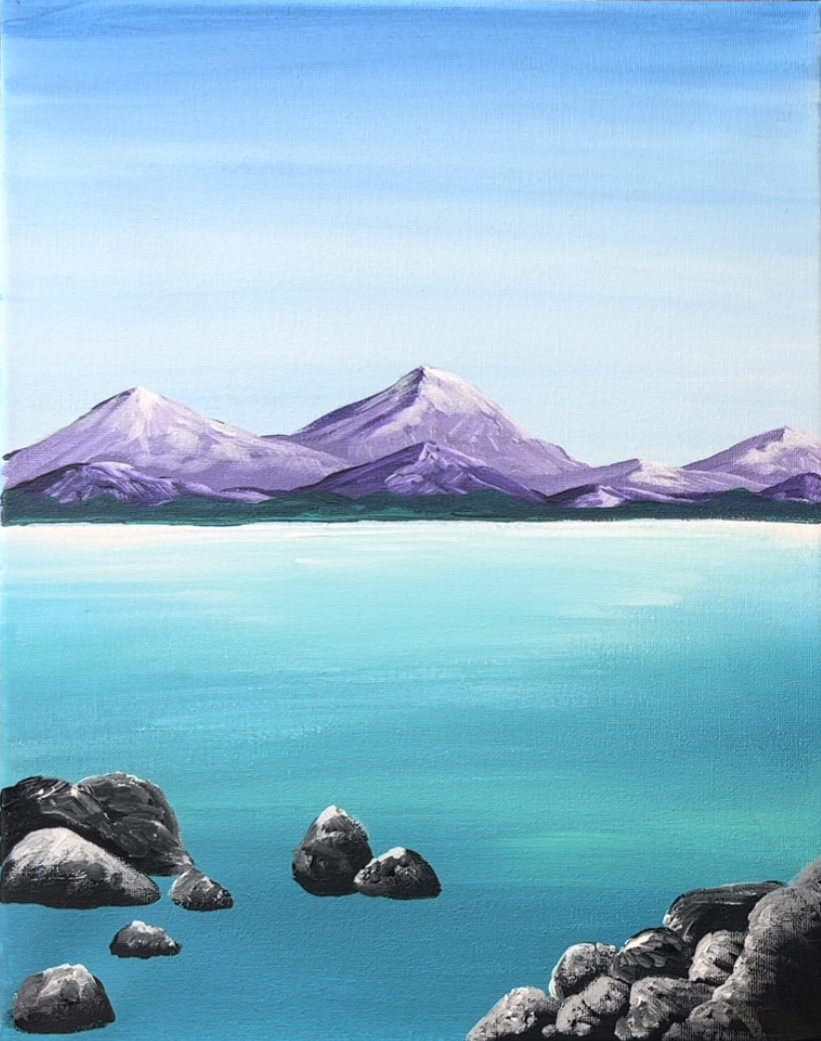
I love the turquoise water in this painting! I actually have never been to Lake Tahoe but the pictures I’ve seen are beautiful with the crystal clear water!
We will be going over some advanced rock painting techniques in this painting as well. If you did my “Galaxy Lighthouse” painting, these rocks are very similar to the technique I used to paint the rocks in that painting.
Enjoy and happy painting!
Materials
- 11 x 14 Canvas
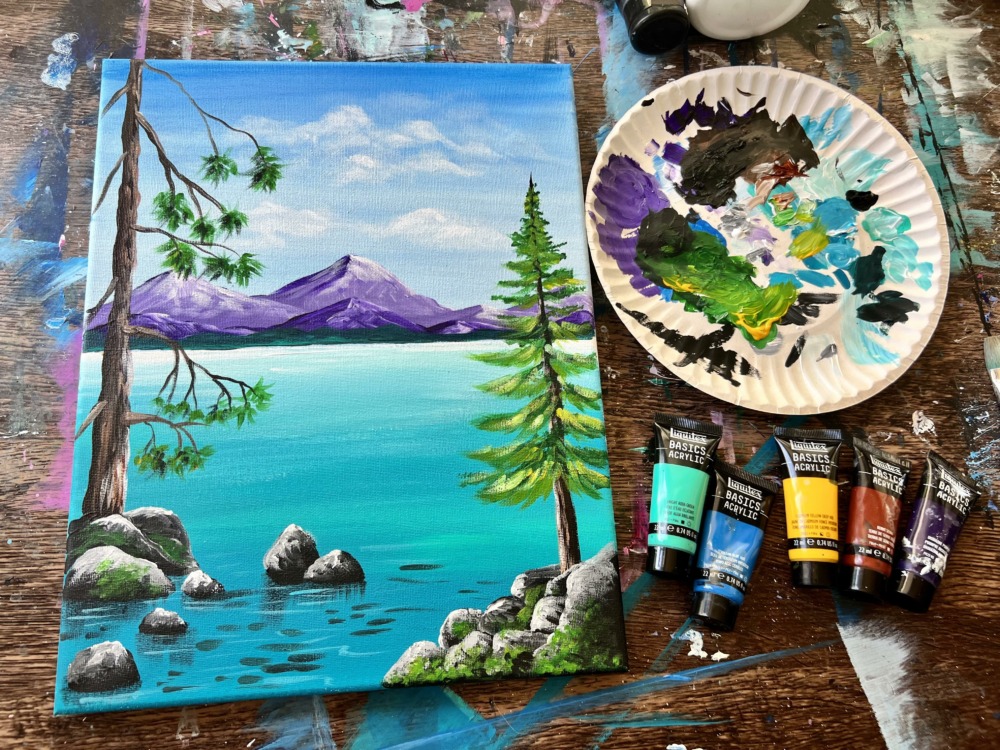
- Acrylic Paint (I use Liquitex BASICS)
- Paint Brushes (I used Princeton Velvetouch & Royal & Langnickel)
- T-Square Ruler
- Painters Tape
- Pencil
- Water Cupe
- Palette
- Protected Workspace
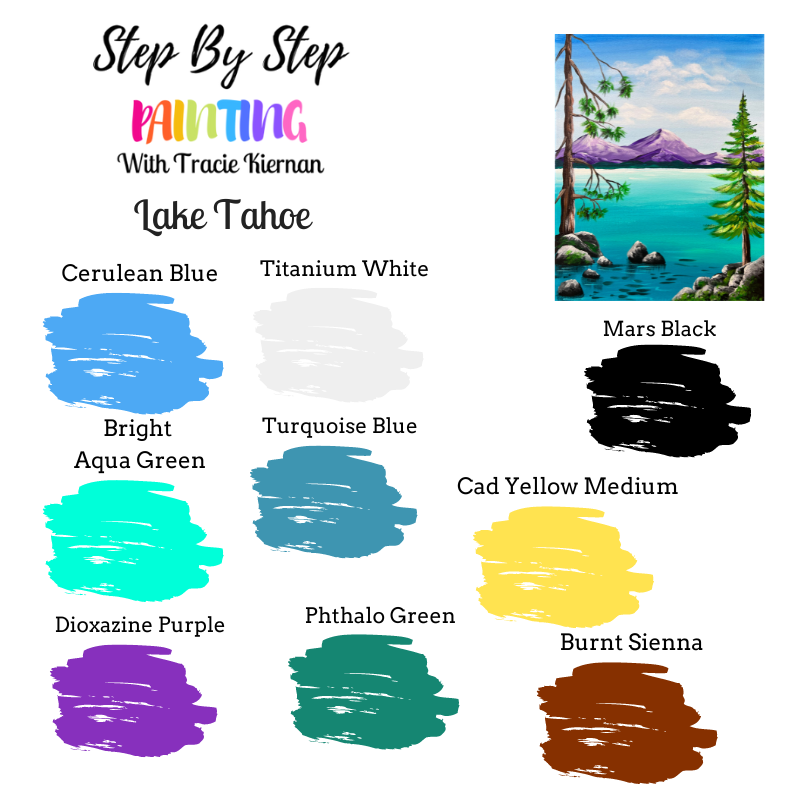
Colors
- Titanium White
- Mars Black
- Cadmium Yellow Medium Hue
- Phthalo Green
- Cerulean Blue
- Turquoise Blue
- Dioxazine Purple
- Burnt Sienna
- Bright Aqua Green
Brushes
- 3/4 Flat Brush
- 12 Bright Brush
- 3/8 Angle Brush
- 4 Round Brush
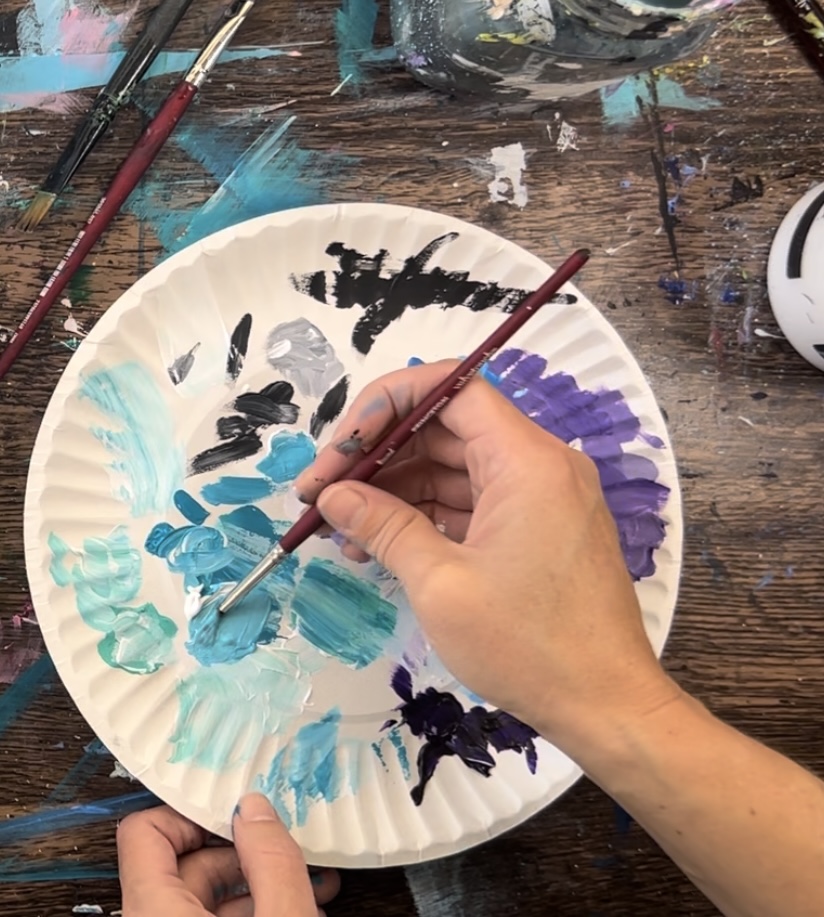
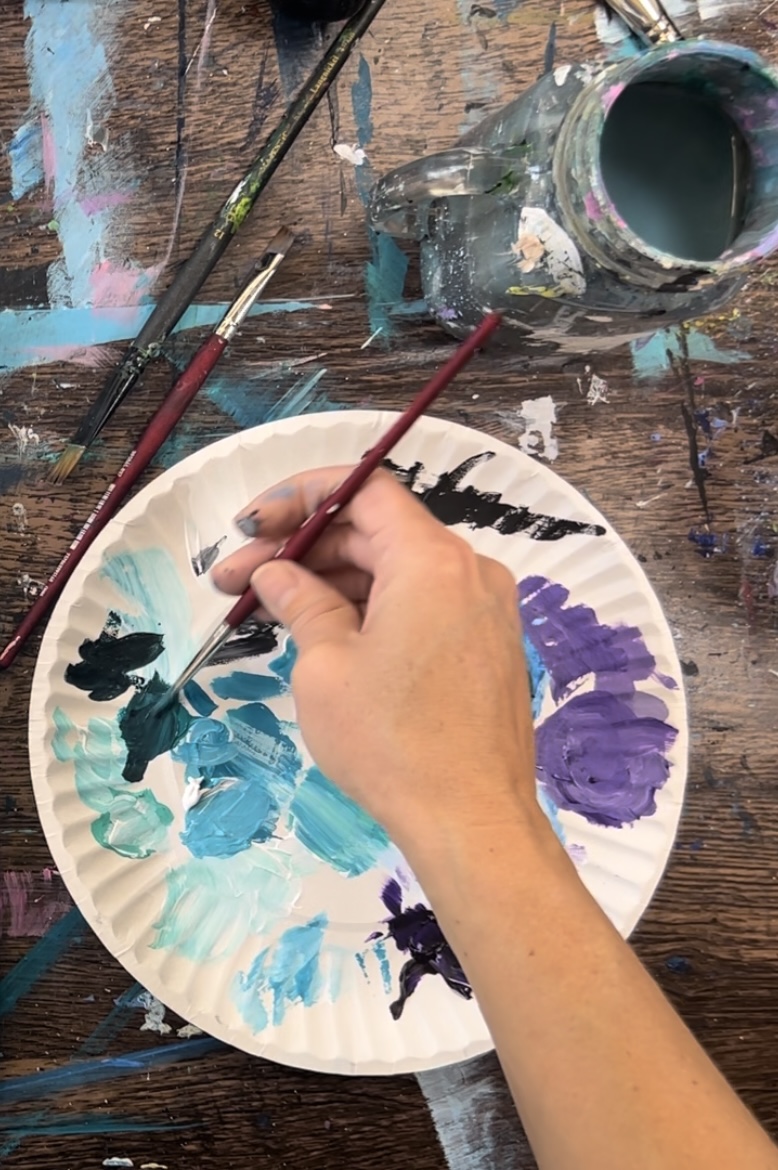
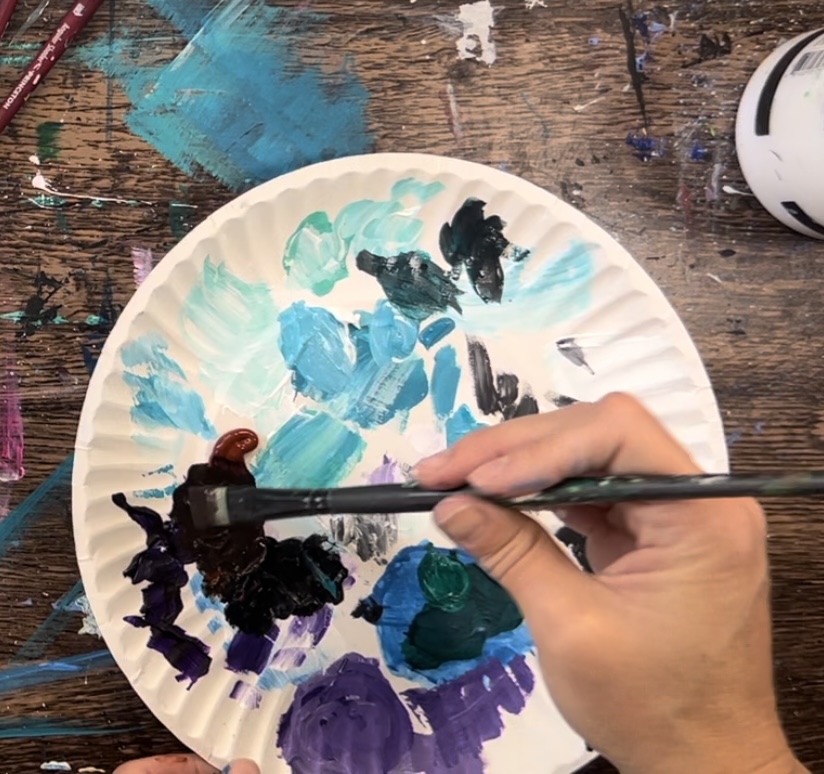
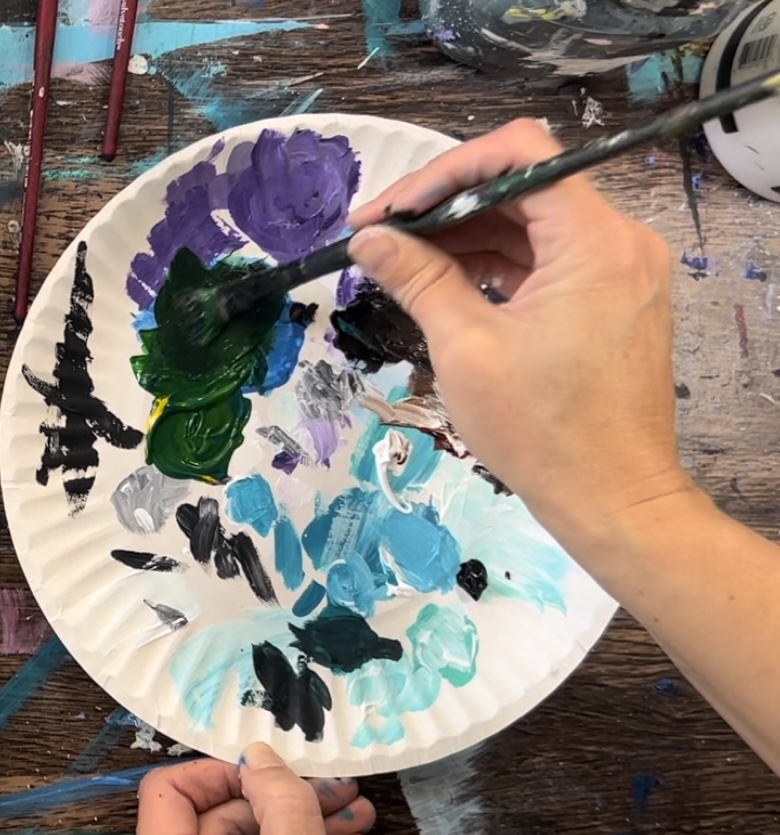
Color Palette
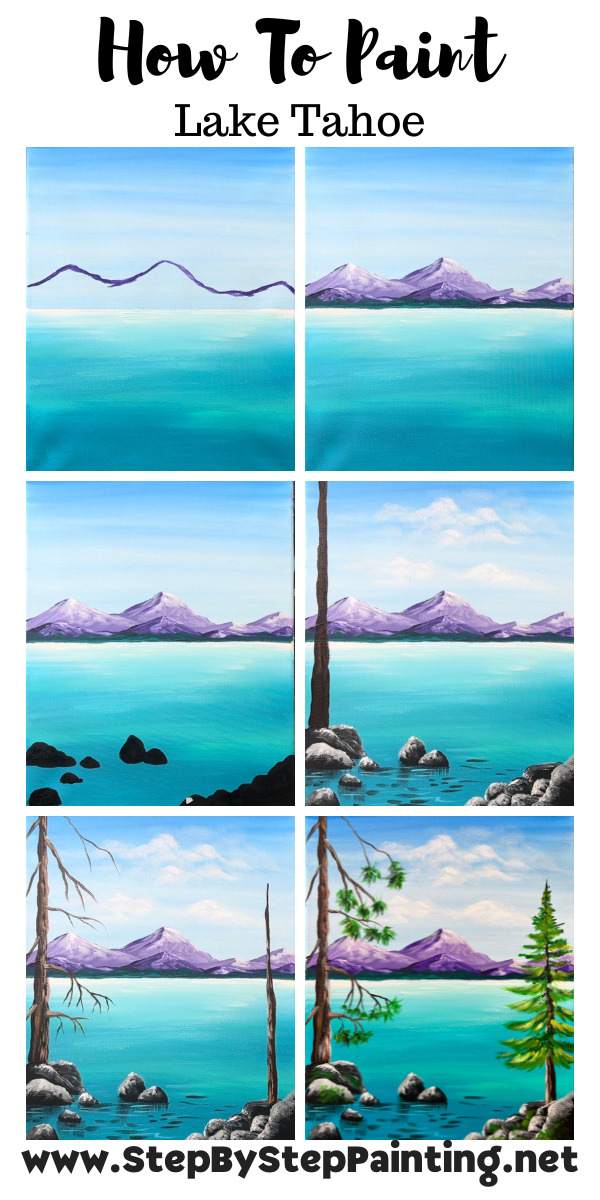
Directions At A Glance
Video
Step By Step Instructions:
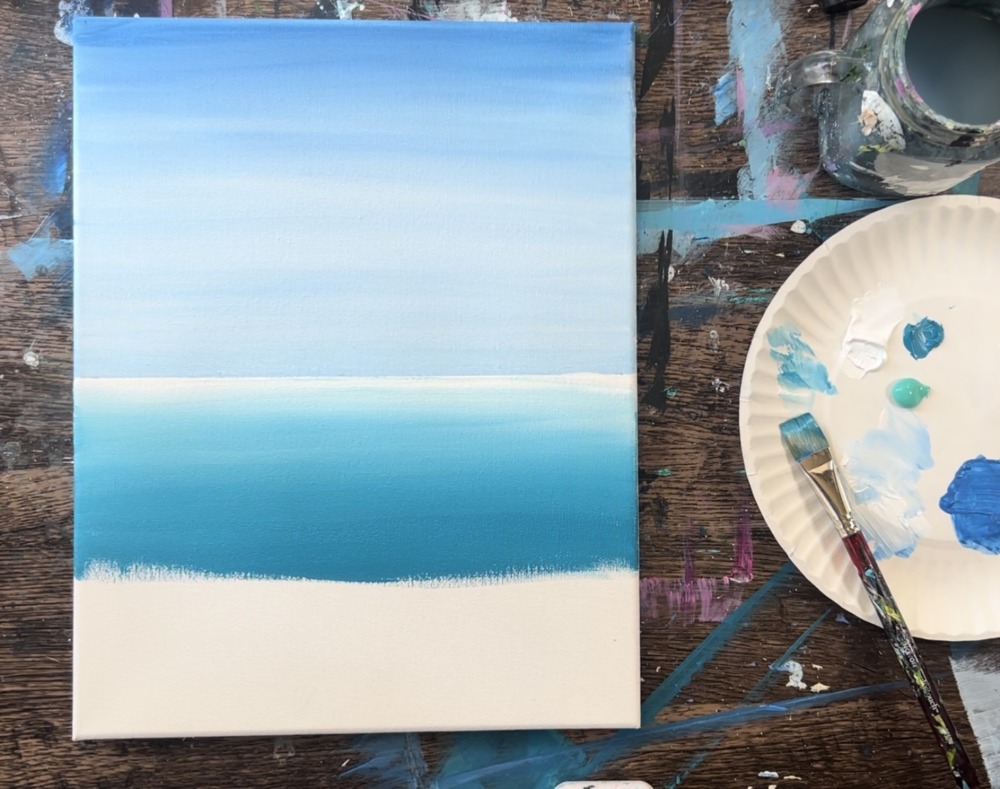
1. Paint Sky
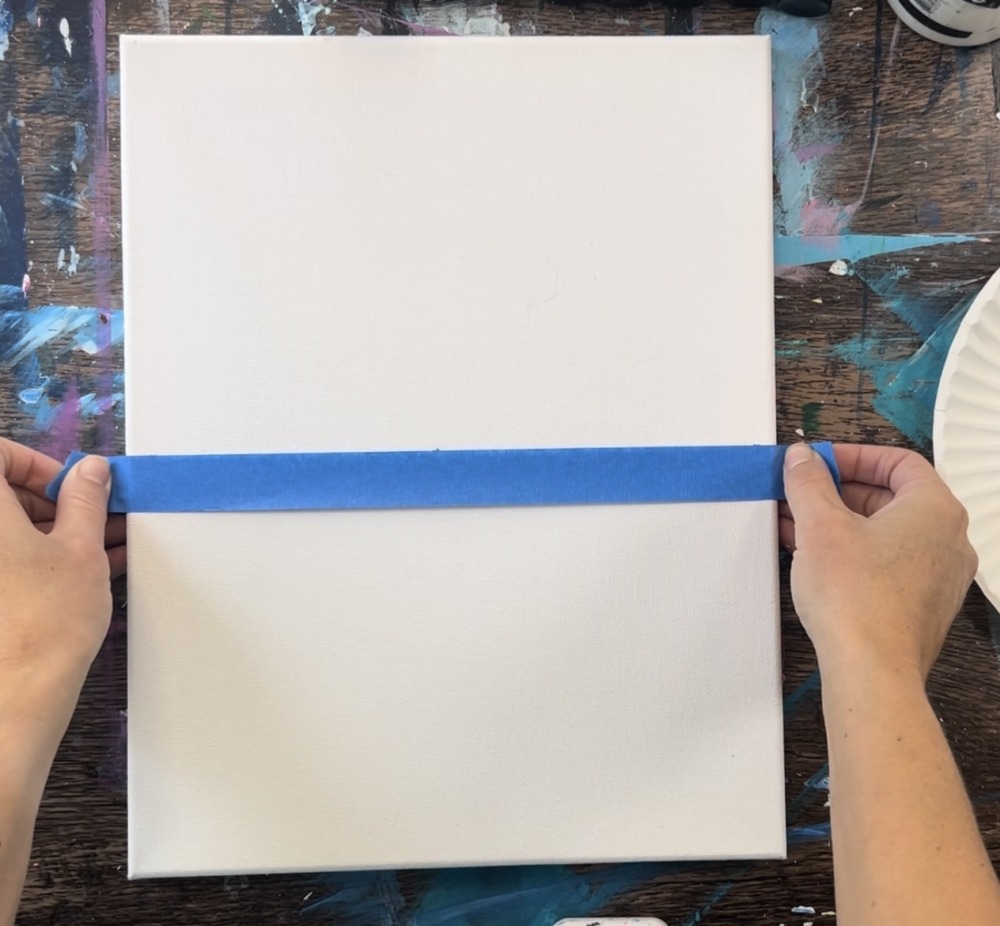
The horizon line in this landscape painting is exactly at 7″ from the bottom of the canvas.
Locate the center of the canvas. If you are working on a 14″ canvas, place a mark at this point. Then lay a piece of painters tape along this midpoint so the top of the painters tape is below the 7″ mark. You’ll want the top of the tape to be below the horizon line because we are painting the sky first.
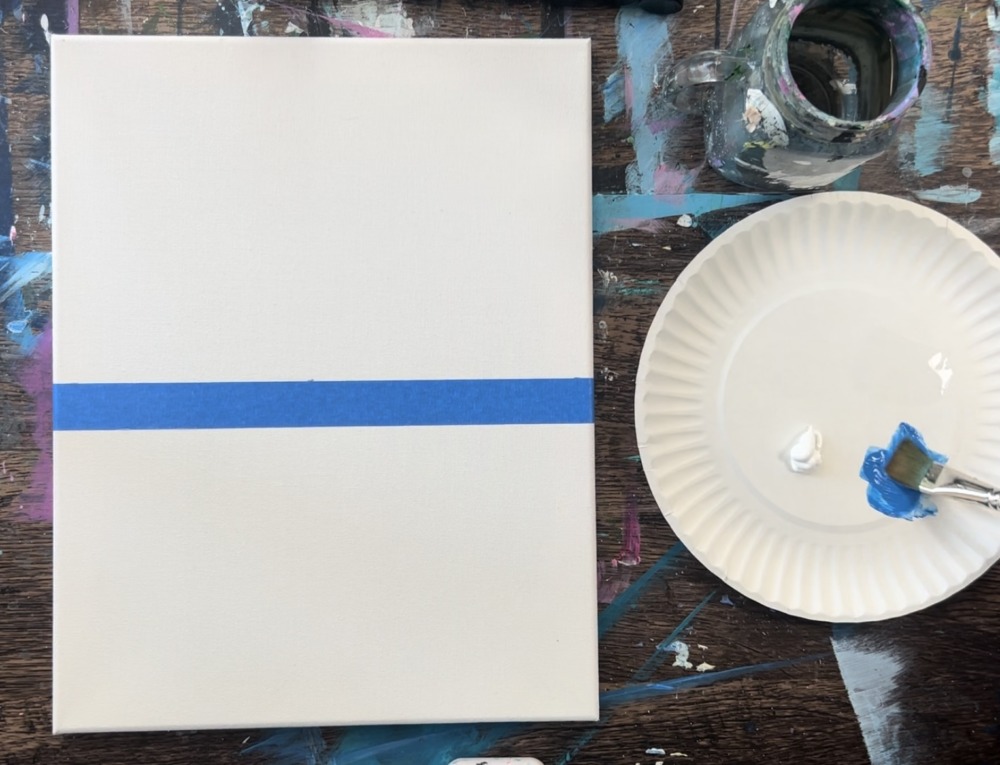
Load your palette with the two colors: “cerulean blue” and “titanium white”. Load your 3/4″ flat wash brush into water and pat dry. Then load it into just cerulean blue. Paint left and right strokes with the cerulean blue and go down about a few inches.
Then, without rinsing the brush, load the tip of the brush into titanium white. Add the titanium white below the cerulean blue and blend up. This will start to create a gradient blend.
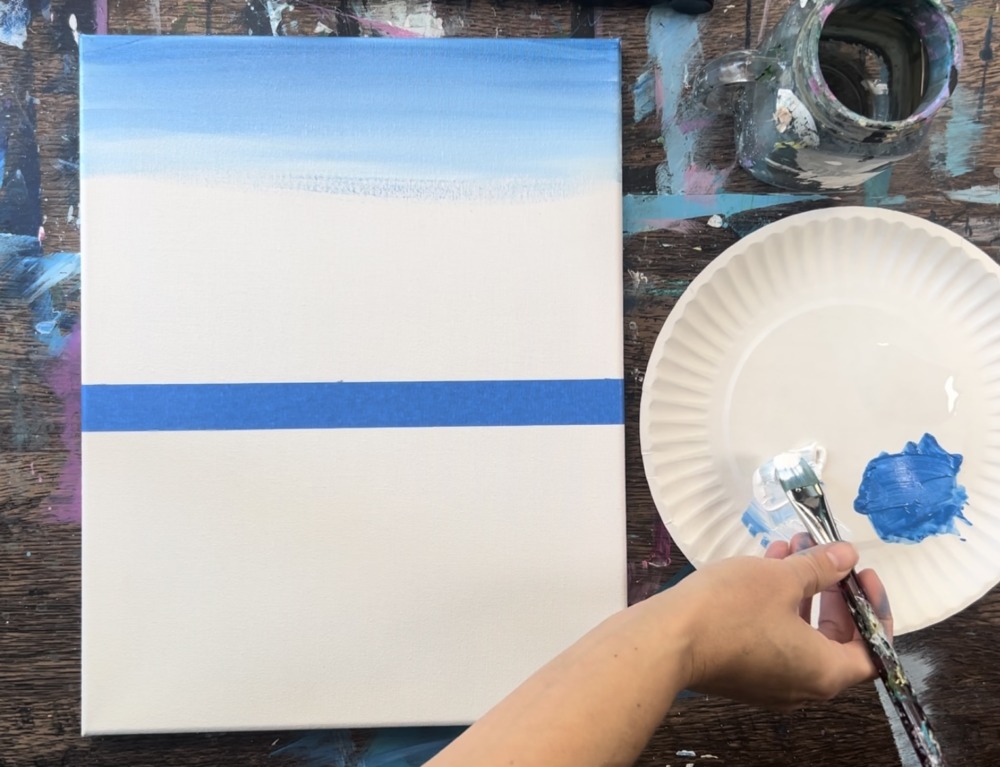
Continue to paint left and right strokes all the way down to the horizon line. Gradually add more white as you work your way down. The goal is to make the sky darker at the top (pure cerulean blue) and lighter at the bottom where the horizon line is.
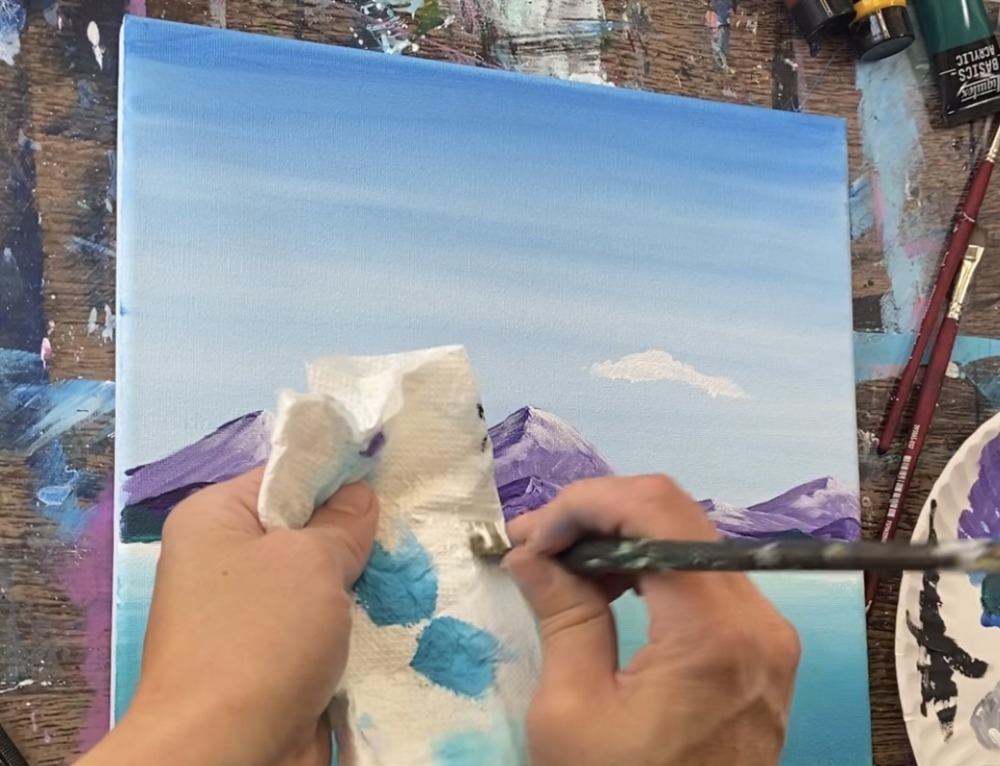
Then gently lift the painters tape. I did not wait for this to dry before lifting the tape.

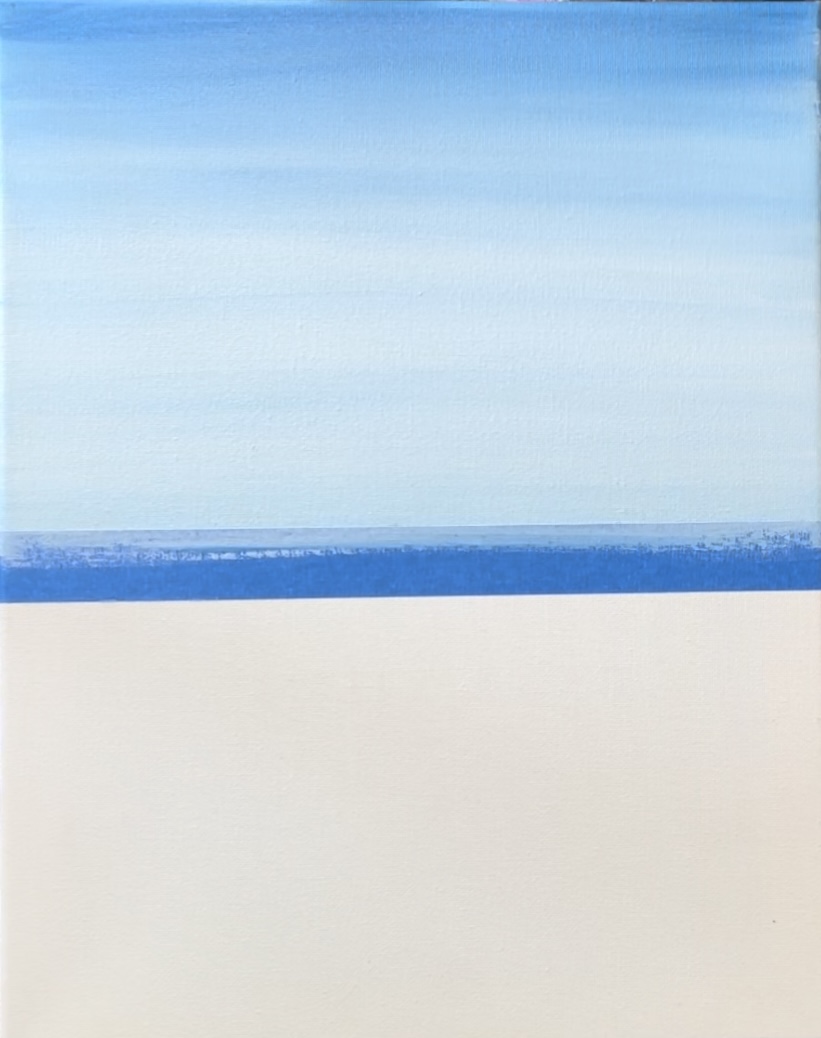
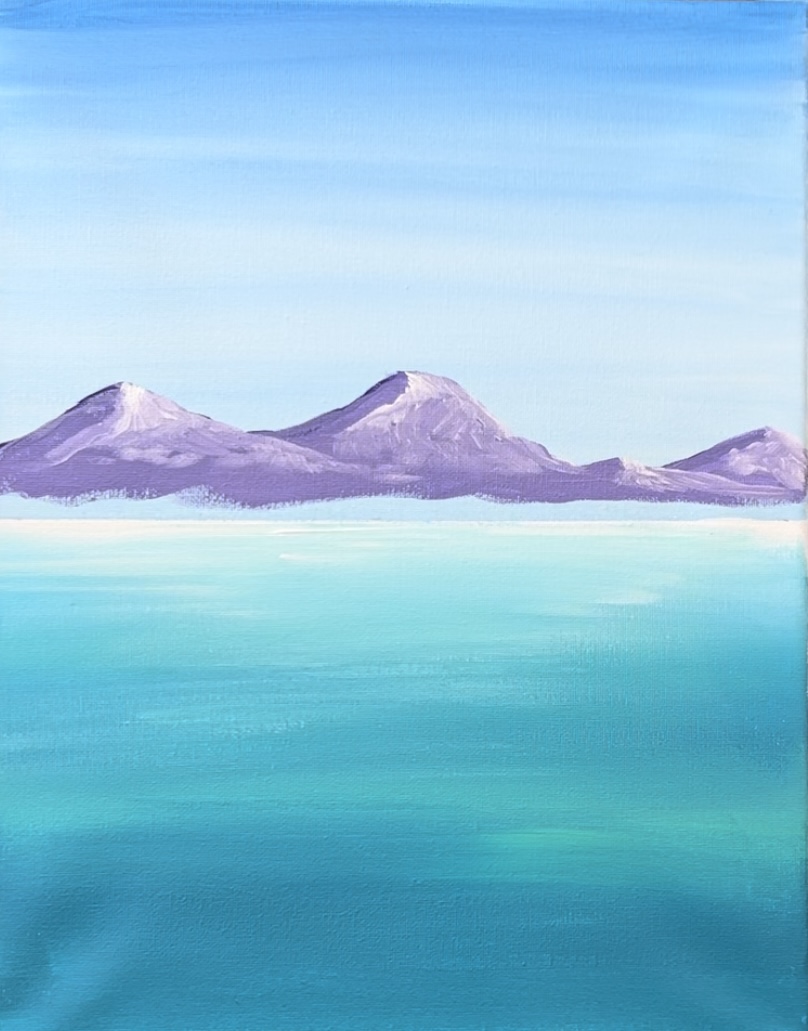
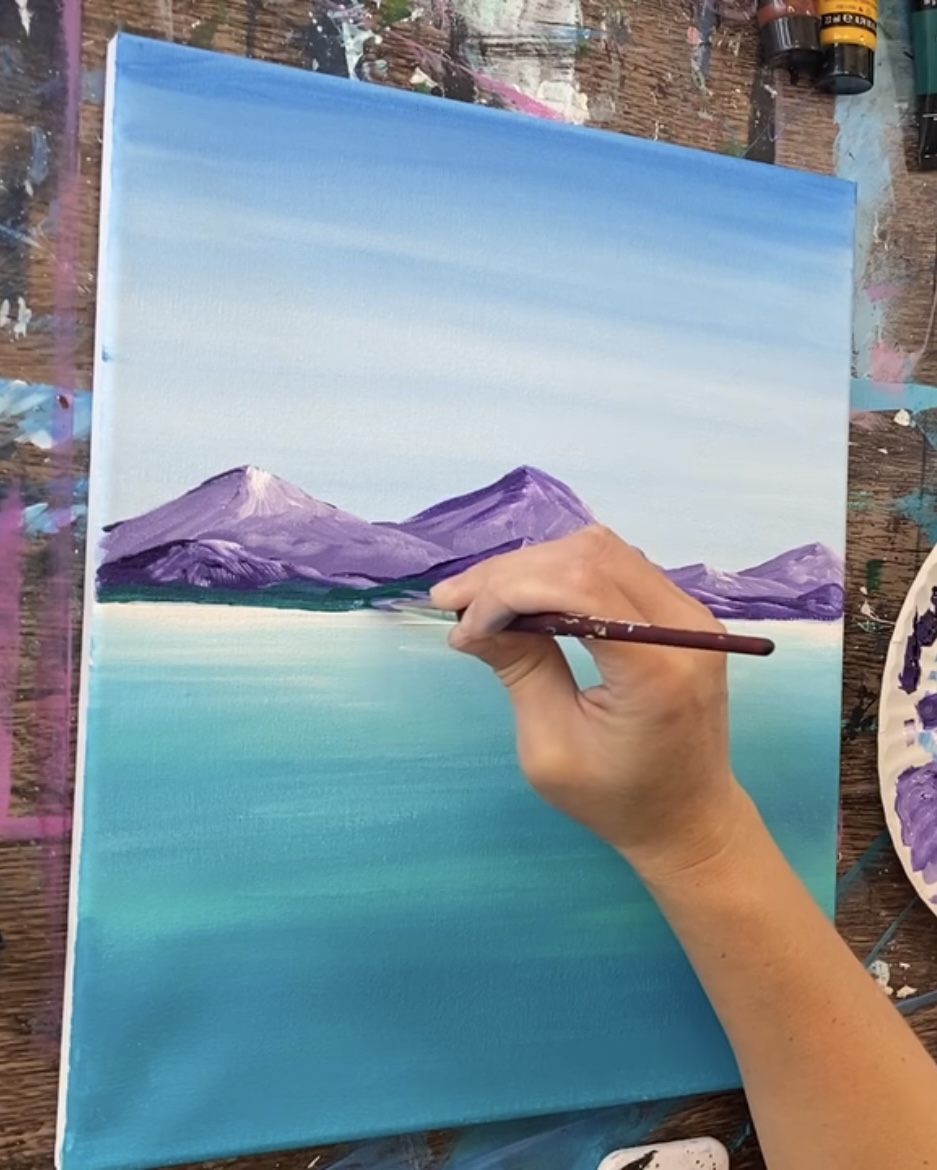
2. Paint Water
Load your palette with: “titanium white”, “turquoise blue” and “bright aqua green”. Use the 3/4 flat brush to paint only titanium white just under the horizon line. Go down about 1″ with this white.
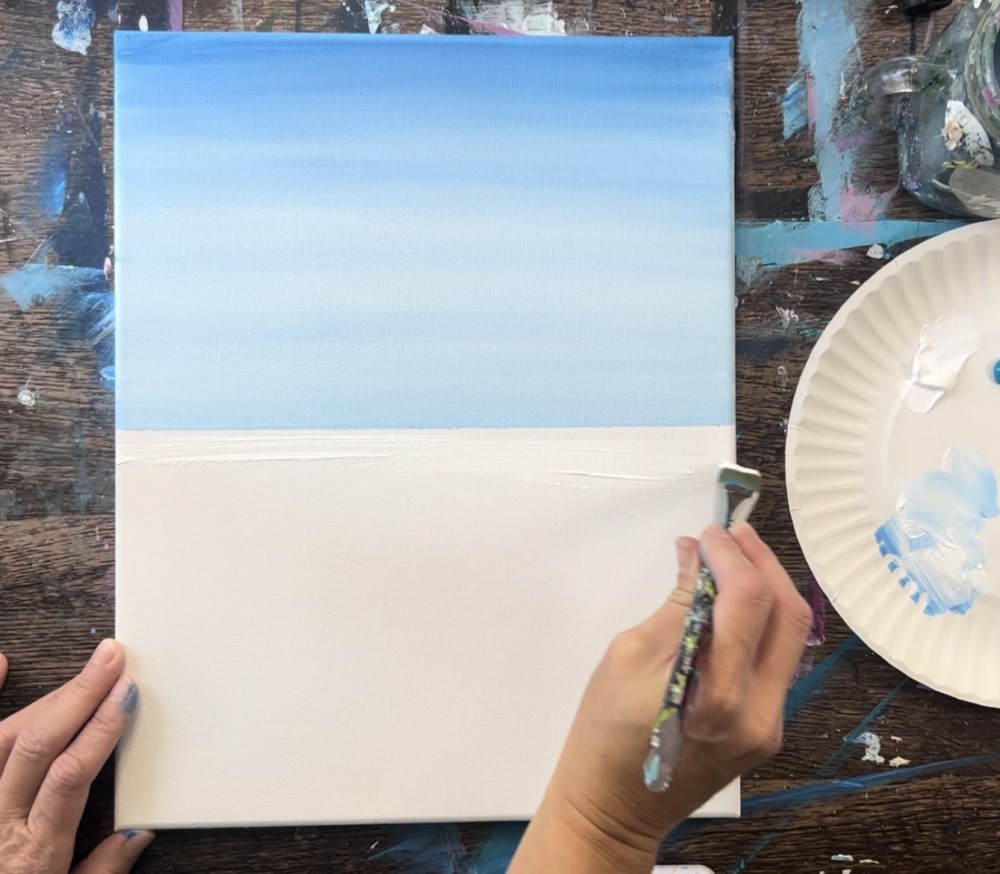
Then add a very small amount of turquoise to your brush (like a very small dot of paint on the corner of the brush). Blend it up into the white but not all the way! Leave a pure white area just under the horizon line.
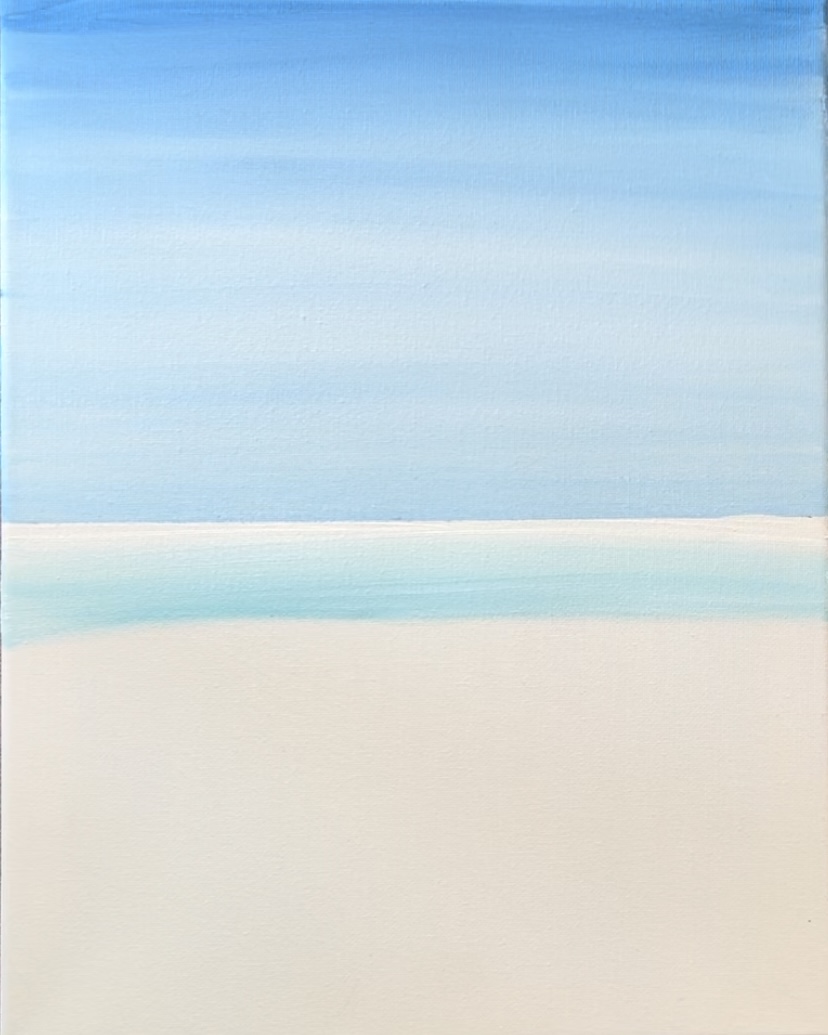
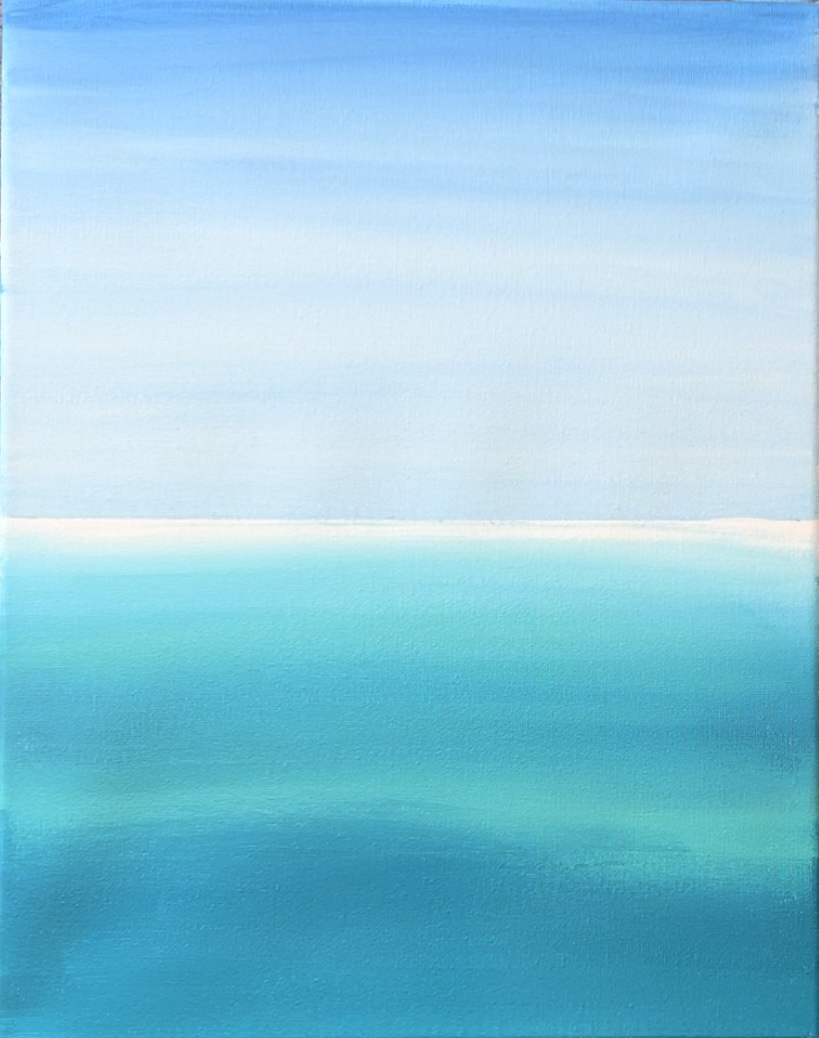
Go down about three inches with this very light turquoise color. Then load your brush in solid turquoise. Paint below the light turquoise area and then gently blend it up. The goal with this water is to create a gradient blend of white to very light turquoise to dark turquoise on the bottom.
Blend this very gently. Make sure there still is a small white water area just under the horizon line.
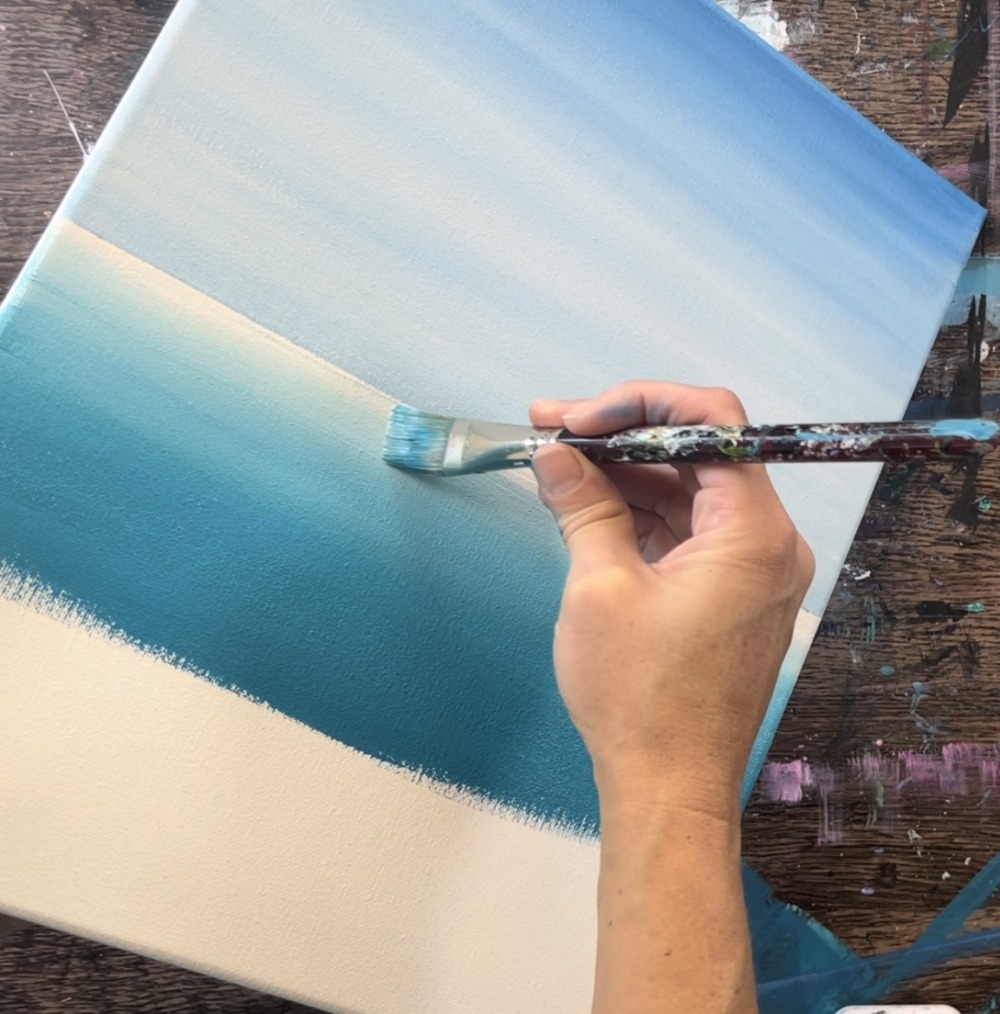
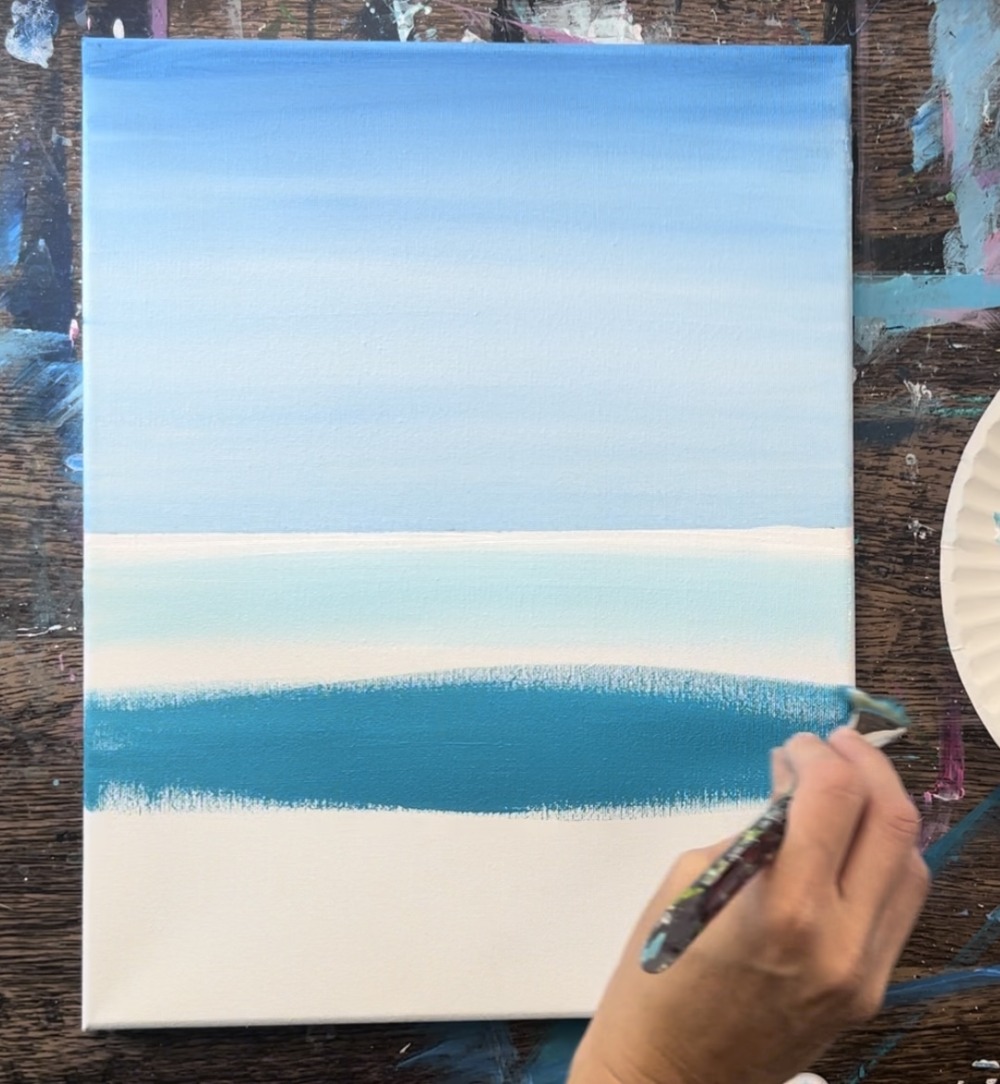
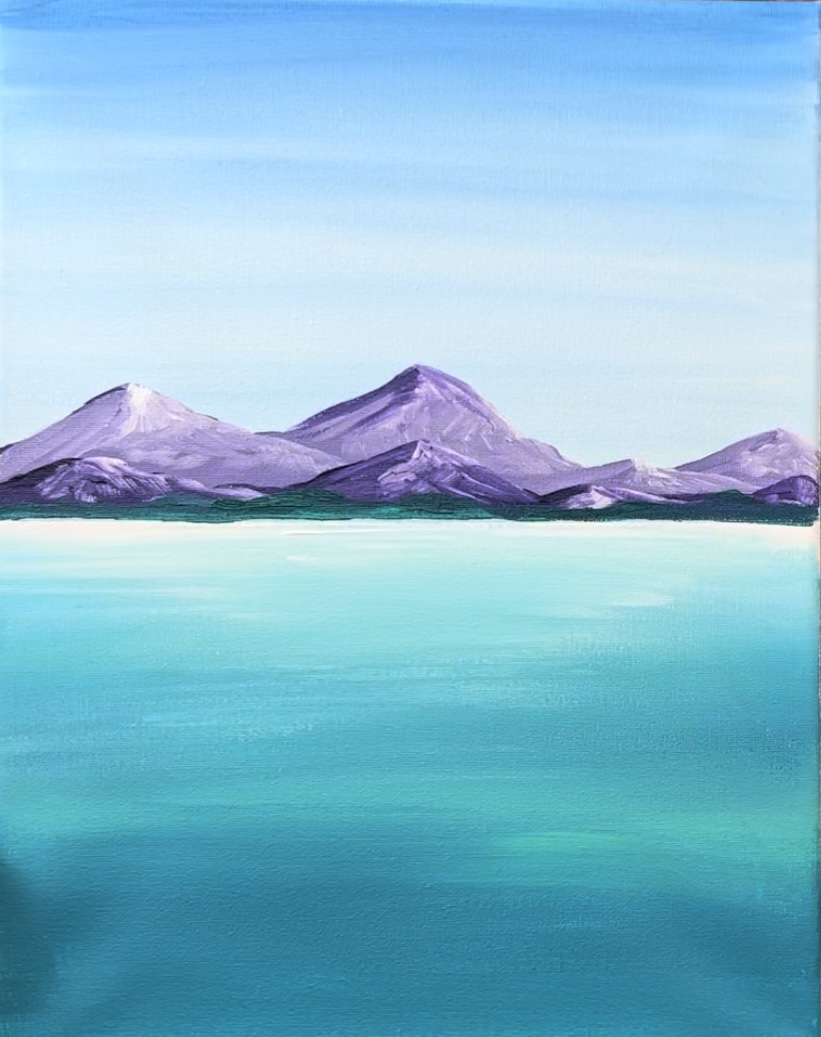
Go down about halfway and then load your palette with “bright aqua green”.
Next, wipe your brush off. Then load it into the “bright aqua green”. Blend this bright aqua green into the turquoise to create a lighter aqua area in the water.
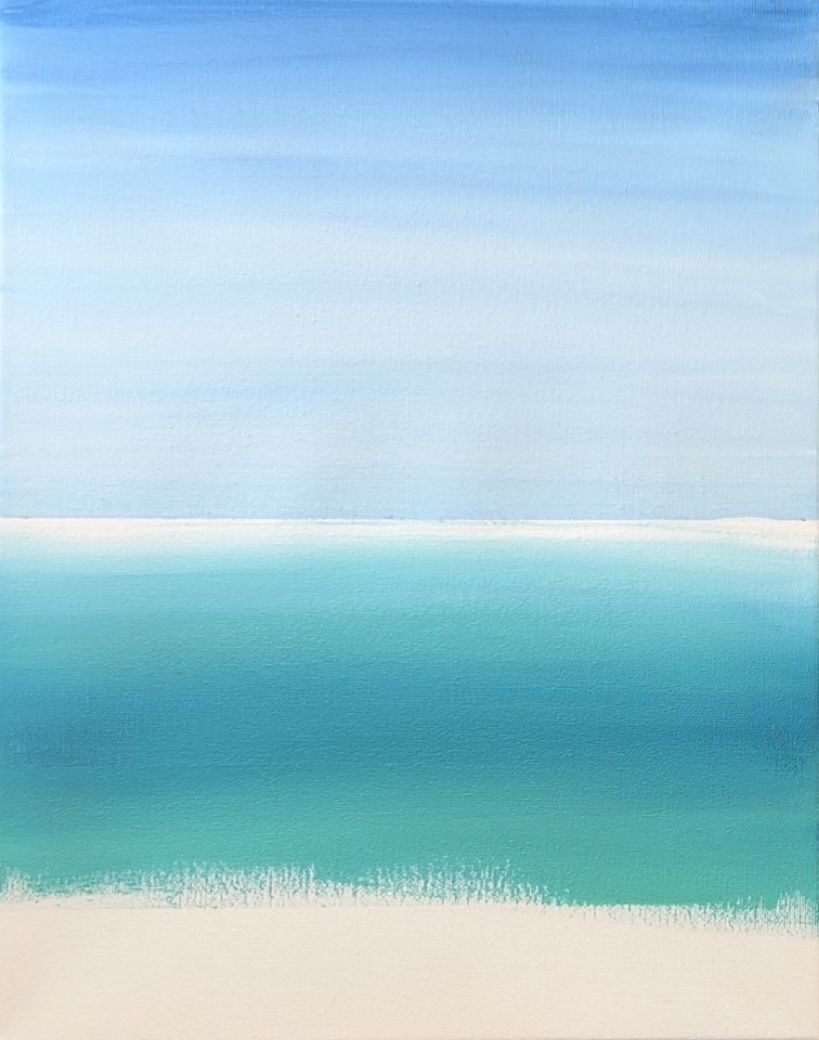
Then continue down the rest of the water area with turquoise until you get to the bottom edge of the canvas.
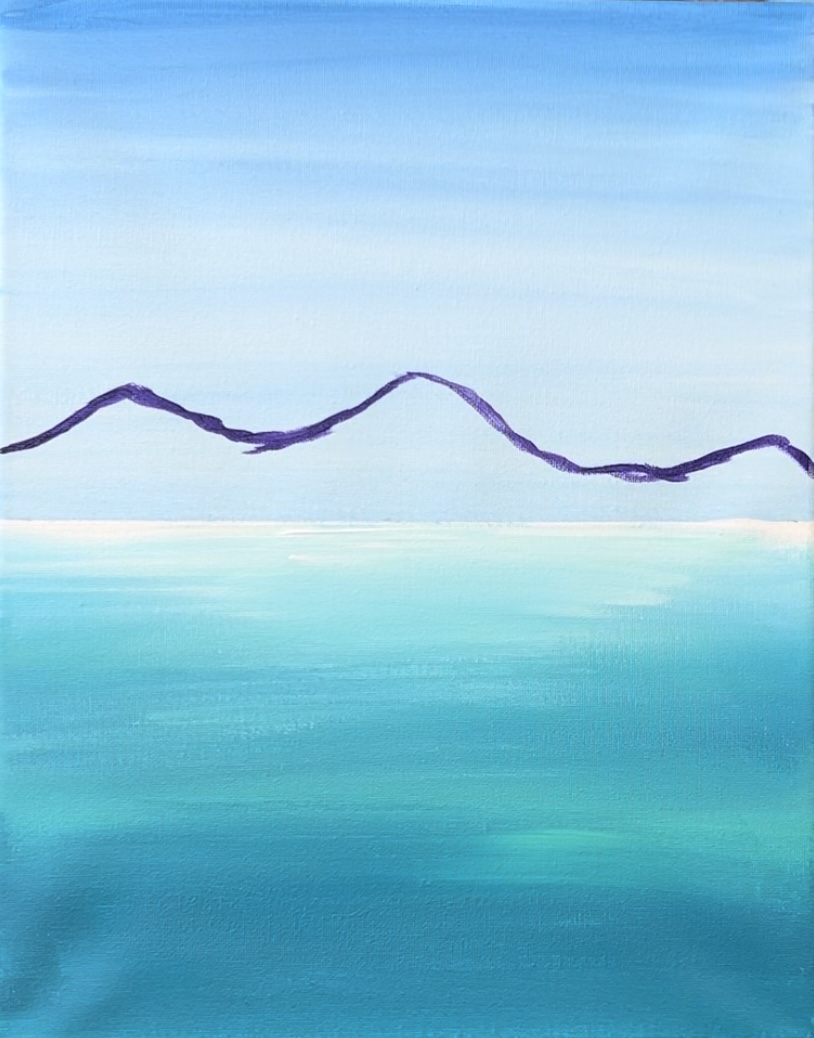
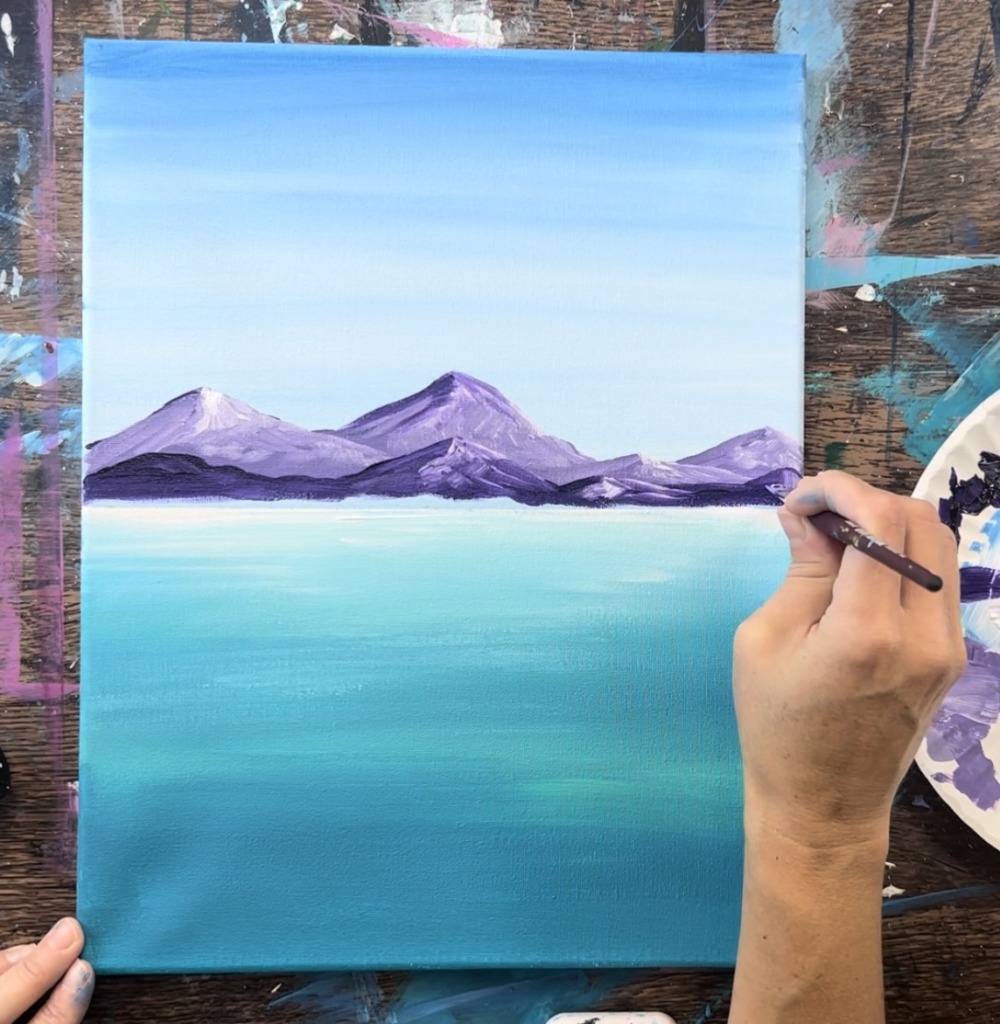
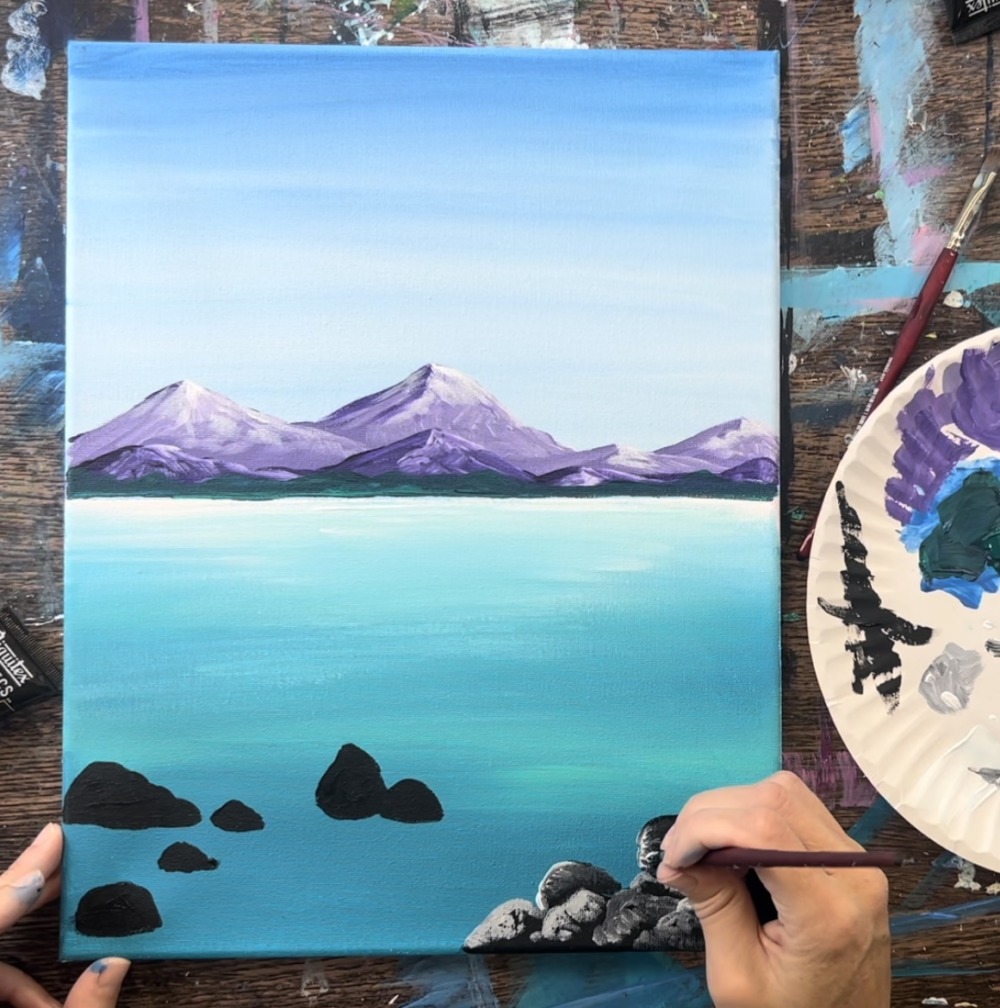
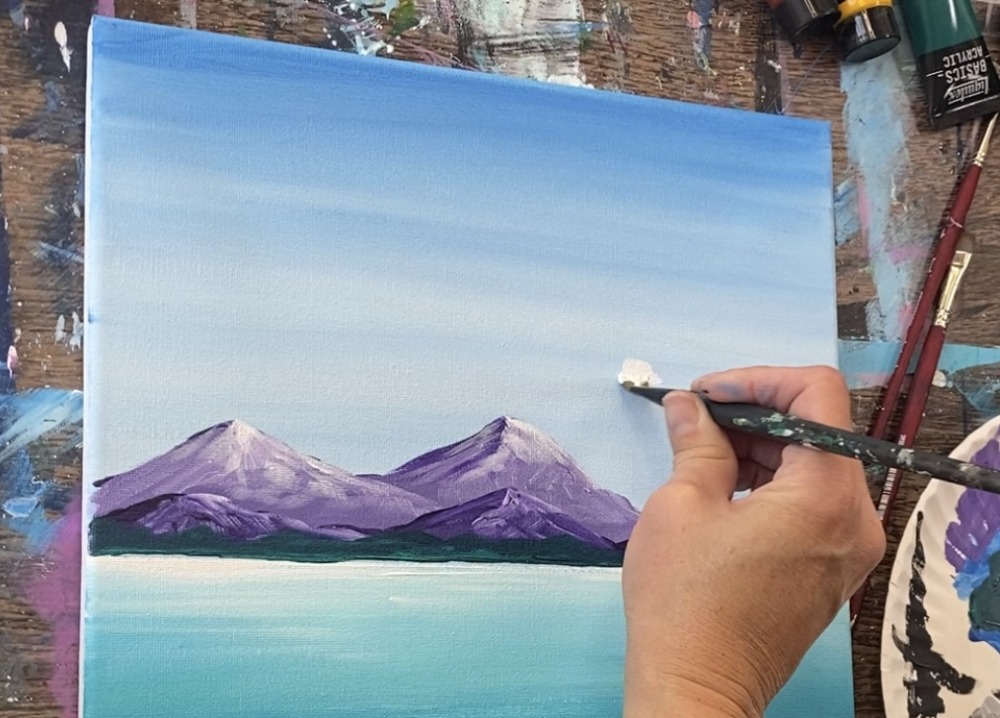
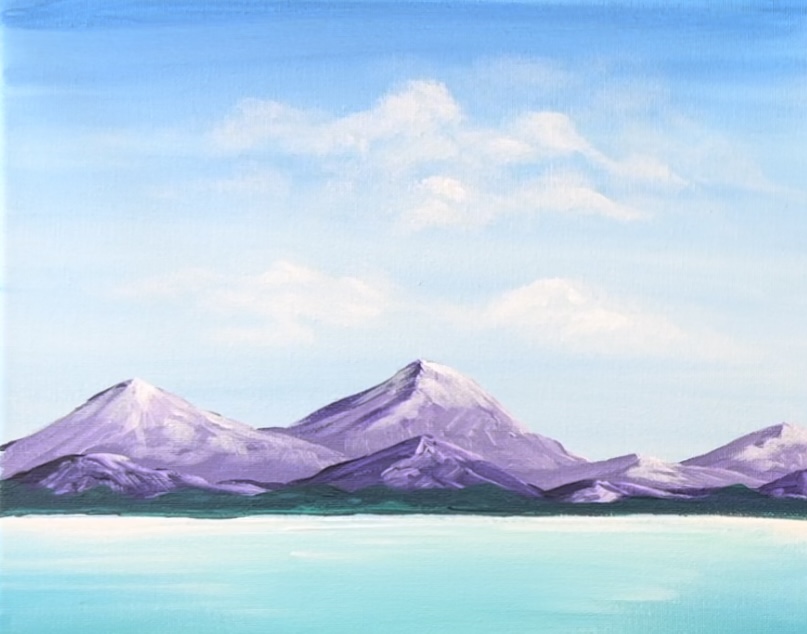
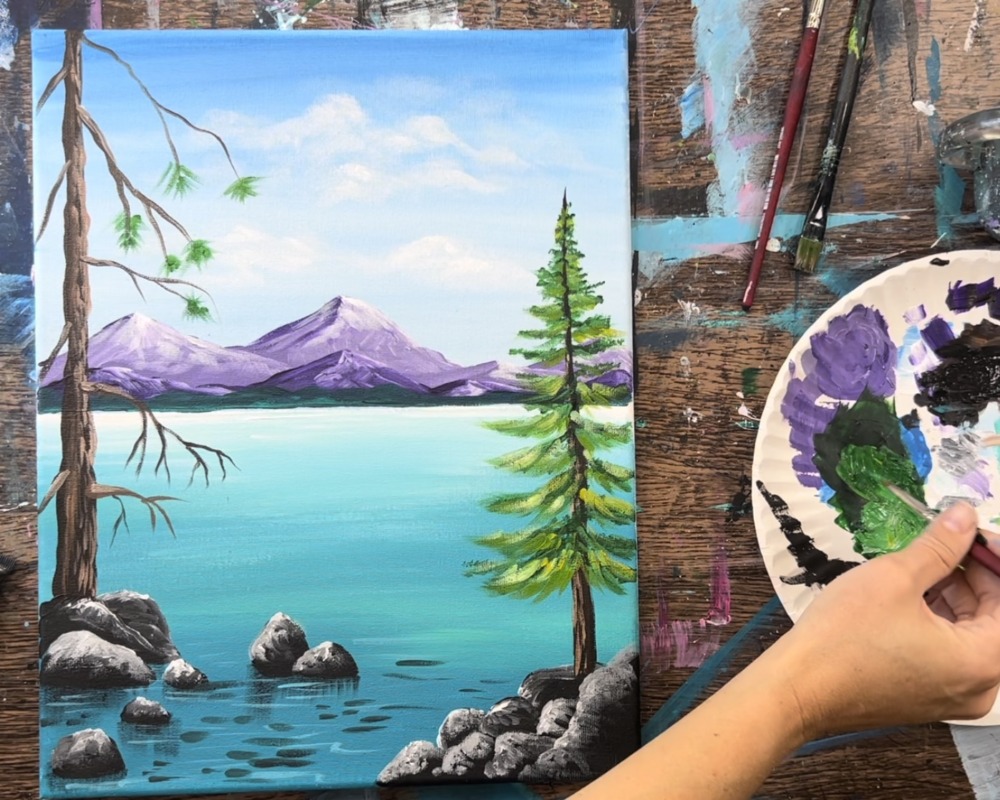
3. Paint Mountains
Measure 2″ from the horizon line and make a mark with your pencil. This will be the highest point of the mountain peaks.
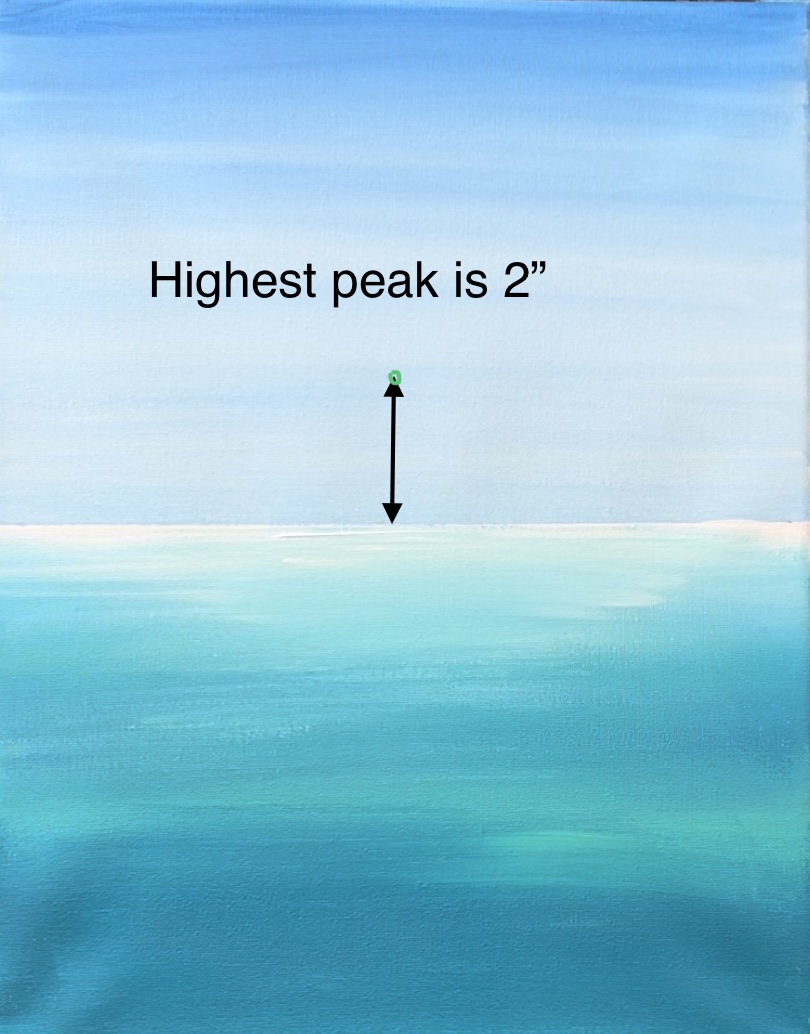
Then load your palette with dioxazine purple. Use a 3/8″ angle brush to paint/draw out your mountain line. Start on the left side of the canvas and paint an uneven line with several peaks and valleys but do not let the line touch the bottom of the horizon line. The highest mountain peak should not go above 2″.

Next, mix about equal parts titanium white and purple on your palette. Then add a very small dot of black into it. This will make a gray-purple. Then use the 3/8″ angle brush to fill the mountain in. Do this with short angle strokes and leave about a 1/4″ gap on the bottom above the horizon line.
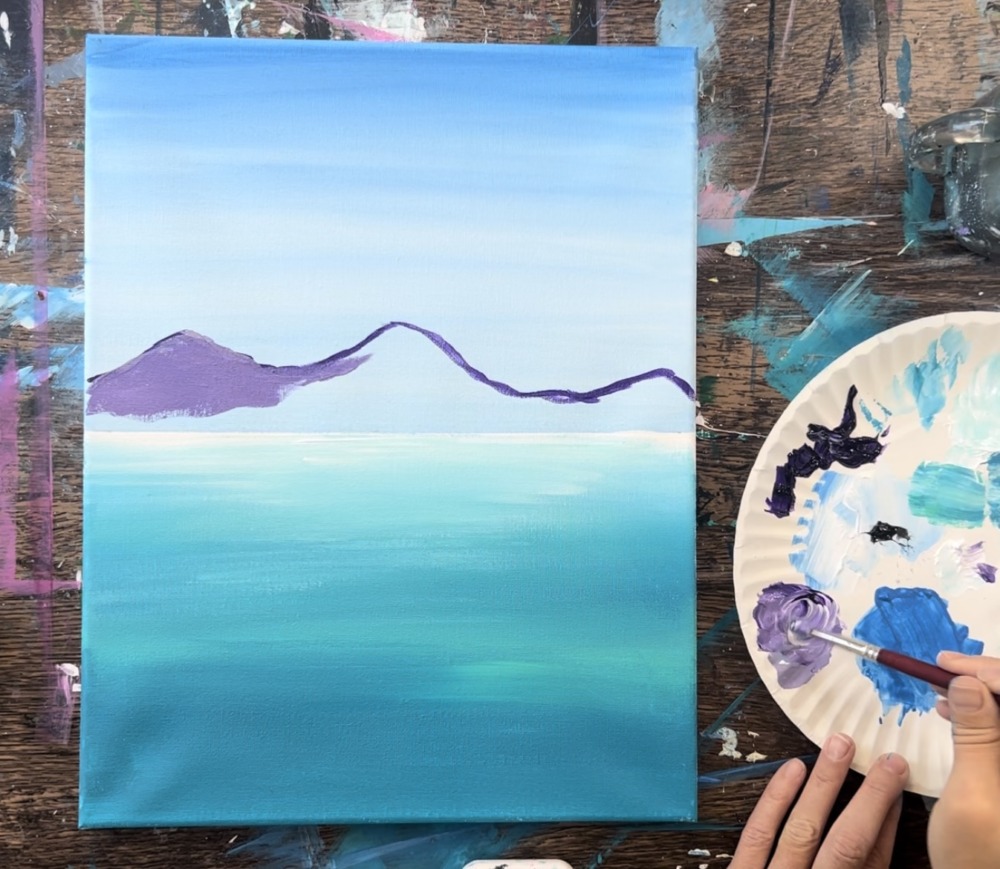
This will be a solid coat of that gray-purple color. In the next step, we will be adding highlights to the mountain peaks.
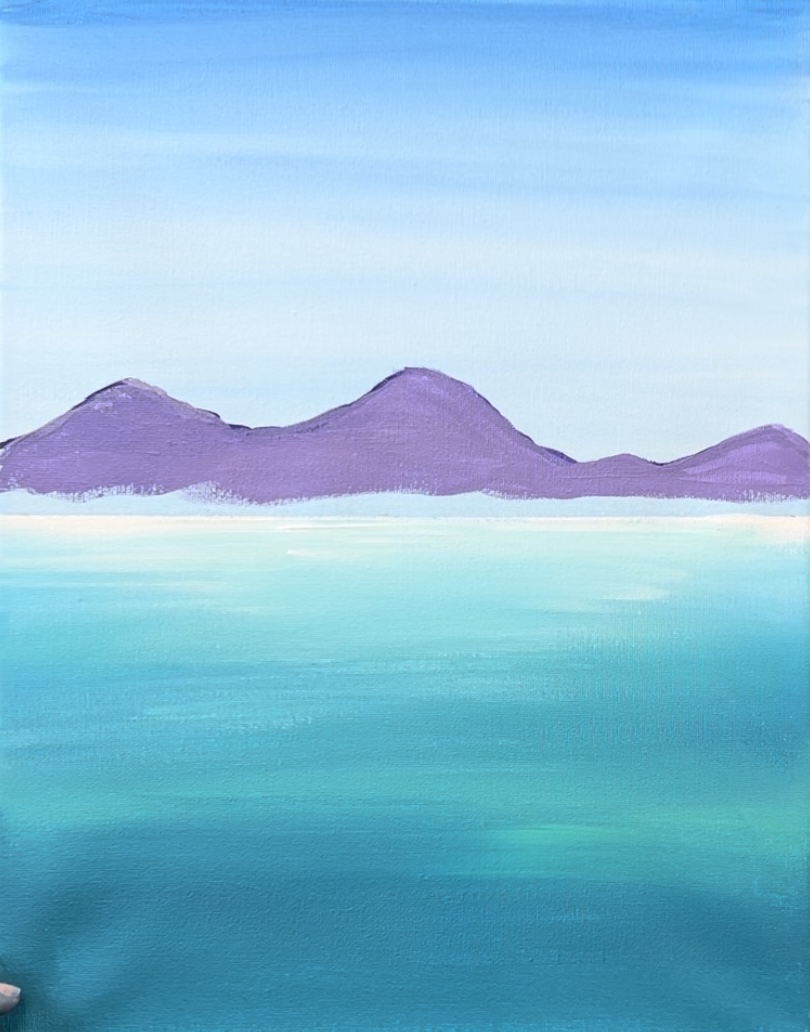
Then mix a little more white into the purple to make it lighter. Paint angle strokes only on the right side of the mountain. Angle the strokes down to the right.
Do this on the right side of each of the mountain peaks.
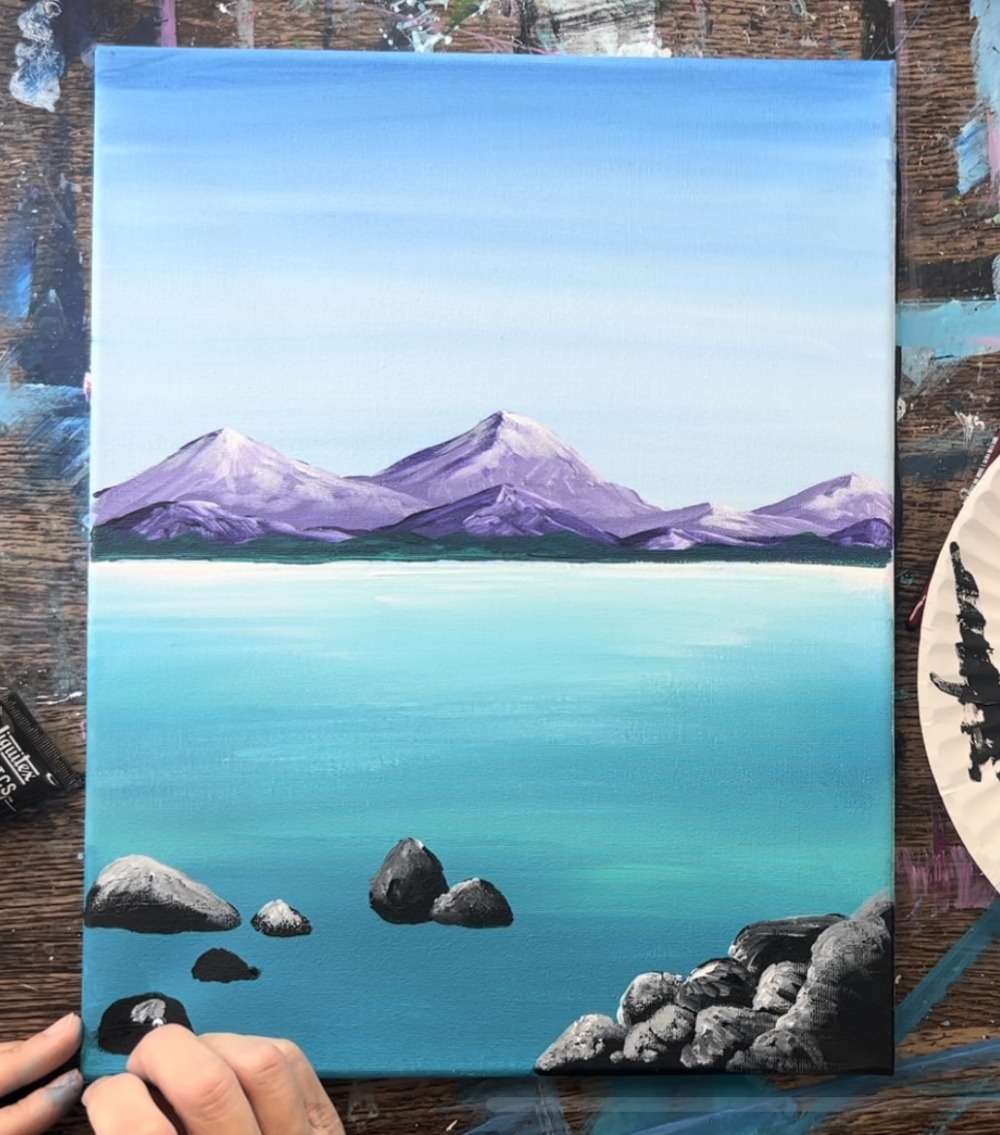
Then load your brush into just dioxazine purple. Paint a low mountain range with the dark purple just above the horizon line. This will overlap the bottom of the first large mountain range you just painted.
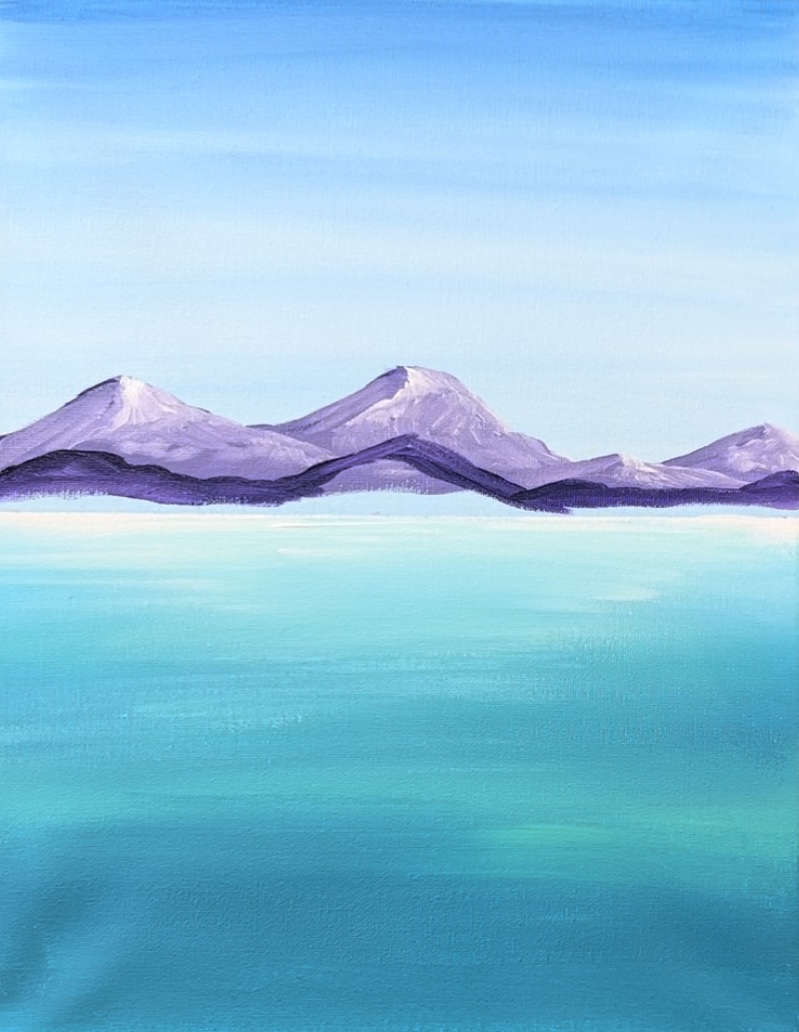
Paint this low mountain range with solid dioxazine purple.
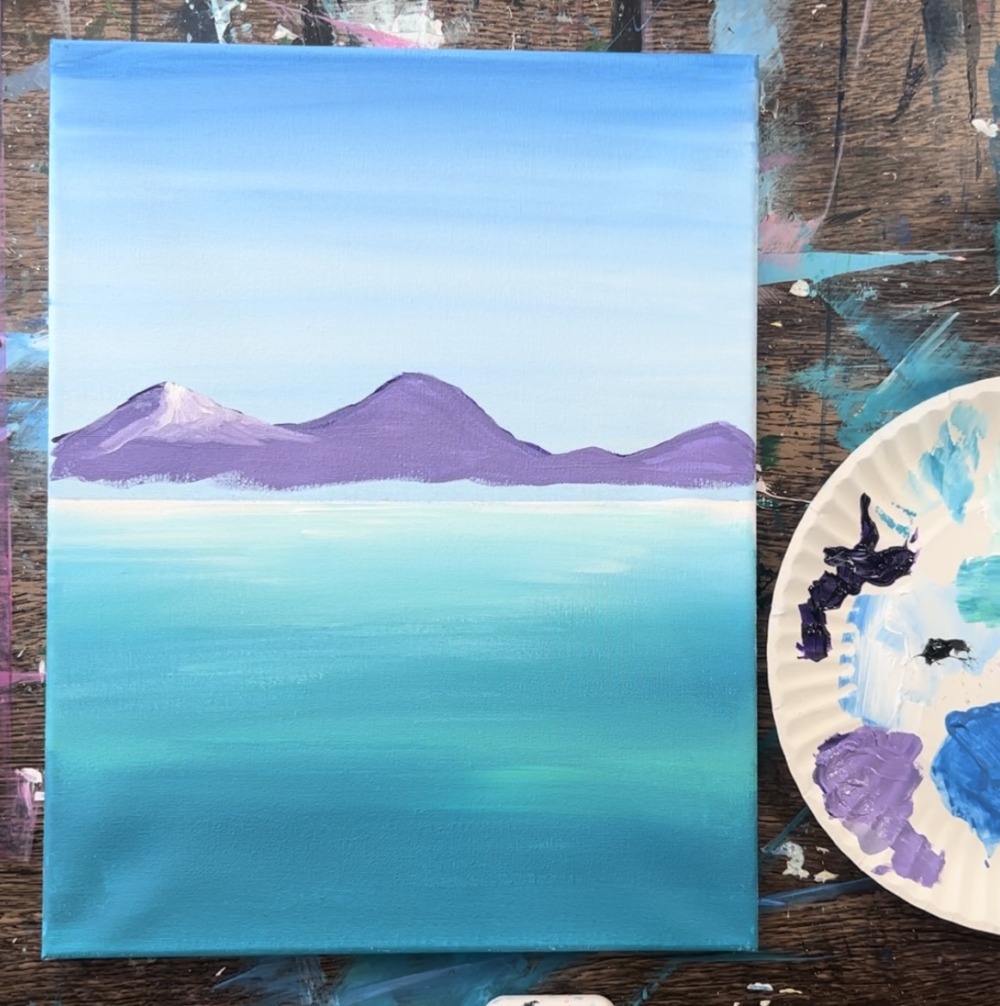
Then add white mixed with purple on the right sides of the mountain peaks.
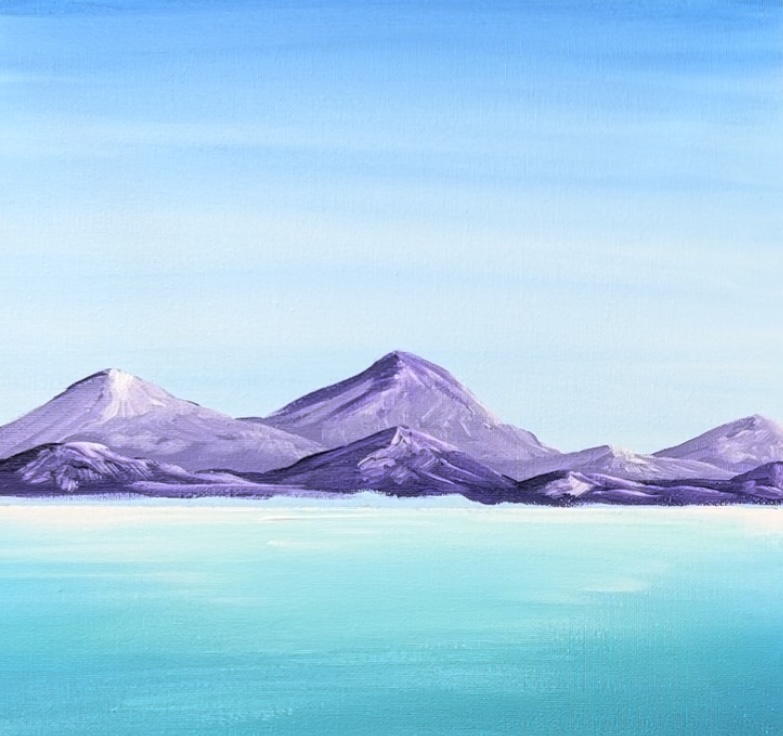
Load your palette with “phthalo green”. Load your 3/8″ angle brush into the green without rinsing the purple off of the brush. Then paint a very low hilly land area that overlaps the bottom of the middle mountain range that you just painted.
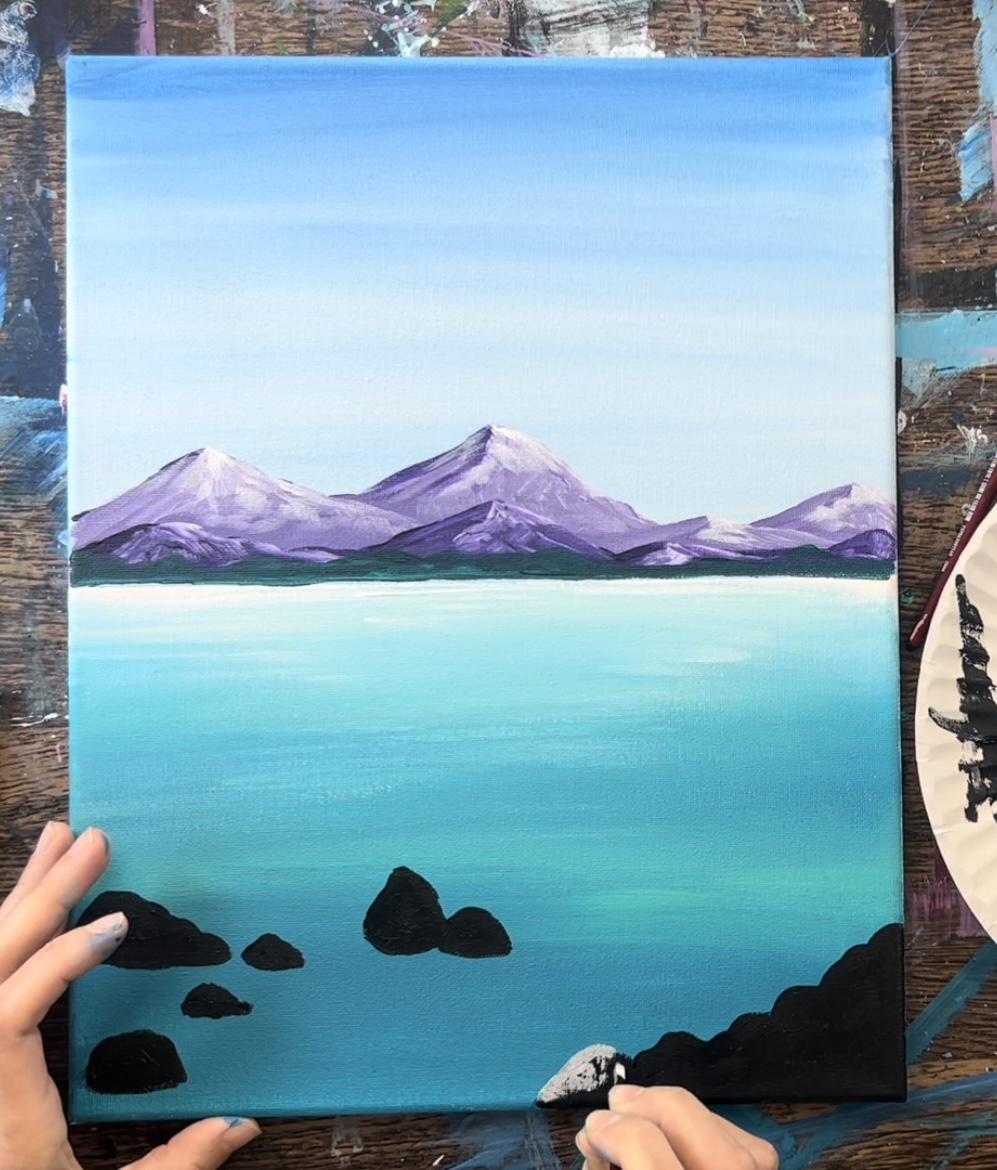
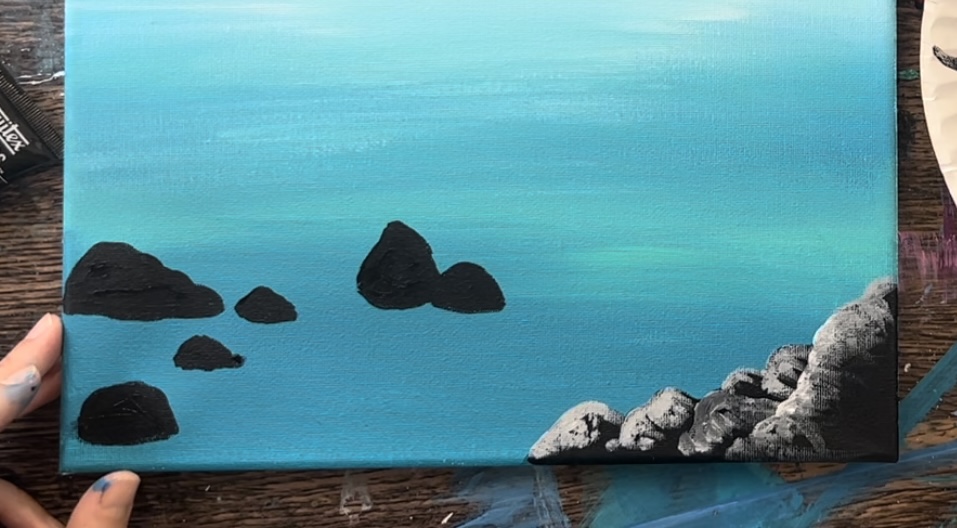
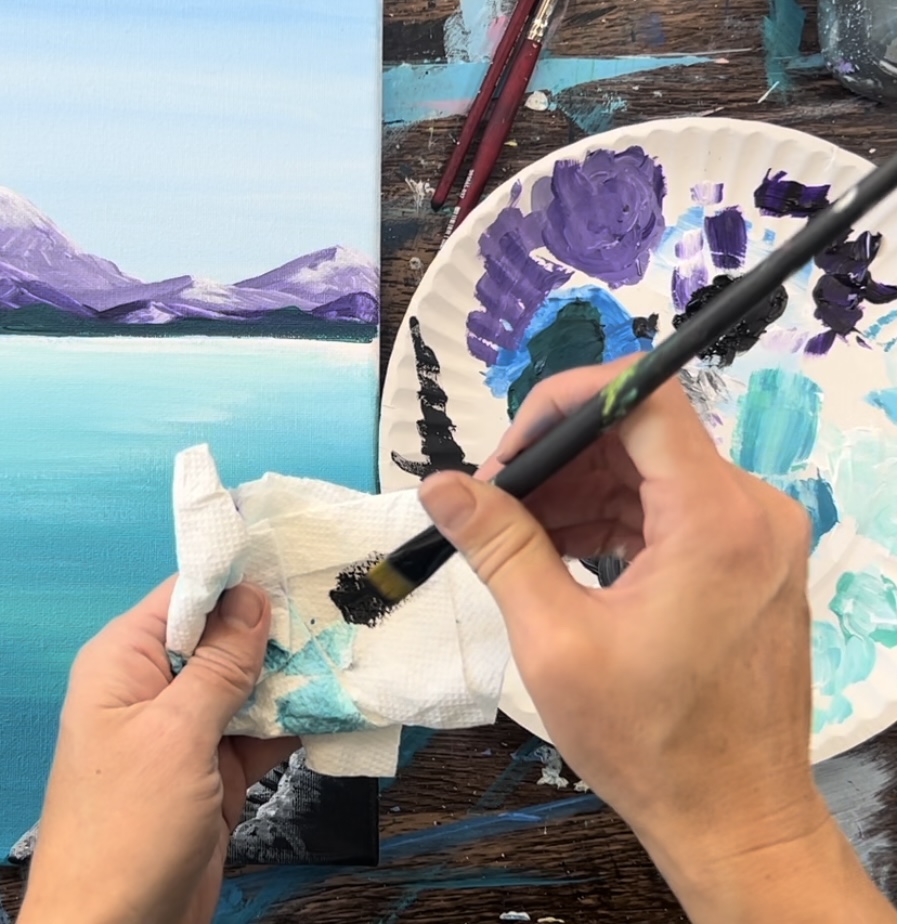
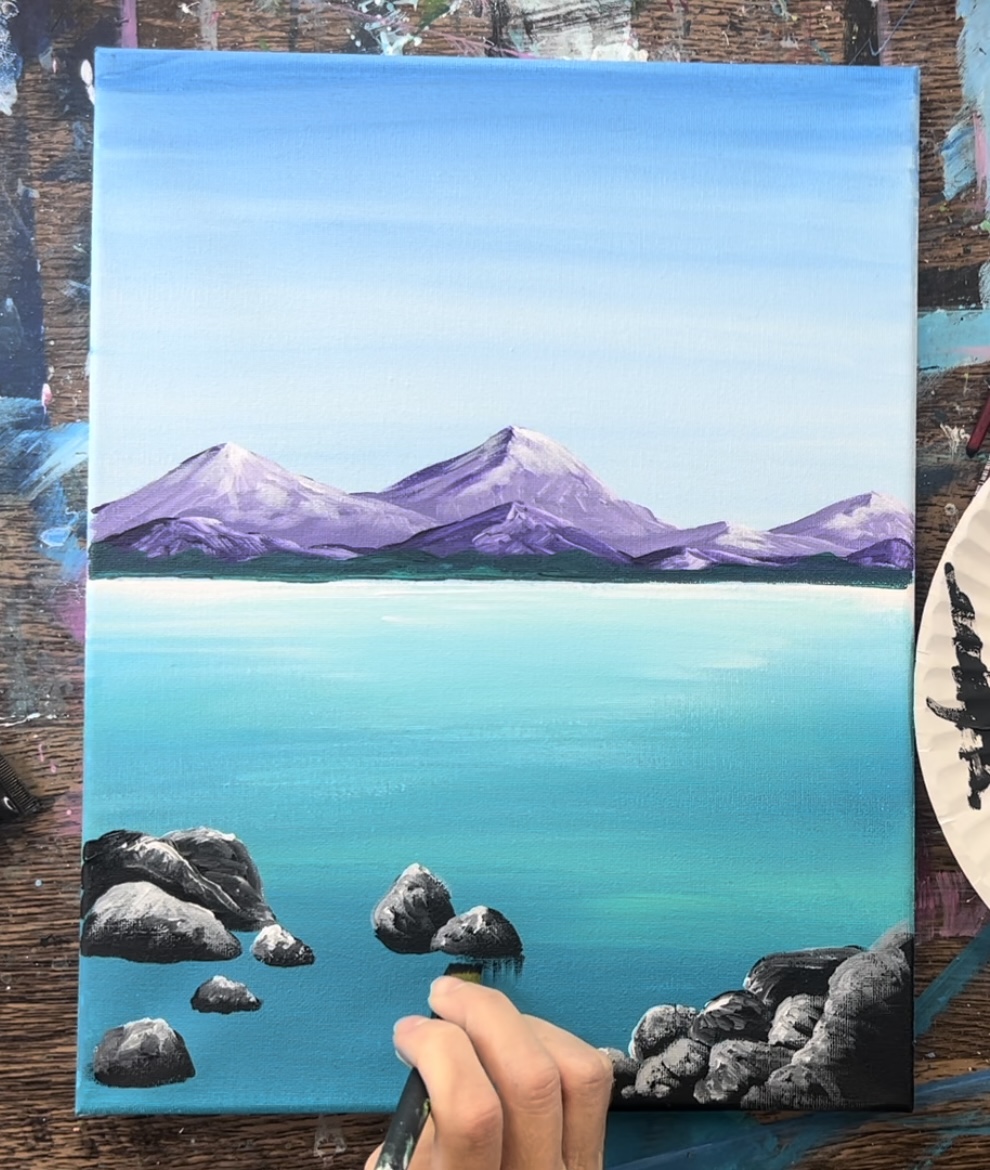
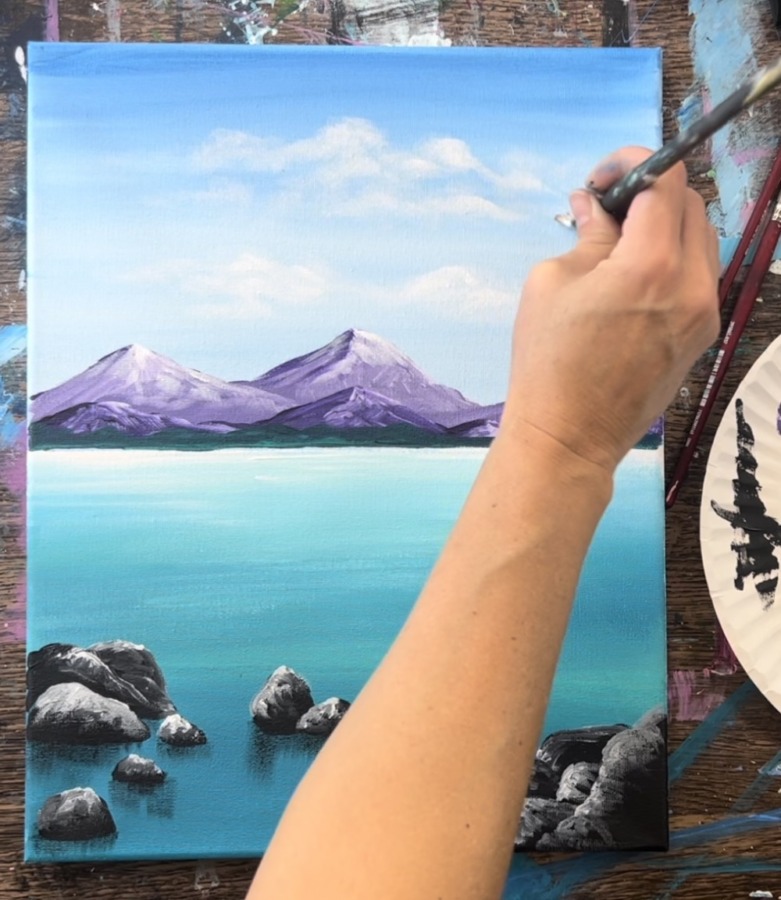
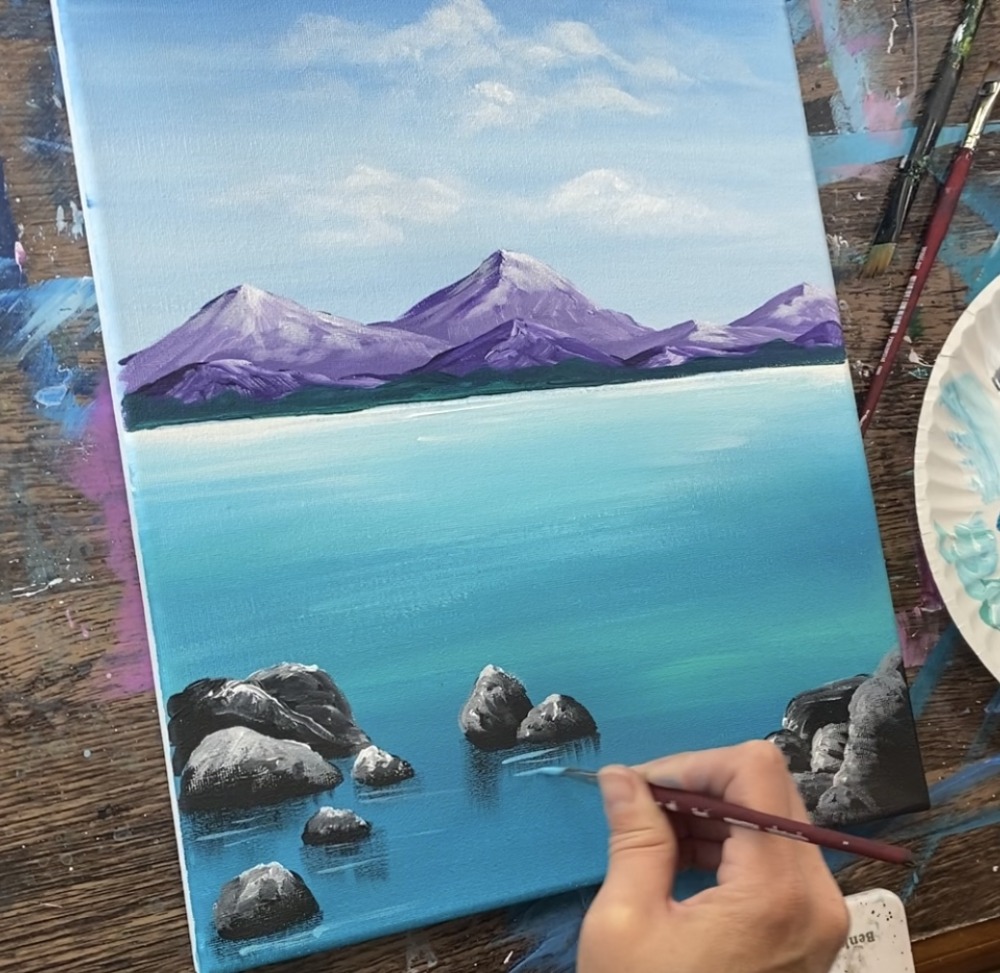
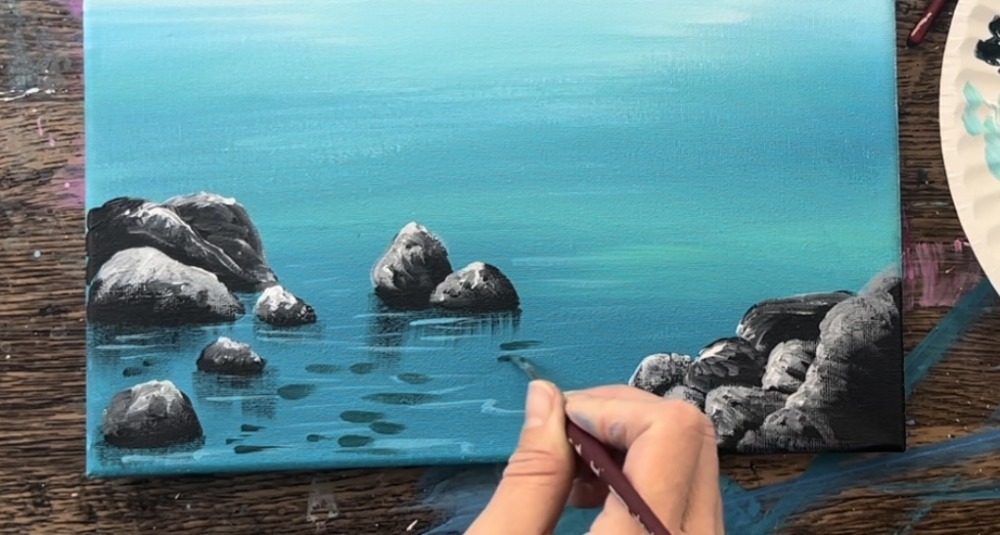
4. Paint Rocks
Use a #4 round brush and mars black. Use the round brush to paint a silhouette of the rock formation in the lower right corner.
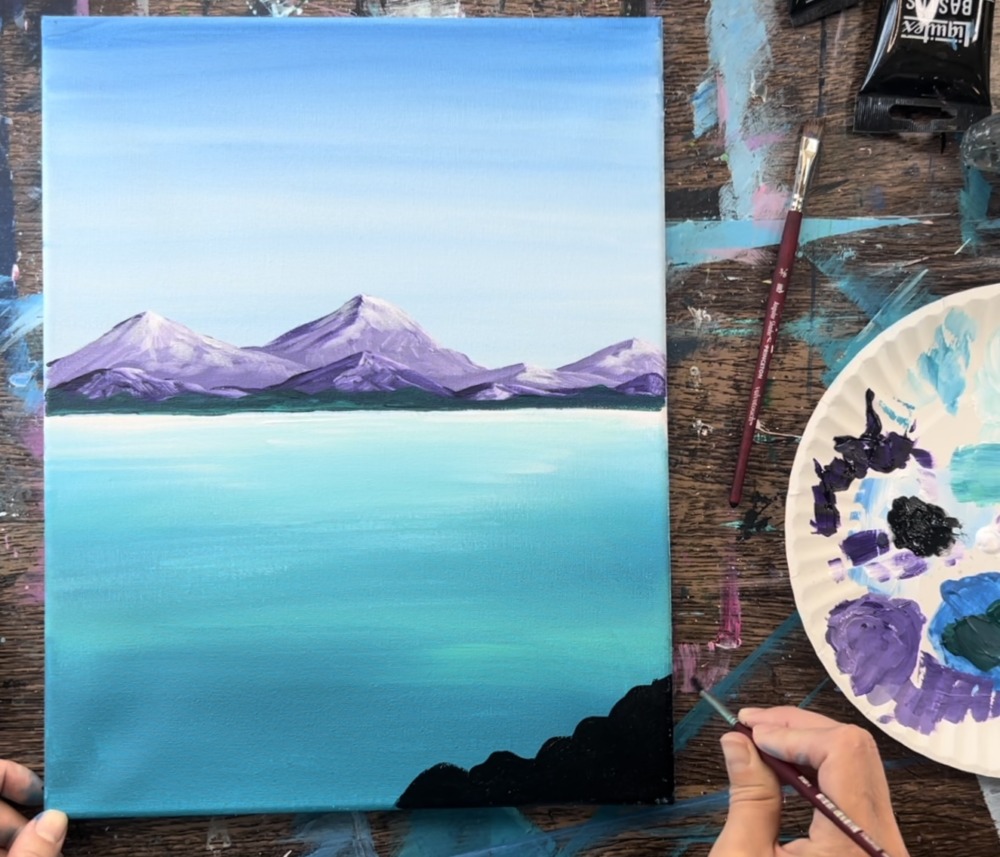
Then paint the rocks in the left lower area. Paint a medium size rock by outlining the shape of the rock and then filling it in.
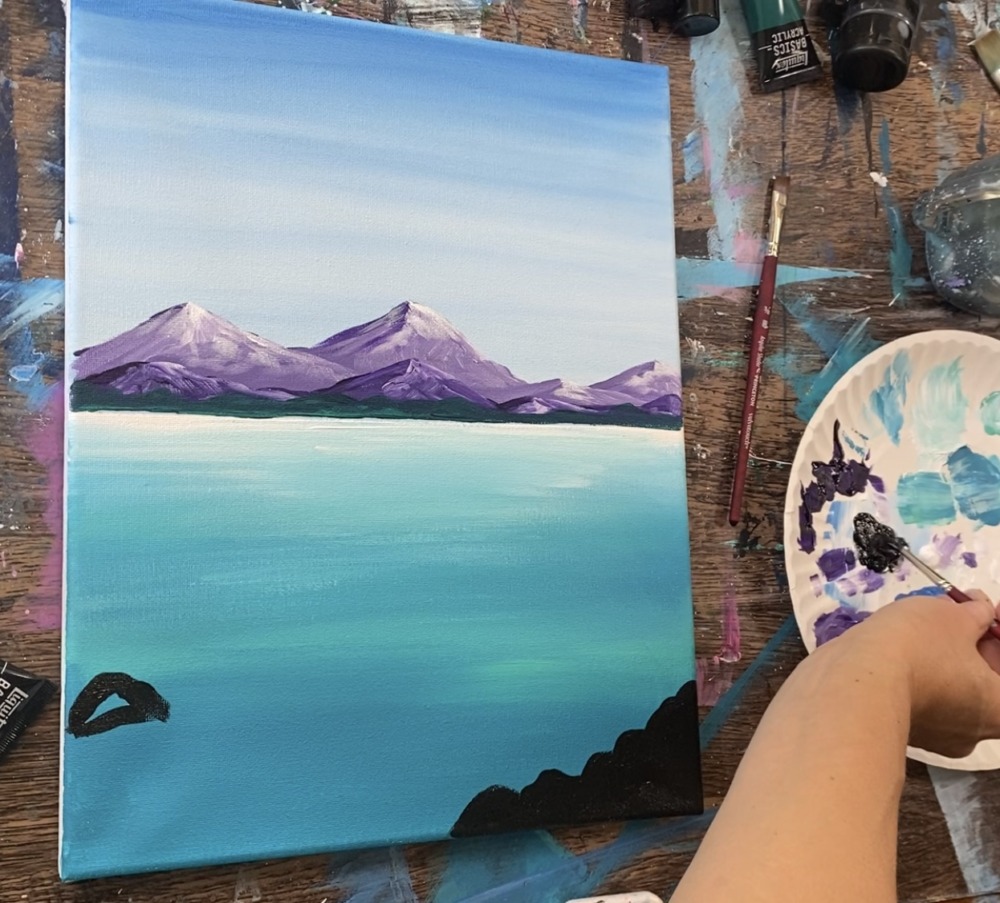
Paint a few more rocks including a smaller one and two medium sized rocks in the center.
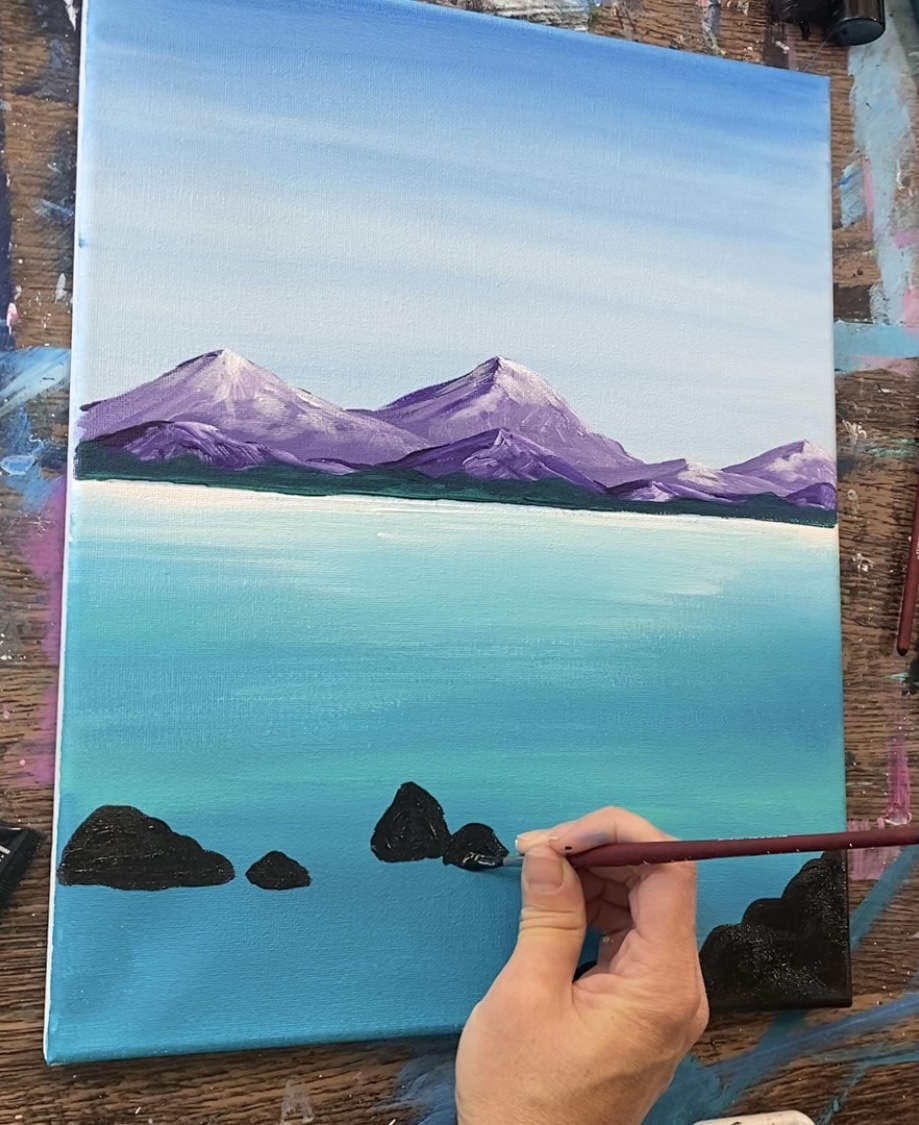
Then paint a few rocks in the lower left area.
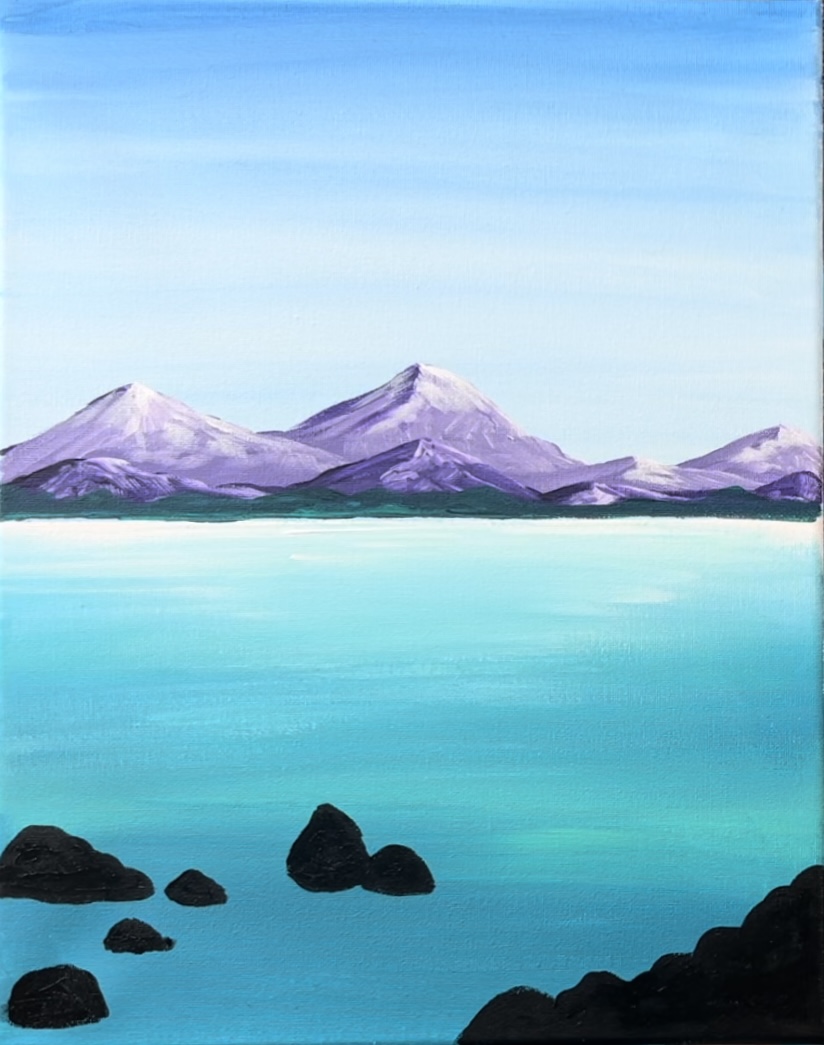
Add highlights to the rocks next. Use the round brush to mix a medium to light gray on your palette. Mix about 2 parts white to 1 part black.
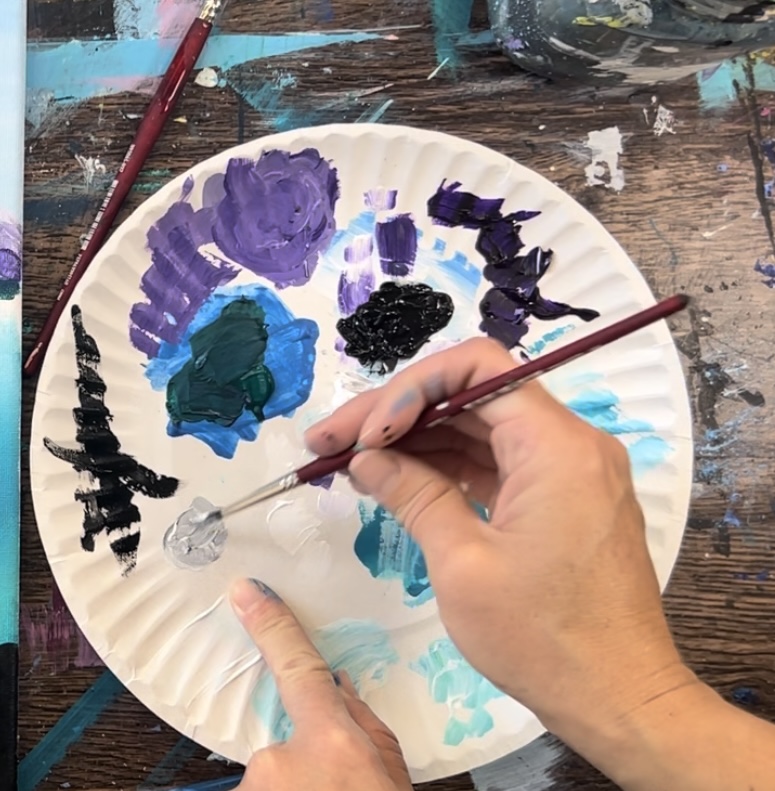
Use the 4 round brush to paint the edges of the rock this “light gray color”. Add the gray to just the left side and let the rest of it fade back to black. You can use your finger to “smear” the paint and blend it into the black. Or you can “stipple” the brush to blend it. If needed, add more black to your brush to help it blend.
Do this to the left edges of all the rocks on the lower right. You are also defining each of the rock shapes and creating overlapping with the rocks by leaving the bottom of the rocks black.
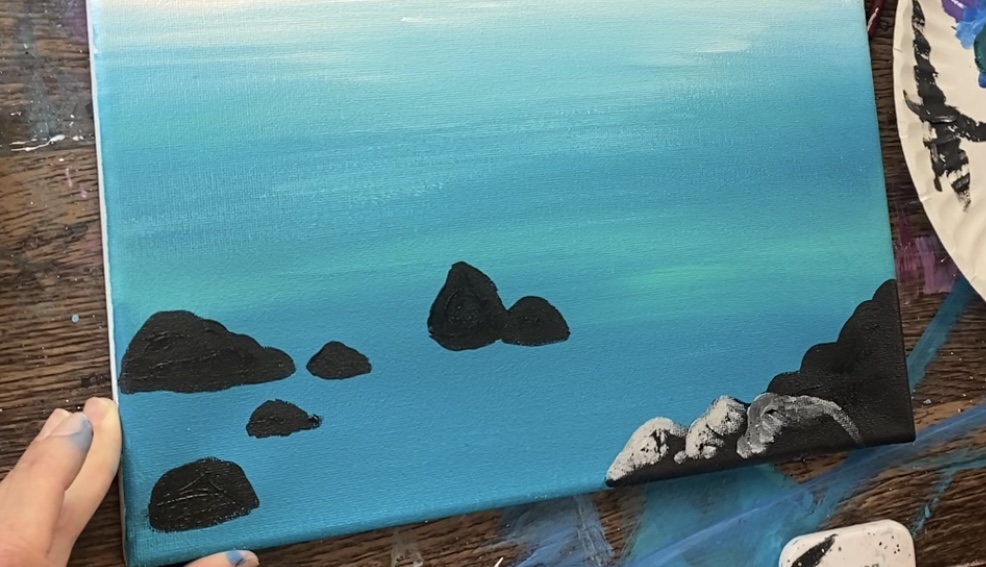
Continue to add highlights to all of the left sides of the rocks.
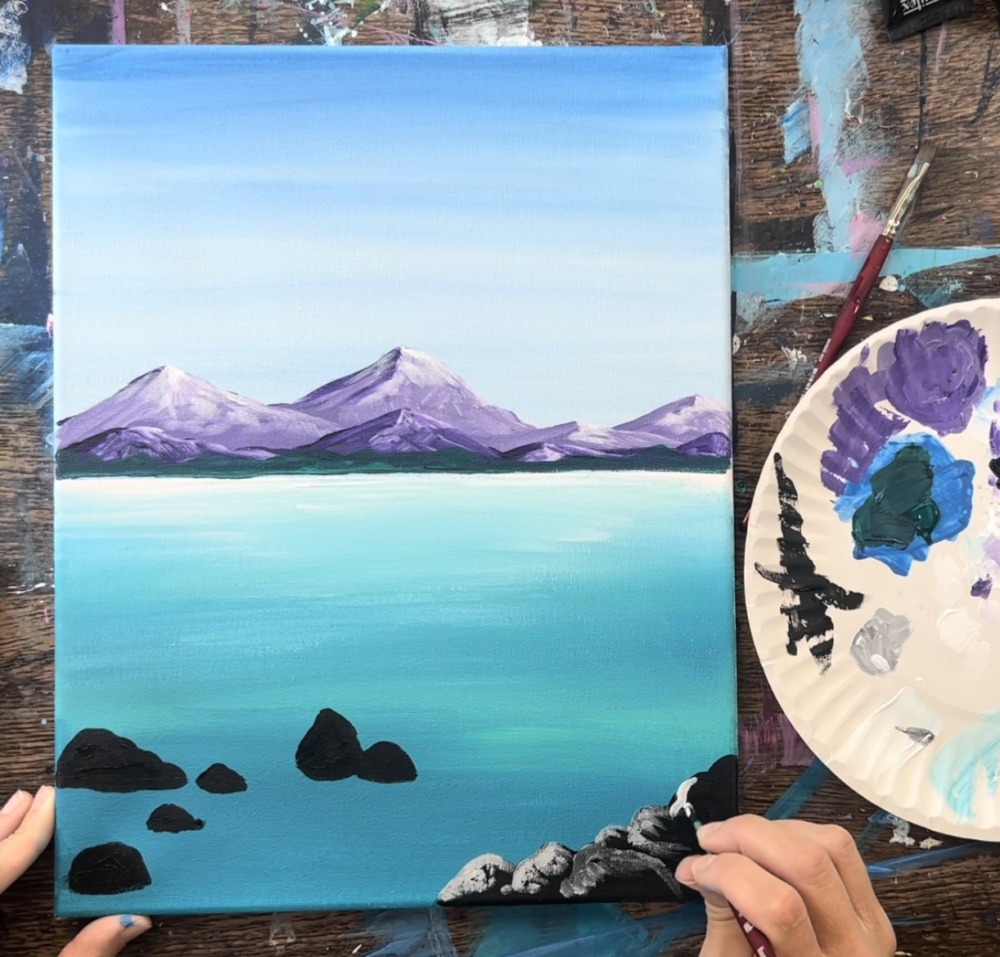
Then use the black to paint more rocks, including a flat rock on the right. Add highlights to those rocks as well.

Then add highlights to the left side of each of these rocks.

Next, highlight the rocks on the left. Do the same technique. Some of the rocks can have the highlights on the top.
Tip: it’s helpful to use your finger to “smear” the white paint down and blend with the rest of the black. This can work even if the black layer has dried.
Next, paint the reflection from the rocks using a 12 bright brush. Load the tip of the brush into black and then wipe it off with a paper towel. You only want a small amount of paint on the brush so that you can create this “dry brush” effect.
Then use the full width of the brush and drag downwards under each of the rocks. This black should be dark at the base of the rock but fade away very quickly and you stroke down.
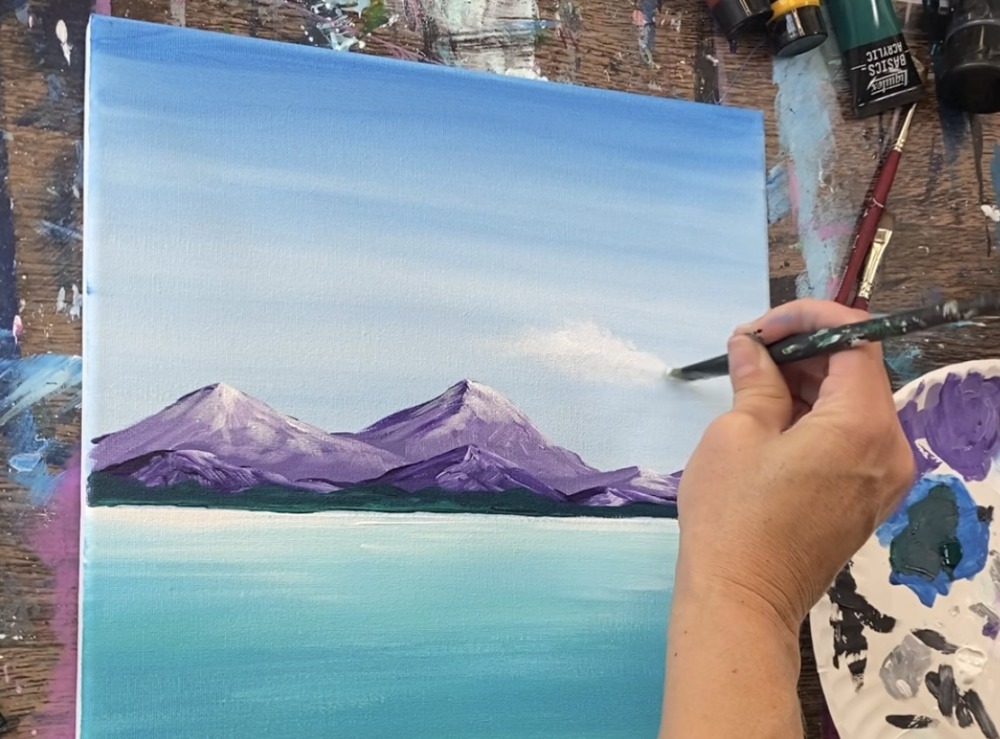
5. Paint Clouds
Use a clean, dry 12 bright brush and load the tip into titanium white. Have a paper towel handy to wipe off some of the paint. When you do these clouds, you only want a small amount of paint on the brush. This will create the light and fluffy effect in the clouds.
Use just the tip of the brush to paint the top edge of the clouds.
Then wipe the brush off with a paper towel.
Paint small, circular strokes using just the tip of the brush. This bottom part of the cloud is translucent because of the “dry brush”. Use the brush to blend the paint on the canvas. The trick is to make sure there is barely paint on the brush so the cloud can be light and somewhat see-through.
On the tops of each of these clouds, add a little extra white (but not too much). This will give the clouds more brightness on the top edges.
Paint another set of long, stretched clouds higher up in the sky using the same technique.
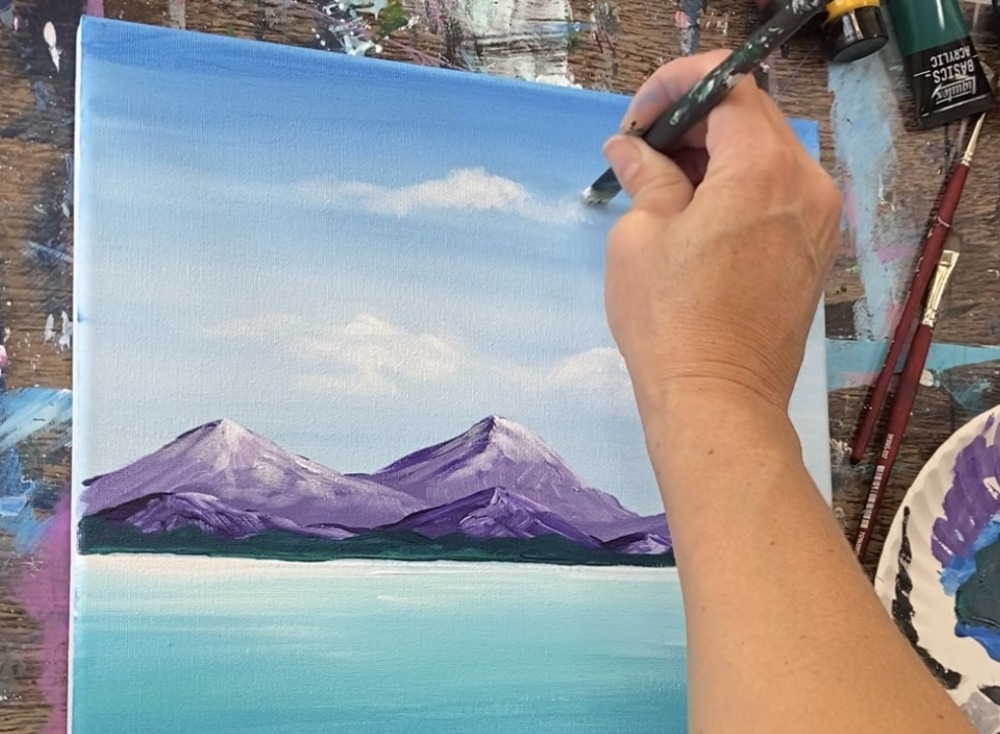
I made these clouds a little more rounded at the top.
Overall, this is “dry brush” style. The clouds should be light/ translucent. Create variations in the brightness of the white by adding more or less white to your brush. The tops of the clouds should have brighter white and the bottoms are very light and see-through.
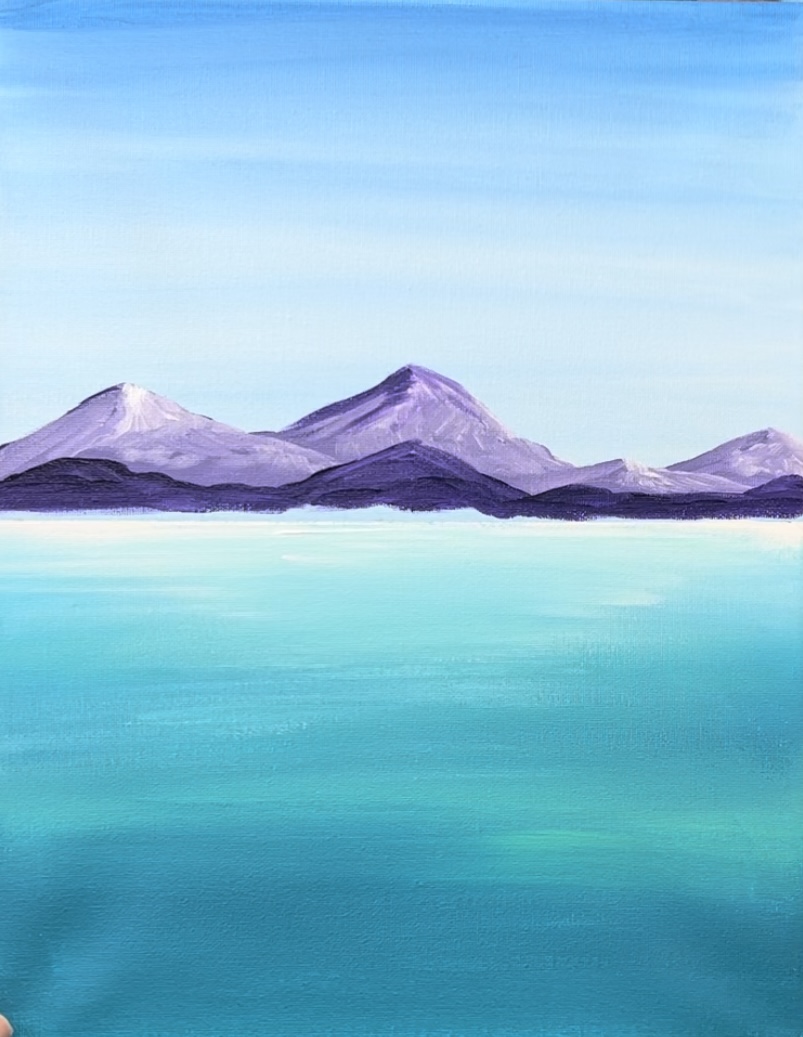
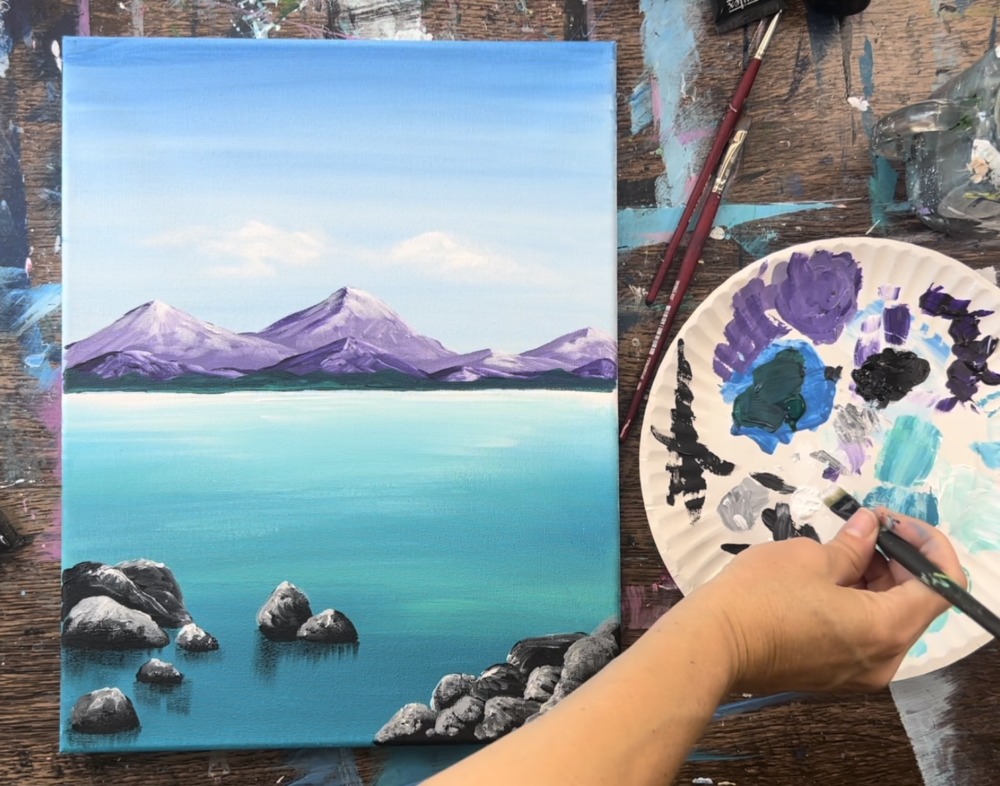
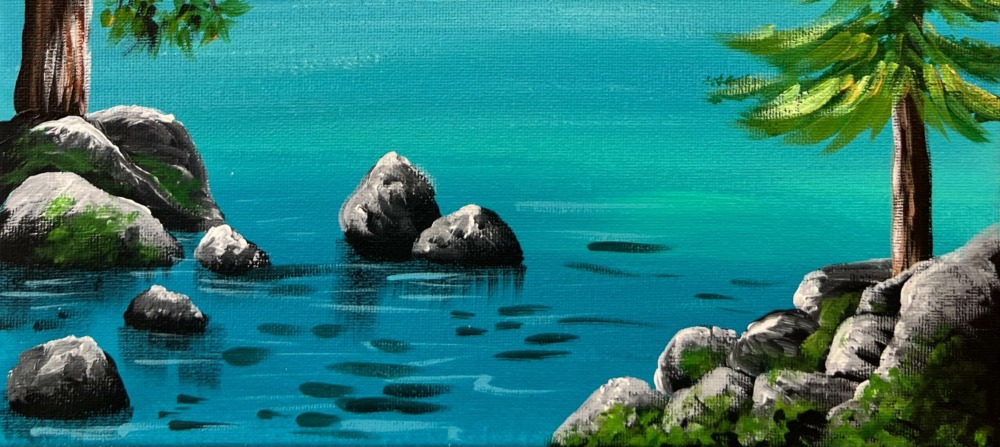
6. Paint Water Reflection Lines
Use the #4 round brush to paint water reflection lines. Mix a light turquoise on your palette by mixing about equal parts white and turquoise. Water it down slightly.
Then loosely paint horizontal reflection lines under the rocks that overlap the black vertical dry brush marks that you painted earlier.
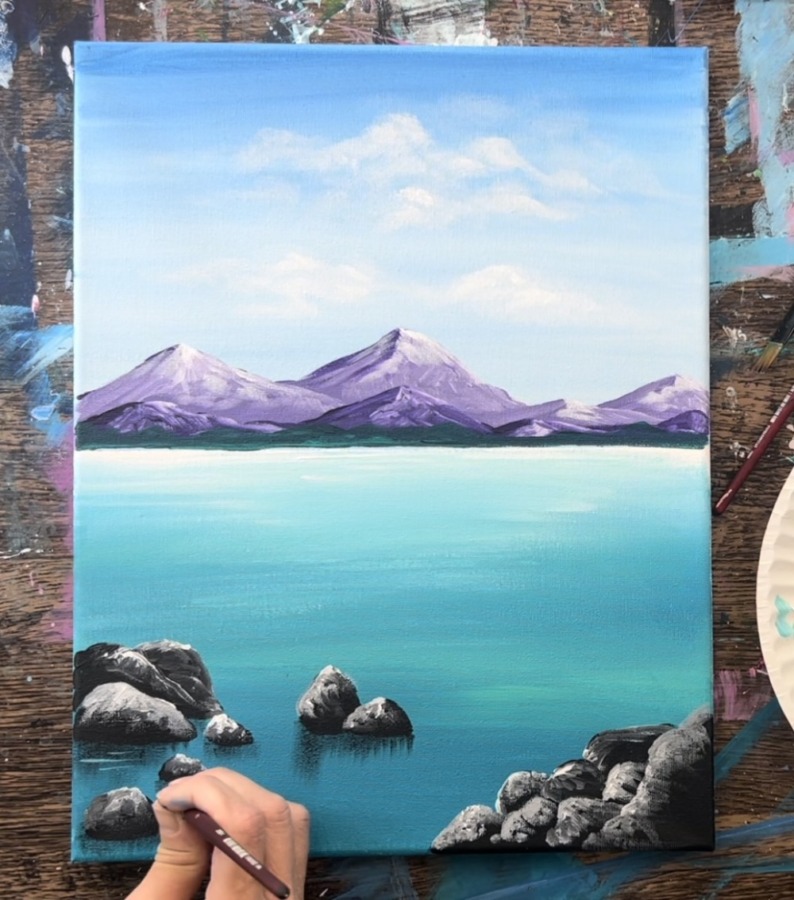
Do these lines sparingly under the rocks throughout the bottom lake area of the painting.
Some of the lines can be a bit more curvy and flowing but most of them are horizontal.
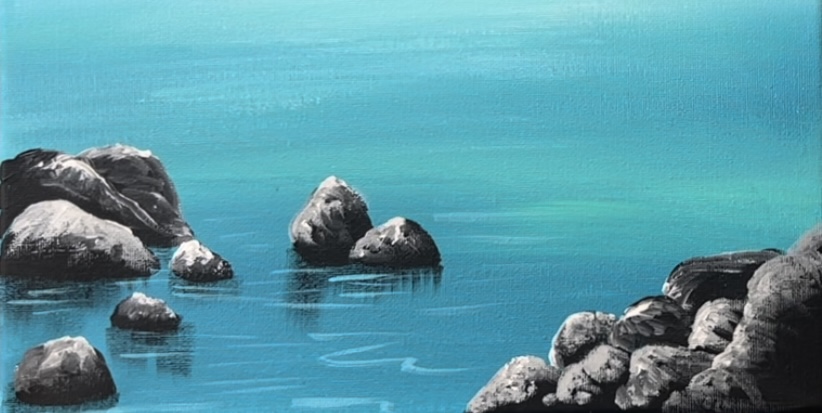
Next, mix a dark turquoise on your palette by mixing phthalo green and turquoise together (about equal parts). Water it down slightly and add a very small amount of black into it.
With the round brush make horizontal marks scattered in this water area. These lines are thicker than the light color reflection lines you just painted.
These thicker lines are supposed to create the impression of rocks under water (or darker reflection lines). Do this just in the bottom rocky area of the painting.
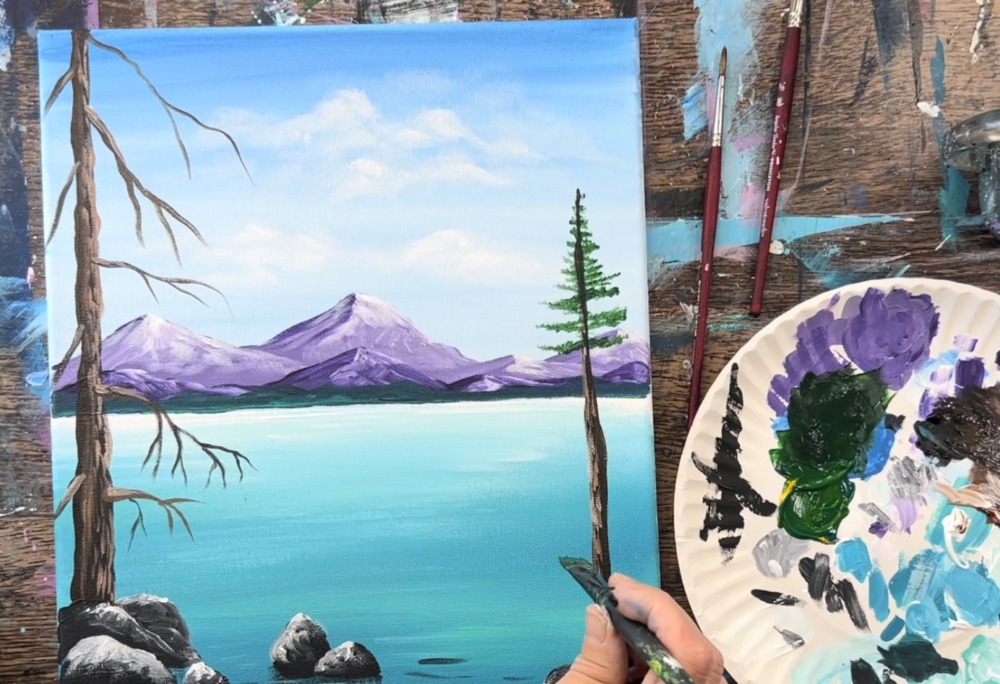
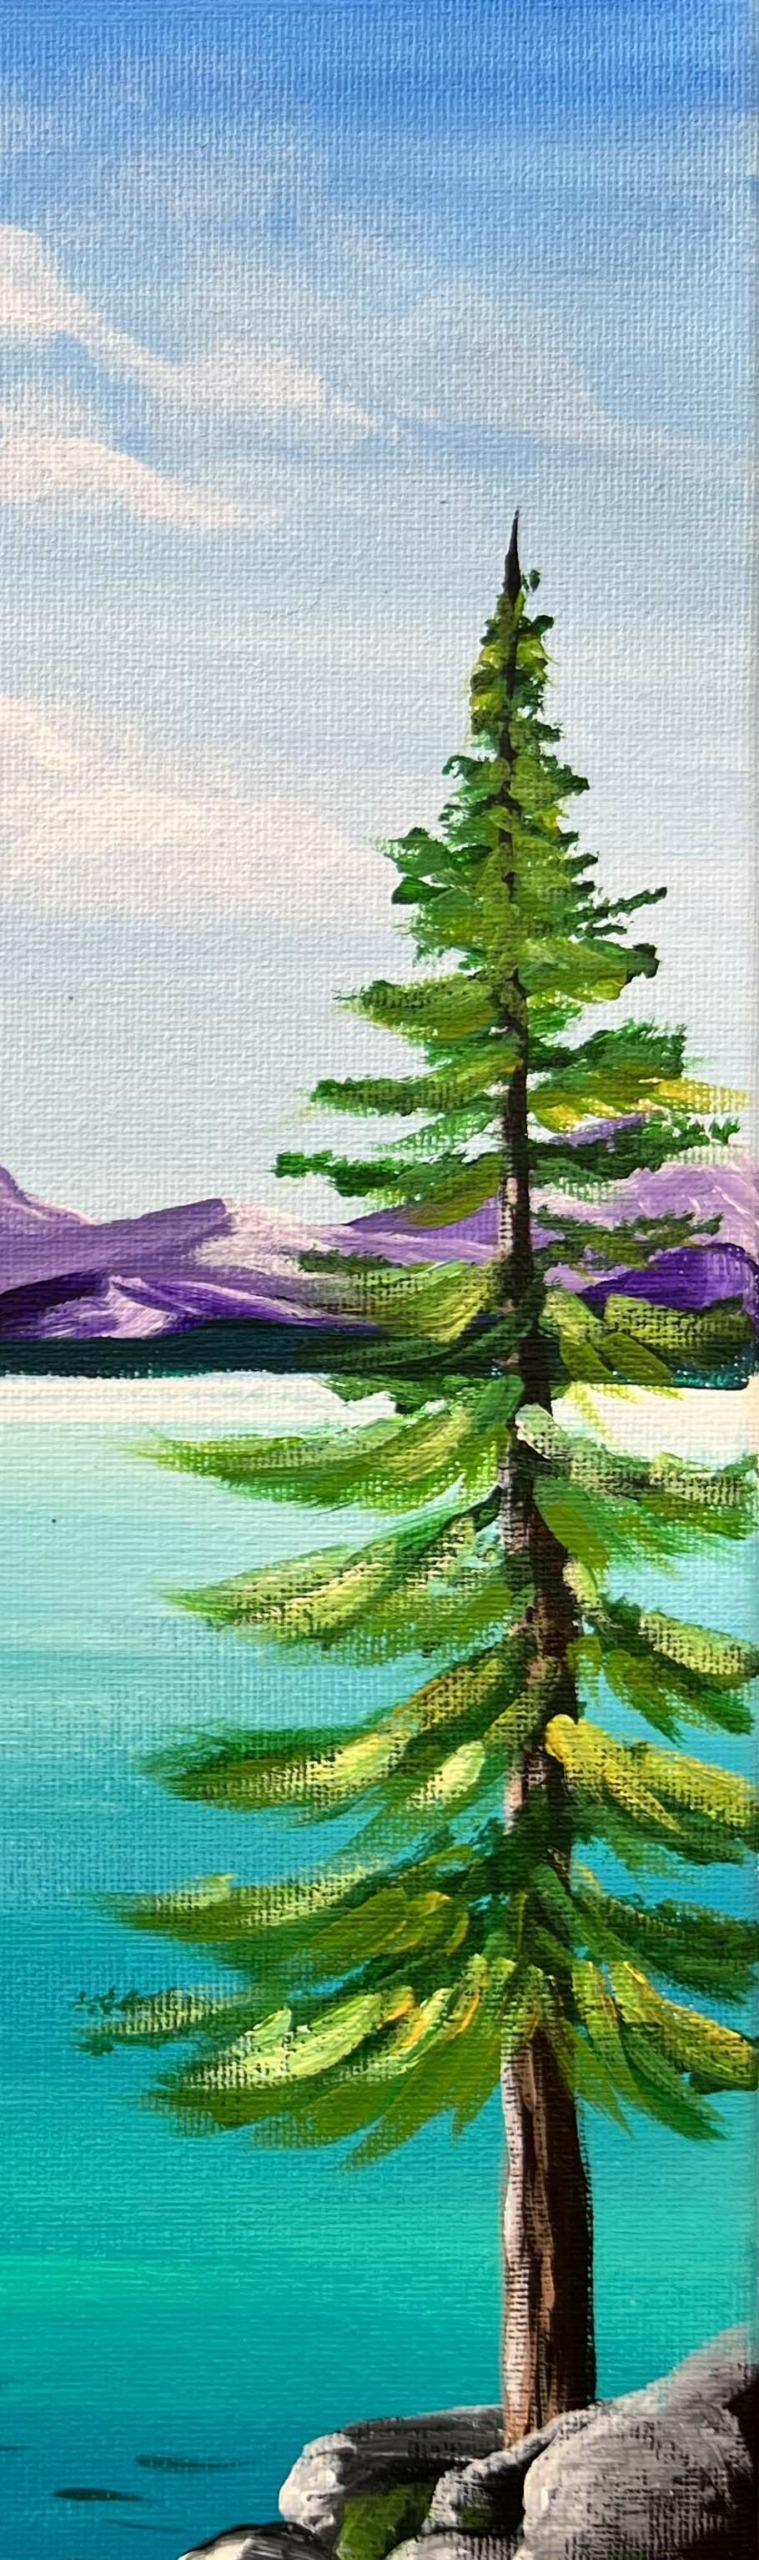
7. Paint Pine Trees
Load your palette with “burnt Sienna” and more “mars black” if needed. Mix both the black and brown together in equal amounts.
Use a #12 bright brush to paint the tree trunk. Start out with a thick base (about as thick as the width of the brush). Use the tip of the brush to loosely sketch the sides of the tree so that it is wide at the base and goes narrow at the top edge of the canvas and then off the edge of the canvas.
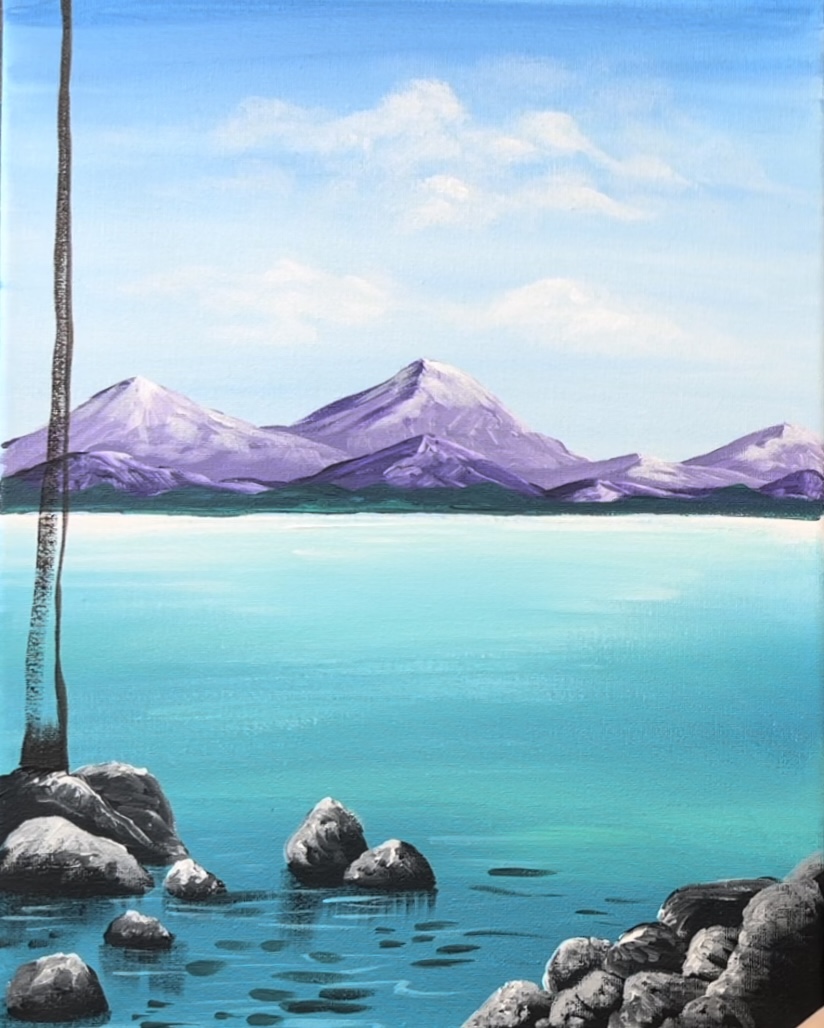
Fill the tree in solid with this dark brown. You can make the edges of the trunk kind of loose/ lumpy but wiggling the brush on the edges of the tree trunk.
Then paint the pine tree on the right.
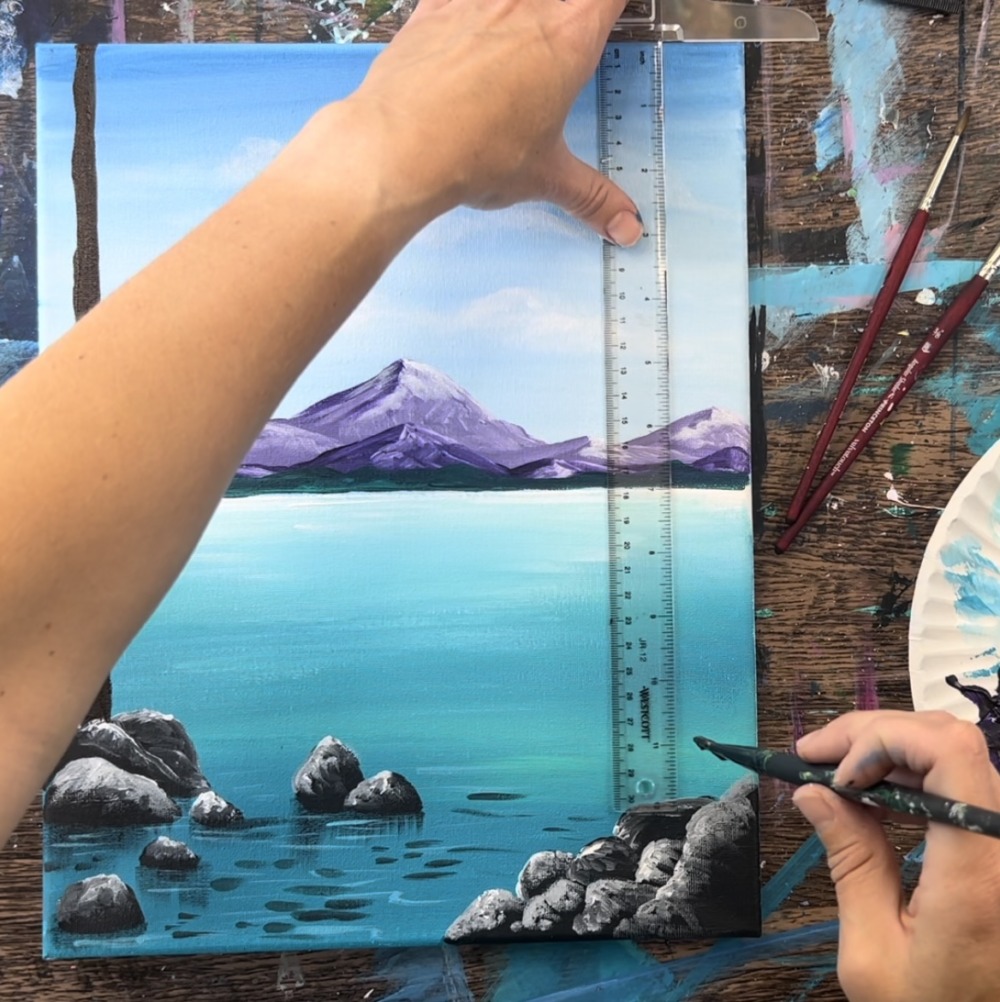
Tip: Use a t-square ruler to help make sure the tree is vertical.
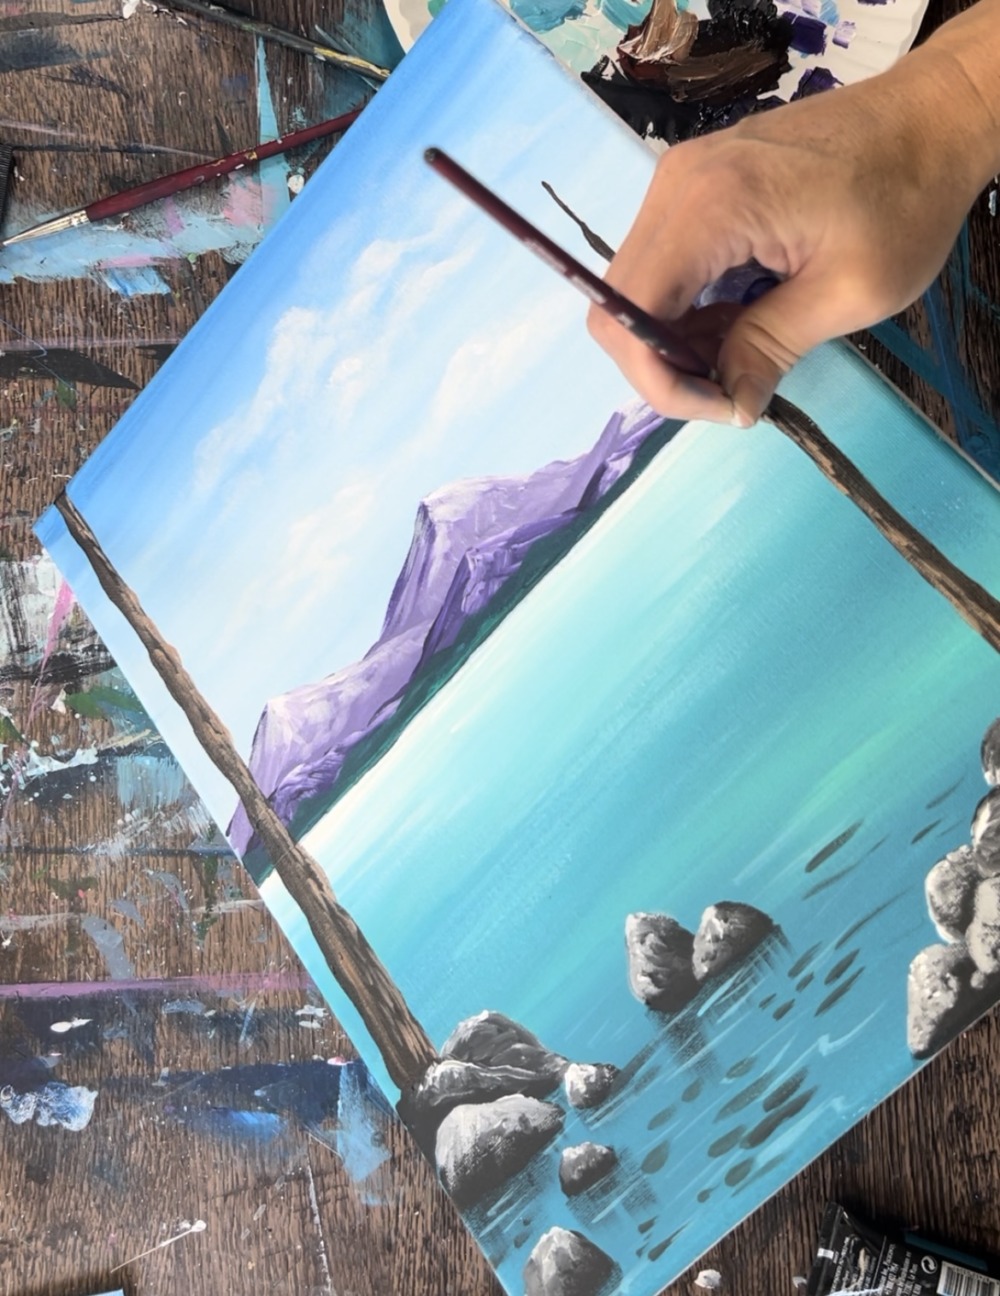
Use the 12 bright brush and the same brown-black color to paint a thin, vertical line. This trunk will be thinner than the pine tree trunk on the left.
Make this line go to a point at the top and then make the base part of the trunk a little thicker.
If needed, use a round brush to help with this.

It’s okay if the edges of this trunk are uneven.
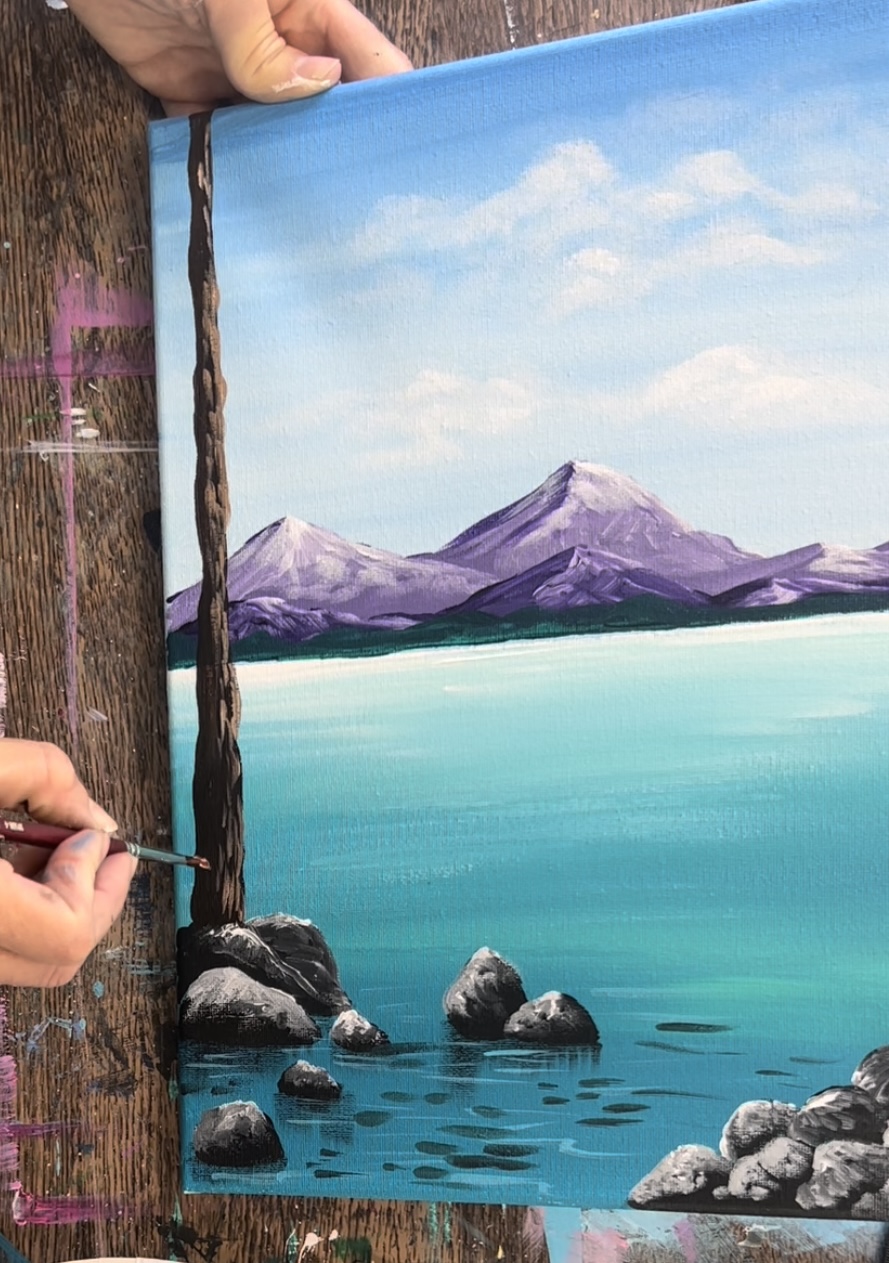
Use a #4 round brush to paint the texture on the bark of the tree trunks. Mix white into the brown-black combination of color on your palette. This will make a lighter brown. Then use the #4 round brush to paint vertical texture marks just on the right side of the larger tree trunk on the left.
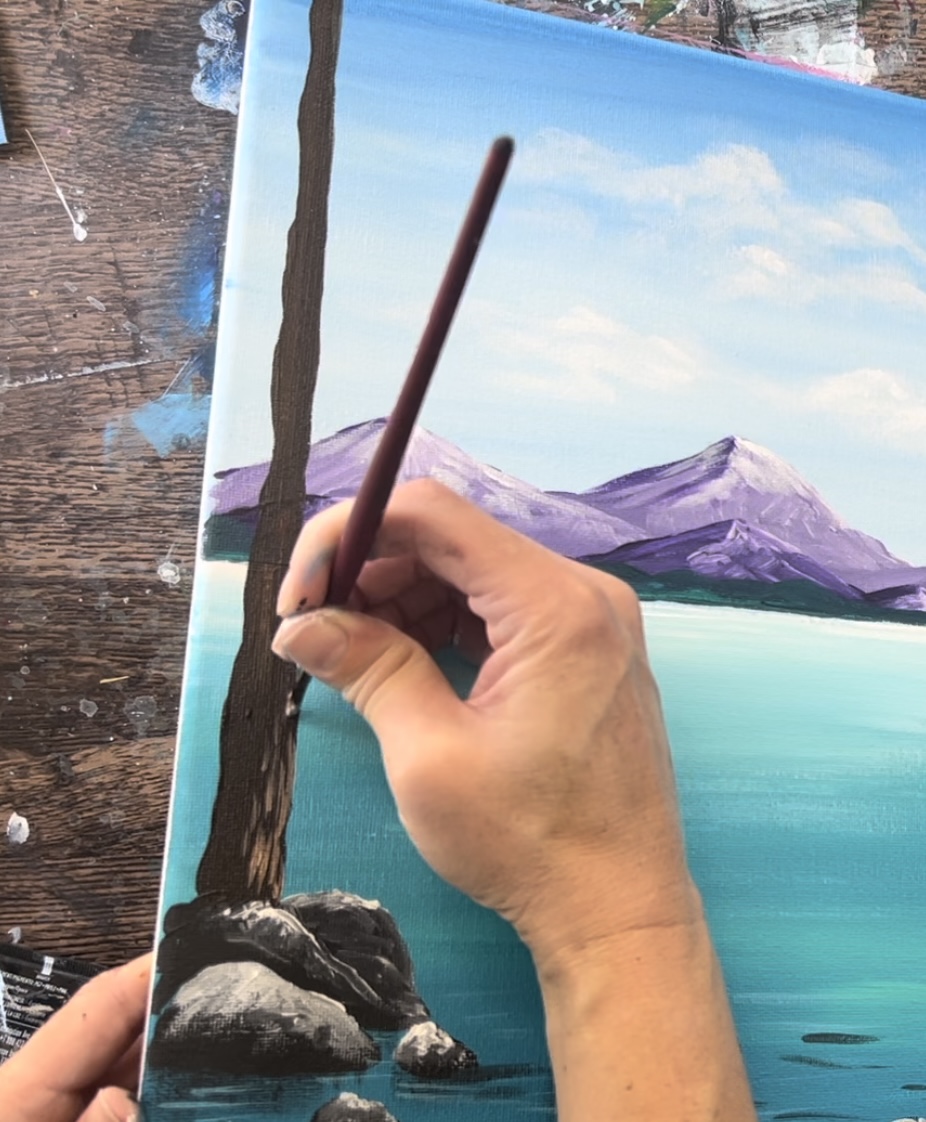
Make sure a lot of the first dark layer is still showing through on this tree trunk. If needed, go back with darker color and add darker color texture marks on the left side of the trunk.
Repeat this for the tree trunk on the right. This time, do the light texture marks on the left side of the tree trunks and leave the shadowy part on the right.
Then paint small branches on the tree trunk on the left. Use the 4 round brush (or a smaller brush if you have one) and the same brown-black color on your palette. If needed, add a little white into it to lighten some of these branches up. Paint small branches starting at the bottom of the tree. These branches are all curving downwards slightly.
Paint more branches up the tree. The ones that are higher up become slightly longer and still angling downwards.
Paint branches on the left side of the tree that are also angling downwards. Depending on the placement of the tree, these branches likely go off the edge of the canvas.
Then you can add a little white into the brown and go back over the larger parts of these branches with textured strokes.
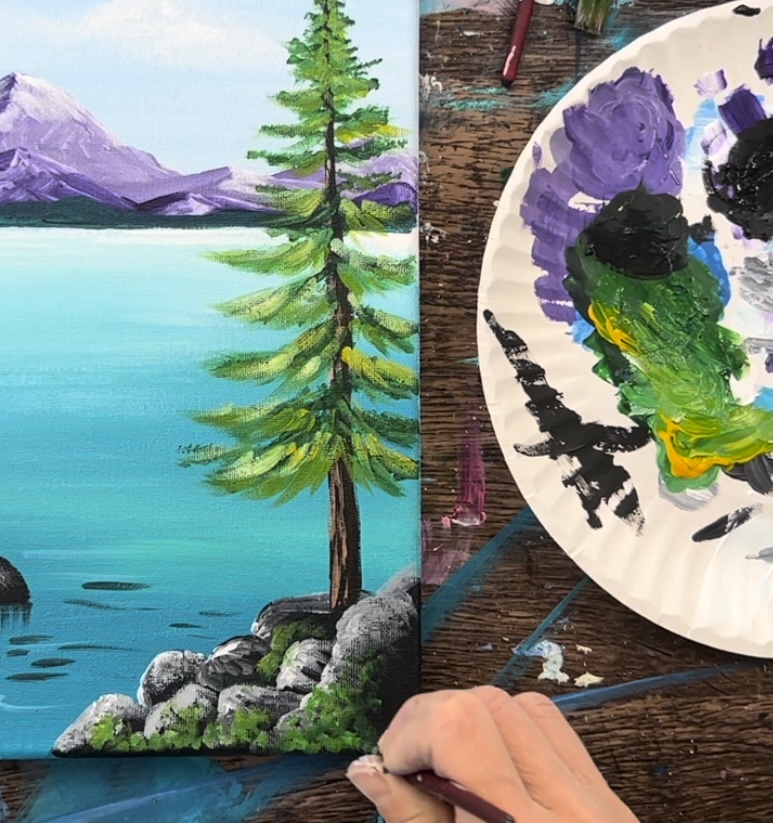
Next, use a 12 bright brush to paint the green on the conical pine tree on the right. Start by mixing a dark green on your palette.
Mix equal parts “phthalo green” and “cadmium yellow medium hue” together. Add a tiny bit of “mars black” into that color. That black will darken the green that we will use for our first layer.

Then load the paint just on the tip of the flat brush. Use just the corners at first because we will be starting at the top where the branches are small and thin. Gently tap just the tip of the brush and start forming the branches in a triangular direction. Work in a left to right zig-zag direction and work your way down the tree.
For this style of tree, leave a gap between the branches. Also, as you start forming the branches in the middle of the tree, have them slightly curve upwards but still use the tip of the brush to stamp the first layer of branches.
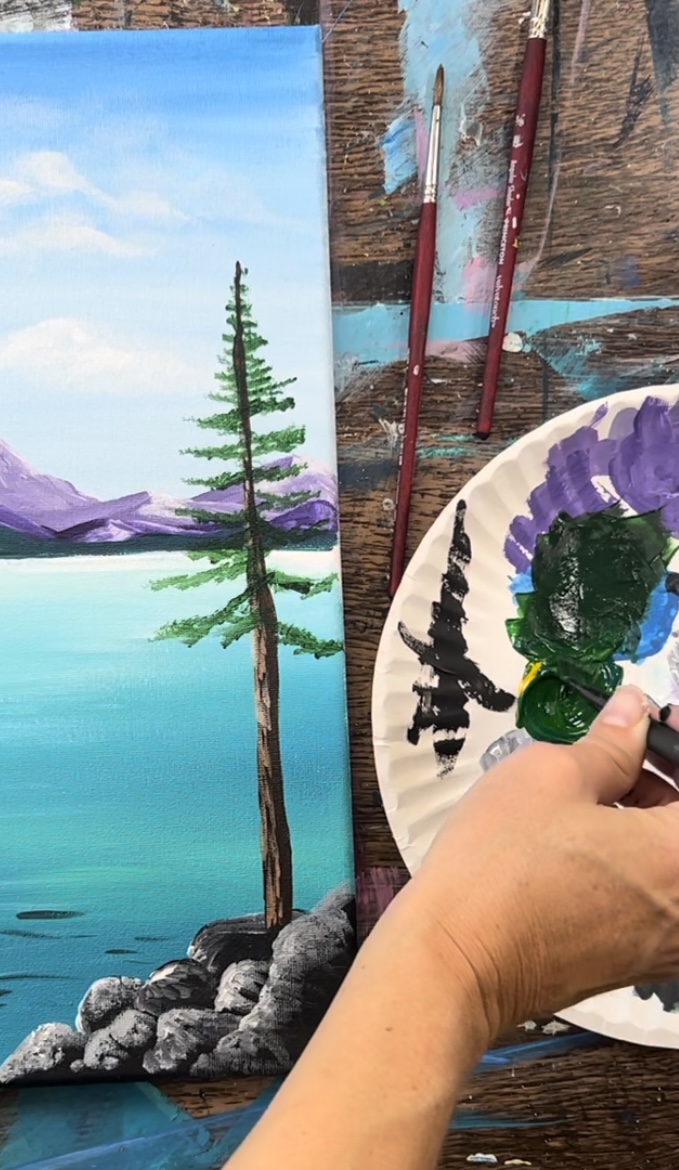
Continue painting branches down the tree trunk and leave a gap in between the branches.
Leave about an inch or two of space on the bottom of the trunk without any branches.
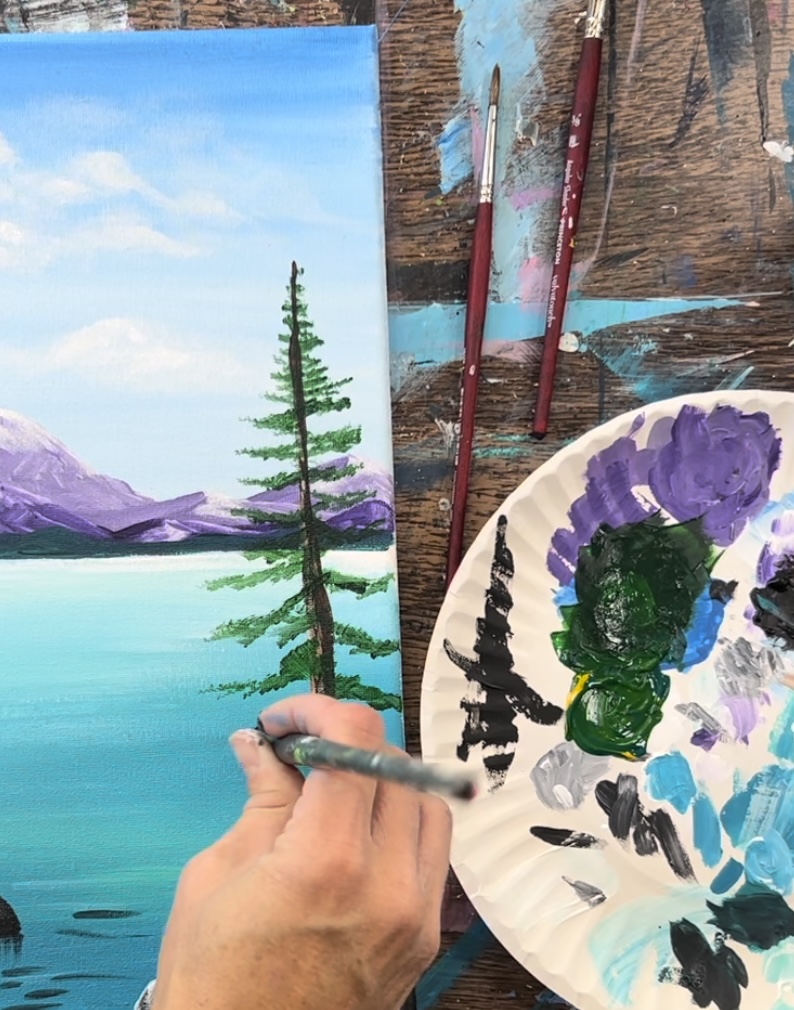
Next, we will be going back with a round brush and adding lighter colors to this and more branch details. Mix white into the green on your palette to make a lighter version of this green.
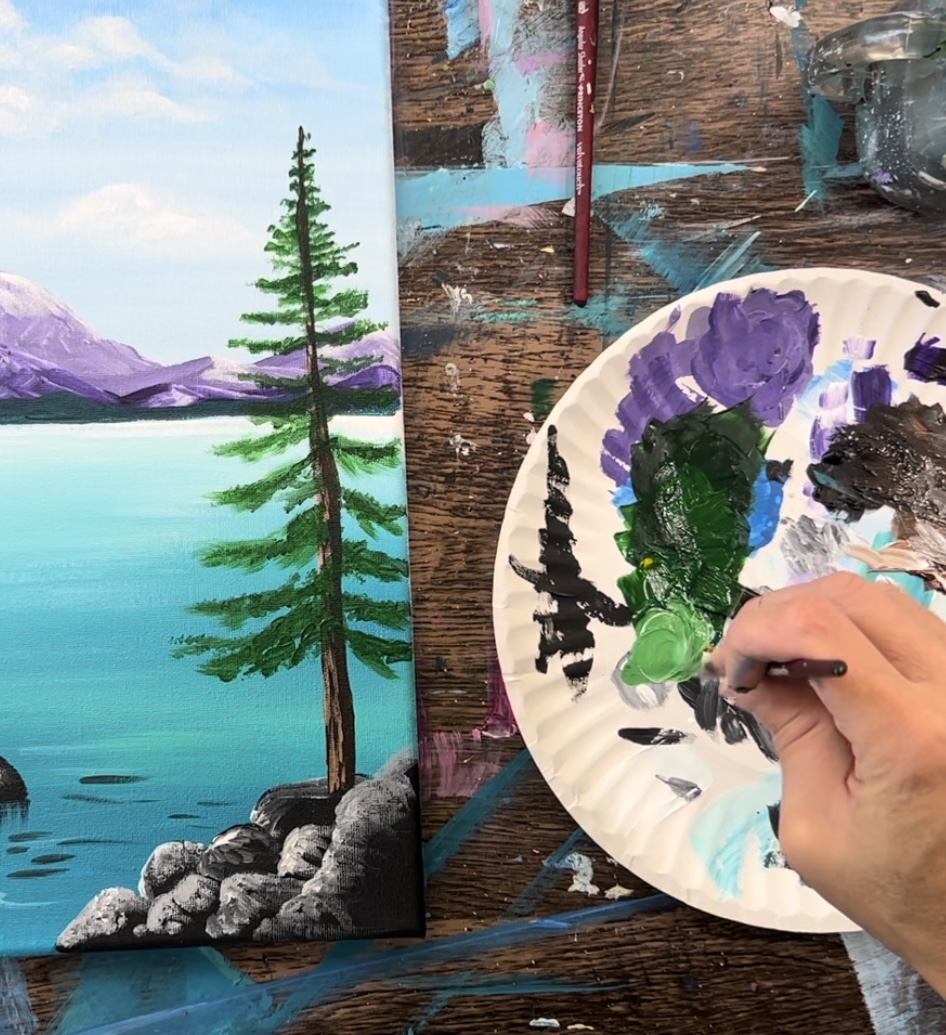
Use the round brush to paint curved branch strokes downwards on each of the dark green branches. When you get to the top, you can just “stipple” the brush or make it look more abstract because the branches are so small up there.
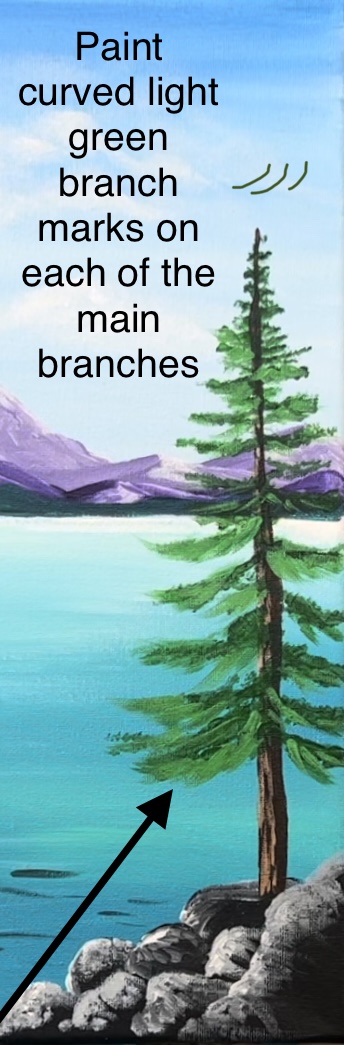
Add some “cadmium yellow medium hue” into the green and paint more curved marks on the branches. This will lighten up the tree a bit more.
Then add a final lighter layer with white mixed with your green-yellow color.
Next, paint the pine needles on the large pine tree on the left. This time, you are painting short bundled marks on the tips of all the branches. Use the various greens on your palette.
Add some black or very dark green into some of the pine needle bunches to give it some more depth.
8. Paint Moss
In this final step, we will be “stippling” the #4 round brush with the various greens on our palette to paint moss/greenery on the rock formations. Paint little textured dots on various parts of the rocks but try not to cover all of the rock. In the bottom area, I did the moss mostly on the bottom dark parts leaving the highlighted parts still showing.
Add some moss on the rocks on the left as well.
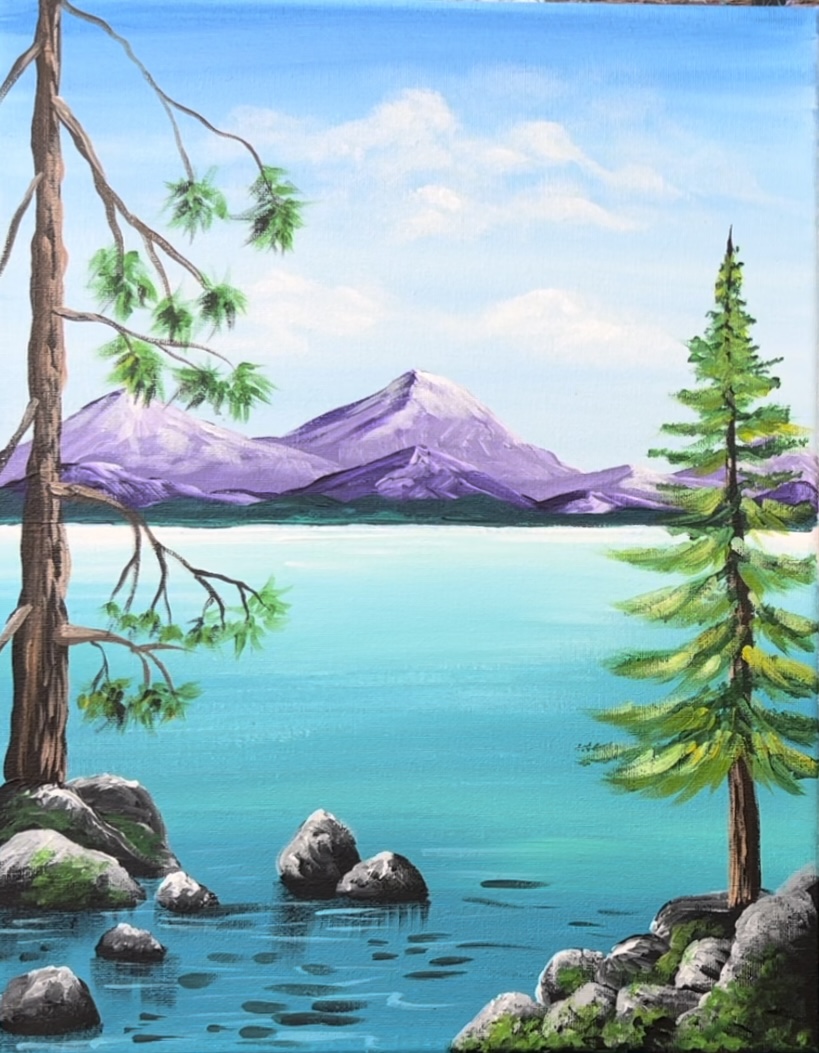
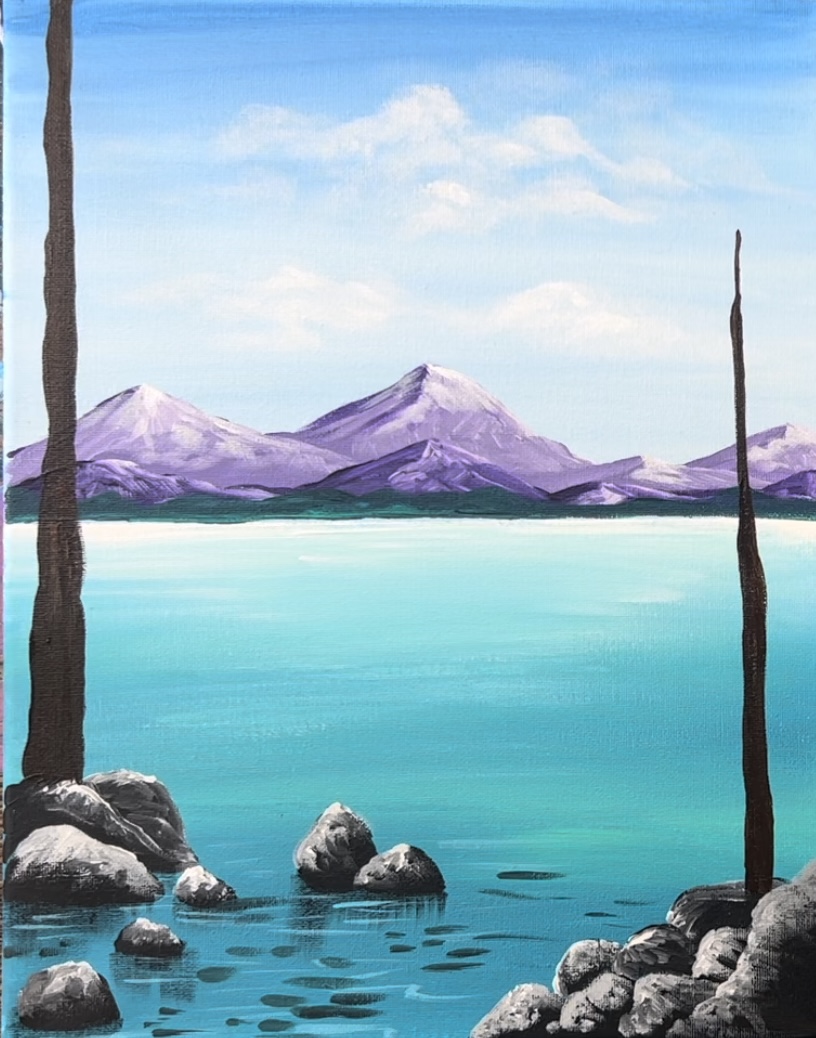
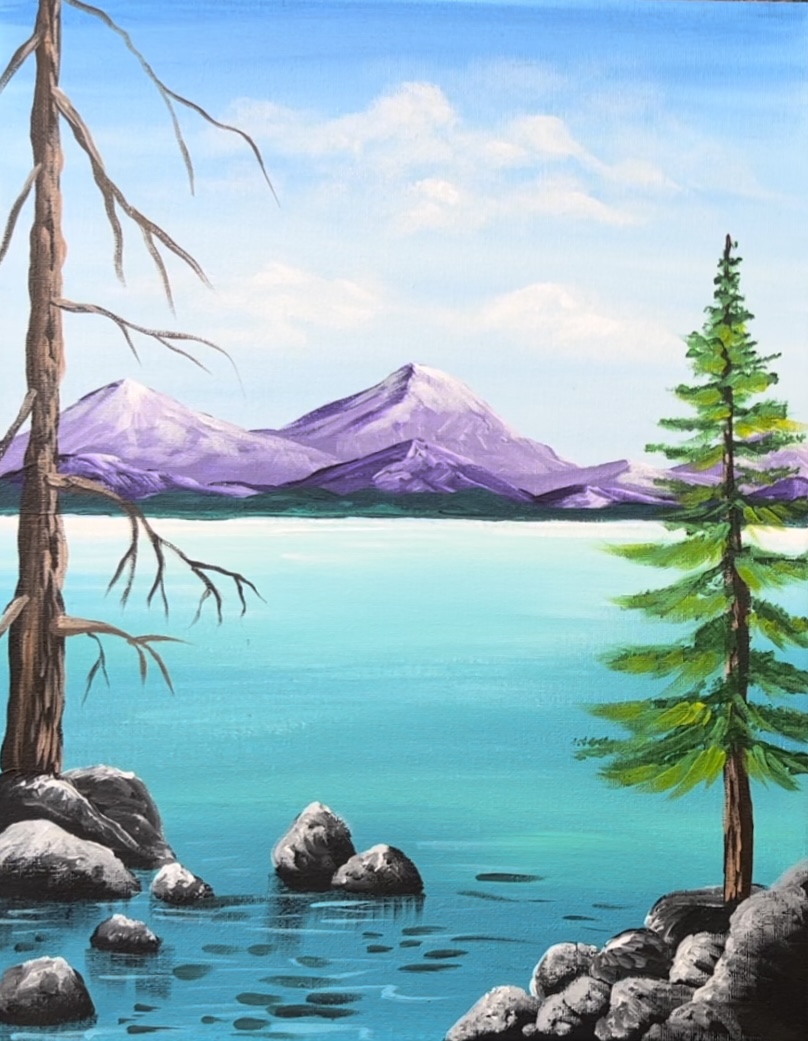
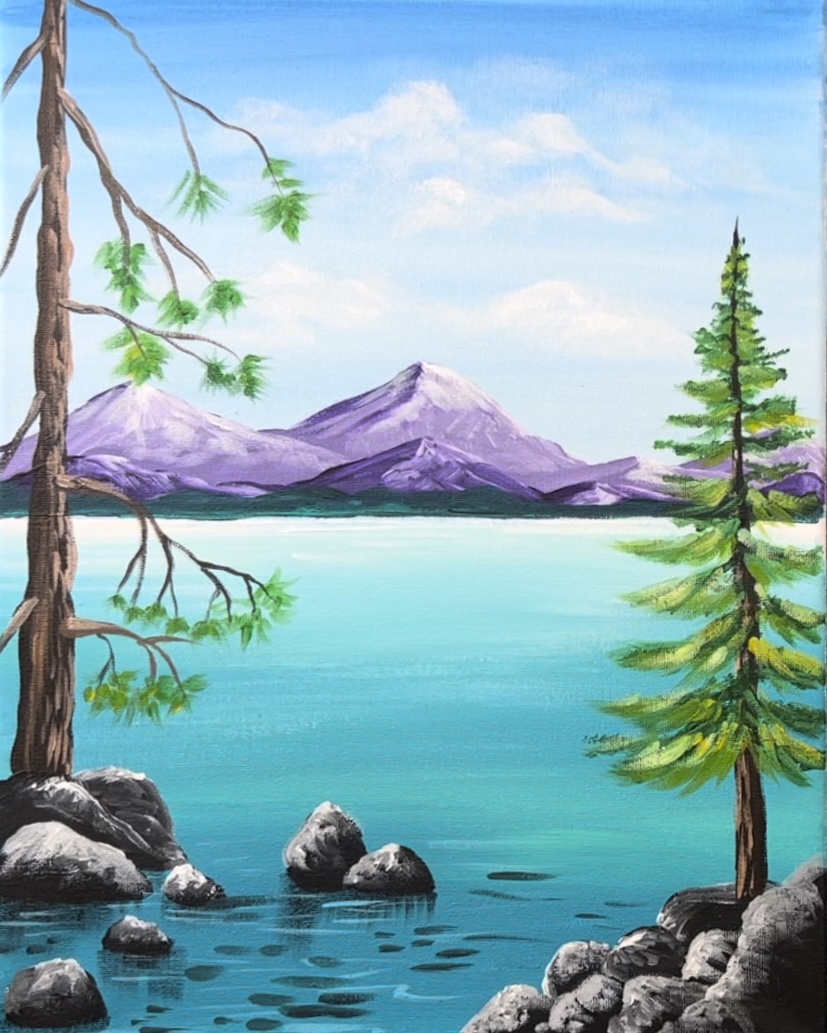
Finished!