

Would you like to save this?
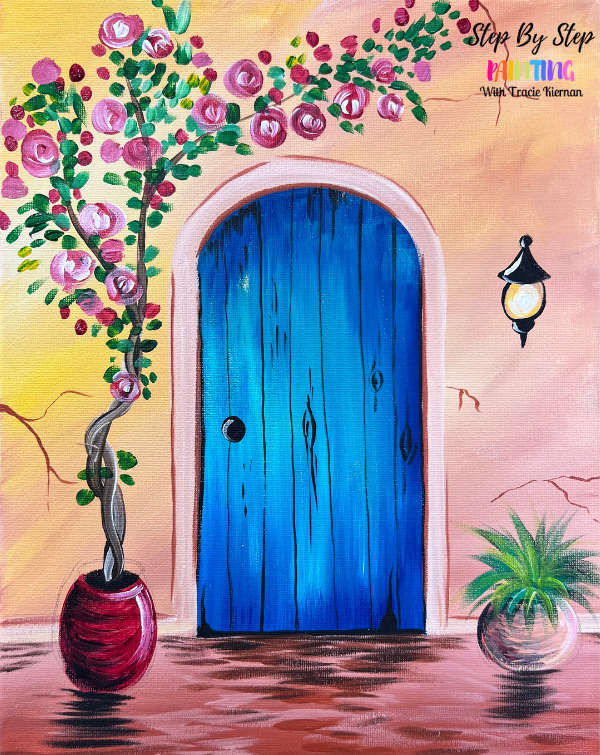
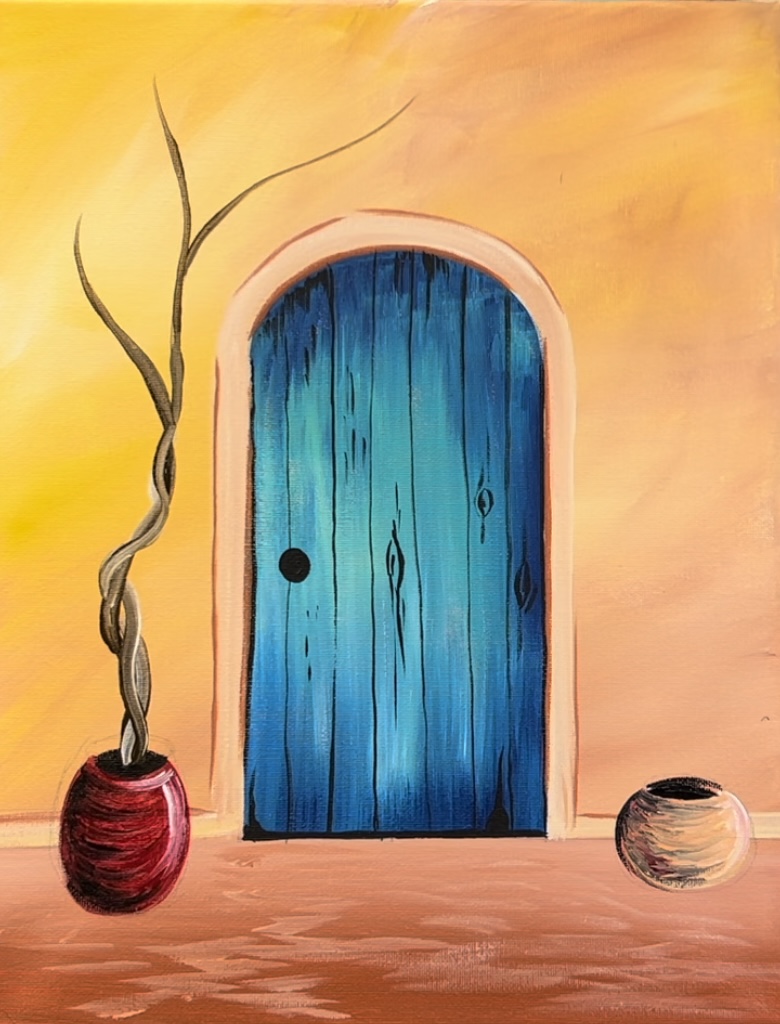
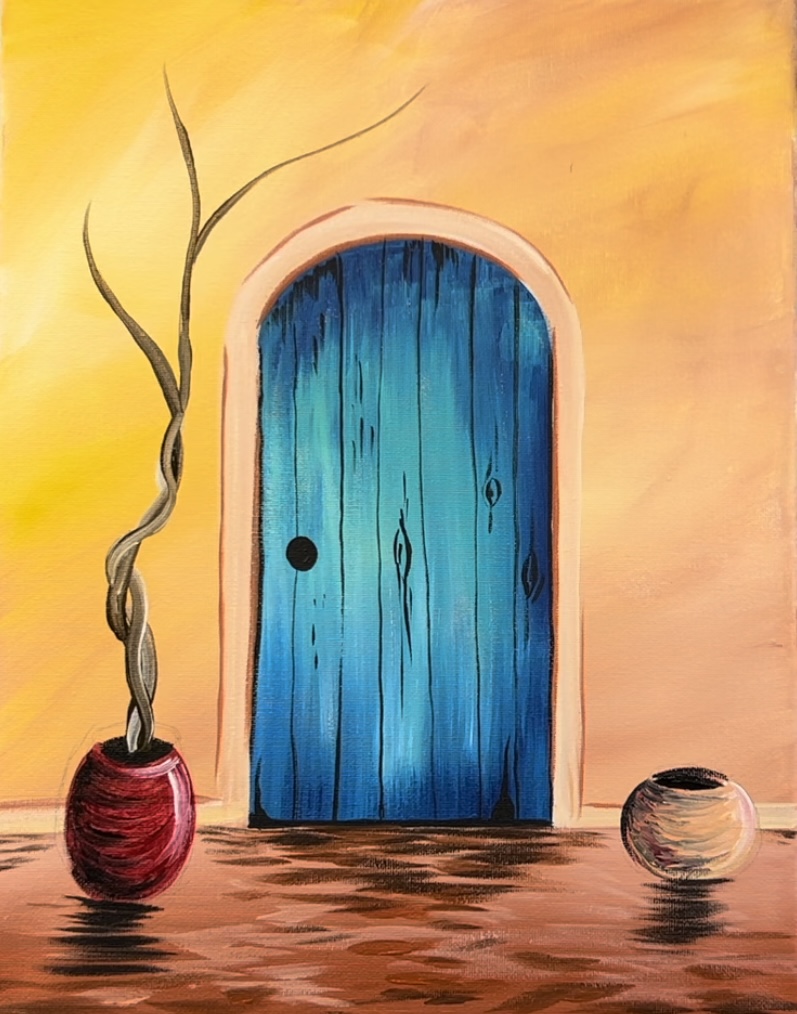
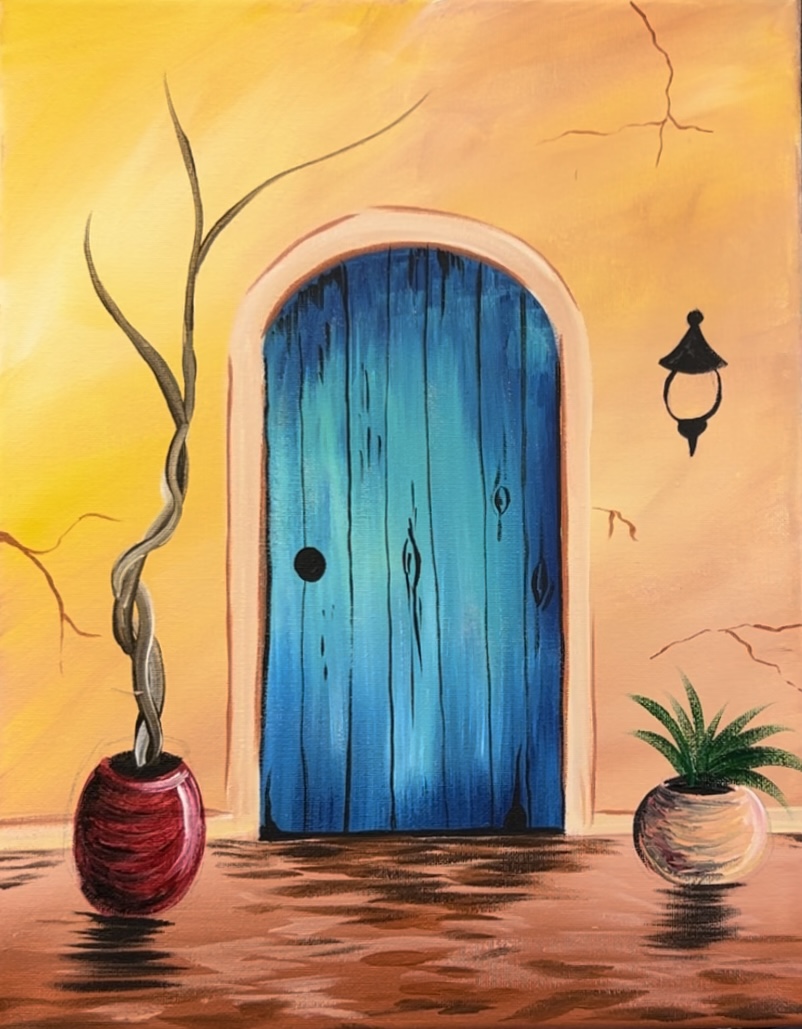
Learn how to paint a blue tuscan door with planters and rose tree. This acrylic painting has a beautiful warm color palette that contrasts nicely with the bright blue door.

Materials
- 11 x 14 Canvas
- Acrylic Paint
- Acrylic Paint Brushes
- Ruler (Preferably a T-Square)
- Painters Tape (optional but very helpful!)
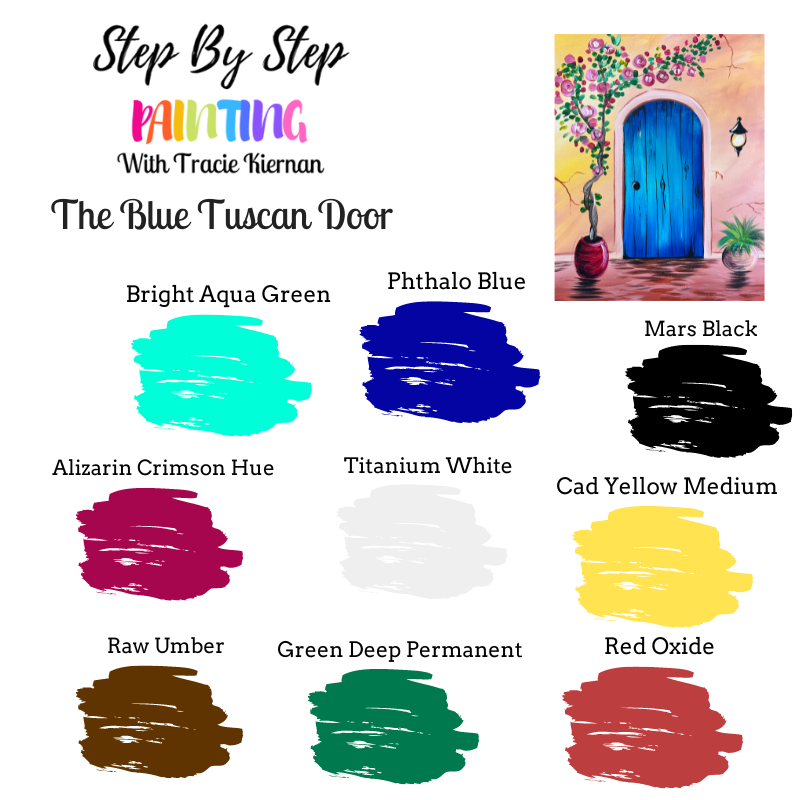
Colors
- Titanium White
- Mars Black
- Red Oxide
- Cadmium Yellow Medium Hue
- Phthalo Blue
- Bright Aqua Green
- Green Deep Permanent
- Raw Umber
- Alizarin Crimson Hue Permanent
Brushes
- 1″ Flat Wash Brush (optional)
- 3/4″ Flat (from this set)
- 12 Bright Brush (1/2″ wide flat)
- 4 Round Brush (or smaller for fine details) (from this set)
Color Palette
I used Liquitex BASICS for this tutorial. If you are using a different brand, you can use the color chart below to help you match colors.
Craft Paint Conversion:
If you are using craft paints such as Apple Barrel Craft Paints, I would recommend subbing to these colors:
- Black
- White
- Bimini Blue
- Too Blue
- Tuscan Red
- Bright Yellow
- Melted Chocolate
- Bright Magenta
Directions At A Glance:
Video
Step By Step Instructions
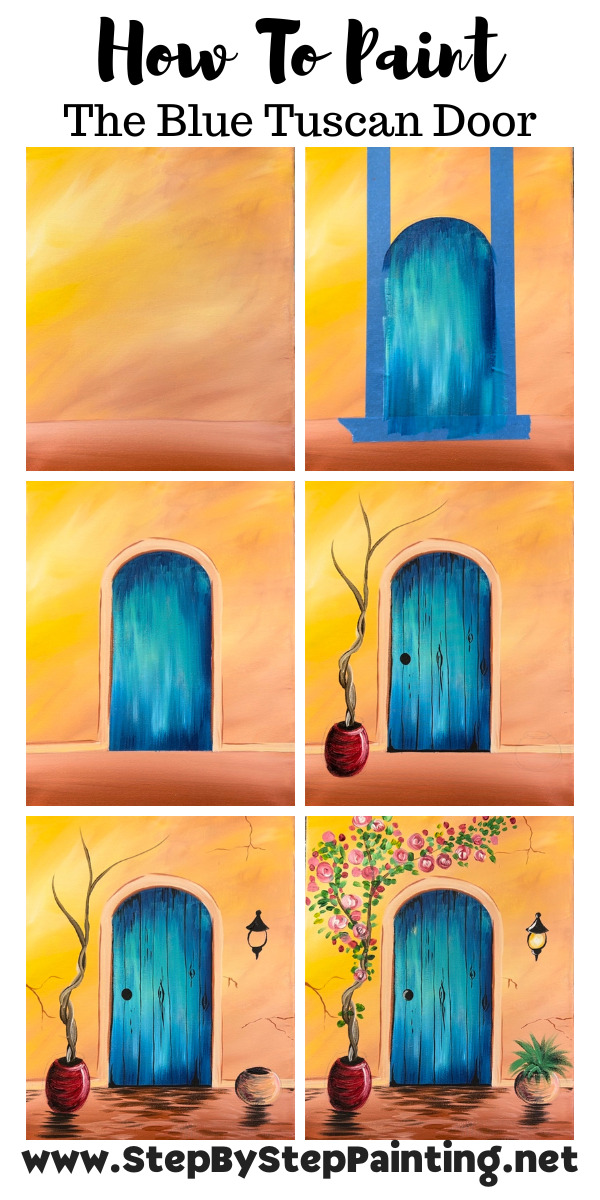
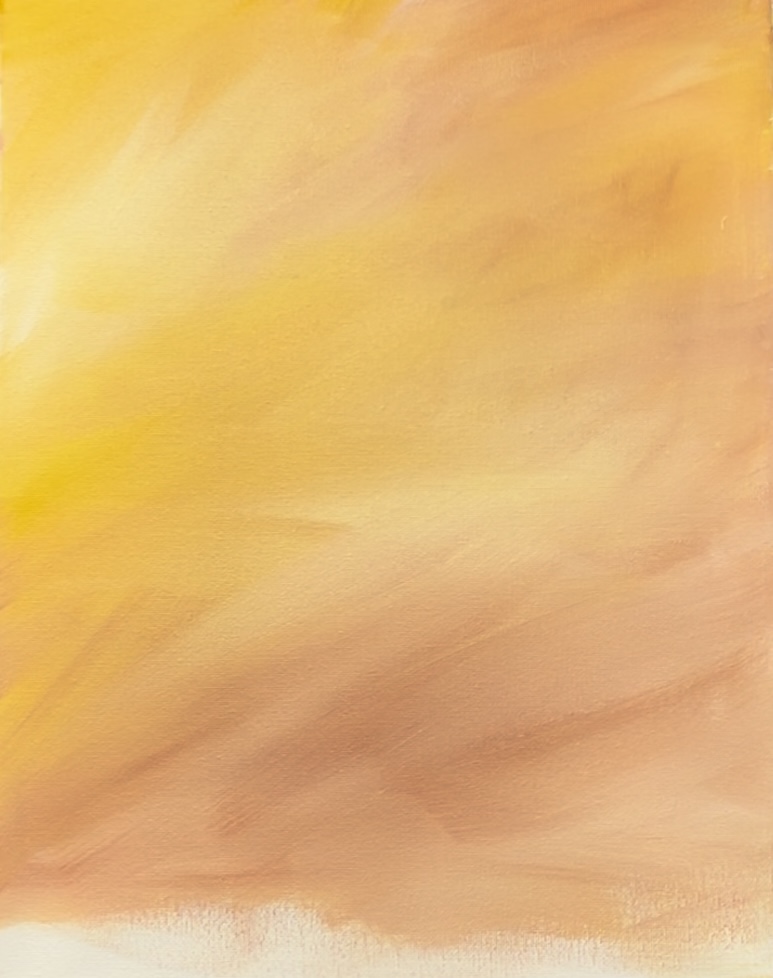
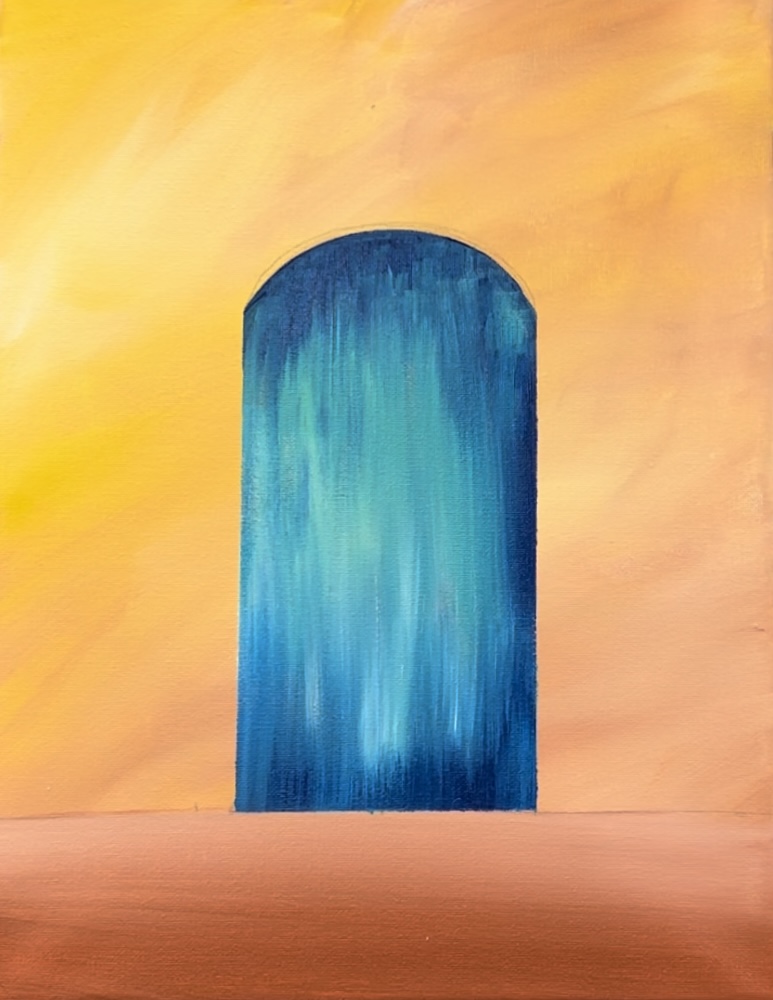
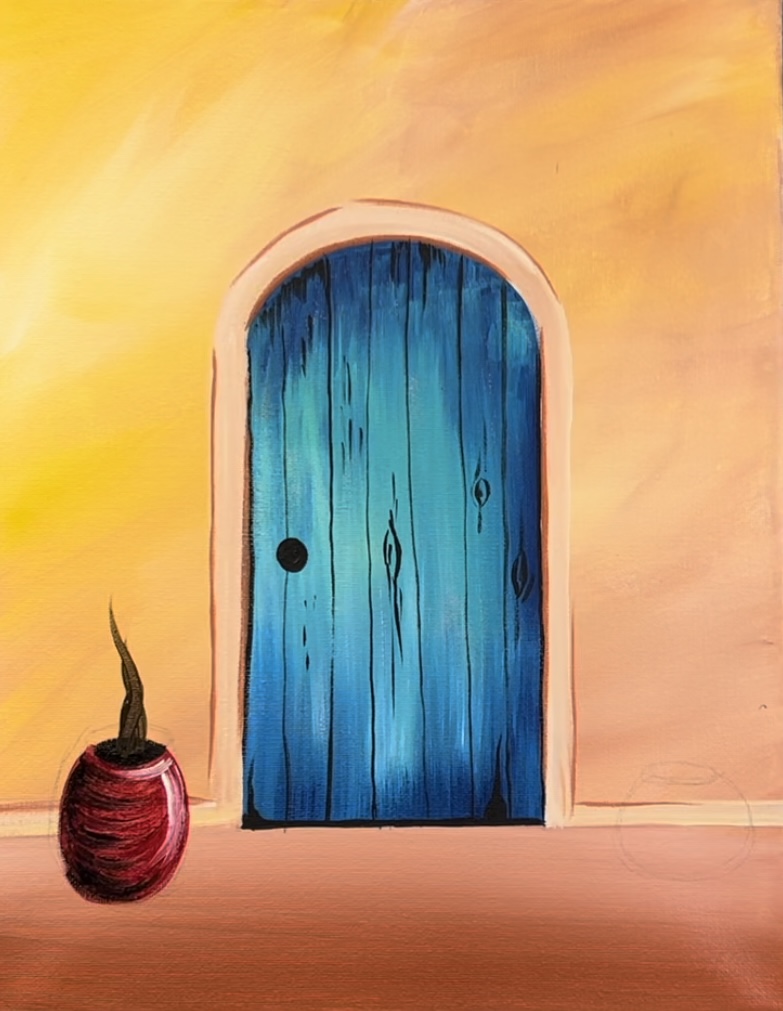
1. Paint The Background
Load your palette with the colors: titanium white, cadmium yellow medium and red oxide. Use a 1″ flat brush. Load it into the water and pat dry. Then load about 4 parts white, 1 part yellow and 1 part red onto your brush.
Paint long, smooth angle strokes and fill the canvas. Try to blend different variations of the three colors but don’t blend the color all the way.
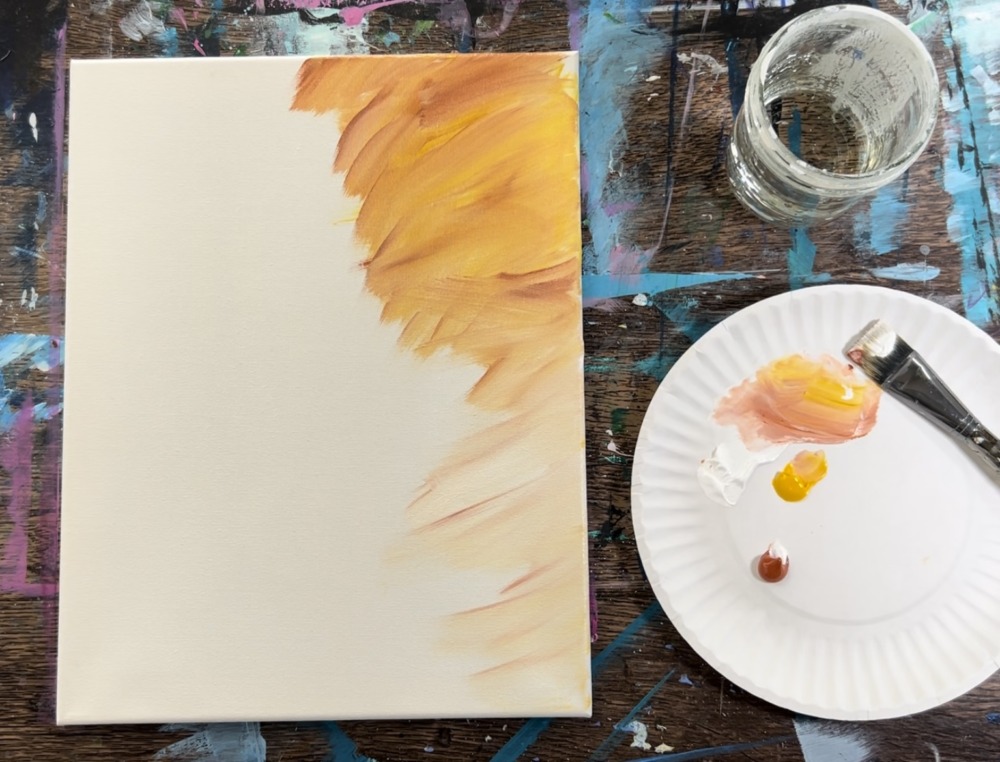
You will need a generous amount of white to keep the background soft and light and the white helps the yellow and red blend.

Fill this entire background with this color. It’s okay if there are variations in the color and that it is not blended all the way.

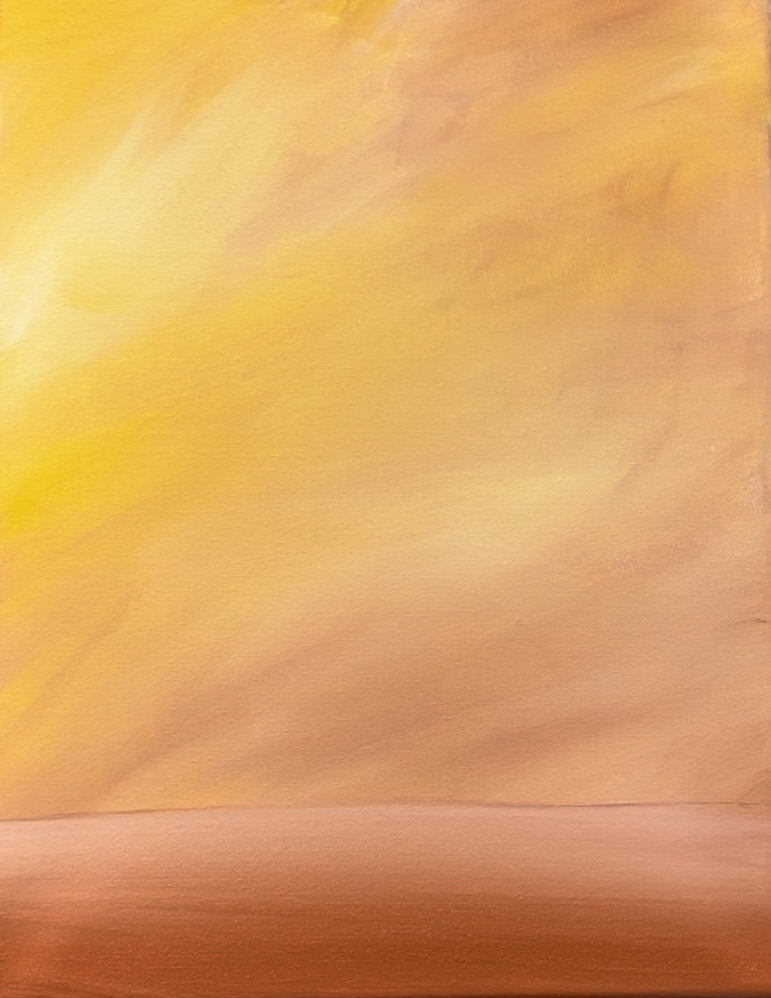
2. Paint Sidewalk
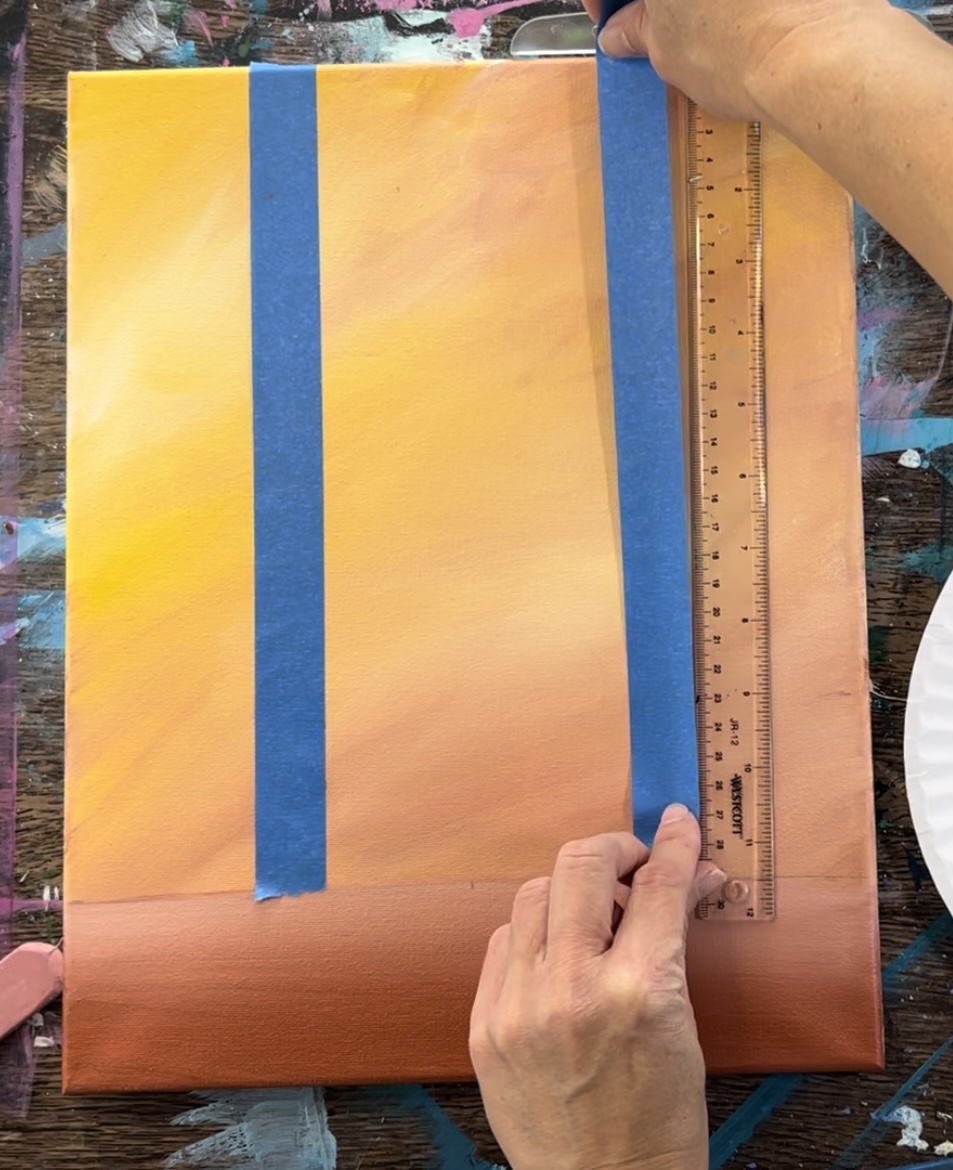
Use a ruler to measure 2.5″ from the bottom of the canvas. Draw a horizontal pencil line across the canvas.

Use the 1″ flat brush to paint red oxide on the bottom of the canvas and blend it up. This is done with all horizontal strokes.
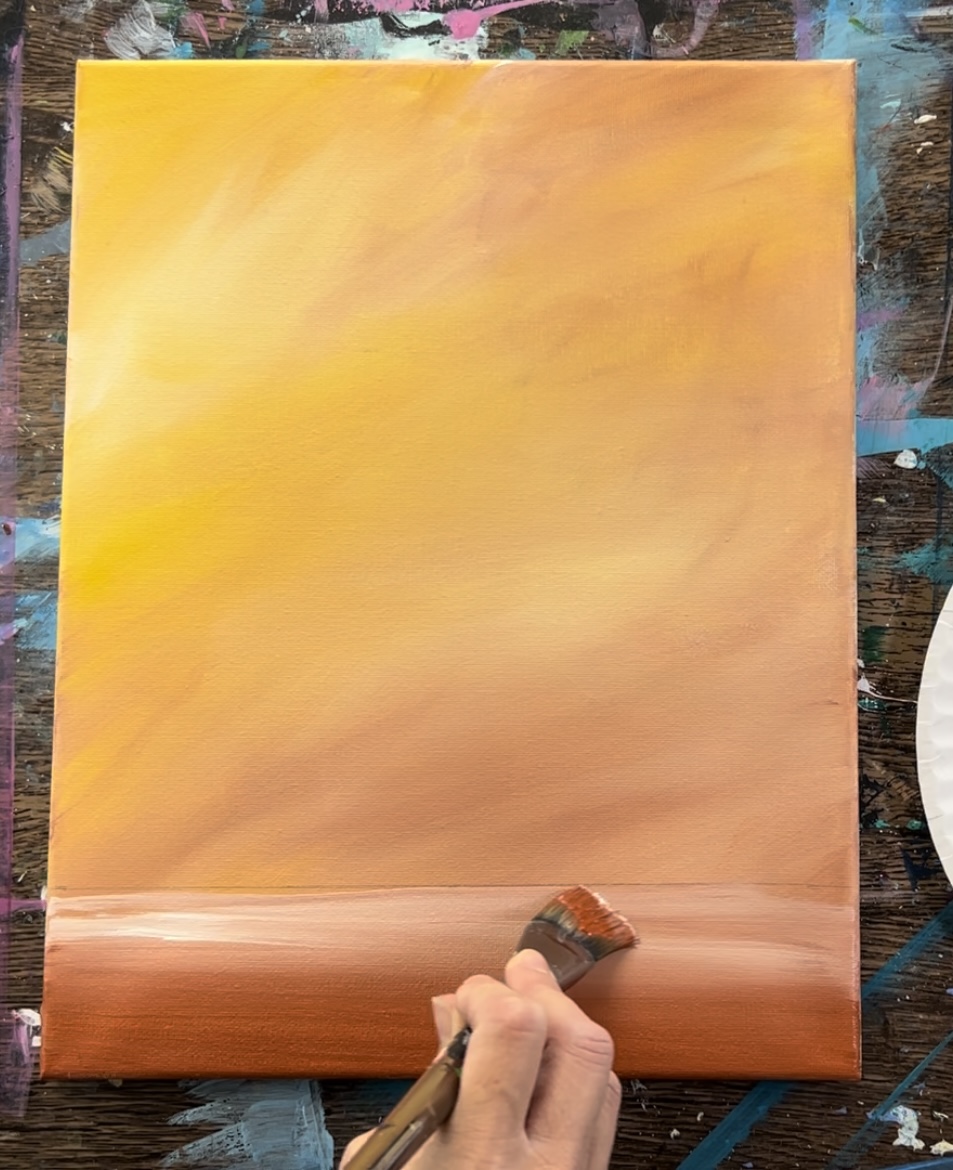
Then add titanium white to your brush and blend white at the very top. Blend the red oxide so that it is darker on the bottom and lighter at the top.
3. Tape Off Door
The door is approximately 4″ wide. Locate the center of the canvas. If you are using an 11 x 14 canvas, make a mark at 5.5″. Then measure 2″ on each side so you have a 4″ wide area.

Next, position the painters tape so that it is on each side of the marks. Use a t-square ruler to help position the tape so that it is vertical.

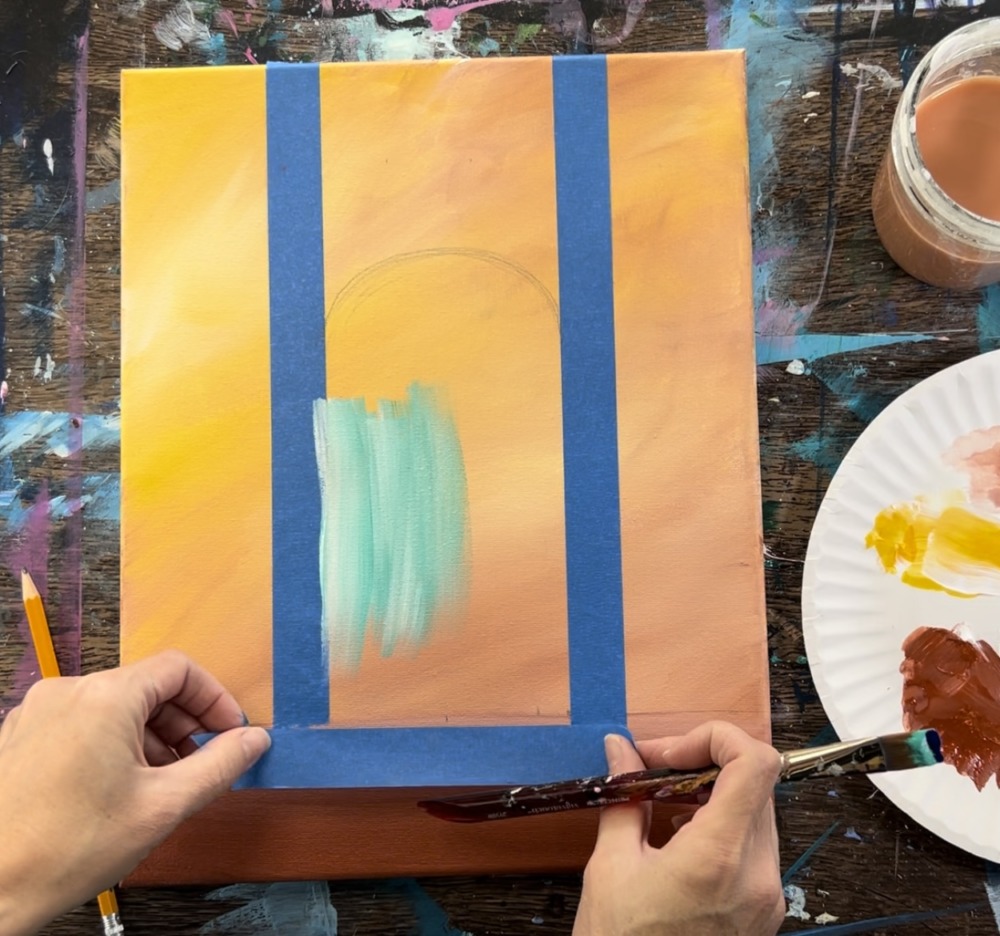
Then draw an arch line in between the pieces of tape so that the height of the door is approximately 8″ from the bottom to the highest part of the arch.

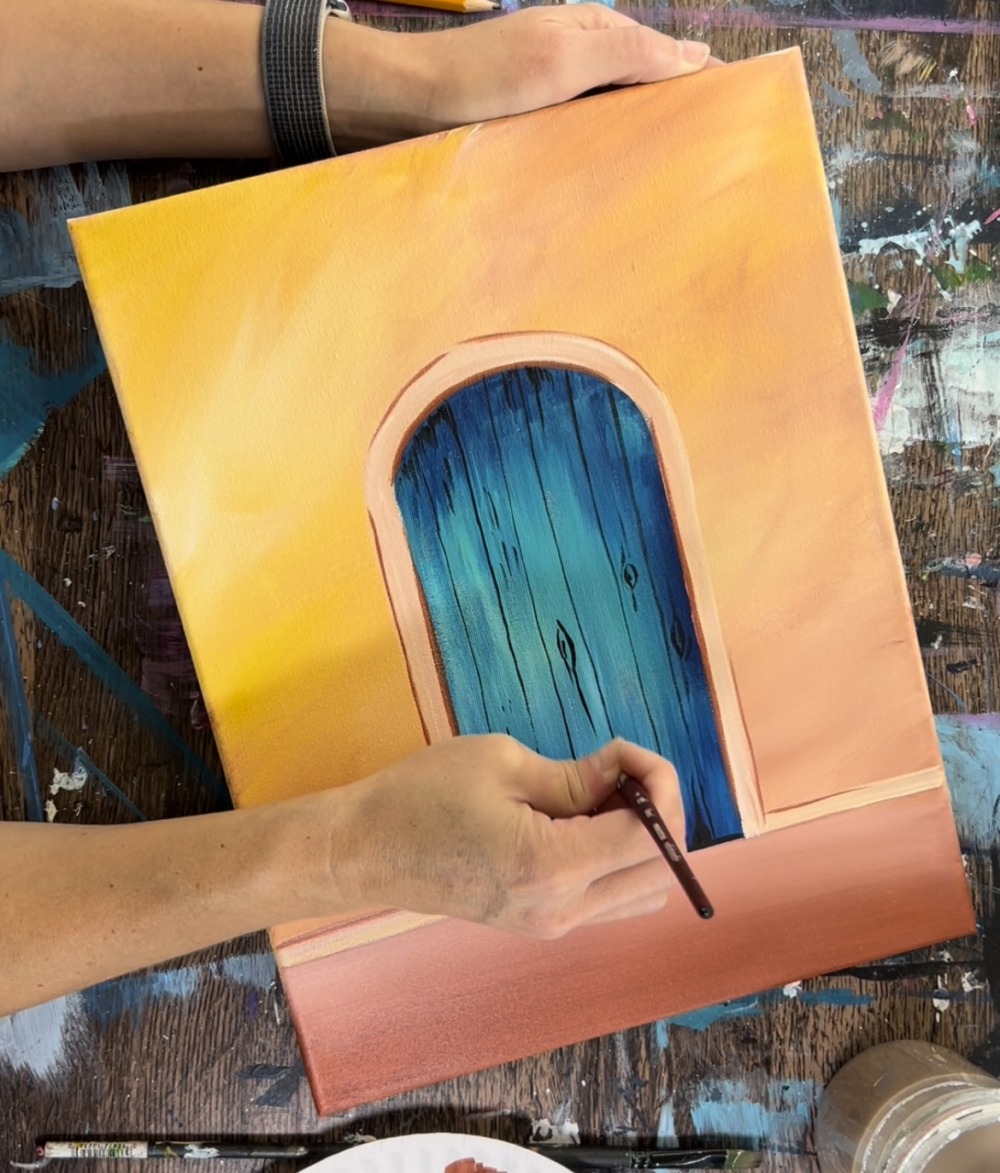
4. Paint Door
Load your palette with bright aqua green, titanium white and phthalo blue. Use a 3/4″ flat wash brush. Load it into just the aqua and white (about equal amounts). Start in the middle area of the door and paint up and down strokes. Let the aqua and white blend gently together but not all the way. You’ll want streaks of these colors that don’t blend all the way in order to create the rustic look in the door.
Then, without rinsing the brush, load it into a small amount of phthalo blue. Use full width strokes with the brush to blend the darker blue on the bottom up into the aqua. This door is slightly darker on the bottom and darker on the top.
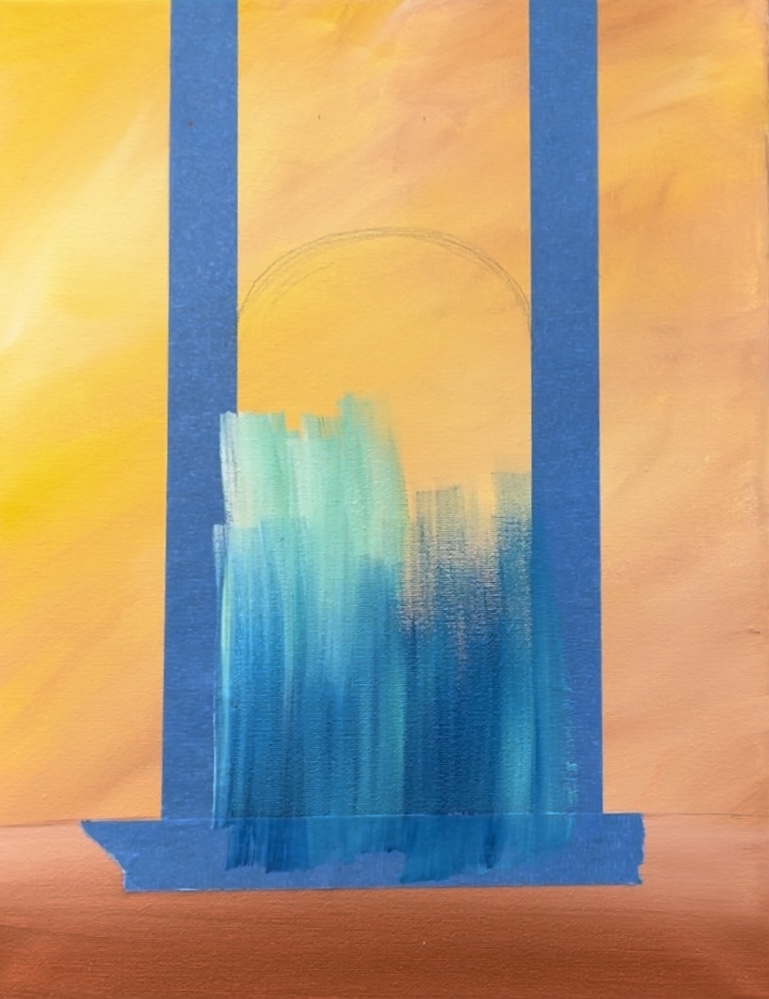
Use the tip of your flat brush to paint the arch. Draw it in with the brush and then fill the top part of the door with the dark color. Try to keeping the mid area of the door lighter with more aqua/ white and the top and bottom area darker.
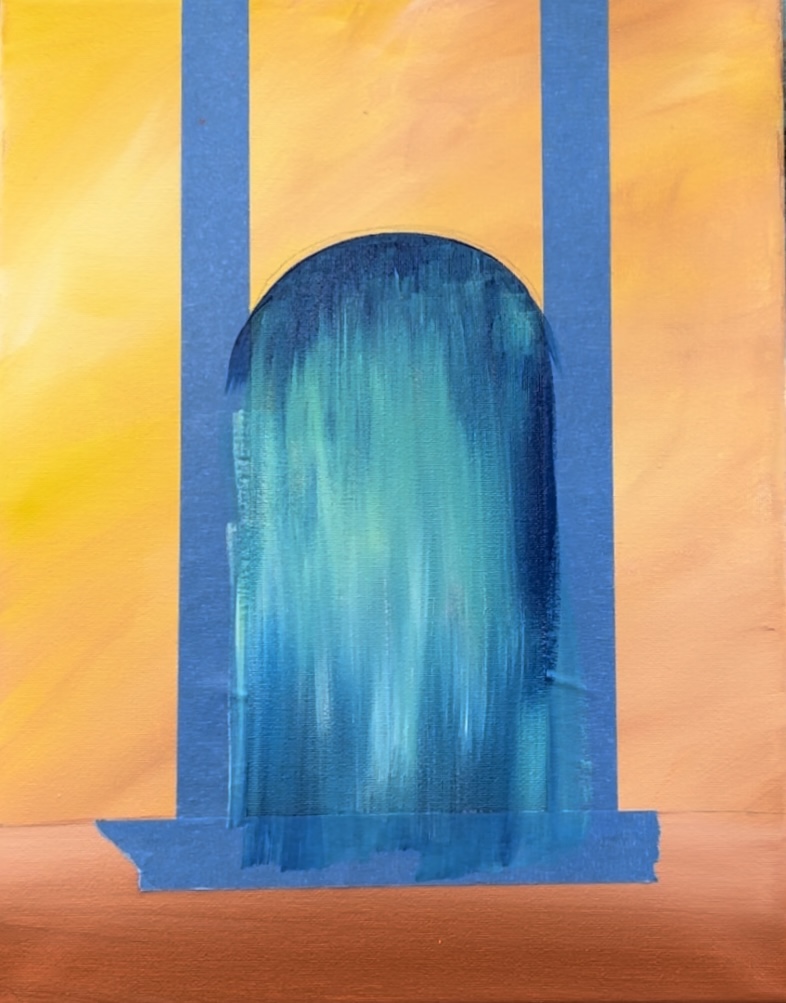
Gently pull off the painters tape. You don’t need to wait for this to dry before pulling the tape off.
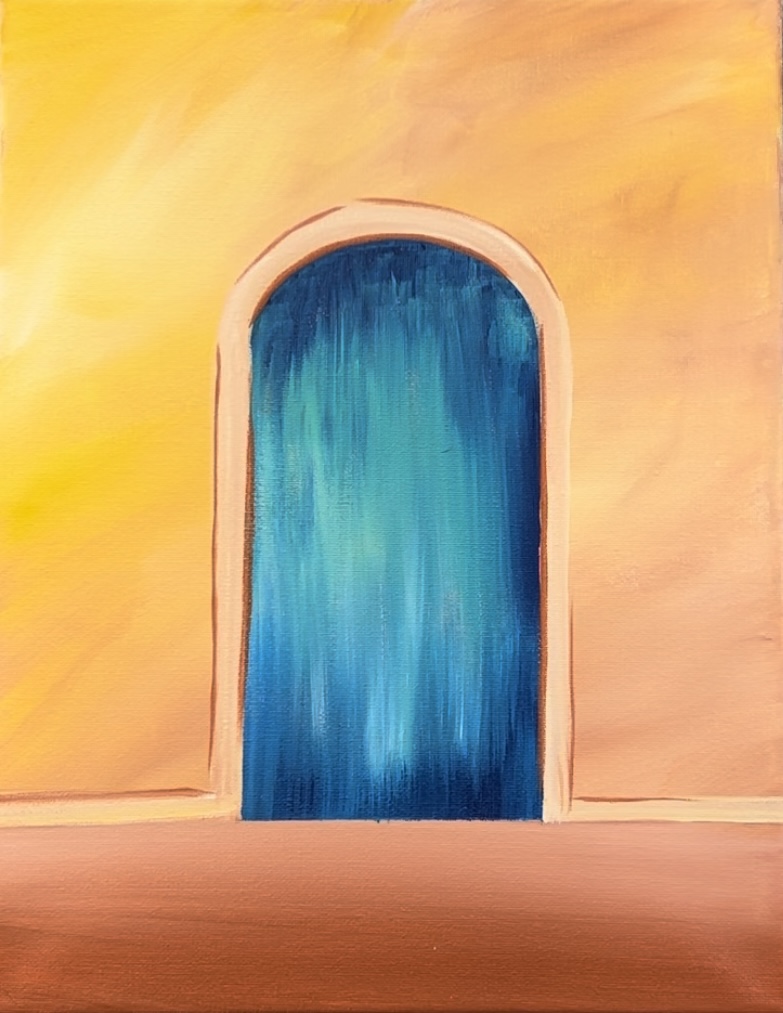
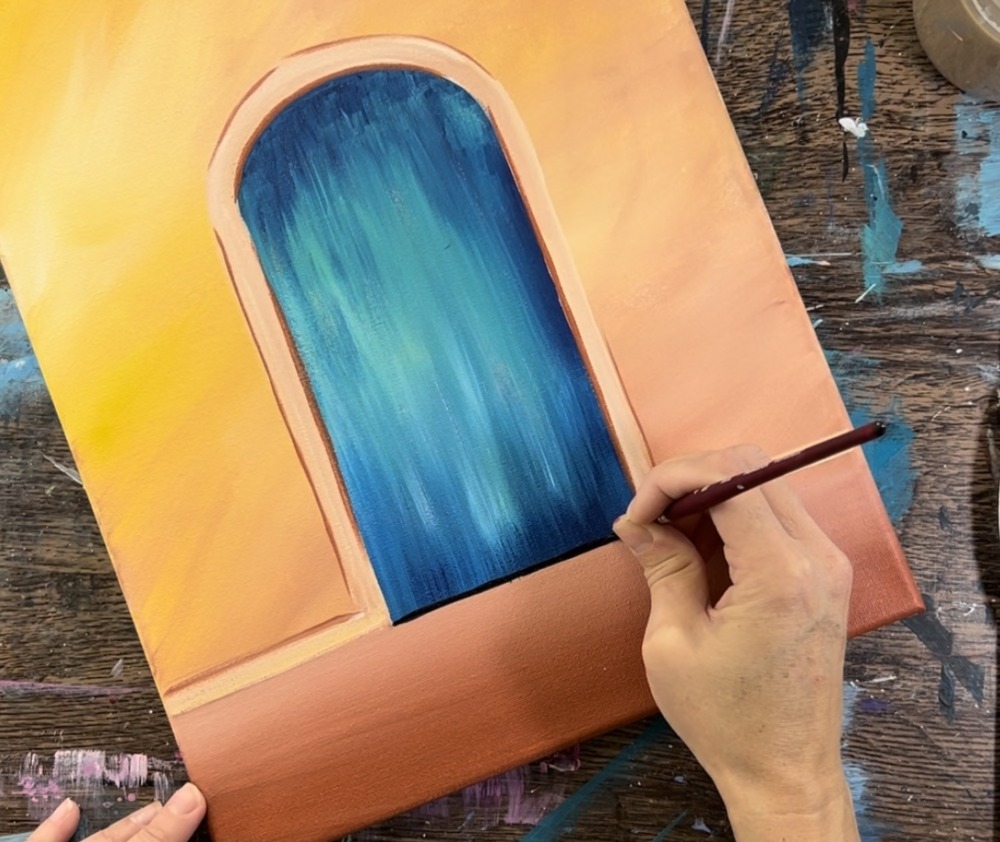
5. Paint border around door and baseboard
On your palette, mix the same color you used for the background, only add more white to it so that it shows up lighter. Mix: 5 parts white, 1 part red oxide and 1 part cadmium yellow medium hue.
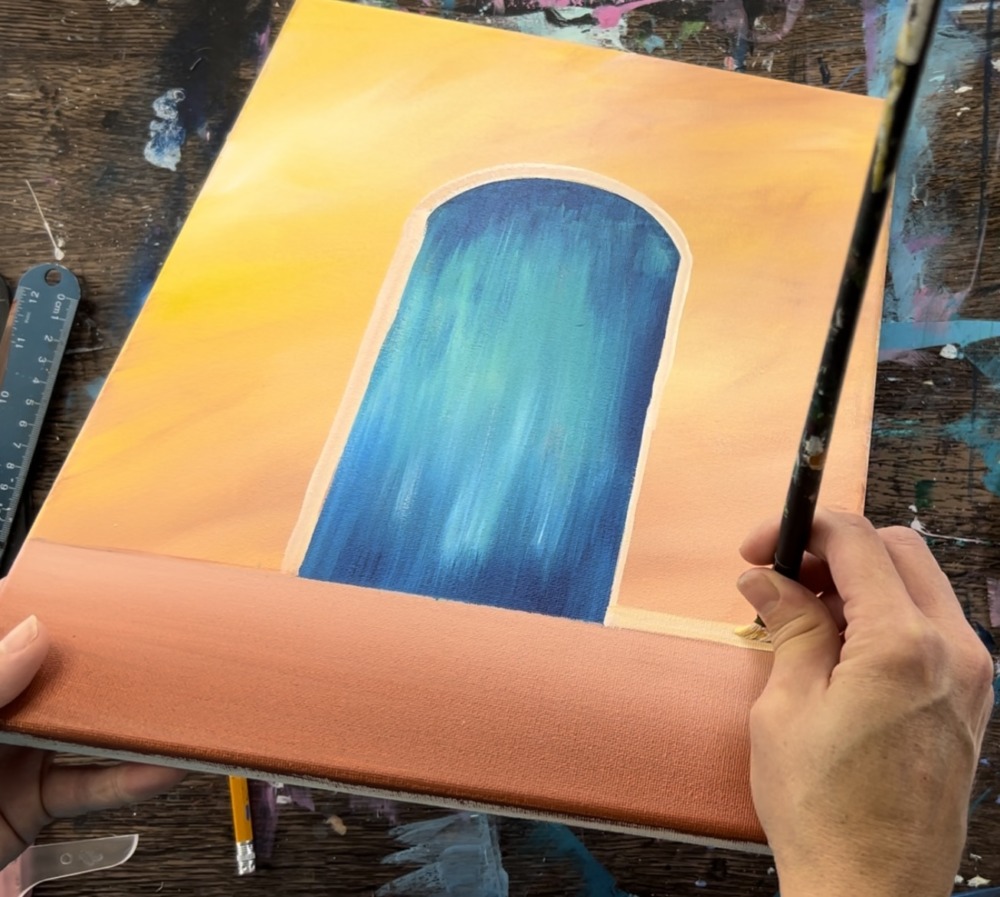
Use the 12 bright brush to paint the border of the door and baseboard on the bottom of the wall.

Gradually make the border thicker until it is about 1/4″ to 1/2″ wide. You can adjust it wider if you want.

Then loosely outline the border and the baseboard edging using the tip of the brush and red oxide. You don’t need to outline all of it, just some of the edges with lines that are broken and loose.

Some of the interior edging of the door border gets outlined too. This loose outlining helps the baseboard and door border stand out from the rest of the wall color.
6. Paint panels and door & small gap on the bottom of the door
Use the #4 round brush and mars black to paint a very small slither on the bottom horizontal edge of the door. This will create a little gap under the door so that it isn’t flesh with the ground.
Then paint vertical lines to divide the door up into smaller vertical panels. Do this with the mars black and the #4 round brush as well. If needed, you can switch to a much smaller round brush or even use a black paint pen for this step. These vertical lines are very thin and loose. They do not need to be perfectly straight either.

They also don’t need to be perfectly spaced apart. I did mine about 1/2″ to 3/4″ apart. If the spacing varies, that is okay!

Then add knots and wood texture detail work with the same brush and color. Paint pointed elliptical shapes with some contouring lines. You can also paint a few cracks on the bottom of the door to make it look like the wood is splitting a little.

Then, paint a black circle for the door knob. I did this in the very center, left side of the door.

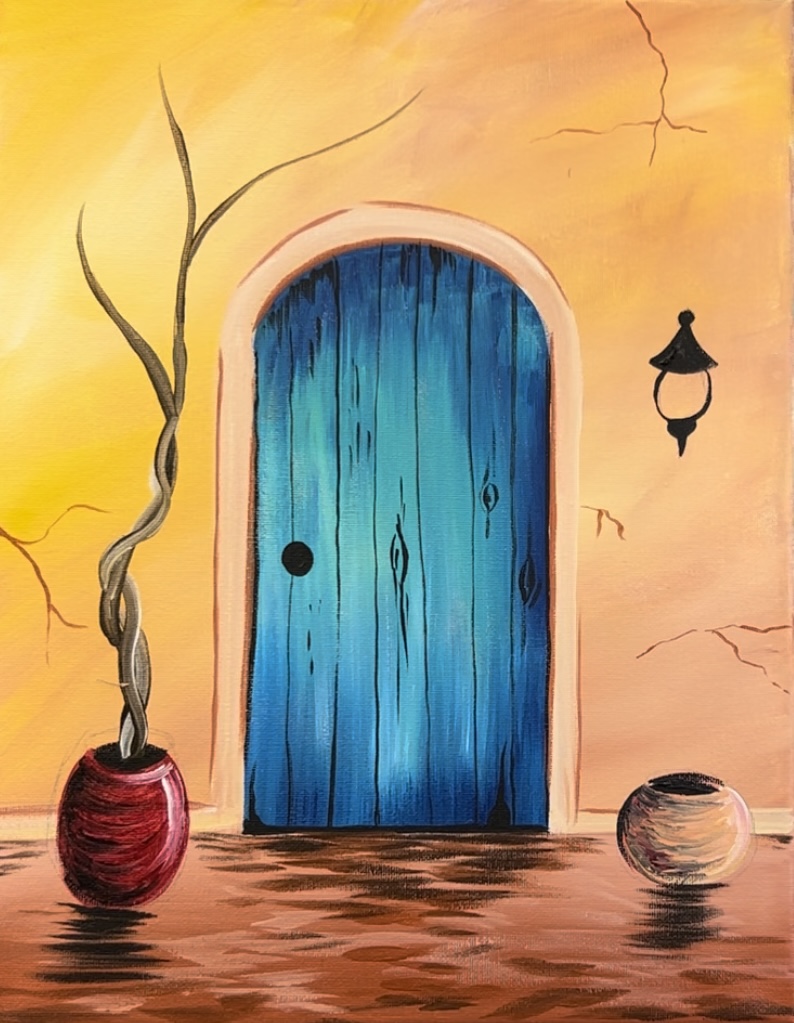
7. Draw/ Paint Pots
Lightly draw the two pots with a pencil. I did the one on the left slightly taller and thinner and the one on the right shorter and rounder.
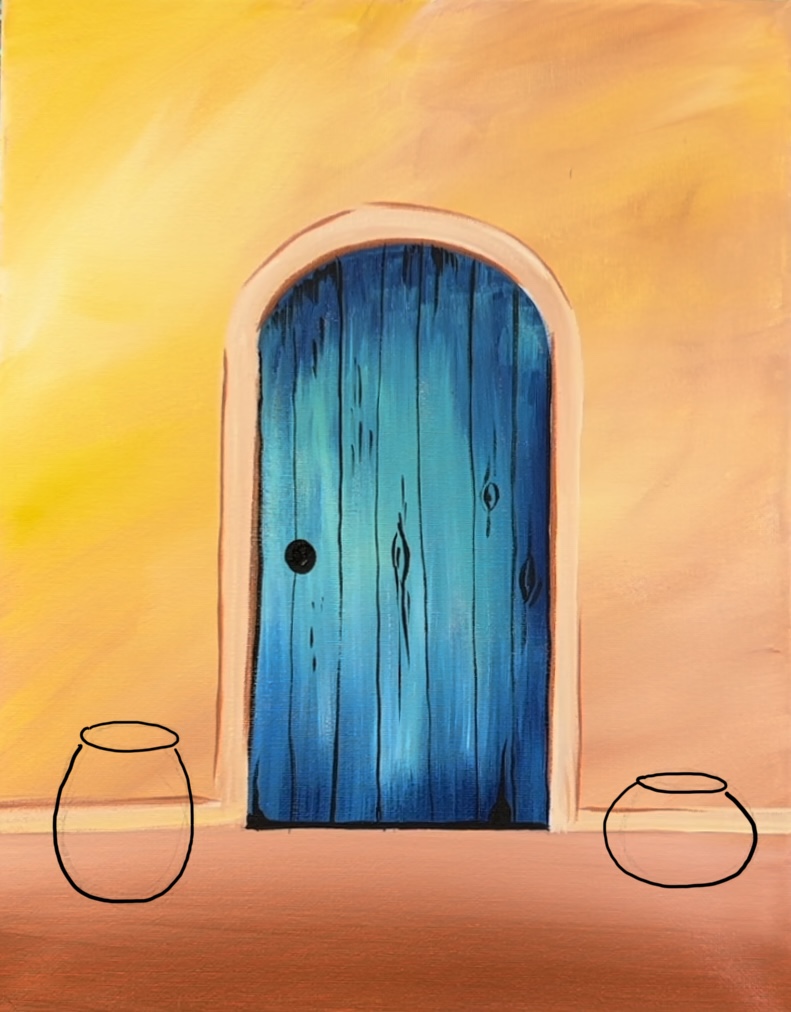
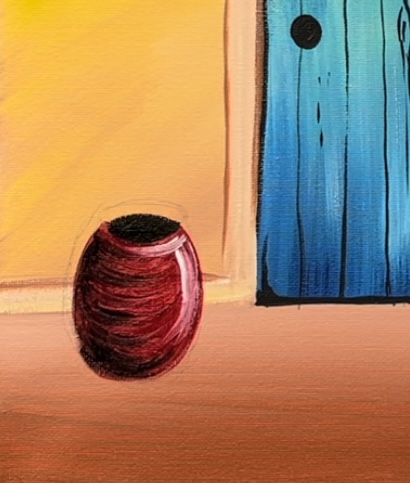
Use “alizarin crimson hue” and a #4 round brush to paint the pot. Paint the top opening of the pot with mars black.
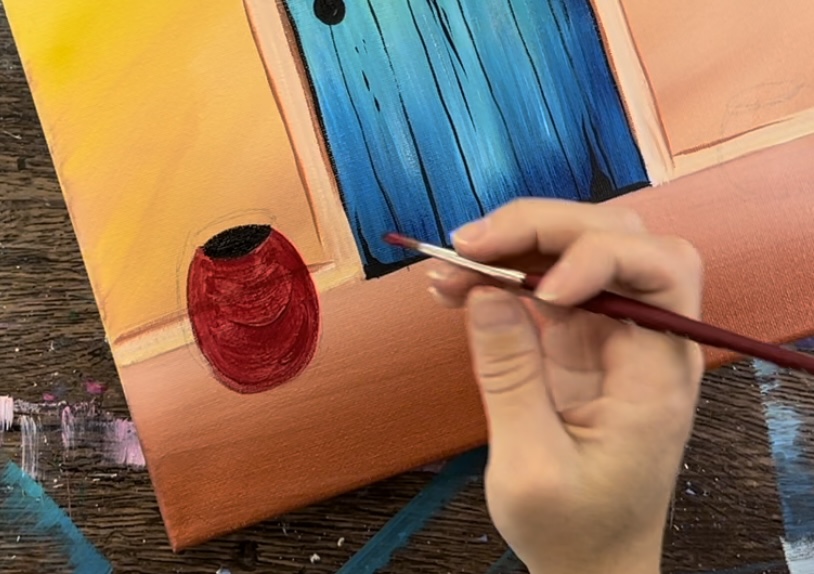
Paint dark shadow with the black mixed with “alizarin crimson”. Add this on the left side of the pot with curved strokes. Then rinse the brush. Load it into titanium white and paint a curved stroke on the right side of the pot.
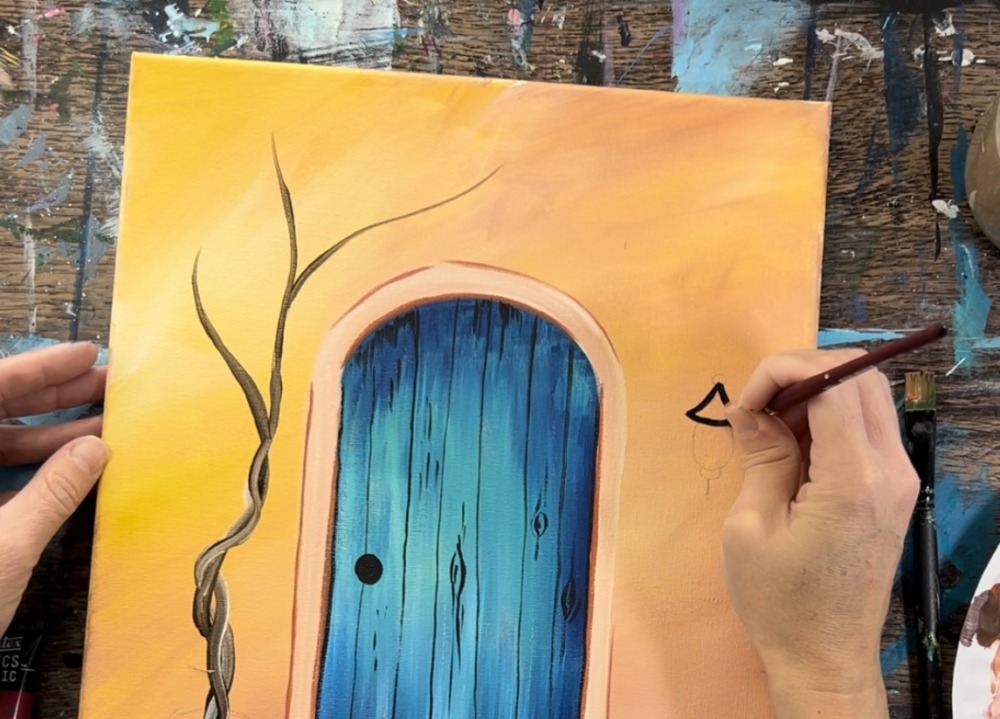
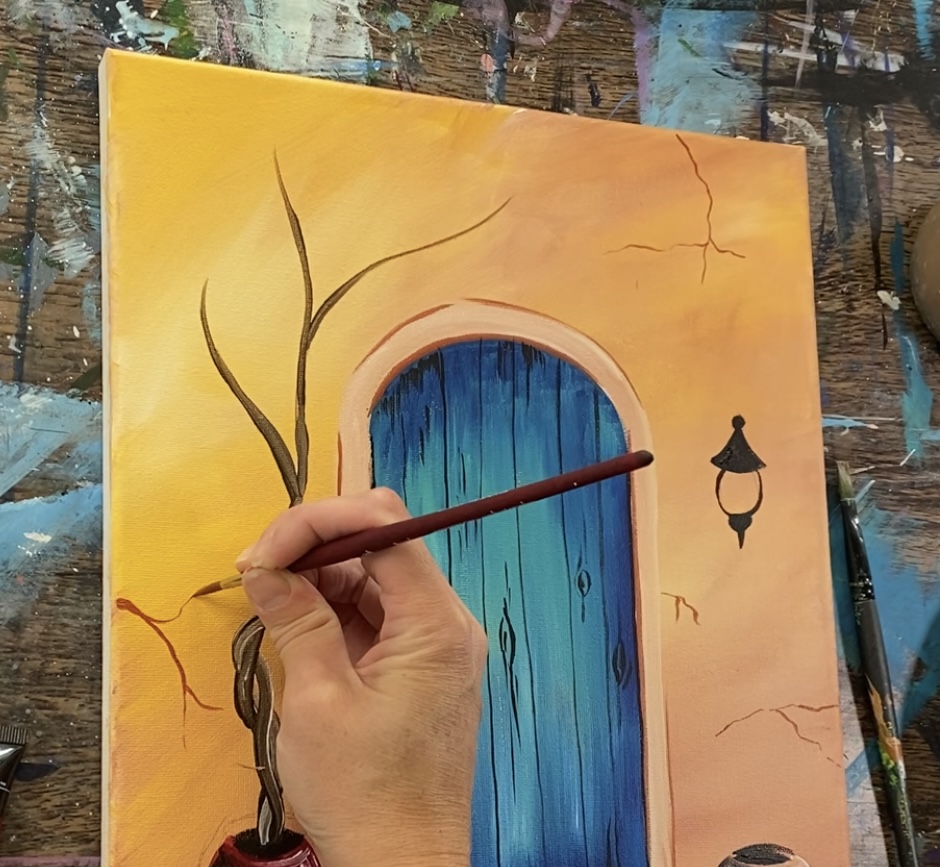
Then load your palette with raw umber. Use a #4 round brush to paint the tree-like branch that will host the roses and leaves.
Paint a twisting line. To get the lighter brown color, load a small amount of titanium white on the brush and paint the branch so that it twists around the main branch.

Then paint three main branches that split off in different directions and then go to a point.

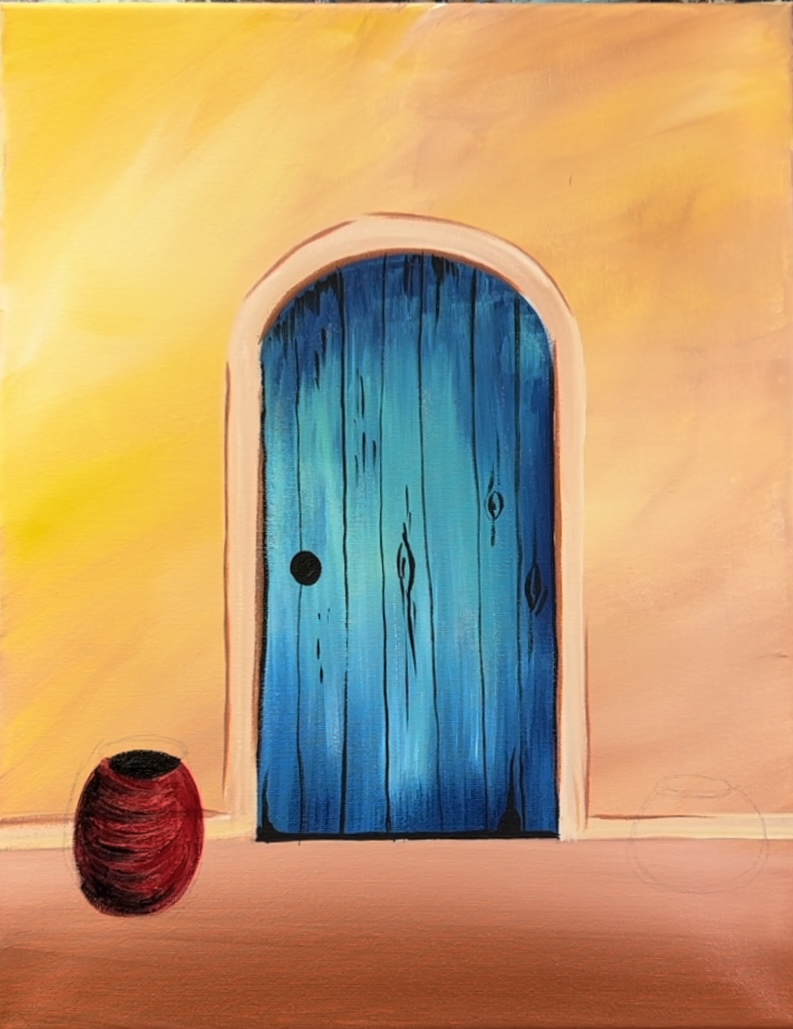
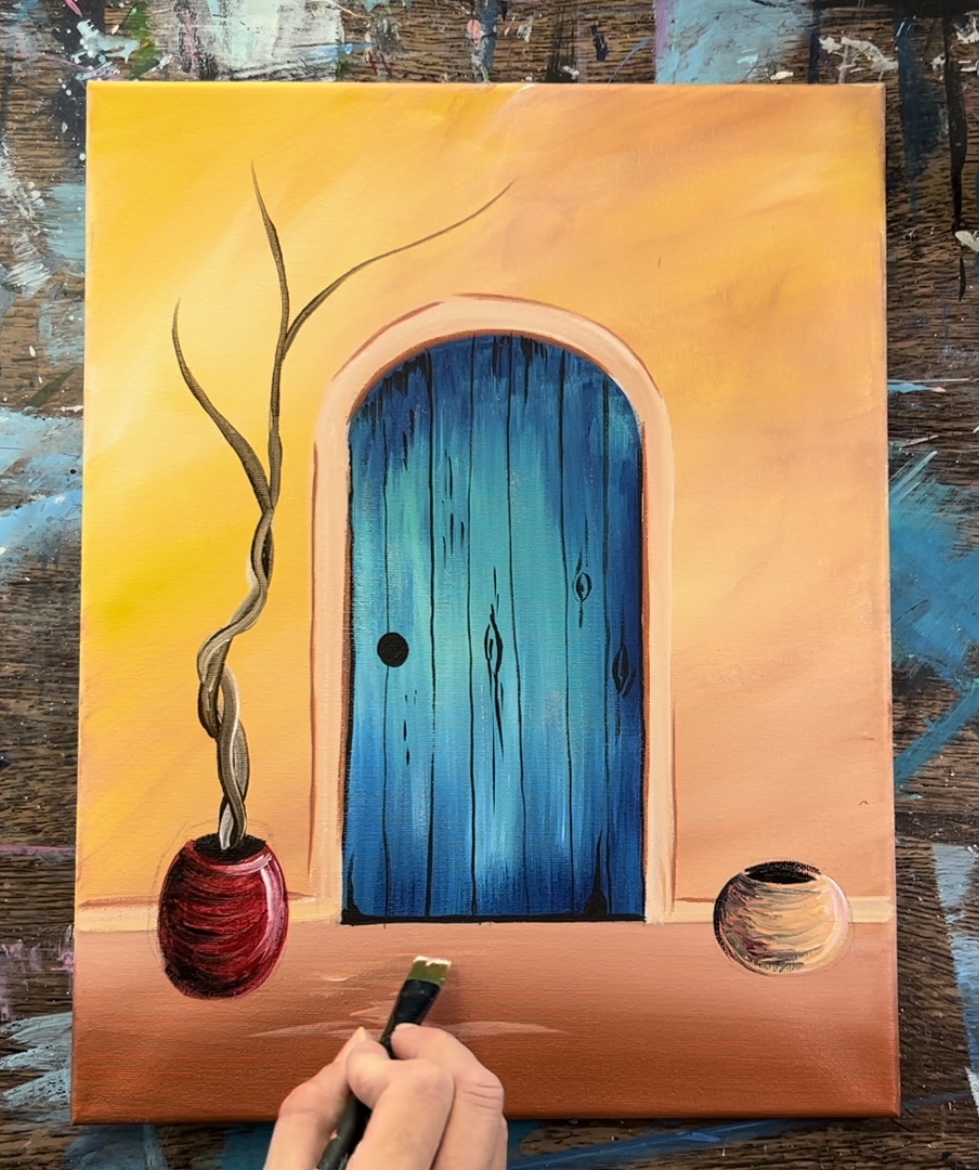
Next, paint the light yellow color pot in the lower right corner. Paint this with the same color as the background (titanium white mixed with cadmium yellow and a little bit of red oxide). If needed, add more white so that it stands out better.
You can also change the colors of these pots!

Add red oxide on the left side of the pot and blend it into the rest of the light yellow.
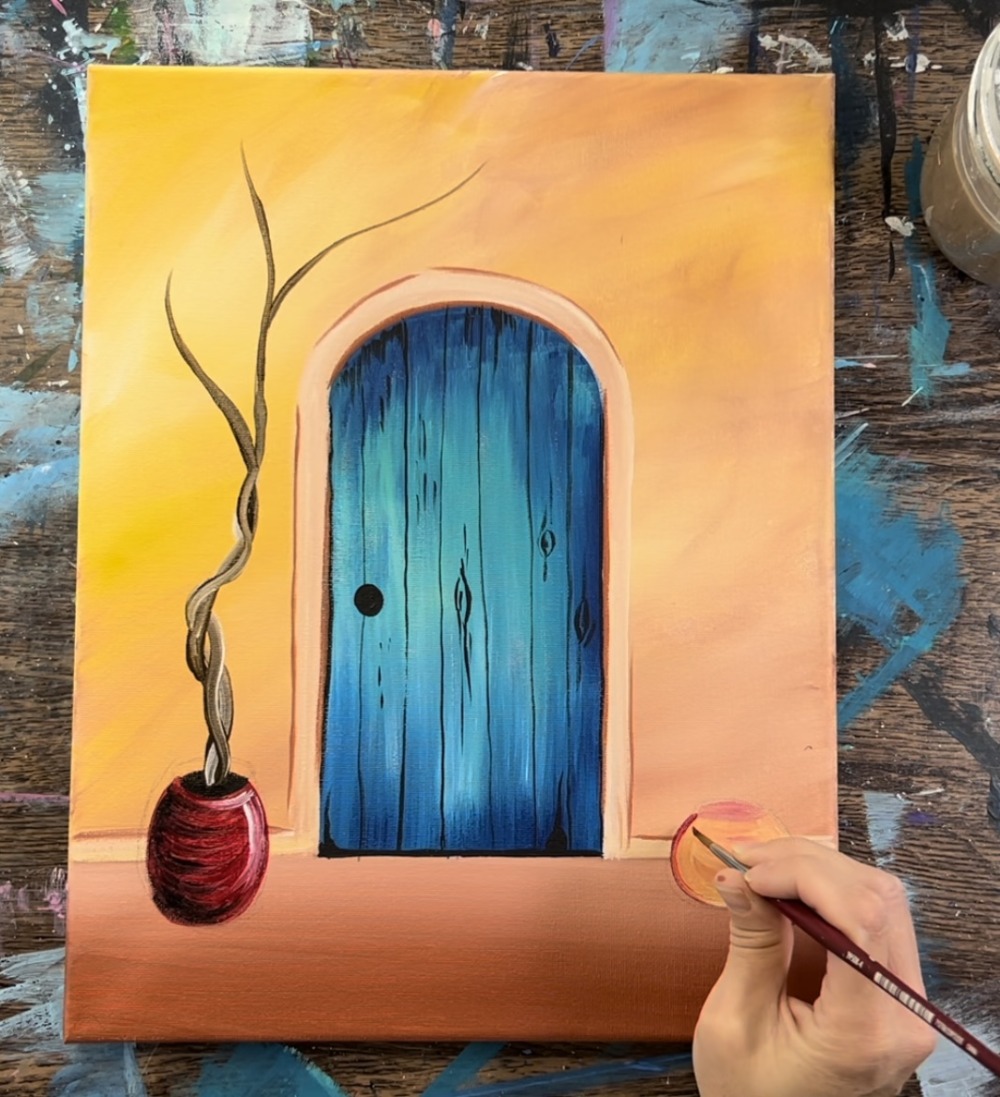

Then add a little bit of black in the top opening of the pot and on the left side.

Blend the black in on the left side.

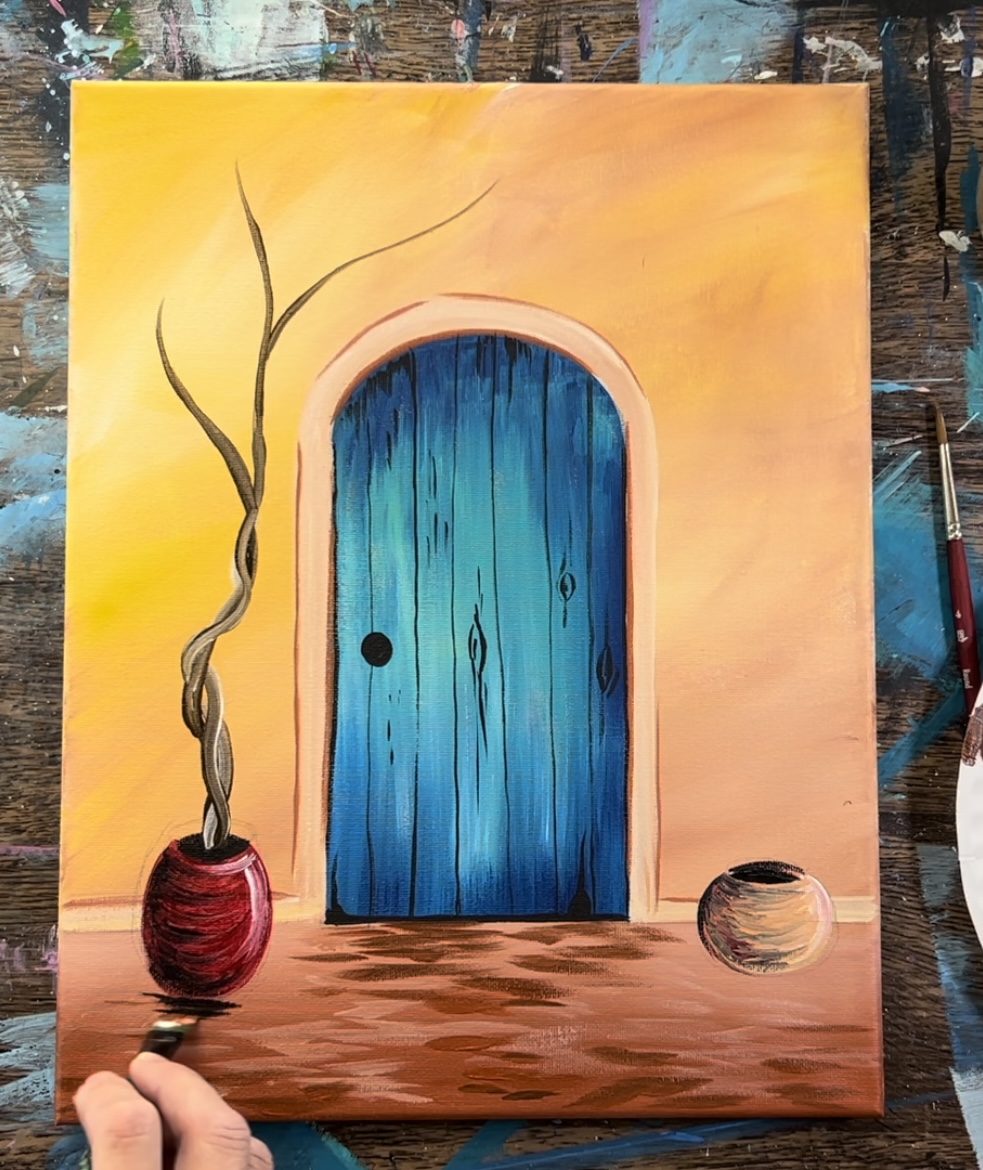
8. Paint Texture On Ground
Use the tip of the 12 bright brush to paint “texture” on the ground. Mix red oxide with white (about equal parts). Then paint loose, left and right strokes to create texture on the ground.
Then add a very small amount of black into the same color you just used. This will create a darker color. Continue to paint left and right marked lines to create more texture on the ground. Do this specifically under the door, under the pots and towards the bottom of the ground area.
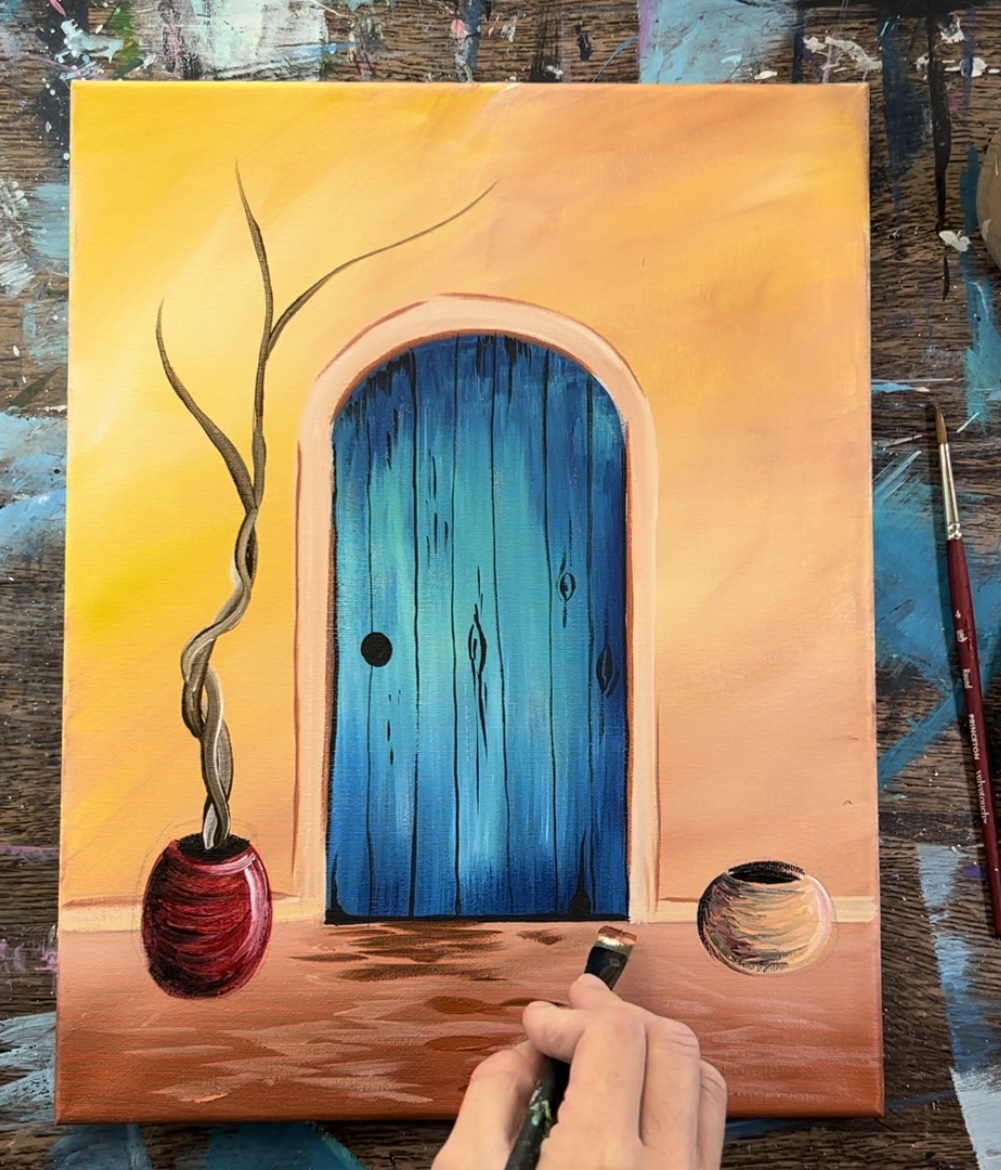
Next, add more black to the tip of your 12 bright brush. Paint shadow under the pots and a little bit of shadow under the door. Paint loose, left and right strokes.

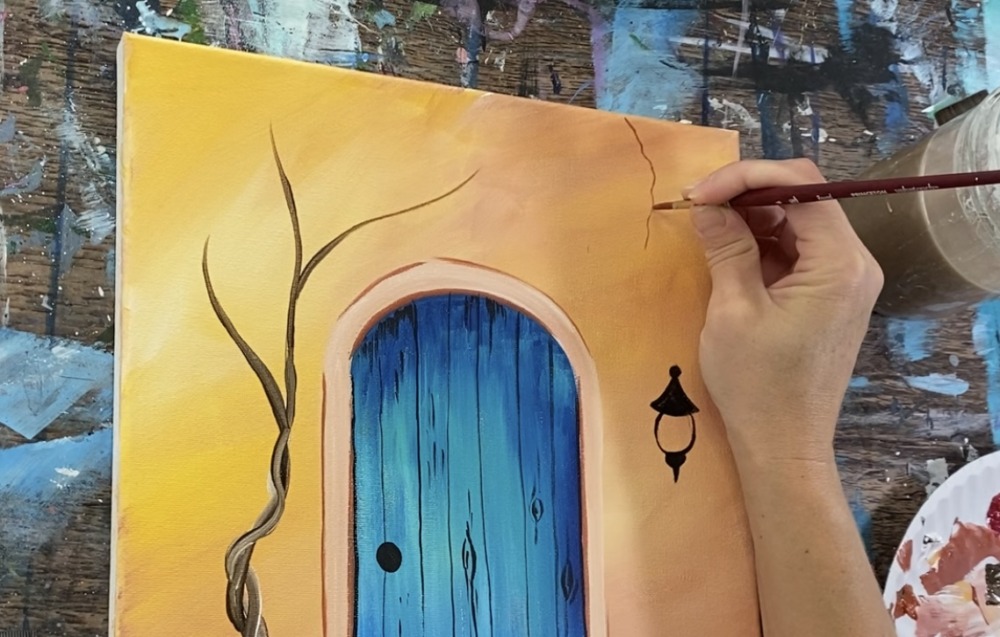
9. Paint Lantern
Draw the lantern with a pencil first.

Then use a #4 round brush and mars black to paint the lantern. Start by painting the top triangle piece. Outline it and fill it in solid black.
Then paint the bottom piece and outline the outer part of the glass piece. Wait for this to dry before painting the light inside of it.

10. Paint Cracks
Use a #4 round brush (or a smaller round brush) to paint the cracks in the wall. Use the color “red oxide” and use just the tip of the round brush to loosely paint crack lines that start on the edge of the canvas and split off into different areas. This is very similar to painting branches or lightning!
11. Paint Green Plant & Leaves
Load green deep permanent and cadmium yellow medium hue on your palette. Mix the two together equally. Then add a very small amount of black into the color to make it slightly darker.

Use the #4 round brush to paint curved strokes to form the plant inside the pot.
Next, paint the leaves on the rose tree. Use the dark green color and the #4 round brush to paint the leaves on the rose bush branches. These are very expressive, simple strokes. Load a lot of paint on the tip of your round brush and paint small, rounded marks.
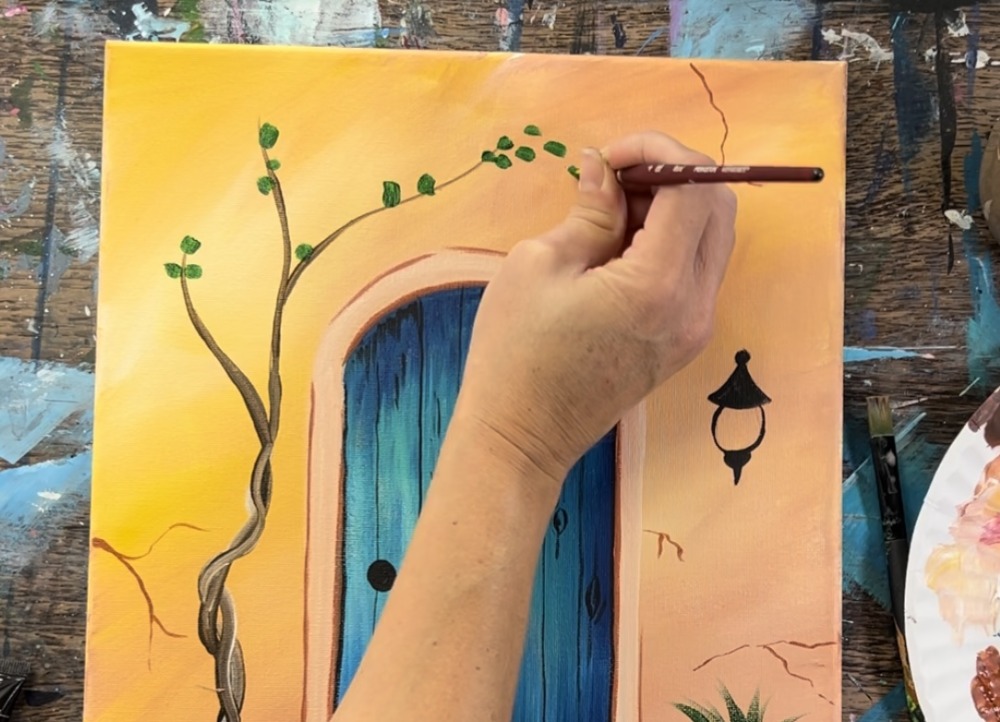
Then load a small amount of titanium white onto your brush. Paint more marks with the round brush so you have a variety of light and dark leaves.
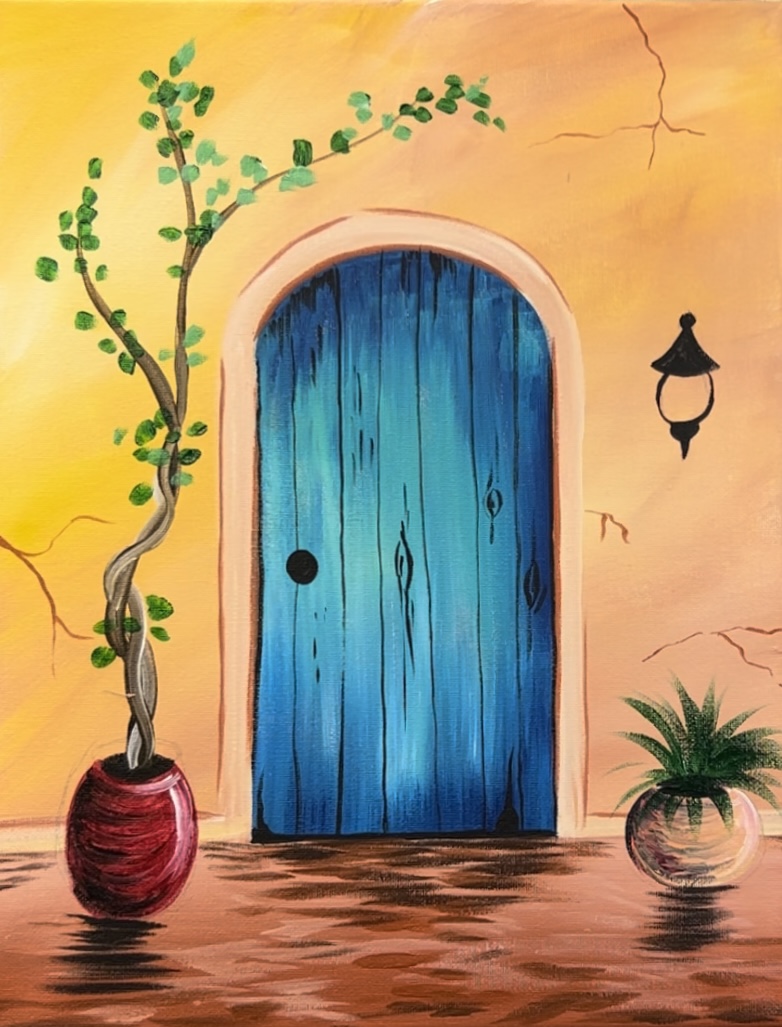
Next, add more curved leaf strokes on the small potted plant in the lower right. Do this with the lighter green so that it adds another layer of green on this plant without covering all of the dark green.

12. Add details to door knob and lantern
Use the #4 round brush and titanium white to paint a curved highlight on the left side of the doorknob and the lantern.
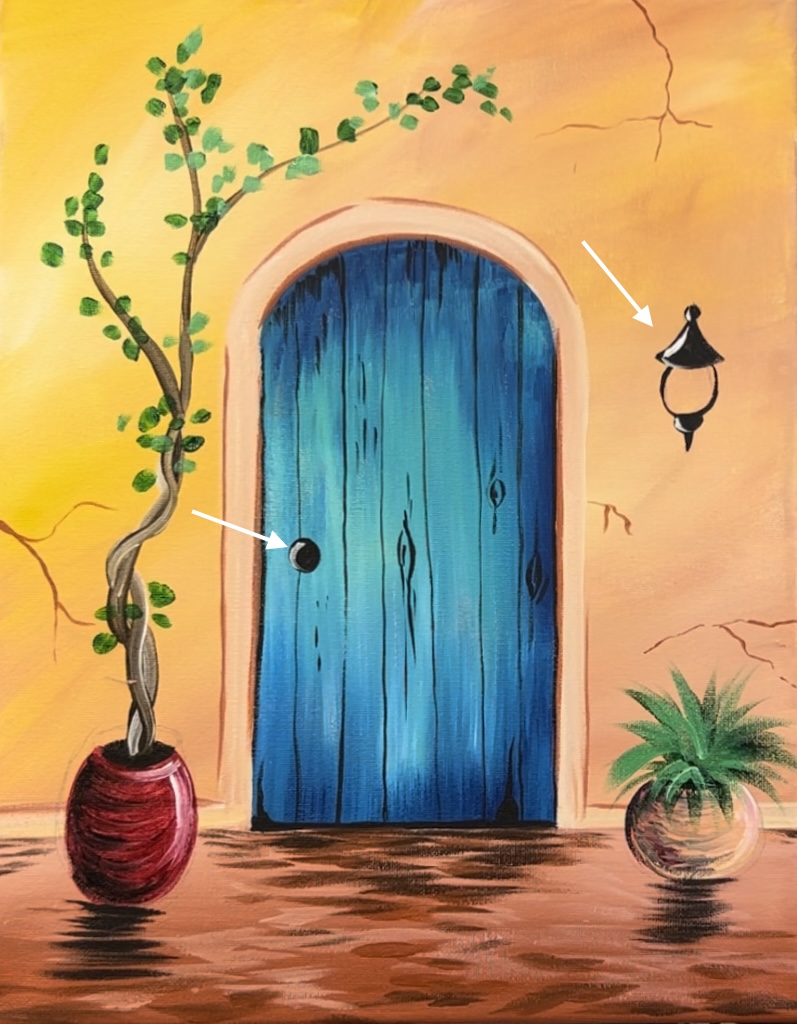
Then paint the interior of the lamp a light yellow color (mix cadmium yellow with titanium white). Also, add a pure white circle on the inside of the lamp.

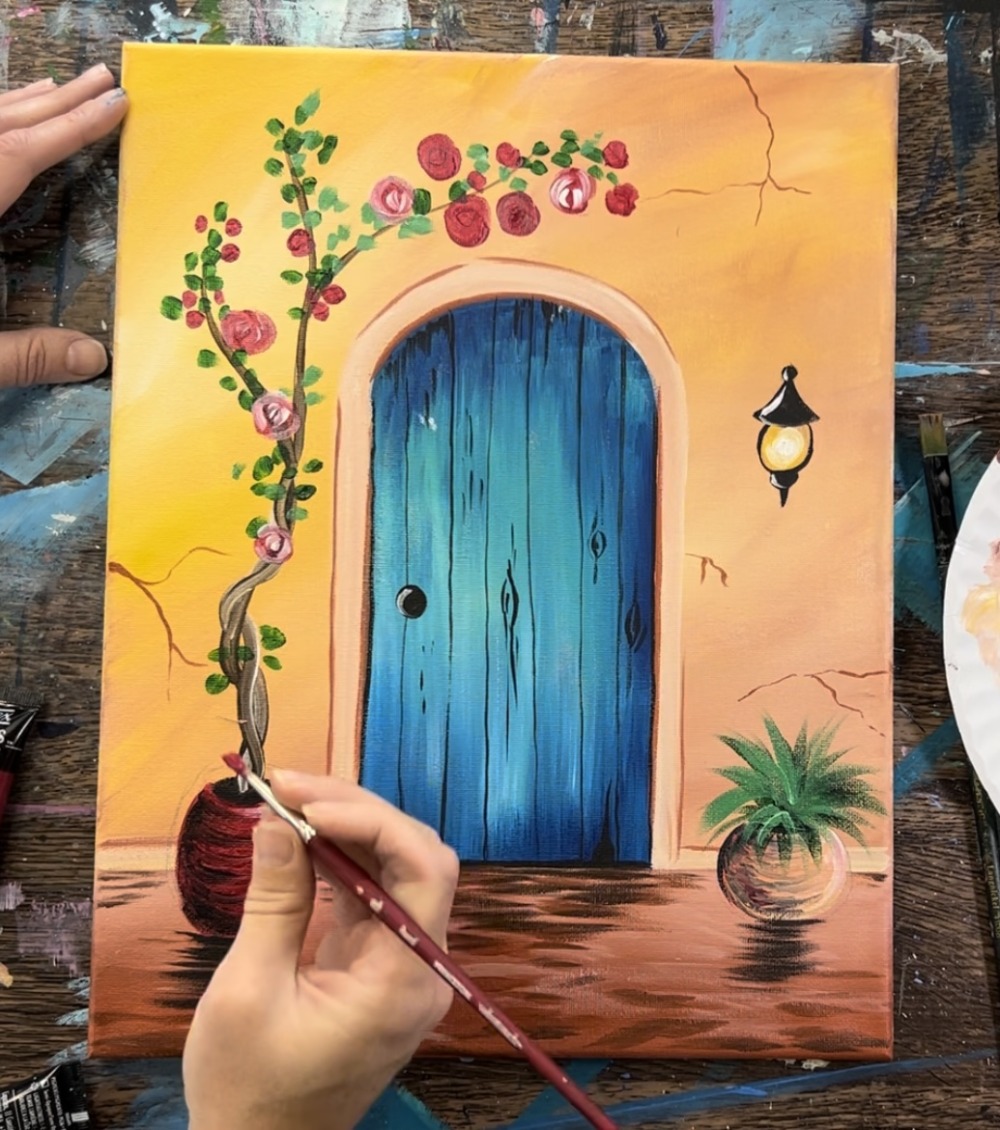
13. Paint Roses
Use the #4 round brush and “alizarin crimson hue” to paint small red rose shapes. These are circles that have curves on the outer parts of the circle.
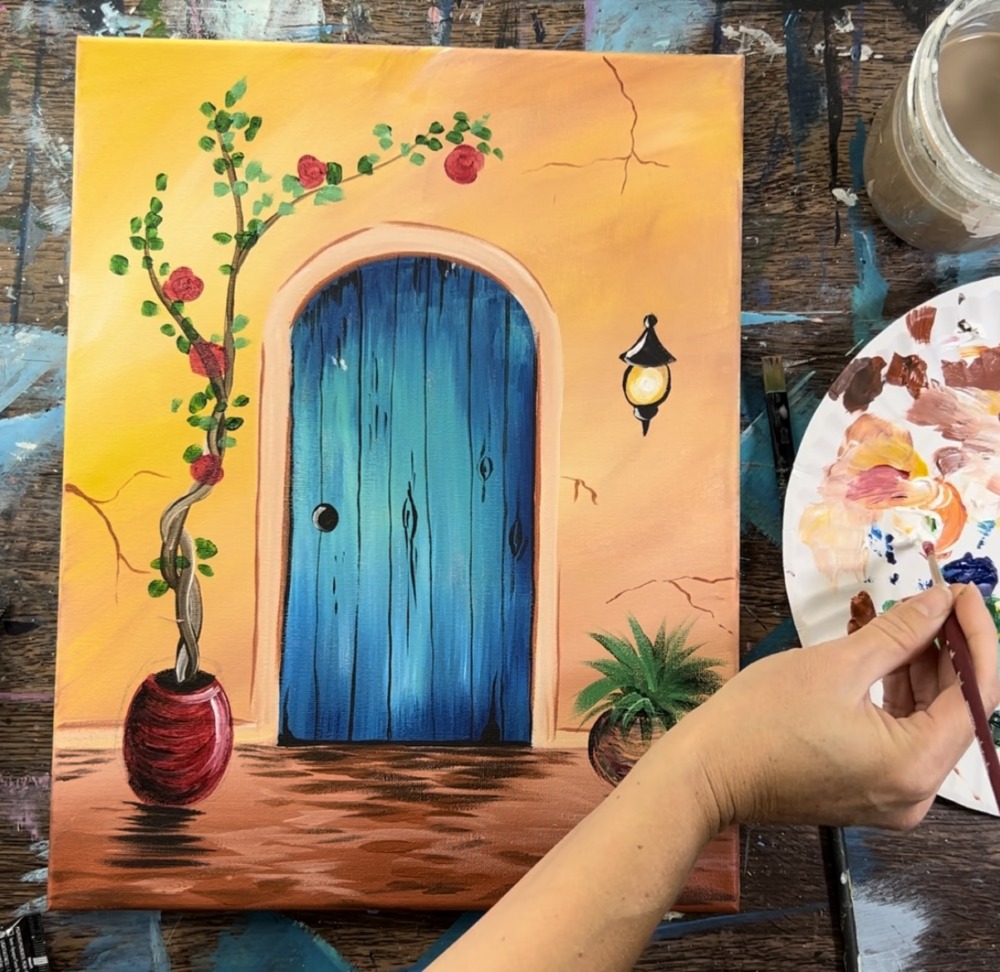
Then, before the red rise, load a small amount of titanium white on the brush. Paint “c strokes” that start in the middle of the rose and stagger outwards.
Continue to paint more roses and more leaves to fill up this area.


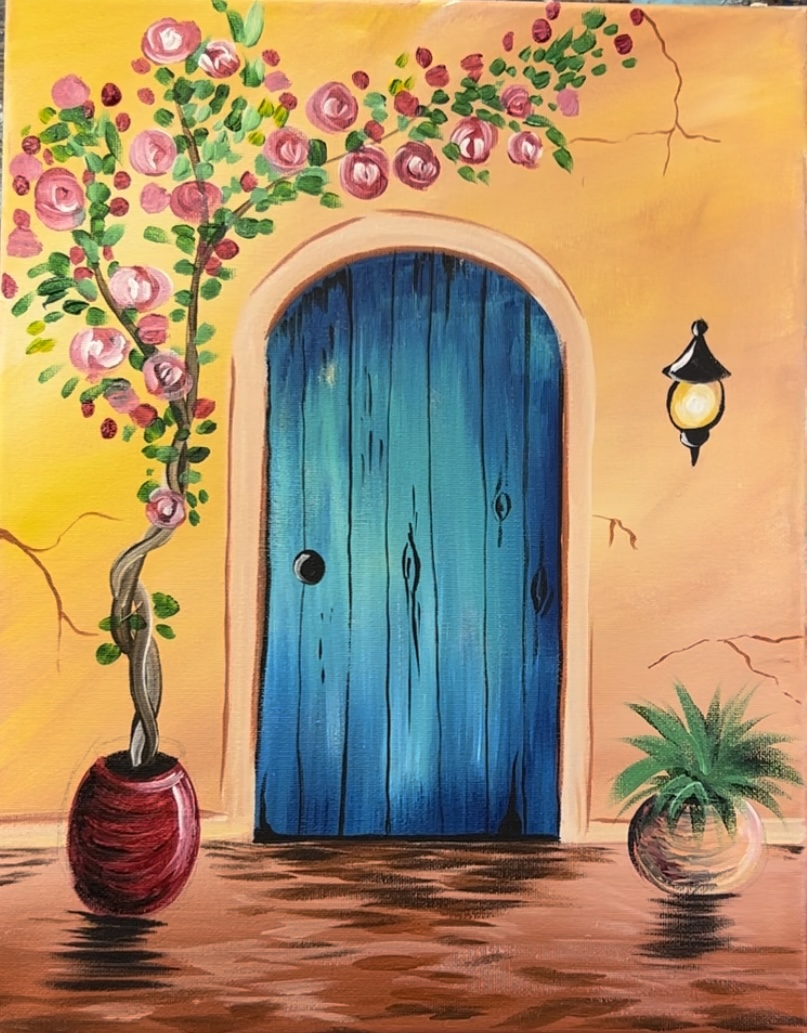
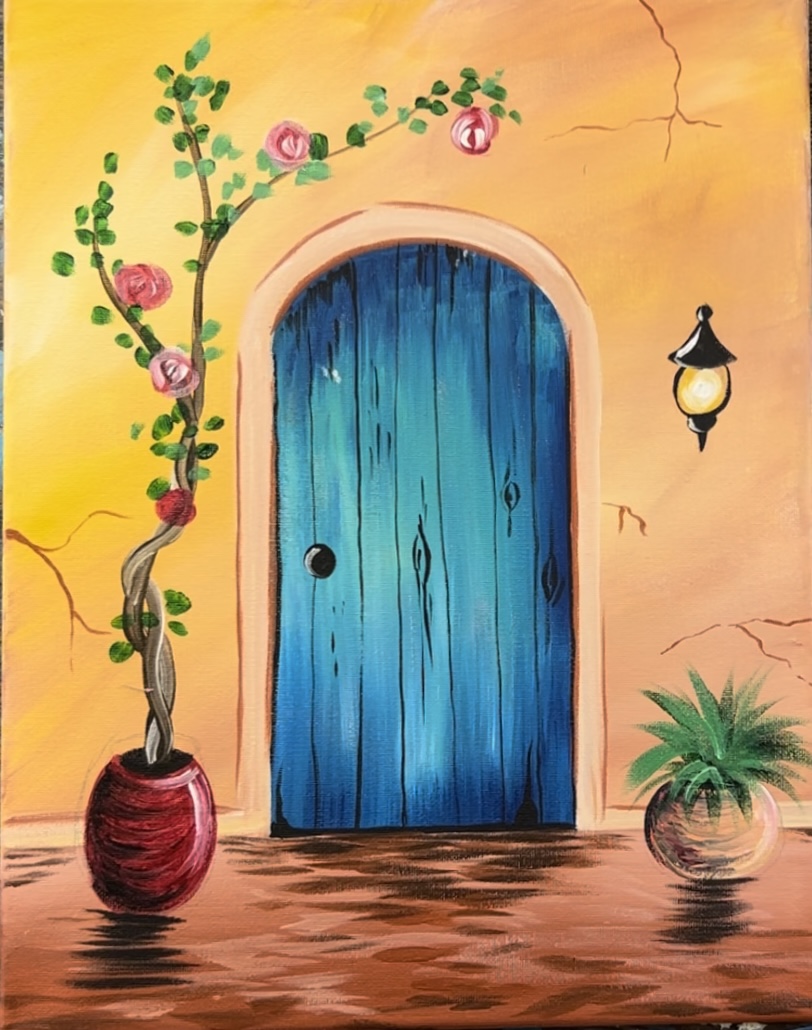
Finished!