
Would you like to save this?
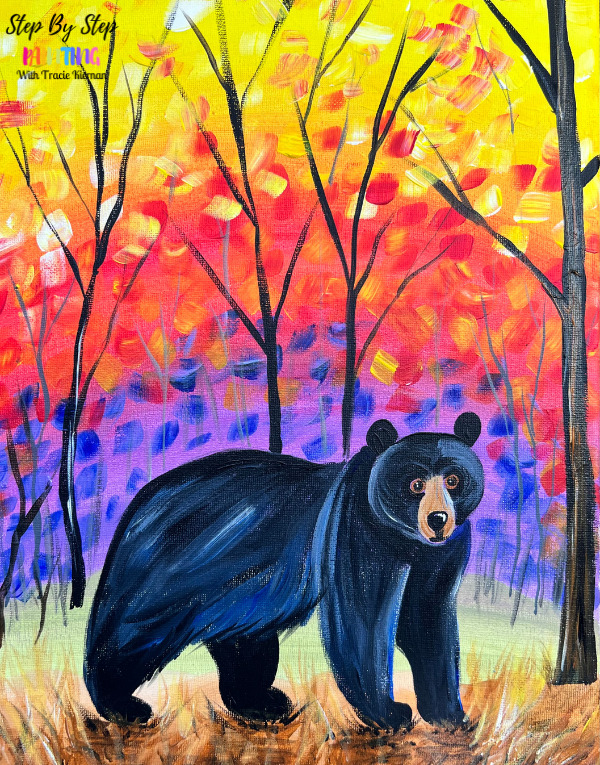
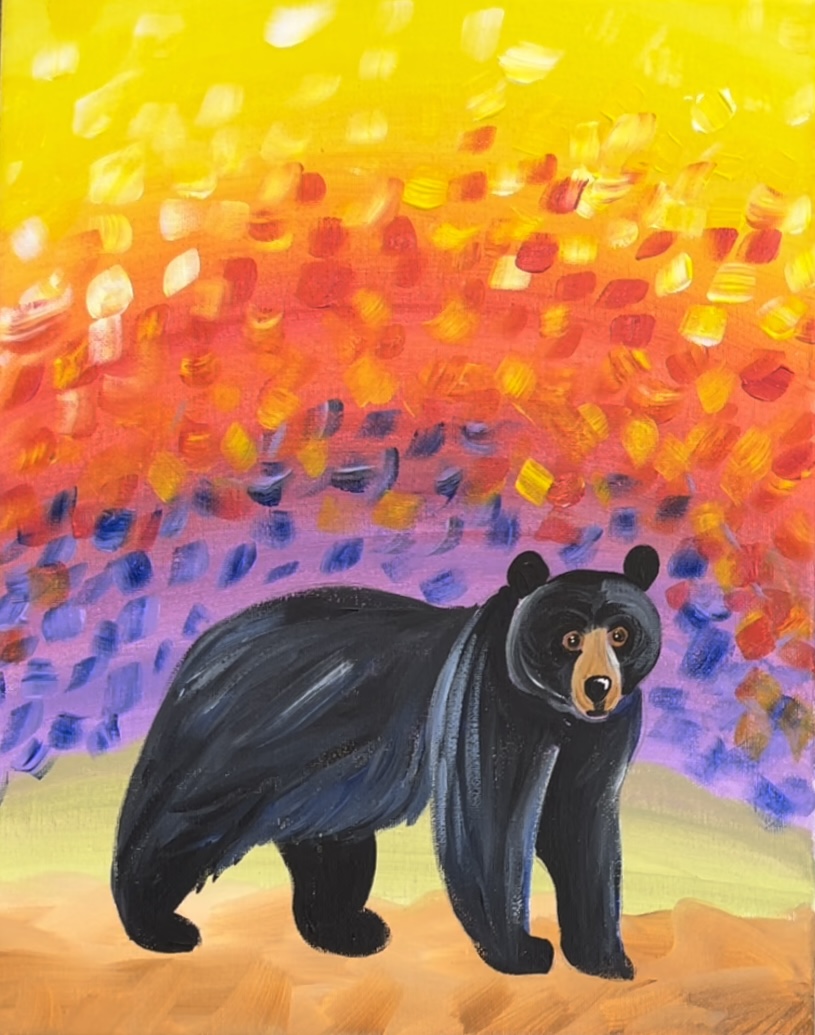
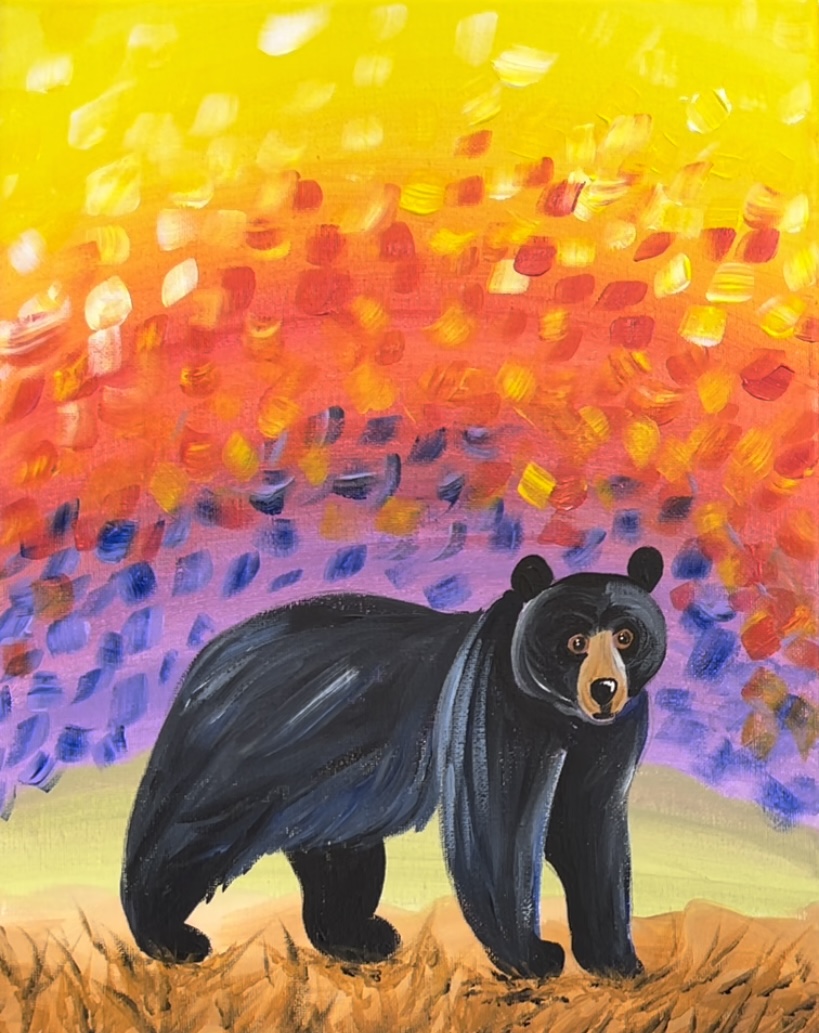
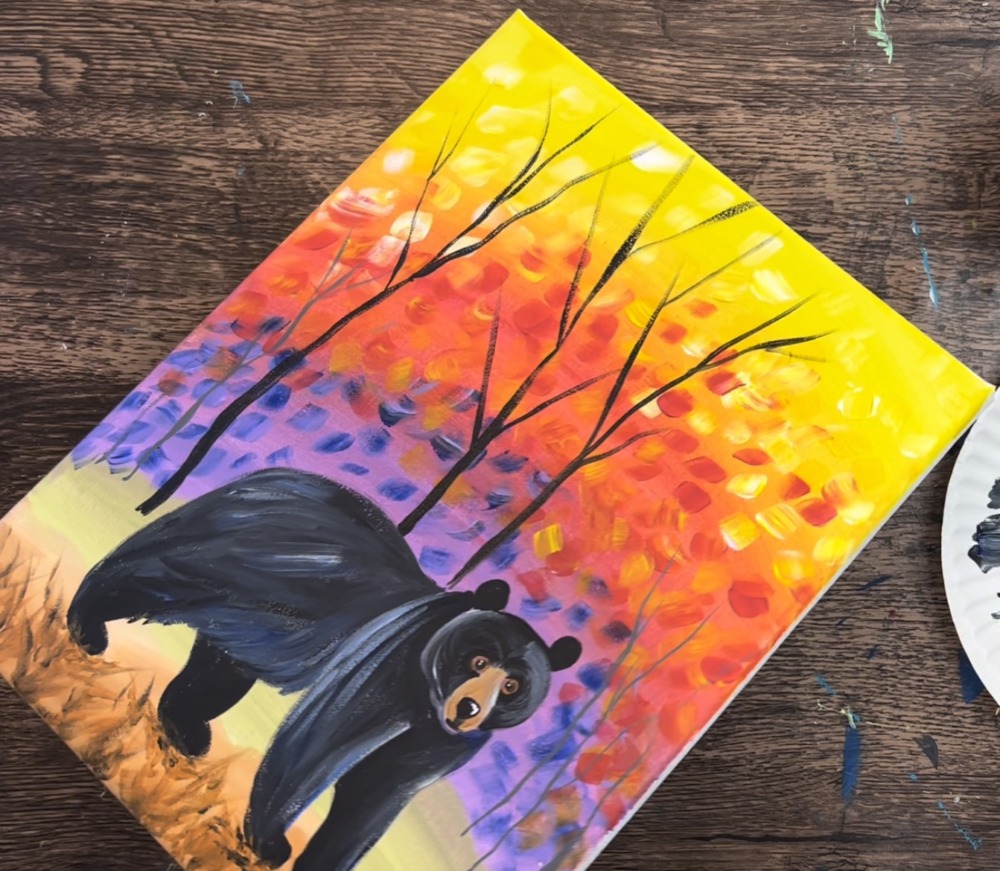
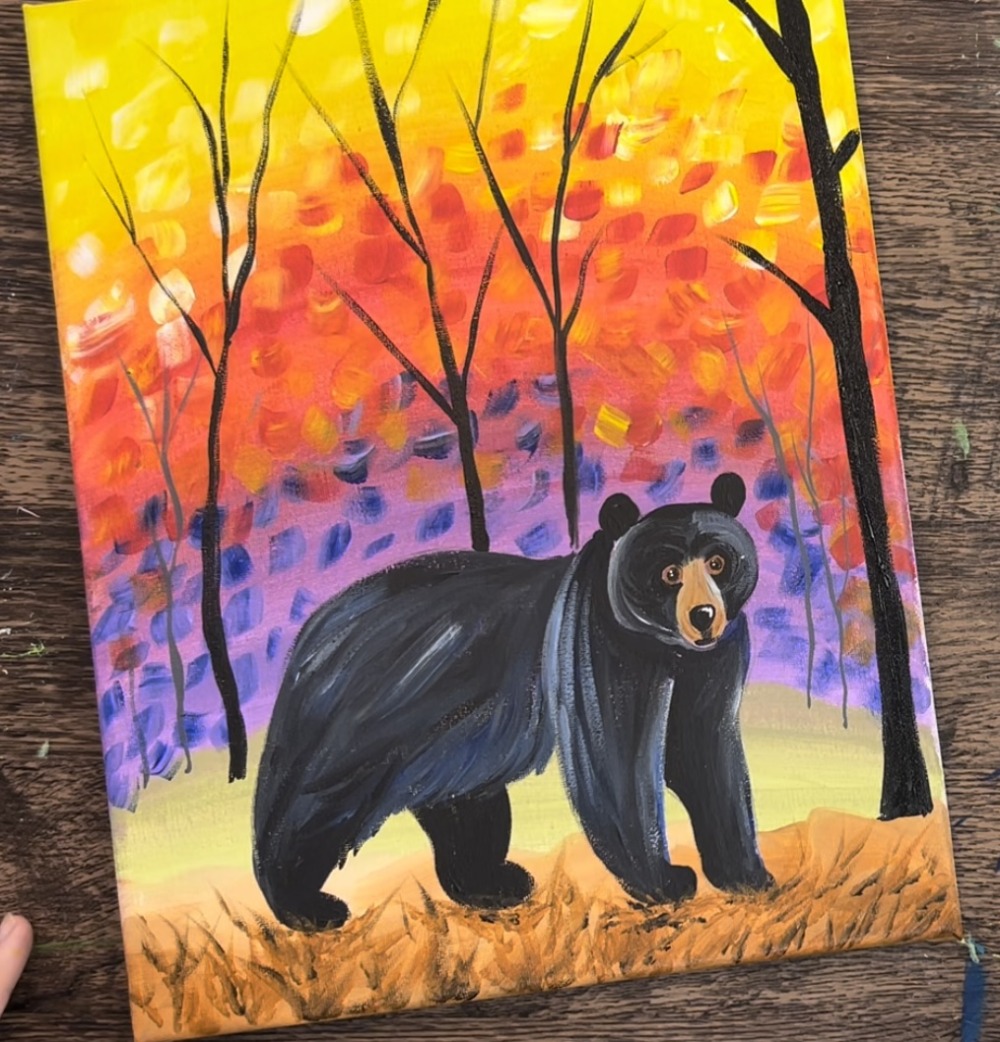
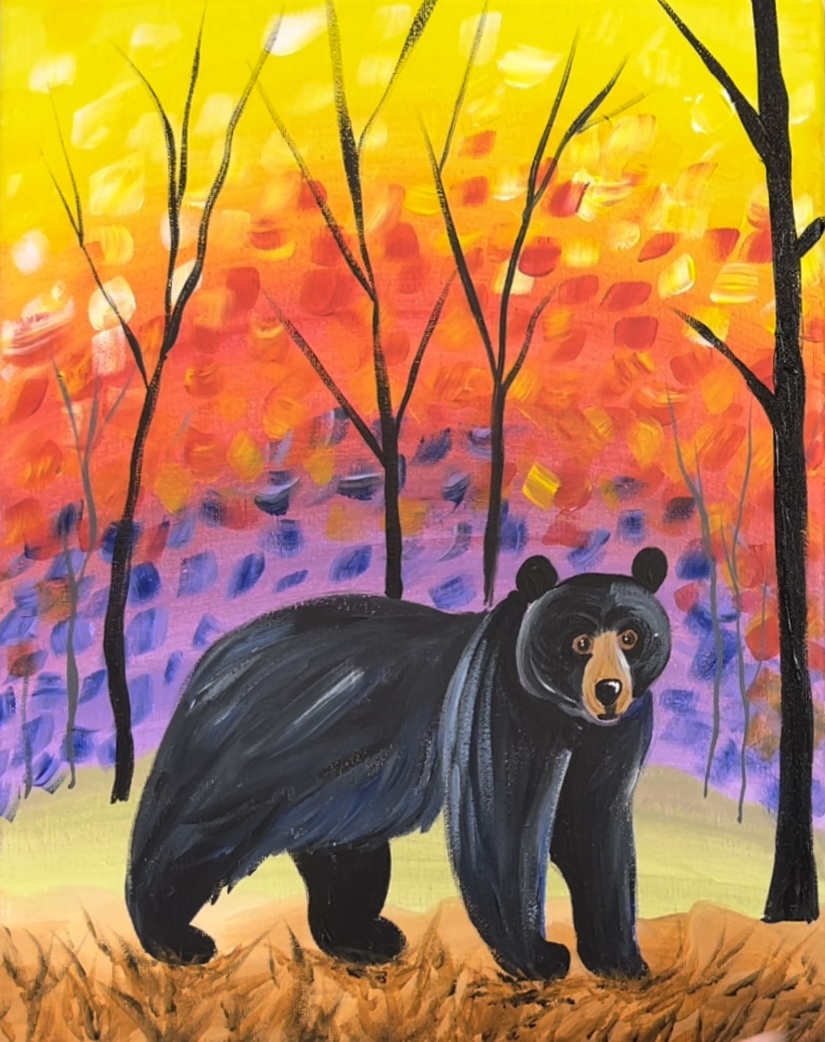
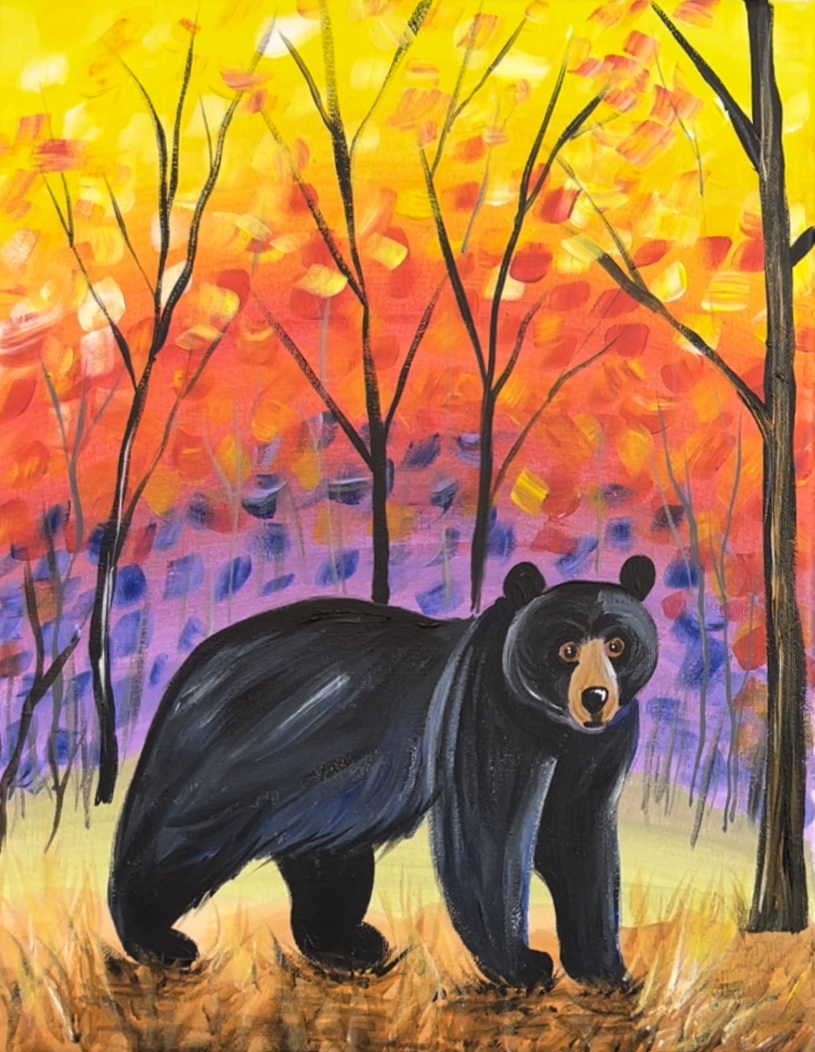
This acrylic painting tutorial demonstrates how to paint a colorful fall forest with black bear!

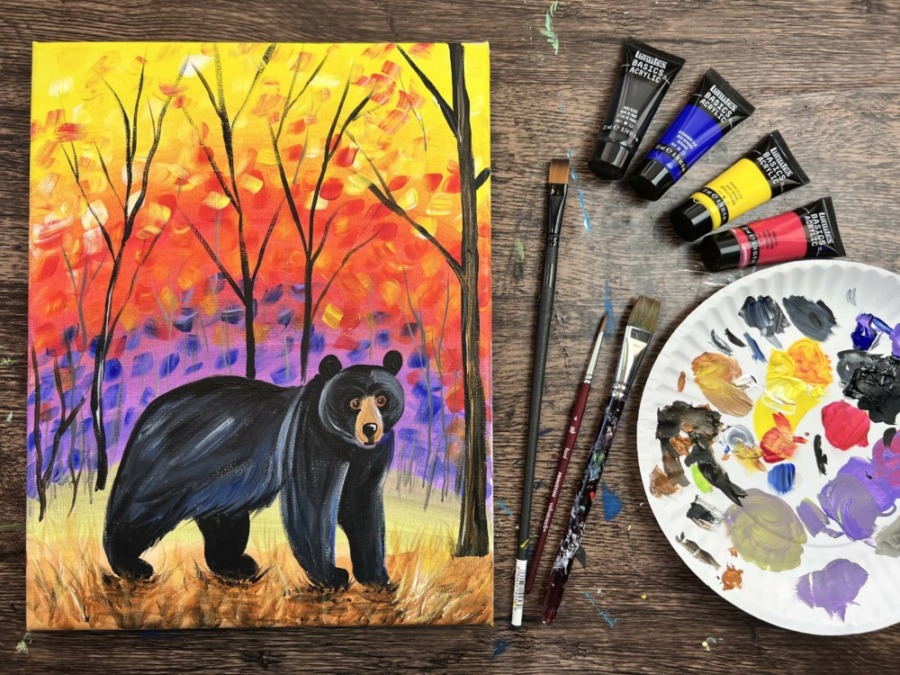
Materials List
Bear Forest Acrylic Painting
Learn how to paint a colorful fall forest with black bear.
Materials
- 11 x 14 Canvas
- Acrylic Paints
- Brushes
- Traceable
- Graphite or Carbon Paper
- Pencil
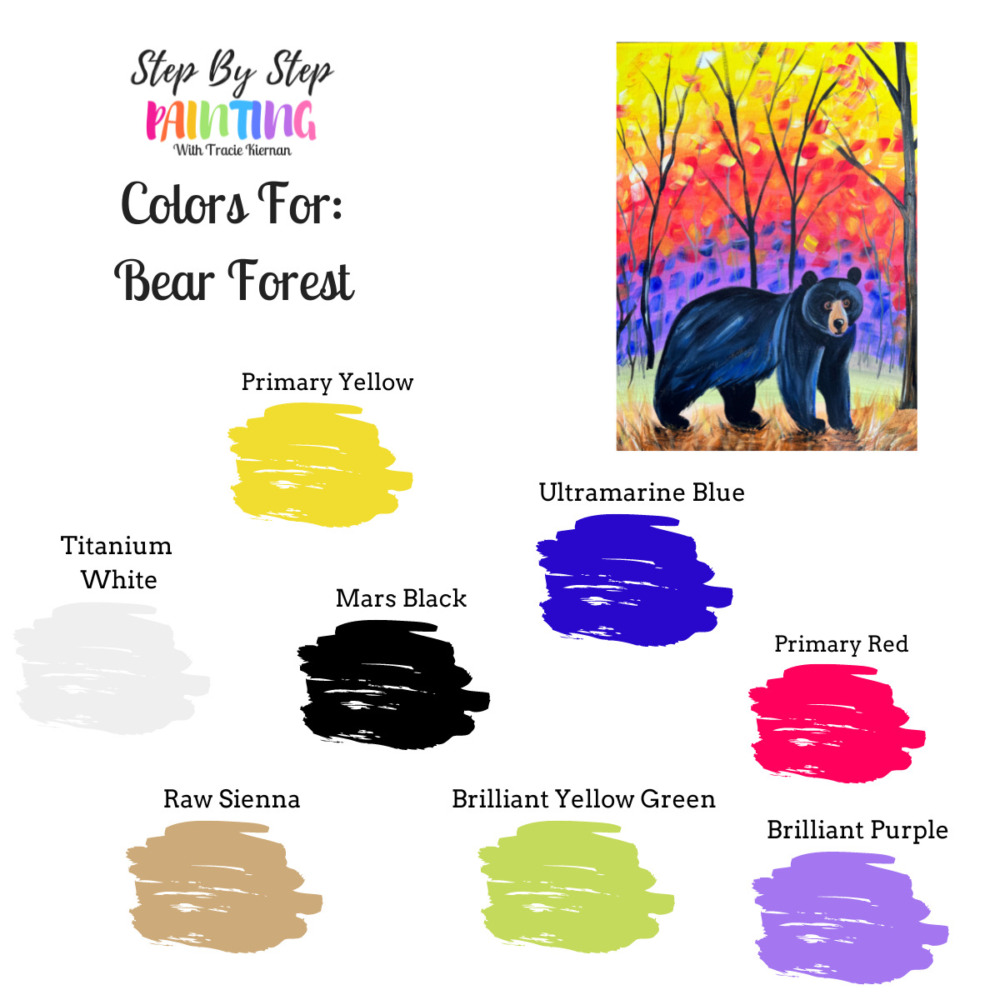
Colors
- Titanium White
- Mars Black
- Primary Red
- Primary Yellow
- Raw Sienna
- Brilliant Yellow Green
- Brilliant Purple
- Ultramarine Blue
Brushes
Brushes Used In This Tutorial
I used a #4 round brush and a 3/4″ flat wash brush from my FAVORITE pack of brushes “Princeton Velvetouch” brushes. I also used a 12 bright brush from the Majestic Royal & Langnickel line of brushes. You are welcome to use these or any similar brush you have on hand!
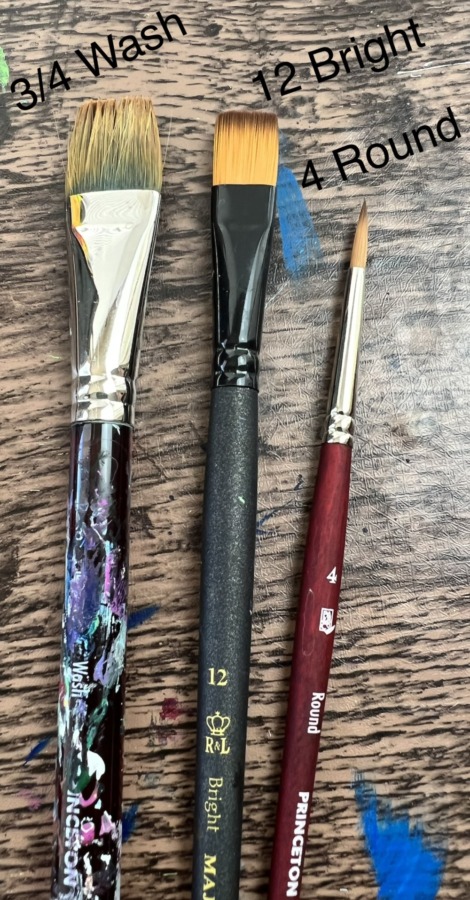
- 3/4 Flat Wash Brush
- #12 Bright Brush
- #4 Round Brush
Color Palette
I used Liquitex BASICS acrylic paints for this tutorial from the Liquitex BASICS 48 pack of paints! You’re welcome to use BASICS paints or any paint that you have on hand! Use the color chart below to help match colors!
Using Craft Paints?
Yes you can use craft paints for this! Craft paints are thinner and blend differently than student grade paints but are a great budget choice for beginners! If you are using craft paints such as Apple Barrel Craft Paints, I would recommend subbing to these colors:
- Snow White
- Yellow
- Cobalt Hue
- Jet Black
- Candy Pink (Or Red Apple)
- Caterpillar
- Brown Oxide
- Grape Jam (Or Lilac Mist)
Traceable
This tutorial utilizes a traceable template! Sometimes traceable templates are used to help us with the drawing portion so we can focus on our painting skills. Of course, you’re welcome to draw this on your own if you love implementing your own style!
Download the file below to be used on an 11 x 14 canvas. It is sized just like the one I use in the tutorial! Use a sheet of graphite paper below the design to transfer your bear to your painting.
If you are using a different size canvas, you can download the .JPEG image and resize it.

Directions At A Glance
Video
Step By Step Instructions
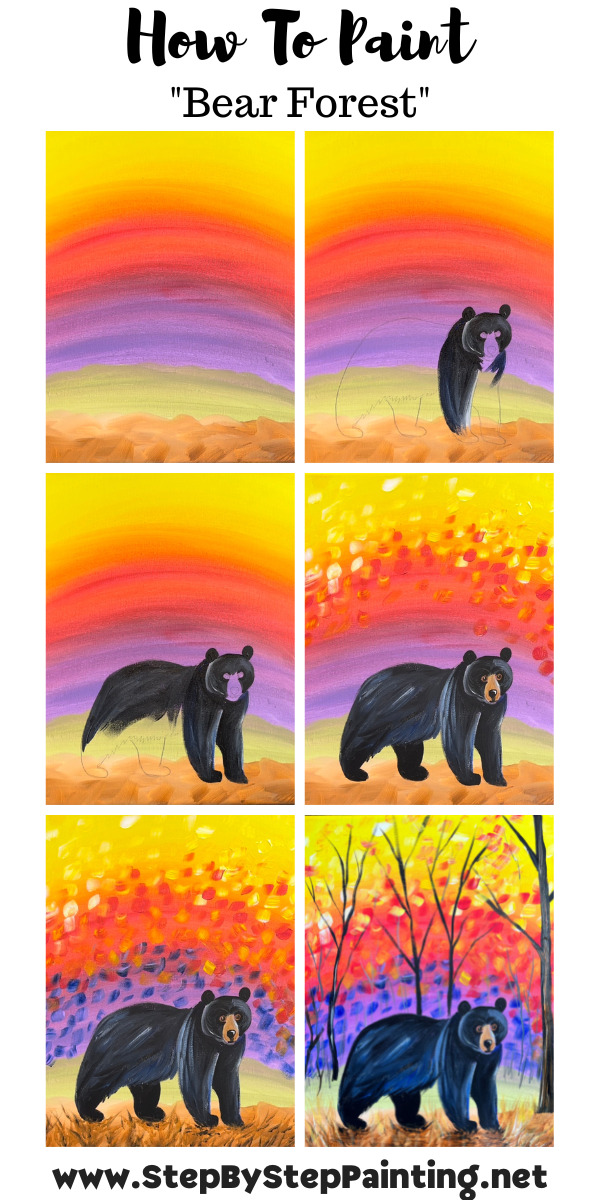
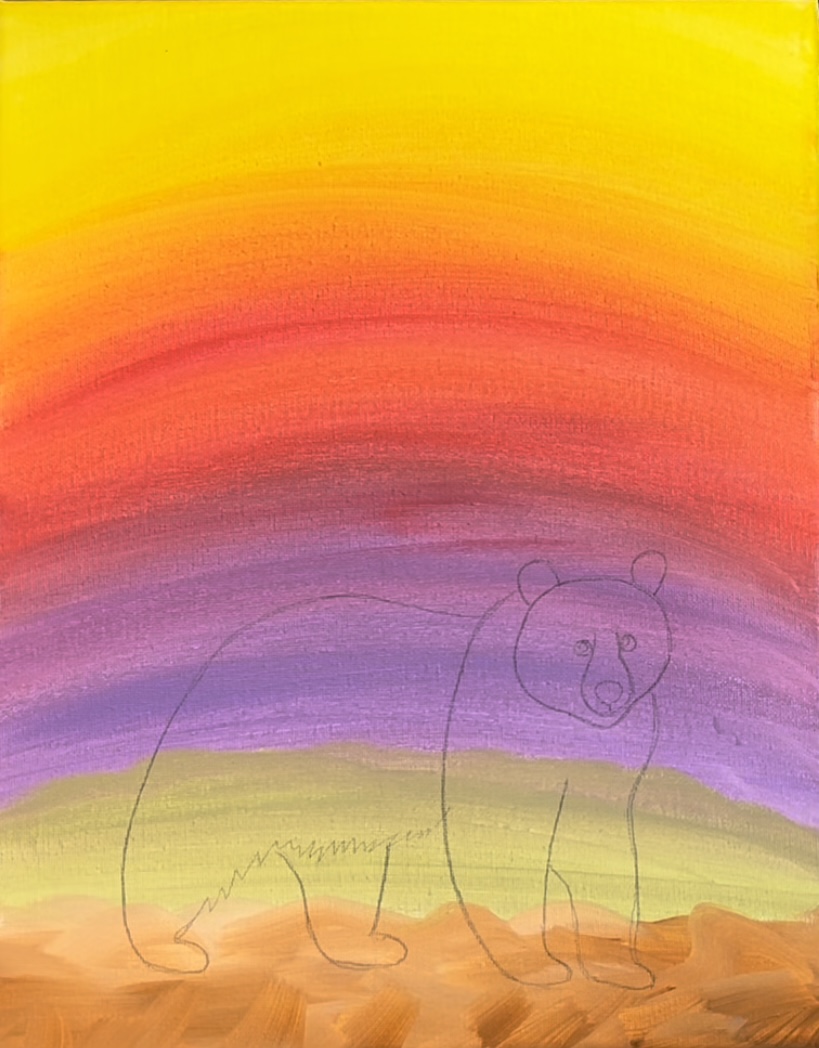
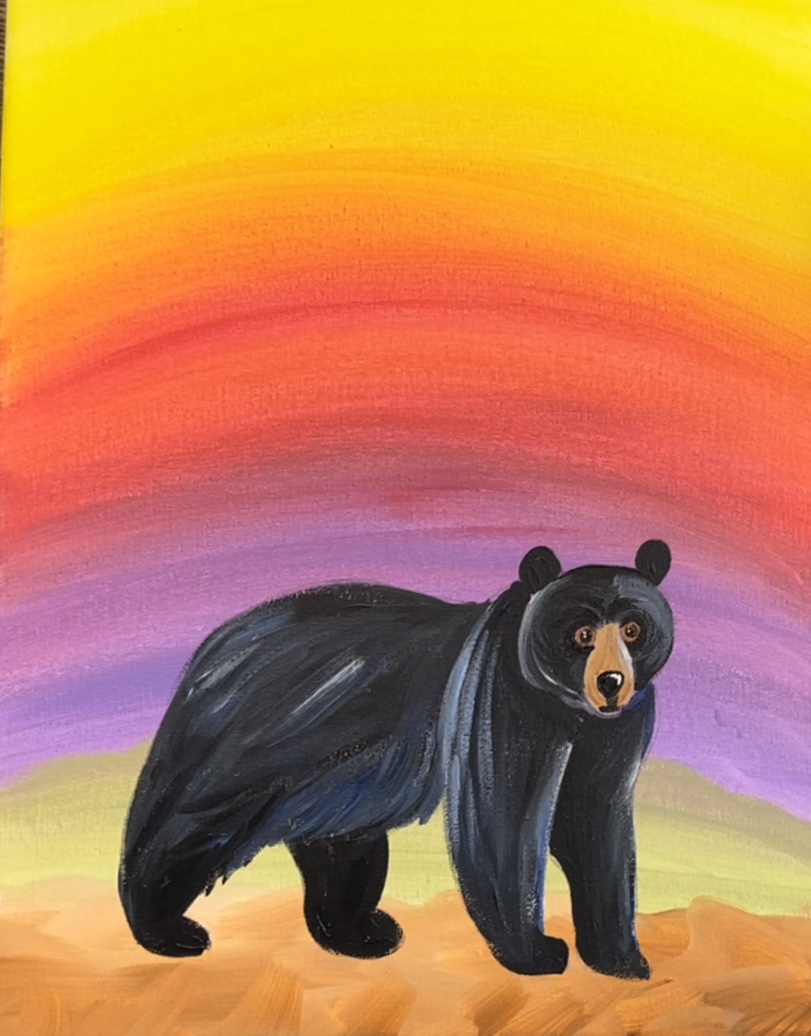
1. Paint the first color layer
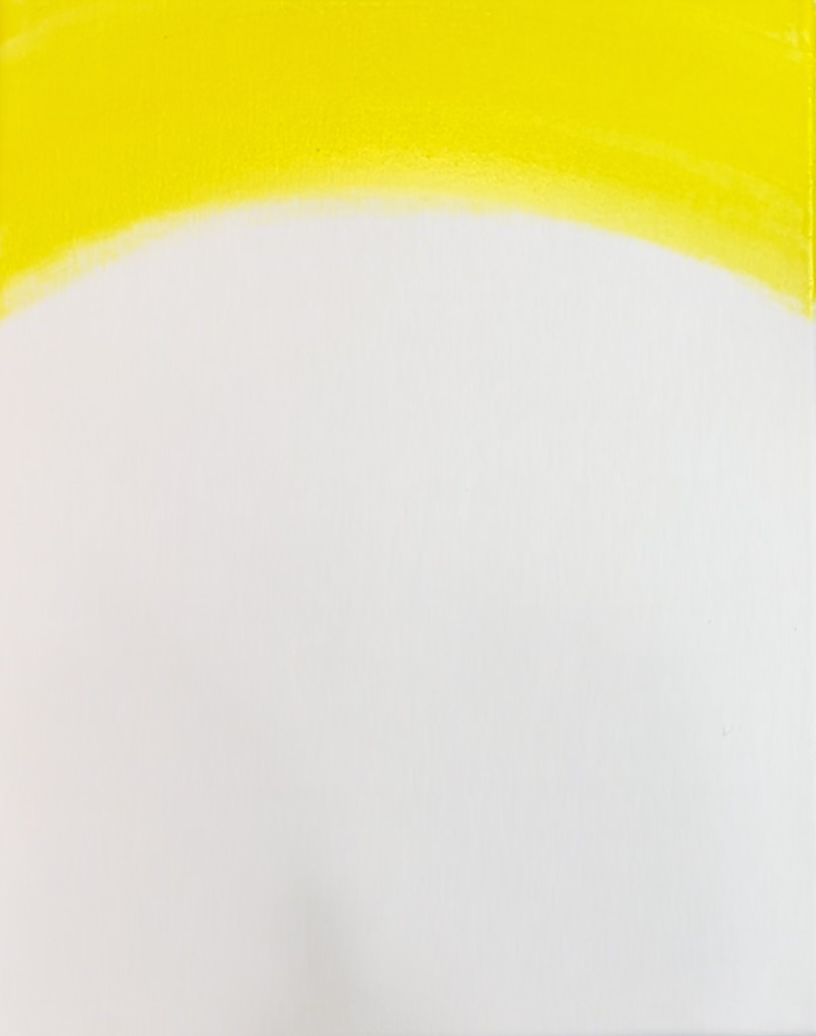
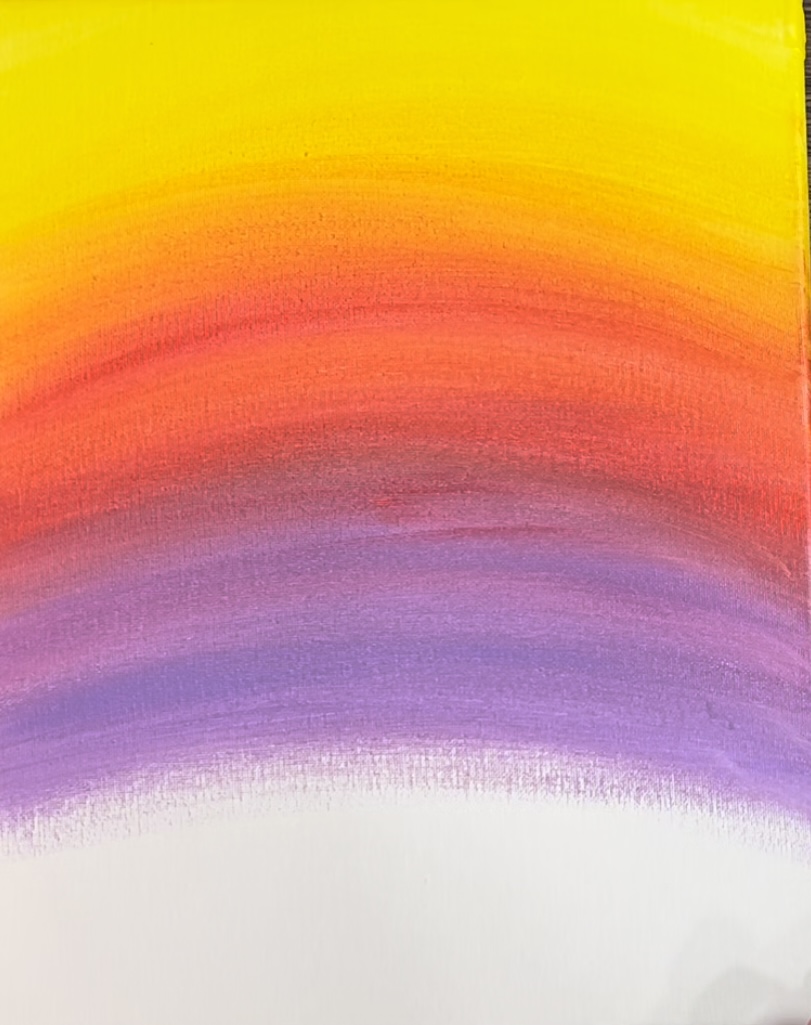
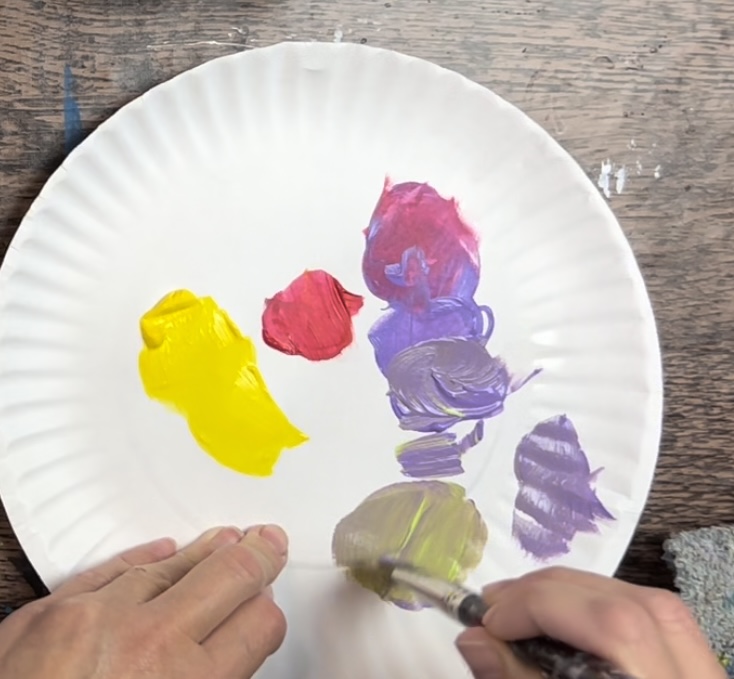
Position your canvas in a vertical format. Then load your palette with the colors: primary yellow, primary red and brilliant purple. Load your 3/4″ flat wash brush with brilliant yellow.
Paint an arc area at the top of the canvas. This should be a relatively thin layer of paint and you can add a little water to the paint color to thin it down a bit. Go down about 3-4 inches with this yellow.
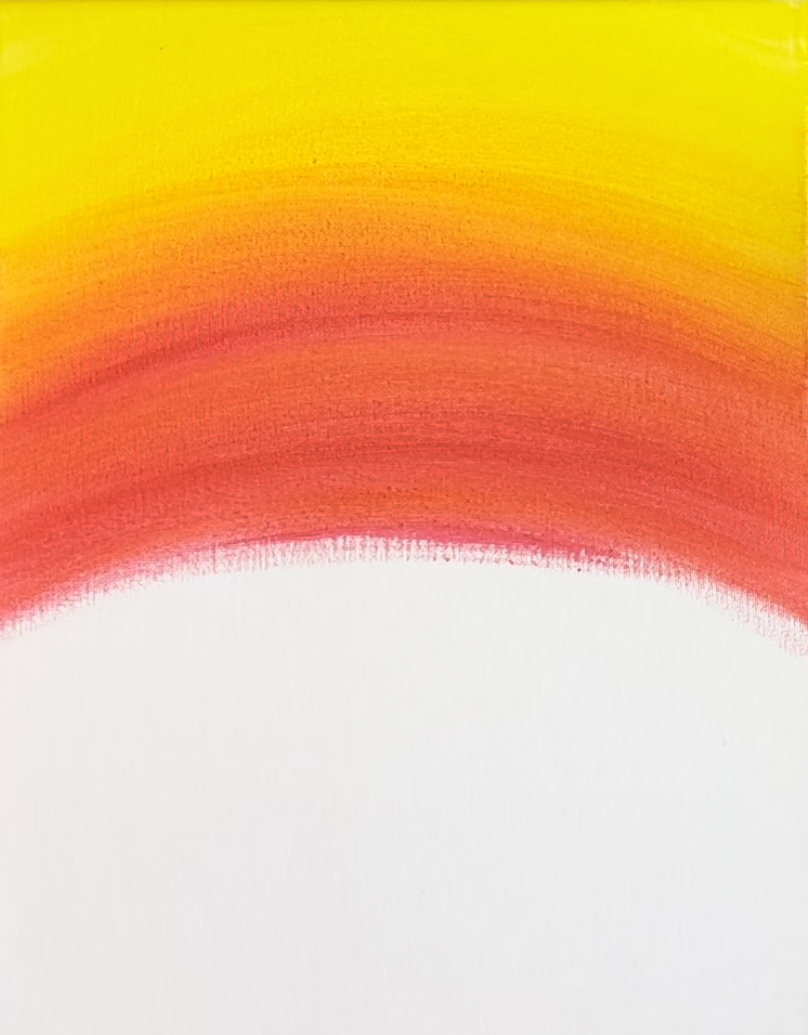
Next, load you brush in primary red (without rinsing the yellow off). Gently blend the primary red below the yellow. It will turn an “orange” color.
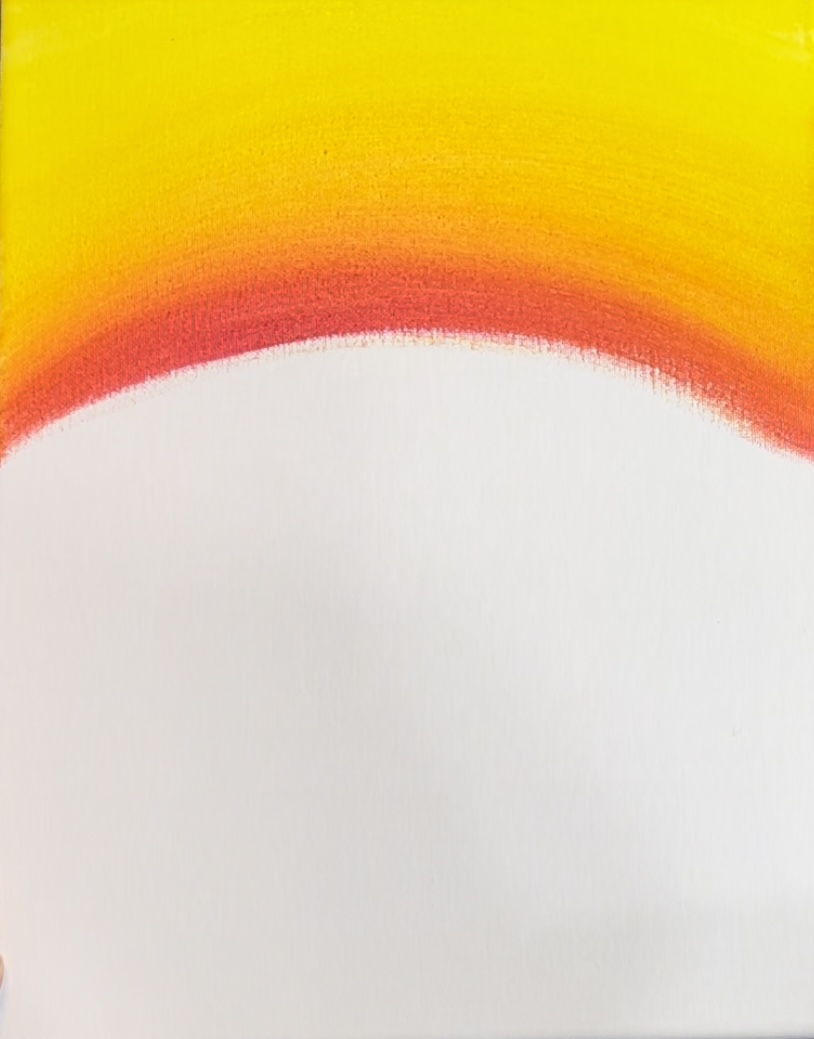
Go down another 3-4 inches with this primary red.
Next, rinse your brush. Load it into the brilliant purple. Gently blend the brilliant purple with the primary red. These two colors may turn a slight brown color when they blend so you don’t have to “over blend” them.
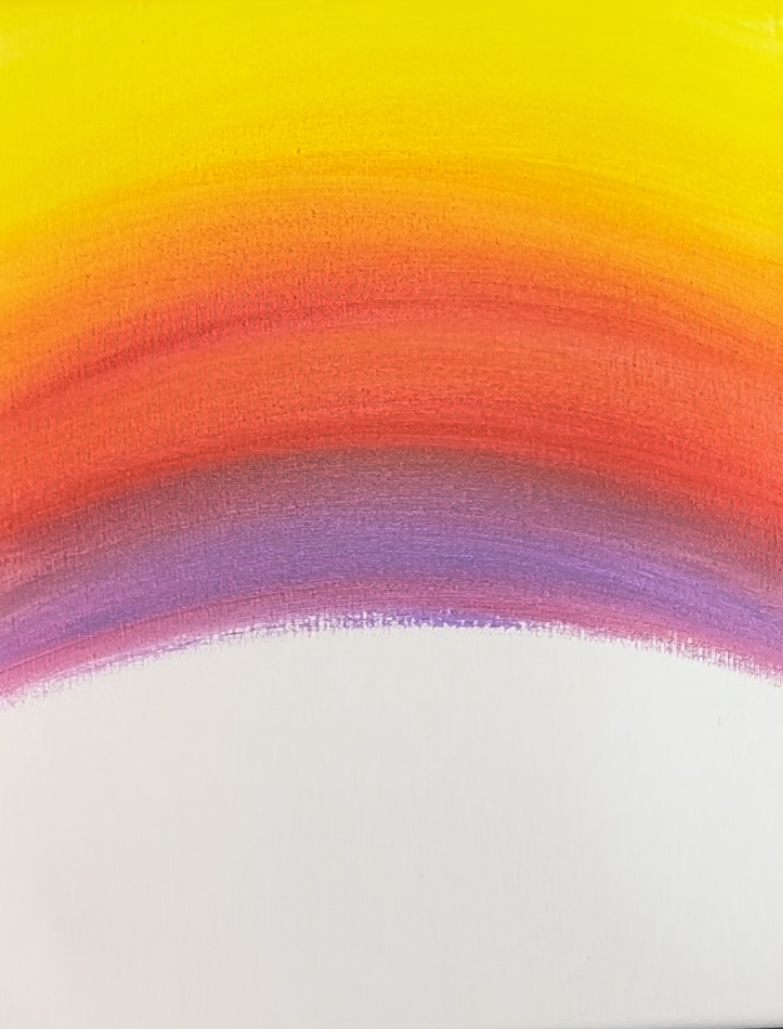
Go down a few inches with this purple. Your strokes at this point can turn a little more flat.
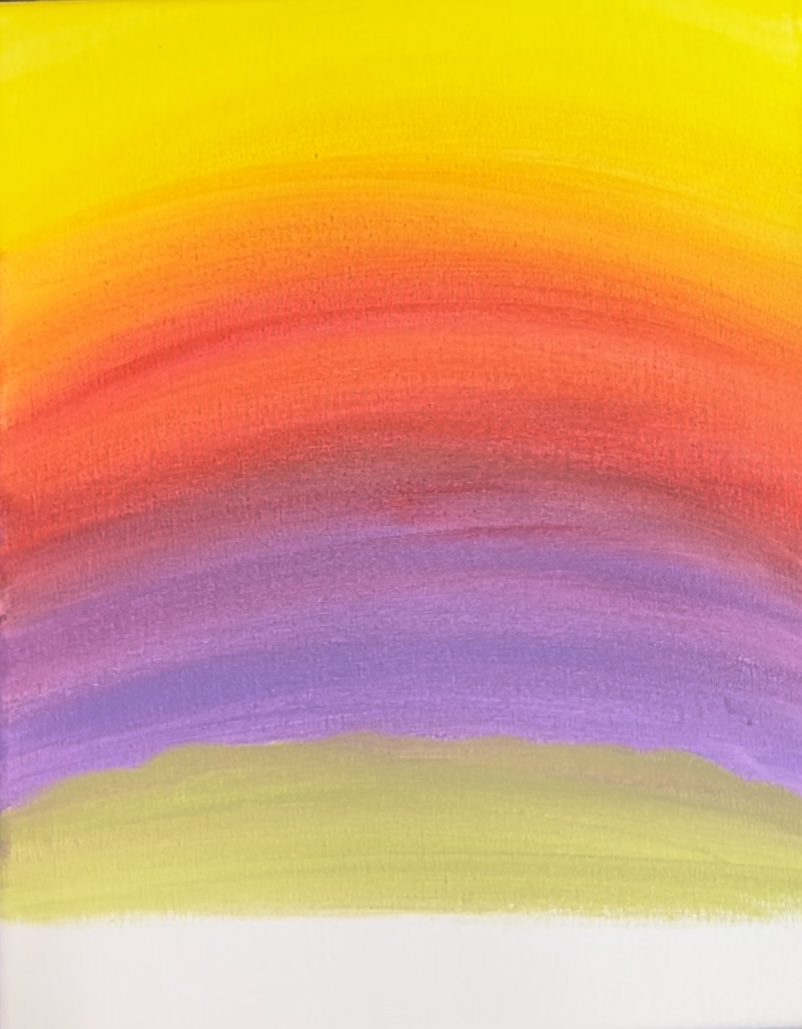
Load brilliant yellow green on your palette. Mix about 1 part brilliant purple to 2-3 parts brilliant yellow green. You will make a gray-green color. Use this gray-green color to start painting the ground area.
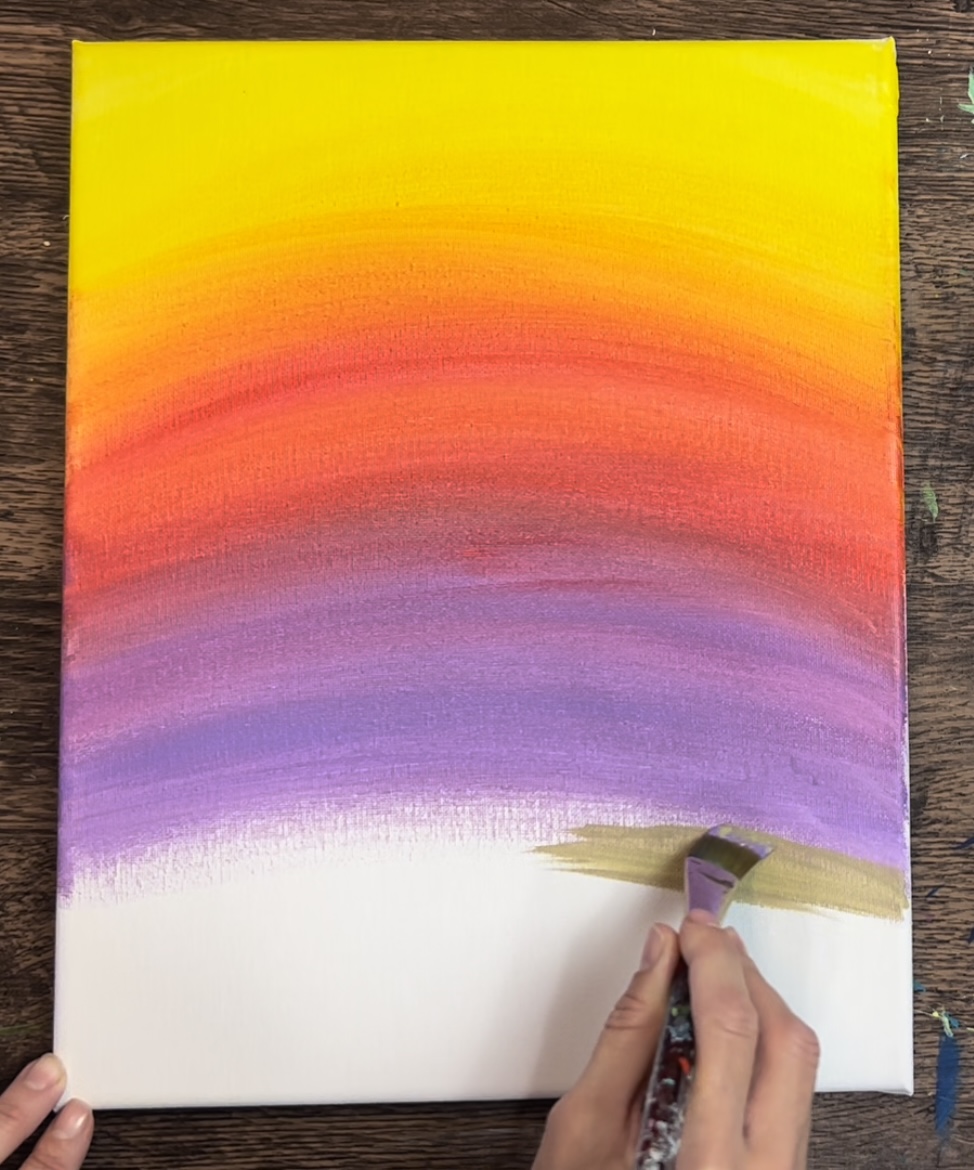
Go down about an inch with this gray-green color. At this point, the strokes are going flat/left and right.
Next, load your palette with raw Sienna and titanium white. Mix about 3 parts raw Sienna and 1 part titanium white. Use your 3/4″ flat wash brush to paint the rest of the ground area. Do these strokes with short “expressive” angle strokes.
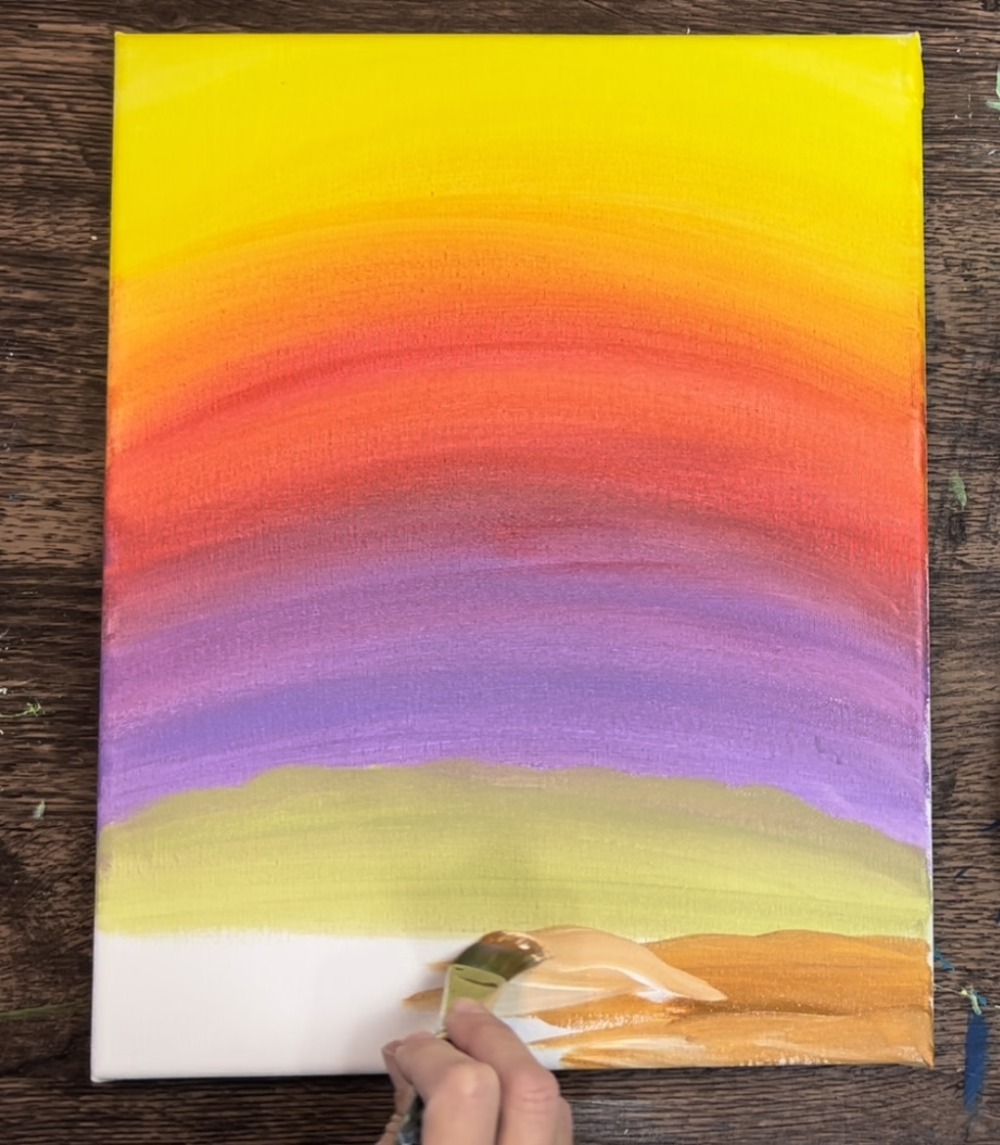
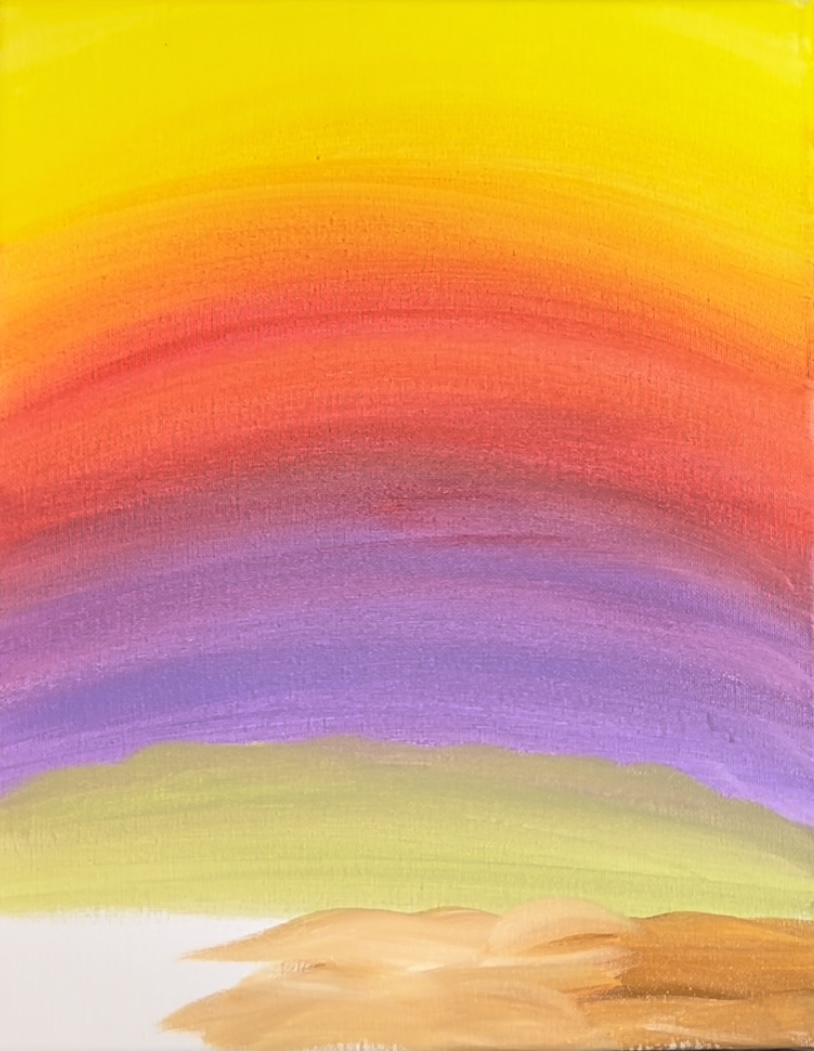
The expressive strokes kind of make the texture for the ground. Add a little bit of extra raw Sienna (not mixed with white) on the bottom so the ground is slightly darker on the bottom.
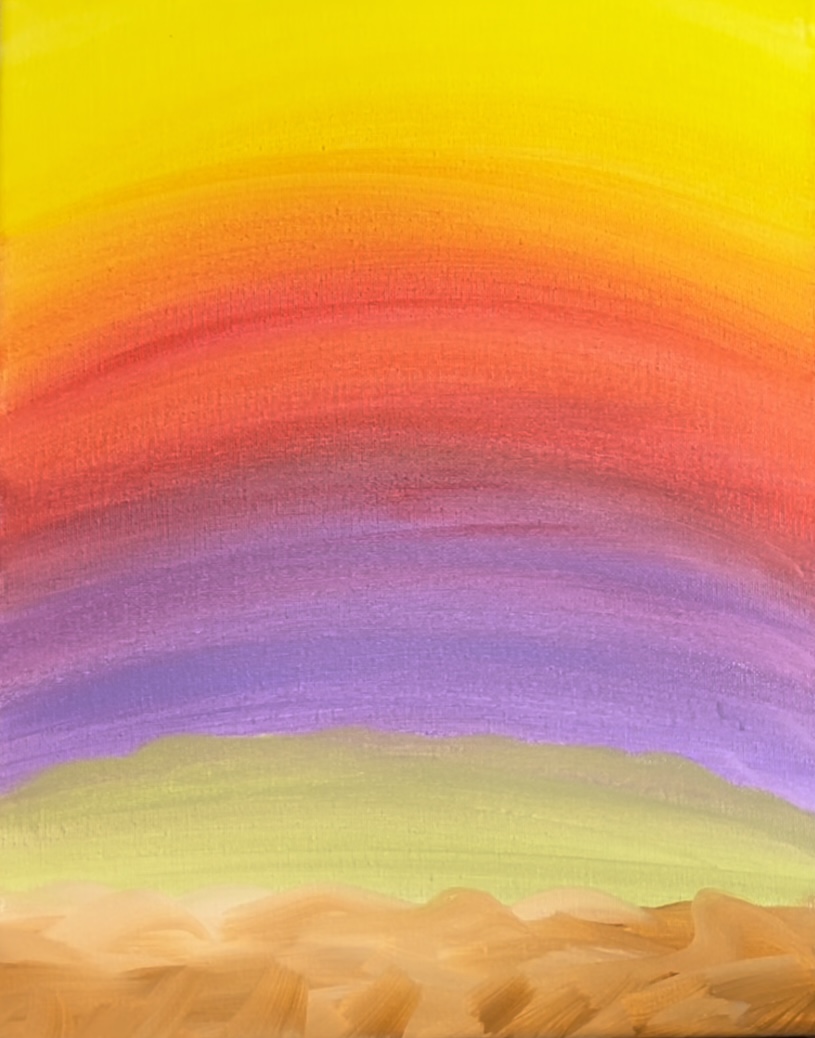
Wait for this to dry before going onto the next step.
2. Transfer The Bear Template
Print out the bear template and cut on the dotted lines.
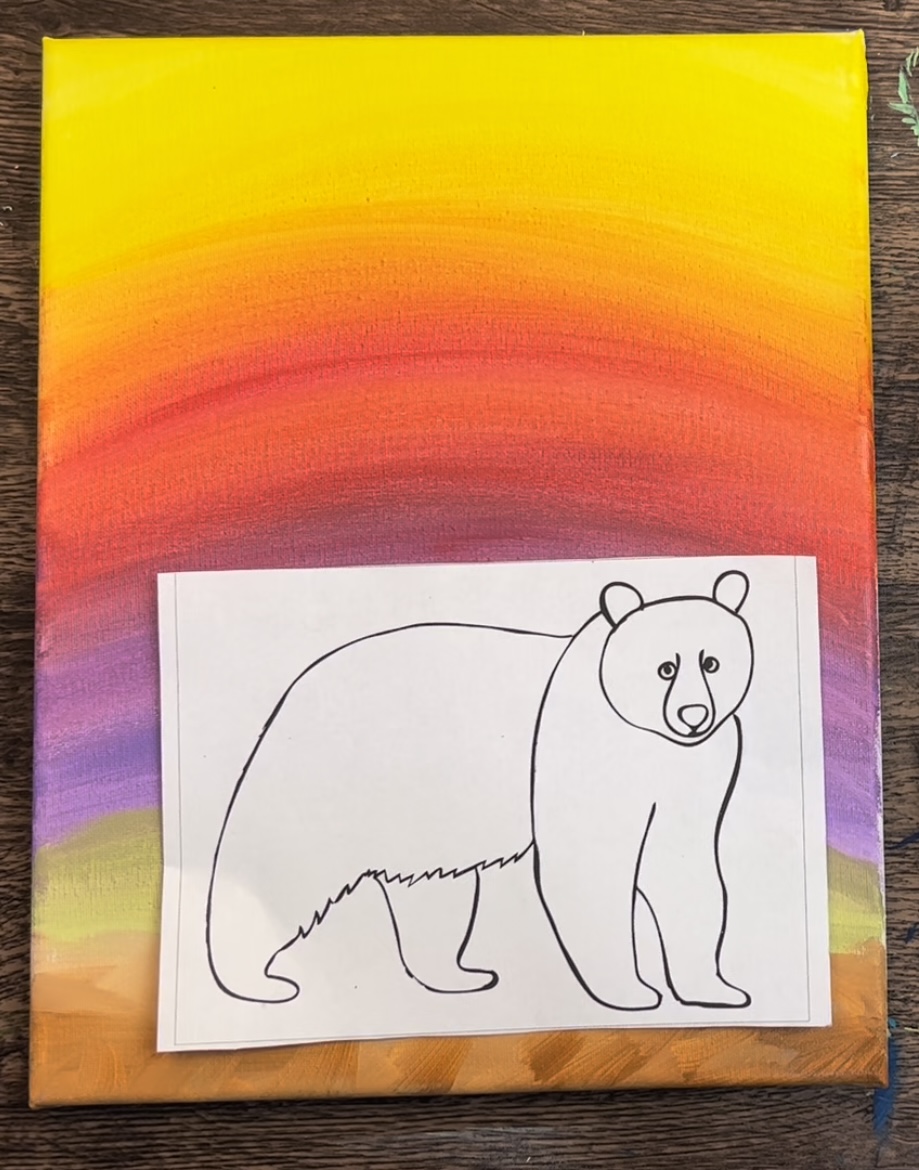
Place a sheet of graphite paper below the bear. Position the bear so the bottom of his feet are about a half inch from the bottom of the canvas.
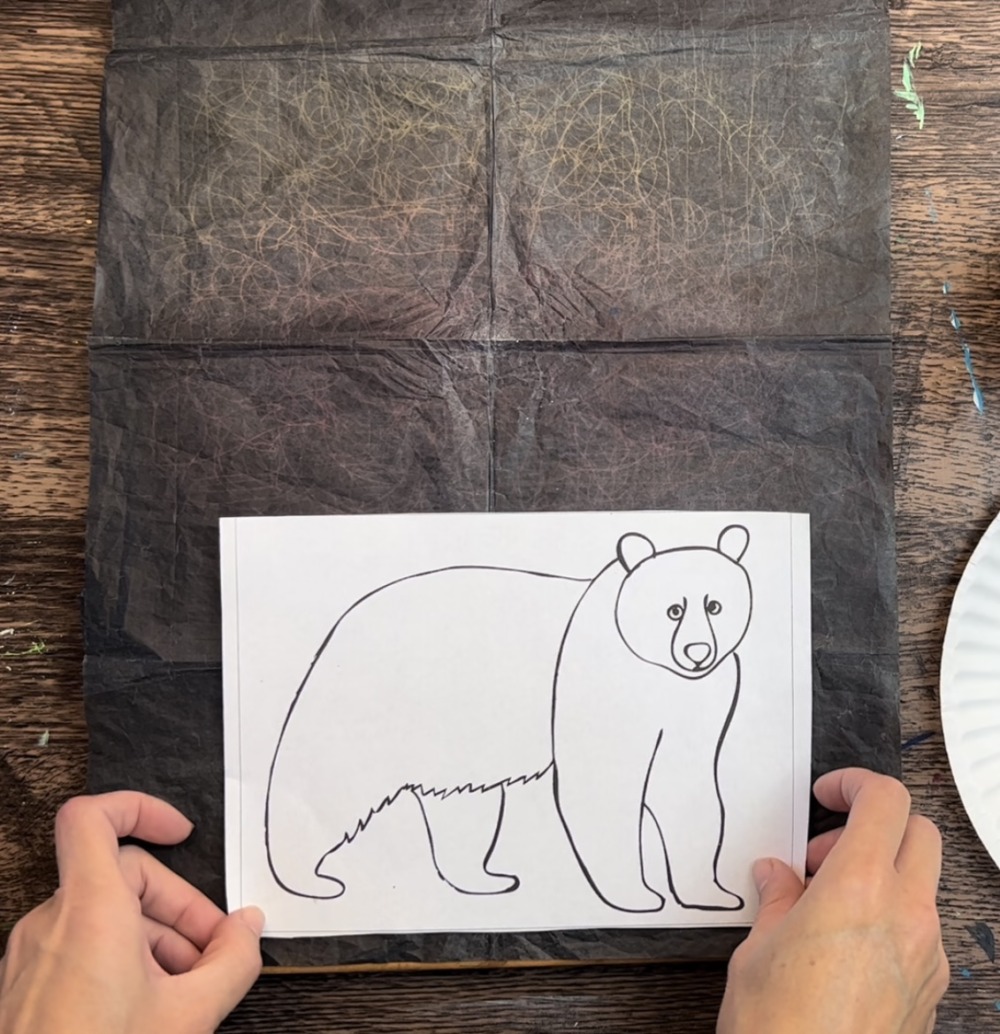
Firmly trace the bear drawing onto the canvas.

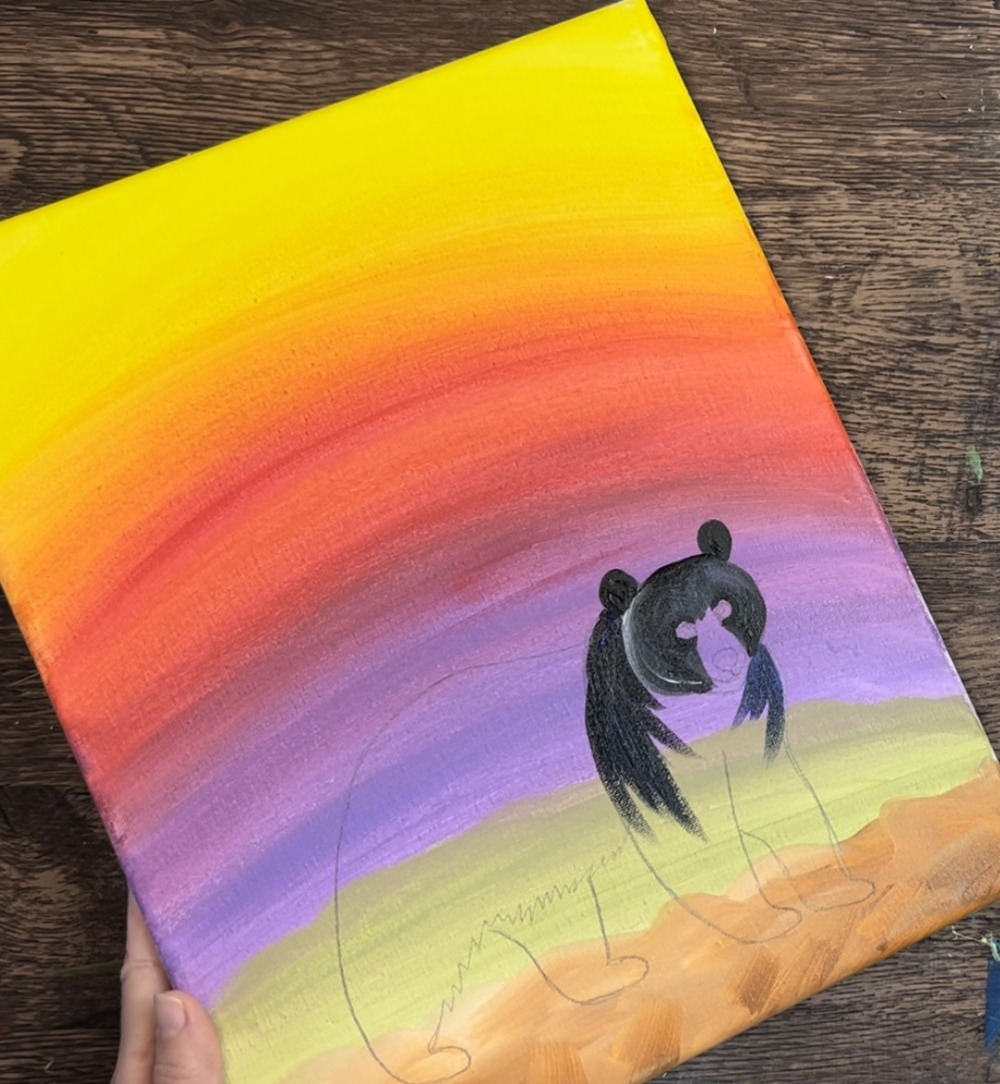
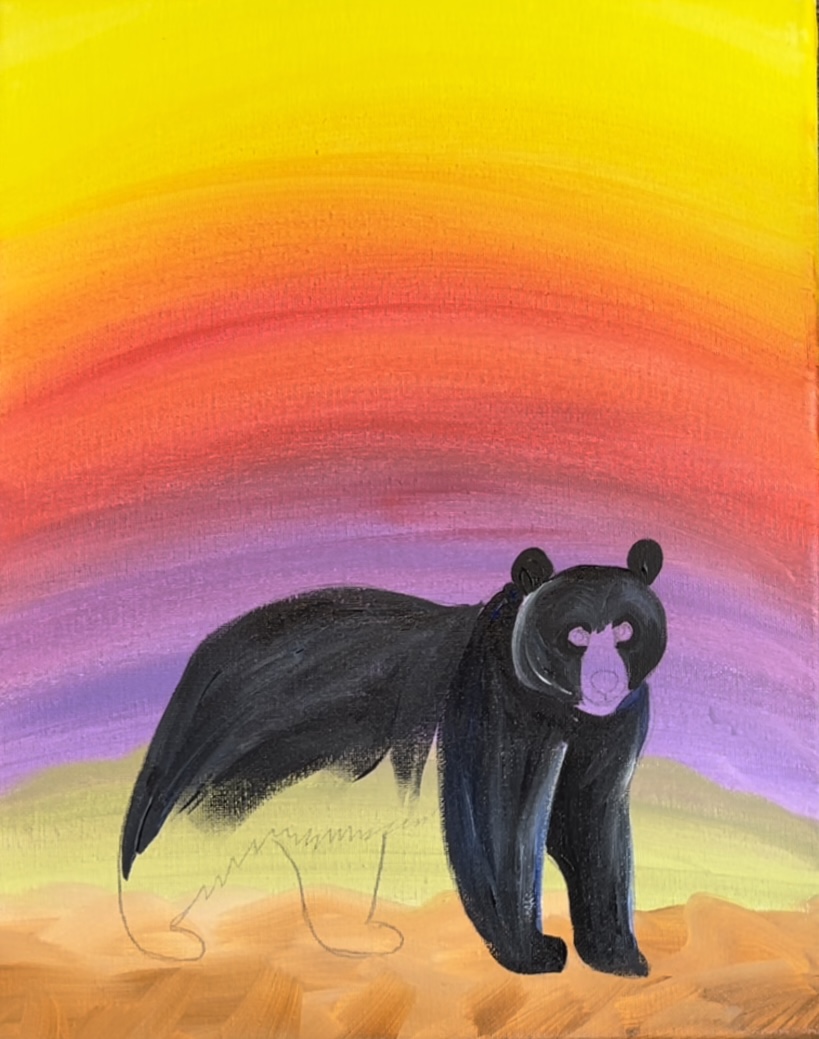
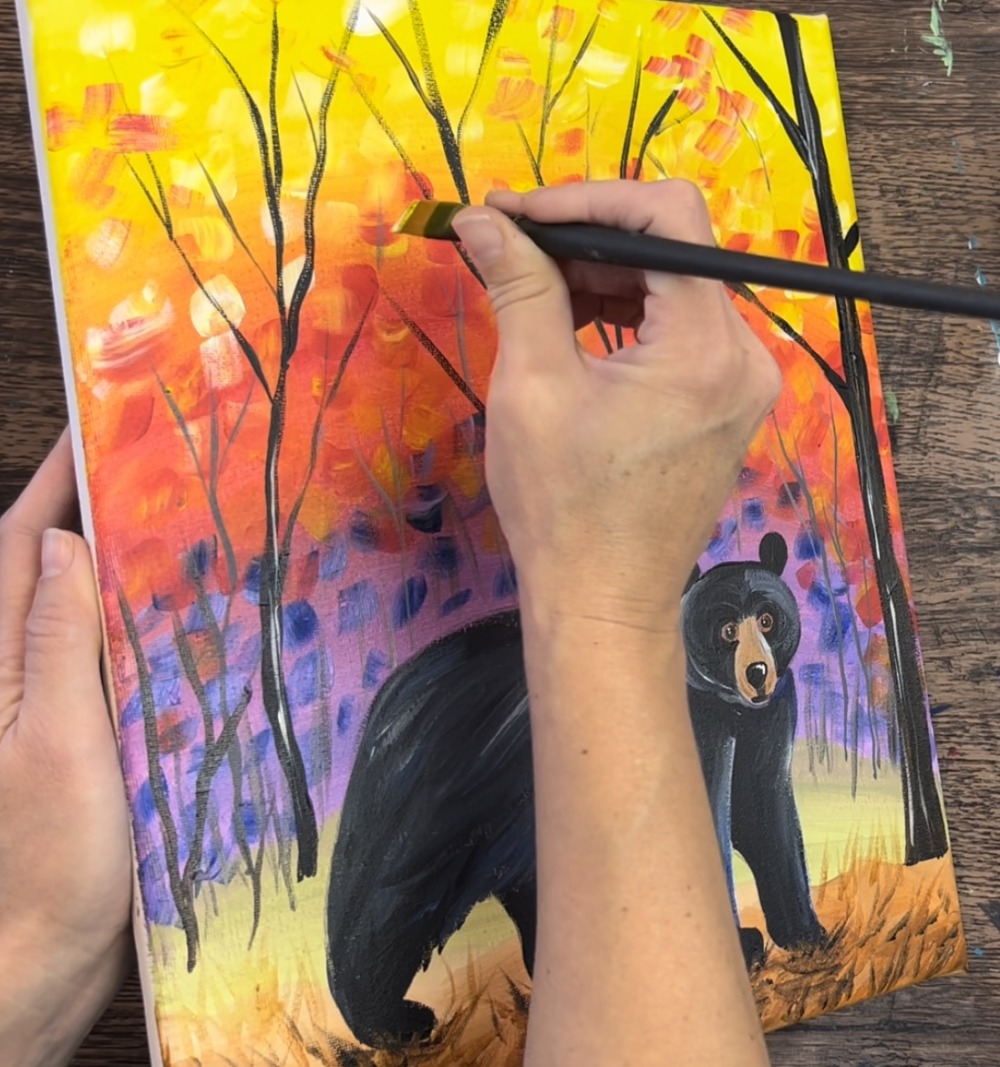
3. Paint The Bear
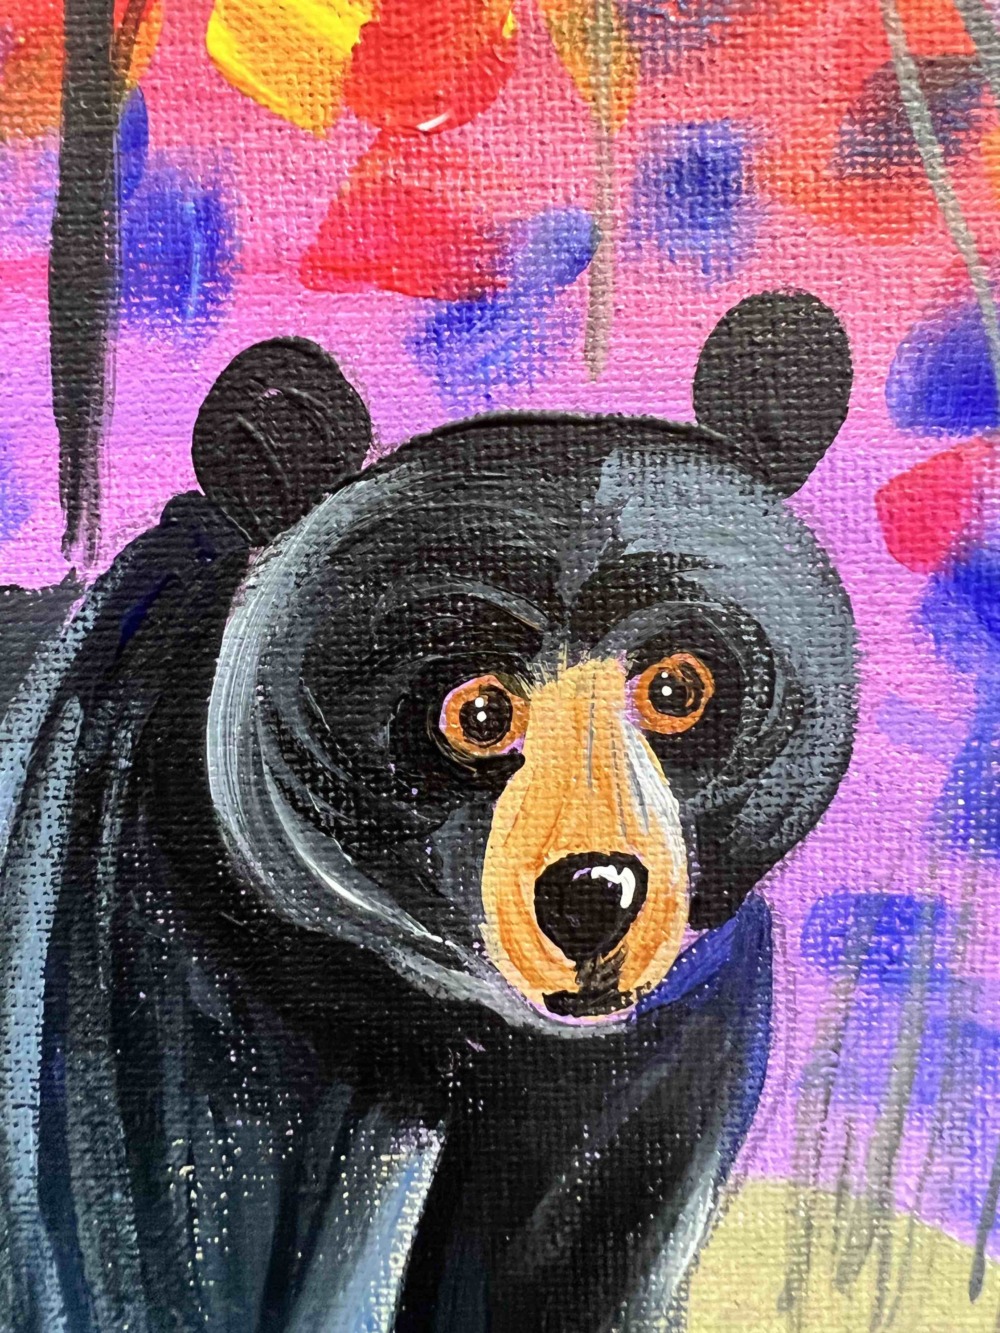
This bear is painted with a #4 round brush (for smaller areas) and a #12 bright brush (for larger areas). The techniques used for this is blending colors on the canvas. Since the bear is black (with a brown nose), we will be using white and blue to help create “contrast” and color variation with the black.
You can try practicing blending black with blue and white on your palette to make a few different variations of black…

Use the #4 round brush and paint the ears of bear solid black. Paint around the eyes.
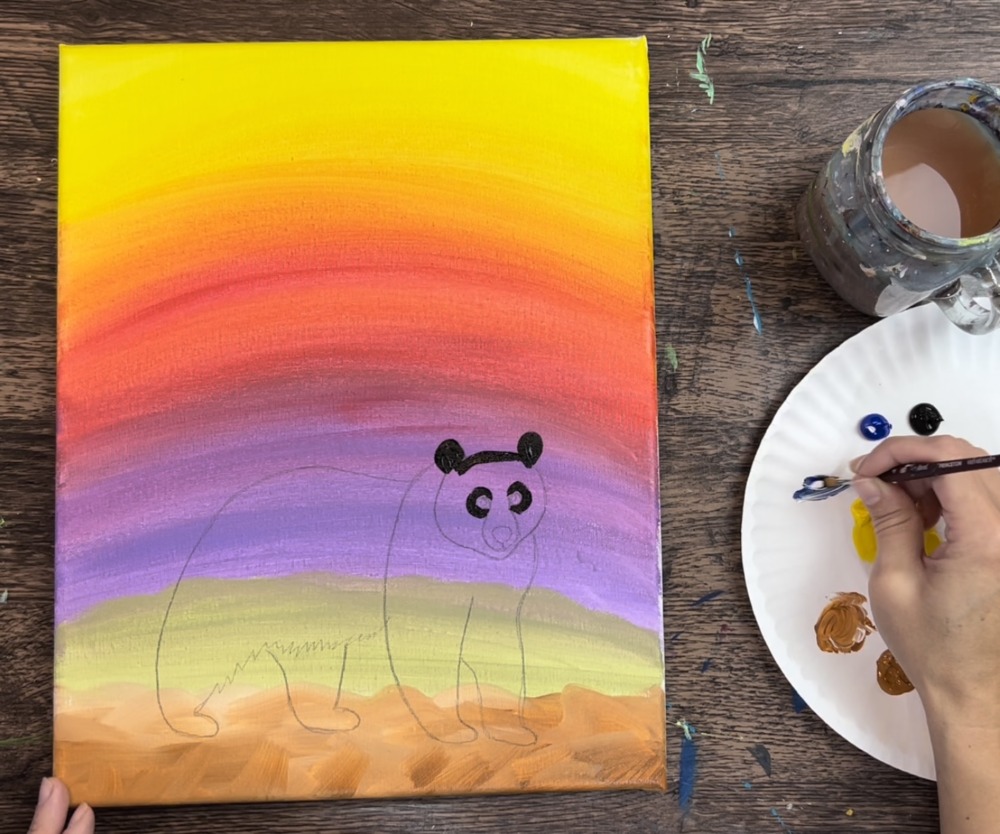
Then start filling in the head area around the eyes and around the nose area. Use a little bit of white to make the right part of the head lighter.
Continue to paint “contouring strokes” to fill the head. On the left side of the head, make the far left curve a little bit lighter by adding a small amount of white into it. Then paint the left side of the bear with pure black so that it contrasts with the head.
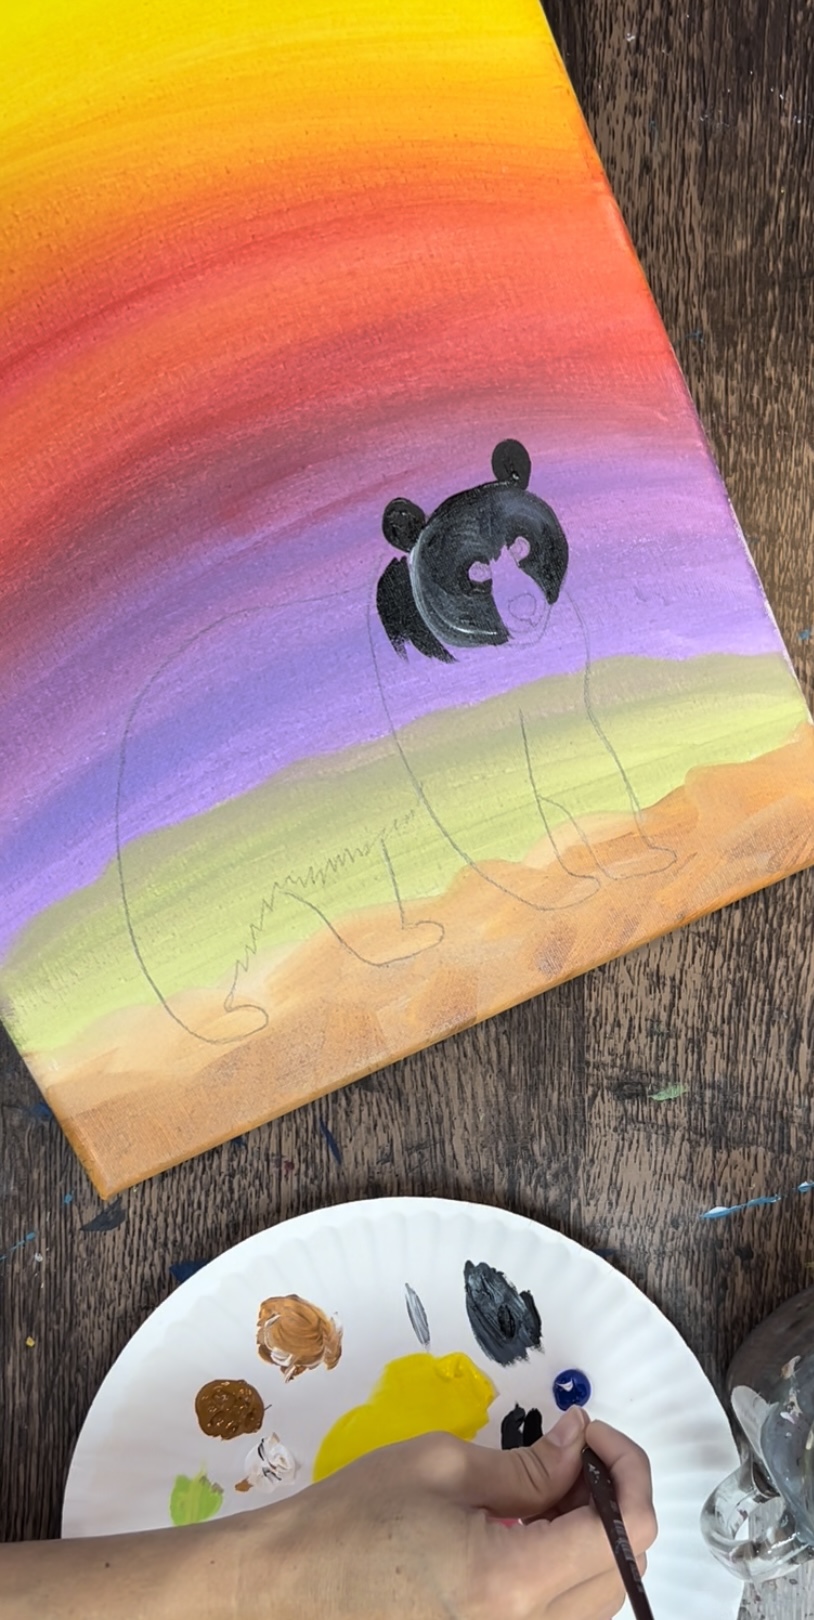
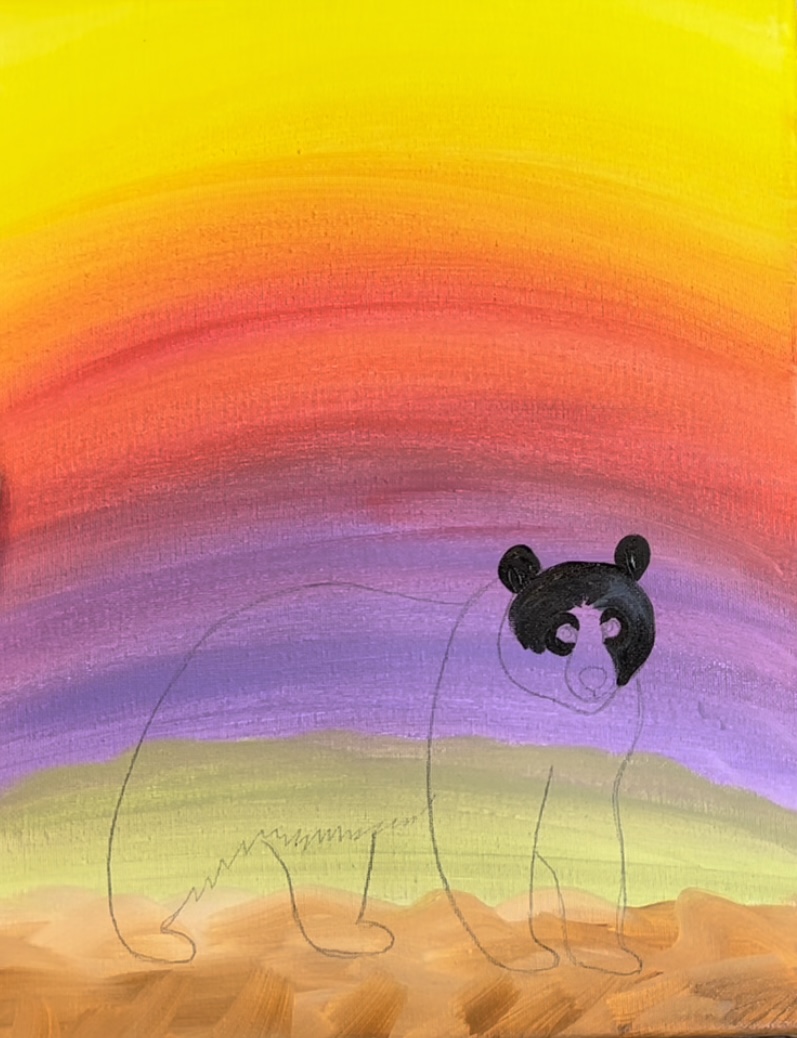
Drag your round brush downwards to paint the front legs. Continue to mix in blue and a little bit of white to create color variation.
Add a little bit of white on the right side of each of the front legs so they stand out from one another.
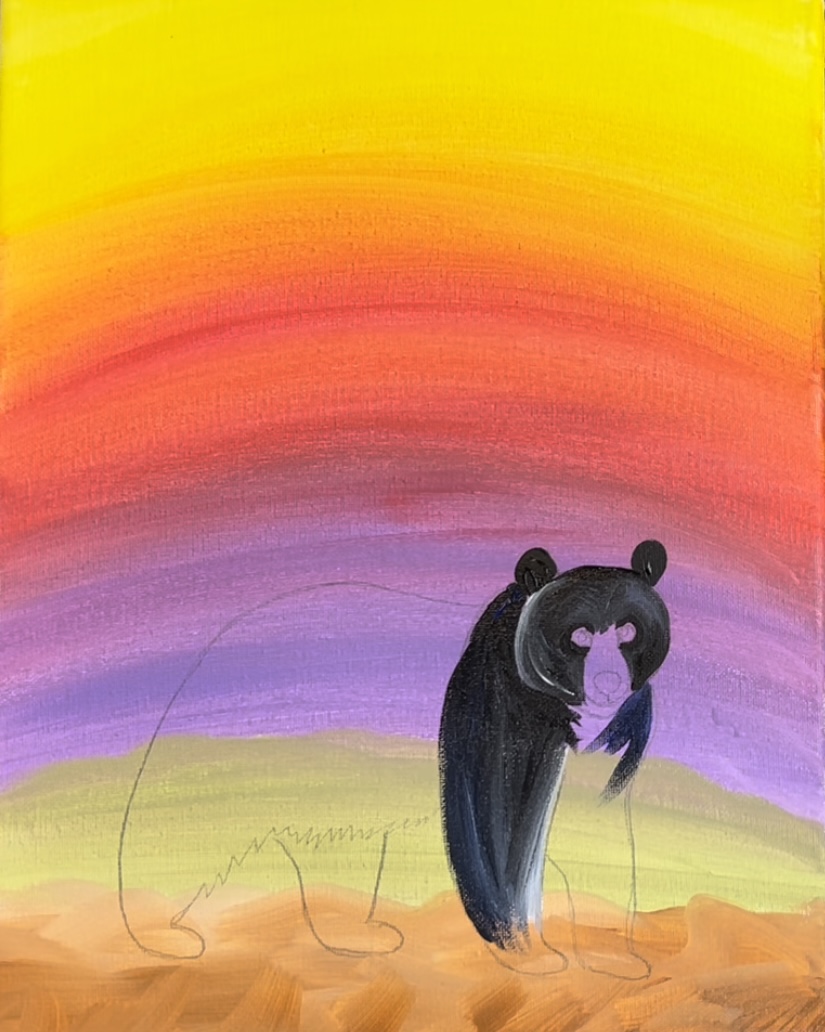
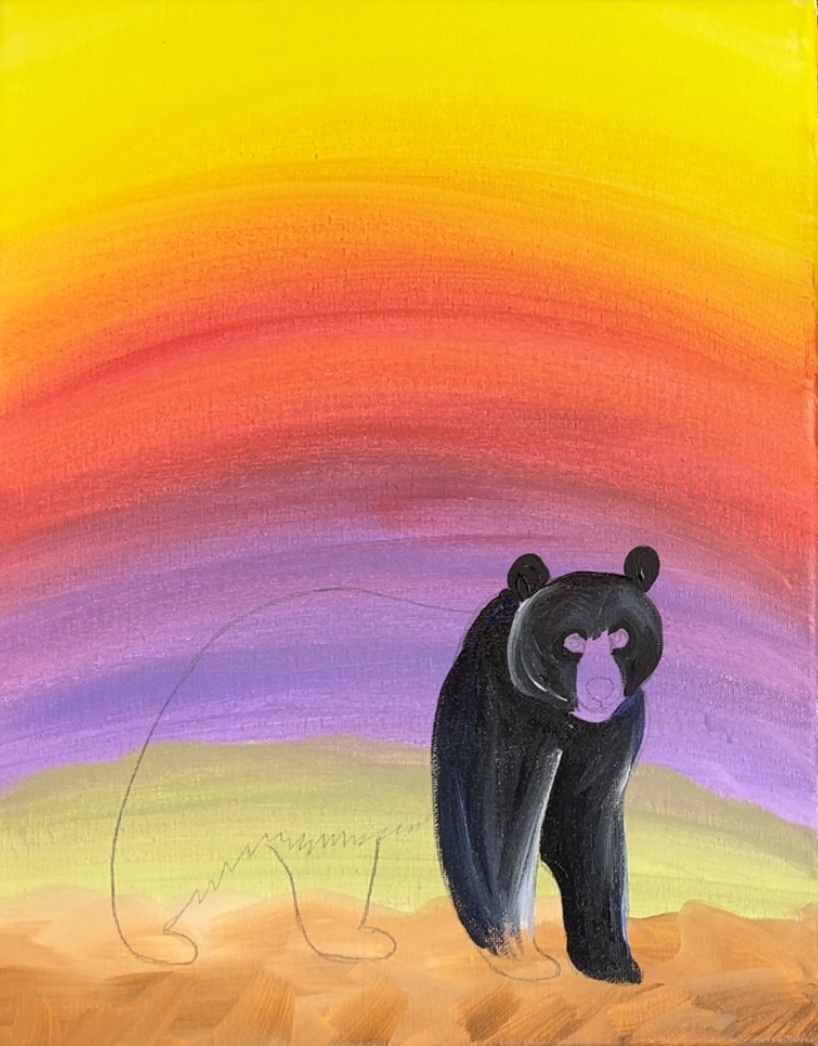
Paint the back of the bear using both the round brush and 12 bright brush. You can switch to the 12 bright brush to fill in this larger area. Continue to mix in little bits of blue and white for color variation in this area.
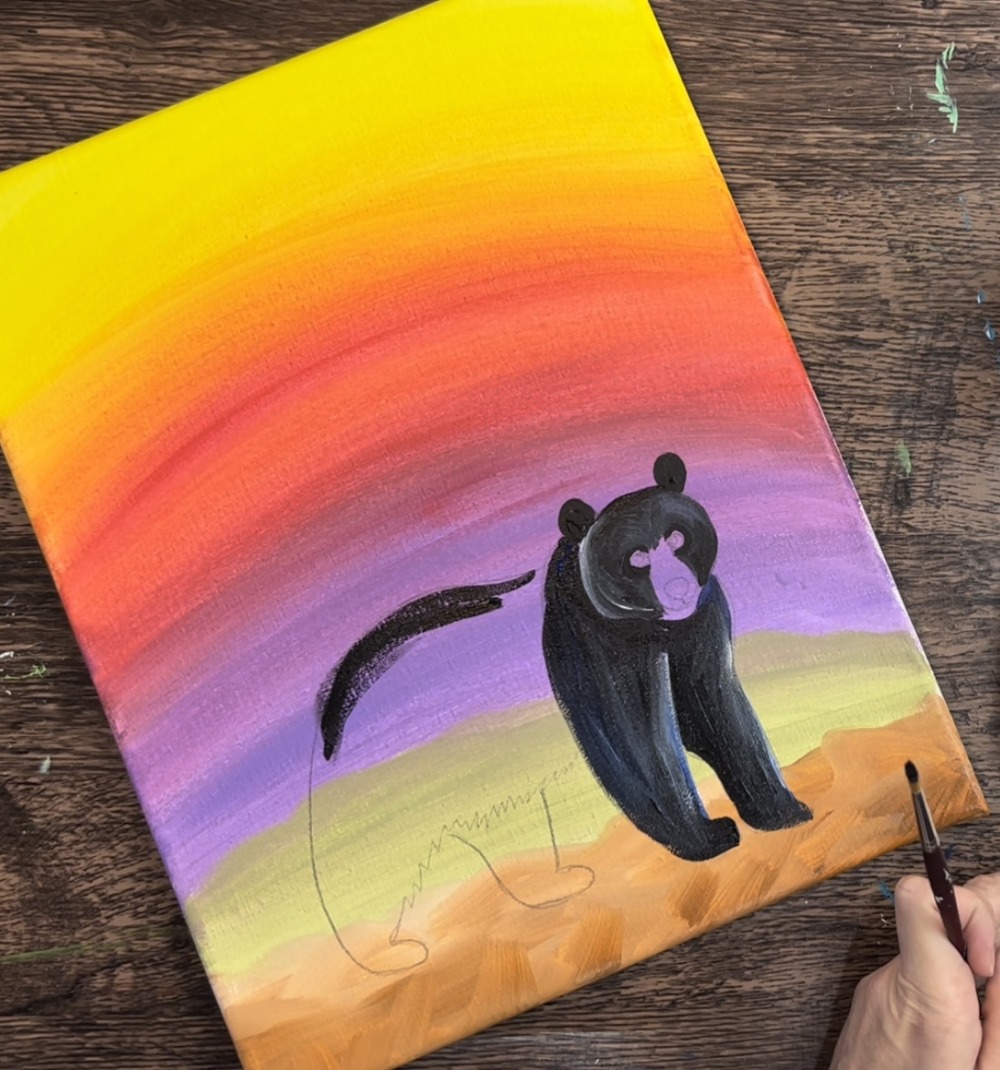
Use the round brush to outline the back legs. The furthest leg I did solid black and then mixed some white and blue in the bottom/belly region of the bear.
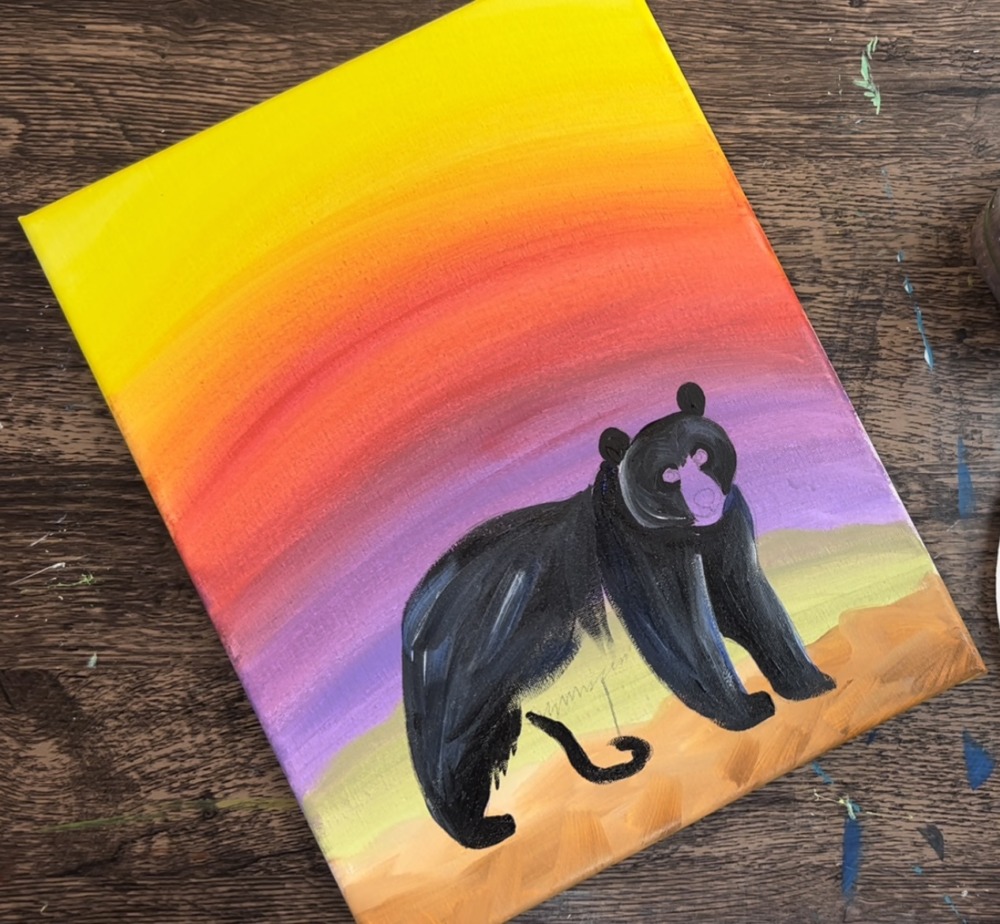
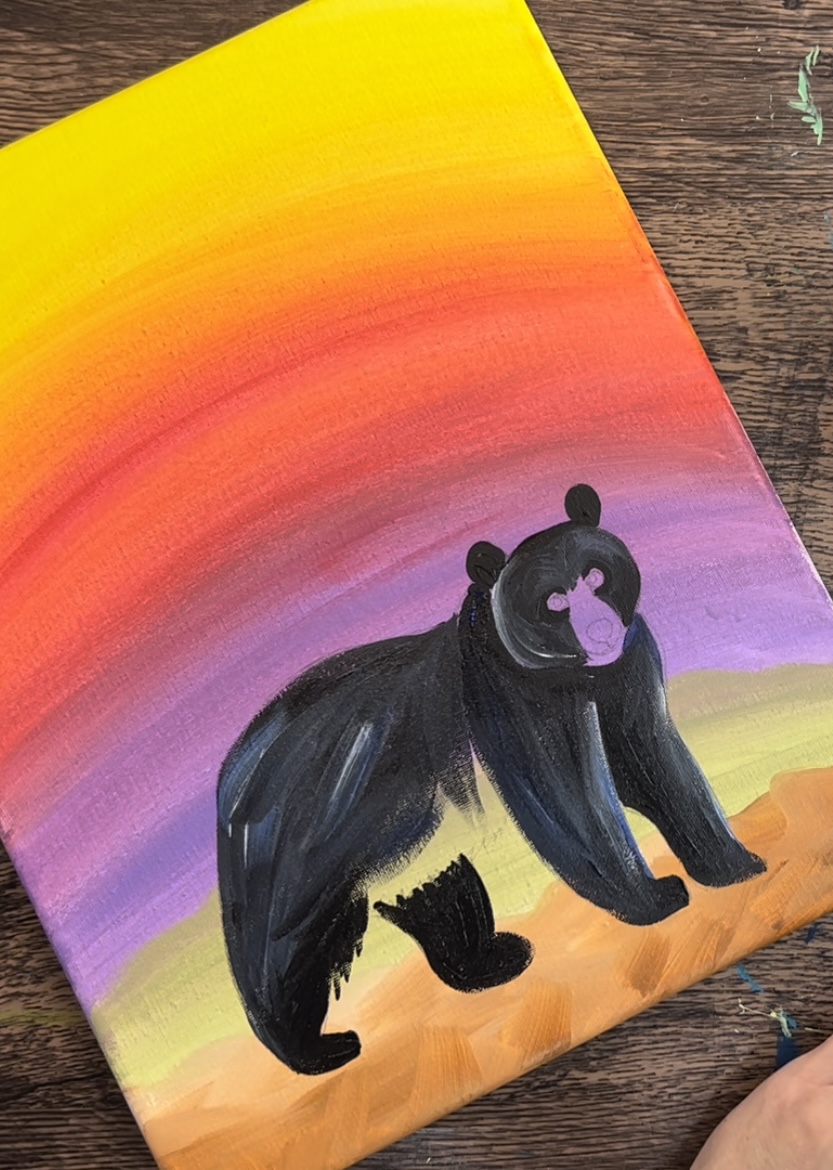
Use the round brush to paint some of the texture sticking out from the edge of the bear’s back leg and belly region.
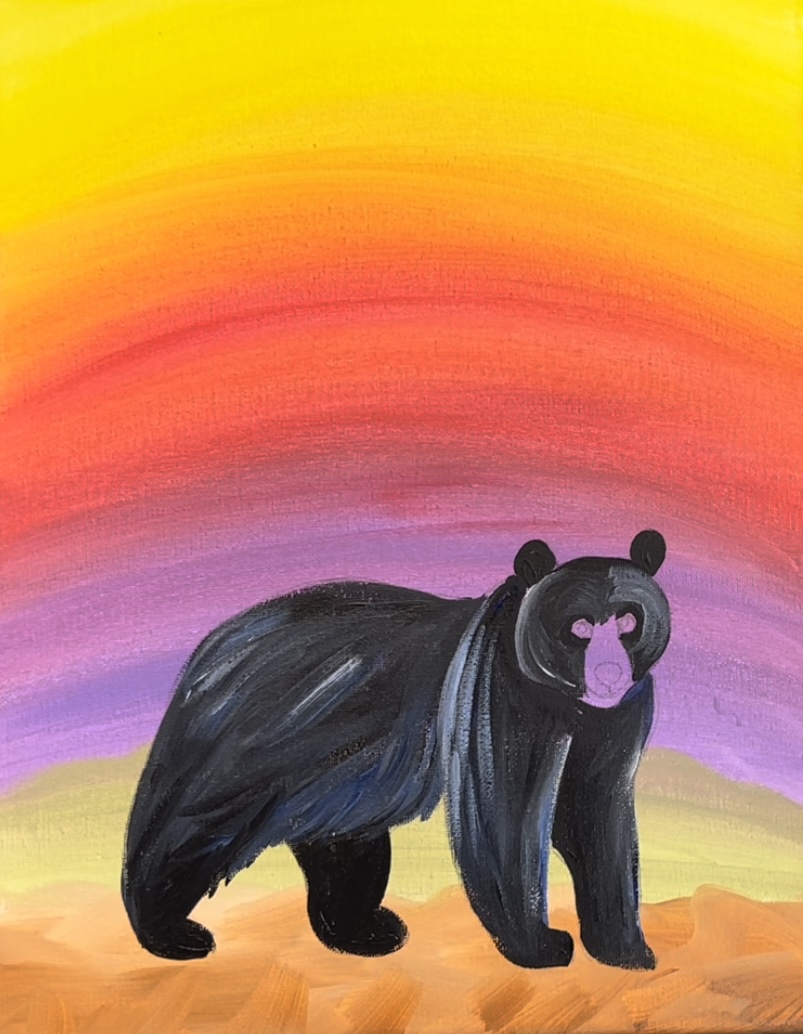
Next, paint the nose of the bear. Mix 1 part titanium white to 1 part raw Sienna. Then use the #4 round brush to paint the bridge of the nose. Leave the actual black nose blank.
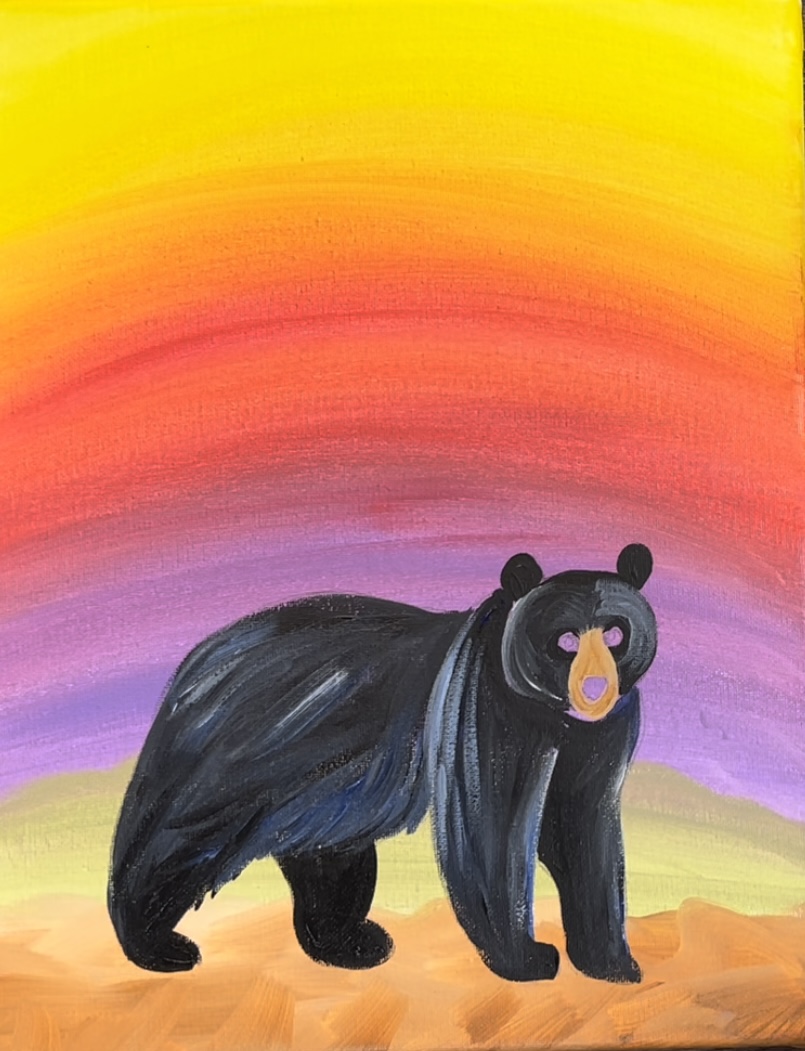
Use the #4 round brush to paint the nose mars black. Paint a tiny line and mouth below the nose.
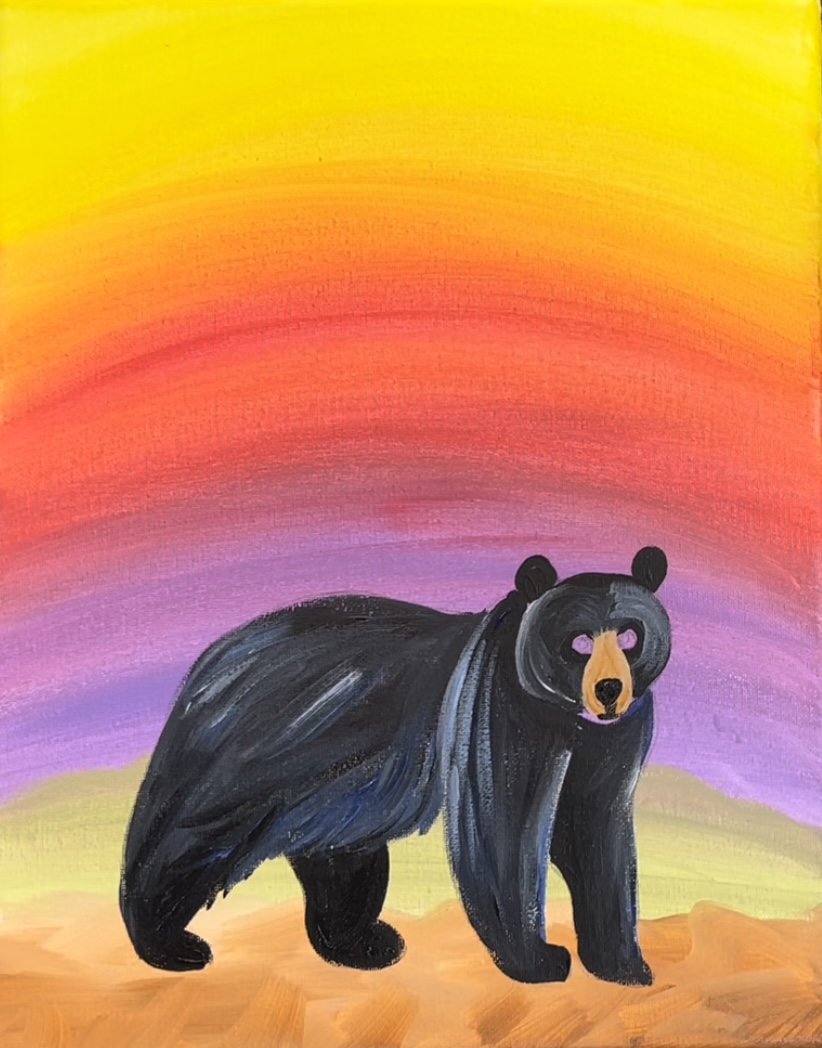
Next, paint a tiny white highlight on the upper right part of the nose. Paint the eyes raw Sienna.
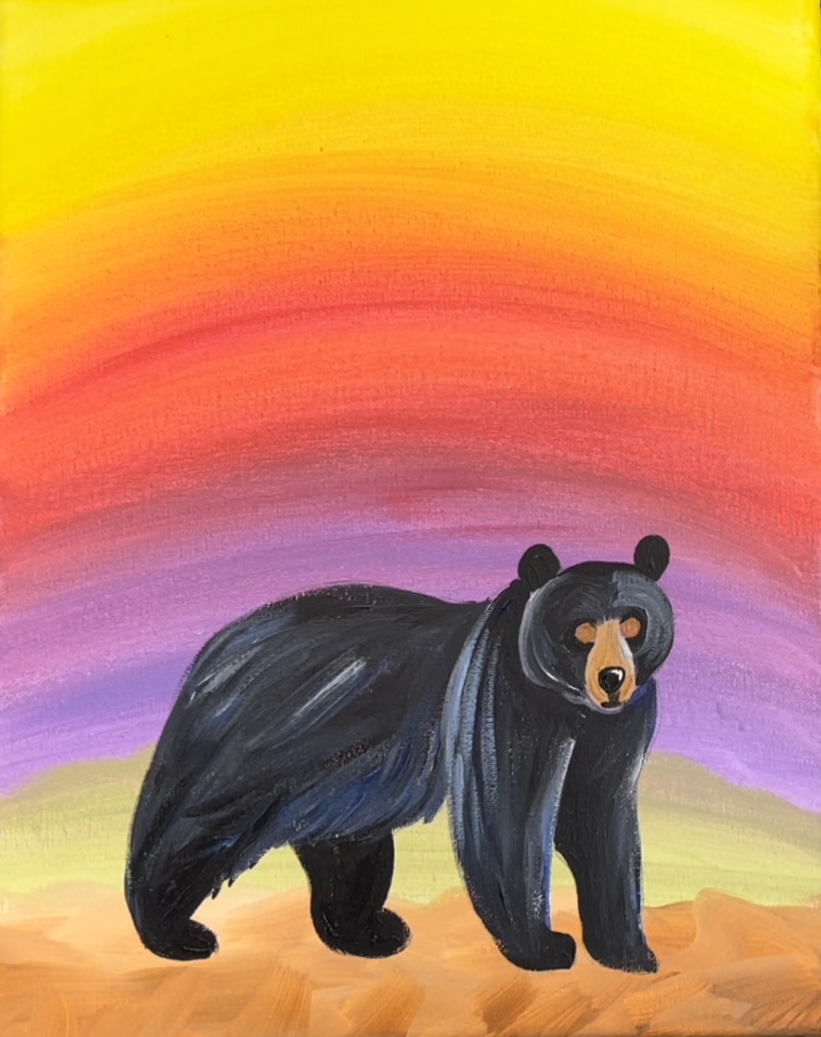
Then paint tiny black circles inside the eyes.
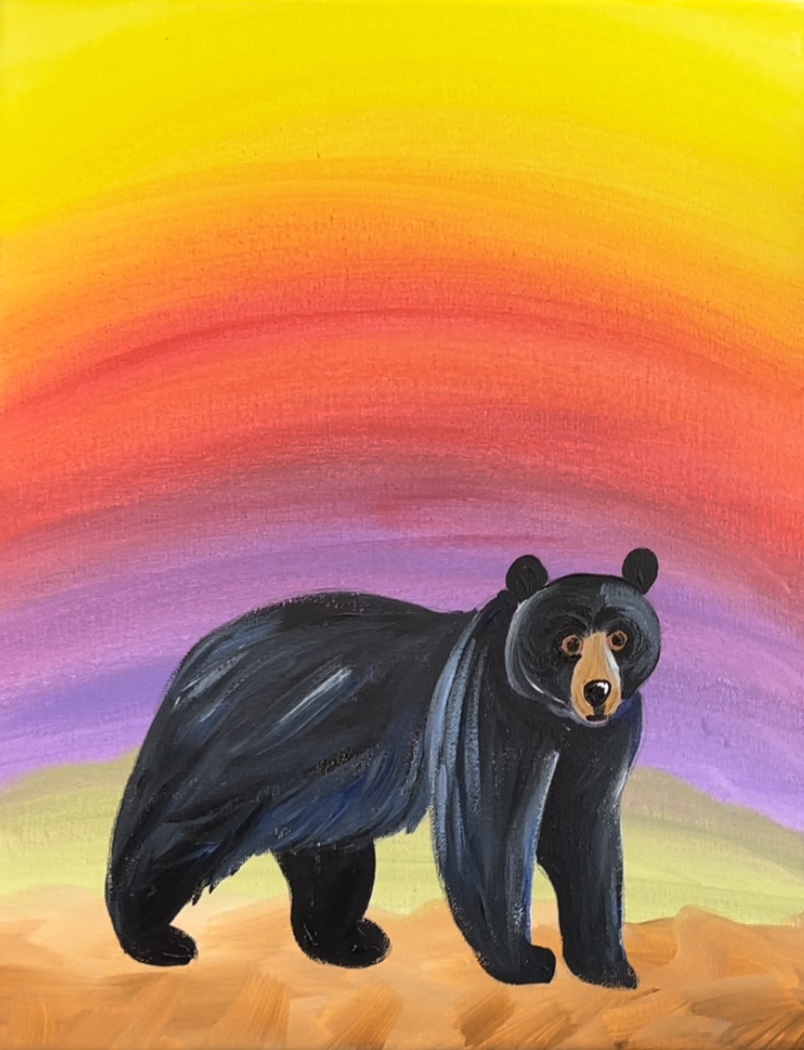
Paint two very tiny white dots (highlights) in the upper par and middle part of the black part of the eye.
Here is an up close view of the bear so you can see the details in the face.
4. Paint First Layer Of Leaves
Use your 12 bright brush to start painting the leaves. These are thick strokes that go at an angle in different directions. Load your palette with primary yellow and titanium white. Double load the brush in both of those colors and start painting the leaves all in the yellow region and some in the orange region.

Next, load your brush in some primary red (without rinsing the yellow off). Paint reddish leaves in the orange area. You can add some yellow to the red to make some orange leaves. Paint the leaves in the pink area and some down into the purple area.
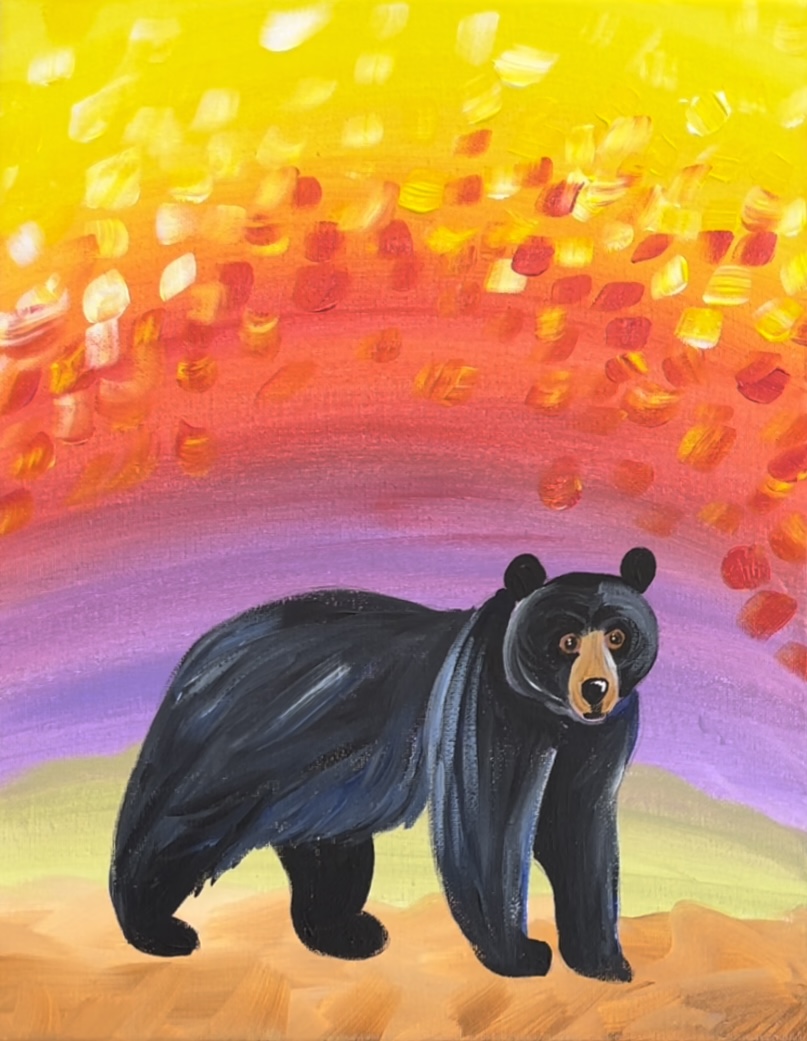
Note: you do not have to completely cover all of the background with leaves.
Next, load your palette with brilliant purple and ultramarine blue. Double load your #12 bright brush in both the blue and purple and create the blue-purple leaves over the purple region. Make sure to make your leaves go all around the bear.
5. Paint Forest Floor
Load your 12 bright brush in raw umber and a very tiny amount of black. Use just the tip of your brush to create grass blades. Create different angle strokes going in different directions under the bear’s feet and all around the ground area.
6. Paint The Tree Trunks & Branches
Use the #4 round brush to paint tree trunks. Start with the small trees way in the distance. These trees are more of a light to medium gray color. Use the tip of your round brush to paint the trunks with very thin and loose vertical lines. These trees go up to the orange region in the background.
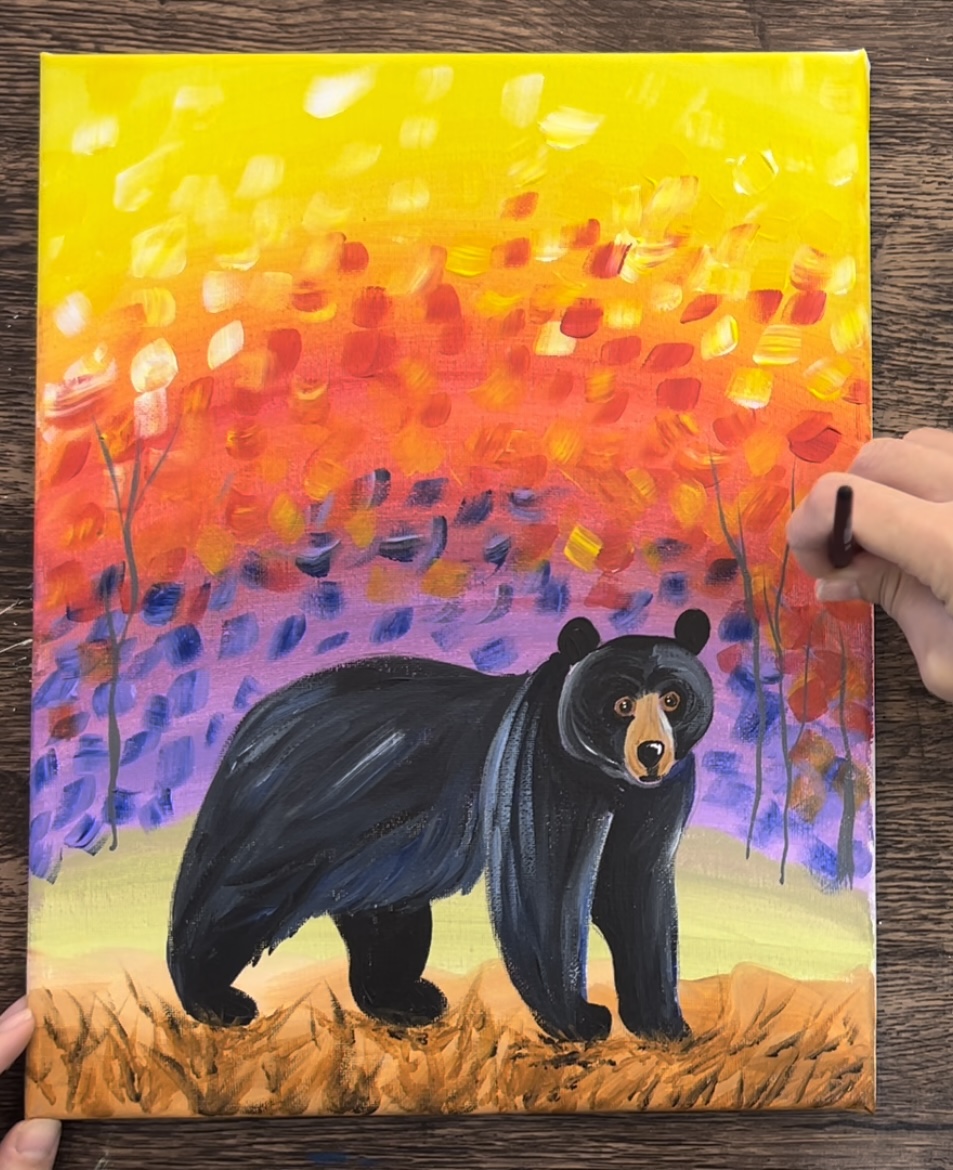
Then paint slightly larger trees with the black. Loosen the paint with water to help it spread and flow easier.
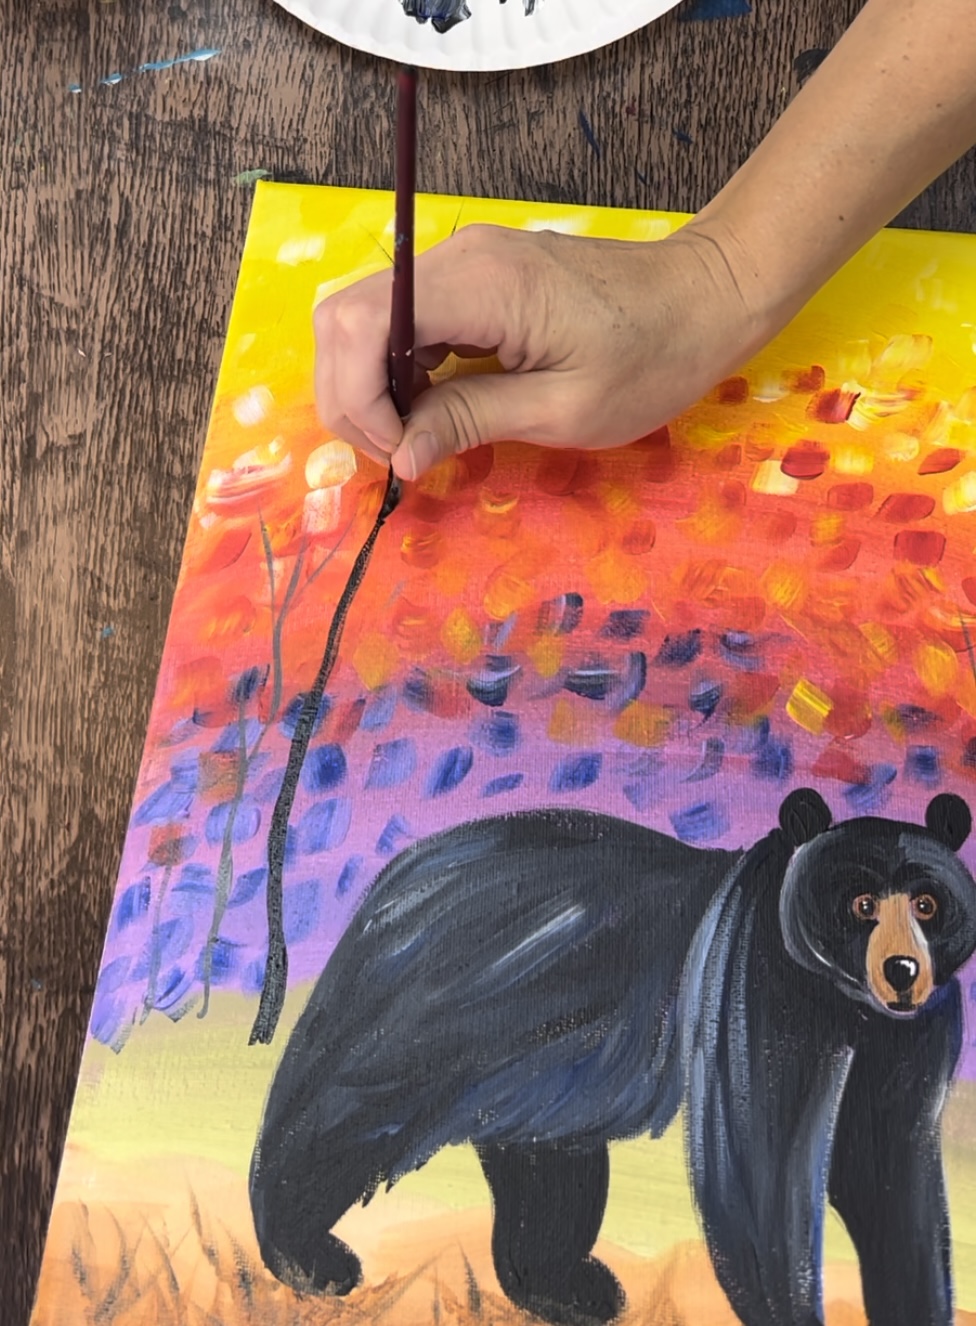
These black trees are very high and go to the top of the canvas and in the yellow region.
Then paint a larger tree trunk on the right side of the bear. This tree has a thicker trunk and a few branches. It goes all the way to the top and off the edge of the canvas.
You can add brown and white texture to your larger trees by using the tip of your #4 round brush and painting loose vertical lines to create tree trunk texture.
7. Paint Second Layer Of Leaves
Use the #12 bright brush to paint more leaves that overlap some of your higher branches. Do this with your yellow, white and primary red colors.
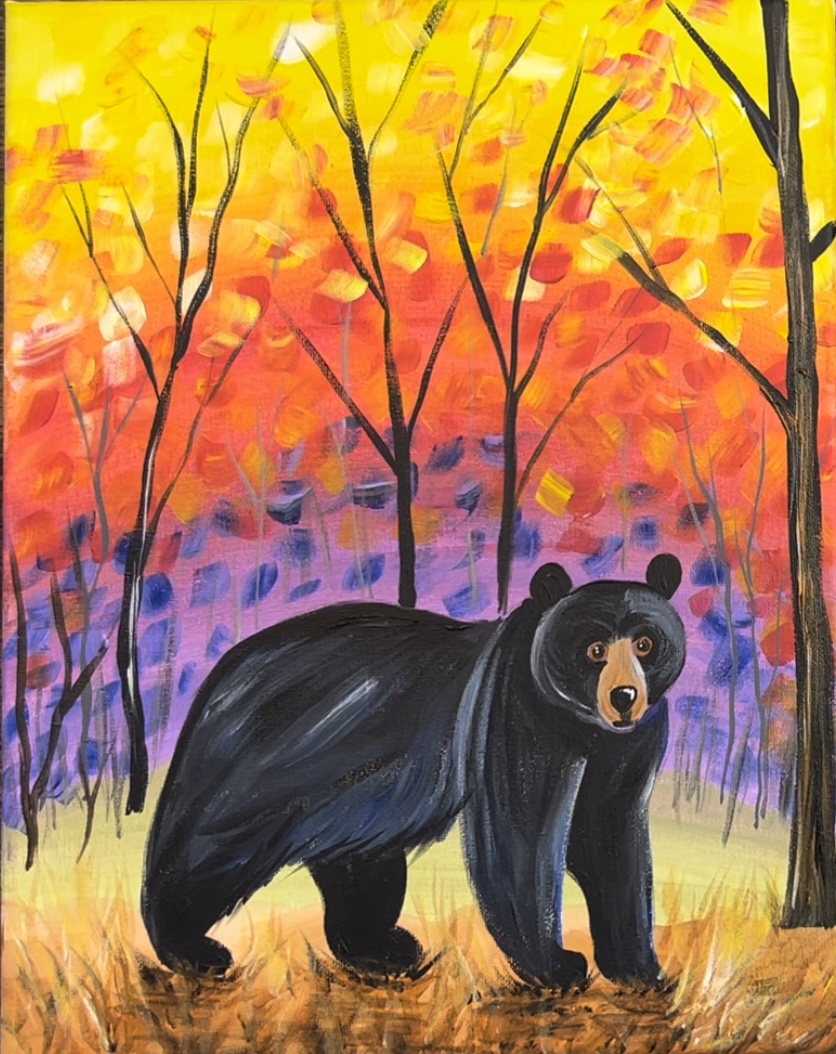
Finished!
An adorable forest bear painting! Hope you enjoyed this painting lesson. Be sure to sign your name and show it off!
Share Your Art Here!
Did you do this painting? You can share on any of the social media links below!


So fun! Did this painting tonight with a bunch of teenagers and, as always, everyone’s turned out great!