
Would you like to save this?
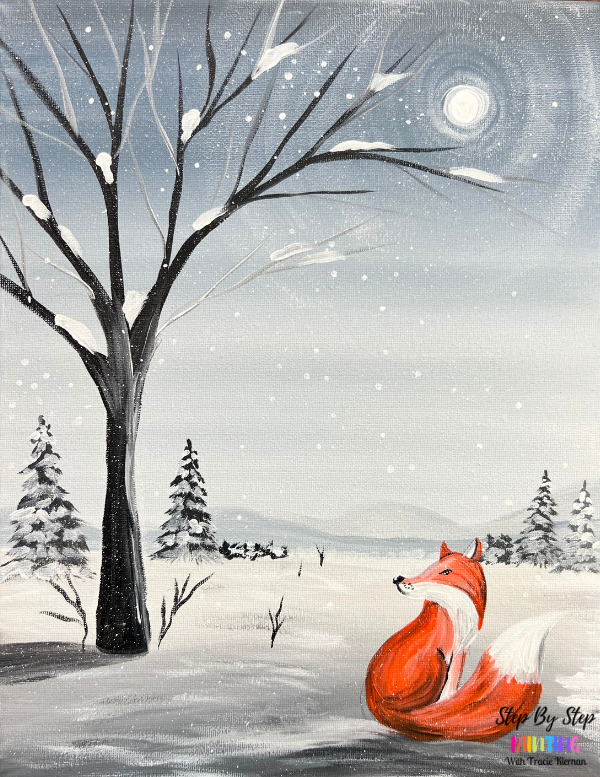
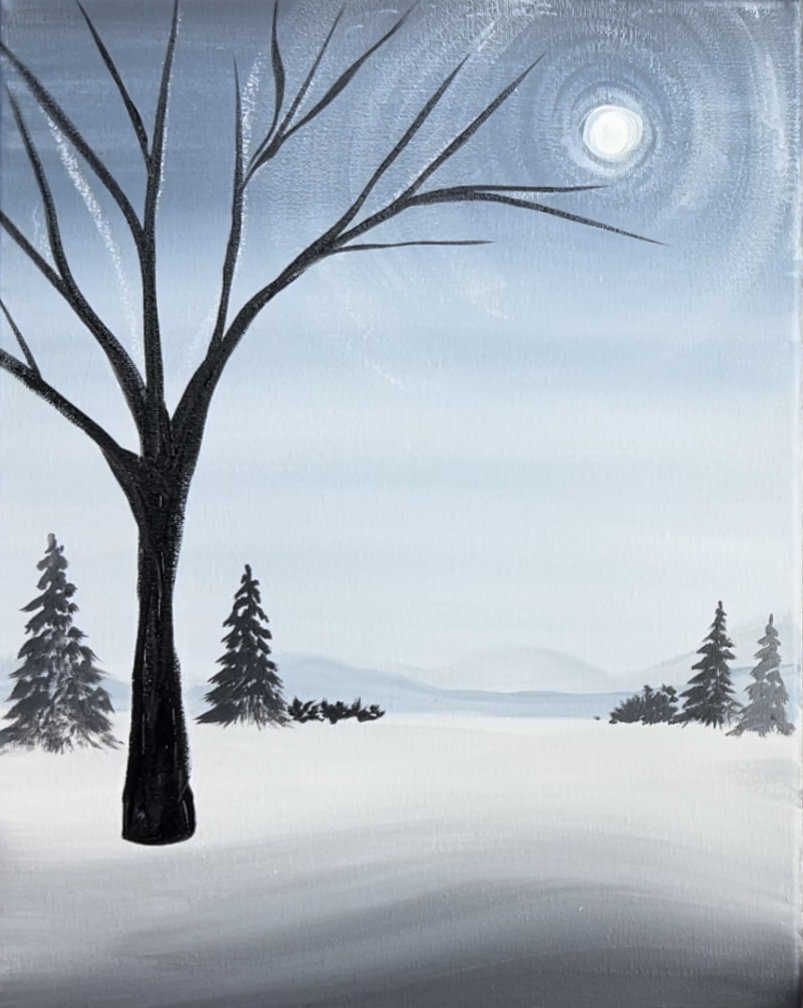
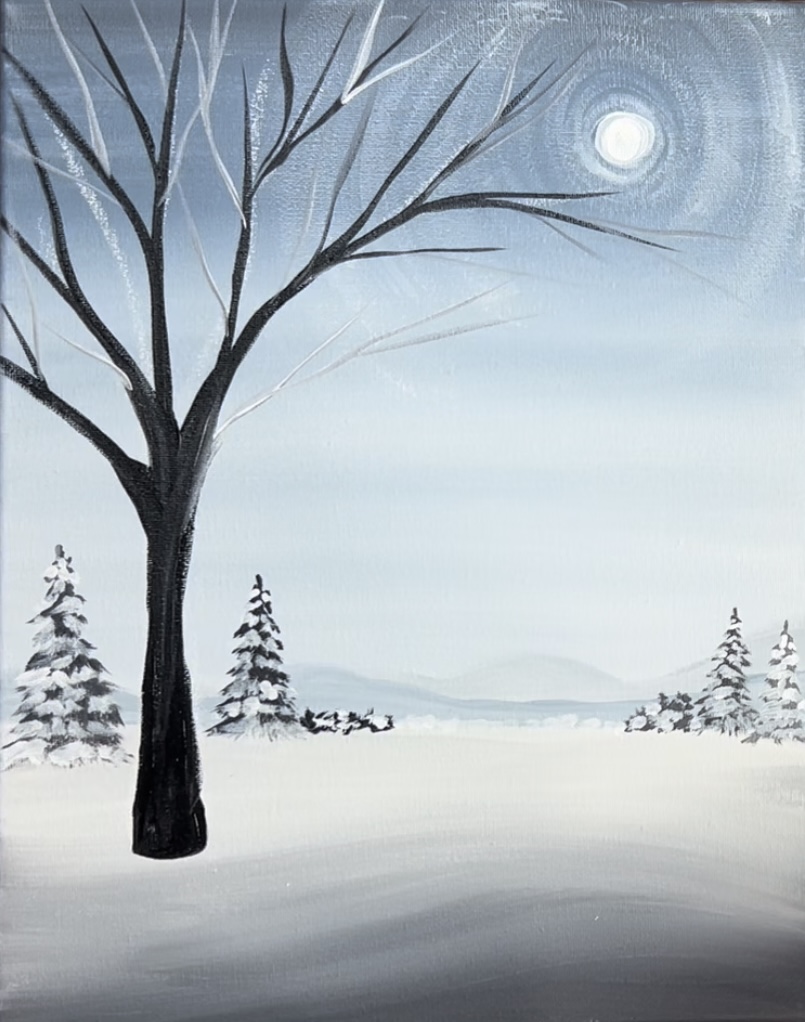
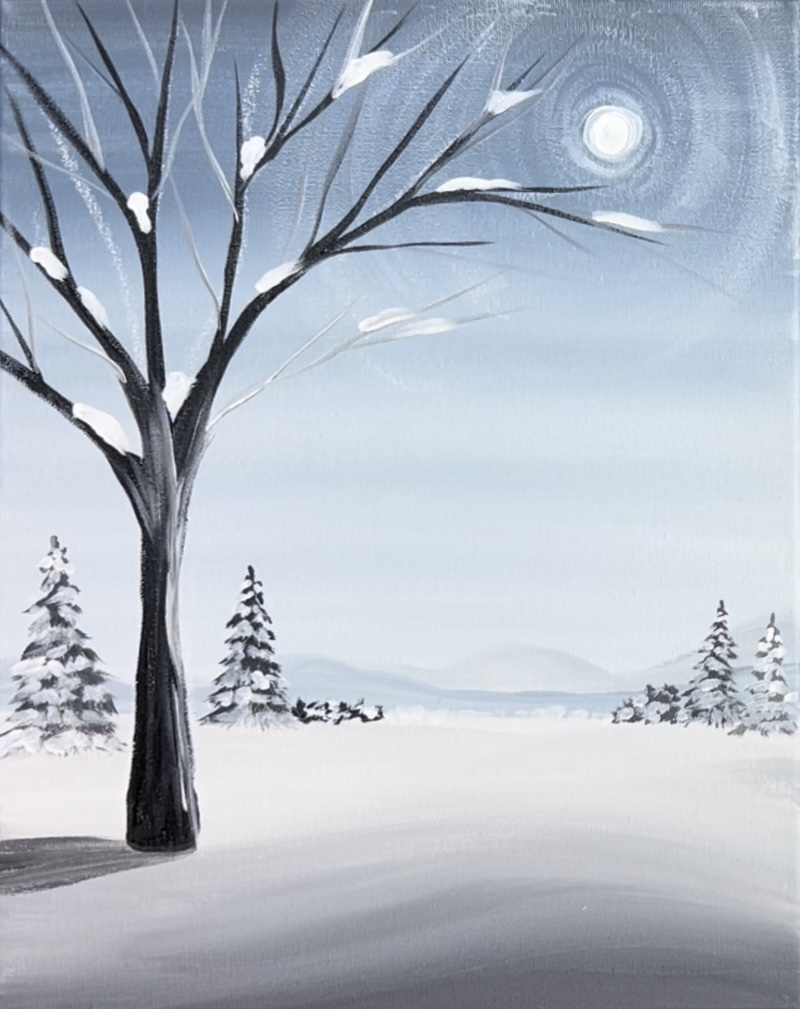
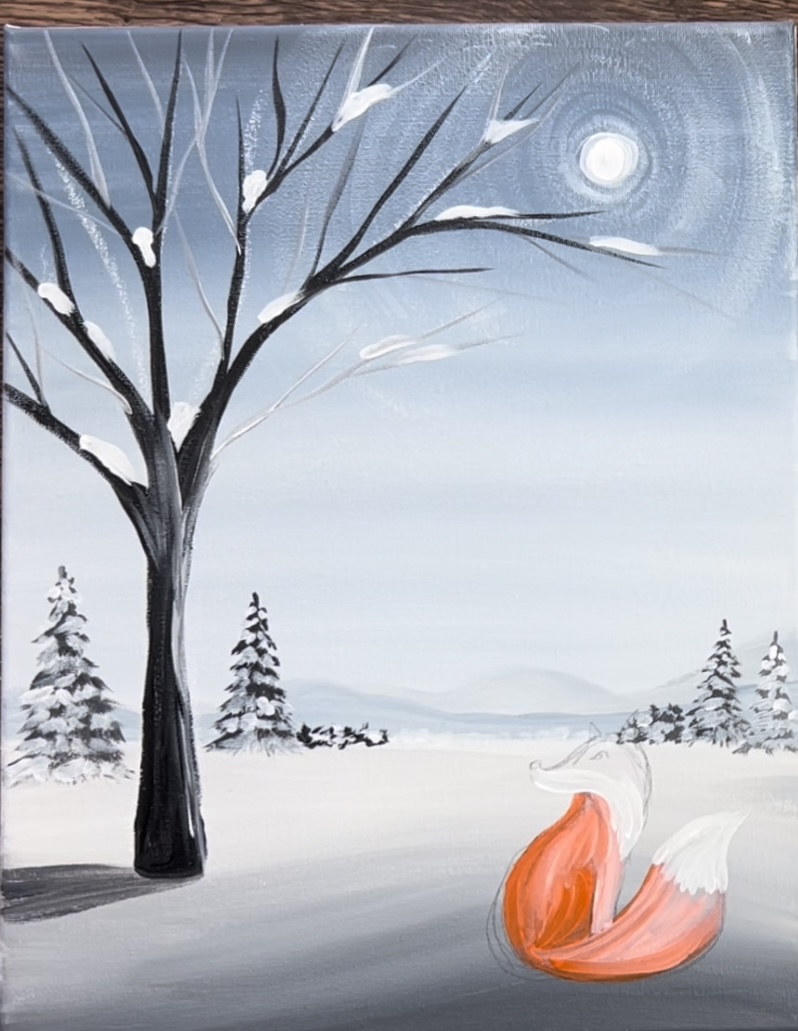
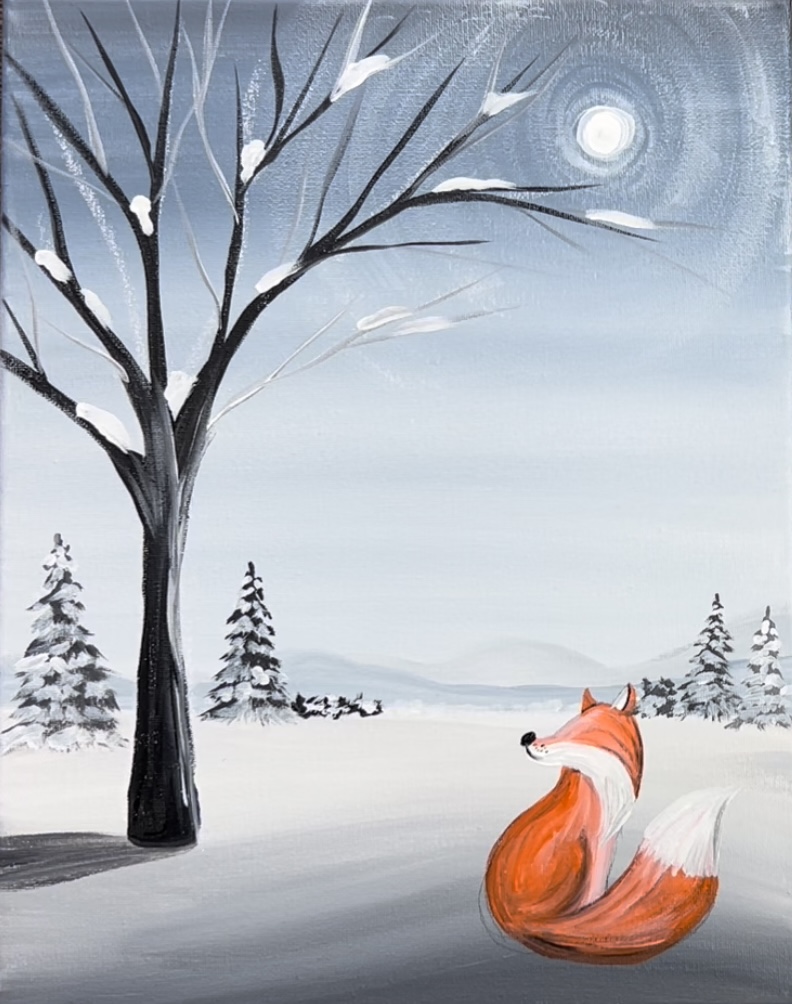
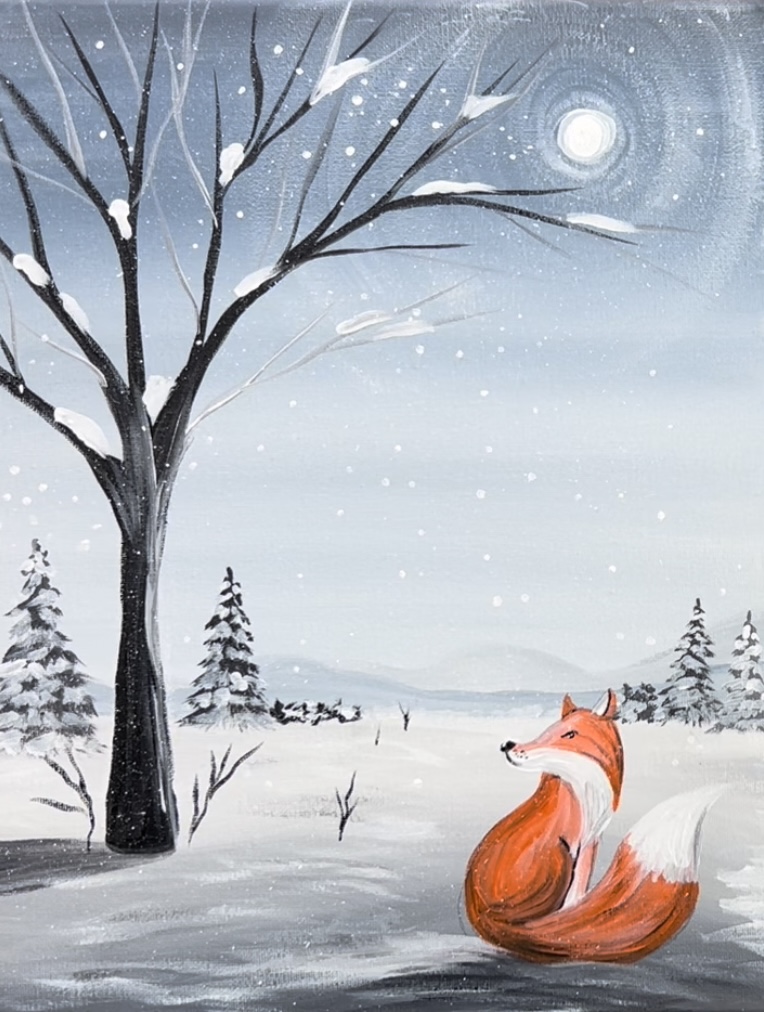
Learn how to paint a winter landscape with red fox. This acrylic painting tutorial utilizes a minimal color palette of only 4 colors. We will be blending different shades of gray to create the wintery scene.

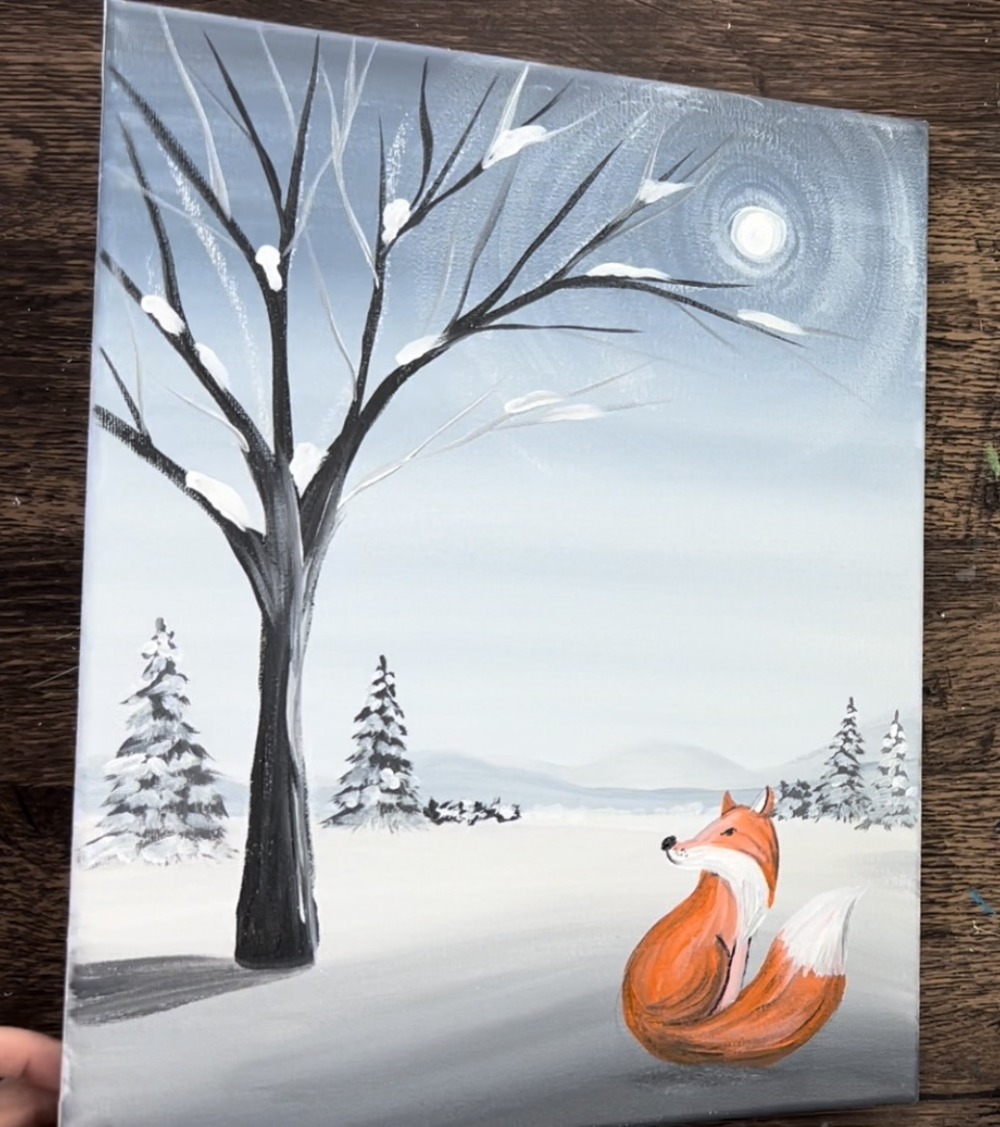
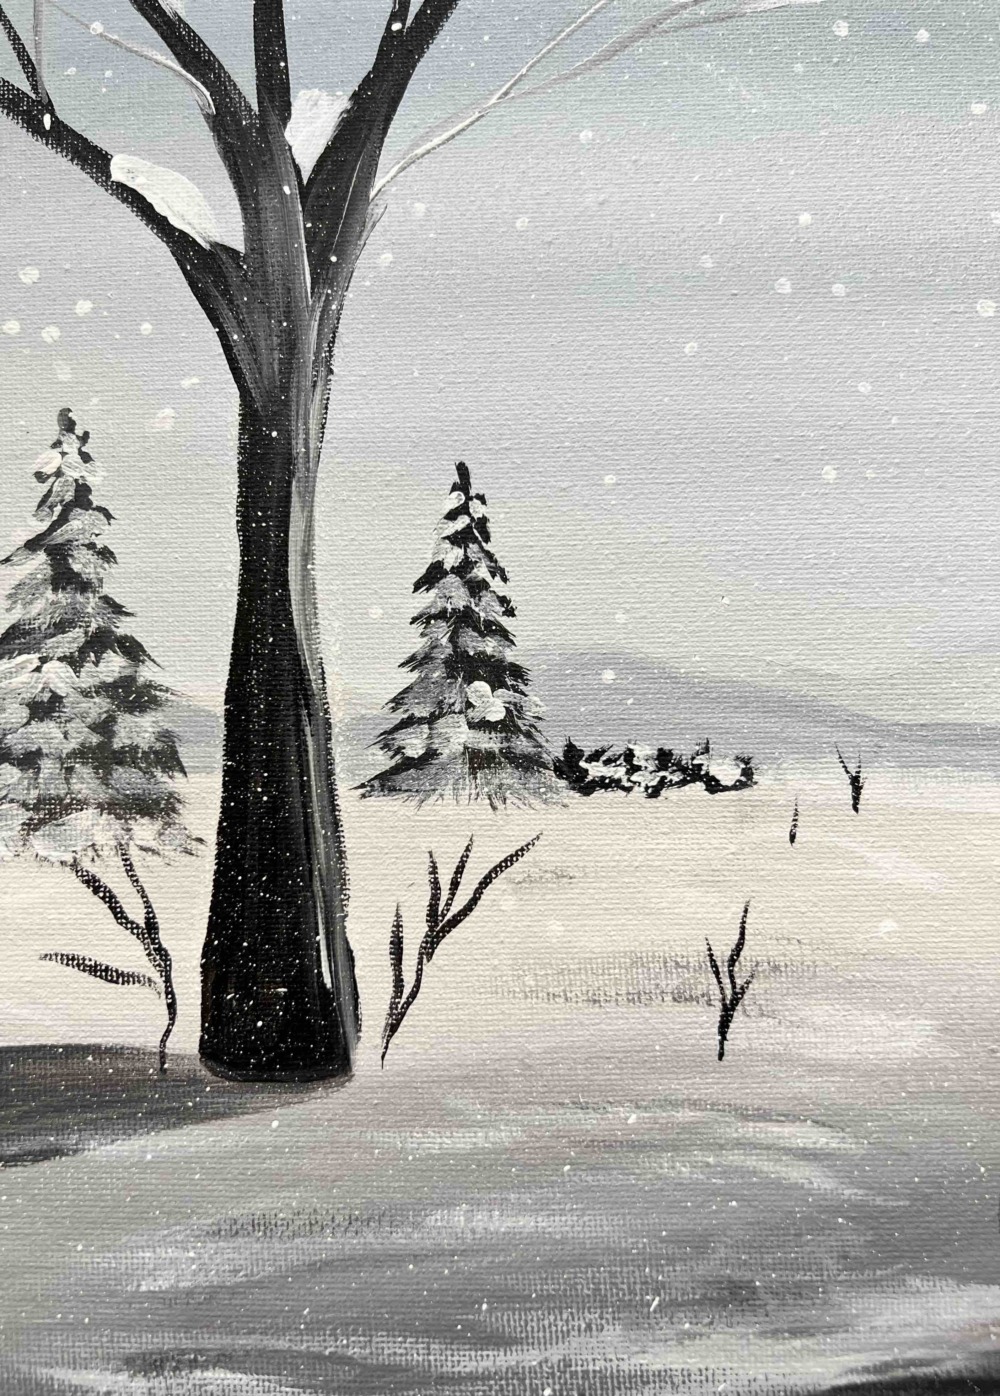
As an alternative, you can leave the painting blank without the fox for a simple winter landscape painting.
I will be showing you how to draw and paint the fox without a traceable template. You can also utilize the free optional traceable for this tutorial.
Enjoy and happy painting!
Materials
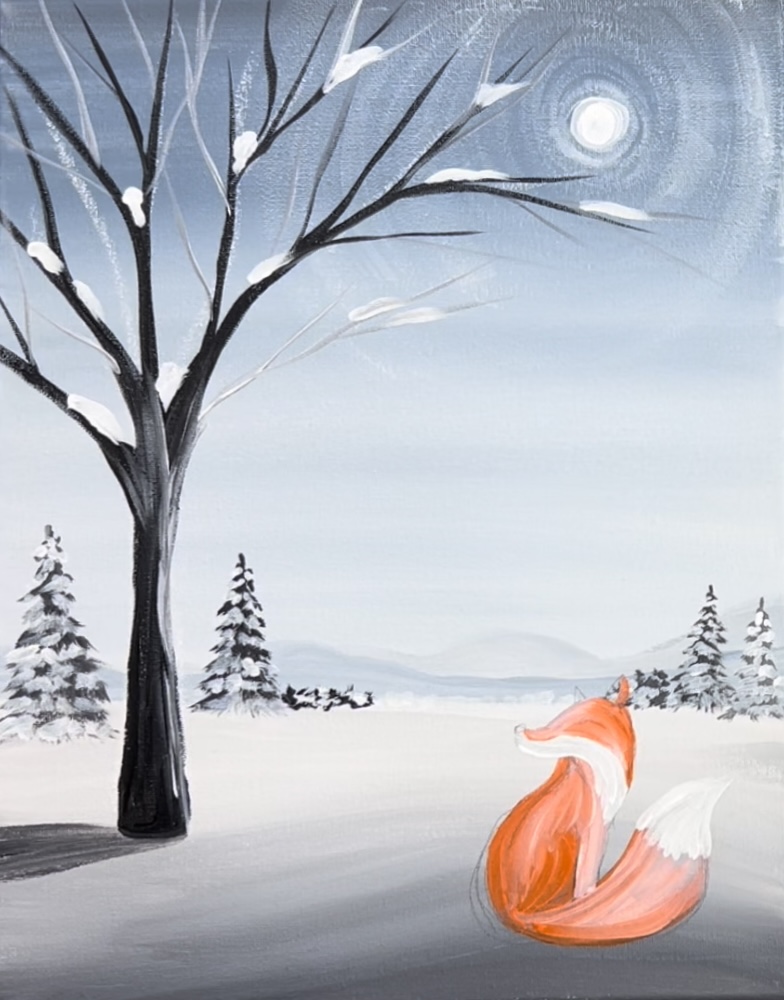
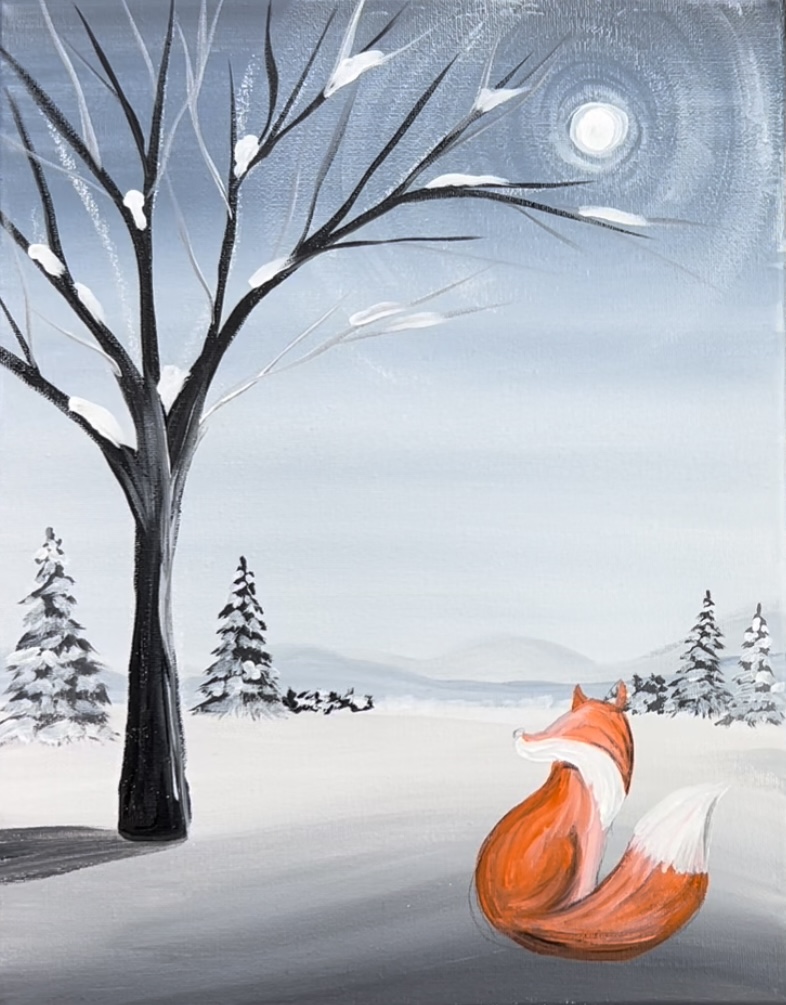
Fox Winter Scene
Learn how to paint a winter scene with a fox in this limited color pallete painting tutorial.
Materials
- 11 x 14 Canvas
- Acrylic Paint
- Paint Brushes
- Pencil
- Toothbrush for snow splatter
Colors
- Titanium White
- Mars Black
- Blue Gray
- Cadmium Orange Hue
Brushes
- 3/4 Flat Brush
- 12 Brush
- 4 Round
- Toothbrush
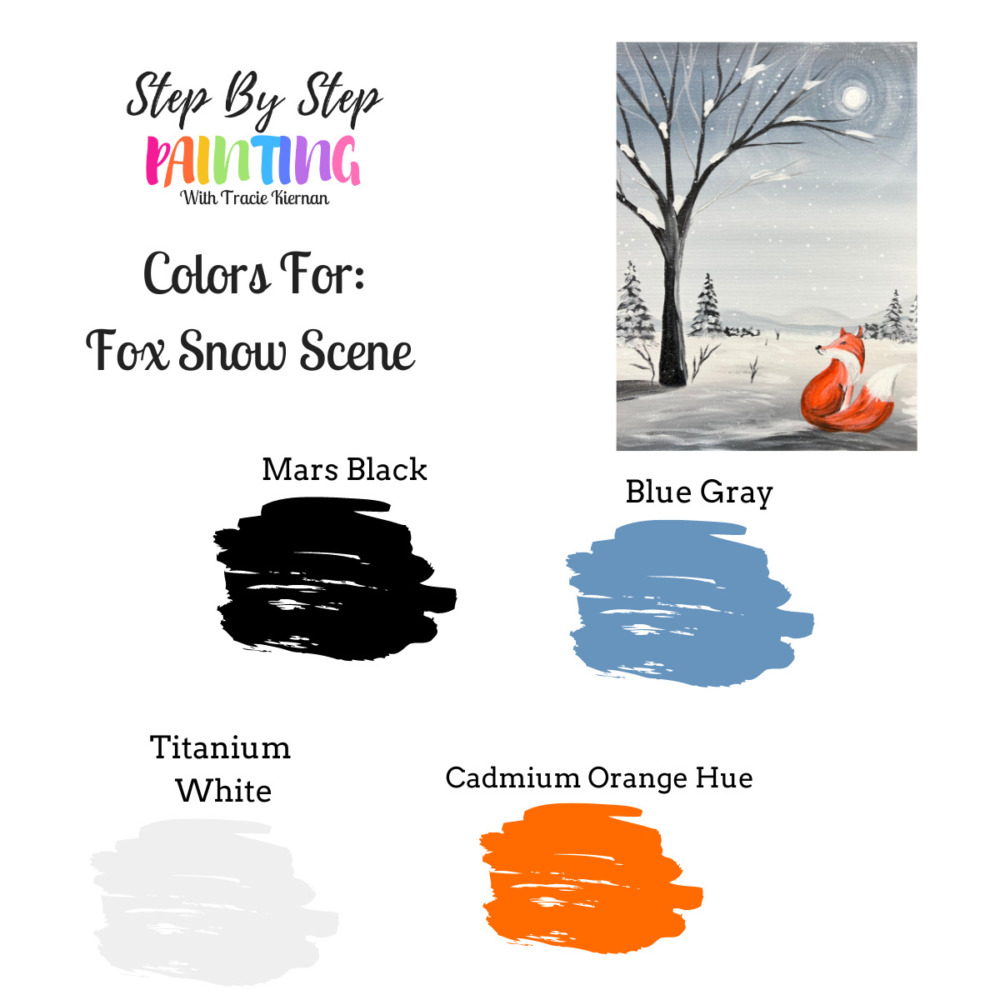
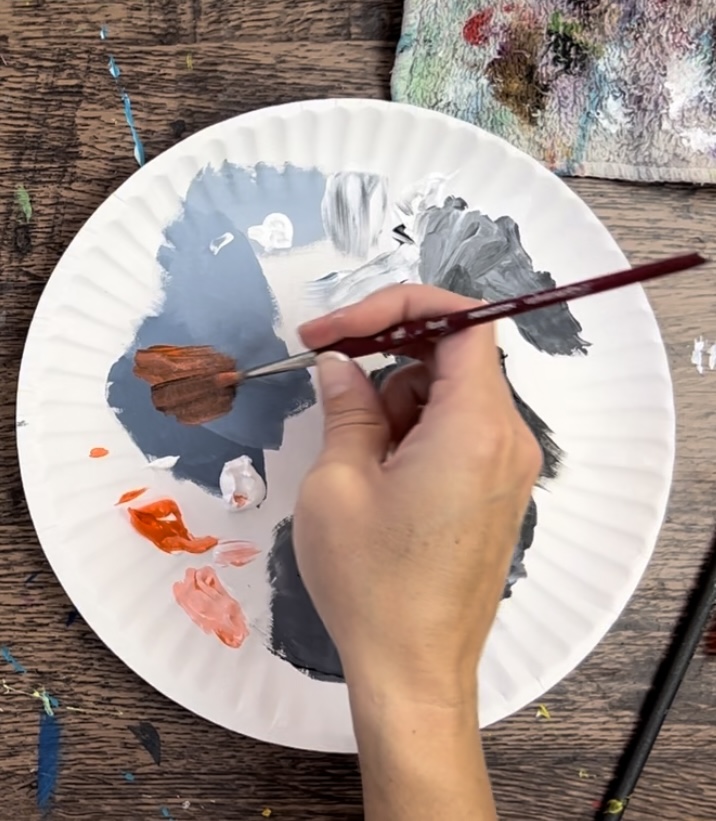
Color Palette
I used liquitex BASICS acrylic paints for this painting. If you are using a different brand, you can use the color chart below to help you match. Note: as an alternative to “blue gray”, you can use “neutral gray value 5” and add a tiny bit of ultramarine blue into it.
Using Craft Paints?
Craft paints can be used for this tutorial. They are acrylic paints but more watered down and may blend differently. If you want to use craft paints, such as the Apple Barrel Craft Paints, I would recommend subbing to these colors:
- Snow White
- Black
- Pewter Gray (mix a little bit of blue into it)
- Jack O Lantern
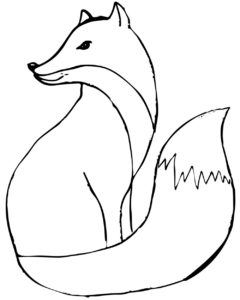
Optional Traceable
This fox traceable is optional. The tutorial is demonstrated without using the traceable template, however, you are welcome to use the fox drawing below to help you transfer to the canvas.

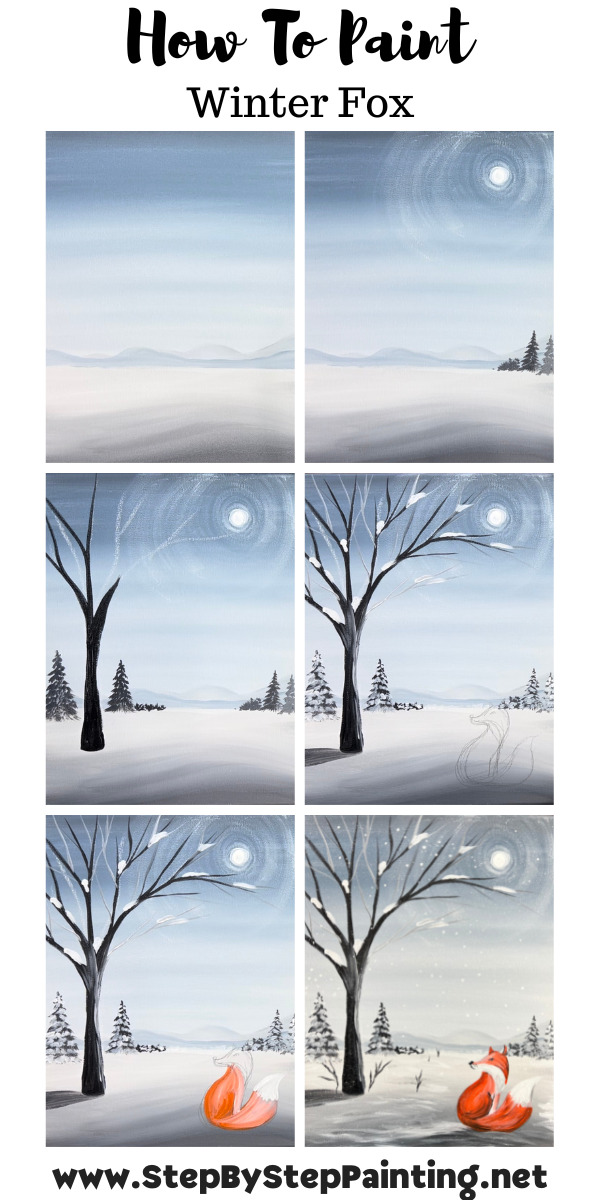
Directions At A Glance
Video
Step By Step Instructions
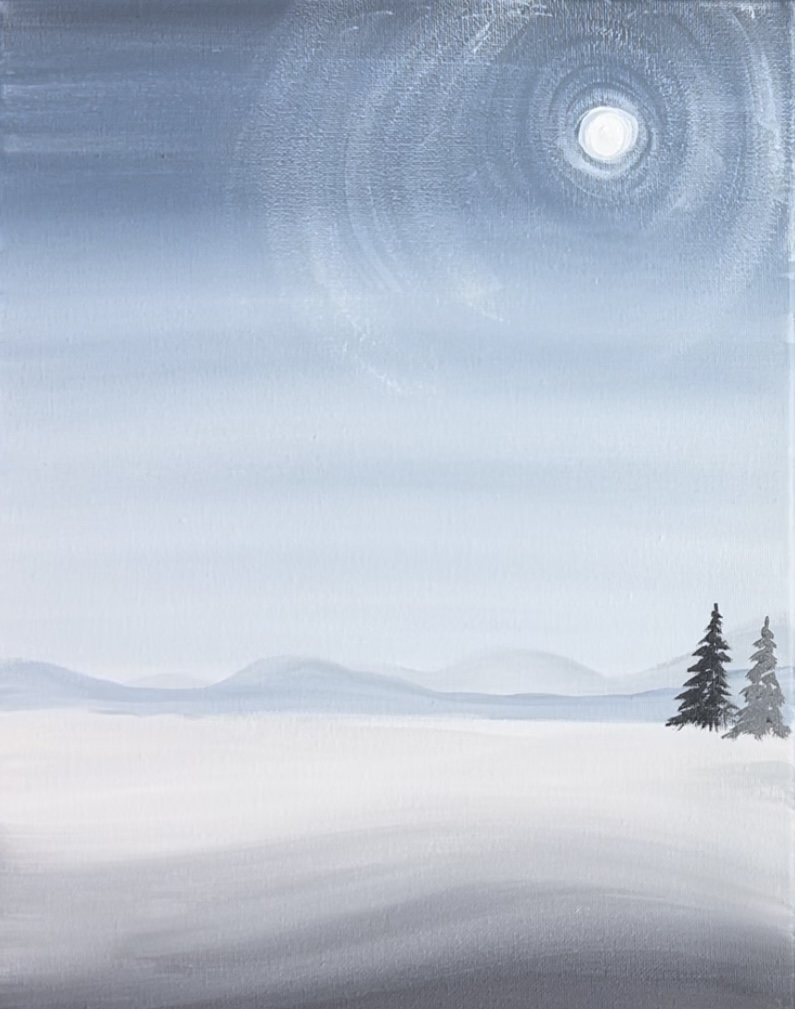
1. Paint the sky
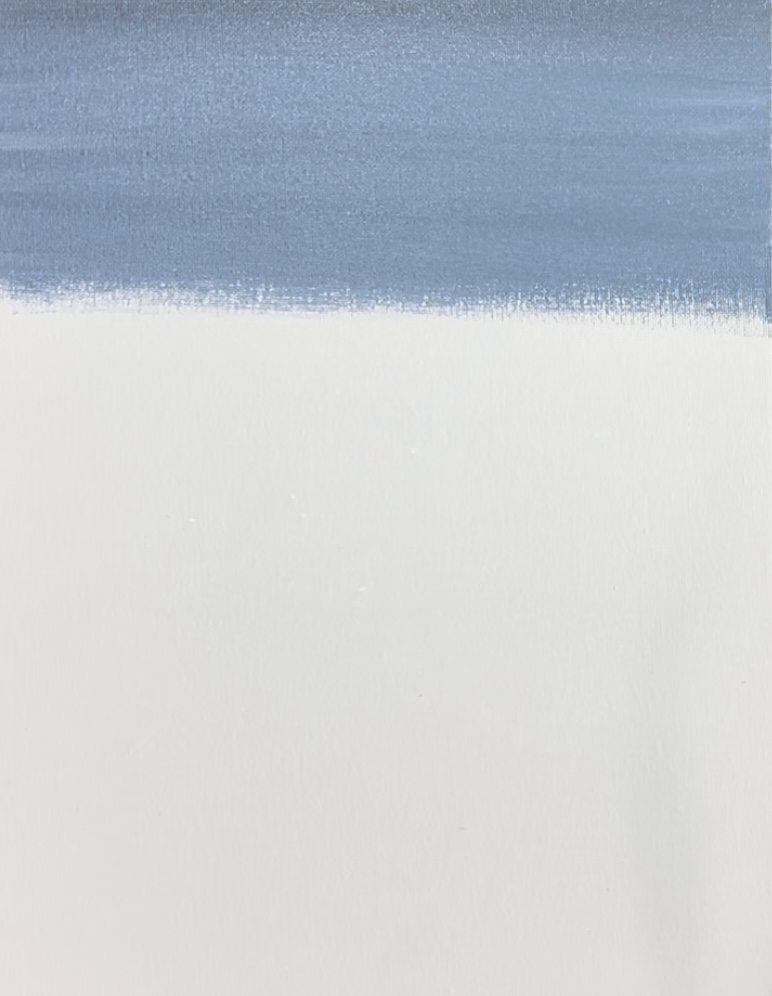
This sky is a blended sky that is darker on the top and lighter on the bottom. You will be painting this gradient with left and right strokes and going down 10″ (leaving 4″ of space on the bottom).
Load your palette with the colors: blue gray, mars black and titanium white.
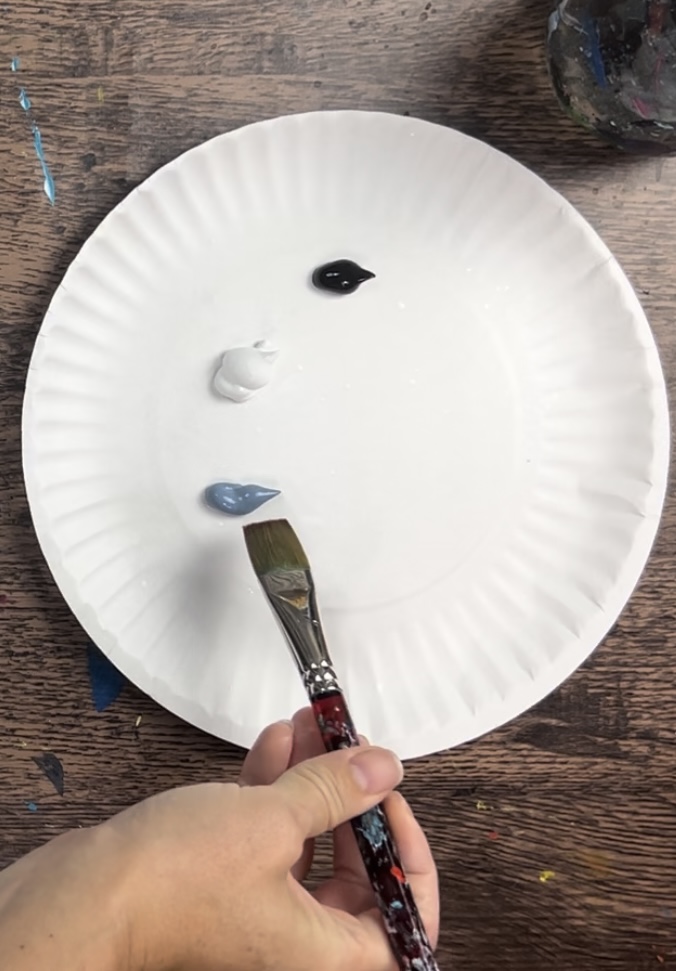
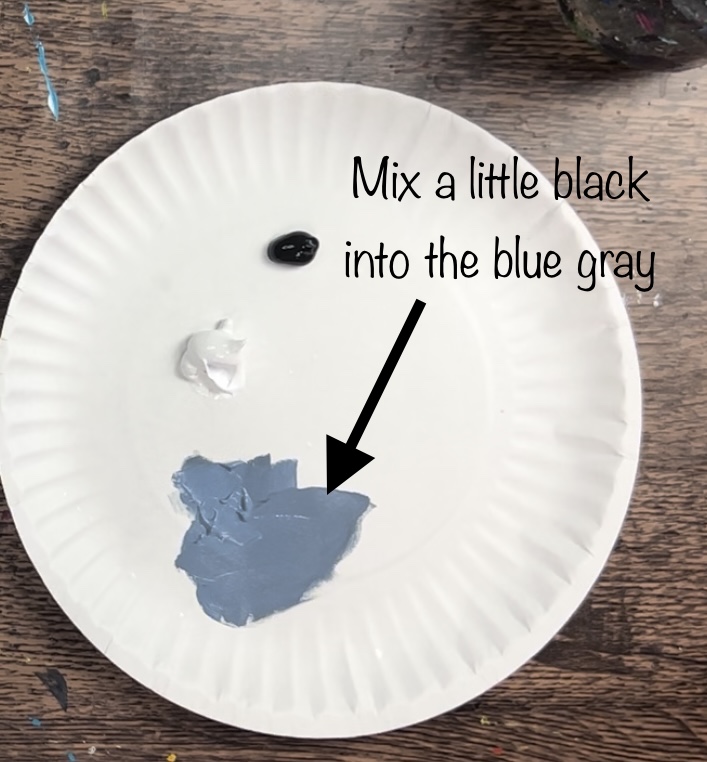
Use a 3/4″ flat wash brush and mix a small amount of black into the blue gray so that it becomes 1-2 shades darker.
Start on the top of the canvas and paint left and right strokes. Go down about 3-4 inches with this medium blue gray color.
Then, without rinsing your brush, load it into titanium white. Gently blend the white up into the blue gray. Then paint this white down the canvas so your sky gets lighter as you work your way down. Continue to paint this in left and right, full width strokes.
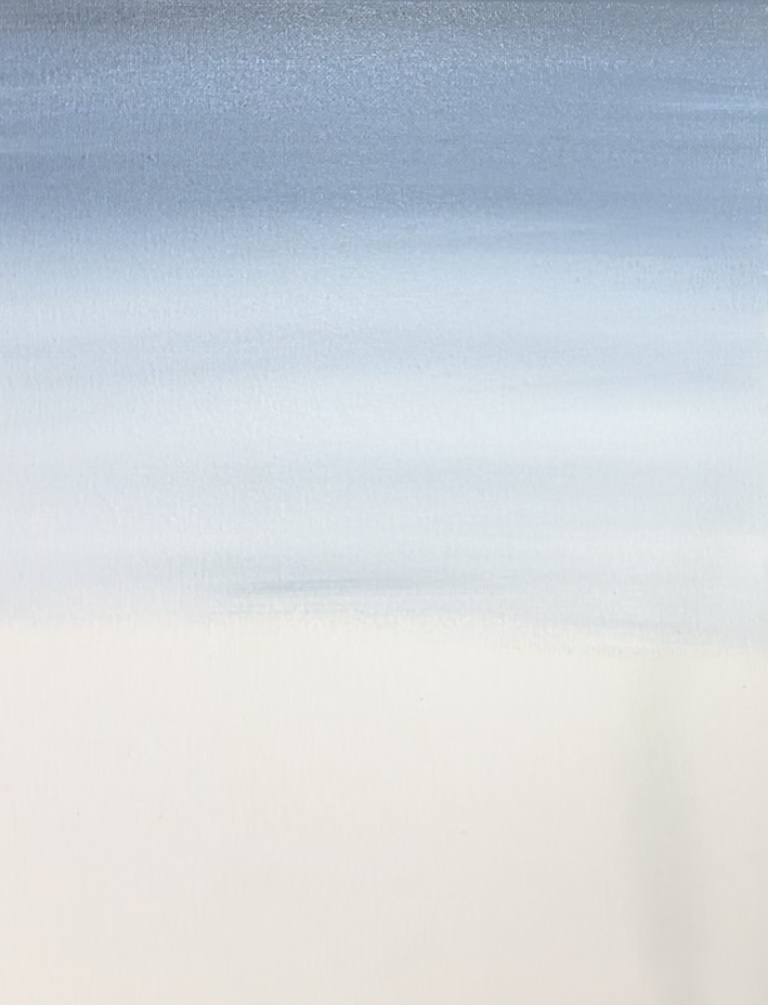
Measure about 4″ from the bottom of the canvas. This is how far you will be going down with the sky. Continue to add more white until you get to this point.

2. Paint The Snow
The colors mars black and titanium white are to be used for the snow. Start on the bottom of the canvas. Mix about 3 parts white to 1 part black to make a medium to dark gray.

Use your 3/4″ flat wash brush to paint a hill area on the bottom. This will be the shadowy part of the snow.
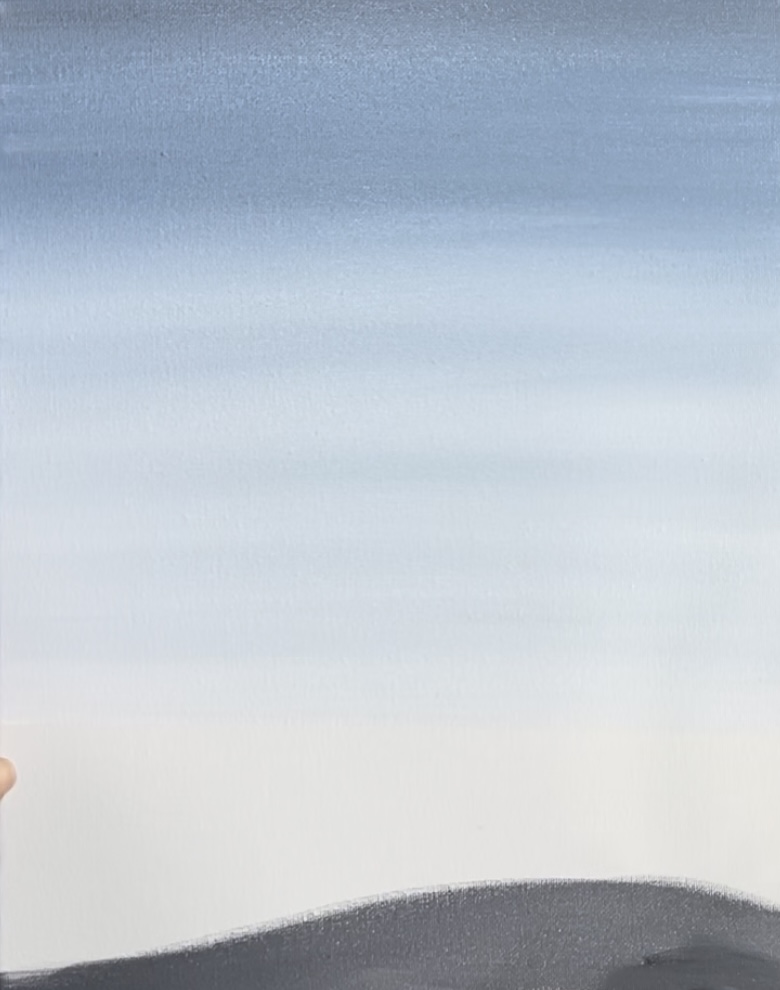
Then blend titanium white into that dark gray color.
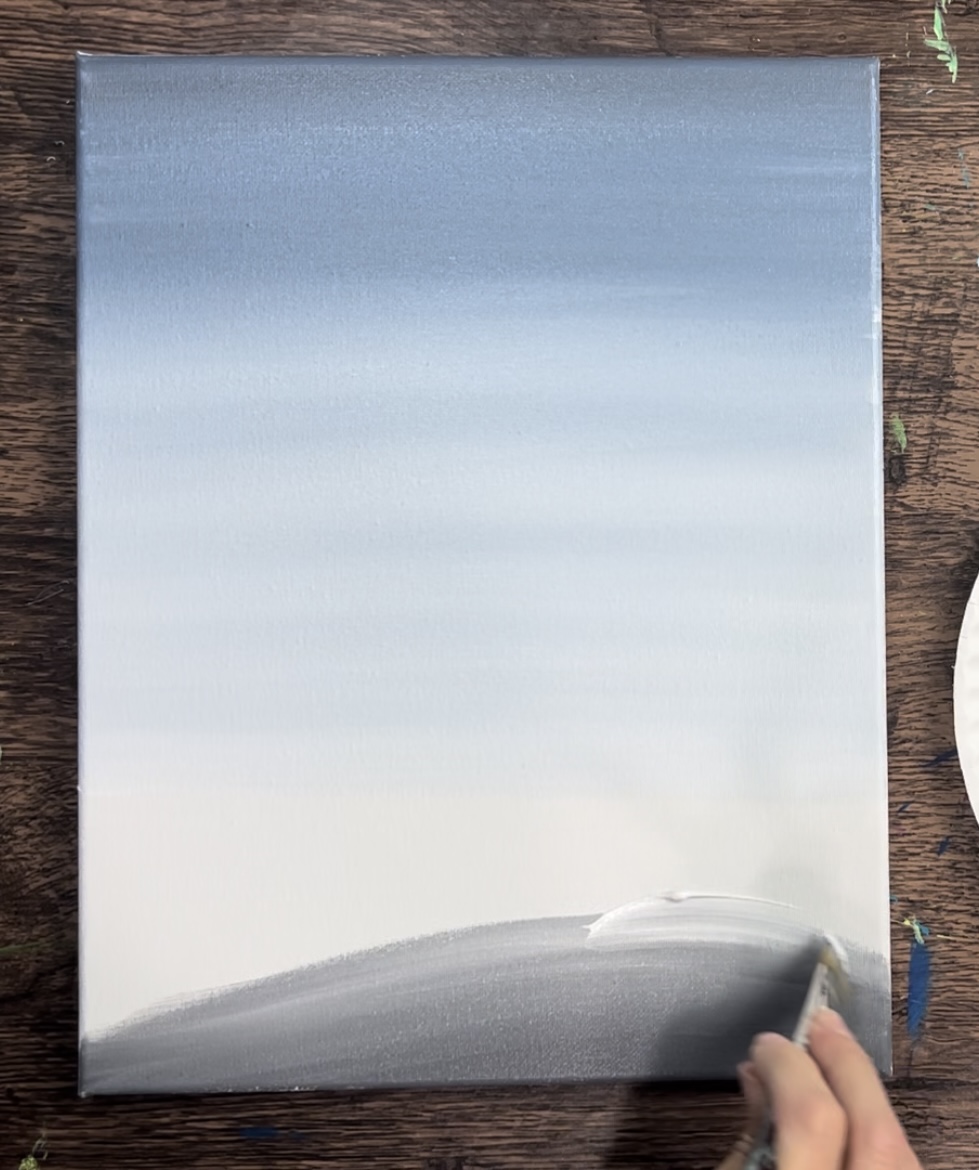
Continue to paint in long, wavy strokes blending your gray with the white. Add more white to your brush as you work your way up. Your ground snow area will be dark on the bottom and light on the top.
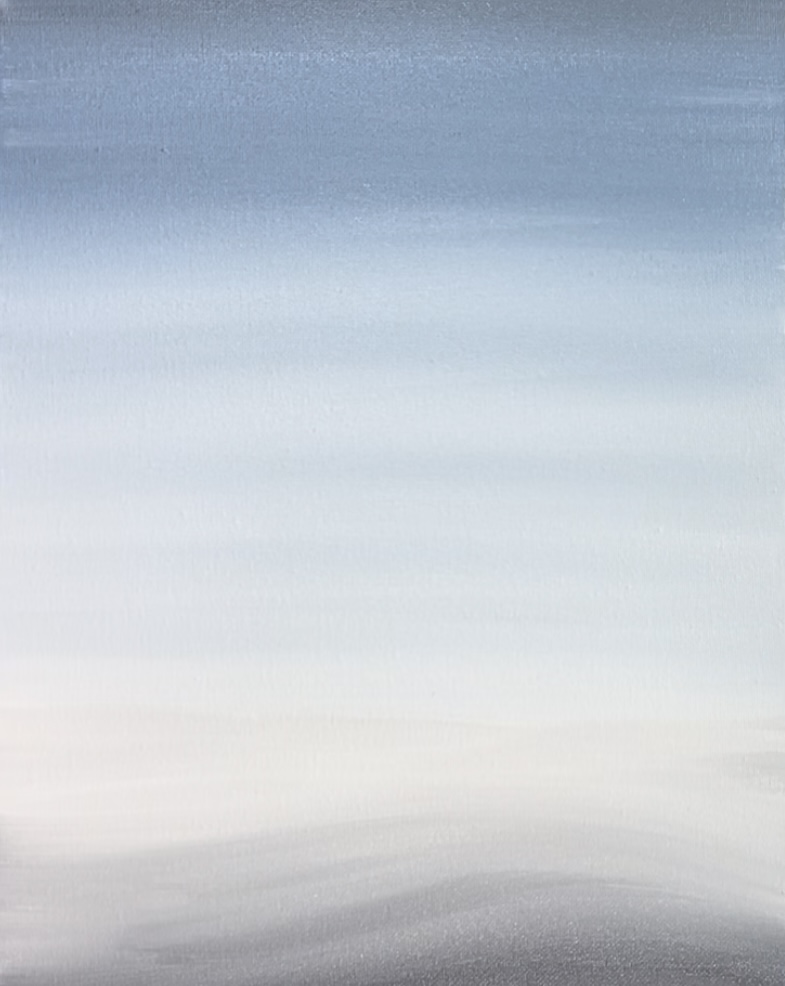
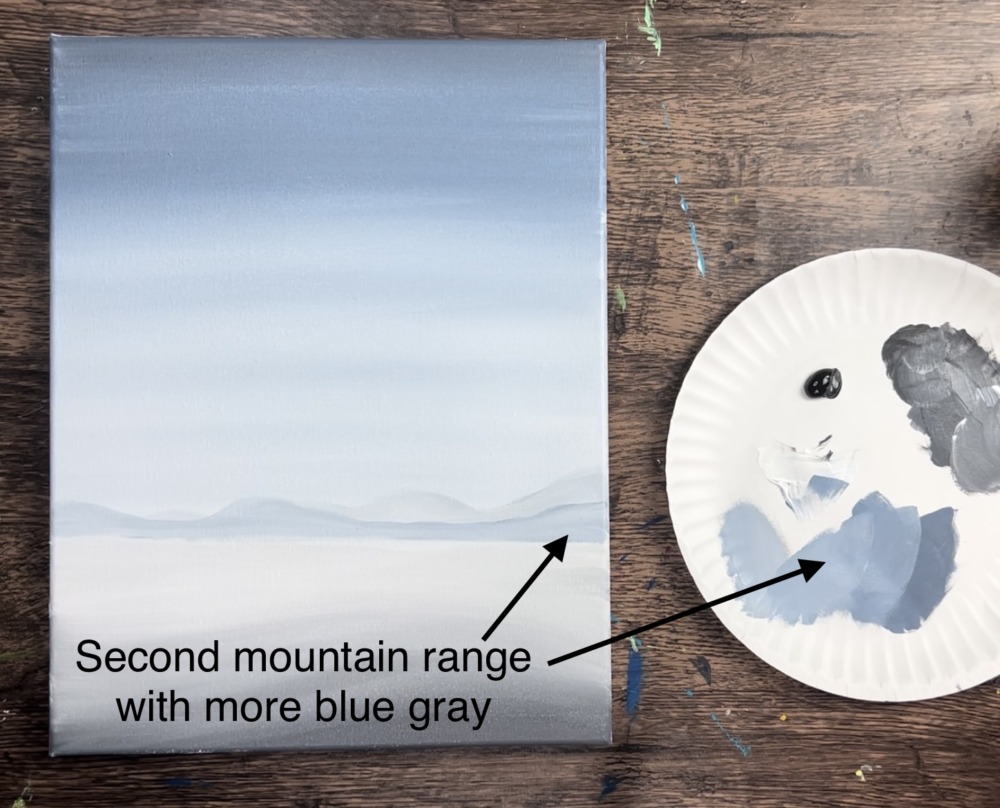
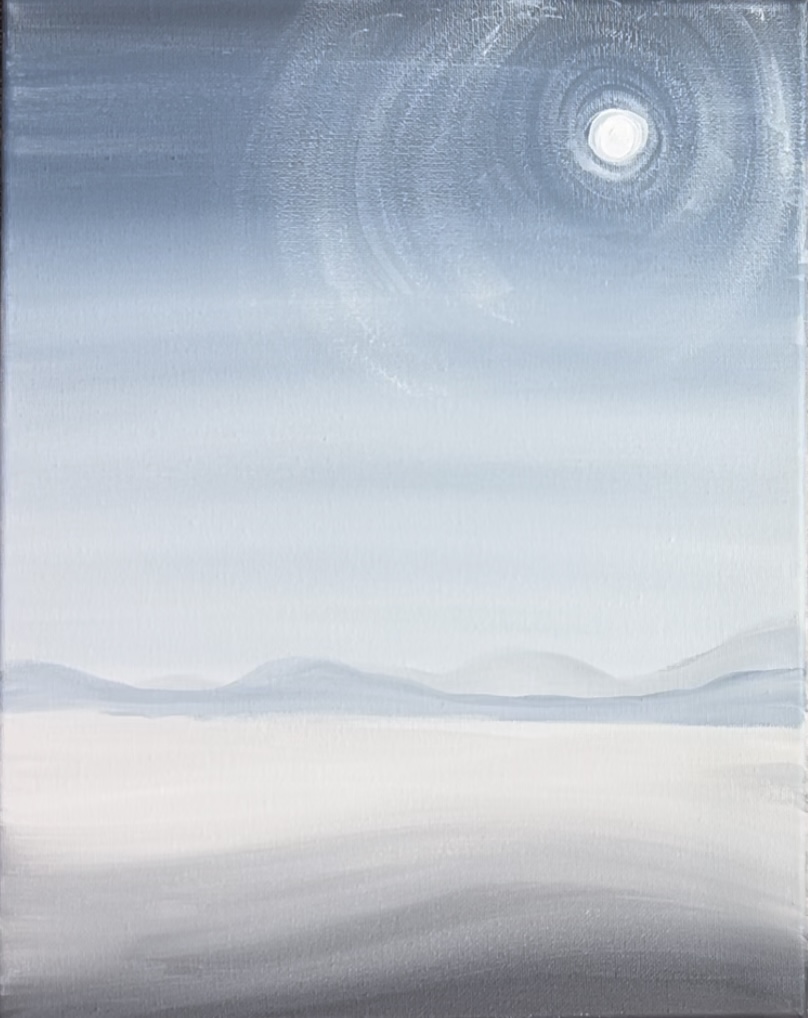
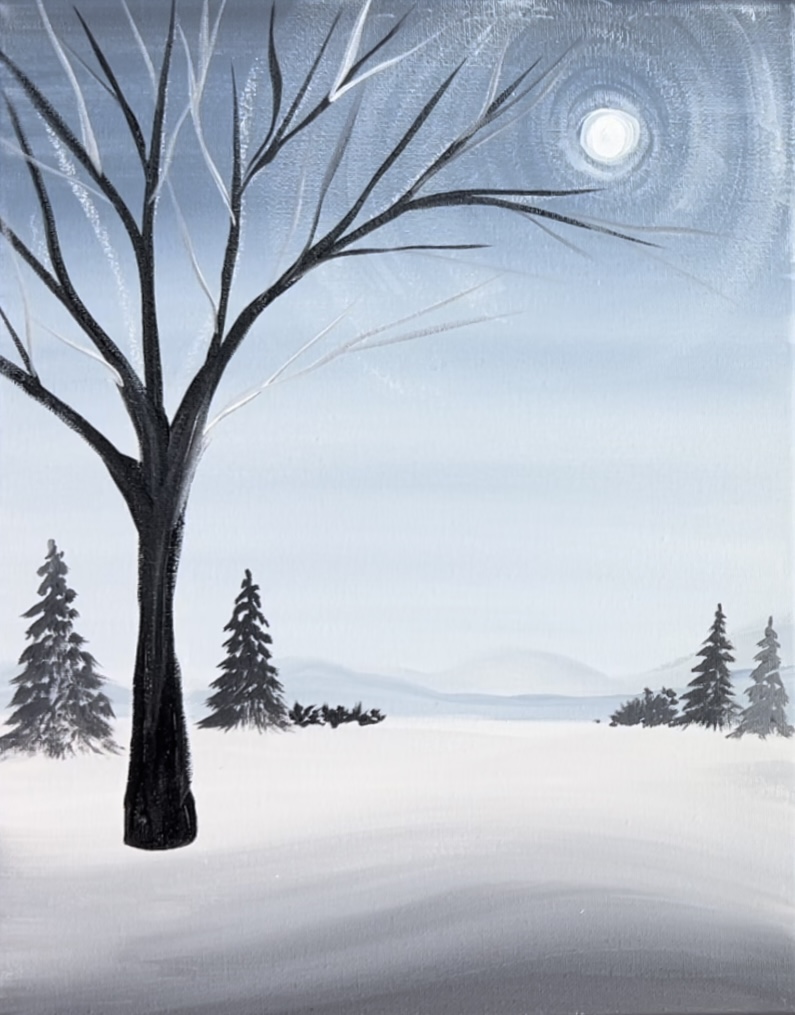
3. Paint Distant Mountains
Use your 3/4 flat wash brush to paint two levels of mountain ranges above your “horizon line”. Note: Your horizon line is the line that divides the sky and land.
Mix a light gray by mixing about 4 parts white to 1 part blue gray. Paint this light colored mountain range across this horizon line. The peaks of these mountains are not very high and go about 1″ at their highest peak. Paint them in solid using the 3/4″ flat wash brush.
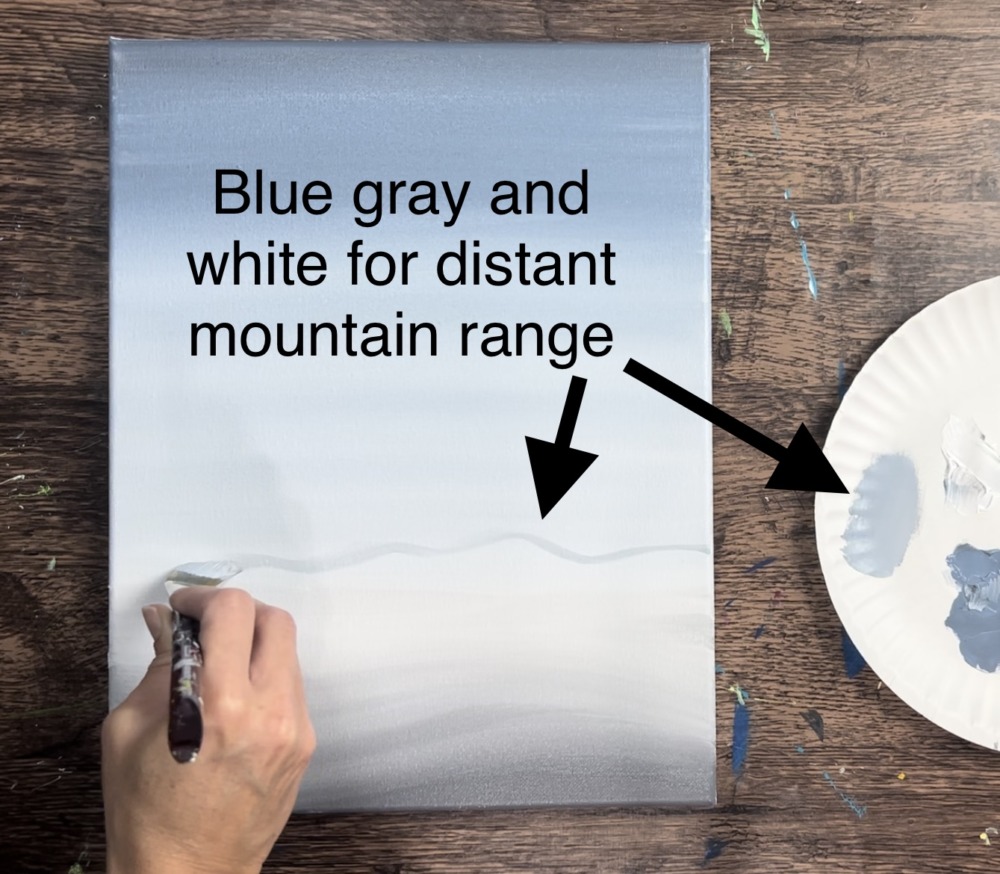
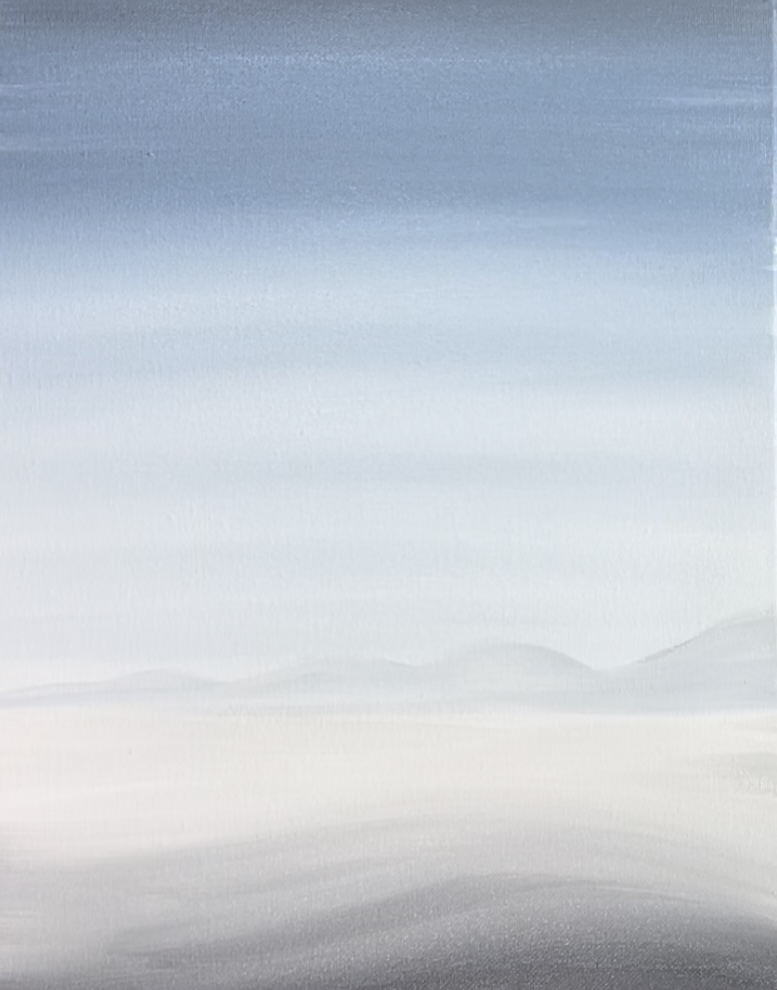
Then mix a slightly darker shade of that gray by adding a small amount of blue gray into it. Paint this second level of mountain range in front of the previous mountain range.
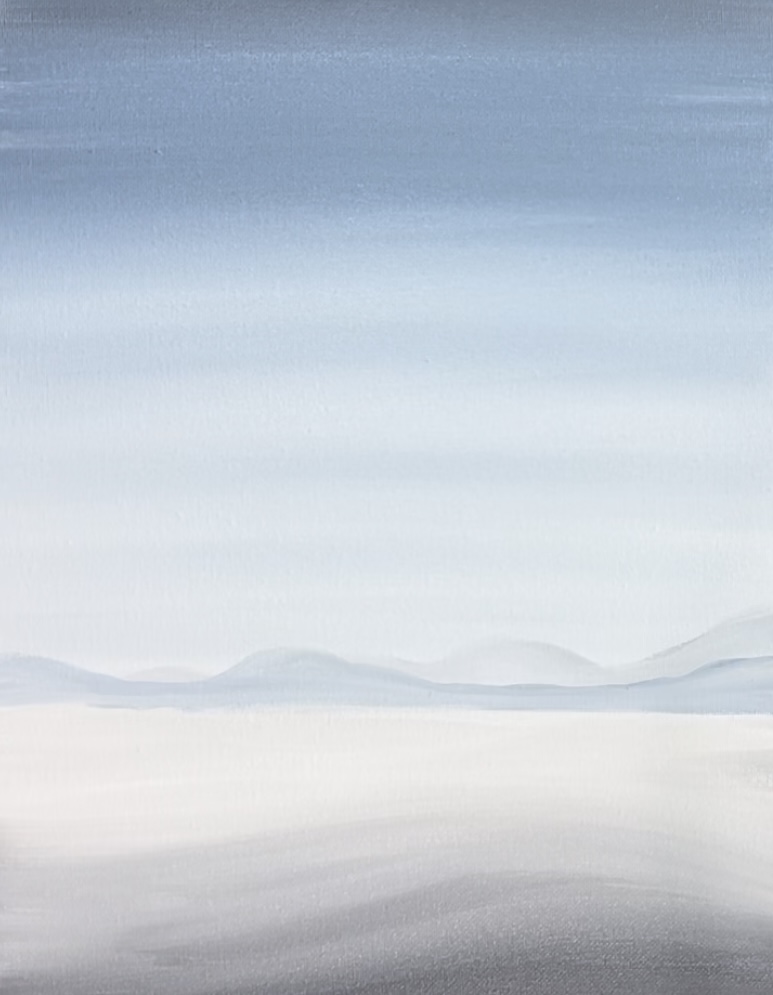
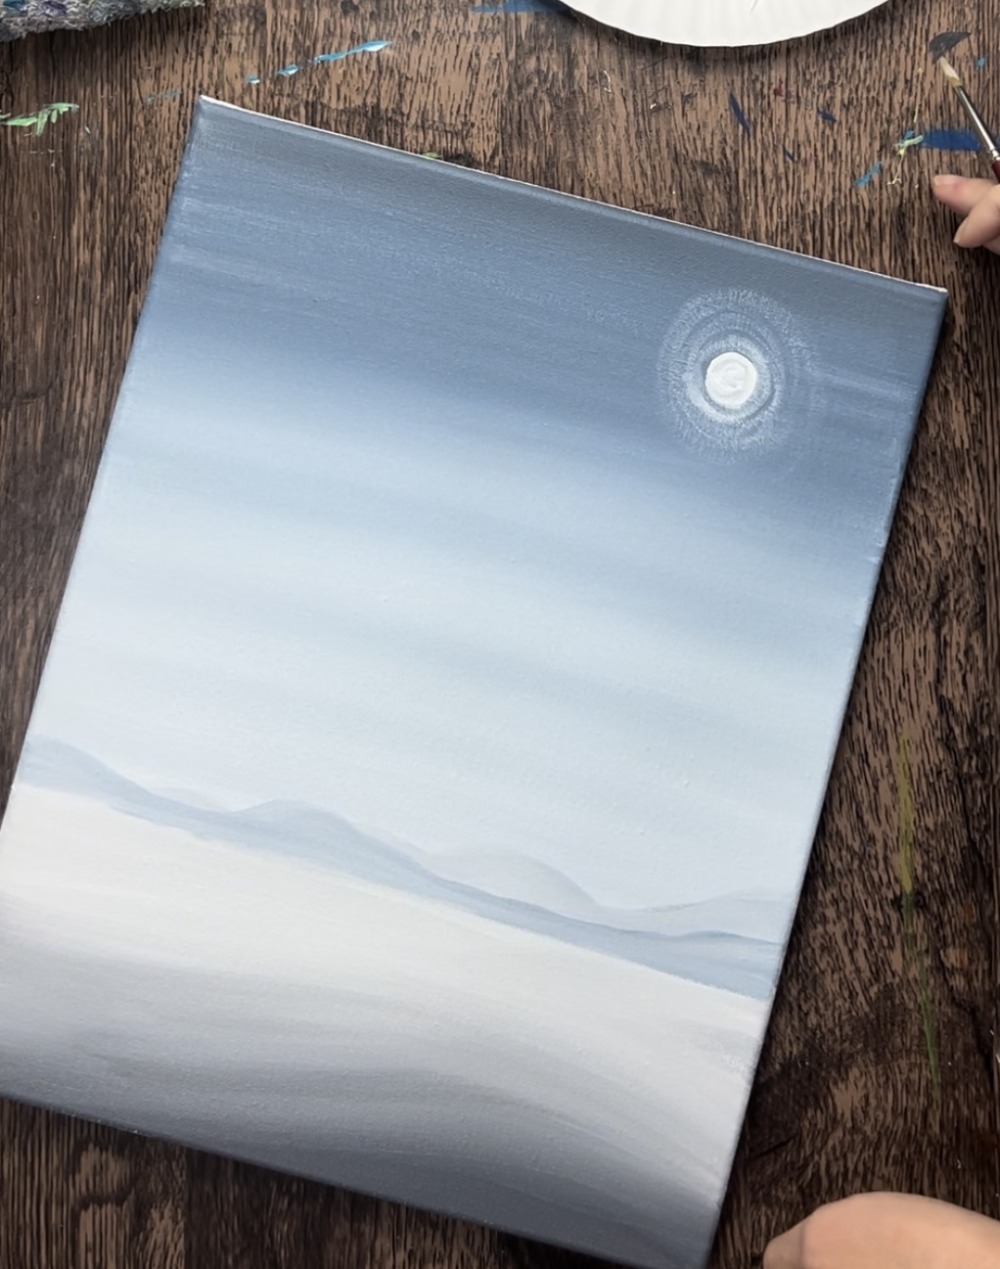
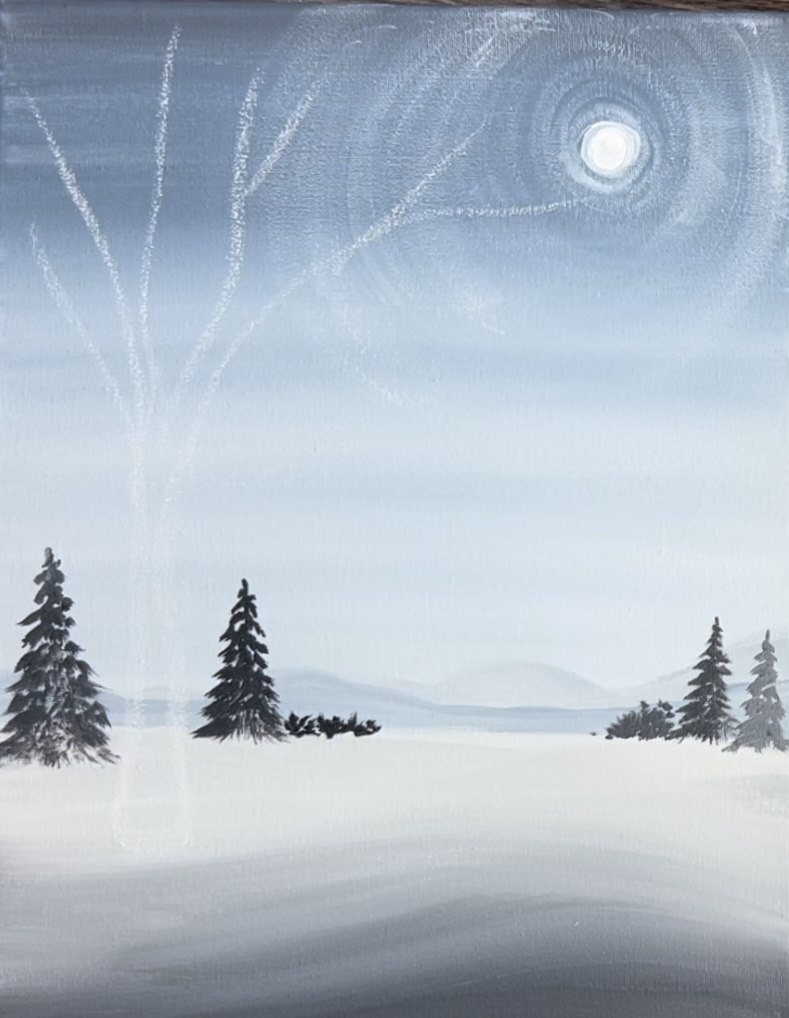
4. Paint Moon
Use your #4 round brush and titanium white to paint a moon. Paint a small circle in the upper left part of the canvas.
Then “dry brush” moon beams around the moon. Load your brush in titanium white and then wipe it off so only a small amount of paint is on the brush. Then paint dry brush strokes around the moon.
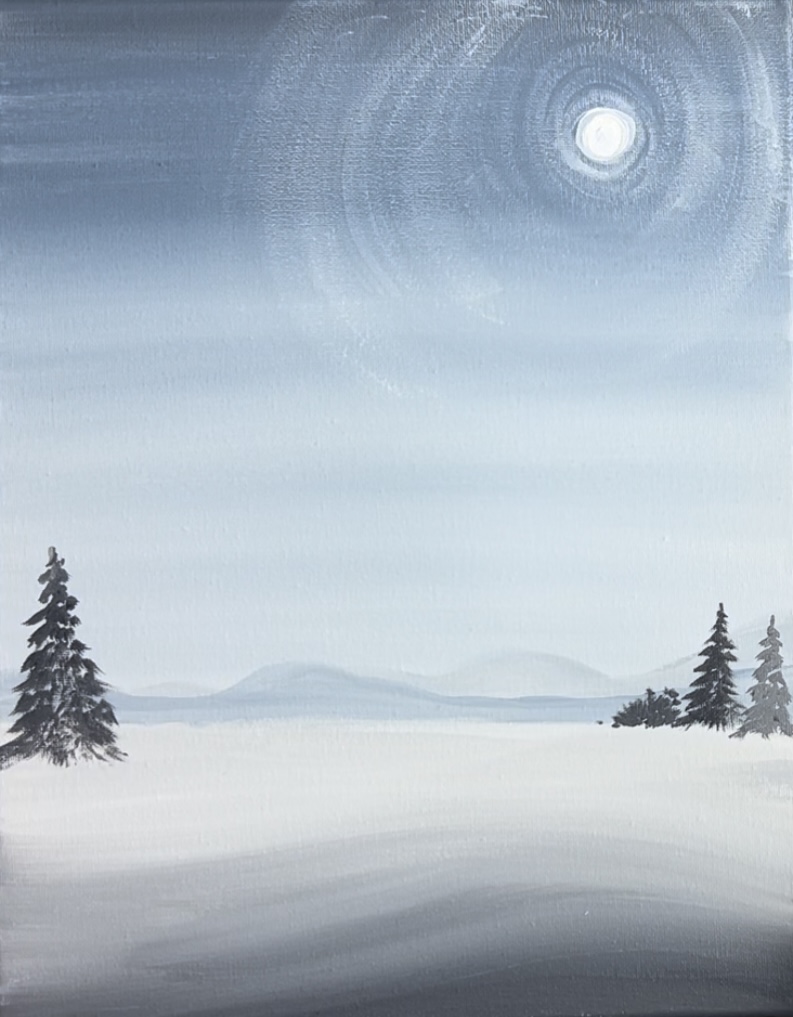
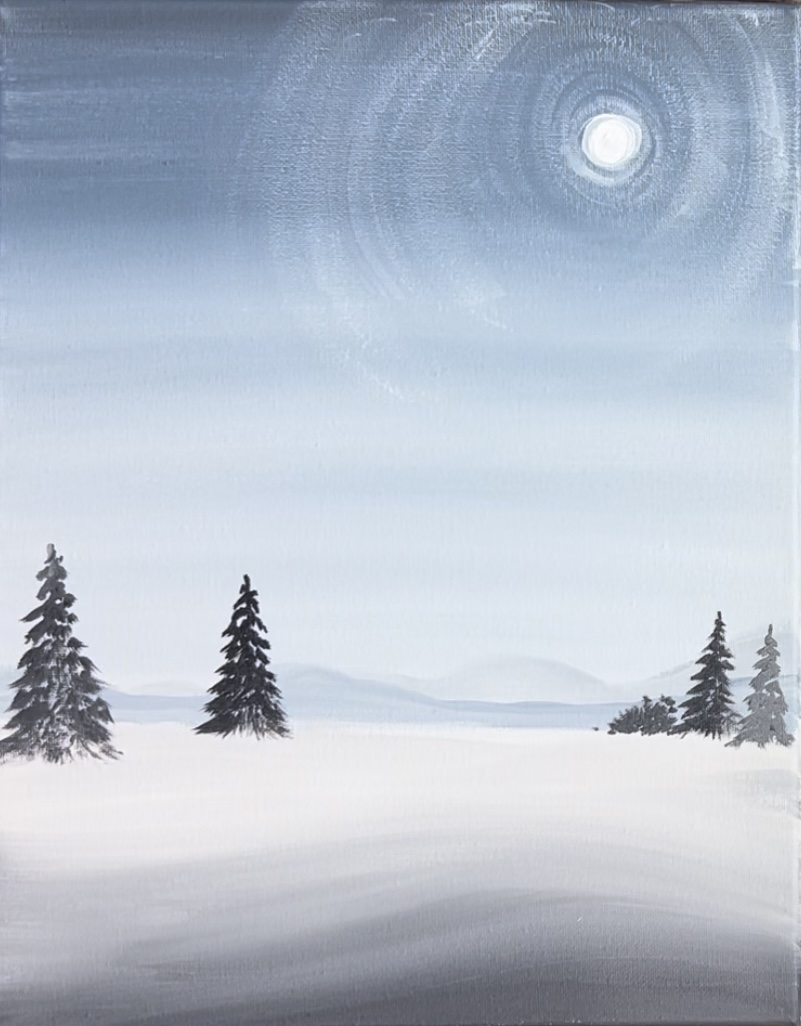
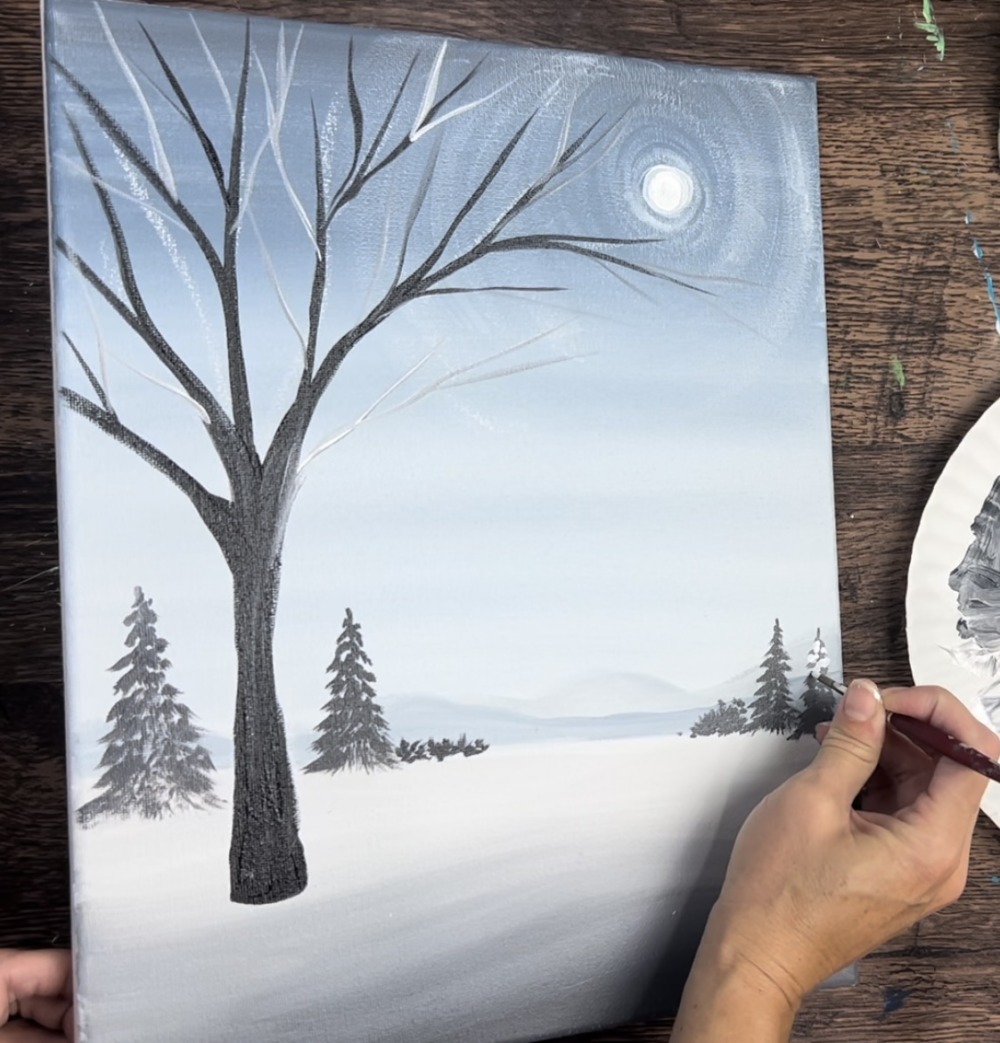
5. Paint Pine Trees
Use a #4 round brush to paint your pine trees. Load the brush in mars black black slightly watered down with water. Start at the top of the tree and stroke down forming a conical tree shape.
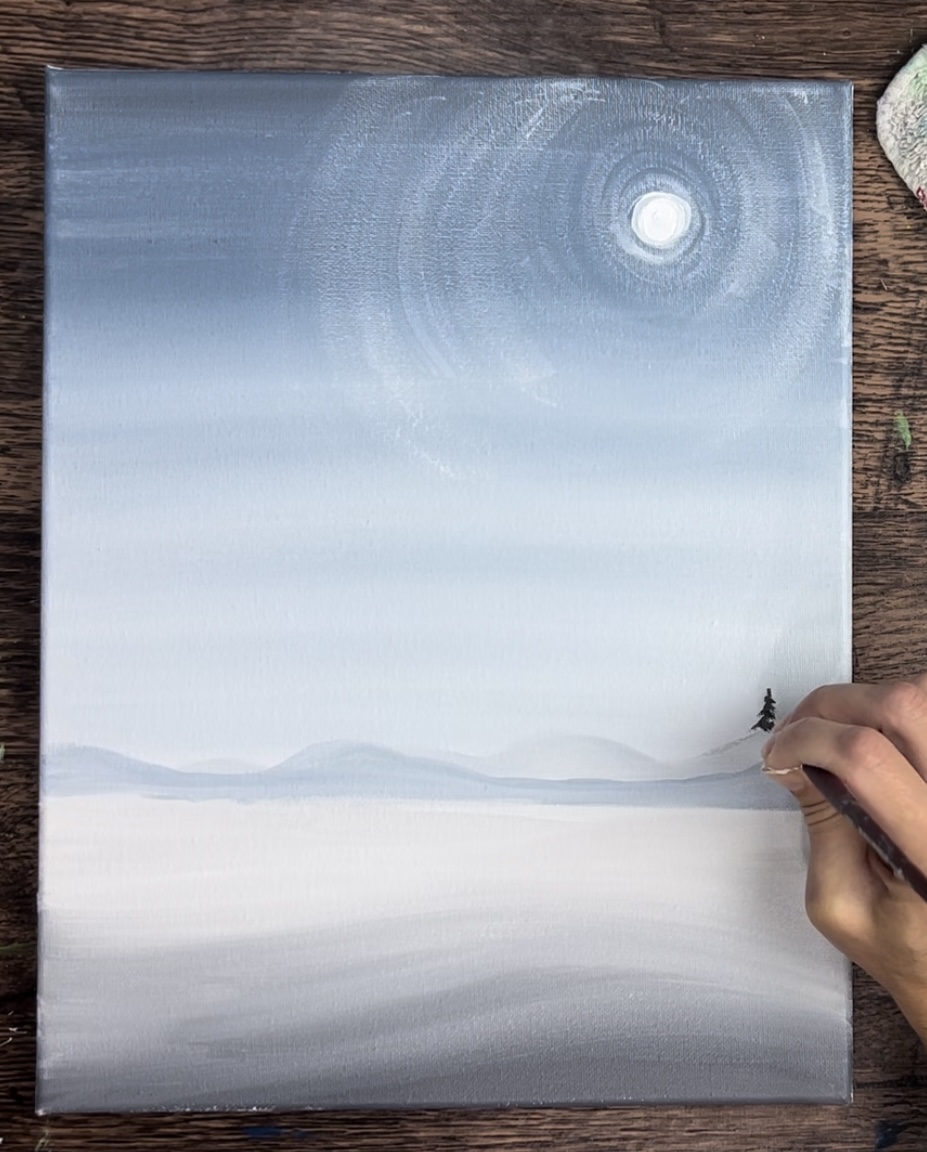
This tree is small. It’s top peak is not much higher than the mountain peaks and its base is just slightly under the horizon line.
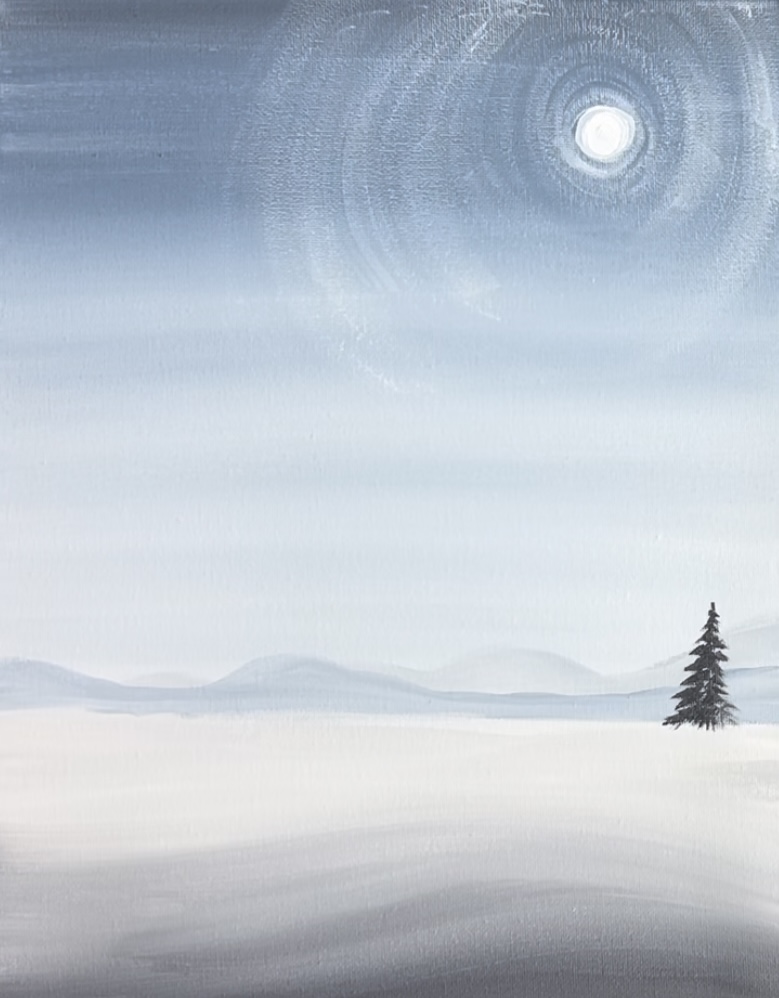
Paint additional trees. You can add more white to your brush to vary the color of the trees. Some are dark gray, some are a light to medium gray.
You can also use your round brush to paint small bushes in the distance with the same grays you are using for the trees.
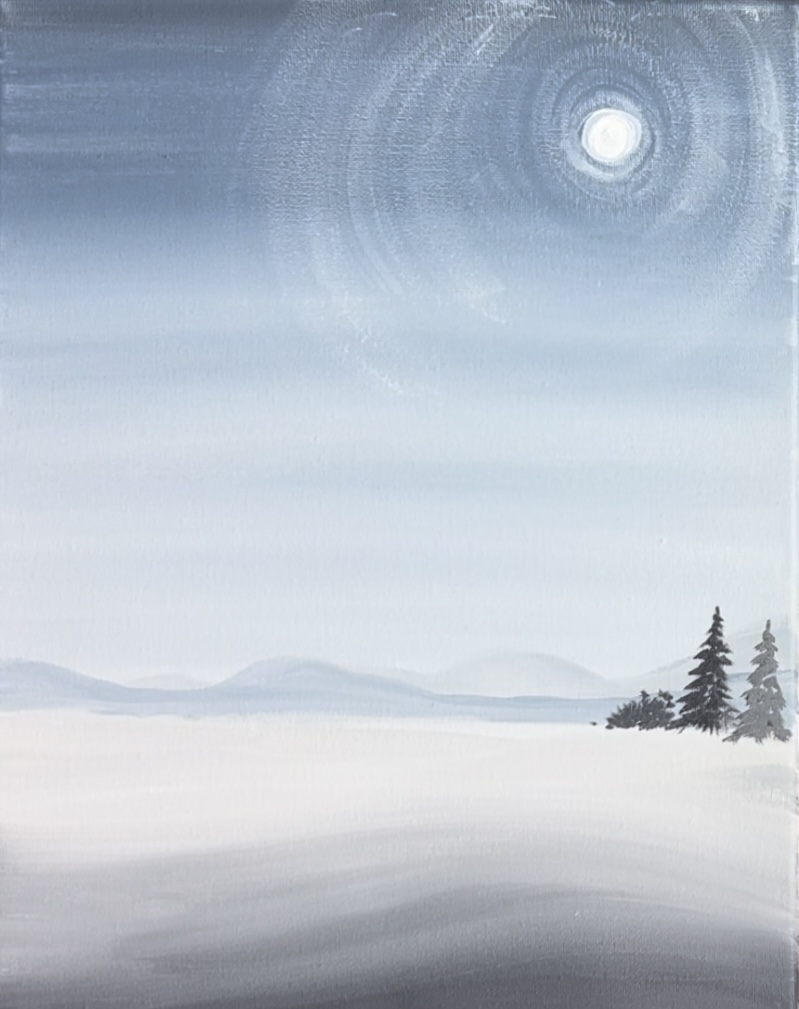
Paint a fee larger pine trees on the right. Keep in mind there will be a large branch tree in the left side of the landscape as well as that fox so make sure you leave enough space for them.

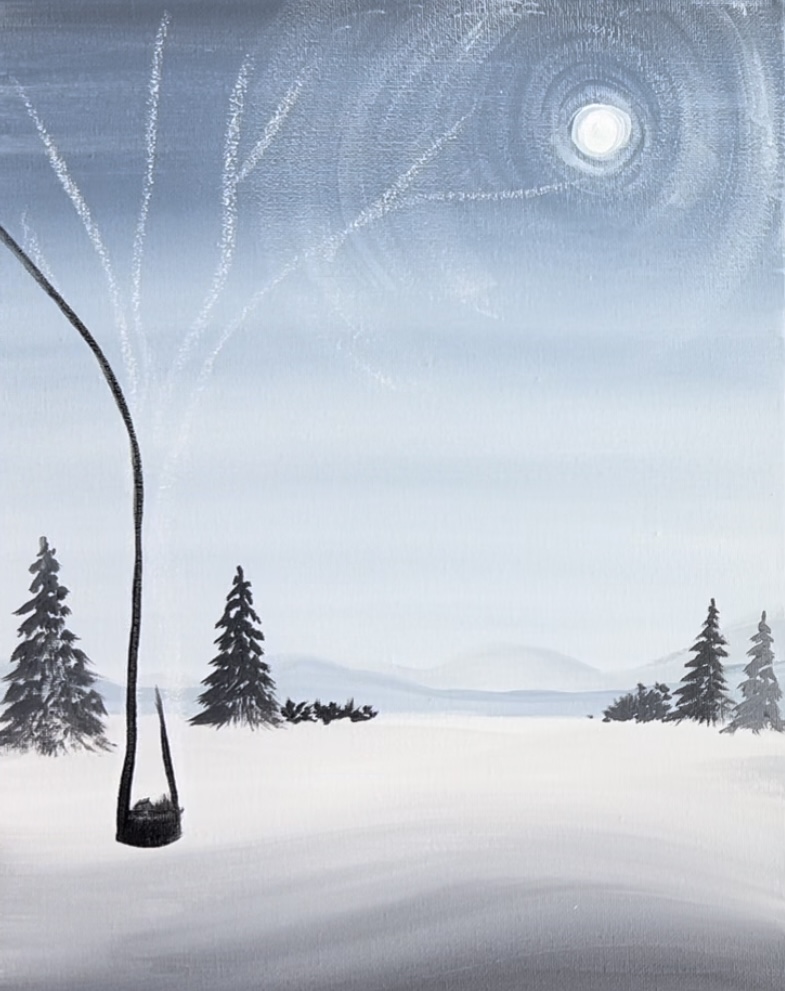
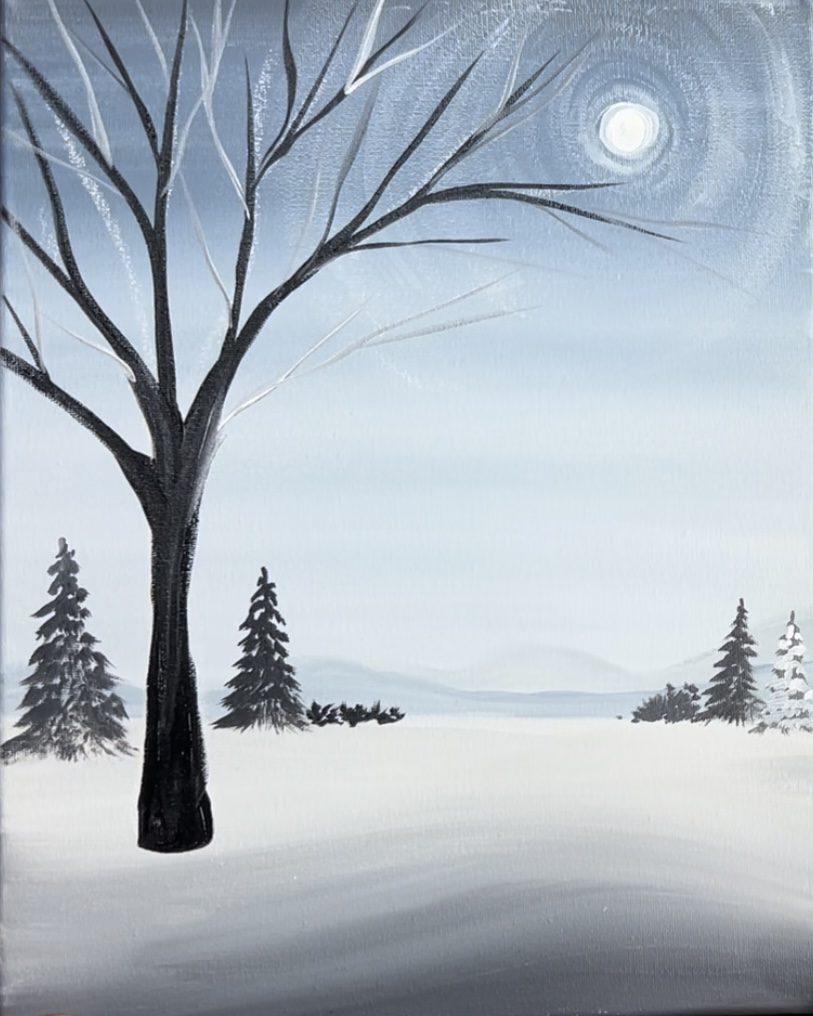
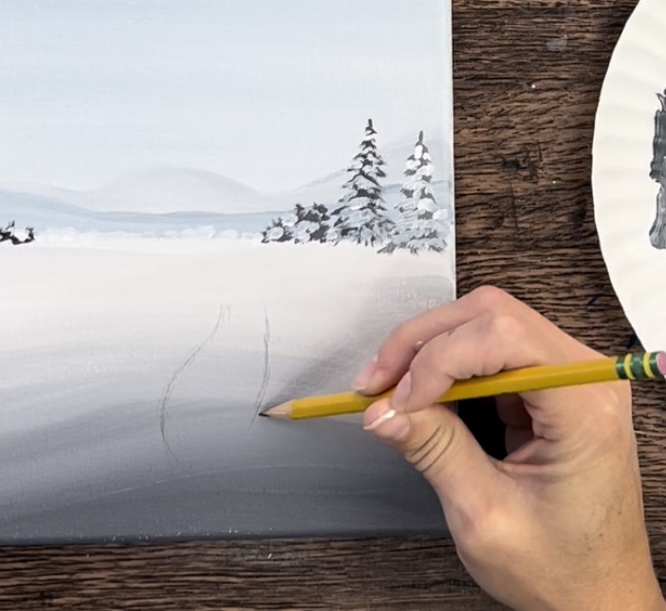
6. Paint Large Tree
I recommend you draw the large branch tree out with a piece of chalk first so that you can get the size and placement of it. Draw the trunk of your tree so that the base is about in the middle of the snow area.
Then draw large branches that go to the top edge of the canvas and smaller branches that cover almost half of the sky. Make sure your branches are going around the moon.
Next paint the tree. I used a 12 bright flat brush for this tree. You can, however, use whichever brush you feel most comfortable painting tree branches with. slightly water down some mars black. Start by painting the trunk outline of the tree using the tip of your bright brush.
Then fill the tree in solid with black. Use the tip of your brush to paint the smaller part of the branches.
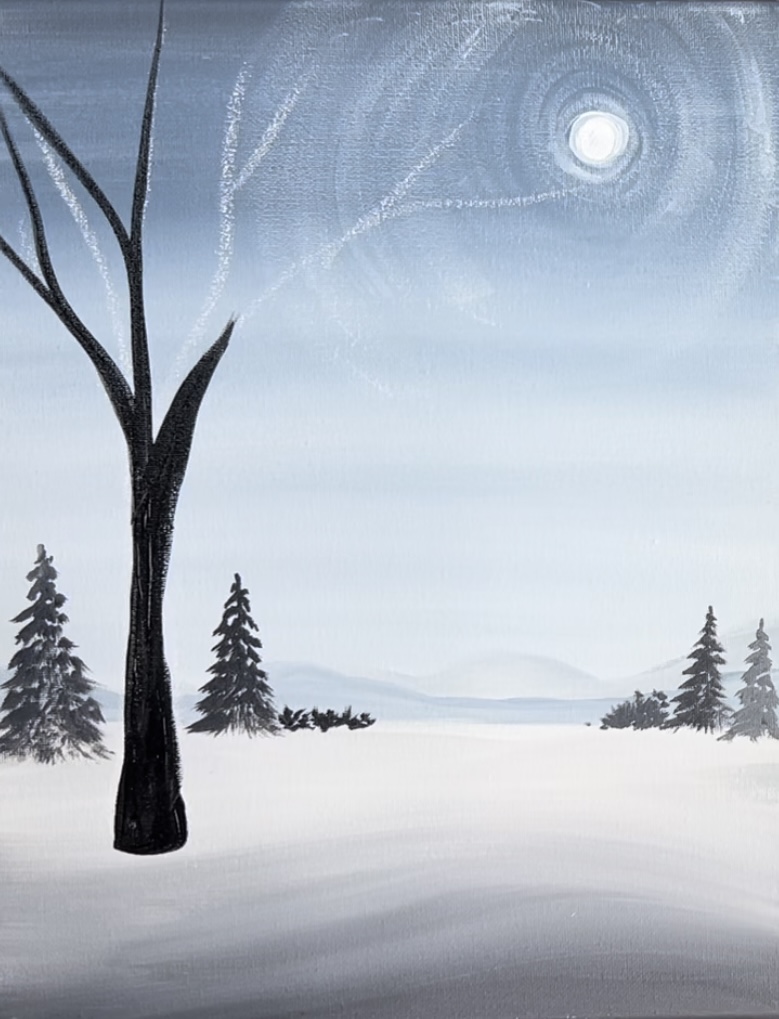
To make the branches go thin, release the pressure of the brush. This creates a thin line versus a thick line which requires more brush pressure.
Next, paint lighter color branches with the titanium white. To do this, wipe your #12 bright brush off and load the tip in titanium white and continue to paint more branches.
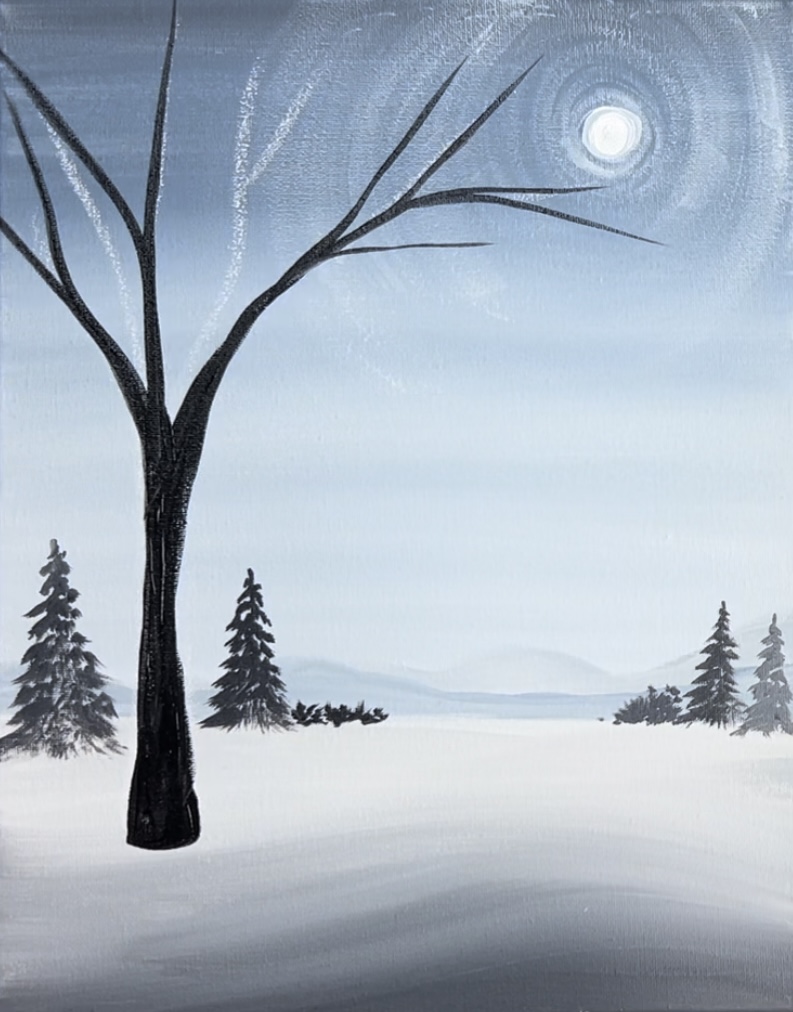
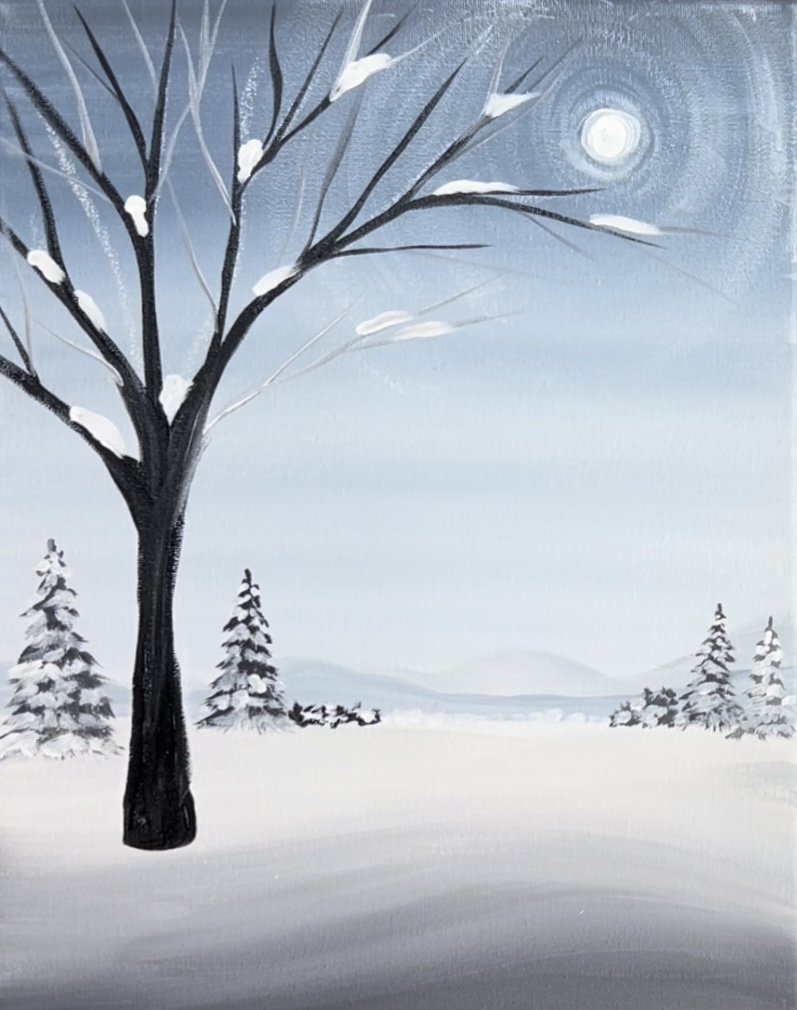
7. Paint Snow On Pine Trees
Use your round brush to paint snow on your pine trees. Start at the top and make little white marks stroking down. Basically, you are painting this the same way you painted the pine tree initially but leaving a lot of the dark showing through.
Do this for each of your pine trees.

8. Paint Snow On Tree & Highlights
Next, use your #4 round brush and titanium white to paint white marks in some of the tree crevices.
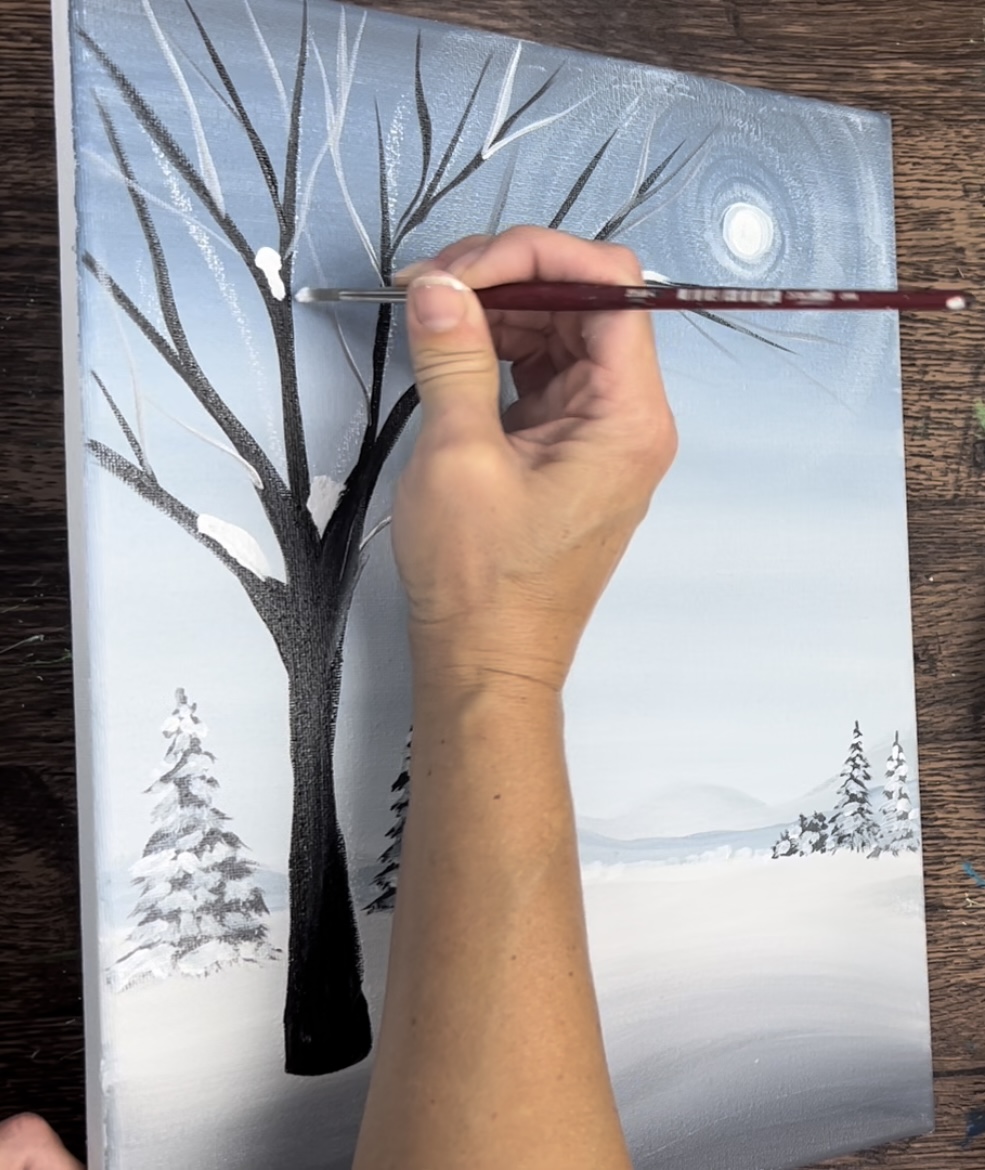
Next, use your #4 round brush and titanium white to loosely paint a highlight/texture on the right side of the tree. If needed, mix a little black into the white to dim it down a bit.
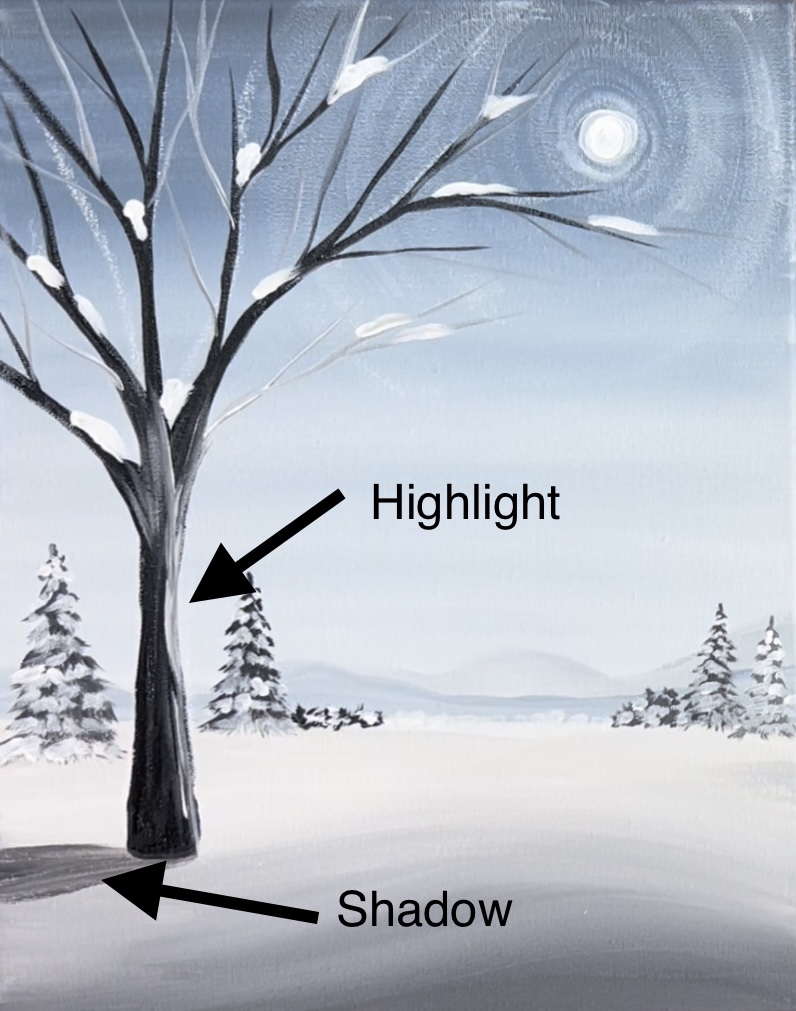
To do the shadow, water down mars black paint to a water color consistency. Then paint a shadow on the base of the tree that goes to the left and off the canvas.
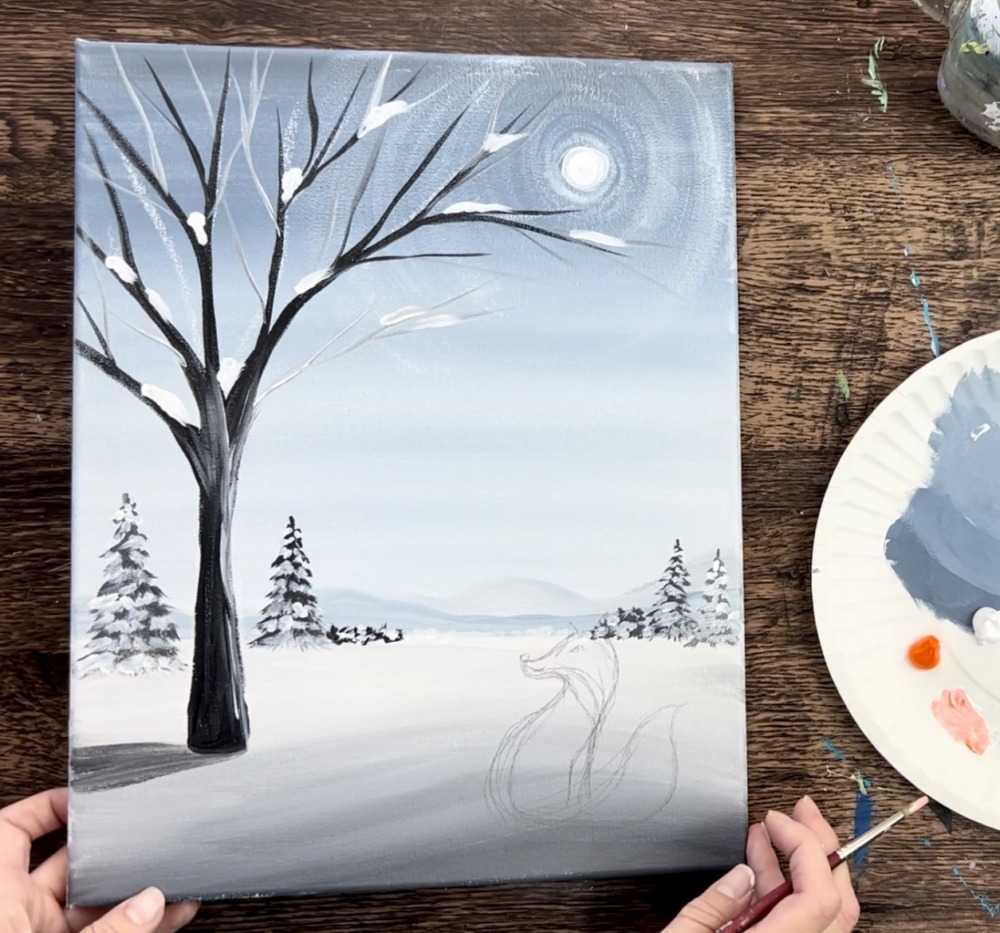
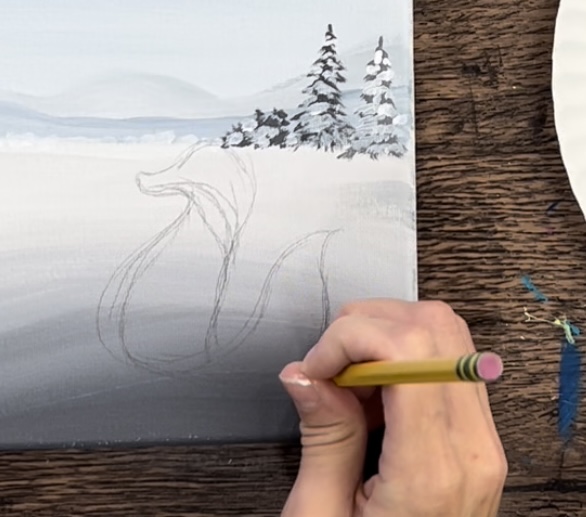
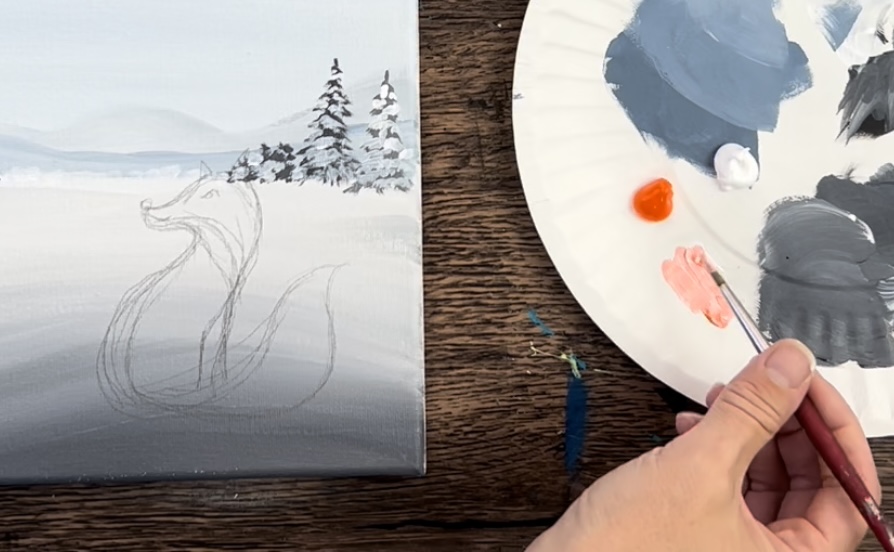
9. Draw Fox
You can follow the directions below for how to draw the fox or, feel free to print out the template and use that to transfer to your canvas.
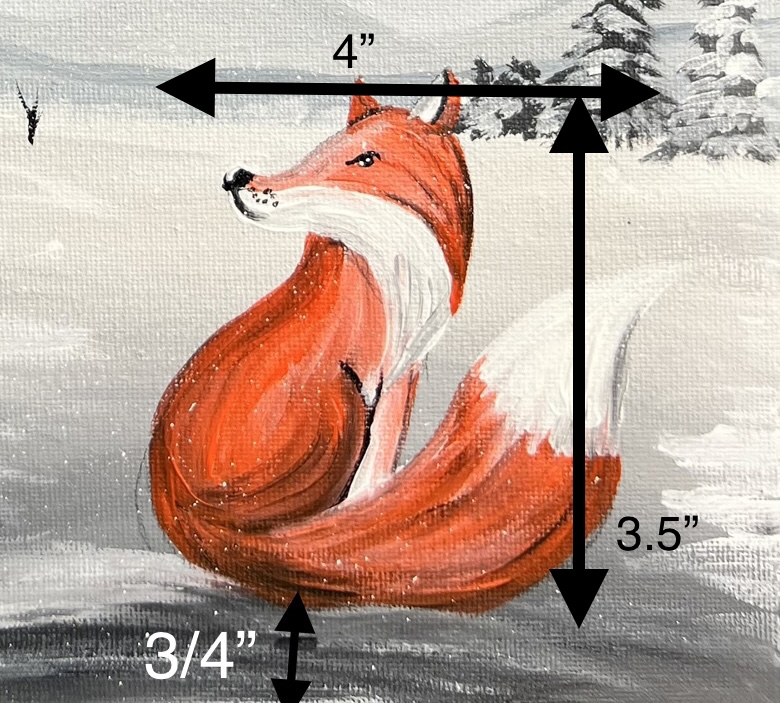
Position your fox so the bottom will be about 3/4″ from the bottom of the canvas. Additionally, you can use the measurements in the picture above to help with the sizing of the fox.
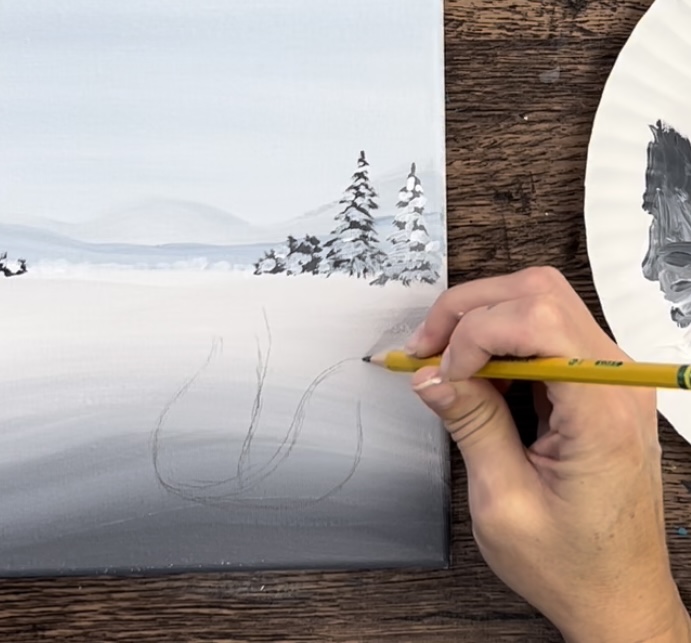
Draw the fox’s back curve and a front vertical line for the front of his leg.
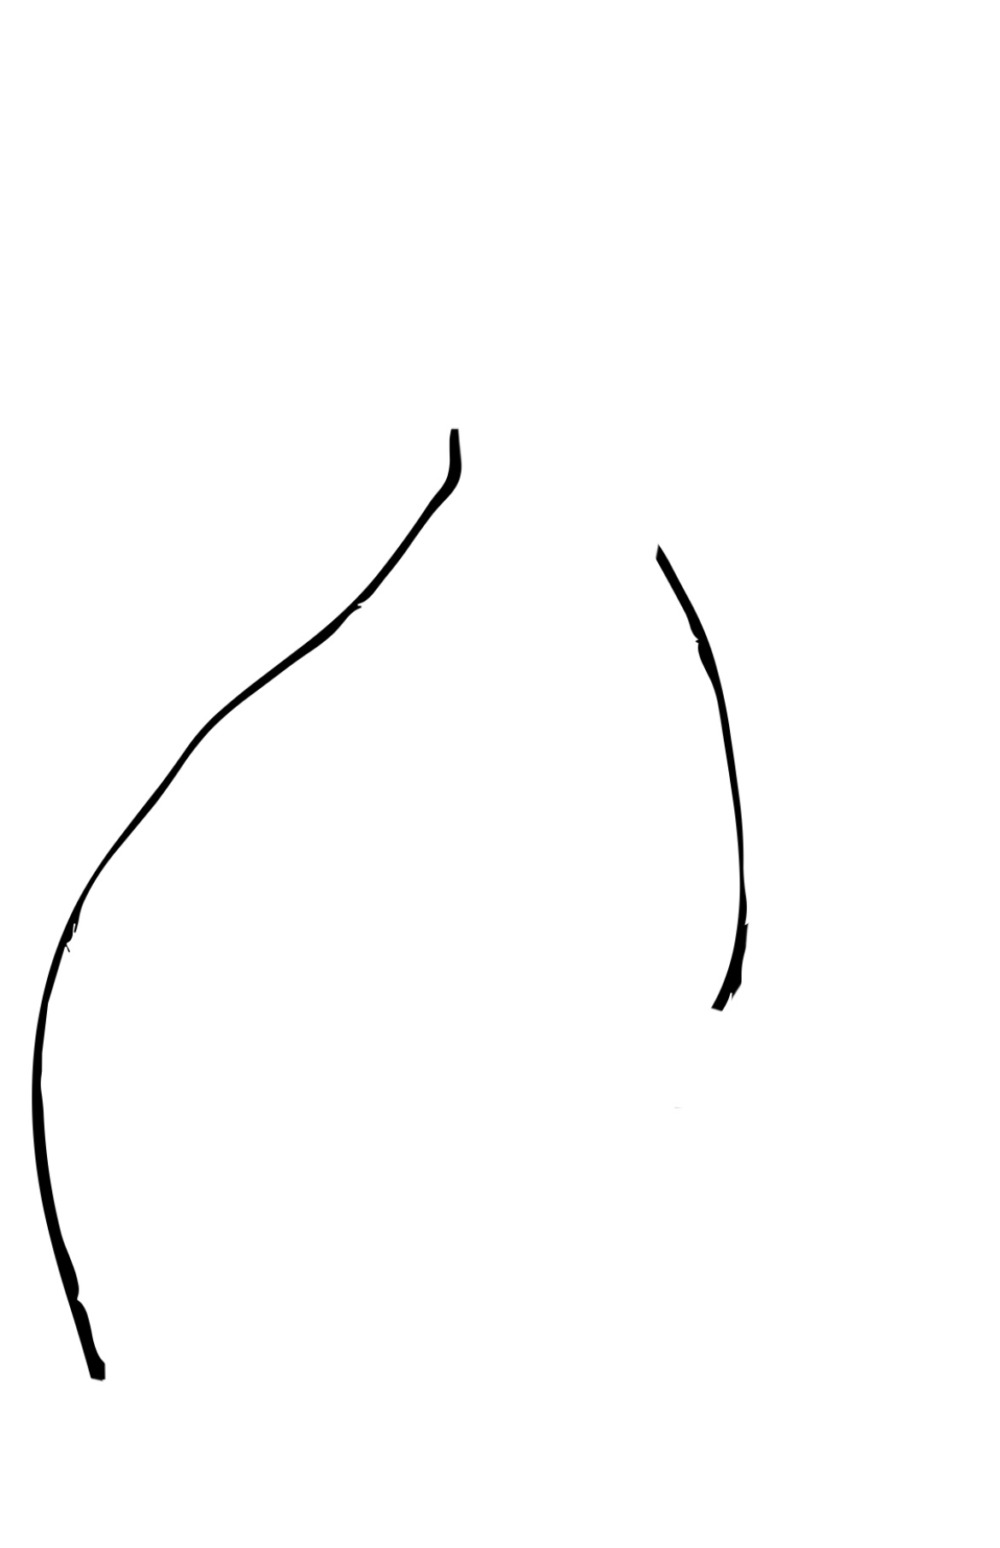
Then draw the tail so that it overlaps the bottom of the fox and goes up to the right of it.
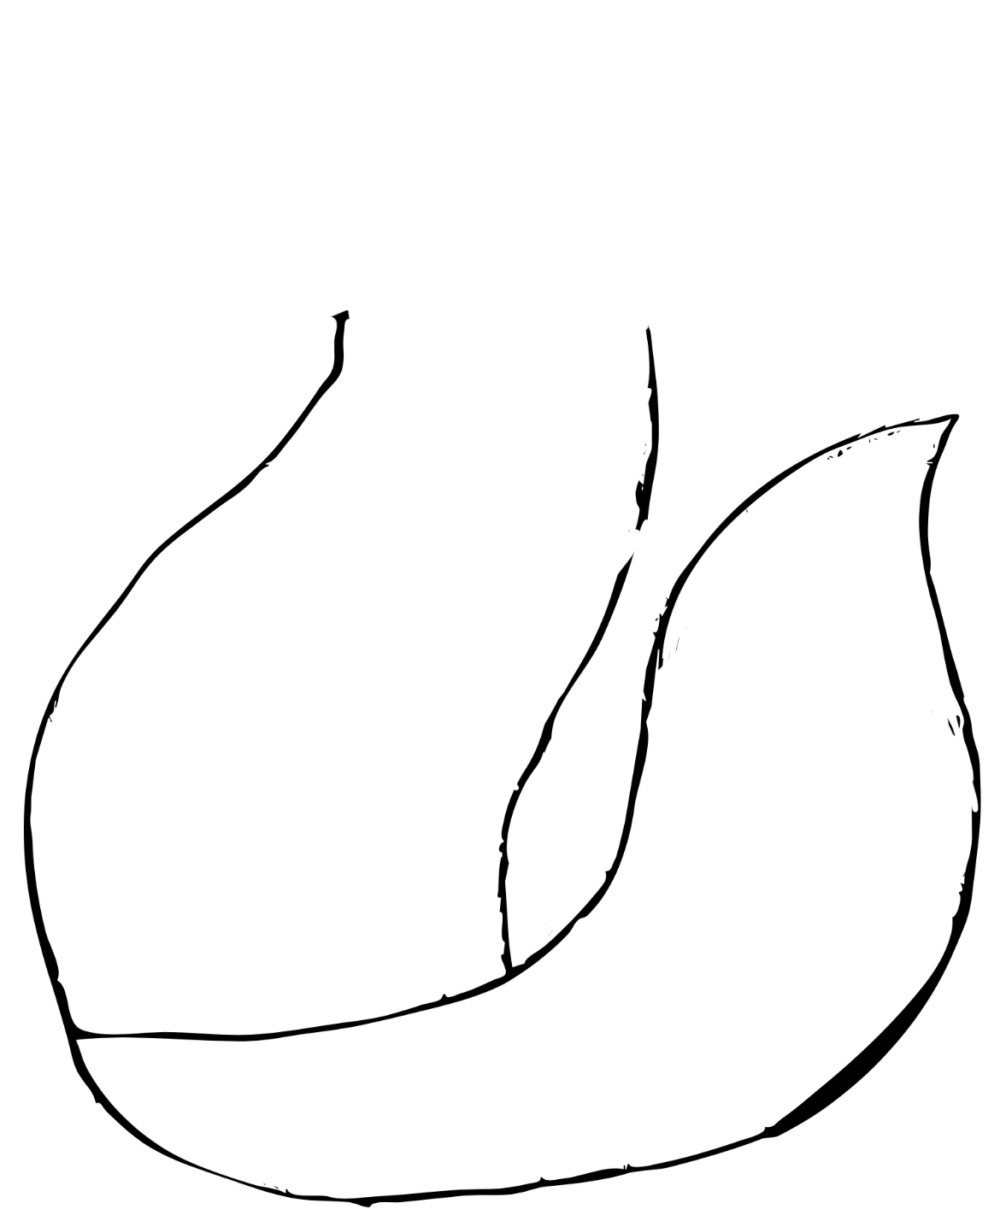
Next, draw the fox’s head so that it is looking to the left. Draw a larger curve for the top of the head and a smaller rectangular shape for the snout.
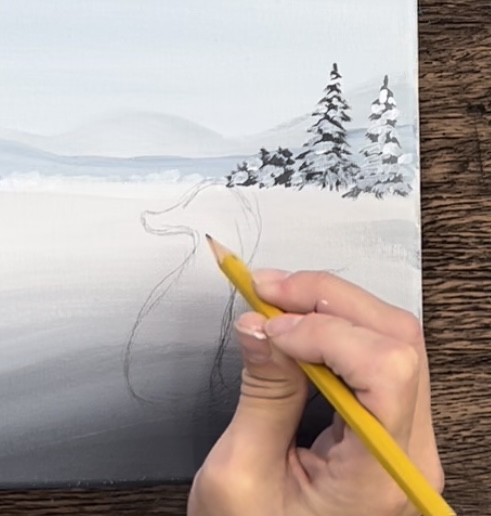
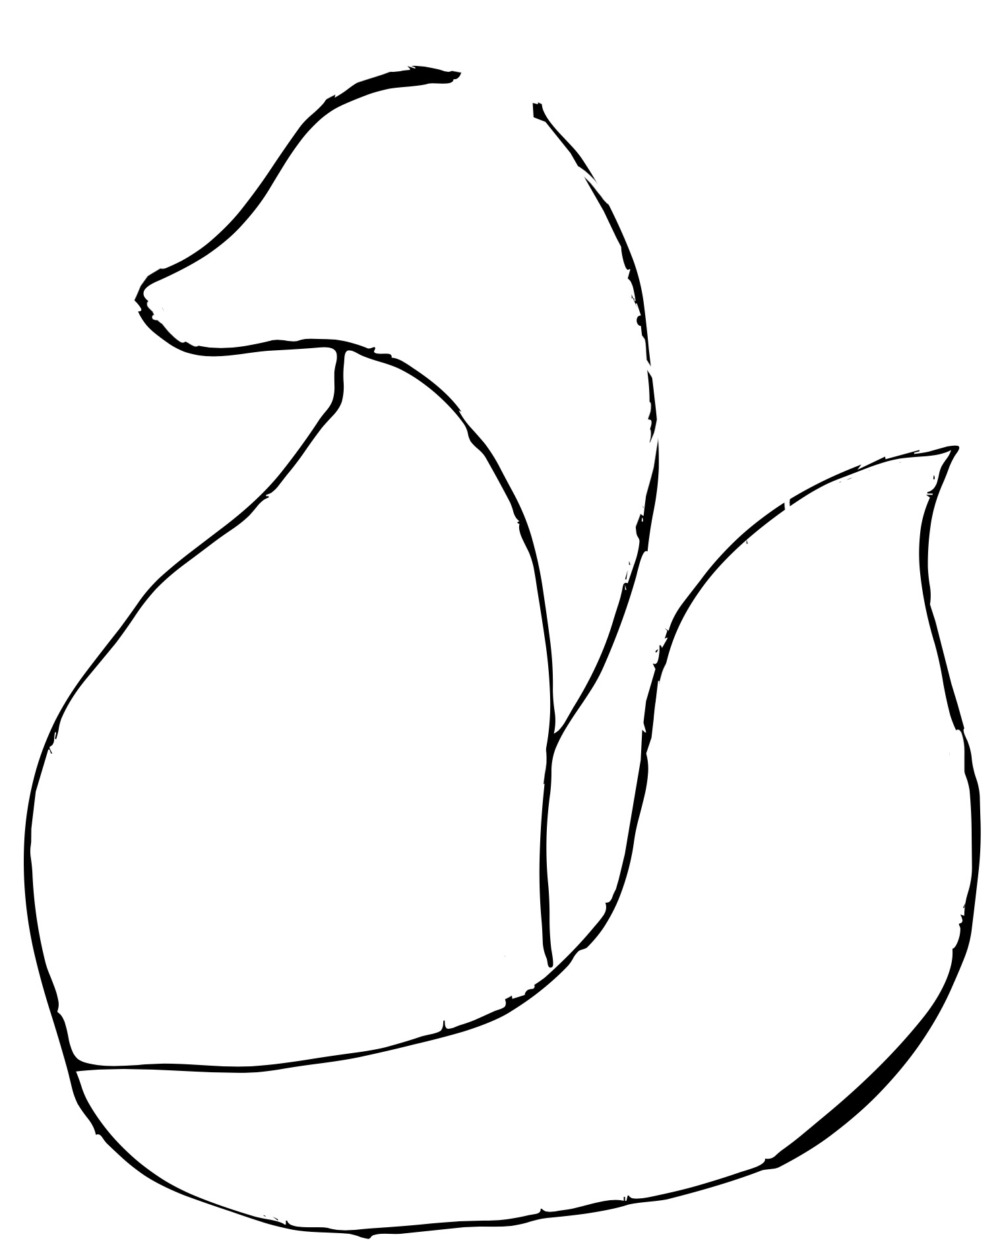
Then draw a line dividing the top part of the head and neck from the bottom part.
Draw the fox’s ears and legs which are behind the tail.
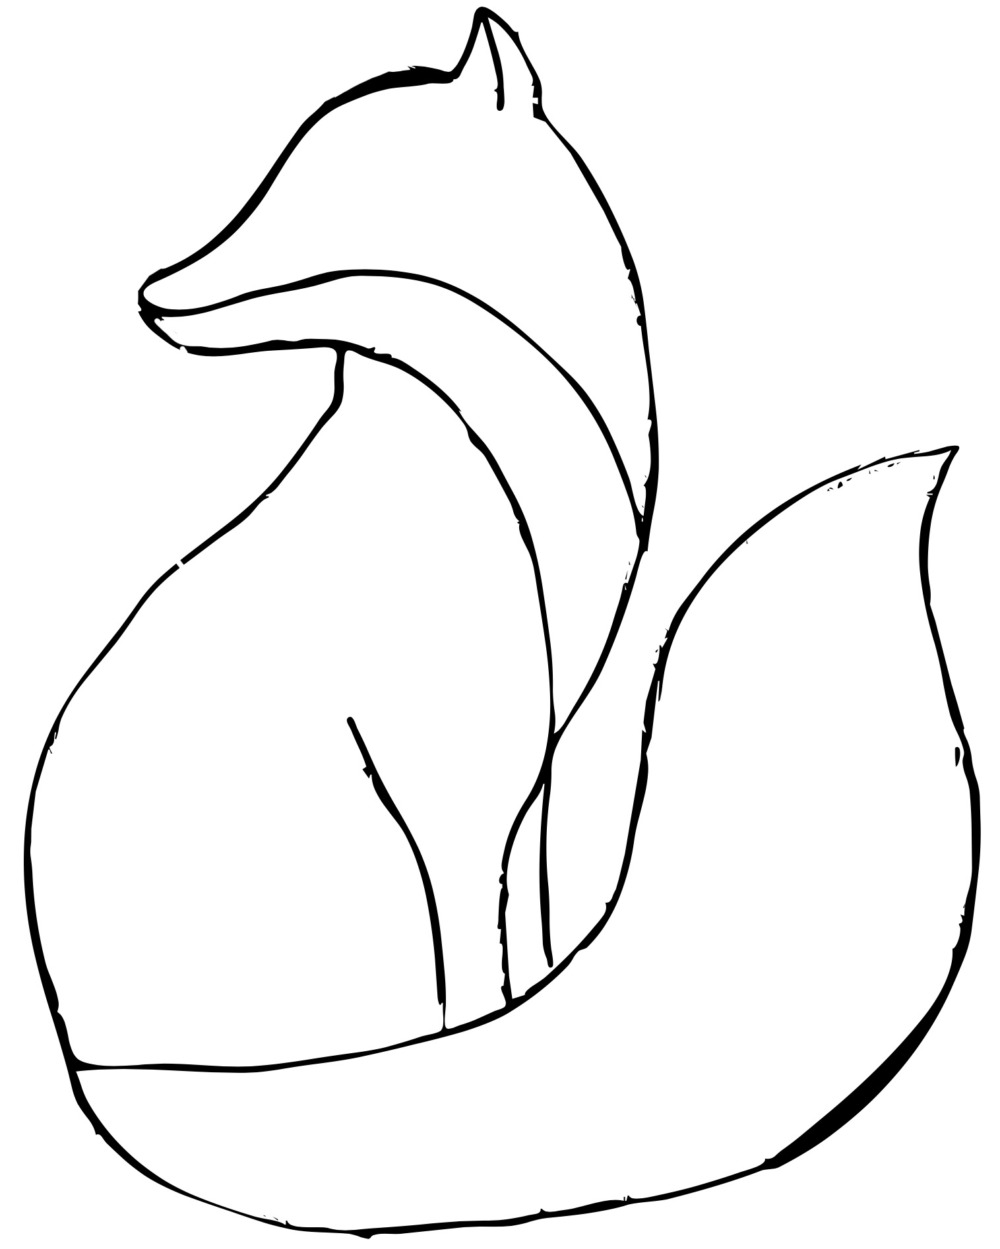
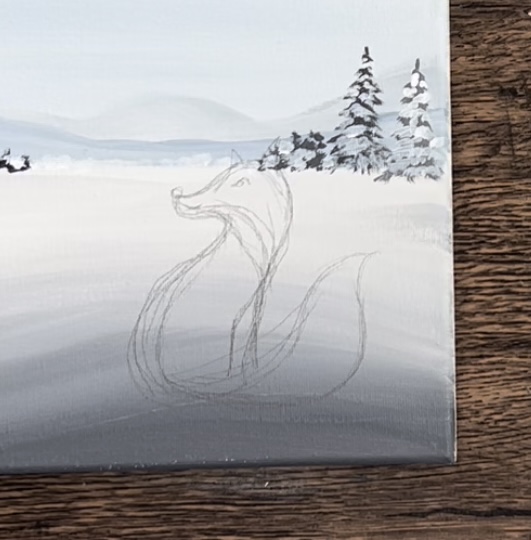
Then draw details such as eye, nose, mouth and division of white tip part on its tail.
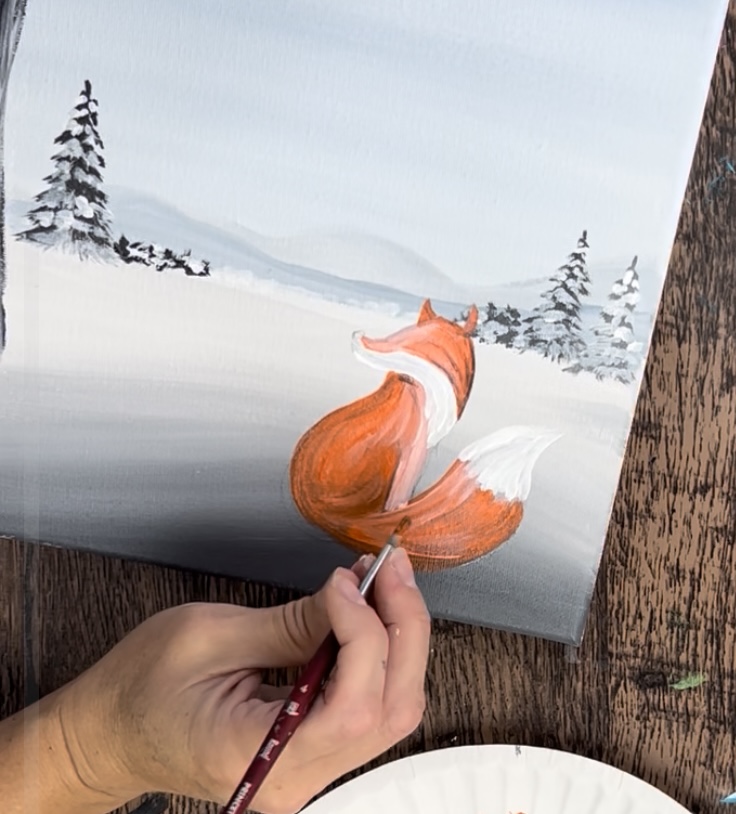
10. Paint Fox
Load your palette with cadmium orange hue and titanium white. Use your #4 round brush and mix equal parts orange and white together. The white will give your orange a more opaque color to cover the background at first. You can always add a second layer to this fox to make the orange darker and less “cream colored”.
Start by painting the fox’s tail. Outline the shape of the fox and fill it in using contouring strokes.
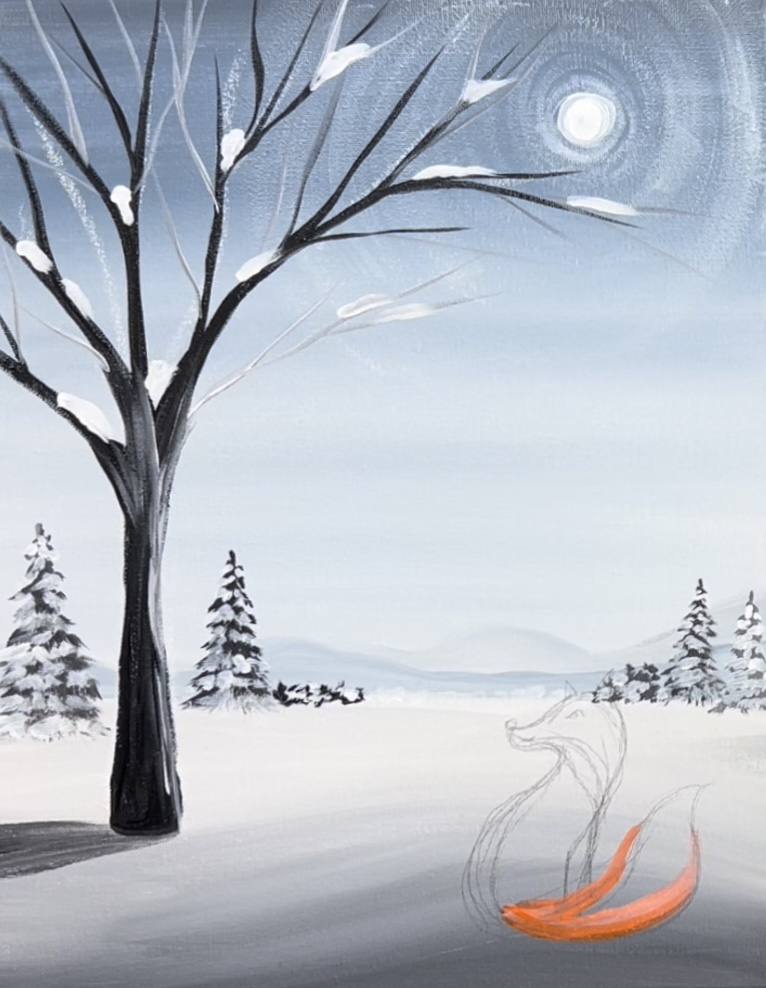
Then paint the body of the fox. To create “contrast” so the tail stands our from the body, add more orange to your brush. Paint in curved strokes forming the shape of the fox’s body. You can also let the orange and bit of white blend on the canvas for color variation.
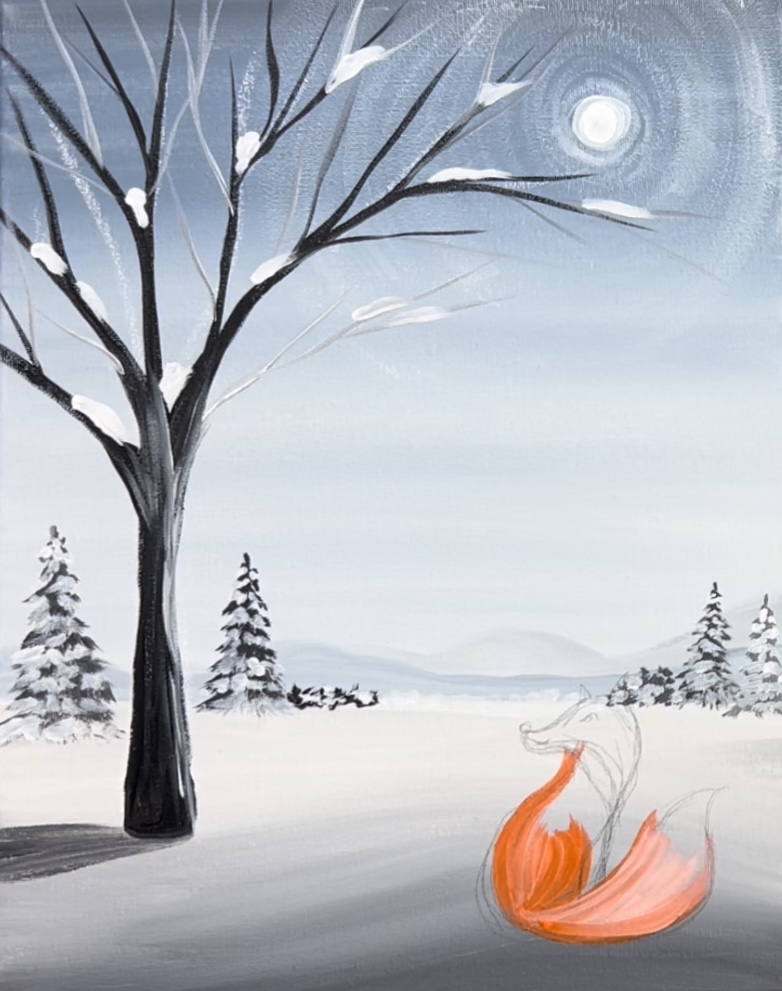
Then paint the leg of the fox using the white and orange. Paint the leg lighter than the body so that it stands out.

Next, rinse your brush. Load it into titanium white and paint the tip of the fox’s tail.
Then paint the under part of the fox’s neck with the titanium white.
Then paint the fox’s head and ear using the orange and white combination. Paint this about the same as you did the body using more orange than white.
Paint the back ear of the fox.
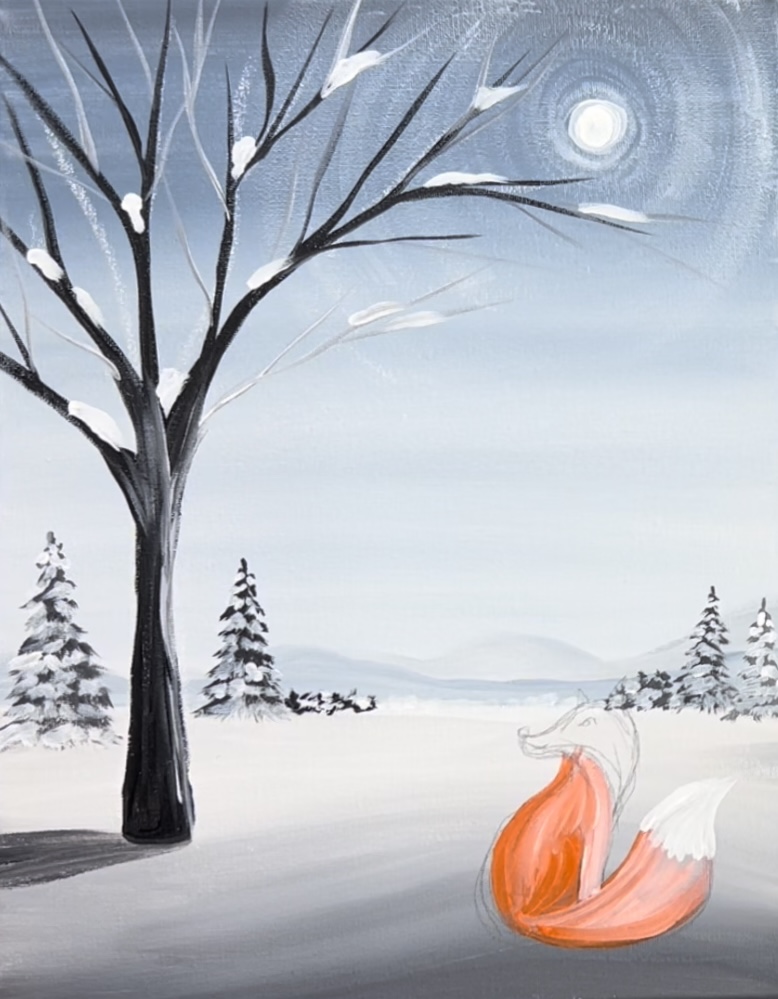
Next, mix a small amount of black into the orange to make a shade of orange. You will be using this darker orange color to help create some shading in the fox.
Add this darker part of the orange on the far right side of the fox’s head, on the left side of the fox’s back and on the bottom of the tail. Blend it in with the rest of the orange on the fox.
Use mars black to paint the nose on the top of the snout and very small curved line for the mouth.
Loosely outline the ears and add tiny black dots to the right of the nose.
Then paint the fox’s eye. Tip: if needed, you can use a black paint pen or tiny round brush for the small details such as the nose and mouth.
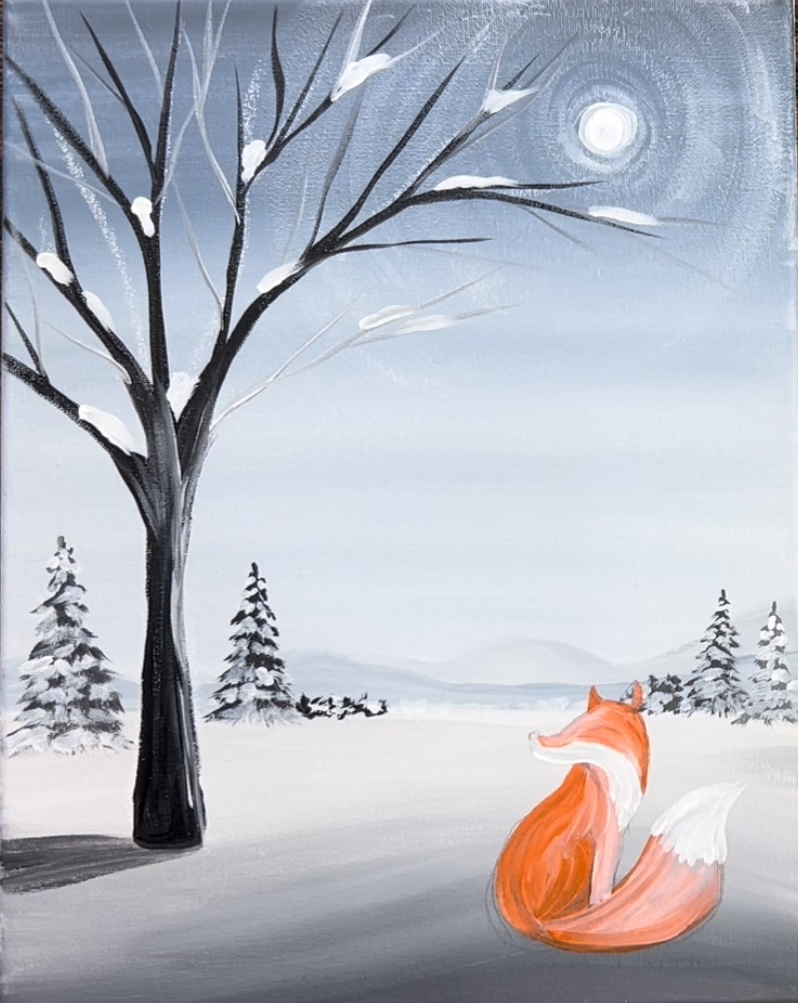
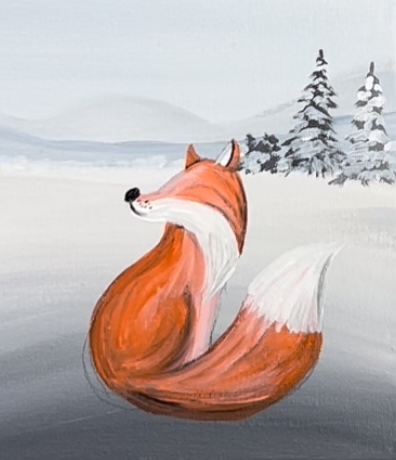
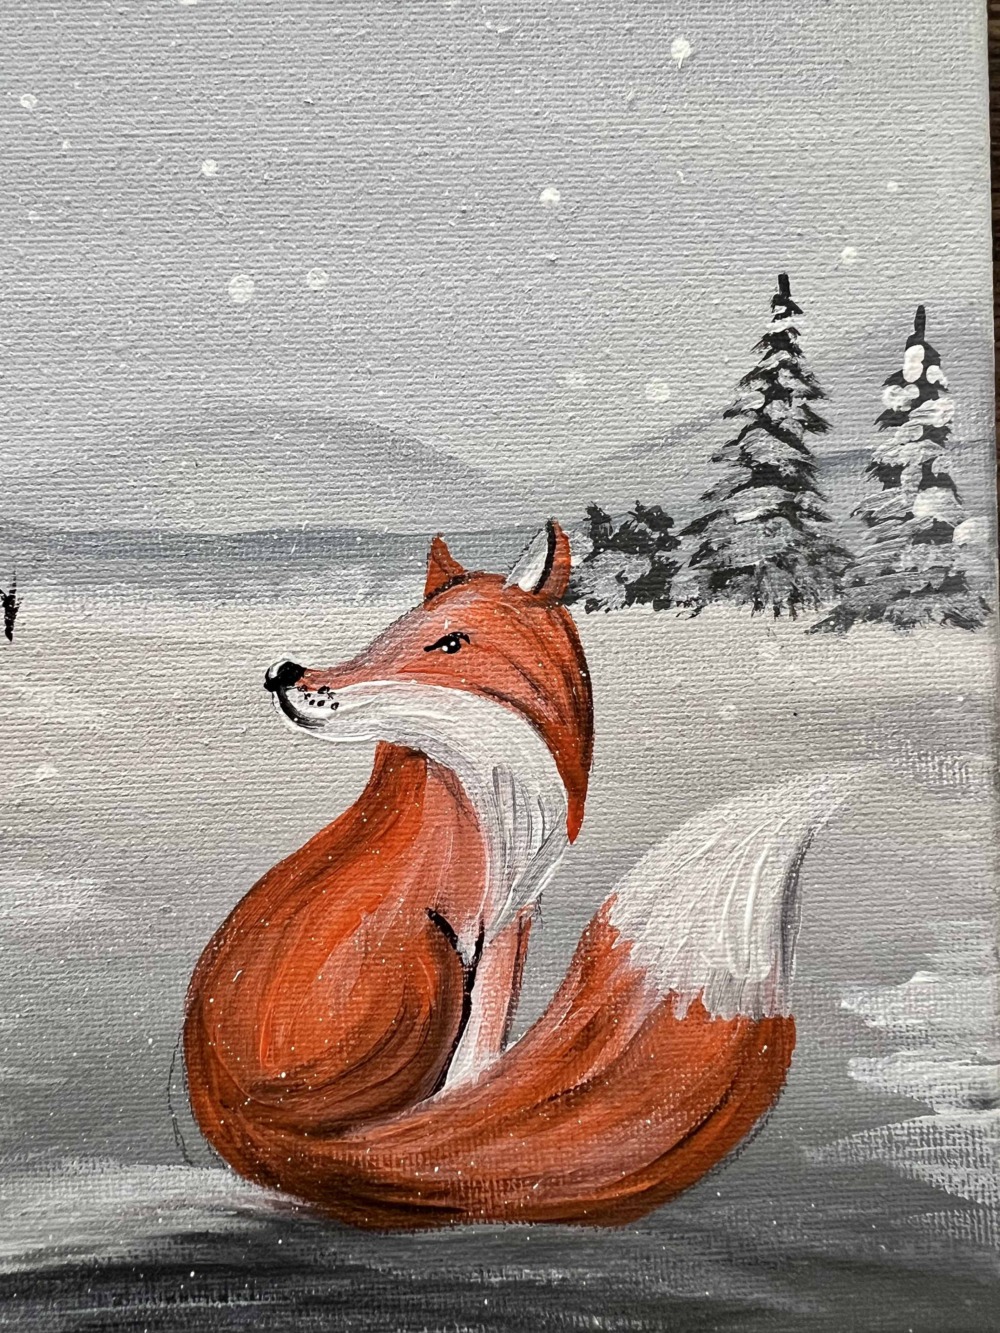
Below is a closeup of the finished fox for your reference. You can also add a tiny highlight on the top of the nose and two little highlight dots on the eyes. If you want to add more texture on the fur, use a tiny bit of mars black and white to create texture on the tail and then use more orange and black to create texture on the red part of the fox.
11. Paint snow texture on ground
Use your #4 round brush and titanium white to paint texture on the ground. Do this by loading your brush in white and loosely painting left and right strokes to create areas on the snow that are brighter over some of the shadowy areas.
You can also paint little black twigs/branches sticking out out of the ground along the landscape. I did this with mars black and the #4 round brush.
12. Paint snow falling
Use a toothbrush to paint flecks of snow all over your painting. Load your brush in titanium white that is slightly watered down. The little specks show up mostly over dark areas of the painting.

Then use the tip of your #4 round brush to paint little white dots of snow all over the painting.
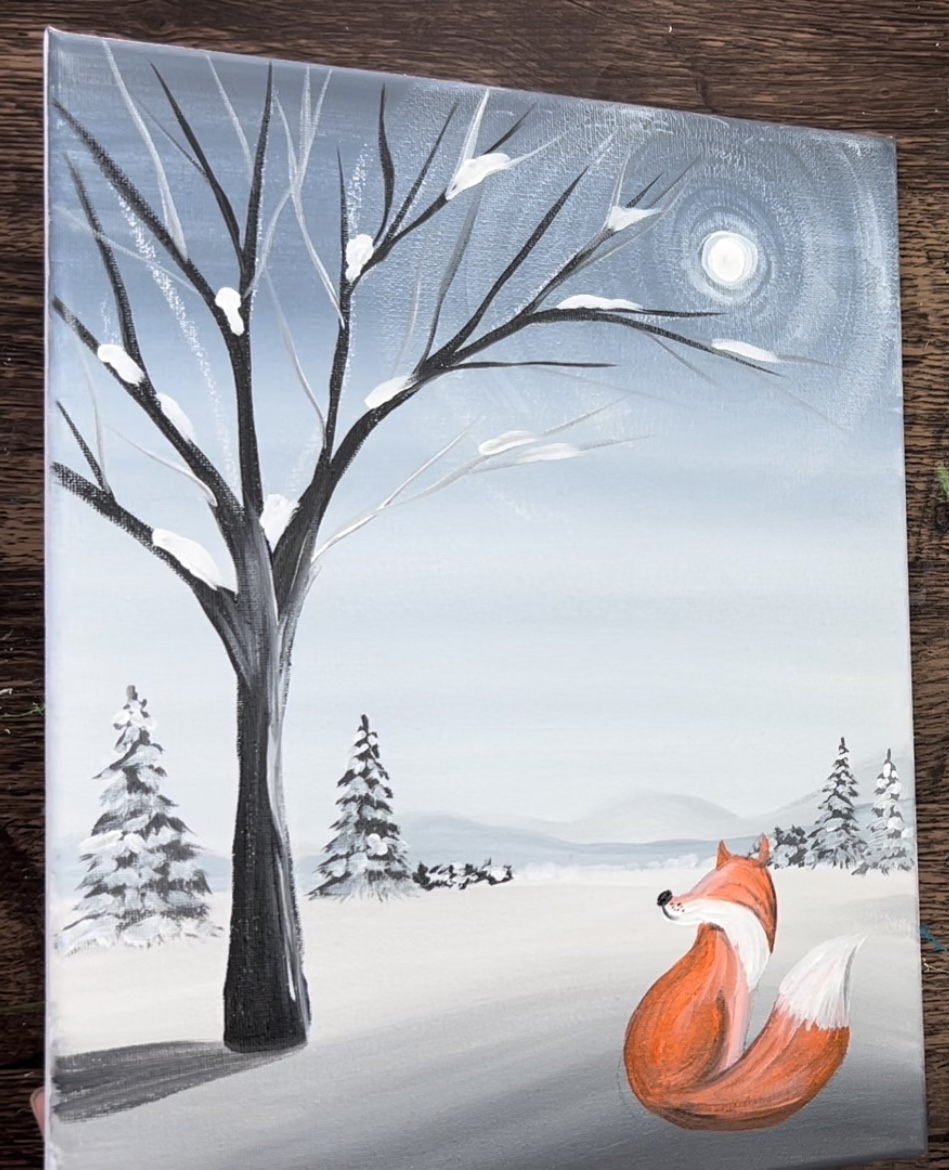
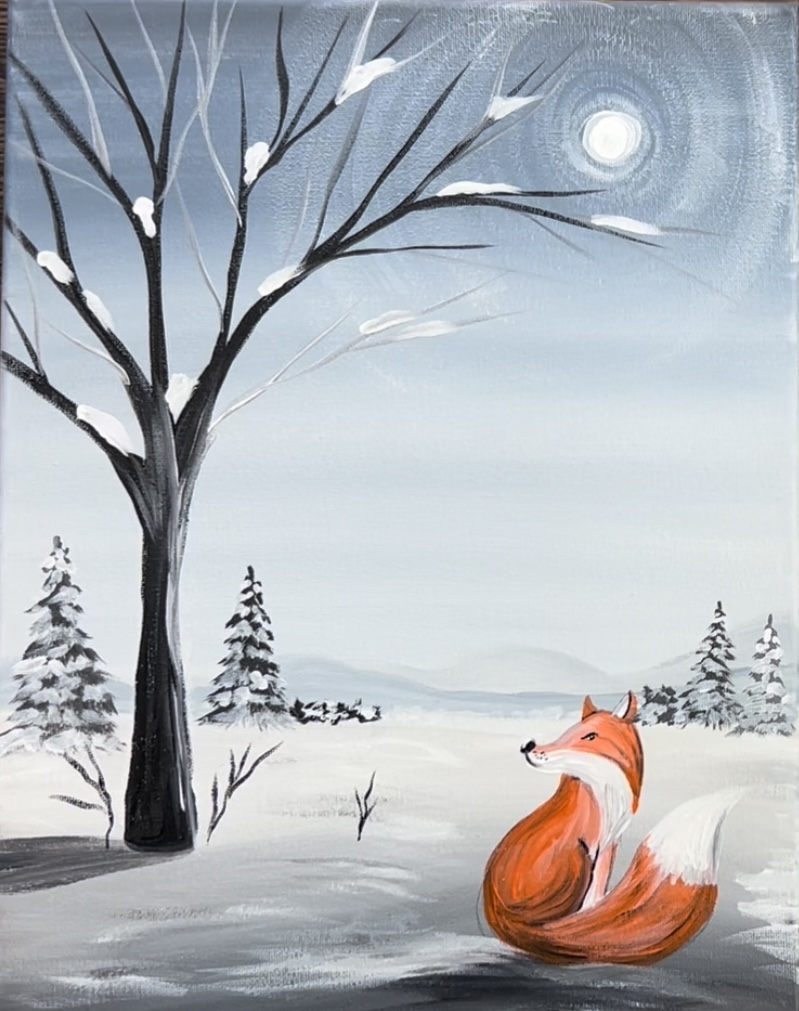
Finished
Sign your name and show it off!
Share your art here


