

Would you like to save this?
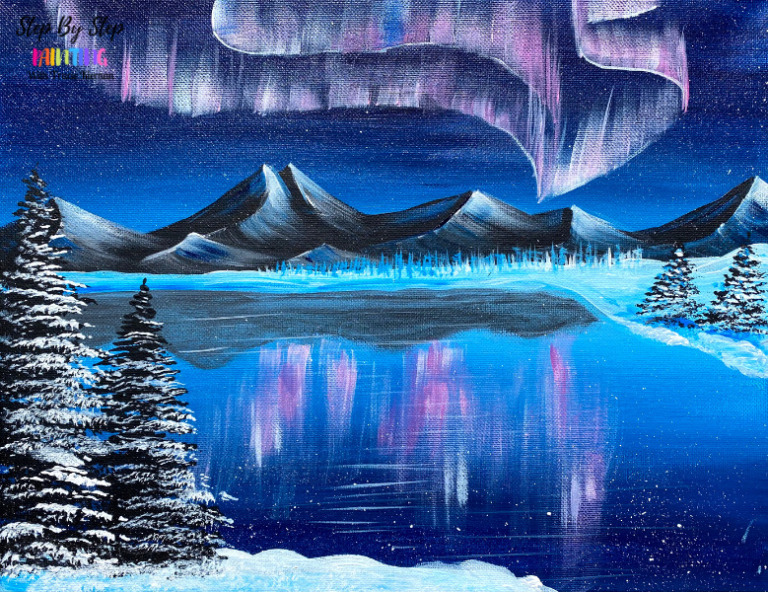
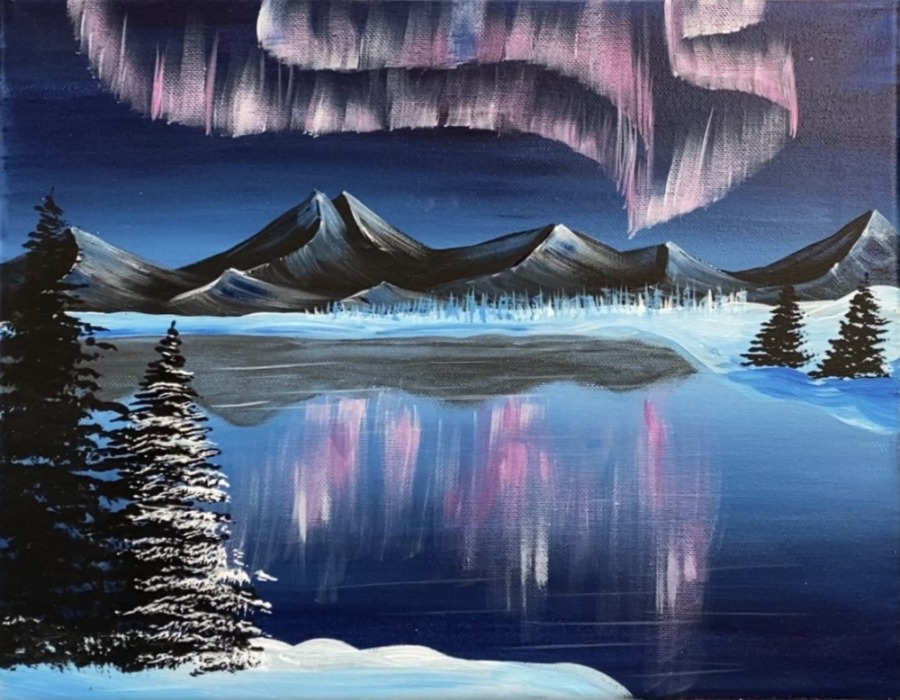
Learn to paint an icy winter landscape with aurora sky reflecting over a frozen lake. This tutorial will demonstrate different techniques such as “dry brush” for the northern lights, mountain painting and fan brush trees.
You can brush up on those skulls with one of my in depth tutorials! Learn more about painting trees with a fan brush here, how to paint mountains here and a basic tutorial for northern lights here!
Enjoy and happy painting!
Materials
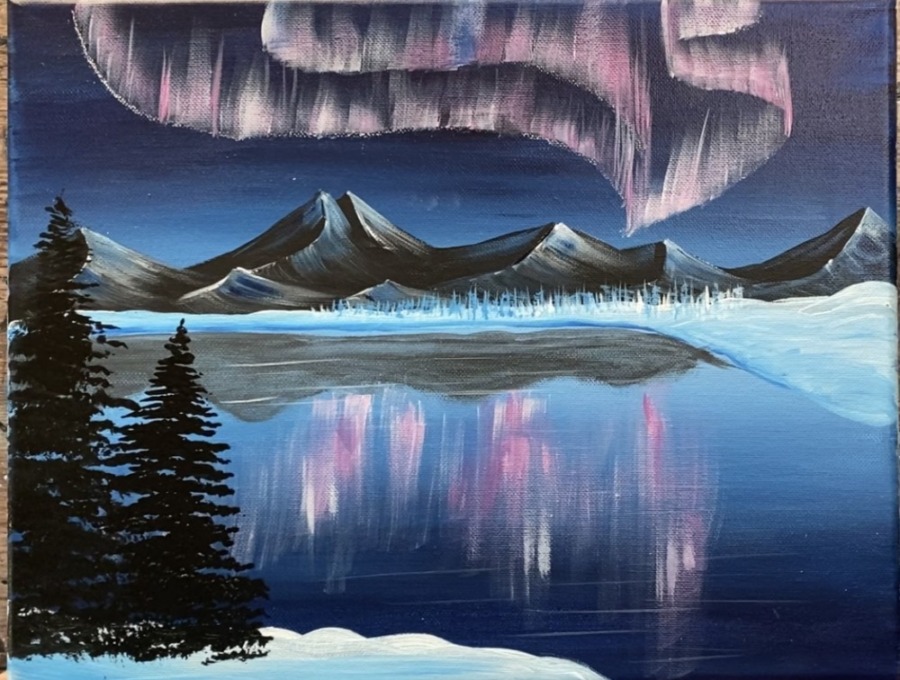
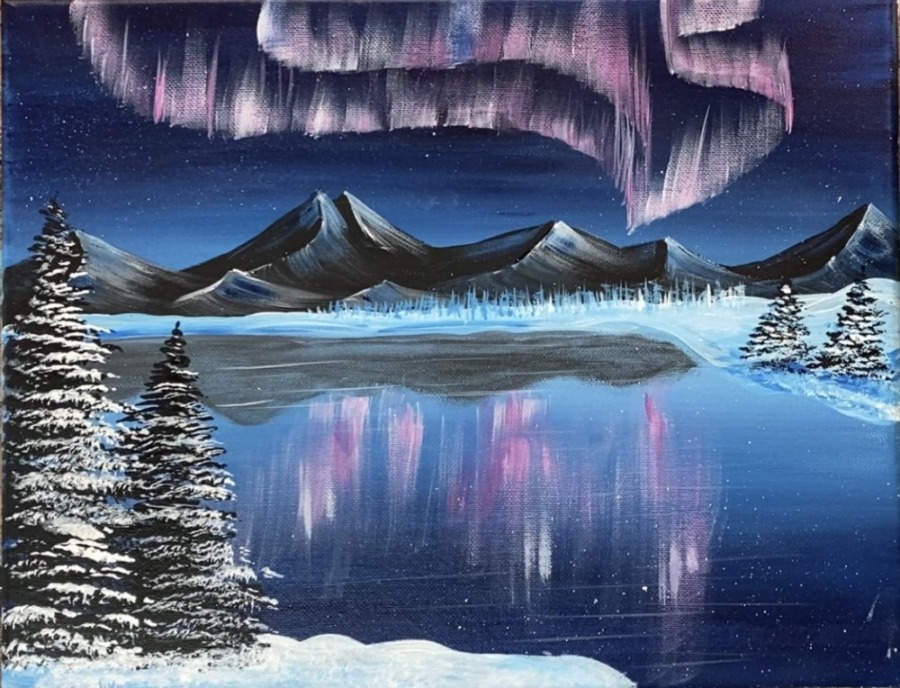
Aurora Lake Acrylic Painting Tutorial

Learn how to paint a frozen landscape with aurora borealis sky.
Materials
- 11 x 14 Canvas
- Acrylic Paint
- Paint Brushes
- Water Cup
- Soft Towel
- Paint Palette
- Chalk
Brushes
- Fan Brush
- 3/4" Flat Wash
- 3/8" Angle Brush
- #8 Round Brush
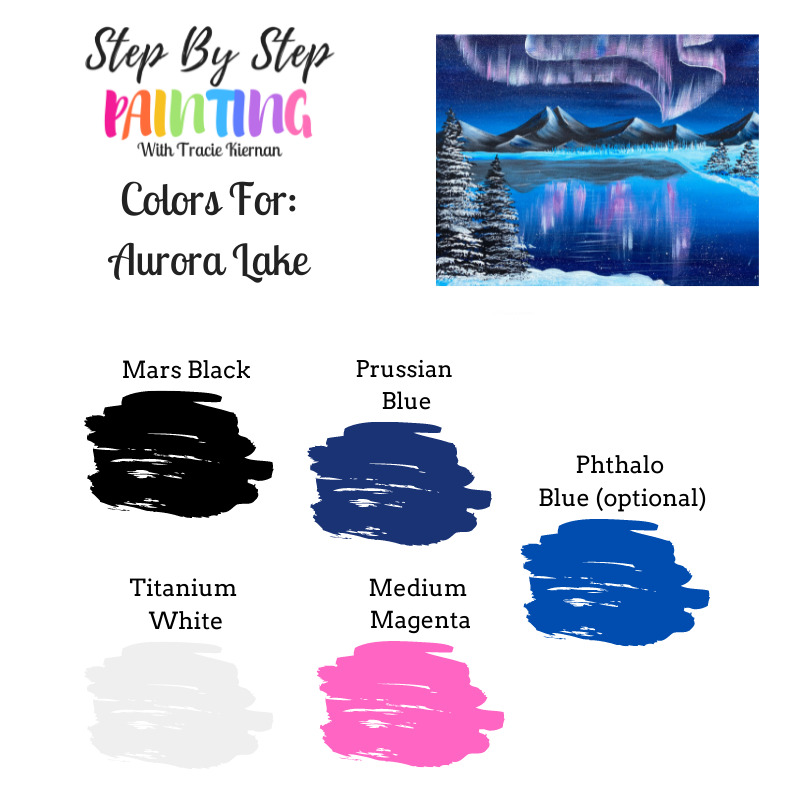
Colors
- Mars Black
- Titanium White
- Medium Magenta
- Prussian Blue
- Phthalo Blue (optional)
Instructions
- See tutorial on www.stepbysteppainting.net for detailed instructions!
Color Palette
Using Craft Paints?
If you are using craft paints such as the Apple Barrel Acrylic Craft Paints, here is what I would suggest substituting with:
- Black
- White
- Too Blue or Navy (for Prussian blue)
- Bright Blue
- Fuchsia or Magenta
Directions At A Glance
Video
Step By Step Directions
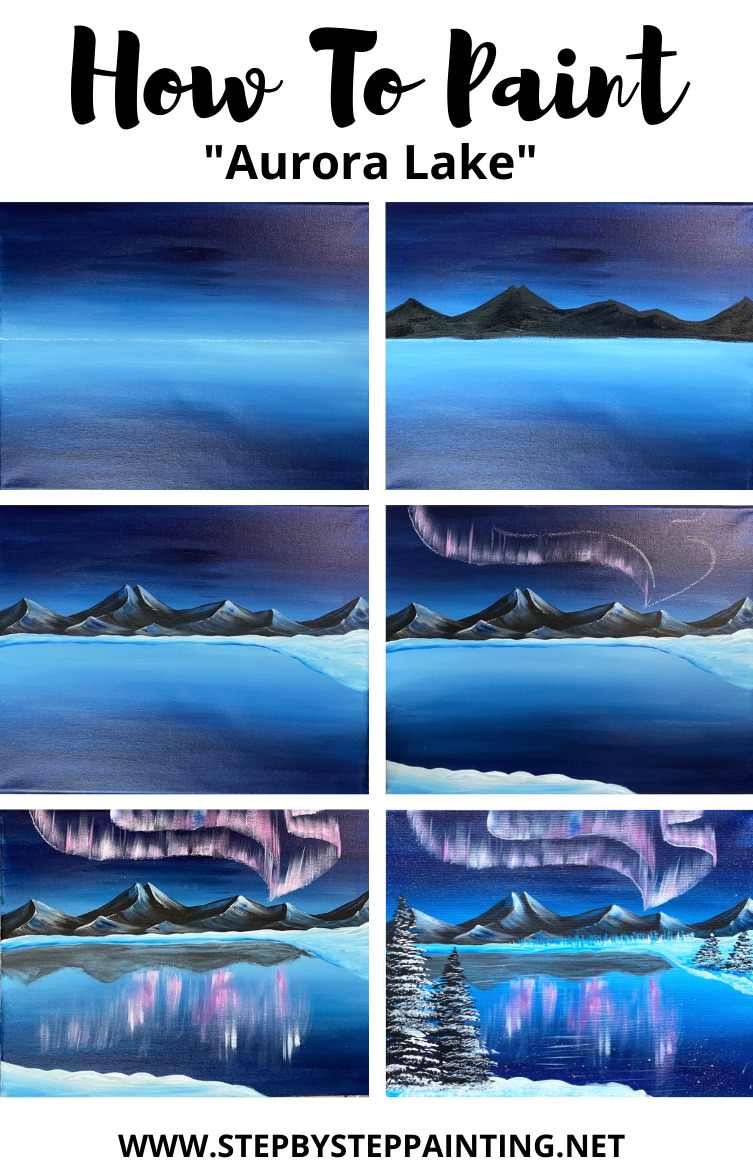
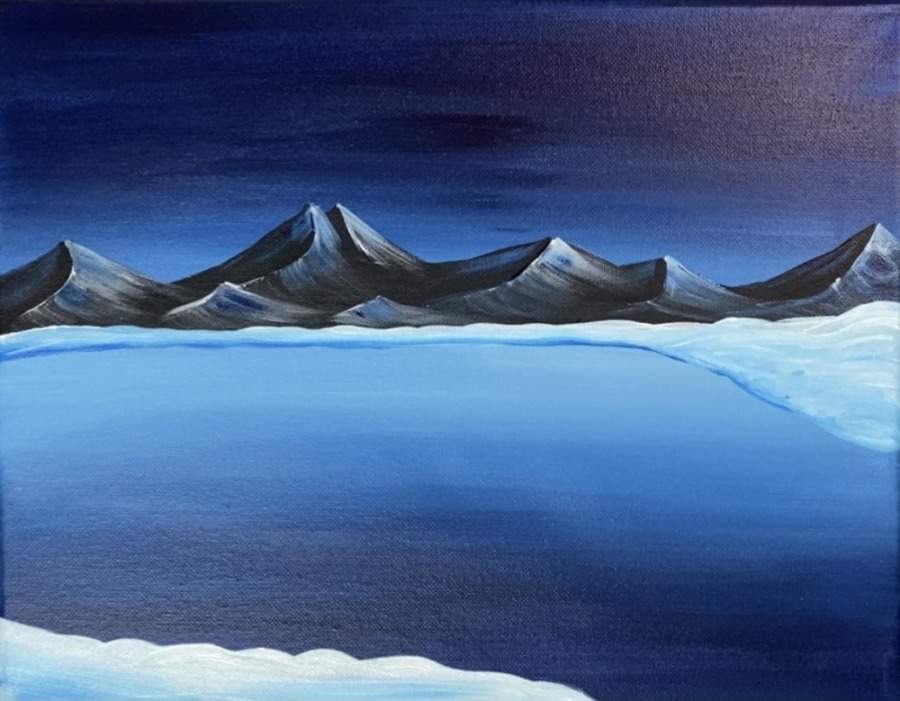
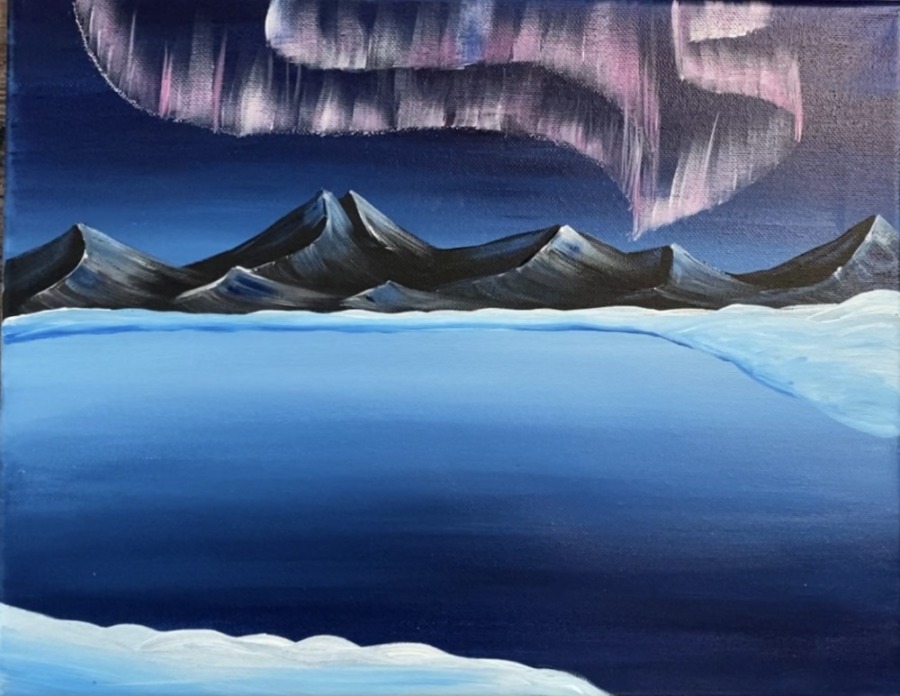
1. Paint Background & Lake Base Colors
The background is a blended gradient of Prussian blue and Titanium White. Basically the center of the canvas is the lightest in color and the top and the bottom of the canvas are the darkest.
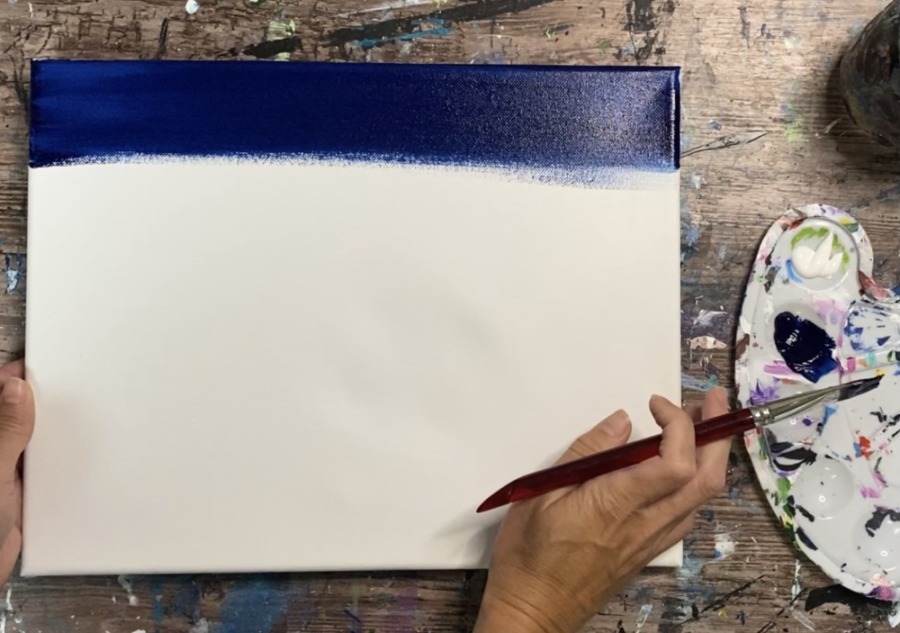
Load your 3/4″ flat wash brush in Prussian blue and a little water. Paint the top and bottom third of the canvas using left and right strokes.

Then blend titanium white towards the middle of the canvas. Load your brush in titanium white (without rinsing the brush. Start below the blue and blend upwards so the sky gets lighter as it reaches the middle of the canvas.
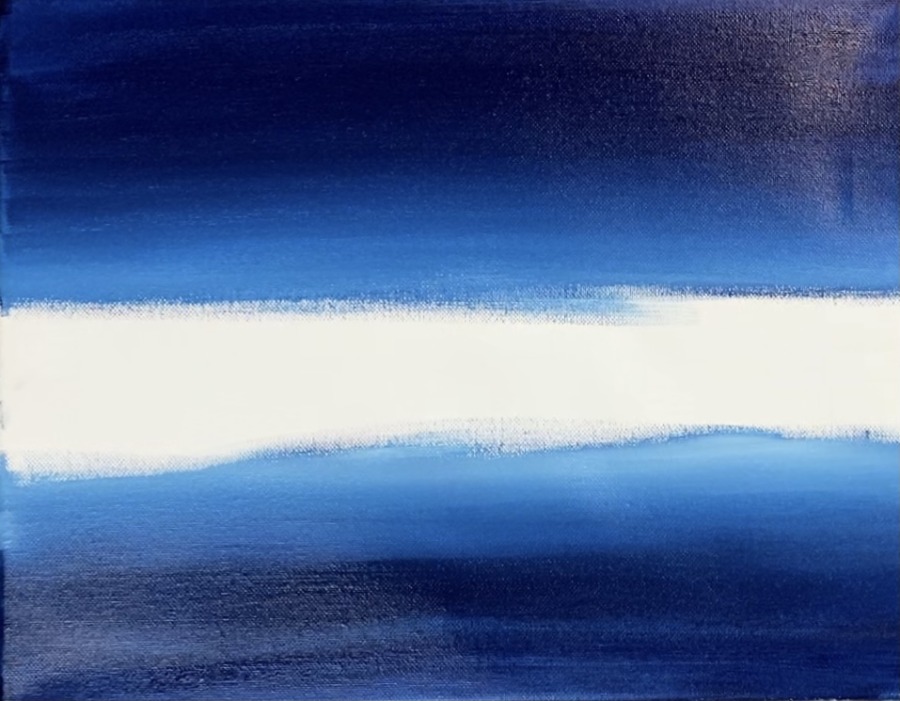
Blend the white from the bottom to the middle as well. Basically you are painting the entire canvas with a gradient of Prussian blue to titanium white in the middle (turns light blue because it blends with the dark blue) and then to darker Prussian blue on the bottom.
Tip: thinning the paint with a little water as you are painting the canvas helps the acrylic paint dry slower and helps it to blend and flow easier. Simply dip the tip of your 3/4″ flat wish in a little water before you reload the paint.
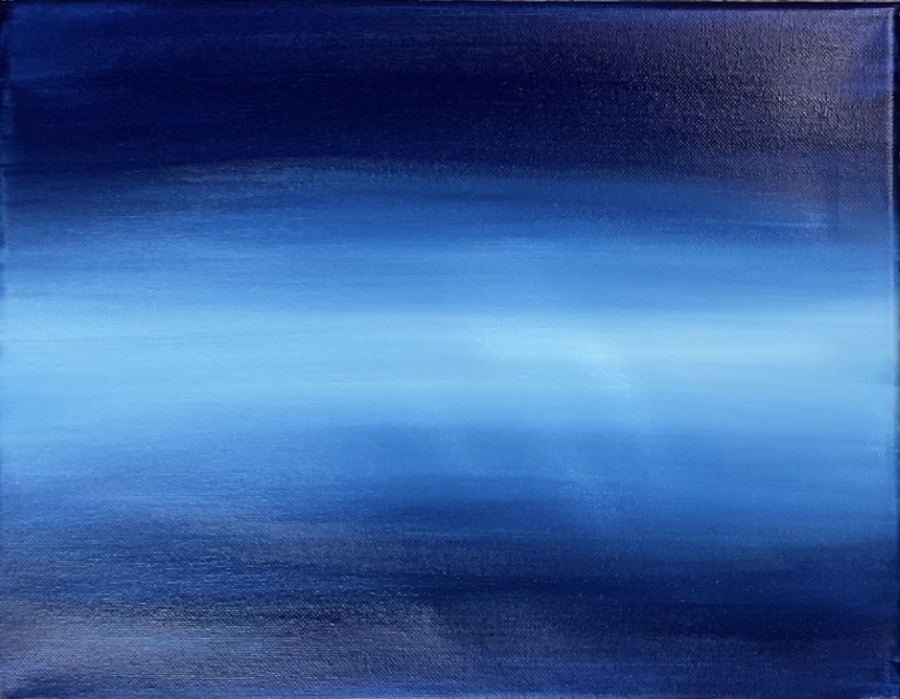
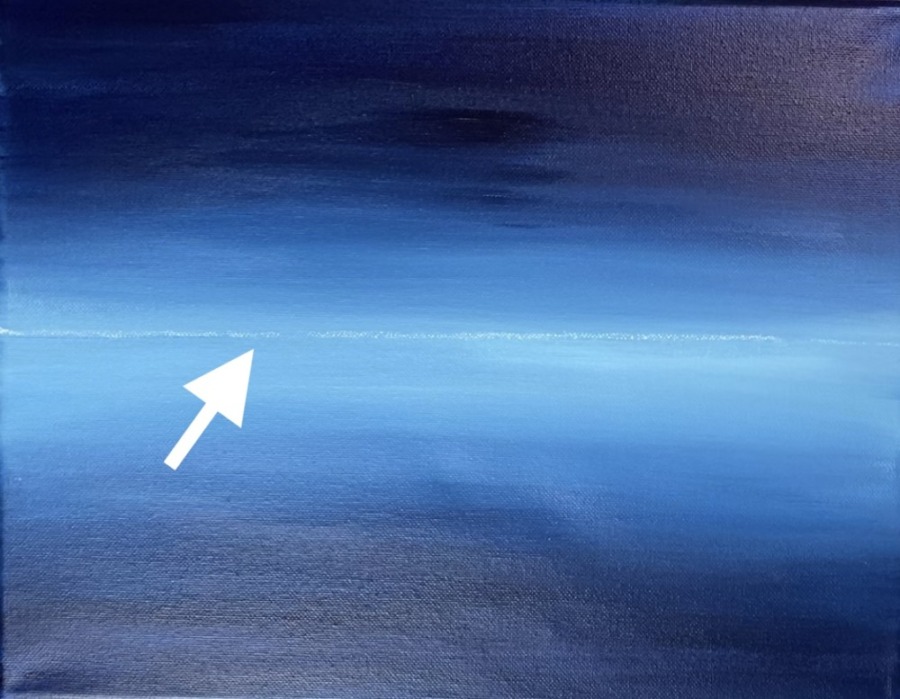
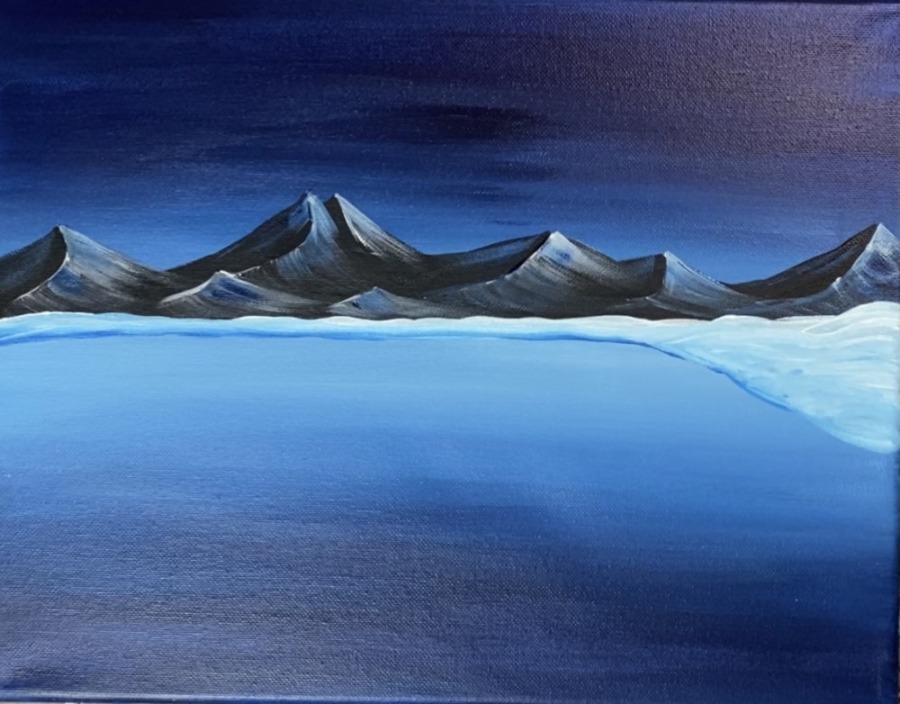
2. Draw Horizon Line With Chalk Or Pencil
Wait for your canvas to dry. Then measure the center of the canvas with a ruler. Draw a horizontal line across the canvas with a piece of chalk. This will be the horizon line. Everything above the line will be mountains and sky. Everything below will be the land, lake and trees.
3. Paint Mountains
Use a 3/8″ angle brush (or a small flat brush) to paint a mountain line above the horizon line. These mountain peaks are pointed and have varying heights and widths. If it helps, you can also draw your mountain line out with chalk first and then fill it in.
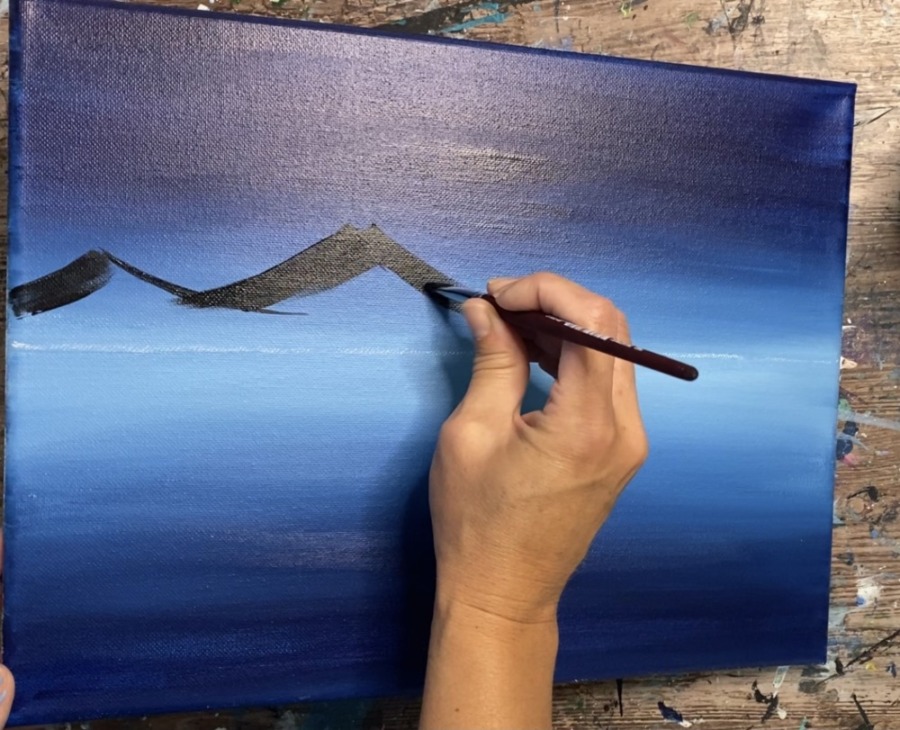
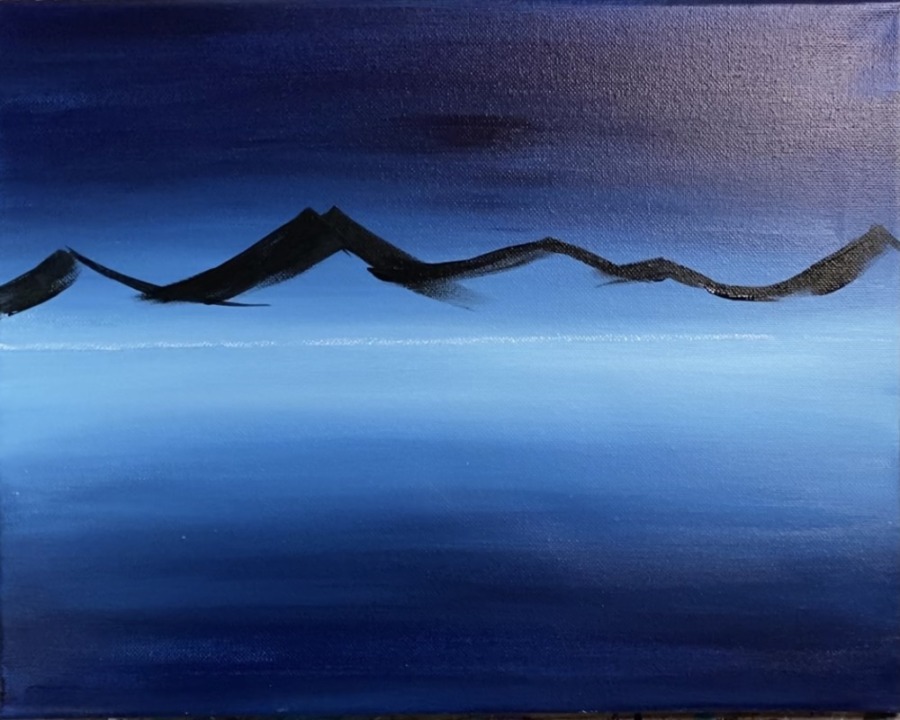
Next, paint your mountains in solid mars black. Paint all the way to the horizon line and don’t go below the line.
Next, rinse and dry your 3/8″ angle brush. Load the tip of the brush in a small amount of titanium white. Divide each mountain peak with a curved line that starts at the point and goes down and turns to the left.
Then wipe off a little white off your brush so that the next strokes will be “dry brush style”. Use the tip of your brush to drag the paint diagonally to the right and let it fade out.
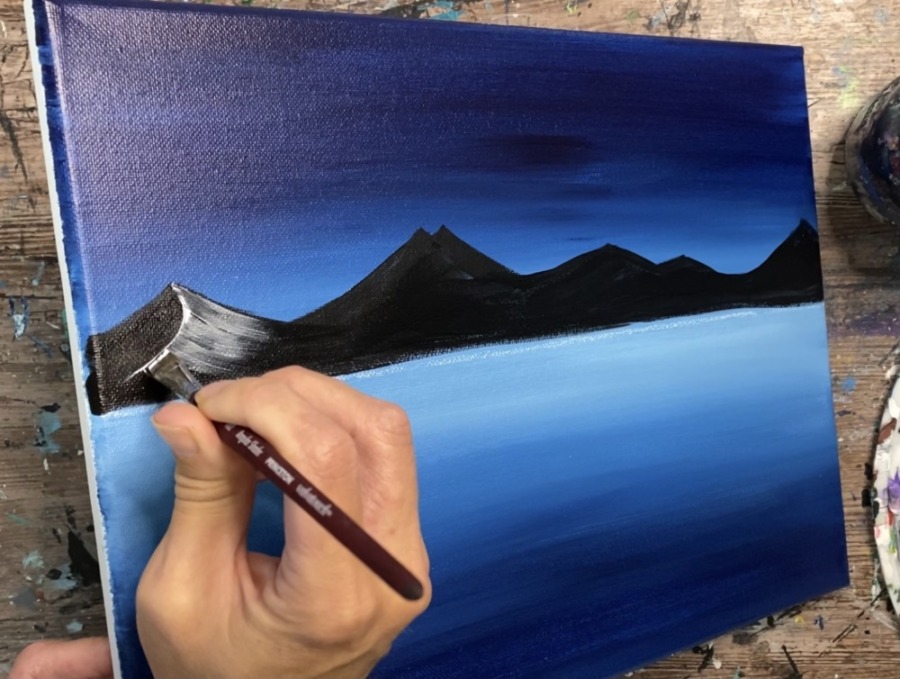
Repeat this for each of your mountain peaks. Only dry brush the right side of each mountain and leave the left side black (for now). To make smaller mountain peaks, you can use your brush to paint a peak and then drag paint to the right.
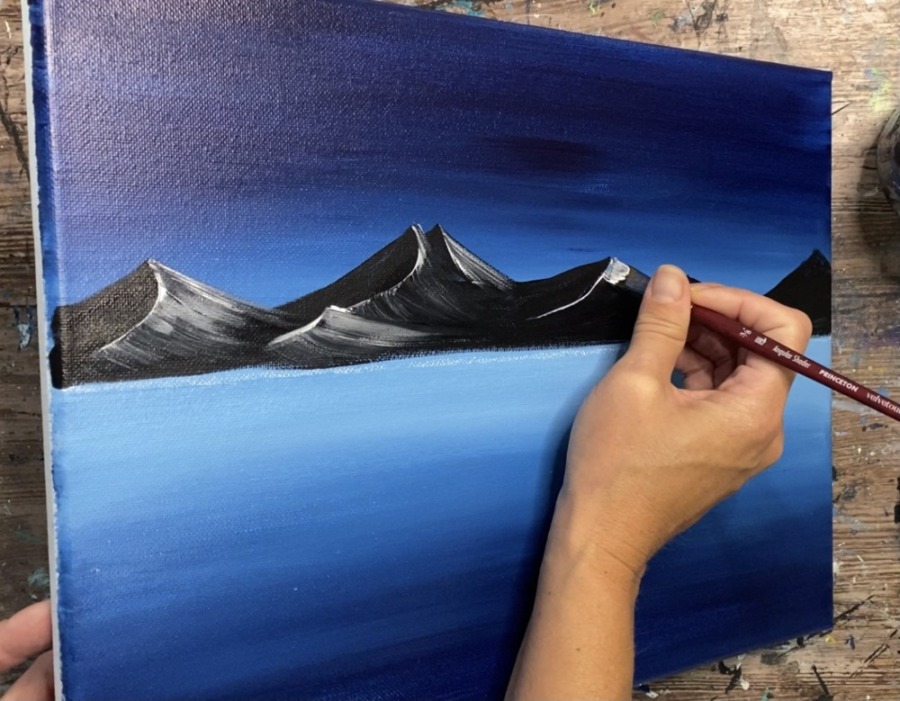
Advanced: you can add a little Prussian blue to your brush to add some blue to the mountain highlights. Just a little is needed!
Also optional: paint a small amount of Prussian blue & white on the left side (dark side) of the mountain peaks. Make sure to only add very small amount to keep the left side of the mountain dark and contrasted against the right side.
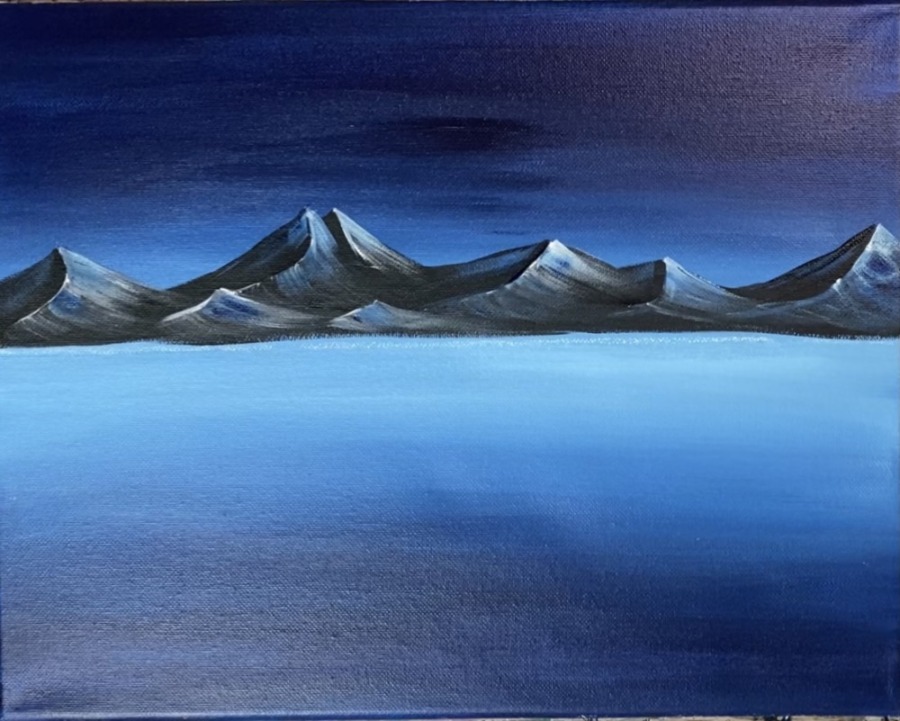
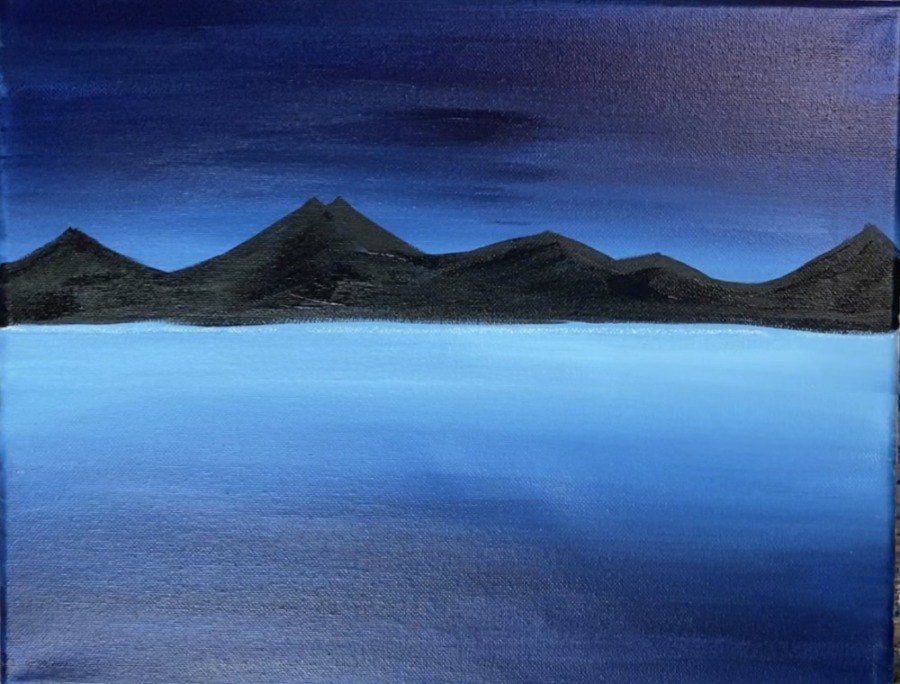
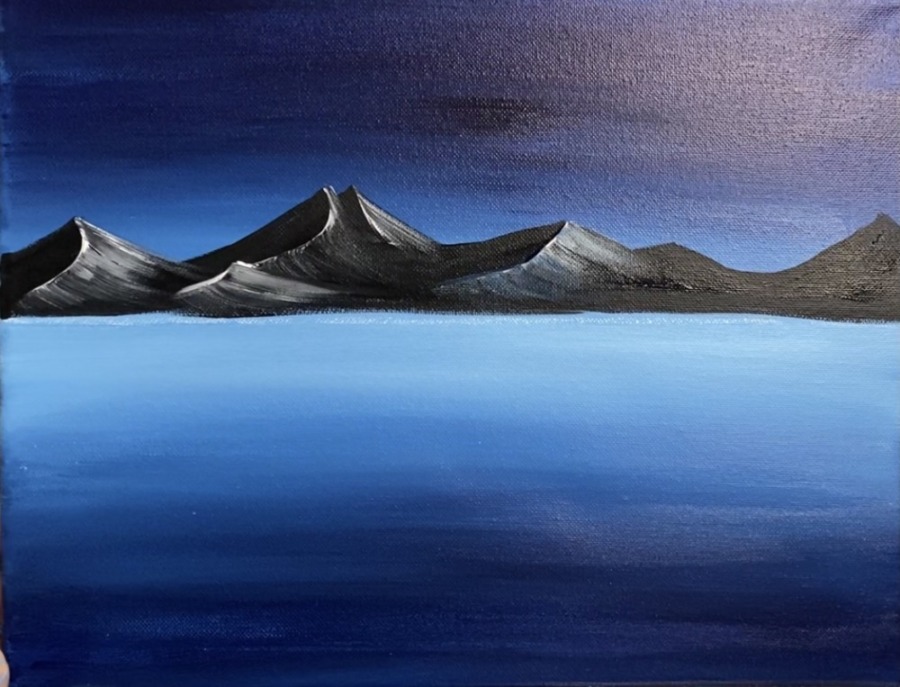
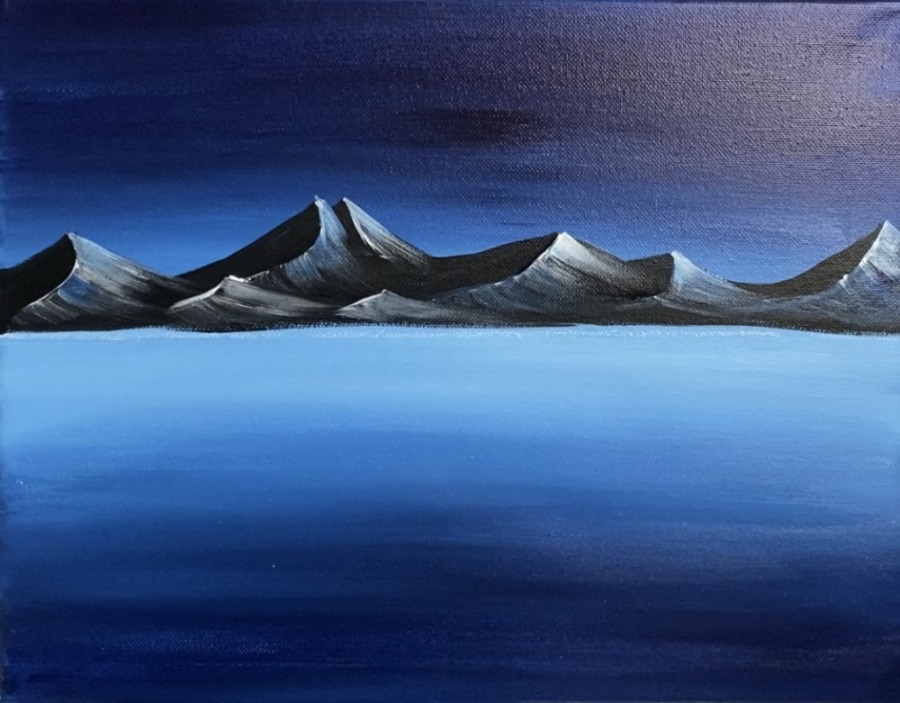
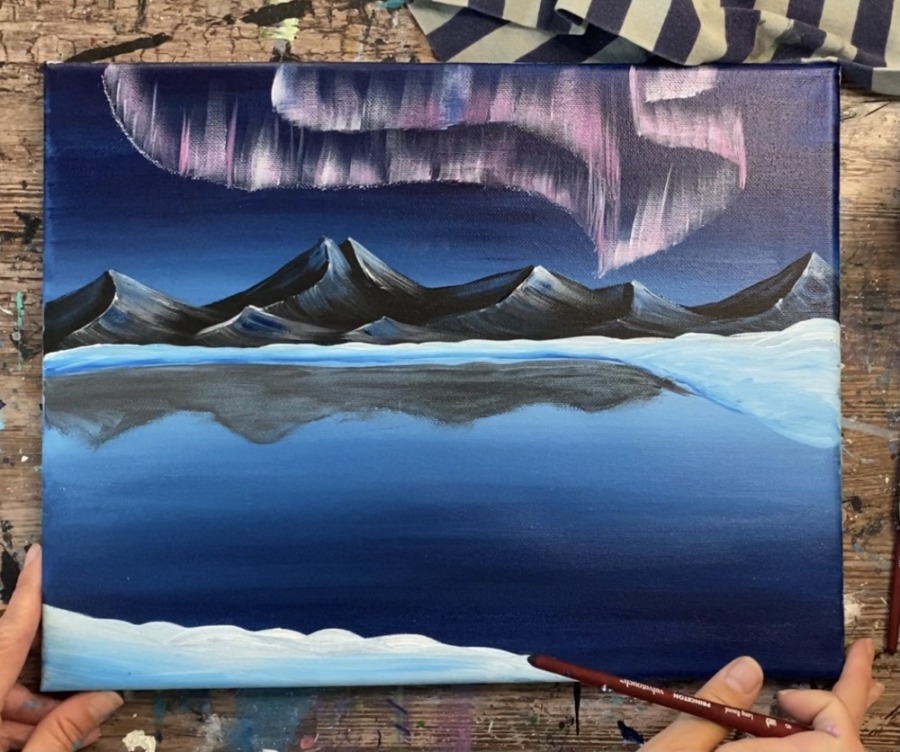
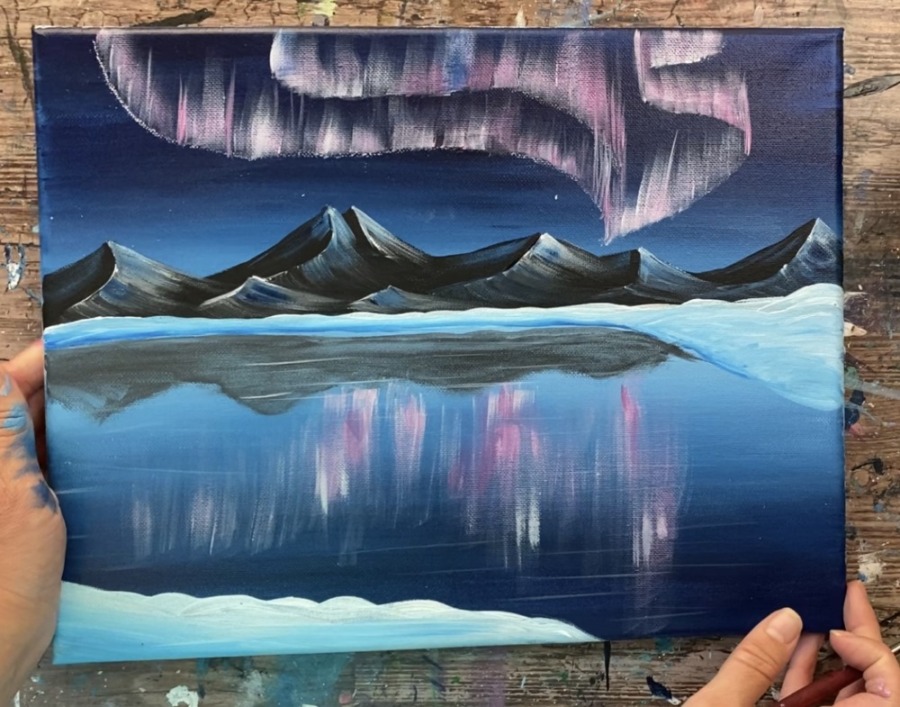
4. Paint Snow Land
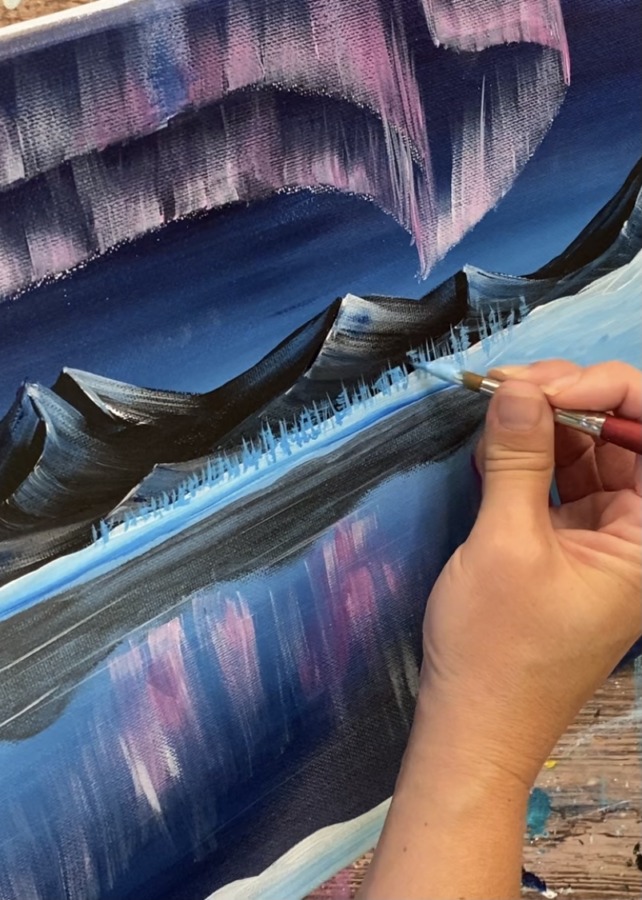
Use a #8 round brush to paint the land that is at the base of the mountain titanium white. Paint a thin to medium size land line along the base of the mountain.
Add a little “phthalo blue” on the bottom of the white land line and blend up. Then paint a diagonal/curved line on the right to bring the land down into some of the lake.
Fill the land with titanium white and a little phthalo blue blended on the bottom. Paint with slightly textured/ wavy strokes.
Then paint a land area on the bottom left of the landscape with titanium white. Make this land area much larger.
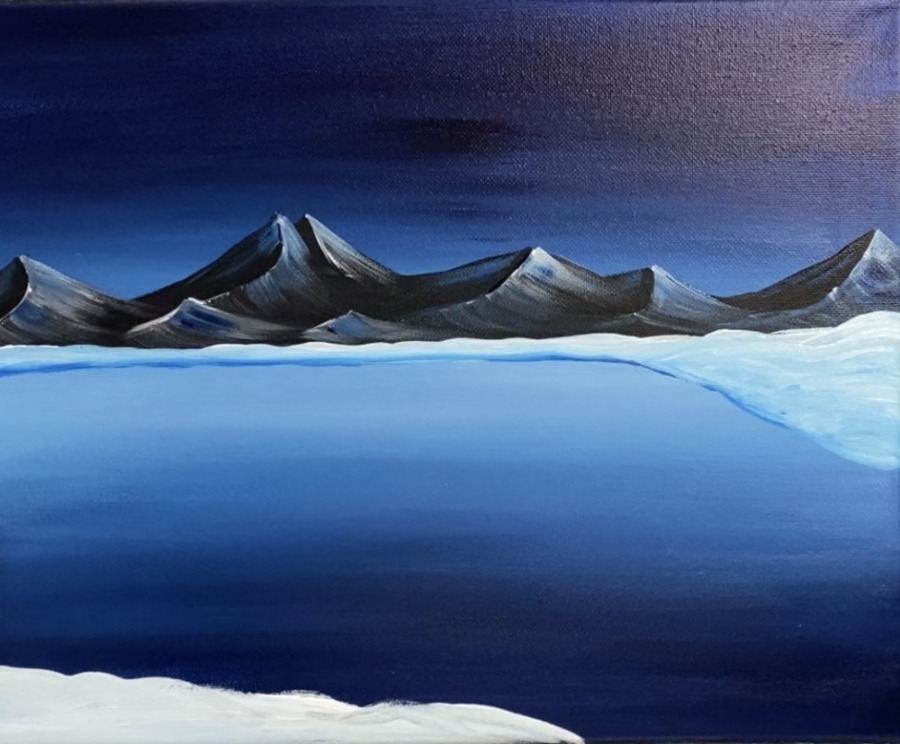
Then add a little phthalo blue on the bottom of the large land area and blend up.
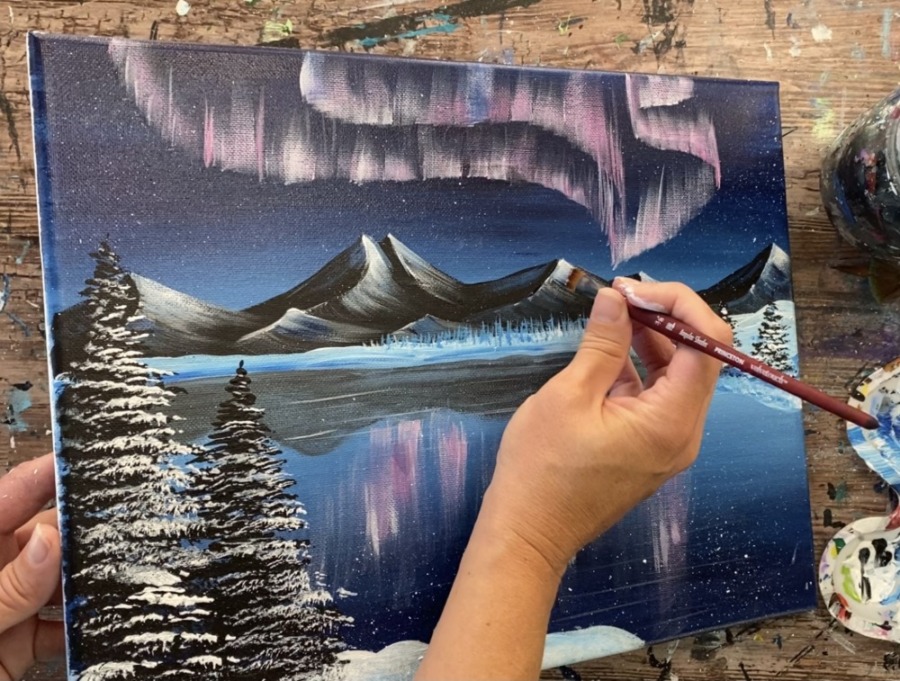
5. Paint Northern Lights (Aurora Borealis)
Use a piece of chalk to draw the base of the aurora borealis lines. I did three lines and each of those lines met at the same point in a lower right area above the mountains.
The first two lines are long and wavy and stretch across the left part of the sky. The third line is more like an “S” and was drawn on the right part of the sky.
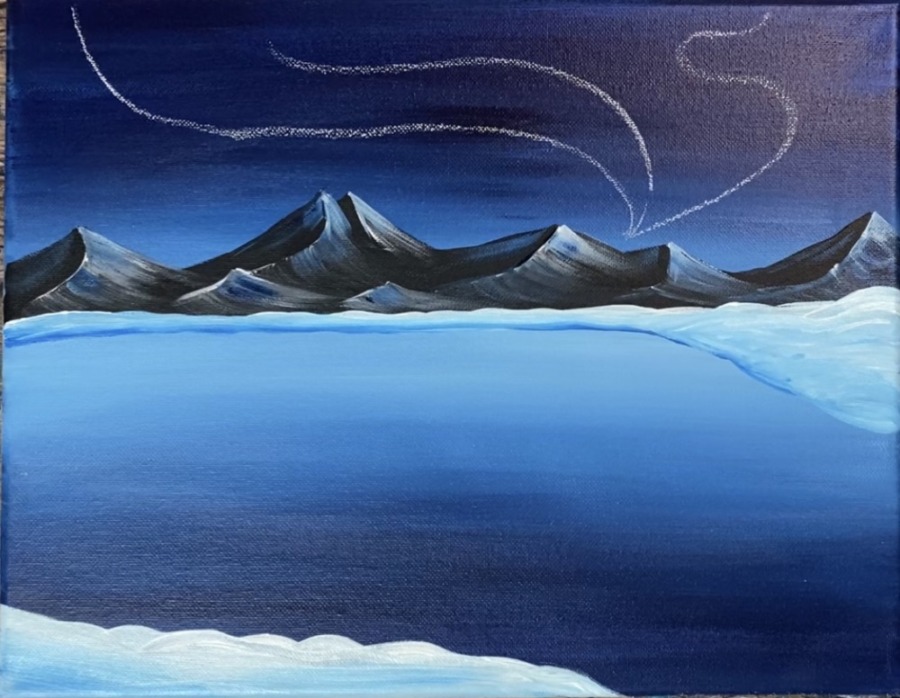
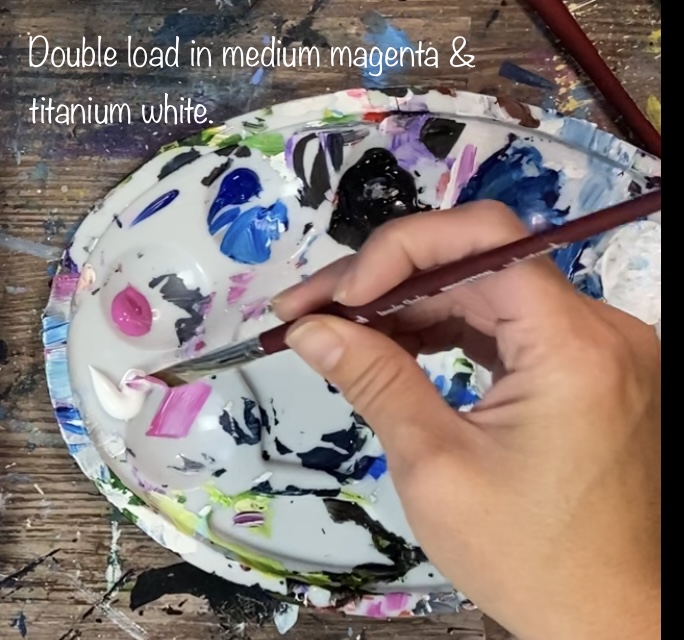
Next, use your 3/8″ angle brush to “dry brush” the aurora borealis. Double load your brush in medium magenta and titanium white. Wipe a little paint off of the brush.
Drag your brush upwards from the base of the aurora borealis line and release the pressure of each stroke so the paint dries out. Ideally you want the base (bottom of the stroke) to be brighter and have it fade out by releasing the pressure of the brush. Also, since you are wiping paint off the brush, it will do the “dry brush effect”.
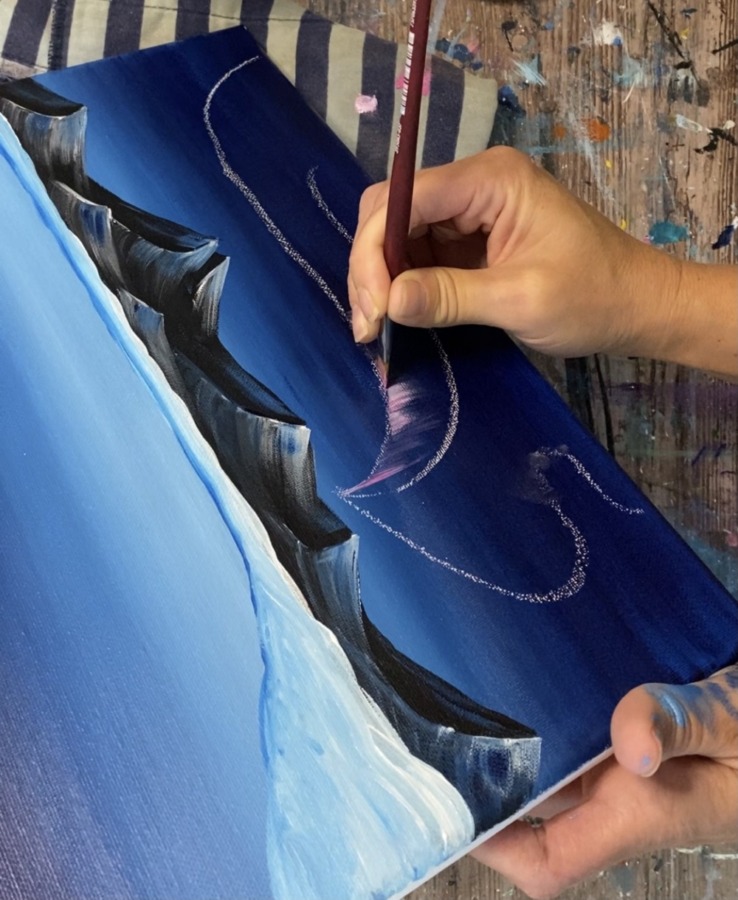
Try to paint each stroke as vertical as possible. You can use the side of your canvas as a reference to keep all your strokes perpendicular.
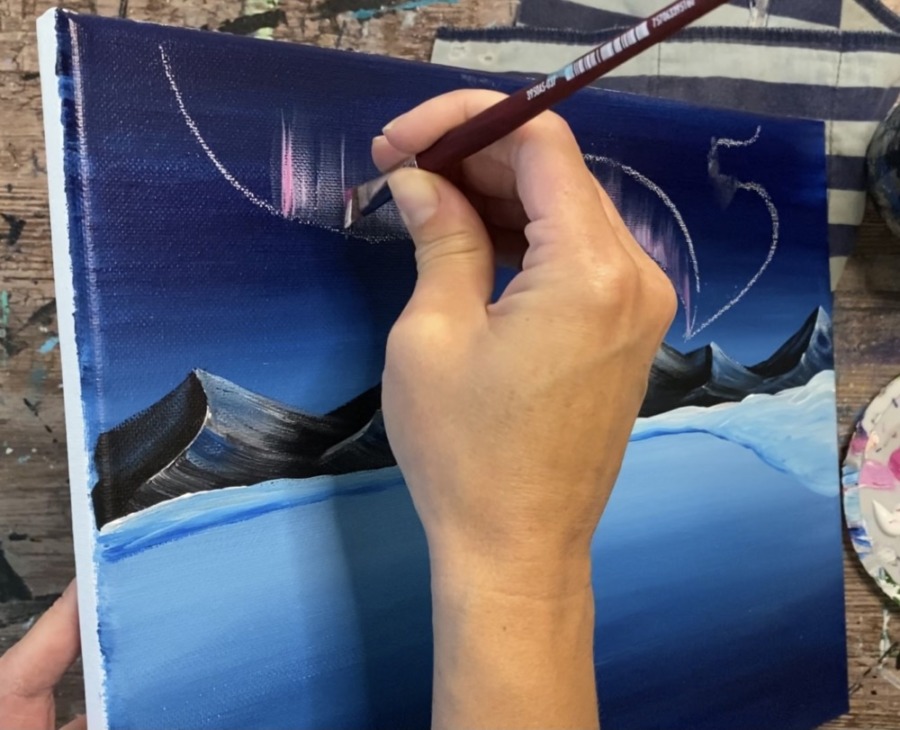
Paint vertical strokes along the chalk line. Vary your strokes so some are thicker, some are thinner. You can use the brush on its side (the tip of the bristles) to create thinner strokes. Add some more white to some of your strokes to get a variety of brightness levels. Also, some of your strokes go higher and some lower.

Repeat this technique for the next aurora borealis chalk line.
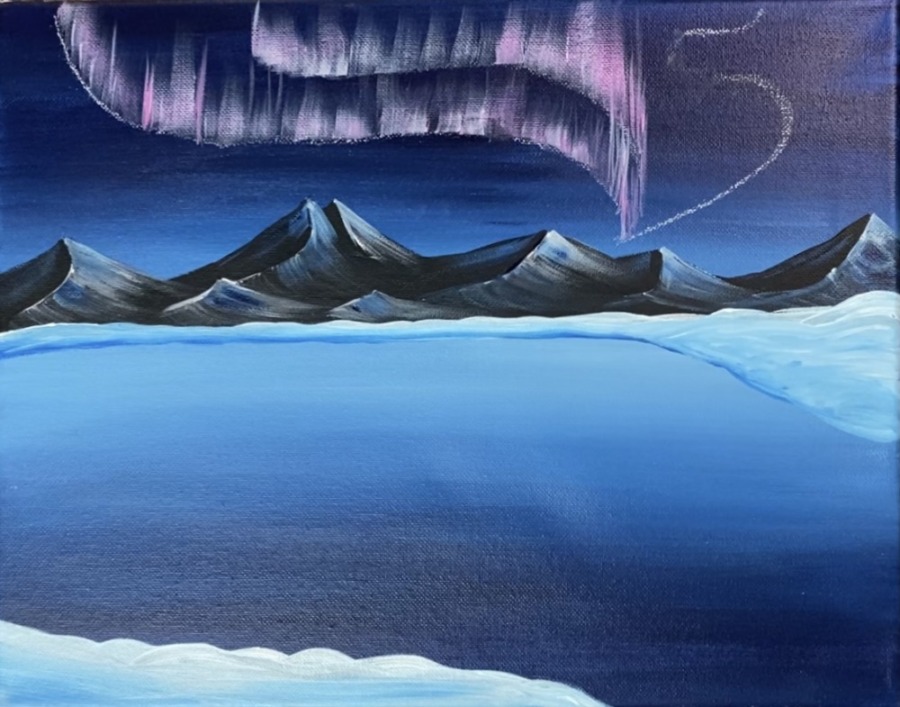
Paint the next “S” chalk line. Again, do each stroke above the chalk line. Where the line curves, you can use just the tip of your brush to create thinner lines.
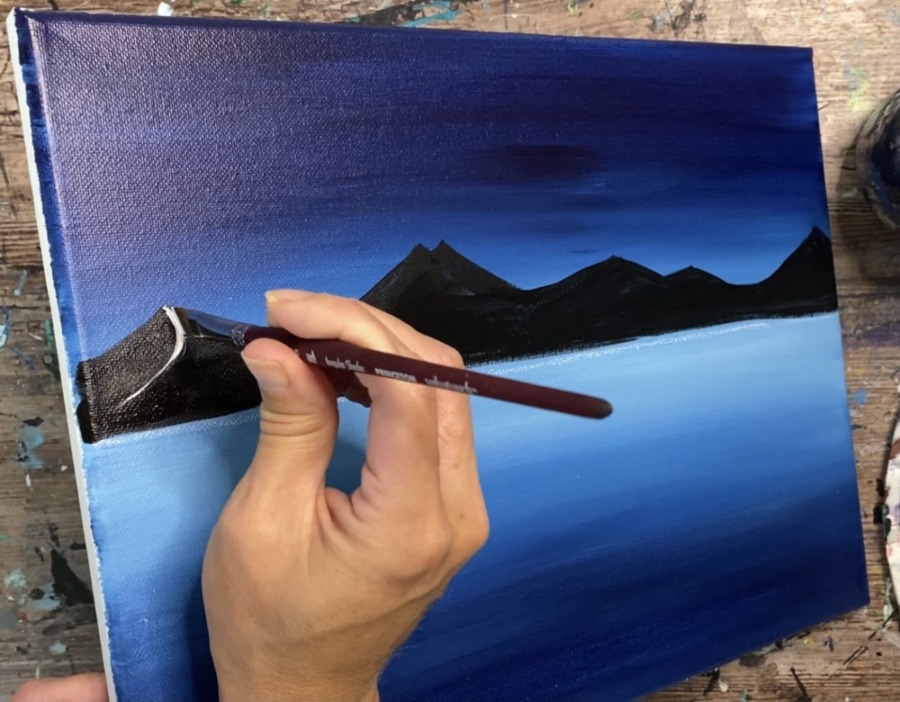
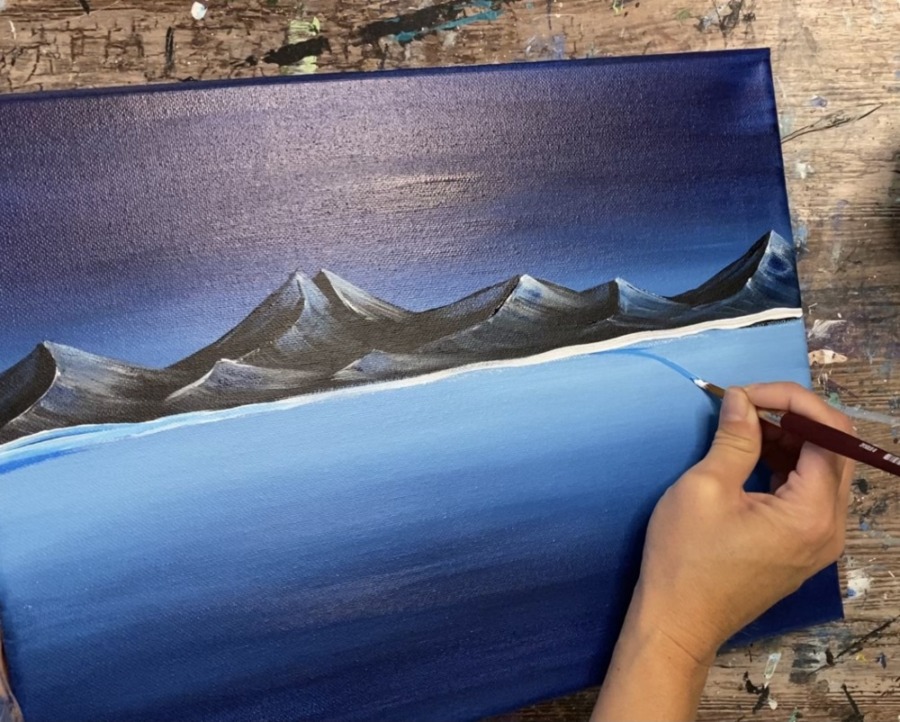
6. Paint Reflection
Use your #8 round brush to paint a reflection of the mountains in the water. Water down dark gray (make dark gray by mixing black with white). Use the tip of your brush to lightly paint out the mountain peak lines.
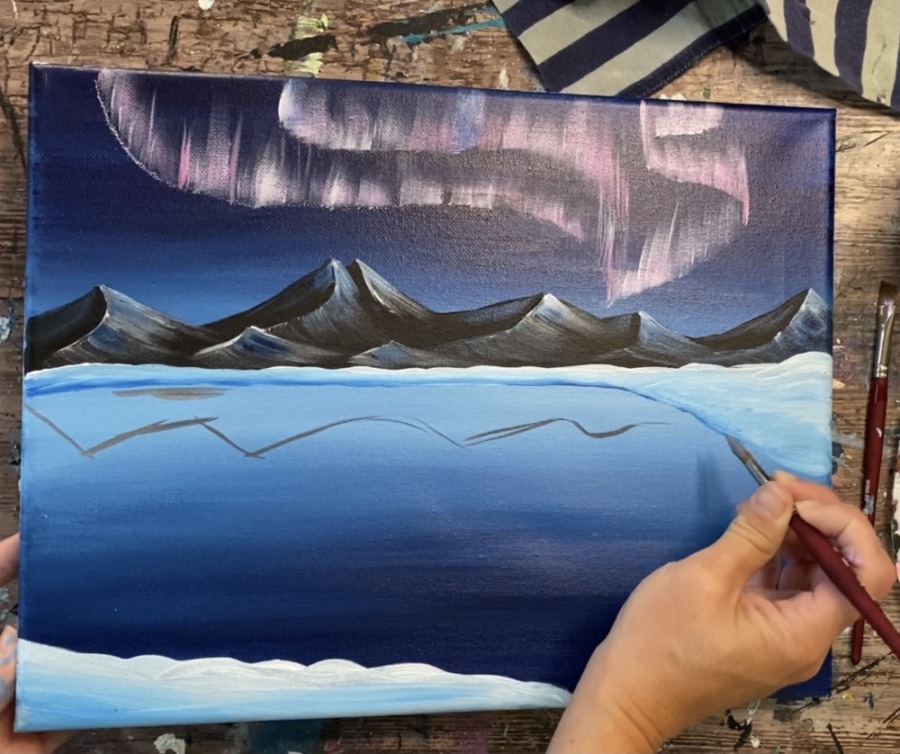
Then water down the dark gray to a watercolor consistency. Loosely paint the mountain shape in the water.
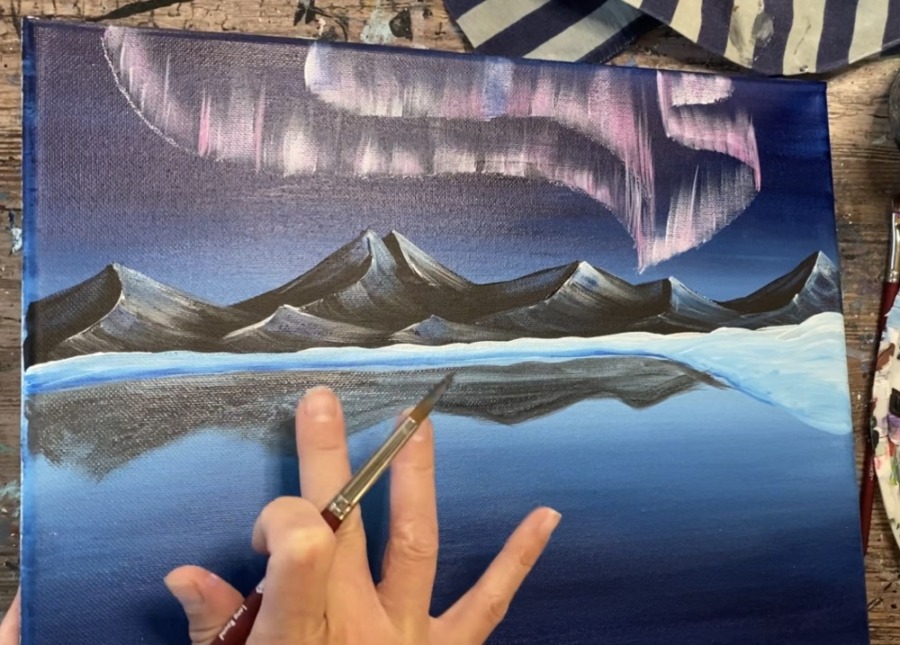
Optional: you can use your finger to smear the mountain a bit to blur the reflection a bit.
Then dry brush the aurora borealis reflection in the water. Paint vertical strokes with the medium magenta and titanium white.
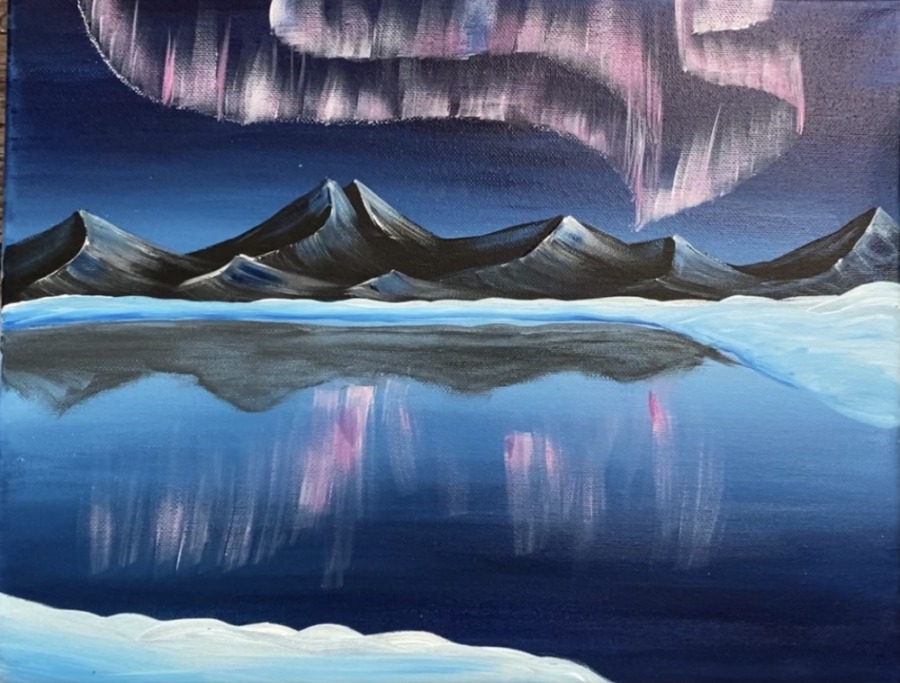
Use your 3/8″ angle brush to paint some horizontal white lines in the water over the reflection.
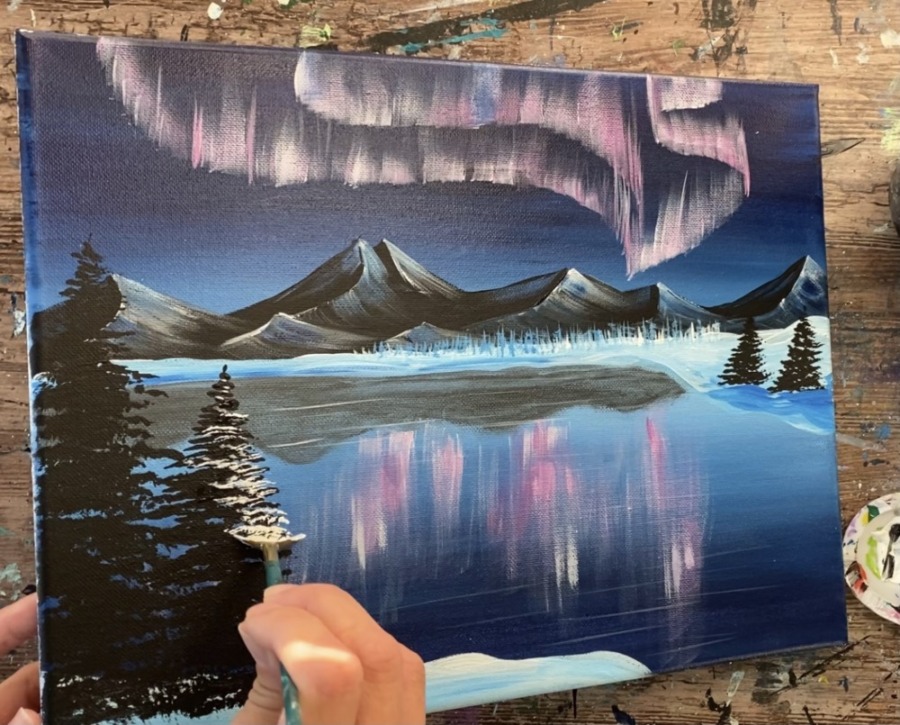
7. Paint Smaller Trees Way In Distance (optional)
Use your #8 round brush and phthalo blue plus titanium white (mix the two together or double load your brush). Paint small vertical marks way in the distance to represent a tree line that is far away. Then paint some small horizontal marks to create some branches that may be showing.
8. Paint Fan Brush Trees
Next, you will be painting black trees with a fan brush. You can see a tutorial that goes in depth for this fan brush tree technique here!
Load your fan brush in a mars black. Then make a vertical mark where you want the top of the tree to be.
Load the tip of your fan brush in the mars black (it helps if you slightly water the black down). Then lightly paint the top of the tree holding the brush kind of tilted to only use some of the bristles.
Tap just the tip of your brush moving it in a zig-zag left and right direction. Form the conical shape of the tree so the top is narrow and the bottom gets wide.

Use the full width of the fan brush by the time you get to the middle of the tree.
The tree trunk is not showing. Paint the bottom of the tree branches so that it rests somewhere on the front snowy land area.
Paint another slightly shorter tree next to the first one.
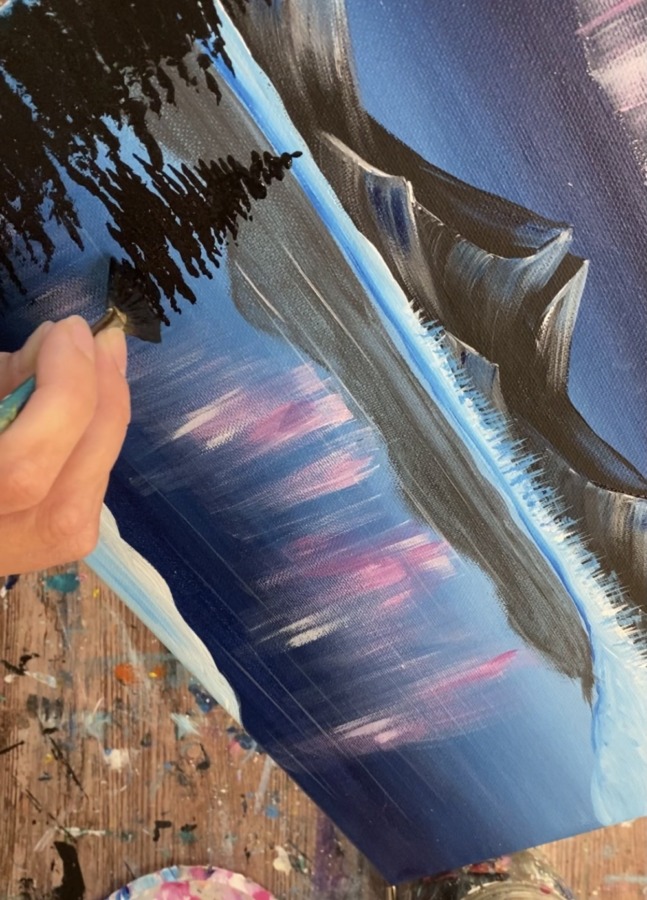
Then paint two smaller trees on the land further in the distance. You can use the fan brush or a smaller flat brush to paint these trees.
Wait for the black to dry. Then paint the snow layer on the trees. Load your fan brush in titanium white. Paint the layer of snow on the trees using the same technique but do not cover all the black. Add a little more white to just the right side of the tree so the right side is a little brighter.
Then repeat this technique to the larger tree on the right. Again don’t cover all the black. Add a little extra white to the branches on the right side of the tree.
Then paint a snow layer on the two trees in the distance.
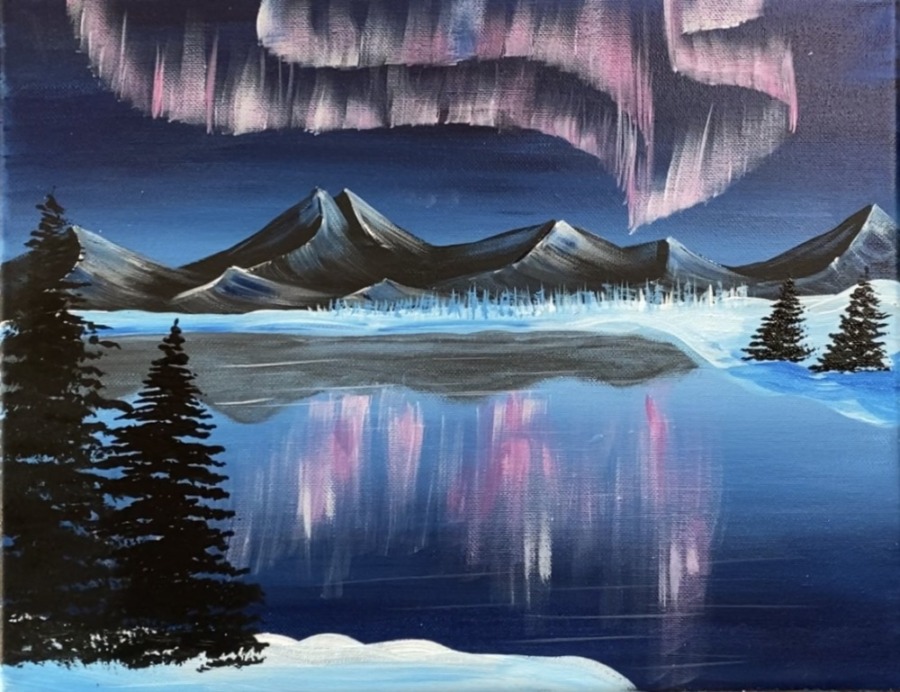
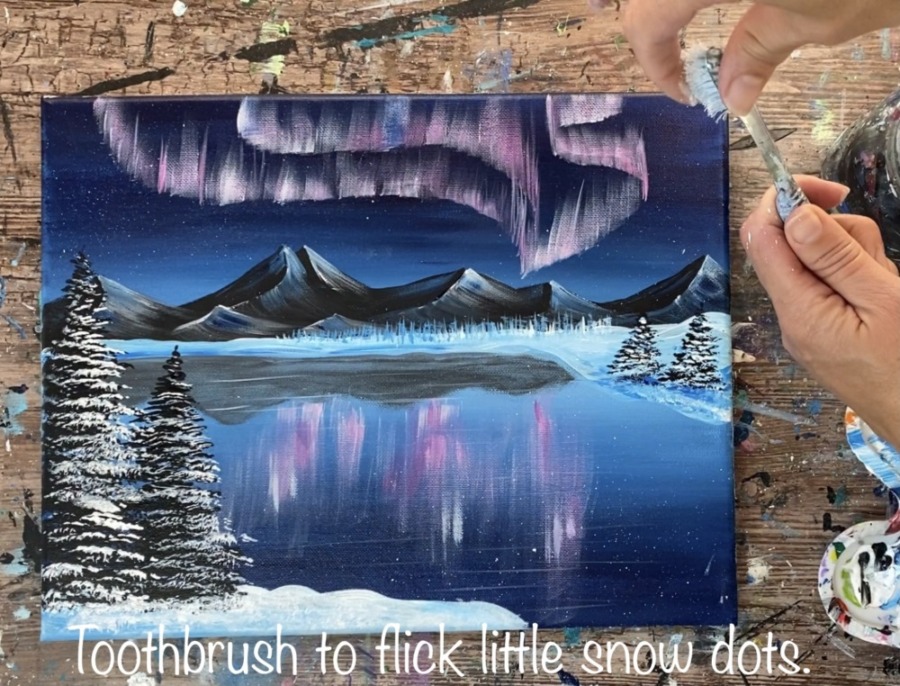
9. Final Touch Ups & Snow Splatters
Use a toothbrush to splatter little snow dots on the painting. You will want the titanium white paint to be slightly watered down but not too “runny”. It also shouldn’t be too thick. Test it on a different surface before splattering the snow dots.
Splatter the snow dots all over the sky and lake area.
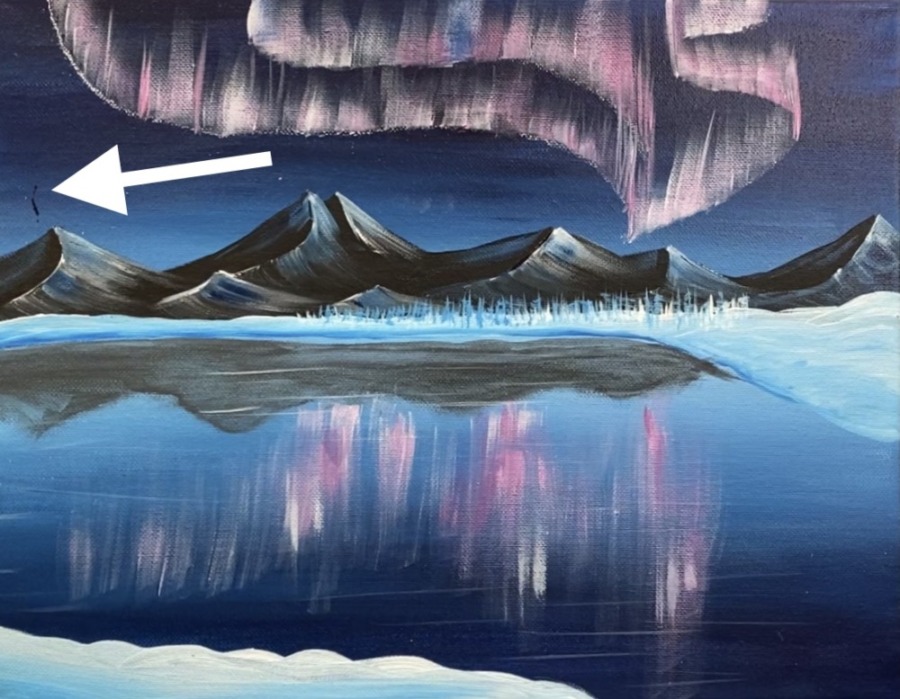
Do final touch ups as needed. I did titanium white on the edges of the peaks of the mountains to brighten them up a bit.
I also added a few more horizontal reflection lines on the frozen lake using the 3/8″ angle brush and titanium white. Use the tip of the brush to create the thin horizontal lines.
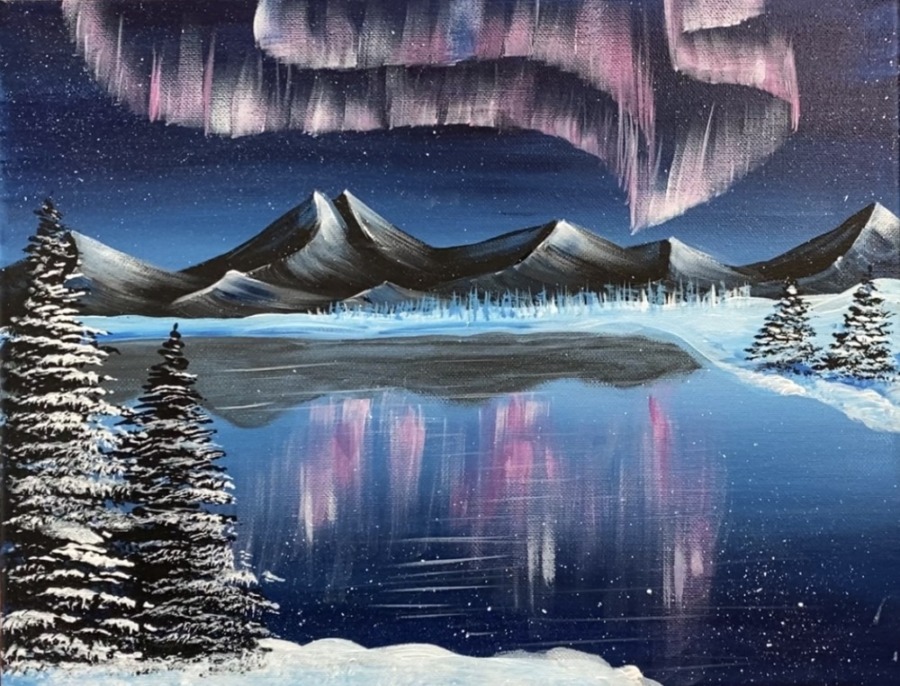
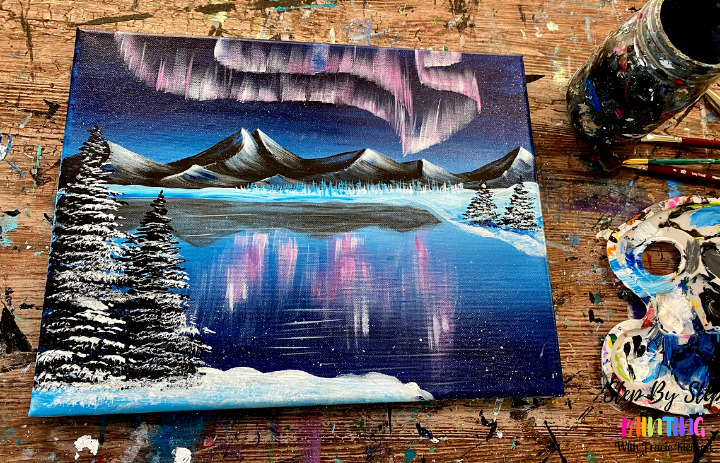
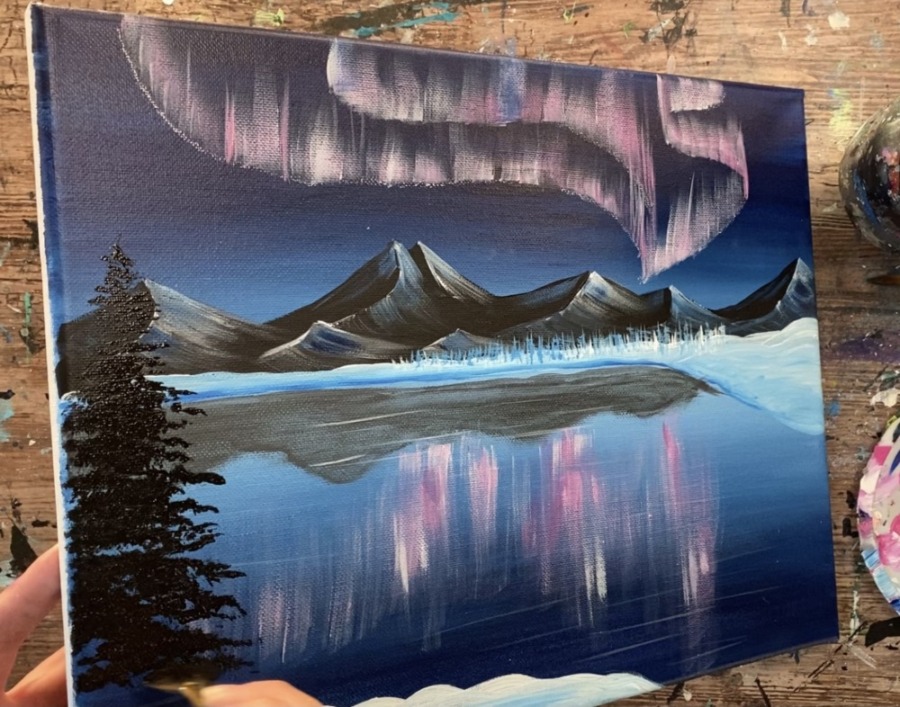
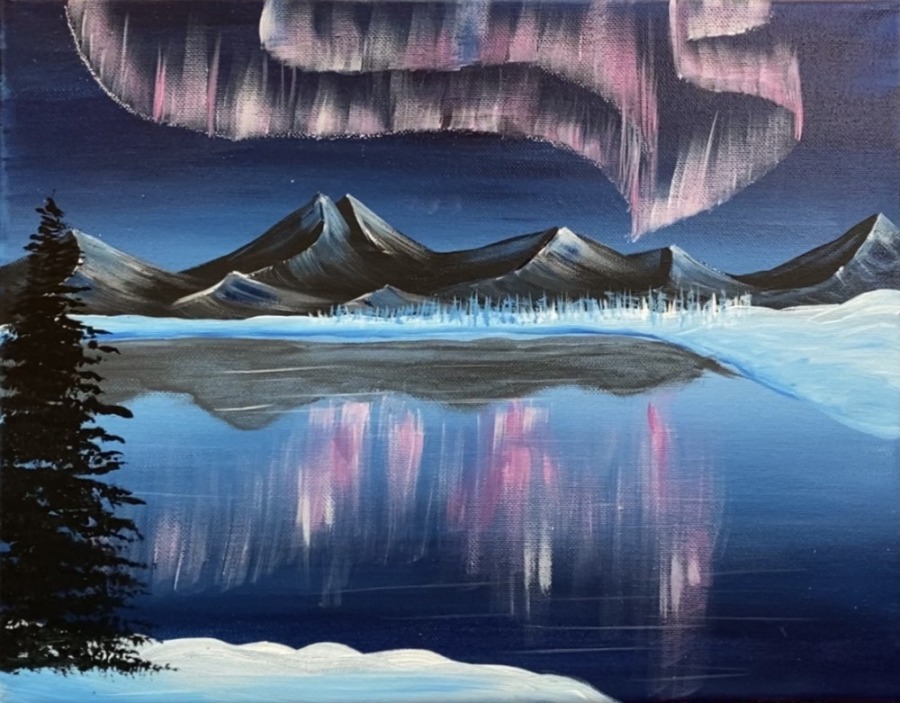
Finished!
That’s it! Sign your name and show it off!
Share Your Art Here!
Did you do this painting? You can share it on social media below!


Any tips on how to make a Prussian blue with the colors we have on hand? Or maybe an apple barrel color we can use to substitute?
Yes! So Prussian blue is very similar to a navy blue. It’s a deep, dark blue. You can use the Apple Barrel Navy color for it. You can also add a very small amount of black to a phthalo blue or even primary blue to darken it. I’ll add the Apple barrel color conversion chart to this!
thnx so much! This is a really gorgeous painting! love it!?
After taking notes on this picture, I am anxious to put it on my canvas. Can only hope for the best as I am basically a beginner. Love learning from these instructions. Wish me luck. Lots of it!!