
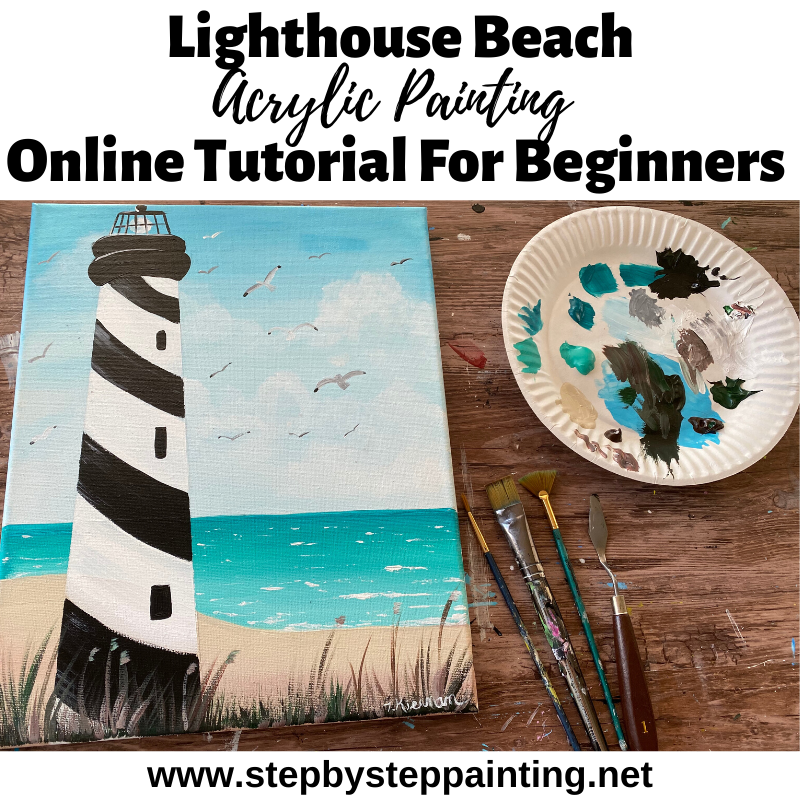
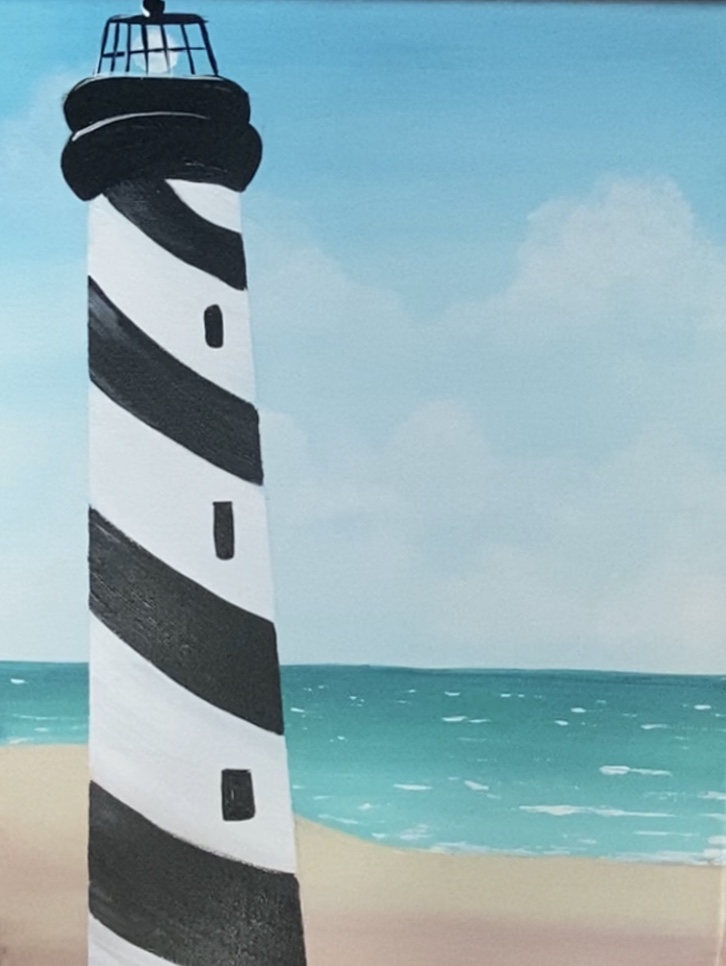
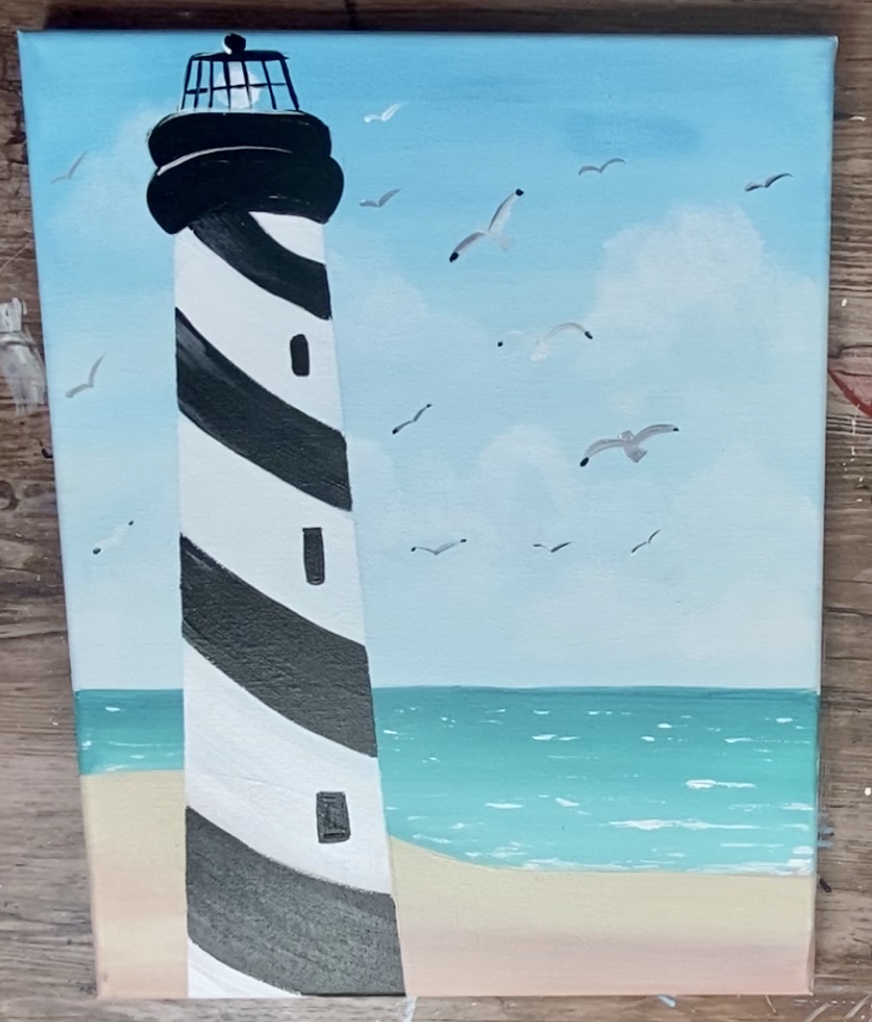
How To Paint A Lighthouse Beach

This acrylic tutorial will demonstrate step by step how to paint a lighthouse on a beach.
What a relaxing way to spend a few hours! I can hear the sound of the ocean waves and those seagulls!
This tutorial includes a traceable of the lighthouse. I will show you how to set up the rest of the seascape behind this lighthouse – and it is so easy!
Enjoy and happy painting!
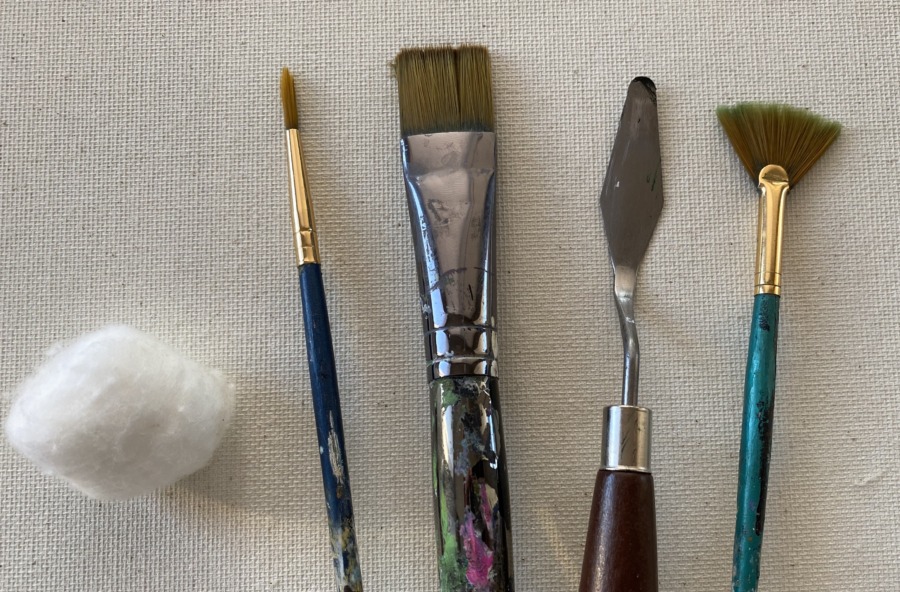
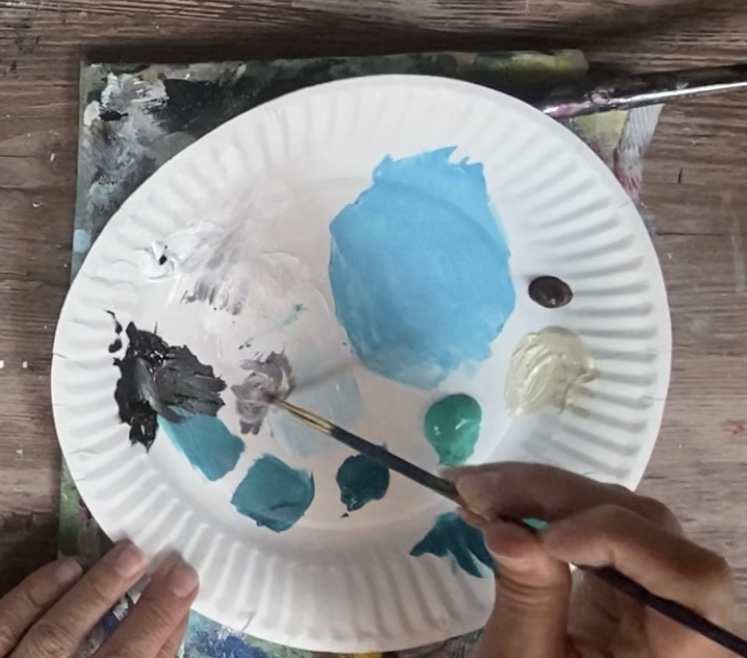
Materials
Lighthouse Beach Painting
Learn how to paint a lighthouse on a beach! This beginner painting tutorial will guide you through the steps.
Materials
- Acrylic Paints
- Brushes
- Palette Knife (optional)
- Cotton (optional)
- Masking Tape (nice to have but still optional)
- 11 x 14 Canvas
- Container of Water
- Palette to hold paint (I use paper plates)
- Traceable
- Graphite Paper
- Pencil
- Ruler or measuring tape
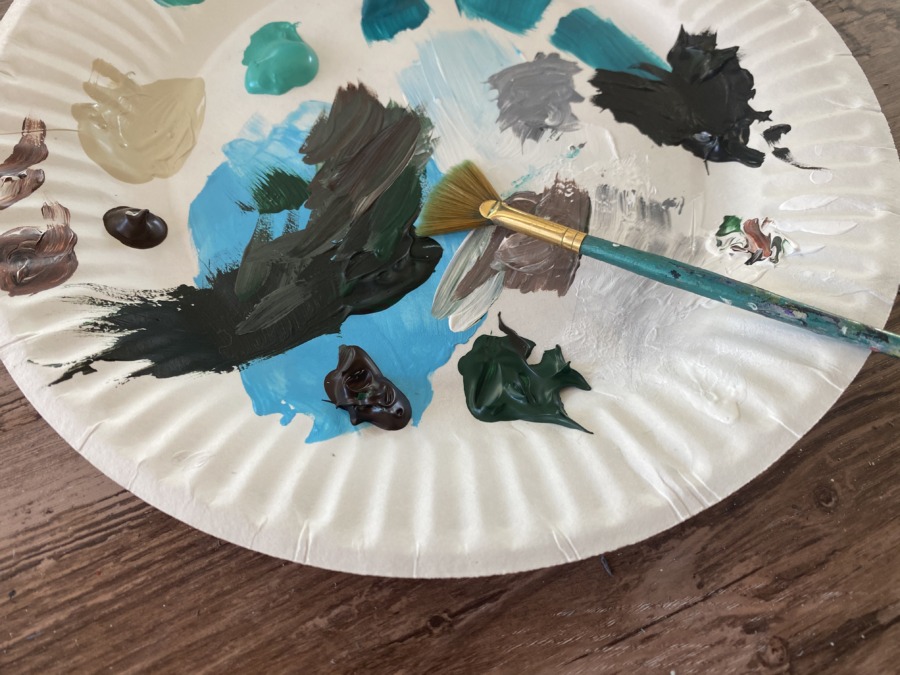
Colors
- Titanium White
- Mars Black
- Deep Green Permanent
- Light Blue Permanent
- Phthalo Turquoise (any dark turquoise)
- Bright Aqua Green
- Burnt Umber
Brushes
- 3/4 Wash Brush
- 4 Round Brush
- Fan Brush For Beach Grass (optional)
- Palette Knife For Lines In Water (optional)
- Cotton For Clouds (optional)
Colors
Note: The Phthalo Turquoise I used was a Hobby Lobby Brand. You can use any dark turquoise color or mix Phthalo Blue with Bright Aqua Green. The rest of the colors I used were Liquitex BASICS.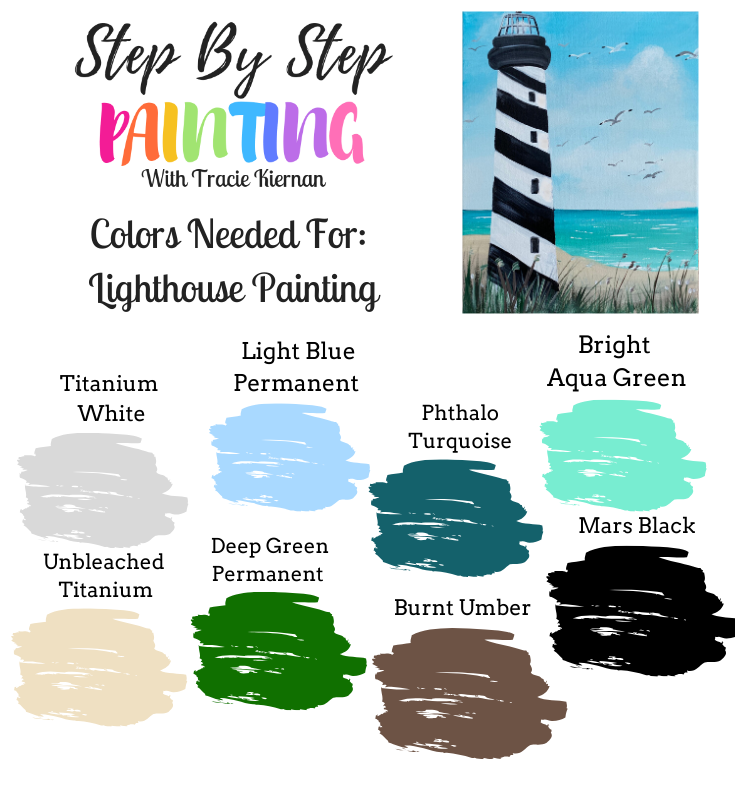
Craft Paints
I commonly get asked which craft paint colors would work, specifically they very popular Apple Barrels Paints. If you are using Apple Barrels, here are my suggestions:
- White
- Black
- Bimini Blue (or any light aqua color)
- Parrot Blue (or any light blue)
- Beige (or any sand color)
- Teal Treat (or any dark turquoise)
- Hunter Green (or any dark green)
Brushes
While these are the brushes/ tools I used, you do not have to use these exact ones and can even use different sizes depending on what you have on hand.
- 3/4 Wash Brush
- 4 Round Brush
- Cotton Ball (I used for clouds)
- #1 Palette Knife (I used for lines on the water)
- Fan Brush (I used partially for the beach grass)
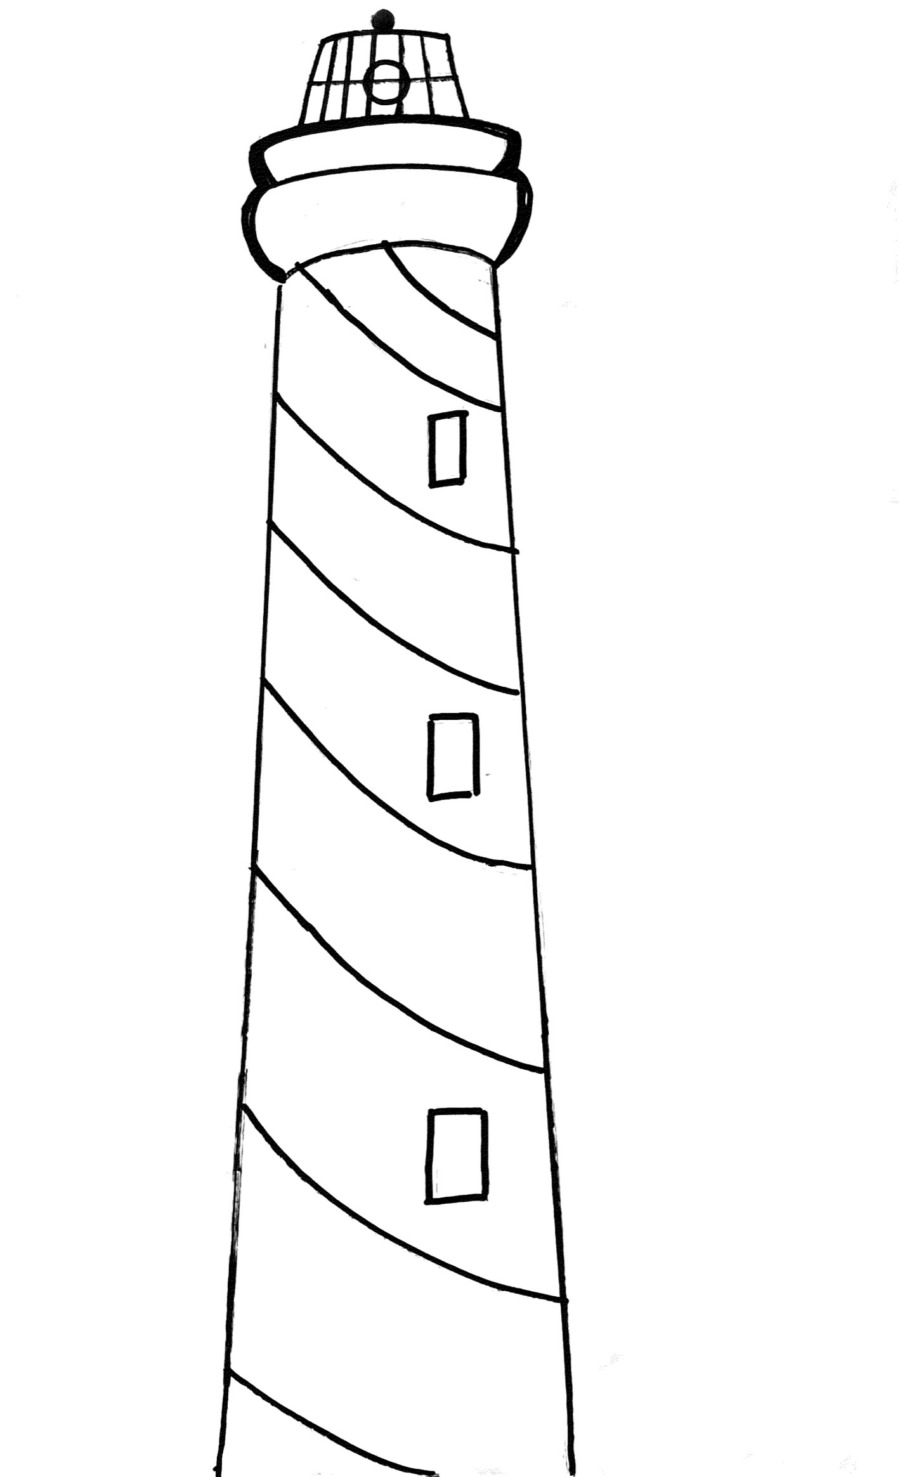
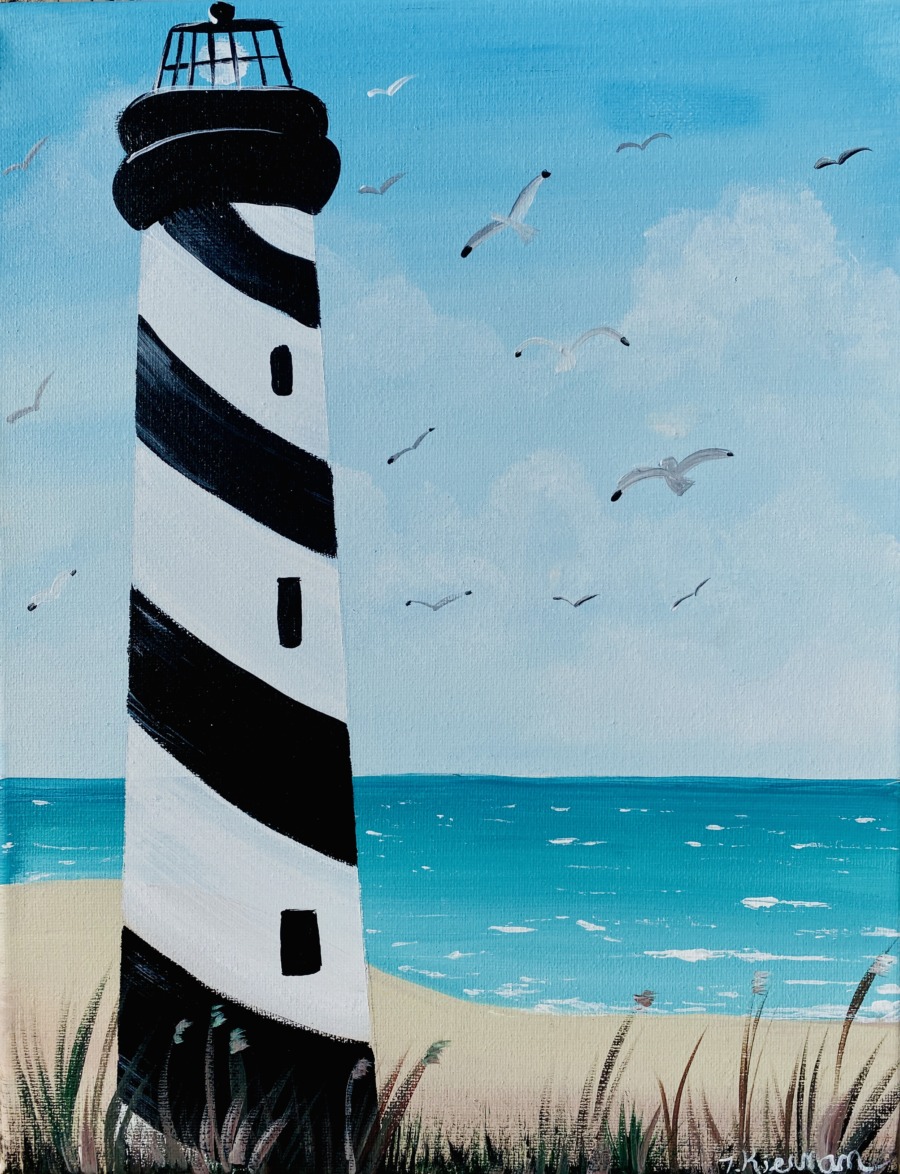
Traceable
Directions At A Glance

Video
Step by Step Directions
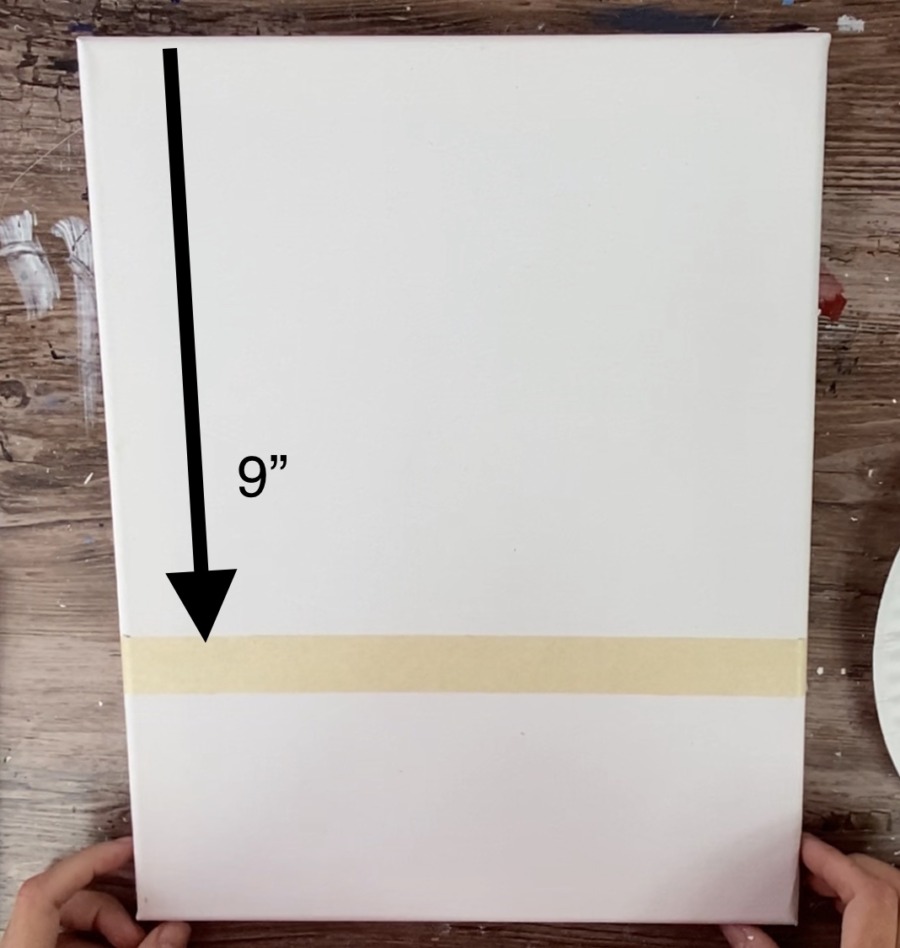
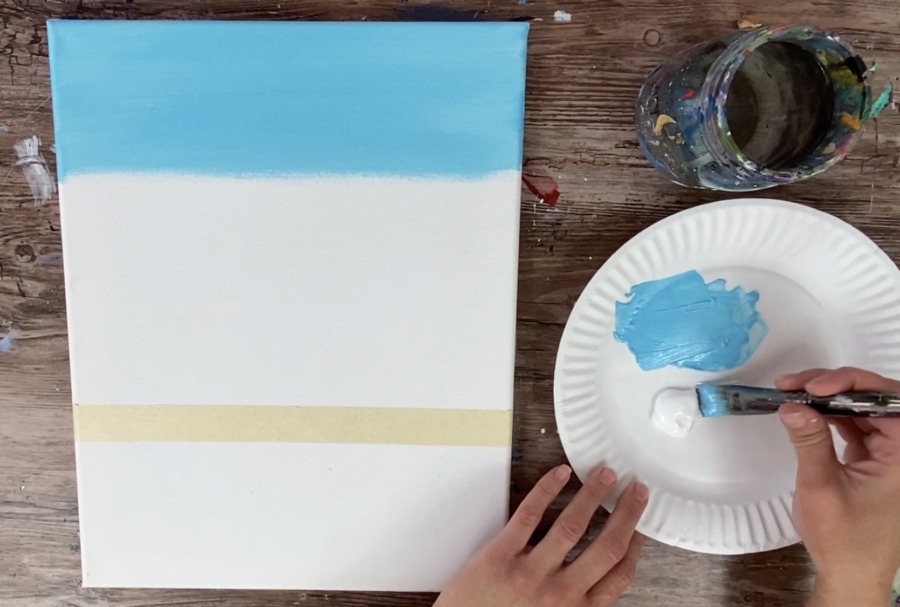
1. Mask Your Horizon Line
Use masking tape to mark your horizon line. I measured mine from the top of the canvas to the horizon line – approximately nine inches.
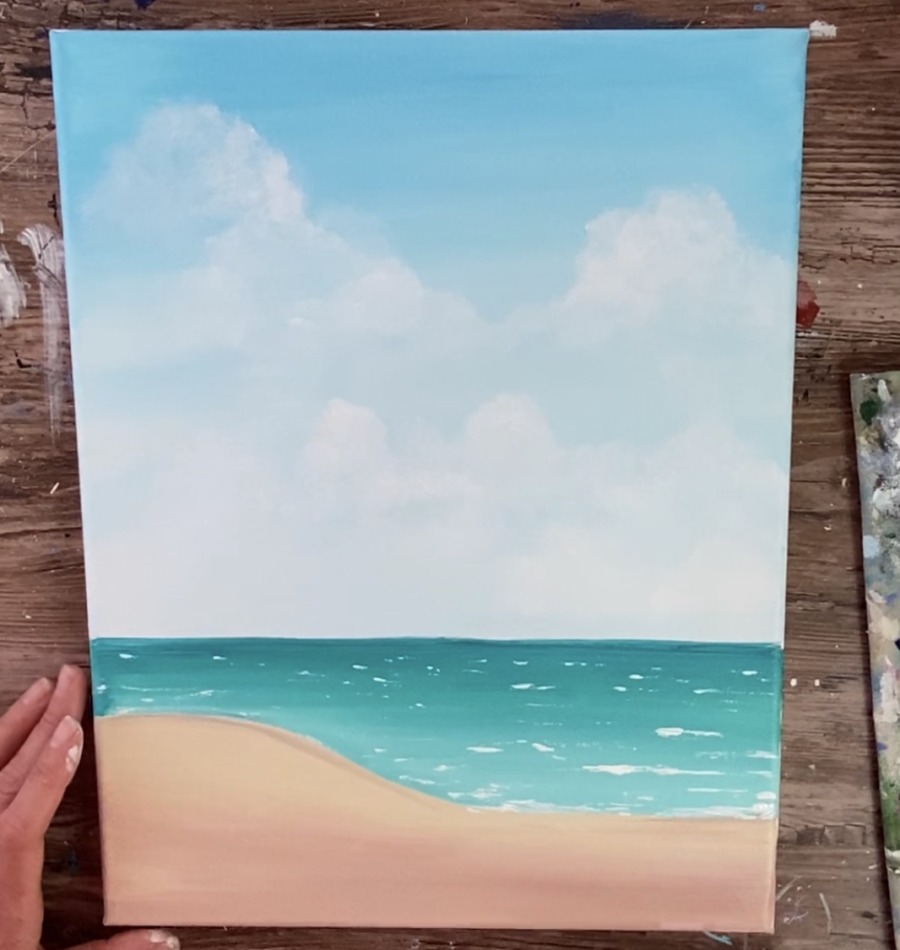
2. Paint The Sky
Use a 3/4” Wash Brush, Light Blue Permanent and Titanium White to paint the sky.
Start at the top with light blue permanent. Paint left and right horizontal strokes about a third of the way down the sky.
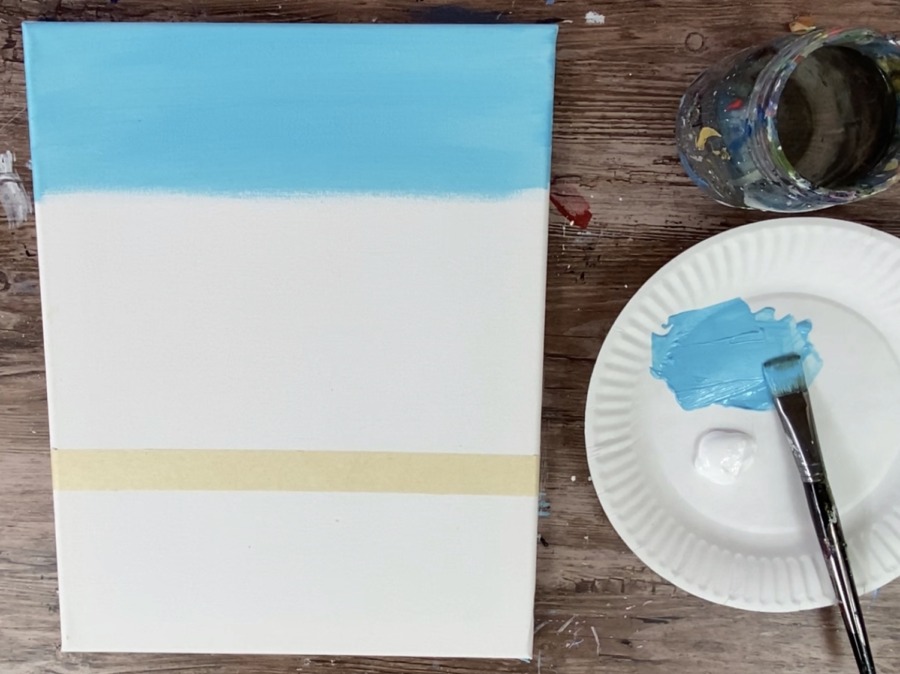
Then, without rinsing the light blue off your brush, load it in titanium white.
Blend this titanium white with the blue so the color in the sky gets gradually lighter as you work your way down to the horizon line.
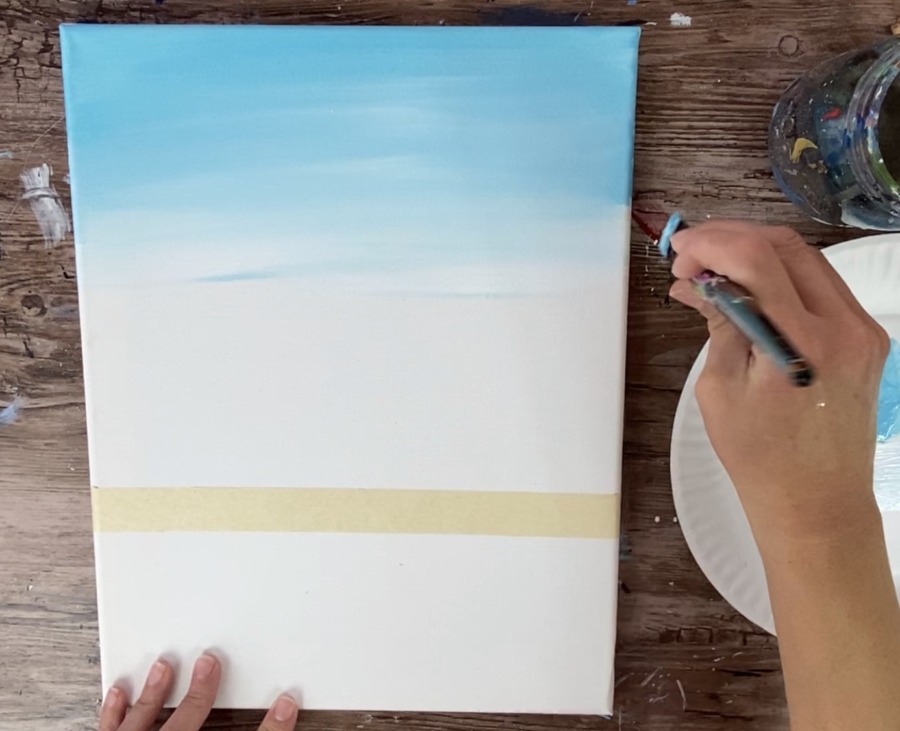
Keep adding more titanium white and paint all the way to the bottom of the horizon line. Your blue should be very light, almost white by the time you get to the horizon.
If necessary, you may need to add a little more light blue permanent but for the most part it should be mostly white.
Gently remove your masking tape. If you want you can apply the masking tape above the horizon line to get a crisp line for the water, however, you may risk pulling off some of the paint with the tape.
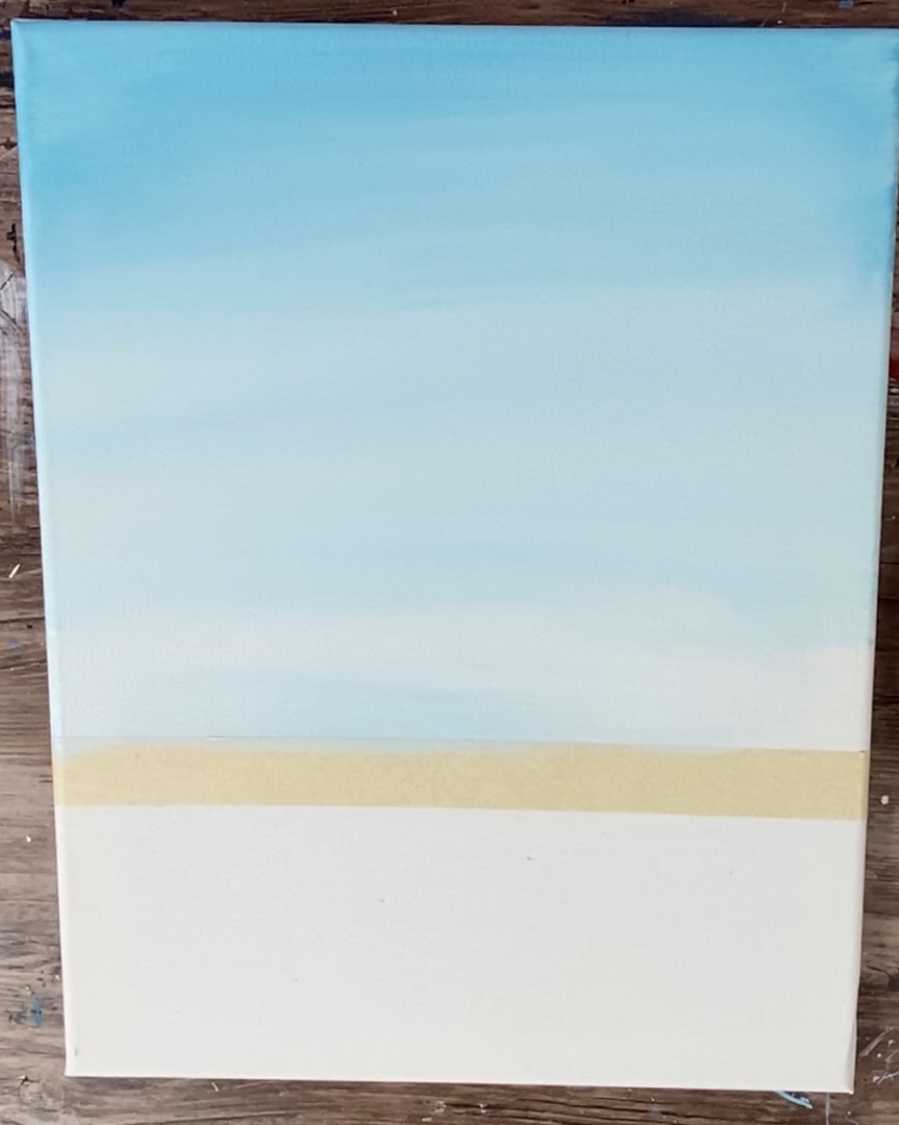
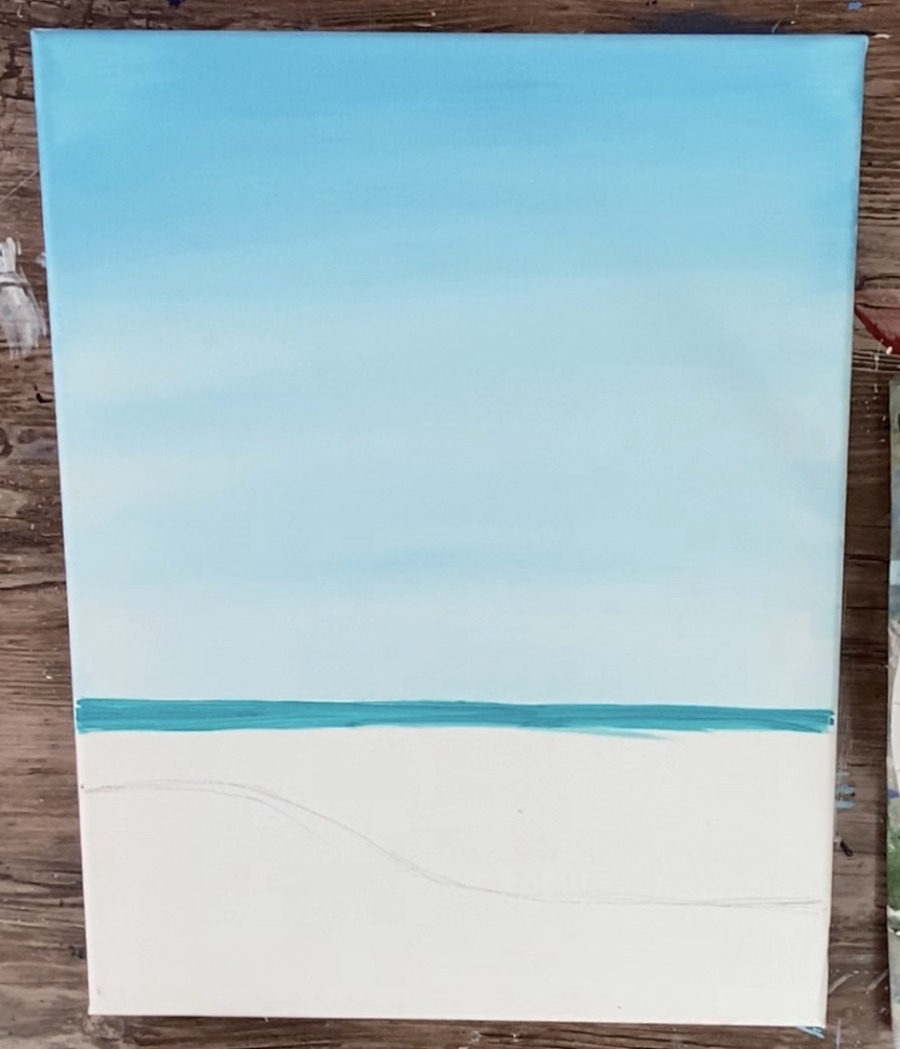
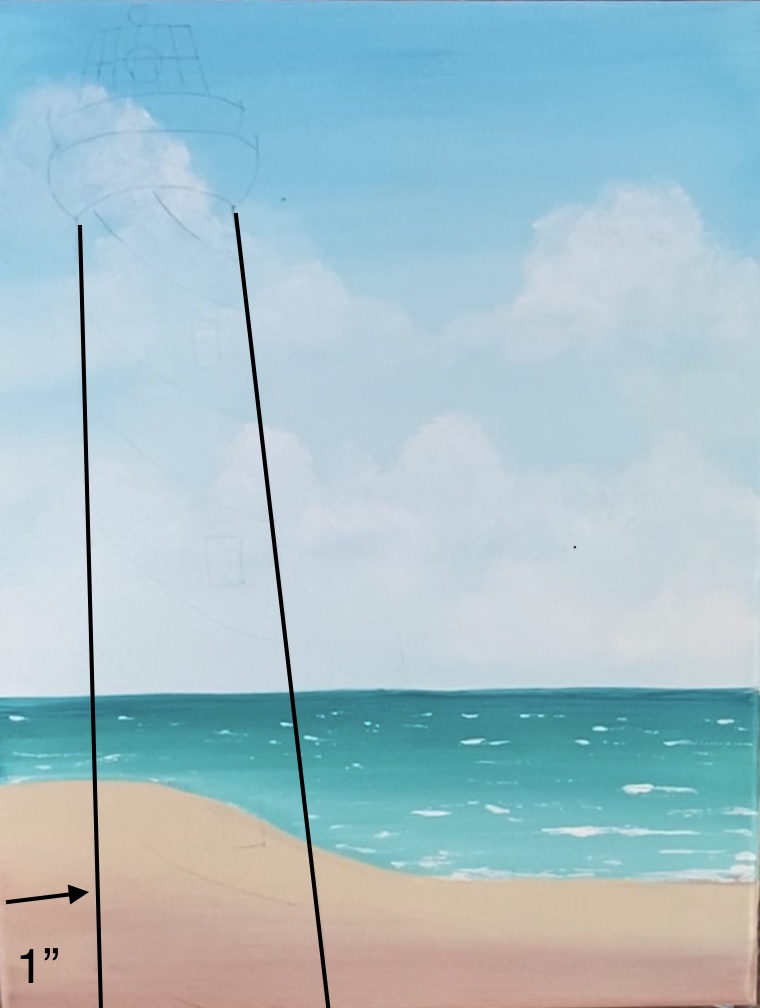
3. Draw the sand line
Use a pencil to lightly draw a line that will divide the sand from the water.
See image below for the exact dimensions – my line started about 3.5” from the bottom on the left and dipped down to 2” on the right.
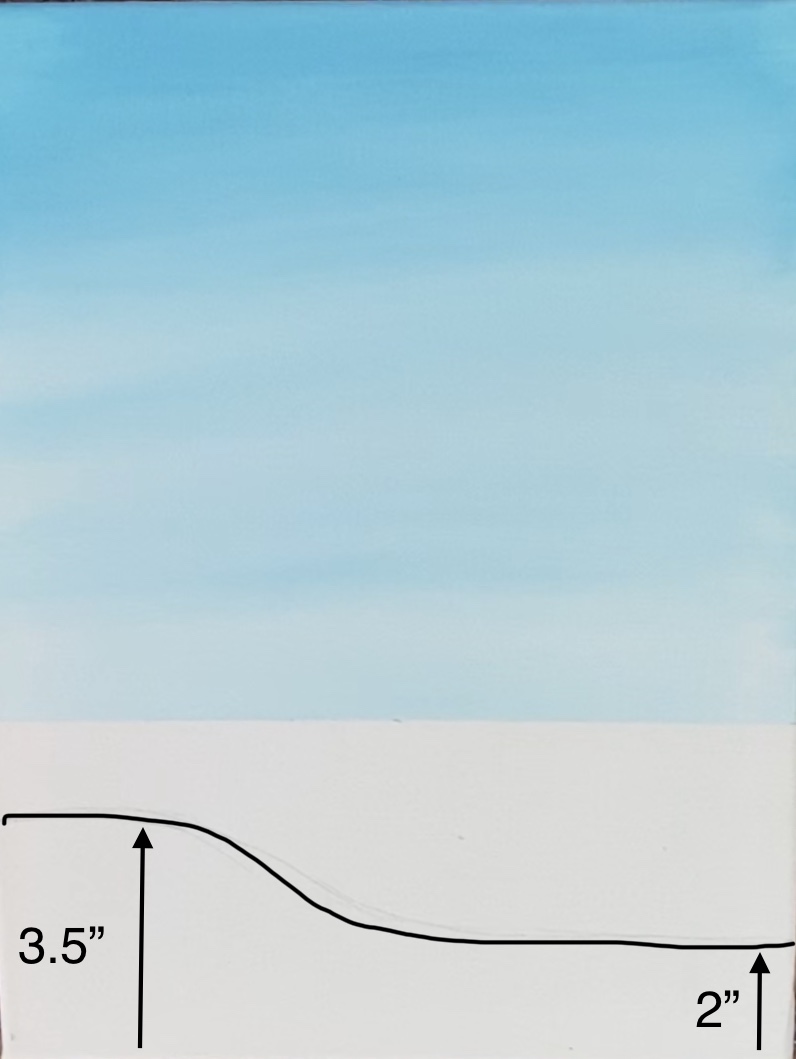
Draw this line lightly with a pencil.
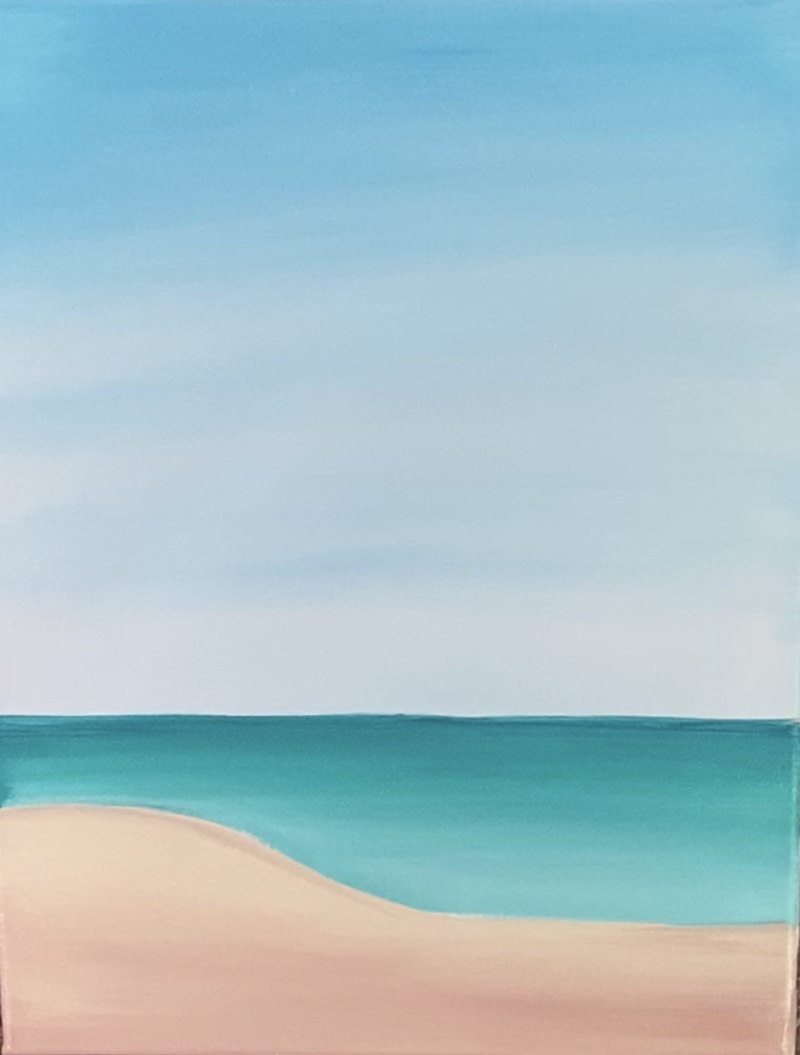
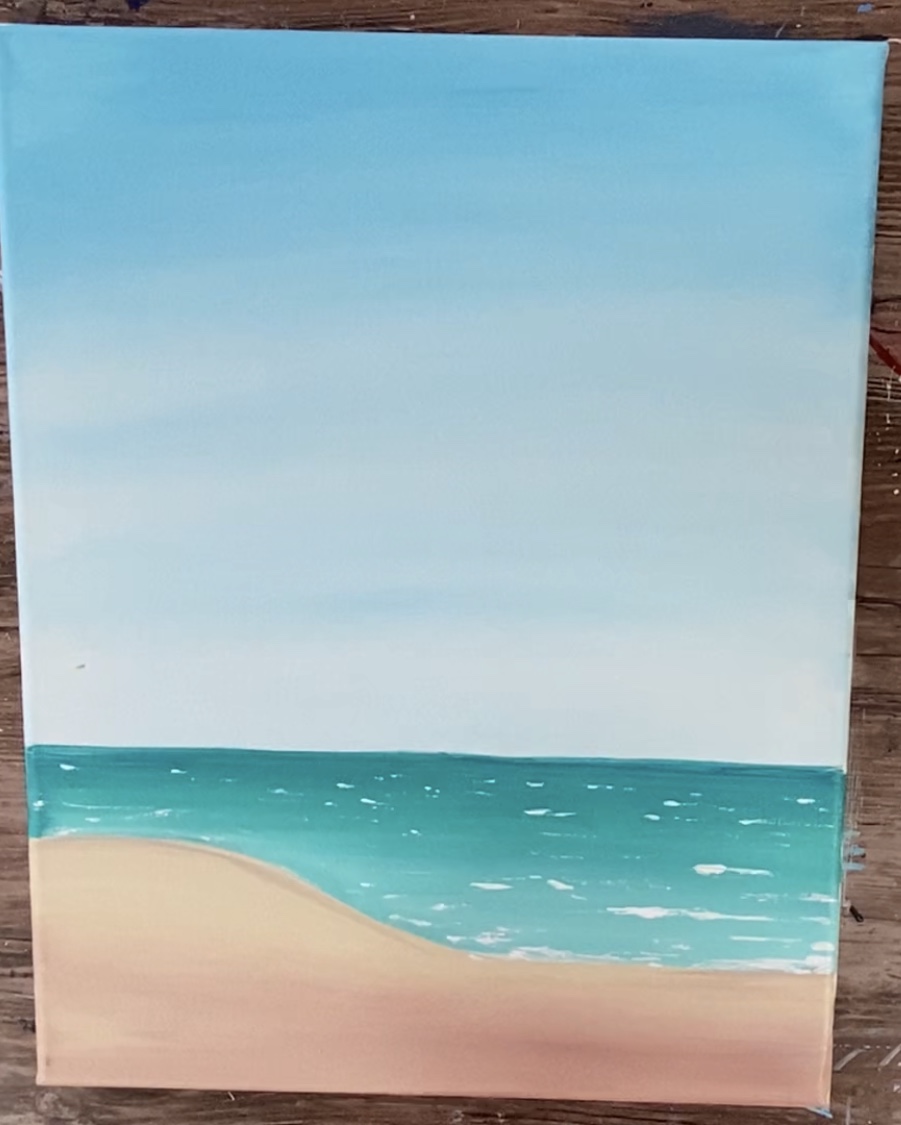
4. Paint The Water
Use your 3/4 Wash Brush to paint a *phthalo turquoise line just under the horizon line. Use the tip of your brush to get the horizontal line.
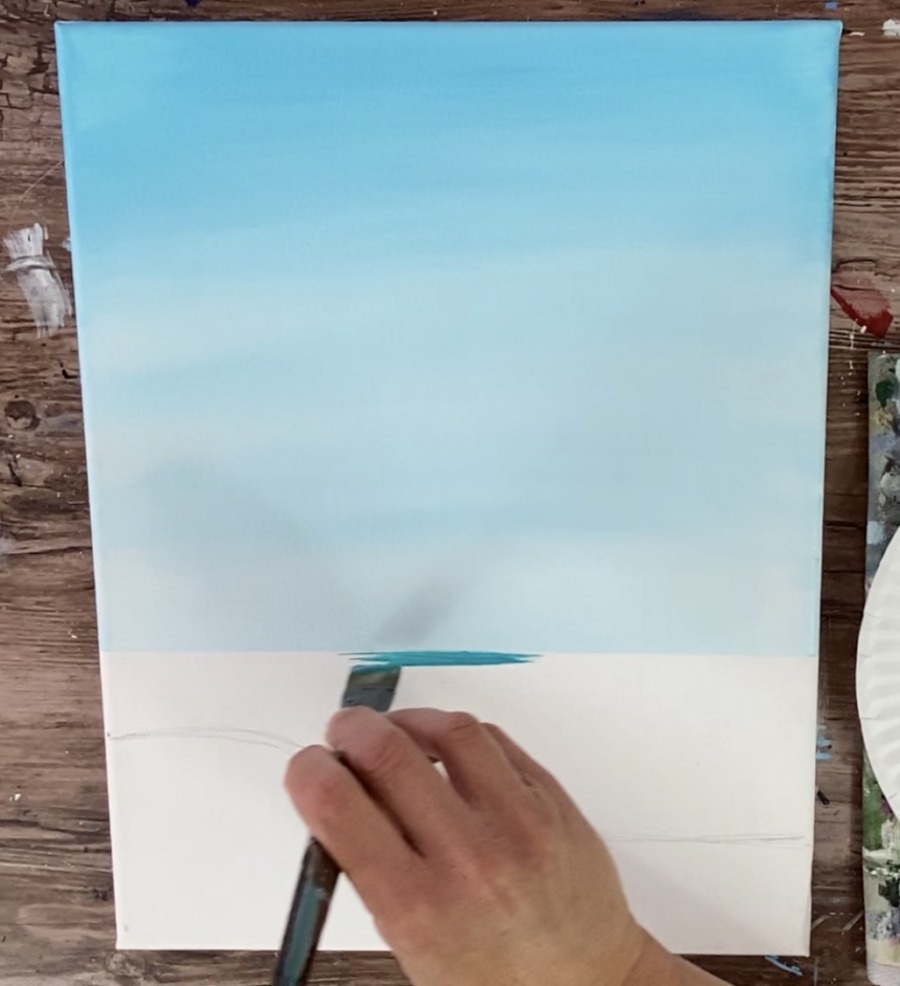
*If you don’t have phthalo turquoise, mix a little bit of phthalo blue with bright aqua green or use any dark turquoise color you have on hand.
Go about a quarter of an inch down with this phthalo turquoise.
Next load your brush in bright aqua green (without rinsing the turquoise off). Paint almost all the way to your sand line. The dark turquoise will blend with the aqua.

Then load your brush in white (without rinsing). Continue to paint down to your sand line, blending the white with the rest of the aqua.
Your water should essentially get lighter as it reaches the sand line.
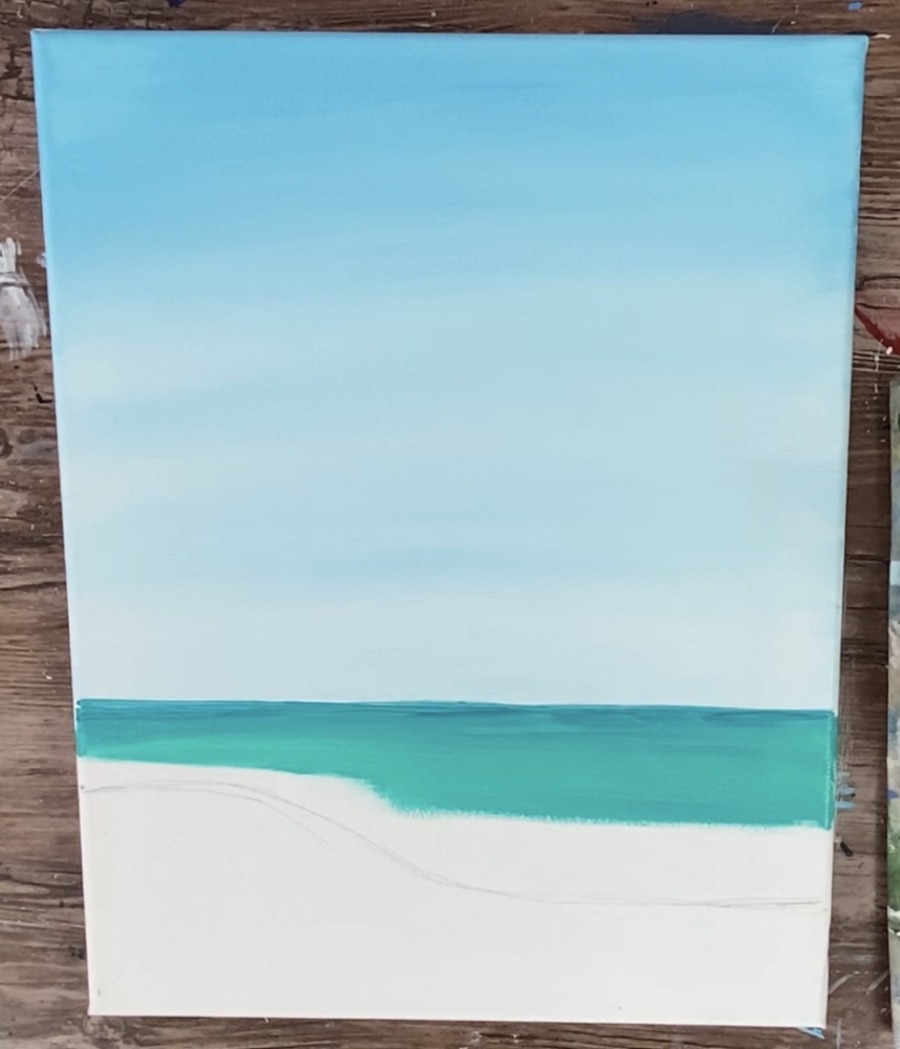
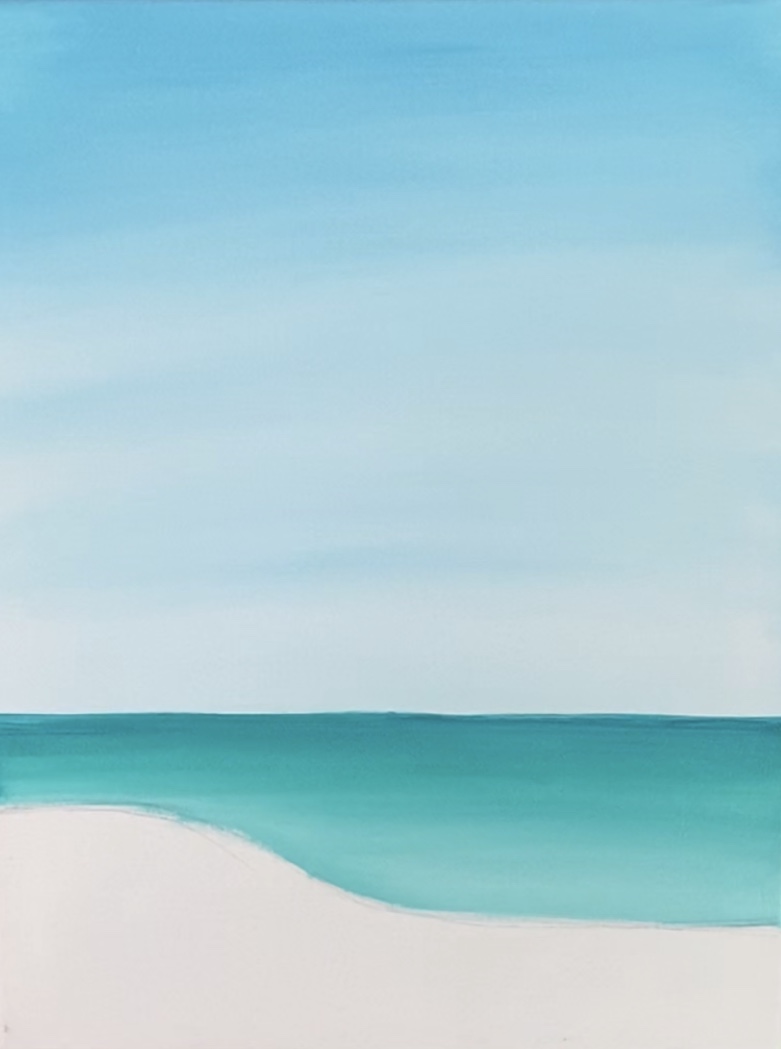
5. Paint The Sand
Completely rinse your 3/4 Wash Brush and pat it dry. Then paint the sand from the curved line to the ground with the color unbleached titanium.
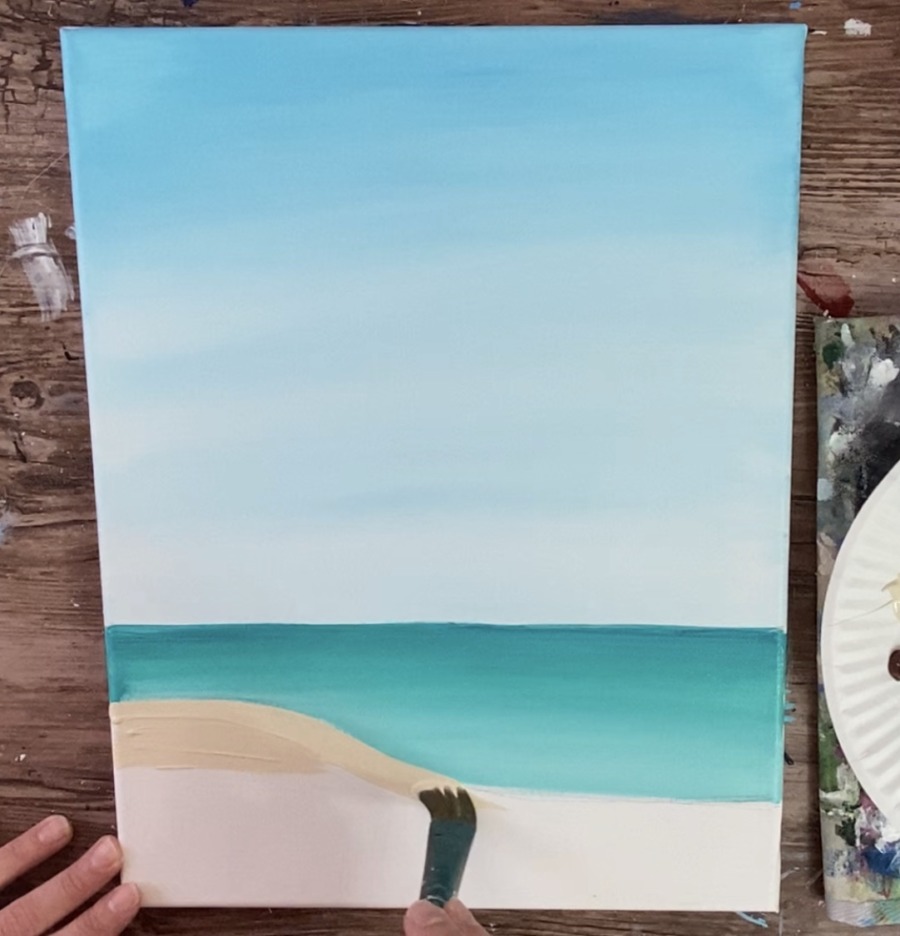
Go almost all the way down with this unbleached titanium then add a little bit of burnt umber into it. Just a tiny bit!
Blend this burnt umber into the unbleached titanium so that it is slightly darker on the bottom.
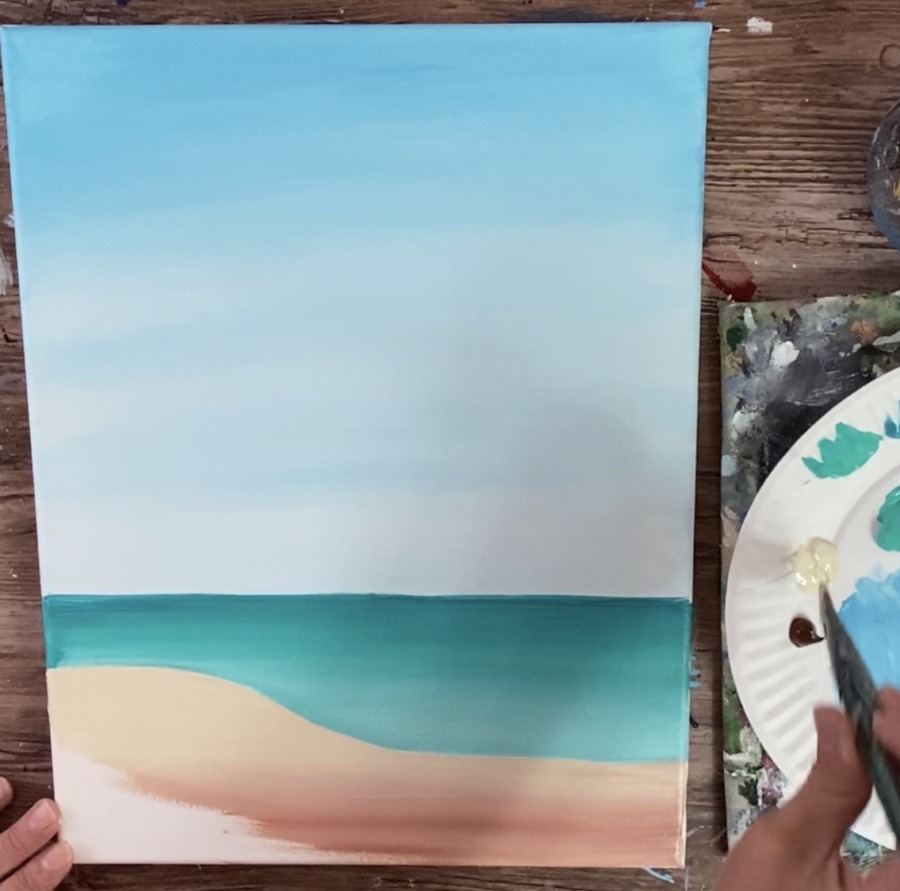
6. Paint The Lines In The Water
To do the lines in the water, I used a palette knife (#1). If you do not have a palette knife, you can use a tiny round brush or even a flat brush.
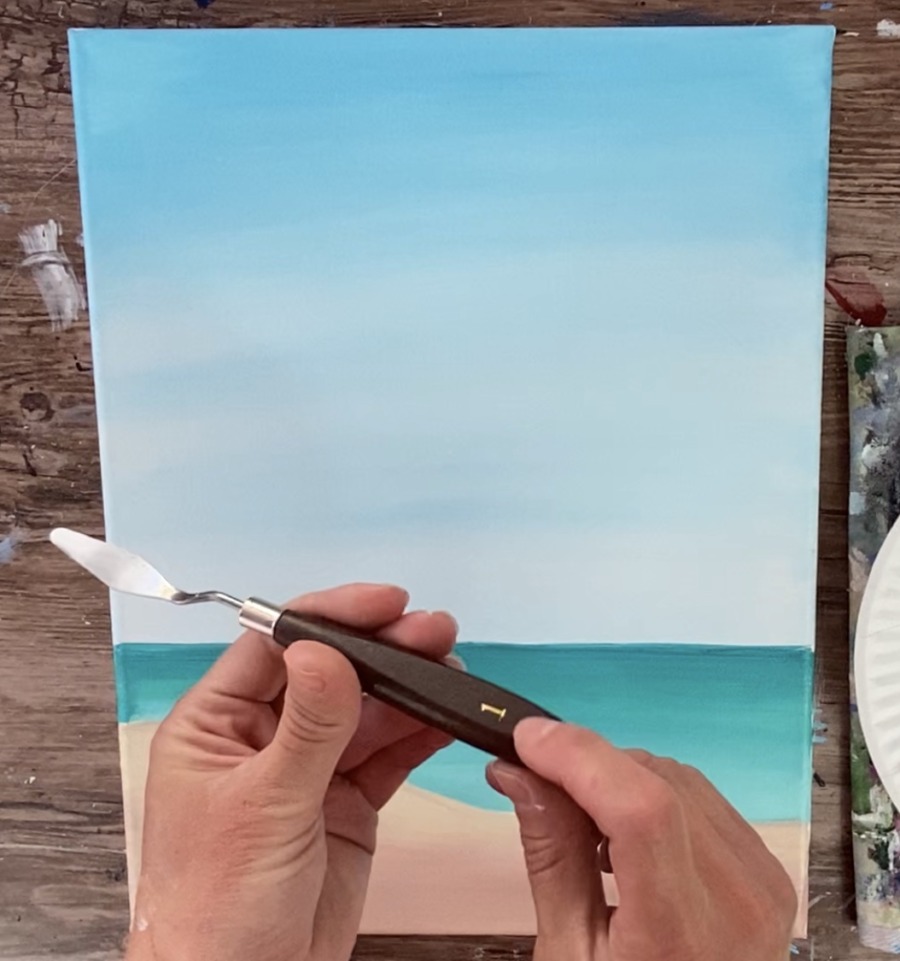
Use the palette knife to paint horizontal lines of pure titanium white in the water.
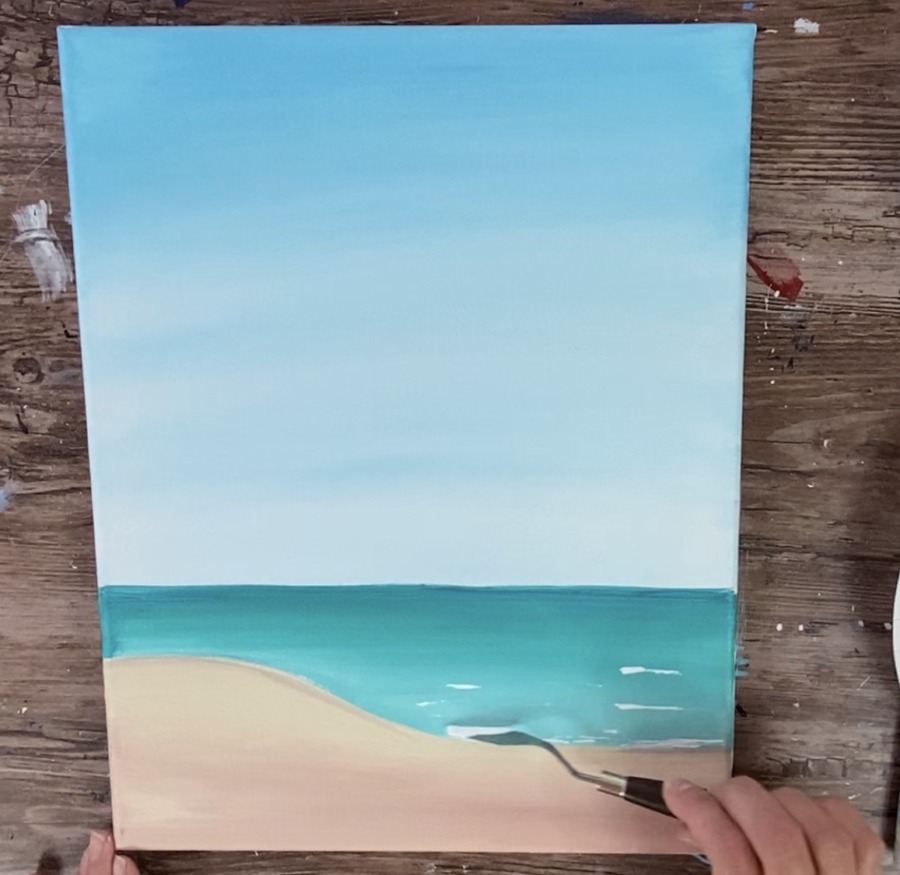
Simply load the side edge of the knife with white and scrape on white horizontal lines in the water. The lines closer to the sand are longer & thicker. The lines further away are thinner, smaller.
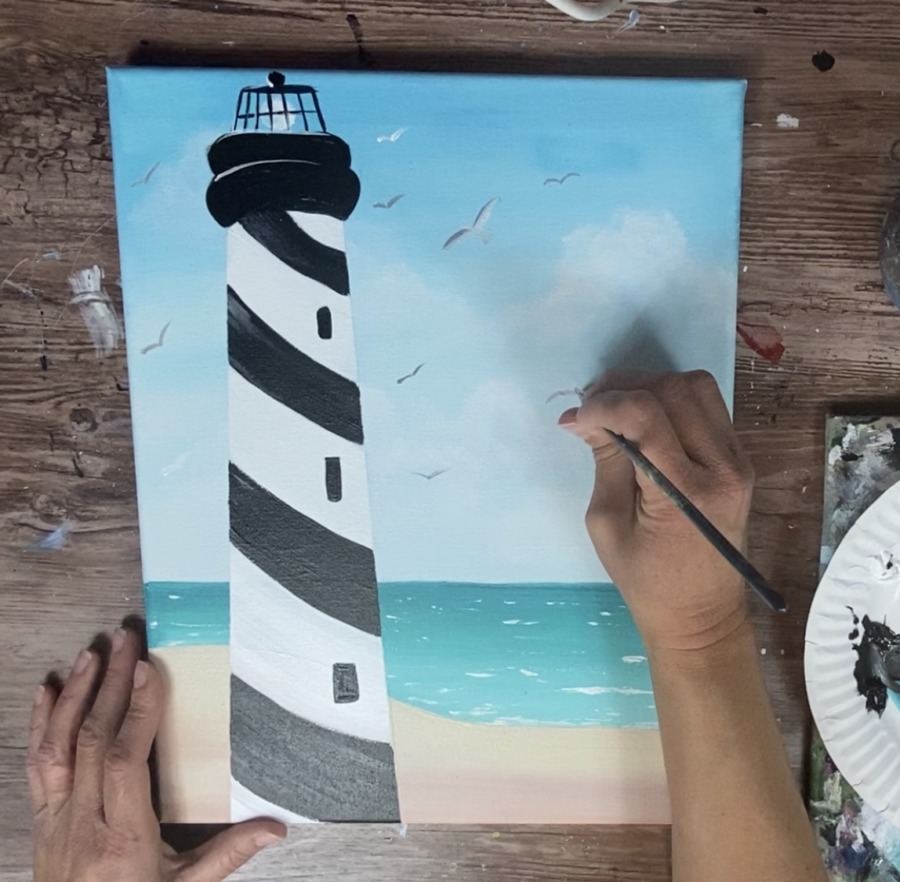
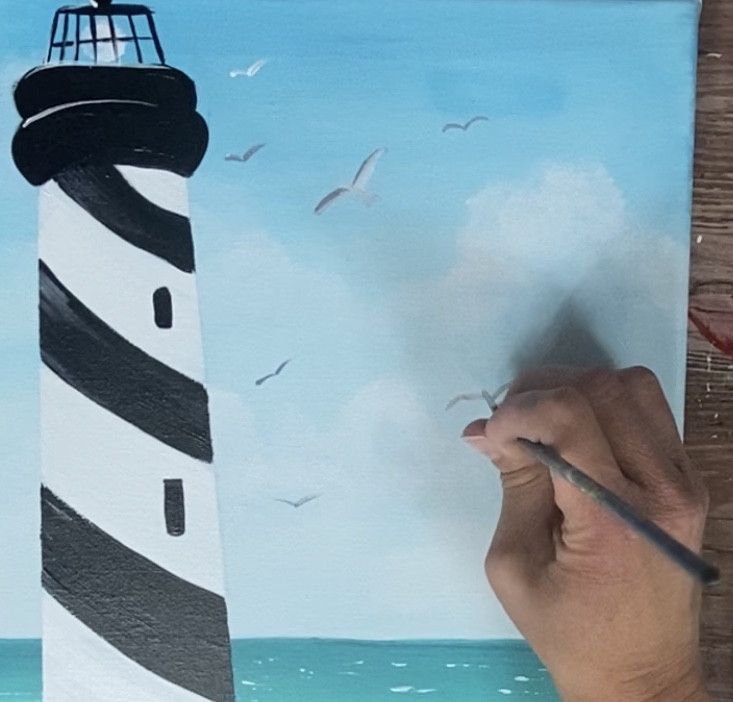
7. Paint The Clouds
This was entirely experimental for me! I decided to try the clouds using cotton and I found it rather successful because the cotton is very soft, creating the soft look of the clouds.
I recommend practicing it elsewhere before tackling it on your canvas. If you don’t like the cotton, you can use any soft round brush or a filbert.
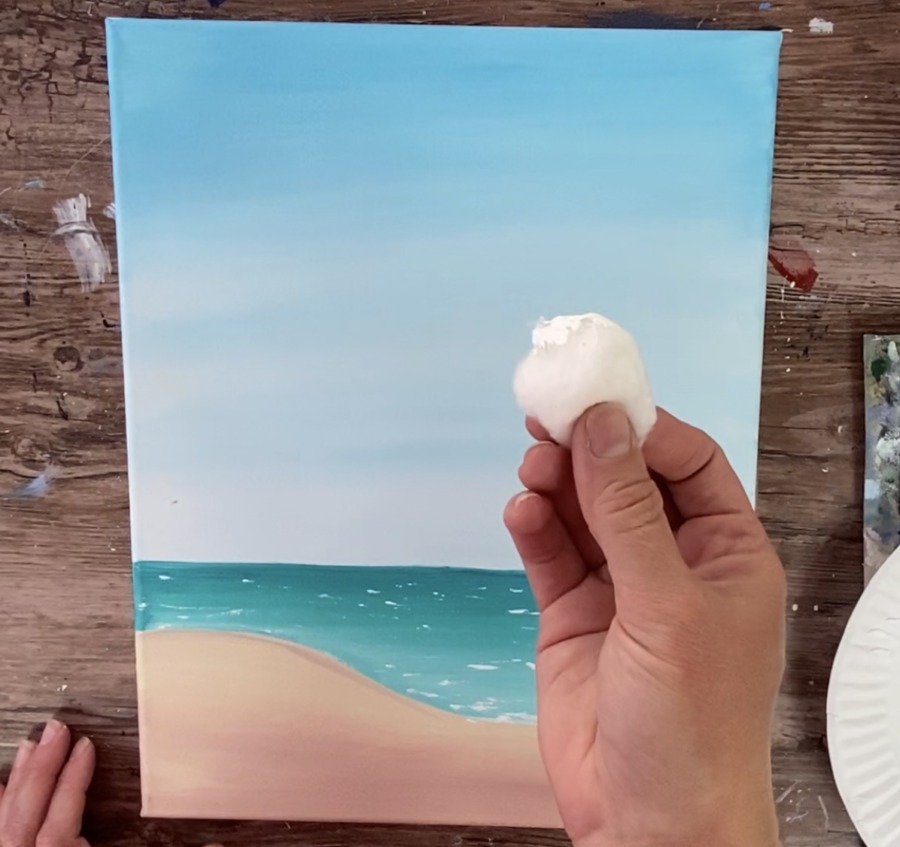
Dip your cotton in a little bit of titanium white. Don’t overload it! Just a little bit will do. In fact, I recommend removing some of the paint after you dip it to ensure only a little bit is on there.
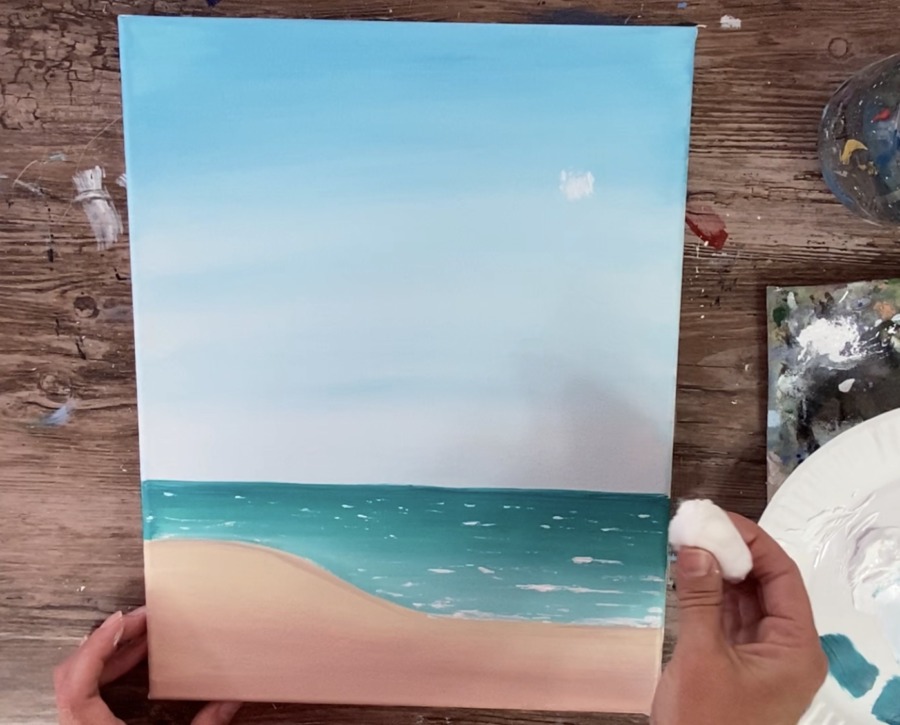
Start your cloud from the top and dab it.
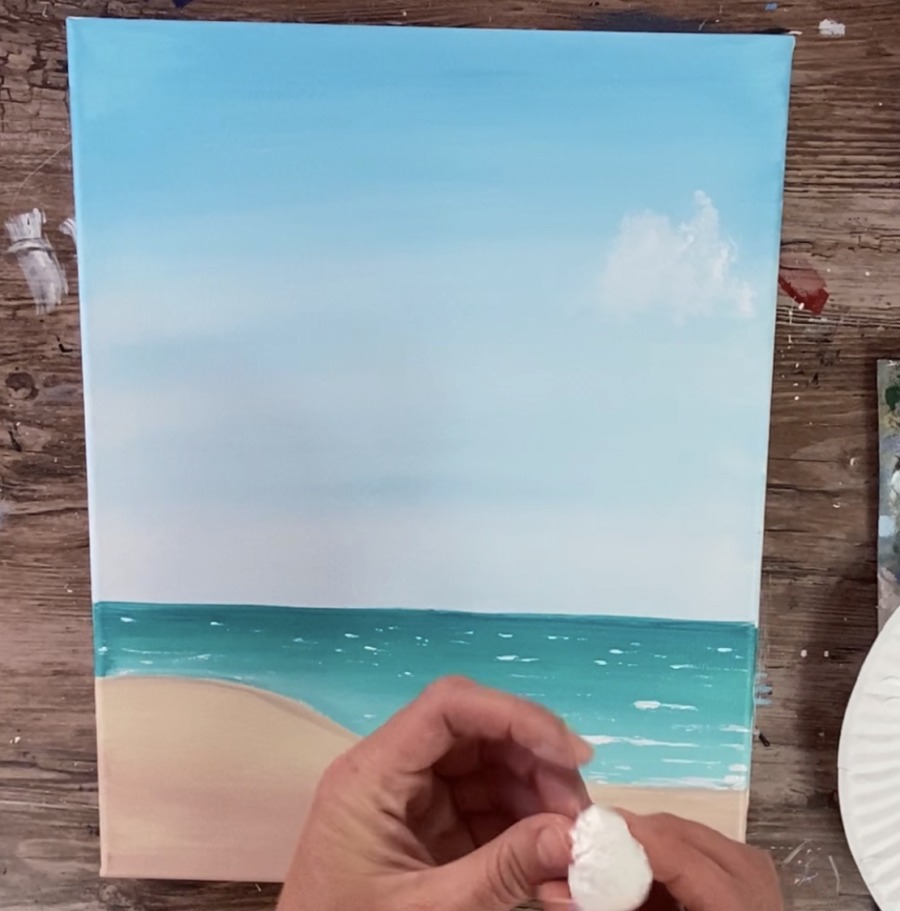
Then move the cotton in a sort of circular motion so the paint forms a cloud shape.
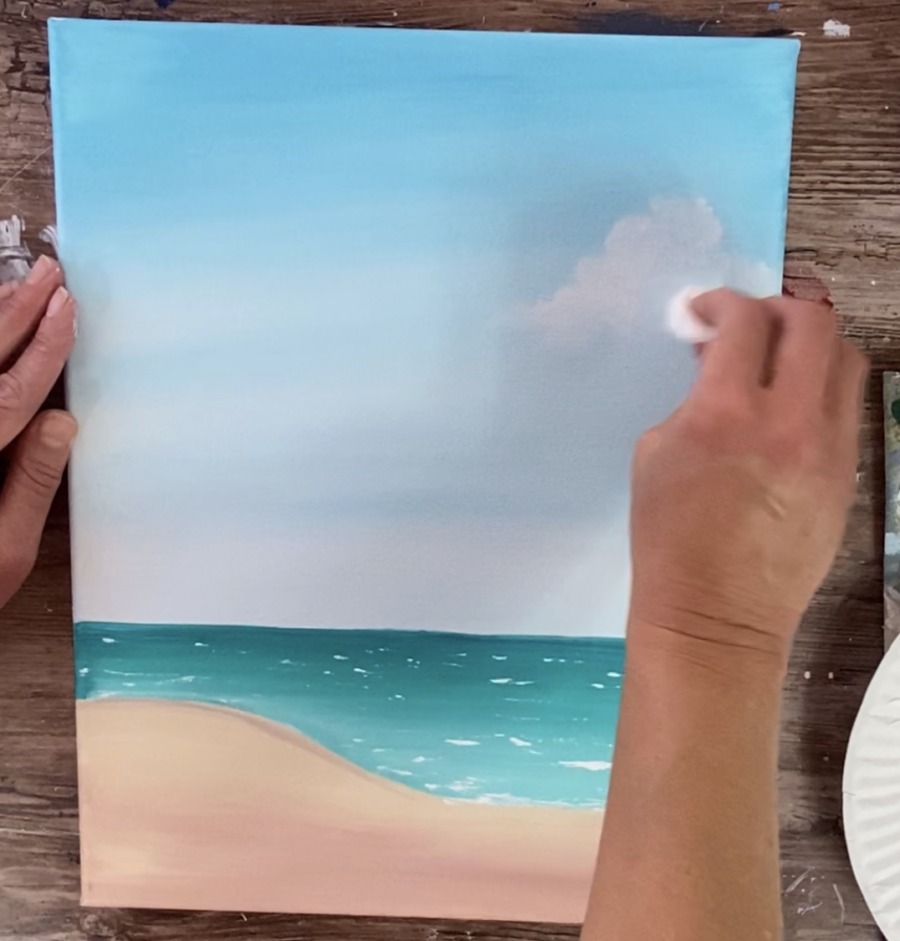
Continue to form the cloud shape using the cotton. Remember that only a little white is needed on the cotton so the white is not that strong in the sky. It should be very light.
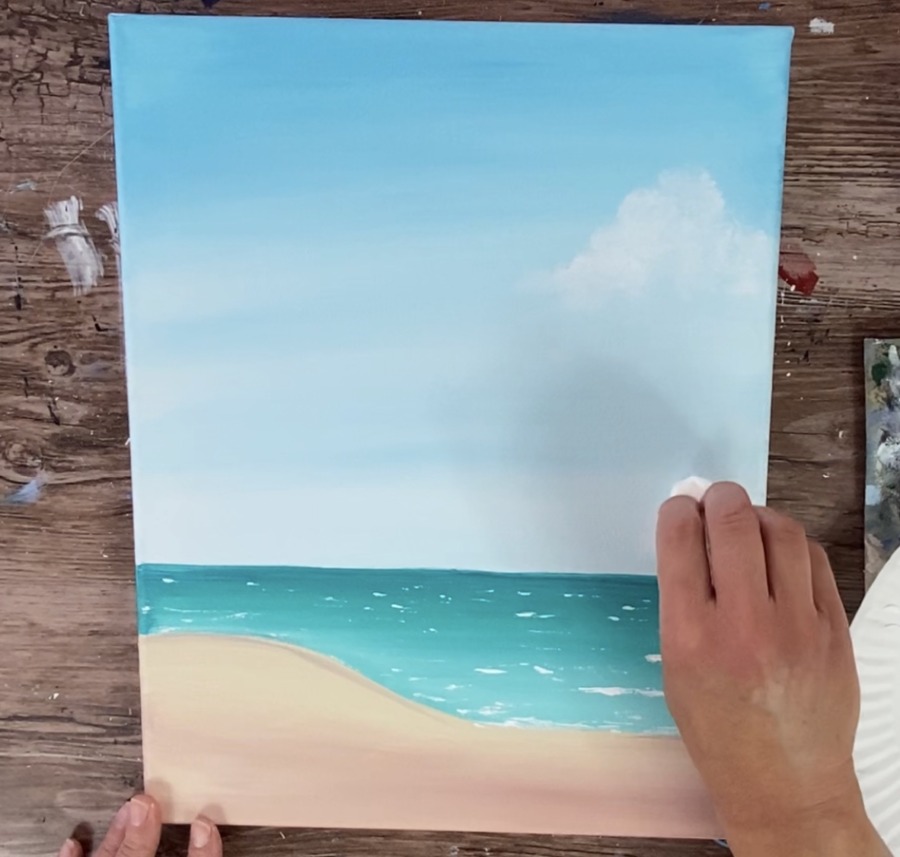
I did one large cloud in the upper right then I did clouds all on the bottom above the horizon.

Continue to form very light, subtle clouds all on the bottom. These will be lighter because the sky is already a lighter color in this area.
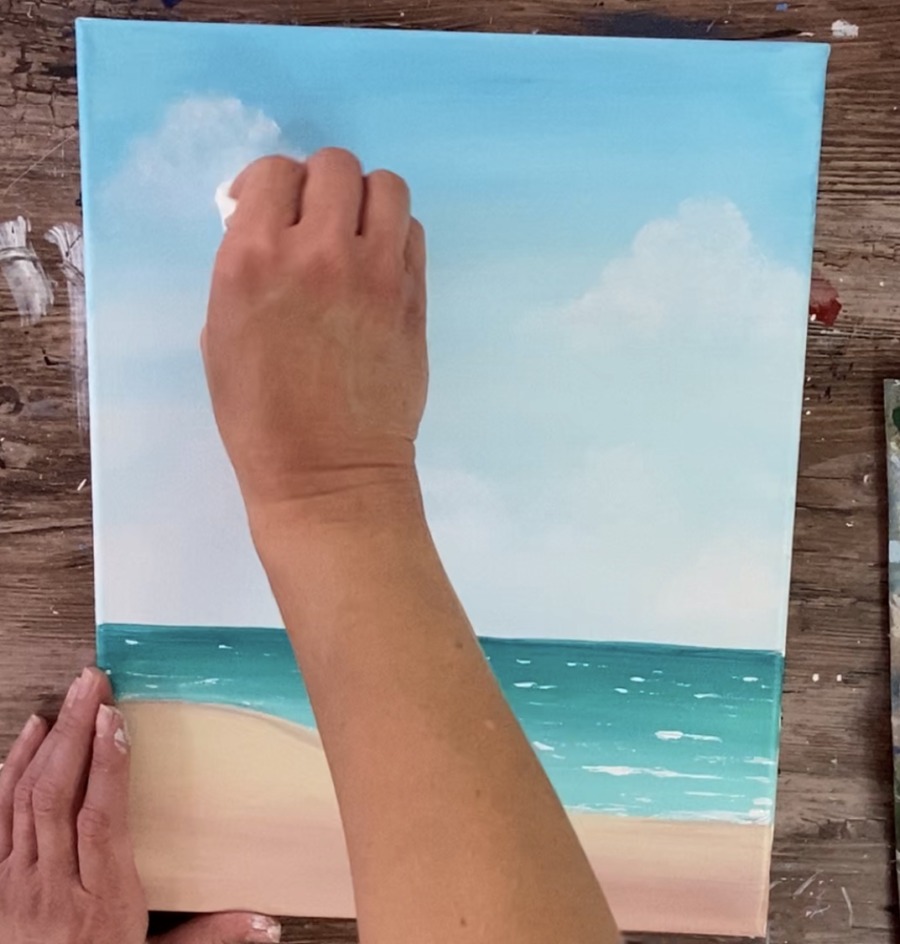
Then I did one more cloud in the upper left. Essentially there is a bit more white on the top tips of the clouds and then it fades away towards the bottom.
I really like how the cotton created the very light and fluffy effect of these clouds way in the distance!
8. Transfer the traceable
Note: Make sure your painting dries first before doing the traceable!
Place a sheet of graphite paper underneath the traceable (shiny side down). Then place the lighthouse so that it lines up with the bottom of the canvas and is on the far left.
There is an inch gap between the bottom of the lighthouse and left side of the canvas.
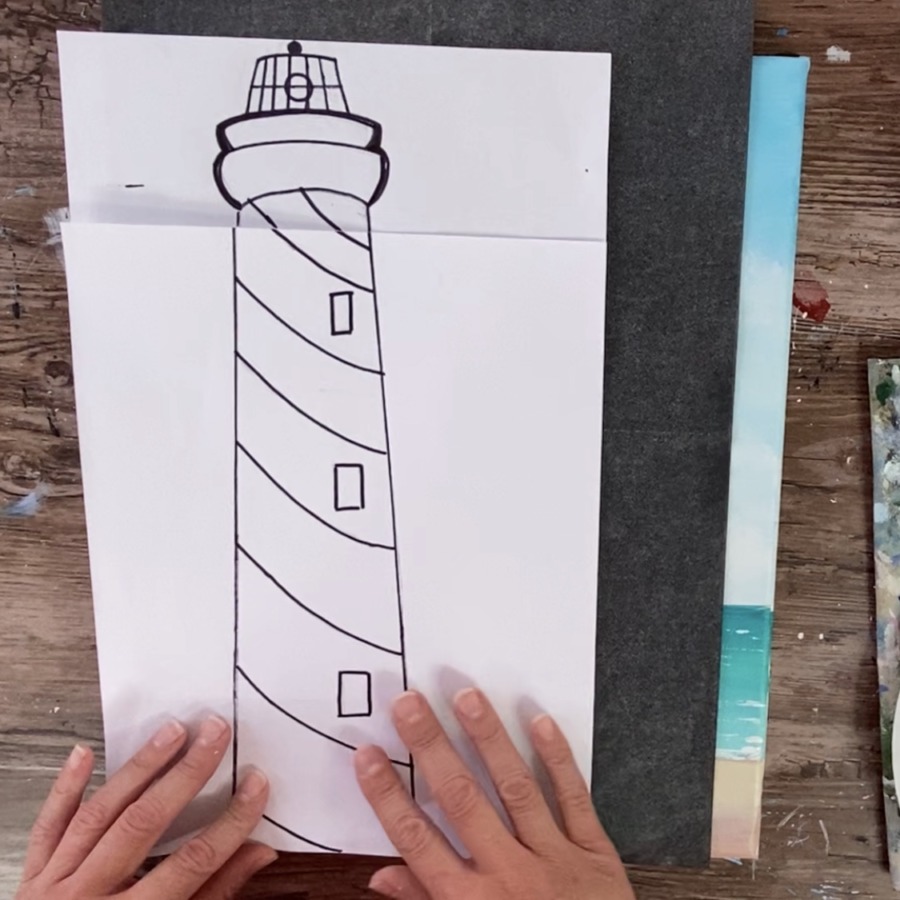
Trace firmly with a pencil so that it transfers to the canvas.
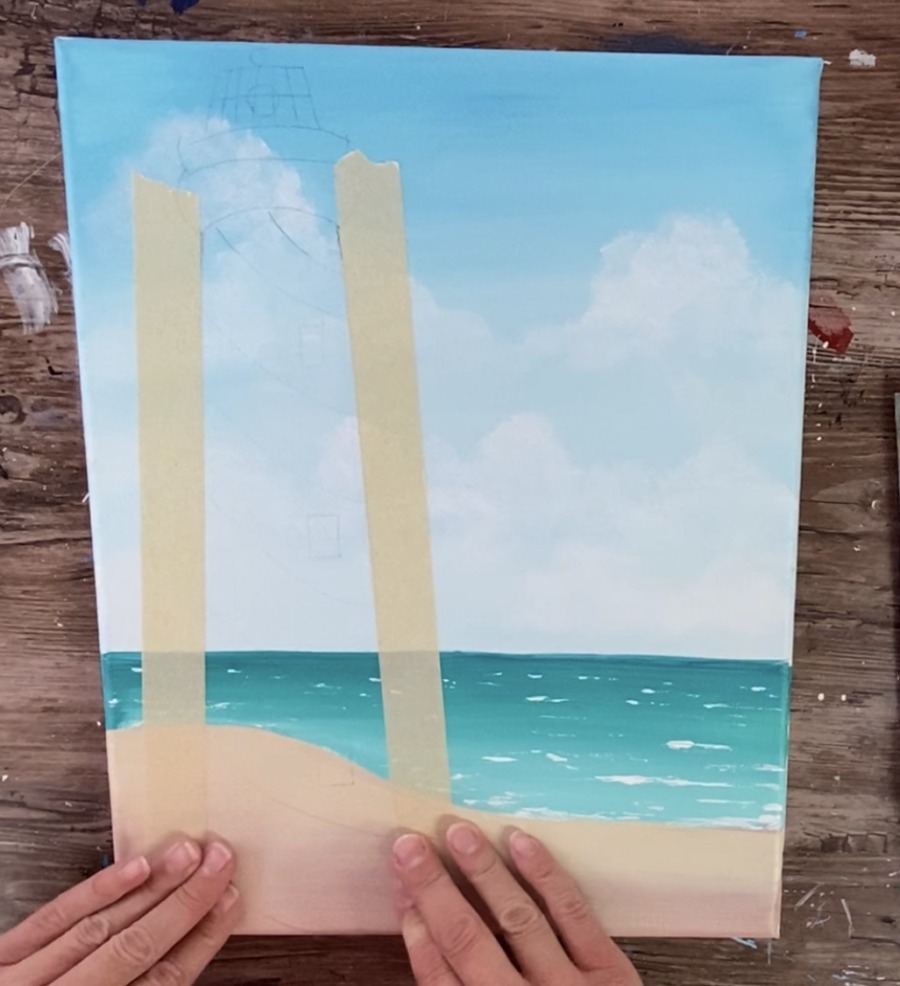
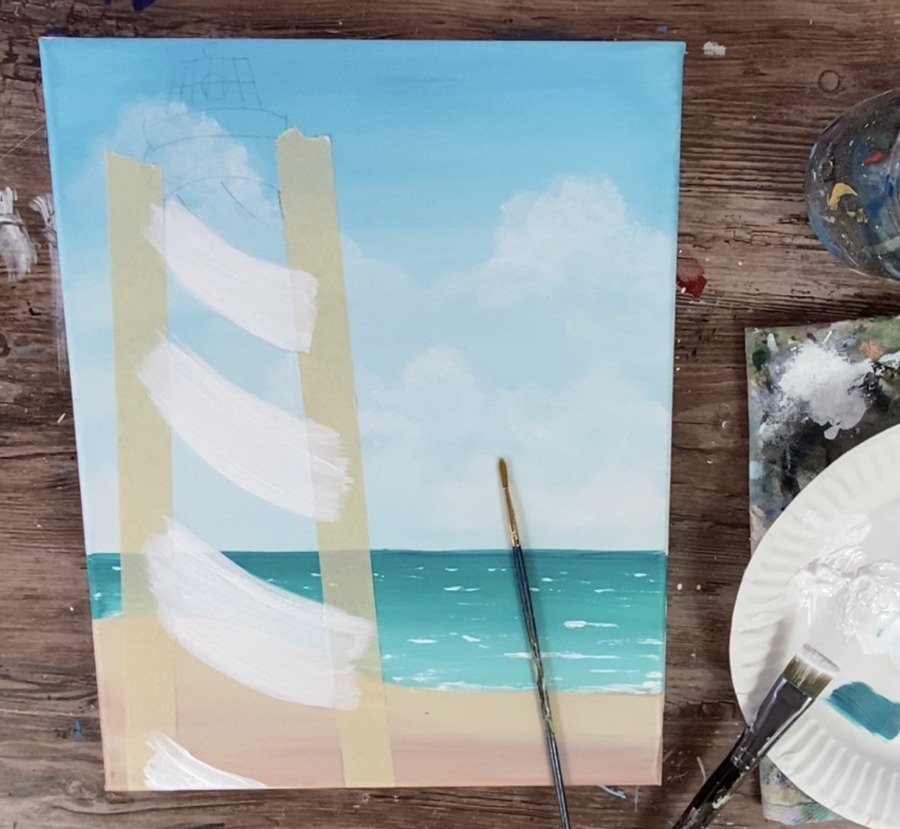
9. Mask The Edges Of The Lighthouse
The masking tape will really help to define the lighthouse shape when painting the stripes. Mask off the edges of the lighthouse.
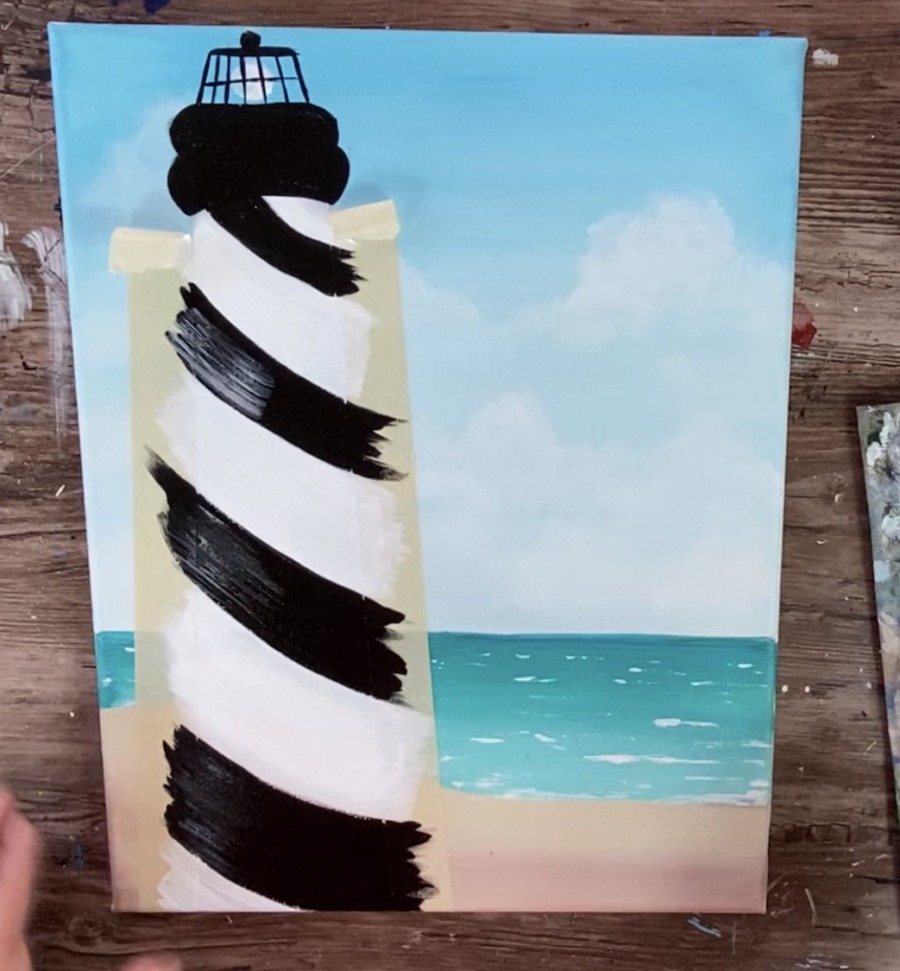
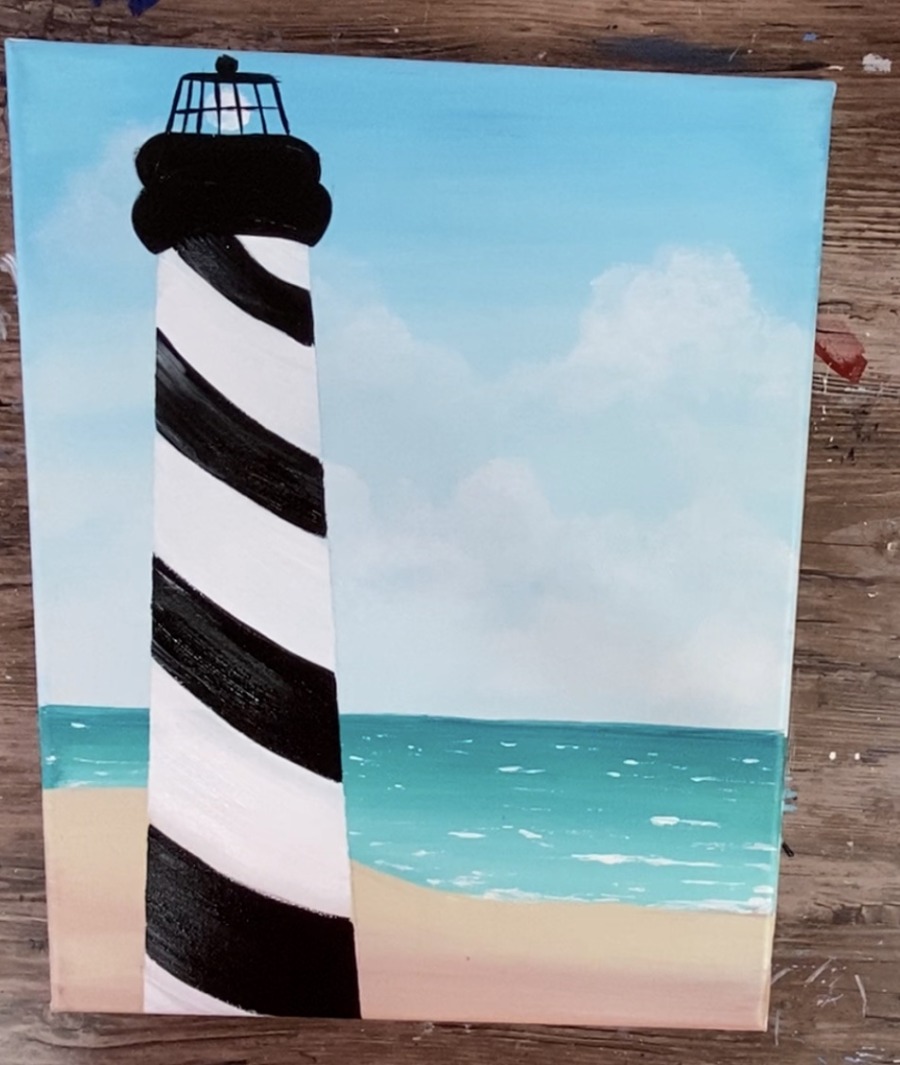
10. Paint the stripes
Use your 3/4 wash brush for the larger areas and 4 round brush for the smaller areas. Paint the white stripes on the lighthouse. Do so in a sort of curved direction.
Tip: you may need a second or third coat depending on how opaque your titanium white is.
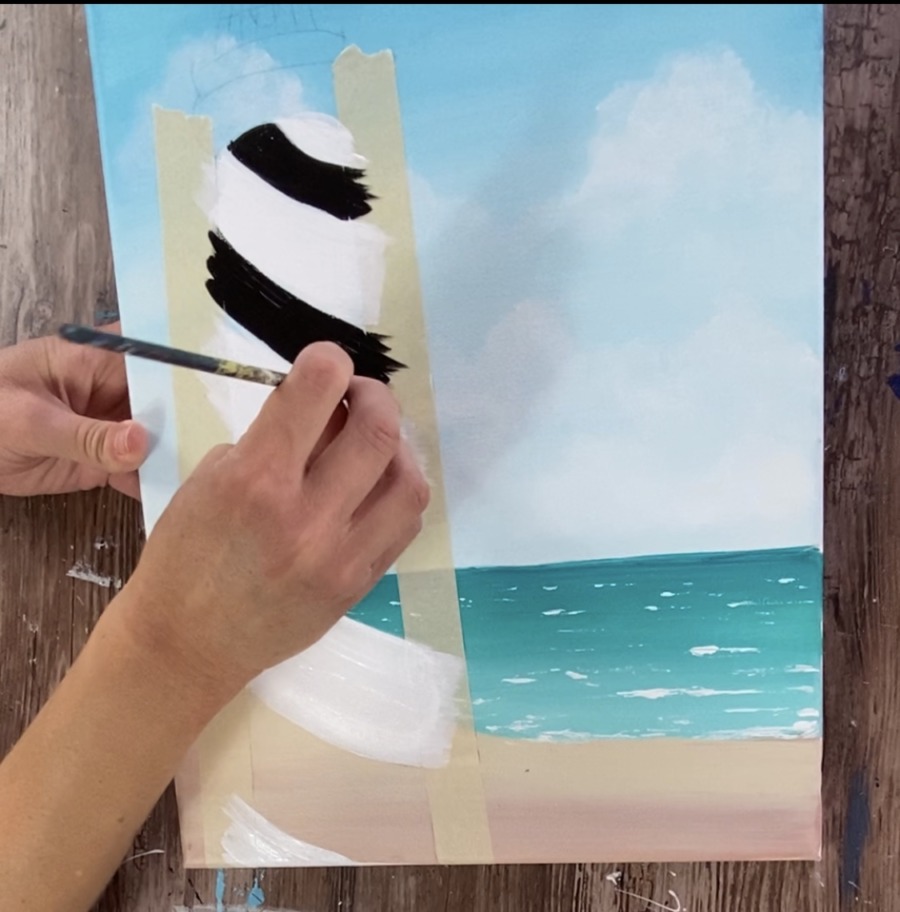
Then do the black stripes. I found it easier to do the black stripes with the round brush.
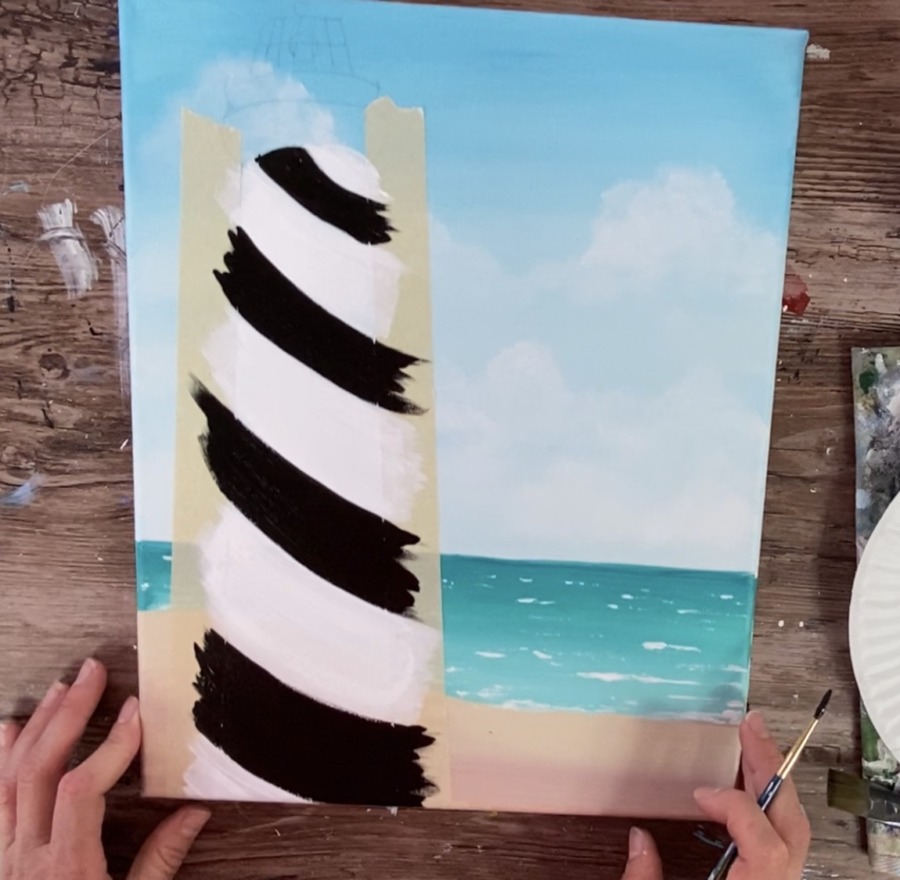
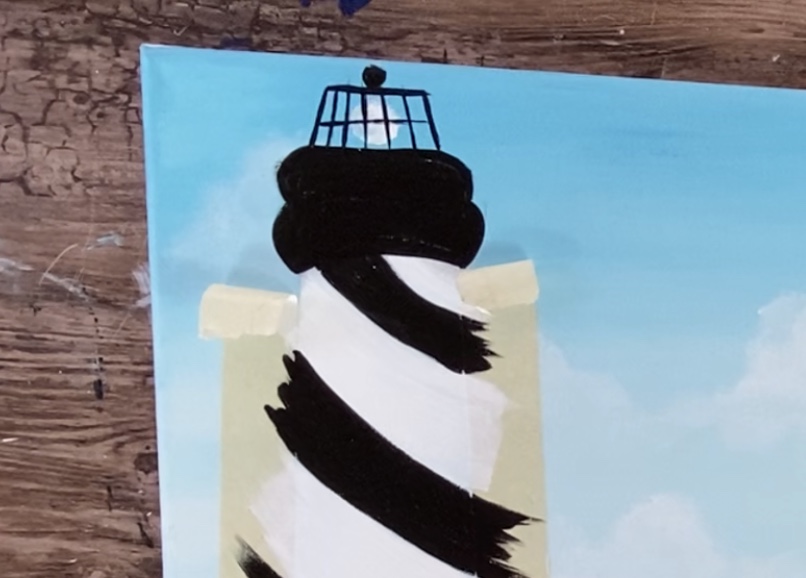
11. Paint The Top Of The Tower
Paint the top area black using a 4 round brush.
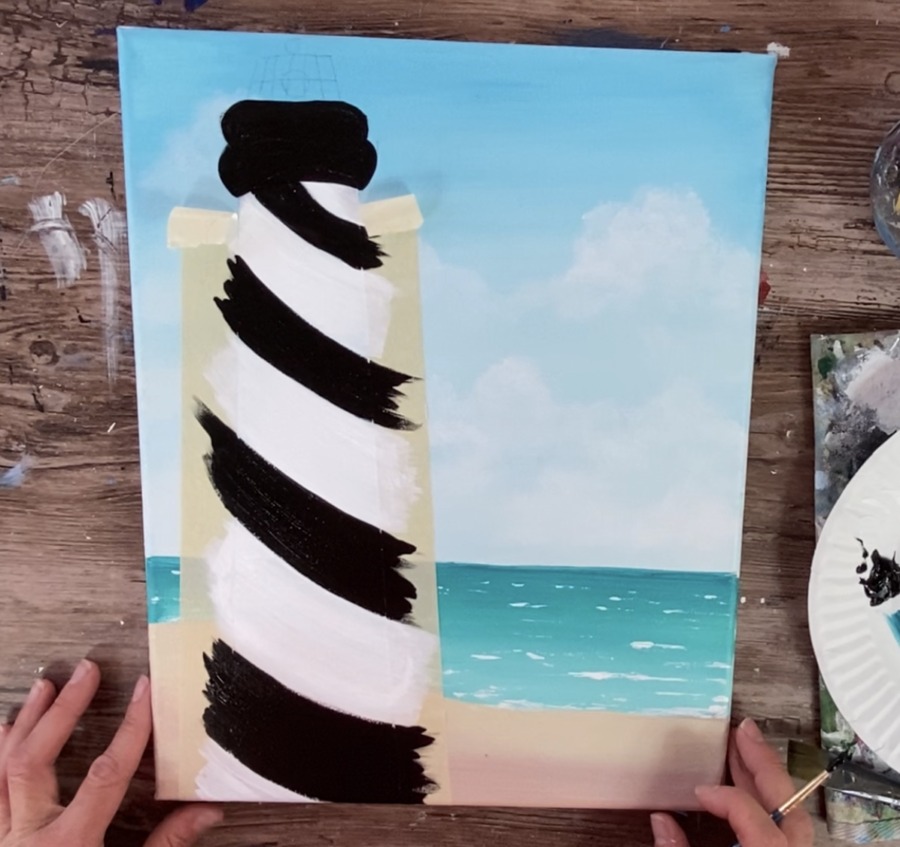
To do the white light inside, use your finger to stamp a titanium white circle.
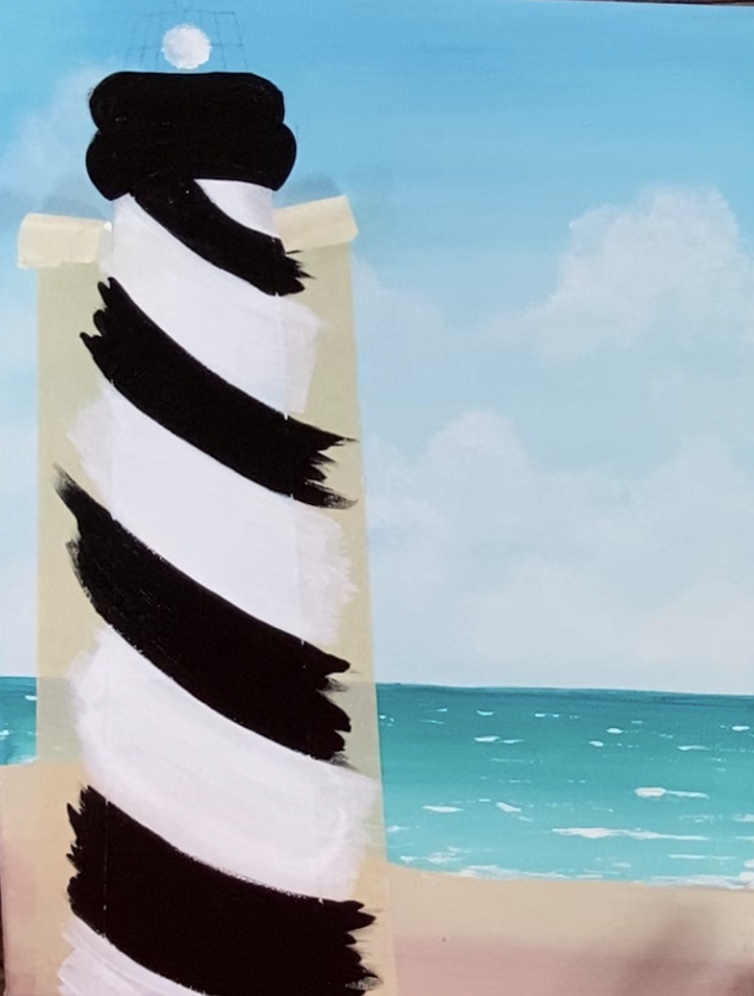
Then use a 4 round brush to paint the lines.

12. Add Some Highlight To The Left Of The Tower
To do this, use your 3/4 Wash brush and “dry brush” titanium white only on the left side of all the stripes.
When you dry brush, you load it in the paint and then wipe it off so only a little bit of paint is on your brush.
13. Gently Pull The Tape Off
Ideally, you’ll want to wait for the paint to dry but I did not do this. Gently peel the tape off to reveal the lighthouse.
14. Add Some White To The Tower Top
Use your 4 round brush and white to paint white lines on the top of the curves and to the left of the small circle on top as well as on the lines.

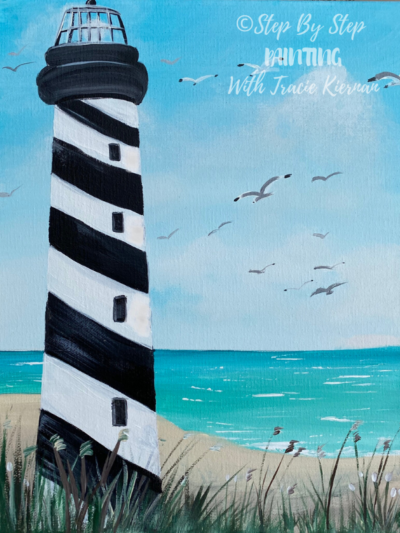
15. Paint Windows
Use your 4 round brush and mars black to paint windows.
16. Paint Seagulls
It is helpful to look at a reference photos for these birds and I am providing you with one below. Observe the formation of their wings, how smaller ones look in the distance and the shape of the bodies for the larger ones. Observe also how they are different shades of gray and white and black.
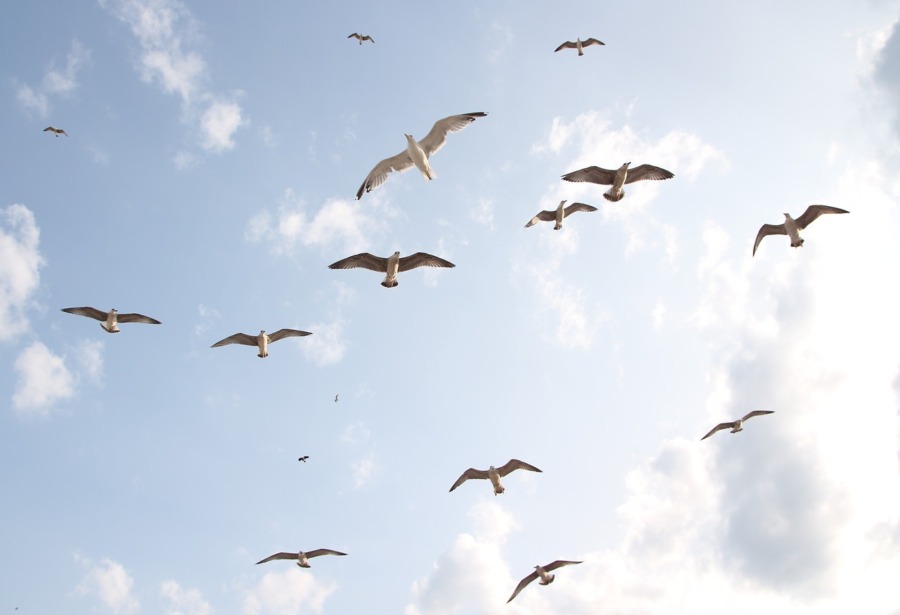
To paint the birds, I use titanium white and mars black. I mixed a shade of medium gray on my palette and used my round brush.
Paint different sizes of birds and have them be different shades of that gray.
Some of the birds have black at the tips of their wings.
17. Paint The Sea Grass
For the sea grass, I used a fan brush as well as the 4 round brush. I also used the colors: deep green permanent, titanium white, mars black and burnt umber.
On your palette, mix a very dark green by mixing deep green permanent with some burnt umber.

Then take your fan brush and brush the base of this sea grass. Use the full width of the brush and stroke up to create the grass.
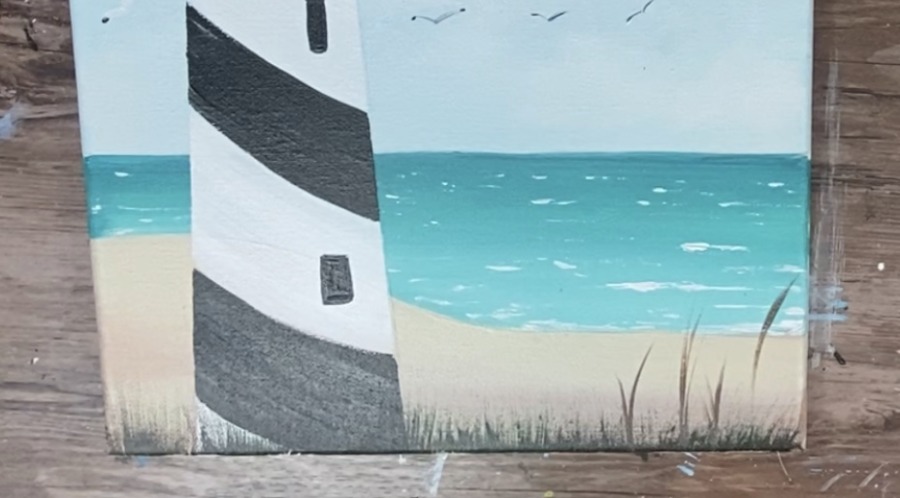
Next paint some taller grass with the 4 round brush. Use different amounts of the brown & green. You may also add some black and white to this mixture.
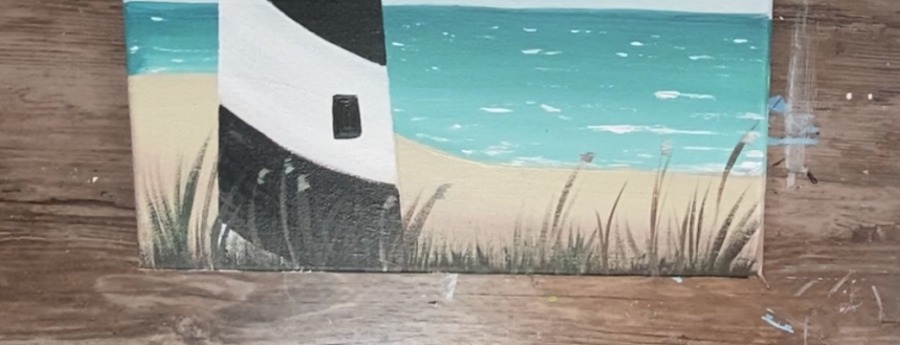
Paint some of the tips of the grass with a mixture of white and brown. Make some taller strands that go from the bottom to overlapping some of the water. Tall strands are also overlapping the lighthouse.
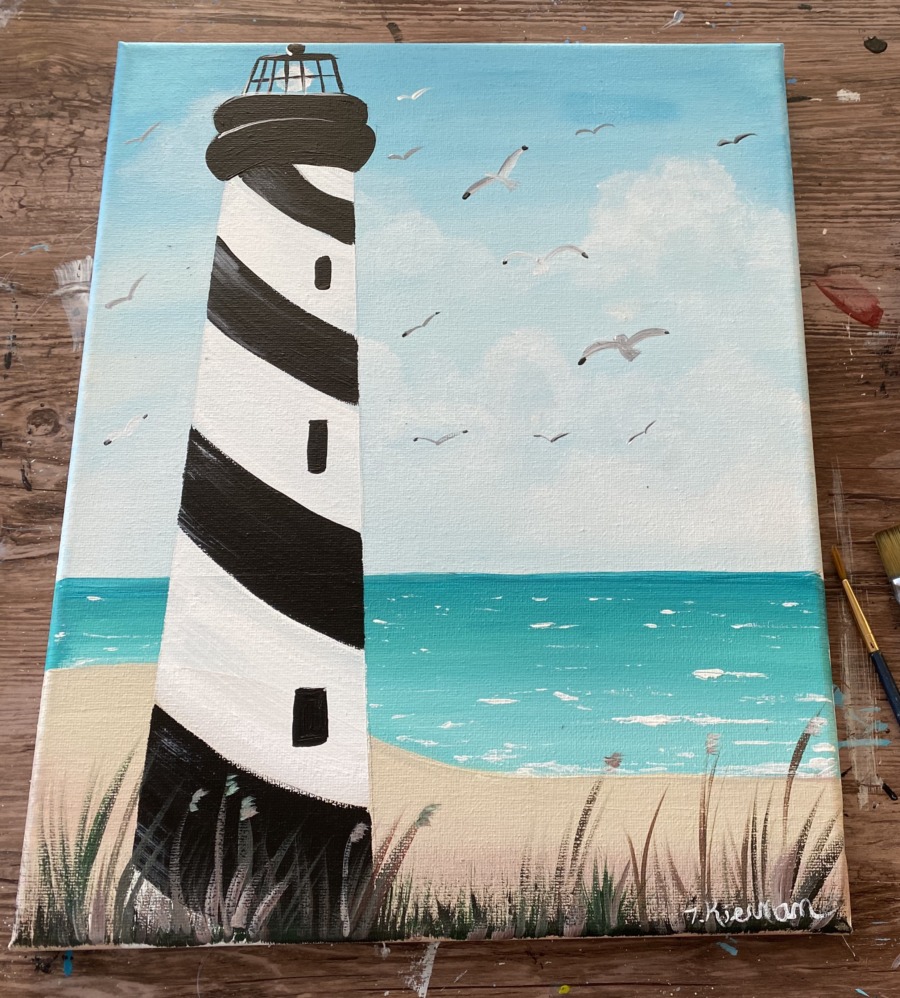
Finished!
I love lighthouses!!! thanks for the ideas!!:)
Me too! And you’re welcome ?
Loved it! My husband and I had such a fun time following along thank you for that! One tip would be to add the need for burnt umber to the materials I was sad to see I didn’t pick it up with my supplies 🙁
I did not even notice I left out burnt umber in the color photo! I will have to fix that. Sorry about that! But I’m glad you enjoyed the painting.
how do I get to your blog to see how to paint the seagulls. I am working on the Lighthouse Beach painting and can’t seem to get to the blog you referred to in the video. (Could be cause I’m not that computer savvy)
Thanks,
This is the blog post. Step 16 talks about how I did the Sea Gulls.
Very clear, enjoyable to follow instructions. You have many fabulous step by step paintings, thanks so much !
You’re welcome!
Thank you soo much for this tutorial! I am currently working on a 4×6 of the sunset pier and it’s very fun, but I plan for this to be my next painting! It looks super fun! I love lighthouses! Also I like how you pull the masking tape off the light house and you got a really pretty painting! Thanks so much for your free and easy to follow tutorials! Really enjoy