How To Paint A Giraffe
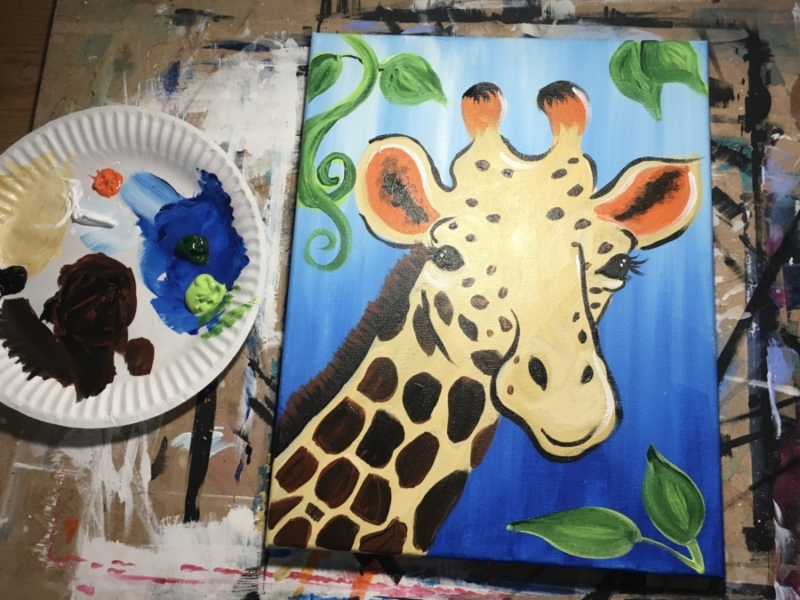
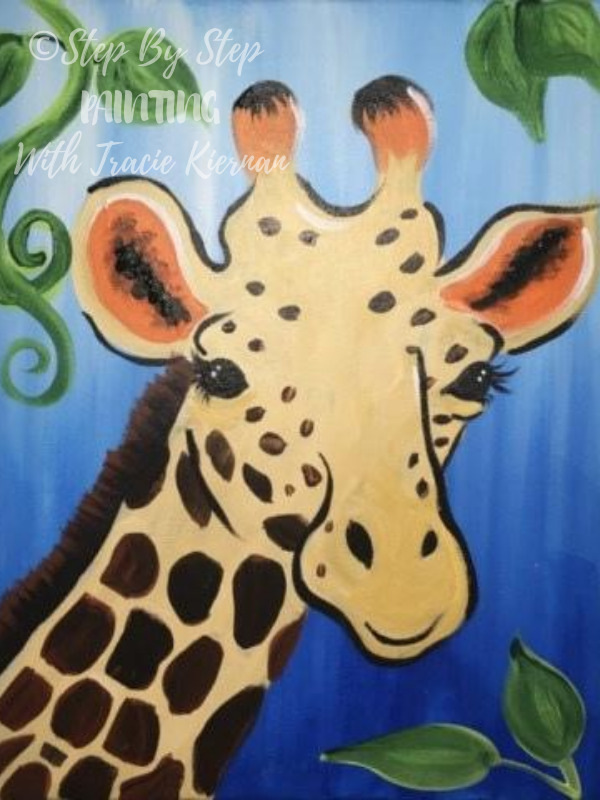
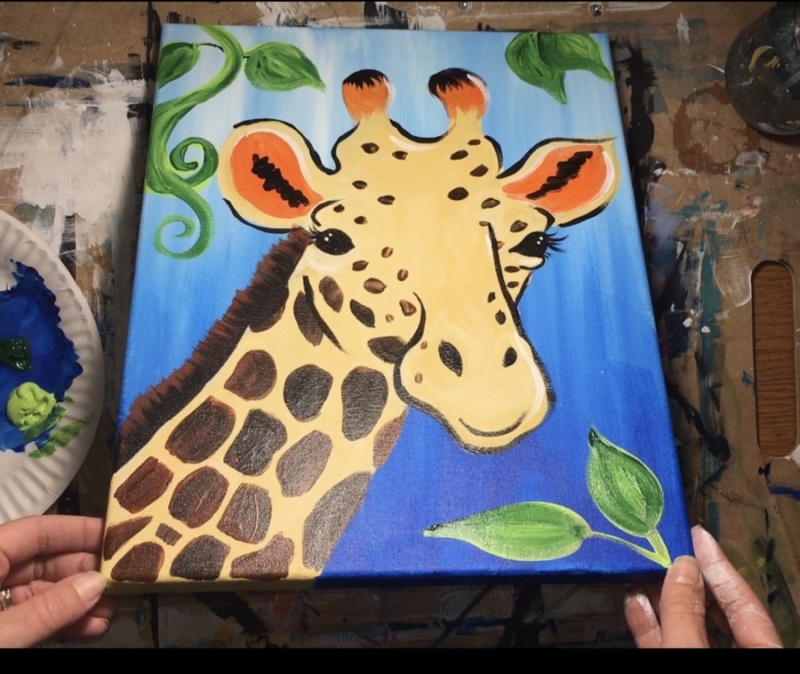
This acrylic painting tutorial will show the beginner painter how to paint a giraffe on an 11″ x 14″ canvas. The style of this giraffe is “loose”, non-realism and cartoon-like!
Would you like to save this?
Included in this tutorial is a free traceable of the giraffe so you don’t have to draw. Simply trace it with graphite paper after the background is painted and dried.
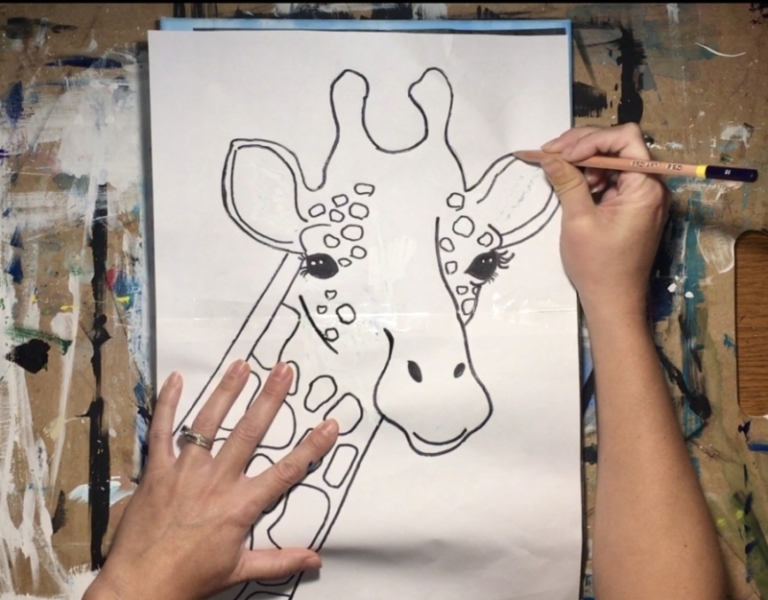
I had a lot of fun with this one! You can change the spots to different colors if you’d like. I chose to stick with the traditional giraffe colors.
Enjoy and happy painting!
See Also:
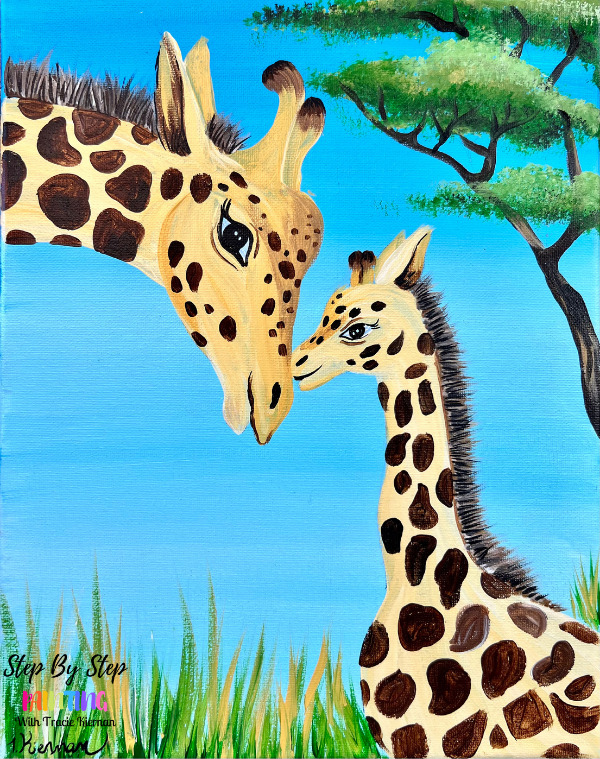
Learn how to paint a giraffe and calf!
Materials
How To Paint A Giraffe
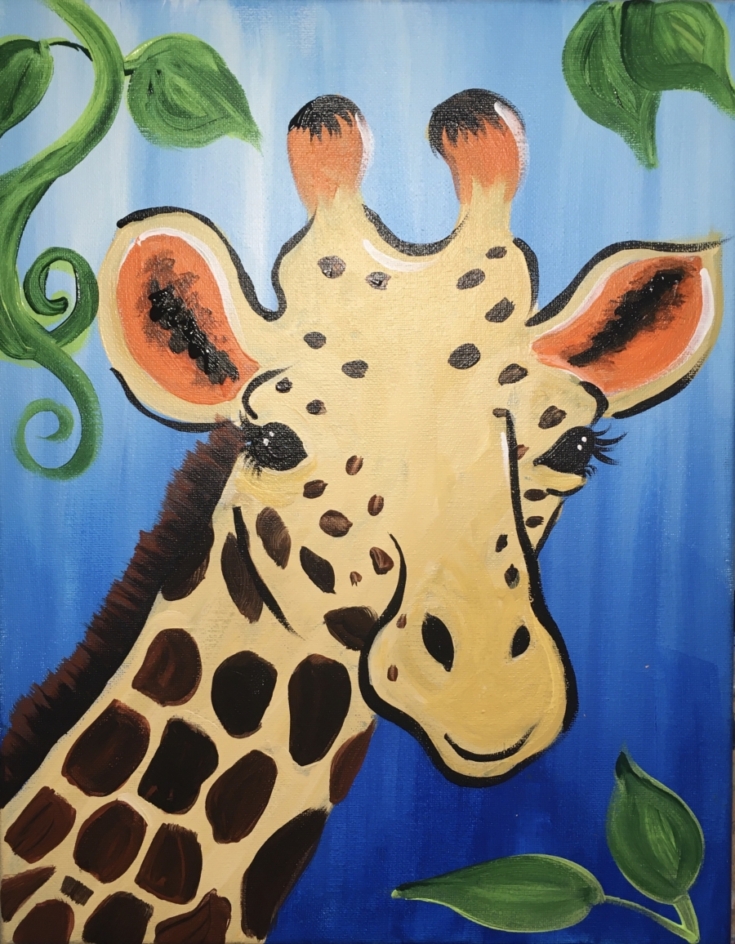
This giraffe tutorial includes a traceable. Use simple colors to paint a cute Giraffe!
Materials
- 11” x 14” canvas
- Acrylic Paint
- Paint Brushes
- Traceable
Colors
- Primary Blue
- Titanium White
- Cadmium Orange Medium
- Naples Yellow
- Brilliant Yellow Green
- Hooker’s Green
- Mars Black
- Burnt Sienna
Paint Brush Sizes
- 3/4” Flat
- 12 Bright
- 4 Round
- 10/0 Liner
Color Palette
I used Liquitex BASICS acrylic paint for this painting. 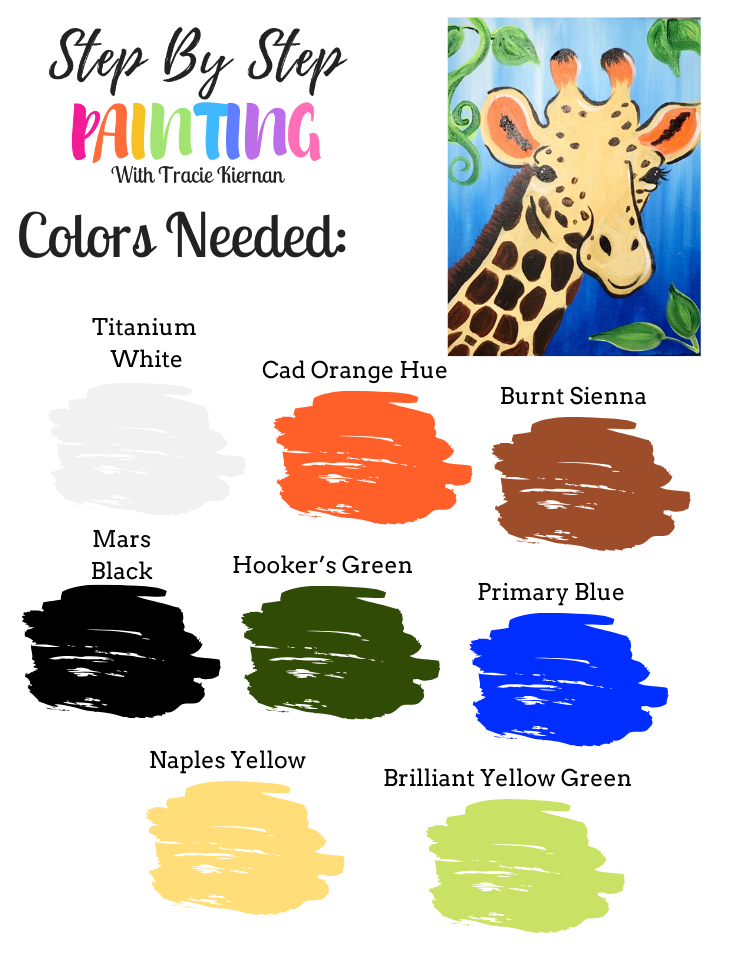
Traceable
Trace this onto your canvas after the background is painted and dried. I recommend printing it on two sheets and taping together (the PDF is split in two).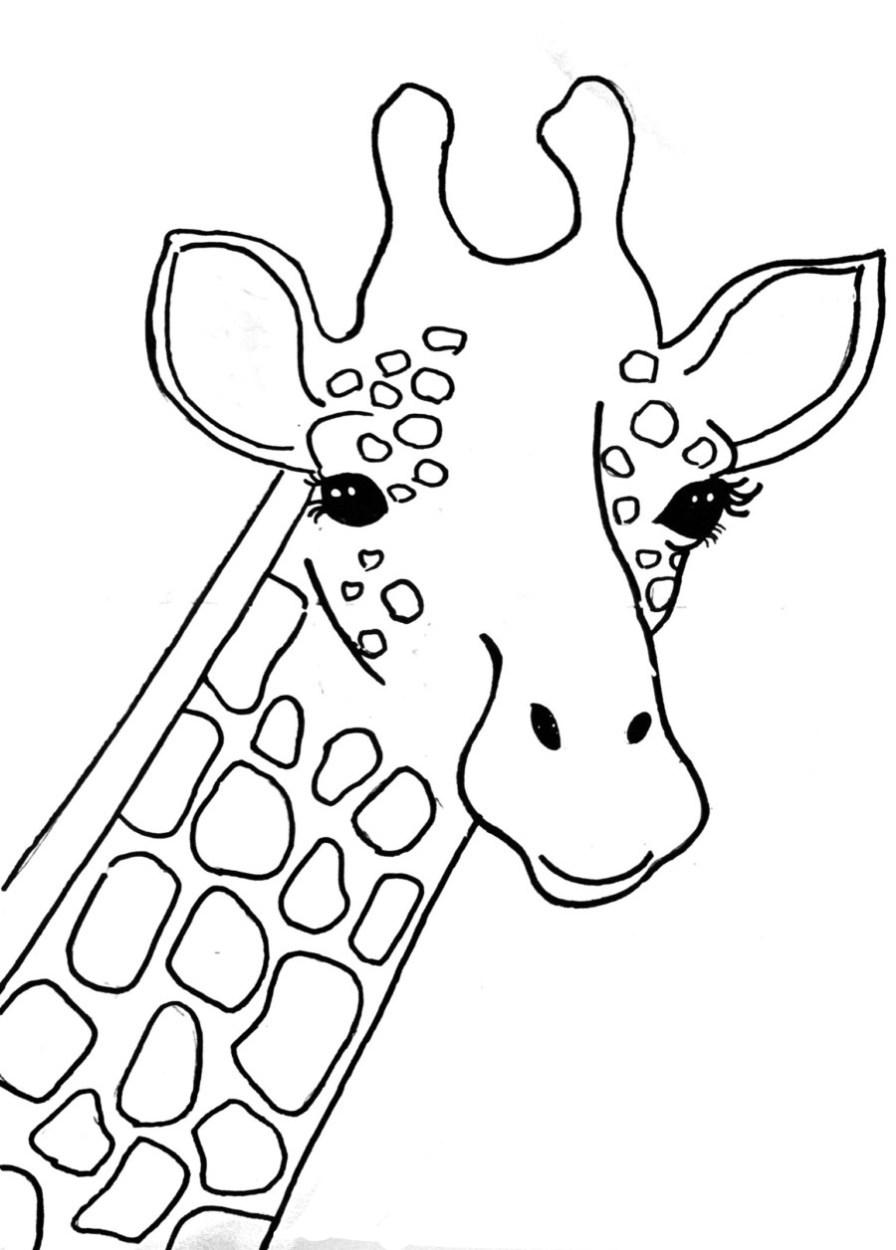
Directions At A Glance
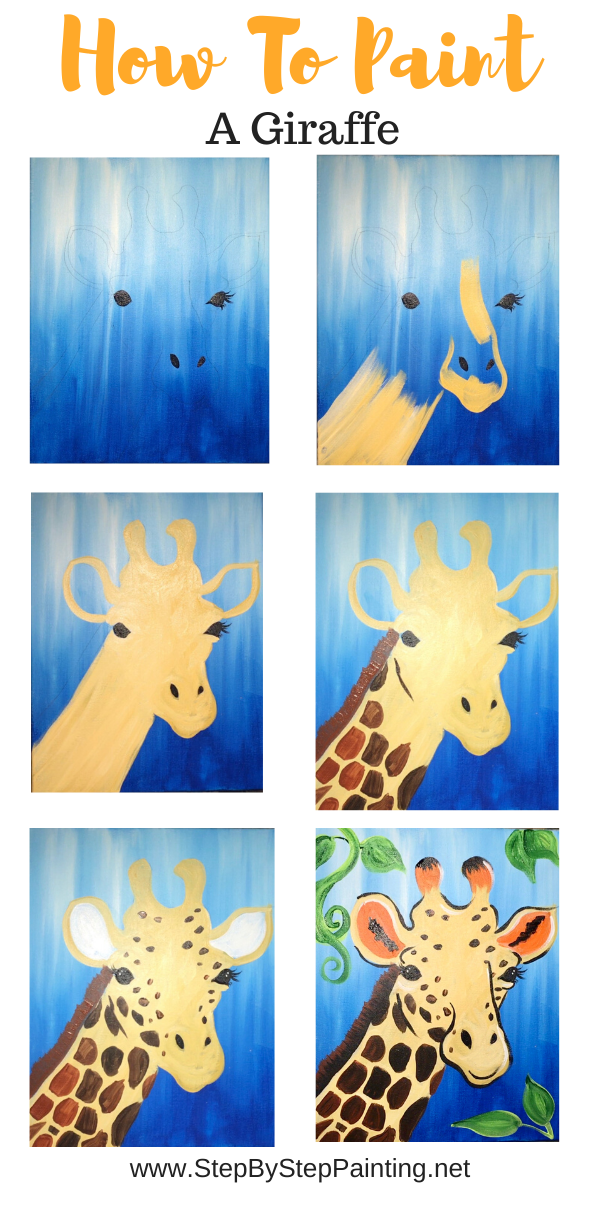
Video:
Step By Step Directions
1. Paint The Background
The background consists of only two colors: primary blue and titanium white. Use your 3/4″ wash brush. Start at the bottom and paint full width vertical strokes but only go about a third of the way up the canvas. 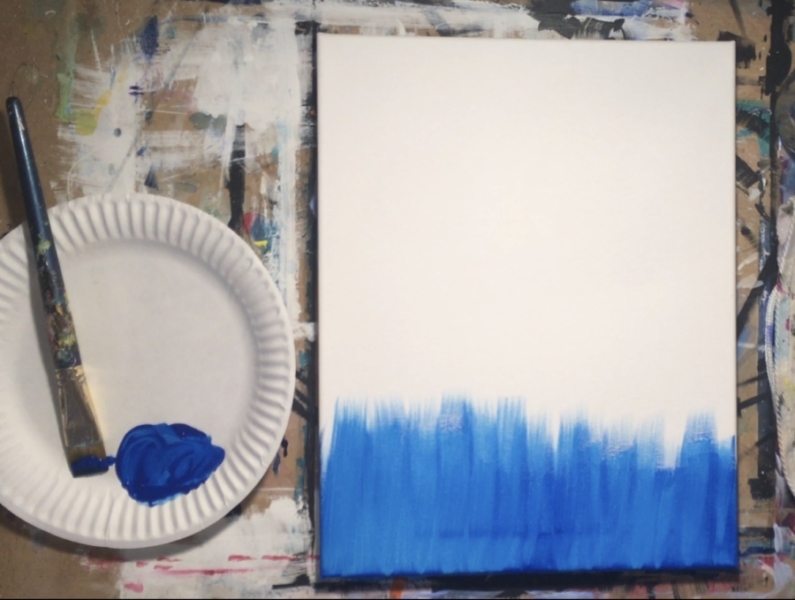
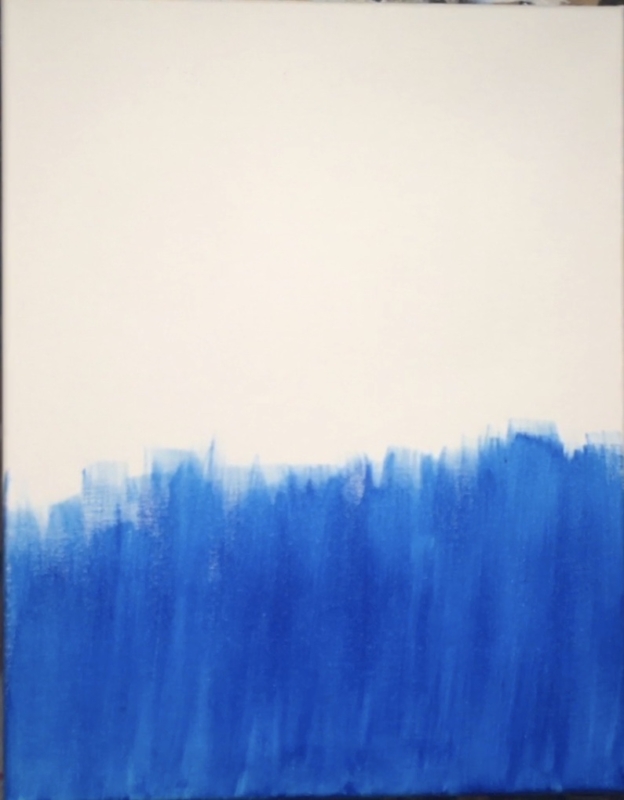
Next load your brush in a bit of titanium white (without rinsing it…there’s still blue on the brush) and paint up and down blending the white with the blue.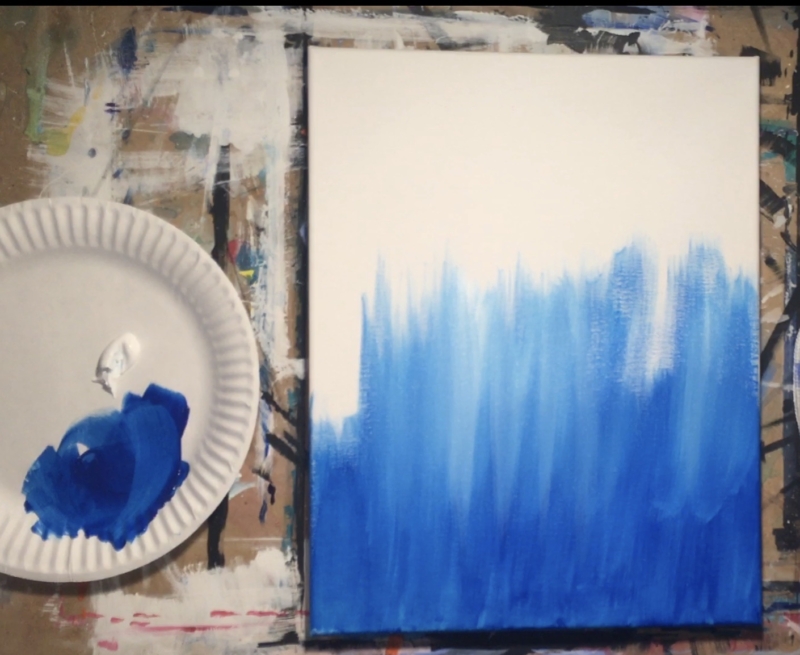
Continue working your way up adding more white as you get to the top. The very top of the painting should be the lightest part of the background. 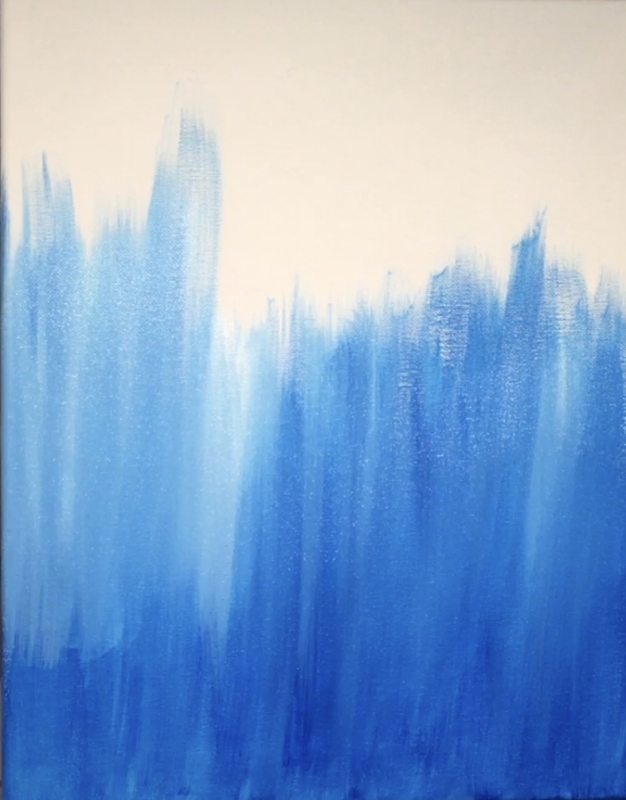
It’s okay if there are some streaks of white and some streaks of darker blue as this was the point of the background – to make it look blended but not blended all the way.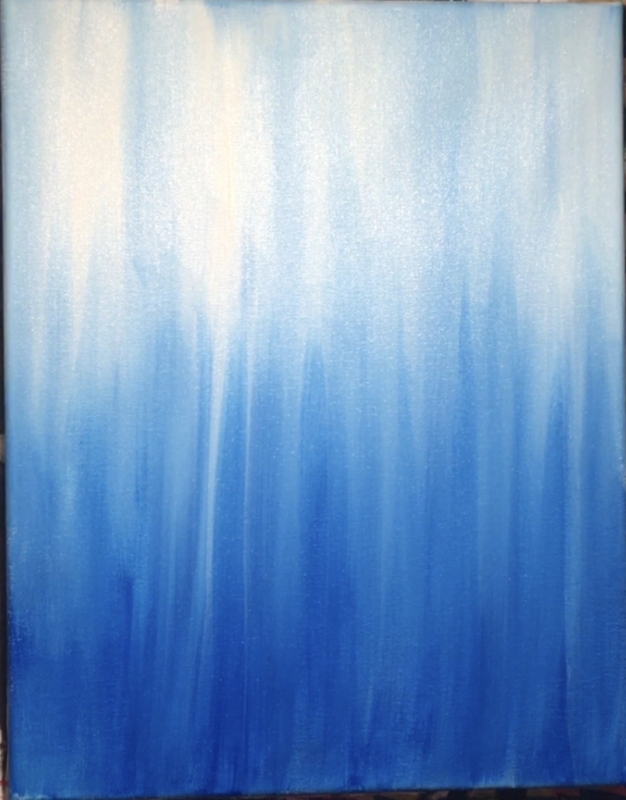
2. Wait for your painting to dry
Either use a blow dryer or wait for the background to completely dry before proceeding to the next step.
3. Transfer the giraffe onto the canvas
This traceable is intended to be printed out and taped together (two 8.5″ x 10″ papers).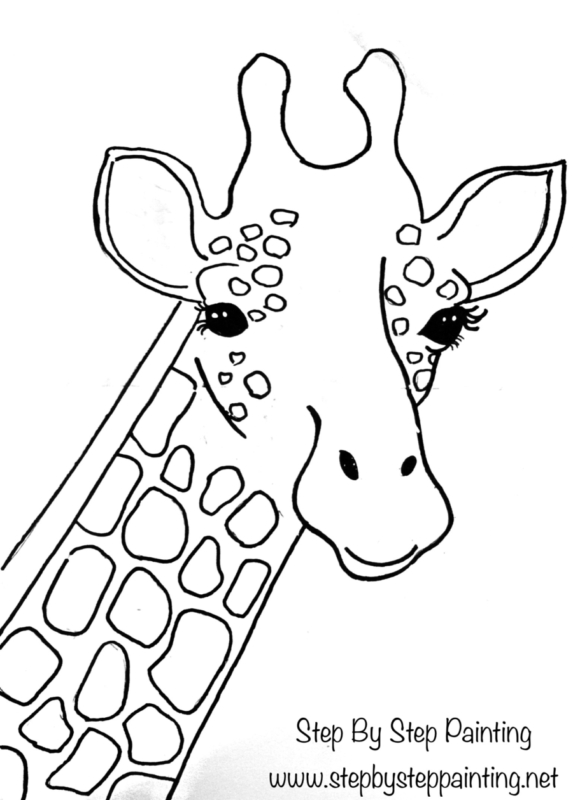
Position the traceable on your canvas to where you like it. Mine was hanging off the bottom a bit with about two inches of space above the giraffe’s ossicones (horns).
Place a sheet of graphite paper below the traceable and trace the design. Note: I did not trace the spots but you may wish to do so. 
Tip: If you are doing this with kids or as a paint party, I recommend outlining the tracing with either a sharpie or a paint pen! That way when you apply the layers of paint, you will still see the main parts of the drawing (especially the spots and facial features).
4. Paint The Eyes & Nostrils
The first thing I painted on this giraffe were the eyes! I used a 10/0 liner brush and mars black. You may also wish to use a sharpie or a paint pen for this step if you feel like you need more control. 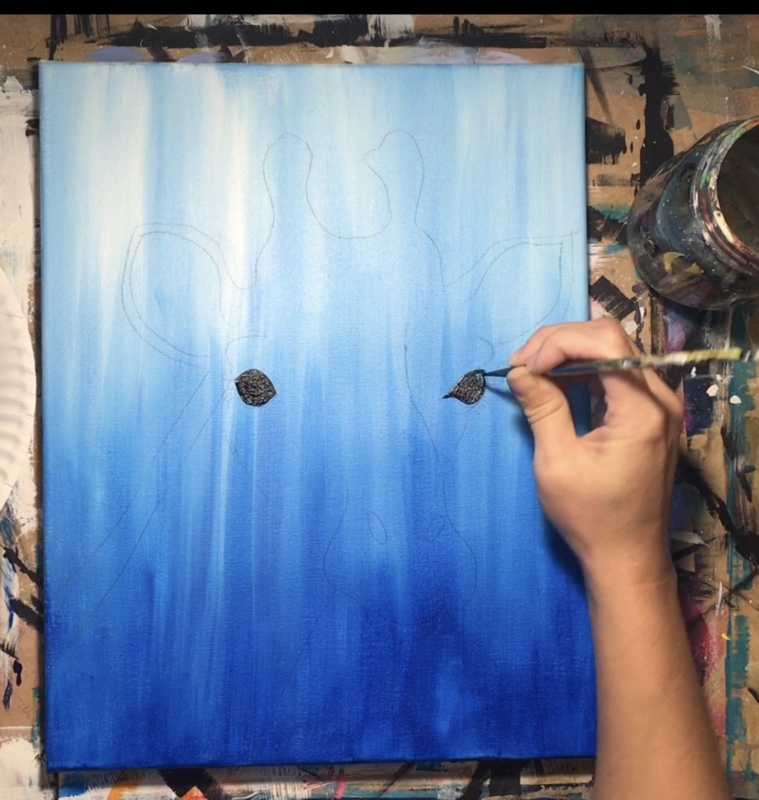
Basically fill in the eye area as it was drawn on the canvas. Do the eyelashes on the right side. You may also want the do the eyelashes on the left but since I knew I was going to paint over that area, I waited until a later step to do so. 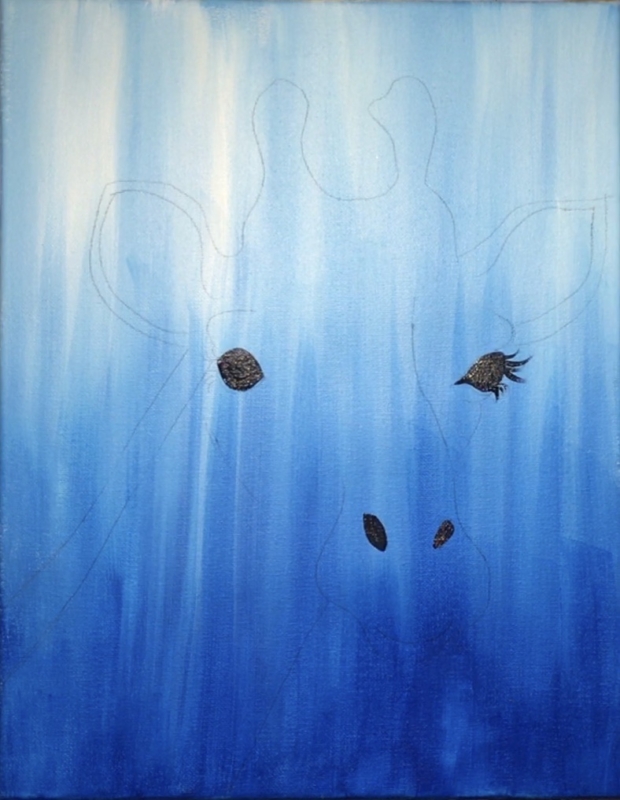
5. Paint the giraffe with naples yellow and titanium white
Next paint the entire giraffe area (except around the eyes, nostril and inside of the ears) with naples yellow and titanium white. Use a combination of your #4 round brush (for small areas) and a #12 bright (for larger areas). 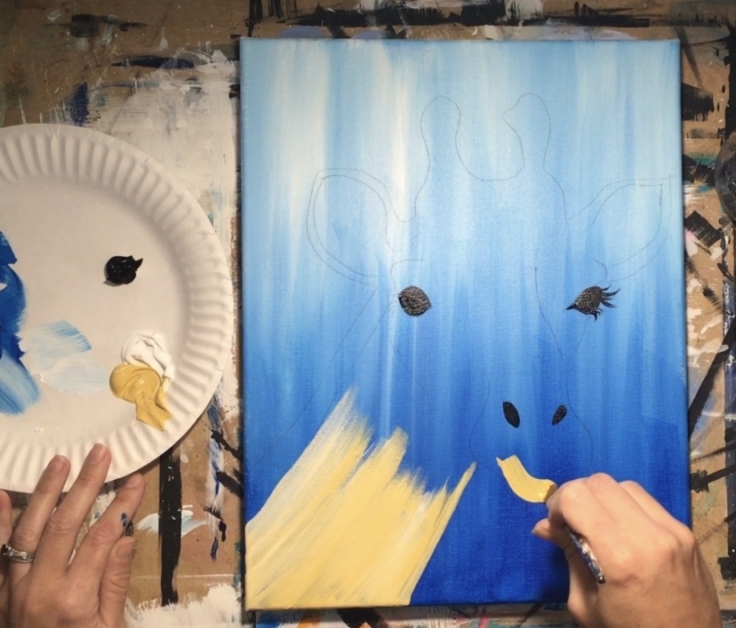
Try to allow the direction of your strokes to contour the shape of the giraffe. For example, the strokes were going diagonally on the neck but went curved around the chin and head areas. 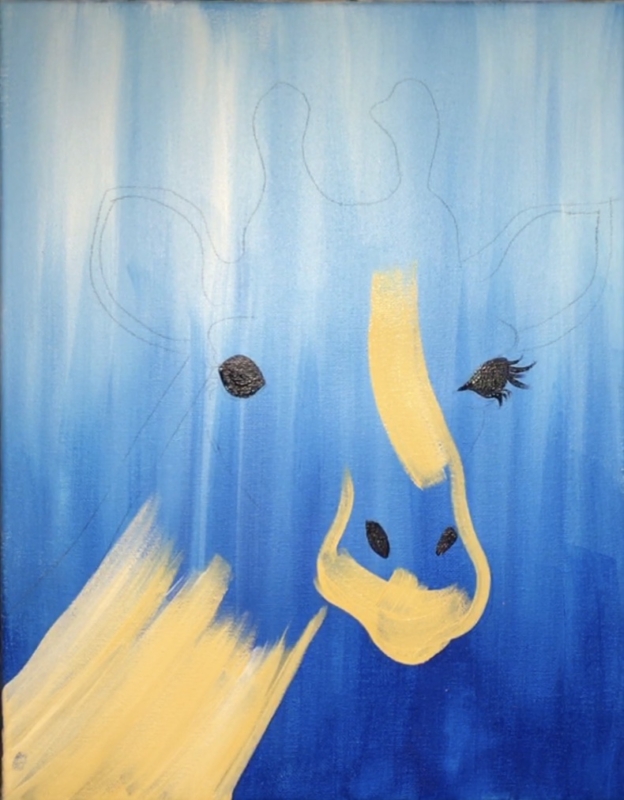
Load your brush in both the naples yellow and the white (about equal amounts) and let the colors blend on the canvas. There were some areas of the giraffe where I did mostly naples and not a lot of white. 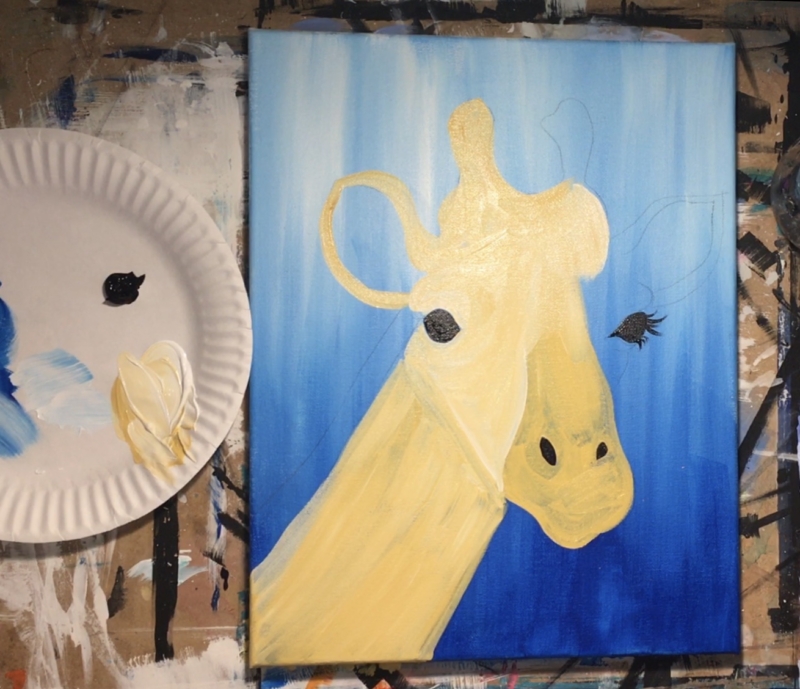
But essentially it all ended up being mostly the same color. I did two coats of paint for this step. Continue to fill in the giraffe until all the areas are solid with no more blue showing through (except for the inside of the ears). 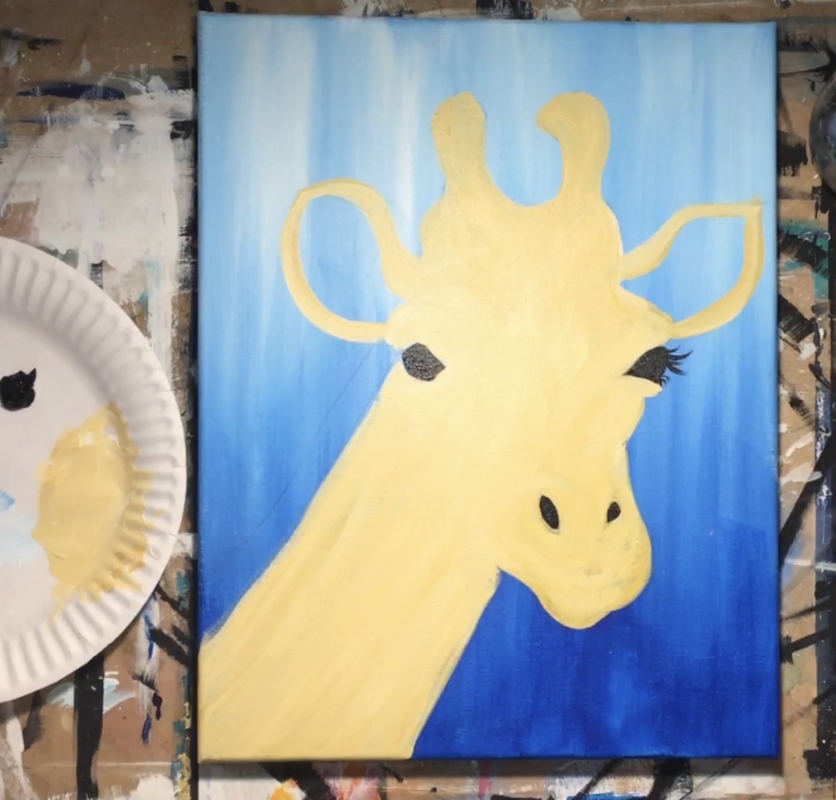
6. Paint The Giraffe’s Hair
Use your #12 Bright brush and burnt sienna to paint the hair. You should still see where you traced it onto the canvas, just fill that area in by dragging each stroke from the giraffe’s back to the edge (using the full width of the brush). 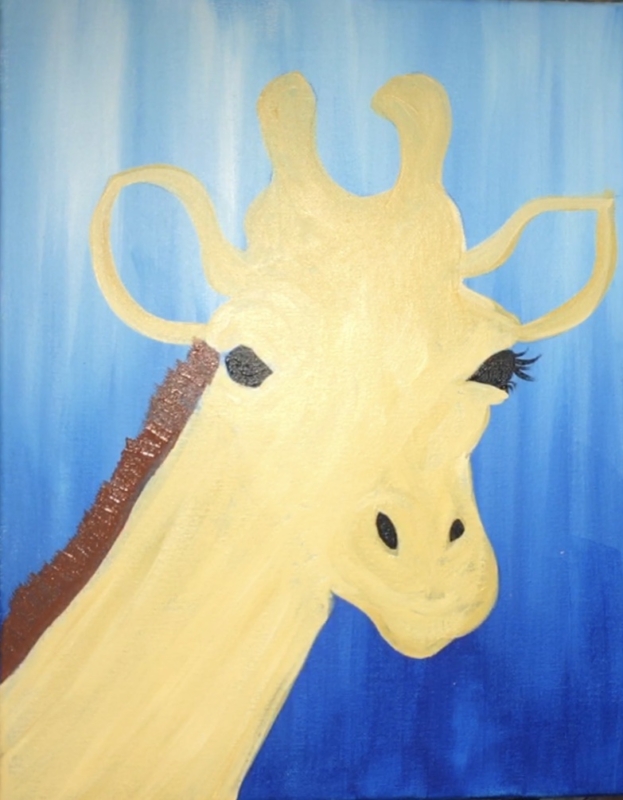
7. Paint The Giraffe’s Spots
I used a combo of the #12 bright and the #4 round to do the spots. Use burnt sienna to paint the spots. I just free painted them but if it helps, you can lightly draw them out with a pencil or use the traceable as a reference guide. 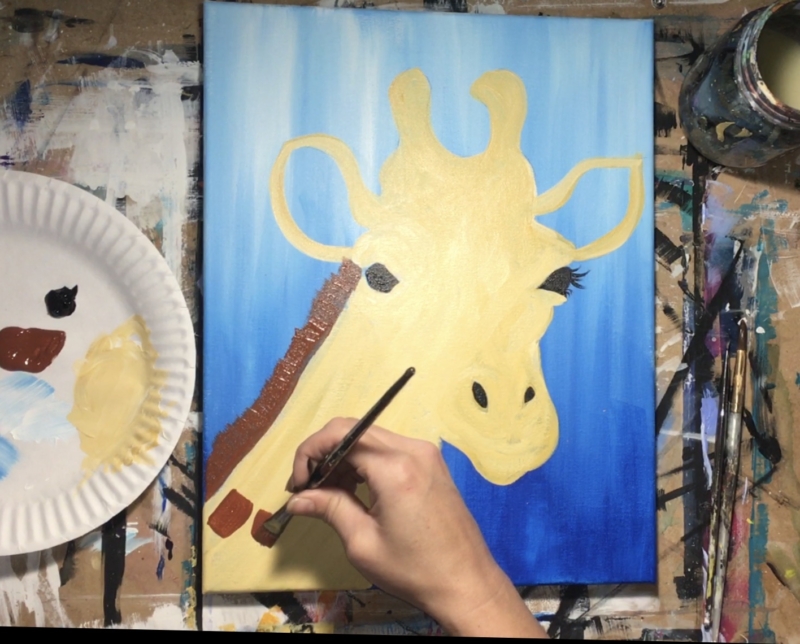
Some of the spots are darker. I added a bit of mars black in the mix of burnt sienna to add color variation in the spots. Simply load your brush in the burnt sienna and a little bit of black and let the colors blend on the canvas.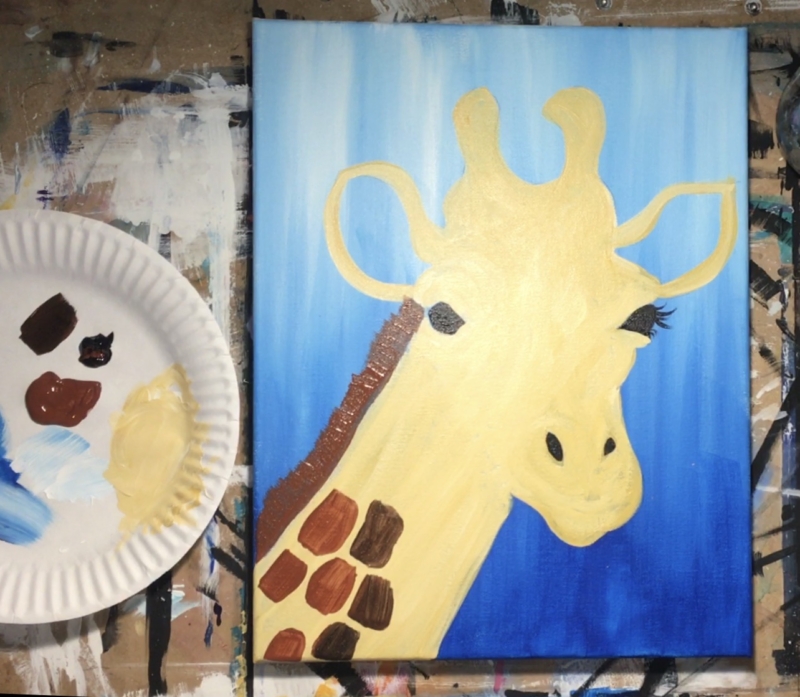
There is a line under the left eye that sort of divides where the giraffe’s head is and where its neck is. I painted that line with the brown/black combo and the 12 flat brush. You can see that line on the traceable as well. This is helpful because all the spots above that line will be smaller and the spots below will be larger. 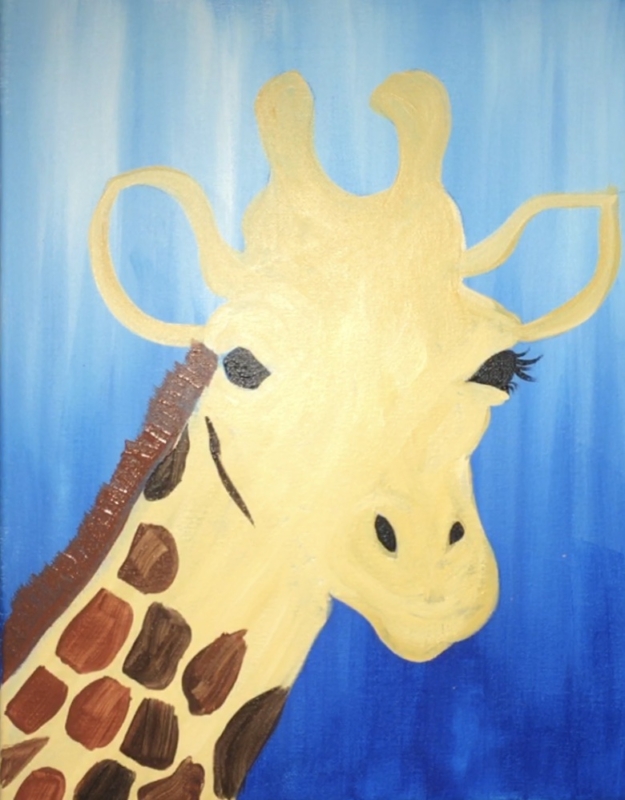
The spots on the head/nose area are smaller. I did those with the round brush. There also aren’t as many spots in this area as the neck. 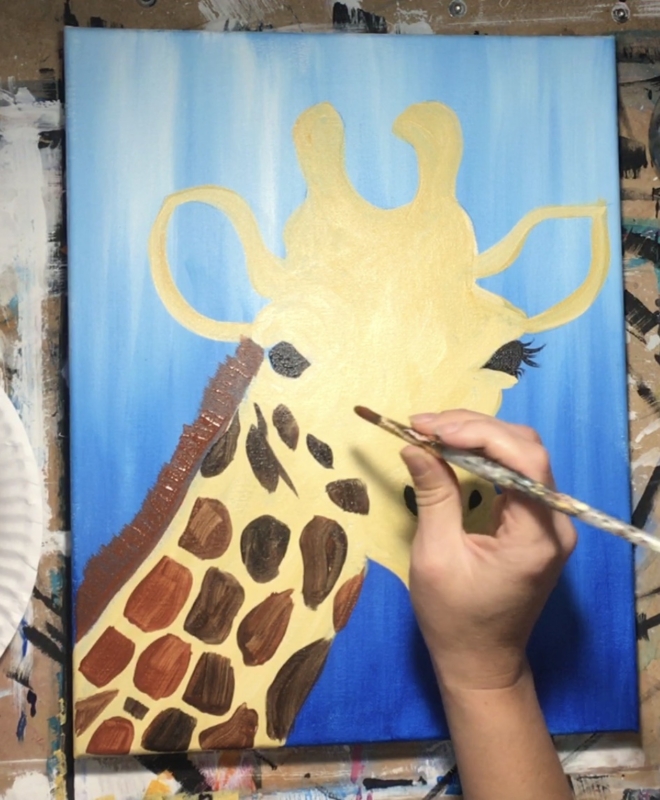
Paint a few small spots here and there up to the top of the head (leave the middle part of the head/nose spotless).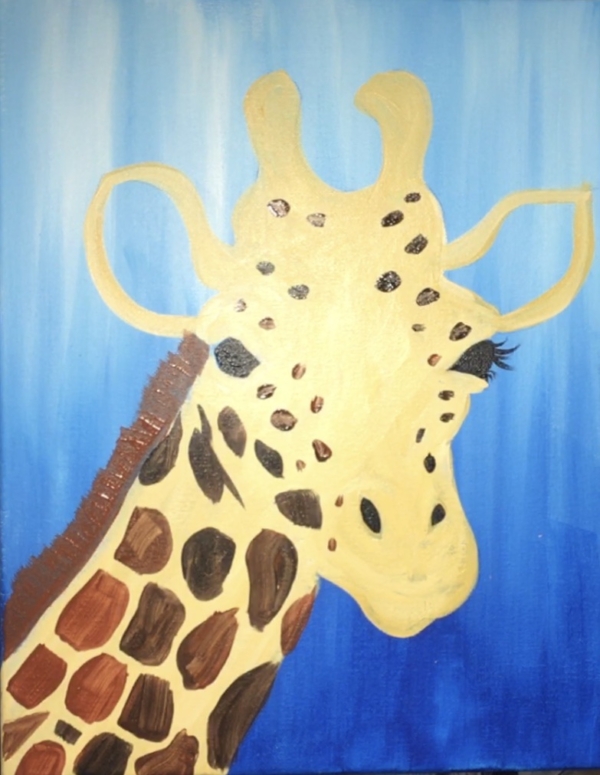
8. Paint The Inside Of The Ear And Highlight On The Eye
Use a #4 round brush to paint the inside of the ears white (for now) and use a 10/0 liner to paint two dots on the eye (highlight in the eye). 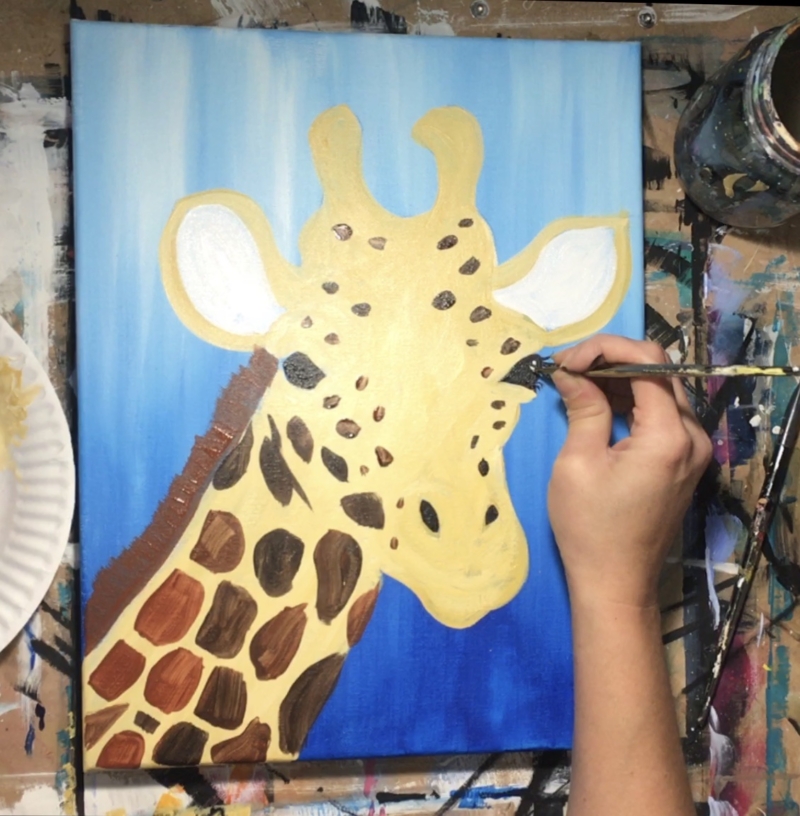
I also did the eyelashes on the left side. 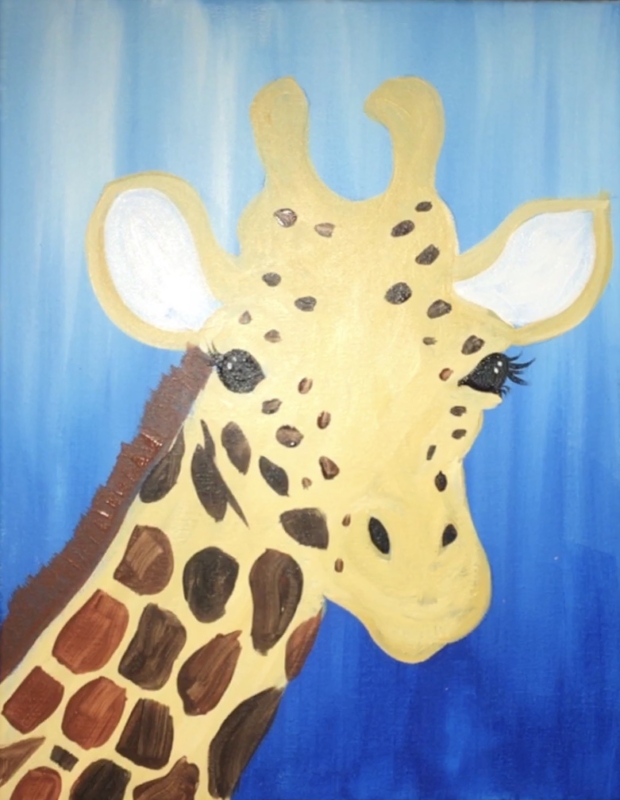
9. Paint the inside of the ears and top of the ossicones with cadmium orange hue.
Use your #4 round brush and cadmium orange hue. Paint the entire inside of the ear over the white. Then on the top of the occicones, paint them orang by dragging your strokes downwards. (Note: makes sure the white part of the ear is dry before painting over). 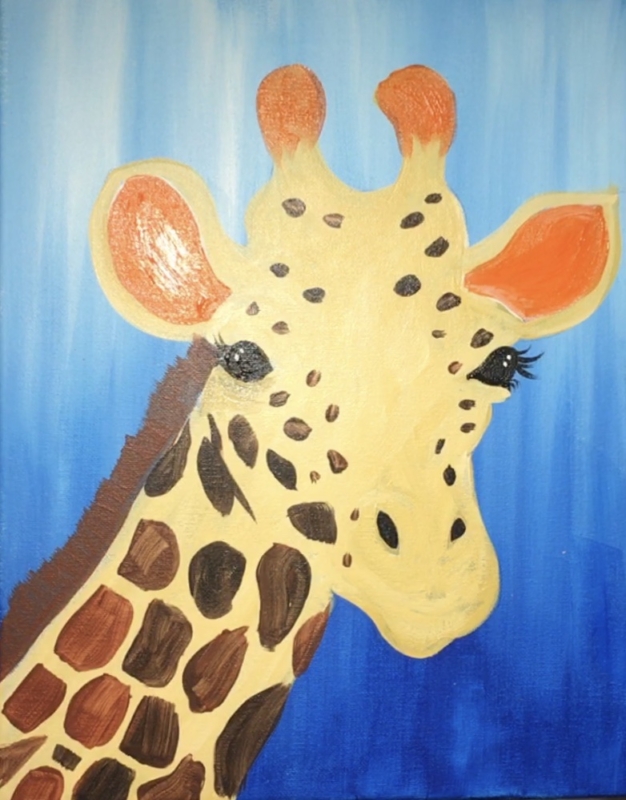
Then paint black on the top of the ossicones. Use your #4 round brush and drag down a little bit of black so that the top of the ossicones are black. I also started to do black in the center of the ears but realized this part of the orange wasn’t dry so I skipped that part for later. 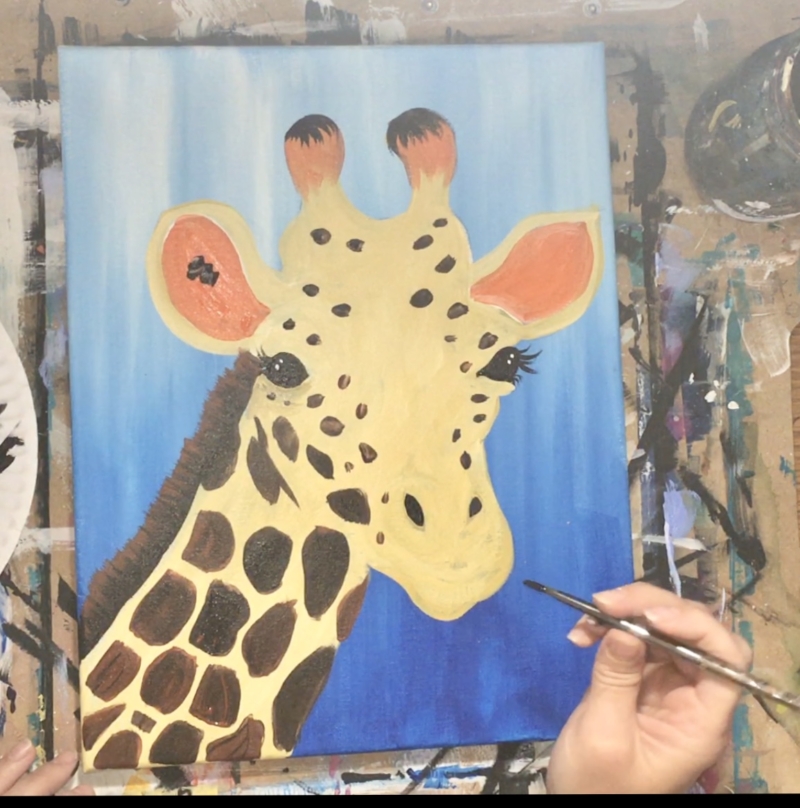
10. Loosely Outline The Giraffe
Next I loosely outlined the giraffe with mars black and a #4 round brush. Outline the top of the ears, outside of the ossicones and the middle part between the ossicones.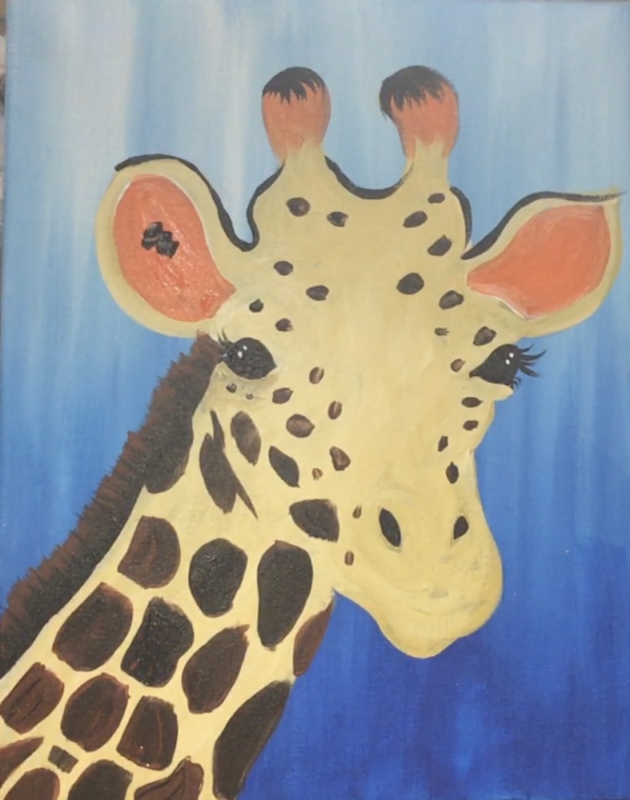
Then outline the bottom of the ear, and left side of nose as well as above the right eye (eyelid). 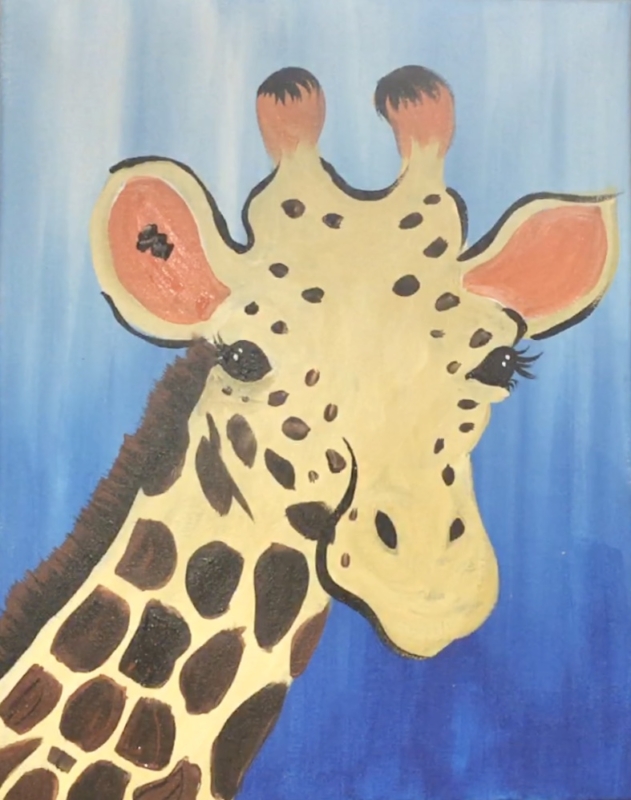
Then outline the right side of the giraffe’s face and the right side of his nose. You may also use the traceable as a reference. Also I panted its mouth.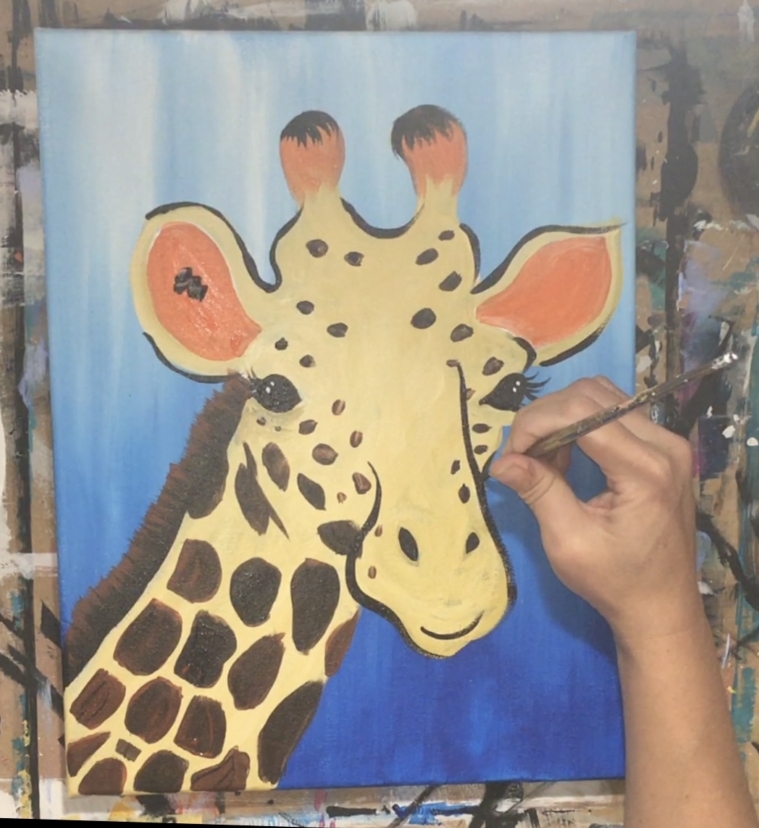
Then I outlined the giraffe’s left eyelid. 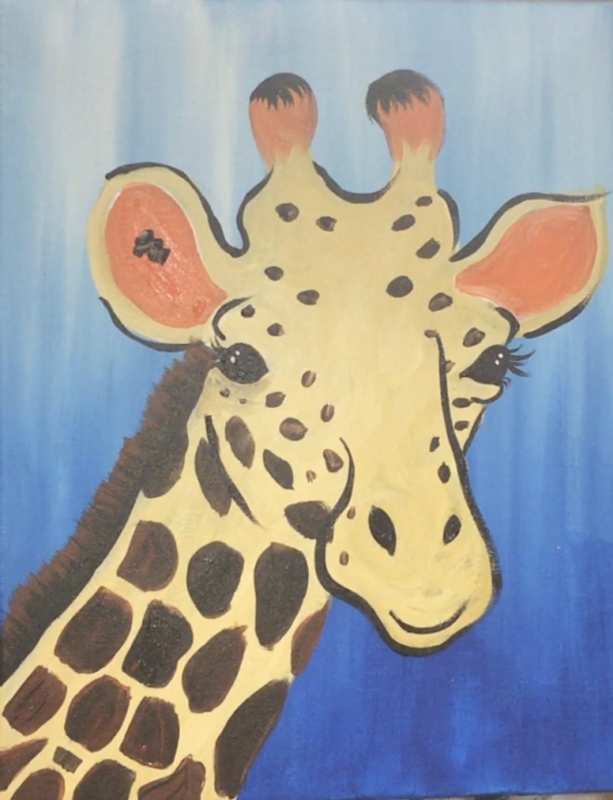
Then I painted the inside of the ears with the black. Use the same #4 round brush and loosely paint zig-zag lines on the inside of both the ears.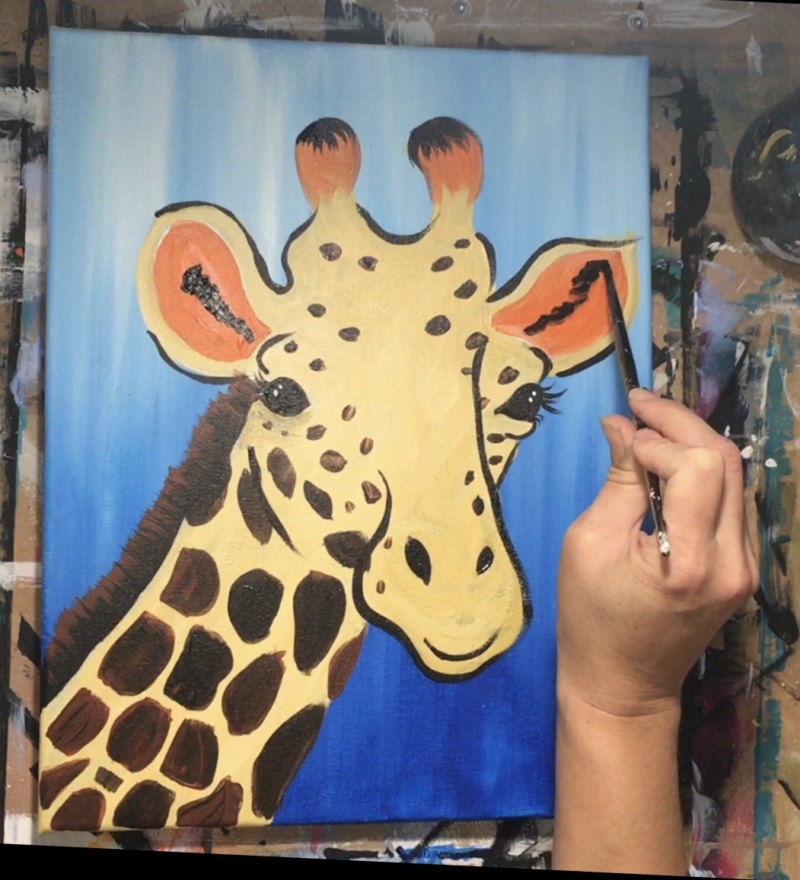
11. Do Some Outlining (very slightly) With Titanium White
Next I did some loose white lines on the right side of the ossicones, on the top of the head between the ossicones , on the inner parts of the ears and on the right side of the nose. 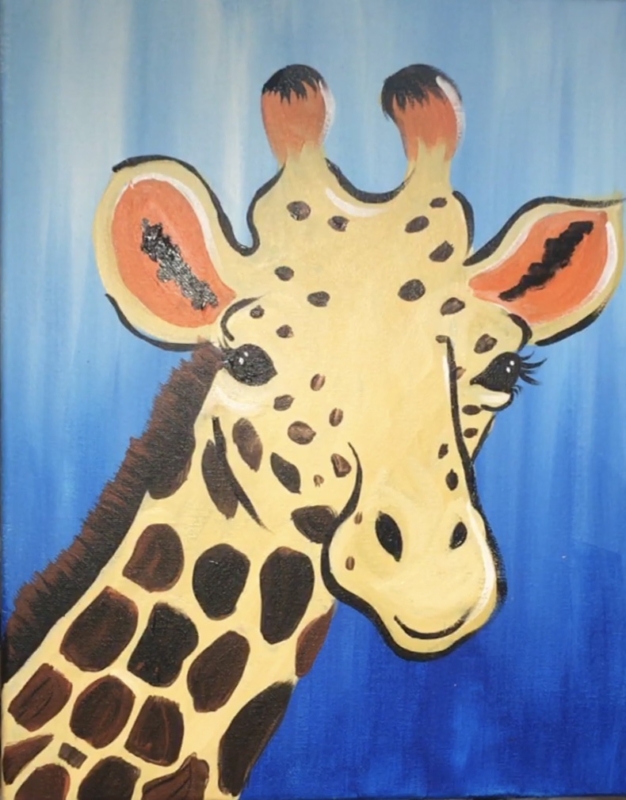
12. Paint Jungle Leaves
For the vines/ jungle leaves I used a #4 round brush and the colors brilliant yellow green and hookers green. Start with brilliant yellow green and paint a swirly vine. 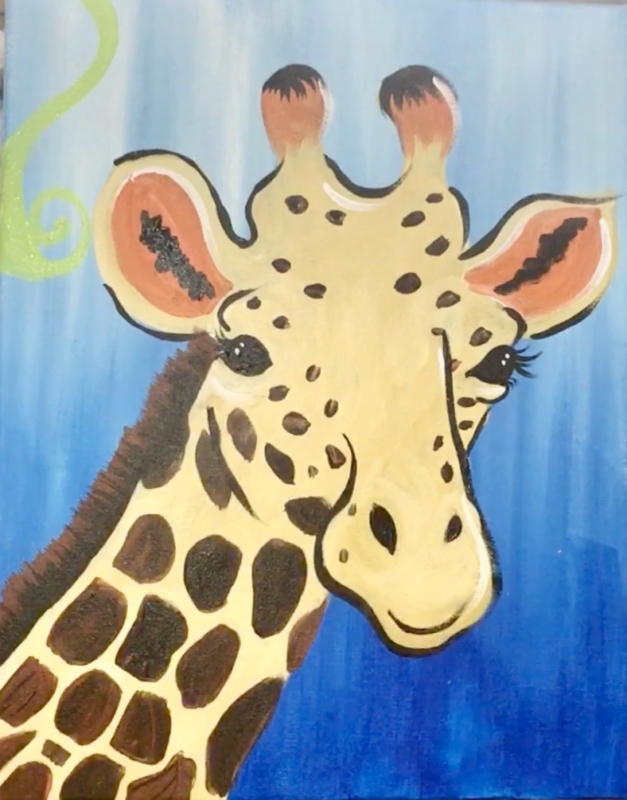
Then paint larger leaves with the same brilliant yellow green. I did a few on the lower right corner of the painting and four at the top. 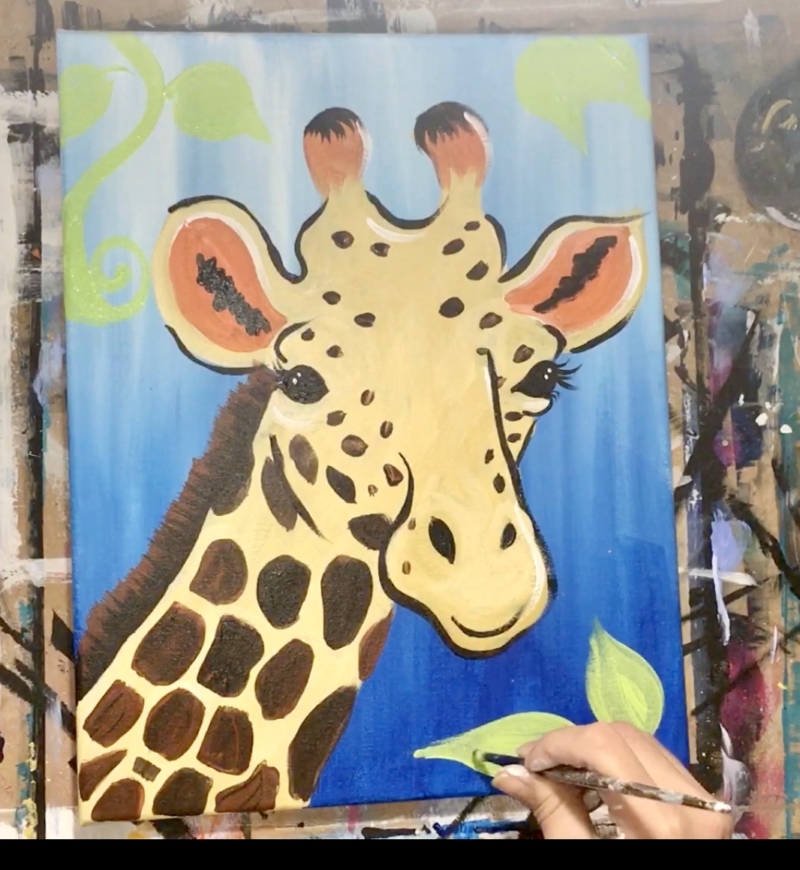
To make the leaves appear darker/ have color variation paint over the leaves and vine with hooker’s green while the brilliant yellow green is still wet. The two greens will blend. 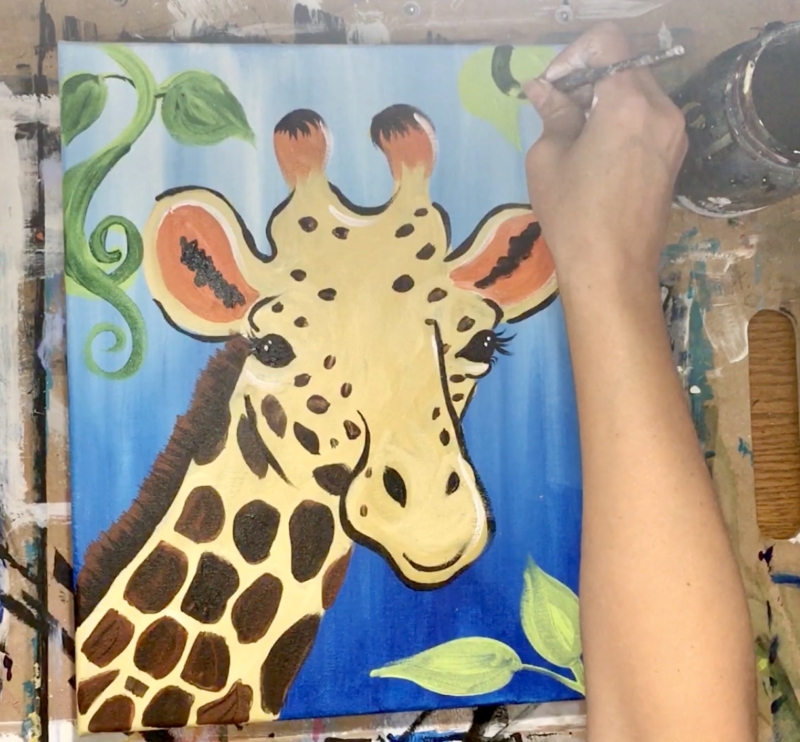

Finished!
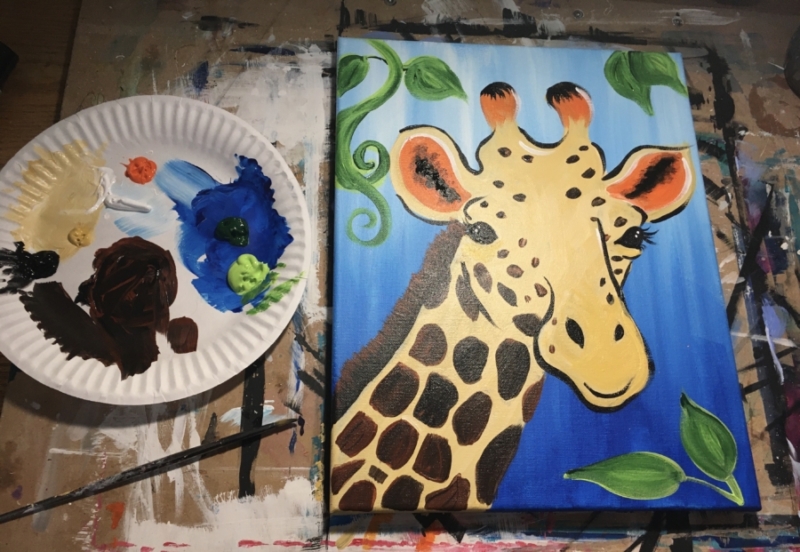
Share your art!
See Also:



Do you have a tutorial for a monkey in a similar style to the giraffe? My son loves monkeys and my daughter giraffes, so I read hoping to do one for each of them.
Thanks!
No monkey yet but I’ll add it to my idea list ?