
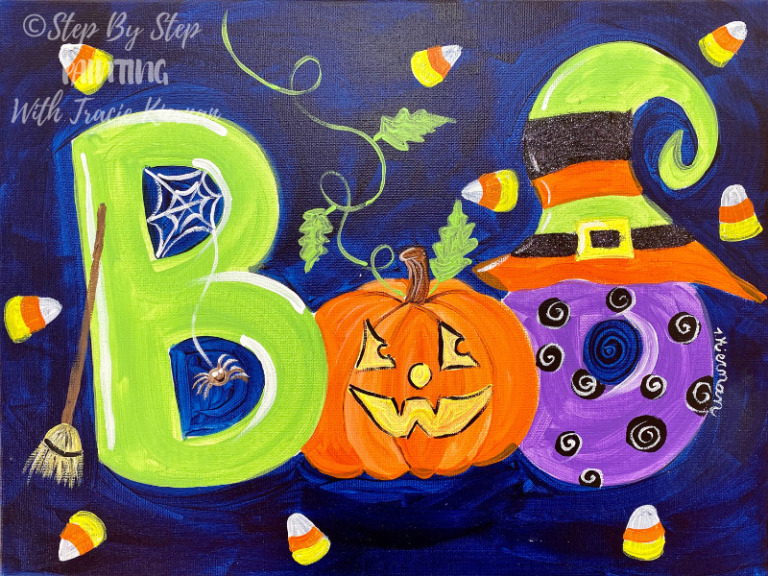
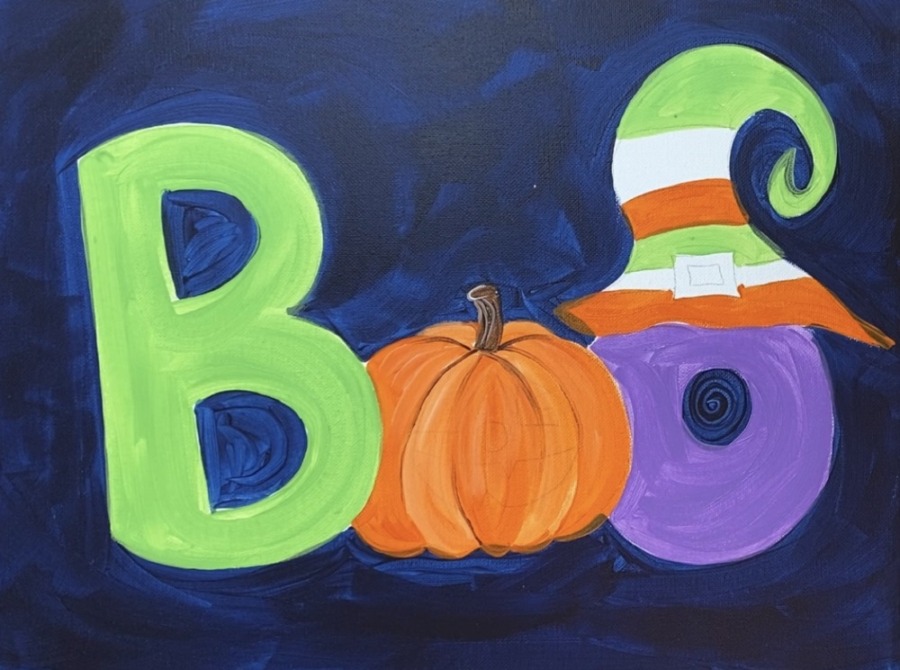
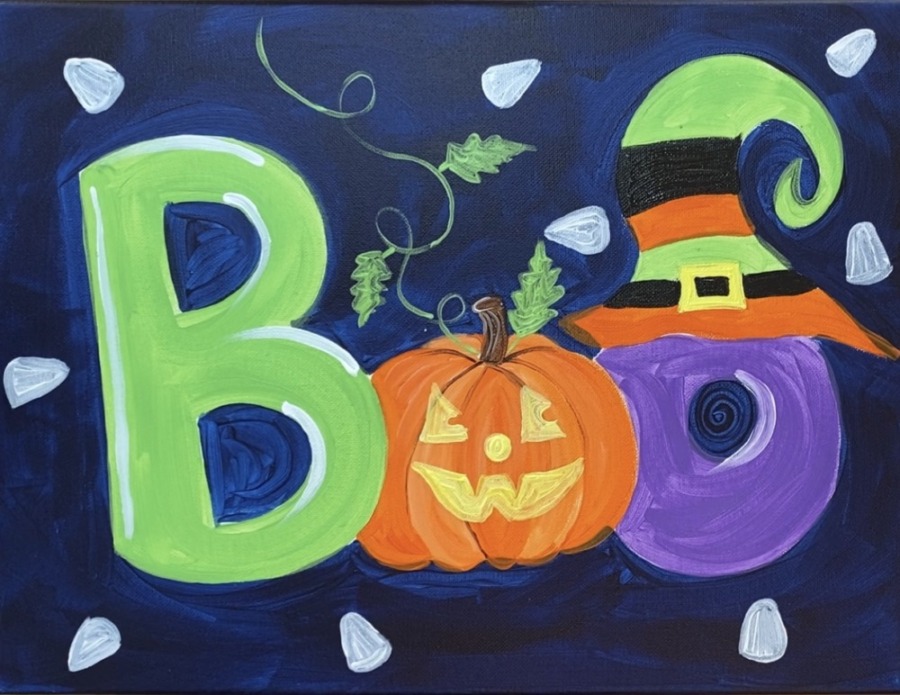
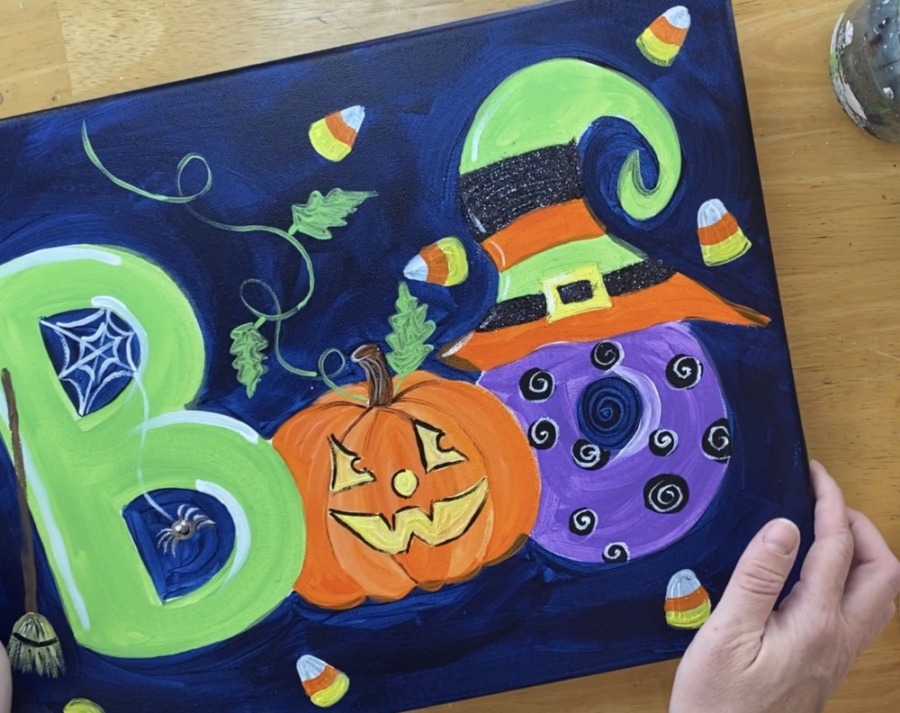
Here is a fun Halloween Painting you can add to your Halloween Canvas collection! It is also a fun one you can do with the kids.
Would you like to save this?
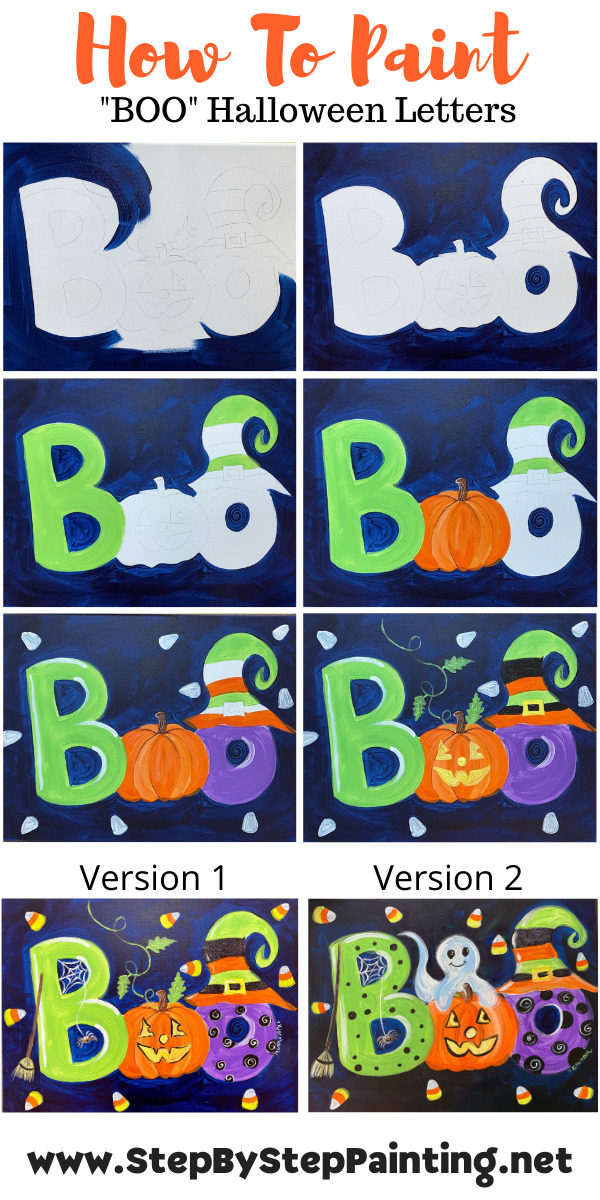
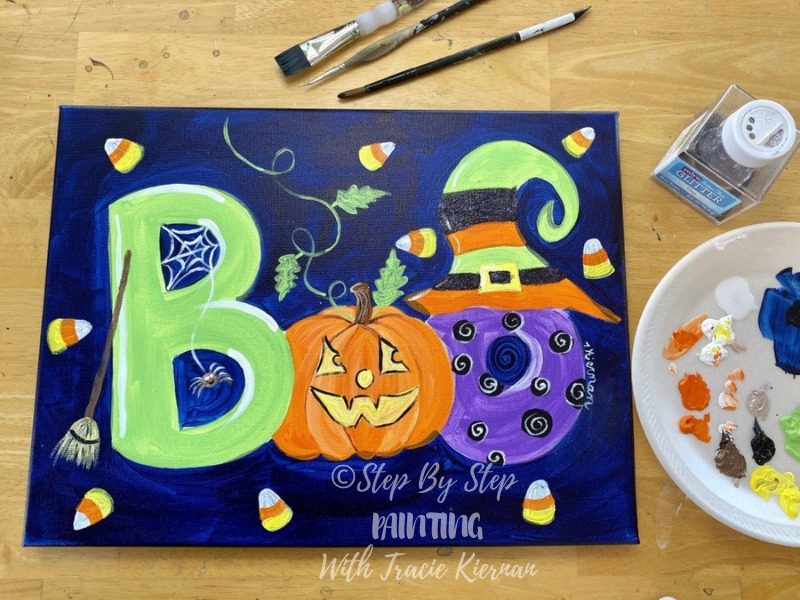
I did this on a 12″ x 16″ canvas with acrylics. I also used a little bit of fine black glitter on the witch hat above the “O”.
The background is a unique color that I do not use often. It was painted with DecoArt Americana “Prussian Blue”.
If you do not have Prussian blue or do not like the deep navy color, you can use black, Paynes gray or any dark color for the background.
I would suggest a dark color because it is what makes the other bright colors really “pop”!
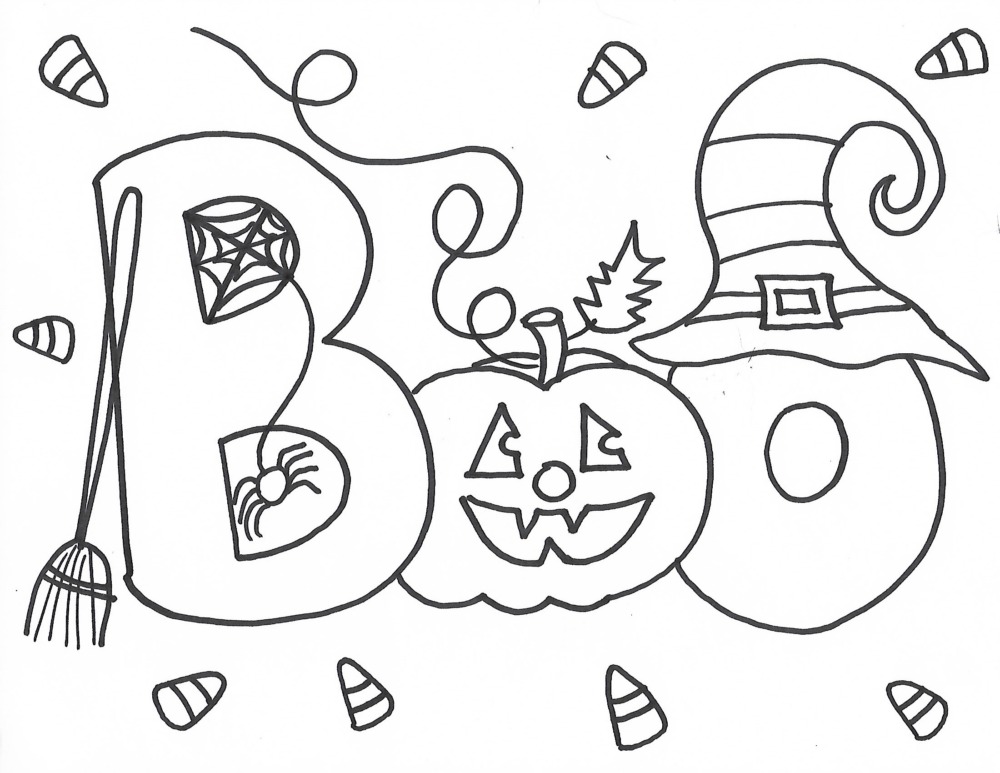
I will also be showing you in the full tutorial video how to draw the “Boo” letters! Or if you prefer, you can use my traceable 🙂
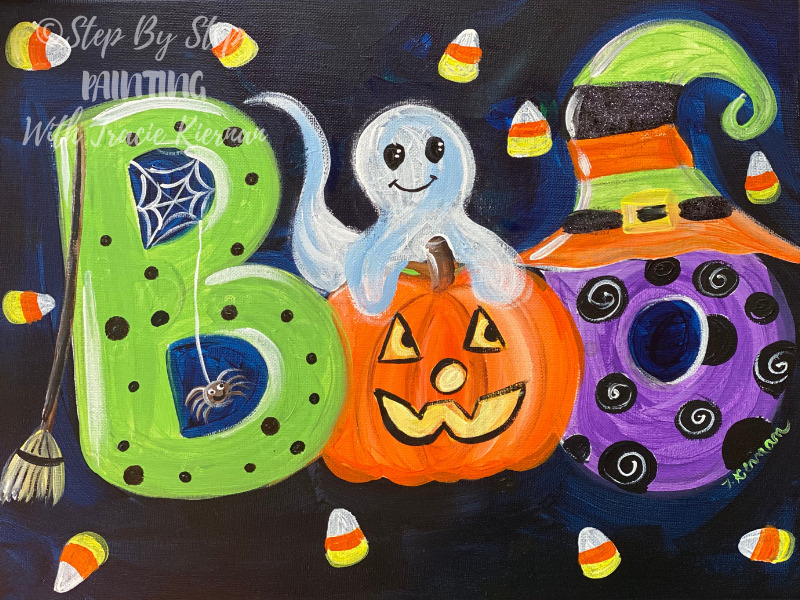
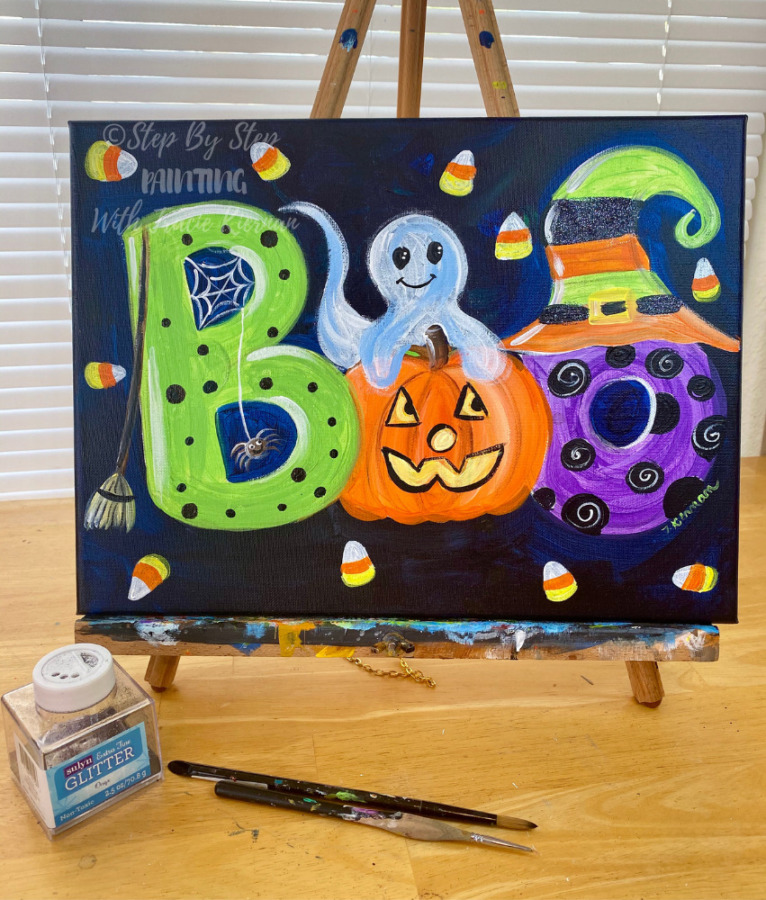
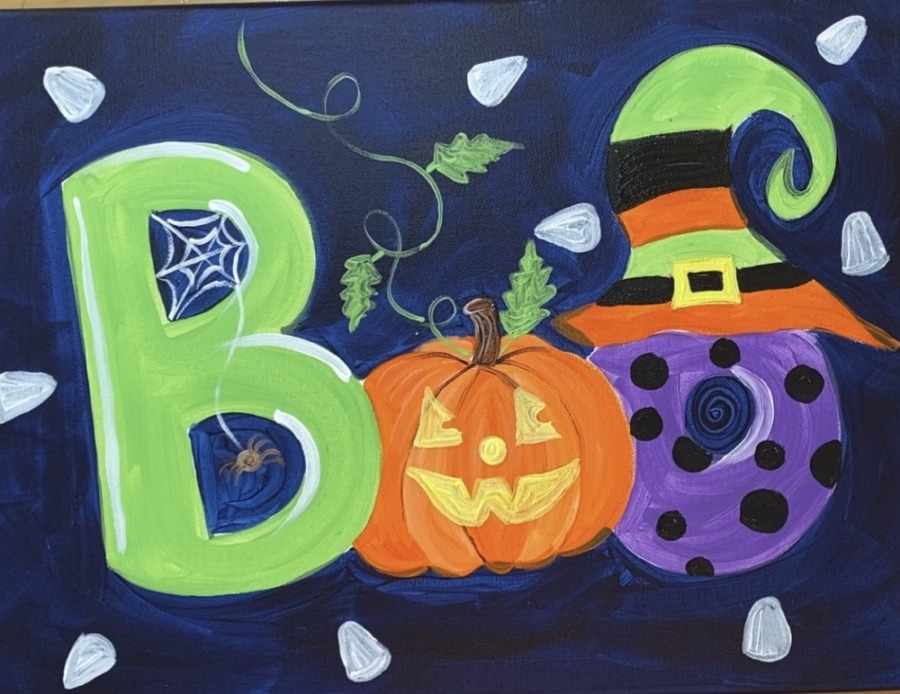
There is a slight (but adorable) design variation you can do with this paining too! In a second version of this painting, I decided to add a ghost on the pumpkin (since it is a “Boo” painting). I think the ghost brings out so much character in this painting!
You can decide which one you like best! Enjoy and happy painting!
Materials
"Boo" Canvas Painting Tutorial

Create an adorable Halloween Canvas Painting! This tutorial will teach you how to paint "Boo" on a 12 x 16 canvas with acrylics.
Materials
- Acrylic Paints
- 12 x 16 Canvas
- Brushes
- Traceable
- Graphite Paper & Pencil
- Black Fine Glitter (optional)
- Medium For Applying Glitter (optional & see notes)
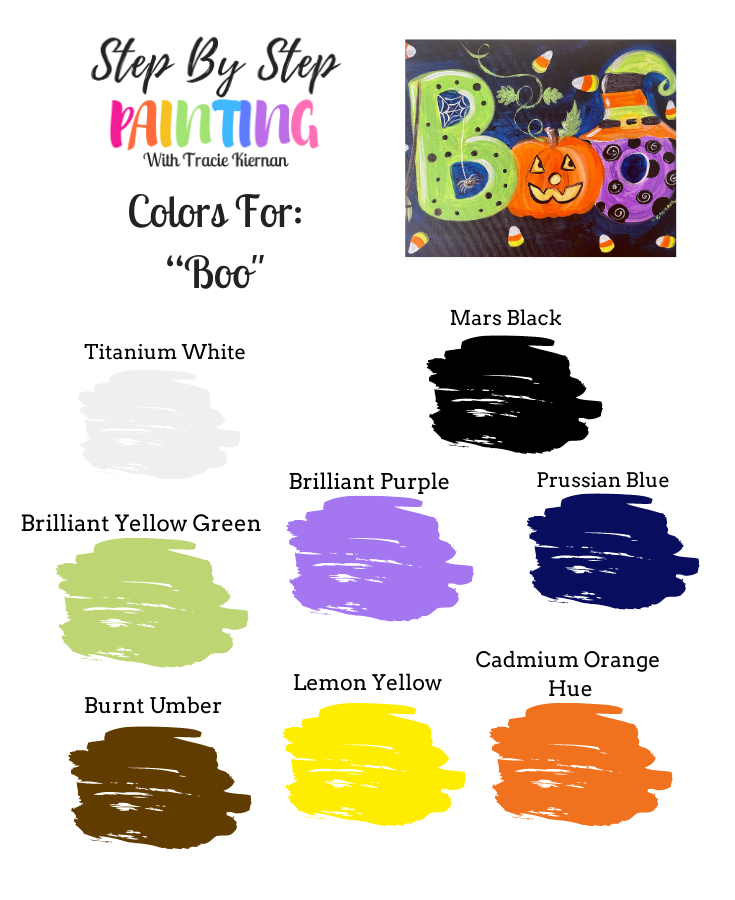
Colors Used:
- *Prussian Blue (color used for background)
- Titanium White
- Mars Black
- Brilliant Yellow Green
- Cadmium Orange Hue
- **Lemon Yellow
- Brilliant Purple
- Burnt Umber
Brushes
Notes
*In lieu of "Prussian Blue", you can use Payne's Grey, Ivory Black or Mars Black.
**In lieu of "Lemon Yellow", you can use Primary Yellow or Cad Yellow Medium.
***To apply the glitter, I used Liquitex Glazing Medium. You can use "Mod Podge", "Gel Medium Gloss" or even brush on "Elmer's Glue". You just need something that dries clear but also works as an adhesive for the glitter.
Craft paint suggestions:
Pumpkin Orange, Bright Yellow, Lime Green, Very Dark Navy Blue, Brilliant Purple, Black, White, Brown
Color Palette
Traceable
Note: if you are adding the ghost, look at the last few steps in this painting. I draw it with chalk and it is super easy!
Directions At A Glance
Video
Directions
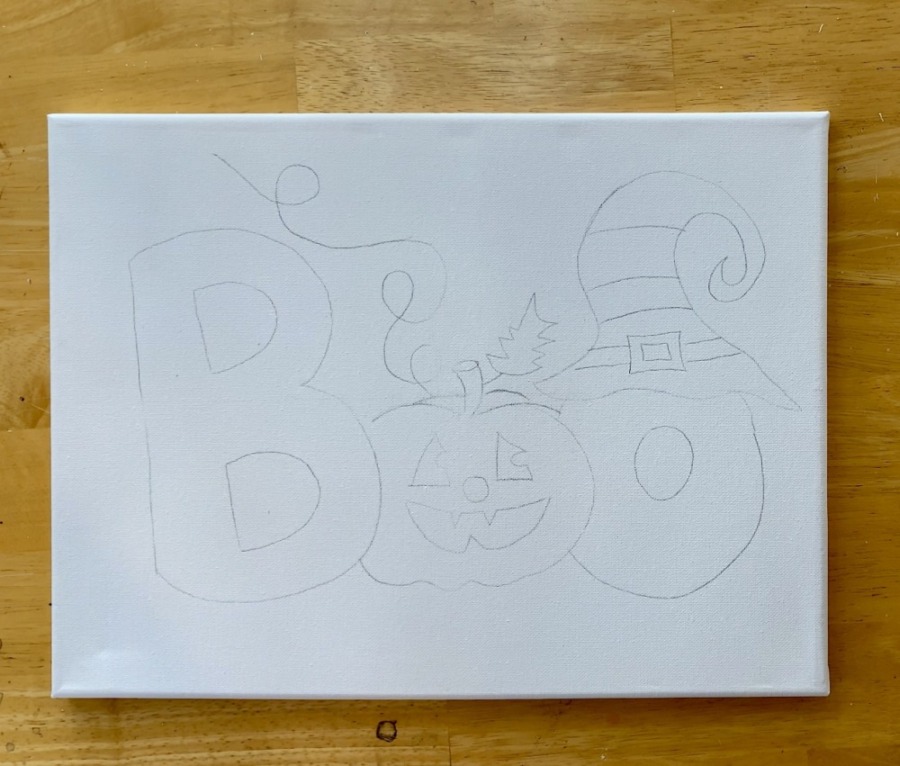
1. Use The Traceable or Draw the Letters on the Canvas
If you are using the traceable, you can scroll up to download it. Place a sheet of graphite paper below the printable and trace. If you do not have graphite paper, you can rub pencil on the back of the traceable.
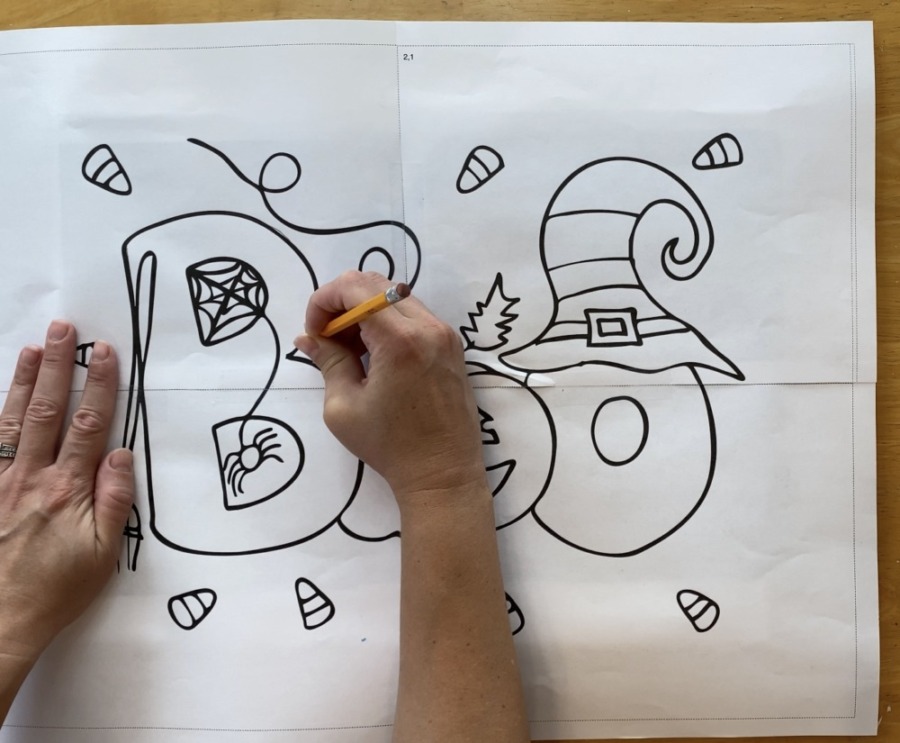
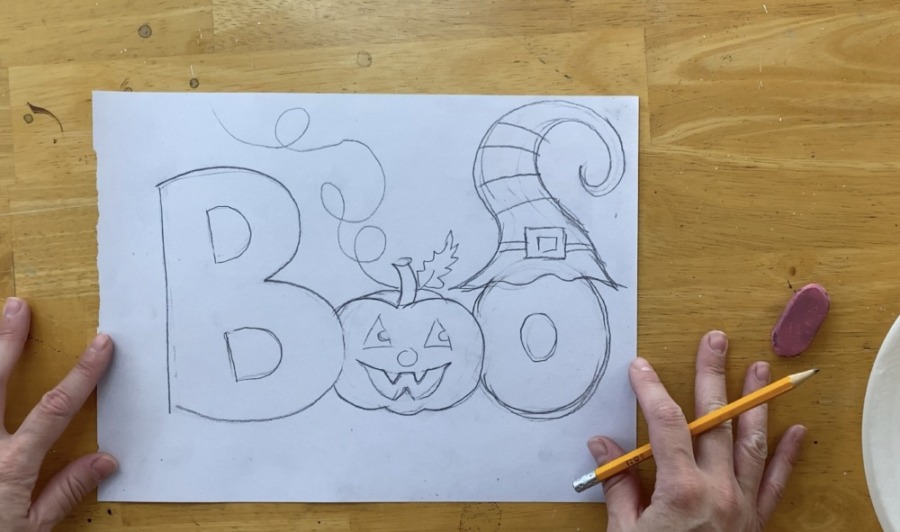
Or you can lightly draw the letters! In the full video, I will be showing you how to draw the letters step by step. It is a fairly simple design to draw and would be a fun drawing to do if you are working with your child!
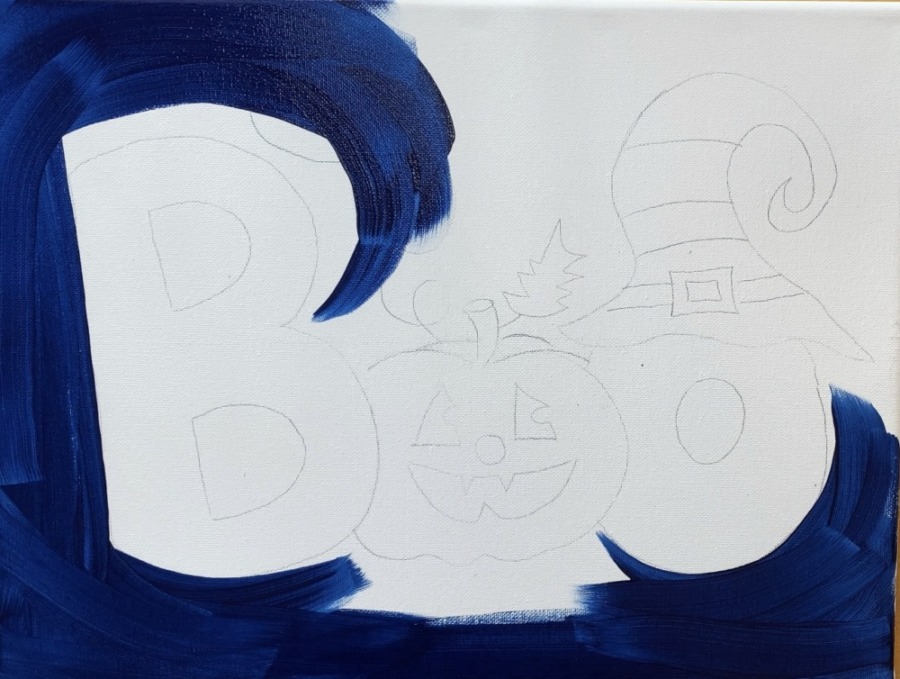
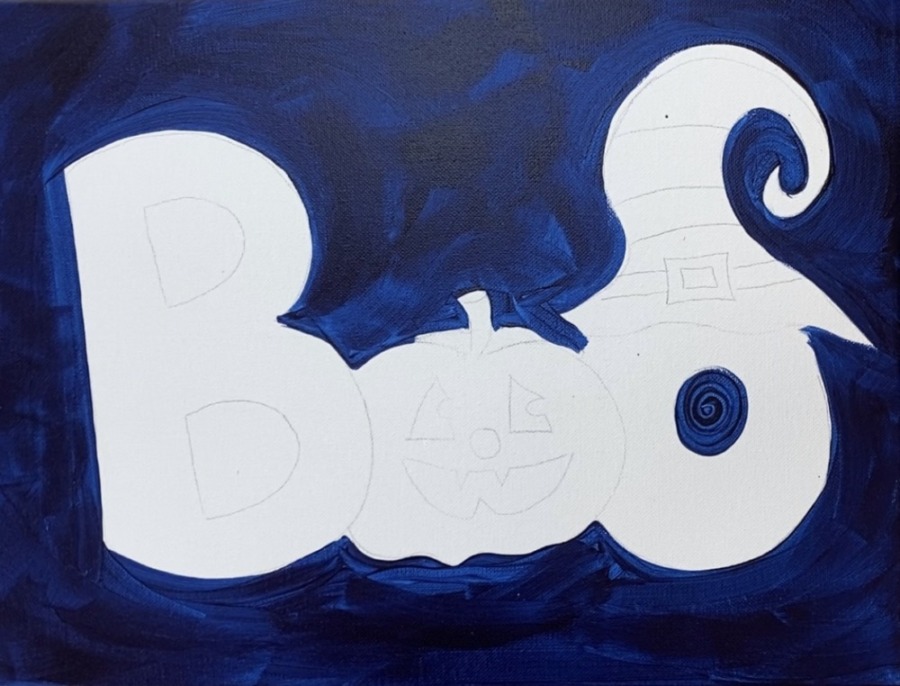
2. Paint the background Prussian Blue.
Use a 3/4″ wash brush to paint the background. If needed, use a smaller brush to get into the smaller areas. Paint all the “negative space” around the letters.
3. Paint the “B”, the green stripes on the hat and the pumpkin.
Use a #8 Round Brush to paint the “B” and the stripes “brilliant yellow green”.
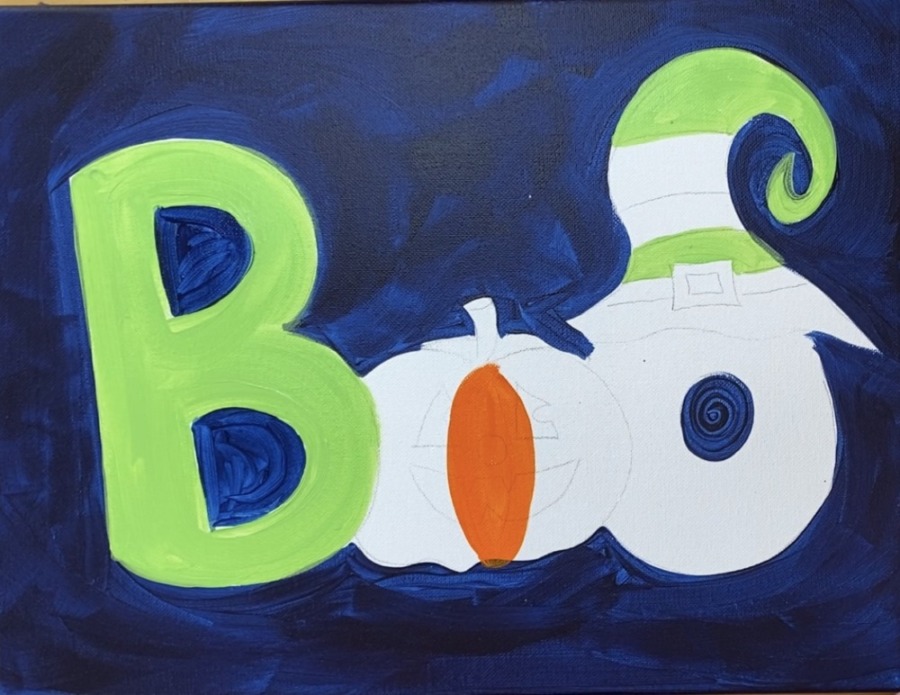
To paint the pumpkin, start in the middle and paint the oval shape cadmium orange hue.
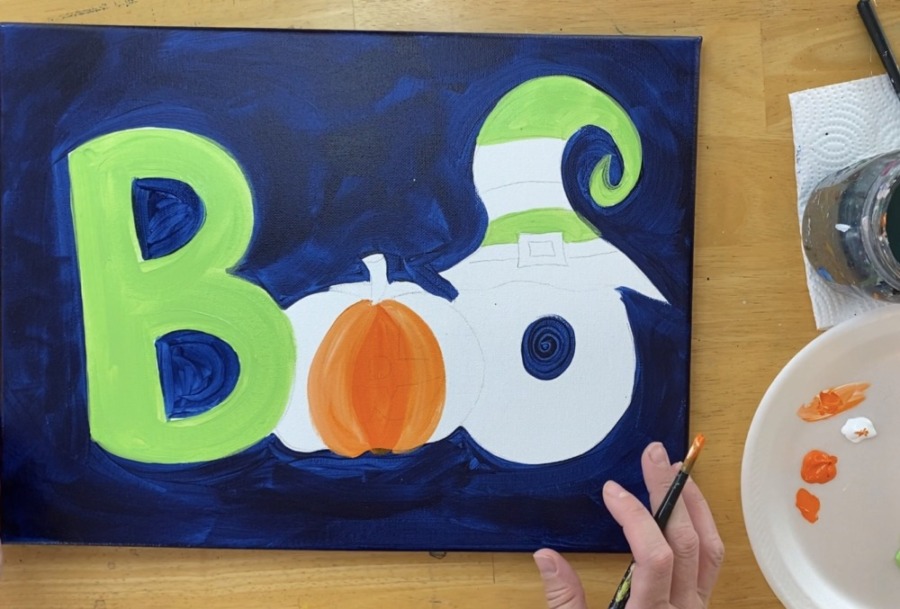
Then add a little bit of white to your brush and paint. When I do pumpkins, I stroke each of the bumps starting from the top and stroking down. I do “wet on wet blending” where the orange and white sort of blend together.
Then paint each of the pumpkin bumps. I did a different variation of “white and orange” for each of the bumps. Also, paint the small bumps in the back behind the stem.
Then add brown lines between the bumps using a 3/0 round brush and burnt umber. I painted these brown lines very loosely.
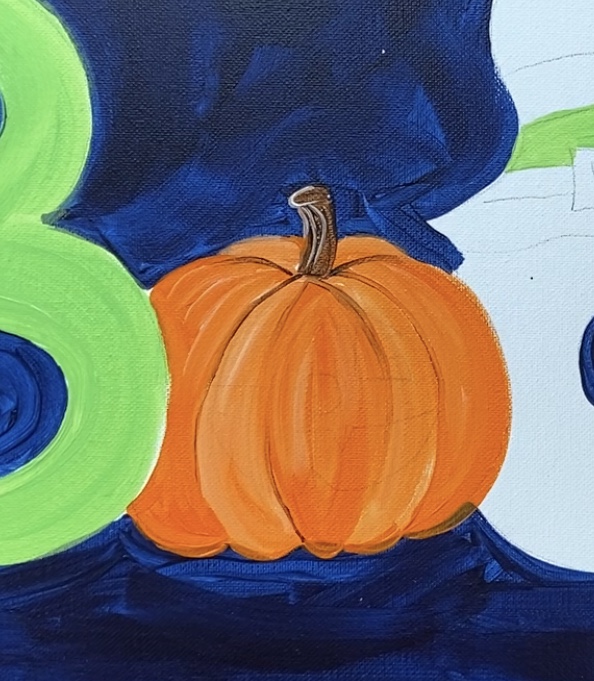
Use the 3/0 round brush and burnt umber to paint the stem. Then add some white to your brush and paint the top oval part and a few lines for texture.
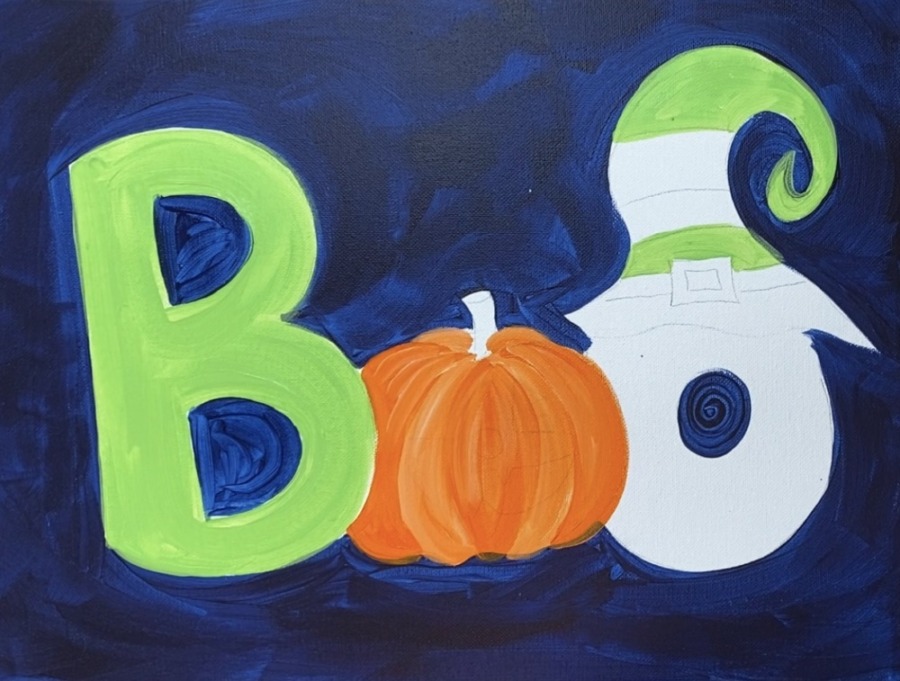
4. Paint the “O”
For the letter “O” I used my #8 round brush and “brilliant” purple.
5. Paint the Candy Corn Base
To make sure the candy corn shows up nice and bright against the dark background, I recommend painting the shape white first. Wait for that white to dry before painting the other two colors.
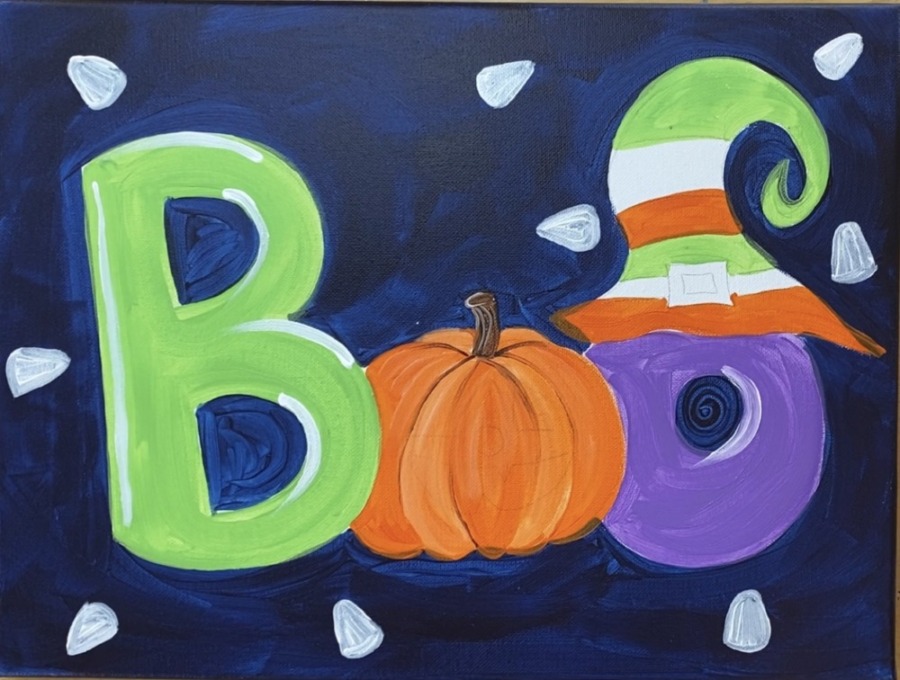
Also note that I did some “highlight” on that “B” and “O”. I did this with my #8 round brush and did a few white curves on the right side of the “B” and the inner part of the “O”.
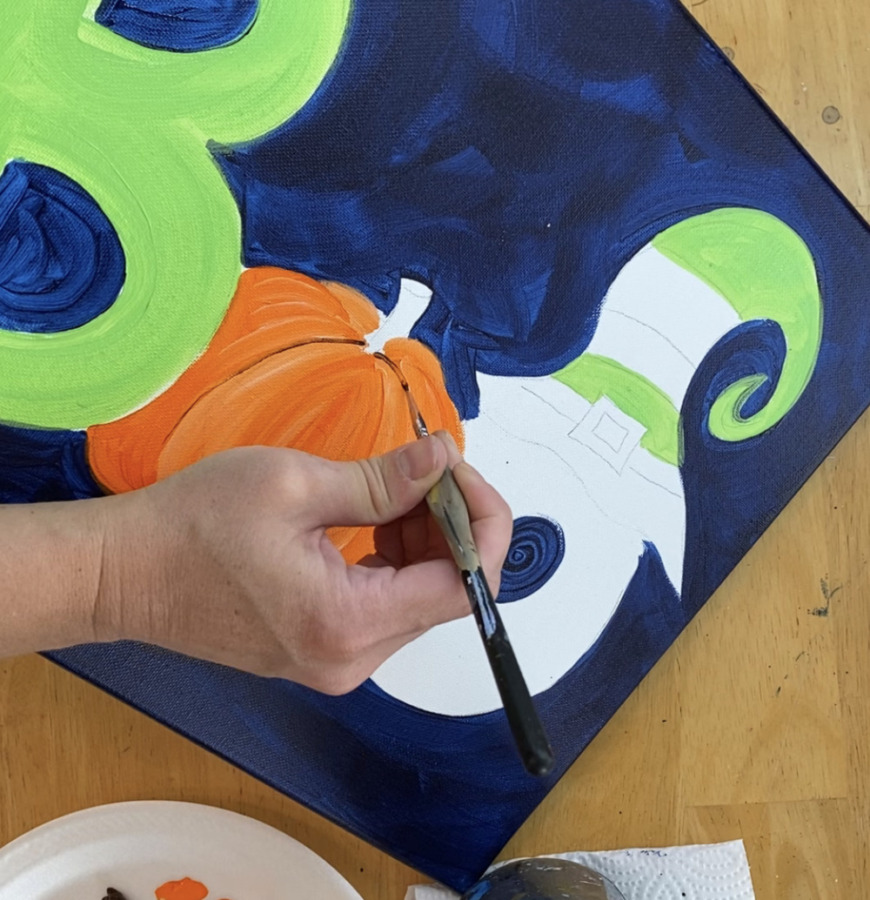
6. Paint the pumpkin vine, leaves & face
I used the 3/0 round brush and brilliant yellow green for this. Paint the swirly vine and the leaves! It helps to outline the leaf shape first and then fill it in solid. Note: if your green isn’t showing up against the dark background, add a little white into it.
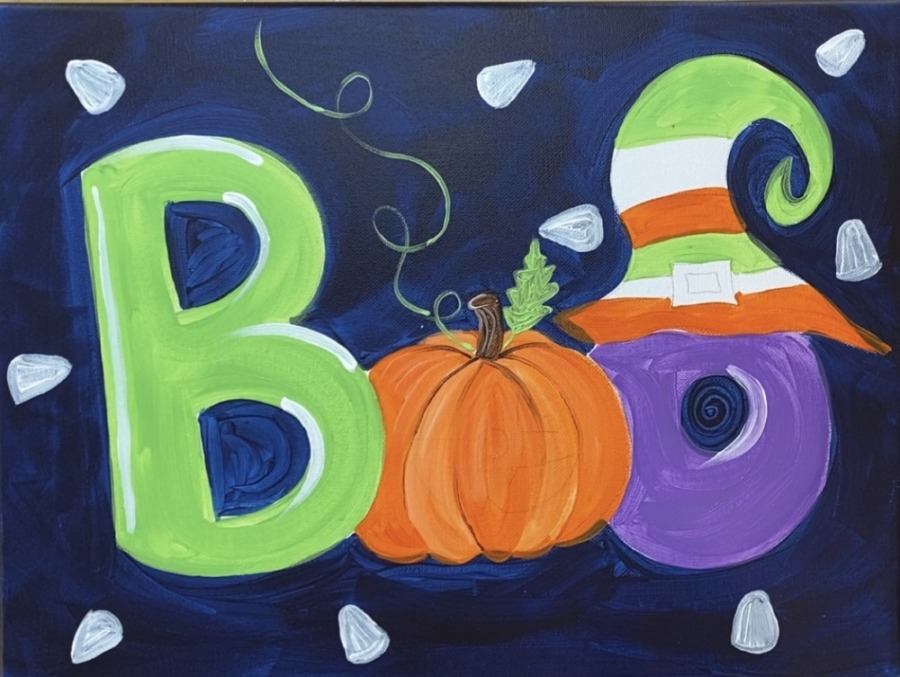
I did a few more leaves and then I went onto the pumpkin face. For the pumpkin face, I recommend mixing your yellow with your white so it will show up nice and opaque against that orange. I was able to still see my drawing through the orange, however, you may decide to sketch out the pumpkin face lightly with a pencil first.
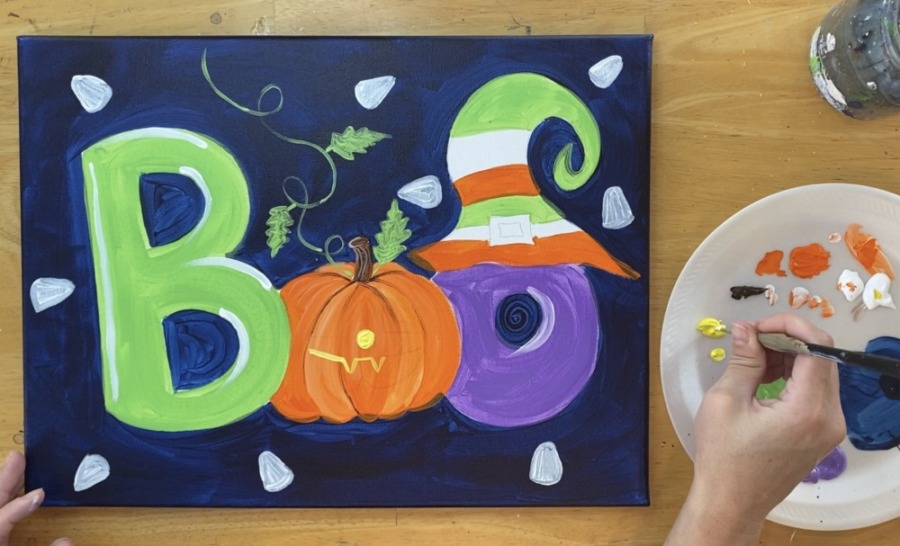
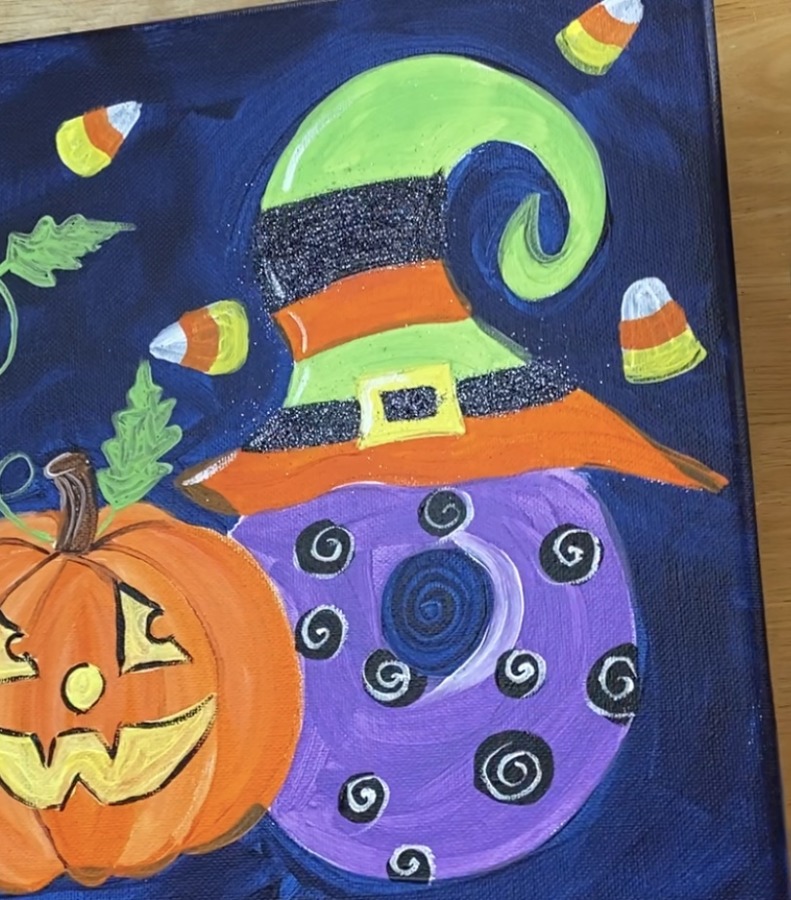
Below is what my pumpkin face looked like before outlining with black (I recommend waiting for the yellow to dry before outlining). Then I painted the black stripes and the yellow buckle on the witch hat.
7. Paint the spider web and spider as well as black dots on the “O”.
For the spiderweb, I used my 3/0 round brush and titanium white. I painted the web on the inside of the B. Then I painted a line for the spider. The spider was painted light brown. Mix about equal amounts of burnt umber and titanium white together to make the light brown.
8. Paint the broom, outline the pumpkin face and add more details on the spider & “O”
To do the broom, I painted the handle burnt umber. You can mix a little white into the brown if it isn’t showing up. Then the bristles were painted with yellow. This was all done with a 3/0 round brush.
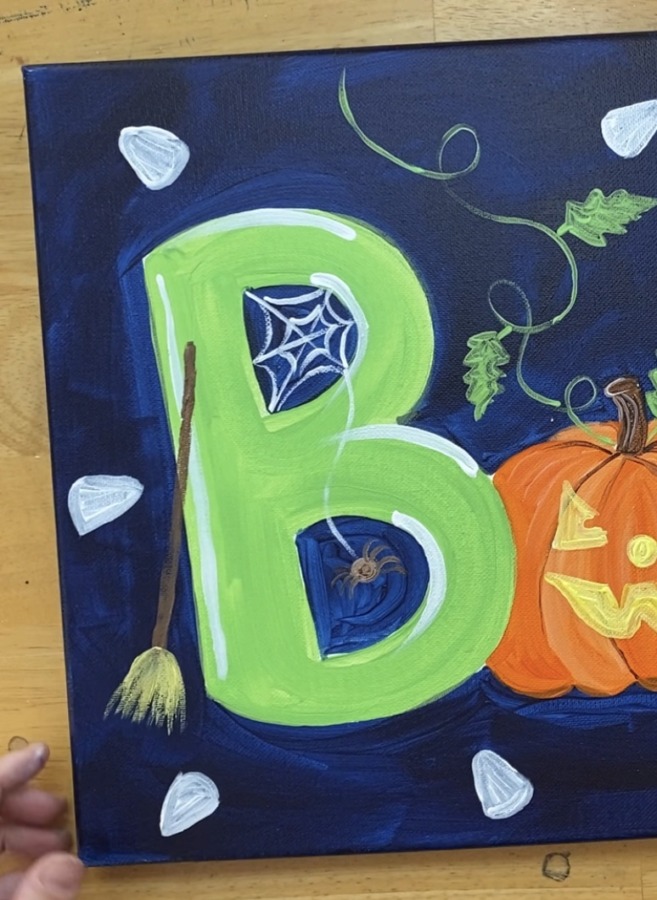
Then paint a black stripe going across the broom bristles. Loosely outline the pumpkin face shapes with black.
Next paint white spirals on the black dots! Make sure your black is all the way dry before doing this. Paint a face on the spider with black and white.
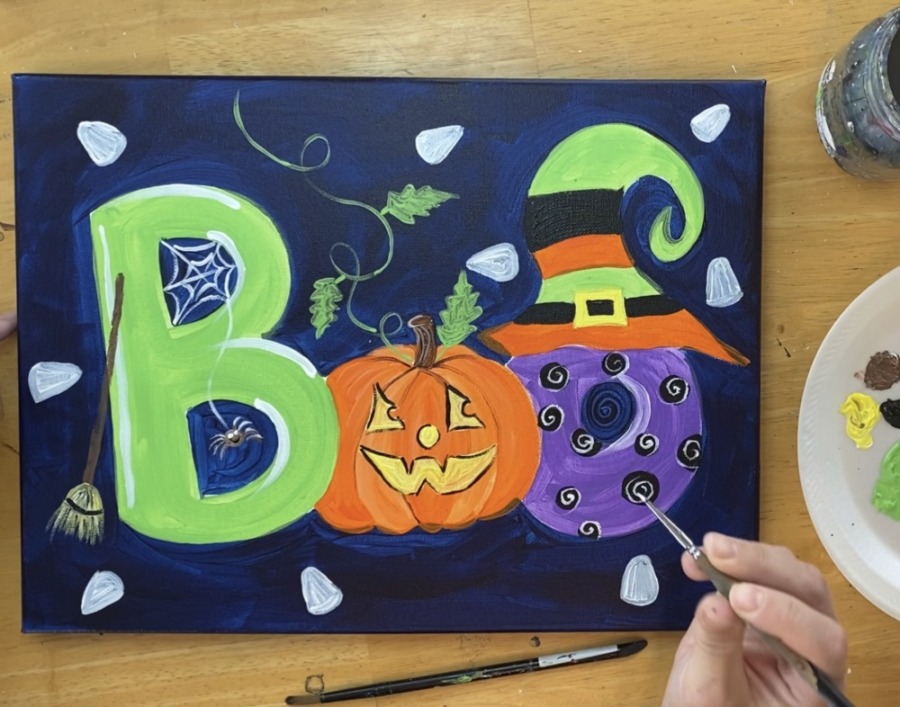
9. Paint the candy corn colors & highlight on the witch hat
For the candy corn, I used the 3/0 round brush to paint the stripes. I did the orange stripe and then the yellow section.
Then use a 3/0 round brush to paint a white highlight line on the left side of the witch hat.
10. Add the glitter!
To add glitter to a painting, you can use glitter paint or you can use a medium to apply loose glitter onto dried paint. I use Liquitex Glazing Medium. It acts as an adhesive and dries clear. This medium is kind of pricy, so you can also use any gel medium, Mod Podge or even Elmer’s Glue!
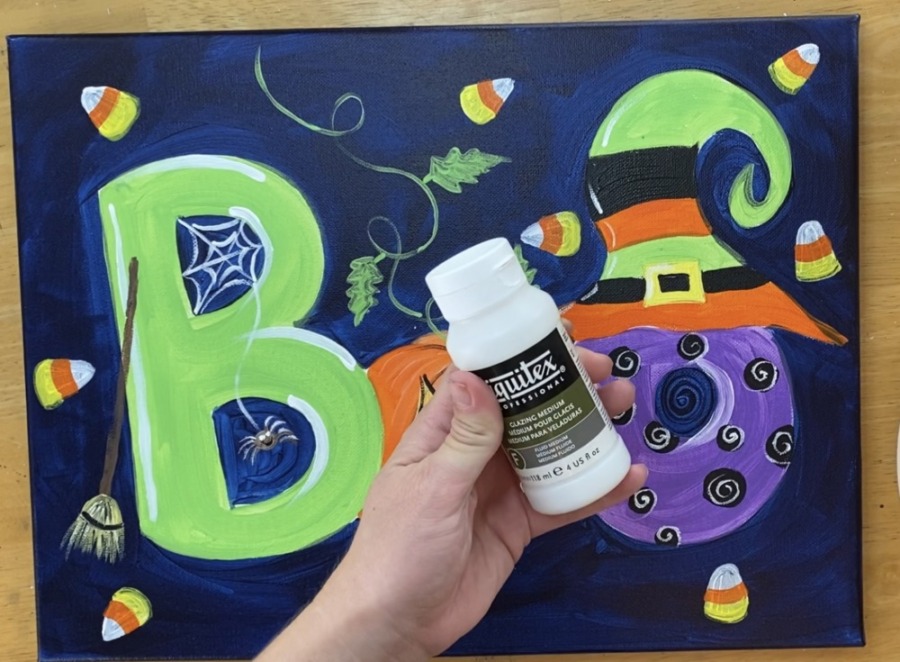
Apply the medium onto the area using a paint brush.
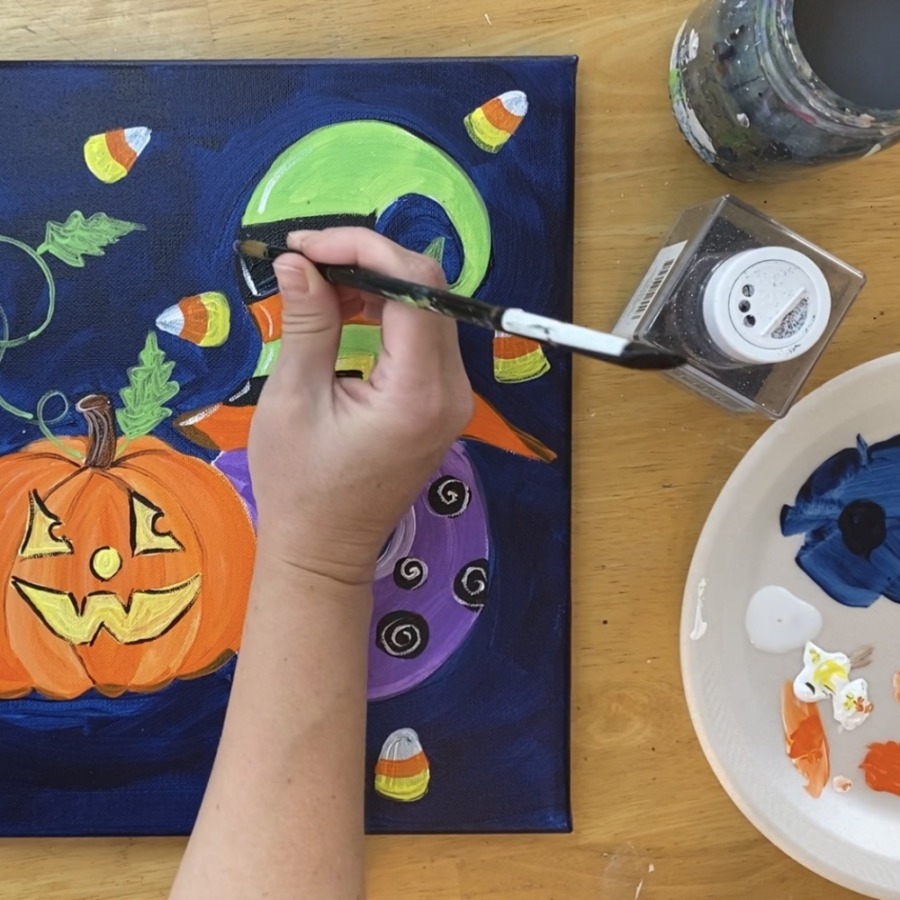
Then sprinkle on the glitter.
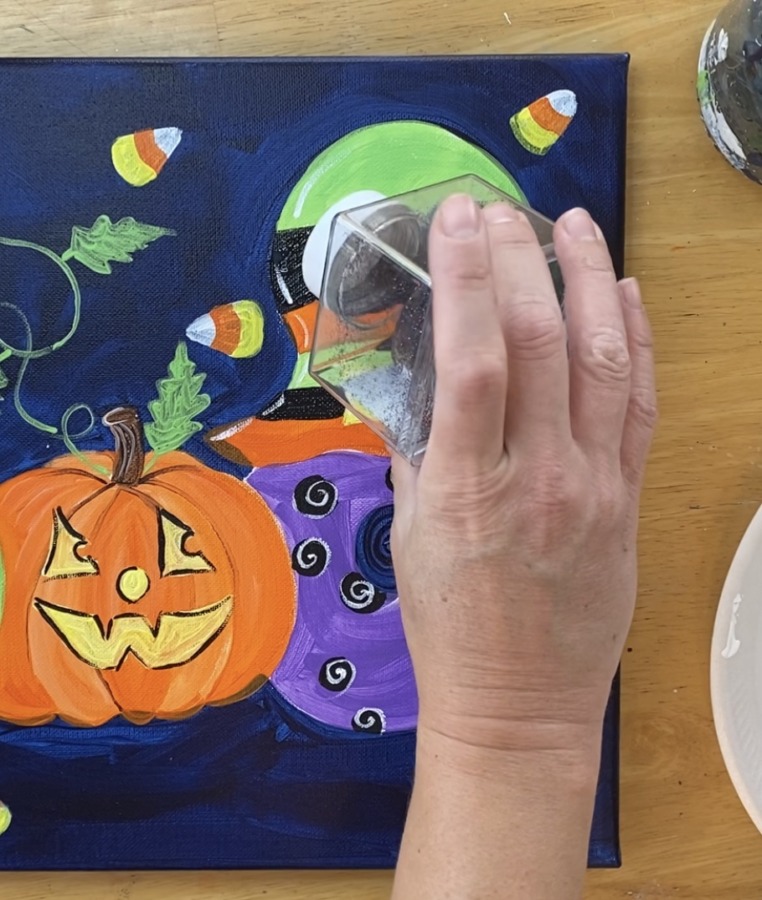
Dust off the excess.
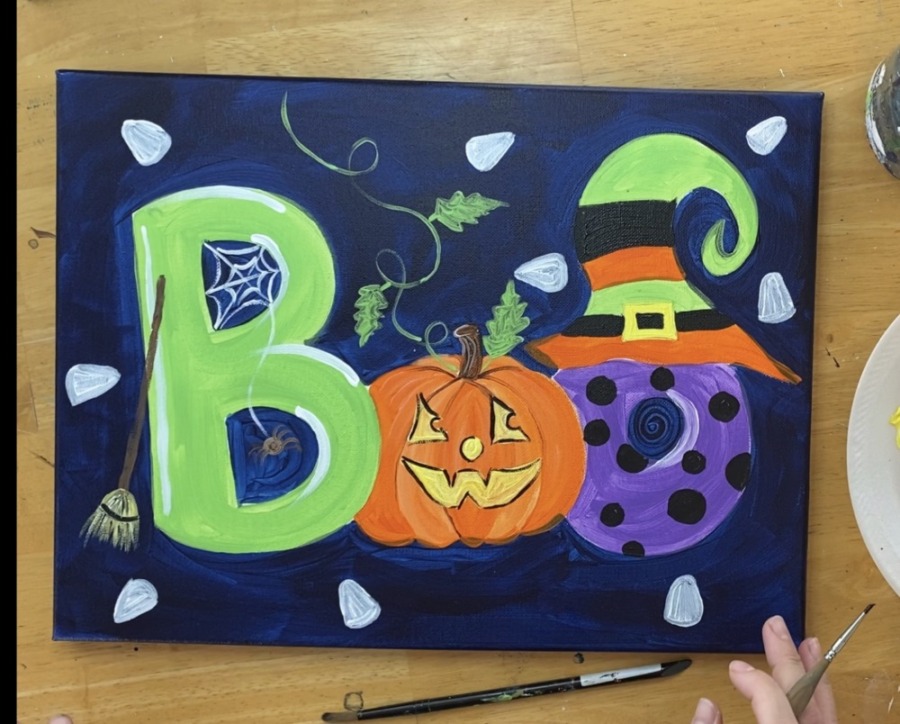
A Cute Ghost Version!
Another version of this painting has a cute ghost on the pumpkin instead of the leaves and vine! It also has dots on the “B”. To do the ghost, I drew him in with chalk. He is a super simple shape!

Then I used titanium white and a little bit of Prussian blue mixed white white for the shading. I used my round brush to paint him in. Simply paint the ghost white first. Then mix a TINY bit of Prussian blue with white to make light blue. Use that light blue to paint a few areas on the ghost.
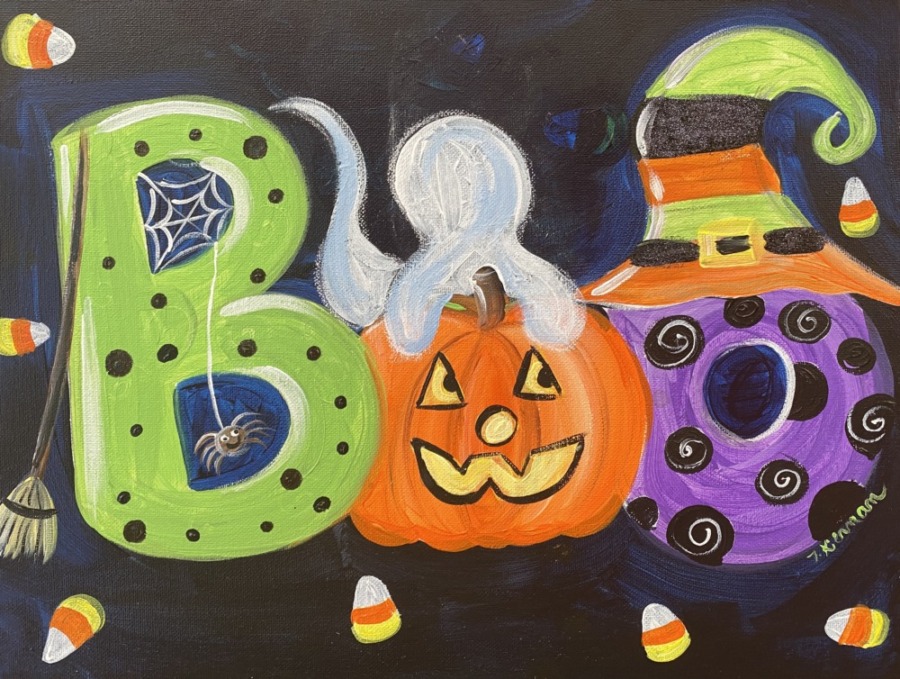
Then I used the 3/0 round brush to paint the eyes and mouth! So cute!
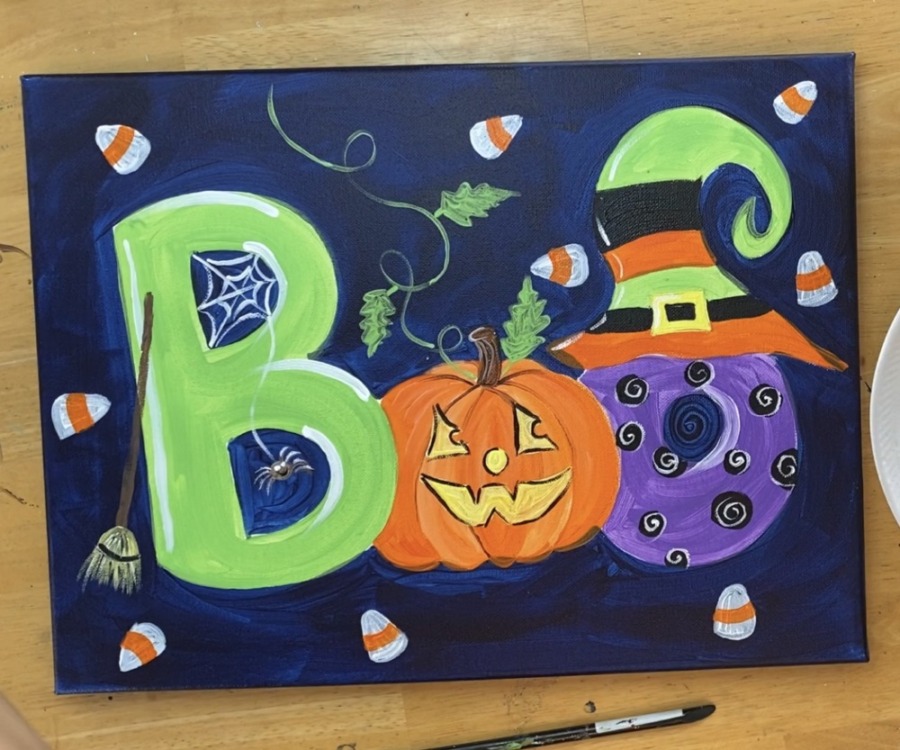
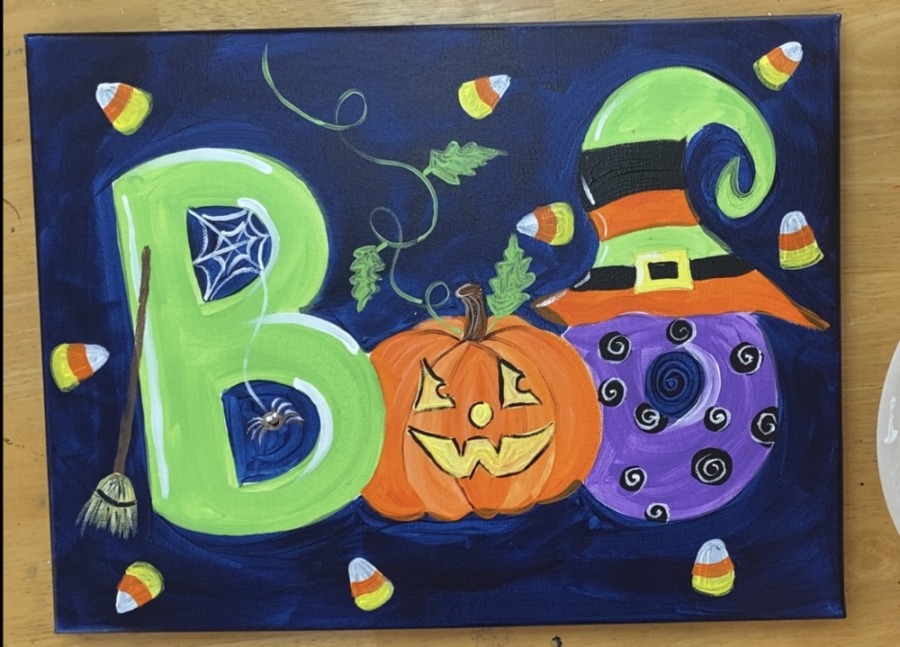
Finished!
That’s it my friends! A fun Halloween Painting to display for the holiday!
Share Your Art Here!


1 thought on ““Boo” Halloween Letters Painting Tutorial”
Comments are closed.