Would you like to save this?
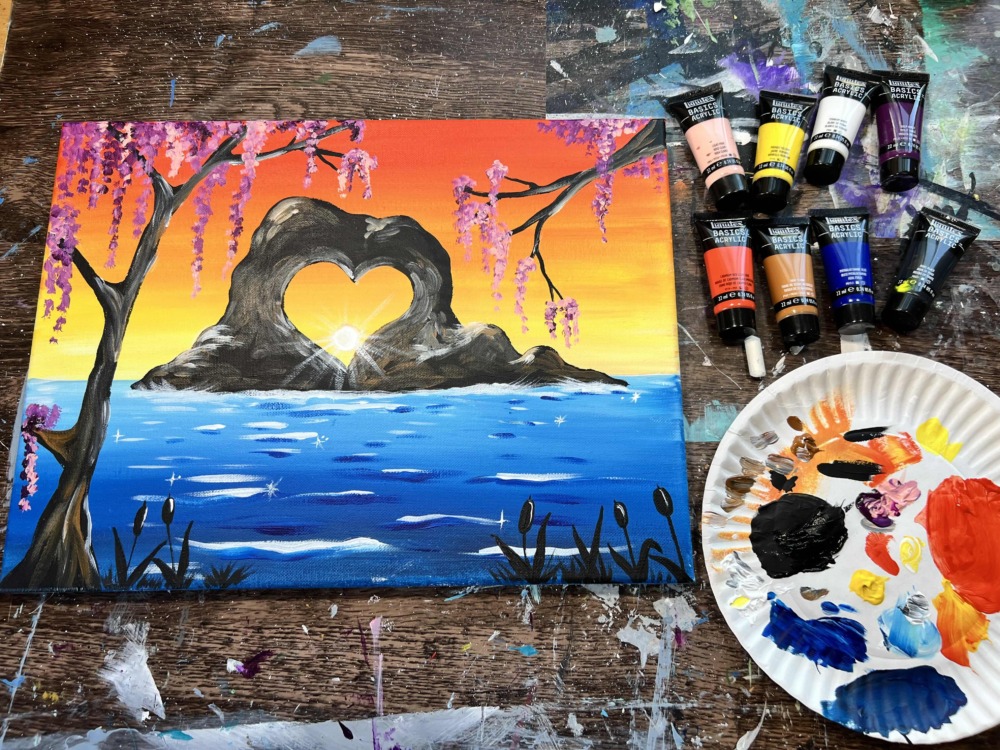
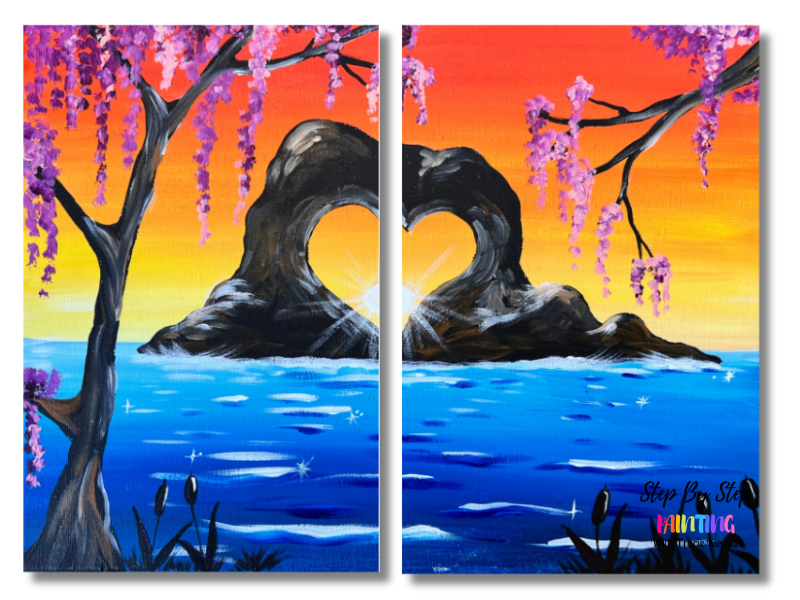
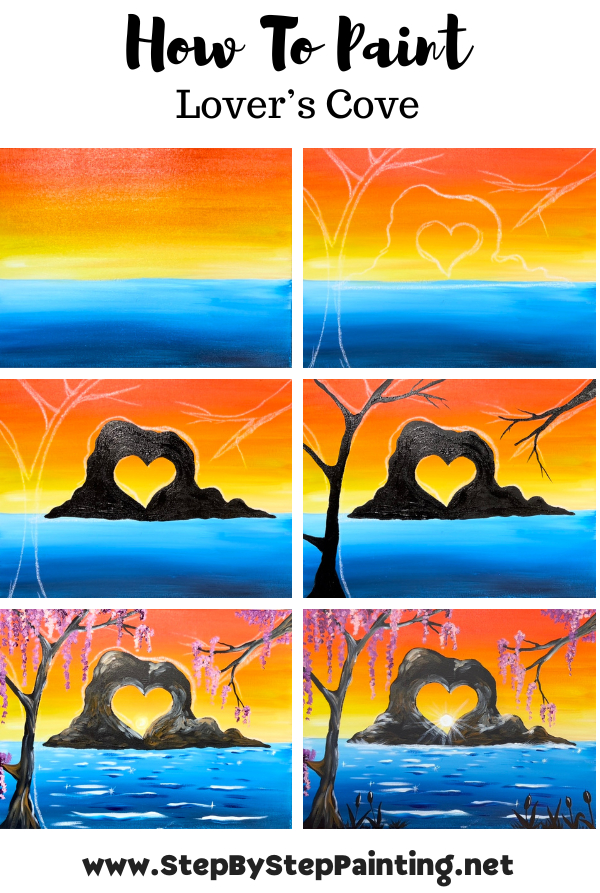
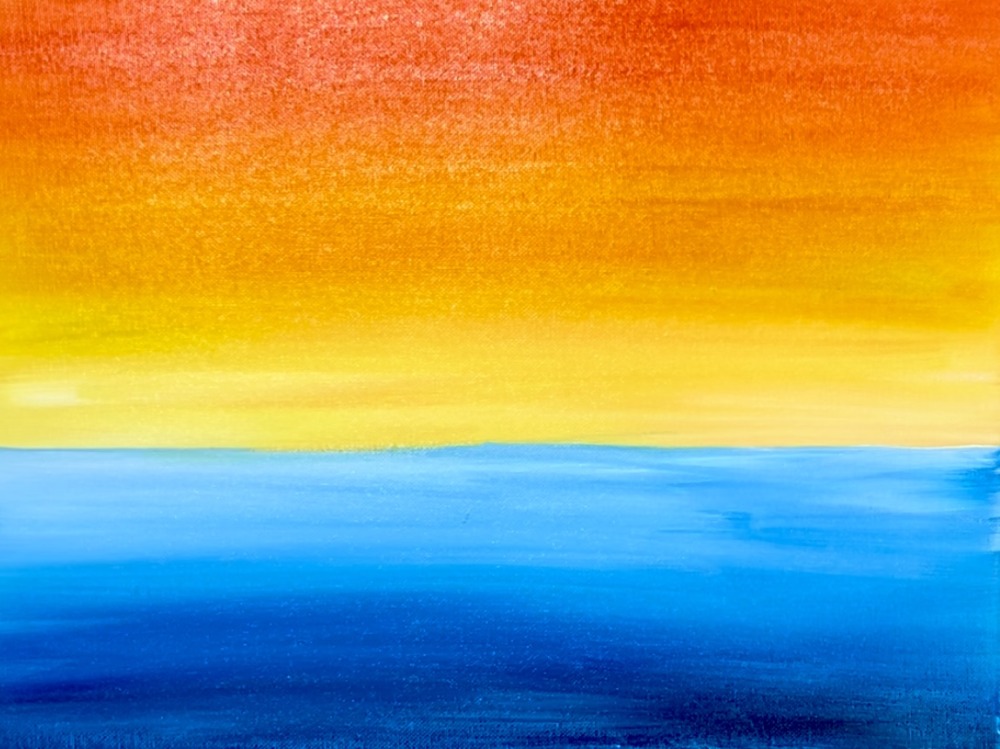
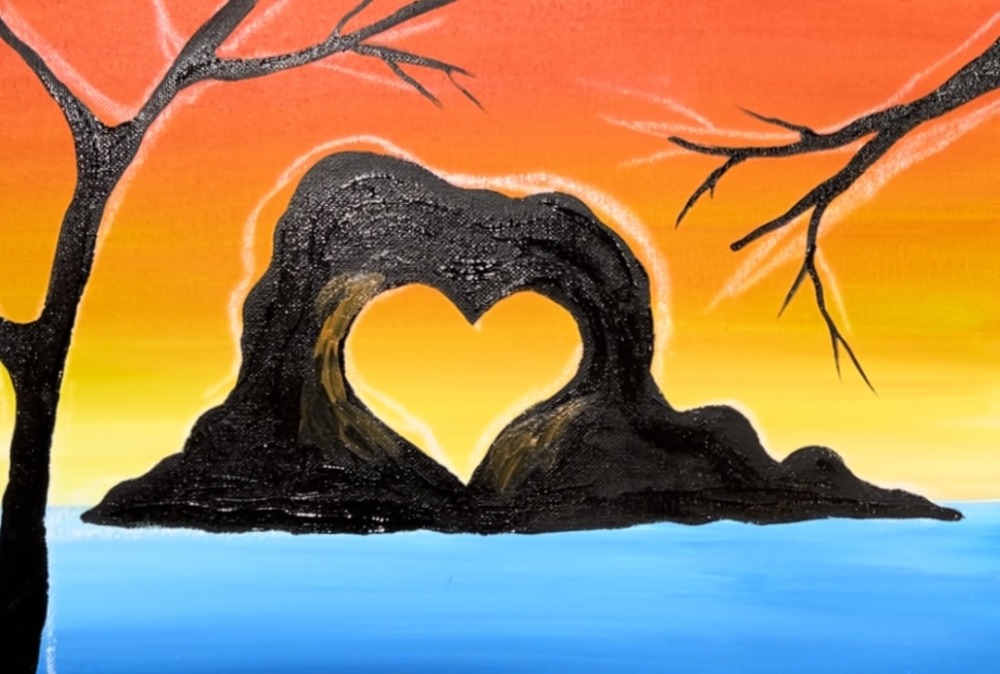
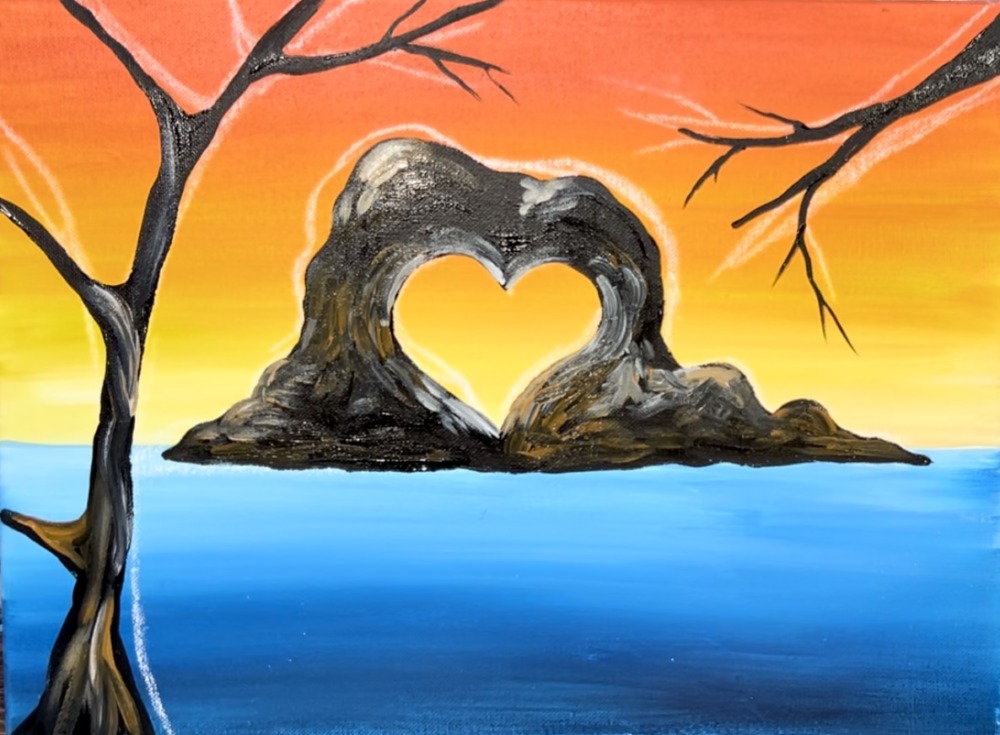
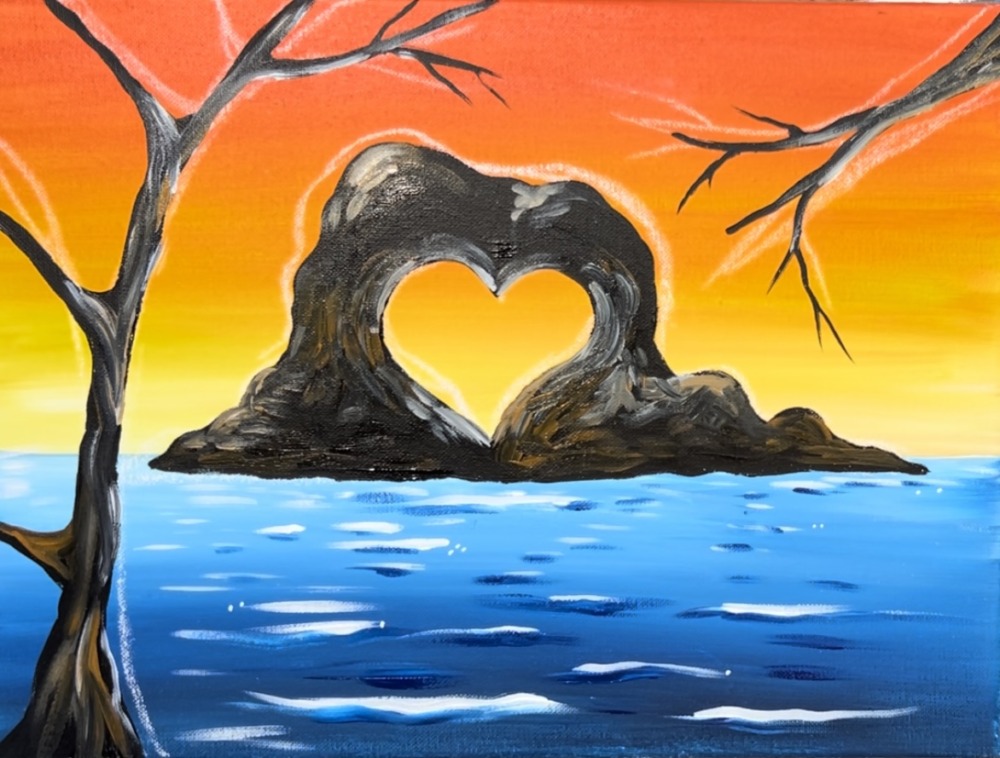
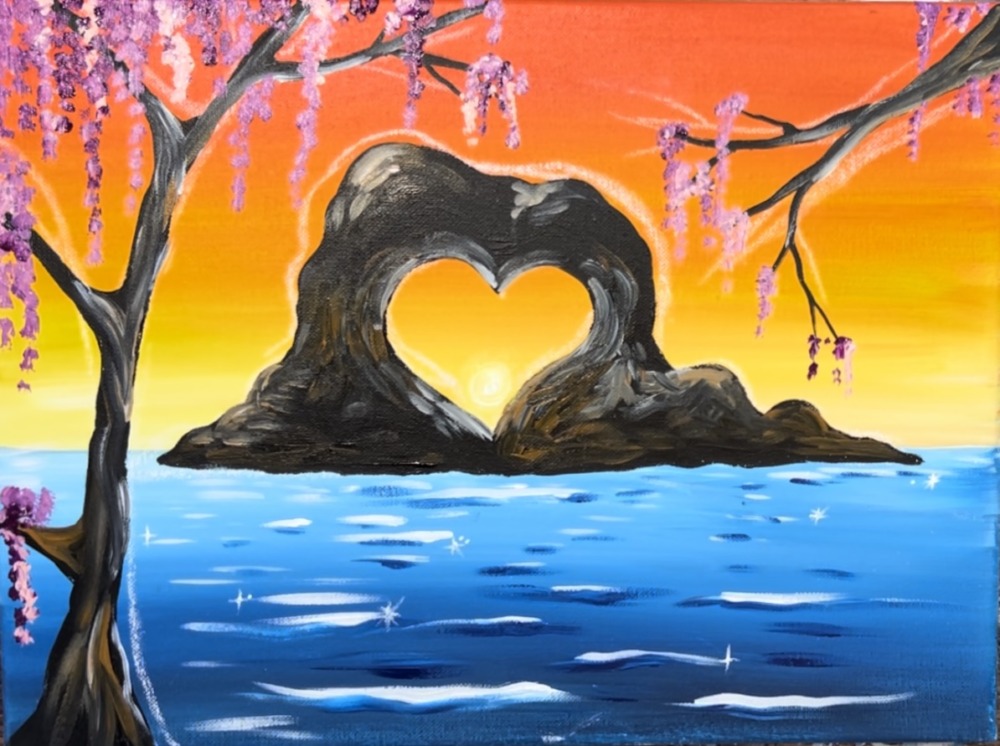
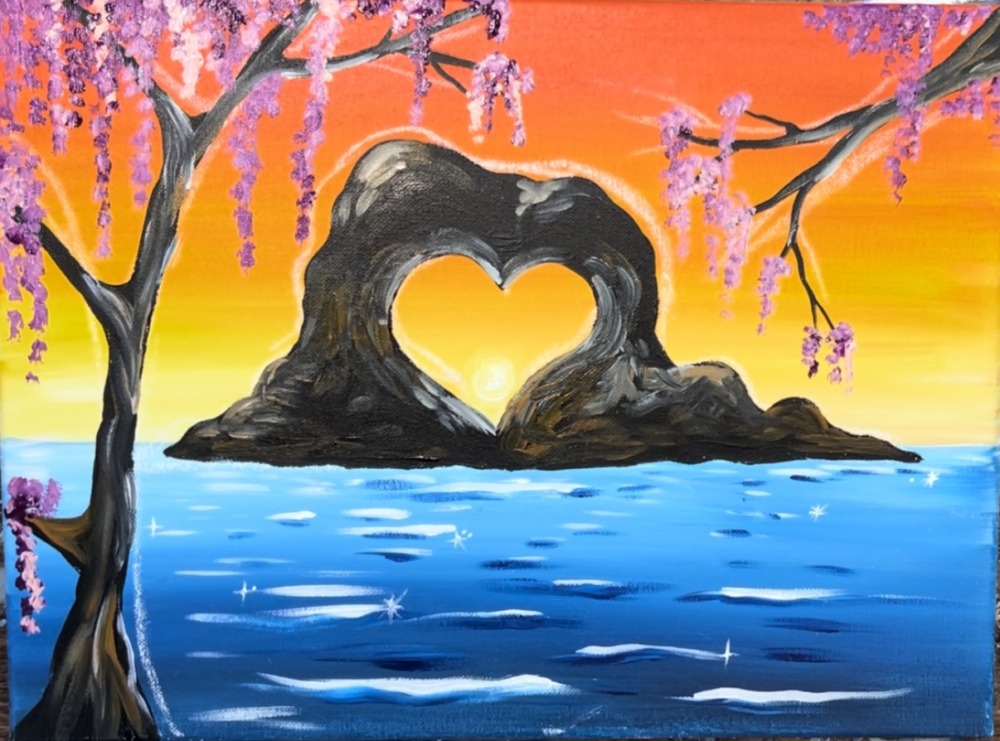
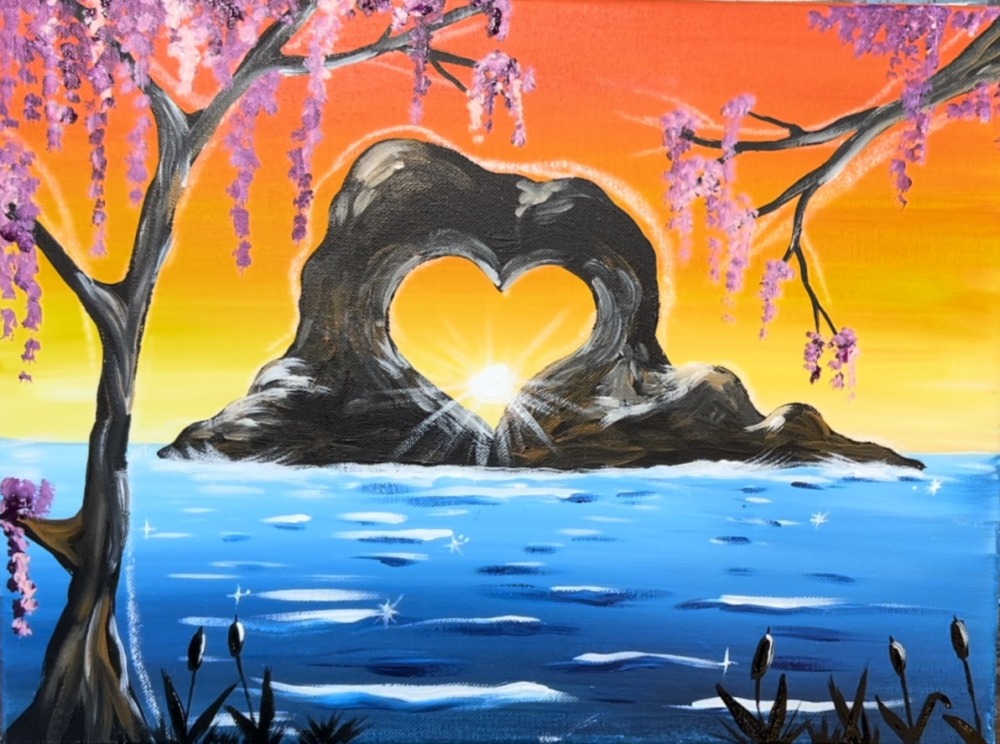
This is a Valentine’s Day themed design and it’s one you can do with a partner or as one painting. “Lover’s Cove” is demonstrated on a 16 x 12 canvas but it can be divided in half to two 9 x 12 canvases.
I love doing these types of sunset landscape paintings! The bright orange and yellow colors make for beautiful contrast against dark elements in a painting. We will be taking the silhouette concept a step further and add brown-gray/ textures to make the trees and heart shaped rock formation look a little more realistic.
Materials
Lover's Cove Acrylic Painting Tutorial
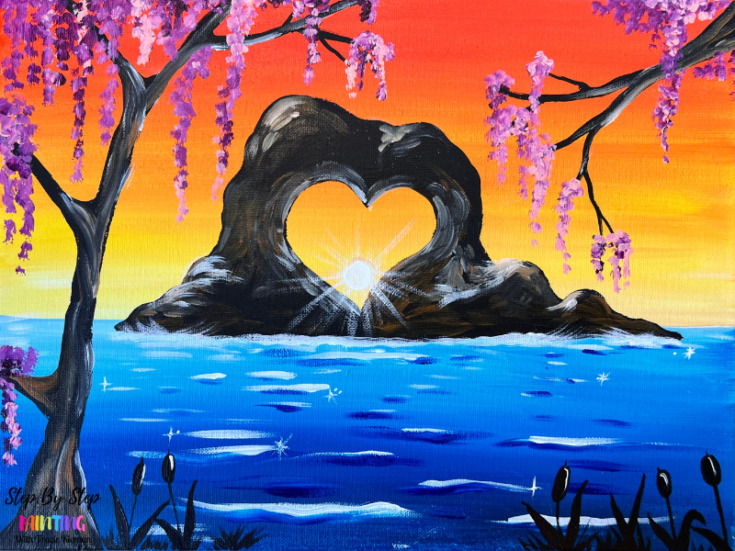
Paint a beautiful sunset scene of a hear shaped rock over an ocean with wisteria trees. "Lover's Cove" can be painted as a single painting or split in half as a couple's painting where you and a partner can each paint one half.
Materials
- 12 x 16 Canvas or Two 9 x 12 Canvases
- Acrylic Paints
- Brushes
- White Chalk
- Ruler
- Pencil
- Water Cup
- Palette
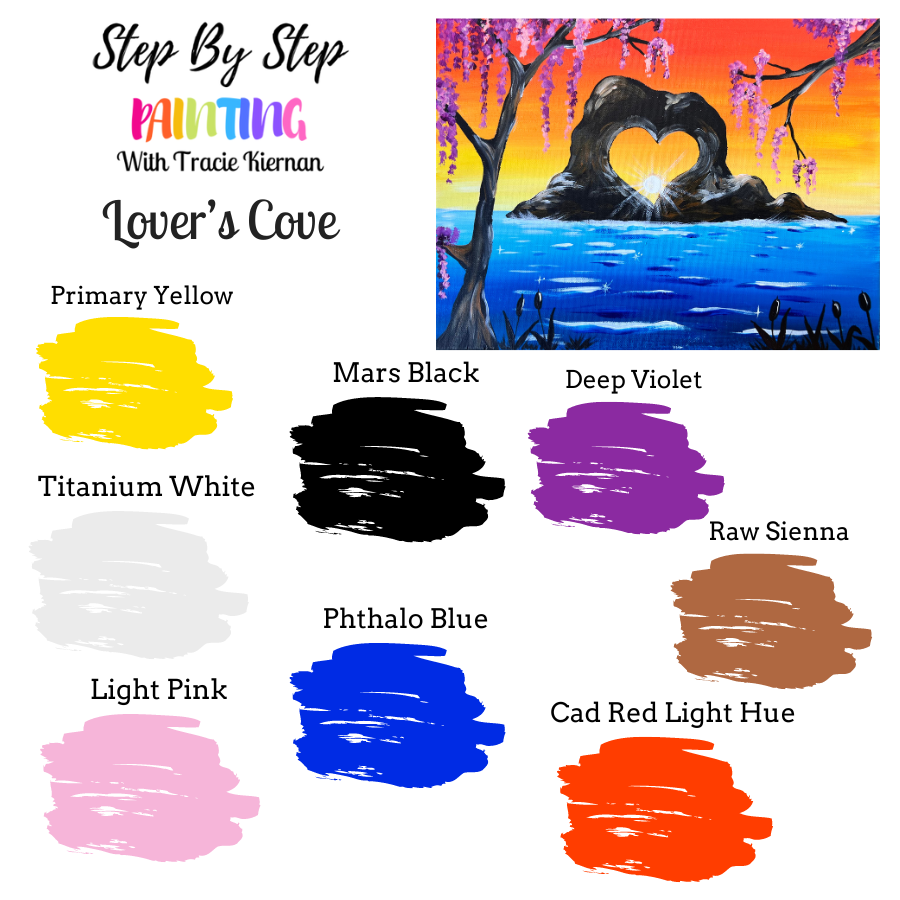
Colors
- Titanium White
- Mars Black
- Raw Sienna
- Cadmium Red Light Hue (or any orange)
- Primary Yellow
- Light Pink
- Deep Violet
- Phthalo Blue
Brushes
Color Palette
I used Liquitex BASICS acrylics for this tutorial. If you are using a different brand, you can look at the color chart below to help you match your colors.
Craft Paint Conversion
If you are using craft paints, such as Apple Barrel Craft Paints, you can sub to these colors:
- Bright Yellow
- Black
- Purple Iris
- White
- Too Blue
- Nutmeg Brown
- Fuchsia
- Jack-O-Lantern
Directions At A Glance
Video
Step By Step Instructions
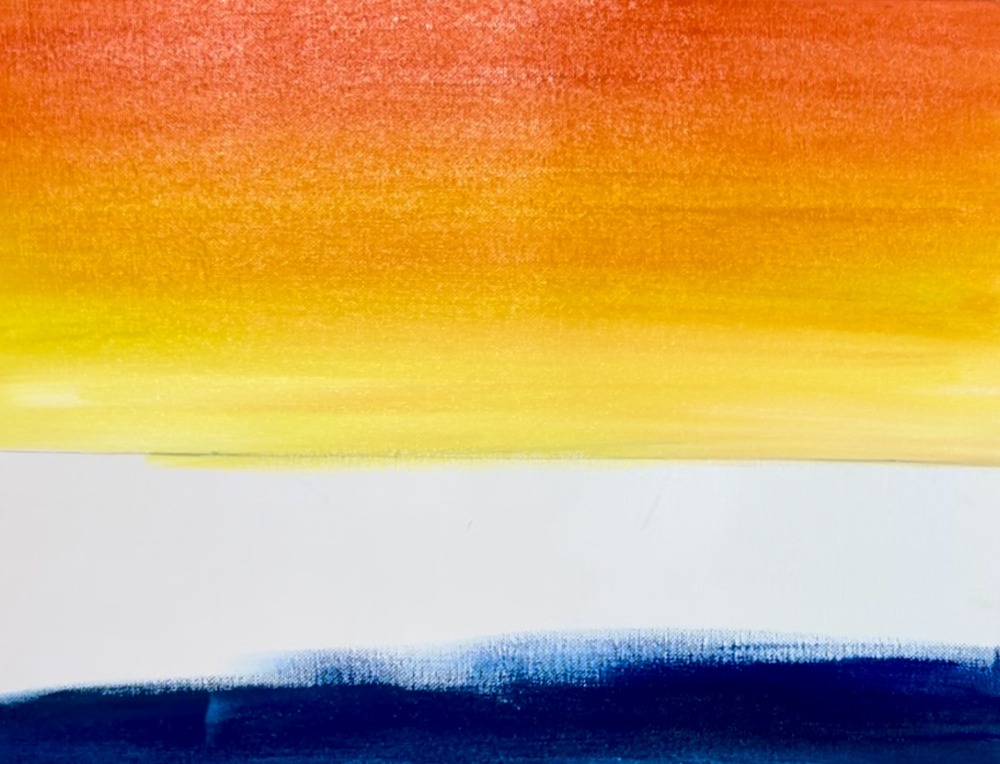
1. Paint Sky
Position your canvas (or canvases) in horizontal mode. Note: if you are doing this as a “couples painting”, position your canvases in vertical mode.
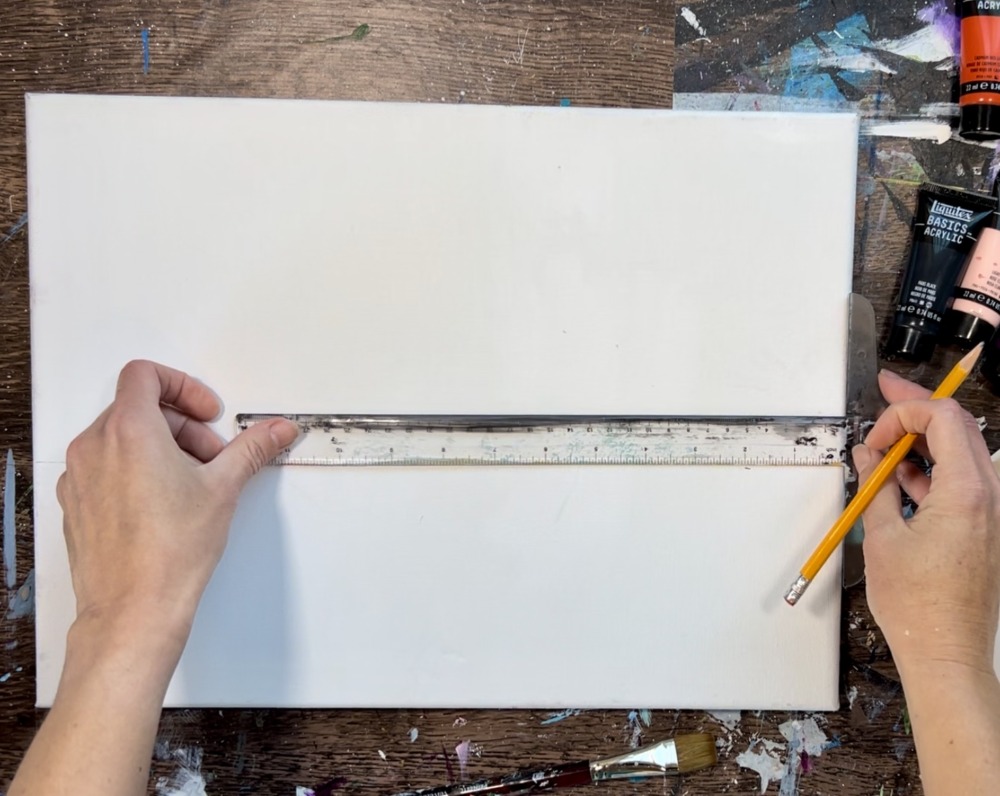
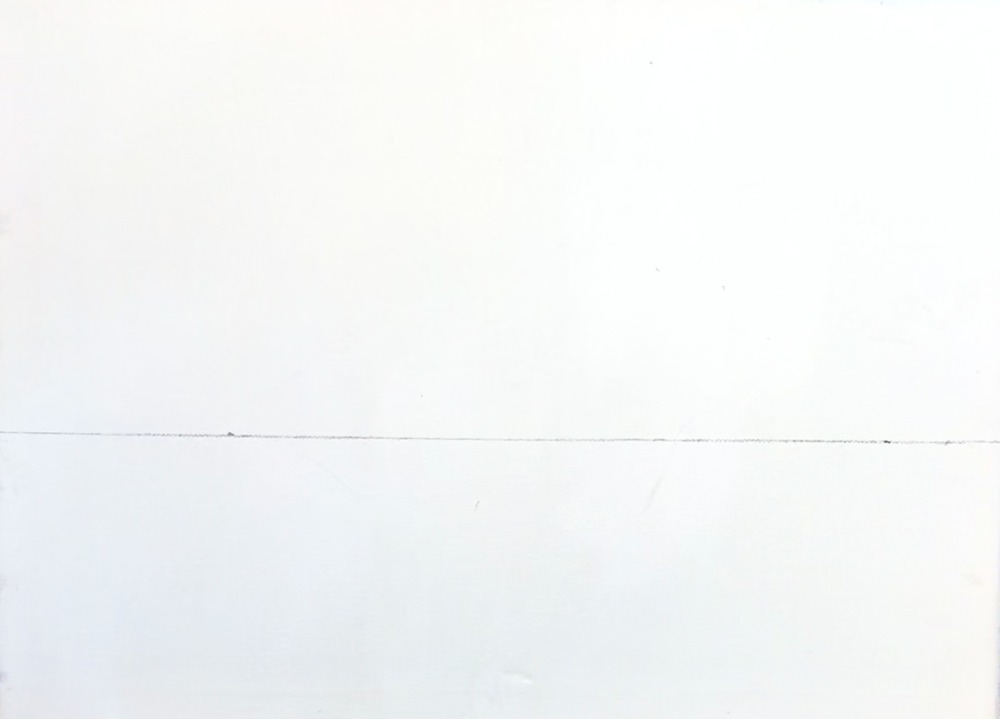
Measure 7″ from the top edge of the canvas and then draw a horizontal line. This “horizon line” is not in the center of the painting. It is lower than the center. This is because there is more sky in this painting than water. If you are working on two 9 x 12 canvases, this measurement is the same. If you are working on a different size canvas, you’ll need to adjust the measurement so the line is lower than the center of the painting.
Load your paint palette with the colors: “cadmium red light hue” (dark orange), “primary yellow” and “titanium white”.
Use a “3/4 flat wash brush” to paint the top of the sky area a solid coat of the “dark orange” color. Paint full width, left and right paint strokes going all the way across the canvas.
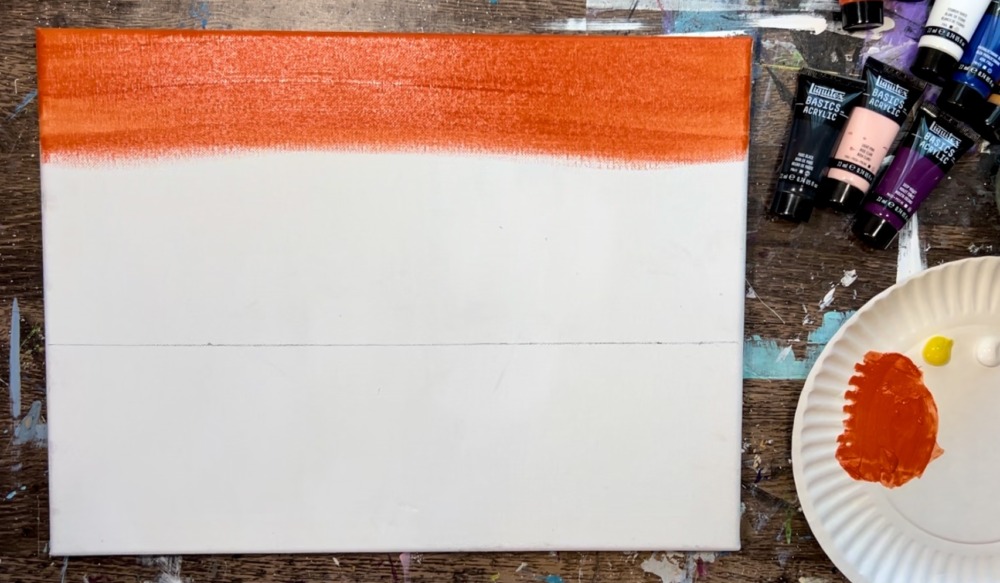
Go about a quarter or a third the way down the sky. Then wipe the brush off. Load it into the “primary yellow”. Then blend the primary yellow under the orange color.
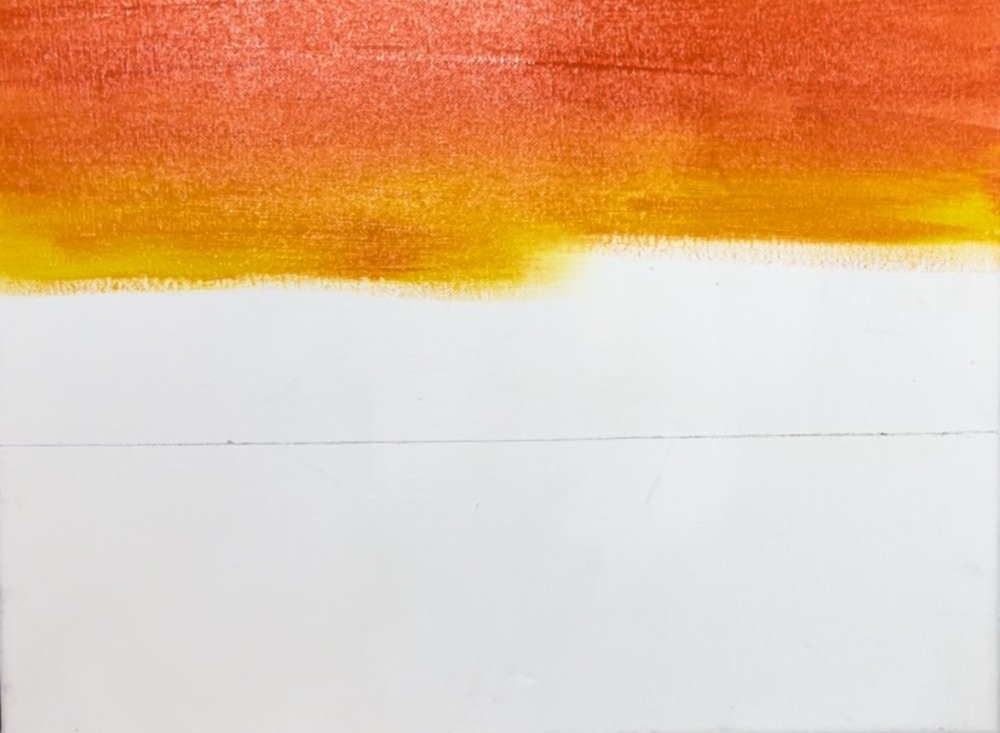
Paint left and right paint strokes to allow the orange to blend to a light orange color. Go to almost the bottom of the sky and leave a blank spot for the “titanium white” color.
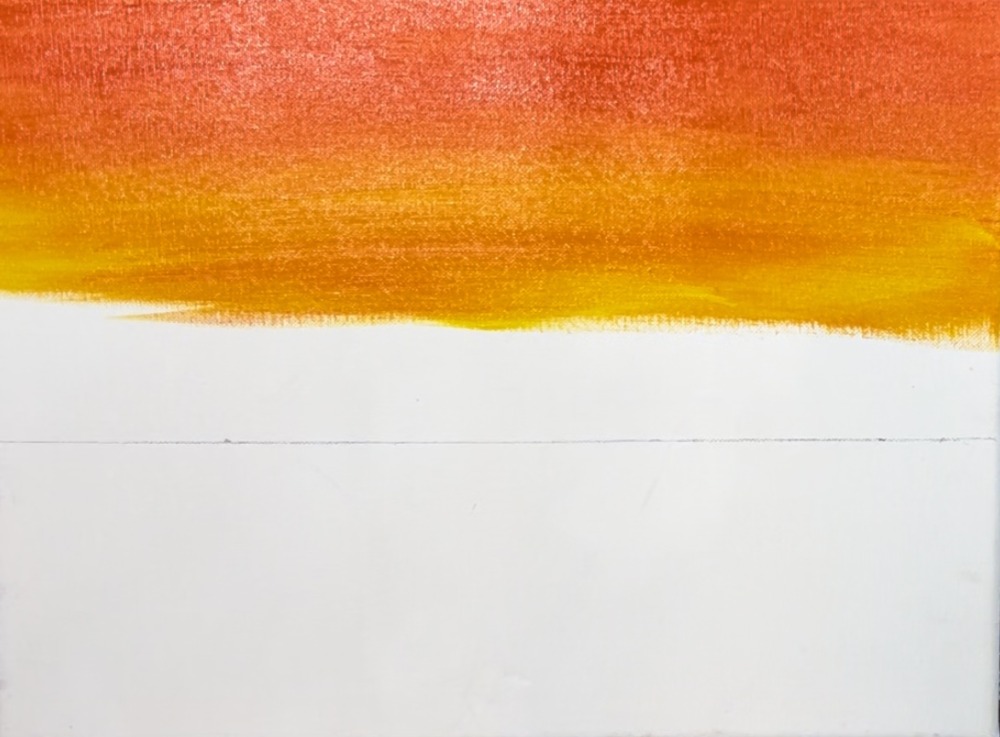
Rinse or wipe your brush off. Then load it into “titanium white”. Blend titanium white into the yellow color on the bottom just above the horizon line. If needed, add a little more “primary yellow” to your brush. This bottom area should be a very light and bright yellow.
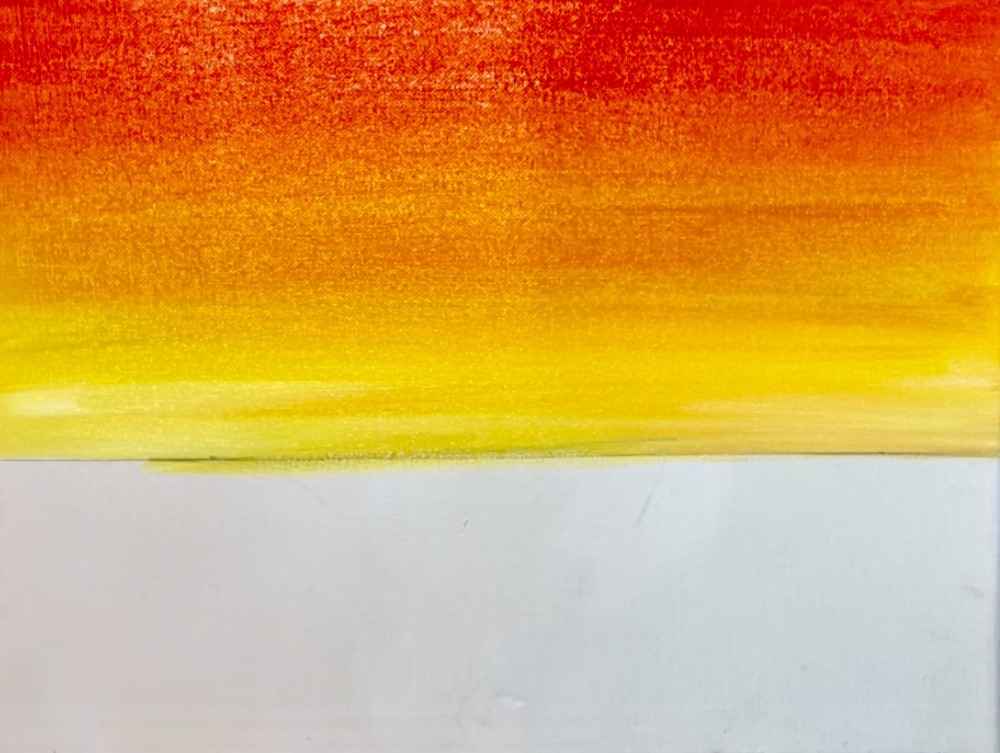
Gently blend the colors in your sky together but don’t over blend the colors.
2. Paint Water
Load your paint palette with the colors: “phthalo blue”, “mars black” and “titanium white”. Mix a dark gray-blue colors on your palette by mixing 3 parts blue, 1 part black and 1 part white.
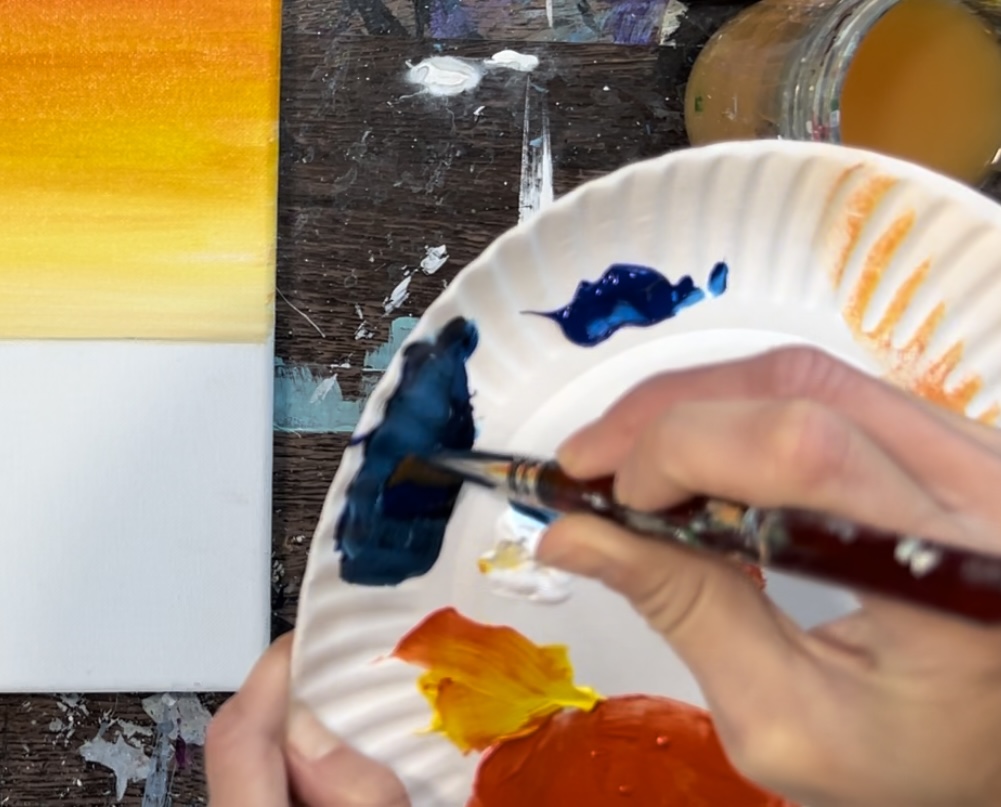
Start on the bottom of the canvas. Paint this dark gray-blue color with the 3/4 wash brush and use full width paint strokes that go all the way across the canvas.
As you work your way up, blend more blue but allow it to get lighter as you work your way to the horizon line. To do this, either rinse or wipe the dark blue off of your brush. And then add more “pure blue” in the middle. Then add a bunch of “titanium white” to your brush and allow the white to blend with the blue on the canvas so the blue becomes lighter.
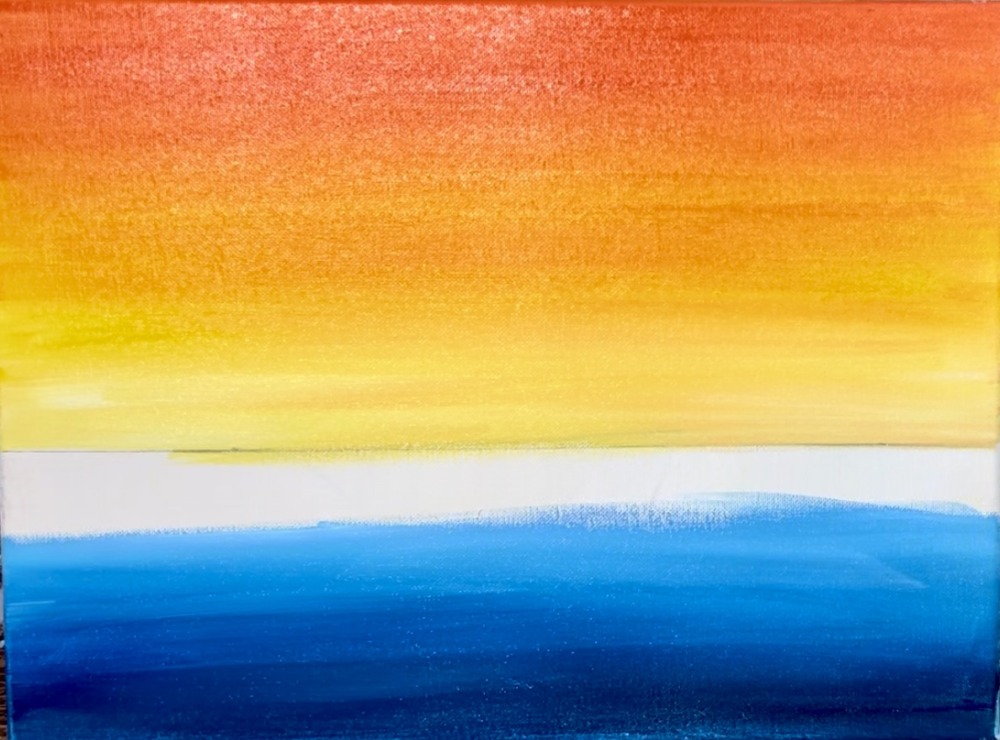
Continue to blend until your blue becomes much lighter at the horizon line. Try not to “over blend” your blue. It should be a gradient of light at the top and dark at the bottom.
Let this dry before going onto the next step.
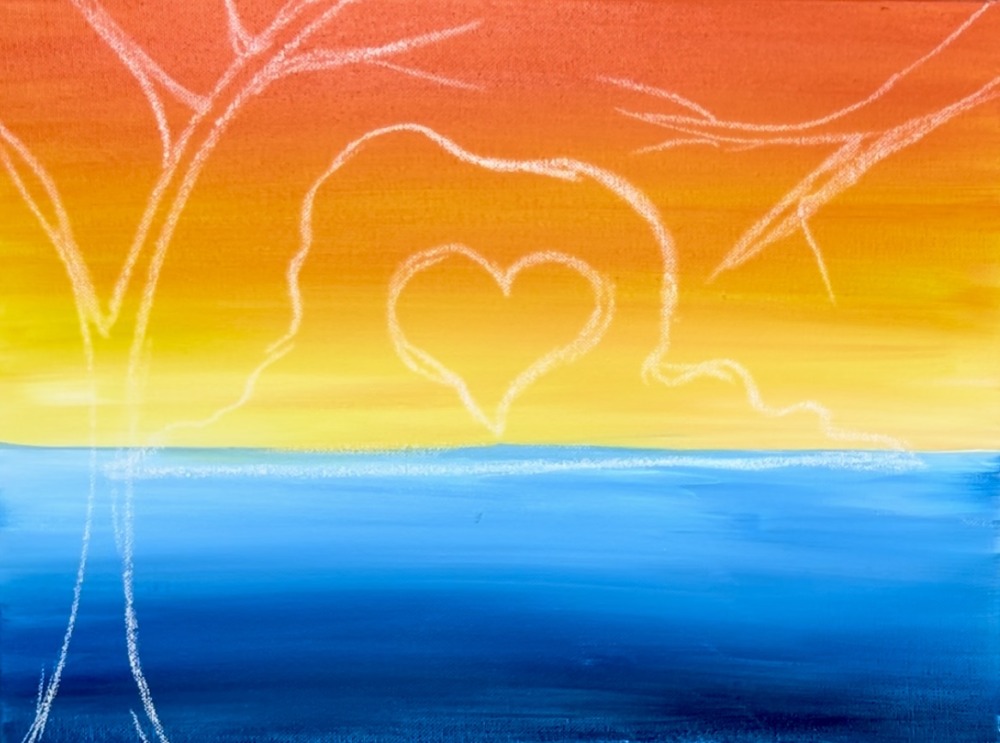
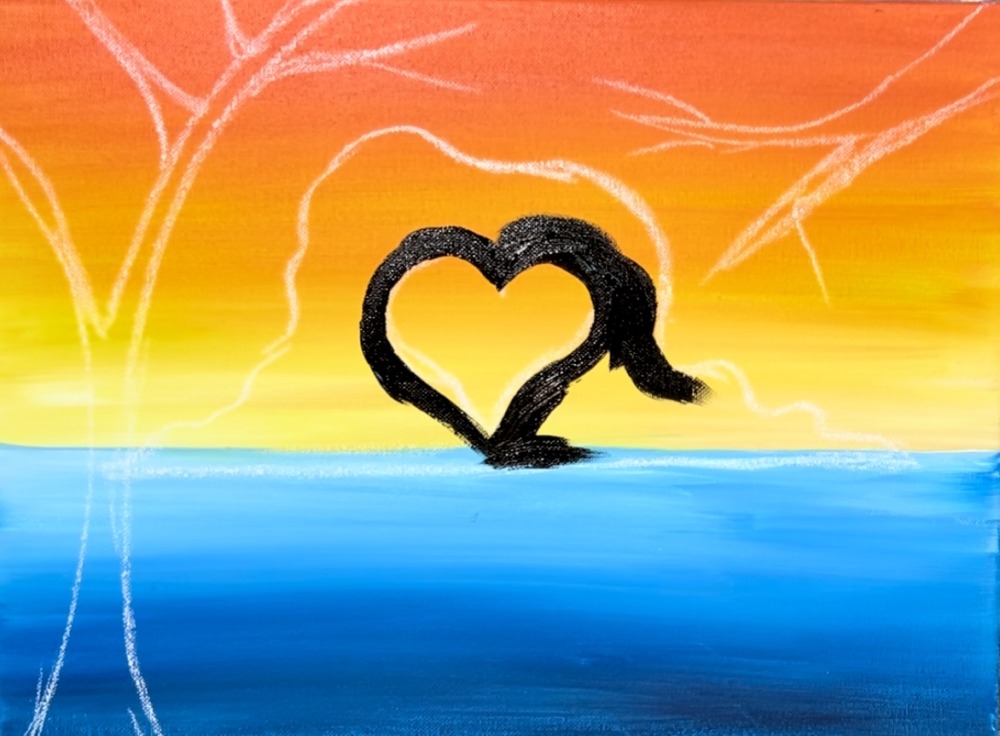
3. Draw Heart Rock Formation & Trees
Tip: if you are doing this on two canvases with a partner, it may be helpful to place your canvases together when you draw this.
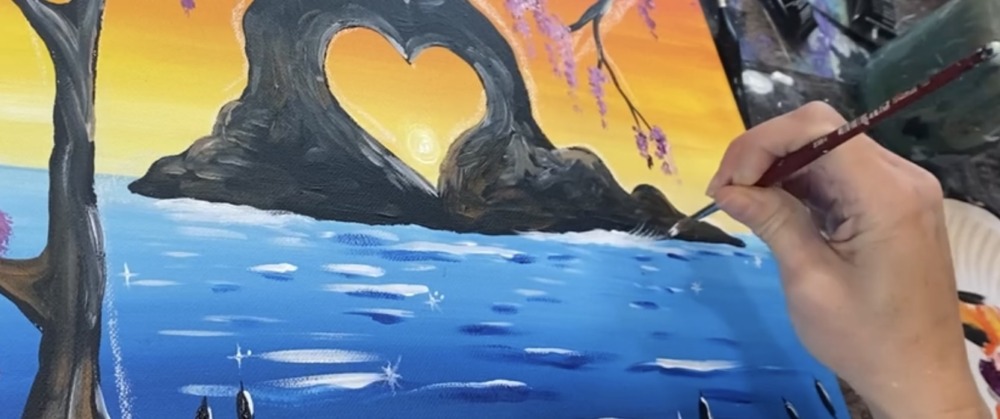
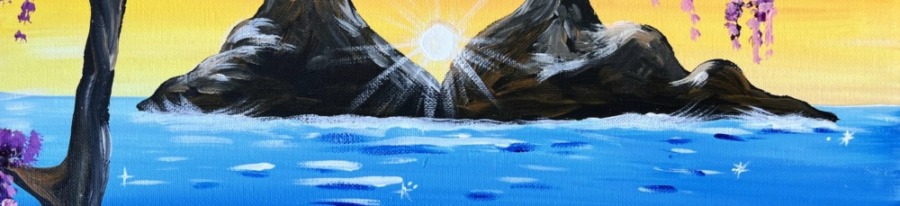
Start by drawing a heart in the very center of the canvas just above the horizon line. This will be the opening of the cove/rock formation.
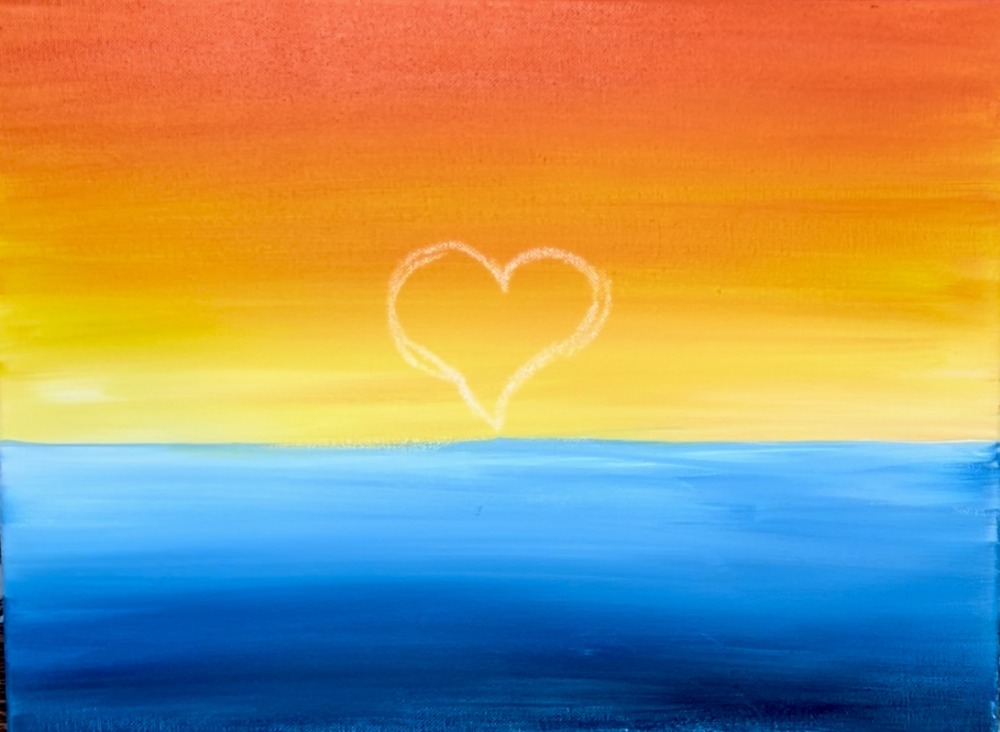
Then draw the cave formation around the rock. You can choose to make it more symmetrical or a-symmetrical. Keep some space on the left and right bottom of the rock formation (about 1″ or more) for the trees.
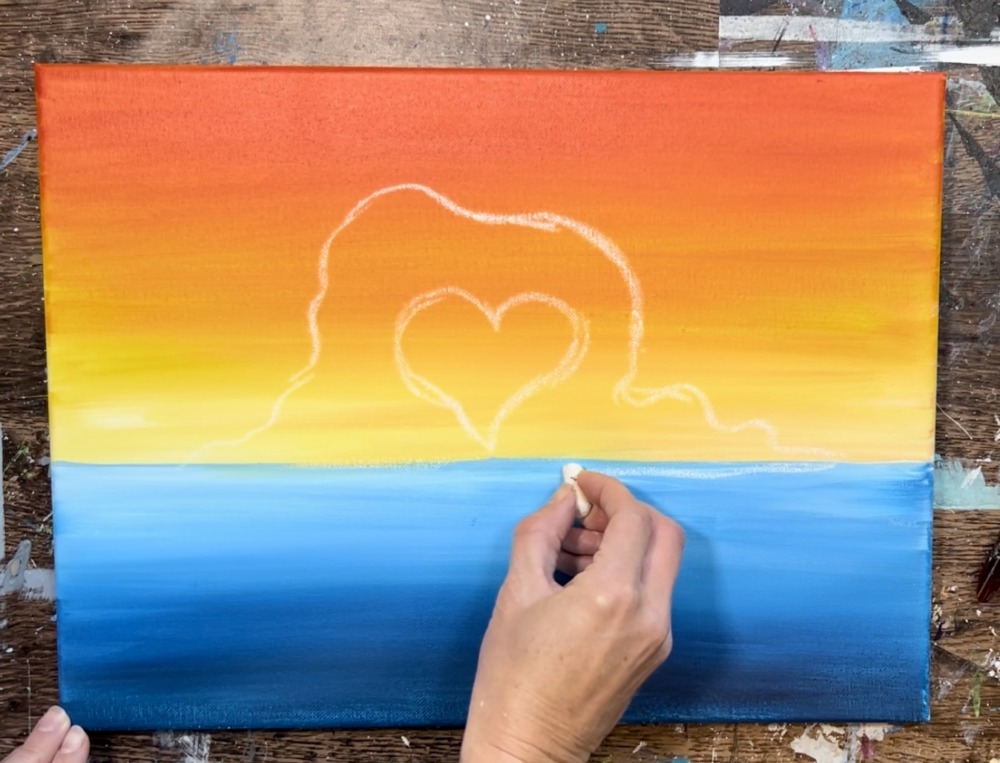
Also note: the bottom edge of the rock formation actually goes under the “horizon line” by about 1/4″. This allows there to be water behind it.
Then draw both trees. The tree on the left starts on the bottom left of the canvas as a wide trunk. Then draw the trunk so that it goes narrow. The main branch splits off to the right and then another main branch splits off to the left and off the edge of the canvas. Then draw smaller branches that are attached to the main branch on the right.
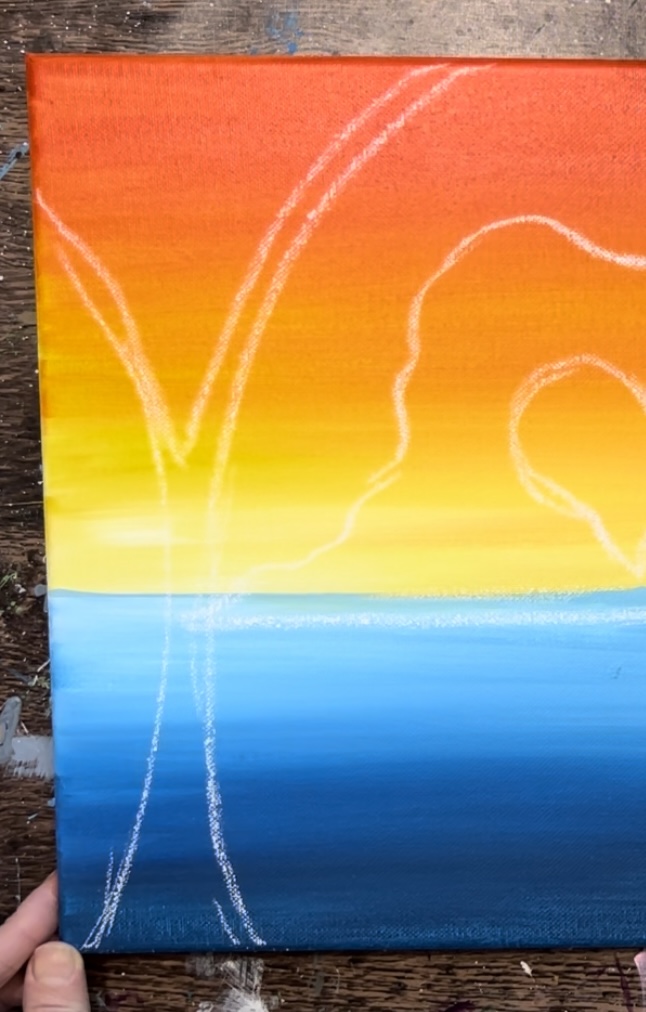
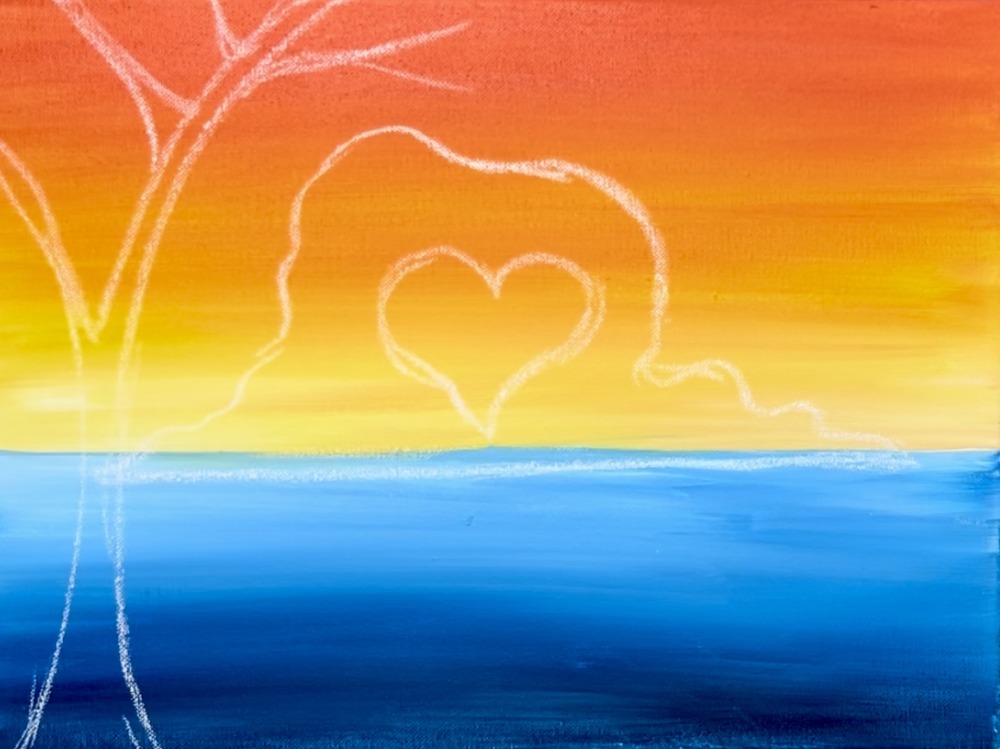
Then draw the branch in the upper right corner so that it hangs down diagonally towards the rock formation. Split the branch into two main sections and then draw smaller branches attached.
4. Paint Rock & Trees Black
Load your palette with “mars black” paint. Use the “#4 round” brush to paint the rock formation a solid coat of black. If you are using regular acrylics, you can slightly water the black down to increase the flow of the paint.
Paint the entire shape of the rock formation.
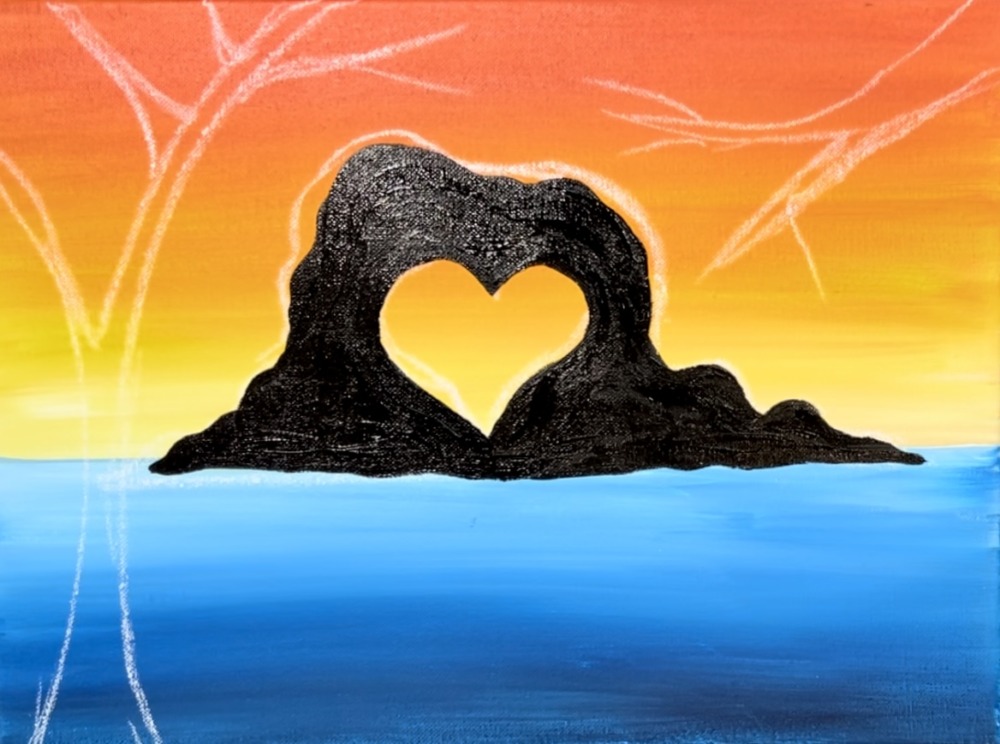
Then paint the trees black.
Tip: to get the “thin branches”, make sure to apply only light pressure on the end of your round brush. This will create a smaller paint stroke.
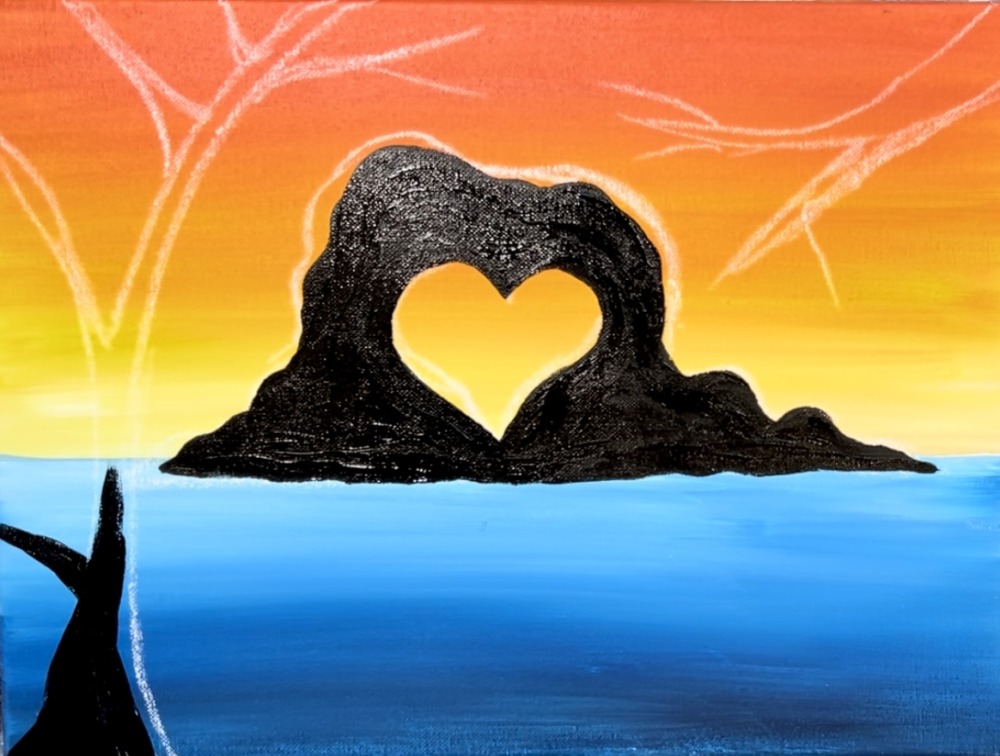
5. Highlight The Rock
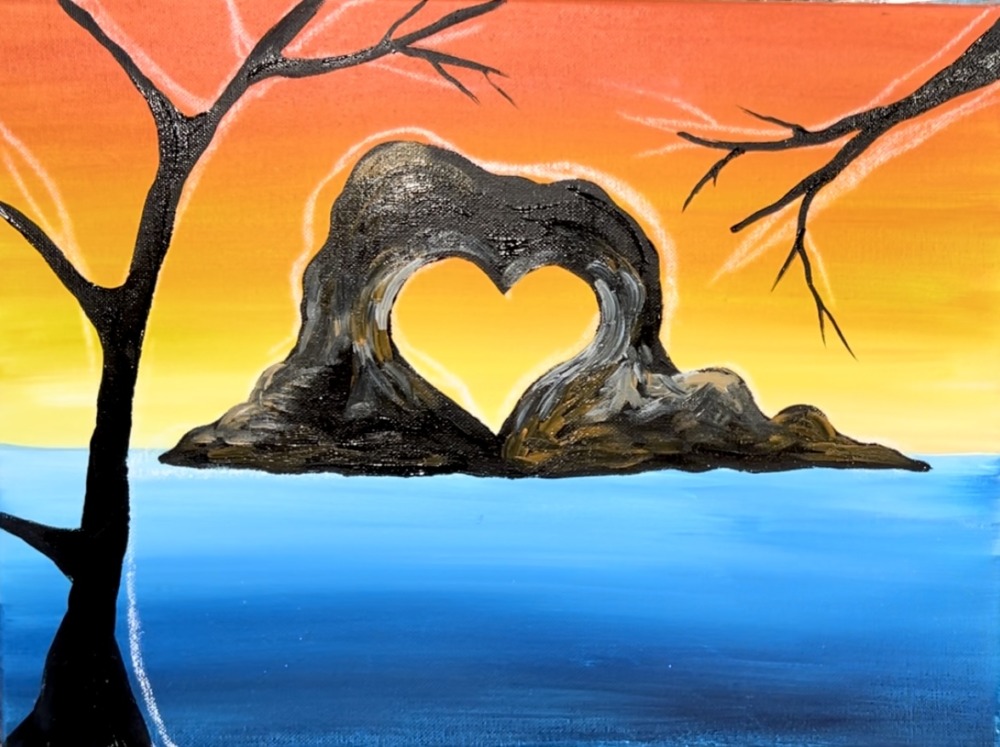
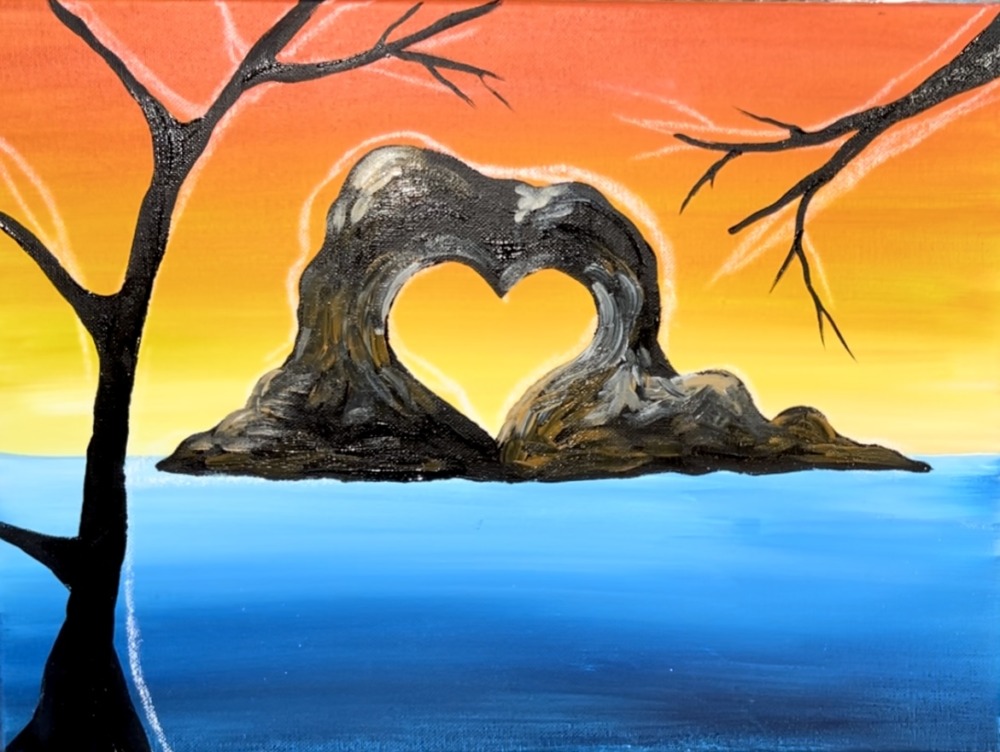
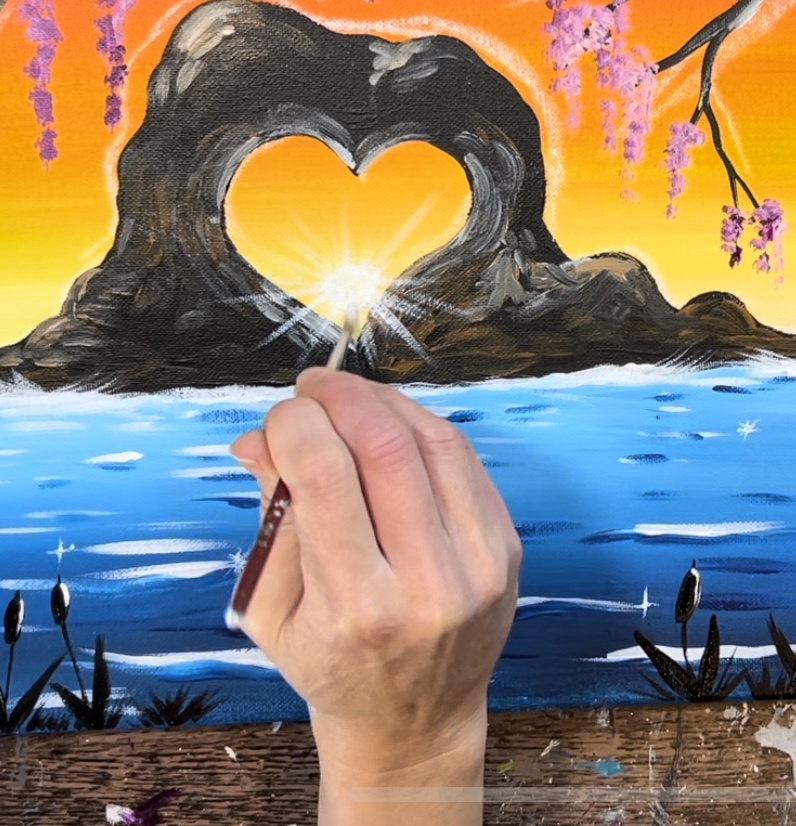
Load your paint palette with “raw Sienna”. Use the “4 round” brush to add texture and highlight to the rock formation. Start by adding the brown color around the heart shape. Do short, curved paint strokes.
Continue painting curved, textured brown paint strokes around the rock formation. Leave a lot of the black layer showing through. Also, if the black is blending with the brown, that is okay!
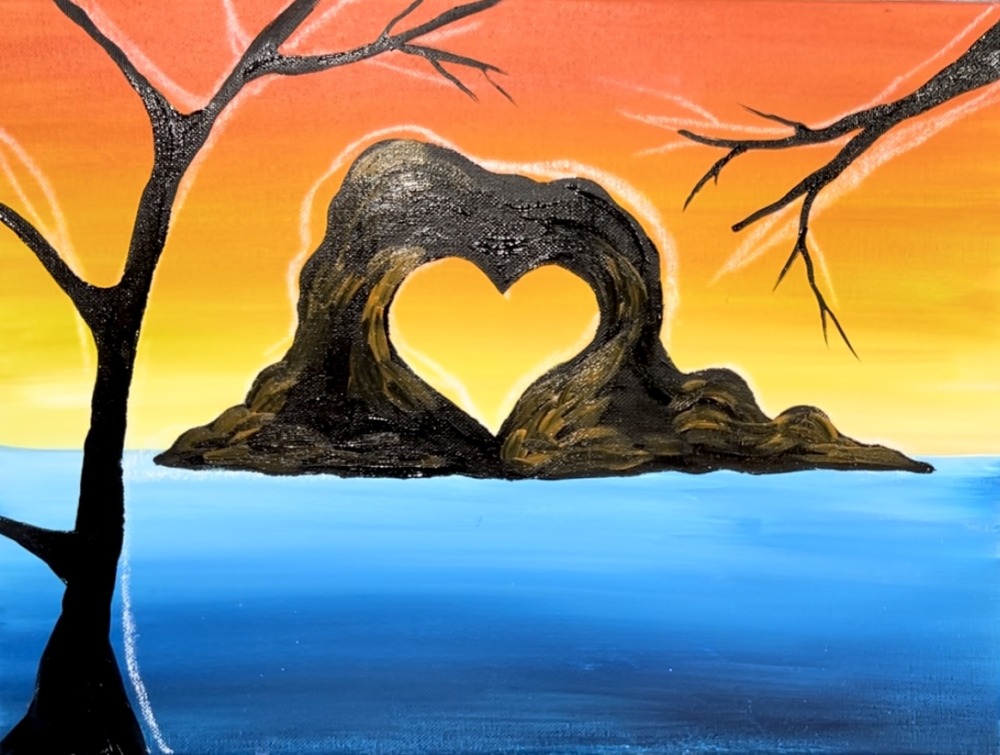
Add a little bit of titanium white to your brush (or white mixed with black to make gray so it’s not as bright). Then paint some gray paint strokes around the rock formation. Do this on some of the edges and blend it into the rest of the rock.
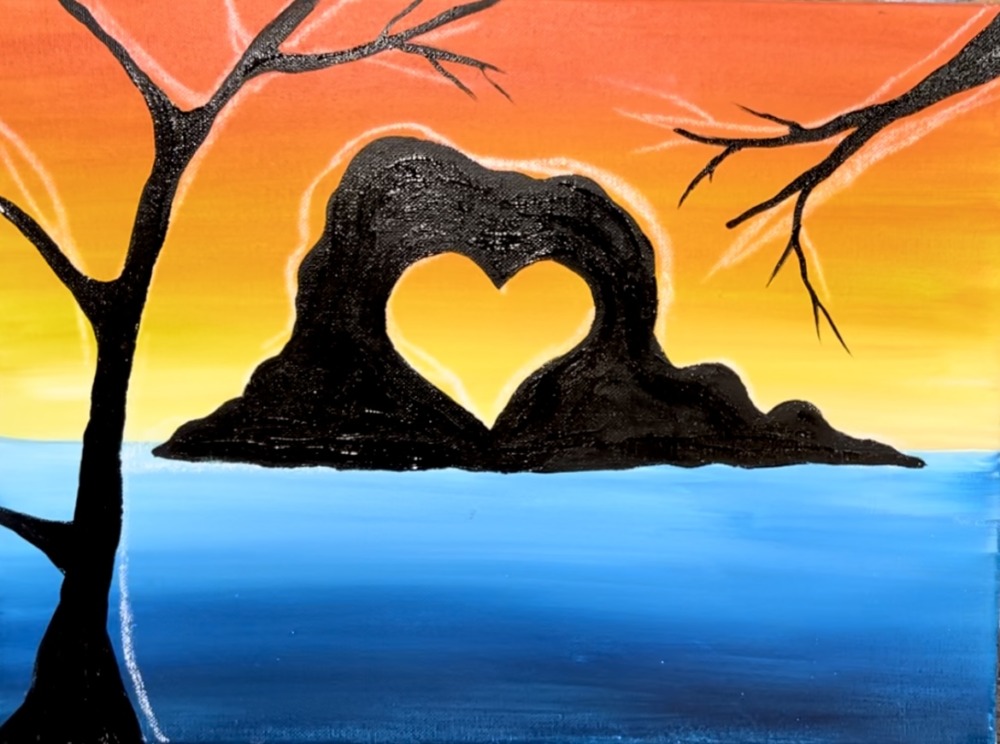
6. Add Texture/ Highlight To Tree Branches
To add the texture to the tree branches, it is almost the same technique as what we did to the rock! Use the light brown color and the gray as well as the #4 round brush to paint loose, wavy lines going in a vertical direction along the shape of the tree branch. Allow much of the black layer of the tree to still be visible.
Add some “titanium white” to some of the edges of the tree that face the sun. Do this to both of the trees.
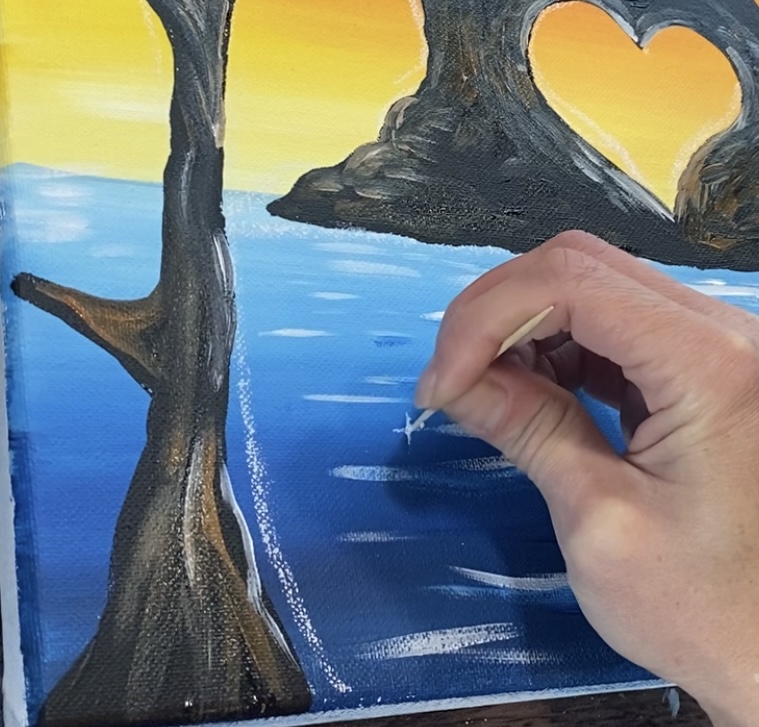
7. Paint Water Reflections
Use a #4 round brush and titanium white to paint “water reflection lines” in the water area. Paint long, slightly wavy lines towards the bottom of the canvas. Paint shorter lines that are closer together further up the canvas. This will create some perspective in your water lines.
Rinse the brush off. Then load it into just “phthalo blue”. Paint blue lines just underneath your white lines and allow it to blend with the white a little bit. This will create some shadow in your water lines. You don’t need to add blue to all of the lines.
Use a “3/0” round brush to paint little dots in clusters around your water. This will add a “sparkle” to your water.
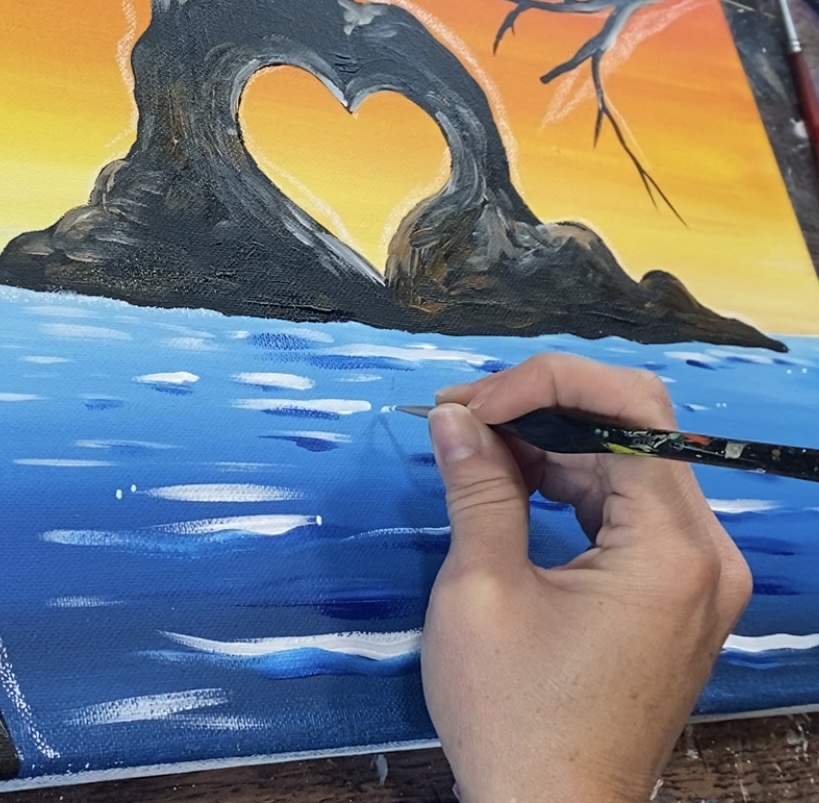
Then you can turn some of those dots into “diamonds” to really add a sparkle to your water! Tip: try using a toothpick to drag the paint on the dot up and horizontally to create the small diamond shape.

8. Paint Sun & Flowers On Trees
Use a #4 round brush to paint the vertical bundles of blossoms that blanket over the branches. Load the tip of the brush into both “deep violet” and “light pink”. Use a combination of the light pink and purple to create different variations of color with these blossoms.

Each bundle is a column of vertical dots. Paint a lot of dots in the upper left corner of the tree area.
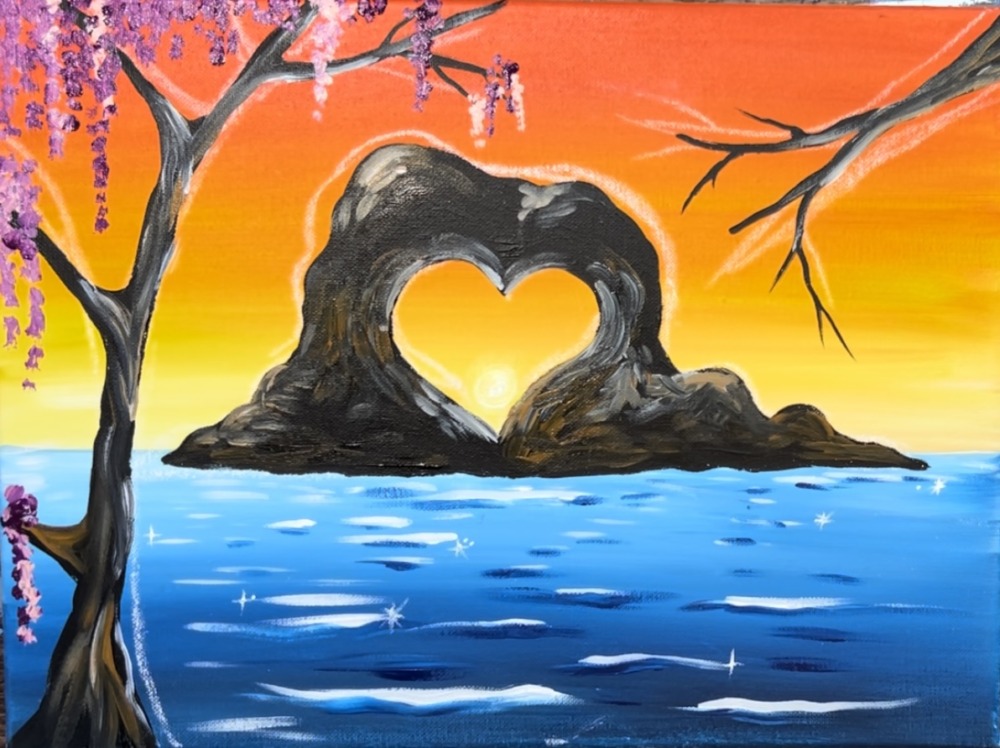
Do this on both tree branches.
9. Paint Cattails
Use a 3/0 round brush to paint cattail silhouttes.
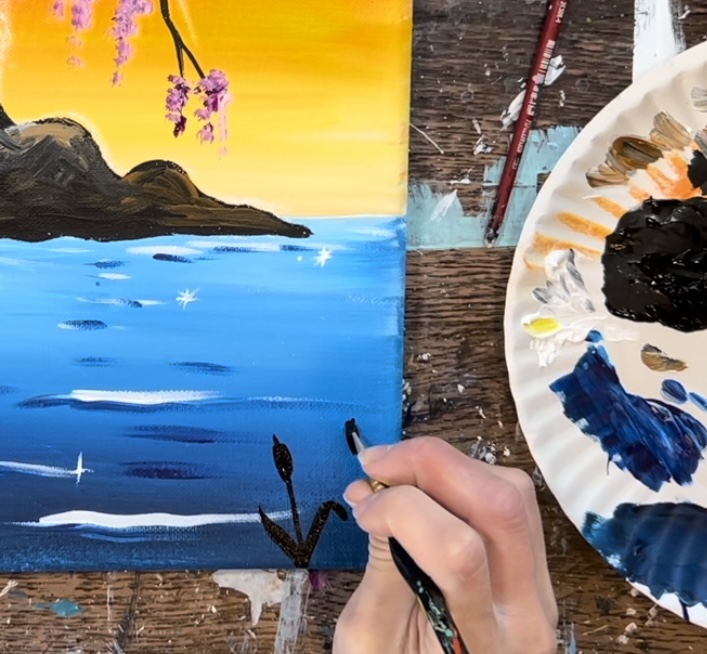
Do this on both sides of the painting.
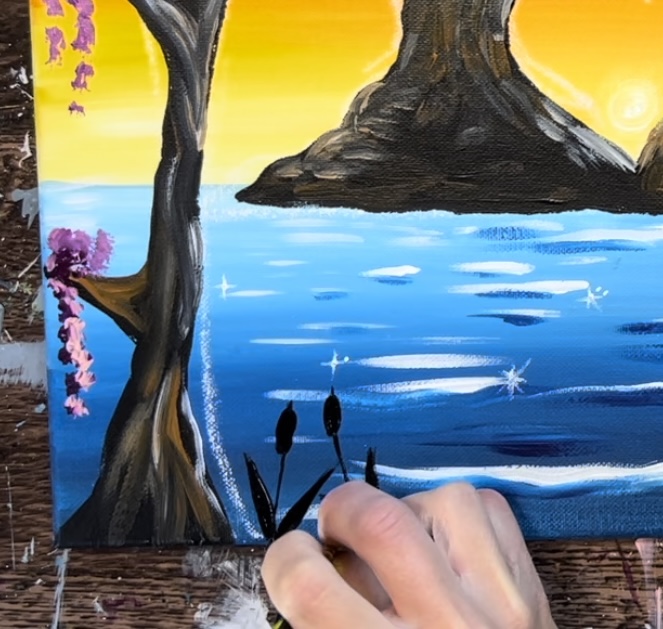
Tip: you can highlight the upper part of the cattails with white paint. This helps to get the cattails to stand out a bit better because that is a dark area of the painting.


10. Paint Rays Of Sun & Waves
Use the #4 round brush and titanium white to paint waves that overlap part of the bottom of the rock. You can also drag your brush upwards a bit to create splashing waves.
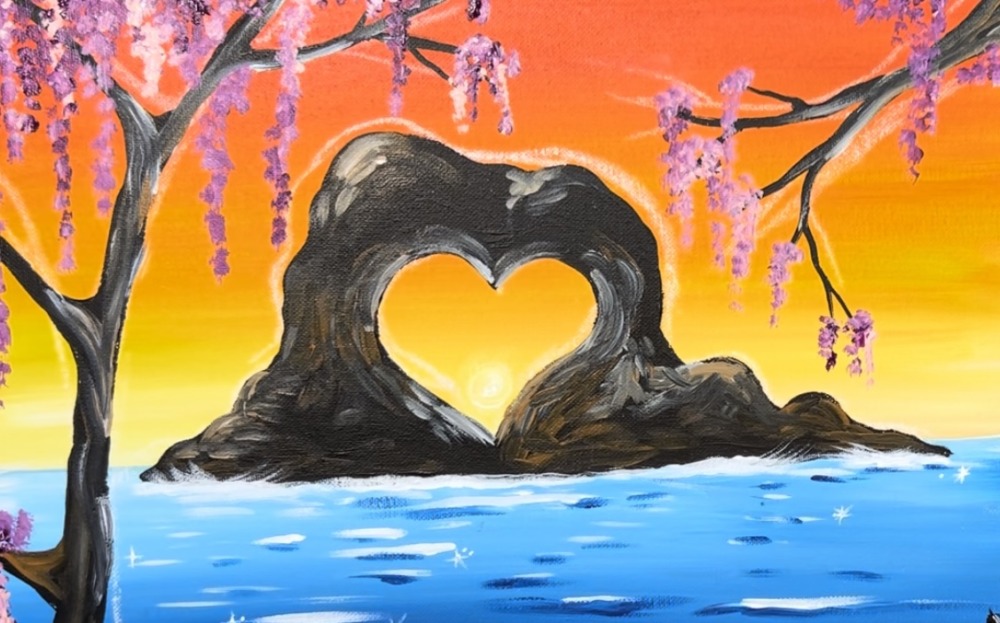
Then you can paint the sun rays. Use the #4 round brush to paint the circle white. Then wipe the brush off. Drag the brush from the circle and outwards to create a dry brush sun ray that is very thin and translucent.
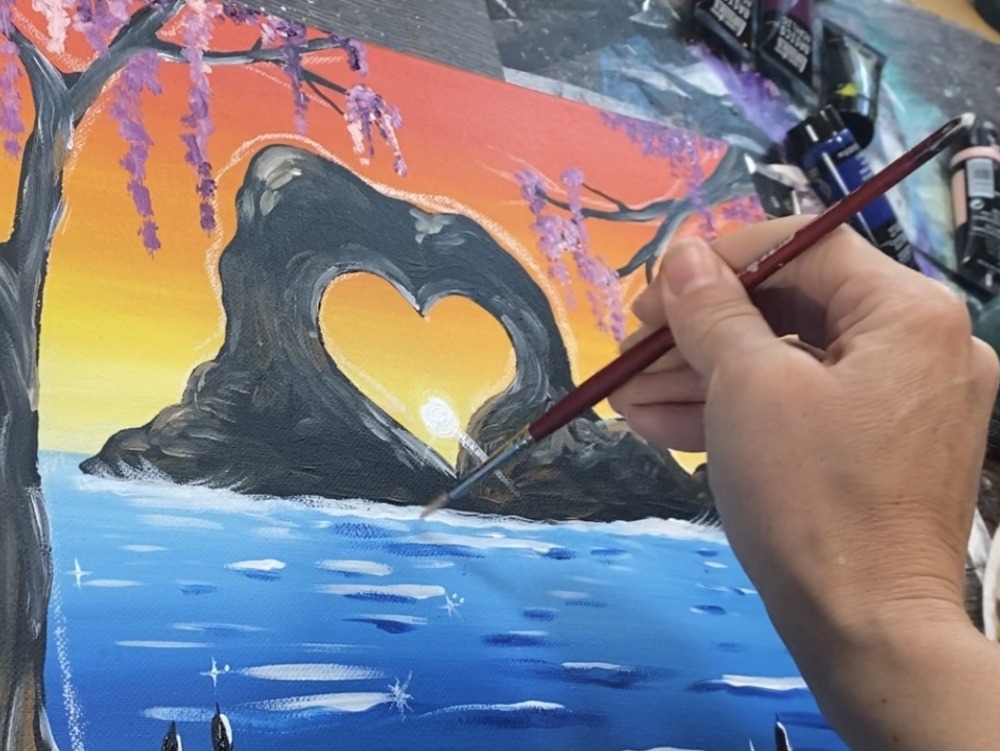

Paint several rays going outwards from the circle.
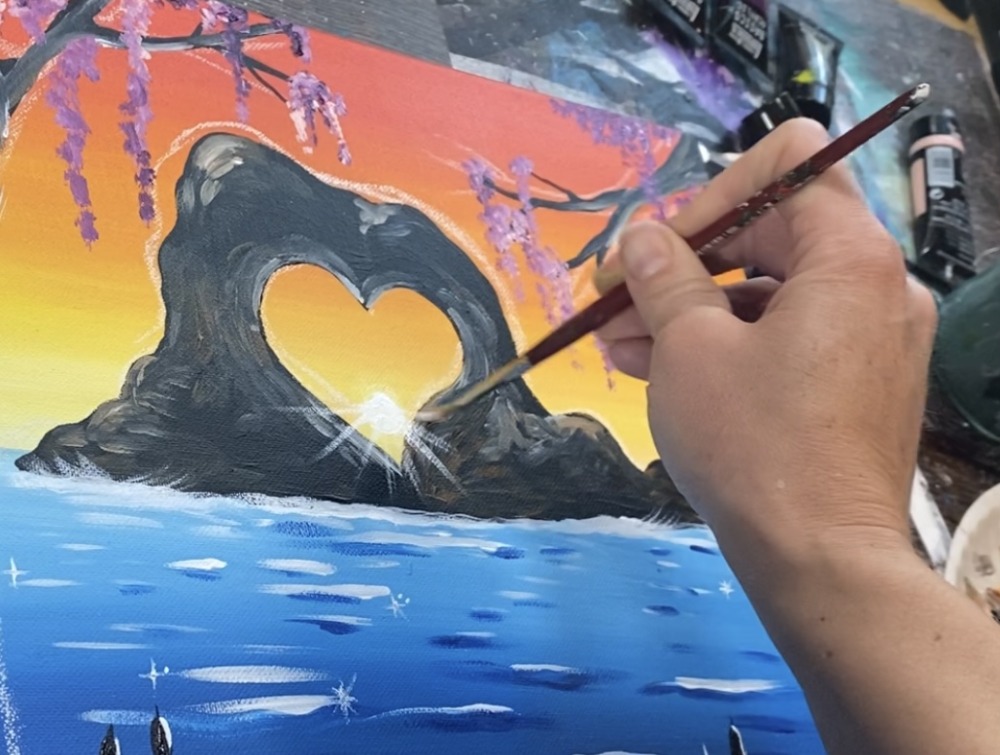
As you paint each ray, release the pressure of the brush so that each sun ray goes to a point. Then, if needed, repaint the circle of the sun white.
As a final step, you can erase any of the chalk lines that are still visible. Make sure your painting is completely dry. Then use a clean wet paint brush to erase the chalk.
Finished!