


Would you like to save this?
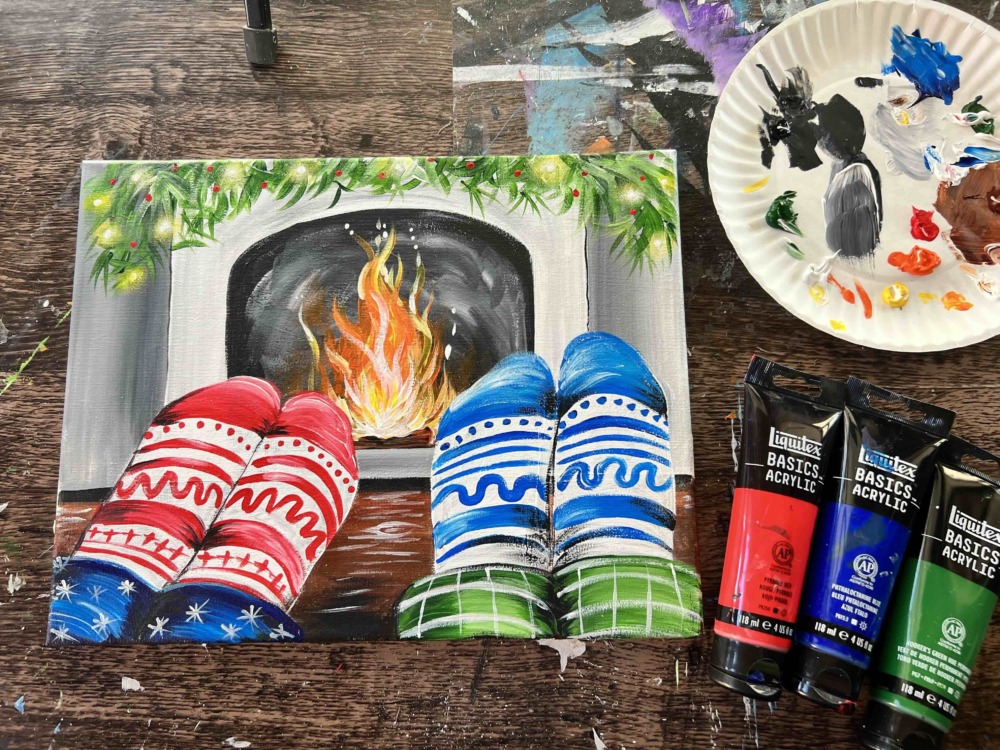
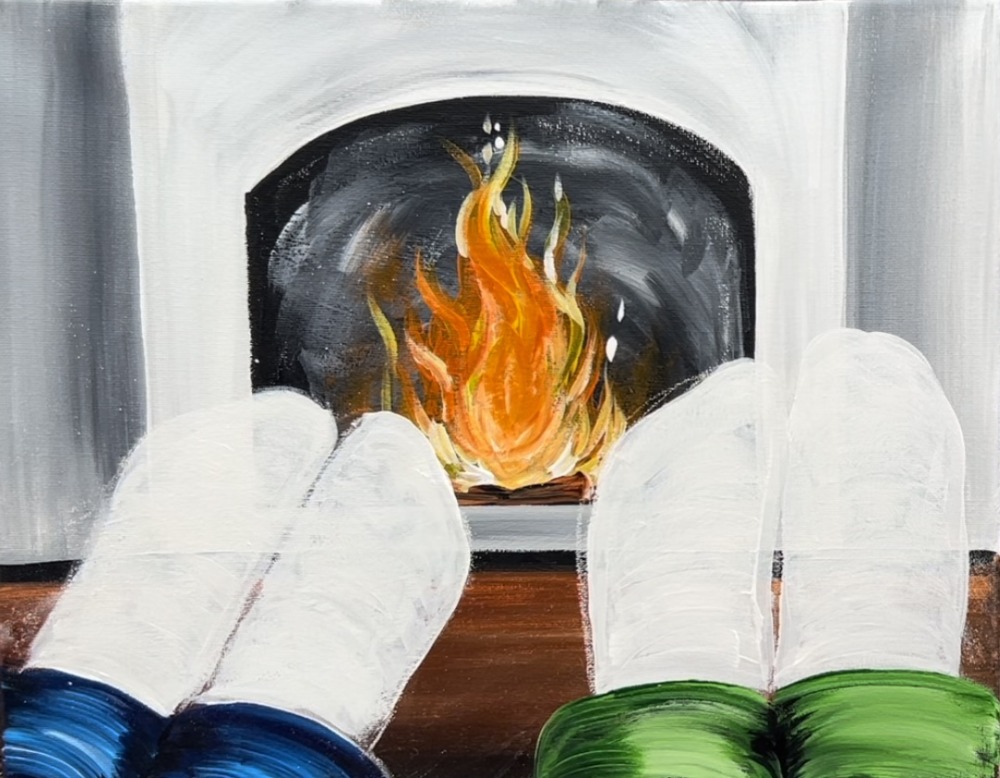
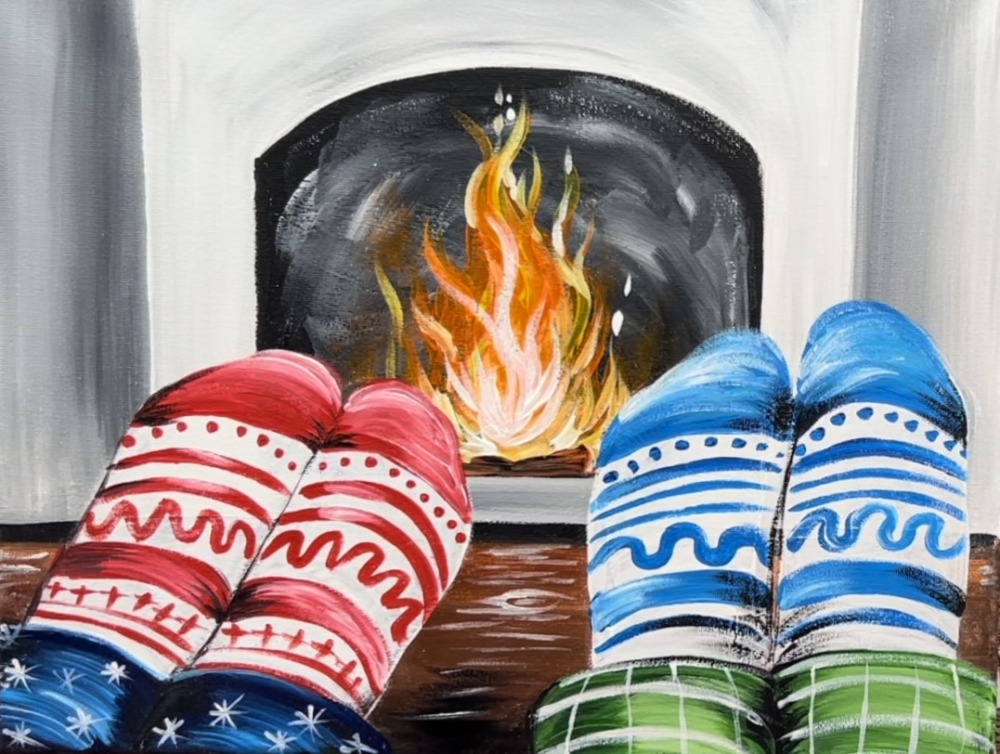
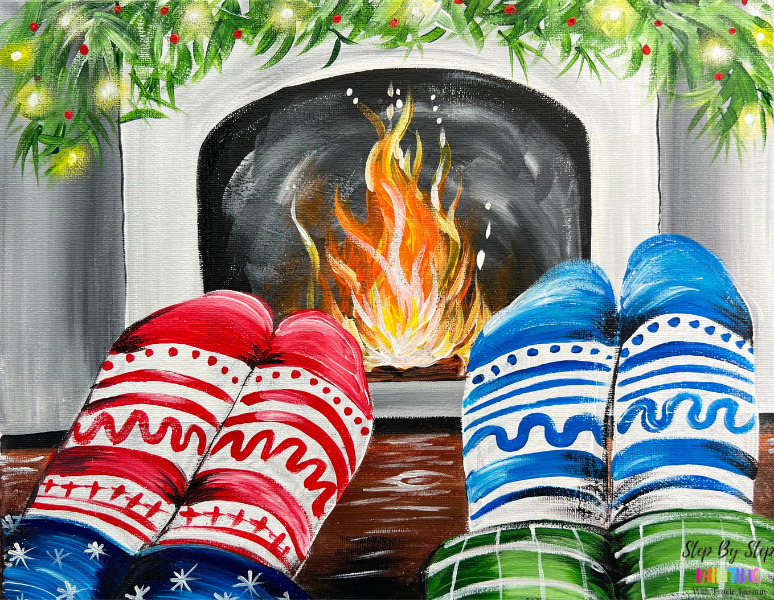
Learn how to paint “Fireplace Besties”! This acrylic painting tutorial will guide you through the steps of how to paint two pairs of socks/ pajamas from two people sitting by the fire.
This painting can be customized with unique designs, colors and patterns. You can also add more legs and socks to the painting or even a cup of hot cocoa on the table.
Enjoy and happy painting!
Materials
- 11 x 14 canvas
- Acrylic paint
- Ruler
- Pencil
- White Chalk
- Baby wipe or soft damp paper towel
- Optional Traceable
- Optional Graphite Paper
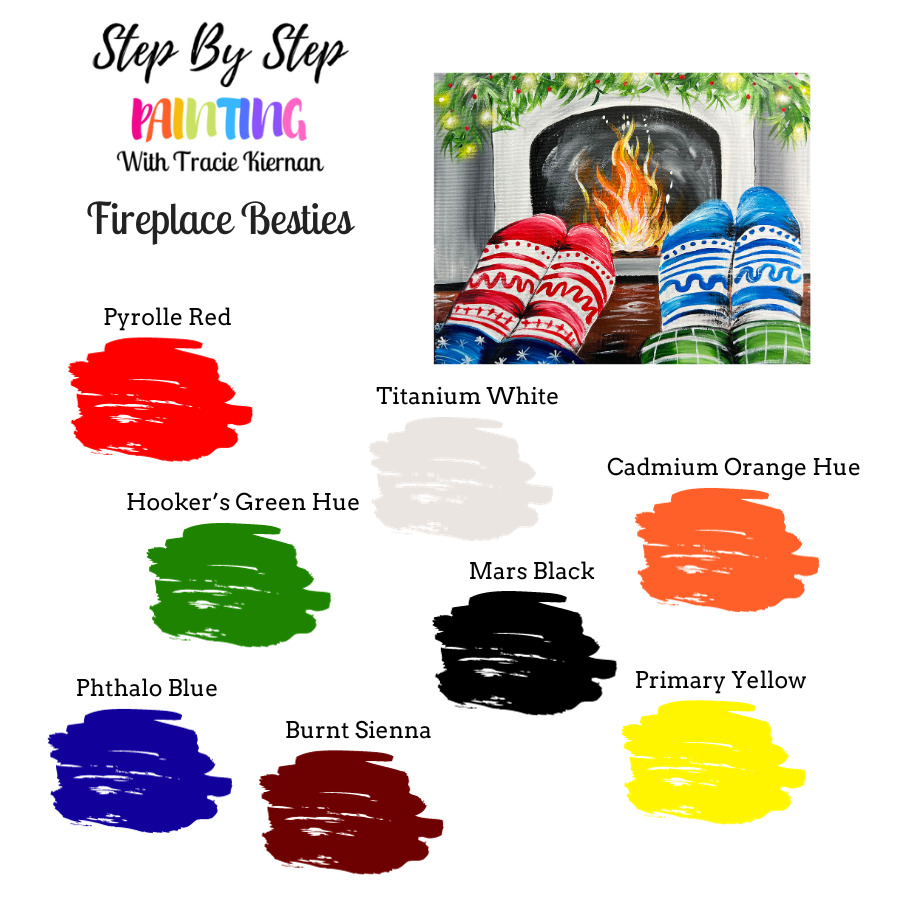
Colors
- Titanium White
- Mars Black
- Pyrrole Red
- Cadmium Orange Hue
- Primary Yellow
- Hooker’s Green Hue
- Phthalo Blue
- Burnt Sienna
Brushes
- #4 Round Brush
- 3/4 Flat
- 12 Bright
Color Palette
I used Liquitex BASICS acrylics for this painting. If you are using a different brand, you can look at the color chart below to help you match colors.
Directions At A Glance
Traceable
This is optional!
Video
Step By Step Directions
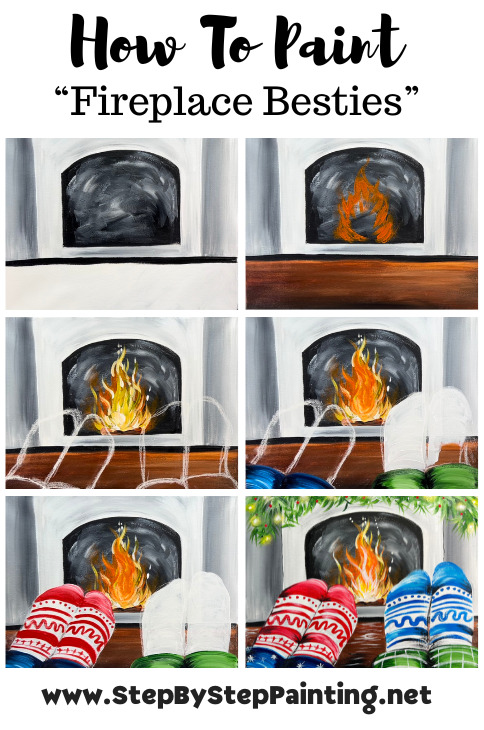
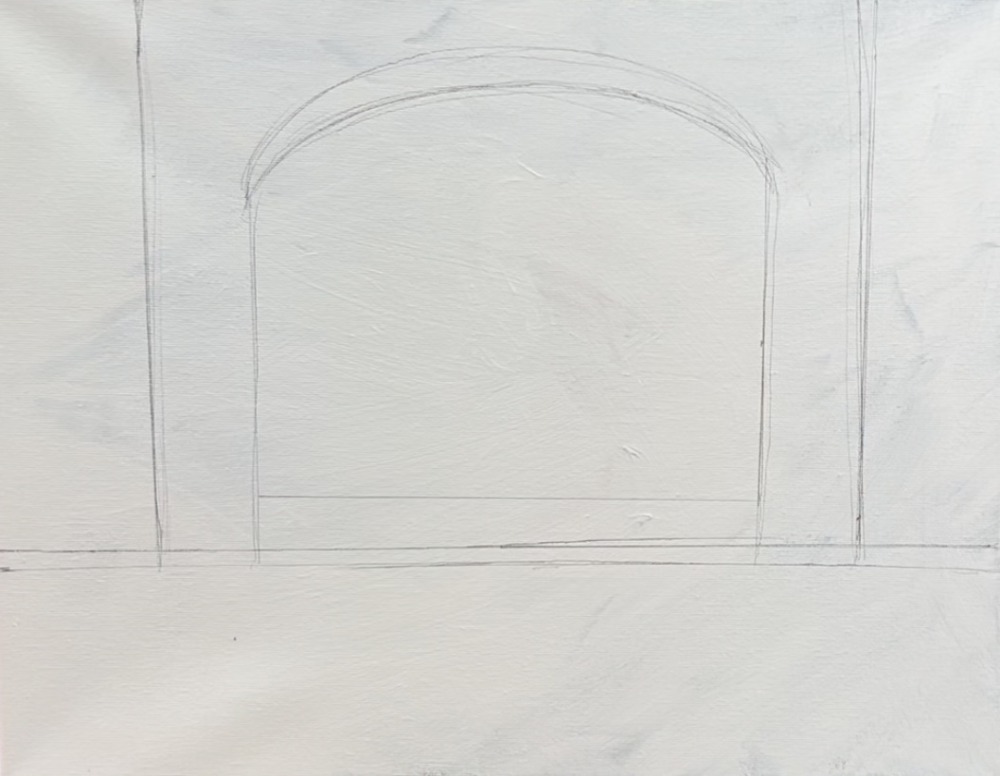
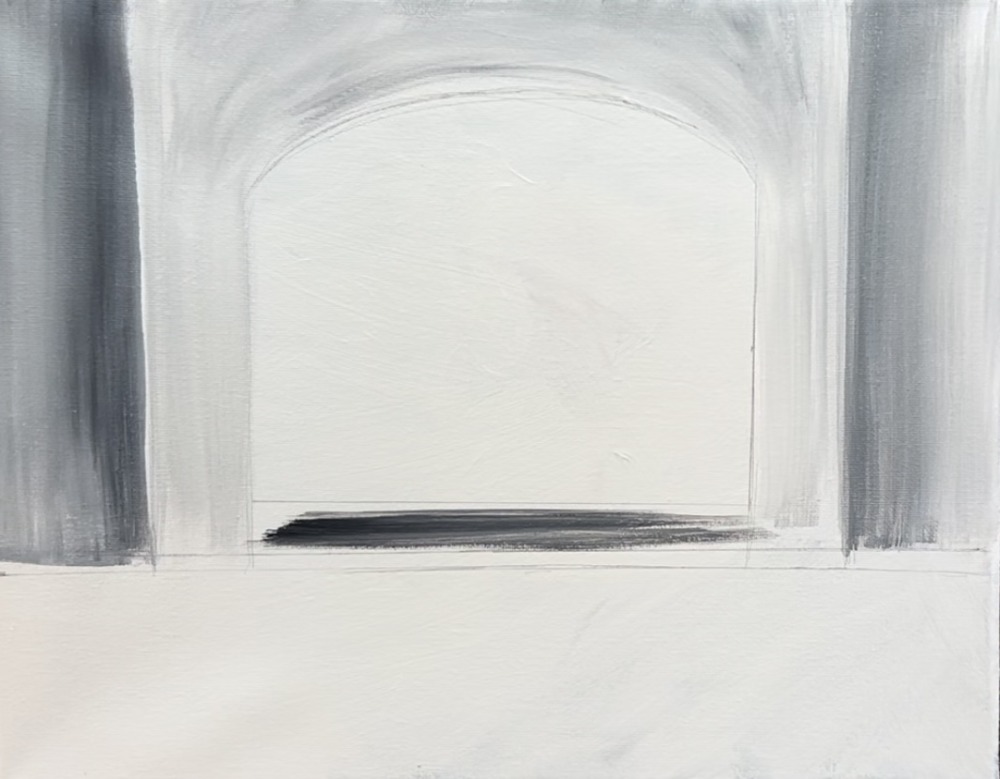
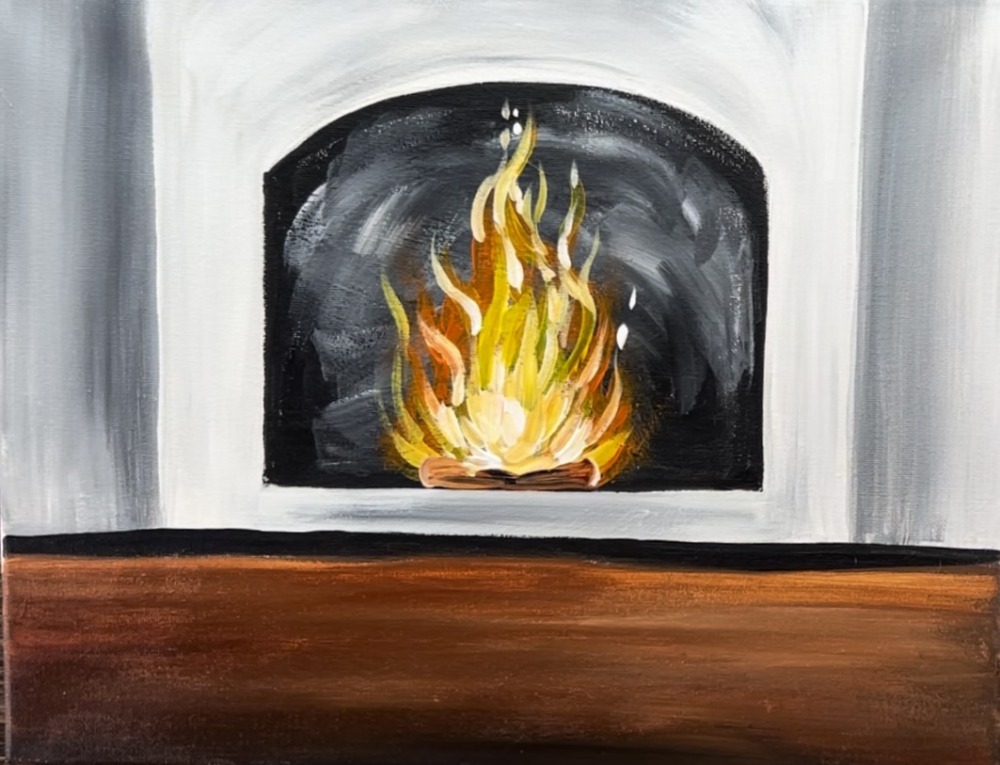
1. Draw Fireplace
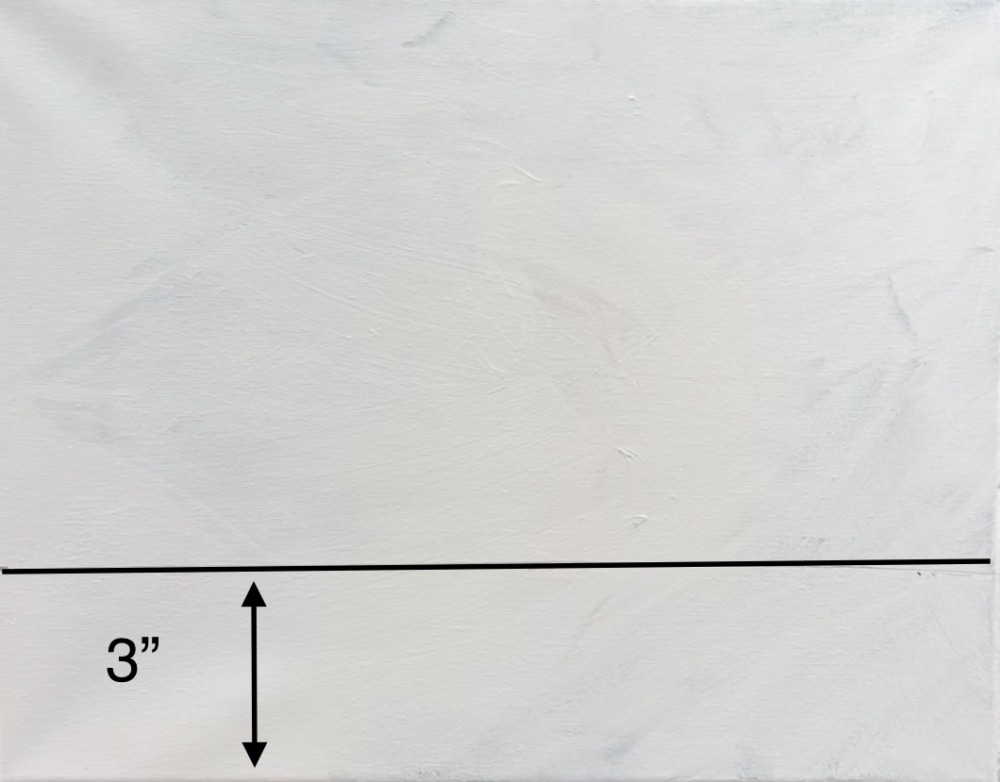
Position your canvas horizontally. Use a ruler to draw a horizontal line that is about 3″ from the bottom of the canvas.
Then draw two vertical lines. These lines are about 3.5″ from the edges of the canvas. Then draw an arc between the two lines at the top. This is the opening of the fireplace.
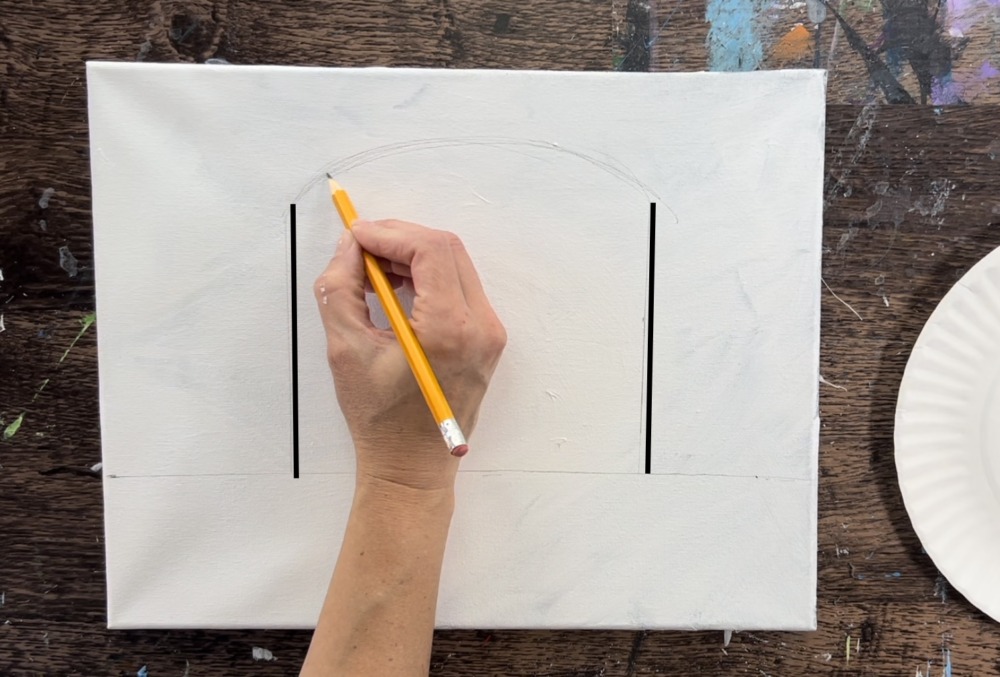
Next, draw two more vertical lines on each side of the fireplace opening (about an inch wide) and draw these vertical lines all the way to the top edge of the canvas.
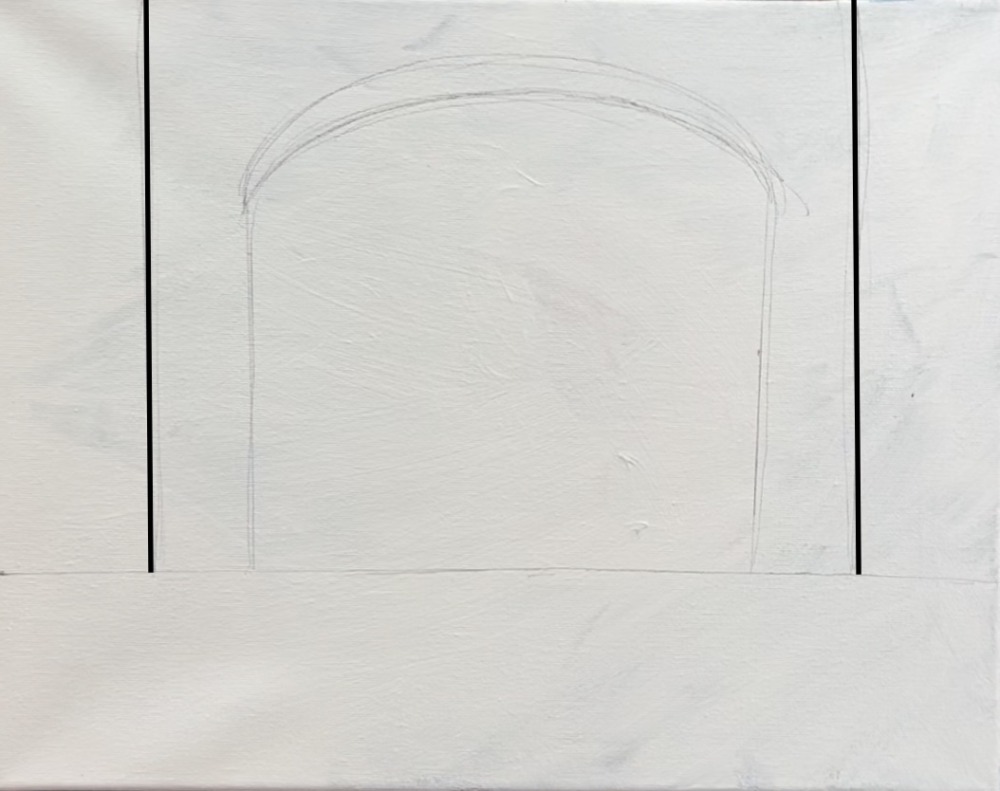
Then draw a horizontal line in the bottom area of the fireplace about 1/2″ from the bottom edge. Also, draw a second horizontal line just a slither above the first horizontal line.
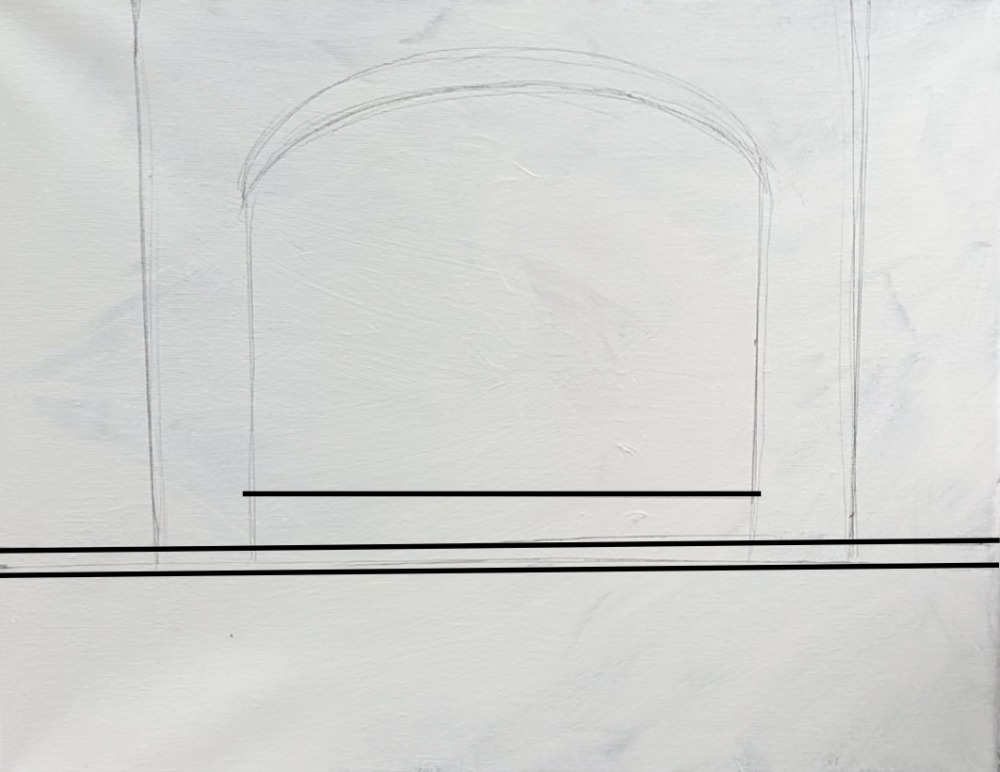
Here is a finished sketch of the fireplace. It is done kind of loosely. The lines do not need to be perfectly straight. You also do not have to use my exact measurements.
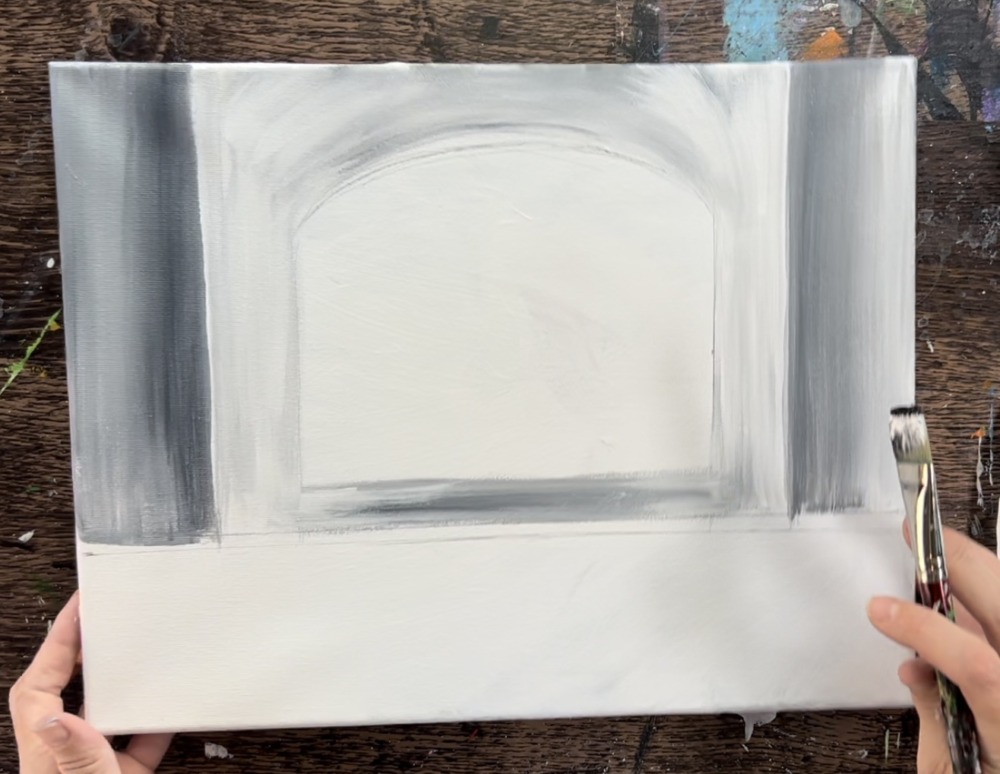
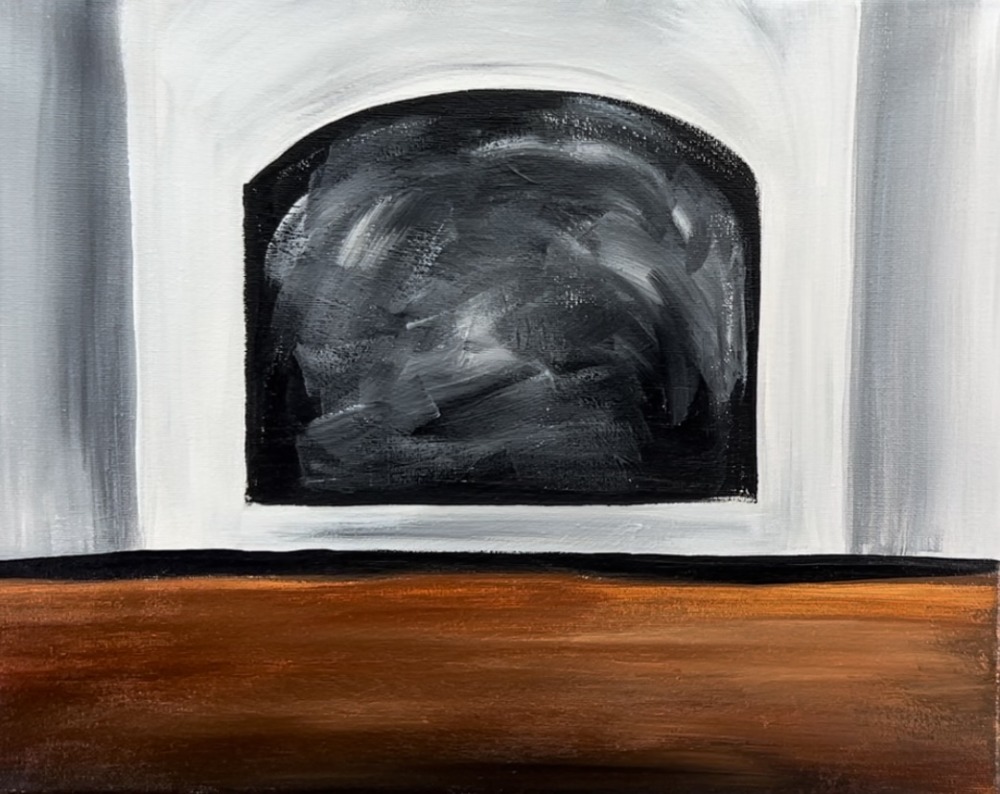
2. Paint Wall & Fireplace
Load your palette with the colors: mars black and titanium white. Load your 3/4″ flat wash brush in water and tap excess drippings off the brush. Double load the brush in mars black and titanium white. You’ll want about two parts white and one part black for this. Paint up and down strokes, painting the wall to the right of the fireplace. Allow this wall to be slightly darker towards the fireplace and then lighter as it goes to the right edge of the canvas.
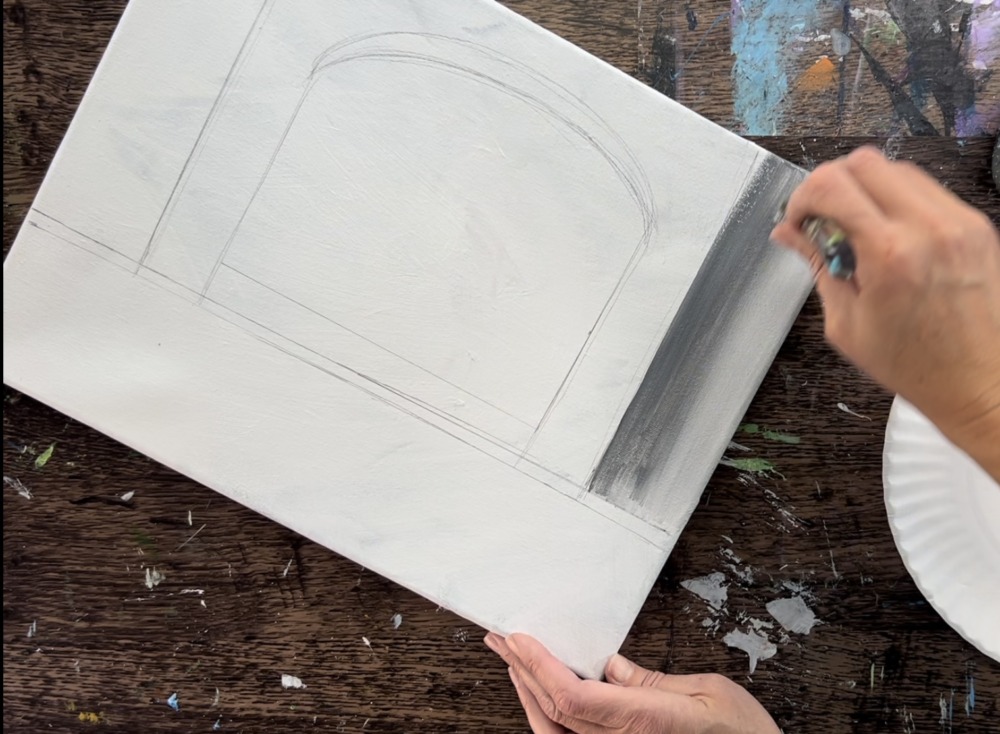
Repeat this on the other wall on the left.
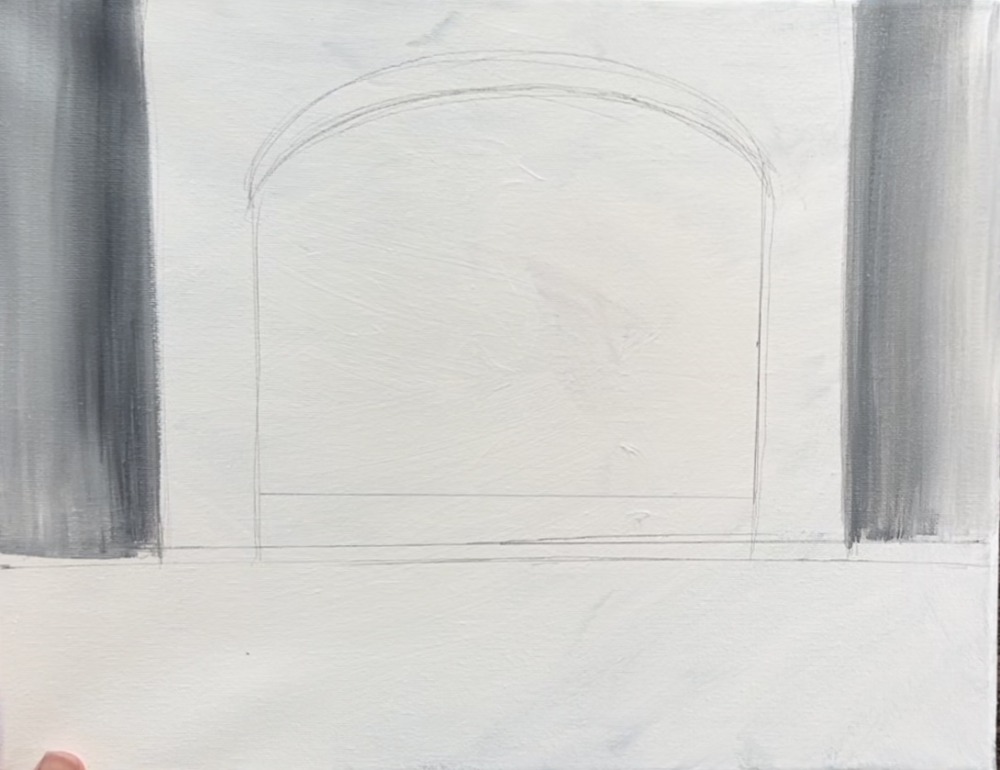
Next, paint the fireplace surround. Use the same brush and the black and white. This time, add much more white to your brush so that it appears lighter than the wall. On the “arc” part of the fireplace, paint it with curved strokes. Paint vertical strokes on the side. It is okay if you do not blend all the colors all the way.
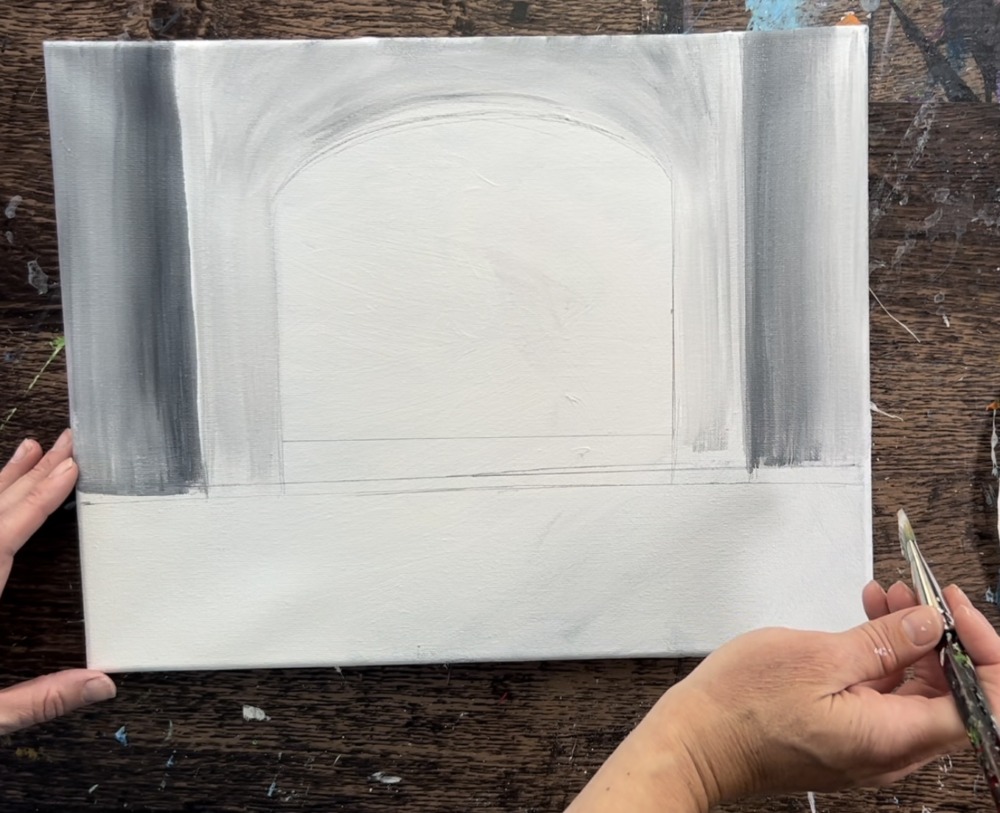
Paint the bottom horizontal area on the fireplace. This is a slightly darker gray than the light gray of the fireplace surround.
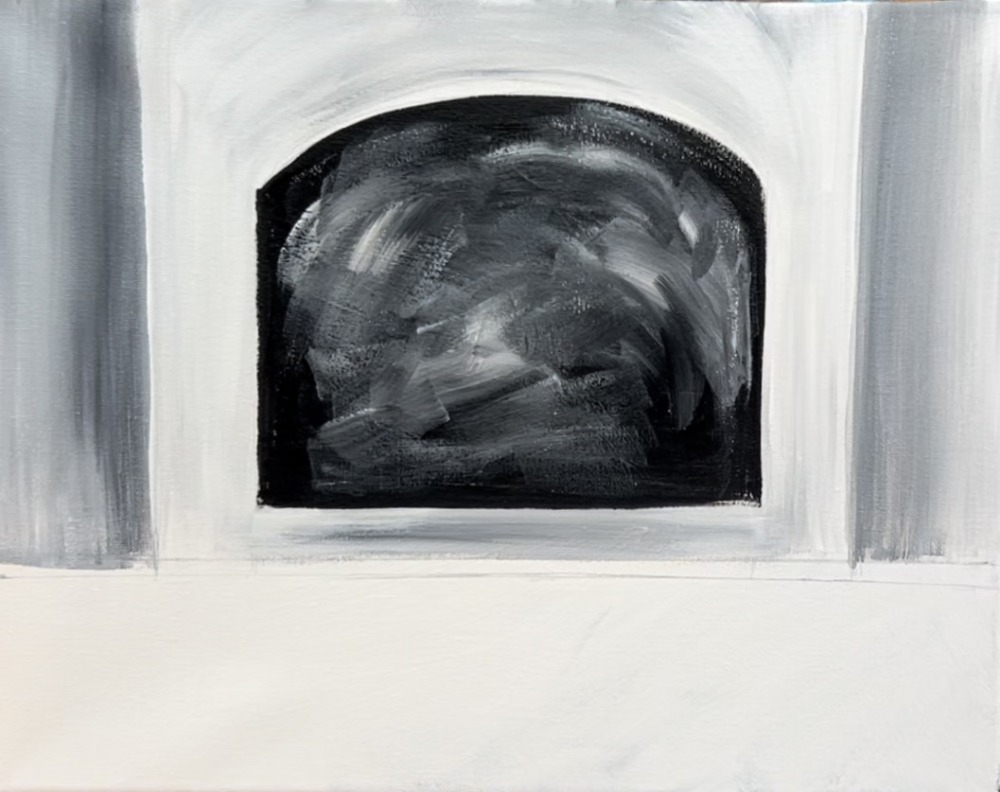
Next, paint the inside of the fireplace. Load the 3/4″ flat with “mars black.” Outline the shape of the inside area using the tip of the paint brush and then fill it in with “expressive” paint strokes.
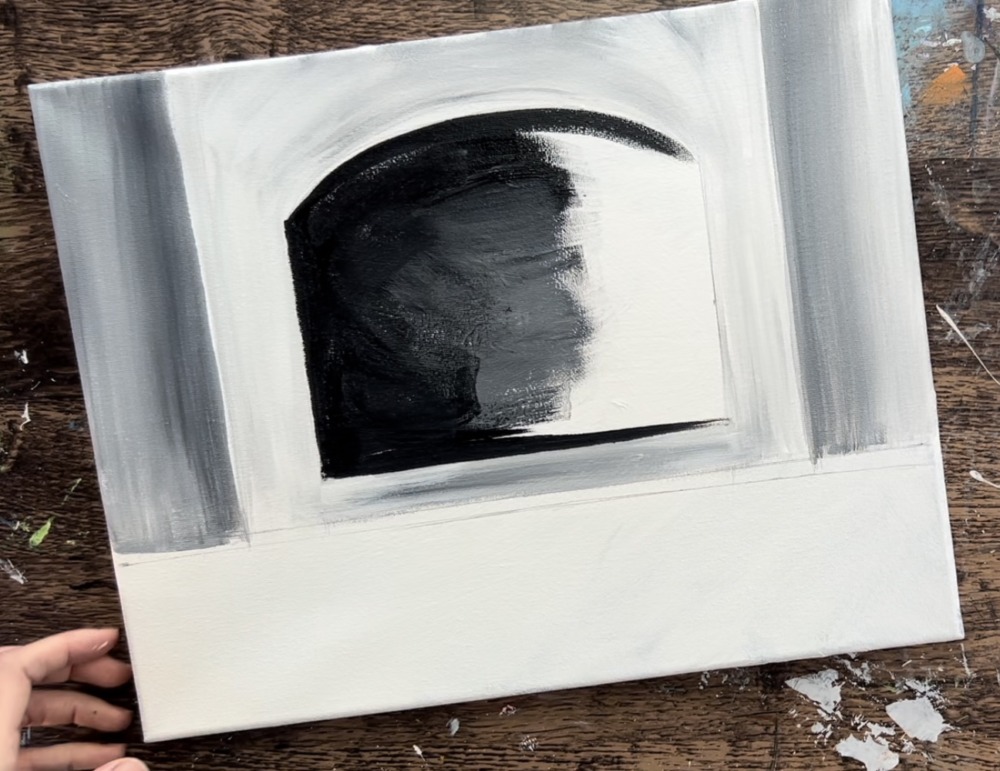
Add a little bit of white in the middle of the fireplace opening and blend it with the black. Allow it to be a bit lighter in the middle but darker on the edges. Blend the white and black but don’t blend it all the way. Sort of “scribble” the paint brush. This creates more of an expressive effect.
Then paint a black line on the bottom (where those two horizontal lines are). Use the 3/4″ flat to paint it.

I actually made it about 1/4″ thick. This area is a division between the end of the table and the bottom of the fireplace (the floor area).

3. Paint Table
Load your palette with burnt Sienna. Paint left and right strokes with the burnt Sienna using the 3/4″ flat brush. Blend a little bit of black on the bottom of the table area so this area becomes slightly darker.
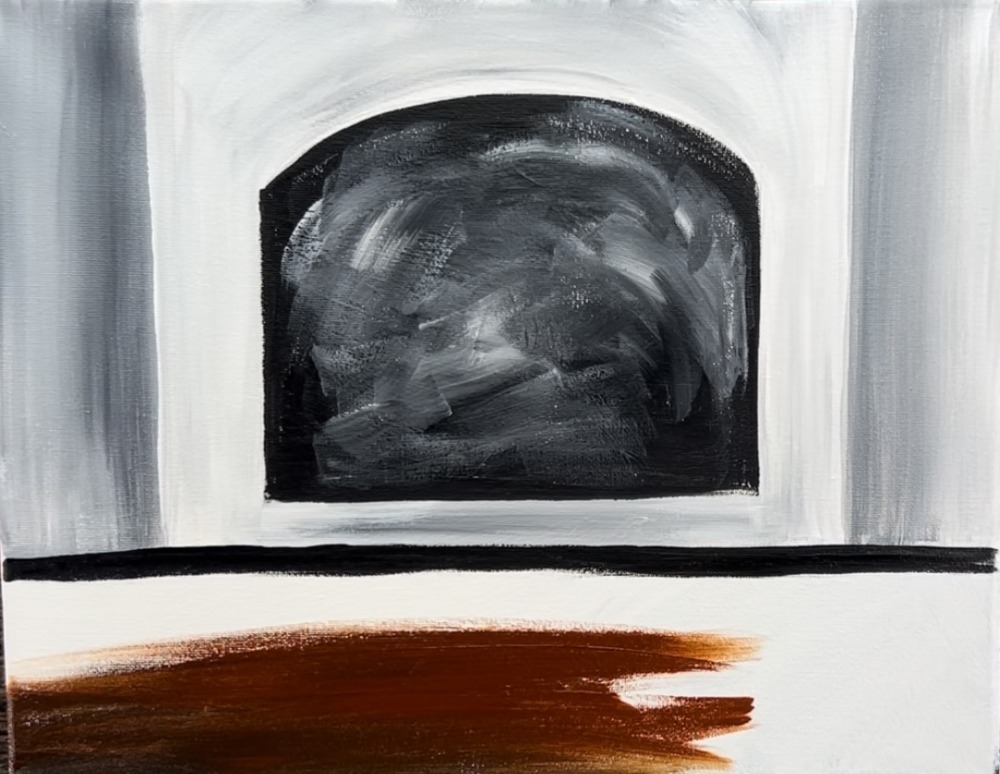
Add a little bit of white on the top of the table area so that it appears slightly lighter. You don’t need to blend this brown all the way, you can leave streaks of light and dark in it to give it more of a “wood look”.
4. Paint Fire
Use a #4 round brush and cadmium orange hue to paint the fire. Start by outlining the shape of the flame.
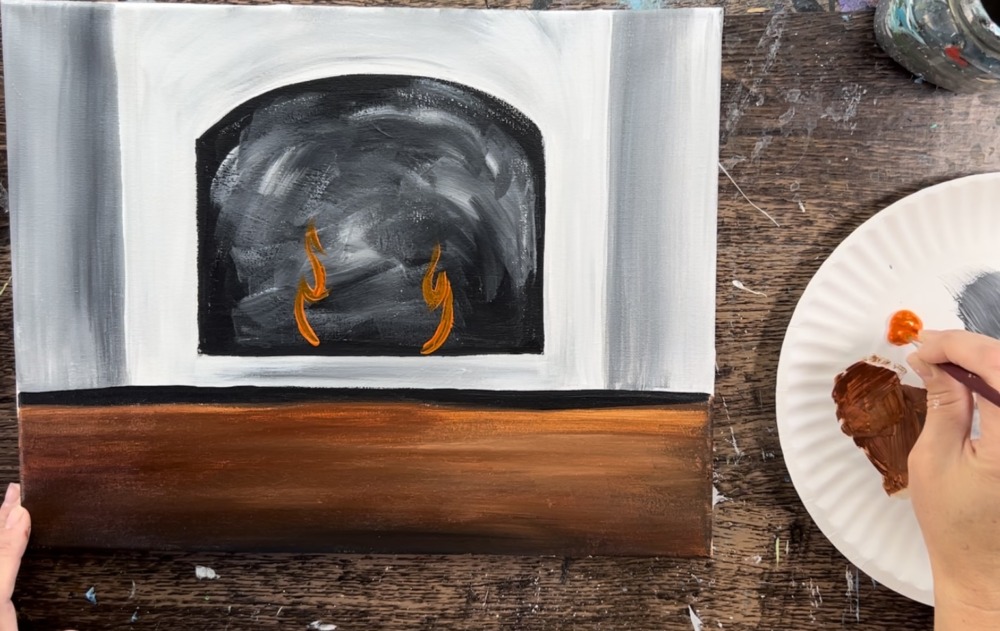
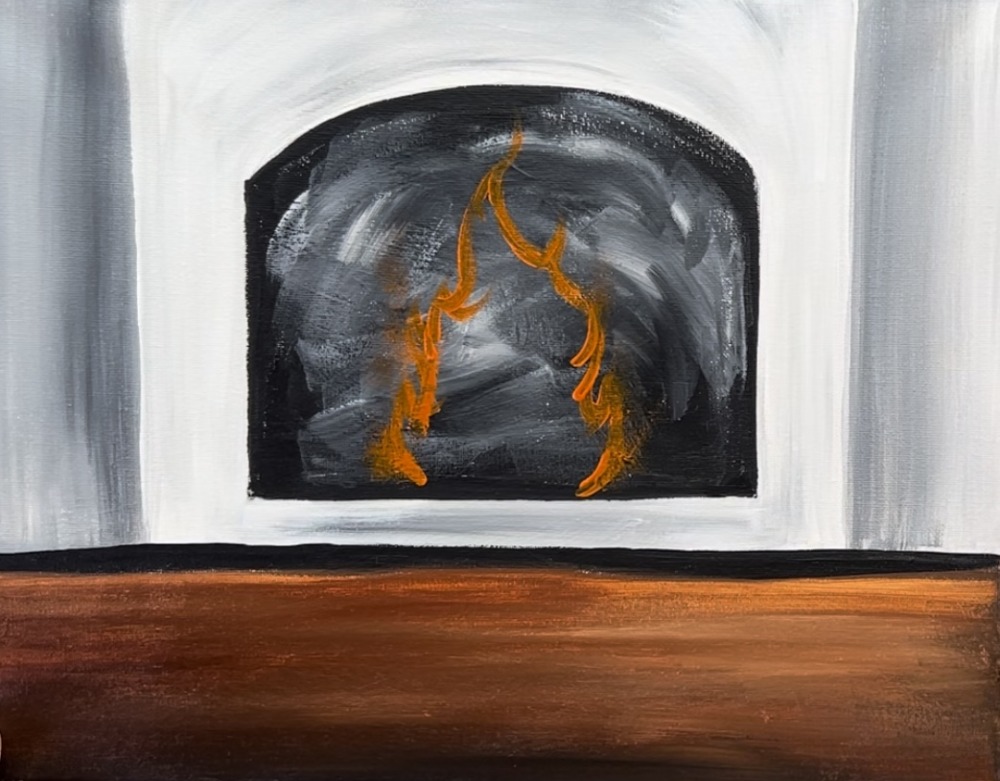
Then paint curved strokes with the orange going in the direction of the flame shape. Leave the center of the flame blank without any orange.

Next, add primary yellow to your paint palette. Add a yellow to your brush and paint the center of the flame with curved, contouring strokes. Leave the outer edge of the flame more orange without any yellow.
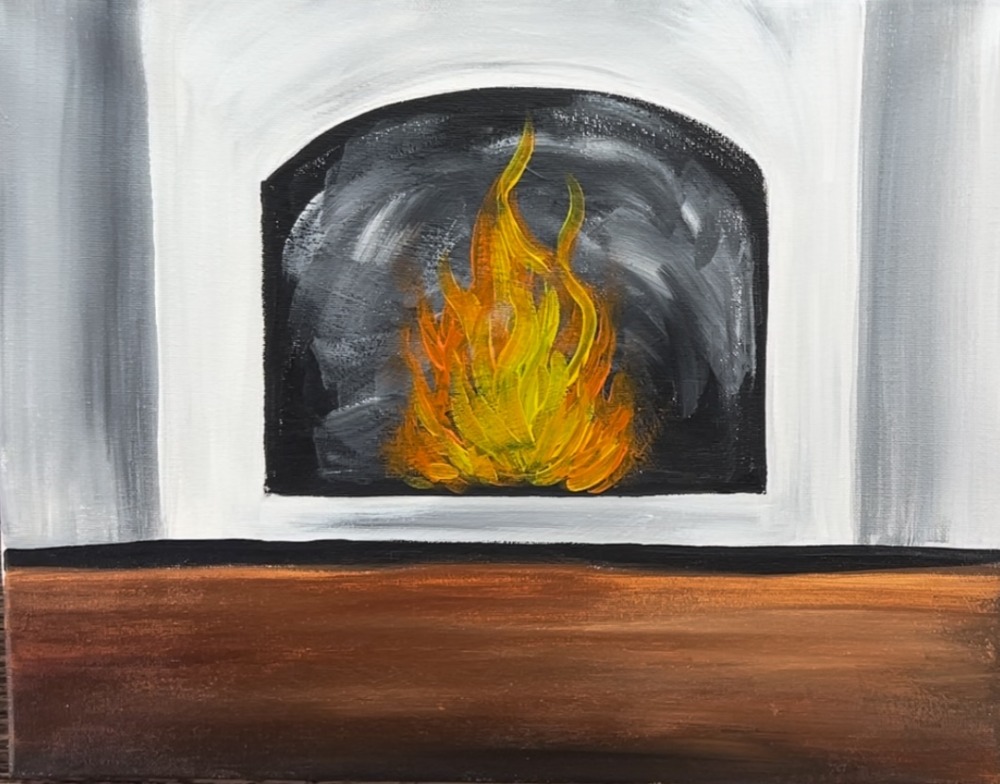
Next, rinse the brush. Add some titanium white to the 4 round brush and paint white on the bottom and very center of the flame. This will blend with the yellow and it will make the fire look very bright.
Paint a few curved strokes with the white towards the top of the flame.
Then paint a few “sparks” with the titanium white by painting a few dotted paint strokes on the top of the flame.
Paint a small log on the bottom of the flame using “Burnt Sienna”. Mix a little bit of white into the Burnt Sienna to make the brown a little lighter. Then paint a small rectangular shape just on the bottom of the flame. Note: this log may not be noticeable in the end so keep it very simple.
Wait for this to completely dry before going onto the next step.
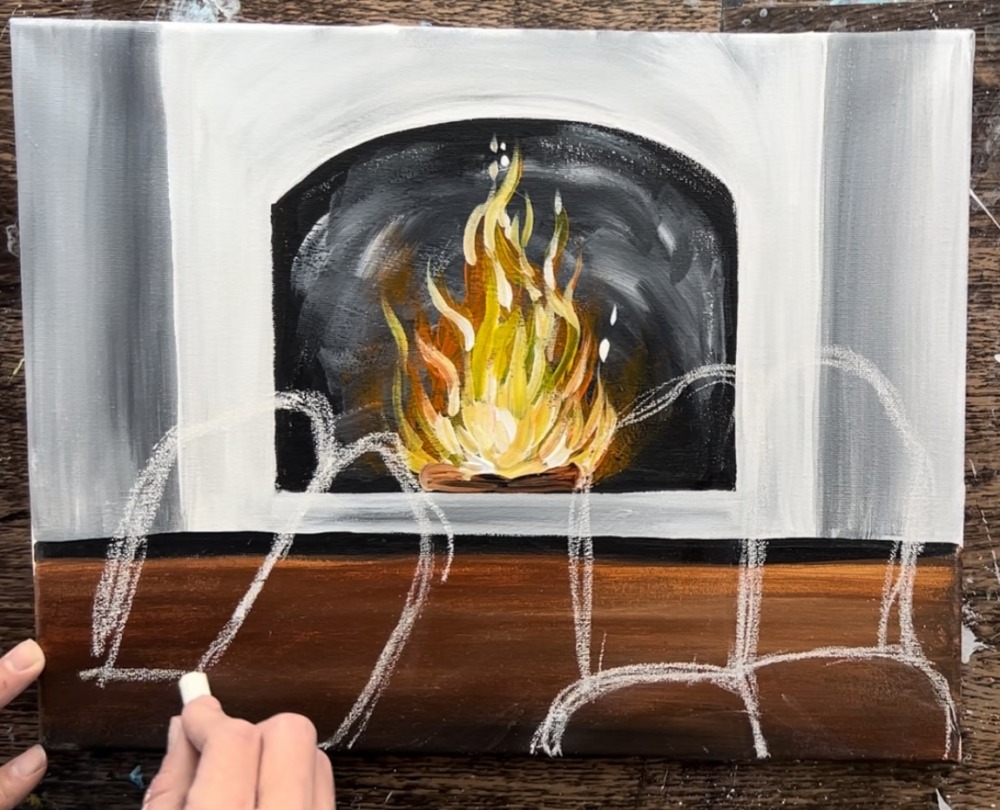
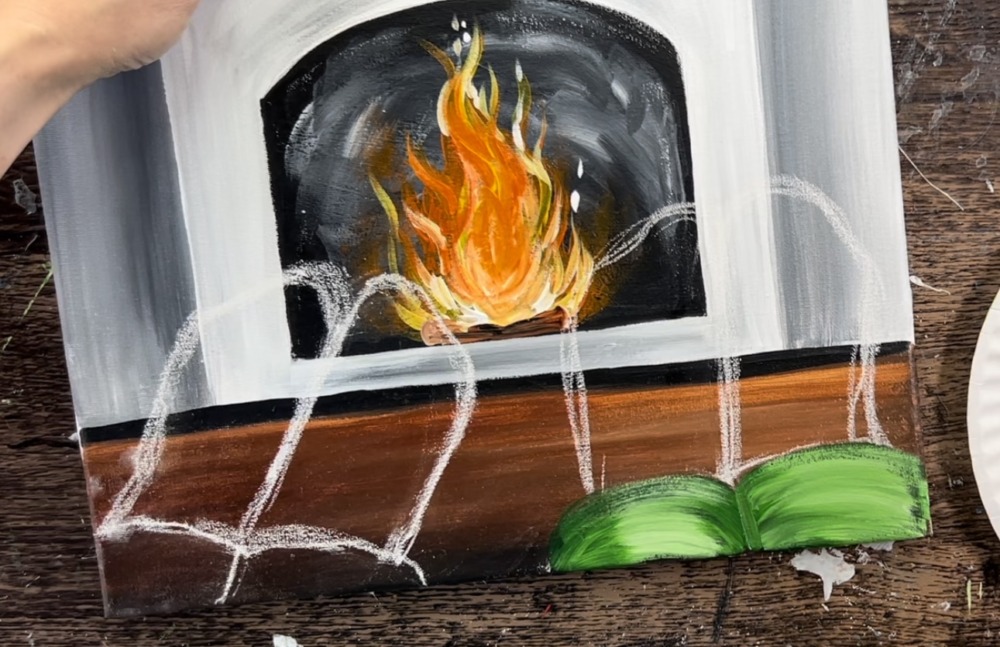
5. Draw Feet
Use a piece of chalk to draw the bottom of the pajama paint legs on the lower right. Slowly sketch the pant legs so they are going diagonally to the lower right and curved on the ends of the pants.
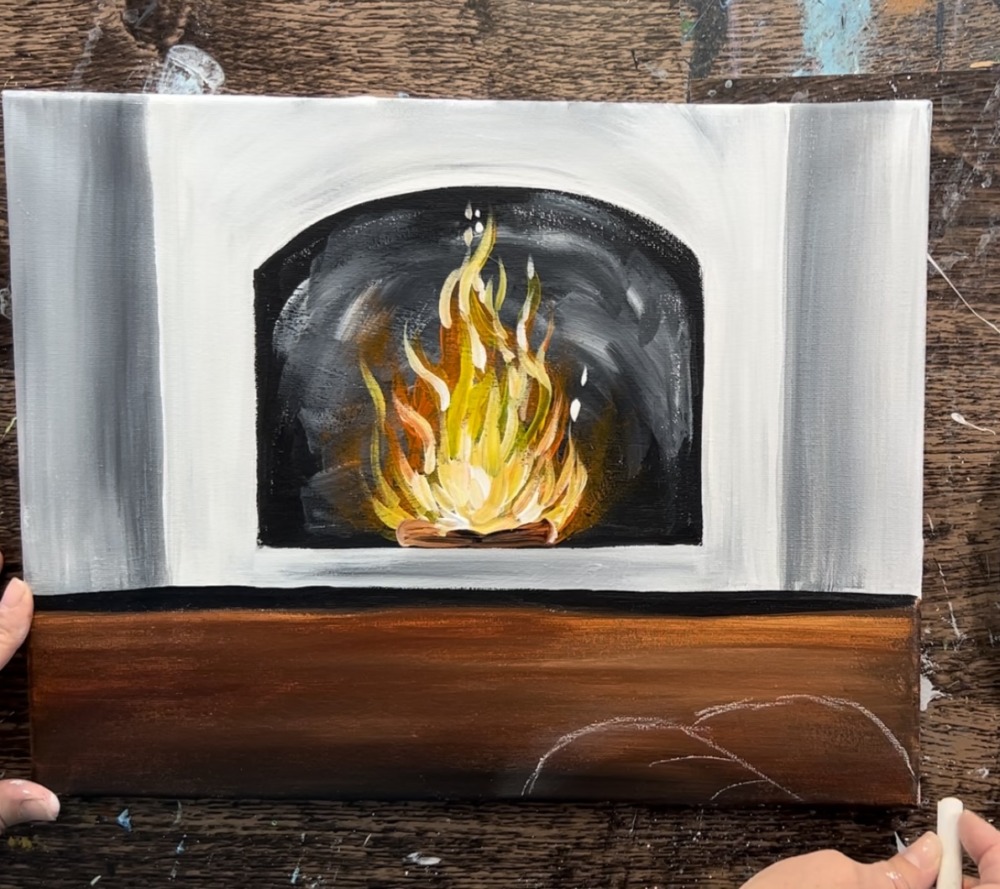
Then draw the feet. Make the feet so the big toes are pointing upwards and the end of the sock goes diagonally down. Tip: have a baby wipe handy to erase your chalk lines. Sketch this drawing portion with multiple lines until you achieve the shape that you want.
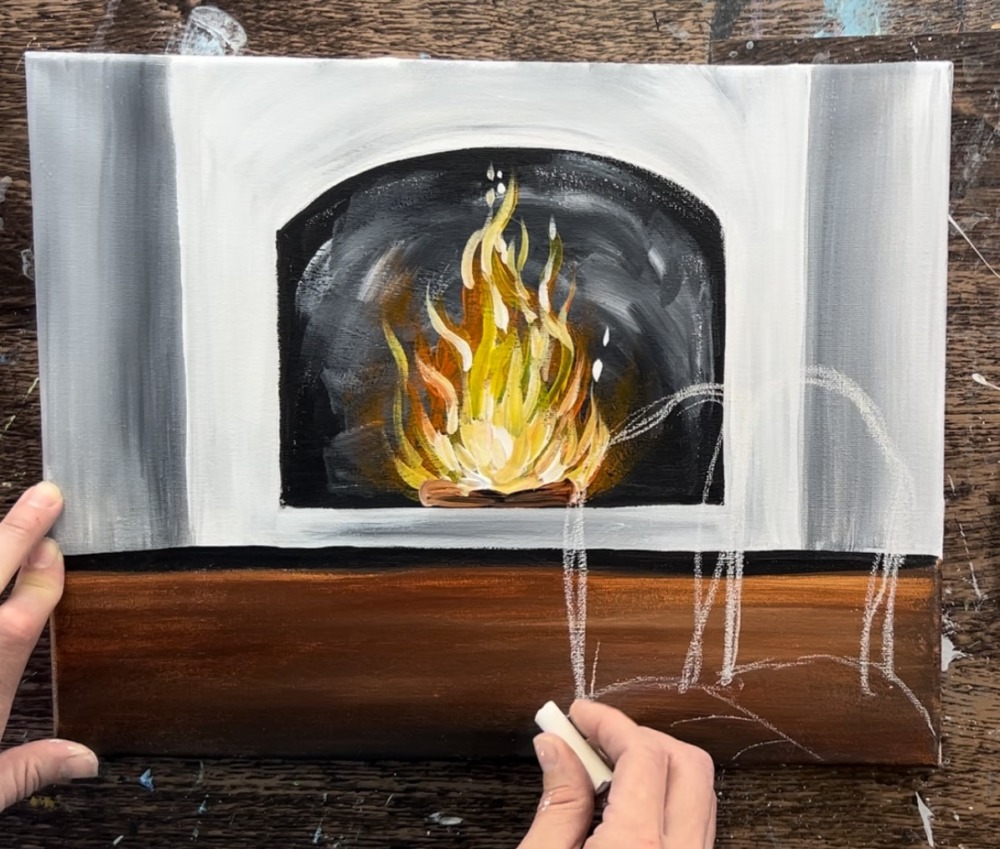
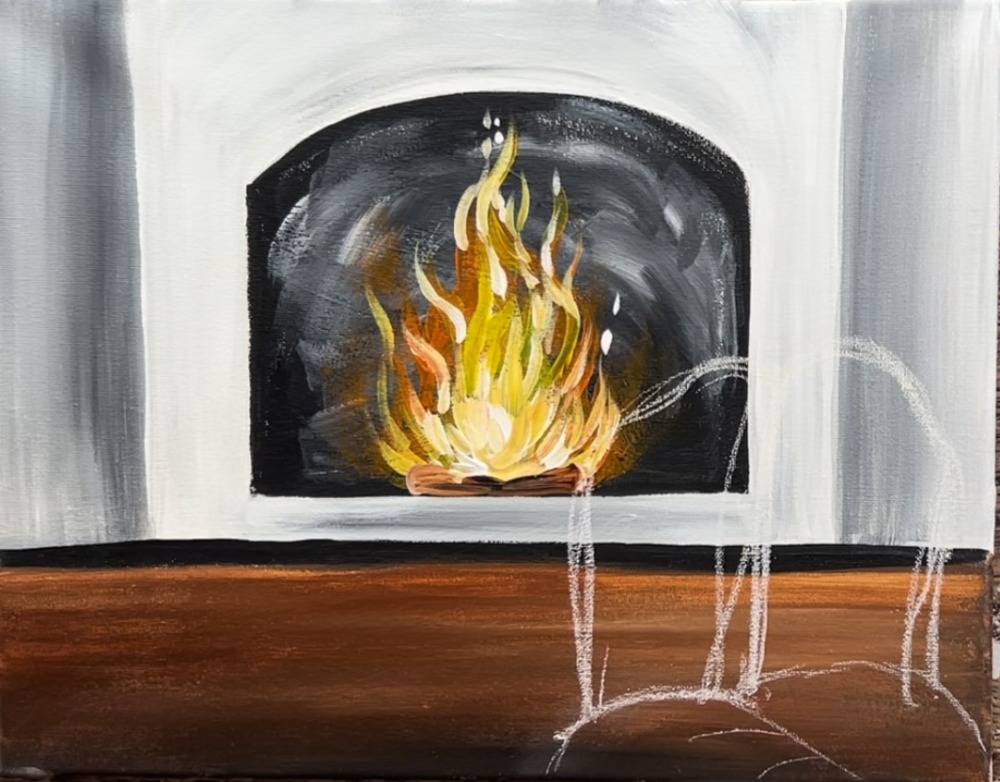
Sketch the second pair of feet. I made these going diagonally and not straight up like the feet on the right.
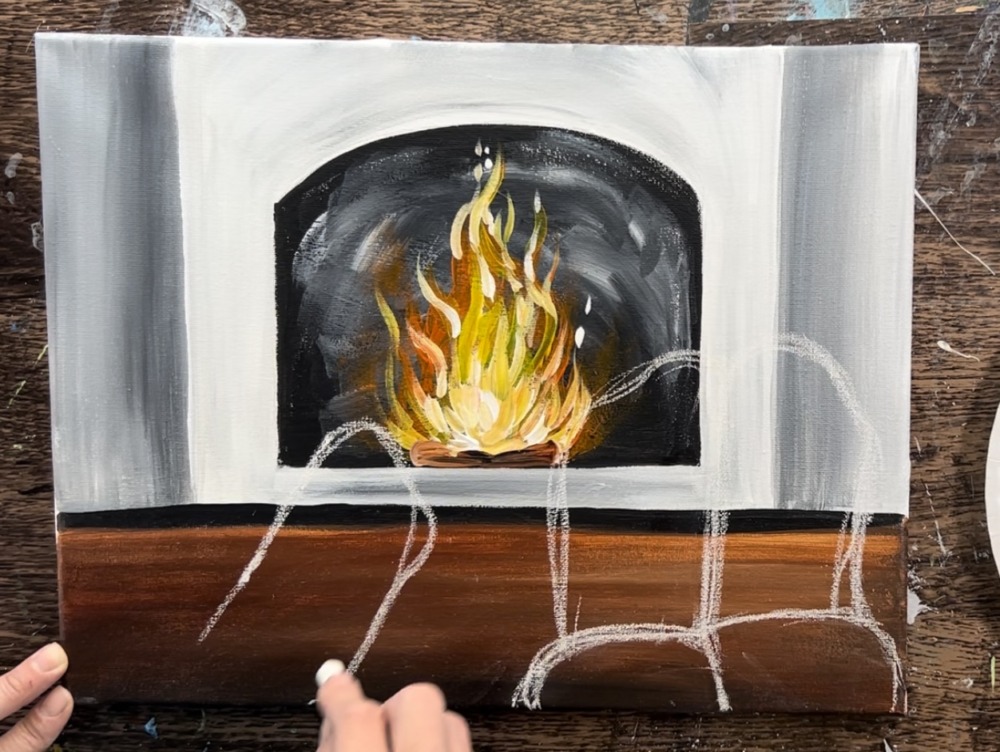
Then draw both of the bottoms of the pajama pant legs.

6. Paint Pajama Pants
Load your palette with the colors you will paint the pajama pants. For the pants on the right, I used “hooker’s green hue”. Use a 12 bright brush to paint these paints. Paint your strokes going horizontally in a curved direction. The curved direction is very important because that will create depth in your legs and socks rather than them looking flat.
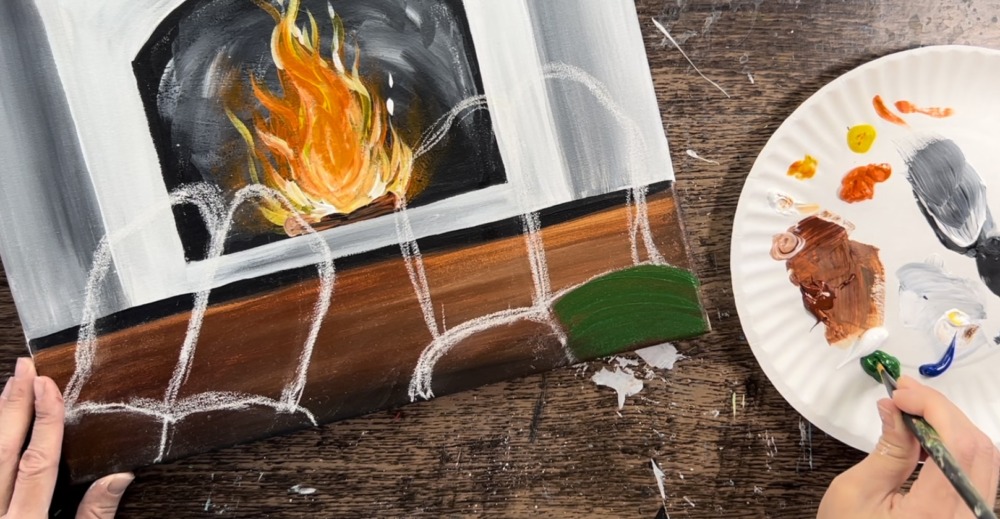
Each pant leg bottom is painted solid green and in a curved direction.
Next, without rinsing the brush, load a very small amount of titanium white on the brush. Paint curved strokes just in the middle of the green area, blending with the green on the canvas. The goal is to get the center of the pants to be lighter and then darker and shadowy on the edges. When you paint in the curved direction, you create form on your pants so that it doesn’t look flat.

Do this to both of the pant legs.
Repeat this for the pant legs on the left. Use phthalo blue for the first coat of paint.
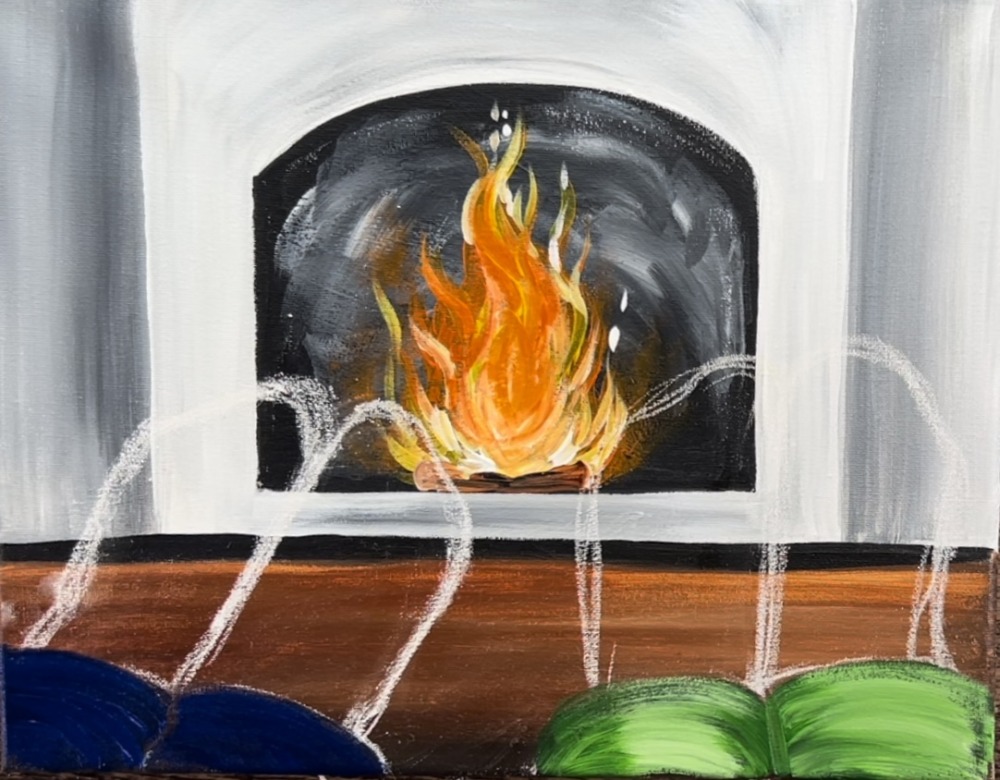
Then blend titanium white in it and make sure to go in a curved direction. Make sure to not let the white blend all the way.

Optional: use “mars black” to paint shadowing on the paint legs. Gently blend black on the center edges of the paints and curve it upwards into the lighter area. Make sure to only add a small amount of black for the shadowing.
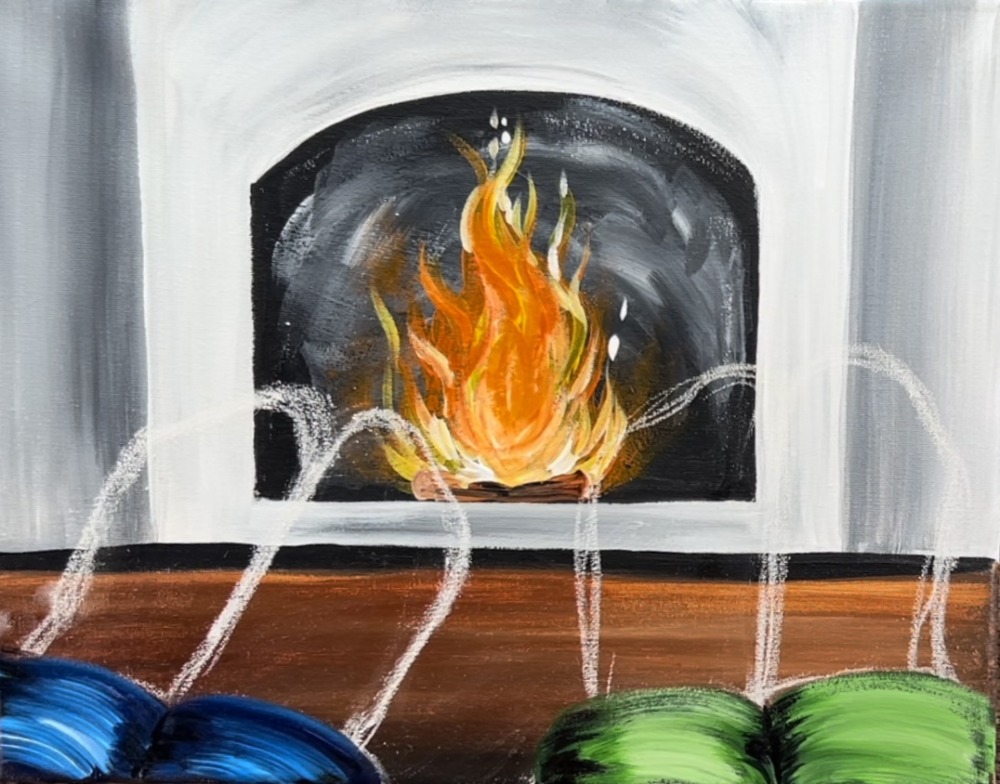
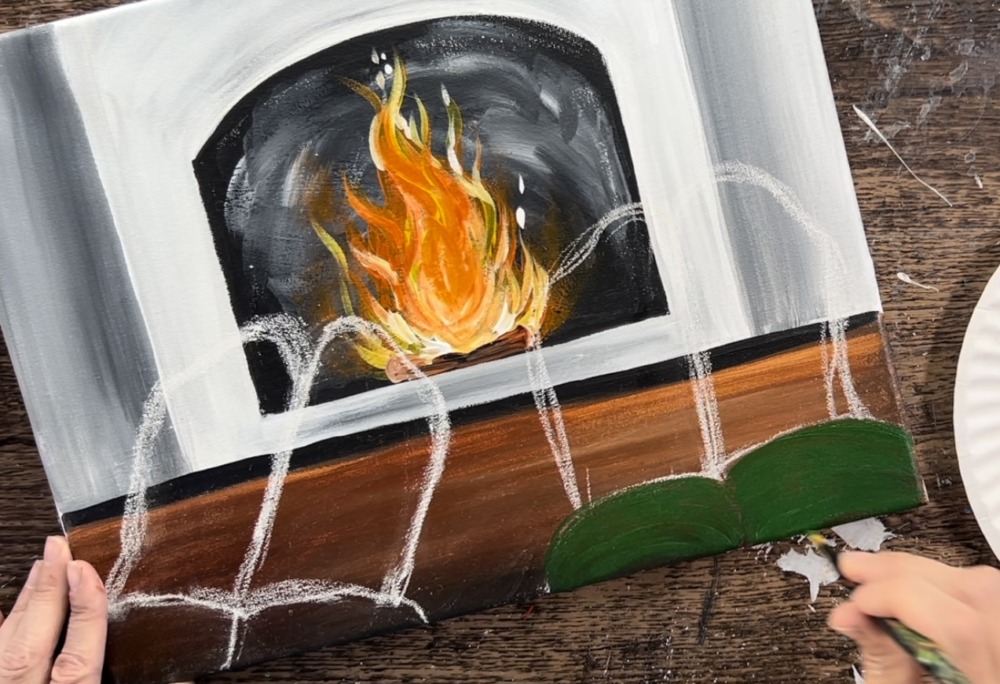
7. Paint Socks White
Use the 12 bright brush to paint the socks white. Even if you are painting these a different color, I recommend painting the first layer white. This will ensure good coverage over the background of the painting. If you want the socks to have a solid color, wait for the white to dry and then go over them with your chosen color.
Outline the shape of the foot and then fill it in with curved, full width paint strokes.

When you paint curved strokes, this helps the foot look more three dimensional and not so flat. Do this to both of the pairs of socks.
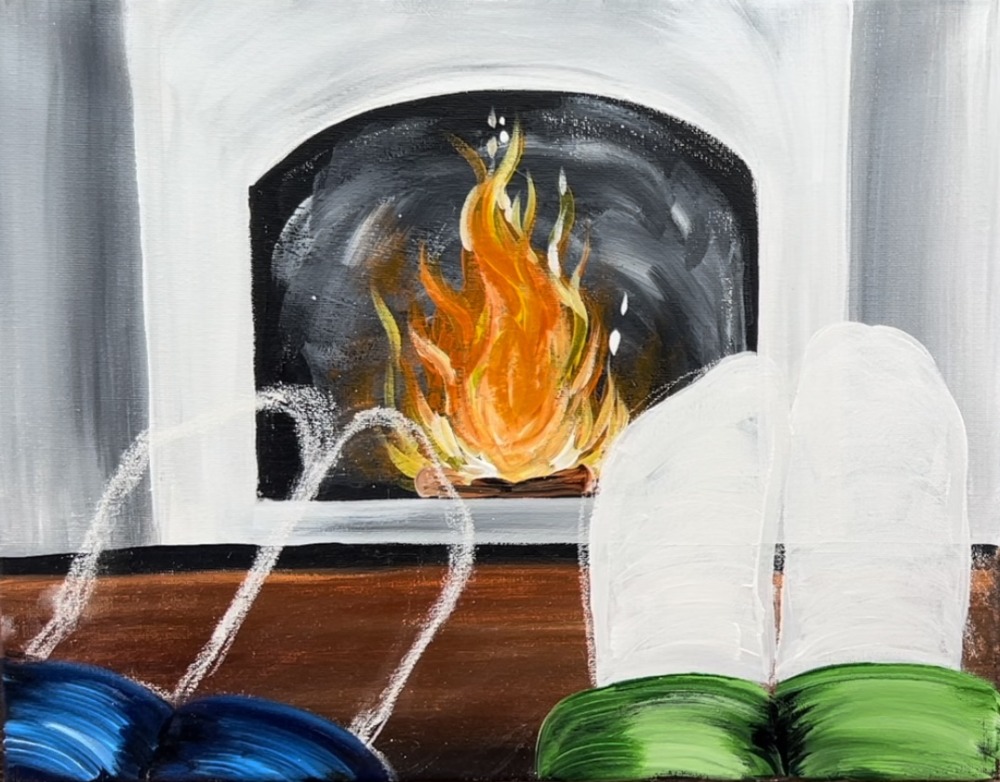
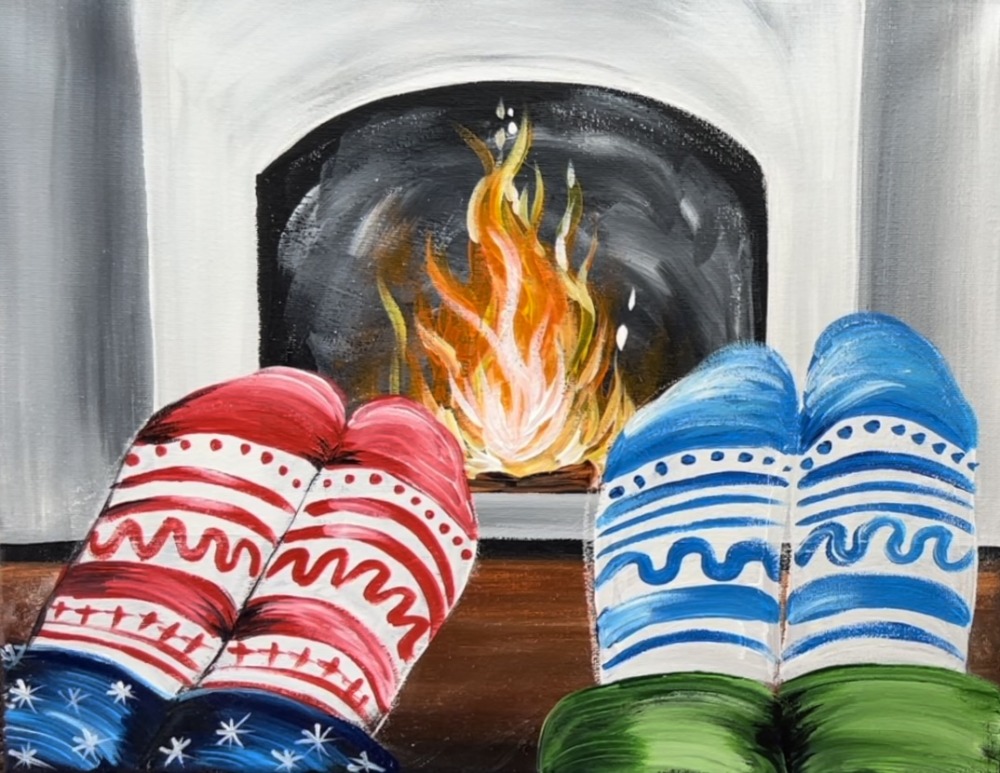
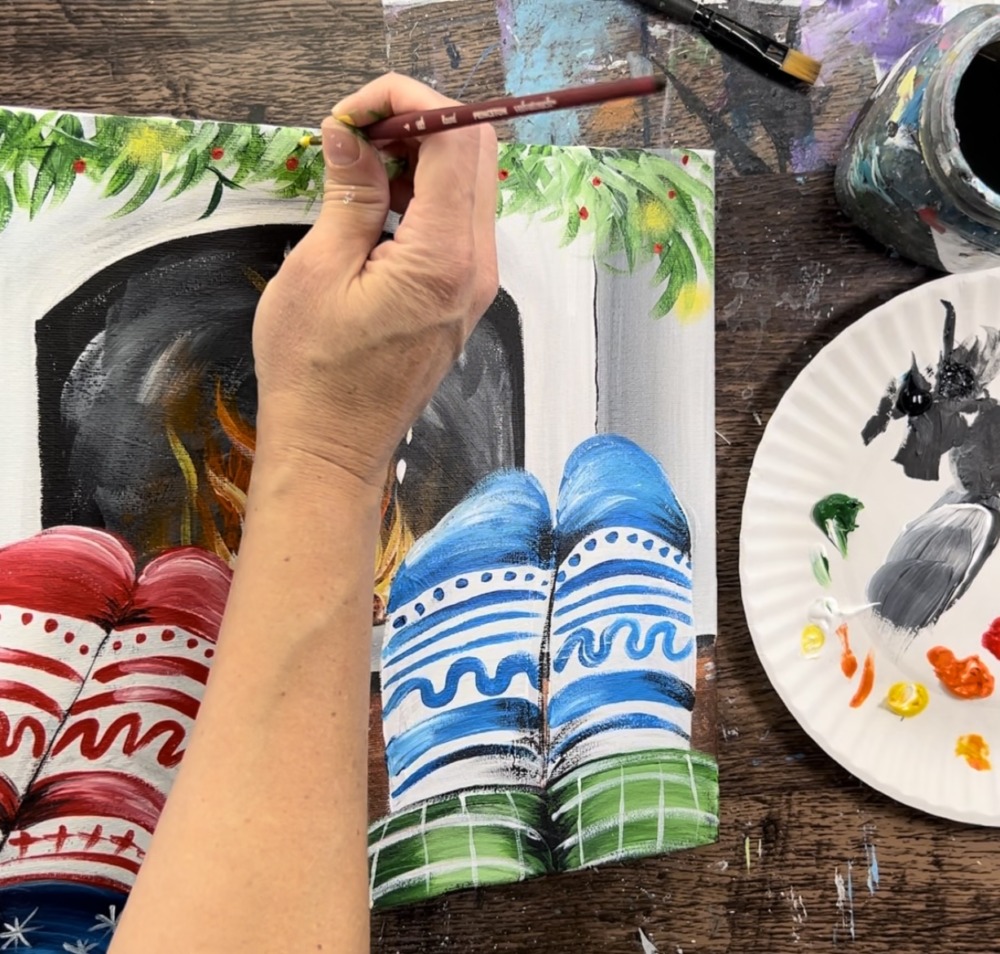
8. Paint Patterns On Socks
Wait for the white to dry a bit before going to this step. Use a #4 round brush and pyrrole red to paint the patterns. I started by painting the “toe tips” of the socks. Then I added a little bit of titanium white into the red on the ends and blended it slightly to give it some “highlight”.

Then paint designs such as dots, stripes, stars, etc. Make sure to do this in a curved direction.

You can also add patterns on the pajama pants. I used titanium white and painted little stars. You do not need to highlight or shade these stars.
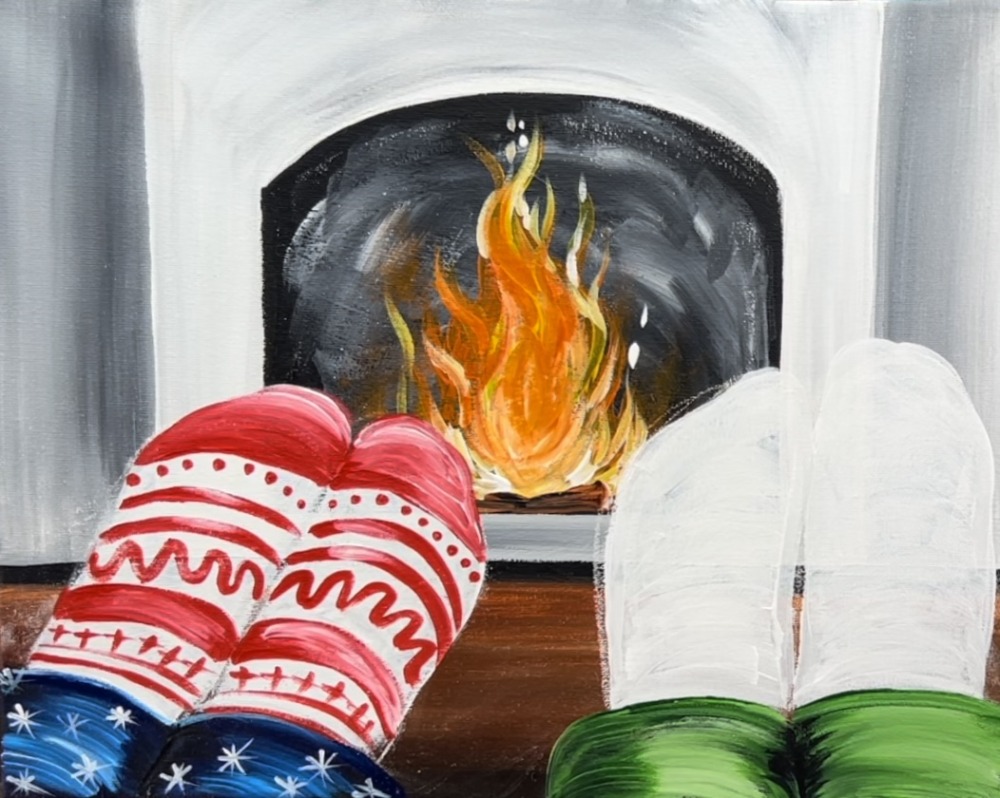
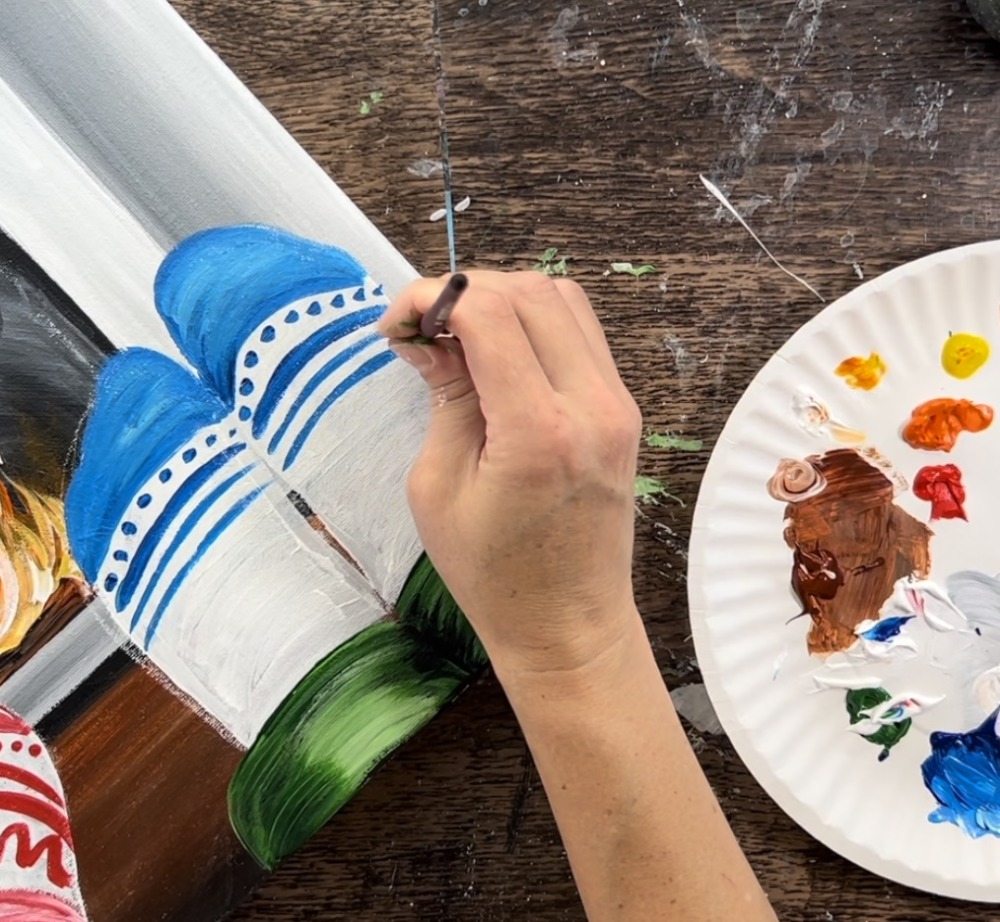
Next, paint the patterns on the socks on the right. I mixed titanium white with phthalo blue to create a lighter blue. Then I painted similar designs using the same techniques for this pair of socks.

You can add a pattern on the green pajama pants too! I did a plaid design by painting left and right curved lines and then vertical/ diagonal lines. Also, optional, you can add some darker shading in the socks by blending mars black in on the centers and sides of the socks.
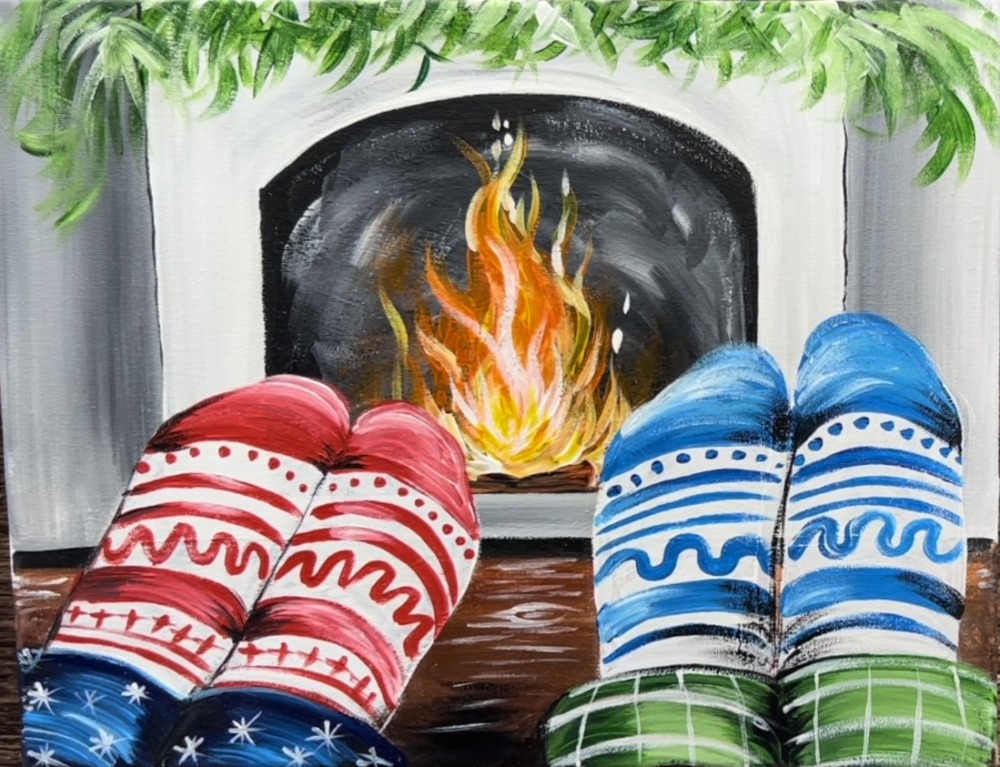
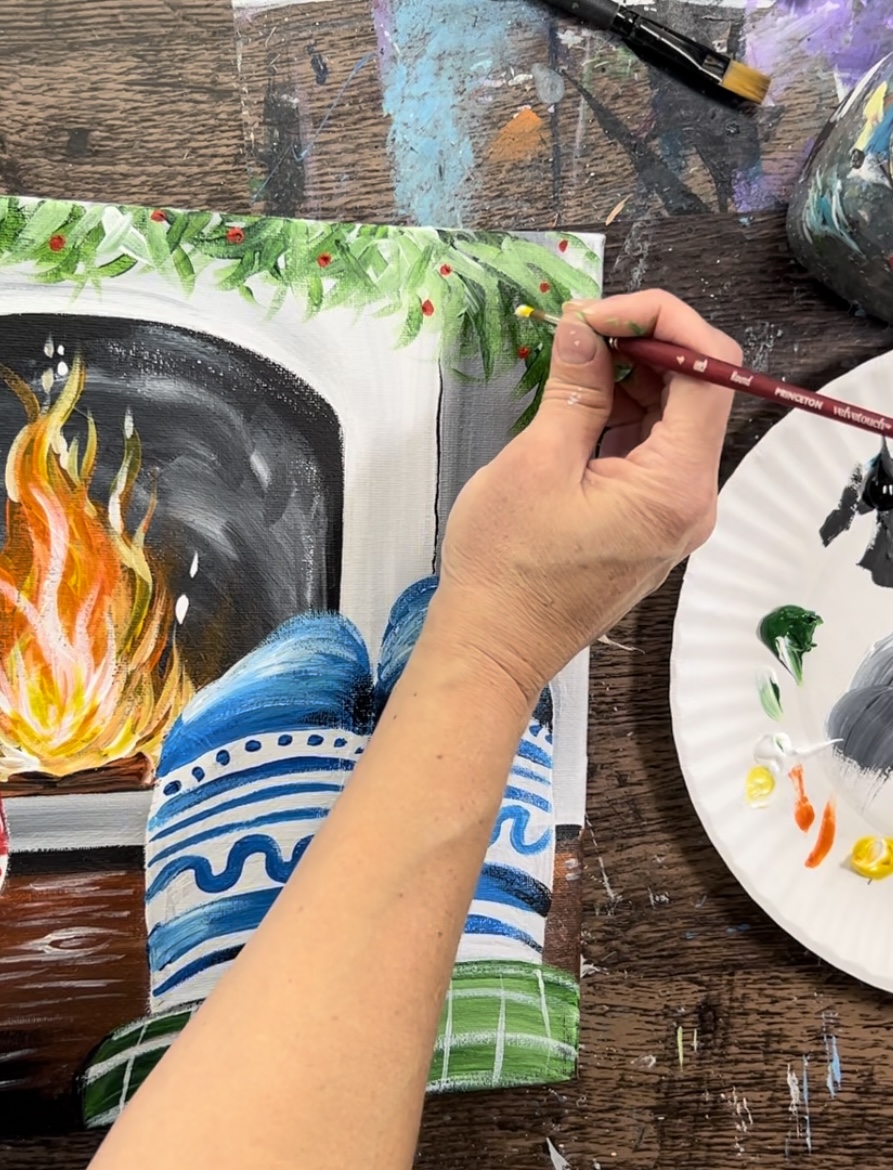
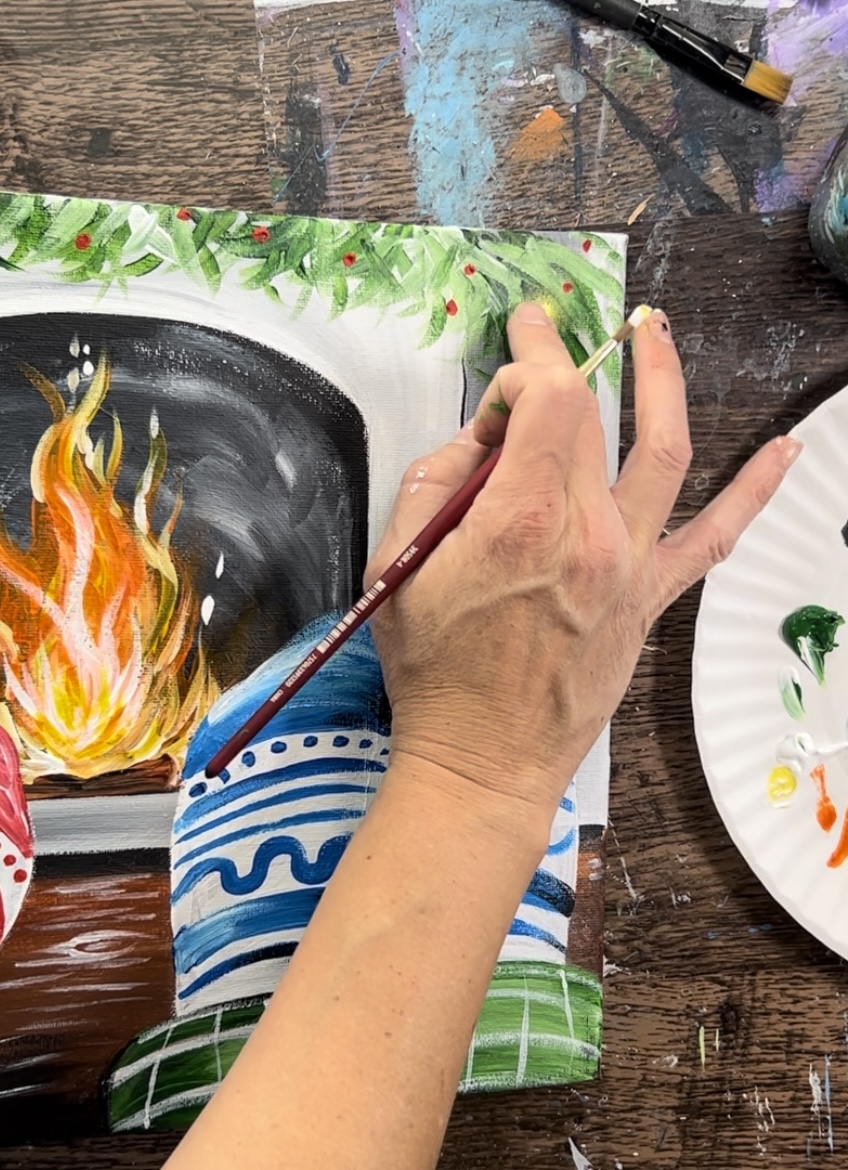
9. Paint Garland
Mix a tiny bit of mars black into hooker’s green to make a dark green. Use a #4 round brush to paint this dark green “garland” across the top of the fireplace. Paint angle strokes that point in different directions and overlap.

Make the left and right ends of the garland hang downwards on the ends.
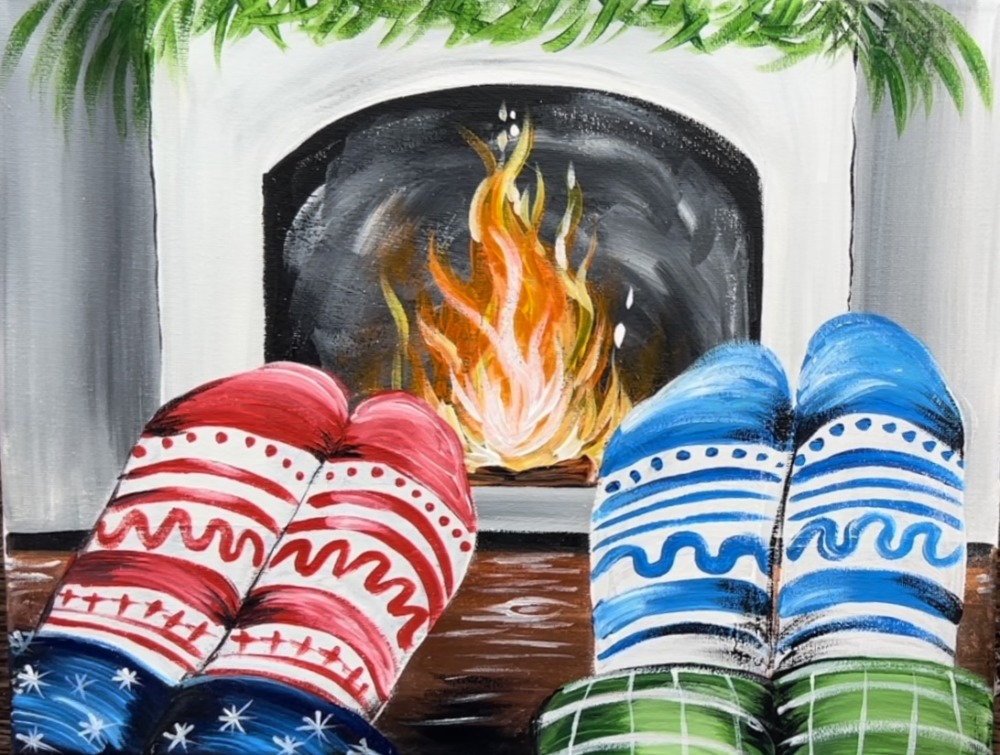
Then mix a lighter green on your palette by mixing a little bit of titanium white into green. Paint a second layer over the first darker green layer. This will make the garland have a little more depth.
Rinse the #4 round brush. Use the top of the round brush to paint red dots on the garland using the pyrrole red.
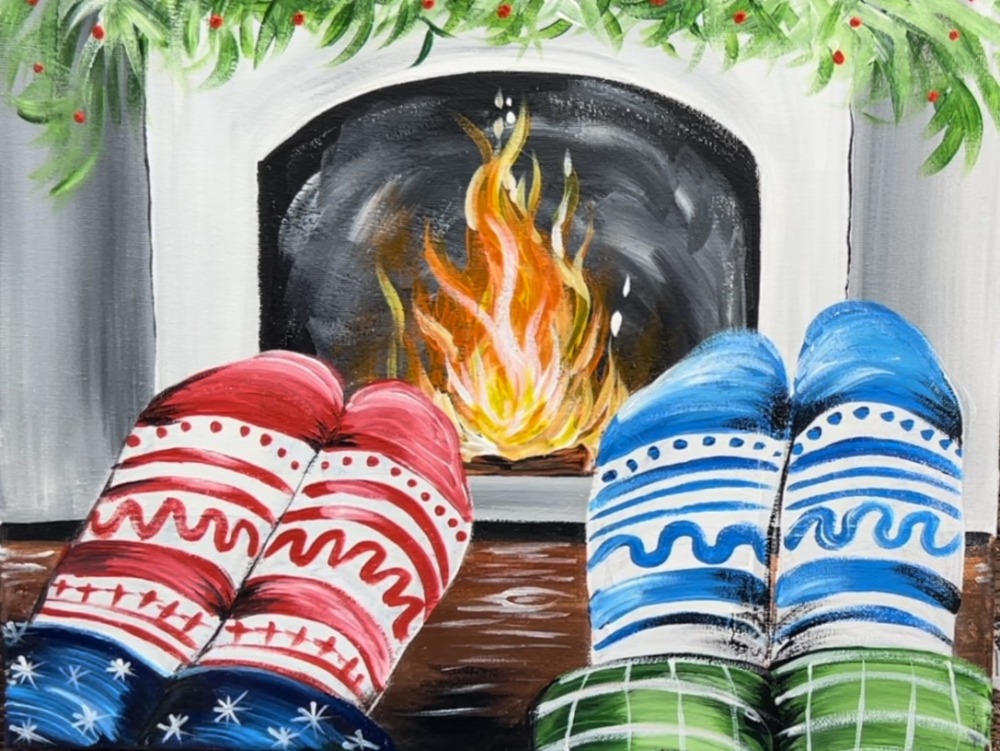
Next, paint the lights on the garland. You want to ensure the garland is completely dry before doing this step.
Completely rinse the #4 round brush. Then mix equal parts titanium white and primary yellow. Paint a small yellow dot with the round brush and then use your finger to “smear” the dot. This will create a blurry see-through yellow circle.
Paint yellow see-through circles all throughout the garland.

Then load the tip of your brush in just titanium white. Paint white dots in the center of all the yellow circles. This will create a bright glowing light effect.
Perfect timing. Just last night I was talking to friends about doing a painting with a fireplace.