
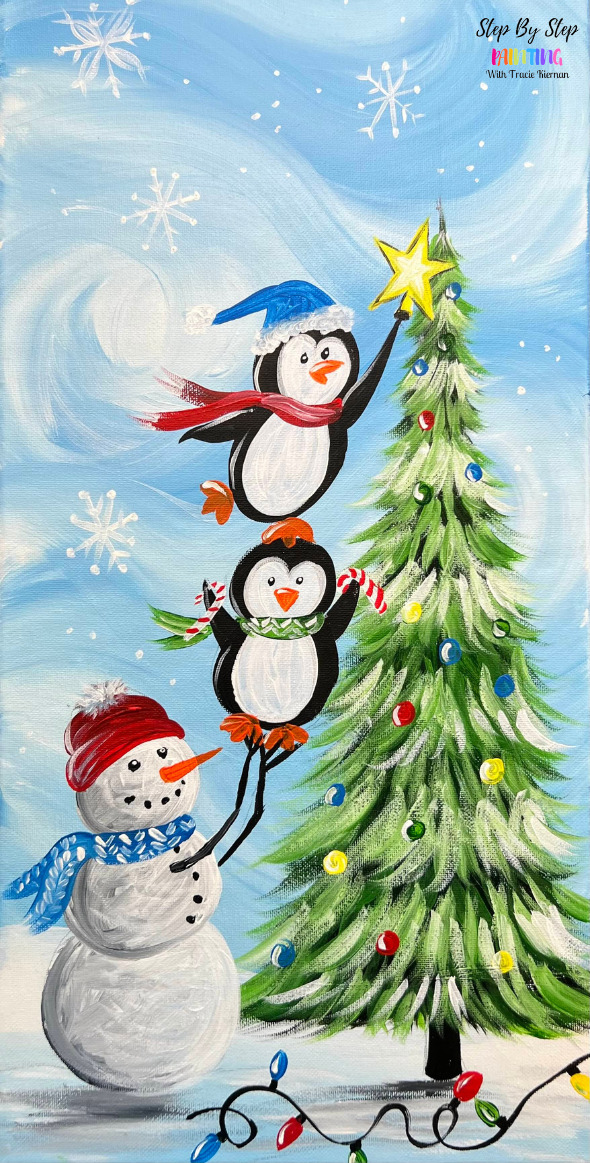
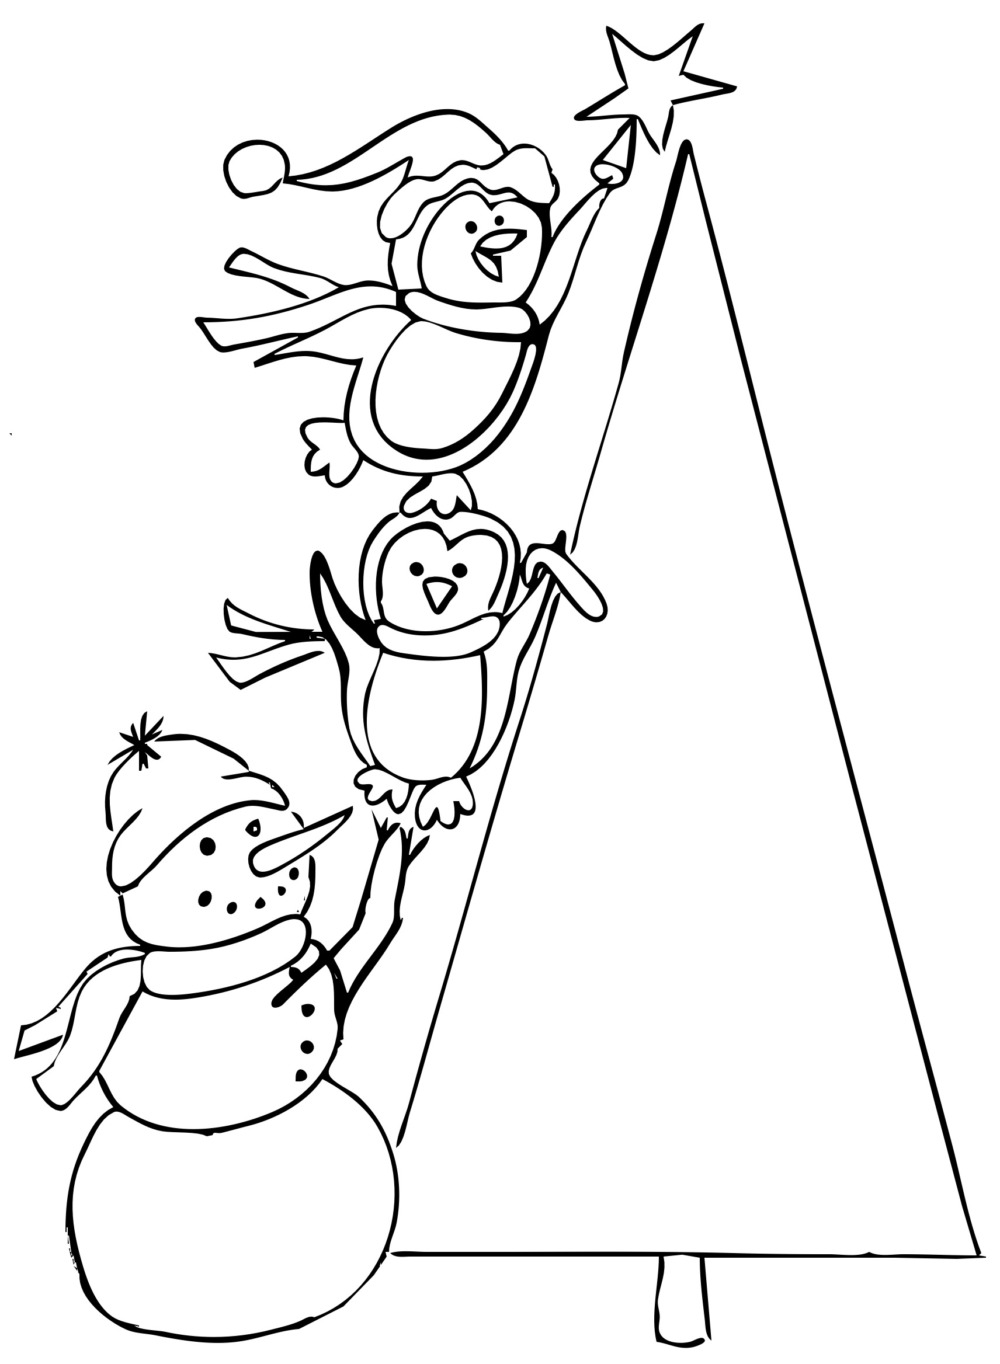
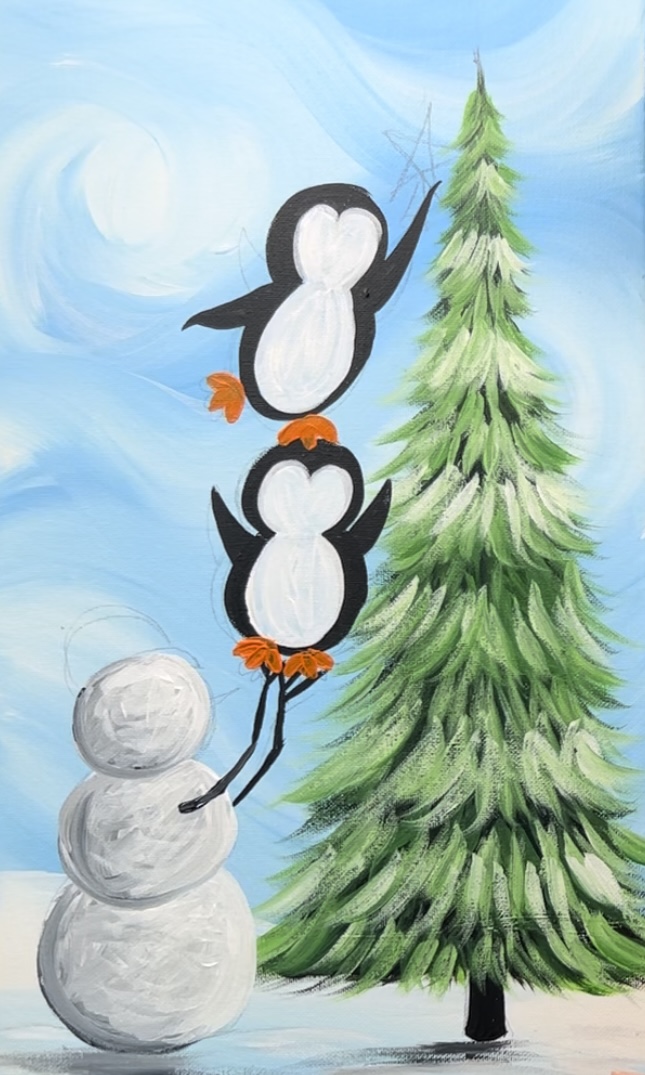
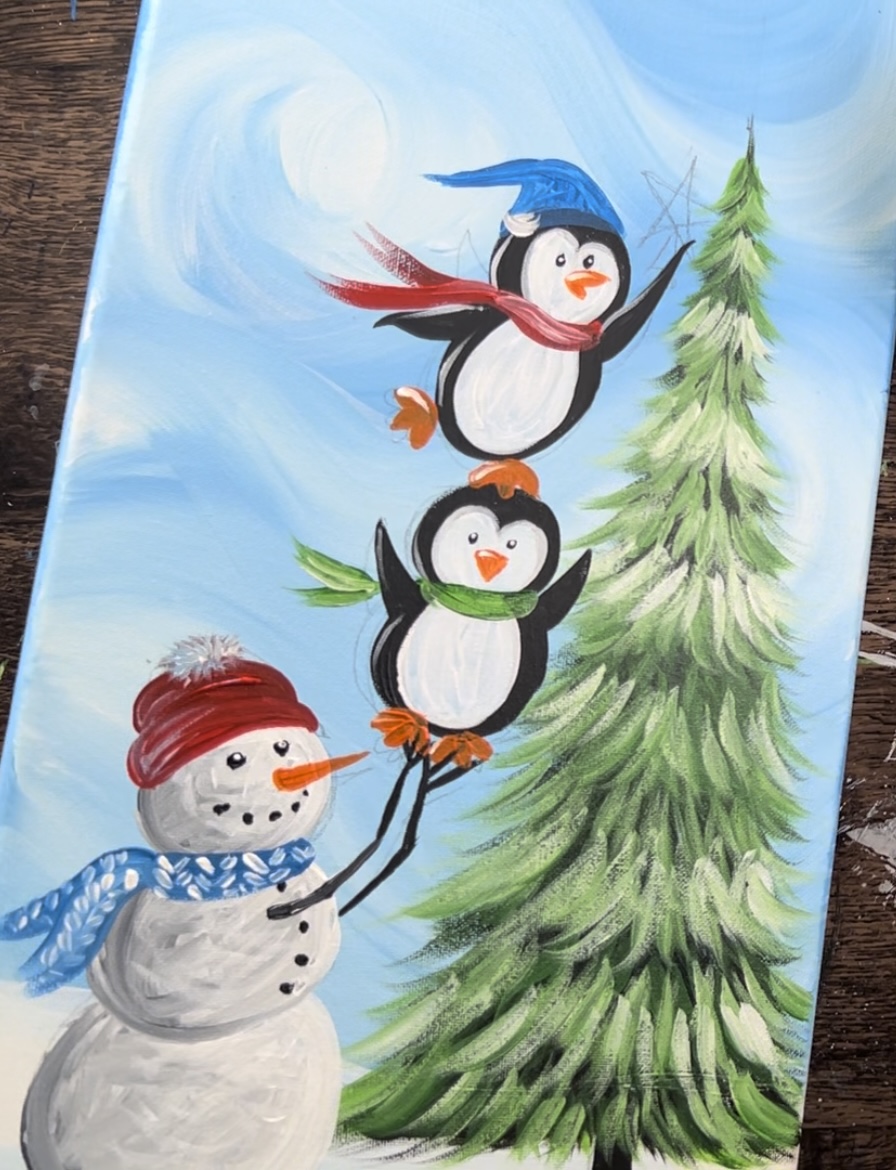
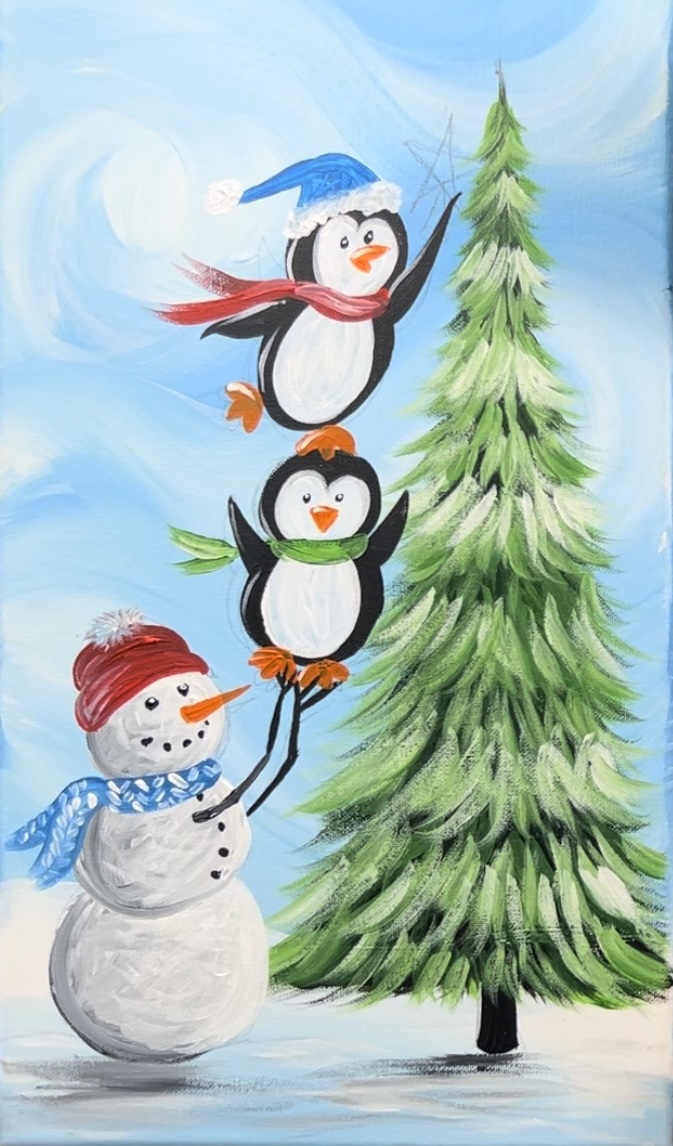
Paint a swirly winter sky with a tall Christmas tree and two penguins decorating the tree with the help of a snowman. This adorable Christmas theme painting can be customized with extra details and colors.
Would you like to save this?
This painting is demonstrated on a long 10 x 20 canvas. However, it can be done on any canvas size such as an 11 x 14. There is also an optional traceable template you can download.
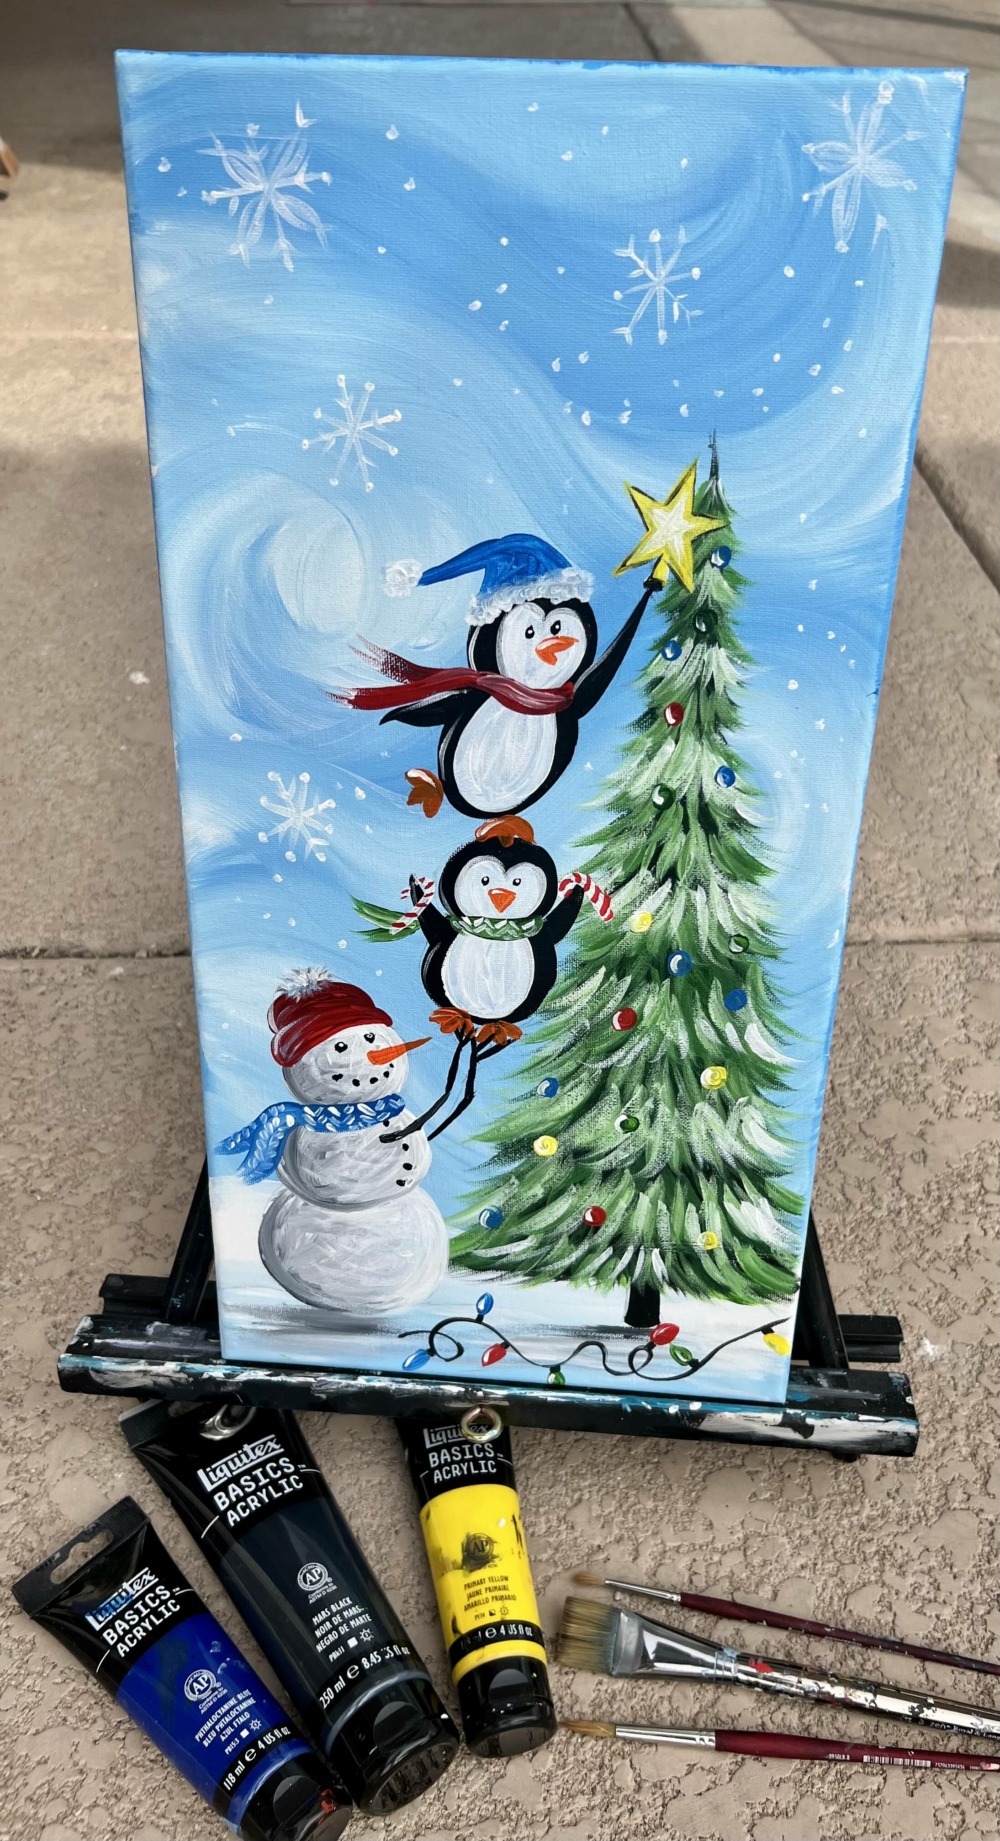
Materials
- 10 x 20 Canvas
- Acrylic Paint
- Brushes
- Optional Traceable
- Optional Graphite Paper (if using template)
- Ruler
- Pencil
- Eraser
Colors
- Titanium White
- Mars Black
- Pyrrole Red
- Cadmium Orange Hue
- Primary Yellow
- Cerulean Blue
- Hooker’s Green Hue
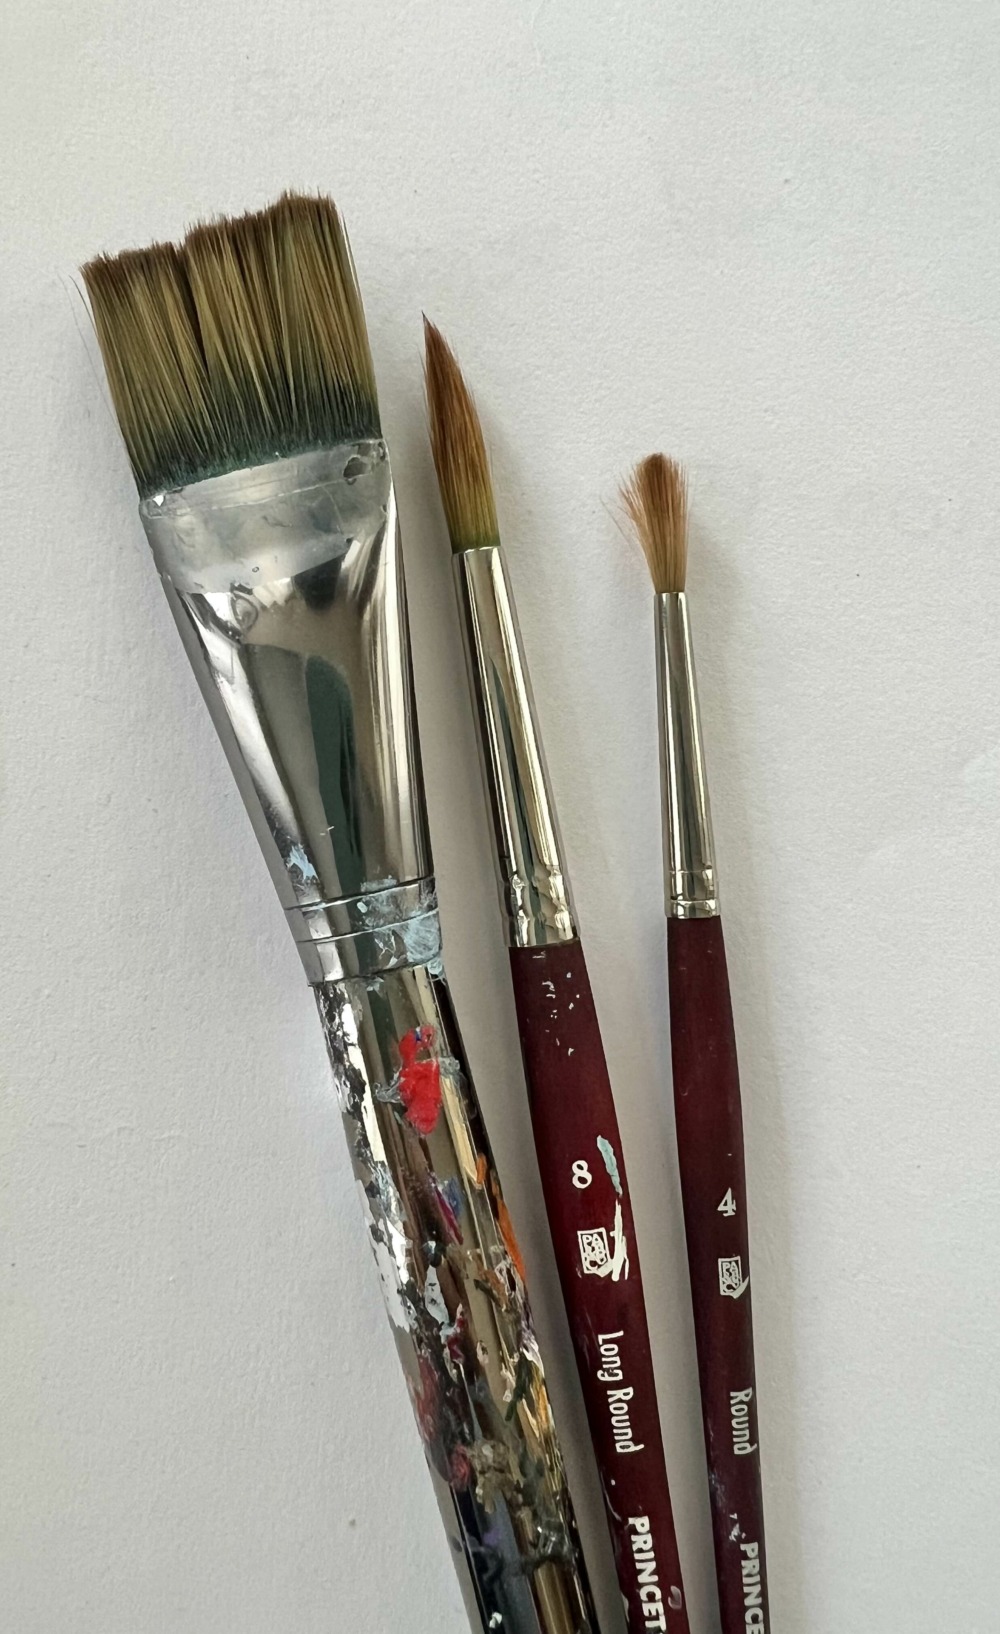
Brushes
- #8 Round
- #4 Round
- 1″ Flat
Color Palette

Directions At A Glance
Optional Traceable
Video
Step By Step Directions
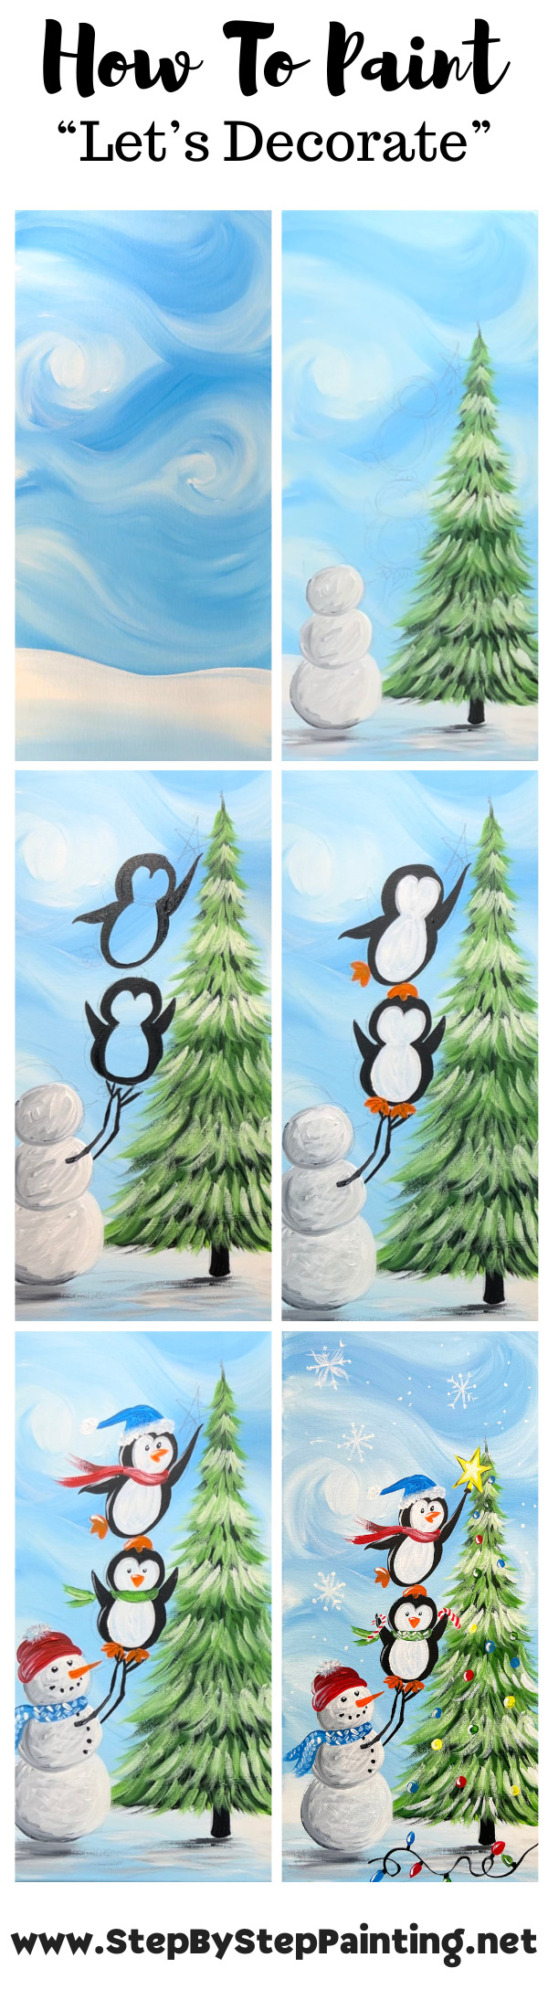
1. Paint the sky
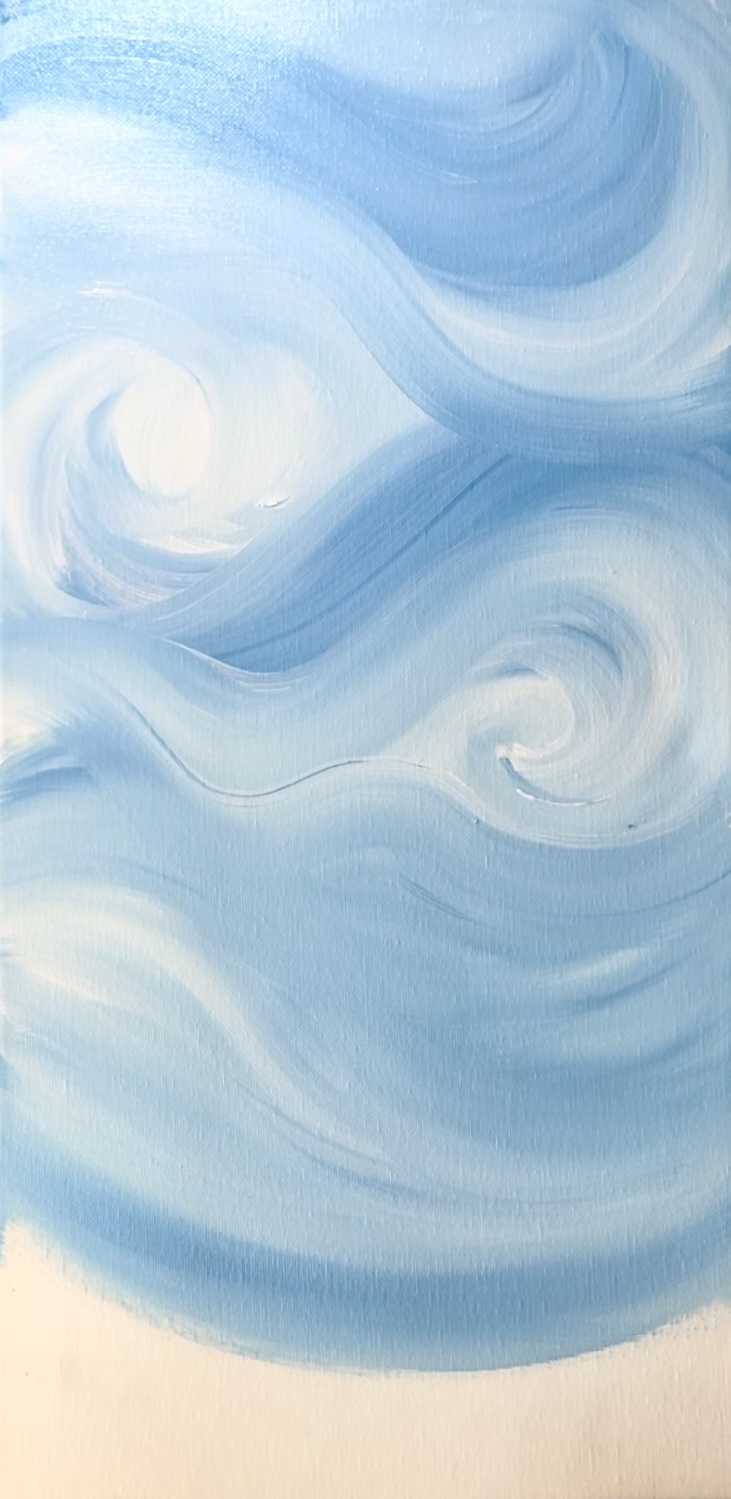
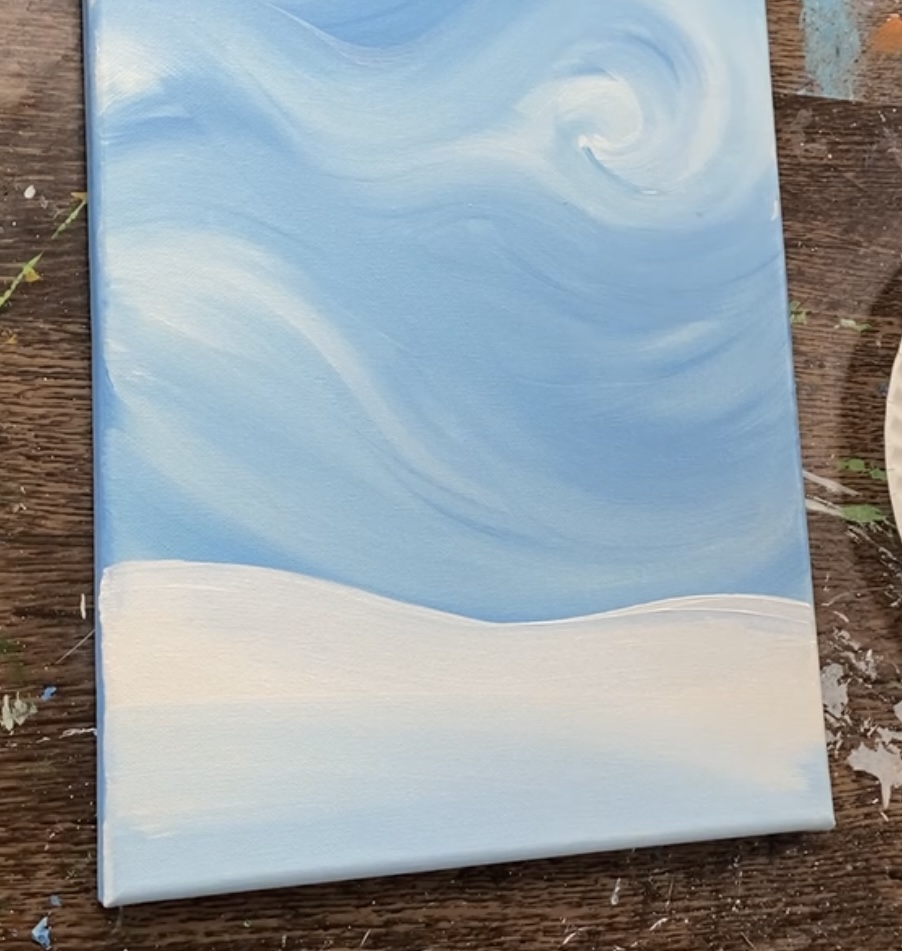
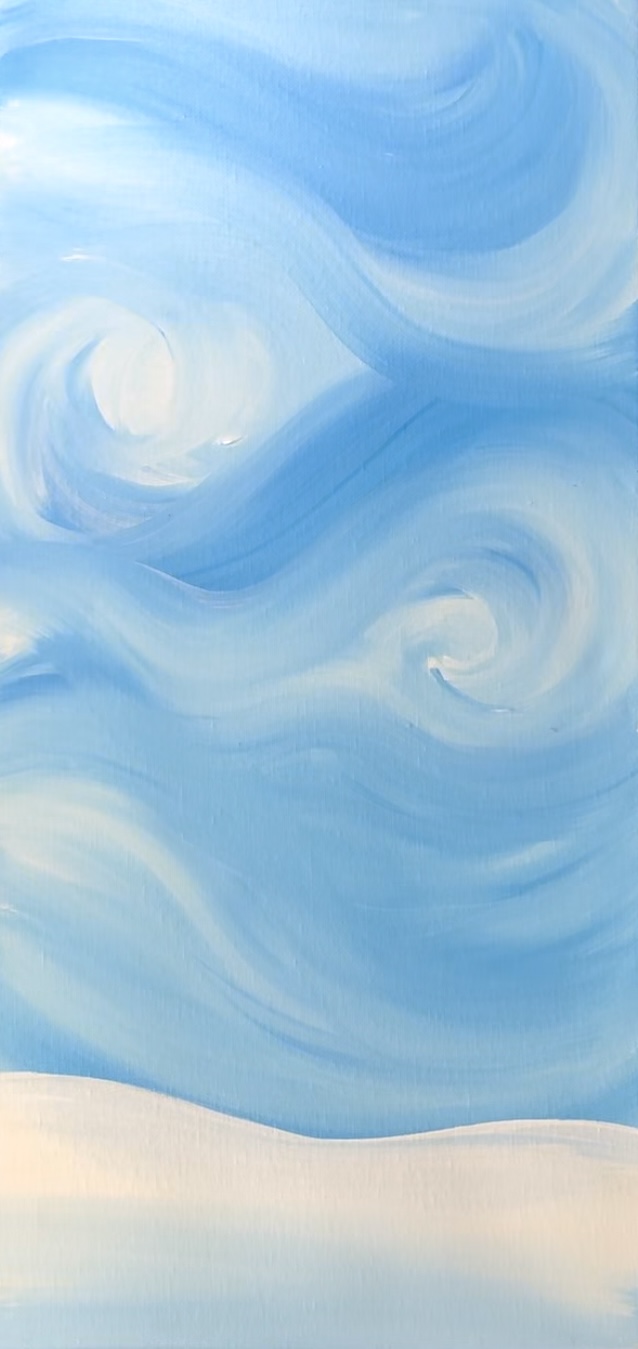
The sky in this painting is a blended swirly sky of different variations of blue and white. Most of the canvas is sky and only about the bottom 4″ is ground.
Start by loading your paint palette with the two colors: cerulean blue and titanium white. Mix equal parts blue and white together. Use the 1″ flat brush to paint a large spiral in the sky.
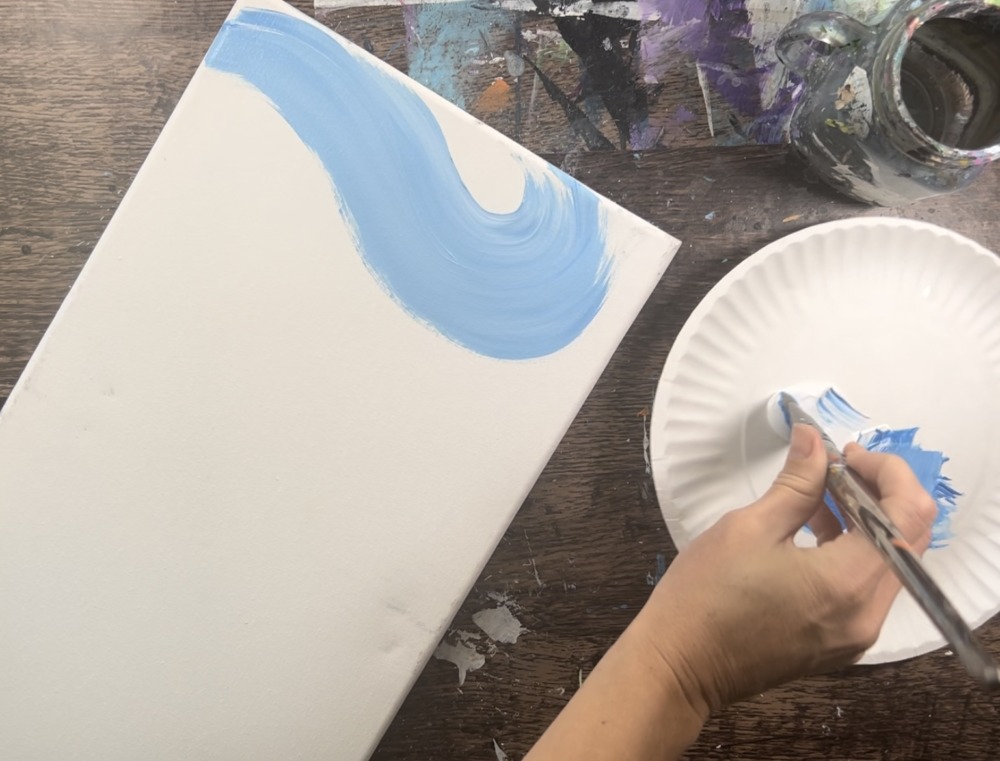
Then blend either a darker or lighter version of that first spiral (by adding more blue or more white to your brush). Paint another spiral going in a different direction and blend it with the first spiral.
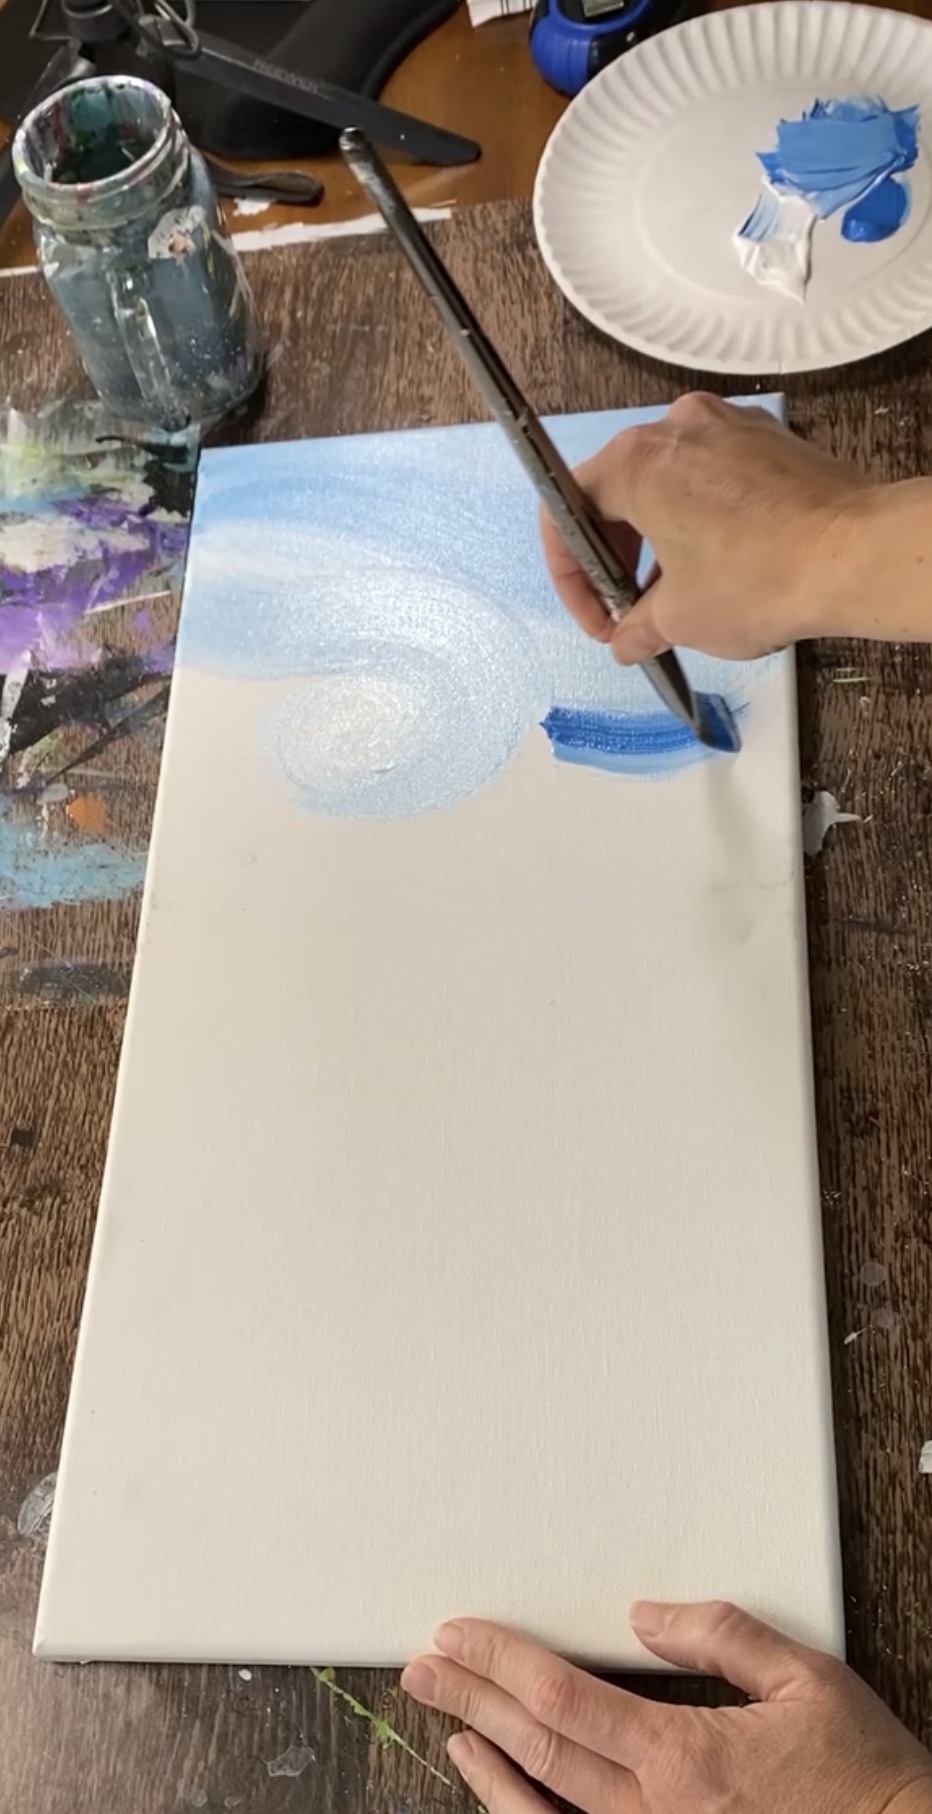
Basically, you are painting large “waves” and “spirals” in the sky and blending them with each other.

Continue painting spirals and swirls in the sky and try not to “over blend” your white and blues. Leave variations of darks and lights all throughout the sky.
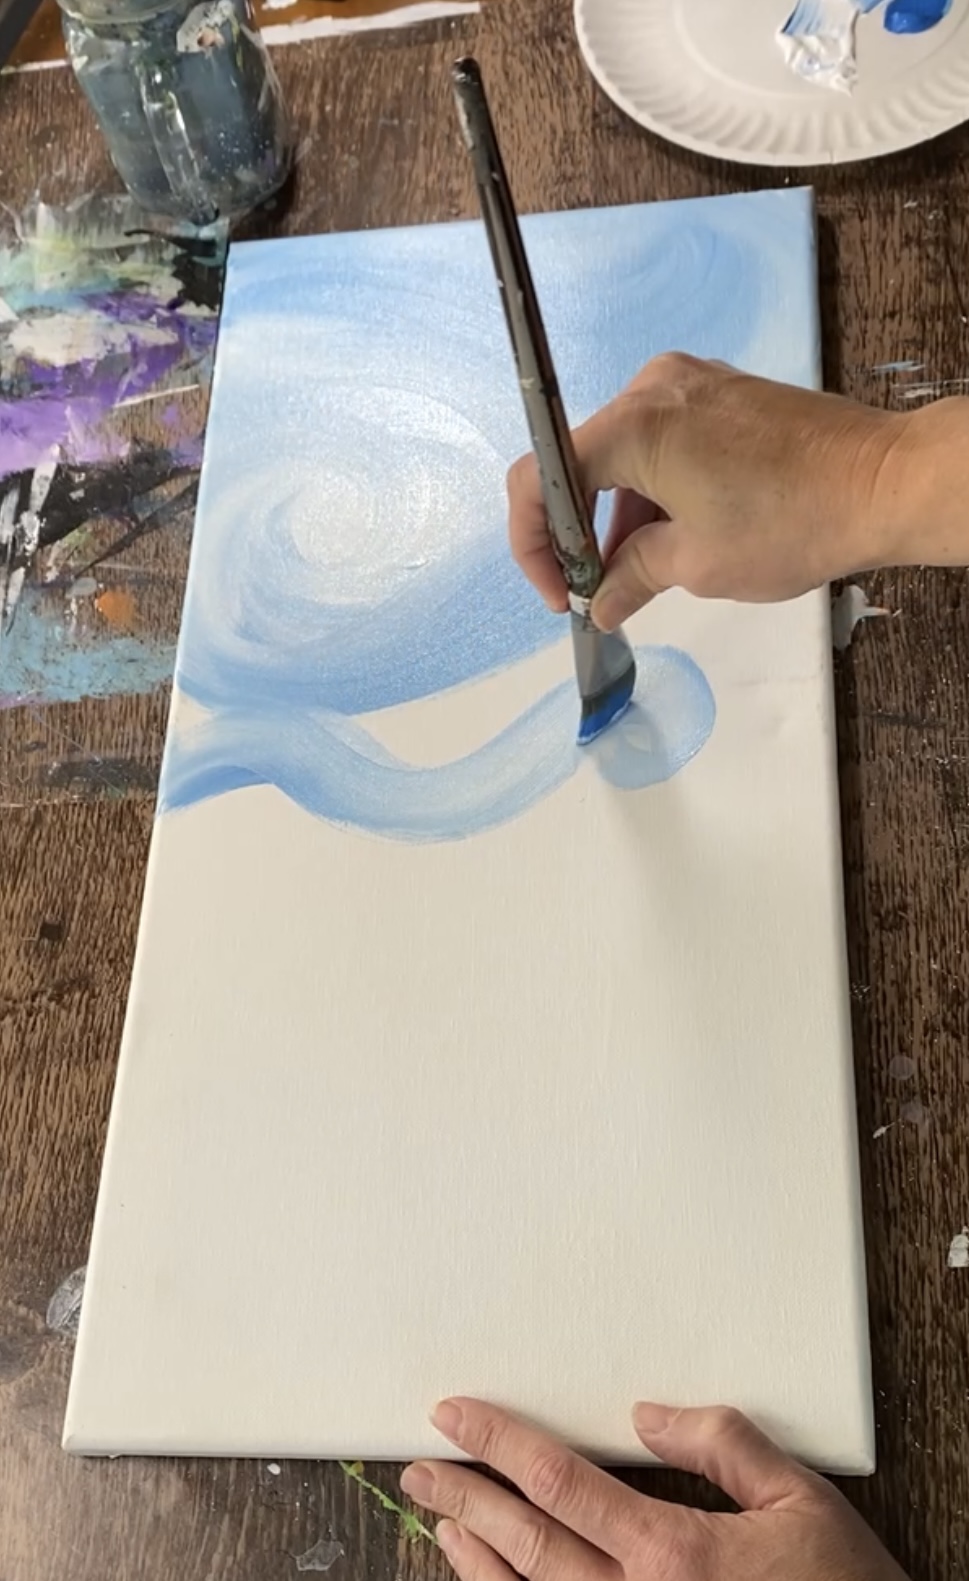
It will look like “skirled frosting”!
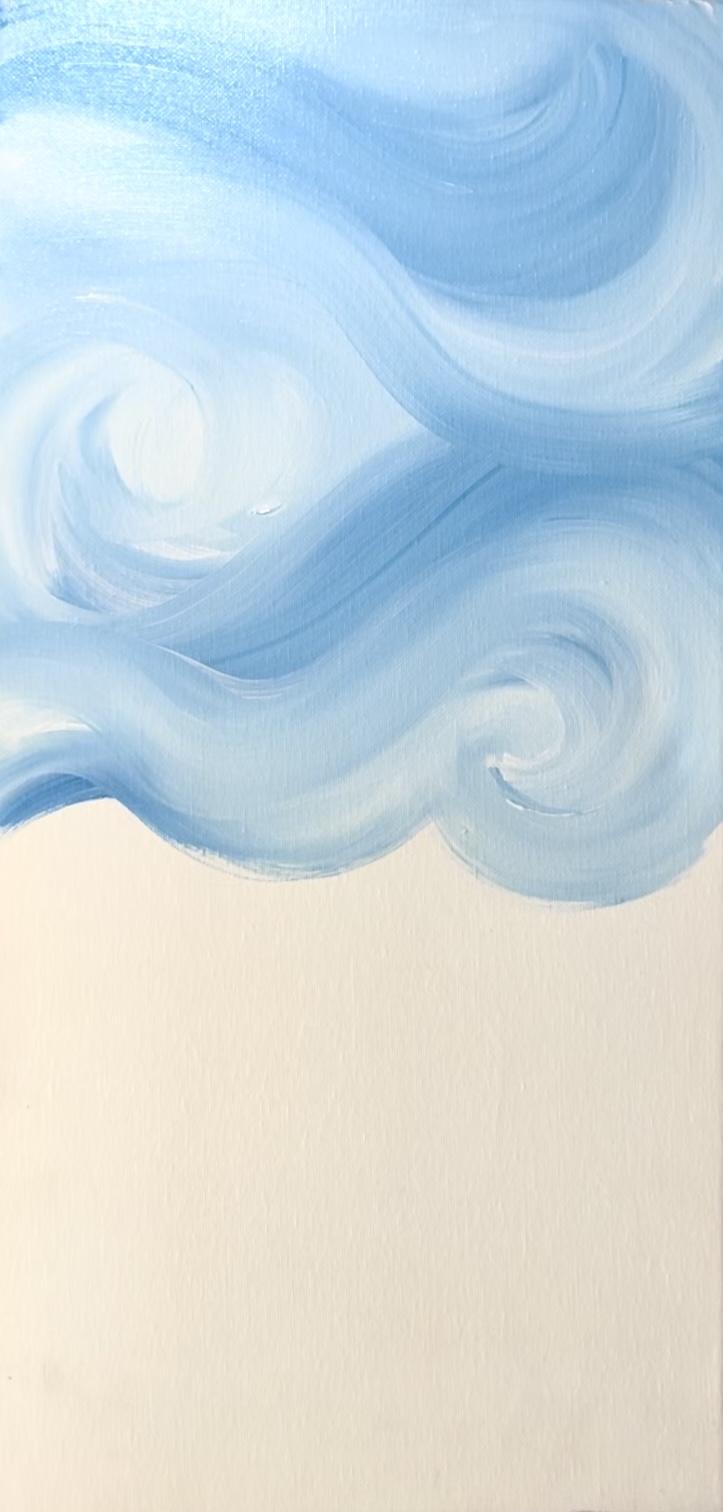
As you approach the “horizon line” (bottom of the sky), you may find that it’s easier just to do wavy lines. Leave about 4″ of space on the bottom of the canvas.
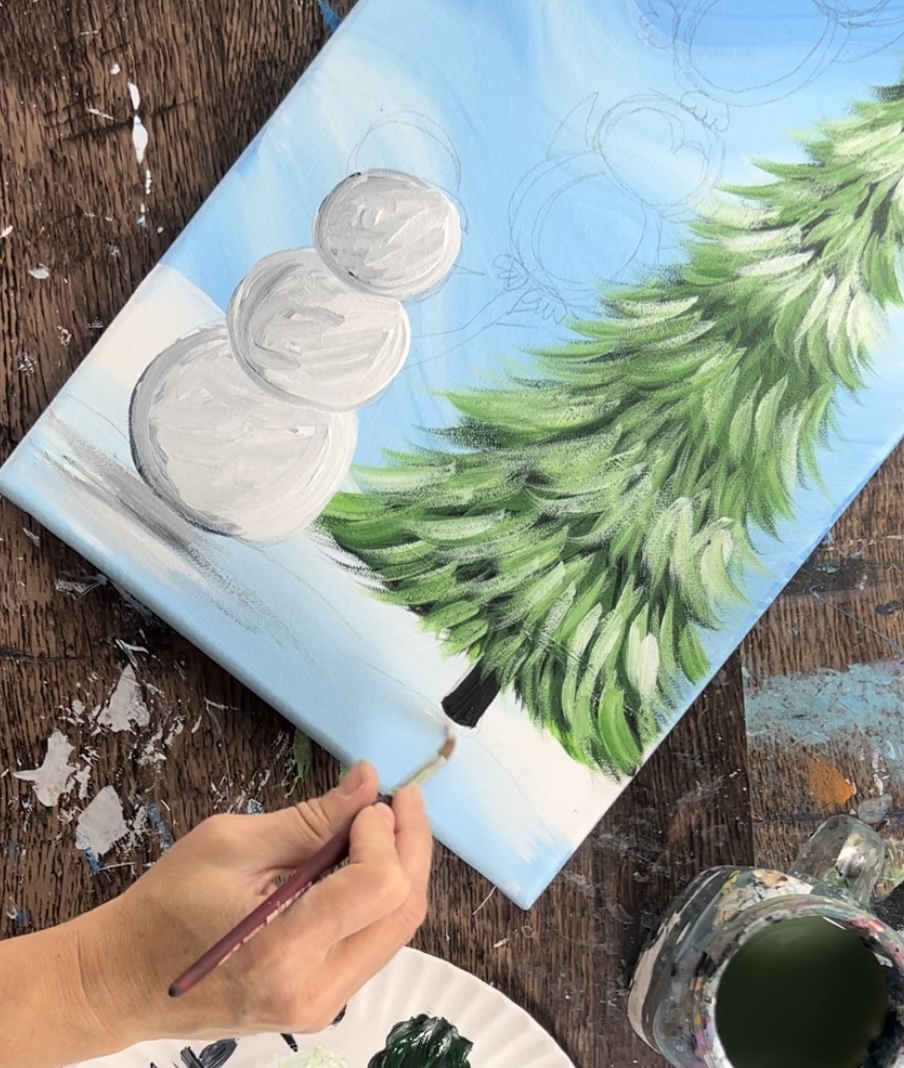
2. Paint the ground
Rinse the brush. Then load it into just titanium white. At about 4″ from the bottom of the canvas, paint a “horizon line” with just the white. You can paint it straight or make it more like a hill.
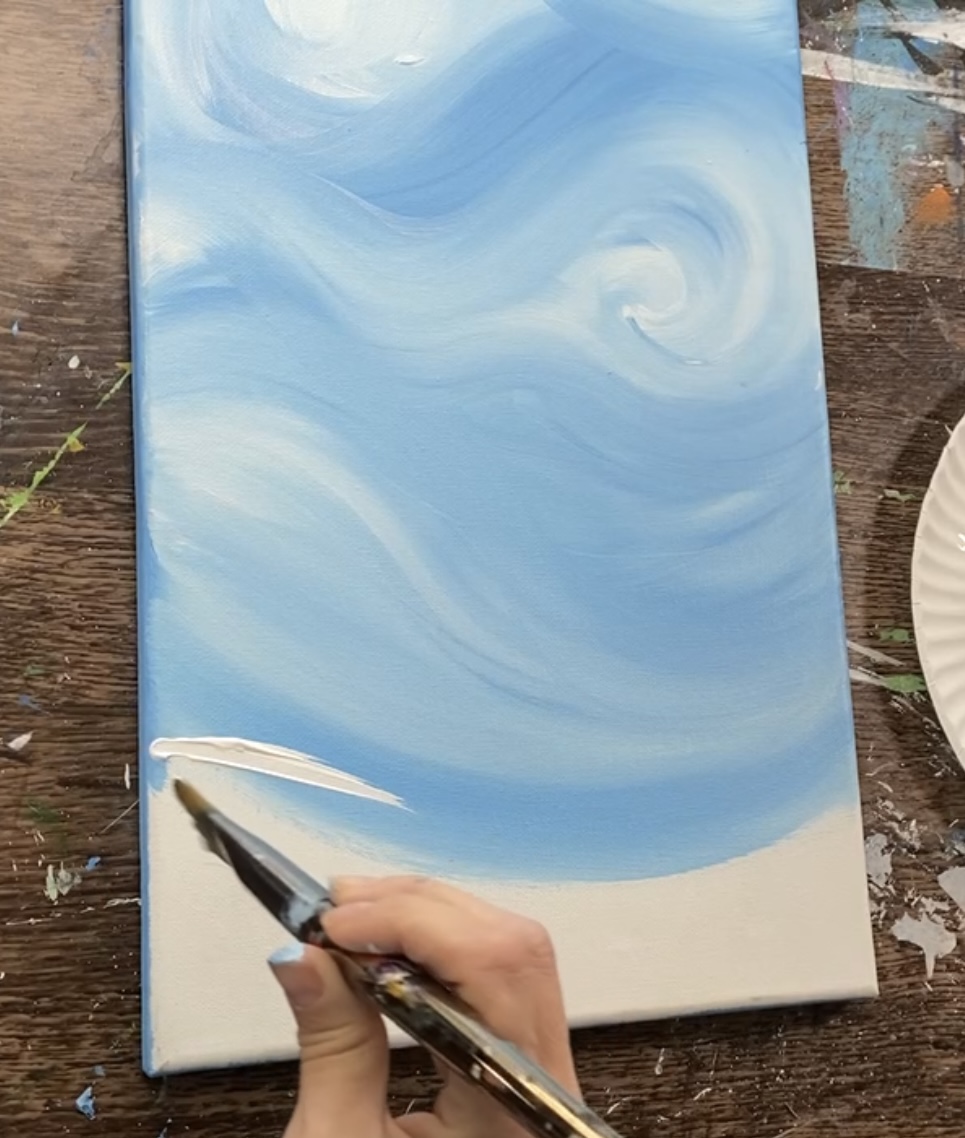
Paint this entire bottom area solid titanium white.
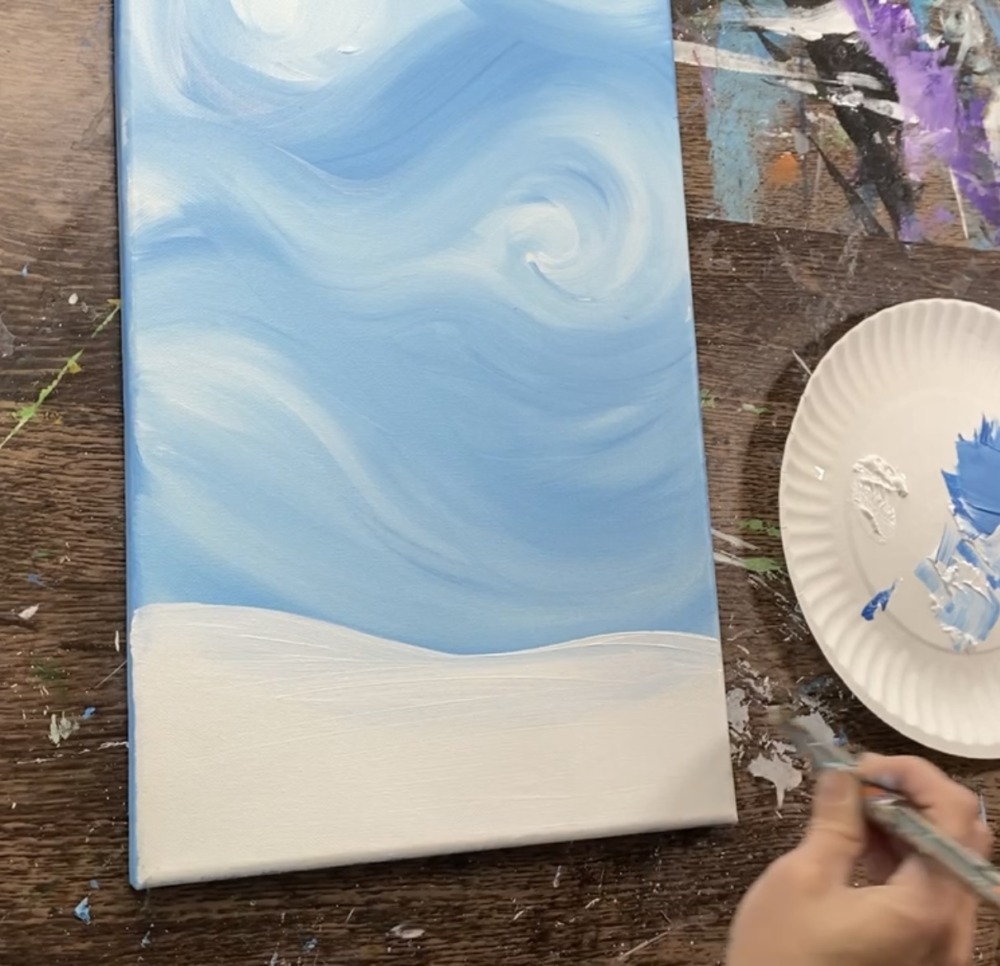
Next, load a small amount of cerulean blue onto the brush. Blend it up into the titanium white so that the bottom of the ground area is slightly darker and the top area is much lighter.
Let everything dry before going onto the next step.
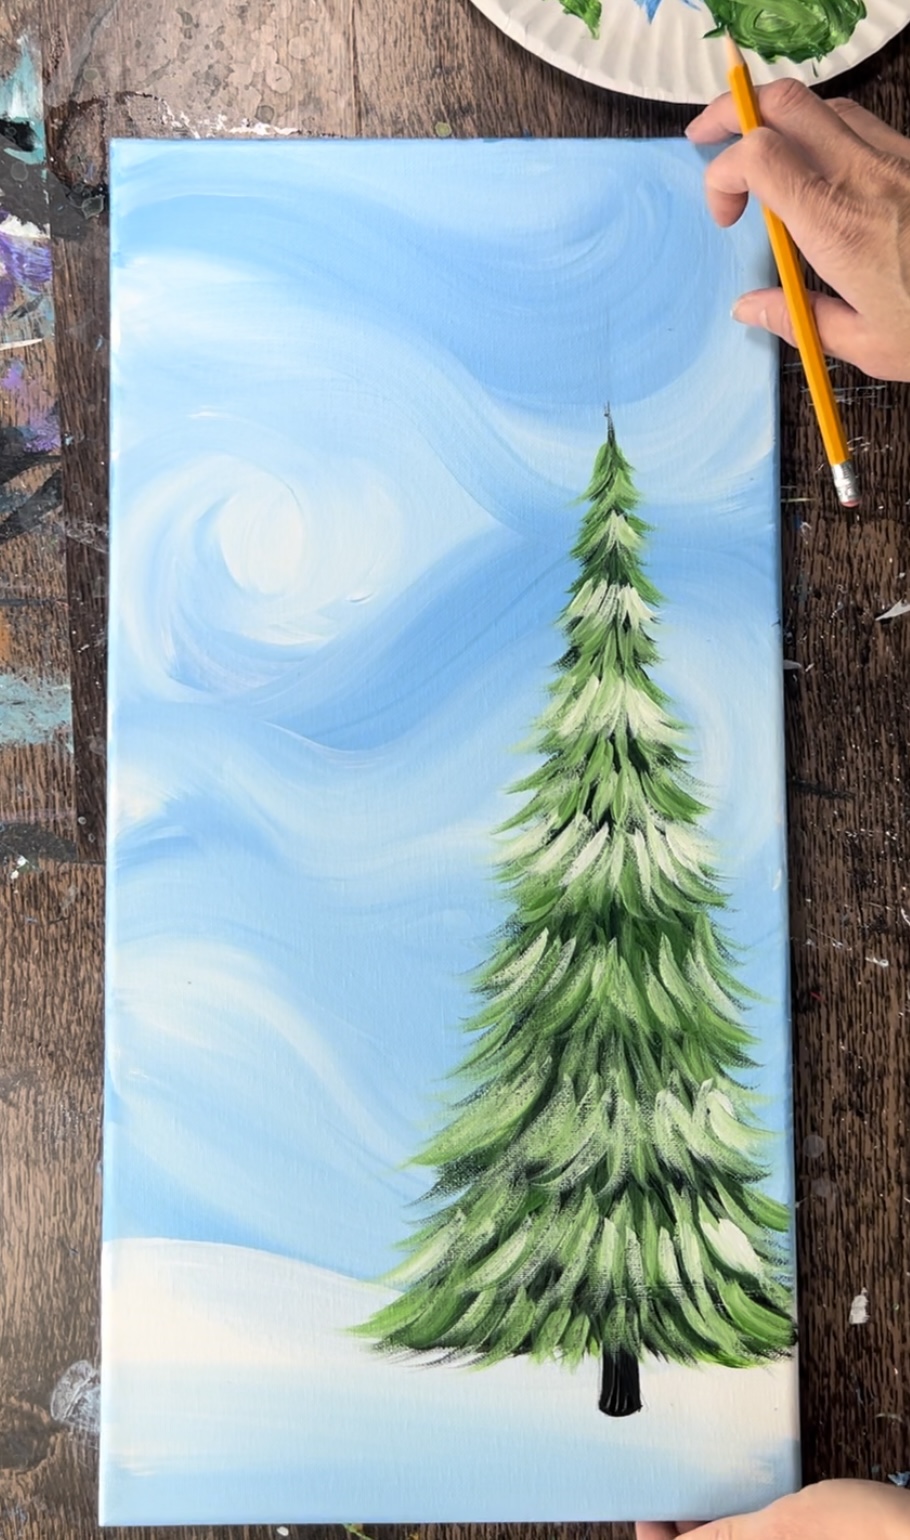
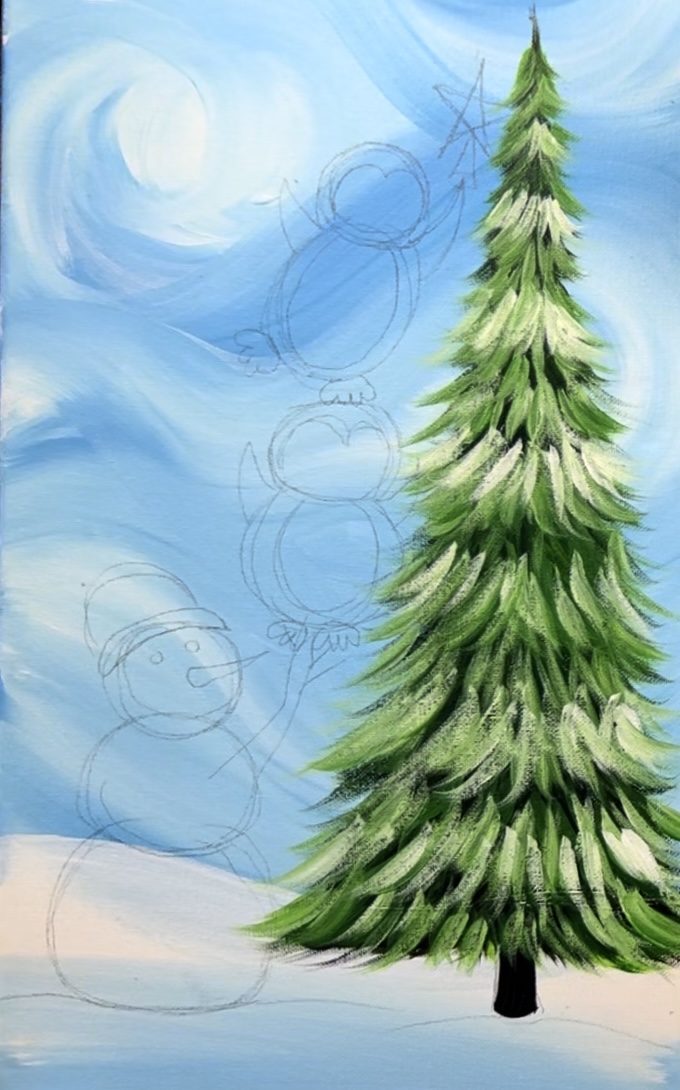
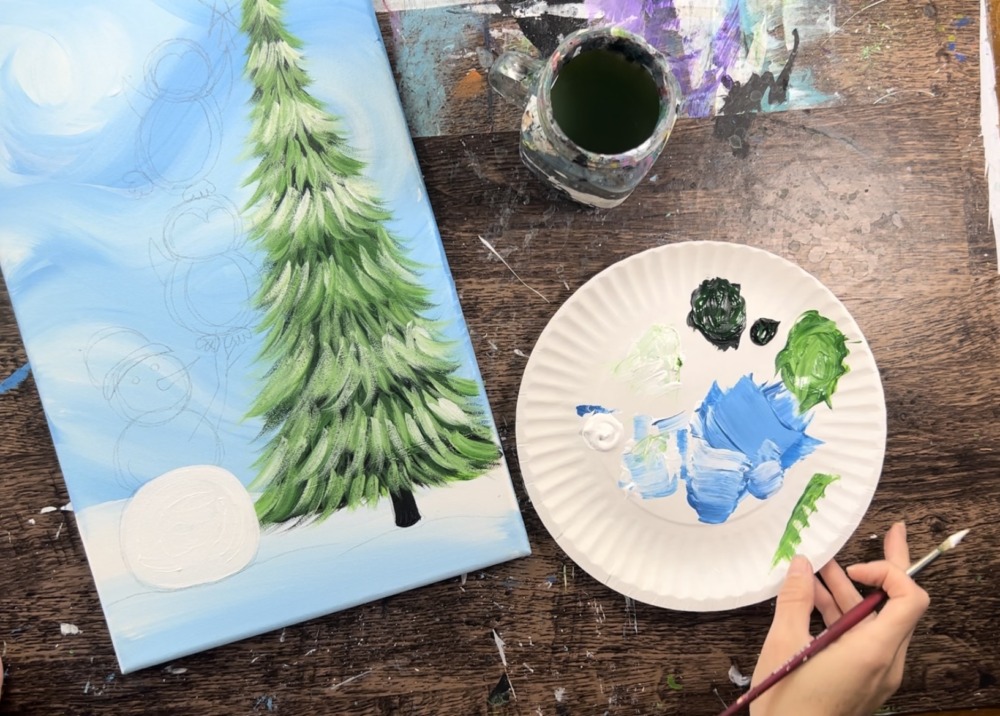
3. Draw and paint the tree
Use a ruler and pencil to help create a basic tree shape and draw this lightly with your pencil. Start by drawing a horizontal line about 2.5″ from the bottom of the canvas and about 6″ wide.
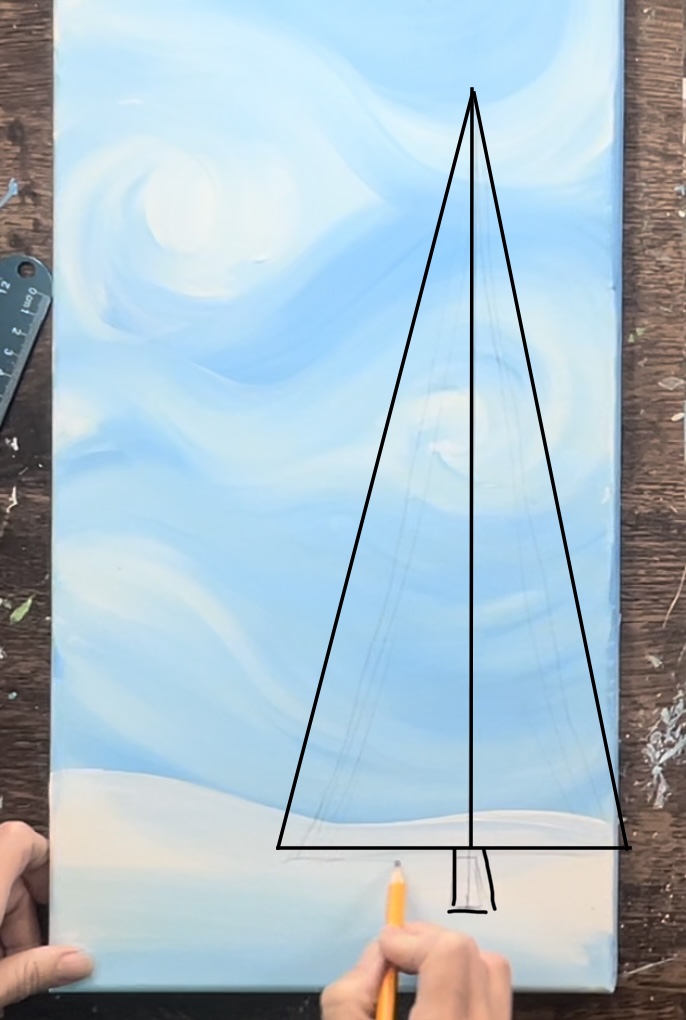
Then draw a vertical line in the center of that initial horizontal line. I made mine about 14″ high although you can change the height of this depending on the size of your canvas. Then complete the triangle by drawing diagonal lines connecting to the middle point.

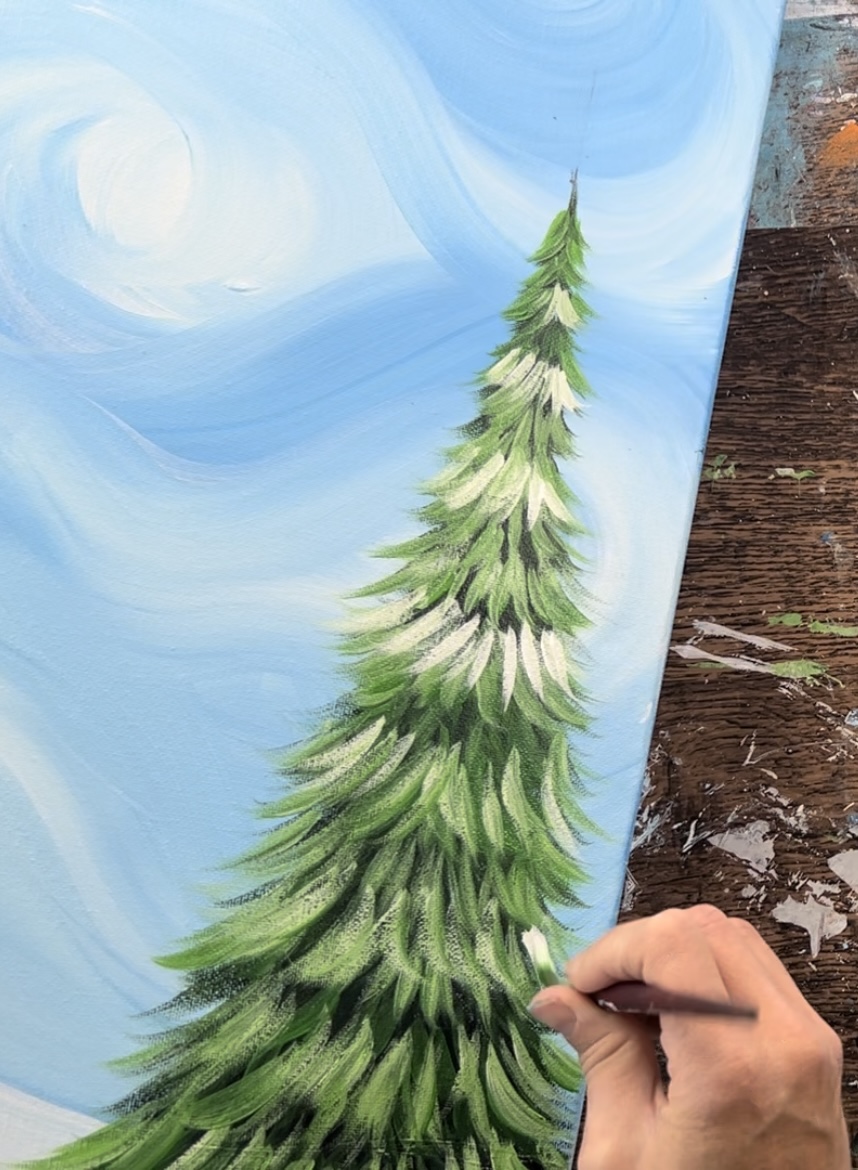
When painting this tree, we will start by creating a dark layer first and then layer on the lighter green colors. Doing this will create texture and depth in the tree.
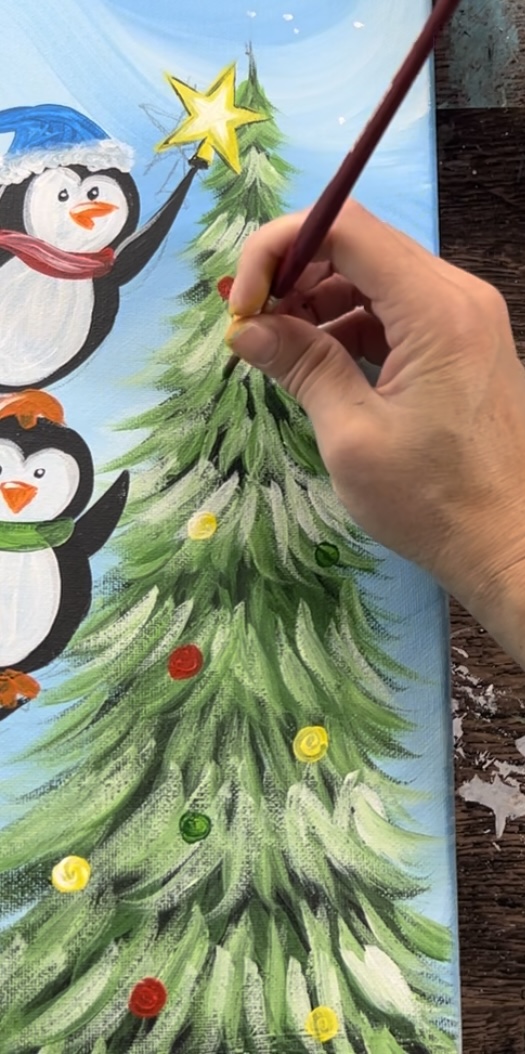
On your paint palette, mix about equal amounts “hookers green hue” with “mars black”. This will make a very dark green. Then, use the #8 round brush to paint the tree.
In this technique, I recommend starting from the bottom edge of the tree and painting a row of “branch strokes”. Paint small curved lines by stroking the brush from top down. Paint an entire row of this.

Continue painting rows of this dark green color and work your way up. Stay inside the lines of the tree drawing. As you paint each row, let the branches overlap the row above it. This creates texture in the tree.
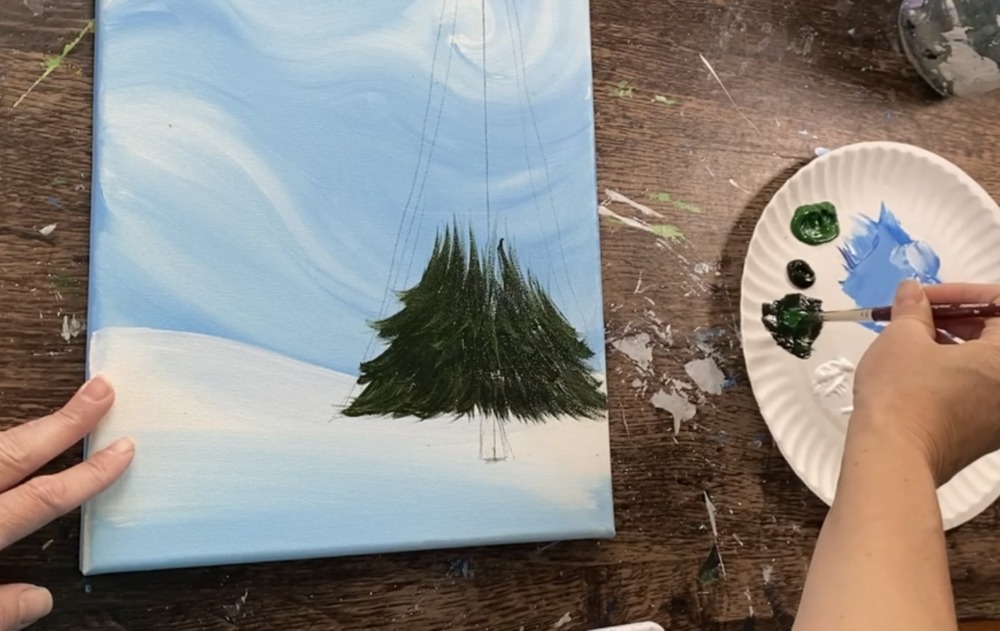
Each row of branches gets more narrow as you work your way up to the top point of the tree.

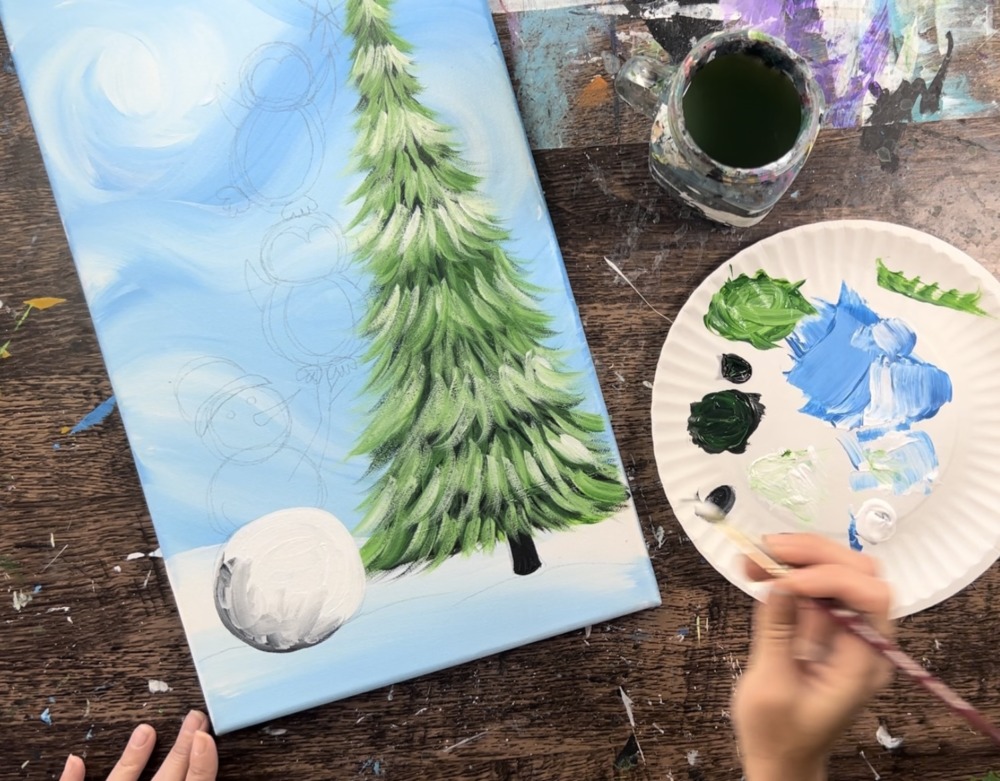
Let this first layer dry a bit. Paint the trunk of the tree using black.
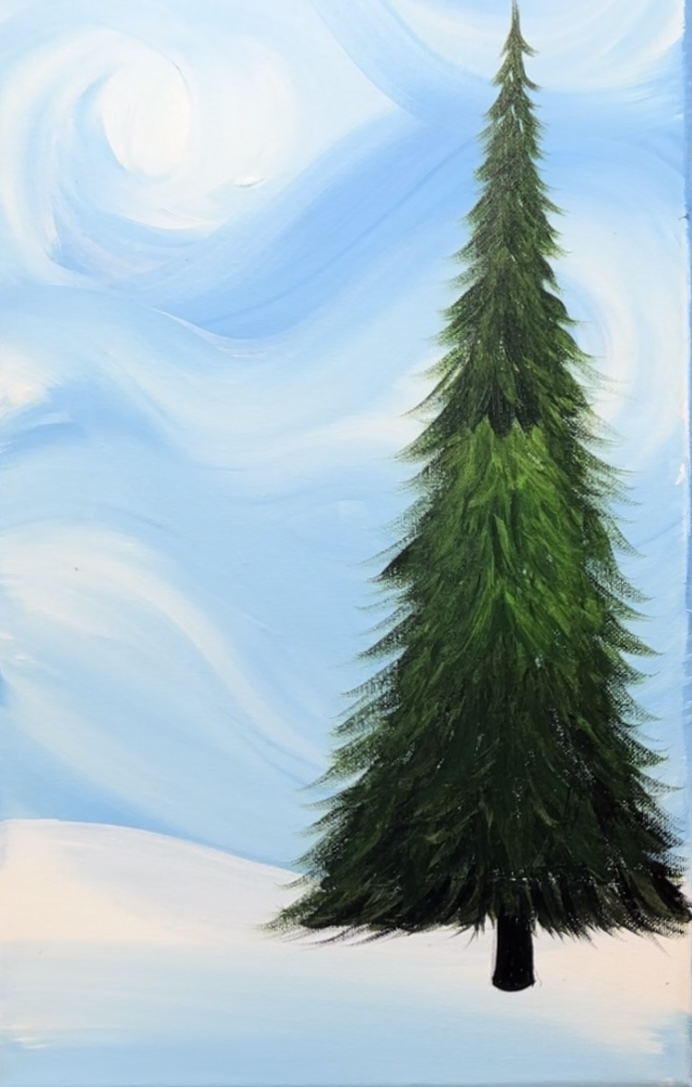
Then mix a lighter green on your palette. Mix about 1 part white to 3 parts green. You’ll want to make a medium tint of green but not too light just yet.
Repeat the steps for painting the branches. Start on the bottom of the tree and paint the branches row by row but leave a lot of the dark layer still showing. When you paint these lighter color branches over the darker layer, it will start giving the tree more texture and dimension.
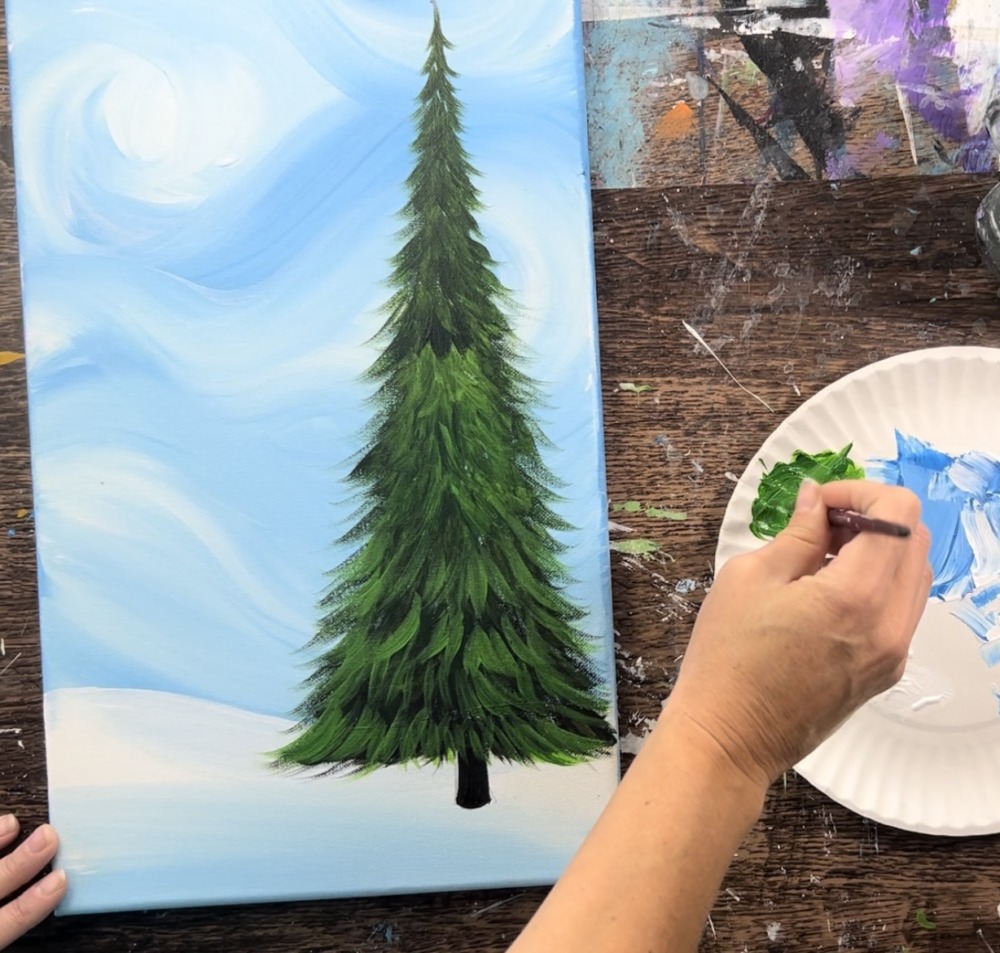
Paint a third layer with a lighter green. Mix more white into the green to lighten it up. Leave a lot of the darker layers still showing through.
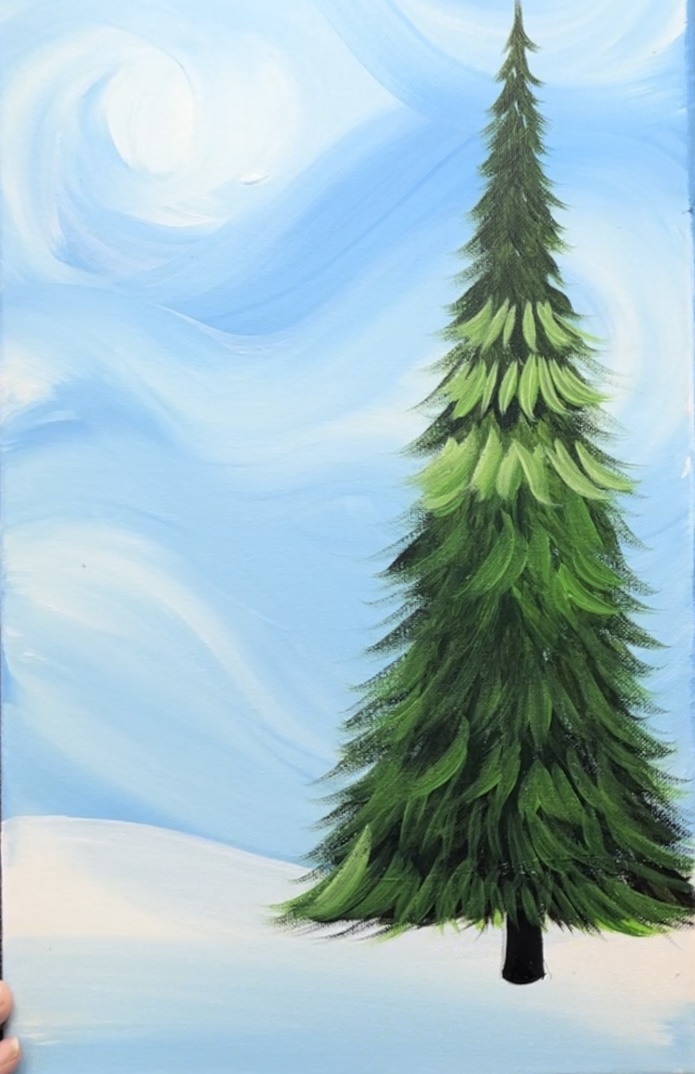
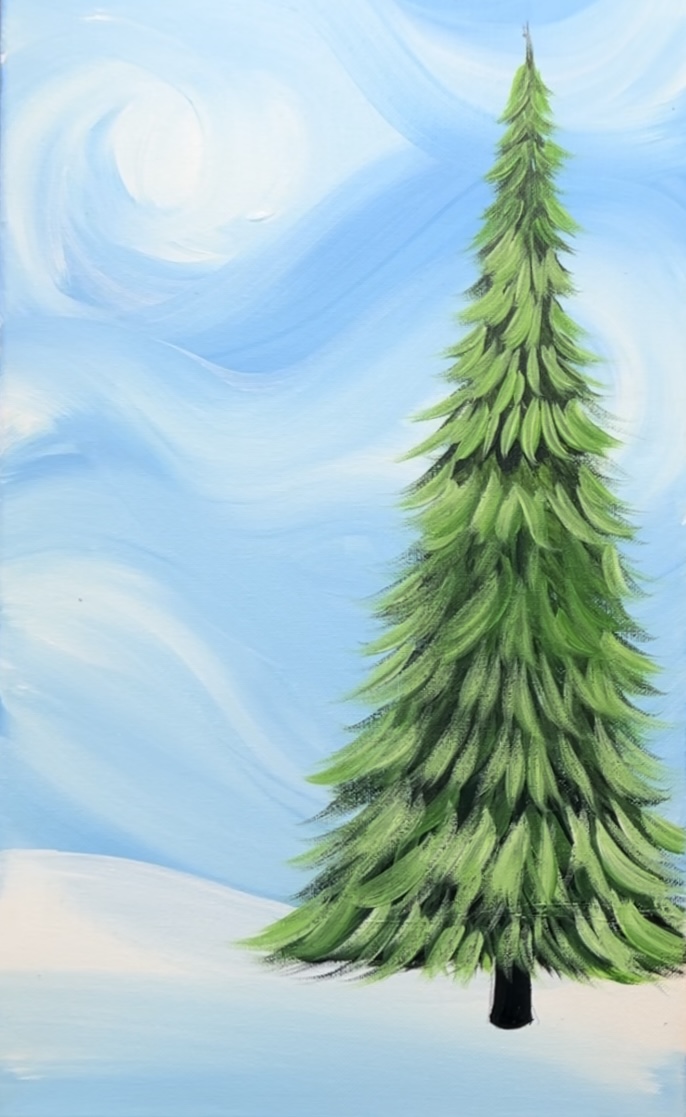
As a final layer, I added white mixed with a very small amount of green (almost pure white). I didn’t do as many of these branches, just a few. This makes it look like there is some snow or frost on the tree branches.
Let this dry before adding decorations to the tree.
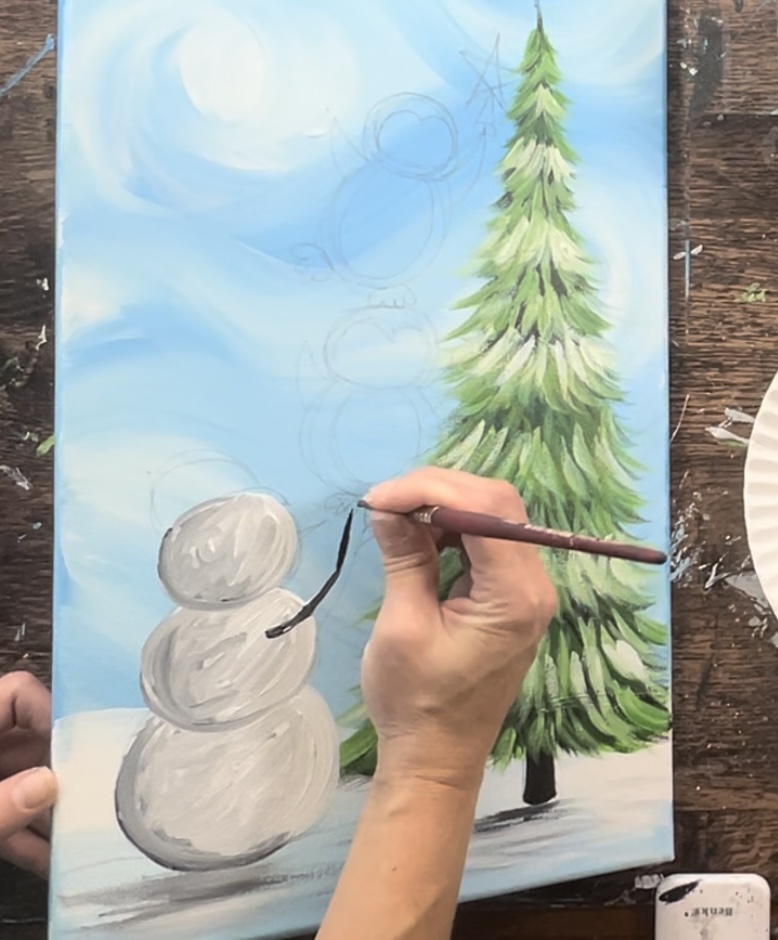
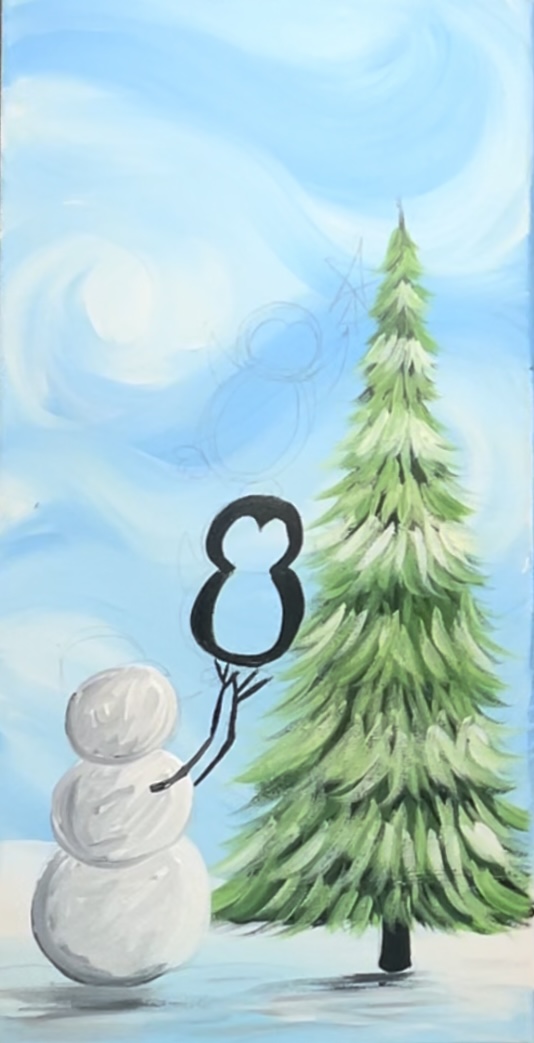
4. Draw and paint the penguins and snowman

Use a pencil to sketch the snowman and penguins. Start with the snowman. Draw a large circle for the bottom snow ball. Make sure the bottom of it is level with the bottom of the tree trunk. Then draw the center circle so that it slightly overlaps the larger one on the bottom.
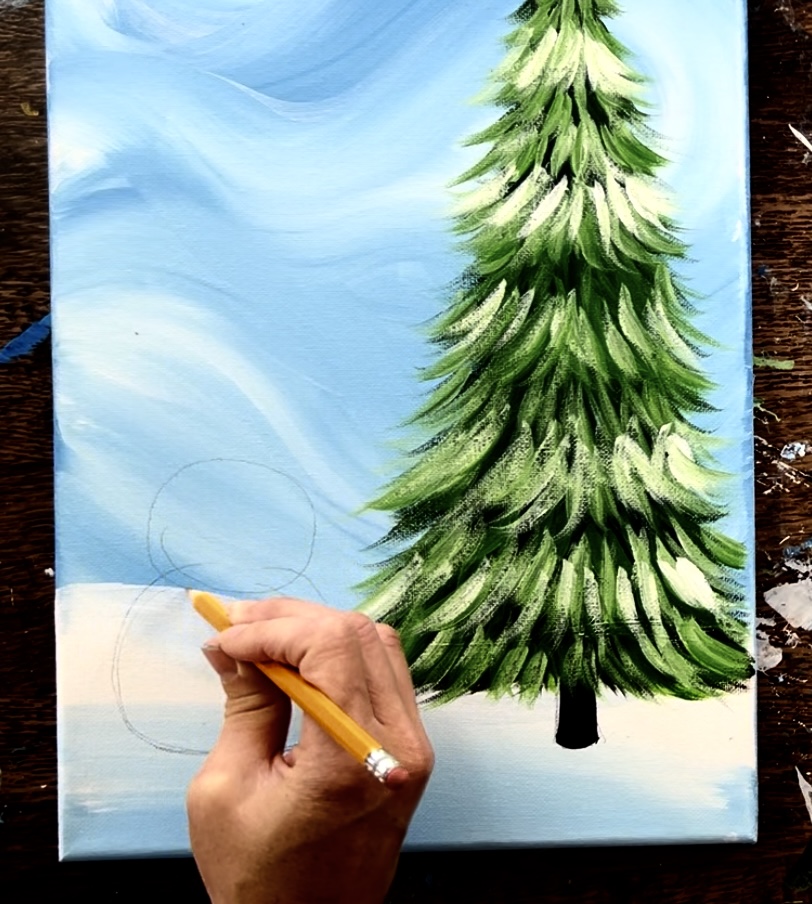
Draw the third snowball so that it slightly overlaps the middle circle.
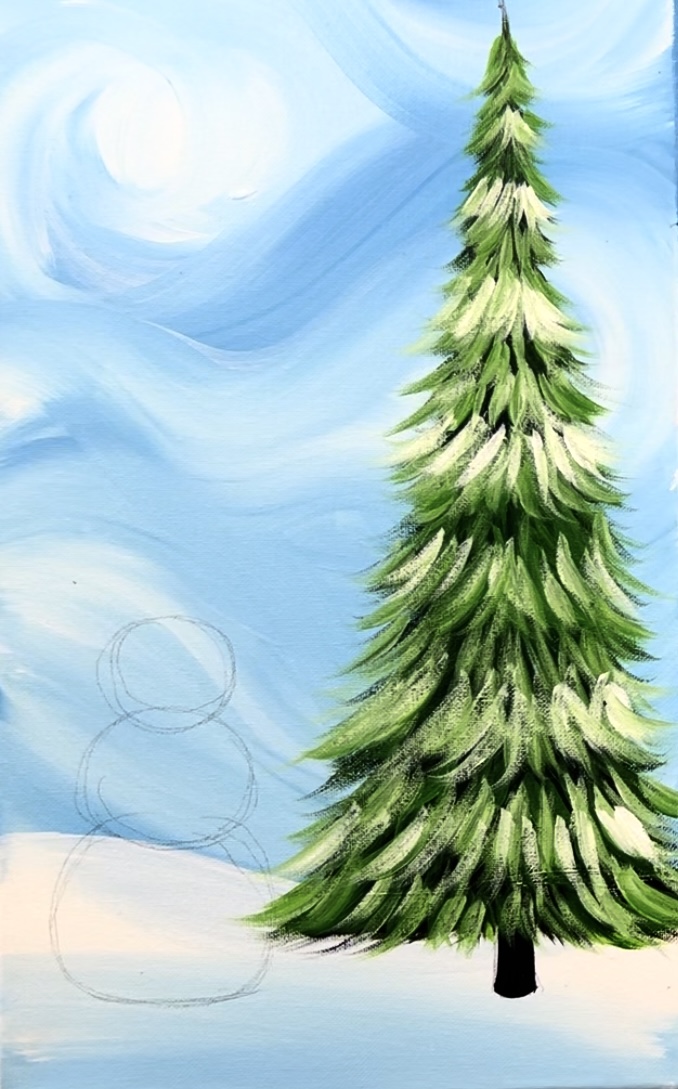
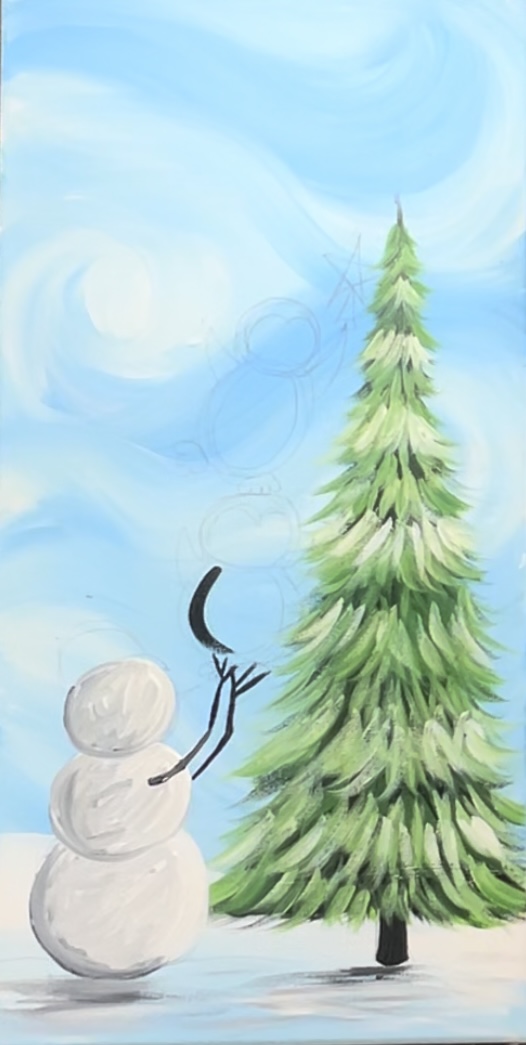
Draw the nose, eyes, hat and arms. The arms are facing to the right and going upwards because the penguin will be standing on them.

Next, draw the first penguin. Drawing these cartoon penguins is similar to drawing snowmen. Start by drawing the bottom circle shape and then draw a medium circle shape that overlaps it.

Draw the “flippers/ arms” of the penguin, draw the belly and the head area where the line curves and points downwards.
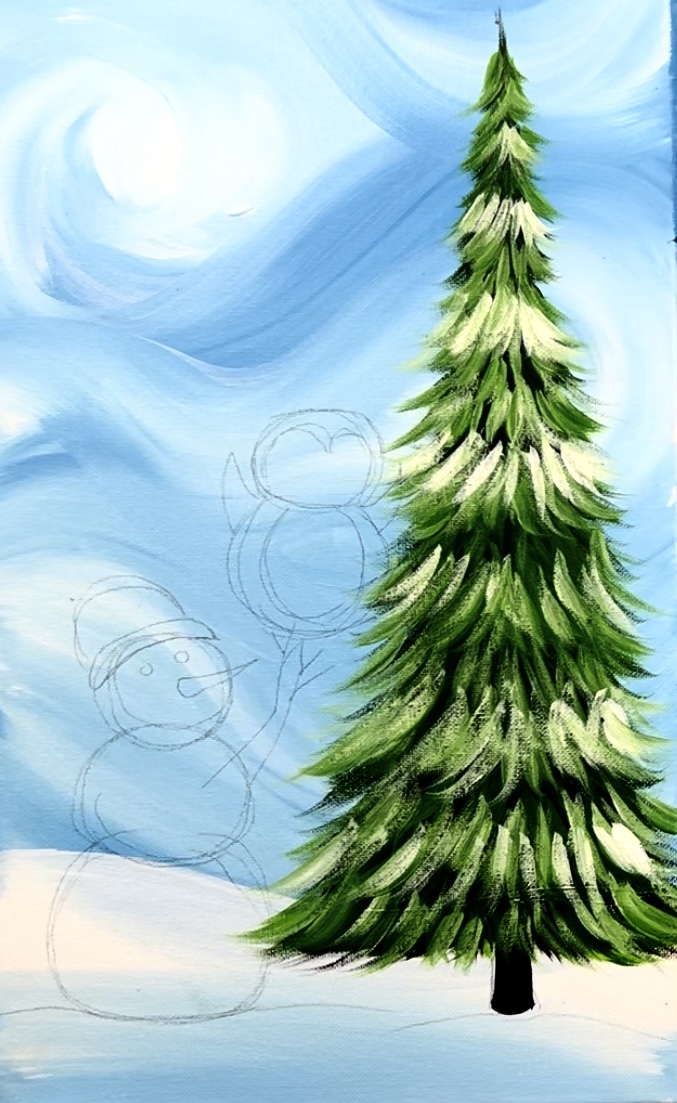
Draw a second penguin the same way but make it go slightly diagonal so that it looks like it is reaching for the top of the tree.
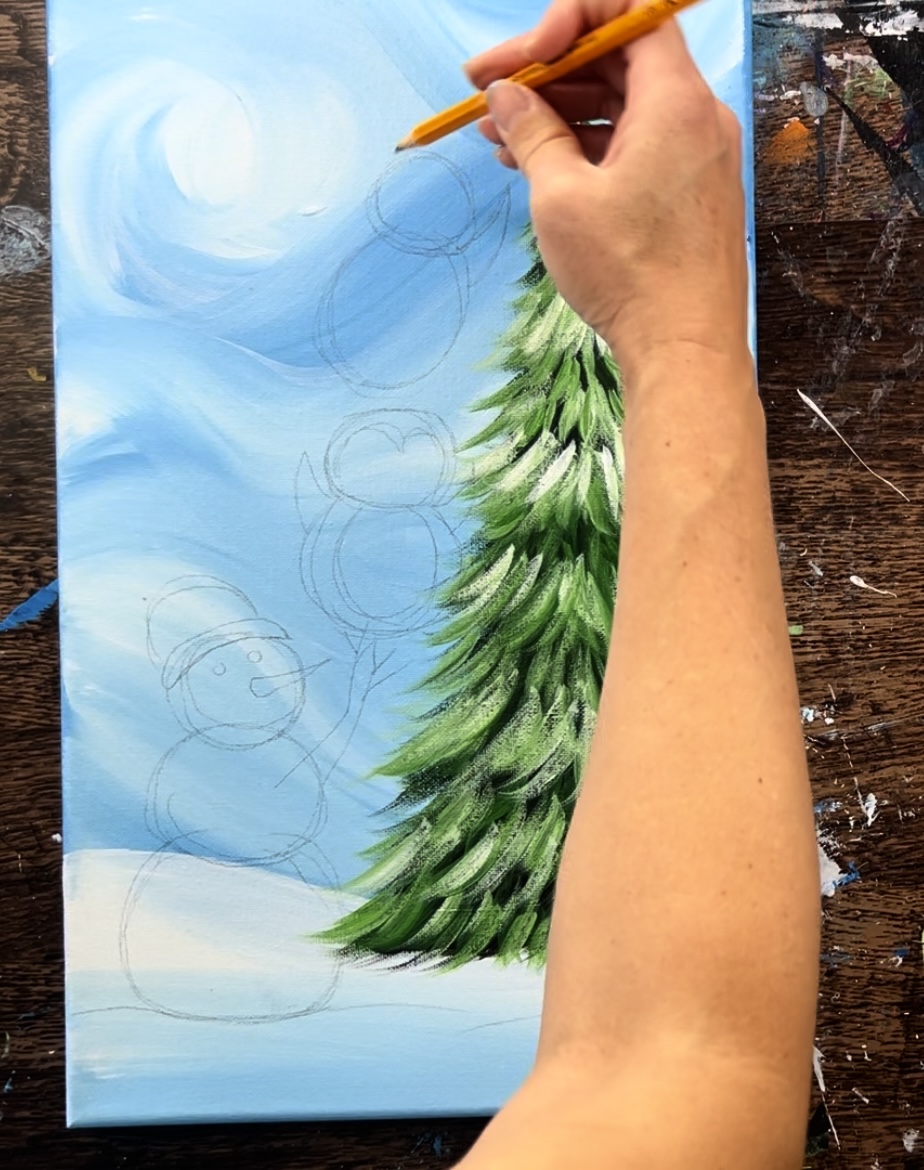
Draw the little feet. The top penguin’s foot is on top of the other penguin’s head and the bottom penguin’s feet is on top of the snowman’s arms.
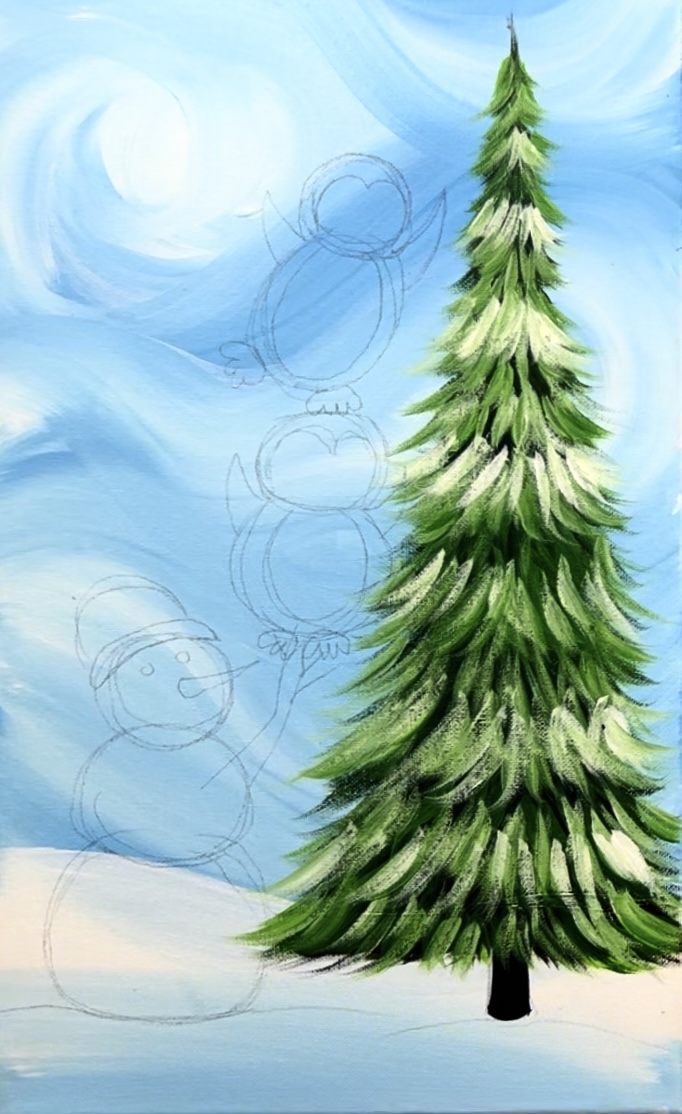
Then draw the star. I did s small cone on the top of the penguin’s flipper and then drew a basic star above that.
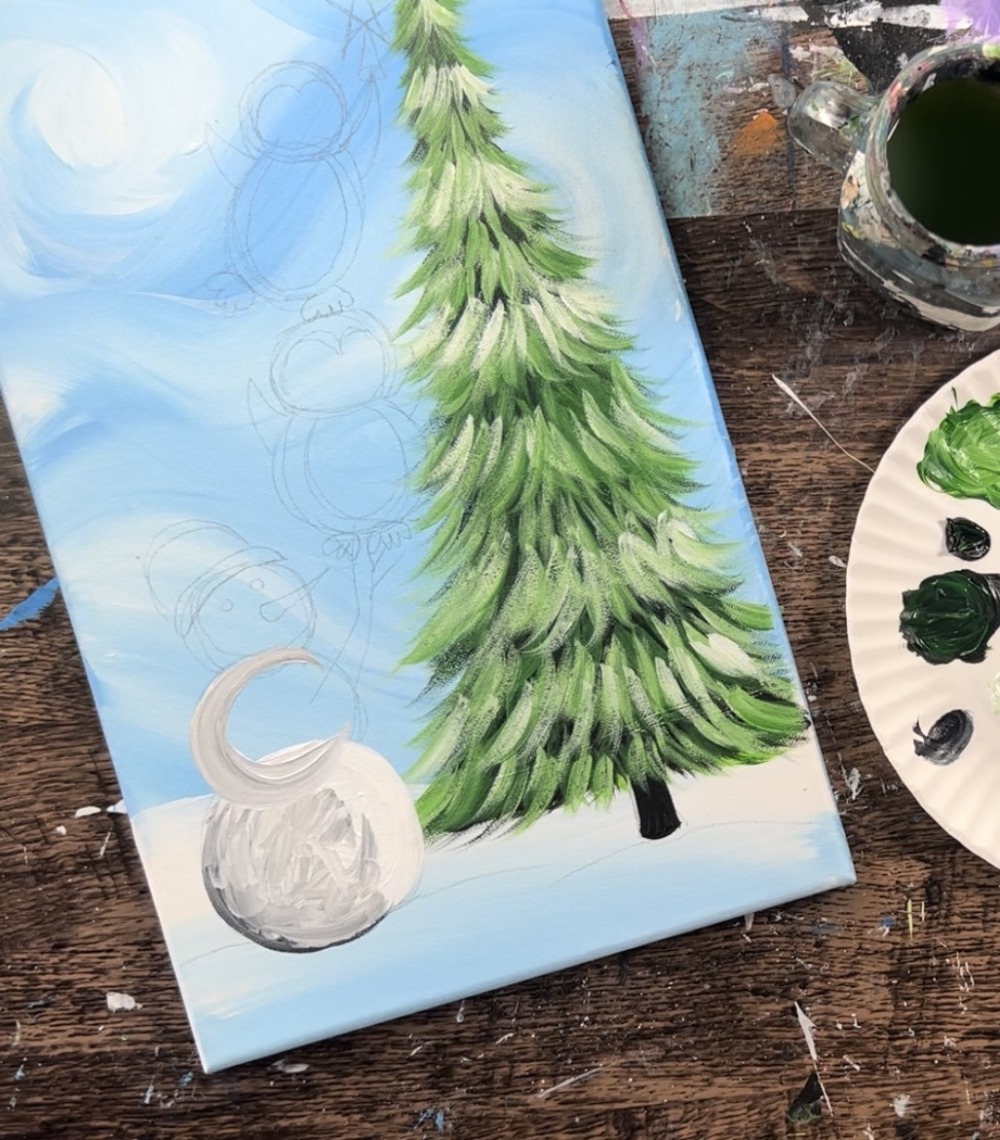
5. Paint the snowman
Load your palette with fresh titanium white. Use either the 8 round or 4 round to paint the bottom circle solid white.
Load a VERY small amount of black on the brush and blend it in with the circle on the bottom so that bottom left is shaded.
Blend the black in with the white using either your brush or your finger. Make sure the snowball stays bright white on the far right and the top.
Paint each of these circles the same way and each circle overlaps the circle below it.
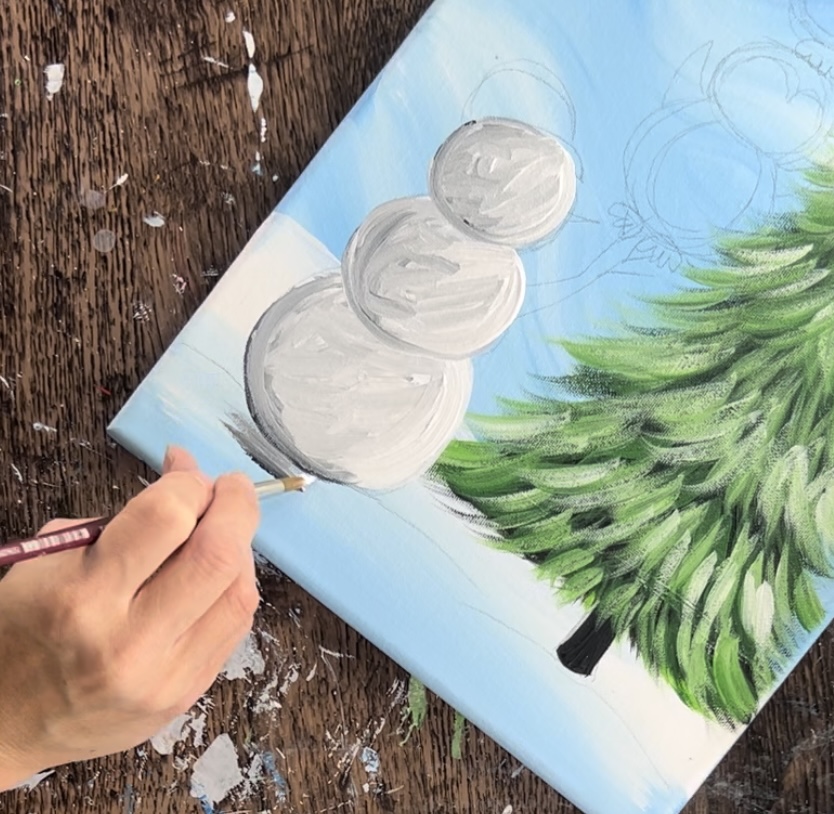
Next, paint some shadowing under the snowman and under the tree. Do this with a medium gray (mix about 3 parts white and 1 part black).
Paint loose, left and right strokes under the snowman and tree.
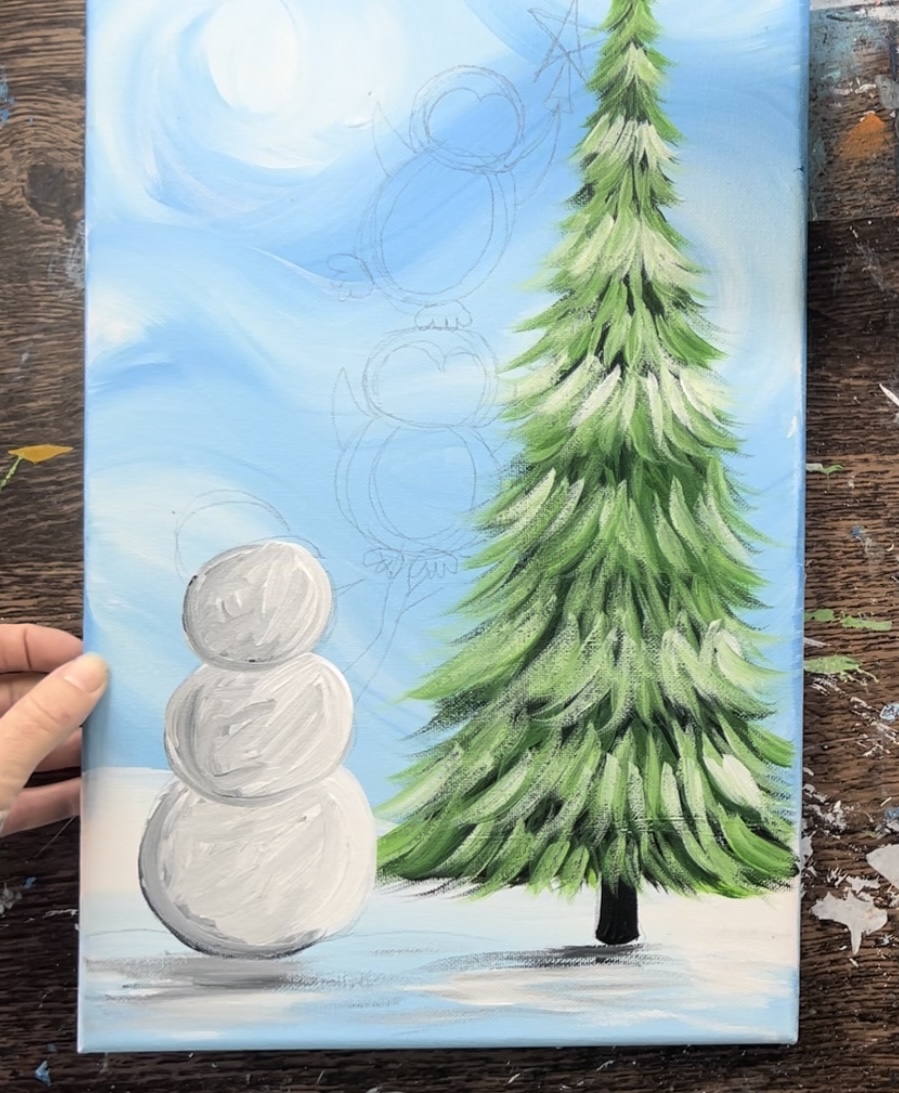
Then paint the arms of the snowman with the black.

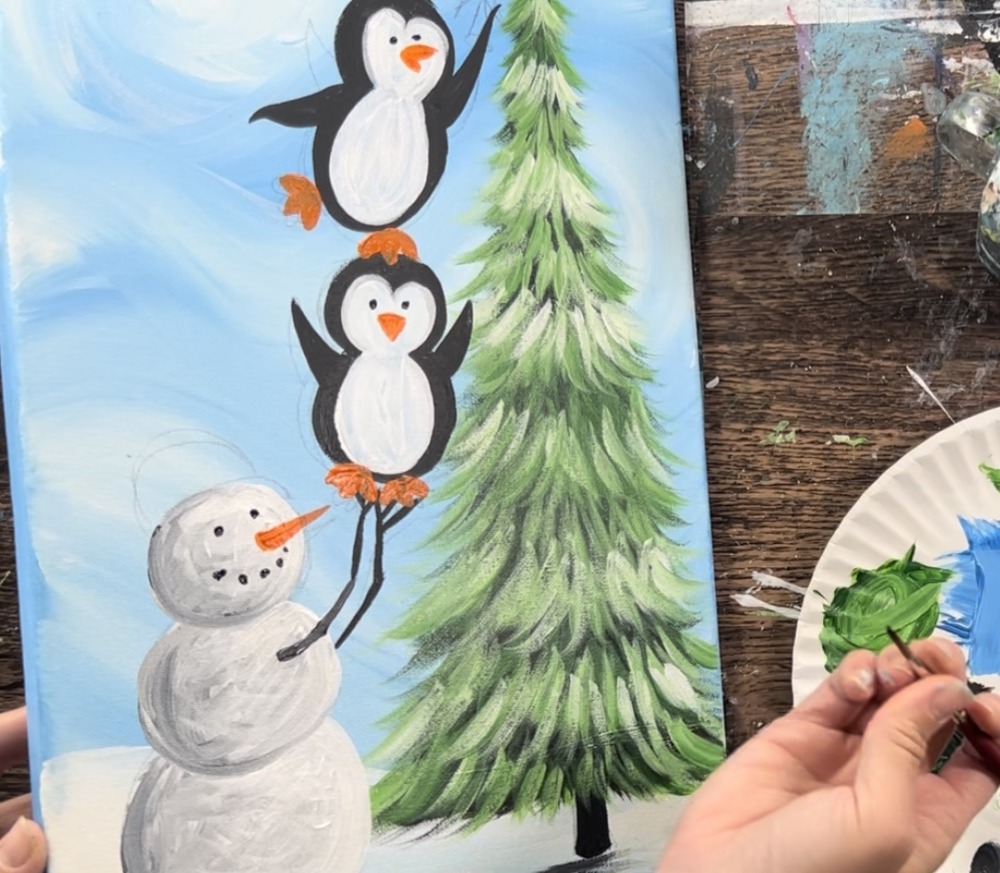
6. Paint penguins
Use the #4 round brush and mars black to paint the black parts of the penguins first. Outline the shape and fill it in.
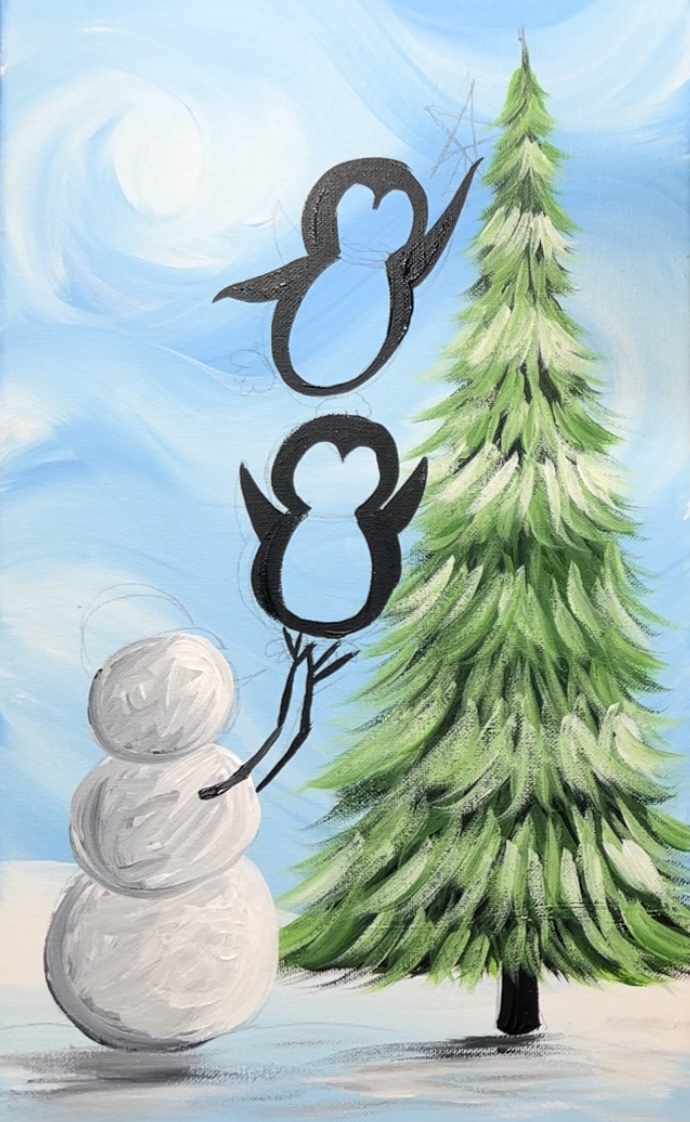
Then fill in the white areas of the penguins. Don’t worry about doing any shading or blending.
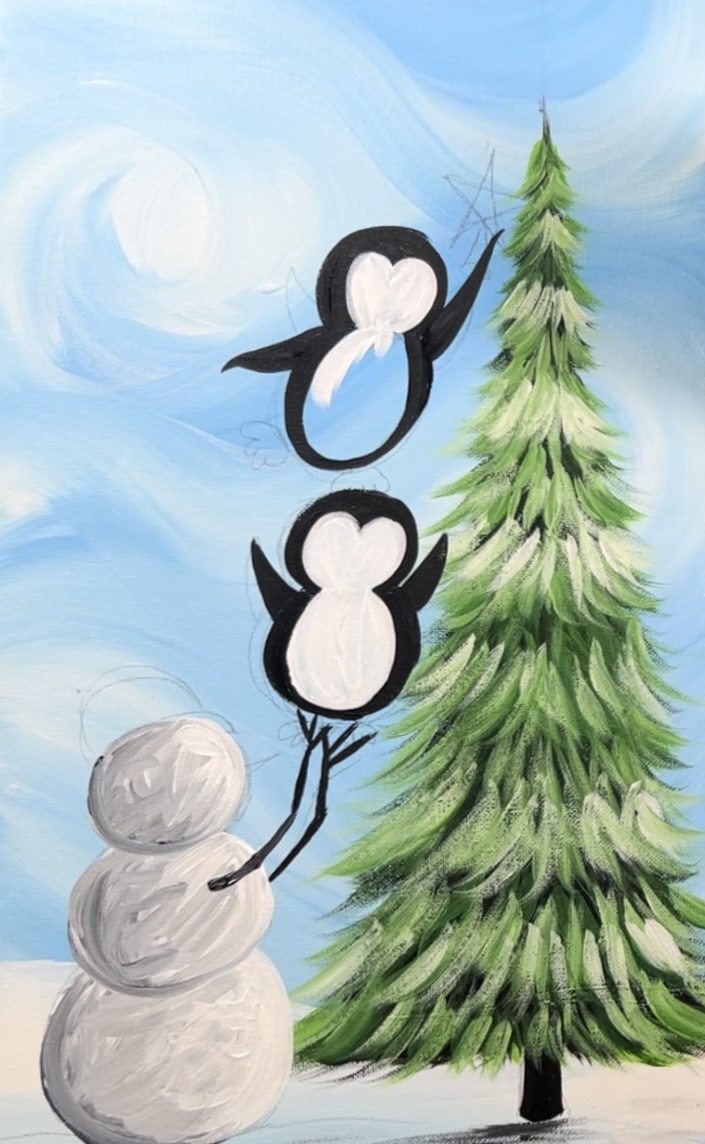

Load your paint palette with cadmium orange hue. Use the #4 round brush to paint the feet of the penguins. These are just simple, three oval shapes.
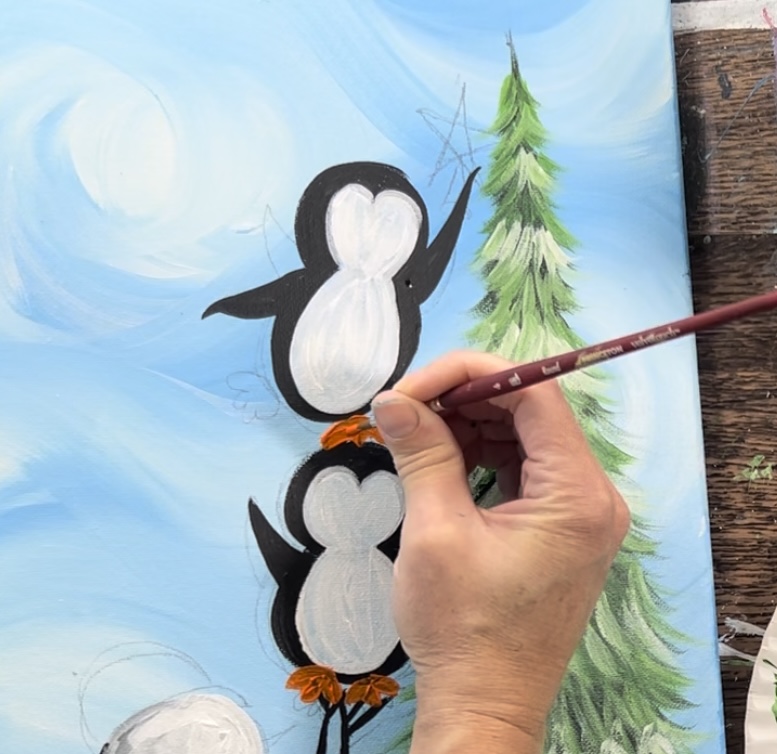
Then paint the beaks of the penguins. For the bottom penguin, I did a basic triangle shape. Then the top penguin is an open beak facing towards the right.

Use mars black to paint the eyes on the penguins and snowman and also the coal mouth and buttons.
7. Paint details on penguins and snowman
Some more details for the snowman include painting a beanie hat with the color pyrrole red. You can mix a little bit of black into the red to make it darker. Then paint a scarf on the top penguin. You can also change the colors of the scarfs and hats.
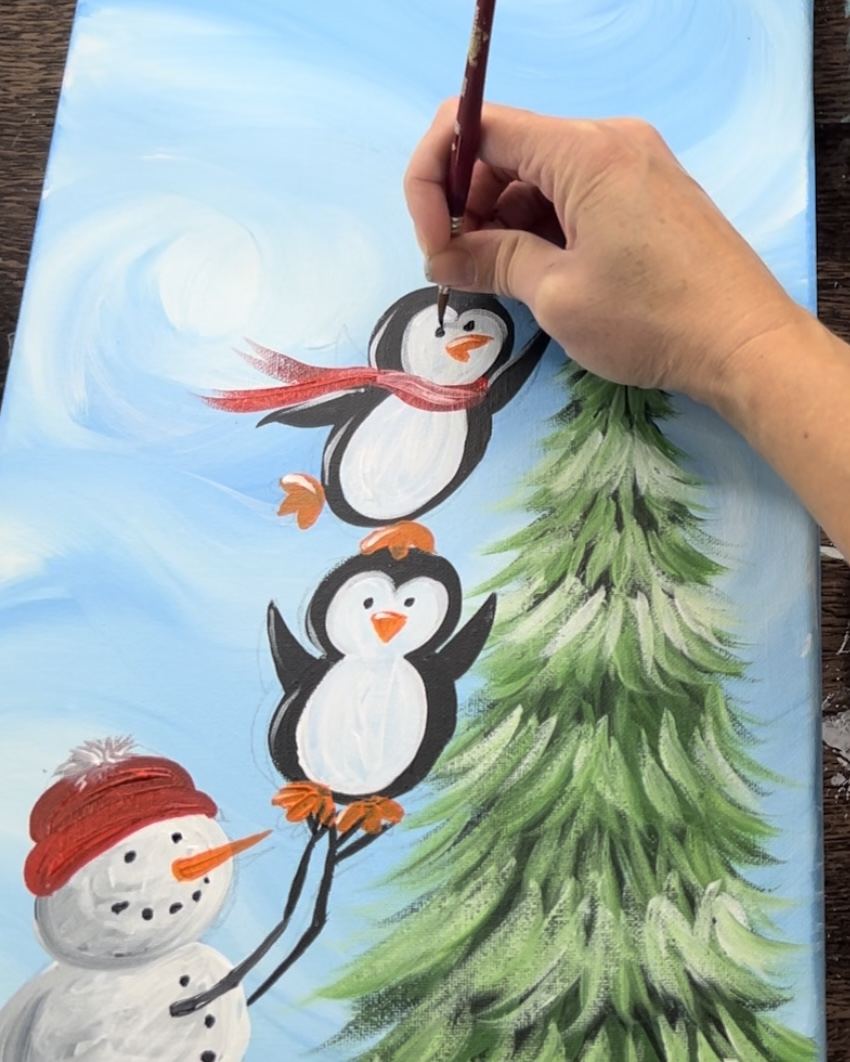
Paint the top hat of the upper penguin with cerulean blue. Then paint a blue scarf on the snowman. To do the “sweater texture”, use titanium white to paint small zig-zag type of strokes that are slightly spaced apart.
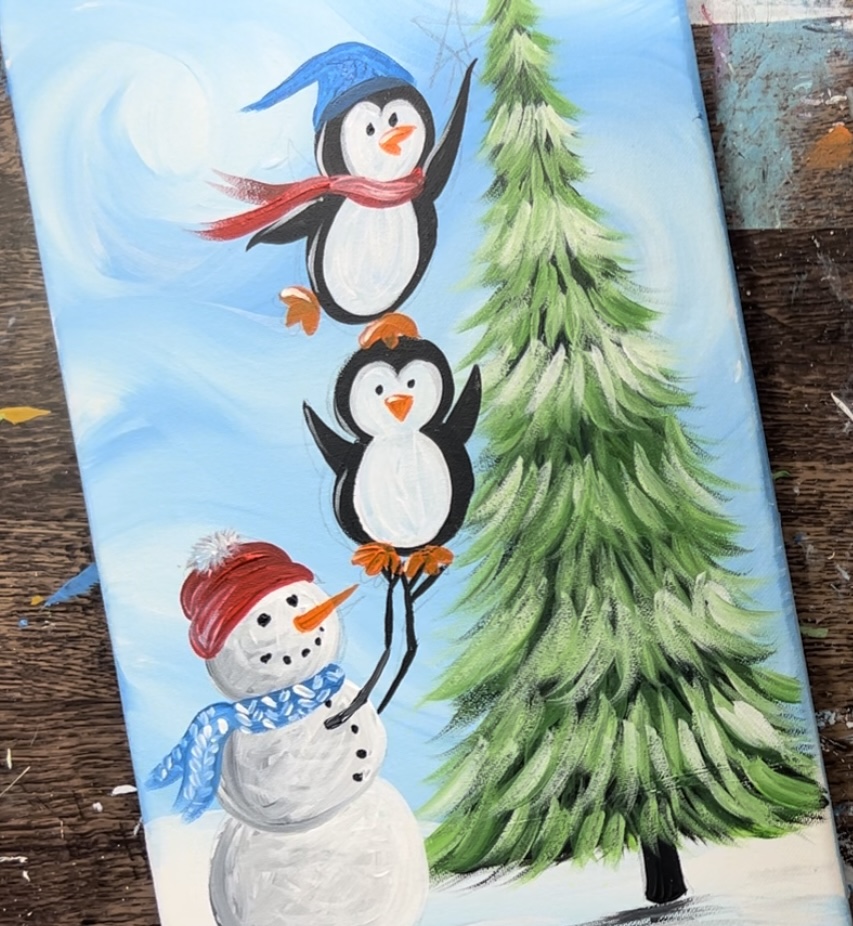
Paint a green scarf on the middle penguin. You can also add “highlights” on the penguins by painting a white curve on the left side of the black part of the penguin’s body. You can also add a white curve on the feet and beaks. Add highlight in the eyes of all of the characters by painting a white dot in the middle of the black circles.
Then paint the star. I recommend painting it white first and then painting the yellow layer over the white layer. This will make it look extra bright and opaque.
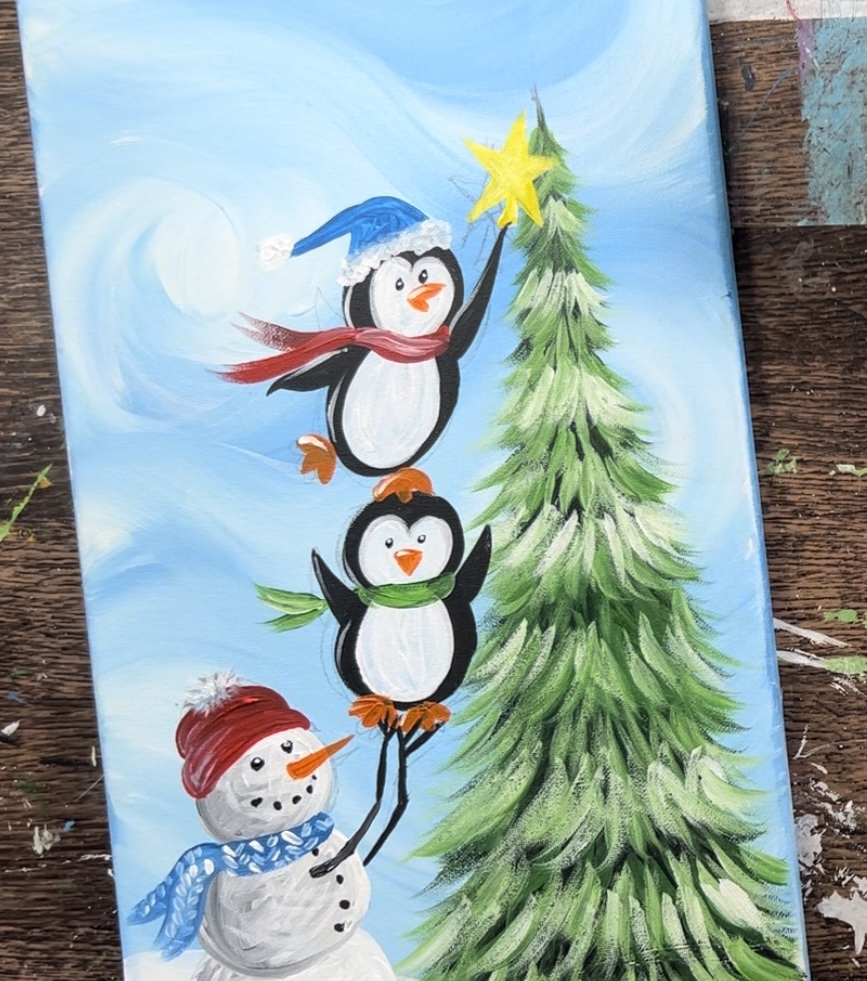
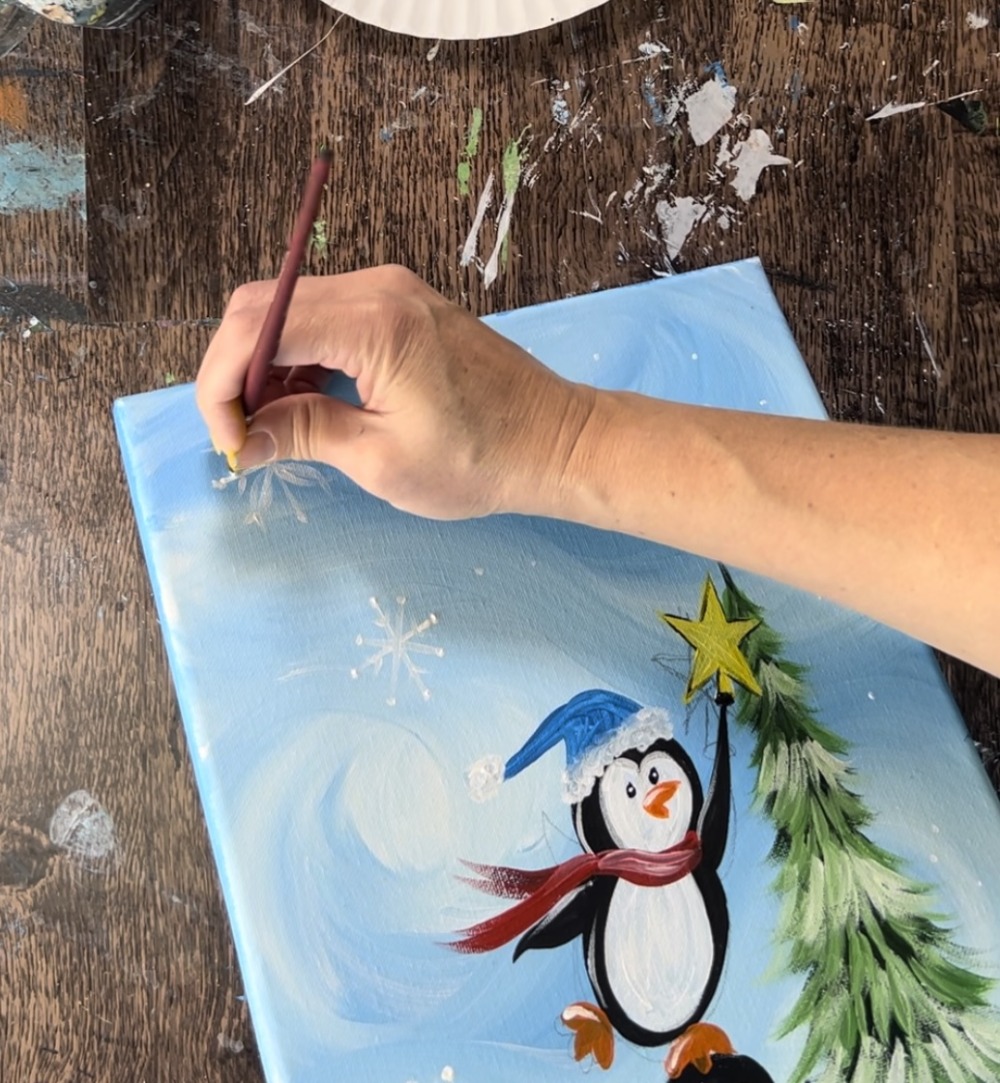
8. Paint snowflakes & snow dots
Use the #4 round brush and titanium white to paint snowflakes all throughout the sky. Paint small white dots scattered around the sky as well.
9. Paint ornaments and string lights
Use various colors on your color palette to paint small circles on the Christmas tree.
Then paint a strand of lights on the bottom using mars black and the #4 round brush.
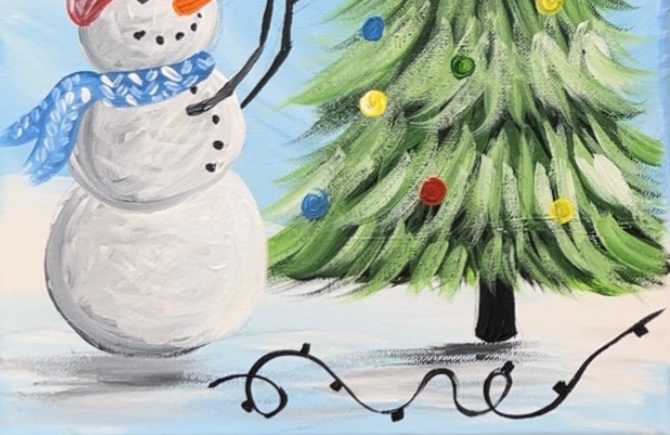
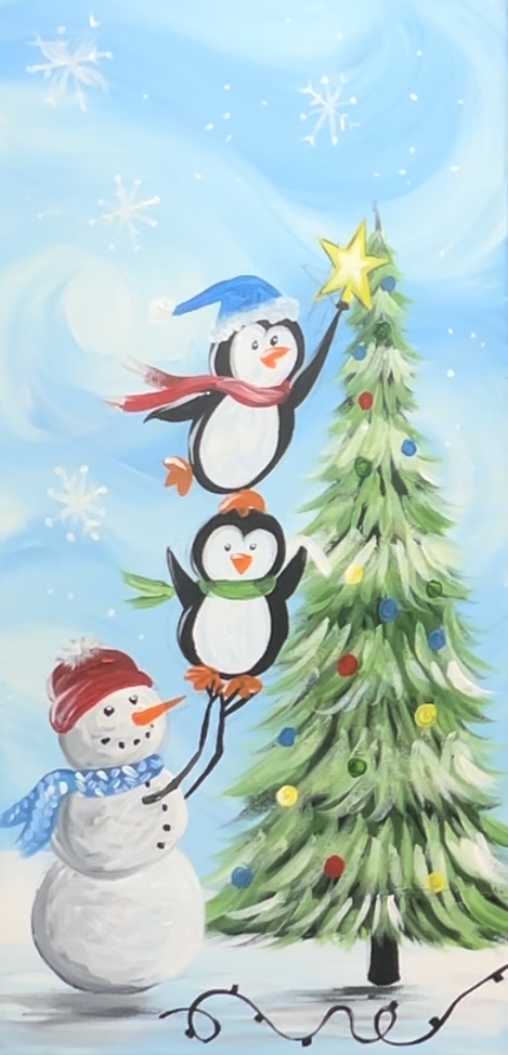
After the black from the strands dries a little bit, paint the light bulbs using various colors on your color palette.

When this dries, you can add curved white line highlights on the right side of the bulbs and ornaments. You can also add more details such as candy canes, etc.
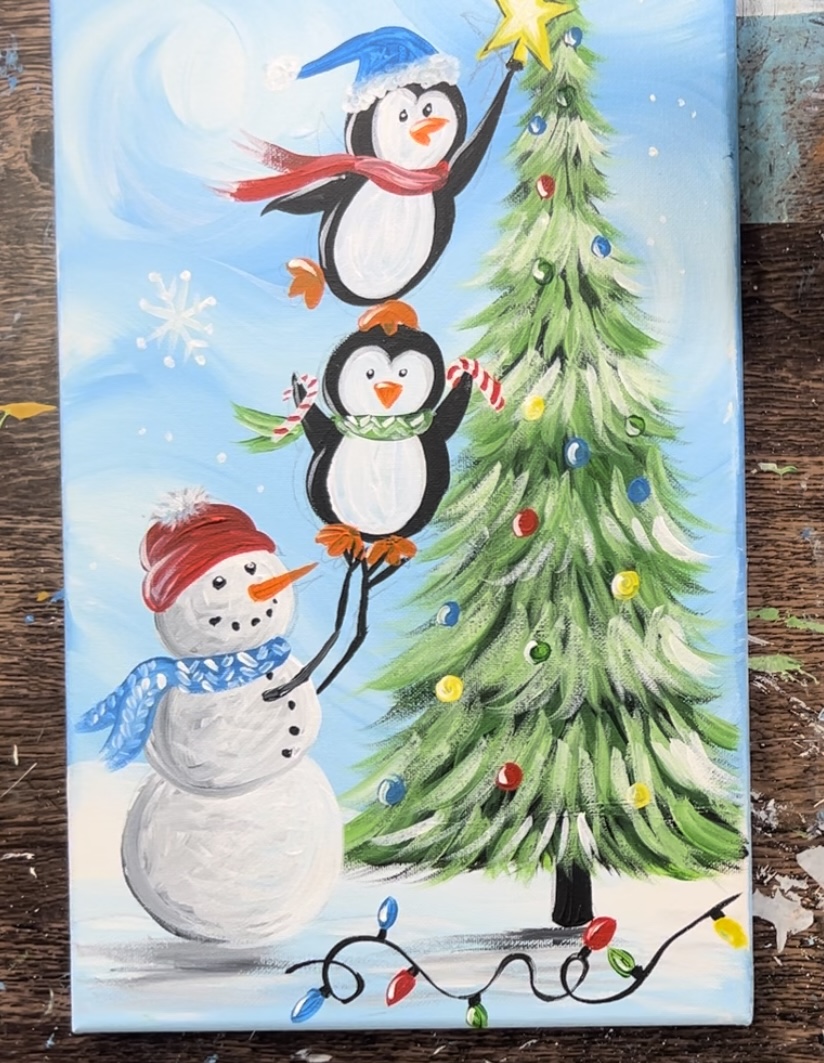
Finished!