Would you like to save this?
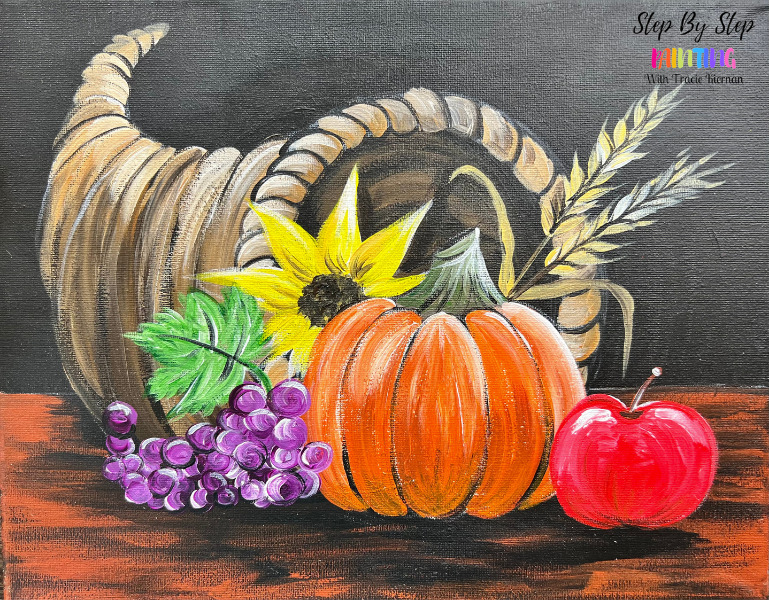
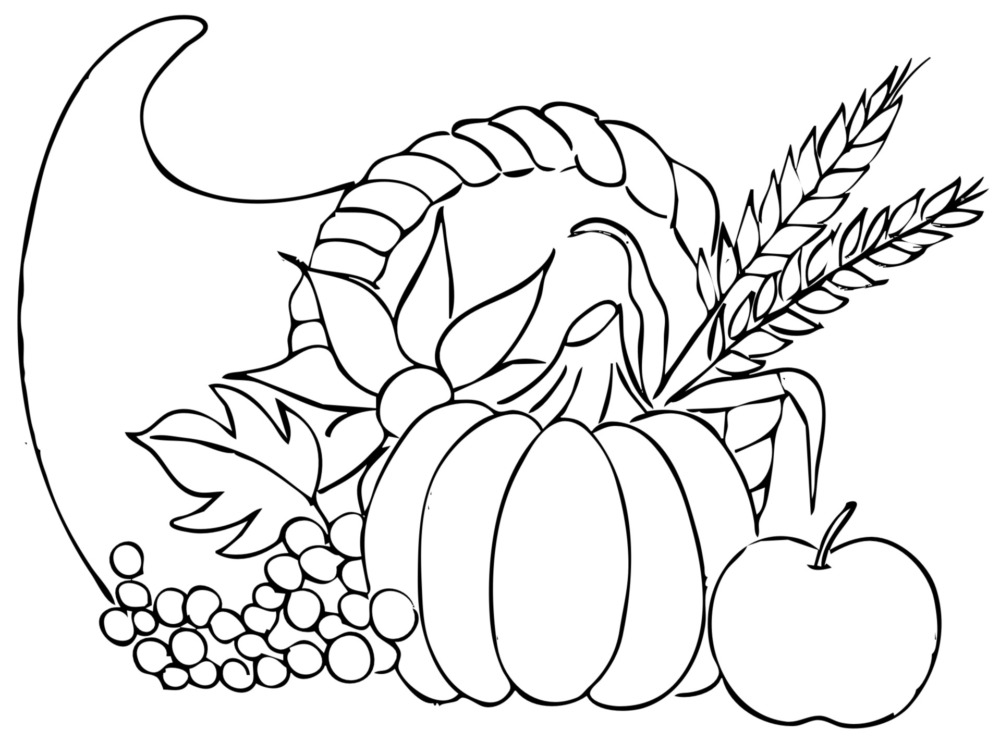
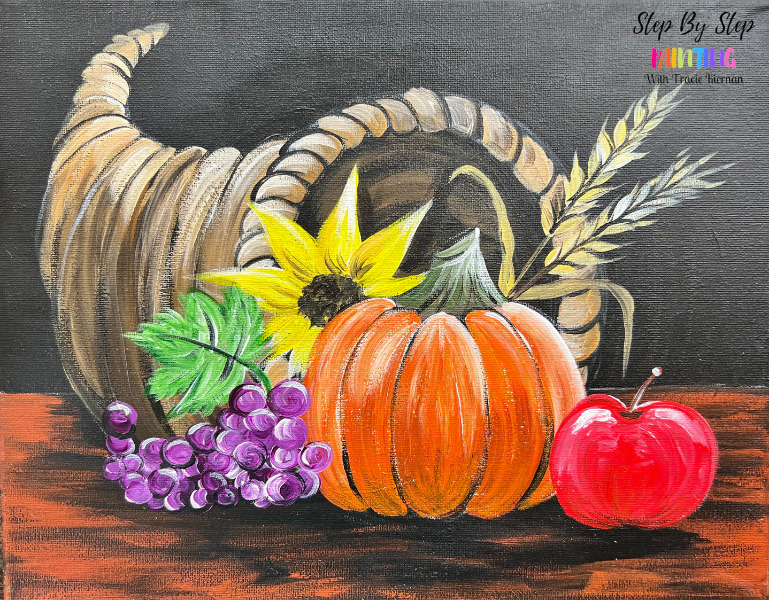
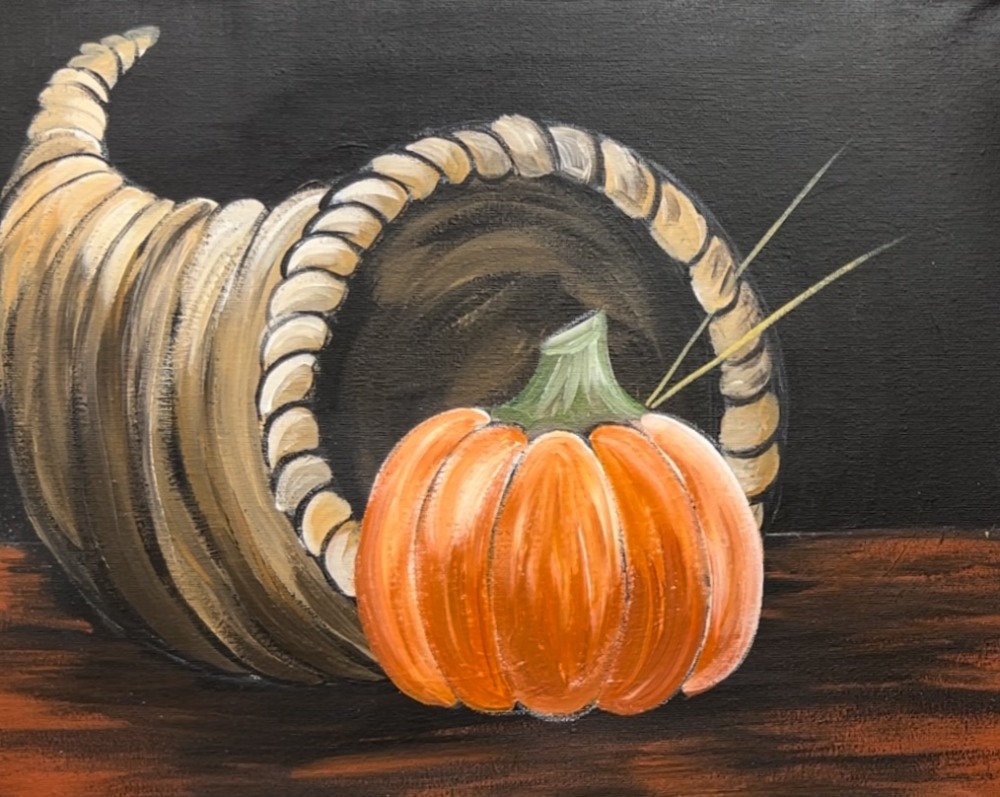
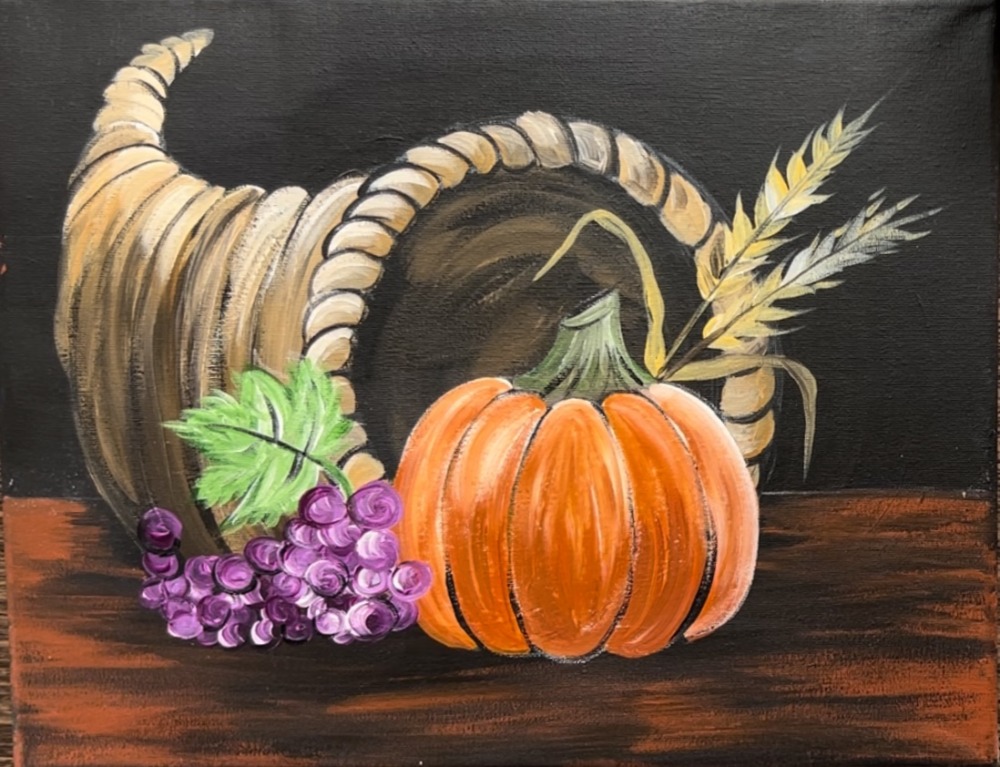
Learn how to paint a cornucopia with acrylics on a pre-painted black canvas. This tutorial is a little bit of a challenge because of the details in this painting. You are welcome to use the printable template and/or simplify it. I have a template for the cornucopia you can download!
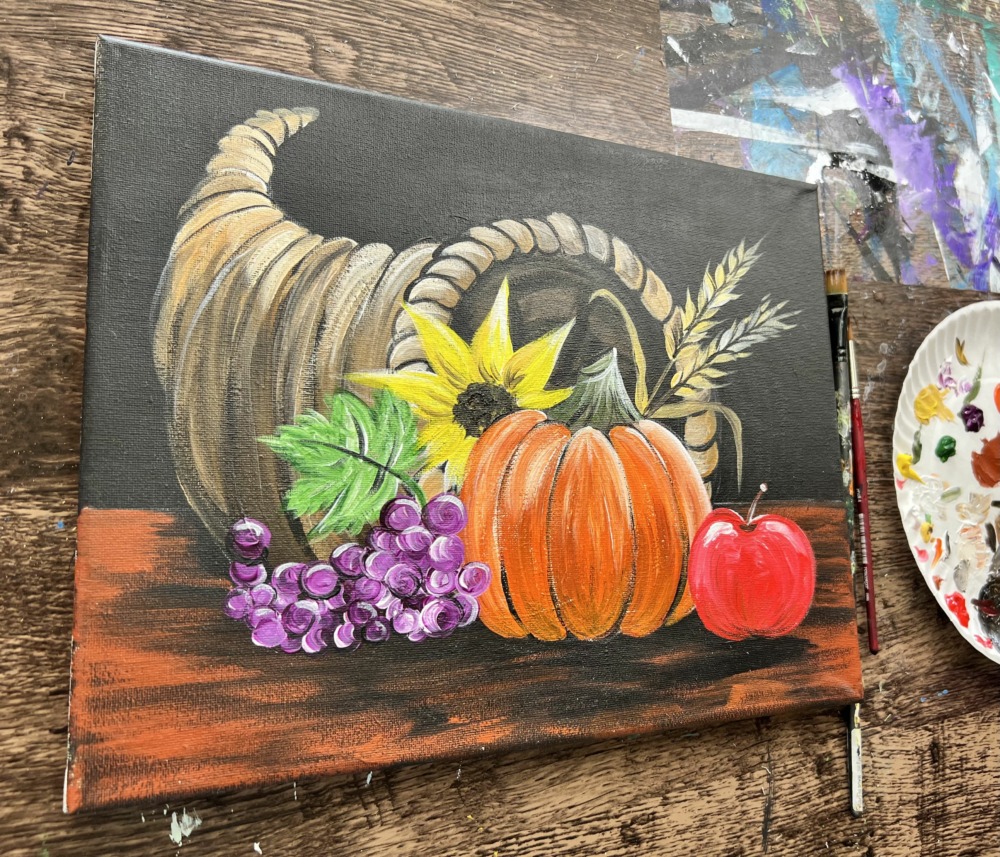
You are also welcome to make this more advanced by adding more fruits and veggies and changing the composition around.
Enjoy and happy painting!
Materials
How To Paint A Cornucopia
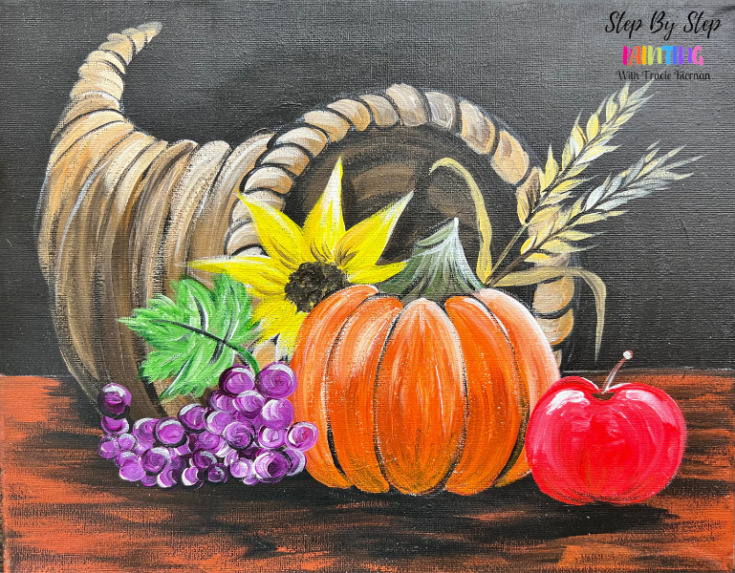
Paint a colorful cornucopia on an 11 x 14 canvas with acrylics.
Materials
- 11 x 14 Canvas
- Acrylic Paints
- Brushes
- White Chalk Pencil
- Ruler
- Optional Traceable
- Optional White Graphite Paper If Using the Traceable
Brushes
- 1" Flat Brush
- 12 Bright Brush
- 4 Round Brush
Colors
- Titanium White
- Mars Black
- Red Oxide
- Cadmium Orange Hue
- Primary Yellow
- Hooker's Green Hue
- Raw Sienna
- Deep Violet
- Naples Yellow
- Pyrrole Red
- Raw Umber
Color Palette
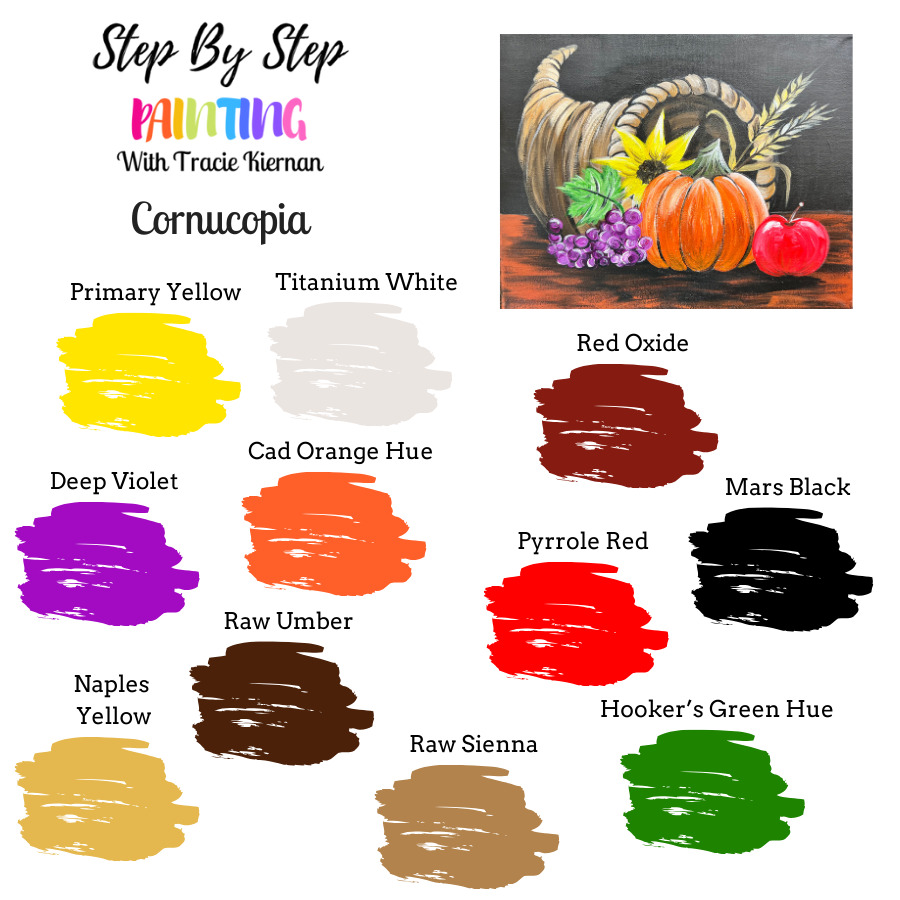
I used Liquitex BASICS for this painting. If you are using a different brand, you can look at the color chart below to help you match colors.
This painting has a very large color palette. If you are simplifying this, you can take out “Naples yellow” and “red oxide”.
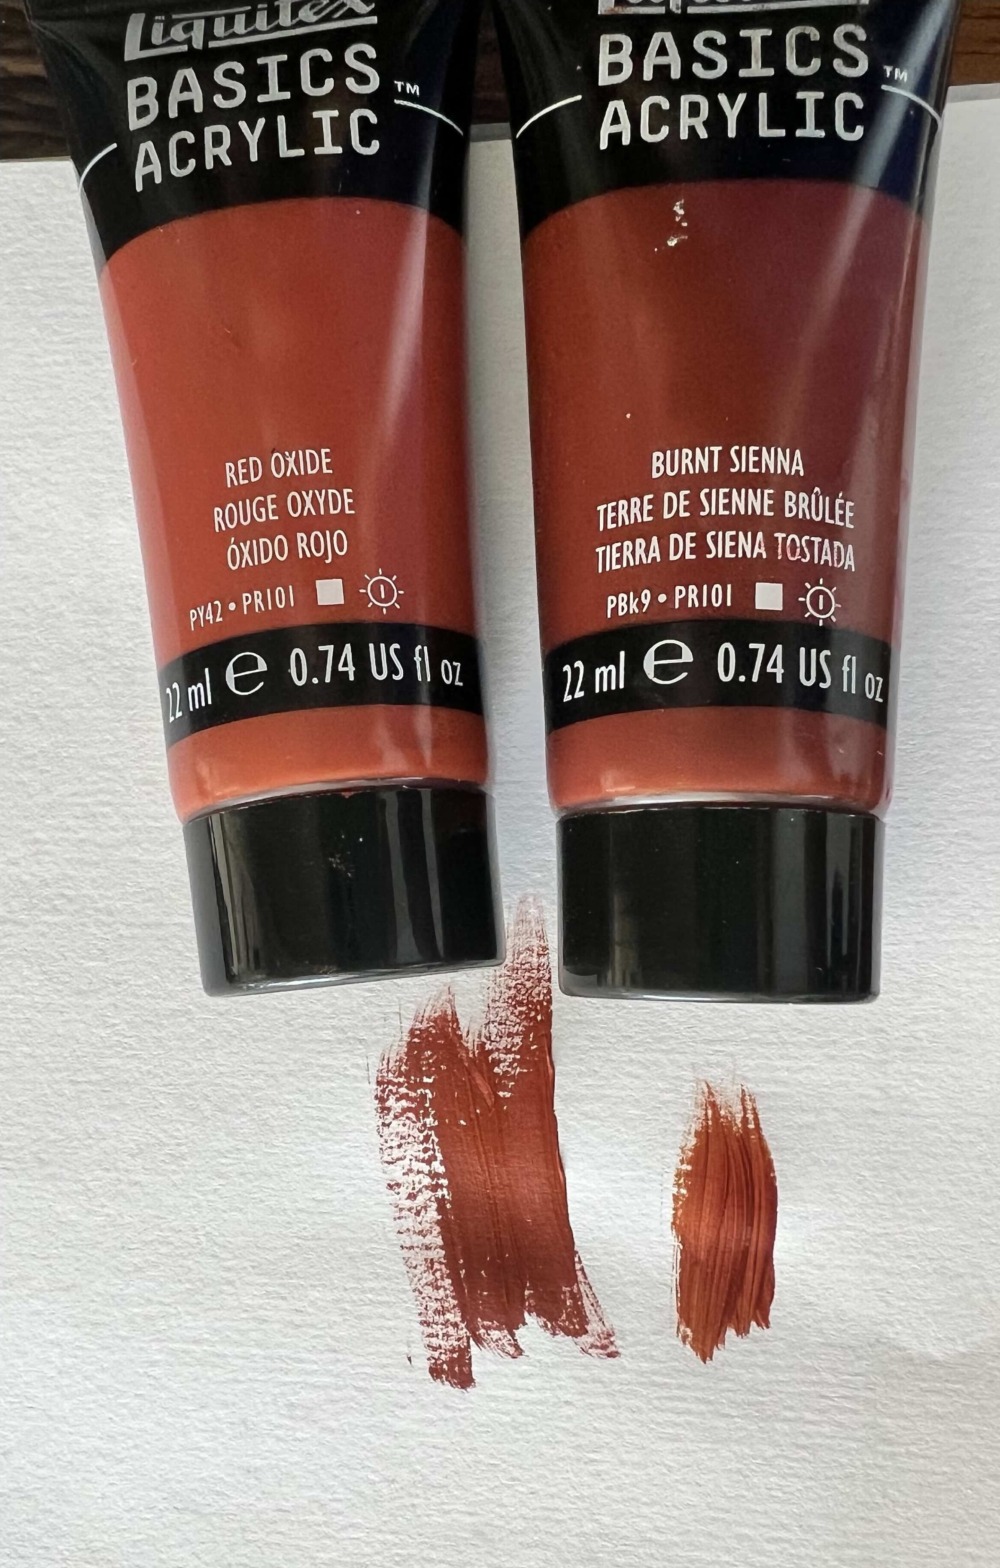
An alternative to “red oxide” could also be “burnt Sienna”. They are very similar to each other. Red oxide has a little bit of a metallic tone to it which looks pretty in this painting, however, it may be hard to locate this particular color.
Optional Traceable
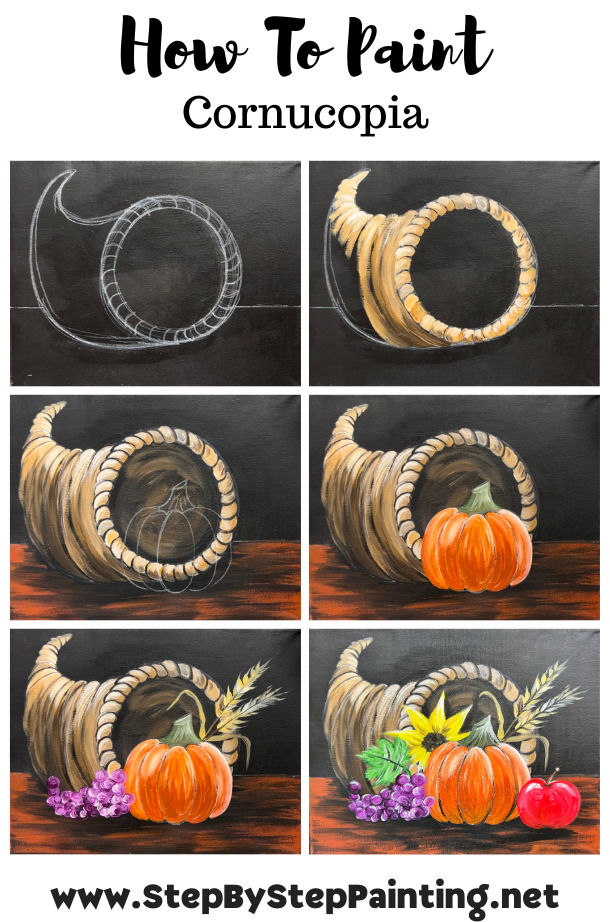
Directions At A Glance
Video
Step By Step Directions
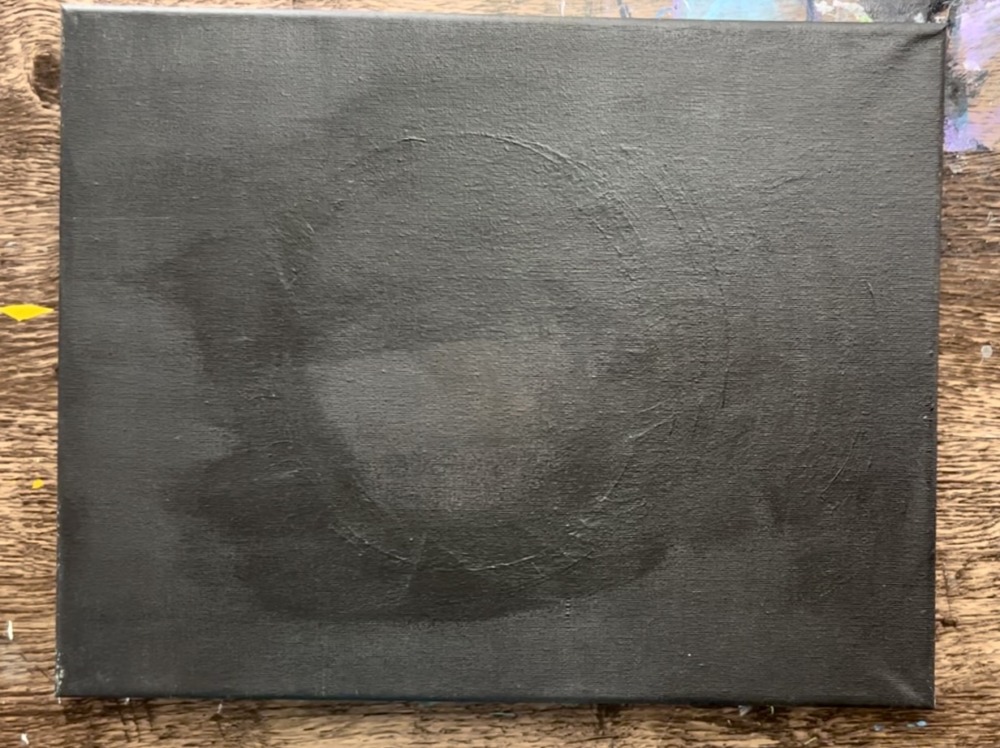
1. Paint canvas black (or use a pre-primed black canvas)
Use “mars black” acrylic paint and a 1″ flat brush to paint an entire canvas black. Let this dry completely before going onto the next step. You can also purchase a canvas that is already primed with black paint.
2. Draw Cornucopia
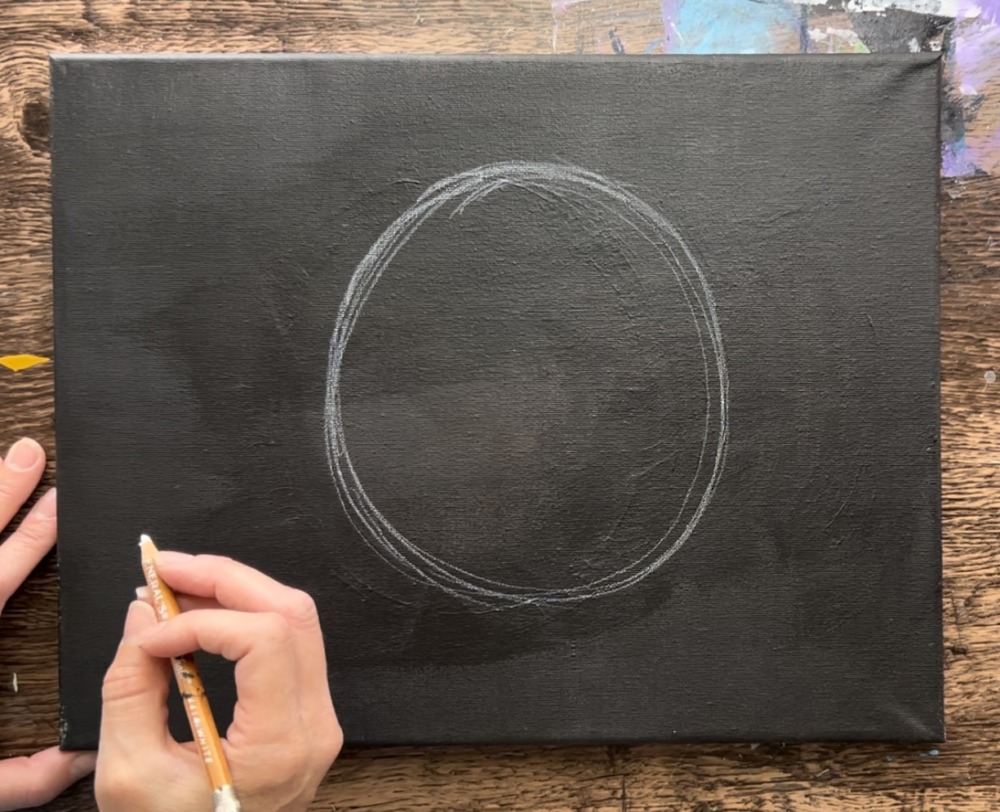
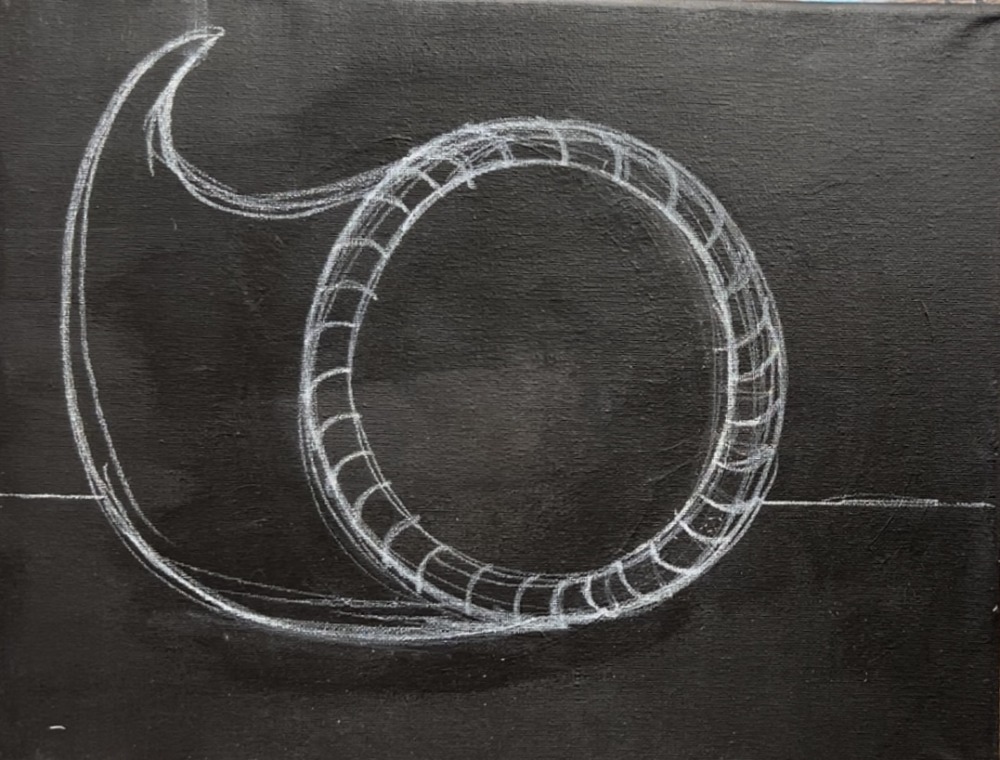
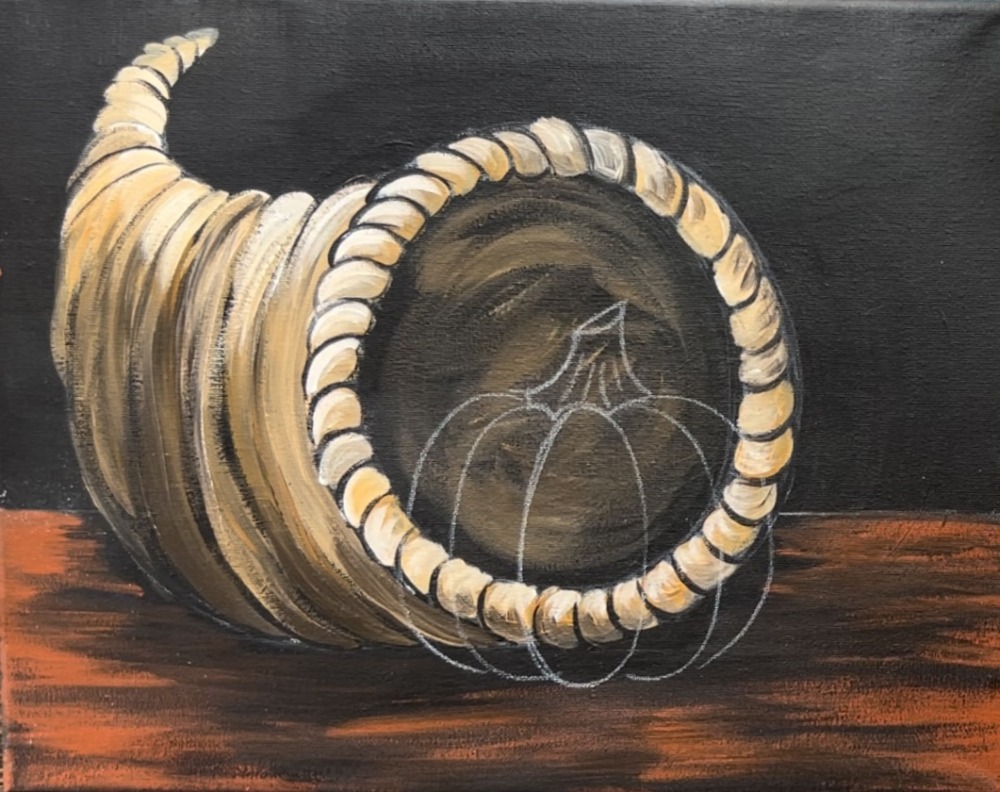
Use a white chalk pencil (recommended) to sketch out the shape of the cornucopia. You can also use a white piece of chalk, colored pencil or regular pencil if it shows up on the black.
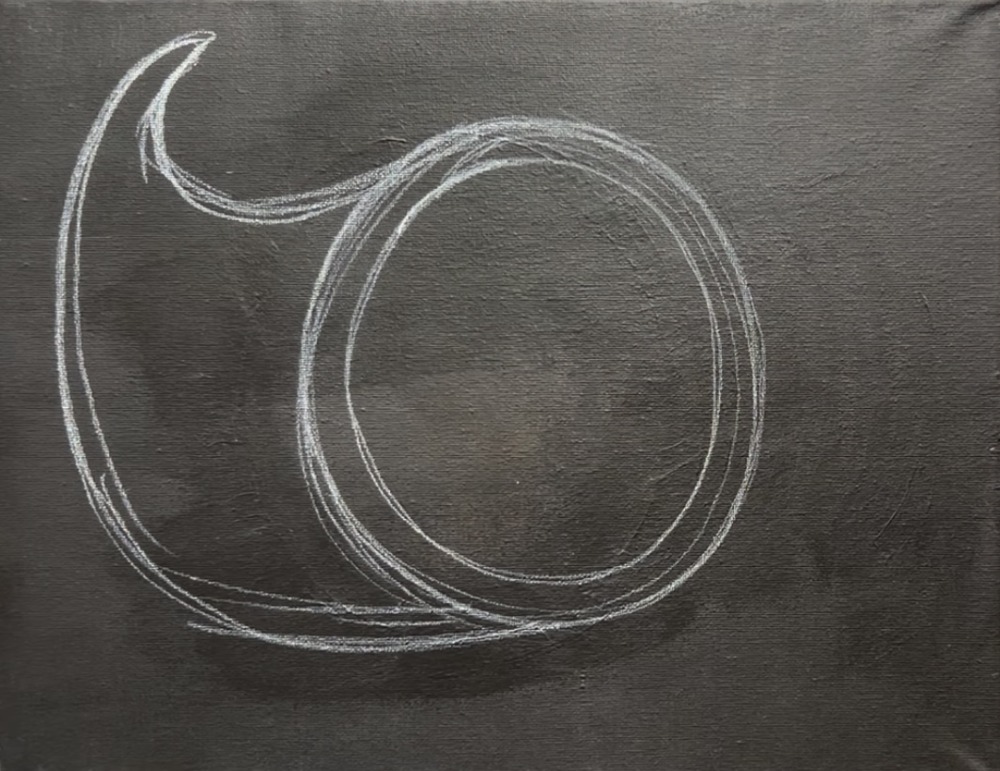
Draw the opening of the basket. This is not quite a circle. It is more of an oval because of the way it will be situated on the table. It is also slightly off centered to the right (to give enough room to draw the horn shaped part of the basket).
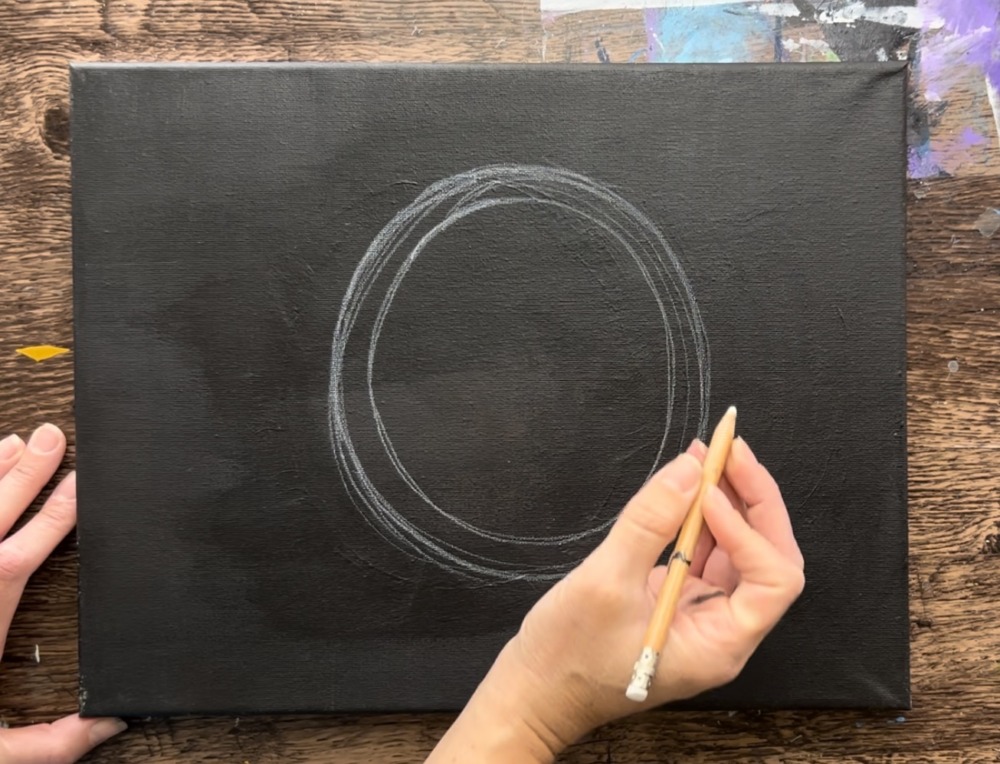
Next, draw a second “ring” on the inside of that first oval shape. This should be spaced about 1/2″ to 3/4″ apart.
Then draw the horn shape of the cornucopia basket.
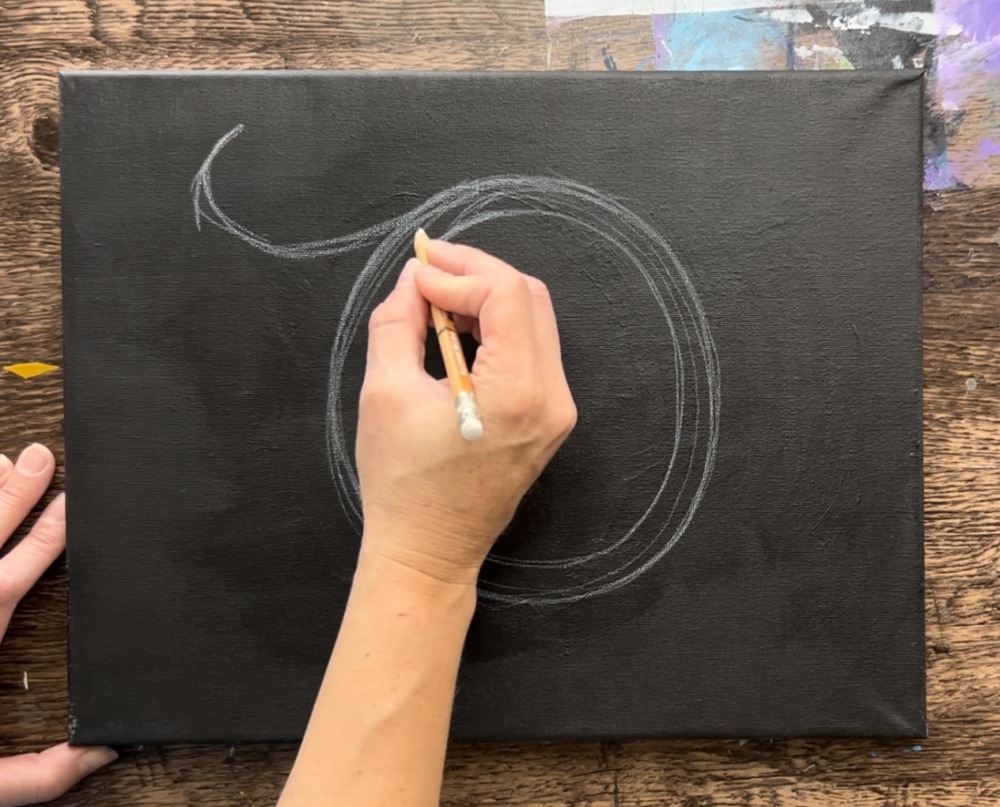
As you draw the bottom, make it slightly flat on the bottom as it attaches to the opening.
Next, draw curved lines going around the circumference of the ring. Make these all relatively evenly spaced apart and about 1/2″ to 3/4″ apart.
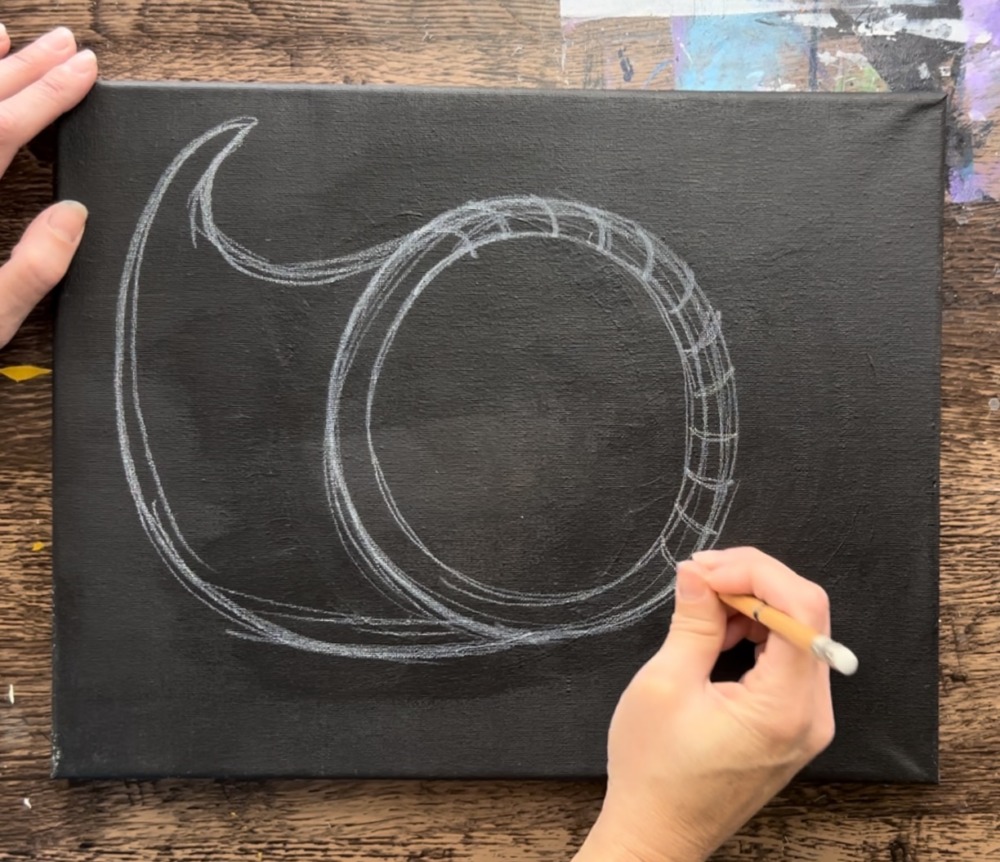
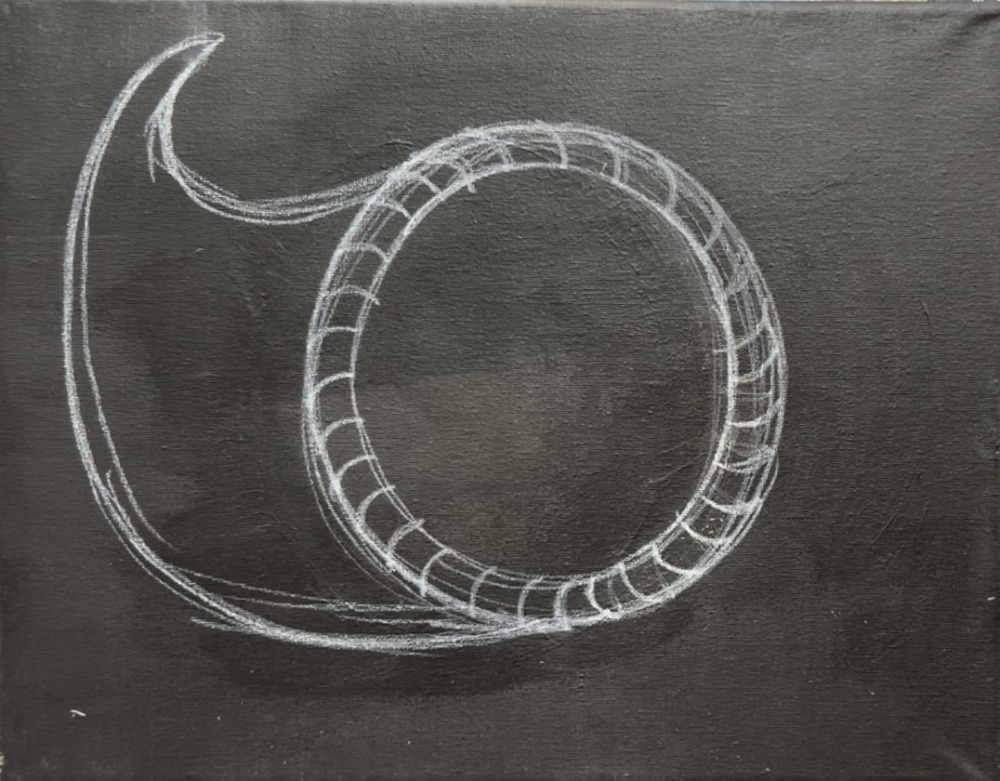
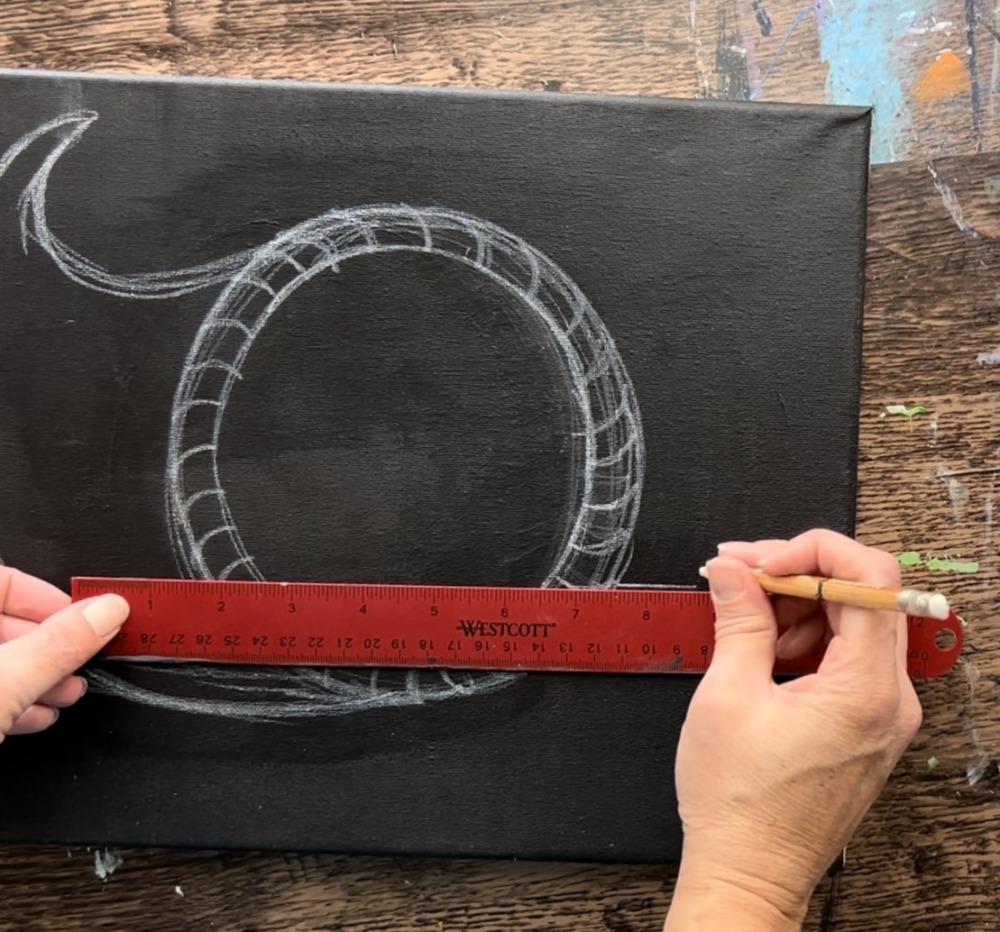
Next, use a ruler to draw the “table line”. Draw it so that the horizontal line goes behind the cornucopia basket.
3. Paint Cornucopia Opening
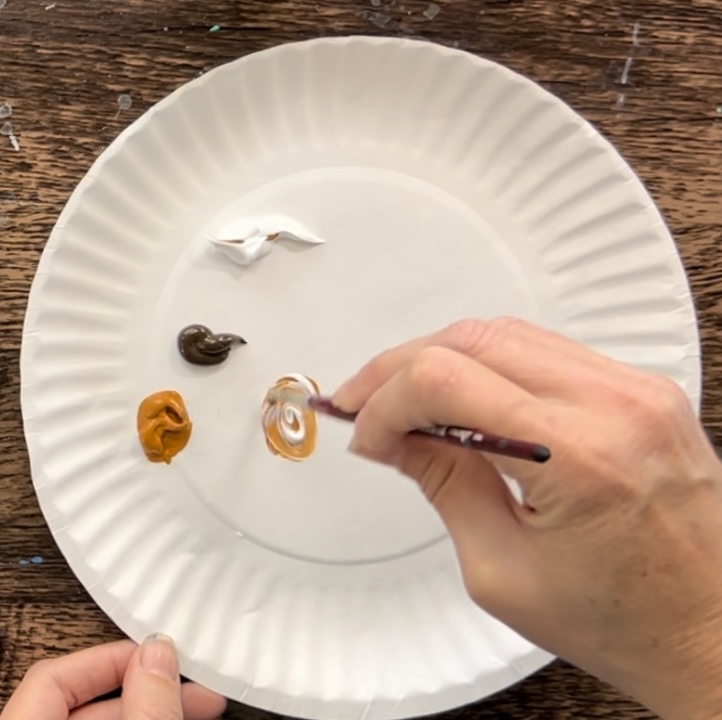
Load your palette with the three colors: raw Sienna, titanium white and raw umber. These are the three colors you are going to blend and use for the cornucopia. The first thing I painted on this was the border/ opening of the basket.
Load your #4 round brush in water. Start by mixing equal parts raw Sienna and titanium white. This will make a light golden brown.
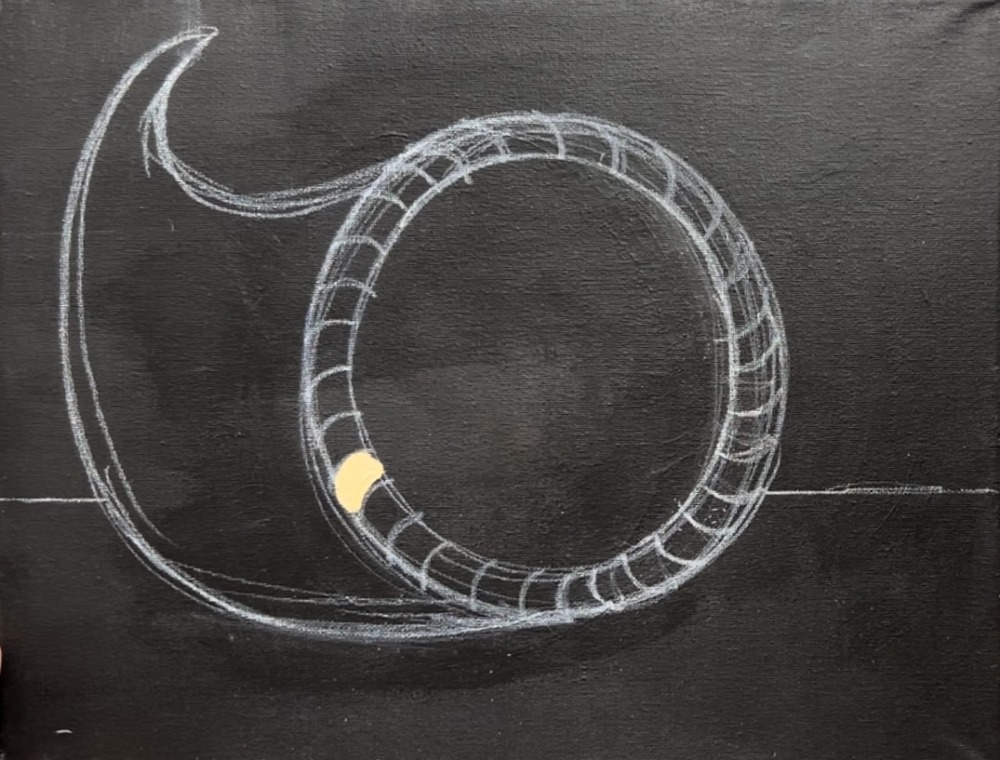
Paint each little segment on the basket border with a thick, curved stroke.
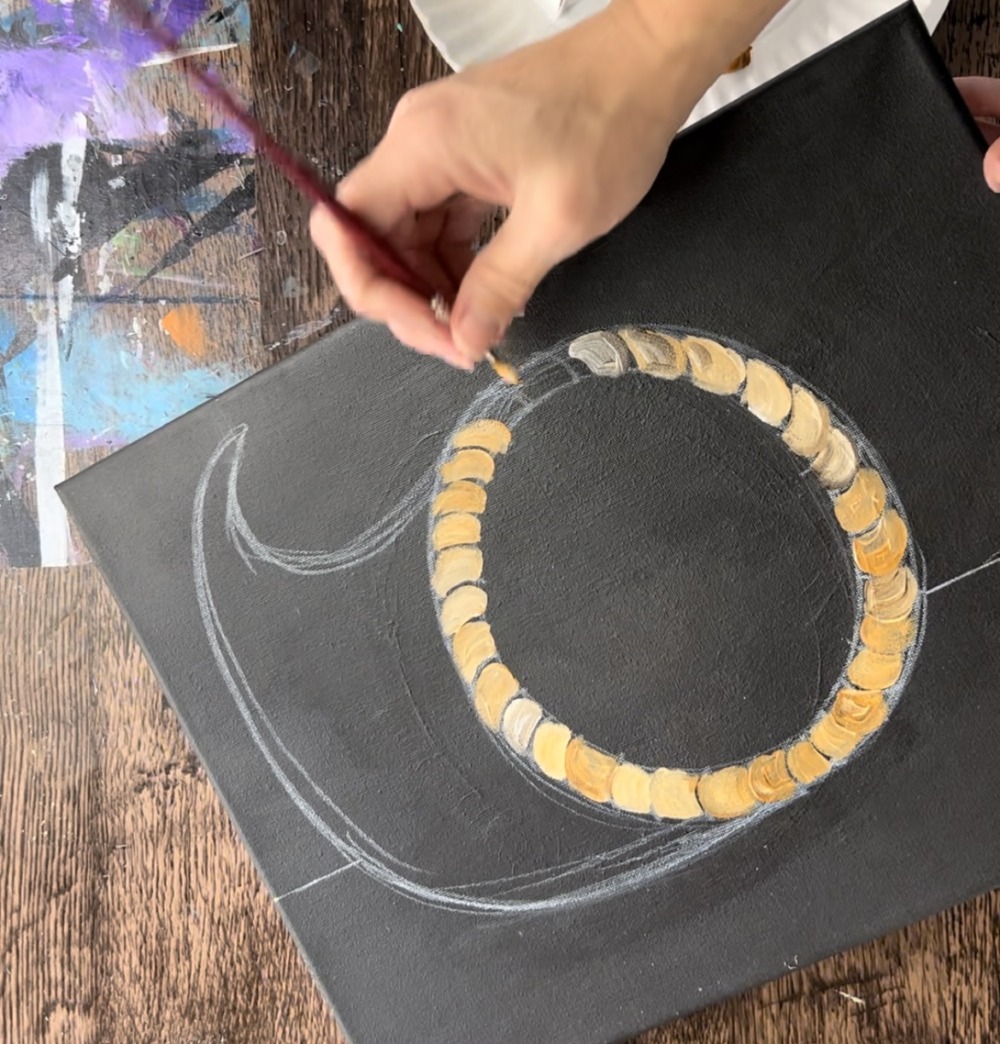
Try to vary the colors of each of the curved segments. Do this by adding different amounts of your browns and white on the palette. You can also leave a very small slither of black in between each of the segments to allow them to stand out (although this may not be necessary because we will outline this with black in a later step).
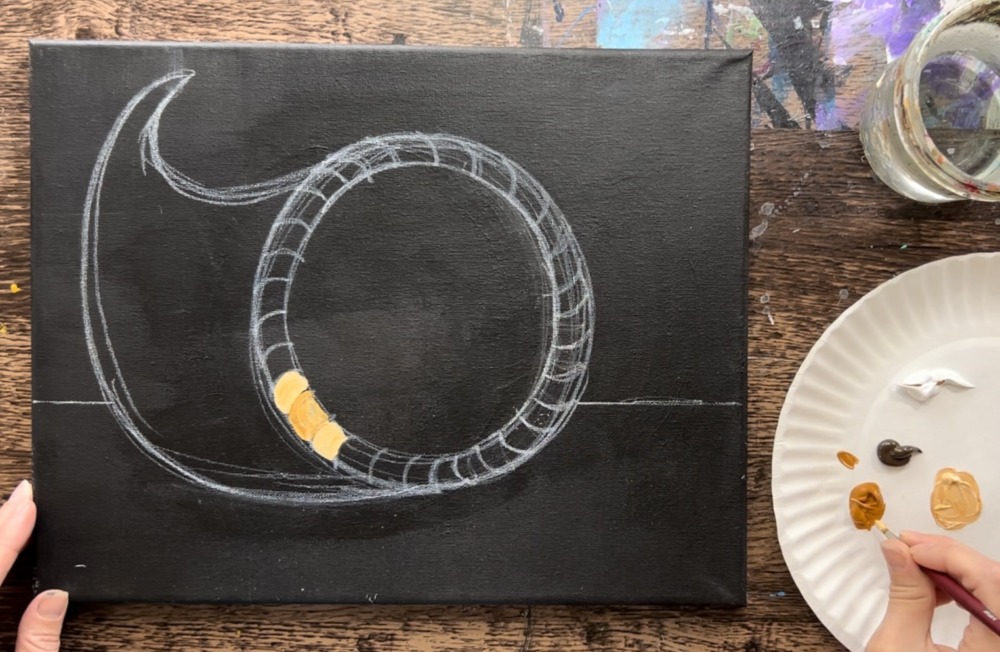
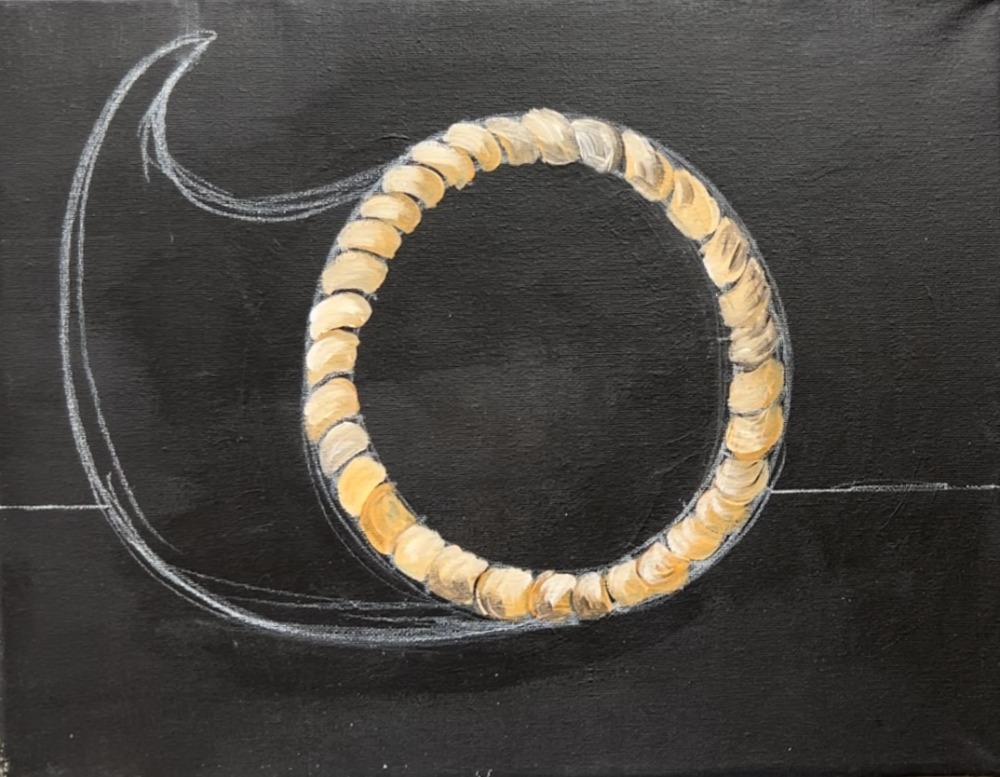
Fill the entire border with varying amounts of these three colors.
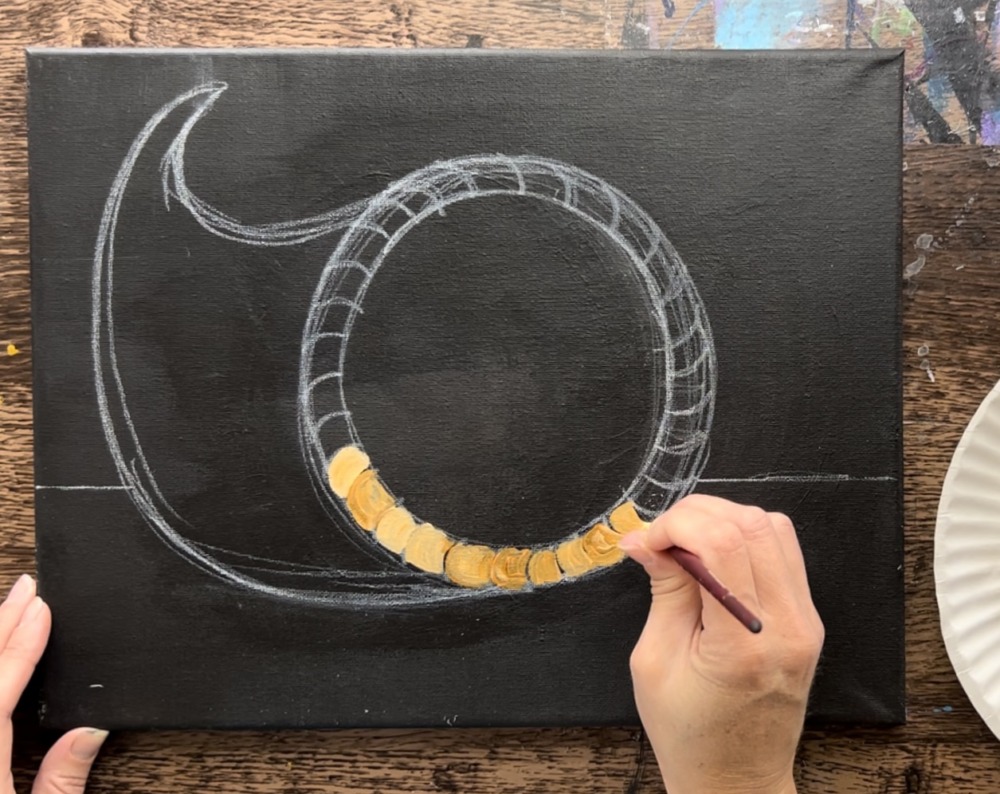
Go all the way around and make sure each stroke is going in the same curved direction.
4. Paint Cornucopia Horn
Use the same colors and brush to paint the side of the basket. Start by painting one “rib” at a time. Try to make the top of the basket lighter and the bottom darker. For this first stroke, I did raw Sienna and titanium white for the top and then blended raw umber on the bottom.
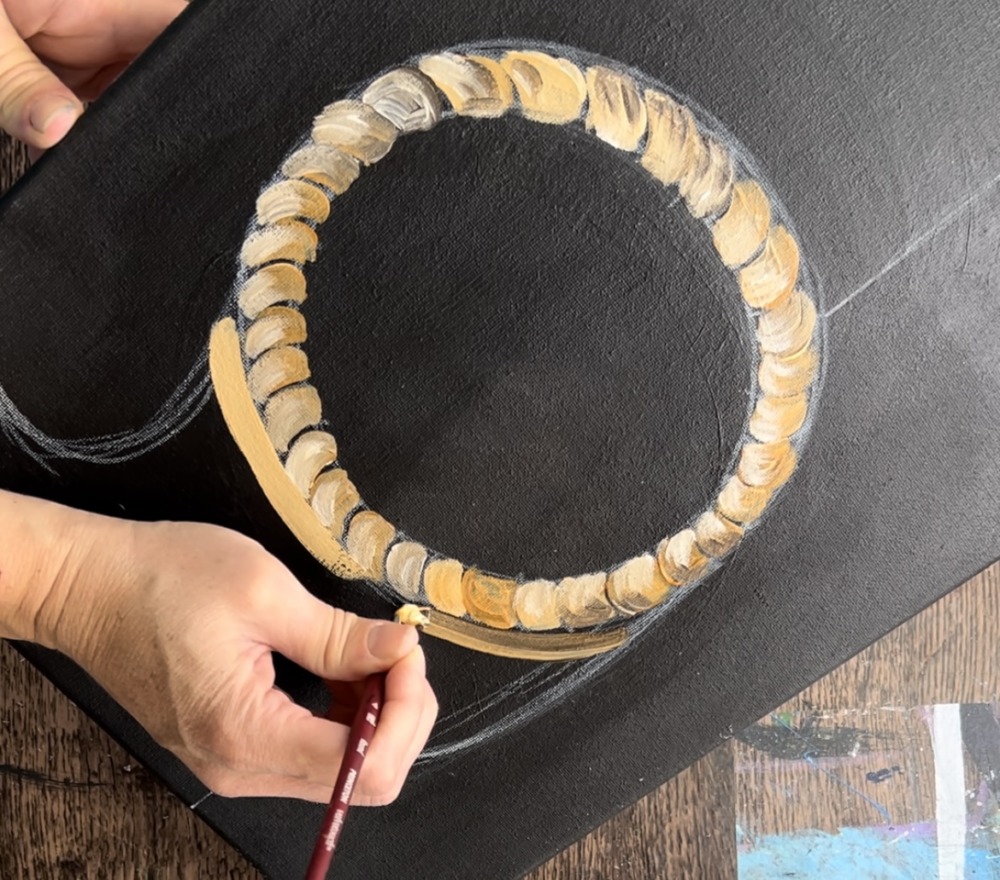
Paint each “ribbed” area starting from the top and curving down. It’s okay to leave a little slither of black in between the ribs. Also, add darker brown on the bottom to make it darker/shadowy on the bottom.
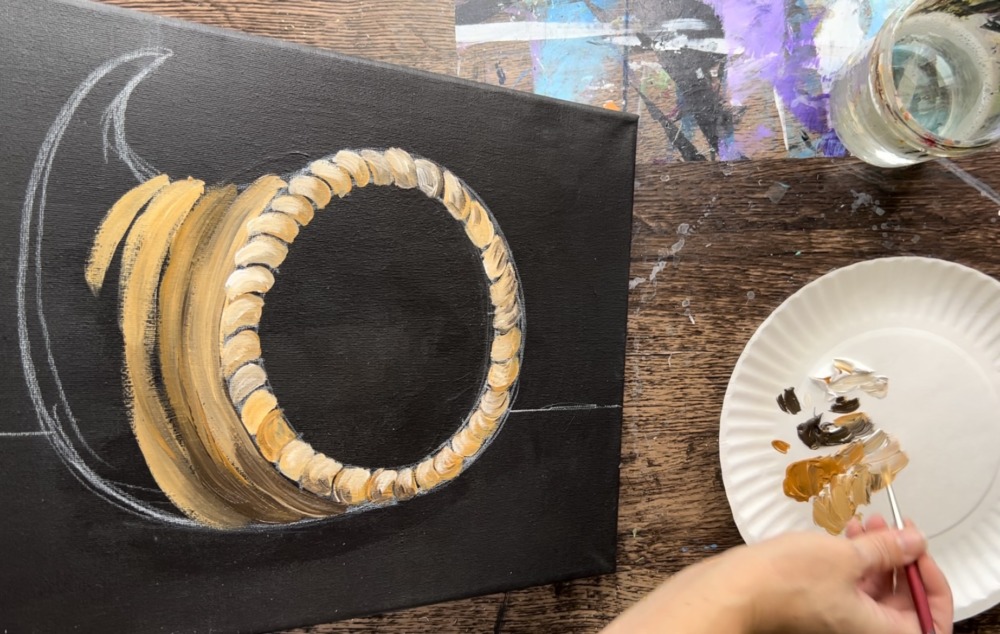
It’s okay if the colors don’t blend all the way. When you leave it “unblended”, it adds to the textured look of the basket.
As you paint to the left, the “ribs” will get smaller. I also make them lighter towards the tip of the horn.
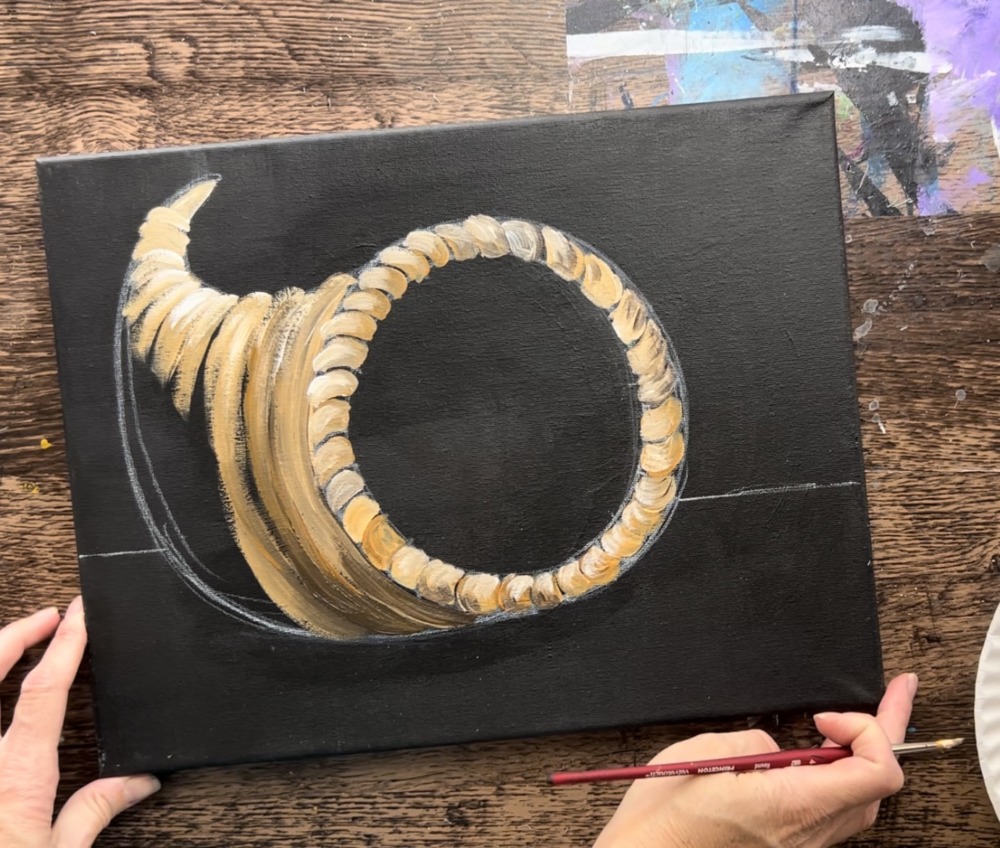
After adding lighter browns on the top, I went back and finished each of the “curved ribs” with the darker brown and blended it up.
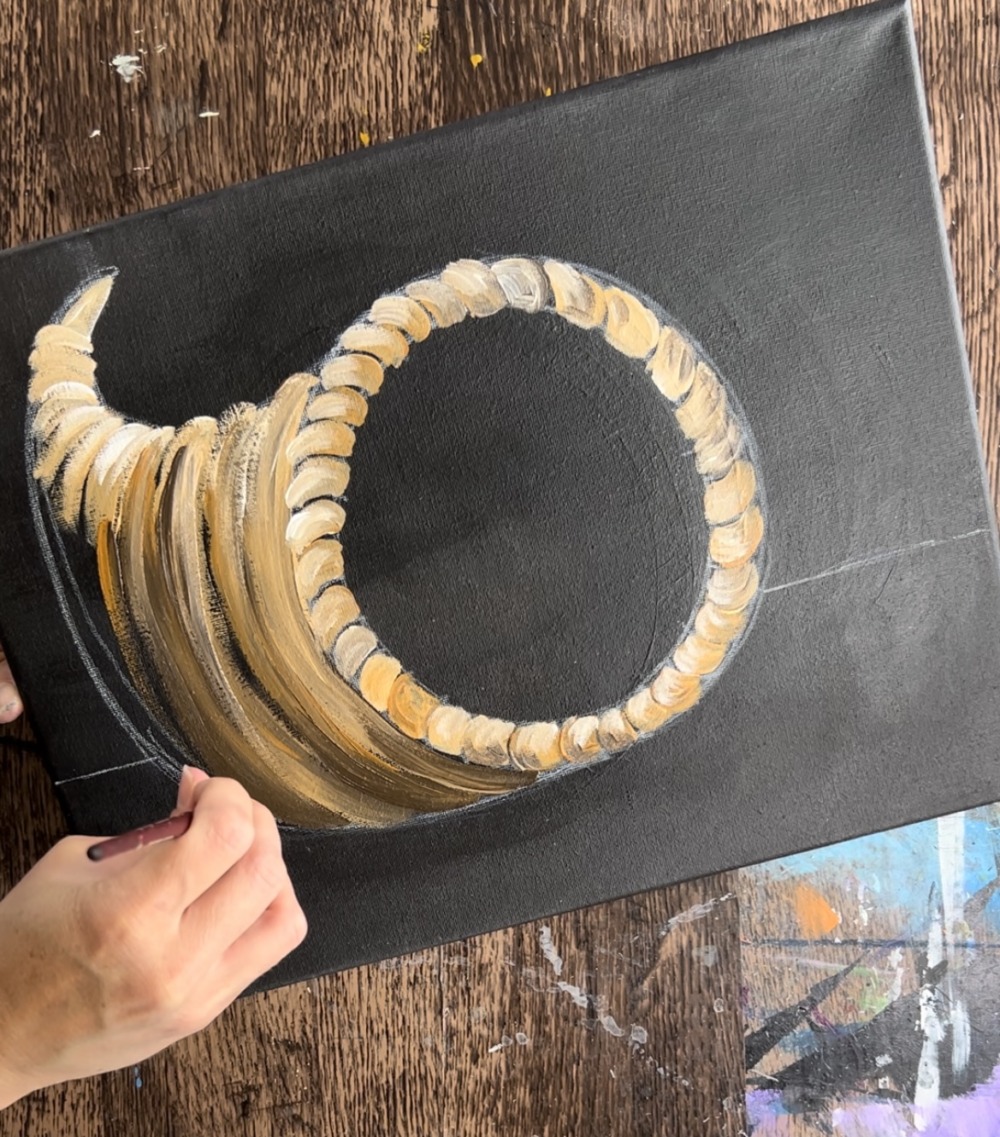
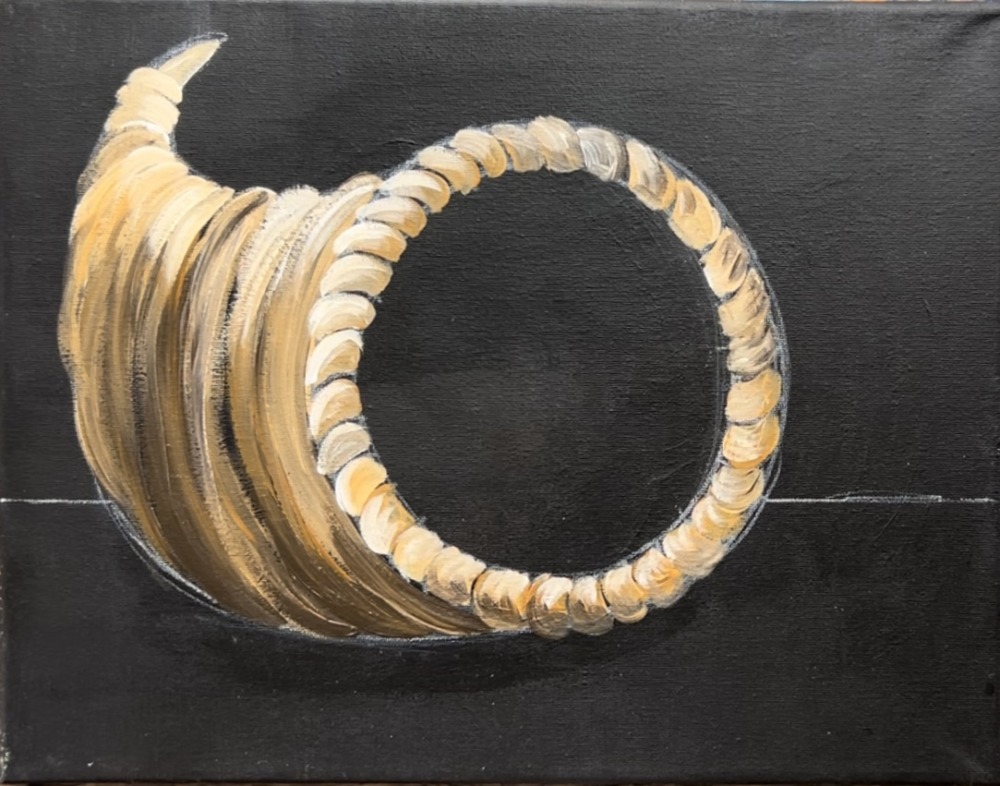
The inside of the basket can actually be left black. If you want color in it, you can use the #12 bright brush and the raw umber to paint textured strokes. Make sure this area stays very dark.
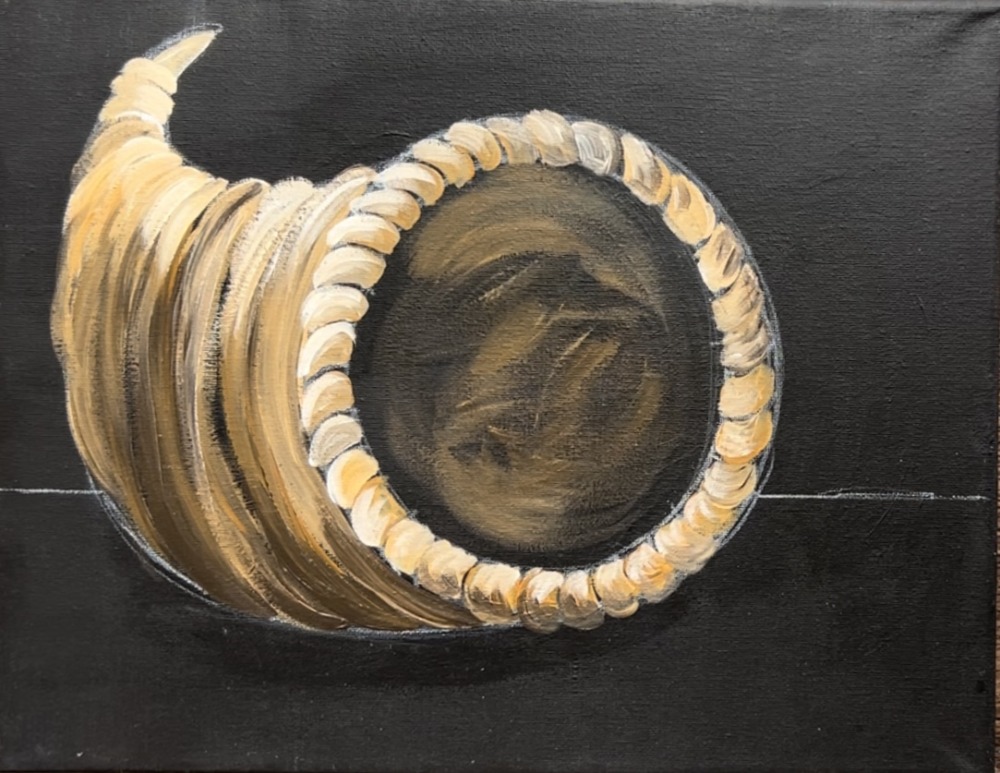
5. Paint Table
Load your palette with the color “red oxide”. Use the #12 bright brush to loosely paint left and right strokes on the table area. Don’t paint this solid, leave a lot of black still showing through. Leave the area around the bottom of the cornucopia very dark for shadow.
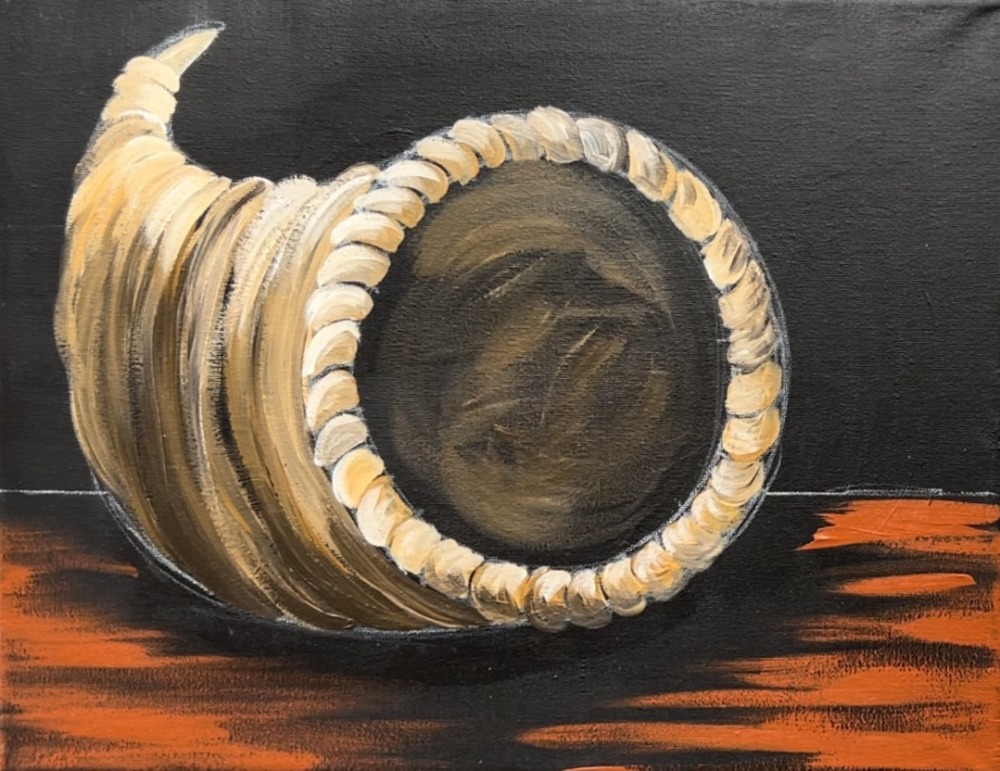
If needed, go back with mars black paint to blend with the red oxide to make sure there are enough dark areas in the table areas.
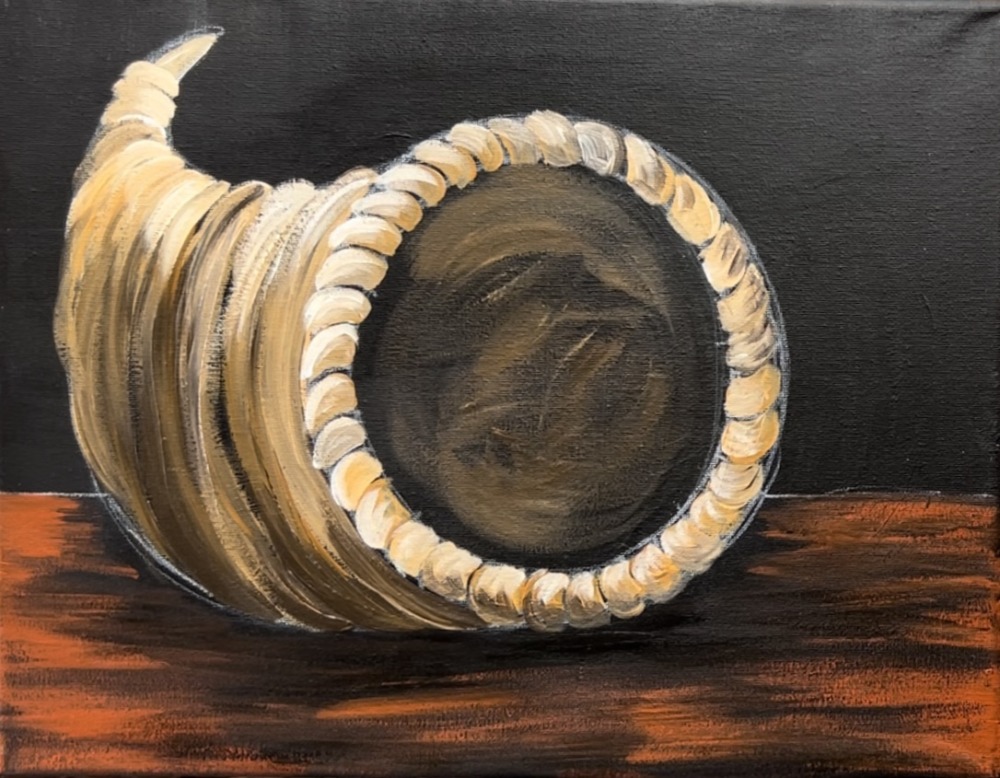
6. Paint Outlining On The Cornucopia
Next, use the #4 round brush and mars black to outline parts of the cornucopia. I first outlined the border/ opening where it looks like the basket is “twisted”. I outlined the curved line between each of the “twists” and also along the edges.
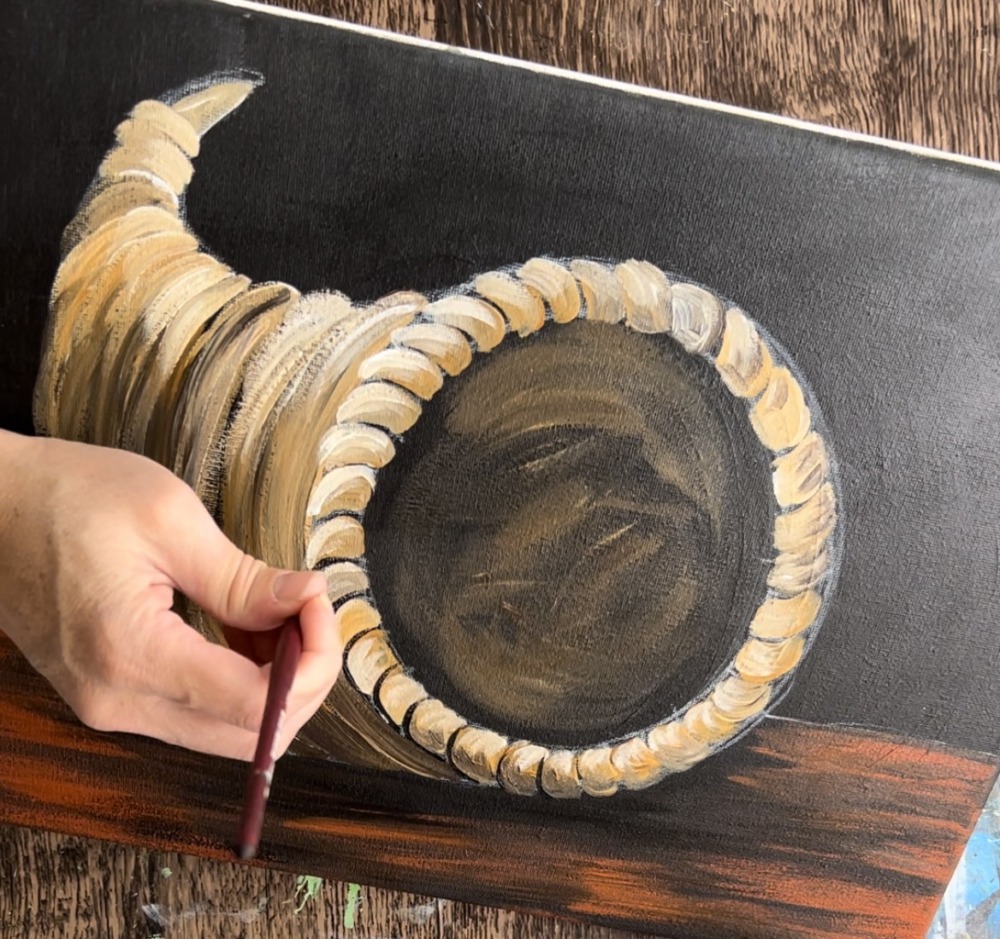
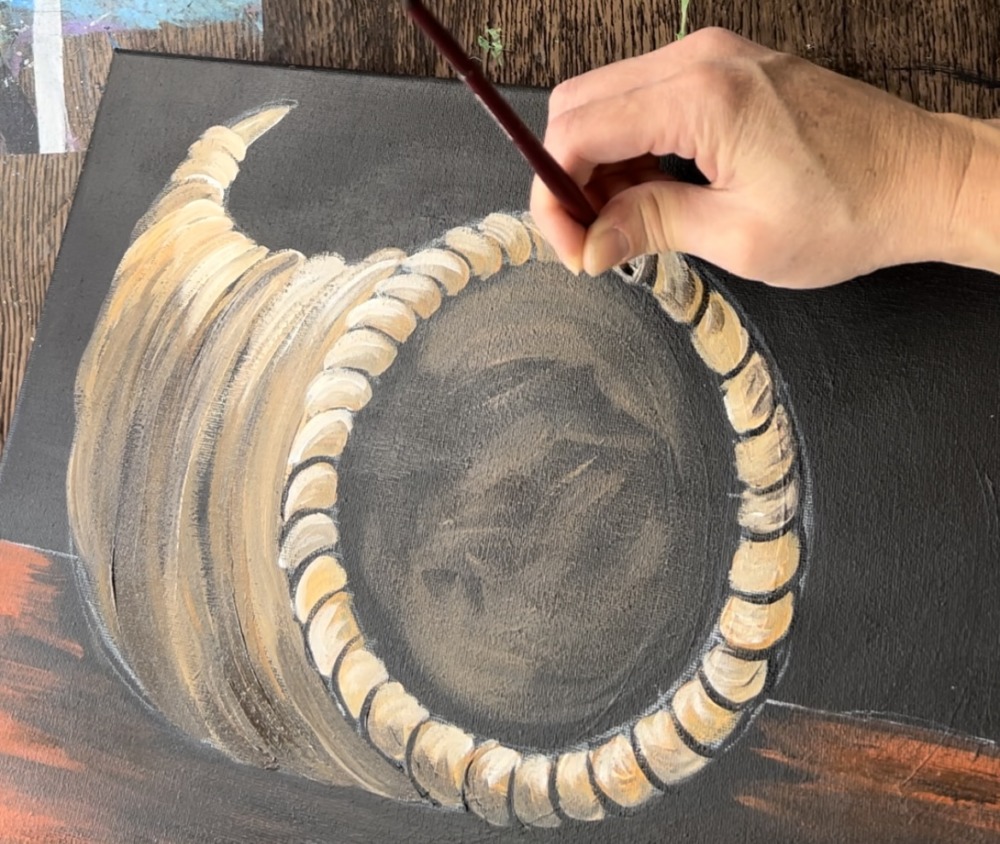
I also did some “loose outlining” along the horn part of the basket. Specifically this was the dark lines between each of the ridges.
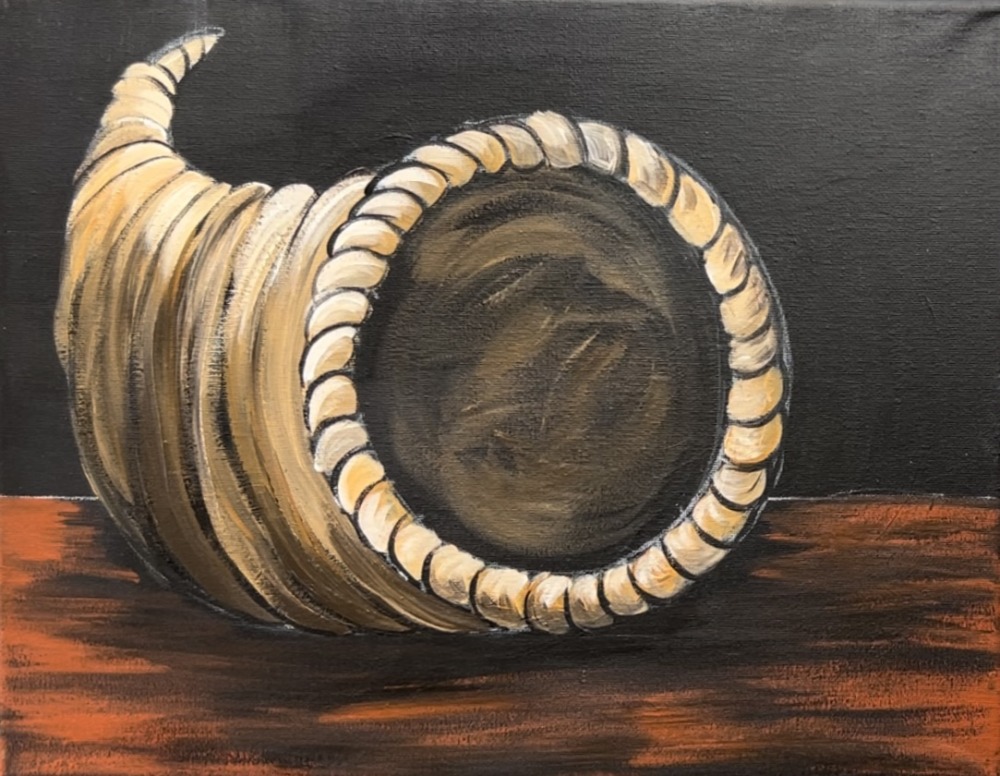
Wait for this entire painting to dry before going onto the next step.
7. Draw and Paint Pumpkin
Use a white chalk pencil to draw the pumpkin. Start by drawing a large oval about 4″ high and 1.5″ wide. This doesn’t have to be exact and you are also welcome to change the composition/ placement of the fruits and vegetable.
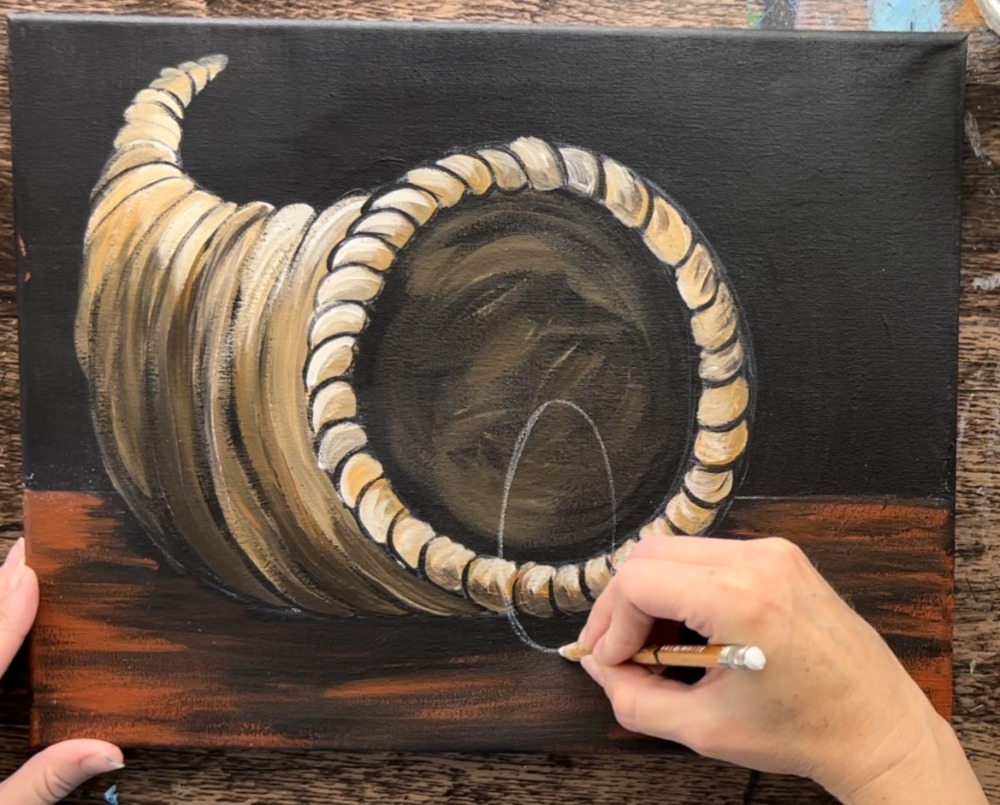
Draw curved lines on each side of the oval. I did one on each side of the oval and then another set on each side of those.
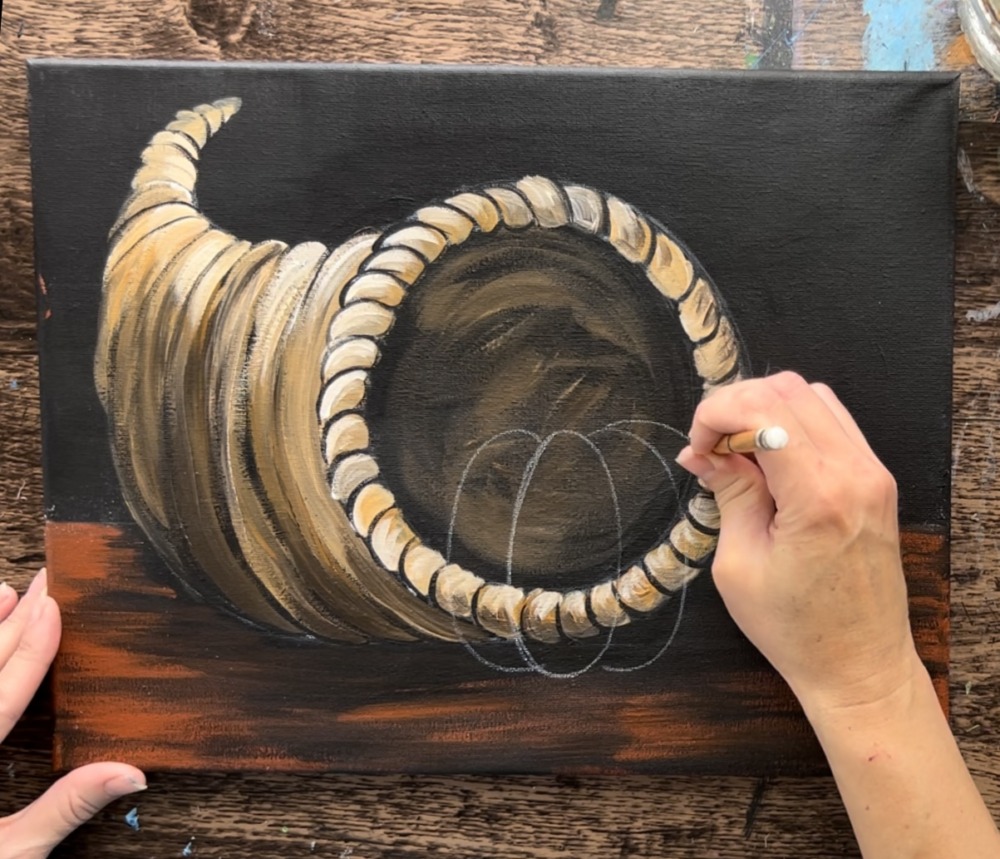
Draw the stem. The base of the stem lines up with the top “bumps” of the pumpkin that you drew. I did a stem that angles upwards with a slanted oval shape on the top.
Load your palette with titanium white. Use a #4 round brush to paint the pumpkin white first. When you paint this white first, it will allow the pumpkin to be a bright orange and the background will not show through the paint.
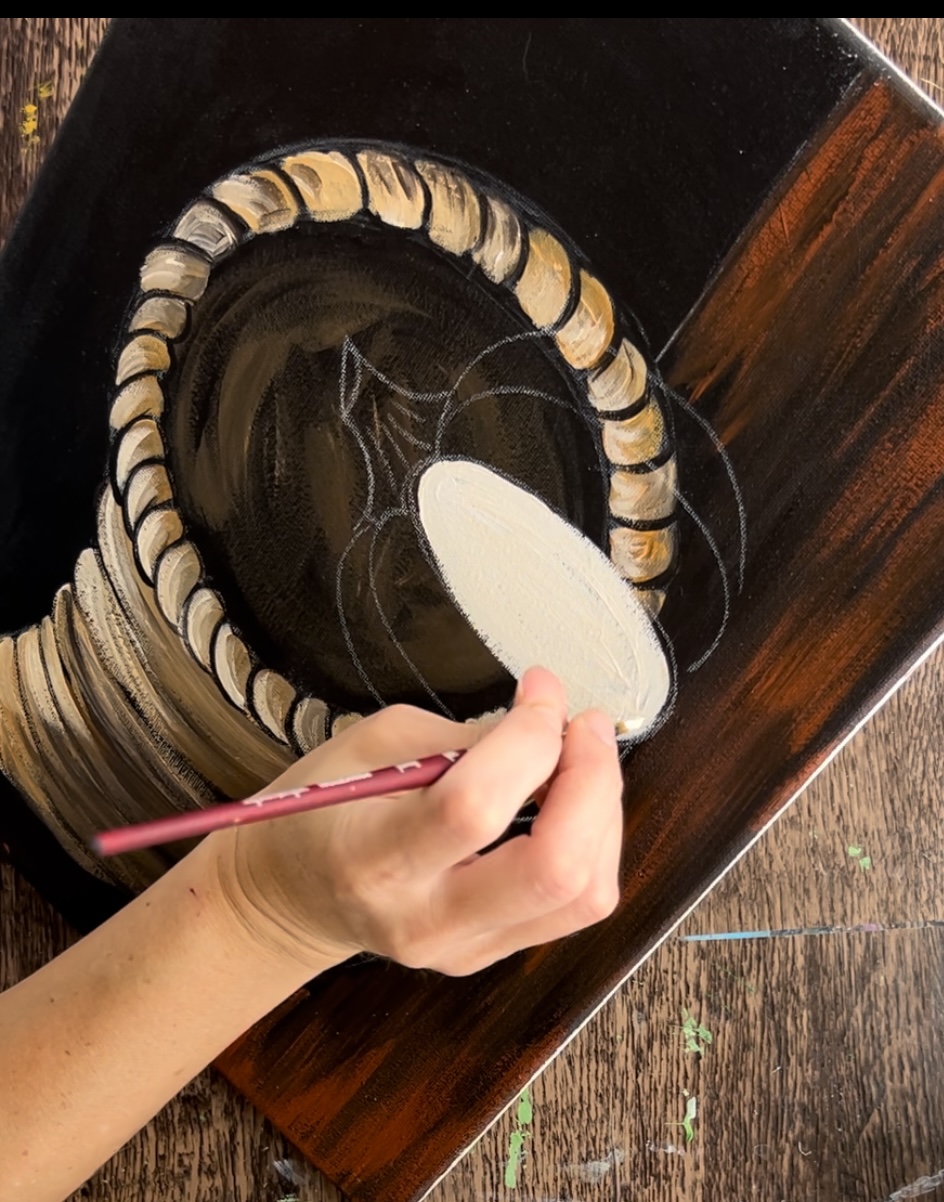
Paint the center oval first. Then paint the curved lines on each side. Leave a slither of black in between each of the shapes/pumpkin bumps.
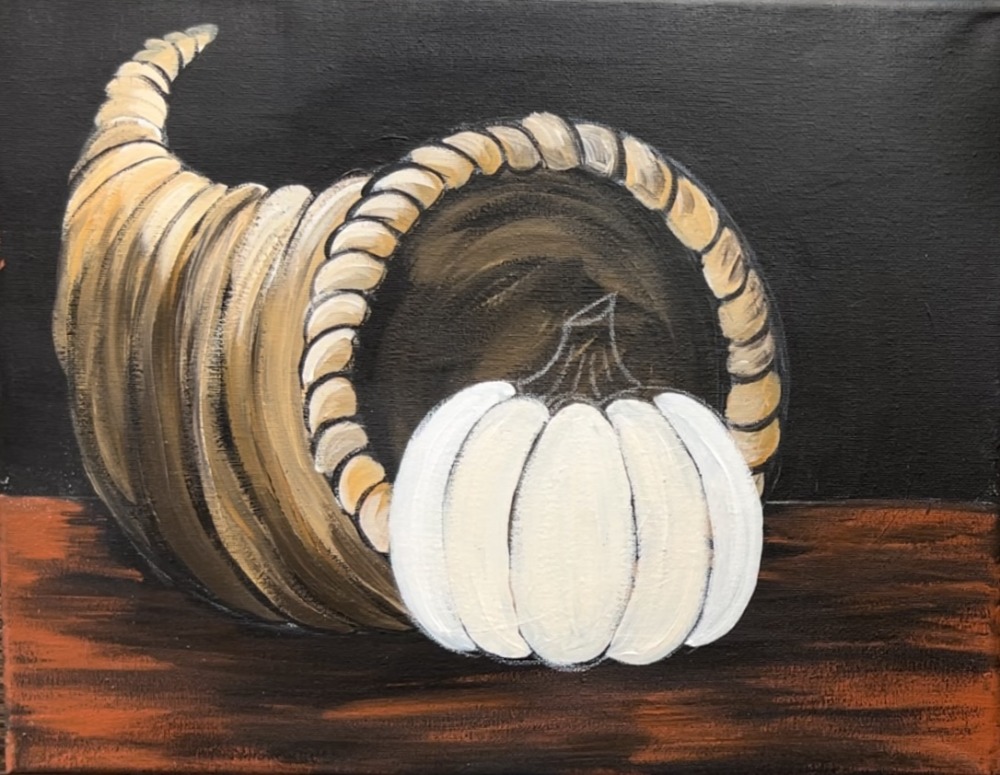
Next, paint the stem. On your palette, mix titanium white, raw Sienna and hooker’s green hue (about equal amounts). Then use the #4 round brush to paint the stem. Outline the shape of the stem first and then paint curved strokes that go upwards in the shape of the stem. Add titanium white on the top oval shape of the stem.
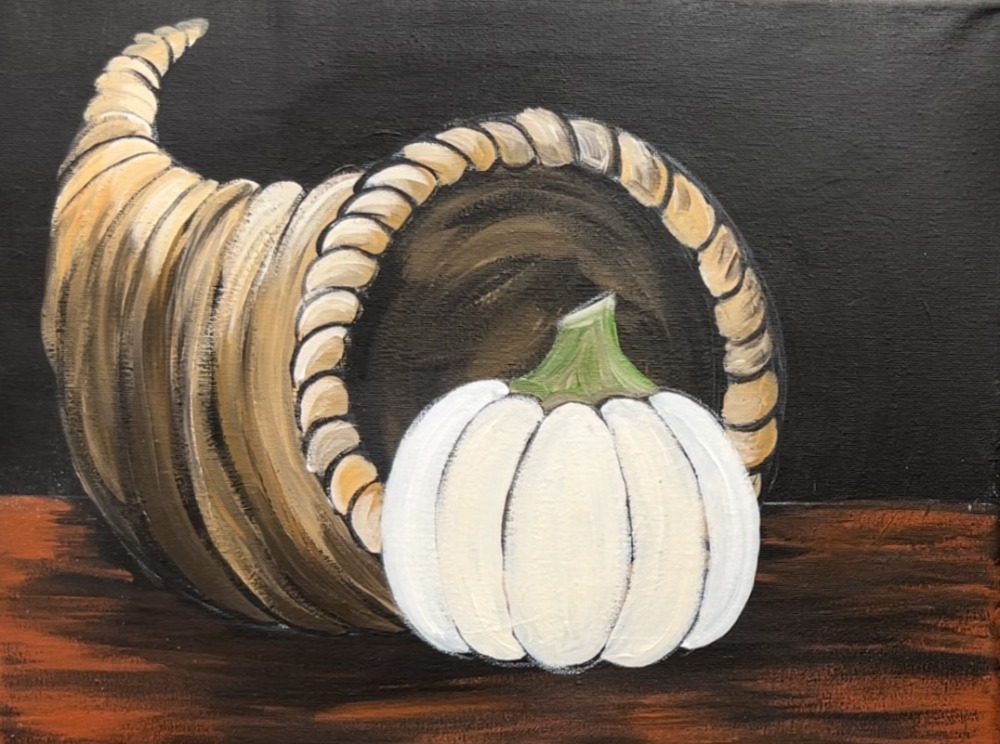
Let the white dry. Then load cadmium orange hue and raw Sienna on your palette. Mix equal parts orange and raw Sienna together. Use the #4 round brush and start by painting the center oval. Outline the shape of the oval and then paint curved strokes to fill in the shape.
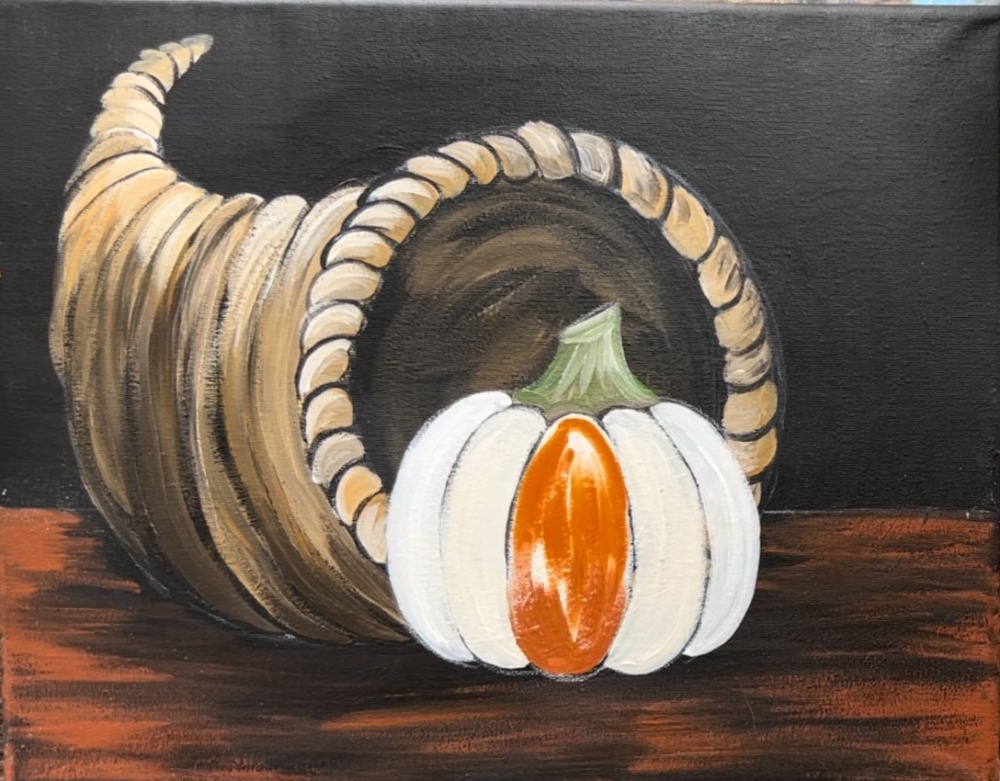
Blend titanium white towards the top of the oval. Then blend either raw Sienna or red oxide towards the bottom to make it slightly darker on the bottom. Leave line/ streaks that appear “unblended”.
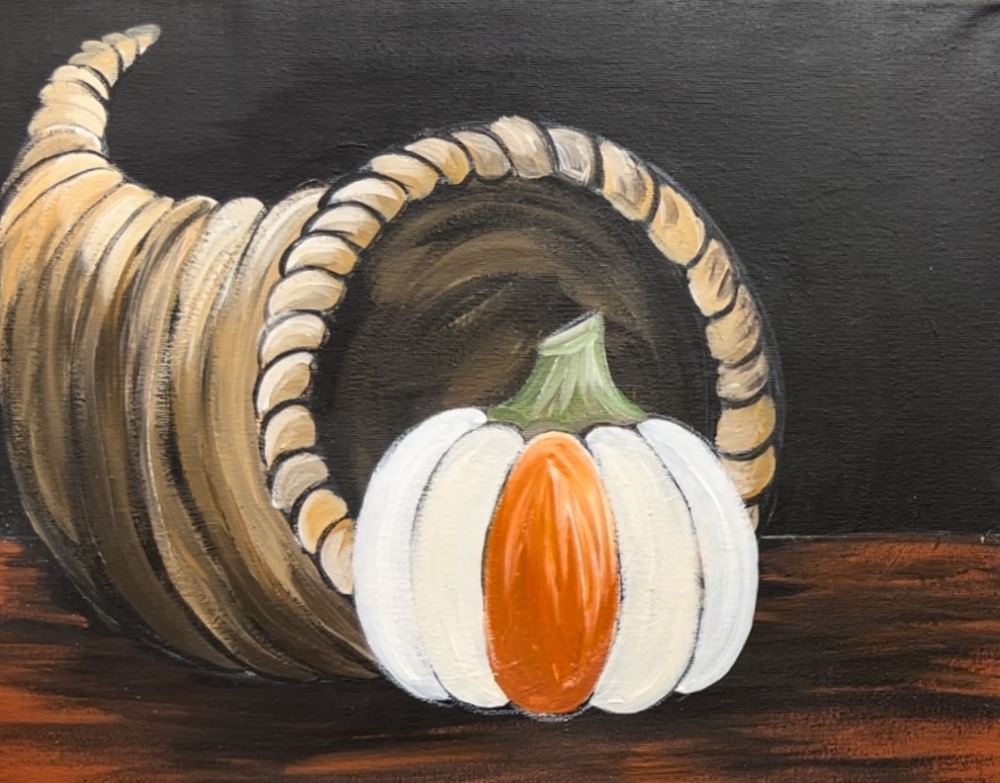
Repeat this for each of the curved areas on the pumpkin.
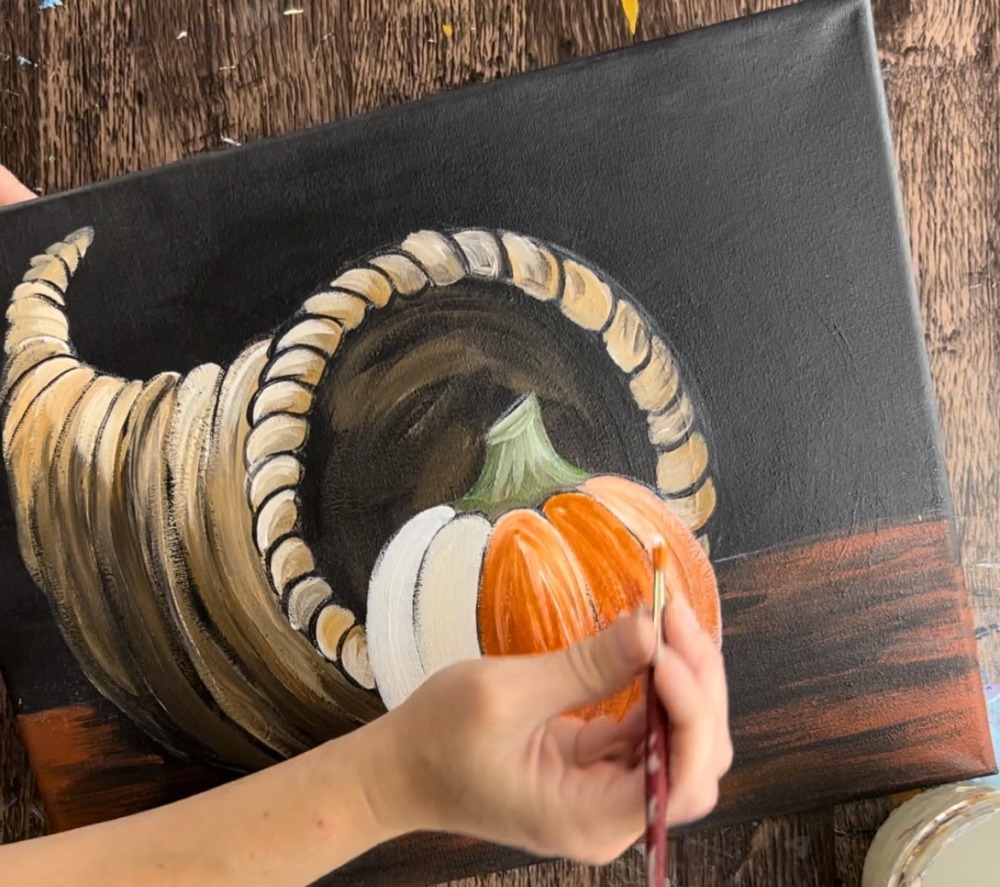
Each of the “curved areas” of the pumpkin have lighter orange at the top and darker orange at the bottom. You can achieve this by blending white in with the orange at the top and blending red oxide or raw Sienna with he orange on the bottom.
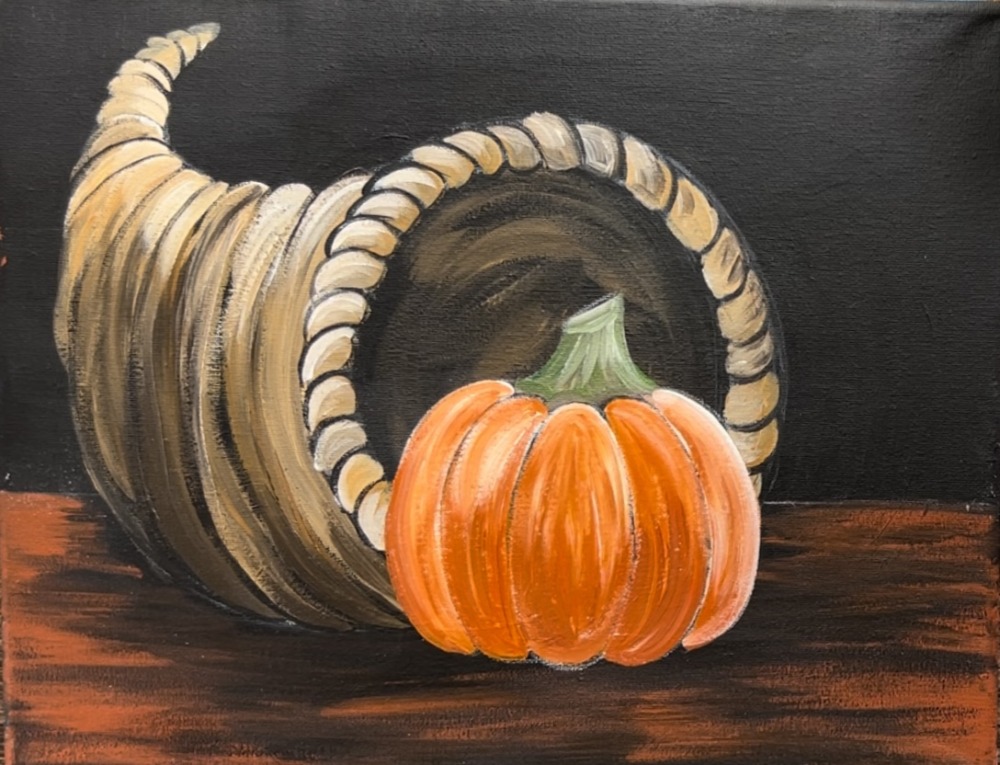
8. Paint Wheat
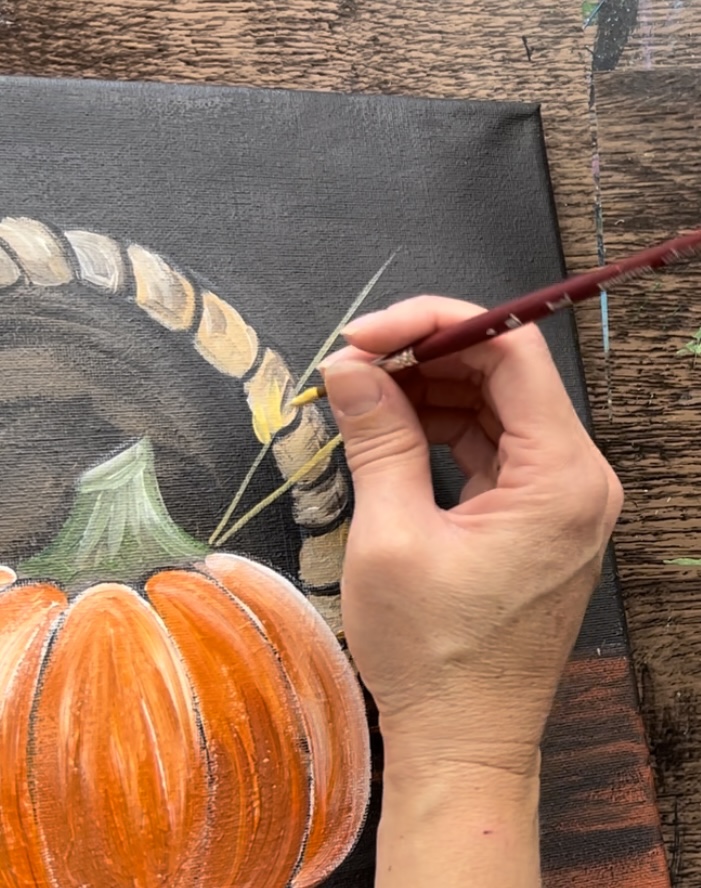
Load your palette with yellow oxide mixed with titanium white. Use the #4 round brush to paint two diagonal thin lines going outwards from behind the pumpkin.
Paint each wheat kernel using titanium white mixed with Naples yellow. Each kernel is a teardrop shape on each side of the line. And each kernel slightly overlaps the previous kernel.
Vary the color by adding titanium white into the Naples yellow. You can also add raw umber (the dark brown) into the Naples yellow.
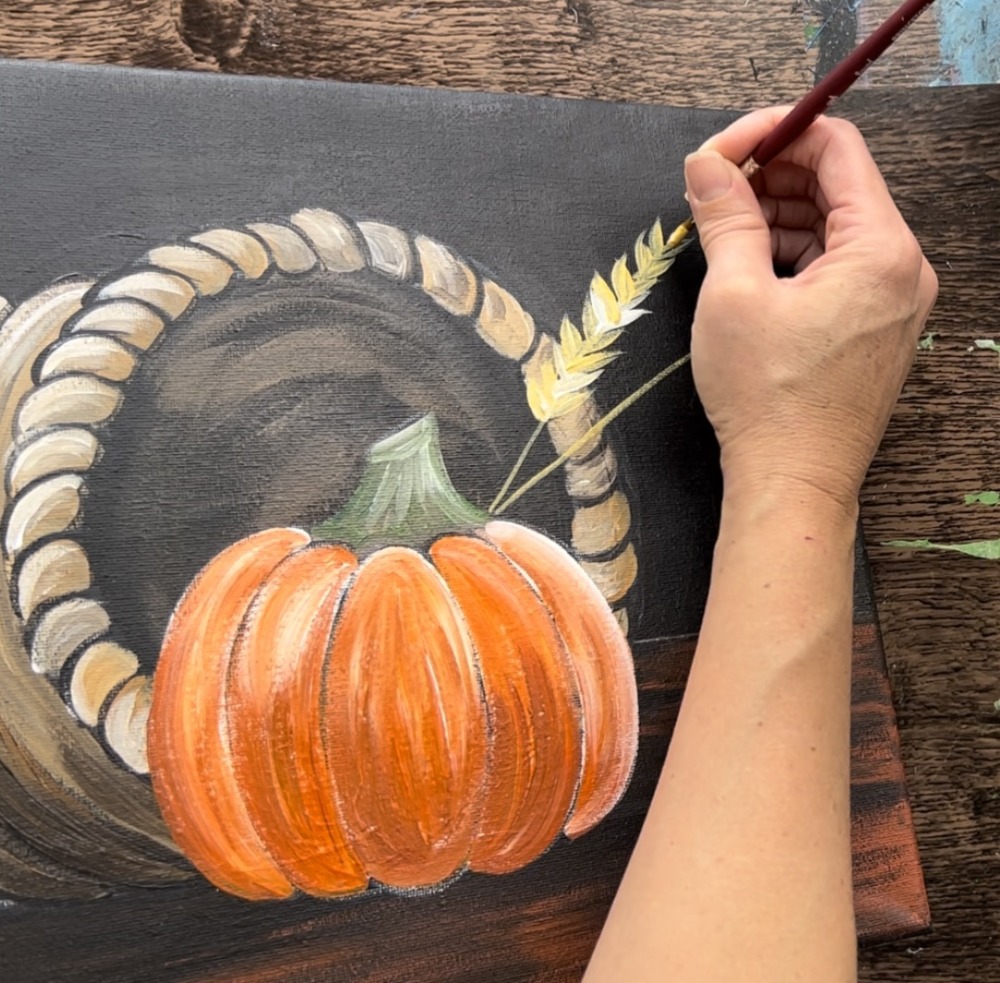
Paint kernels all the way to the end of the center stem line. Then paint a thin leaf line that bends down and goes to a point (with the Naples yellow and titanium white).
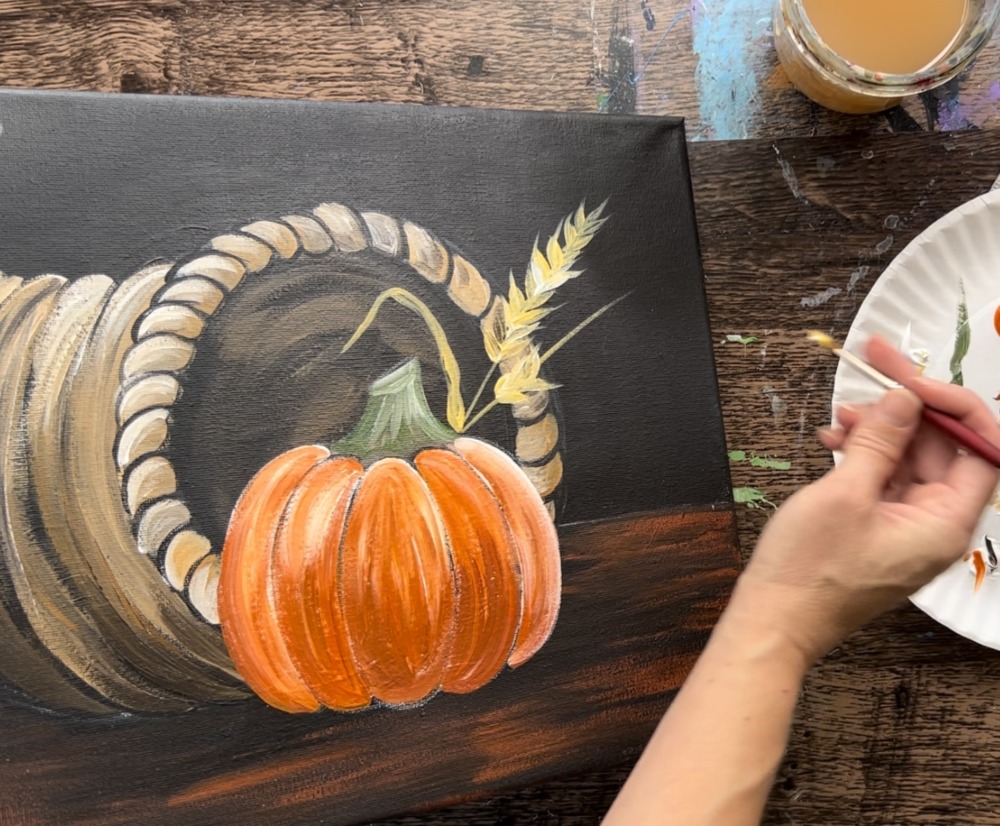
Paint the second set of wheat kernels on the other line and paint another leaf.
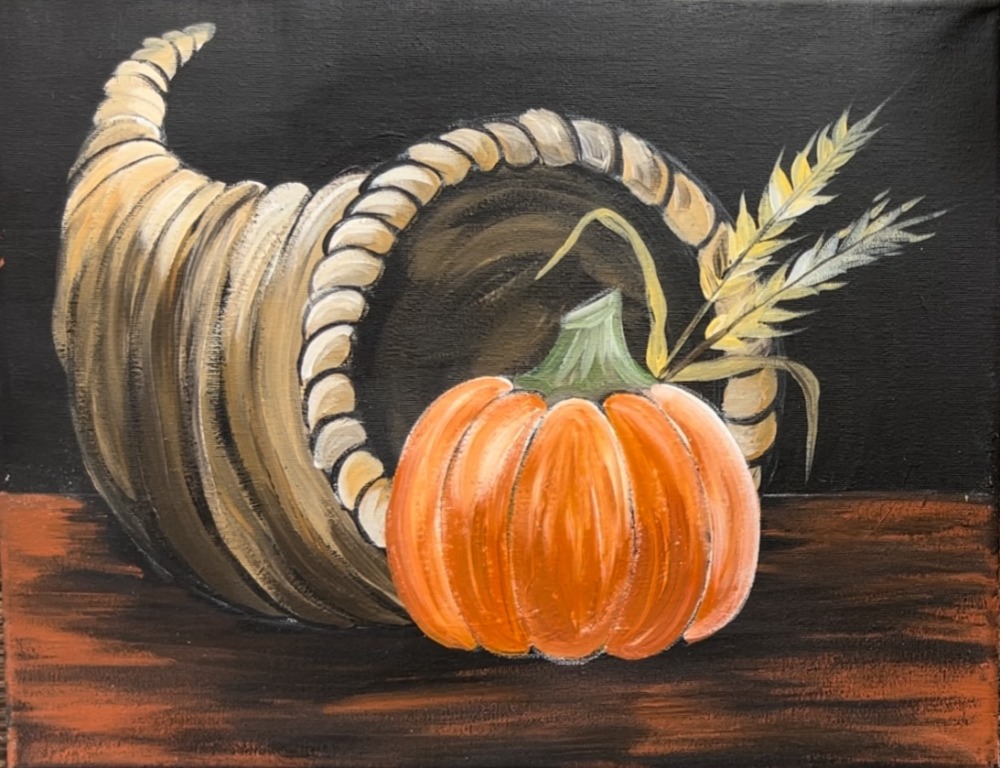
9. Paint Grapes
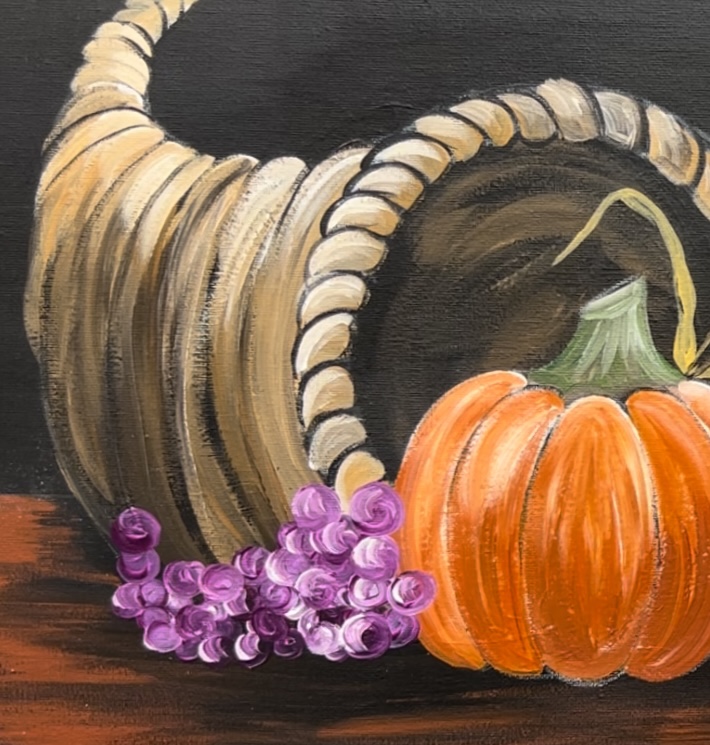
Load your palette with deep violet and titanium white. Use the #4 round brush to paint the grapes. Double load your brush in both the purple and the white. Paint little circles that slightly overlap each other.
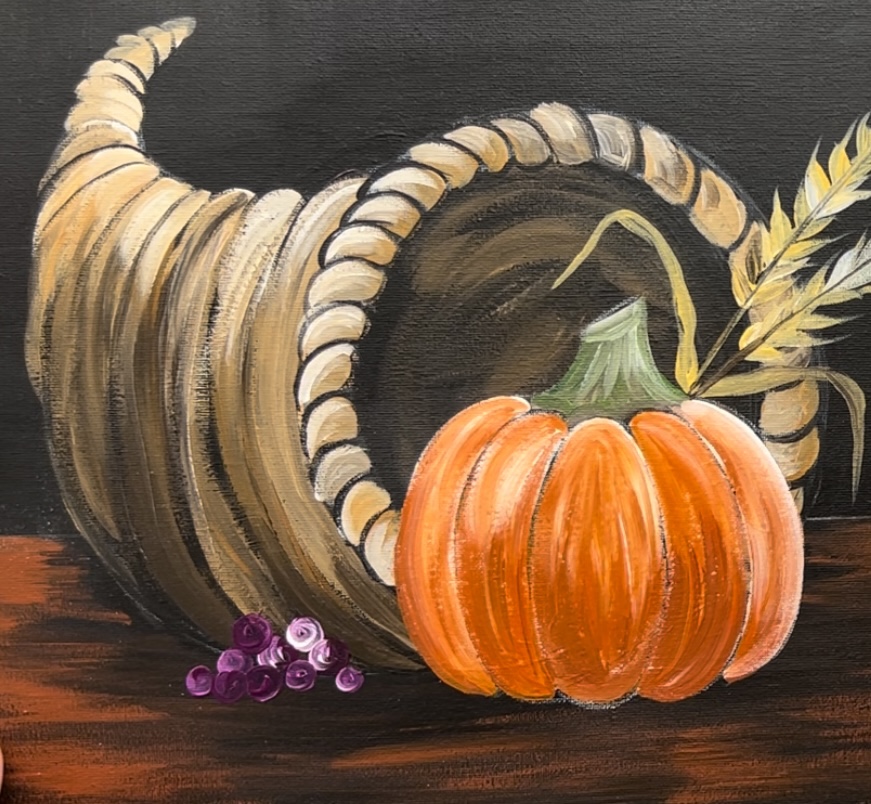
Paint the bundle so that it is flat on the ground and bunches up and overlaps the pumpkin.
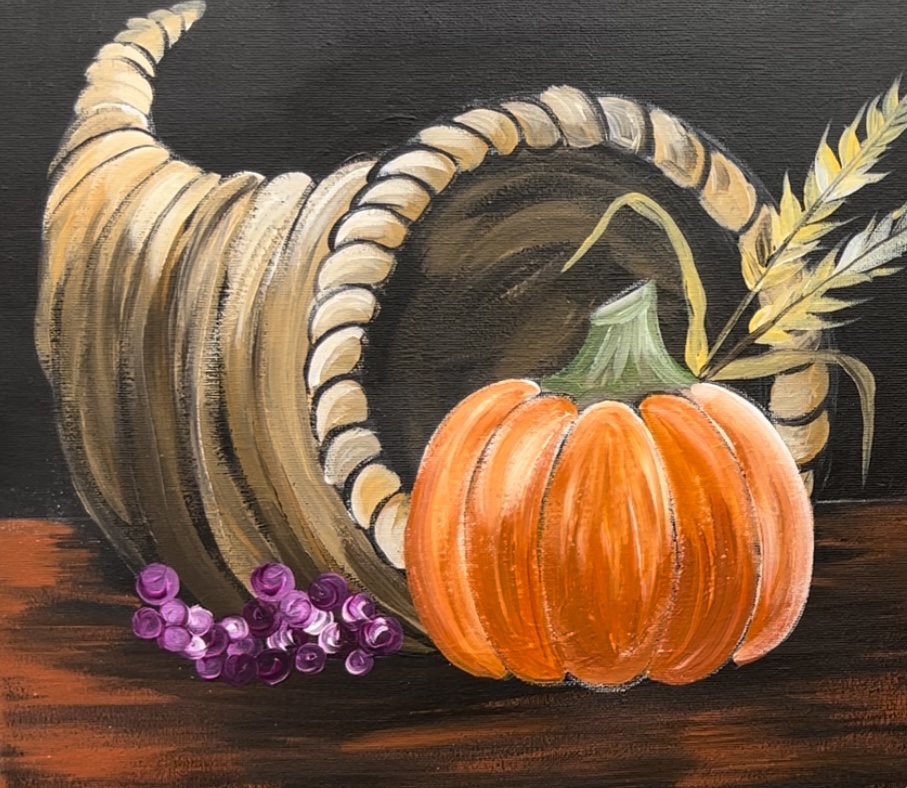
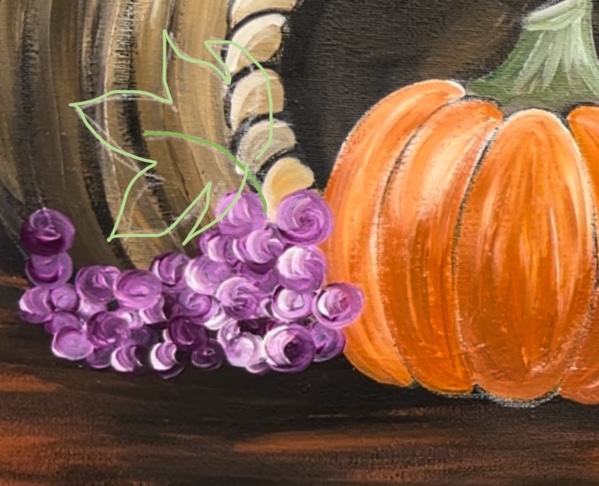
Next, draw the grape leaf with the white chalk pencil.
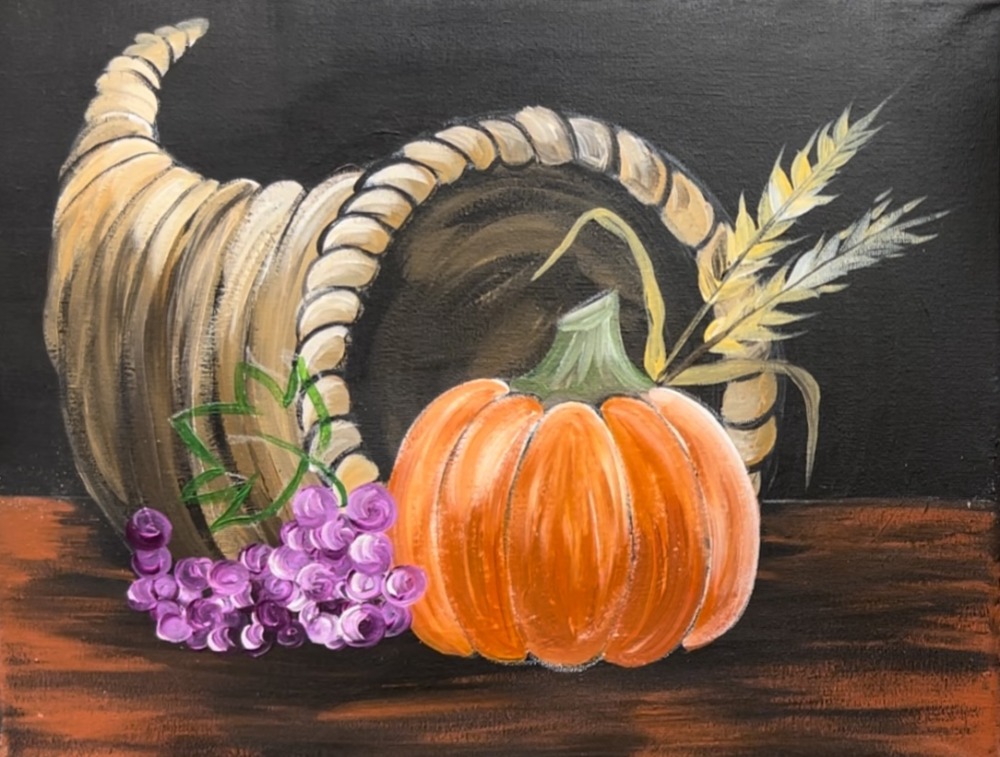
Use the #4 round brush and hooker’s green hue to outline the shape and stem.
Then double load the brush in both the green and titanium white. Let the green and white blend together to paint the leaf in. Add some texture to the edges of the leaf so it’s not smooth on the edges but kind of “jagged”.
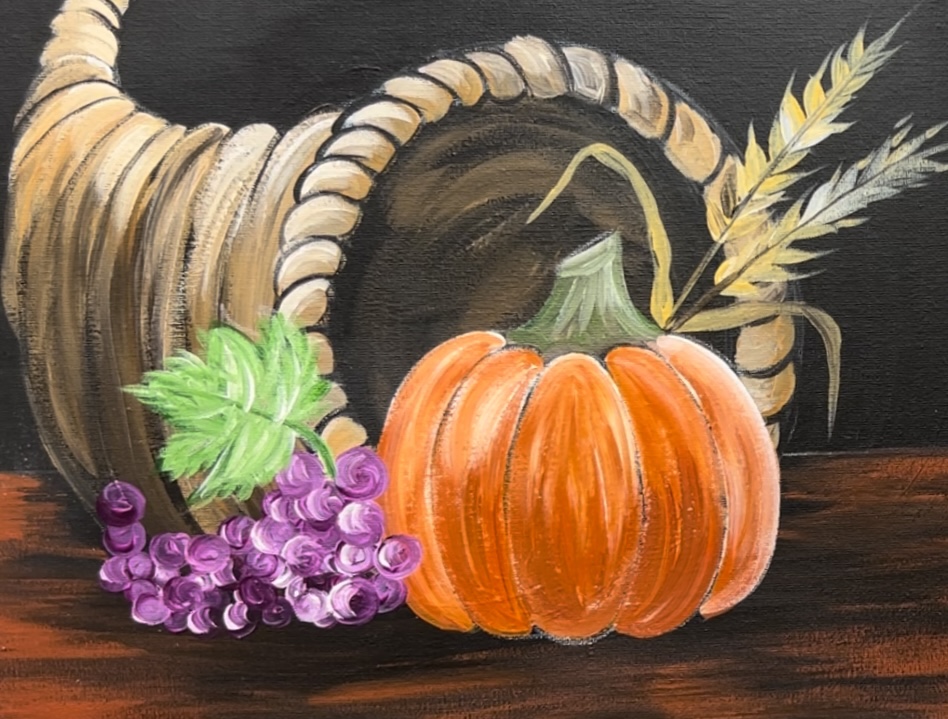
Paint either black or green leaf vein lines.
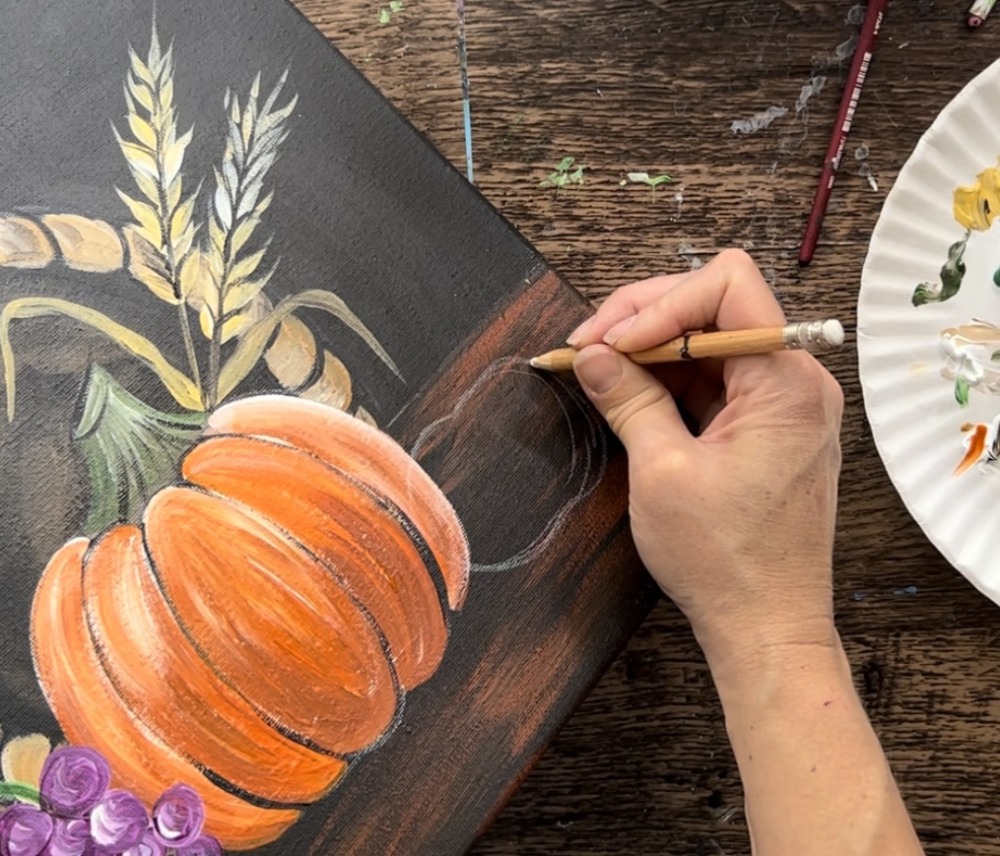
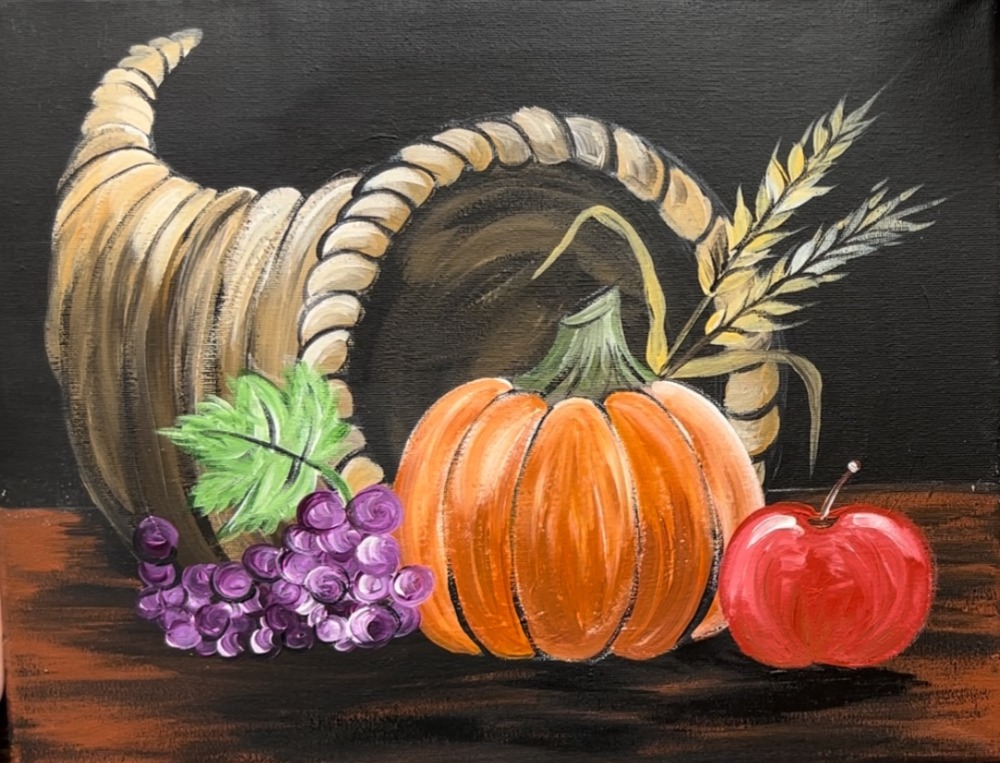
10. Draw and Paint Apple
Use the white chalk pencil to draw an apple shape. This slightly overlaps the right side of the pumpkin.
Use the #4 round brush and titanium white to paint the apple white.
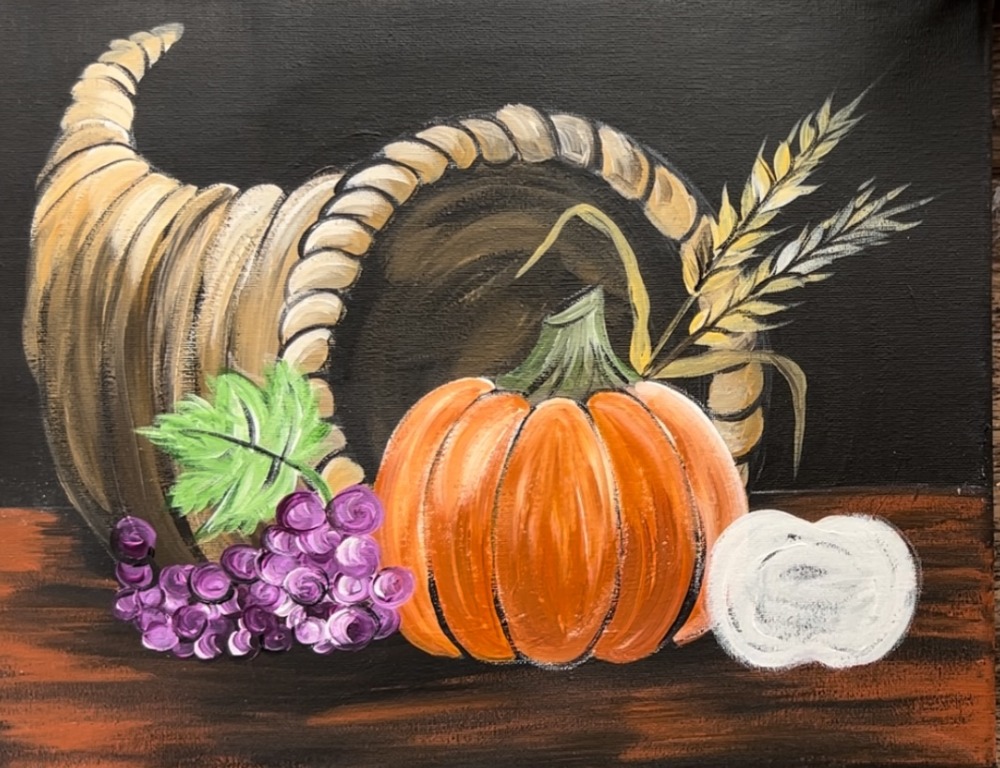
When the white dries, load pyrrole red onto your palette and paint the apple red.
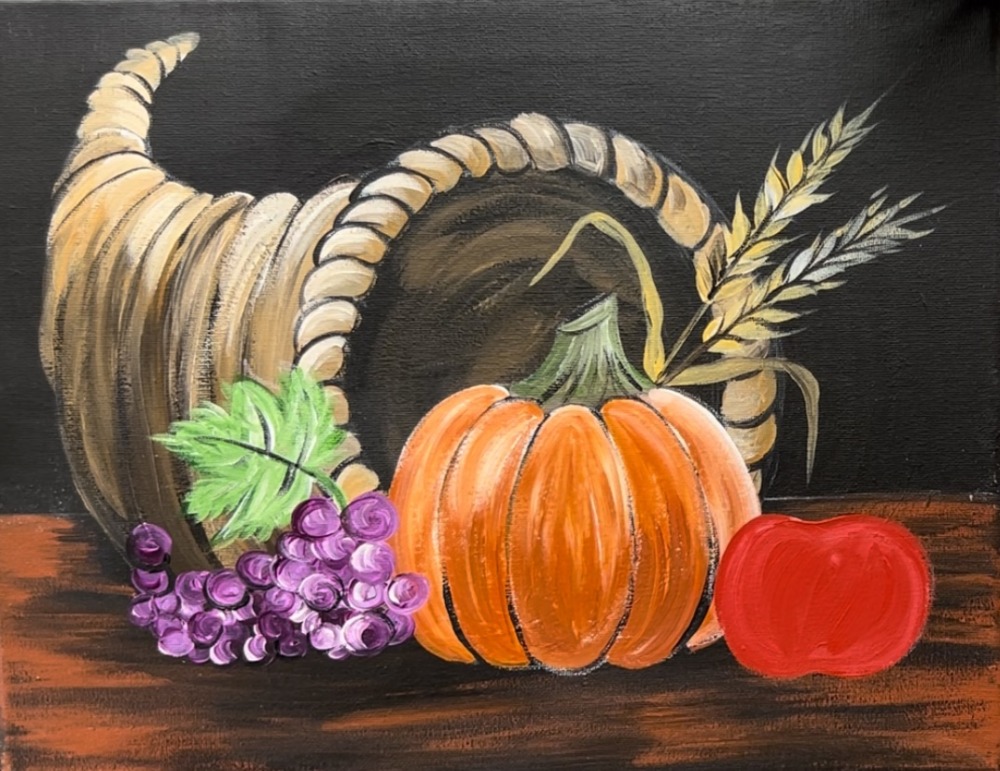
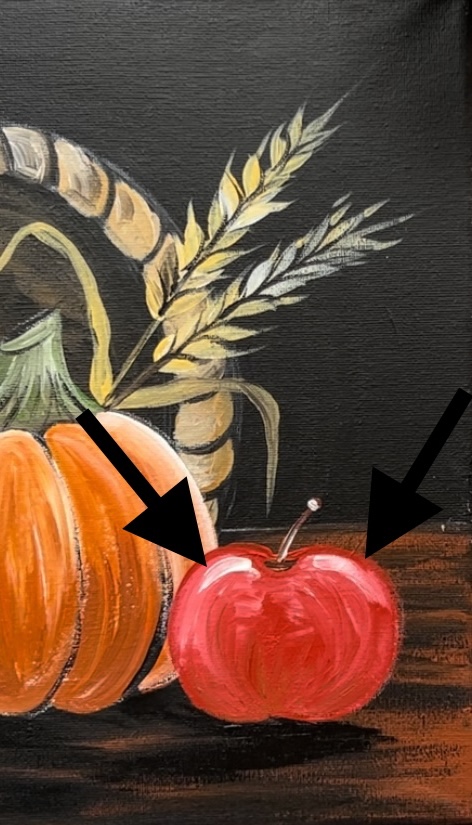
Then, load titanium white on your brush with the red without rinsing the brush. Paint a curved highlight stroke line on the left side of the apple.
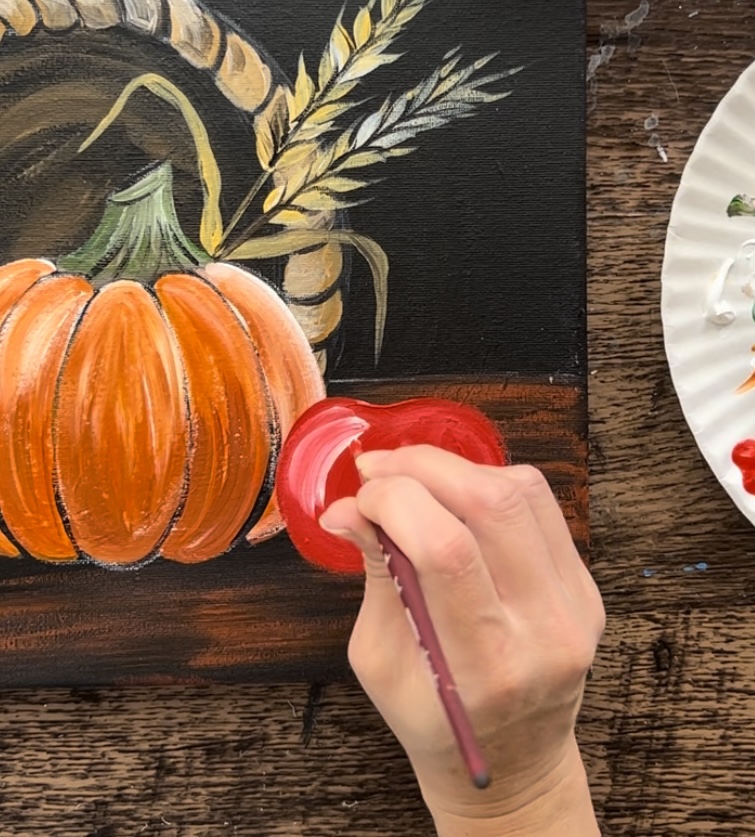
Then use your finger to “smear it” a little bit.
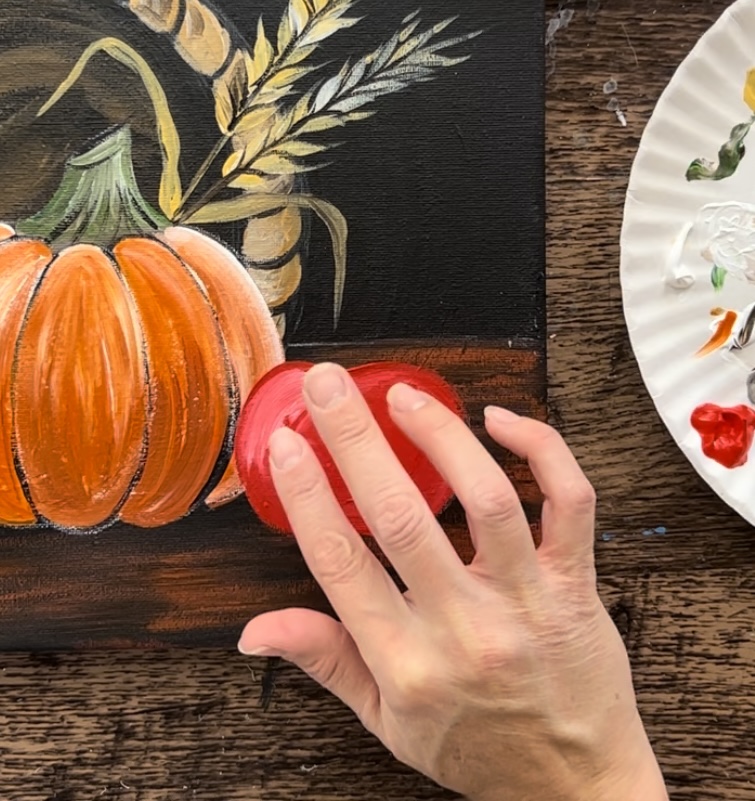
Do the same thing on the right. This will give the apple a little bit of highlight. You can add more solid white to the apple after this dries.
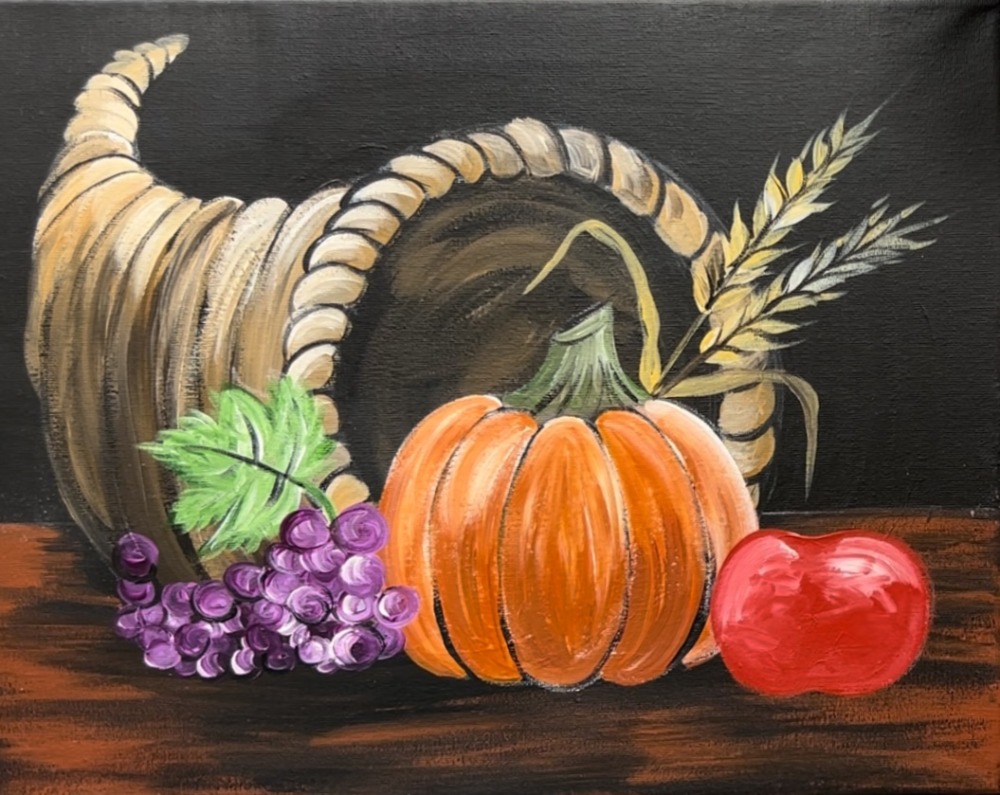
Next, use mars black to paint a little curved line for where the stem will be. This is a little below the top edge of the apple. Then use either raw umber or red oxide to paint a stem. Add a little white dot on the edge of the stem.
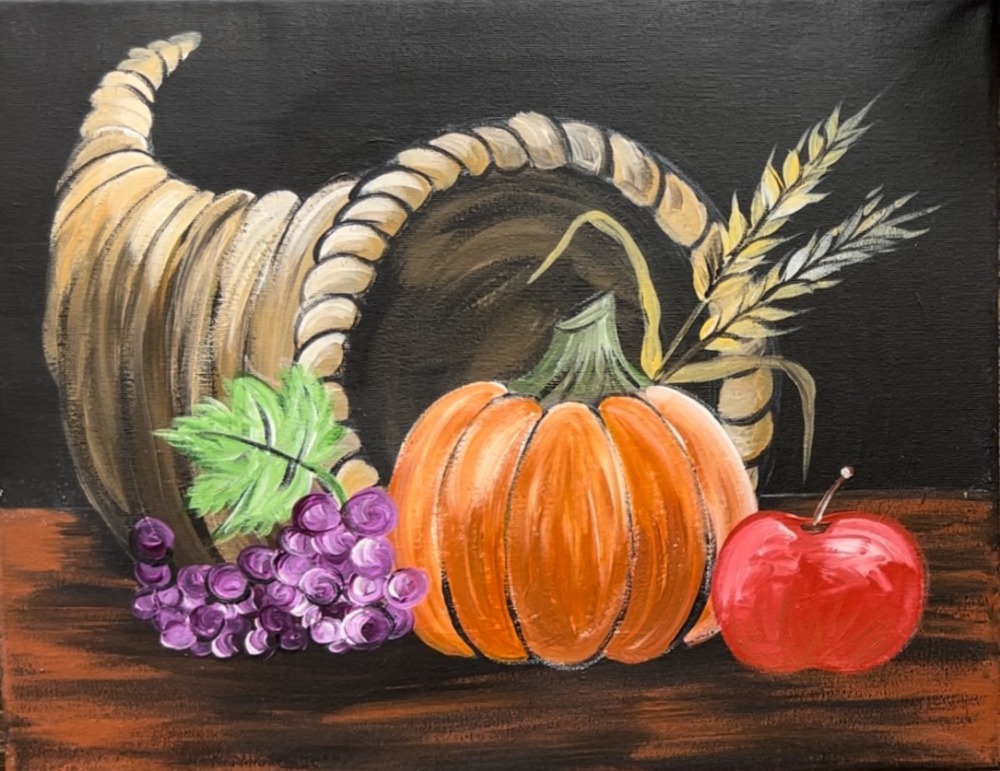
After the apple dries, add another solid white highlight as a curved stroke on the top two sides of the apple.
11. Draw and Paint Sunflower
Use the white chalk pencil to draw a sunflower. Draw the center circle first so that it is going behind the pumpkin. Then draw each individual petal shape as a curved base and pointed tip.
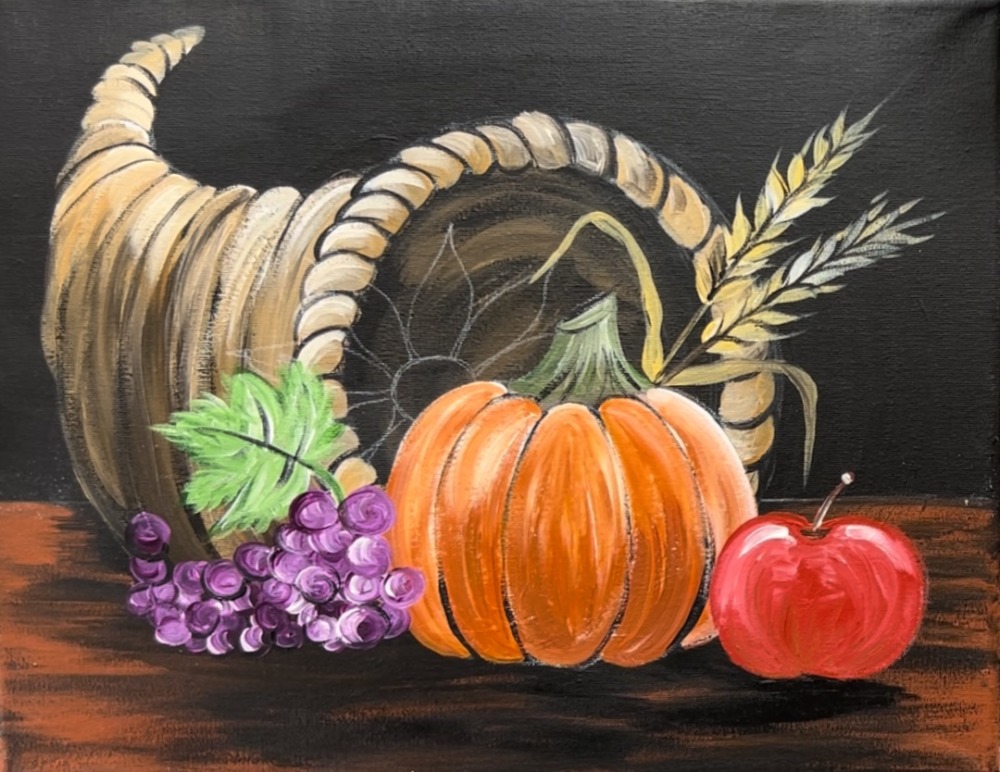
Paint the center of the circle with raw umber and the #4 round brush. Rinse the brush. Then use titanium white to paint each of the petals.
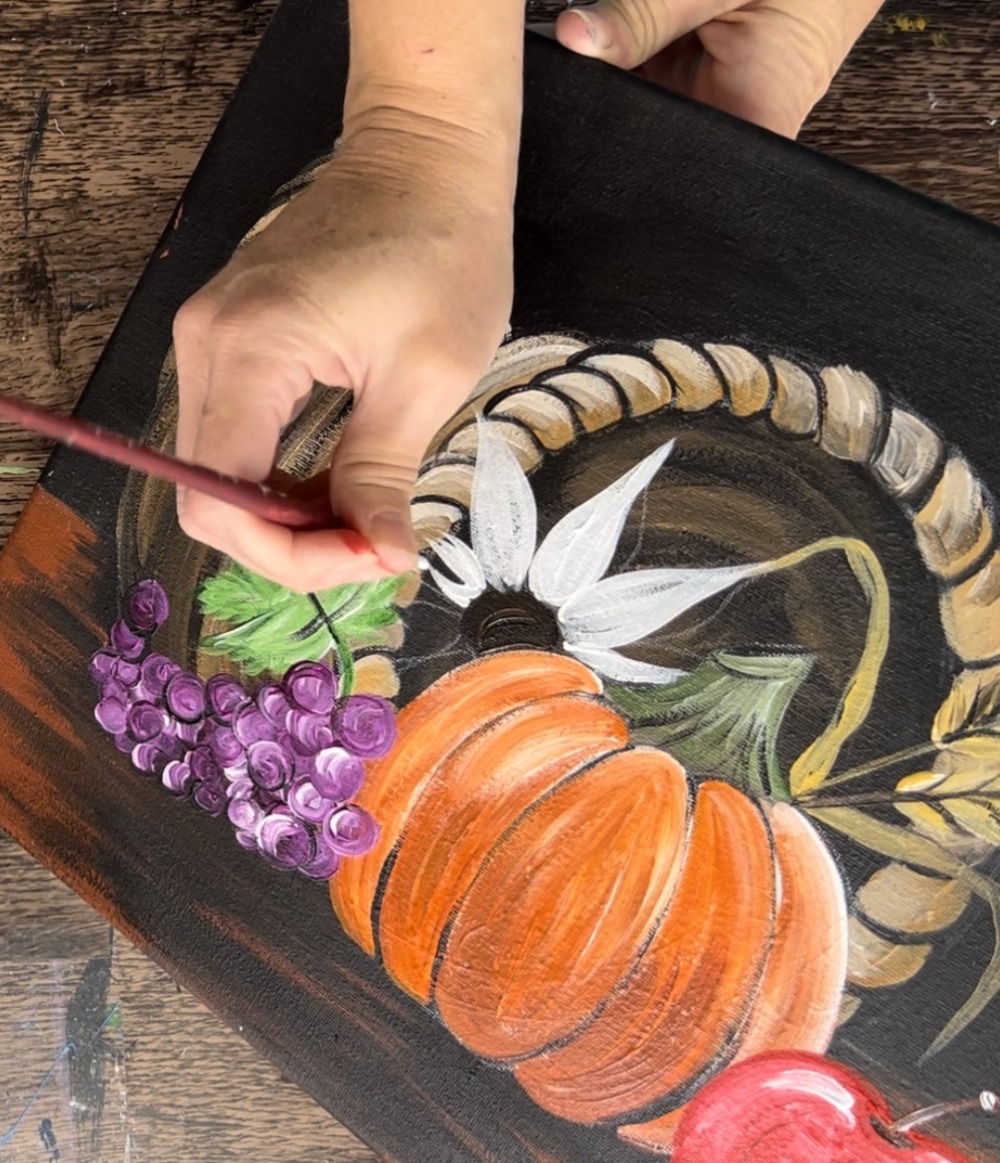
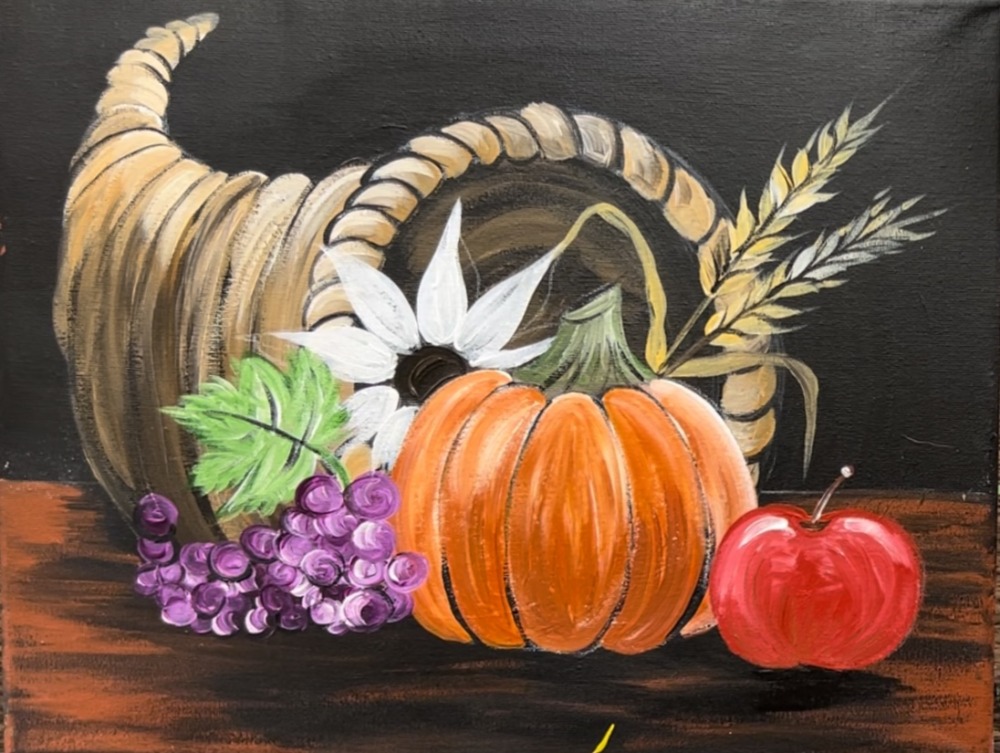
After this dries, paint the petals with primary yellow.
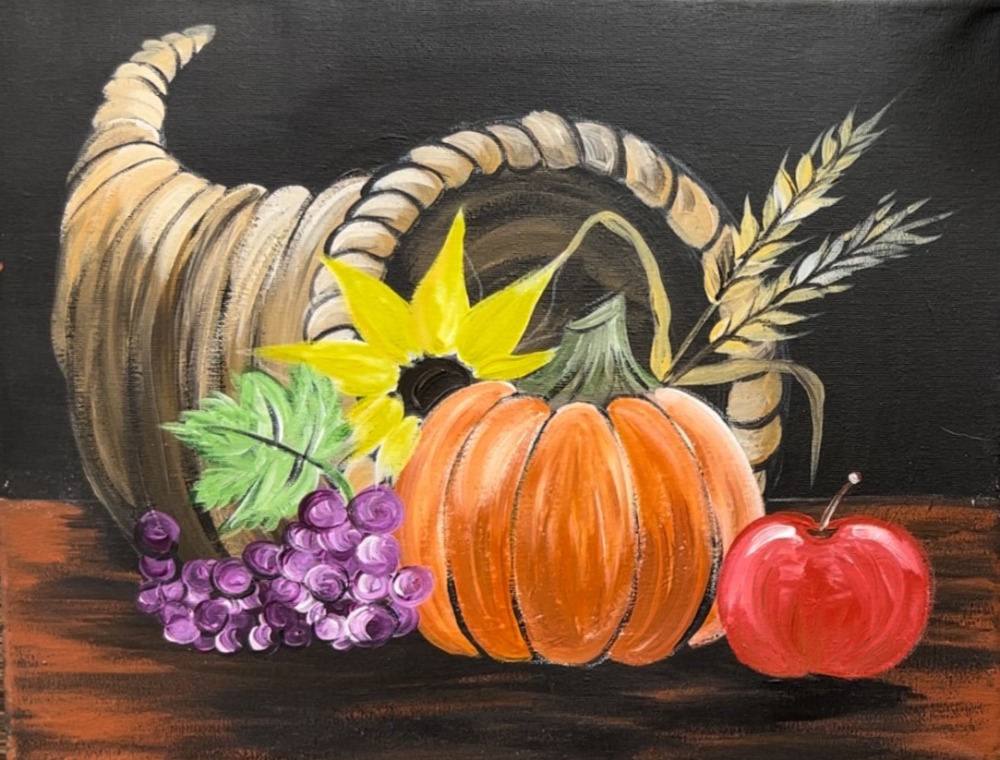
Then use raw umber to paint little dots in the circle shape. Add a few yellow dots in it as well for added color variation. Then use the raw umber and/or the Naples yellow to paint some of the sides and bottom of the petals.
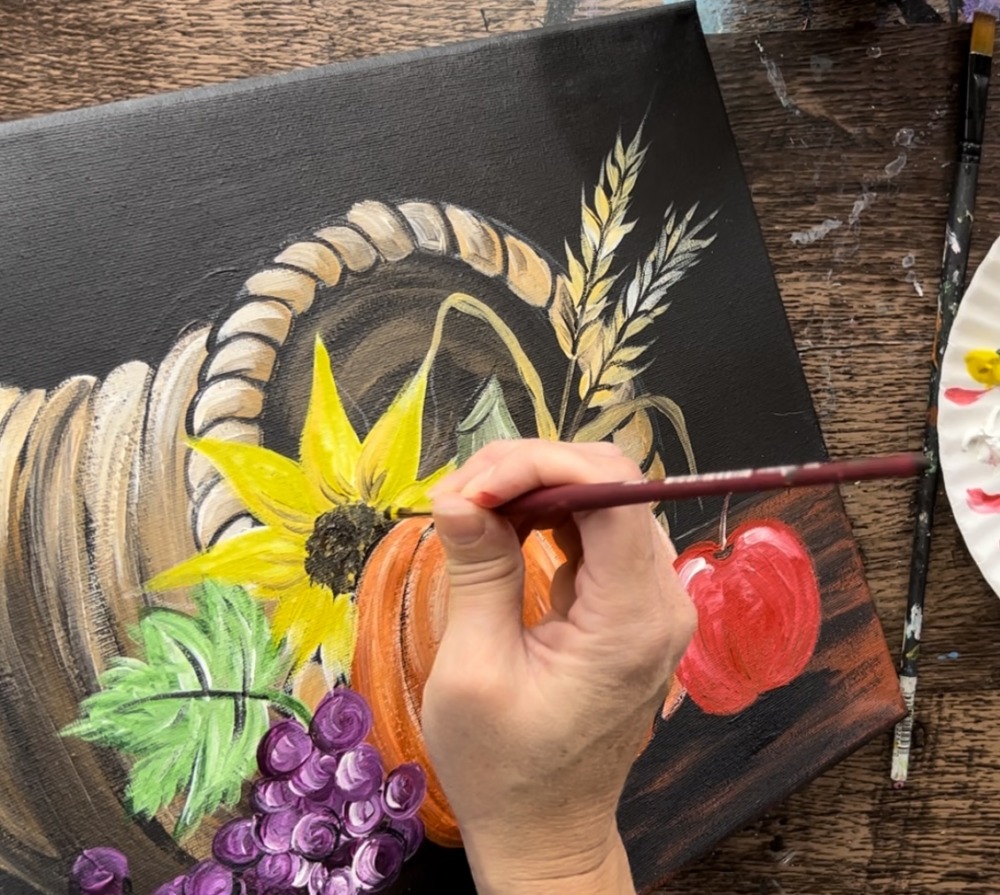
Paint little lines on the base of the petals with the brown that blends in with the yellow and paint Naples yellow on one side of each of the petals.
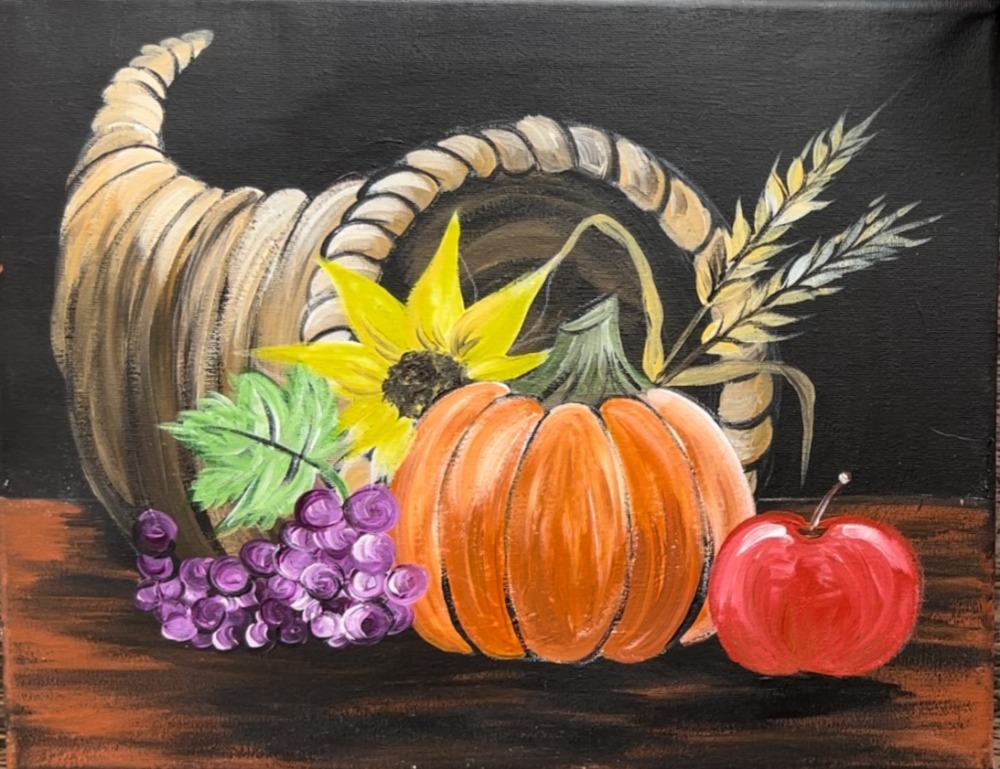
Finished
