

Would you like to save this?
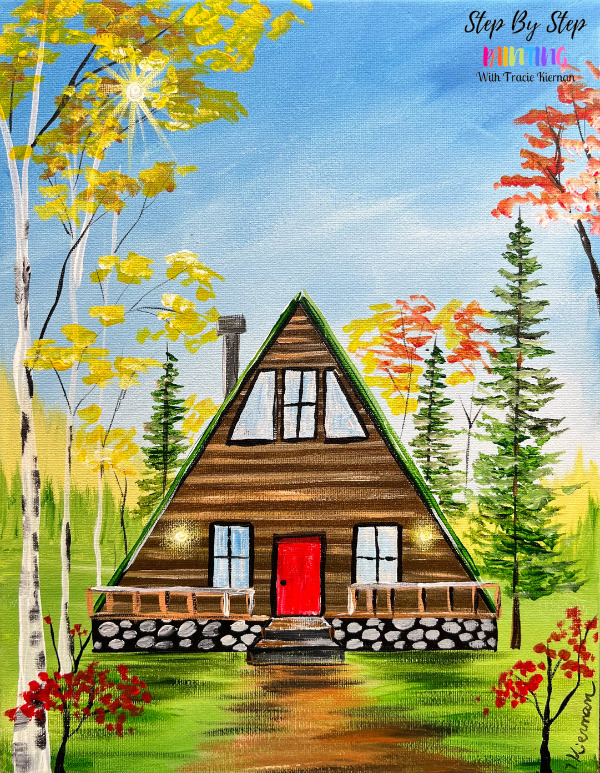
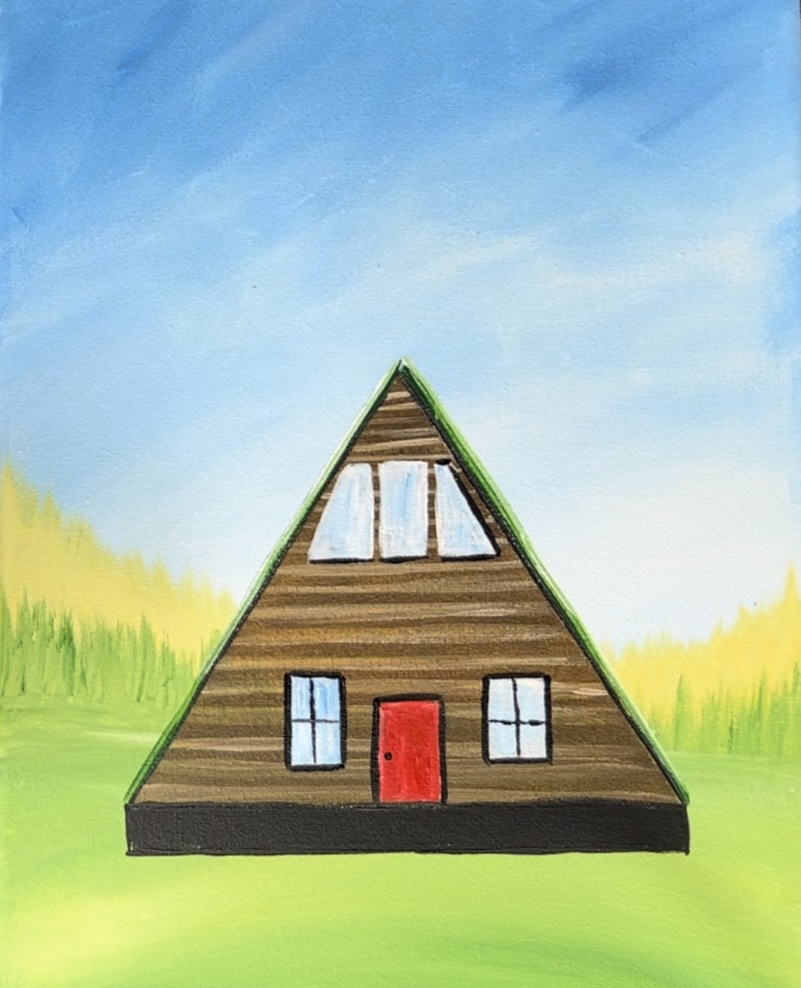
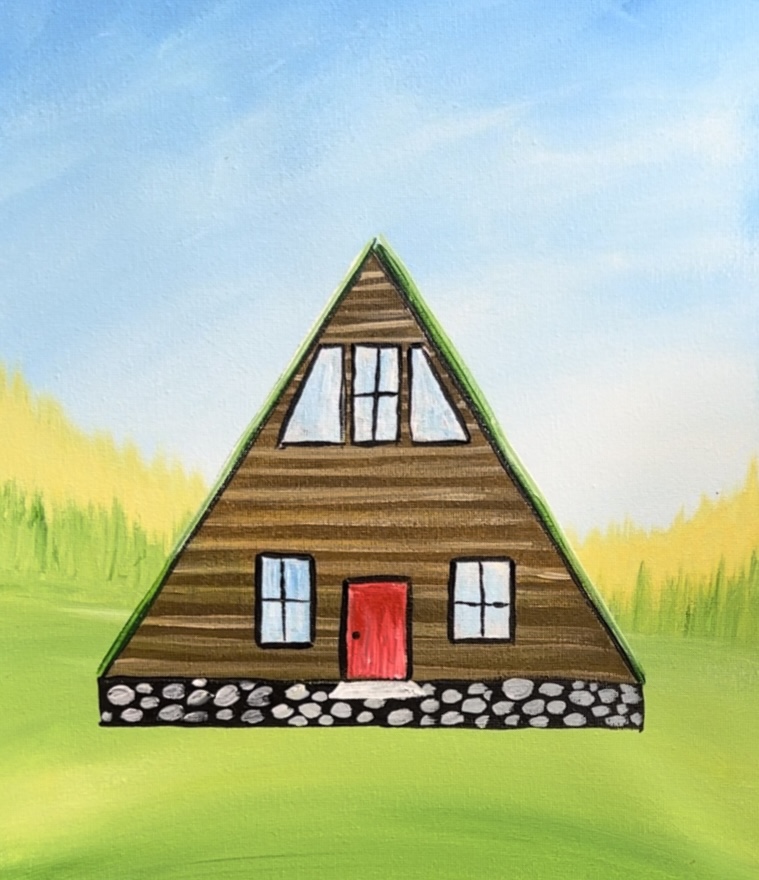
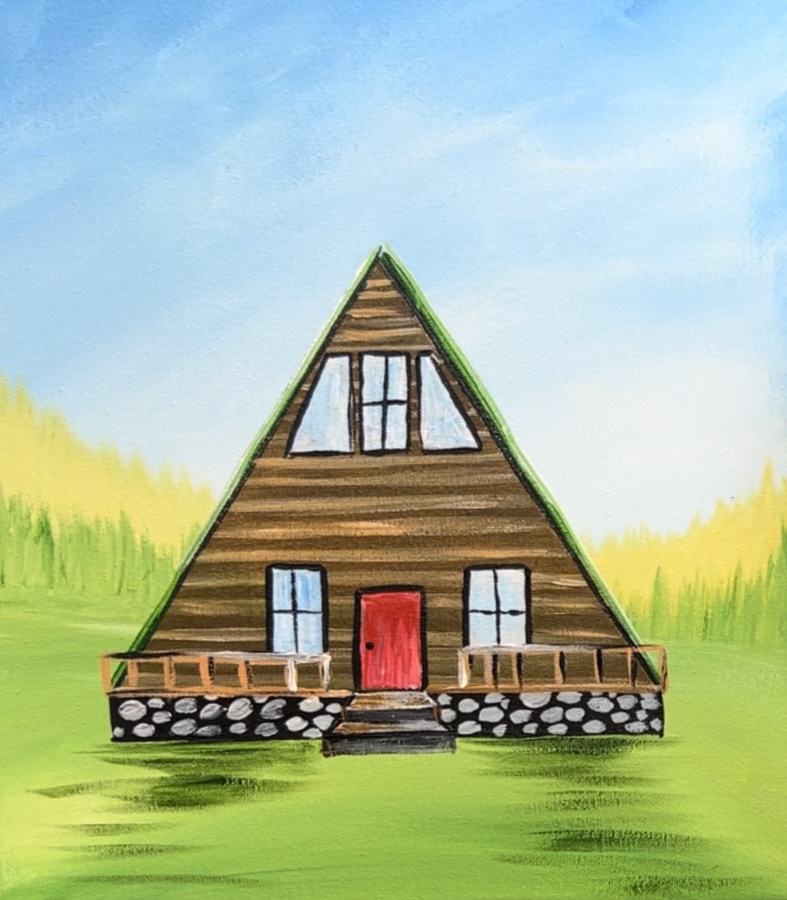
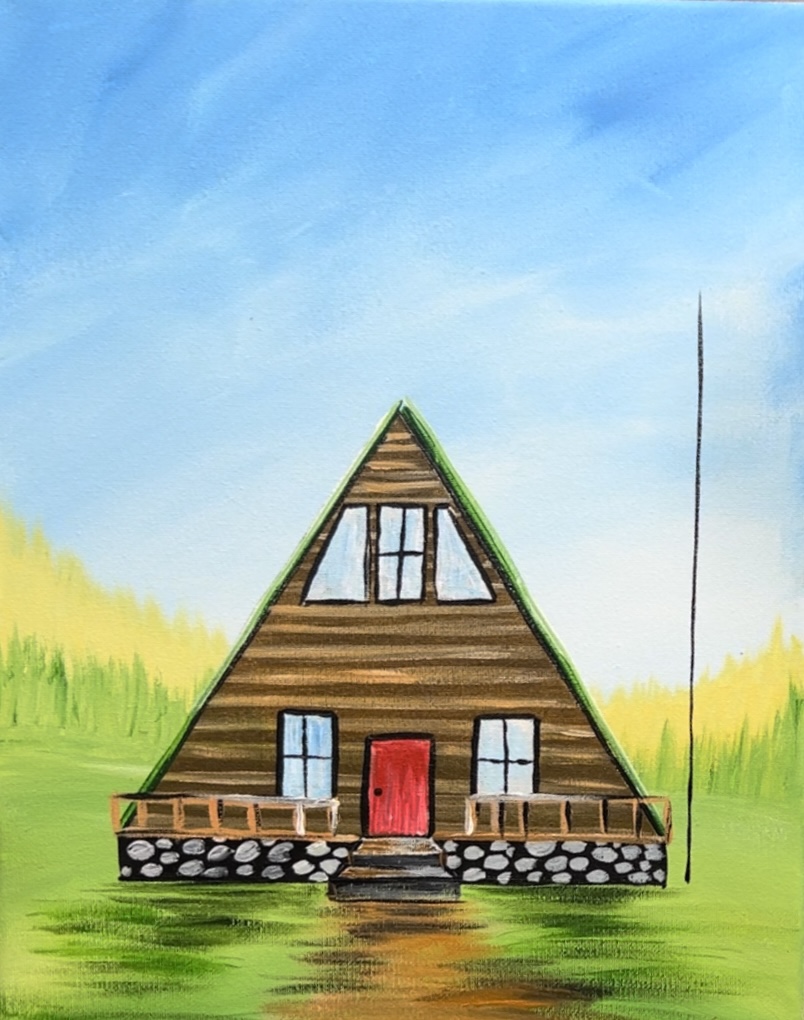
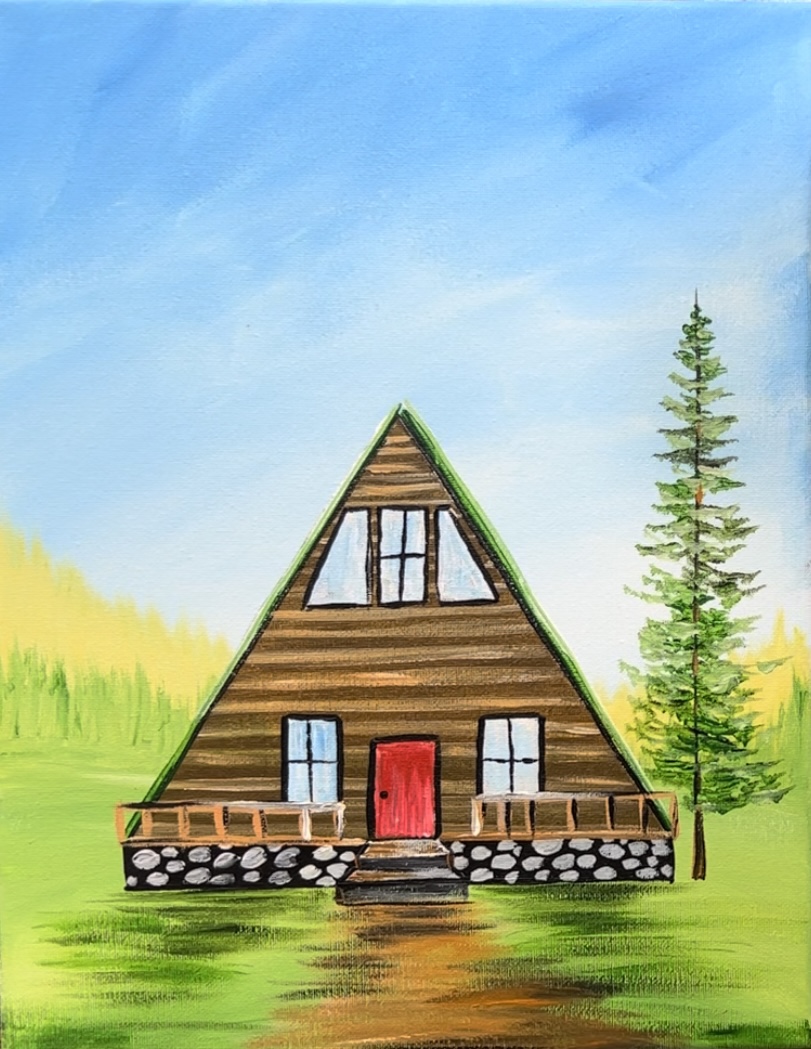
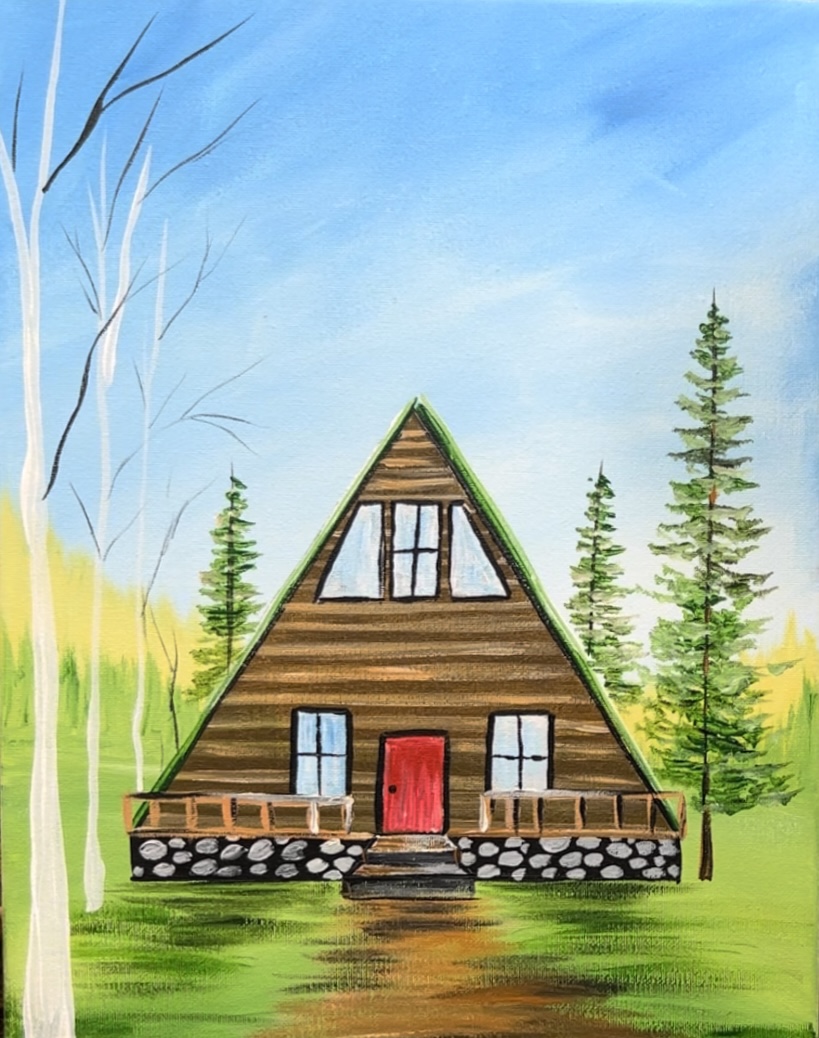
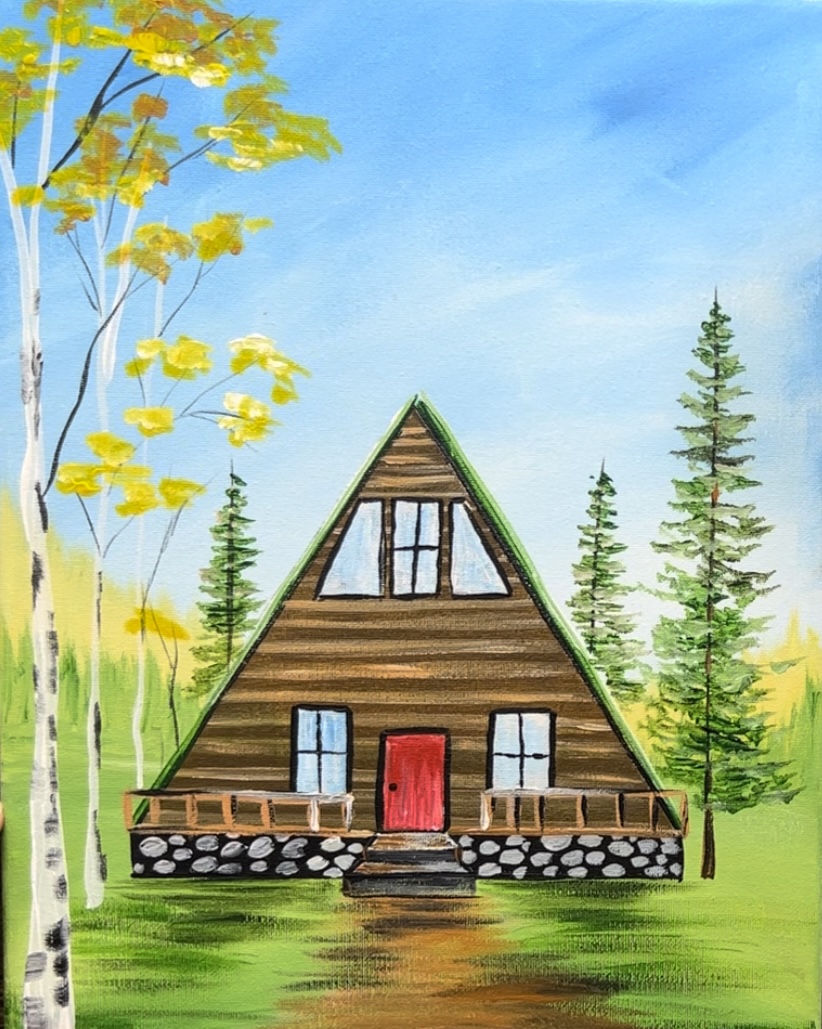
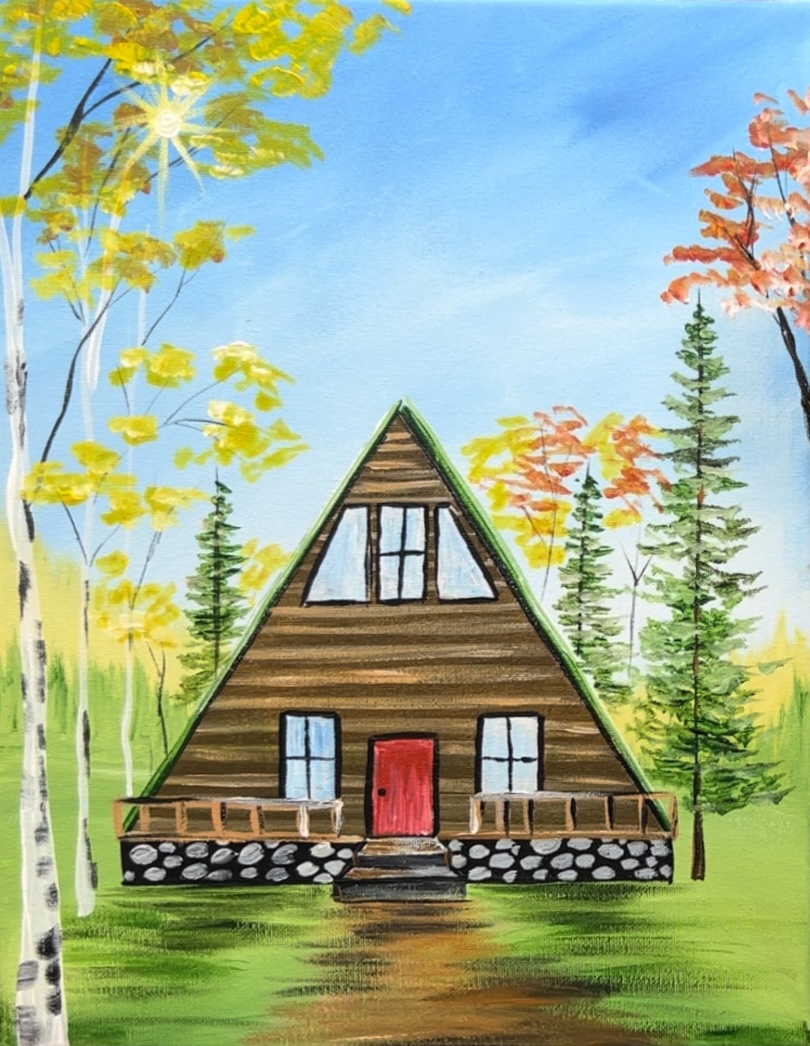
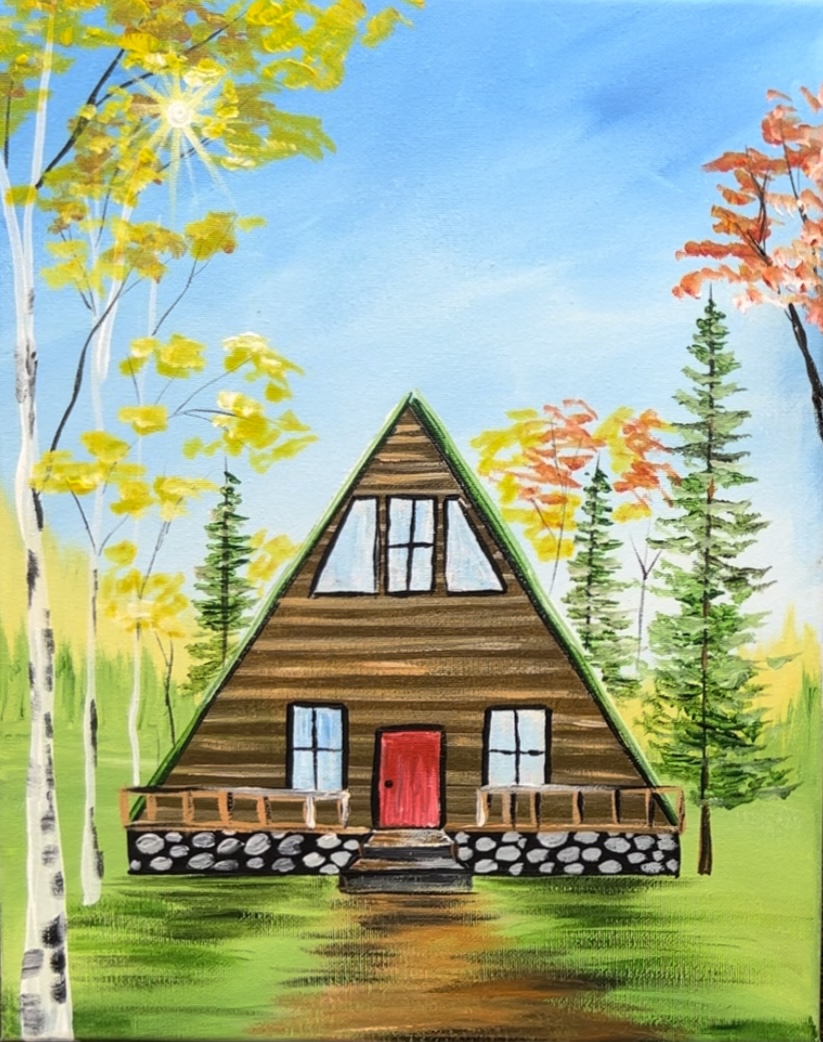
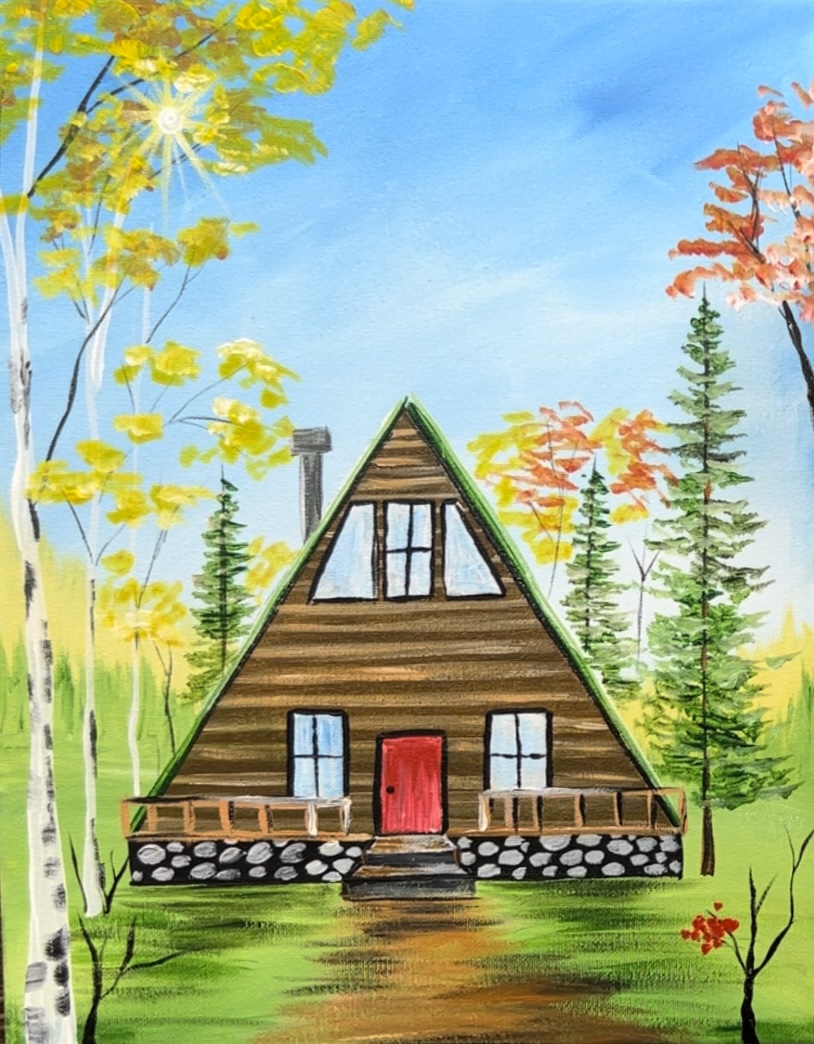
Paint a super cute and cozy fall a frame cabin! I would LOVE to stay here and sit by a wood burning stove while sipping coffee and watching fall leaves fall down!
This painting tutorial will show you how to paint an a frame cabin in the fall. This is a little bit of a challenge because of all the details. If you want, you can simplify this. Or, you can add more things such as a fall wreath on the door or pumpkins on the ground.
Enjoy and happy painting!
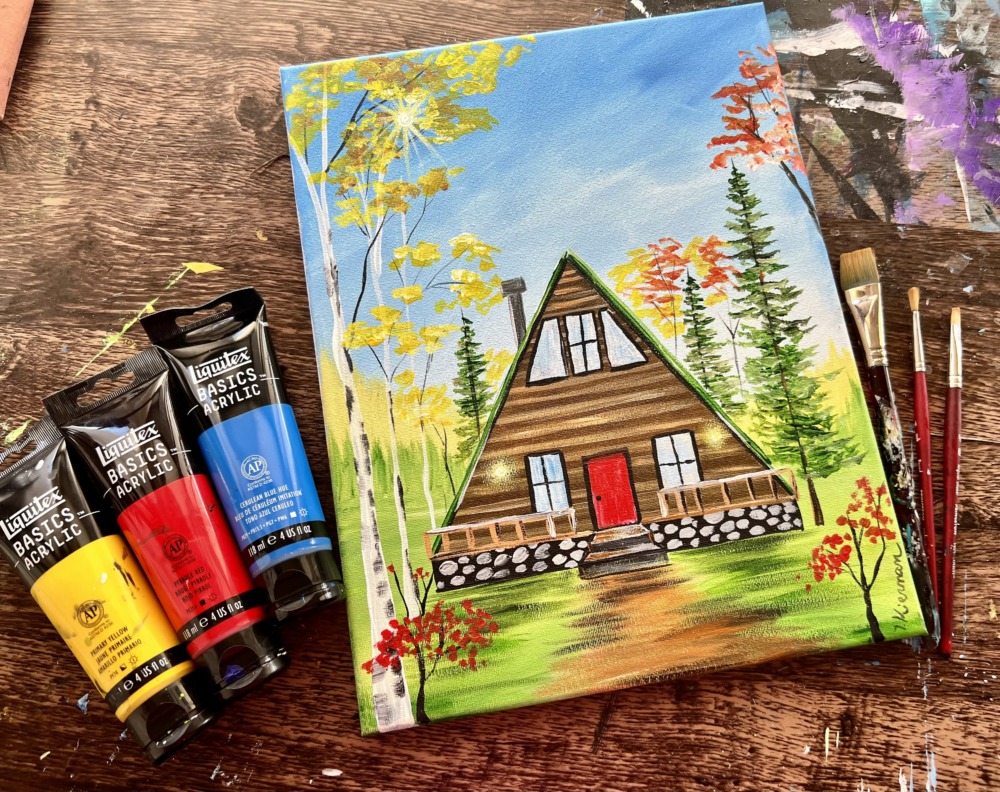
Materials Needed
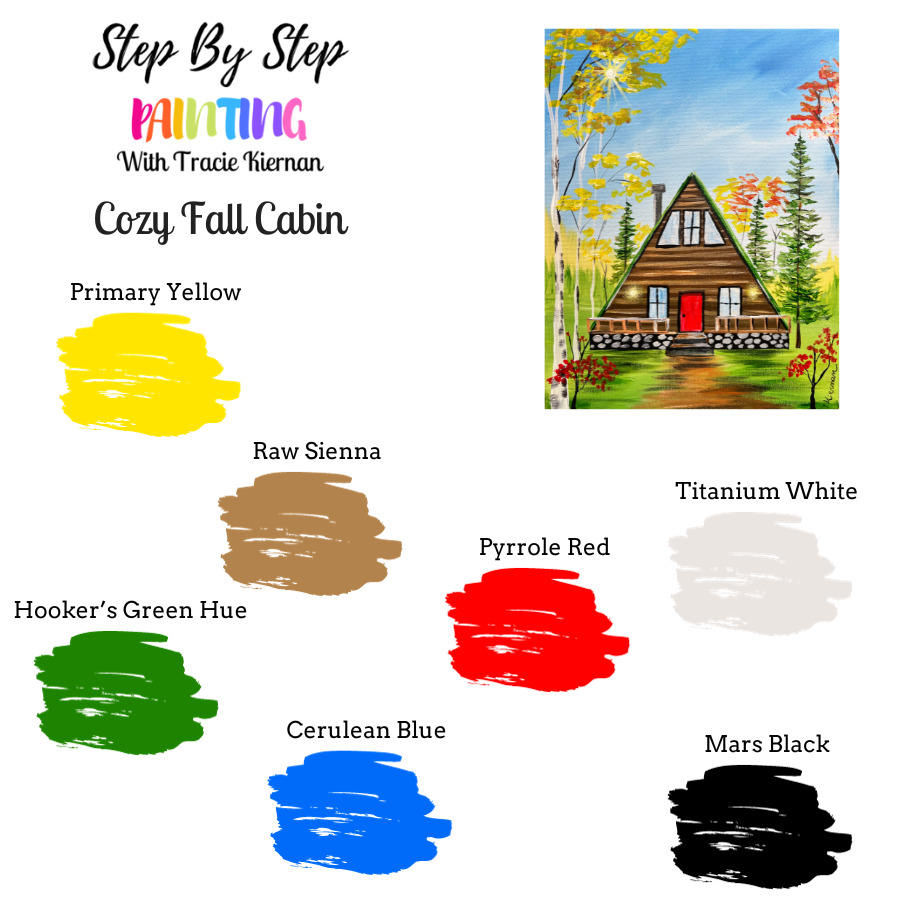
How To Paint A Cozy Fall Cabin
Materials
- 11 x 14 Canvas
- Acrylic Paint
- Brushes
- Ruler
- Pencil
- Painters Tape
Colors
- Titanium White
- Mars Black
- Hooker's Green Hue
- Primary Yellow
- Pyrrole Red
- Raw Sienna
- Cerulean Blue
Brushes
- 3/4" flat brush
- 4 round brush
- 3/8" angle brush
Color Palette
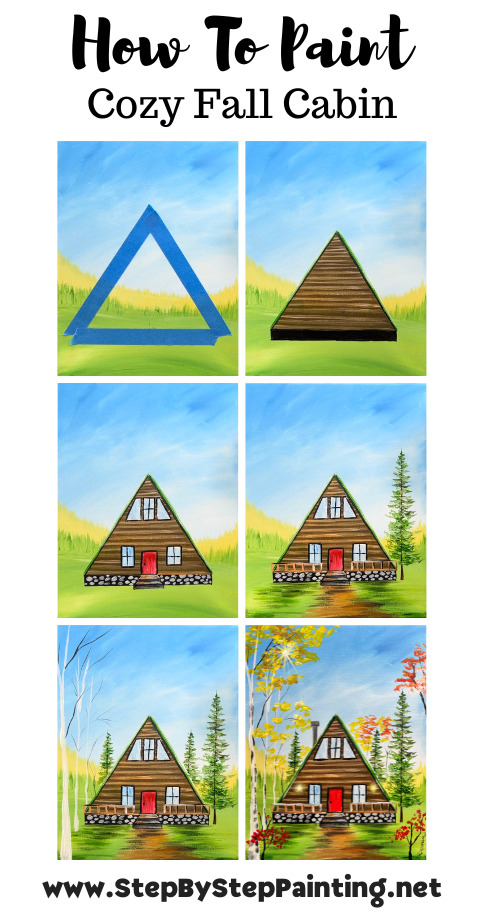
Directions At A Glance
Video
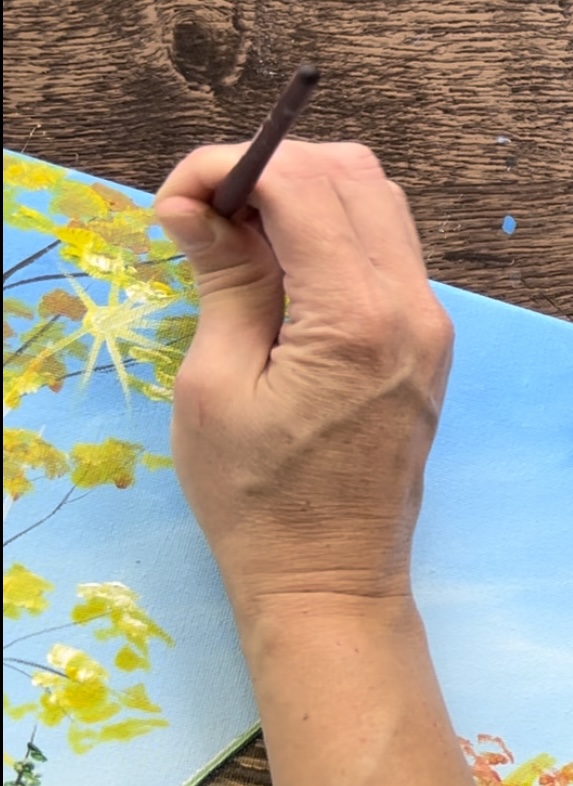
Step By Step Instructions
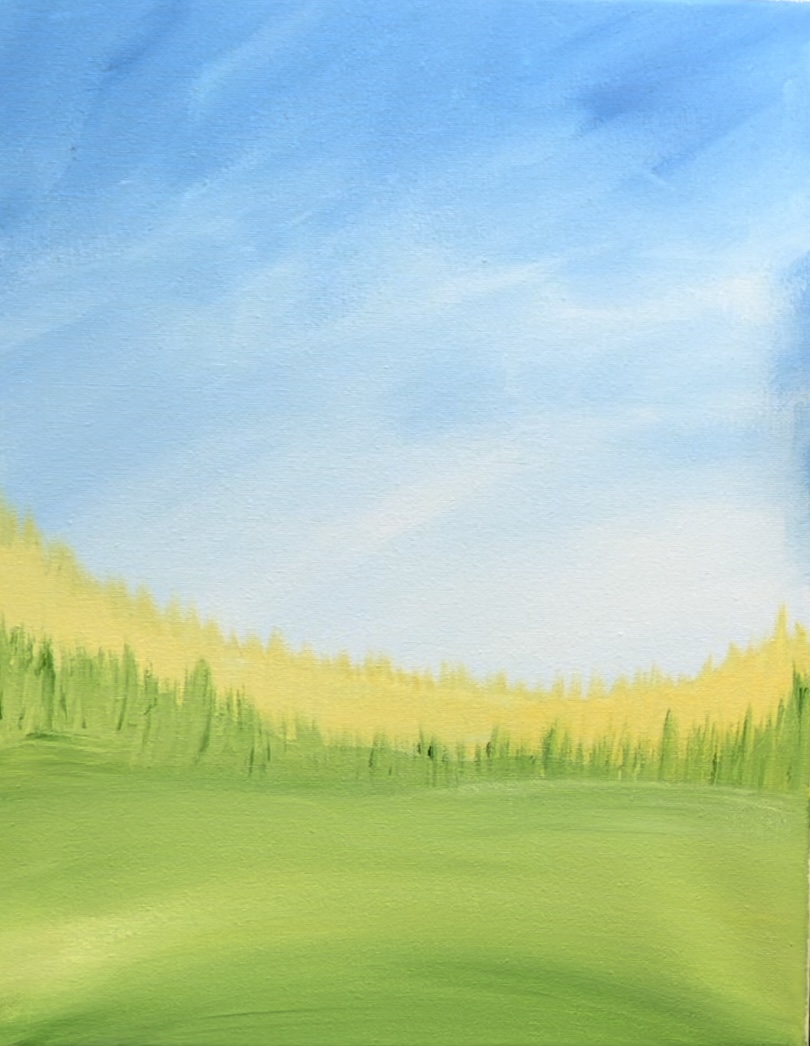
1. Paint The Sky
Load your palette with cerulean blue and titanium white. Use a 3/4″ flat wash brush and mix equal amounts of blue and white together. Then start painting the sky using the flat brush. Paint angle, choppy paint strokes.
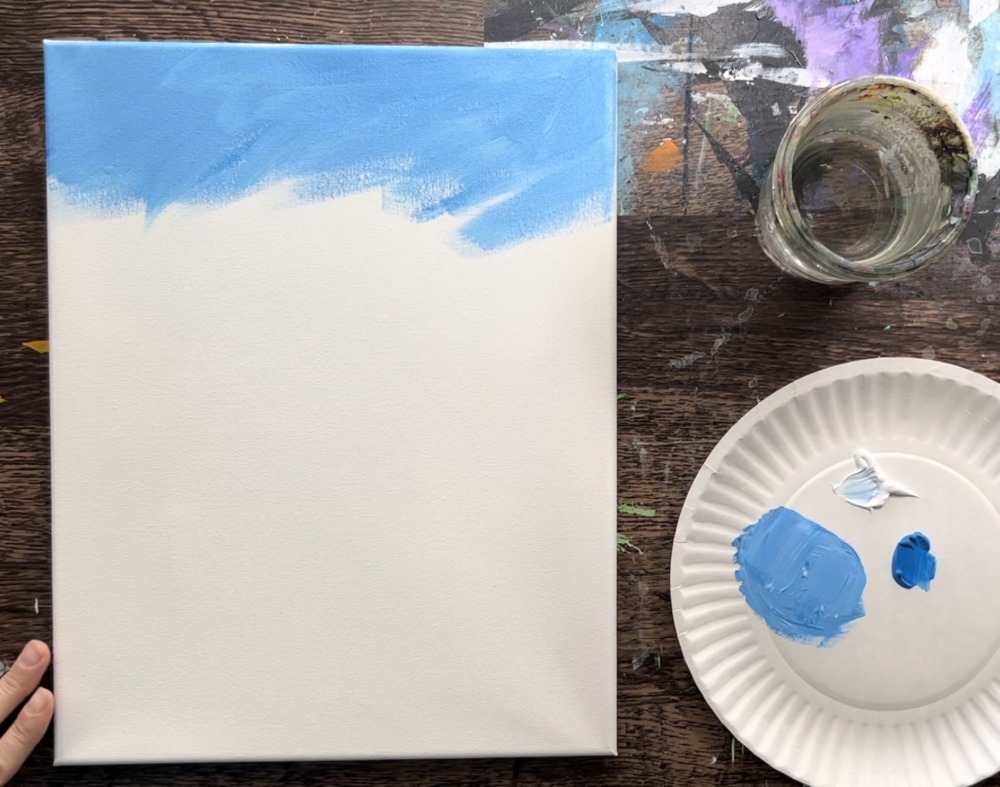
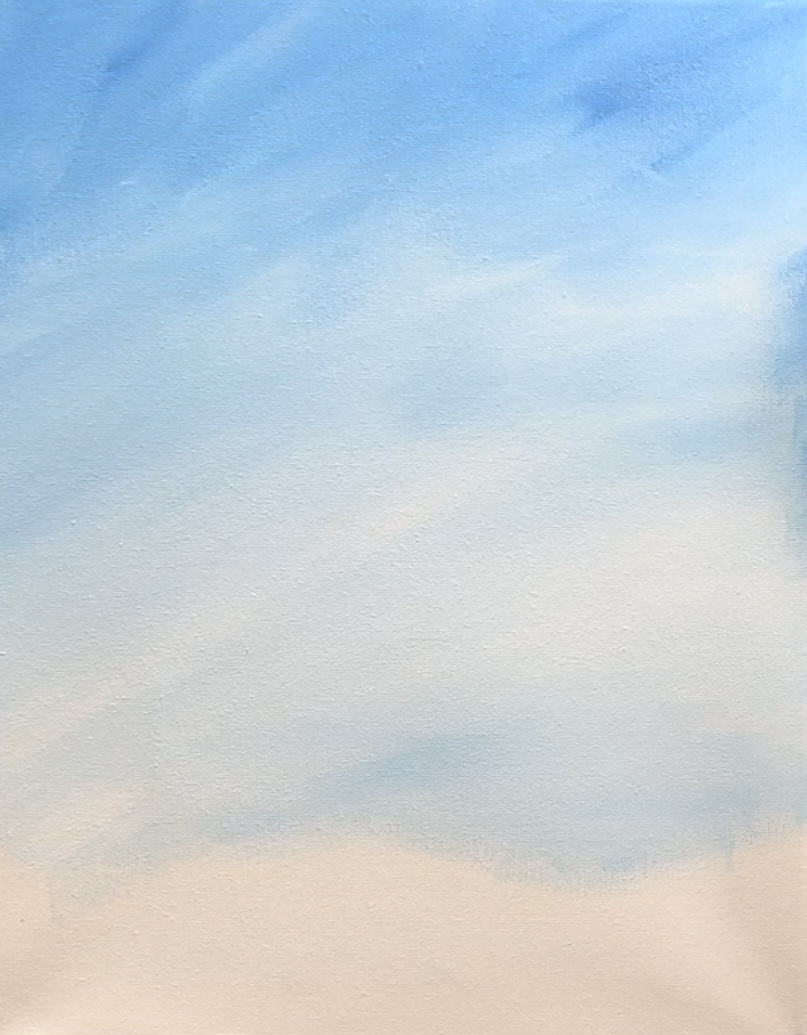
Go about a quarter of the way down the canvas and then load the brush with more white. Blend the white with the blue to allow the sky to get lighter towards the bottom of the canvas.
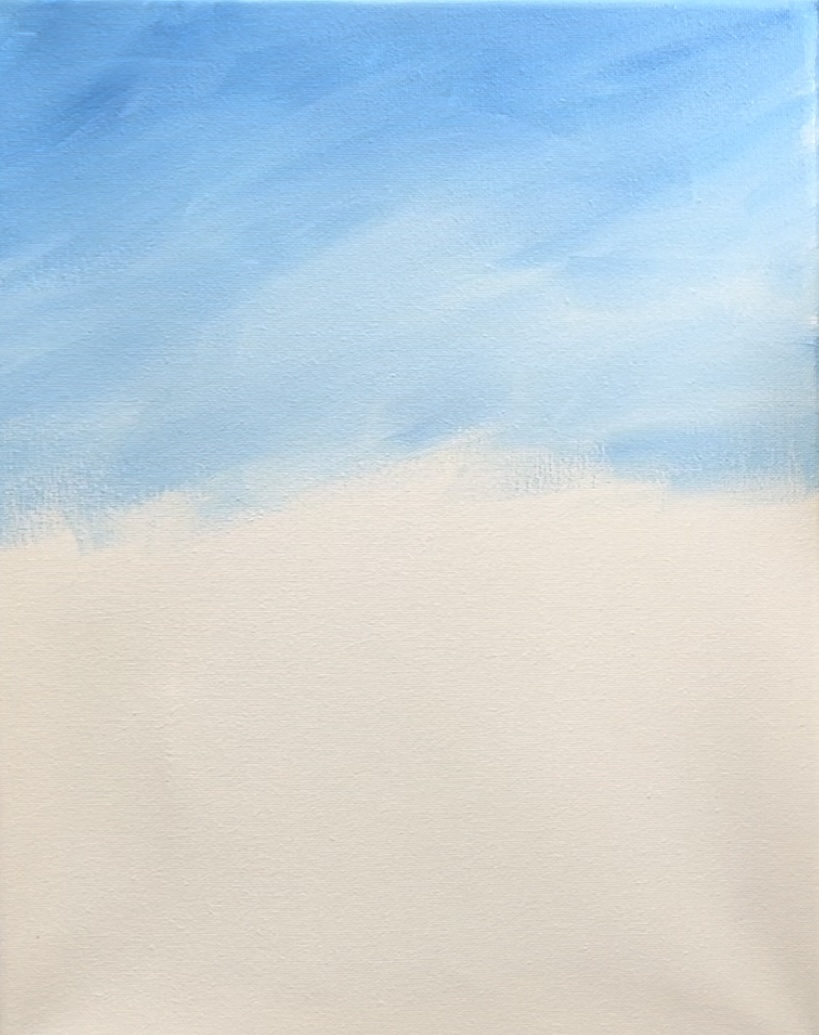
Let the sky be darker at the top and lighter on the bottom. You don’t need to blend the paint strokes all the way, you can leave them kind of “choppy” and “unblended”.
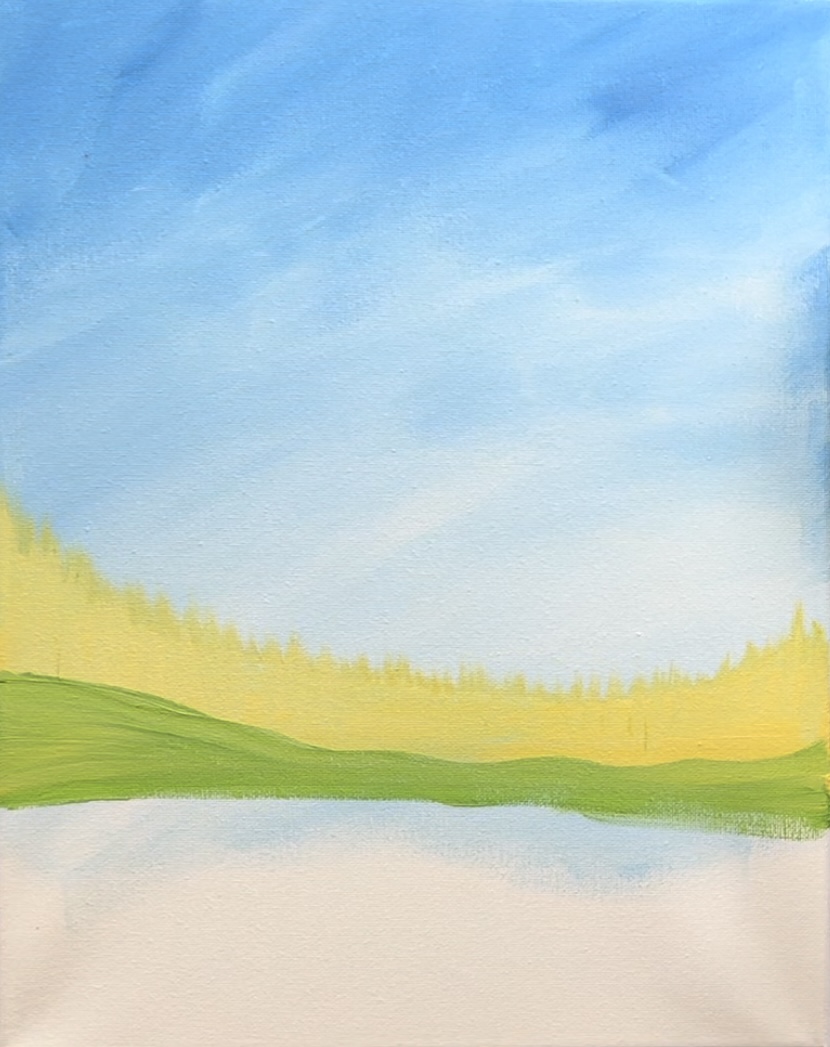
2. Paint The Golden Tree Line
Load your paint palette with: primary yellow, titanium white and raw Sienna. Use the 3/4″ flat wash brush and mix about 1 part raw Sienna, 2 parts yellow and 3 parts white. This doesn’t need to be exact, it should make a light golden yellow color.
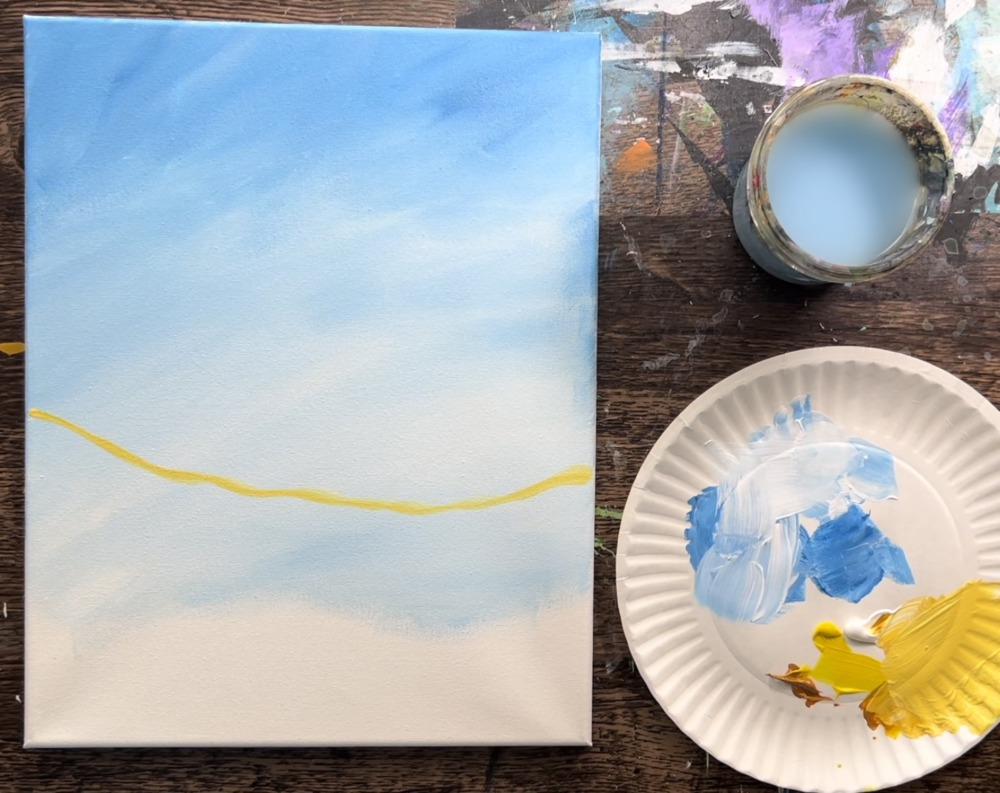
Use the tip of the brush to paint the top edge of the “tree line” as a long wavy line. Start on the left of the canvas in the center of the painting, dip the line down and then curve it back up.
Next, use the tip of your brush and paint tiny paint strokes going in a vertical direction. These little vertical marks are the tops of trees way in the distance.
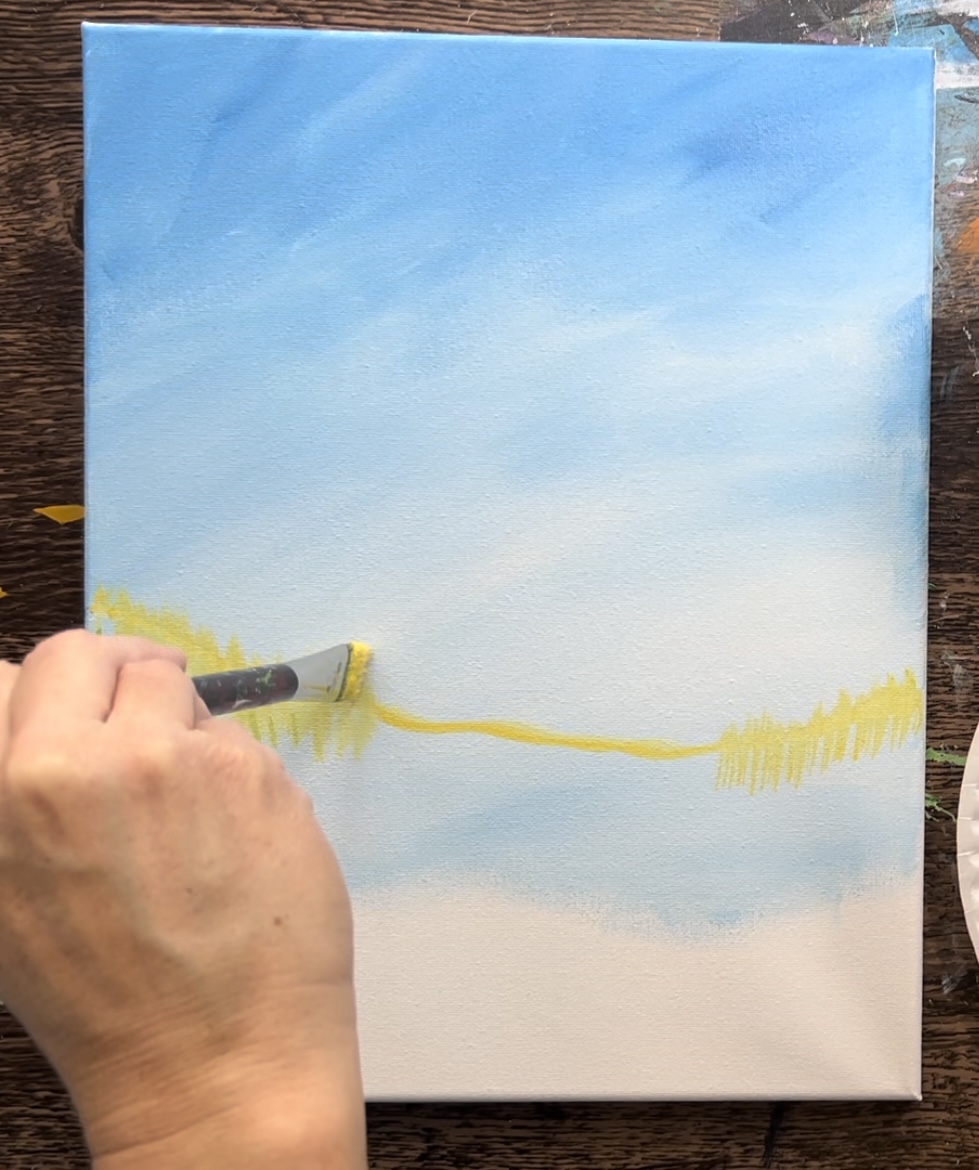
Drag your brush in a vertical direction all along that line to create this tree texture.
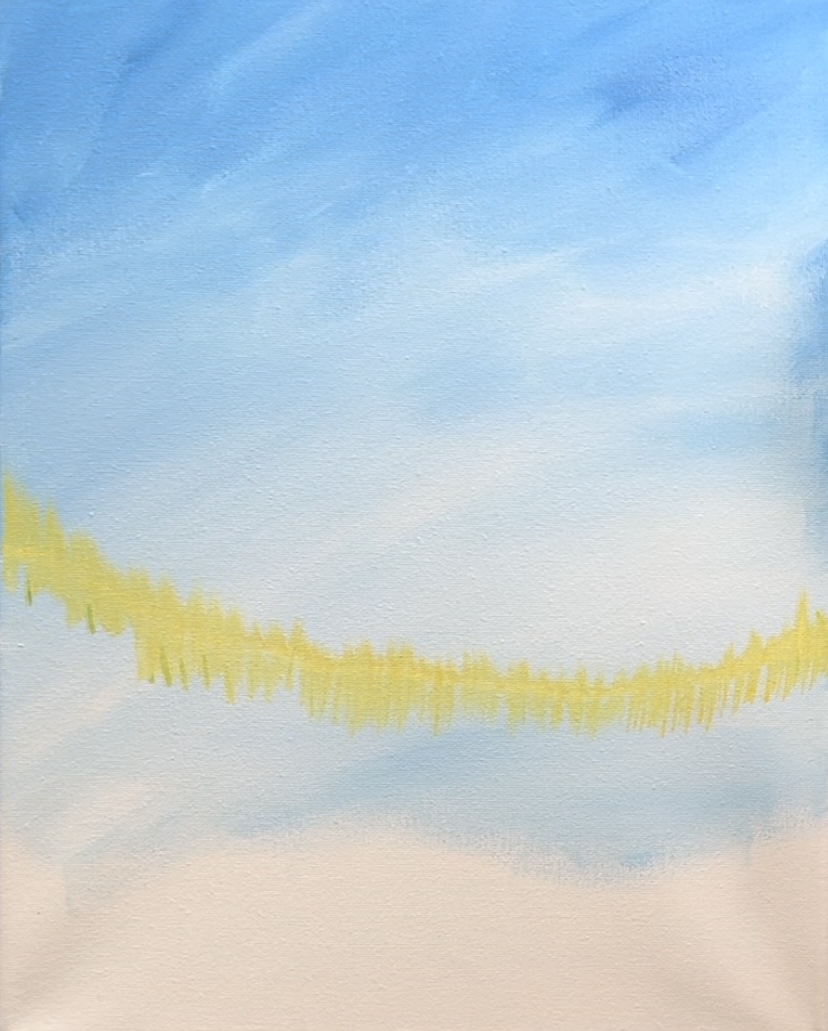
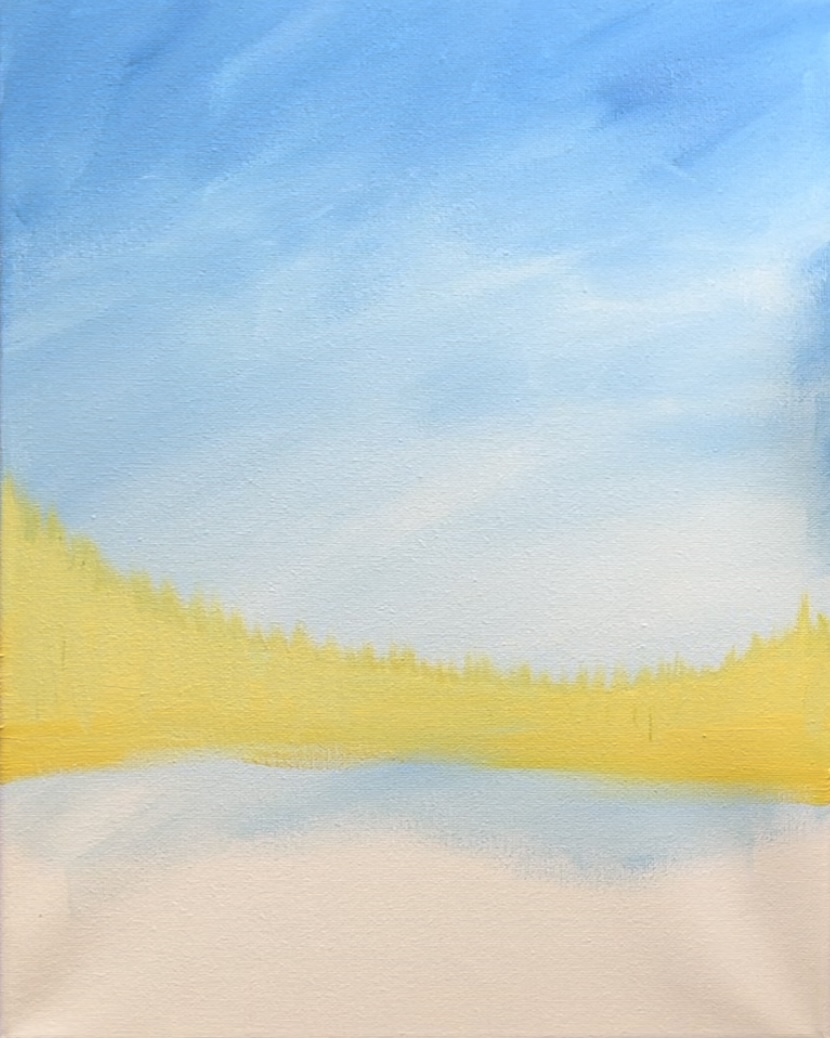
Then use the full width of the brush to paint this area solid and go down a few inches with this yellow.
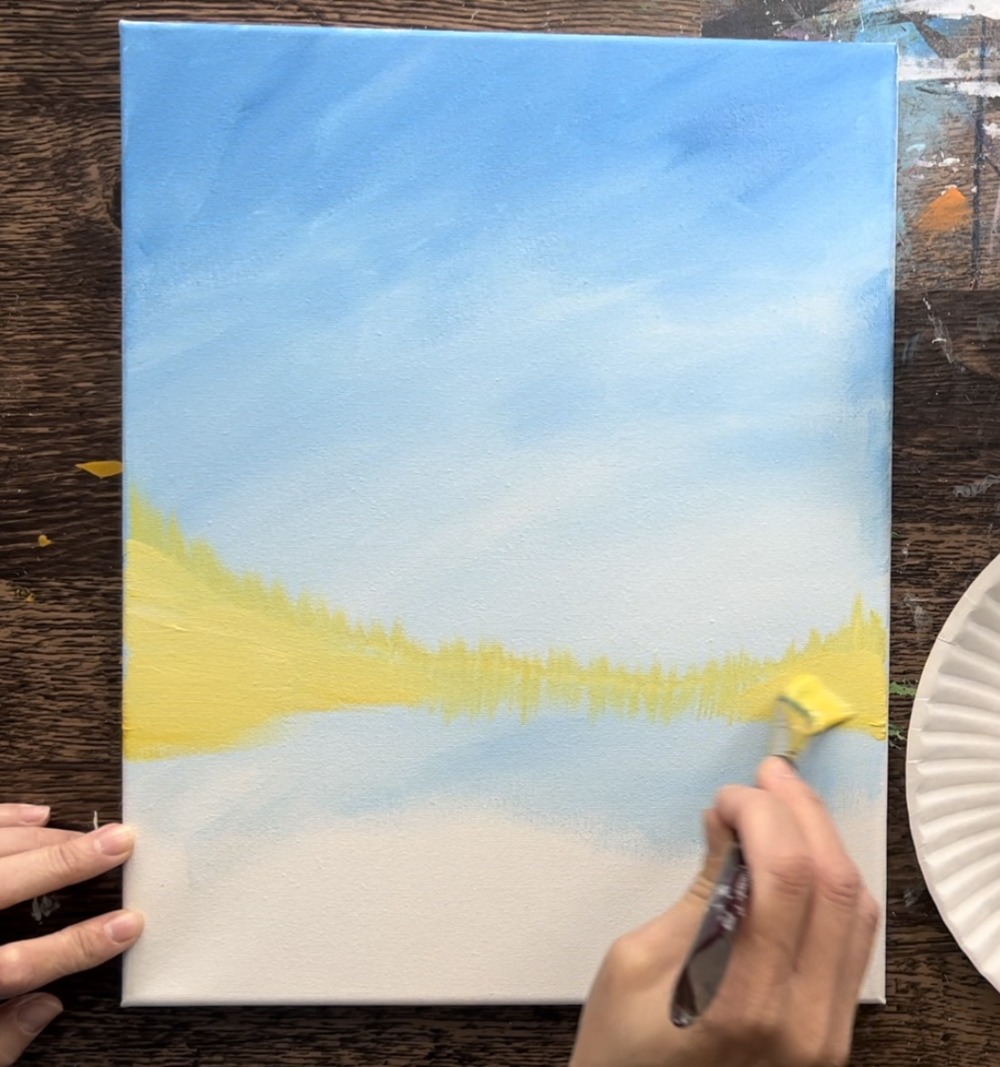
Remember, these are trees way in the distance so it should look very abstract and not super detailed.
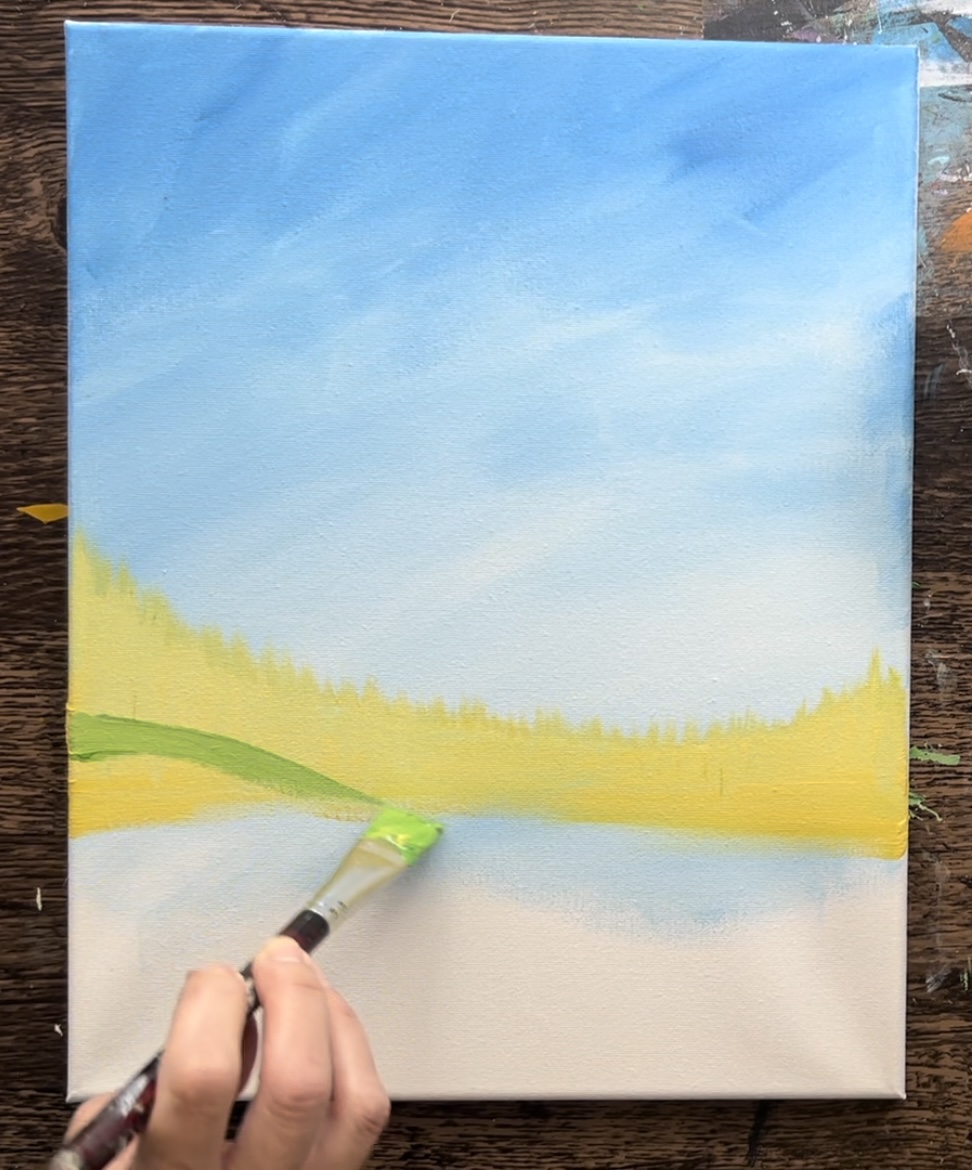
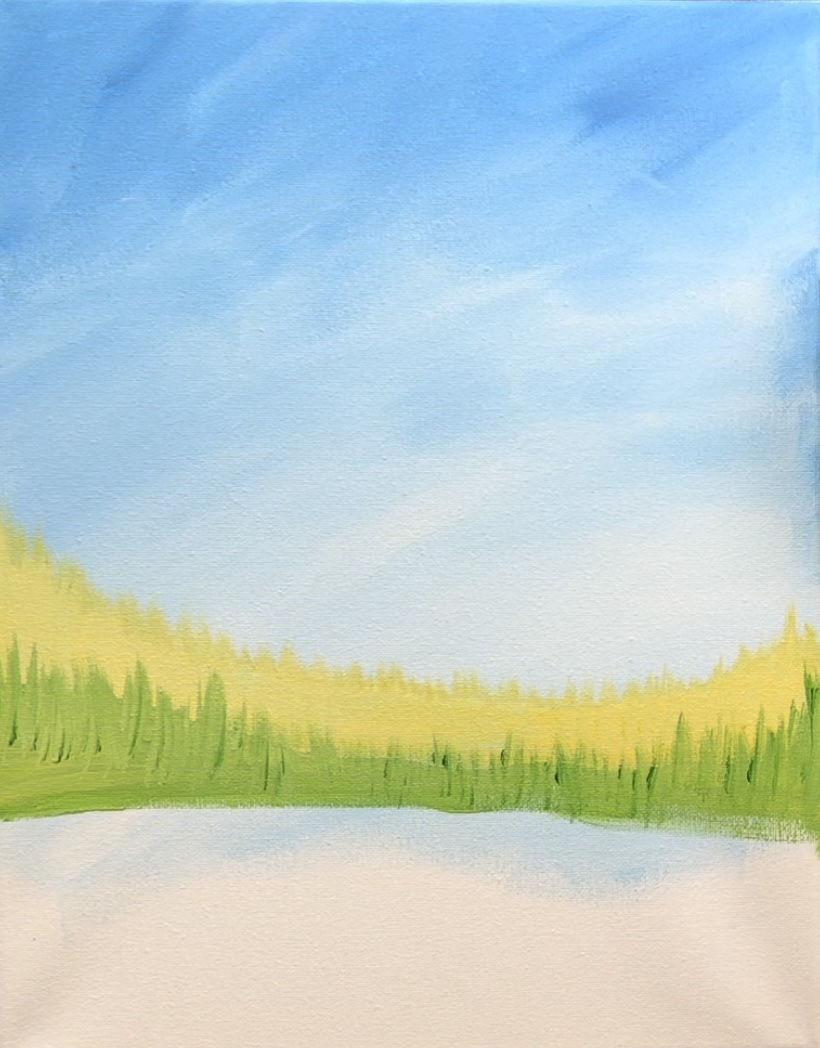
3. Paint The Green Tree Line
Do not rinse the yellow off of your 3/4″ wash brush. Load hooker’s green hue onto your palette. Mix your “golden yellow” color into the green on your palette.

Then paint another layer of “tree line” that starts about halfway down the yellow area (about 1.5″ below the highest part of the yellow). Use the tip of the brush to paint a wavy line that dips down in the middle and goes across the canvas.
Fill the area in solid.
Then use the tip of the brush to paint vertical marks along that line going all the way across (the same way you painted the vertical yellow marks).
4. Paint The Ground
Use the same green to paint the rest of the canvas. Do this with the same 3/4″ flat wash brush but paint full width strokes that go in kind of a curved hill-like direction.
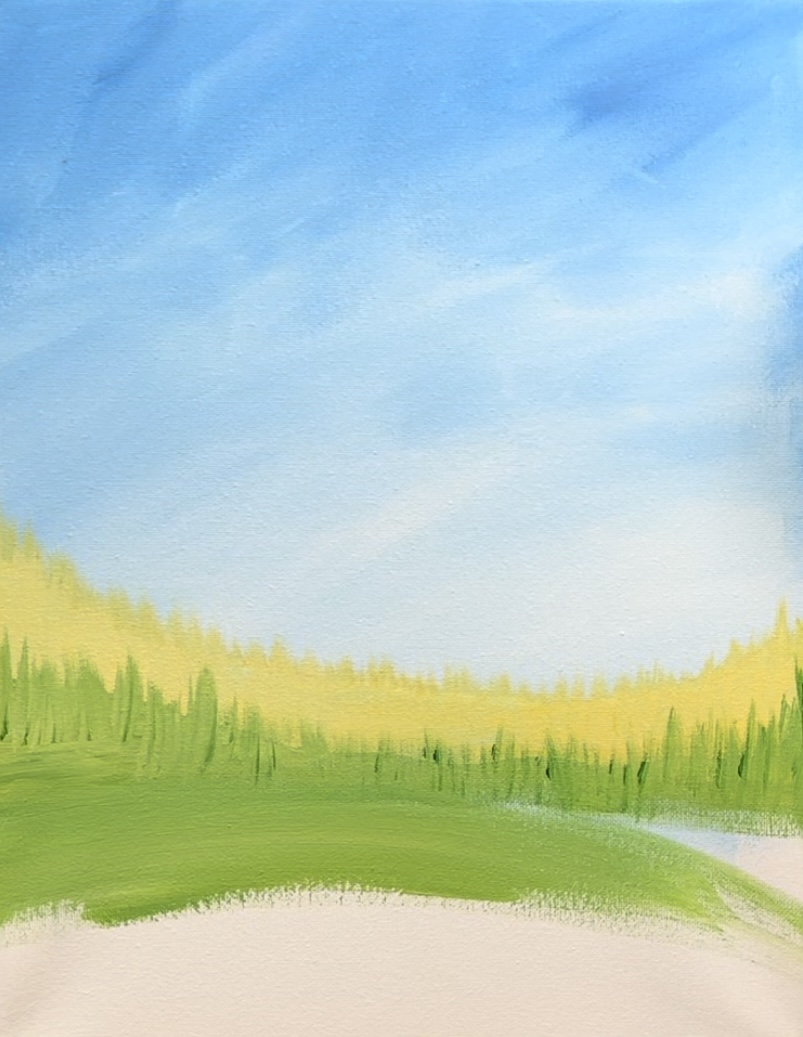
Blend a little more green on the bottom so that it is slightly darker and a little more white in the distance so that it is slightly lighter.
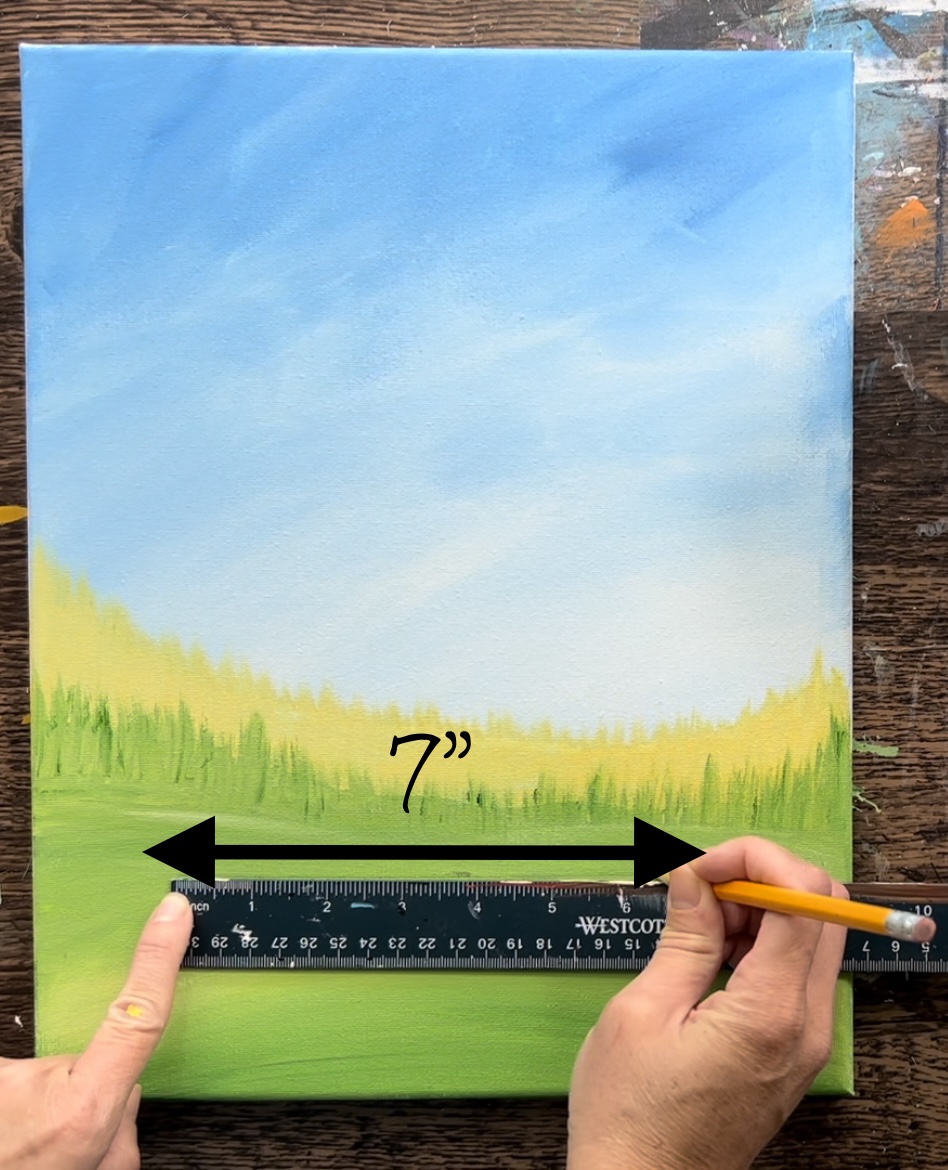
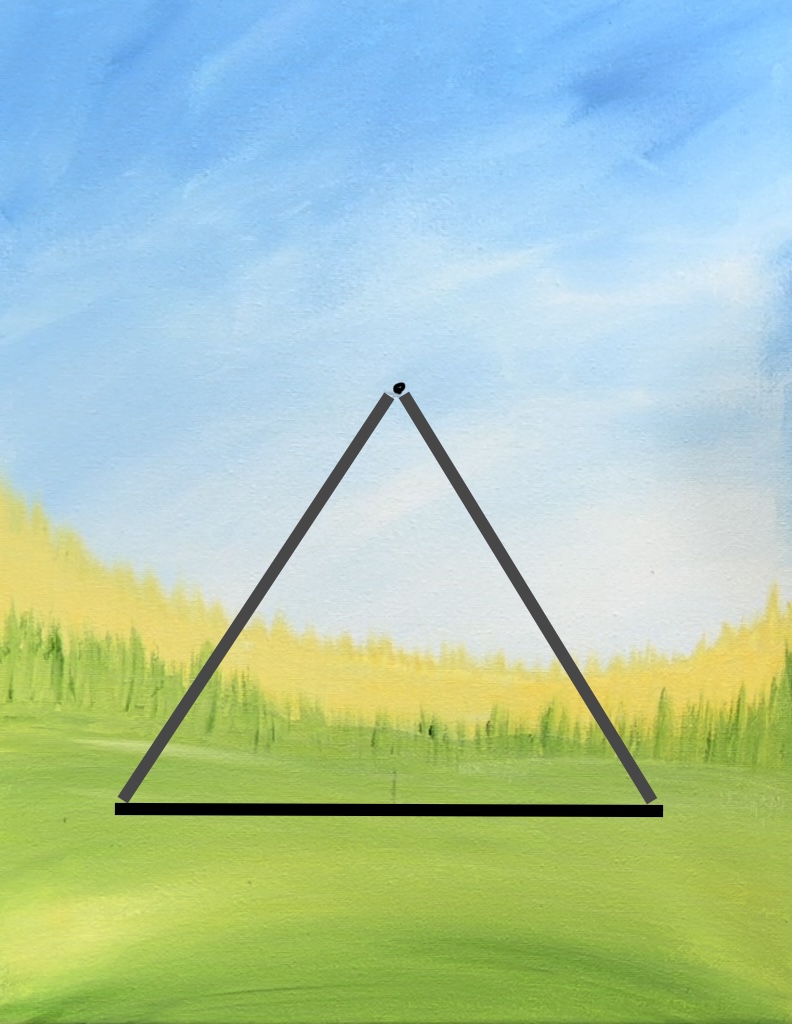
5. Draw Triangle & Tape It With Painters Tape
Wait for your canvas to completely dry before doing this next step. I recommend using a ruler and painters tape for drawing this triangular shaped cabin.
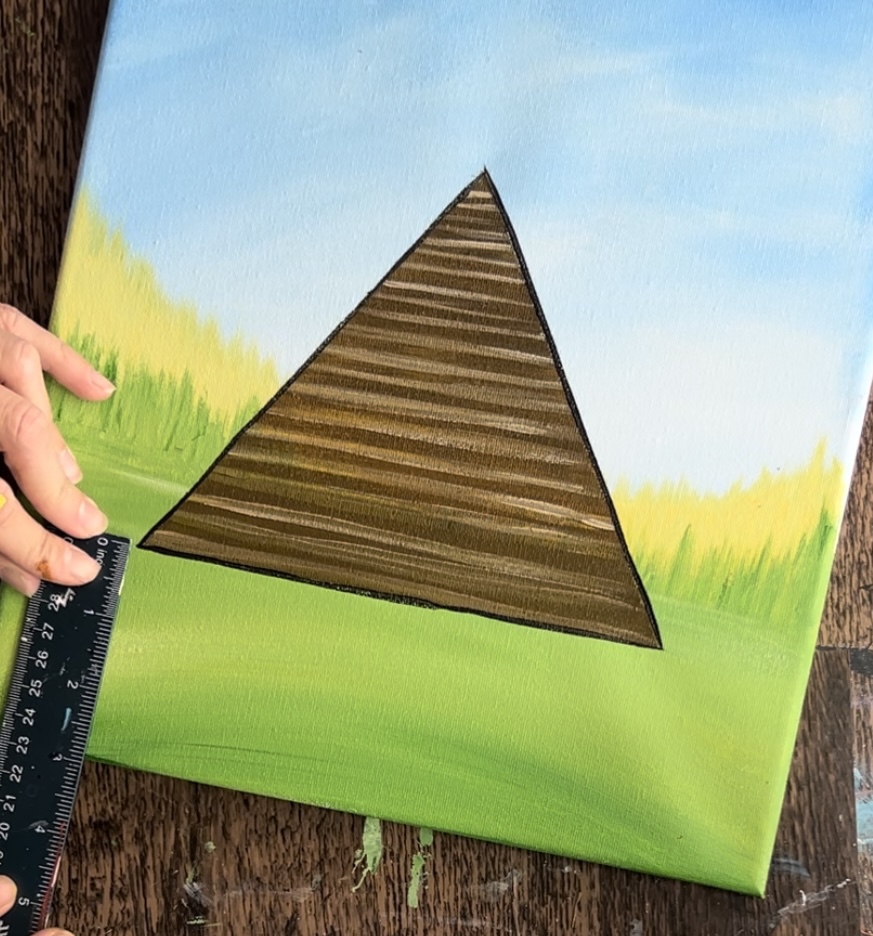
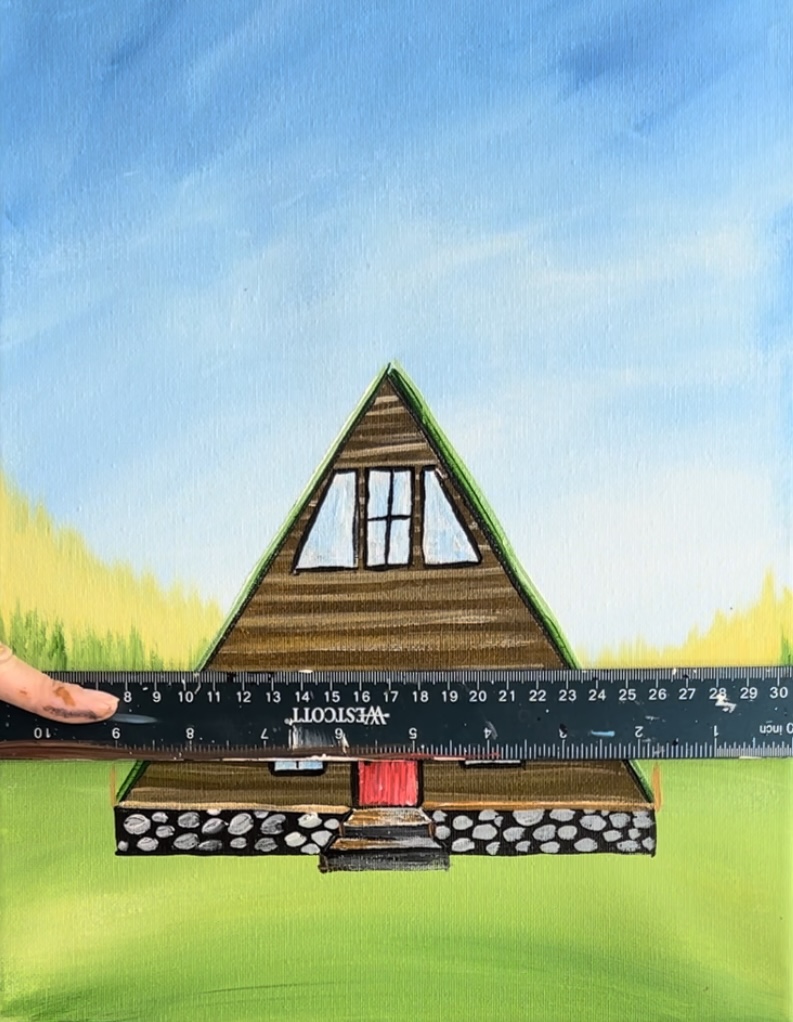
Draw a horizontal line that is centered on the canvas and about 3″ from the bottom edge. This line is approximately 7″, however, you can change the dimension of this if you want.
Next, locate the center of that horizontal line. Then make a “dot” at 5.5″ vertically up from that horizontal line.
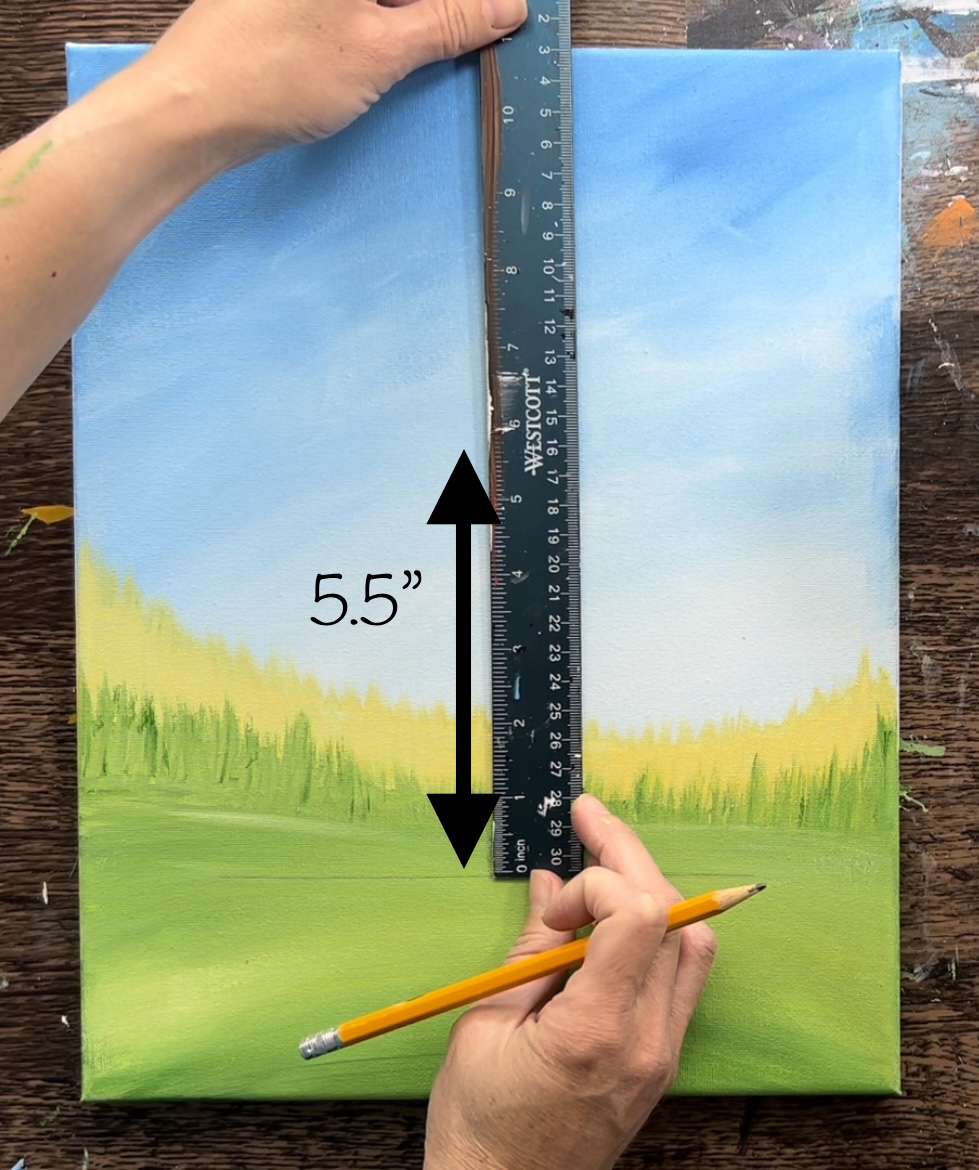
Then use your ruler to connect that dot to both ends of that horizontal line to form a triangle.
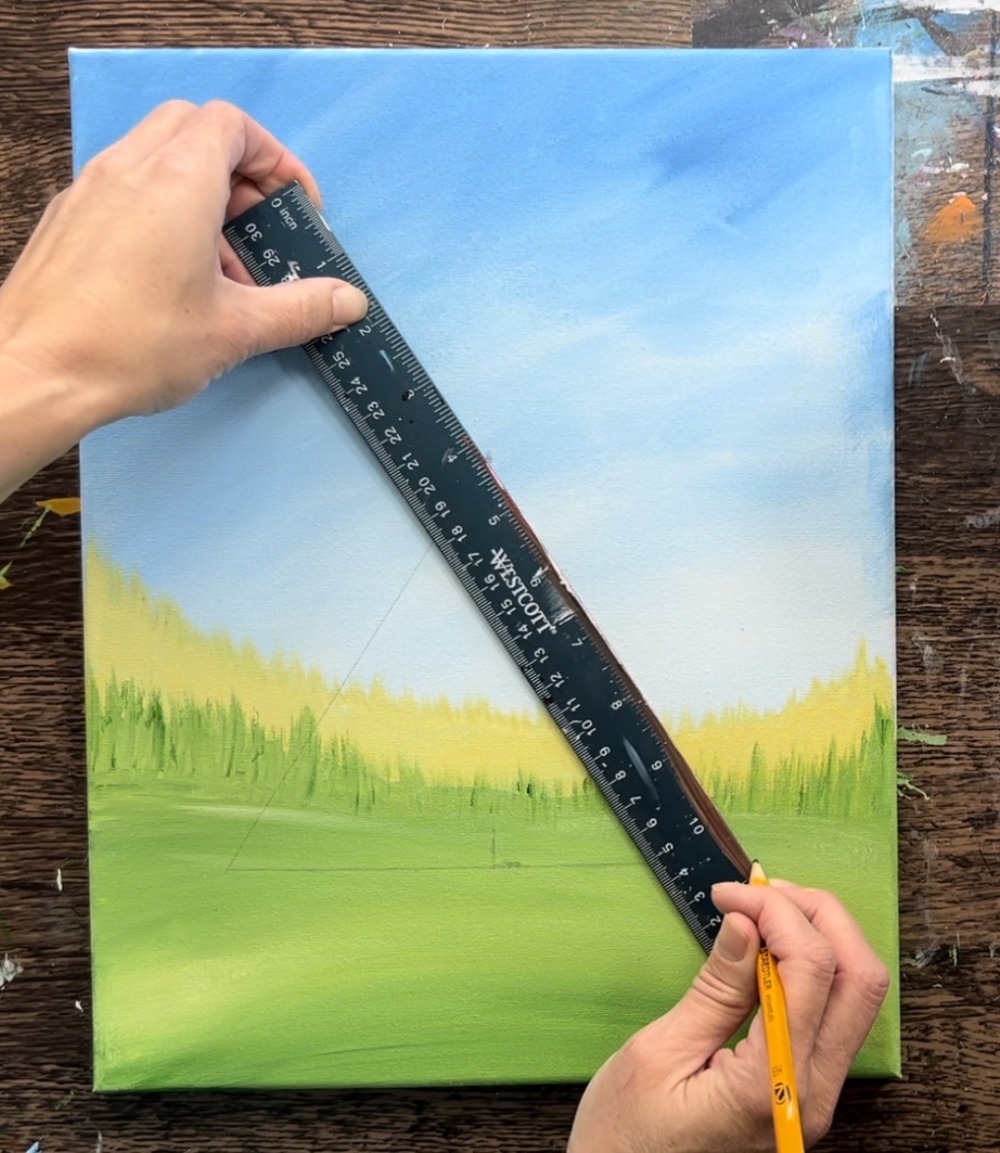
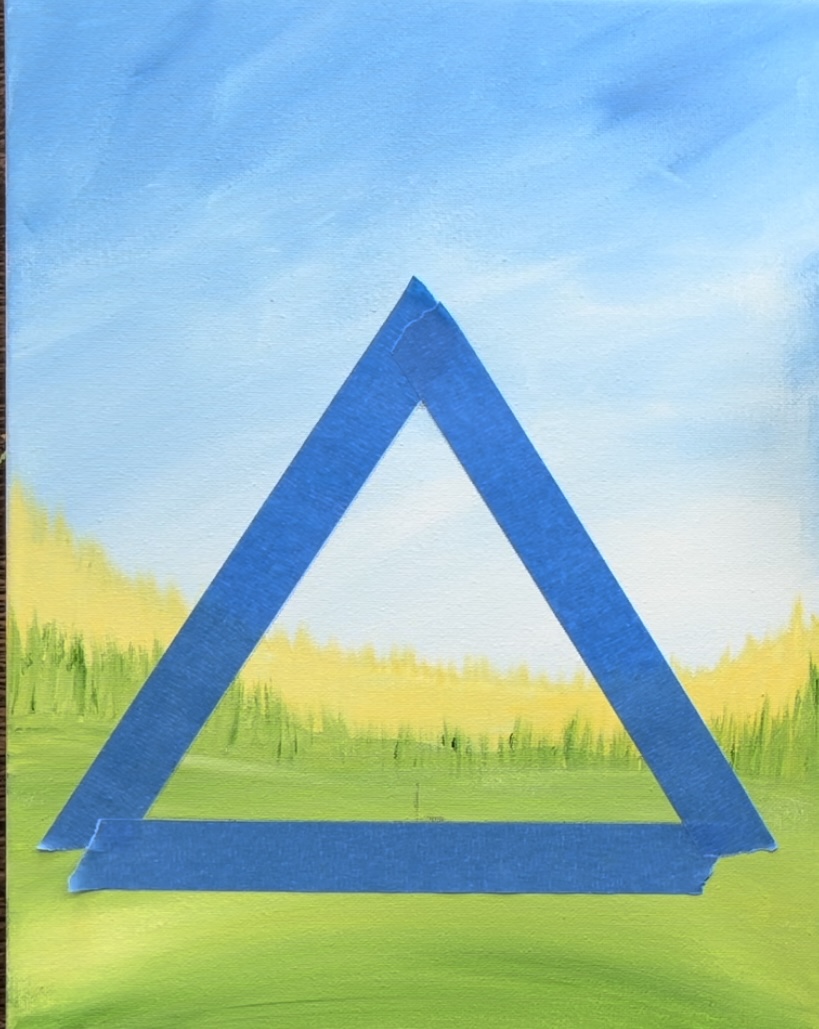
Next, lay painters tape down around the triangle that you just drew.
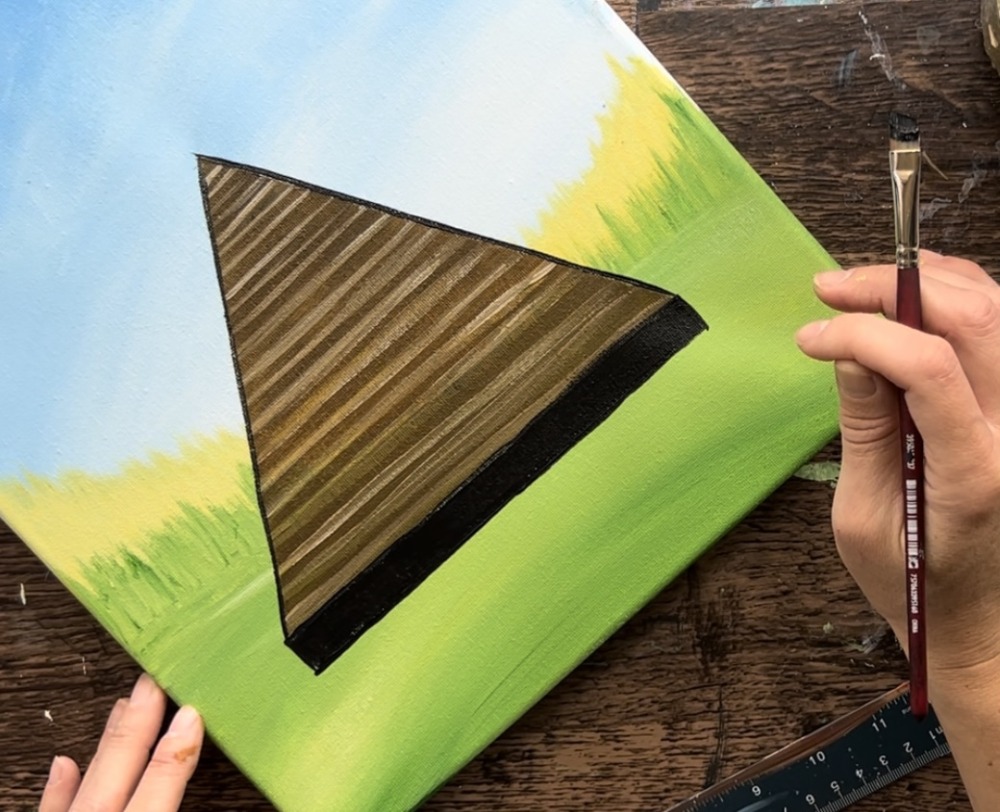
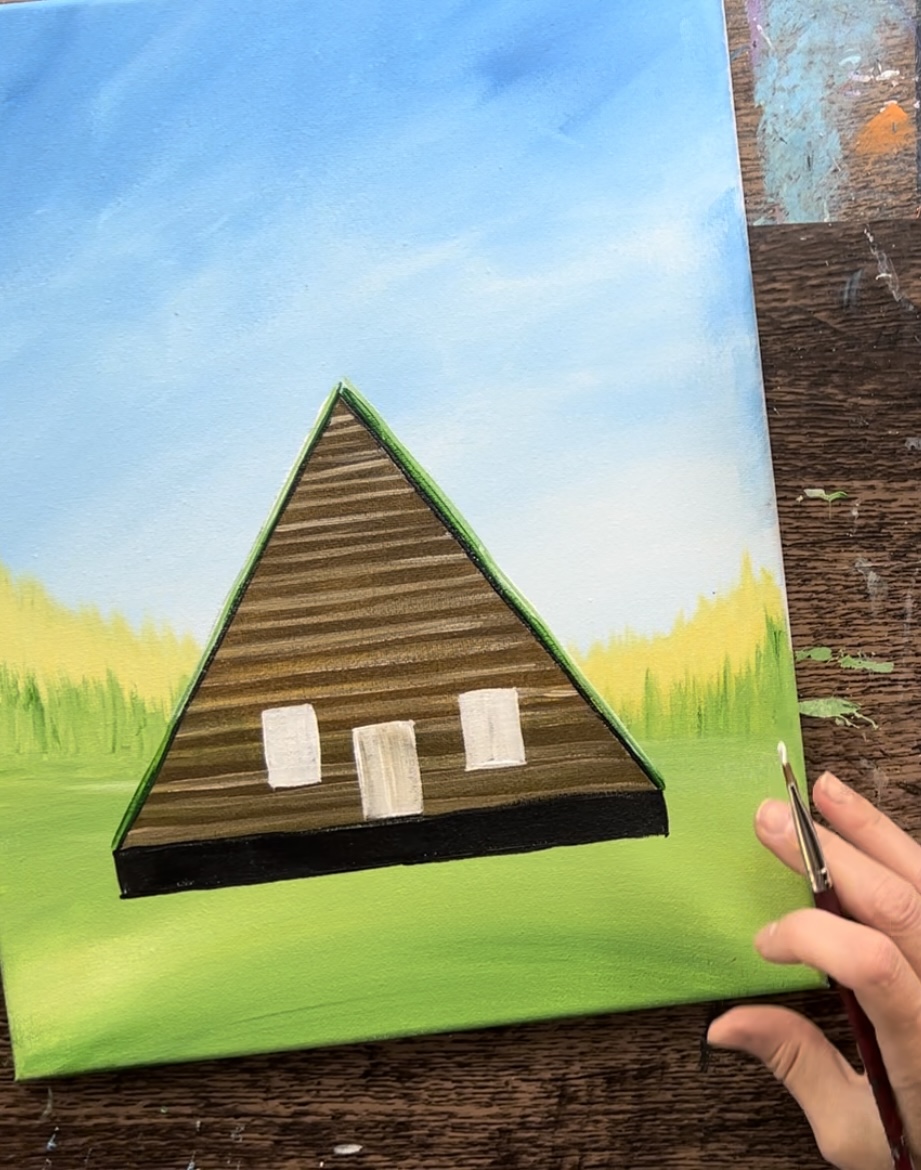
6. Paint Cabin First Layer & Logs
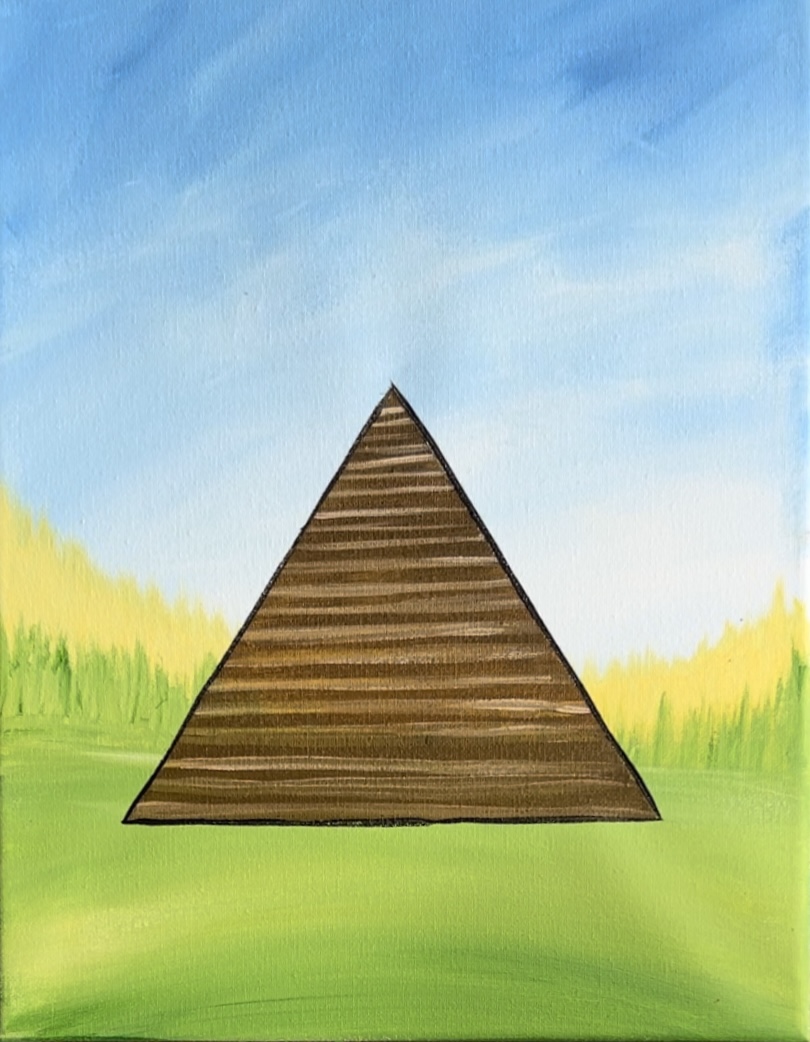
Load your palette with raw Sienna and mars black. Mix about 3 parts raw Sienna and 1 part mars black (this doesn’t have to be exact) to make a “dark brown”. Use the 3/4″ wash brush to paint the entire triangular area dark brown. Make sure everything is painted with left and right horizontal strokes.
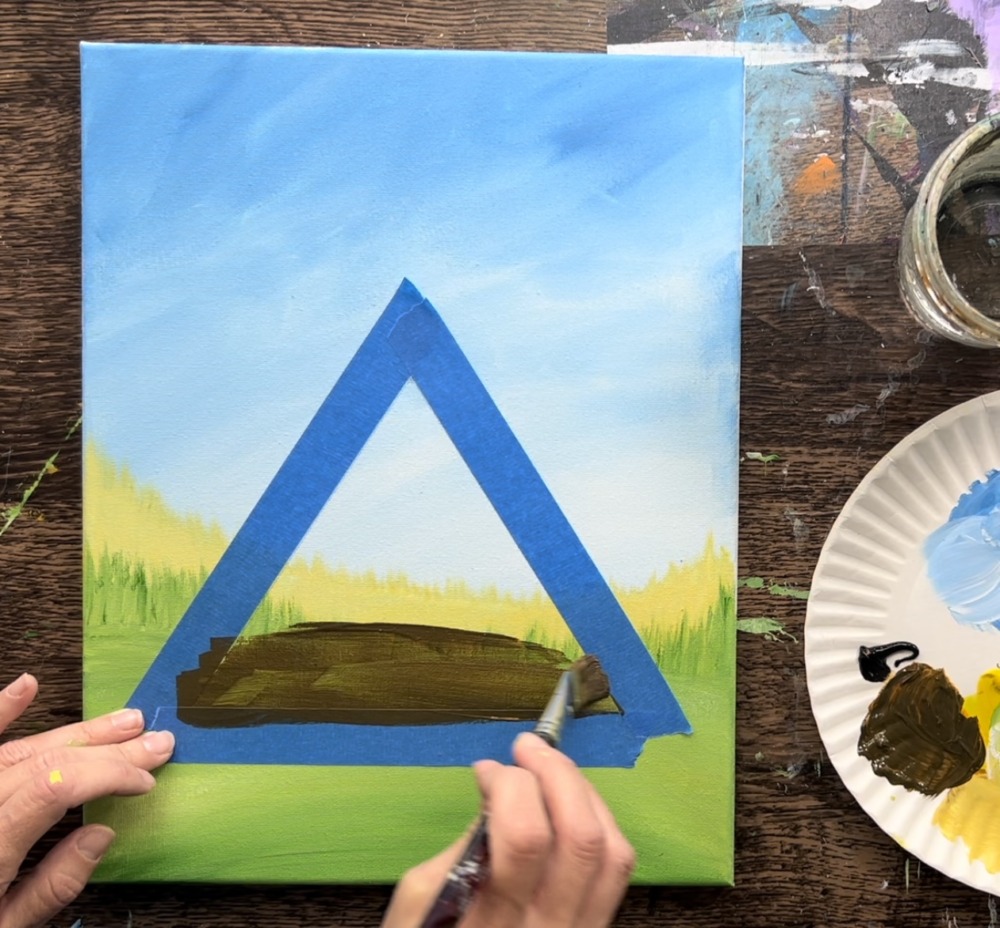
I recommend painting two coats of paint on this to make sure all of the background is covered and not showing through.

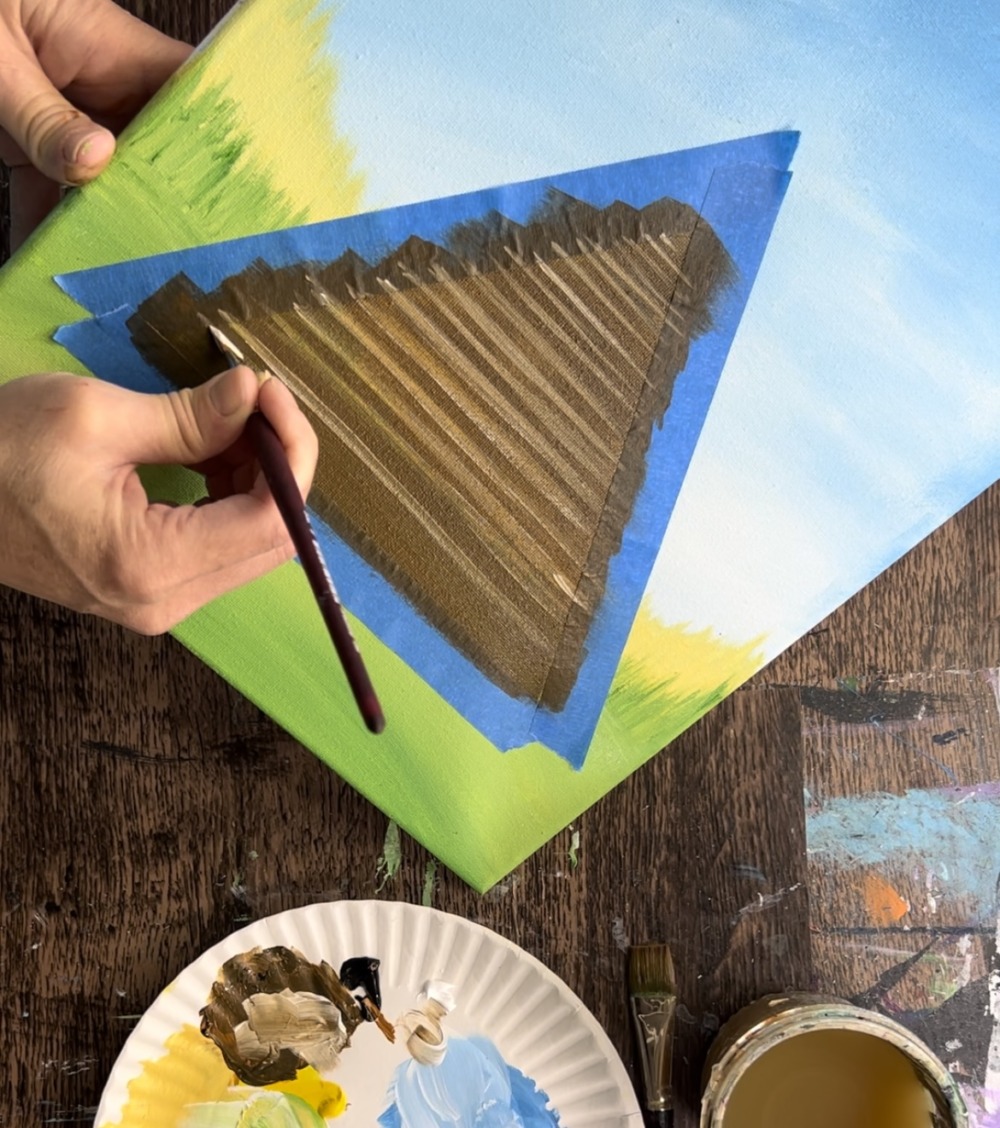
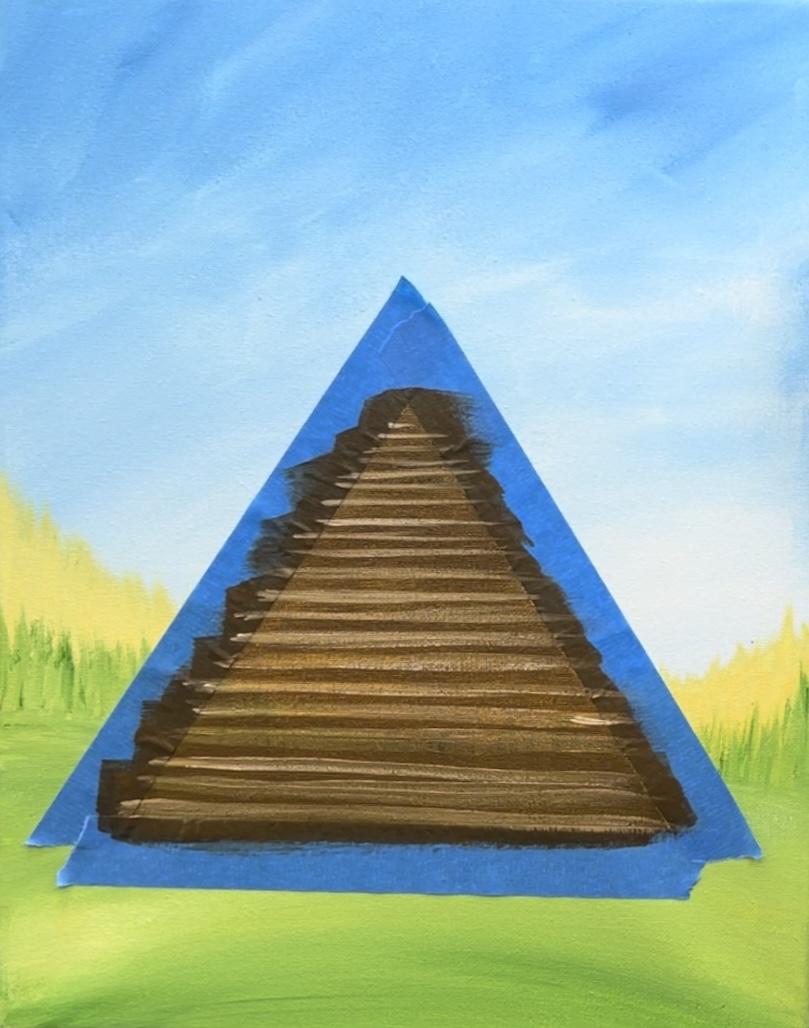
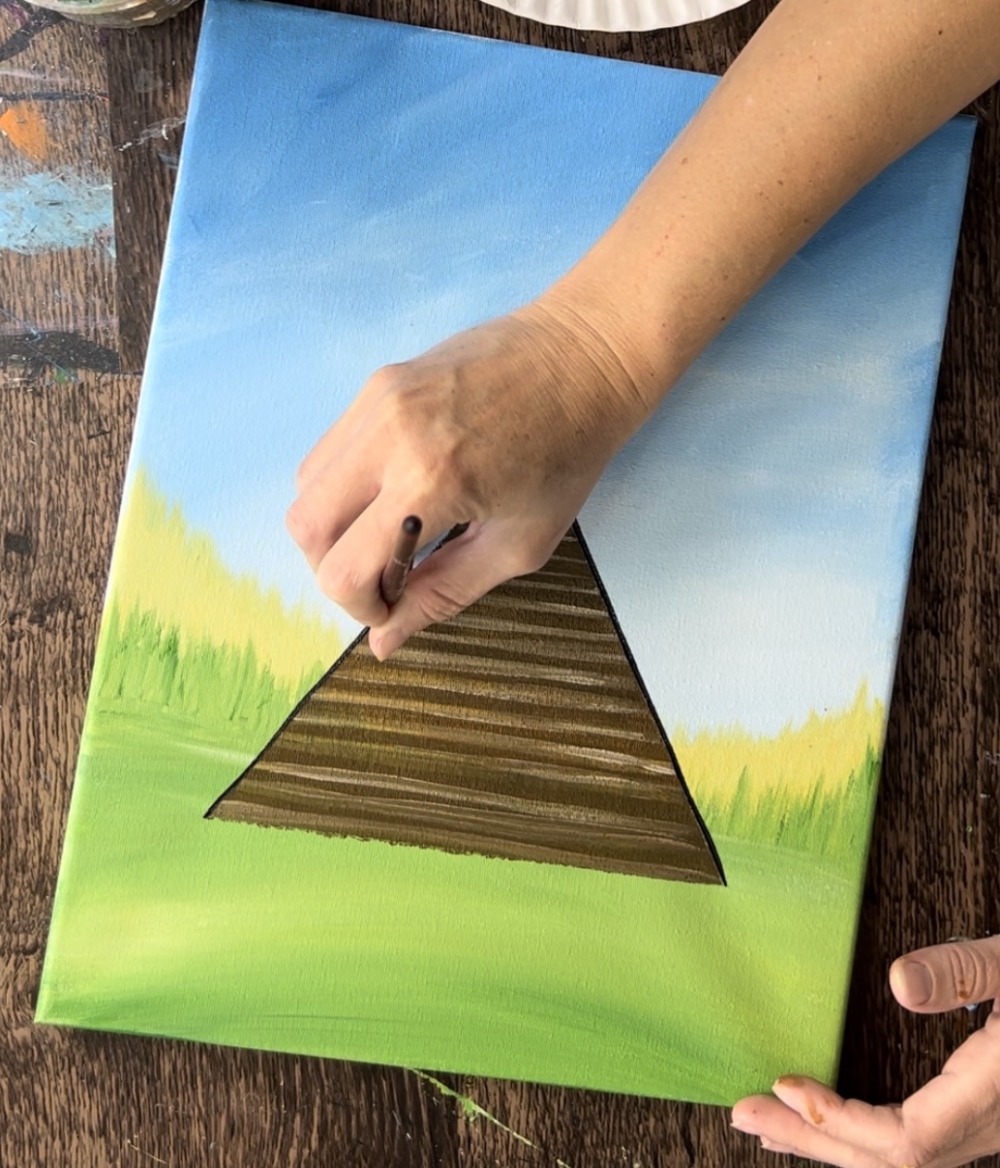
You don’t need to wait for this to dry unless it is “saturated” and won’t take anymore layers of paint. Use the “3/8″ angle brush” to paint light brown lines on the triangle. To make “light brown”, mix “titanium white” into your dark brown on your palette so that it becomes lighter.
Paint thin, horizontal lines on the entire cabin. I started at the top of the triangle and worked my way down.
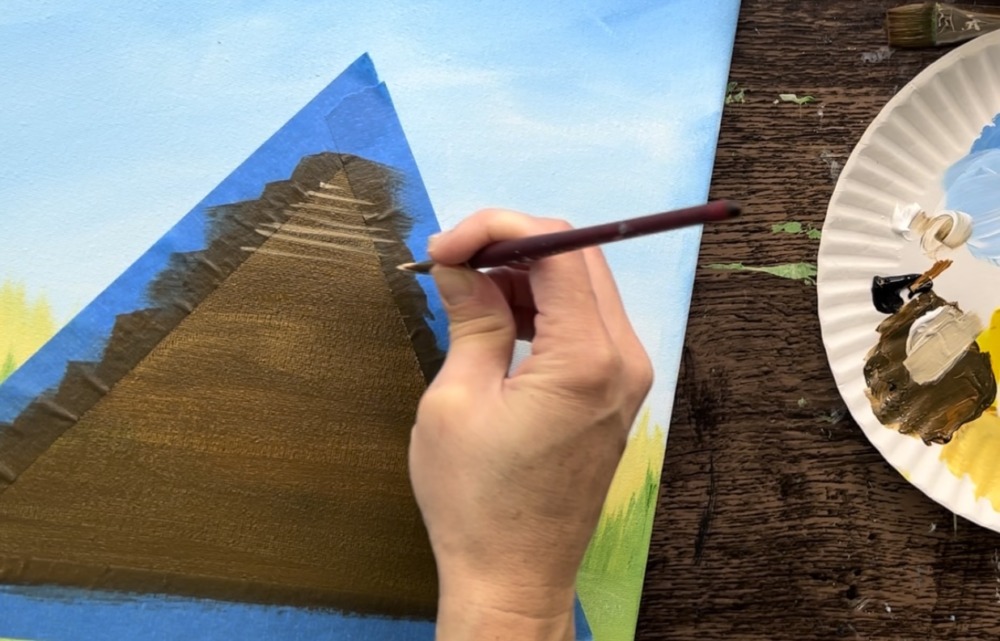
It’s okay if your lines are not the same shade of light brown throughout and it’s also okay if they aren’t evenly spaced apart.
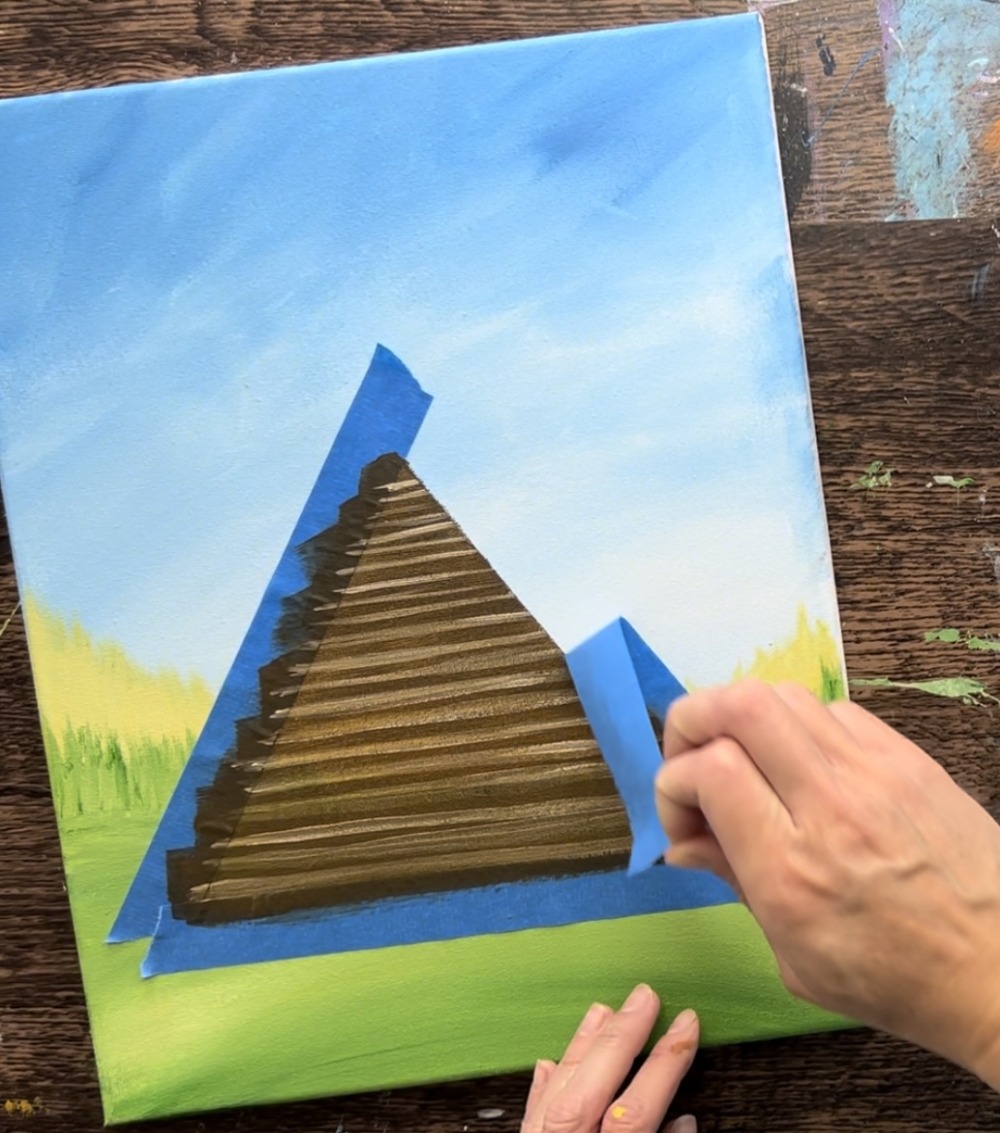
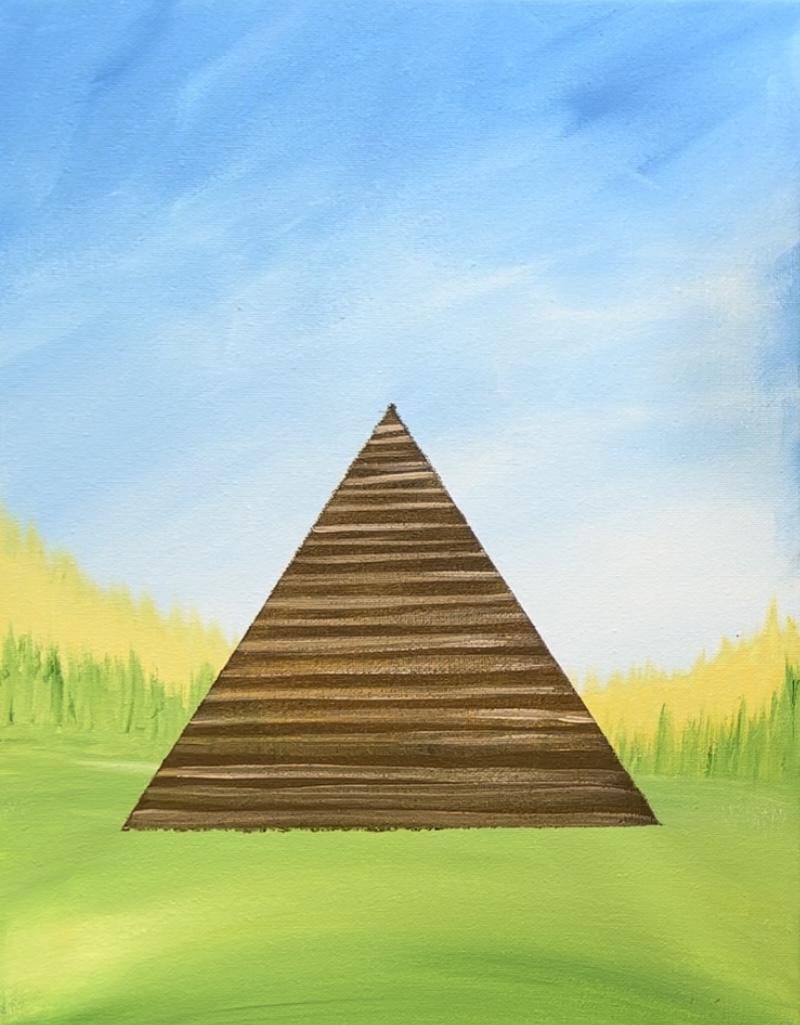
7. Remove Painters Tape
Carefully remove the painters tape. You don’t need to wait for the paint to dry all the way before removing.
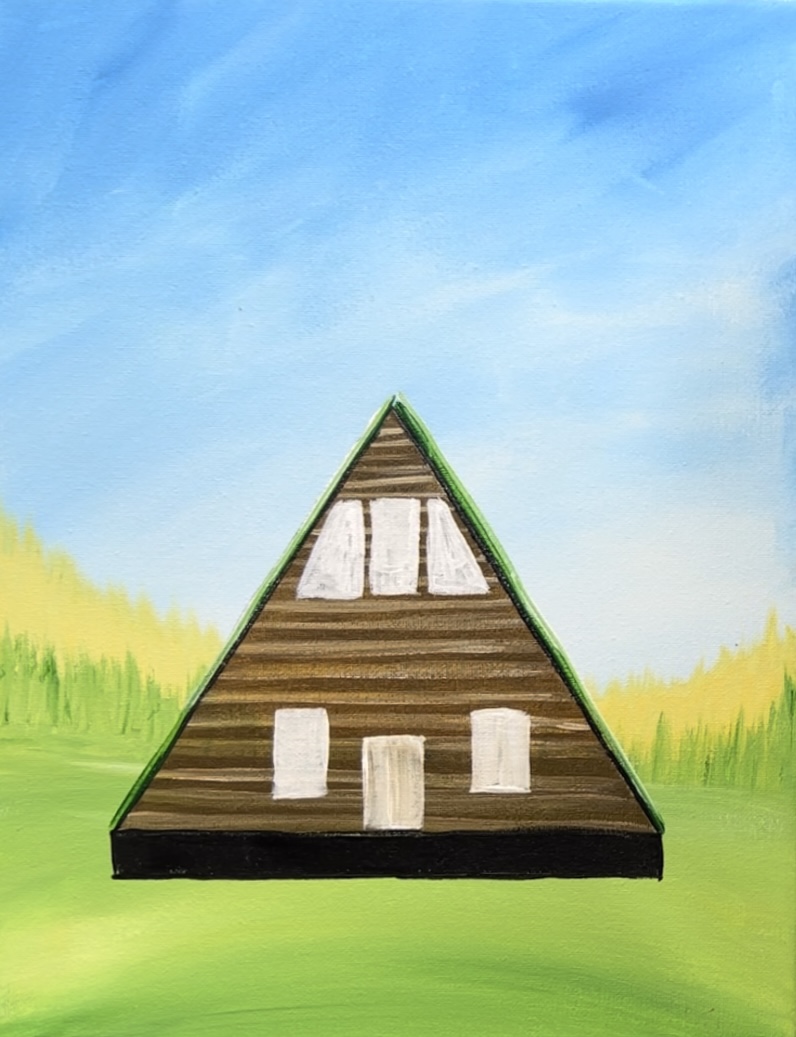
8. Outline Cabin Black & Paint Foundation
Load your palette with “mars black”. Use the 3/8″ angle brush to outline the entire triangle with the black. This is a thin line on the outside edge of the cabin.
Next, paint a rectangle under the flat edge of the triangle. First use the angle brush to draw the triangle out with black paint. You can also use a paint pen or a sharpie to draw this triangle out.
I made the height of my rectangle about 5/8″, however, you cad round yours to about 1/2″ or 3/4″.
Use a ruler to draw two vertical lines going down on each side of the bottom of the triangle and then draw a horizontal line going across.
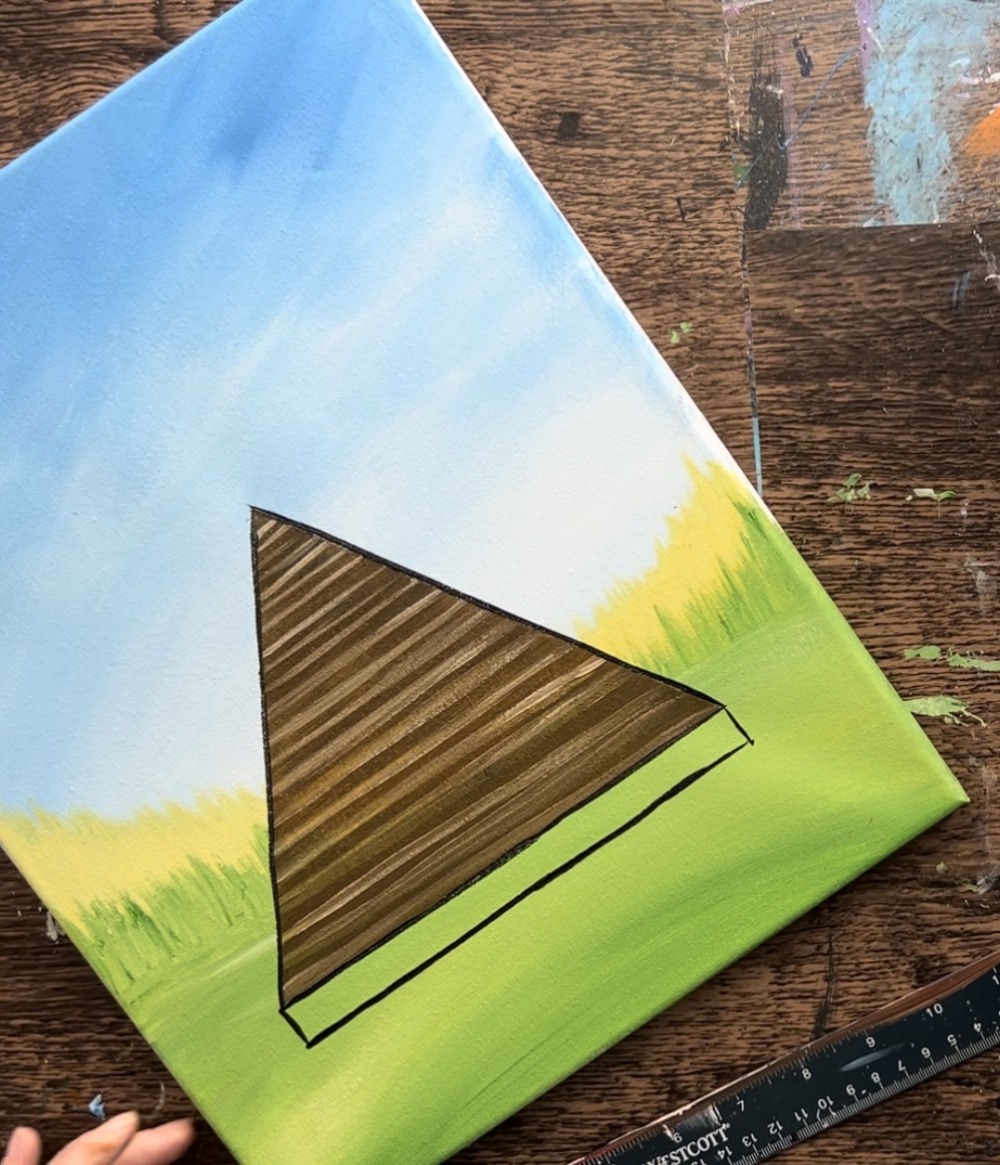
Paint this rectangle solid black.
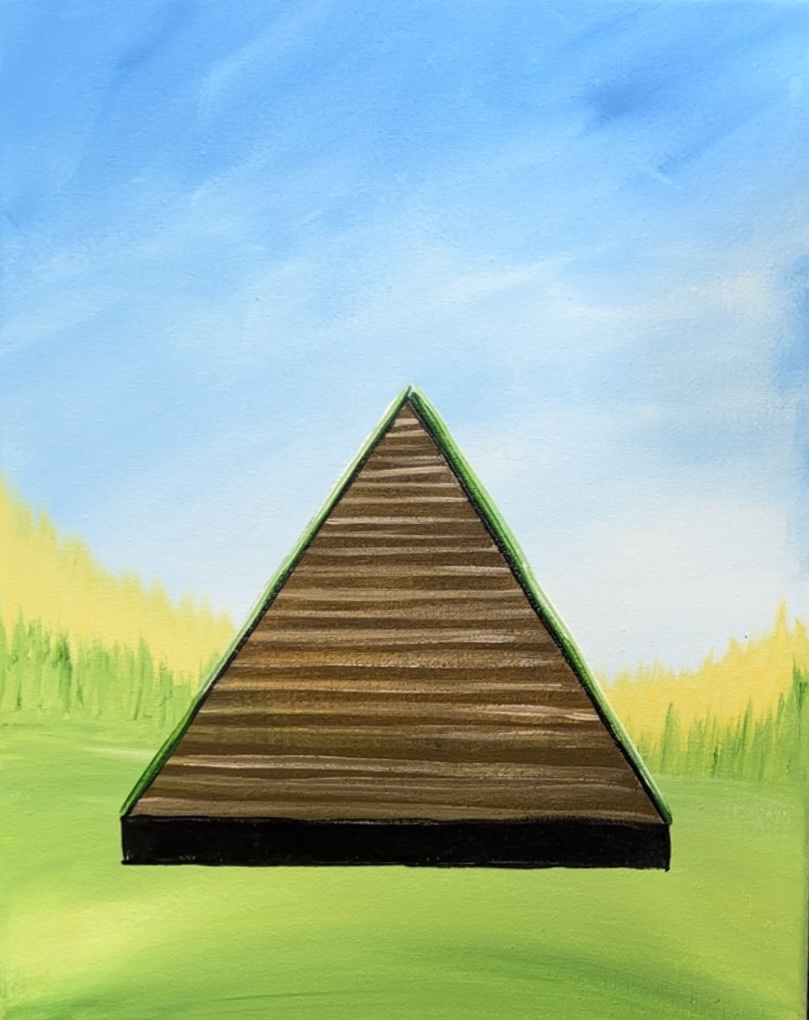
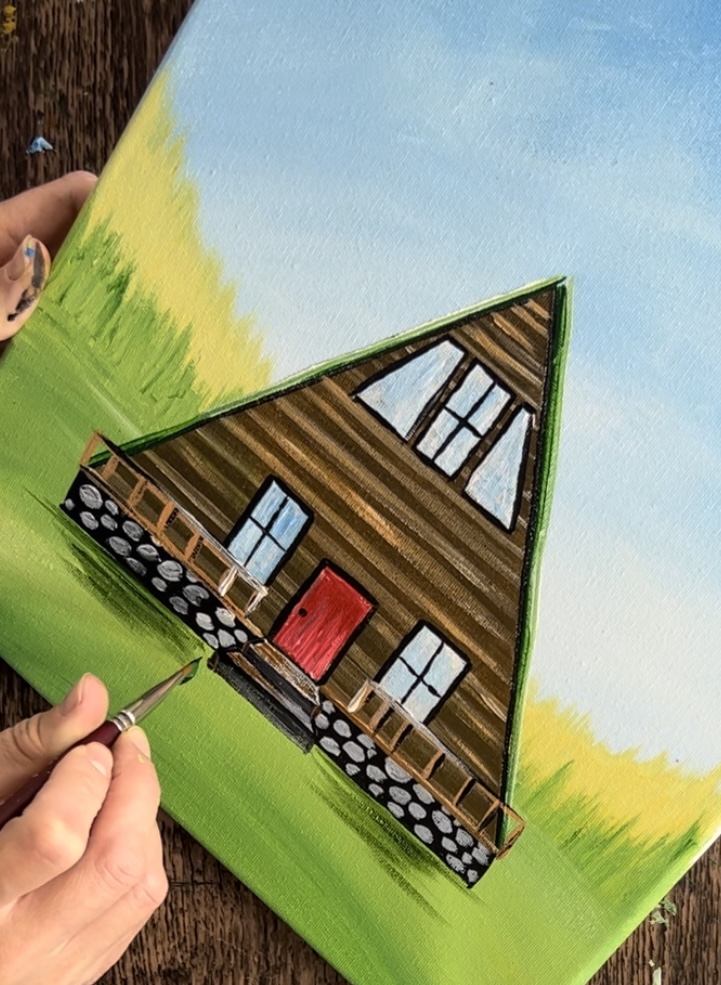
9. Paint Green Roof
Next, load your palette with hookers green hue. Then use the angle brush to paint a thin green line next to the black line that you painted earlier.
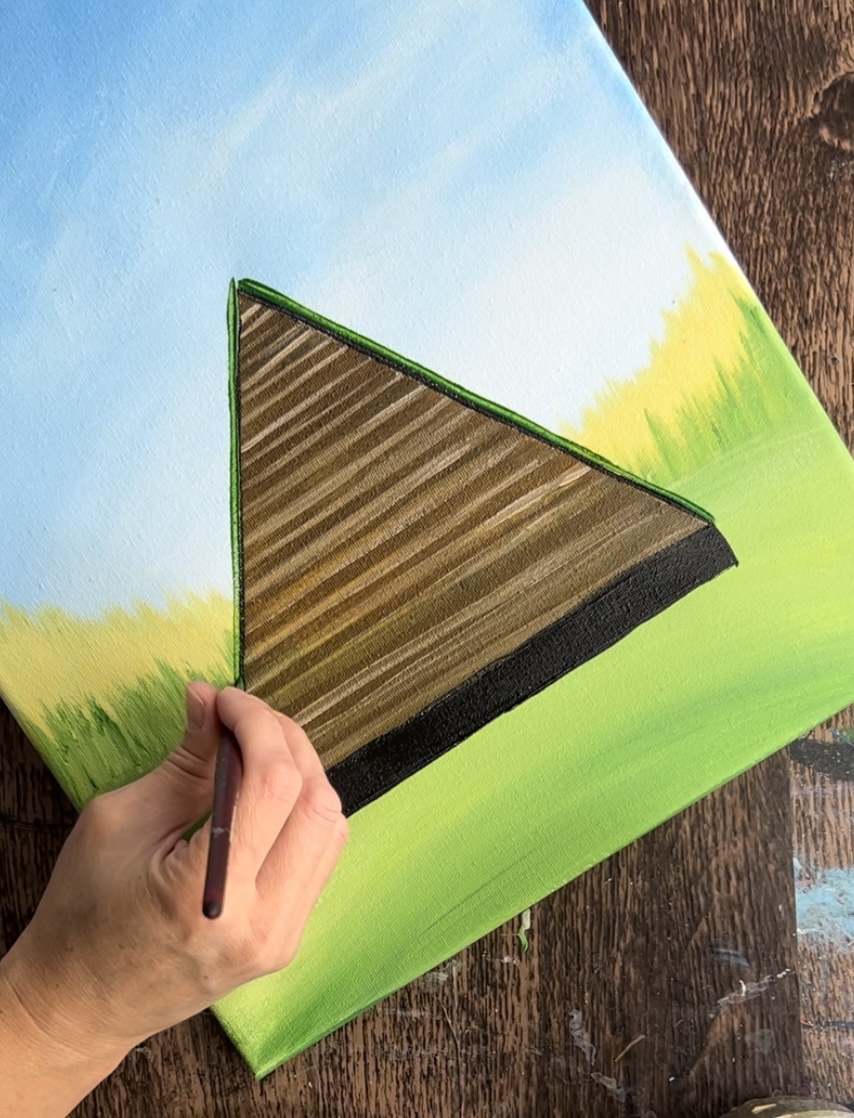
Optional: add titanium white to your brush without rinsing the green off. Paint a thin, white line (that blends to a light green) next to your green line. This will give your roof a little bit of “highlighting”.
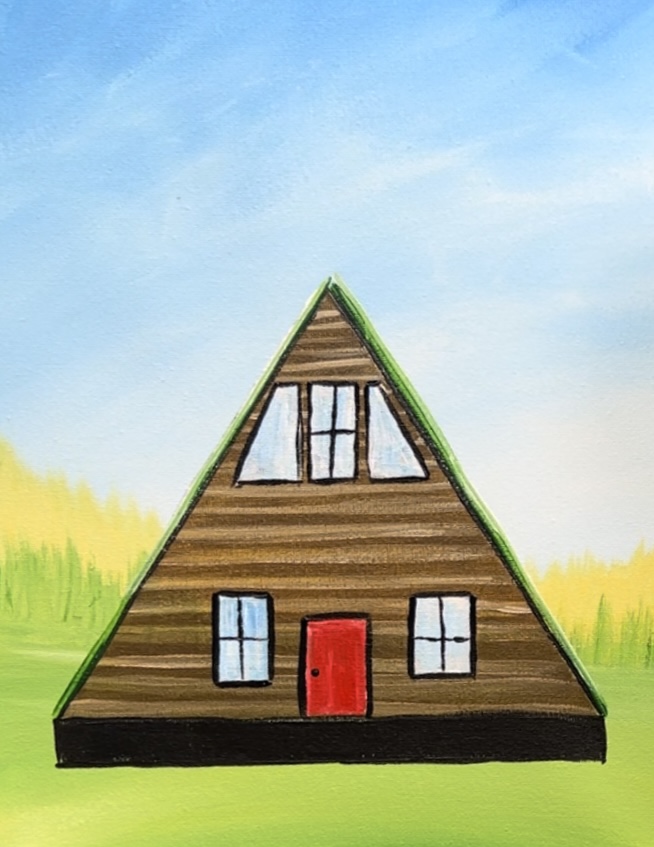
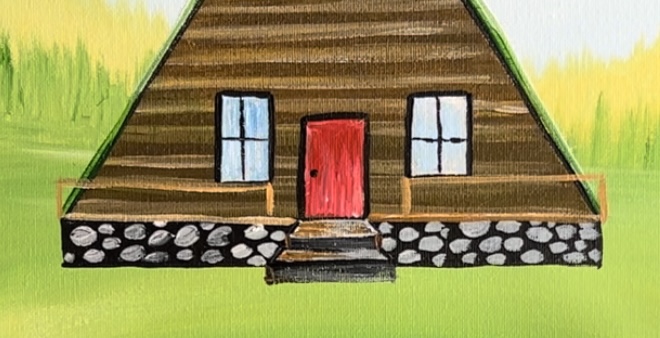
10. Paint Door & Windows
Make sure the brown of your cabin is dry. Then paint the door and windows. I used both the angle brush and the #4 round brush. Paint a rectangular shape and then fill it in solid white for the door.
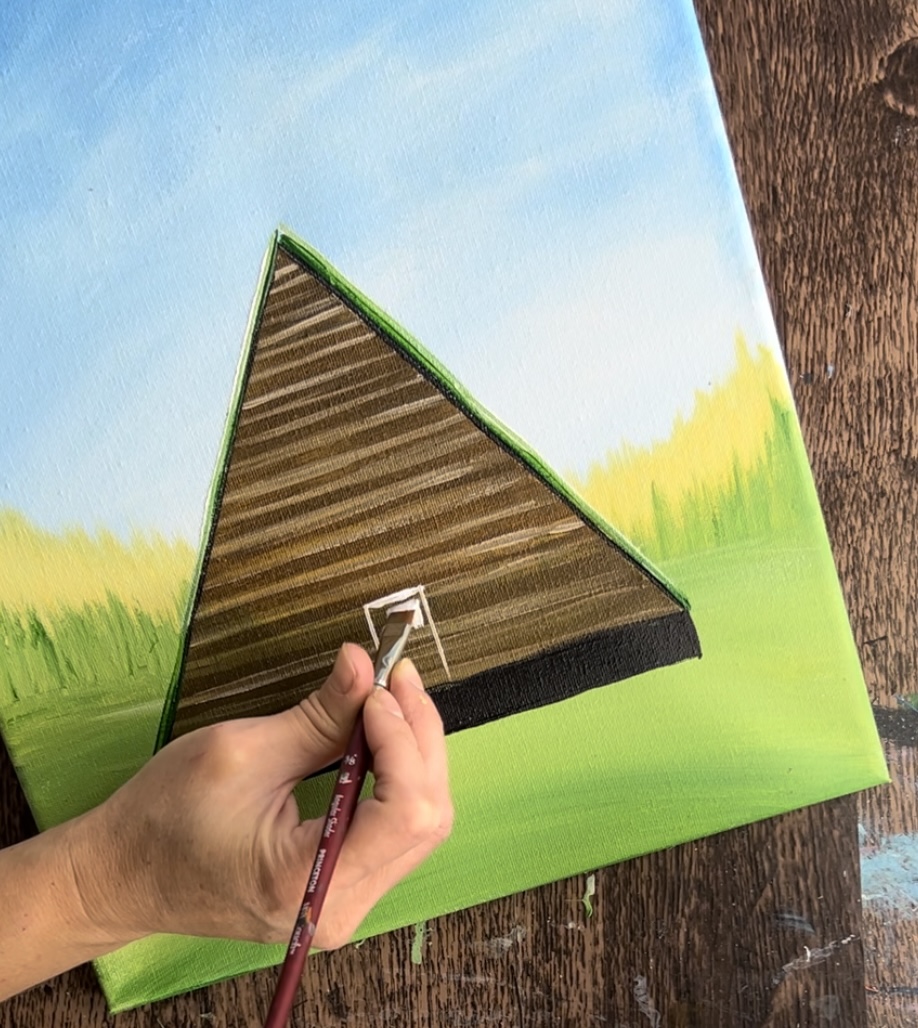
Tip: it may be helpful to use a paint pen or a sharpie to draw your door and windows out and then paint them white.
The height of my door is 1.5″ and the width is 3/4″. You can use these measurements as a guideline or you can change the size of the door. The windows are about 1.25″ high and 3/4″ wide.
Then paint the windows on the top. I did a rectangle and then two angled windows with the angle side parallel to the roof.
Tip: If your windows/door do not look even, they will look better when we outline them with black in a later step.
Wait for this white to dry. Then add color to the door and windows. For the door, I used “pyrrole red” and for the windows I used cerulean blue.
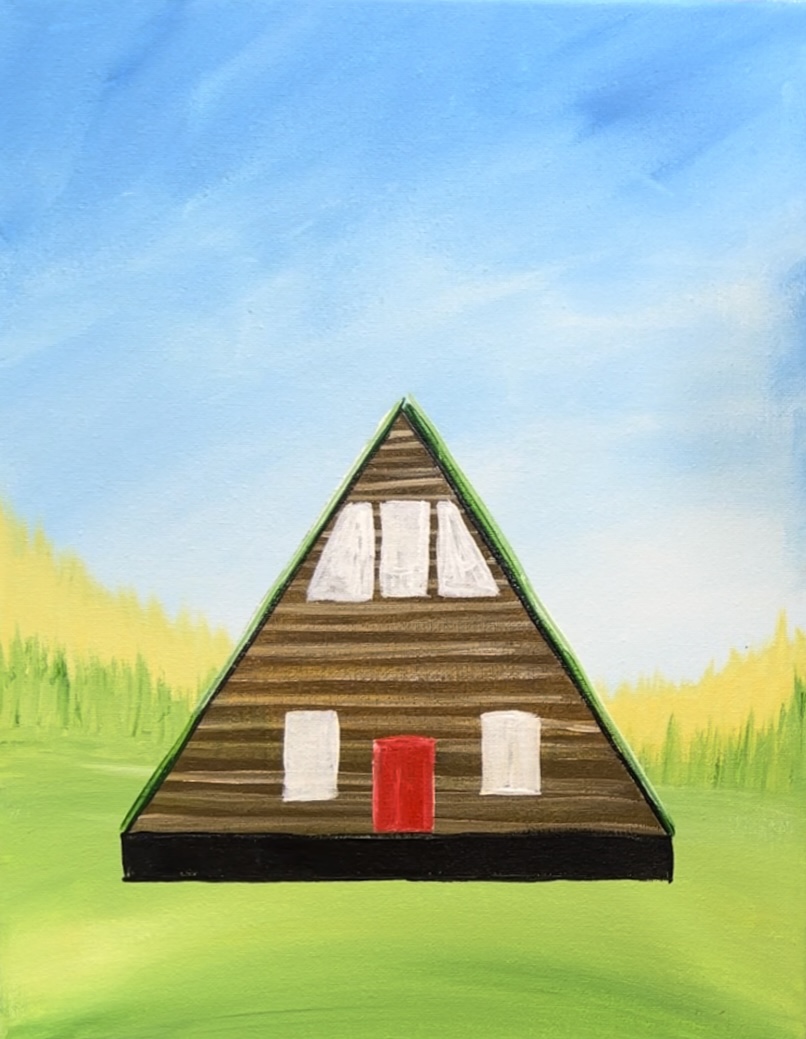
To make the very light blue color, mix a very small amount of cerulean blue with your titanium white so that it is very light blue.
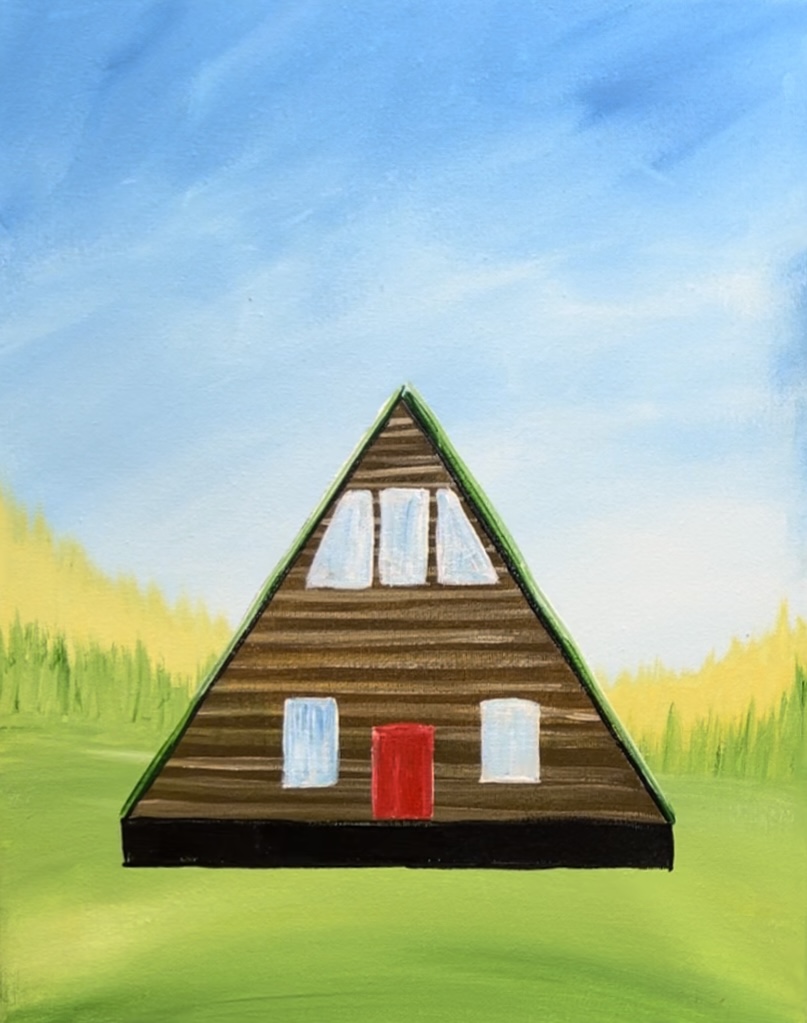
Next, use a #4 round brush and mars black to frame all your windows and door. Simply outline each of the shapes. You can also add window pane lines to the windows.
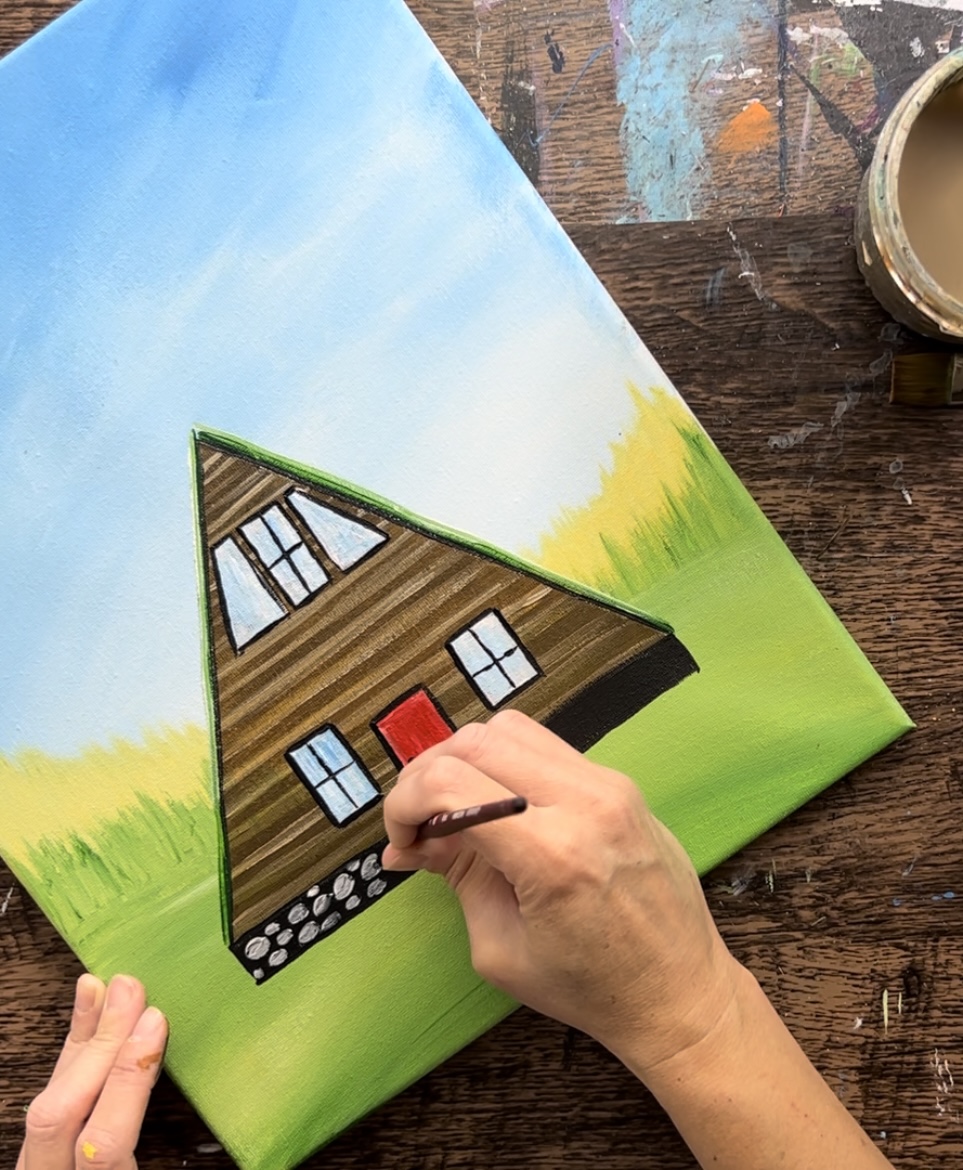
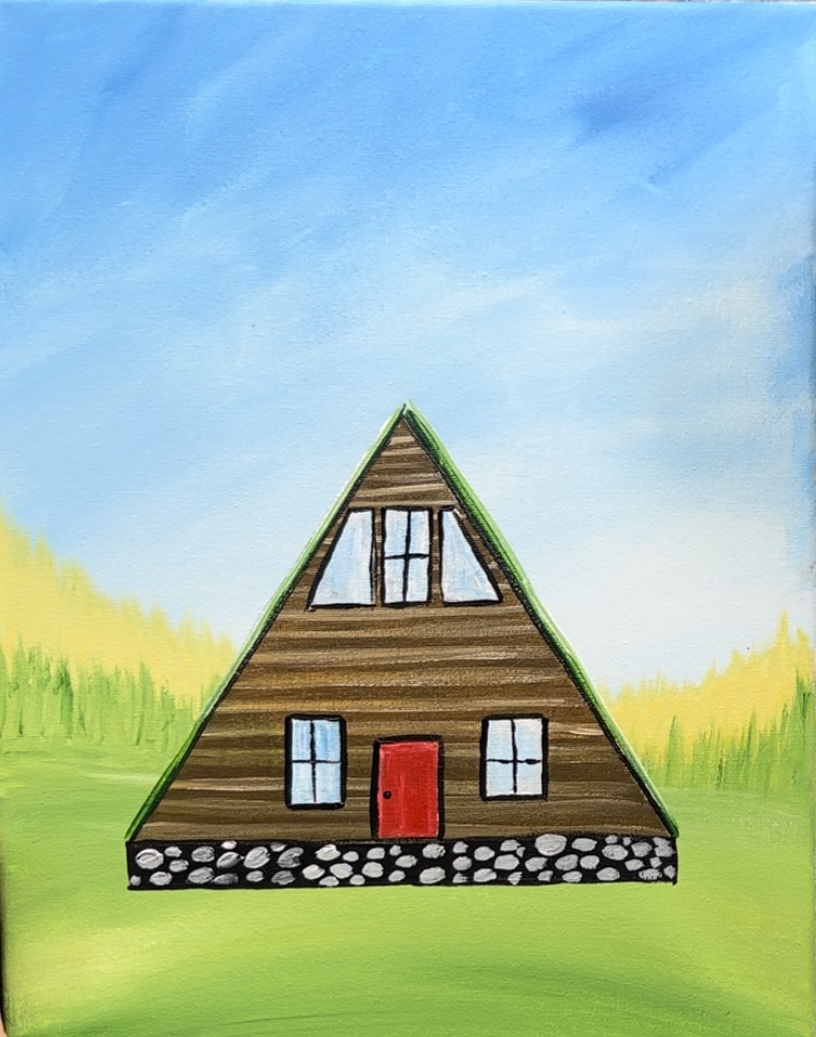
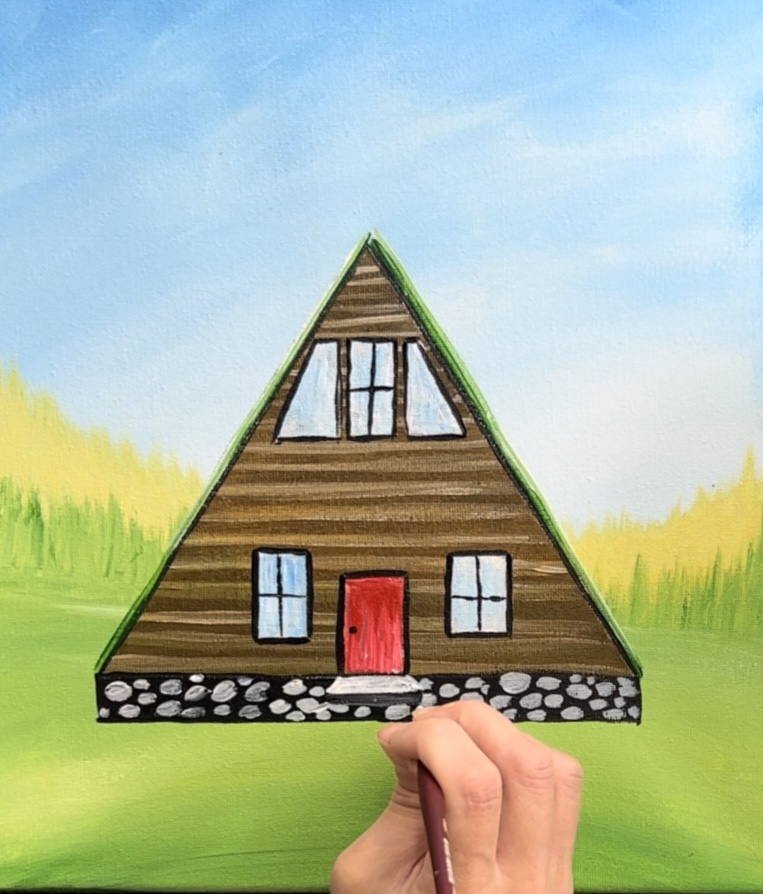
11. Paint Stones
Mix a medium to light gray on your palette by mixing black and white together (more white than black). Use the #4 round brush to paint stone shapes on the foundation. Paint various sizes all thought the black rectangle area.
12. Paint Steps
Use the #4 round brush to paint simple steps in front of the door. Start by painting a white “trapezoid shape”. These are two diagonal lines and a horizontal line.
Then paint a rectangular shape under the trapezoid shape. I did this with a different color (black) so that it would stand out.
Then paint another trapezoid shape with white. This will be slightly wider than the top trapezoid shape.
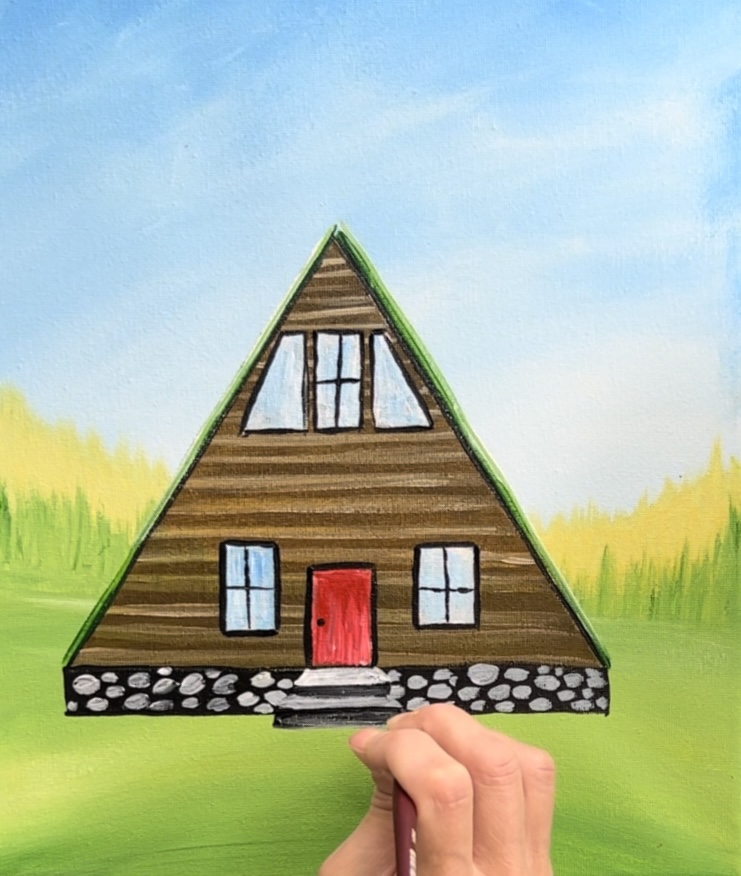
Then paint another rectangle under that shape and do it with a darker color/ black so that it will stand out.

Optional: add a small amount of brown onto the top/ lighter colors of the steps.
13. Paint Railing For Porch
This is an optional step, you don’t have to detail this with a porch. For the porch, I used a #4 round brush and raw Sienna mixed with titanium white. Paint two rectangles on each side of the door. I made the heights of my rectangles no larger than the bottom edge of the windows.
Next, paint evenly spaced vertical lines inside the rectangular area.
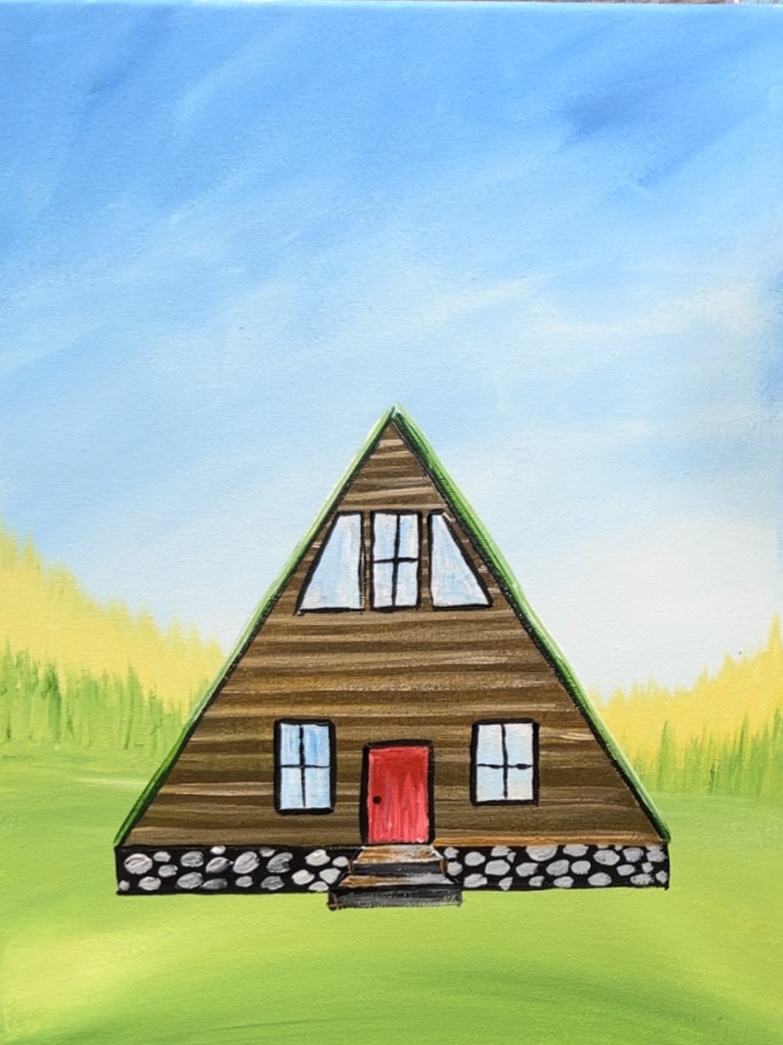
14. Paint Shadow & Path Under Cabin
Use the angle brush and green mixed with a little black. “Dry Brush” left and right paint strokes underneath the foundation and go all the way to the bottom edge of the canvas. If it is too dark, add a little more green to the color and less black. When you “dry brush”, you need to only add a small amount of paint onto the tip of the brush. You don’t want to cover all of the light green ground area, leave some of it still showing through.
Leave the area under the steps blank because we will paint a path there in the next step.
The area directly under the foundation should be slightly darker and the area on the bottom edge of the canvas is lighter. Do this by adding more paint under the foundation area and less as you work your way to the bottom edge of the canvas.
Next, mix raw Sienna with a little bit of titanium white on your paint palette. Use the angle brush to dry brush a path area under the steps. Allow the path to get wider as you go towards the bottom edge of the canvas.
Then make a darker brown on your palette (mix a little black into the raw Sienna). Paint this little bit of dark brown in the path area.
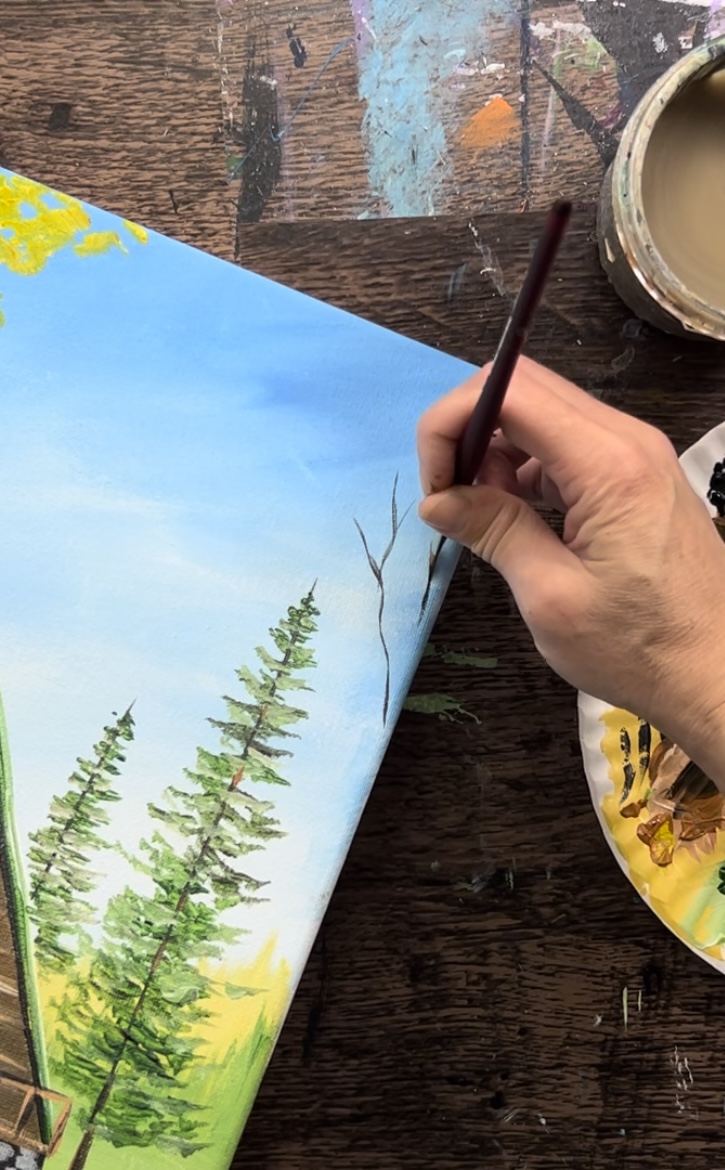
15. Paint Pine Trees
Use the 3/8″ angle brush to paint a black vertical line for the tree trunk. This line starts at the base of the foundation and goes up almost higher than the top peak of the roof.
Don’t rinse the brush. Load it into hooker’s green hue permanent. Then “stamp” the tree branches. Start at the tip and paint very small branches using only one corner of the brush. Then stamp the tip of the brush and work your way down in a zig-zag direction going left and right.
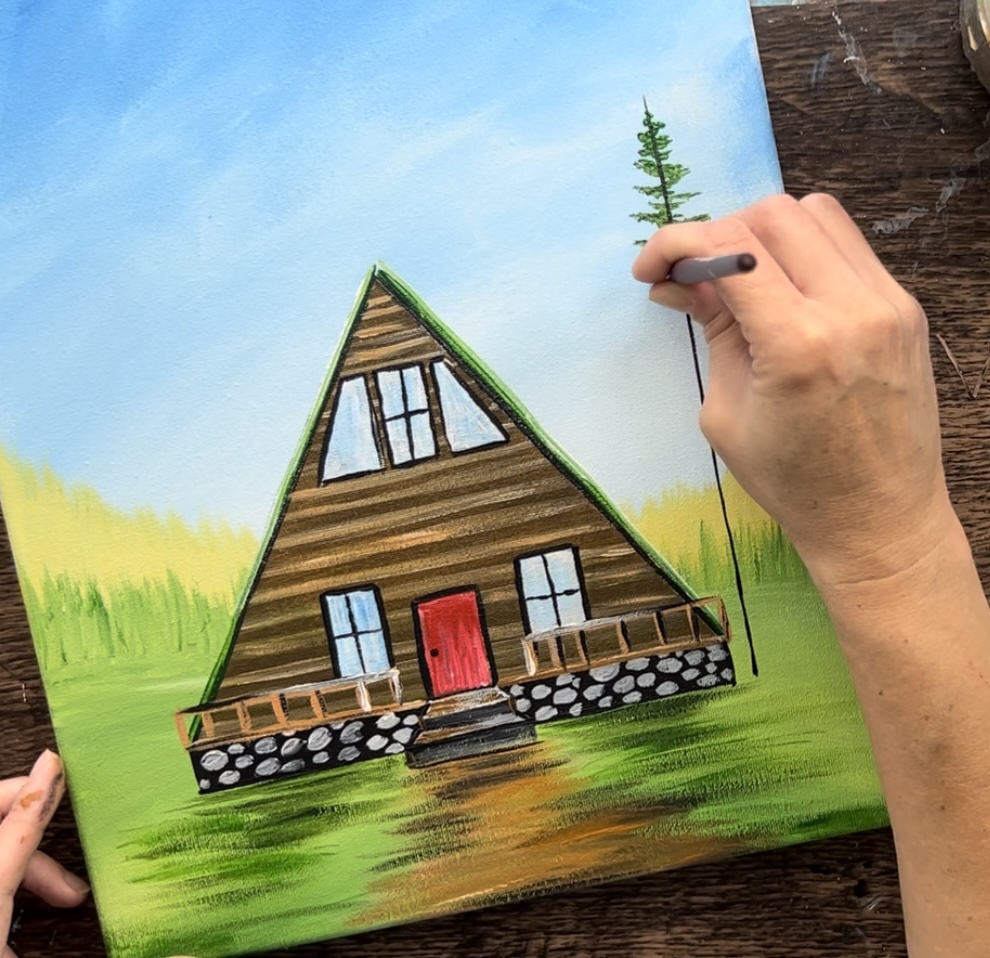
Allow the branches to curve slightly upwards on the ends. Also, allow the tree to get wider as you work your way down to form a triangular shape.
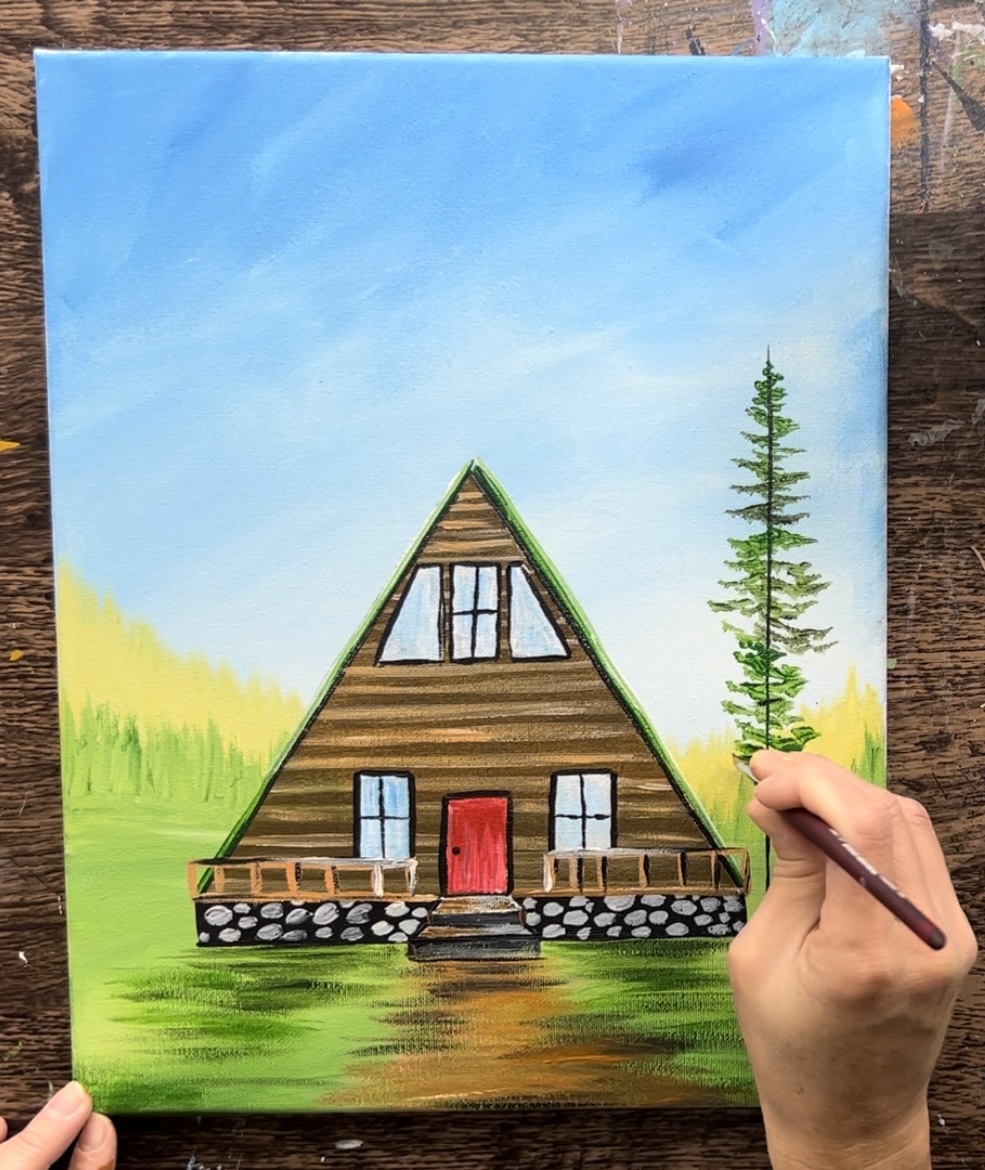
Next, add a little bit of white to the brush with the green without rinsing the brush. Add a second layer of light green over the first layer but don’t cover all of the dark green. Adding this light green layer will give the tree highlight/ dimension.
Then paint more trees. I did two more trees behind the cabin using the same technique as the first tree.
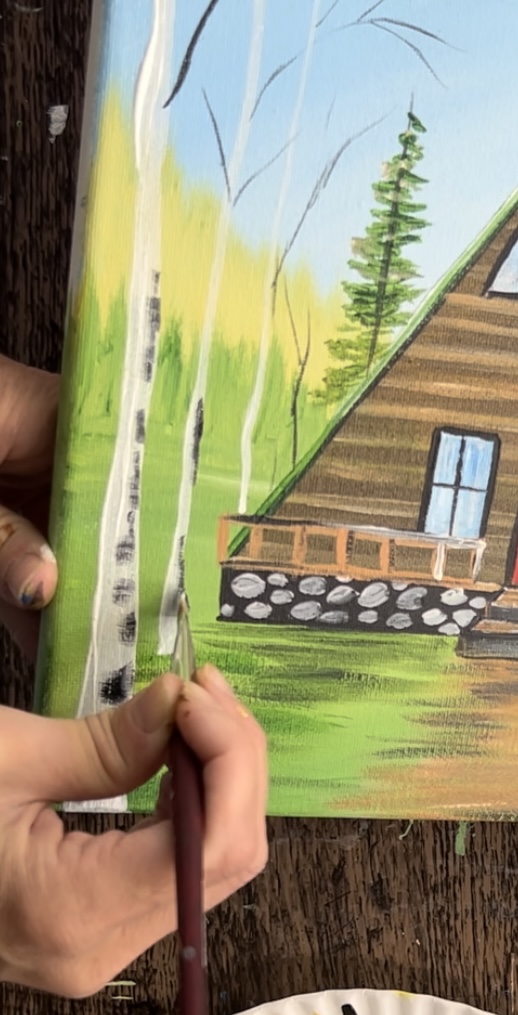
16. Paint Birch Trees
Use the angle brush and titanium white to paint the birch trees. Start with the large tree on the lower left of the painting. Create the trunk so that it is very thick on the bottom and then allow the trunk to go thinner as you go to the top and split into two branches.
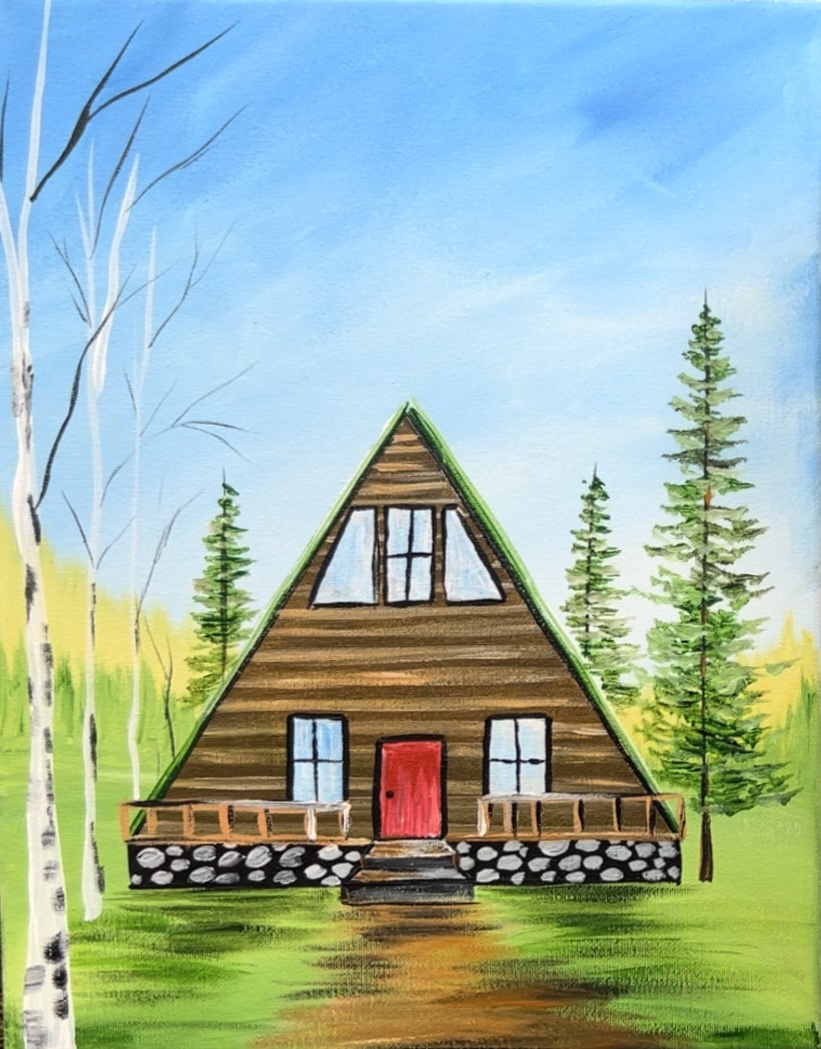
Paint two more birch trees. Each one is a little thinner because it’s further away. Paint a very thin white line for the furthest away birch tree that is behind the cabin.
Then use either the round brush or the angle brush to paint black branches towards the tops of each of the birch trees. Paint the branches so they are thinner further away and a little thicker on the large closer tree.
Next, paint black markings on the sides of the trees. Do this with the angle brush and black. Only load a small amount of black on the brush and drag horizontal markings on each side of the tree.
Then paint the leaves on the birch trees. Start by mixing “raw Sienna” with “primary yellow”. This will make a medium golden yellow color. Use the angle brush to stamp clusters of yellow paint strokes on the tips of all the branches.
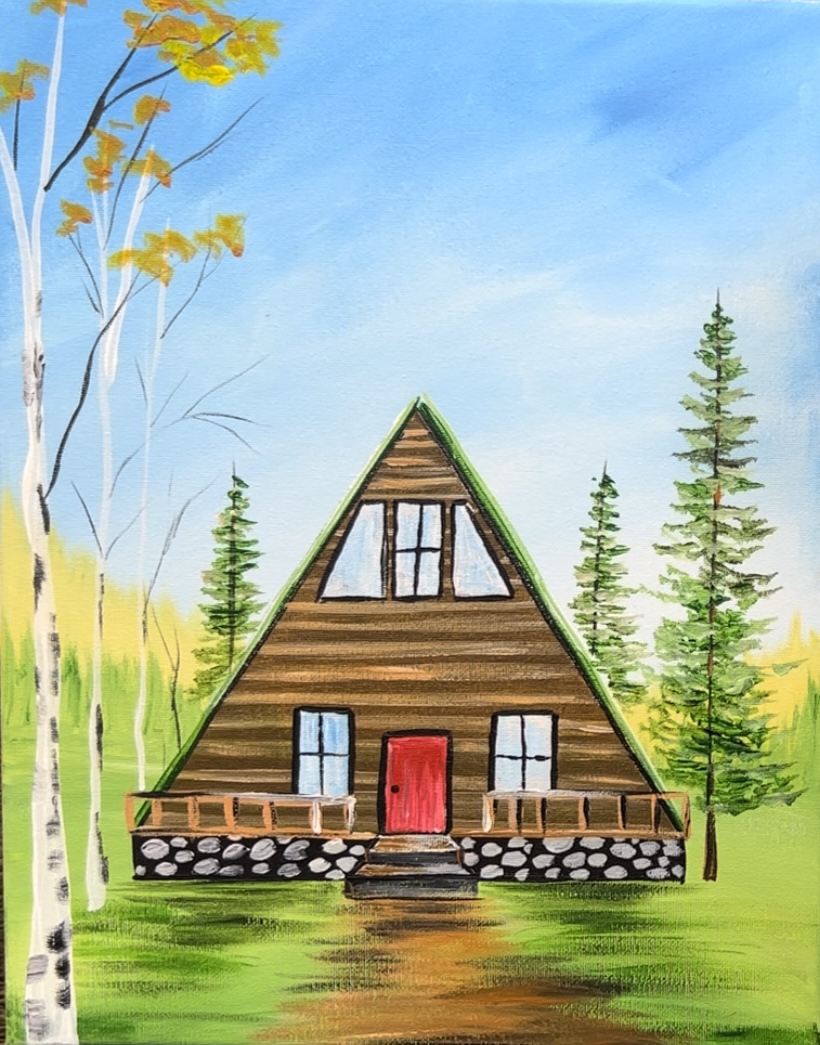
Add just the primary yellow to the brush for a mixed yellow look in your leaves.

Also, add a little bit of titanium white to the brush to paint some bright yellow colored leaves.
Paint more branches on the right side of the painting sticking out from the top right edge of the canvas.
Paint some red clusters of leaves on the ends of these branches on the right. Mix the red with the yellow and white to make variations of orange/ red on your palette.

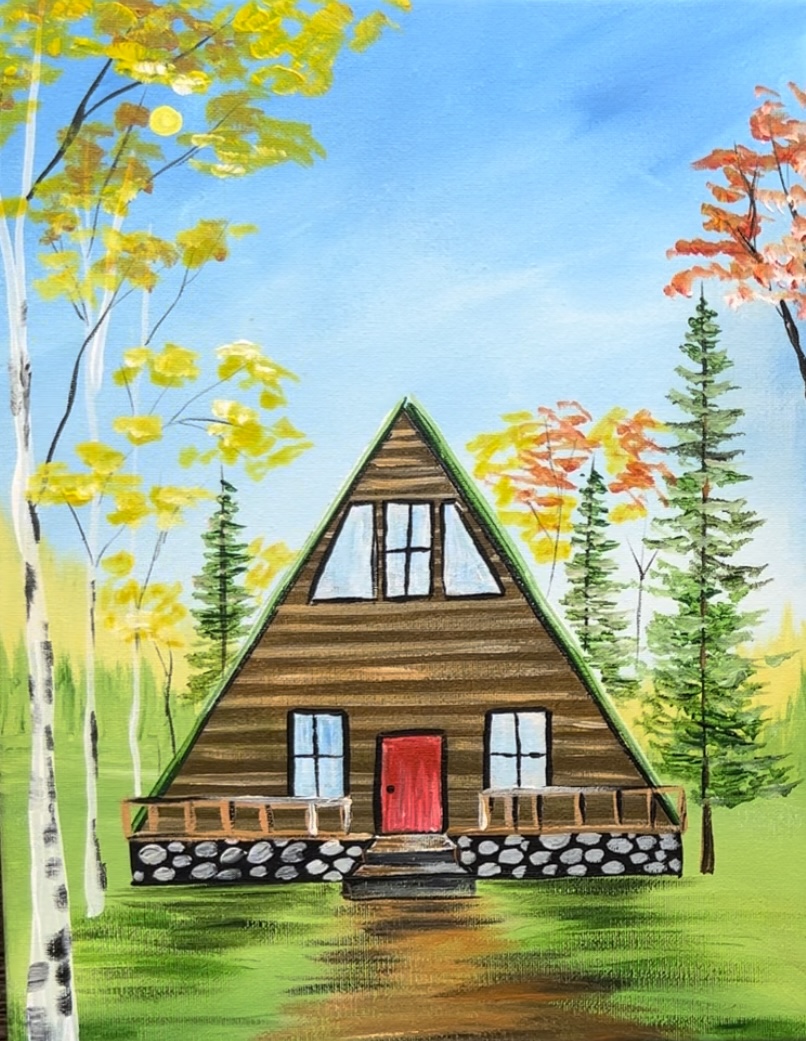
17. Paint Sun (optional)
Use the round brush to paint the sun. Mix primary yellow and titanium white on your palette. This will make a very light yellow. Paint a small yellow circle in an open area of the branches.
Next, wipe the round brush off but don’t rinse. Use the tip of the brush to drag sun rays outwards from the circle. You are basically dragging the wet paint from the circle.
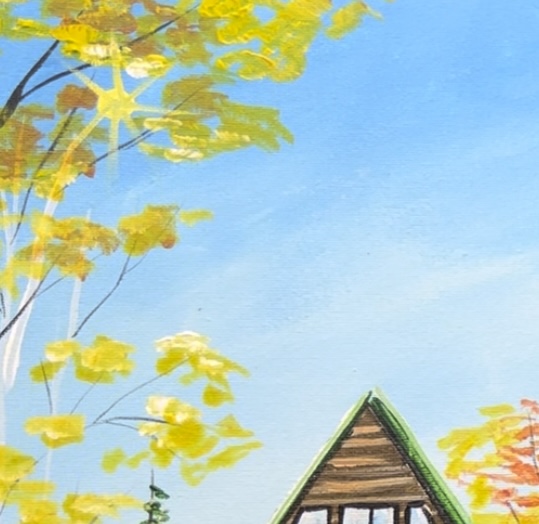
Next, paint more white on the circle and drag that outwards very lightly to paint more sun rays.
When you are done painting the sun rays, paint a final white circle in the center to make the sun appear very bright.
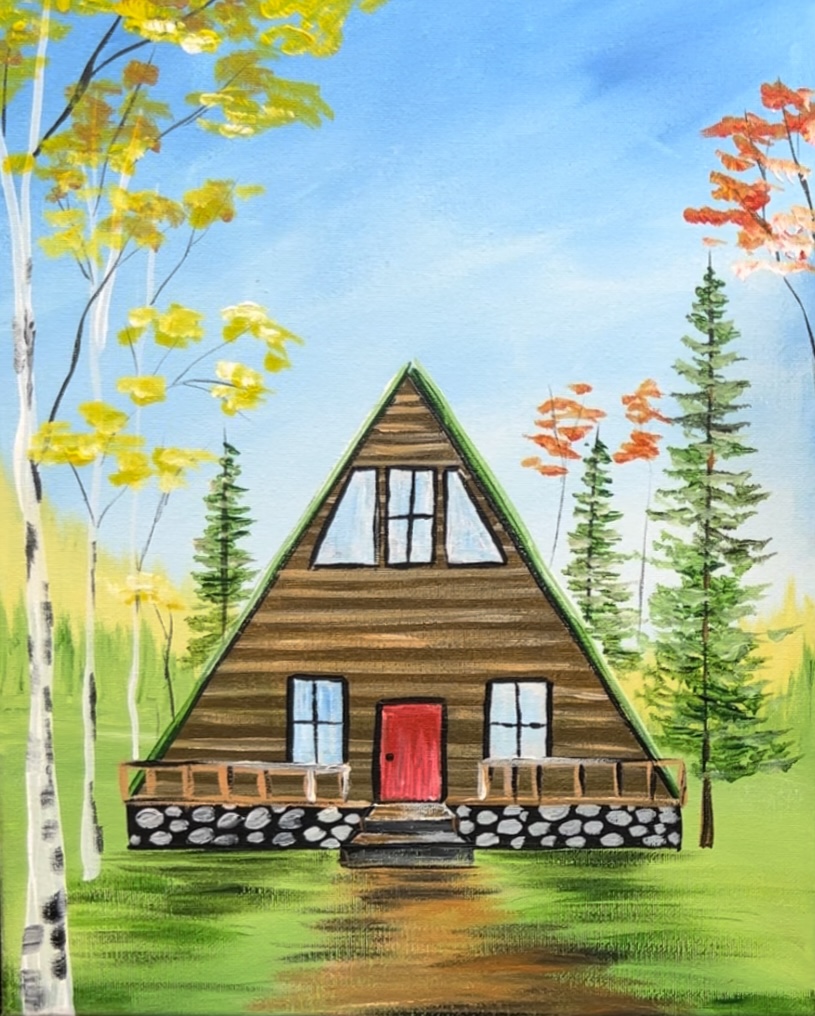
18. Paint small red bushes in foreground (optional)
Paint small black branches using the round brush on the bottom edges of the painting. Then paint little red dotted leaves on these branches.
19. Paint lights on cabin (optional)
As a final touch, paint two lights on the cabin. Mix white and yellow together on your palette. Then use your round brush to paint a small yellow dot. Using your finger to smear the dot creates a blurry circle.
Then paint a small white circle in the center of that blurry circle. Repeat this for the other light.
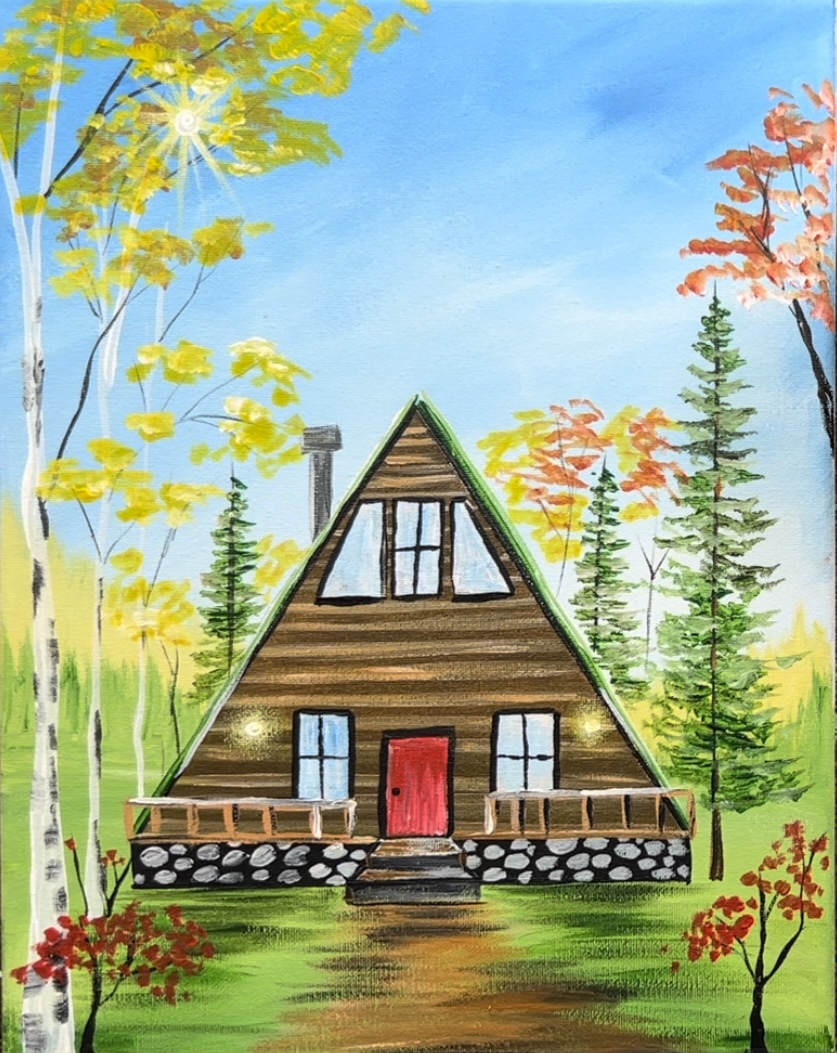
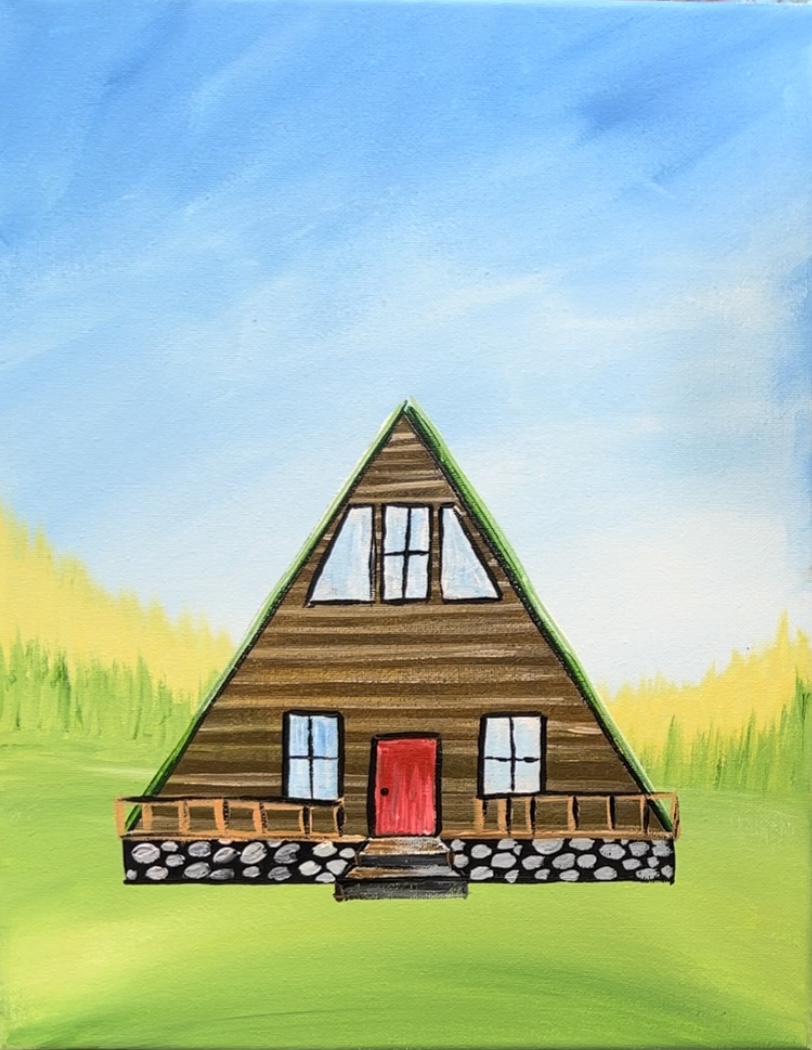
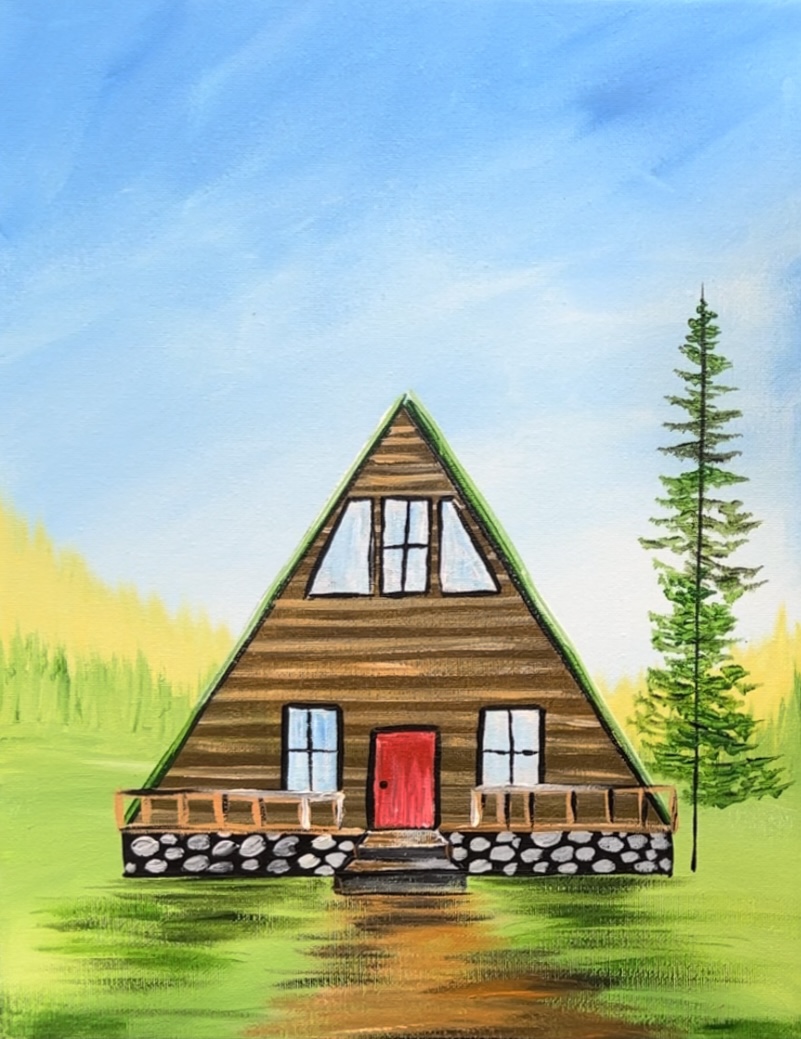
Finished!