
Would you like to save this?
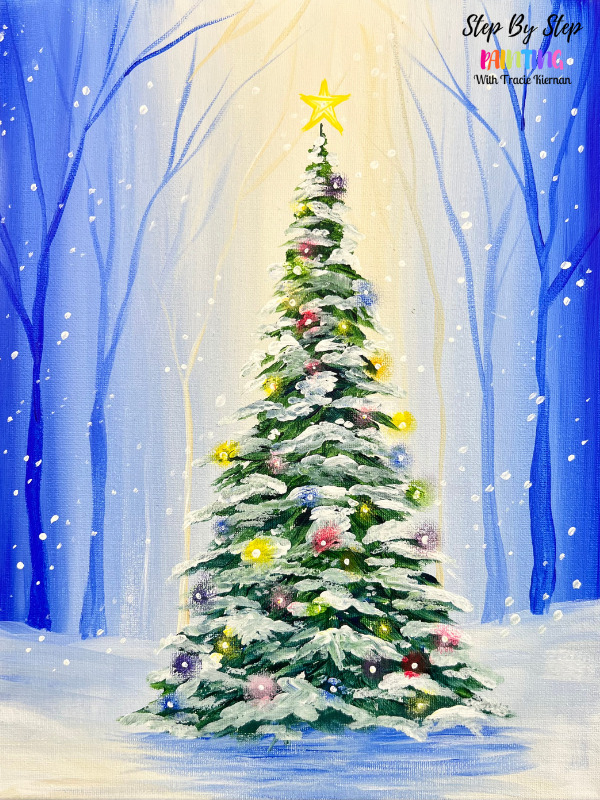
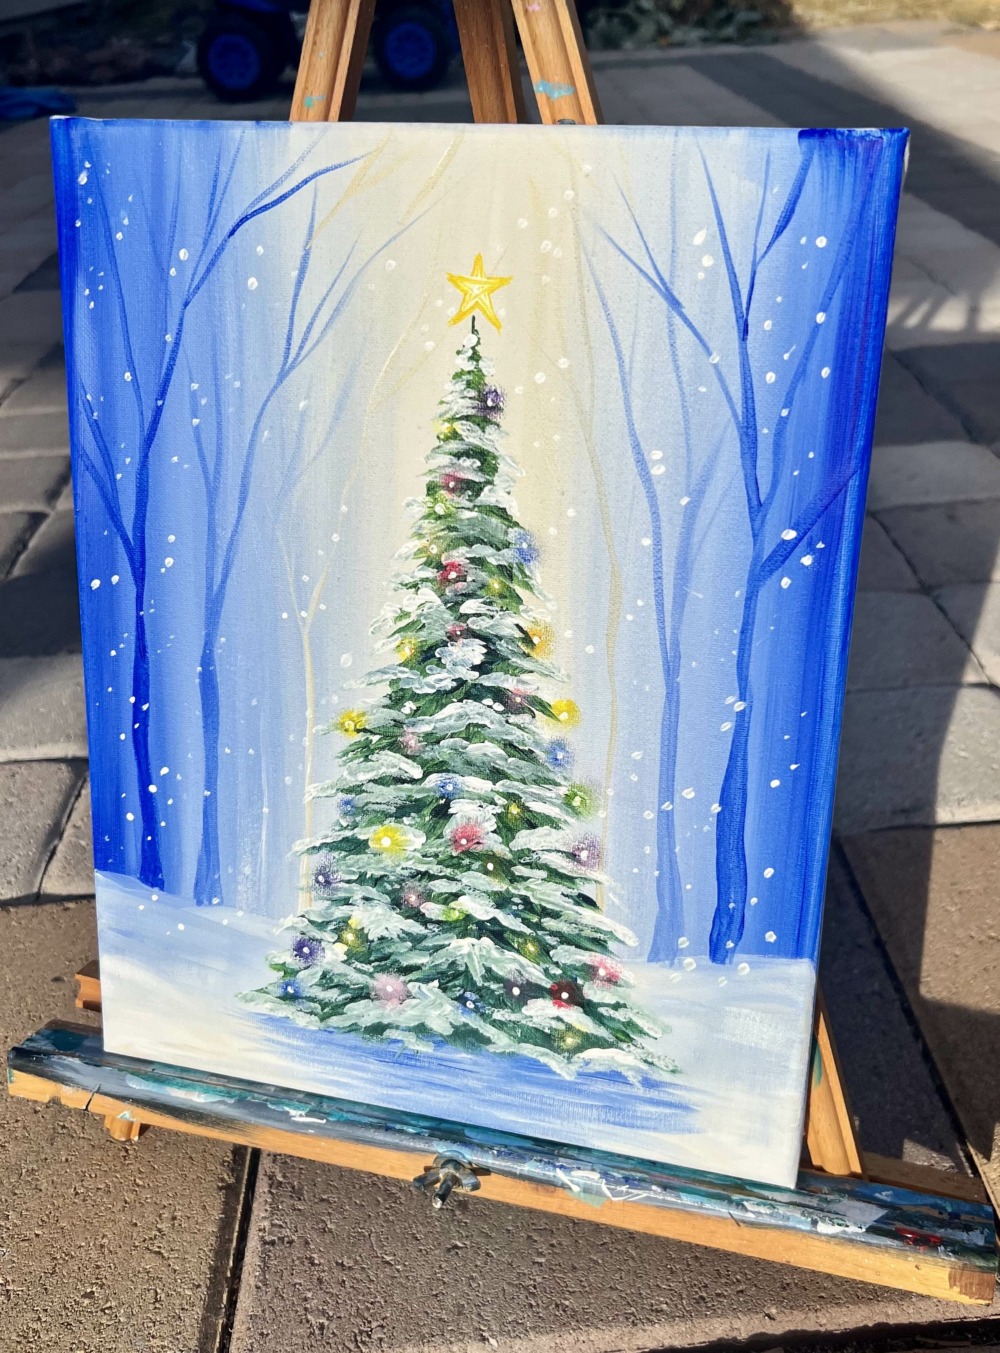
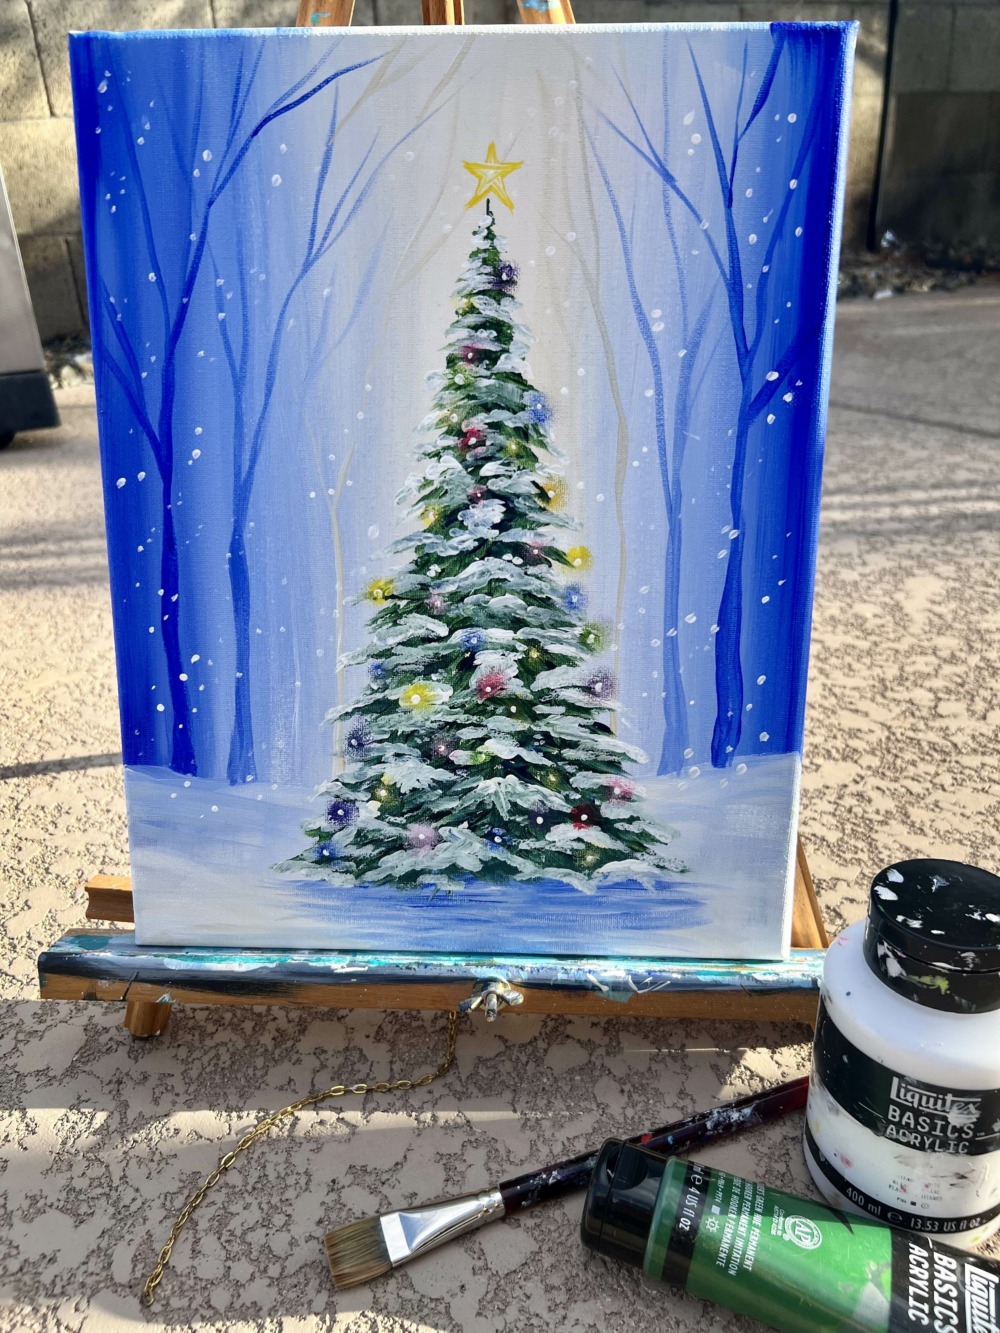
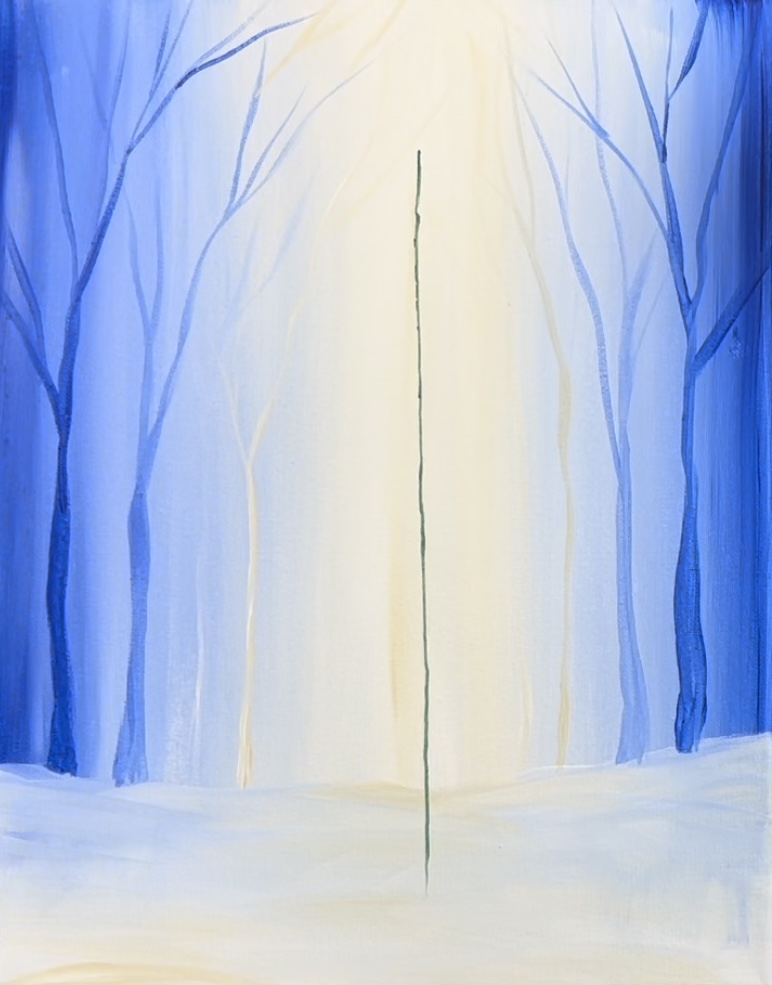
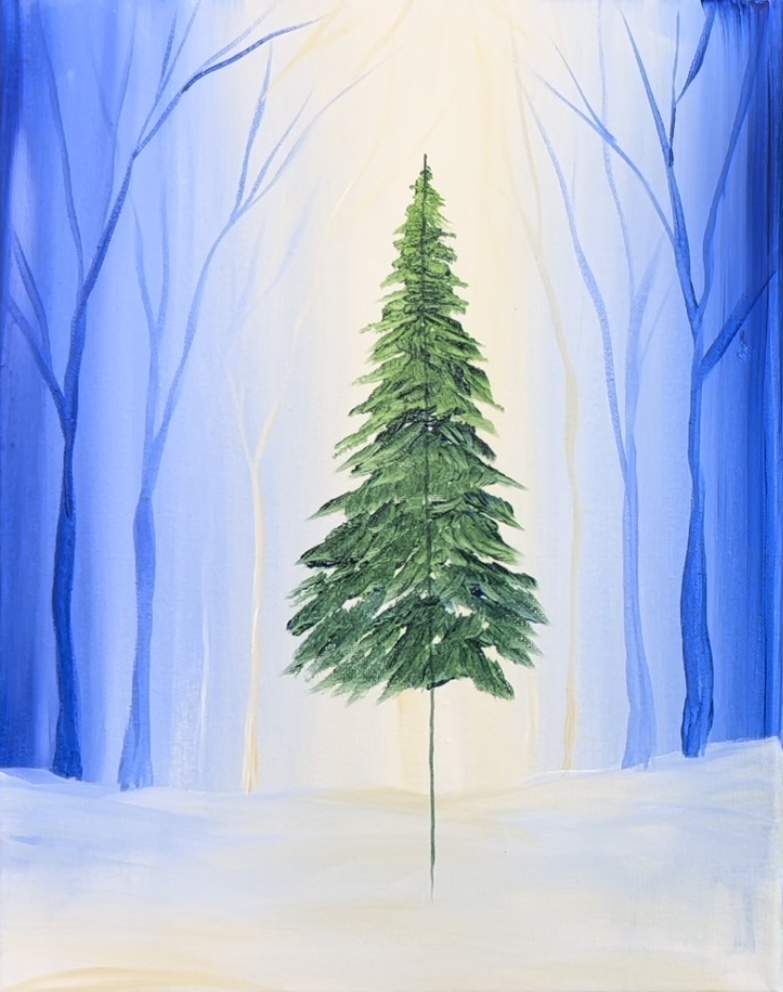
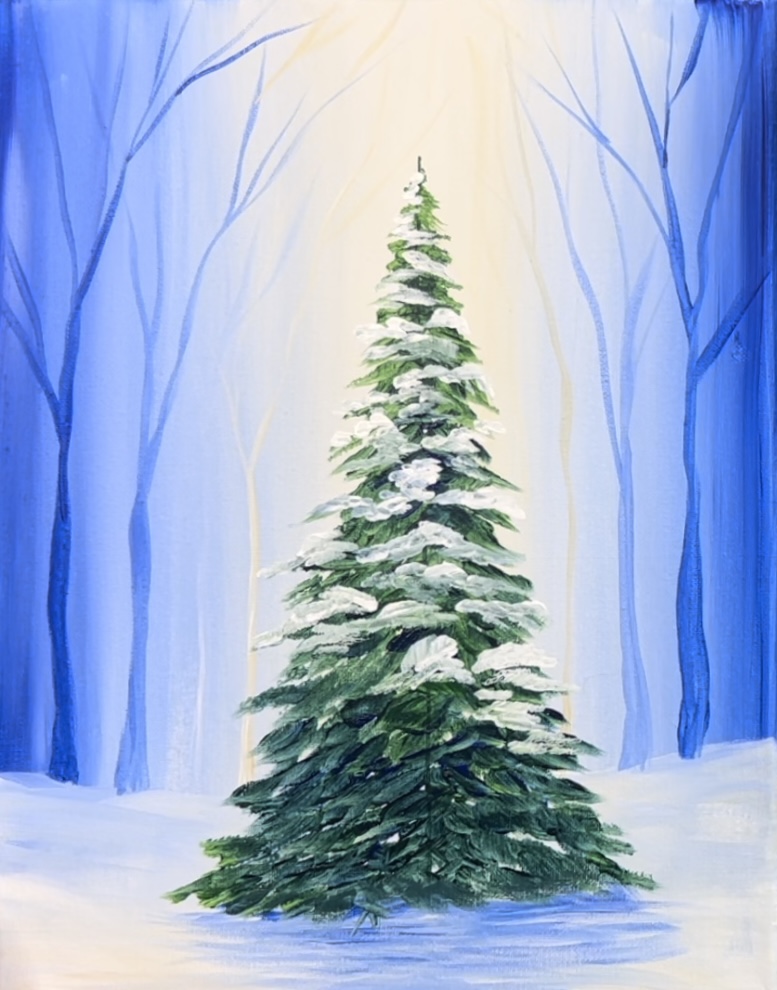
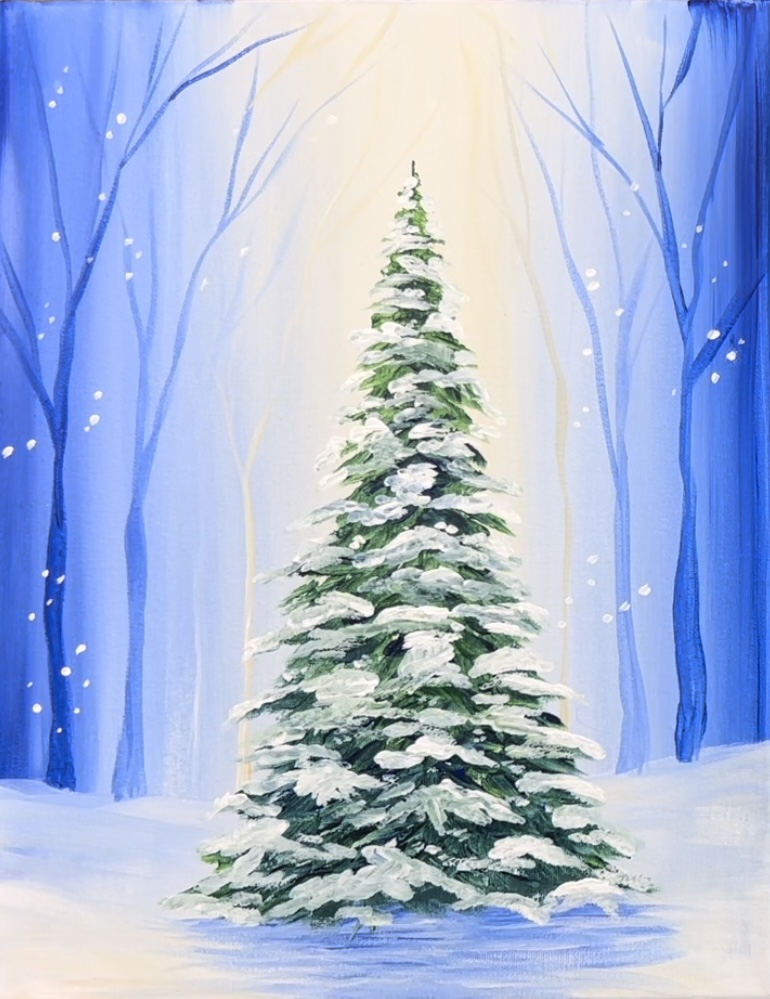
This acrylic painting tutorial will demonstrate how to paint a Christmas tree with a glowing snowy forest background and snow falling!
The video of this tutorial will demonstrate specific techniques for painting the branch trees you see in the background as well as how to paint a detailed Christmas tree!
Painting trees is often tricky and most of it has to do with brush control – how hard or how soft you hold the brush to achieve the style of brush stroke that looks like a branch.
You can also see my post about how to paint Christmas trees using different brushes. In this particular tutorial below, I will be demonstrating with a bright brush.
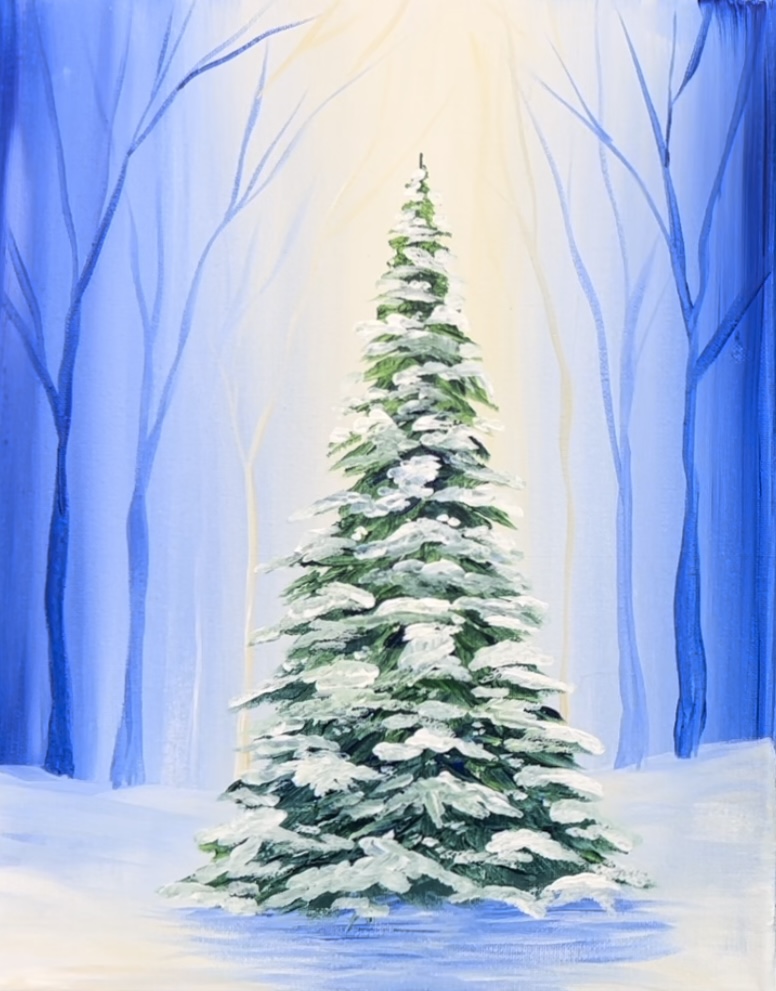
This painting can also be simplified if you don’t want to add the Christmas lights and star on the tree. You can have it be a simple winter tree in a forest.
Enjoy and happy painting!
Materials Needed
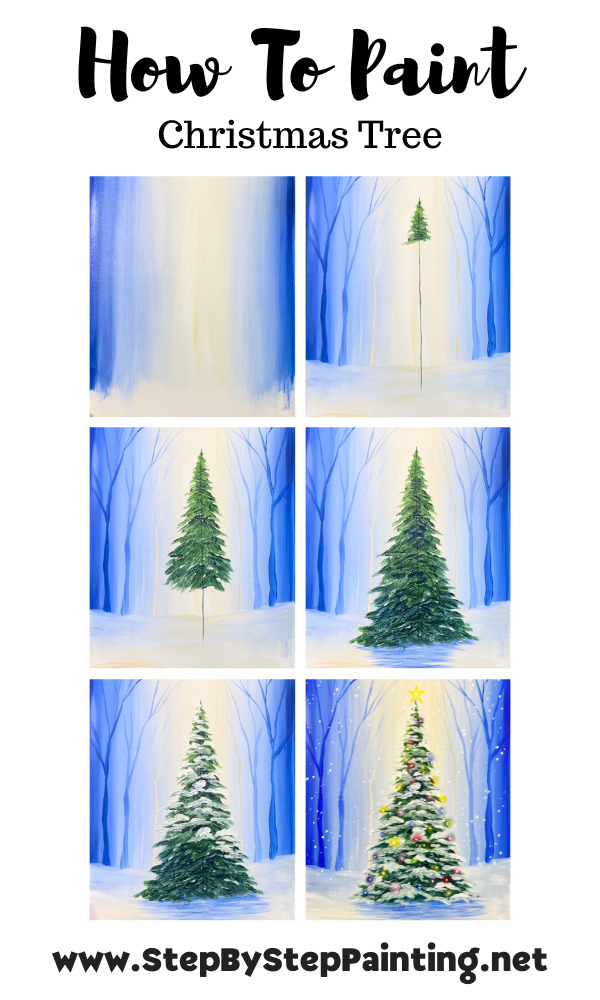
How To Paint A Christmas Tree

Learn techniques for painting trees! This tutorial demonstrates how to paint branch like trees in the distance with a decorated snowy Chrismtas tree in the center.
Materials
- 11 x 14 Canvas
- Acrylic Paint
- Paint Brushes
- T-Square Ruler (Optional but helpful)
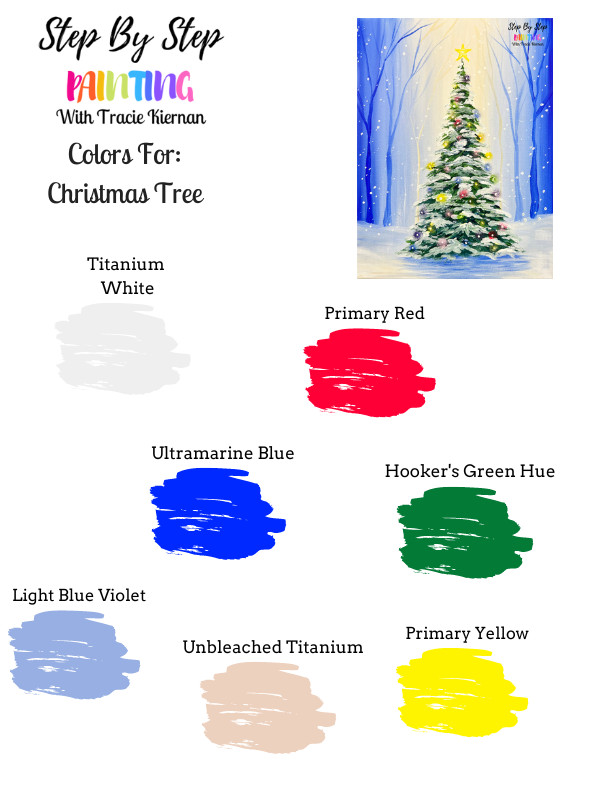
Colors
- Titanium White
- Light Blue Violet
- Ultramarine Blue
- Hooker's Green Hue Permanent
- Primary Yellow
- Primary Red
- Unbleached Titanium
Brushes
- 3/4" Flat Wash Brush
- 12 Bright Brush
- 8 Round Brush (optional)
- 4 Round Brush
Looking for a download?
Purchase this as a $5 download from my PDF shop. This also has traceables, video download and PDF instructions.
Color Palette
Using craft paints?
If you are using craft paints such as the Apple Barrel Craft Paints, I would recommend subbing to these colors:
- White
- Bright Blue
- Flag Red
- Holly Branch
- Parrot Blue
- Yellow Flame
- Any Beige Color (optional)
Directions At A Glance
Video
Step By Step Directions
1. Paint The Blue/Golden Background
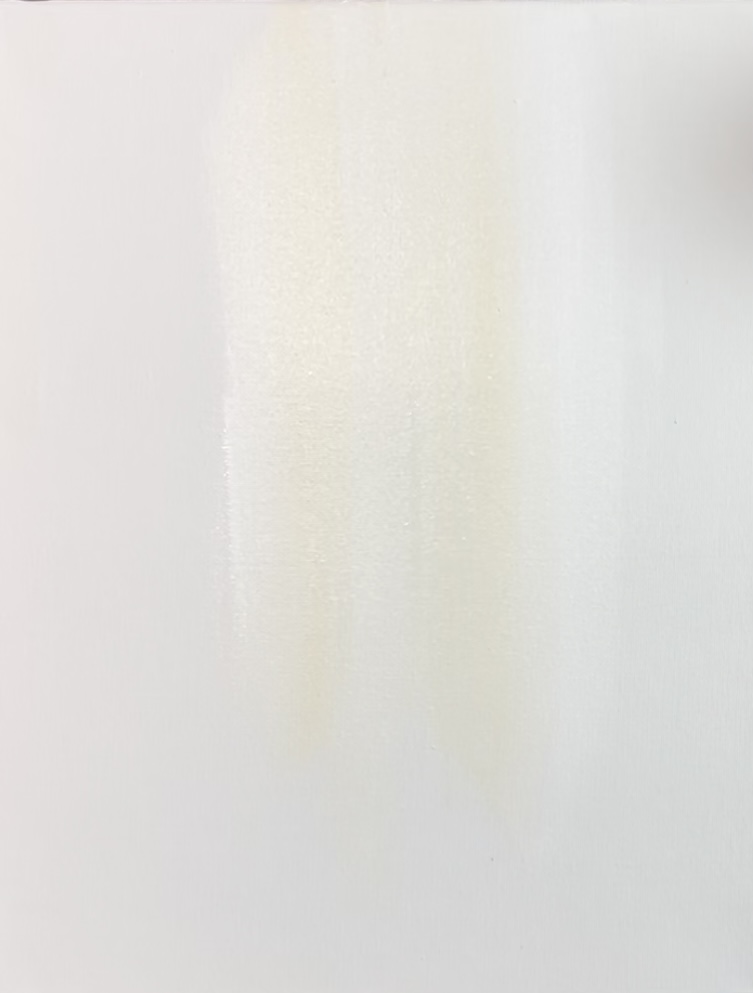
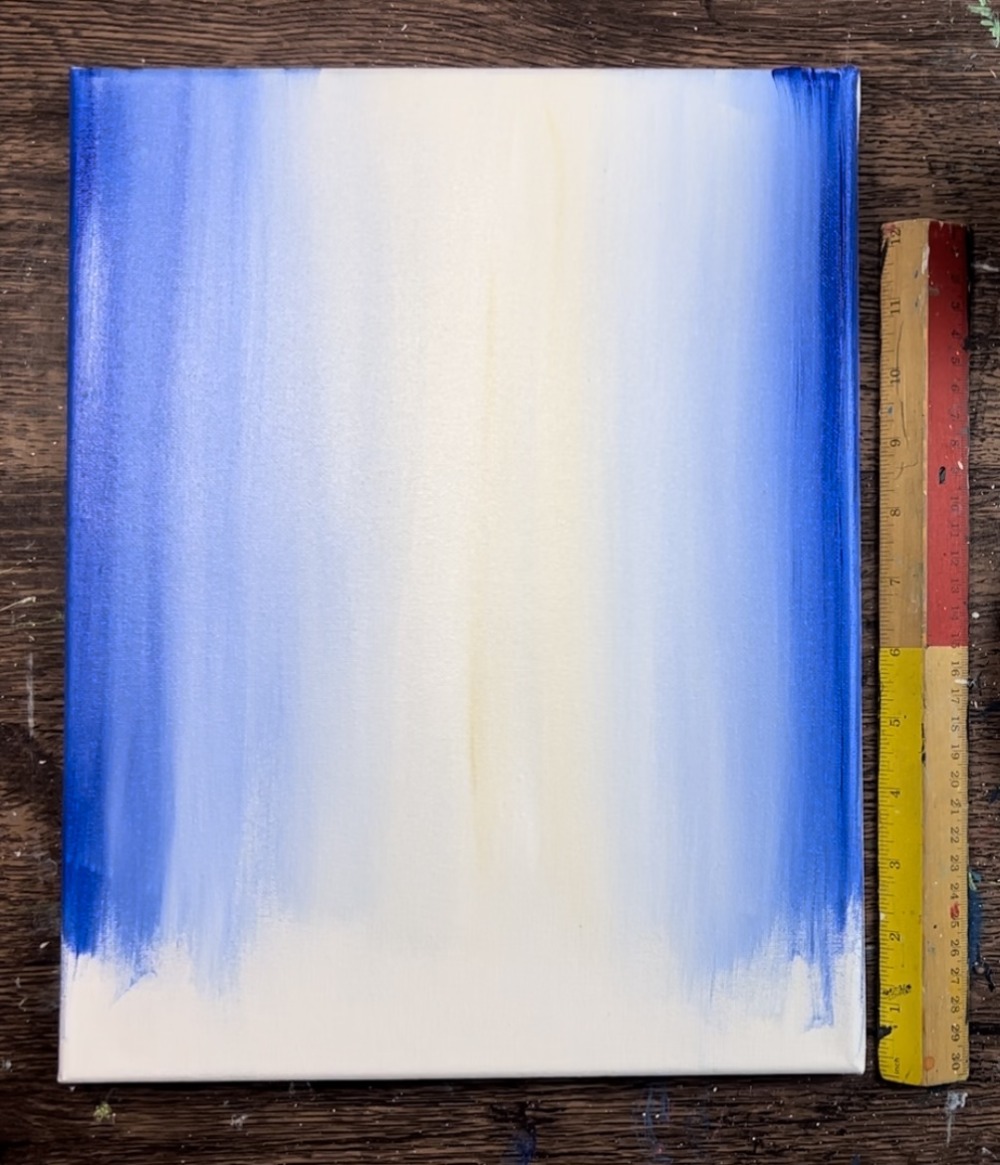
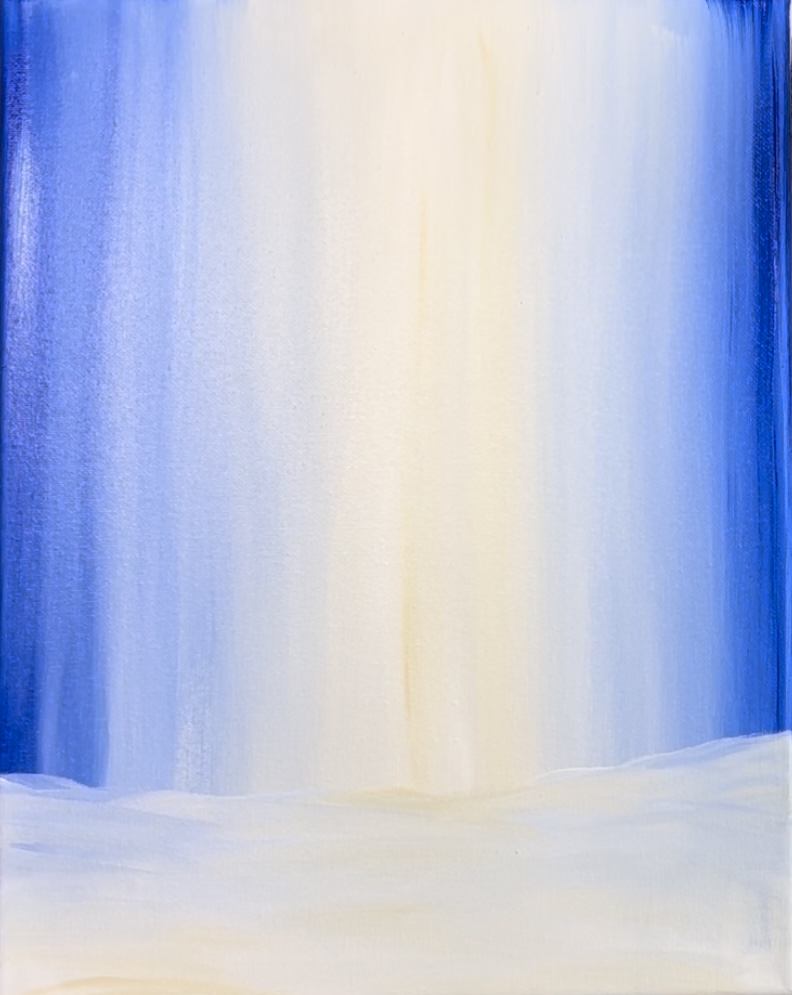
Position your canvas so that it is vertical. You will first be painting the background. The background of this painting is a blended background with a white/golden center that blends to dark blue on the sides. The golden color is achieved by using titanium white and unbleached titanium.
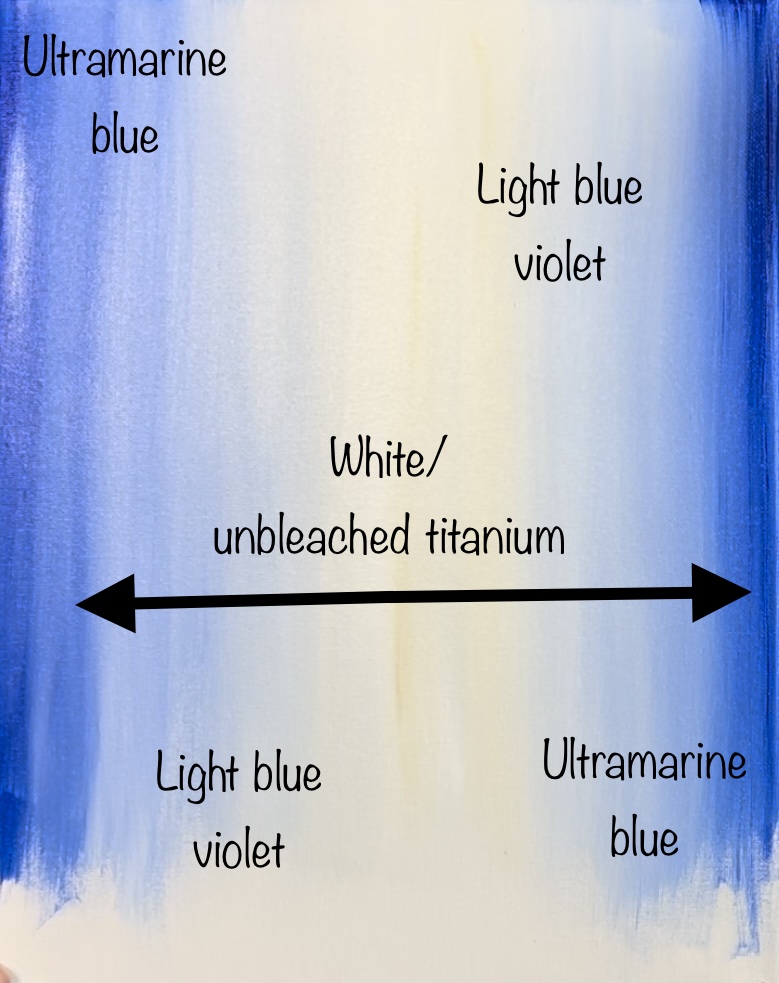
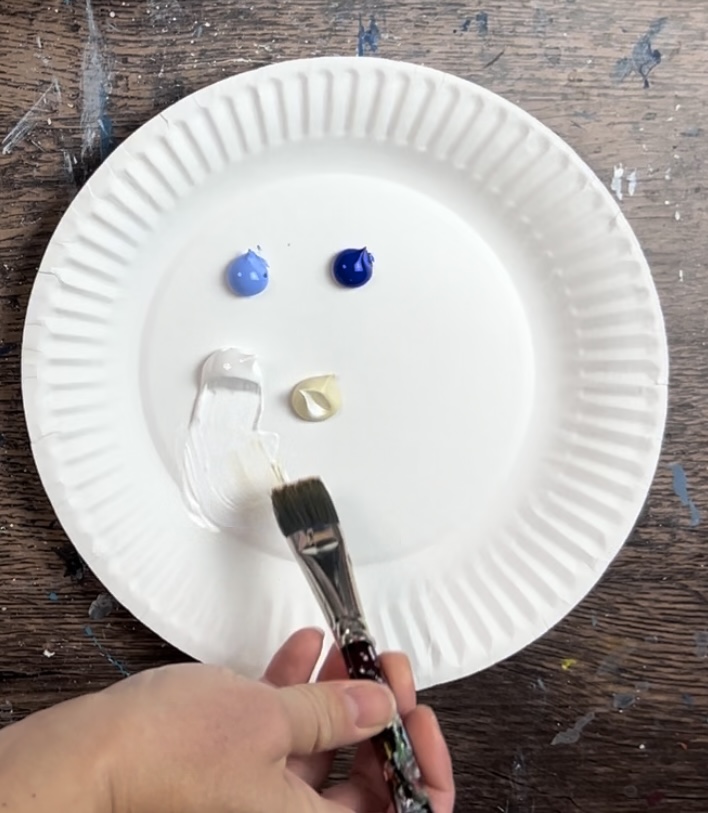
Load your palette with the colors: light blue violet, ultramarine blue, titanium white, unbleached titanium.
Use a 3/4″ flat brush and load it into the white and beige (about equal amounts). Note: brush should have a small amount of water on it left from dipping it into the water cup.
Next, paint just the center. Paint just vertical strokes of the white and beige. Try not to over blend the colors. Paint about a 5″ area with these light colors. Leave about a 3″ gap of space on the bottom of the canvas so you can paint the ground in a later step.
Next, wipe your brush off but don’t rinse. Add a small amount of light blue violet to the brush. Gentle blend it into the sides of what you just painted in the middle. If it is too dark at first, add more white to your brush. You want this to be a very very light blue because it will gradually get darker on the sides. Try not to over blend these colors. The darker streaks in this background will create the illusion of trees in the distance.
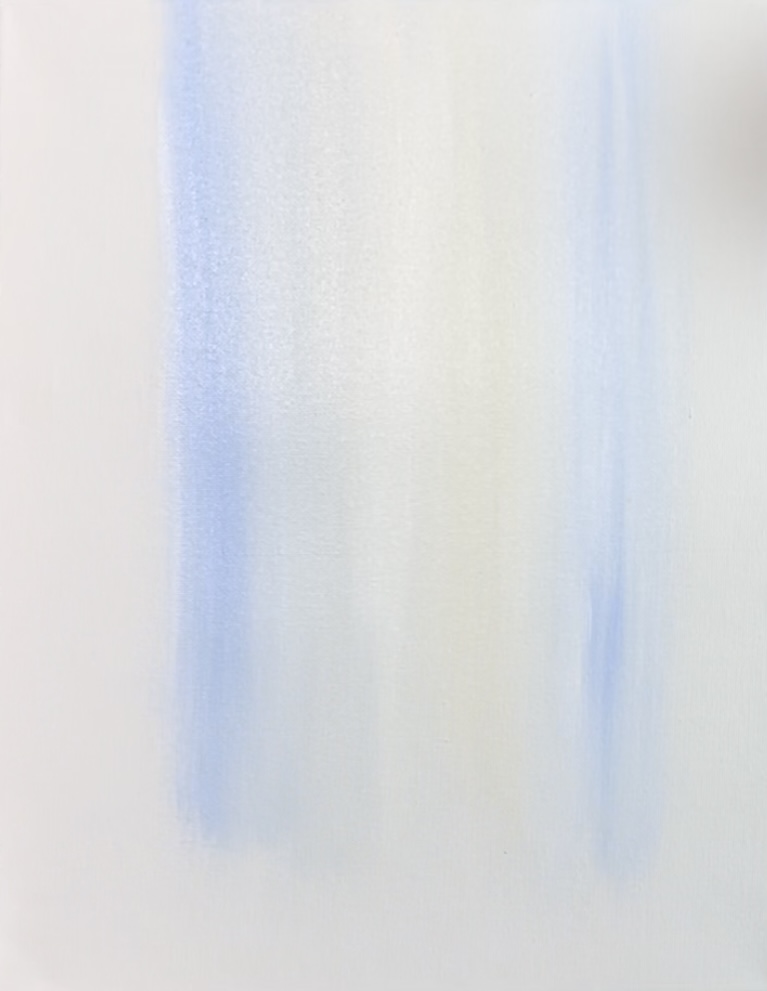
As you work your way to the far left and right edges of the canvas, you’ll want to blend in ultramarine blue so the background is darker on the edges. Ultramarine blue will blend in nicely with light blue violet.
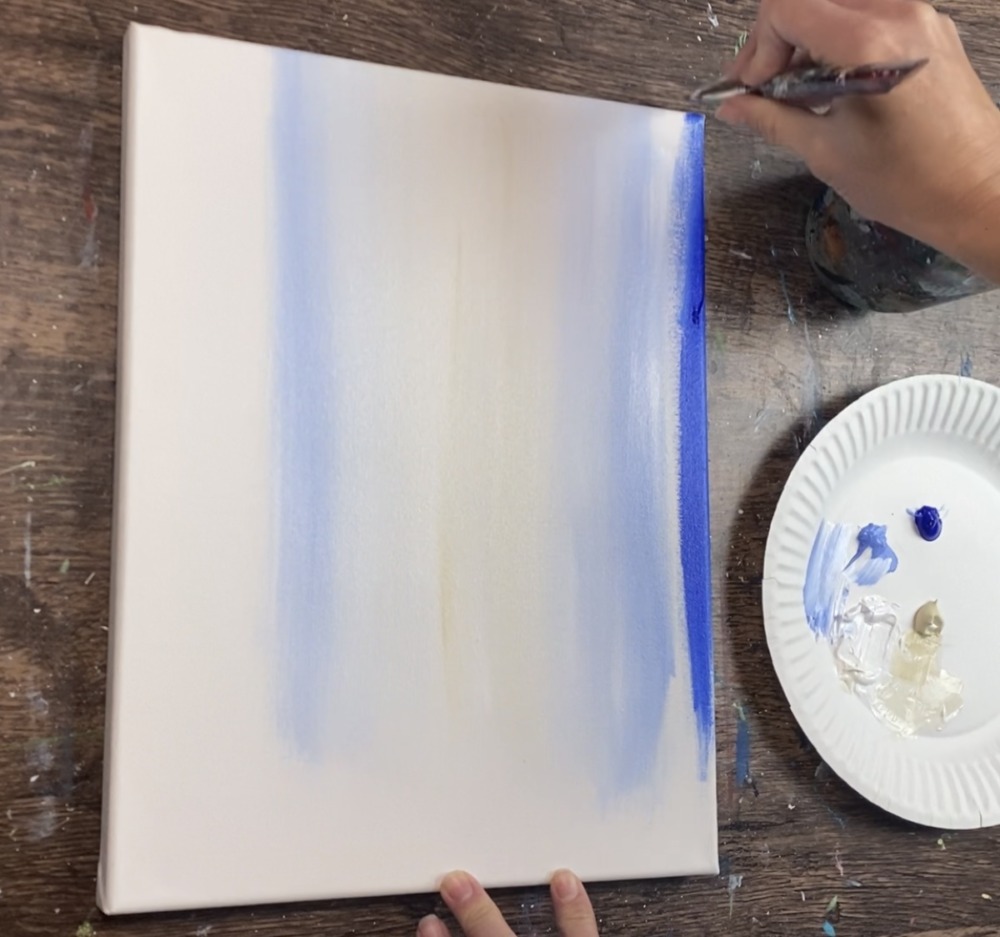
Your background should be a golden light color in the center and blues on the sides. This does not have to be a perfect gradient. In fact, having darker streaks of color throughout will make it look like there are trees way in the distance.

2. Paint Snow Ground
You do not need to wait for your background to dry to do this step. It is okay if your colors end up mixing with the white you are painting for the ground. Use a ruler or estimate about 4″ from the bottom of the canvas.
Next, use your 3/4″ flat was brush and titanium white to define the ground line. Make a long wavy line with its highest peak just under 4″.
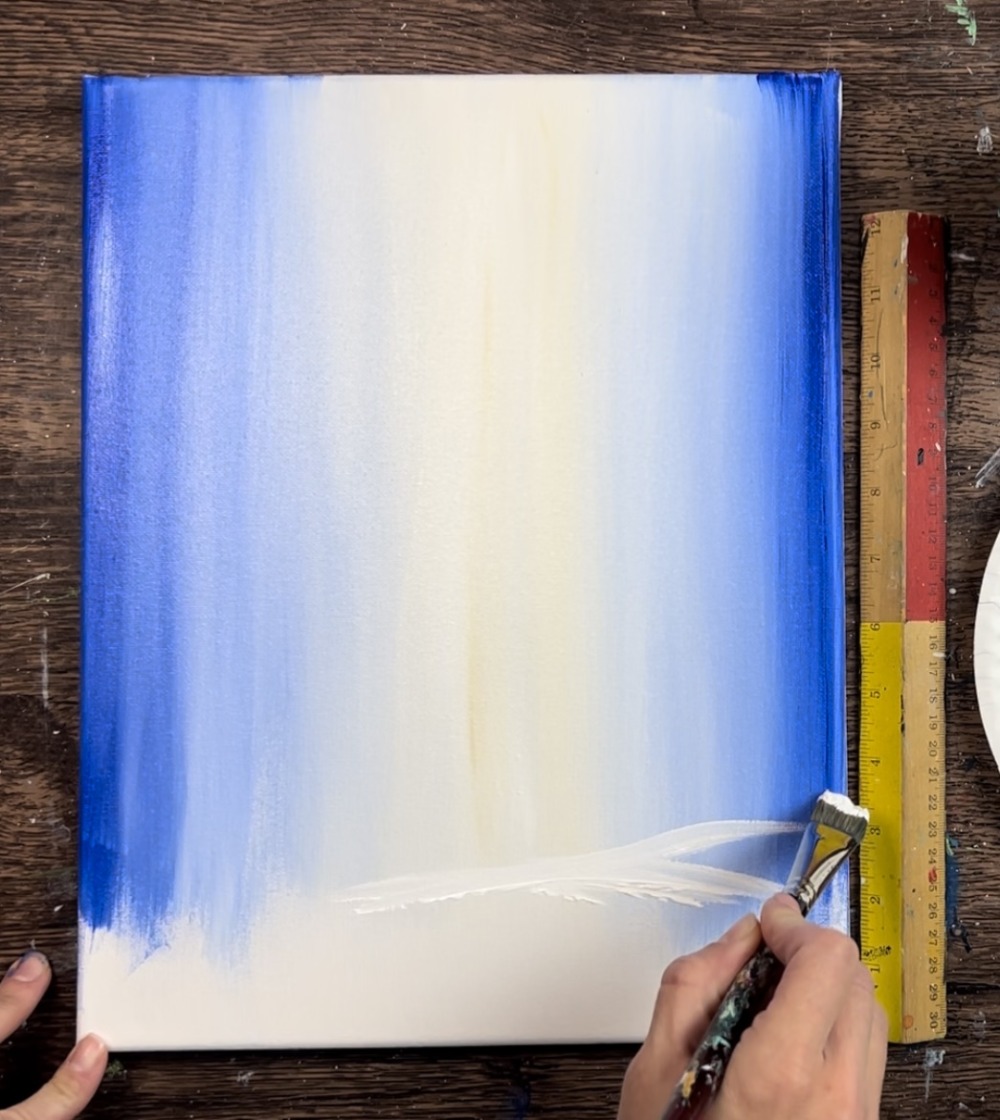
Then loosely paint the land area with wavy, left and right strokes using just titanium white. If any of the blue mixes with the white at the top of this land area, that is okay!
The bottom of the land area (bottom of the canvas) should be more bright and white is less blue in it.
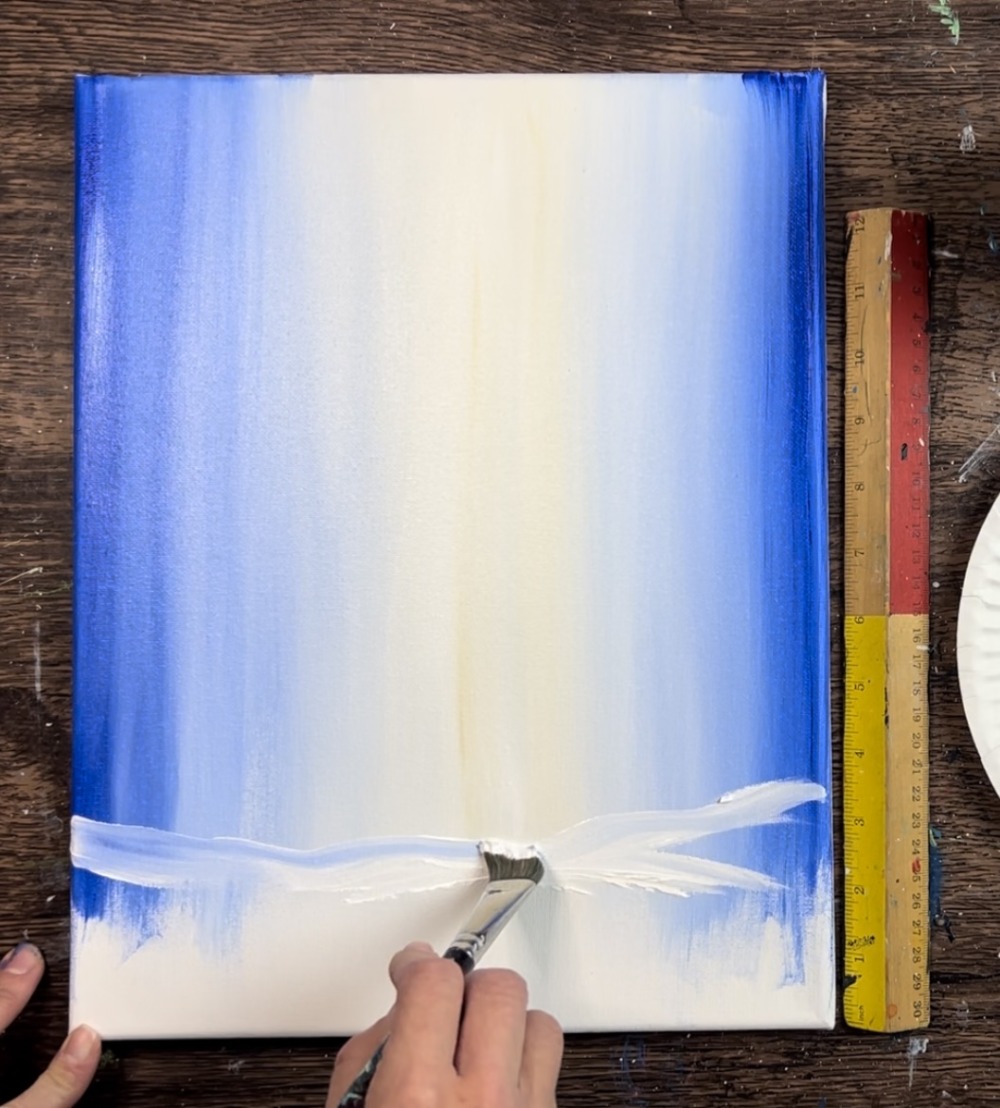
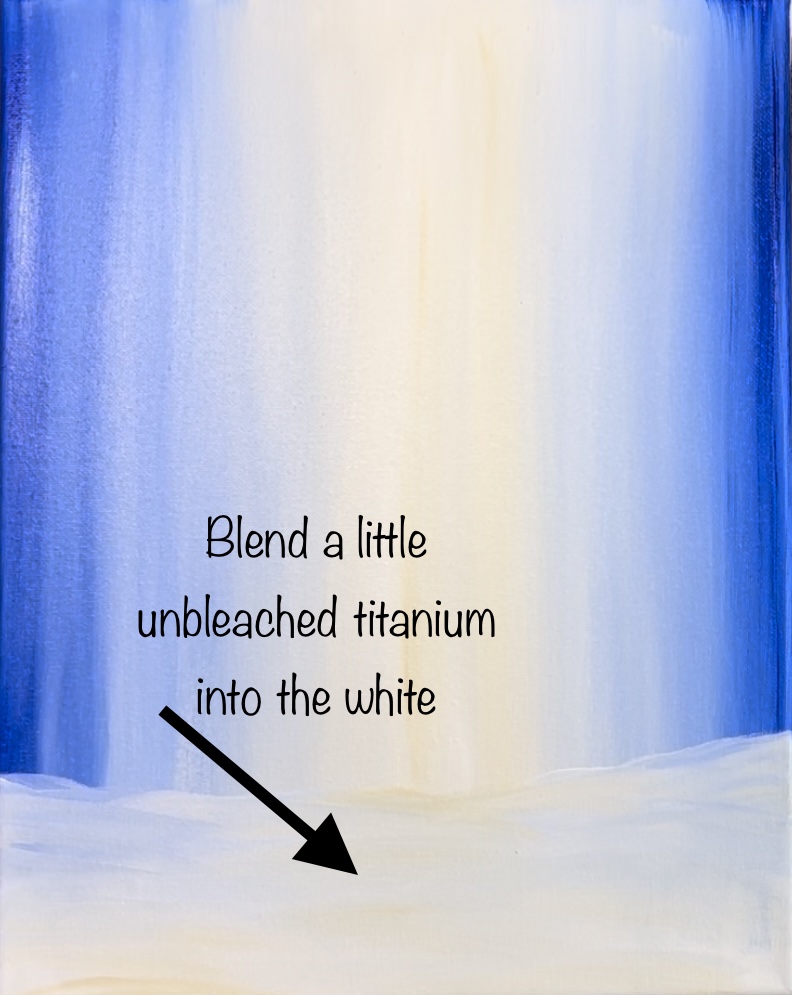
Next, blend a little unbleached titanium into the white of the snow on the ground just in the center.
3. Paint Branch Trees
Use your 12 bright brush (or 8 round brush if you prefer) to paint trees in the background along the top of the snow ground line. Start on the left and right and paint branch style trees using just ultramarine blue.

Use the full width of the brush to paint thicker strokes and then twist the brush and use just the tip of it to create the thinner branch strokes. The branches of these trees curve a little at the top and. meet in the middle. I did two ultramarine blue trees, one on each side of the painting. These trees reach to the very top of the canvas.

Next, paint light blue violet trees next to the darker blue trees. These trees should be slightly shorter and the branches go behind the dark blue trees. They also should be slightly lighter because you are using the lighter blue color.
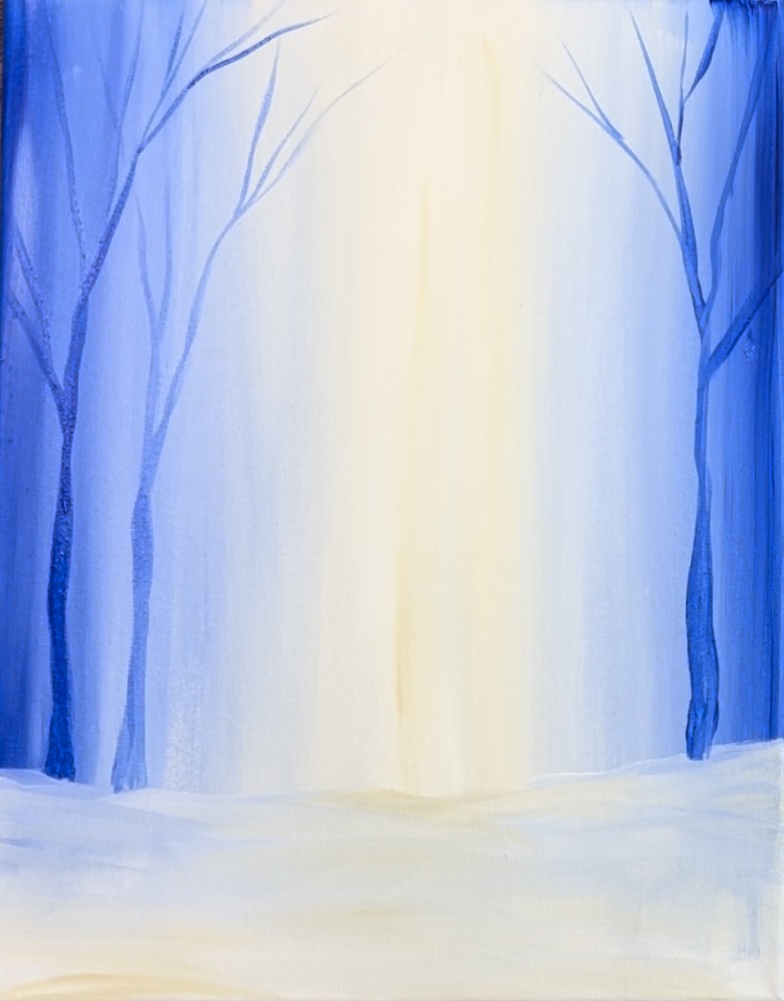
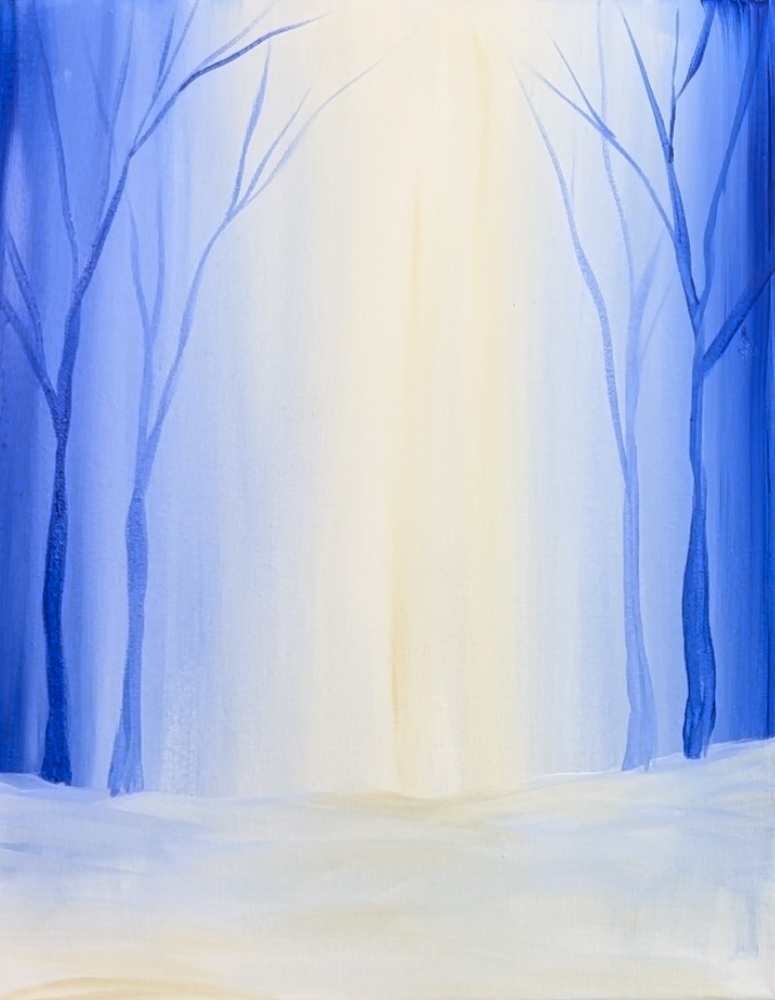
Next, paint, very thin and slightly shorter trees using white mixed with unbleached titanium. If it isn’t showing up, add more of the unbleached titanium or a little bit of blue into that color. These trees are also slightly shorter.

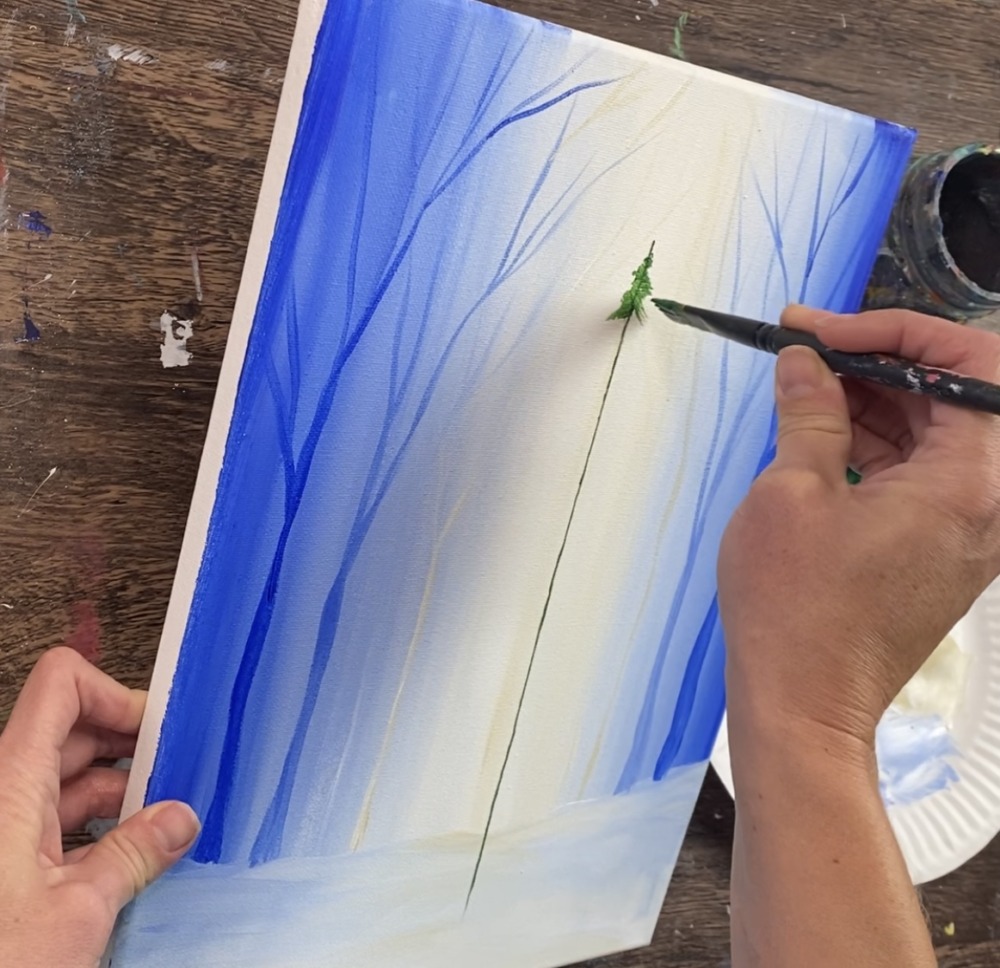
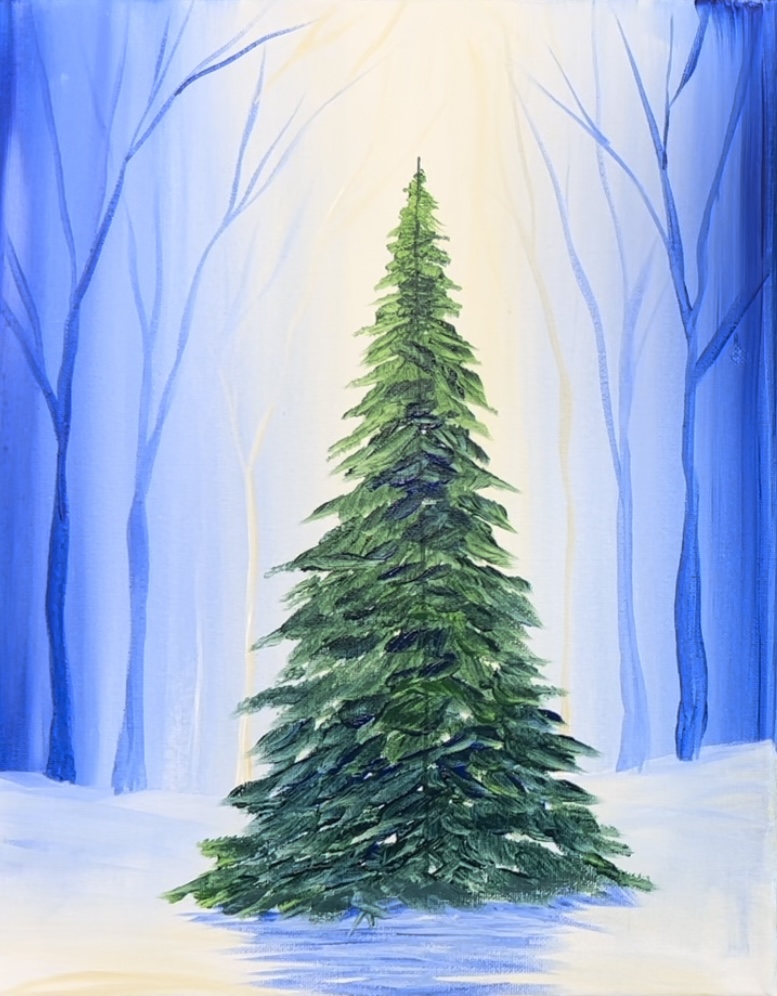
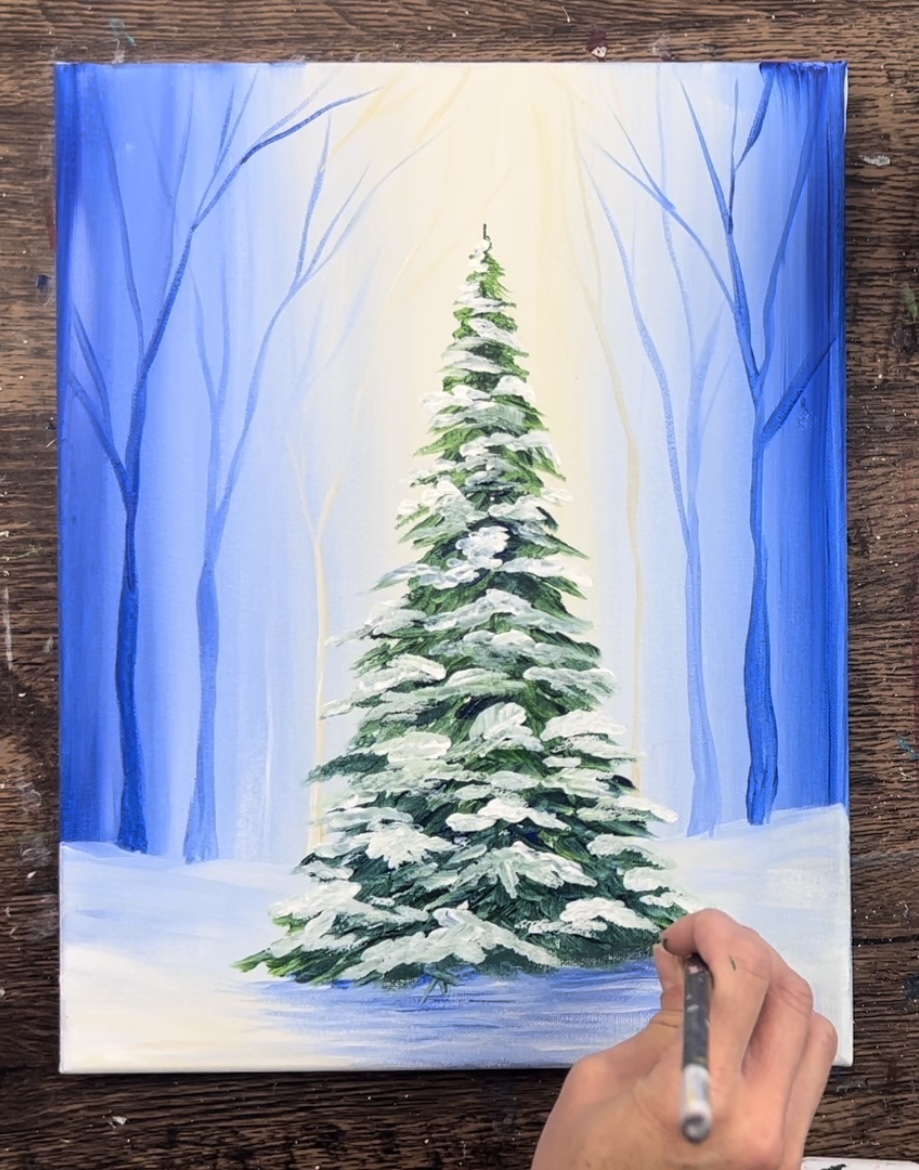
4. Paint Christmas Tree First Layer
For the Christmas tree, I recommend painting or drawing a vertical line to help you with the shape and keeping it vertical. Use a t-square ruler to line up the edge of your canvas. Then use your 12 bright brush and hooker’s green hue permanent paint color to paint a vertical line from the top area to the bottom middle area of the snow.
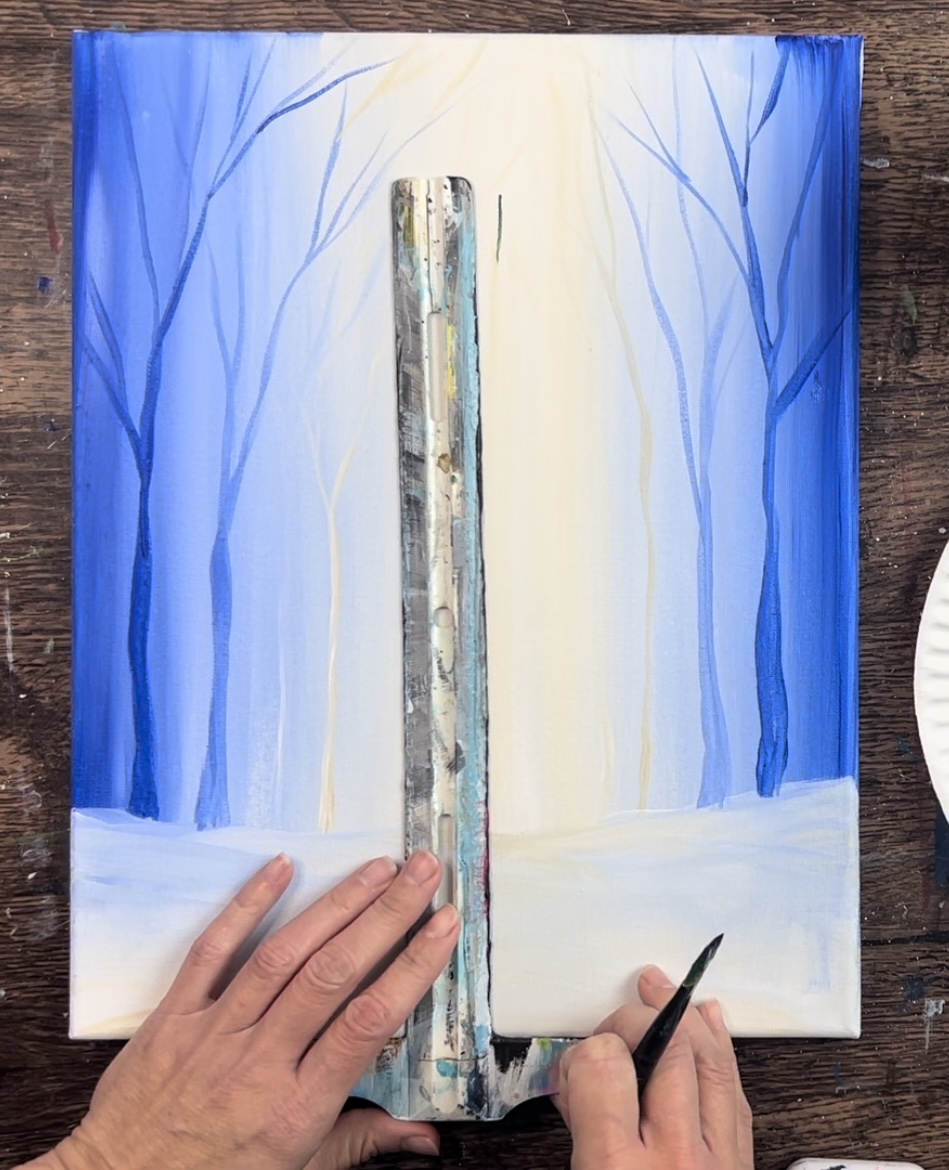
This will determine the height for the tree from the top tip to the bottom edge. This tree will not have a bottom trunk visible.
Next, mix equal amounts of hooker’s green hue permanent and ultramarine blue on your palette. This will make it into a dark bluish green. The reason why you want to start dark is because this will be the first layer on the tree. The second layer will be the snow which will provide nice contrast against the first dark layer.
Load the blue-green color on the very tip of your bright brush. You will not be able to use the full width of the brush first because the branches are small in this area. Make small branches that are pointing down. Leave a tiny point at the top for the top tip of the tree.

As you work your way down, your branches will get wider. Work in a zig-zag direction tapping just the tip of your brush and going from left to right.
Your branches will get wider and bushier as you work your way down. Try not to go too wide at first. Your tree will be a triangular shape but you do not need to spread the branches out that wide yet!
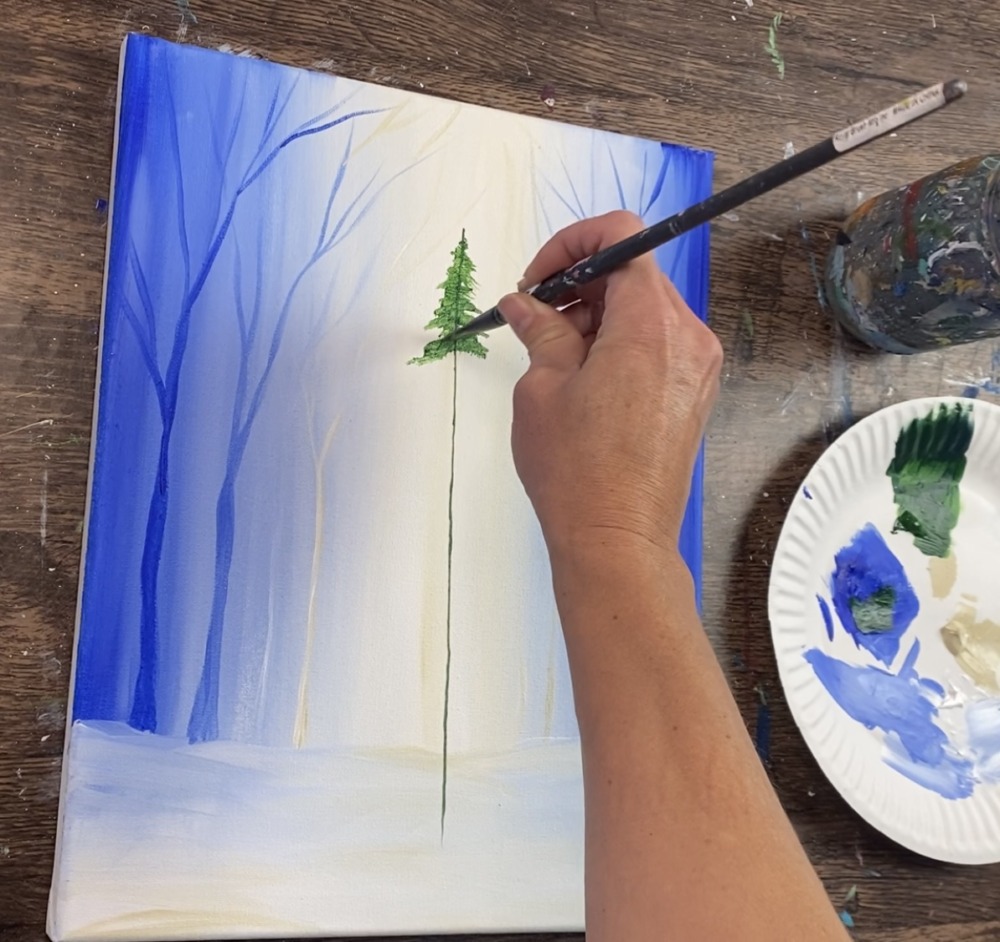

Keep stamping just the tip of your brush former wider and wider branches as you work your way down. Each stroke is slightly stroking downwards. Pay attention to the outer edges of the tree. Have some of your branches sticking out to create “texture” on the sides of the tree.
Keep working our way down. It’s okay to add a little more blue or green in some areas and not mix the color all the way. This creates texture in your tree as well as color variation.
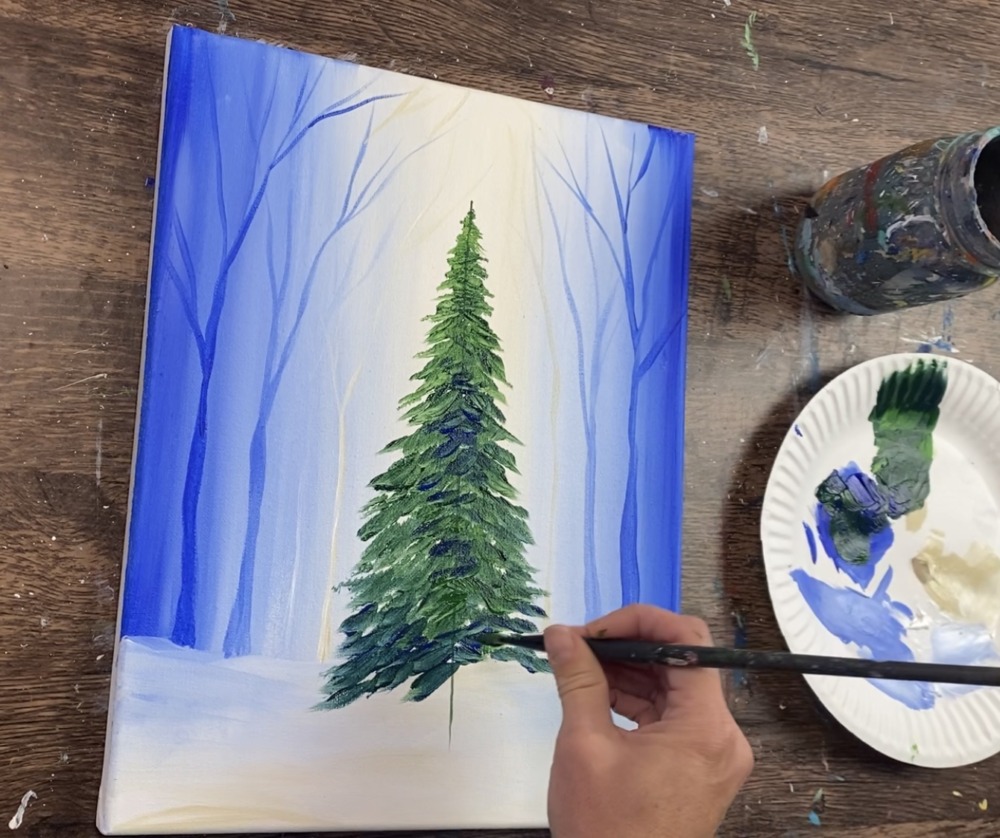
Tip: branches go the opposite direction on each side of the line. For example: branches sway to the left on the left side of the line and to the right on the right side.
As you get to the bottom part of the tree, form the base so it is the widest part of the tree. We don’t see the tree trunk in this painting so don’t worry about painting that. Make your strokes on the bottom slightly longer.
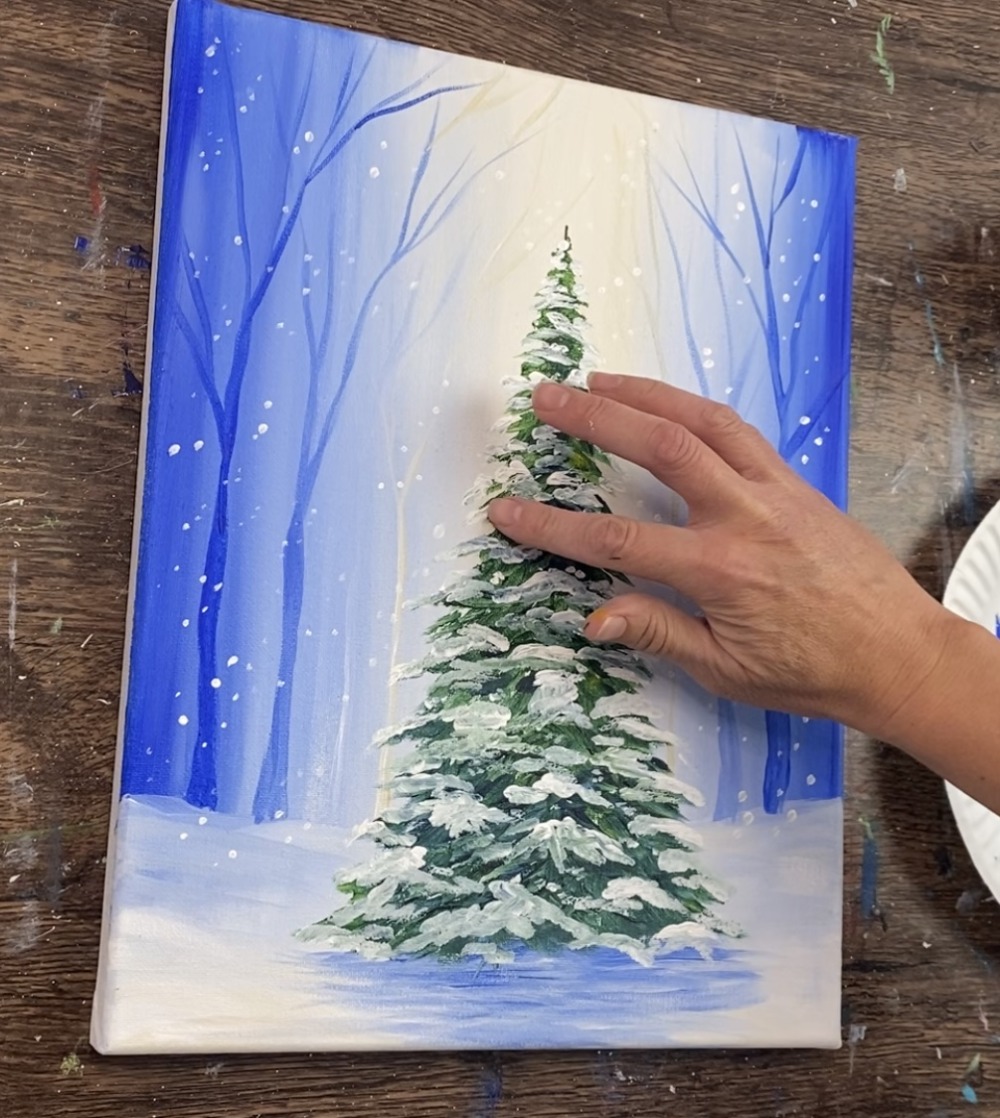
5. Paint Shadow
Use your 12 bright brush to paint a shadow under the tree. Use the color light blue violet mixed with a little white. Paint left and right strokes very loosely forming the shape of the shadow opposite the tree.
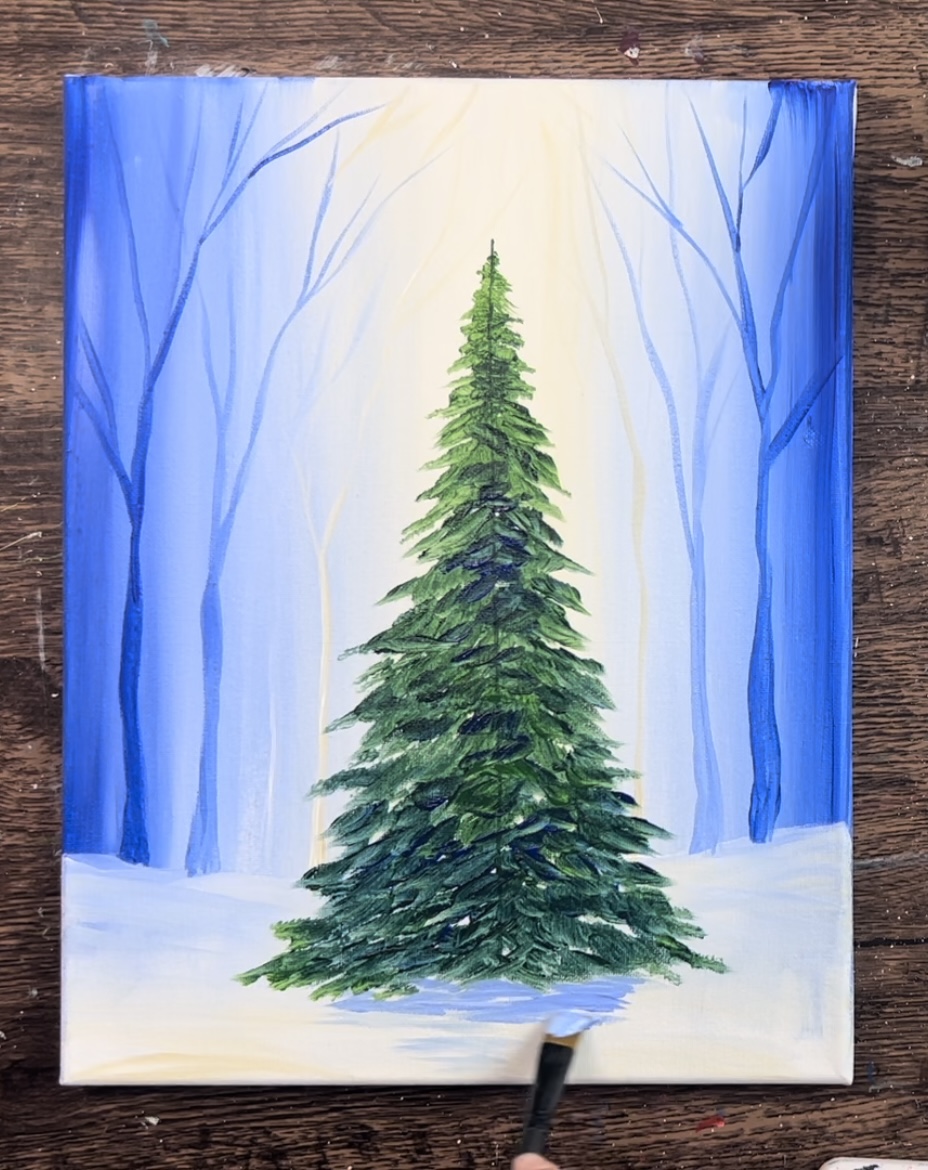
Add a little bit of ultramarine blue just under the branches to make the shadow slightly darker just under the branches. The shadow gets slightly lighter towards the bottom and the edges.
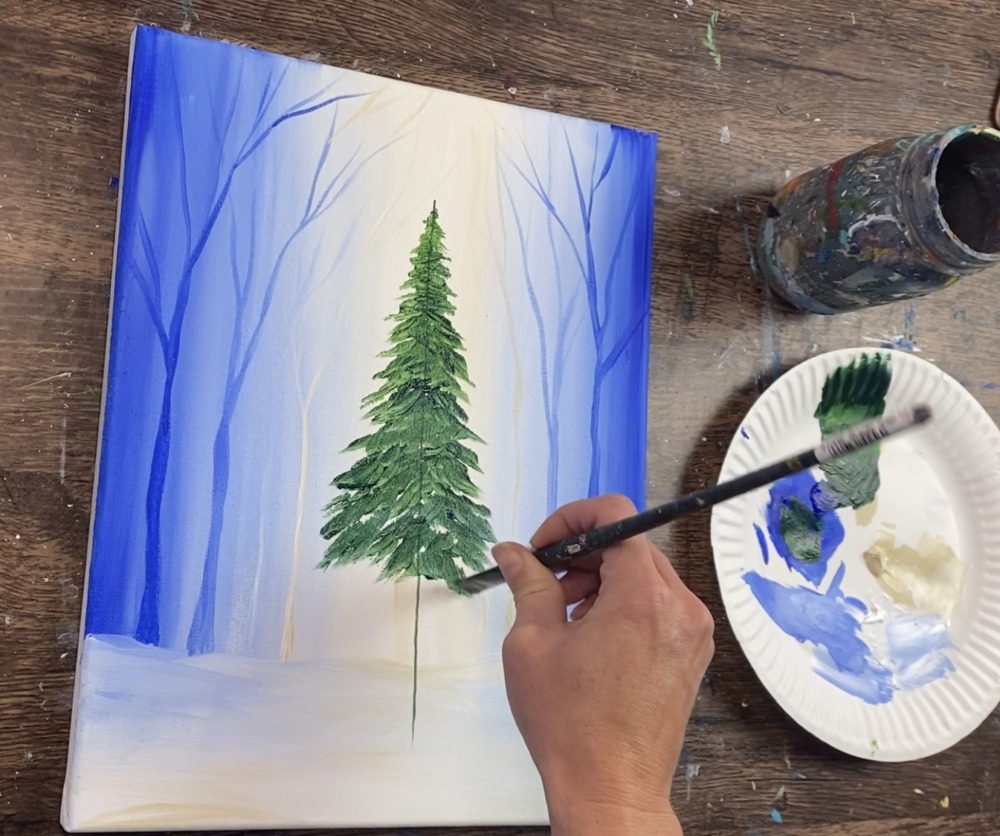
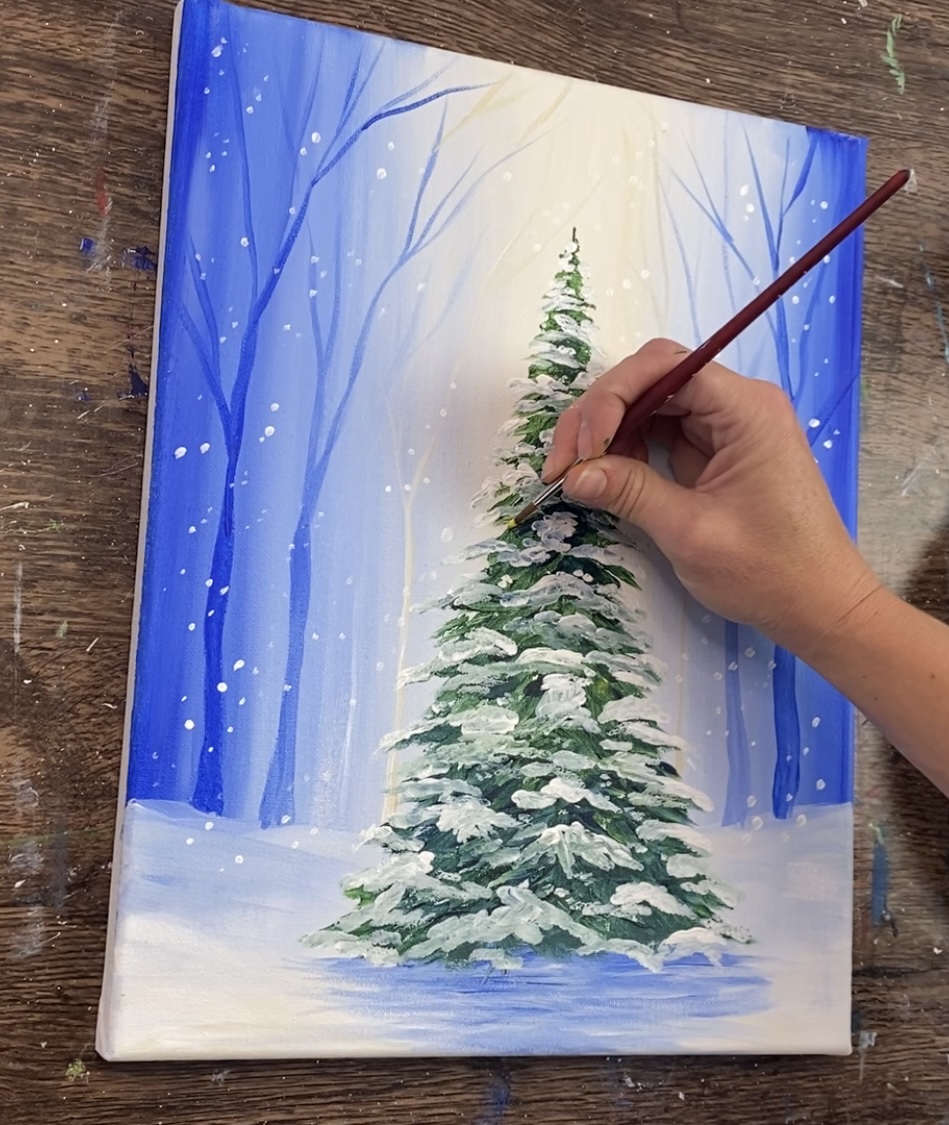
6. Paint Snow On Christmas Tree
Use a very clean, dry #12 bright brush for the snow. Load the tip of the brush in a nice chunk of titanium white paint. You will be applying this snow rather thickly.
Start at the top. Use just the corner of your brush (because this is a small area). Apply snow to just the edges of the branch and some in the center.
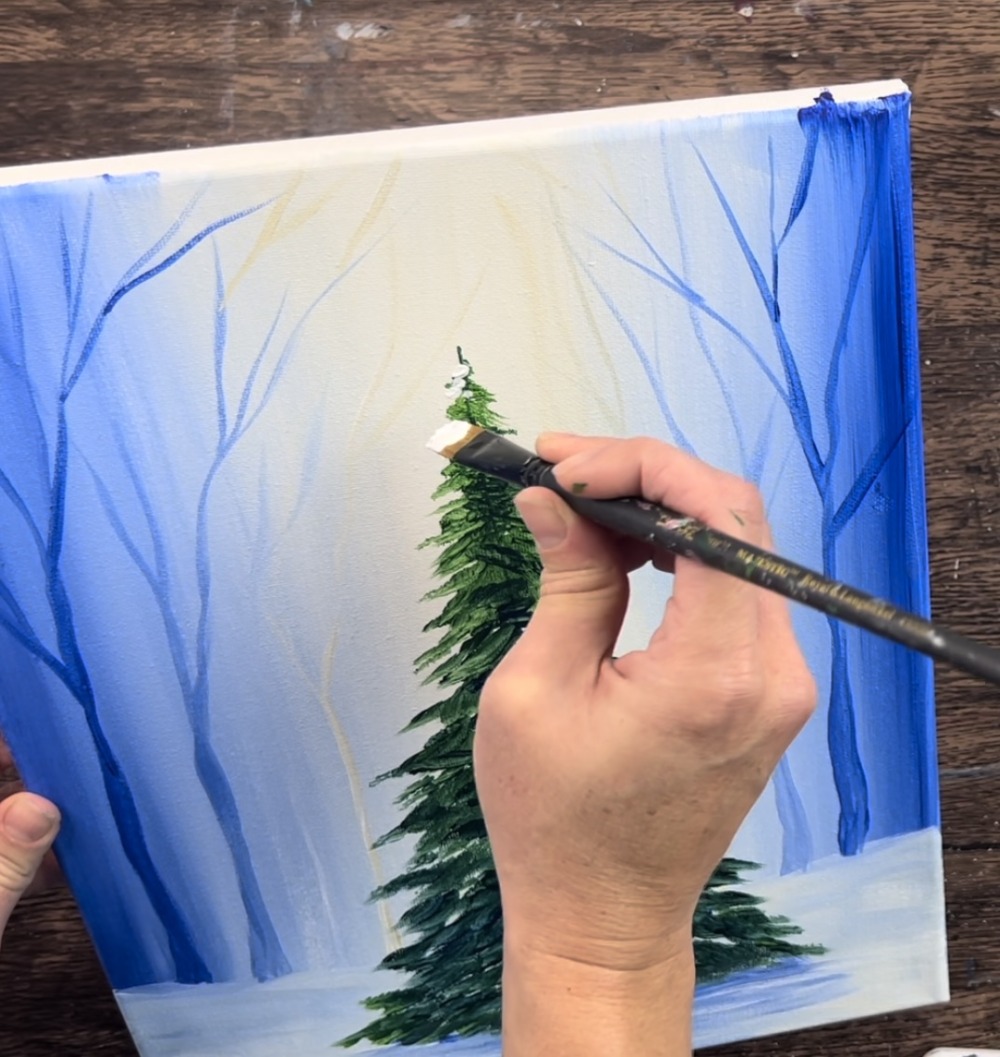
You want to apply the snow the same way you painted the branches (only thicker). Leave a lot of the dark green still showing through. Tip: if the white is blending too much into the green, you will need to dry your painting. It’s okay if it blends a little but not too much. You don’t want green snow.
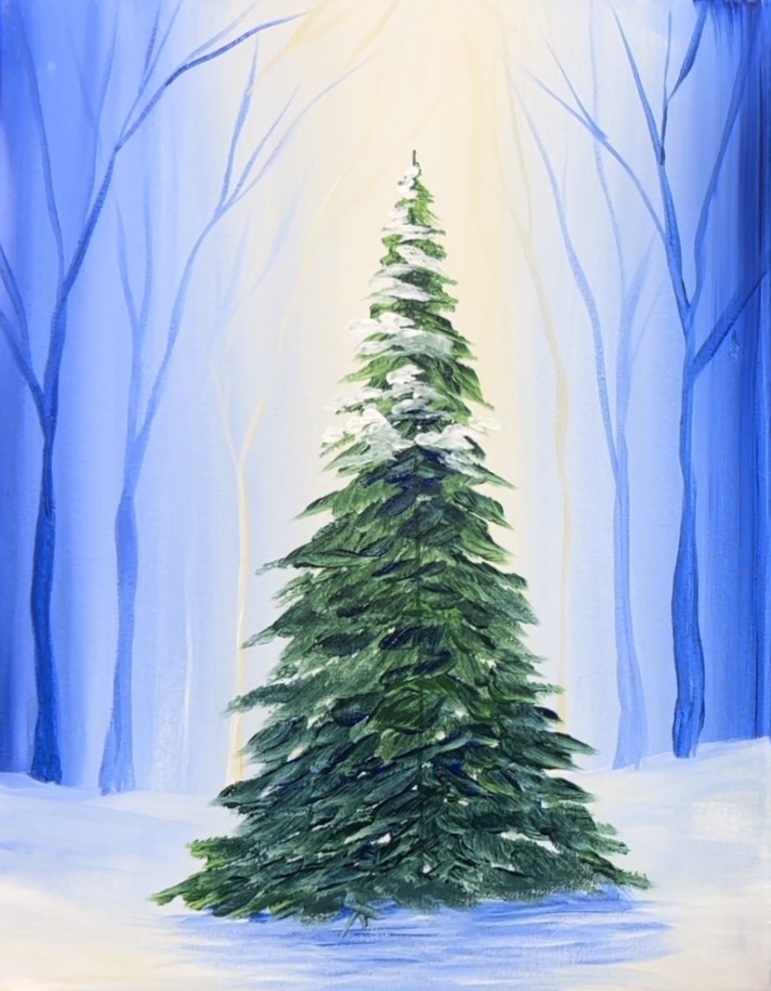
Pay particular attention to the edges of the branches and be sure to apply thicker layers of white on those. Add “glob areas” of white in the center parts of the tree.
Keep working in a left and right direction with the snow. As you get to the bottom, you’ll want to form larger branches of snow that point downloads in opposite directions depending on what side of the midline you are on.
7. Paint Snow In Sky
Use the #4 round brush to paint tiny snow dots throughout the sky. Paint them so they are clustered together in some areas and further apart in others. Vary the dots so some are small and some are larger.
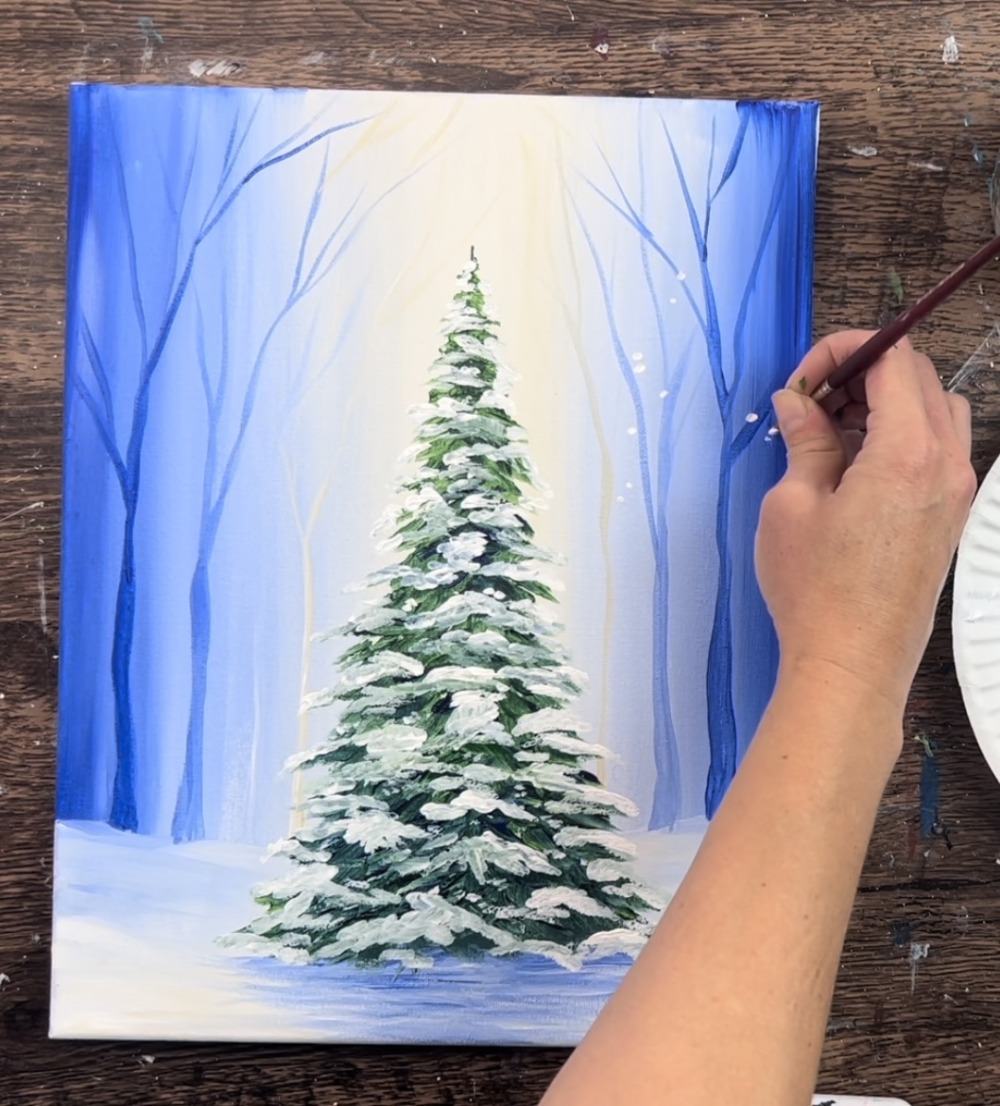
Paint your snow going in a diagonal direction like the wind is blowing (optional).

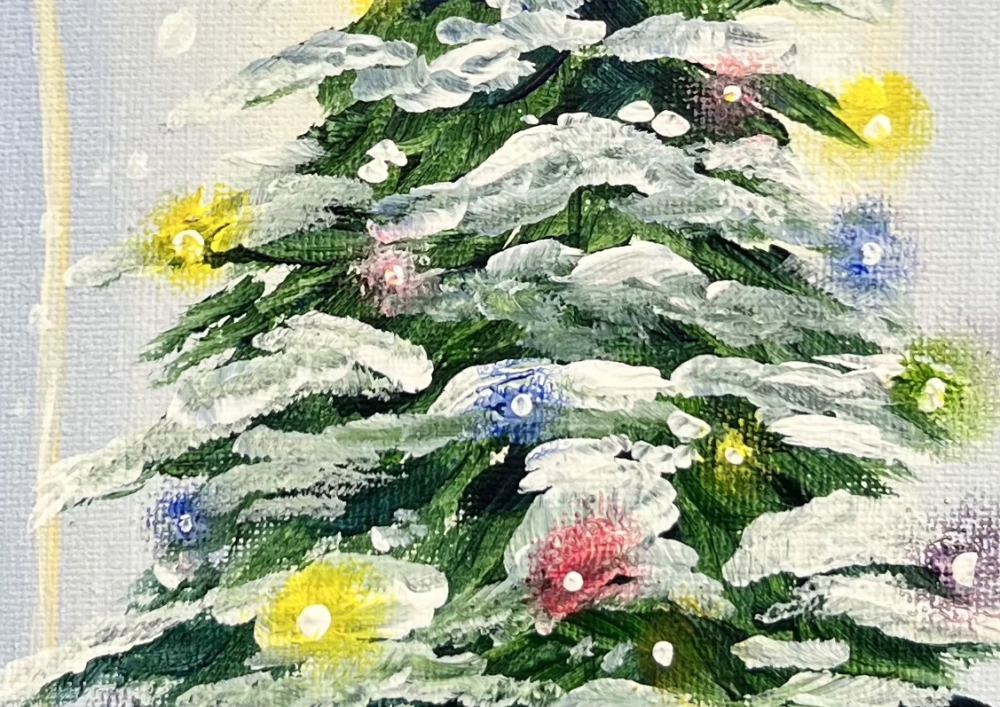
8. Paint Christmas Tree Lights
To paint the Christmas lights, use the #4 round brush to paint colored dots. Start by loading your palette with the colors you will be using for the lights. I used: primary yellow, primary red, ultramarine blue, and mixed orange and purple from those colors.
Start with the yellow (or any color). Paint a small circle with the brush (or just make a dot).
Then use your finger to smear it outwards a little bit. This will make it look light and blurry.
Then use your round brush to paint a white dot in the center of each of the lights. This will make it look like your lights are glowing.
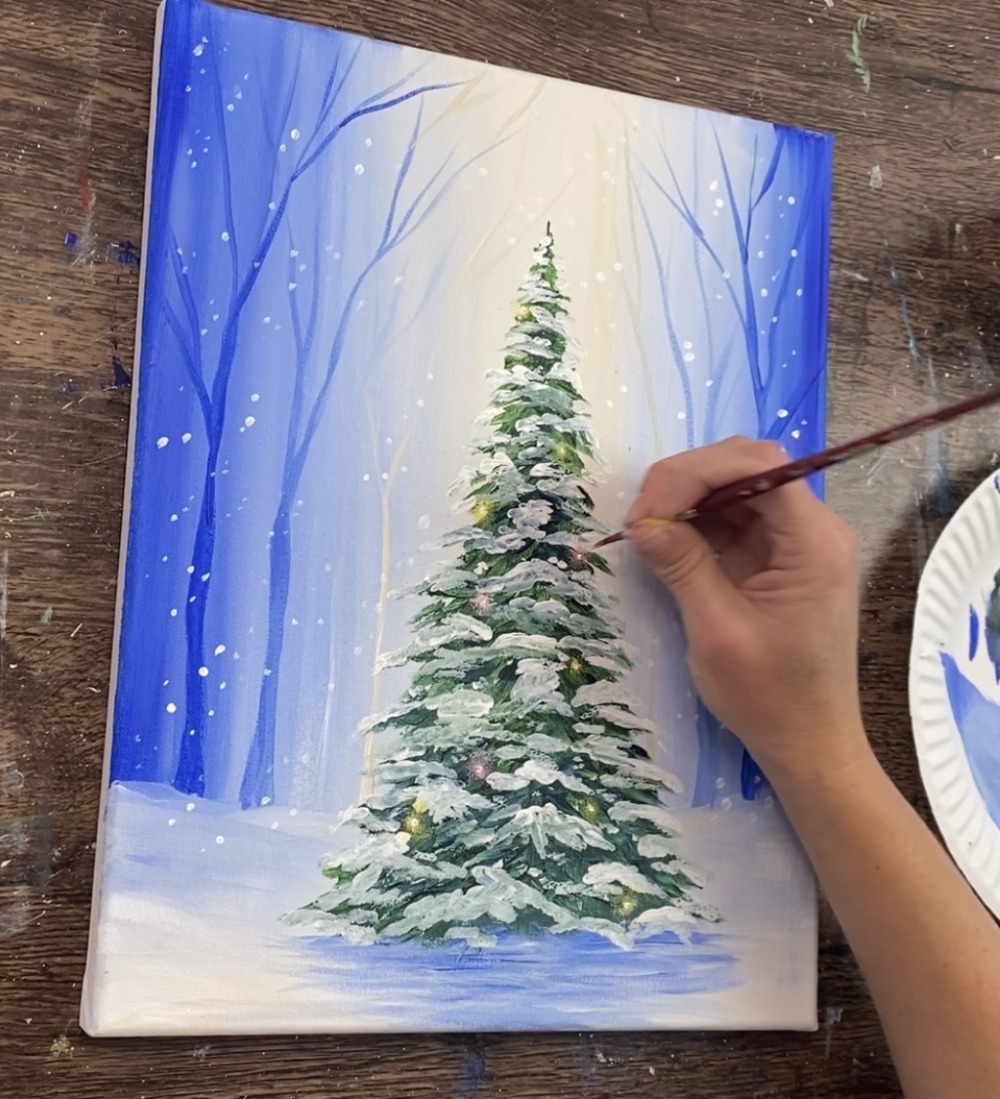
Close up of lights pictured below. To make “pink lights”, mix the primary red with a little white. To make “purple lights” mix primary red and ultramarine blue. To make “orange lights” mix primary yellow with a little primary red.
9. Paint Star
Use your #4 round brush and primary yellow to paint a star.

Then in the center of the star, add a little bit of white mixed with yellow to make it appear brighter.
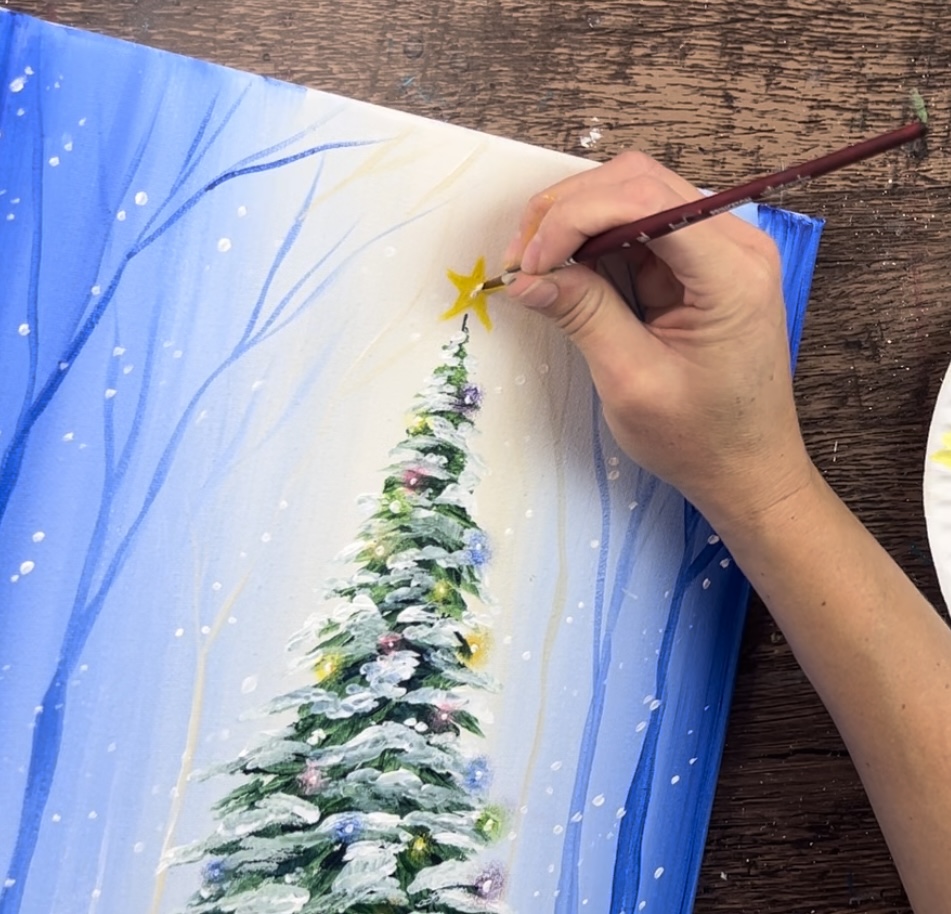
Add a little extra white right in the center.
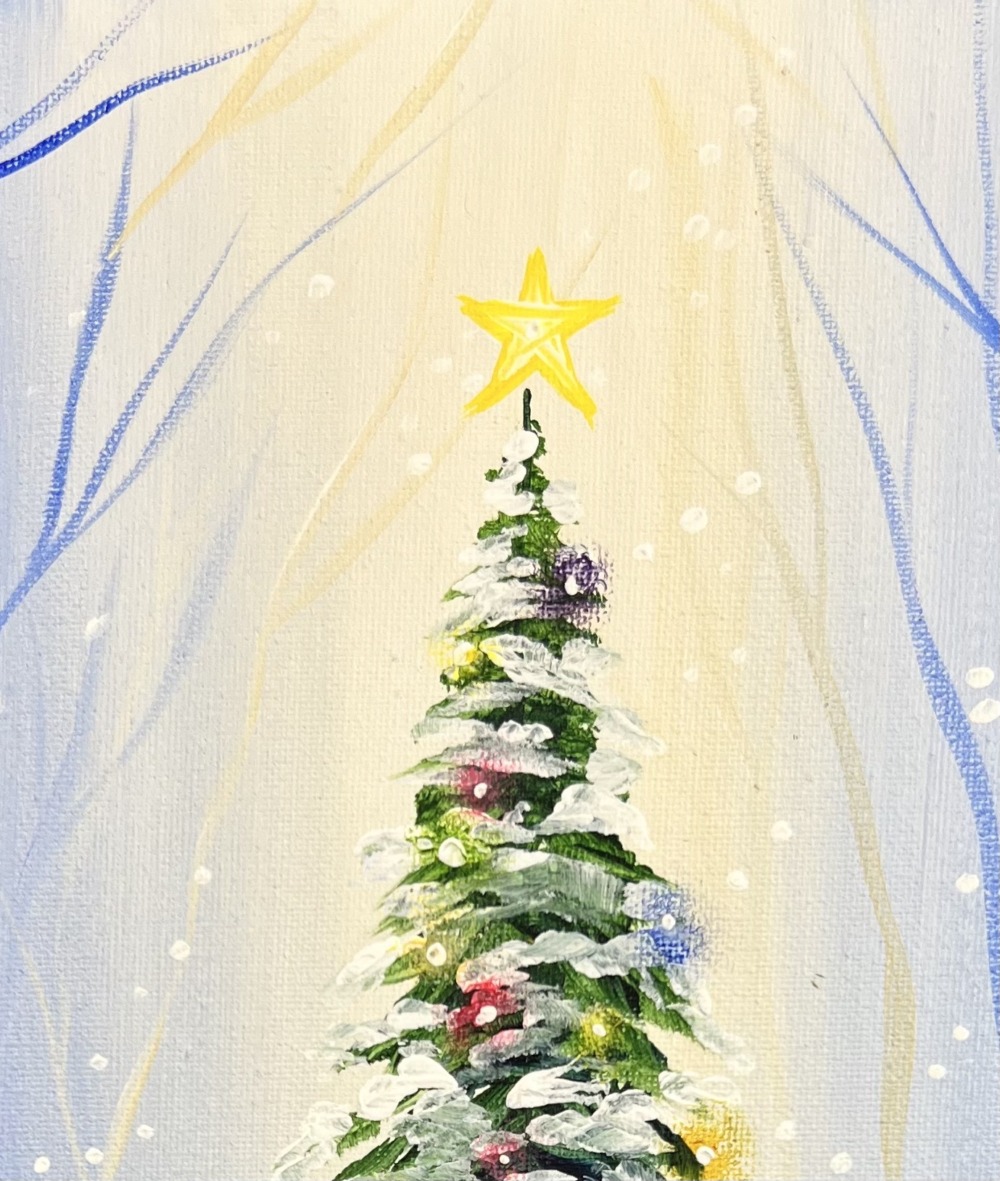
Finished!
Share Your Art Here:


