
Would you like to save this?
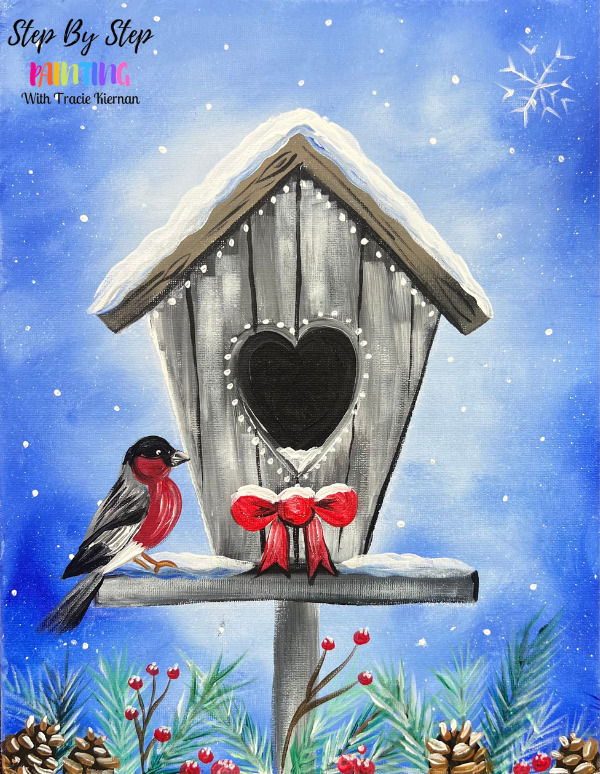
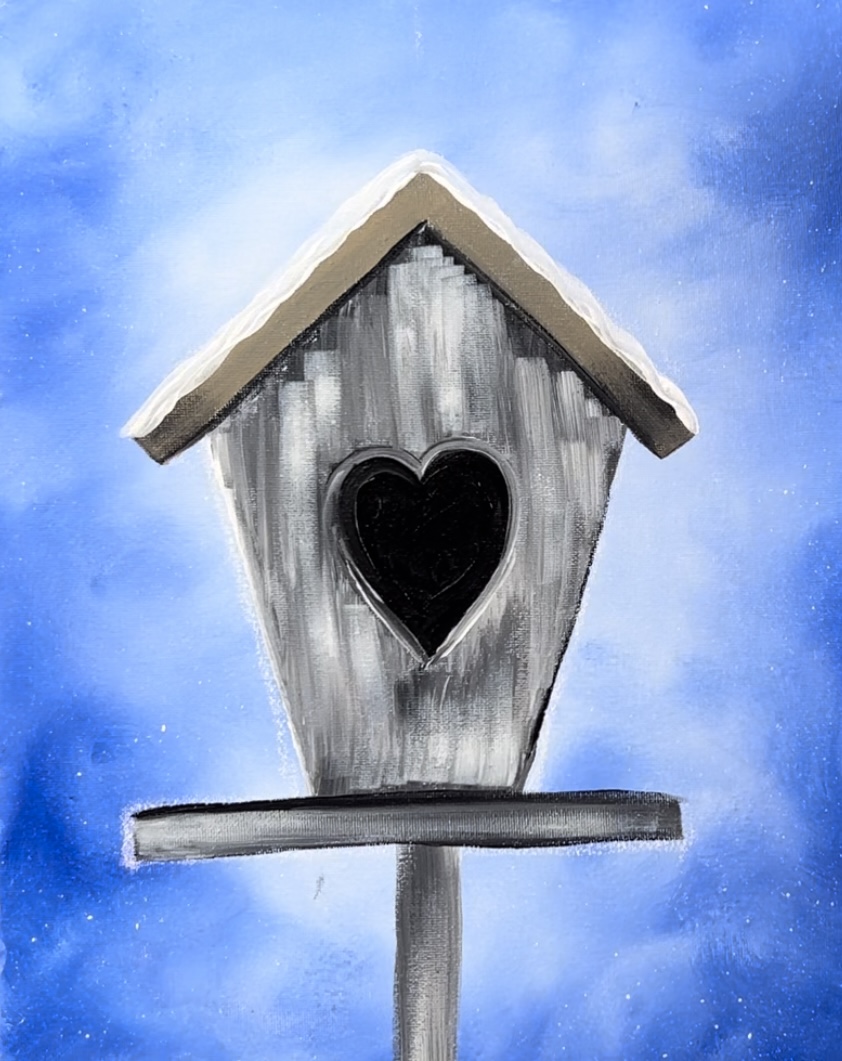
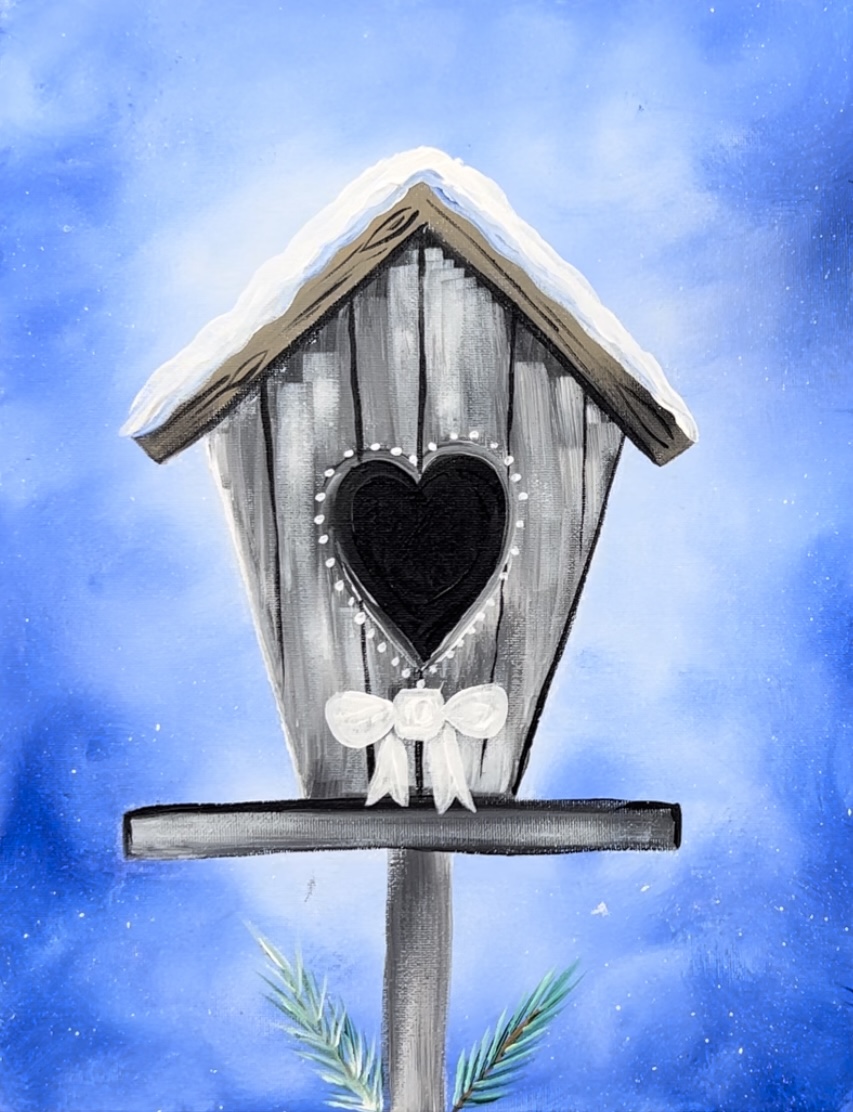
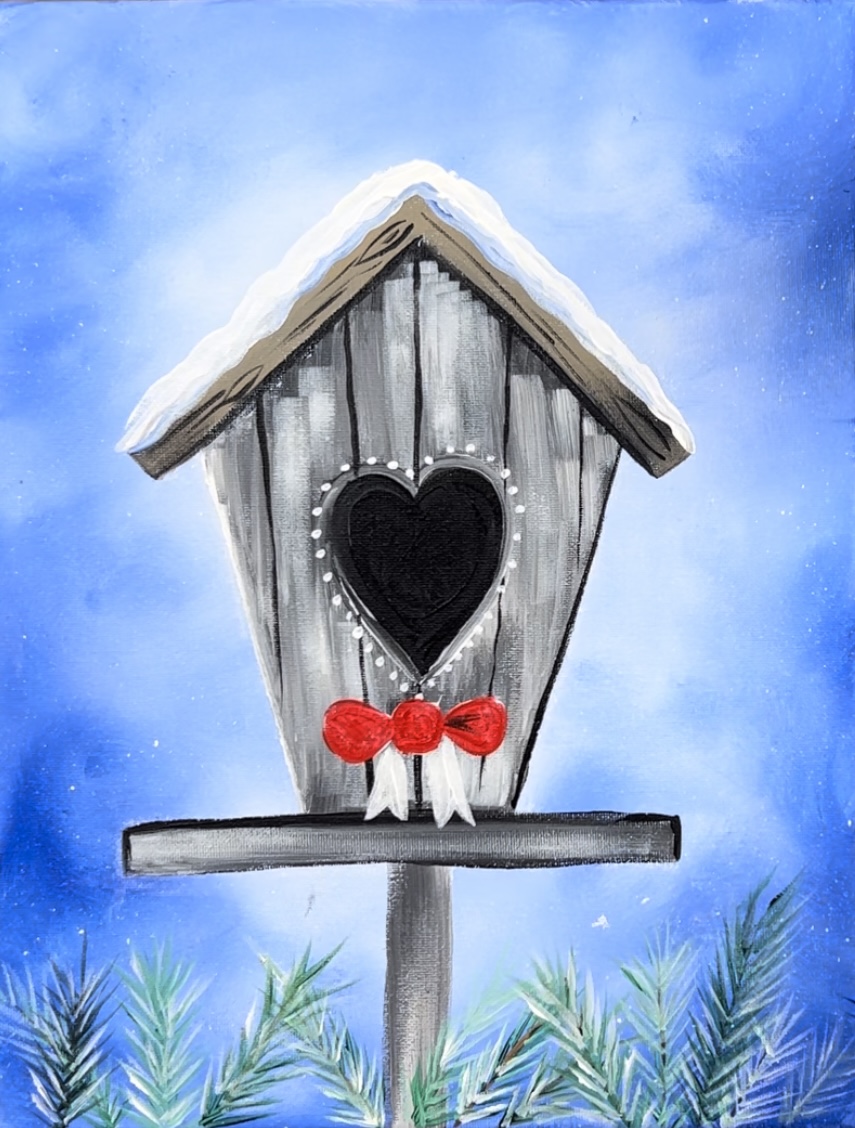
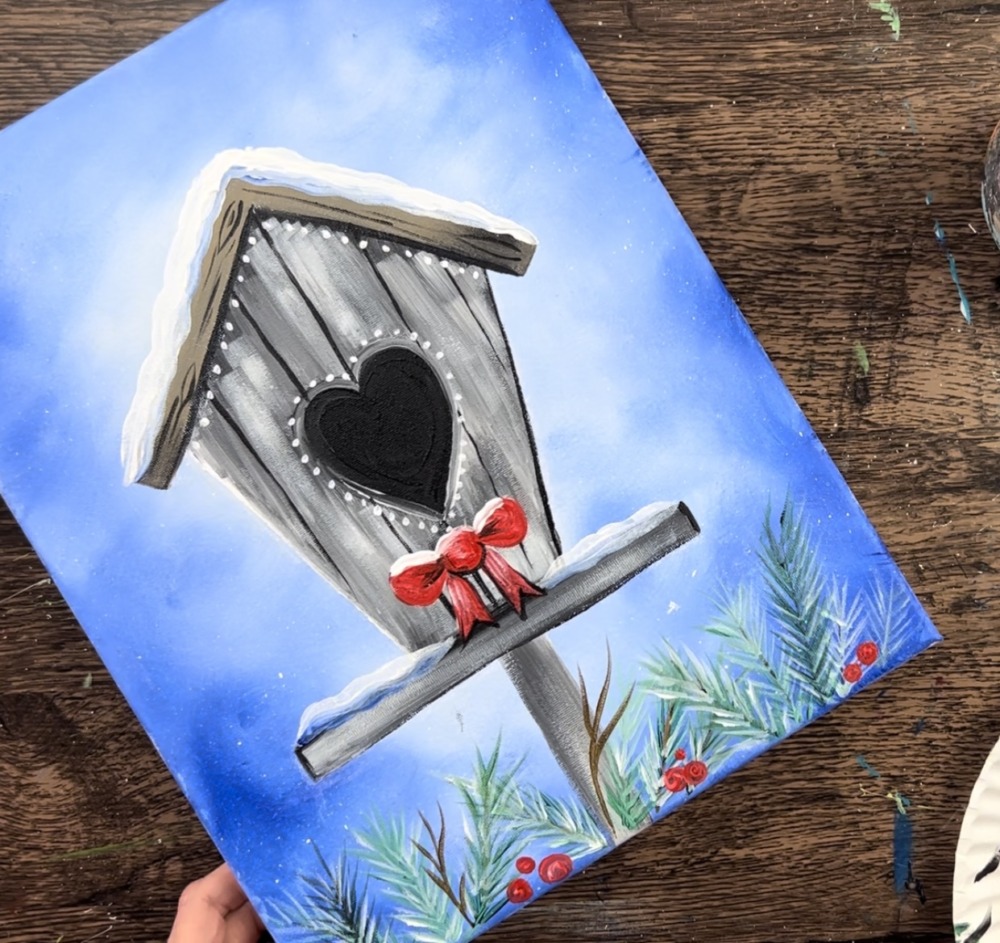
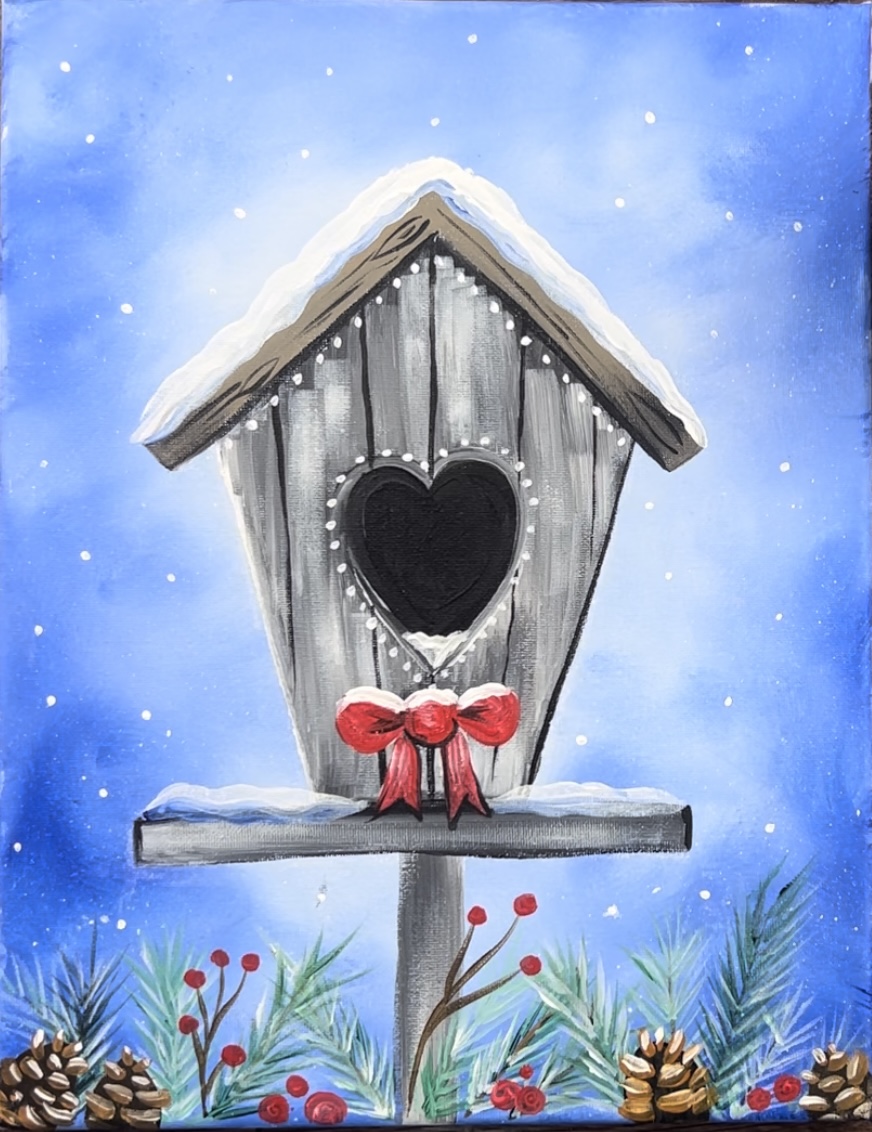
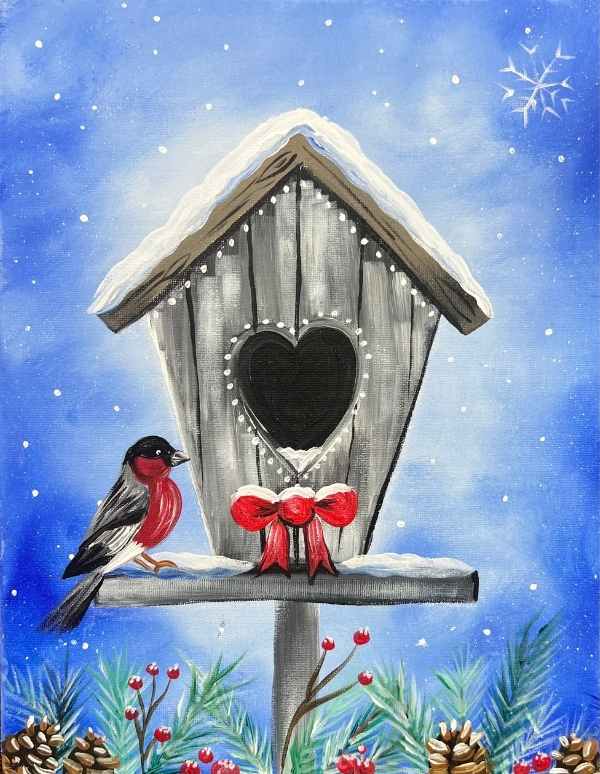
Learn how to paint a beautiful winter birdhouse with a bright blue snowy background and cute gray and red bird perched on the ledge. This painting is very similar to the Summer Birdhouse Design.
Decorate the bottom with pine needles, winter berries and pine cones. Then paint a cute gray and red bird perched on the ledge.
Enjoy and happy painting!
Materials Needed
How To Paint A Winter Birdhouse
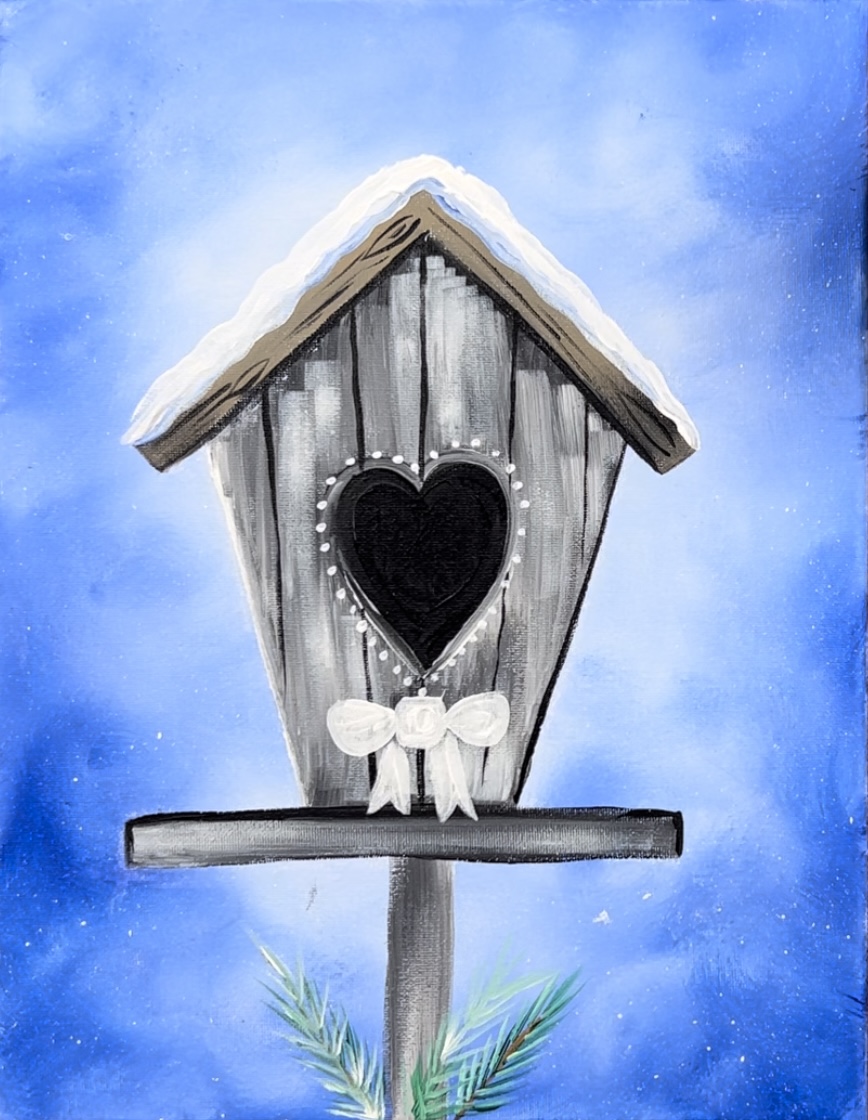
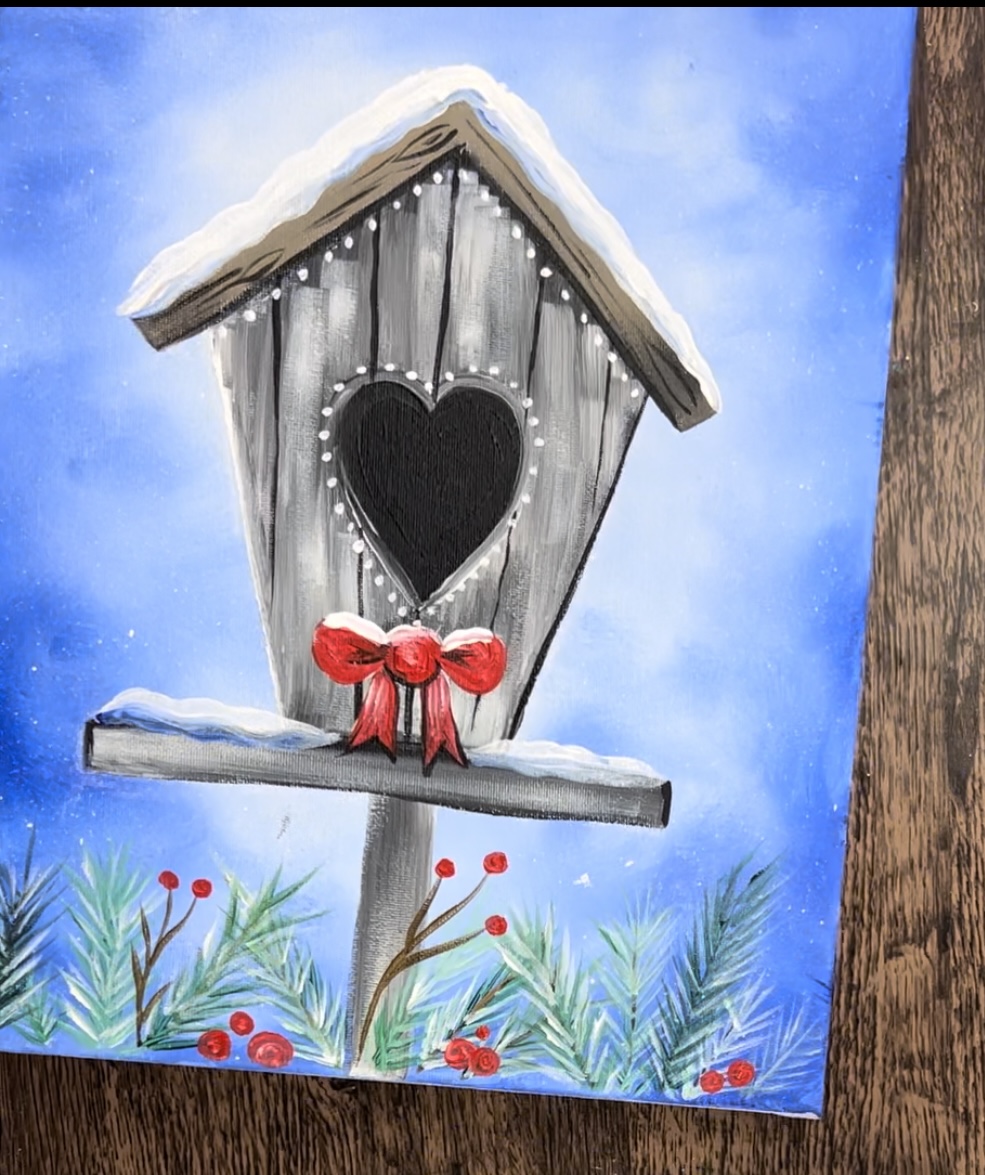
Learn how to paint a winter birdhouse with acrylics on canvas. Learn to paint a cute red and gray bird, pine cones and pine needles surrounding a gray wood vintage birdhouse.
Materials
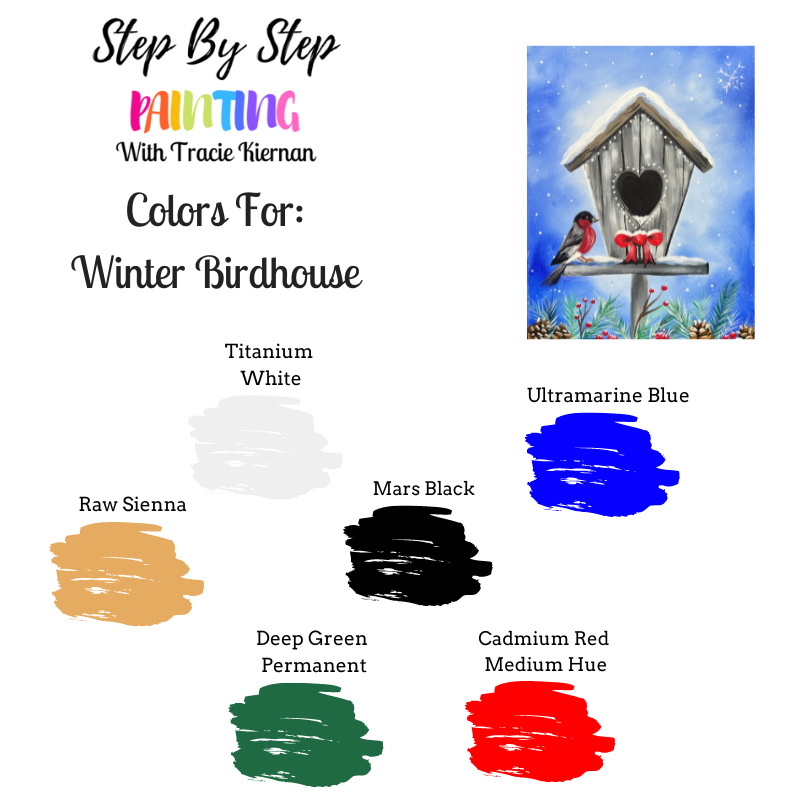
Colors
- Titanium White
- Mars Black
- Cadmium Red Medium Hue
- Ultramarine Blue
- Deep Green Permanent
- Raw Sienna
Brushes
Color Palette
Using craft paints?
If you are using craft paints such as Apple Barrel, I would recommend subbing to these colors:
- White
- Black
- Bright Blue
- Nutmeg Brown
- Holly Branch
- Flag Red
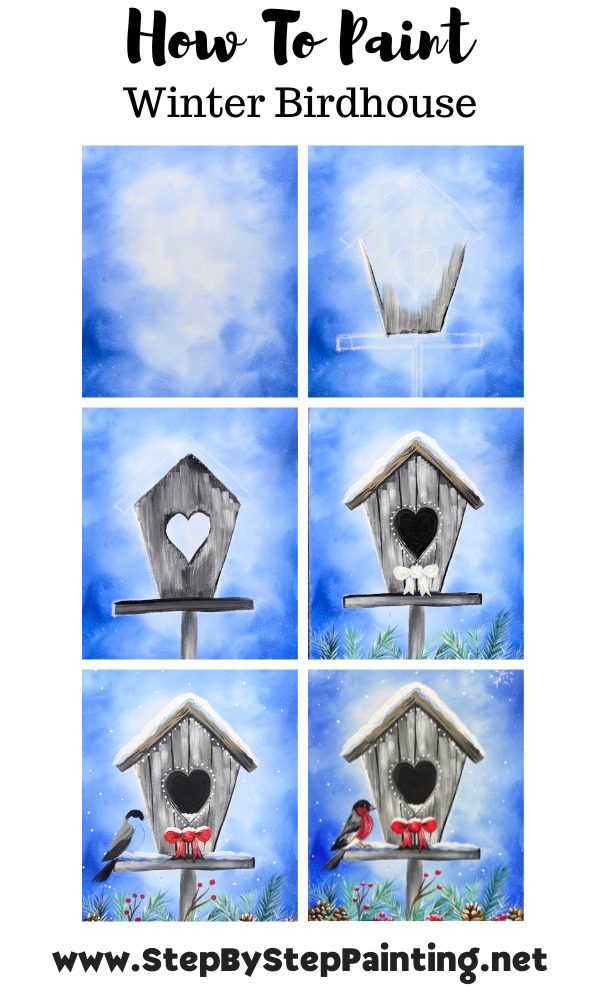
Directions At A Glance
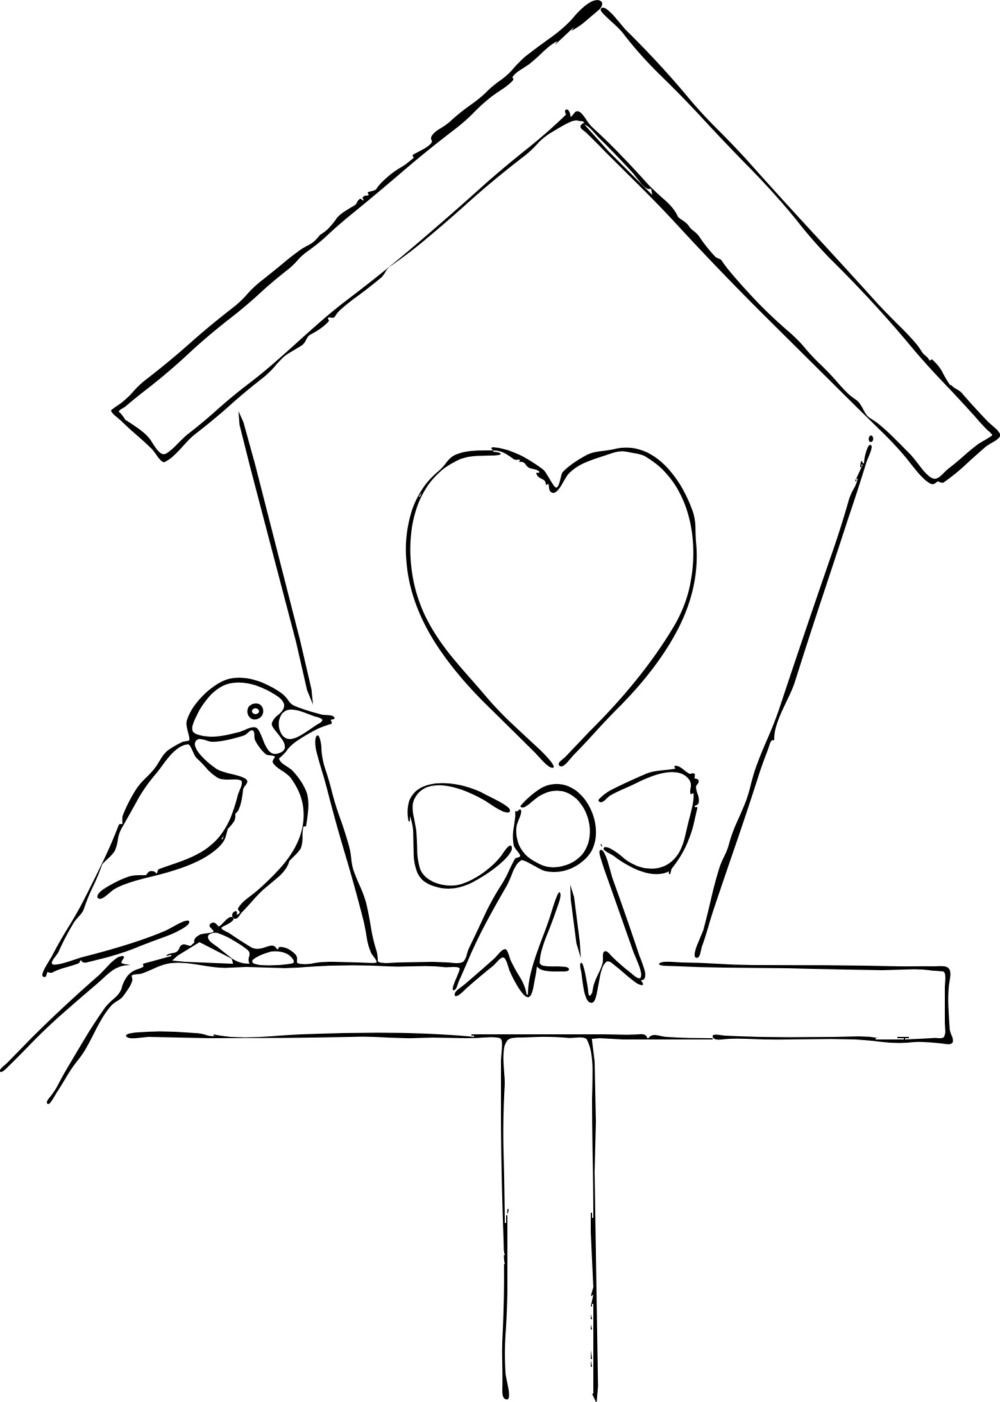
Traceable
This is optional! Tracie demonstrates how to draw the birdhouse and bird. If you would like to use this template to help with the drawing, you are welcome to!
Video
Step By Step Directions
1. Paint The Background
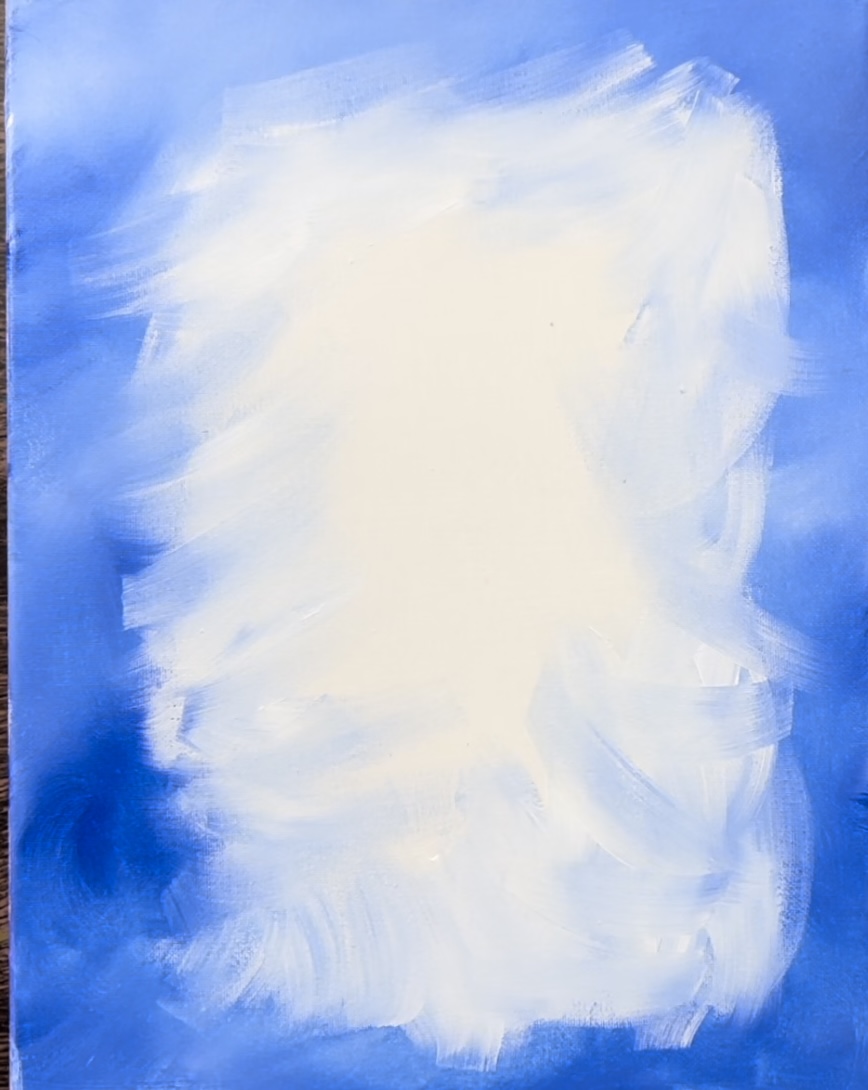
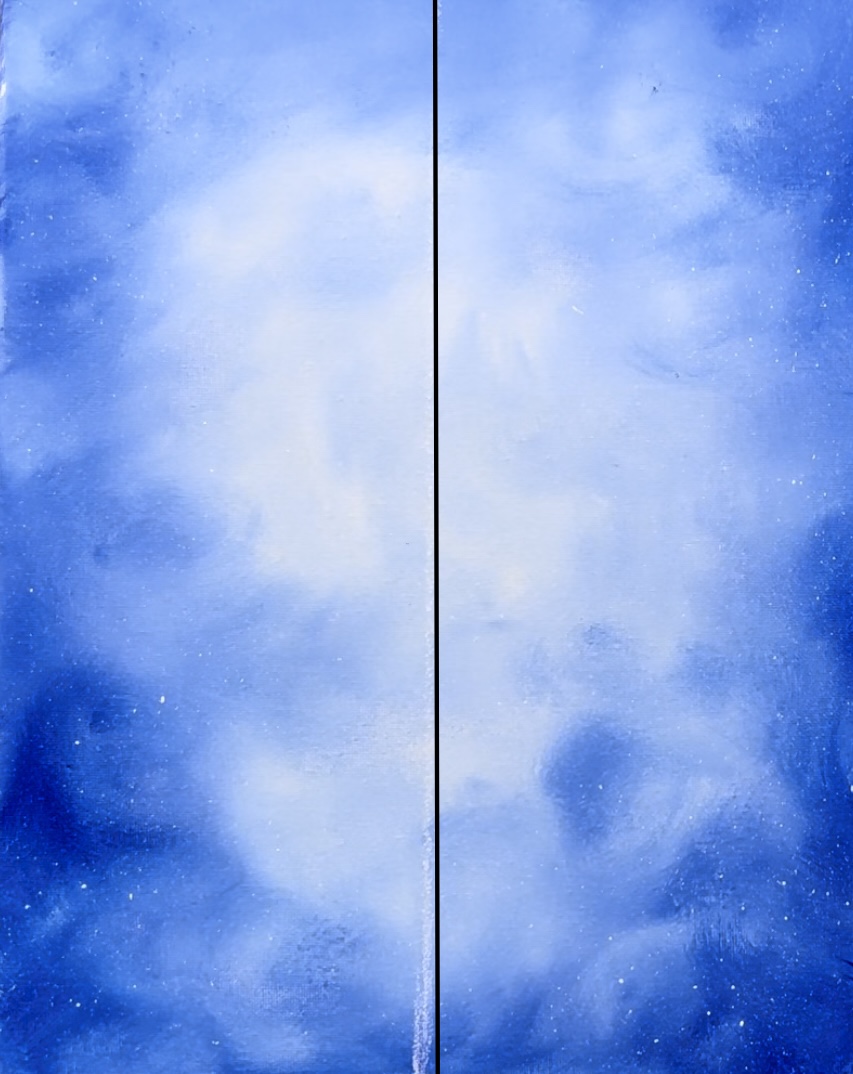
The first layer of this painting is the background and it is painted on the entire canvas before the birdhouse is painted over it. It is a blended background with darker blues on the edges of the canvas and lighter blues in the center.
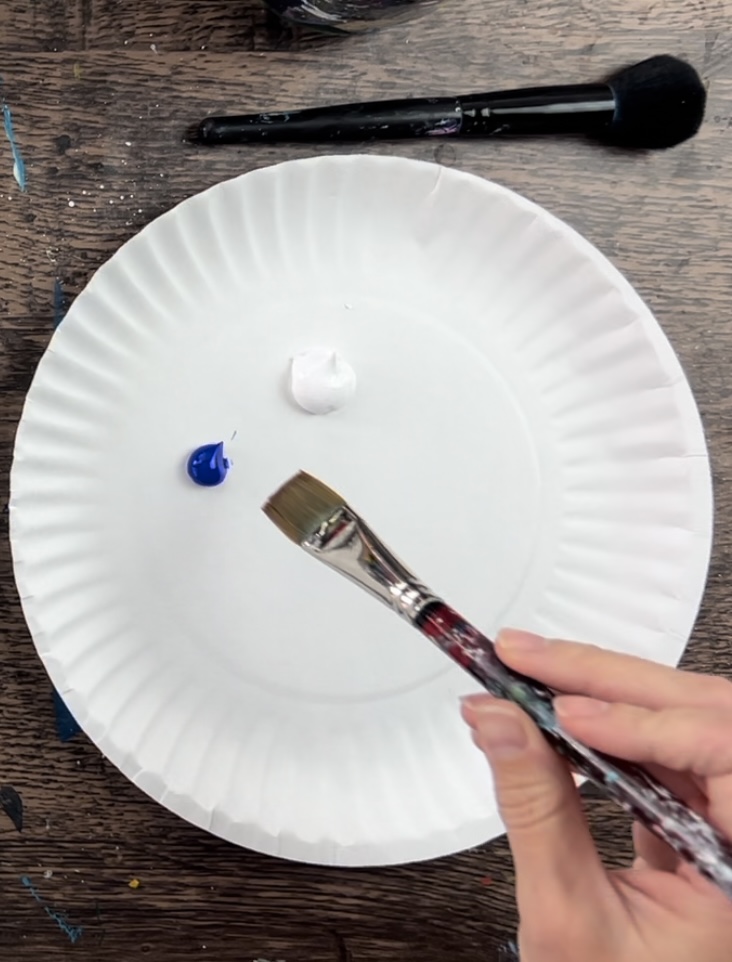
Load your paint palette with ultramarine blue and titanium white. Then double load your brush in ultramarine blue and titanium white but add more blue to your brush than the white. We will be painting the darker part of the background first.
Paint the blue and white along the border of the canvas. Paint your strokes in “flip-flopping” expressive strokes that blend on the canvas. Vary the blue slightly by adding more blue in some parts and less in others and blend it gently together.
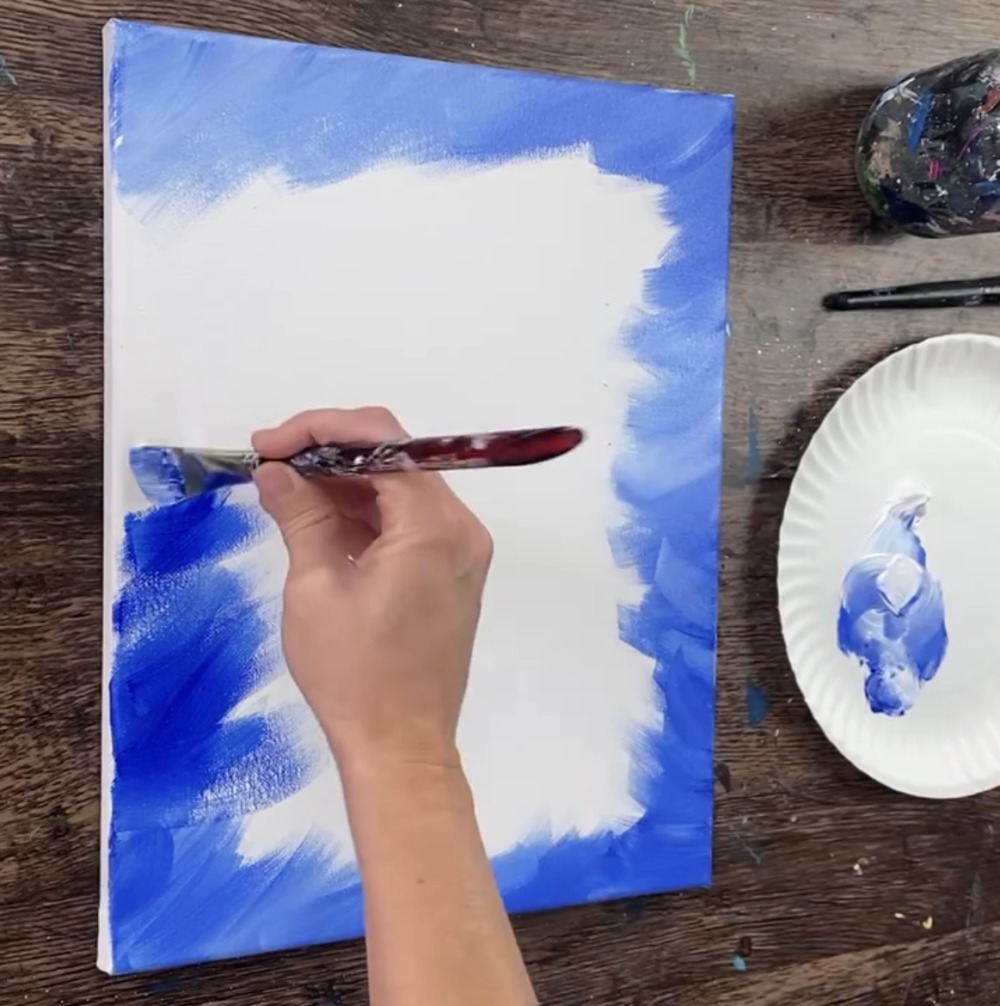
Note: in the next step you will be smoothing the strokes with the blender brush so work fast before this layer dries.
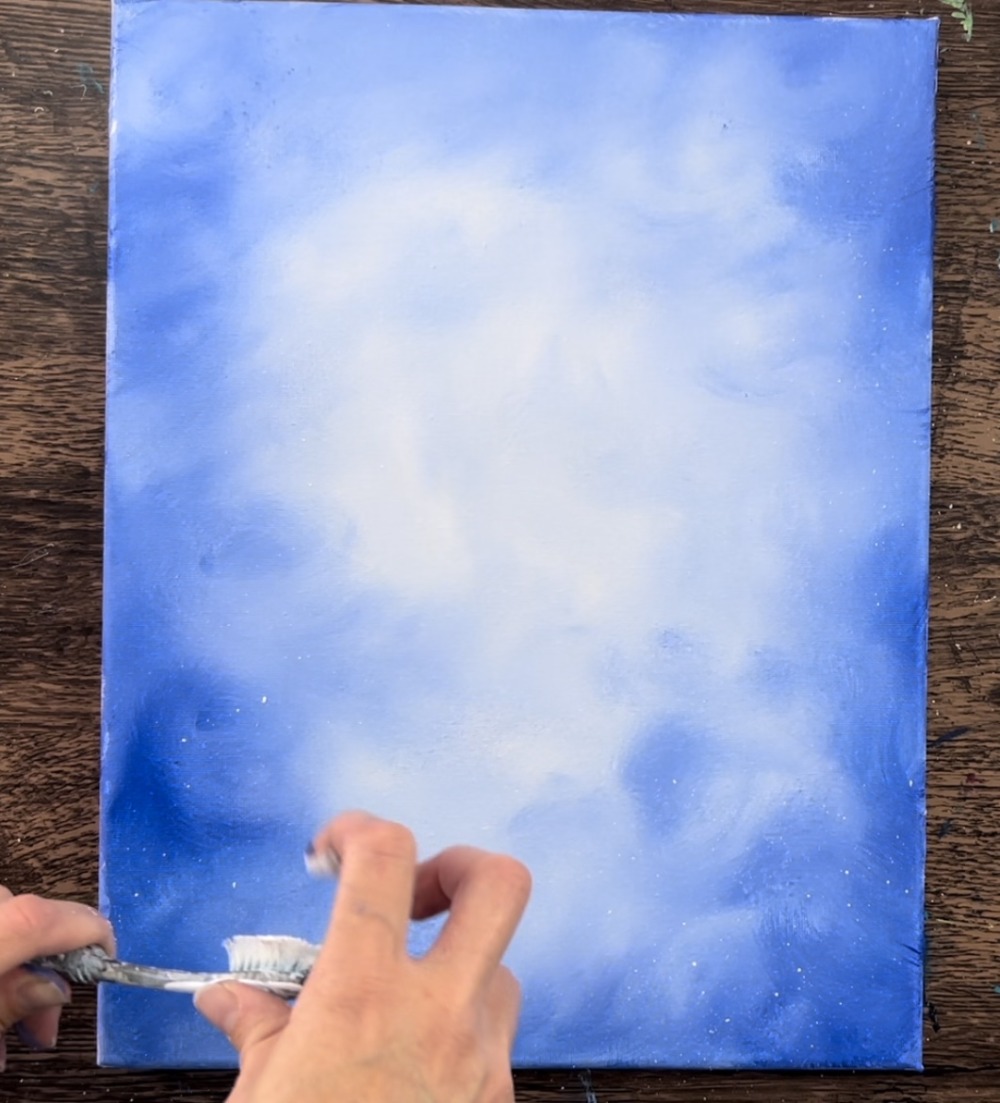
Next, use a clean and dry blender brush (I used a makeup brush) to gently smooth the strokes. Paint in light circular strokes. This will smooth out the harsh angles created from the flat brush.

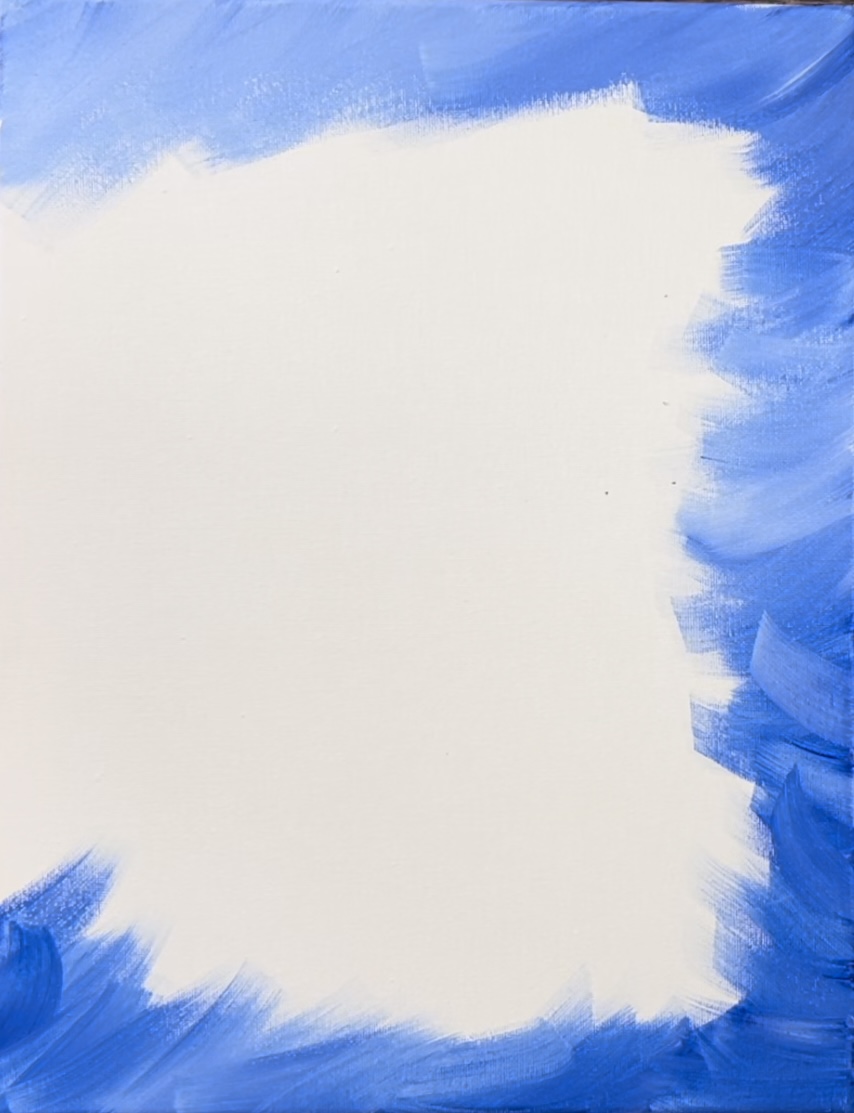
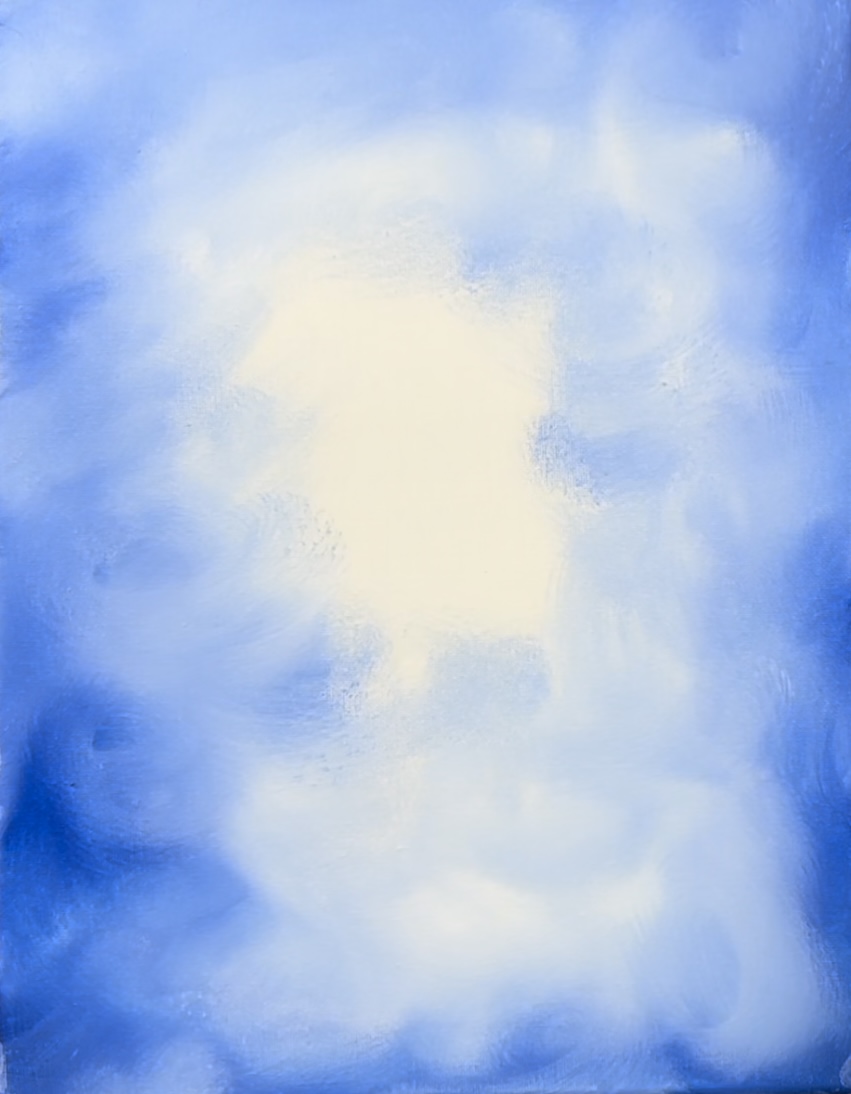
Then switch back to the flat brush and continue to paint the center of the canvas. This time use more white than blue so that the center is lighter.
Use the blender brush to smooth it out.
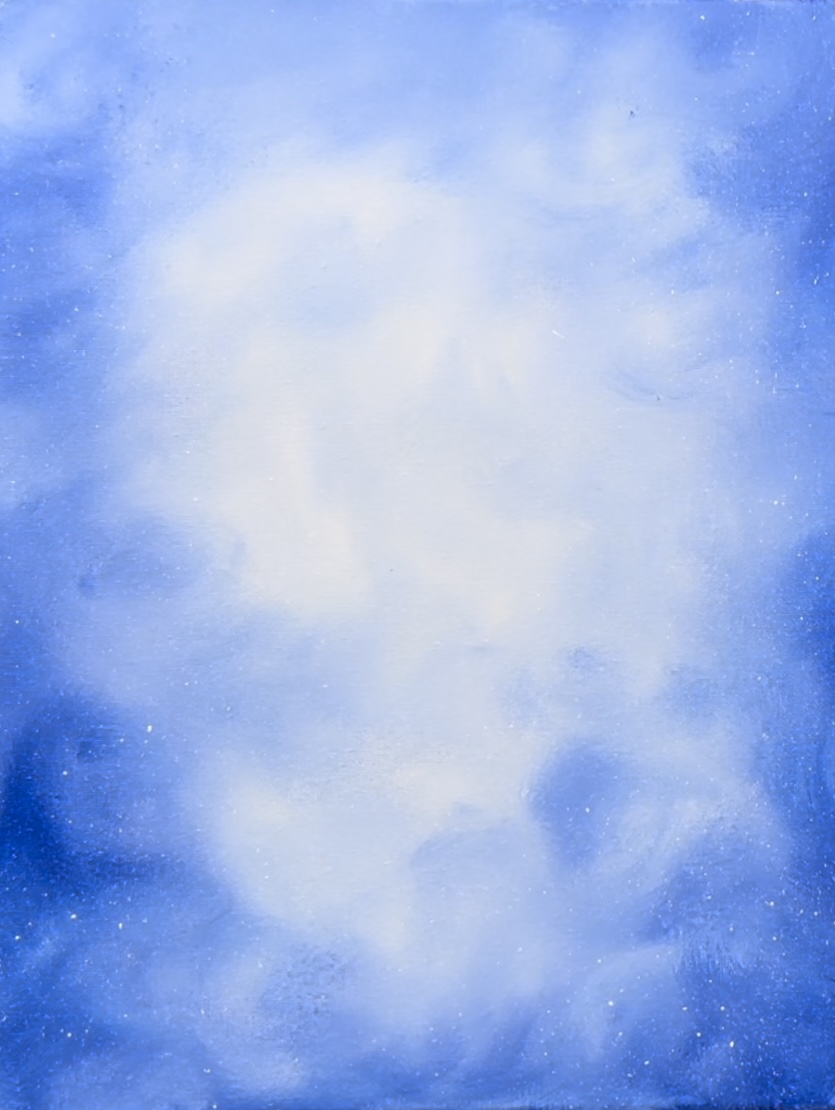
Next, add snow speckles all throughout the background using a toothbrush. Slightly water down titanium white. Test this out on a seperate surface to make sure it’s not too watery or not too thick.
Then flick the brush to create fine snow dots everywhere.
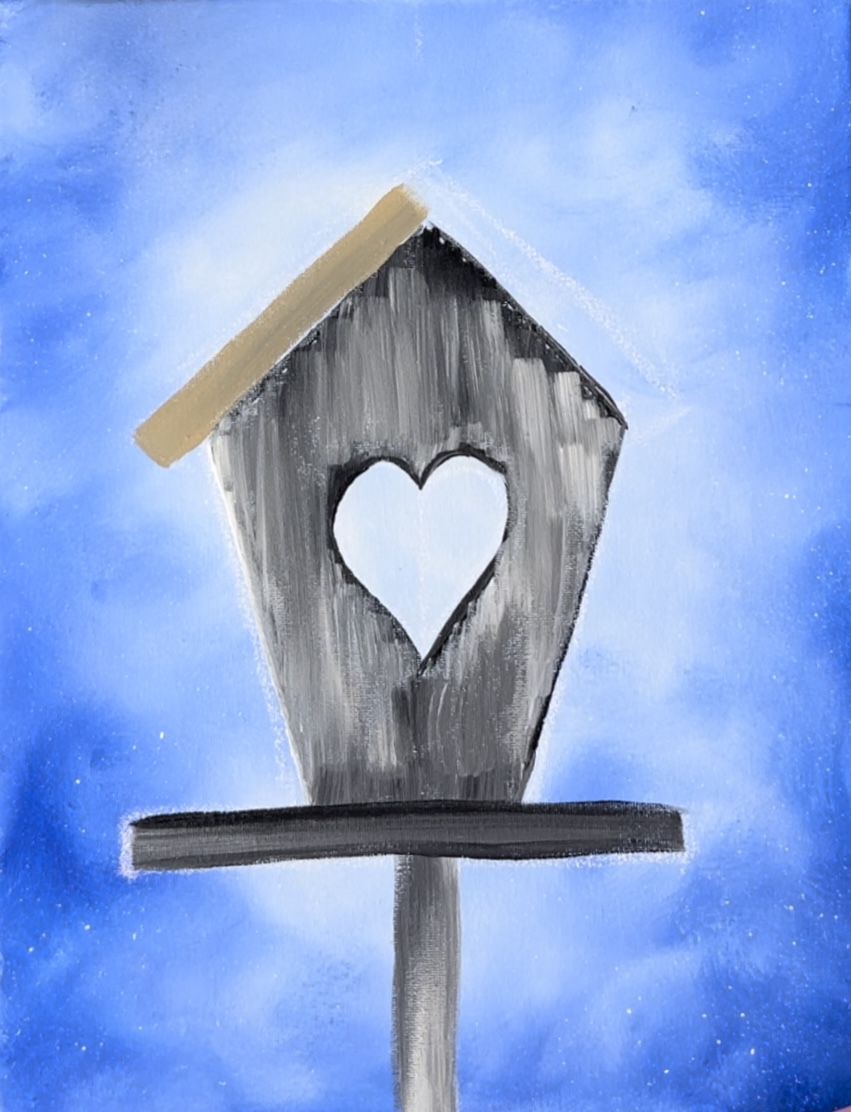
2. Draw The Birdhouse
You can use the dimension to help you with your drawing. I recommend using a piece of chalk to draw this.
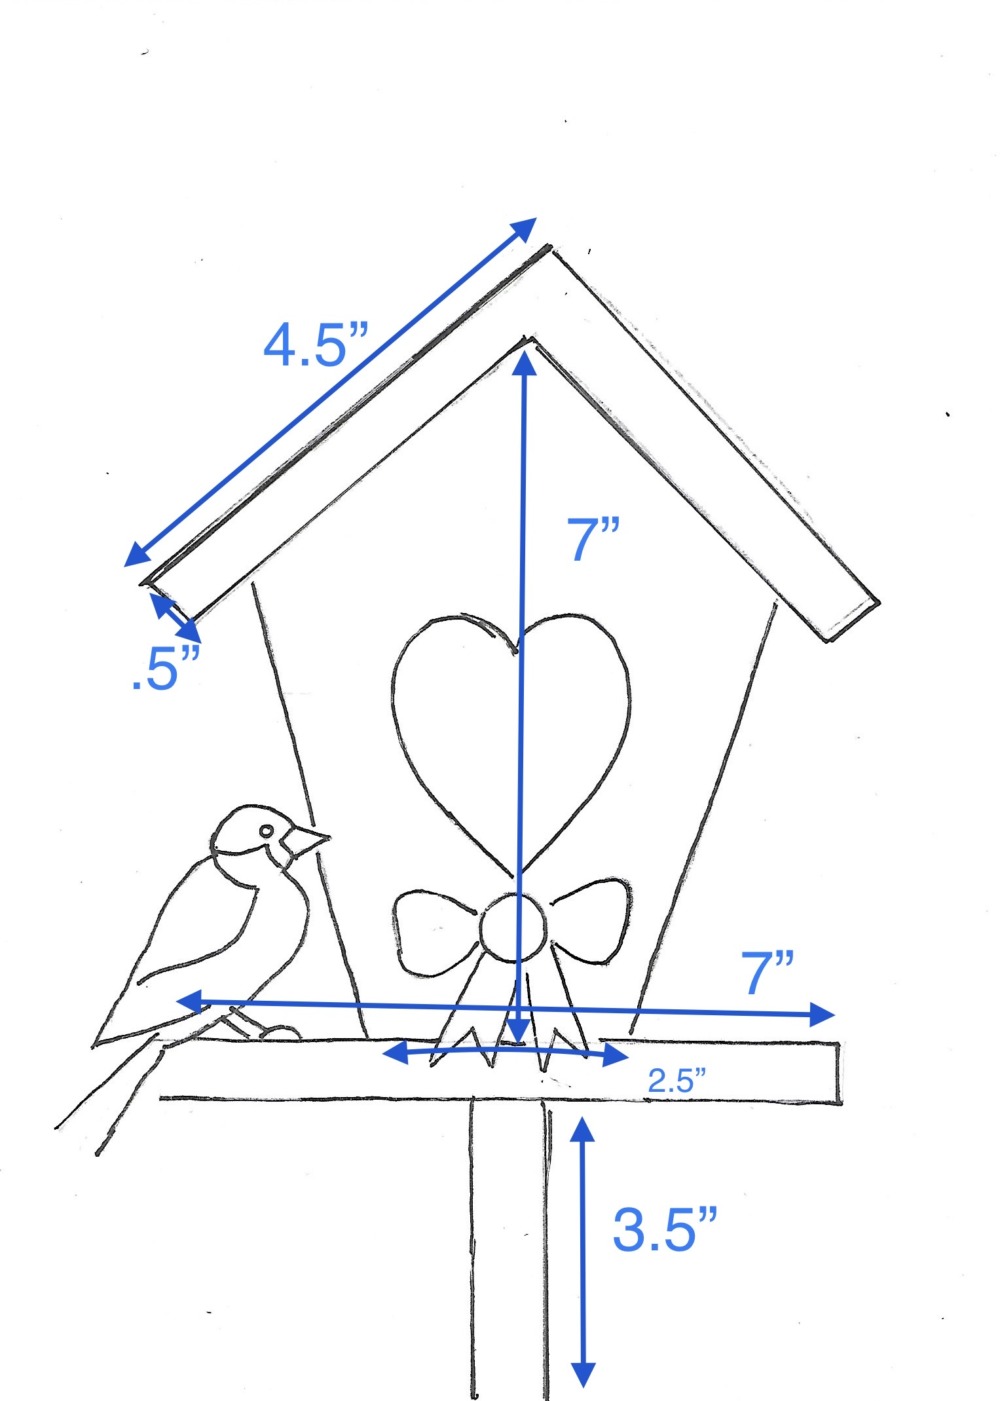
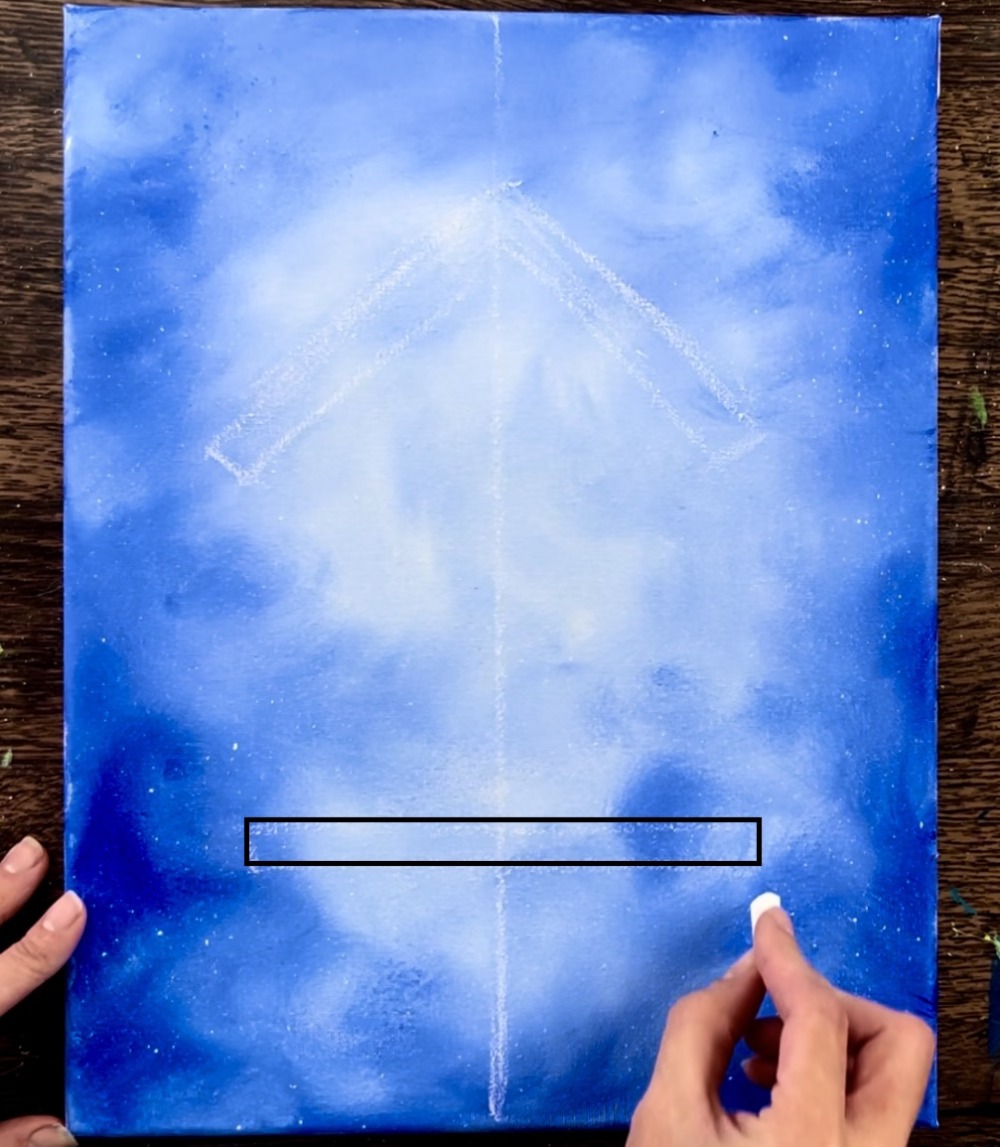
First divide the canvas in half vertically.
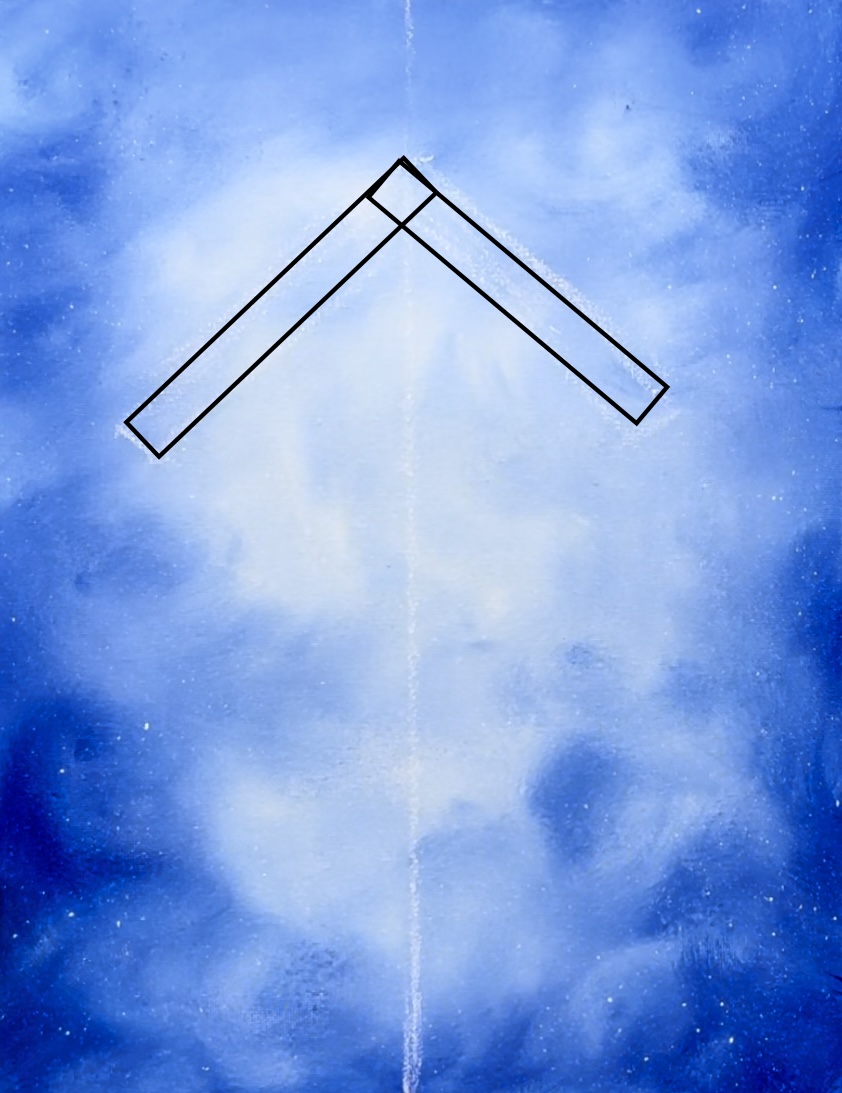
Next, draw the roof of the bird house. These are two triangular shapes that meet with the middle line as the peak of the roof.
Draw the bottom horizontal ledge.
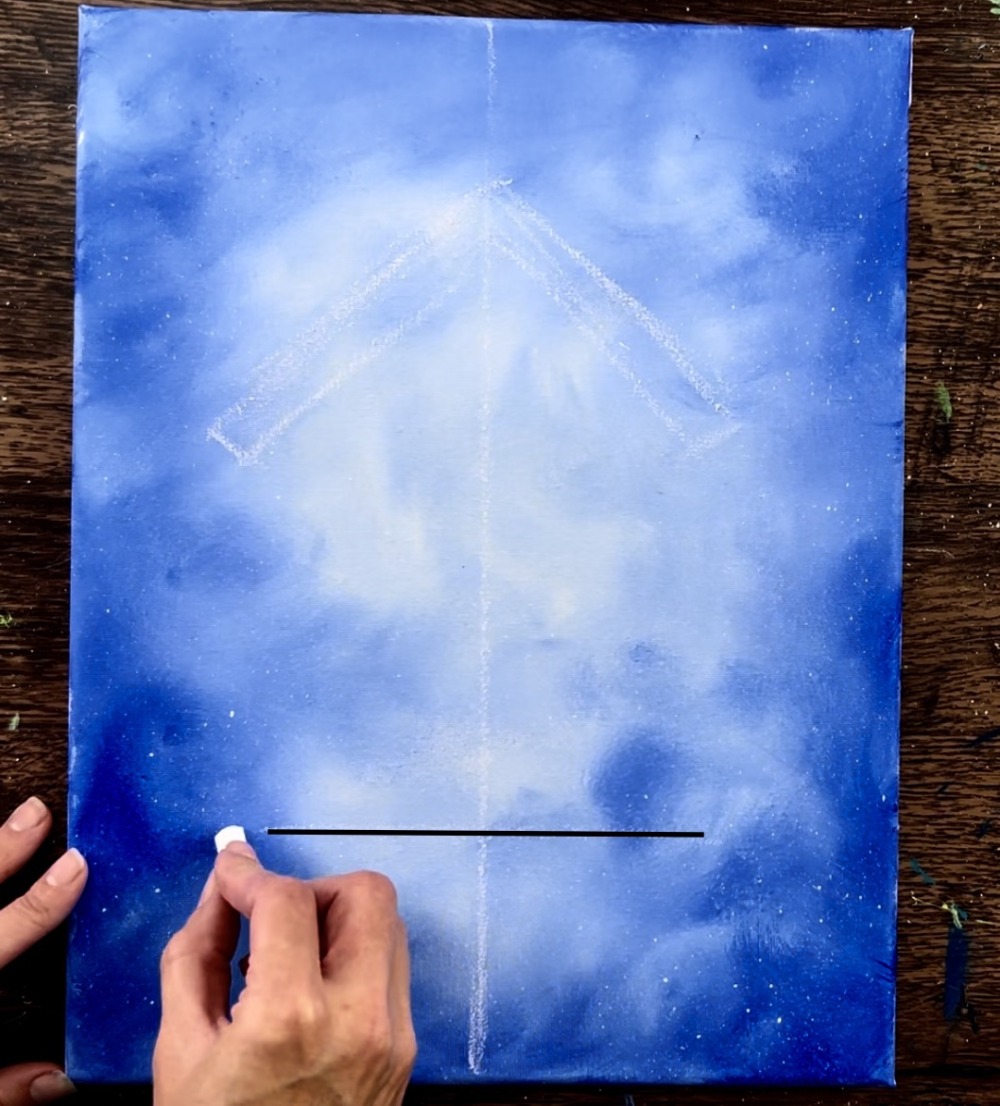
Then make the bottom horizontal ledge into a rectangular shape.
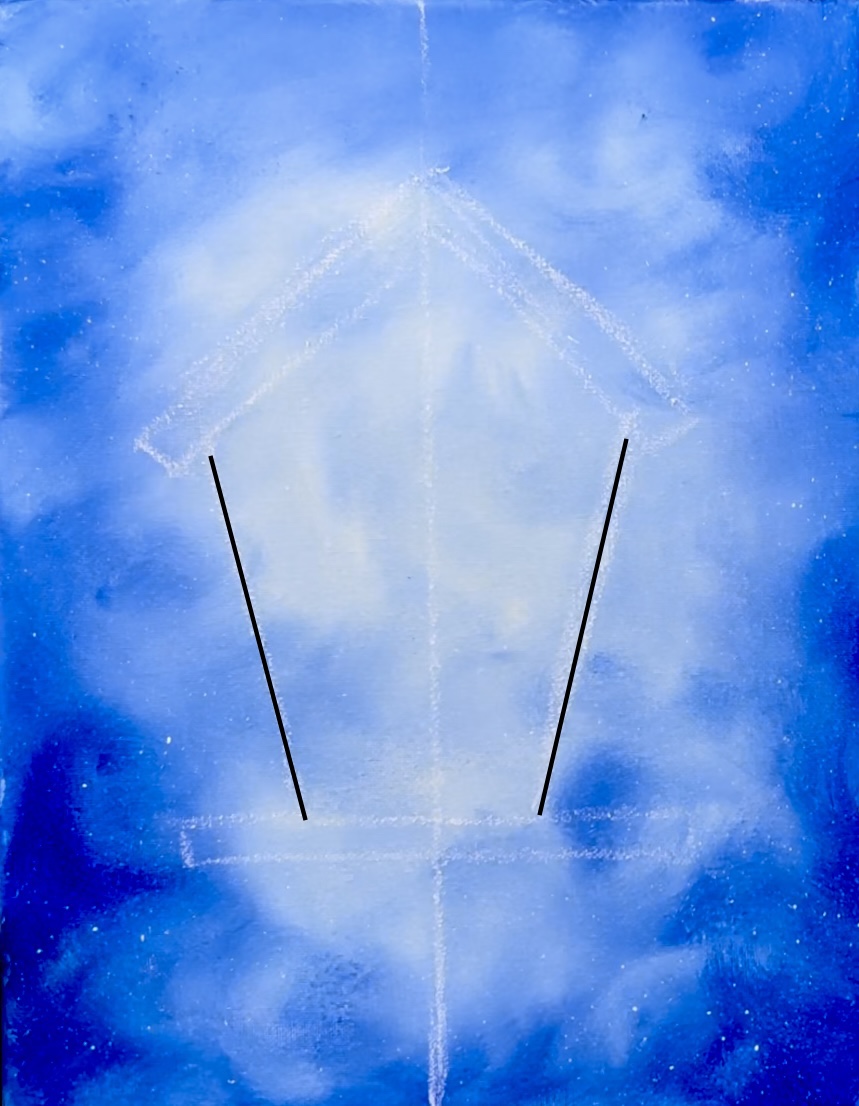
Draw two diagonal lines up from the bottom ledge to the bottom of the roof.
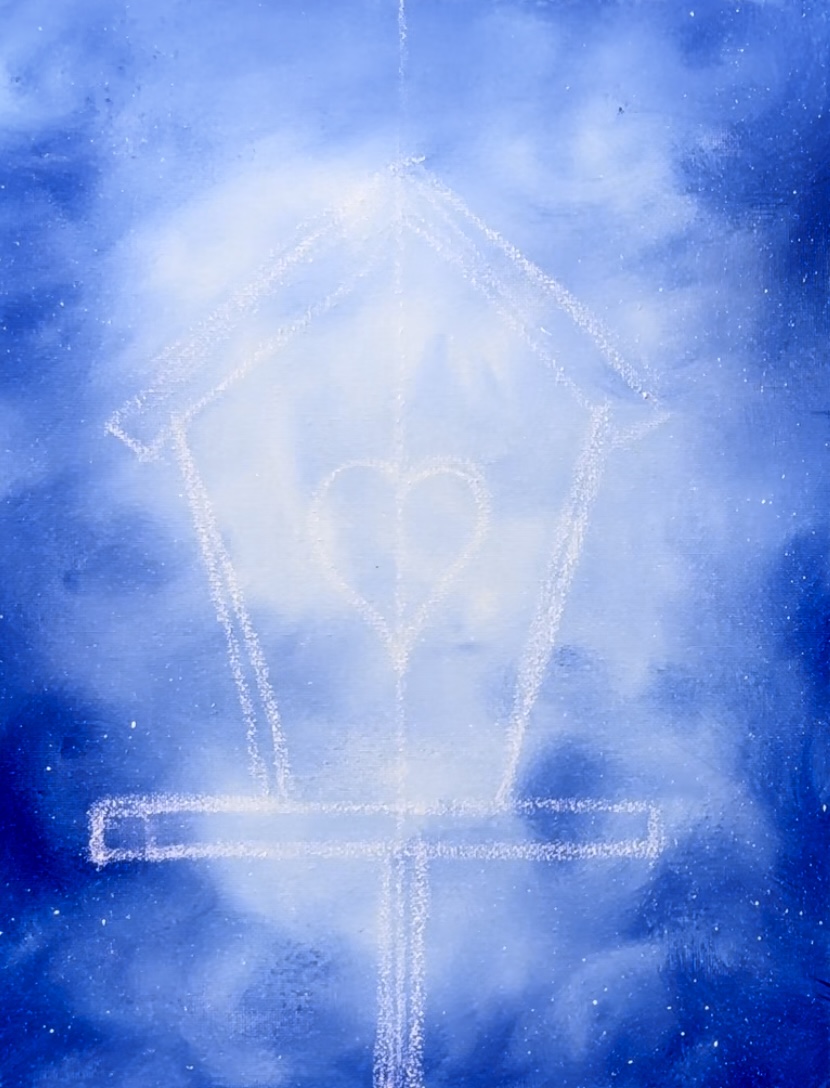
Then draw a heart in the center.
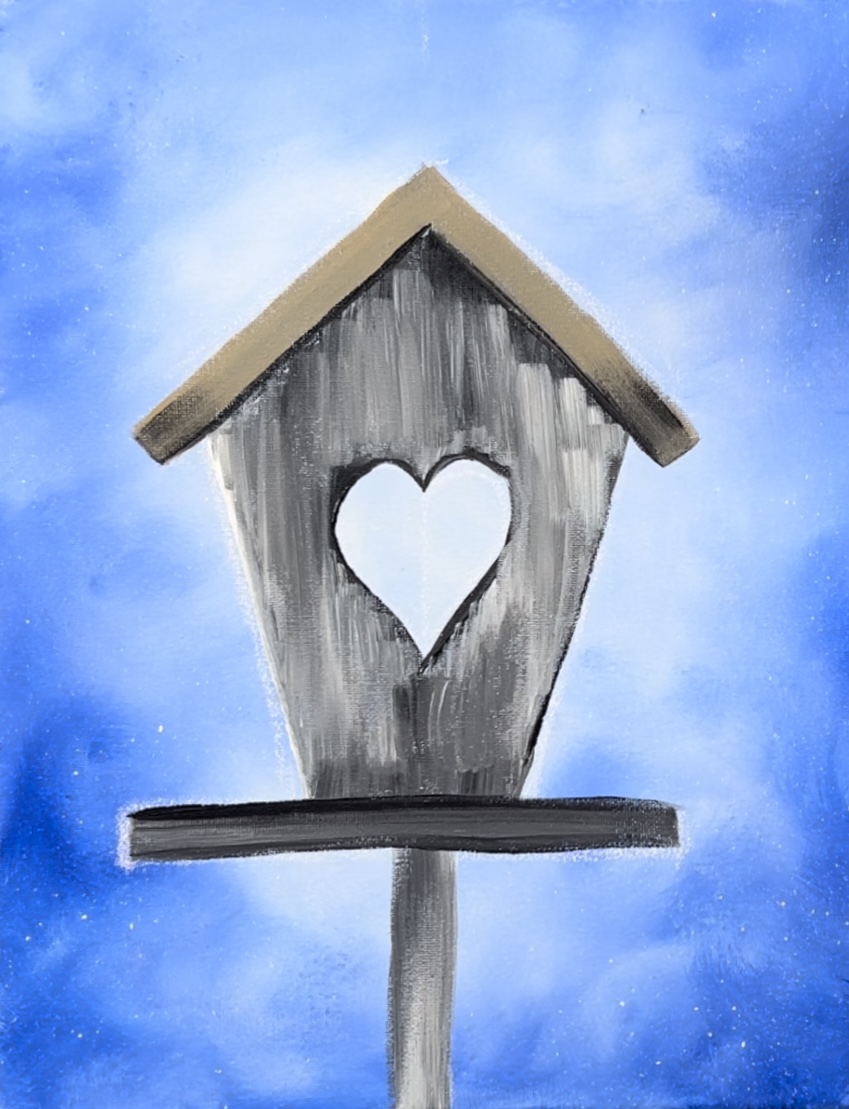
3. Paint The Birdhouse
Load your palette with titanium white and mars black. Use a 12 bright brush to paint the entire birdhouse. Do this with all up and down strokes. You want to create a medium to dark brown.
Double load your brush in about equal parts titanium white and black.
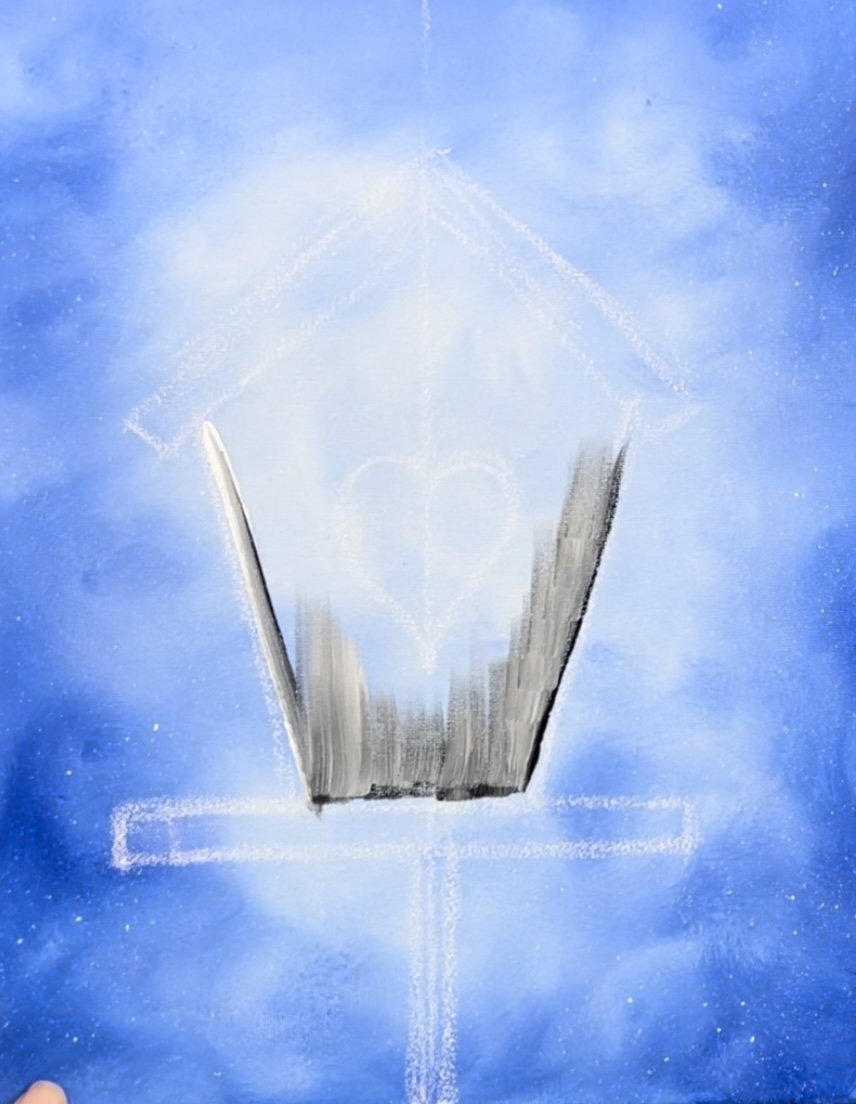
Use the tip of your brush to outline the edges of the heart and birdhouse shape. Keep the rest of the strokes going in full width vertical strokes. You want your black and white to blend together on the canvas.
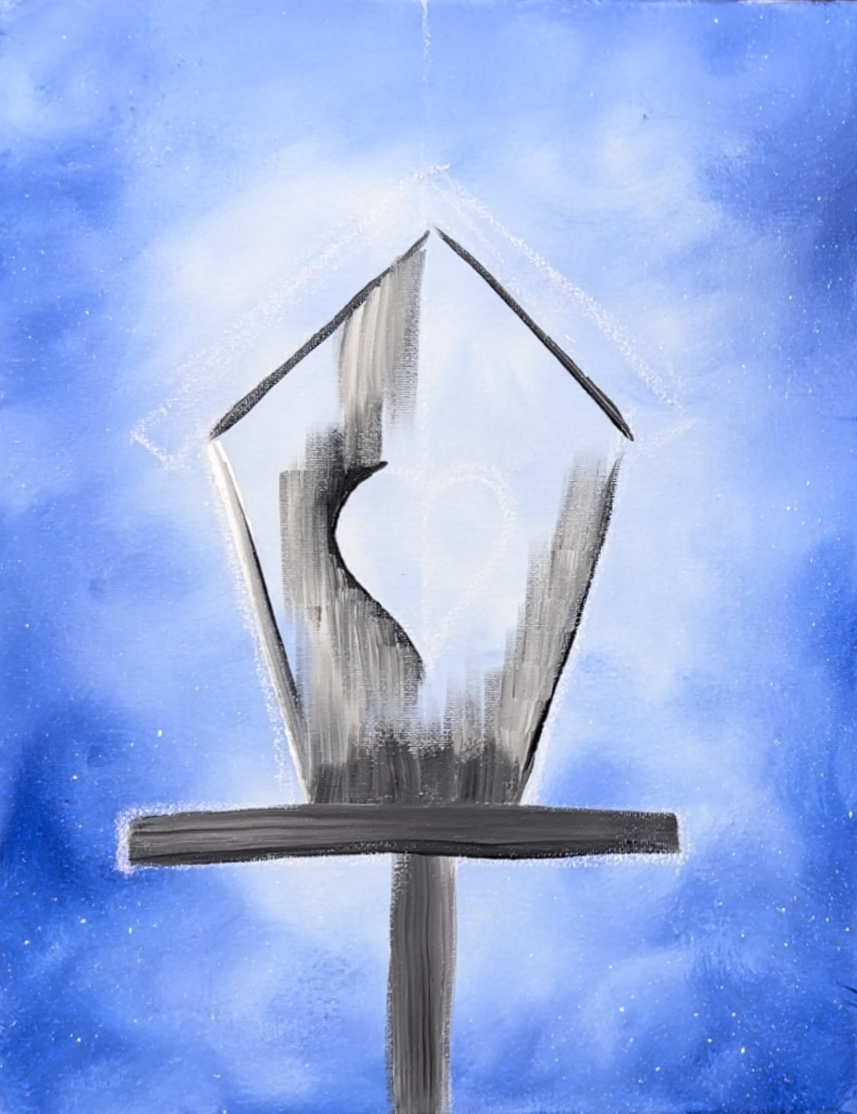
Some areas might be slightly darker and some slightly lighter but overall, it should be a medium to dark gray. Also, try not to over blend your colors. When you have the “un blended” look, it gives it that “faux wood” look.
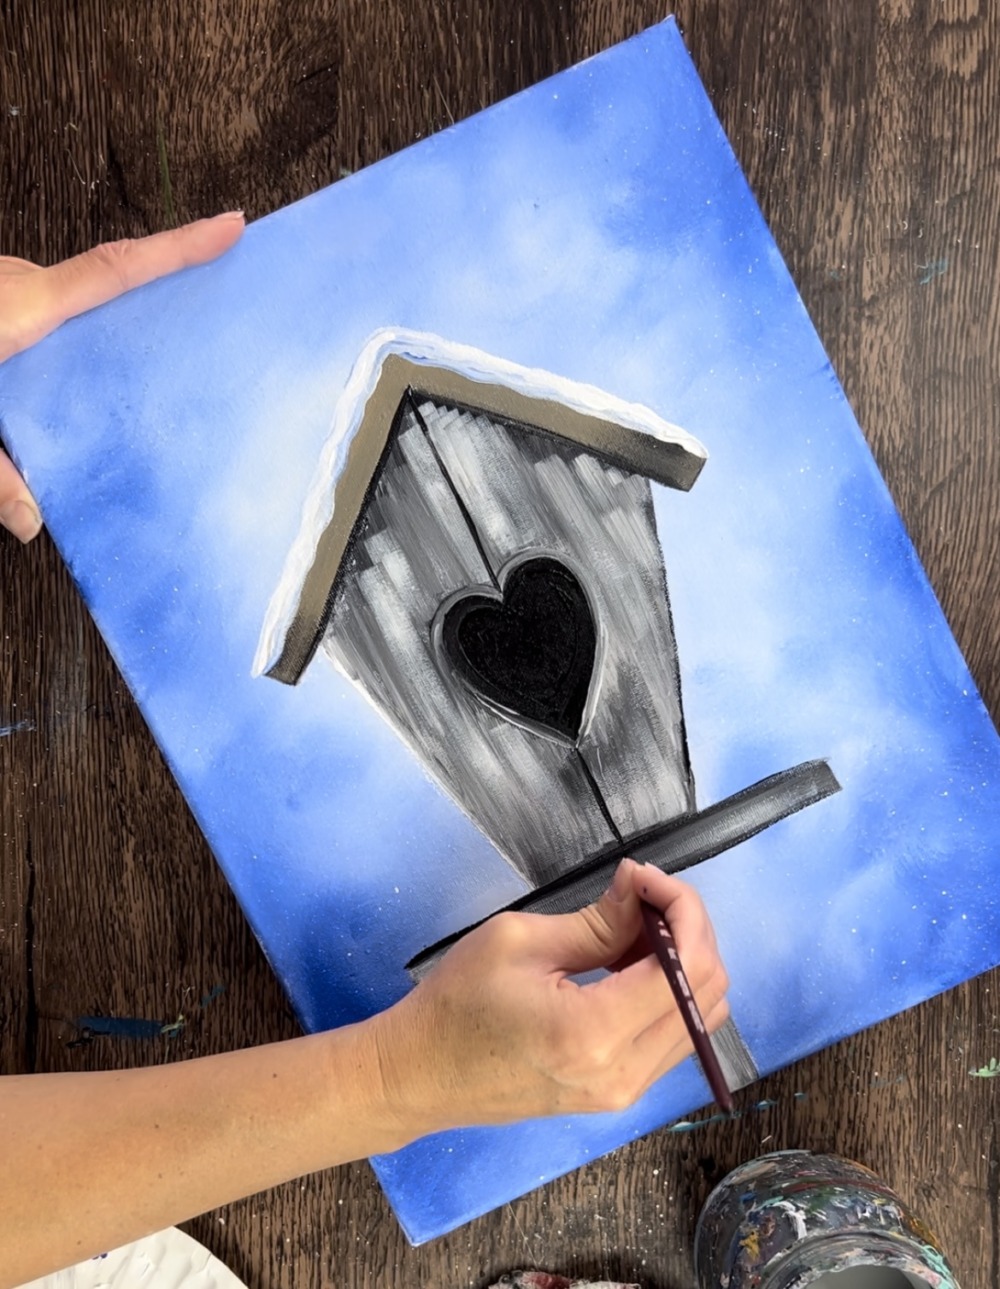
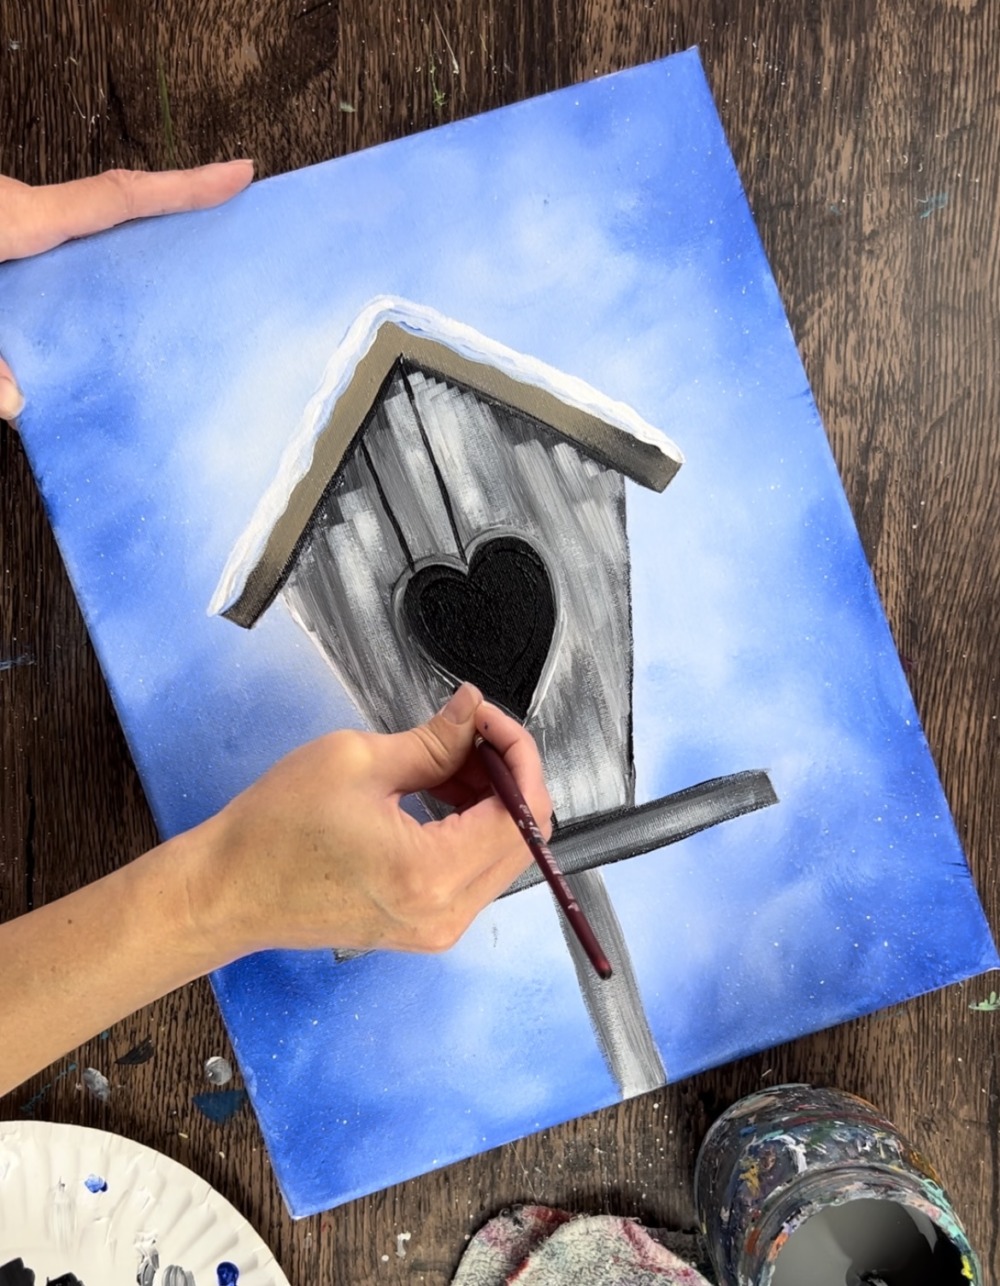
Paint the pole and the horizontal ledge. The ledge is painted using horizontal strokes and the post is painted using vertical strokes.
For the roof, load raw Sienna onto your palette. Mix it with gray to make a gray-brown color.
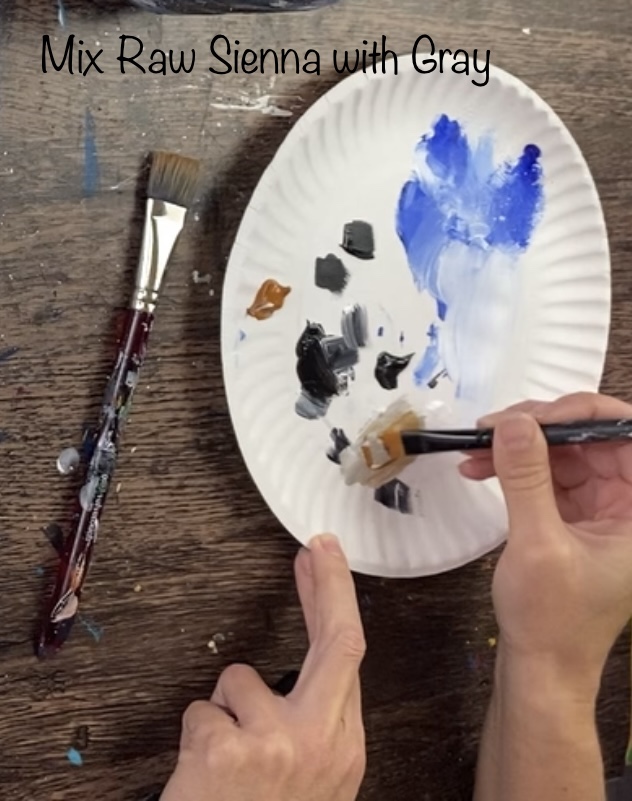
Paint the roof this color. Use the full width of your 12 bright brush and paint in a diagonal direction.
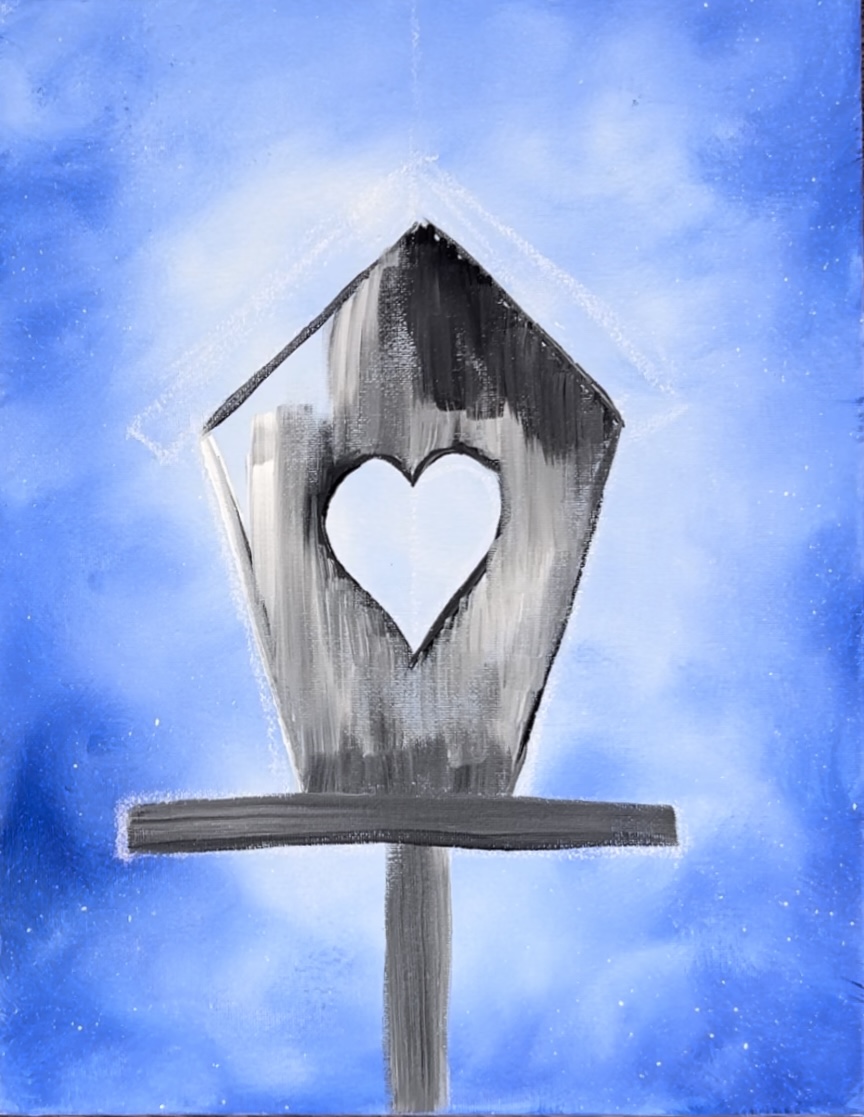
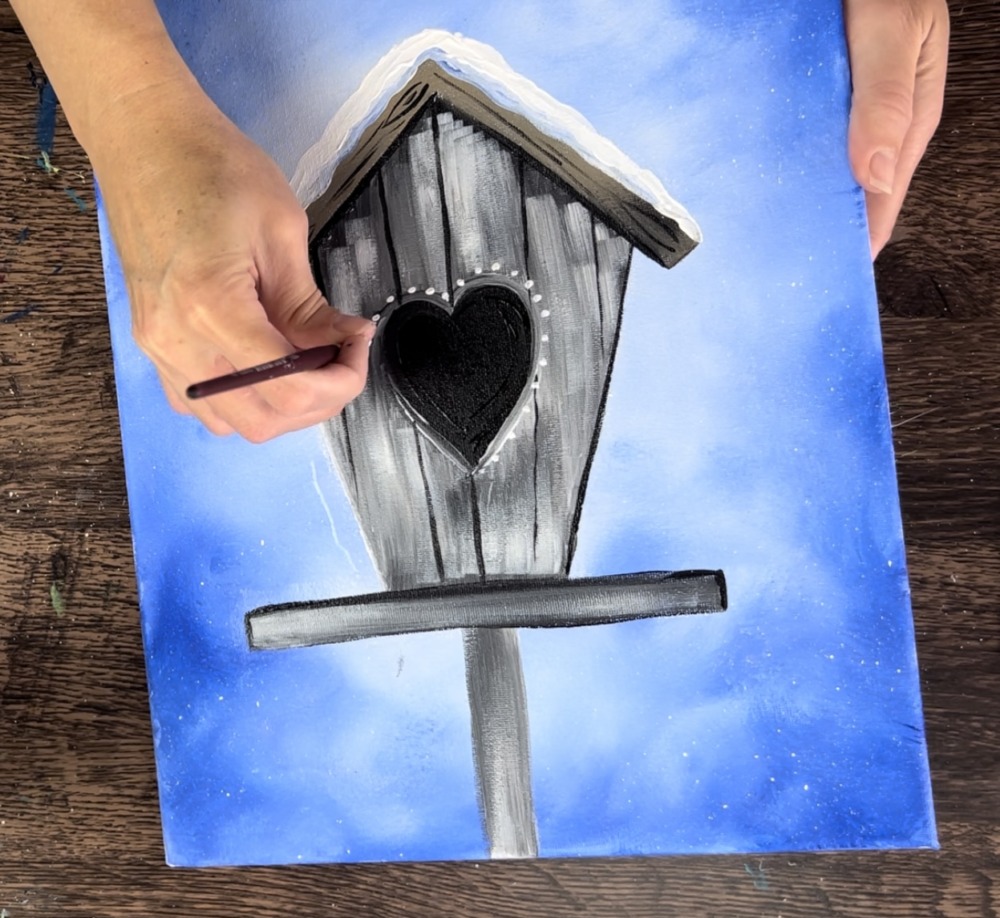
Next, use your round brush to paint the heart a solid coat of mars black.
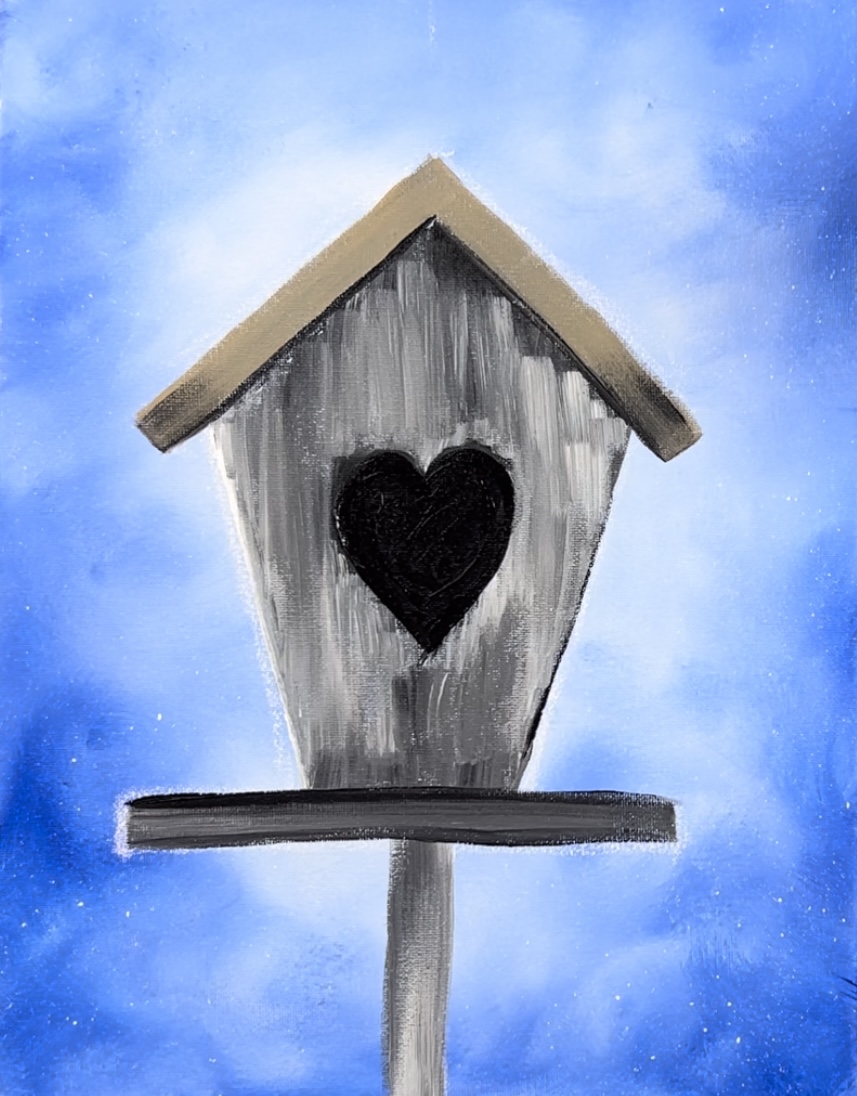
Then outline the outer edge of the heart with gray.

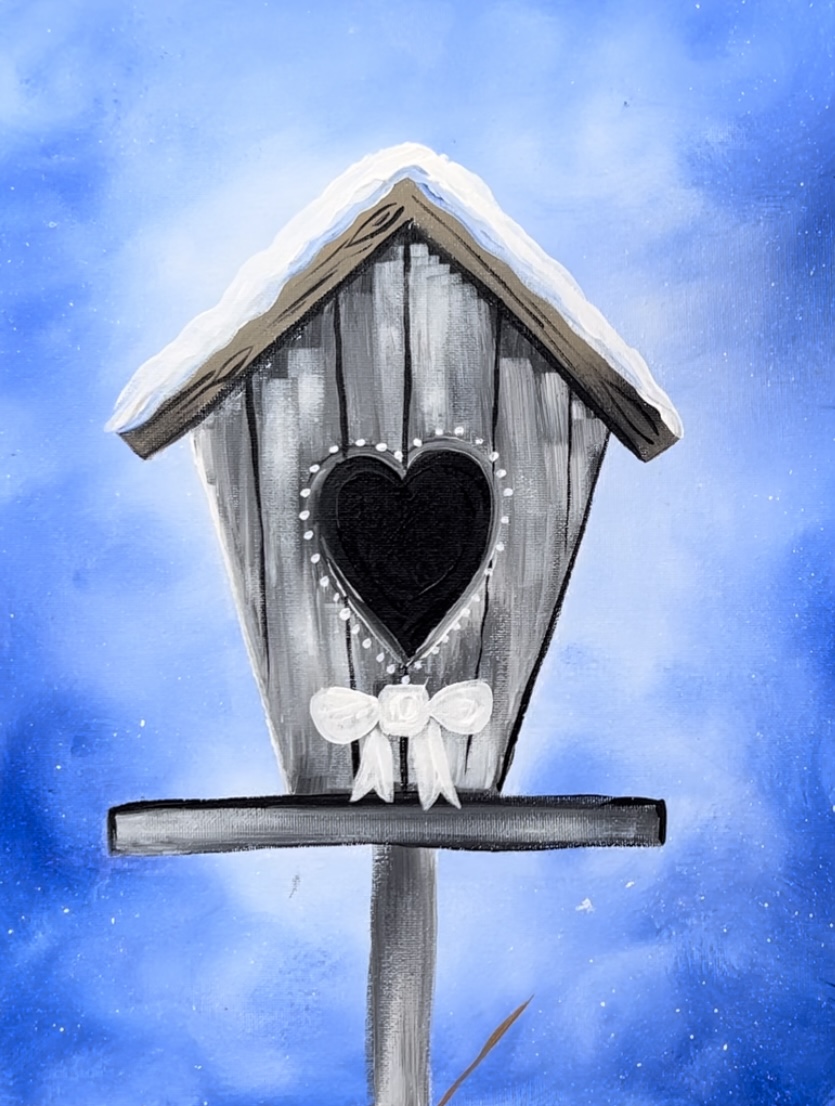
To create more texture on the wooden house, dry brush a titanium white layer over your wood in most areas (you don’t have to cover everything). Use the 12 bright brush, load it in a small amount of white and wipe the brush off. Then paint all vertical strokes all over the birdhouse.
This dry brush technique will give the house more of a rustic look.
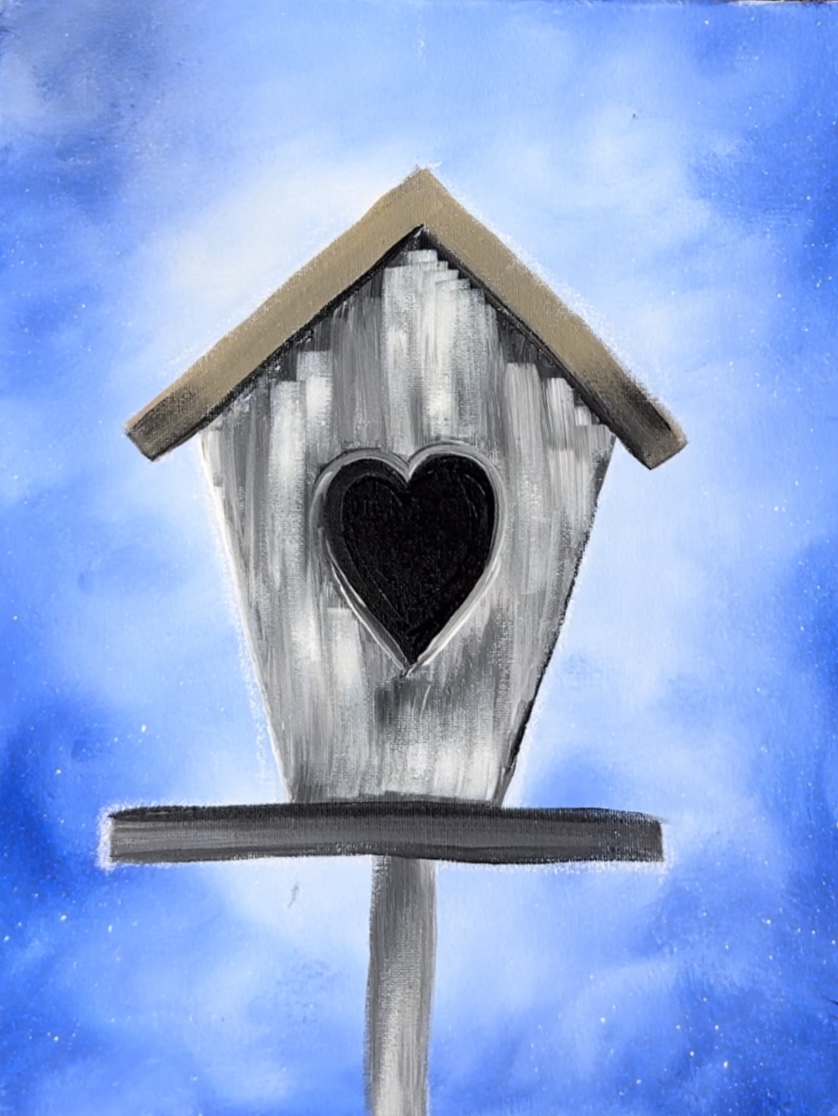
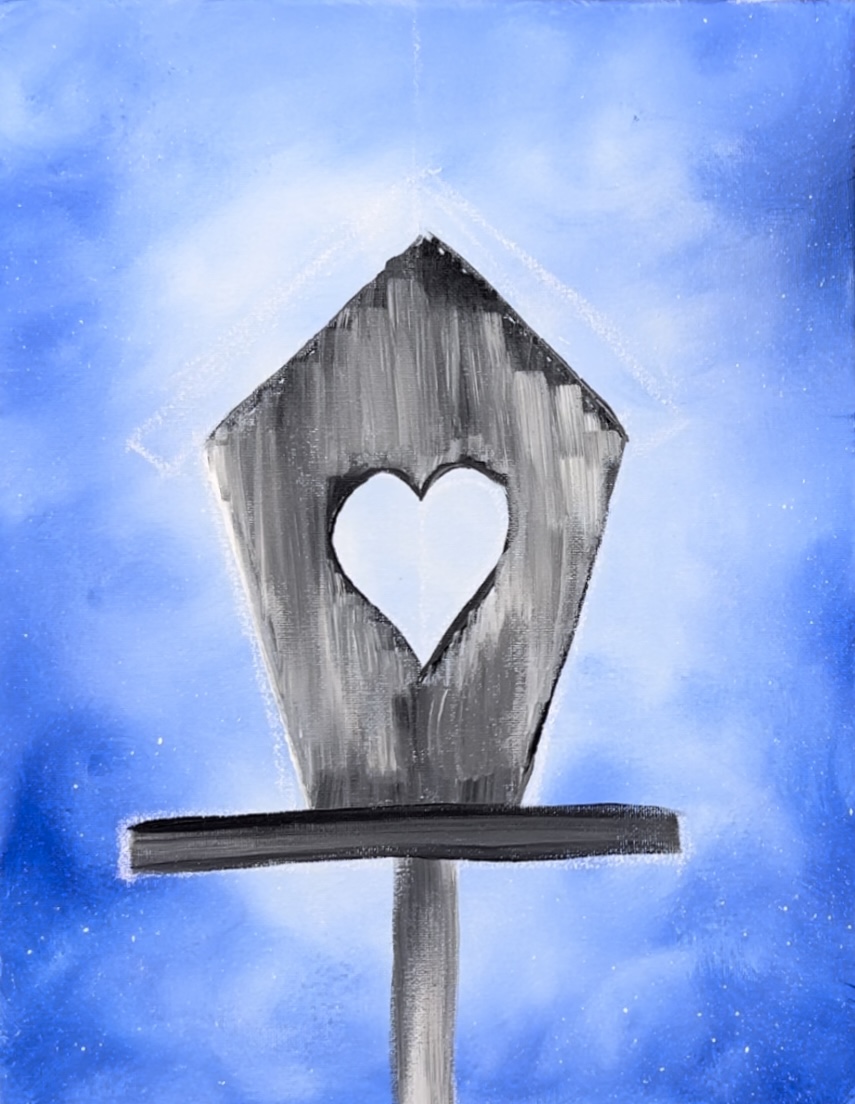
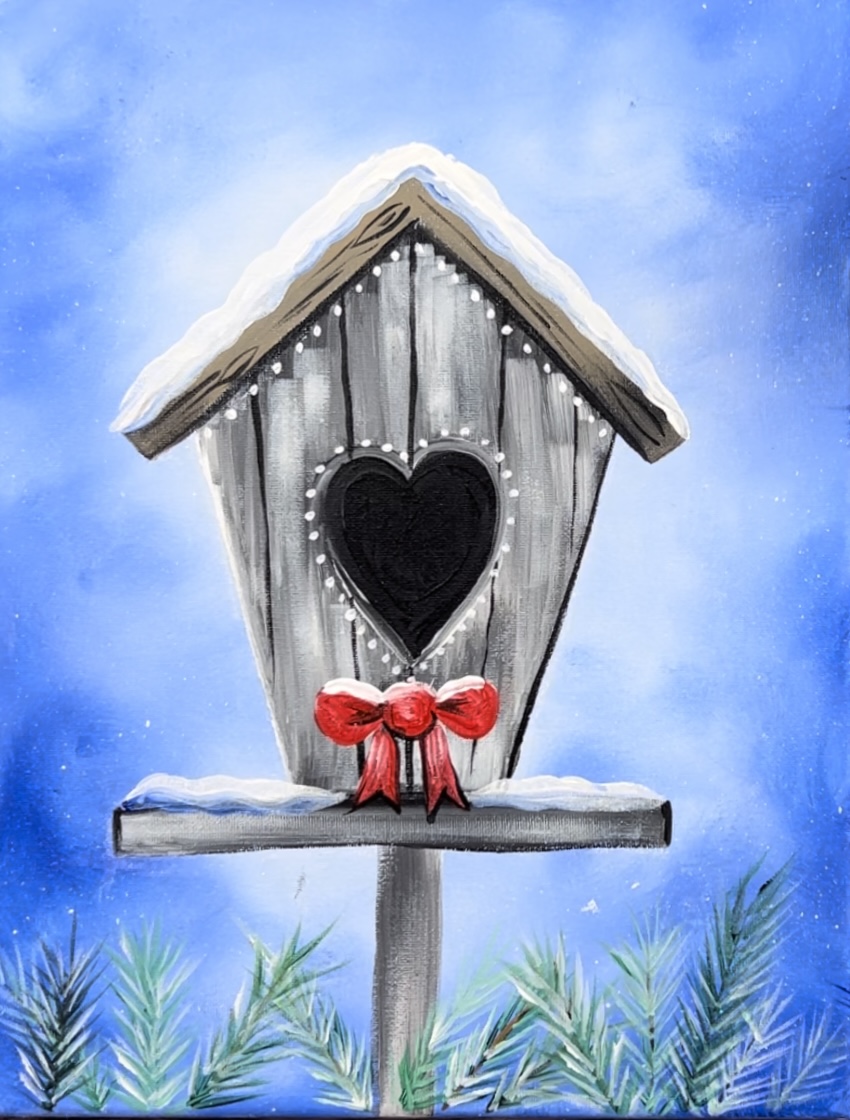
4. Paint Snow On Birdhouse
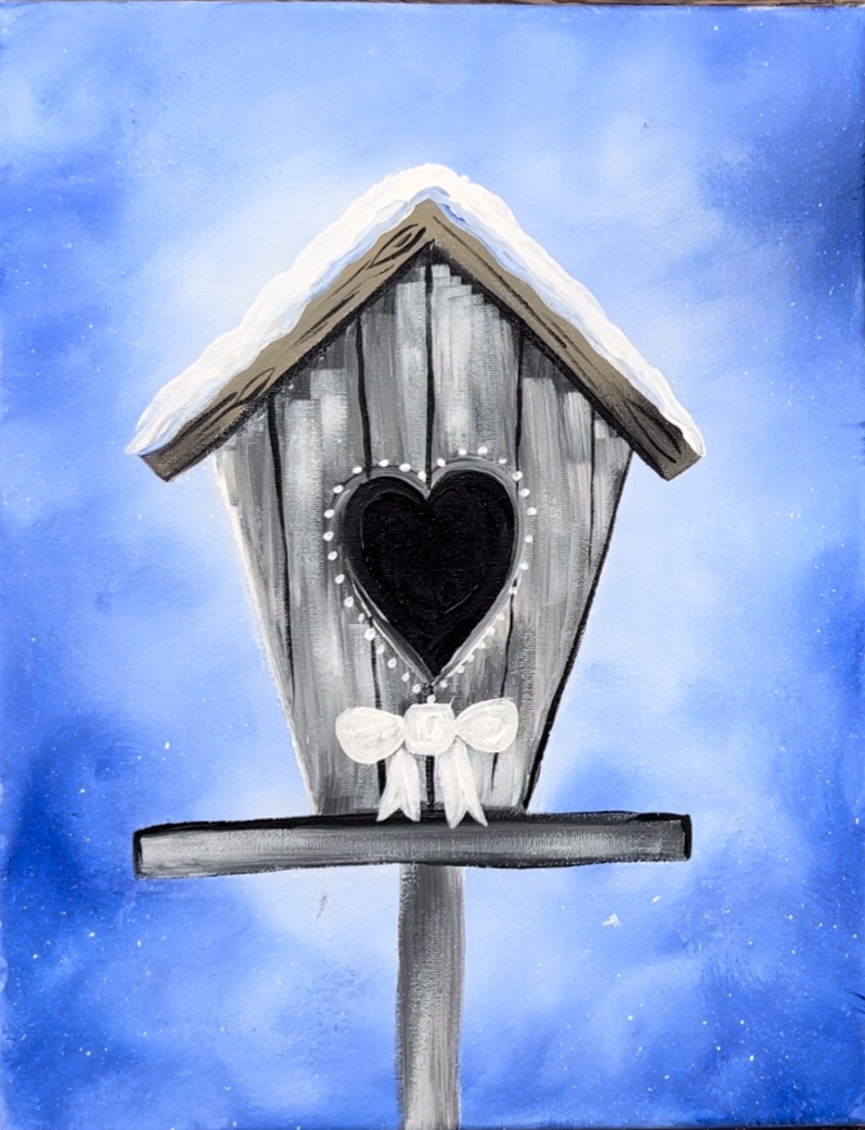
Use titanium white to paint the top edge of the roof to look like a small layer of snow blanketed over the roof. You can use either your round brush or your 12 bright brush.
Then add a tiny bit of ultramarine blue on the bottom of the snow area. Blend it gently up into the snow.
5. Paint Panels
Use your #4 round brush and mars black to paint the panels on the bird house. Start with the peak of the roof and go vertically down through the heart and to the bottom edge of the birdhouse. You can use a ruler if it helps you.
Then paint two more vertical lines on each side of that line. You can measure these lines equal distance apart or estimate them.

6. Paint Decorative Elements
Paint white dots around the heart using the round brush and titanium white.
Then paint the bow. Paint a center circle piece, the two triangular side pieces and then the two strands hanging down.
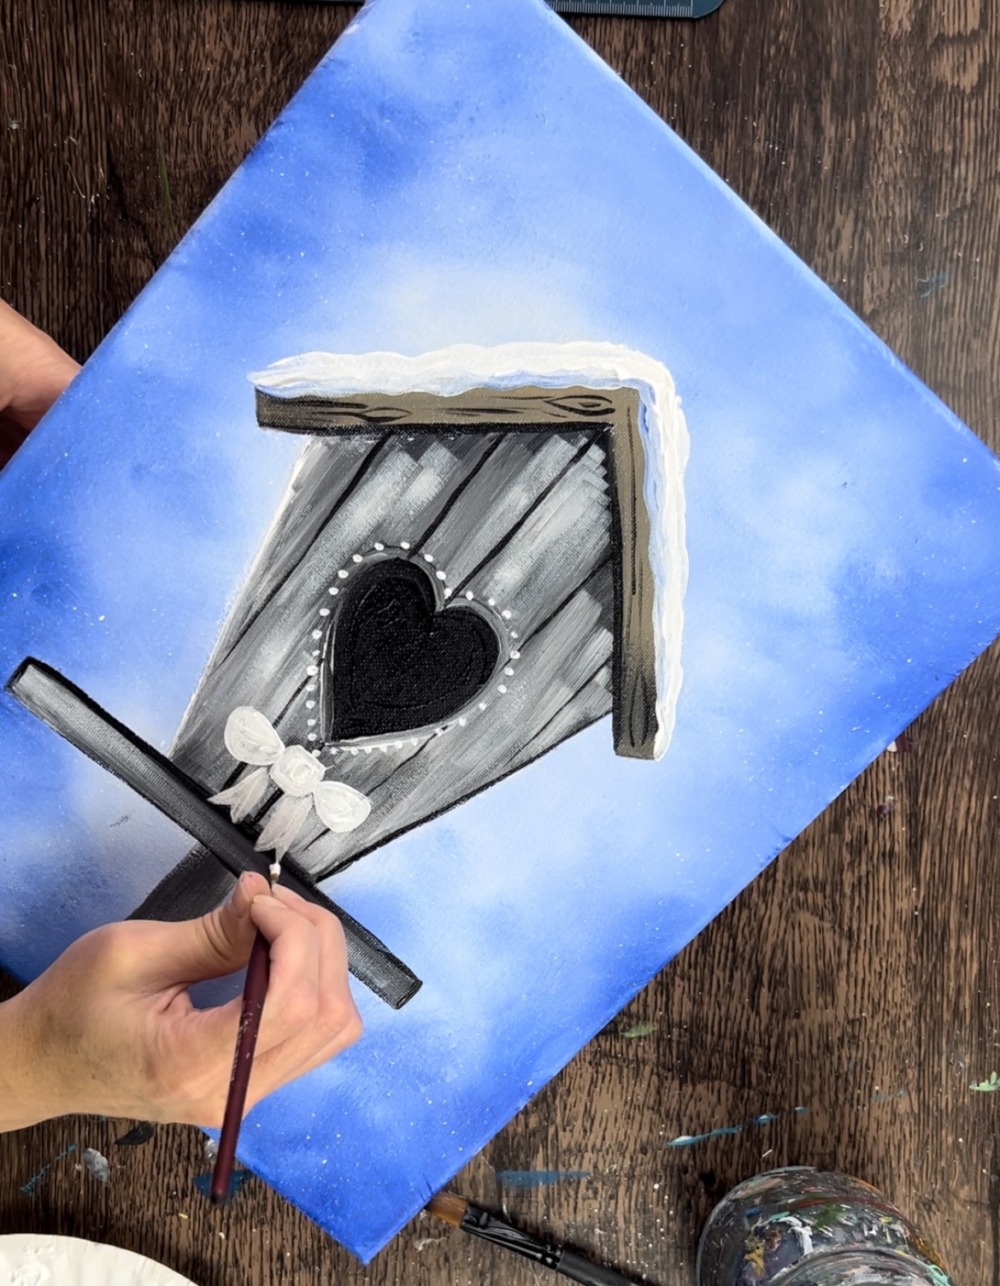
Note: the bow is painted white first so the red will show up bright.
7. Paint Pine Needles
The colors used for the pine needles are: deep green permanent, raw Sienna and titanium white. Additionally, I recommend using a #12 bright brush to paint these.
Start with raw Sienna. Load your #12 bright brush into the raw Sienna and make a thin line using just the vertical tip of the brush.
Then rinse and dry the brush off. Load the tip of the brush in deep green permanent and titanium white (about 50-50 of each color but doesn’t have to be exact). Use just the tip of the brush to paint each individual pine needle.
I recommend starting at the bottom of the stick and working your way up. Paint each pine needle line individually going in a diagonal direction pointing upwards.

You can add a second and third layer to your pine needle to create variation in the color. For example, you can paint pine needle strokes that are just the green and others that are the white. This will give your pine needles a frosted look.
Repeat this process for each other pine needle branches. Paint them all throughout the bottom edge of the canvas.
Paint your pine needle branches going different angles and overlapping each other. Be sure to vary your colors. Some may be darker, some lighter. You can also mix some of your raw Sienna into the green to help get different tones in the green.
It may also help to paint all the center line twigs first and then add your pine needles.


8. Paint Bow Red
Land your #4 round brush in cadmium red medium hue. Then paint the white bow red.
Use your round brush to add some highlight and shadow in the bow. Paint the center part slightly black. Paint the top parts of the bow slightly white and blend it into the rest of the red.
9. Paint More Snow
Use your round brush to paint snow on the top part of the ledge and on the top part of the bow tie. Add a layer of titanium white first. Then blend a small amount of ultramarine blue on the bottom of the snow and blend it up for the shadowing.
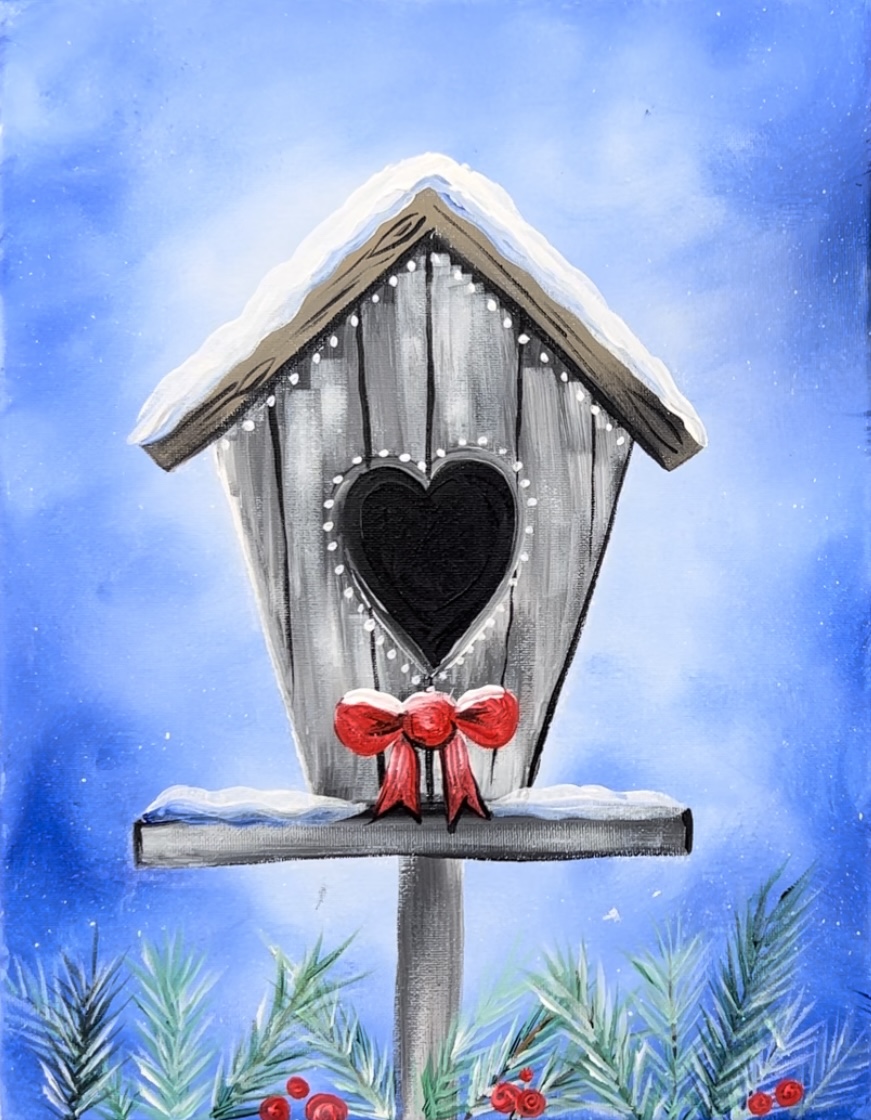
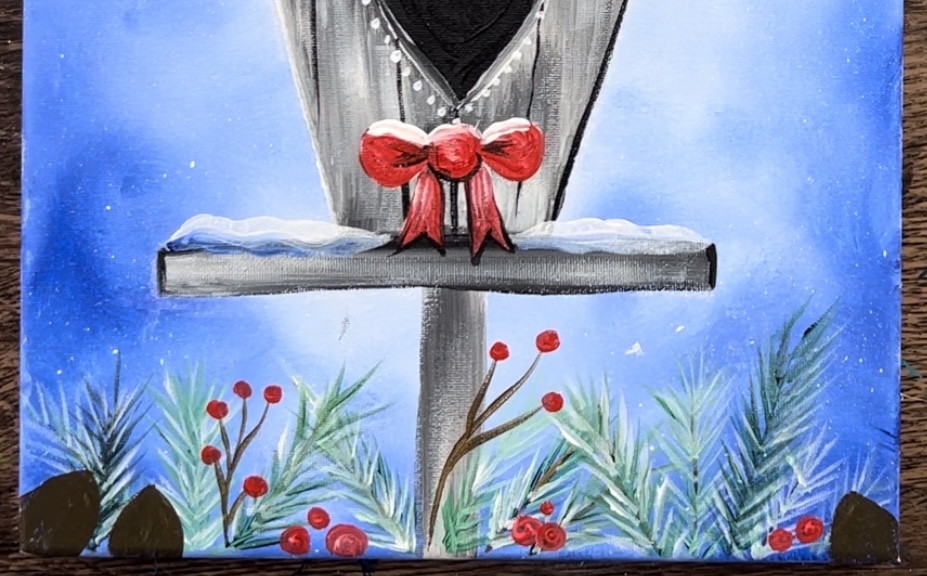
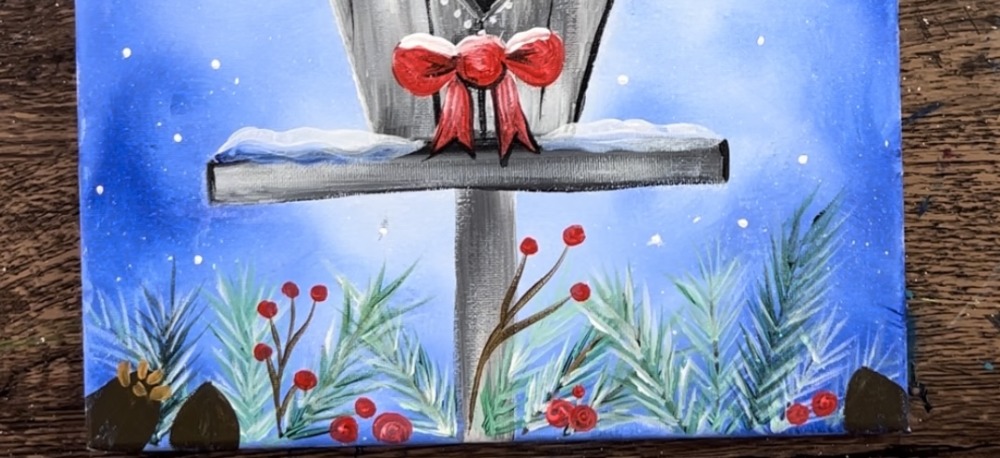
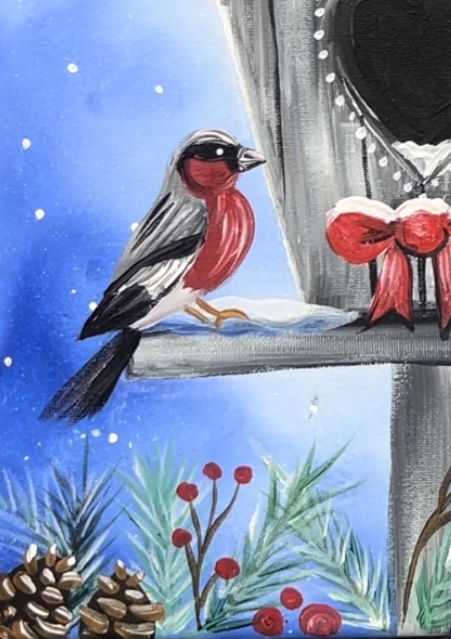
10. Paint Berries
Use your round brush and the cadmium red medium hue to paint small clusters of circles on the bottom. Paint them in groups of two or three.
Then use your raw umber to paint sticks. Note: You can mix a little bit of black into the raw umber to darken it up.
Paint more berries on the tips of each of the sticks.

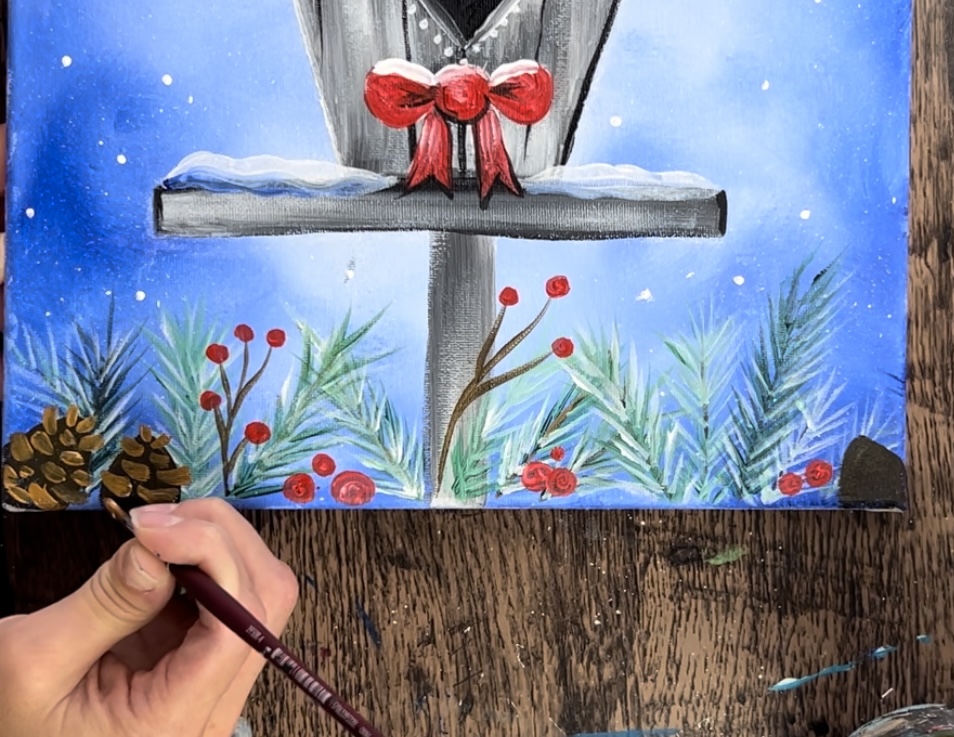
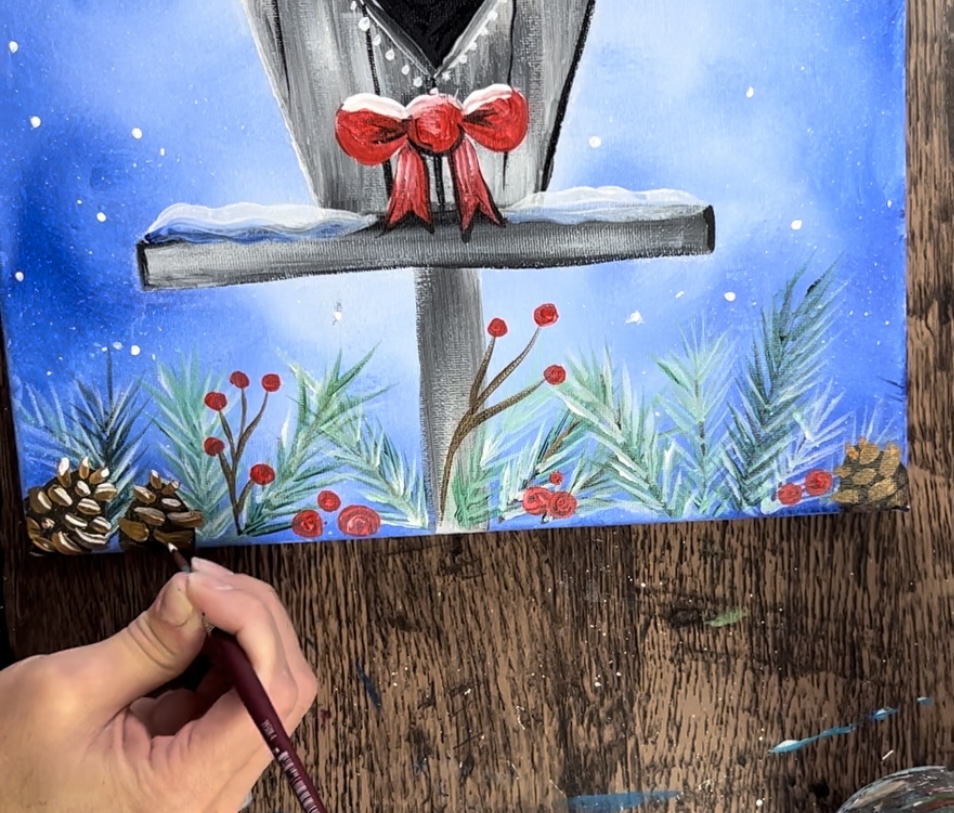
11. Paint Pinecones
These decorative pinecones are done in three layers. The first layer is a dark brown for the overall shape of the pinecone. The second layer is a light brown for the individual scales. The third layer is a layer of snow on top of the individual scales.
To do the first layer, mix a dark brown on your palette. Mix about 1 part blue to 3 parts raw Sienna.
Then use your #4 round brush to paint 3-4 pine cone shapes. I did my pinecones at the very bottom of the canvas. And we only see half of the pine cone (or the top 3/4 of it).
Let the first layer dry a little…
Load your round brush in raw Sienna. Then start at the top. Paint two scales that are sticking out at the top of the pine cone. Then paint individual scales going in a staggered pattern. Each stroke is a small curved stroke going vertically across the pine cone. Leave a lot of the dark layer still showing through.
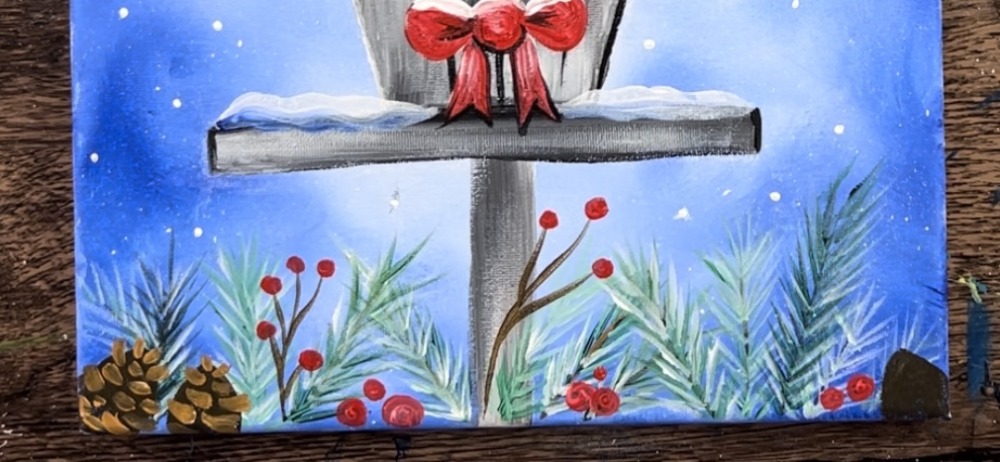
Next, let the raw umber layer dry a little. Then add a layer of white just on the top of each of the scales.

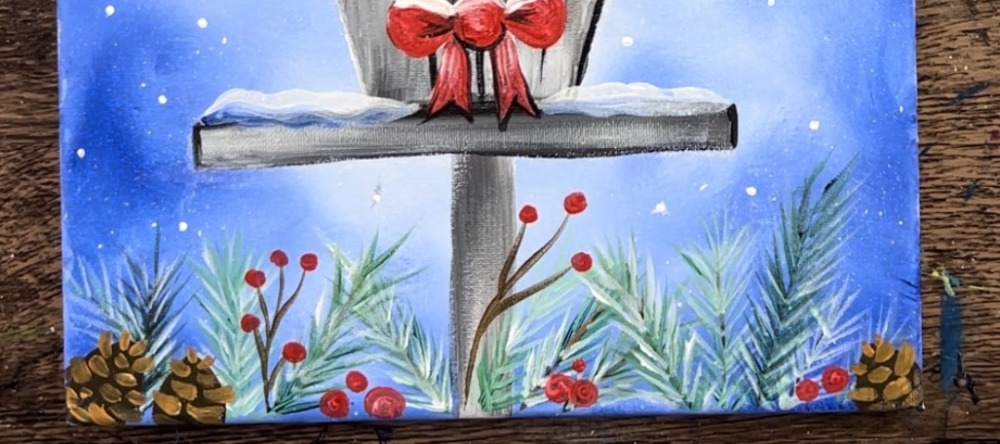
12. Paint Snow Dots
Use a 4 round brush and titanium white. Paint small white dots all over the background.
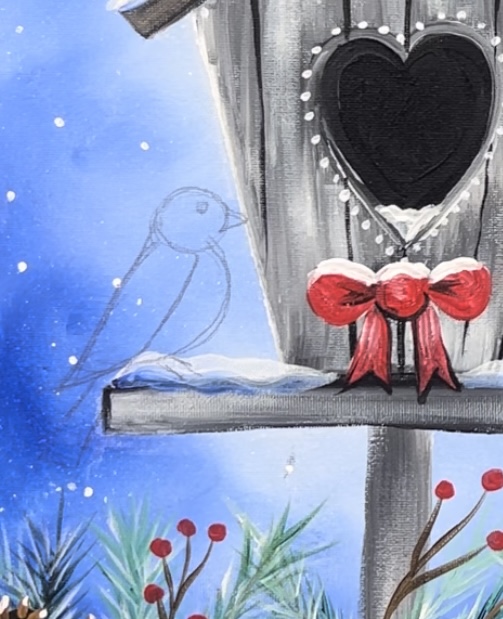
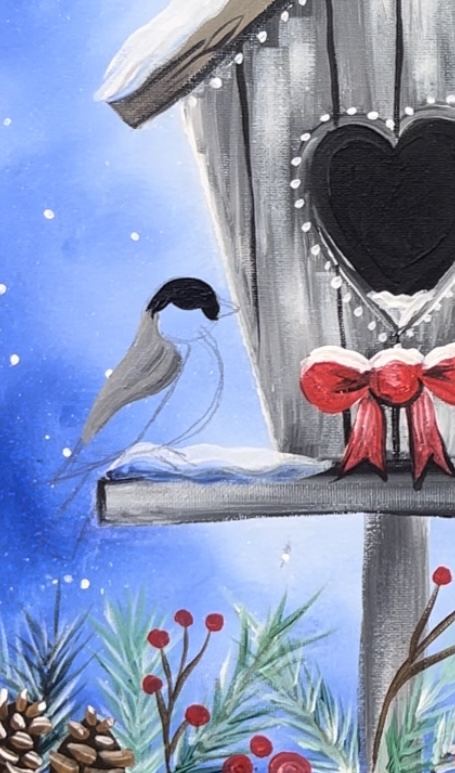
13. Draw Bird
The bird was drawn with a pencil. Lightly sketch the bird on the ledge (or in a different spot if you prefer).
Draw a small circle for the head. Then draw a semi circle for the body and back of the bird.
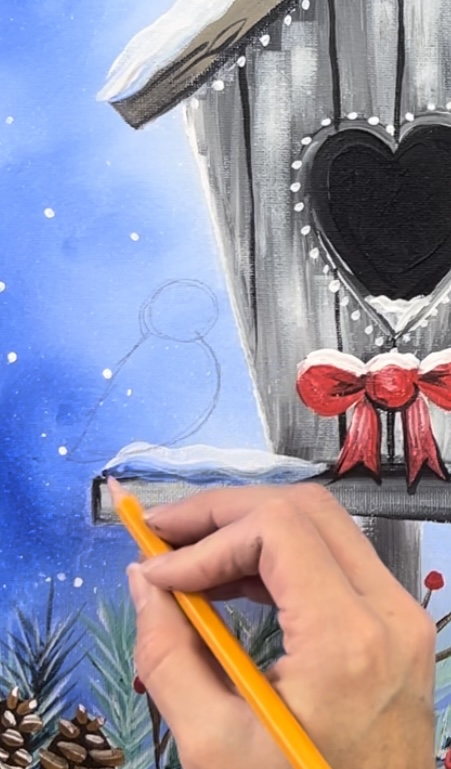
Next, draw the tail as a large rectangle going diagonally.

Then draw the eye as a small circle in the center top portion of the head. Draw the beak as a triangle shape.
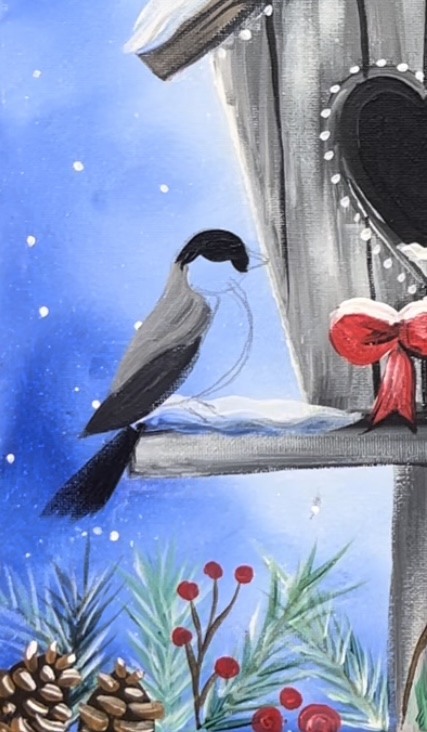
14. Paint Bird
Use a round brush and the colors: mars black, titanium white and cadmium red medium hue.
Paint the top half of the bird head black. Paint the top portion of the wing medium gray (mix 2 parts white and 1 part black to make a medium gray).
Then paint the tail and bottom half of the wing dark gray. Make the dark gray by mixing equal parts white and black.
Then paint the bottom half of the head with cadmium red medium hue.
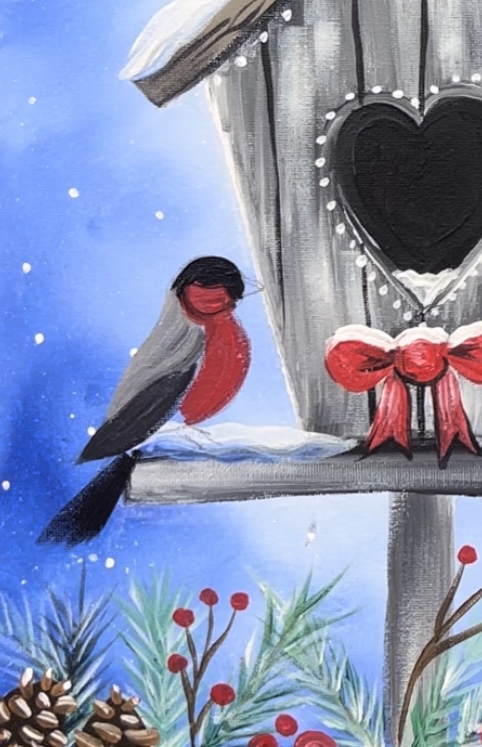
Paint the front part of the bird’s chest with the red.
Then paint white feather strokes on the side of the wing.
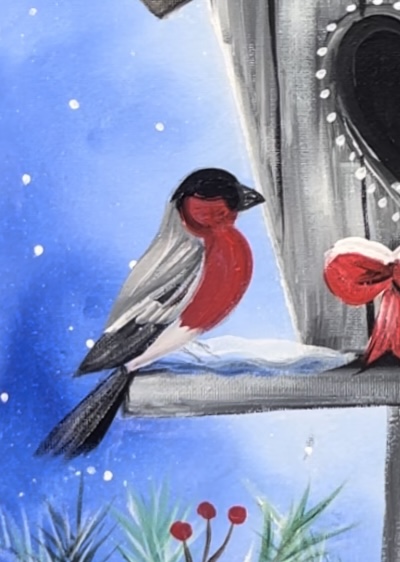
Then paint the beak dark gray.
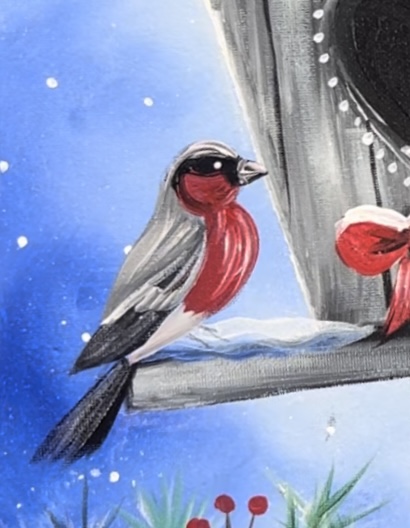
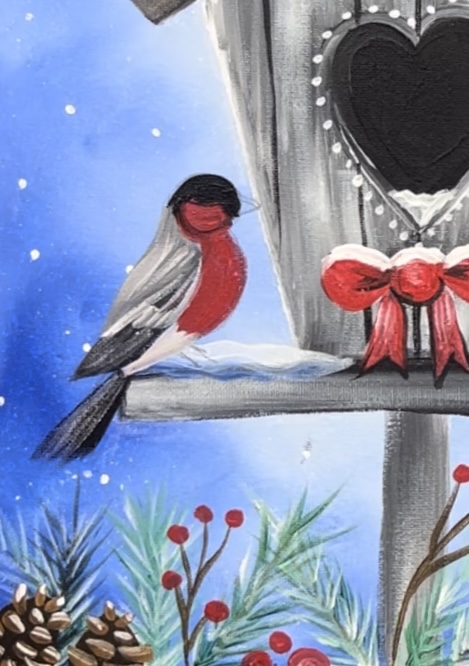
Add a white dot for the eye. Then paint some white feathered strokes on the red chest area.
Use raw Sienna to paint the legs of the bird.

Finished!
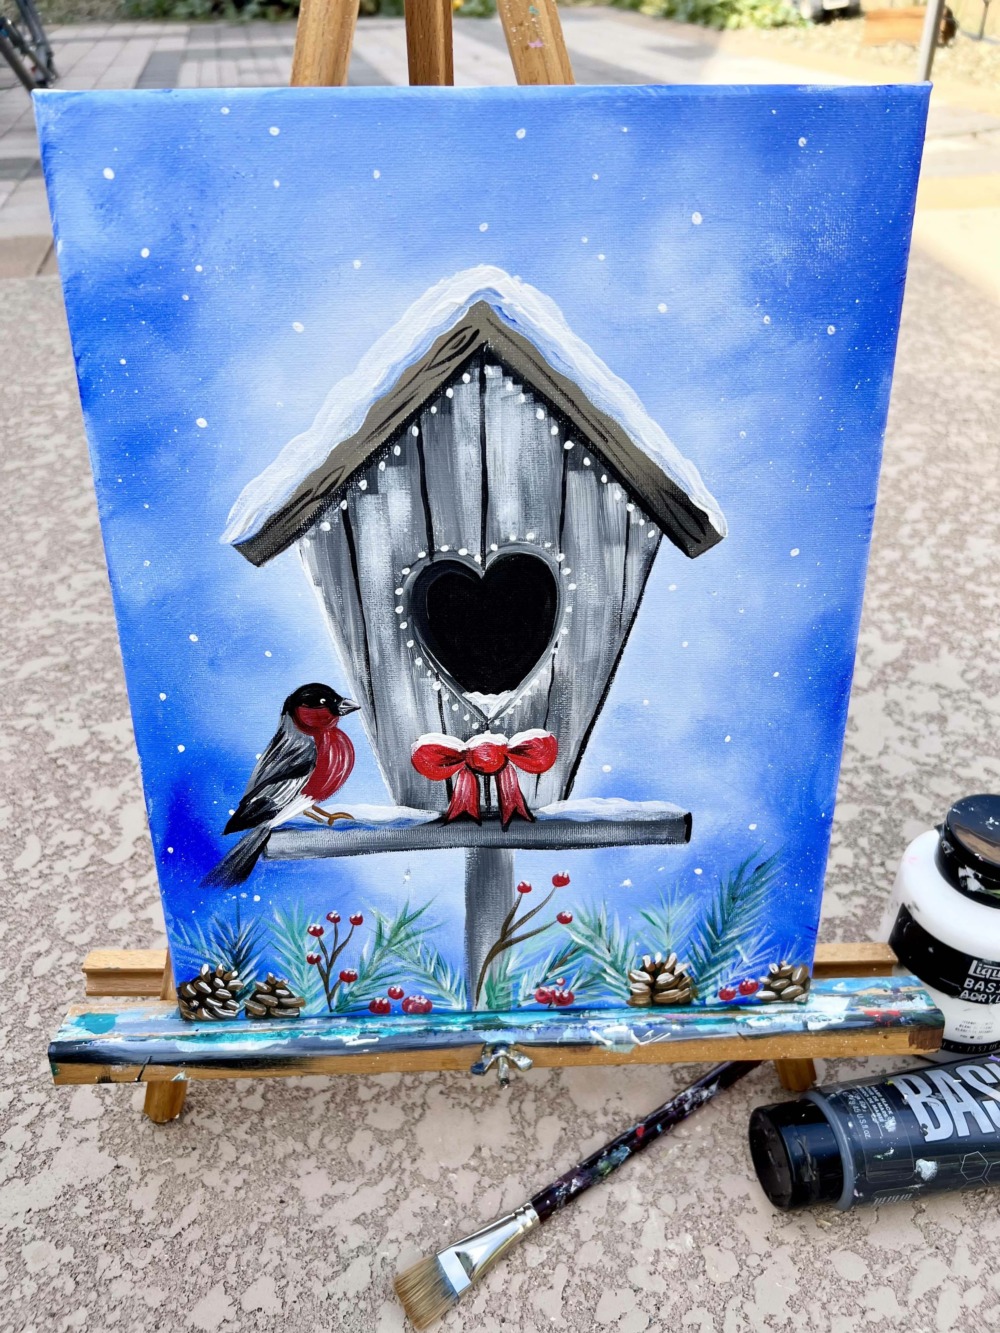
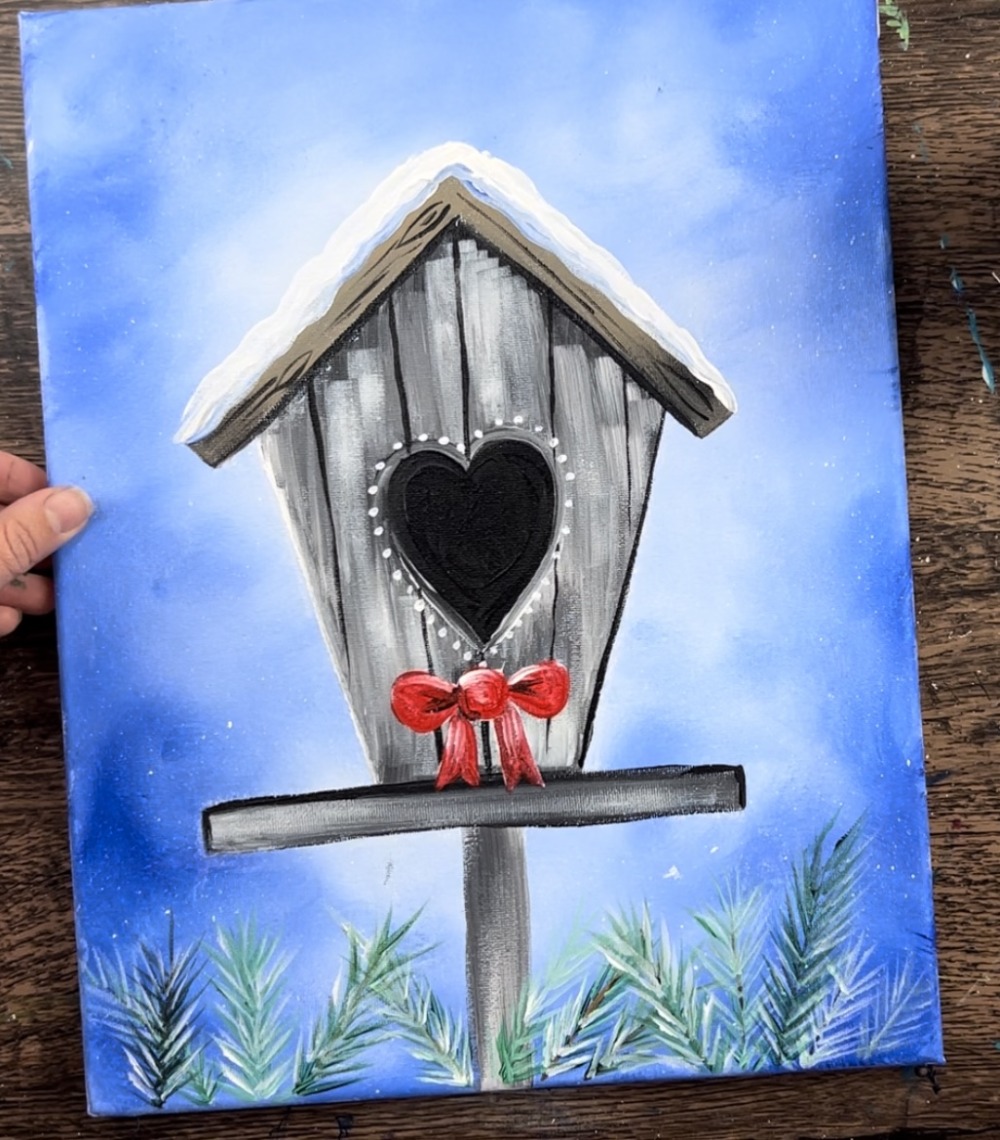
Share Your Art Here


Thank You Tracie for sharing this painting! I had so much fun painting it! Keep it up! Love your paintings!
Happy Holidays!
Serene
Thank You Traice for this tutorial! I had so much fun painting it! Lover your paintings!
Serene
Tracie, I painting this today and it is so cute! Thank you for the clear and easy instructions and for the traceable. I really like the berries, branches and pine cones at the bottom and especially love the easy way you did the pine cones. The pops of red really bring out the painting and tie it all together.