

Would you like to save this?
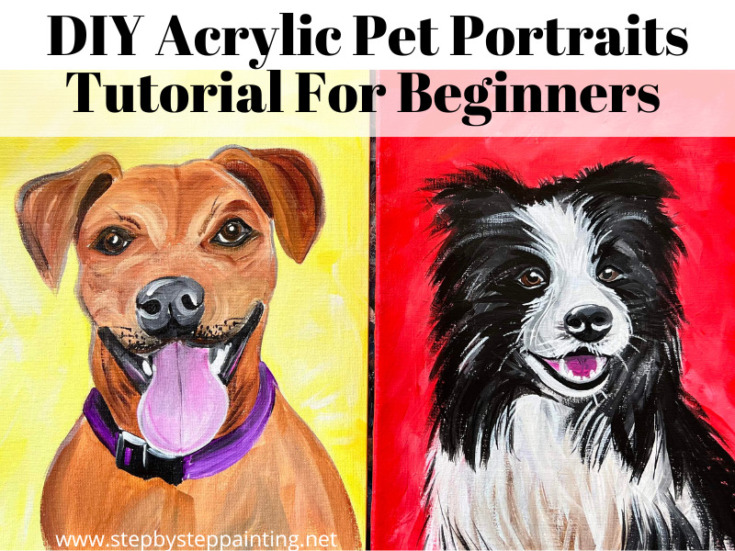
This acrylic painting tutorial will demonstrate how to paint your pet on canvas! Pet portraits are super popular right now! They make for great themed paint party gatherings. It is also a great way to create a memorable picture of your furry loved one that you can hang up in your home! I’m going to show you how to use your photo of your pet to create a painting!
If you don’t have a good photo of your pet, I will show you where to find some amazing royalty free dog pictures you can use for this painting tutorial!
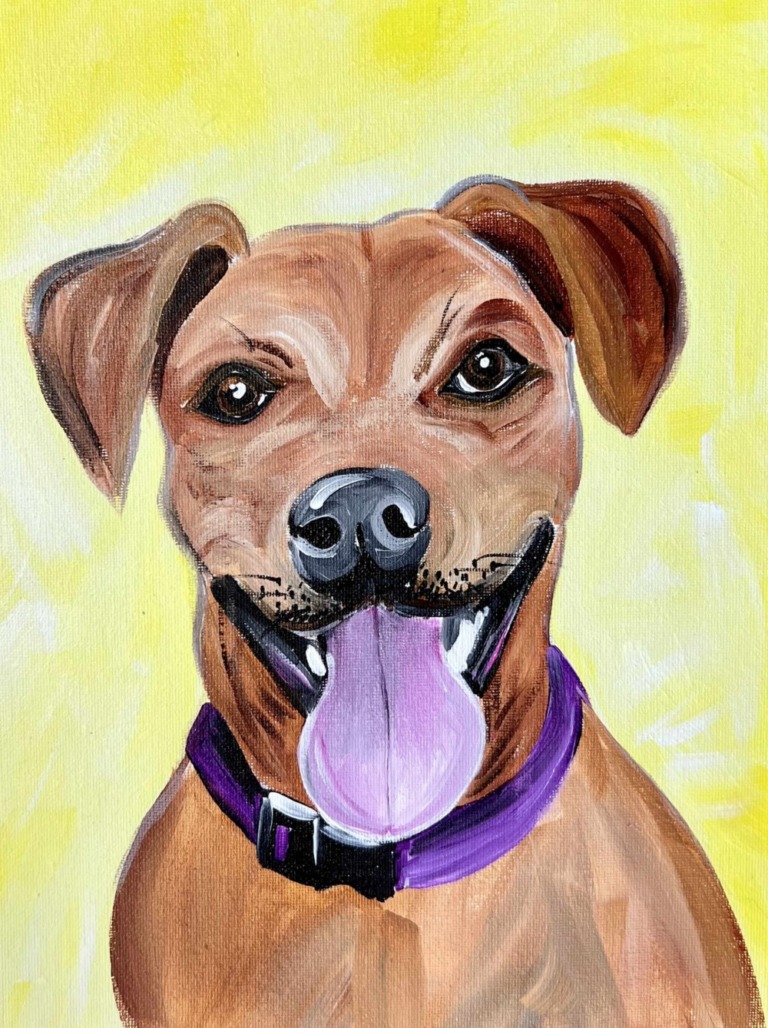
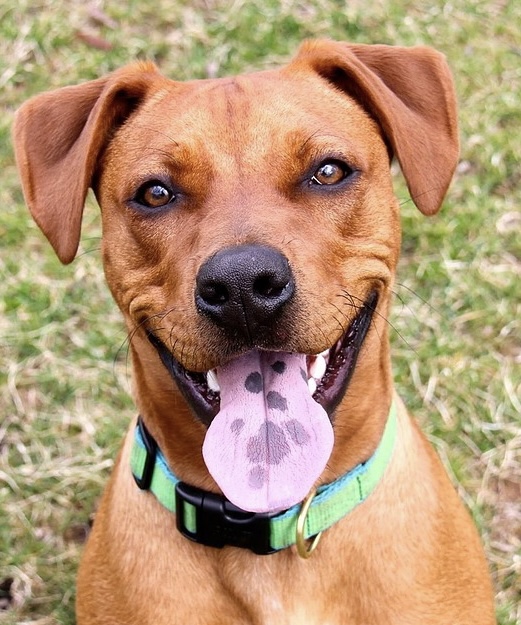
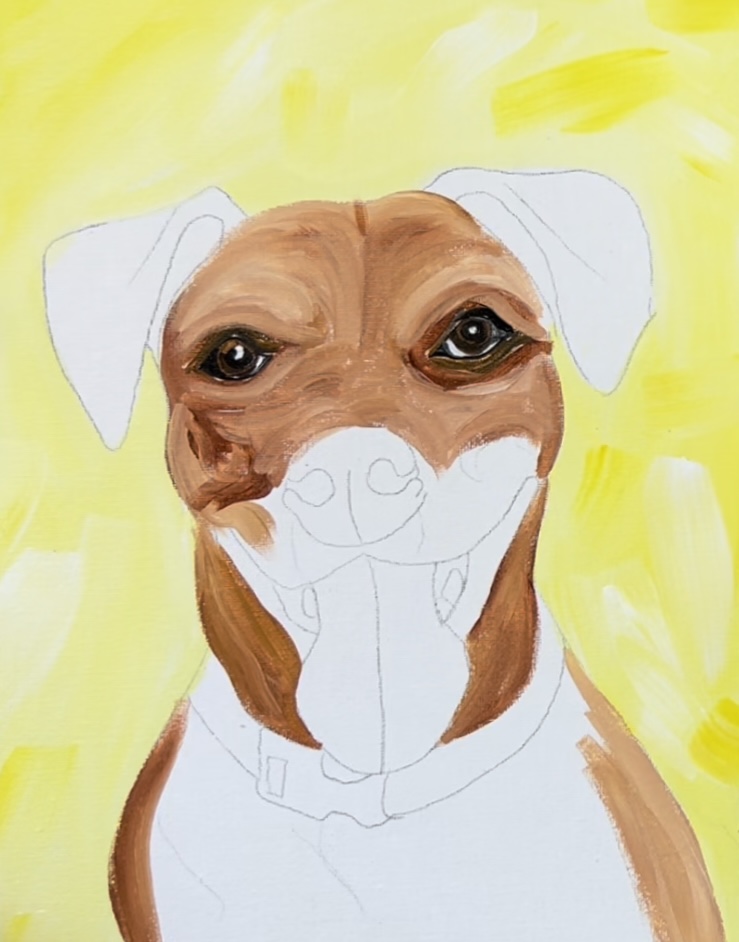
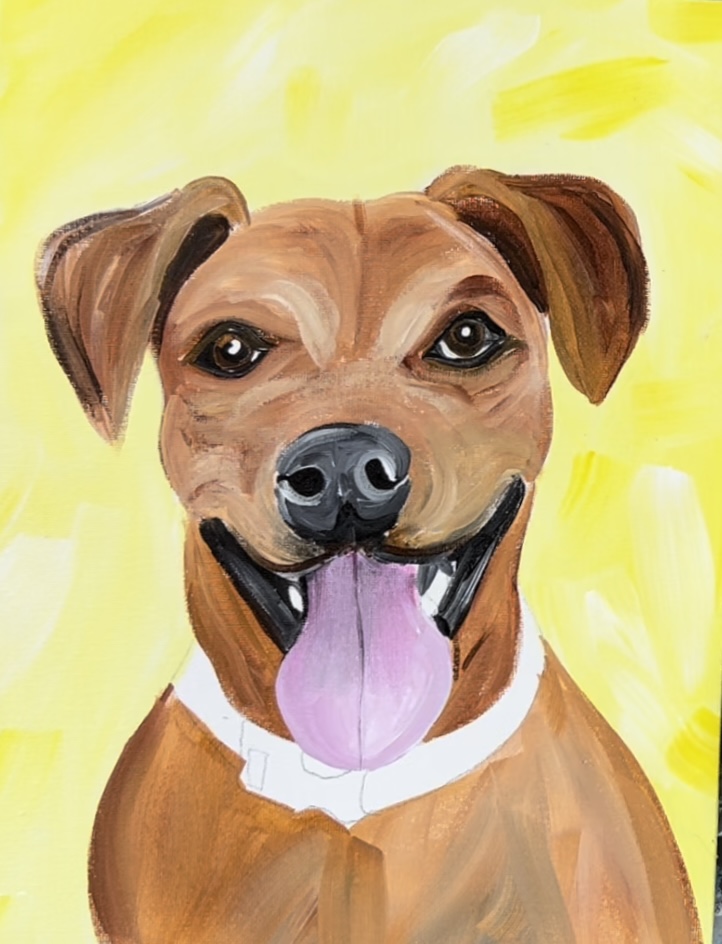
I’ll be painting the brown dog in this tutorial. We are going to make this a bit abstract and almost like an oil painting. Don’t worry about making the dog look real! It’s supposed to be fun and relaxing!
You can simplify them, add fun colors to compliment your furry friend’s personality and even make it a “pop art” style painting by changing the color of the fur to bold and colorful colors.
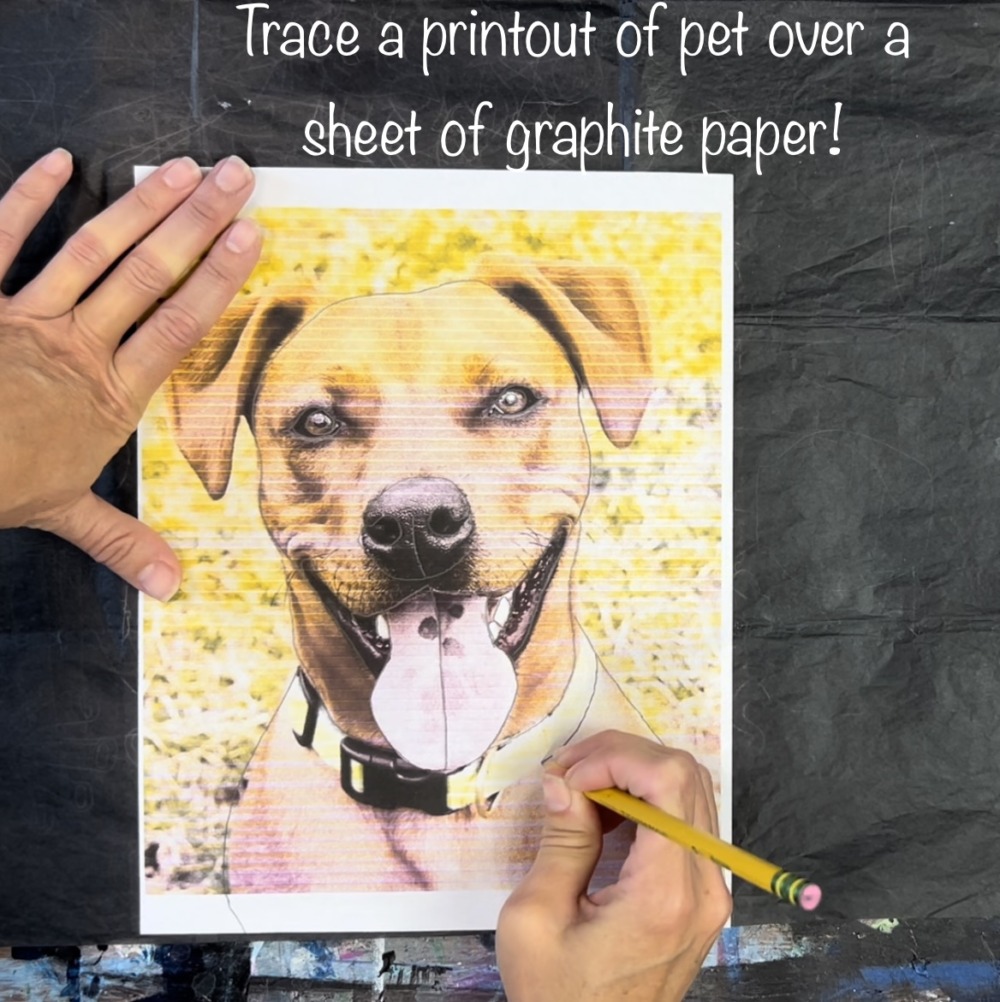
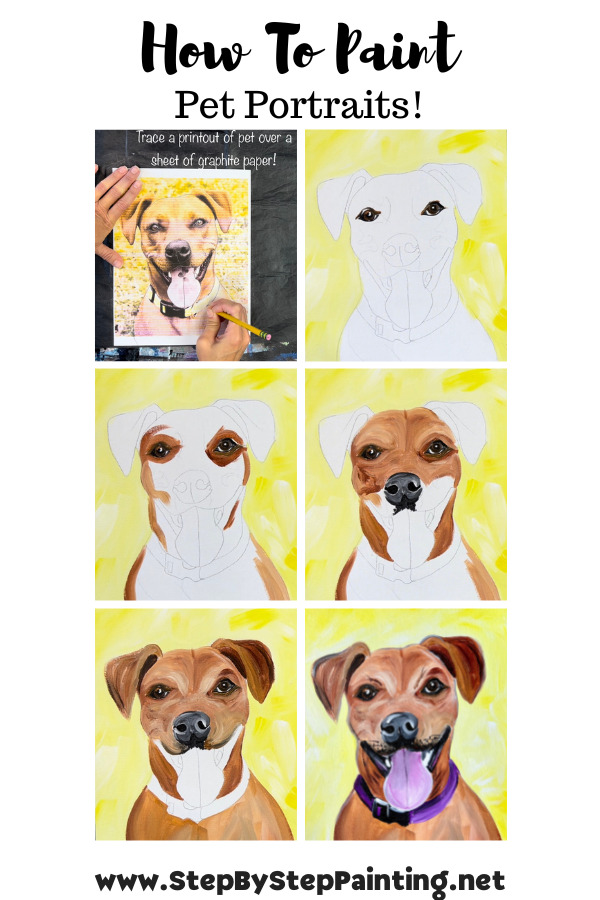
Did you know you can transfer your photo to the canvas? You won’t be transferring every little detail but you can use graphite paper to get the main features such as outline of the head, eyes, nose and ears. This is tremendously helpful for the painting process!
I will be demonstrating in the pictures below and in the video how to paint this cute brown dog with his tongue sticking out! You can use that same dog as well or follow the instructions below for how to get a great photo of your own pet and transfer that to your canvas.
Enjoy and happy painting!
Materials Needed
How To Paint Your Pet - Custom Pet Portrait Tutorial
This tutorial will guide you step by step how to paint your pet in a portrait painting.
Materials
- One 9 x 12 Canvas
- Photograph of your pet (see notes about how to select the best photograph)
- Printer Paper & Printer
- Graphite Paper
- Pencil
- Acrylic Paint
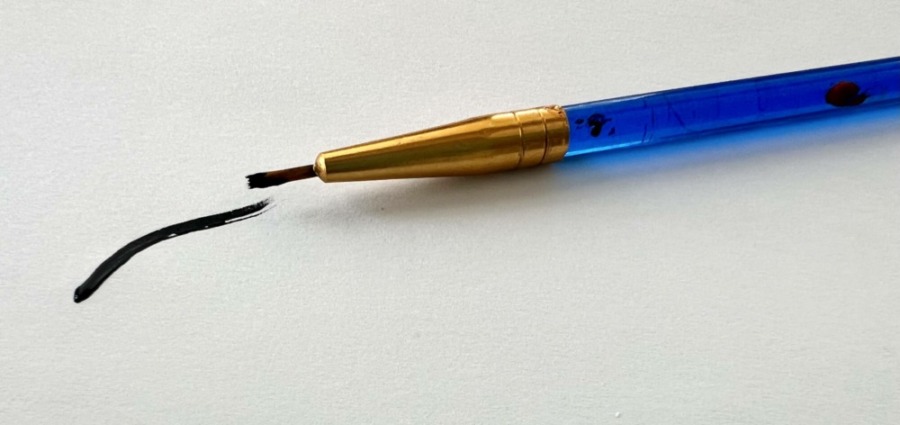
- Brushes
- Optional paint pens for details
Colors - this is going to depend on the color of your pet and the background color you want!
- Titanium White
- Mars Black
- Raw Umber
- Turquoise Blue (what I used for background color)
- Medium magenta (if you are painting a tongue)
Brushes
- 3/4" flat wash brush
- #8 Round Brush
- #4 Round Brush
- 10/0 spotter brush
Instructions
1. Select a good photo of your pet. Make sure that the photo has good "contrast" with very little in the background. Ideally you'll want to have a photograph that goes from the chest to the head. The pet can be looking forward or to the side. Make sure the main features such as the eyes and nose are clearly visible in the photograph.
2. Print the photograph on an 8.5" x 11" sheet of printer paper. Try to get the photograph to fill up the entire paper.
3. Place the photograph print out over a 9 x 12 canvas to position it so it lines up with the bottom edge of the canvas. You will have space around the pet that you can fill with your background color.
4. Lay a sheet of graphite paper below the print out. Use a pencil to trace the outline of the pet. Trace the main features such as the eyes, nose and ears. Trace some of the fur to establish some of the direction the fur is going in. If your pet has other unique features such as a spots, multiple color blocks of fur, etc. make sure you trace all of those as well.
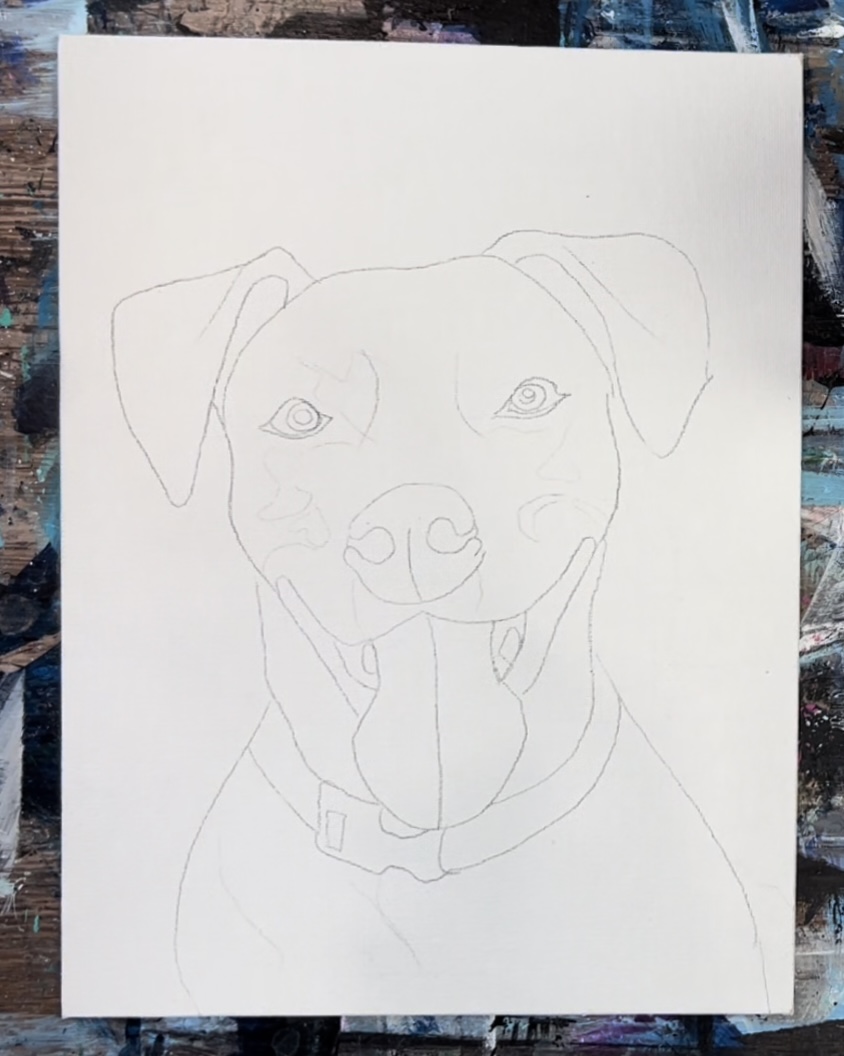
5. Life the paper to find a general outline of your pet!
6. Optional: trace the outline of the pet (you don't need to re-trace the inner features) with a pencil or fine point sharpie. This is to ensure the outline doesn't disappear when you paint the background around the pet.
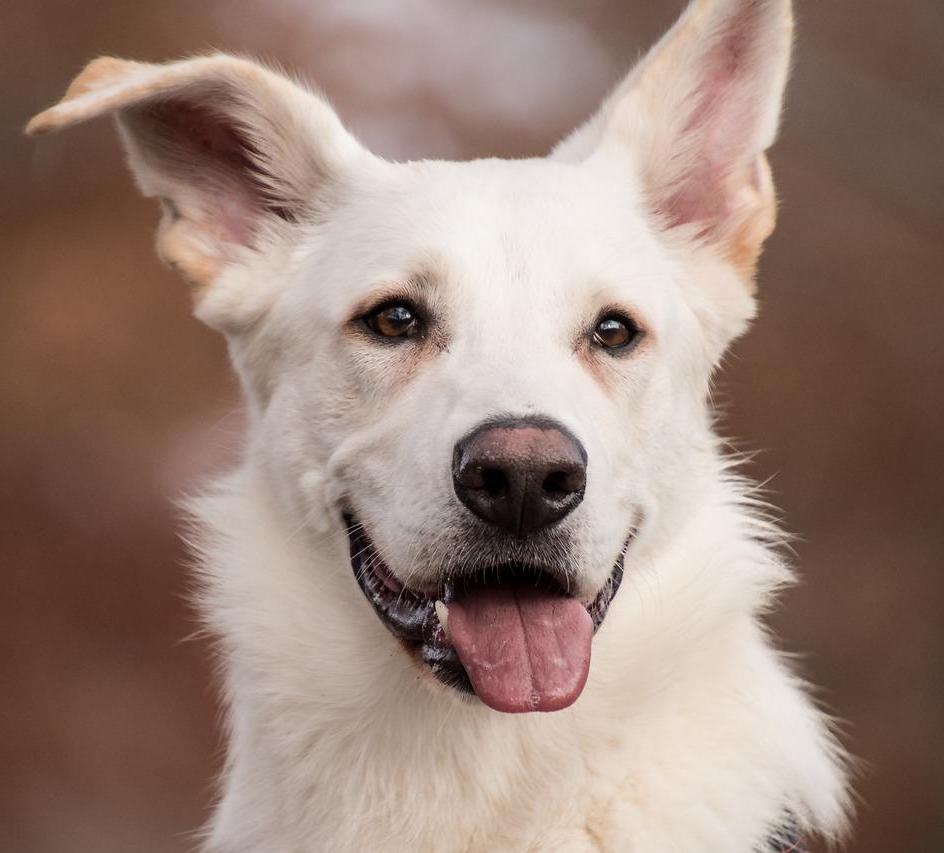
7. Select a background color that will provide good contrast against the color of your pet. For example: a black and white dog would look nice with a bright green or bright red background. However, if you are doing a white dog, a light yellow background may not have enough contrast.
8. Use a 3/4" wash brush to paint the background. You can paint it a solid color or add titanium white into your color to create an abstract mixed background. I did titanium white mixed with the background color to make the background lighter around the pet and then darker along the edges of the canvas.
9. Do not paint the background color over the pet drawing. Go around the outline of the pet. However, if some of your background overlaps some of your lines that is okay because acrylic paint can be painted over. Let this dry before going onto the next step.
10. Load your paint palette with the colors of your pet. The three most common colors you likely will need are: mars black, titanium white and raw umber. If your pet has a reddish color, you can use raw sienna or burnt sienna which is a reddish brown.
11. Use a #4 round brush to start with the outline of your pet. Loosely paint along the edges of the pet to establish the shape. Add some fur texture as well along the edges and this will overlap your background slightly.
12. Then paint the eyes. Look closely at the photograph print out. Typically you'll want to outline the main shape of the eyes first with a very thin line of black. You might want to opt to use a paint pen for that step. Then paint the inside of the eye white. If your pet has dark eyes or the white part isn't showing, you can paint the entire inside a medium gray or dark gray color depending on what is on your photograph. Then paint the iris inside the eye shape. This is a solid color. For example, if your dog has brown eyes, use burnt umber to paint a solid circle. Add a little white into the burnt umber and blend it in if the brown is a lighter color. Then wait for this to dry. Paint the pupil black. Then after the pupil dries, use titanium white to paint the white highlight. Observe closely where that highlight is in your photograph. After all that dries, re-outline the outside shape of the eye with black.
13. Paint the nose next. You'll likely only need black and white for this. I recommend painting it black first and then going back and adding the lighter colors. Look closely at the shape of the nose and the curves/lines.
14. Use a #8 round brush to paint the fur on the rest of the pet. Paint long or short contouring strokes. If your pet has short hair, you'll want to do short strokes or simply paint the shape solid colors. If you pet has long hair, you'll want to do longer and wavy strokes. I recommend starting with the darkest fur color then layering on the lighter fur colors. Use a smaller brush for fine fur details especially around the eyes and nose.
15. If your pet has their mouth open, I recommend painting the tongue first. Then paint the teeth and then the lips. A white paint pen is really helpful for painting the teeth and a black paint pen is really helpful for painting the lips.
16. Paint any leftover details such as a collar, whiskers, etc. For whiskers, use a 10/0 round brush and titanium white to paint very thin lines. You can also do this with a white paint pen.
Directions At A Glance
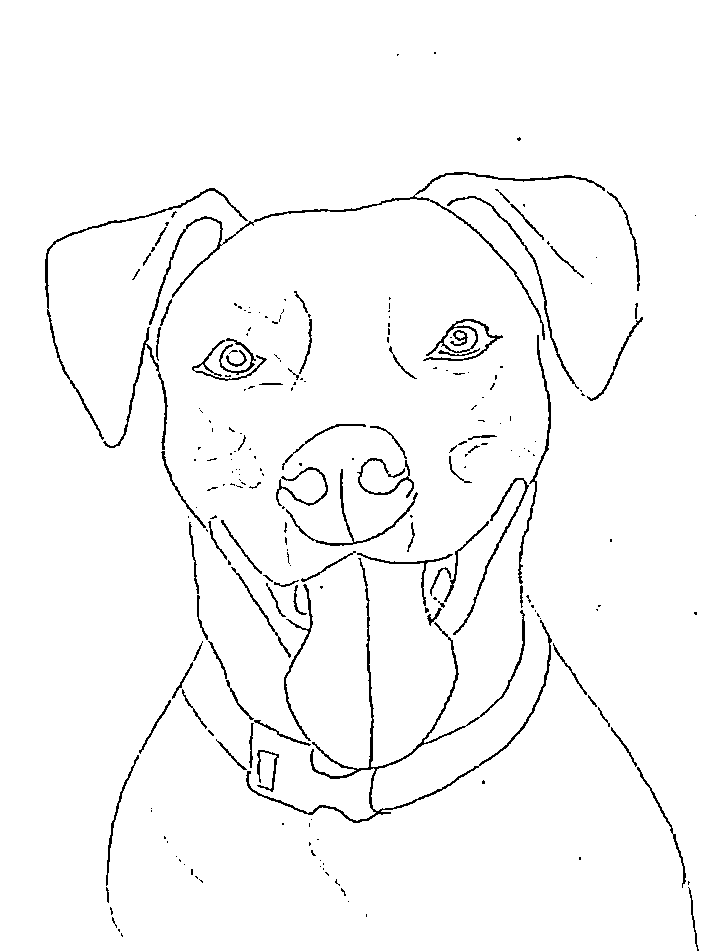
Traceable
I recommend that you print the photograph if you are using this dog that I use in my demonstration!
If you want to use the outline that I did, you can click the image below to download it. If you want to download the exact photograph, you can click here!
Video
A Comprehensive Guide About Painting Pet Portraits!
This guide below is going to teach you what colors to use, how to get a good picture of your pet, how to print that picture for your canvas and how to transfer that picture to your canvas for the painting!
You can skip this guide by scrolling further down in this tutorial for the step by step directions.
Color Palette – What colors do I use to paint my pet?
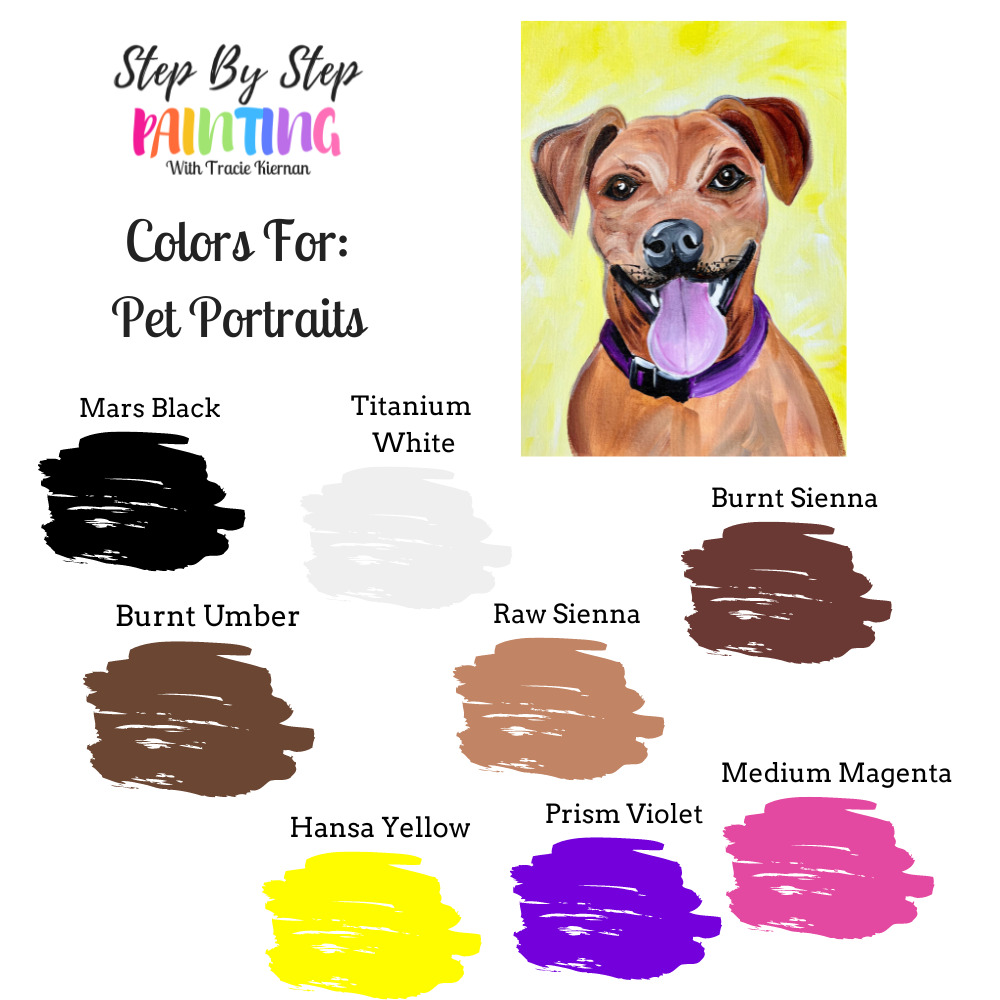
Colors are going to vary depending on the colors in your pet! The most common colors you’ll likely use are: titanium white, mars black, raw Sienna, burnt Sienna and raw umber. Even if your pet is all white, you will still need to use black and possibly brown to get different shades of white to create your fur texture!
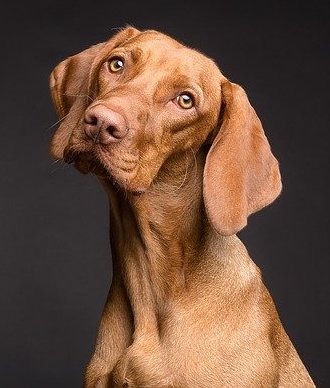
If your pet has reddish colors, I recommend using raw Sienna and burnt Sienna which are reddish browns.
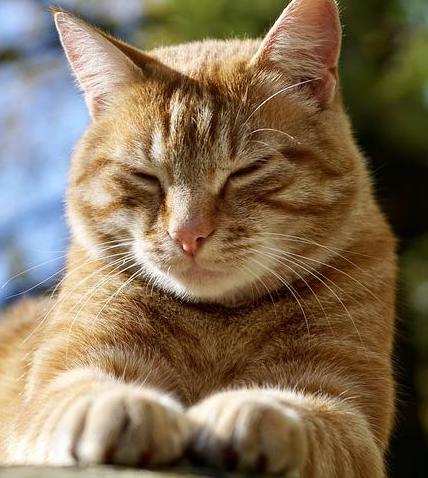
You can use orange if your pet has orange fur (such as an orange tabby cat).
Don’t forget about eye color! If your pet has blue eyes, I recommend light blue permanent or a cerulean blue mixed with white. Raw umber mixed with titanium white and a tiny bit of yellow or green in it can work for hazel eyes. If your pet has dark eyes, use raw umber.

If your pet picture has a tongue or has pink in the inner ears, use medium magenta. Mix white and black into the medium magenta to tone the pink down a bit. You will be able to lighten that color with titanium white and darken that color with black.
Can I use craft paints?
Yes craft paints are acrylic paints! They don’t, however, blend the same way as the student grade paints I use in my tutorials. If you are using craft paints, I recommend getting a set that has a bunch of different neutral colors (different shades of browns, whites, grays, tans, etc.). This is going to depend on the color of your pet!

![]()
What colors should I paint the background?
I recommend choosing a color that will contrast well with the main colors of your pet. You don’t want to do a color that is too close the the fur color.
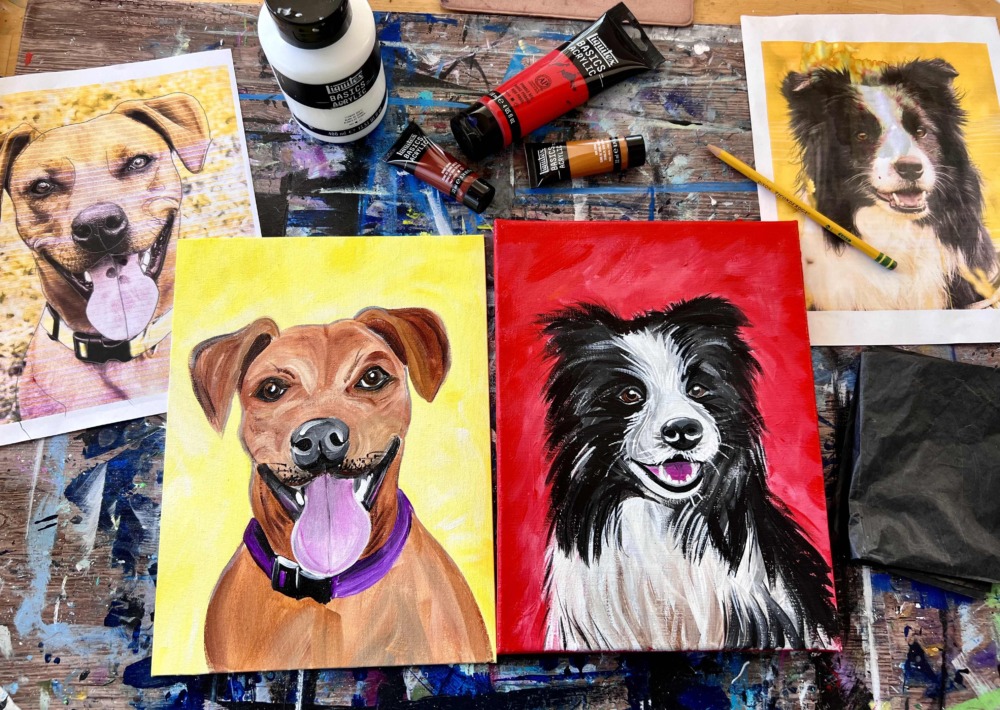
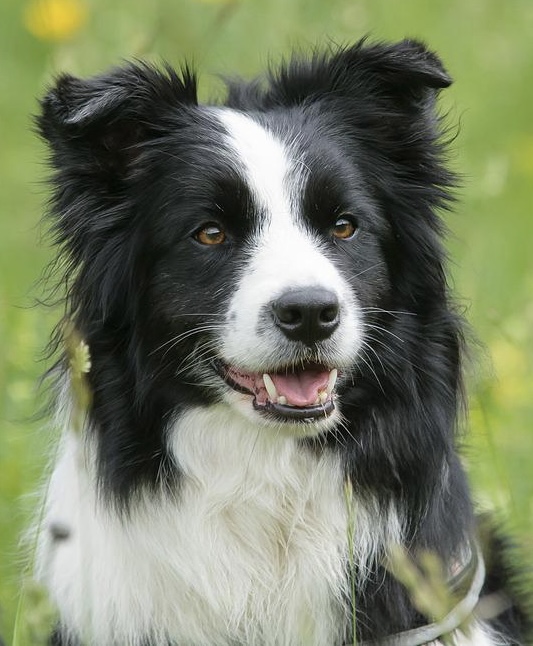
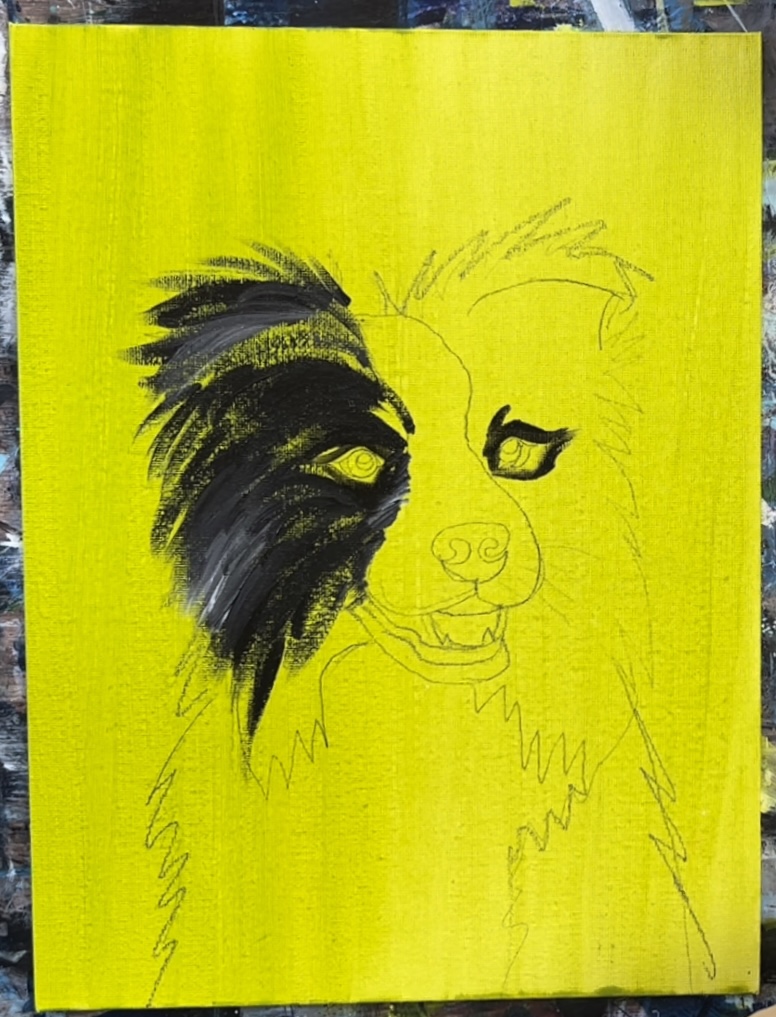
For the border collie, I chose red! The red contrasts very nicely with the black and white. Another color that would have looked nice is yellow or green!
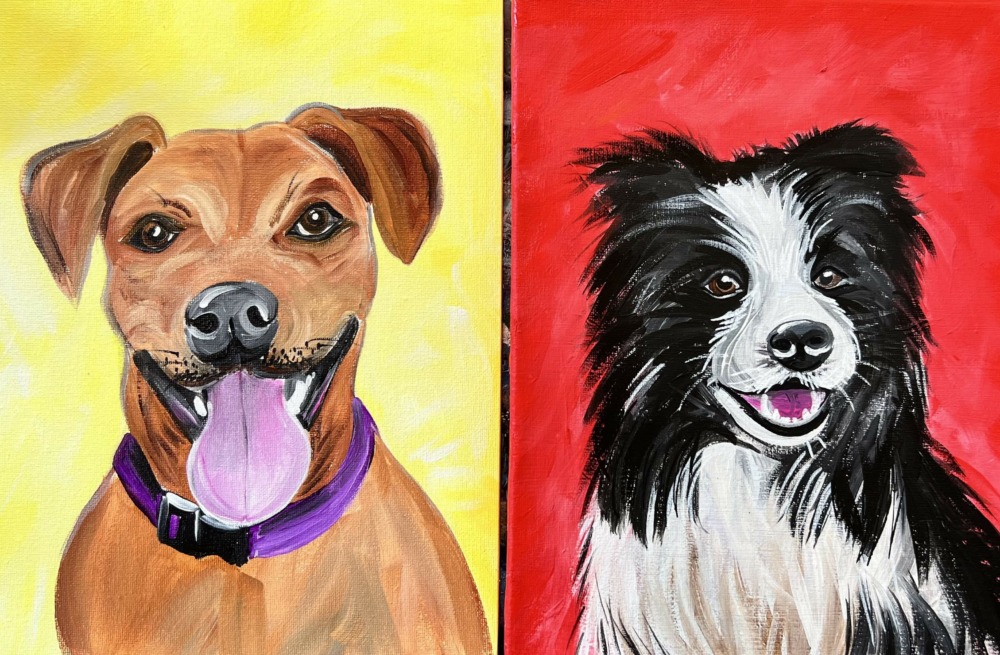
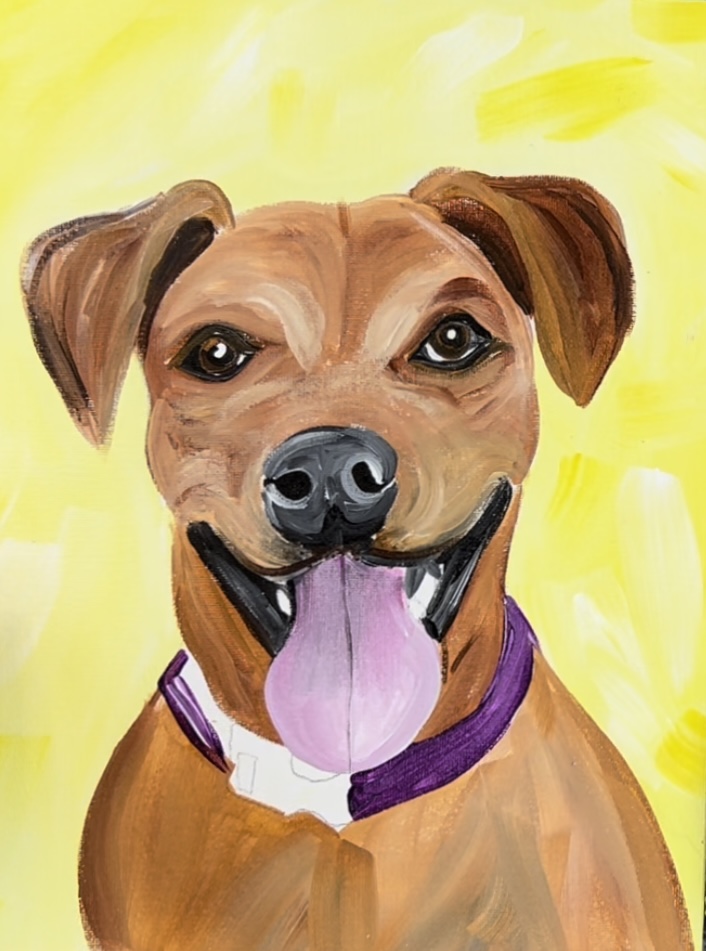
For the brown dog, I chose a yellow background. I decided to make her collar purple because yellow and purple are contrasting colors!
I also recommend adding titanium white into your selected color. This will make the background look more interesting! I chose to have the color be lighter and brighter around the dog and then get darker on the edges.
You can also do a fun design such as polka dots or even small dog bones. However, I would recommend keeping the background as simple as possible because the focus is the pet! You don’t want to have a background that is too busy!
Should I prime the canvas?
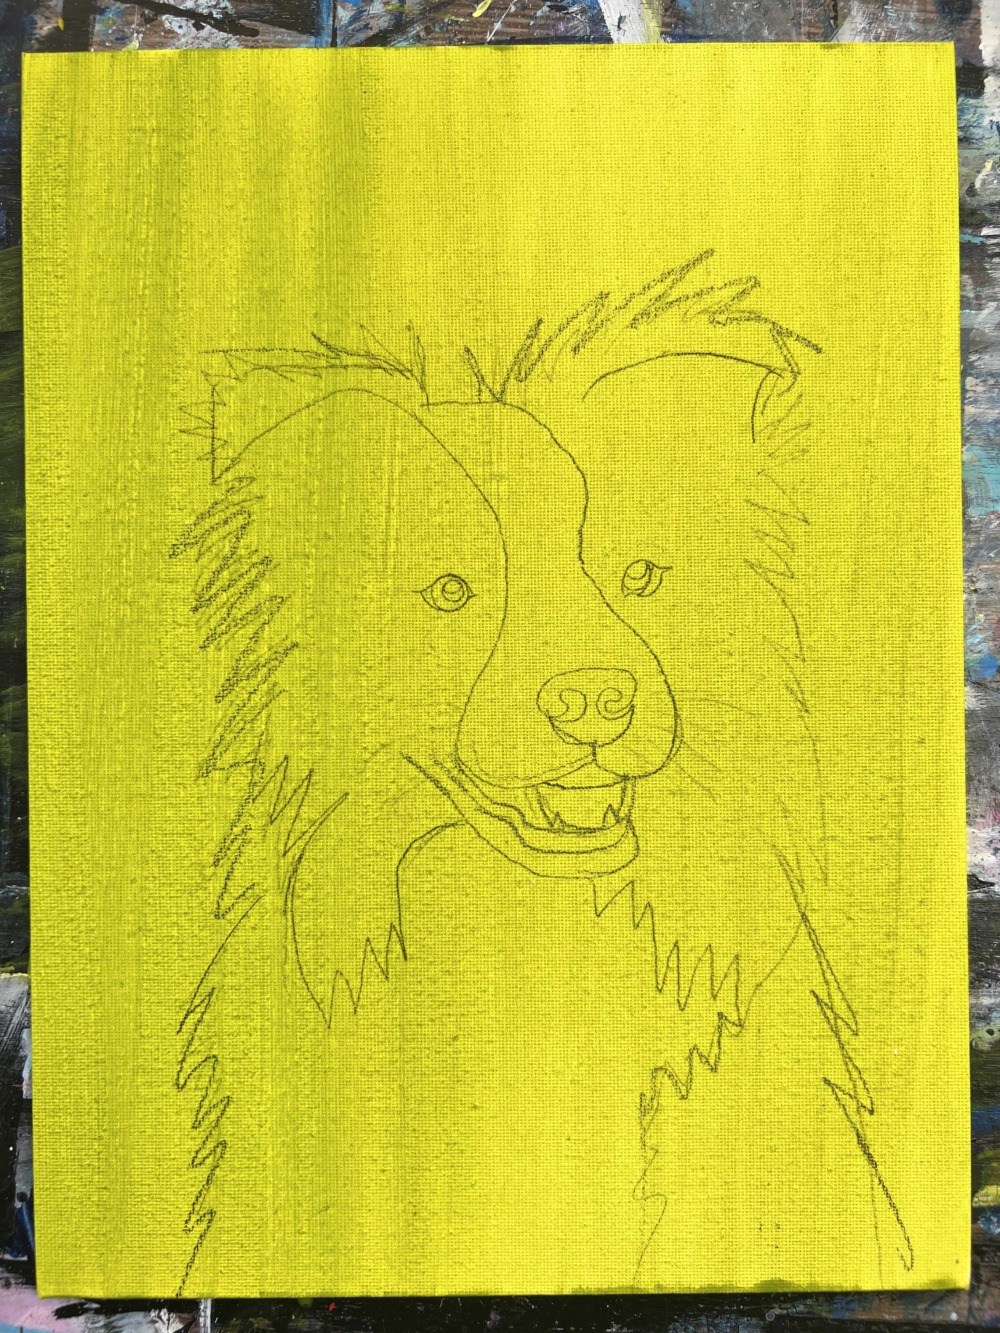
Priming the canvas would mean painting the entire canvas a solid color and then transferring your pet picture over that. An example below is a canvas I have decided to paint a thin layer of light green over. Then I did the animal tracing over that. This is a great way to avoid having white canvas showing through the final results!
In the demonstration, I did not prime the canvas. However, you can choose to! Both ways are fine!
I can’t draw my pet! How am I supposed to paint it?
I am demonstrating how to paint a pet portrait using the “transfer paper method”. Basically, you need a good photo of your pet to be printed out on 8.5″ x 11″ printer paper. Then you will be using graphite paper to transfer the pet to your canvas in order to get the proportions down so you can focus on painting.
But first…you will need a good photo of your pet to do this painting!
How do I select a good picture of my pet?
Here are 5 tips that I have for you for selecting the perfect photo of your pent to use in your painting!
Note: the photos below are not my photos. They were found on www.pixabay.com! That is a royalty free image data base that you can use as reference photos for paintings! I will put a link to the photos where you can find them or you can click the photo to download it and use it for your painting.
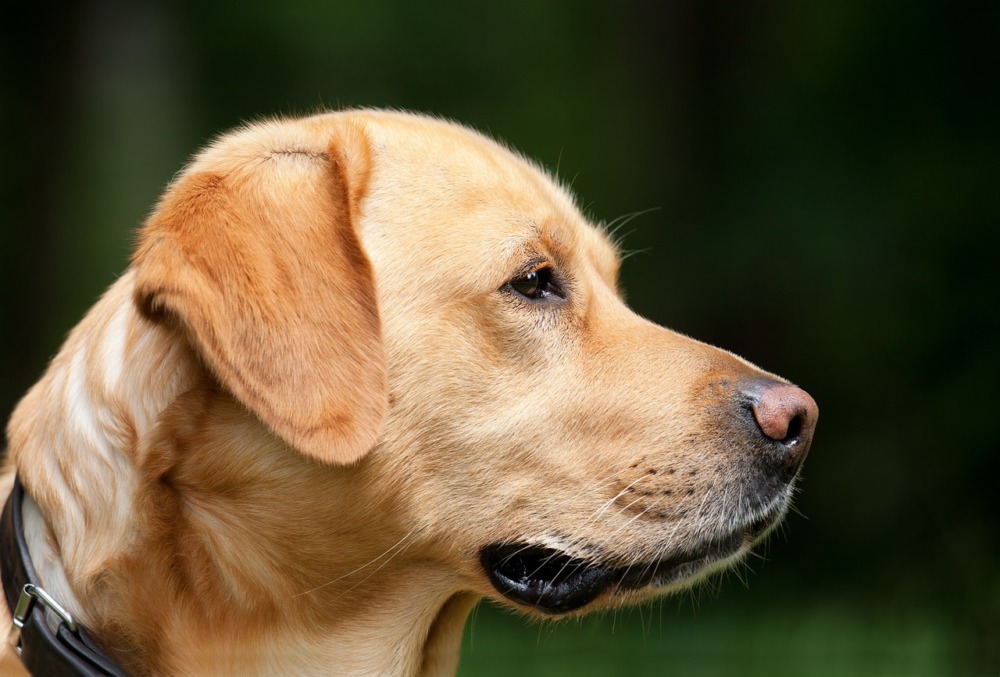
1. Select a photo of your pet that is mostly the head
Select a photo that has mostly the head and front chest area (like a portrait). You can do the full body if you want but it’s easier to do just the head region. Try to either have your pet completely looking forward or you can have your pet looking to the side.
2. Select a photo that is focussed & clear on the pet with good contrast
Make sure the picture is focussed on the pet. You don’t want too many other things in the picture. I also recommend your photo has really good contrast with a plain background.
Although these doggies in the picture below are super cute, this photo might be tricky to paint because there isn’t a lot of contrast or in the picture.
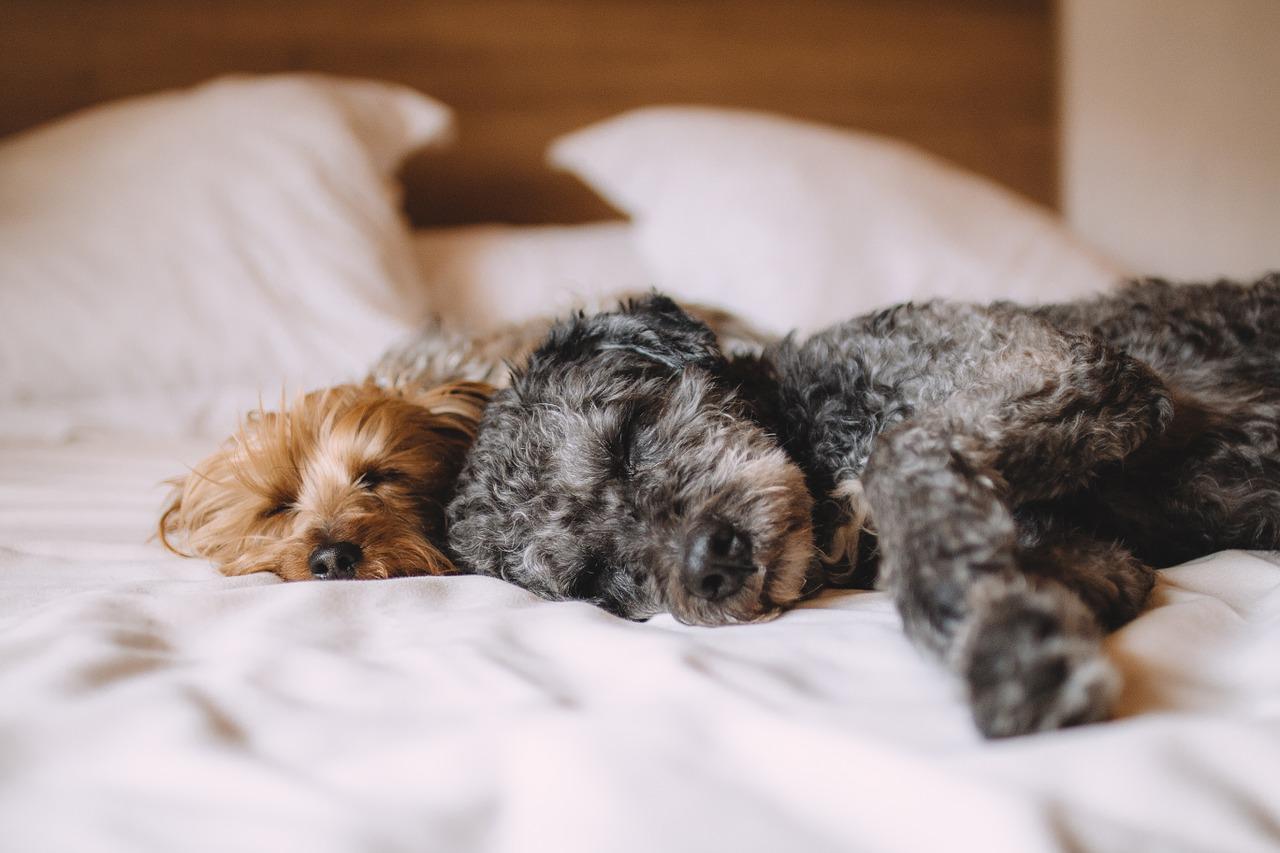
3. Crop the photo
If needed, crop the photo so the picture is mostly the portrait. Crop it so the pet is centered with only a little bit of space around it.
Example: the picture of the full dog with the ball is cute! However, it might be a little harder to paint the full body. Try cropping the photo so you just have the head and front area.
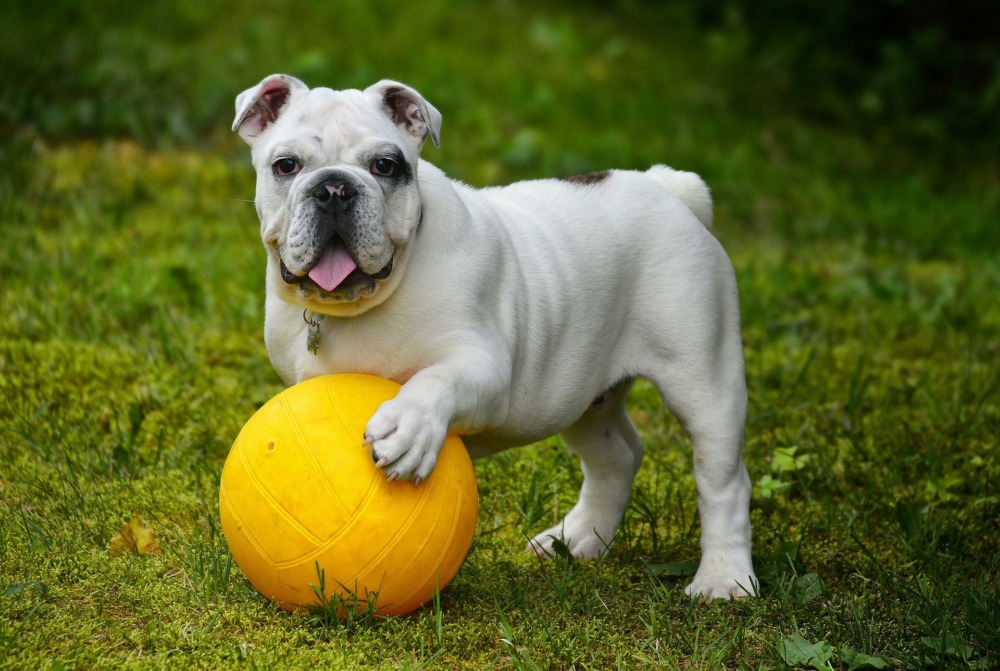
When you crop a photo like the one above, you will be able to better focus on face for your pet portrait and really bring out its personality in your painting!
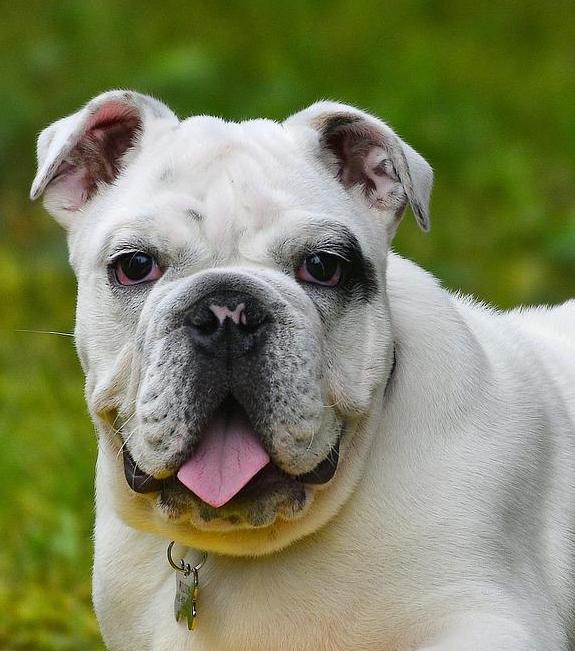
4. Eyes & Nose are Clearly Visible
The eyes and nose of the dog are the most prominent features that we are painting! Make sure your photo has large, open and visible eyes and the nose is clearly visible as well! Make sure there is enough contrast on those features that will allow you to easily trace them onto your canvas from your printout.
How Do I Print My Photo?
For the purposes of this tutorial, I recommend printing your photo on standard size printer paper 8.5″ x 11″. You will need to get that photo to print on as much as that paper as possible!
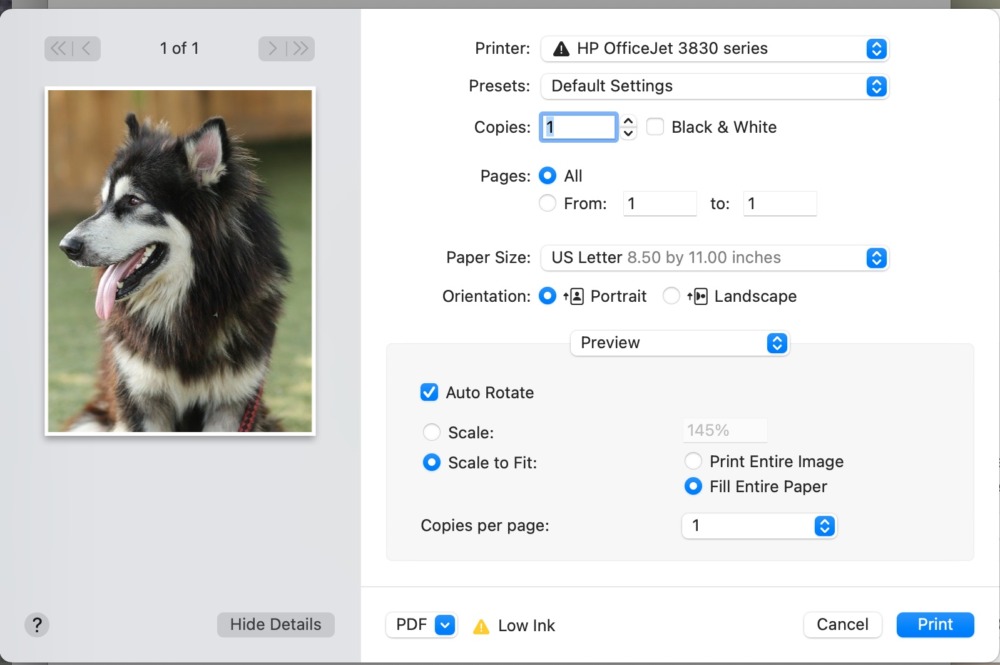
Open your photo on your device. Then go to print the photo. Your printer settings will open. Click “scale to fit”. This will stretch your photo to fit the entire sheet of paper.
You may need to mess around with the printer settings for a bit to get the photo to stretch.
I do recommend you print this in color to help you with your painting, however, if you need to print in black and white, that is fine too!
How do I scale my photo up?
I like to use the online software Rapidresizer.com to scale my photos up. You can also try using your printer settings to see if it will print on multiple sheets to be taped together like a puzzle for large canvas sizes. My HP printer does not have this setting so I use the Rapidresizer.com software.
For this tutorial, I am not scaling up in order to make things simple! I will be using a 9 x 12 canvas which enough of a size to paint on and get the main details of your pet.
How do I transfer my photo to the canvas?
You will need to place a sheet of graphite paper between the printout of the photo and the canvas. I recommend using a 9 x 12 or 8 x 10 canvas. You might need to experiment with the canvas sizes to get the best results.
Your pet picture will have space around it for the background. However, there shouldn’t bee too much space around the pet. If there is, you might need to crop the photo better, use a smaller canvas or scale the photo up.
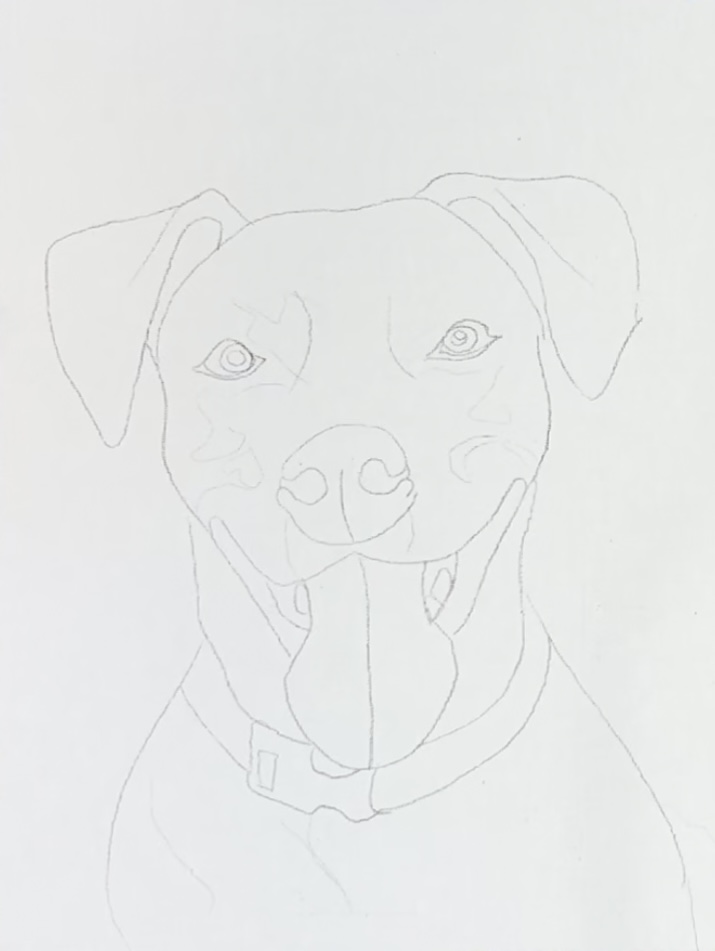
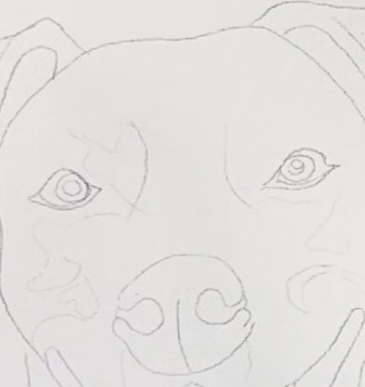
Trace the pet outline. Trace the ears, eyes, nose, mouth and any other important features such as a collar.
When you lift the paper, you should see a coloring book style outline of your pet!
Photos in this tutorial (other than photos of my paintings) were found on Pixabay.com a royalty free image database! I do not own those pictures. If you would like to search for dog pictures to use in this painting lesson, you can search there too!
Step By Step Directions
Note: the order of these directions do not have to be exact! You may choose to paint this in a different order.
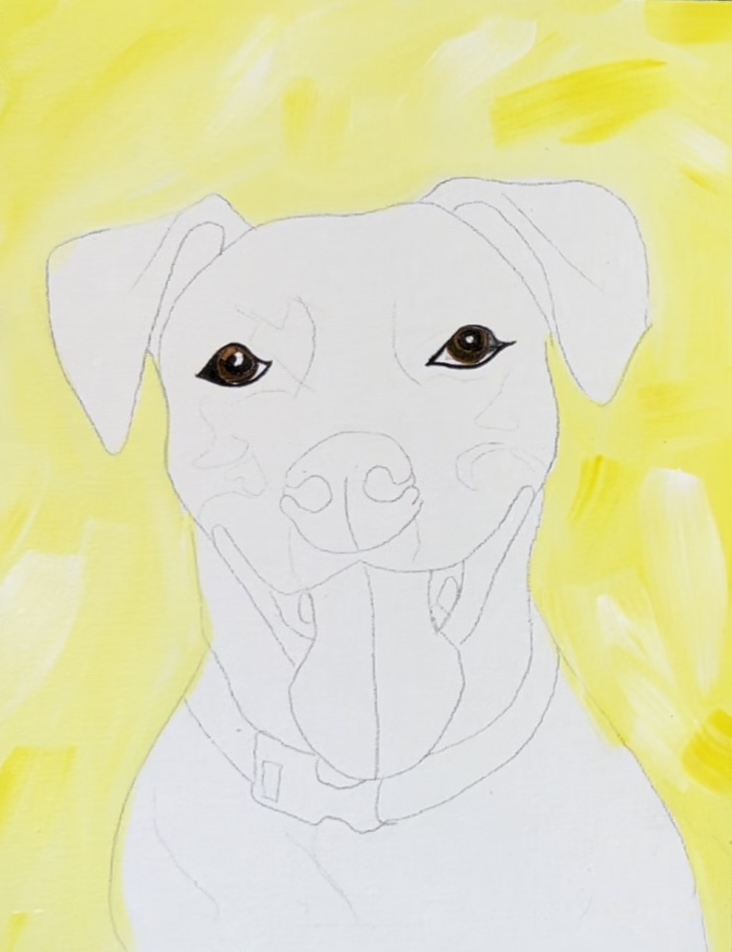
1. Print your pet portrait & transfer
Print the pet picture on a sheet of 8.5″ x 11″ paper. Stretch it as big as possible on the paper. Then use a sheet of graphite paper to transfer your pet drawing to your 9 x 12 canvas.
Note: if you are using the same dog as me, you can download this exact photo here!
Simply trace the outline of the dog! Trace all the edges and the main features. You don’t need to trace all the fur details.
Pay particular attention to the eyes! Make sure you trace all the parts of the eyes including the highlight in the eyes, the pupil and the color part!
Trace the outline, the nose, the tongue, the ears, collar, etc. Basically you need to make sure all the main features are traced! You may also want to trace a few wrinkle lines are areas where there is a different color fur or darker fur.
Note: you might want to chose to “prime” the canvas first before transferring your pet drawing. This basically means covering the canvas first with your background color. This will prevent too many blank white canvas spots showing through in the end.

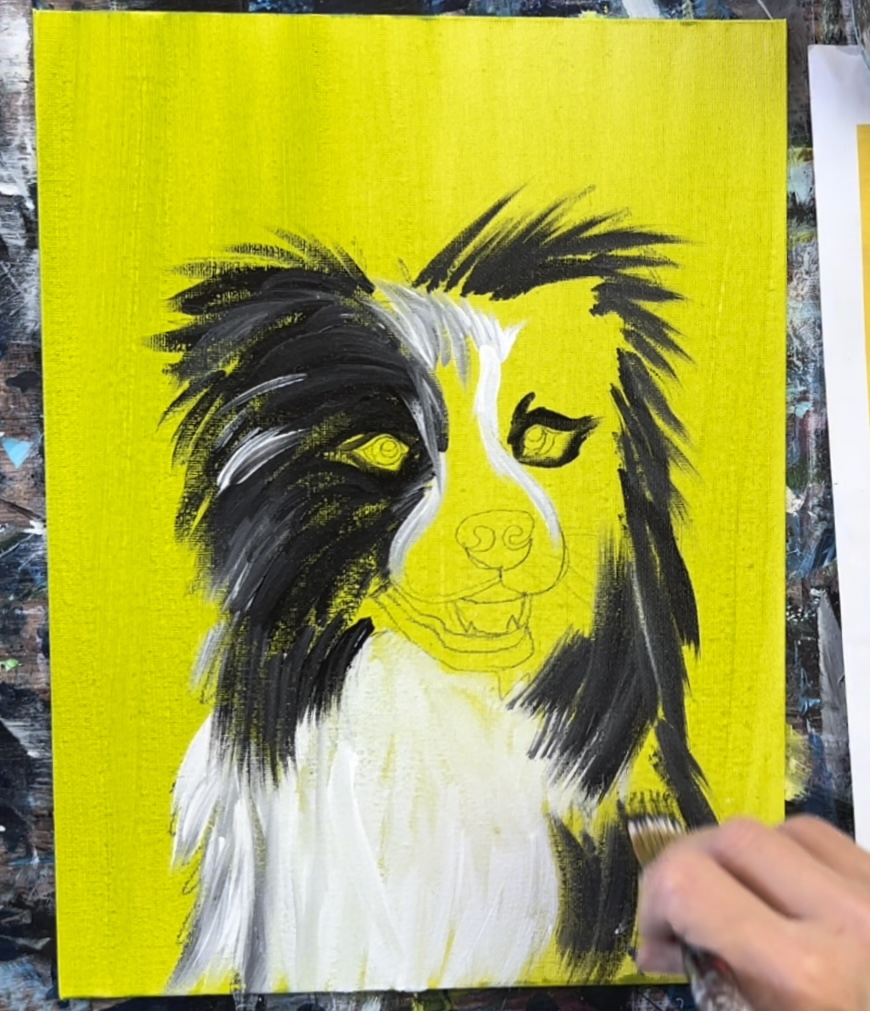
If you are tracing a pet that has longer fur, make sure you trace the outer edges of the pet with “jagged lines” to represent the fur sticking out. If there are multicolors (such as in the border collie dog), make sure you trace the areas where the colors change. And, of course, if there are spots or other important features, trace those!
2. Paint the background
Note: if you “primed” your canvas before step one, skip this step.
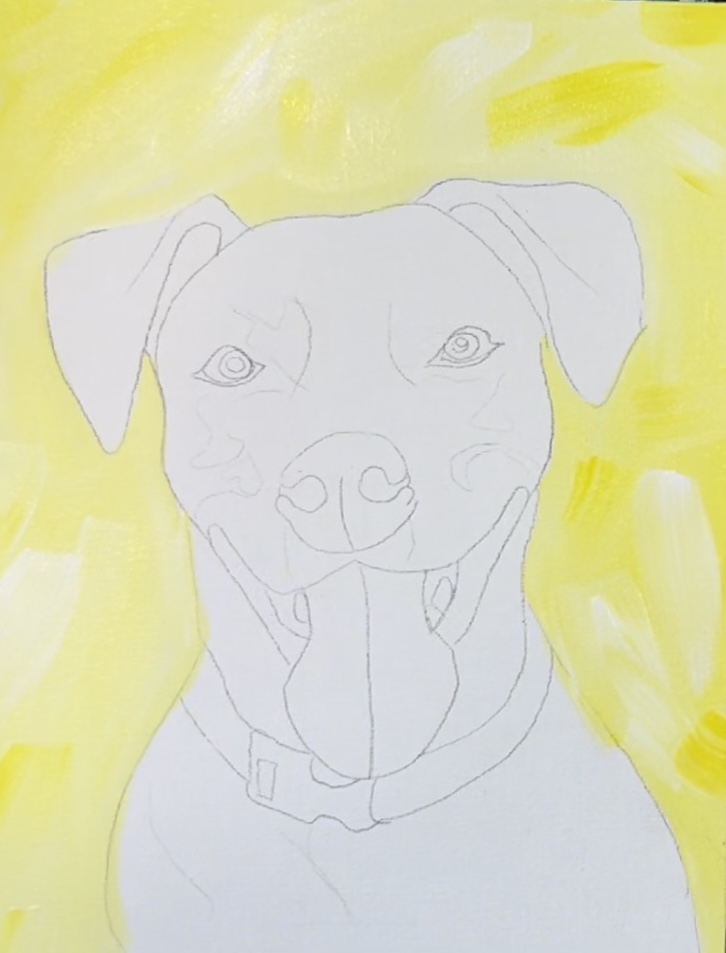
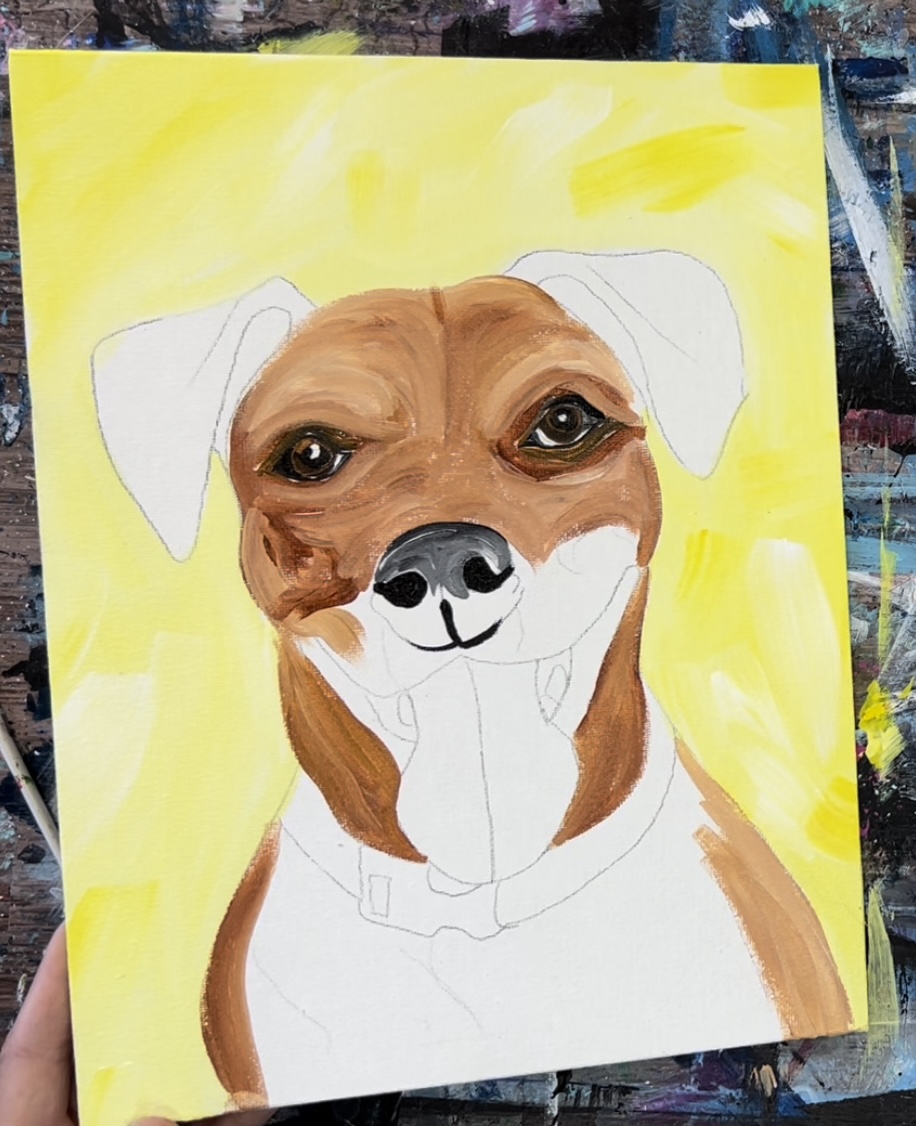
Select a color for your background! I choose “Hansa Yellow”. You will also need titanium white to help make that background have a “two-toned” look. Use a 3/4″ flat wash brush to paint the background all around the dog.
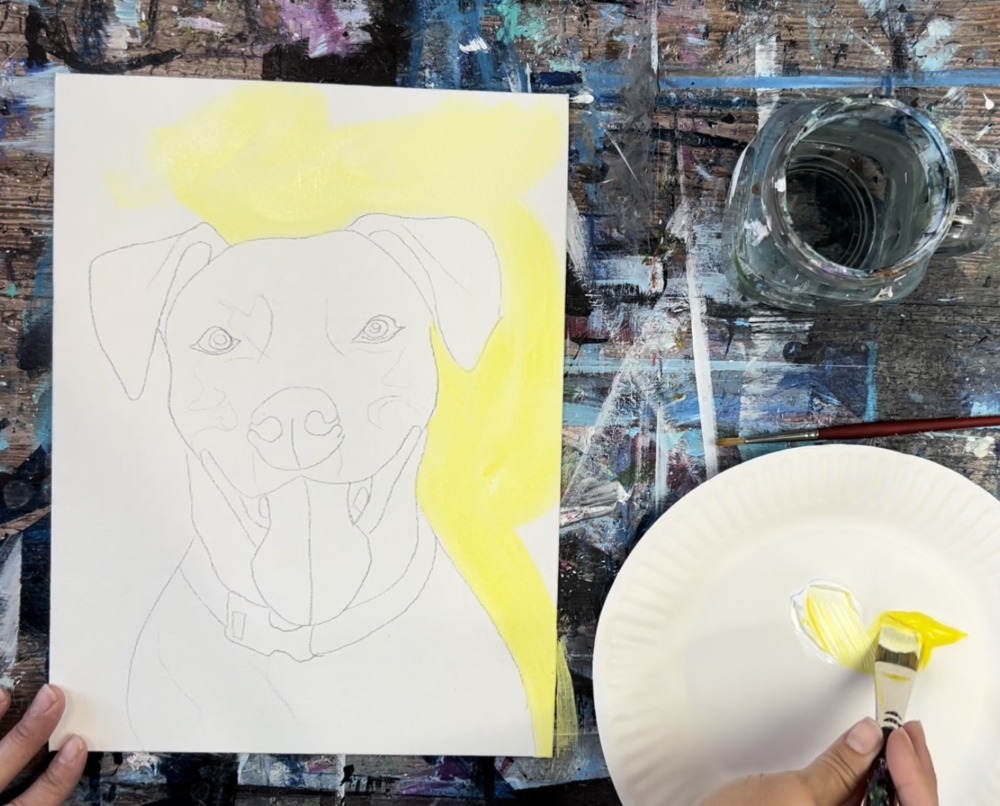
Basically use the 3/4″ flat brush to paint the negative space around the dog. I like the “un blended look” so I made sure the yellow and white did not blend all the way. Use the tip of the brush to “cut in” around the shape. If needed, use a smaller brush to get into smaller areas. If you need to paint over some of the pet shape, you can!
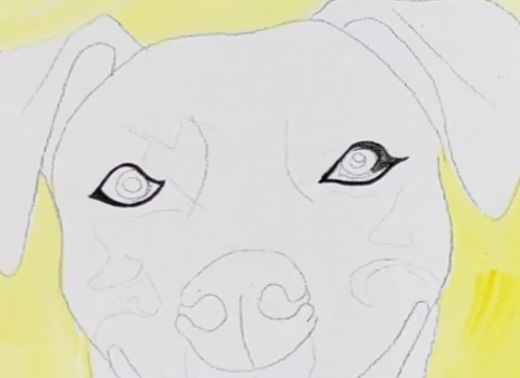
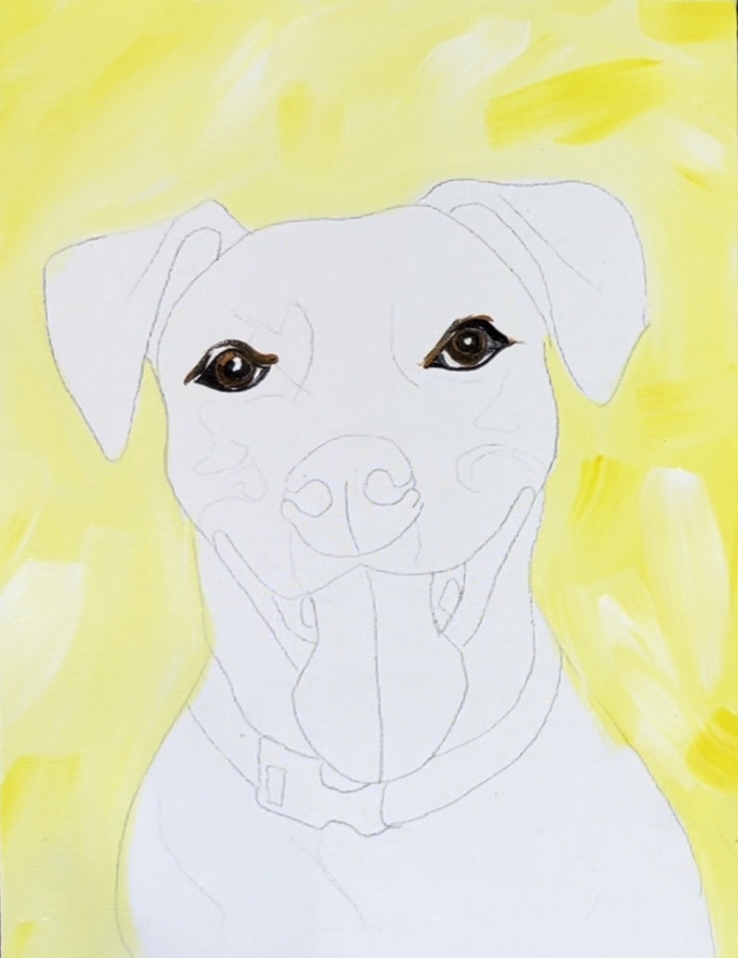
3. Paint the eyes
Tip: you’ll need at least a 0 or smaller round brush for this step. Find one that has a little bit longer bristles for ease of control for the intricate details in the eyes. You can also try using a paint pen for this! I’ll be using a 5/0 round brush.
Observe your reference photo. Likely your pet has a dark outline on its eyes. Paint that outline first. Use mars black to thinly outline the eyes. Then observe where the other dark parts are. In this case, there is a dark inner eyelid on both the left and right side of the eye.
Then paint the colored part of the eye. This dog has dark brown eyes so I used the color “burnt umber”. Don’t paint over the pupil and the highlight.
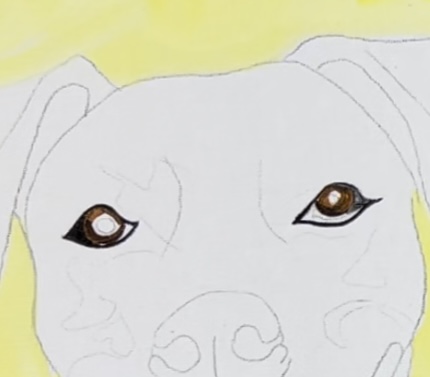
Then paint the pupil black. Leave the highlight blank. In a later step (after this dries) you will paint the white highlight.
I also left the area next to the colored part of the eye white. This will vary depending on the photograph you are looking at.
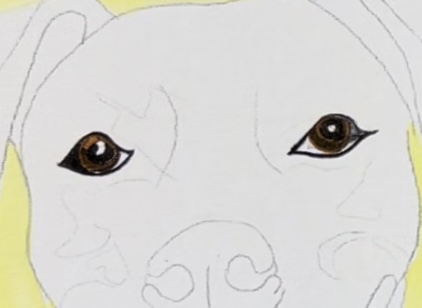
The eyes are tricky! They are an important part of this painting. If you are frustrated with the eyes, you can move on and paint over/touch up the eyes later.
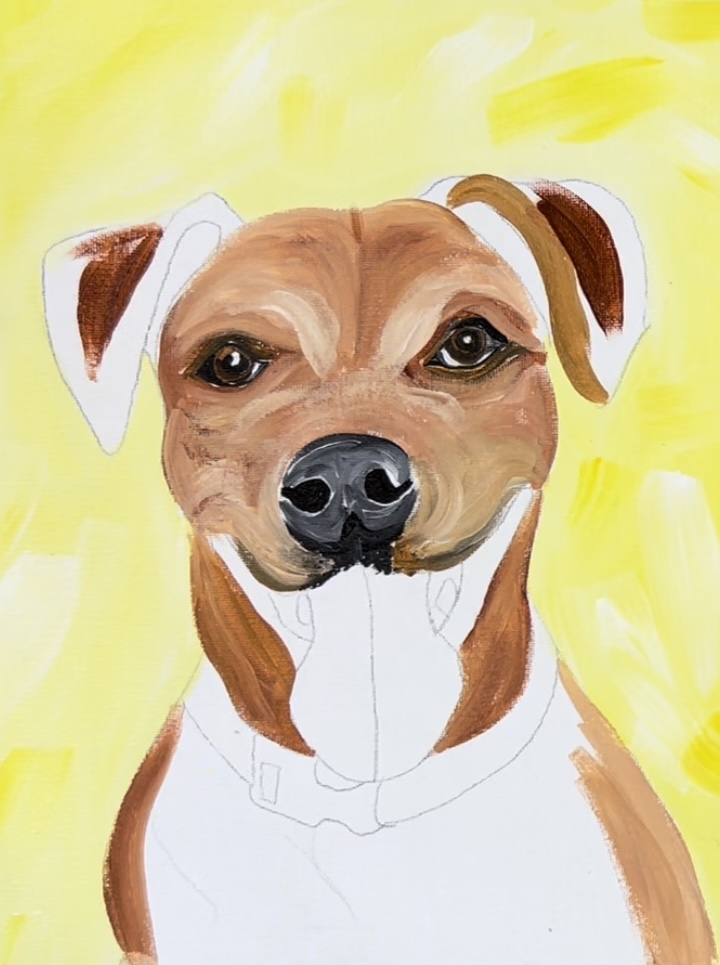
4. Paint the fur around the eyes and start edging the outer parts of the dog’s shape
Next, load your palette with the colors of your dog’s fur. For this dog, I used: burnt Sienna, burnt umber, raw Sienna and titanium white. Since this dog has warm browns, the “siennas” are great browns to use because they are warm/reddish browns! If your pet has cool browns, the umbers are great browns to use. Of course if you want to make your pet “multi-color” you are welcome to paint the colors whatever you want!
Tip: observe your photograph closely! Look at where the fur is dark and where it is light! You will be mixing paints on the canvas and palette by using black and white to either darken or lighten the color. Remember, this does not need to look realistic! You are painting an abstract/stylized dog so imperfections in color are okay!
You’ll be mixing your colors both on the palette and on the canvas. Add small amounts of black (or dark brown) into your color to darken it. Add white into your color to lighten it.
To start the fur, I used burnt umber mixes with some raw Sienna and titanium white. I used the #4 round brush to contour my strokes around the eyes.
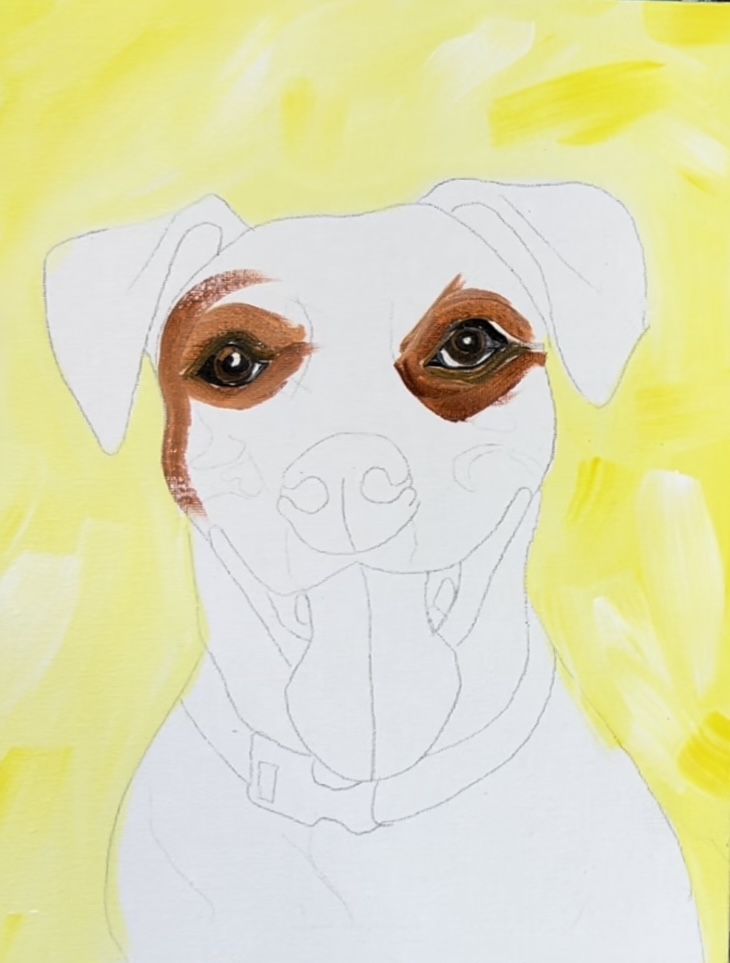
Loosely outline the shape of the dog’s face and front chest area.
Add lighter colors on the bridge of the nose by adding more white into your browns. To darken your brown, add small amounts of black or dark brown. Again, look closely at your photograph to observe where the dark and light areas are. The direction of your strokes should contour and go in the direction of the shapes in the dog’s face.
If Your Pet Has Longer Fur…
You’ll be doing a similar technique, only, you will be painting longer strokes with your round brush. Paint attention to the negative space around the shape of the pet. The fur will be overlapping a lot of the painted background color along the edges.
The flat brush is also very helpful for painting long fur because you can change the wedge of it to cover a lot of areas. Stroke down to create different overlapping textures. Also, be sure you are not using just one solid color. If you are painting solid black fur, make sure you add a little white/gray into the black to create dimension and texture. The same goes for solid white areas of fur.
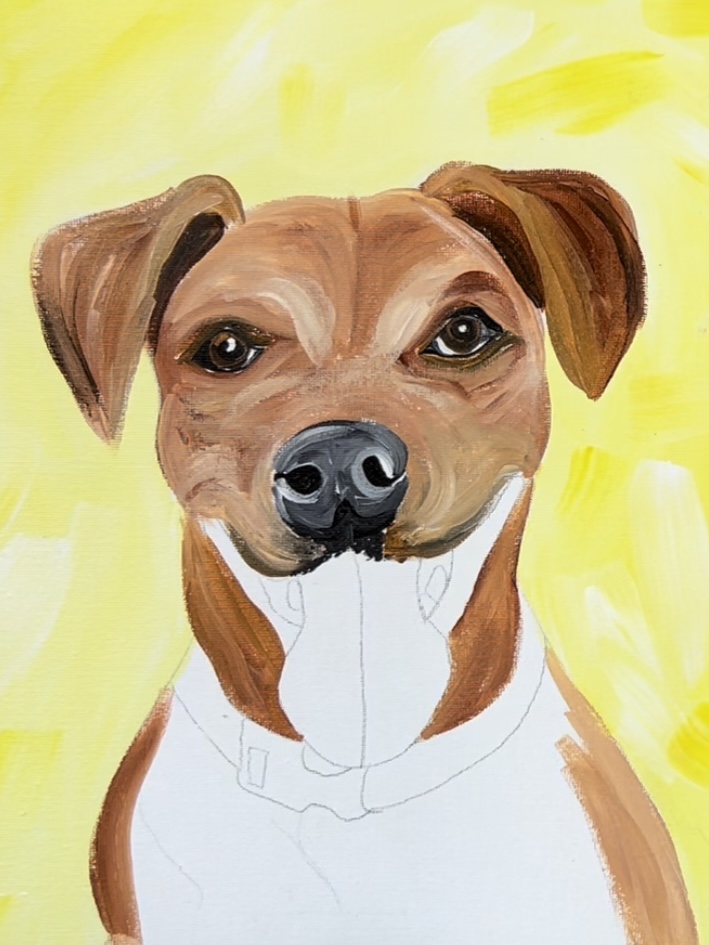
5. Paint the nose
Start with black. Paint the inside part of the dog’s nose inside if its nostrils. Then paint the curved part that swirls outwards.
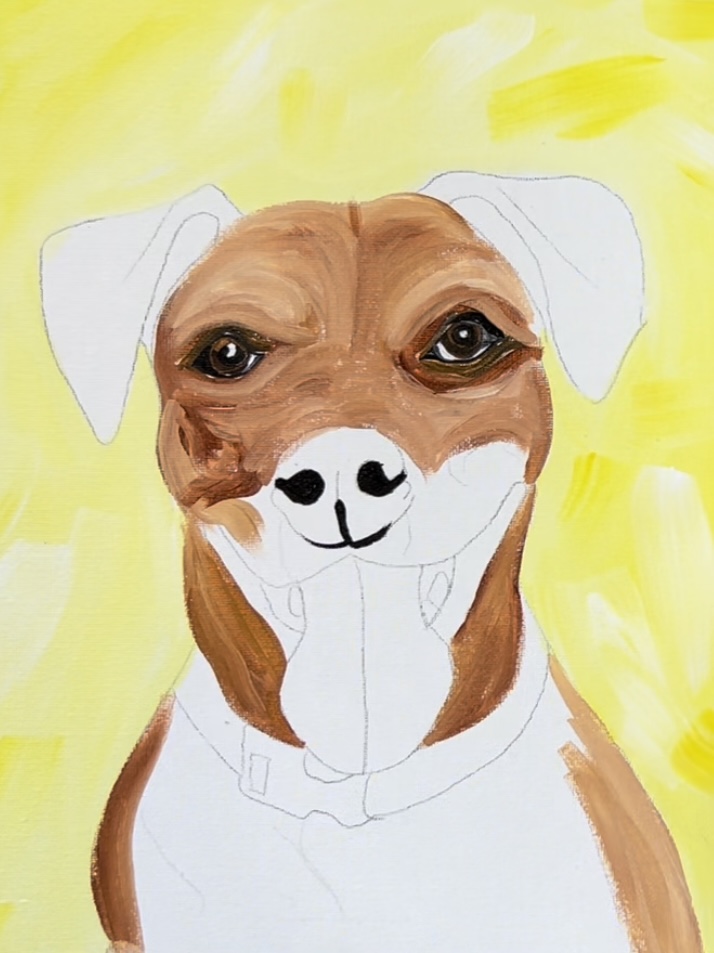
Gradually add in more lighter colors by mixing titanium white with mars black to make a medium gray. Paint in contouring strokes to form the shape of the nose. You can let the colors gently blend on the canvas.
Then add a little bit more black towards the bottom of the nose so that it is darker on the bottom. “Stipple” or paint little dots below the nose with the black. This is the upper part of the top of the mouth.
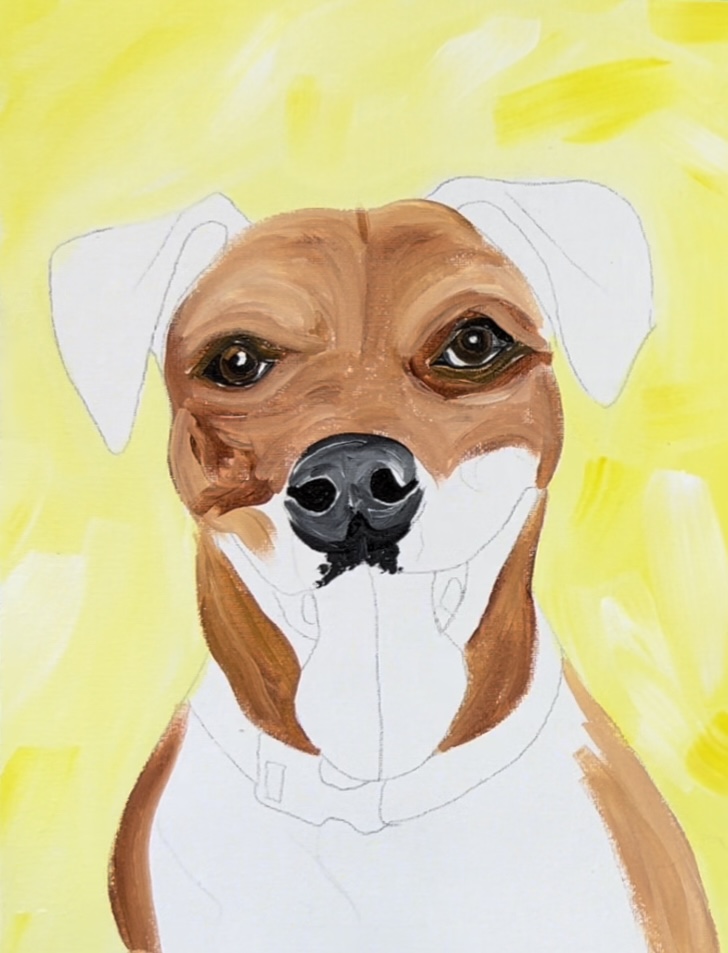
Then gradually start to paint the top outline of the mouth with a dark color.
Paint the rest of the upper part of the mouth with lighter brown. Curve the strokes so they contour around the nose.
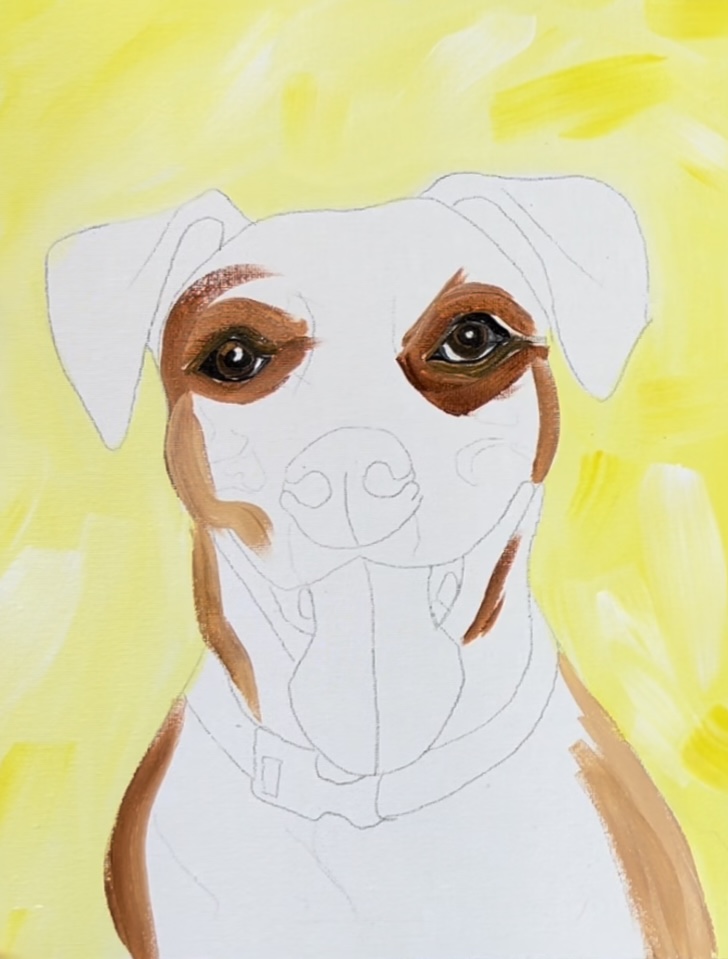
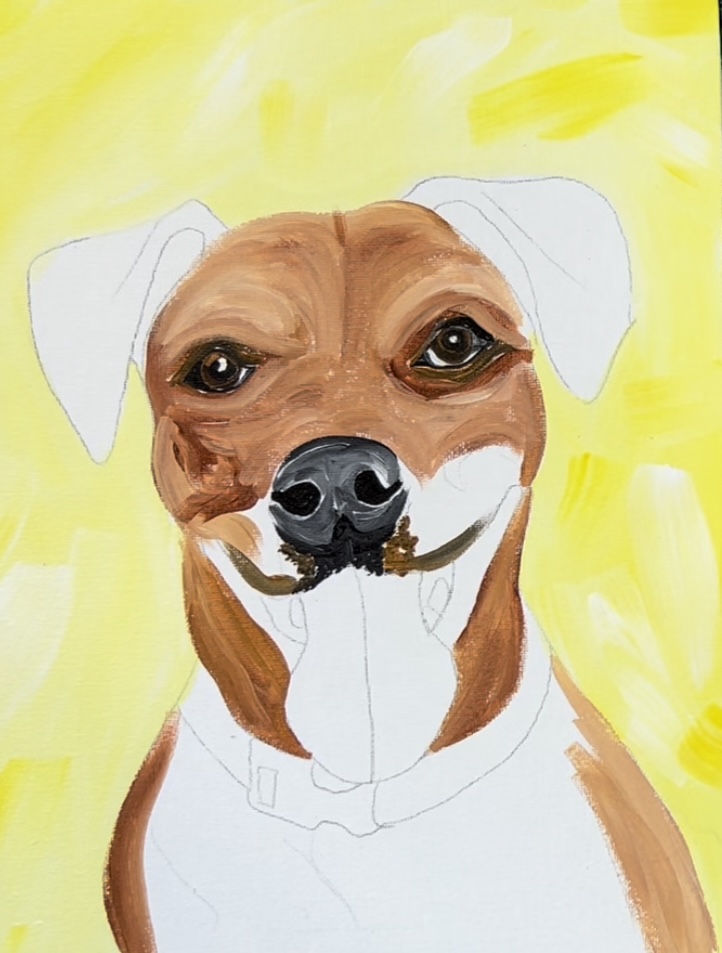
6. Paint the ears
Paint expressive strokes to till the center top part of the ears with burnt Sienna. Then add a bit of raw umber to the edges of the ears and blend that into the burnt Sienna.
Add darker color in the under part of the ear (burnt umber). This part should be darker and the part that flops over should be lighter.
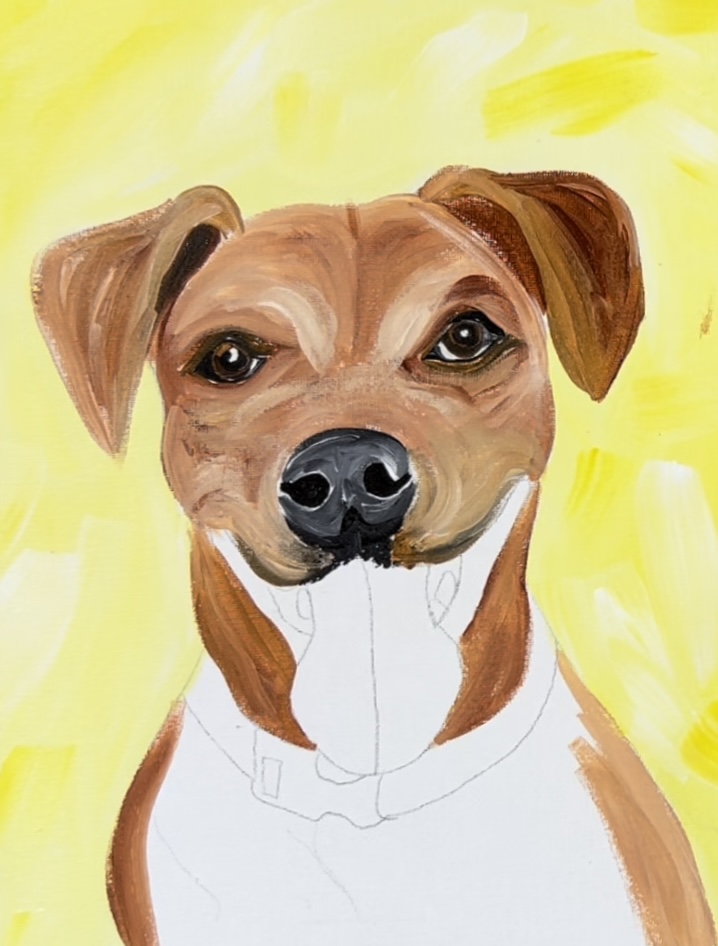
Render the ears a little further to add darker parts and lighter parts looking closely at your reference photo.
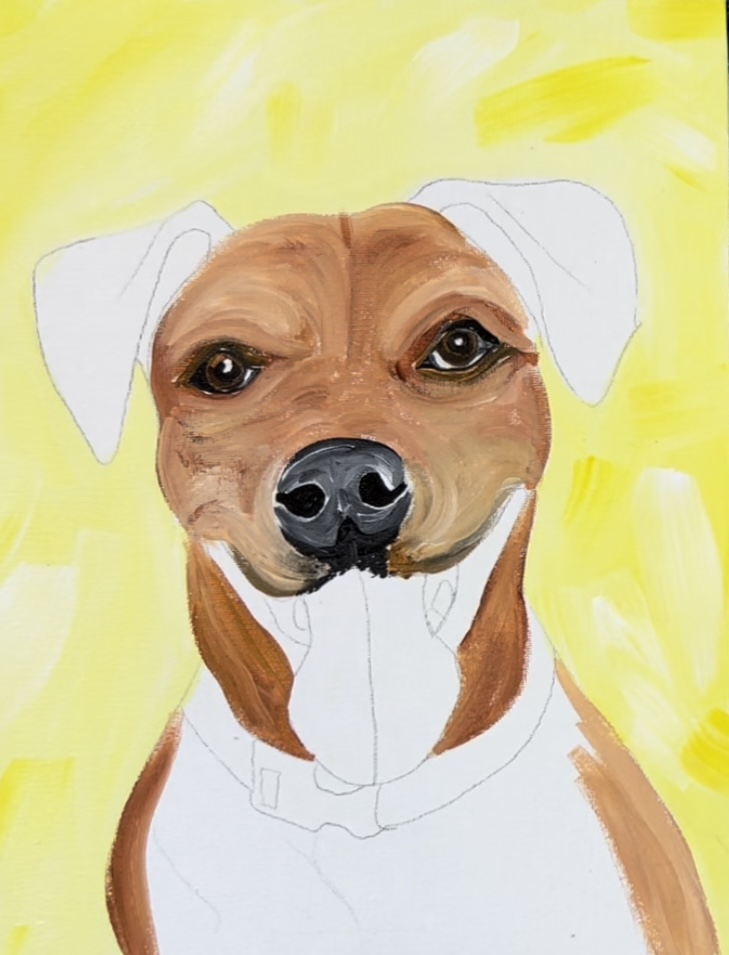
7. Paint the rest of the fur areas including neck and front chest area
For larger areas to be filled in, I recommend using the 3/4″ flat wash brush. Paint in both full width and side strokes. I used mostly raw umber in the bottom area but also blended some white and black into it.
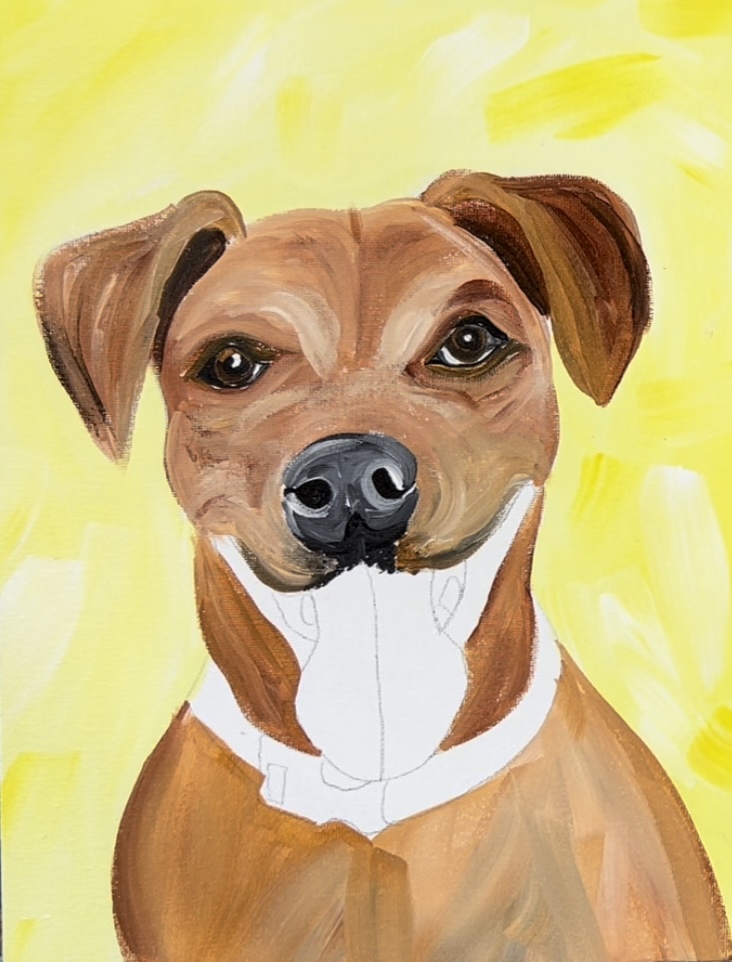
If you are filling a large area, be expressive with your strokes! These are long and angled. There is a bit of color variation and I let the colors blend on the canvas. I used the tip of my brush to outline the edge of the dog. Paint around the collar.
8. Paint the tongue, lips and teeth (if applicable)
For the tongue, I mixed 1 part medium magenta, 3 parts titanium white and a very tiny bit of mars black. The black will help tone the pink down to a gray-pink color.
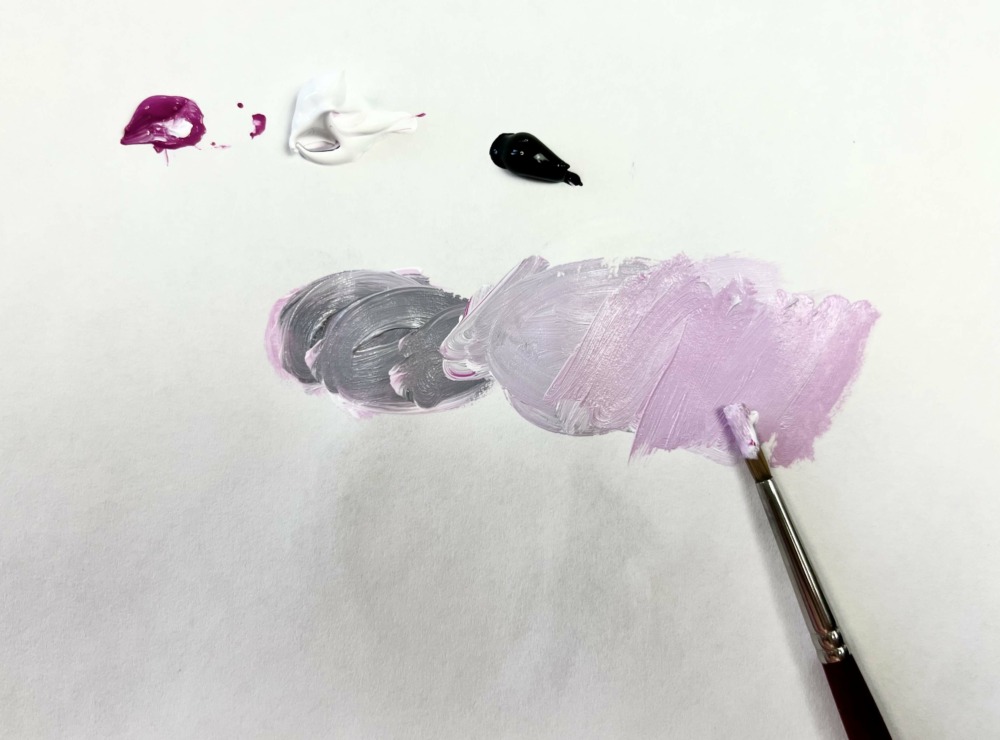
Look at the reference photo and notice where the lighter part of the tongue is. Likely it is lighter on the tip and darker and more shadowy further back into the mouth.
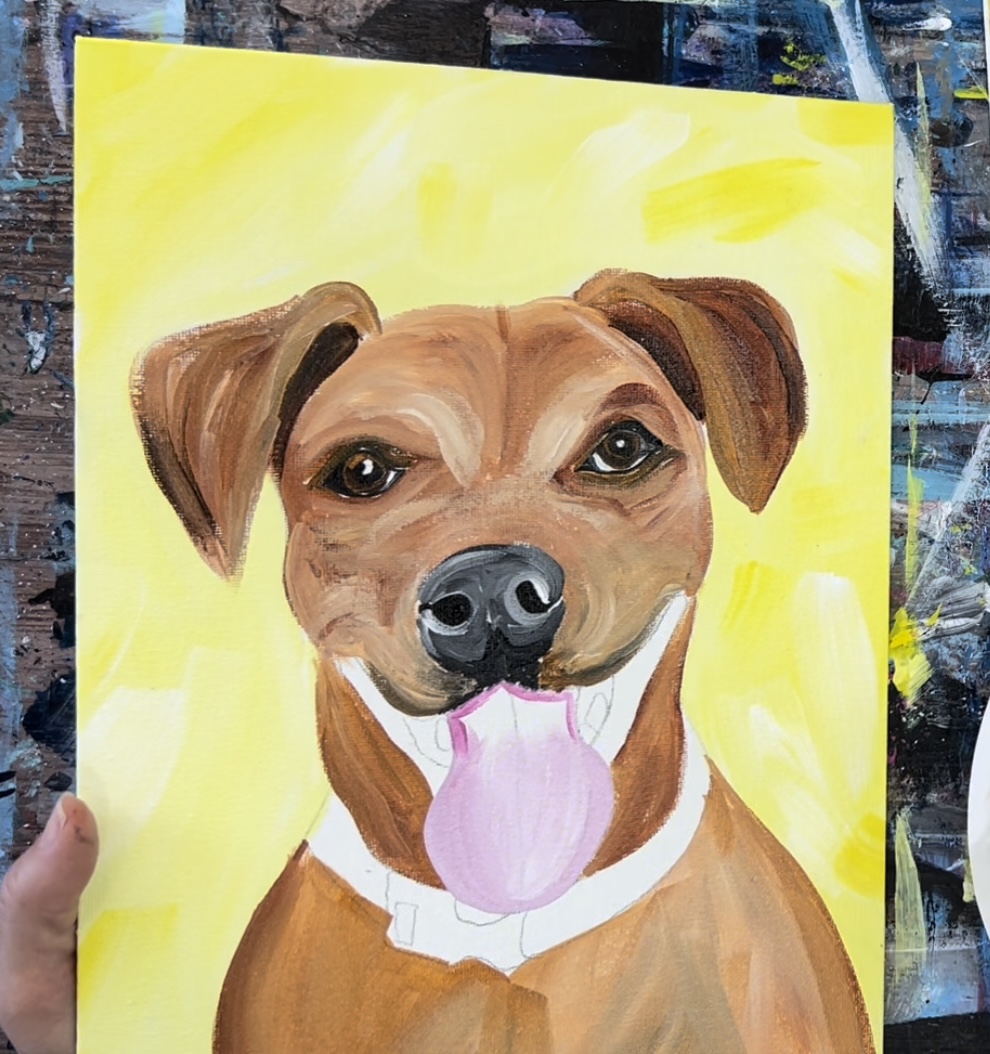
I started with the light part. Then blended the darker part. For the dark, I added more medium magenta with a little bit of black and no white. Then I used my finger to blend that dark part in the back with the lighter part in the front.
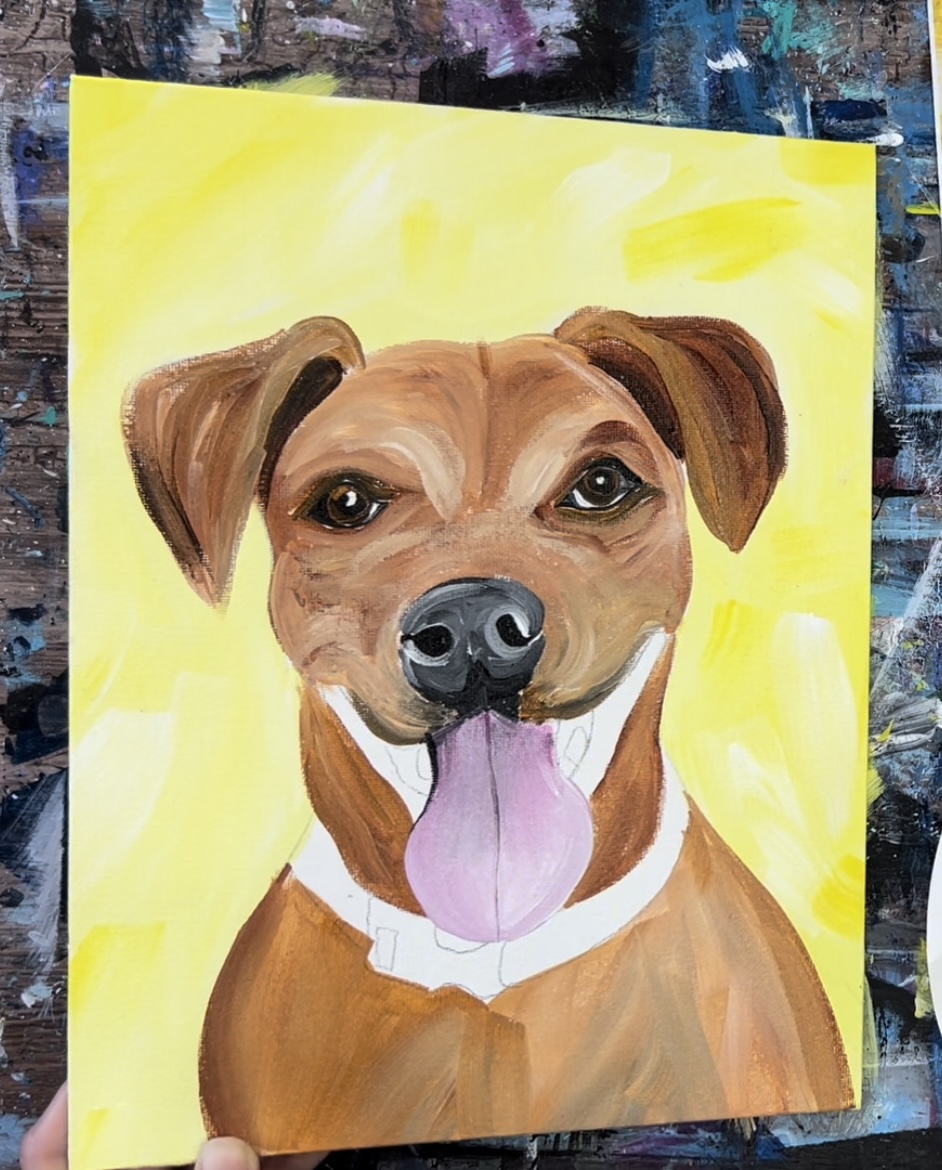
Use your 3/0 round brush to paint a dark gray line down the middle of the tongue.
Paint the lips using mars black and titanium white. The lips are mostly black but there is a little bit of gray in the middle to lighten them up. Keep this area very simple! Leave the teeth blank for now and when the black/gray dries up, paint the teeth shape white.
9. Paint accessories such as collar
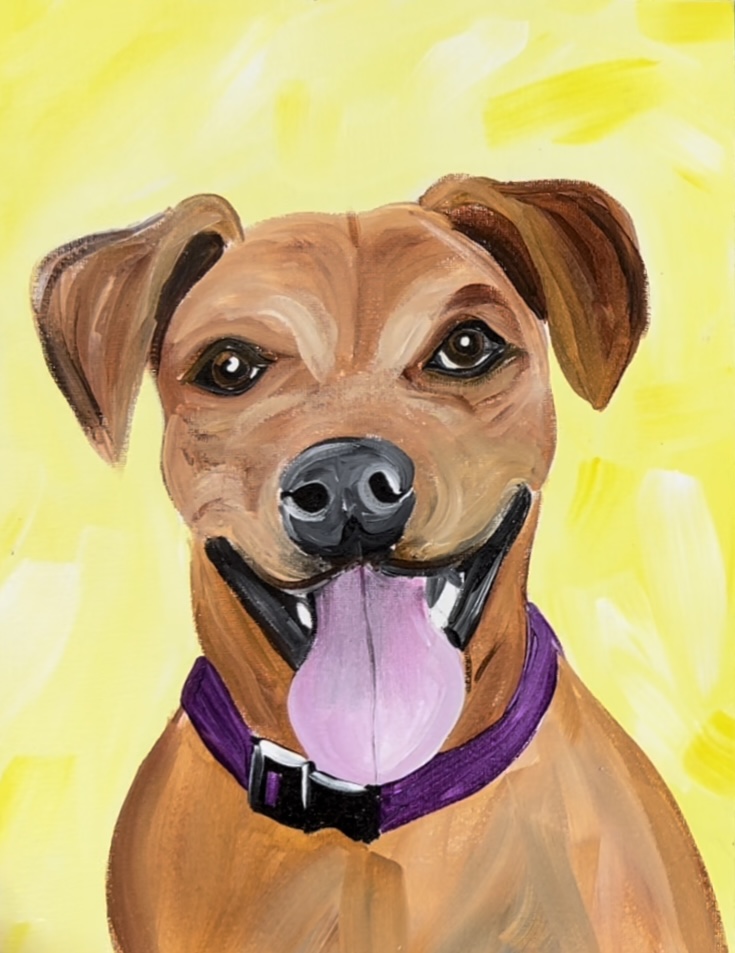
I chose prism violet for the collar. I used a #4 round brush and double loaded it into the purple and white. Then I gently blended the purple and white on the canvas (for color variation).
Then paint the buckle black. Add titanium white highlight on the top of the buckle.
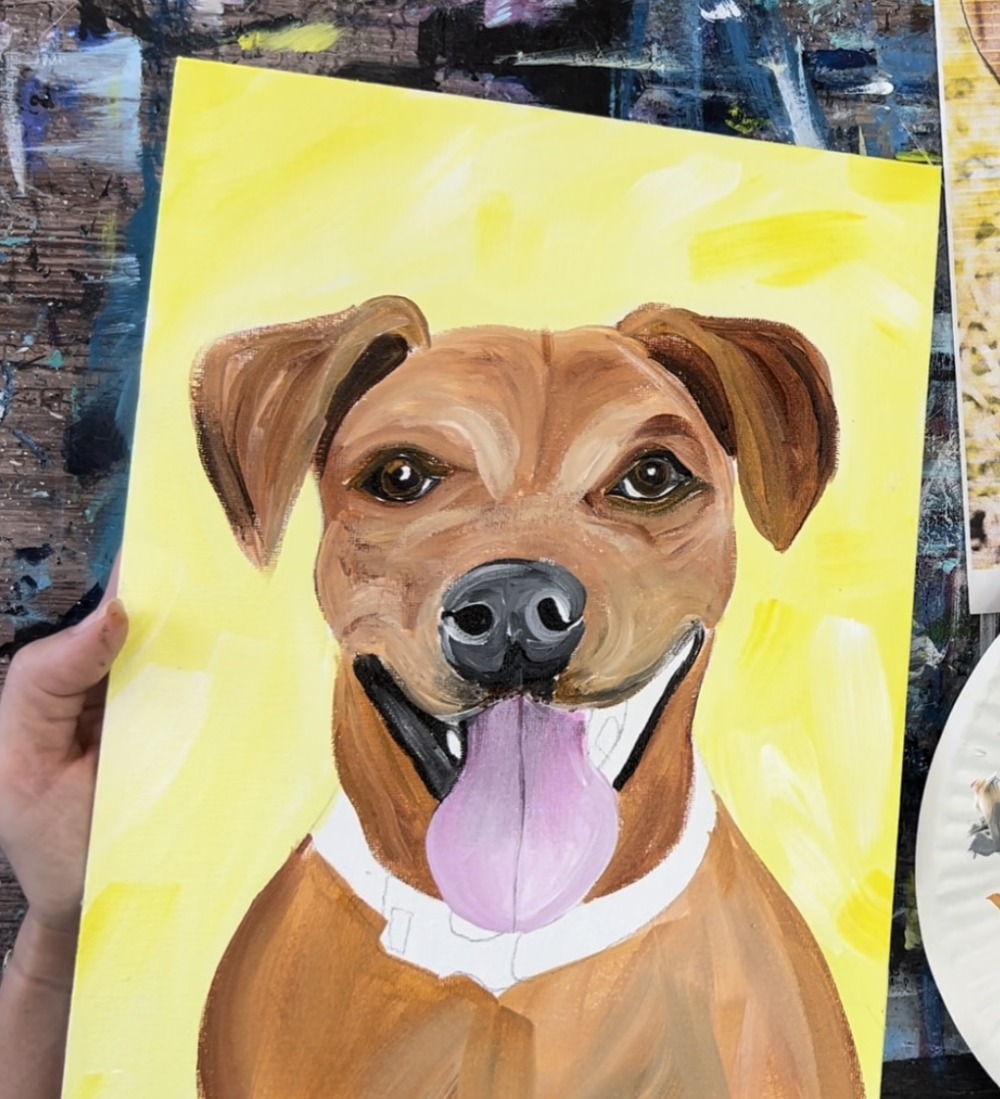
10. Touchups and other prominent features
Be careful not to do too many touchups. If you want to add whiskers, use a 3/0 round brush and thinned down black paint. Paint very thin lines where you see the whiskers on your reference photo.

Another recommended touchup is the add a second coat of paint in the background. You may need to touch up the negative space around the pet.
Finished!

Share your art here:


I just happened to look at your site today to see what new tutorials you have and saw this pet one. The brown dog looks so much like my dog that I lost almost exactly a year ago that it brought tears to my eyes. I will definitely have to give it a try and paint a painting in his memory. ❤️❤️
On a brighter note – any tips for painting a black cat? I tried before and gave up because I had such a hard time with his eyes and face since there is so little contrast.
Hi Kat!
I’m so sorry for the loss of your dog :'( It’s so hard loosing our fur babies!
As far as the black cat, I would definitely try mixing different shades of the gray for the highlighting/fur texture instead of using solid black. Perhaps even use blues and purples as a different color in some of the highlighting. This helps create some contrast. If you “squint your eyes” while looking at the reference photo, sometimes that helps you determine where the contrast darks/lights are better!
Struggling with eyes is not uncommon. Try to use a reference photo that is focussed on the eyes with clear distinction of the different parts of the eyes. Eyes are such an important part of the portrait but they are tricky for sure! Having them drawn out correctly helps. Really observe the colors you see in the eyes. For example, even though they may be green eyes, there may be other colors such as yellow or brown in them… And practice, practice, practice!