
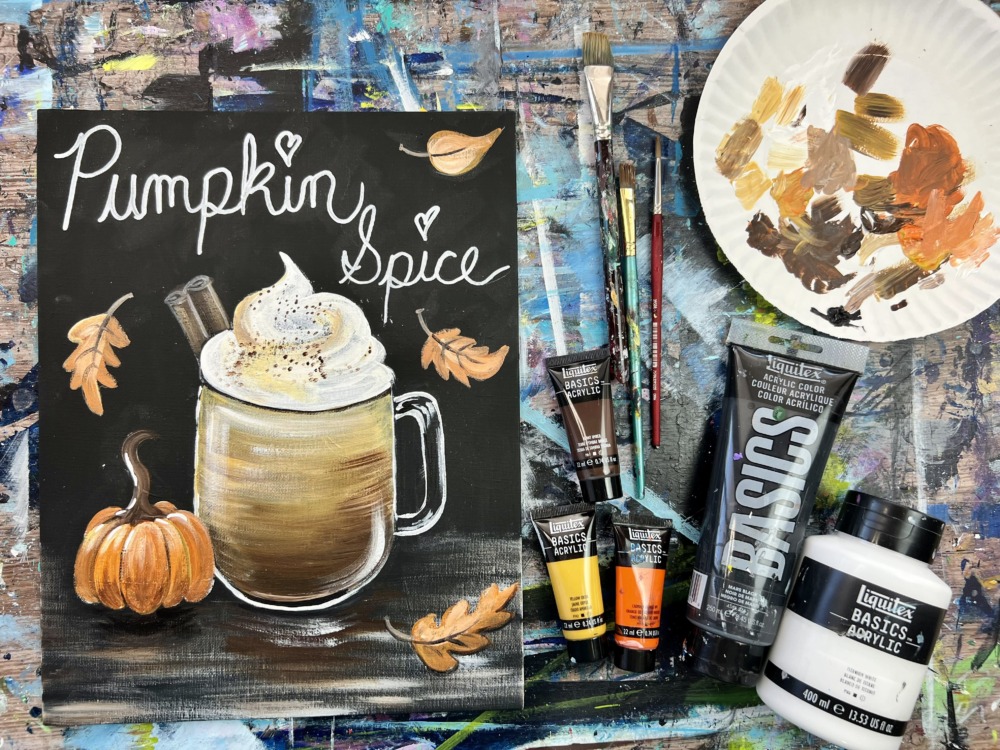
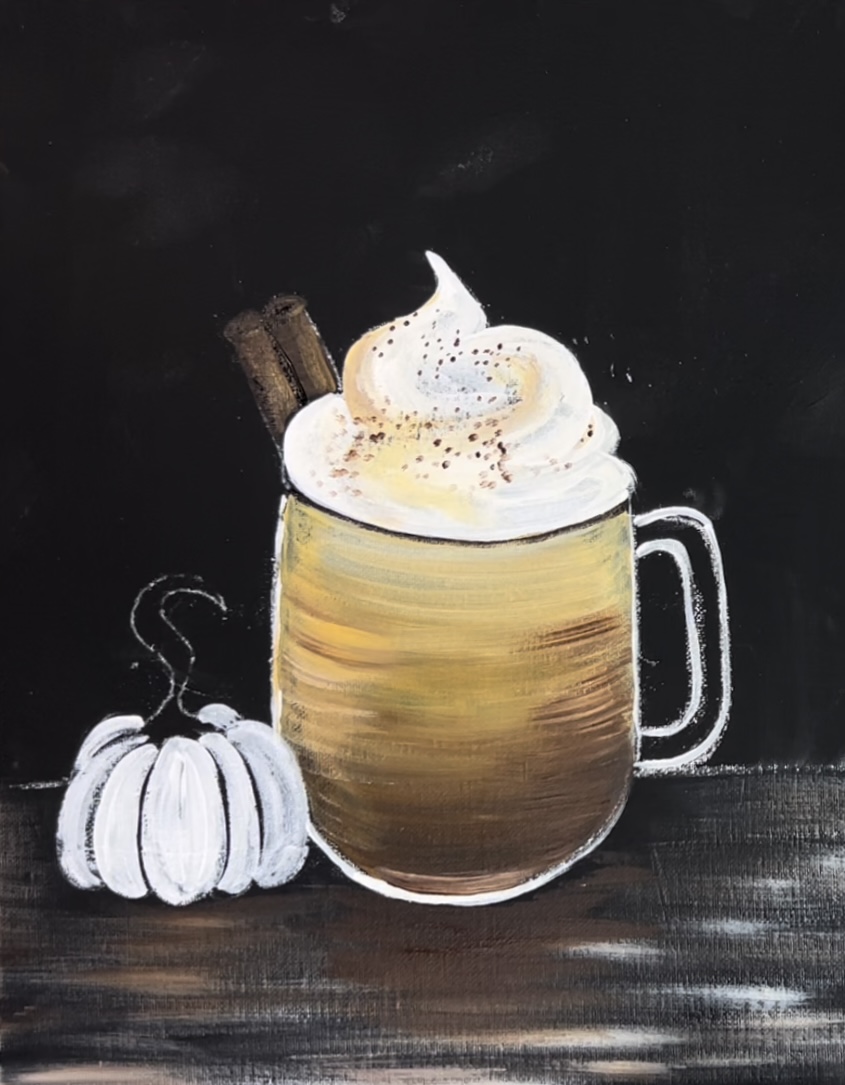
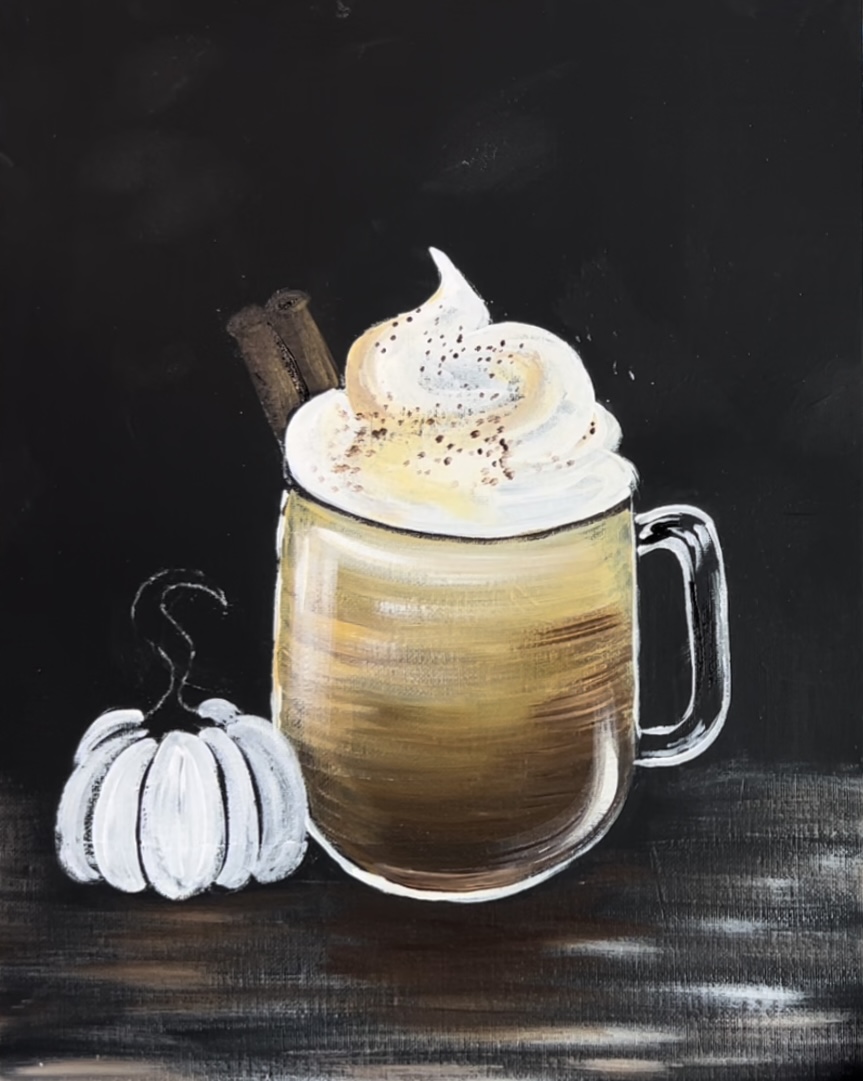
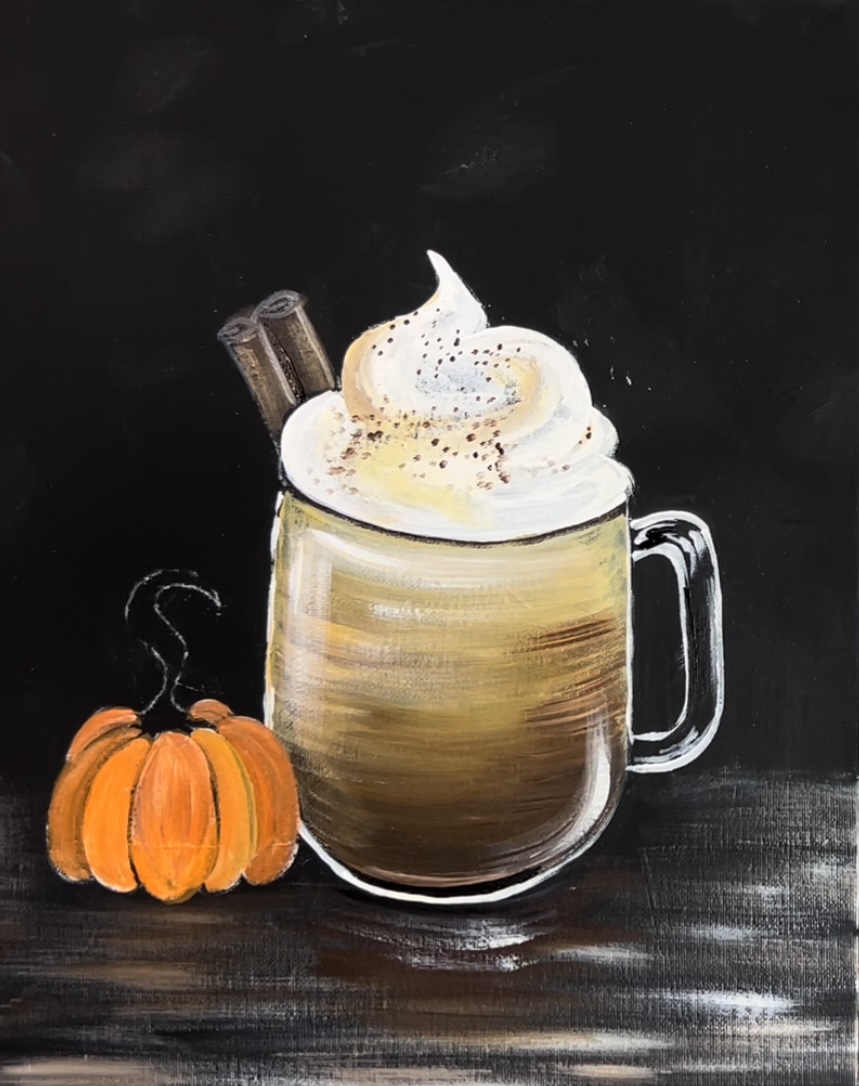
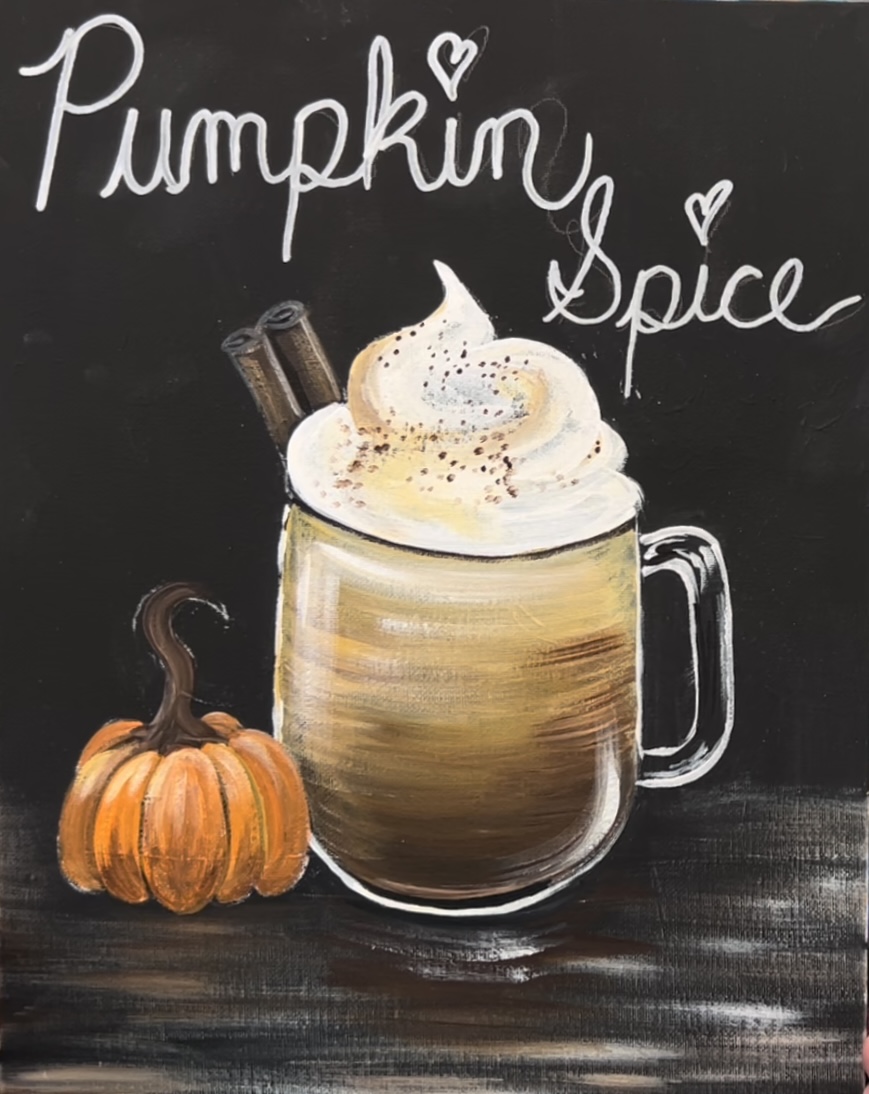
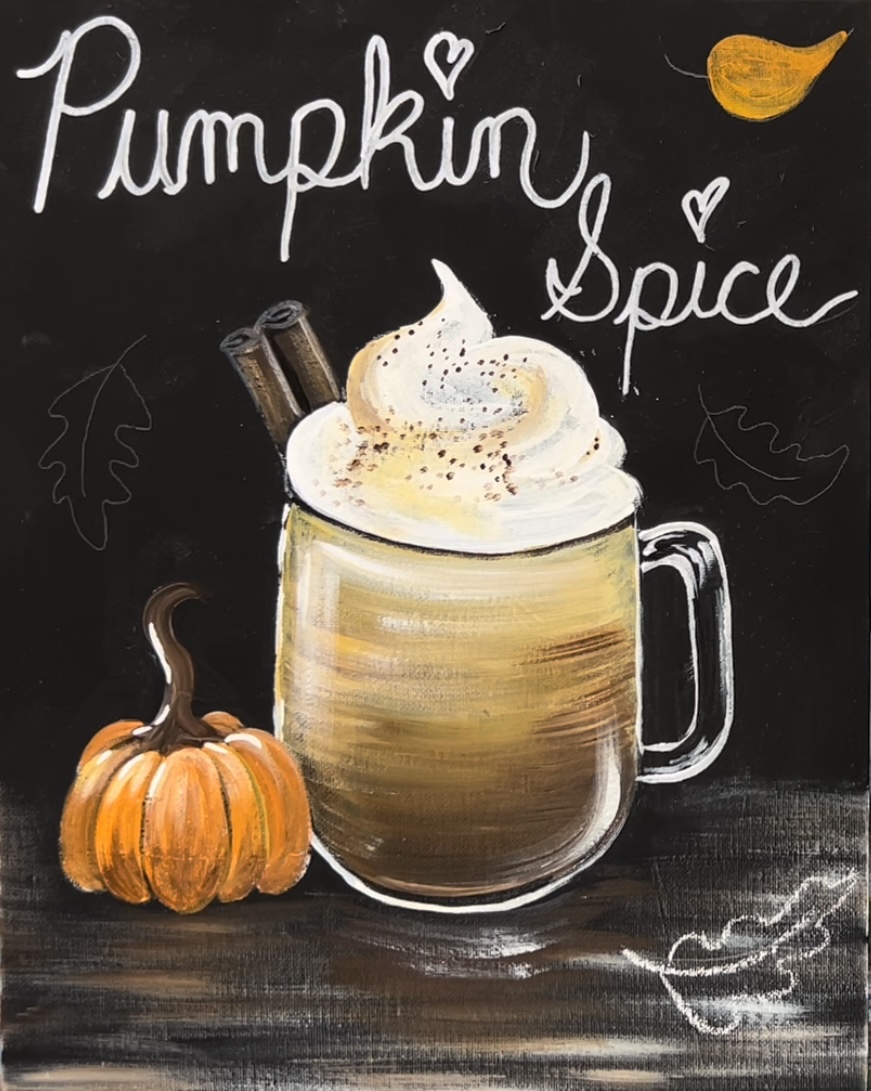
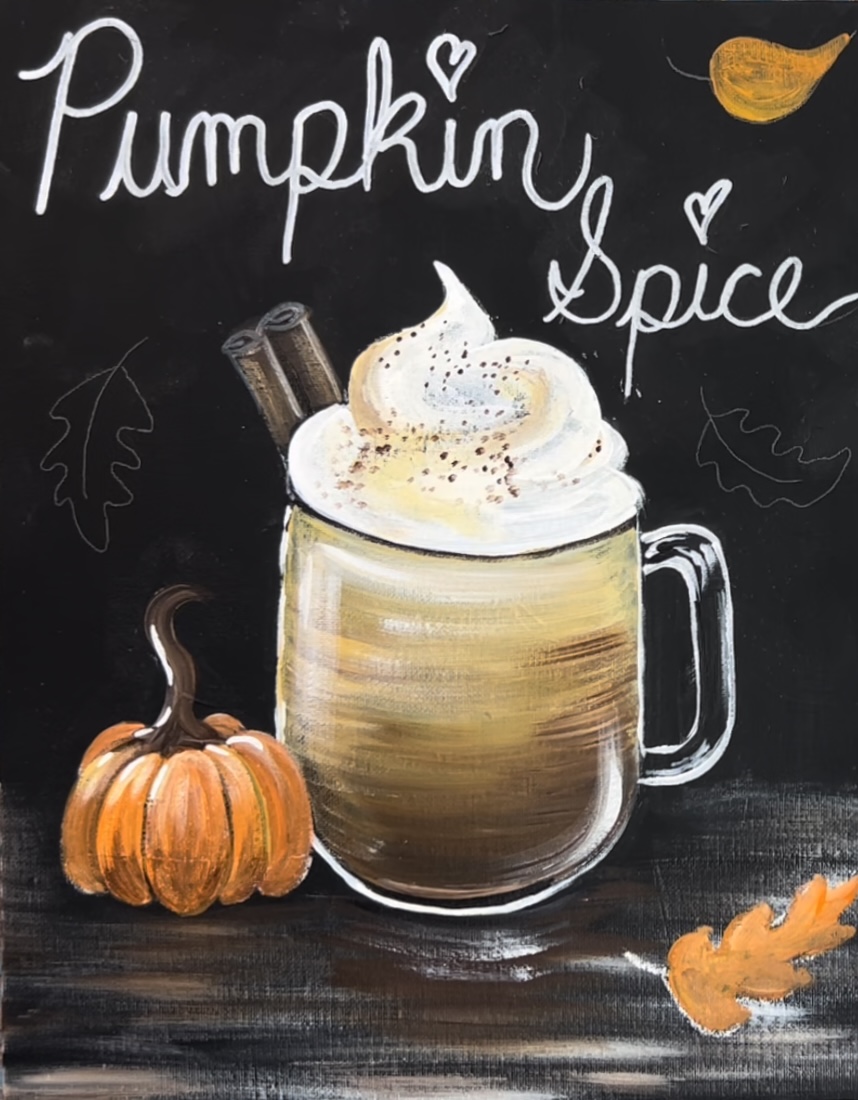
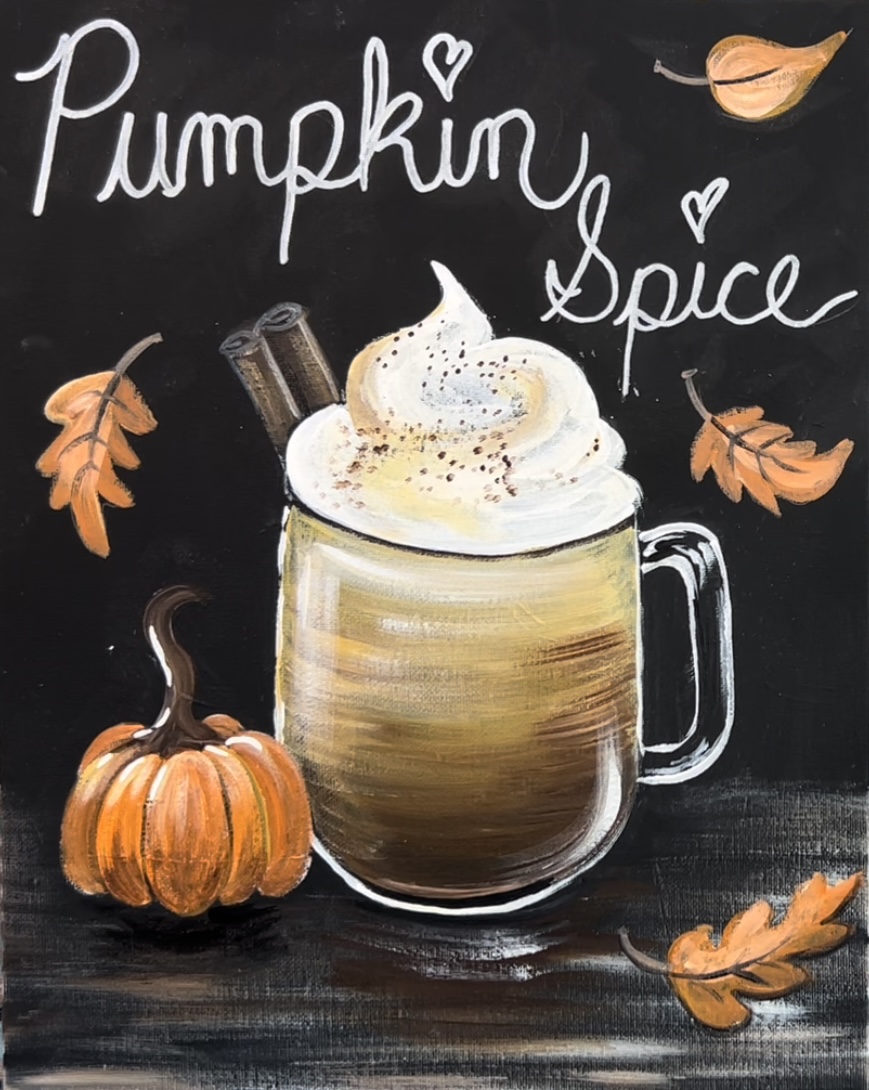
This acrylic painting tutorial on a black canvas will demonstrate how to paint a pumpkin spice latte with cute little pumpkin and fall leaves.

Would you like to save this?
The painting was done on an 11 x 14 canvas painted black with Apple Barrel Matte Black Paint. Matte black was used so the black would not show up with a shiny sheen.
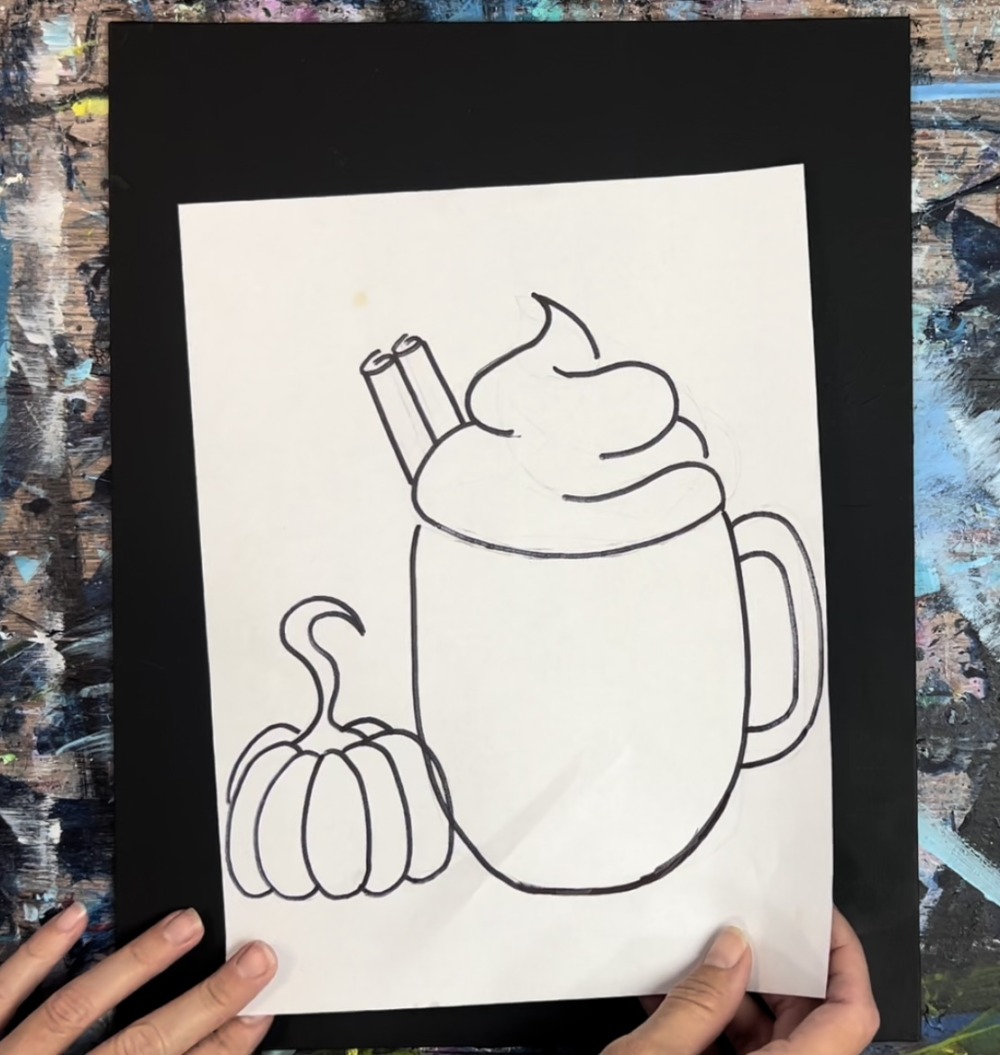
This tutorial also comes with a traceable template that you can download and trace onto your canvas with white graphite paper. Don’t have white graphite paper? You can, instead, rub chalk on the back of the print out and trace the design. This will transfer the chalk drawing to the canvas. I’ll be demonstrating this transfer technique in the video and instructions below.
Enjoy and happy painting!
Materials
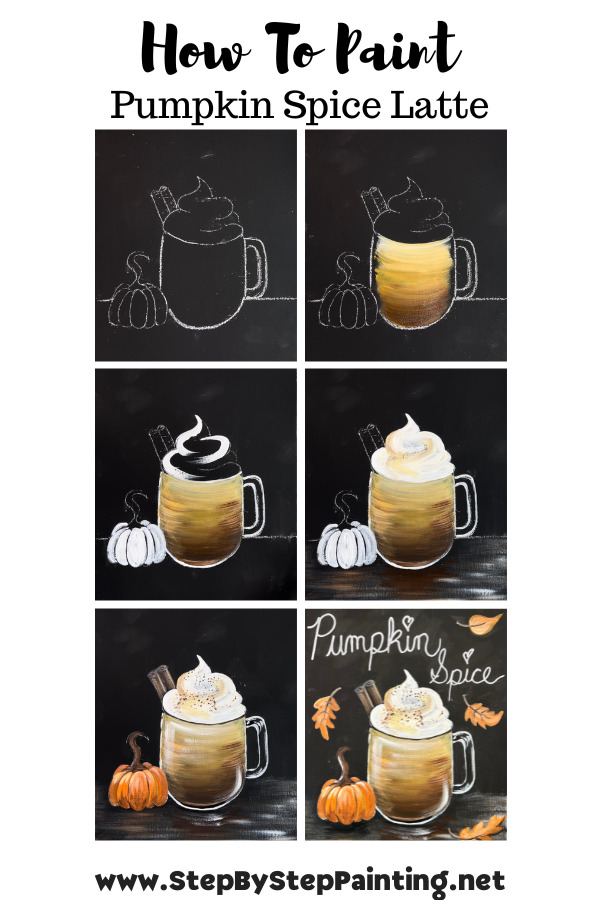
How To Paint Pumpkin Spice Latte
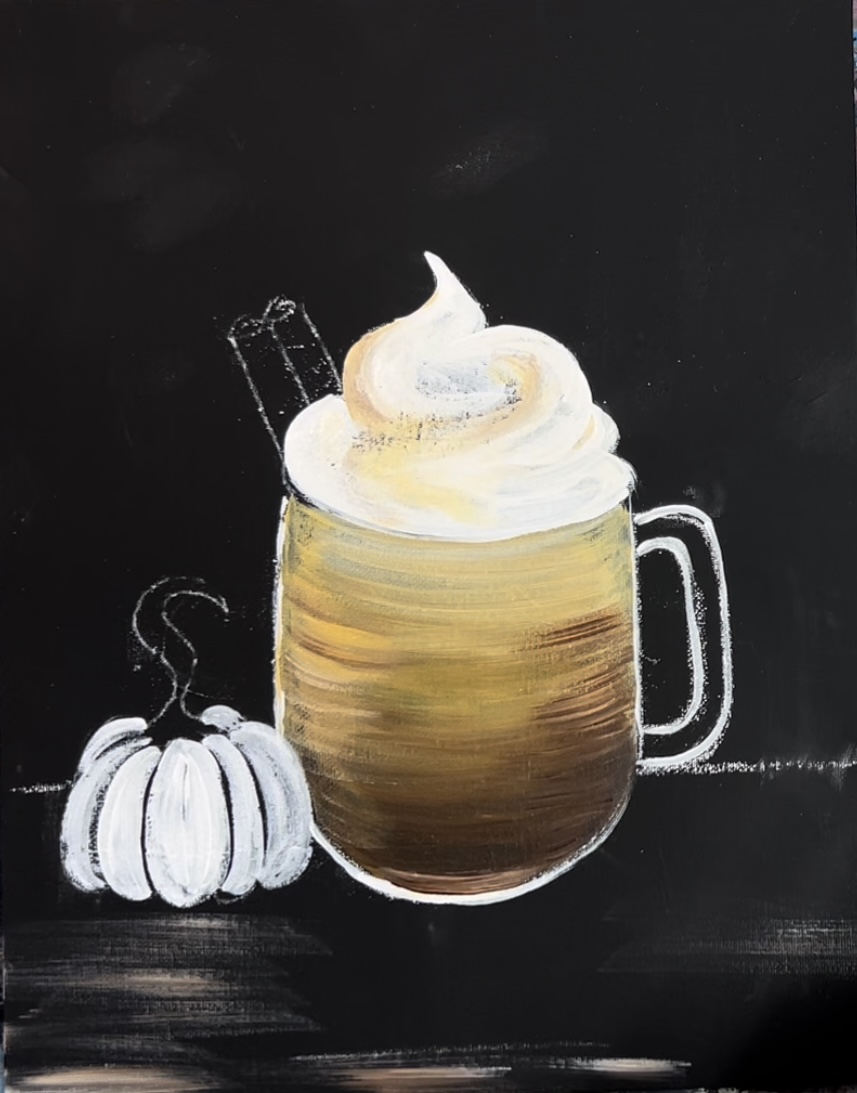
Paint a pumpkin spice fall still life on an 11 x 14 black painted canvas.
Materials
- 11 x 14 Canvas
- White Chalk
- Acrylic Paint
- Brushes
- Traceable Template
- White Paint Pen (optional)
- White Graphite Paper (optional)
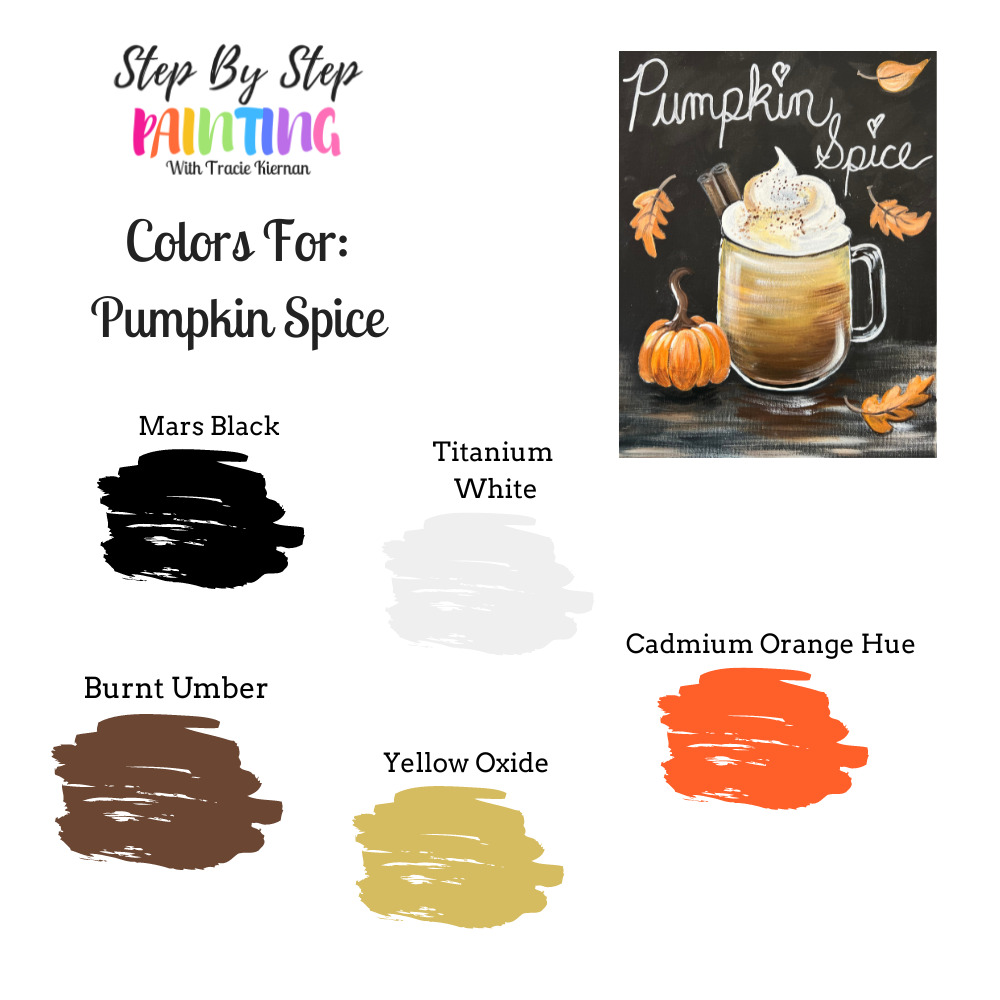
Colors
- Titanium White
- Mars Black
- Burnt Umber
- Yellow Oxide
- Cadmium Orange Hue
Brushes
- 3/4" Flat Brush
- #8 Round Brush
- #4 Round Brush
- 12 Bright Brush (I use the 12 bright in this set)
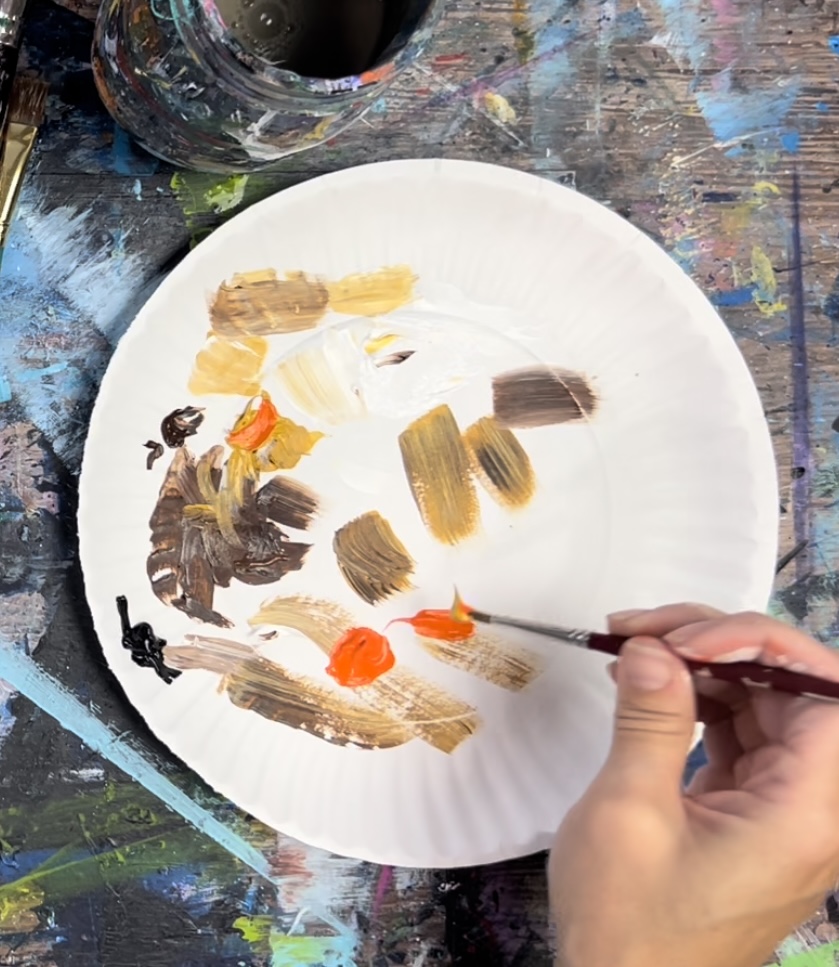
Color Palette
I used Liquitex BASICS acrylic paint for this and I used Apple Barrel Matte Black paint to cover the white canvas. If you are using a different brand of paints, you can use the color chart below.
Using Craft Paints?
If you are using craft paints such as Apple Barrel, I would recommend subbing to these colors.
- White
- Black
- Brown Oxide
- Harvest Orange
- Yellow (add a tad bit of brown into this)
Traceable:

Directions At A Glance:
Video:
Step By Step Instructions:
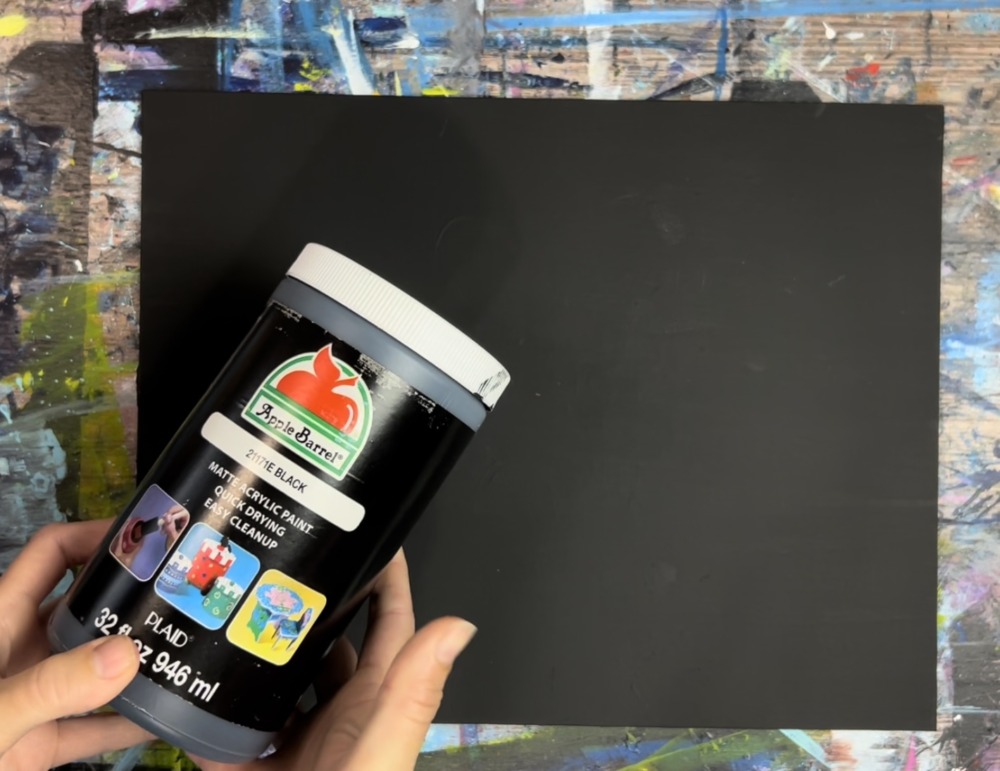
1. Paint Canvas Black
Use an 11 x 14 canvas (or different size if you want). Paint the entire canvas with one coat of Apple Barrel Matte Black. If you don’t have Apple Barrel black paint, you can use the Liquitex BASICS mars black paint. It will still be fine but the background might show up a little shiny.
I chose a matte finish so the background would be flat and not shiny. This helps the foreground objects stand out better.
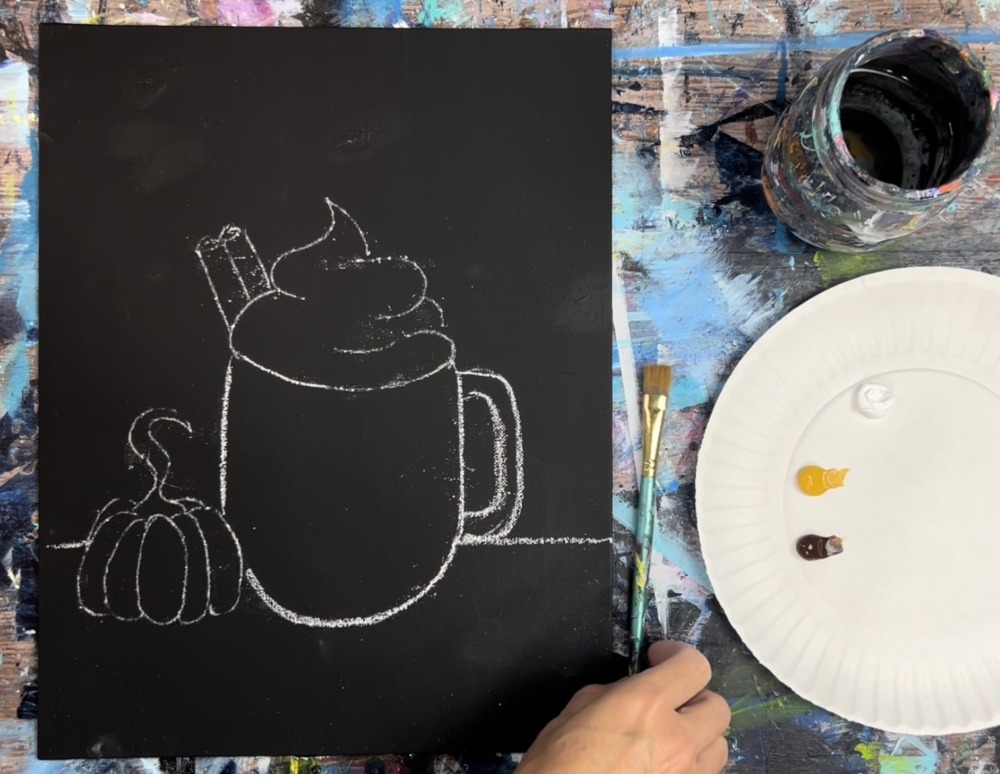
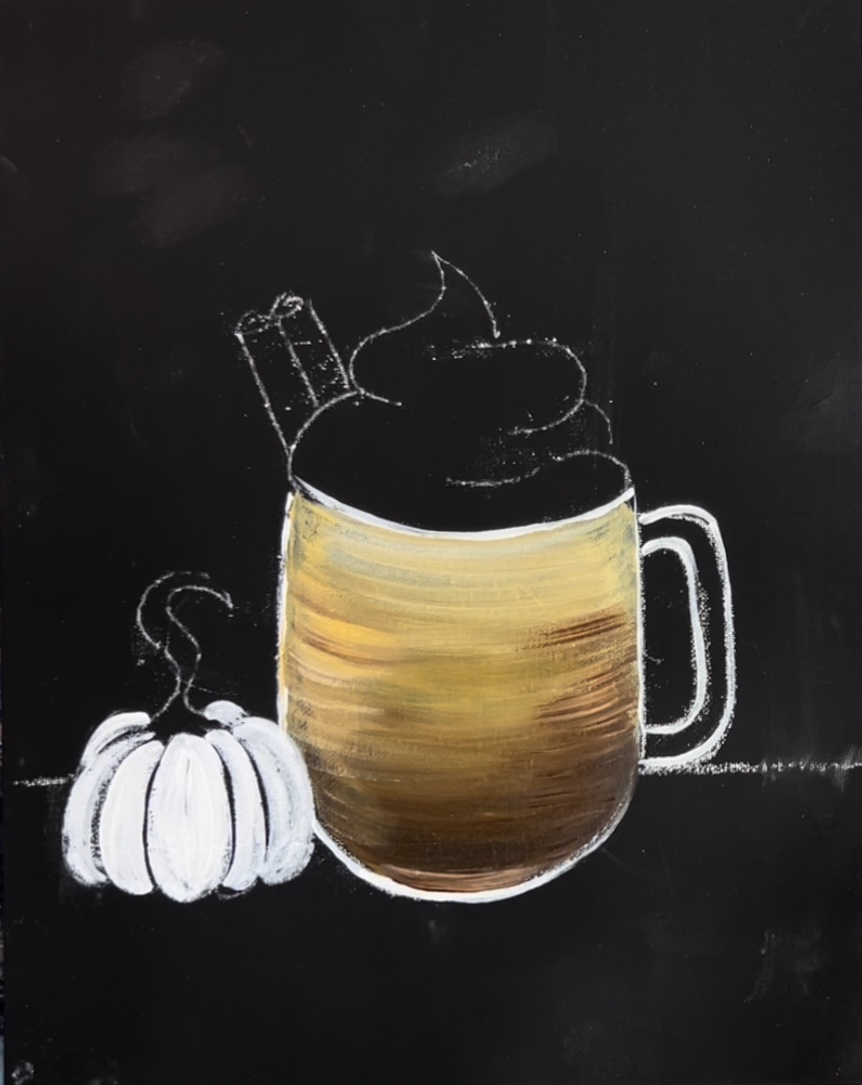
2. Transfer Pumpkin Latte Design Onto Canvas
Print out the template or draw the design free handed on the canvas using a piece of chalk.
If you are using the template, turn it over and rub chalk on the back. Alternatively, you can use white graphite paper to transfer the design. Rub the chalk just on the back of the drawing.
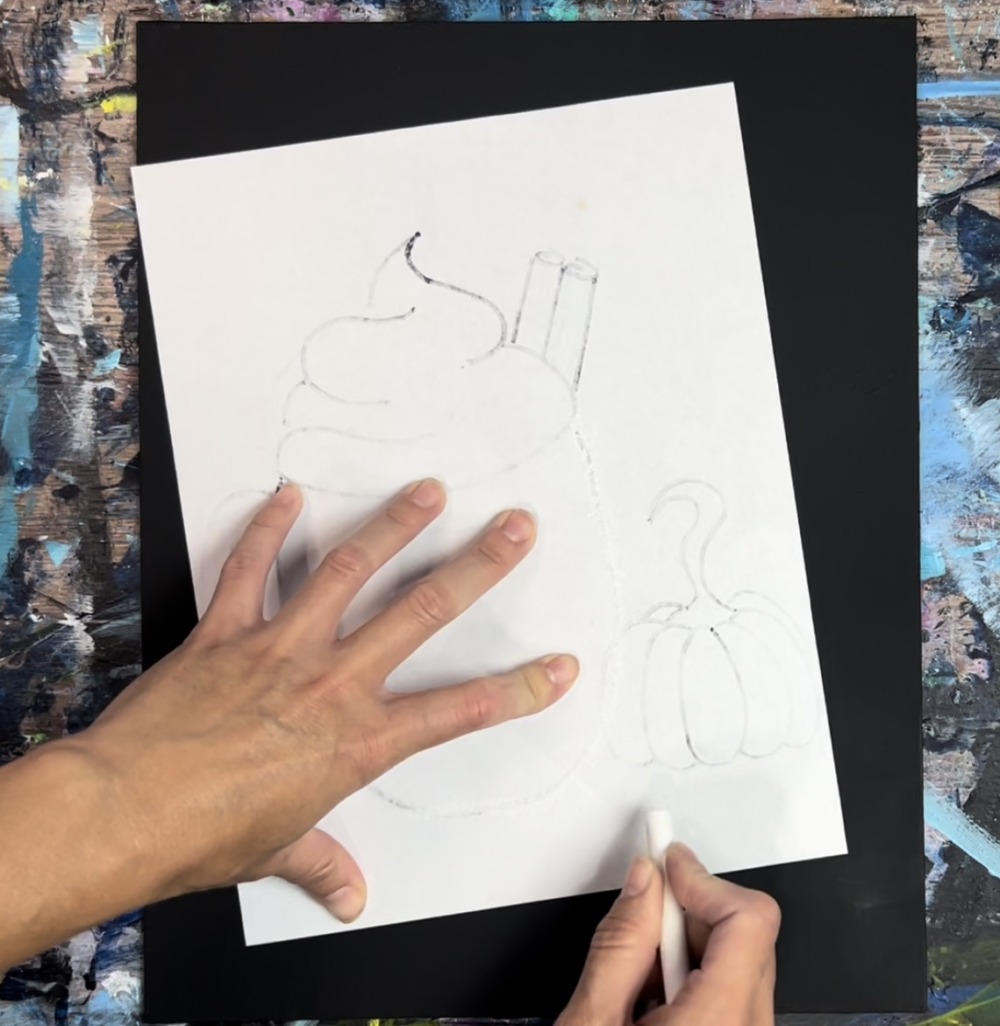
Then position the template so the bottom of the coffee cup is about 2.5″ from the bottom of the canvas.
Use a pencil to firmly trace the design.
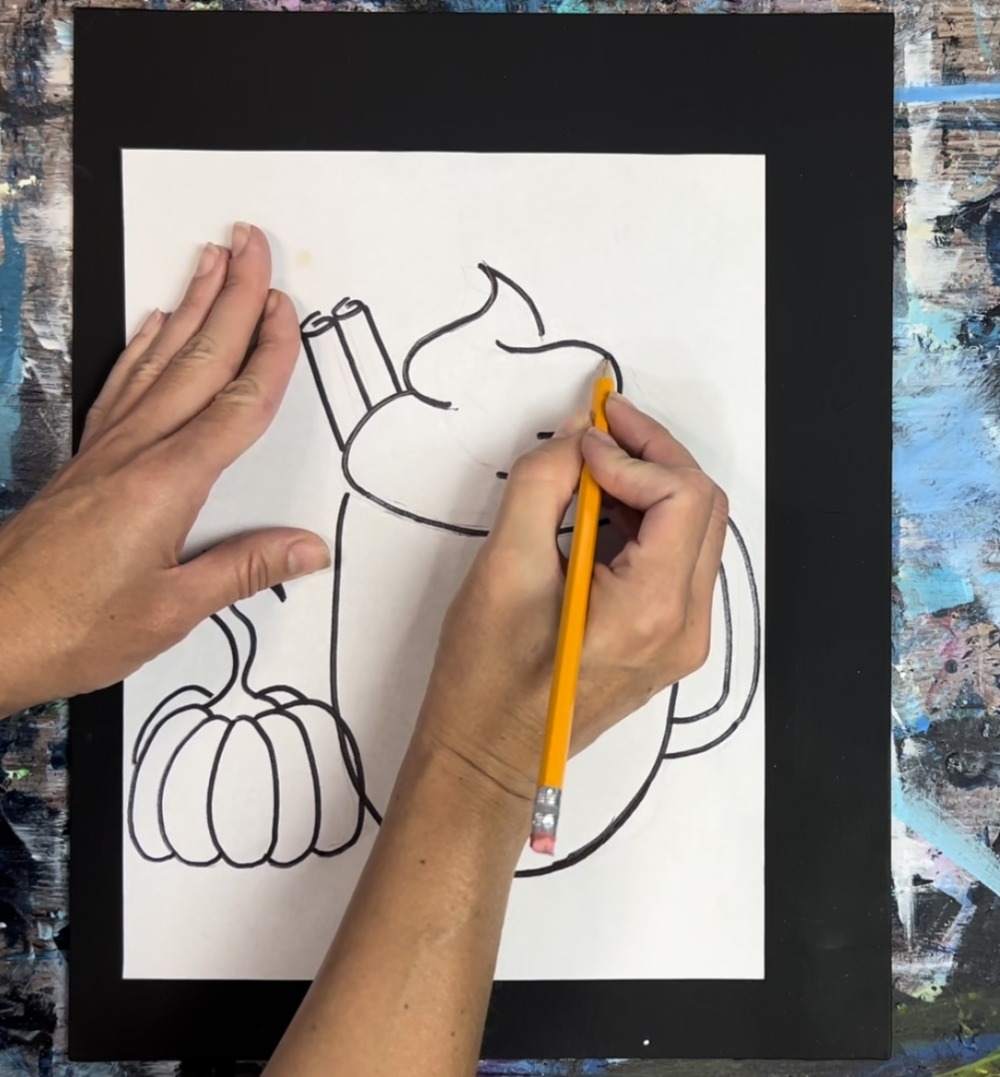
The chalk will make an imprint on the canvas. Then use your piece of chalk to draw over any lines that need to show up better. Also, draw a horizontal table line just below the bottom edge of the coffee cup handle.
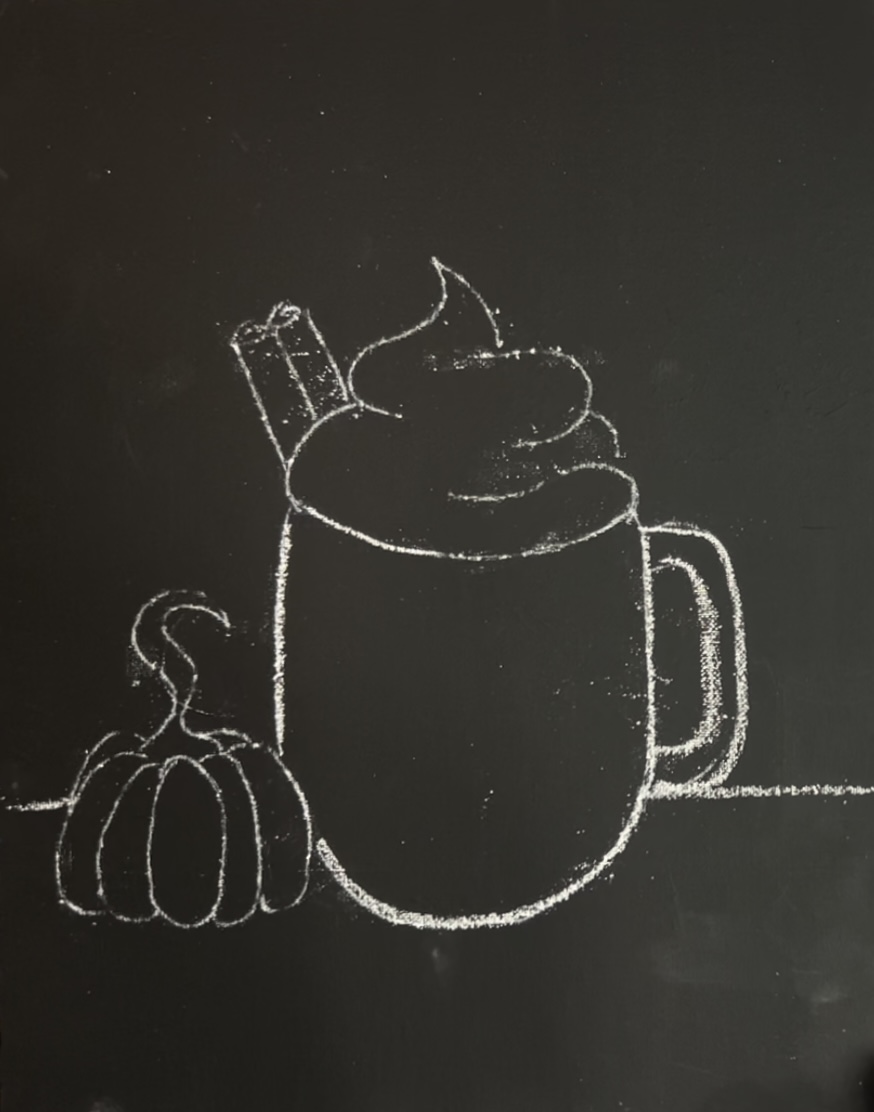
Note: excess chalk residue can be wiped with a soft wet baby wipe. You can do this now or when the painting is finished.
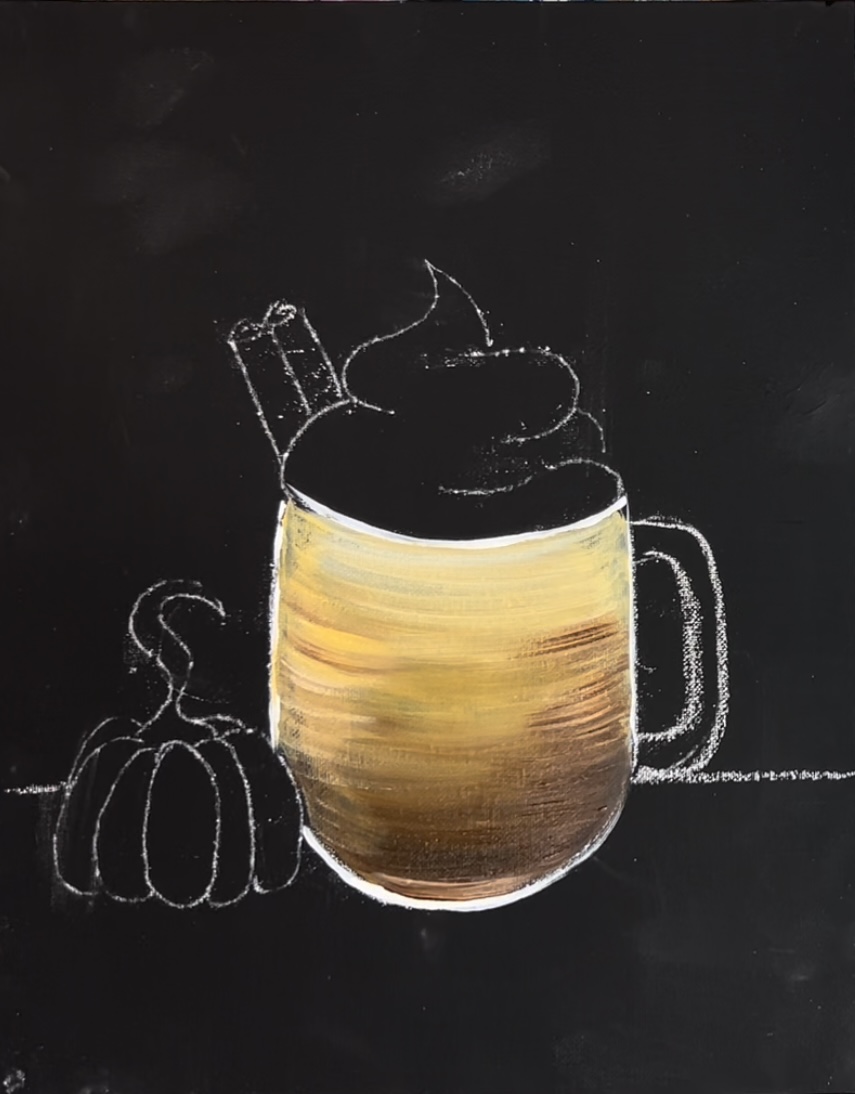
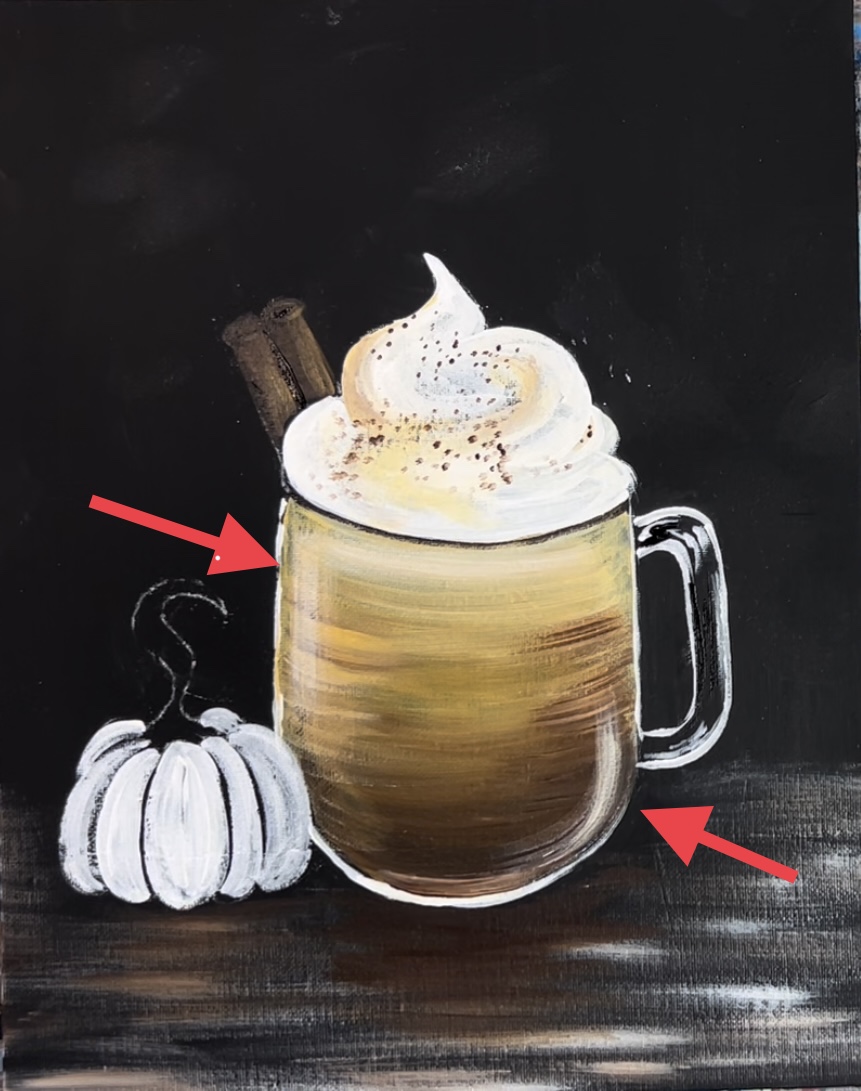
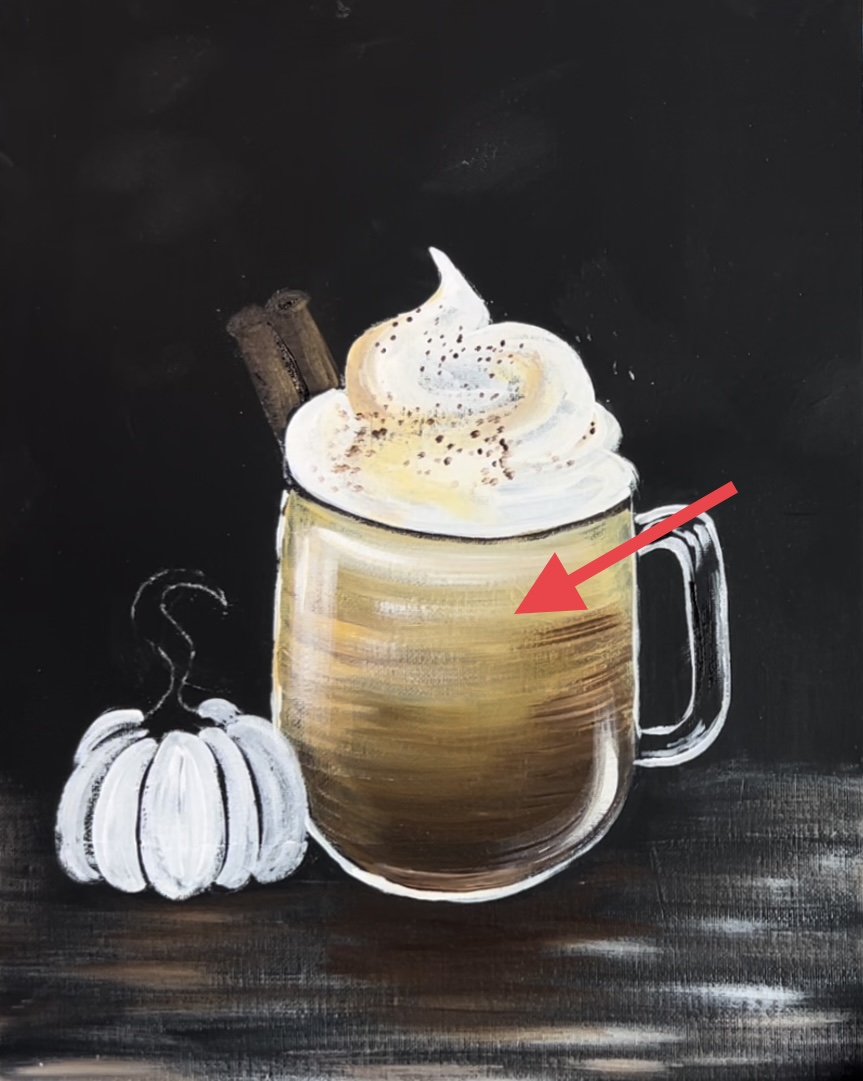
3. Paint Liquid Coffee Color Inside Cup
Load your palette with: burnt umber, yellow oxide and titanium white. Use a #12 bright brush.

Mix equal parts brown and yellow oxide together. This will make a medium brown color. Start at the bottom of the coffee cup and paint full width curved strokes.
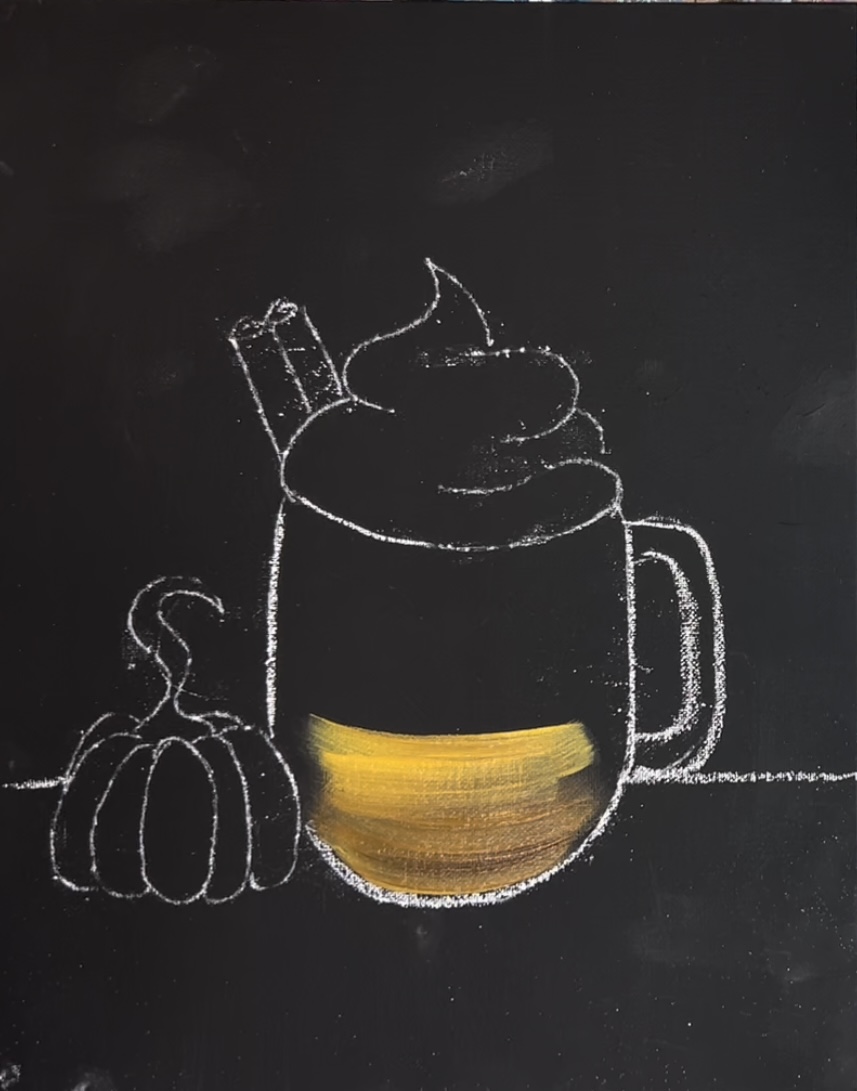
This coffee liquid should be dark on the bottom and gradually get lighter as it goes to the top. Gradually blend just the yellow towards the top. Then add titanium white onto your brush and blend that with the yellow at the top. Try to get a gradient of brown to yellow to light at the top. If needed, blend more of the darker brown on the bottom.
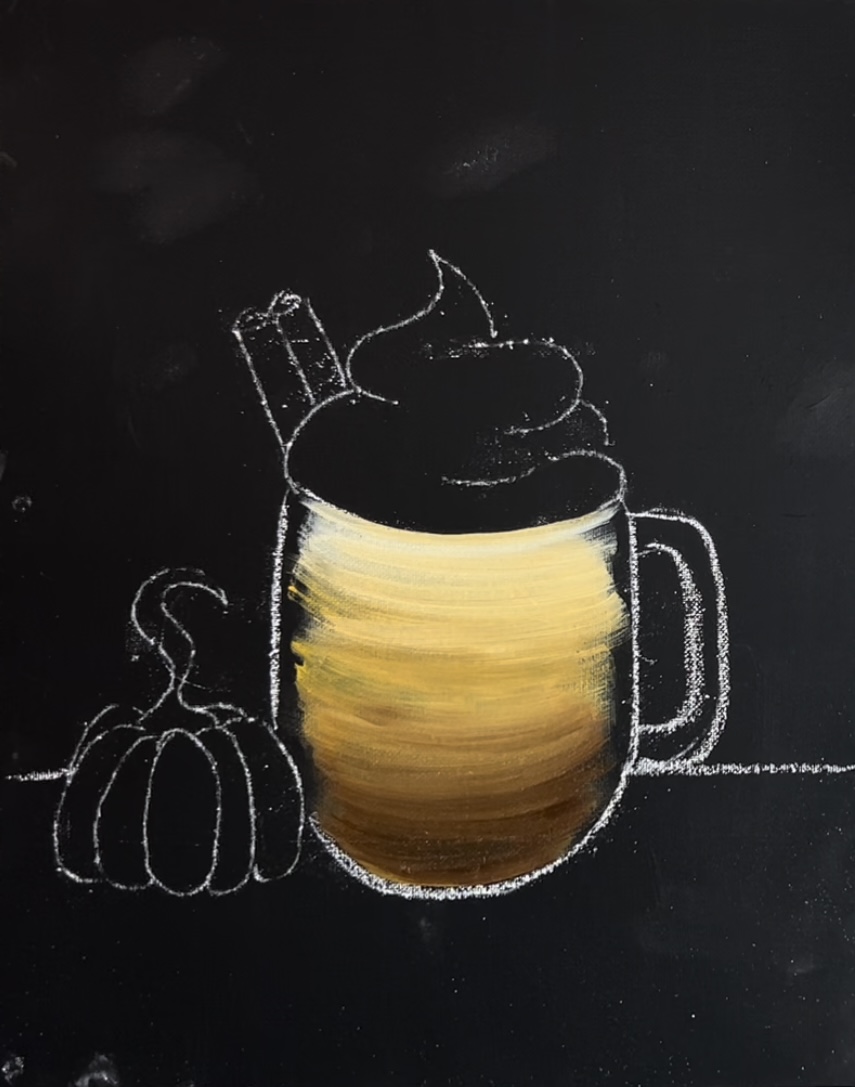
4. Loosely Outline Outer Edge Of Coffee Cup
Use a #4 round brush and just titanium white paint to loosely outline the outer perimeter of the coffee cup shape. Outline the handle as well.
5. Paint Pumpkin White
Next, use the #4 round brush and titanium white to prime paint the pumpkin bumps. Paint each of the bumps separately. The direction of each of the strokes should start at the top of each bump and stroke down. The reason the pumpkin is painted white first is so the final orange color shows up nice and bright.
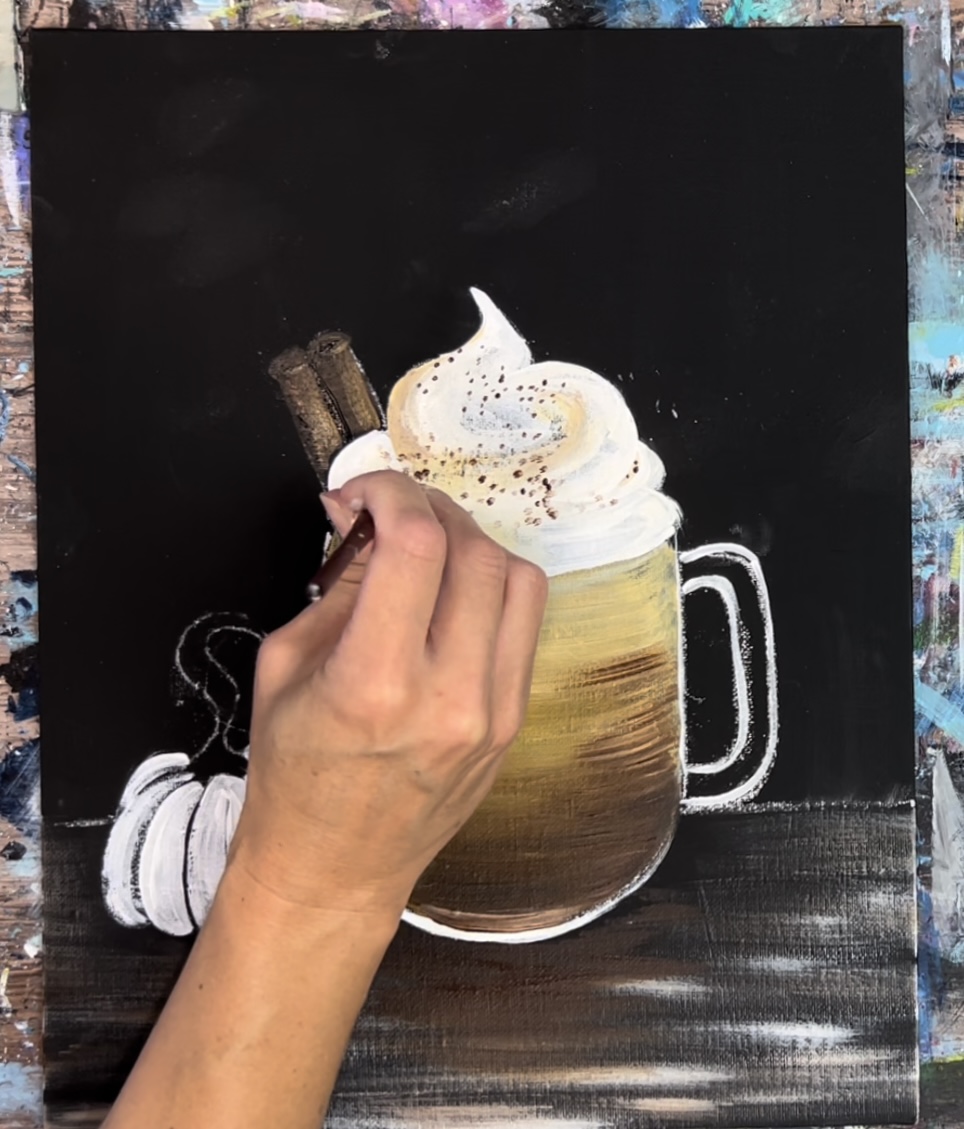
6. Paint Whip Cream
Next, use a #8 round brush to paint the whipped cream on top of the coffee. Load the brush in just the titanium white and loosely outline the shape of the whipped cream and some of the inner lines.
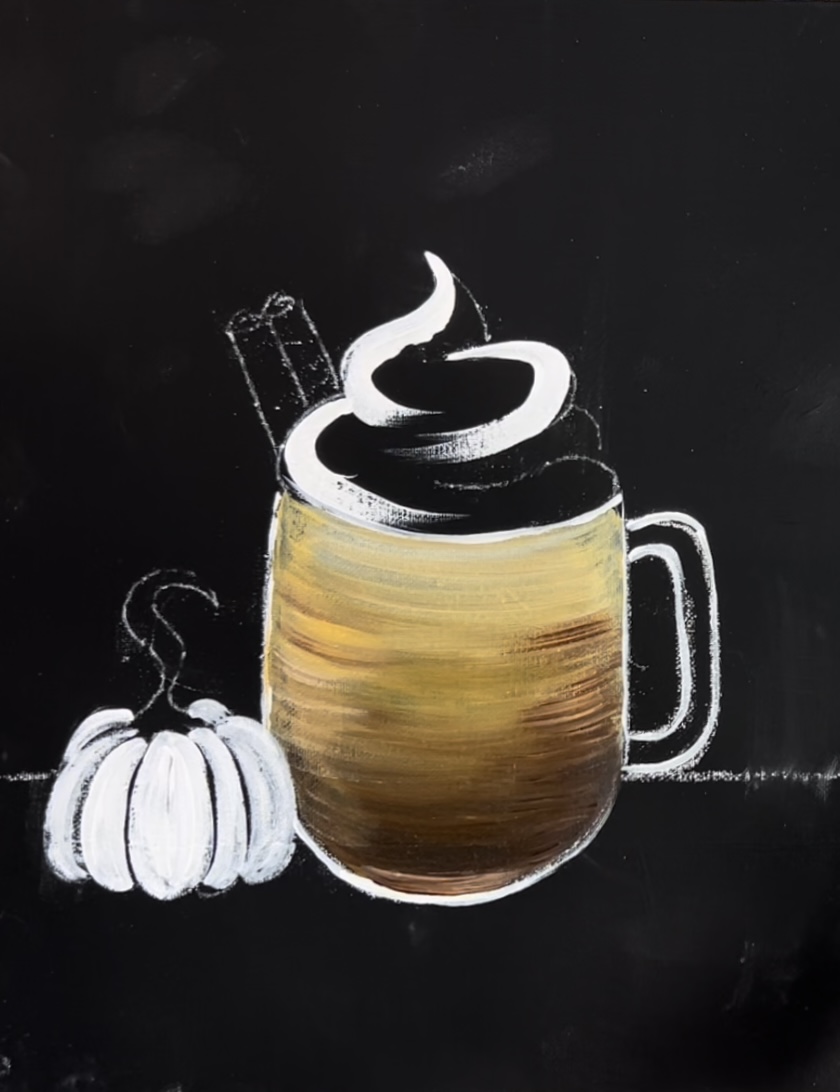
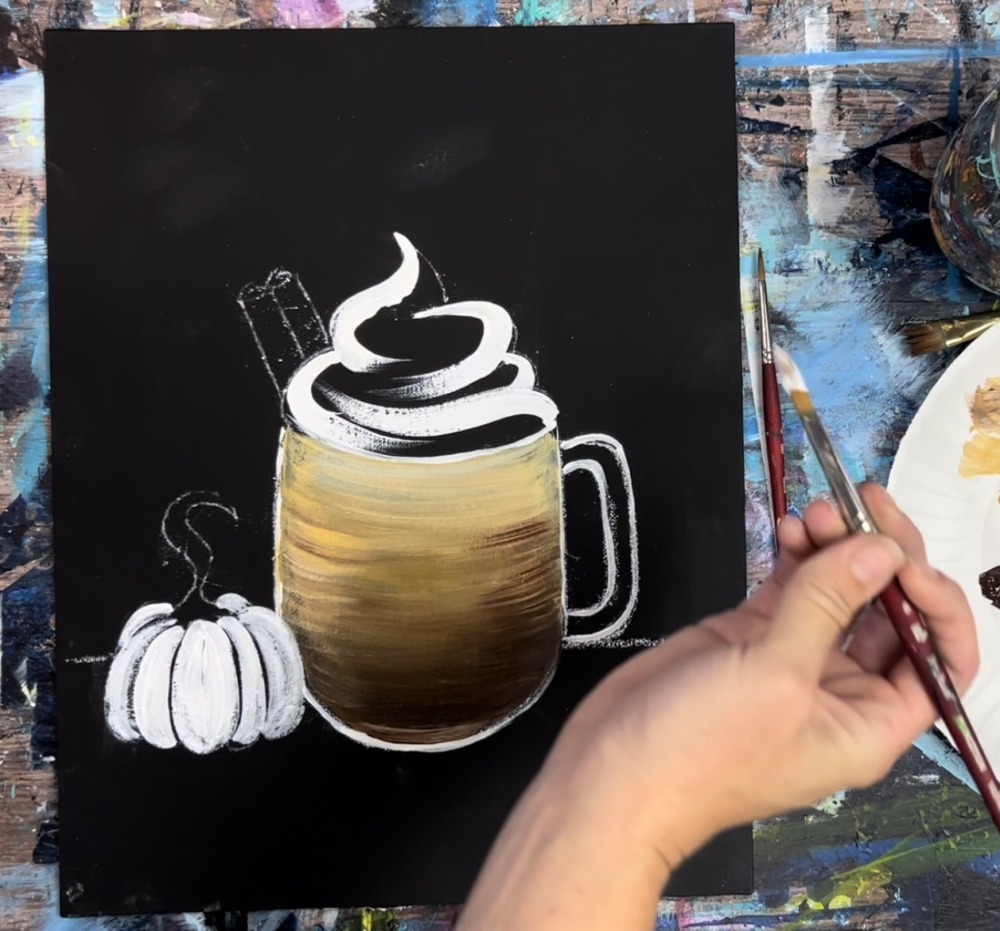
Then fill in the entire whipped cream area. Your strokes should go in the direction of the shape of the cream. Leave some of the black form the canvas still showing through.
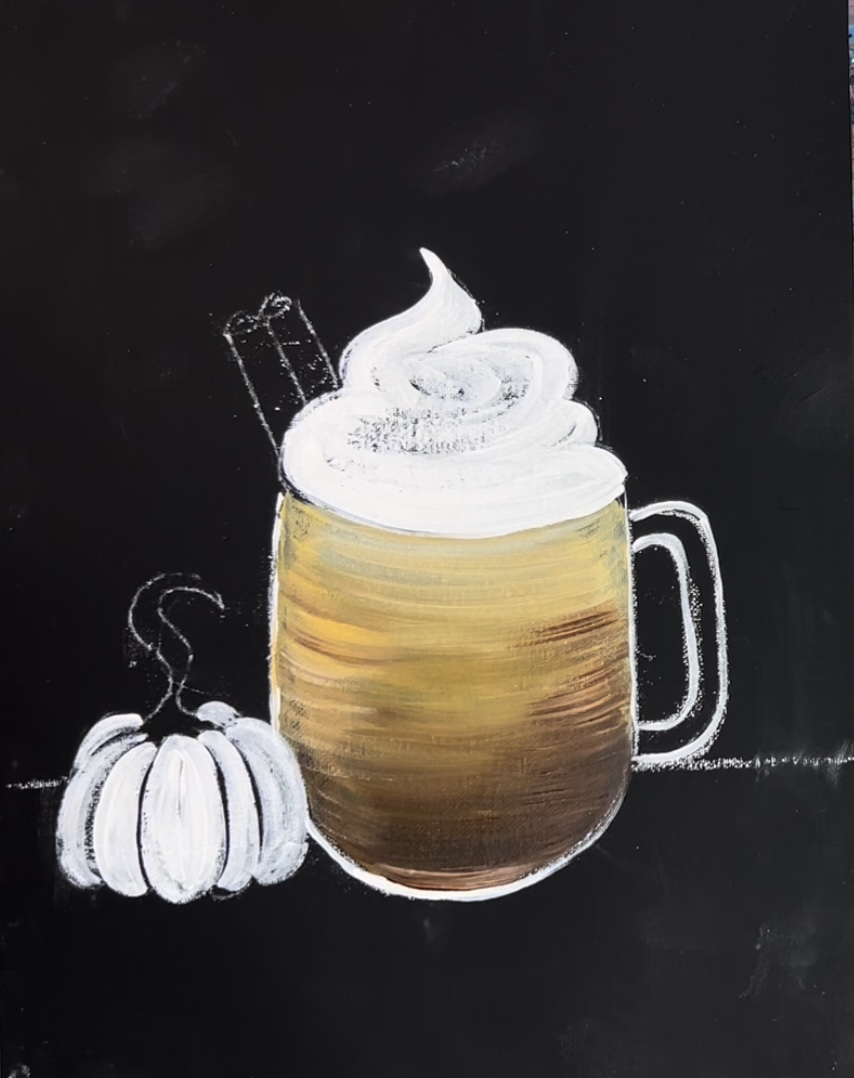
Then load your brush in some yellow oxide paint (without rinsing the white off your brush). Gentle blend the yellow oxide on the edges of some of the swirls of the cream. Then use your finger to gently blend the yellow into the white.
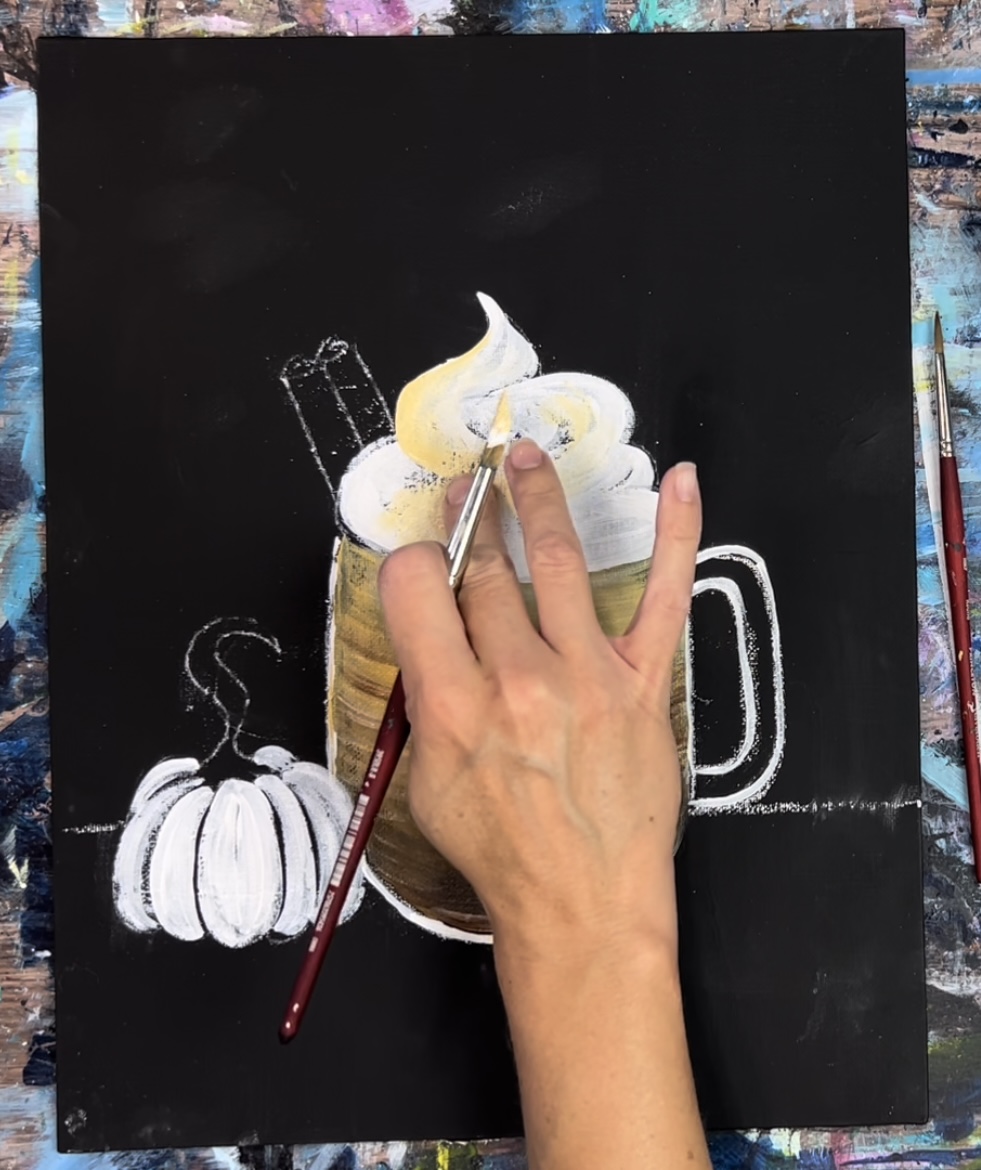
Don’t add too much yellow to the cream. Just add it so some of the edges and some of the inner parts.
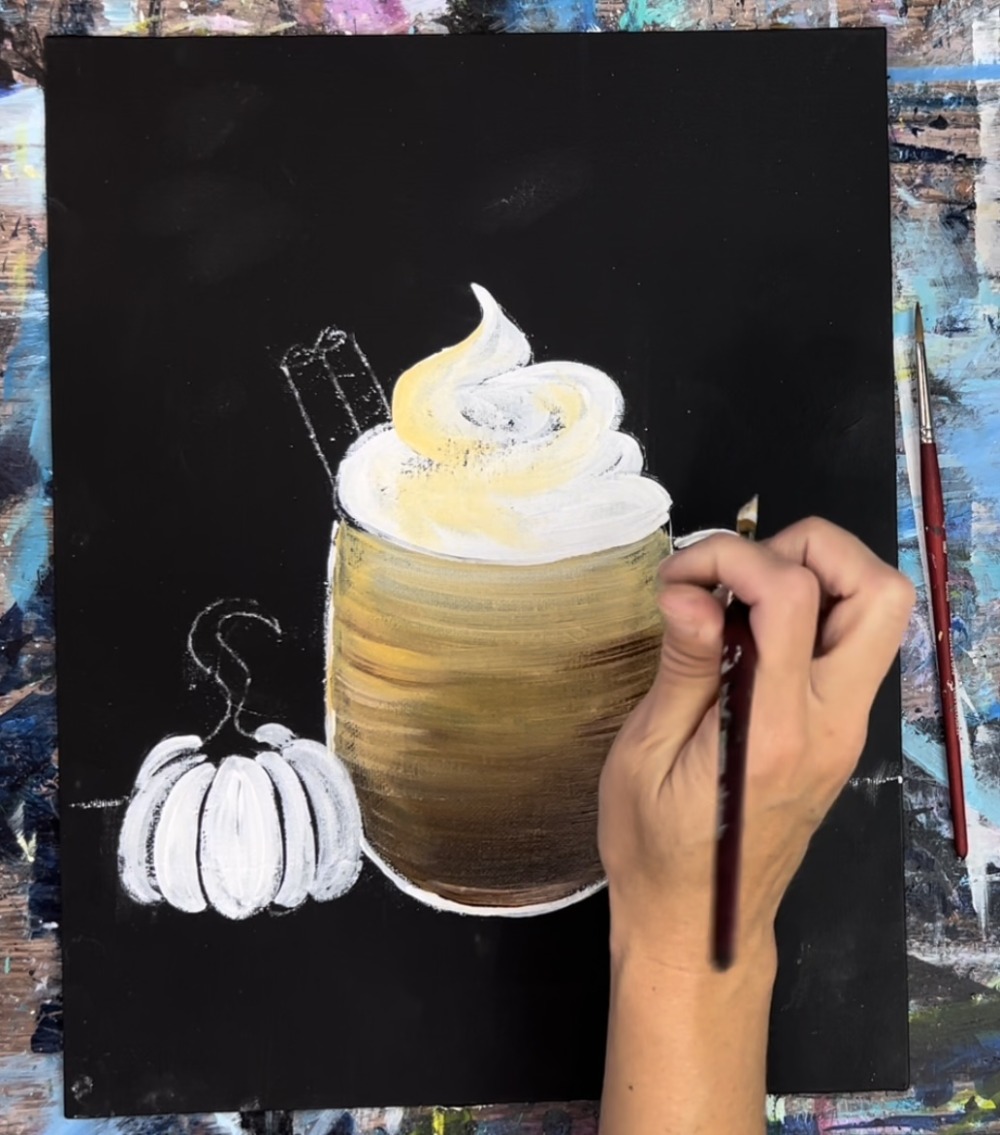
Then add a tiny bit of brown into the yellow. Paint the brown just on some of the edges and blend it in with your finger. If needed, go back over some of the whipped cream swirly with more white. Try not to over blend the color.
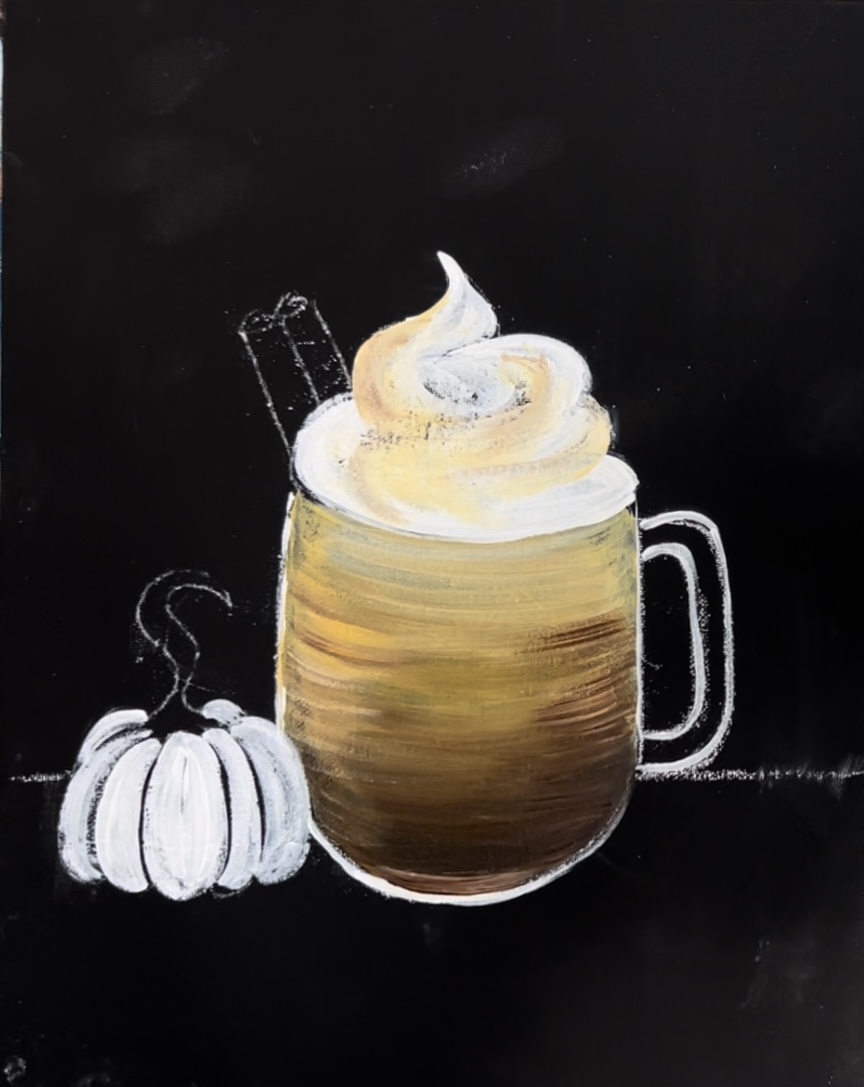
7. Paint Table
Use a 3/4″ flat wash brush. Double load the tip of the brush in burnt umber and titanium white. Wipe off some of the paint off the brush. Then paint full width left and right strokes. The paint should appear dry leaving a lot of the black background still showing through.
Paint the entire table area with this “dry brush” effect.

8. Paint Cinnamon Sticks & Cinnamon Topping
Use the #4 round brush to paint the cinnamon stick a combination of burnt umber and titanium white. Mix a little white into the brown so the brown will show up lighter against the dark background.
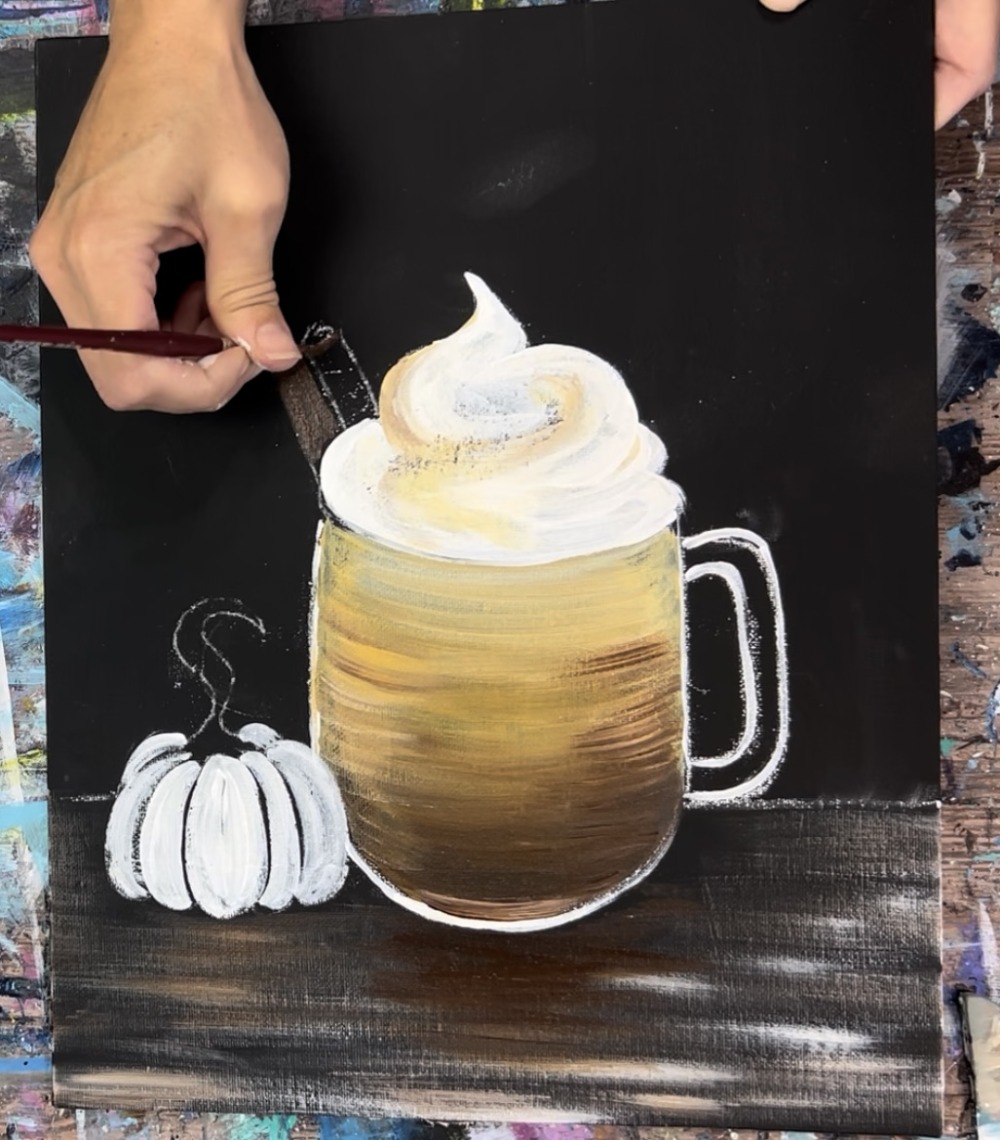
Paint both of the cinnamon sticks. Use mars black to loosely outline the edges of the sticks and the top oval pieces.
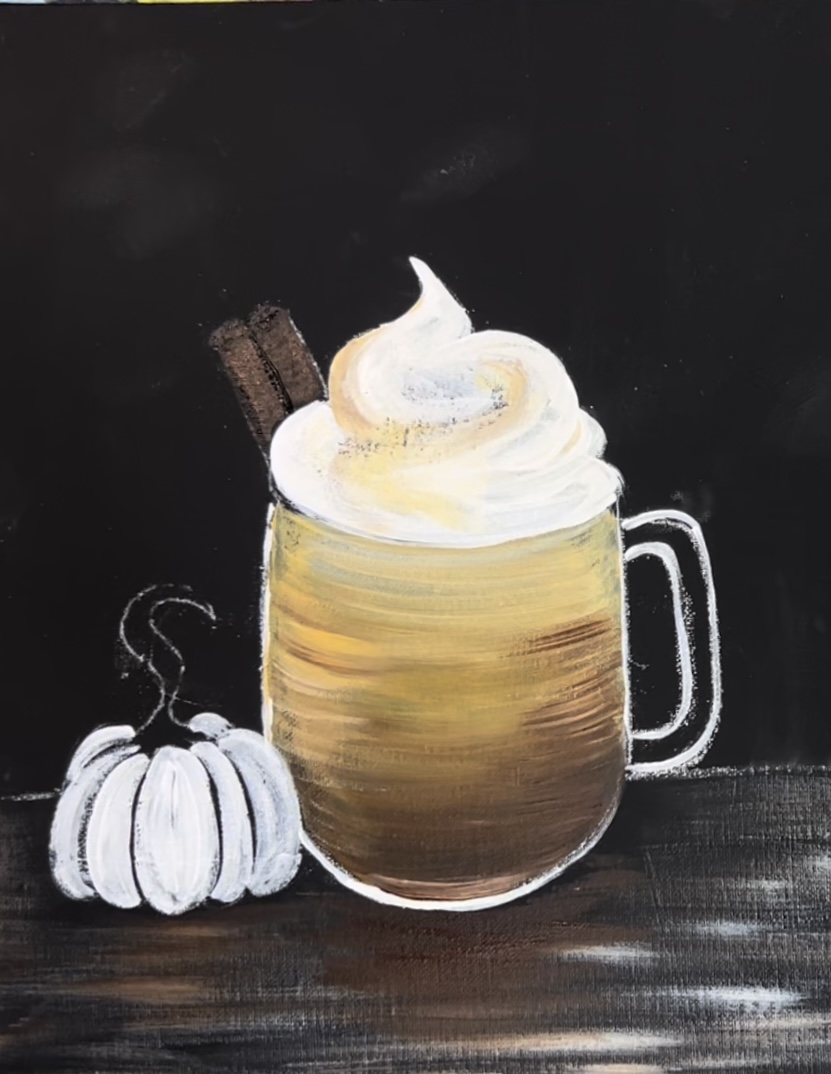
Then mix some yellow oxide into brown to lighten it. Use the light brown color on one side of the cinnamon stick to make it appear lighter/ highlight.
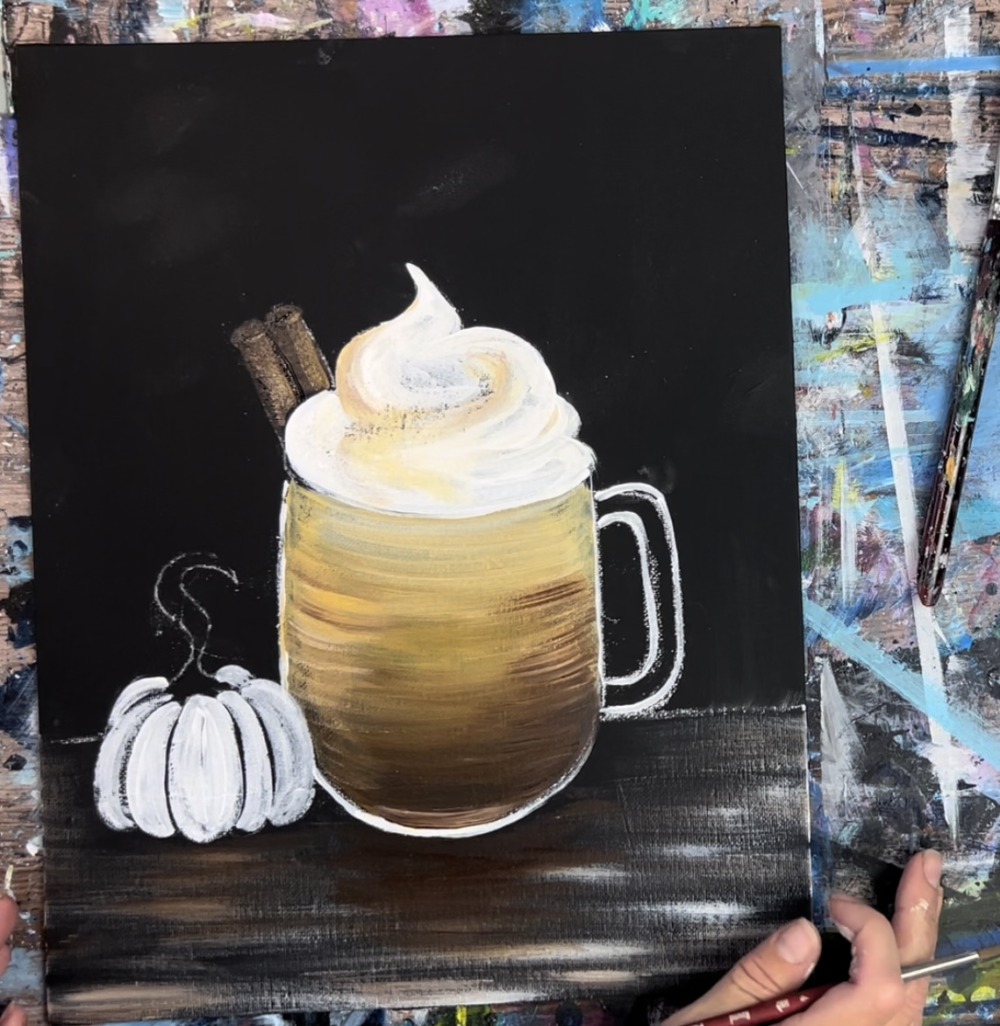
To do the cinnamon, use the tip of your round brush to paint (stipple) brown dots all over the whipped cream. You can use the pure burnt umber color for this. Try to vary the dots. Some are clustered together and some are spread apart more sporadically.
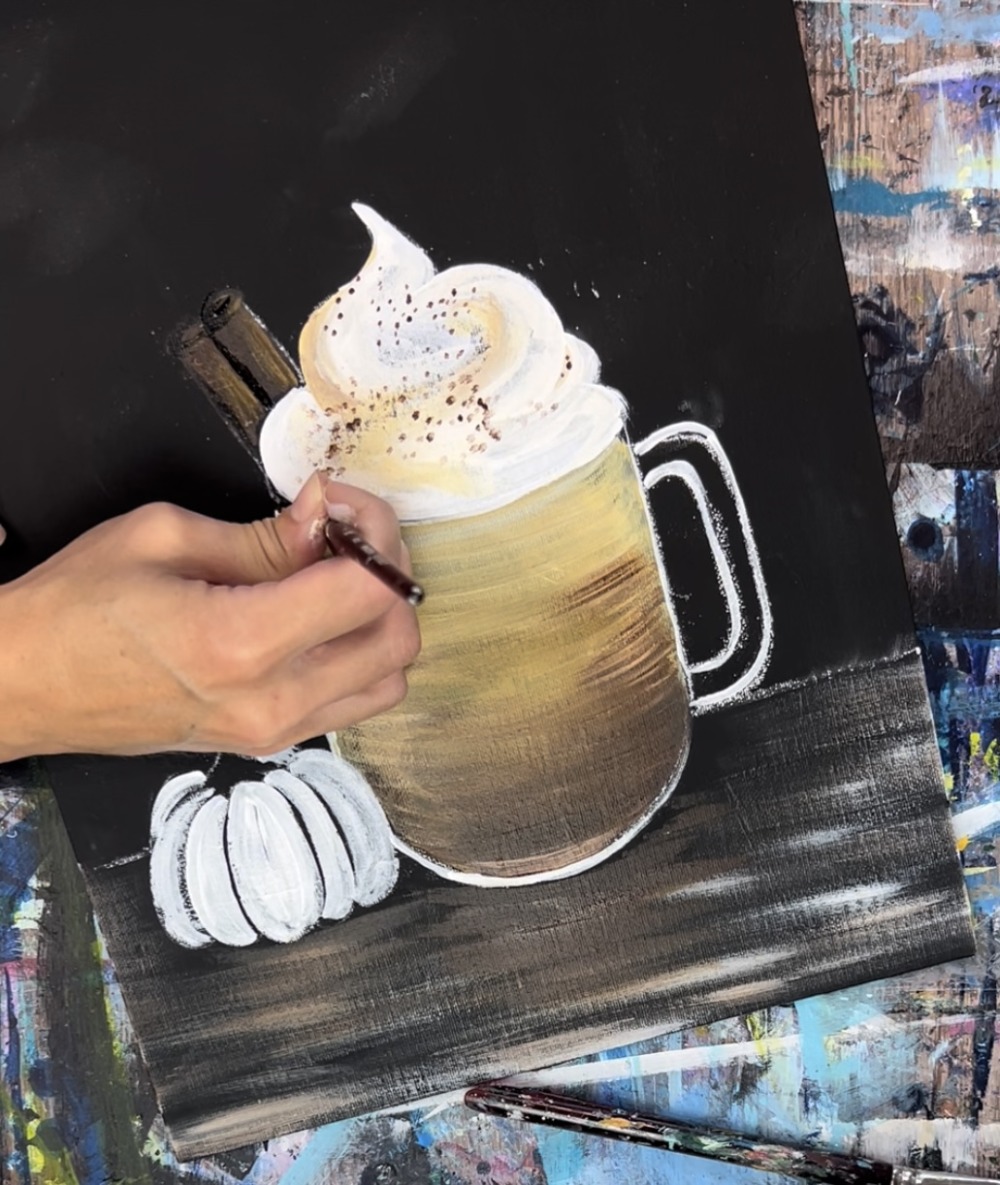
9. Add Highlight Glass Details To Handle & Cup
Use the #4 round brush and titanium white to paint little curved lines on the handle of the glass mug. Keep in mind that most of the inner part of the handle needs to be black.

Paint little sketch marks on the curved areas and along the vertical part of the handle. If needed, go back and add more black onto the handle.
Then add “dry brush” strokes to create the reflection on the glass. Load your #12 bright brush in titanium white. Then wipe off some of the brush. Paint a curved mark in the lower right and upper left corner. This should be very light and see through.

Add a second coat over the first set of reflection on the glass mug. Then add a few more curved dry brush marks in the middle part area.
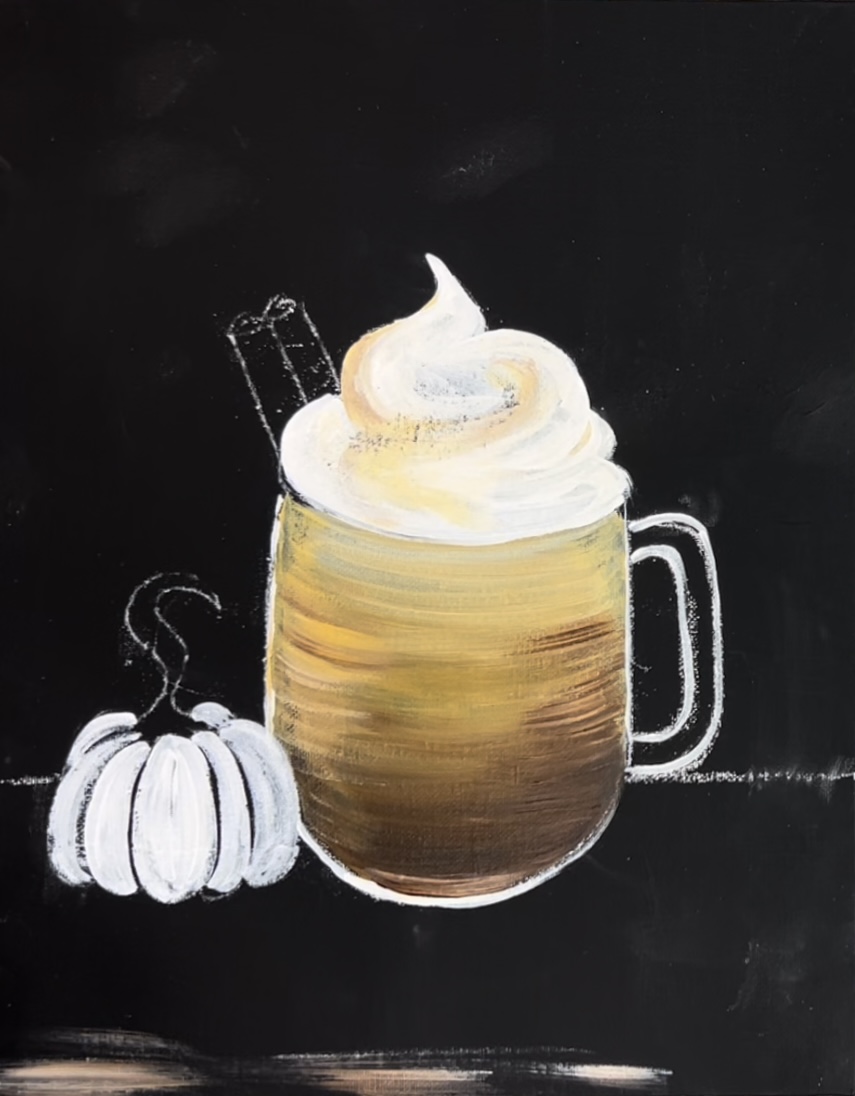
10. Paint Pumpkin
Use a #4 round brush to paint the pumpkin. Mix equal parts orange and yellow together.
Paint the first pumpkin bump with this yellow/orange combination.

Paint each pumpkin bump individually. Leave a slither of black from the background still showing through. This helps with the division of the pumpkin bumps.
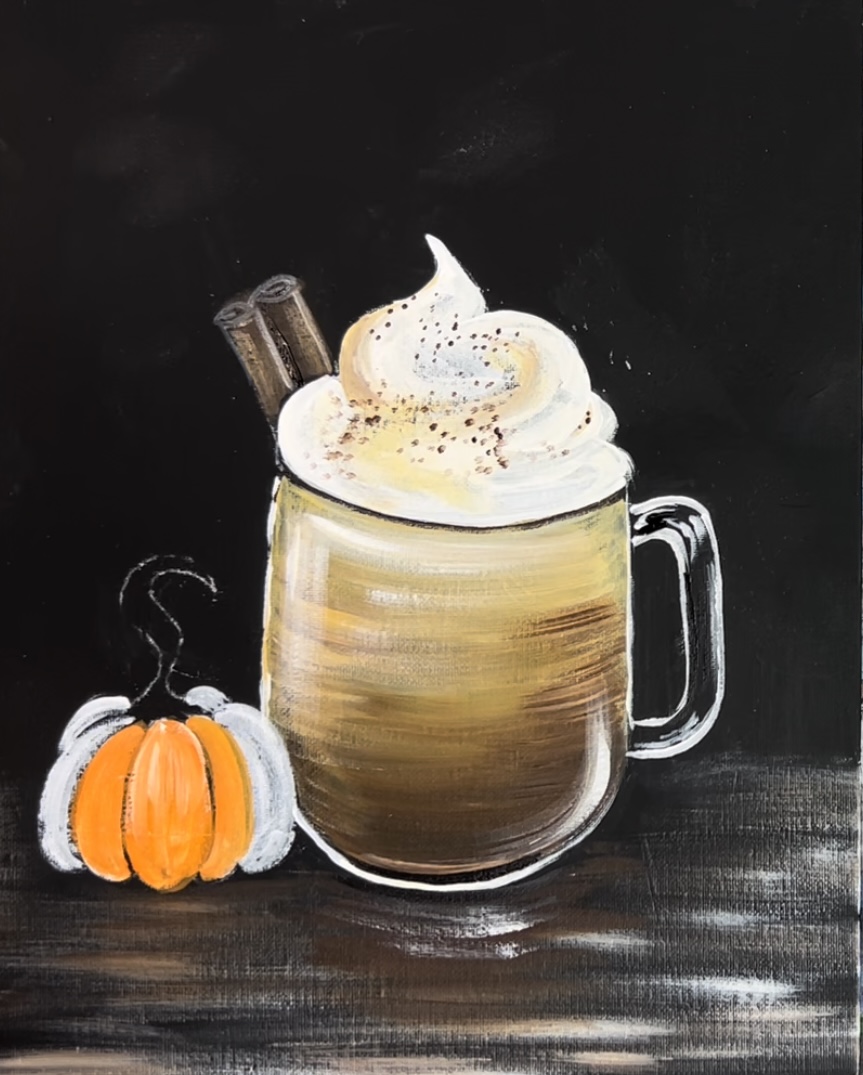
To create color variation in the pumpkin bumps, vary the colors slightly. Add a small amount of brown to the pumpkin bumps on the outer right and left edges. The brown will shade your orange just slightly darker.
Next, paint the stem. Use burnt umber and the #4 round brush. Add a small amount of white into the brown so that it will lighten and show up against the black background.

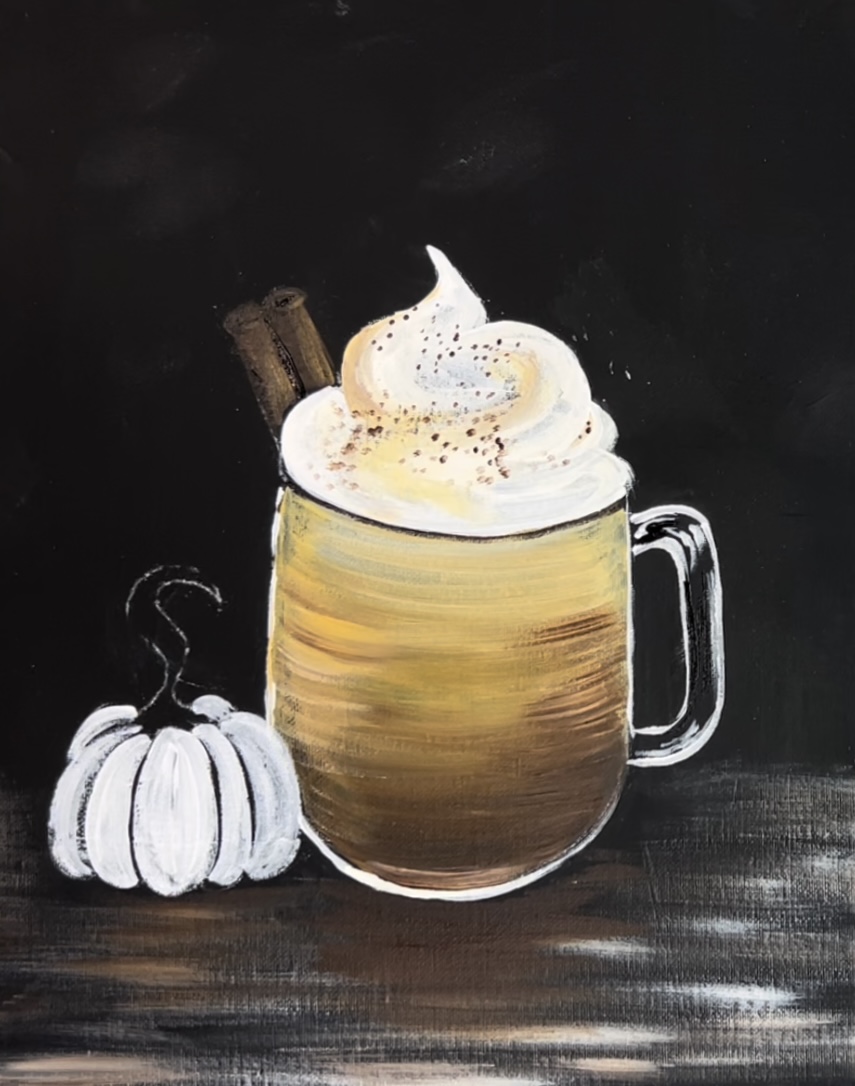
11. Write Words & Paint Pen Over Words
Use a pencil to write out the words “Pumpkin Spice” (or a chosen fall quote). The pencil helps to get the spacing right just in case you mess up on the lettering.
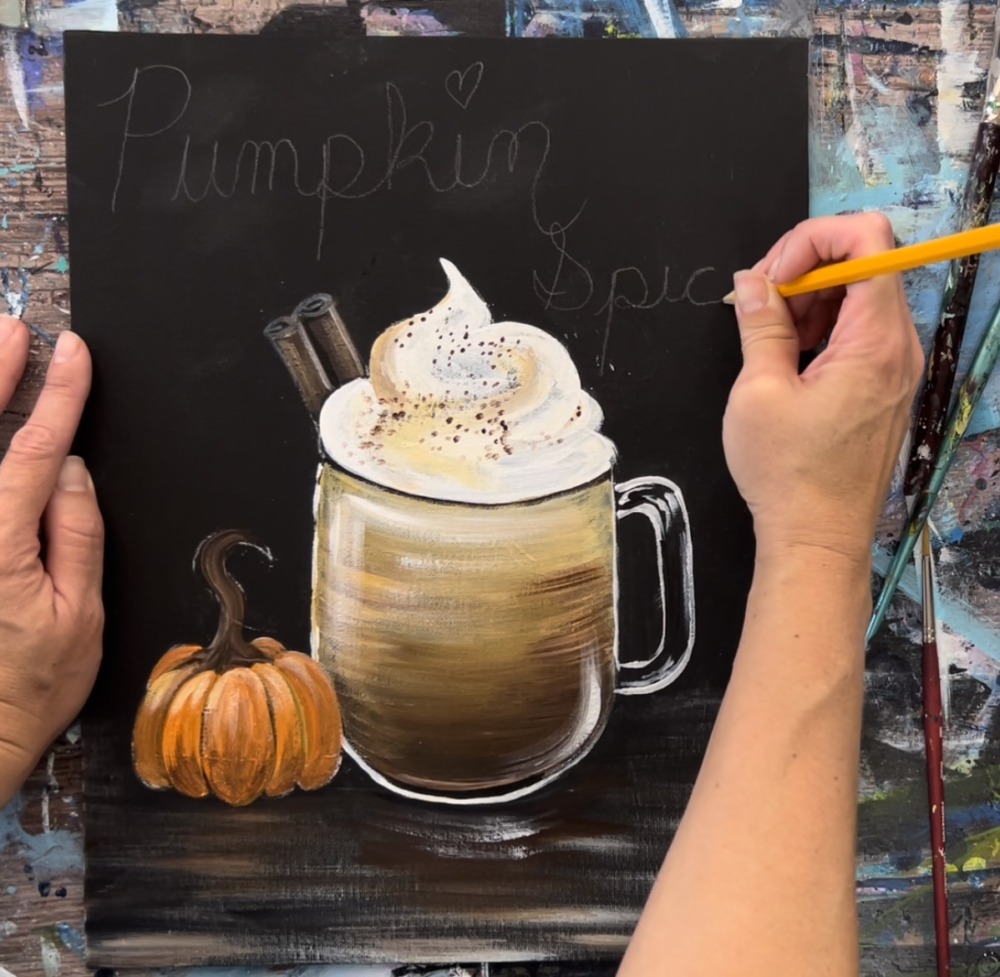
I wrote “pumpkin spice” in cursive. You are welcome to use this style or change the font!

Next, use a POSCA white paint pen to trace over the letters.
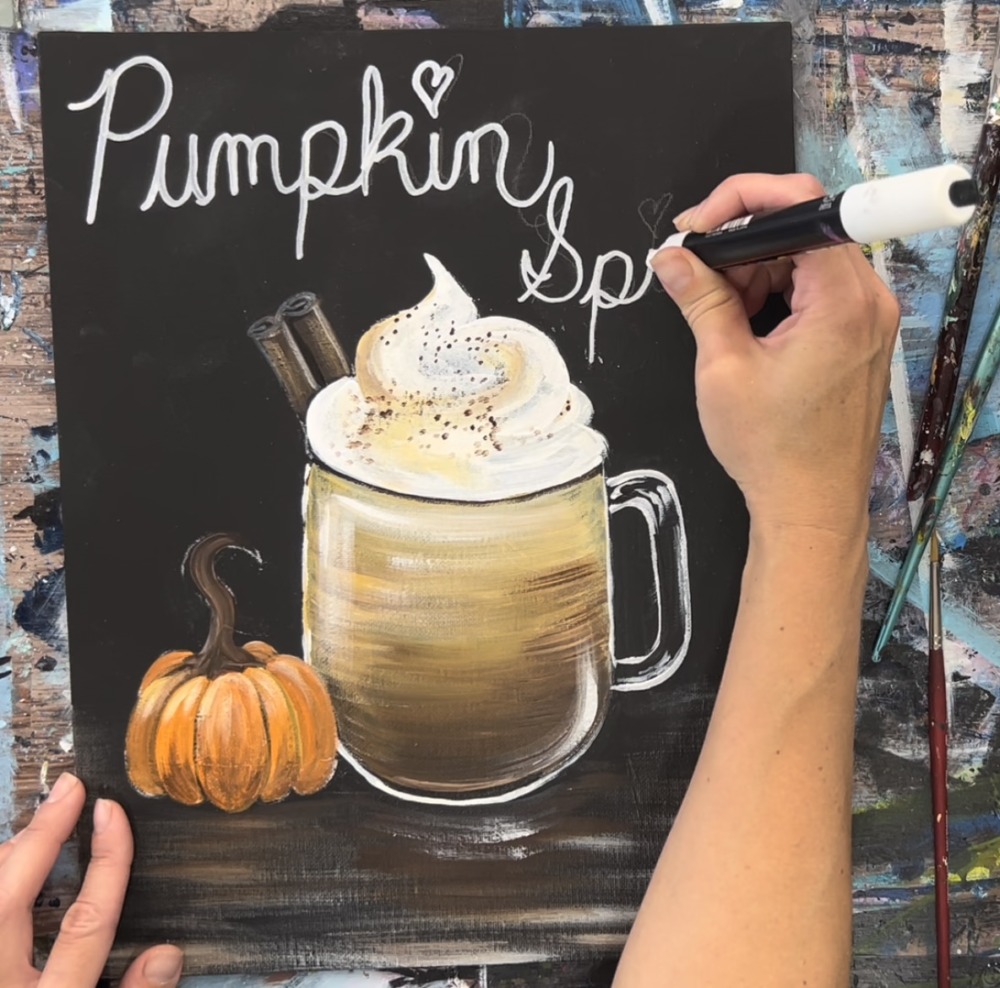
Optional: I also used the white paint pen to do a few touchups including highlighting the pumpkin stem on the left side.
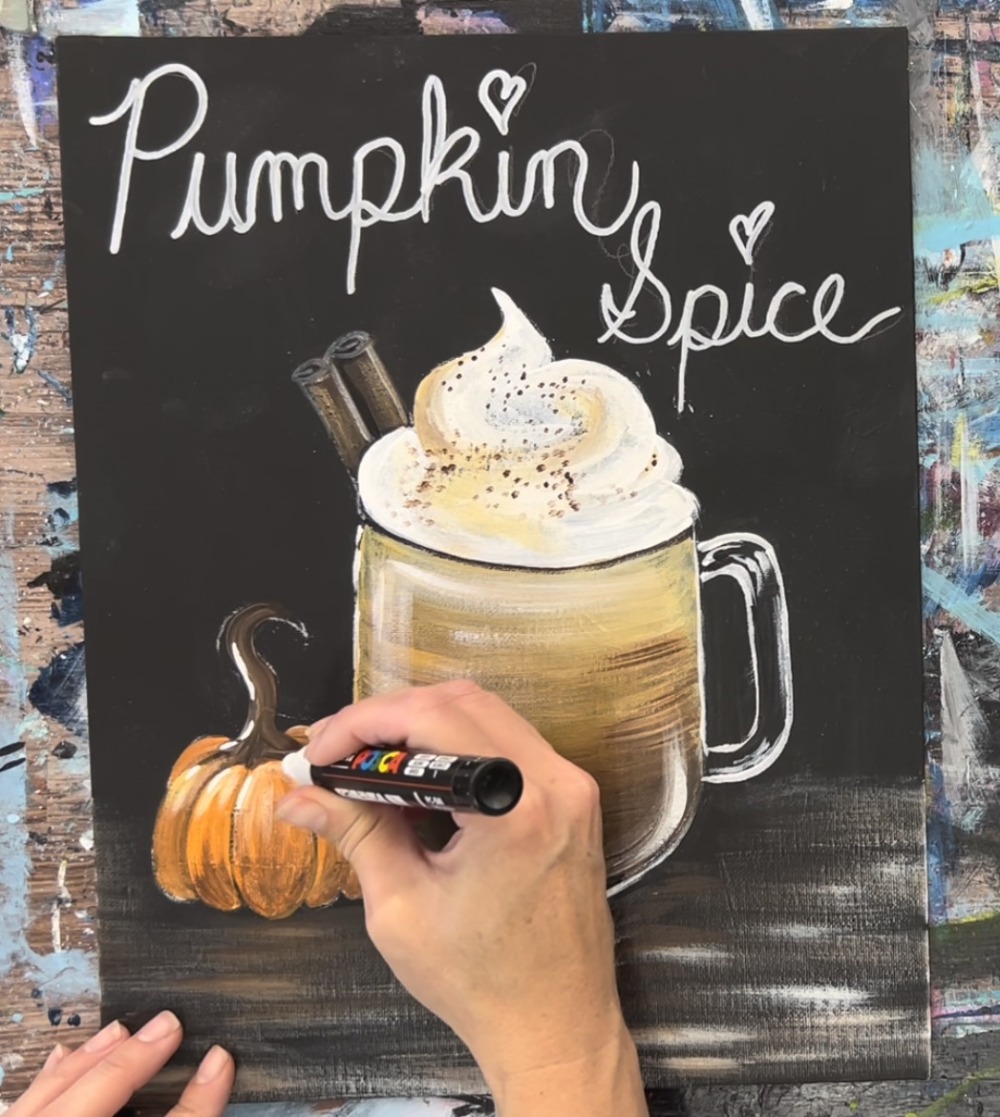
12. Draw And Paint Fall Leaves
Next, draw your leaves. You can do basic leaf shapes or more advanced one. In the upper right, I did a teardrop leaf shape. The other two that are falling are more of an oak leaf style.

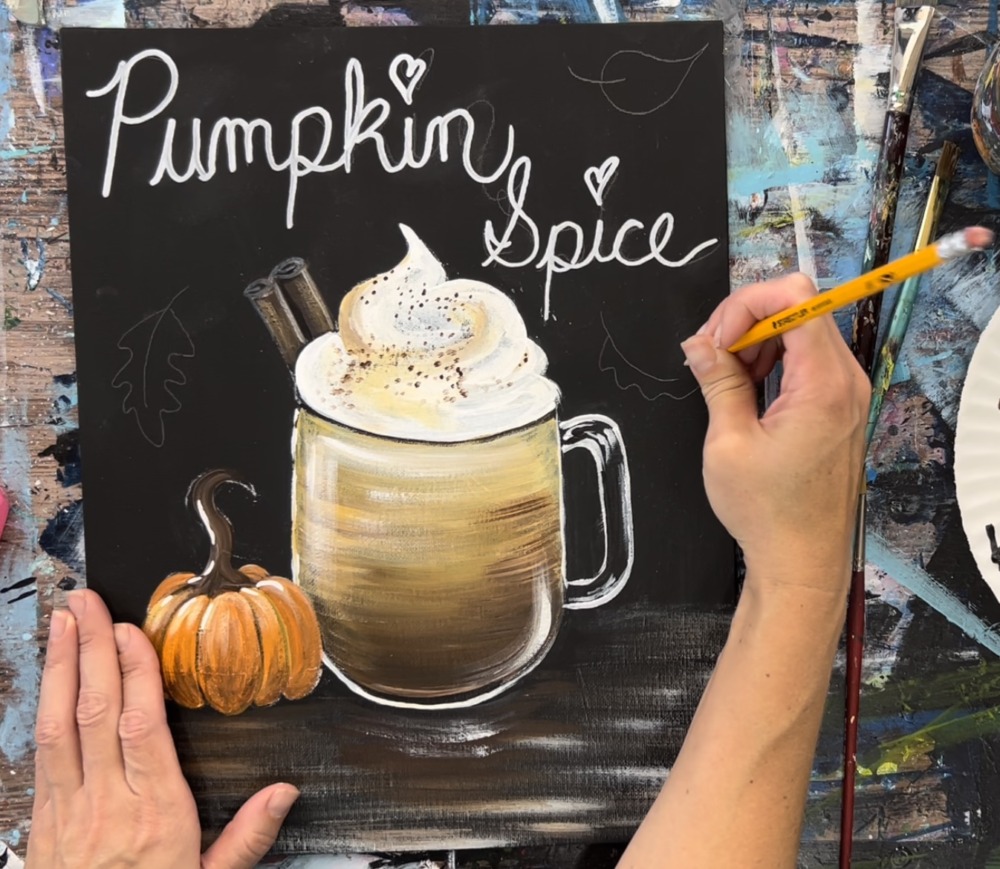
I used a piece of chalk to draw the oak leaf on the table.
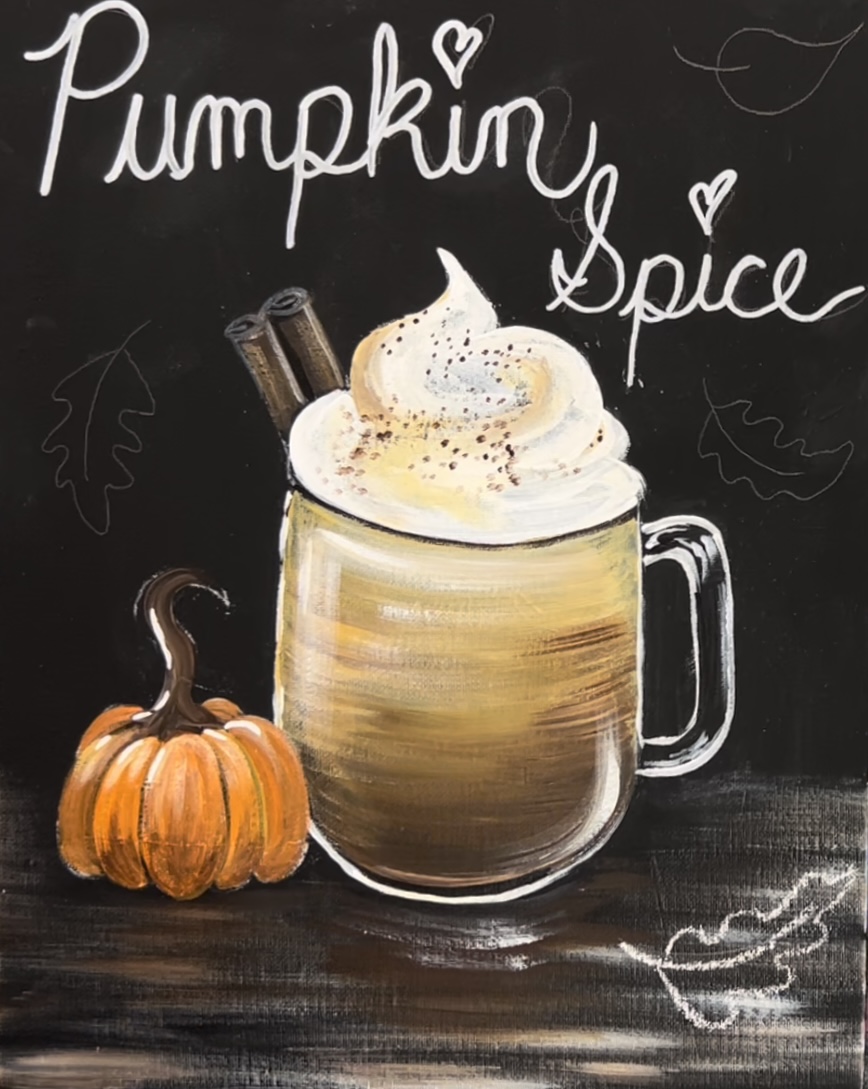
Then paint the leaves. Use the colors on your palette (yellow oxide, orange, brown, white) to paint different variations of colors on each of the leaves. Use your #4 round brush for this.

Next, paint the stems on the leaves using a #4 round brush and burnt umber mixed with titanium white. Paint a little curved line on the base of each of your leaves and then a little dot on the base of the stem.

Then paint the middle line and veins of the leaves using mars black.
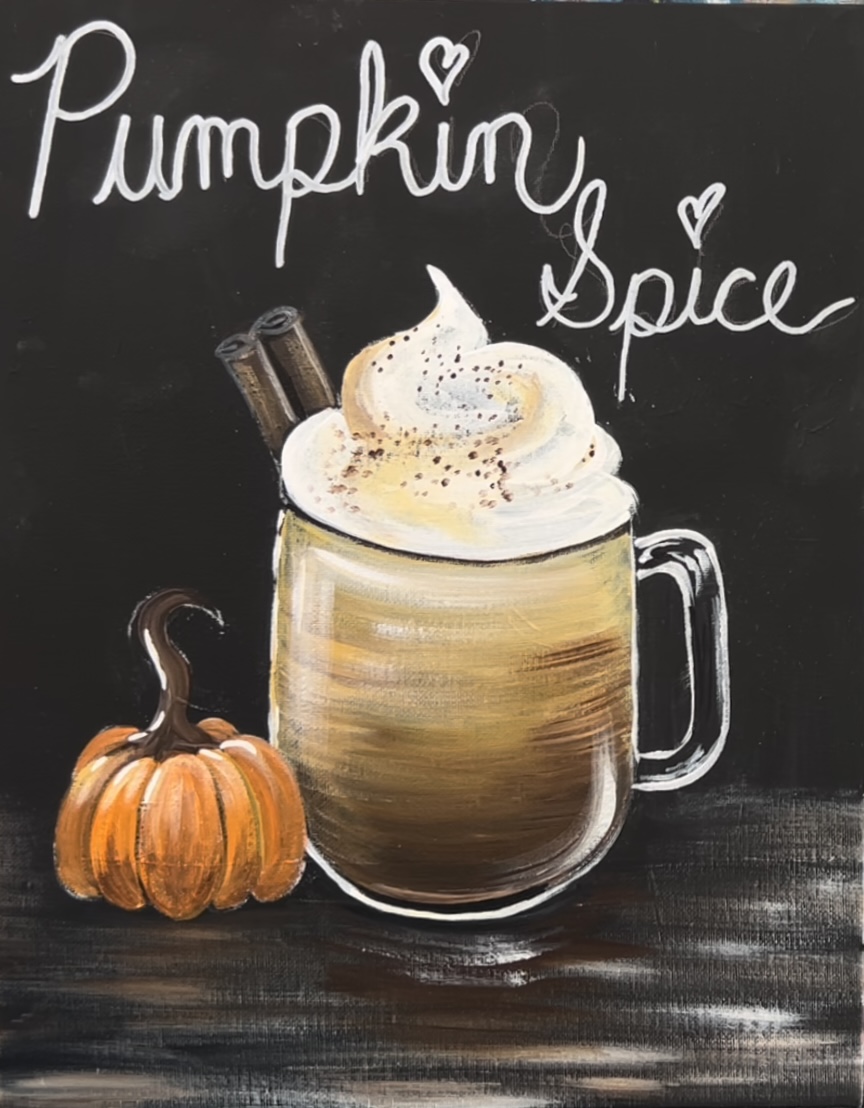
Finished!
Sign your name and show it off!

Share Your Art Here:


