

Would you like to save this?
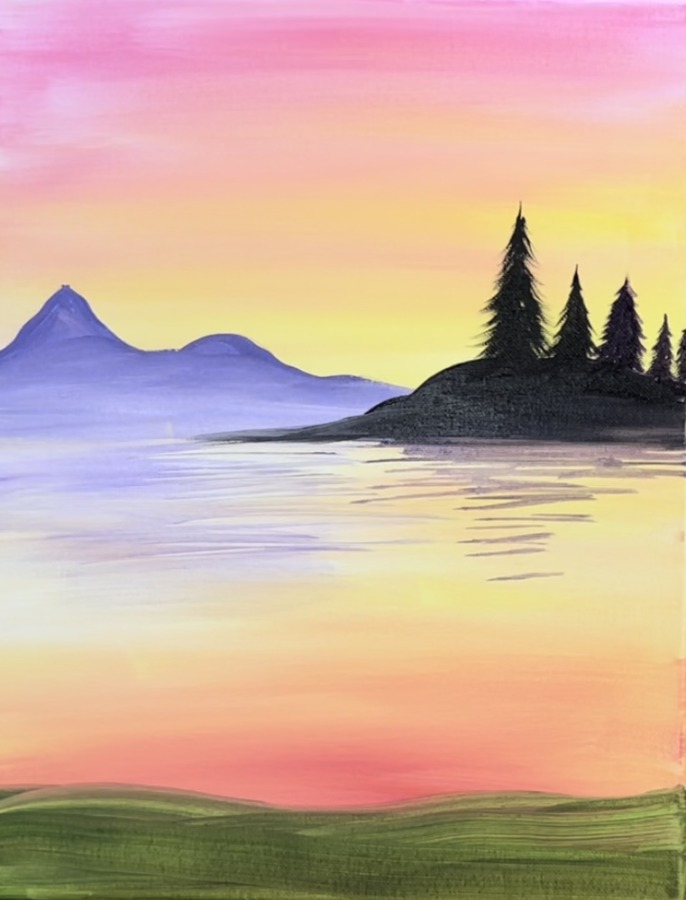
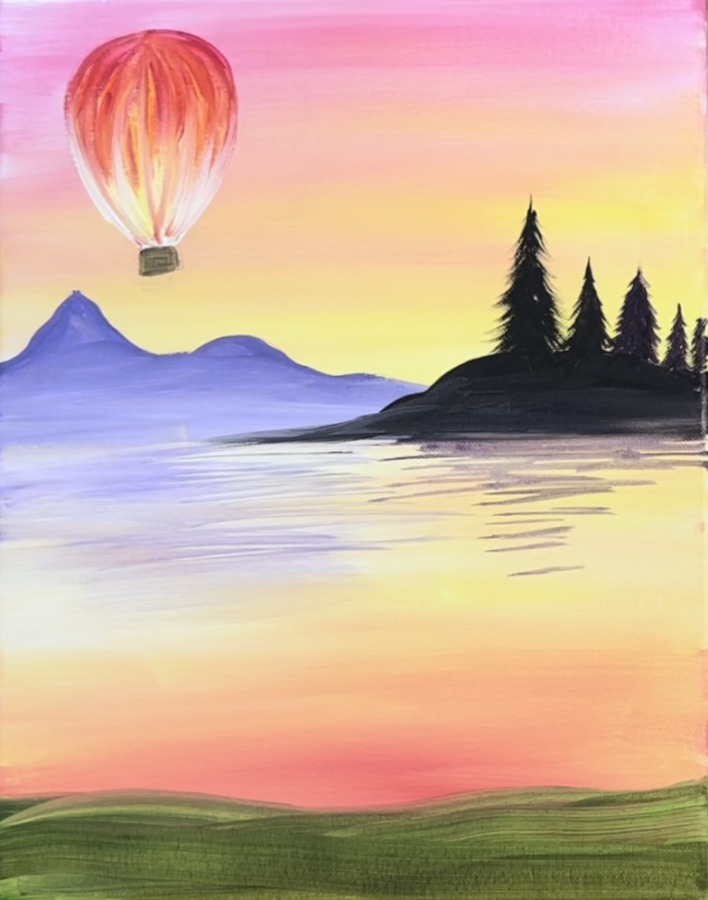
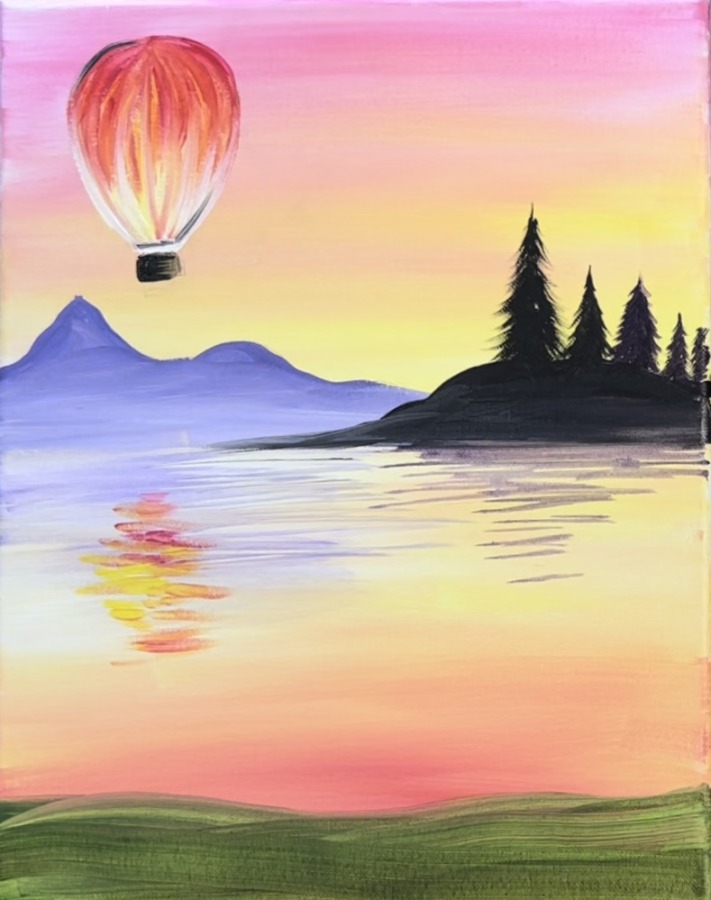
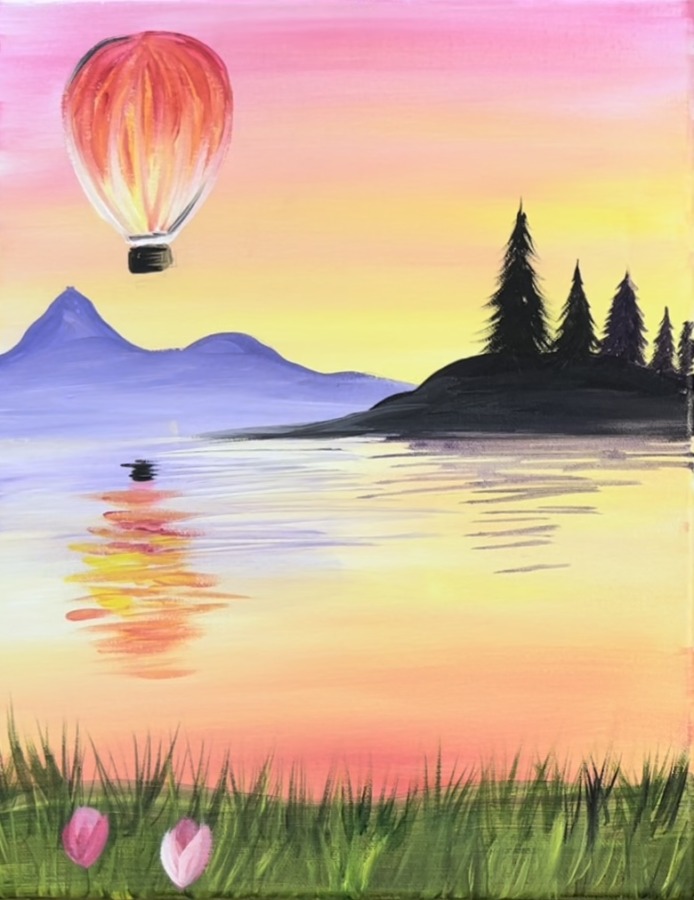
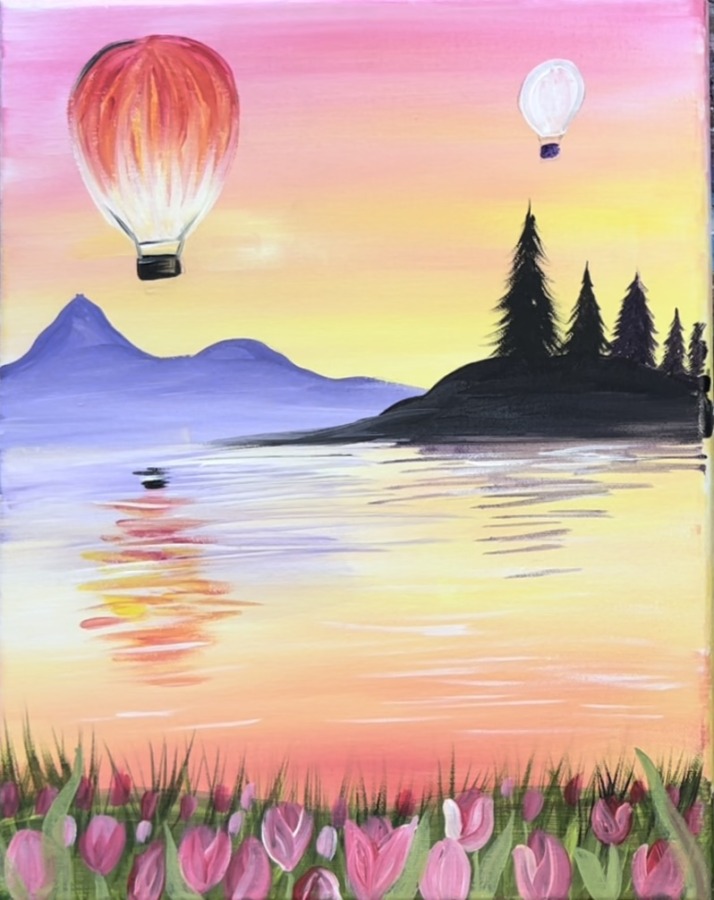
Paint a vibrant sunset with hot air balloons over the water and a small tulip field in the foreground. There are so many bright cheerful colors in this painting!
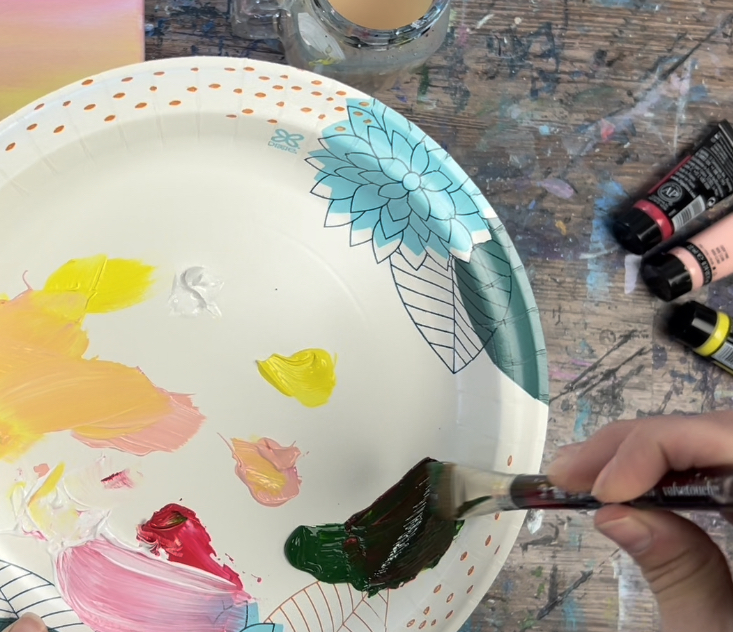
Materials
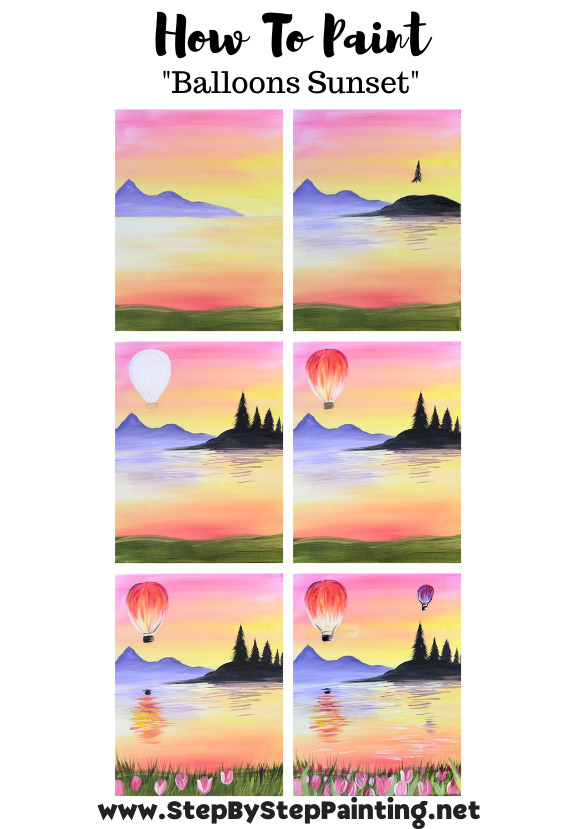
Balloons And Tulips Sunset Acrylic Painting Tutorial
Learn to paint a sunset reflecting over the water and hot air balloons with tulips in the foreground.
Materials
- 11 x 14 Canvas
- Acrylic Paint
- Brushes
- Palette
- Water Cup
- Drawing Pencil
- Ruler
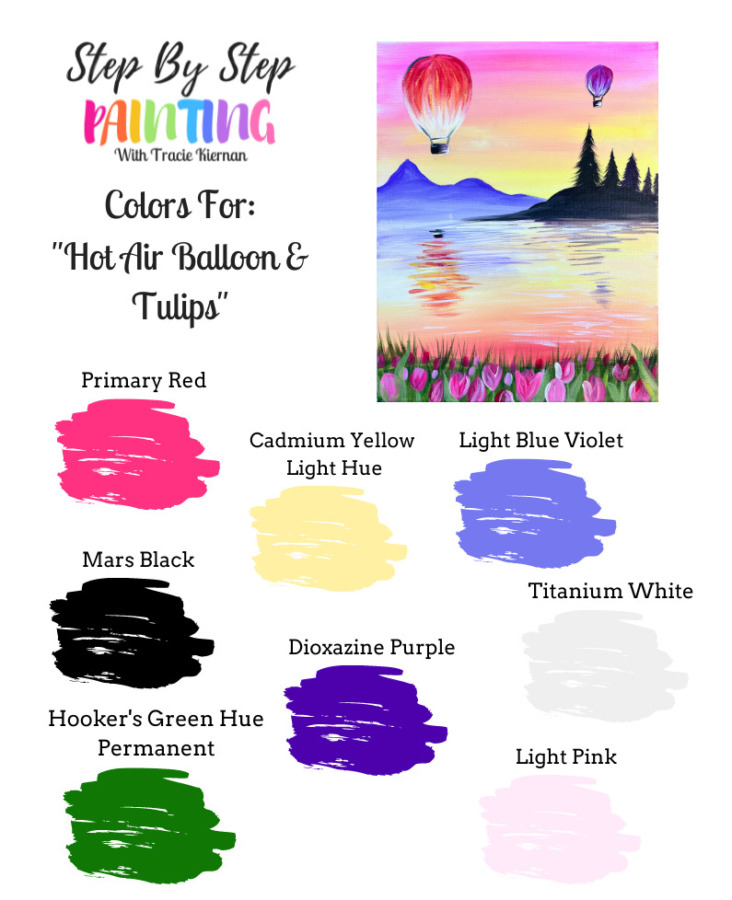
Colors
- Titanium White
- Mars Black
- Primary Red
- Cadmium Yellow Light
- Hooker's Green Hue Permanent
- Dioxazine Purple
- Light Blue Violet
- Light Pink
Paint Brushes
- 3/4" Flat Wash
- #8 Round Brush
- #4 Round Brush
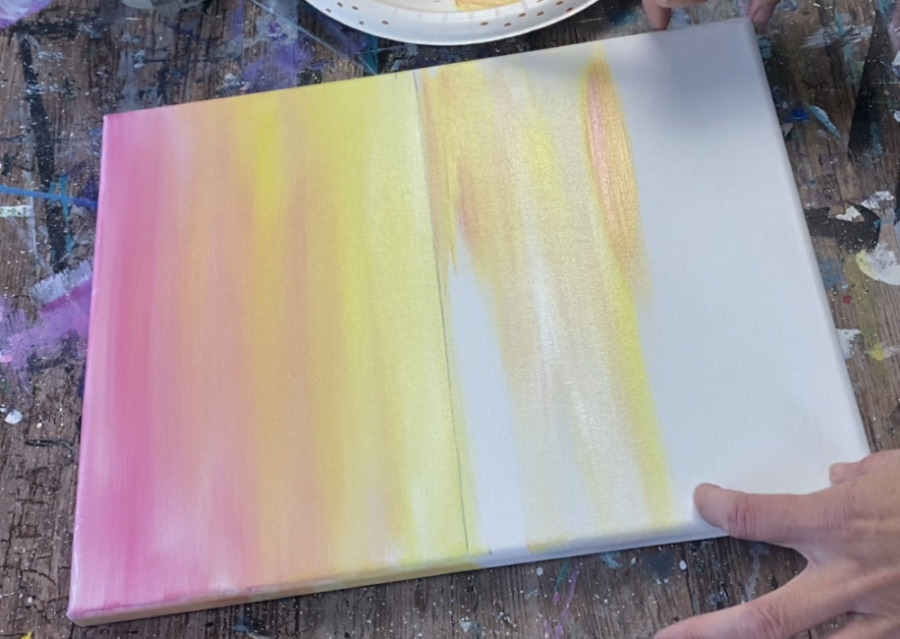
Color Palette
Using Craft Paints?
If you are using craft paints such as the Apple Barrel Paints, I suggest subbing with these colors:
- Black
- White
- Bright Magenta
- Fuchsia (mixed with white to make it lighter)
- Purple Iris
- Parrot Blue
- Holly Branch
- Yellow Flame
Directions At A Glance
Video
Step By Step Directions
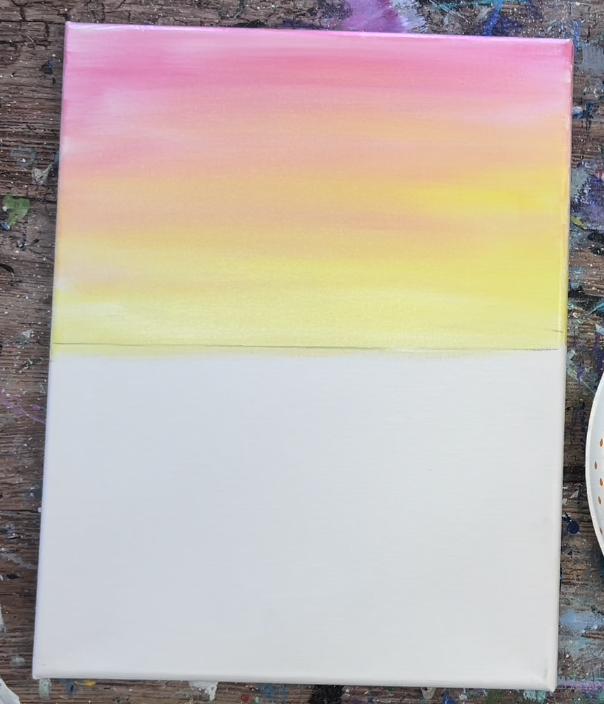
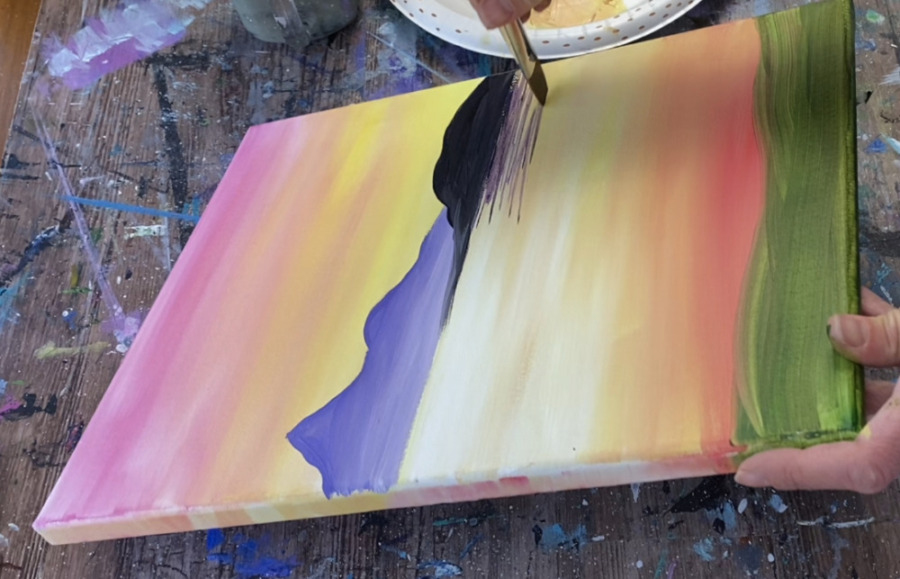
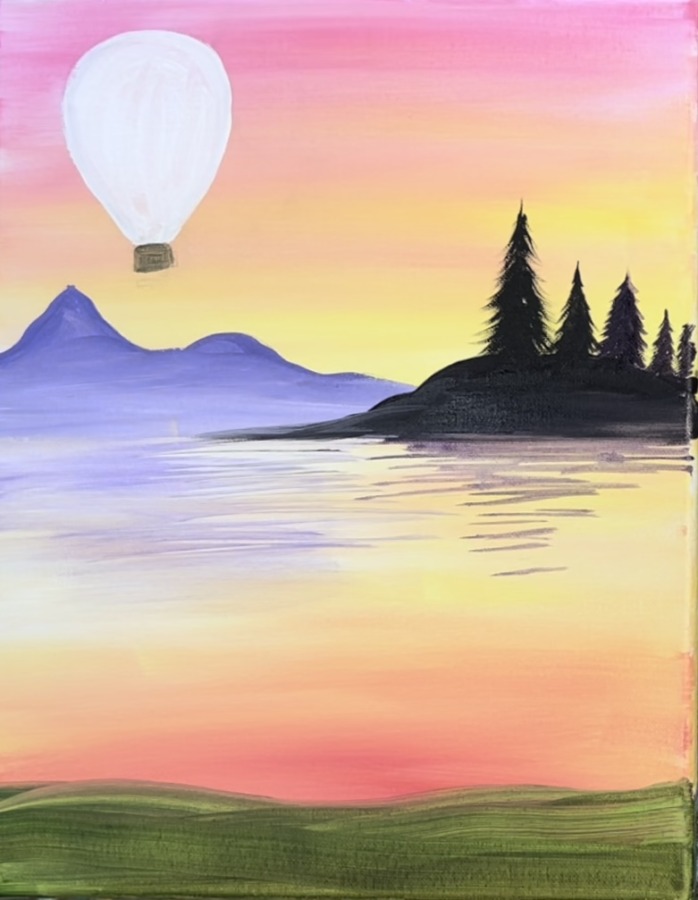
1. Paint The Sky
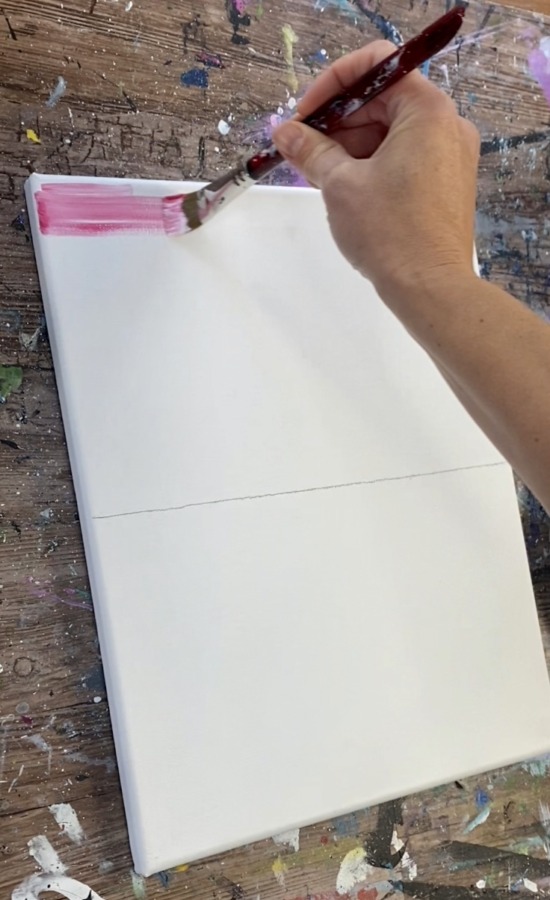
Position your 11 x 14 canvas so that it is vertical. Locate the center of the canvas and use a ruler to draw a horizontal line across the canvas. This “horizon line” will divide the sky and the water.

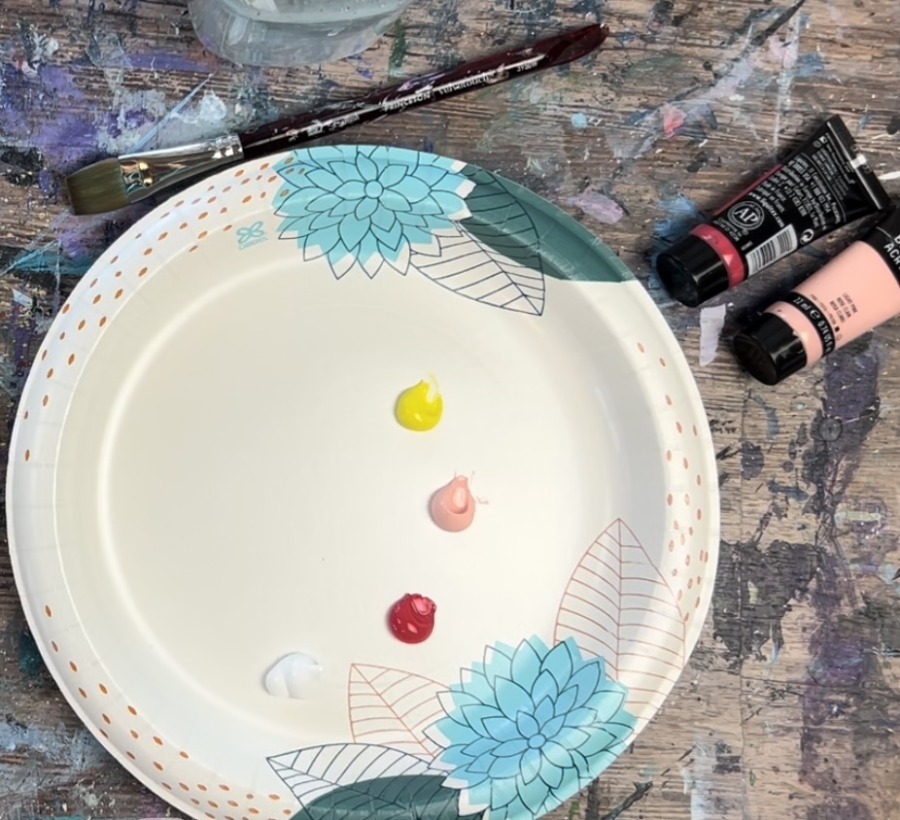
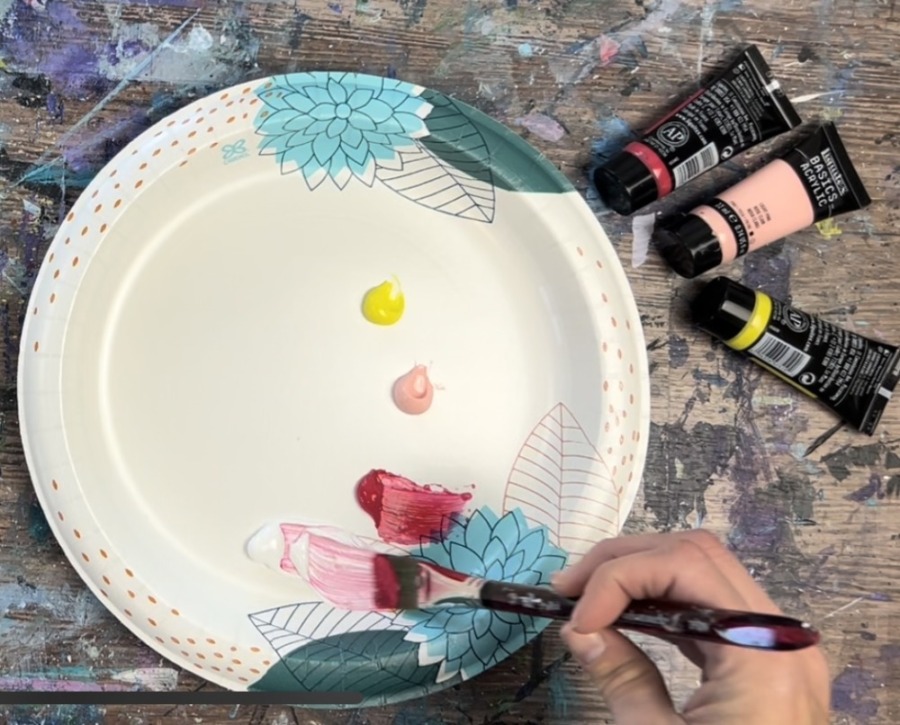
Load: Cadmium yellow light, light pink, primary red and titanium white onto your palette. Then load your 3/4″ flat wash brush in water and pat it dry.
Mix about equal amounts of primary red with titanium white so that it turns to a dark pink color.
Start at the top of your canvas. Paint left and right strokes across the canvas.
Go about two or three inches down with this pink.
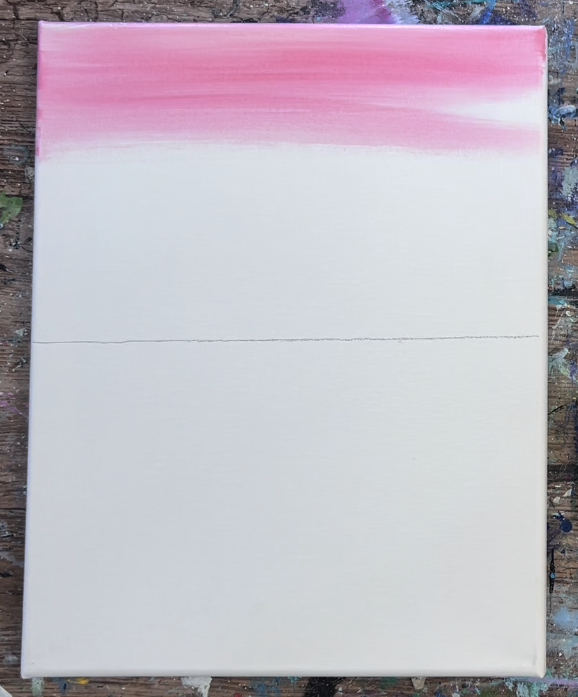
Then gently blend some light pink below the primary red. Go down another 2-3 inches.
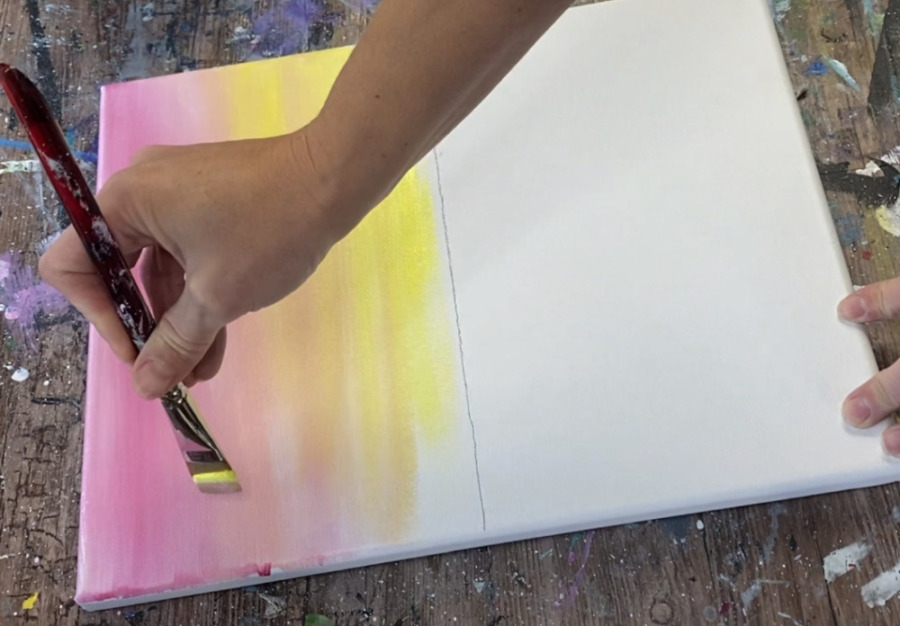
Then mix about equal parts titanium white with cadmium yellow light.

Paint the yellow down to the horizon line and gently blend it with the pink. When overlapping the pink, your yellow will turn to an orange color.
Add some extra titanium white on the bottom just above the horizon line so that area is bright.
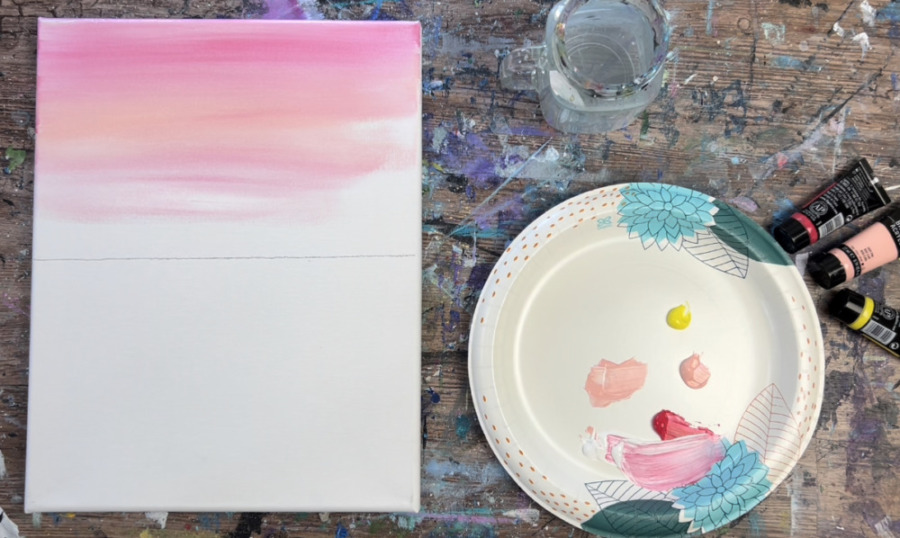
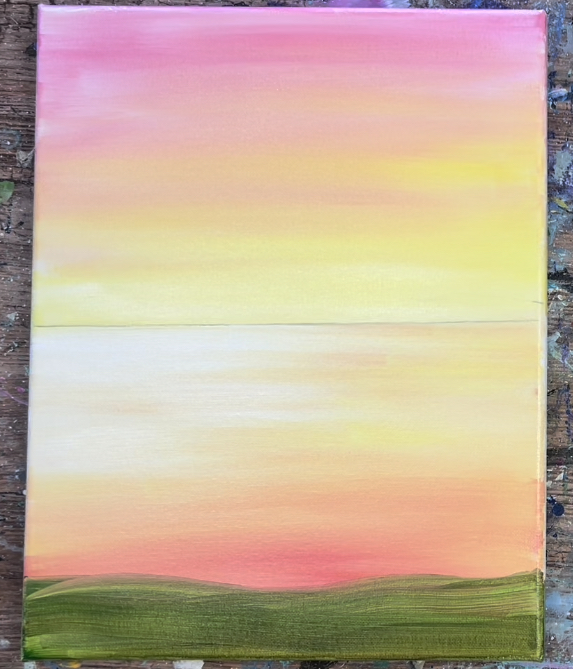
2. Paint The Water
Use the same colors for the water area. Paint left and right strokes with the yellow, white and pink.
Gently add some primary red on the bottom and blend it up into the yellow area. Add some white in the upper left area of the water.

Leave about a 3/4″ space on the bottom of the canvas where the greenery/ tulips will be painted.
3. Paint The Green Ground Area
On your palette, mix hooker’s green hue permanent with a little bit of primary red.
Your green will turn to a darker, more natural looking green. Paint the bottom area with this green.
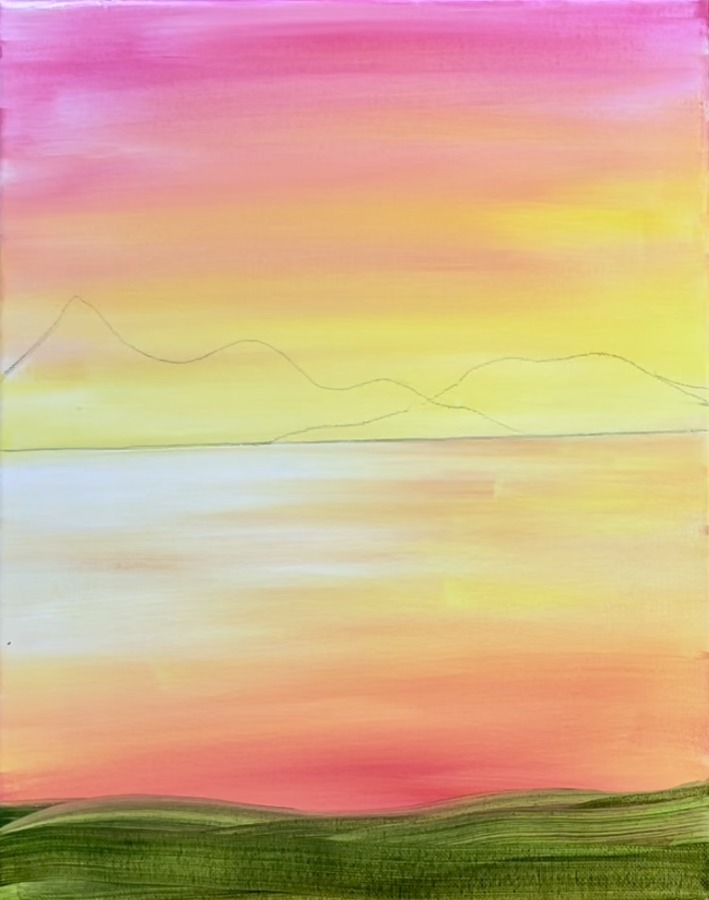
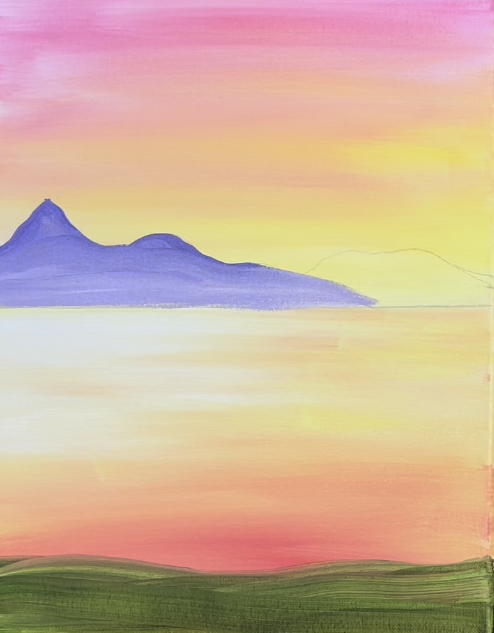
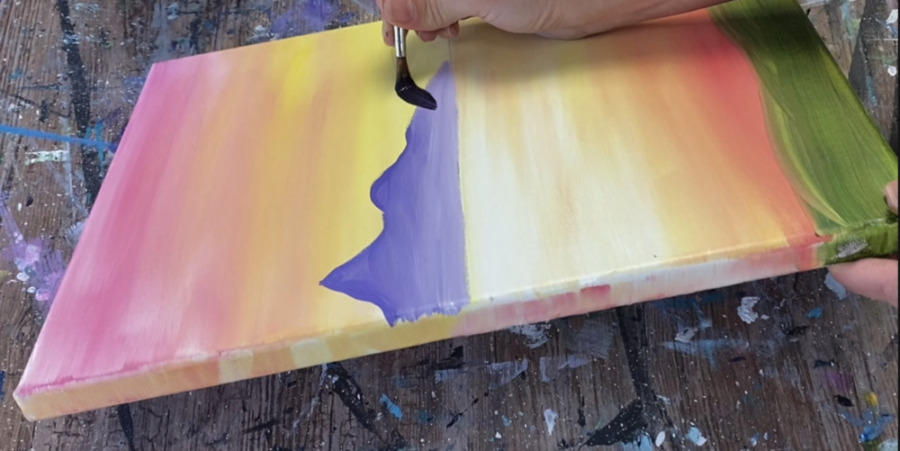
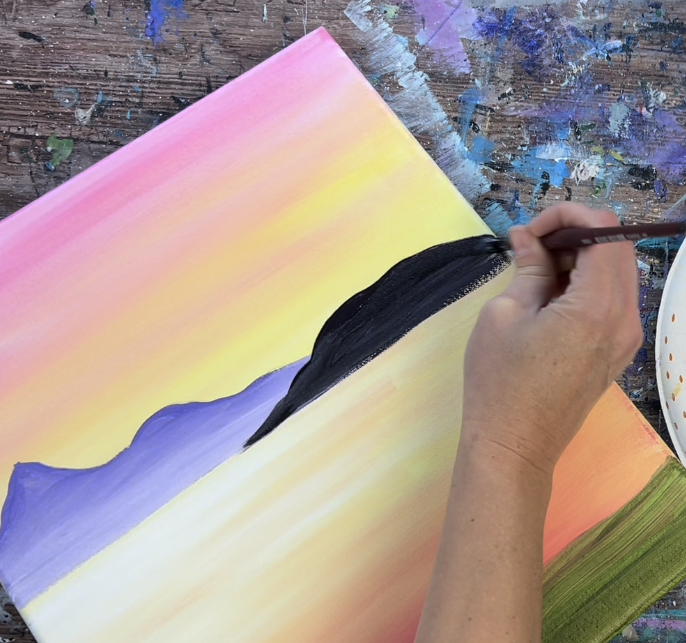
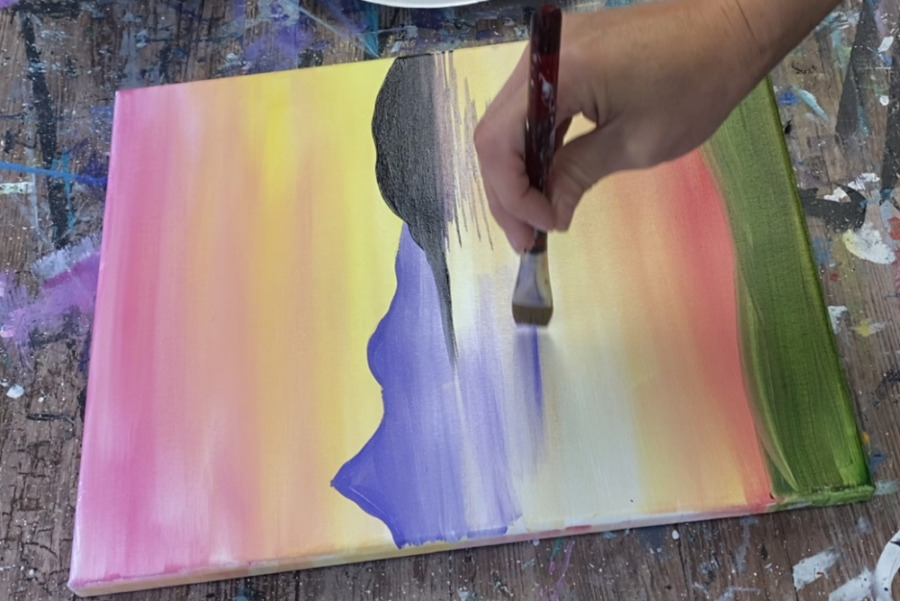
4. Draw & Paint The Mountains
Use a pencil to draw the mountains. Start with the mountain on the left and draw a peak that goes up about 4″ from the horizon line.
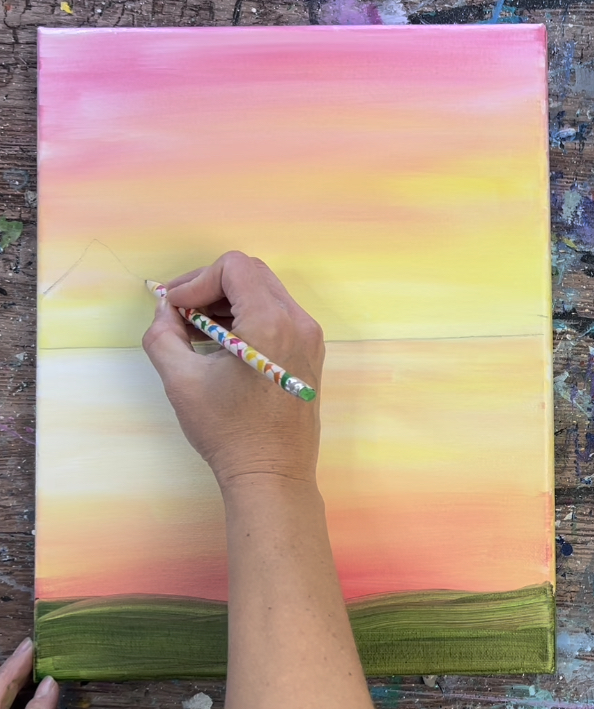
This mountain dips down into two smaller peaks and goes almost all the way across the horizon line. Then paint a shorter hill in front of this mountain.
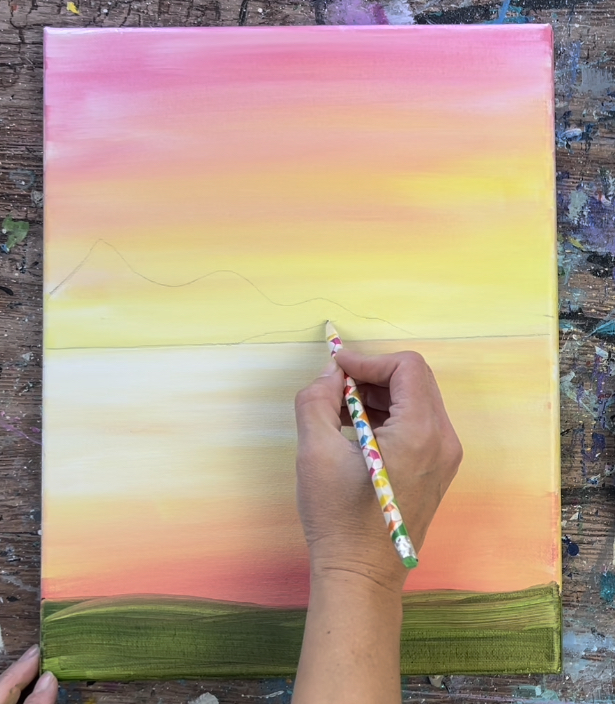
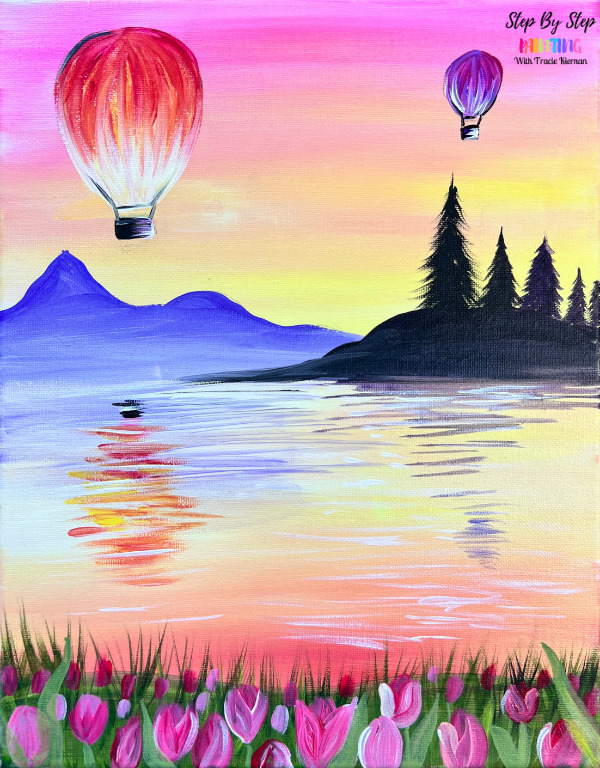
Image below was darkened so you can see the mountain lines.
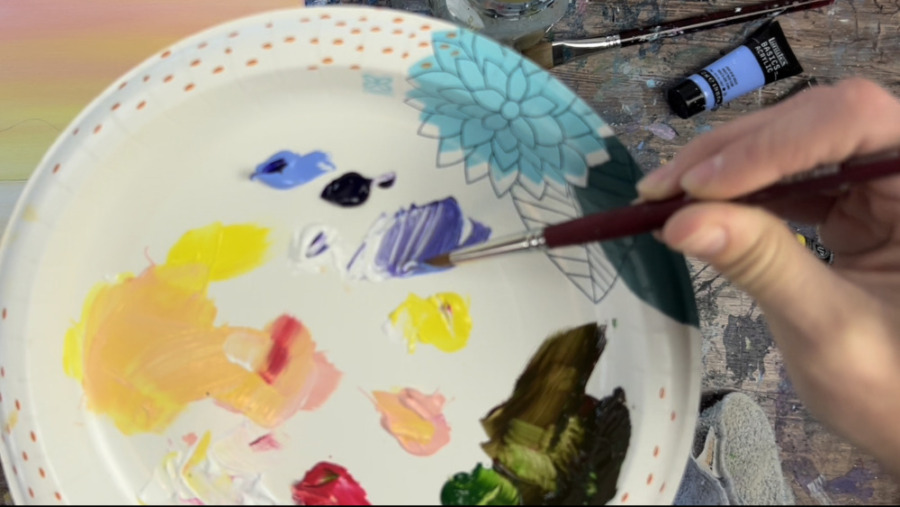
Next, mix the purple mountain color on your palette. Mix about 2 parts titanium white, 1 part light blue violet and 1 part dioxazine purple.
Use your #8 round brush to paint the left mountain. Start by outlining the peak of the mountain.
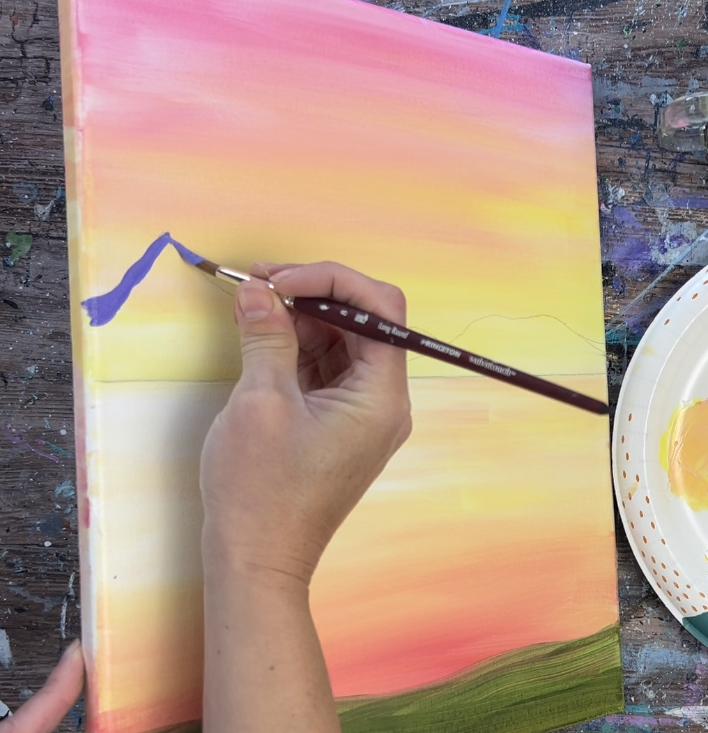
Then fill it in solid. Add titanium white on the bottom of the mountain so the bottom is lighter. Blend the white up into the mountain.
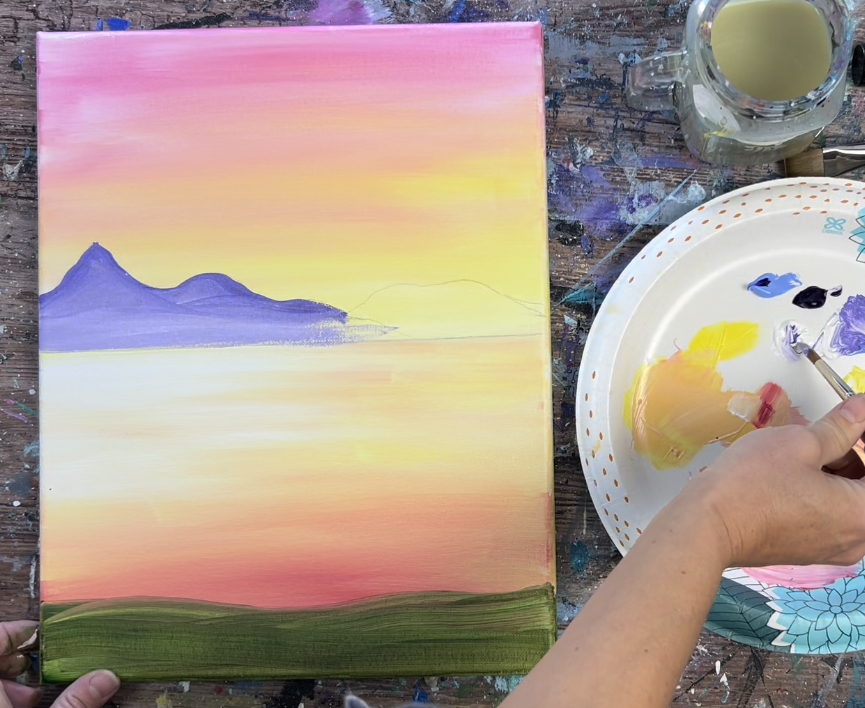
Then paint the dark shadowy hill that is in front of the purple mountain. Mix about equal parts dioxazine purple and mars black. Water it down slightly. Then paint this low laying mountain.
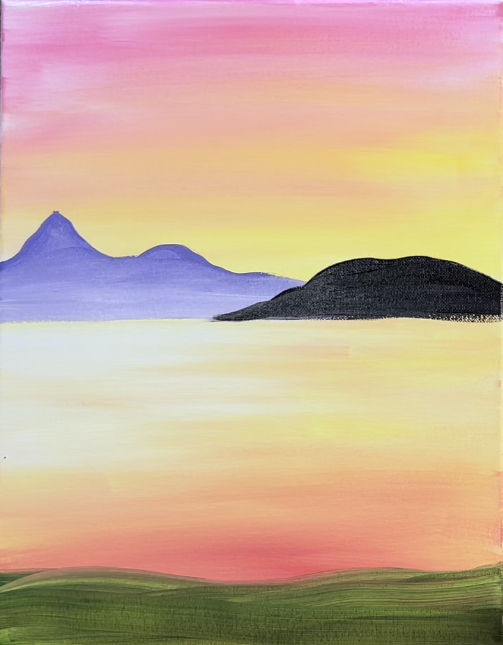
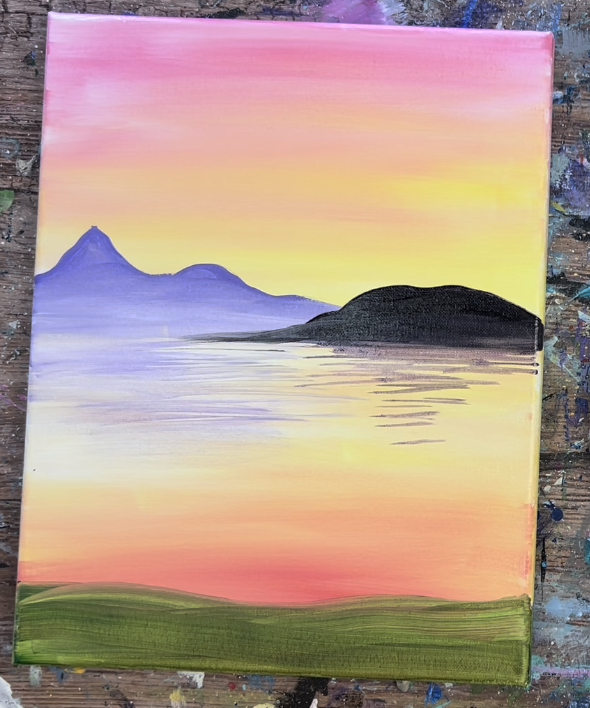
5. Paint The Reflection
Use your 3/4″ flat wash brush to paint the dark purple reflections under the dark mountain. Water down mars black and dioxazine purple to a water color consistency. Loosely paint left and right lines under the dark mountain to create the reflection.
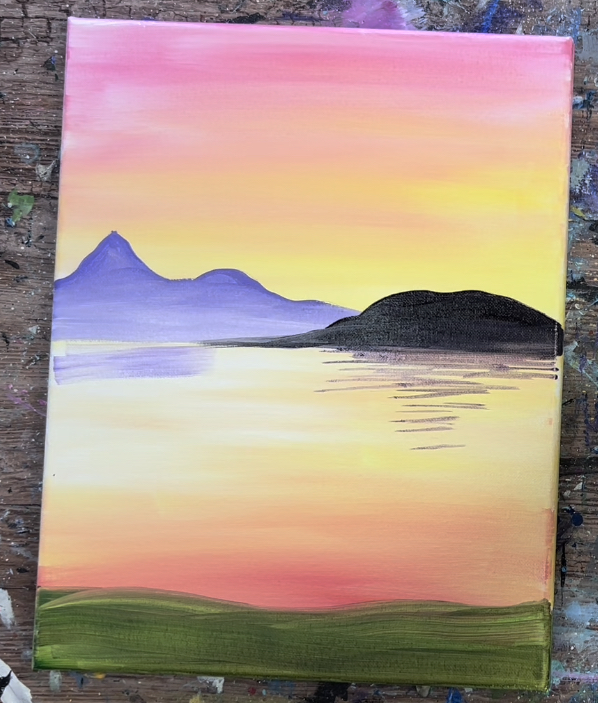
Then rinse brush and dry. Slightly water down the purple mountain color. Loosely paint that color under the mountain using full width strokes.
Try to leave some of the sky color in the water showing when painting the reflections.
6. Paint The Trees
Use a #8 round brush to paint the pine trees on the hill. Use the same purple/black on your palette that you used to paint the dark hill.
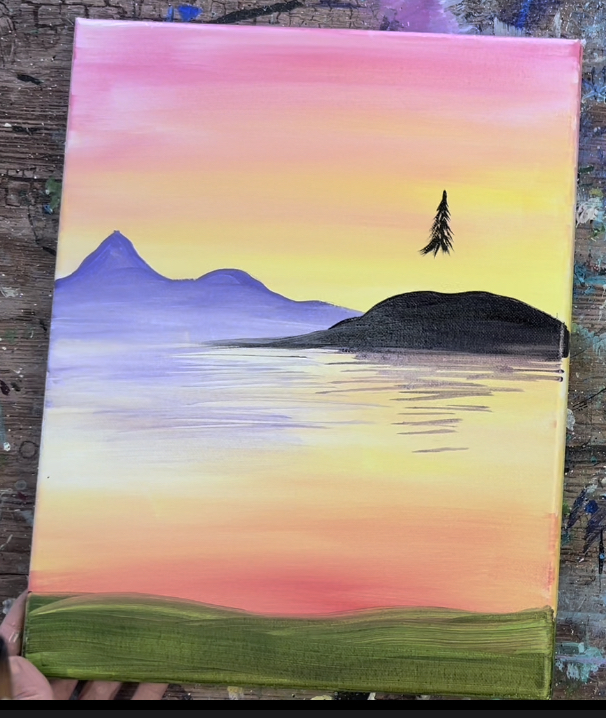
Start at the top of the tree and stroke downwards to create the shape.
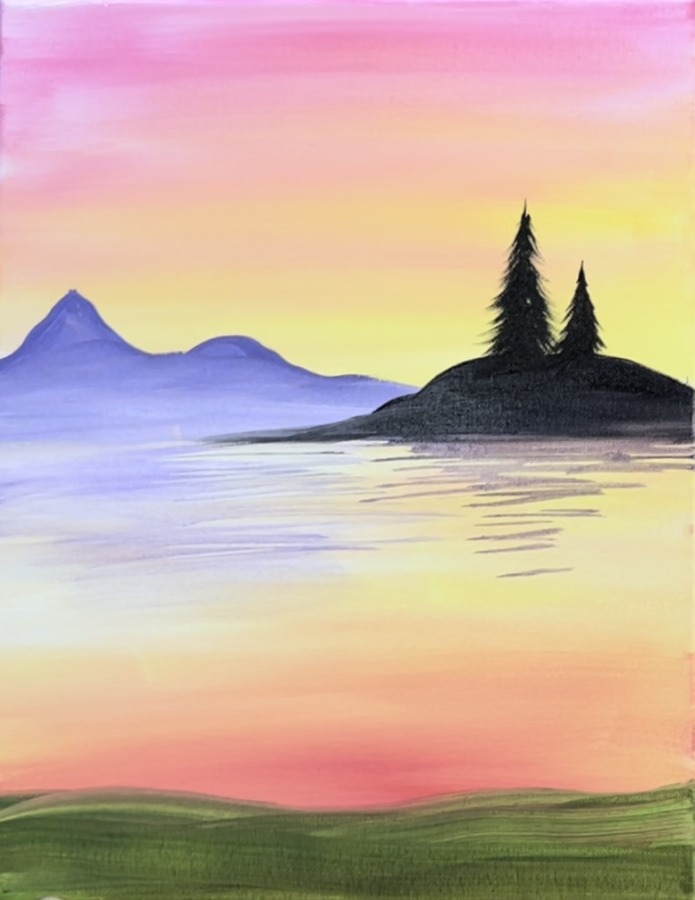
I did five trees of different heights. You can change the amounts and heights of the trees to your liking!
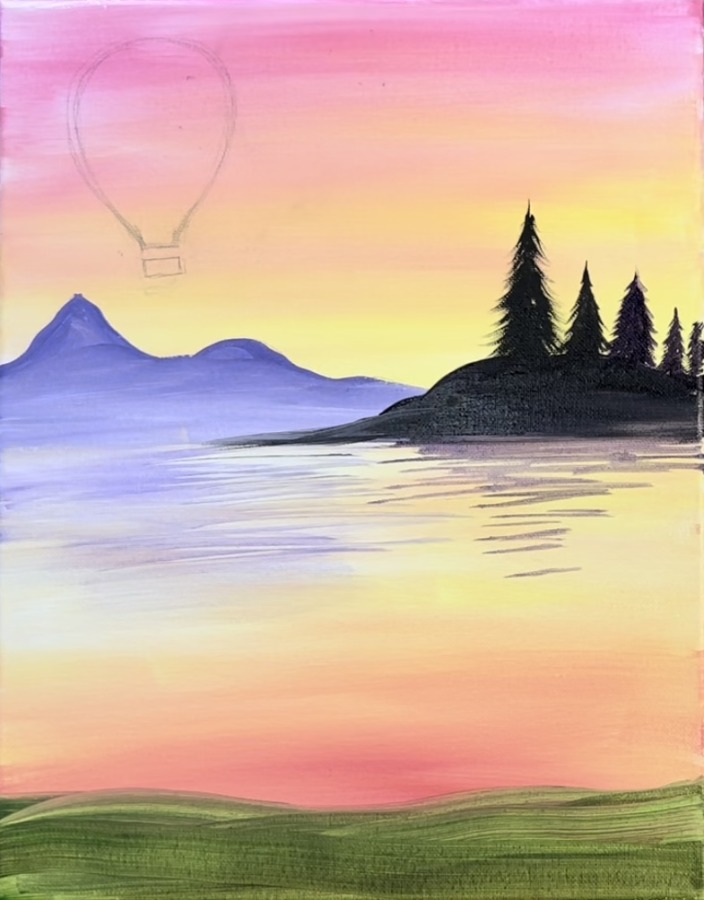
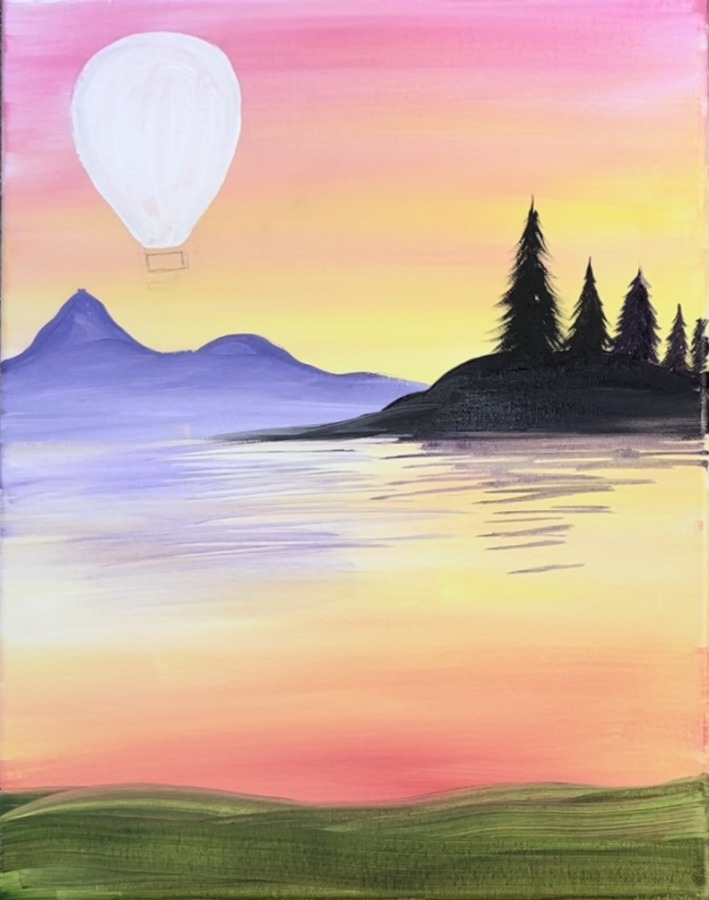
7. Draw & White Out The Large Hot Air Balloon
Next, draw the hot air balloon. Draw a balloon shape and a basket lightly with a pencil.
Use a #4 round brush and titanium white to paint the balloon in.
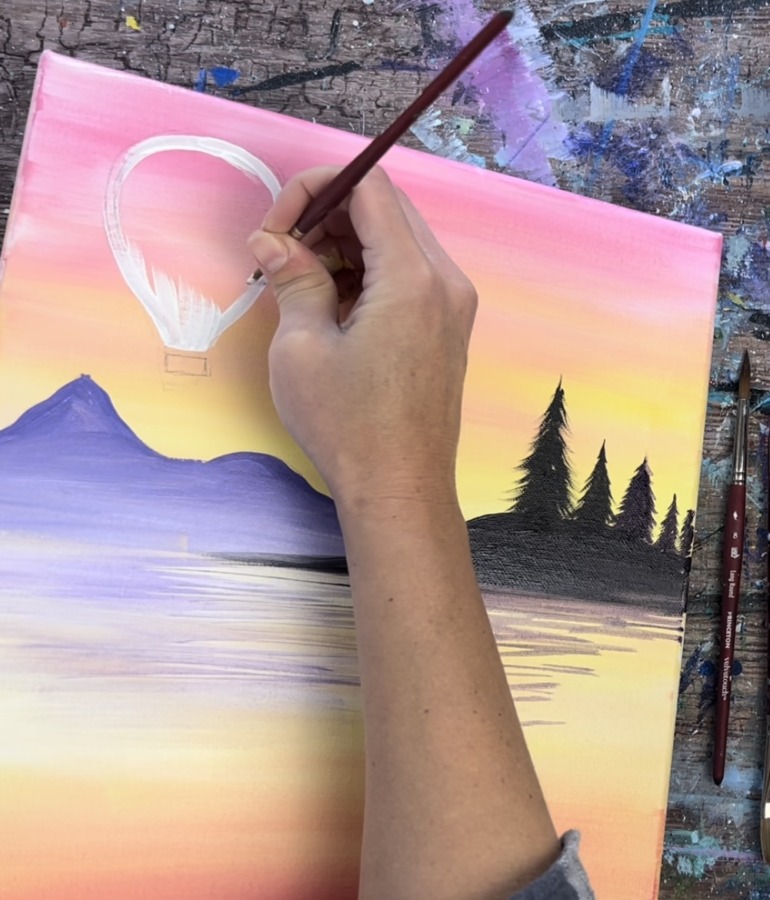
Let this white dry before painting the color on the balloon.
8. Paint Hot Air Balloon
Then paint the basket with brown (green and primary red mixed together) or mars black.
Use a #4 round brush to paint the color on the balloon. Start at the top and stroke down with primary red. Then add yellow to your brush. Stroke down so the red blends with the yellow to make orange.
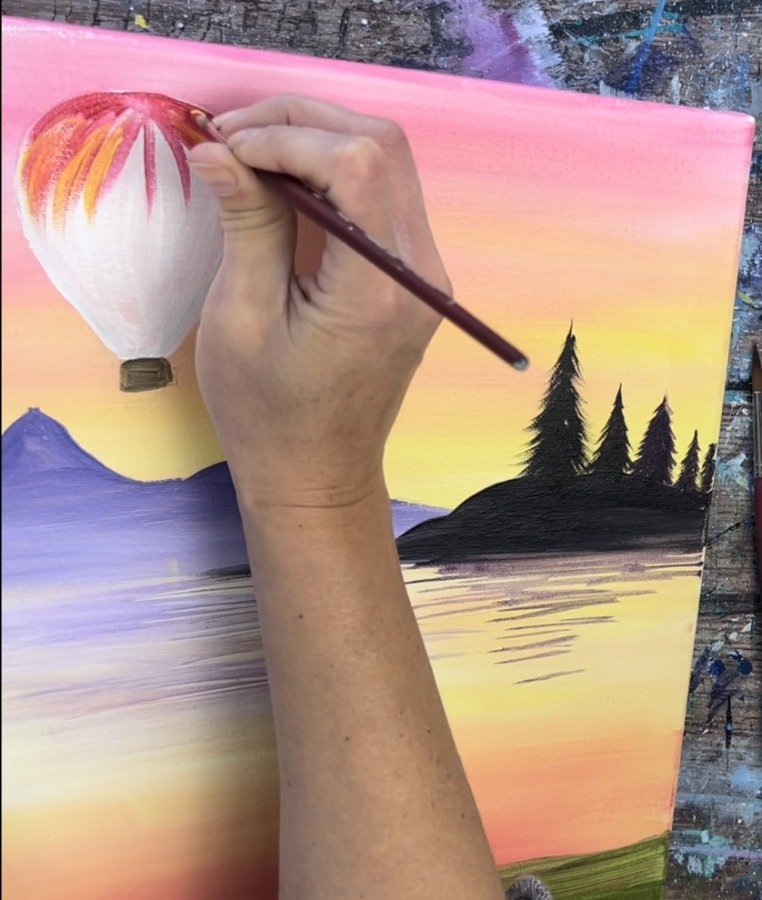
Stroke downwards to form the shape of the balloon (almost like painting a pumpkin).
Then add cadmium yellow light on the bottom of the balloon and blend that with the orange. Add more white on the bottom to make the bottom of the balloon brighter.
Loosely outline the bottom and some of the top of the balloon with black.
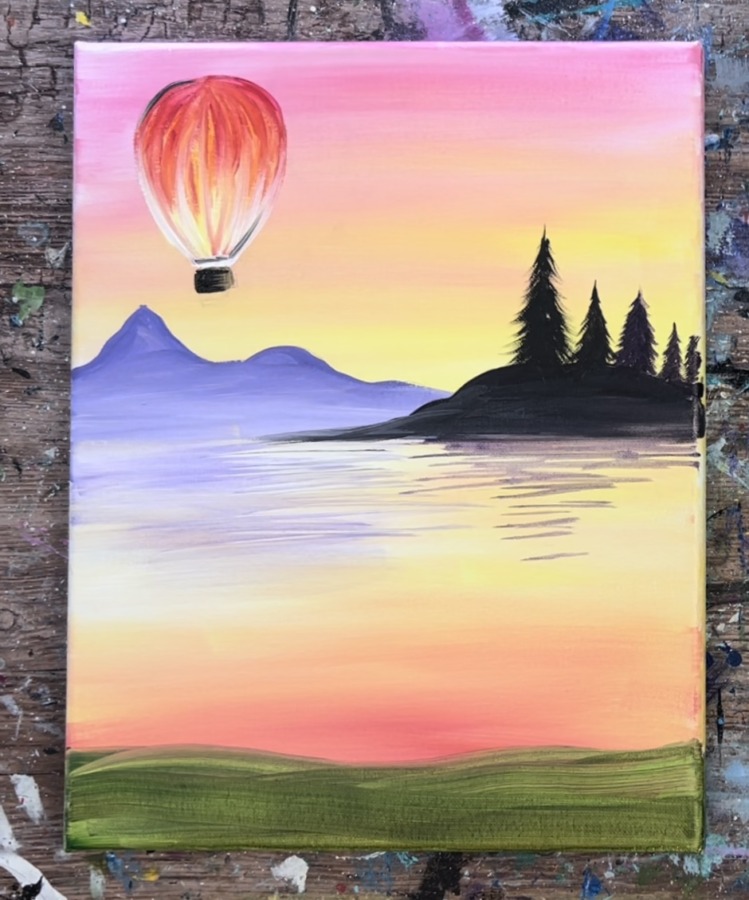
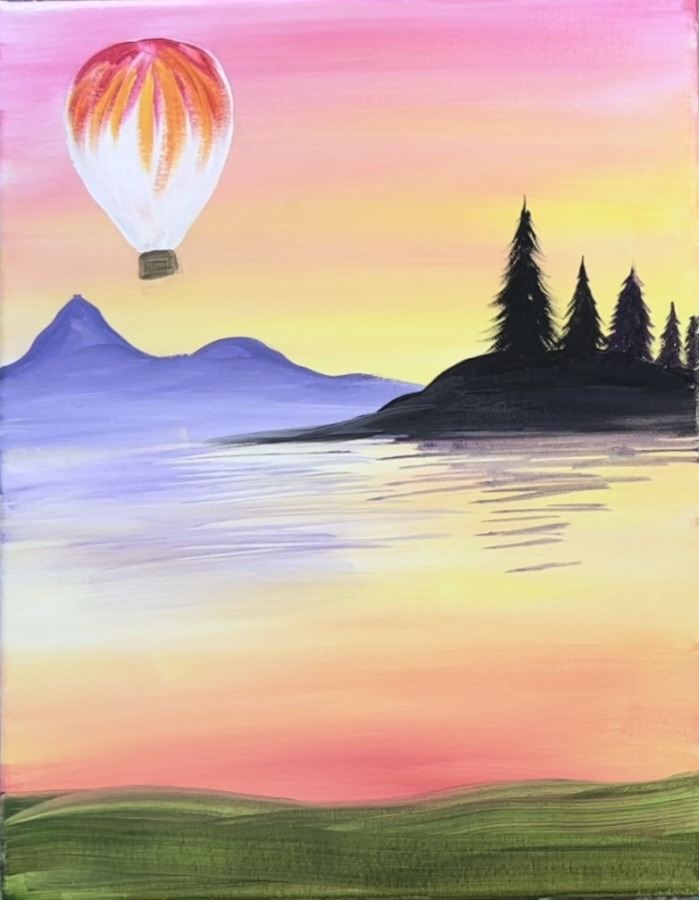
9. Paint Hot Air Balloon Reflection
Use primary red and cadmium yellow light to create the reflection in the water. Paint left and right horizontal strokes forming the shape of the balloon.
Paint a black area where the basket would be reflecting. Do this with the 4 round brush and small left and right strokes.
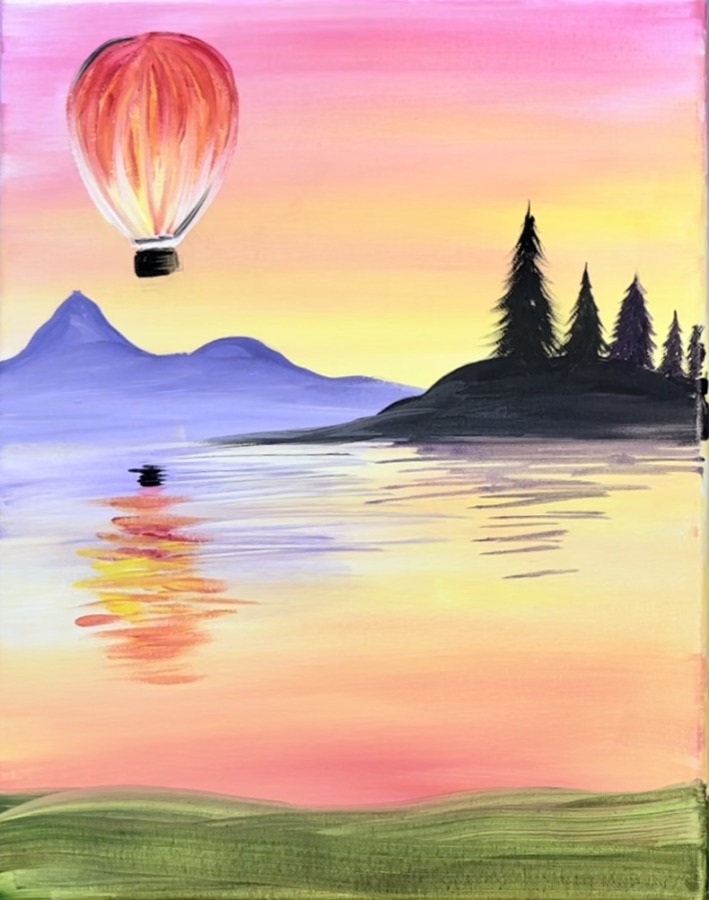
10. Paint Grass
Use a #8 round brush to paint the grass. Load your brush with hookers green hue permanent mixed with a little bit of primary red. Paint little angle strokes to form the grass blades. Add a little black into the paint to vary the color. Start at the top of the green area.
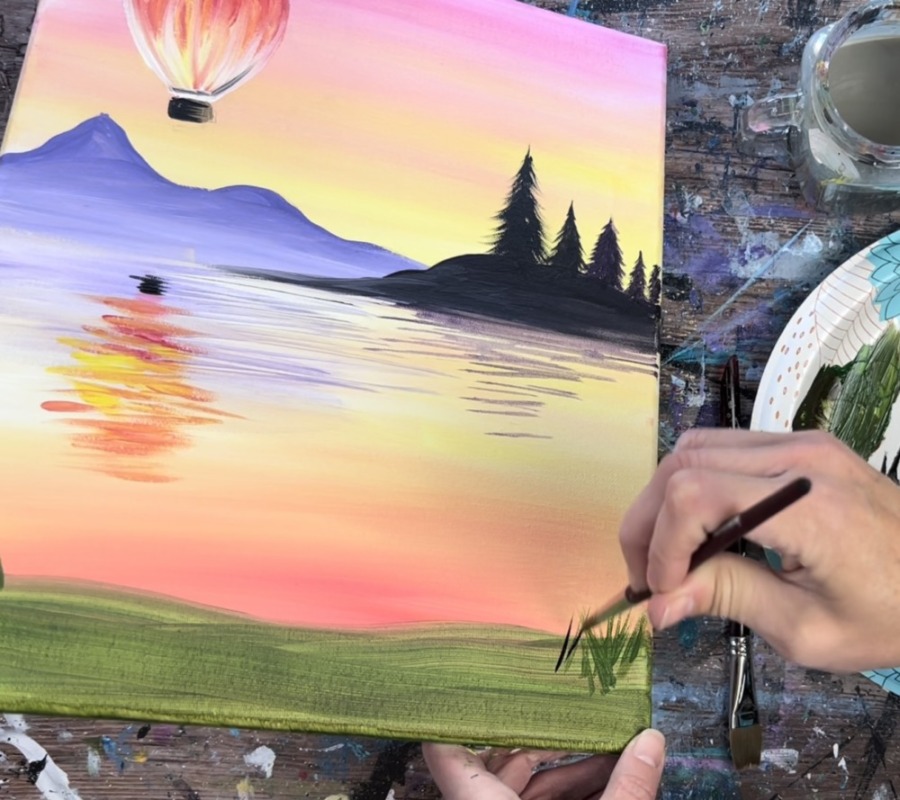
Paint your first row on the top. Then paint a second row of grass blades that overlaps the first row. Add a little yellow and/or white into the paint to vary the colors.
Keep painting layers of the grass blades until that area is full of grass texture.
Tip: the #8 round brush (Princeton Velvetouch) has a nice tip to it which makes it easier to create thin and pointed paint strokes.
Wait for this area to dry before painting the tulips.
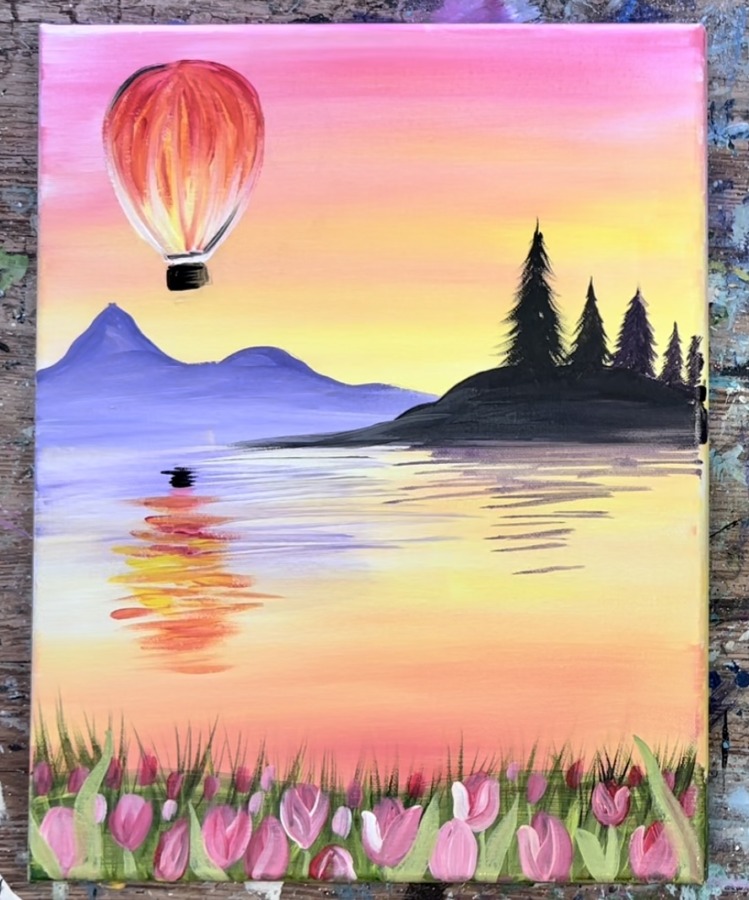
11. Paint Tulips
Use primary red and titanium white to paint the tulips. You can also use yellow and/or light pink to create other colors in your tulip.
Use your #4 round brush. Start by painting a small oval shape with the primary red mixed with titanium white. Then create 2-3 strokes going from the bottom up overlapping your first oval. Do this with a slightly darker or slightly lighter color (adding white or primary red to your brush). This creates petals that overlap the firs oval shape.
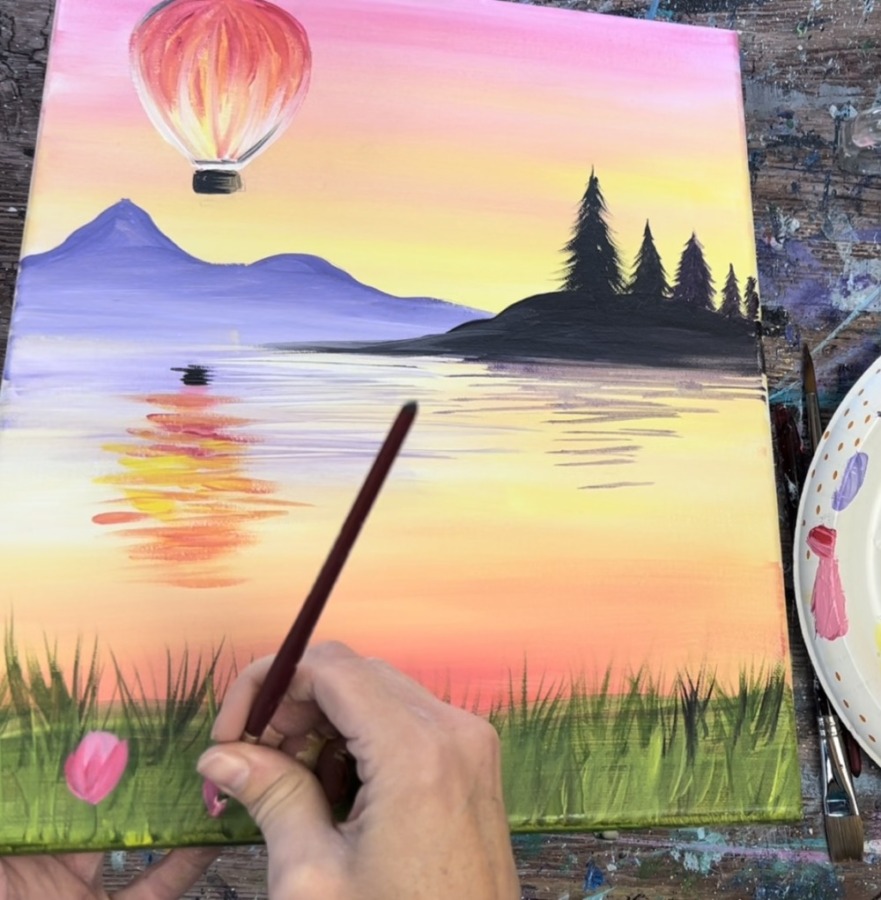
Repeat this technique to create a lot of little tulips over your grass area.
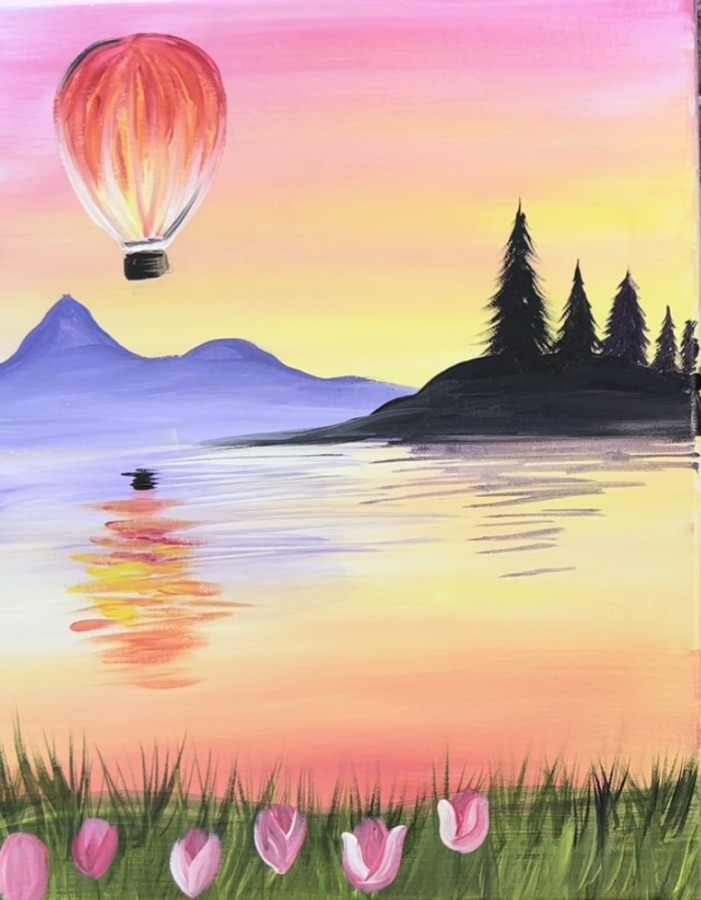
Paint single oval shapes (smaller tulips) for the ones in the distance/ further away.

Rinse brush and dry. Mix white into hooker’s green hue to make a lighter green. Paint small stems and some leaves for some of the tulips. Not all the tulips have to have stems.
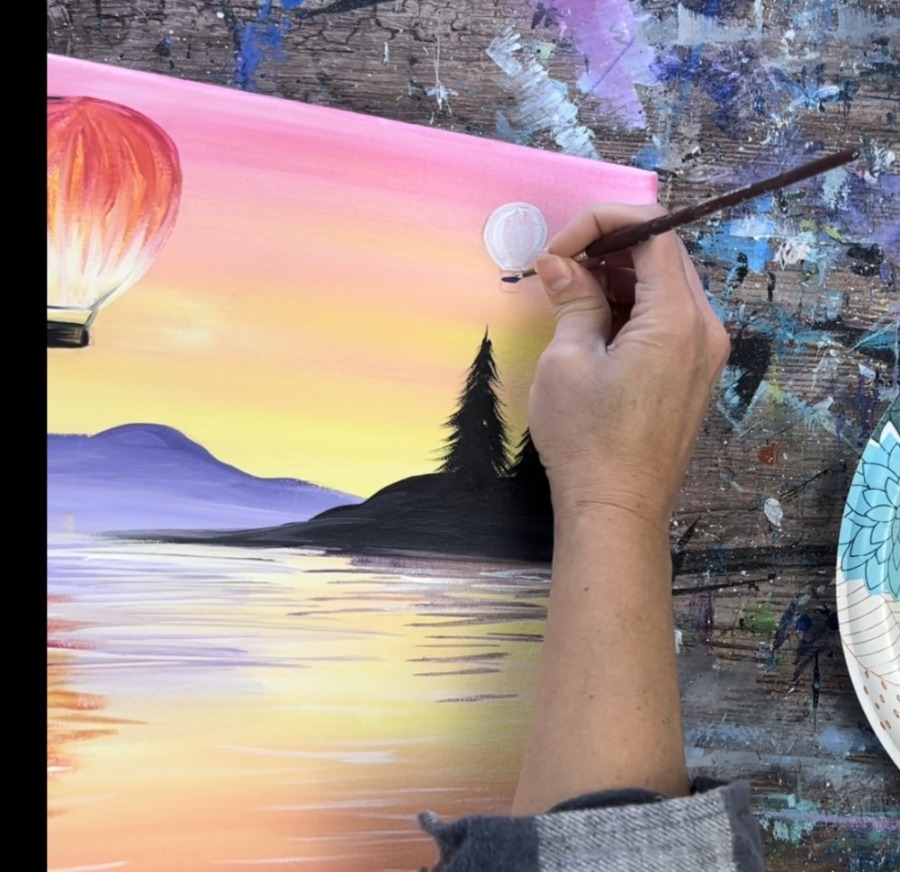
12. Draw and paint smaller hot air balloon
Lightly draw the other hot air balloon (a smaller one).
Also, use your #8 round brush to paint white lines in the water. This creates some more water texture. In addition, I adjusted the large balloon by creating a little bit more space between the basket and bottom of the balloon. I painted the ropes that attach to the basket black.
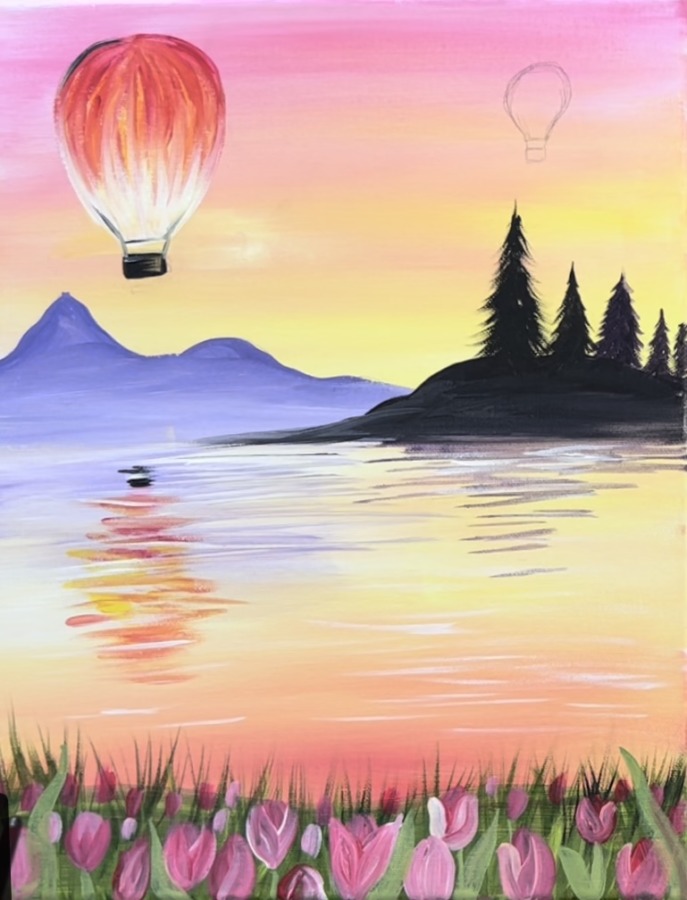
Paint the top of the smaller balloon white. Then paint the basket black.
Paint the top of the smaller balloon with primary red. Stroke each paint stroke downwards.
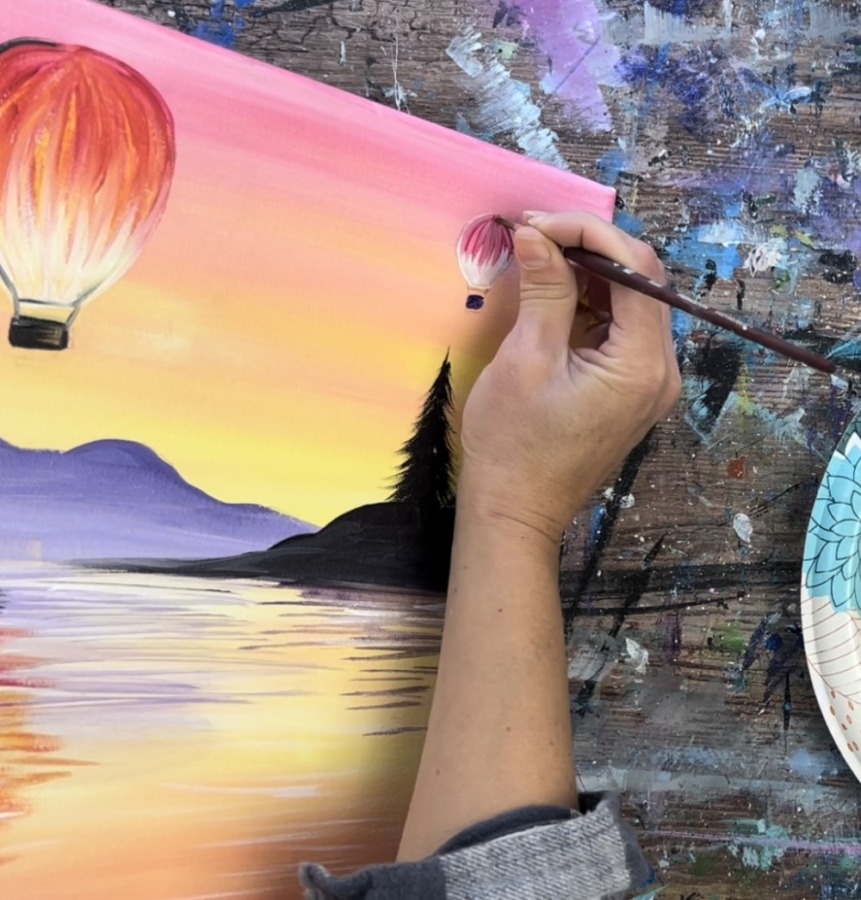
Then blend some purple on the bottom of the balloon and blend it up into the red.
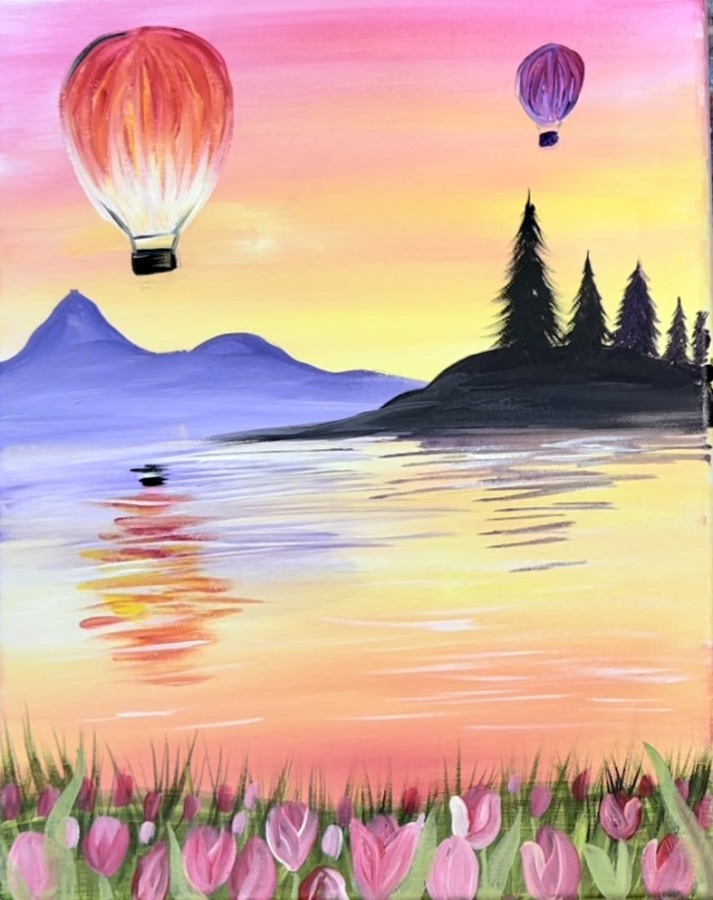
Add some highlight to the balloons. Paint some white highlight on the right side of the basket on the large balloon. Paint some white highlight on the right side of the purple balloon basket. Add a small amount of white on the bottom of the purple balloon and blend up.
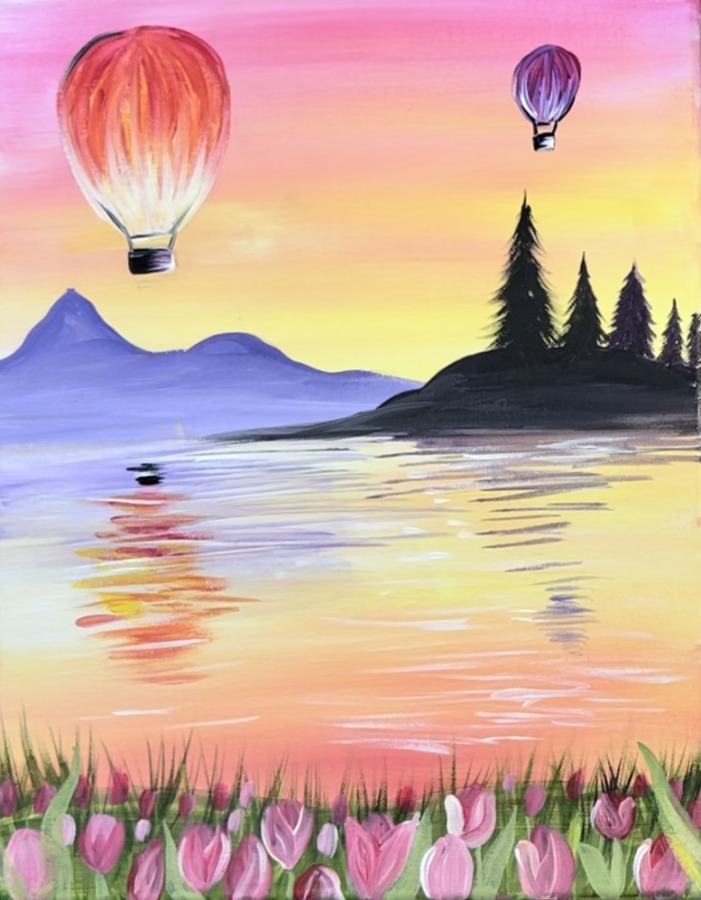
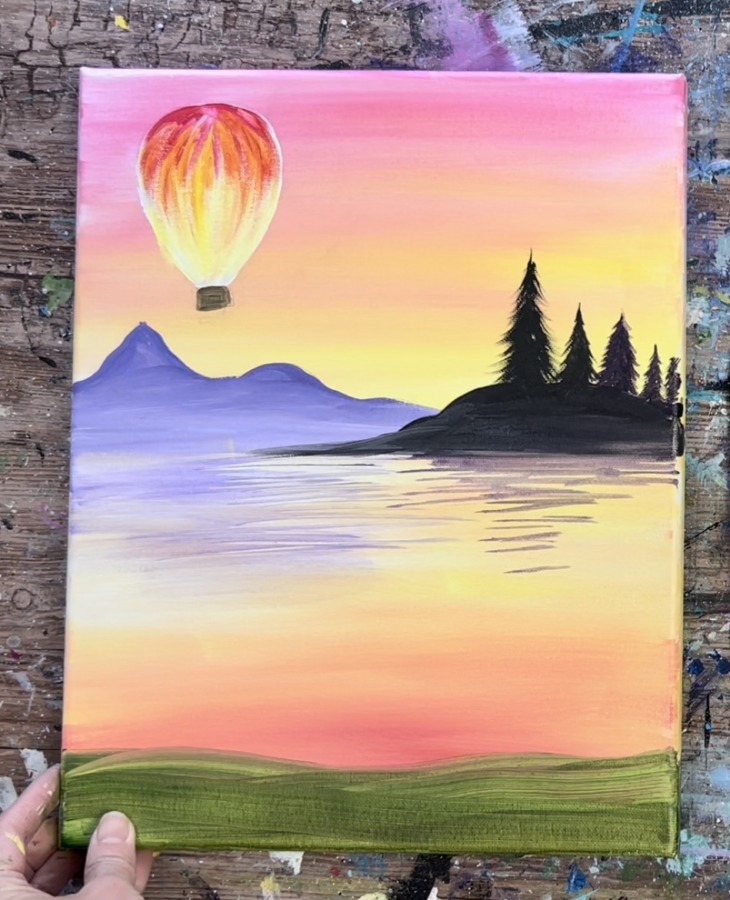
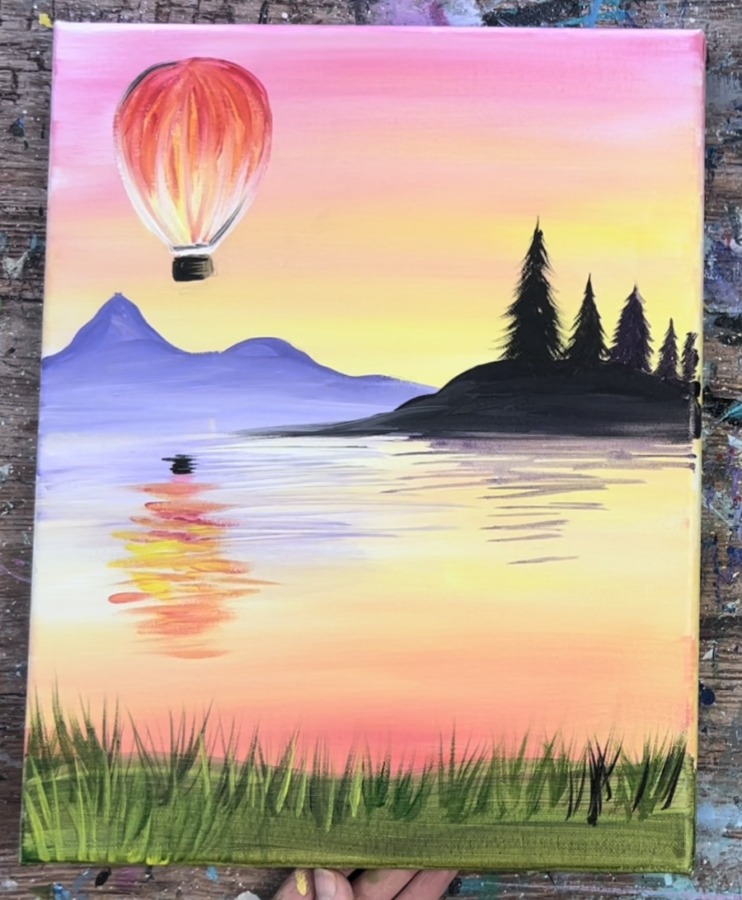
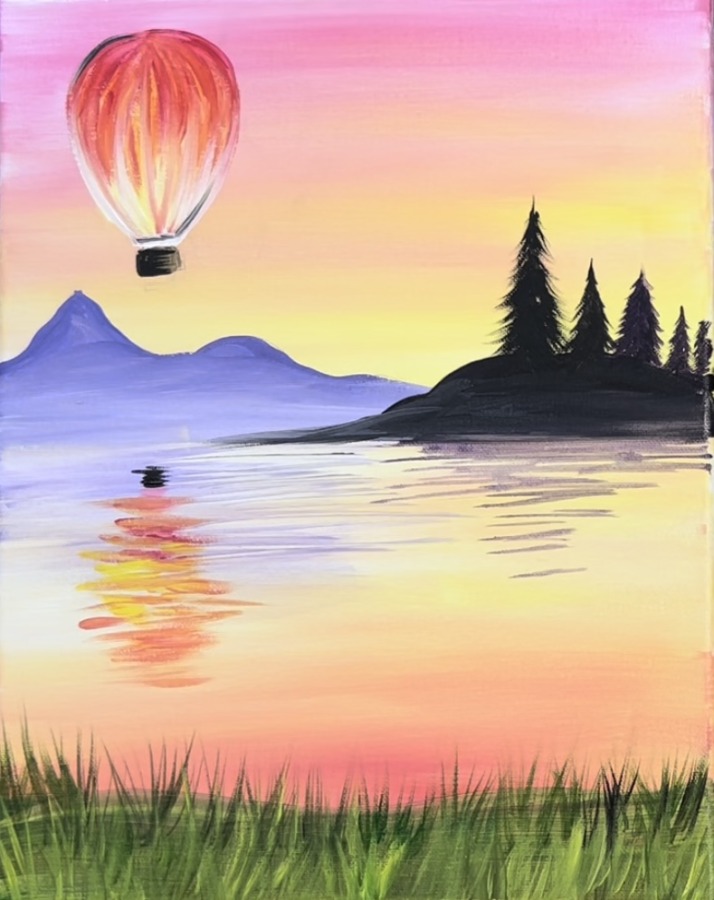
Finished
Share Your Art Here


This is so beautiful. A lovely technique to paint realistic tulips and grass.