

Would you like to save this?
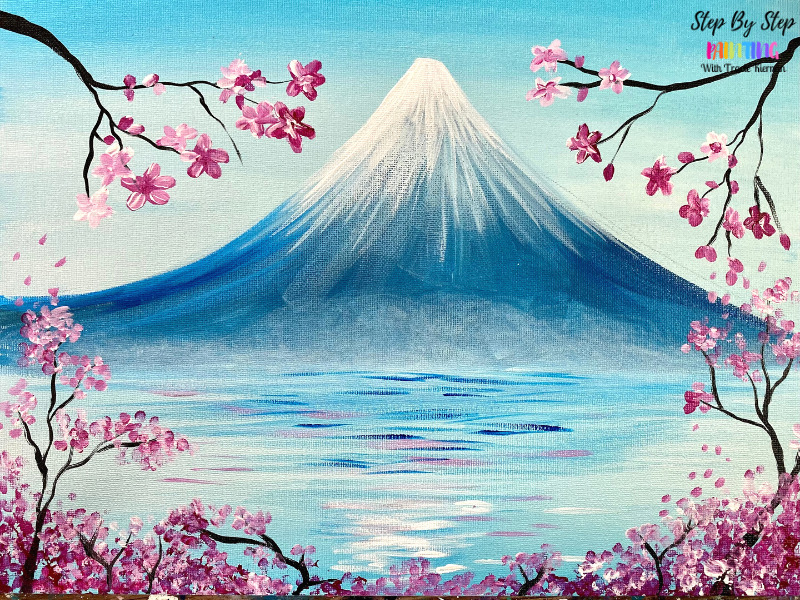
This acrylic painting tutorial will demonstrate how to paint “Mount Fuji” in a landscape with cherry blossom trees and blooms.
Mount Fuji is a beautiful volcanic mountain located in Japan. It is depicted in a lot of pieces of art including the famous “The Great Wave” painting by Katsushika Hokusai.
This tutorial is a simplified demonstration on how to paint the mountain depicted in front of a waterfront with reflections and cherry blossom trees in the foreground.
Enjoy and happy painting!
Materials
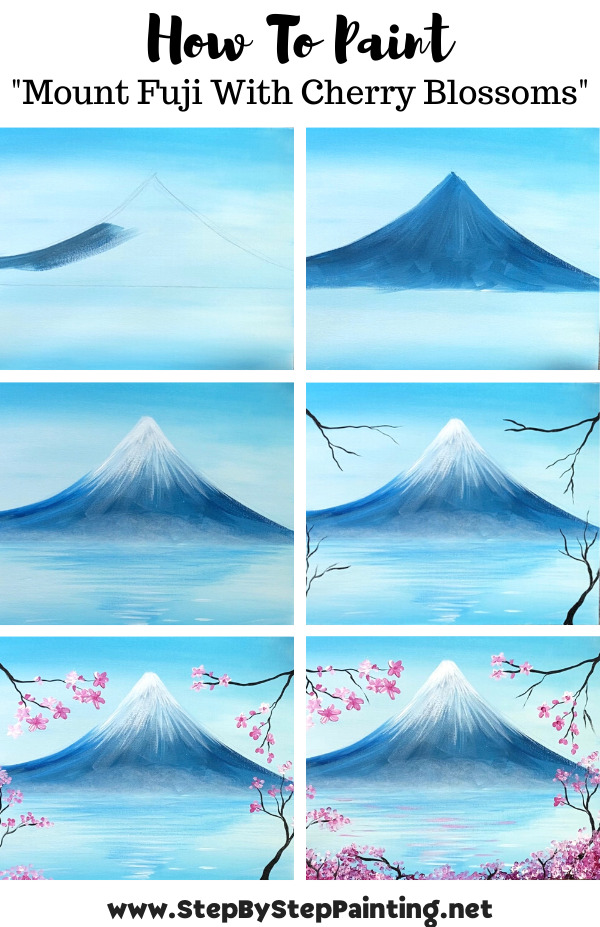
Mount Fuji Painting With Cherry Blossoms

Learn how to paint Mount Fuji with cherry blossoms on an 11 x 14 canvas.
Materials
- 11 x 14 Canvas
- Acrylic Paint
- Brushes
- Q-Tips For Cherry Blossoms
- Water Cup
- Palette For Paint
- Rag or Paper Towel
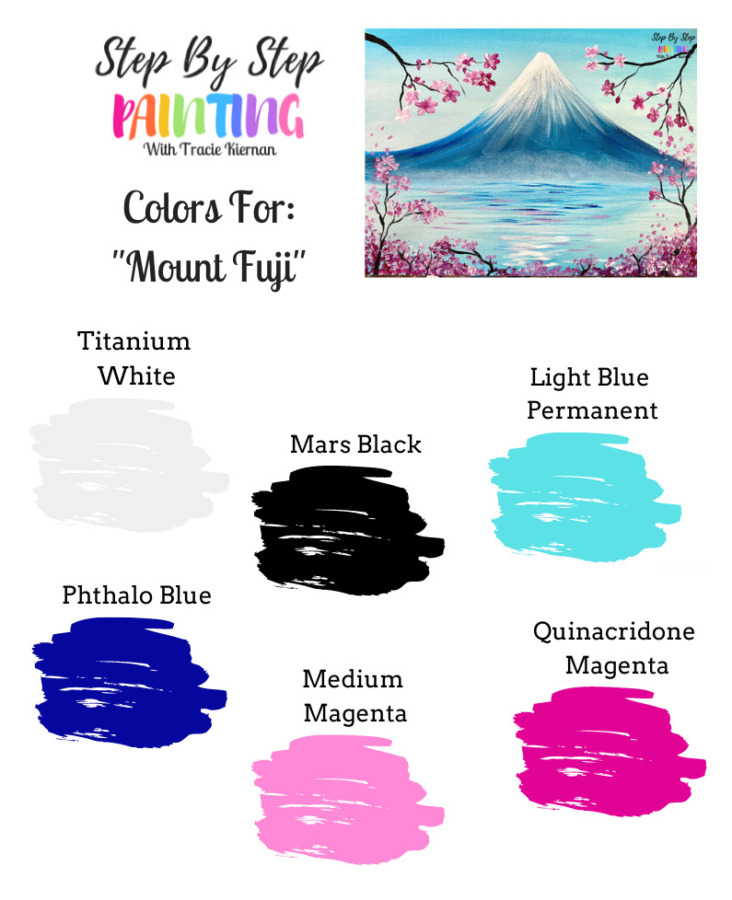
Colors
- Titanium White
- Light Blue Permanent
- Quinacridone Magenta
- Medium Magenta
- Mars Black
- Phthalo Blue
Brushes
Color Palette
I used Liquitex BASICS student grade acrylic paints for this tutorial.
Using Craft Paints?
If you are using craft paints such as the Apple Barrel paints, you can try substituting for these colors:
- White
- Black
- Parrot Blue
- Bright Magenta
- Candy Pink
- Too Blue
Directions At A Glance:
Video:
Step By Step Directions:
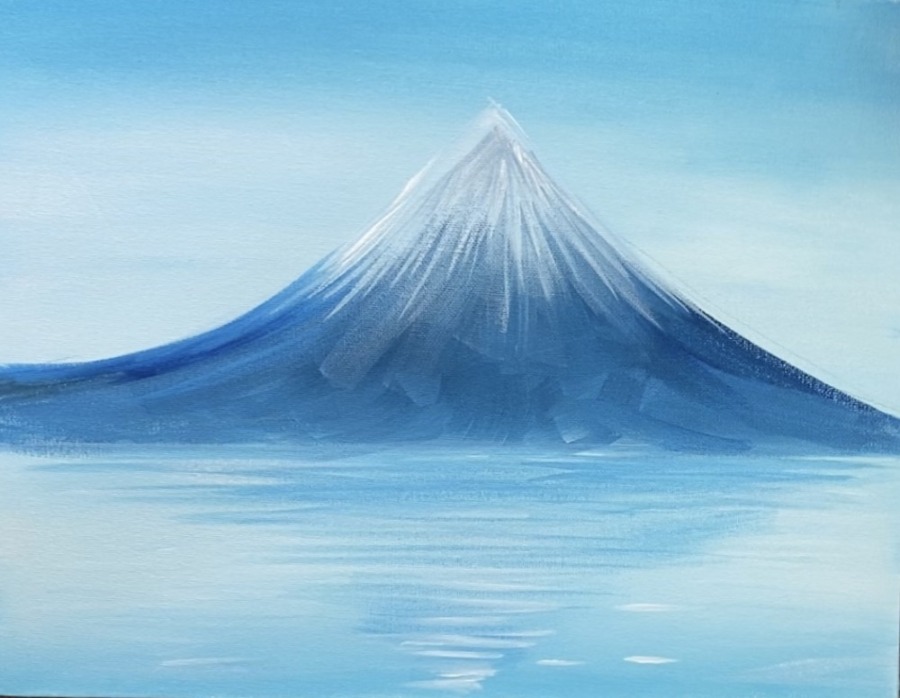
1. Paint Sky & Water Gradient
Use a 3/4″ flat wash brush and the colors light blue permanent and titanium white to paint the entire canvas a “gradient blend of light blue to white and then to light blue again”.
Start at the top with just light blue permanent. Paint left and right strokes. This should be thin and not a thick layer. Add a bit of water to the brush to help with the flow and consistency of the paint.
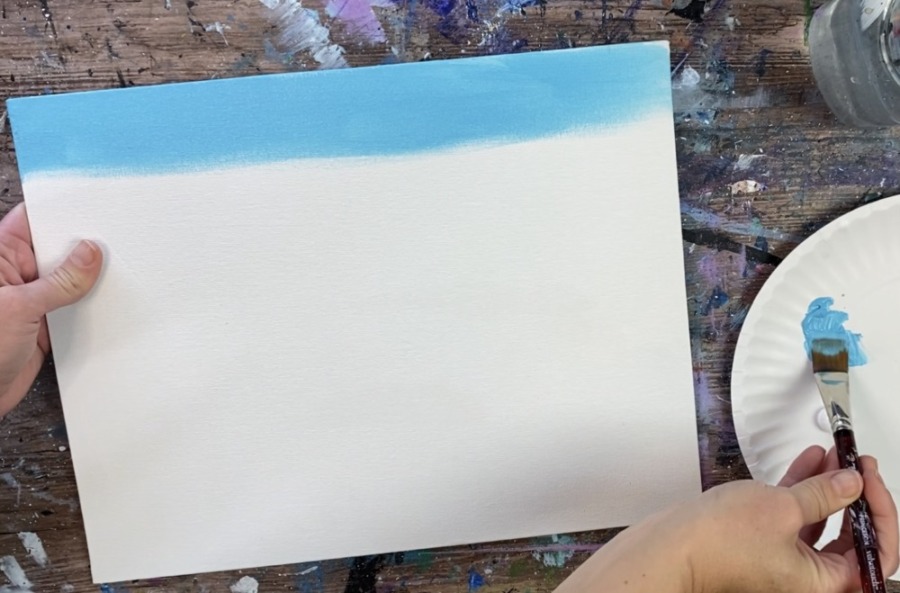
Go down about three inches with the blue and then add a small amount of titanium white to your brush. Gently blend the white up so the light blue turns to a lighter color.
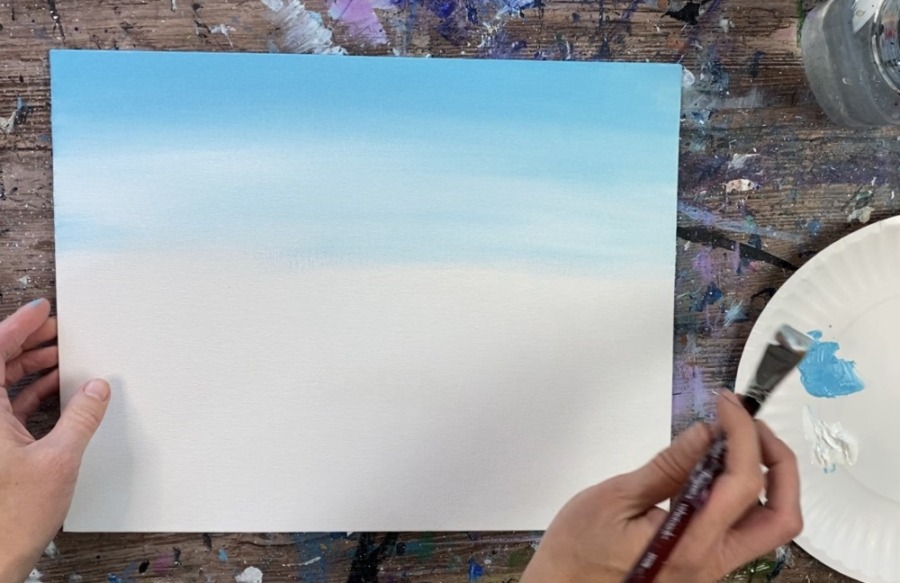
Go down about seven inches with the lighter color. The sky should get lighter and lighter as you work your way down the canvas.
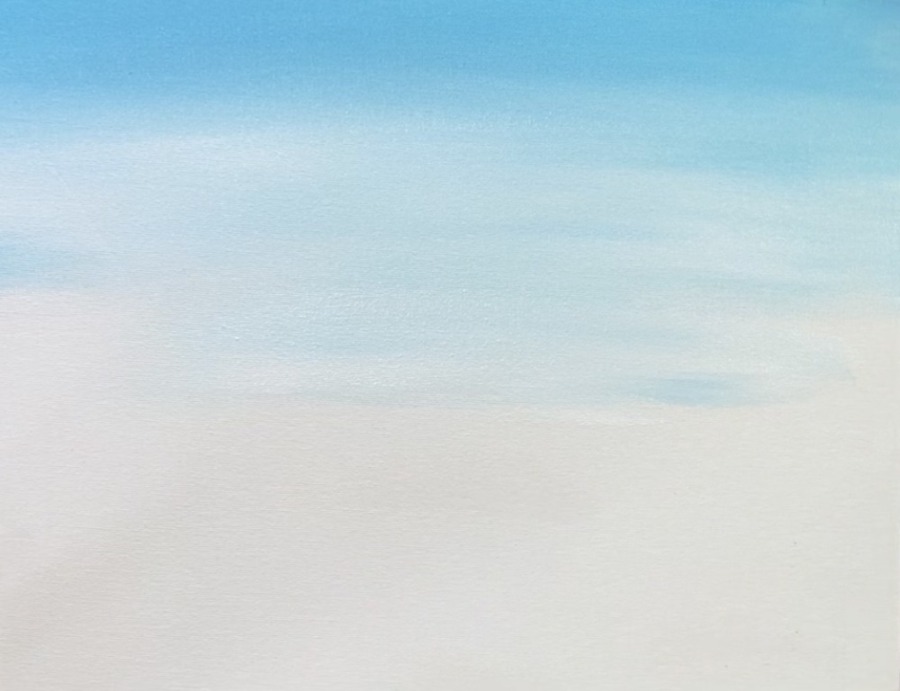
Then gently add in more light blue permanent so your gradient blend becomes slightly darker as you get to the bottom of the canvas. The bottom of the canvas should have mostly the light blue permanent.
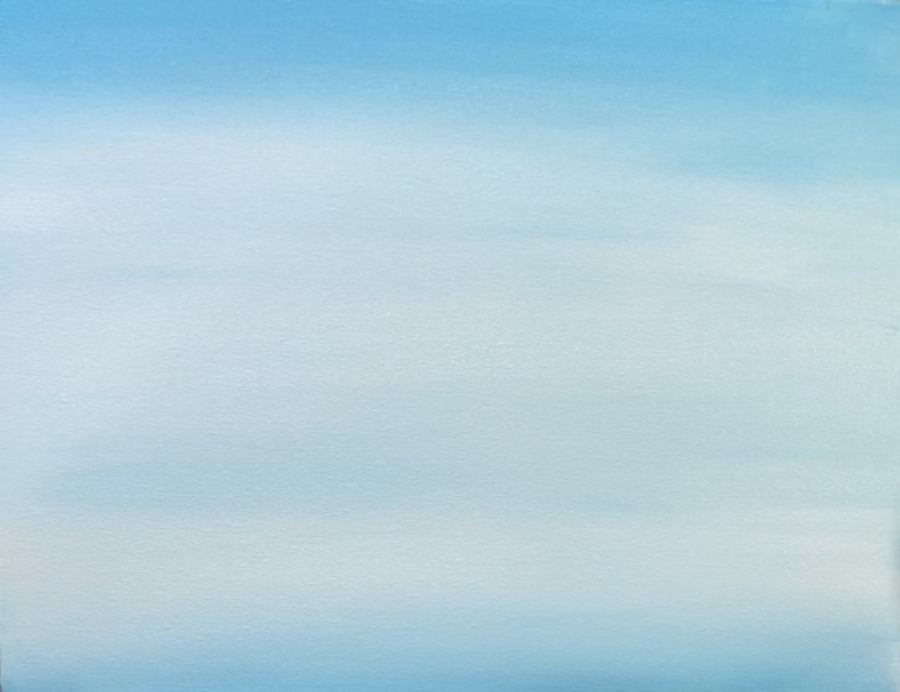
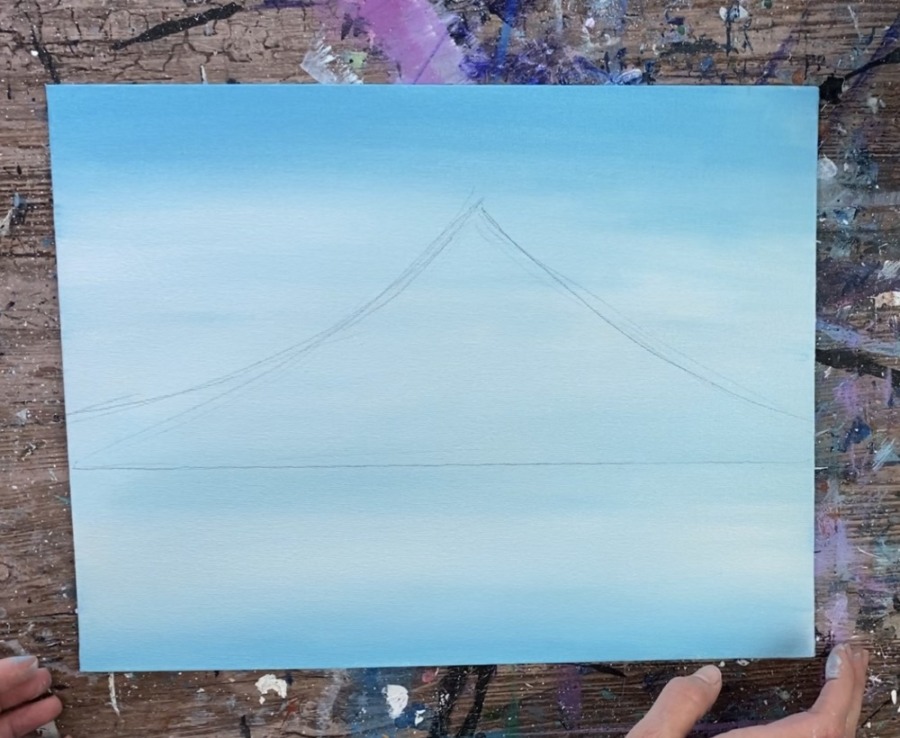
Let this first layer of the painting dry before going onto the next step.
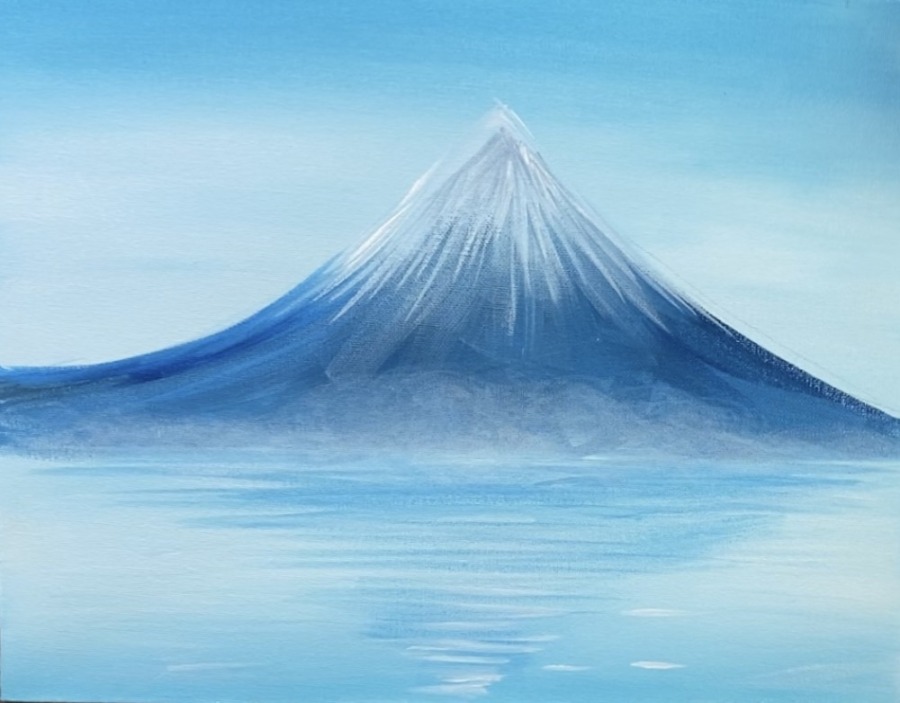
2. Draw Mountain & Horizon Line Composition
The horizon line (base of the mountain) is about 4″ from the bottom of this painting. If you are doing this on a different size canvas, you can estimate about a third up from the bottom of the canvas.
Use a ruler to draw a horizontal line.
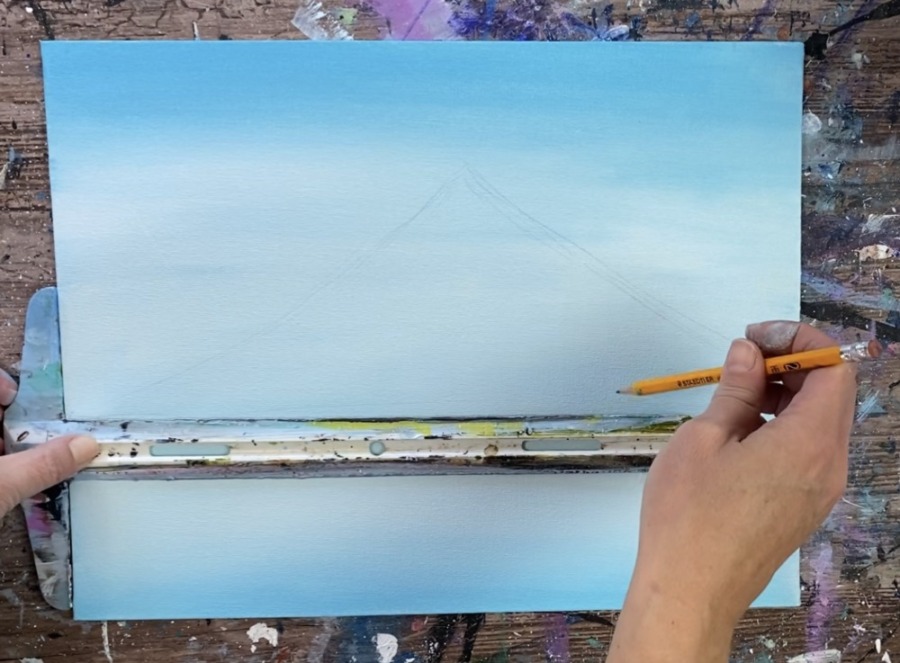
Then draw your mountain peak. Draw two diagonal lines that go to a point that is slightly off center. These lines slightly curve inwards.
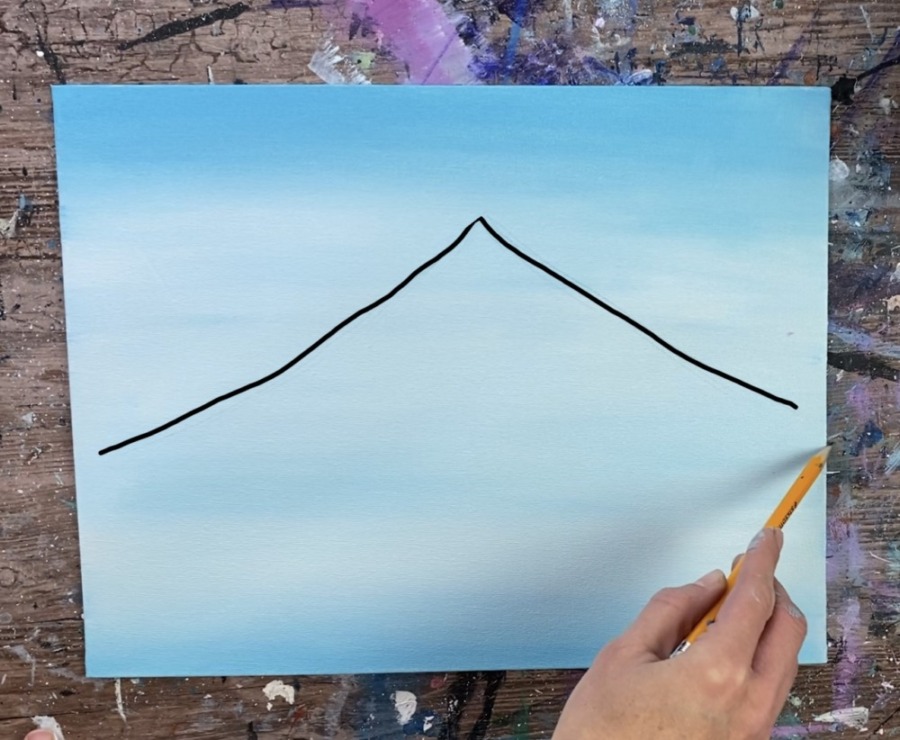
Leave a little gap from the horizon line to the bottom part of the slope on the left and right edges. In other words, none of the lines of the mountain touch the horizon line.
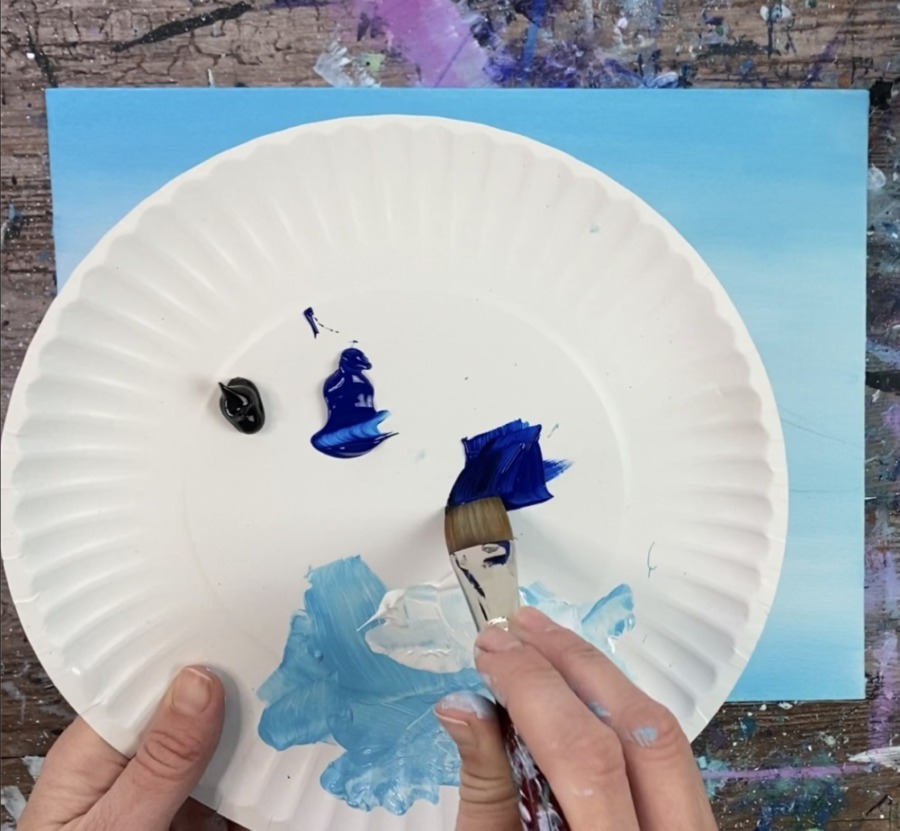
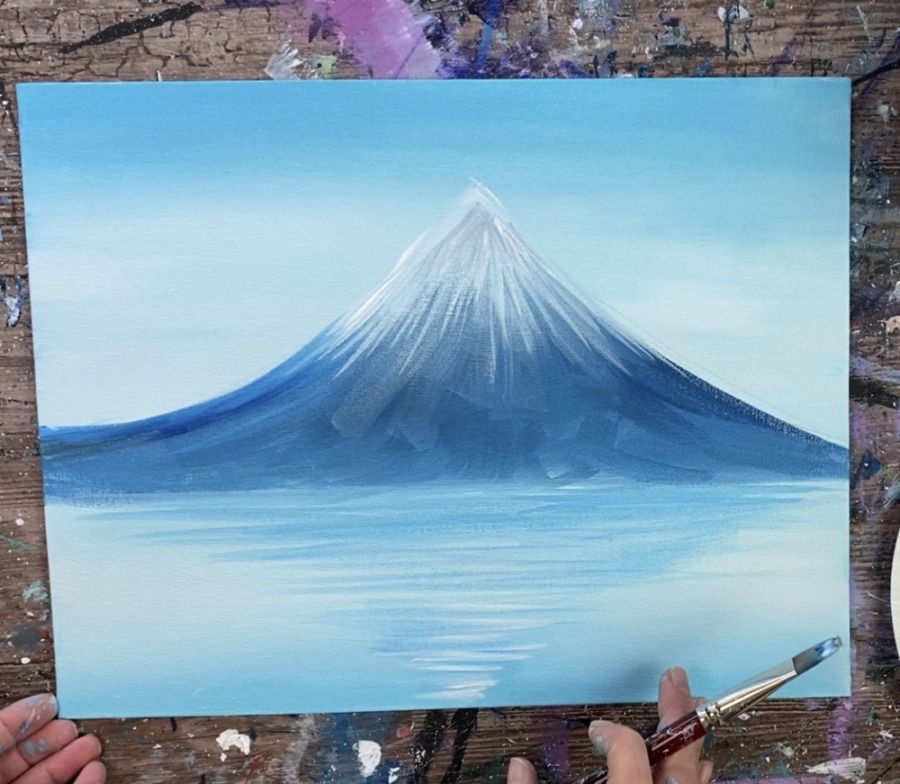
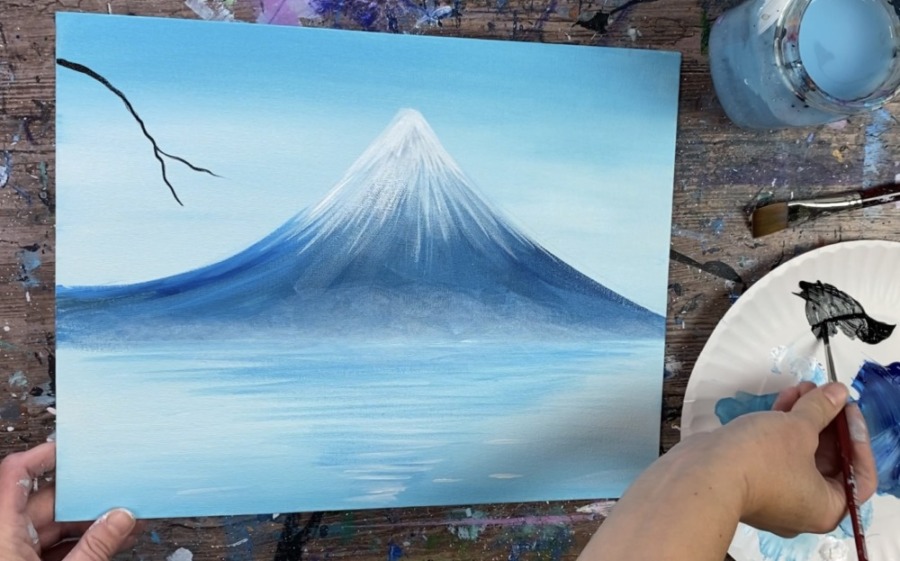
3. Mix Dark Blue-Gray Mountain Color & Paint Mountain Shape
Next mix your mountain color. This is a dark blue-gray color. Load your palette with phthalo blue, mars black and titanium white. Use your 3/4″ flat wash brush to mix about 3 parts phthalo blue, 1 part mars black and 2-3 parts titanium white. Add more white if needed.
Use your 3/4″ flat wash brush to pain the mountain. Use the tip of your brush to “cut in” the edges of the mountain slope. Then use the full width of the brush to paint the entire mountain in.
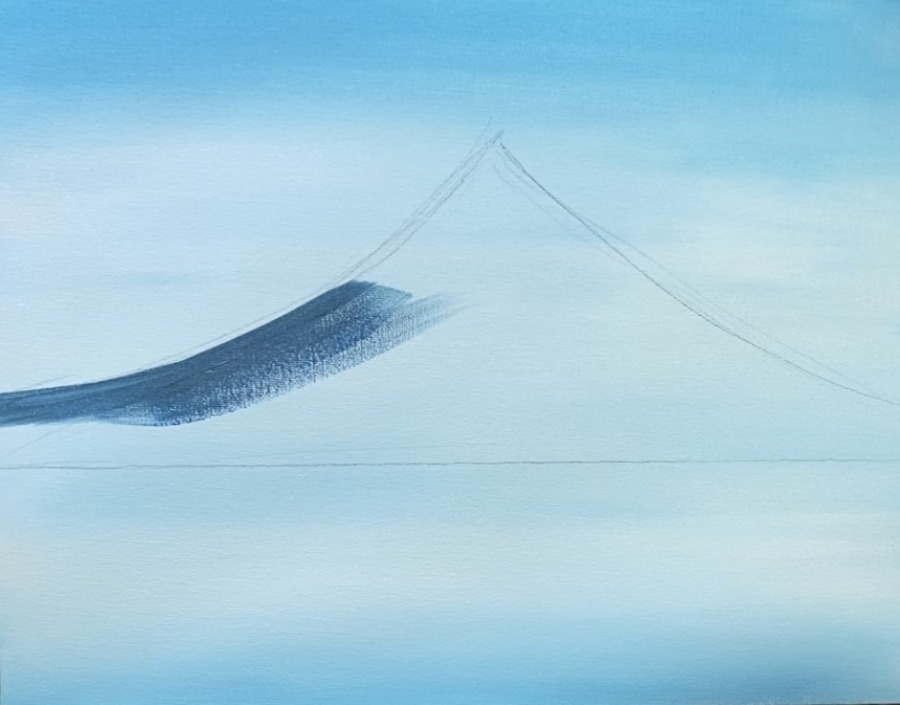
Paint in the direction of the shape of the mountain. On the bottom of the mountain, paint in more expressive “x style” strokes.
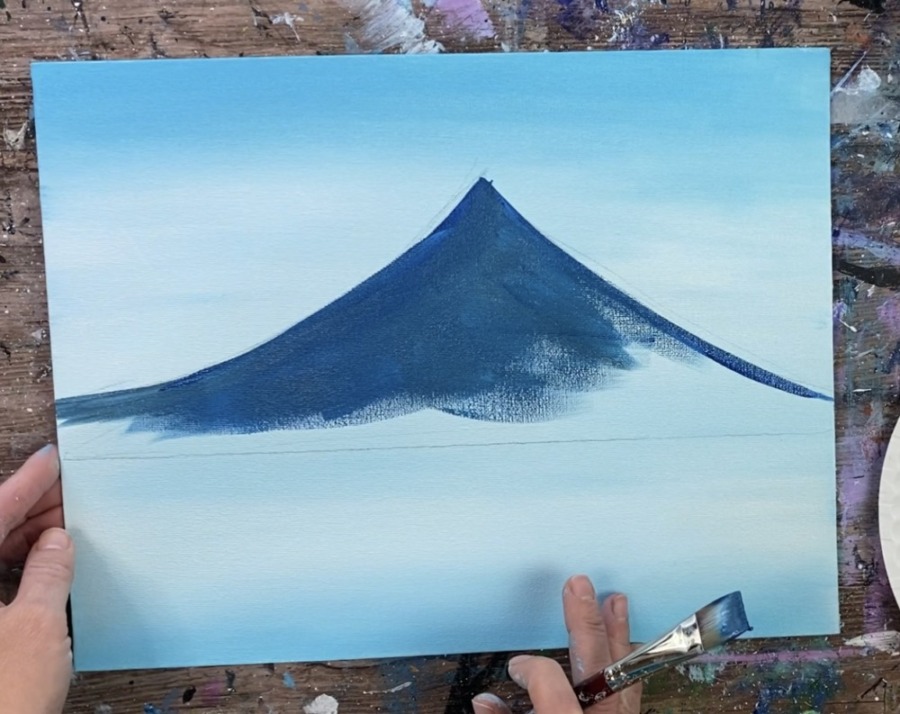
Then add a bit more titanium white on the base of the mountain and blend it up into the blue-gray color.
The bottom base of the mountain is slightly lighter than the top. Snow will be added in the next step.
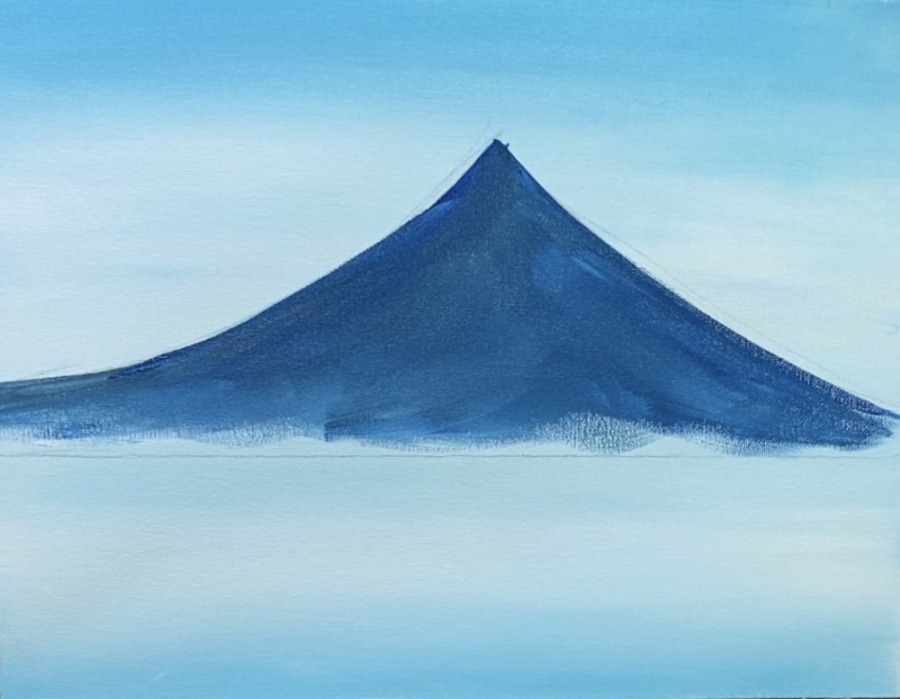
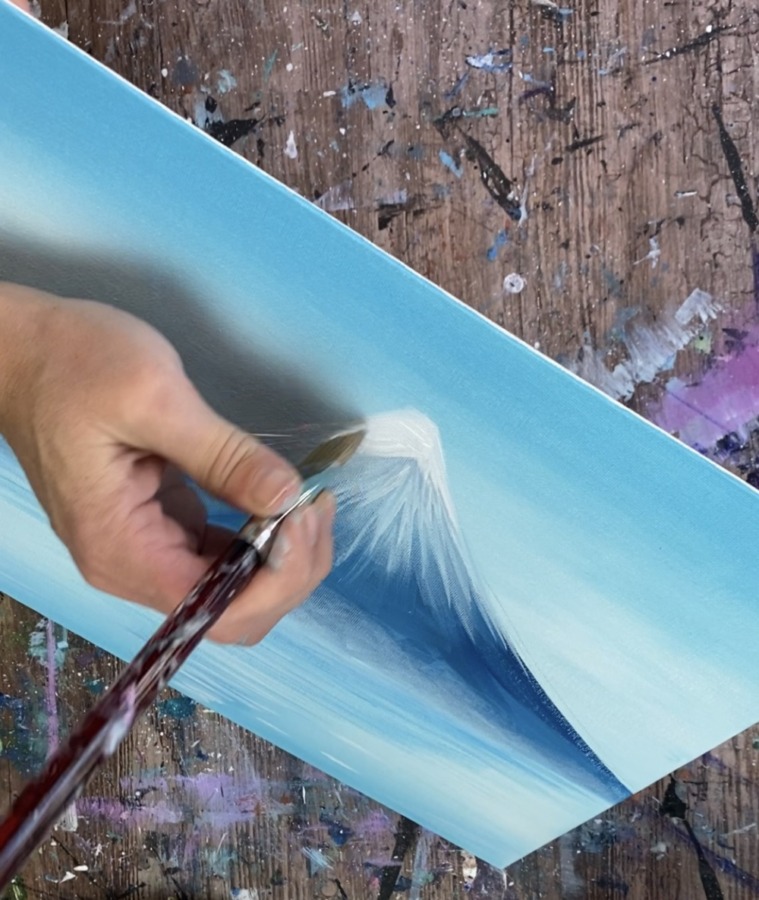
4. Paint Snow Cap On Peak Of Mountain
Wipe your brush off. Then load it in titanium white. Paint the top peak of the mountain with the white ands stroke down in the direction of the slope.
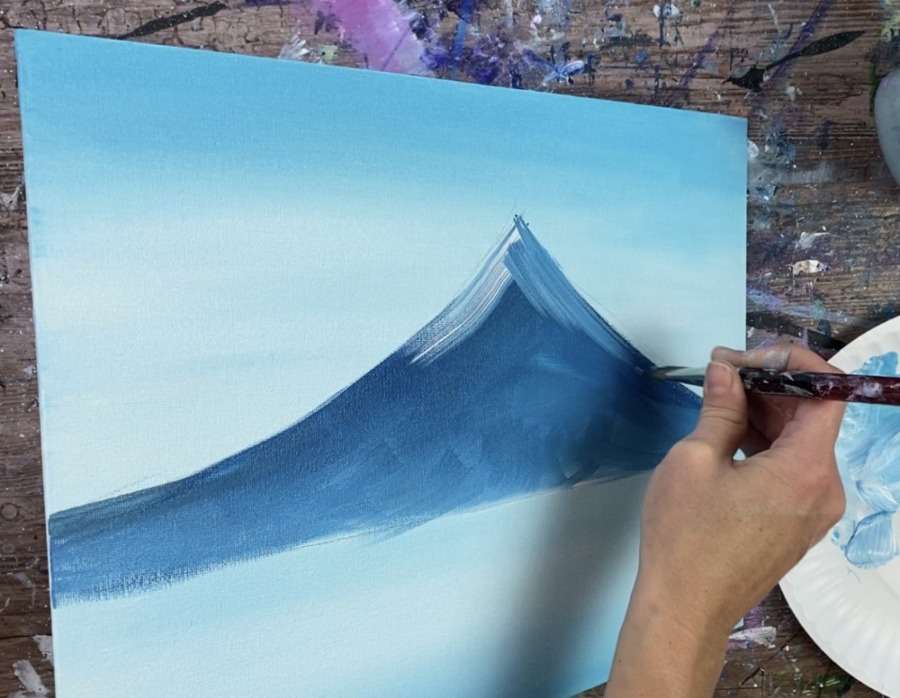
If your blue layer isn’t dry yet, your white will quickly blend with the blue-gray color and not look bright. You may need to dry the mountain peak with a blow dryer.
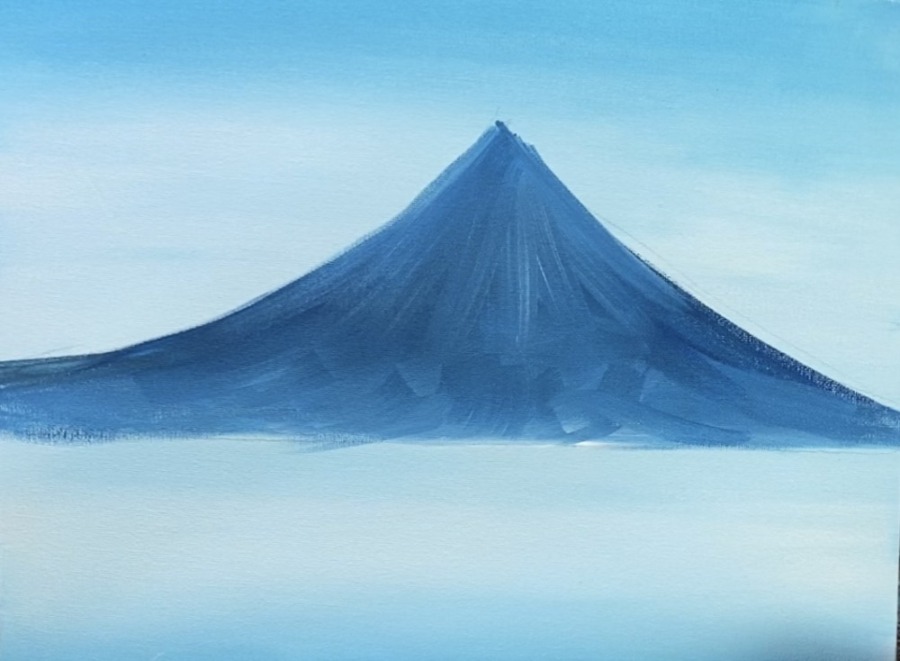
Then add more white to your brush. Paint another layer of the snow. Drag your brush in downward directions. Release the pressure as you stroke down so the stroke gets lighter and runs out of paint at the bottom.
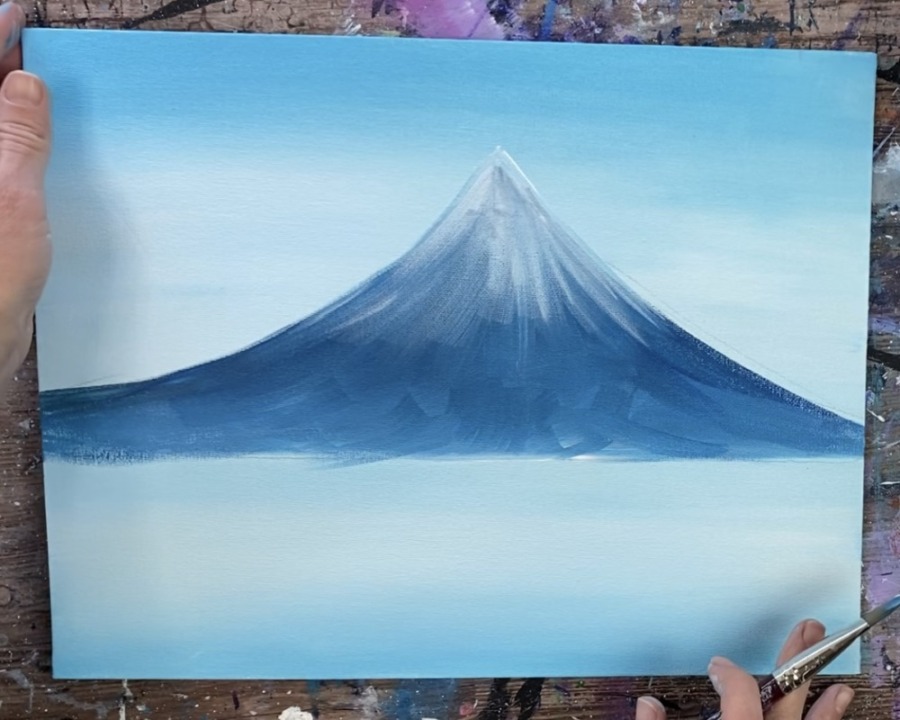
If needed, another layer can be applied later after this snow layer dries to make it brighter.
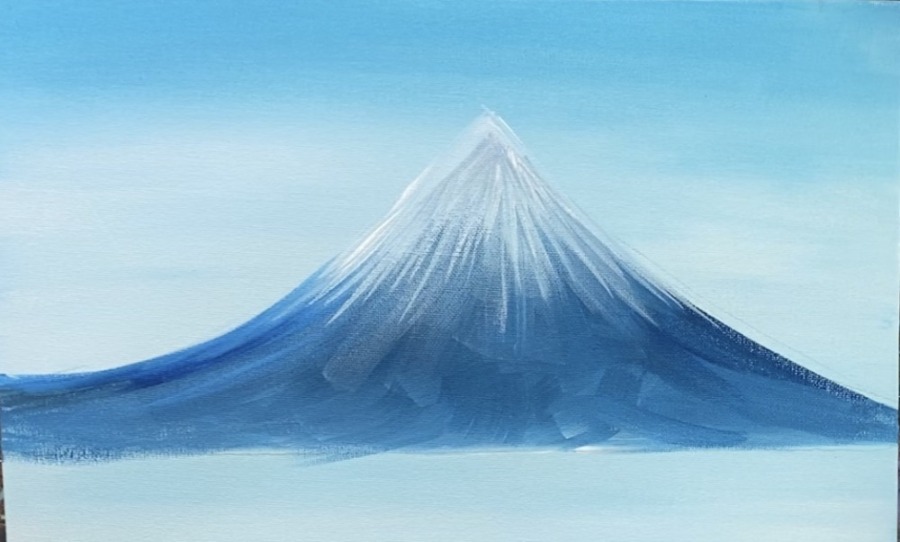
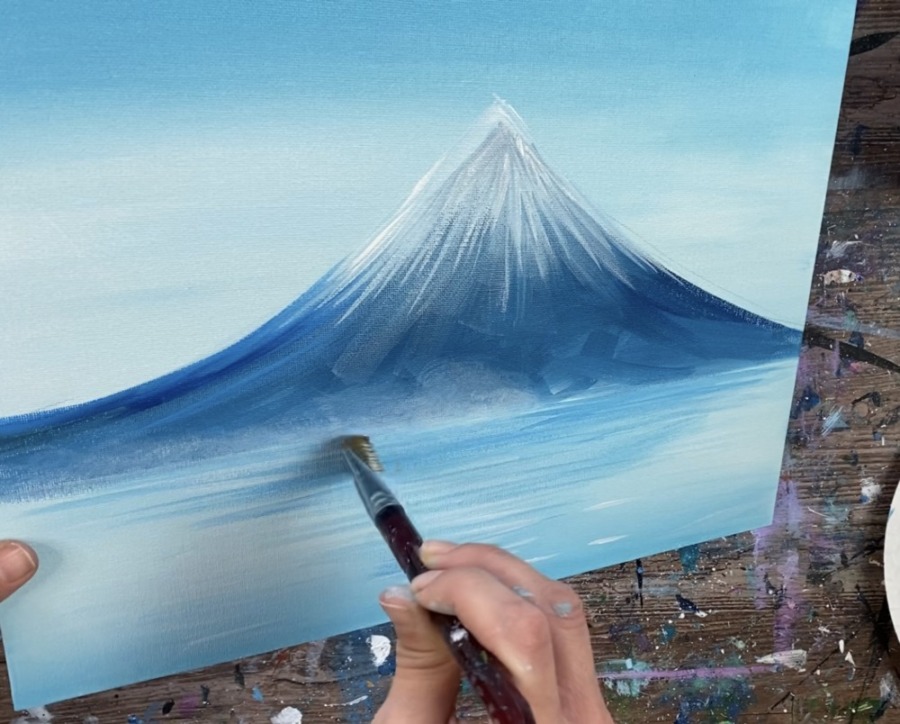
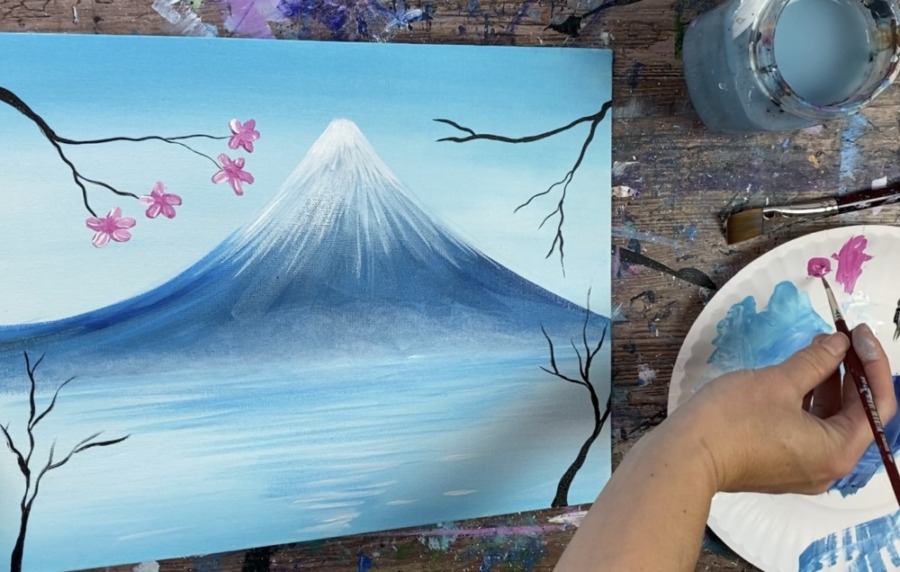
5. Paint Reflection In Water
Next, use the blue gray color on your palette and add a small amount of white to it to lighten it up. Water it down slightly. Then use your 3/4″ flat wash brush to paint left and right strokes under the mountain to make an area that reflects a mirror image of the triangular shaped mountain.
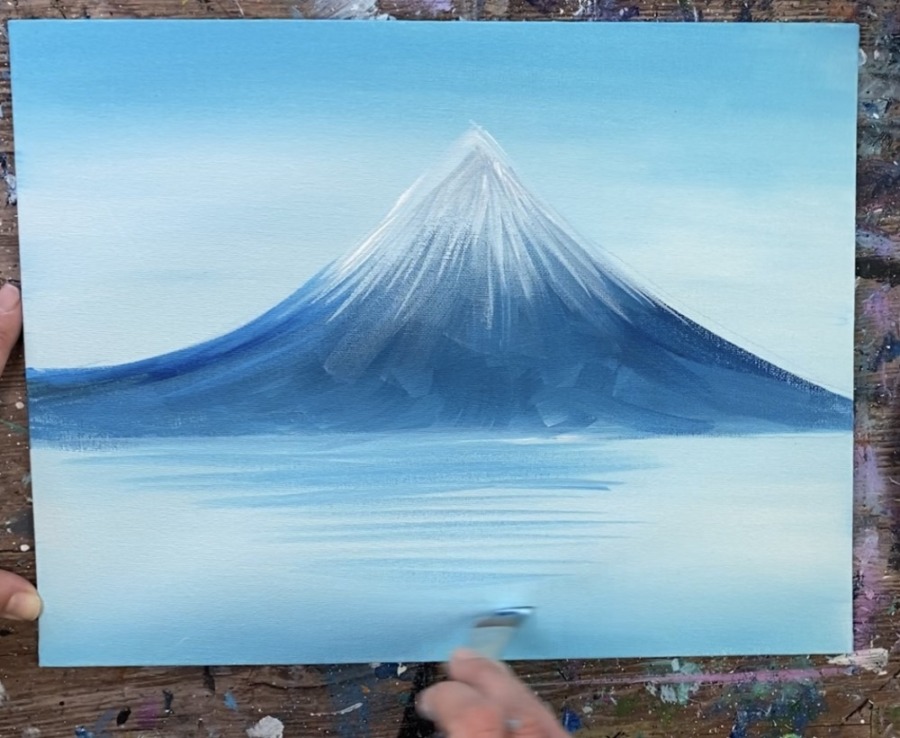
Leave a little bit of the first light blue layer of the water still showing. Then add a small amount of white on the bottom part of that triangular reflection area. This reflection is simple and very subtle.
Then add a few water lines around the other areas of the water outside of the reflection area.
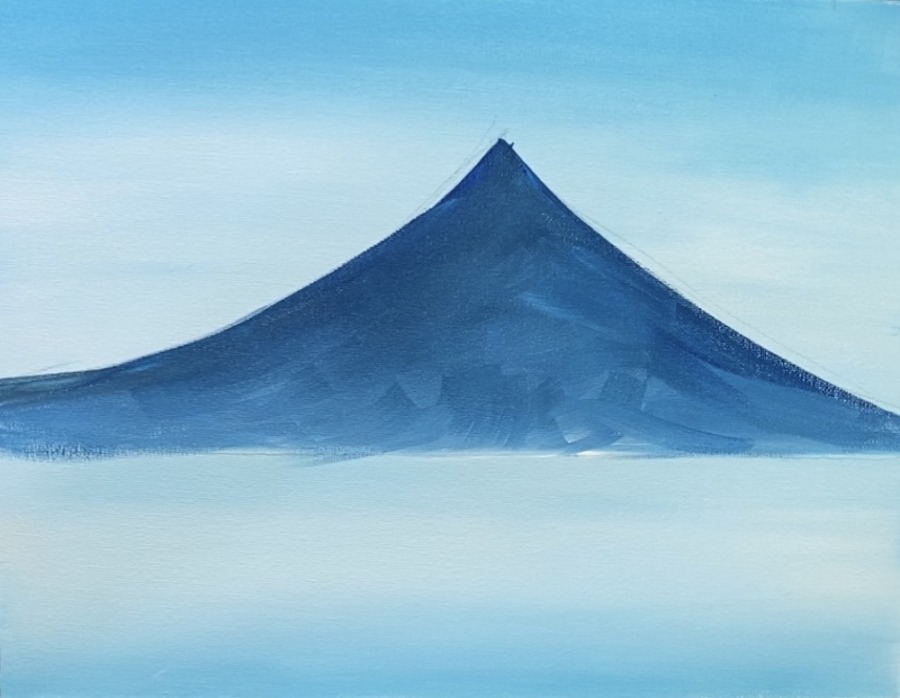
6. Dry Brush “Misty Base” of Mountain
If you want the base of your mountain to look “misty” use your 3/4″ flat wash brush to dry brush titanium white. Clean and dry your brush. Then load it into a small amount of titanium white. Wipe the brush off with a paper towel or rag so only a small amount of paint remains on your brush.
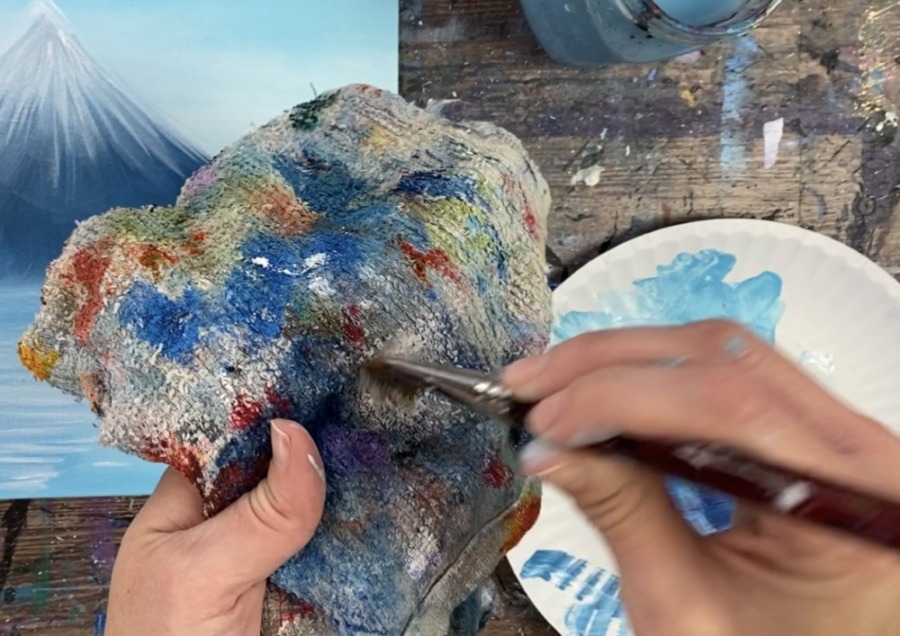
Then use your brush to paint circular strokes at the base of the mountain and slightly over the water area. This should be very dry and translucent. If it is showing up too bright, you’ll need to wipe your brush off some more.
I made the mist go a little bit higher in the middle base of the mountain and lower on the left and right sides.
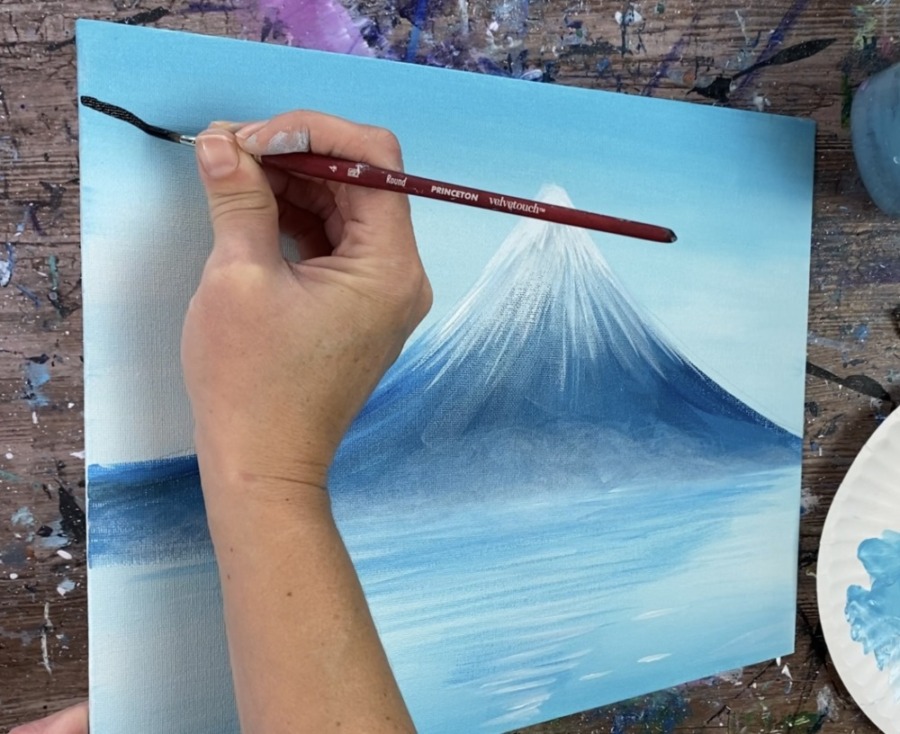
7. Add Another Layer Of Snow
If needed, paint more white on the top of the snow cap to make it brighter.
8. Paint Cherry Blossom Branches
Use a #4 round brush and mars black to paint the branches of the cherry blossoms. Load mars black on your palette and water it down to a water color consistency.
Paint the branches that are up in the sky area of the painting. Cherry blossom branches are a little “twisty” so when you paint the branches, “wiggle” your brush a little bit to get this style of brush stroke.
Make the base of your branch a little thicker then make the edges of the branches thinner.

Paint two branches above the mountain on the left and right and then paint two more branches on the bottom left and right.
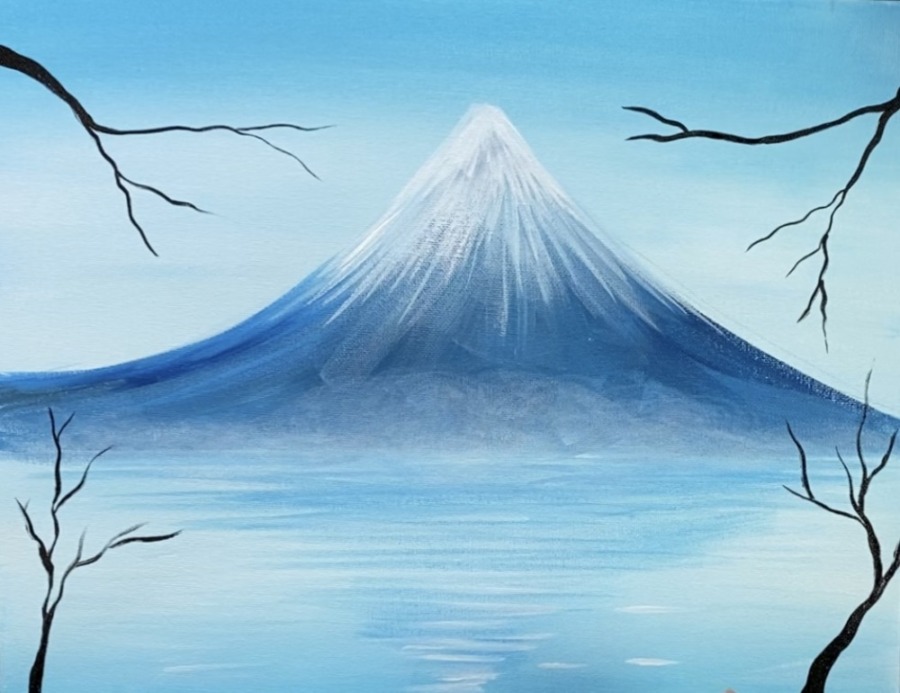
9. Paint Cherry Blossoms
Then load your palette with medium magenta, quinacridone magenta and titanium white. Use your #4 round brush to paint 5 petal flowers on the ends of the branches up in the sky.
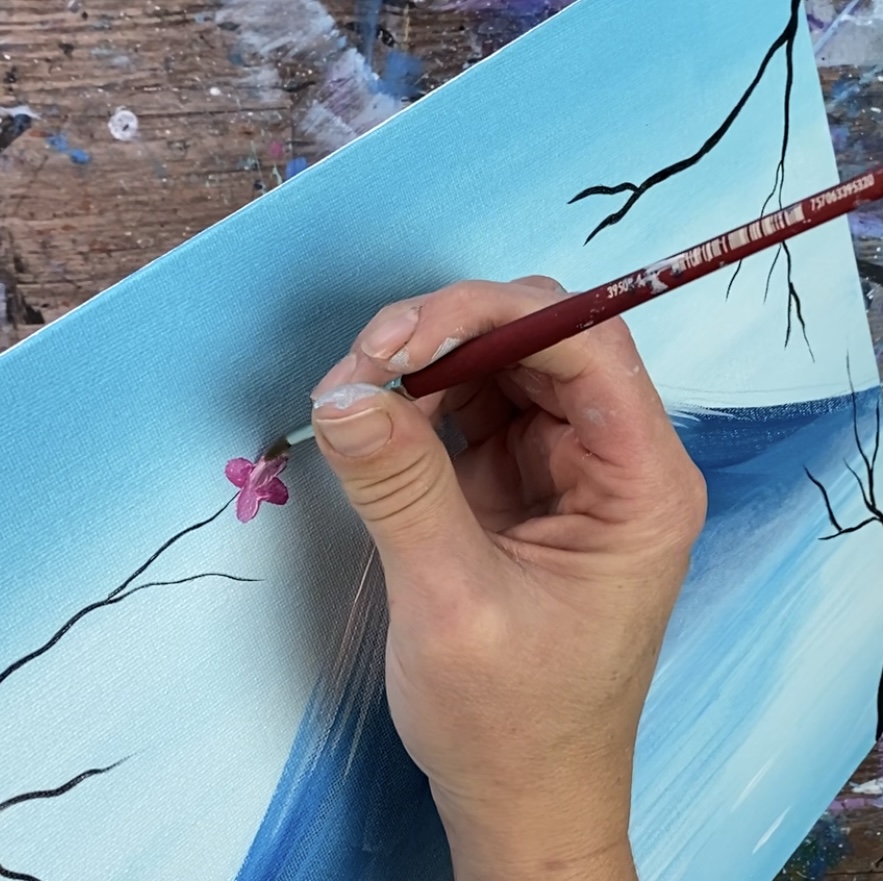
Double load your round brush with the medium magenta and titanium white. Use the full bristles to press/stamp each of the petals of the flowers.
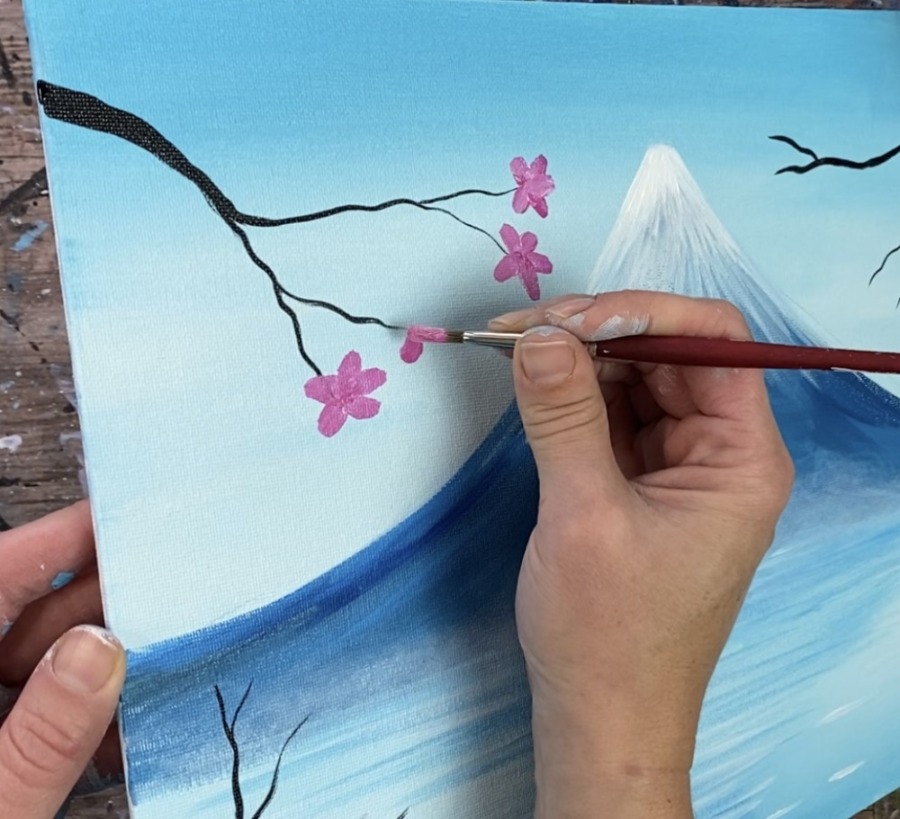
Then you can go back and add white or quinacridone magenta to your petals to do some wet-on-wet blending to create color variation.
Then paint little cherry blossom buds along the branches with just one small stroke.
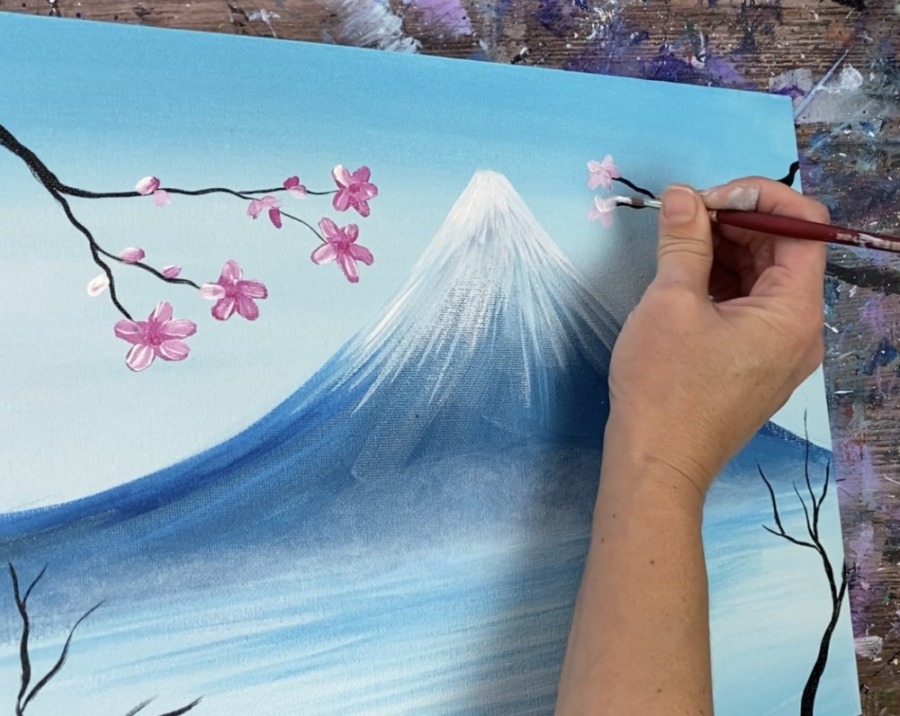
Paint as many blossoms as you want on the top. For the bottom branches, use the “stippling technique” to dot your cherry blossoms. Load your brush in variations of the quinacridone magenta, medium magenta and titanium white and dot your little blossoms all over the top area of the branches.
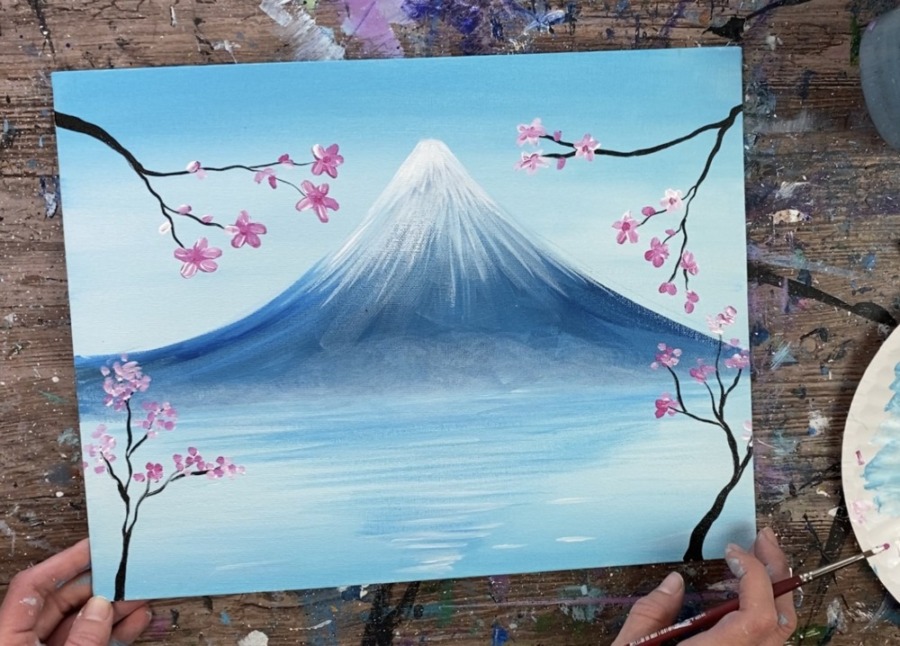
Then use a set of about 5 q-tips to dot the blossoms on the bottom of the painting. Load the tips of your q-tip bundles in the pinks and whites then stamp it to create an area of blossoms.
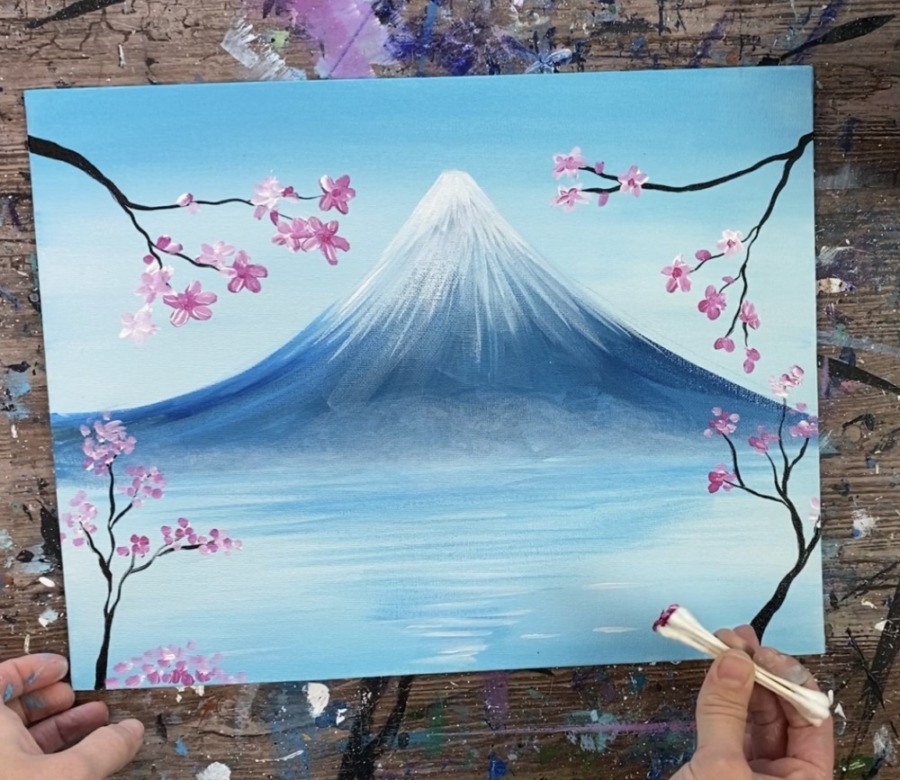
Do this all along the bottom of your painting. The blossoms slightly dip down in the middle.

If needed, paint a few more black branches in the bottom area.
10. Paint Pink Reflections On Water
Use your #4 round brush and medium magenta mixed with titanium white (about equal parts to lighten the color up). Paint some pink reflection in the water area using very thin left and right horizontal strokes.
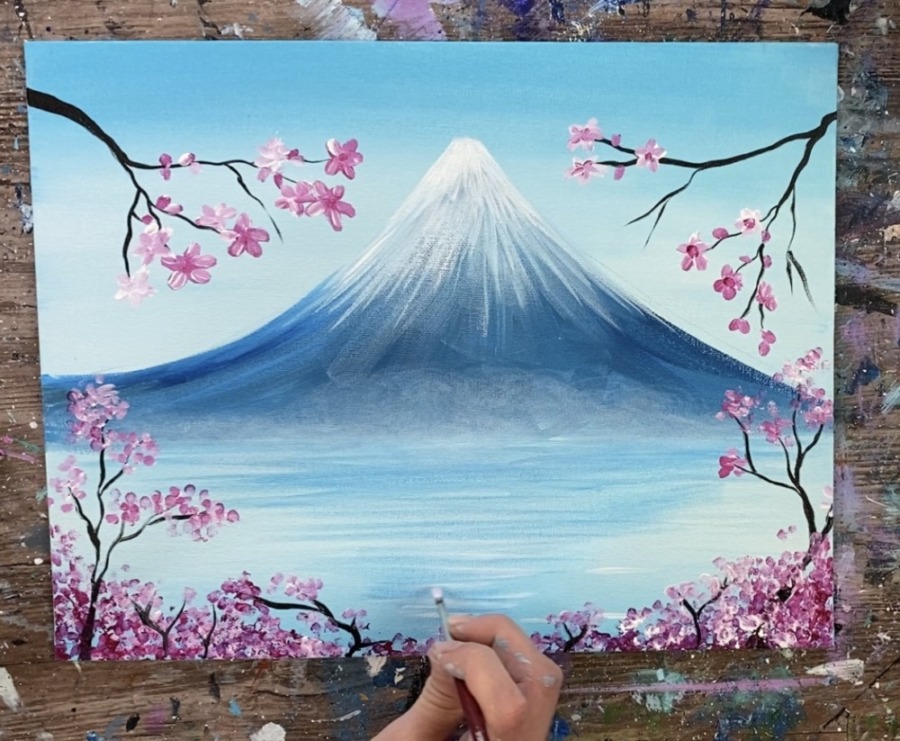
Paint a few blossoms falling down and add touch ups where needed.
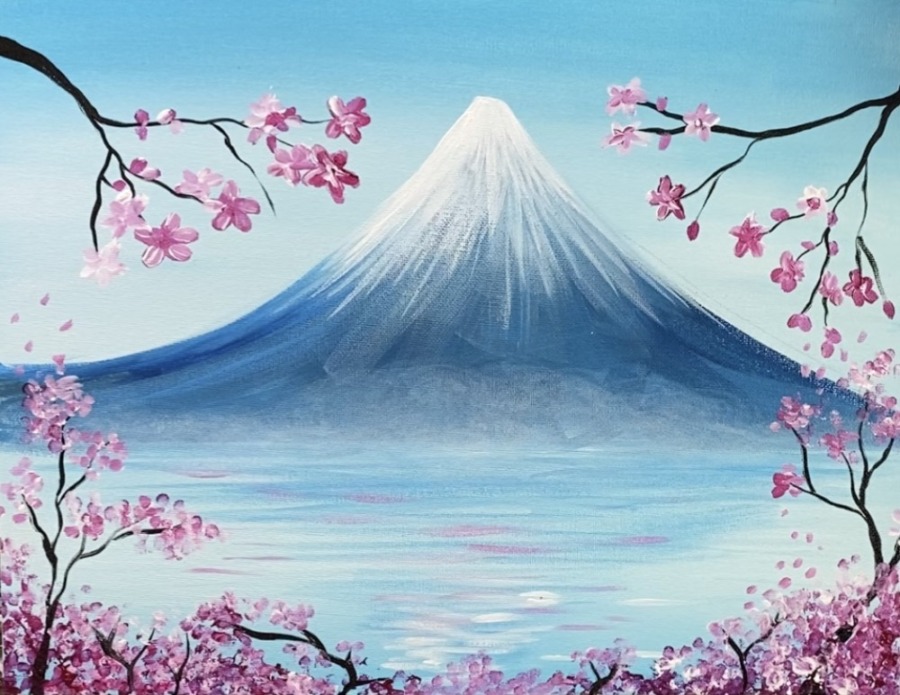
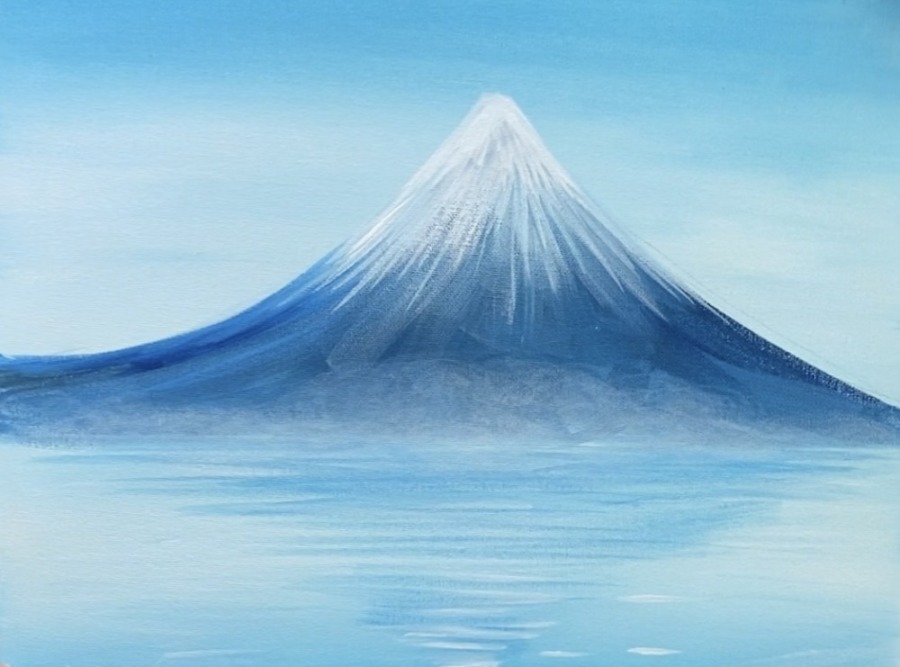
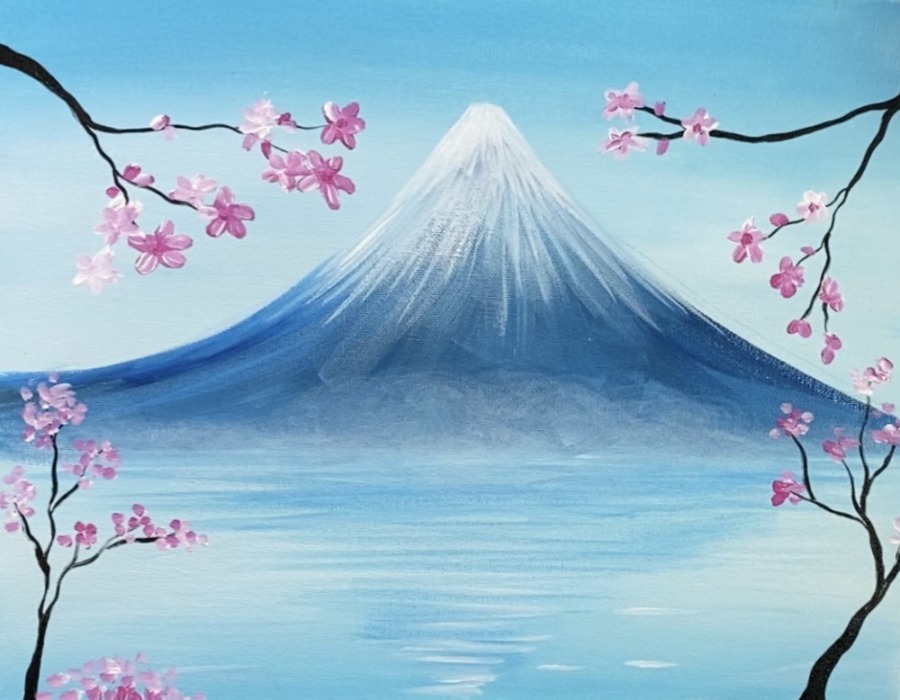
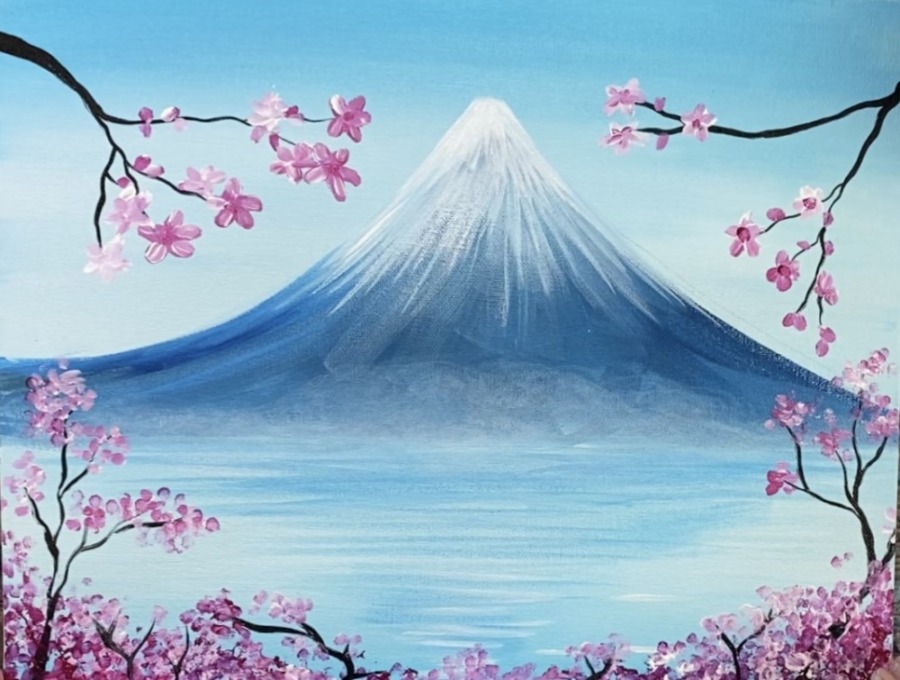
Finished!
That’s it! Your very own simple Mount Fuji with Cherry Blossoms painting! Hope you enjoyed it! Sign your name and show it off.
Share Your Art Here:


Tried this on a large 20 x 24inches stretchable canvas . It came out well . Thnk u.