

Would you like to save this?
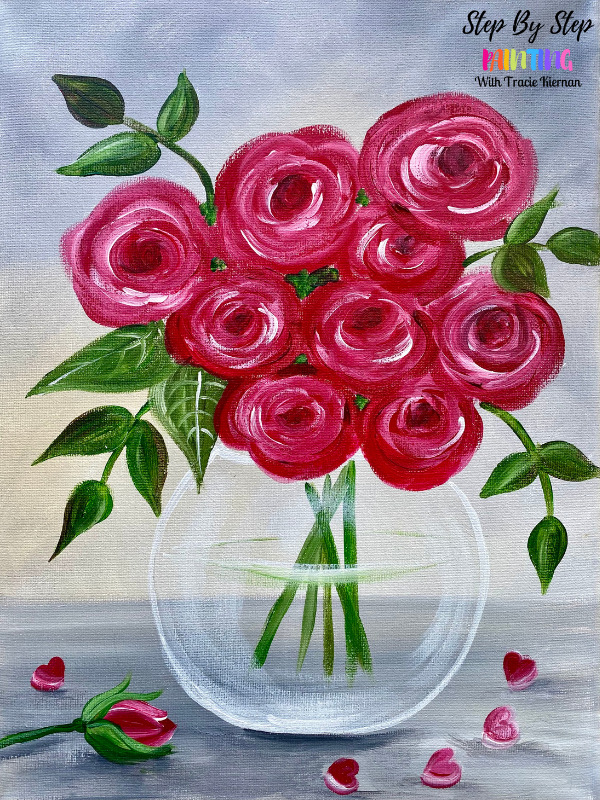
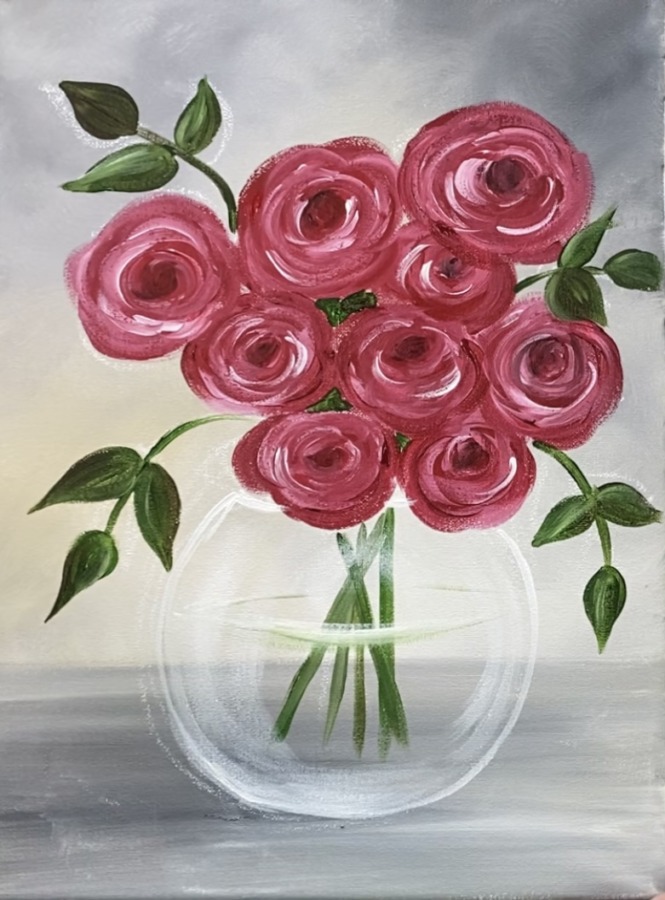
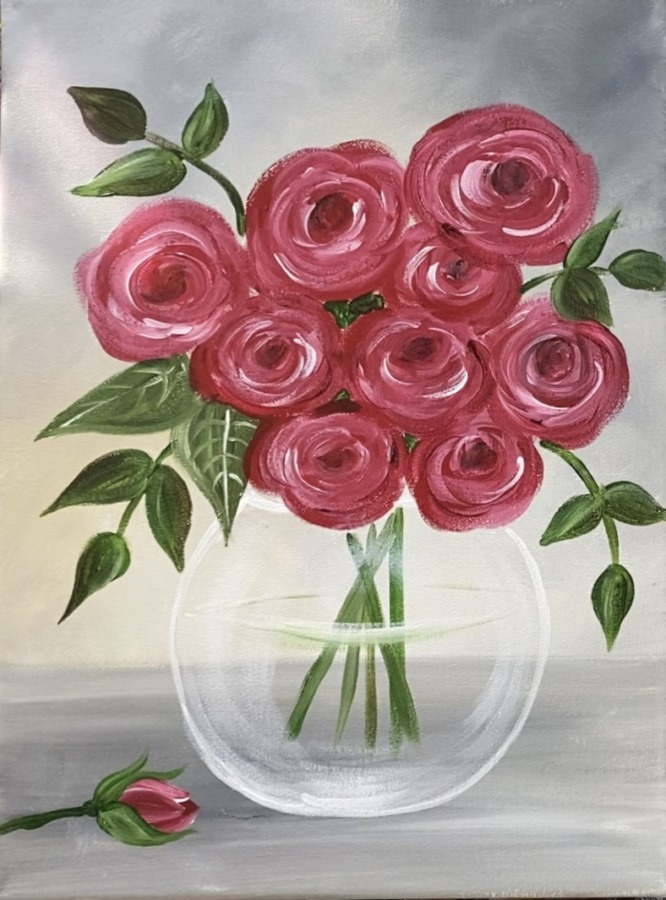
This tutorial demonstrates how to paint an abstract bouquet of red roses in a round glass vase with a neutral background.
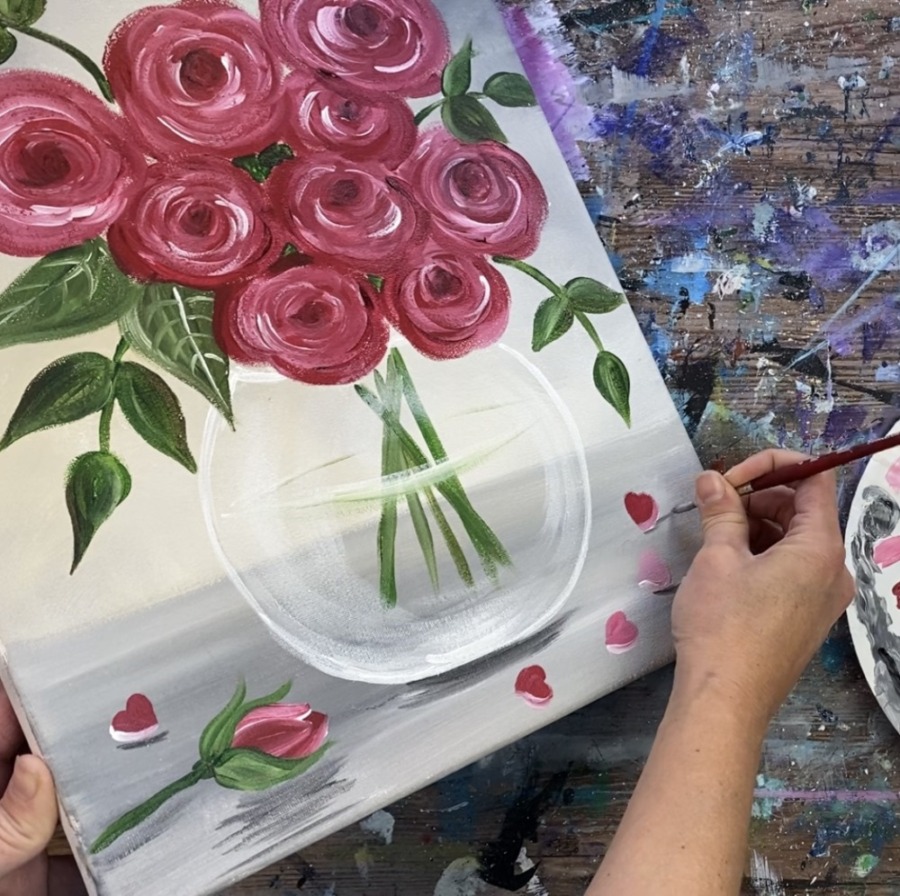
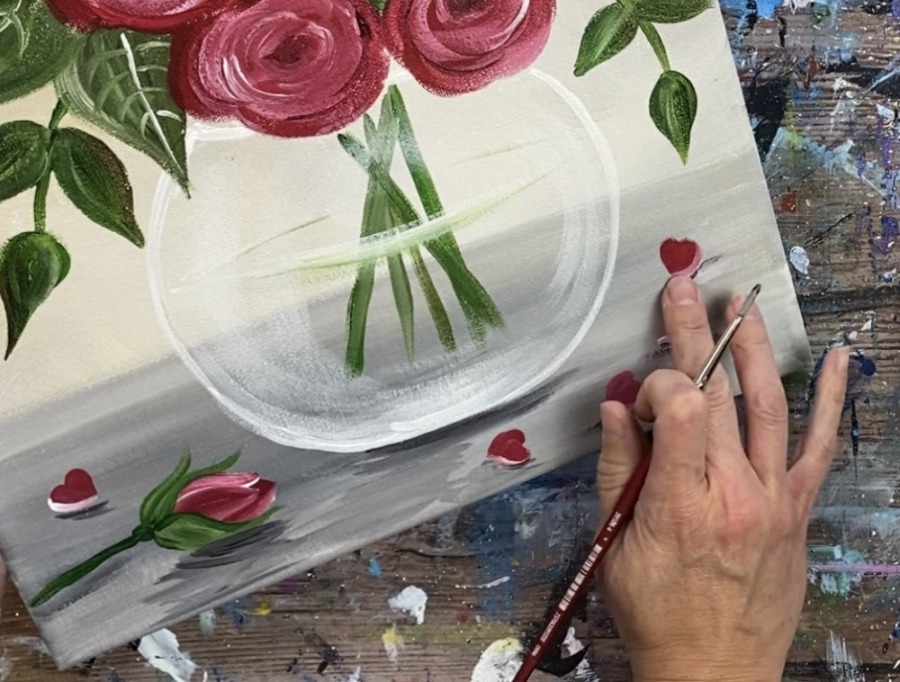
This painting can work as a Valentine’s Day painting design or year round! The little hearts & extra rose on the table are an optional added touch.
I will showing you the technique that I use to paint simple roses. This technique has been explained in previous tutorials such as my “How To Paint Simple Roses” tutorial. I recommend that you practice these first before doing this painting for the first time.
Enjoy and happy painting!

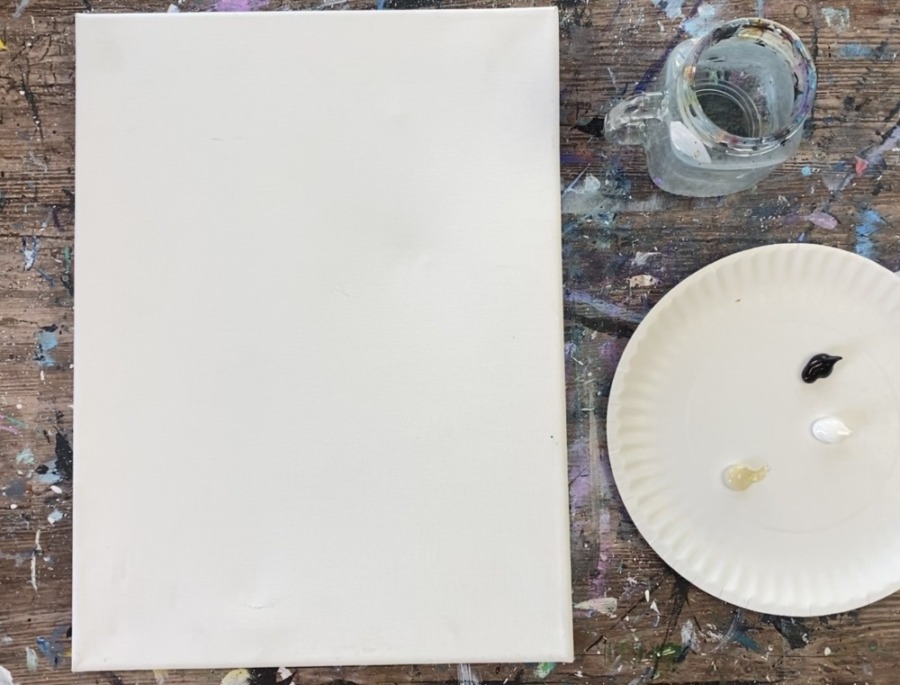
Materials:
How To Paint Red Roses In A Glass Round Vase
Learn how to paint a bouquet of abstract red roses in a glass vase with acrylics on canvas.
Materials
- 12 x 16 Canvas
- Acrylic Paint
- Brushes
- Water Cup
- Palette
- White Chalk
- T-Square Ruler
Colors
- Titanium White
- Mars Black
- Unbleached Titanium
- Hooker's Green Hue Permanent
- Alizarin Crimson Hue
- Cadmium Red Deep Hue
- Primary Red
Brushes
- 3/4" Flat Wash Brush
- Blender Brush (optional)
- #8 Round Brush
- #4 Round Brush
Color Palette:
I used Liquitex BASICS acrylic paint.
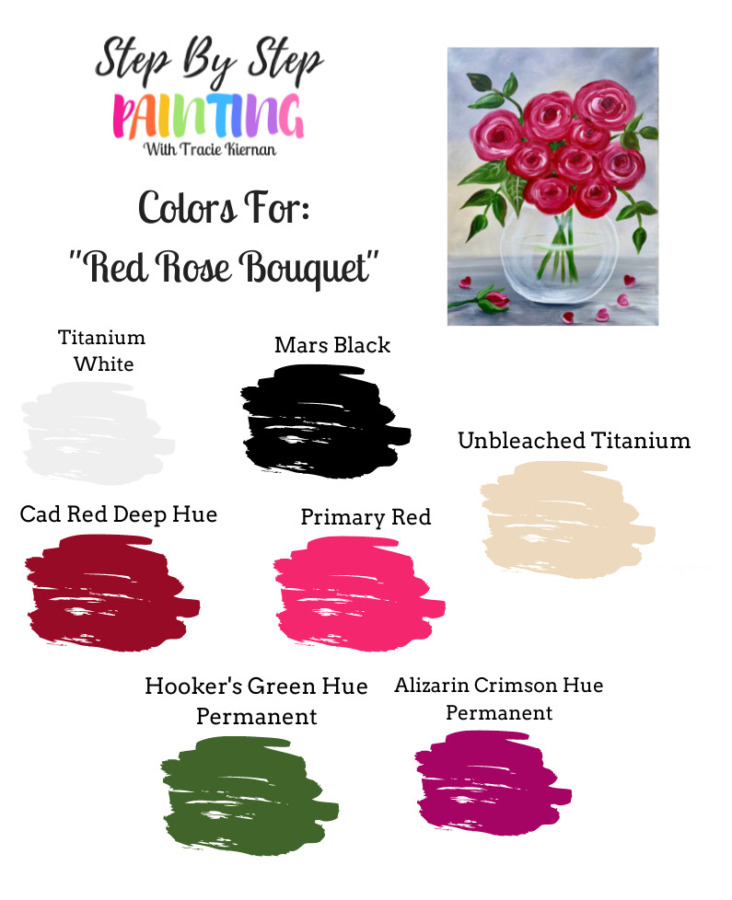
Using Craft Paints?
If you are using craft paints such as the Apple Barrel paints, you can try subbing for these colors:
- White
- Black
- Any light beige/peach color (this color is also optional, it’s only used a little in the background)
- Bright Magenta
- Fuchsia
- Flag Red
- Holly Branch
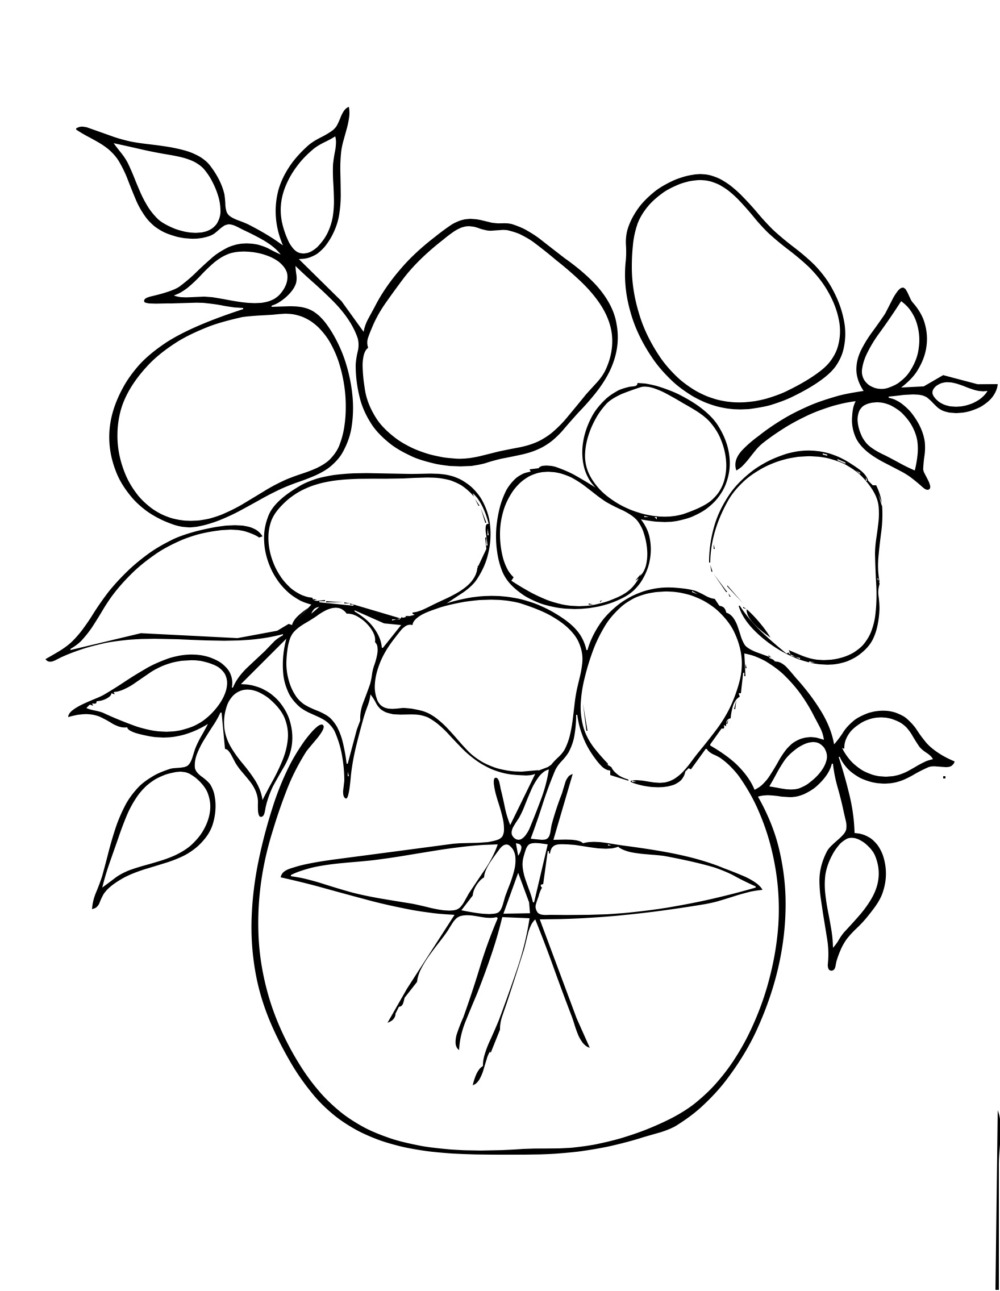
Traceable:
Do the background first and then transfer this to your canvas using graphite paper.
Directions At A Glance
Video
Step By Step Directions
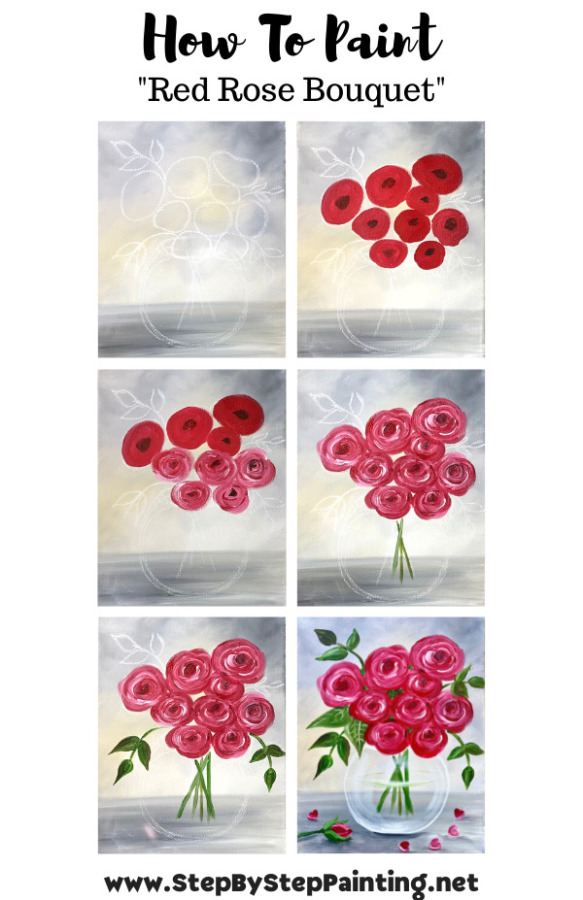
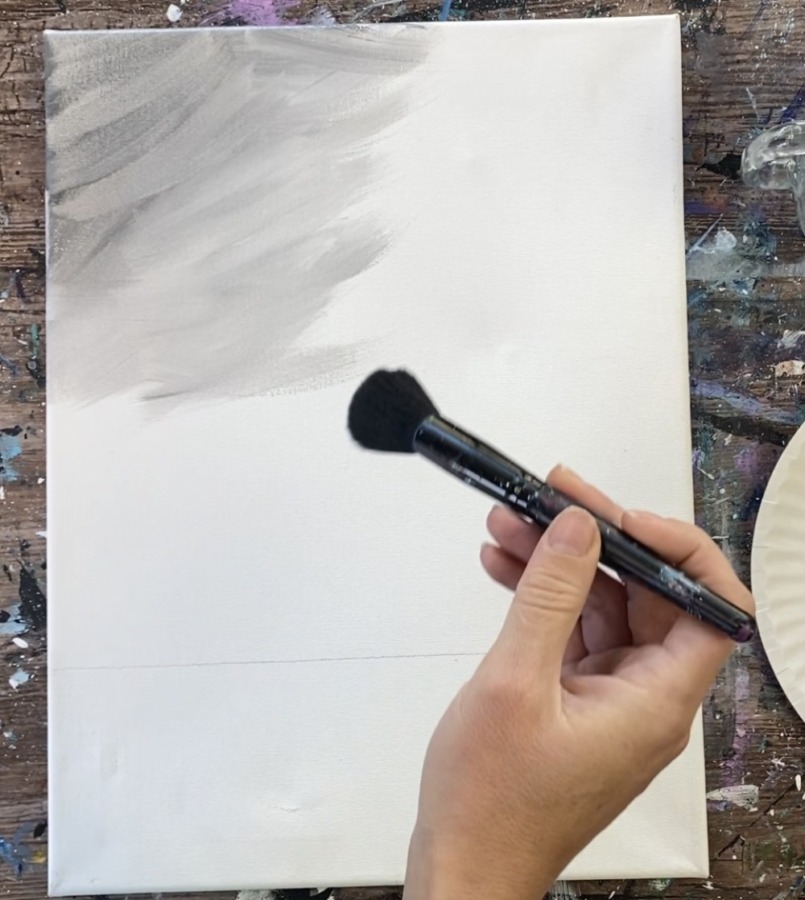
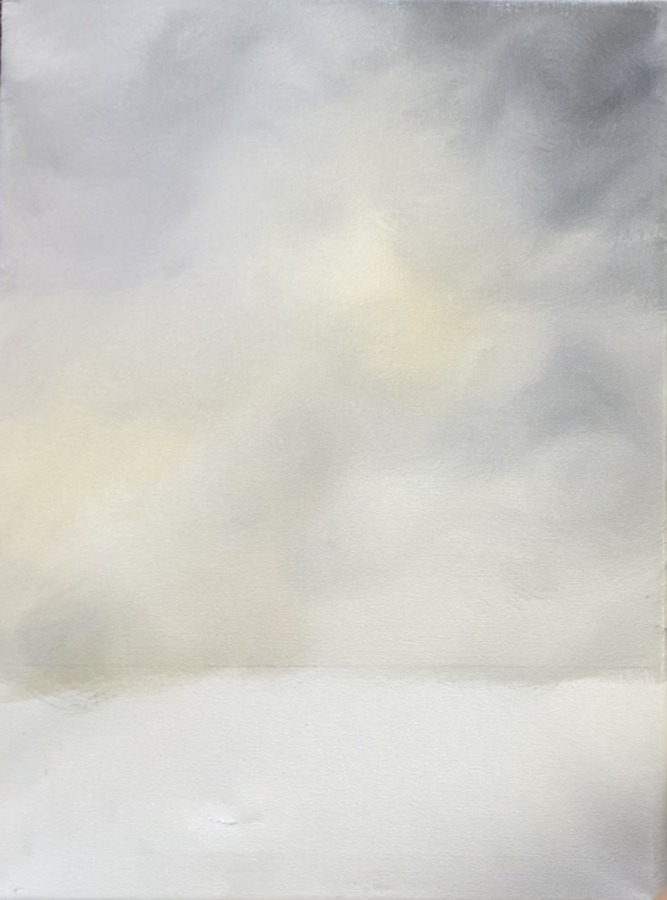
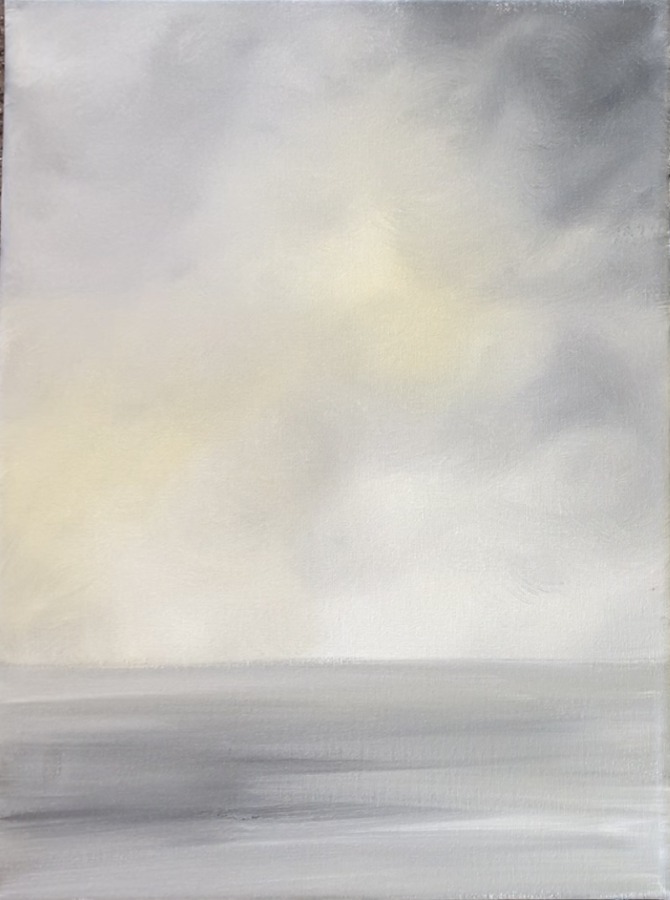
1. Paint The Background
The background is a blended, abstract background using the colors: mars black, titanium white and unbleached titanium. Load those three colors on your palette.
Measure your table line at the bottom of the canvas. This about 4″ from the bottom. Use a t-square ruler to draw the horizontal line.
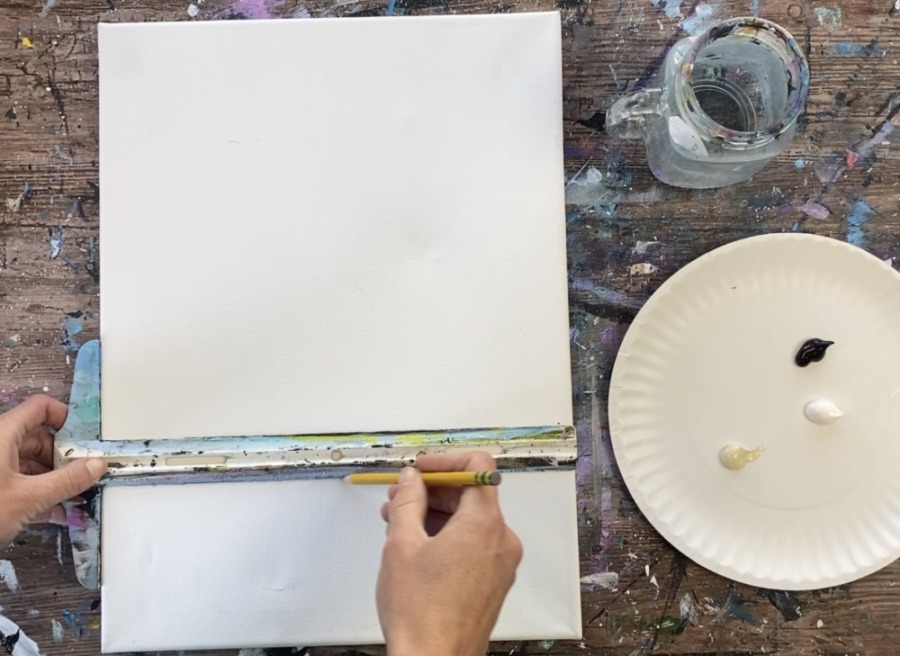
Use a 3/4″ flat wash brush and load it into the white, the beige and only a tiny bit of black.
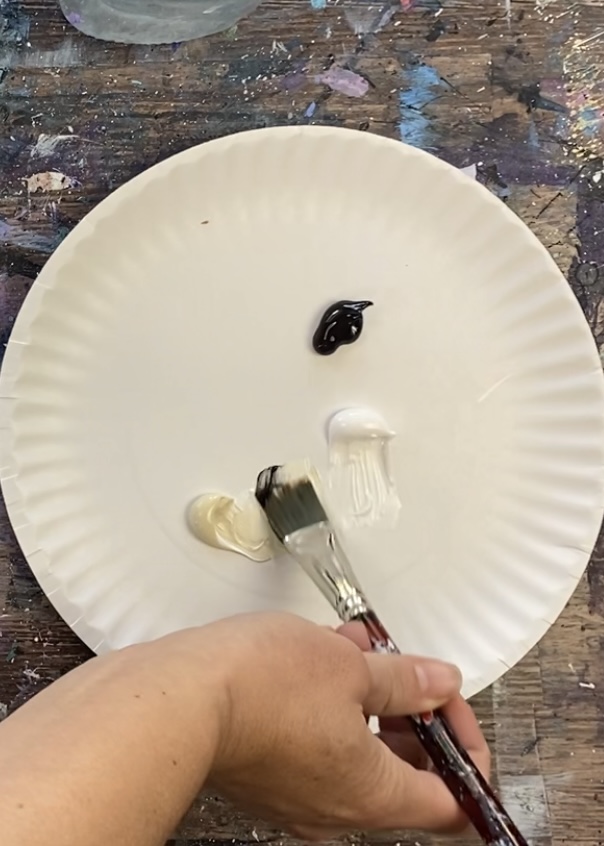
Paint in criss-cross strokes letting the three colors blend. Add more white or beige as needed. It should be a light warm gray color.
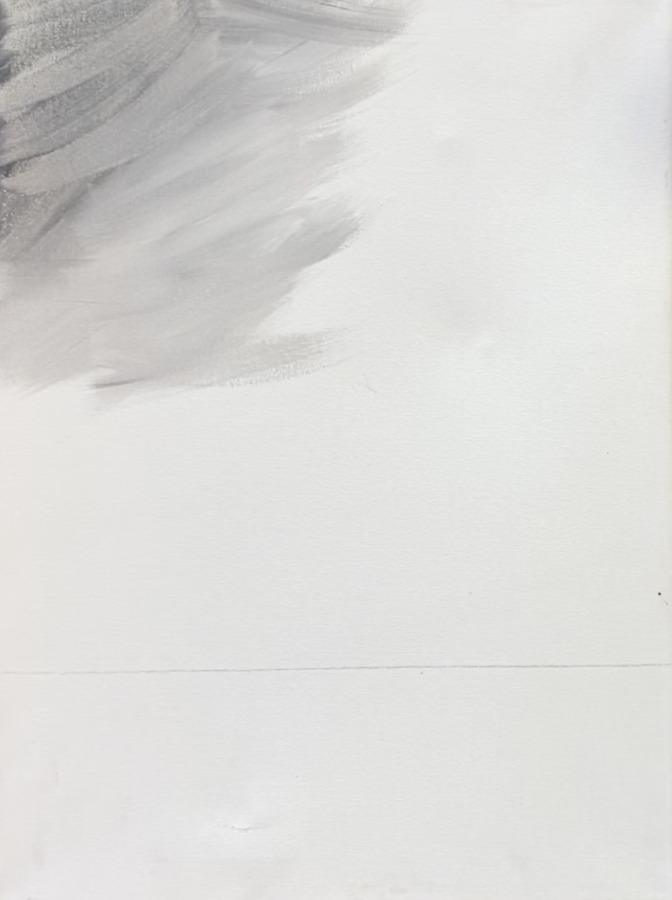
If you want your strokes to look smooth, you can use a “blending brush” to lightly blend the colors on the canvas and smooth out the strokes.
Continue to add the combo of those three colors on your canvas. Makes sure to only use small amounts of black so the background doesn’t get too dark. Alternate between applying the color with the flat brush and blending the strokes smoother with the blending brush.
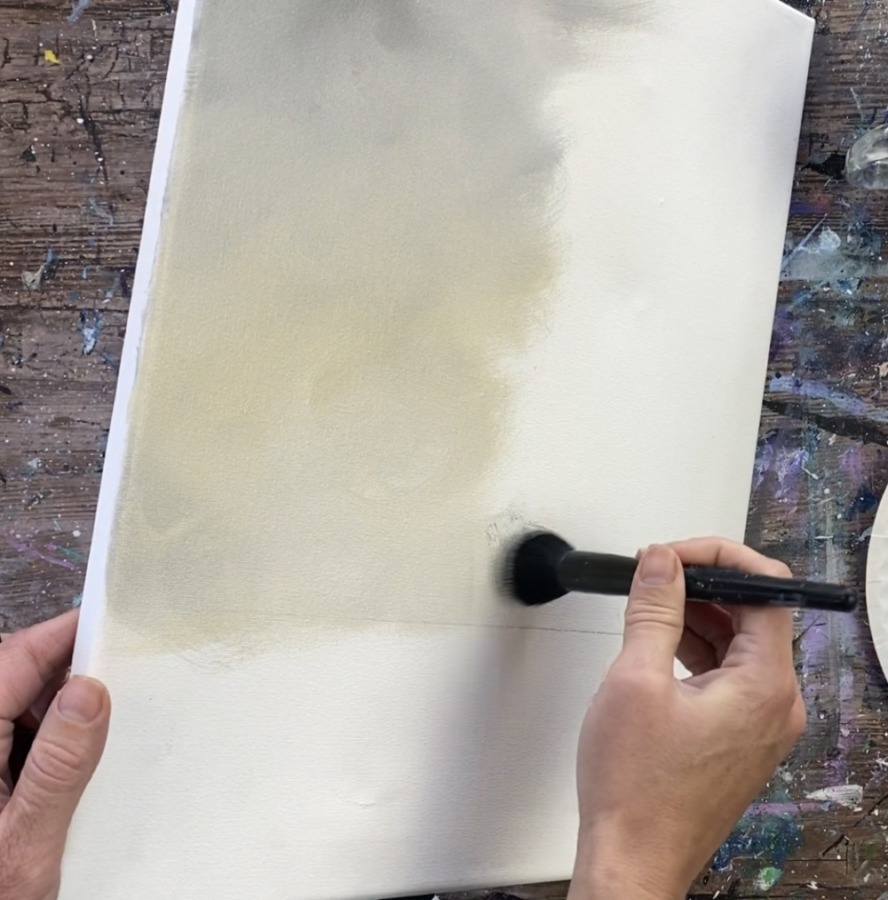
You can vary the color throughout the background. Some of it will be darker, some lighter, etc.
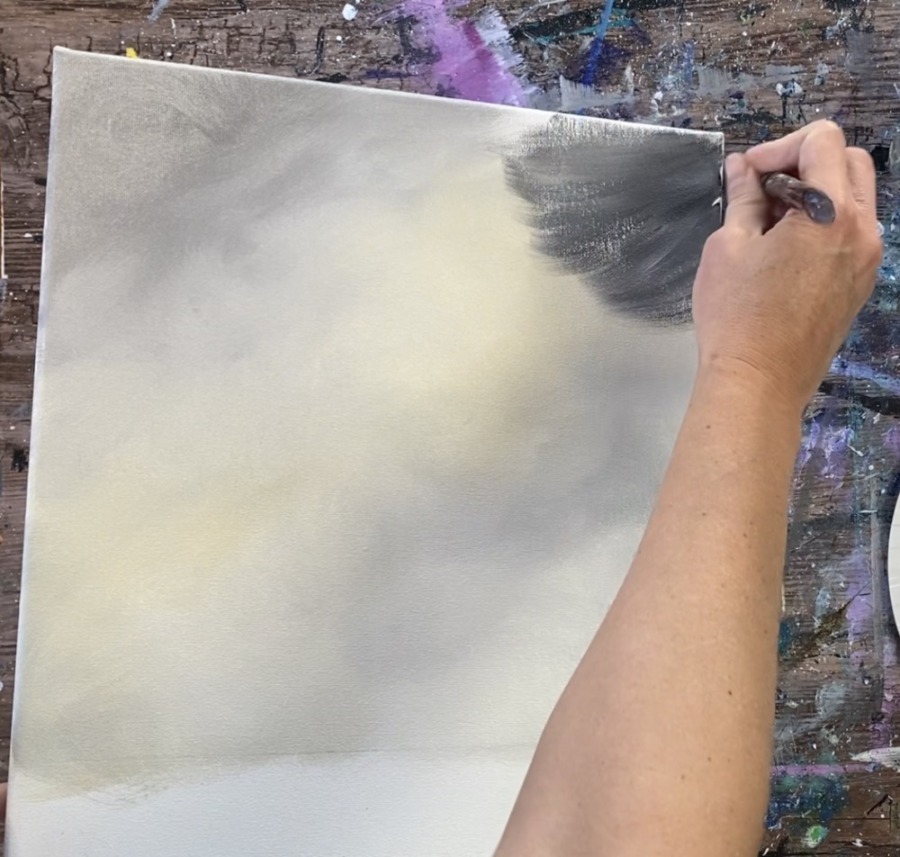
Try not to over blend. It should have a nice variety of the light warm gray with different variations throughout.
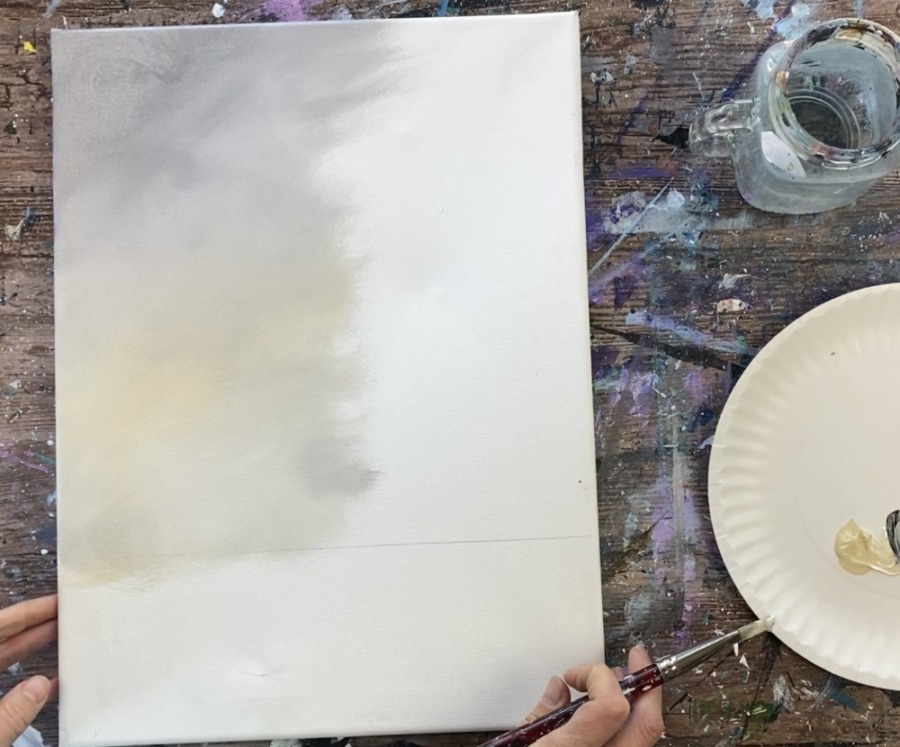
Then use the same colors to paint the table area. Use the 3/4″ flat wash brush to paint left and right strokes. You do not need to use the blender brush for this step.
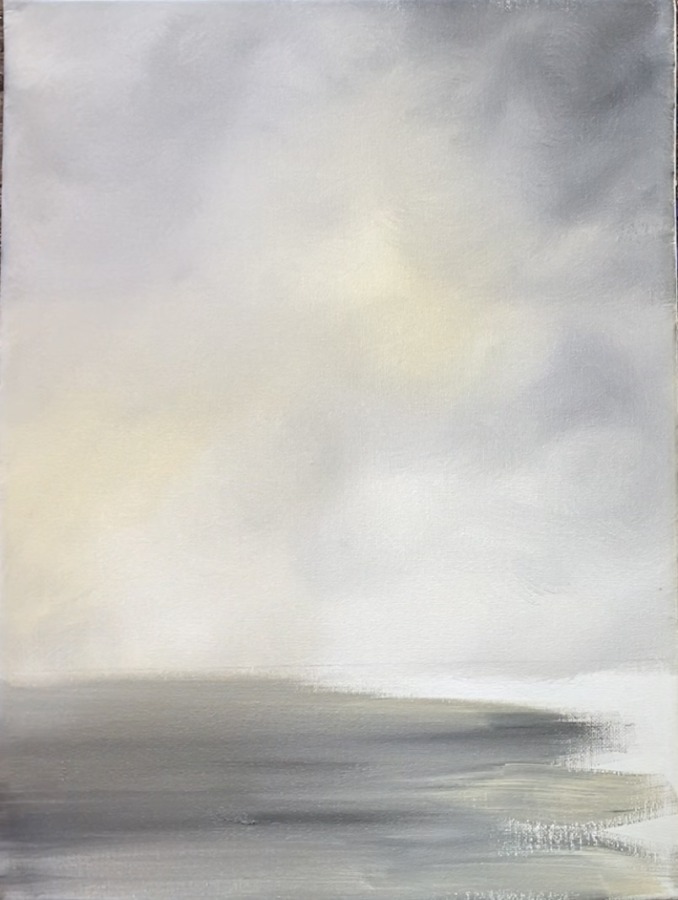
Allow this to dry before going onto the next step.
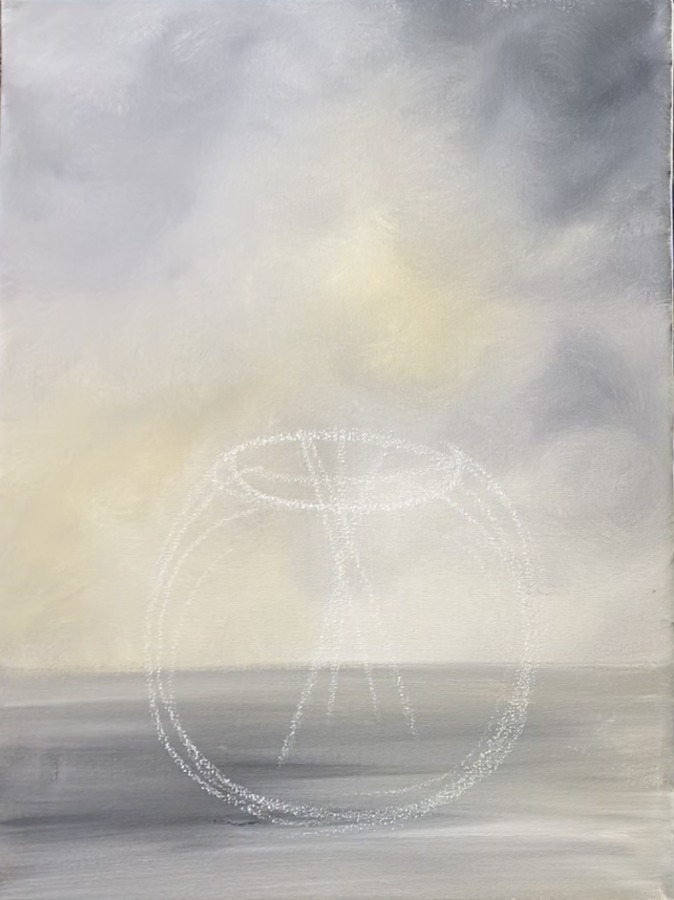
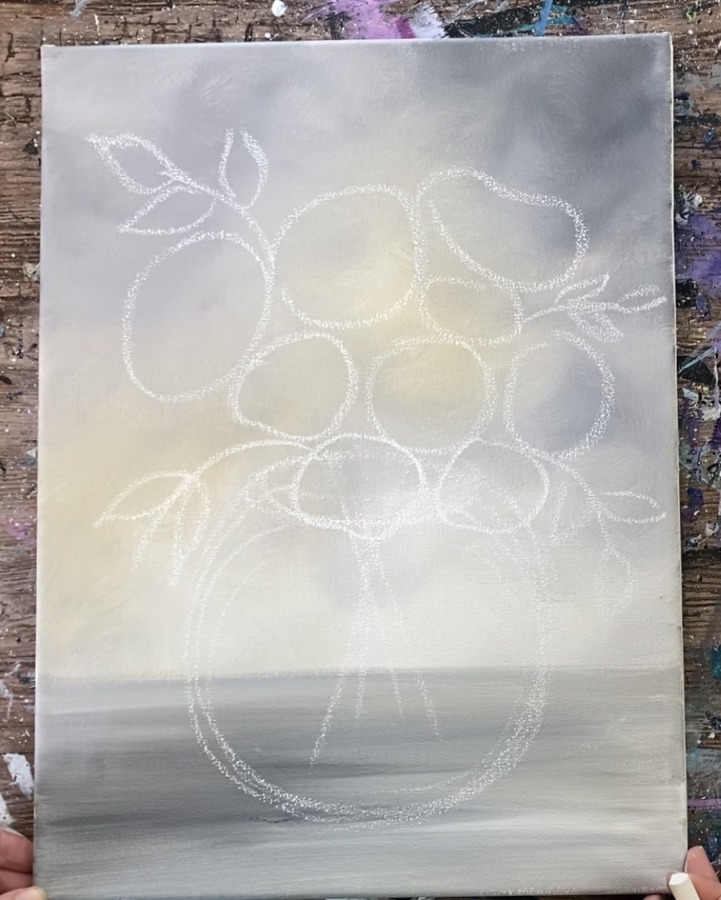
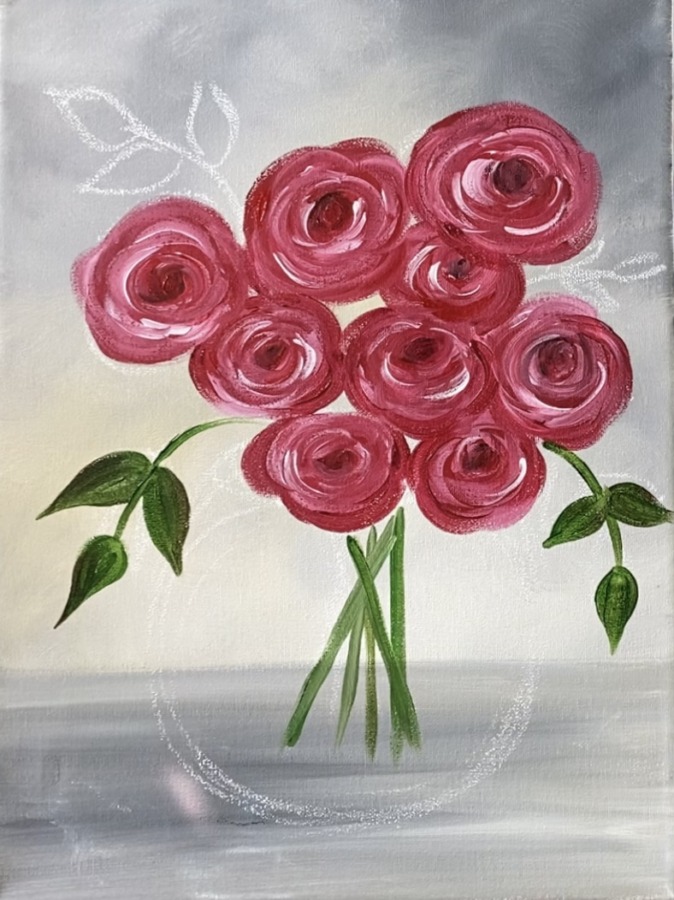
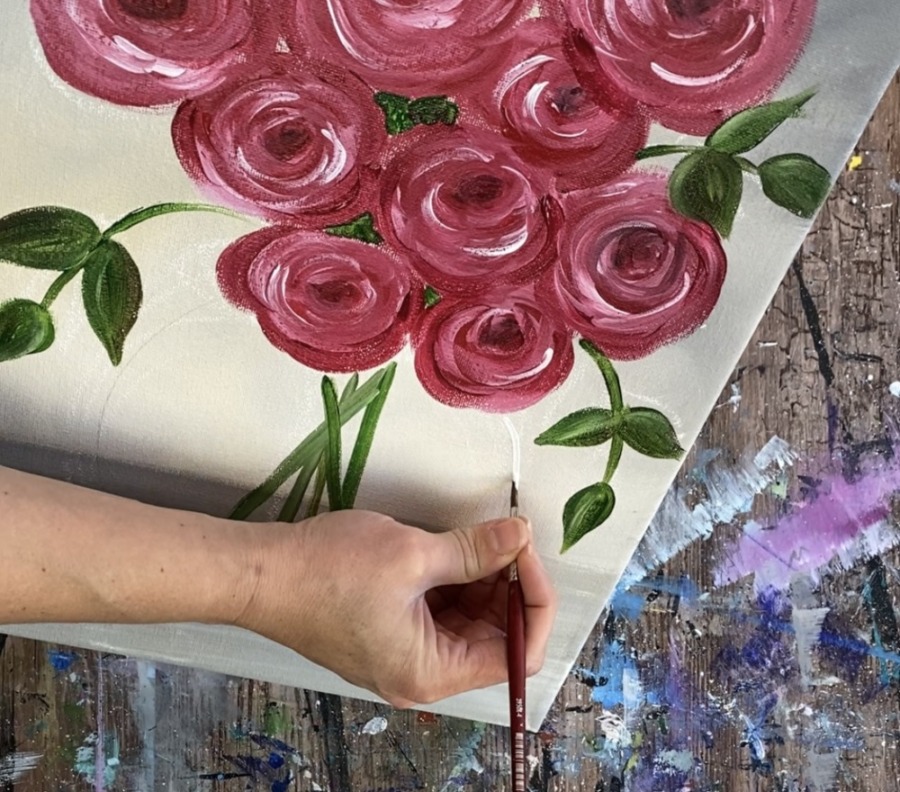
2. Draw The Vase And Flowers
After your background has dried, use a piece of chalk to draw your vase and flowers. Draw a circular shaped vase on the table.
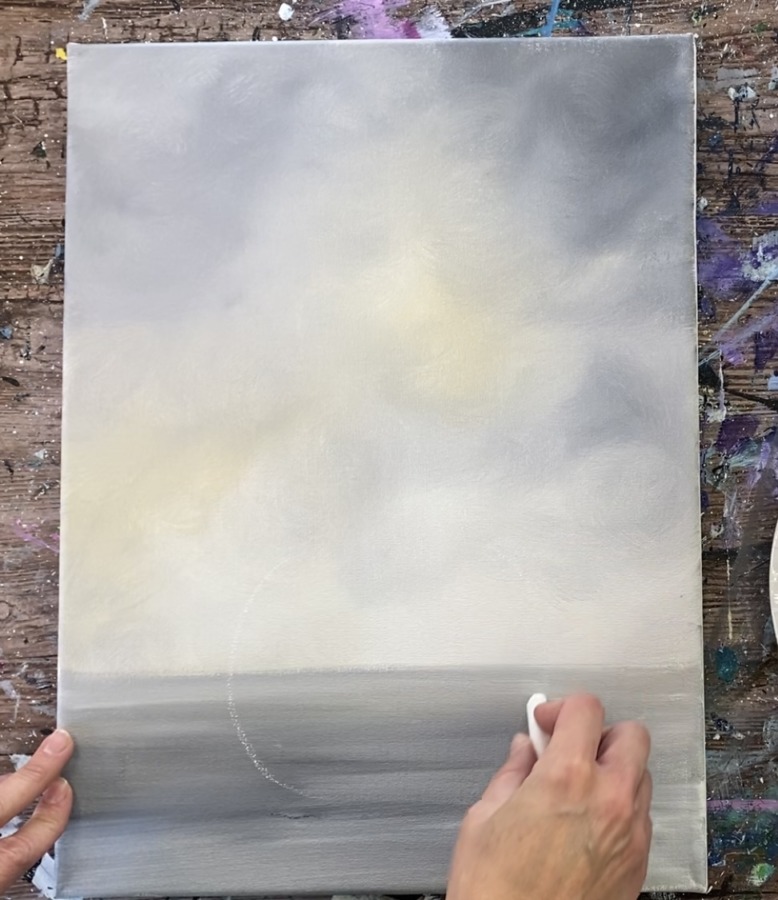
The opening of this round vase is an oblong oval shape.
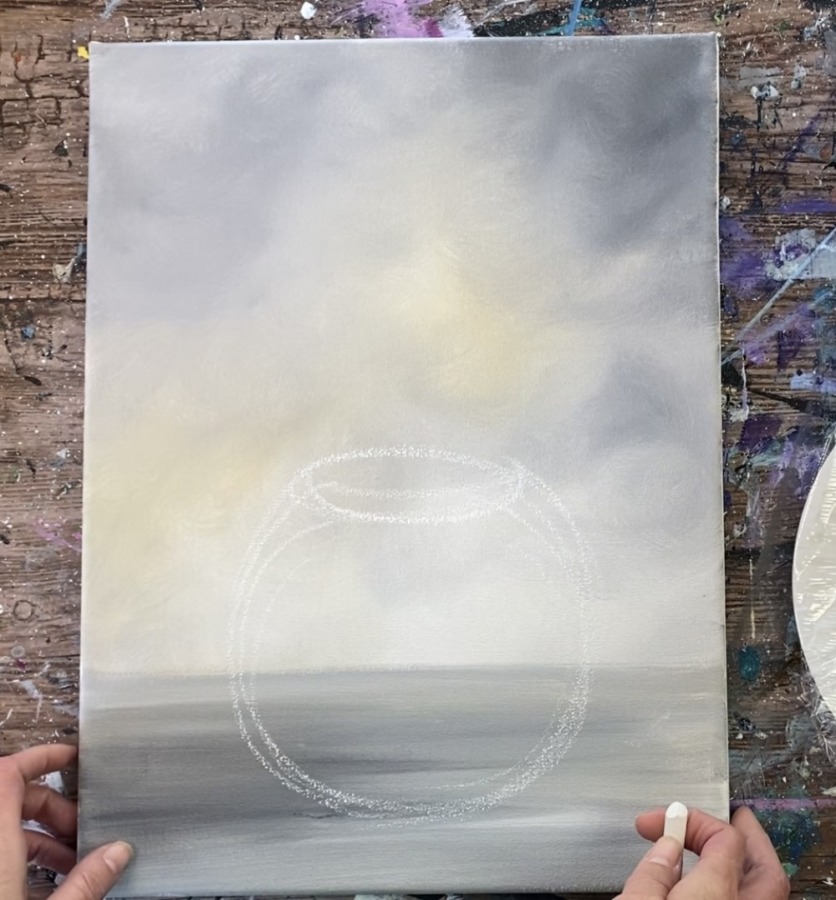
Then draw a few diagonal lines going inside the vase. These will be the stems of the roses.
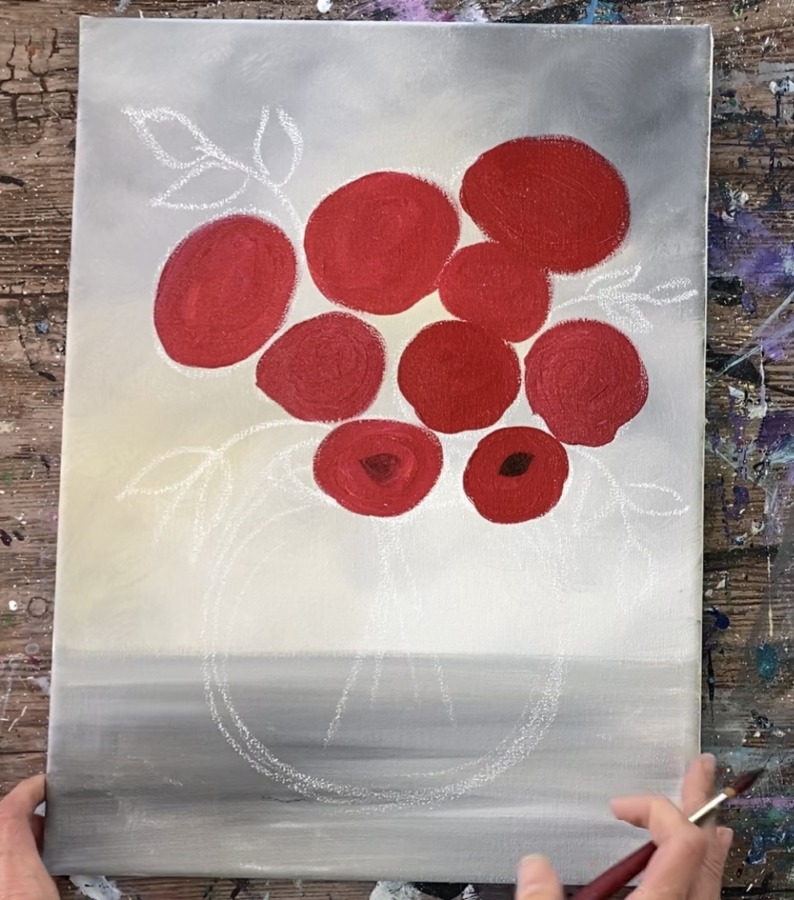
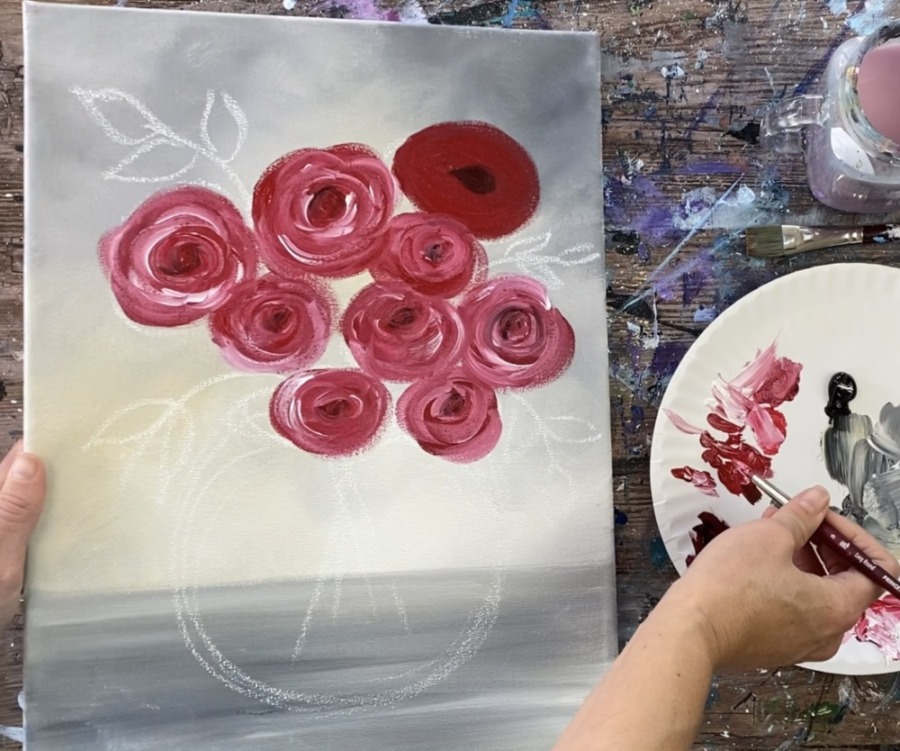
Then draw the rose shapes. These are various organic circular shapes. Make some larger and some small. Draw them close together.
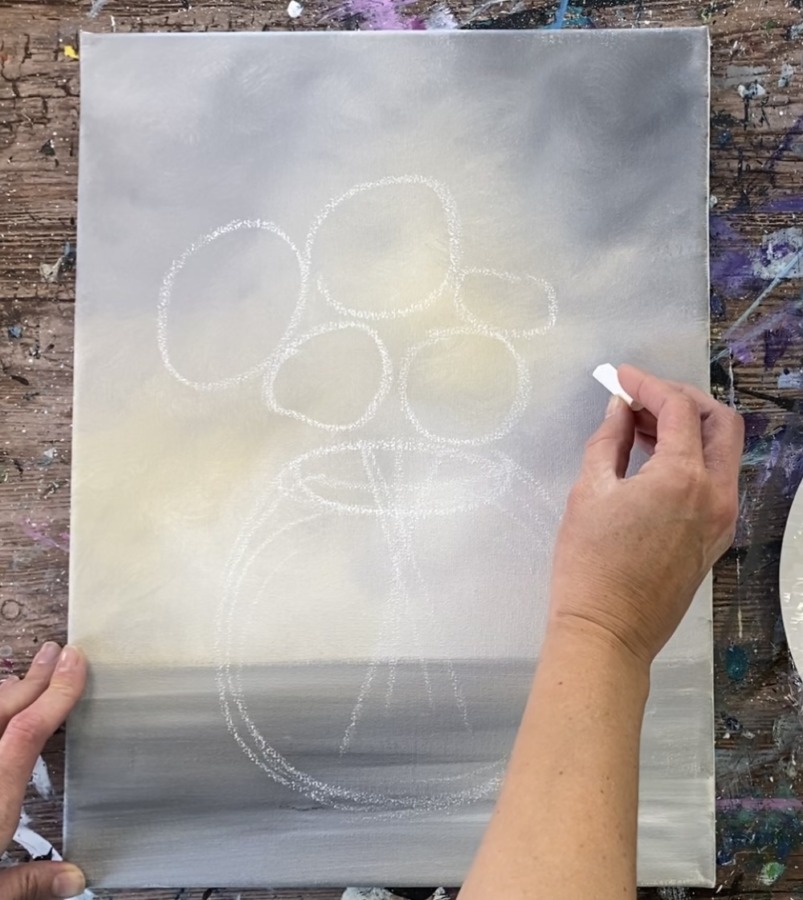
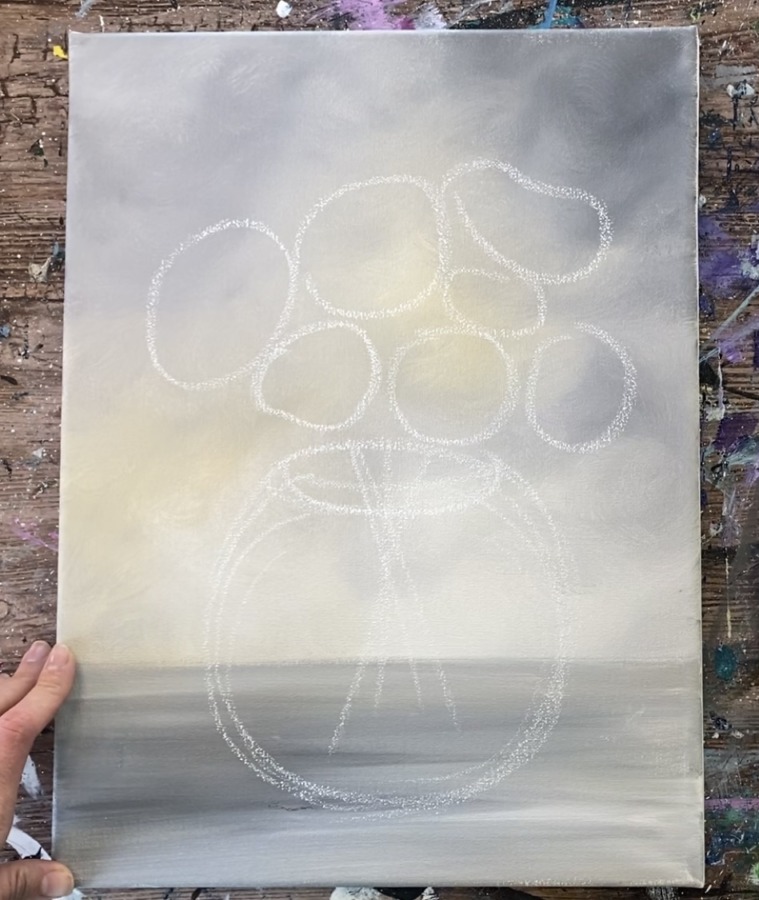
Then draw stems and leaves dropping down and upwards from the bouquet.
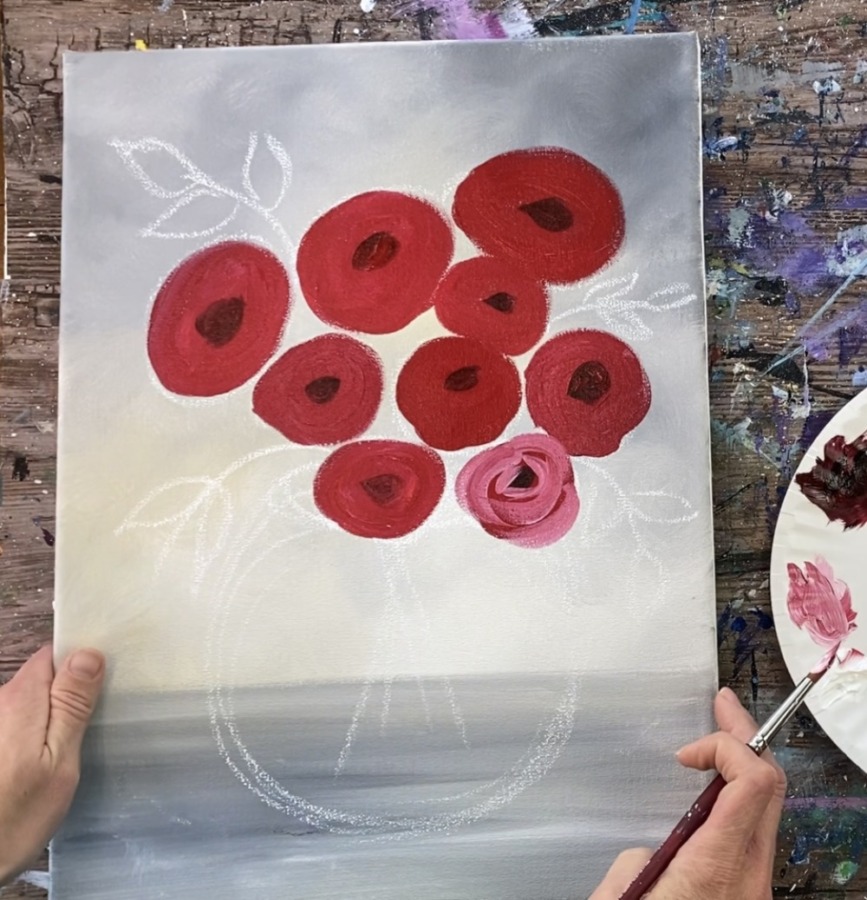
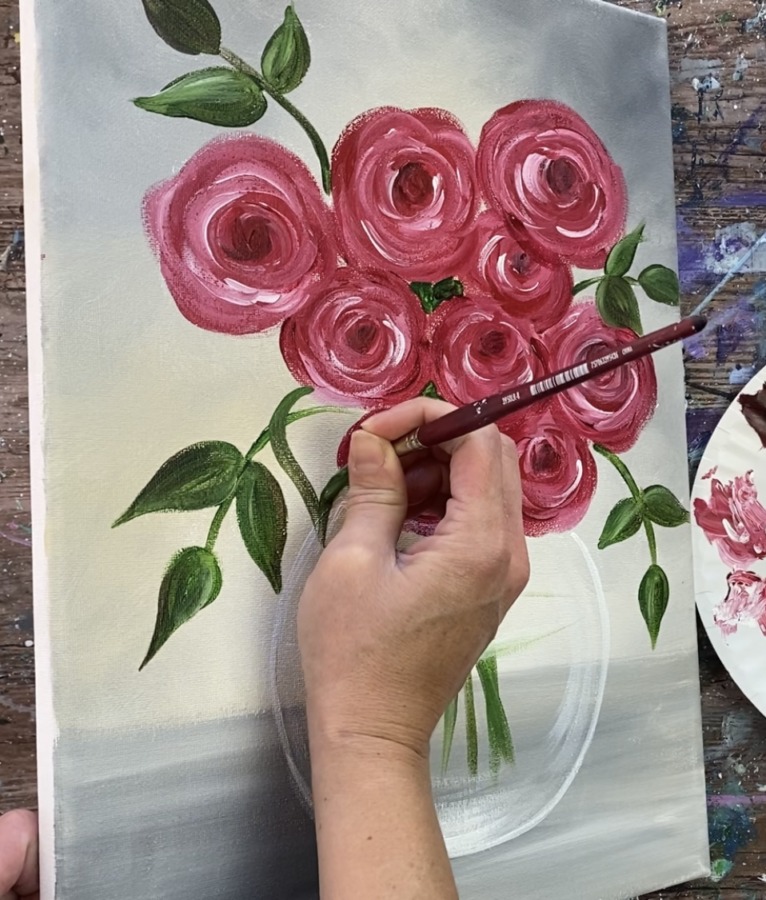
3. Paint The Flowers
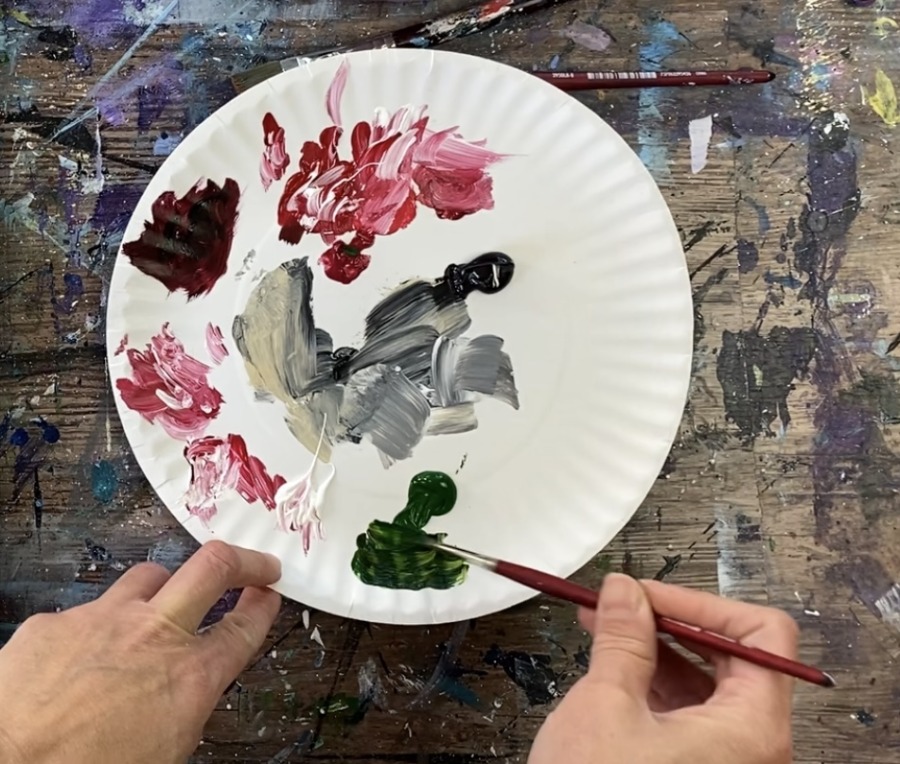
I used 3 different reds for these roses. The different reds give them color variation. You don’t have to use the three reds, you can use just one or two.
Load your palette in the colors: cadmium red deep, primary red and alizarin crimson hue. Use your #8 round brush. Start with any of the reds (I used cadmium red deep).
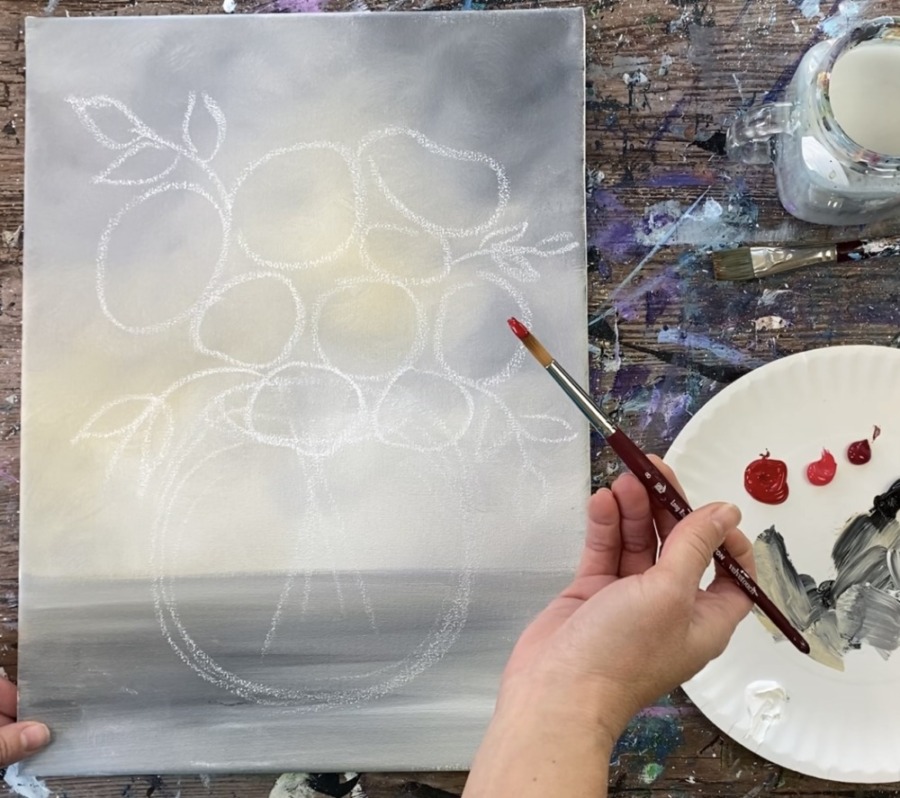
Paint the circular shapes in a solid coat of the red. Then paint the next circular shape with a different red (you don’t need to rinse your brush each time).
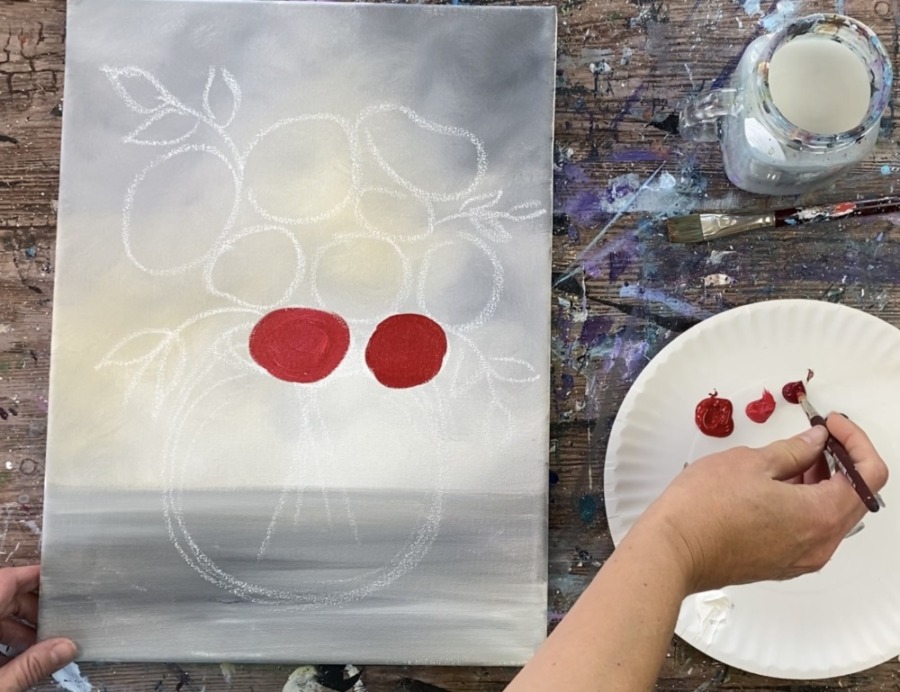
Fill each of the shapes with the reds.
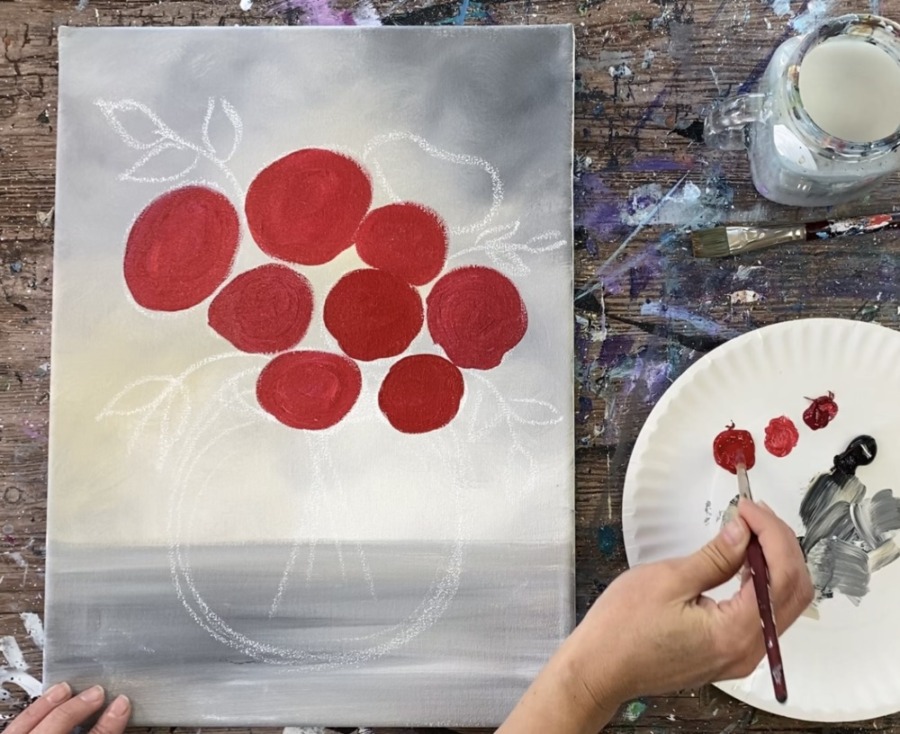
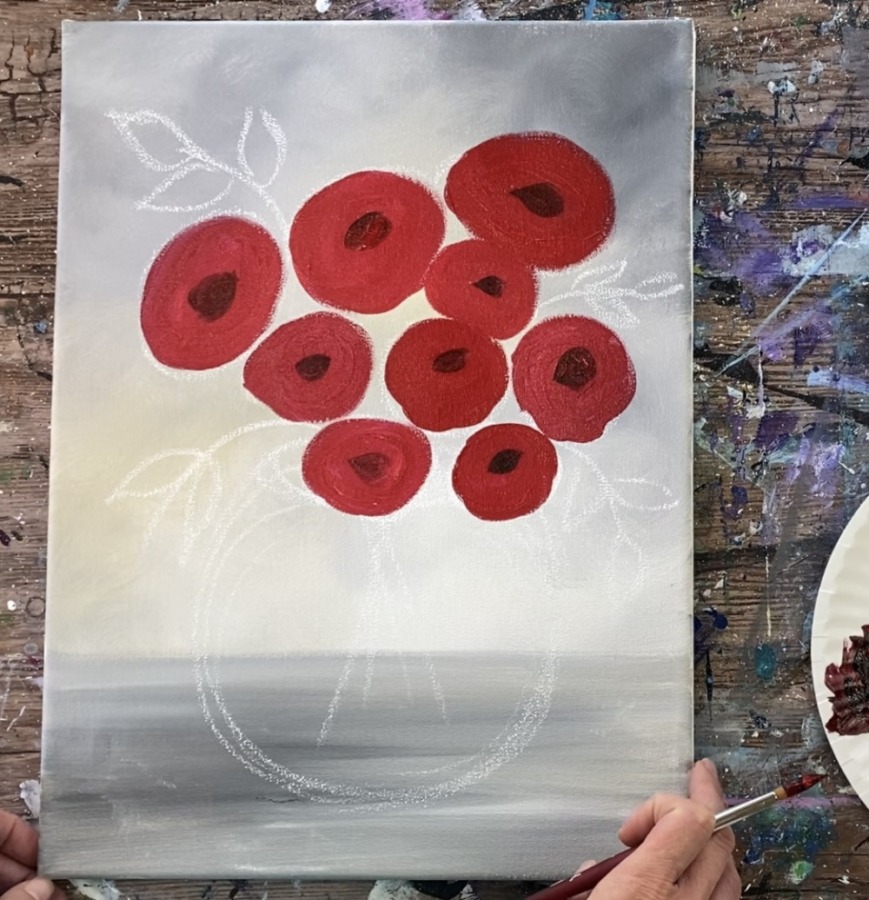
Then mix a very dark red by mixing 1 part mars black to 3-4 parts cadmium red deep hue. Use your #8 round brush.

Paint a small dark area in the center of all the roses. This is an oval/organic shape. It doesn’t have to be the same on each of the roses.
It’s okay if the color blends with the red that may not be dry.
Then do the highlights on the roses. Rinse and dry your #8 round brush. Mix a light red on your palette by mixing 3 parts titanium white to 1-2 parts cadmium red deep hue.
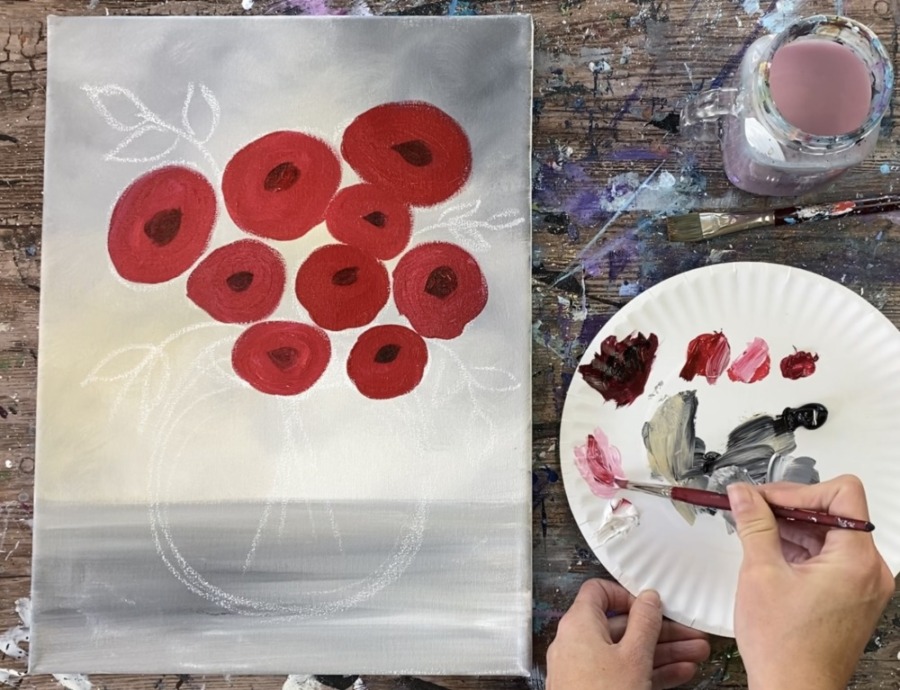
Paint “C” shaped curved strokes starting in the center around the dark area. Stagger your strokes working your way outwards.
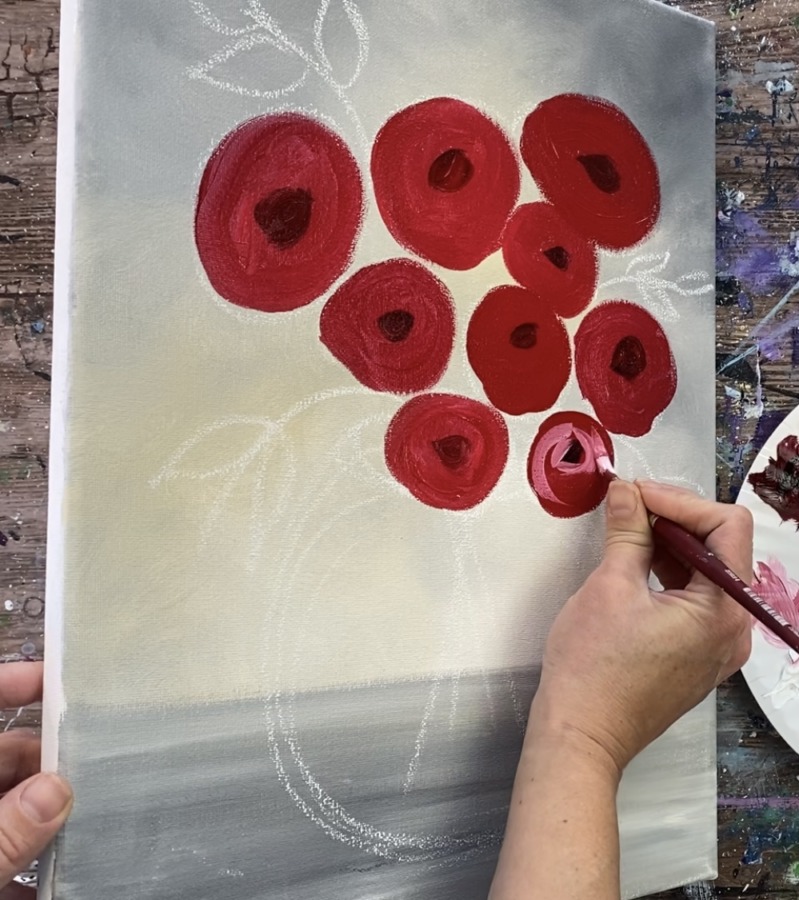
Your rose will form with the light red strokes leaving some of the dark red still showing and the dark red-black in the center. You can go outside of your original shape a little with your curved strokes.
Need more practice? You can see my post here about “Roses” that explains this technique in further details!
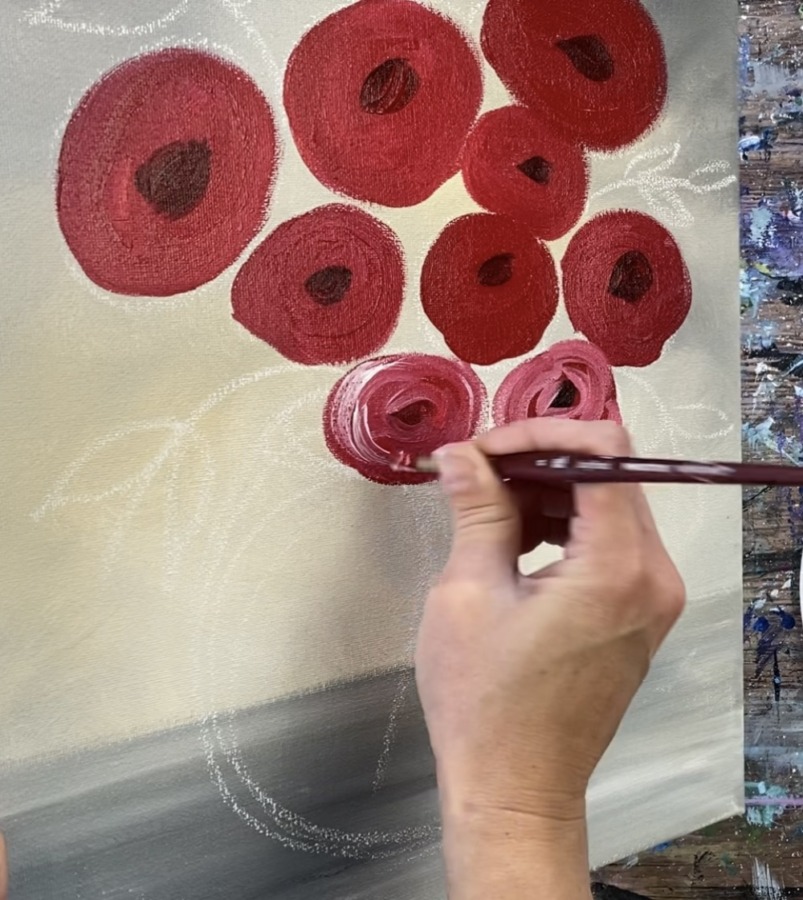
Continue to add the petals to each of the rose shapes. You will want to load more white onto your brush and vary the color a little bit. You can also go back over your strokes again but try not to continue to paint over your strokes or it will all turn to the same solid color.
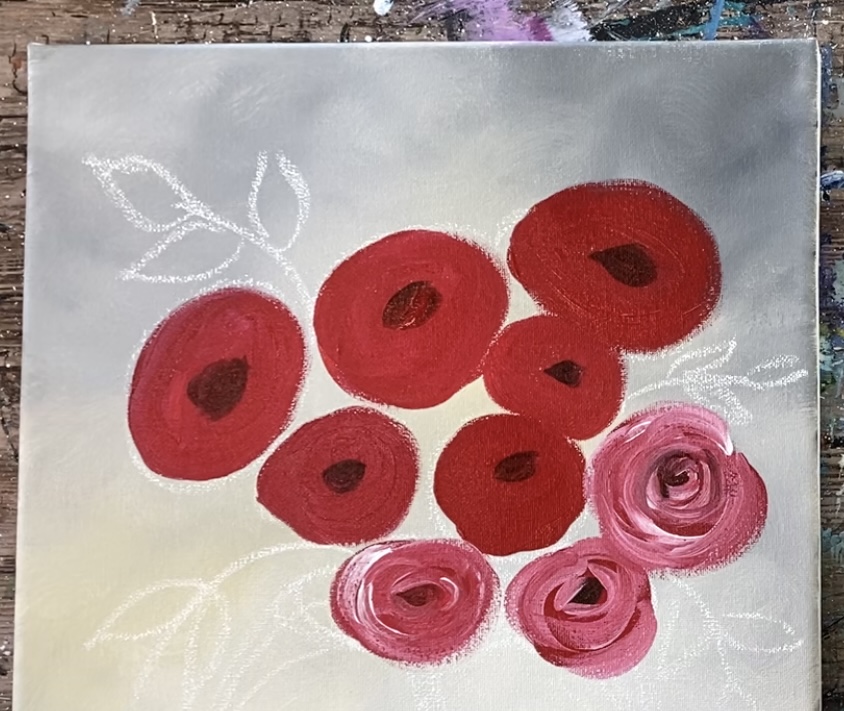
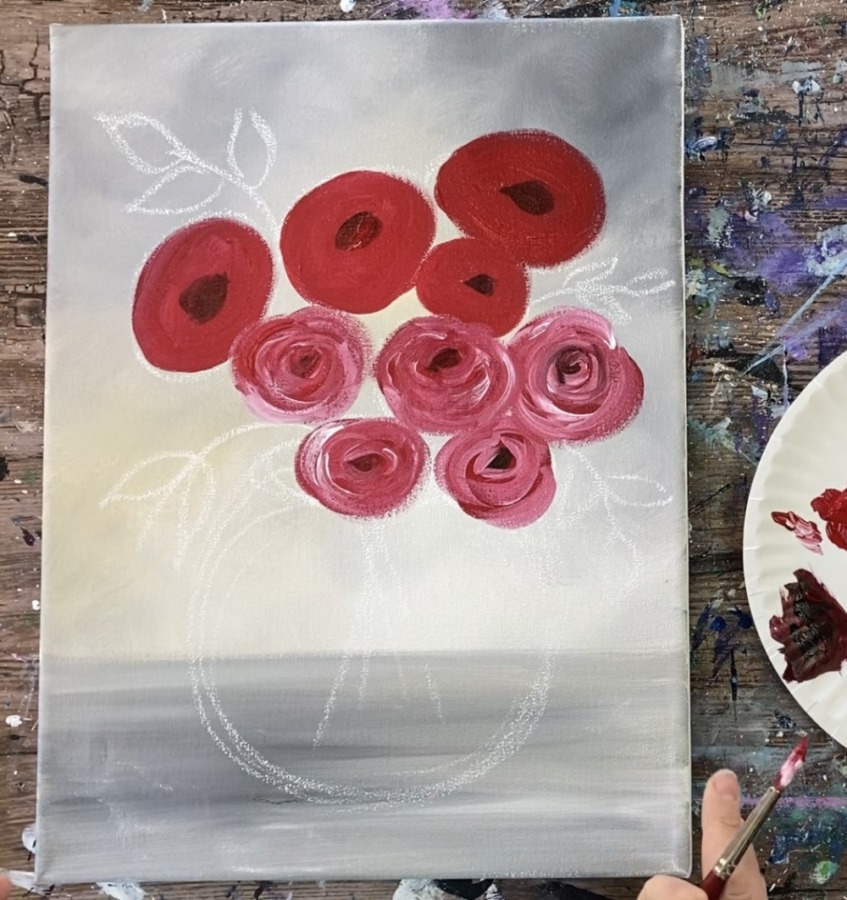
Some of the roses overlap other roses slightly.

4. Paint The Leaves
Use the #8 round brush to paint the leaves. Load your palette with hooker’s green hue permanent. Add a small amount of cadmium red medium hue into the green to make it more of a dark green, natural color. Water the green down just slightly so that it will flow well when you paint the leaves.
Paint the stem lines downwards in one stroke.
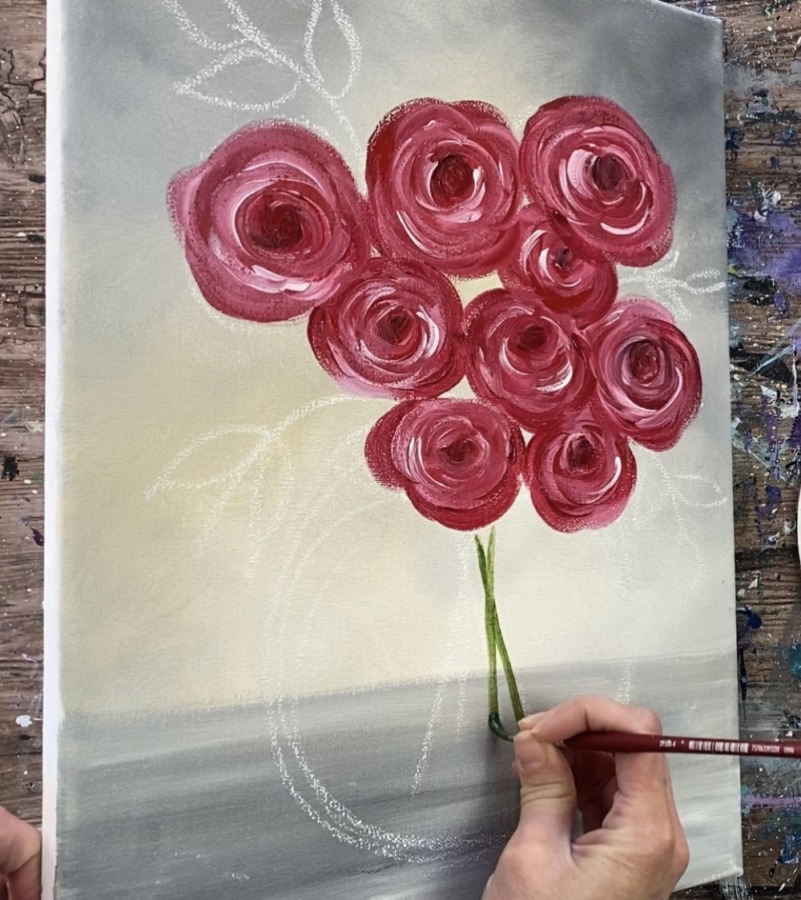

Then paint the leaves and stems that are sticking out from the bouquet. To do the leaves, start at the tip of the leaf with light pressure on your brush. Then put firm pressure on the brush to make the leaf bigger and rounded.
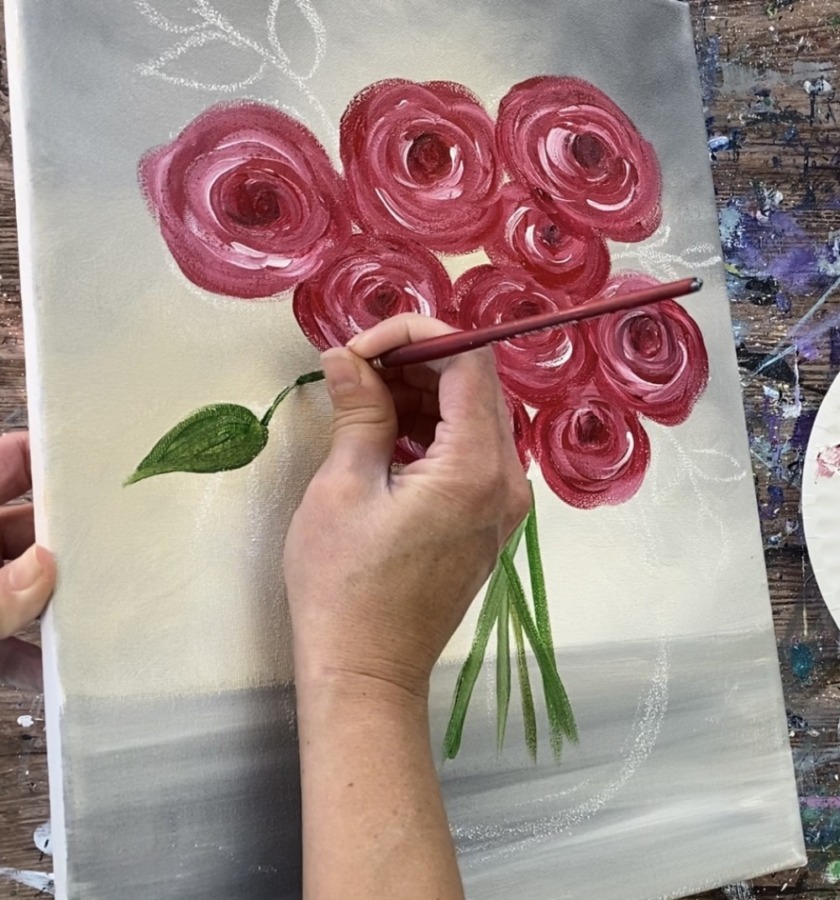
You can vary the color of the leaves by adding more dark or light green to them.
For some of the leaves, I painted one stroke on one side of the leaf with a lighter green (add white into it on your palette to make it lighter). You can also fill. the gaps between the roses with dots of green.
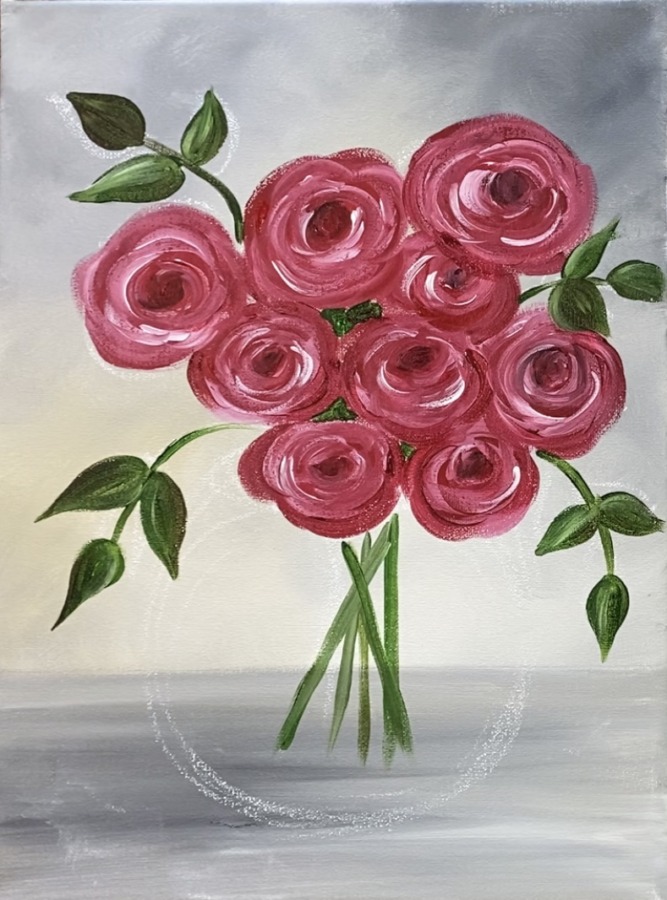
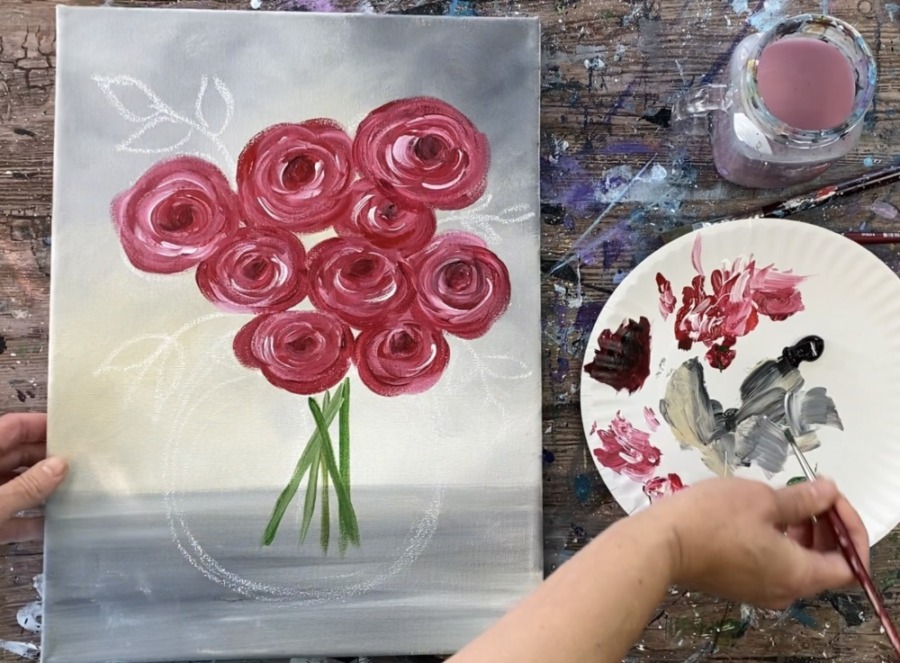
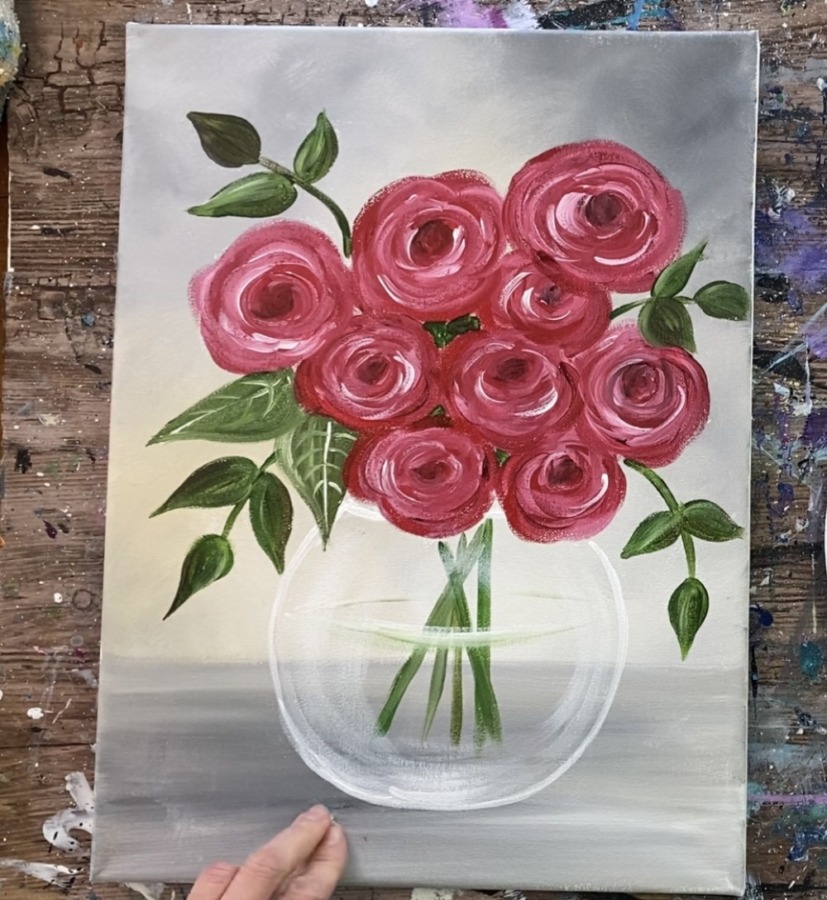
5. Paint The Vase
Use your #4 round brush and titanium white to paint the vase. Load a small amount of water into the white so your stroke will be thin and will flow easily.
Outline the shape of the vase using one solid, consistent and thin stroke.
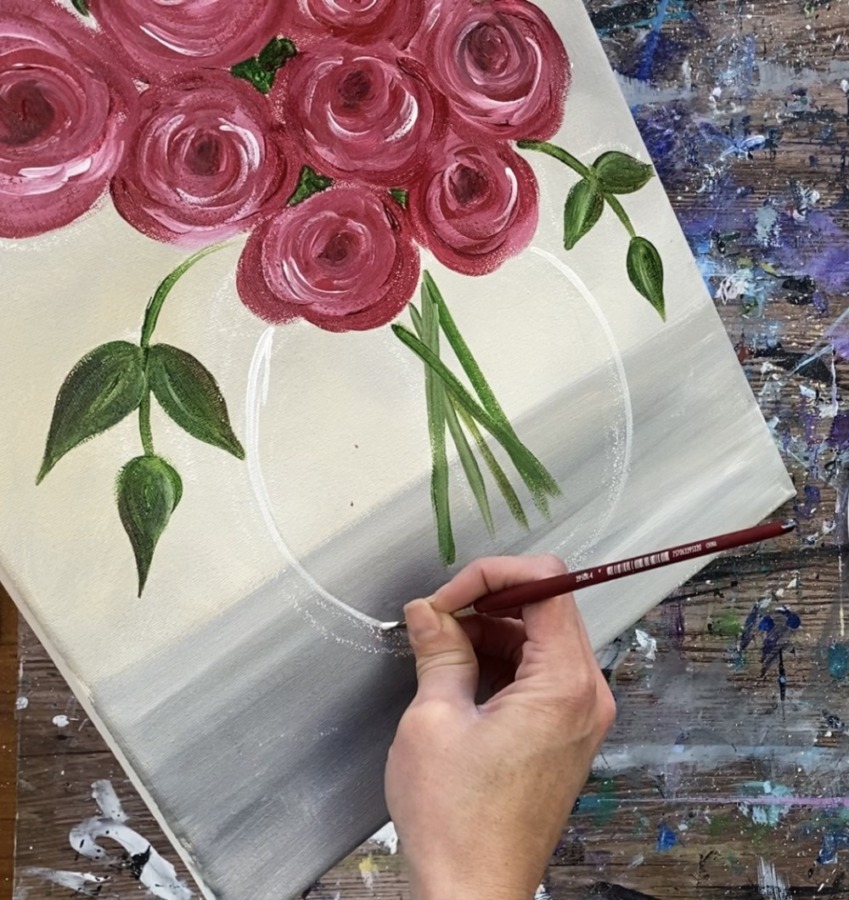
Lightly paint the inner water line by painting a curved line in the middle that overlaps your stems.
Then add a small amount of green to your water line and blend it in with the white (optional).
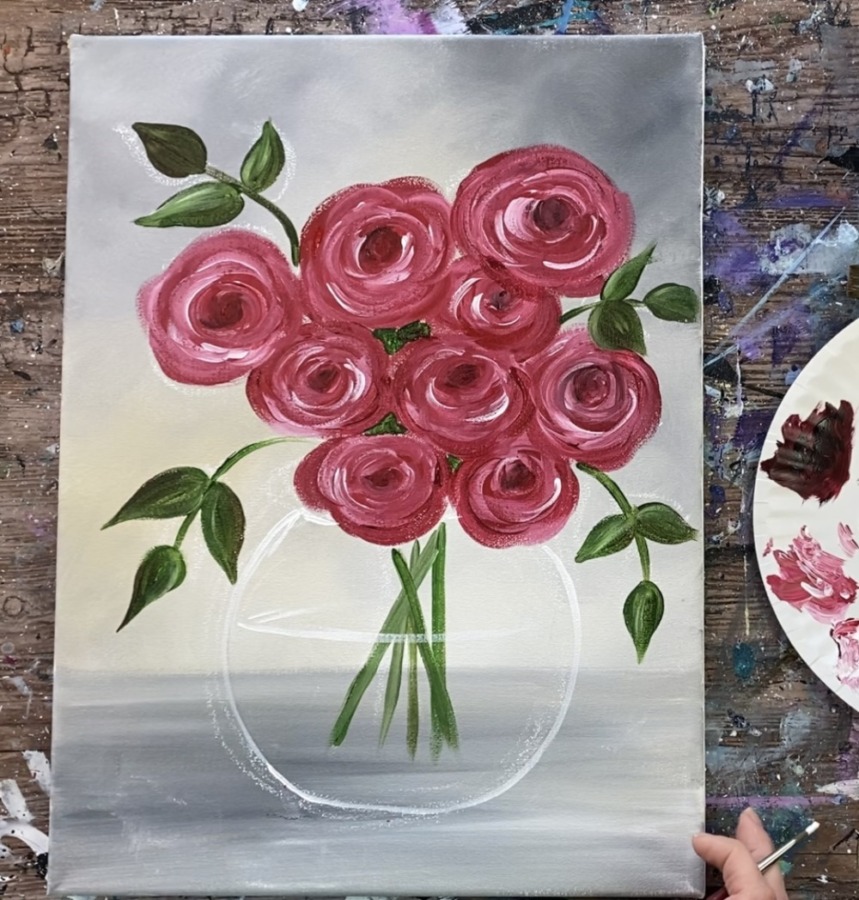
To do the glare on the glass, use a 12 bright brush (or any flat brush). Load it into the whit and wipe some of it off so theres barely any paint on your brush. Then brush in curved strokes in the direction of the glass vase. When you do this “dry brush” it will make your stoke look transparent like glass.

Do a few strokes going in more of a horizontal/curved direction on the bottom of your vase. Make a few strokes at the top of the vase overlapping the stems. You don’t want to do too many strokes because you still want to keep the glass see through.
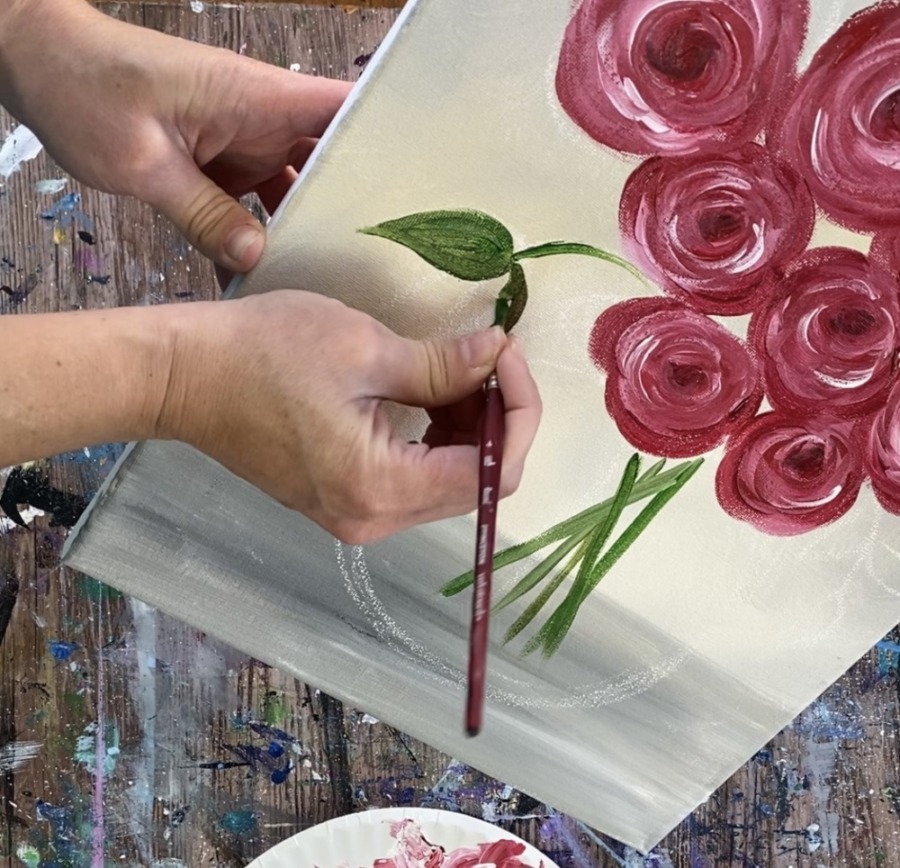
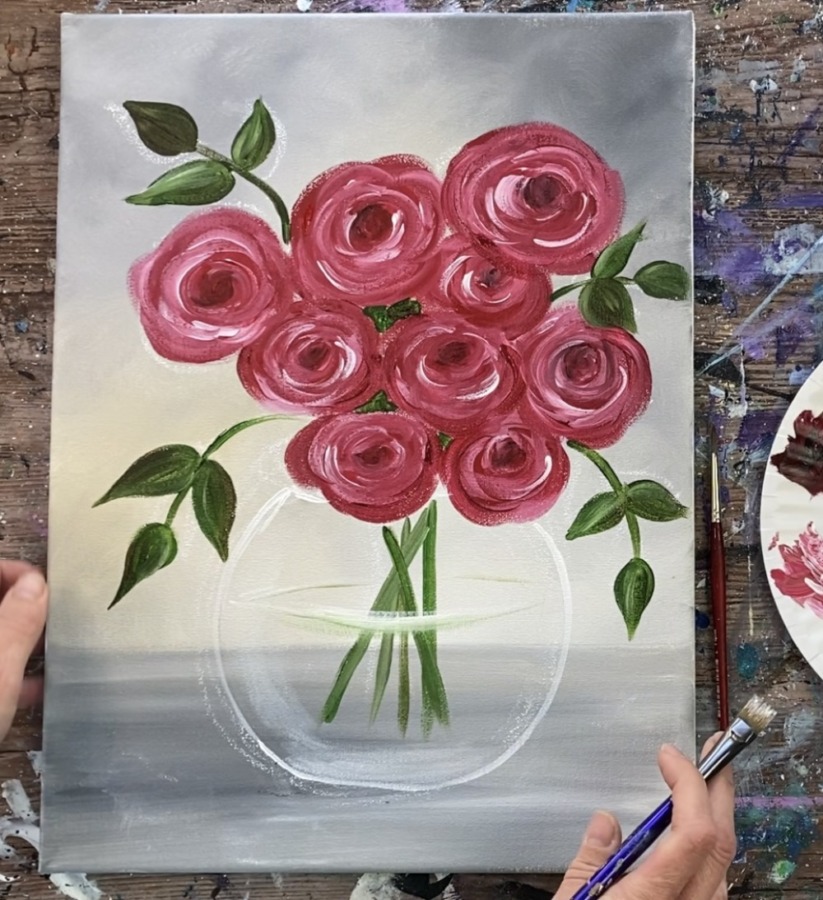
6. Add More Leave Details
If desired, add more leaves around your bouquet to balance it out. I did another larger leaf in the lower left area of the bouquet because there was a blank space there.
Then on some of the leaves I painted white lines. You can do this with a small round brush and titanium white mixed with green to make it a very light green.
7. Paint Rose On Table
To do the rose bud, start with your cadmium red medium hue. Paint a tear drop shape on its side and paint it in solid red. Use a #8 round brush.
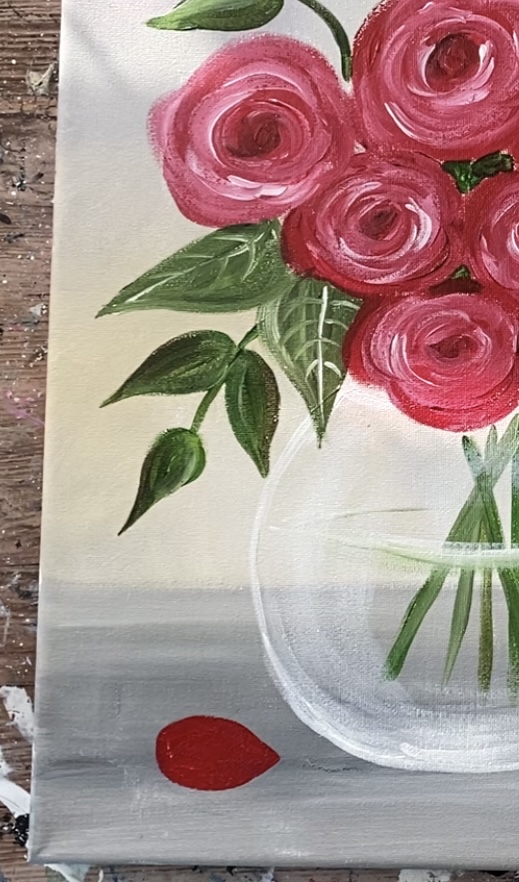
Then load white and red onto your brush (double load). Paint a middle tear drop shape in 2-3 strokes without blending the white all the way in.
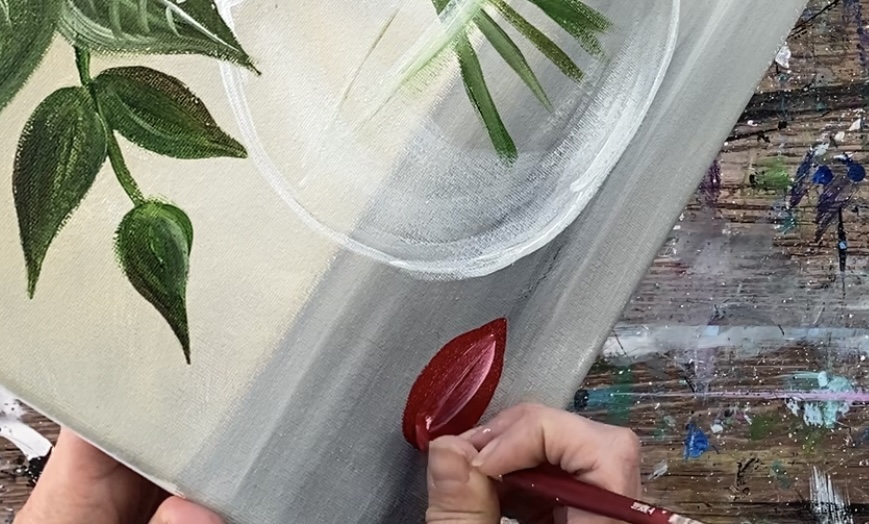
Paint a curve on one side and curve on the other. You should have what looks almost like side rose petals with the white blending slightly with the red.
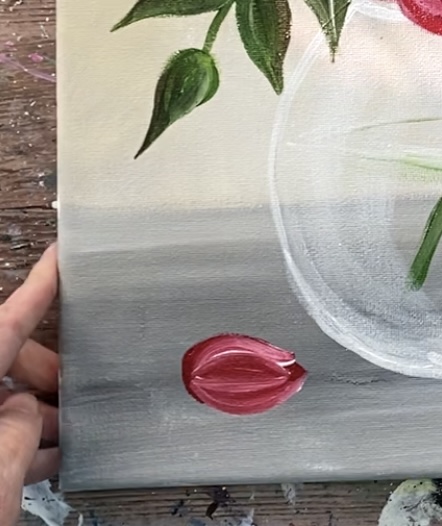
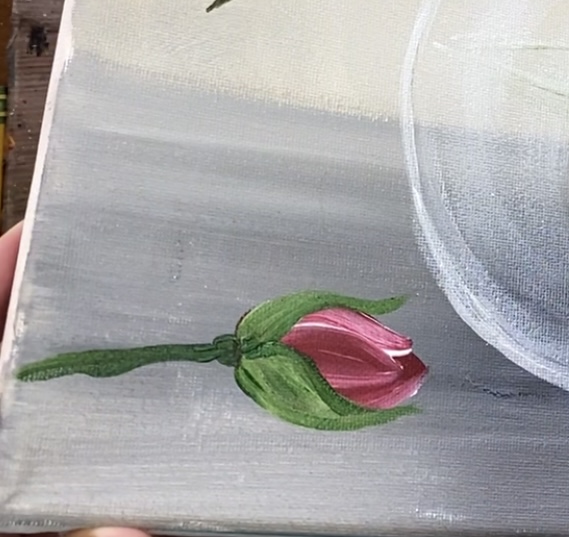
Rinse the brush and paint the stem of the rose. Paint a small circular green shape. Then paint a stem under that.
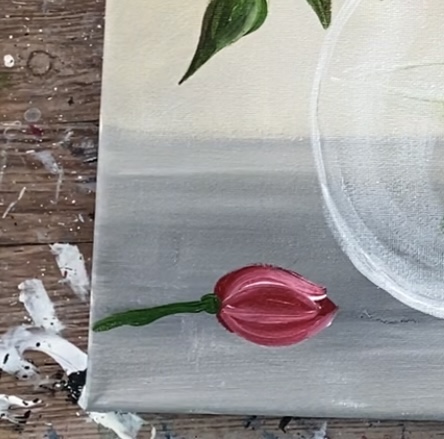
Then paint the side leaves of the rose. These leaves start out wide, hug the bottom of the rose bud, slightly curve and then go to a point outwards from the rose bud. Do one leaf on each side.
8. Paint Hearts On Table
These little candy sweethearts are optional! To do them, I used my #4 round brush. I made different shades of pink and light red on my palette by mixing white with one of the reds. For example, to make the light pink color, I mixed white with primary red to create pink.
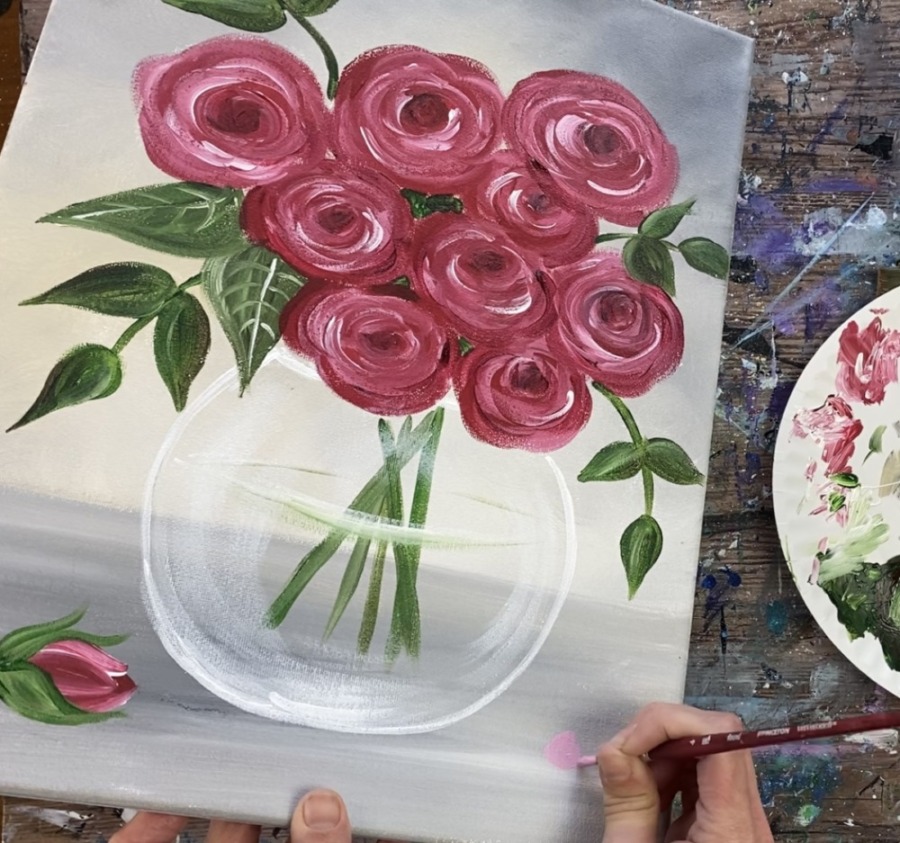
Then I did a few different reds and pinks with each heart by mixing various amounts of white with the reds on my palette. Paint the little hearts going in different directions.
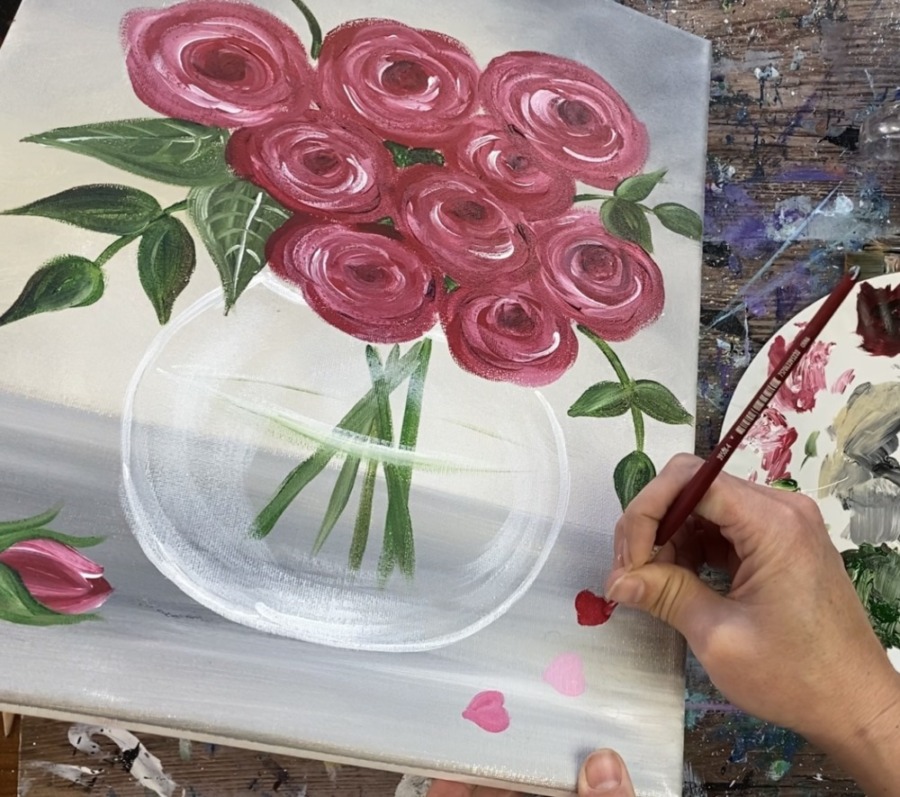
Then use white plus the color of the heart to paint the bottom side of the heart to make it look 3D. Just do one curved stroke below the bottom side of the heart.
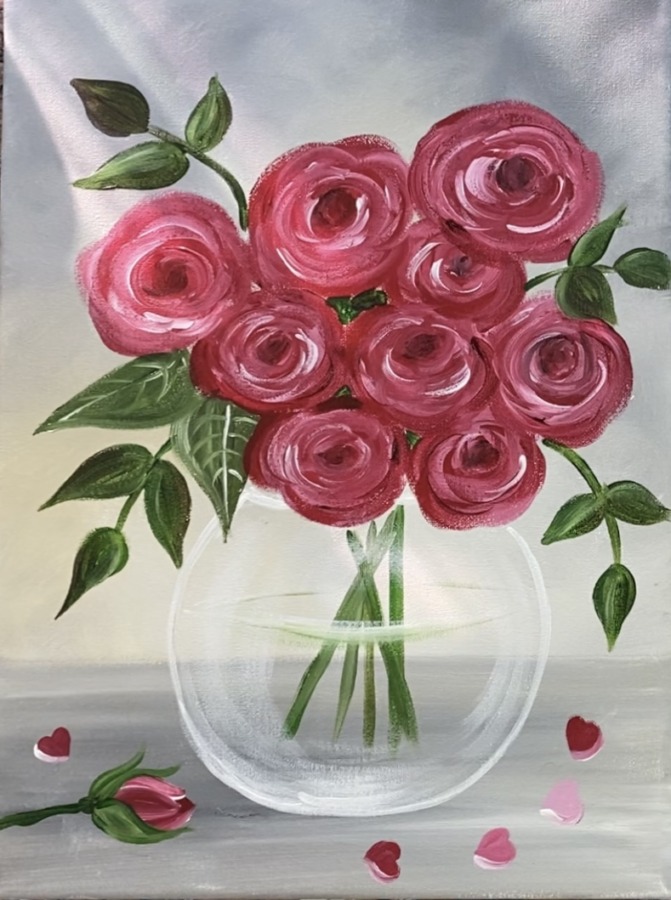
9. Paint Shadows
To do the shadows, you want to mix a gray on your palette that is slightly darker than the table color but not too dark. Water it down to a thin consistency. Then paint your shadow below your hearts, below the vase and below the rose bud.
Paint left and right strokes. Then use your finger to smear it a little to distort the shadow.
The shadow should be very subtle and not very dark on the table.

Finished
Sign your name and show it off! A beautiful bouquet of roses that can be displayed with your Valentine’s Day paintings or year round!

Share Your Art Here!


