

Would you like to save this?
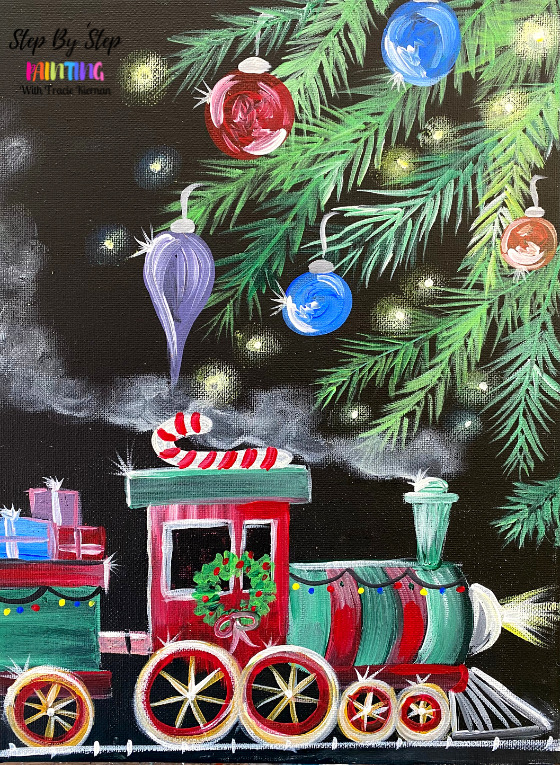
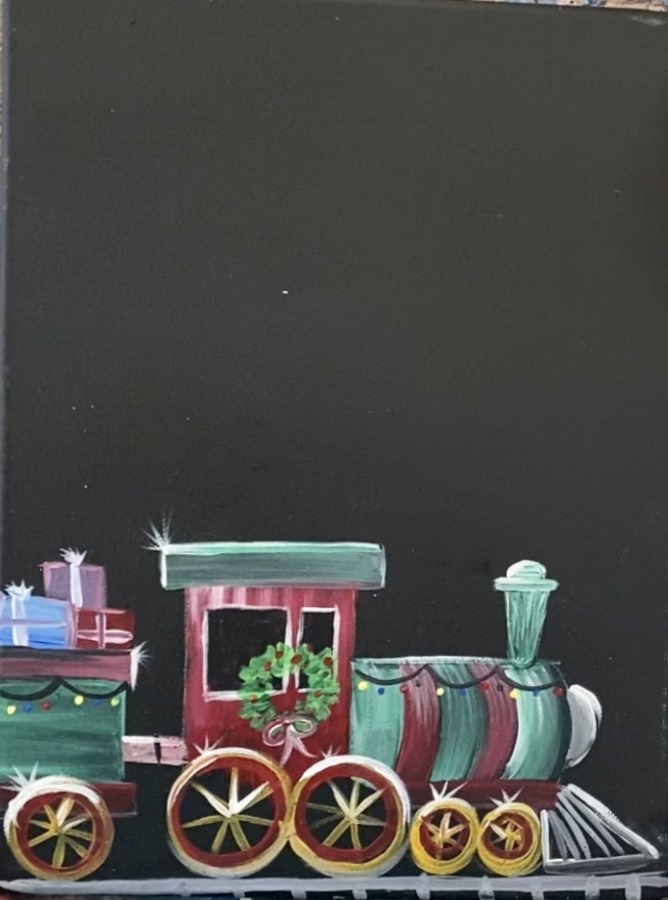
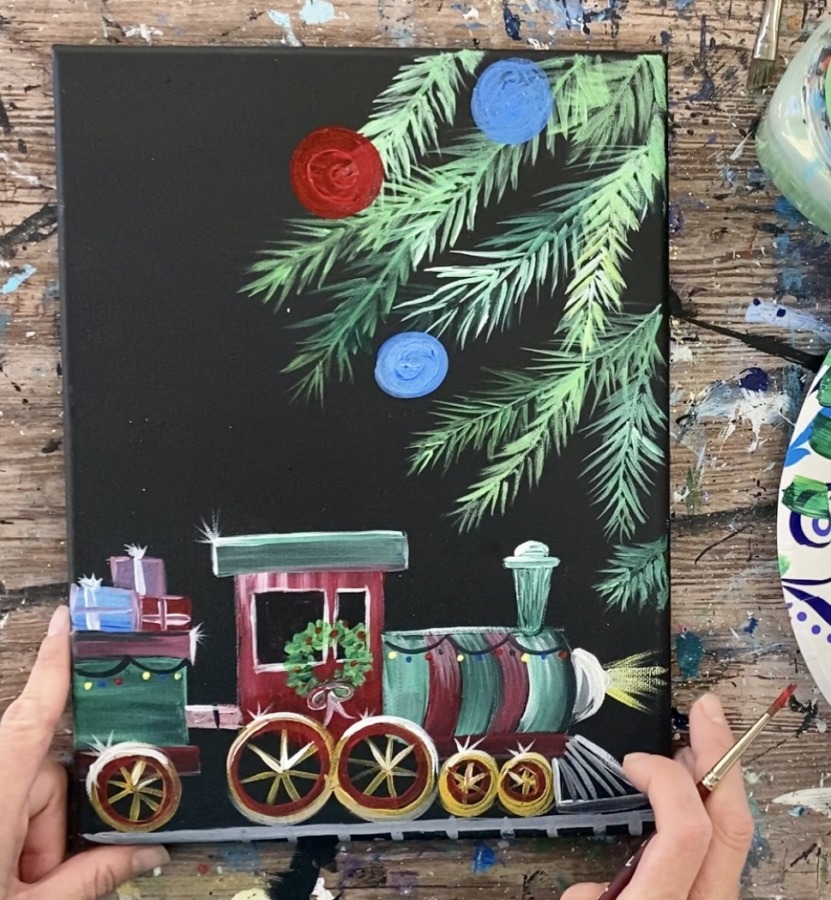
This acrylic painting tutorial will demonstrate how to paint a Christmas Train under a Christmas Tree on a black 9 x 12 canvas with acrylics!
The canvas that you use can be painted black (such as painting black over a mess up painting). You can also purchase a canvas that is already black.
Painting on a black canvas is simple! You just need to make sure that the colors you are using are opaque and will show up against the black. I recommend mixing a little titanium white in your colors because that will brighten the color up enough for it to show on the black canvas. Also, I will demonstrate which colors to use in the instructions below!
Enjoy and happy painting!
Materials:
How To Paint A Christmas Train On A Black Canvas
This tutorial demonstartes how to paint a Christmas Train on a black canvas with acrylics.
Materials
- 9 x 12 Canvas (or similar size)
- Optional Traceable
- White Graphite Paper (if using traceable)
- Acrylic Paint
- Brushes
- Paint Palette
- Water Cup
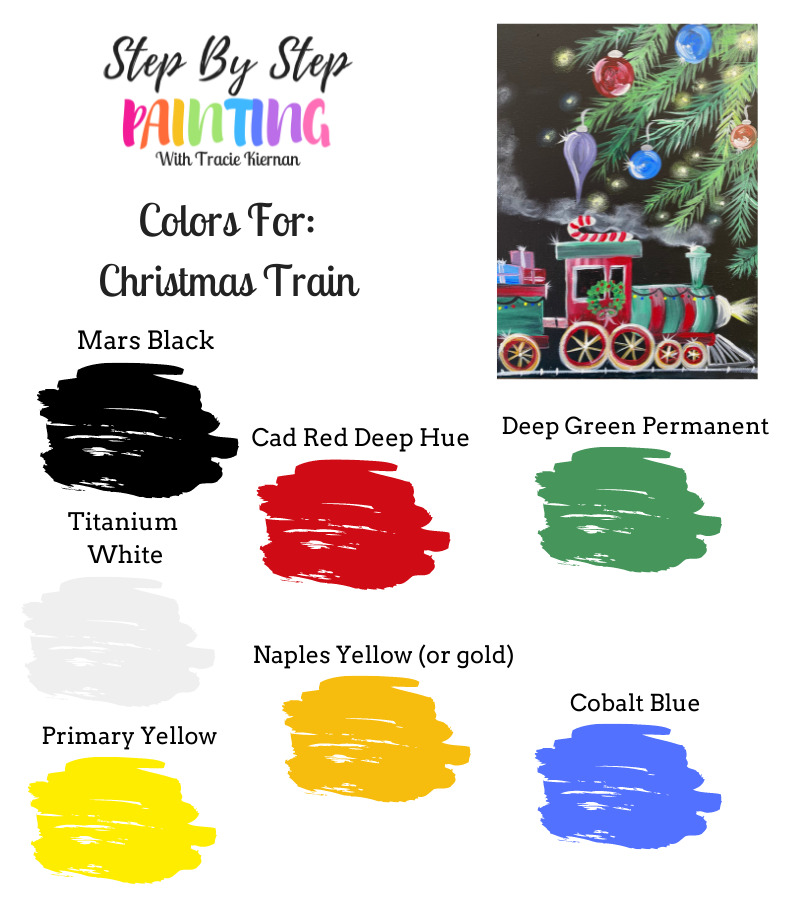
Colors
- Mars Black
- Titanium White
- Cadmium Red Deep Hue
- Primary Yellow
- Deep Green Permanent
- Cobalt Blue
- Naples Yellow (can also substitute gold)
Brushes
Color Palette:
Gold can be substituted for the Naples yellow. Since gold tends to be a translucent color, I recommend painting a layer of white first and then adding the gold on top so that it will show up. Naples is an opaque color that is similar to gold and will show up against the black background.
Using Craft Paints?
If you are using craft paints such as the Apple Barrel craft paints, I recommend substituting with these colors:
- Black
- White
- Flag Red
- Holly Branch
- Gold or Yellow Flame
- Bright Yellow
- Bright Blue
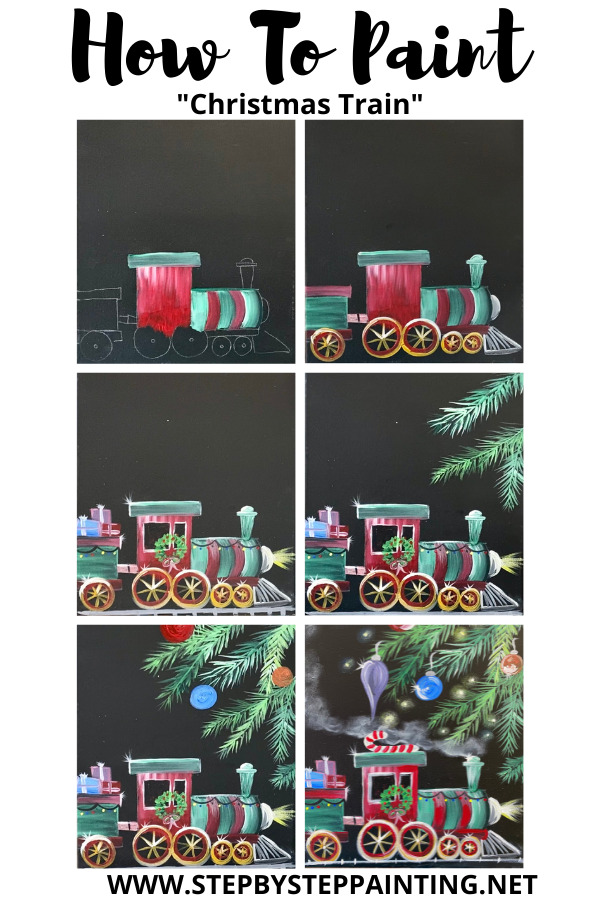
Directions At A Glance:
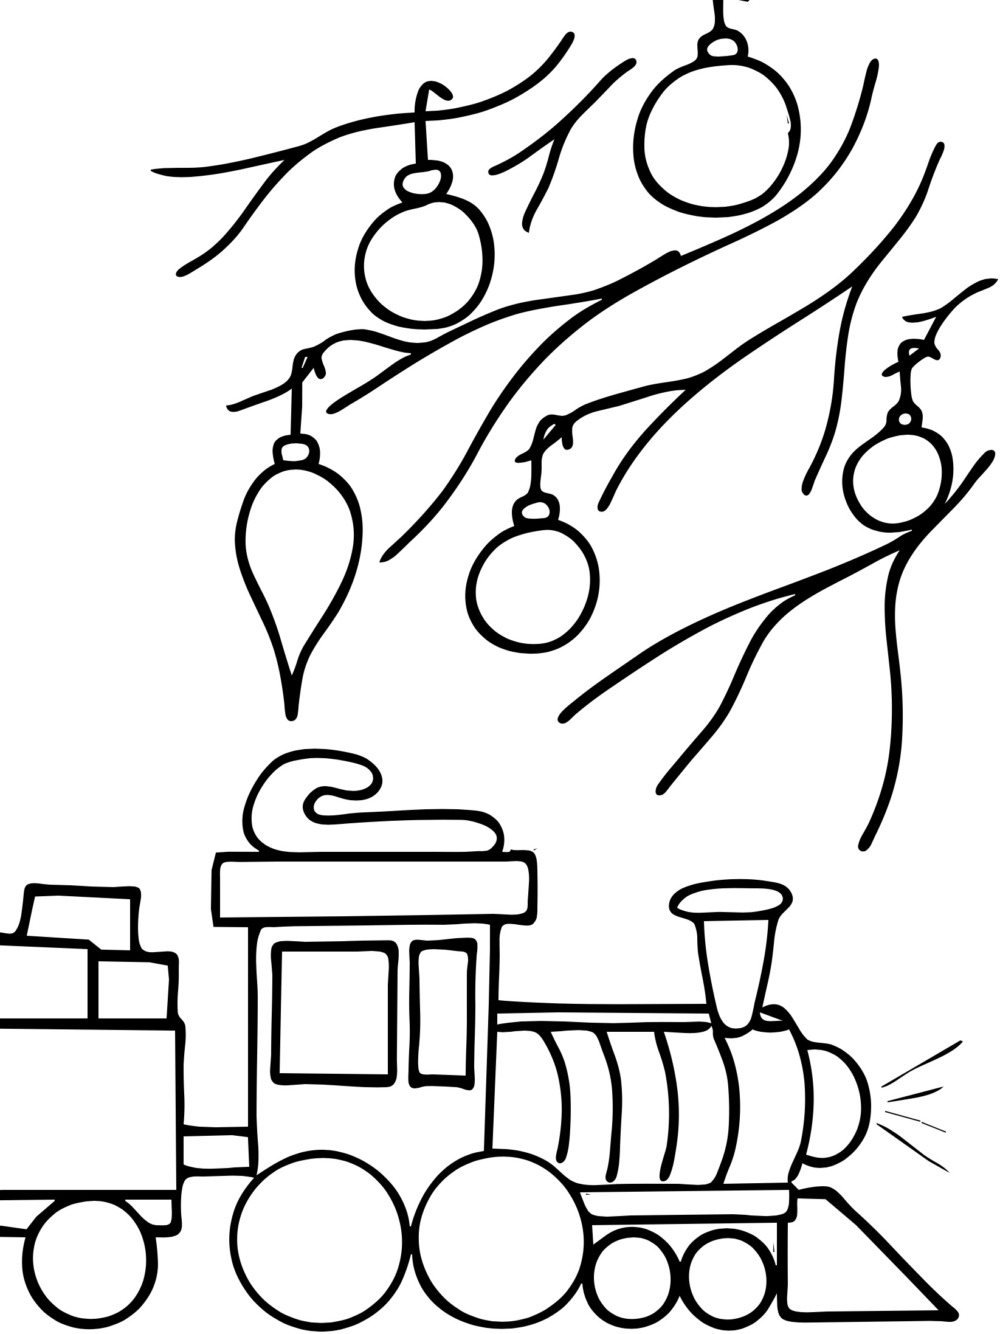
Traceable:
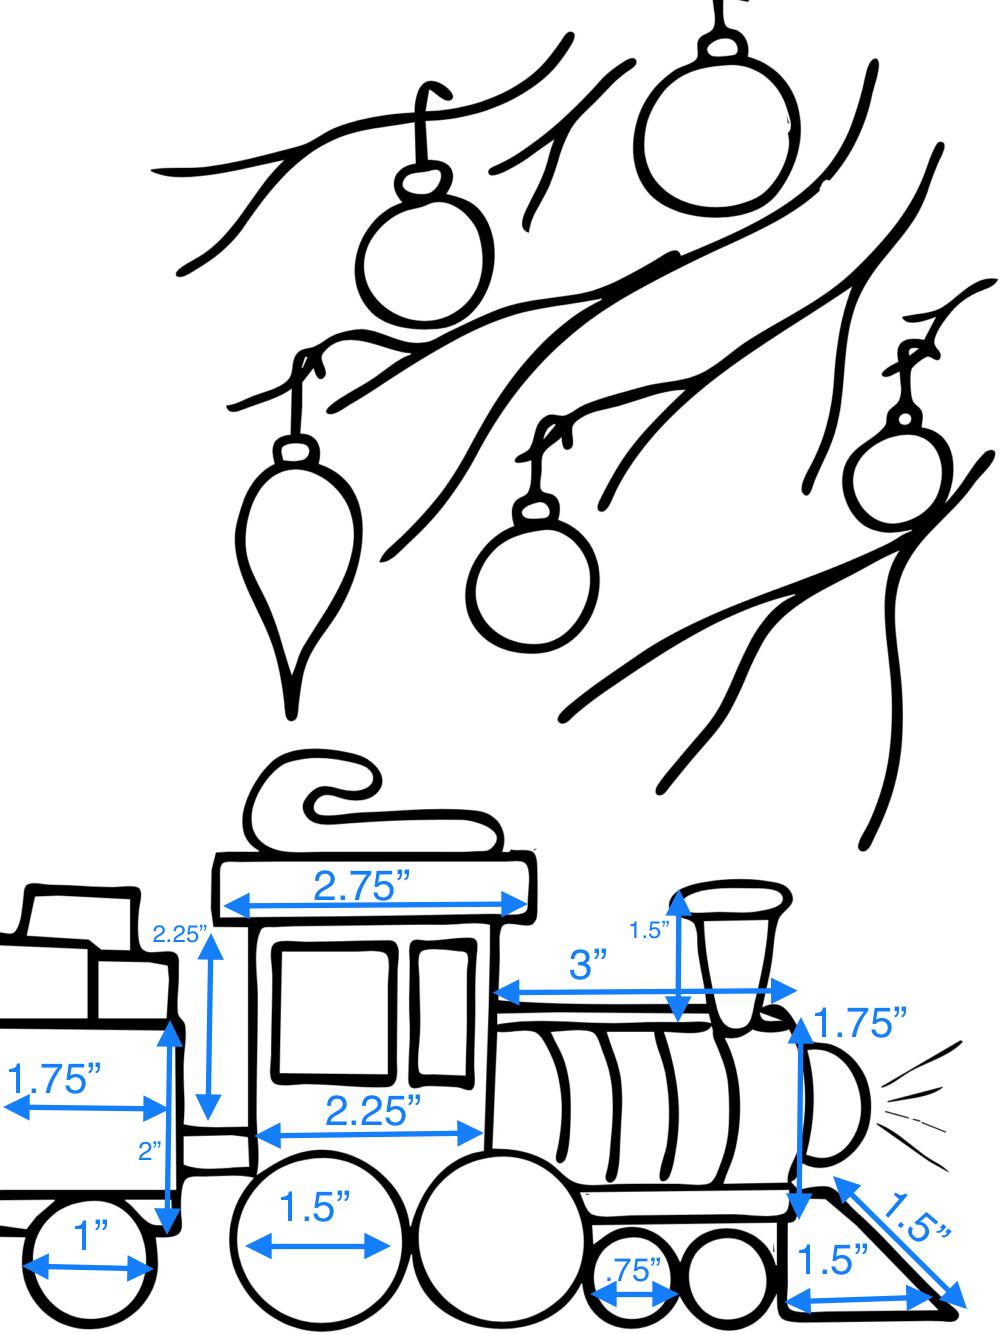
Train Dimensions:
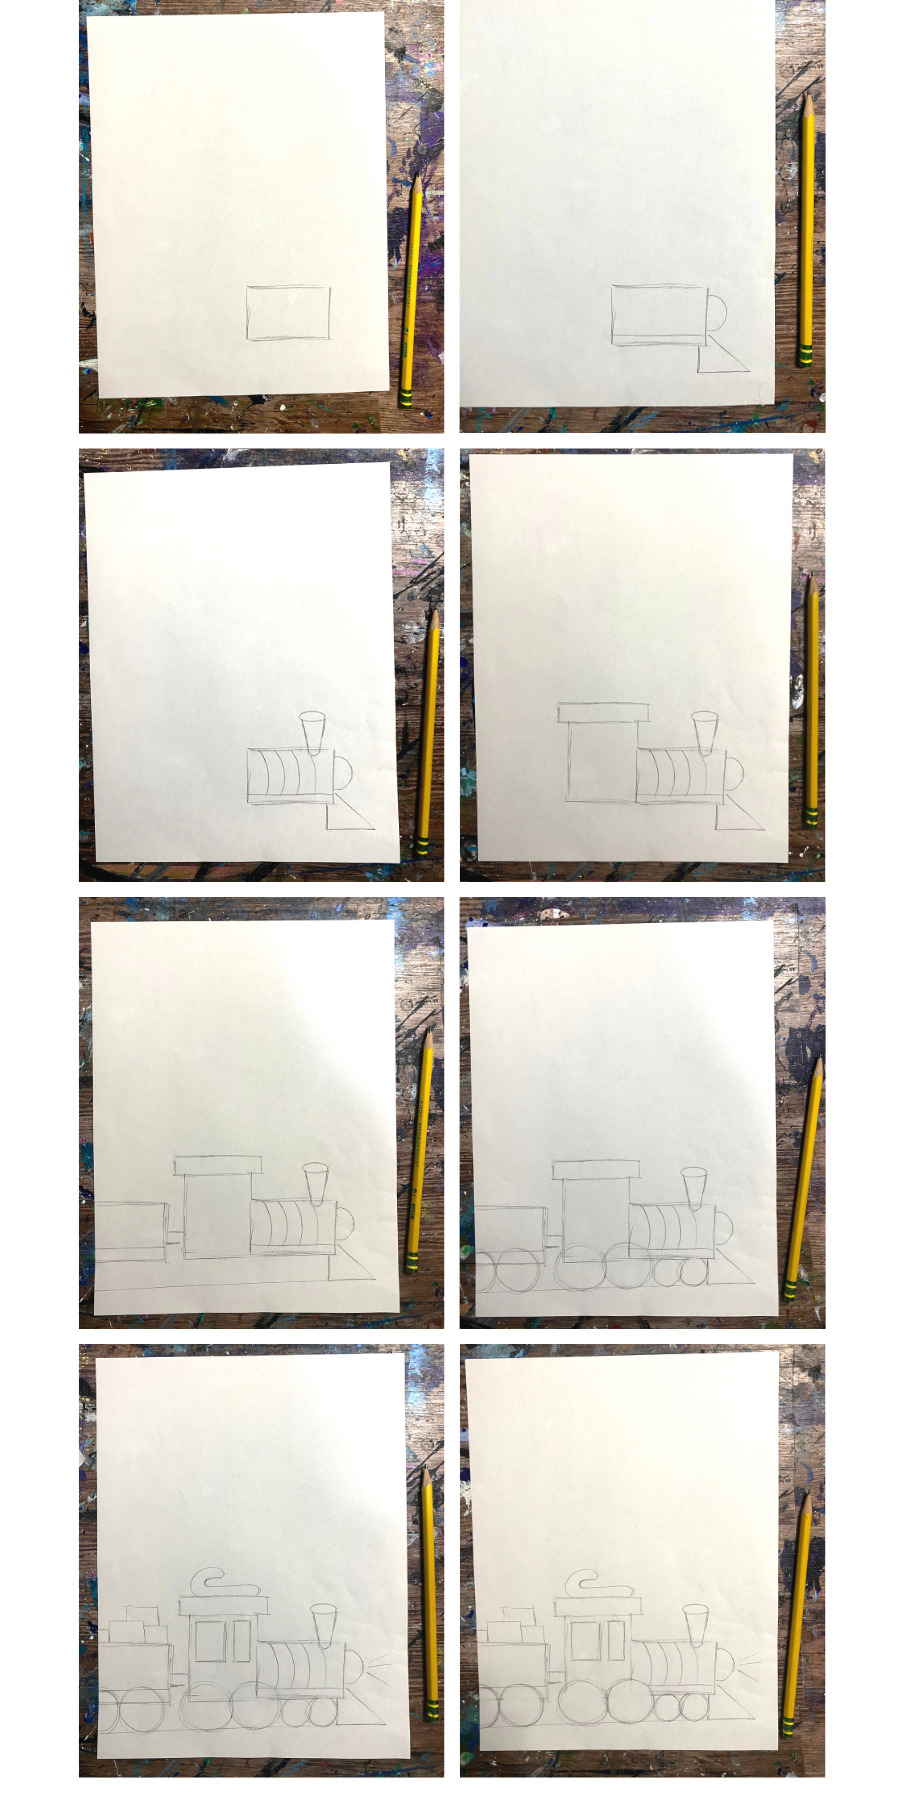
How To Draw Train:
Video:
Step By Step Directions:
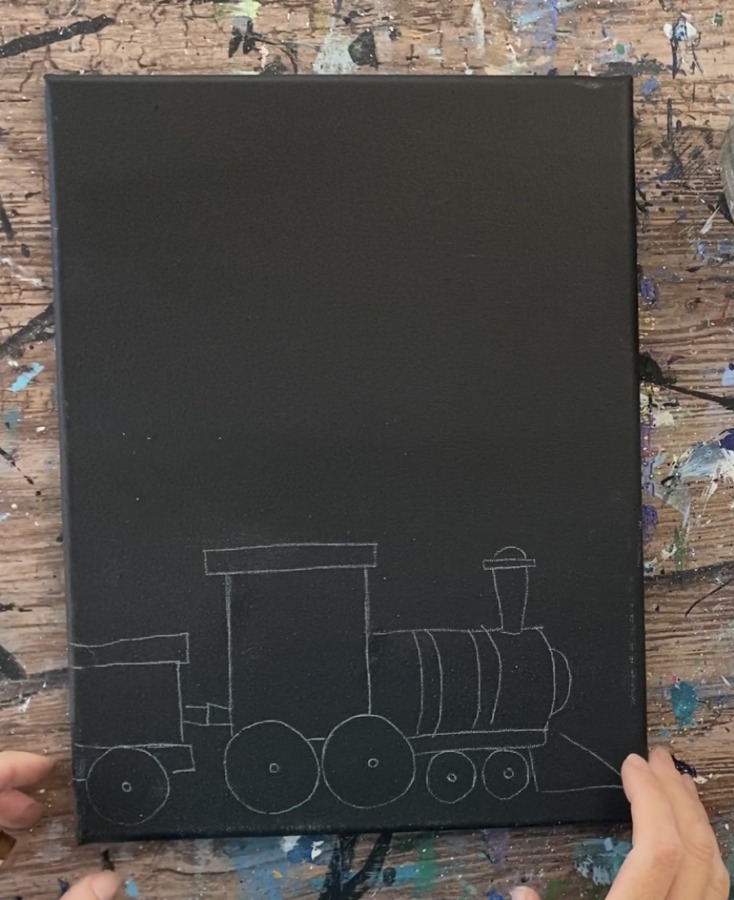
1. Paint A Canvas Black & Draw or Transfer Train Design
You can draw the train with a white chalk pencil, piece of chalk or regular pencil. Or you can use the provided traceable. I’m working on a “how to draw” demo for this! You can also see dimensions for the train drawing above.
I recommend you use a sheet of white graphite paper to transfer the train onto the 9×12 canvas. This will allow the drawing to show up against the black background. Position the train so that it is on the bottom of the canvas.
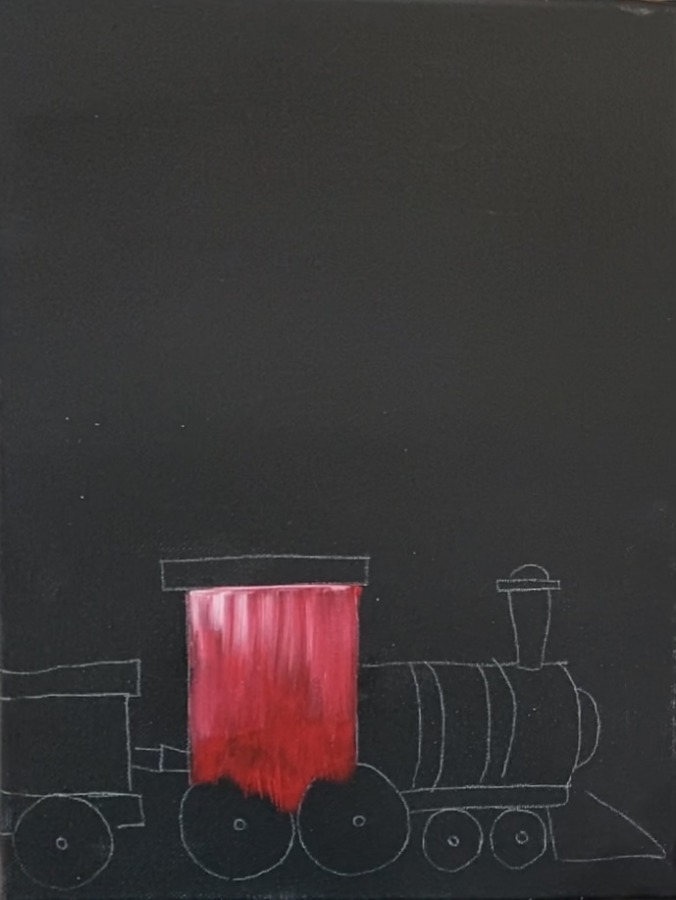
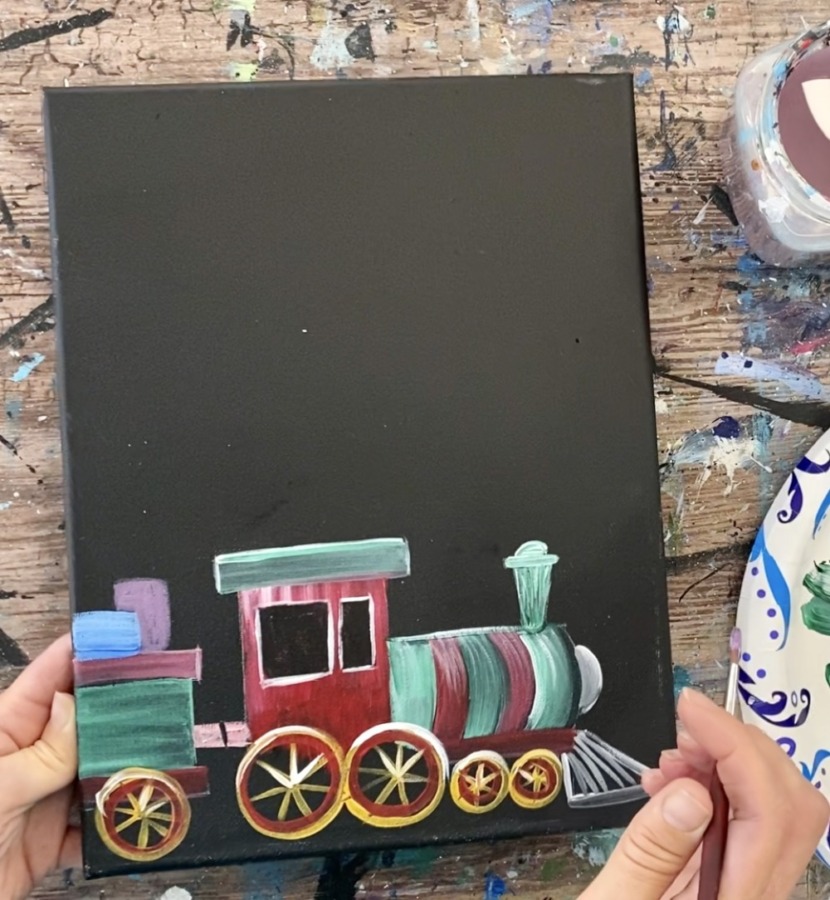
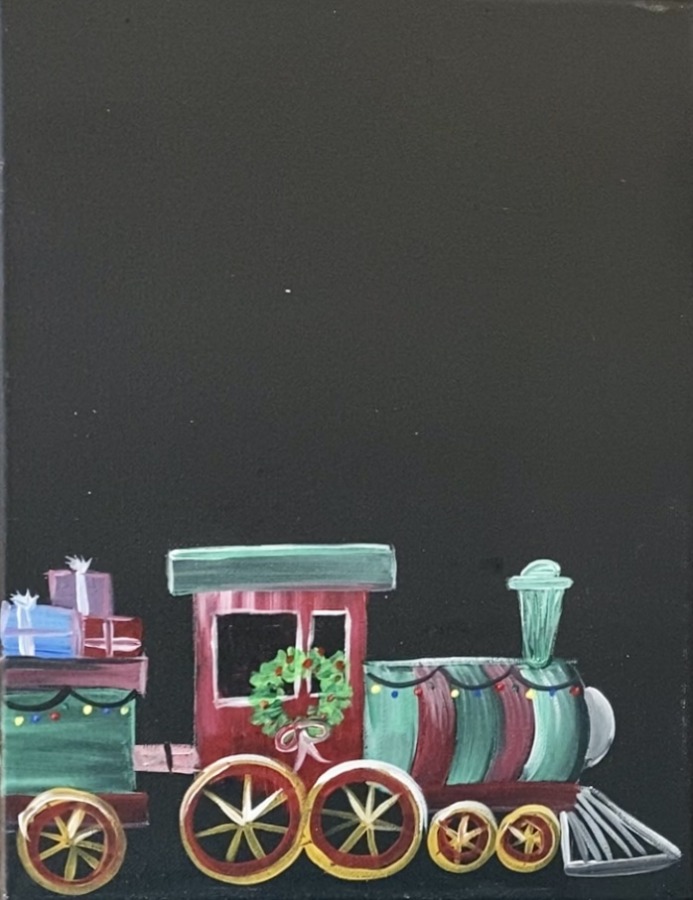
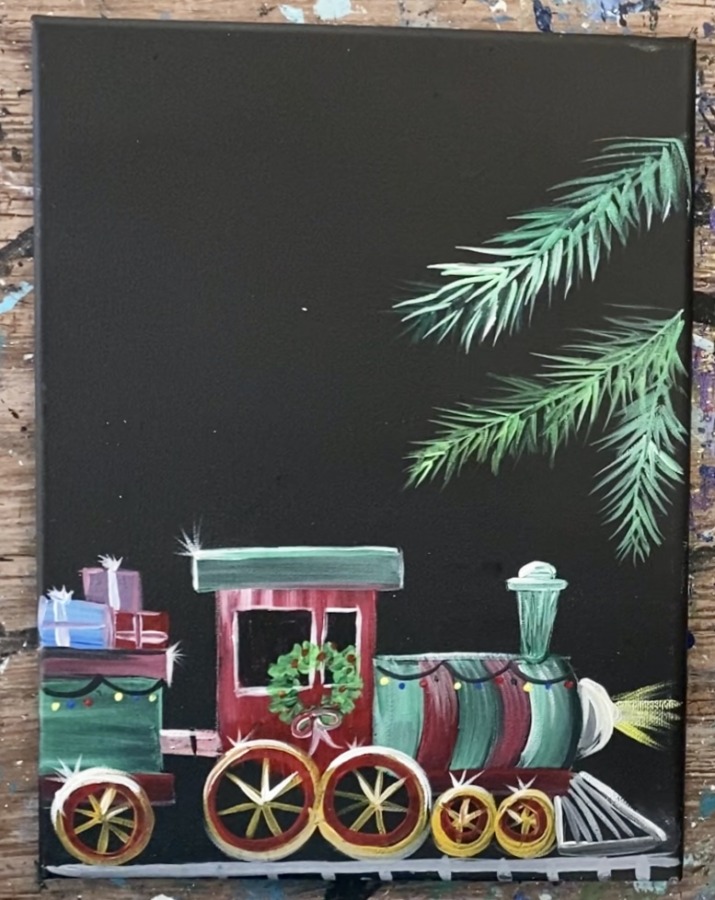
2. Paint Locomotive
You’re welcome to change the colors in this train and customize it!
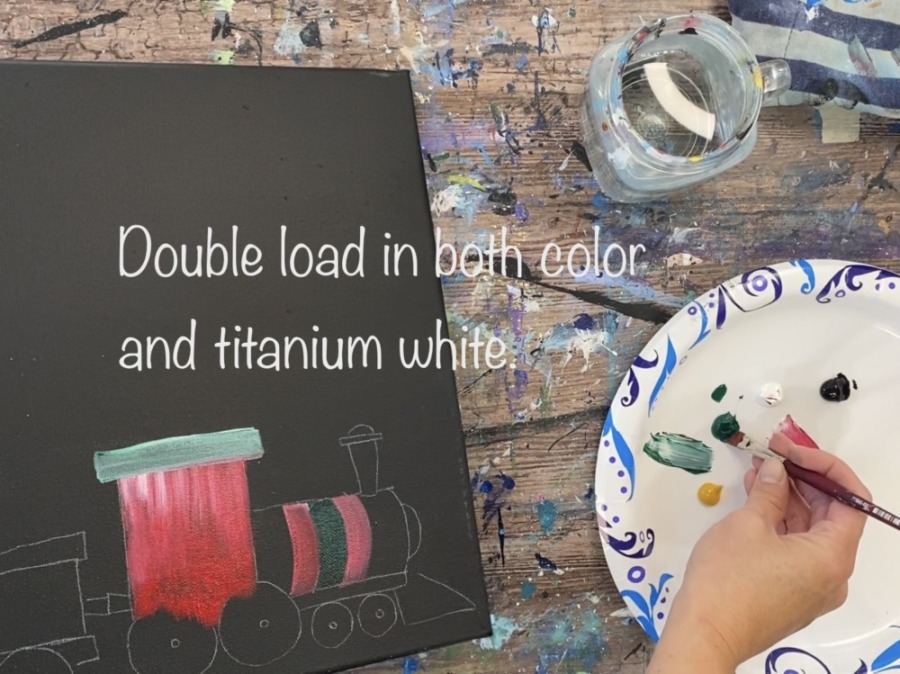
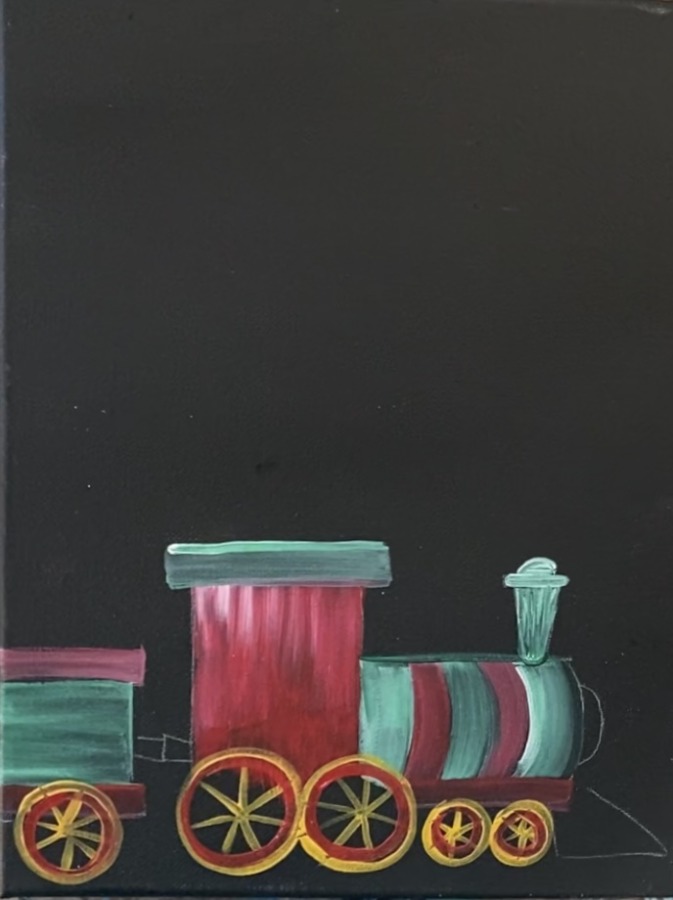
Next, paint the locomotive. I use a 3/8″ angle brush and the colors: cadmium red deep hue and titanium white. Start by painting the left rectangular area of the locomotive. Double load your brush in the red and the white. Paint in up and down strokes filling in the shape.
The white will blend with the red and allow it to be opaque and bright against the black canvas.
Paint the top rectangular piece with deep green permanent mixed with titanium white. Then paint the curves on the side of the locomotive. Make your strokes go in a curved direction and create a green and red alternating pattern.
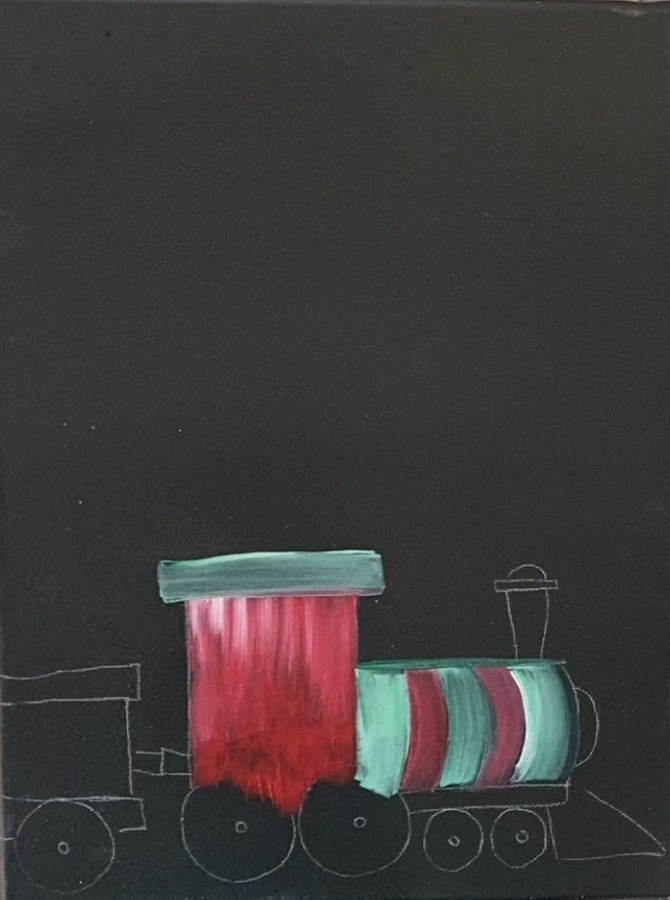
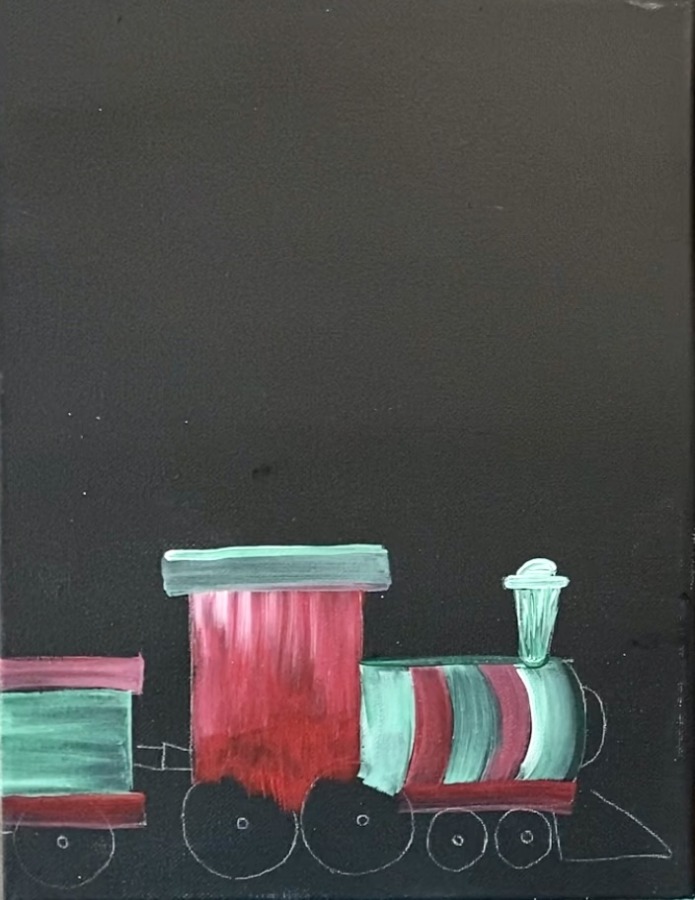
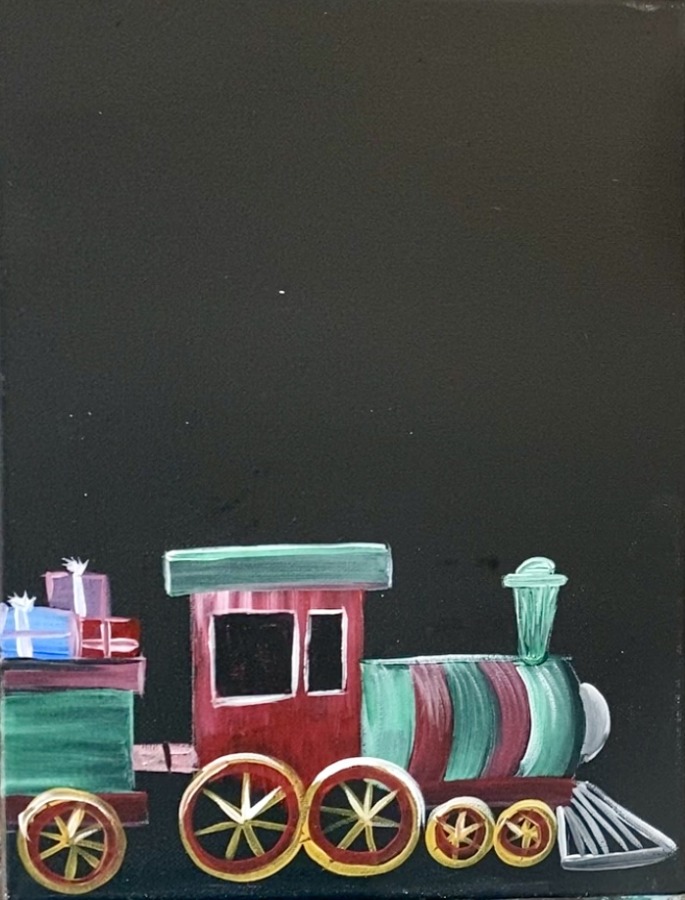
3. Paint Cargo Car
Paint the cargo car with the red and the green. Go in horizontal strokes with your 3/8″ angle brush.
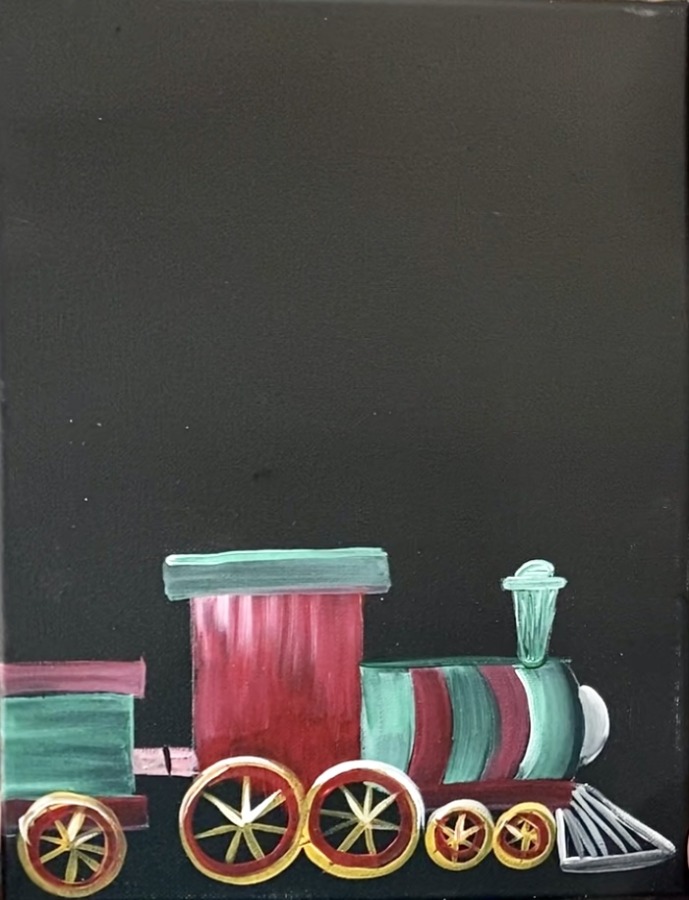
4. Paint Wheels
Use a #4 round brush and Naples yellow to paint the wheels and the spokes. Paint a circle and the diagonal lines in the center of the circle. Alternatively, you can do this with gold. Since gold is not a very opaque color, I would recommend painting the wheels white first and then painting gold over them.
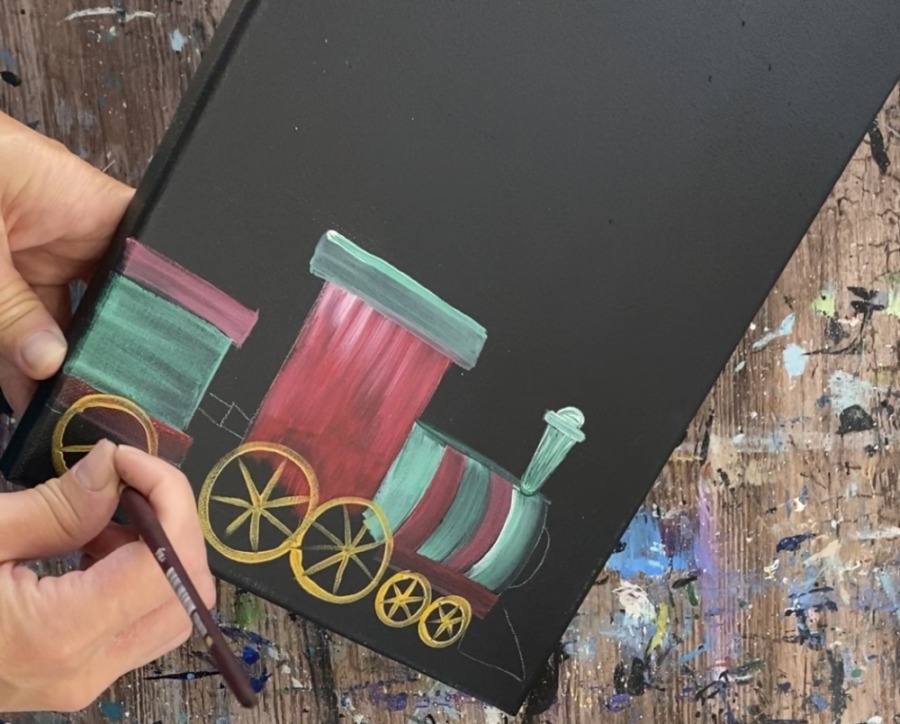
Paint the inner circle of the wheel with cadmium red deep hue.
5. Paint Details on Train
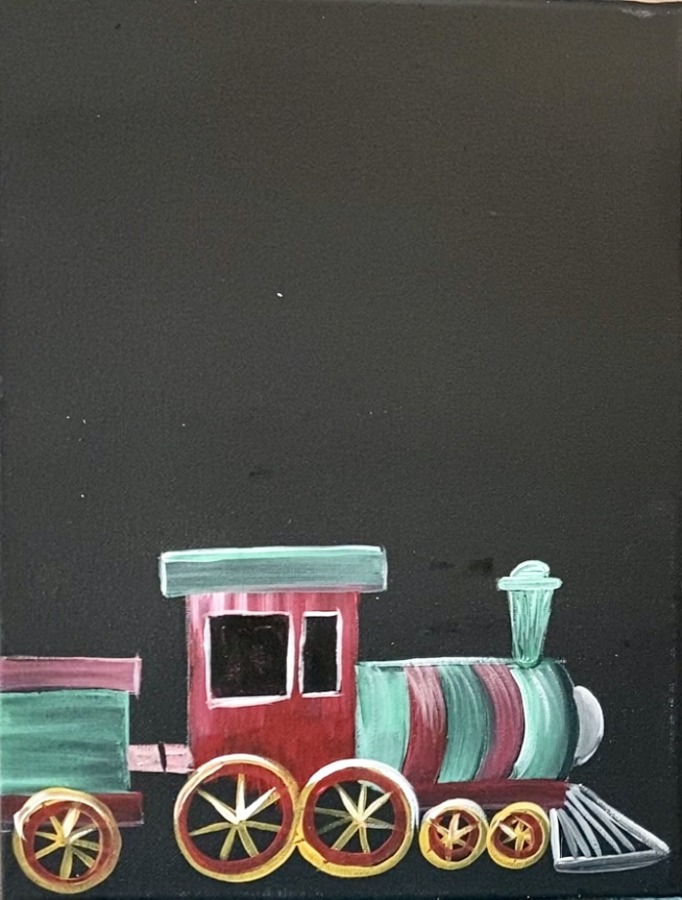
For the front grill of the train, I used titanium white mixed with a little black to make it gray. I outlined that with the #4 round brush. Then I did the front light base with the same gray color.
Attache the locomotive and the cargo car together with red or another chosen color.
Then paint windows on the locomotive. Do this with the #4 round brush and mars black. Paint a smaller rectangle and a square.
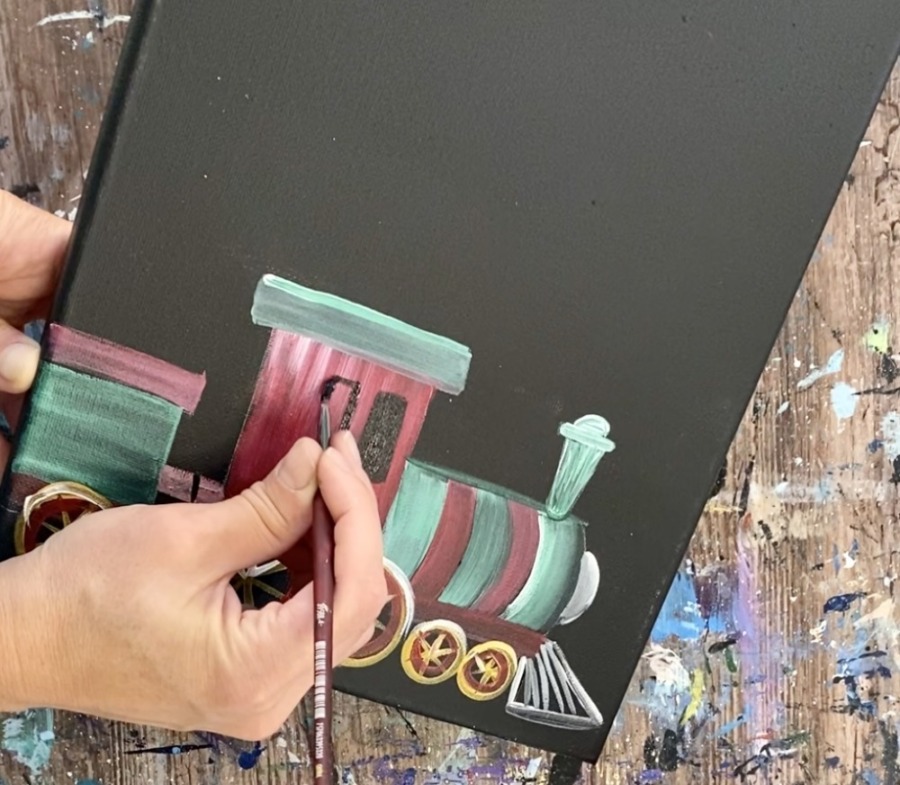
Then outline the inner part of the shapes with white.
6. Paint Presents In Cargo Car
Paint rectangular shapes in the cargo car. Do this with cobalt blue or your color choice. For the purple present, I mixed the cobalt blue with the cadmium red deep hue. Also, you may need to add a little white into the colors so they will show up opaque against the black canvas.
Then use titanium white to paint the bows on the presents.
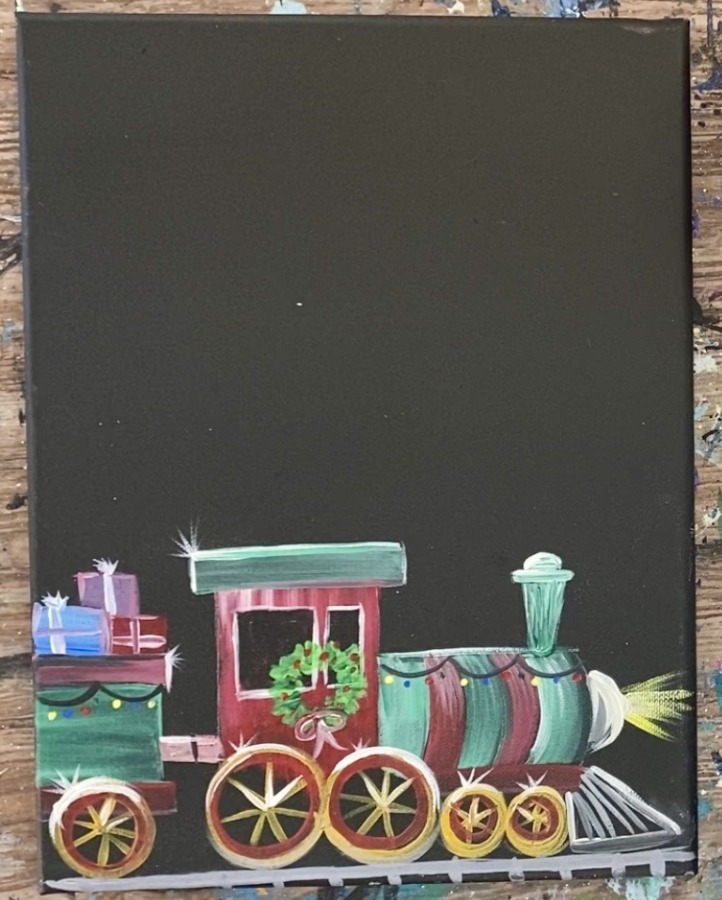
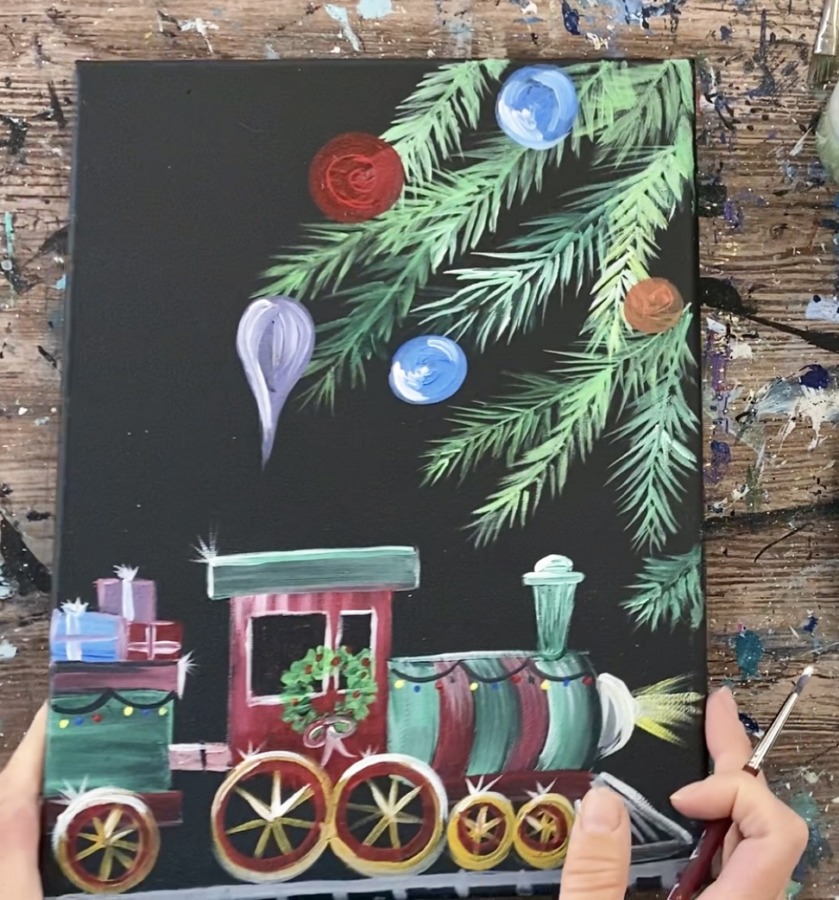
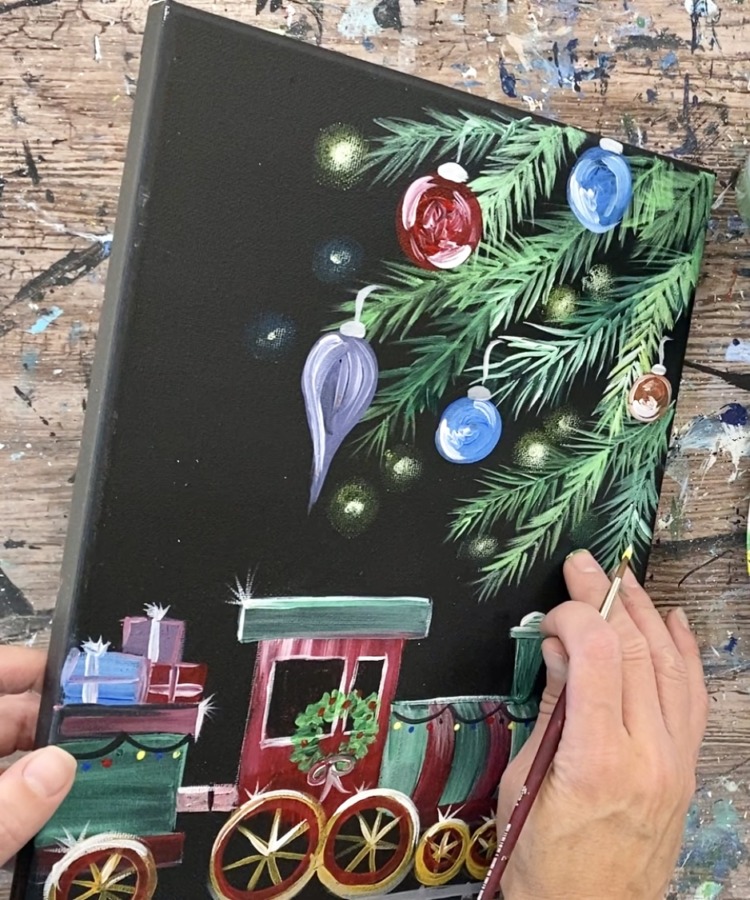
7. Paint Christmas Lights & Wreath On Train
To do the lights, use mars black to paint a strand of wire across the cargo car and locomotive. Then paint different colored little dots along the strand.
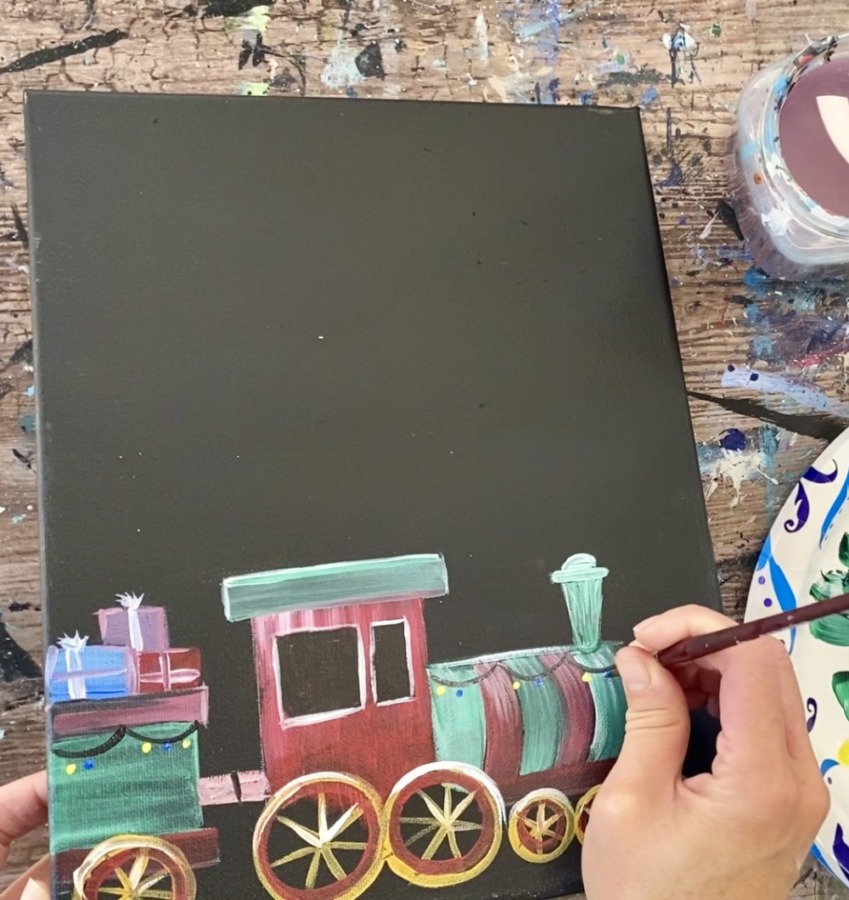
To do the wreath, use deep green permanent to paint a circle on the side of the locomotive Then paint textured strokes around the circle with the green and a little bit of white. These are little “x” style strokes.
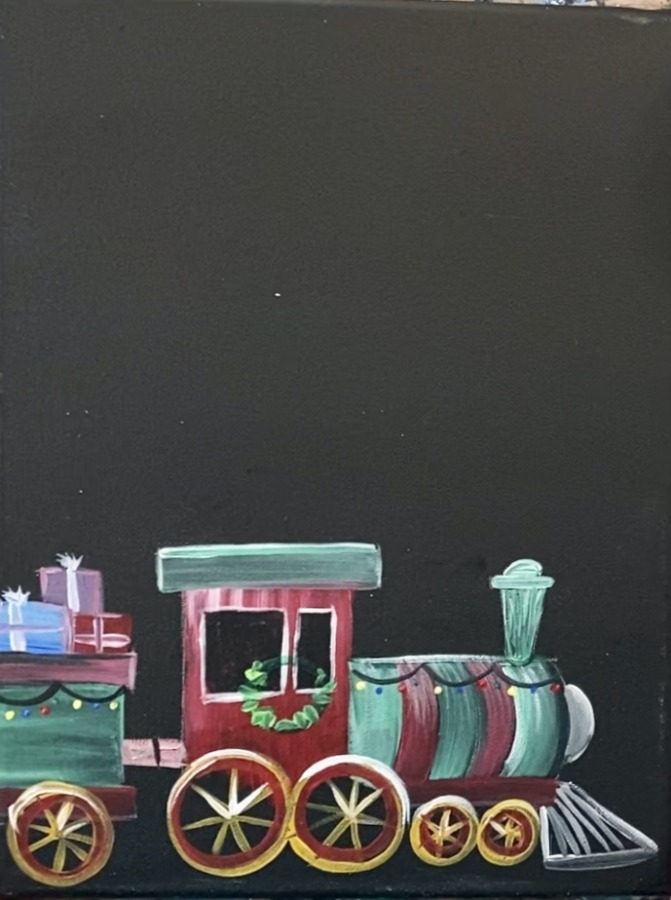
Paint the little “x” strokes in a circle so the wreath is formed.
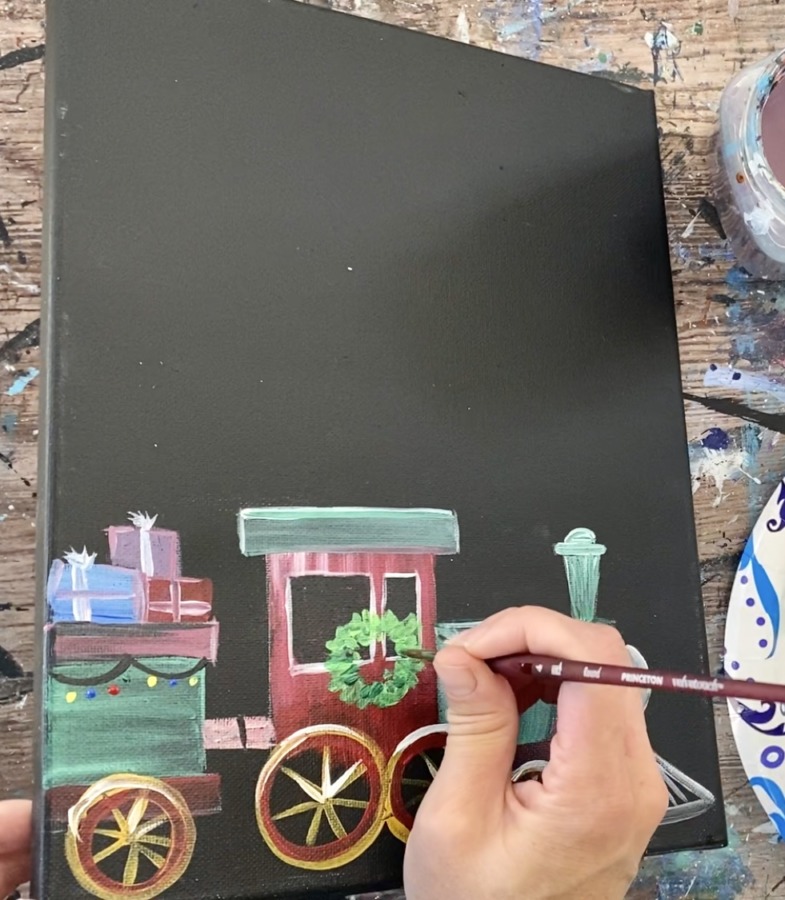
Then paint little red dots on the wreath. Mix the red with the white to make a little bow on the bottom of the wreath.
8. Paint Track
Use a ruler to paint a straight horizontal line under the wheels. Do this with titanium white mixed with a little black to make a gray. Alternatively you can paint the track with silver paint color.
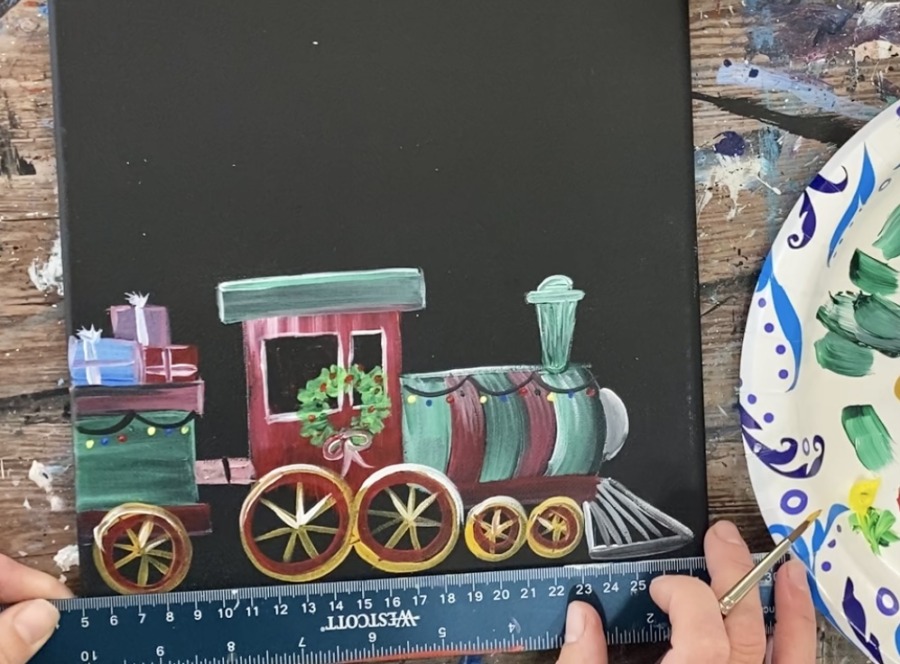
Then make little vertical tic marks under the horizontal line.

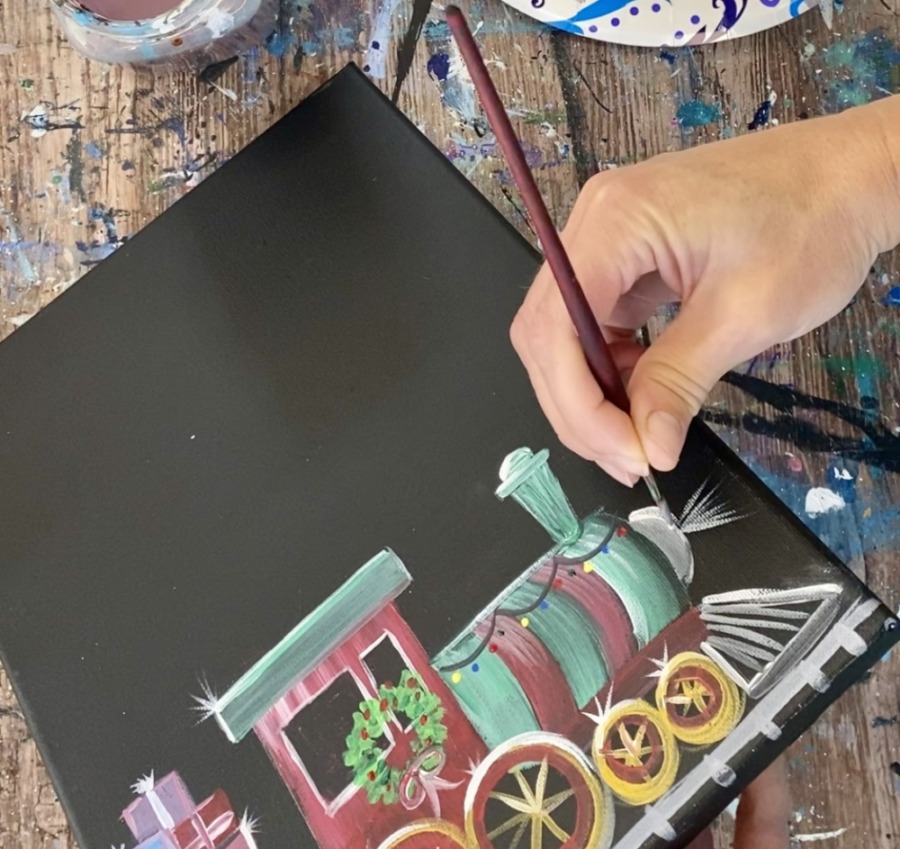
9. Paint Highlights on Wheels & Shiny Small Reflections
Use a #4 round brush and titanium white to paint some reflections in some areas of the train, especially the corners. Only load a small amount of paint on your brush (wipe some off if needed). Then very lightly paint little diagonal lines.
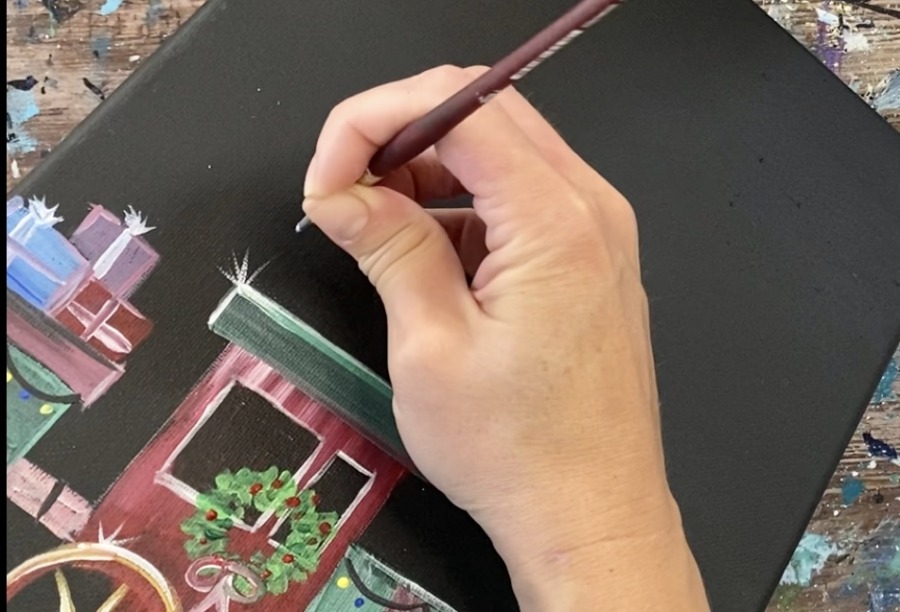
Paint some more shiny areas on the wheels (top left of the circles).
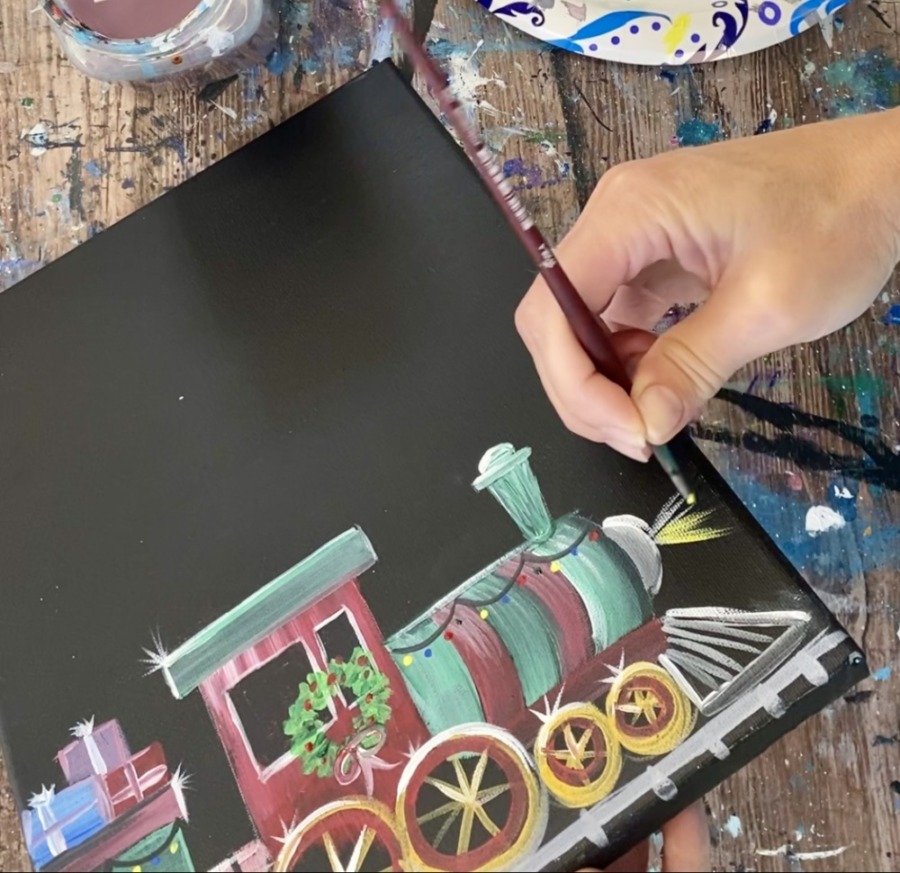
10. Paint Train Light
Do this same technique with the light. Load a small amount of titanium white paint to the tip of your round brush. Then lightly drag the brush to create diagonal lines forming the light beam.
Then paint primary yellow over the light beam. Only add a small amount of primary yellow to your brush.
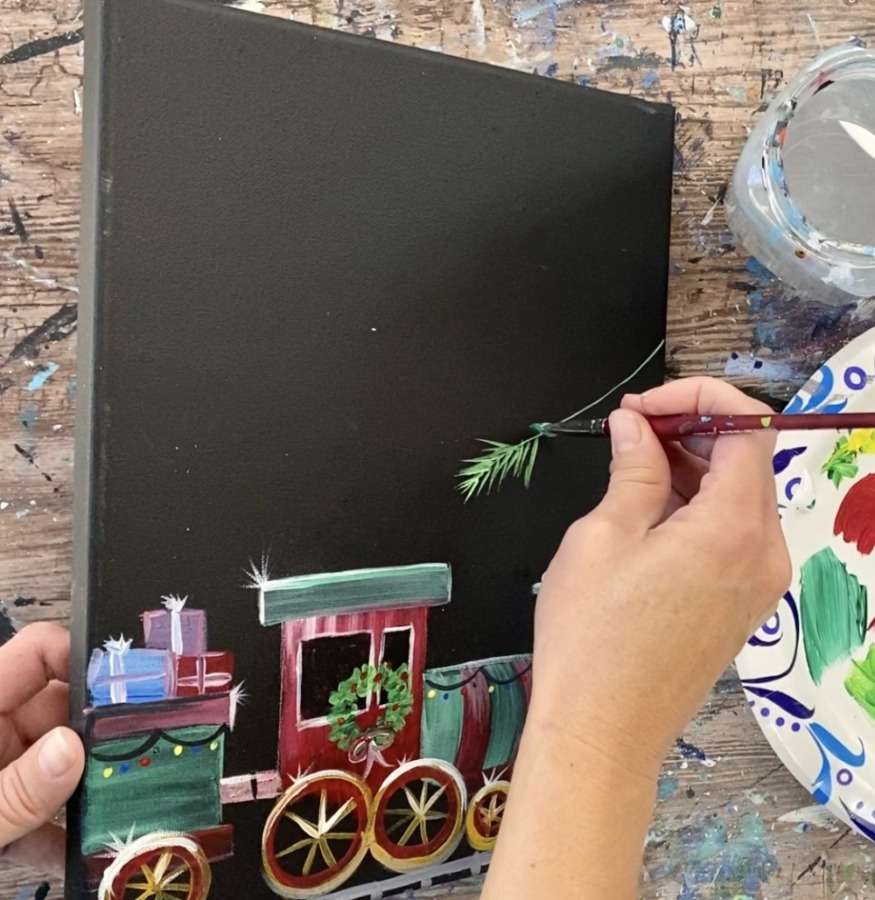
11. Paint Christmas Tree Branches
For these branches, I used a 3/8″ angle brush. Double load the brush in both white and deep green permanent (so that your green will be light and show up against the black background). Paint a thin line using the tip of your brush. This will be the center of the branch.

Then start at the end of the line. Paint little diagonal lines for the pine needles. Double load your brush in the green and the white. Continue to paint little diagonal lines going from the left of the line and working to the right.
Add a little yellow into some of the green as well. You can mix variations of the green, white and yellow on your palette. This makes your pine needles stand out. Also, working from the left of the branch and going to the right helps your little diagonal strokes overlap each other and create the texture of the pine needle branches.
Paint several branches going diagonal down all on the upper right part of your canvas painting.
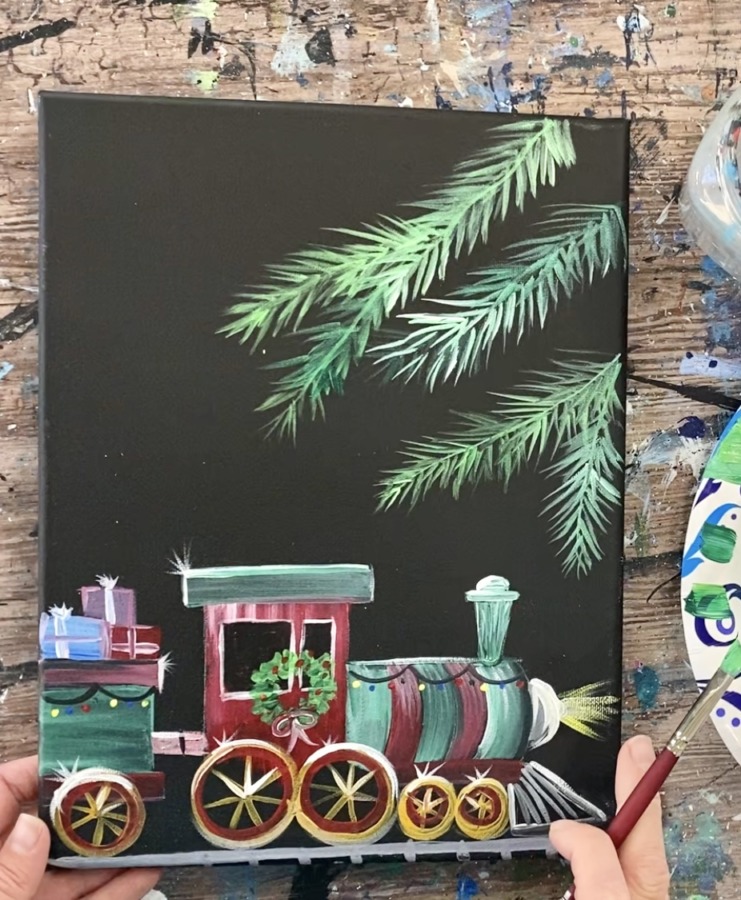
Some of the branches can be overlapping each other. Some can be stemming out from each other.

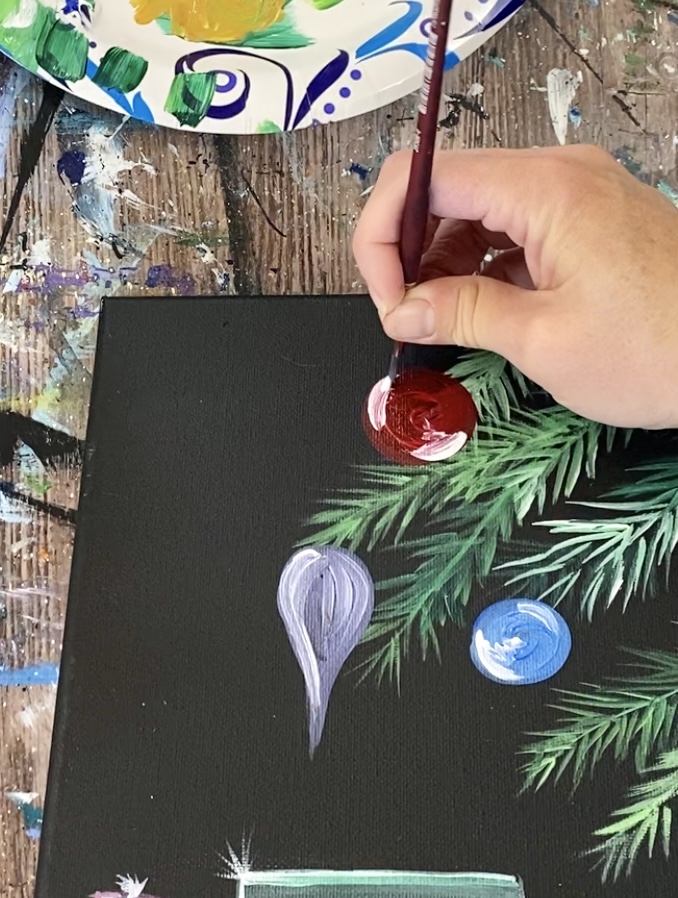
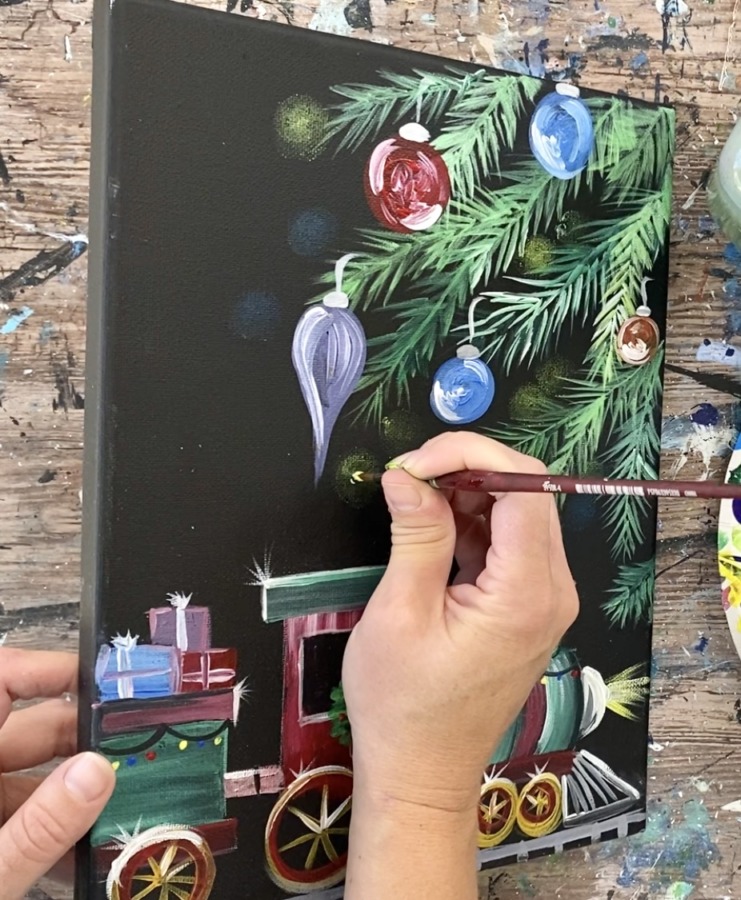
12. Paint Ornaments
Use a #4 round brush to paint the ornaments. I used cobalt blue mixed with titanium white to paint two circles.
Then do a red circle with cadmium red deep hue.
Mix the red and blue together (and some white) to make a purple ornament. I did this one in a teardrop shape! Also, I made orange by mixing yellow and red together and painted an orange circle.
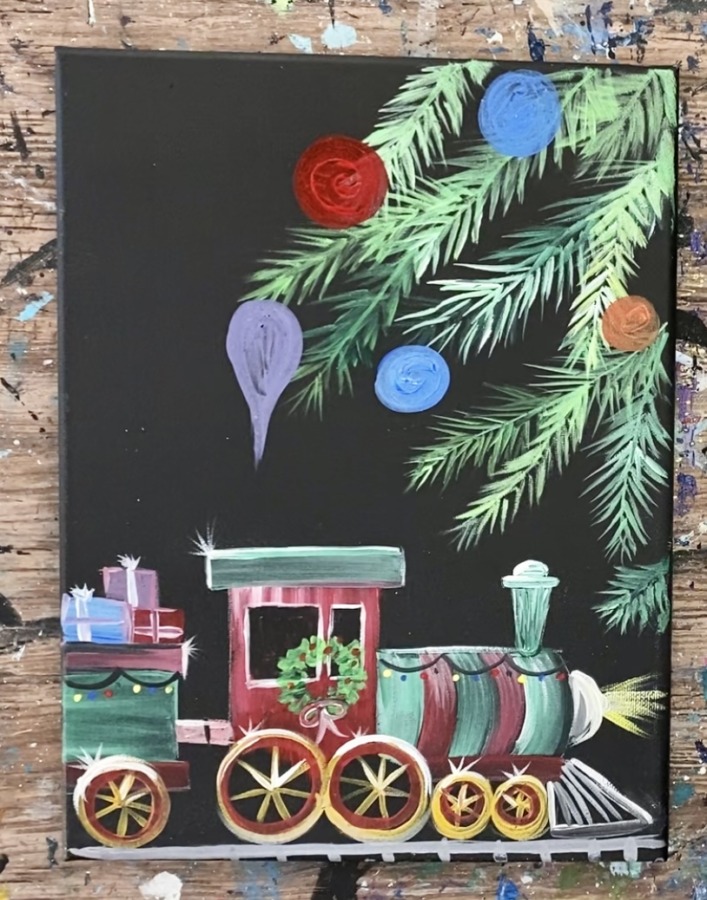
Paint a highlight on the left part of the ornament. Use titanium white and the #4 round brush. Paint small zig-zag strokes on the left to create then highlight/reflections of the ornament. It’s okay if the color of the ornament isn’t dry all the way.
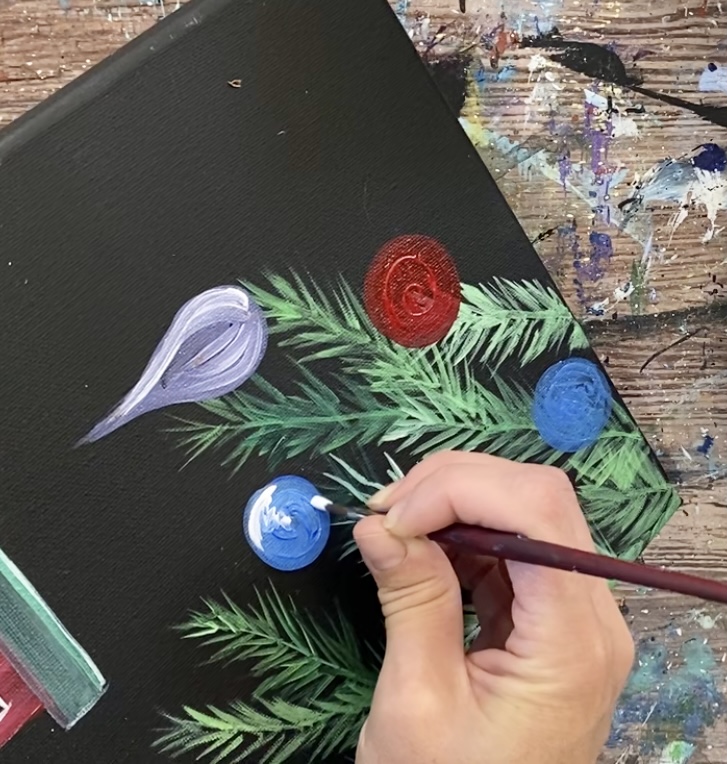
Then paint a curved stroke on the right part of the ornament.
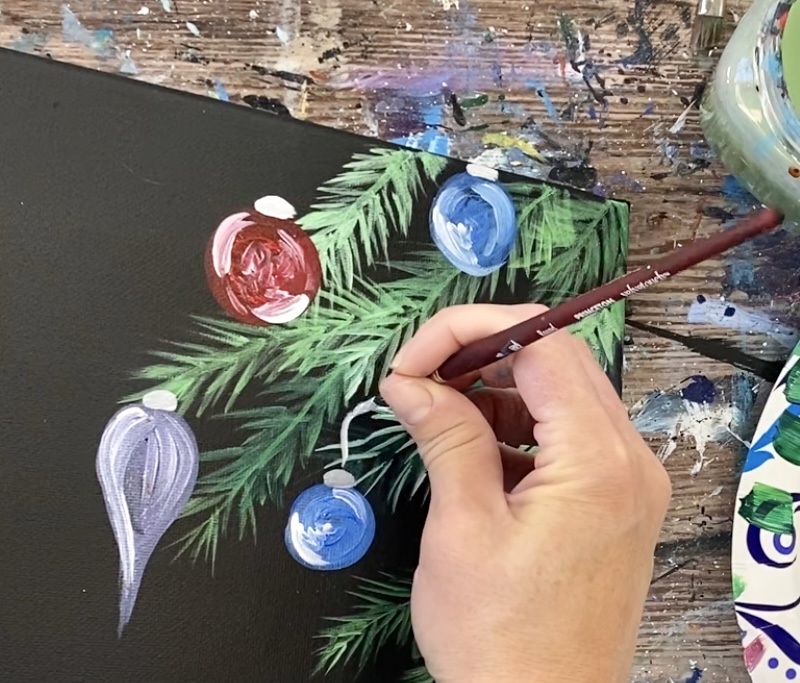
Repeat this for each of the ornaments.
Then paint the ornament hooks and top piece. Mix a small amount of black with white to make a light gray. Then paint a hook and attach the ornaments to the branches.
You can paint more branches if needed.
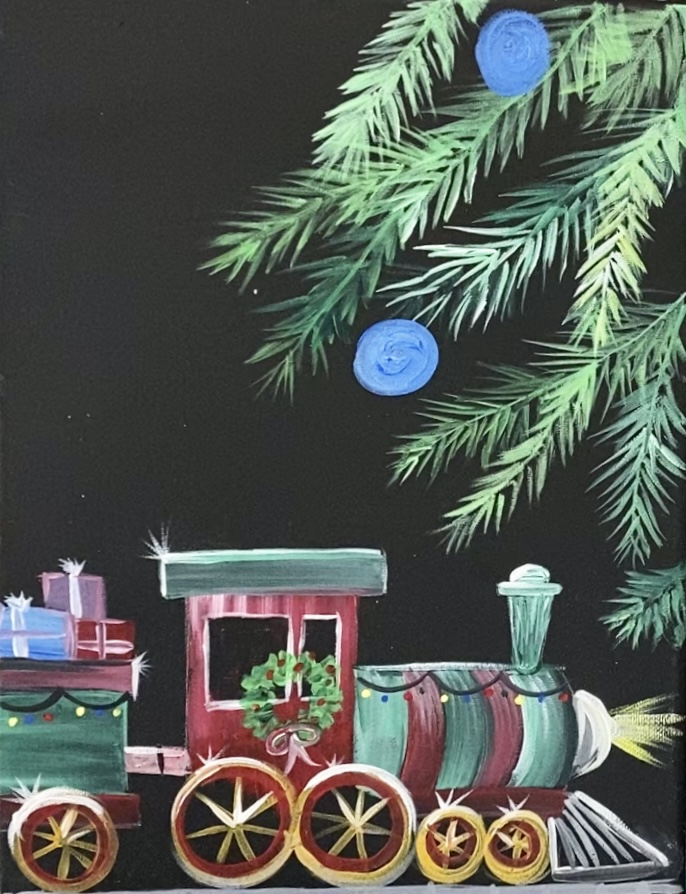
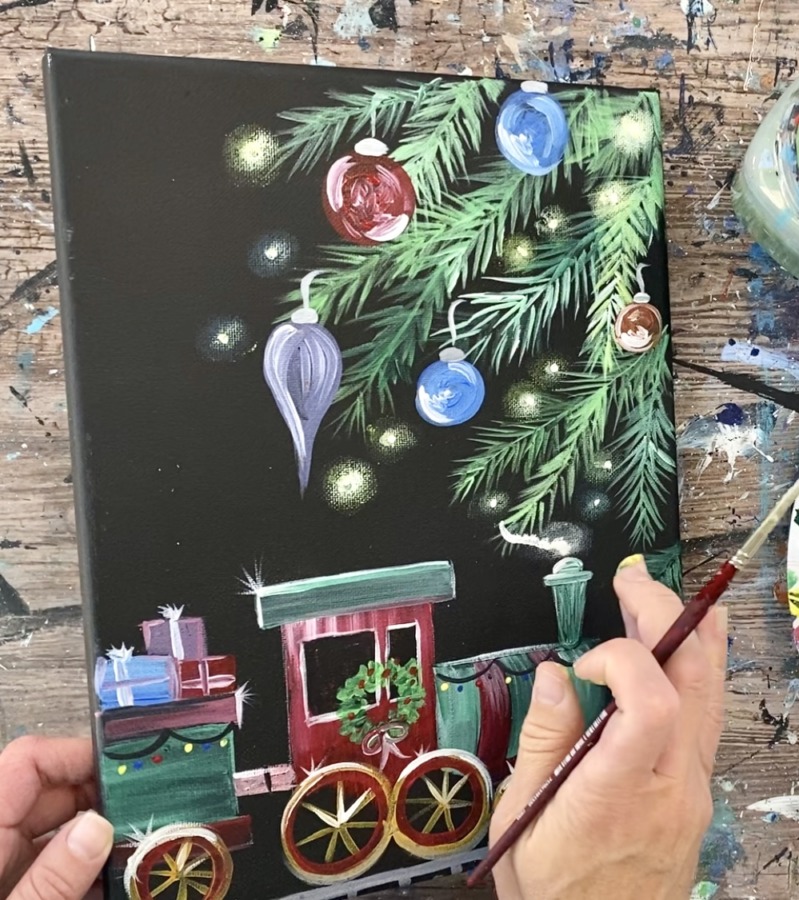
13. Paint Blurry Lights
To do the blurry lights, I used my index finger. Load only a small amount of paint on your finger tip and wipe some of the paint off. Then press and form a circle with your finger. This will make a blurry/ glowing light. Do this several times around the tree branch area.
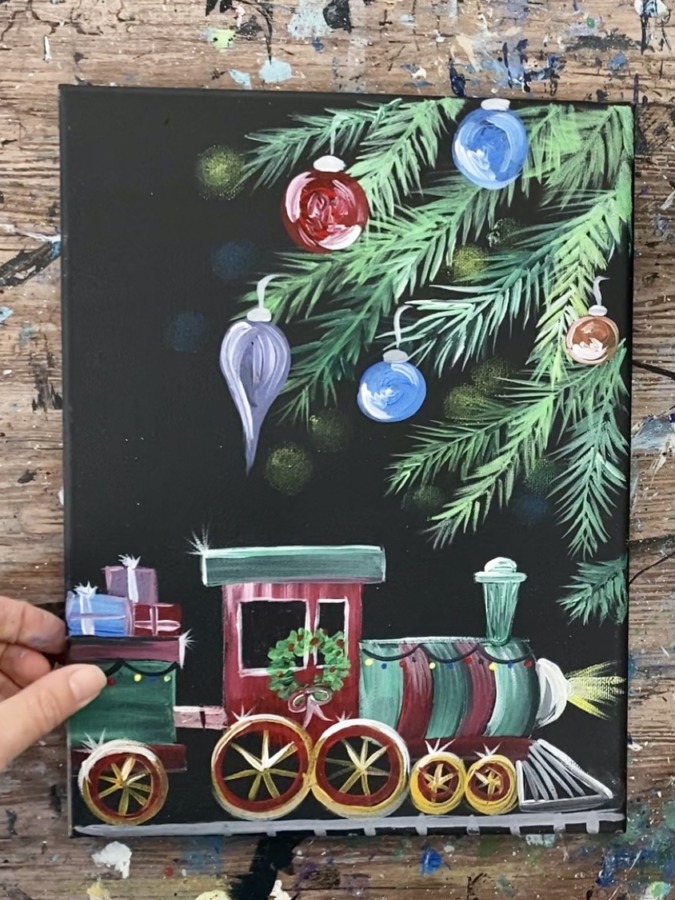
Then use your #4 round brush to paint a small dot inside the blurry light.
Use your finger to make the dot blurry. Then add another small white/yellow dot in the middle This will make your light really bright.
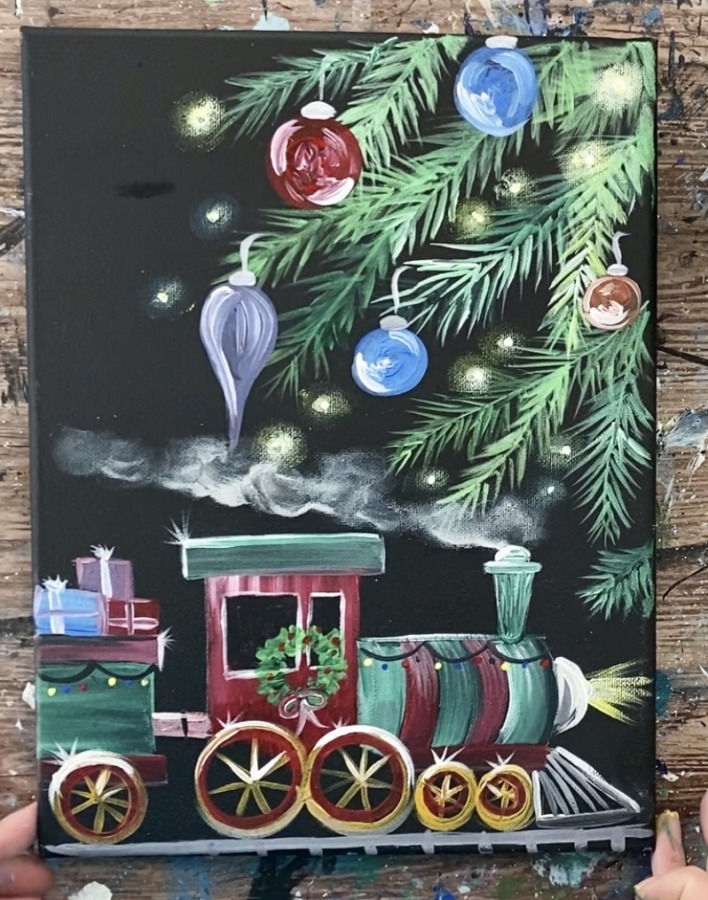
14. Paint Smoke
The smoke for this train was done using very watered down titanium white paint. Water it down to a water color consistency. This will allow the white to show up shear and sea through on the canvas. Use your brush to apply the watered down white. Paint in small circular strokes. Then quickly take your finger and smear the paint and form it in a circular direction with your finger.
The smoke is “see through” because the white is very watered down and you use your finger to smear it. This also creates some different variations of brightness in the smoke.
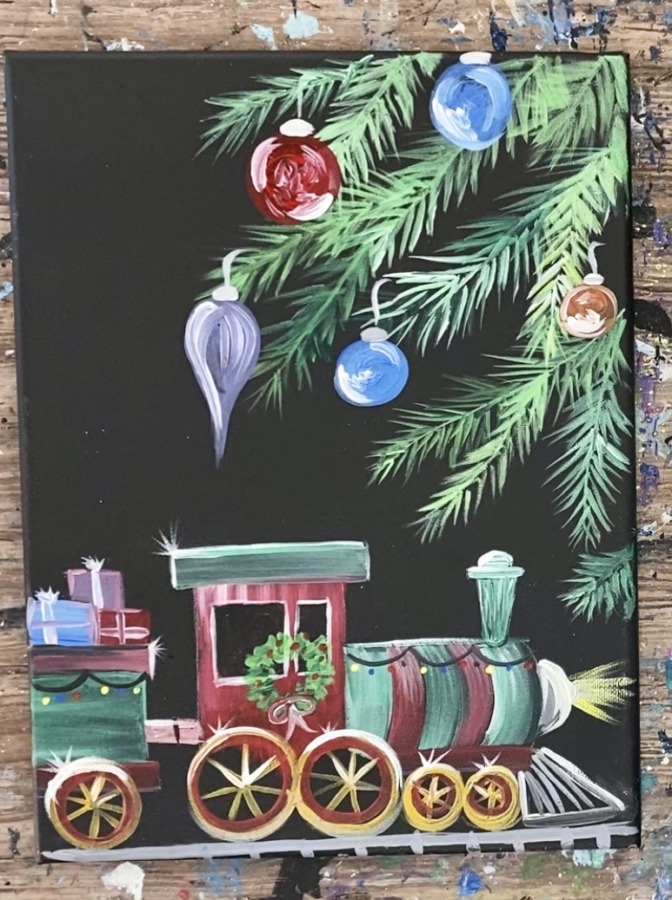
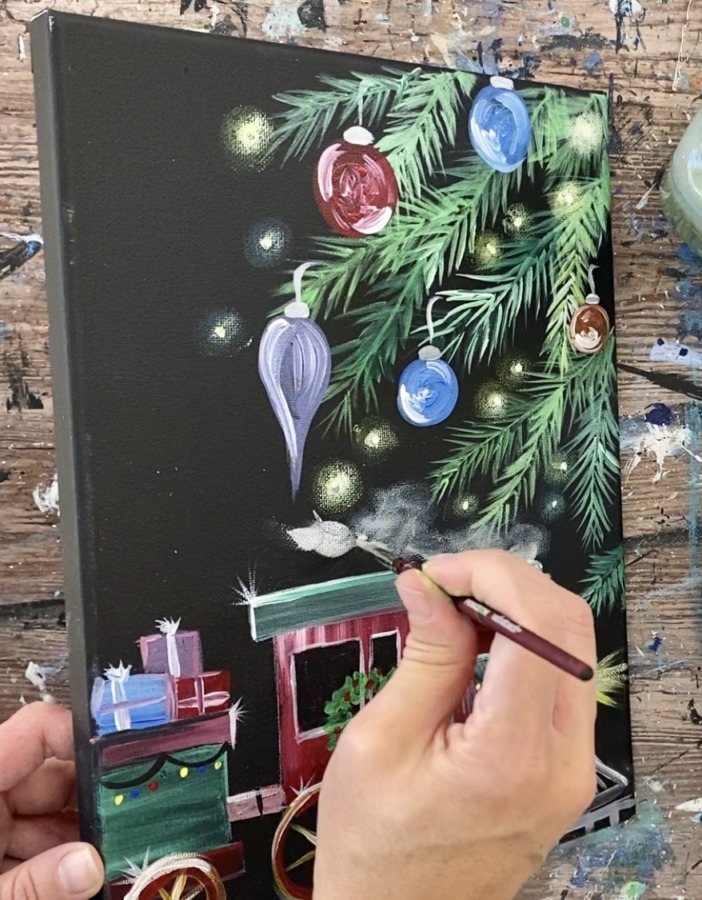
15. Paint Candy Cane & Other Touch ups as Needed
Some other touch ups I did included painting a candy can on top of the locomotive! I did this by painting the base “J” shape with white. Then when the white dried, I painted red stripes. I also added more smoke from the train and had the smoke go up in some of the blank area in the upper left of the canvas.
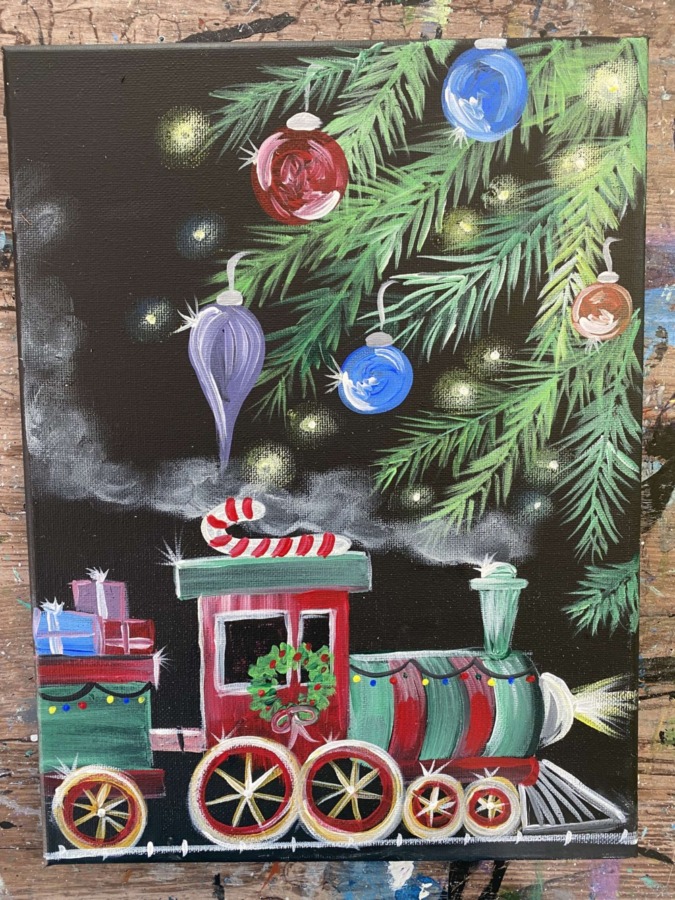
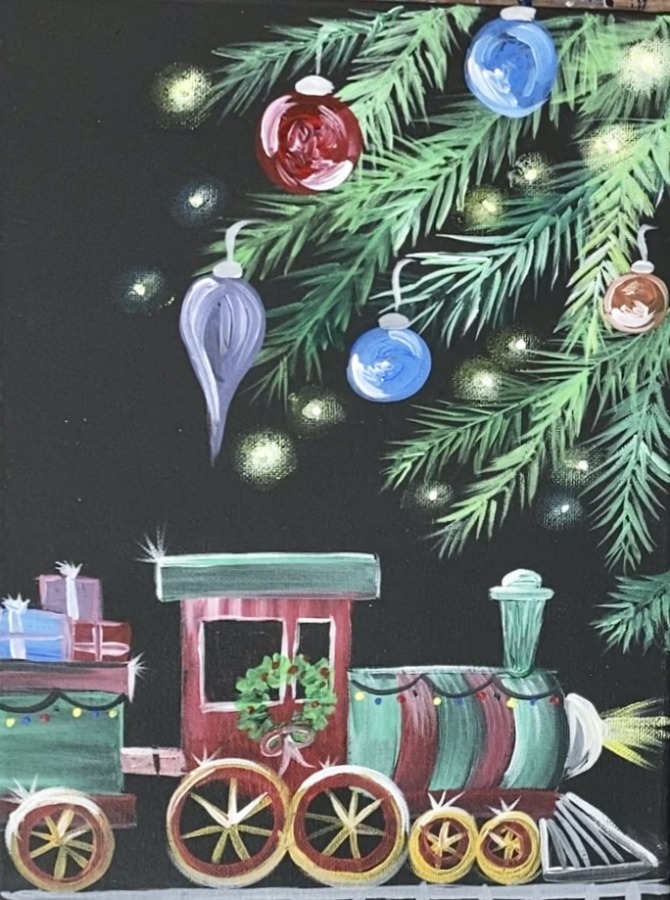
Finished
Sign your name and show it off!!

Share Your Art Here


I’m not sure why the traceable came out small when I print it out. Can you please fix this.
Thanks for letting me know! I’ll look into what’s causing that to happen.
The traceable is intended for a 9 x 12 canvas and, after testing it, this PDF printable does fit that size: https://stepbysteppainting.net/wp-content/uploads/2021/12/9-x-12-Christmas-Train-Printable.pdf
Love this train, and had so much fun painting this!