
Would you like to save this?
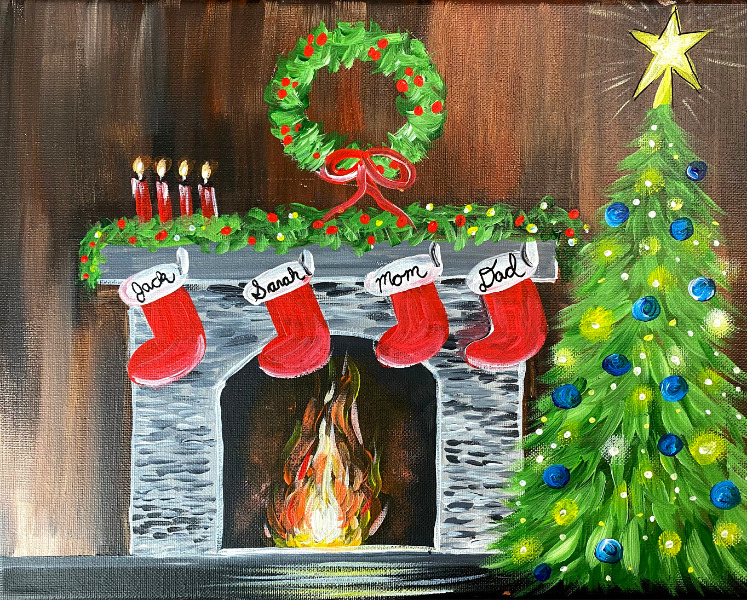
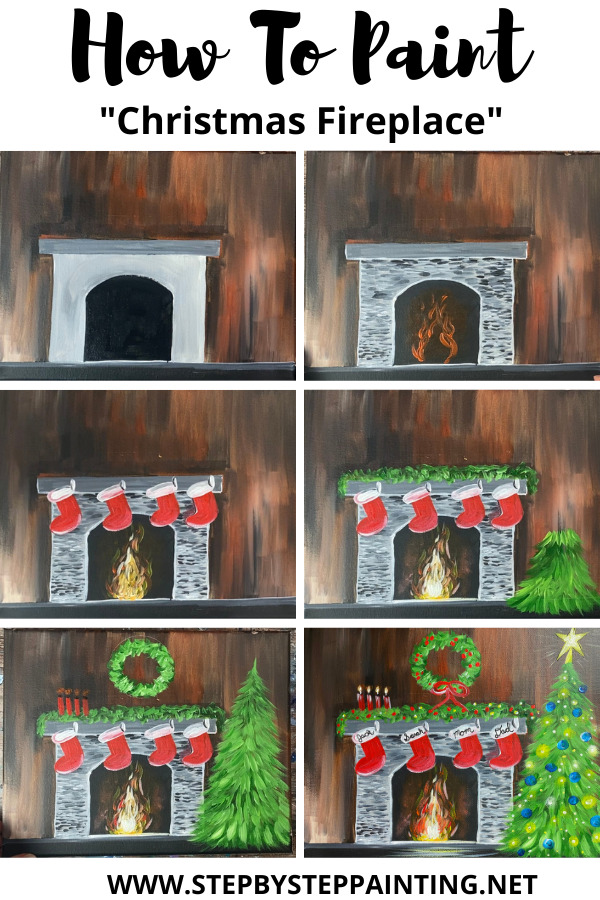
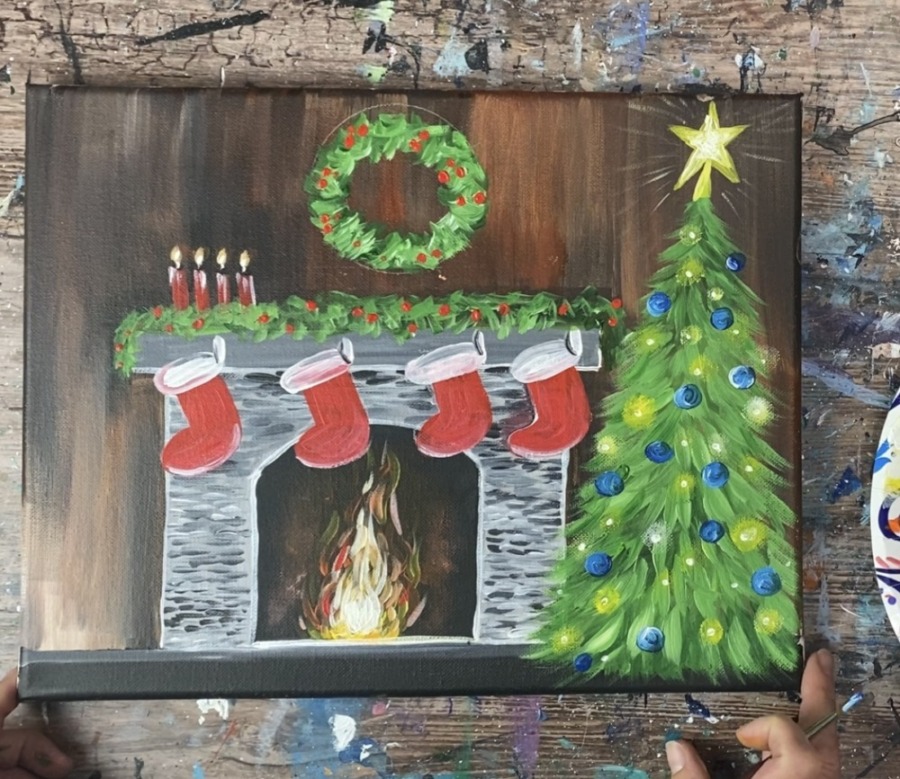
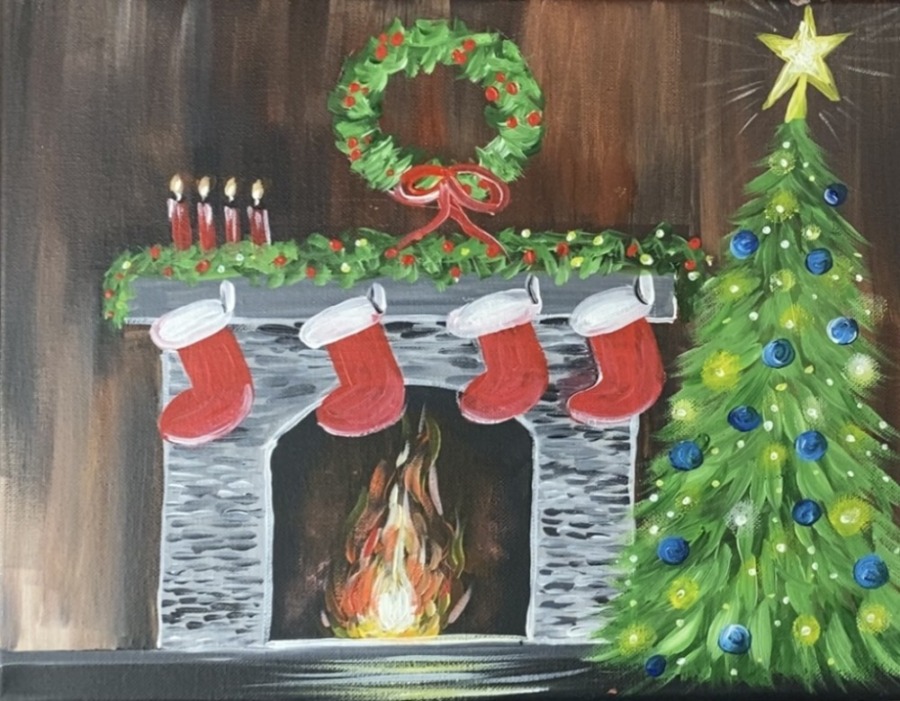
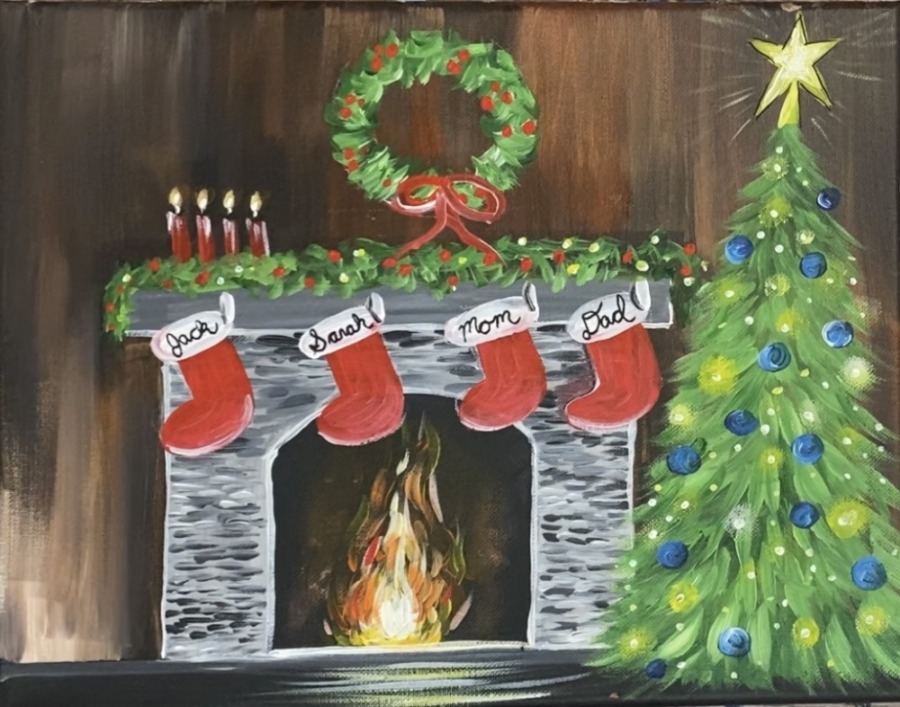
Learn how to paint a beautiful lit fireplace at night with a Christmas tree, stockings and wreath. This beginner painting tutorial can be customized with different names on the stockings and different colors.
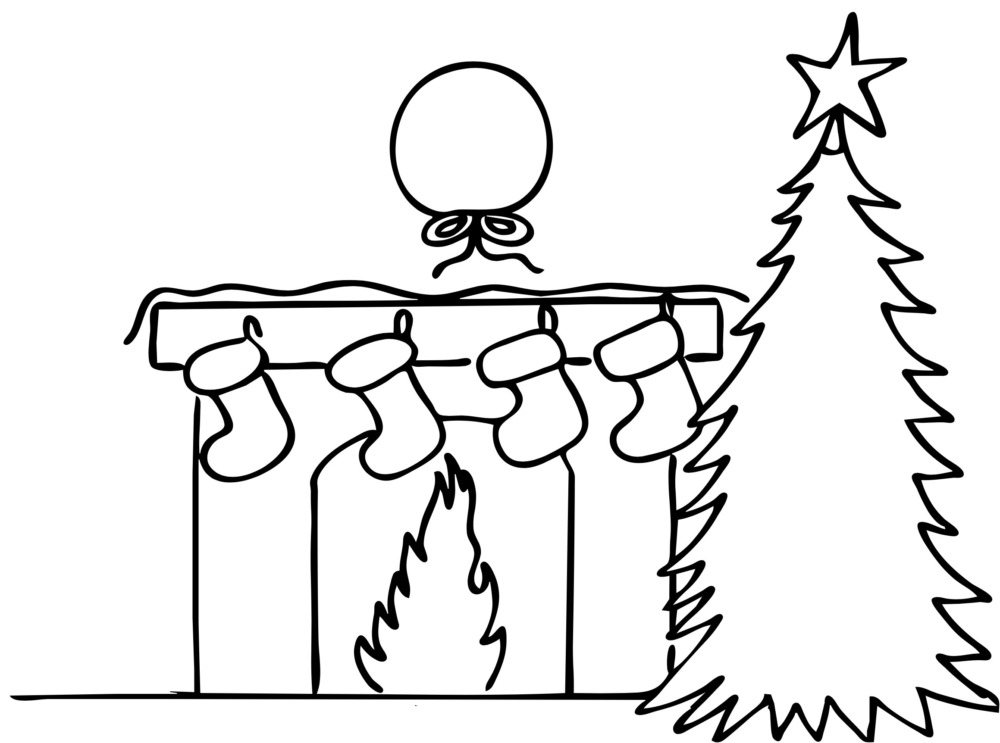
The tutorial comes with a traceable, however, I will show you how to draw the fireplace design.
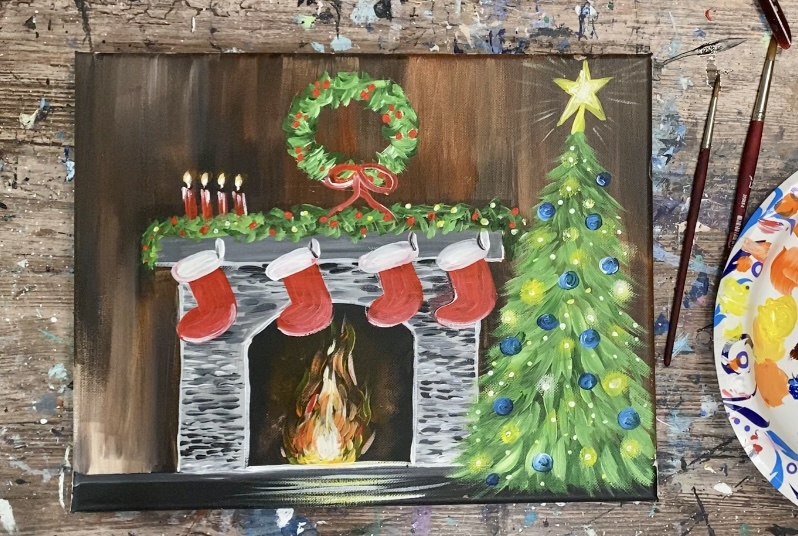
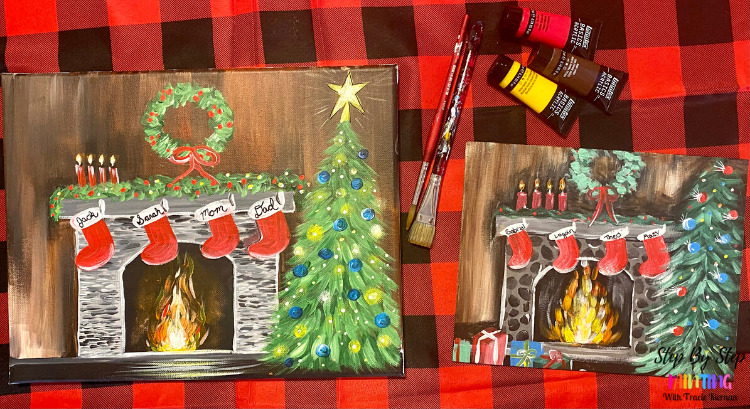
You can also do this on another canvas size such as an 8 x 10.
Enjoy and happy painting!
Materials Needed
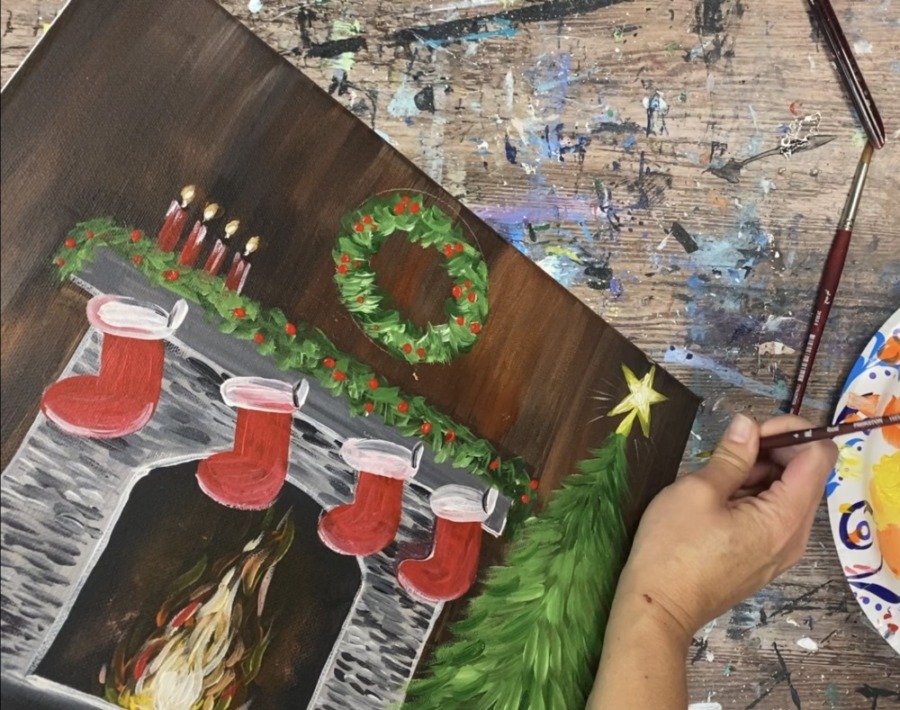
Christmas Fireplace Painting Tutorial
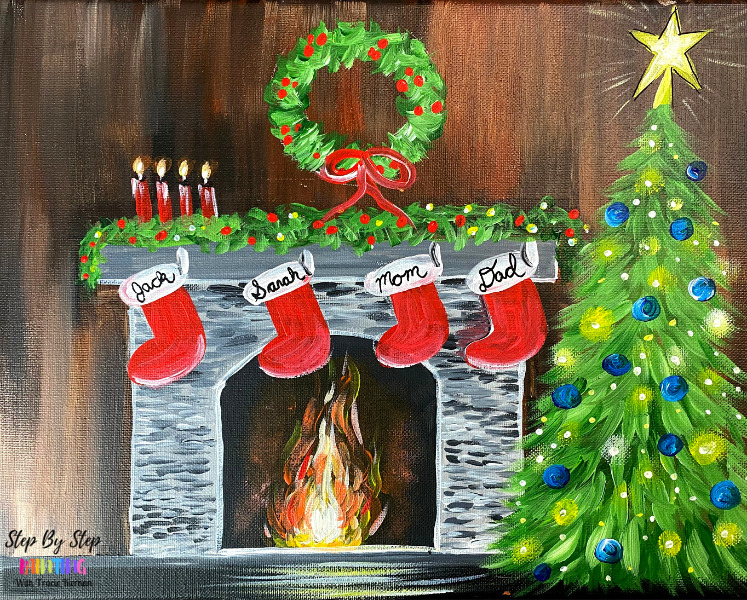
This tutorial demonstrates how to paint a fireplace, christmas tree and stockings on canvas.
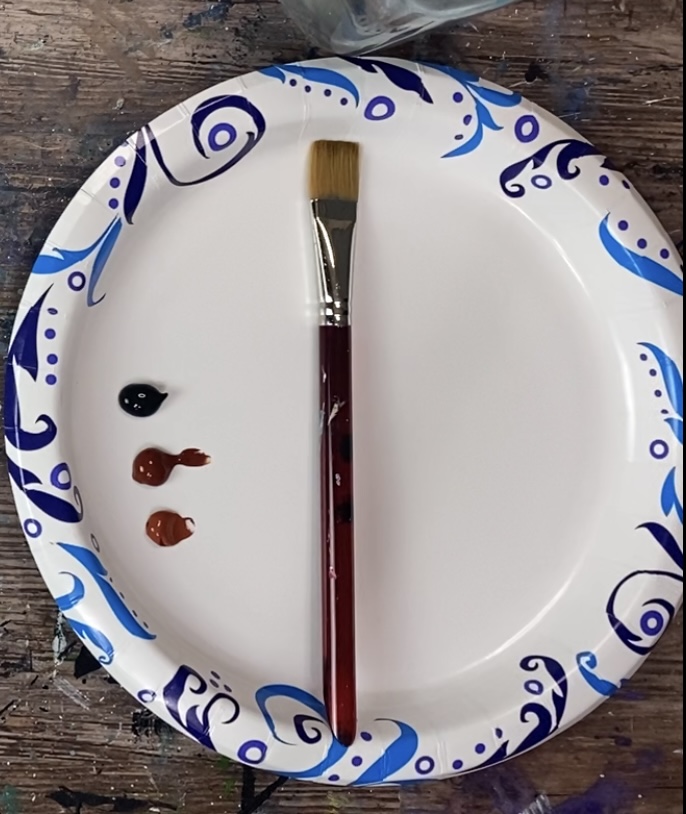
Materials
- 11 x 14 Canvas
- Brushes
- Acrylic Paint
- Paint Palette
- Water Cup
- Soft Rag or Paper Towel
- Pencil
- Ruler
- Optional Traceable
- Optional Traceable Graphite Paper
- White Chalk Pencil or Chalk (optional)
- Paint Pen or Sharpie (optional)
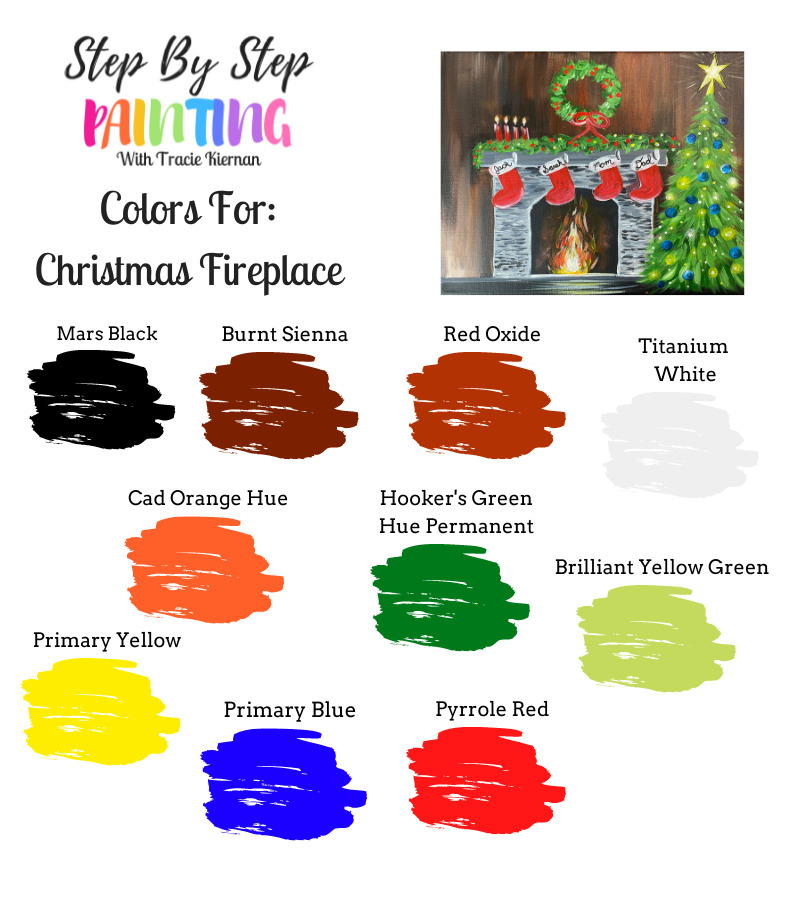
Colors
- Titanium White
- Mars Black
- Red Oxide (optional)
- Burnt Sienna
- Cadmium Orange Hue
- Primary Yellow
- Hooker's Green Hue Permanent
- Brilliant Yellow Green
- Primary Blue
- Pyrrole Red
Paint Brushes
Color Palette
This painting was done with Liquitex BASICS acrylic paint. I recommend the 48 piece set that includes a wide variety of colors including the colors in this tutorial! I also recommend purchasing titanium white and mars black separate since those colors get used up fast.
Using Craft Paints?
If you are using craft paints such as the Apple Barrel Craft Paints, try substituting with these colors:
- White
- Black
- Yellow Flame
- Nutmeg Brown
- Jack-O-Lantern
- Bright Blue
- Flag Red
- New Shamrock
- Holly Branch
Brushes
I used Velvetouch Brushes by Princeton! Each of the brushes used in this tutorial can be found in this set!
Traceable
Directions At A Glance
Video
Step By Step Directions
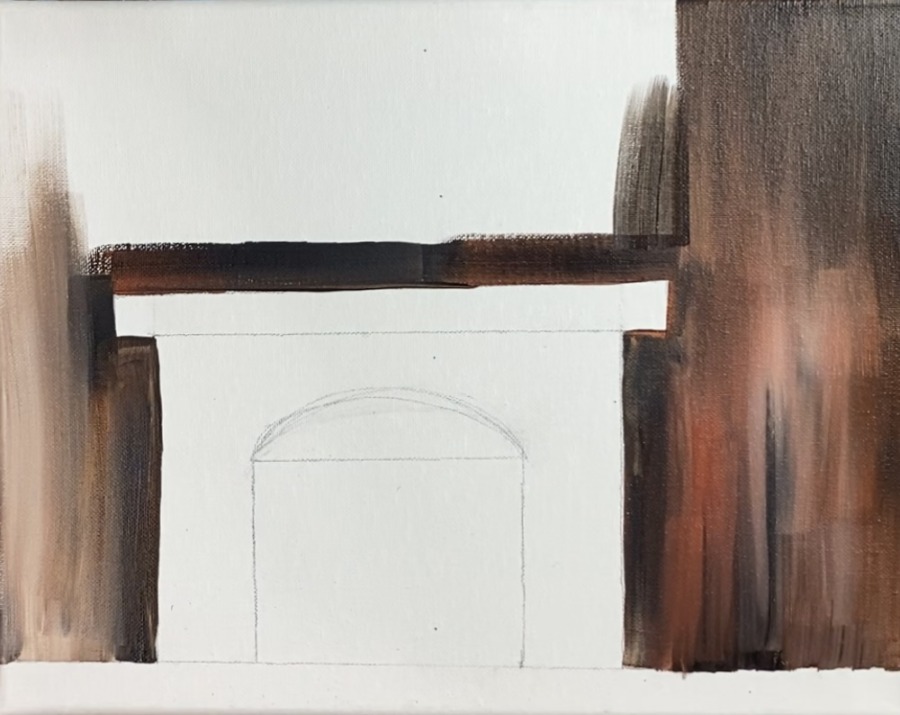
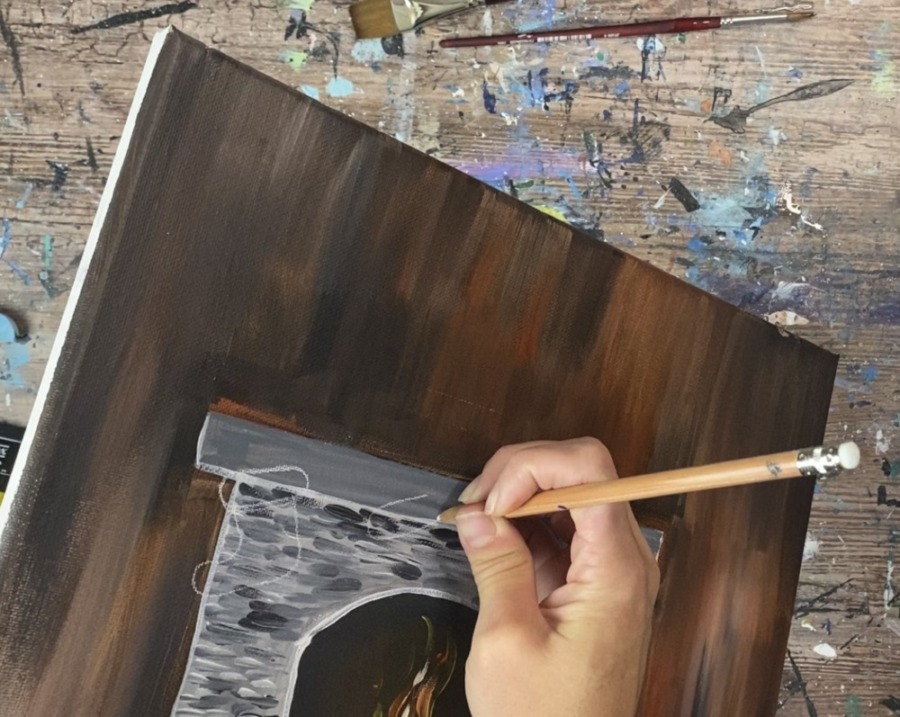
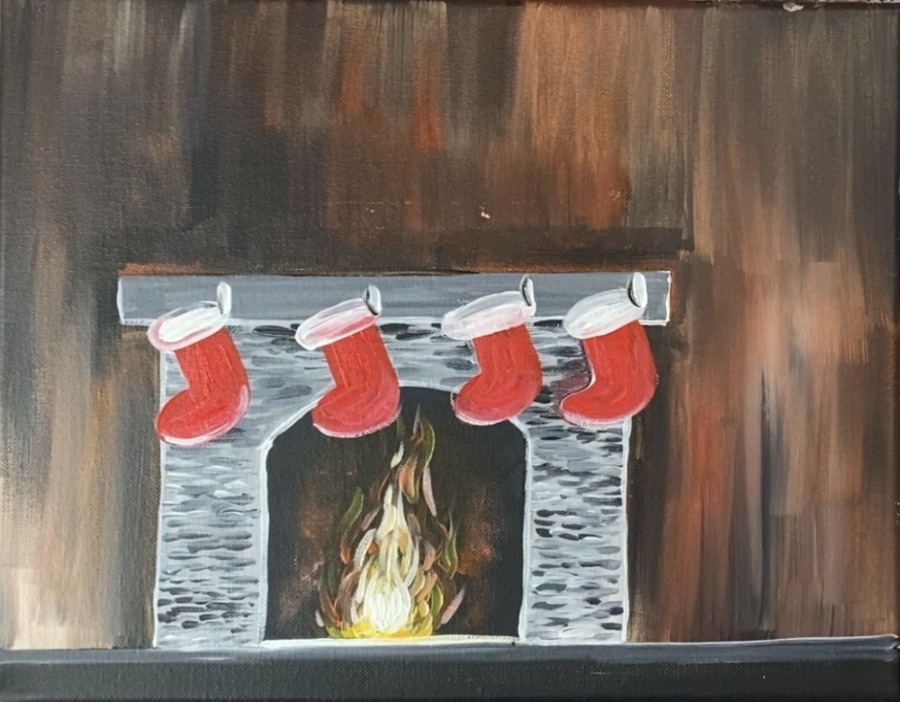
1. Draw the Fireplace
I recommend using a T-Square ruler for this step so you can make sure your lines are parallel and perpendicular with the sides of the canvas.
The dimensions below are provided to give you measurements of how I drew my fireplace. They do not have to be exact! In fact, you are welcome to draw this without measurements.
You are also welcome to use the traceable for this tutorial! Simply print and transfer using a sheet of graphite paper.

First draw a horizontal line on the bottom of the canvas. This line is about a half inch to three-quarters inch from the bottom of the canvas (you can estimate it). This will be the floor in the painting.
The fireplace is offset to the left in this painting because the Christmas tree will be on the right.
Then draw two vertical lines for the fireplace. Use your T-Square to make both of the vertical lines and go up as far as you want. The width of this fireplace is 7″ wide so make sure to make little marks on the floor line to get the accurate width of the two vertical lines.
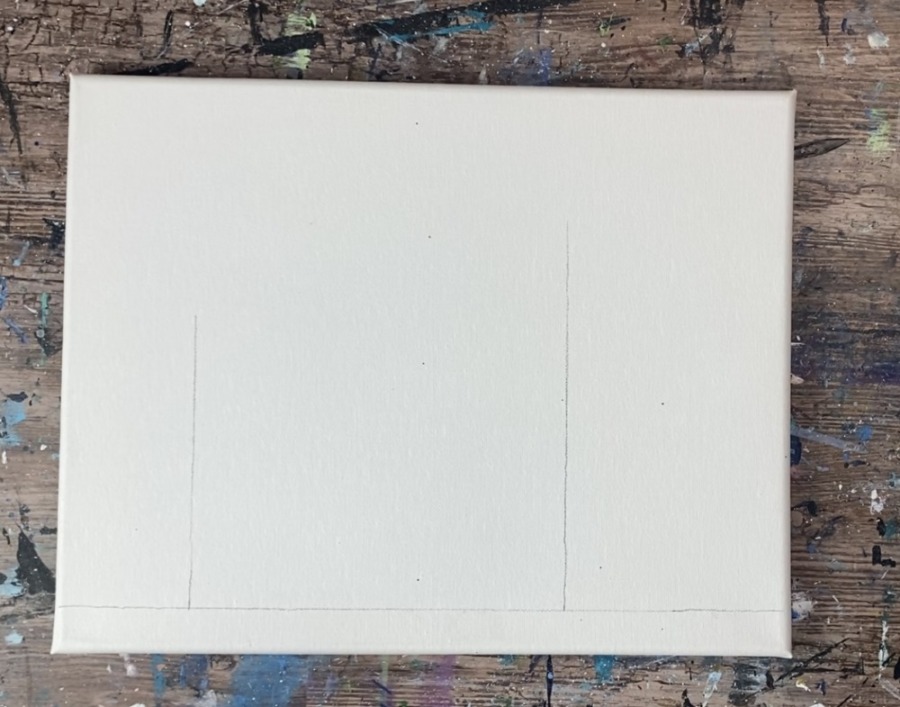
Then measure 5″ from the floor line. Draw a horizontal line across. The fireplace is 7″ wide and 5″ high.
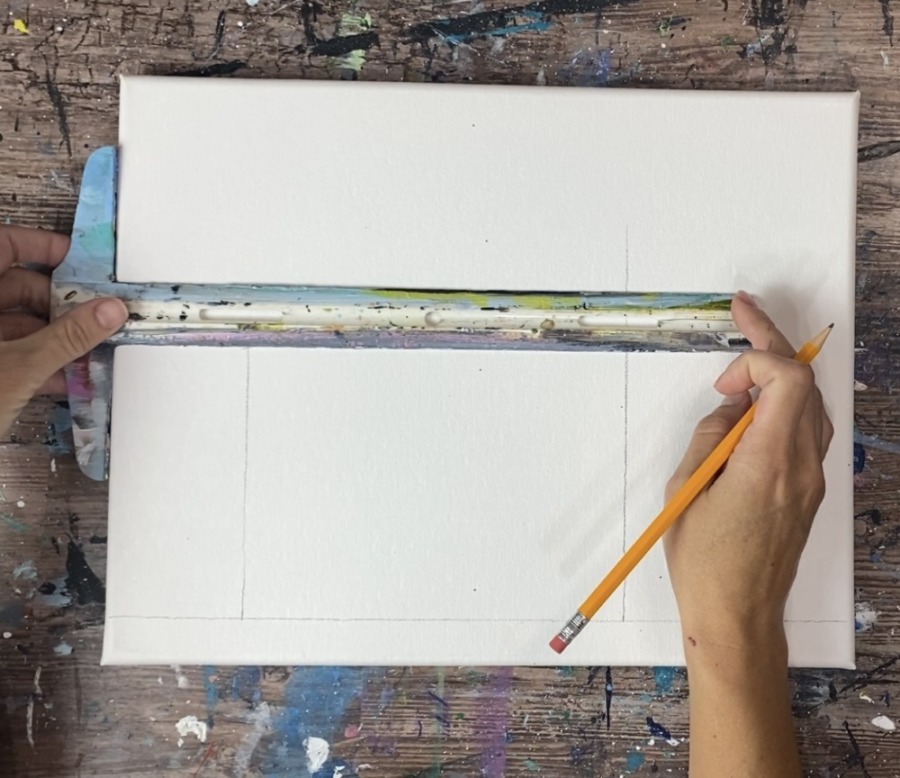
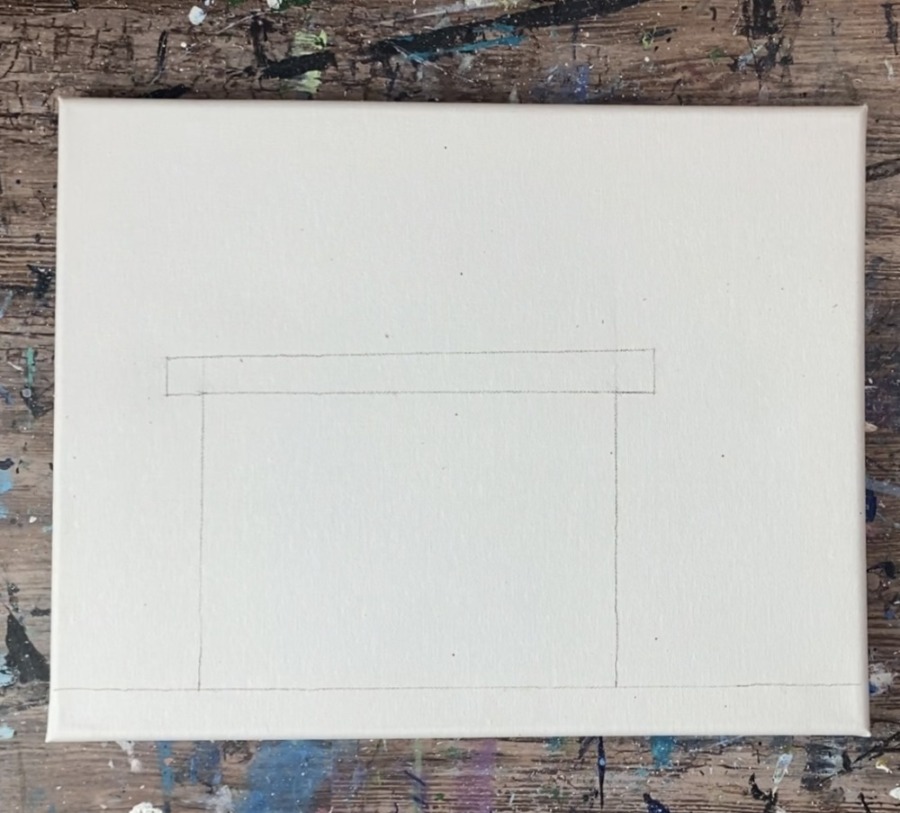
Then draw the mantle on top of the fireplace. This is a rectangle that is hanging out about 3/4″ on both sides of the vertical lines. The height of this mantle is about 1/2″.
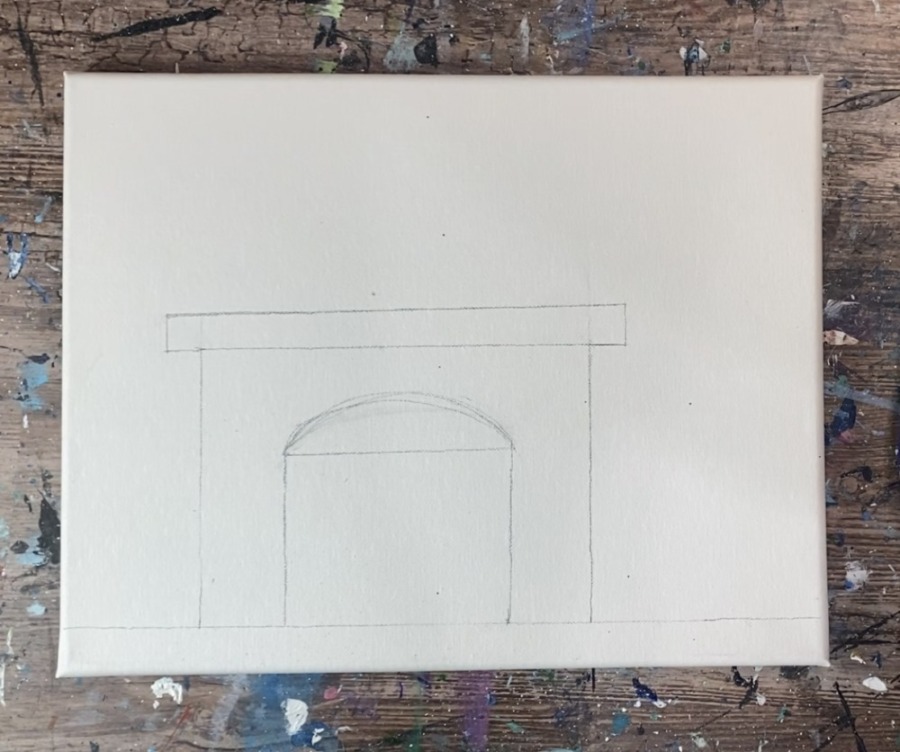
To do the center opening of the fireplace, draw two vertical lines that are centered. The height of these lines are about 3″.
The distance from each side of the center is about 1.5″ and the opening is about 4″ wide. Then draw a horizontal line on the top. Draw the arc above the two vertical lines.
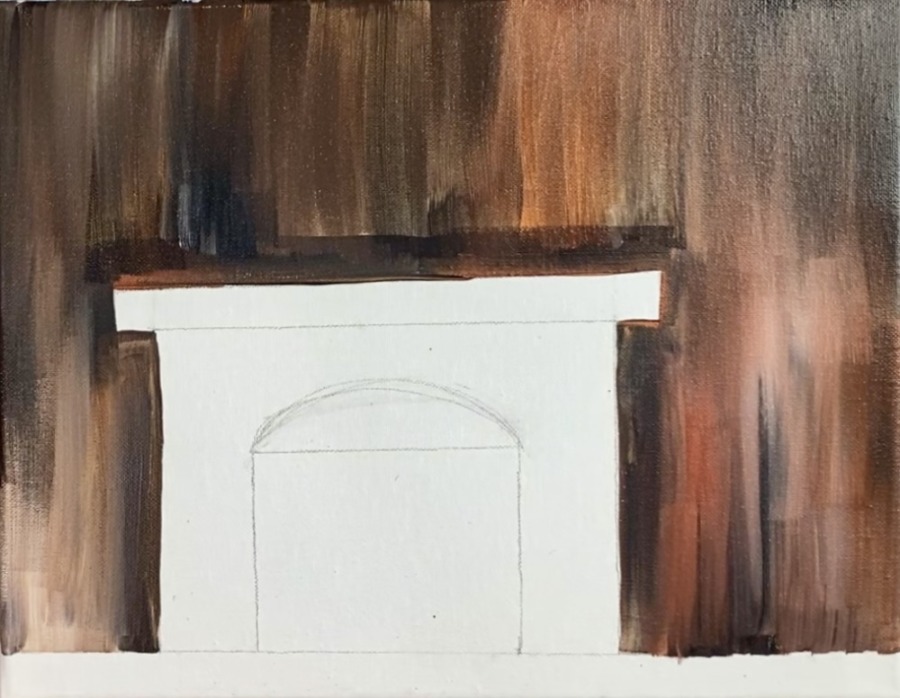
2. Paint the wall (background)
Load your palette with the following colors: mars black, titanium white, burnt Sienna and *red oxide. *Red oxide is optional because it is a very similar color to burnt Sienna, you can do the same results without it. I chose red oxide to give the walls more of a reddish hue.
Load your 3/4″ flat wash brush in water and tap dry.
Triple load your 3/4″ flat wash brush in black with burnt Sienna and red oxide on the corners.
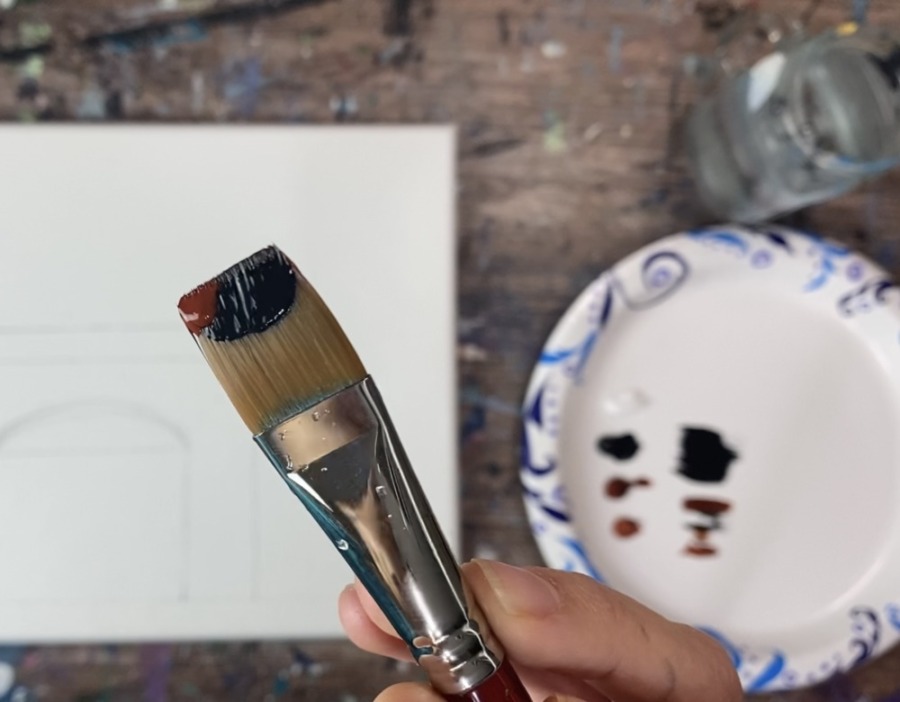
You will be painting the entire background this color combination. Start by “cutting in” around the fireplace very carefully.
Use the tip of your brush to paint the negative space around the fireplace going in a vertical direction and a horizontal direction above the mantle.
The three colors on your brush will gently blend to make a very dark reddish brown color.
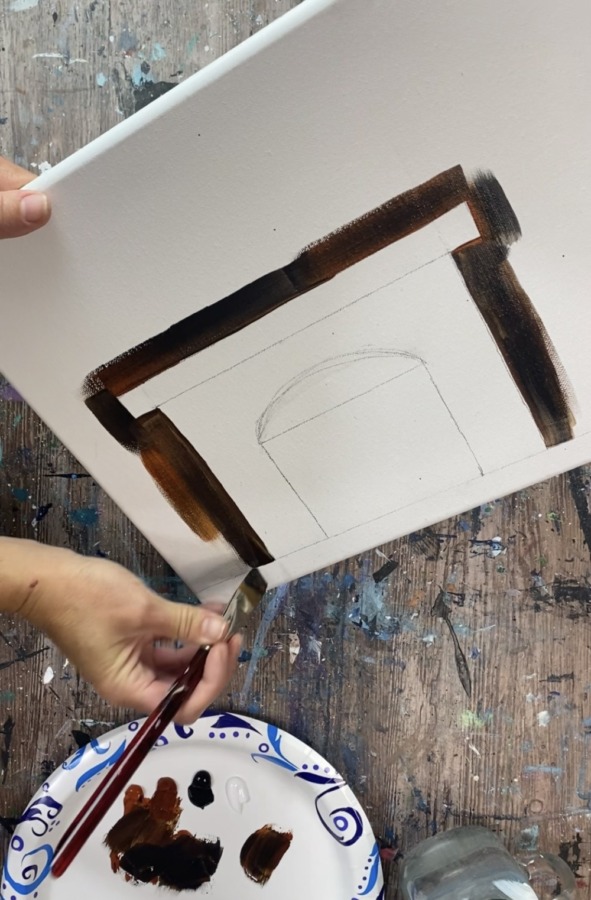
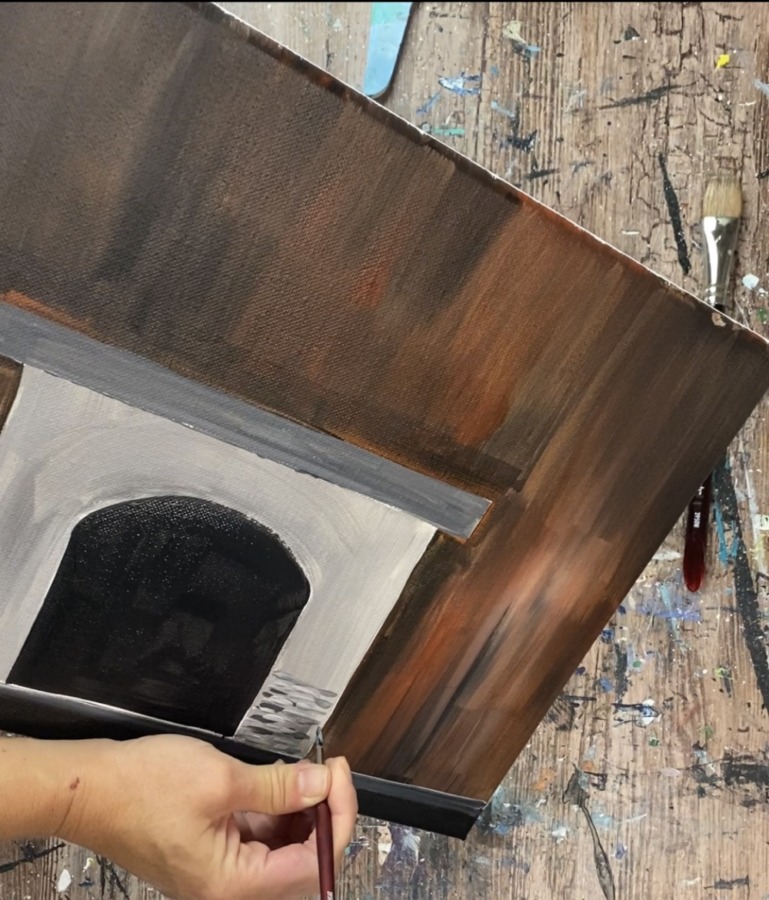
After cutting in around the fireplace, continue to paint the background. Use all up and down strokes in the entire background. Introduce titanium white into the colors to make some parts of the wall lighter.
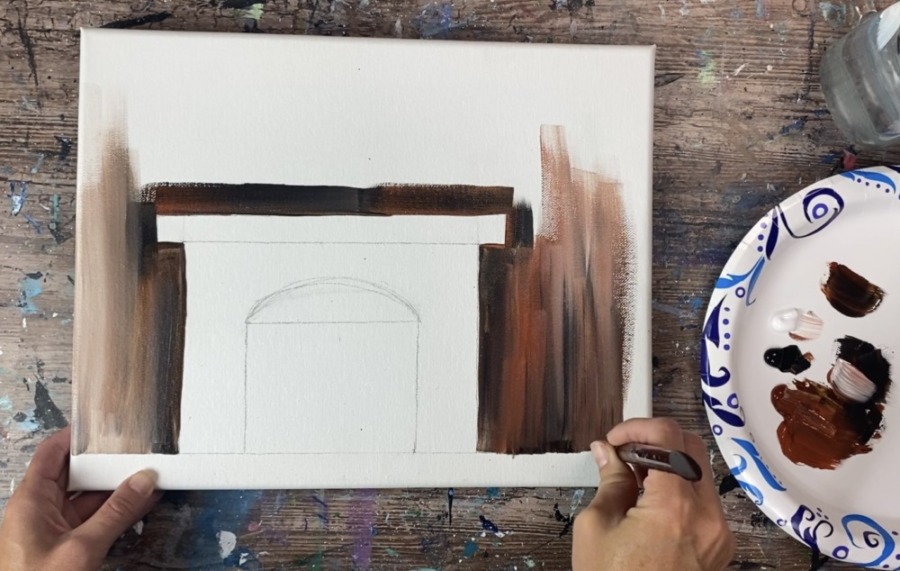
Continue to gently blend the colors but do not over blend them. You will have a mixture of different brown tones all over the wall.
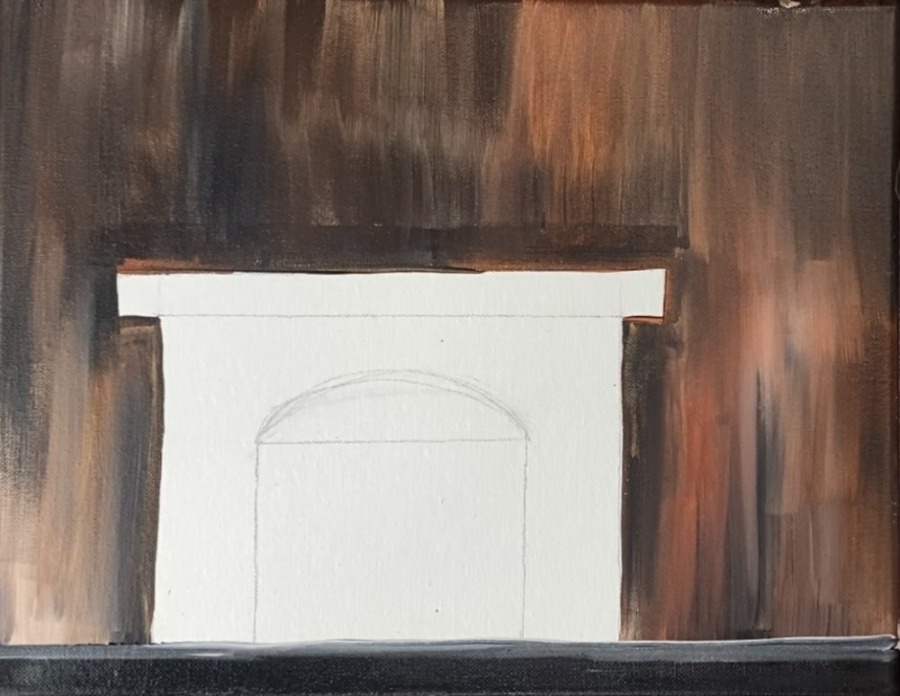
2. Paint the floor
Use your 3/4″ flat wash brush. Paint the bottom part under the wall and fireplace with mars black. Then, optional, paint a border above the black area with a gray. Mix white with black to make a medium gray.
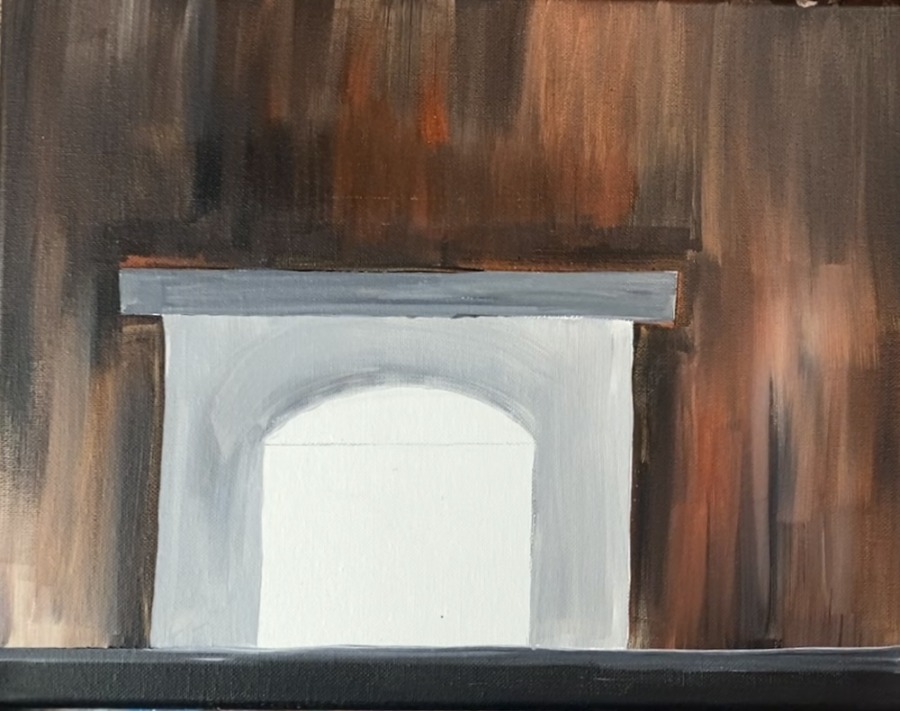
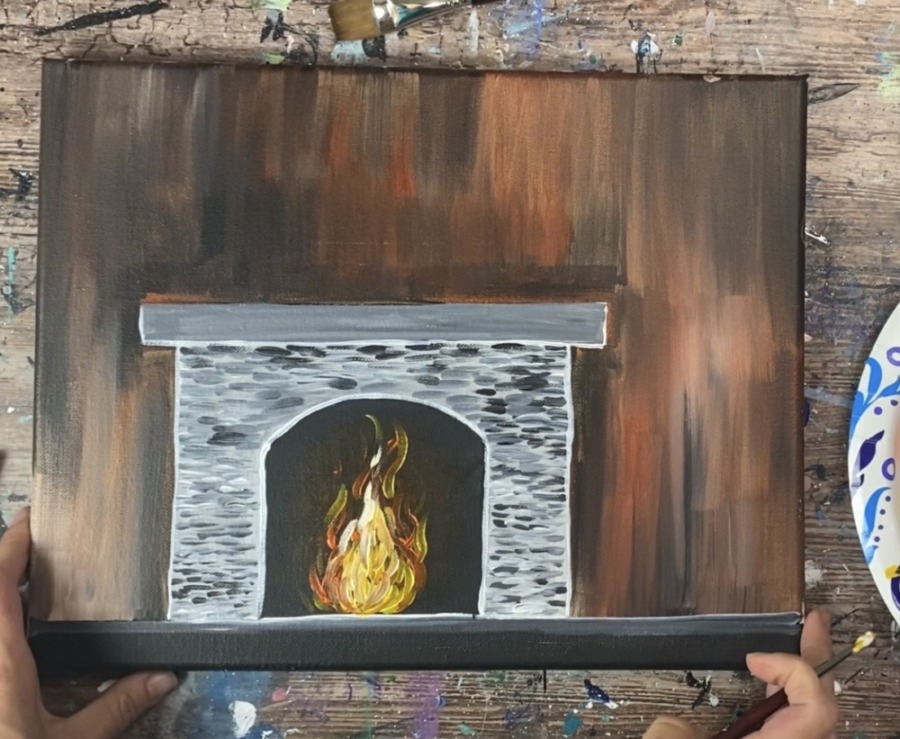
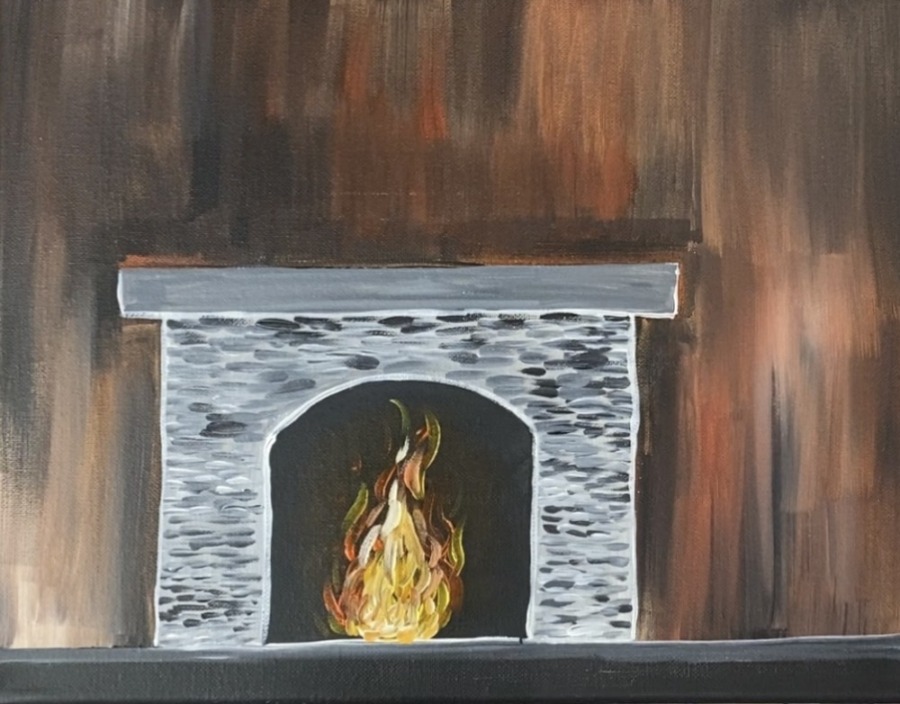
3. Paint The Fireplace
Mix about 3 parts titanium white with 1 part black to make a light to medium gray. Use your 3/4″ flat wash brush to paint the face of the fireplace.
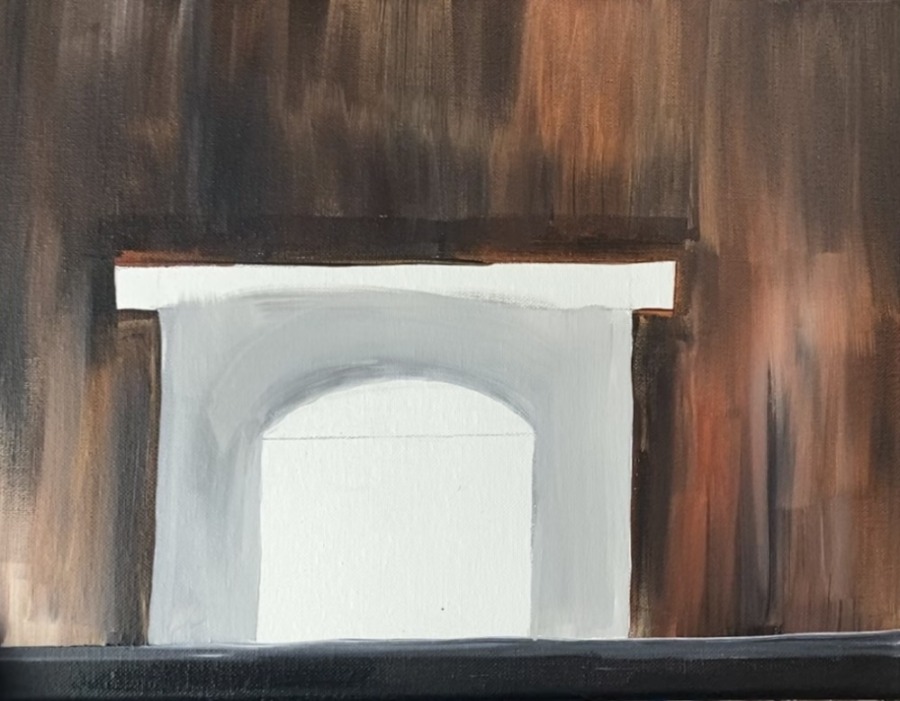
Then make a slightly darker gray on your palette. Paint the mantle of the fireplace.
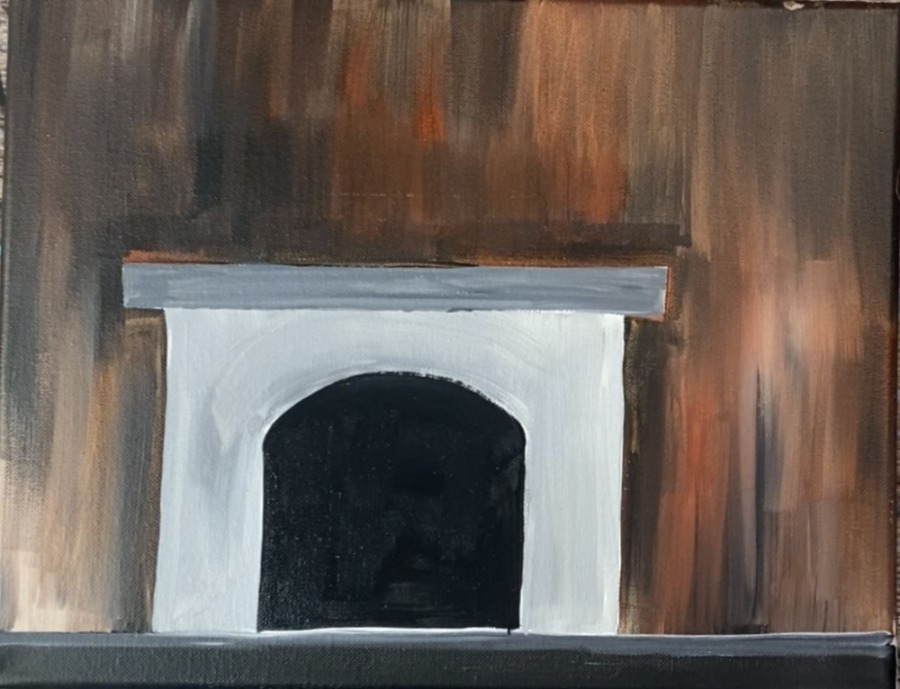
Next, paint the inside opening of the fireplace with mars black.
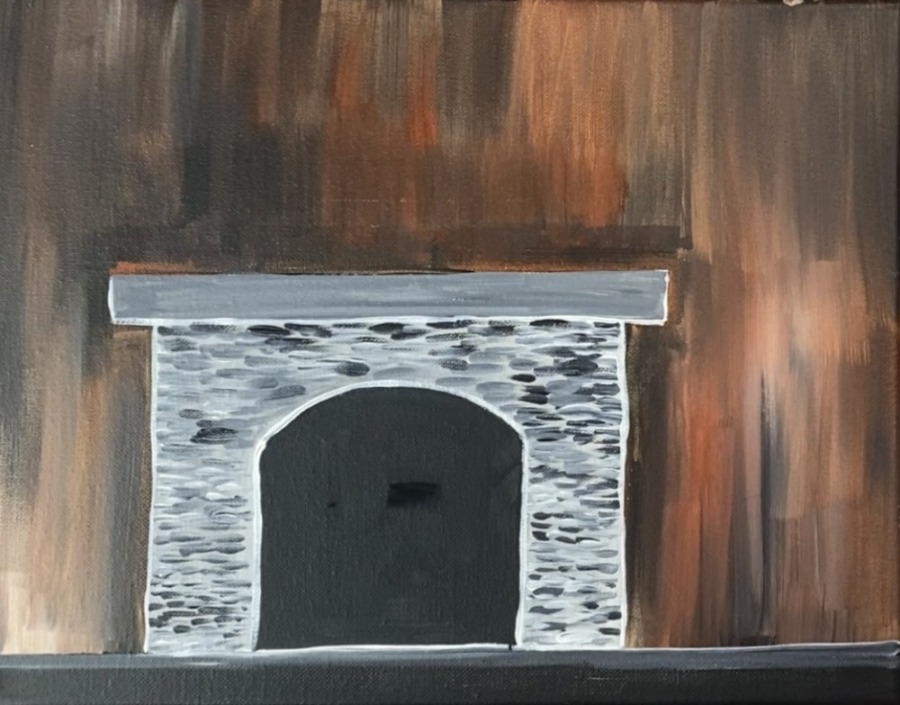
To paint the texture, use a #4 round brush. On your palette mix a darker gray (about the same gray as the mantle). Paint little horizontal tick marks over the face of the fireplace to start the texture.
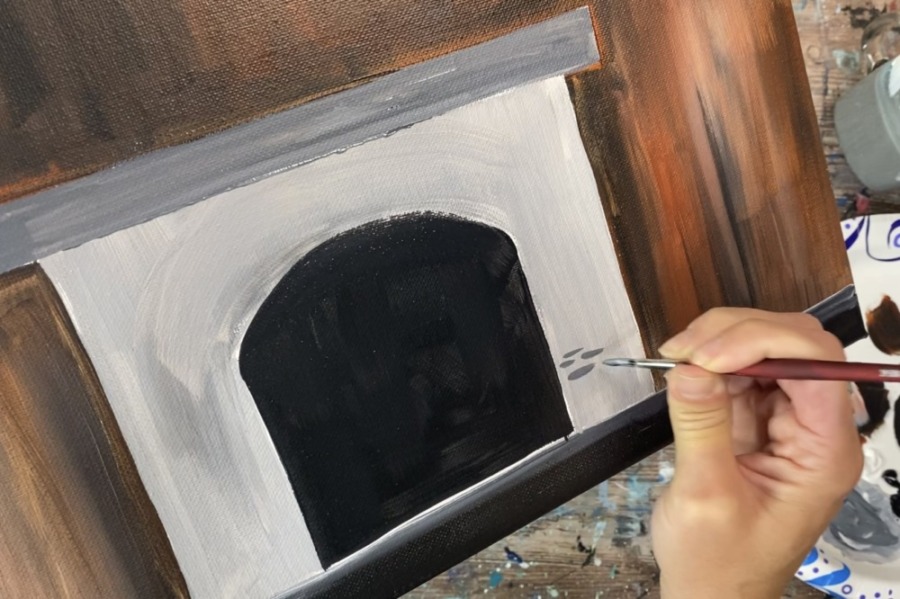
As you reload your round brush, load your brush in different amounts of black and white to create different shades of gray. Continue to paint little horizontal tick marks all over the face of the fireplace. These marks can slightly overlap each other.
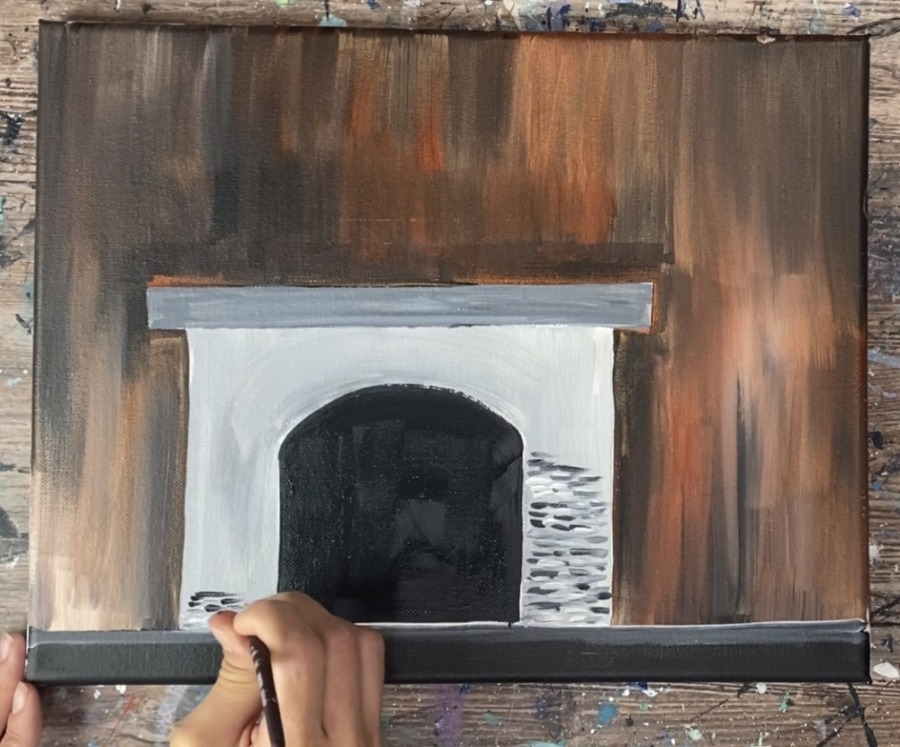

Then rinse your #4 round brush and load it in just titanium white. Outline the inner opening of the fireplace, under the mantle, the floor line under the fireplace and the left and right vertical lines. By outlining your fireplace in white, it helps to create more contrast and to define it.
4. Paint the Fire
Start by painting the glow of the fire inside the fireplace. To do this you will use your 3/4″ flat wash brush and cadmium orange hue. Note: this color orange is semi-transparent which means that when you paint it, a lot of the black needs to show through. If you are using an opaque orange (such as craft paint orange) I recommend watering it down to a water color consistency so that it will be semi-transparent.
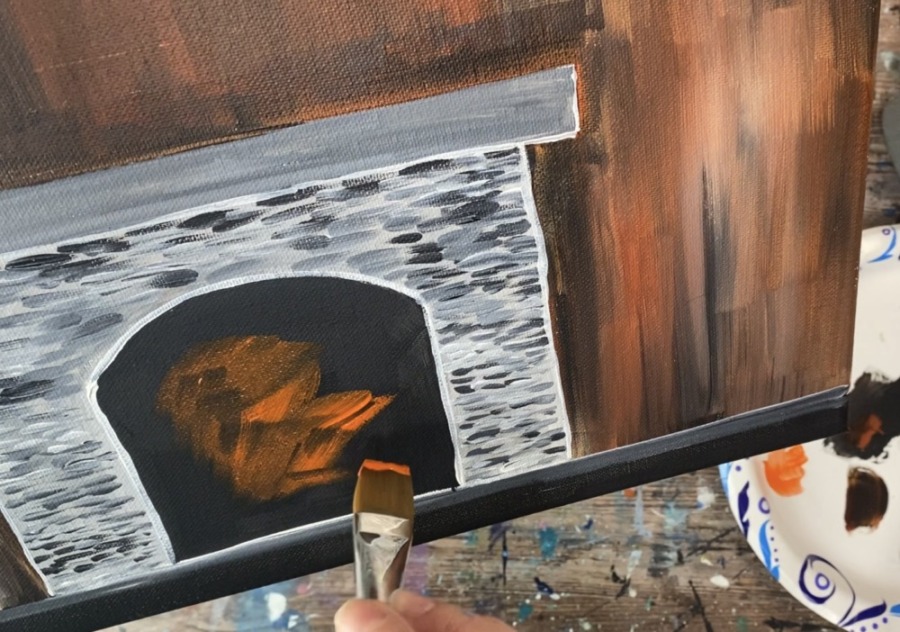
Paint textured strokes with your 3/4″ flat wash brush and the cad orange hue to create a “blob” area. This will be the fire glow in the background.

Then use your #4 round brush to paint the outer shape of the flame. Use the round brush to sketch out your flame using the orange paint. Do this in the center part of the “glow”.
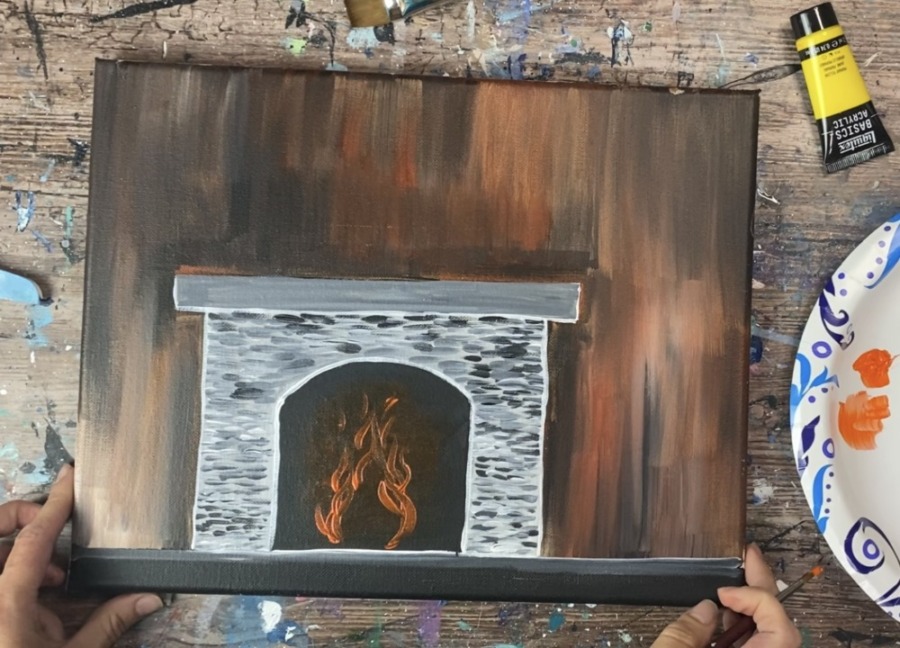
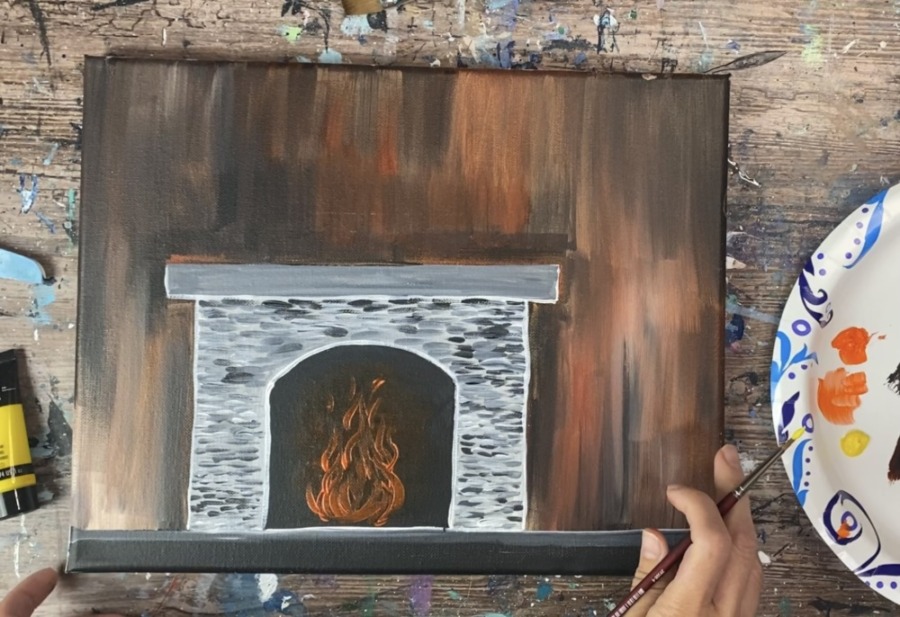
Then load primary yellow and titanium white on your palette. Mix the two colors together to make a bright yellow. Use your round brush to paint little curved strokes on the inside of the flame. This yellow will turn up bright.
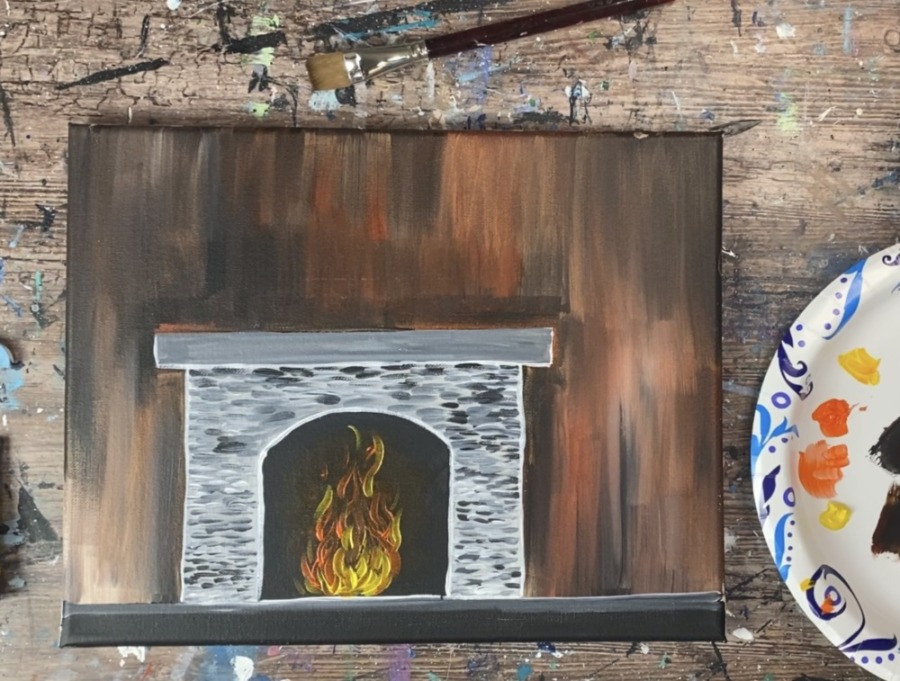
The flame should be brightest in the center and bottom area. Continue to add more layers of the bright yellow in the center. Do little curved strokes forming the shape of the flame. You can also add just white in the center to make it much brighter.
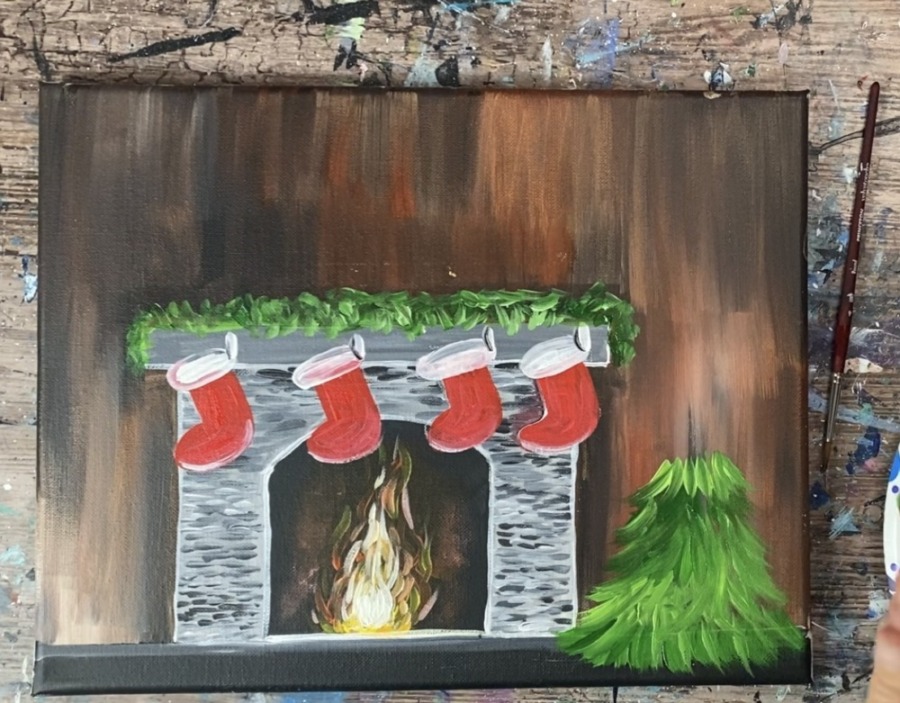
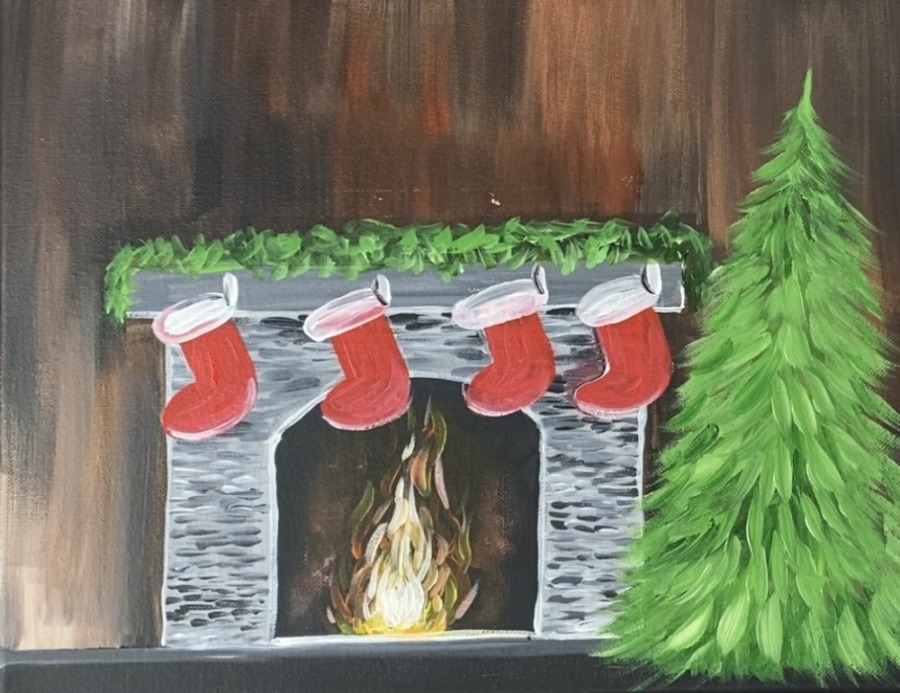
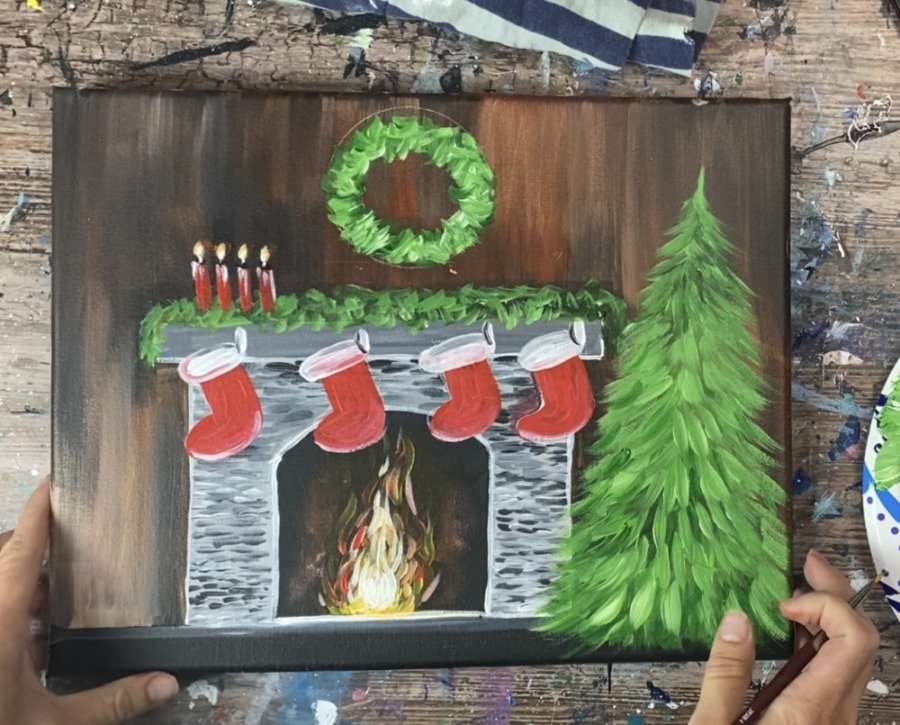
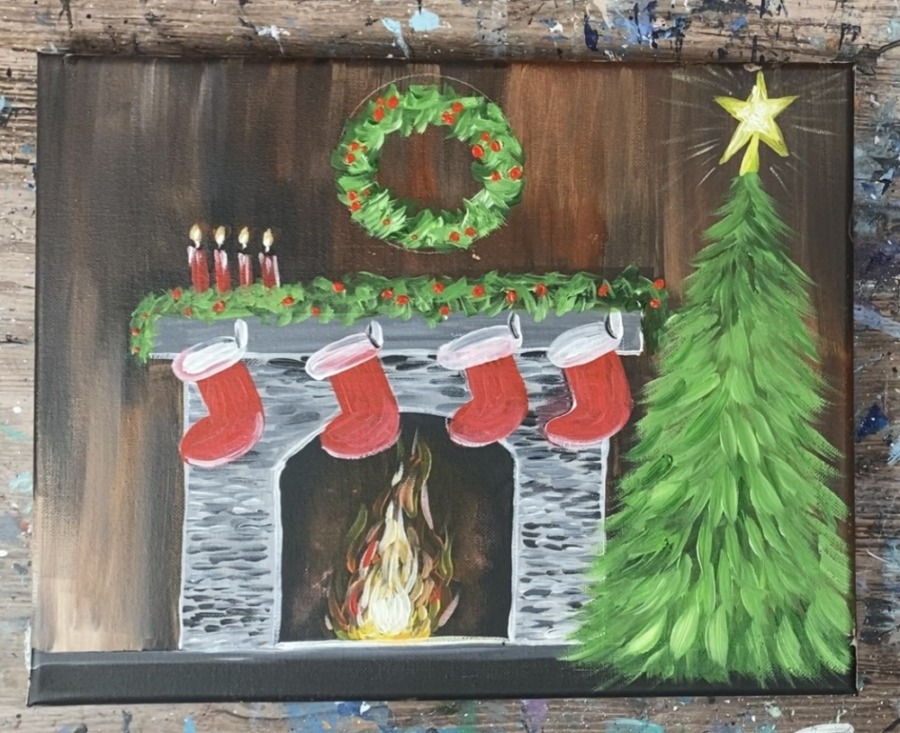
5. Paint The Stockings
Use a white chalk pencil, color pencil or regular pencil to draw the shape of the stockings.
You can choose how many stockings to add. The top of the stockings are a basic rectangular shape with curved corners going in a diagonal direction. The bottom shape is like a backwards “L”.

Then load your palette with pyrrole red and a round brush. Note: if you are not using pyrrole red, I recommend using a red that is opaque and has good coverage. Otherwise you may need to paint all the bottom parts of your stockings white first and then paint over it so that you will have good coverage. Most reds are semi-translucent so they will not have the greatest coverage.
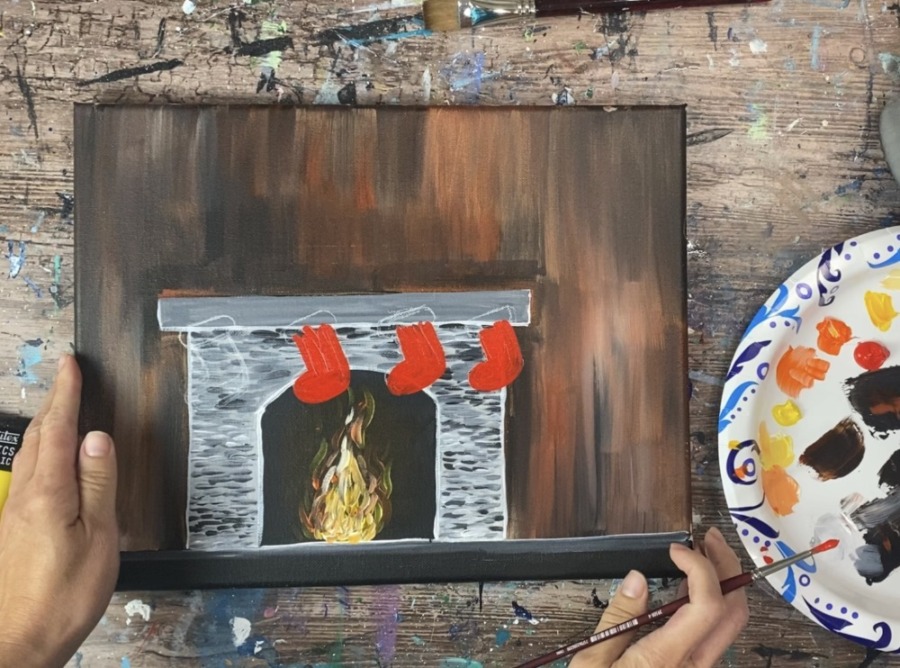
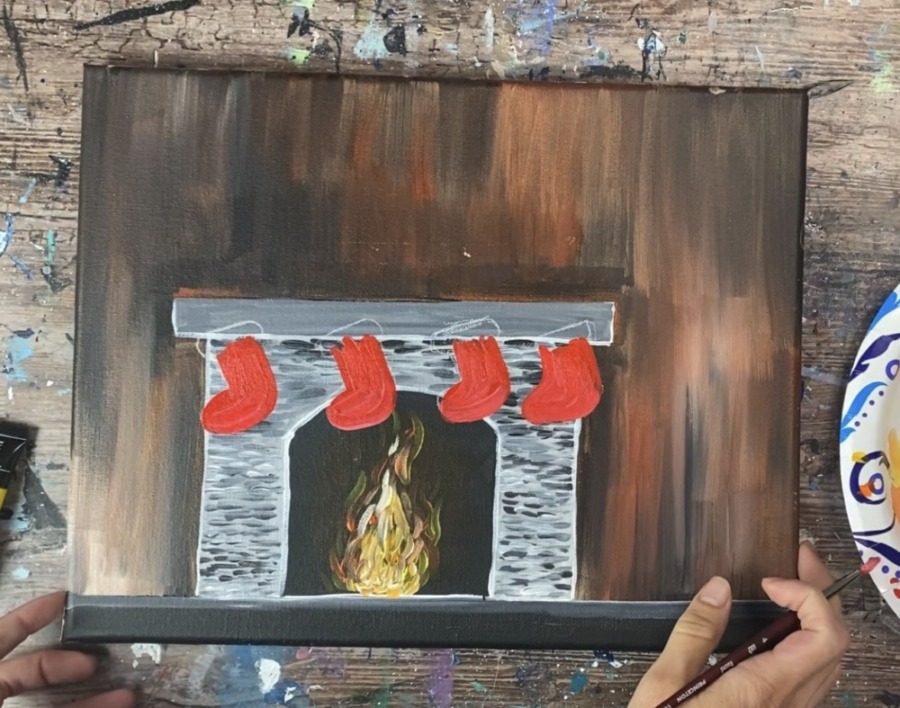
Then paint the tops of your stockings titanium white. Paint a little vertical mark for the hanger of each of the stockings. If you want, you can do a little shading with gray paint on the top and left part of the hangers and top part of the stockings.
You can also add a little bit of white on the bottom red area of the stockings and blend that white back up. This highlights the bottom of the stocking where the light would be reflecting on the bottom from the fire.
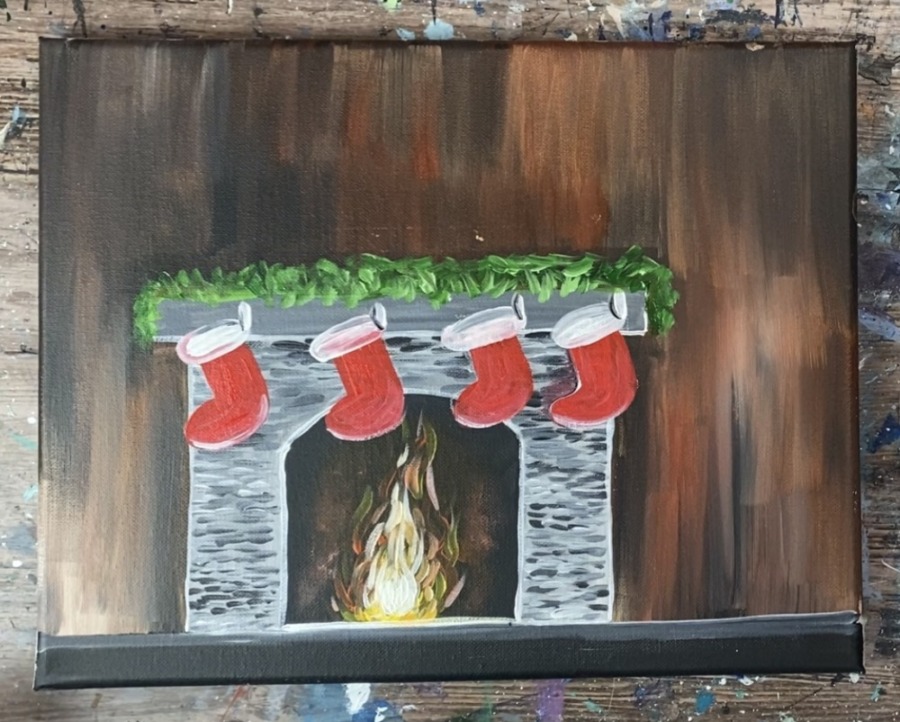
6. Paint the Garland
To do the garland, use hooker’s green hue permanent and brilliant yellow green. Use your #4 round brush. Paint small textured strokes along the mantle of the fireplace.

These small textured strokes of the dark green and light green mixing together gives the effect of the Christmas tree garland. You can also add a little bit of titanium white into the green that gently blends together.
7. Paint The Christmas Tree
This technique involves using a #8 round brush to paint a “round brush” style Christmas tree. You can see an entire tutorial about how to do this here! If this is your first time, I recommend practicing it really quick on a piece of sketch paper.
You will be using the same two greens you used in the garland: the hookers green and the brilliant yellow green. Load your #8 round brush in both of these colors.
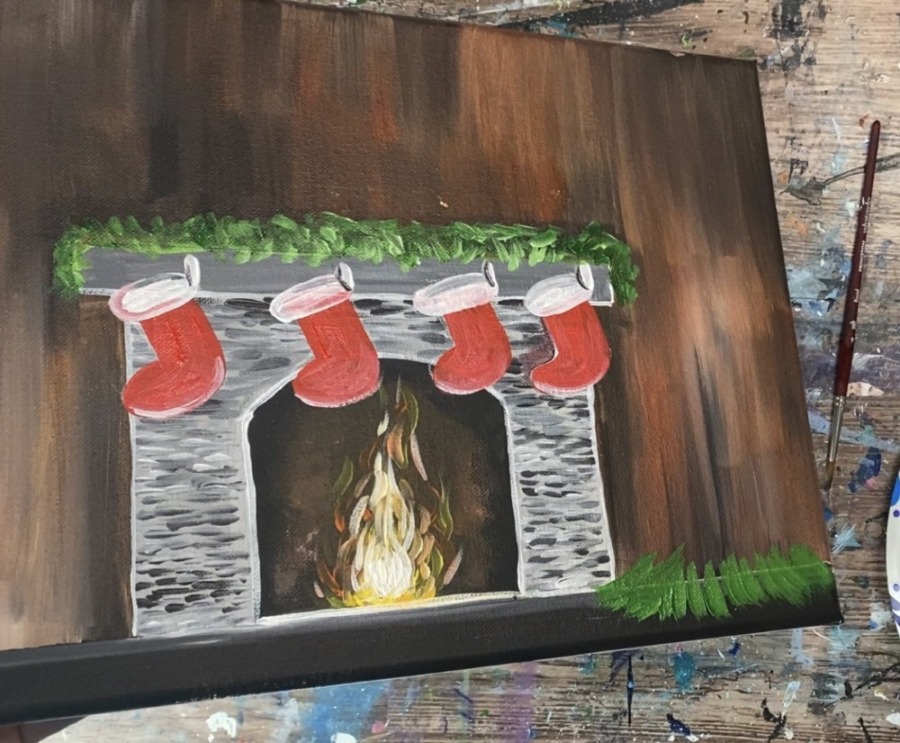
Start at the bottom. Paint a row of branches by stroking each brush stroke down (from top to bottom). This forms the bottom base of the Christmas tree.
Then load your brush in a little more of the brilliant yellow green color. Make a second row above the bottom row. This second row slightly overlaps the bottom row.
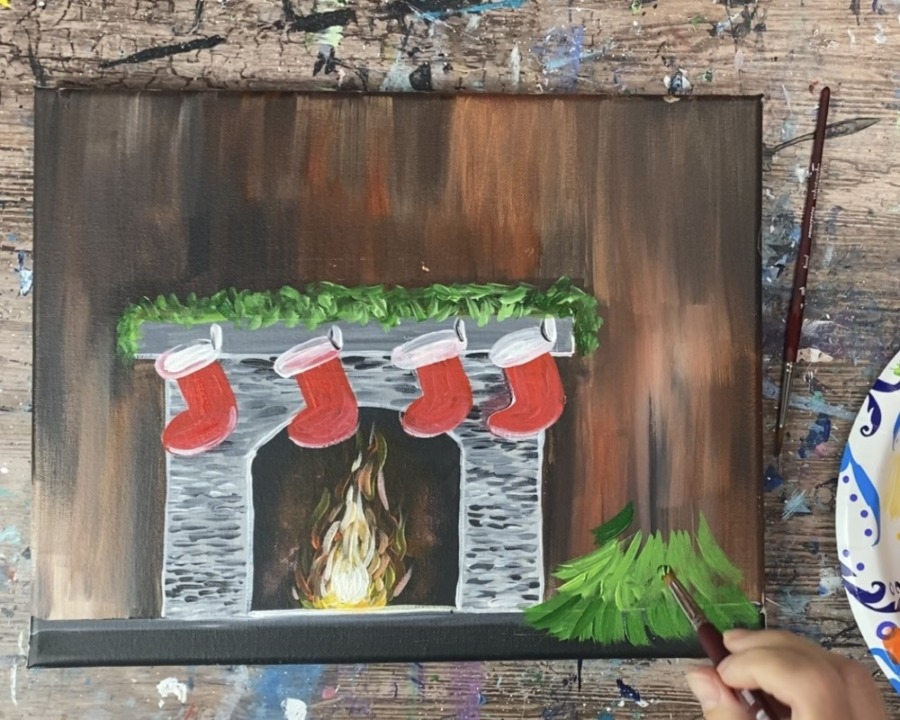
Continue to paint rows of branches. The tree needs to form a conical shape so each row is slightly less wider than the previous. Alter the amount of greens on your brush to make each row stand out.
Need more practice on these trees? You can see my tutorial here about how to do this technique!
Then decide how tall your tree will be. Make a pointed tip for the tree.

Continue to paint downward strokes to fill the Christmas tree up to its height.

Then go back over your strokes to fill the Christmas tree further. Each stroke is going from top to bottom and overlapping the previous row (working from bottom to top of the tree).
8. Paint The Wreath
Find a small circle to trace. I traced a small plastic cup with dimensions of about 3″ wide. Use the white chalk pencil to trace.
Then use this circle as a guideline to painting the circle wreath. Use the #4 round brush and hookers green hue permanent as well as brilliant yellow green. Paint in small textured strokes blending the two greens together. Go along the circle to form the wreath shape. This is the same technique you used to paint the garland on the mantle.
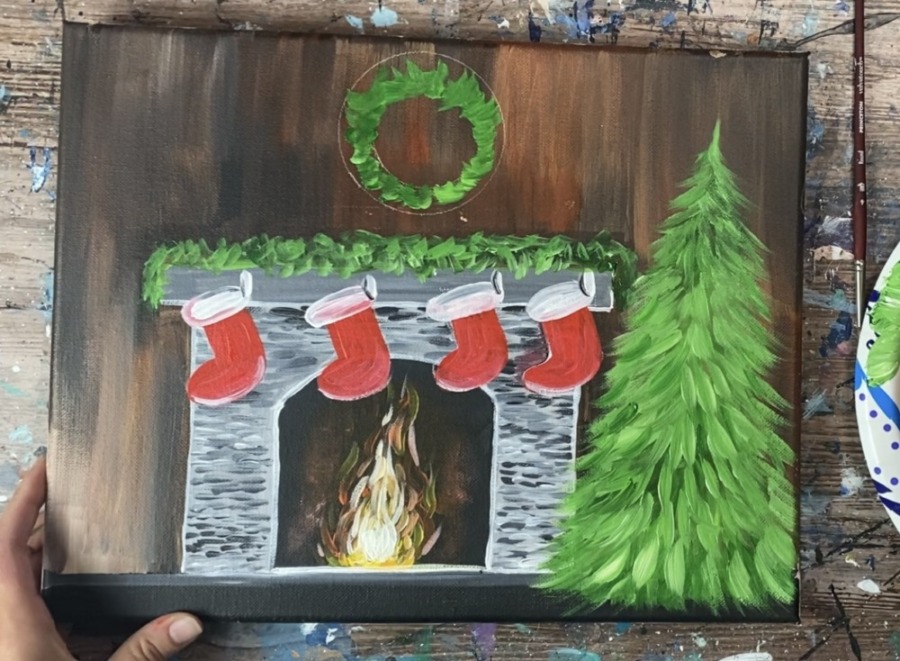
You can also add a small amount of titanium white on the wreath to brighten the green up.
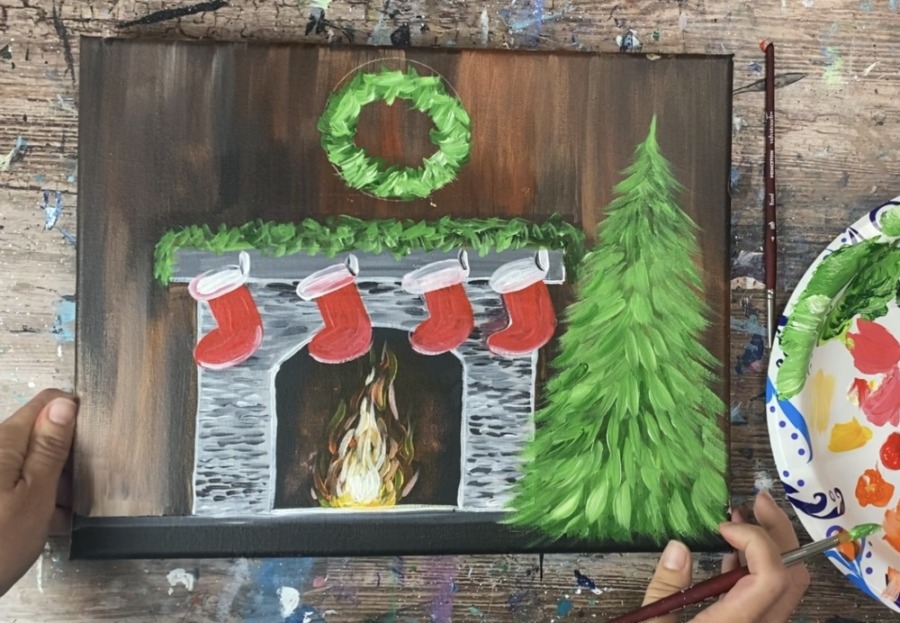
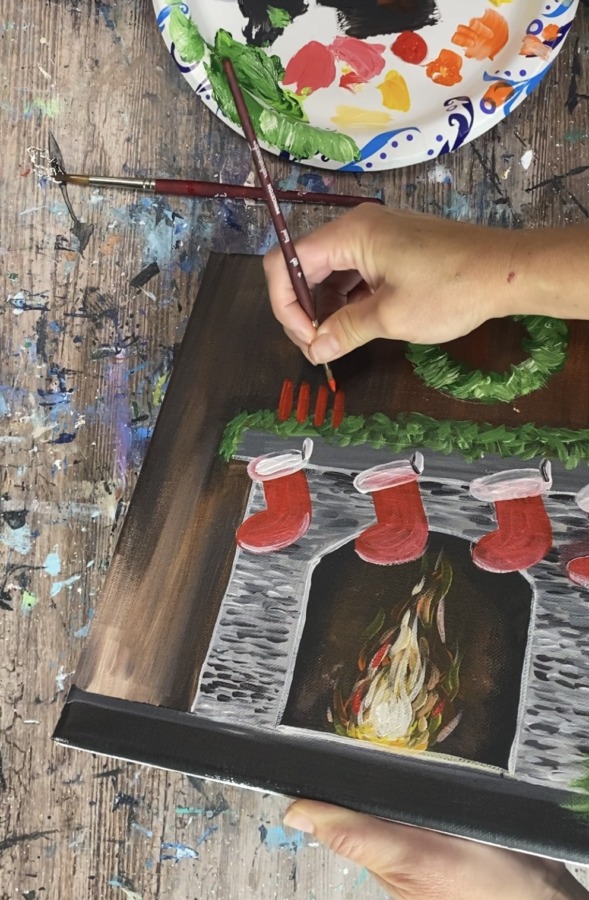
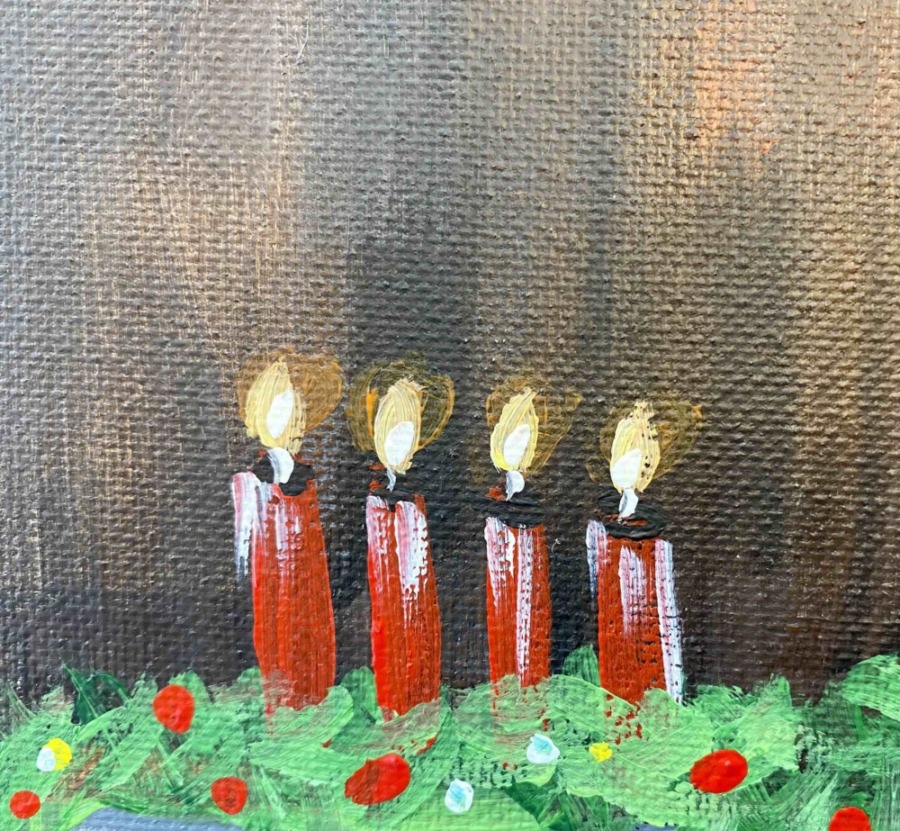
9. Paint The Candles
Use your #4 round brush and pyrrole red to paint four vertical lines for the candles (you can do more or less candles if you want).
Then paint a black circle on top of each of the four red lines. Then paint an orange circle for the “glow” of the flames. These orange circles should be semi-transparent.
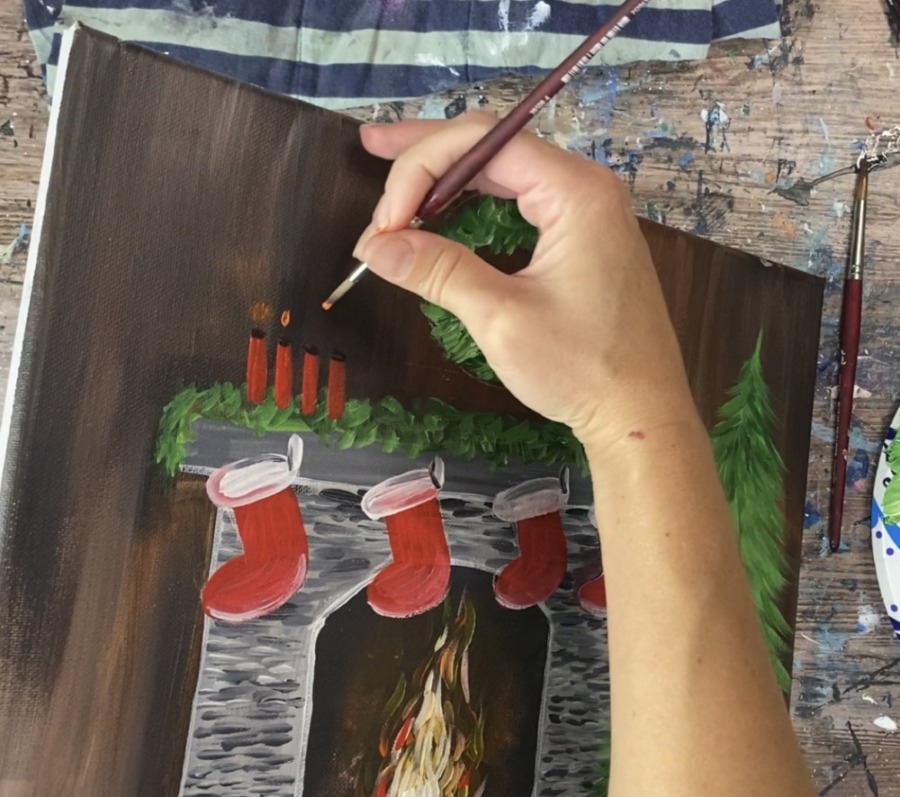
Then paint a flame shape inside of the orange circle. Do this with primary yellow mixed with titanium white (about equal amounts).

Then use titanium white to paint the wick of each of the candles. Paint some vertical strokes with the white to represent melting wax/highlights.
Close up of candles below.
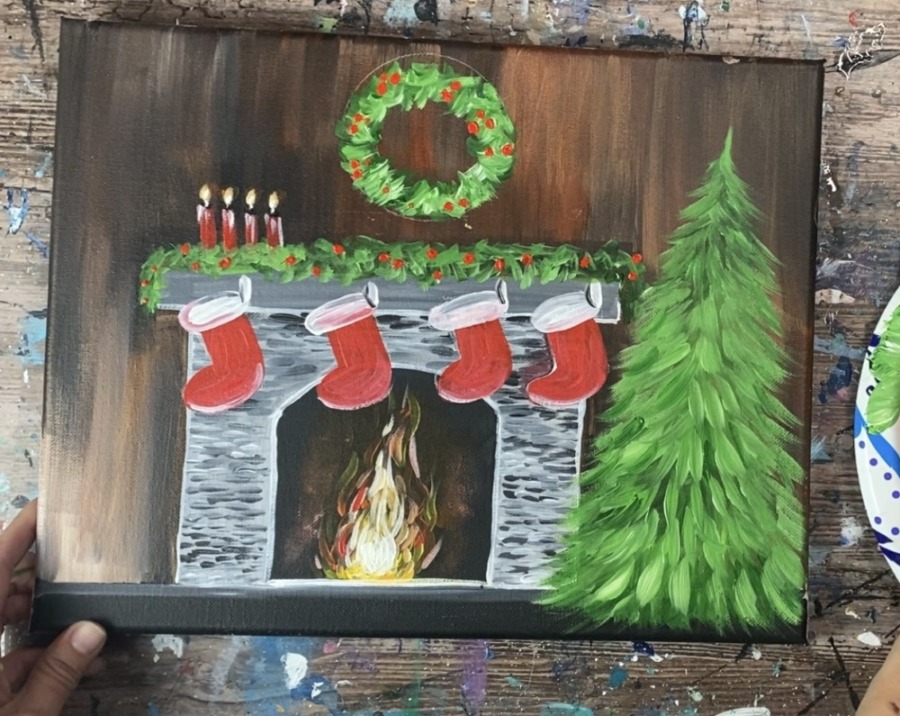
10. Paint Berries On Wreath and Garland
Next use your #4 round brush to paint small red dots on the wreath and garland.
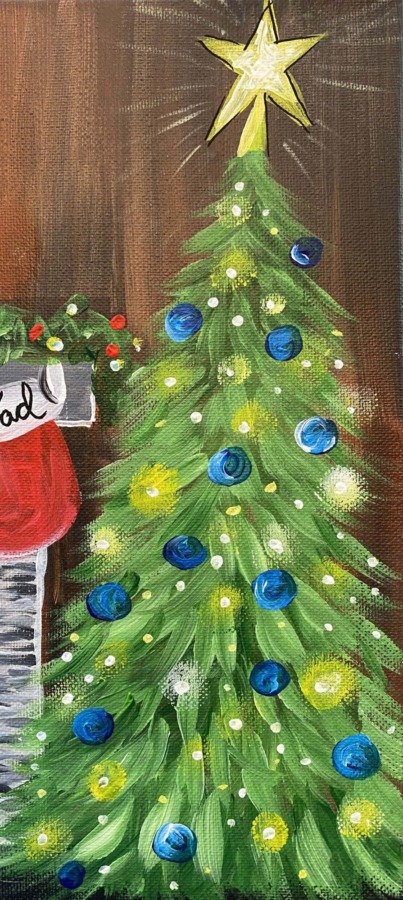
11. Paint Star On Tree
Use primary yellow mixed with titanium white to paint the star topper on the tree. Paint a triangular base for the star and then the star above it.
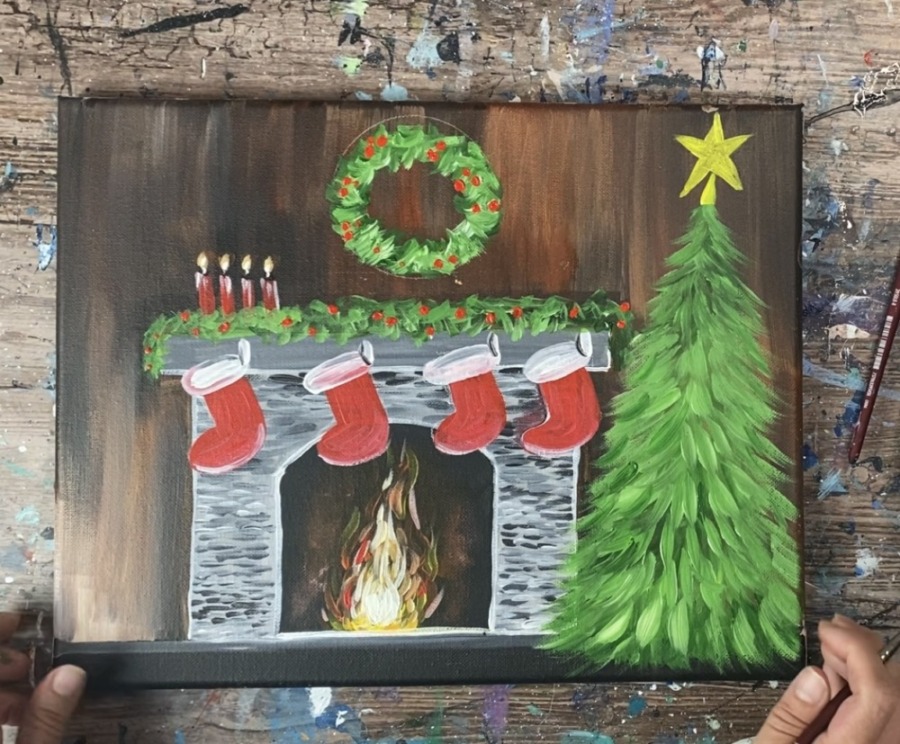
Add extra white in the center of the star to make it appear bright. Then dry brush thin lines around the star to make it appear like it is glowing.
12. Paint lights and ornaments on tree
To make glowing lights, I used my finger to press and form small blurry circles with titanium white and primary yellow paint. You only want a small amount of paint on your finger when you do this so it appears very thin and translucent.
Then use your #4 round brush to paint small white dots inside of the lights to make them appear as though they are glowing.
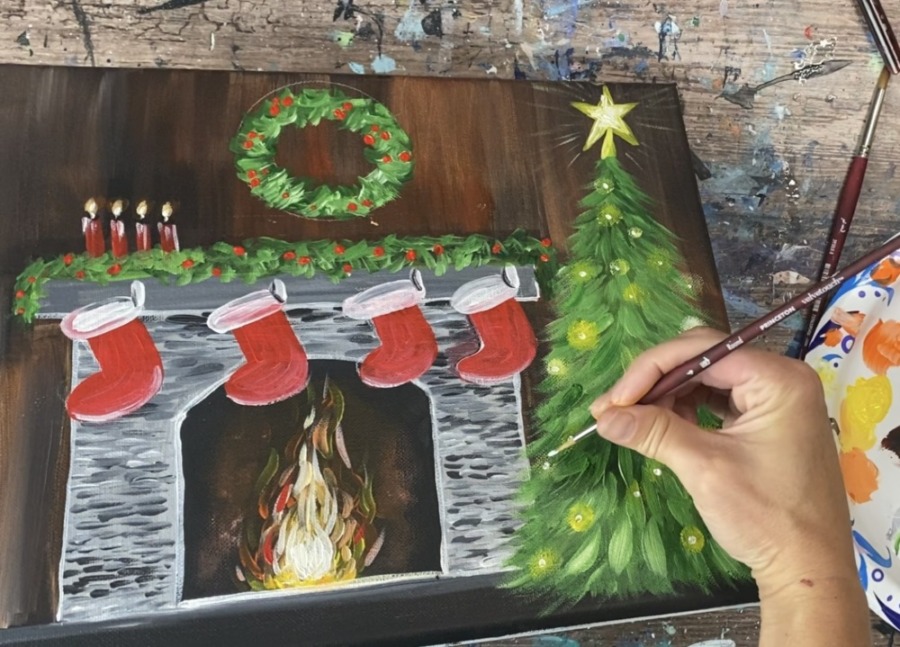
Use primary blue to paint the ornaments. You can also use other colors for the ornaments if you want different colored ornaments.
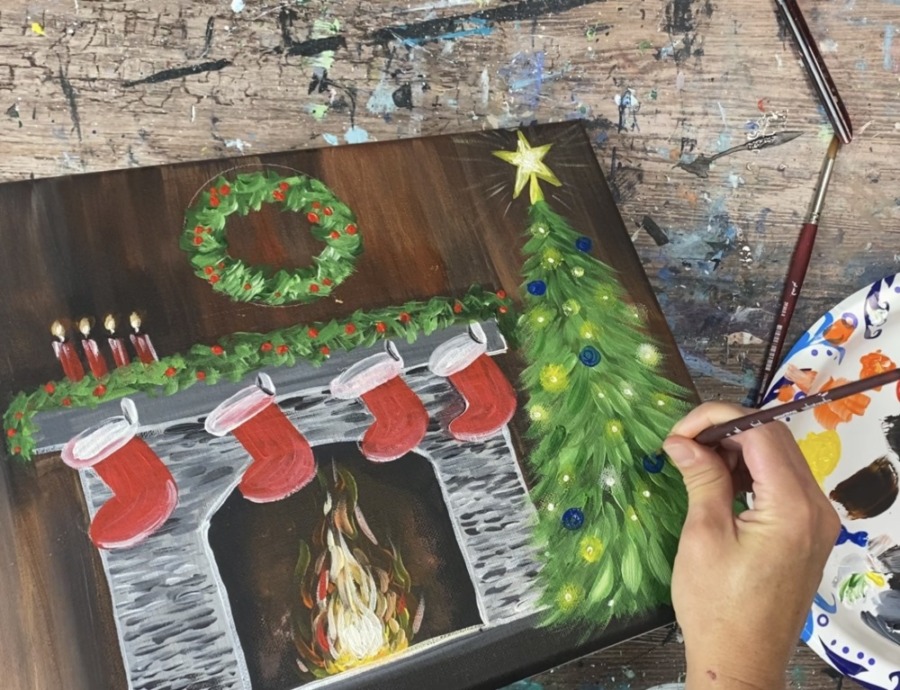
Use your round brush to paint small blue circles all over the tree.
Then use some titanium white to paint a highlight on the left side of each of the ornaments. Blend it in lightly with the blue.
13. Paint Bow on Wreath
Use your round brush and pyrrole red mixed with a little titanium white to paint a bow on the bottom of the wreath.
Close up of tree below.
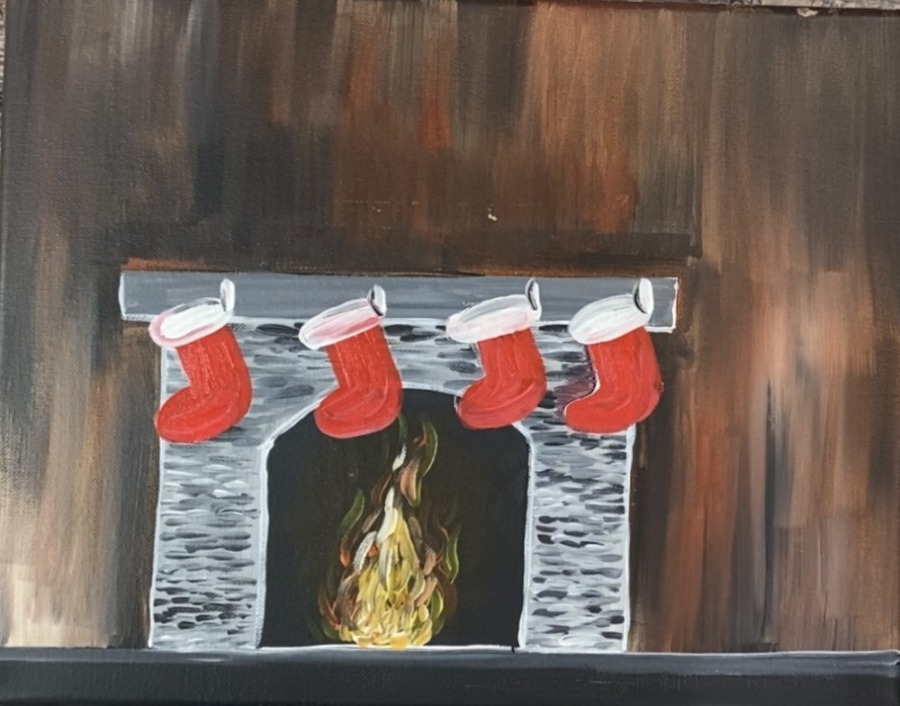
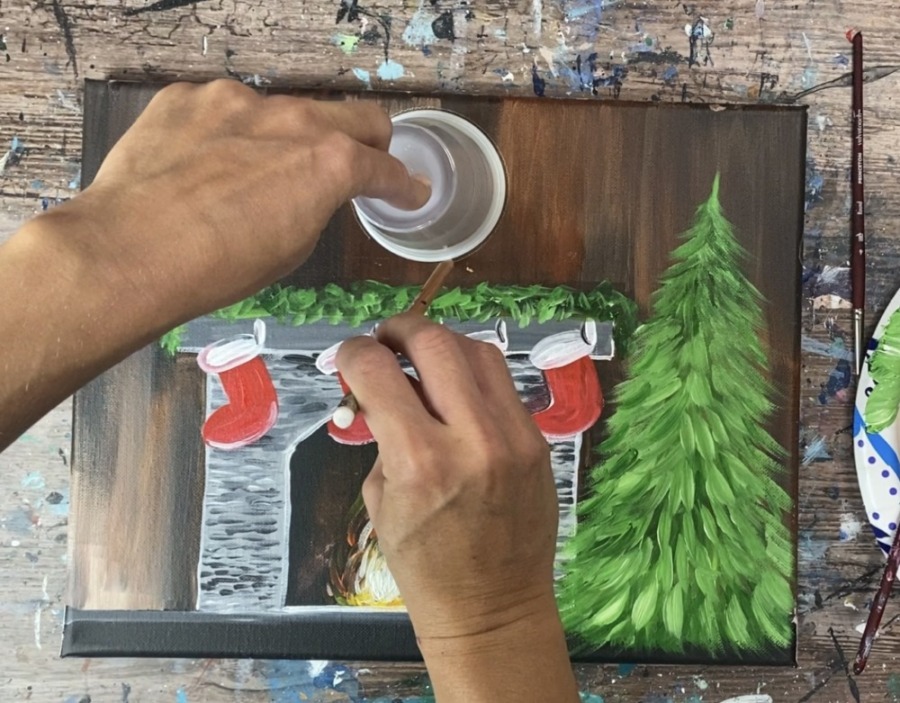
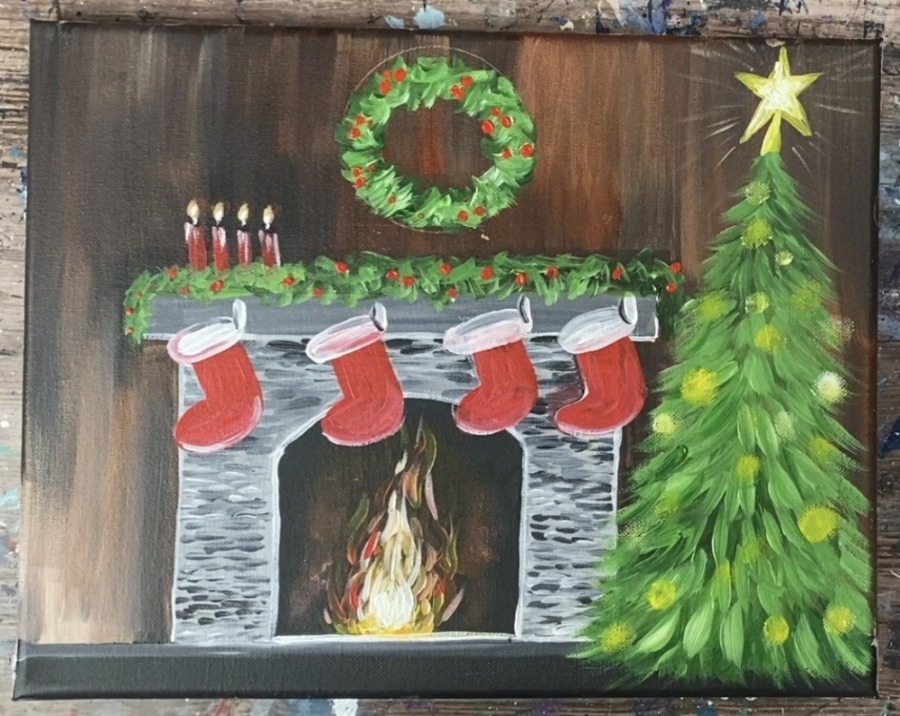
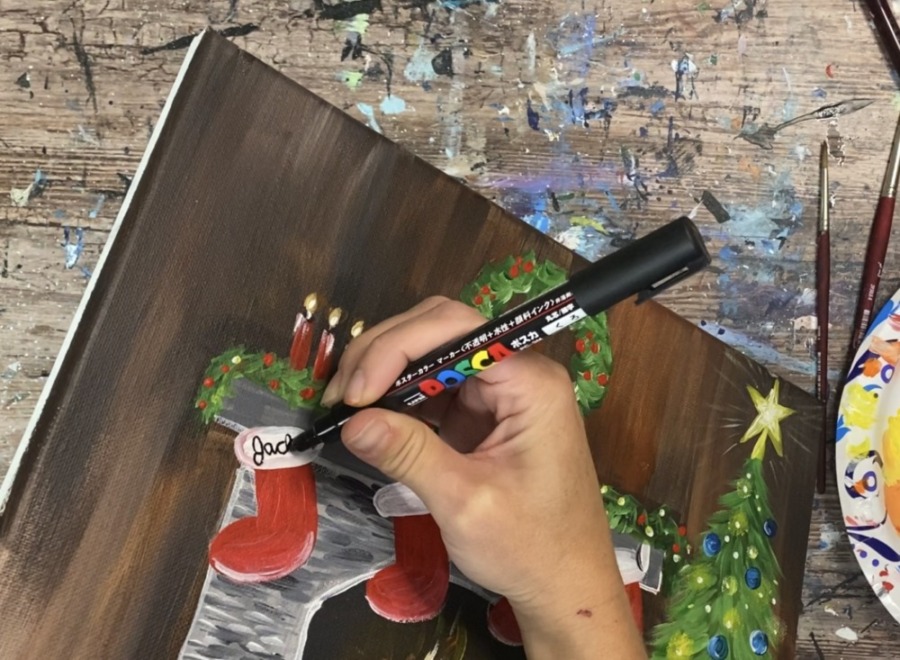
14. Write Names On Stockings
Use a black paint pen to write the names on the stockings. I used a POSCA black paint pen but you can also use a black sharpie for this step.
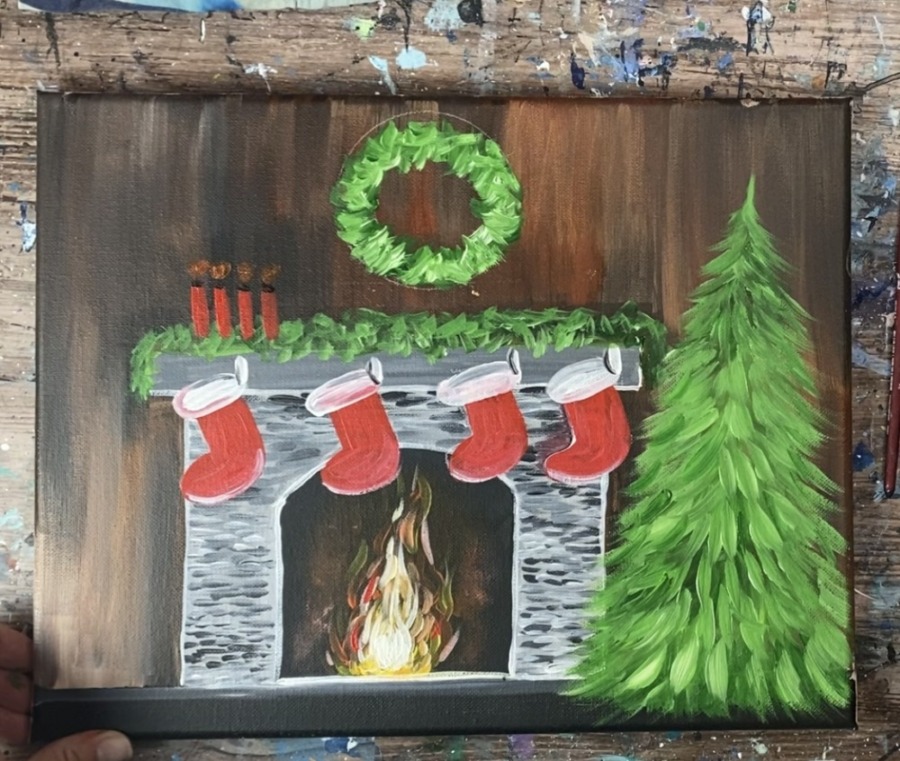
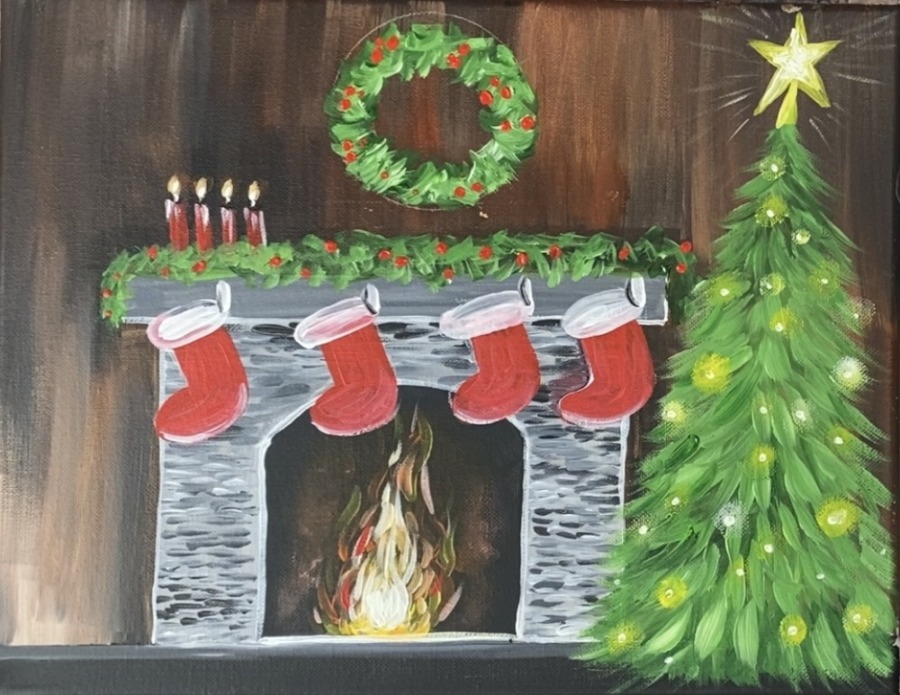
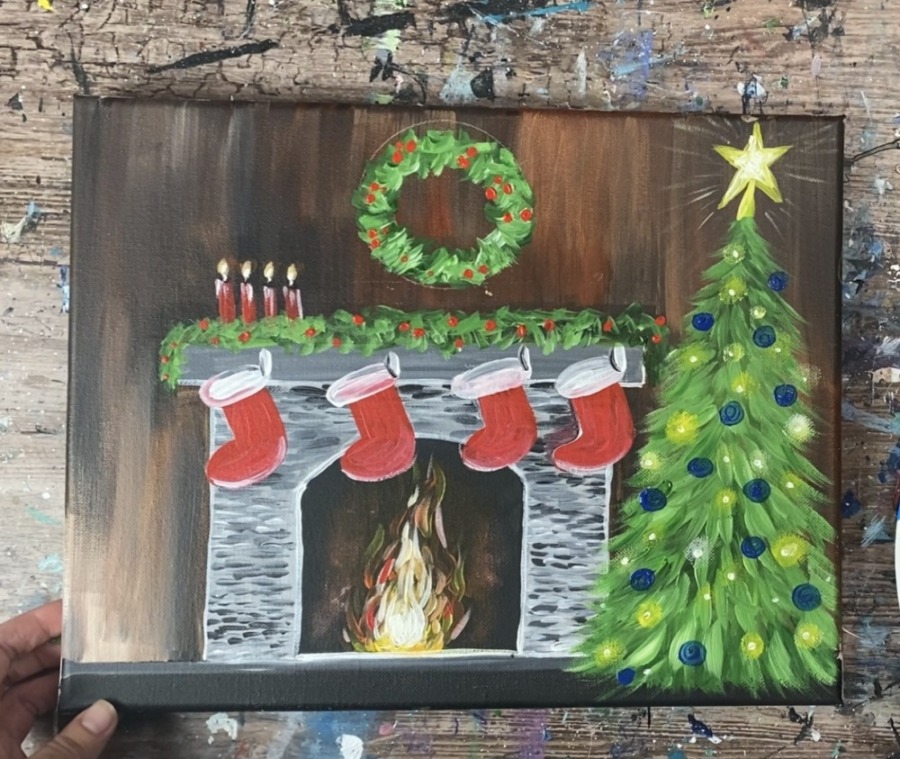
Finished!

Share Your Art Here!


Is there anyway to add 6 stockings
Yes you can add 6 stockings. I would maybe make them smaller and push them so they are closer together. If I using the traceable, you can trace them two more times.
Thank you
Hello I hope you are well .. I really enjoyed the tutorial .. keep it lit
Thanks! Im glad you enjoyed!!